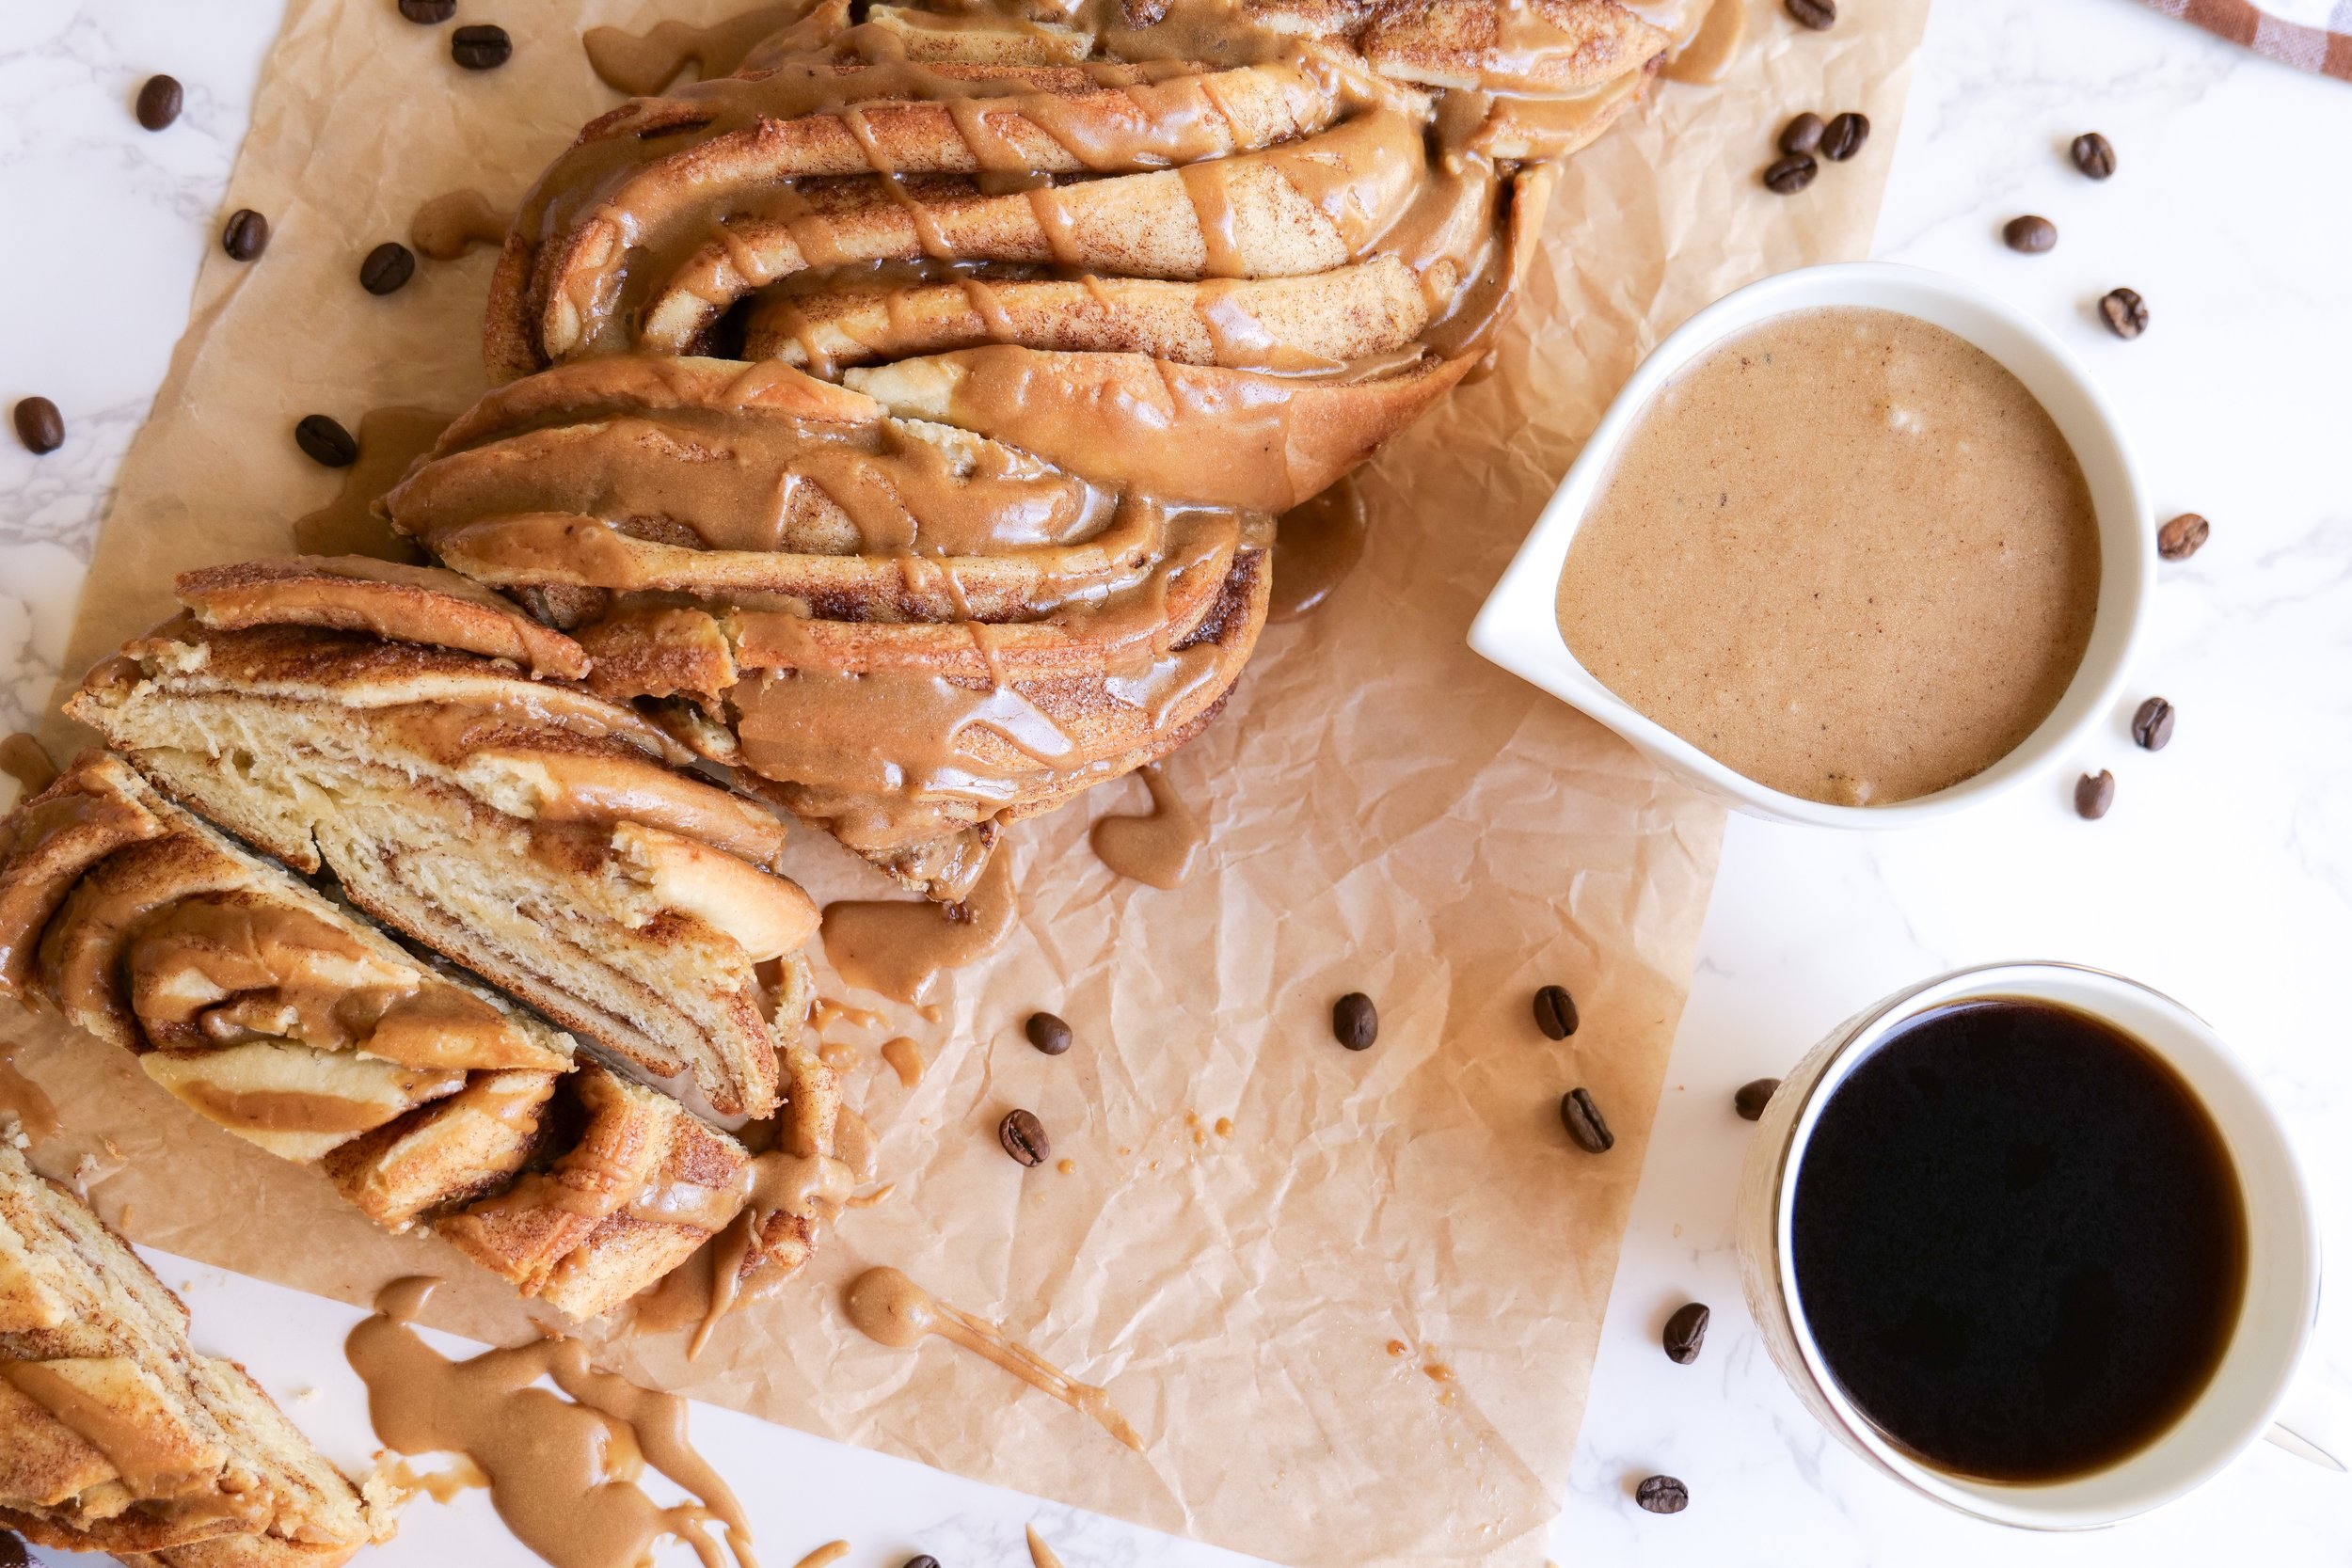
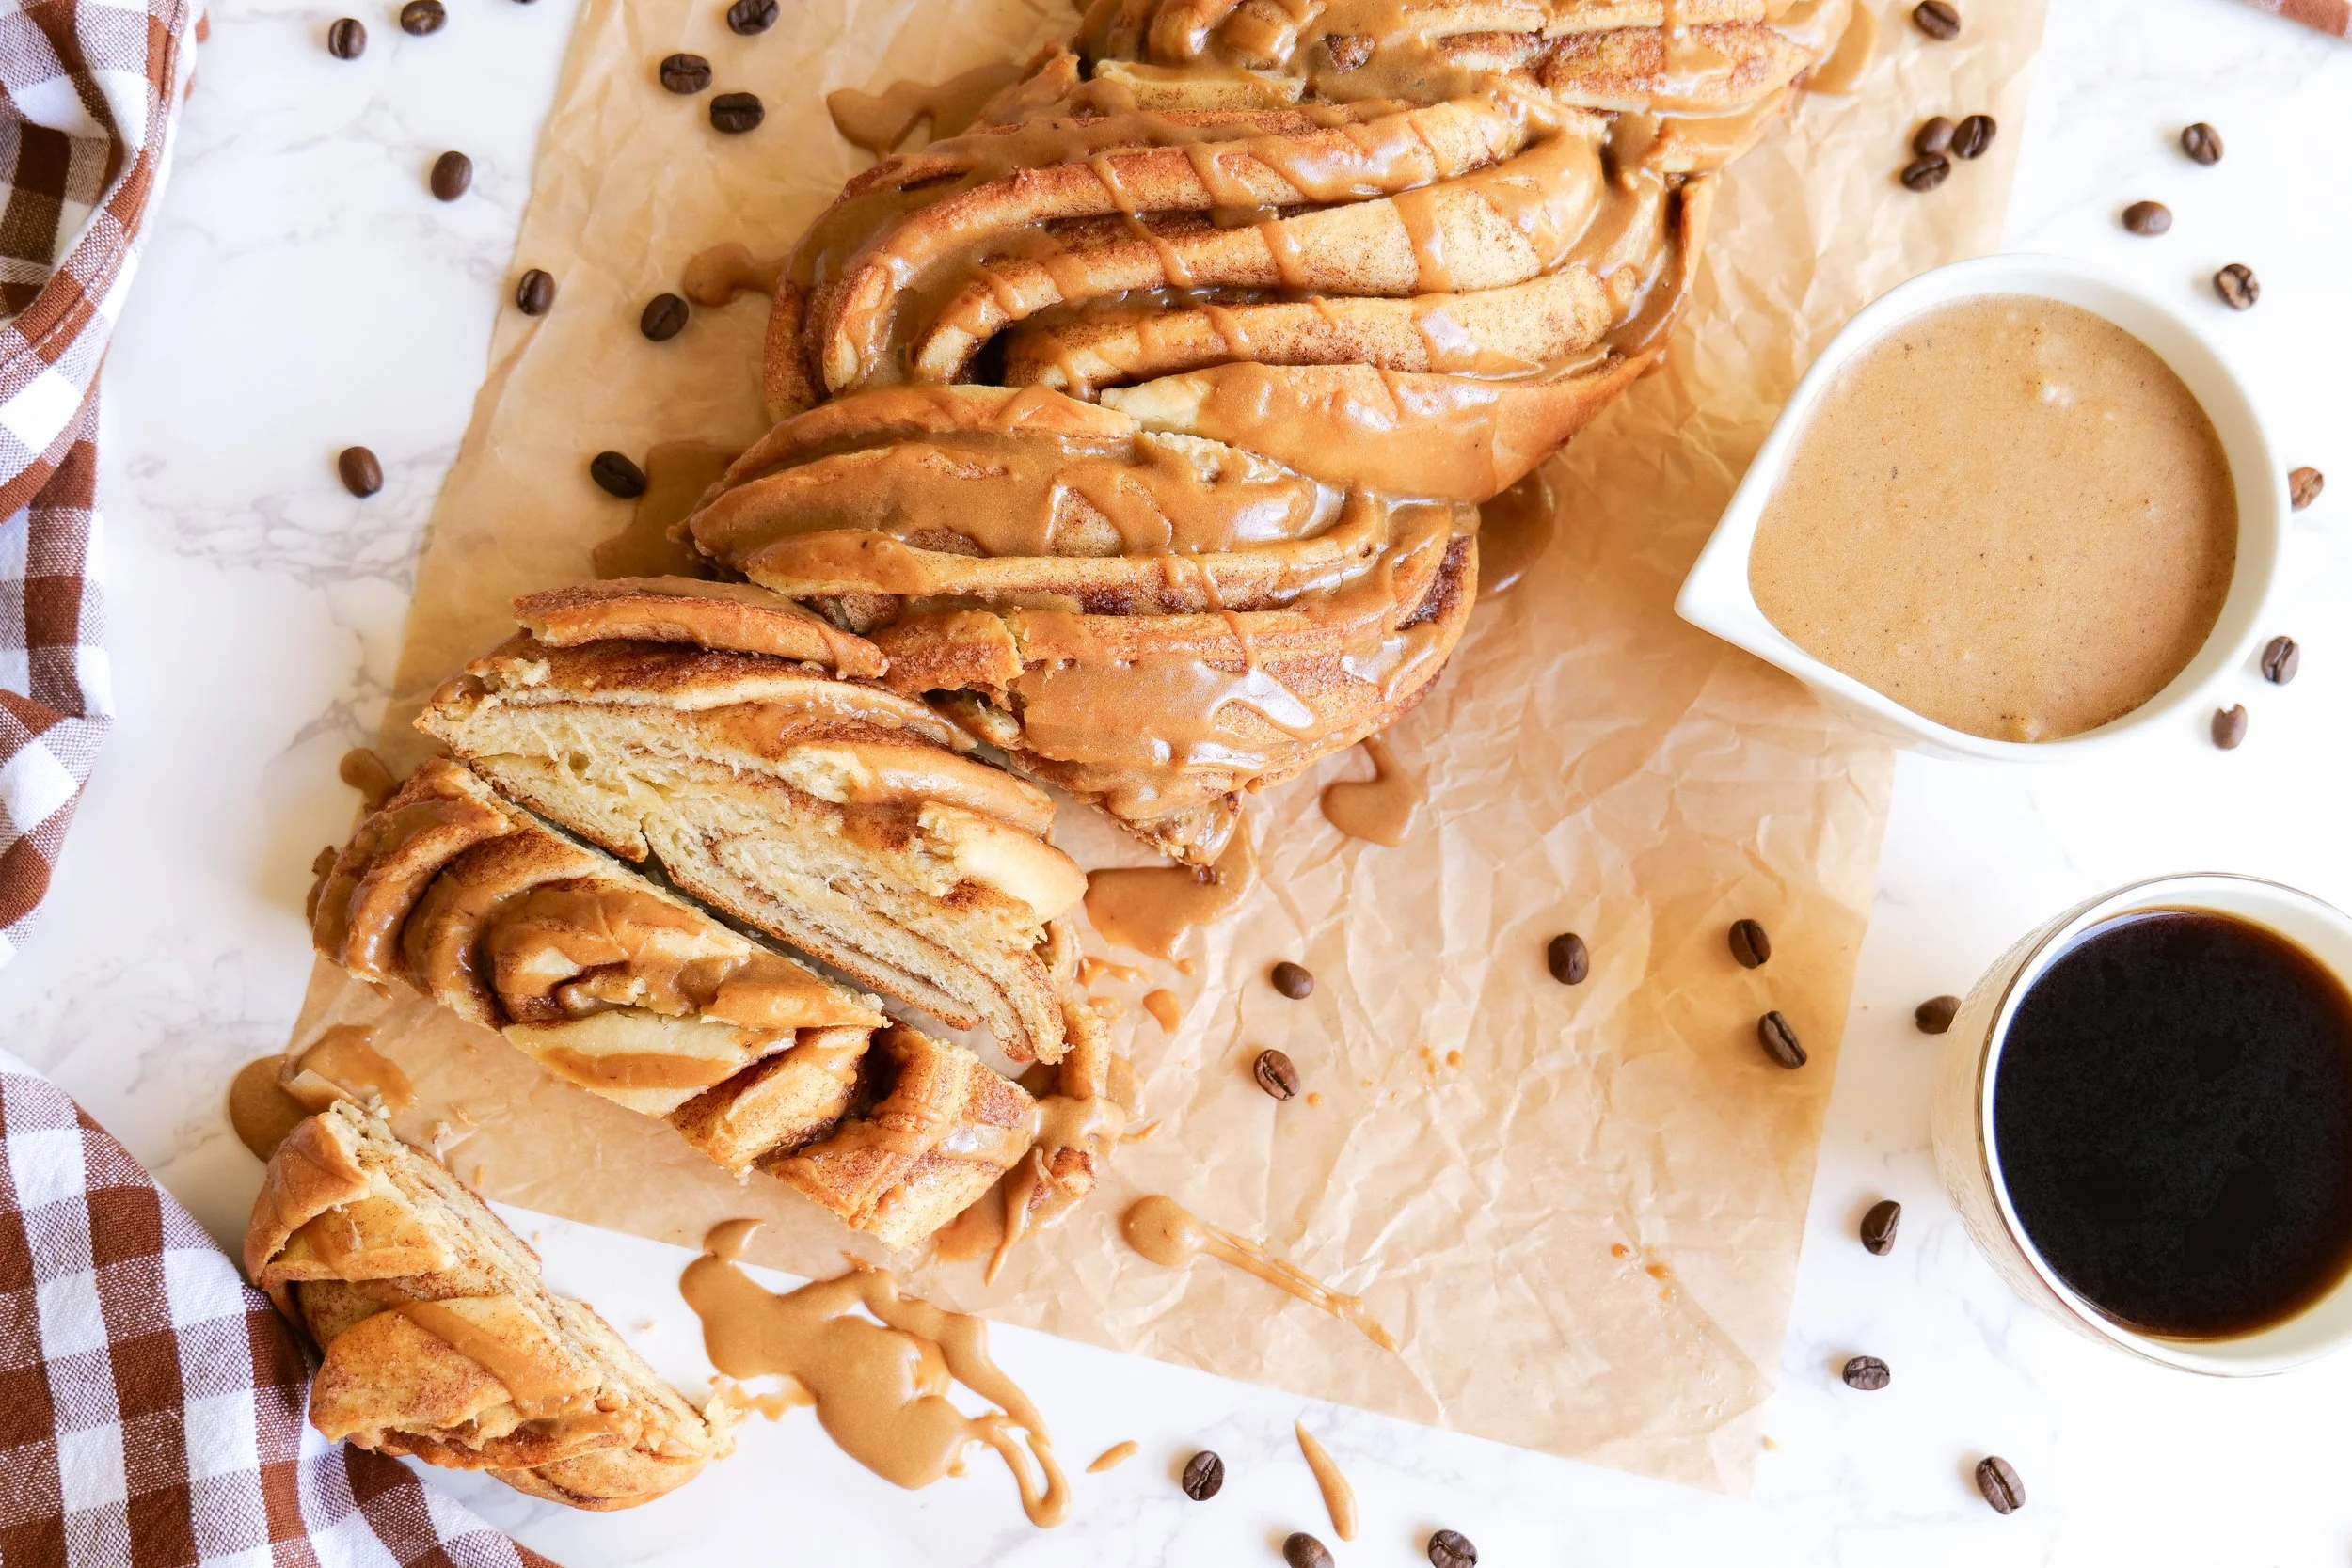
Sweet Perfection: Baking the Ultimate Cinnamon Roll Loaf with Espresso Glaze
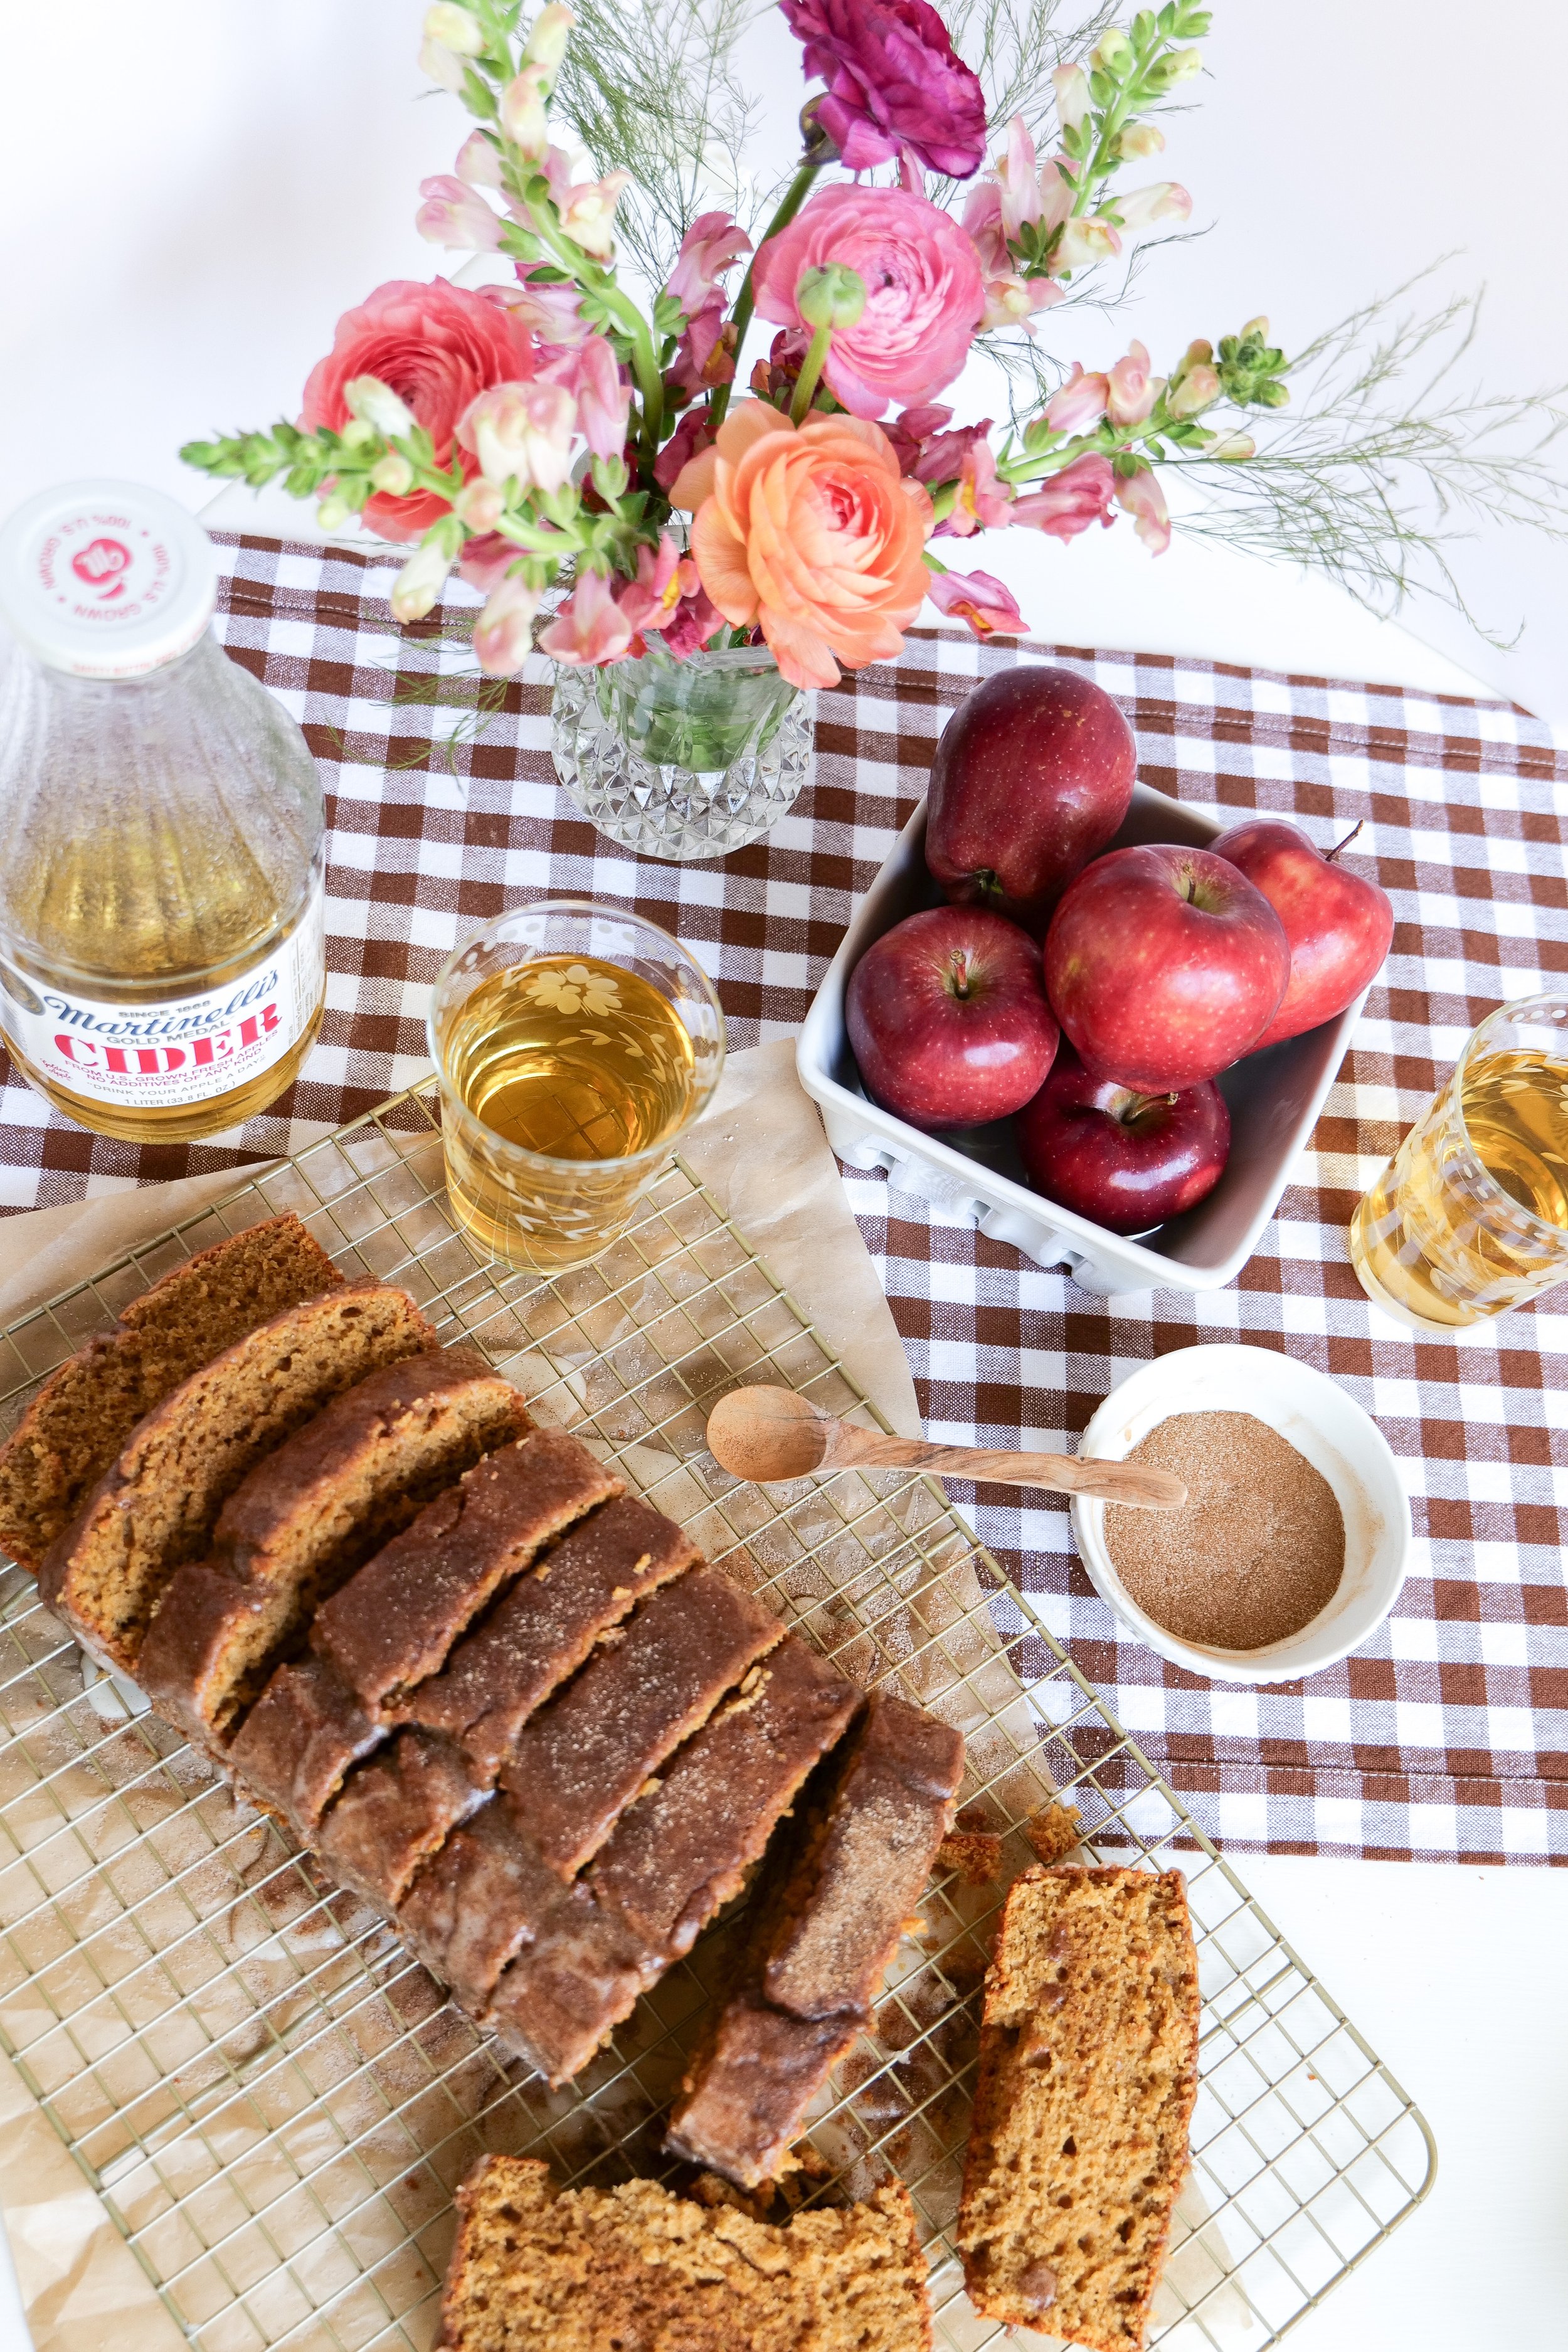
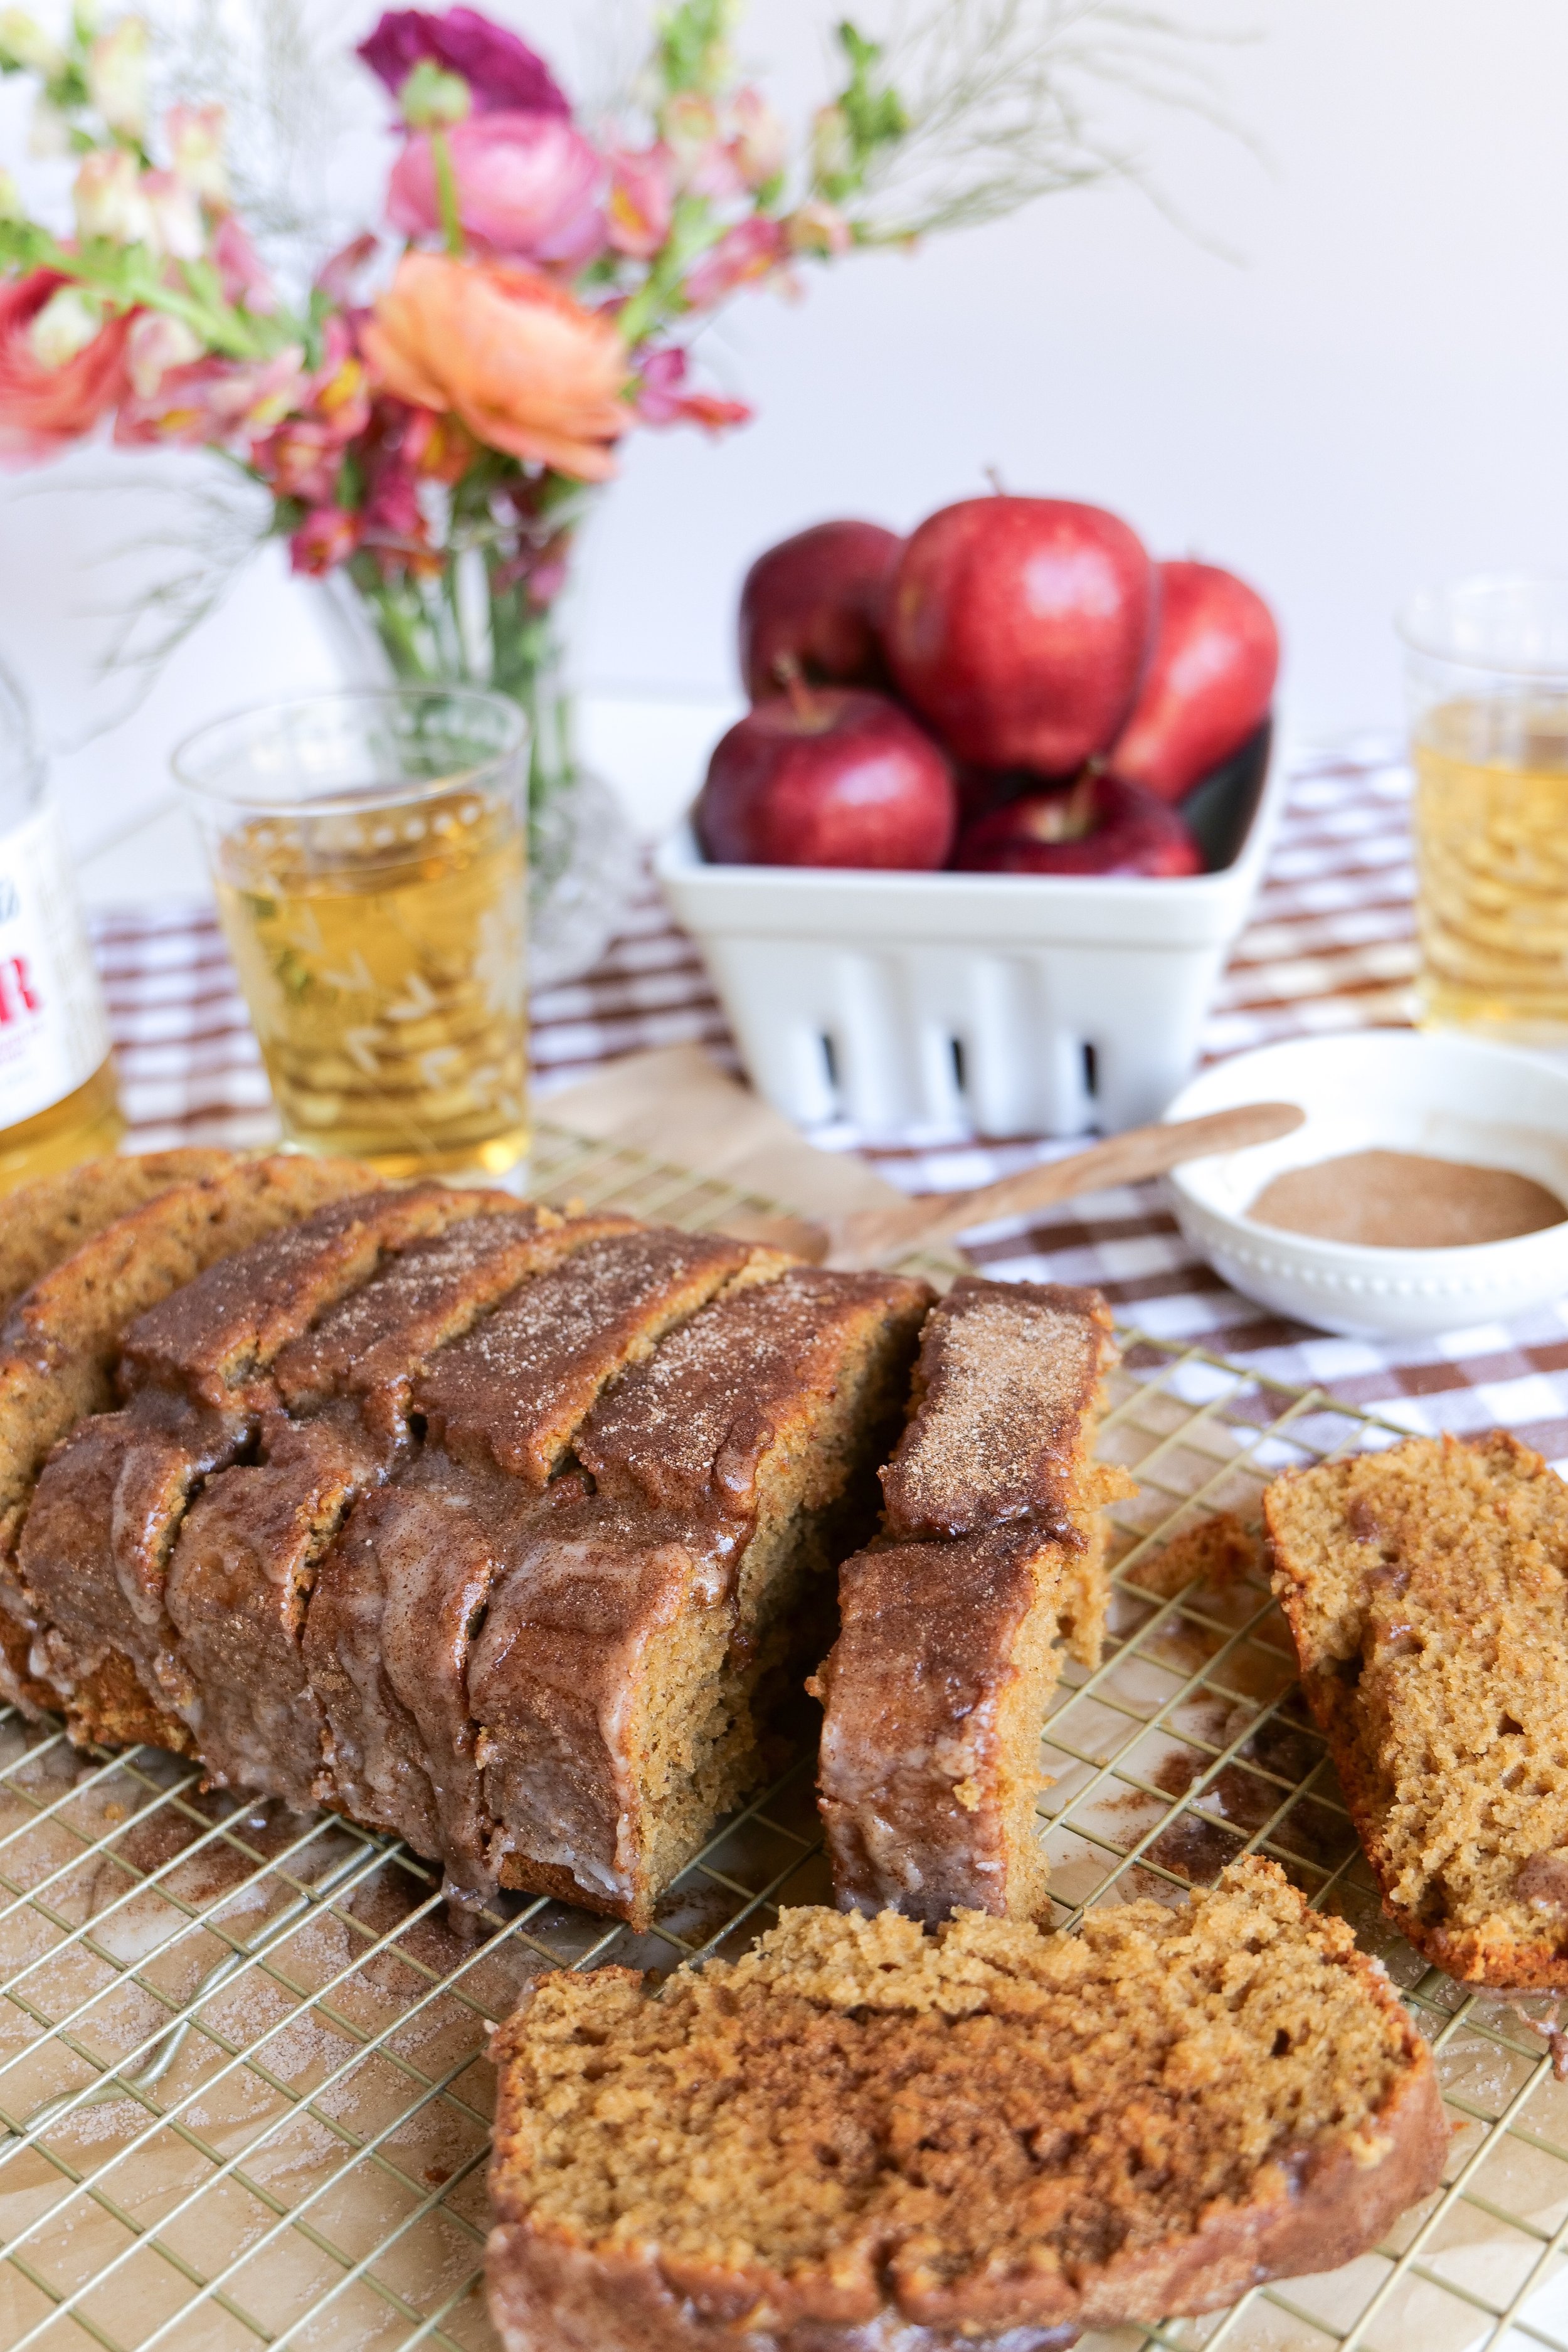
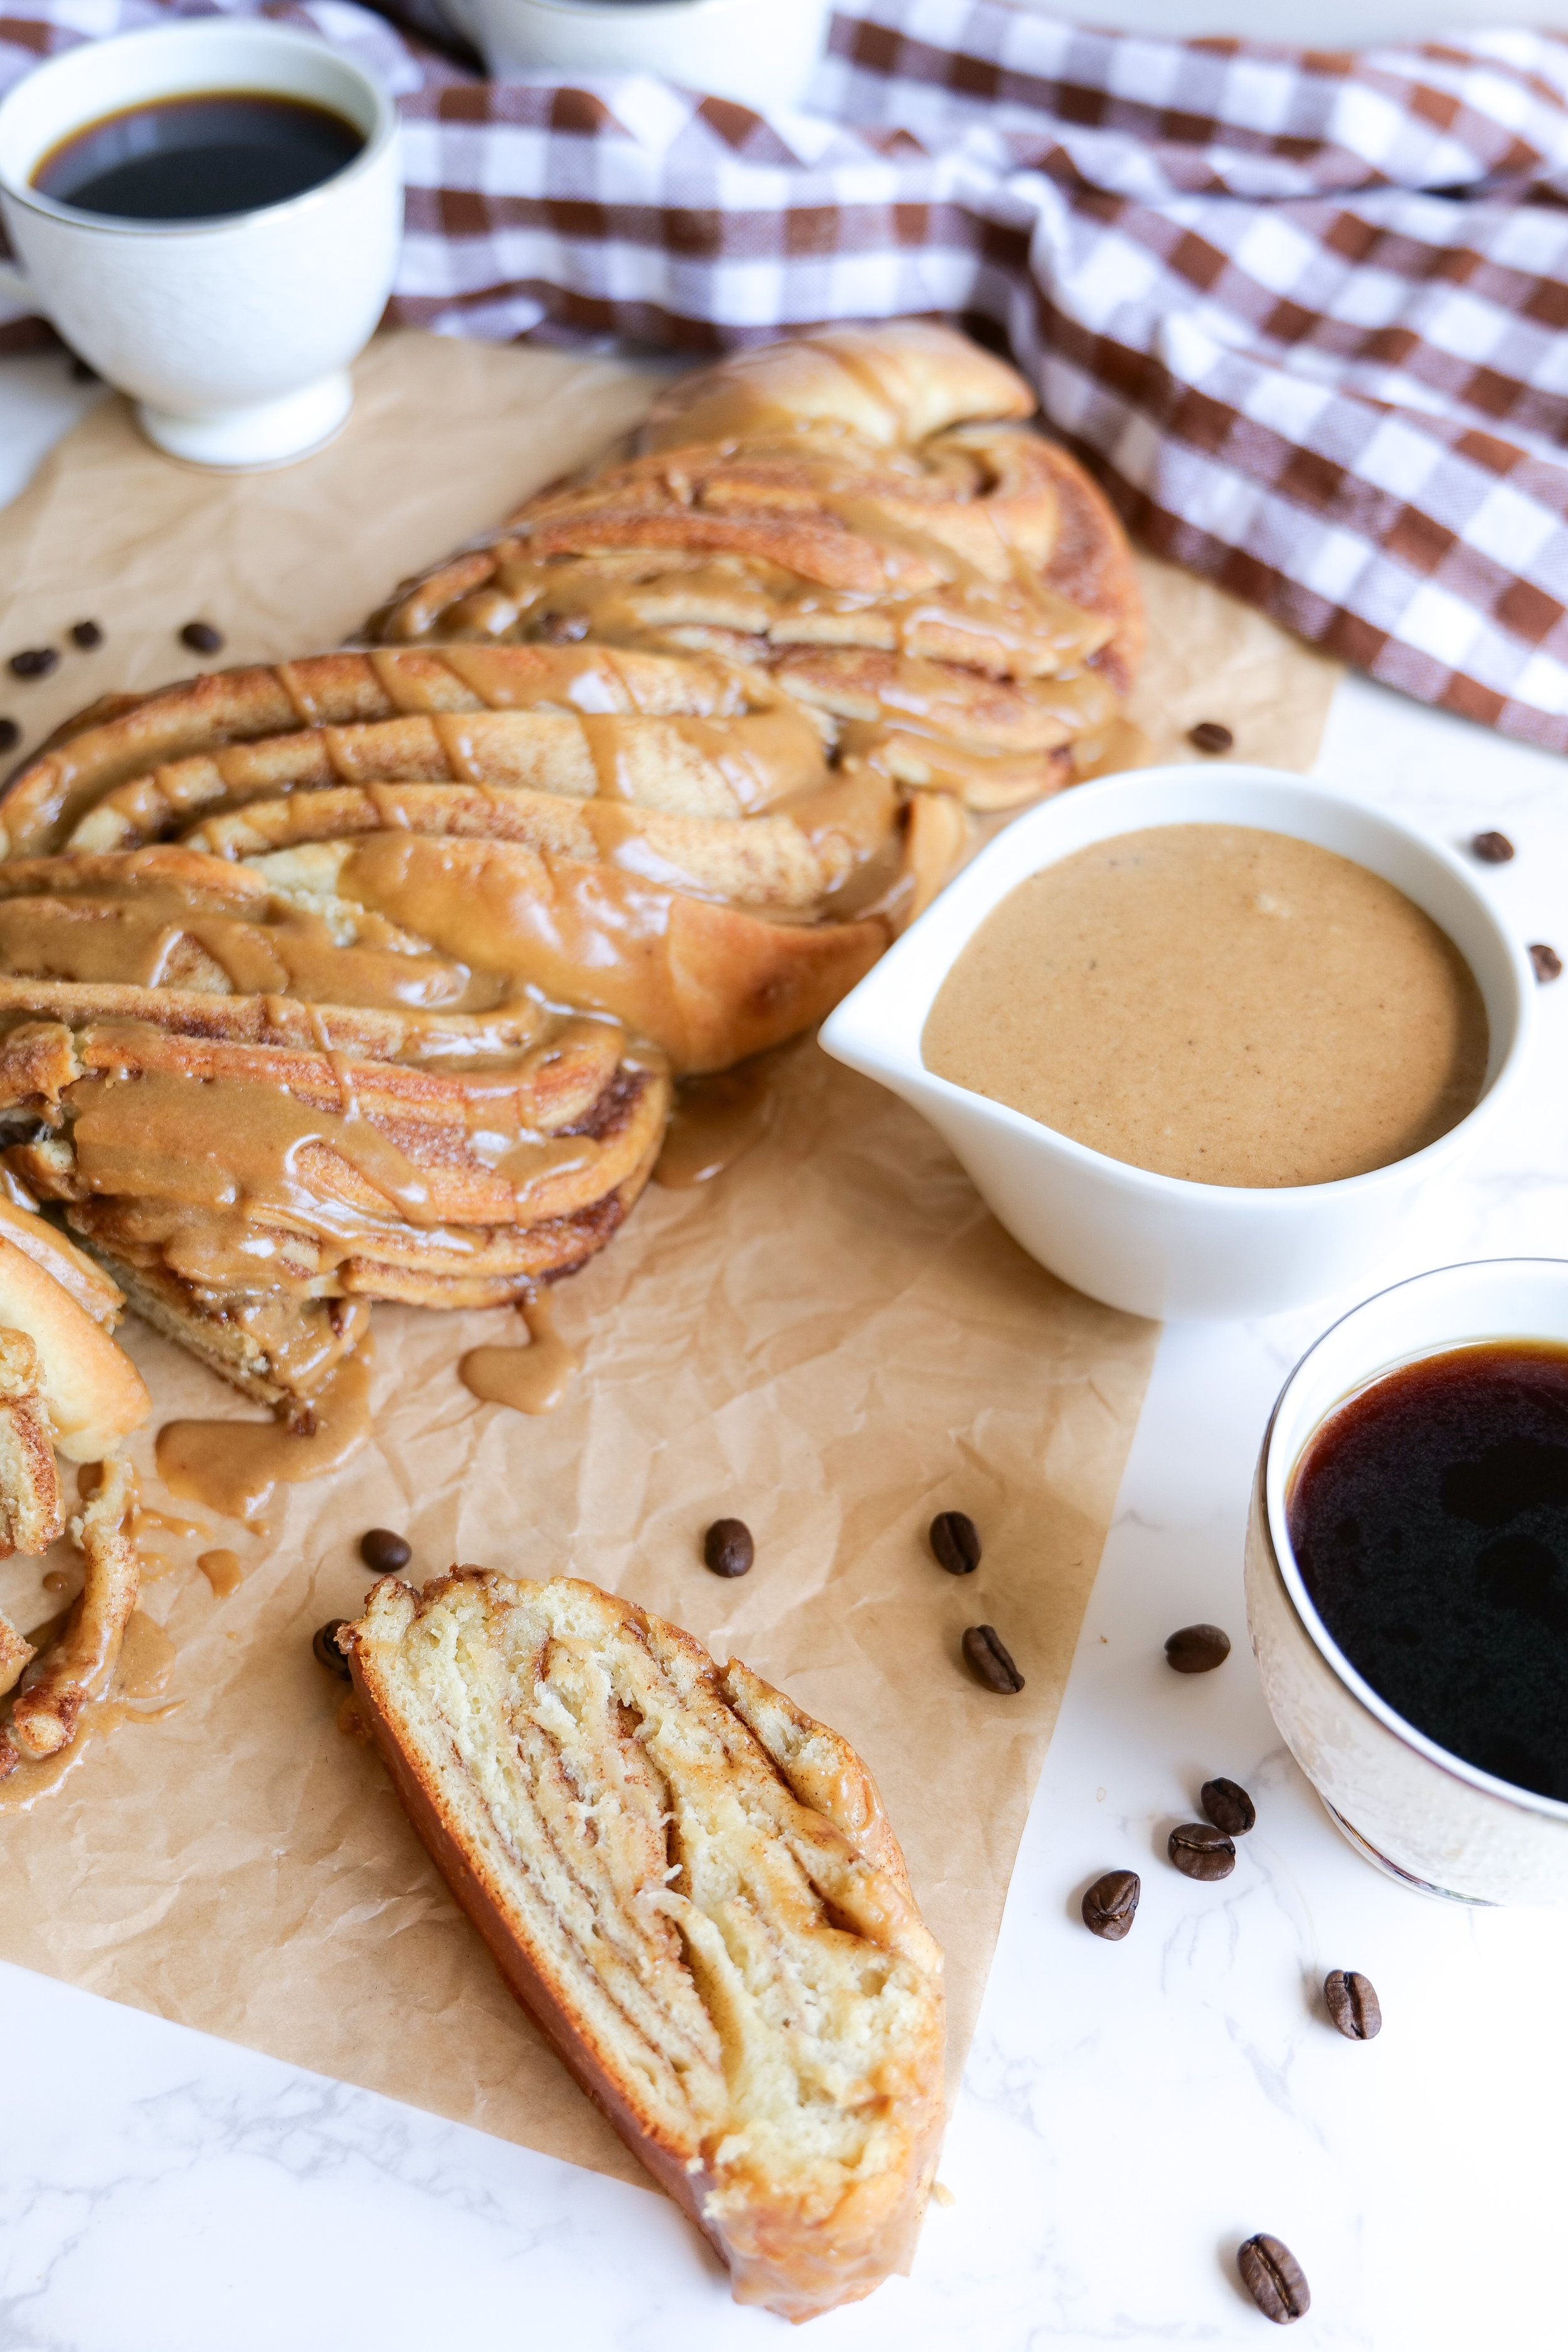
If you're looking for an indulgent, coffee-infused twist on the classic cinnamon roll, then you have to try this Cinnamon Roll Loaf with Espresso Glaze! This sweet and decadent dessert is the perfect combination of a classic cinnamon roll and a rich espresso taste with a yummy glaze. The loaf is incredibly moist and has all the flavorful delight of a classic cinnamon roll. Plus, the espresso glaze adds an extra layer of flavor that will have you coming back for more. So, if you're in the mood for the perfect morning treat, this Cinnamon Roll Loaf with Espresso Glaze is the perfect indulgence. It is great for breakfast, brunch, or dessert. Plus, it is easy to make and packed with flavor. So don’t wait, give it a try today!

What type of flour is best to use for the Cinnamon Roll Loaf with Espresso Glaze?

Making a delicious Cinnamon Roll Loaf with Espresso Glaze is easy and simple with the right ingredients. All-purpose flour is the best type of flour to use for this recipe, as it will give the loaf the right texture. If you want a fluffier, lighter loaf, try substituting half of the all-purpose flour for cake flour. To ensure the best results, it's important to measure the flour correctly. Flour should be spooned into a measuring cup and leveled off with the back of a knife. For a gluten-free version of Cinnamon Roll Loaf with Espresso Glaze, use a gluten-free all-purpose flour blend. If you’d like a nuttier flavor, you can also use whole wheat flour instead of all-purpose flour. For an even richer flavor, try substituting some of the all-purpose flour with almond flour. With all of the right ingredients and the right measurements, your Cinnamon Roll Loaf with Espresso Glaze will be a delicious success!

Is the Espresso Glaze necessary for the Cinnamon Roll Loaf?

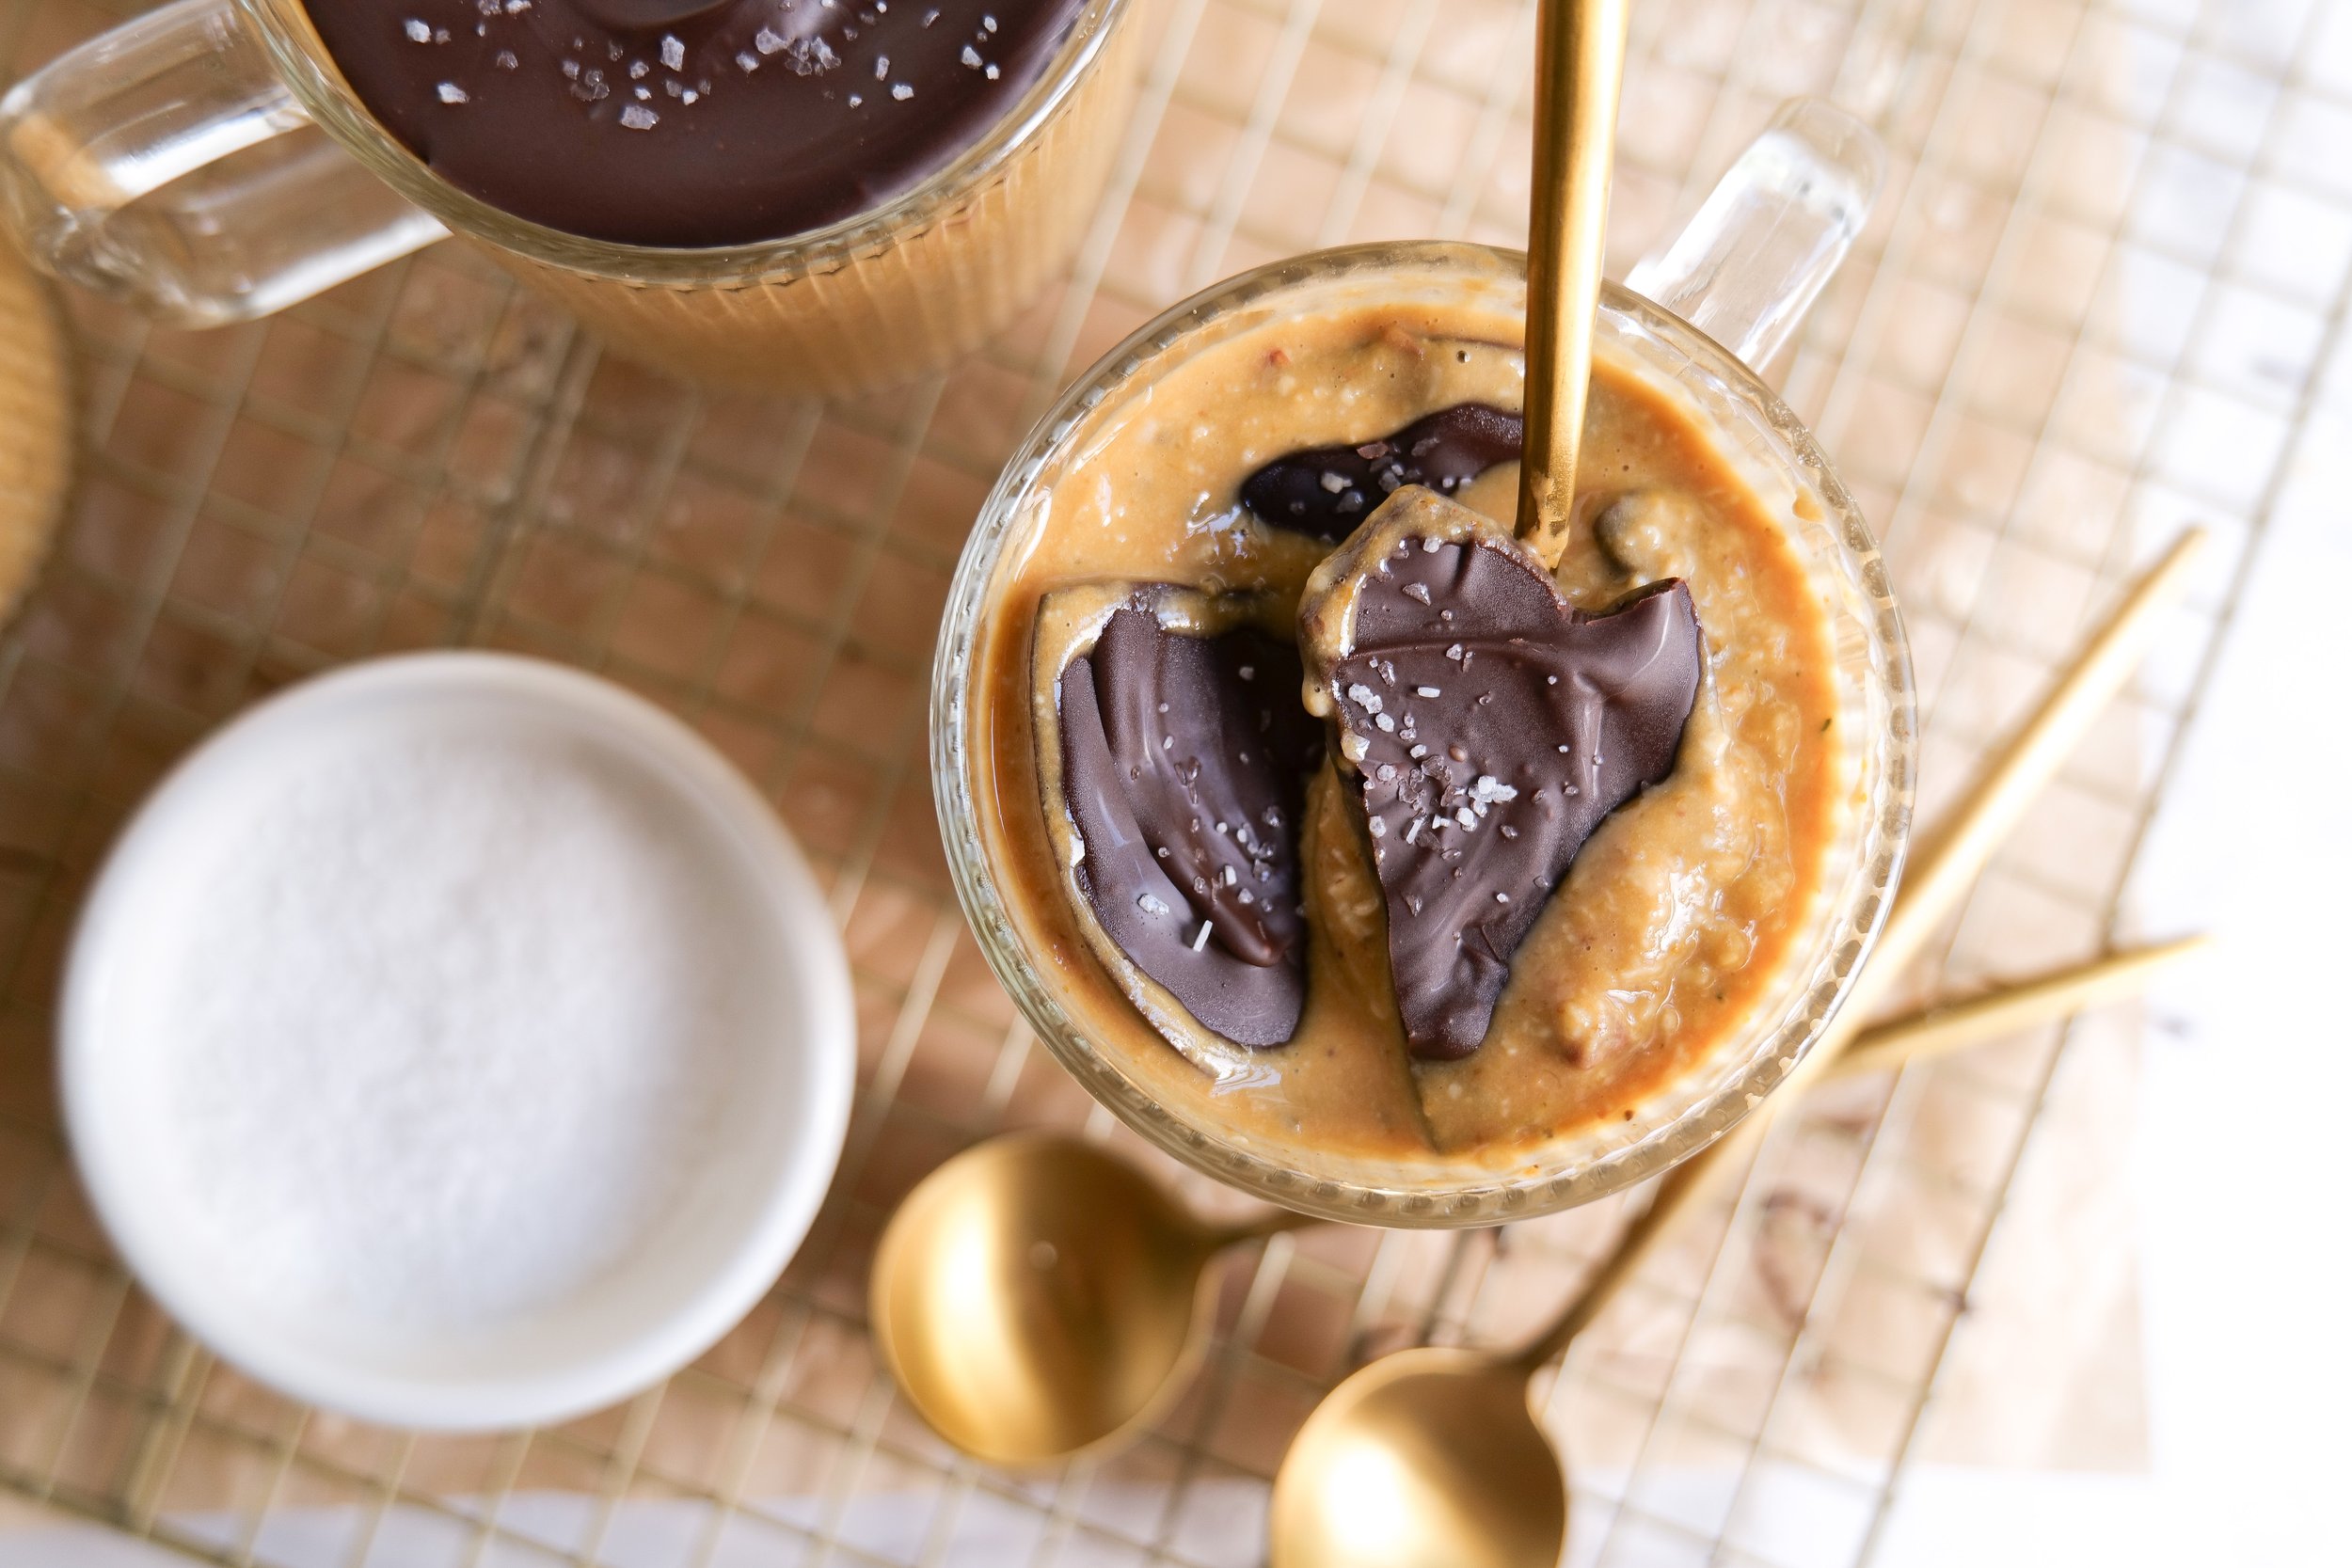
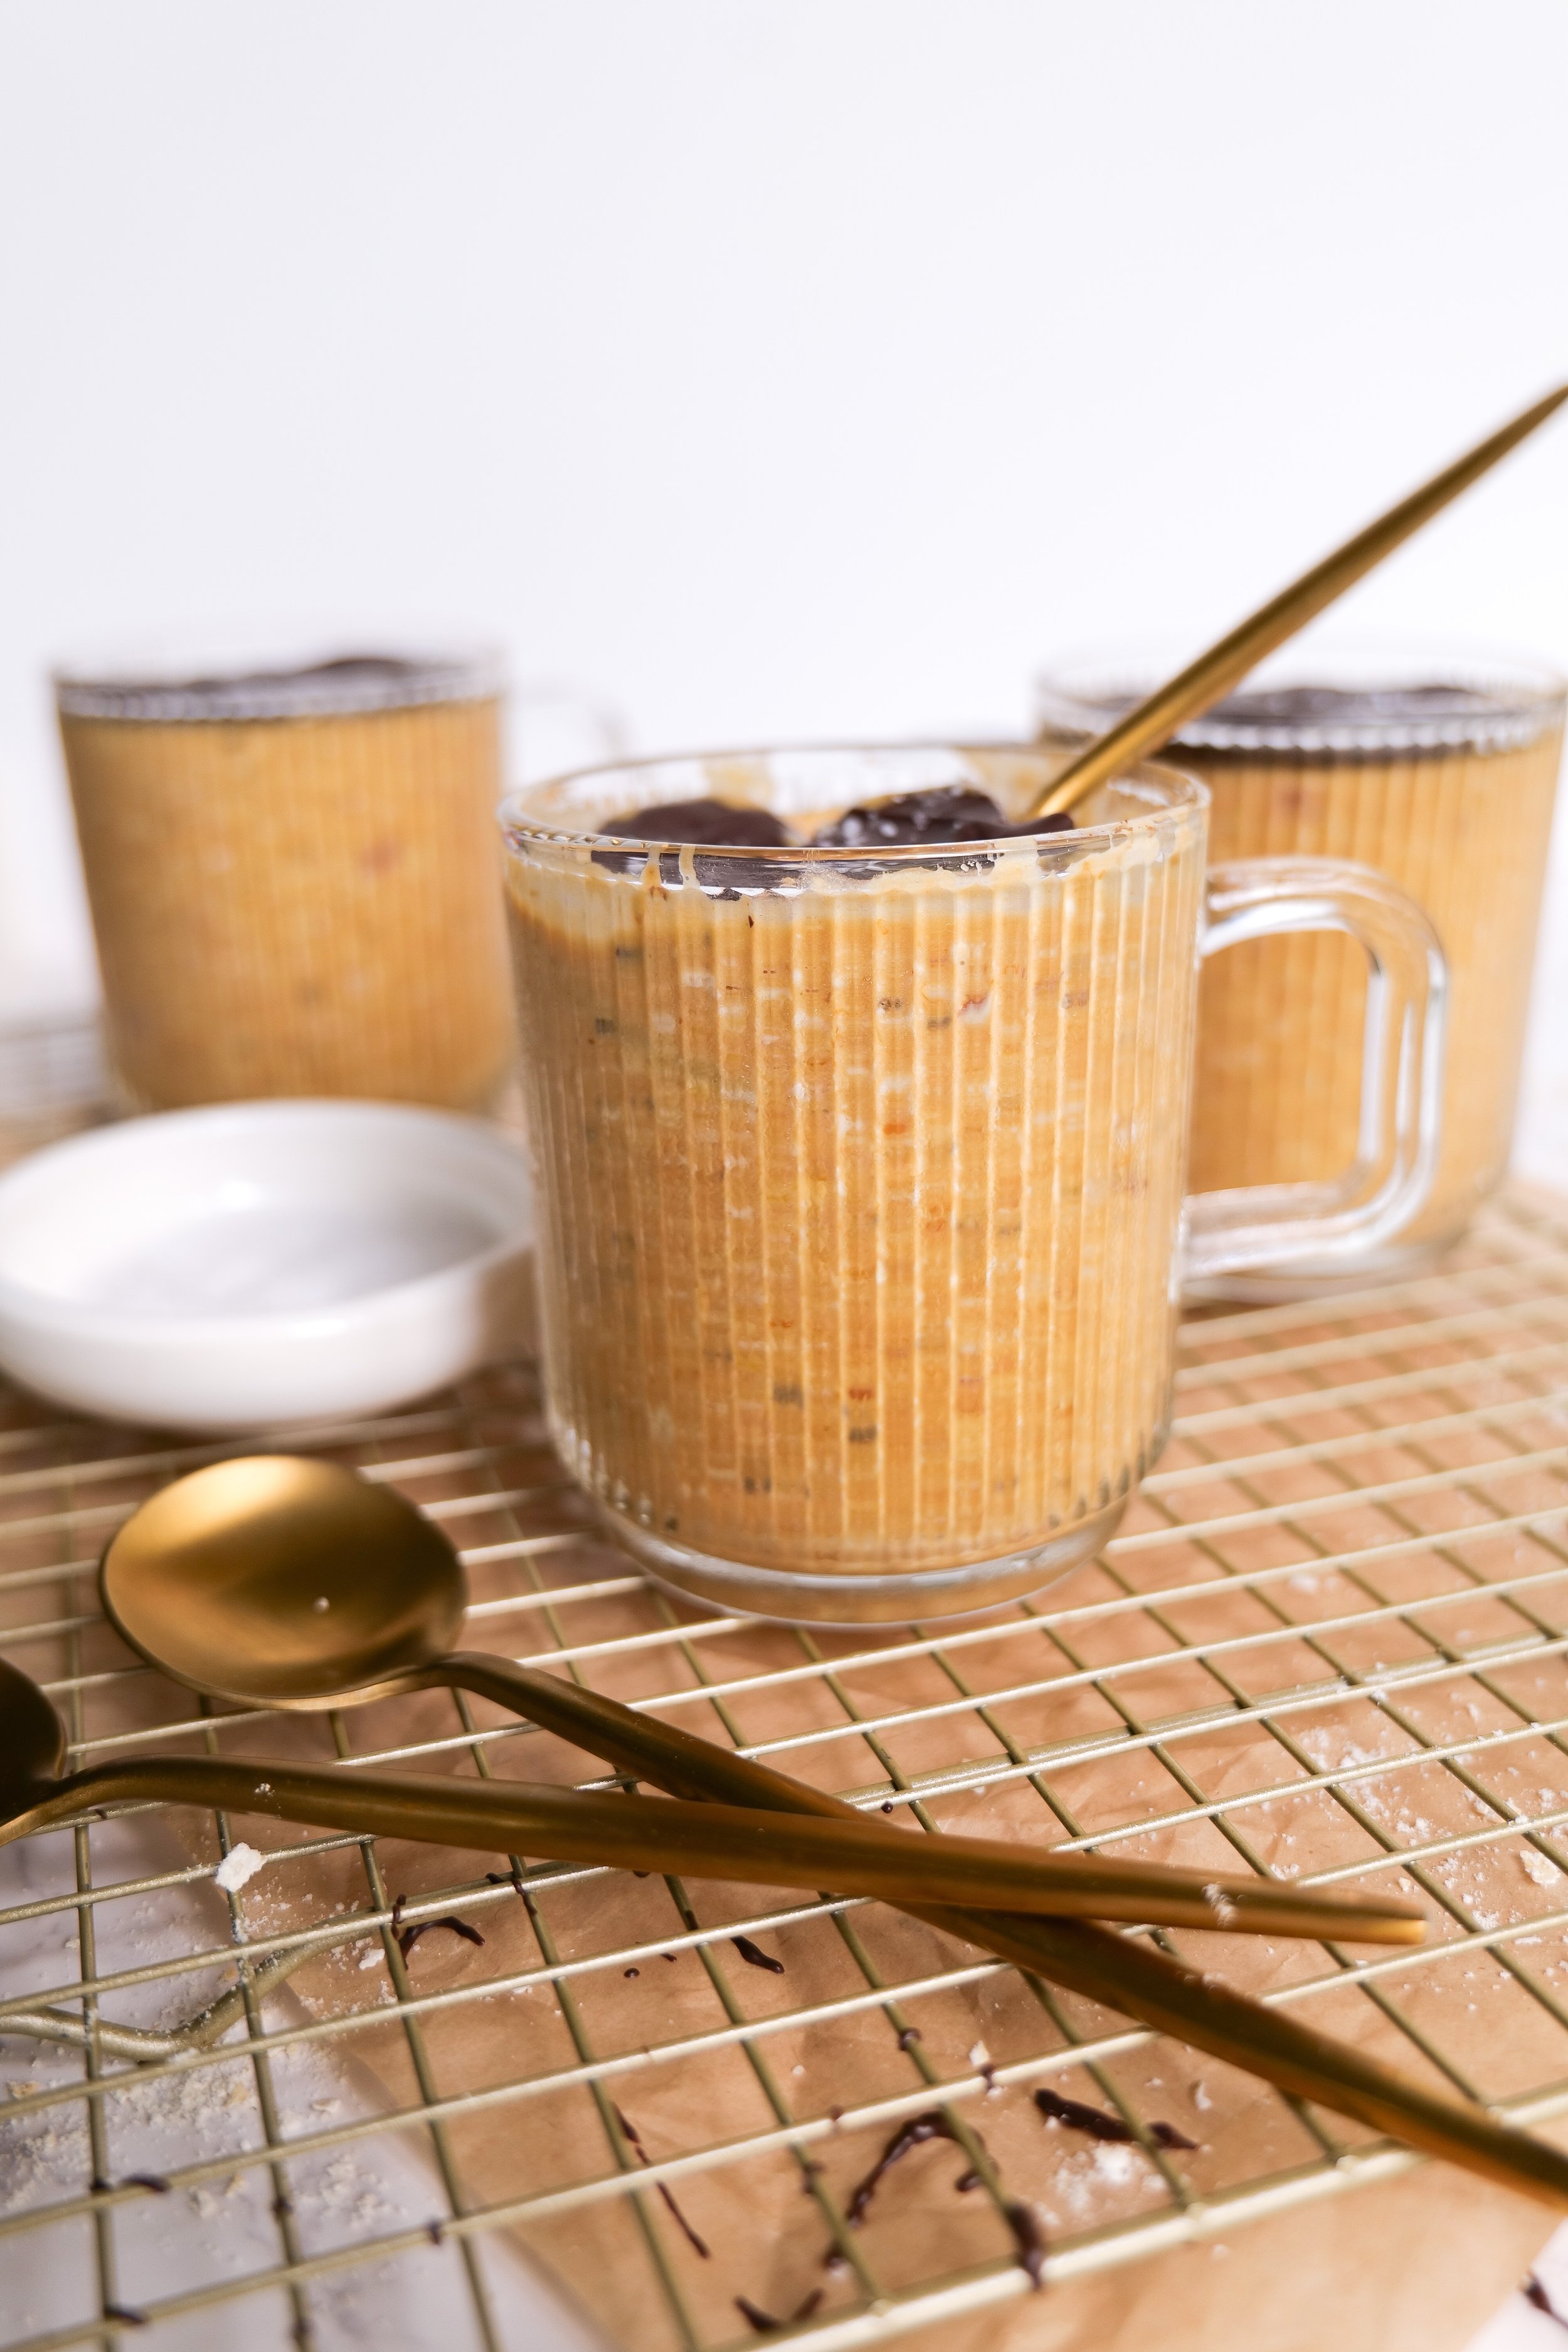
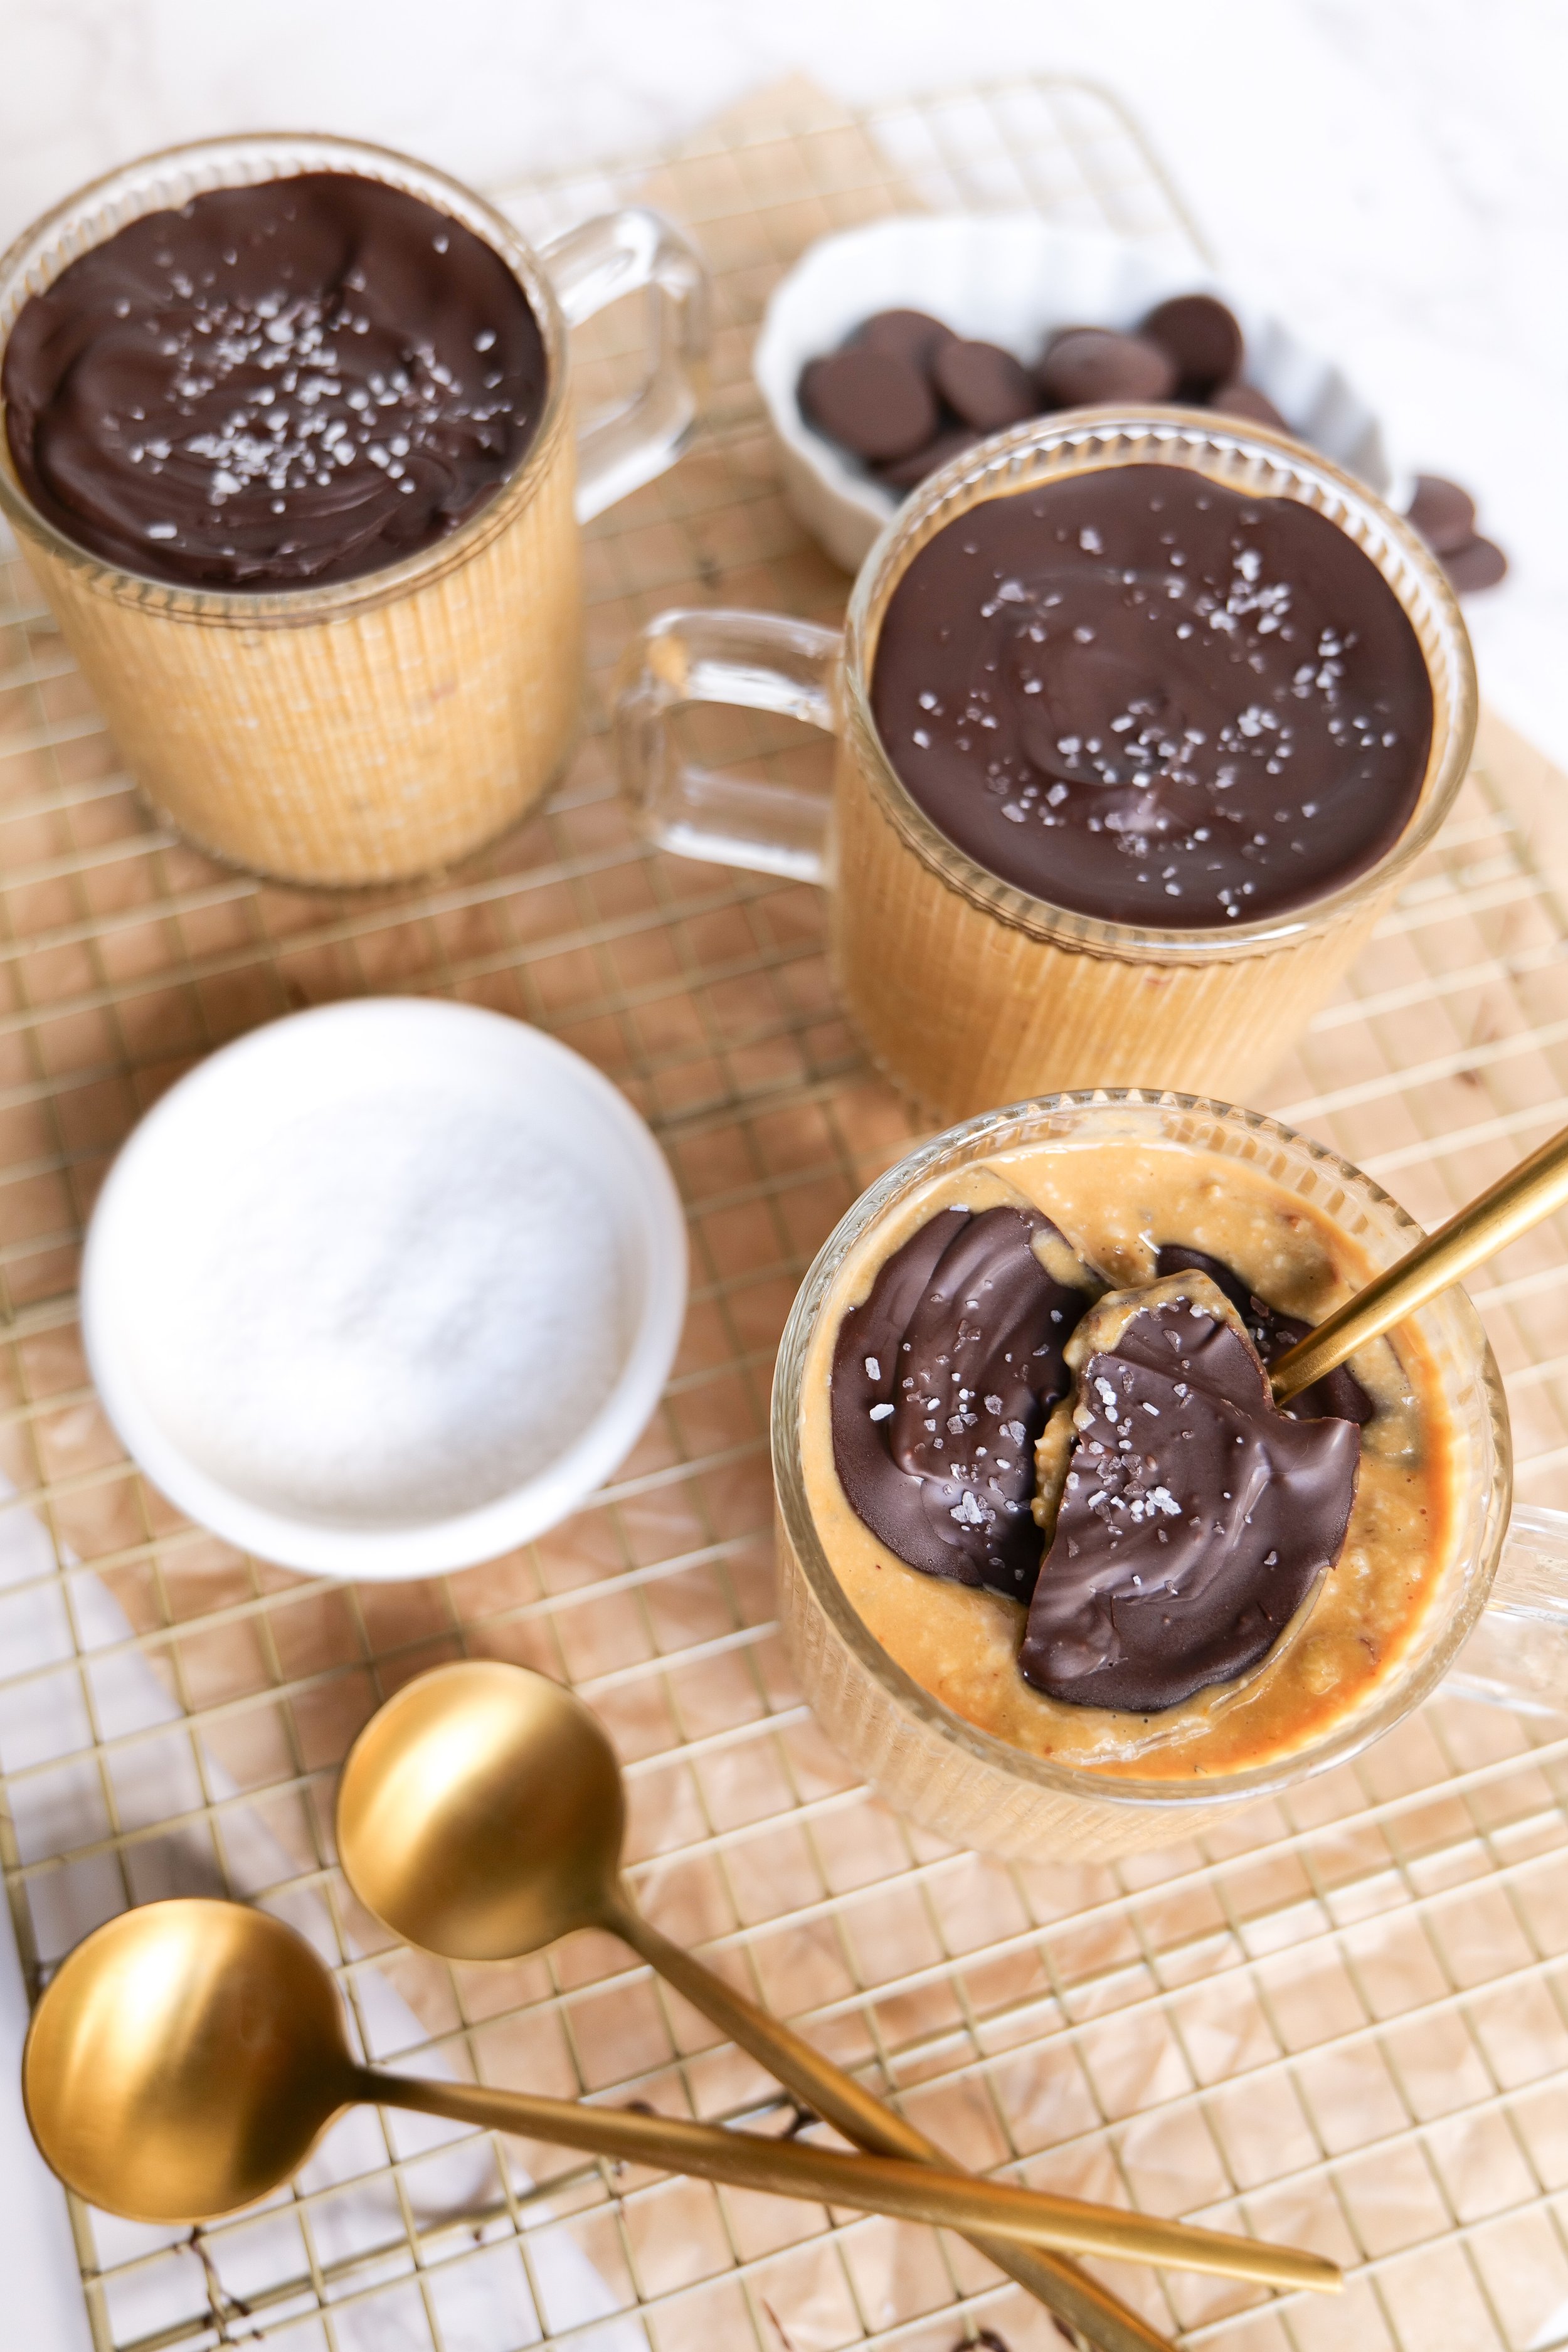
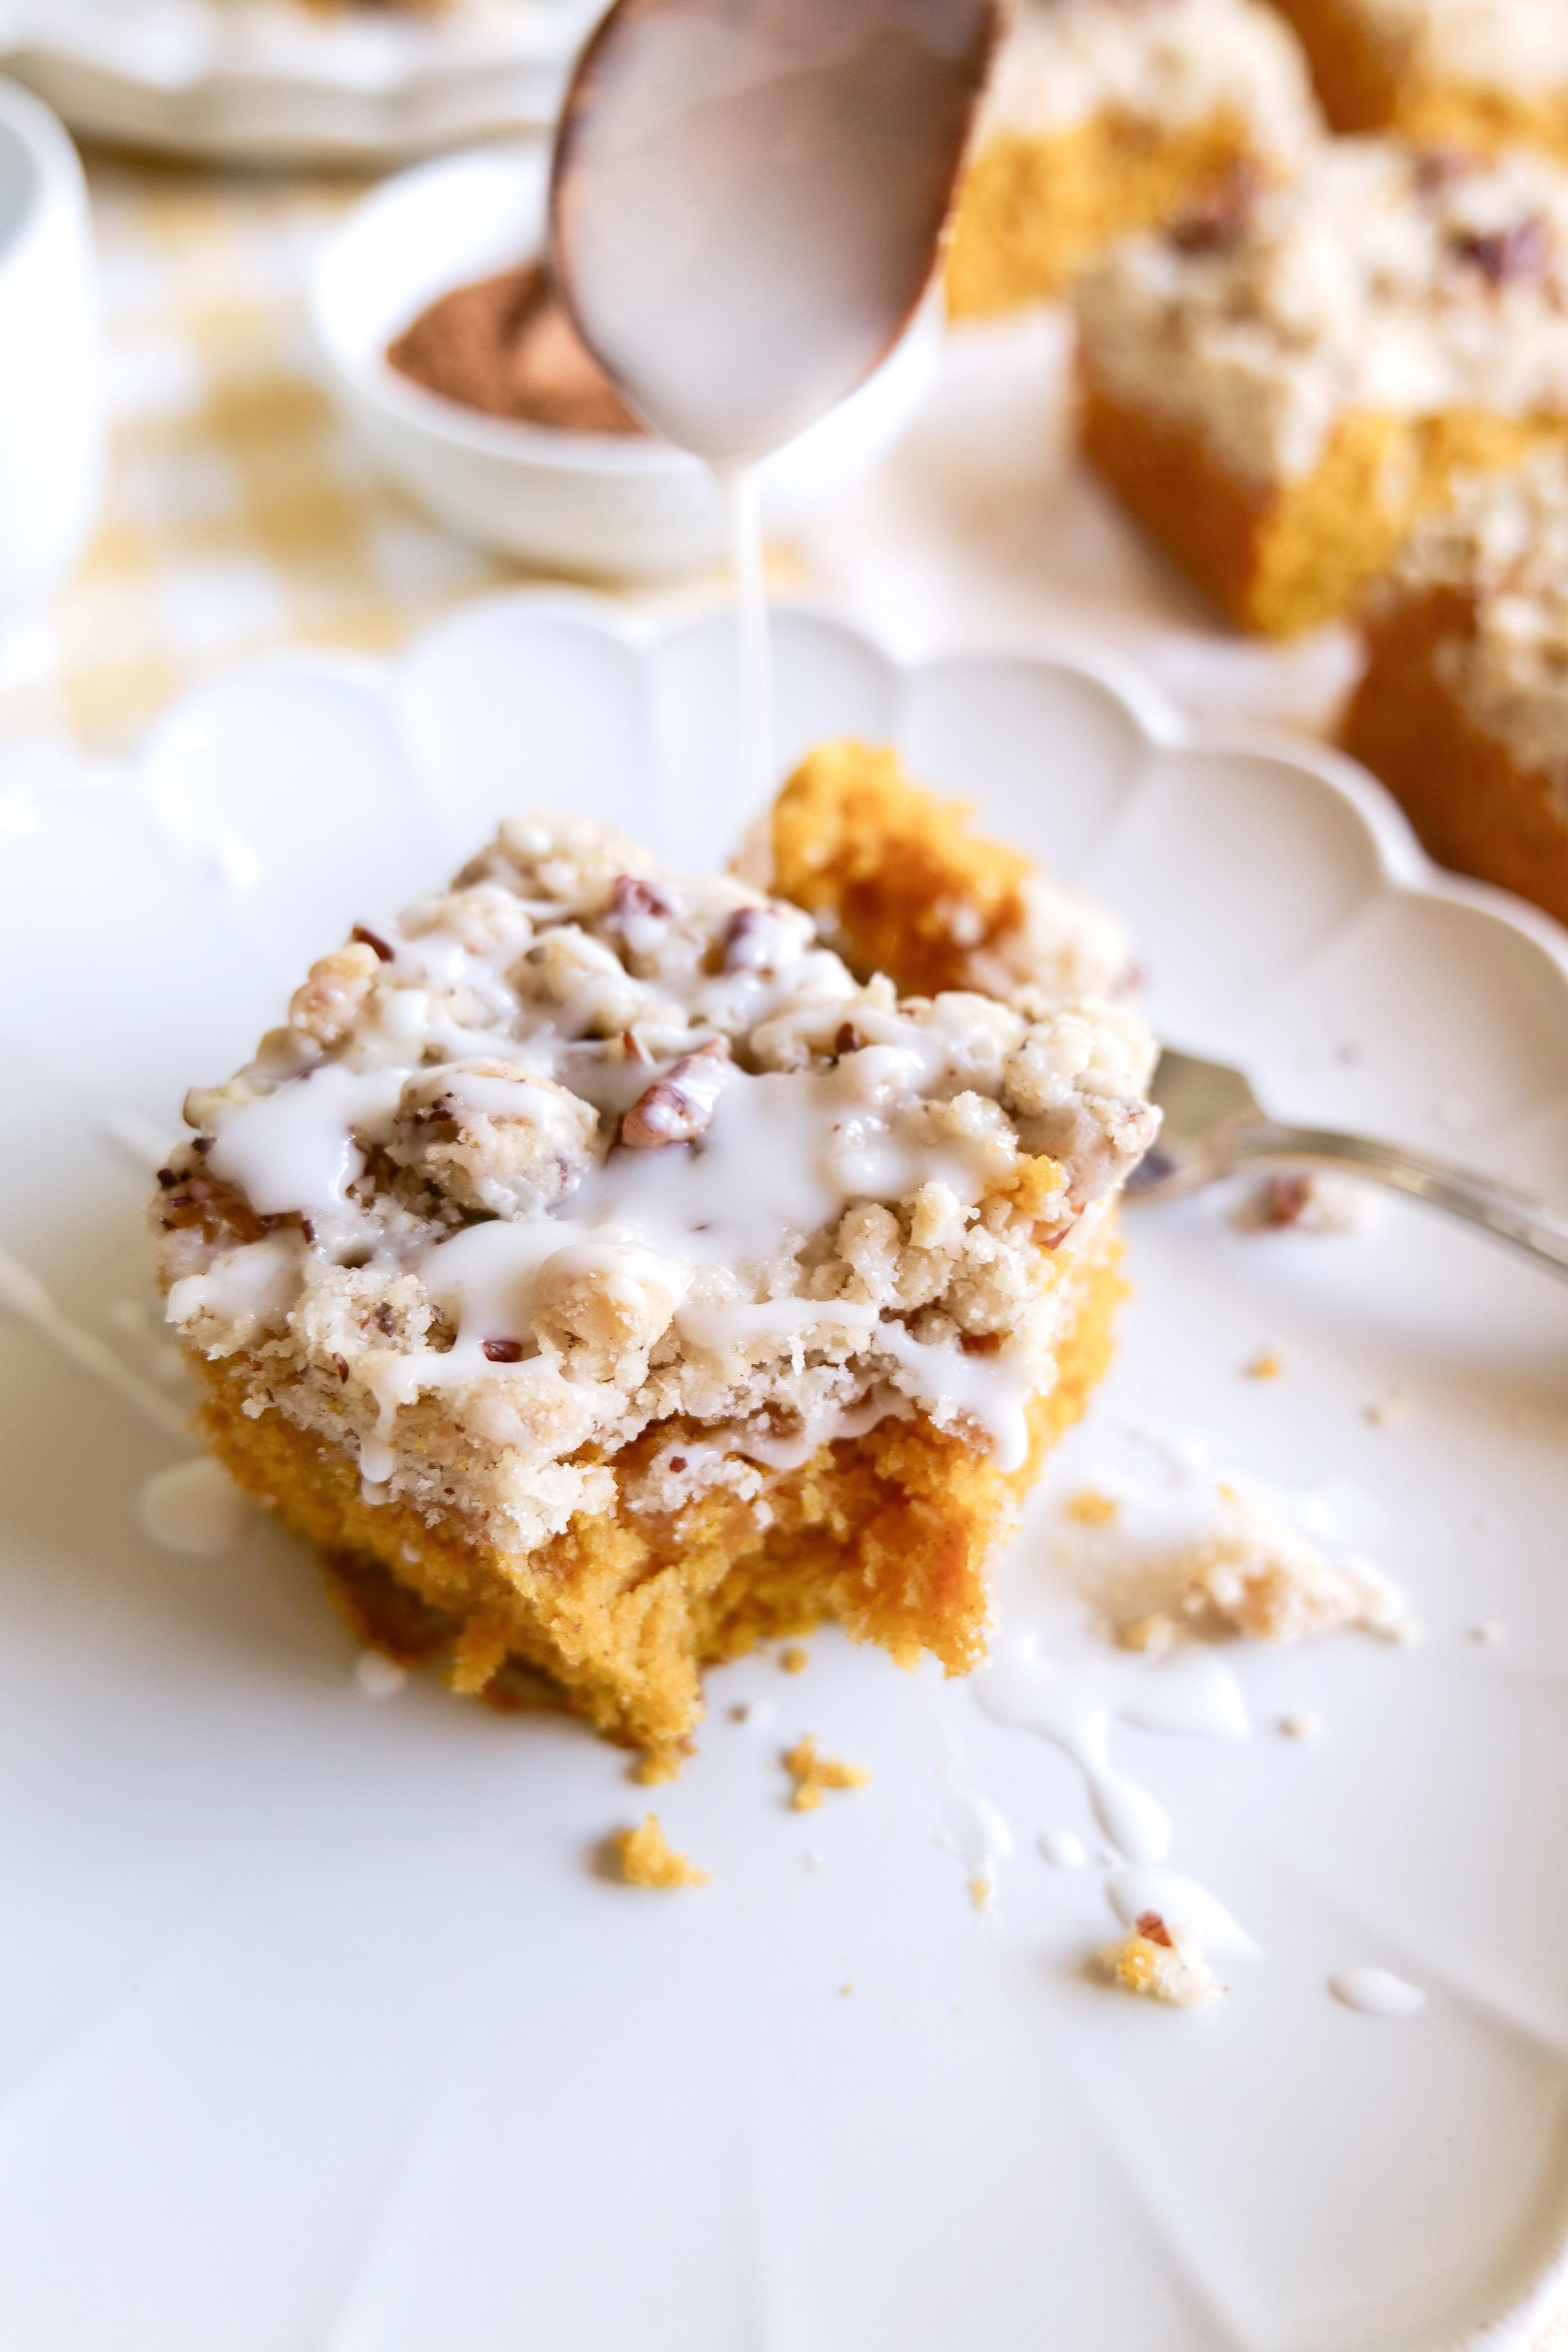
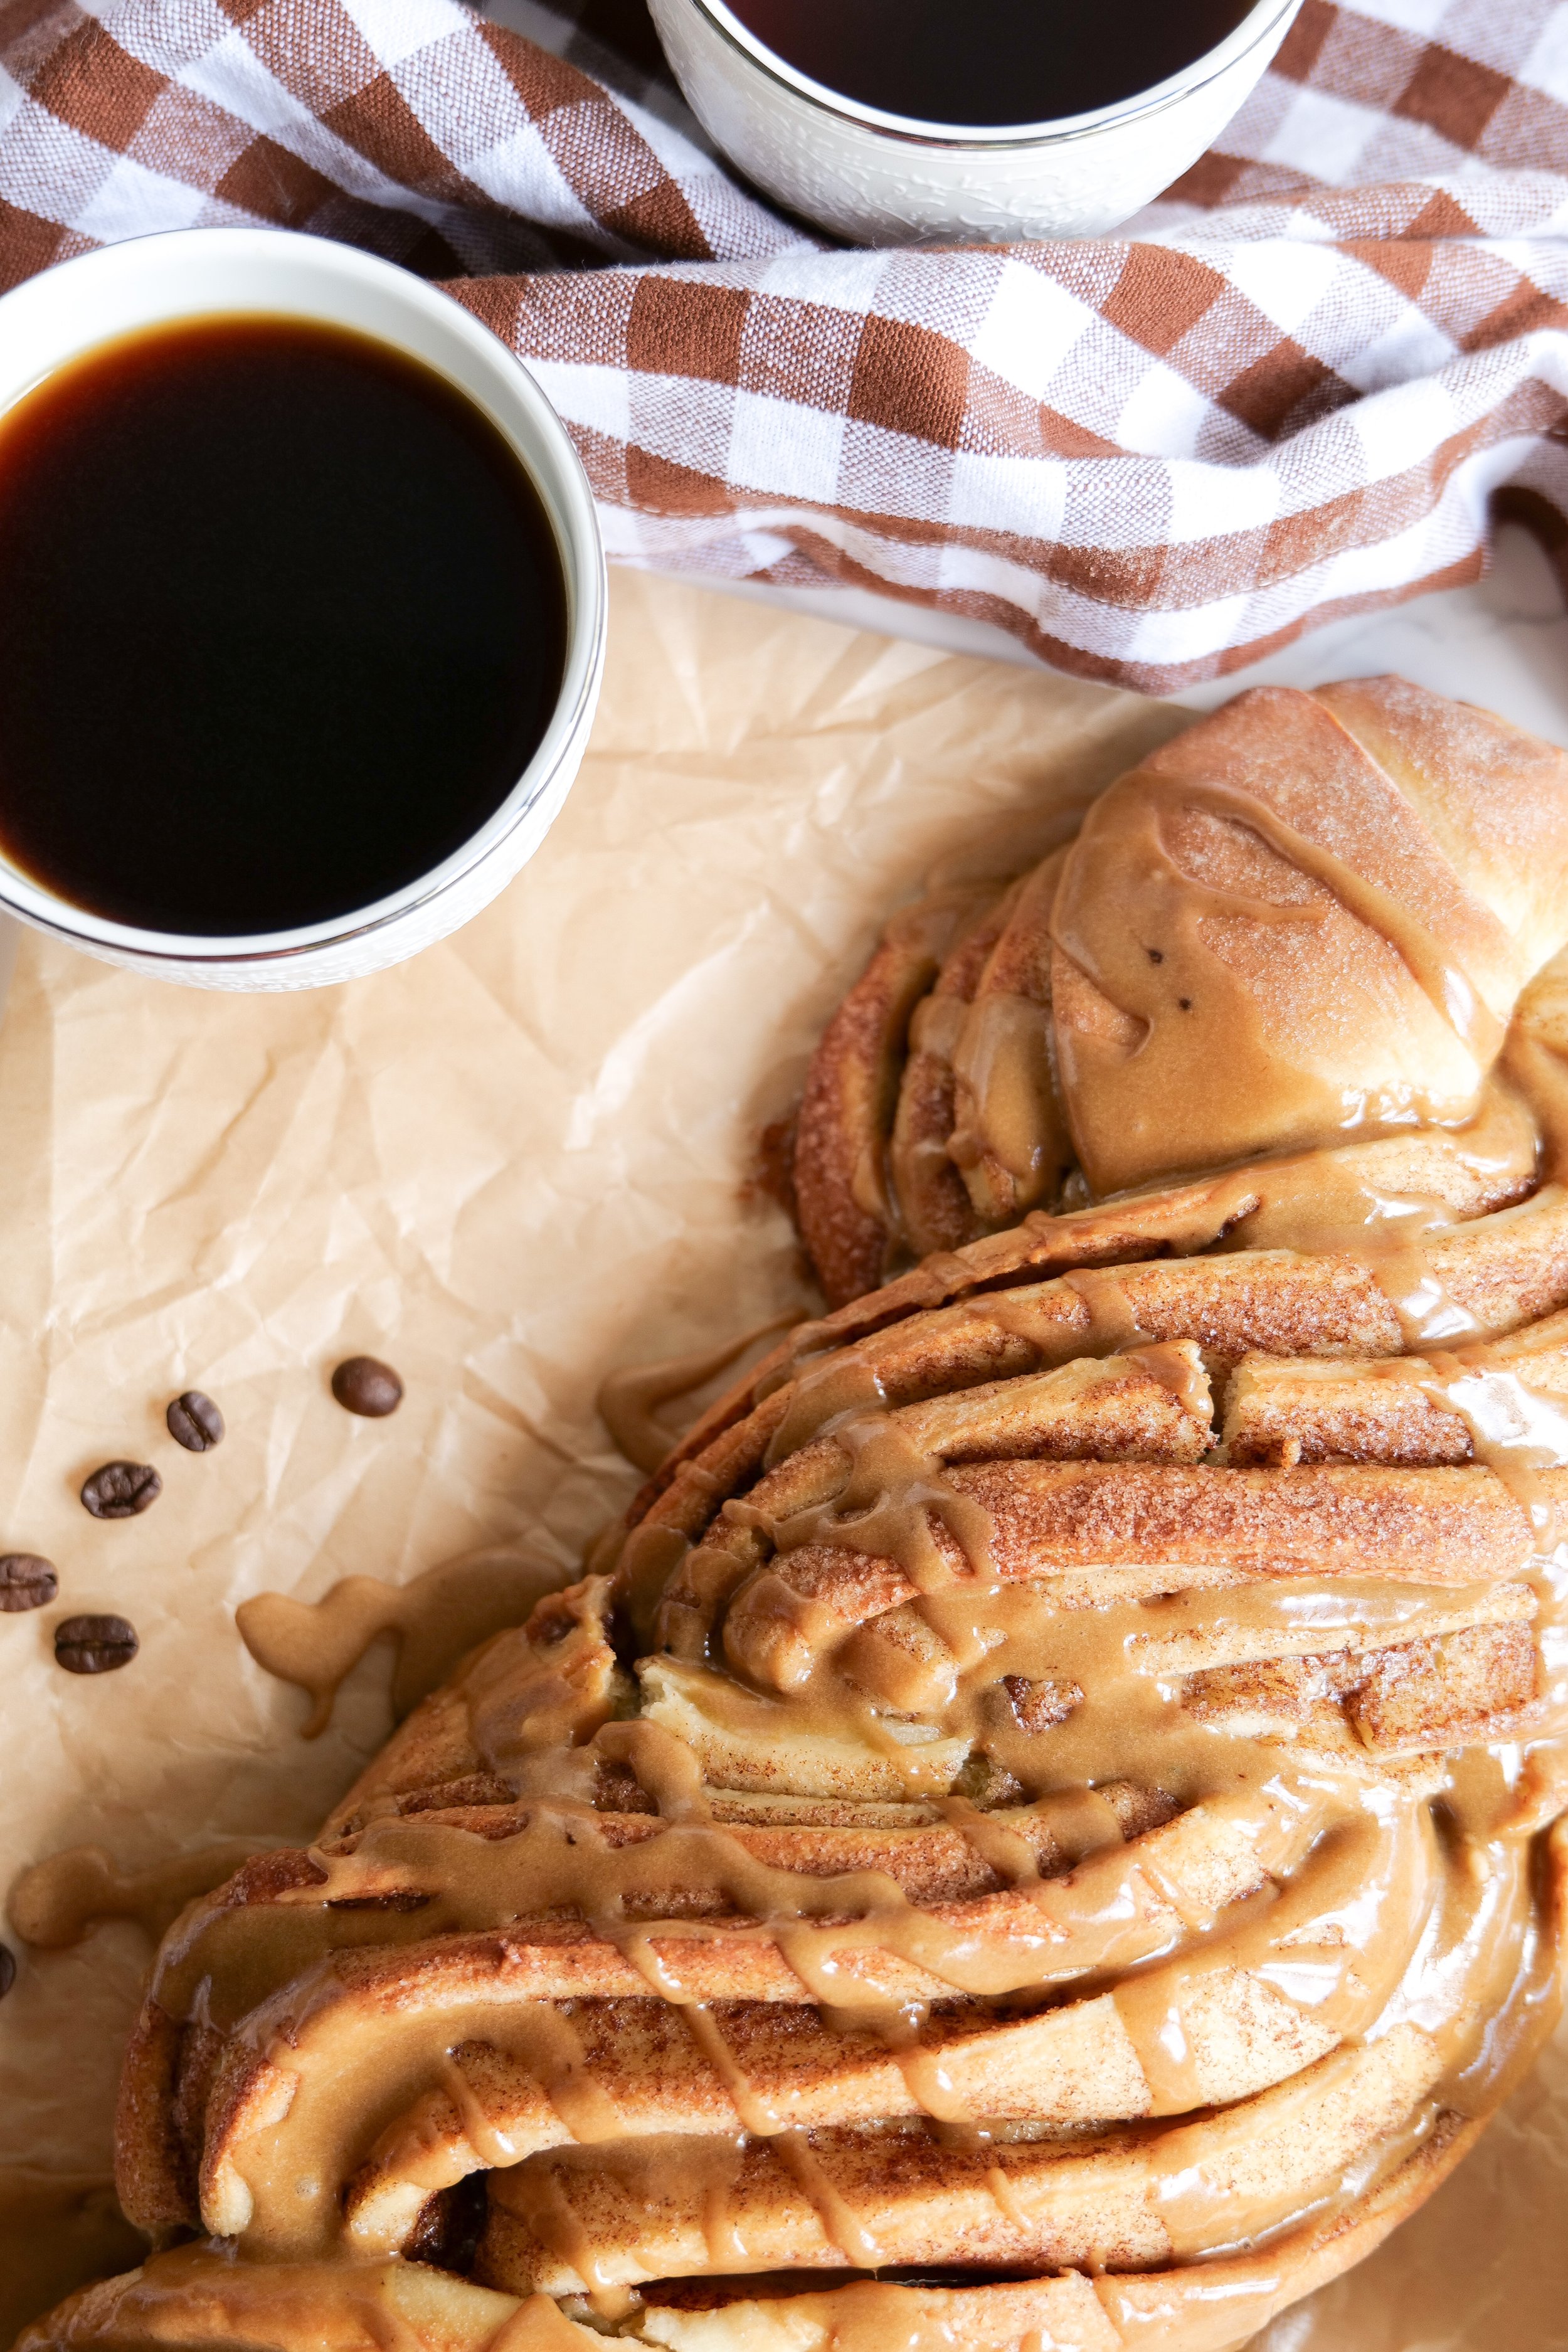
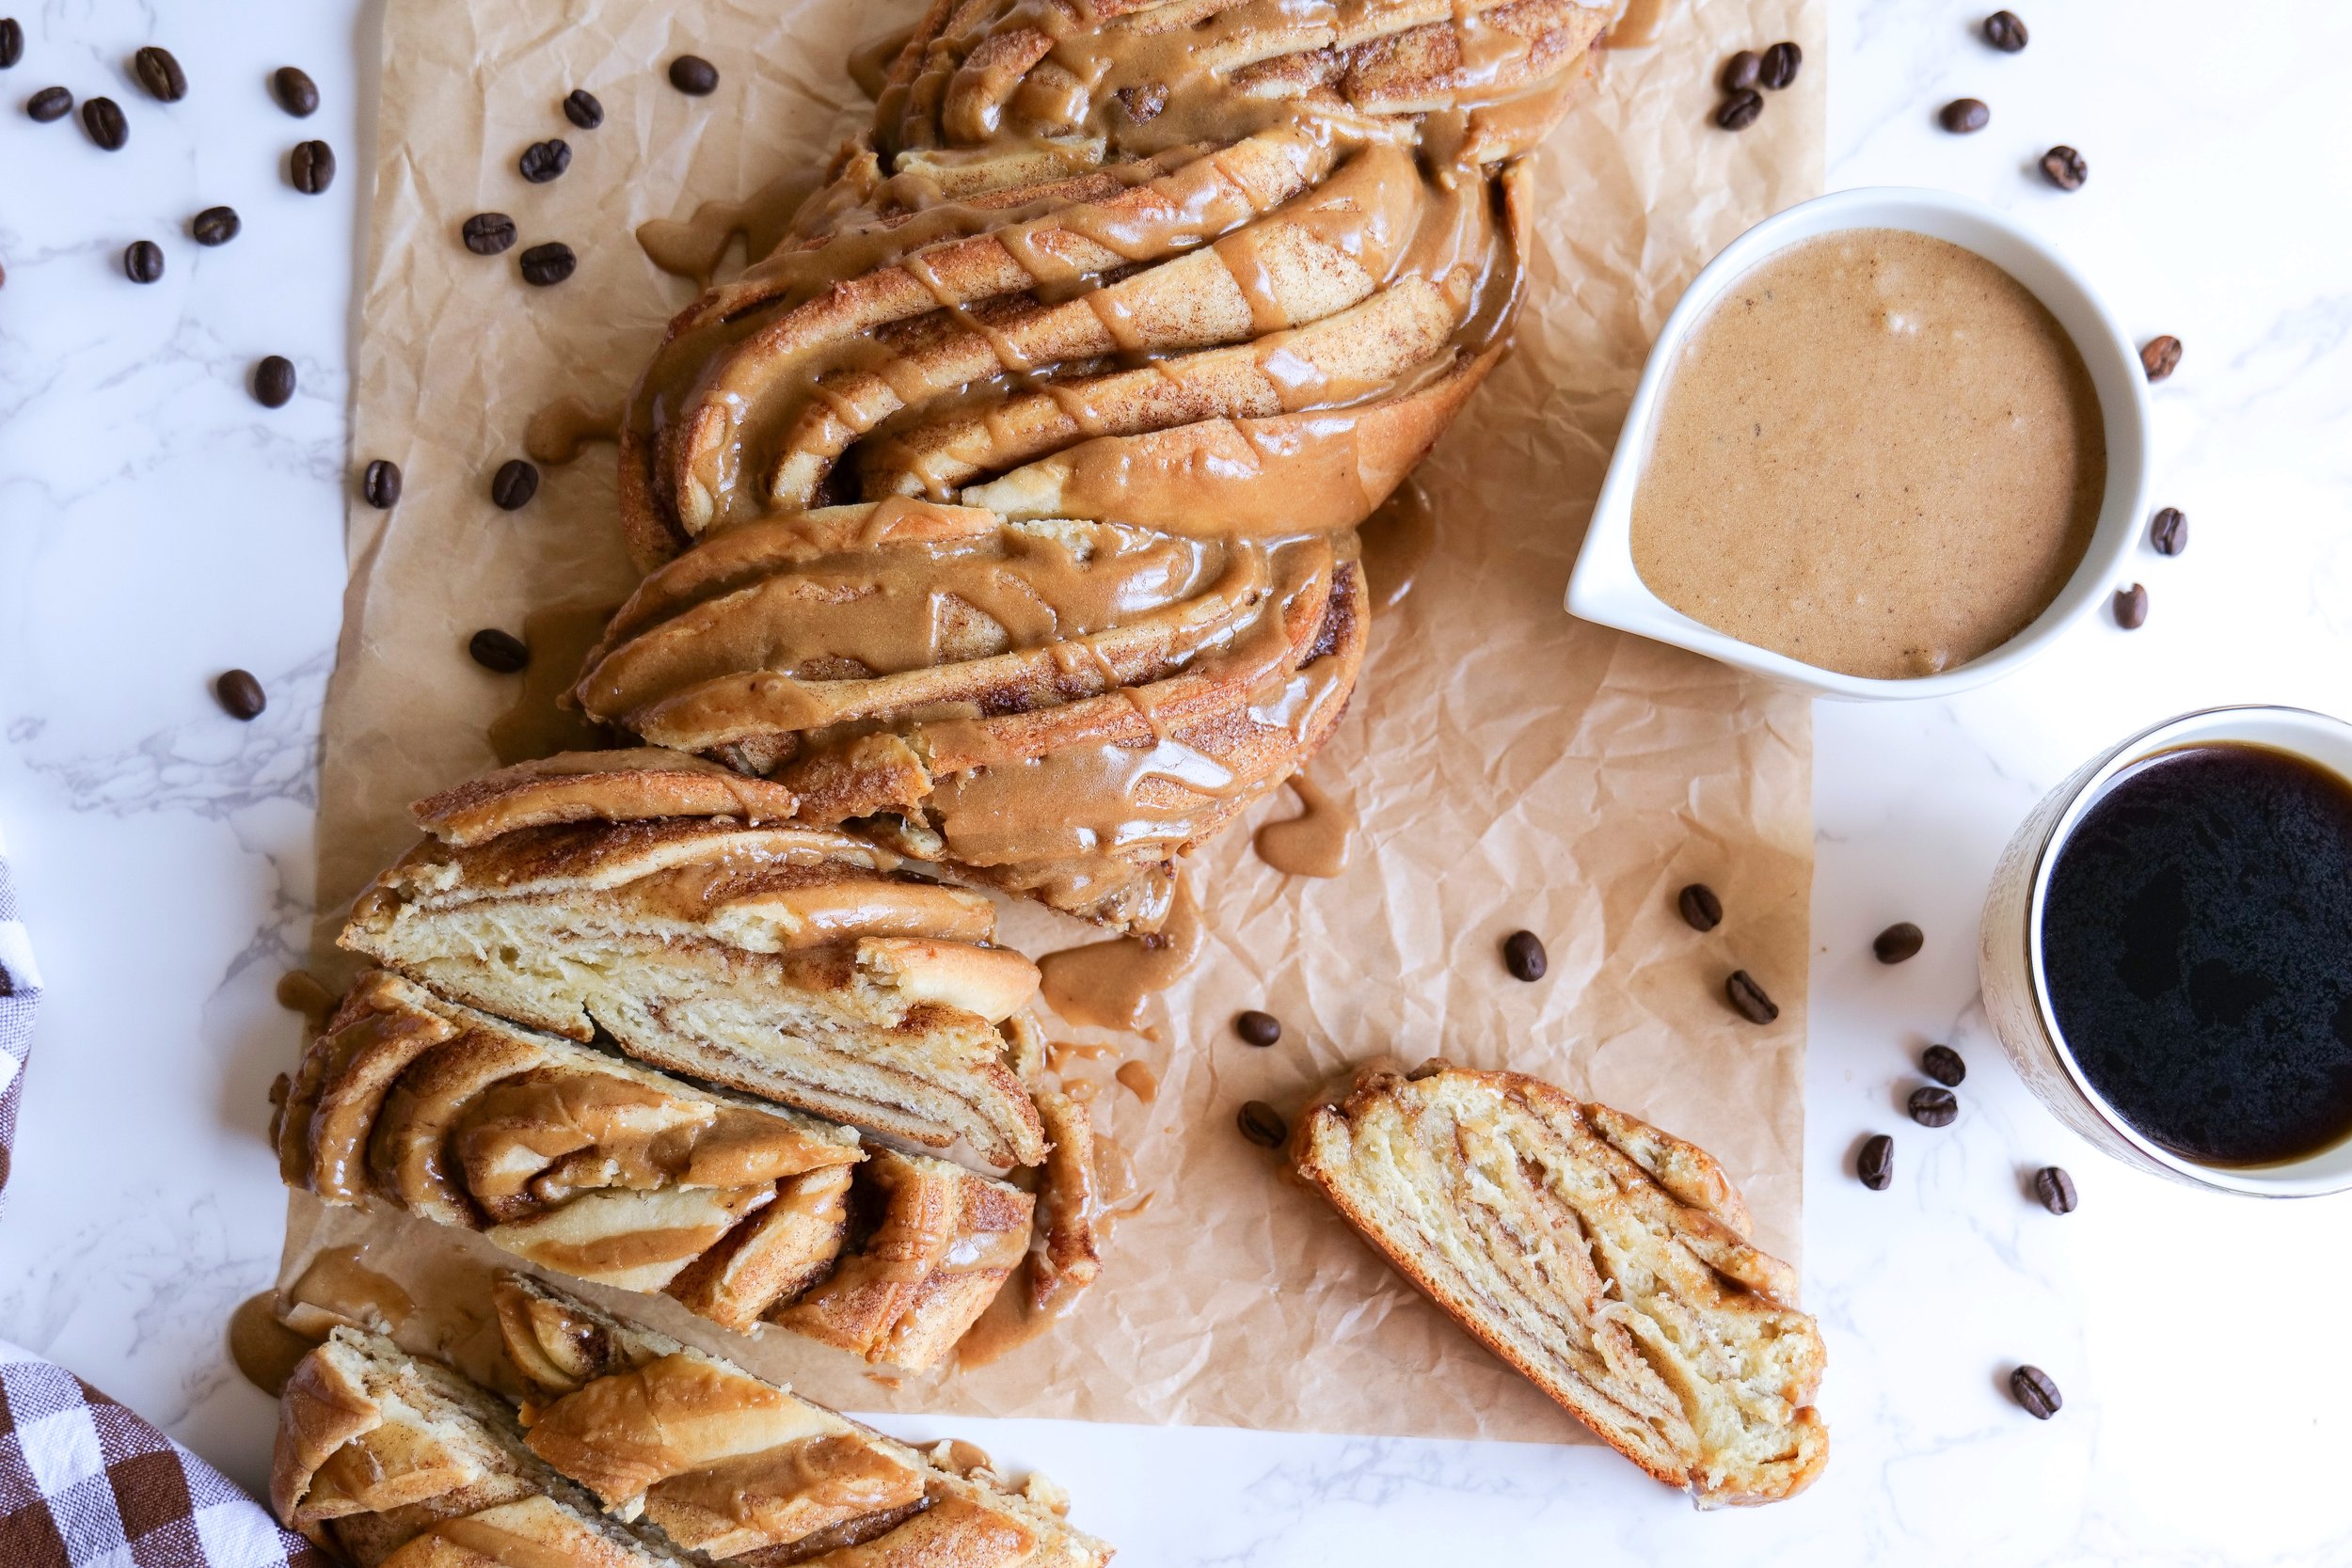
The Espresso Glaze is an optional topping for the Cinnamon Roll Loaf that adds a unique flavor and richness to the dessert. However, it of course isn't mandatory and can just as easily be served on the side or substituted for any glaze or frosting of your liking. This espresso glaze recipe adds a very subtle coffee flavor to the loaf that pairs perfectly with the cinnamon and sugar in the rolls. The coffee taste is not overpowing, and your classic cinnamon roll lovers will find it just as irresistible. The Espresso Glaze is not necessary for the Cinnamon Roll Loaf, but it is a delicious addition that adds a unique flavor and makes the dessert even more special.

What type of espresso should be used for the Espresso Glaze?

The best type of espresso to use for the perfect flavor of Espresso Glaze is actually instant espresso powder. If you don't have espresso powder, you can also use a freshly made espresso shot. When using a freshly made espresso shot be sure to take out some of the milk or add additional powdered sugar to keep consistency the same. If you want a stronger espresso flavor in your glaze, you can use a double amount of espresso powder instead of the recommended amount in the recipe. This will give your glaze a bold and rich coffee flavor. The espresso flavor if very mild in this recipe to not overpower the cinnamon roll taste, but be sure to add more if you feel necessary. You can also add espresso to the filling to make these espresso cinnamon rolls to pair with the glaze frosting. With the combination of the cinnamon roll dough and the espresso glaze, this dessert is sure to please even the pickiest of eaters!

Ingredients:

Dough

4 1/2 teaspoons fast-acting dry yeast

1/2 cup sugar

1/2 cup butter

1 egg

1 teaspoon salt

4 cups all-purpose flour

1/4 cup warm water

1 cup milk

Filling

1 cup browned butter

1/2 cup sugar

2 tablespoons cinnamon

Icing

1/4 cup butter

3 cups powdered sugar

1/4 cup milk

2 teaspoons vanilla

2 tablespoons espresso powder

Instructions:

  1. Mix lukewarm water and yeast, and let sit for roughly 10 minutes to make sure the yeast is still active and bubbling. You will notice the yeast growing in size.

  2. While the yeast is growing, you will whisk these together in a new bowl: sugar, butter (softened for 15-20 sec on microwave) egg, milk and salt with an electric mixer. Add in yeast mixture until fully incorporated.

  3. Slowly add in flour with a wooden spoon, once you have added in all 4 cups make sure the dough is slightly sticky and looks like dough. Once you see this mix for another few minutes. If you still don’t see it looking like dough, add in more flour, 1/4 cup at a time, until you do.

  4. Once you have fully mixed together the dough form into a ball in your bowl, cover with a kitchen towel or plastic wrap and let rise in a warm place for 2 hours.

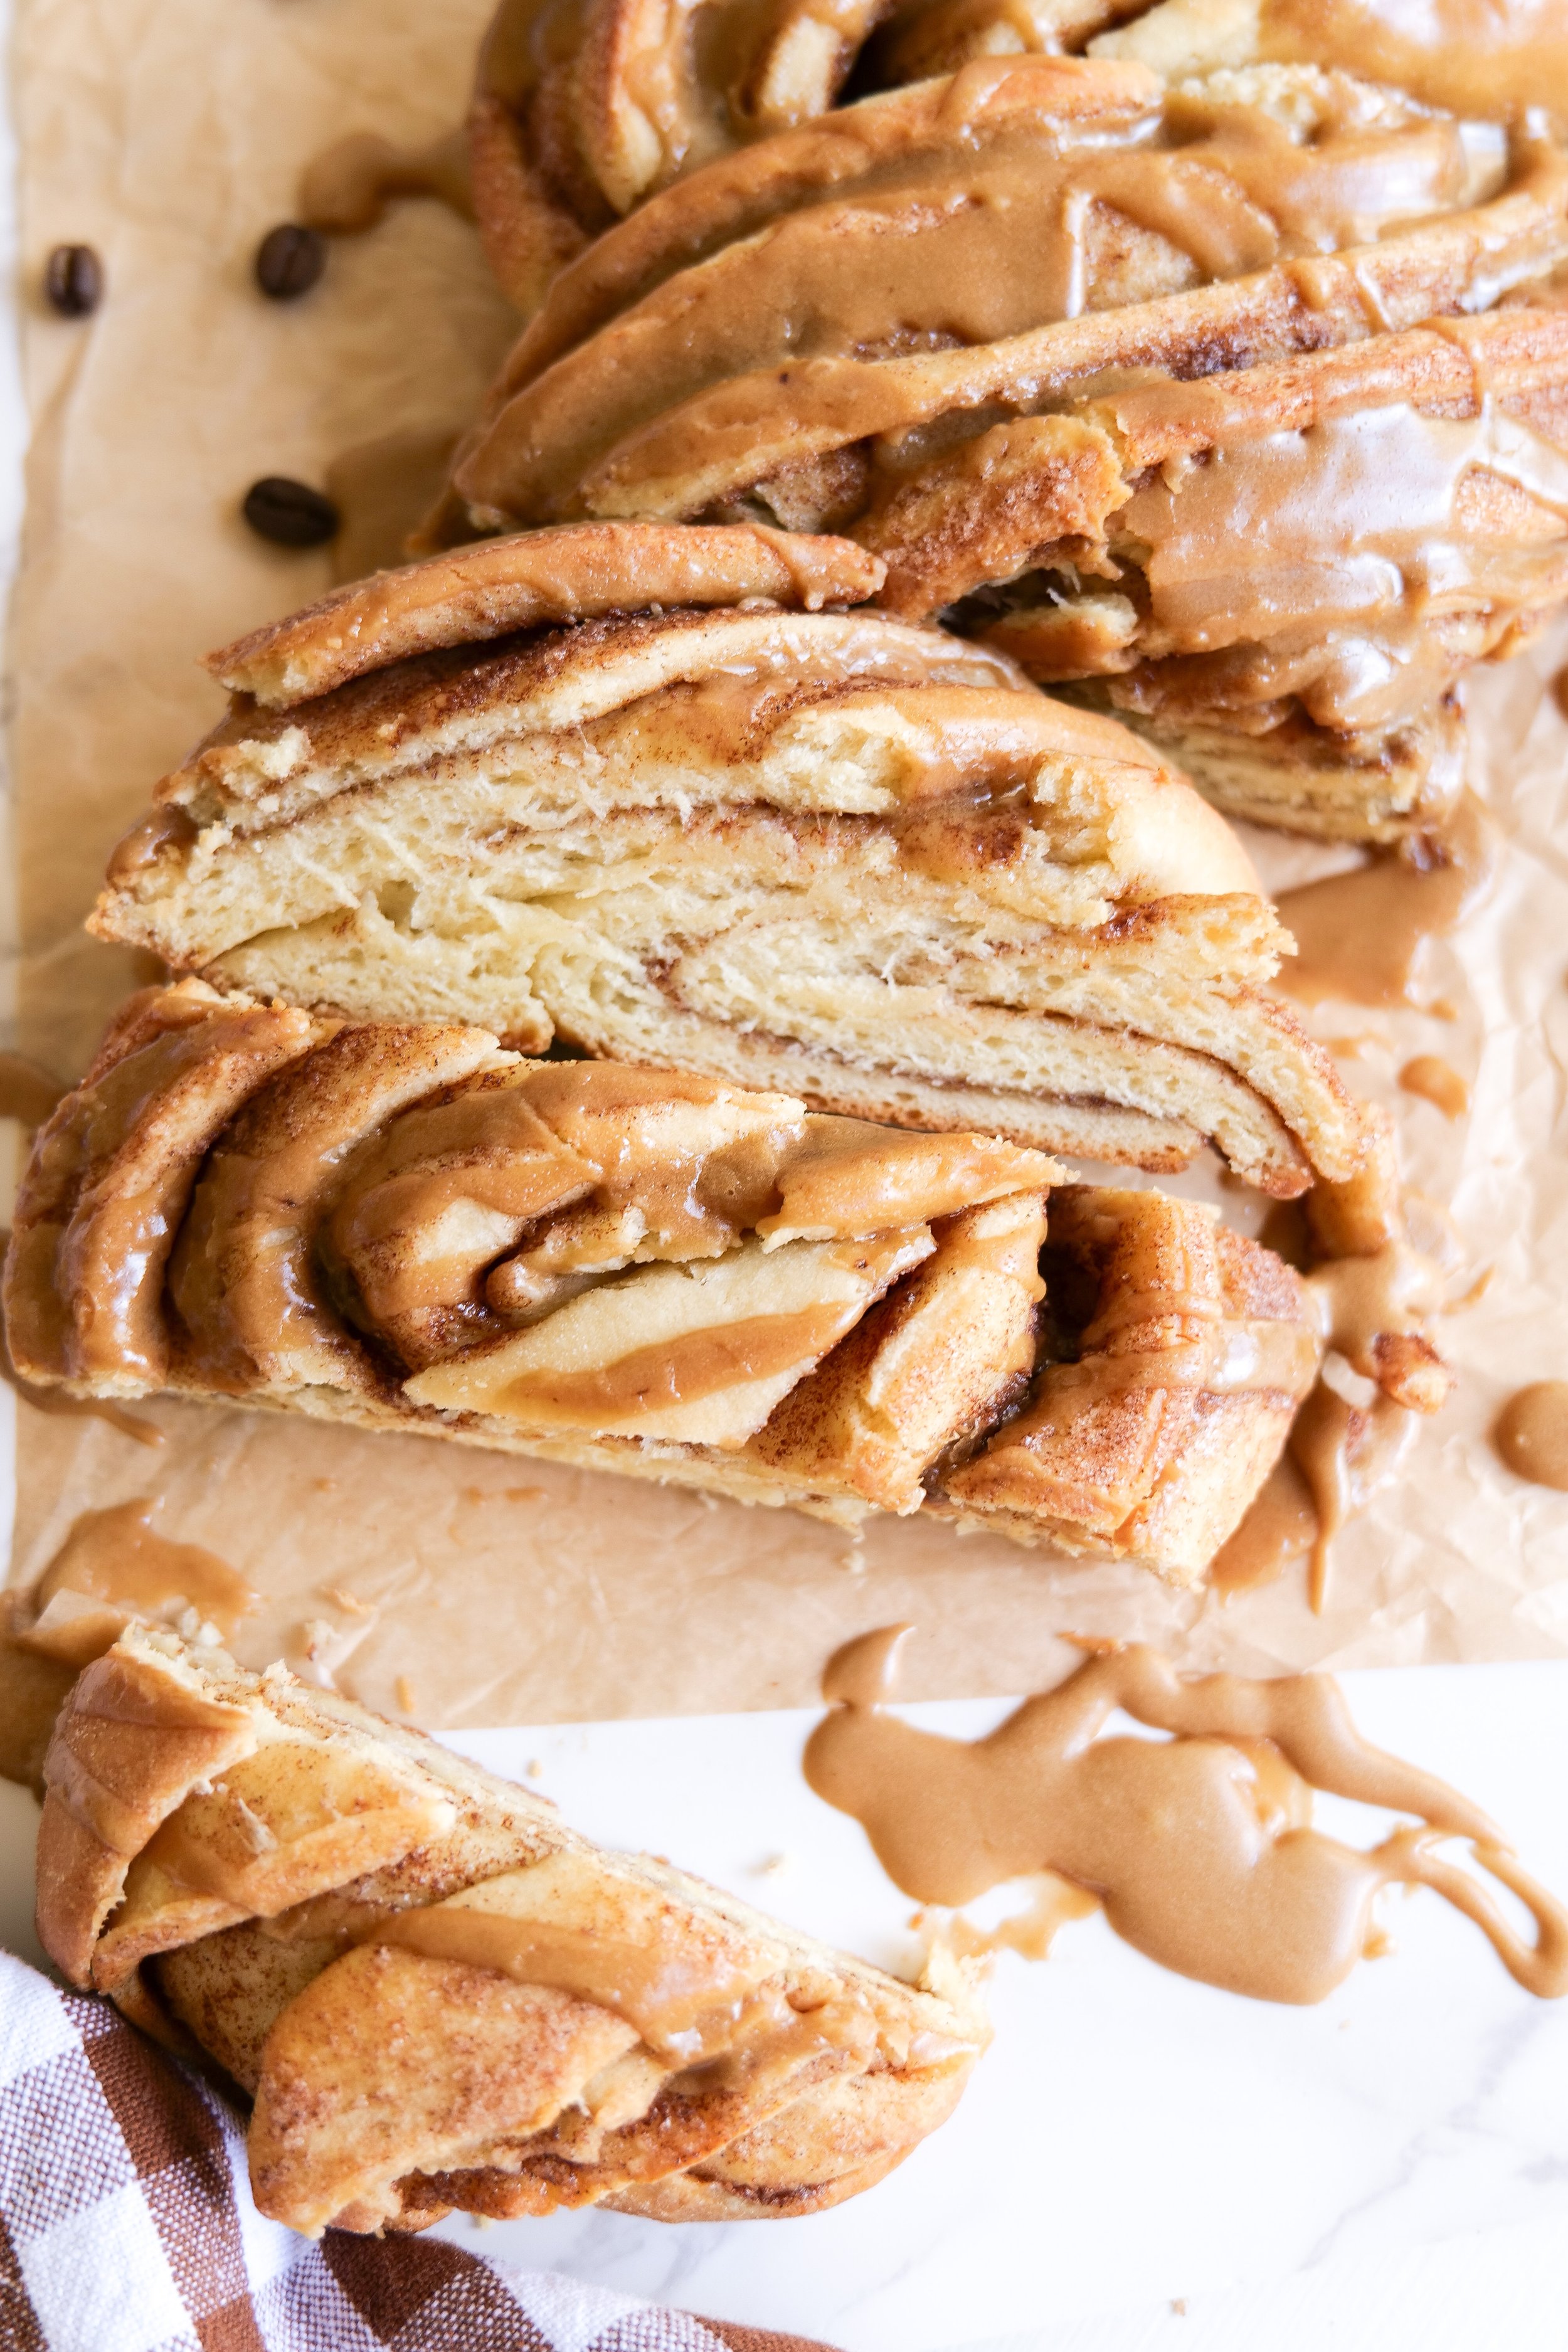
  5. Next, soften butter and mix in cinnamon and sugar for filling and preheat oven to 350 degrees. When the dough is ready roll out lightly flour your work area and roll to about 1/4 inch thick rectangular shape. Add filling to the middle making sure to cover all of the dough

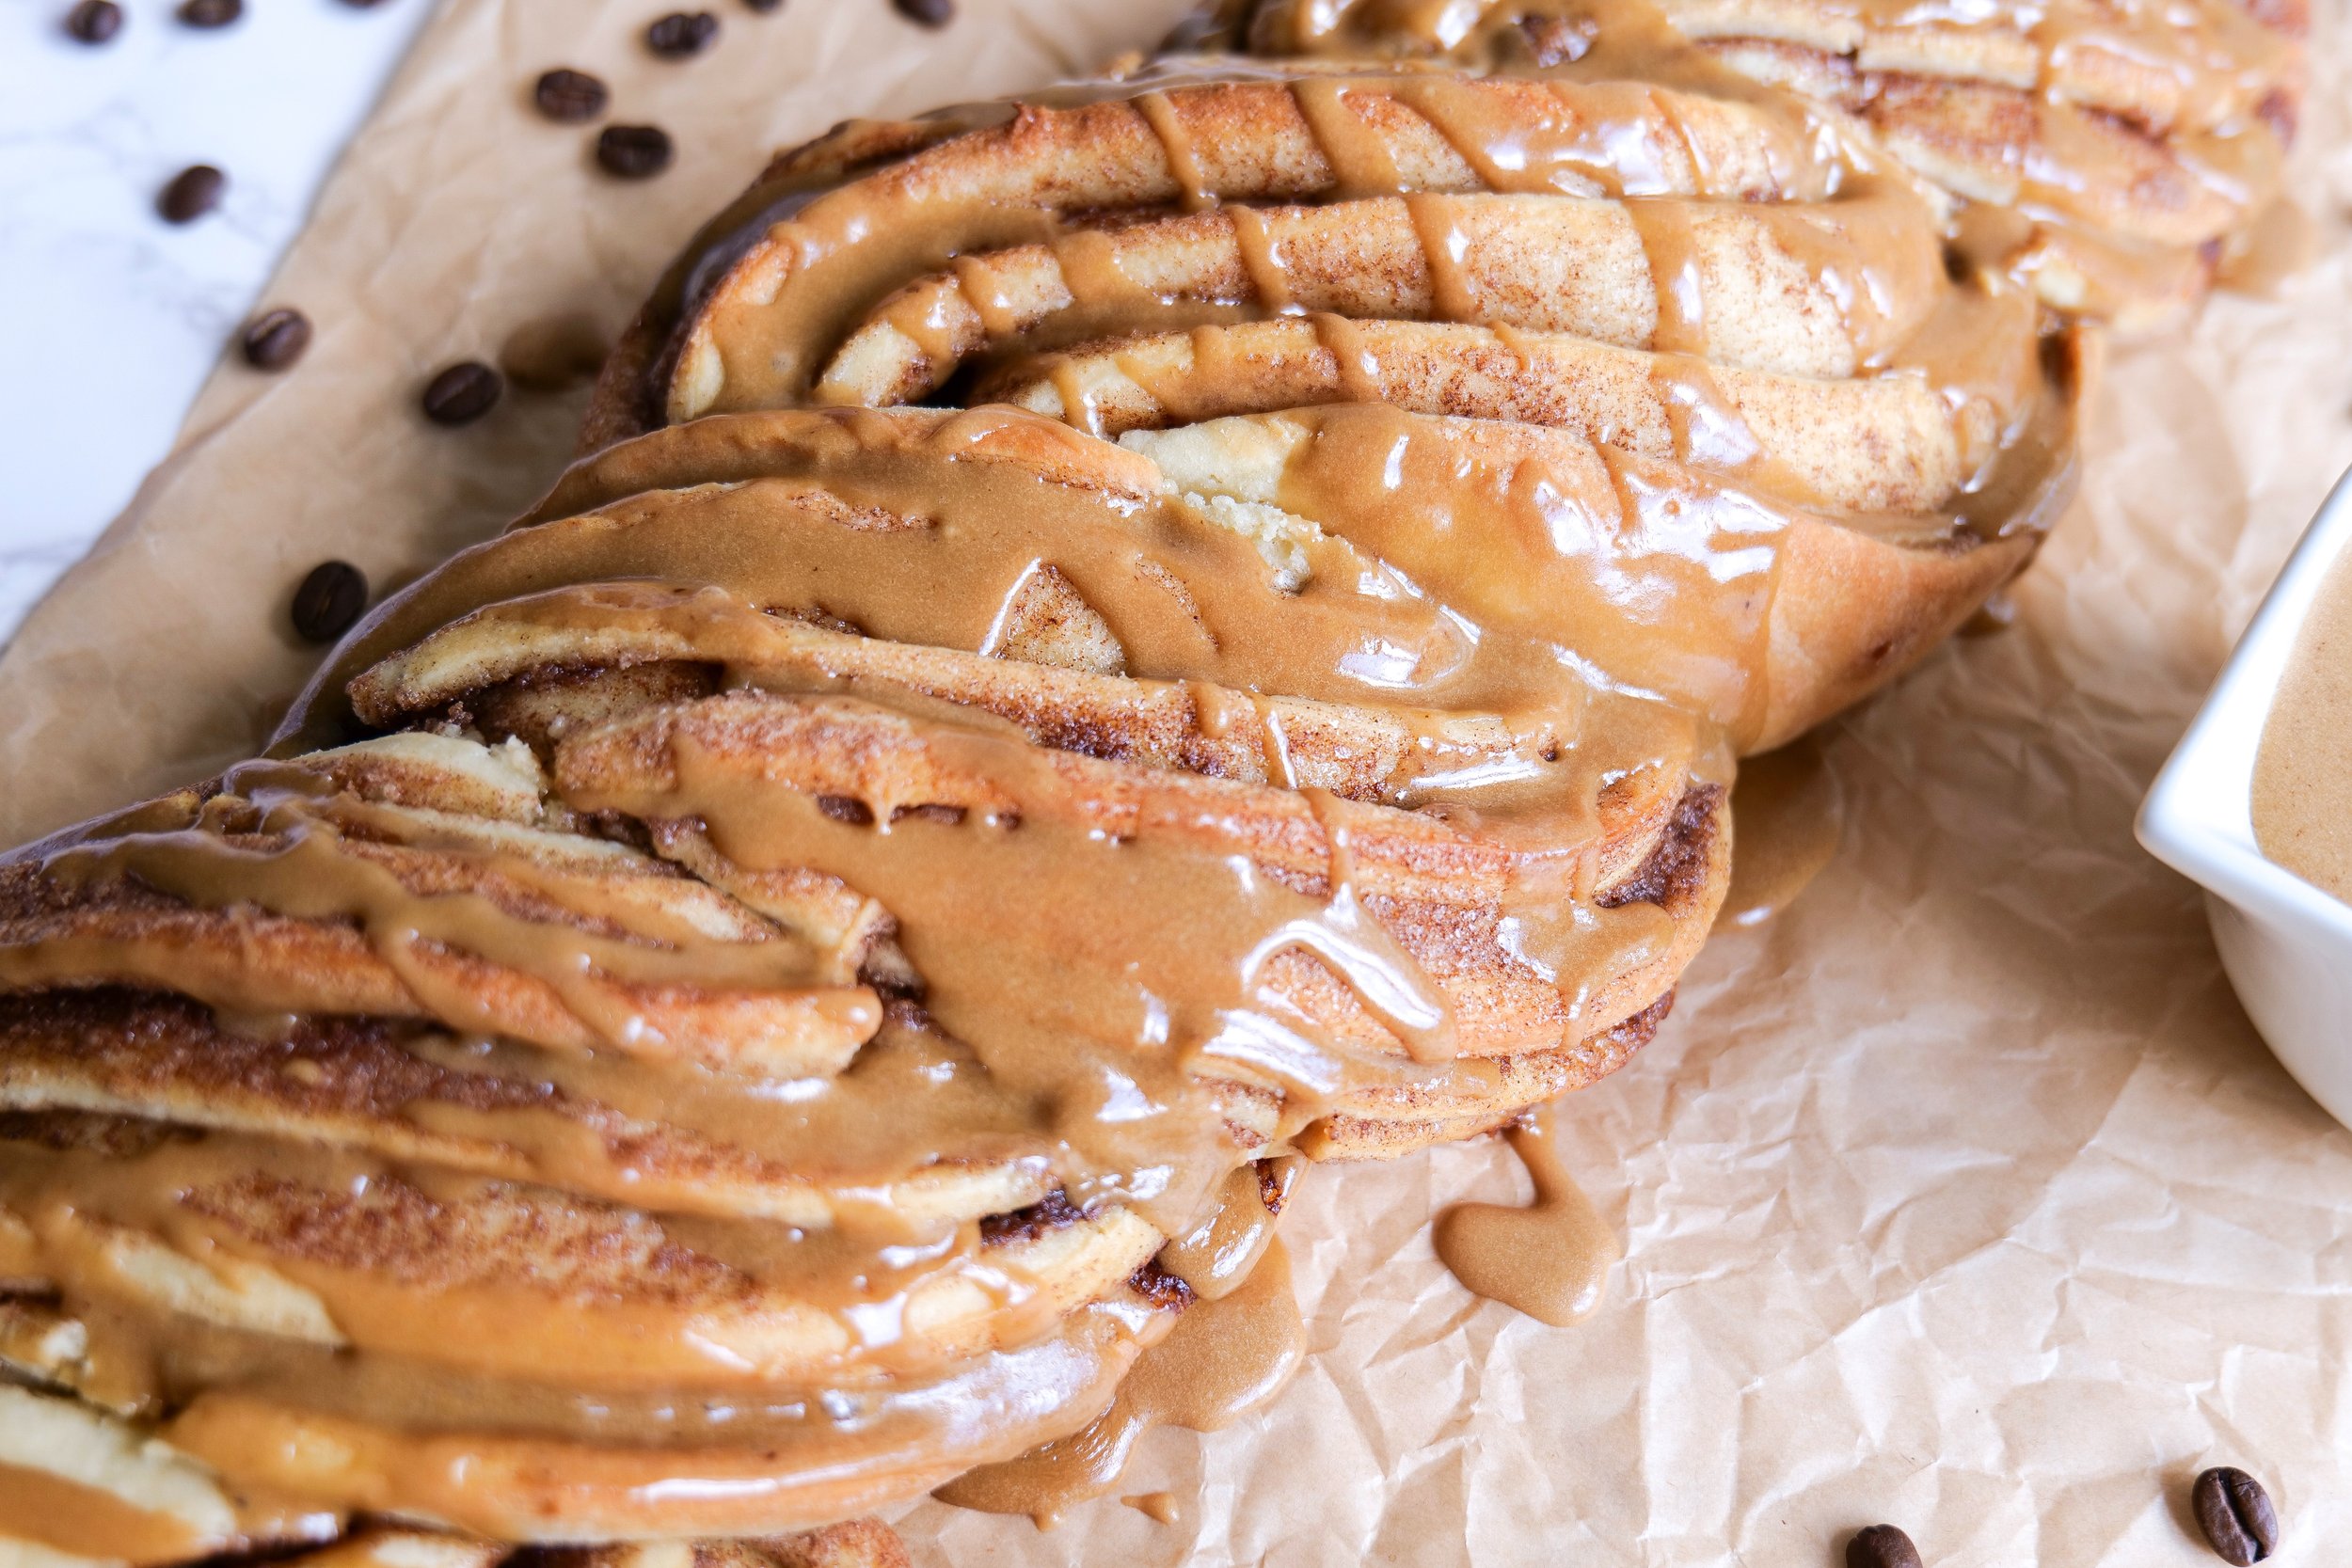
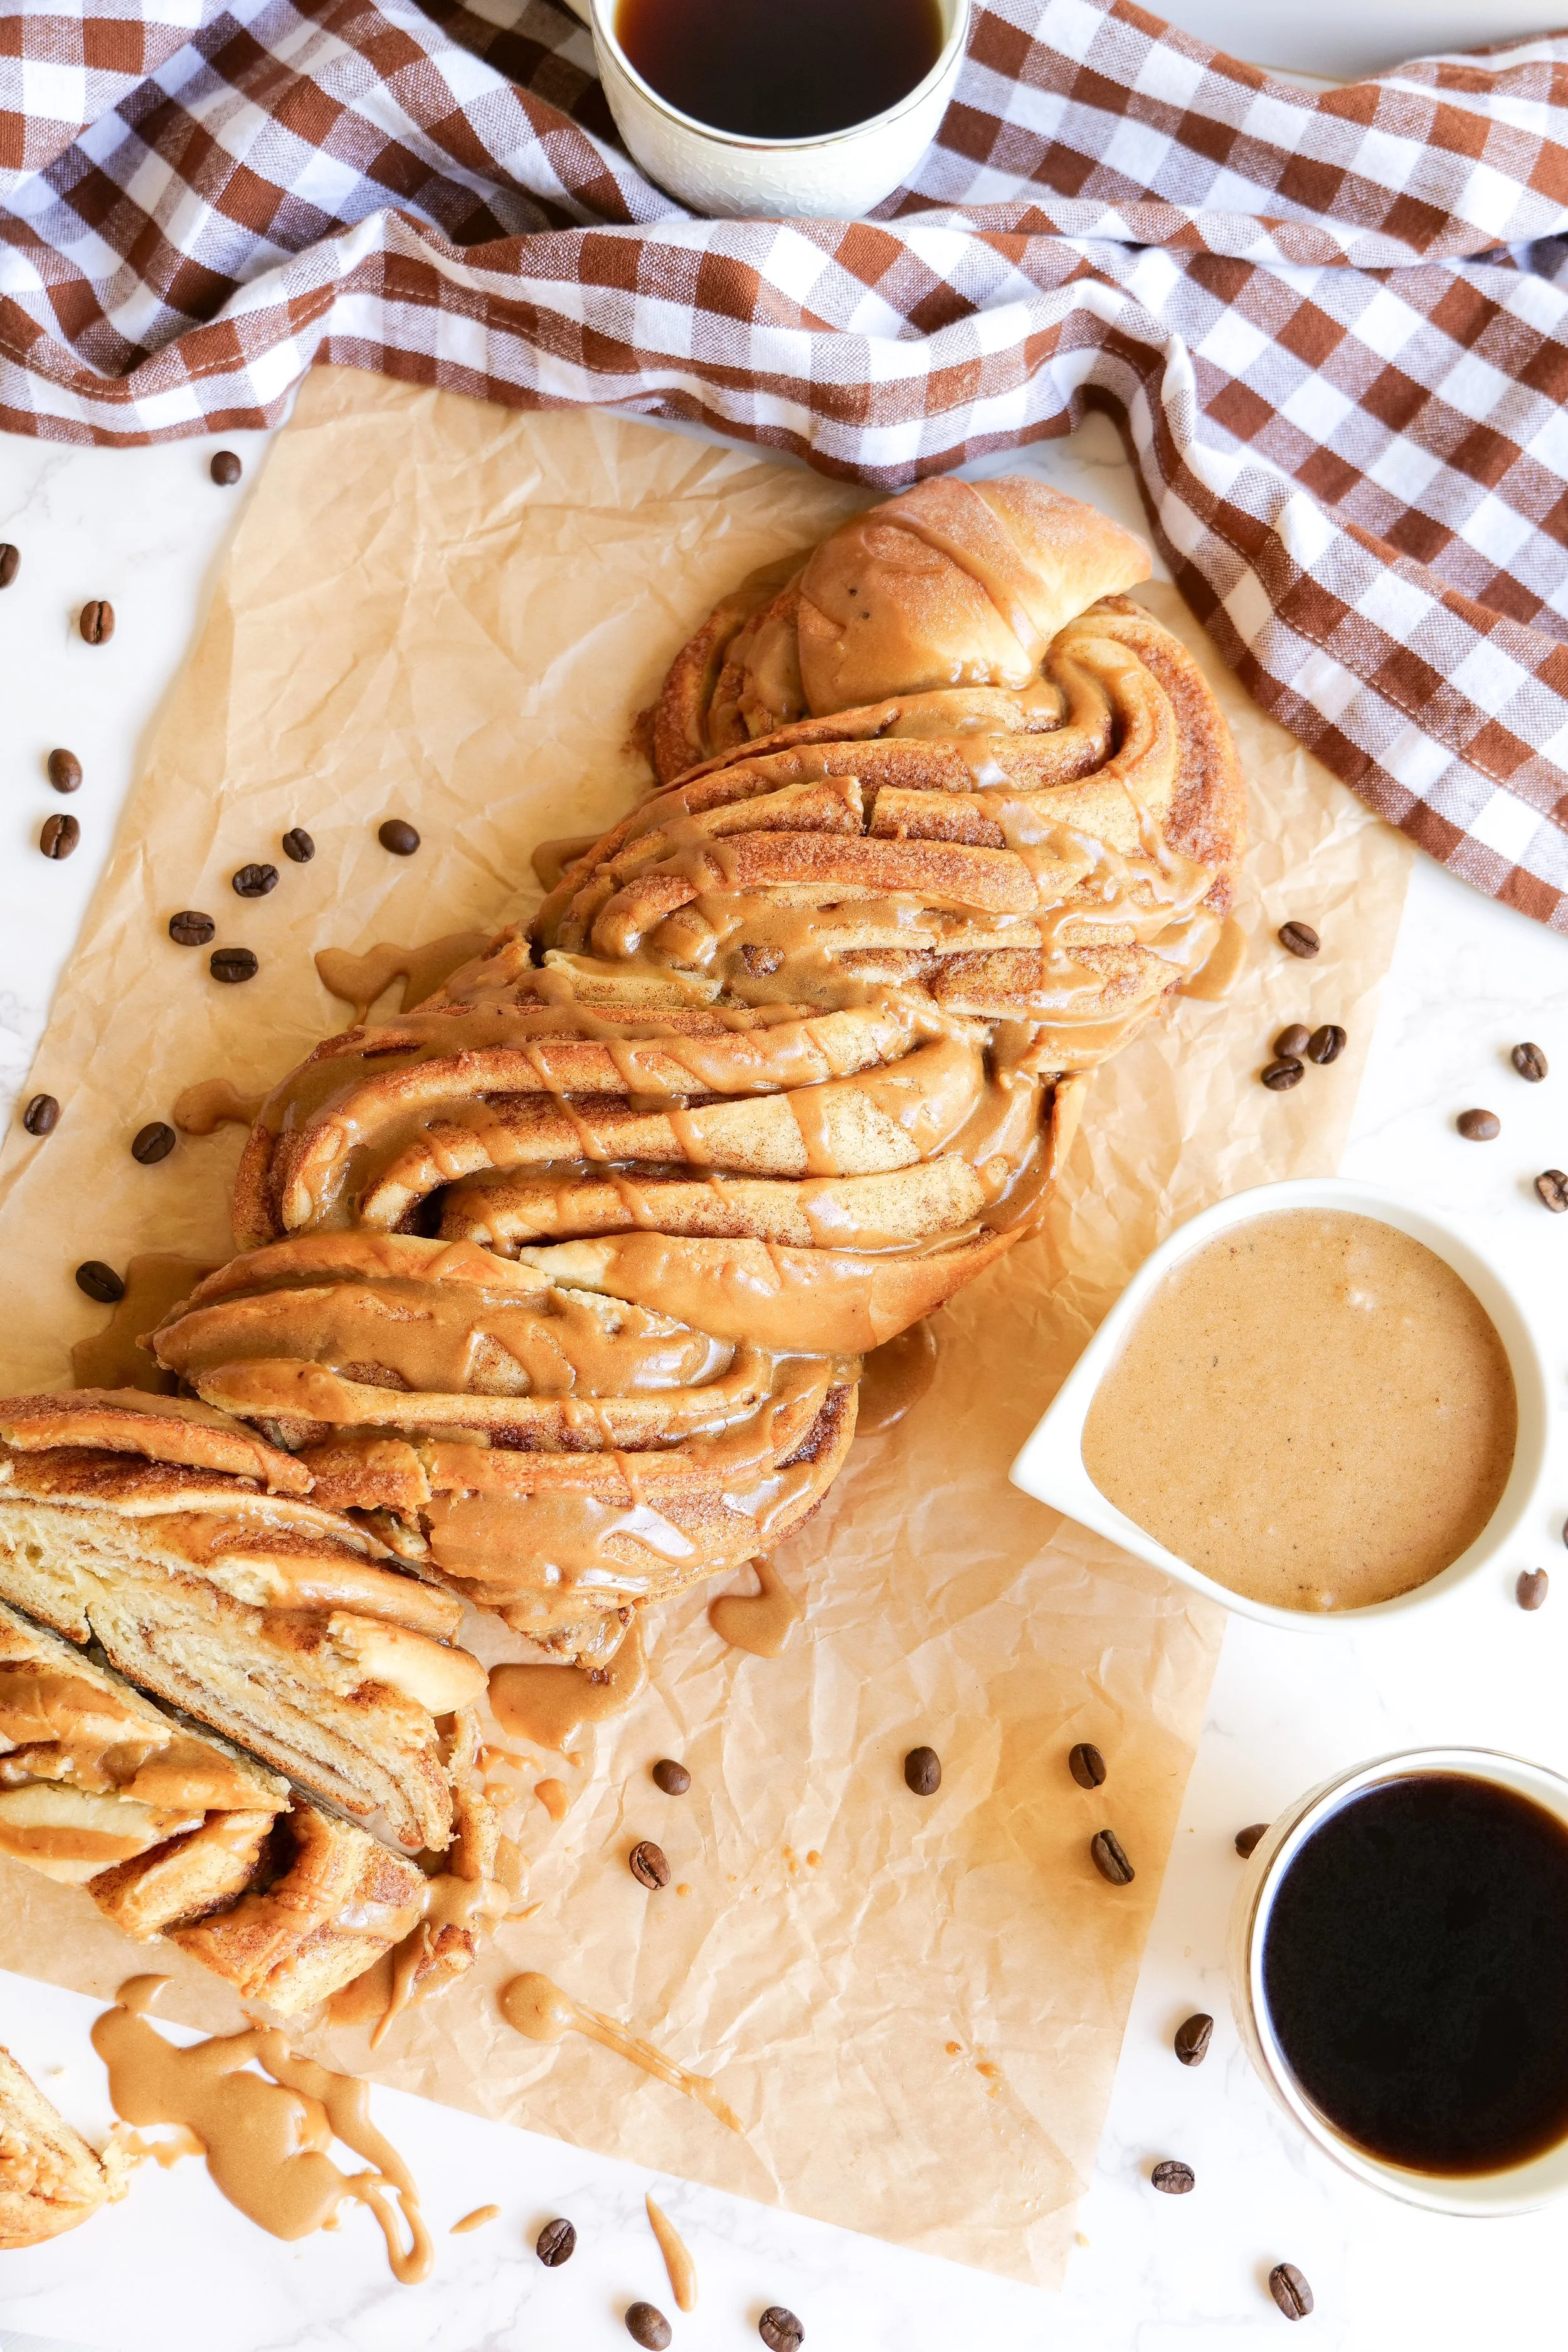
  6. Roll dough from one side of the rectangle to the other and place it on a baking sheet lined with parchment paper. Cut along the middle and crisscross the dough from one side to the other. Tuck both ends under.

  7. Bake at 350 for 20-25 minutes or until golden browned on the top.

Frosting:

  1. Mix softened cream cheese and butter until smooth. (If not in the room temp warm it for 30 seconds in the microwave before)

  2. Add powdered sugar, milk, and vanilla. Mix and drizzle over cinnamon roll loaf, serve extra on the side for those who like extra frosting. Enjoy!

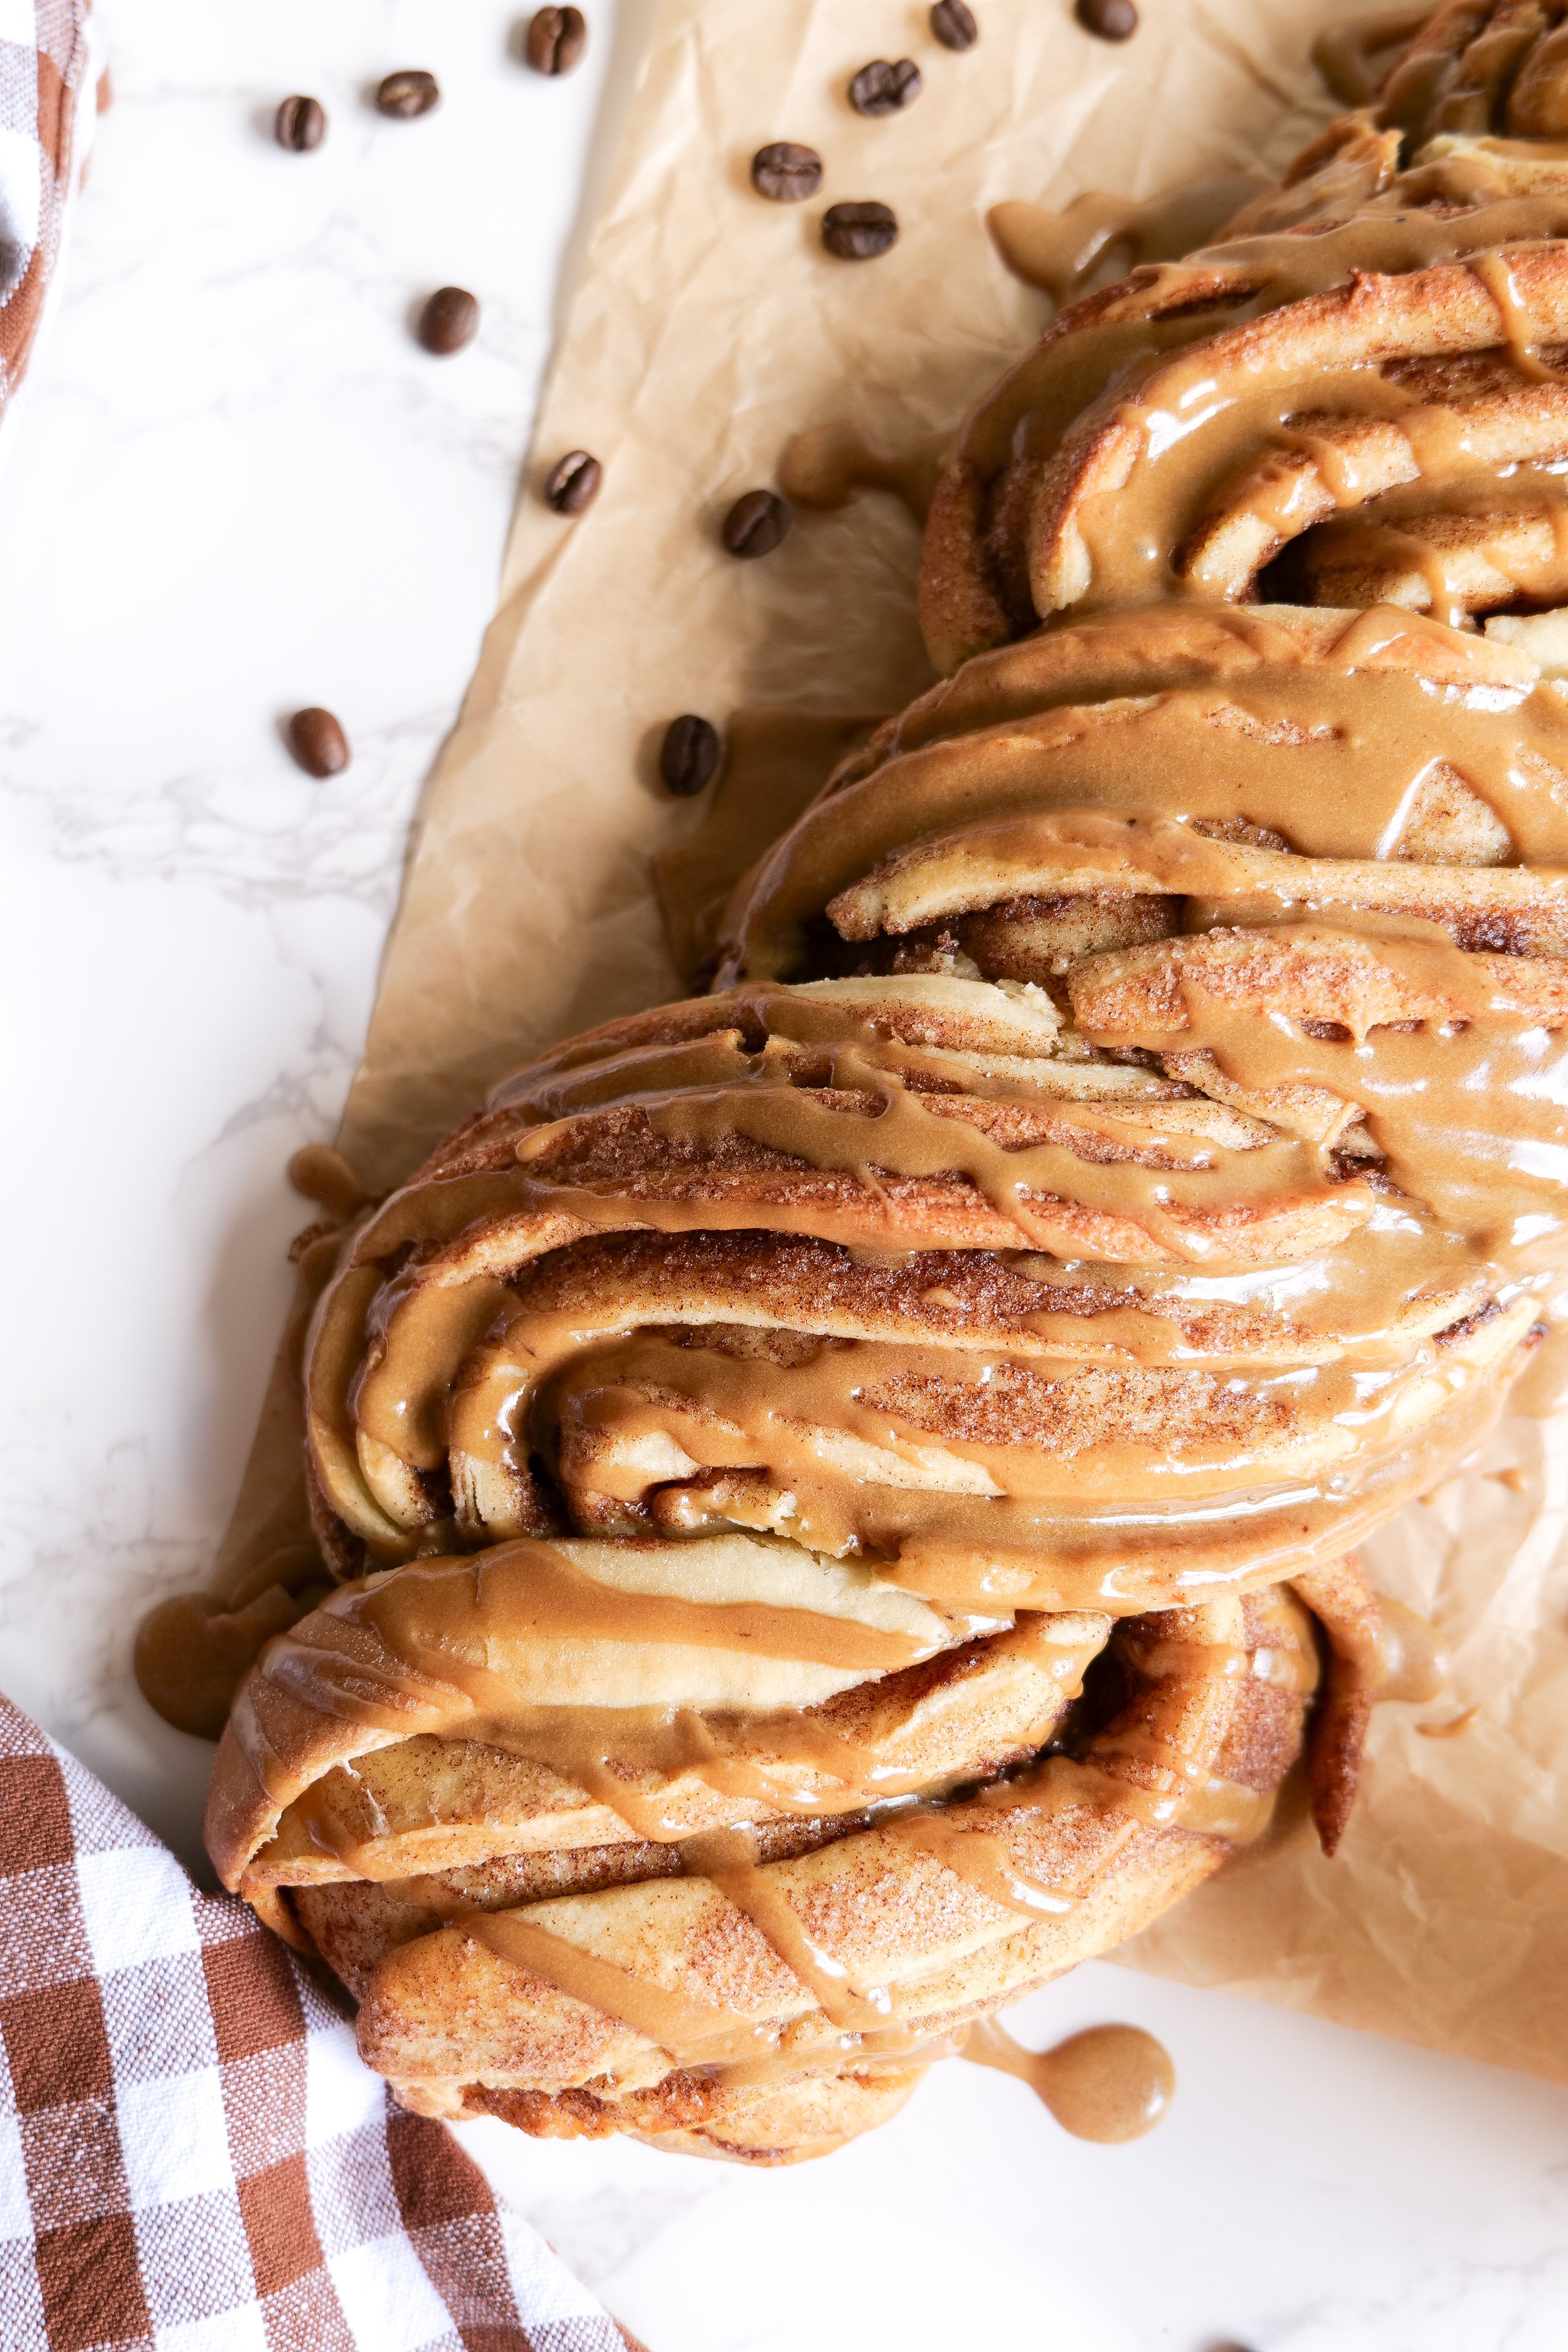
The espresso glaze is simple to make and adds a unique flavor to the rolls, while the cinnamon roll dough is light and fluffy, making it the perfect addition to any special breakfast. The espresso glaze gives the cinnamon rolls a beautiful sheen and adds to the flavor, making them a must-try for any cinnamon roll lover. These Espresso Glazed Cinnamon Rolls will be a hit no matter what the occasion is. Not only are they delicious and easy to make, but they’re also a great way to enjoy a special treat at home. So, if you’re looking for a unique twist on the classic cinnamon roll, these espresso glazed rolls are a must-try!

Other Fall Inspired Recipes:

Blackberry Cinnamon Rolls with Mascarpone Frosting

Indulge in Delicious Personal Pear Tarts

Indulge Your Sweet Tooth with This Delicious Brown Butter Spice Cake with Honey & Fig Jam Frosting

Whip up a Breakfast Delight: Pumpkin Pie Overnight Oats with A Hard Chocolate Top - A Recipe Worth Waking Up For

Start your day off right with a delicious bowl of overnight pumpkin oats topped with a hard chocolate shell. This no-fuss, nutritious, and decadent breakfast option packs in the best flavors of the season and makes the perfect treat for any chilly Autumn morning. This recipe not only ensures you indulge in a guilt-free treat but is also a fantastic way to sneak in some extra fiber and vitamins into your diet. So, get ready to usher in the season of pumpkins and warm spices with this utterly comforting and delectably healthy breakfast bowl. Overnight oats are an incredibly convenient, tasty breakfast option. Make a batch ahead of time and you’ll have breakfast ready in minutes for those busy weekday mornings. Continue reading to discover the magic behind this perfect blend of flavors and textures.

Ingredients

1 Serving (double, and triple to make more)

1/2 cup Oatsome overnight oats

1/2 cup oatsome organic oat drink

3 tablespoons pumpkin puree

1 tablespoon pure maple syrup

2 tablespoons chopped pecans

1/4 cup chocolate

1 tablespoon olive oil or coconut oil

Instructions

1. Mix until well blended in a medium bowl Oatsome overnight oats, Oatsome organic oat drink, pumpkin puree chopped pecans and maple syrup. Pour into a glass container or mason jar.

2. In a new bowl melt chocolate in the microwave for 30 seconds at a time until smooth. Add in oil to help consistency if needed.

3. Once the chocolate is smooth layer over top of the oatmeal mixture and smooth out to cover the entire top of the oatmeal touching the outside glass. Sprinkle with sea salt and place in refrigerator for at least 4 hours if not overnight. The next morning get ready to enjoy the perfect make-ahead easy pumpkin overnight oats!

Blood Orange & Rosé Sangria Recipe for a Perfect Autumn Evening

As the crisp, Autumn air sweeps in and the leaves begin their annual display of fiery hues, our palates begin to crave flavors that beautifully complement the season. Welcome this enchanting season with our delectable Fall Blood Orange & Rosé Sangria recipe. With its vibrant color from fresh blood oranges, and the delicate flavor of a soft, refreshing Rosé, this stunning concoction is sure to capture the very essence of Fall in every sip. Perfect for cozy evenings, festive celebrations, or just unwinding after a long day, this cocktail will prove to be a festive companion to your autumnal feasts.

What is Sangria?

Sangria is a classic Spanish beverage that is perfect for serving at any party or gathering. Traditionally made with red wine, brandy, fruit, and a sweetener, it is a great way to use up leftover wine or fruit that would otherwise go to waste. Sangria can be made with any type of wine, including white, rosé, and any sparkling champagne, and it is typically served over ice with slices of fresh fruit. For those looking to add a seasonal flair to their sangria recipe, look no further than this blood orange and rosé sangria. This delicious and easy-to-make variation on the classic sangria recipe is a great way to bring a touch of Fall to any special occasion or event. The combination of sweet and juicy blood oranges and crisp rosé wine will be a hit with both wine and fruit lovers alike.

The beauty of sangria is that it can be made in large batches ahead of time, allowing hosts and hostesses to focus on more important things during their gatherings. To make this delicious fall-inspired sangria, simply combine your favorite rosé wine with freshly squeezed blood orange juice, brandy, and a sweetener of your choice. Then, add in sliced oranges, cinnamon sticks and apples for an extra hint of color, textures, freshness, and delicious flavor. Chill the mixture for a few hours or overnight to allow the flavors to infuse, and then serve over ice for a refreshing and delicious beverage.

The key to this delicious sangria recipe is the fresh seasonal blood oranges. These citrus fruits are full of flavor and add a vibrant color to the drink. Combined with a light and refreshing rosé, this sangria will quickly become a favorite. Not to mention, it's easy to make and can be made ahead of time so there's one less thing to worry about when hosting a gathering.

For those looking for a creative twist on the traditional sangria, this easy rosé sangria recipe is sure to be a hit at your next girls' night, Friendsgiving celebrations, or any other Fall event you are celebrating. The combination of the fresh seasonal blood oranges and the light and refreshing rosé make this the perfect drink for any outdoor gathering.

Sangria Serving Tips

To get the most out of this sangria, it's important to follow a few simple steps. First, the sangria should be served chilled. Place the sangria in the refrigerator for at least two hours or in the freezer for an hour prior to serving. If you have time, let the sangria sit for 12 to 24 hours before serving to really let the flavors meld. Add a few ice cubes to each glass, if desired. When serving, use a large pitcher and ladle to distribute the sangria or a dispenser for an easy pour.

For an extra festive touch, add garnishes like extra fruit, herbs, edible flowers, or a twist of citrus peel. You can use a variety of glasses to serve the sangria, such as wine glasses, highball glasses, or mason jars. Lastly, enjoy the sangria responsibly and in moderation. This blood orange & rosé sangria is sure to be a hit at your next celebration.

Use a different type of citrus fruit if you don't have blood oranges for the sangria recipe

Blood oranges are a great way to add some rich flavor to your sangria. With their deep red hue and tart taste, they make the perfect substitute for regular oranges but they aren't always readily available. I had to special order these from Florida, so if you aren't able to find them or want another flavor here are some great substitutes. For a less tart sangria, substitute in some grapefruit or tangerines. These will add a more bitter flavor for those who prefer a fuller taste. If you're looking for a sweeter sangria, try adding in some mandarins or clementines. These citrus fruits will add a delightful sweetness to your sangria. If you're looking for something a bit more zesty, try adding some sliced lemons or limes. These will give your sangria a nice zing that will leave your guests asking for more. With all these options, you're sure to find the perfect flavor combination for your perfect Fall sangria.

Ingredients

1 bottle rosé wine

2 cups apple cider

1 cup club soda

3 apples sliced (plus more for garnish)

3 blood oranges sliced (plus more for garnish)

3 cinnamon sticks (plus more for garnish)

1/2 cup brandy

1/2 cup blood orange juice

1/2 cup cinnamon sugar simple syrup

  • 1/2 cup sugar (plus more for garnish)

  • 1 tablespoon cinnamon (plus more for garnish)

  • 1/2 cup water

Instructions

1. The first thing you want to do is make the cinnamon sugar simple syrup. You can also use regular simple syrup but this flavor gives a beautiful fall smell and taste to this sangria. Mix sugar, cinnamon, and water on the stove on medium-high heat until boiling and the sugar has evaporated. Let cool to room temperature and move on to the next steps.

2. While simple syrup is cooling start gathering ingredients and thinly cut apples and blood oranges.

3. Grab your pitcher of choice and add in sliced apples, blood oranges, and cinnamon sticks. Pour over top rosé, apple cider, club soda, brandy, blood orange juice and cooled simple syrup. Stir together and place in the fridge for 1-2 hours or up to 24 hours if you have the time.

4. Add garnish to glasses. Mix together equal parts sugar and cinnamon in a plate and rim glasses by wetting the edge with an orange wedge and rubbing around the glass in the sugar mixture. Fill the glass with ice, a slice of apple, blood orange and cinnamon stick and fill it with blood orange & rosé sangria. Enjoy!

Indulge in This Deliciously Sweet Chocolate Espresso Cream Pie Recipe

If you're looking for an indulgent dessert that will satisfy your sweet tooth, look no further than this delicious Chocolate Espresso Cream Pie recipe! This decadent pie is made with a rich chocolate filling and a creamy espresso topping, making it perfect for special occasions, nightcaps, or for just a simple indulgence. Enjoy the perfect balance of the flavors of coffee and creamy chocolate all in one amazing dessert. If you’re looking for an easy and delicious dessert that everyone will love, try this Chocolate Espresso Cream Pie recipe. Your guests are sure to be asking for seconds!

Can I make this with regular whipped cream instead of espresso?

If you are looking for a recipe that doesn't involve espresso, you can easily make this pie with regular whipped cream instead. To begin, you can omit the espresso powder in the whipped topping. For even more flavor, add 1 teaspoon of vanilla extract to the cream filling and omit the coffee liquor. To give the pie a special touch, sprinkle some unsweetened cocoa powder over the top. Now you can enjoy your delicious Chocolate Espresso Cream Pie with regular whipped cream instead of espresso.

Is it possible to make this Chocolate Espresso Cream Pie ahead of time?

This pie has a decadent and delicious flavor, but it’s not too hard to make. If you plan to make the Chocolate Espresso Cream Pie ahead of time, it is possible to make most of the components in advance. You can prepare the crust the day before and store it in the fridge until you are ready to assemble the pie. The espresso cream can also be made a few days in advance and stored in the refrigerator until you are ready to assemble the pie. When you are ready to assemble your pie, all you have to do is assemble the components and you are ready to go! Feel free to also add some melted chocolate or chocolate chips to the top of the pie for an even more indulgent, rich chocolate dessert. Try this delicious Chocolate Espresso Cream Pie recipe today and enjoy a delicious treat you can make ahead of time and serve any time!

Do I need to refrigerate the Chocolate Espresso Cream Pie after baking?

Once you’ve finished baking the Chocolate Espresso Cream Pie, there are several ways you can store it. Refrigeration isn’t necessary, so you can keep it at room temperature for up to three days. It can also be covered in plastic wrap or aluminum foil and refrigerated for up to five days. Refrigerating will make the pie last longer. However, it can also affect the texture of the crust and the creaminess of the filling. If you’d like to keep the Chocolate Espresso Cream Pie even longer, you can freeze it for up to three months after following the directions below.

Ingredients

3/4 cup granulated sugar

1/4 cup cornstarch

1/2 teaspoon sea salt

2 cups whole milk

1/2 cup heavy cream

4 egg yolks

4 tablespoons butter, cut into 4

4 oz semi-sweet chocolate

1 teaspoon vanilla

2 tablespoons coffee liquor

Crust

12 oz chocolate graham cracker

8 tablespoons melted butter

Whipped Topping

1 1/4 teaspoons instant espresso powder

1 1/4 cups cold heavy cream

1 tablespoon powdered sugar

Instructions

1. Preheat oven to 375. Spray pie pan with olive oil spray and make Crust by adding graham cracker to blender and processing until fine. Add in melted butter and blend again. Press the crust mixture into the bottom of the pan until even all the way around. I use a flat-bottom cup or a metal spoon to help. Bake in the oven for 13-15 minutes. Once done remove and let cool before adding filling.

2. Combine sugar, cornstarch and sea salt in a medium saucepan. Whisk in milk and heavy cream and cook over medium heat stir continuously until bubbling and thick.

3. In a large bowl whisk yolks. Pour in the milk mixture slowly while whisking. Once fully incorporated return to saucepan and cook over medium heat until returns to boil.

4. Remove from heat. Add in vanilla, coffee liqueur and butter. Whisky until butter cubes are fully dissolved and incorporated. Pour into pie pan with crust and let cool on the counter for 45 minutes.

5. Press plastic wrap onto the top of the custard filling. Fully covering. Place in the fridge for 4 hours or overnight.

6. Once the pie is ready to serve make espresso whipped topping. In a large bowl whisk add together cream and espresso powder with a hand mixer on medium-high until peaks form. Spread onto pie and sprinkle with additional espresso powder or chocolate shavings.

Delicious and easy to make, this Homemade Chocolate Espresso Cream Pie Recipe is the perfect way to end your meal. Satisfy your sweet tooth with this classic dessert that everyone loves.

Other Delicious Desserts You Will Love:

Tantalizingly Delicious Recipe For Lemon Cheesecake With An Amazing Glaze

Taste the Deliciousness of Pistachio Cake: A Treat for Any Occasion

Indulge in Delicious Personal Pear Tarts

Deliciousness Cherry Chip Cake with chunks of dark chocolate recipe

Uncork the Perfect Evening: Discover the Optimal Three-Course Meal to Pair with J. Lohr

Welcome, wine and food enthusiasts! We all have our favorite bottles on the rack or stored in a wine cellar, and today we’re going to talk about three wines in particular – all delightfully complex and rich Cabernets from the acclaimed J. Lohr Vineyards & Wines. In this blog I’ll introduce you to a  meticulously curated three-course meal that’s been uniquely designed to enhance and synchronize perfectly with the distinct layers of these remarkable Cabernets. So, prepare your taste buds for a delectable journey of flavors, starting with light and delicate tastes, moving to rich and hearty, ending on a perfectly sweet note.

Exploring Cabernet Sauvignon Characteristics for Optimal Food Pairing

According to Wine Folly, “Cabernet Sauvignon is a full-bodied, red wine with dark fruit flavors and savory tastes from black pepper to bell pepper.” Cabernet tends to have moderate to high levels of tannins and acidity, but also higher in alcohol than other red wines. This wine pairs beautifully with a variety of foods. When pairing Cabernet Sauvignon with food, it is important to take into account the wine’s medium to full body and its moderate to high levels of tannins and acidity. This means rich and flavorful foods like grilled steak, roasted lamb, game meats, and hard cheeses are ideal for this full-bodied wine. The tannins in the wine will help to cut through the fat of the food and the acidity will help to balance out the flavors.

The First Course

If you’re looking for the perfect pairing for your next three-course meal, look no further than the Cabernets from J. Lohr Vineyards & Wines.. Start your meal off with a classic five-ingredient charcuterie board and pair it with the J. Lohr Pure Paso® Proprietary Red Wine. Pure Paso is a blend of 64% Cabernet Sauvignon, 28% Petite Sirah, 5% Petit Verdot, 2% Malbec, 1% Merlot.  The main varietals in this wine being Cabernet Sauvignon and Petite Sirah wines happen to be two J. Lohr benchmark varieties in the central coast.

This five-ingredient charcuterie board is a great start to a 3-course meal.. Each of the ingredients pair well with the bold and robust flavors of the wine. When picking the five items I wanted to put on this charcuterie board, I considered the weights of the flavors of the cheeses and meats and avoided a wine that overpowered them. Picking meat, cheese, crackers or bread, honey and fruit as your ingredients for a simple board is the best way to start. Listed below is what I picked for this board and a few other choices that will help your board come to life.

Cheese: A classic option that complements the robust taste of the wine. I chose blue cheese for today's charcuterie board as a great option that brings out the herbal and tannic notes in the wine. Other options are aged cheddar, parmesan, gouda, and gruyere because they are all sharp, hard cheeses that pair well with the boldness of the cabernet. For a rich, indulgent pairing, try a triple-creme cheese such as Brie andCamembert.. For a truly unique pairing, try pairing with creamy, tangy aged goat cheese. Regardless of the cheese selection you make, you are guaranteed to relish a delightful pairing! Fruit: Plums, cherries, and an array of berries are all splendid choices to pair with Cabernet Sauvignon. The acidic nature of the wine works brilliantly in highlighting the fruit's inherent sweetness. For those who love a nice crunch, apples and pears work as a delightful complement to the texture spectrum here. On the other hand, the succulent juices packed in berries and grapes do more than just add to the dish. Their luxurious juices amplify the flavors of the wine, resulting in an unforgettable savory experience.

Crackers & Honey: Some great cracker options include rye crackers, sesame crackers, and whole wheat crackers. A lovely rosemary herb blend is perfect to add a hint of flavor without overdoing the pairing. Most importantly when selecting the crackers and honey, keep the cracker flavor simple. Crackers will just add a hint of crunchy texture and honey the perfect sweetness. They are beautiful options without adding too much flavor.

Meat: Pairing a high-alcohol wine with food that has a high salt content can make the wine come across as “hot.” You will want to avoid pepper-crusted salami or other meats with heavy spices. The subtle spice of the prosciutto is brought out in this bold and delicious red blend.

The Second Course

For the second or main course, we are going with a classic dish: Ribeye pan-grilled steaks and garlic mashed potatoes. For our wine pairing, we selected the J. Lohr Estates Seven Oaks Cabernet Sauvignon, a choice that perfectly complements the rich flavors of the ribeye and the creamy texture of the mashed potatoes. This exquisite wine enhances the dining experience, offering a harmonious blend of boldness and elegance to your meal.

 This wine is an excellent option because it can handle strong flavors while also enhancing delicate ones, such as the smoky char from the steak, which pairs harmoniously with the wine's robust tannins. Another pairing option is braised lamb shanks or for something a bit lighter, try a roasted pork tenderloin for a delicious and versatile dish. Juicy pork cuisines are perfect for the deep, dark fruit flavors of the Cabernet Sauvignon. Roasted duck is another great option if you are feeling adventurous, as the robust juicy flavor of the duck is complemented by the complexity of Cabernet Sauvignon.

The Third Course

For dessert, you can’t go wrong with a classic chocolate mousse with raspberries and almond slivers. This decadent dessert will be perfectly complemented by the sweet and smooth flavors of the 2021 J. Lohr Hilltop Cabernet Sauvignon. Other great choices to pair with this wine are delectable treats such as dark chocolate cake, coffee ice cream, berries in dark chocolate sauce, and pies filled with blackberries, raspberries or boysenberries. Each of these yummy dessert options will bring out the ripe fruit aromas of black cherry and currant  accented by notes of toasted pastry, hazelnut, and vanilla from J. Lohr’s extensive barrel aging program. When in doubt, dark chocolate is always a classic pairing. The richness of the chocolate will balance out the boldness of this Cab perfectly.

Each course of this incredible meal will be perfectly complemented by the various J. Lohr Cabernets. They all contribute to a delightful evening and are the ideal accompaniment for a dinner with guests or date night. With J. Lohr Cabernets from Paso Robles, you can embark on a distinctive and delectable culinary journey that is certain to impress your guests.

Delight in Every Bite: Making the Ultimate Apple Cider Loaf with Brown Butter Glaze

Welcome to our delicious corner of the internet, where today, we're diving into the delectable flavors of Autumn with an exceptional Apple Cider Loaf covered in a mouth-watering Brown Butter Glaze. This cozy, comforting recipe captures the essence of the season, combining the rich aroma of fresh apples and spicy cider with a tantalizingly sweet and nutty brown butter glaze. Whether looking for a scrumptious addition to your brunch table, a decadent afternoon snack, or a homemade gift for loved ones, this Apple Cider Loaf recipe promises to take your Fall baking adventures to exciting new heights. So, put on your favorite apron, fire up your oven, and let's get baking!

How to Make Brown Butter

To make the brown butter glaze, you will need to first make brown butter. If you haven't done this before let me explain to you just how easy it is. Soon, you'll be doing this to your butter for many recipes you make. First, you will need to melt the butter in a small saucepan over a medium-low heat. Let that cook, stirring occasionally, until the butter is a light golden brown color and has a nutty aroma. Then remove from heat and let cool. Depending on the recipe you will let it come to room temp and place it in the fridge, let come to room temp alone with no fridge, or use right away. Any way you choose to use the butter, it takes every recipe to the next level. The combination of sweet apple cider and nutty brown butter makes for a truly indulgent treat. Brown butter glaze is the perfect finish to this autumnal delight.

How to Store This Cake

After baking the cake, allow it to cool completely before storing. To ensure the cake stays fresh, wrap the cake tightly in plastic wrap, foil, or place it in an airtight container or cake carrier. Store at room temperature for up to 3 days, and in the refrigerator if you plan to keep the cake for longer than 3 days. If freezing, wrap the cake tightly in plastic wrap and then in aluminum foil. Feel free if necessary to store in the freezer for up to 3 months. To thaw, remove from the freezer and place in the refrigerator overnight. Enjoy the delicious flavors of this Fall delight apple cider loaf with brown butter glaze, no matter what time of year it is.

The best part is that this cake is easy to make and can be prepped ahead of time for a quick and easy dessert. So don’t worry if you’re short on time - this cake is a great option for any busy holiday.

Why is this apple cider bundt cake so good?

If you’re looking for the perfect Fall dessert, look no further than this delicious apple cider loaf with brown butter glaze! The addition of apple cider in the batter makes the cake incredibly moist and fluffy, and the warm Fall spices, such as cinnamon, nutmeg, and allspice, give it an unmistakable seasonal flavor. The addition of brown butter in the glaze adds a rich, nutty flavor that perfectly complements the sweetness of the cake. Not only does it add flavor, but the brown butter glaze also adds a beautiful glossy finish to the cake, making it look as good as it tastes. The classic combination of apple flavor and cinnamon in this cake is sure to be a hit with your family and friends.

What’s the difference between apple cider and apple juice?

Apple cider and apple juice are both popular drinks enjoyed by many around the world, but they are not the same. Apple cider is made by pressing and fermenting apples while apple juice is made from the juice of apples that have already been pressed. Apple cider is slightly tart and usually contains less sugar than apple juice. Additionally, apple cider is often enjoyed warm and spiced while apple juice is served cold. Furthermore, apple cider has a shorter shelf life than apple juice, as it is not pasteurized. Apple cider is usually darker in color than apple juice. If you can't find fresh apple cider, store-bought apple cider will work just as well. For a sweeter loaf, opt for unfiltered, preservative-free apple cider. This will make the loaf more flavorful and give it a richer sweetness.

Using these flavorful ingredients, you can easily whip up this delicious apple cider loaf with brown butter glaze. This delightful loaf is perfect for a light breakfast or as an afternoon snack. Enjoy it on its own or with a side of Greek yogurt and fresh berries. The possibilities are endless!

Can the brown butter glaze be prepared ahead of time?

The brown butter glaze gives this cake a rich, nutty flavor and a creamy texture. Conveniently, the glaze can be prepared ahead of time. Up to one day ahead for best results. To prepare the glaze ahead of time, simply melt the butter, whisk in the spices, and then let cool to room temperature. When ready to use, whisk in the powdered sugar and apple cider until it's smooth and creamy. Refrigerate the glaze until ready to use, and then bring to room temperature before pouring over the loaf. The glaze will add a beautiful sheen to the loaf and a wonderful flavor that will make your taste buds sing. Serve this apple cider loaf with brown butter glaze at your next brunch gathering, holiday celebration, or any day you're looking for something sweet and special.

Can I substitute or omit any ingredients in the apple cider loaf with the brown butter glaze recipe?

There are always substitutions you can find to better suit your diet. Here are a few that are easy for this recipe. Know that these substitutions can alter the flavor and cook time, however. Instead of using butter, you can substitute applesauce to cut down on the fat content of the recipe. Omitting the nutmeg and cinnamon will still yield a tasty loaf, but adding raisins, dried cranberries, or chopped walnuts to the batter will give the loaf some extra texture and flavor. For an even more unique taste, you can substitute apple cider for apple cider vinegar. This will give the bread a slight tangy taste that will be sure to tantalize your taste buds.

Ingredients

2 cups all-purpose flour

2 teaspoons baking powder

½ teaspoon cinnamon

¼ teaspoon nutmeg

½ teaspoon kosher salt

1 ½ cups apple cider reduced to ¾ cup

1 cup dark brown sugar

2 large eggs room temp

½ cup brown butter

1 teaspoon vanilla extract

½ cup sour cream

Glaze:

1 & 1/3 cups powdered confectioners sugar

3 tablespoons brown butter

2 tablespoons apple cider, saved from above

Instructions

1. Preheat oven to 375 and oil a loaf pan.

2. Put cider in a small saucepan over medium heat and bring to a boil. Boil for about 10 minutes, or until reduced to 3/4 cup. Pour the cider into a small bowl and set aside to cool slightly. Then brown butter for glaze and loaf (1/2 cup + 3 tablespoons) in the same saucepan until it gets a nutty fragrance and is browned. pour in another separate bowl and let cool. At this time you can take a third bowl and add in the 2 tablespoons of cider and 3 tablespoons of brown butter and set aside. This will be used later for the glaze

3. Once the bowl with apple cider has cooled to room temp add sour cream and set aside. Mix all wet ingredients, brown sugar, egg, brown butter, and vanilla extract with hand or stand mixer on medium-high until well combined.

4. Add dry ingredients to bowl of wet ingredients (not the one with apple cider), all-purpose flour, baking powder, and salt until smooth and no powder is showing and well incorporated. With a spatula mix in apple cider and sour cream mixture.

5. Pour batter into the prepared loaf pan. Bake for 55-60 minutes or until a toothpick in the center comes out clean.

6. While the loaf is baking mix powdered sugar and remaining brown butter and apple cider together for frosting. As soon as the loaf is done place it on a cooling rack and drizzle the glaze mixture on top so that it will stick well and melt into the warm loaf. Cut, Serve and Enjoy!

Apple Cider loaf with Brown Butter Apple Cider Glaze is a moist and flavorful loaf that will be sure to please any crowd. With a hint of apple cider, this loaf is the perfect way to use up any extra apple cider you may have. The brown butter glaze provides a nutty, caramel-like flavor that is sure to be a hit. The loaf is easy to make and only requires a handful of ingredients, so you can whip it up with ease. The result is a moist and flavorful loaf that will be sure to become a family favorite! Whether you're in the mood for a classic cake or something a bit more unique, this Apple Cider Loaf with Brown Butter Apple Cider Glaze is sure to satisfy. Serve it up with a dollop of whipped cream or a scoop of ice cream for a truly indulgent treat!

Other Fall Recipes You Will Love:

Indulge Your Sweet Tooth with This Delicious Brown Butter Spice Cake with Honey & Fig Jam Frosting

The Ultimate Thanksgiving Dessert - My Pumpkin Crisp Recipe

Baked Burrata Pumpkin Ziti with Pork Sausage Recipe

A Taste of Heaven: Deliciously Easy Apple Pie!

Deliciously Sweet: Pumpkin Coffee Cake with Pecan Crumbles

As Autumn leaves fall and mornings become crisp, there's nothing more comforting than the aromatic blend of spices filling your kitchen. Pumpkin not only lends its gorgeous hue but also the essence of Fall to this delightful Pumpkin Coffee Cake with Pecan Crumble. It’s irresistibly soft, moist, filled with pumpkin spice, and topped off with a crunchy pecan crumble that will make you swoon. Whether you're easing into your day with a cup of coffee for breakfast or entertaining guests in the afternoon, this delectable dessert is a perfect companion that highlights the seasonal flavors with every bite. The pumpkin cake is light and fluffy, and the pecan crumble topping adds a delightful crunch to the cake. It's the perfect combination of sweet and savory flavors and will be sure to please everyone. This Pumpkin Coffee Cake with Pecan Crumble is sure to become a Fall favorite. The cake is easy to make and has an irresistible combination of flavors that will leave your guests wanting more. Serve this delicious cake at your next Fall celebration and you won't be disappointed!

What Pan Size is Best for Coffee Cake?

If you’re looking for the perfect way to enjoy pumpkin coffee cake, you’ll need the right pan. For the perfect size, a 9-inch by 13-inch rectangular pan will give you enough room for both the cake batter and the pecan crumble topping. An 8-inch square or round cake pan will also work, though you may not have enough room for all of the toppings and the time to cook varies. If you prefer a loaf-shaped pumpkin coffee cake, 2 loaf pans will also work. Whichever size you choose, you’ll be able to enjoy this delicious pumpkin coffee cake with pecan crumble topping. The pan I used here and similar ones I often use are all linked below.

Ingredients

Cake:

2 cups pumpkin puree

1-3/4 cup sugar

1 cup melted butter

4 eggs

2 cups all-purpose flour

4 tsp baking powder

1 teaspoon salt

2 teaspoons cinnamon

Crumble:

2/3 cup sugar (can do half brown sugar)

1 1/2 cups all-purpose flour

1/2 cup melted butter

1/2 teaspoon pumpkin spice

1/2 cup chopped toasted pecans

Instructions

1. Oil pan and preheat oven to 350 degrees

2. Mix together pumpkin, sugar, butter (fully melted) and eggs until well blended

3. Add in dry ingredients until well incorporated and pour into an oiled pan

4. Clean bowl and melt butter for 1 min in microwave

5. Add all dry ingredients until the mixture is crumbled and well mixed

6. Evenly put the crumble mixture over the cake part. Cook for 40-45 min

How to Store Coffee Cake with Pumpkin:

This coffee cake is the perfect treat to have for any special occasion or to simply enjoy during a cozy, chilly night. It's easy to make and even easier to store. Before storing, make sure to allow the coffee cake to cool completely. Store it in an airtight container at room temperature for up to a few days. Refrigeration helps to keep the cake fresh for up to 5-7 days. For longer storage, place the wrapped coffee cake in a freezer-safe bag and store it in the freezer. You can freeze it for up to 3 months. However, if you do freeze the cake, make sure to let it come to room temperature before serving. I hope you enjoy this pumpkin coffee cake with pecan crumble. For more recipes to enjoy with your family and friends look below and sign up for my email alerts to know when a new one drops!

Other Recipes You Will Love:

Banana Bread Recipe

Blackberry Cinnamon Rolls with Mascarpone Frosting

Soft Cream Cheese Lemon Blueberry Scones

How to Make Delicious Lobster Sheet Pan Nachos At Home: A Step-by-Step Guide

Treat yourself and your loved ones to a unique and delicious gourmet appetizer or lunch with these delicious Lobster Nachos! This decadent dish is made with crispy tortilla chips, succulent lobster chunks, creamy cheese sauce, and flavorful pico de gallo and is a dupe on Disney's California Adventure lobster nachos, which is where I first tried and fell in love with this dish. The combination of crunchy, salty chips, savory buttery lobster, and a creamy cheese sauce creates a flavor profile that is sure to be a hit with everyone who tries it. I had this many many years ago at what is now the Lamplight Lounge in Disneyland’s California Adventure and it is a continued favorite of mine. I haven't been to Disney in years, but have been craving this dish badly, so this is my version of their tasty dish!

The best part about these Lobster Nachos is that they are easy to make and can be prepared in less than 30 minutes. All you need is some fresh lobster, cheese, chips, and a few other ingredients. The full recipe is below and don't be afraid to add in anything else you'd like or take out things you don't. This dish is extremely customizable, so experiment and make it all your own! Most importantly, enjoy every last bite!

Does this recipe work well with other types of seafood?

The traditional nacho topping of cheese and cream is the perfect accompaniment to the sweet and savory lobster. You can also substitute the lobster with other types of seafood nachos such as shrimp, crab, or scallops. For a different twist on the dish, why not try adding a combination of different seafoods? You can enjoy the same cheesy, creamy nacho topping with a variety of seafoods. Transform the dish into a seafood medley by adding different types of seafood. Experiment with different textures and flavors by adding different types of seafood. This delicious Lobster Nacho Recipe is sure to be a hit at any gathering, especially for those that love the taste of lobster.

Ingredients

16oz Chips

1/2 pound shredded cheddar cheese

1/2 pound shredded Monterey jack cheese

4 Sliced Serrano peppers

queso (favorite store-bought or make your own)

Beans:

15 ounces seasoned black beans

2 tablespoons Fresh Cilantro, Chopped

1 teaspoon Ground Cumin

Crema:

1 1/2 tablespoons chipotle in adobo sauce

2 garlic cloves, minced

8 ounces sour cream

Salt and fresh cracked pepper to taste

Pico:

5 Roma Tomatoes, Diced

1/2 Medium Red Onion, Diced

1/4 cup Fresh Cilantro

1 tsp Sea Salt

1 tablespoon Fresh Lime Juice

Lobster:

3 large lobster tails

2 tbsp melted butter

Instructions

1. Preheat oven to broil. Prep beans by rinsing until the water runs clear. Add to bowl with cilantro and cumin and mix set aside.

2. Prep crema adding all ingredients to another bowl and mixing until well combined.

3. Prep Pico dicing all ingredients and adding to another bowl. Toss until well combined.

4. Cook lobster. Clean lobster removing all veins and hard shell. Chop into bite-sized pieces and pat dry. Add to a warm pan with butter and cook until bright pink. 3-5 minutes.

5. Layer chips on a sheet pan no chips overlapping. Add half of Monterey cheese & Cheddar cheese. Layer another layer of chips and cheese again. Top with queso & black beans. Place under the broiler until ready and the cheese is melted, watching carefully, 2 to 4 minutes.

6. Add pico de gallo; top with lobster. Drizzle chipotle crema over top and garnish with sliced serrano peppers (optional). Serve immediately & Enjoy!

Are there any variations to the recipe that I can try?

This delicious lobster nacho recipe is sure to be a hit at your next gathering. Start with a layer of crispy tortilla chips, then top with succulent lobster, melted cheese, and your favorite nacho toppings. For a seafood twist, substitute the lobster for cooked shrimp or crabmeat. Add a layer of refried beans for a heartier version of the dish. Sprinkle grilled corn or diced bell peppers over the top for added flavor and texture. Use jalapeños or other hot peppers for a spicy kick. Try adding a layer of cooked ground beef or chorizo for a meatier version. The toppings choices are endless – top with diced tomatoes, red onions, and avocado slices for a colorful finish. You can also use a different type of cheese, such as pepper jack or Monterey jack, for a different cheesy flavor. Finally, add a dollop of sour cream or guacamole to the top of each nacho for an extra creamy and flavorful finish. Serve these delicious lobster nachos with your favorite beverages and get ready to enjoy!

Other Appetizer Recipes You Will Love:

Create a Delicious Layered Hummus Dip for Your Next Snack or Appetizer

Delicious Buttery Italian Croissant Sandwich

Fruit & Goat Cheese Bruschetta

5 Ingredient Bacon Ranch Football Shaped Cheese Ball

The Perfect Match: Grilled Steak & Blue Cheese Salad with Grilled Corn paired with J. Lohr Estates Seven Oaks Cabernet Sauvignon

If you're looking for a new recipe that's delicious, hearty, and healthy, look no further than this grilled steak and blue cheese salad with grilled corn! This savory dish is made with flavorful steak, creamy blue cheese, and sweet grilled corn. Pair with a glass of the J. Lohr Estates Seven Oaks Cabernet Sauvignon to create a world-class meal that's sure to please. Not only is this dish tasty, but it's also easy to make, giving you a delectable dinner on the table in no time! One of my favorite go to salad meals and I am especially enjoying it on National Cabernet Day today!

Let me just say, that this unique combination of flavors will surely impress your dinner guests and make even the pickiest eater happy. A juicy steak is the perfect complement to the tangy blue cheese and smoky grilled corn for a flavor combination that is out of this world. Let's not forget that when accompanied by a glass of J. Lohr Estates Seven Oaks Cabernet, the dining adventure of this meal becomes truly epic! The bold, full-bodied flavor of the Cabernet adds the perfect touch of elegance to this dish, making it an ideal pairing for a casual dinner at home to an elegant dinner party.

A little background on the wine is that it is produced and bottled by J. Lohr Vineyards & Wines in Paso Robles, CA. In the glass you’lll see a deep, bright, red-purple hue and on the nose an abundance of dark cherry and black currant fruit enhanced by accent notes of toasted pastry, hazelnut, and vanilla. This comes from their extensive barrel aging program. I find that you can pair this Cabernet with a variety of dishes, from pulled pork sandwiches and coleslaw to your favorite lasagna. Hard cheeses and beef are the best pairing of them all which is why I think this steak and blue cheese salad is the ultimate dish.

Steak Choices

The key to making this salad is to choose the right cut of steak. In my opinion, a grilled ribeye works best as the ribeye has a bold, beefy flavor that will stand up to the intense flavors of the blue cheese. For a juicy, flavorful steak, look for a steak with plenty of marbling. To get that perfect medium-rare steak, grill each side for 3-4 minutes at high heat. Make sure to rest the steak for 5-10 minutes after cooking, as this will allow the juices to redistribute and ensure it’s perfectly juicy. Add grilled corn, blue cheese crumbles, and a drizzle of the blue cheese dressing to complete the salad.

Grilling Corn

Start lightly brushing the corn with extra virgin olive oil or melted butter before grilling. This will ensure even cooking and maximum flavor when it's time to add it to the salad. Grill the corn over medium-high heat, turning frequently, for approximately 8-10 minutes until it is lightly charred and tender. Add a sprinkle of sea salt and freshly ground black pepper to the corn for optimal flavor before grilling. Once the corn is finished grilling, let it cool slightly before adding it to the salad.

Salad Ingredients

Serving 4

10 ounces of butter lettuce or mixed spring greens

2 - 10 oz ribeye steaks

1/2 cup blue cheese crumbles

4 corn on the cob

1/2 a large red onion, sliced

6 oz cherry tomatoes, halved

1 avocado thinly sliced

Dressing Ingredients

1 cup mayonnaise

3/4 cup low-fat buttermilk

1/2 cup sour cream

4 oz blue cheese crumbled

3 garlic cloves minced

1 tablespoon fresh lemon juice

1/2 teaspoon ground pepper

1/4-1/2 teaspoon coarse salt

Directions

1. Rinse and pat dry all fruit and vegetables.

2. Add all dressing ingredients into a blender and blend until smooth. If you liked your blue cheese dressing more chunky, you can add crumbles into the dressing now. For a thinner consistency, leave alone after blending. This dressing can be premade in an airtight container in the refrigerator up to 2 days ahead.

3. Grill steaks and corn. Start your grill, butter corn on the cob, and add salt and pepper to corn and steaks. Place steaks and corn on the grill. Grill corn for 8-10 minutes, turning every 2-3 minutes. Grill Steaks for 3-4 minutes on each side or until cooked to your liking. Remove all from the grill and let sit for 5-10 minutes. Slice steaks into strips and cut corn off of the cob.

4. Now, it's time to assemble the grilled steak blue cheese salad with grilled corn salad. Add butter lettuce roughly chopped into a large bowl with half the red onion, corn, blue cheese, and cherry tomatoes. Pour dressing over the top and stir together! Then, layer the remainder of the red onion, corn, cherry tomatoes, sliced steak, and avocado. Liberally sprinkle blue cheese on top and serve!

My husband and I always enjoy a great steak dinner with a chopped salad, the perfect way to enjoy it as a lighter fare. Nothing compares to the smoky, charred flavor of grilled steak and the blue cheese's nutty richness. Enjoy the flavors of this delicious steak salad paired with the J. Lohr Estates Seven Oaks Cabernet Sauvignon for a truly memorable experience. I love how this Cabernet brings out the charred flavors of the steak and the nutty flavors of the blue cheese. The sweetness of the grilled corn is a perfect balance for the bold cabernet, creating an unparalleled flavor combination.

For Other Recipes & Pairings with J.Lohr wines:

The Perfect Pair: Chicken Picatta and J. Lohr Wine

Planning the Perfect Romantic Picnic with J. Lohr Wines

The Bloggers Guide to Merlot

A Deliciously Sweet Treat: Mini Key Lime Pies with Splenda

When it comes to finding a deliciously light, fun, and colorful dessert, mini key lime pies made with Splenda are the perfect treat. Mini Key Lime Pies with Splenda are a delicious and sugar-free way to enjoy a classic dessert. Made with fresh lime juice and a generous helping of Splenda, these mini pies provide a guilt-free way to satisfy your sweet tooth without compromising on flavor. The tart lime flavor combines perfectly with the sweetness of Splenda, creating a flavor that won’t disappoint.

These mini pies are the perfect treat for diabetics and health-conscious individuals, as they are low in sugar but still packed with flavor. So, if you’re looking for a guilt-free dessert without compromising on flavor, then look no further than these Mini Key Lime Pies with Splenda. With a delicious taste and low sugar content, they’re sure to become a favorite in your household.

How do I store Mini Key Lime Pies with Splenda?

When it comes to storing Mini key lime pies with Splenda, there are a few key rules to follow. The pies can be refrigerated for up to one week. For longer storage, the pies can be frozen for up to one month. Be sure to label the pies with the date when they were placed in the freezer, so you can keep track of when the pies need to be eaten before going bad. Following these simple steps will ensure that your mini key lime pies with Splenda remain fresh and delicious.

Ingredients

Crust:

1.5 cups or 12 sheets of crumbled gram crackers

6 tbsp melted butter

2 tablespoons Splenda

Filling:

8oz cream cheese

1 can condensed milk, sweetened

2 large egg yolks

3/4 cup lime juice

1 tbsp lime zest

1/2 tsp Splenda

1 tsp vanilla

Whipped Topping:

2 cups cold heavy whipping cream

1 cup Splenda

1 teaspoon vanilla extract

Directions

1. Preheat oven to 350 degrees and oil pie pans.

2. Mix together crust ingredients, graham crackers, melted butter and Splenda. Portion out into 6 individual pies pans and press down on the bottom and around sides to form into pans. Bake in the oven for 5-7 minutes or until golden brown.

3. While crust bakes make filling. Blend cream cheese with a hand mixer until smooth. Add in egg yolks and blend again until fully incorporated. Add in remaining ingredients; condensed milk, lime juice, Splenda and vanilla until all mixed and fully blended.

4. Once the crust is done baking remove from the oven and let come to room temp. Then add in filling to each pan. Place back in the oven to bake for another 15-17 minutes or until the filling is set. Remove from oven and let come to room temperature. Place in refrigerator for at least 4 hours or overnight.

5. Before serving top the pie with homemade whipped cream. With an electric hand mixer set on high blend the whipping cream, Splenda monk fruit, and vanilla extract. (to make Splenda into powdered sugar consistency you will mix in blender on high until powdered sugar consistency forms). Whip until peaks form and add to key lime pies. Top with a lime wedge and/or lime zest and serve.

Using Splenda instead of sugar in Mini Key Lime Pie recipes will ensure that the dish maintains its sweet, tangy flavor without sacrificing flavor or texture. Splenda is a versatile sweetener that can be used in a variety of recipes and is a great way to reduce the sugar content of a Mini Key Lime Pie. The best part about Splenda is that it can help you enjoy all the flavor of a Mini Key Lime Pie without the guilt of consuming too much sugar.

Other Delicious Desserts Made with Splenda:

Banana Cake made with Brown Butter Frosting

Raspberry Low Sugar Scones made with Splenda

Indulge Your Sweet Tooth with This Delicious Brown Butter Spice Cake with Honey & Fig Jam Frosting

Welcome to my kitchen! This time, we’re baking a truly decadent cake that is sure to impress any dessert aficionado. Welcome the early fall season with this delicious and flavorful Brown Butter Spice Cake with Honey & Fig Jam Icing recipe. The brown butter and spices give the cake a unique flavor that will make it a favorite in your home. The sweetness of the fig jam icing is sure to be a hit with everyone as well. This recipe is perfect for any occasion, from a family dinner to a special celebration. You can make this cake ahead of time and store it in the refrigerator for up to a week, making it a great make-ahead dish. Serve it as is or dress it up with some fresh figs on top.

What type of honey works best in the icing?

Clover honey is the most popular honey for baking as it has a mild flavor, but you can also experiment with orange blossom honey for a subtle citrus flavor or wildflower honey for a bolder flavor. Acacia honey is a great choice as it is light and delicate in flavor, while Manuka honey is unique and has a distinctive flavor. Whichever honey you choose will go great with this delicious cake and add its own unique twist.

Are there any other variations of this recipe that can be tried?

To make the cake even more unique to you here are a few changes you can make on this cake. You can add walnuts, almonds, or hazelnuts to give it a crunchy texture. For a slightly different flavor, you can also swap the honey for maple syrup. To make the cake even more impressive, you can make this into 2 layers and add icing in between each layer instead of one thick cake. If you're looking for a different flavor, you can try using apricot or raspberry jam instead of fig jam. For a less intense flavor, try substituting dark brown sugar for white sugar. With so many different variations, you can make this Brown Butter Spice Cake with Honey & Fig Jam Icing Recipe your own.

Ingredients:

4 large eggs

1/2 cup buttermilk

1/3 cup brewed espresso

1 cup butter

2. teaspoons almond ext.

1 - 1/2 cup dark brown sugar

2-1/4 cups cake flour

1 tablespoon baking powder

1/2 teaspoon salt

1 teaspoon chai powder

1 teaspoon cinnamon

1/2 teaspoon ground cloves

1/2 teaspoon ginger

Frosting:

1 cup butter

8 oz cream cheese

4 cups powdered sugar

1 teaspoon almond extract

1/4 cup honey

Fig preserves or jam

Instructions:

1. Prep by greasing a 9-inch round cake pan & preheat the oven to 350 degrees.

2. Brown butter in a saucepan and cook until browned and nutty in fragrance. Set aside in a clean bowl freshly brewed espresso and let cool while getting other ingredients ready.

3. Blend eggs, heavy cream, almond extract and the brown butter/espresso mixture, from above, completely in a medium bowl.

4. In a new clean bowl whisk dry ingredients until combined. Add wet ingredients to dry and blend together with an electric hand mixer.

5. Once combined pour into an oiled 9-inch pan and place in the oven. Bake for 45-55 minutes or until a toothpick inserted comes out clean.

7. While the cake is baking blend together all frosting ingredients until well combined. (butter and cream cheese should be at room temperature if not heated in the microwave for 30 sec at a time)

8. Once the cake is done baking let cool in the pan for 15 min and transfer to the cooling rack for another 15.

9. Add Frosting to the top of the cake adding in a large spoon fulls of fig jam and using a knife or rubber spatula to blend to make a stunning and tasty marble effect. Add Fresh figs and drizzled honey on top for an even prettier and tastier cake and Enjoy!

Other Delicious Cake Recipes:

Taste the Deliciousness of Pistachio Cake: A Treat for Any Occasion

My Favorite White Cake Recipe

Indulge in Deliciousness: Cherry Chip Cake with Chunks of Dark Chocolate Recipe

Indulge in the Sweet & Salty Deliciousness of Peach Baked Brie

Are you looking for the perfect appetizer to serve at your next gathering? Look no further! This Sweet & Salty Peach Baked Brie Recipe is sure to be a hit with your guests. The combination of sweet and salty flavors, creamy cheese, and juicy peaches creates a tantalizing dish that is sure to have everyone asking for more. With a few simple ingredients and a few easy steps, you can whip up this delicious appetizer in no time. Read on to find out how to make this delicious Sweet & Salty Peach Baked Brie Recipe!

Simply bake the Brie in the oven and top with the peaches, butter, and brown sugar mixture when done. When the Brie is finished baking, the result is an irresistible appetizer with a creamy texture and a delicious sweet and salty flavor. Serve this dish warm with crackers or crusty bread and be sure to prepare enough for seconds - this recipe is sure to be a crowd-pleaser at your next gathering.

Full Video of Peach Baked Brie Being Made on Instagram

Ingredients

1 wheel of brie cheese

2 juicy fresh peaches

1/2 cup dark brown sugar

3 tablespoons butter

1 tablespoon flour

Instructions

1. Preheat your oven to 350°F. Place a wheel of brie in an oven-proof dish and score the top with a knife in a crisscross pattern. Bake for 10 to 15 minutes, until the cheese is soft and bubbling.

2. While brie is baking in a stovetop pan melt butter and let brown. Once butter gets a nutty smell add in dark brown sugar and stir to combine. Slice peaches thinly and add to butter/brown sugar mix. Stir occasionally and let juices marry into peaches for 3-5 minutes or until the brie is ready.

3. Once the cheese has reached the desired texture, it's time to serve! Transfer the brie tp a plate and top with peach mixture. Serve and enjoy with your favorite crackers, toast points, or a sliced baguette. You can also add chopped pecans for an added crunch.

The Perfect Recipe for an Authentic Chicago-Style Dog

Chicago-style hot dogs have been a beloved delicacy of the Windy City since all the way back to the year 1893! Whether you’re a local, a tourist, or an aspiring home chef, this classic recipe is sure to take your taste buds on an unforgettable journey. Please do yourself a favor if you aren't from the Chicago area and try your next hot dog in this classic style. I promise you even if you think you aren't a fan of the individual ingredients that they come together perfectly for an amazing taste. From the unmistakable flavor of the all-beef hot dog to its signature toppings, a Chicago-style hot dog is a truly unique culinary experience of flavorful mastery in your mouth. In this post, I’ll walk you through the step-by-step instructions for creating your own delicious Chicago-style hot dog. Get ready to enjoy a truly unforgettable lunch or dinner!

The Chicago Dog is a classic American hot dog with a unique flavor and texture, made with a combination of condiments and toppings. The traditional Chicago Dog is made with a Vienna Beef hot dog on a steamed poppy seed bun and is dressed in yellow mustard, sweet pickle relish, diced onions, tomato slices, pickle spear, sport peppers, and a dash of celery salt.

For a truly authentic Chicago-style hot dog, use an all-beef frankfurter, which is larger than the traditional pork and beef hot dog. When shopping for a hot dog, check the label to make sure the product is labeled “all-beef.” Next, choose a poppy seed bun to complete the classic Chicago-style experience. The bun is an extremely important part of the Chicago Dog. It should be lightly toasted and steamed, which gives it a light and fluffy texture. Making a Hot Dog at your next barbeque, and especially in the form of a Chicago Dog is a time-honored tradition that can be enjoyed at home with the help of the right classic ingredients. With the perfect combination of weiner, bun, and condiments, you can craft an authentic Chicago Dog that is sure to be a crowd favorite.

Restaurants That Serve As Main Dish

From classic spots like Wiener & Still Champion and Portillo’s to more creative eateries like Franks ‘n' Dawgs and Flub A Dub Chub’s, there’s something for everyone when it comes to Chicago dogs.

Hot Dog Heaven has been around since 1967, serving up classic Chicago-style dogs with all the fixings. Wiener & Still Champion is a hip, retro eatery that offers up classic hot dogs and loaded fries with a gourmet twist. Red Hot Ranch, located in the heart of downtown Chicago, specializes in flame-grilled hot dogs with a variety of unique toppings. Portillo’s is an iconic Chicago chain known for their famous Chicago-style hot dogs and Italian beef sandwiches. At Franks ‘n' Dawgs, you’ll find unique gourmet hot dogs with inventive toppings like apple bacon relish and truffle oil. The Wiener's Circle is a no-nonsense spot that serves up classic Chicago dogs and French fries with plenty of attitude. And last but not least, Flub A Dub Chub’s is known for their classic Chicago dogs, Chicago-style Italian beef, and Maxwell Street Polish sausages. If you’re looking for a delicious Chicago-style hot dog the next time you're in the famous city, be sure to find one of these spots to satisfy your cravings. Chicago-style hot dogs are a classic American favorite, and they are easy to make at home. Just make sure you have the proper ingredients. The amazing people of Chicago take great pride in this style of hot dog, with precise ingredients, and rightfully so. So let's join them and make the best Chicago-style hot dog at home!

Ingredients

6 all-beef hot dogs

6 poppy seed hot dog buns

2 tomatoes, sliced into moon shape

6 dill pickle spears

1 white onion, diced

12 sport peppers

Yellow mustard

Relish

Celery salt

Instructions

1. Cooking the hot dogs. You can do this 2 ways, on the grill if you are BBQing, or my usual way is bringing a large pot of water to a boil, lowering the heat to simmer and cooking dogs for 10 minutes.

2. Next, the buns. It is very hard to find poppy seed buns here in Texas. So I substitute for regular hot dog buns and brush with an egg white or water and sprinkle poppy seeds on top. Add to a preheated oven at 350 for 3-4 minutes. This gets buns warm and toasty and gets the poppy seeds to stick.

3. Assemble the hot dogs. Add cooked hot dog into bun and layer in this order; mustard, sweet relish, tomato slices (moon shape), diced onions, kosher pickle spear, sport peppers, and lastly celery salt.

4. Serve immediately and enjoy!

What is the Best Method for Cooking a Chicago Dog?

For those looking for a classic Chicago experience, look no further than the Chicago Dog. This iconic dish is a must-have for any visit to the Windy City. The key to a great Chicago Dog is in the cooking method. Boiling is the traditional method for cooking a Chicago Dog. Start by boiling a pot of water and adding the hot dogs. Boil for about 5 minutes, then remove the hot dogs. Grilling is another great way to cook a Chicago Dog. Heat up the grill and cook the hot dogs for about 5 minutes, turning them regularly until they’re golden brown and cooked through. For a slightly healthier option, try steaming the hot dogs. Place the hot dogs in a steamer basket and steam for about 10 minutes, for a juicy flavor. Baking is a quick and easy way to cook a Chicago Dog. To bake, preheat the oven to 350 degrees. Place the hot dogs on a baking sheet and bake for about 15 minutes. Lastly, for a truly quick fix, you can microwave the hot dogs. Place the hot dogs on a plate and microwave for about 1 minute.

What are Some of the Most Popular Condiments to Put on a Chicago Dog?

Mustard is a must-have condiment for a Chicago-style dog. It adds a tangy and slightly spicy flavor. Pickle relish is another classic topping for a Chicago-style dog. It is made from pickles, onions, and sweet peppers and adds a salty and sweet flavor. Chopped white onions are a classic topping for a Chicago-style dog that adds a crunchy texture and a bit of sweetness. Thinly sliced tomatoes are also a great topping for a Chicago-style dog; they provide a refreshing flavor and a juicy texture. Sport peppers, which are a type of pickled pepper that have mild to medium heat, are a traditional topping for a Chicago-style dog. They add a spicy and tangy flavor. Lastly, celery salt is a mixture of salt and ground celery seeds that adds a unique flavor.

What Types of Buns are Traditionally Used In a Chicago Dog Recipe?

Creating the perfect Chicago Dog is a matter of experience and finesse. One of the most important elements of a traditional Chicago Dog recipe is the bun. A steamed poppy seed bun is the most popular choice, as it provides a soft and fluffy base for the hot dog. However, some recipes also call for the use of a sesame seed bun, as this provides an additional layer of flavor. If you're looking for a more flavorful bun, you may want to substitute it for a pretzel bun. For a truly authentic Chicago Dog experience, opt for an all-beef hot dog. This will give you a juicy, flavorful hot dog with a crunchy exterior that will be sure to satisfy you. No matter which bun you choose, make sure to steam it in order to achieve the perfect Chicago Dog.

Other Summer Time Recipes:

The Perfect Mediterranean Pasta Salad Recipe for Summer Entertaining

A Refreshing and Delicious Melon Burrata Salad Recipe

The Perfect Summer Meal: Grilled Chicken, Mexican Street Corn & Cucumber Salad

Planning the Perfect Romantic Picnic with J. Lohr Wines

Are you looking for the perfect way to spend a lovely afternoon with your special someone and show them just how much you care? Why not plan a romantic picnic with the help of some delicious J. Lohr wine? J. Lohr is well known for its award-winning wines, so you can be sure that with their help you're putting together the most memorable picnic with an amazing selection of wines to sip. In this blog post, we'll discuss how to successfully pack the perfect romantic picnic date with the help of J. Lohr and their delicious Hilltop Cabernet Sauvignon. I'll help you with everything for this lovely picnic, from choosing the right food and wine pairings to creating a beautiful aesthetic atmosphere. With these tips, you're sure to have a romantic, unforgettable picnic with your loved one and forget about all your worries!

To start, you’ll want to make sure you have plenty of seating. Pack a large blanket or beach towels for enough space for the two of you to comfortably sit on. Plates, cutlery, and napkins are also essentials for any successful picnic. Don’t forget to bring a cooler filled with ice to keep all of your food and drinks cold. Most importantly, don't forget the delicious J Lohr wine. Be sure to pick up a bottle of your favorite vintage to share with your special someone. Along with the wine, obviously, bring a picnic basket with plenty of snacks and light refreshments for your picnic. A good pro tip is to make sure you bring a wireless Bluetooth speaker to play some romantic playlists to properly set the mood. You can also bring a few games to pass the time and keep the good times rollin’! Card games, board games, charades, or any other favorite game you two enjoy will help to pass the time as you slowly finish your delicious wine. Sunscreen and bug spray are must-haves for any outdoor picnic as well. Also, don’t forget to bring a camera to capture the moment. Lastly, don’t forget a romantic gesture like a bouquet of flowers, a unique special gift personable to the two of you, or goodies such as chocolates.

With a little bit of planning, you can make your Summer picnic even more special with delicious J. Lohr wines. Let's further break down some ideas to pack up and plan the perfect romantic picnic this Summer.

Something to Carry Your Picnic Goodies

Start with the ideal way to carry your supplies. A classic picnic basket is a great way to pack all the goodies for a romantic picnic for two. For a longer hike or outdoor adventure, a roomy backpack is the perfect solution for room and comfort. Insulated totes are also great for keeping food and drinks at the perfect temperature for hours. If you plan on bringing J. Lohr wines on your romantic picnic, a specialized wine carrier will make sure your bottles stay safe and secure. Don’t forget a cooler. It’s an absolute must for any romantic picnic, especially if you plan on packing perishable items or beverages that need to stay cold.

Something Comfortable to Sit on

When planning a romantic picnic, the setting is key. For the perfect picnic experience, find a scenic spot most likely in the shade to lay down the blanket. To make your setting even more cozy, add an extra layer of comfort by bringing a blanket to snuggle up in if the temperature drops or the cold wind kicks up. For a special decorative touch, get creative and bring a blanket that matches the colors of the picnic items or the surrounding nature. To take comfort of seating to the next level, consider adding folding chairs for a more comfortable and elevated seating arrangement. If you’re feeling adventurous and want to add a unique element to your romantic picnic, maybe opt for an inflatable seat. This luxurious experience will surely make your romantic picnic unforgettable.

Food & Wine Pairings

When packing the perfect romantic picnic with J. Lohr, you’ll want to make sure you have all of your bases covered. Start off with a few bottles of J. Lohr wines. Whether you prefer red, white, or a sweet dessert wine, J. Lohr has something great for everyone. For the perfect pairing, grab some delicious cheeses and crackers to enjoy with your wine.

J. Lohr offers a wide variety of wines to choose from, and for this picnic, I chose the Hilltop Cabernet Sauvignon. The pairing of this wine with my garlic aioli steak sandwiches creates a delicious and memorable meal. I have the full recipe for these steak sandwiches -here- for you to create when picnicking.

When selecting cheese to pair with this Cabernet Sauvignon, aged Gouda, aged sharp cheddar, and Gorgonzola are some of the best options. Each cheese variety has a high-fat content, which helps to cut through the tannins in the wine and bring out its tasting notes. The cheese can enhance the different flavors that you’ll find in the wine, which leads to a better overall tasting experience. Sharp, Aged, Cheddar gives a higher fat content that will help in taking some of the bite out of the high tannin levels while the aged aspect will help bring out some of the fruity/berry notes in the wine. Gouda is also a great cheese option for pairing with cabernet sauvignon. Its high-fat content will help cut through the tannins just like the cheddar cheese does, and it will cut down on the dryness of the wine. Looking for a creamier cheese? Gorgonzola is a great option, blue cheese can be tricky with cabernets, but this milder form is ideal because the flavors skew creamier and nuttier rather than sharp.

In addition to the cheeses, a few other charcuterie style/ finger foods pairings are; rosemary crackers, dried cherries, fresh strawberries, walnuts and chocolate. These tasty treats all provide a balanced flavor and texture for the perfect pairing with the J. Lohr Cabernet Sauvignon.

Finally, it is important to remember to bring the right practical essentials for your romantic picnic. Complete your packing with safe, shatterproof glasses, plates, and a wine bottle opener or corkscrew to make it an easy and enjoyable and romantic experience.

More About J. Lohr Hilltop Cabernet Sauvignon

When you’re planning a romantic picnic, choosing the right wine is an important part of setting the scene for a special day. J. Lohr Cabernet Sauvignon is a benchmark Paso Robles Cabernet Sauvignon that displays elegant layers of blackberry, currant, and toasted pastry. This complex and refined red wine is made up of 95% Cabernet Sauvignon, 3% Petit Verdot, 1% Malbec, and 1% Cabernet Franc. Enjoy juicy layers of black and red currants leading to a bright finish, accented by pastry notes from extended barrel aging.

If you’re new to wine, J. Lohr Cabernet Sauvignon is a great option since it’s a more middle-of-the-road varietal. It’s not light, but it’s not overly robust, making it enjoyable with many dishes. Rich, savory, and subtle nutty or earthy flavors are the perfect accompaniment to a romantic picnic. Pack a bottle of J. Lohr wine and you’ll have the perfect date night at home or on any picnic. With the structure to age gracefully for 10-15 years when properly cellared, this wine is sure to set the mood for any romantic outing. If you are staying in and enjoying this wine I recommend pairing it with beef, lamb and again a hard cheese. A delicious well-balanced dinner would be a rosemary-seasoned ribeye and garlic-roasted potatoes with parsnips and fennel.

Decorate Your Picnic with Pretty Flowers

When it comes to packing the perfect romantic picnic, adding beautiful flowers to your picnic basket will make all the difference. Some great classic decorative choices are roses, gardenias, lilies, orchids, tulips, and daisies. These flowers will help add a romantic atmosphere to your picnic, making it all the more special and memorable. Whether you choose the classic roses, the fragrant gardenias, or the delicate daisies, you can’t go wrong with these romantic blooms. I absolutely love the way flowers make me feel and love decorating with fresh flowers for any occasion.

Not only do these varieties of flowers look beautiful, but they also smell amazing. The fragrance of these romantic flowers will fill the air with love, and create an unforgettable atmosphere for your picnic.

With these fun and simple tips, you're sure to have the perfect romantic picnic with J. Lohr. wine and your loved one. Enjoy, and Cheers!

Other Wine-Related Blog Posts You Will Enjoy:

The Bloggers Guide to Merlot

The Perfect Pair: Chicken Picatta and J. Lohr Wine

How to Make Delicious Nutter Butter Cookies At Home

Have you ever wanted to make your own version of this classic childhood favorite cookie? Well, now you can with this recipe for homemade Nutter Butter cookies! This easy-to-follow recipe will have you enjoying these delicious, soft, and creamy peanut butter cookies in no time. These homemade Nutter Butter cookies are the perfect way to get your peanut butter fix and homemaking them for a twist on the classic store-bought version. With just a few simple ingredients and a few minutes, you can bake your own batch of delicious homemade Nutter Butter cookies. So grab your ingredients and let’s get to baking!

Who doesn't love the classic Nutter Butter cookie? This delicious treat is full of nutty flavor, and now you can make it right at home! With just a few simple ingredients and a few minutes of your time, you can have homemade Nutter Butter cookies that are just as delicious as the store-bought kind. To make your own Nutter Butter cookies, you'll simply need flour, butter, peanut butter, sugar, baking powder and vanilla extract. Mix the ingredients all together and roll the dough into small balls. For an extra crunch, roll the dough balls in crushed peanuts before baking. Once the cookies are done baking, let them cool and enjoy! These homemade Nutter Butter cookies make a great after-school snack or are perfect for a mid-morning pick-me-up. Enjoy them with a cold glass of milk or your favorite cup of coffee. No matter how you choose to enjoy them, you'll love the homemade nutty flavor of these classic cookies.

Why Make Nutter Butters at Home?

If you’re looking for a fun and rewarding activity that the whole family can enjoy, homemade Nutter Butter cookies are the perfect choice! From start to finish, the process of making them is incredibly simple and you can customize the recipe with whatever ingredients you have on hand. Unlike store-bought versions, homemade Nutter Butter cookies can be much healthier because of the natural sweeteners you can substitute such as honey and agave nectar instead of sugar or corn syrup. Not only does this give you complete control over the ingredients you use, but it also allows you to avoid any allergens or other ingredients that may not be suitable for your family.

When it comes to the size and shape of your Nutter Butter cookies, the possibilities are endless! You can make them as big or small as you like and even customize the shape and size to fit your tastes. You can even make them into smaller Nutter Butter bites for a fun take on peanut butter cookies. Not to mention, a homemade version of a Nutter Butter dessert is a great way to show your family and friends that you care about their health and well-being by providing them with a healthier alternative to store-bought.

Ingredients

1 cup unbleached all-purpose flour

1/2 tsp baking soda

1/4 tsp sea salt

1/2 cup melted butter

1/2 cup PBfit Powder

2/3 cup granulated sugar

1 egg

1/2 tsp vanilla extract

Filling

1-1/2 cups PBfit powder

1 cup powdered sugar

2/3 cup water

Instructions

1. In a large bowl blend melted butter, sugar, and PBfit then blend with an electric hand mixer or standing mixer until combined. Add in egg and vanilla extract. Mix with blender again on medium speed.

2. Add in dry ingredients; flour, baking soda & sea salt and mix again.

3. Take a parchment paper lined baking sheet and form Nutter Butters. For a medium size Nutter Butter you will take one cookie scoop and break it in half. Form both halves into balls and place them together on parchment paper. Using a fork make a criss-cross pattern. Make sure before removing the fork you press the 2 cookie balls together. Continue until the pan is full making sure cookies are 2 or more inches apart.

4. Bake at 350 degrees for 10-12 minutes or until the cookie is lightly browned.

5. While the cookies are baking make filling by mixing with whisk PBfit powder, powdered sugar, and water in a bowl. Fill a piping bag and set aside.

6. Once cookies are done baking remove them from the oven and place them on a cooling rack. Once cooled you will fill with the filling mixture and enjoy! You can dip in chocolate for an added layer of goodness or make the adorable referee cookies I did for a sports theme party -here-.

How Long Will My Homemade Nutter Butter Last?

When it comes to storing your homemade Nutter Butter, you’ll want to make sure it is kept in a cool, dark place. It can last up to two weeks stored in an airtight container in the refrigerator. If stored properly, homemade Nutter Butter can even last up to a month in the freezer. However, for best results, it is recommended to consume the Nutter Butter within four days of its preparation, and honestly, who can even wait once that delicious smell fills your ktichen. If you do plan on storing the Nutter Butter for longer than a week, be sure to wrap it tightly in plastic wrap to maintain its freshness.

How Can I Store My Homemade Nutter Butter?

Homemade Nutter Butter is a delicious treat that is easy to make. However, it is important to store it properly to maintain its freshness. The best way to store Homemade Nutter Butter is at room temperature in an airtight container. To keep them from sticking to each other, place a piece of wax paper between each layer of the Nutter Butter. Make sure the container is placed in a cool, dry place away from direct sunlight. If you don’t plan to eat the Nutter Butter within 1-2 weeks, it is best to freeze it. To thaw the Nutter Butter, place the container in the refrigerator overnight before eating. By following these simple steps, you can enjoy your Homemade Nutter Butter for weeks to come.

Other Delicious Cookie Recipes:

Monster Cookie Recipe

Birthday Cutout Sugar Cookies

Brown Sugar Toffee Cookies

Brown Butter Caramel Pretzel Cookies

The Perfect Mediterranean Pasta Salad Recipe for Summer Entertaining

If you're looking for a delicious and light meal, this Mediterranean Pasta Salad is the perfect dish. This flavorful salad is packed with fresh vegetables like tomatoes, cucumbers, and olives, and is combined with an Italian-inspired dressing and a variety of delicious cheeses. The combination of flavors in this dish creates an amazing variety of tastes and is sure to please everyone at the table. Not only is it a great entree, but its bright colors and unique flavors also make it a great side dish for any lunch or dinner. With just a few simple ingredients, you can whip up this Mediterranean Pasta Salad in no time. For a delicious and healthy dish that's perfect for summer picnics and barbecues, Mediterranean Pasta Salad is the way to go. It's an easy dish to prepare and can be served either warm or cold.

Not only is this salad full of delicious flavor, but it is also low in fat and calories. You can customize this dish to your liking by adding different vegetables, proteins, and dressings of your choice. Mediterranean Pasta Salad is a great way to get your daily dose of vegetables and healthy fats. It's a quick and easy meal that's sure to please everyone and have them coming back for a second scoop.

Popular Substitutions & Additions

Mediterranean pasta salad is a delicious and versatile dish that can be tailored to your tastes. It's easy to customize the ingredients for a unique set of flavors and textures. For a tangy kick, substitute feta cheese for Parmesan cheese. Olives and sun-dried tomatoes add a burst of flavor, while whole-wheat bowtie pasta gives it a healthier twist with fewer carbs. Olive oil is a great substitute for mayonnaise to reduce fat and calories. Chopped artichoke hearts give the dish a unique texture, while fresh basil for a more intense herb flavor. Add grilled chicken or shrimp for a protein-packed meal, and capers for an extra salty kick. For a creamier texture, substitute Greek yogurt for mayonnaise. Roasted red peppers bring a touch of sweetness, and arugula can be used instead of spinach for a peppery taste. With so many options, Mediterranean pasta salad is sure to be a crowd-pleaser.

What to Pair with Your Summer Pasta Salad

A Mediterranean pasta salad is a light and delicious dish that is perfect for Summertime meals. Its combination of fresh vegetables, olives, feta cheese, and herbs makes it a great way to enjoy the flavors of the Mediterranean. To complete the meal, a light, dry white wine like a Pinot Grigio or Sauvignon Blanc pairs perfectly with this salad. For a more flavorful drink, try a crisp, bubbly rosé or a chilled rosé Spritzer. Freshly baked garlic bread is also a great addition to this meal.

For a more complete meal, serve the Mediterranean pasta salad with a side of my delicious baked chicken drumsticks, steak, or salmon. For a vegan option, serve the salad with a side of lentils or roasted vegetables. To brighten the meal, add a side of freshly cut fruit or a fruit salad. Finally, top off the meal with a light dessert like a homemade fruit tart or ice cream.

How to Store Mediterranean Pasta Salad

When storing the Mediterranean pasta salad, make sure to let it cool completely before putting it in an airtight container. If possible, store the salad without the dressing and add it just before serving. The Mediterranean pasta salad can be stored in the refrigerator for up to 3-4 days. If you want to store the salad for a longer time, freeze it in a freezer-safe container.

To reheat the frozen Mediterranean pasta salad, thaw it in the refrigerator overnight and then cook it in a skillet over medium-high heat or serve cold. This will help to retain the flavor and texture of the salad. Enjoy the Mediterranean pasta salad as is or top it with a drizzle of olive oil and a sprinkle of fresh herbs.

How Long Will Pasta Salad Last In the Fridge?

A good pasta salad is a great way to use up leftover pasta, and the combination of flavors is sure to please any crowd. The best part is that you can store it in the fridge for up to 4 days, so it's perfect for meal prepping or making ahead of time. When storing your pasta salad in the fridge, make sure to keep it in an airtight container to prevent it from spoiling. If you're not planning to eat the pasta salad within 4 days, it's a good idea to freeze it to keep it fresh longer.

It's important to remember that if you notice that the pasta salad is starting to look or smell off, it's best to discard it. While it's okay to keep it in the fridge for up to 4 days, any longer than that and you may not be able to trust the quality of the dish. So make sure to store it properly and enjoy it while it's still fresh.

My Best Pasta Salad Tips

To make this delicious salad, start with your favorite type of pasta. Penne, shells, or rotini all work great. Then, mix in a light vinaigrette or Italian-style dressing to keep it light and flavorful. Add in some fresh, seasonal vegetables like tomatoes, cucumbers, peppers, and onions. If you're looking for a bit more protein, try adding some chickpeas, olives, feta cheese, or grilled chicken. Finish off the salad with some fresh herbs like basil, parsley, or oregano. Keep it chilled until ready to serve.

To ensure maximum flavor, use fresh ingredients when making Mediterranean Pasta Salad. For a salty kick, add a sprinkle of freshly grated Parmesan cheese. Top it off with a drizzle of extra-virgin olive oil for a hint of Mediterranean flavor. With a few simple ingredients and a few minutes of prep time, you can have a delicious and healthy Summertime meal

Served Warm or Cold?

Mediterranean Pasta Salad is a delicious and healthy meal option that can be served both warm and cold. If served warm, the flavors of the vegetables, herbs, and cheese will be more intense and the pasta will be more tender. If served cold, the salad will have a refreshing taste and the vegetables will be crunchy. Whichever way you choose to serve it, Mediterranean Pasta Salad is sure to be a hit at your next gathering.

The beauty of Mediterranean Pasta Salad is that it can be made with whatever ingredients you have on hand. From tomatoes, cucumbers, olives, and feta cheese for the classic version to adding artichoke hearts, roasted red peppers, and roasted garlic for a more intense flavor, the possibilities are endless! You can also easily customize the salad with your favorite herbs and spices.

Whether you’re looking for a light and healthy lunch or dinner option, or something that will feed a large crowd, Mediterranean Pasta Salad is an easy and delicious choice that the whole group will love. You can make it ahead of time and serve it warm or cold, so you don’t have to worry about last-minute meal prep. Plus, it’s a great way to use up any extra veggies you have in the fridge. Try making this Mediterranean Pasta Salad today – you won’t be disappointed with this family-friendly yummy dish!

Ingredients

16 ounces of favorite cooked pasta

1 pint cherry tomatoes

1 cup cucumber, sliced into quarters

1/2 a medium red onion

1/2 cup Kalamata olives, pitted

1 15.5 oz canned chickpeas, drained

1/2 cup sliced pepperoncini

2/3 cup crumbled feta cheese

Dressing

1/4 cup extra virgin olive oil

2 tablespoons red wine vinegar

1 tablespoon lemon juice

3 tablespoons mayo

2 teaspoons Dijon mustard

1 tablespoon maple syrup

sea salt & black pepper

Instructions

1. Prepare pasta according to package directions. Drain and set aside in bowl.

2. Mix together all dressing ingredients in mason jar and shake together until fully blended, adding sea salt & black pepper until desired taste.

3. Prepare vegtables; slice cherry tomatoes in half, cut cucumbers into quarters, cut red onion into slices, pit and cut in half kalamata olives, and slice pepperoncini into desired shapes. add ingredients into bowl with pasta and pour over dressing. Mix together. Serve topped with feta cheese & serve.

3 Refreshing Summertime Bourbon Cocktails to Beat the Heat

Summertime is the perfect time to enjoy a refreshing and delicious cold bourbon cocktail. Whether you're gathering with friends for an outdoor barbeque or simply having a lazy day at home, these three bourbon cocktails are sure to please your taste buds and give you the perfect Summertime buzz. From a classic mint julep to a paper plane, to a fruity and fizzy combination, these drinks are sure to add a special touch to your Summer celebrations. So, grab your favorite bottle of bourbon and let's get mixing these 3 Summertime bourbon cocktails!

Cherry Bourbon Smash

A Cherry Bourbon Smash is a fruity and delicious sip that is sure to be a hit with your friends and family. The name automatically catches your interest and makes you want this delicious drink. This delightful cocktail requires only a few simple ingredients – bourbon, muddled cherries, and a splash of lemon juice – and can easily be made at home. The combination of bourbon and juicy cherries creates a refreshingly fruity flavor that will have you reaching for another glass. Plus, you can switch up these fruity bourbon cocktails by using other types of smashed or finely chopped fruit such as grapefruit, pomegranate, strawberries or raspberries if you wish.

Ingredients

2 oz Bourbon

Fresh Mint

1/4 cup cherries

1 oz freshly squeezed lemon juice

1/2 oz simple syrup

Instructions

1. Muddle a fresh mint sprig and 1/4 cup chopped fresh cherries in a cocktail shaker. Add in bourbon, freshly squeezed lemon juice, simple syrup, and ice.

2. Shake until the ice has mostly dissolved or your wrist hurts. Strain into a cocktail glass of choice. Add cherries & mint sprig to garnish and enjoy!

Blueberry Basil Bourbon Refresher

When that Summer heat starts to climb, it's time to switch up your beverage selection! Try out a Blueberry Basil Bourbon refresher for a cool and refreshing summertime cocktail. The mix of sweet and tart blueberries, fresh basil, and bold bourbon is sure to make your taste buds dance. Plus, with just a few simple ingredients, whipping up a Blueberry Basil Bourbon Refresher is easy and fast. Serve up your Blueberry Basil Bourbon Refresher in a glass with a few sprigs of basil for a classic presentation. Or, for a cool and unique twist, blend the ingredients with some crushed ice for a slushy-style drink. Either way, it's sure to be a hit with your friends and family. They'll be raving about their favorite mixologist in no time.

Instructions

1/4 cup blueberries

2 oz bourbon

1/2 oz simple syrup

fresh basil

club soda

Ingredients

1. Muddle blueberries, 1 basil leaf, and simple syrup in a cocktail shaker until the blueberries have burst and you can smell the basil.

2. Add in bourbon and ice. Shake until the ice has broken up and dissolved.

3. Grab your fresh glass and fill it with ice. Strain the cocktail shaker over a glass of ice. Fill the remainder of the glass with club soda (or ginger beer if you want more of a kick) and garnish with blueberries and fresh basil leaf.

Coconut Lime Bourbon Creamsicle

The Coconut Lime Bourbon Creamsicle is a perfect Summertime drink that takes you to a place in your mind where you're relaxing on a tropical beach. This lovely drink packs a creamy punch with its combination of coconut milk, limeade, lime juice, and simple syrup. The smooth, creamy texture of the coconut blends perfectly with the tartness of the lime juice, creating a unique flavor that is both sweet and tangy. The addition of lime juice gives the cocktail a zesty kick that perfectly complements the sweetness of the coconut and the smoky flavor of the bourbon. This is probably one of my top favorite Summer cocktails and the perfect drink to enjoy while lounging by the pool or relaxing on the beach.

Ingredients

2 oz bourbon

1 cup limeade

1/2 cup coconut cream

1/2 oz simple syrup

1/2 oz freshly squeezed lime juice

Instructions

1. Add bourbon, limeade, coconut cream, simple syrup and lime juice into a cocktail shaker and stir together over ice.

2. Strain out into a freshly chilled cocktail glass removing all ice. Add a lime wedge and coconut shavings to garnish and enjoy!

What Type of Bourbon is Best for These Cocktails?

Whether you want to sip on something light and easy or mix up a bold and flavorful concoction, there's a perfect bourbon for every occasion. For a classic Old Fashioned, reach for Maker’s Mark. This wheat bourbon is easy to sip and adds a great flavor to classic drinks. If you want something a bit more interesting, try Bulleit. This rye-forward bourbon is bold and spicy, making it perfect for a Mint Julep or a bourbon rickey. If you're looking for something more indulgent, try a Manhattan with Woodford Reserve. This rich, full-flavored bourbon adds great depth to this classic cocktail. If you want to mix up something a bit sweeter, Knob Creek is a great choice. This smooth, sweet bourbon is perfect for a classic Suffering Bastard drink or a Boulevardier. And if you're looking for something classic, grab a bottle of Wild Turkey. This classic bourbon is great in a Whiskey Sour or a Bourbon Highball. So grab your favorite bottle of bourbon and get to mixing because these 3 Summertime bourbon cocktails are the best way to chill, relax, and beat the heat!

Can These Cocktails Be Made with Other Types of Liquor?

It's no surprise that bourbon cocktails are the perfect drink to enjoy on a Summer day. Whether you prefer a classic Mint Julep or an Old Fashioned, bourbon-based cocktails are sure to make your hot days that much better. However, if you don't like bourbon, you don't have to miss out on all the fun. Yes, these Summertime bourbon cocktails can be made with other types of liquor to accommodate different tastes and preferences. If you don't like bourbon, you can substitute these drinks with other liquors like vodka, gin, tequila, or rum. By making these cocktails with different types of liquor, you can create unique flavor profiles and make the cocktails even more enjoyable. Additionally, using different types of liquor can make the cocktails more accessible to those who don't usually drink bourbon. Whether you decide to make a bourbon-based cocktail or one with a different type of liquor, you're sure to find a Summertime favorite that you can enjoy all season long. So, don't be afraid to get creative with your cocktails and mix things up this summer!

These three Summertime bourbon cocktails are sure to make your hot days more enjoyable. Whether you're looking for a refreshing drink to cool off on a hot Summer day, or a classic cocktail to sip on while relaxing in the backyard, bourbon is the perfect spirit to make your days even more enjoyable.

Other Cocktail Recipes You Will Enjoy

Strawberry Orange Bourbon Smash

The Perfect Lemon Drop Martini Recipe for a Refreshing and Delicious Cocktail

4 Deliciously Easy 4-Ingredient Tequila Cocktails

Watermelon Twist Cocktail

Refreshing Lemon Twist Cocktail

Step-by-Step Guide to Making a Refreshingly Delicious Frozen Raspberry Margarita

A Refreshing and Delicious Melon Burrata Salad Recipe

This refreshing Melon Burrata Salad is the perfect way to enjoy the fresh Summer produce in a fun and unique way! This meal is a surprisingly perfect combination of sweet and savory flavors, making this salad a great appetizer or side dish for any meal. The freshness and sweetness of the melon along with the creamy burrata create a delicious balance, while the addition of mint and basil provides a bright flavor. The light vinaigrette dressing brings out the flavor of all the components, tying the dish together. This salad is incredibly simple yet flavorful, making it an ideal Summer side dish. I've been loving recipes lately with a refreshing mix of different flavors that blend well together and are a little different than the normal dishes everybody knows and uses!

Balsamic Strawberry Vinaigrette

The Melon Burrata Salad is a classic recipe that is elevated to the next level when paired with a delicious Balsamic Strawberry Vinaigrette. This vinaigrette adds a perfect balance of sweetness from the Strawberries and acidity from the balsamic vinegar to the salad. This combination of flavors brings out the best in the melon and the creaminess of the burrata. The Balsamic Strawberry Vinaigrette adds a depth of flavor to the Melon Burrata Salad that is not found in other salad dressings.

Can I Make This Salad Ahead of Time?

Not only is it a delicious combination of flavors, but it's also simple to make ahead of time. Simply prepare all the ingredients ahead of time and keep in mind that if adding basil and/or balsamic glaze, then wait to add it until just before serving. To keep the salad fresh, store the ingredients in an airtight container in the refrigerator. Be sure to store pre-cut melon separately to prevent it from becoming soggy. If you're looking to preserve the creamy texture of the burrata, wait to add it as well until you're ready to serve. This melon burrata salad is the perfect dish to get started on in your free time to plan ahead and tackle the busy work week with less stress.

What Ingredients Are Needed to Make a Melon Burrata Salad?

This Summer, try a delicious and refreshing Melon Burrata Salad. This light and flavorful dish is sure to become a new favorite! Start by selecting a ripe and juicy melon such as cantaloupe, honeydew, or watermelon. Then add a soft and creamy cheese, like burrata, for a delightful burst of flavor. Layer melon and cheese with a few handfuls of arugula, spinach, or mixed greens. Finally, drizzle the salad with balsamic dressing (recipe below), and season with salt and pepper to taste. For a little extra crunch, top with a sprinkle of roasted pistachios.

For this salad, you will need cantaloupe, honeydew, watermelon, burrata, and your favorite vinaigrette. If you can't find all the melons, don't fret! Fresh strawberries, cherries, or figs make a wonderful substitute that will still yield a very sweet and delicious flavor. If you are out of burrata and need another cheese to substitute, mozzarella balls are a great flavor choice and give a similar look and texture to this salad. For a sweeter salad, add a tablespoon of honey to the dressing. To add a salty, smoky flavor, add a few slices of prosciutto. For a hint of herbal flavor, sprinkle with fresh herbs such as basil, mint, or thyme.

This salad pairs well with a light white or rosé wine, making it a perfect accompaniment to any summertime meal. Serve this tasty dish with toasted sourdough bread on the side for a delightful crunch. Serve it at your next gathering and watch it disappear in no time!

Ingredients

2 or 3 handfuls of lettuce (optional but makes a pretty display)

3 Cups cubed Watermelon

2 Cups cubed Honeydew

2 Cups cubed Cantelope

8 ounces of burrata cheese, at room temperature

1/4 cup roasted pistachios, chopped

Balsamic Strawberry Vinaigrette

1/4 cup olive oil

1/4 cup balsamic vinegar

1/4 cup fresh basil

1 tablespoon strawberry preserves

1 tablespoon raw honey

kosher salt & fresh black pepper

Instructions

1. Mix together all Balsamic Strawberry Vinaigrette ingredients in a mason jar and shake together until the ingredients come together. Toast chopped pistachios in a pan over the stove until slightly toasty and set aside. Cube all watermelon, honeydew and cantelope. Let burrata come to room temperature.

2. Start assembling the melon burrata salad. Lay down a bed of 2 or 3 handfuls of your favorite lettuce I am using arugula. Add melons. Top with burrata, using your fingers or a fork break apart and spread over the melons.

3. Drizzle Balsamic strawberry vinaigrette and sprinkle pistachios. Add additional basil for color and serve!

This melon burrata salad is easy to make and truly delicious. It's the perfect way to start any Summer meal or have as an amazing appetizer. Either way, it will be a burst of flavor that will surprise your guests and have them coming back for seconds.

Other Salads You Will Love:

How to Make the Perfect Pear and Pomegranate Arugula Salad

Shaved Brussel Sprout Salad with Apples, Goat Cheese & Candied Pecans

The Perfect Summer Meal: Grilled Chicken, Mexican Street Corn & Cucumber Salad

Our Fabulous Stay at the Langham, Boston: A Comprehensive Review

Welcome to our blog post about our amazing stay at The Langham, Boston! We had the pleasure of spending a few nights at this luxurious five-star hotel and wanted to share our fabulous experience with you. From the grand lobby to the amazing restaurant, spa, full gym and pool, this hotel is full of luxurious amenities that make for a truly exceptional stay. Our stay at The Langham, Boston and full review will cover everything we experienced during our stay, including the service, accommodations, and dining. Whether you're looking for a romantic getaway or a family vacation, we think you'll enjoy all The Langham, Boston has to offer!

If you’re looking for a luxurious stay in Boston, then look no further than The Langham, Boston. It is an ideal choice, conveniently located in the heart of downtown Boston. This stunning five-star hotel is set in a beautifully architected historic building and offers stunning suites and guest rooms with modern amenities and decor. Not only will you enjoy the comforts of your room, but you’ll have access to the hotel’s many amenities, such as a full fitness center, an indoor pool, a spa, and a restaurant. The hotel also offers a range of services, including concierge, valet parking, a club lounge and a business center.

Location

When you stay at The Langham, Boston you can enjoy all the luxury and sophistication that the city has to offer. Perfectly located in the heart of Downtown and Waterfront Boston, you can easily walk to explore the nearby historic attractions, such as the Freedom Trail, the Boston Tea Party Experience, the New England Aquarium, and much more harbor-side shopping and entertainment. With easy access to public transportation and the city's major attractions, you can make the most of your stay. The hotel also offers a concierge service, as well as an airport shuttle and car rental service. Only 3 miles from Logan International Airport, 1.1 miles from the Boston Convention and Exhibition Center (BCEC), and .09 miles to the TD Garden, the hotel is perfectly situated for both business and leisure travel. 

Getting around the city is a breeze, thanks to the hotel’s easy access to public transportation, including the “T” (MBTA). Plus, the hotel is within walking distance of many popular attractions, shopping, and dining options in downtown Boston. The hotel is located near many popular attractions and those that are a bit farther than an easy walk, such as Fenway Park, are really just a quick Uber or taxi away. We found the town perfectly situated to hit different areas on different days if planned correctly to see all the many famous historic landmarks that Boston has to offer. We did still choose to walk from the Langham to Fenway Park to watch a Red Sox game, even though the walk is around an hour from the hotel. It is a beautiful city, and sightseeing all the amazing architecture of the neighborhoods along the way and stopping for brunch made the walk to the game a breeze.

Amenities

If you are looking for a luxurious stay in the heart of Boston, The Langham Boston is the perfect choice. From the moment you step into the impressive lobby, you will be surrounded by the utmost sophistication and elegance. The hotel features a full-service spa, offering a variety of treatments and massages. Relax in the pool, hot tub, or fitness center and enjoy in-room dining or take advantage of the hotel’s multiple restaurants and bars. Plus, you can stay connected with free Wi-Fi throughout the property. The Langham Boston also features a 24-hour business center with meeting rooms and event spaces. Whether you are traveling for business or pleasure, The Langham Boston is the perfect choice for an unforgettable stay.

Pool & Fitness Center

The Langham Boston is proud to offer its guests their redesigned fitness center, heated indoor pool, whirlpool, and relaxing saunas making it the perfect destination for a relaxing getaway. The 40-foot heated pool is staffed by friendly, knowledgeable attendants who are always available to answer questions or help out while you enjoy the pool. Hours are from 7 am to 8 pm daily. Guests can also take advantage of the complimentary pool toys and floats for an even more enjoyable experience.

One of the best features of The Langham, Boston is its state-of-the-art fitness center. The fitness center is stocked with top-of-the-line cardio equipment from Technogym, Peloton exercise bikes, and state-of-the-art strength equipment. Plus, the fitness center is open 24 hours a day 7 days a week, so you can get your workout at any time of day or night. The fitness center also features a sauna and steam room, so you can relax and unwind after a workout. The fitness center staff are knowledgeable and friendly, helping you to get the most out of your workout. This really is one of the best fitness centers I have ever seen on our travels. The hotel has a multiple-level, full gym with great views comparable to the best gyms in the city.

Restaurants and Bars

Located in the heart of downtown Boston, the hotel is conveniently close to some of the city’s best restaurants and bars. Whether you’re looking for a casual bite or an elevated dining experience there is nothing short of this in Boston. Wanting to stay at the hotel and dine? The Langham Boston offers 2 locations to enjoy during your stay.

The Grana an authentic Italian cuisine set in the former Federal Reserve Bank's grand hall. Offering delicious Italian family-style dishes for breakfast and lunch with a luxury weekend brunch! For more on Grana & the menu -here-

The other location in The Langham Boston to dine & have a cocktail or two is The Fed. A British-inspired cocktail bar with a sophisticated New England twist. Serving up craft cocktails and pub-style food it's a perfect spot before a night on the town or a delicious dinner after a long day of sightseeing. Open from 3-11 Monday to Thursday and 2-11 Friday to Sunday. For more on The Fed & menu -here-

The Rooms & The Langham Club Lounge

For a luxurious stay in the heart of Boston, look no further than The Langham Boston. This 5-star hotel offers a variety of amenities including 24-hour room service. Their modern rooms are spacious and feature flat-screen TVs, mini-bars, in-room coffee makers and complimentary Wi-Fi. If you need coffee again before leaving the lobby has a daily coffee bar with a high-tech machine making any coffee you will desire. Other additional in-room perks are nightly turn-down service, complimentary shoe shining and pillow options. They have a menu of pillows to fit your sleeping needs. Who has traveled and had the worst night's sleep because the pillows were all wrong? Not at the Langham!

Need even more amenities? The club lounge was my absolute favorite part of the hotel! The lounge offers a range of premium privileges designed to make your stay even more special. Enjoy impeccable service and delightful refreshments, including an omelet station, petit fours, canapés, and culinary creations that are delicious. Truthfully, the food at the Club was right on par with some of the best food we had in all of Boston. Club privileges include complimentary pressing of 3 garments upon arrival, snacks, small bites, and petit fours in the afternoon. Dedicated club attendants, evening canapés, premium bar service throughout the day, and continental and hot breakfast with an omelet station. Open daily from 7 am to 8 pm, this added all-inclusive perk will run you $150 per adult and $50 per child. Unless you are staying in any of their Executive Club Rooms or Suites and this will be an added perk. The Club Lounge really is the perfect option for those with kids, those busy with work who just want to stay inside the hotel, but still eat an extremely well-prepared cuisine, along with everybody else who wants an additional quick snack or drink before you hit the town, or a nightcap before you call it a night if you've had a busy day exploring the town.

Pets Allowed

If you’re traveling with your furry friend, the Langham Boston is the perfect place to stay. This pet-friendly hotel offers pet beds, bowls, and toys, so your pet will be as comfortable as you are during your stay. The hotel also offers a special pet menu, with dishes designed to please your four-legged companion.

The Langham Boston is a great option for pet owners looking for a luxurious getaway. The hotel offers pet-friendly amenities, so your pet will be as comfortable as you are during your stay. This is to note when bringing your furry bestie, they must be under 50 lbs and an additional $100 will be added to your stay.

Laundry & Dry Cleaning

We had 3 items pressed with our Club Langham perk, which was a very nice added service. The staff was attentive, friendly and accommodating, providing us with timely and professional service. To make things even easier, the Langham Boston provides each guest with a complimentary laundry bag. Prices are reasonable, and the service is very reliable.

Guests can drop off their dry cleaning in the morning and have it returned to their room later that day, making it easy to keep their clothes looking their very best. The service is available seven days a week. The staff is friendly and helpful, and we were very impressed with the efficiency and quality of the service.

Overall, our stay at The Langham, Boston was excellent and it instantly has become one of my favorite hotels of all time. The five-star rating is definitely justified. This hotel was very luxurious and the staff were both friendly and accommodating. The rooms were comfortable and clean, and the amenities were top-notch. This hotel brings a feel of European luxury to the States. The Club Lounge was a great unexpected bonus and made our stay even more enjoyable. We will definitely stay here again and highly recommend The Langham, Boston is the perfect choice for anyone looking for the best that the great city of Boston has to offer.

Other Hotel Reviews & Travel Guides:

Morro Bay Travel Tips

An Unforgettable Experience: The Perfect Surprise Trip To Denver

Three Days in The Rainy City: A Seattle Washington City Guide

The Perfect Summer Meal: Grilled Chicken, Mexican Street Corn & Cucumber Salad

Summer is the perfect time to enjoy fresh garden produce and a delicious grilled meal. This Grilled Chicken, Mexican Street Corn & Cucumber Salad is the perfect way to enjoy some of Summer's offerings. The combination of grilled chicken, Mexican street corn, and cucumber salad provides a delicious and unique mix of flavors and textures that will have your family and friends begging for more. Not only is this meal delicious, but it is also fairly simple to make and can be served as a main course, or served as a side at your Summer BBQ. This recipe is sure to be a hit! Let's get to grilling!

This Mexican Street Corn Chicken Salad Has All the Grilled Corn Flavor In a Bowl of Greens and Veggies with Chicken. This delicious Grilled Chicken Mexican Street Corn & Cucumber Salad is the perfect meal for any lunch or dinner. It combines the creamy, crunchy, and savory flavors of grilled chicken, Mexican street corn, and fresh cucumbers for an ideal balance of tastes and textures. Not only is this meal bursting with flavor but it’s also packed with protein and veggies for a tasty and nutritious meal. Plus, you can have it ready in just 15 minutes for an incredibly quick and easy dish.

This versatile recipe can be easily customized with your favorite proteins and veggies. Whether you’re looking for something to serve at a Summer barbecue or a potluck, this Grilled Chicken Mexican Street Corn & Cucumber Salad is sure to be a hit. Try it today and enjoy a delicious and nutritious meal that’s sure to please everyone.

What is Mexican Street Corn?

Mexican Street Corn or "Elote" is a type of grilled corn that is often served in Mexico. This classic Mexican dish is often served as an appetizer or side dish. It's a simple yet delicious combination of fresh sweet corn, mayonnaise, parmesan or cotija cheeses, chili powder, and lime juice that creates a unique and pleasing flavor. If you're looking for a fun twist on this traditional dish, try my Grilled Chicken Mexican Street Corn & Cucumber Salad! I've taken the classic Mexican Street Corn recipe and added grilled chicken and a crisp cucumber salad to the mix for an extra boost of flavor. The result is a delicious and satisfying meal that is sure to be a hit at any gathering. The combination of flavors in this dish is truly something special, making it a great addition to any meal. So if you're looking for a unique and flavorful dish, give this Street Corn Salad a try!

This tasty salad is made with fresh ingredients like grilled chicken, Mexican street corn, cucumbers, arugula, avocado, cilantro, olive oil, lime juice, garlic, and cumin. The chicken is cooked to perfection, while the Mexican street corn adds a delightful sweetness and spice. The cucumbers give the salad a nice crunch, while the avocado adds a bit of creaminess. The olive oil, lime juice, garlic, and cumin provide an extra layer of flavor that makes this salad irresistible. This dish is easy to make and can be enjoyed as a main or side dish. It is a great way to get in your daily serving of vegetables in a flavorful and satisfying way. The combination of flavors is sure to please the whole family.

Ingredients

1 lbs Grilled Chicken

1/4 teaspoon paprika

1/4 teaspoon garlic powder

7 oz. Arugula Lettuce

3 cups corn

2 cups cucumber

1 tbsp olive oil

1 bunch of fresh cilantro

1/2 large red onion

2/3 cup parmesan or cotija cheese

1 large avocado

Dressing

1/4 cup mayonnaise

3 tablespoons fresh lime juice

1/2 teaspoon cumin

1/2 teaspoon paprika

1/4 teaspoon chili powder

sea salt & black pepper to taste

Instructions

1. Season chicken with paprika, garlic powder and salt & pepper to taste. Grill on bbq or on the stovetop. 6 minutes on each side or until fully cooked. Set aside to rest for 10 min while preparing salad. Slice thinly once it has rested.

2. Prepare dressing by mixing together all ingredients above until fully blended; mayonnaise, lime juice, cumin, paprika, chili powder and salt & pepper to taste.

3. Mix together street corn. Add corn to pan used to cook chicken toast lightly on the outside to give a grilled flavor or if BBQing add to grill with chicken. Slice cucumbers in half and thinly slice. Same with red onion. Add cucumber, red onion and corn to bowl and mix together with olive oil 1 tsp fresh chopped cilantro 1/3 cup of shredded cheese. Mix together until fully saturated and blended well.

4. Assemble salad. Lay down lettuce, add sliced grilled chicken, slices of avocado and Mexican street corn mix. Drizzle dressing on top and sprinkle additional cilantro on top. Serve immediately and enjoy!

Is This Dish Suitable for Vegetarians?

Unfortunately, it is not suitable for vegetarians, as it includes grilled chicken. However, the dish can be easily modified to make it vegetarian-friendly. To make the dish vegetarian-friendly, simply replace the chicken with a plant-based protein such as tofu or beans. The salad can also be served without the chicken, and still be packed with flavor and nutrients.

To make the dish vegan-friendly, be sure to choose vegan-friendly ingredients such as vegan mayonnaise and vegan cheese. Additionally, you can also use plant-based milk, vegan margarine, and vegan yogurt to make the salad vegan-friendly. With these simple modifications, you can create an incredibly delicious and nutritious vegan version of this dish. Feel free to make it all your own! Whether you choose to make it vegetarian or vegan, this dish is packed with flavor and nutrition, and it is sure to become a family favorite.

Can I Make the Salad Spicier?

This Grilled Chicken Mexican Street Corn & Cucumber Salad is a delicious and easy meal to make for the whole family. Not only is it healthy and flavorful, but it can also be easily customized to suit everyone’s taste. For those who like a little bit of heat, try adding extra chili powder to the dressing. Or, for an even more spicy crunch, add diced jalapeños to the salad. If you’re looking for a smoky flavor, add diced chipotle peppers. To add a subtle spicy flavor, sprinkle red pepper flakes over the salad. Finally, for a burst of flavor, add a few dashes of your favorite hot sauce to the dressing. No matter which additions you choose, this Grilled Chicken Mexican Street Corn & Cucumber Salad is sure to be a hit!

Other Salad Recipes You Will Love:

How to Make the Perfect Pear and Pomegranate Arugula Salad

Shaved Brussel Sprout Salad with Apples, Goat Cheese & Candied Pecans