Vanilla Bean Cherry Layer Cake (The Perfect Summer Celebration Cake)

A soft vanilla bean cake layered with sweet cherry filling and finished with whipped vanilla cherry mascarpone frosting.
↓ Skip to Recipe
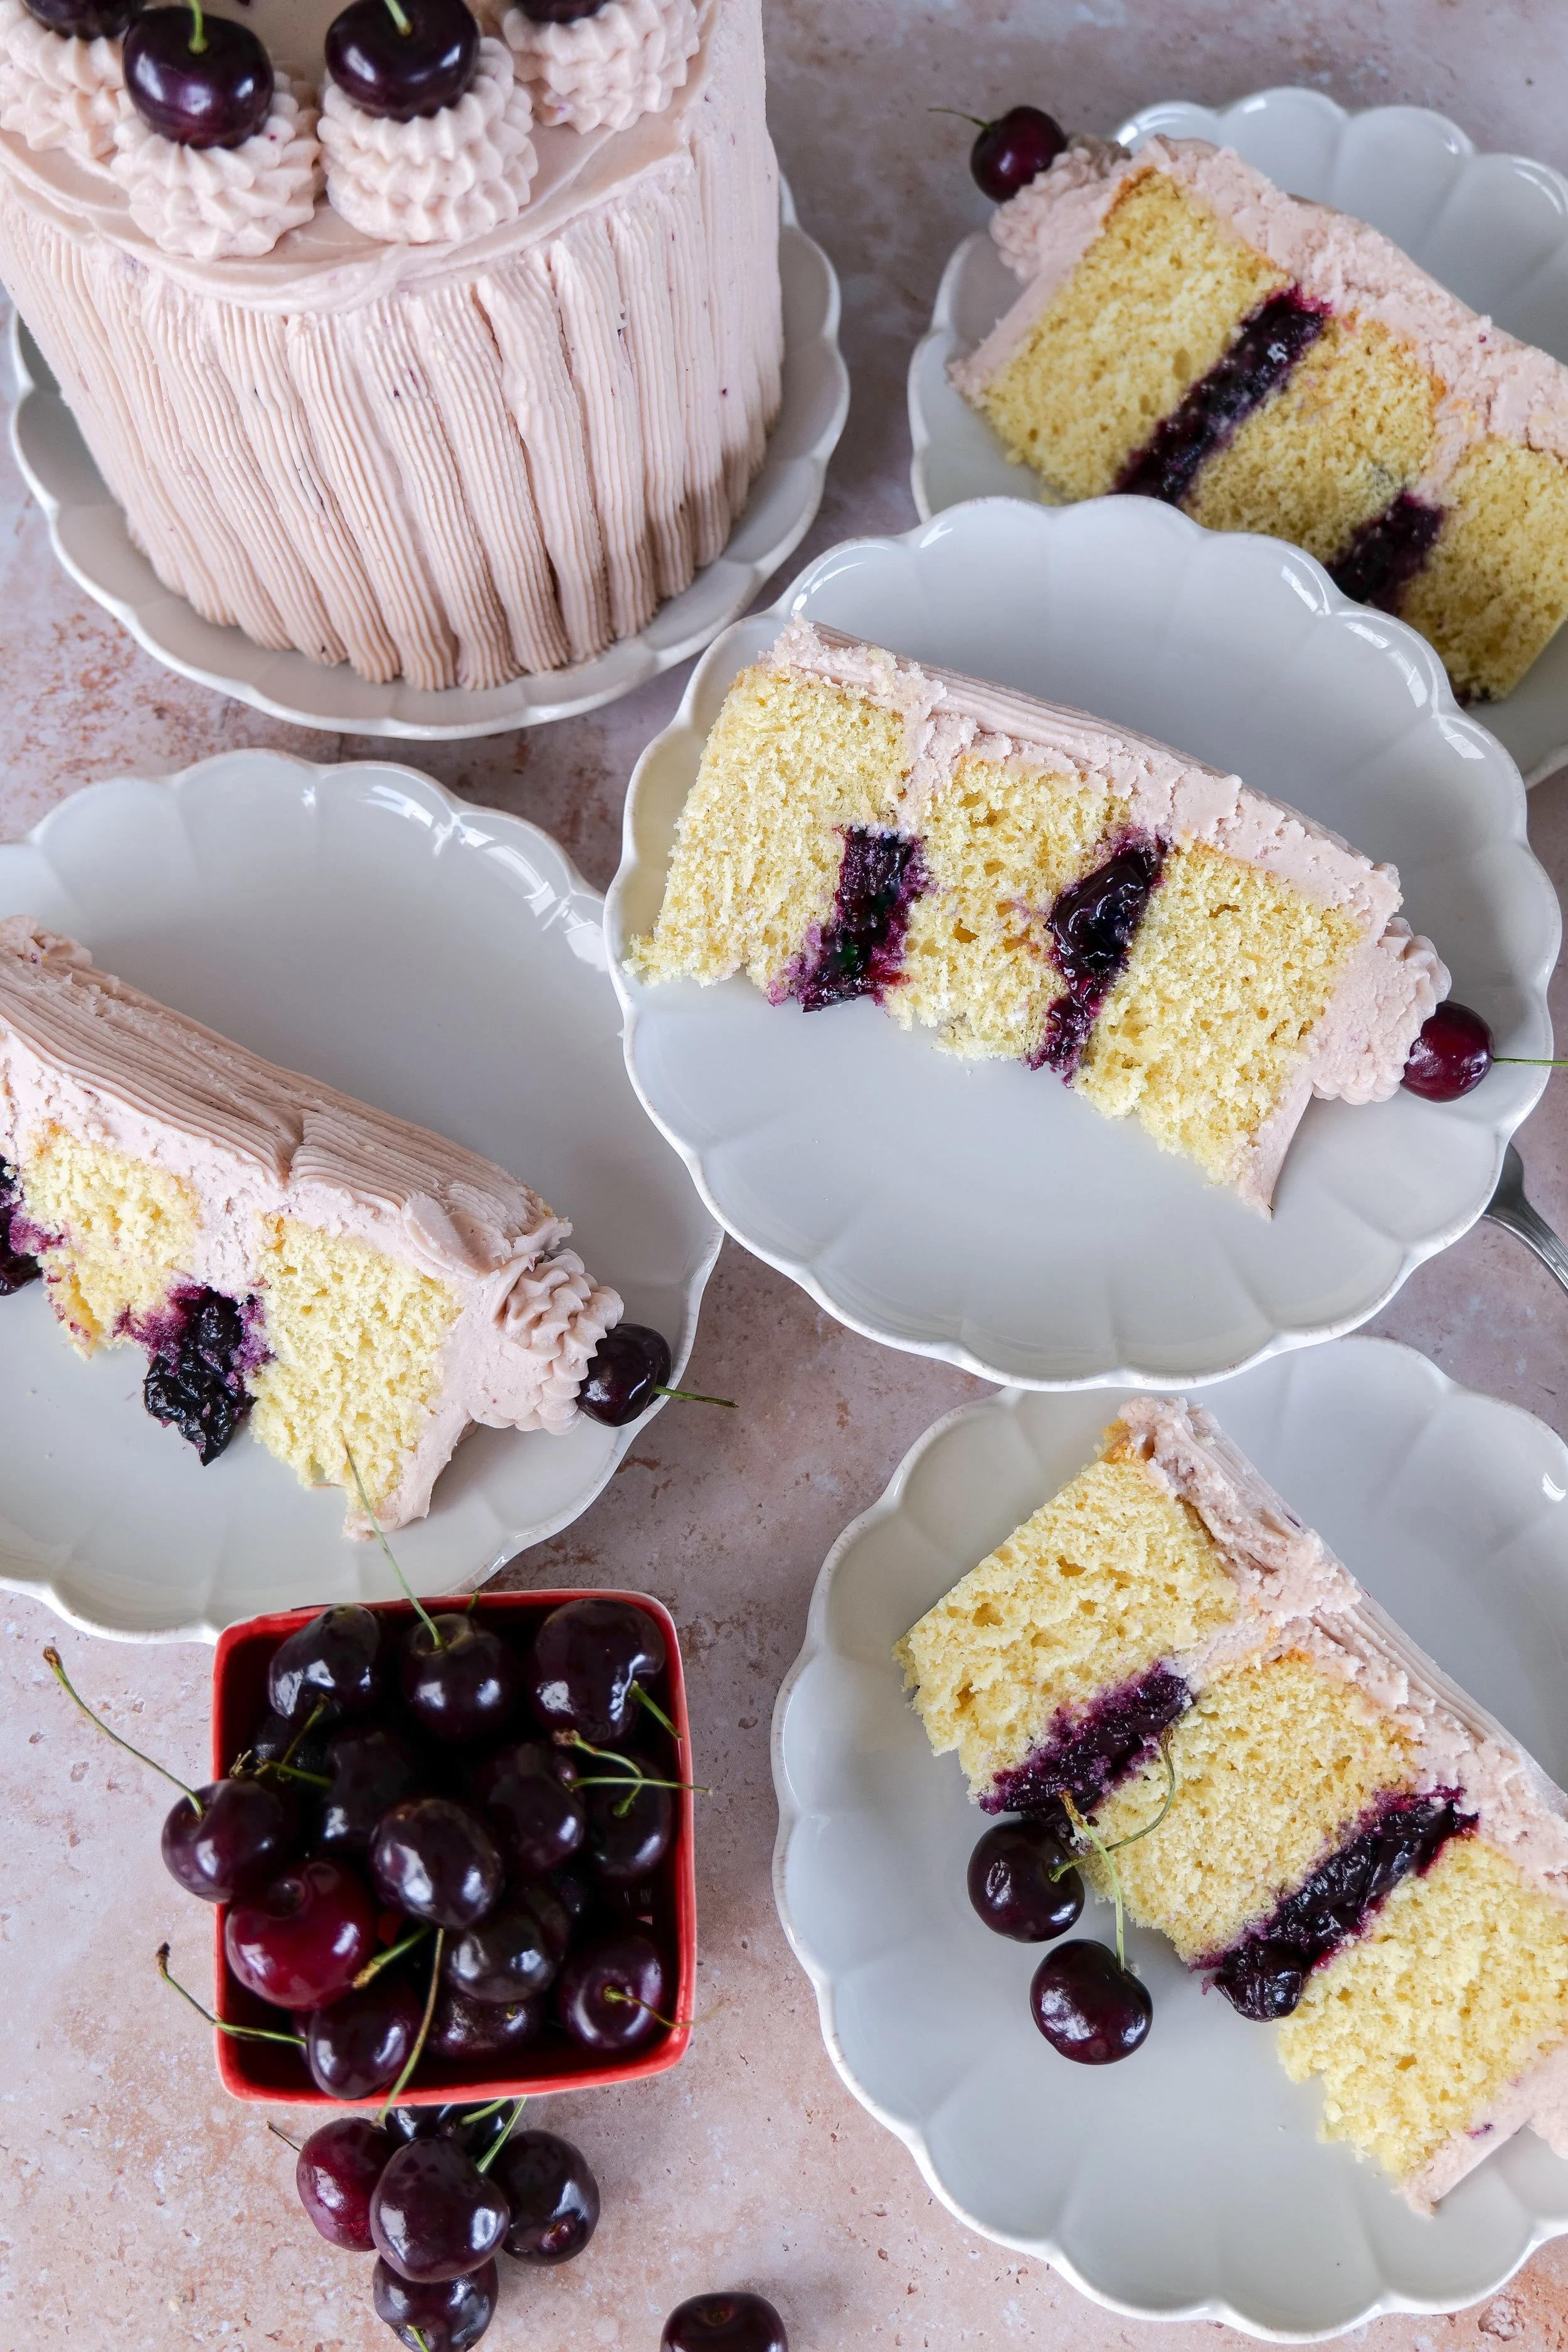
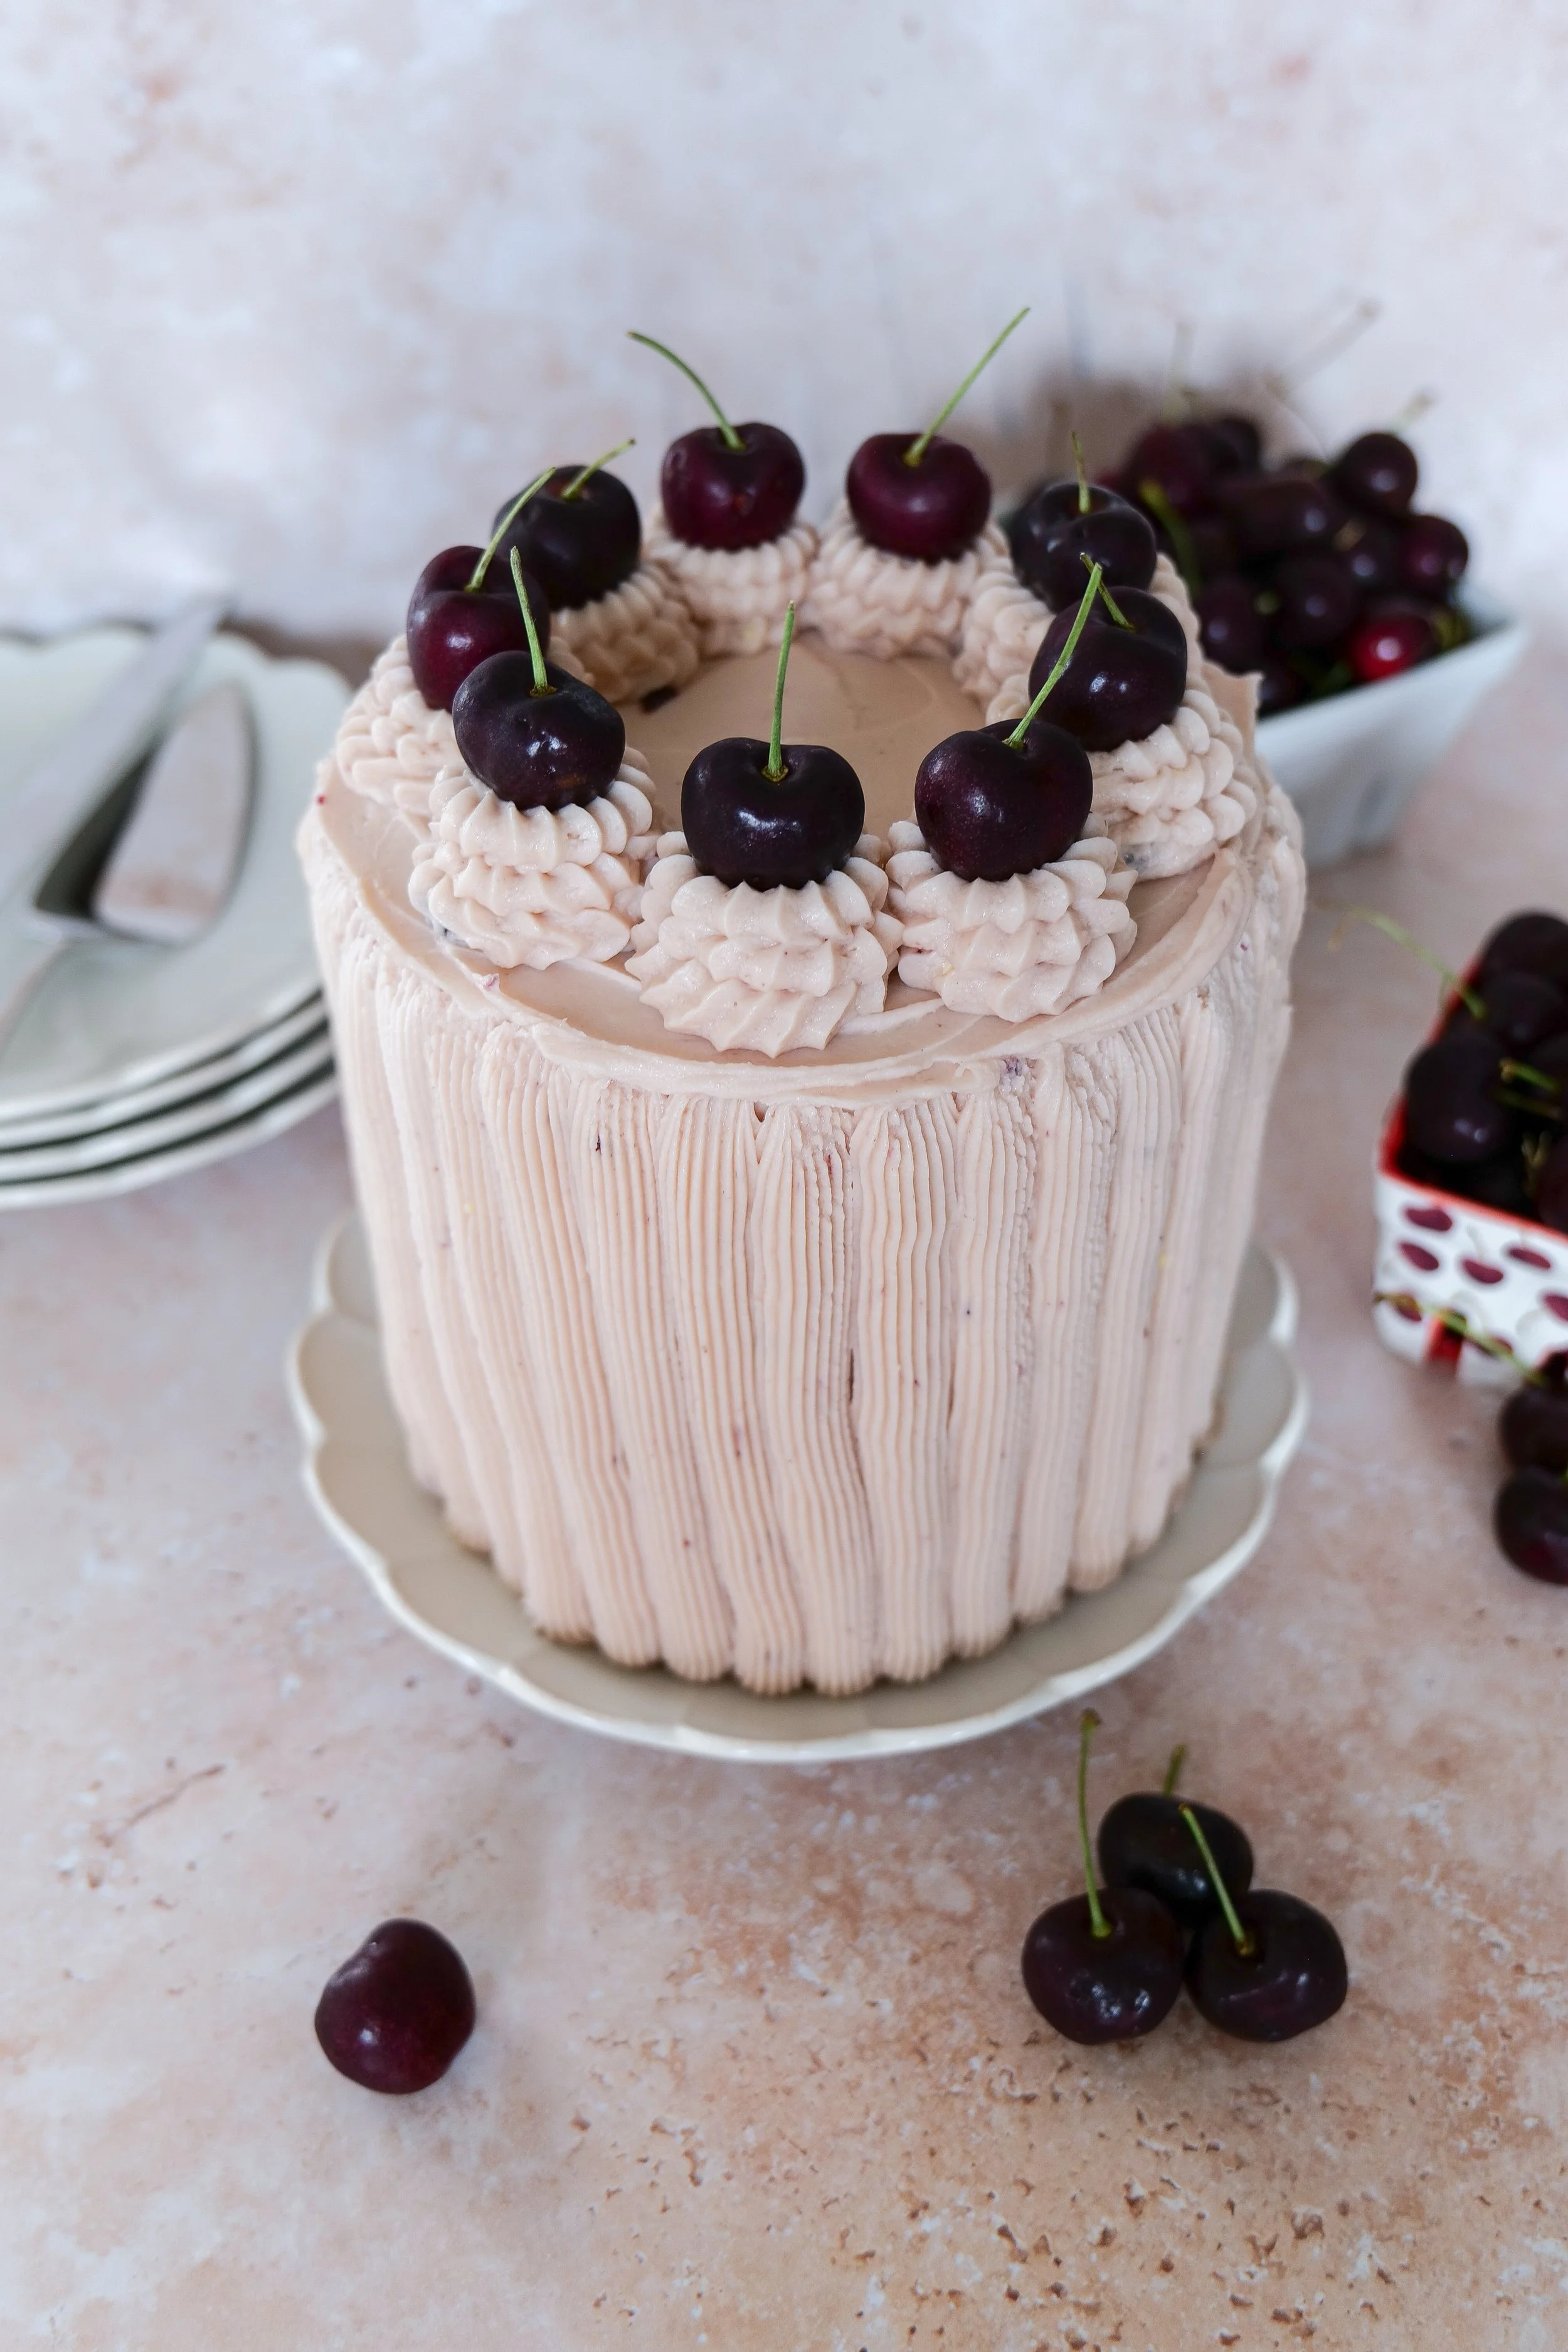
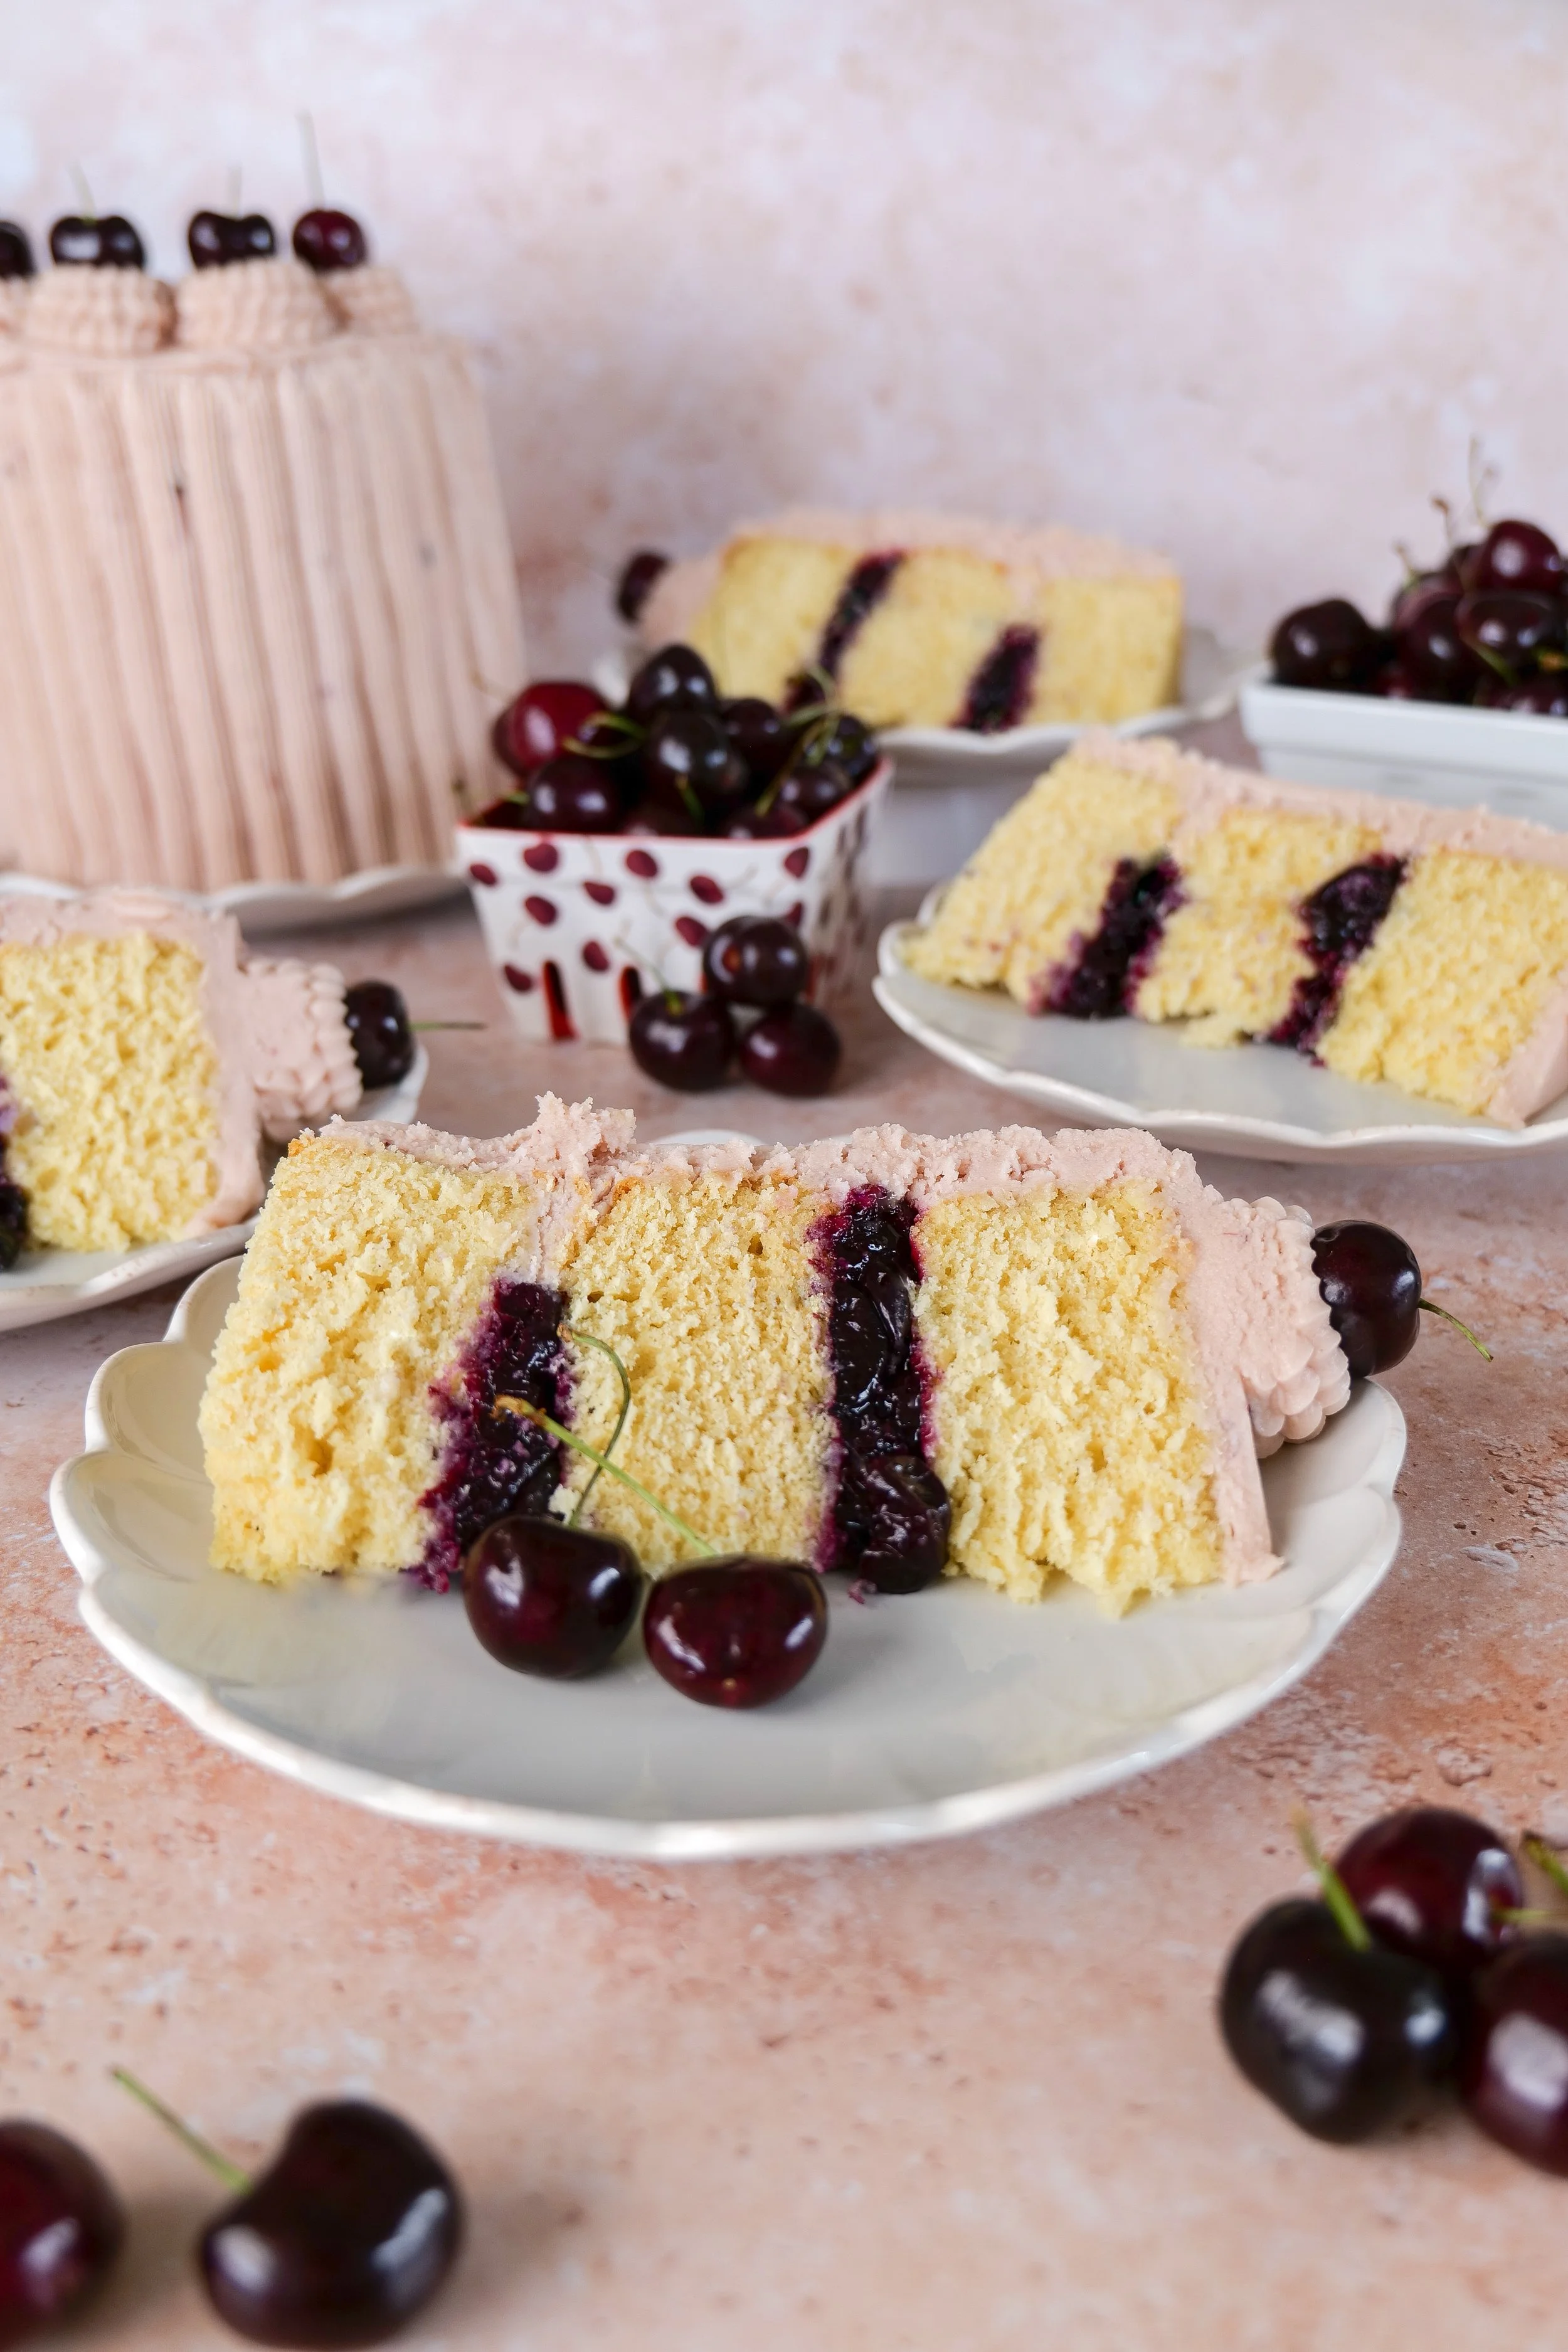
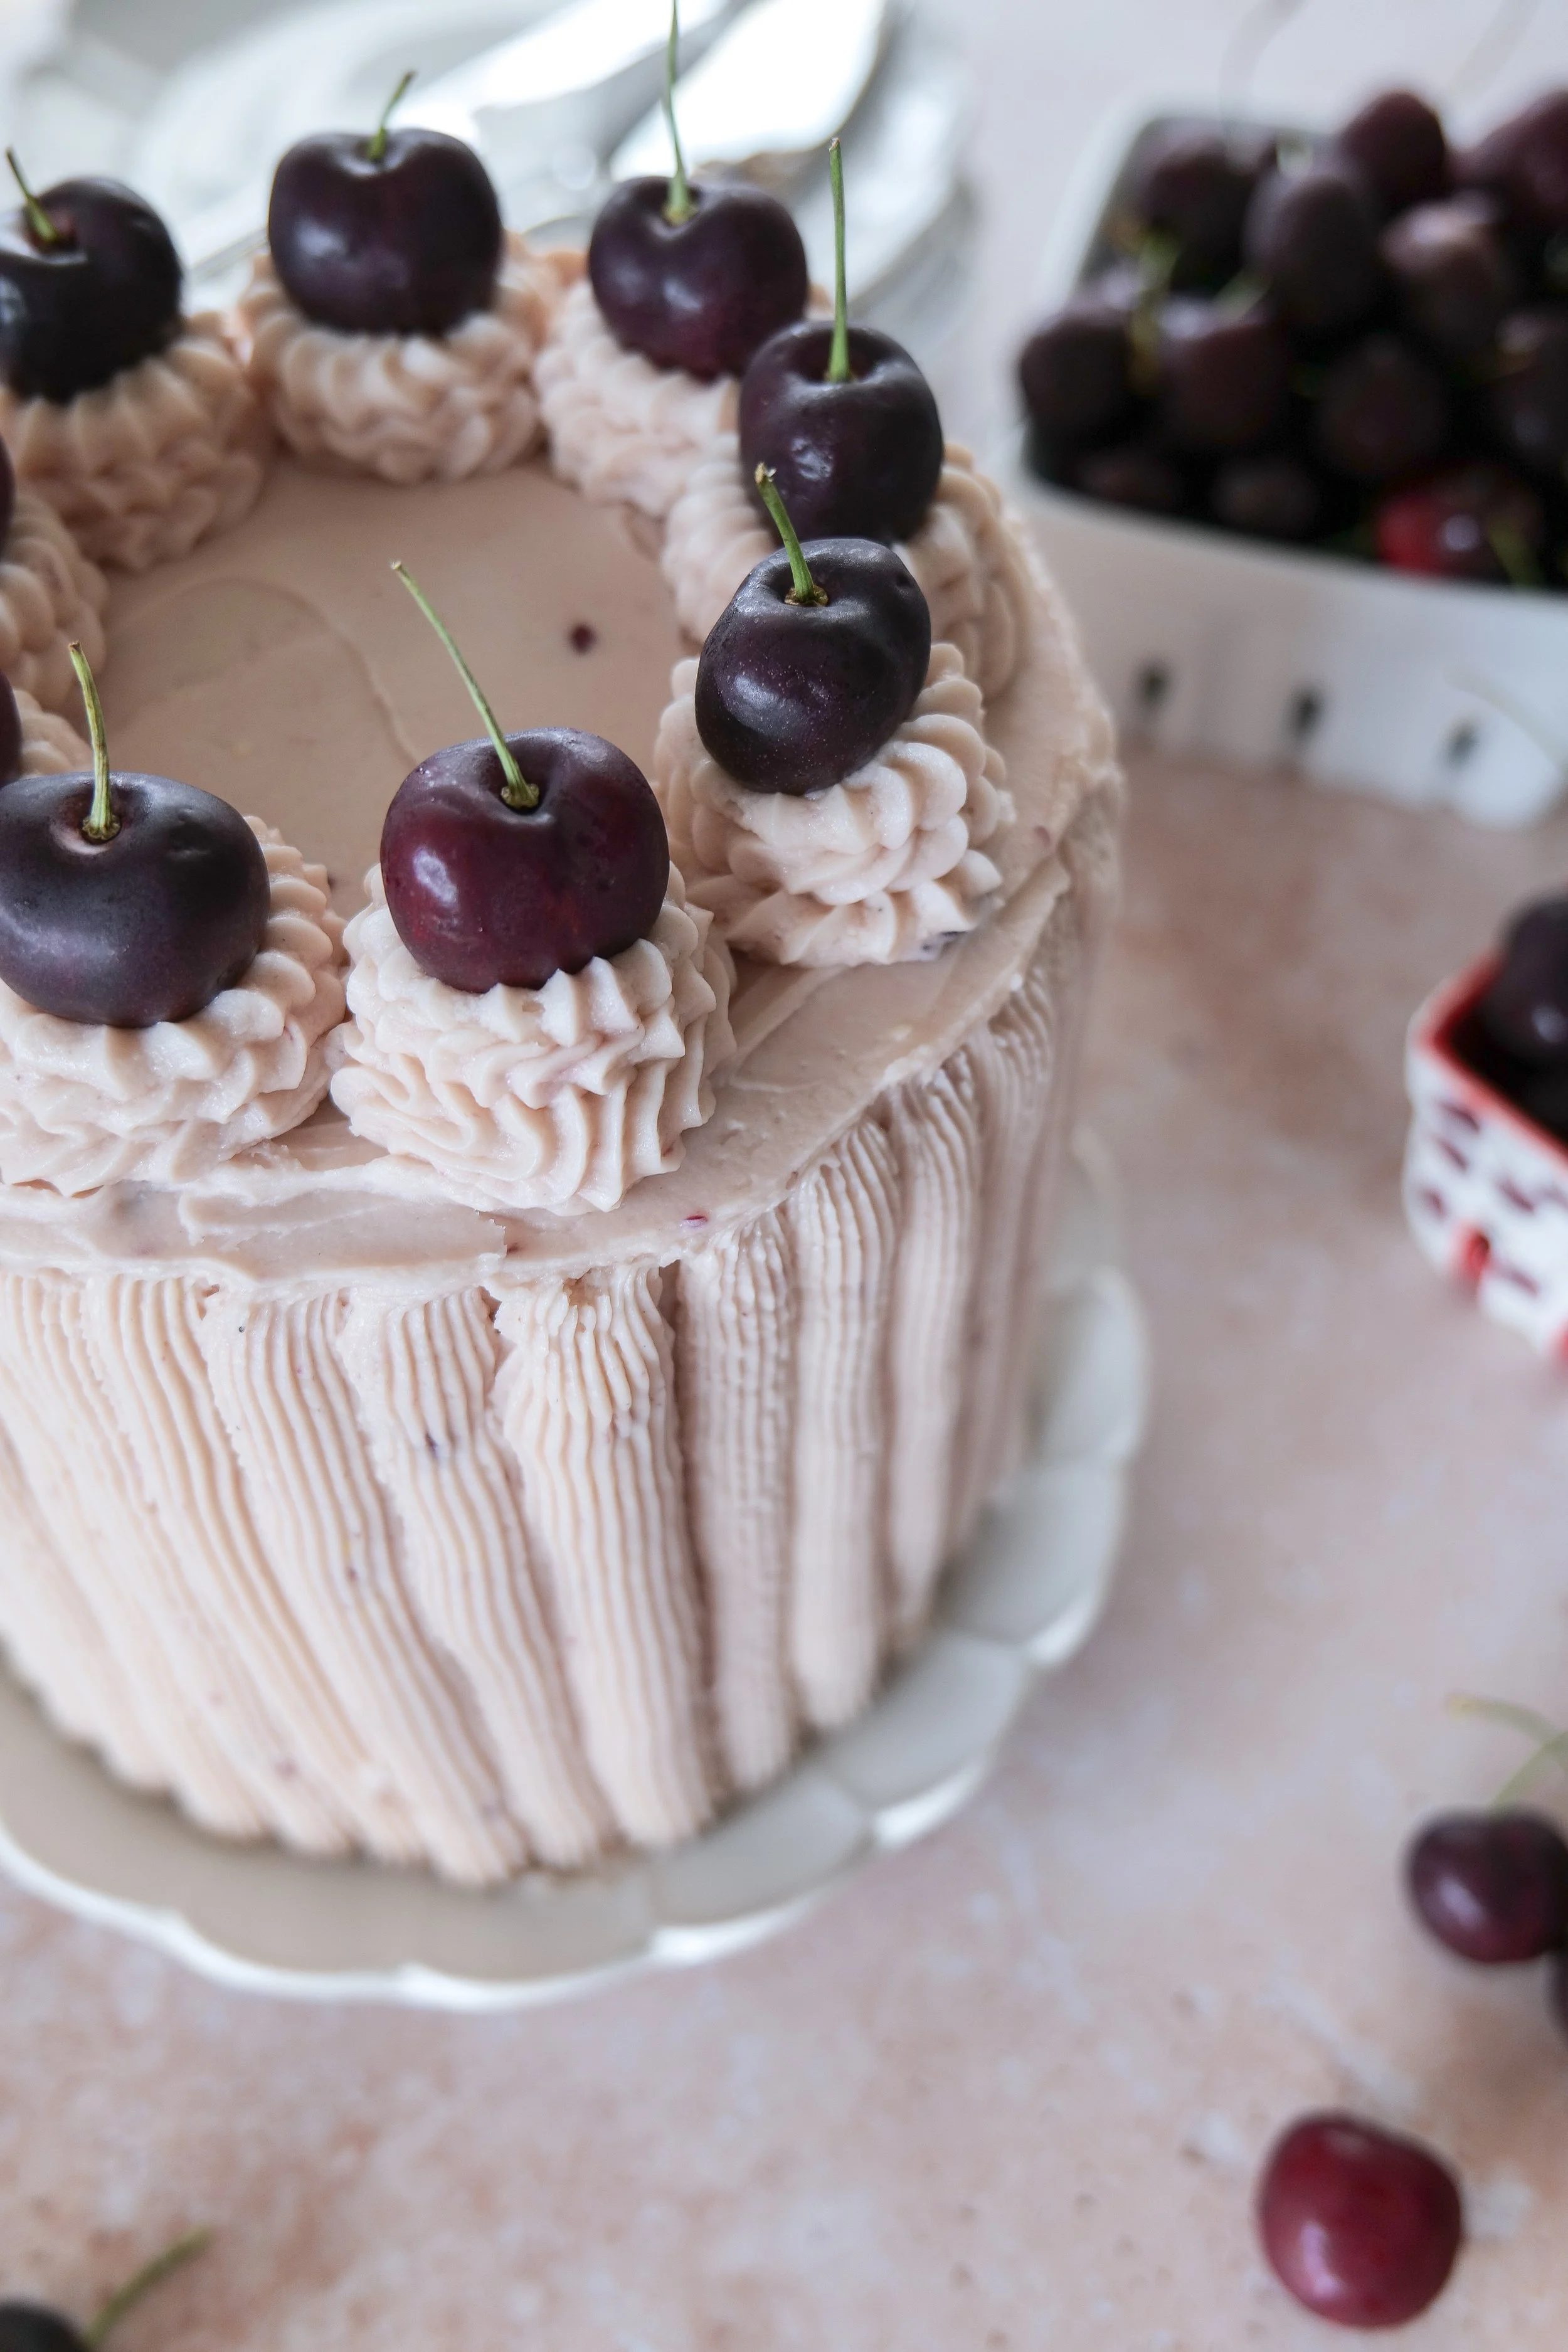
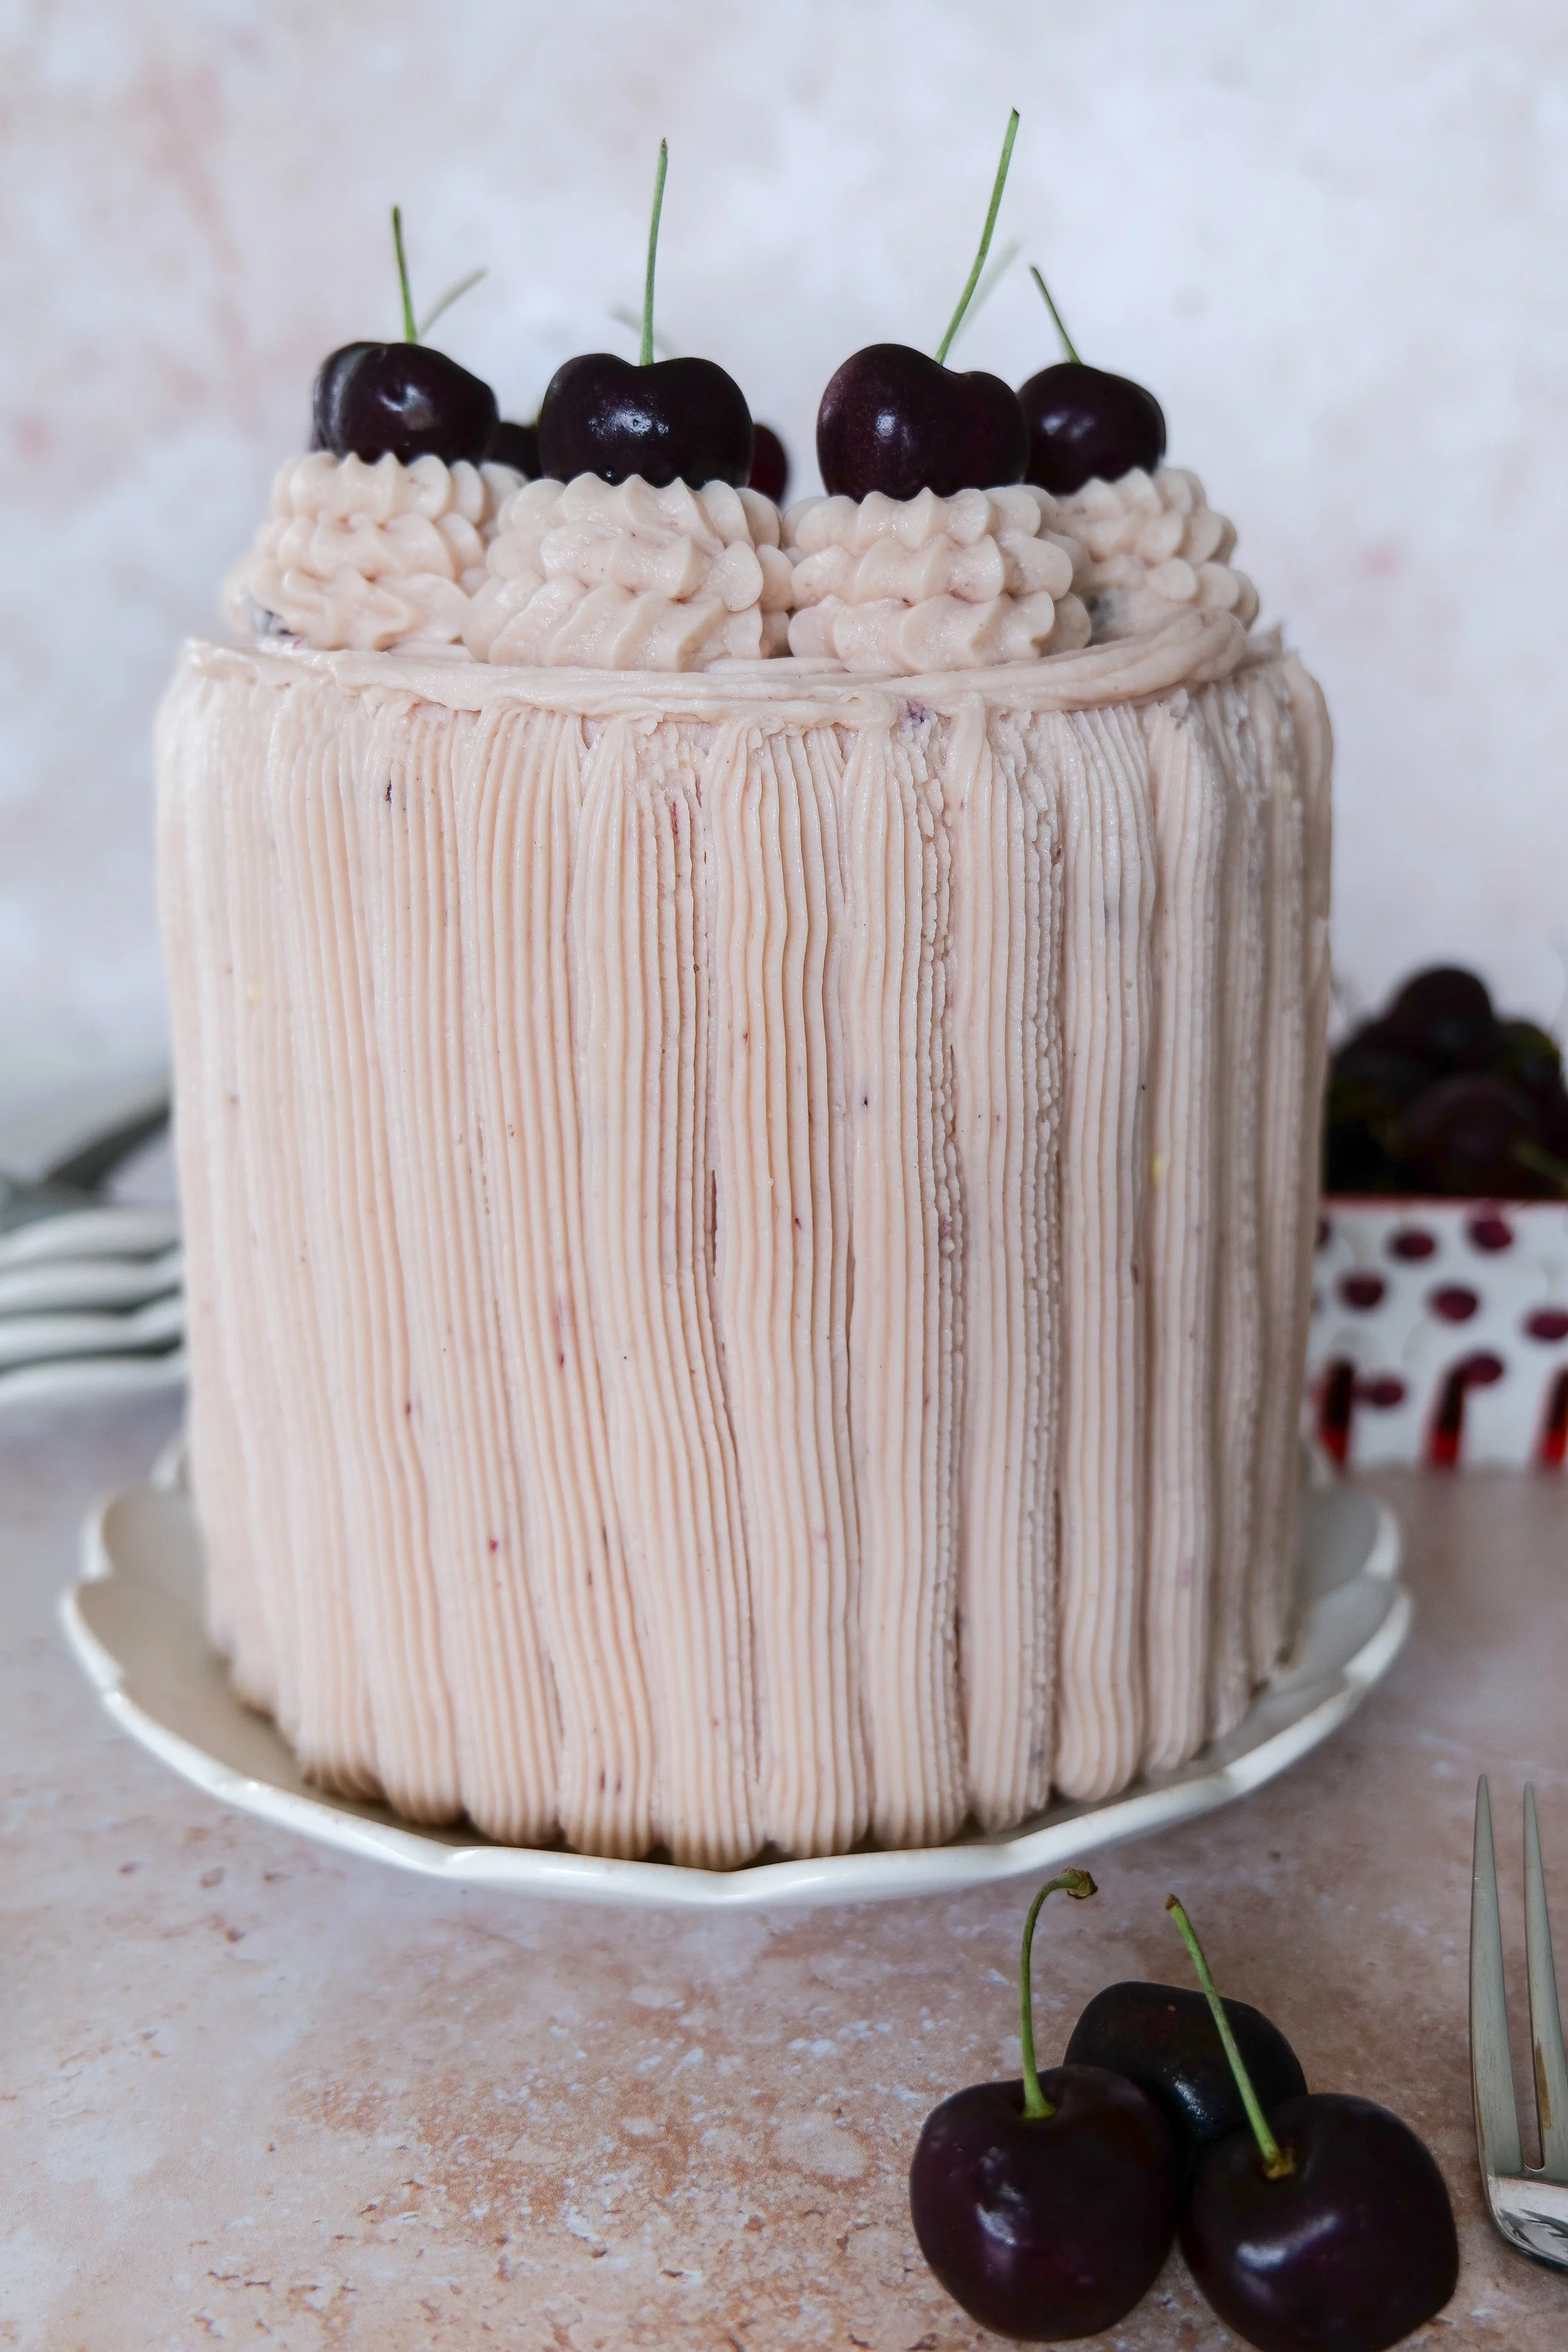
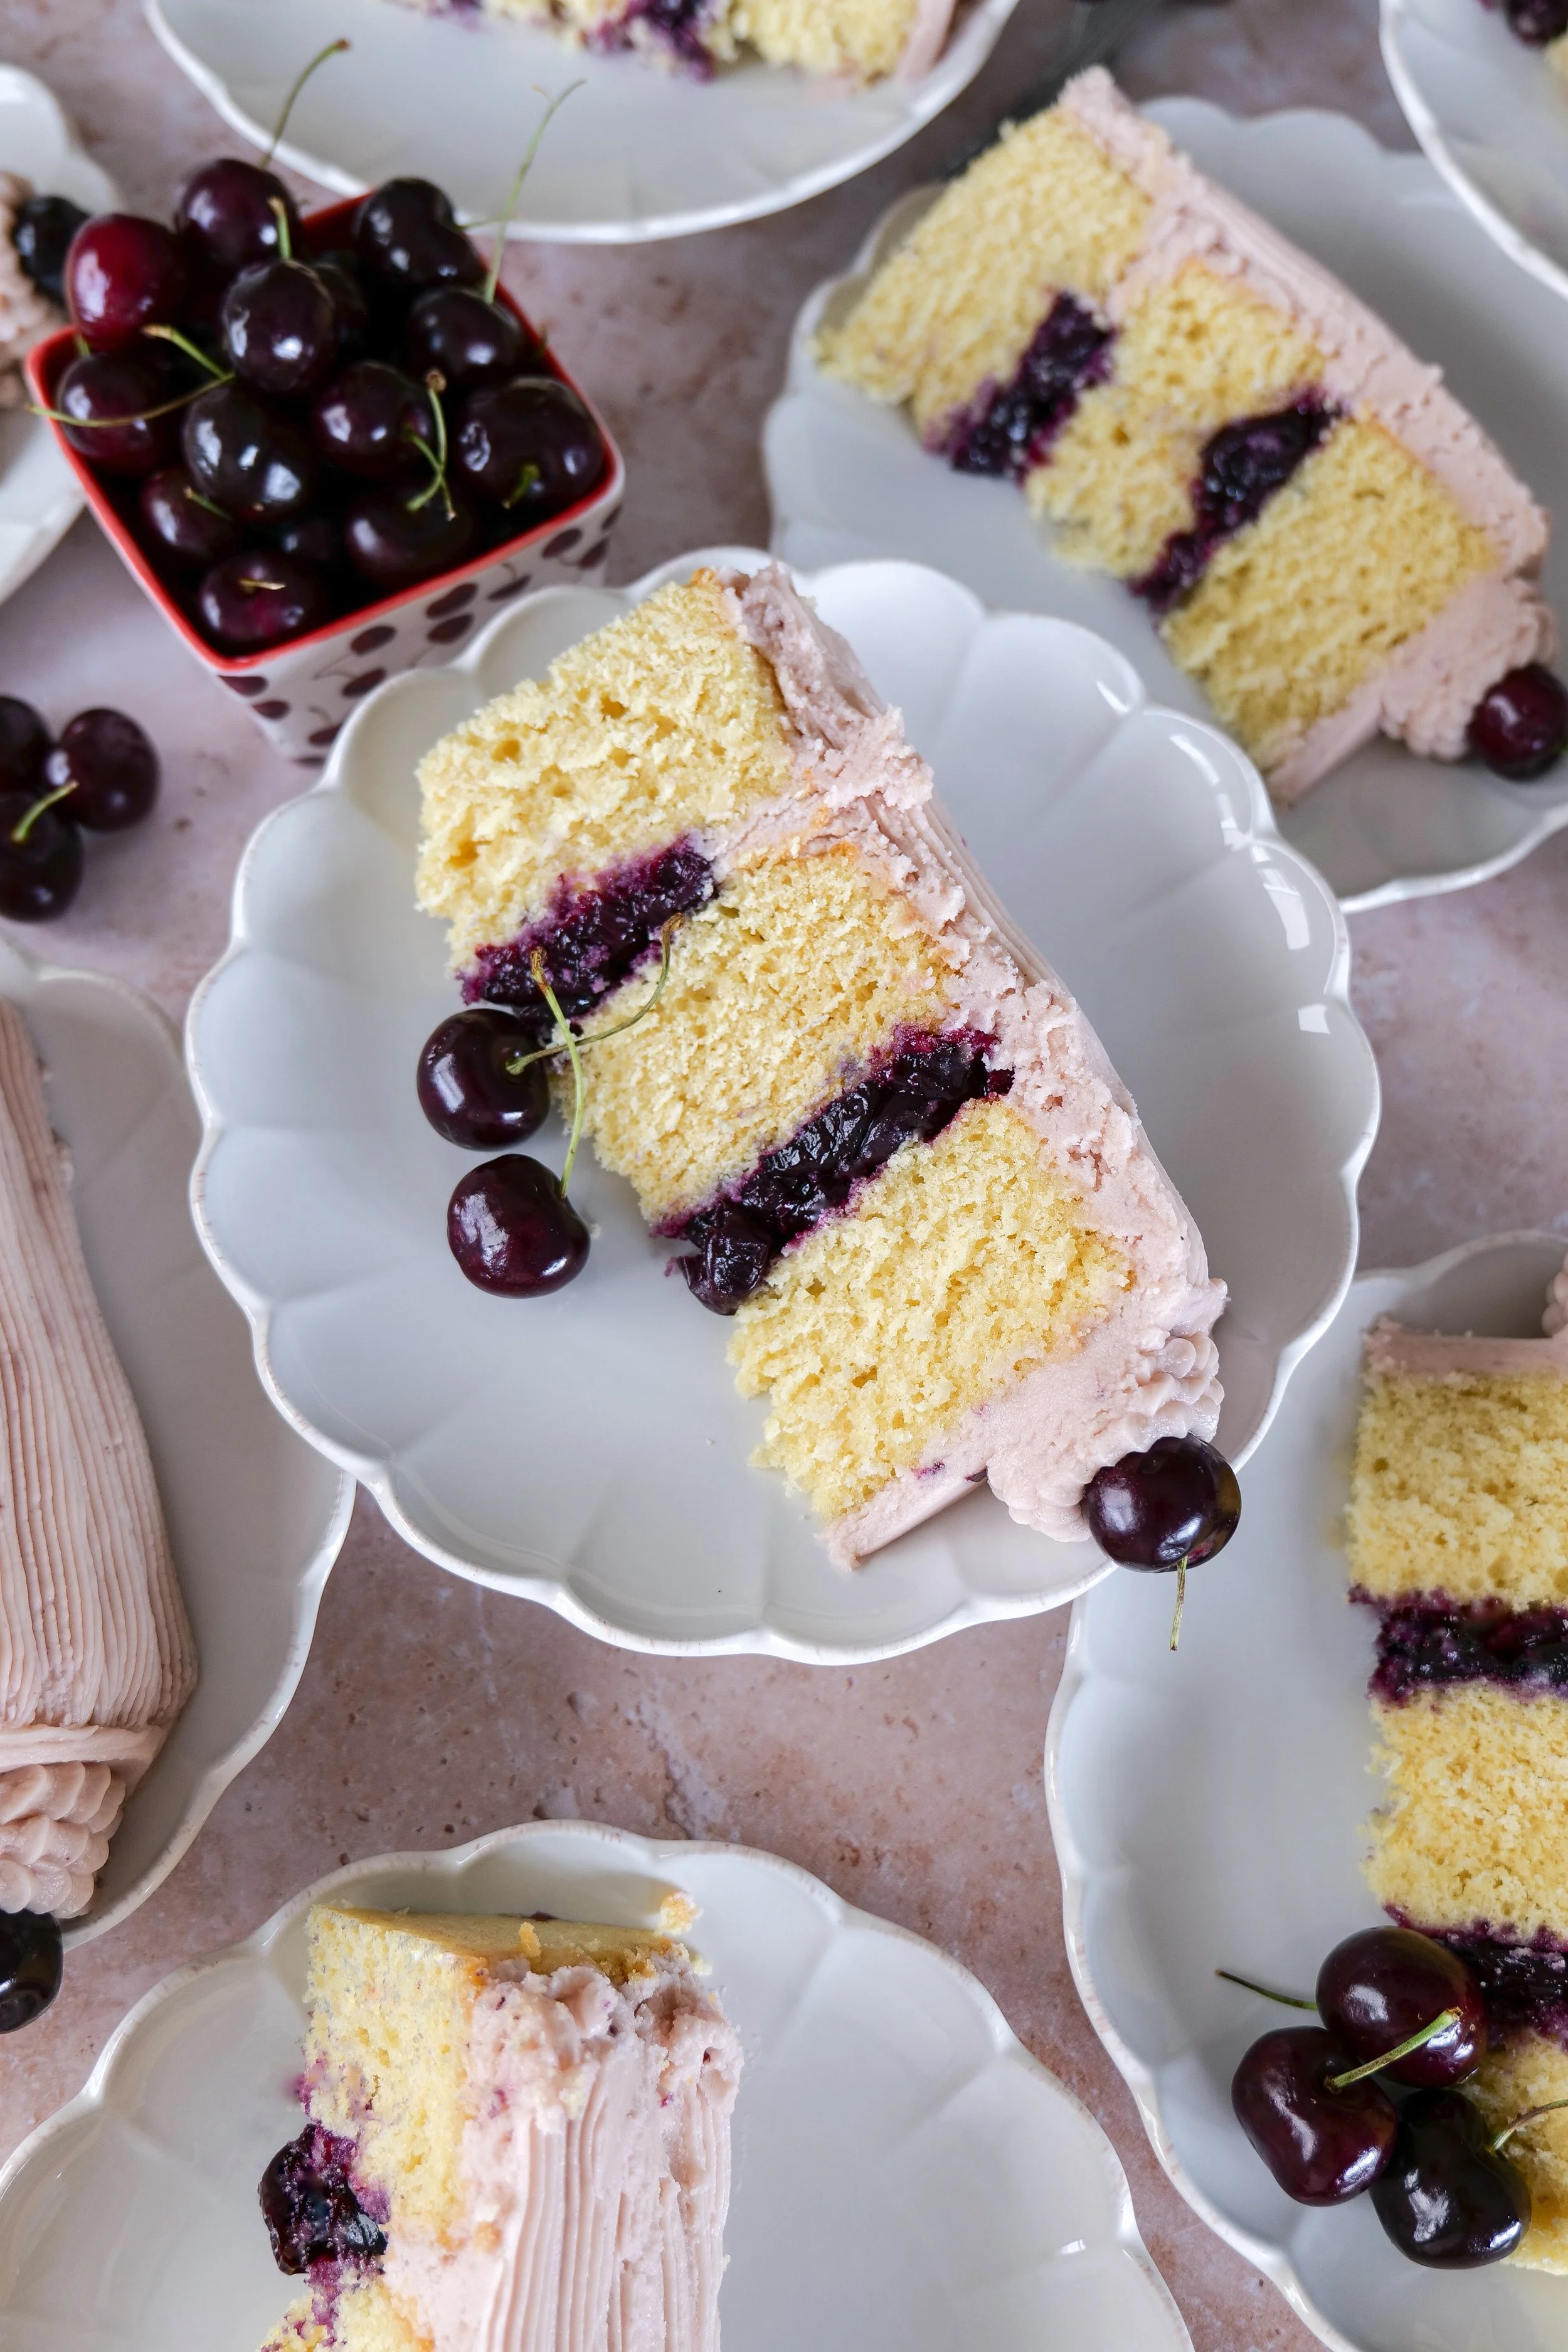
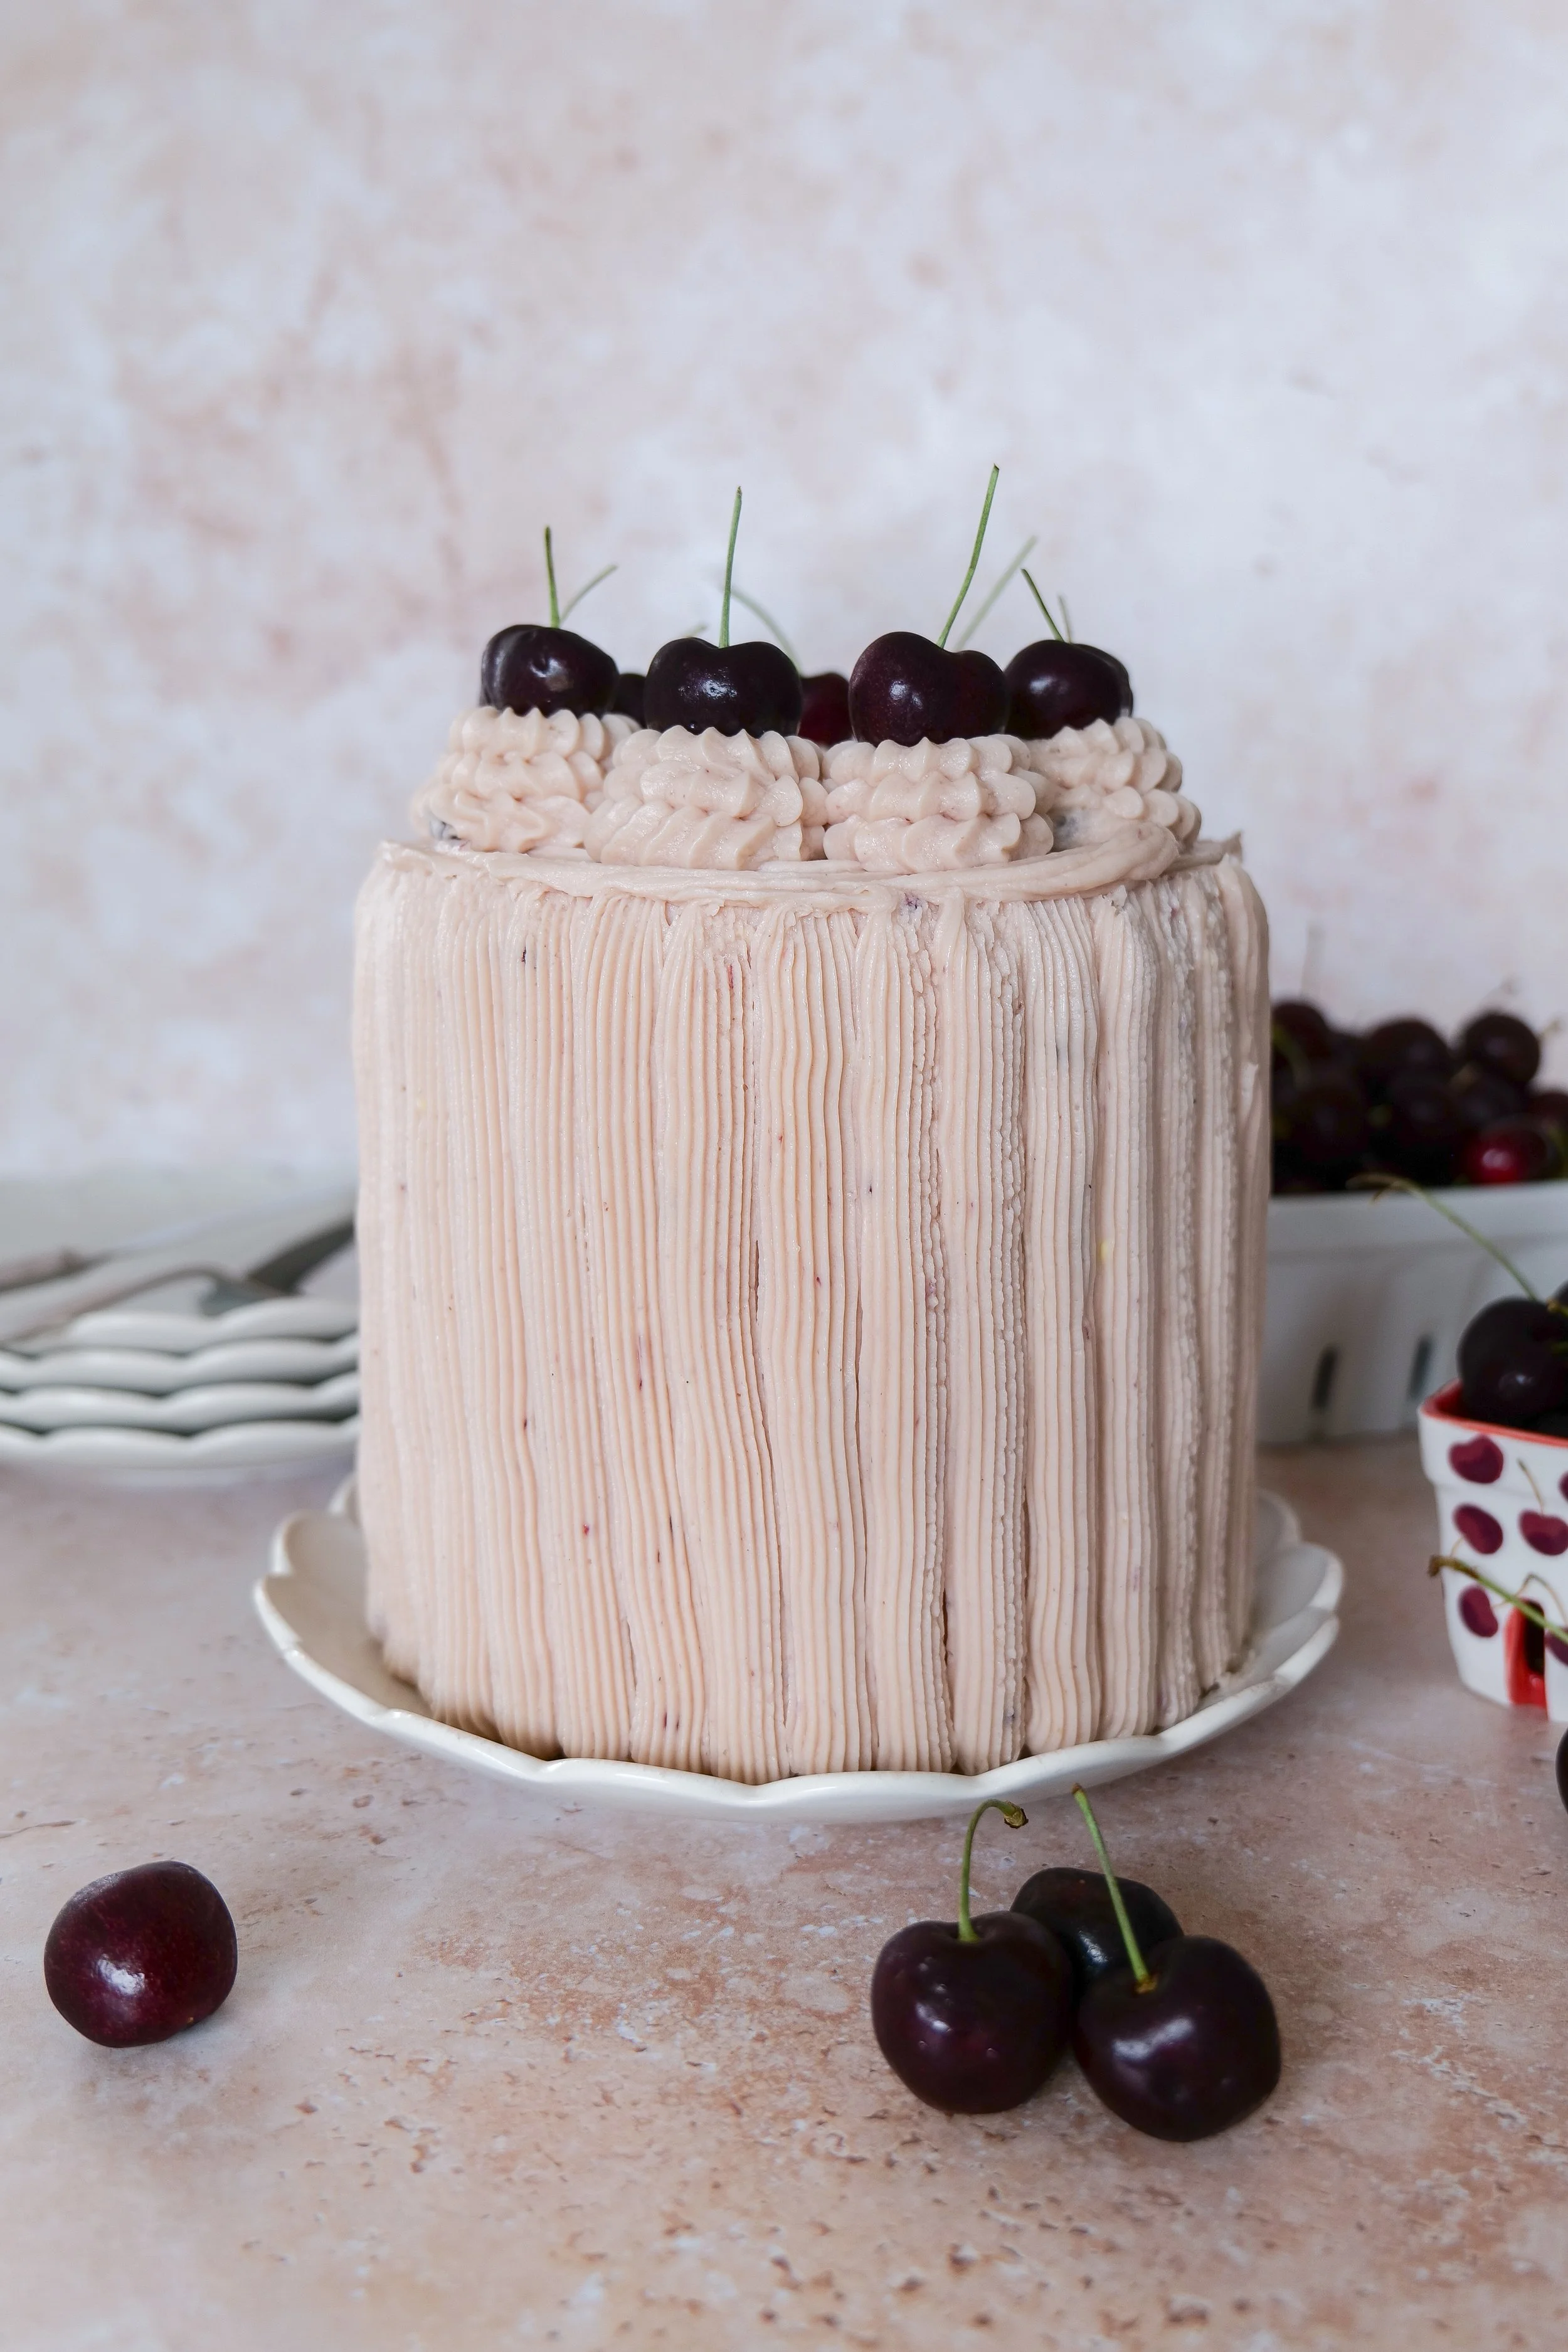
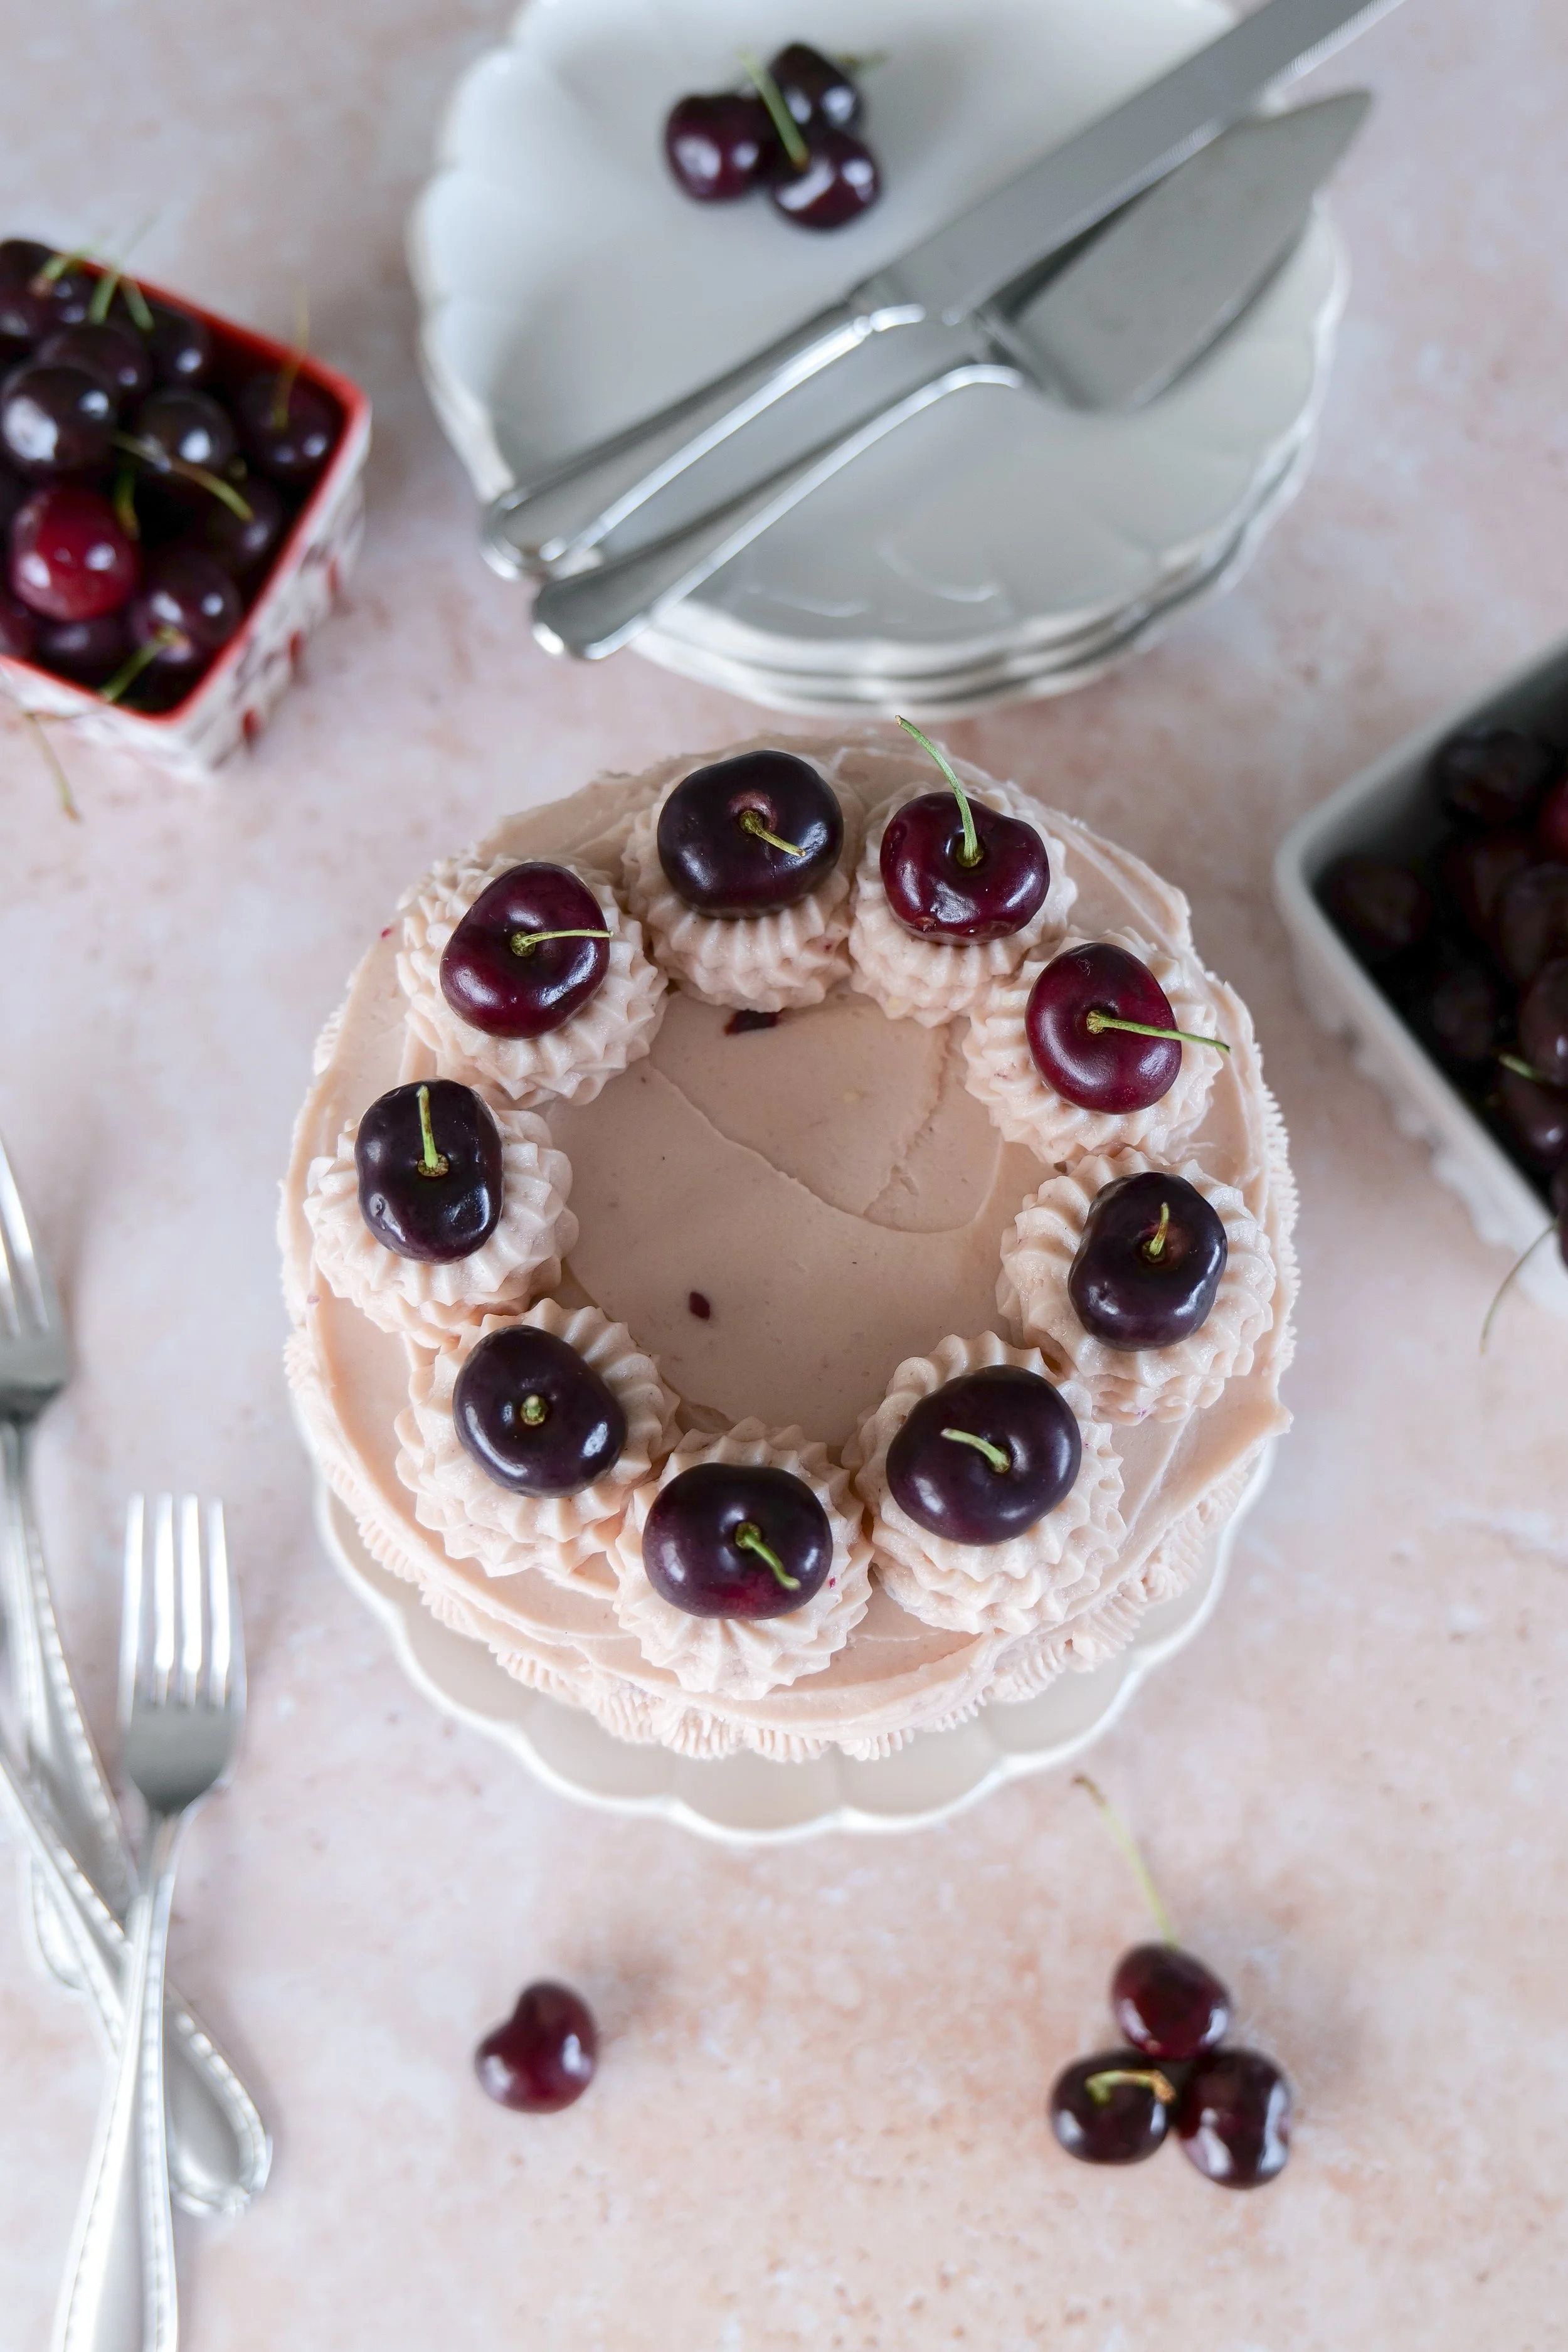
Vanilla bean cherry layer cake with pink cherry buttercream frosting and homemade cherry filling.
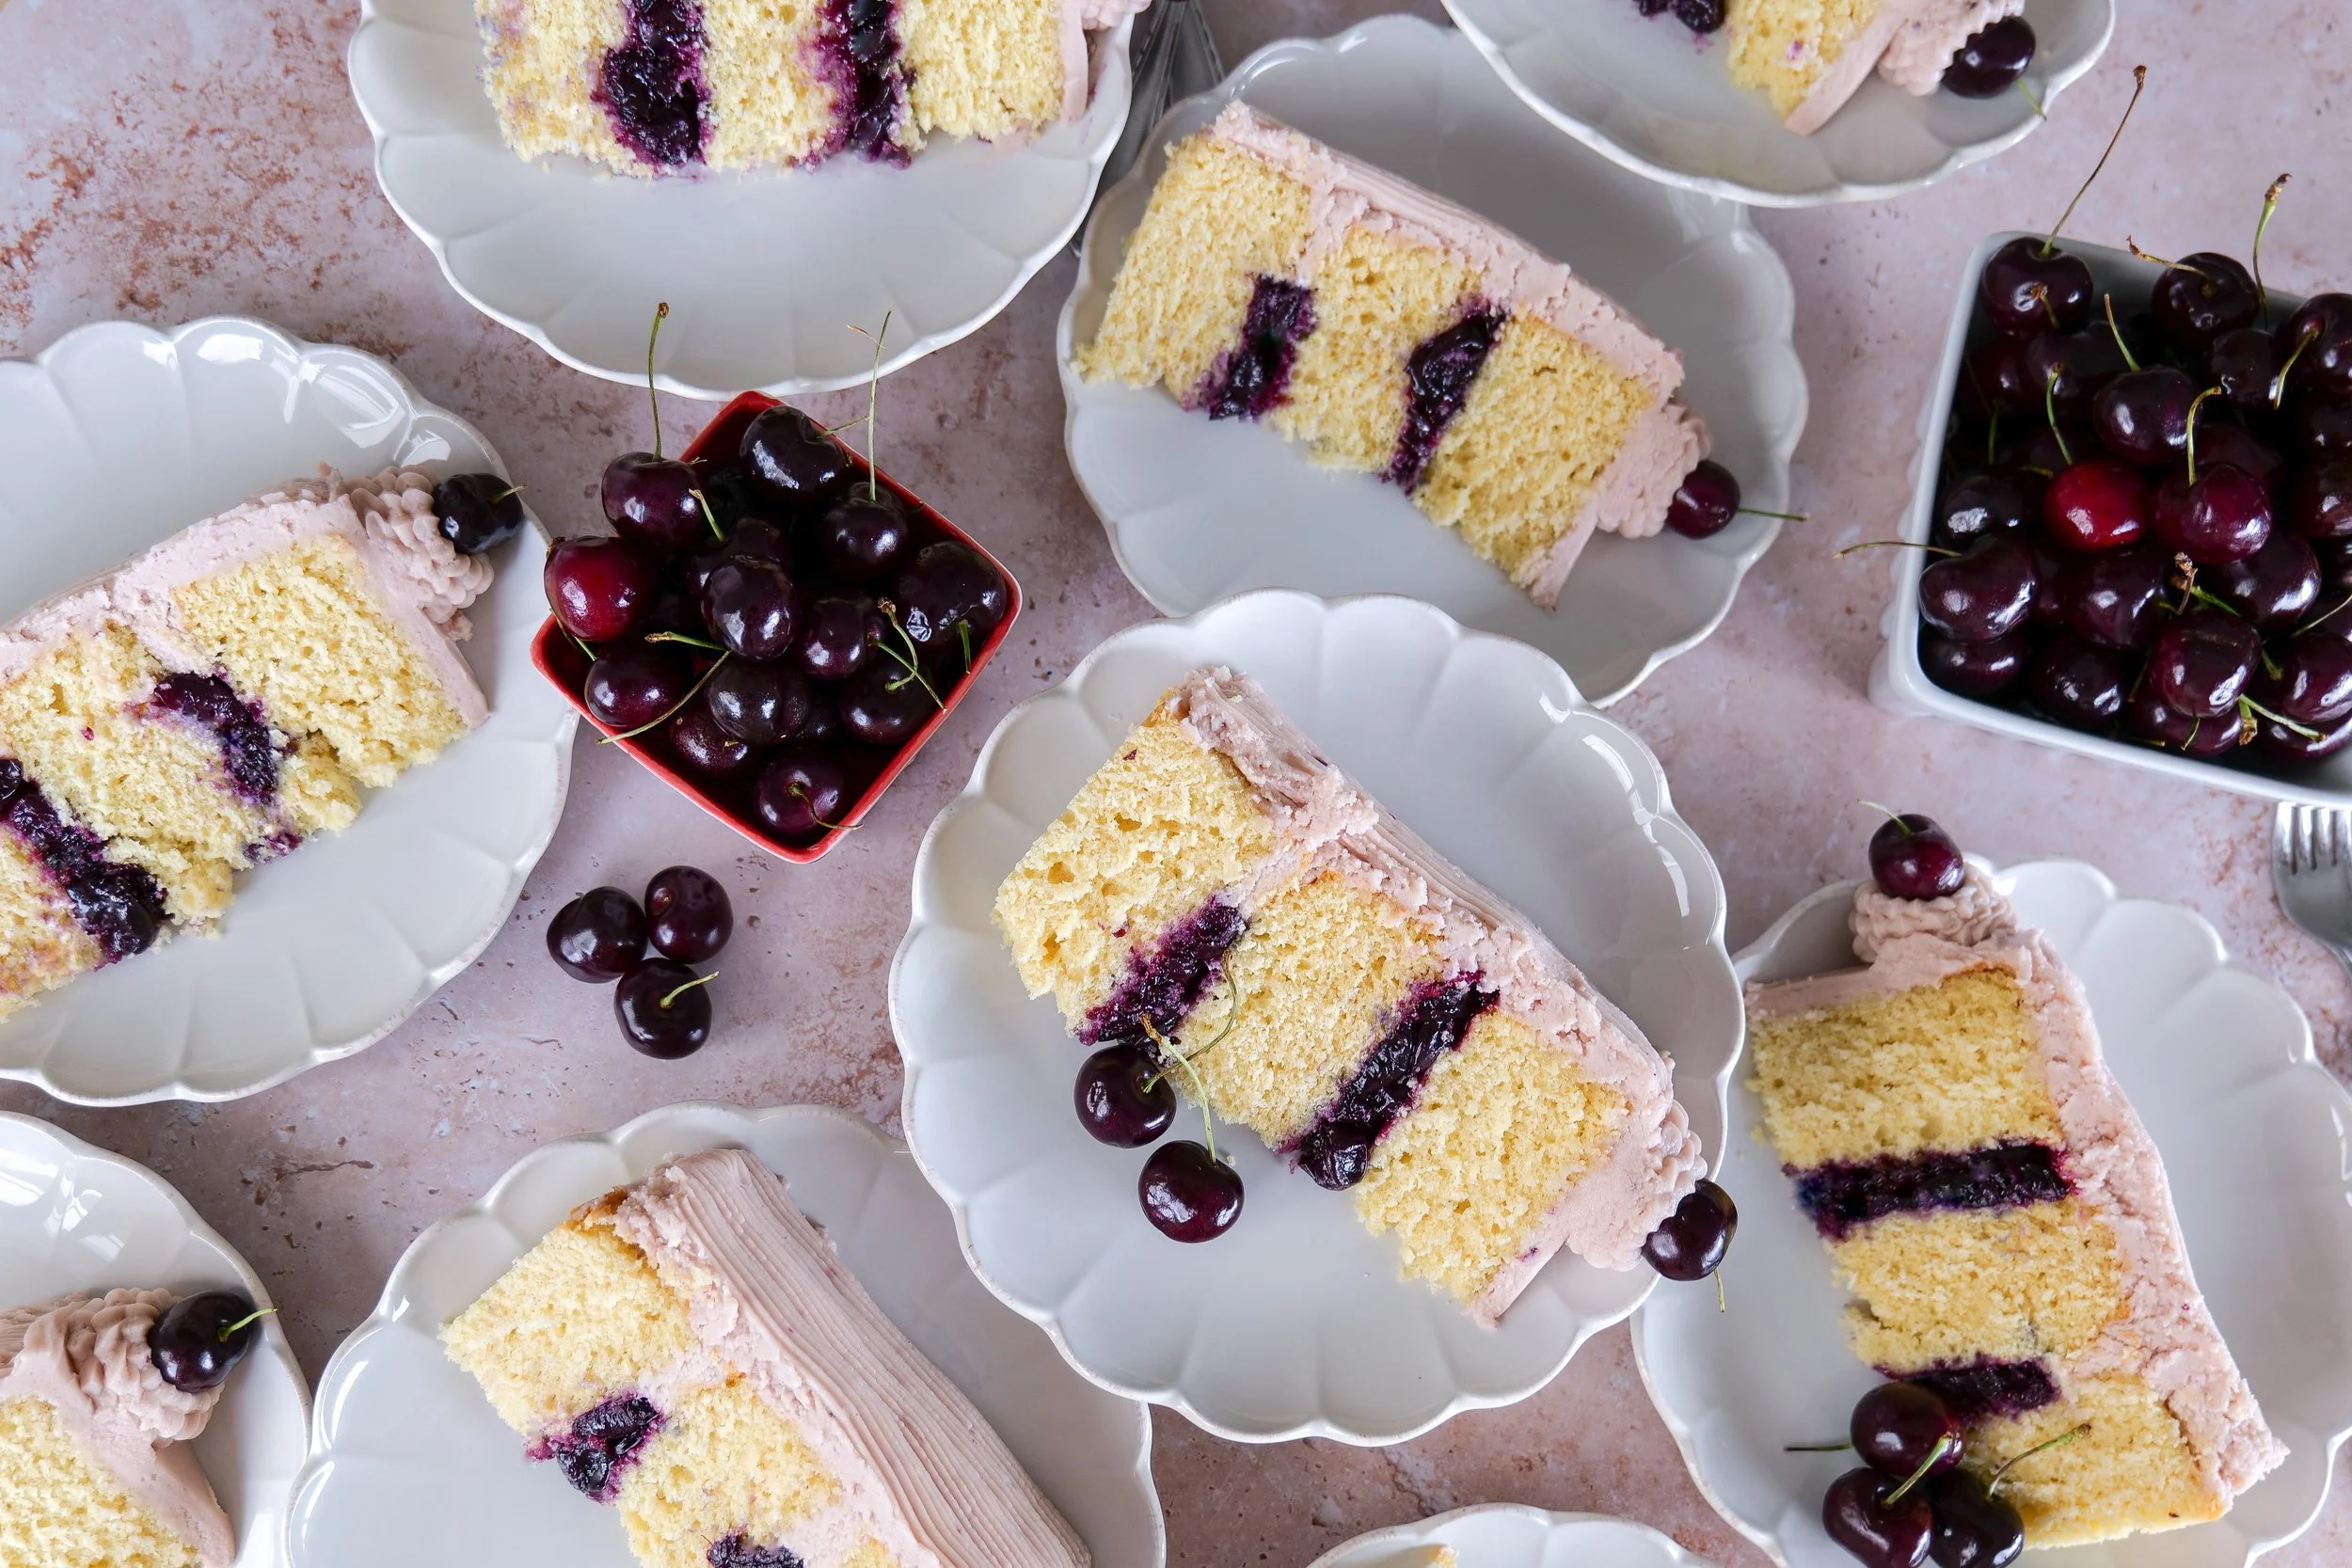
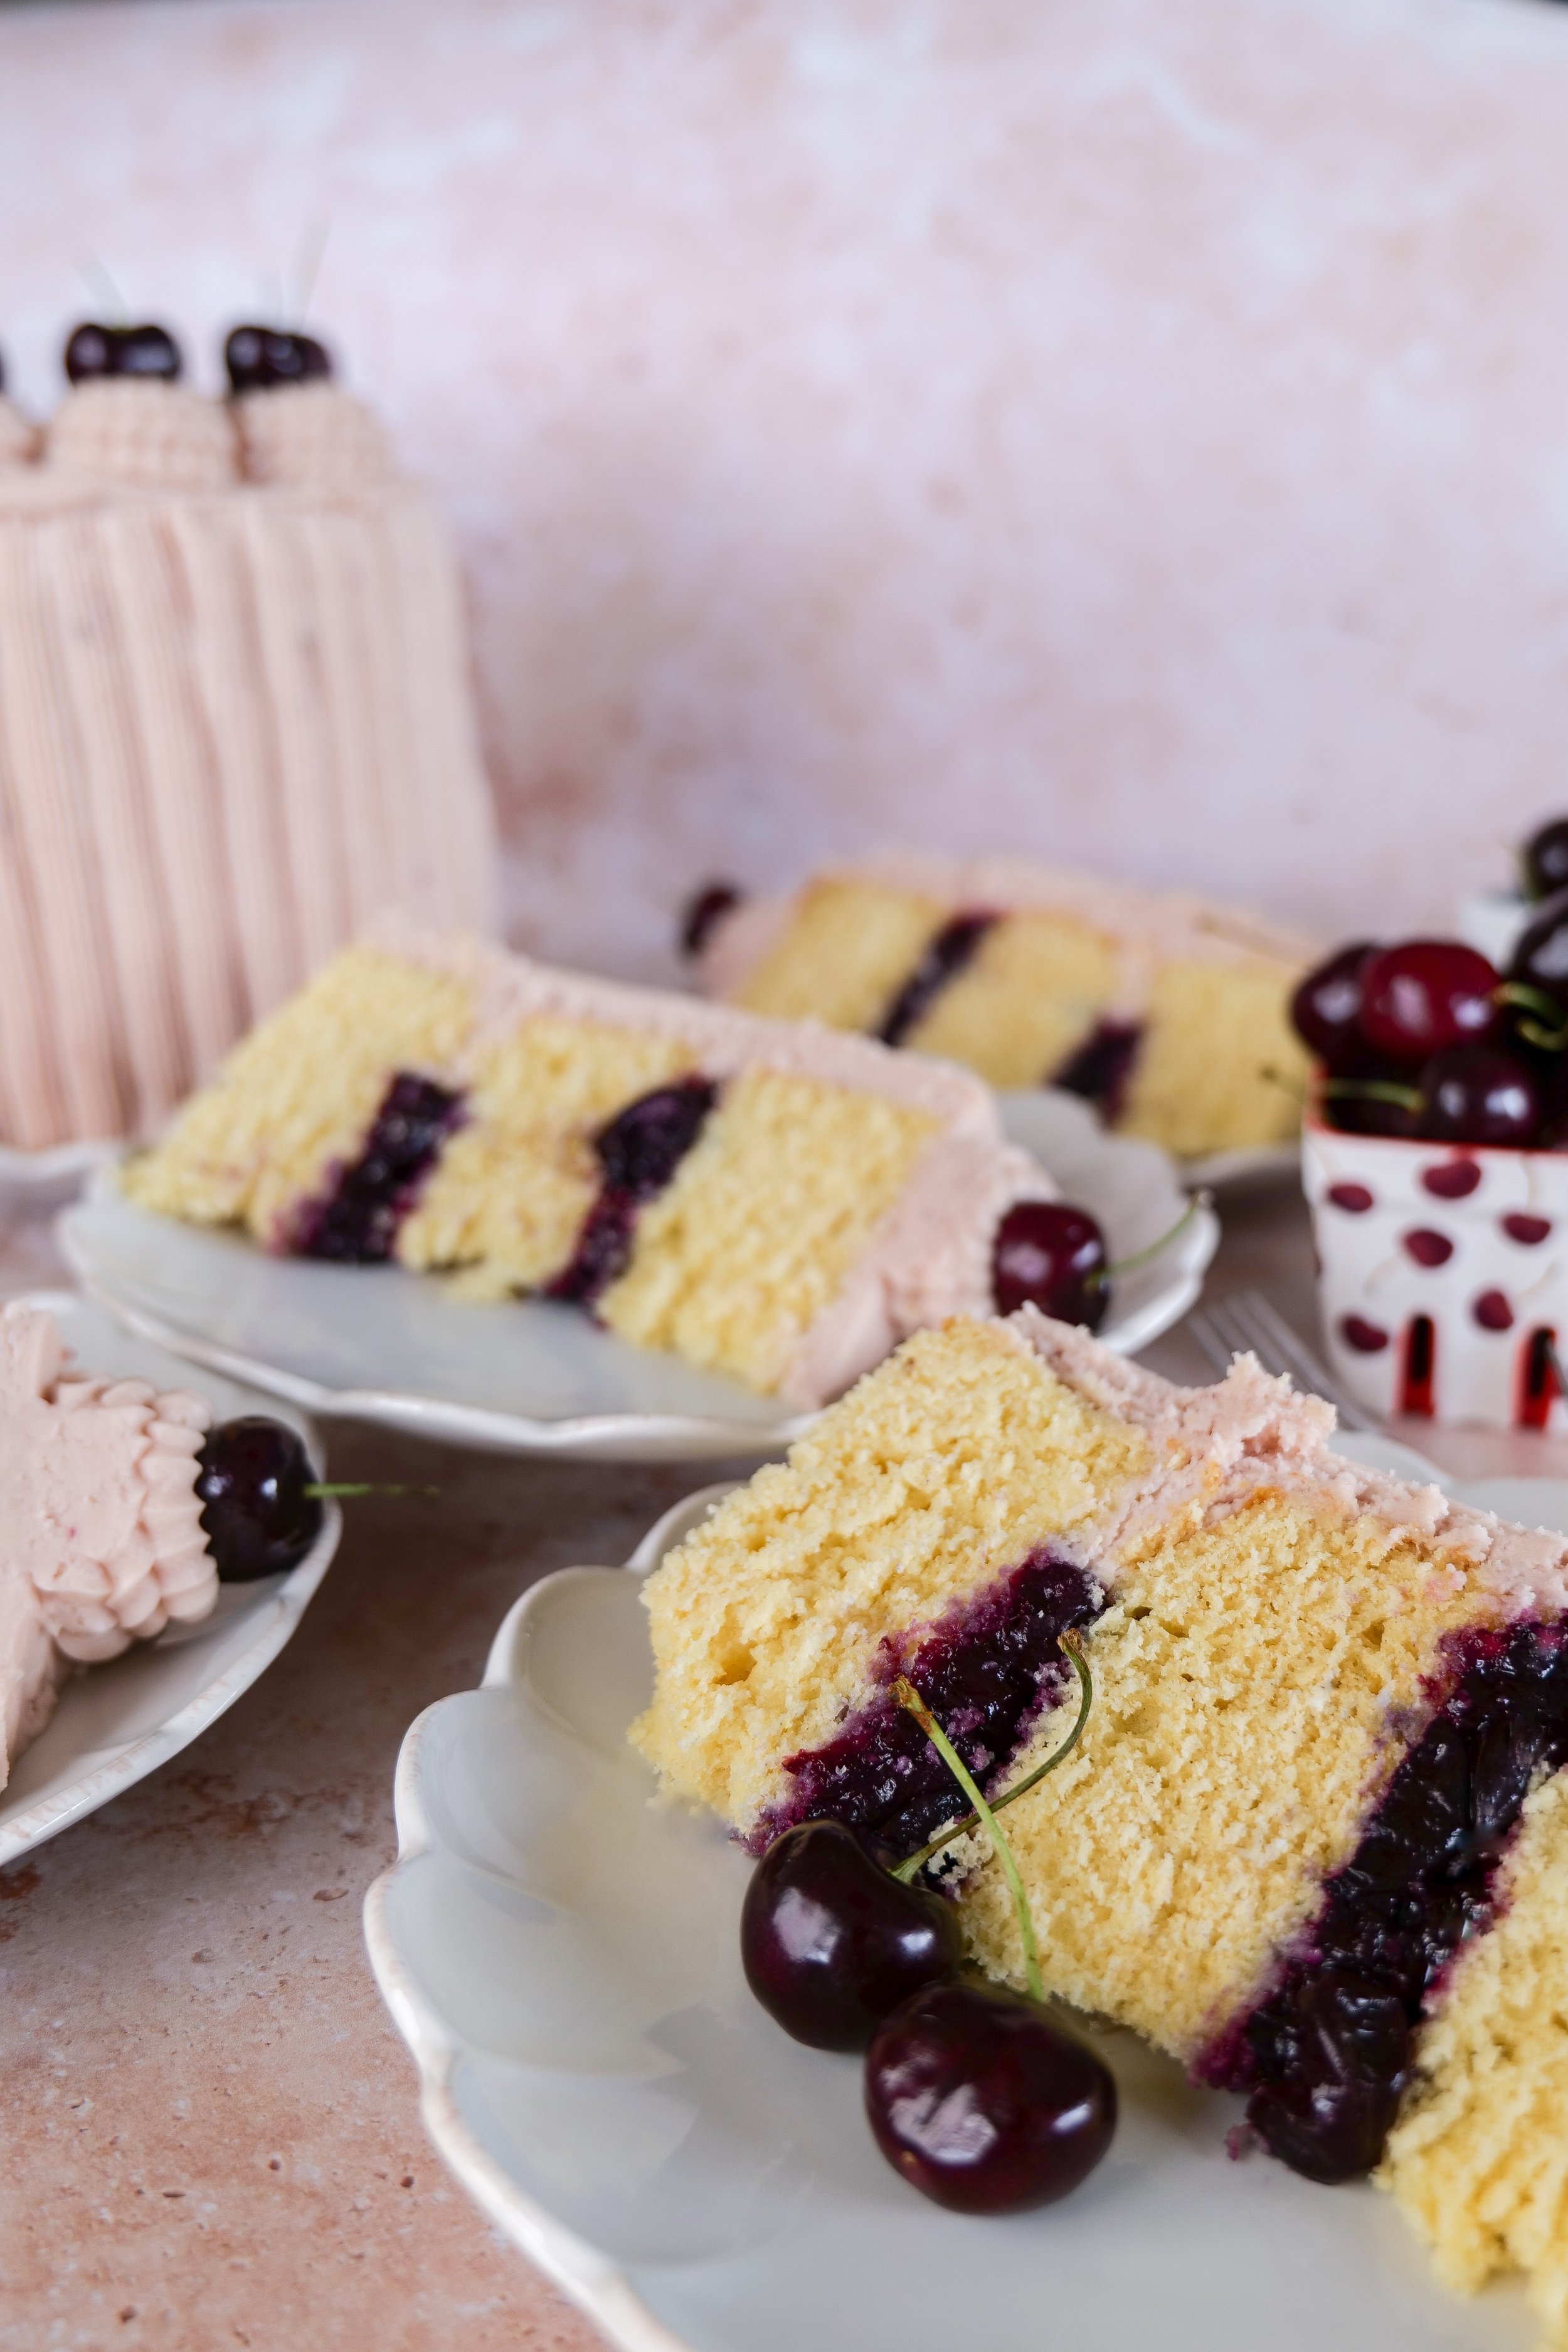
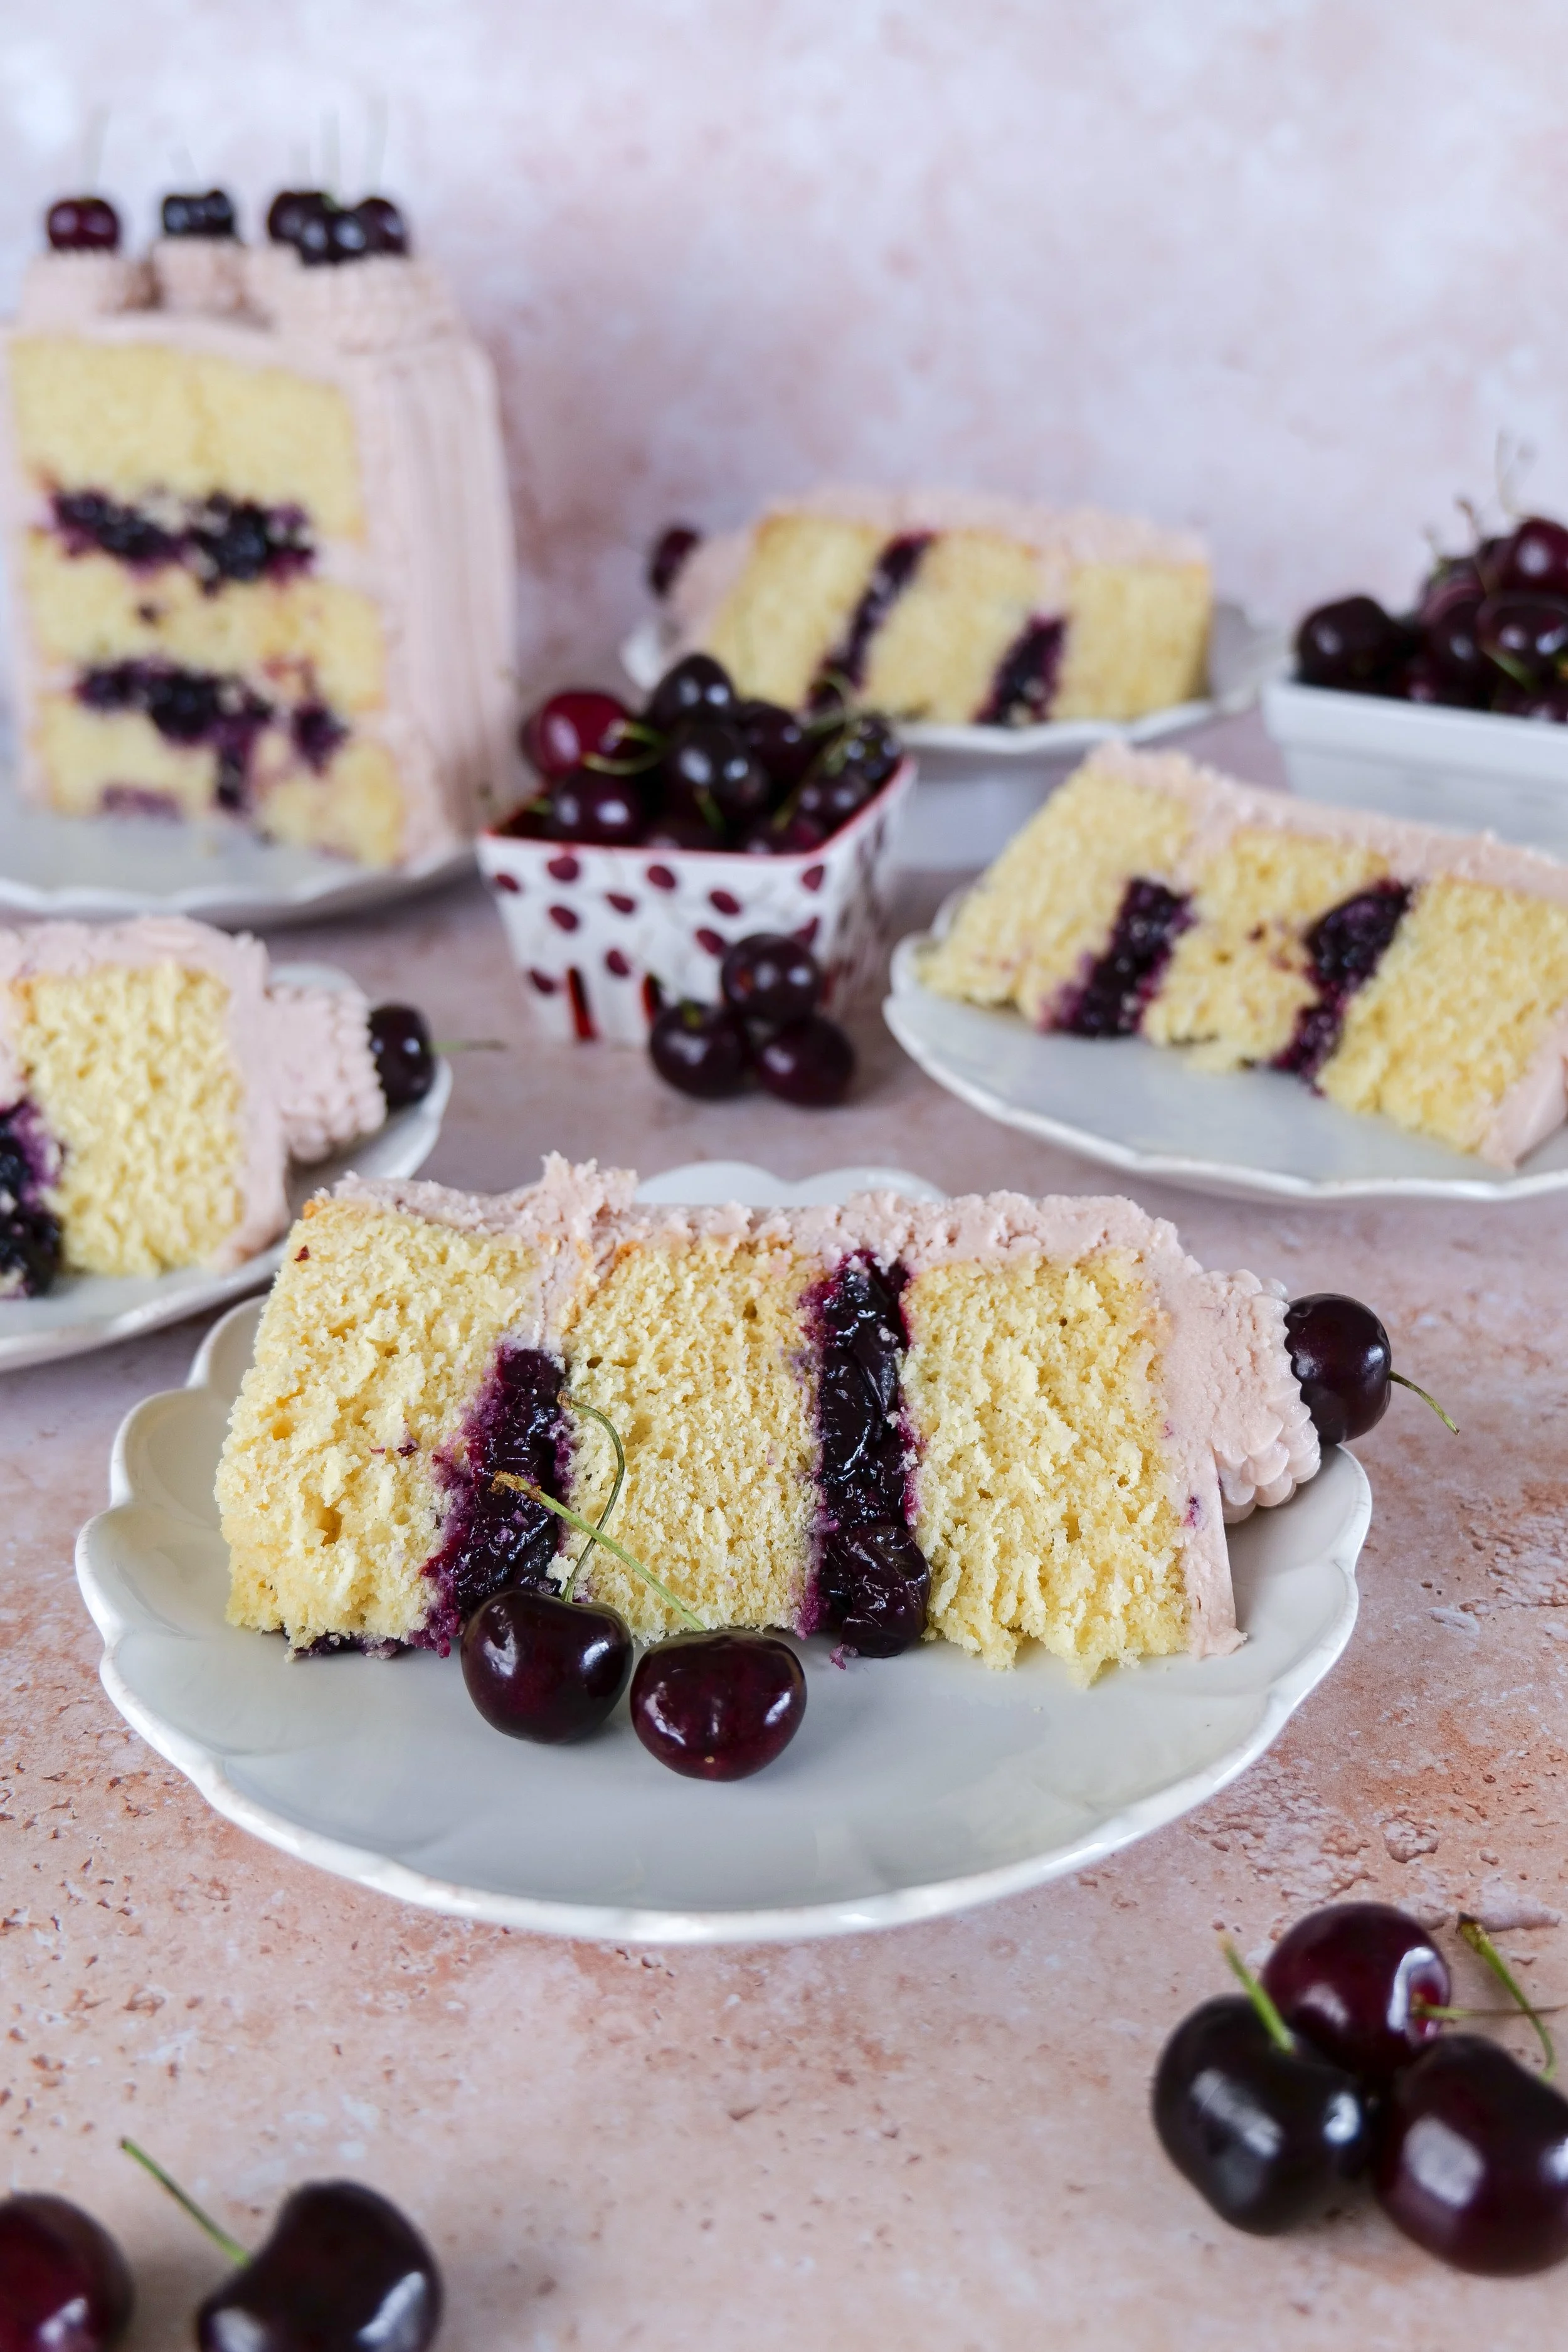
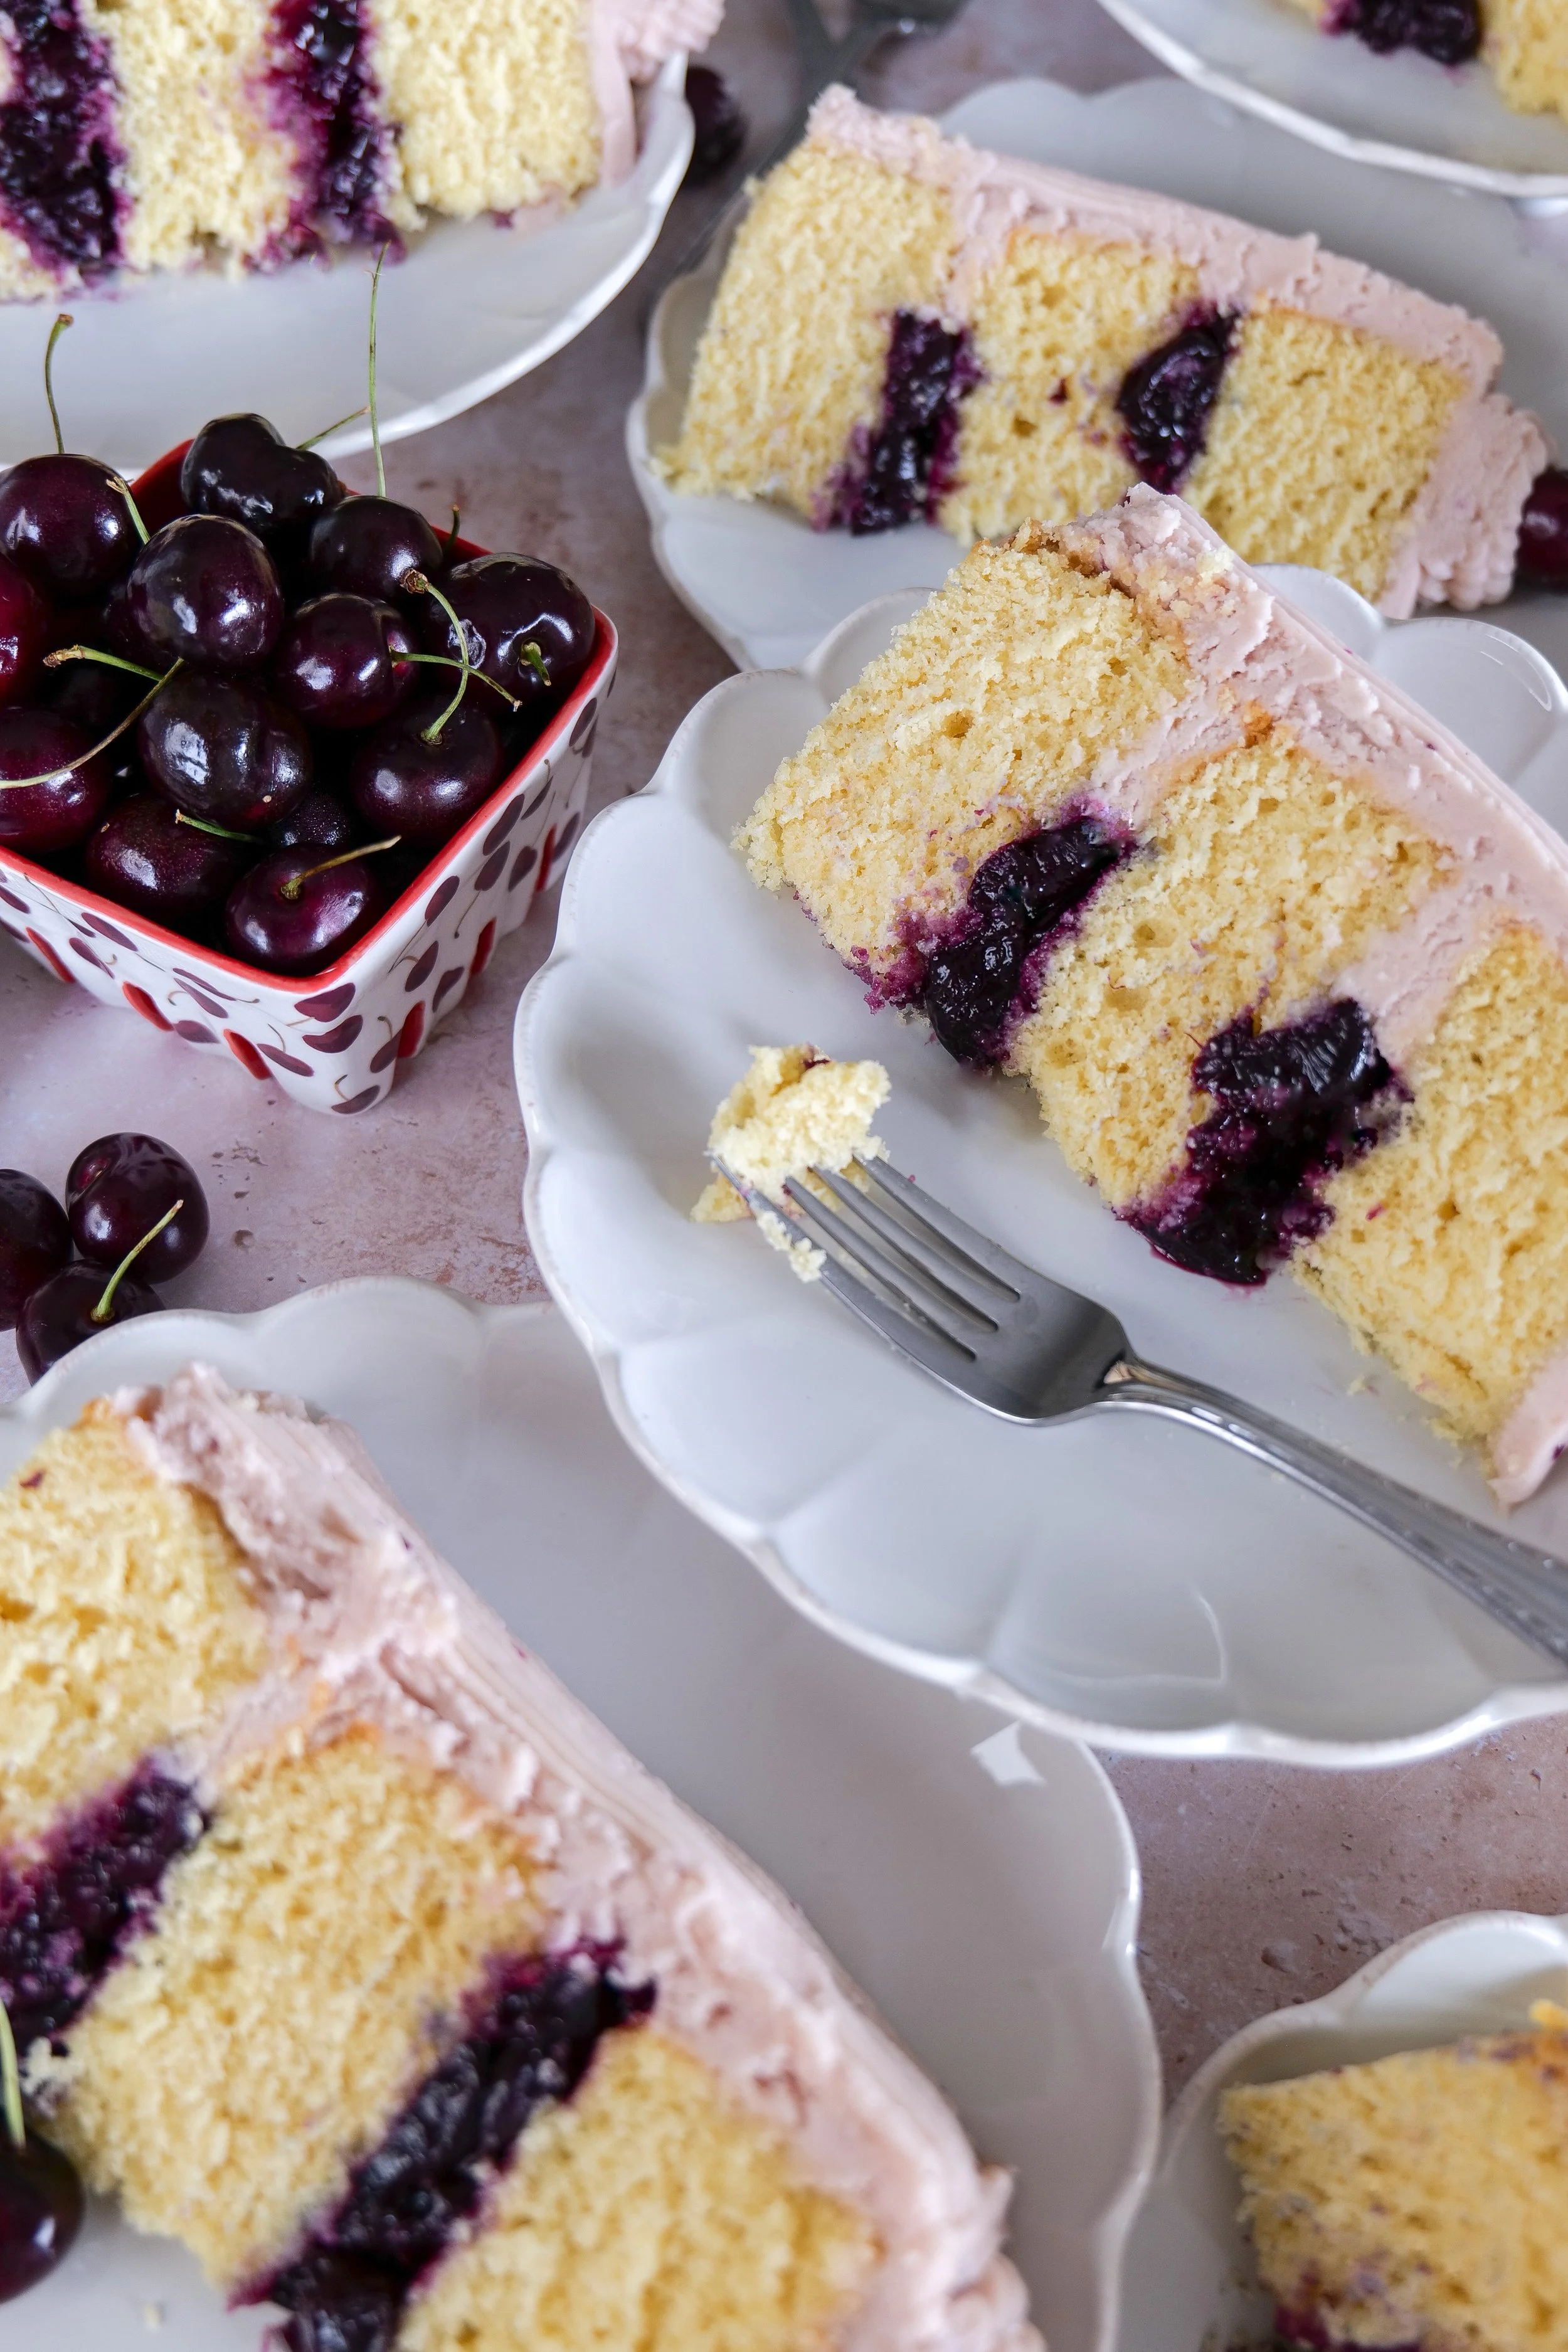
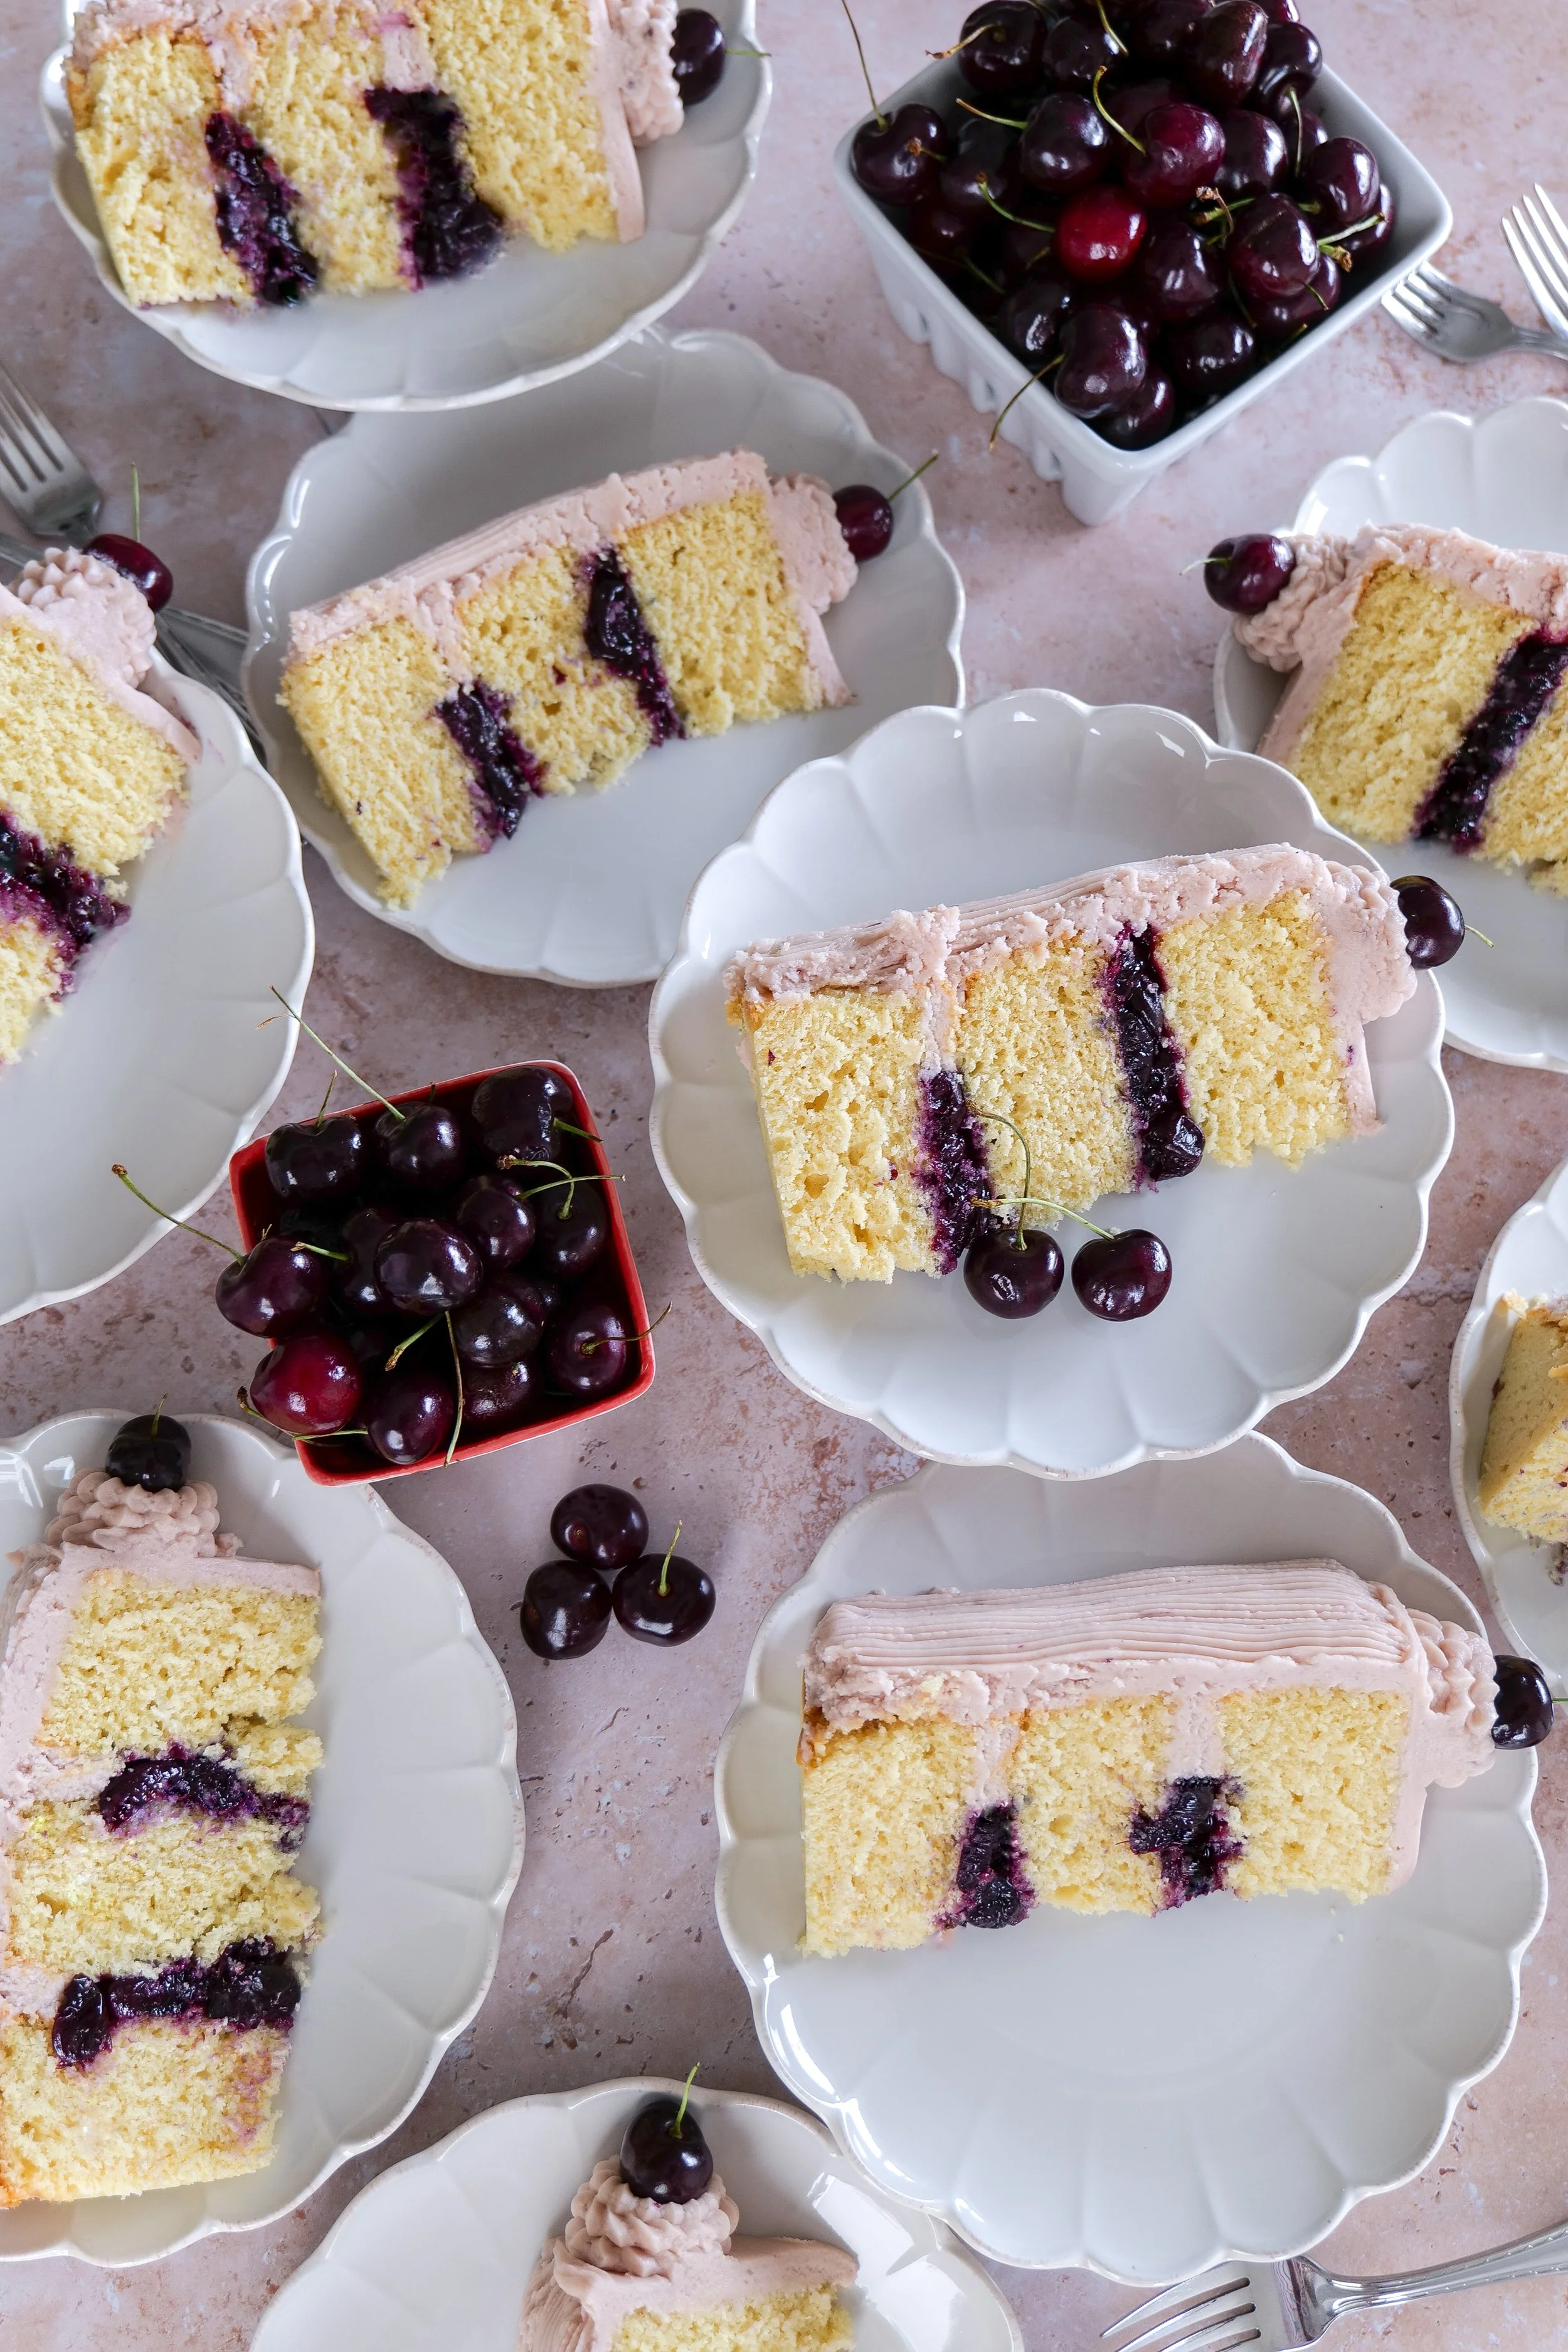
Slice of vanilla bean cherry layer cake showing fluffy vanilla cake layers and fresh cherry filling.
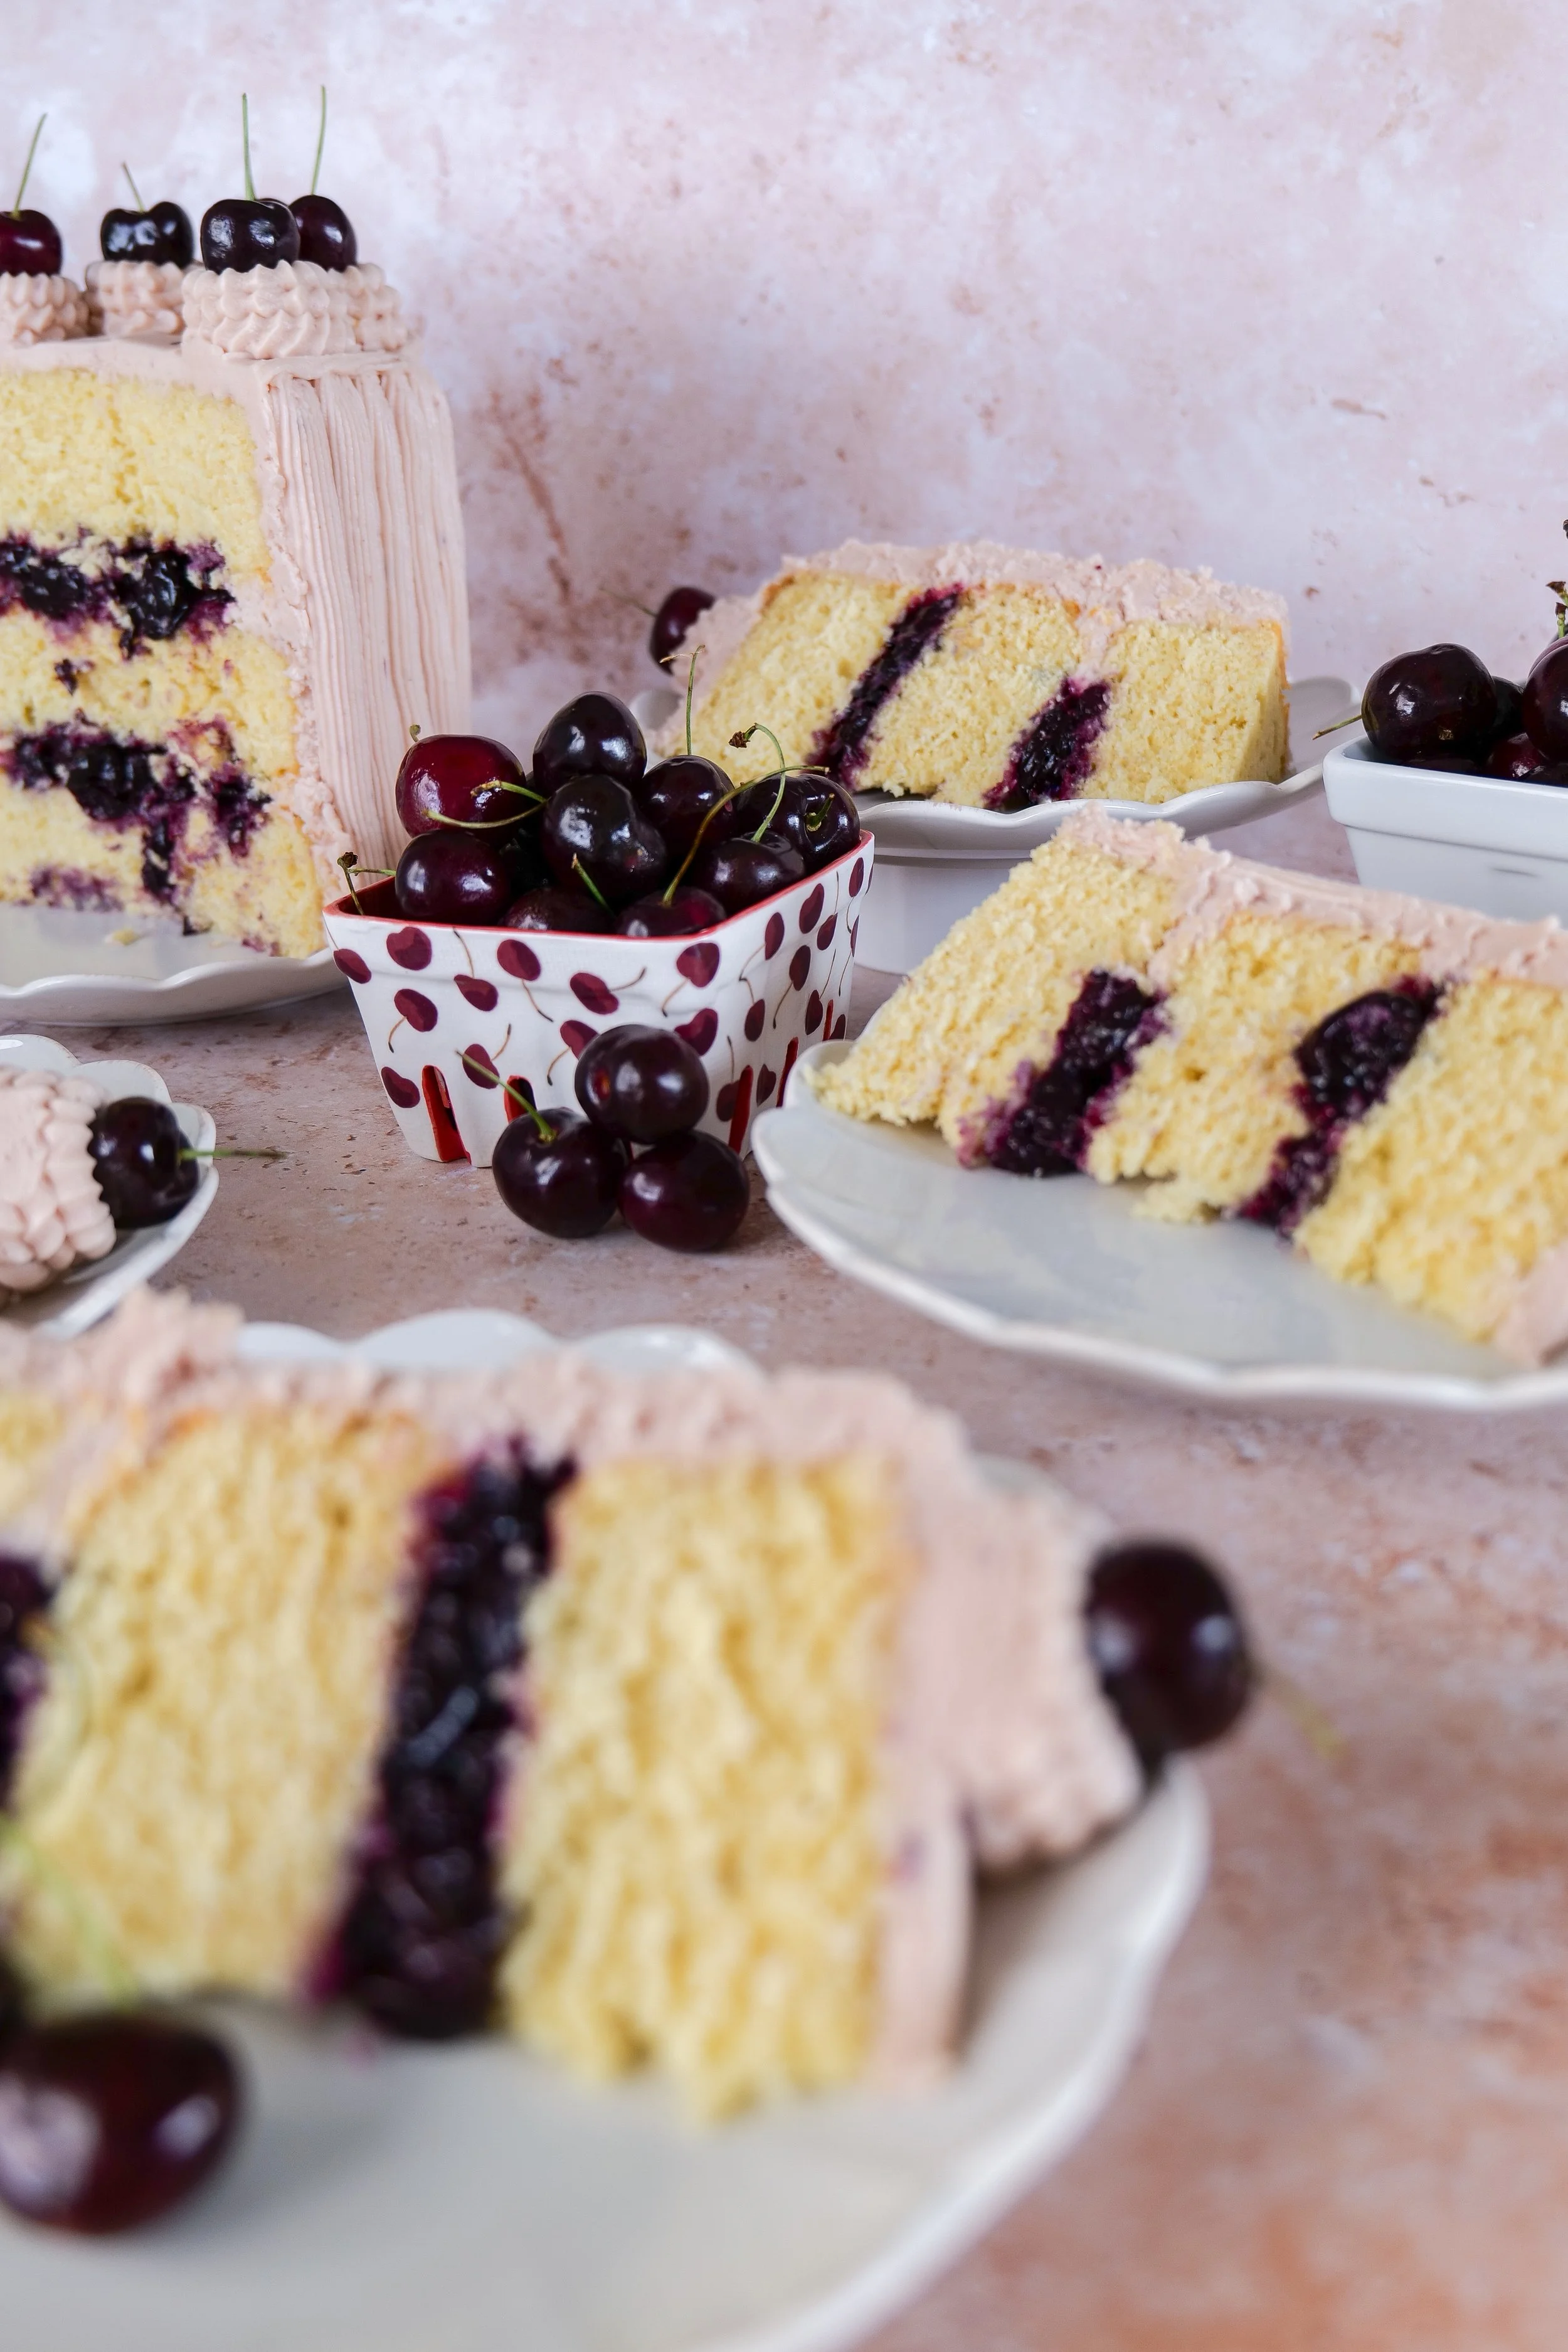
Close-up of vanilla bean cherry cake with homemade cherry filling and soft pink buttercream.

July always feels like the peak of summer.

Fresh cherries are everywhere, the light lasts just a little longer in the evenings, and everything feels slower in the best way. This month’s milestone cake is inspired by exactly that moment—the simplicity of peak cherry season.

Instead of a heavy or overly complex dessert, I wanted something light, beautiful, and centered around one clear flavor: cherry. Paired with soft vanilla bean cake layers and a whipped cherry mascarpone frosting, this cake feels like summer in its most elegant form.

It’s simple, fresh, and designed to let the cherries shine.

Homemade vanilla bean cherry layer cake decorated with fresh cherries and cherry buttercream.
Beautiful summer cherry layer cake perfect for birthdays, holidays, and celebrations.

Why You’ll Love This Cherry Layer Cake

  • Soft vanilla bean cake layers with a tender crumb

  • Homemade cherry filling made with fresh summer cherries

  • Light whipped mascarpone frosting infused with cherry syrup

  • Naturally soft pink frosting for a beautiful finish

  • Elegant but easy enough for home baking

  • Perfect for birthdays, summer gatherings, or milestone celebrations

Shop the Cherry Layer Cake

Before baking, here are the essentials used to create this cake.

Baking + Cake Essentials

Includes:

  • 8-inch cake pans

  • Stand mixer or hand mixer

  • Offset spatula

  • Cake turntable

  • Cooling racks

  • Parchment rounds

  • Piping bags (optional for decoration)

These tools help create a smooth, bakery-style finish at home.

Easy vanilla bean cherry cake recipe made with fresh cherries and creamy buttercream frosting.  7.
Slice of cherry layer cake served on a white scalloped dessert plate.
Vanilla cake frosted with naturally pink cherry buttercream and filled with homemade cherries.

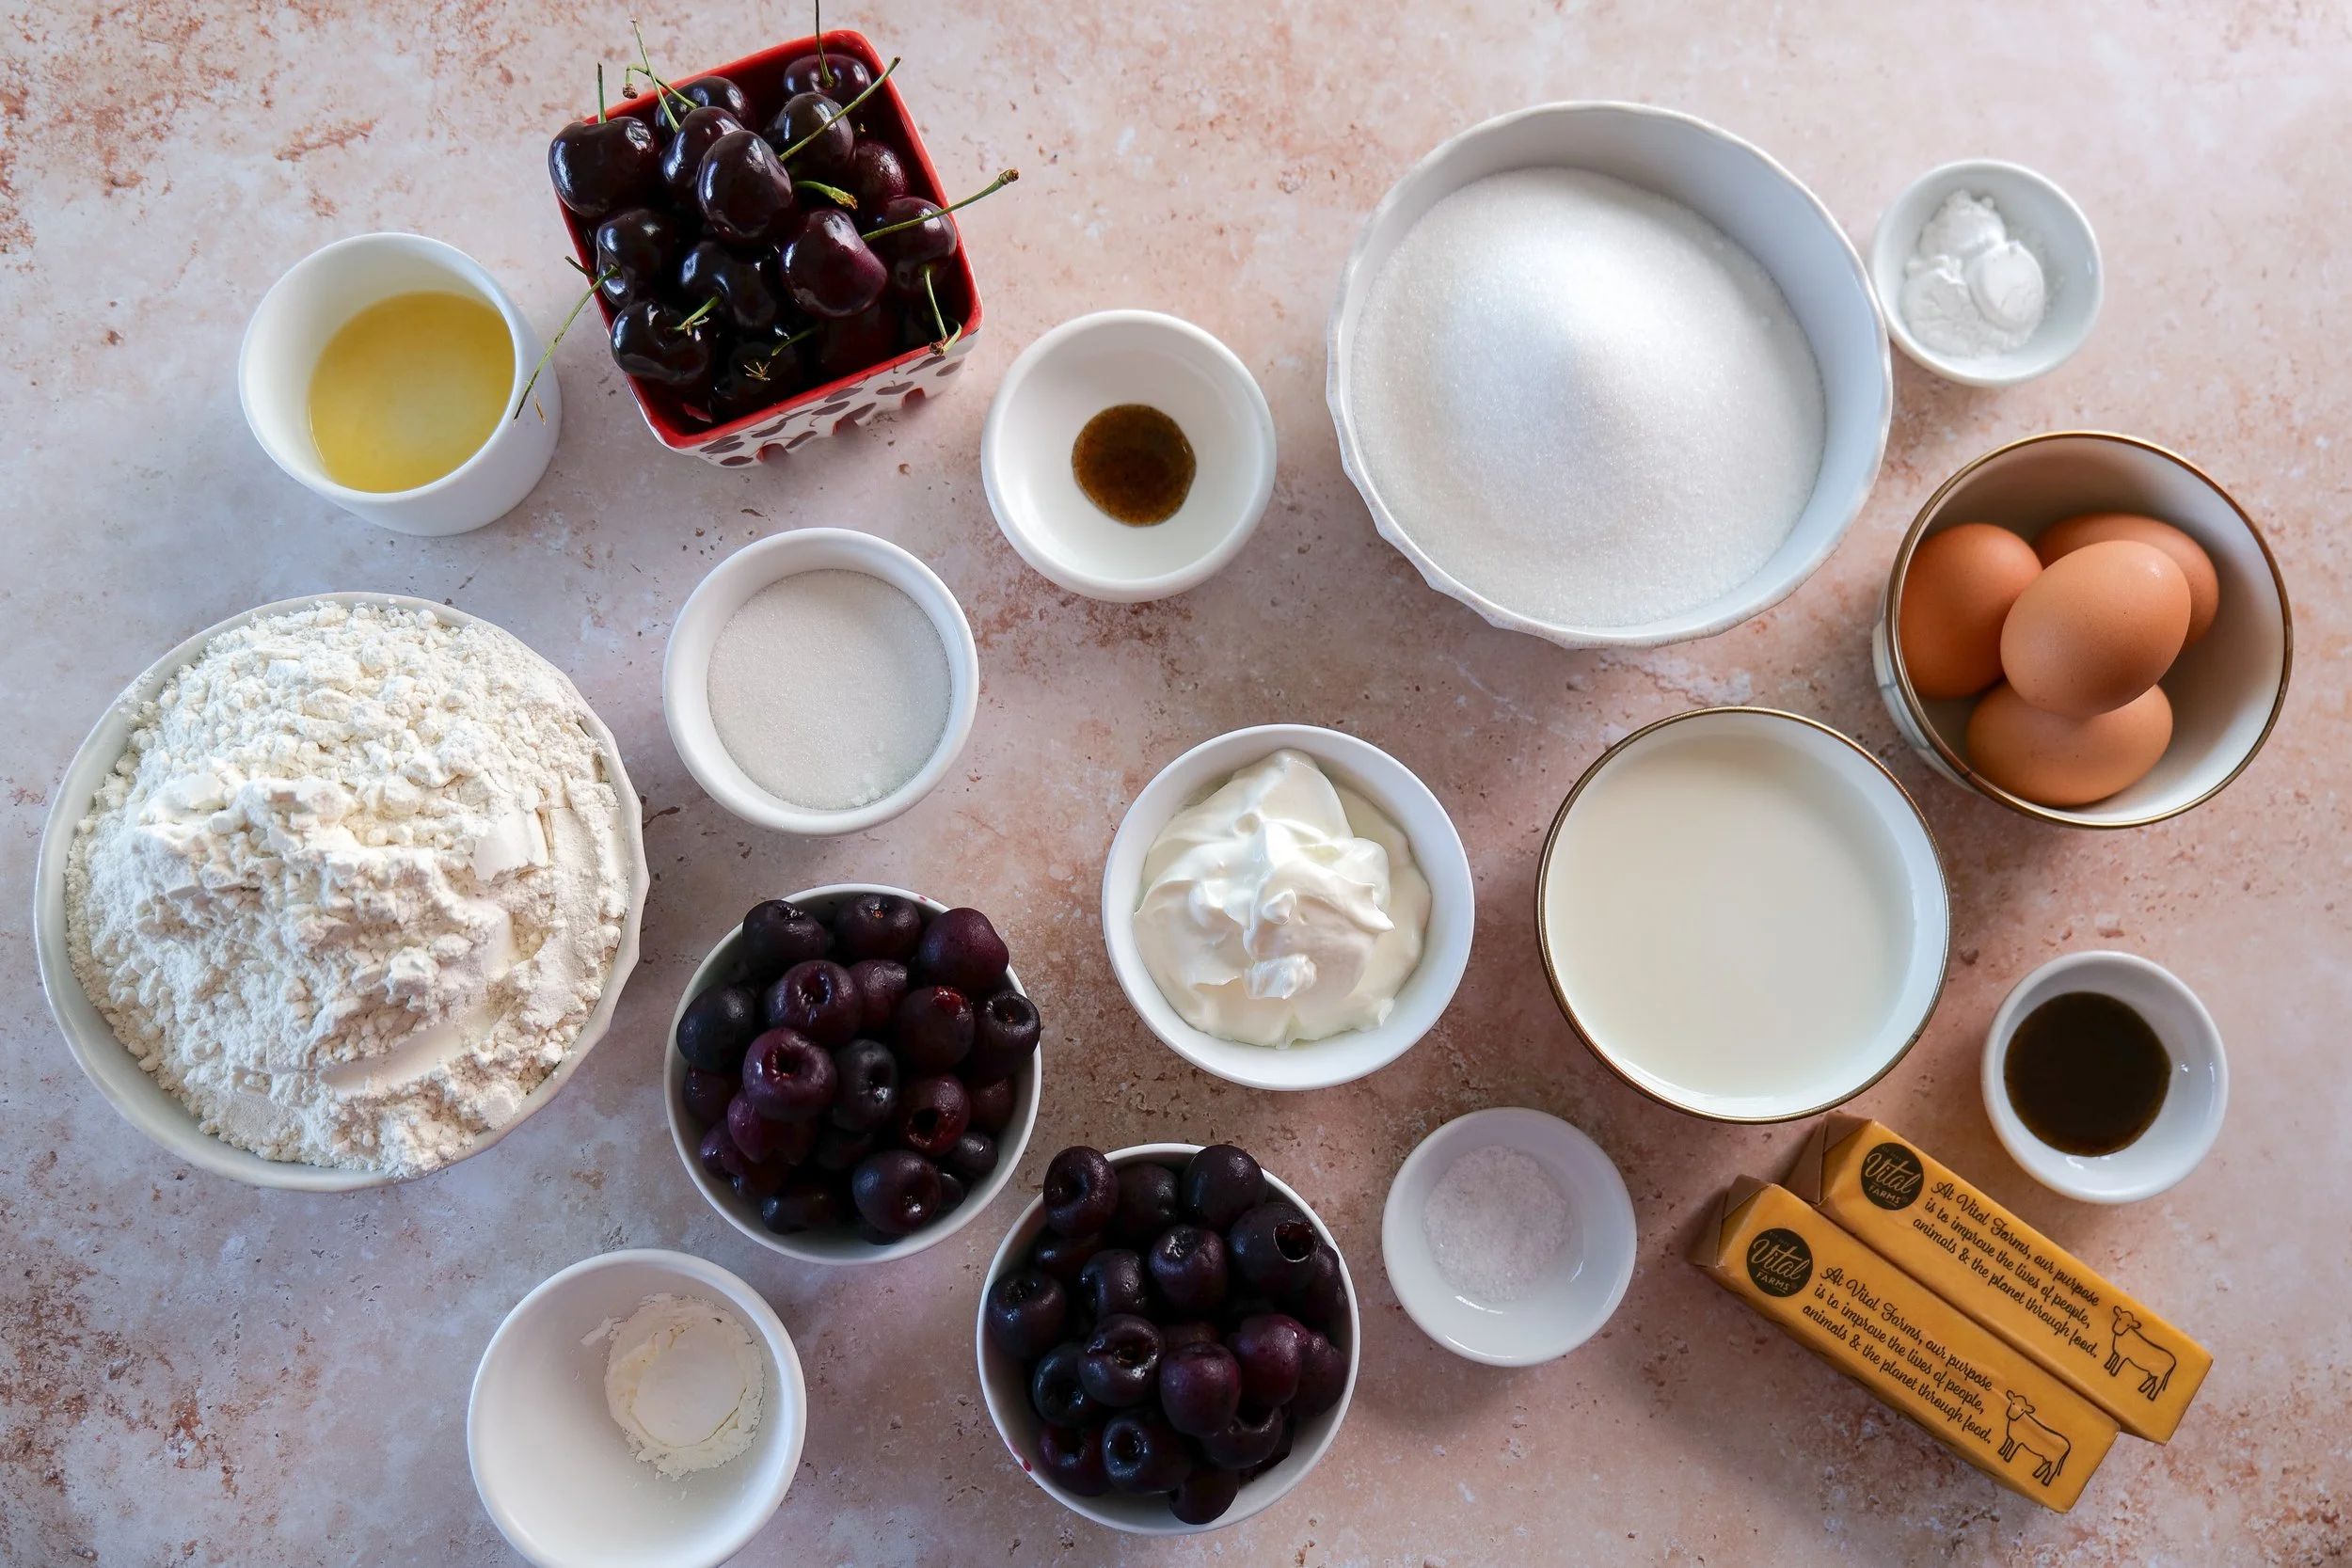
Ingredients

Vanilla Bean Cake Layers

  • 3 cups all-purpose flour

  • 2½ teaspoons baking powder

  • ½ teaspoon baking soda

  • ½ teaspoon salt

  • 1 cup salted butter, softened

  • 1¾ cups granulated sugar

  • 4 large eggs

  • 1 tablespoon vanilla bean paste

  • 1 cup whole milk

  • ½ cup sour cream

Cherry Filling

  • 3 cups fresh cherries, pitted

  • ⅓ cup granulated sugar

  • 1 tablespoon lemon juice

  • 1 tablespoon cornstarch

  • ½ teaspoon vanilla bean paste

Whipped Vanilla Cherry Mascarpone Frosting

This frosting is light, fluffy, and naturally tinted a soft pink from cherry syrup. It adds both flavor and color to the finished cake.

  • 16 oz mascarpone cheese, softened

  • 2 cups salted butter

  • 8 cups powdered sugar

  • 1 tablespoon vanilla bean paste

  • 3–5 tablespoons cherry syrup (or until color and consistency is reached)

How to Make the Cherry Filling

  1. Add cherries, sugar, and lemon juice to a saucepan.

  2. Cook over medium heat for 8–10 minutes until cherries soften and release juices.

  3. Stir in cornstarch and cook until slightly thickened.

  4. Remove from heat and stir in vanilla.

  5. Cool completely before assembling the cake.

How to Make the Vanilla Bean Cake

  1. Preheat oven to 350°F. Grease and line three 8-inch cake pans.

  2. Whisk together flour, baking powder, baking soda, and salt.

  3. Cream butter and sugar until light and fluffy.

  4. Add eggs one at a time, mixing well after each addition.

  5. Mix in vanilla bean paste.

  6. Alternate adding dry ingredients and buttermilk until combined.

  7. Fold in sour cream until smooth.

  8. Divide batter evenly between pans.

  9. Bake 24–28 minutes or until a toothpick comes out clean.

  10. Cool completely before assembling.

How to Make the Whipped Cherry Mascarpone Frosting

  1. Beat mascarpone and butter until smooth and creamy.

  2. Add powdered sugar and vanilla, mixing until fully combined.

  3. Gradually add cherry syrup, 1 tablespoon at a time, while whipping.

  4. Continue mixing until light, fluffy, and softly pink.

  5. Adjust color and flavor with additional syrup if desired, being careful not to overmix.

Tip: Use a thick cherry syrup or reduced cherry juice to avoid thinning the frosting.

Assemble the Cake

  1. Place one cake layer on a stand or plate.

  2. Pipe a border of cherry mascarpone frosting around the edge.

  3. Fill the center with cherry filling.

  4. Repeat with remaining layers.

  5. Frost the outside of the cake with whipped cherry mascarpone frosting.

  6. Smooth or texture as desired for a rustic or bakery-style finish.

  7. Top with fresh cherries if desired.

Fresh cherry cake recipe featuring vanilla bean cake layers and juicy cherry filling.

Decorating Ideas

  • Fresh cherries with stems for a natural finish

  • Soft swirls of pink frosting

  • Light, rustic textured finish for a homemade bakery look

  • Minimal decoration to highlight the natural color of the frosting

Tips for Success

  • Make sure cherry filling is fully cooled before assembling

  • Use thick cherry syrup for frosting color and stability

  • Do not overwhip mascarpone or it may loosen

  • Chill cake slightly before slicing for cleaner layers

More Cake Recipes You'll Love

This creates another internal linking hub, which Google loves for recipe sites. Since this is a cake recipe, readers are often looking for another cake to save for later.

I'd link to something like:

Shop Pairings for Summer Hosting

Shop Shelf: Summer Dessert & Hosting Pairings

Three-layer vanilla bean cake filled with fresh cherries and finished with cherry frosting.
Vanilla bean cake layered with sweet homemade cherry filling and whipped cherry buttercream.

Frequently Asked Questions

Can I use frozen cherries?

Yes. Thaw completely and drain excess liquid before cooking.

Can I make this cake ahead of time?

Yes. Bake layers a day ahead and assemble the next day for best texture.

Can I replace mascarpone frosting?

Yes. A vanilla buttercream works, but the mascarpone version keeps it lighter and less sweet.

How to Serve Vanilla Bean Cherry Cake

This vanilla bean cherry cake is delicious served:

  • with fresh whipped cream

  • alongside vanilla bean ice cream

  • topped with fresh cherries

  • with hot coffee or iced lattes

  • at birthdays, bridal showers, baby showers, and summer celebrations

From Amanda's Kitchen

Some recipes become traditions the moment they're placed on the table, and this Vanilla Bean Cherry Layer Cake is one of those recipes for our family.

The soft vanilla bean cake, homemade cherry filling, and light mascarpone frosting create a cake that's elegant enough for birthdays and celebrations, yet simple enough to make just because cherries are in season. It's the kind of dessert that invites everyone to slow down, pour another cup of coffee, and linger around the table just a little longer.

I hope this recipe finds its way into your family's celebrations for years to come. Print this recipe card, tuck it into your favorite recipe binder, and know it's being shared from my kitchen to yours.

Love, Amanda

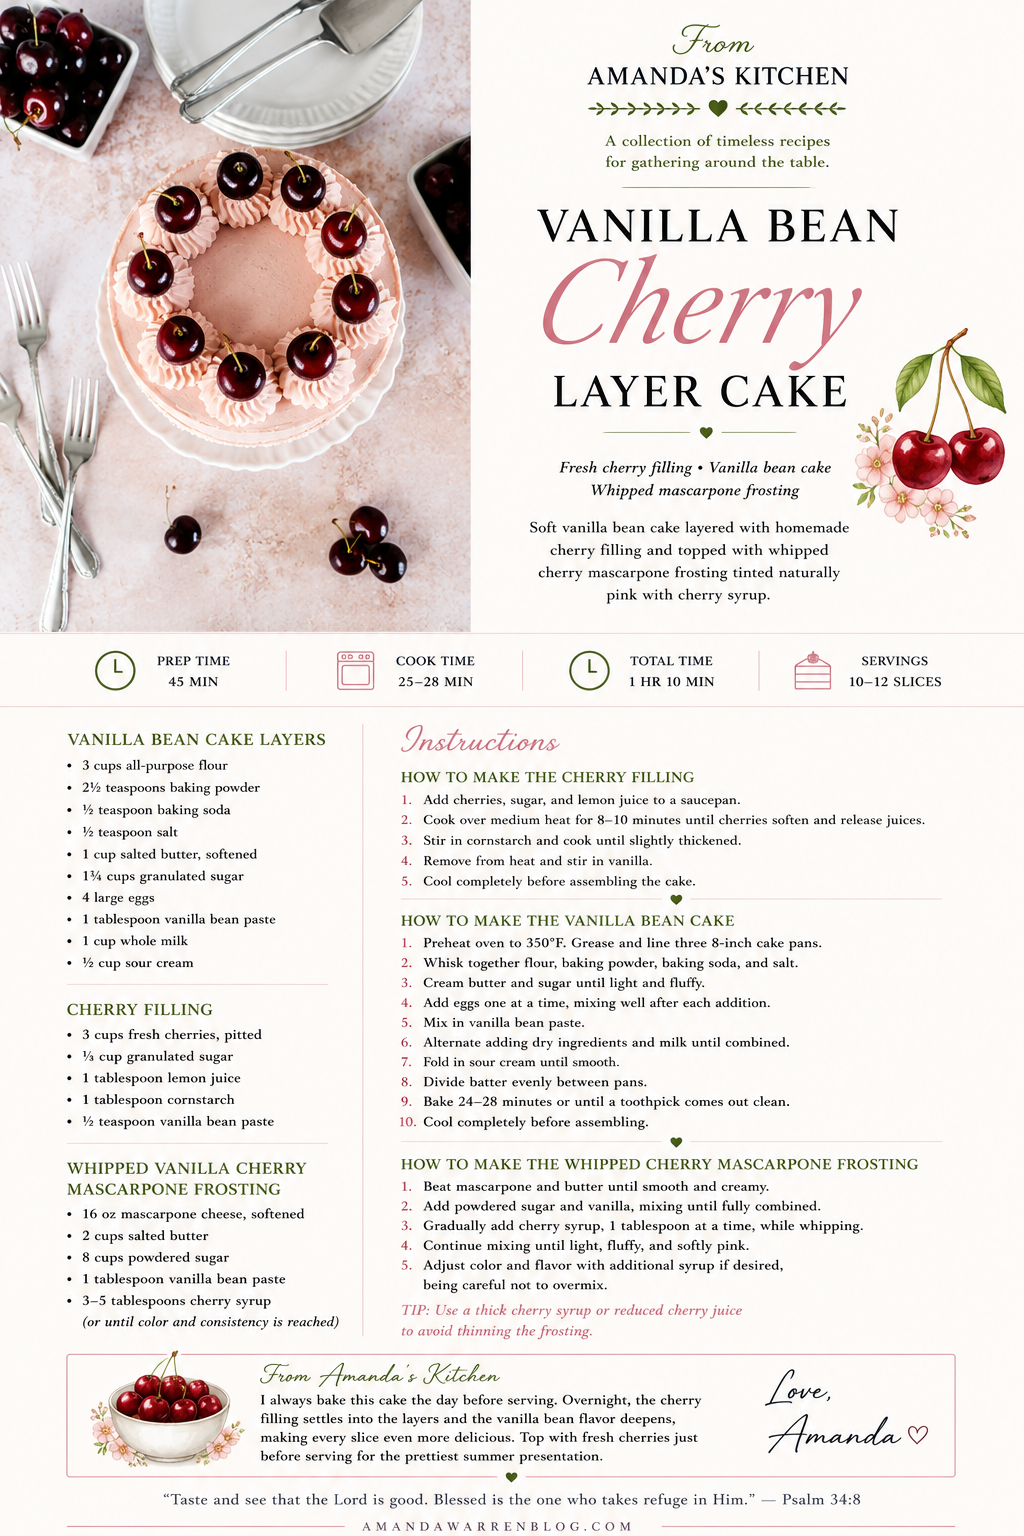
Printable recipe card for Vanilla Bean Cake with Cherry Filling featuring soft vanilla bean cake layers, homemade fresh cherry filling, and whipped vanilla cherry mascarpone frosting. An elegant summer layer cake recipe by Amanda Warren.
Elegant homemade cherry birthday cake with fluffy vanilla layers and fresh fruit filling.
Fresh cherries styled beside slices of homemade vanilla bean cherry cake.
Cross section of vanilla bean cherry layer cake showing thick cherry filling between cake layers.
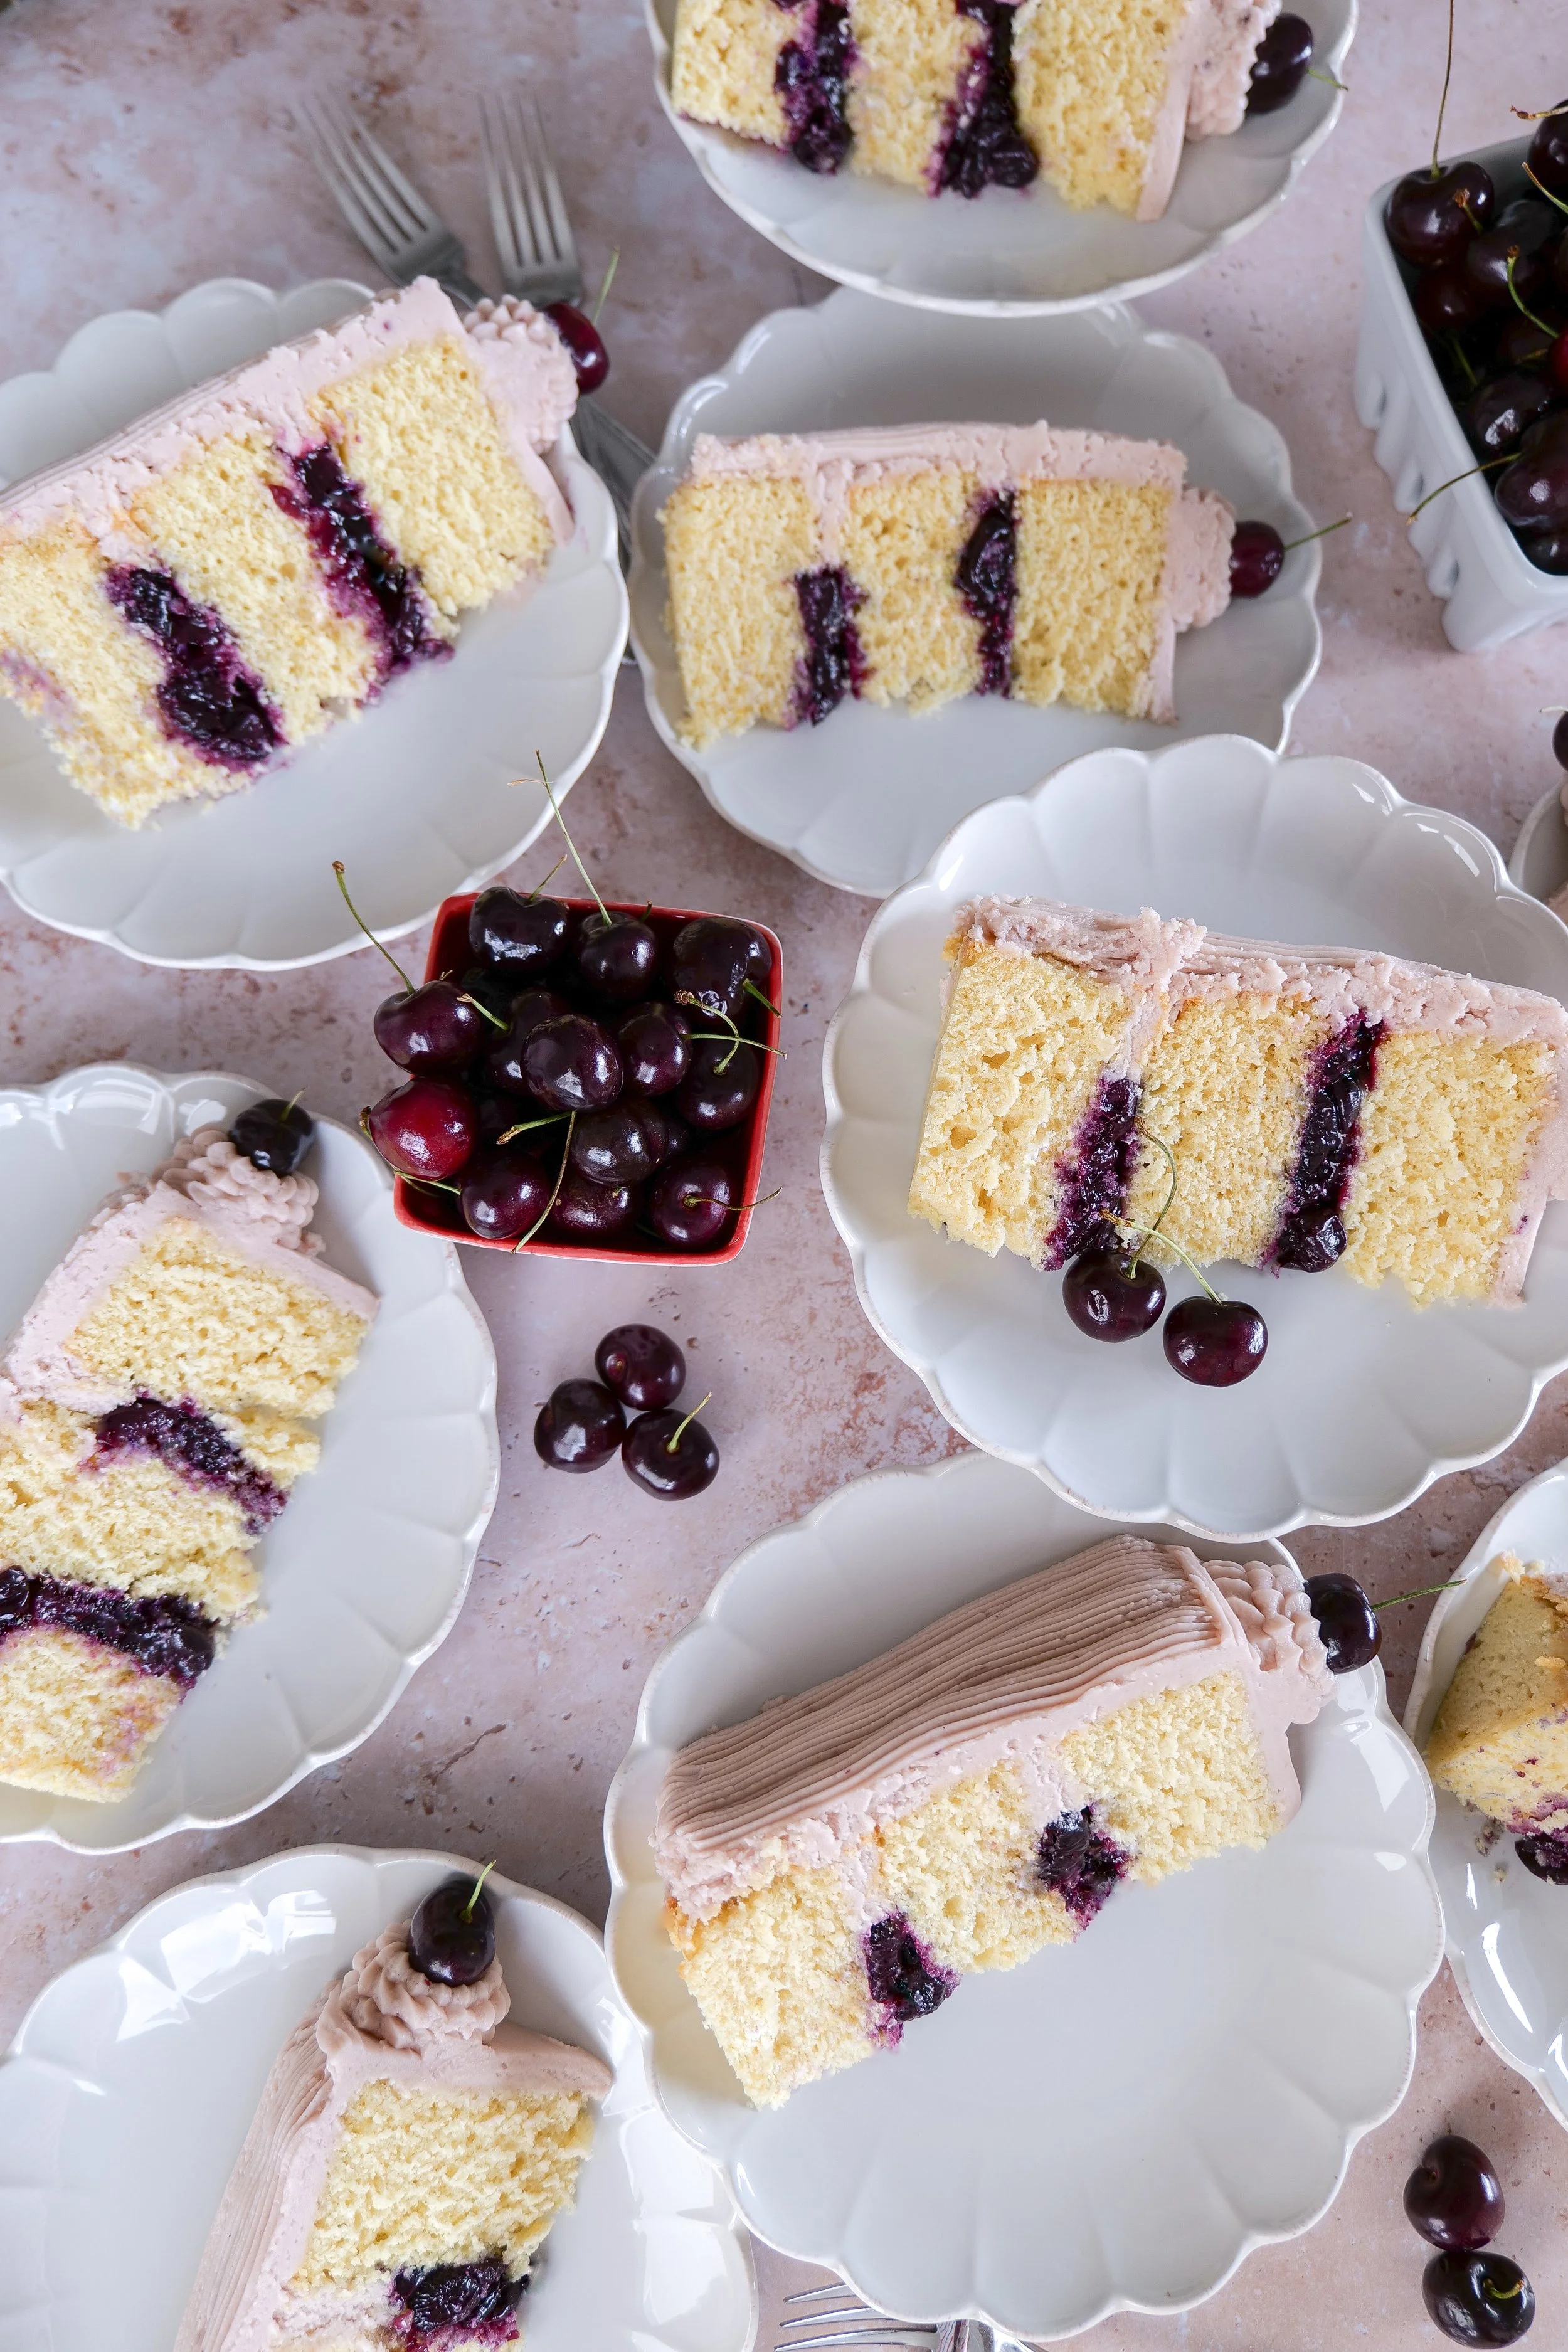
Several slices of vanilla bean cherry cake styled for summer entertaining and celebrations.
Easy homemade vanilla bean cherry layer cake recipe with fresh cherries and pink buttercream frosting.

Peach & Goat Cheese Salad with Sweet Balsamic Dressing

There are certain recipes that just taste like summer, and this Peach & Goat Cheese Salad is one of them. Juicy ripe peaches, creamy goat cheese and homemade candied walnuts are layered over fresh arugula and spinach before everything is tossed with a homemade sweet balsamic dressing.

It has that combination I always love in a salad—something sweet, something creamy and something crunchy—all tied together with a dressing that balances the flavors without overpowering them.

This is an easy salad to make for a summer lunch or dinner, but it's beautiful enough to bring to a gathering or serve when you're having people over. And when peaches are at their best, you really don't need to do much to make them shine.

Peach and goat cheese salad with candied walnuts and sweet balsamic dressing

Why You'll Love This Peach & Goat Cheese Salad

This salad is simple, but every ingredient brings something different to the table.

  • Fresh peaches add natural sweetness and a juicy bite.

  • Goat cheese brings a creamy, tangy contrast to the fruit.

  • Candied walnuts give the salad crunch with just the right amount of maple and brown sugar sweetness.

  • Arugula and spinach create a fresh base with a mix of peppery and mild greens.

  • Sweet balsamic dressing brings everything together with balsamic vinegar, extra virgin olive oil, honey and Dijon mustard.

The result is fresh and light while still having enough flavor and texture to make it feel special.

Summer peach salad with goat cheese, arugula and candied walnuts

Ingredient Notes

Fresh Peaches

The peaches are the star of this salad, so this is one recipe where using ripe, in-season fruit makes a difference.

Look for peaches that have a little give when gently pressed but are still firm enough to slice. You want them sweet and juicy without becoming too soft when the salad is tossed.

Their natural sweetness is such a good contrast to the tangy goat cheese and balsamic dressing.

Goat Cheese

Creamy goat cheese adds richness and tang without making the salad feel heavy. I like leaving some of the crumbles a little larger so you get those creamy bites throughout the salad.

If you're a fellow goat cheese lover, my Berry Walnut Goat Cheese Salad with Strawberry Vinaigrette is another fresh summer salad to save.

Arugula + Baby Spinach

Using both gives you the best of each green. Arugula has a slightly peppery flavor that works beautifully with peaches, while baby spinach is tender and mild.

Together they create a fresh base without competing with all of the other flavors we're adding.

Candied Walnuts

The candied walnuts might be one of my favorite parts of this salad.

Instead of adding plain walnuts, they're quickly coated with maple syrup and brown sugar. Once they cool, you get that sweet crunch that works so well with the juicy peaches and creamy goat cheese.

Sweet Balsamic Dressing

The homemade dressing is a simple combination of balsamic vinegar, extra virgin olive oil, honey and Dijon mustard.

It's sweet and tangy with just enough Dijon to balance everything out, and it ties together the peaches, creamy goat cheese and peppery greens.

Ingredients for peach and goat cheese salad with balsamic dressing
Fresh peaches, goat cheese and candied walnuts over arugula and spinach

Amanda's Tips for the Best Peach Salad

Use Ripe but Firm Peaches

You want the peaches sweet and juicy, but they should still be firm enough to hold their shape when sliced and tossed with the salad.

Let the Candied Walnuts Cool

The walnuts will firm up as they cool, so give them a little time before adding them to the greens. This is what gives you that great crunchy texture.

Wait to Add the Dressing

Don't dress the salad too far ahead of serving. Tossing it shortly before it reaches the table keeps the arugula and spinach fresh.

Save Some Toppings for the End

I add about three-quarters of the peaches, goat cheese and walnuts before tossing and save the rest for the top.

It's such a simple trick, but it keeps all of those beautiful ingredients visible instead of letting them disappear into the greens.

Start With Less Dressing

You don't necessarily need to pour all of the dressing onto the salad at once. Start with enough to lightly coat the greens, toss and then add more as needed.

I love serving salads like this in a large shallow serving bowl so there's plenty of room to gently toss everything together without crushing the peaches or goat cheese.

For the dressing, I usually whisk everything together in a small glass mixing bowl before pouring it over the salad. It's simple, but having a smaller bowl makes it much easier to get the dressing completely combined before adding it to the greens.

Sweet balsamic dressing poured over peach and goat cheese salad

What to Serve with Peach & Goat Cheese Salad

This salad works beautifully as a lighter lunch on its own, but it's also an easy side dish for summer dinners, cookouts and gatherings.

Serve it alongside grilled chicken or steak, or add a simple protein directly to the salad to make it more substantial.

For another salad that works especially well as a summer meal, try my Grilled Chicken, Mexican Street Corn & Cucumber Salad.

And once summer peaches give way to fall produce, my Pear & Pomegranate Arugula Salad has that same sweet-and-savory combination with seasonal flavors.

Fresh peach arugula salad with goat cheese and walnuts

Peach & Goat Cheese Salad with Sweet Balsamic Dressing

This fresh summer salad combines ripe peaches, creamy goat cheese, homemade candied walnuts and mixed greens with an easy sweet balsamic dressing.

Ingredients

For the Salad

  • 5 cups arugula

  • 5 cups baby spinach

  • 2 ripe peaches, sliced

  • 4 oz goat cheese, crumbled

For the Candied Walnuts

  • 2 cups walnuts

  • 1/4 cup maple syrup

  • 2 tablespoons brown sugar

For the Sweet Balsamic Dressing

  • 1/3 cup balsamic vinegar

  • 2/3 cup extra virgin olive oil

  • 1/3 cup honey

  • 1 teaspoon Dijon mustard

Instructions

1. Make the Candied Walnuts

Line a baking sheet with parchment paper and set aside.

In a pan, melt together the maple syrup and brown sugar, stirring until combined and bubbling. Add the walnuts and toss until evenly coated.

Transfer the walnuts to the prepared baking sheet and separate them so they don't stick together. Let them cool while you prepare the rest of the salad.

2. Make the Sweet Balsamic Dressing

Whisk together the balsamic vinegar, extra virgin olive oil, honey and Dijon mustard until combined.

If the dressing is thicker than you'd like, add a small amount of hot water until it reaches your preferred consistency.

Taste and adjust as desired.

3. Assemble the Salad

Add the arugula and baby spinach to a large bowl and toss together.

Add about three-quarters of the sliced peaches, goat cheese and cooled candied walnuts.

4. Dress the Salad

Drizzle the sweet balsamic dressing over the salad and gently toss everything together.

Start with enough dressing to lightly coat the greens and add more as desired.

5. Finish and Serve

Transfer the salad to a serving dish if desired.

Arrange the remaining peaches, goat cheese and candied walnuts over the top for a beautiful finish.

Serve and enjoy!

Amanda's Tip

Save some of the peaches, goat cheese and candied walnuts to add after tossing the salad. You'll still get all of those flavors throughout, but the finished salad will look so much prettier when it reaches the table.

Save This Recipe

Whether you're planning ahead for a summer gathering or simply looking for a fresh salad to make while peaches are in season, I've included a printable recipe card below so it's easy to save, print and come back to later.

Peach and goat cheese salad with sweet balsamic dressing recipe card

Frequently Asked Questions

Can I Make This Peach Salad Ahead of Time?

You can prepare several of the components ahead of time, but I recommend waiting to assemble and dress the salad until shortly before serving.

The candied walnuts and sweet balsamic dressing can both be prepared ahead and stored separately. Slice the peaches and assemble the salad closer to serving so the greens stay crisp and the peaches look their freshest.

Can I Make the Sweet Balsamic Dressing Ahead of Time?

Yes. Make the dressing ahead and store it separately until you're ready to assemble the salad. Whisk or shake it again before serving if the ingredients have separated.

Can I Make the Candied Walnuts Ahead of Time?

Yes. Allow the candied walnuts to cool completely before storing them. Add them to the salad shortly before serving so they keep their crunchy texture.

Can I Use a Different Nut?

Yes. Walnuts are what I use in this recipe, but toasted almonds, pecans or sunflower seeds can also add a nice crunch.

What Greens Are Best for Peach Salad?

I love the combination of baby spinach and arugula. The spinach is mild and tender while the arugula adds a slightly peppery flavor that works beautifully with sweet peaches.

When Should I Add the Dressing?

Wait until shortly before serving to add the sweet balsamic dressing. This helps keep the arugula and spinach fresh instead of letting the greens become weighed down by the dressing.

More Salad Recipes You'll Love

If you love salads with that mix of fresh fruit, creamy cheese and plenty of texture, here are a few more recipes to try:

Final Thoughts

Summer peaches don't need much to turn them into something special, and I think that's what I love most about this salad.

The juicy peaches, creamy goat cheese and sweet candied walnuts bring so much flavor and texture on their own, while the homemade sweet balsamic dressing ties everything together.

It's simple enough to make for lunch at home but pretty enough to put in the middle of the table when we're having people over—which is always my favorite kind of recipe.

If you make this Peach & Goat Cheese Salad with Sweet Balsamic Dressing, I hope it becomes one of those recipes you look forward to making every summer when peaches are finally at their best.

Easy summer peach and goat cheese salad with homemade balsamic dressing

Peach Coffee Cake with Walnut Crumble

Peach Coffee Cake with Walnut Crumble

Fresh summer peaches and coffee cake might be one of my favorite combinations. This Peach Coffee Cake is soft and moist with layers of juicy peaches throughout and a buttery walnut crumble baked over the top.

It's the kind of cake that works just as well for a slow weekend breakfast or brunch as it does for dessert. I love serving it slightly warm, but it's just as good once it's completely cooled with a cup of coffee.

And while the fresh peaches make this especially perfect for summer, that buttery brown sugar and walnut crumble gives it just enough warmth to feel like one of those recipes that carries you right into the beginning of fall.

Peach coffee cake with walnut crumble topping

Why You'll Love This Peach Coffee Cake

This cake has so much texture without being complicated to make.

The sour cream helps create a soft, moist crumb, while cinnamon adds just a little warmth to the batter. Fresh peaches are layered throughout instead of simply scattered over the top, so you get bites of peach all through the cake.

Then there's the crumble.

It's made with granulated sugar, dark brown sugar, flour, melted butter and toasted walnuts, creating a buttery, crunchy topping that contrasts with the soft peach cake underneath.

It's simple enough to make at home but pretty enough to serve for brunch or bring out when you're having people over.

Fresh peach coffee cake with brown sugar walnut crumble
Slice of peach coffee cake with fresh peaches and crumble topping

Ingredient Notes

You don't need anything complicated for this coffee cake, but a few ingredients make a big difference in the finished texture and flavor.

Fresh Peaches

Fresh peaches are the star here. I like using ripe peaches that are sweet and juicy but still firm enough to slice easily.

The peaches are layered into the batter rather than just mixed in all at once, which helps distribute that fresh peach flavor throughout the cake.

If you're making this during peach season and somehow still have peaches left, save my Perfect Peach Cobbler for the next batch.

Full-Fat Sour Cream

Sour cream is one of the ingredients that gives this cake such a soft, moist texture. I use full-fat sour cream here for the richness it adds to the batter.

Melted Butter

I love that this recipe uses melted butter rather than requiring you to wait for butter to soften and cream it with the sugar. Just make sure the melted butter isn't piping hot when you mix it with the eggs.

Cinnamon

There are 2 teaspoons of cinnamon in the cake batter, which adds warmth without taking over the fresh peach flavor.

Toasted Walnuts

The walnuts go into the crumble topping rather than the cake itself. Toasting them first gives them more flavor and adds even more crunch to the buttery topping.

Dark Brown Sugar

I specifically use dark brown sugar in the crumble. Its deeper molasses flavor is so good with peaches, cinnamon and toasted walnuts.

Ingredients for homemade peach coffee cake

Layer the Peaches Through the Batter

Instead of pouring all of the batter into the pan and adding peaches to the top, pour in about two-thirds of the batter first, add peaches, then continue alternating the remaining batter and peaches.

That way, you get peach throughout the cake rather than one layer of fruit sitting at the top or bottom.

Don't Overmix the Batter

Once the dry ingredients go in, mix only until everything is incorporated. There's no need to keep beating the batter once it comes together.

Make Sure the Crumble Is Actually Crumbly

After mixing the melted butter with the flour and sugars, you want pieces of crumble rather than a perfectly smooth mixture. Those little clusters bake into the best crunchy topping.

Spread the Crumble All the Way Across

Don't save the good stuff for the center. Sprinkle the walnut crumble evenly from edge to edge so every slice gets some.

Use the Toothpick Test

The original recipe bakes at 350°F for about 40–45 minutes. Since ovens and pans can vary, start checking around the 40-minute mark. A toothpick inserted into the cake portion should come out clean or with a few moist crumbs rather than wet batter.

Homemade peach coffee cake served for summer brunch
Easy peach coffee cake with walnut crumble

Serving Peach Coffee Cake

I think this cake is best when you keep the finish simple.

Let the crumble be the star and add a light dusting of powdered sugar once the cake has cooled. Your original recipe also gives the option of making a simple powdered sugar and milk drizzle, so either finish works.

Serve slices slightly warm or at room temperature. It's sweet enough for dessert but still feels right at home on a brunch table with coffee.

For summer entertaining, I'd serve it with fresh fruit and coffee and let everyone cut a slice right from the pan or serving platter.

I love serving simple cakes like this on a pretty cake stand or serving platter so the crumble and peaches can really be the focus.

Easy peach coffee cake slice with walnut crumble

Peach Coffee Cake with Walnut Crumble

A soft and moist peach coffee cake layered with fresh peaches and cinnamon and finished with a buttery brown sugar and toasted walnut crumble.

Ingredients

For the Peach Coffee Cake

  • 1 3/4 cups granulated sugar

  • 1 cup butter, melted

  • 4 eggs

  • 2 teaspoons vanilla extract

  • 1 cup full-fat sour cream

  • 2 cups all-purpose flour

  • 4 teaspoons baking powder

  • 1 teaspoon sea salt

  • 2 teaspoons cinnamon

  • 1 cup sliced fresh peaches

For the Walnut Crumble

  • 1/3 cup granulated sugar

  • 1/3 cup dark brown sugar

  • 1 1/2 cups all-purpose flour

  • 1/2 cup butter, melted

  • 1/2 cup chopped toasted walnuts

Optional for Serving

  • Powdered sugar, for dusting

Instructions

1. Prepare the Pan and Oven. I used my bake & roast pan but any 9x13 pan will work.

Preheat the oven to 350°F and grease your baking pan.

2. Mix the Wet Ingredients

In a large mixing bowl, combine the granulated sugar, melted butter, eggs and vanilla extract. Mix until well blended.

3. Make the Cake Batter

Add the all-purpose flour, baking powder, sea salt and cinnamon and mix until incorporated.

Add the sour cream and continue mixing just until the batter is smooth and combined.

4. Layer the Batter and Peaches

Pour approximately two-thirds of the cake batter into the prepared pan.

Add a layer of sliced peaches, drizzle some of the remaining batter over the peaches, add more peaches and finish with the remaining batter.

5. Make the Walnut Crumble

In a clean bowl, combine the granulated sugar, dark brown sugar and all-purpose flour.

Pour in the melted butter and mix until a crumbly mixture forms. Fold in the chopped toasted walnuts.

6. Add the Crumble

Sprinkle the walnut crumble evenly over the entire cake.

7. Bake

Bake at 350°F for 40–45 minutes, or until a toothpick inserted into the cake comes out clean or with a few moist crumbs.

Allow the cake to cool before finishing with a light dusting of powdered sugar, if desired.

For a sweeter finish, you can also mix powdered sugar with a small amount of milk to create a simple drizzle.

Slice, serve and enjoy.

Amanda's Tip

Layer the peaches throughout the batter instead of adding them all at once. It helps distribute those juicy peach bites through the cake so you get peach in every slice.

Sliced peaches layered through homemade coffee cake batter
Golden walnut crumble topping on peach coffee cake
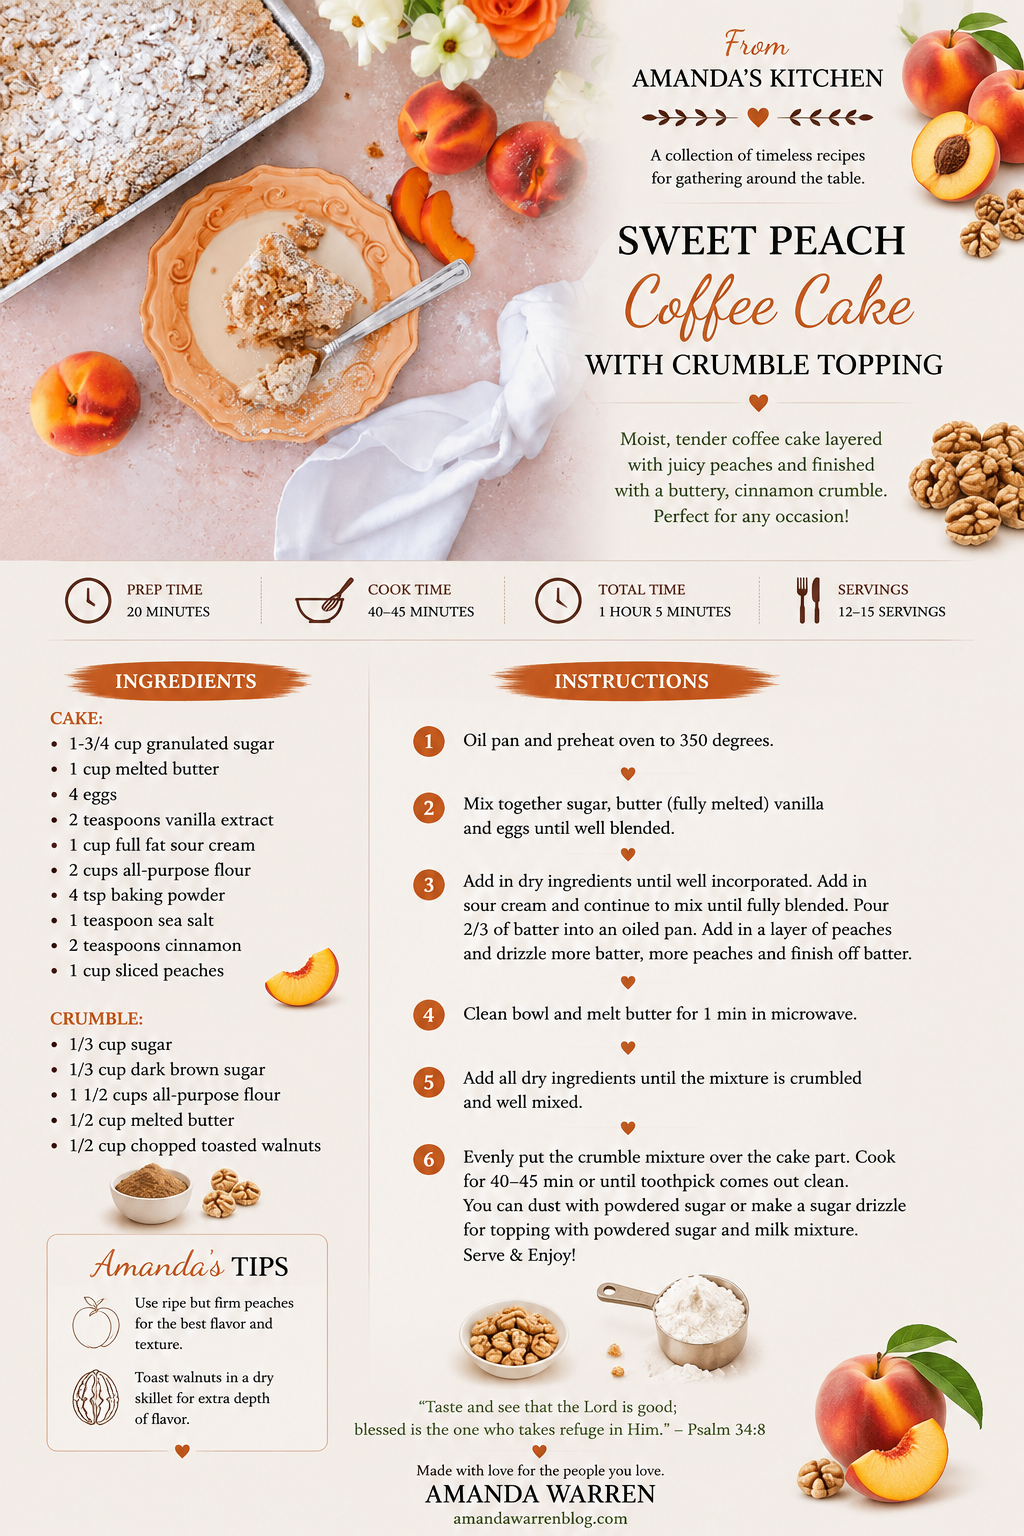
Peach coffee cake with walnut crumble printable recipe card
Moist peach coffee cake with fresh peach layers

Save This Recipe

Whether you're saving this one for the next basket of summer peaches or planning a weekend brunch, I've included a printable recipe card below so it's easy to print and come back to whenever you're ready to bake it again.

A soft and moist peach coffee cake layered with fresh peaches and cinnamon and finished with a buttery brown sugar and toasted walnut crumble.

Frequently Asked Questions

What Kind of Peaches Are Best for Peach Coffee Cake?

Use ripe, flavorful peaches that are still firm enough to slice. Extremely soft peaches can be harder to layer through the batter and may release more juice as the cake bakes.

Do I Need to Peel the Peaches?

The original recipe doesn't specify whether the peaches were peeled, so I wouldn't tell readers they have to do it either way. If you made yours with the skins on, we can add that as your preference.

Why Is Sour Cream Used in Coffee Cake?

In this recipe, full-fat sour cream adds richness and moisture to the batter and helps create the soft texture that works so well with the peaches.

Can I Make Peach Coffee Cake Ahead of Time?

Yes. This is a good cake to bake ahead because it doesn't rely on frosting or a finish that has to be added immediately before serving. Let the cake cool completely before covering it.

How Do I Know When Peach Coffee Cake Is Done?

Start checking around 40 minutes. Insert a toothpick into the cake portion rather than directly through a peach. It should come out clean or with a few moist crumbs.

Does Coffee Cake Have Coffee in It?

No coffee is used in this recipe. “Coffee cake” refers to the style of cake traditionally served alongside coffee rather than coffee being an ingredient.

Homemade peach coffee cake with fresh peaches and walnut crumble

More Peach & Coffee Cake Recipes You'll Love

If you're making the most of peach season, try my Perfect Peach Cobbler or Peach Baked Brie next.

For another cozy coffee cake recipe, my Pumpkin Coffee Cake with Pecan Crumble is one to save for fall, and my Espresso Coffee Cake Muffins turn that classic crumb-topped coffee cake idea into individual muffins.

Final Thoughts

Fresh peaches are one of those ingredients I want to use as much as possible while they're in season, and this coffee cake is such a good excuse to bake with them.

The cake stays soft and moist underneath those layers of juicy peaches, while the buttery walnut crumble adds the texture that makes a good coffee cake so hard to stop eating.

Serve it for a summer brunch, add it to a dessert table or just cut yourself a slice to have with coffee. It's simple, seasonal and exactly the kind of recipe I love having in my kitchen.

Fresh peach coffee cake topped with buttery toasted walnut crumble
Peach sour cream coffee cake with golden walnut crumble topping

Honey Lime Fruit Salad

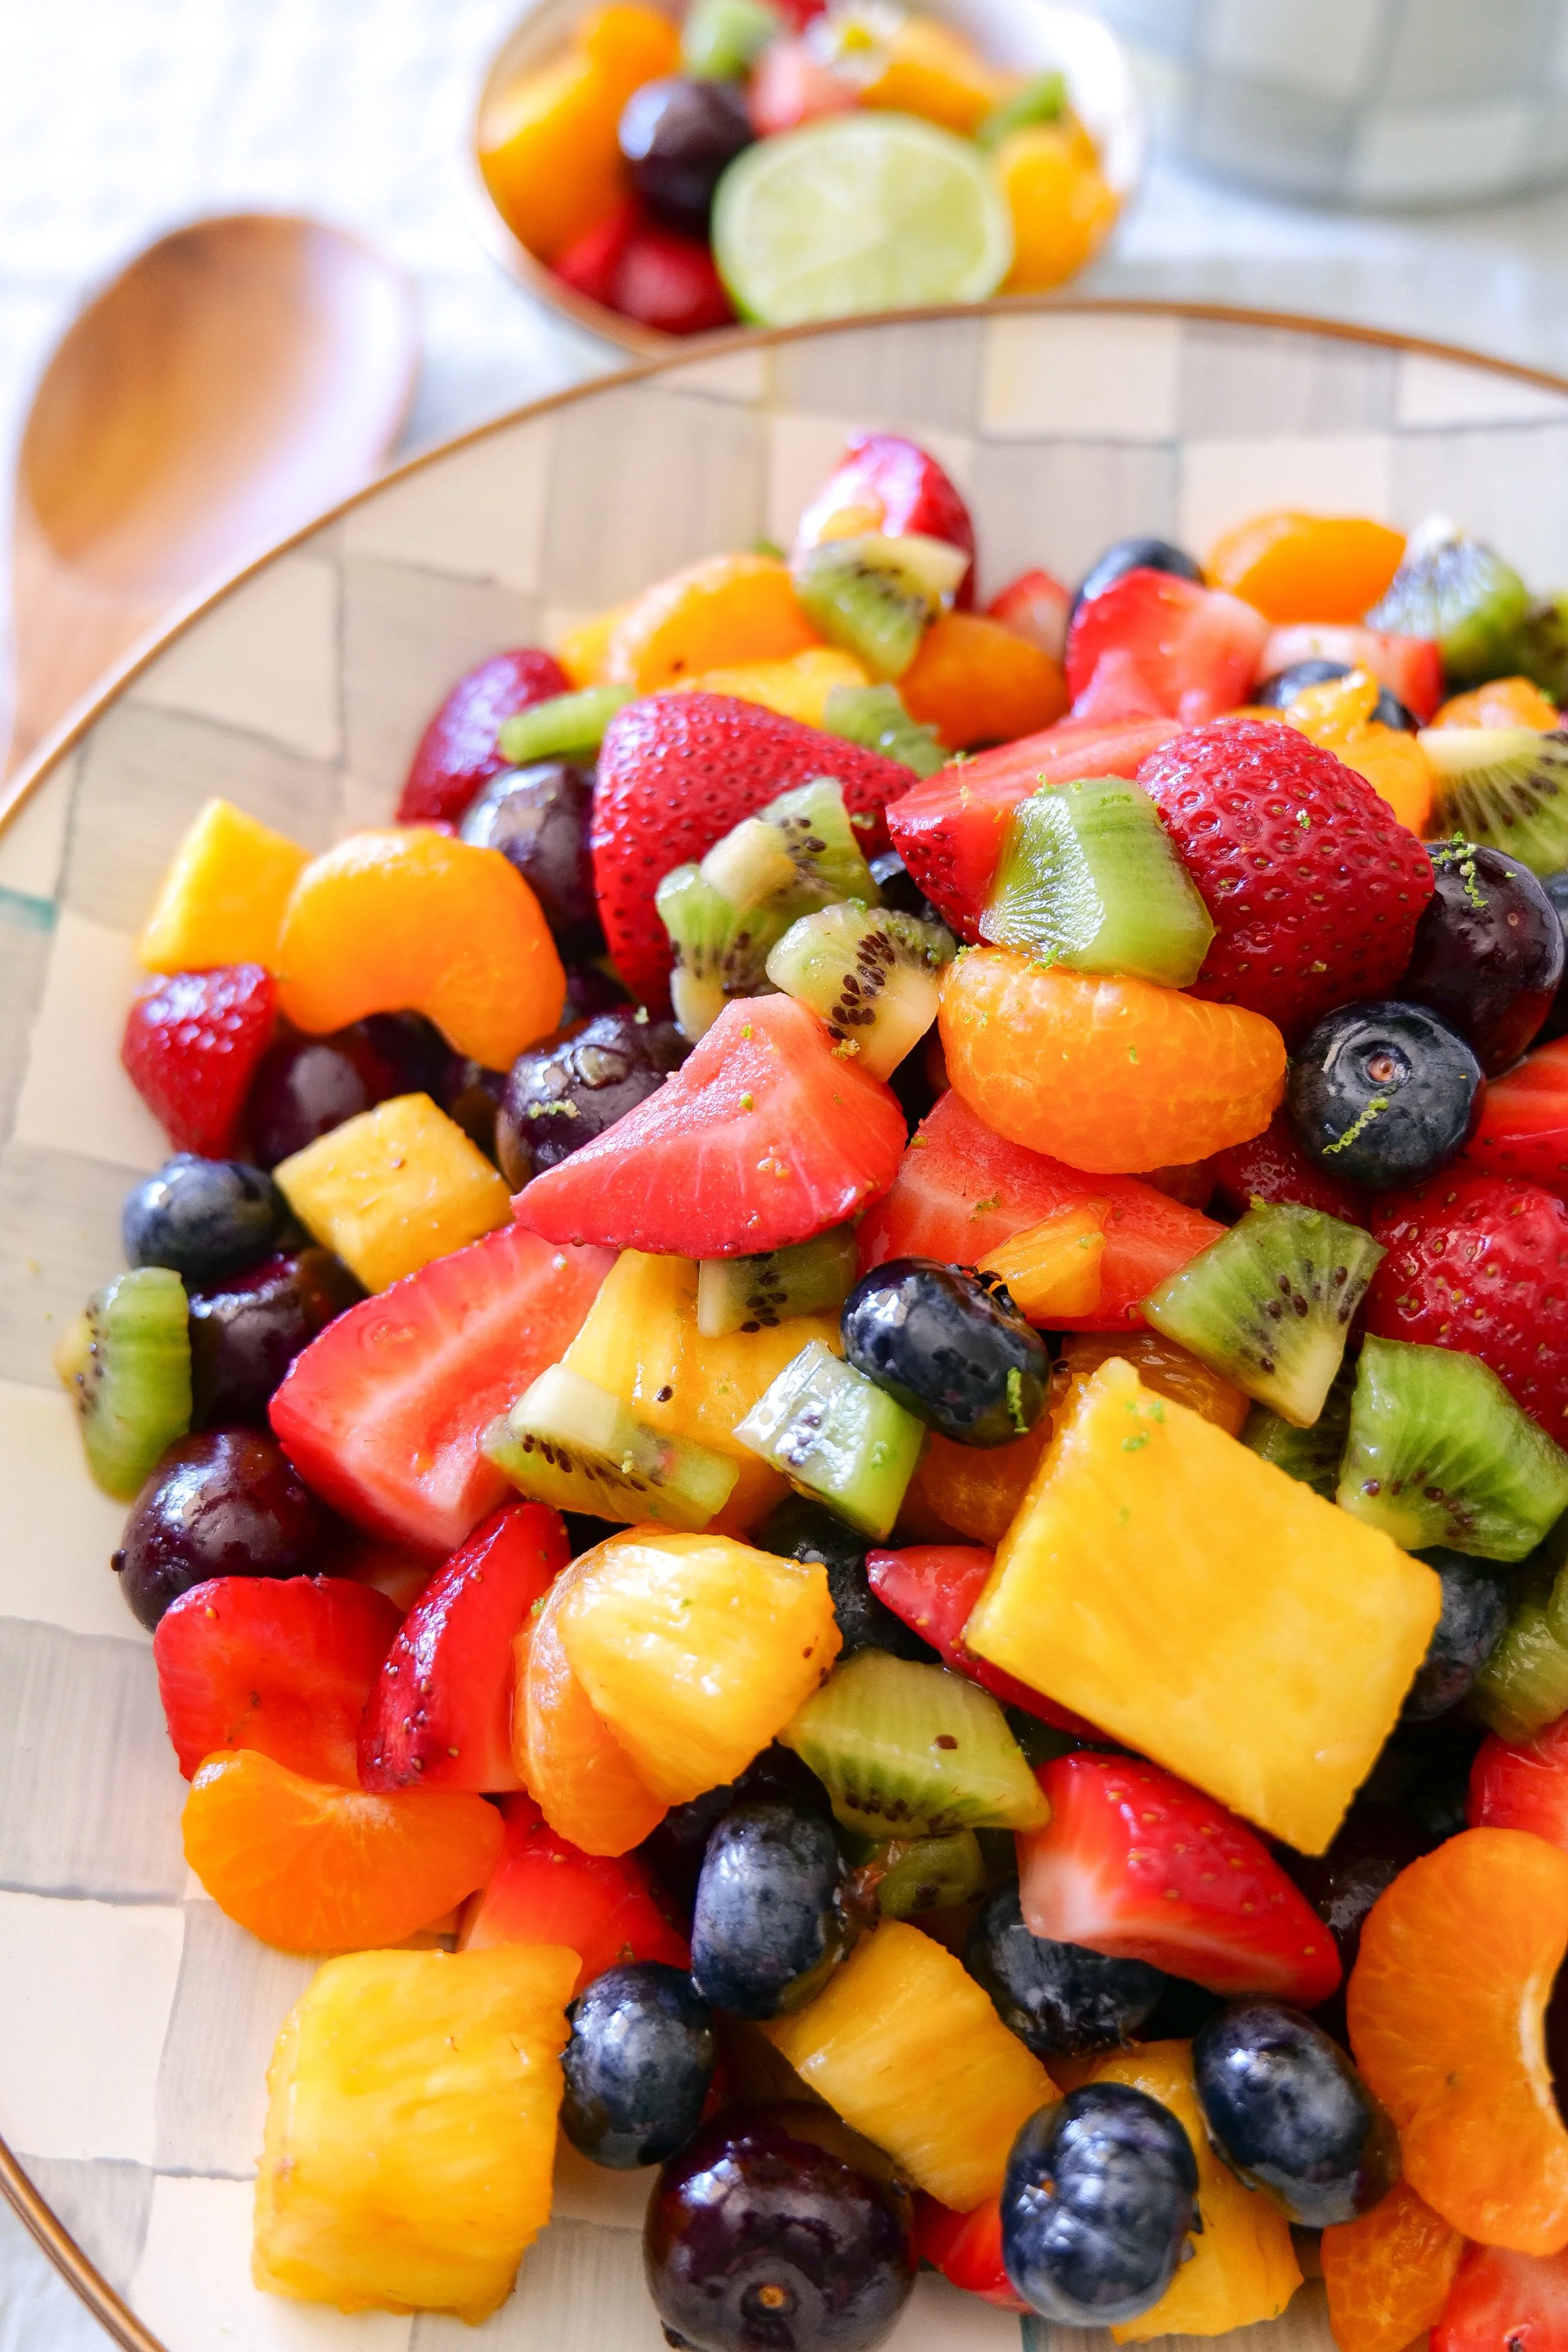
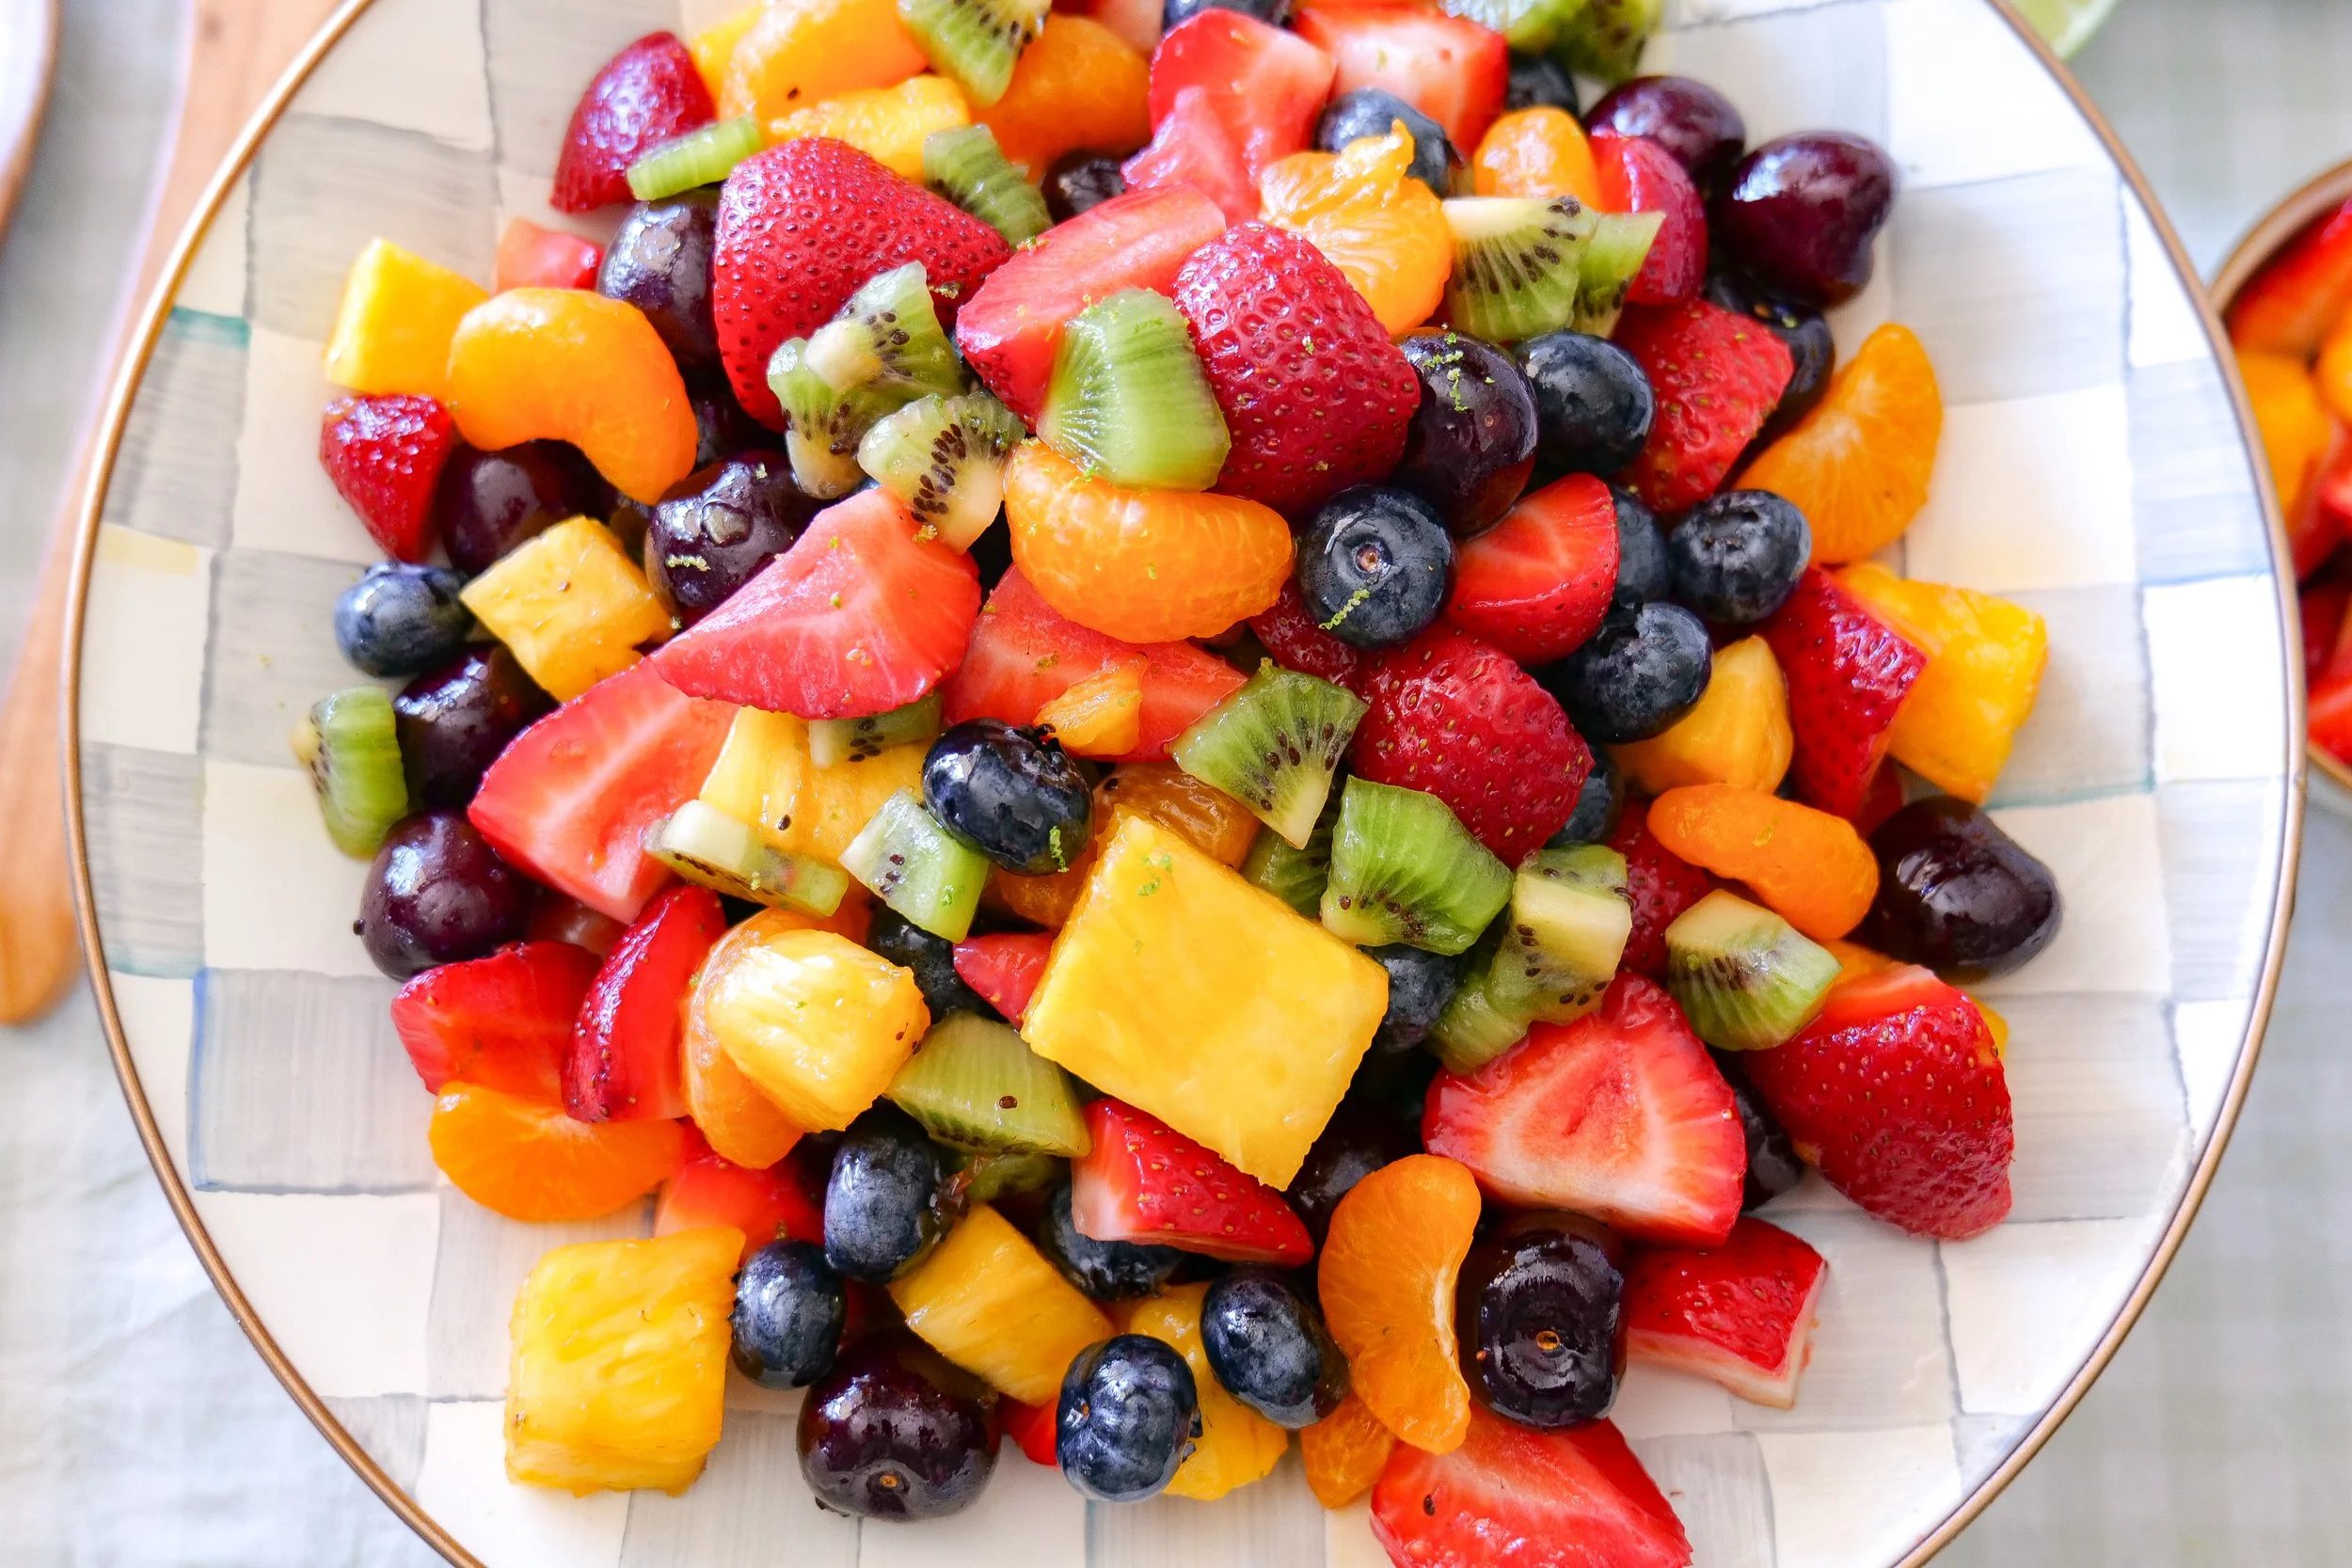
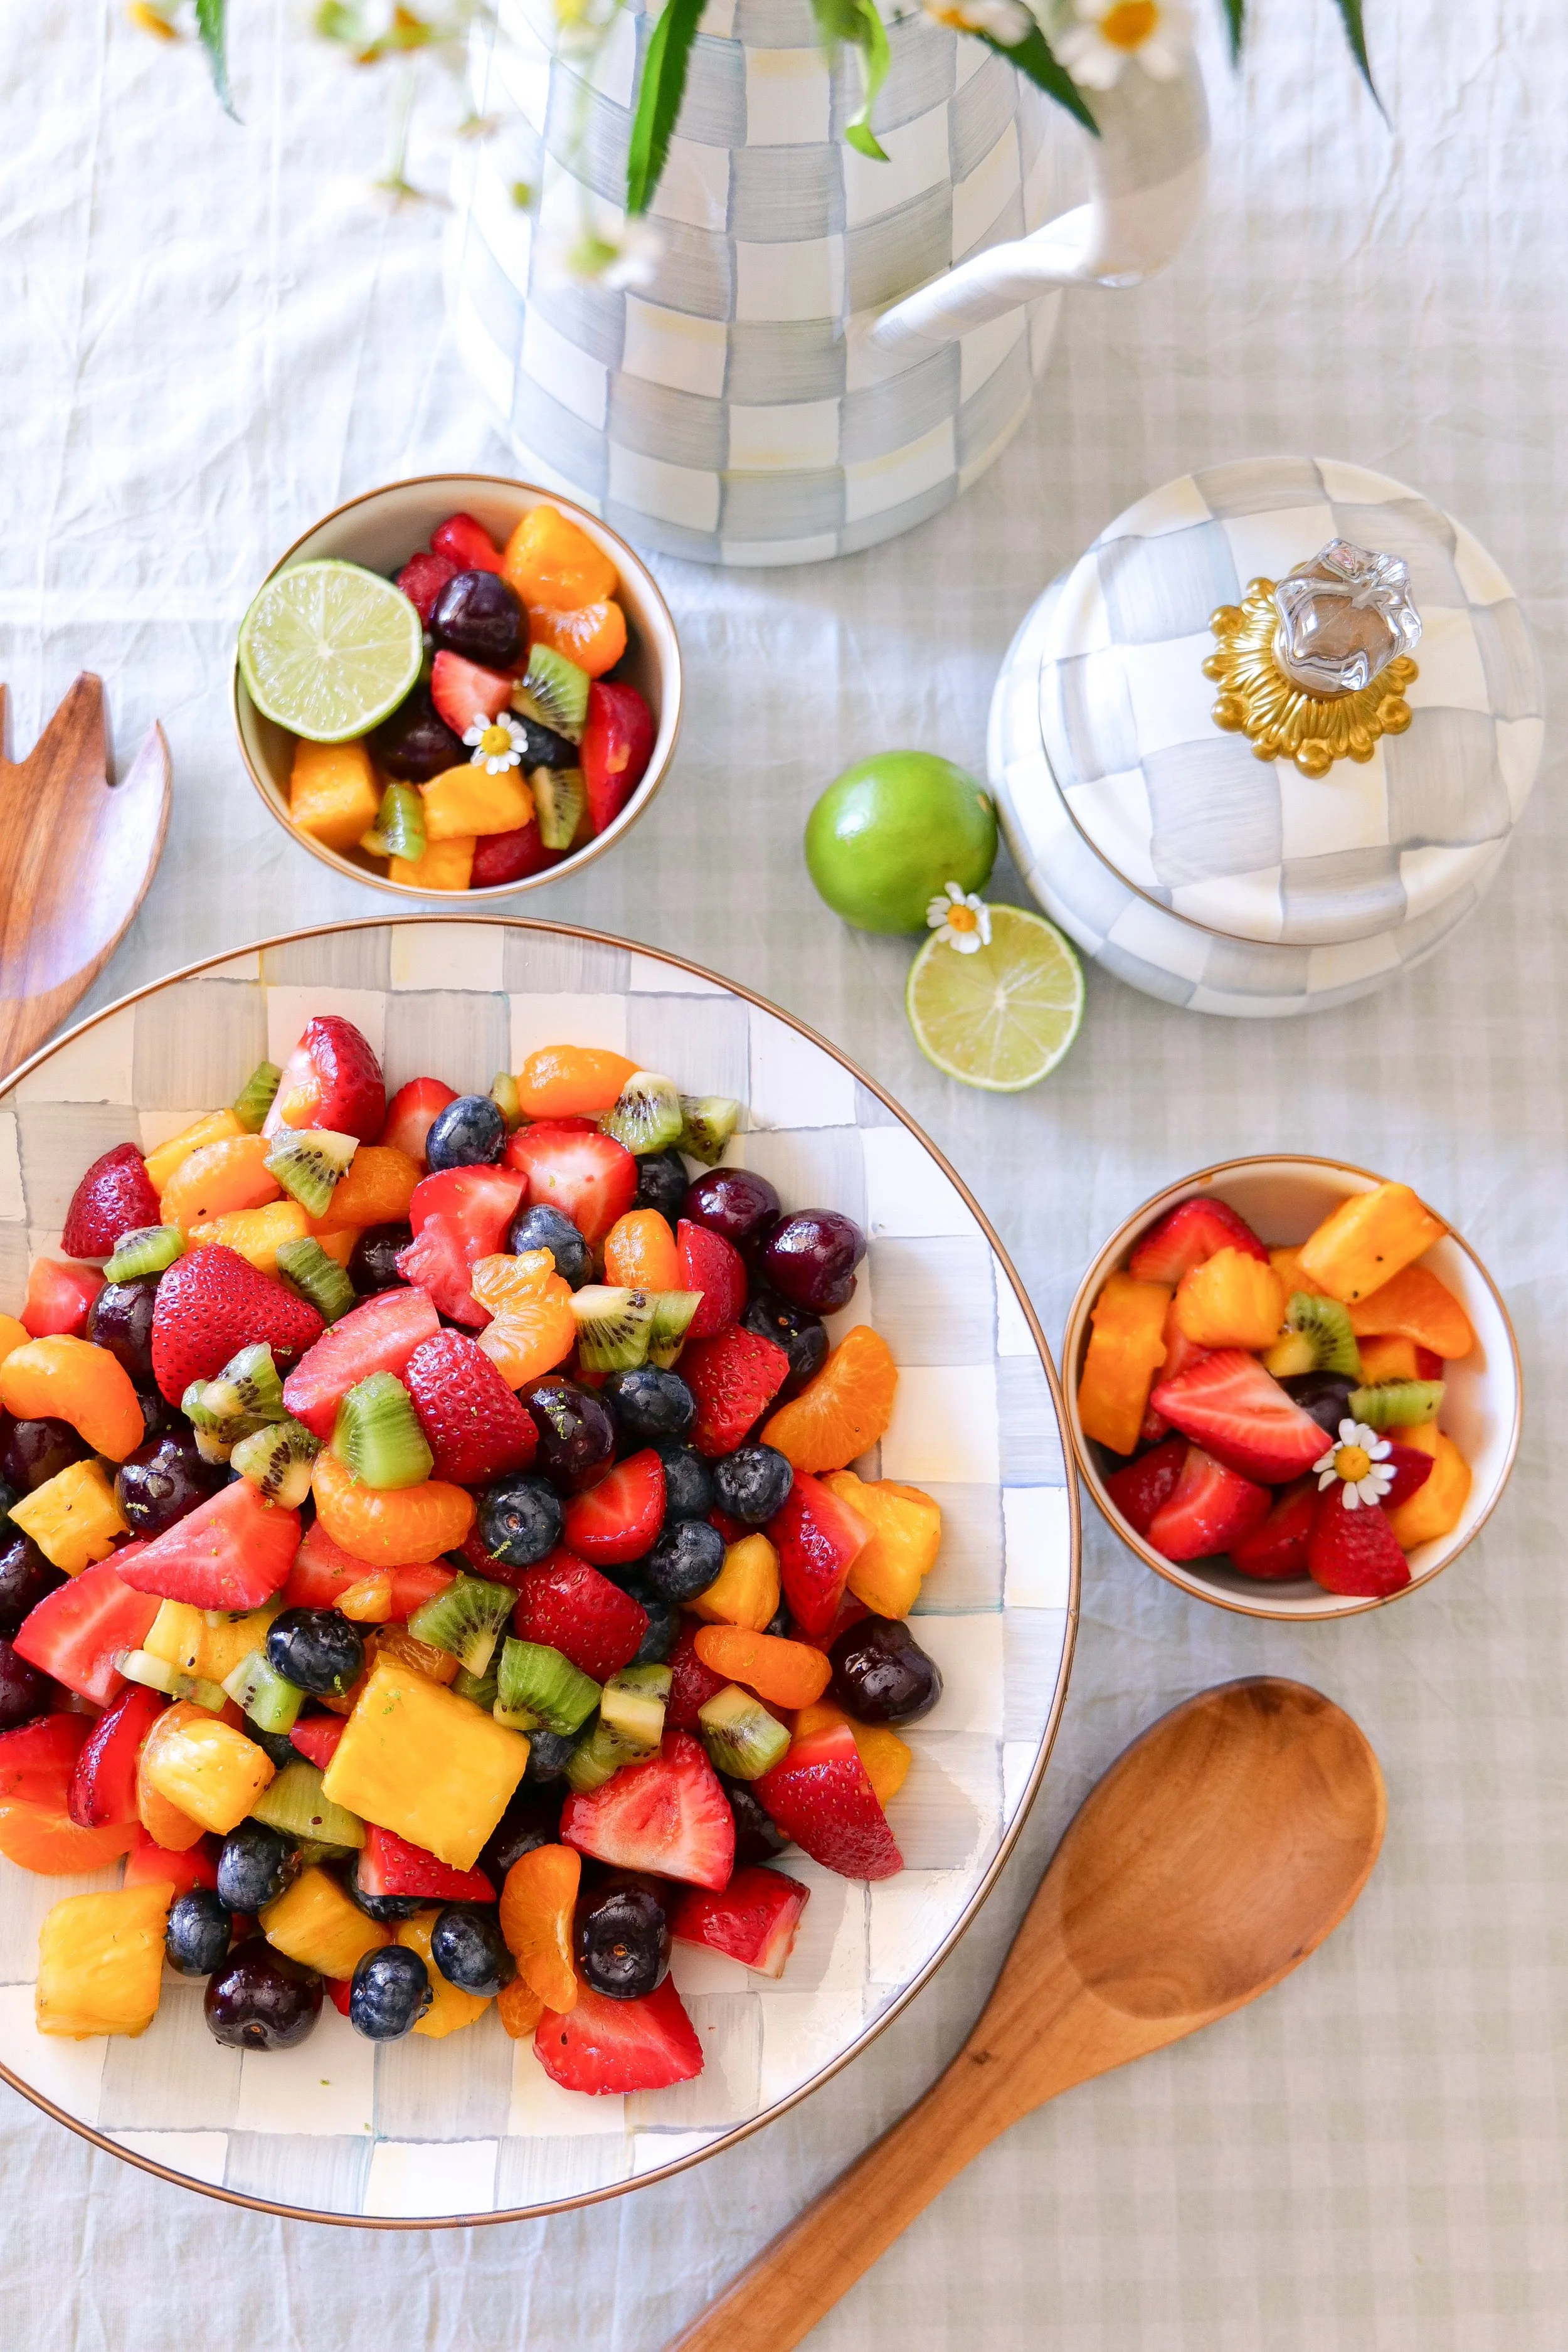
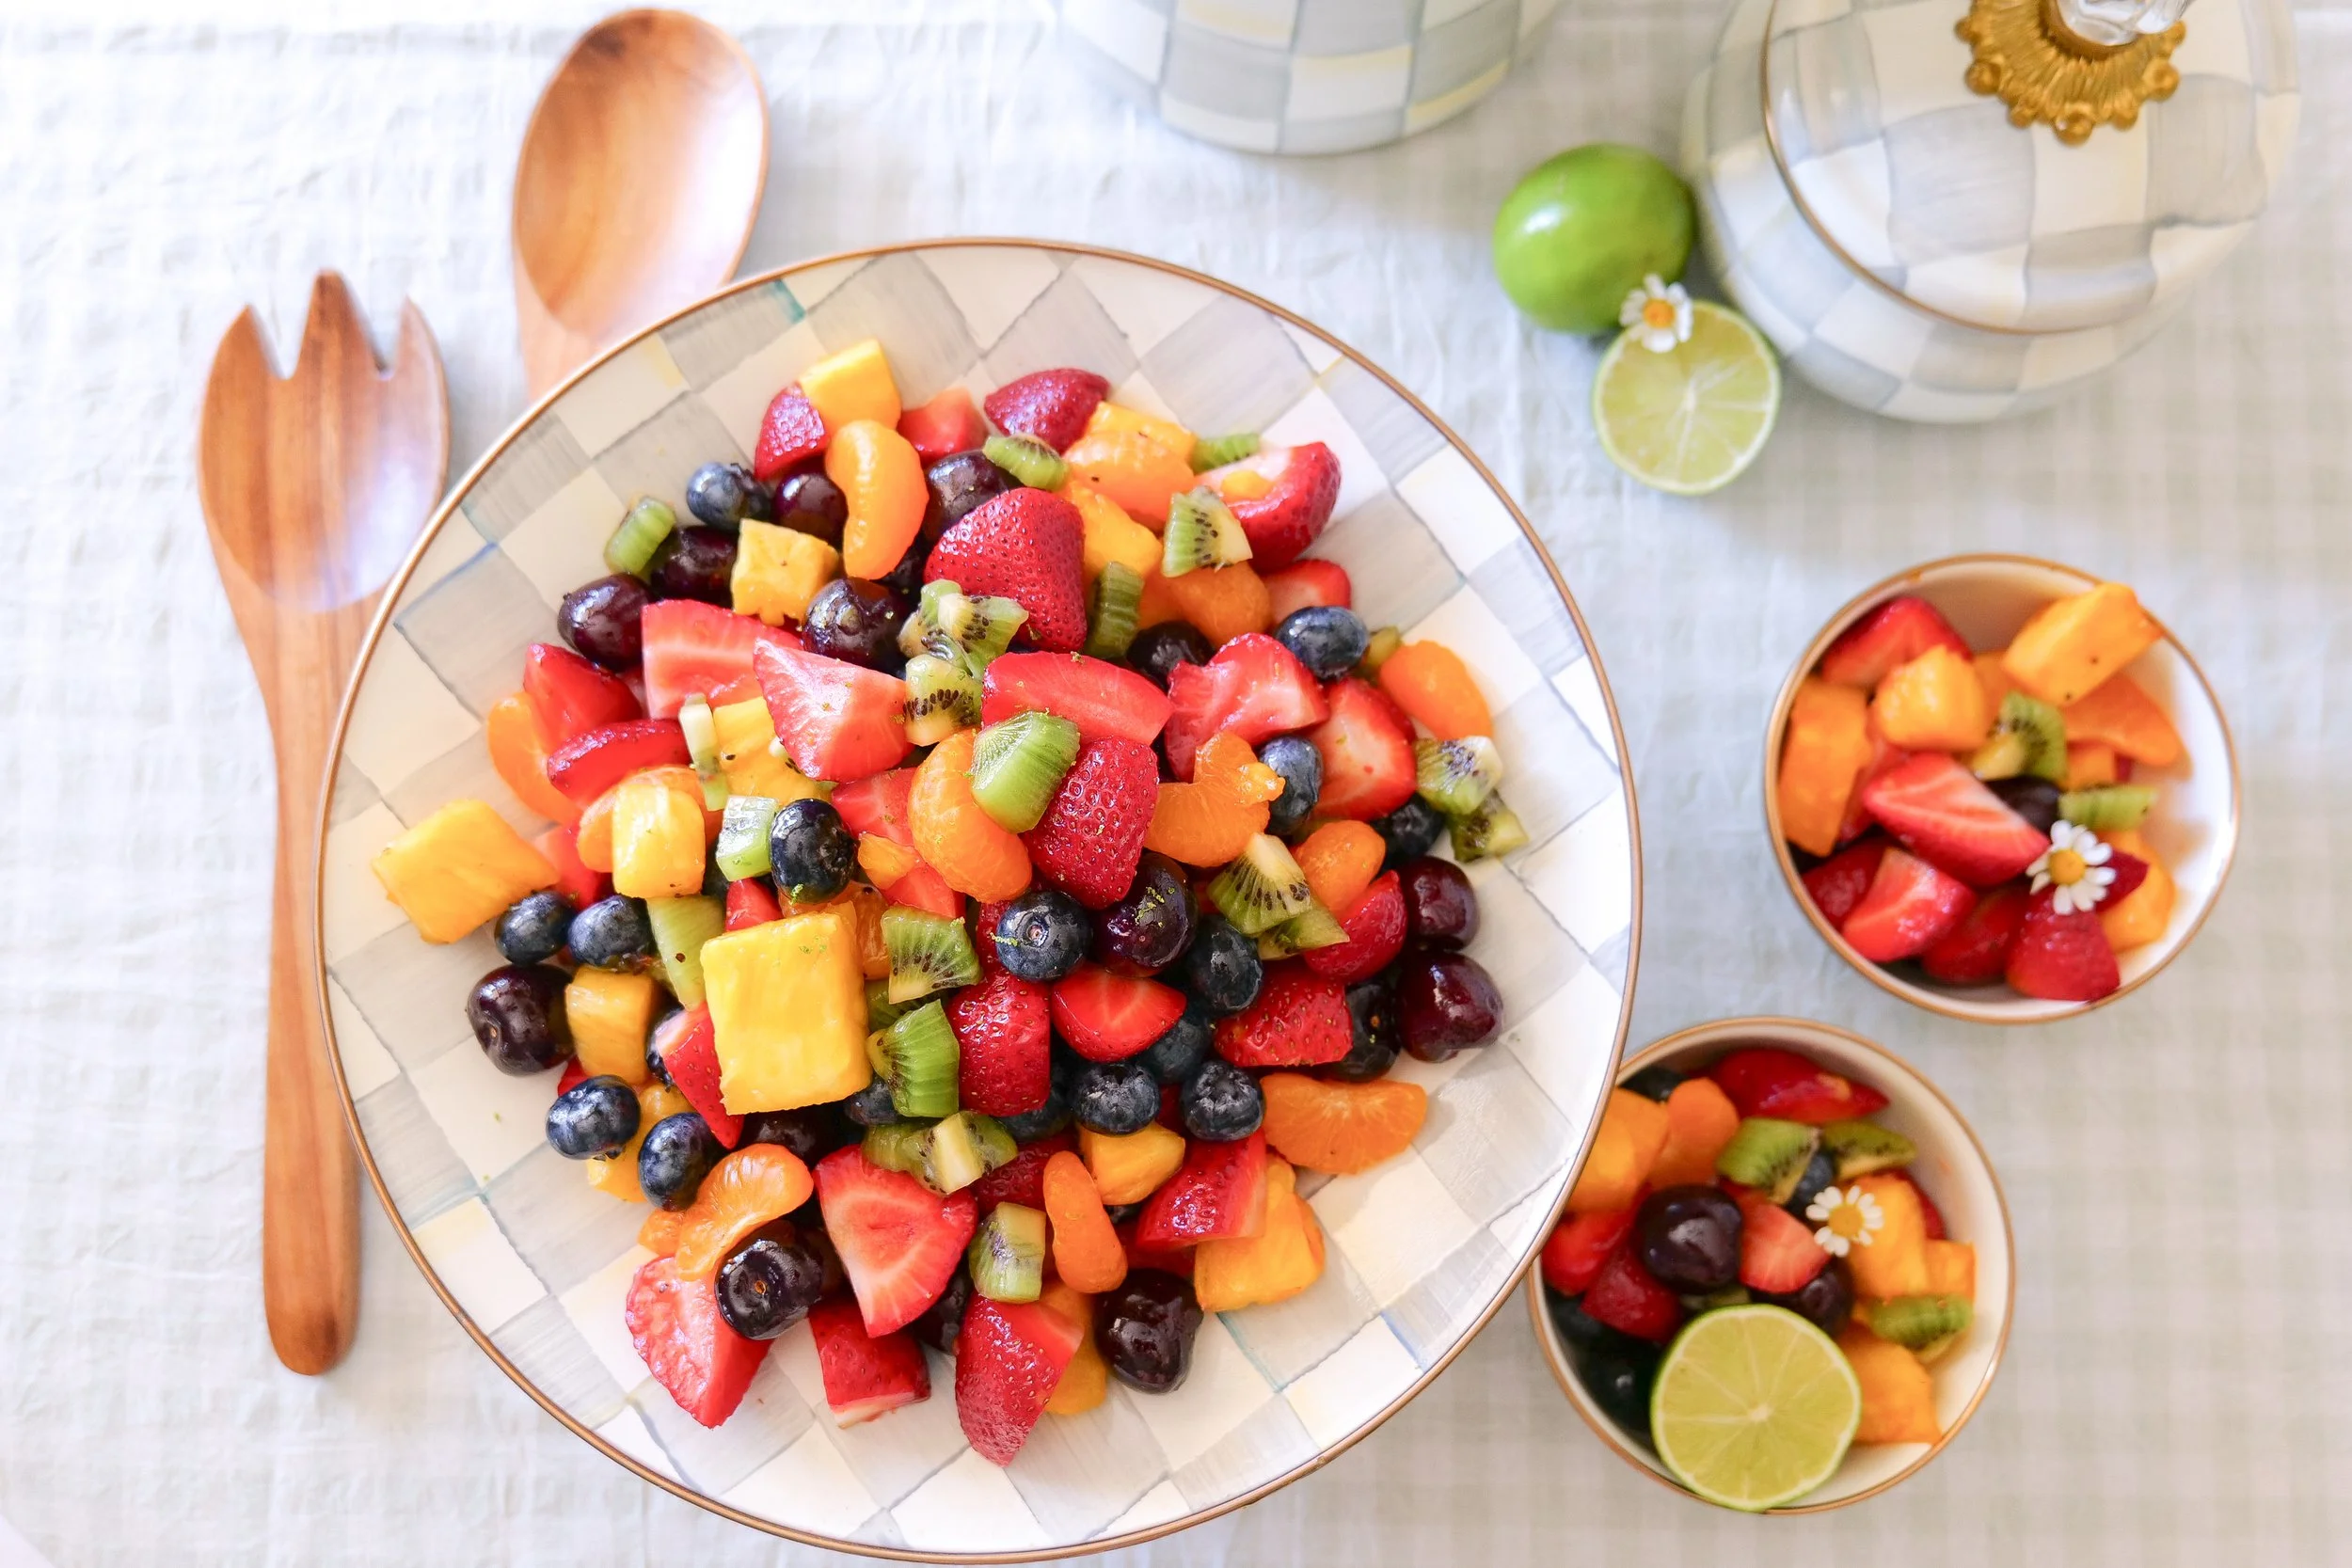
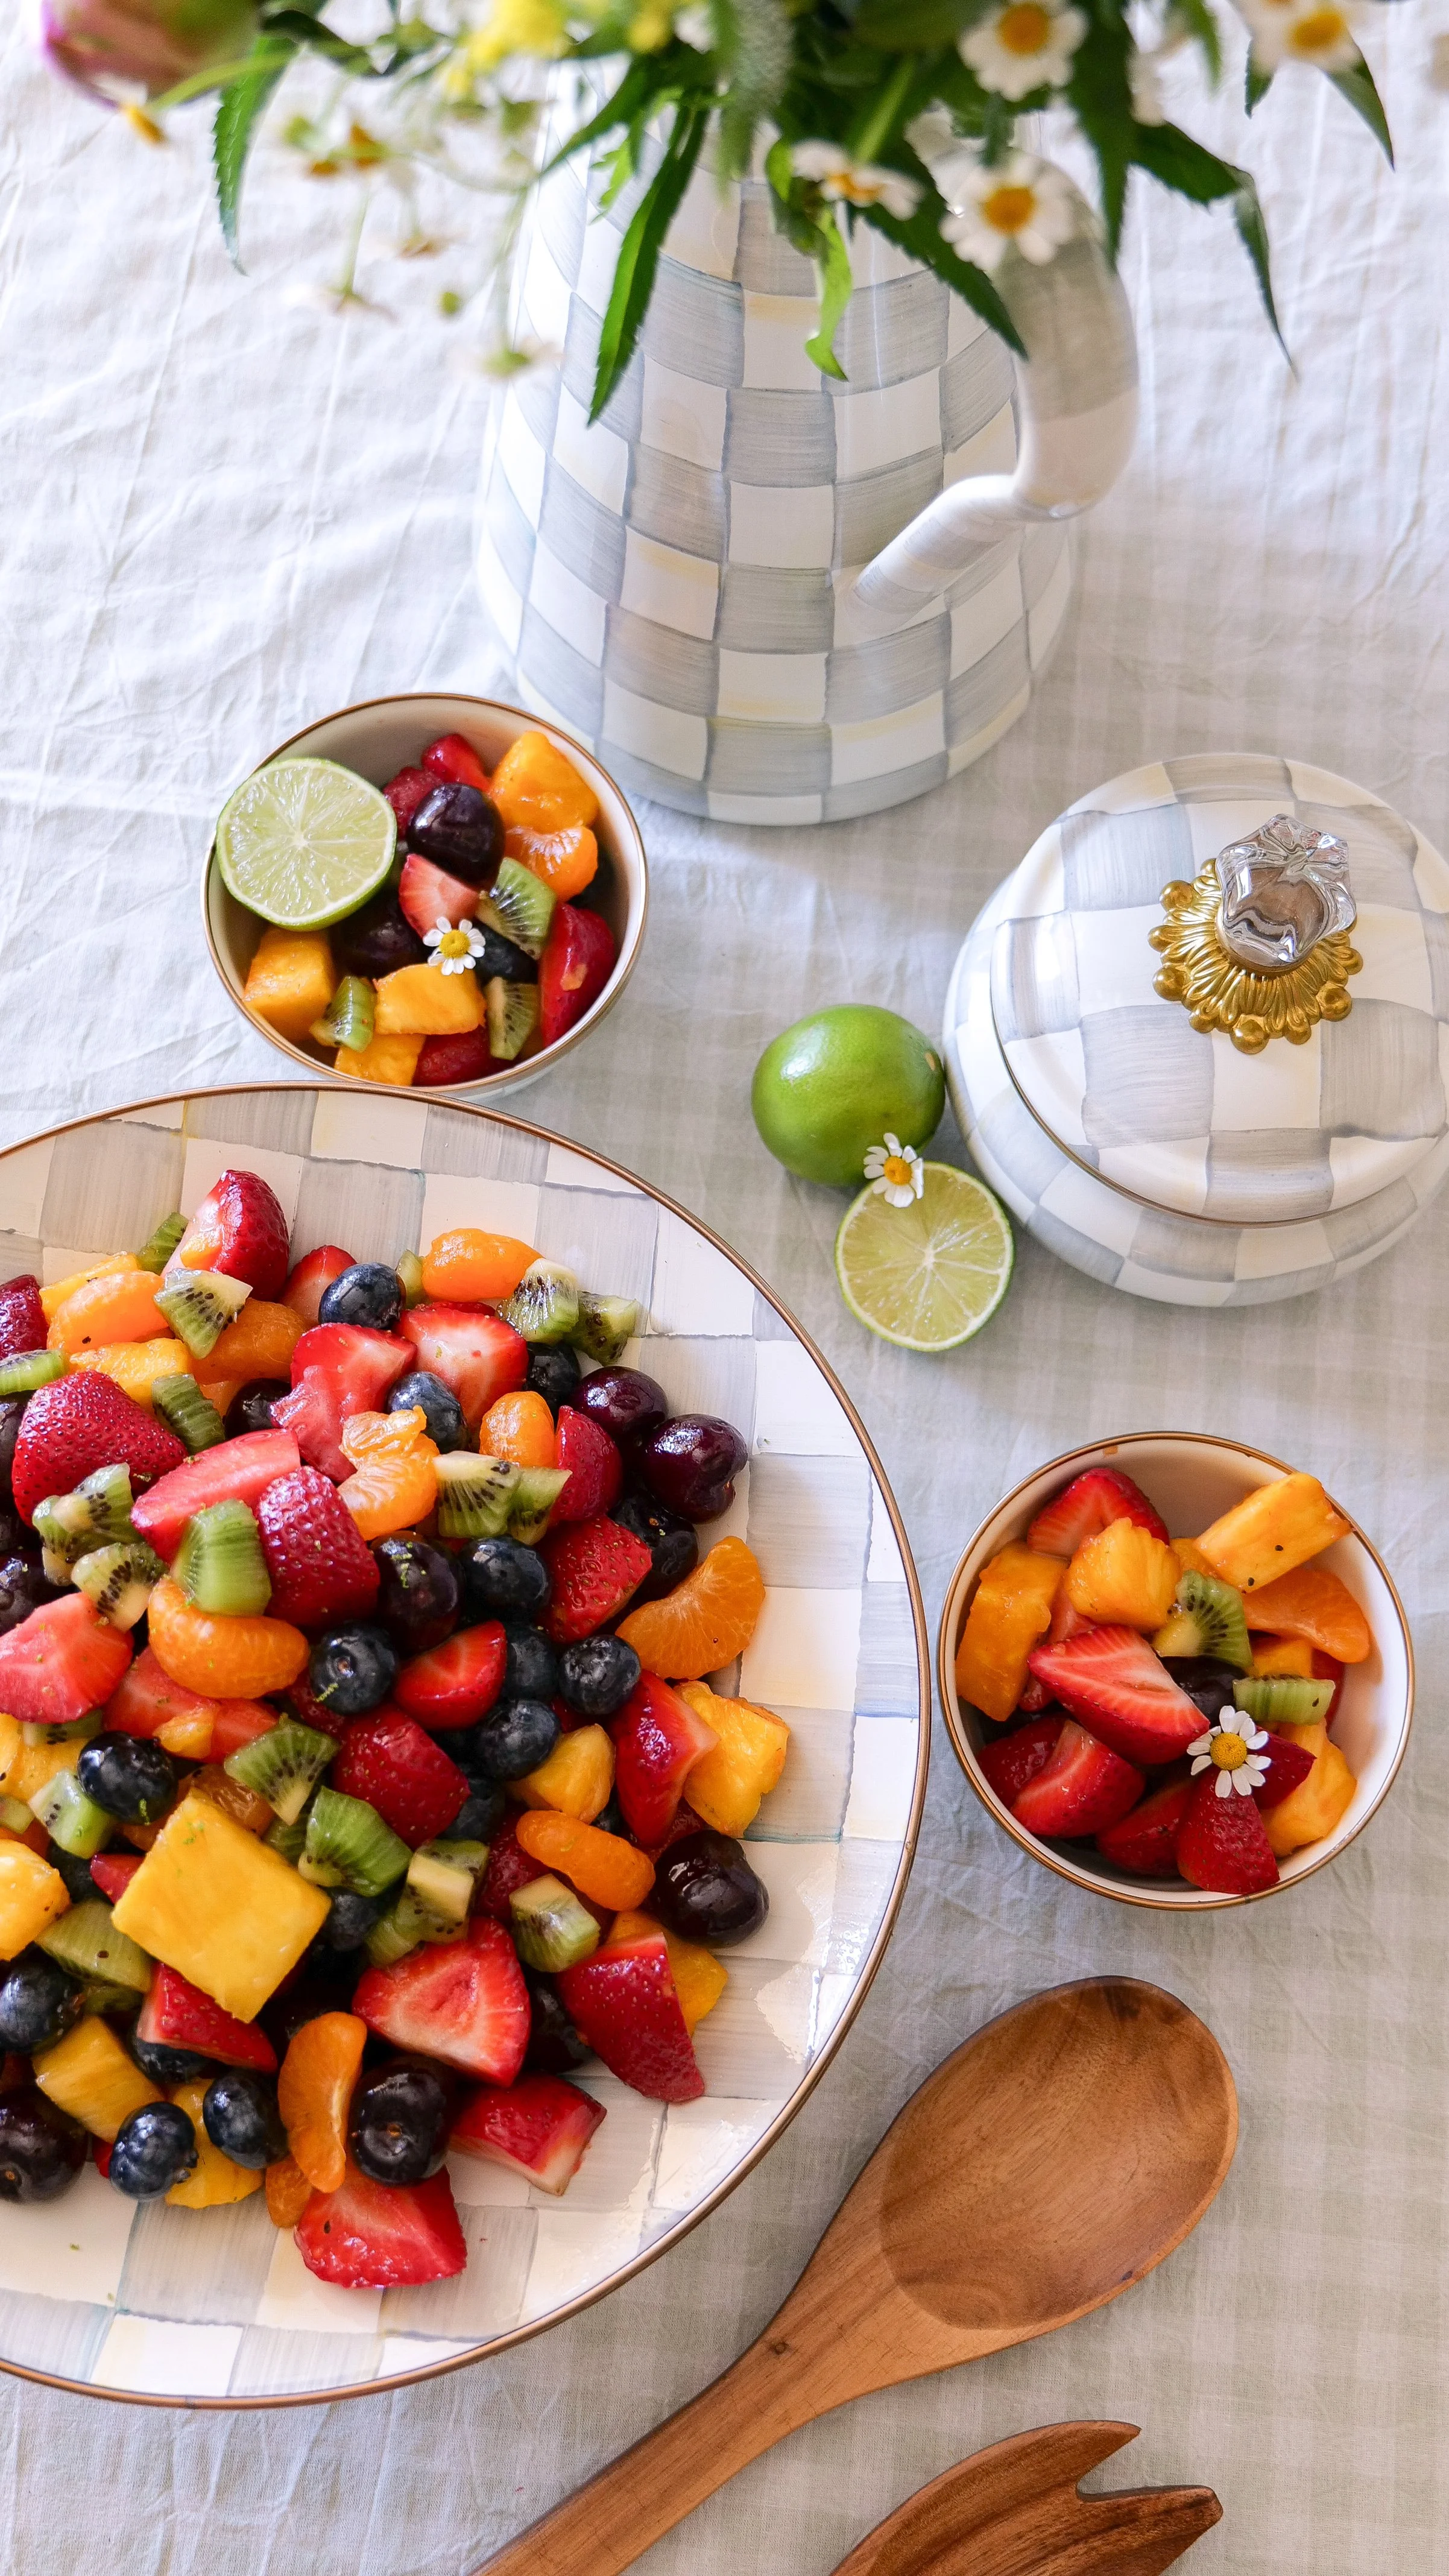
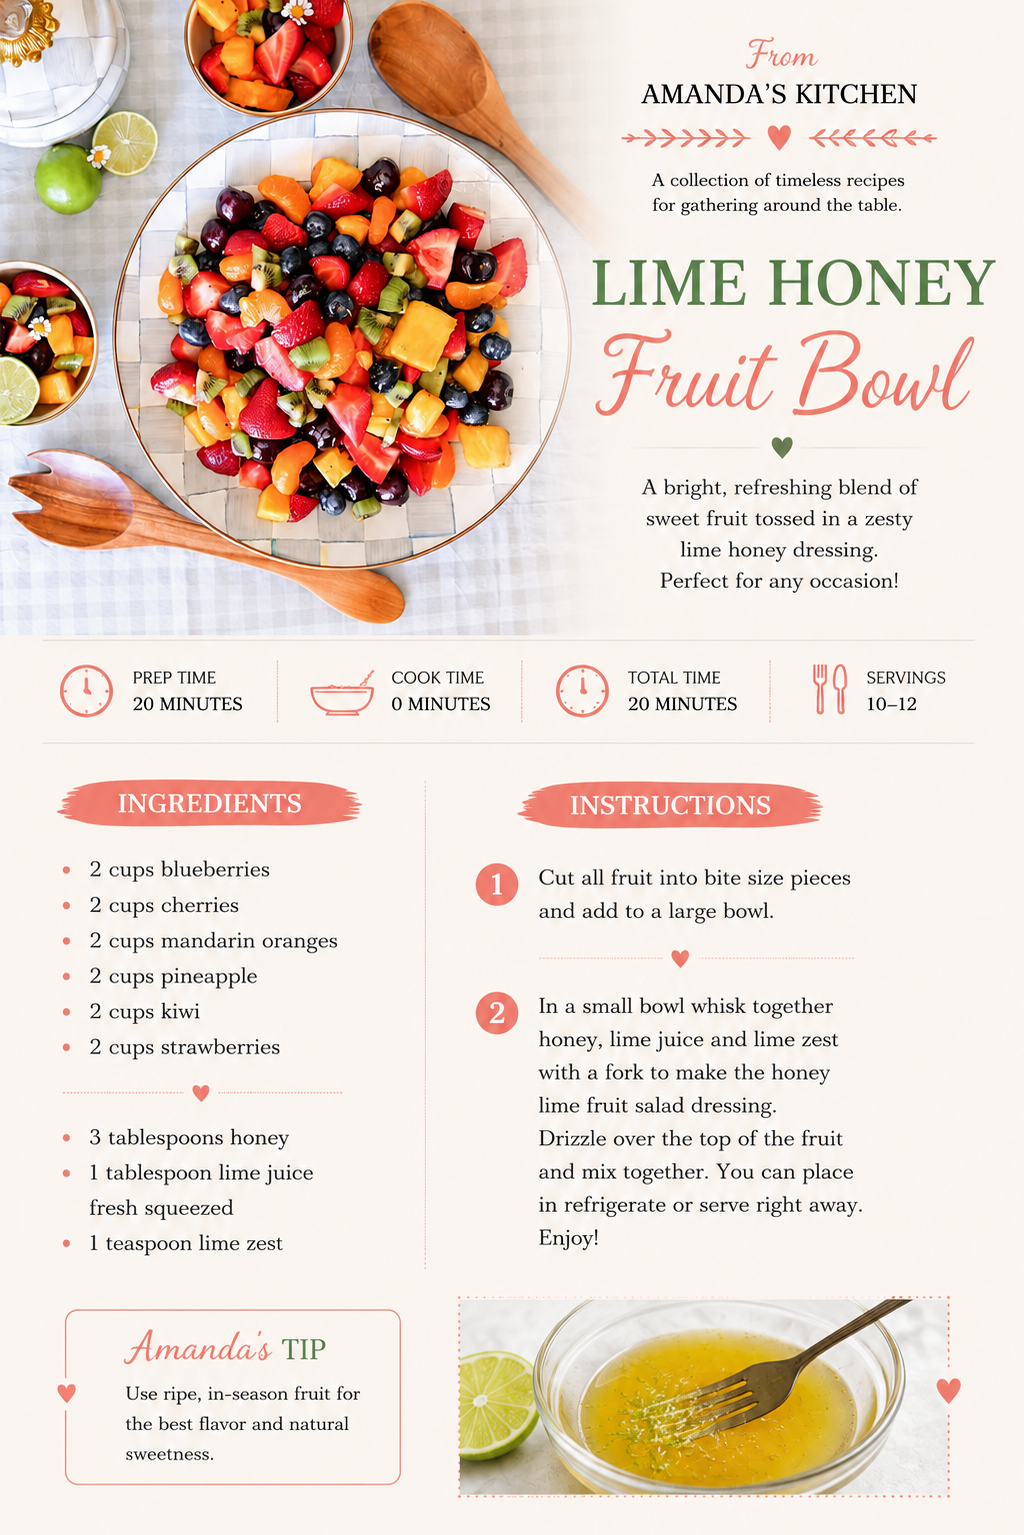
This Honey Lime Fruit Salad is one of my favorite ways to make a big bowl of fresh fruit feel just a little more special. It's filled with blueberries, cherries, mandarin oranges, pineapple, kiwi and strawberries, then tossed with a simple three-ingredient honey lime dressing.

The dressing is just sweet enough without covering up the flavor of the fruit. Fresh lime juice and zest add brightness, while honey brings everything together.

It's colorful, easy to make and perfect for summer brunches, backyard dinners, holidays or anytime you need an easy side dish that everyone can scoop onto their plate.

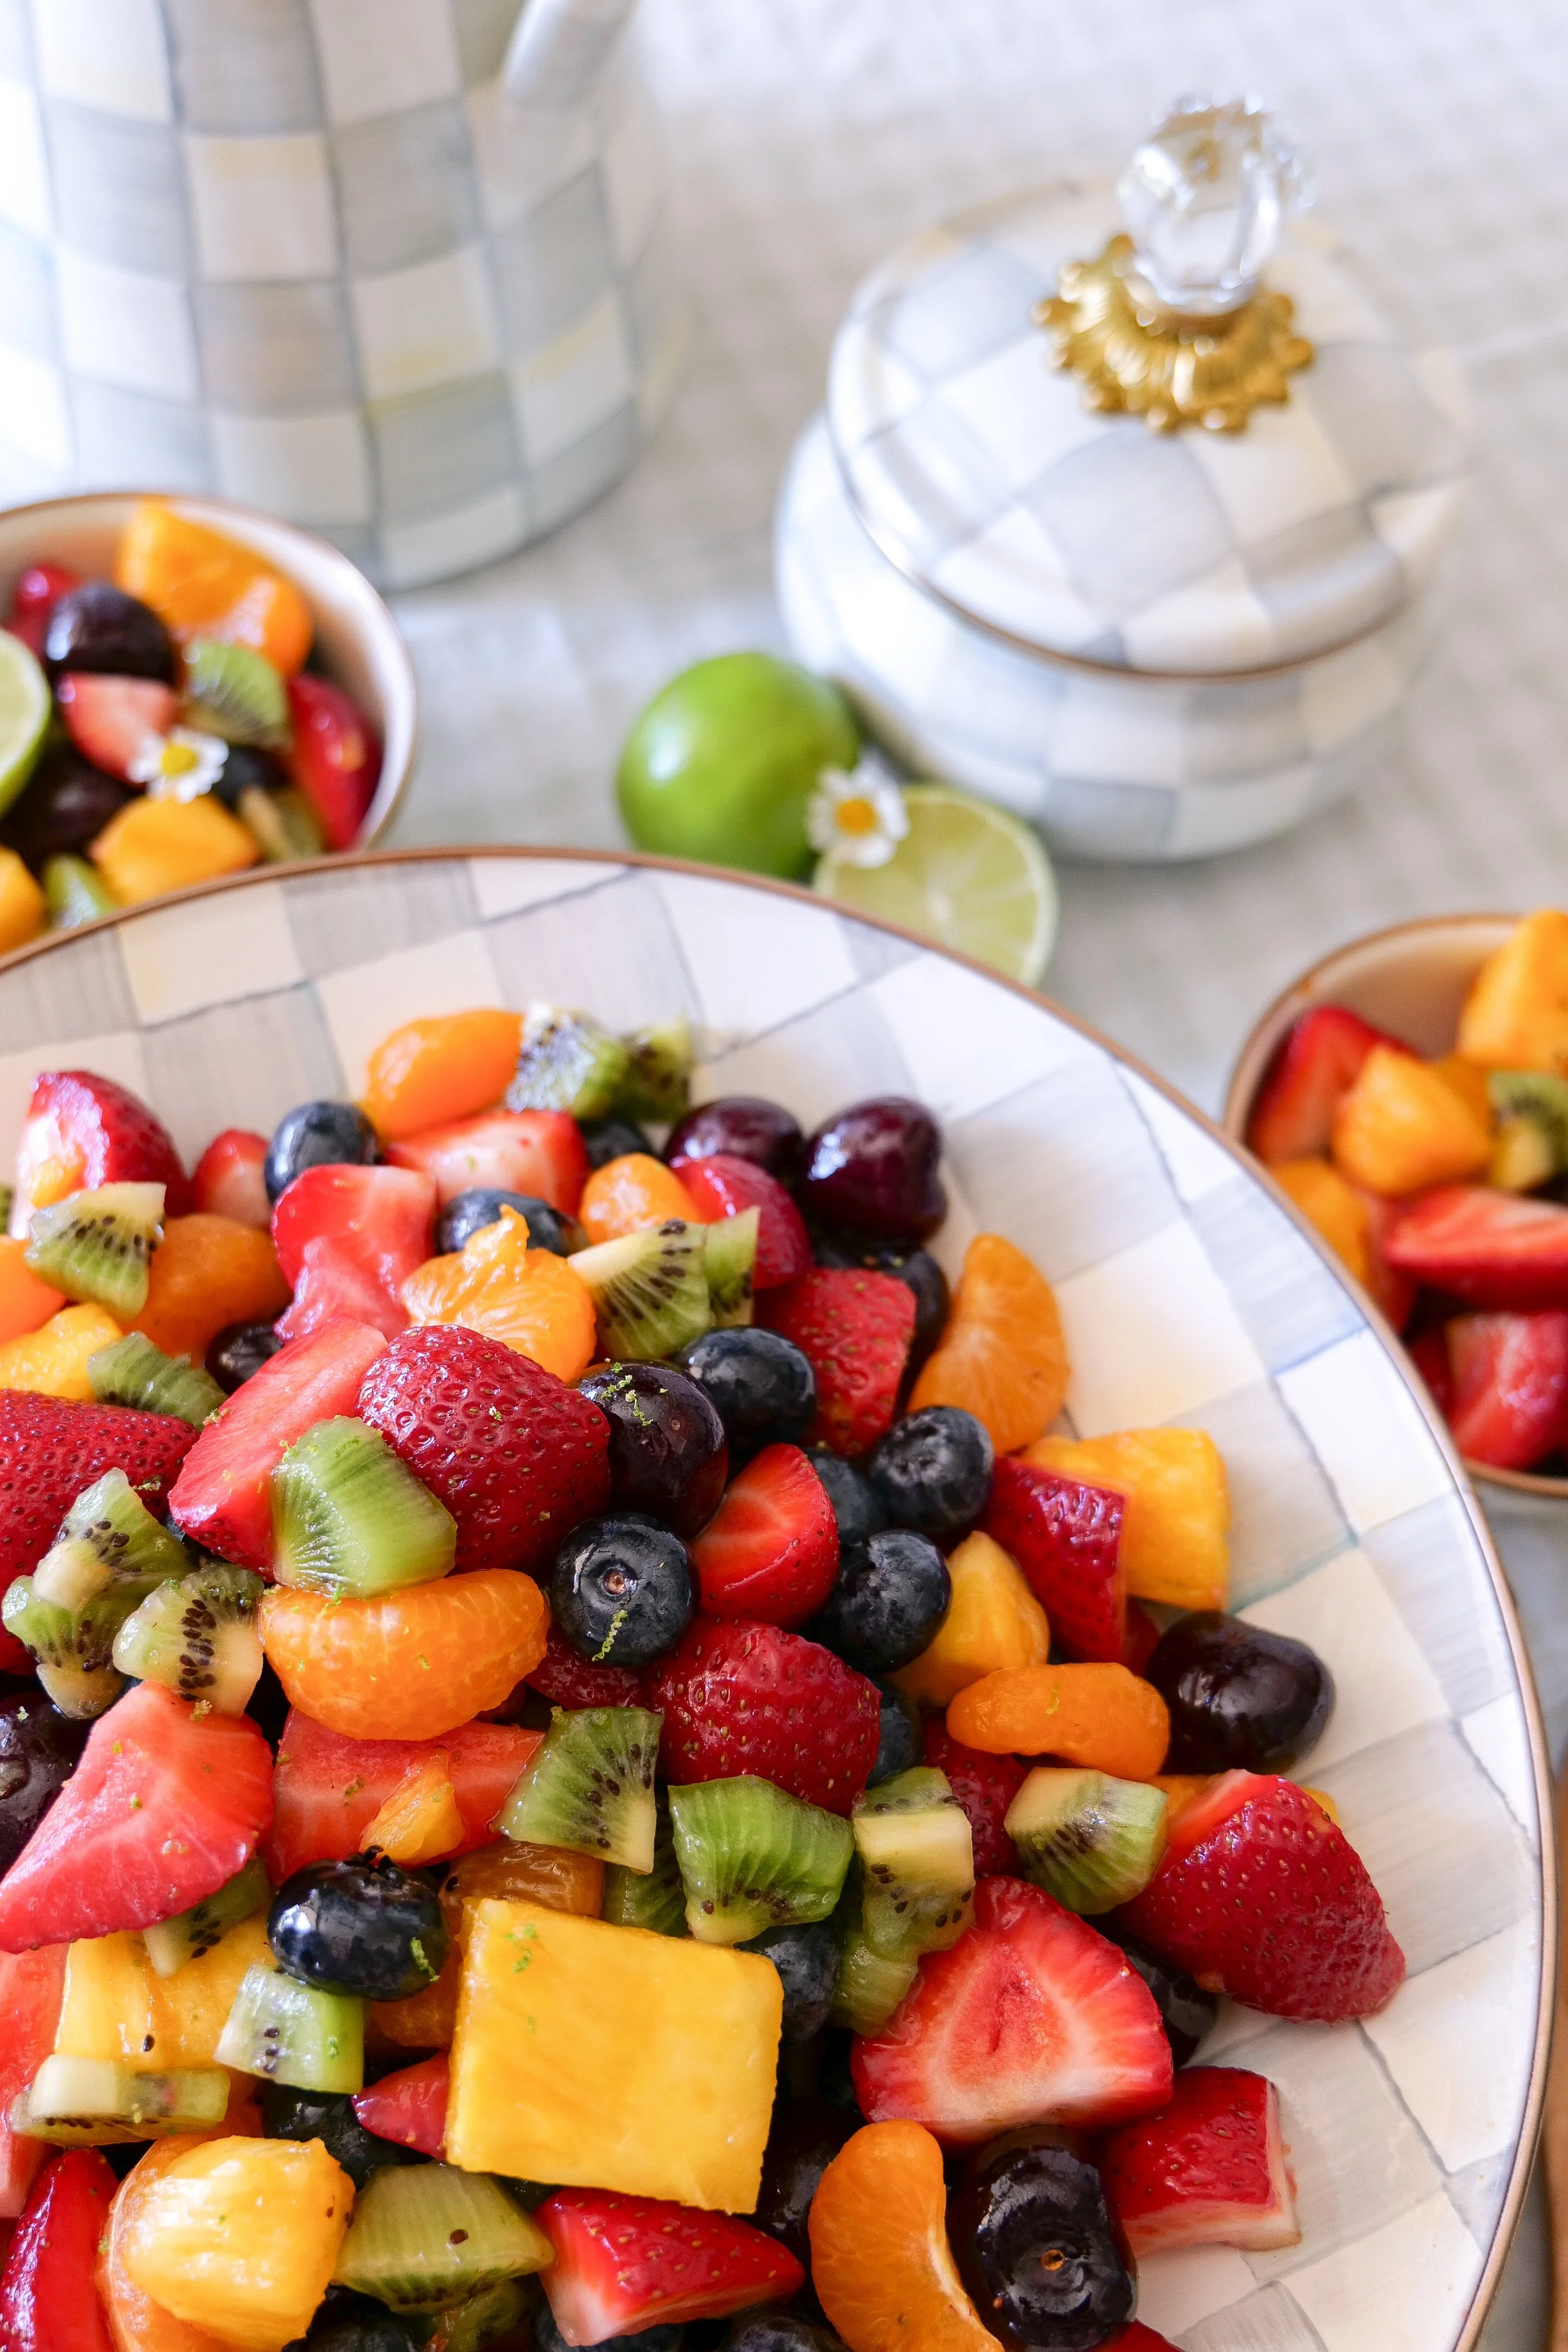
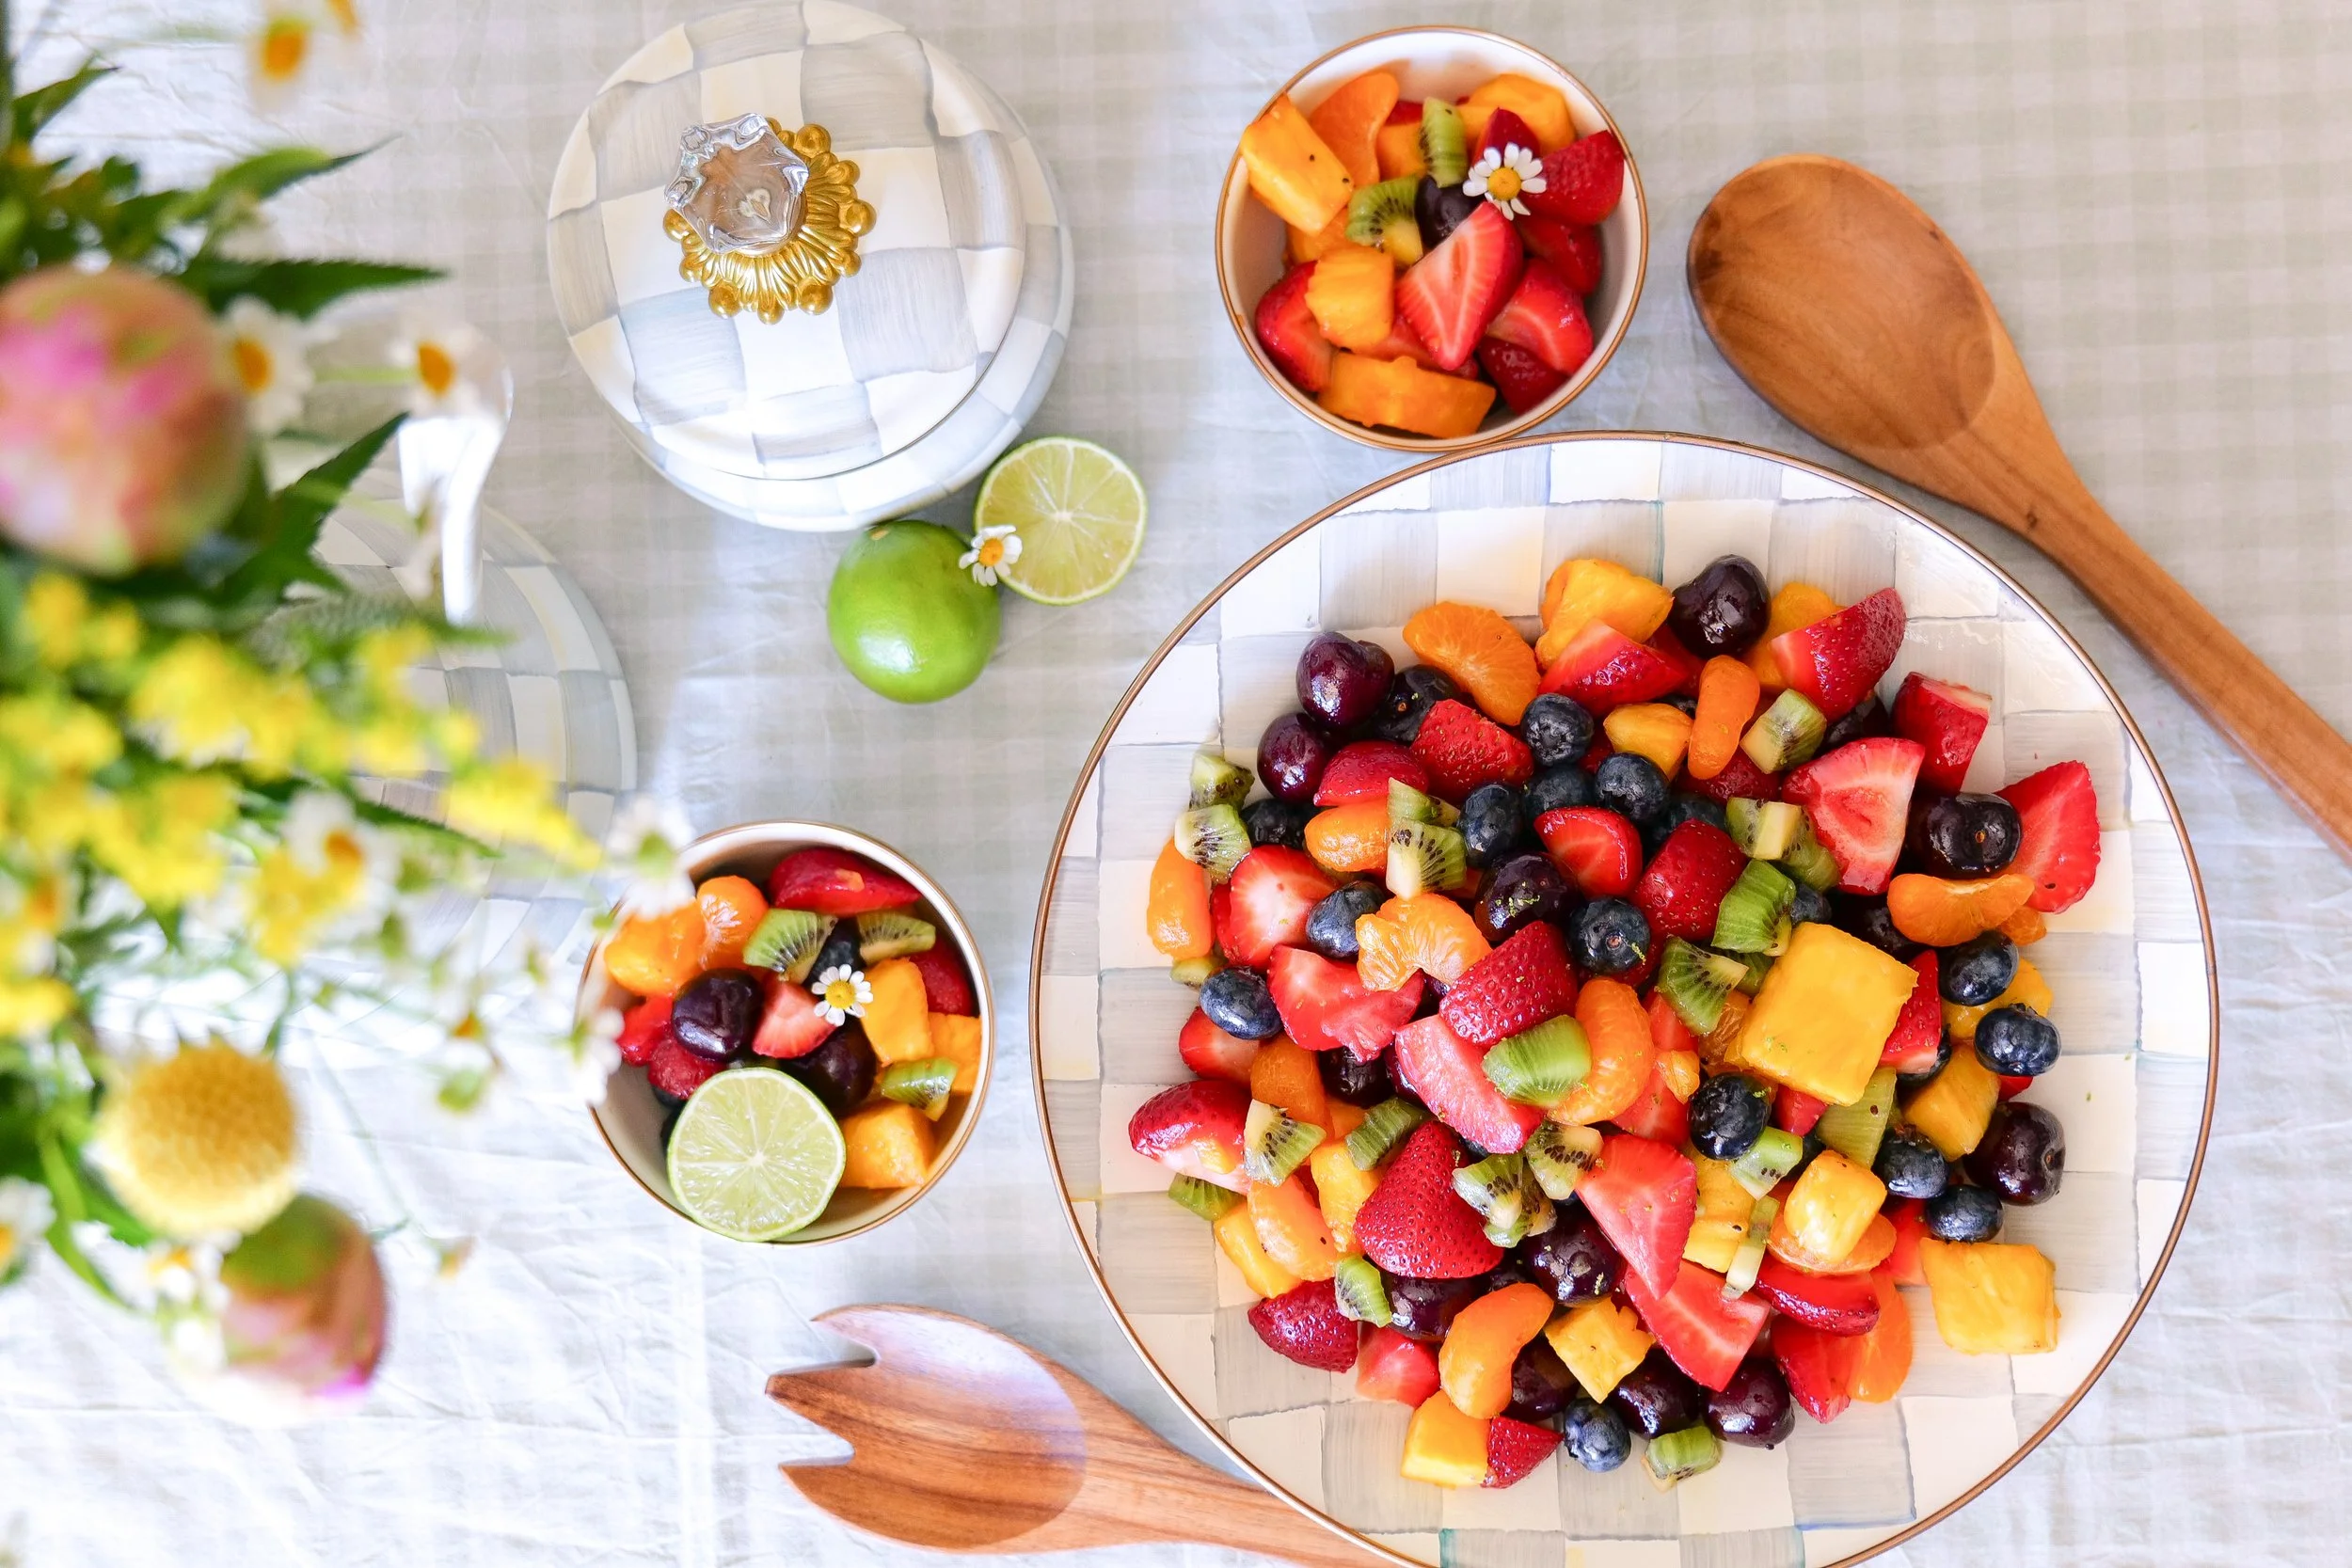
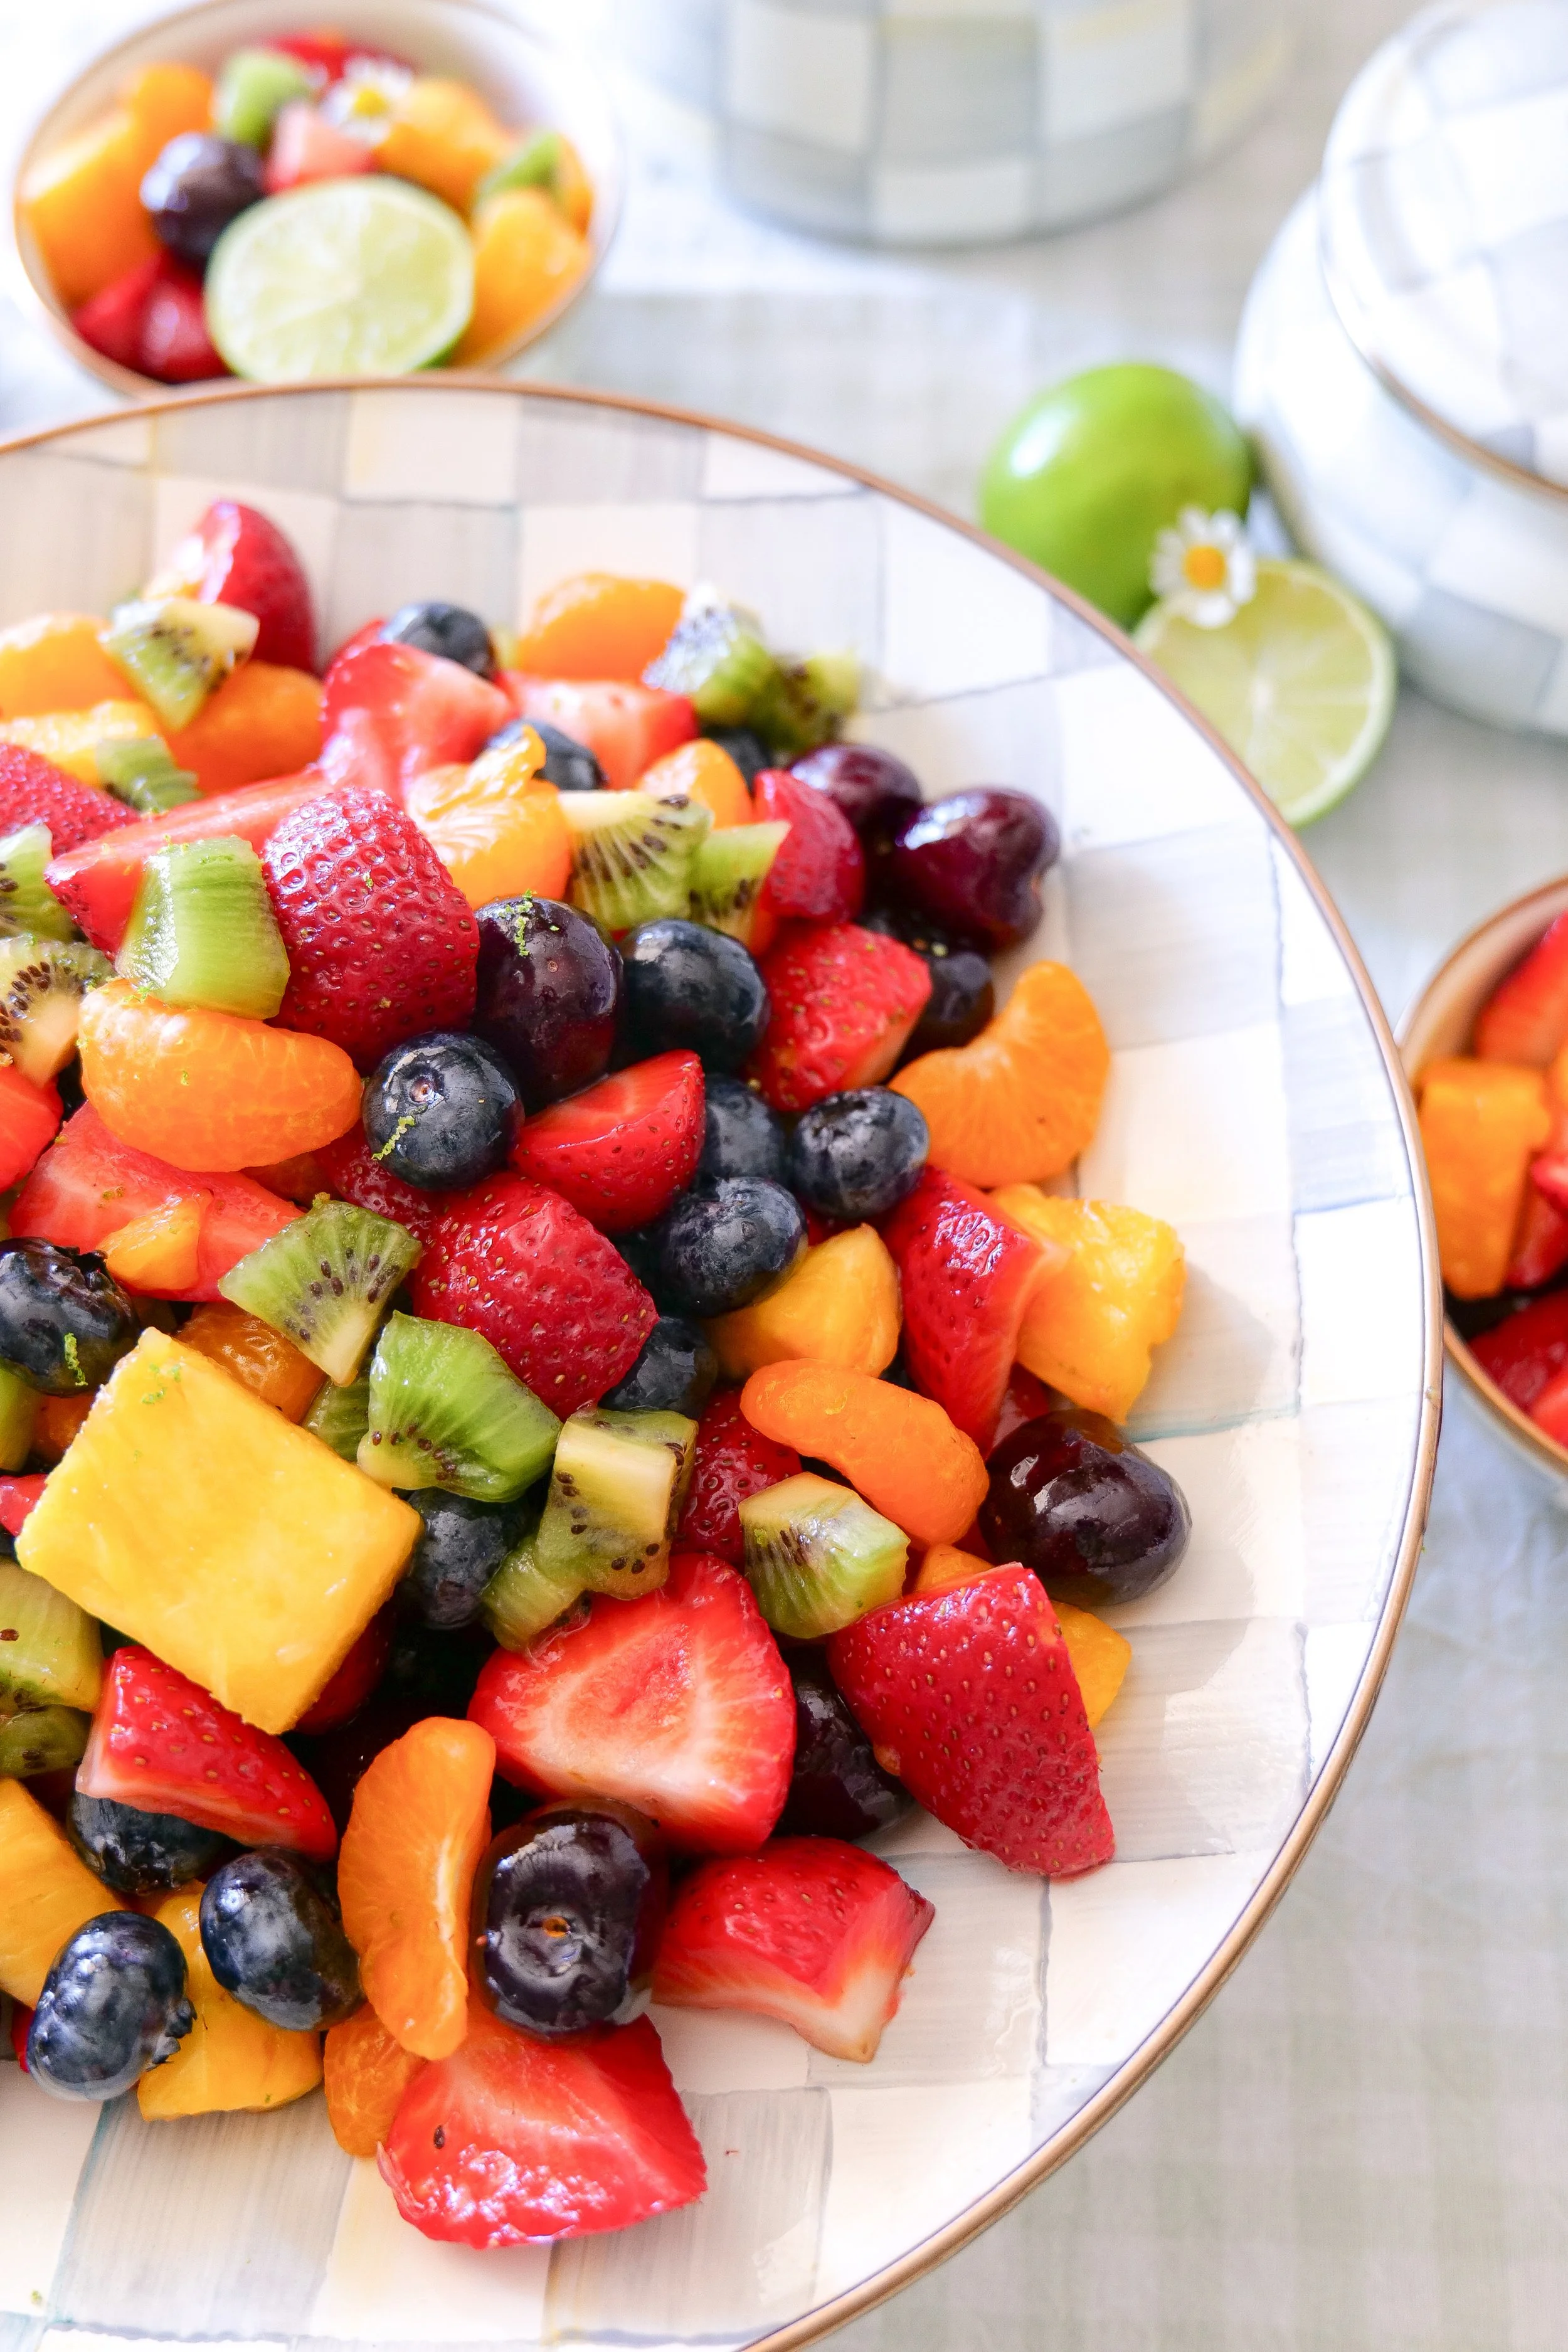
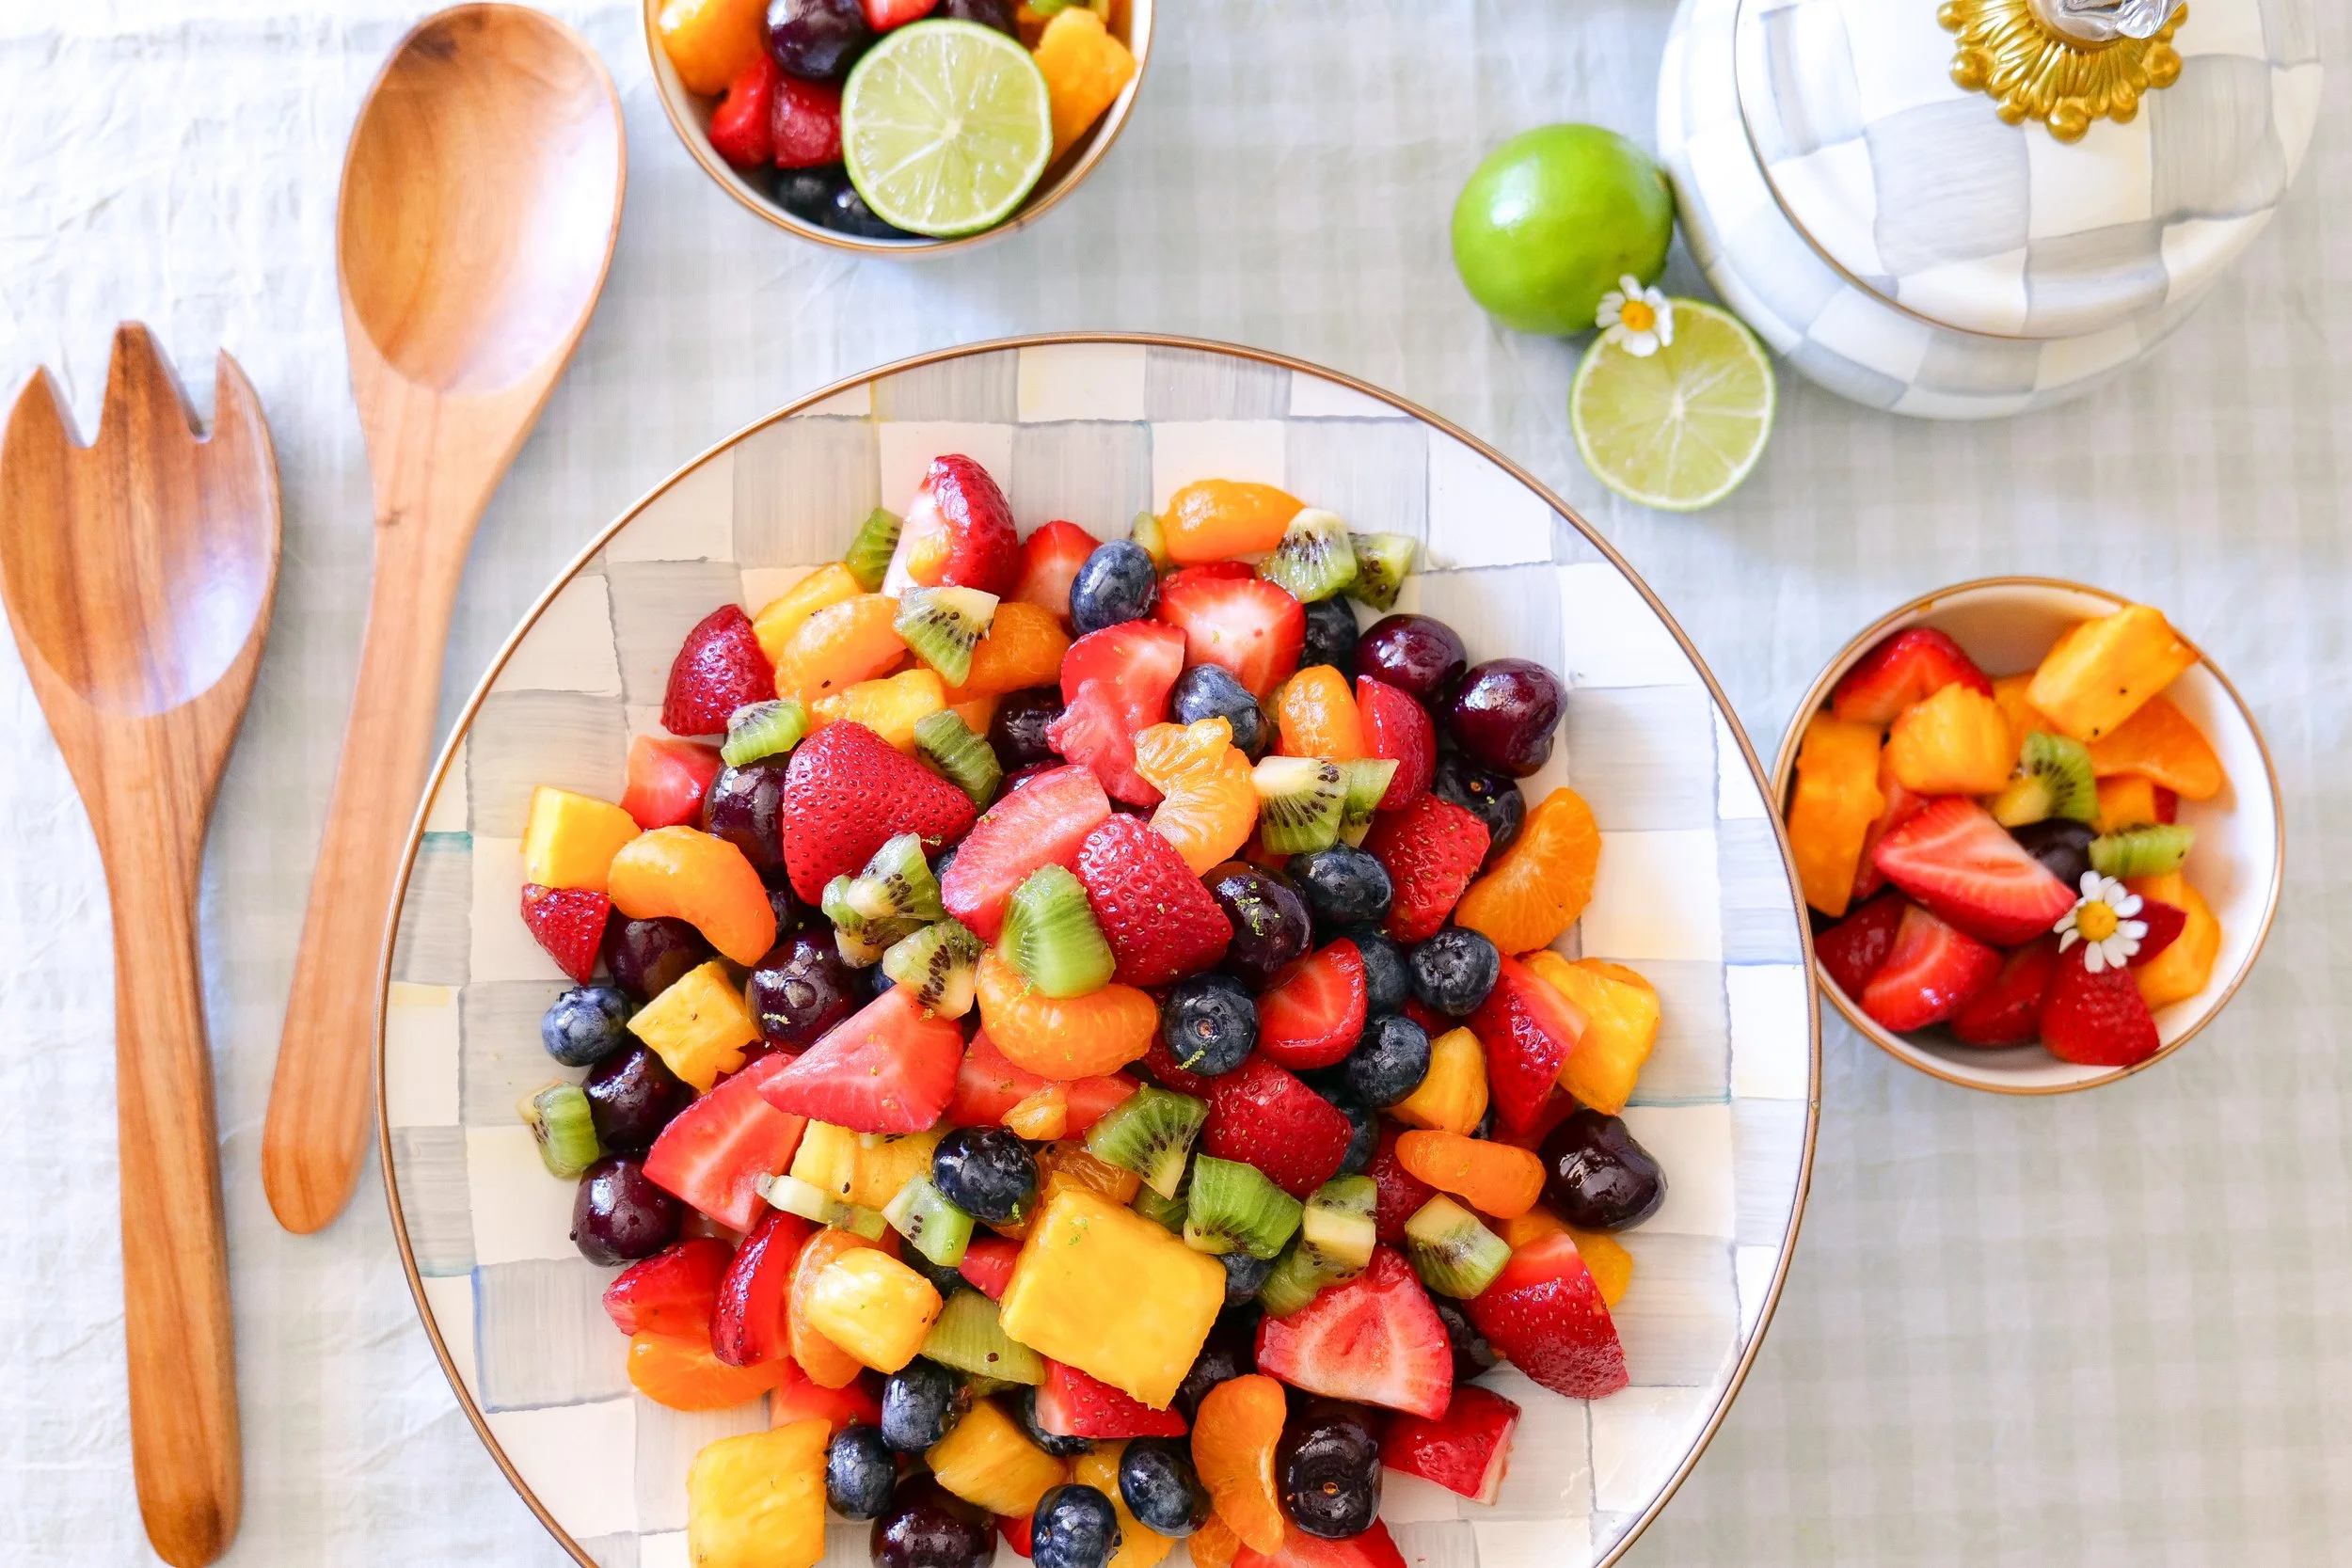
Honey lime fruit salad with fresh berries, pineapple, kiwi and cherries

Why You'll Love This Honey Lime Fruit Salad

The best part about this fruit salad is how simple it is. There's no complicated dressing or long prep process—just fresh fruit and a quick honey lime dressing.

I especially love the mix of colors and textures. You get sweet strawberries and cherries, juicy pineapple and mandarin oranges, tart kiwi and little bursts of blueberries in every scoop.

It's also an easy recipe for entertaining because you can prepare the fruit ahead and toss everything with the dressing shortly before serving.

Fresh fruit salad tossed with homemade honey lime dressing

Ingredient Notes

There are only a handful of things you need to make this recipe, so using fresh, flavorful fruit makes all the difference.

Fresh Fruit

I use a combination of blueberries, cherries, mandarin oranges, pineapple, kiwi and strawberries.

Cut the larger fruits into bite-size pieces so you can get several different fruits in each scoop. Blueberries can stay whole.

You can also adjust the combination depending on what's in season or what you have on hand. The honey lime dressing is simple enough that it works with lots of different fruits.

Honey

Honey adds just enough sweetness to the dressing and balances the acidity of the fresh lime.

Fresh Lime Juice

Use freshly squeezed lime juice here rather than bottled. Since the dressing has only three ingredients, that fresh citrus flavor really stands out.

Lime Zest

Don't skip the zest. It gives the dressing even more lime flavor without adding additional acidity.

Fresh ingredients for honey lime fruit salad

Amanda's Tips for the Best Fruit Salad

Start With Good Fruit

This is one of those recipes where the ingredients really do all the work. Use ripe, flavorful fruit and remove anything that's overly soft or bruised.

Keep the Pieces Bite-Size

Try to cut the strawberries, pineapple, kiwi and cherries into similarly sized pieces. It makes the finished bowl easier to serve and gives you a better mix of fruit in every bite.

Dry the Fruit Well

After washing your fruit, let it drain and dry before assembling the salad. Excess water can dilute the honey lime dressing and leave liquid sitting at the bottom of the bowl.

Toss Gently

Once you add the dressing, gently fold everything together rather than aggressively stirring it. This helps keep softer fruits like strawberries and kiwi intact.

Add the Dressing Closer to Serving

You can prep the fruit ahead, but I prefer adding the honey lime dressing closer to serving so everything stays as fresh and pretty as possible.

Honey, fresh lime juice and lime zest for fruit salad dressing

Perfect for Brunches and Summer Gatherings

This is one of those easy recipes that's especially helpful when you're hosting because it goes with almost anything.

Serve it alongside pancakes, French toast or egg dishes for brunch, add it to a summer barbecue spread, or bring out a big bowl with lunch or dinner.

I love serving colorful fruit salad in a large serving bowl because all of the colors really stand out against it.

Because it's already naturally sweet, you can also serve this as a lighter option alongside cakes and other desserts when you're entertaining.

Summer fruit salad with strawberries, blueberries, kiwi and pineapple
Honey lime fruit salad served in a large white bowl

Honey Lime Fruit Salad

A colorful fresh fruit salad made with strawberries, blueberries, cherries, pineapple, kiwi and mandarin oranges tossed in an easy three-ingredient honey lime dressing.

Ingredients

For the Fruit Salad

  • 2 cups blueberries

  • 2 cups cherries, pitted and cut as needed

  • 2 cups mandarin oranges

  • 2 cups pineapple, cut into bite-size pieces

  • 2 cups kiwi, peeled and cut into bite-size pieces

  • 2 cups strawberries, hulled and cut into bite-size pieces

For the Honey Lime Dressing

  • 3 tablespoons honey

  • 1 tablespoon freshly squeezed lime juice

  • 1 teaspoon lime zest

These quantities stay true to your original recipe.

Instructions

1. Prepare the Fruit

Wash and dry the fresh fruit.

Pit the cherries, hull the strawberries, peel the kiwi and cut the larger fruits into bite-size pieces.

Add all of the prepared fruit to a large serving bowl.

2. Make the Honey Lime Dressing

In a small bowl, whisk together the honey, freshly squeezed lime juice and lime zest until combined.

3. Toss the Fruit Salad

Drizzle the honey lime dressing evenly over the fruit.

Gently toss until the fruit is evenly coated.

Serve immediately or refrigerate until you're ready to serve.

Amanda's Tip

Make sure your fruit is well drained and dry before adding the dressing. Extra water left on freshly washed fruit can dilute that simple honey lime dressing.

Easy fresh fruit salad with honey and lime

Save This Recipe

Save this Honey Lime Fruit Salad for summer gatherings, brunches and those weeks when you want a big bowl of fresh fruit ready in the refrigerator.

I've included a printable recipe card below so it's easy to print and come back to whenever you're ready to make it again.

Honey lime fruit salad printable recipe card

Frequently Asked Questions

Can I Make Honey Lime Fruit Salad Ahead of Time?

Yes, but for the best texture I prefer preparing the fruit ahead and keeping it refrigerated, then adding the honey lime dressing closer to serving.

If you do toss everything together ahead of time, keep the fruit salad covered and refrigerated.

Can I Use Different Fruit?

Yes. One of the easiest things about this recipe is adjusting the fruit based on what's in season.

Just try to choose a combination with different colors, flavors and textures rather than using several fruits that are all very soft.

Can I Use Frozen Fruit?

I prefer fresh fruit for this recipe. Frozen fruit releases considerably more liquid as it thaws and can make the finished salad softer and more watery.

How Long Does Fruit Salad Last in the Refrigerator?

For the best flavor and texture, I would enjoy this fruit salad as fresh as possible. As it sits, the fruit naturally releases juice and becomes softer.

Should I Chill Fruit Salad Before Serving?

You can. If you like your fruit salad cold, refrigerate the prepared fruit before adding the dressing. This gives you that chilled, refreshing fruit salad without requiring the fruit to sit in the dressing for a long time.

Fresh summer fruit salad with berries, cherries and tropical fruit

More Fresh Salad Recipes You'll Love

If you love fruit in summer salads, try my Berry Walnut Goat Cheese Salad with Strawberry Vinaigrette next.

For more fresh salad ideas, save my Pear & Walnut Salad with Honey Mustard Dressing and Sweet Kale Salad with Poppy Seed Dressing too.

Shop My Kitchen Essentials

These are some of the kitchen and serving pieces I use again and again for everyday recipes and entertaining.

Final Thoughts

Fresh fruit doesn't need much to make it feel special, and that's exactly why I love this Honey Lime Fruit Salad.

The combination of colorful summer fruit with a little honey, fresh lime juice and lime zest is simple, bright and so easy to put together. It works for brunch, summer dinners, holidays and just having a bowl of fruit ready for everyone to enjoy.

And when all of those colors are piled into one big serving bowl, it's one of the easiest things you can put on the table that still looks beautiful.

Easy honey lime fruit salad recipe for summer

10 Easy Summer Cocktails for Entertaining

There’s something about summer that makes me want to keep drinks cold, food simple and invite people over. Whether we’re having dinner outside, putting together a last-minute happy hour or hosting a full summer gathering, a really good cocktail is one of my favorite ways to make it feel a little more special.

Over the years, I’ve shared so many summer drinks here on the blog—from frozen margaritas and creamy piña coladas to pitcher cocktails made for a crowd. So I wanted to bring some of my favorites together in one place.

These 10 easy summer cocktails have a little bit of everything: fruity, frozen, citrusy, sparkling and a few pitcher recipes that make entertaining especially easy.

Refreshing summer cocktails for easy entertaining

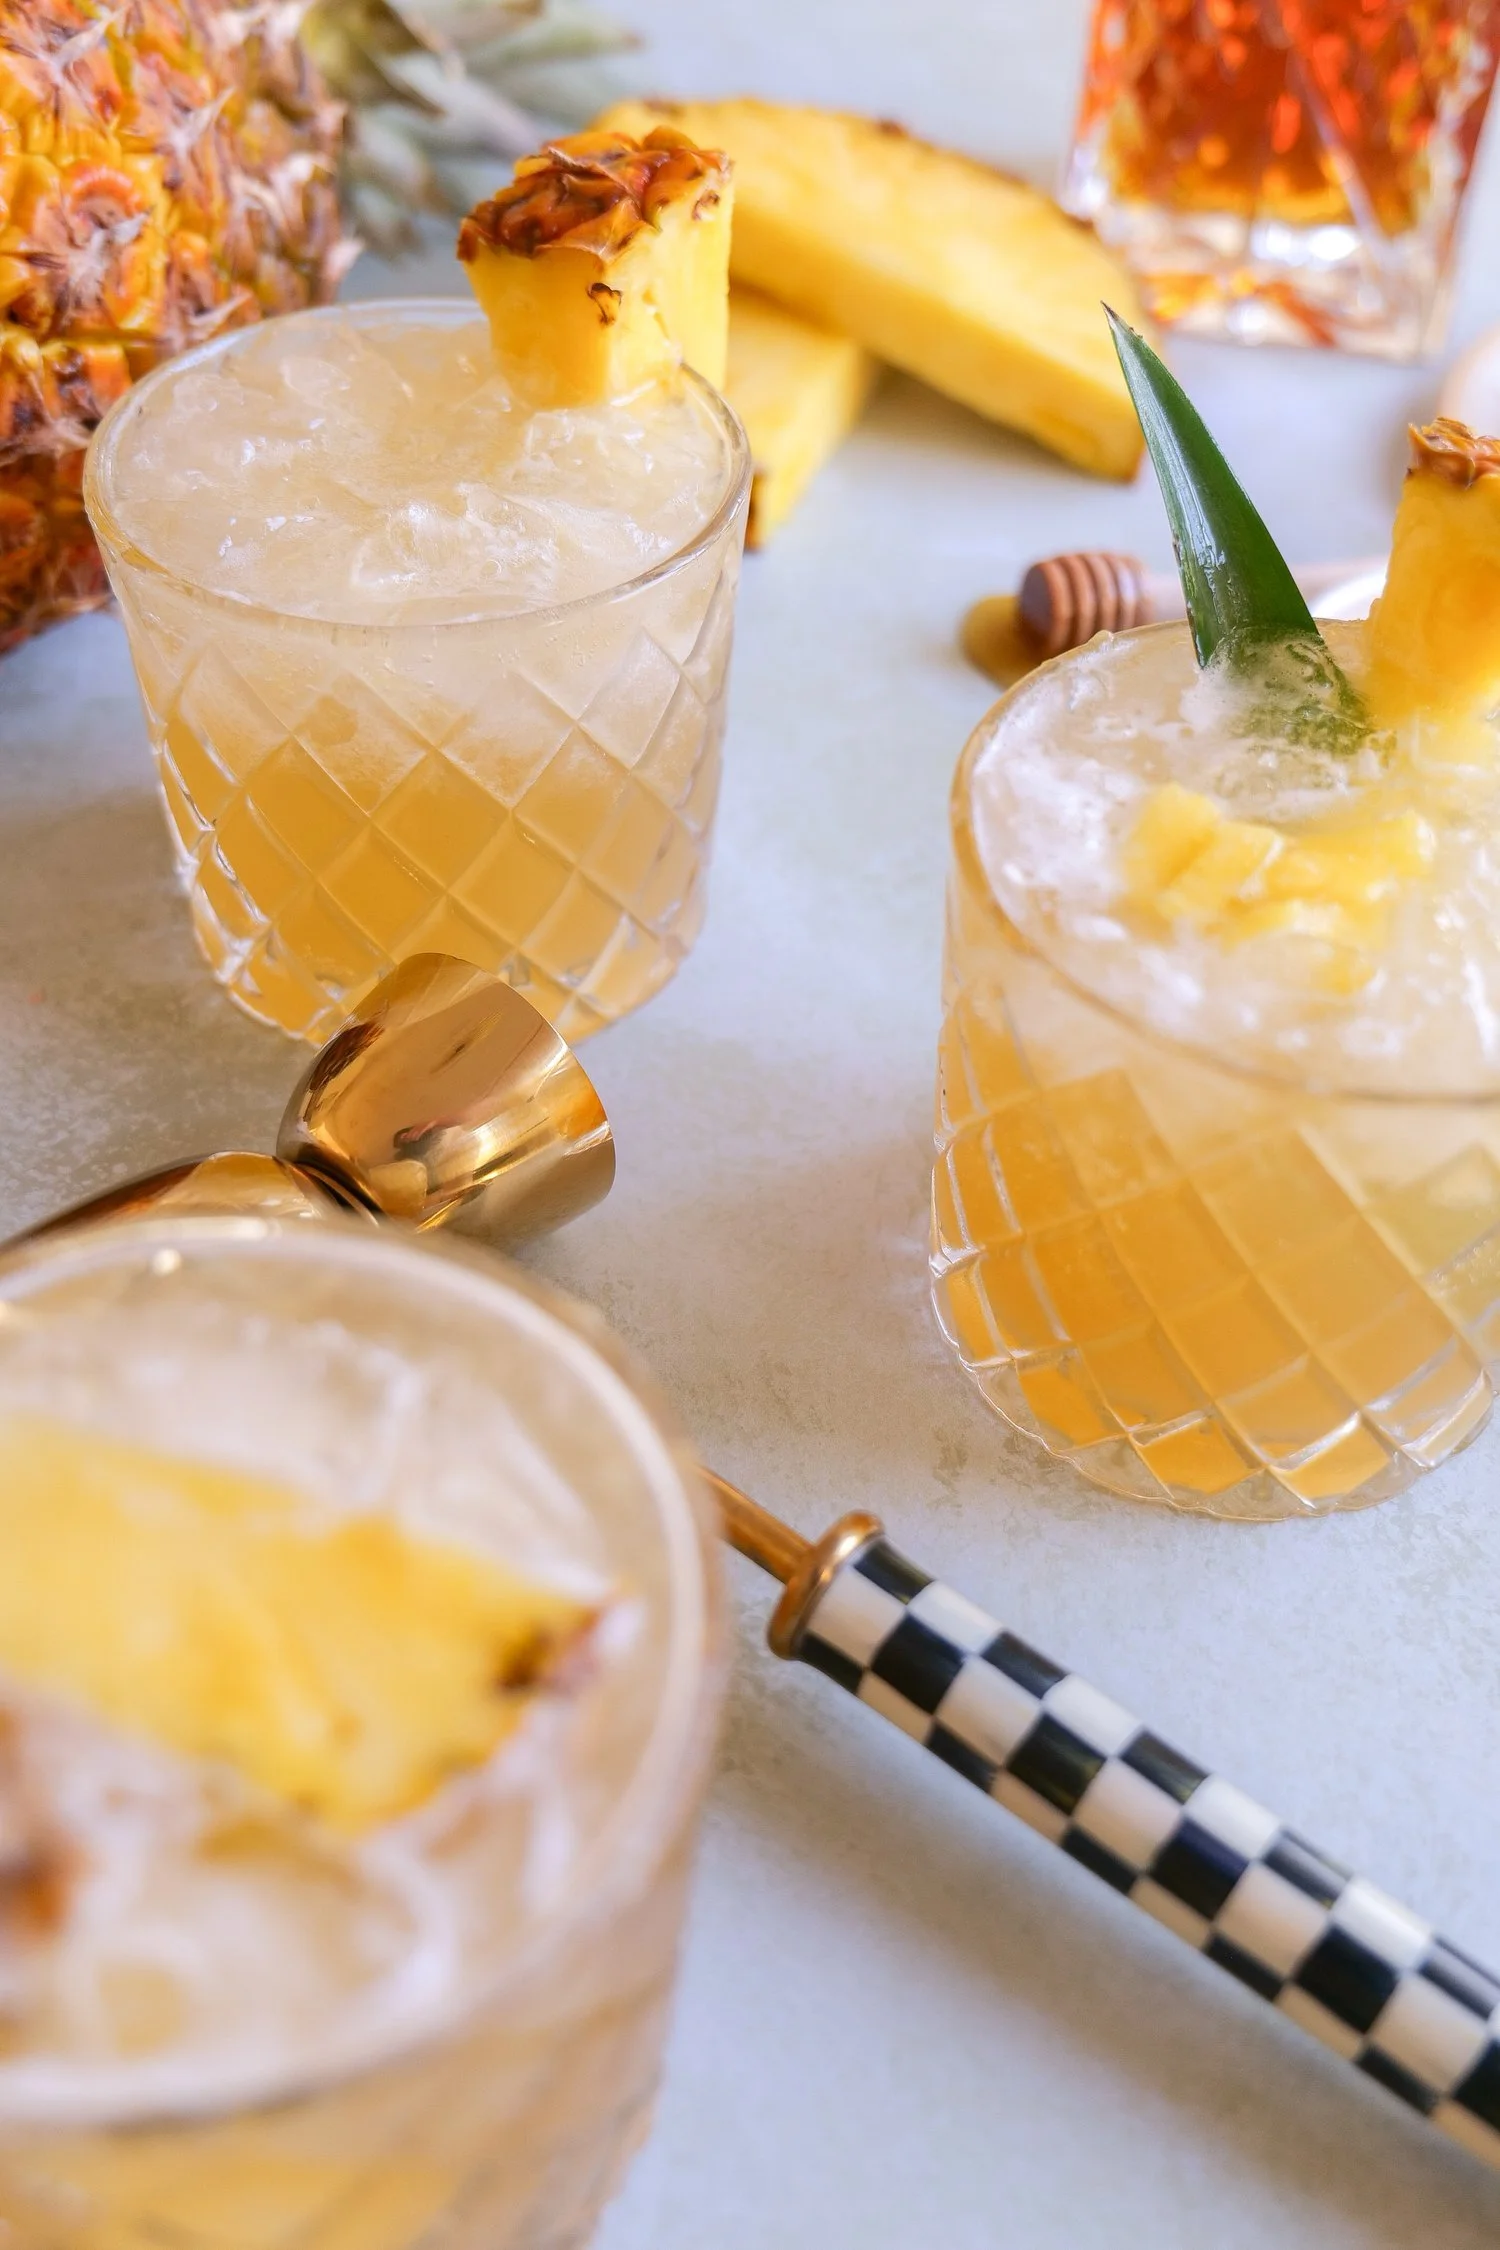
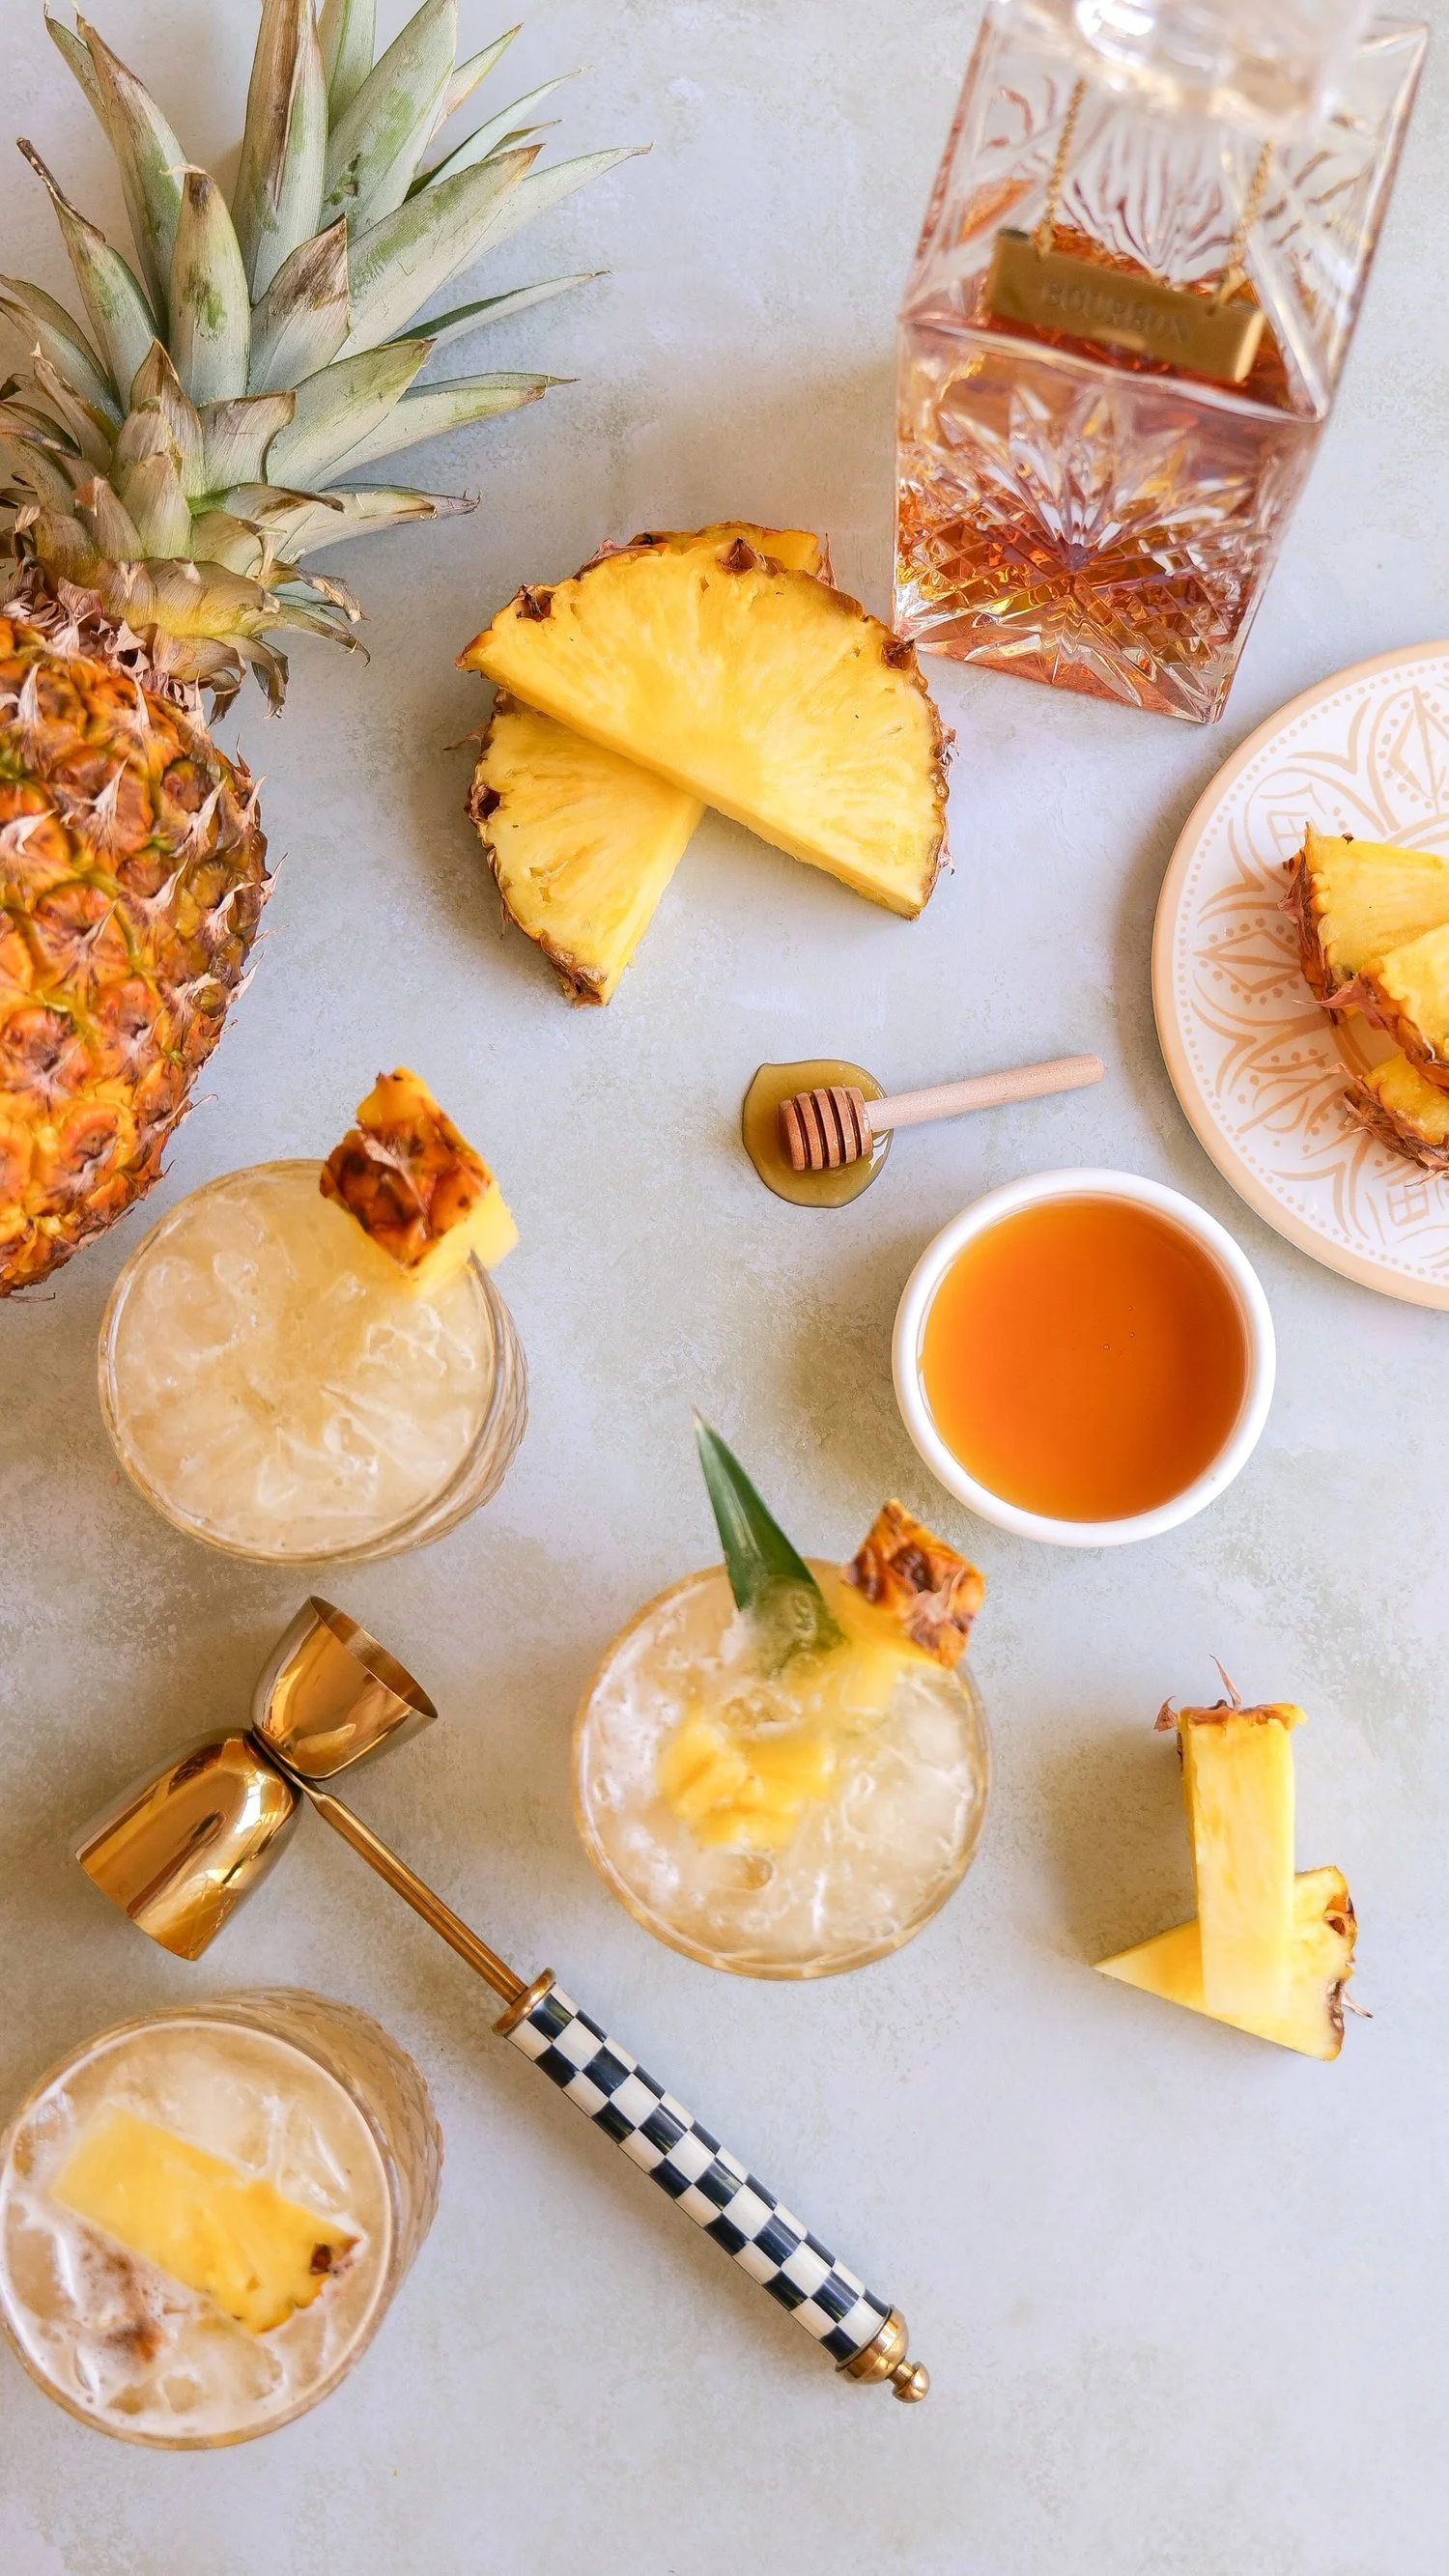
1. Hot Pineapple Whiskey Smash

Sweet pineapple, bourbon, hot honey and ginger beer make this one of the more unexpected drinks on the list. The pineapple and honey bring plenty of sweetness, while the bourbon and little bit of heat keep it from feeling overly sweet.

The homemade pineapple syrup is made by simmering hot honey, fresh pineapple and water before combining it with bourbon and lemon juice. A splash of ginger beer finishes everything off.

This is such a good one when you want a summer cocktail that still has a little depth to it—especially for an evening outside or a summer dinner party.

Hot pineapple whiskey smash with bourbon and ginger beer
Pineapple bourbon cocktail garnished with fresh pineapple

Read the full recipe for my Hot Pineapple Whiskey Smash

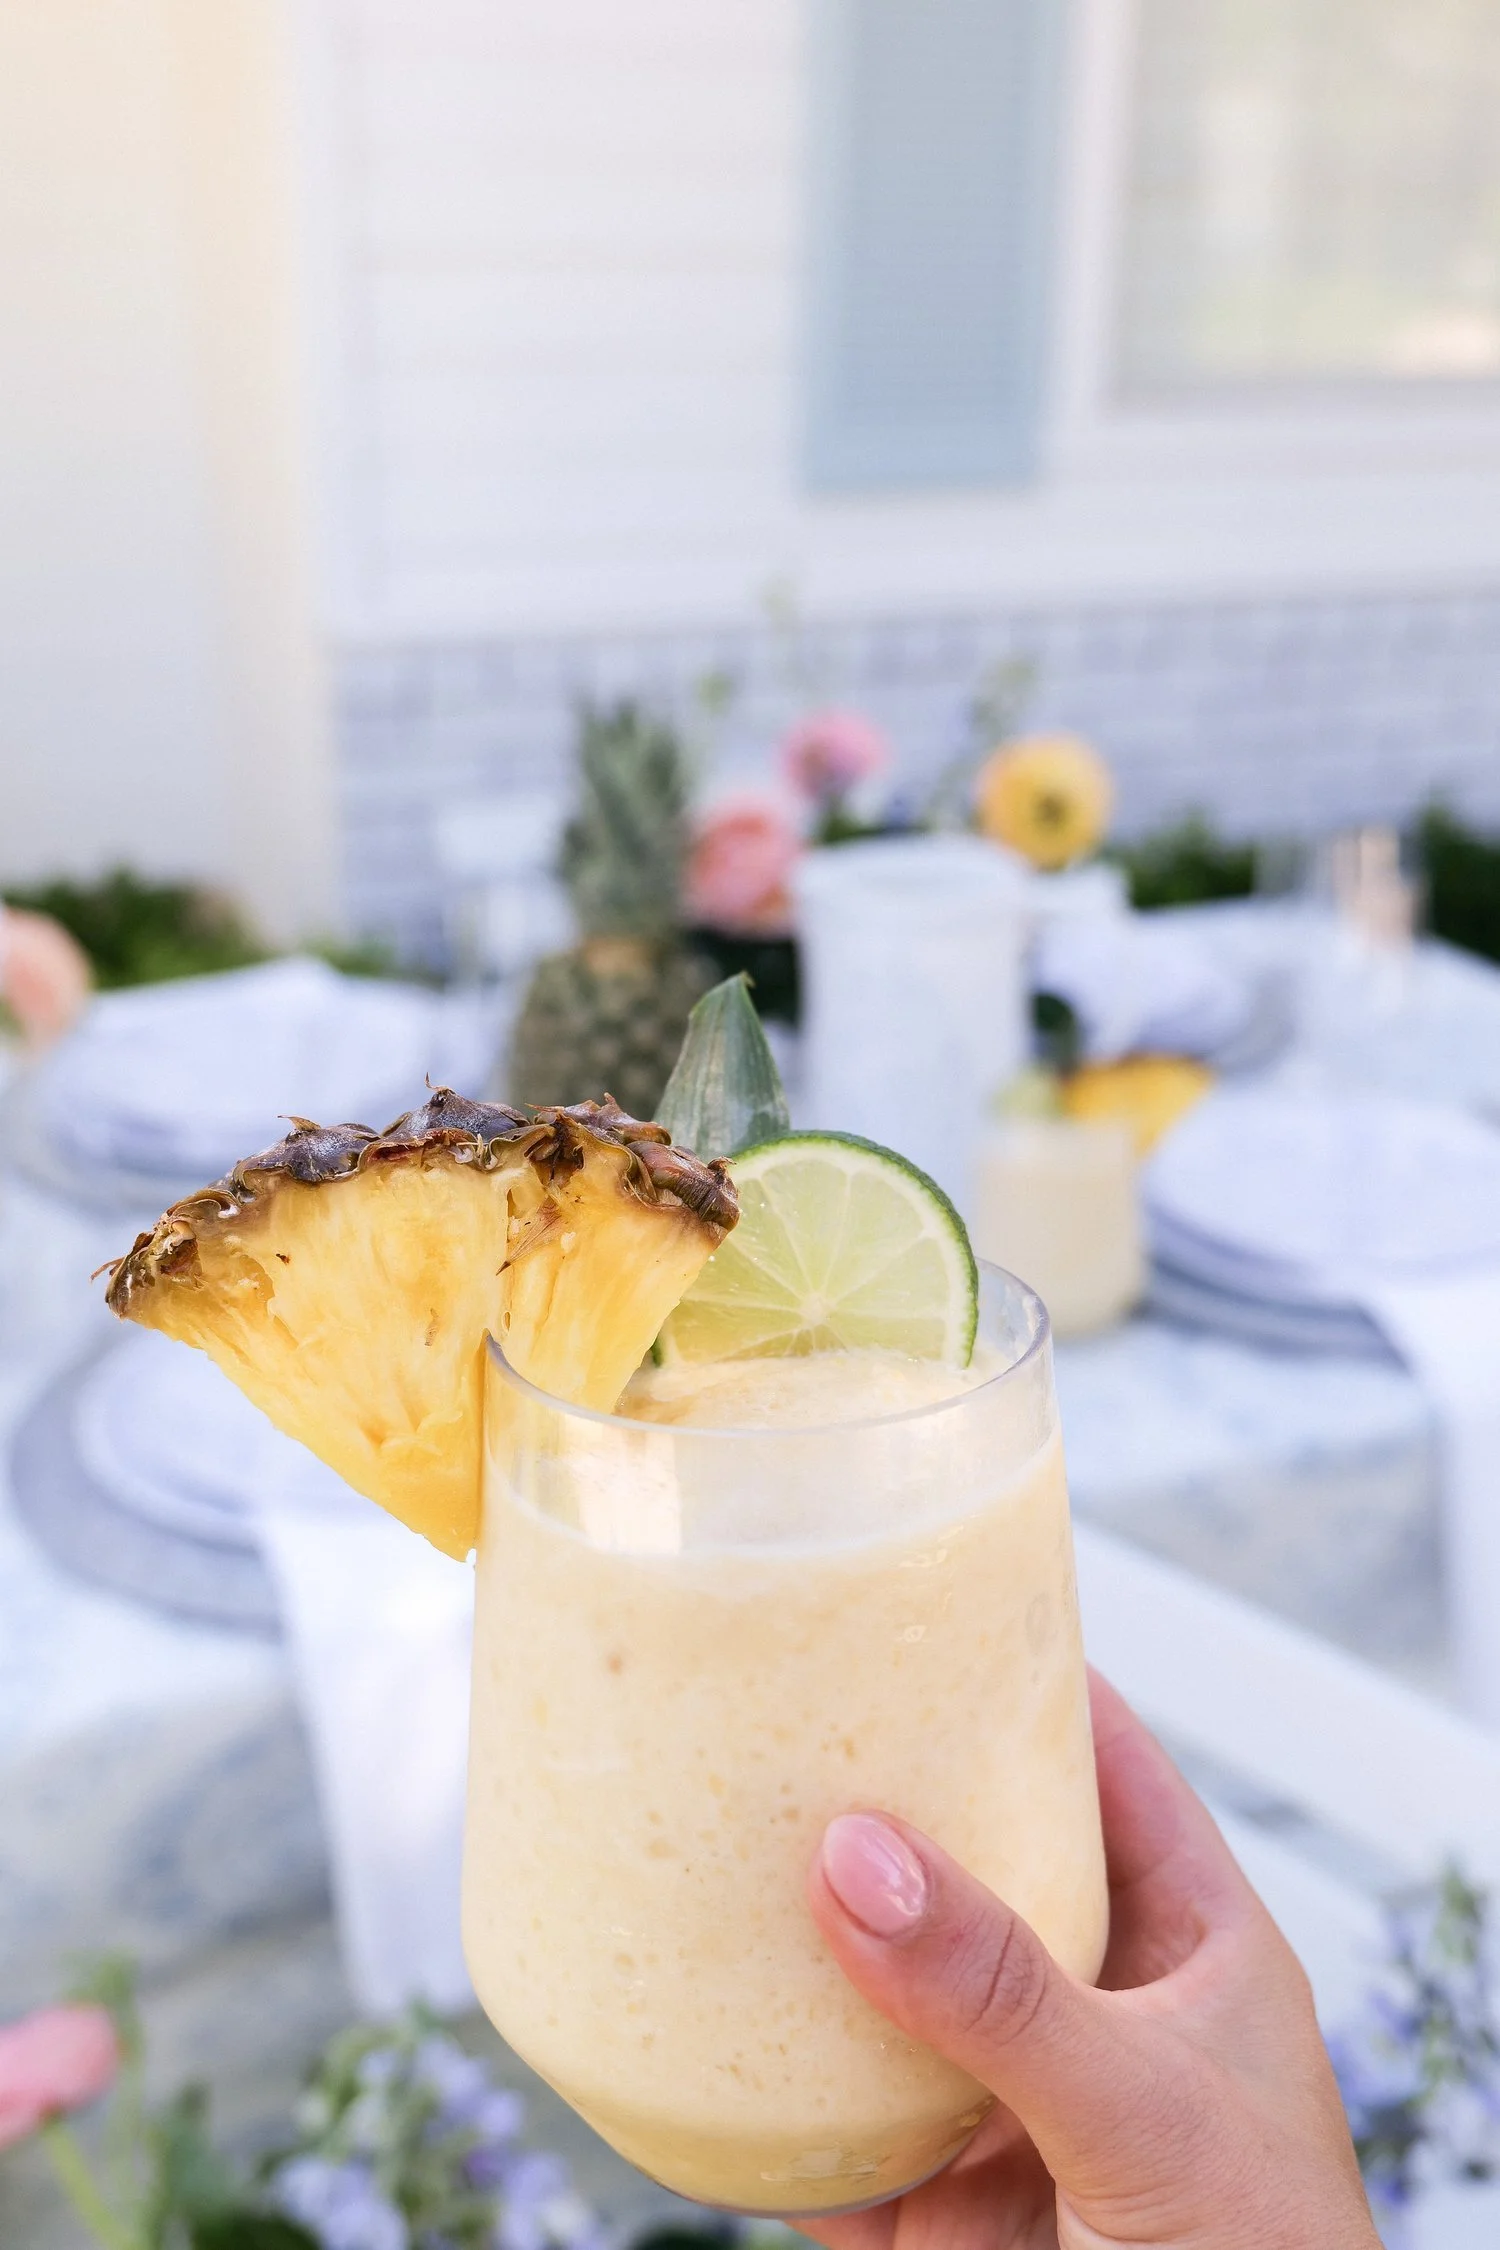
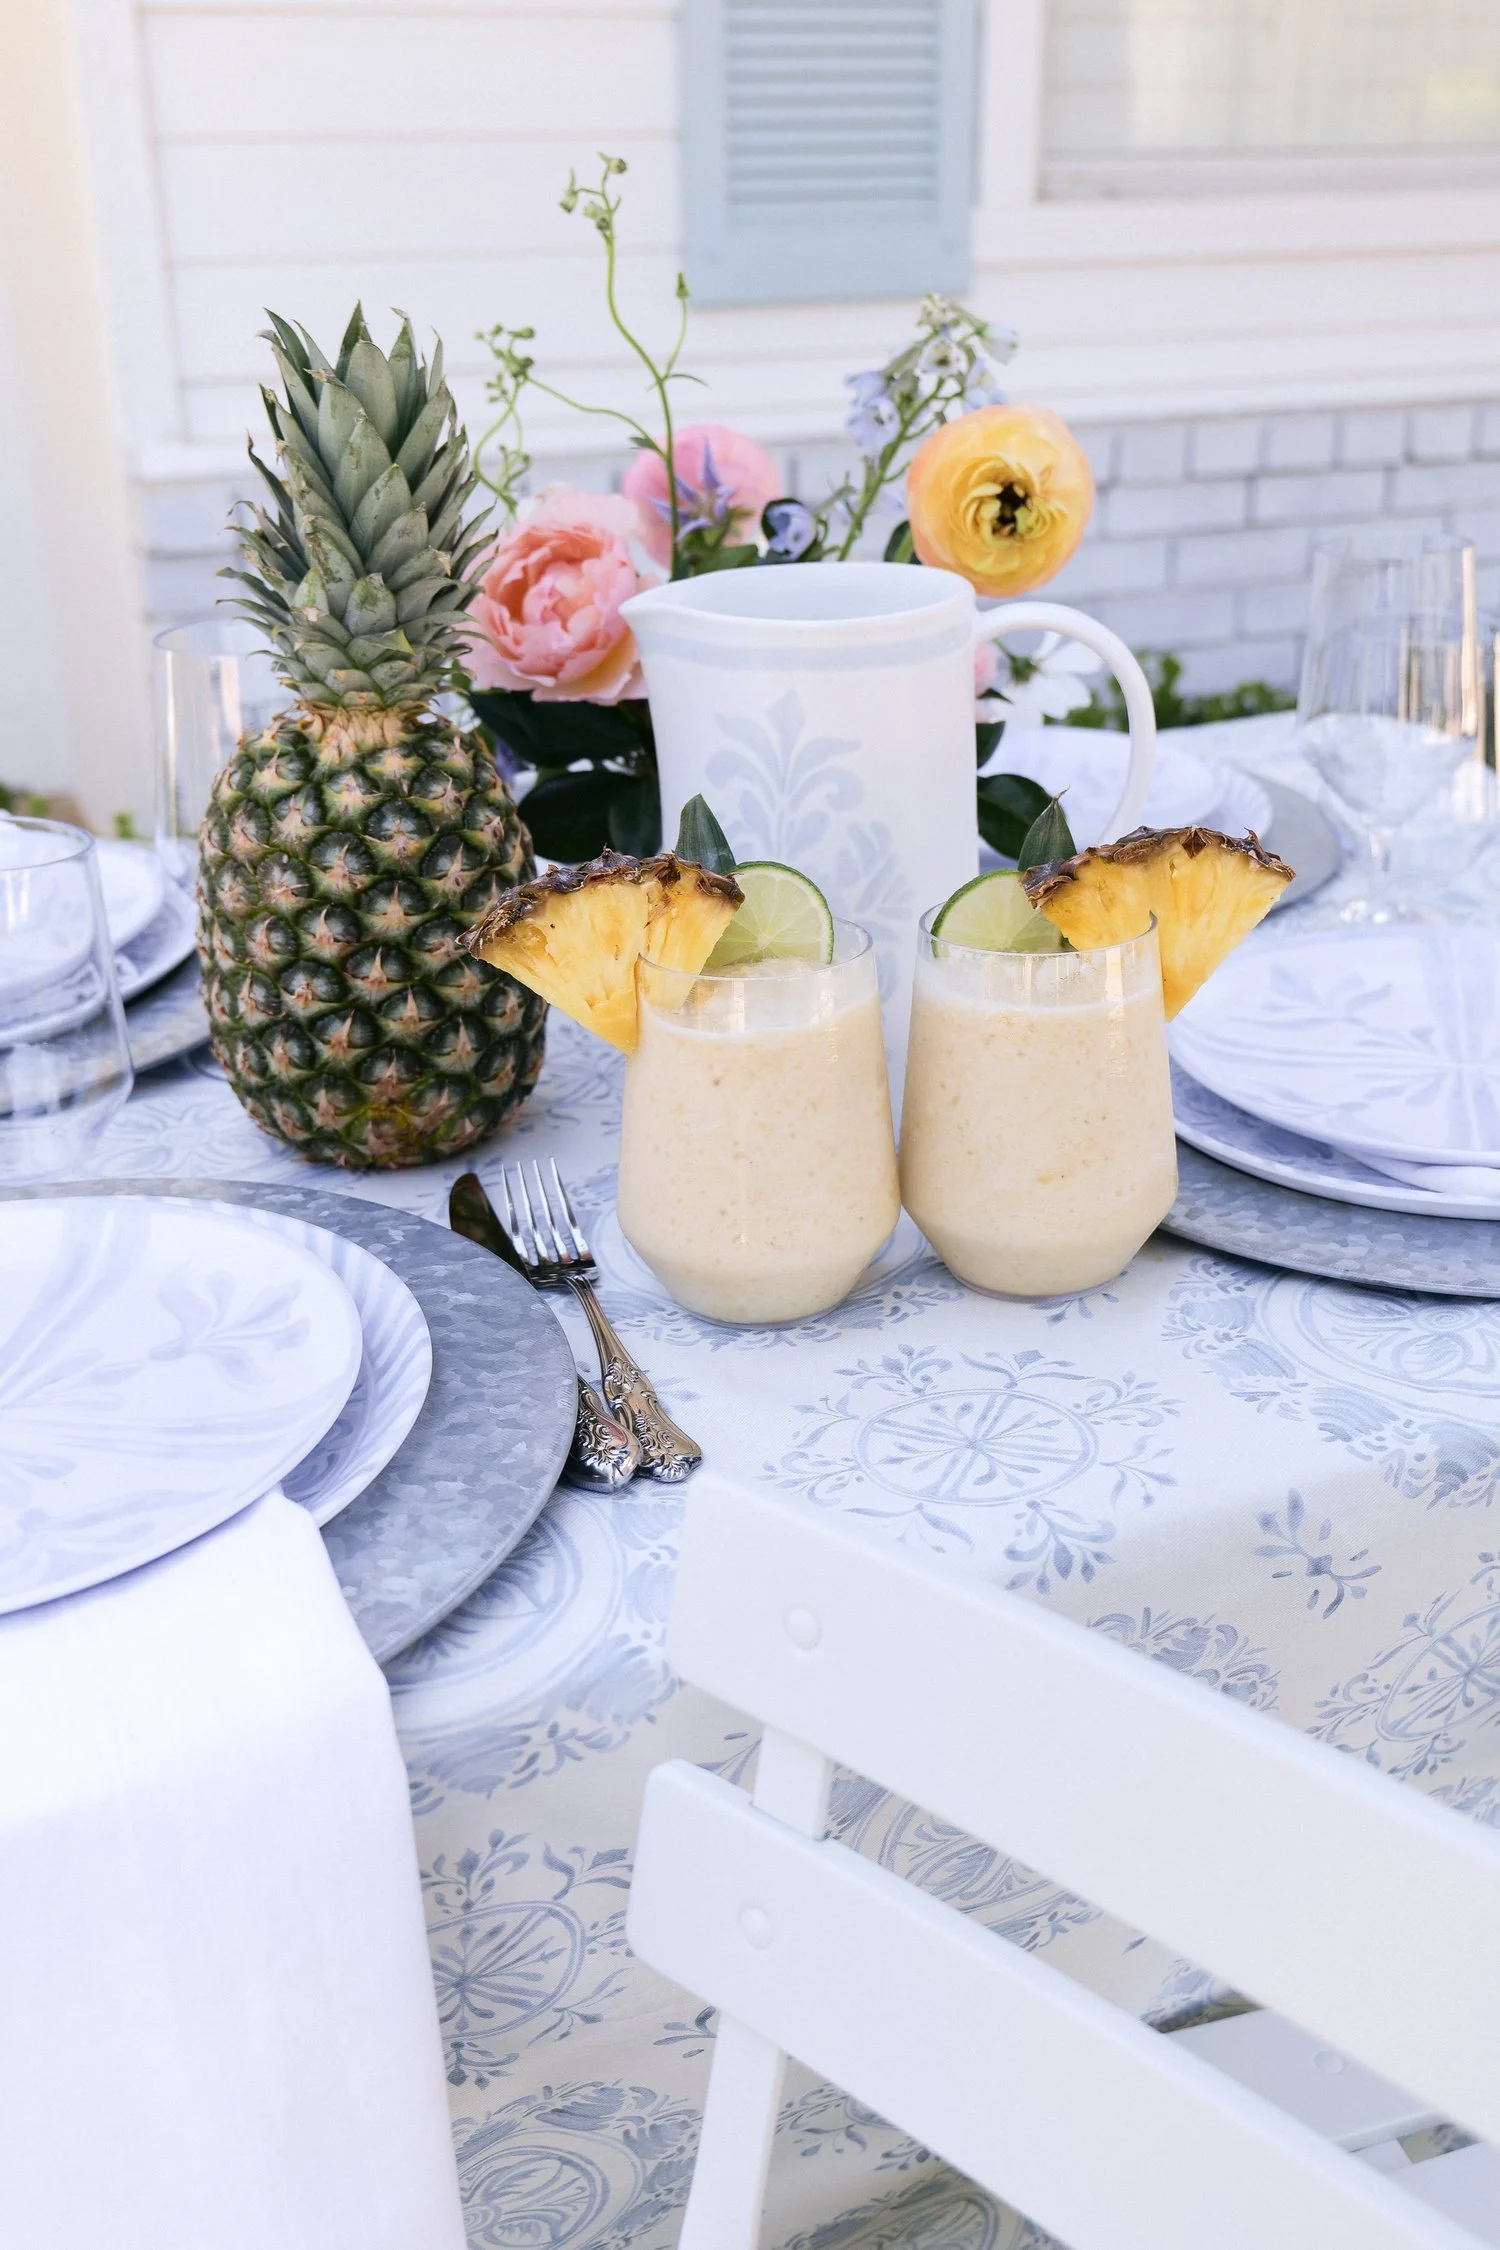
2. Piña Colada Pitcher
There are some drinks that just immediately feel like vacation, and a piña colada will always be one of them for me.
This version is made by blending rum, pineapple juice, coconut milk, lime juice, honey, frozen pineapple and ice until everything is thick and creamy. Even better, it makes an entire pitcher, which is exactly the kind of recipe I want when we’re entertaining.

Pour it into glasses, add fresh pineapple if you have it and serve it right away while it’s icy cold.

Creamy piña colada pitcher with pineapple and coconut
Frozen piña colada served with fresh pineapple

Get the full Piña Colada Pitcher recipe

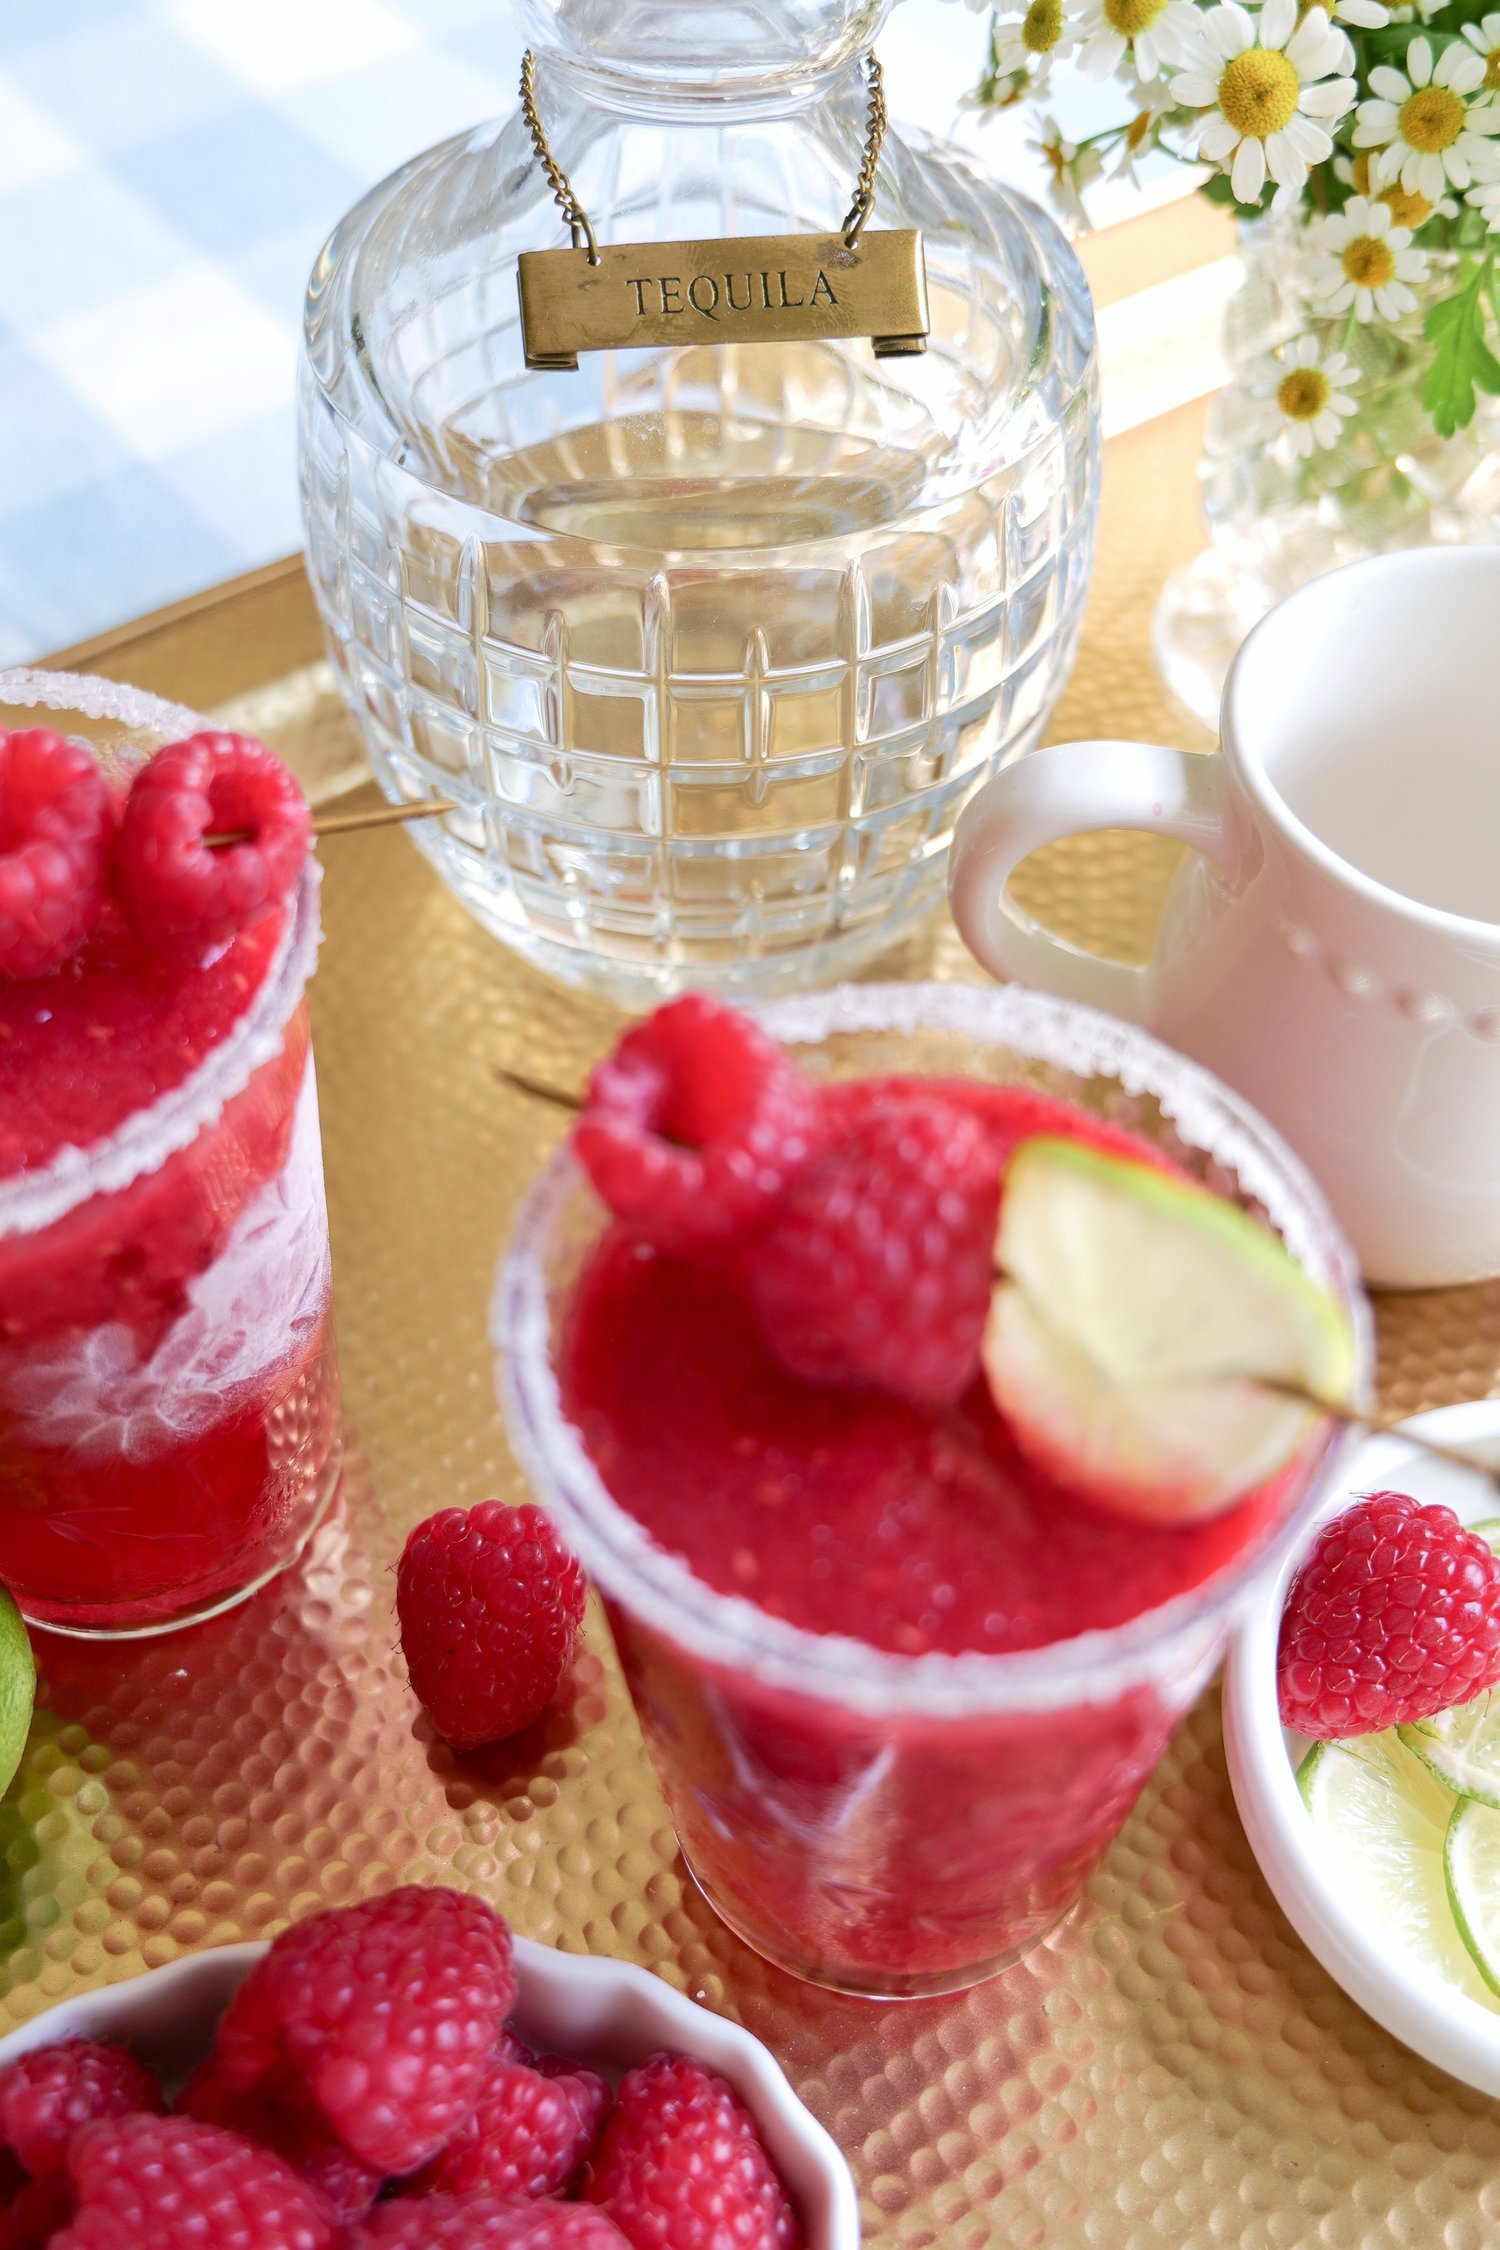
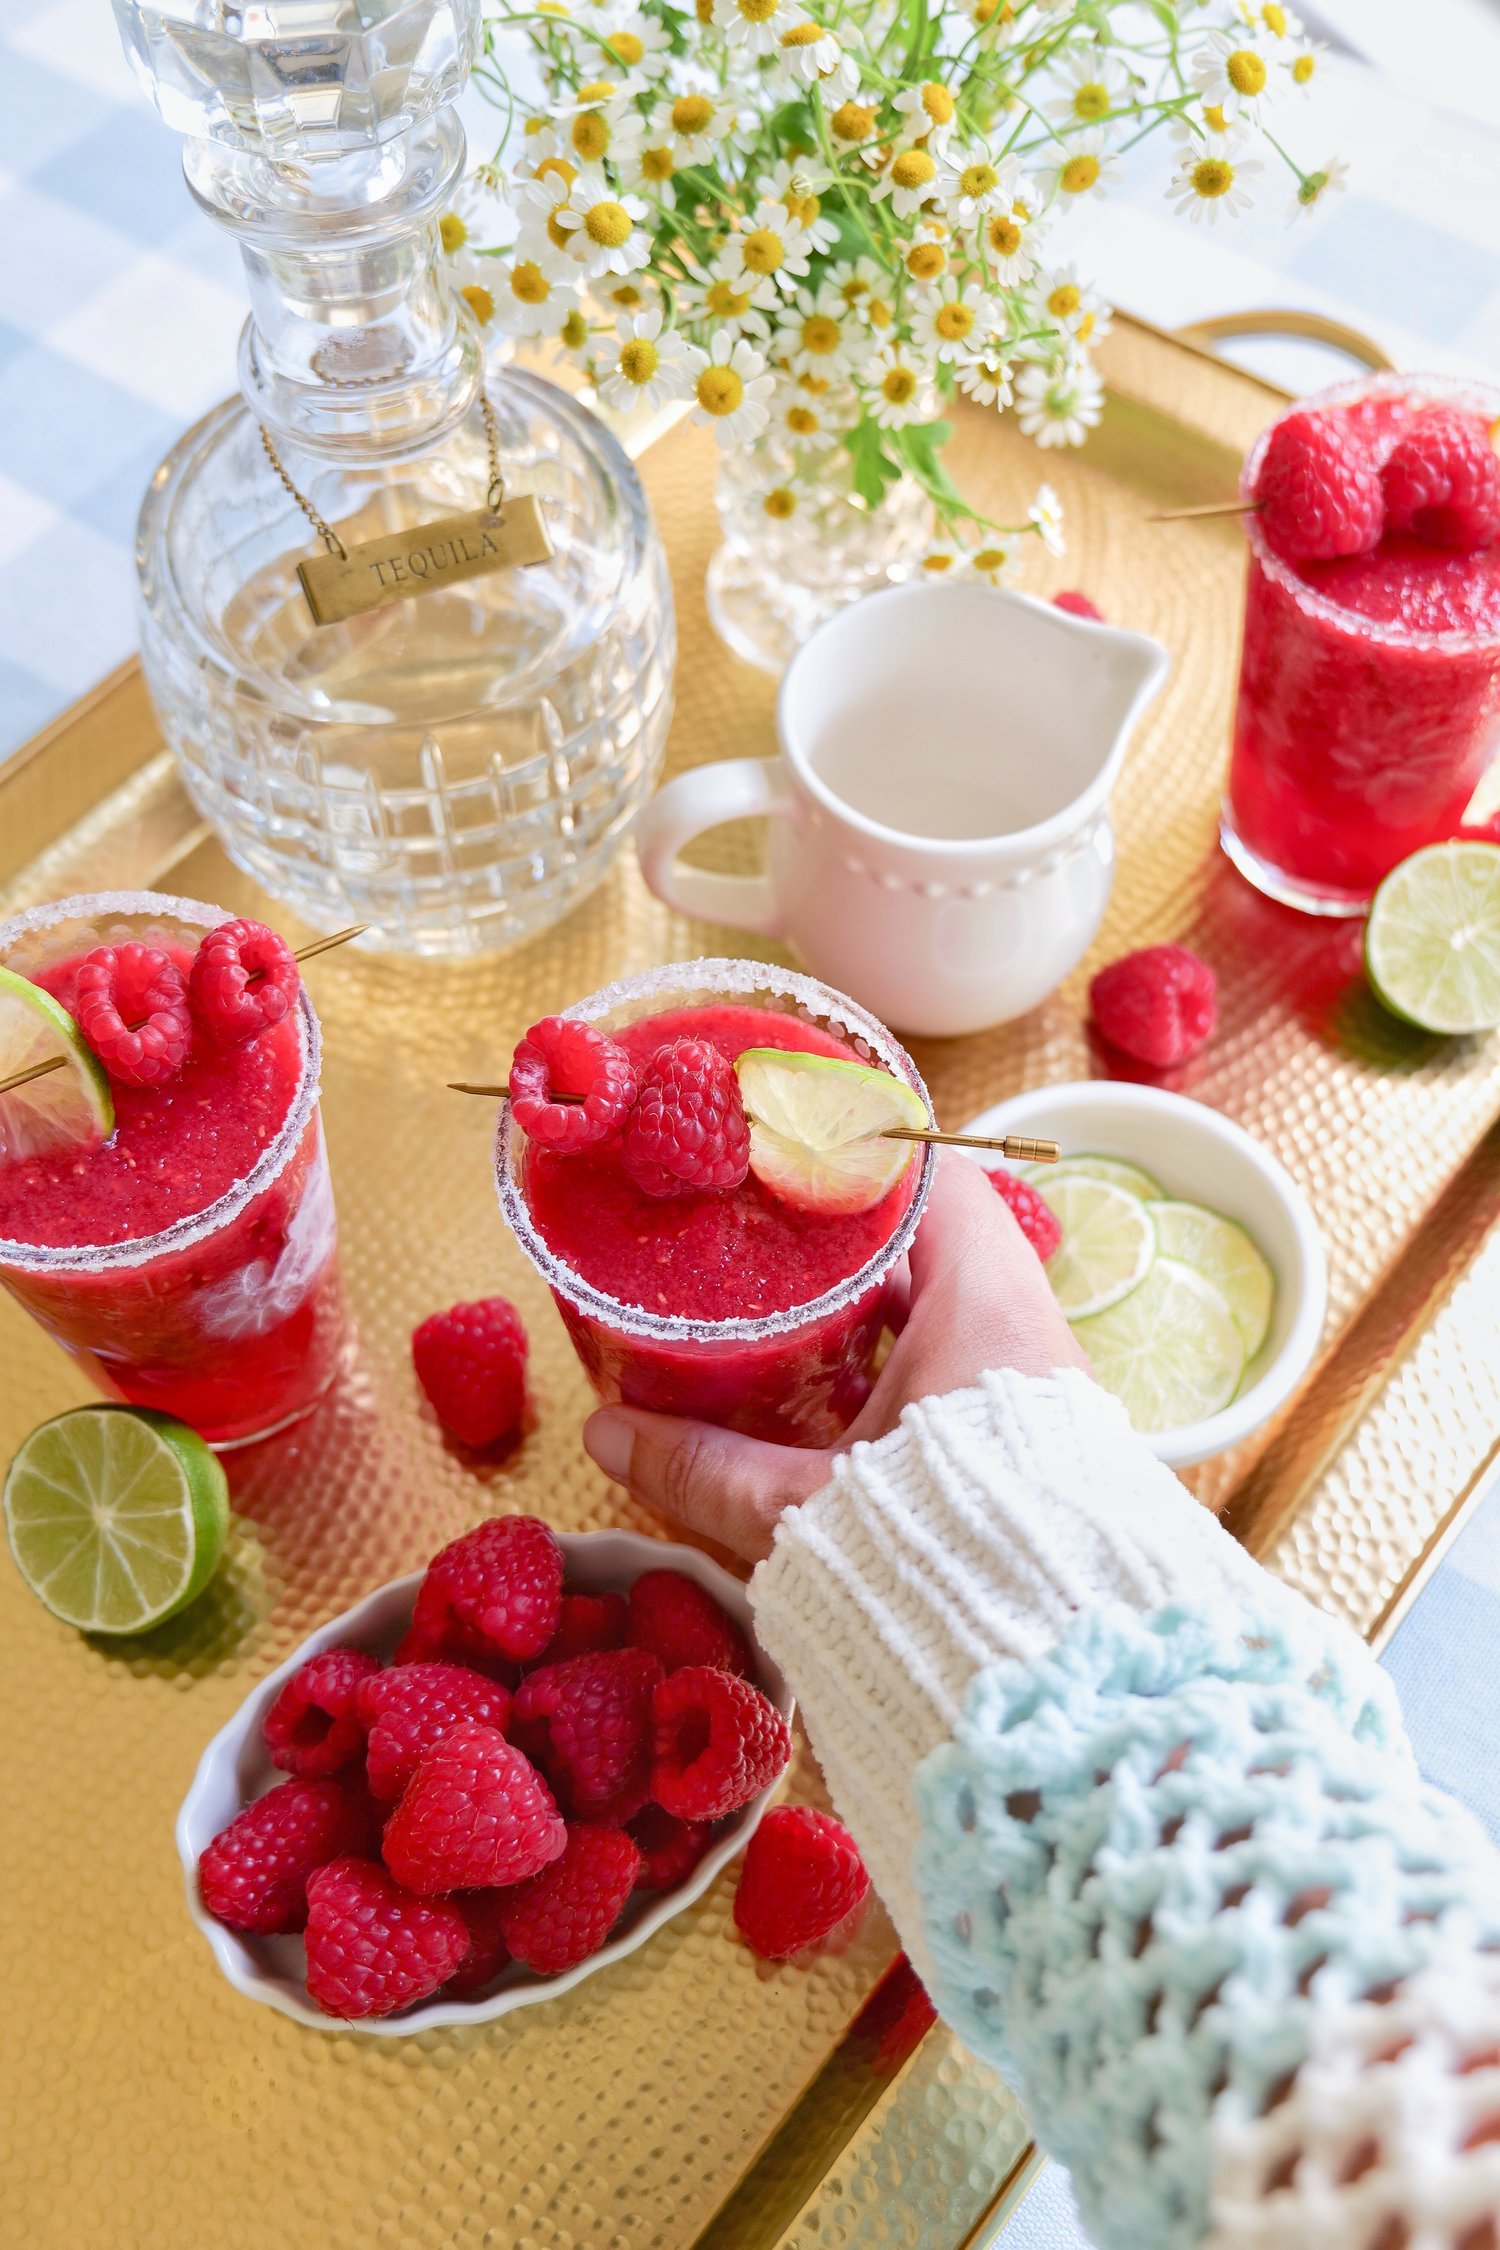
3. Raspberry Frozen Margarita

Frozen margaritas and summer just belong together, and this raspberry version is one of the prettiest.

Frozen raspberries give it that gorgeous color and fruity flavor, while fresh lime juice, tequila, orange liqueur and margarita mix keep it tasting like a classic margarita. I like finishing the glasses with a 50/50 mixture of salt and sugar around the rim, then adding fresh raspberries and a lime wedge.

This would be so fun for taco night, a girls’ night outside or any summer gathering where you want something frozen and festive.

Frozen raspberry margarita with fresh raspberries and lime
Raspberry margarita with salt and sugar rim

Make my Raspberry Frozen Margarita

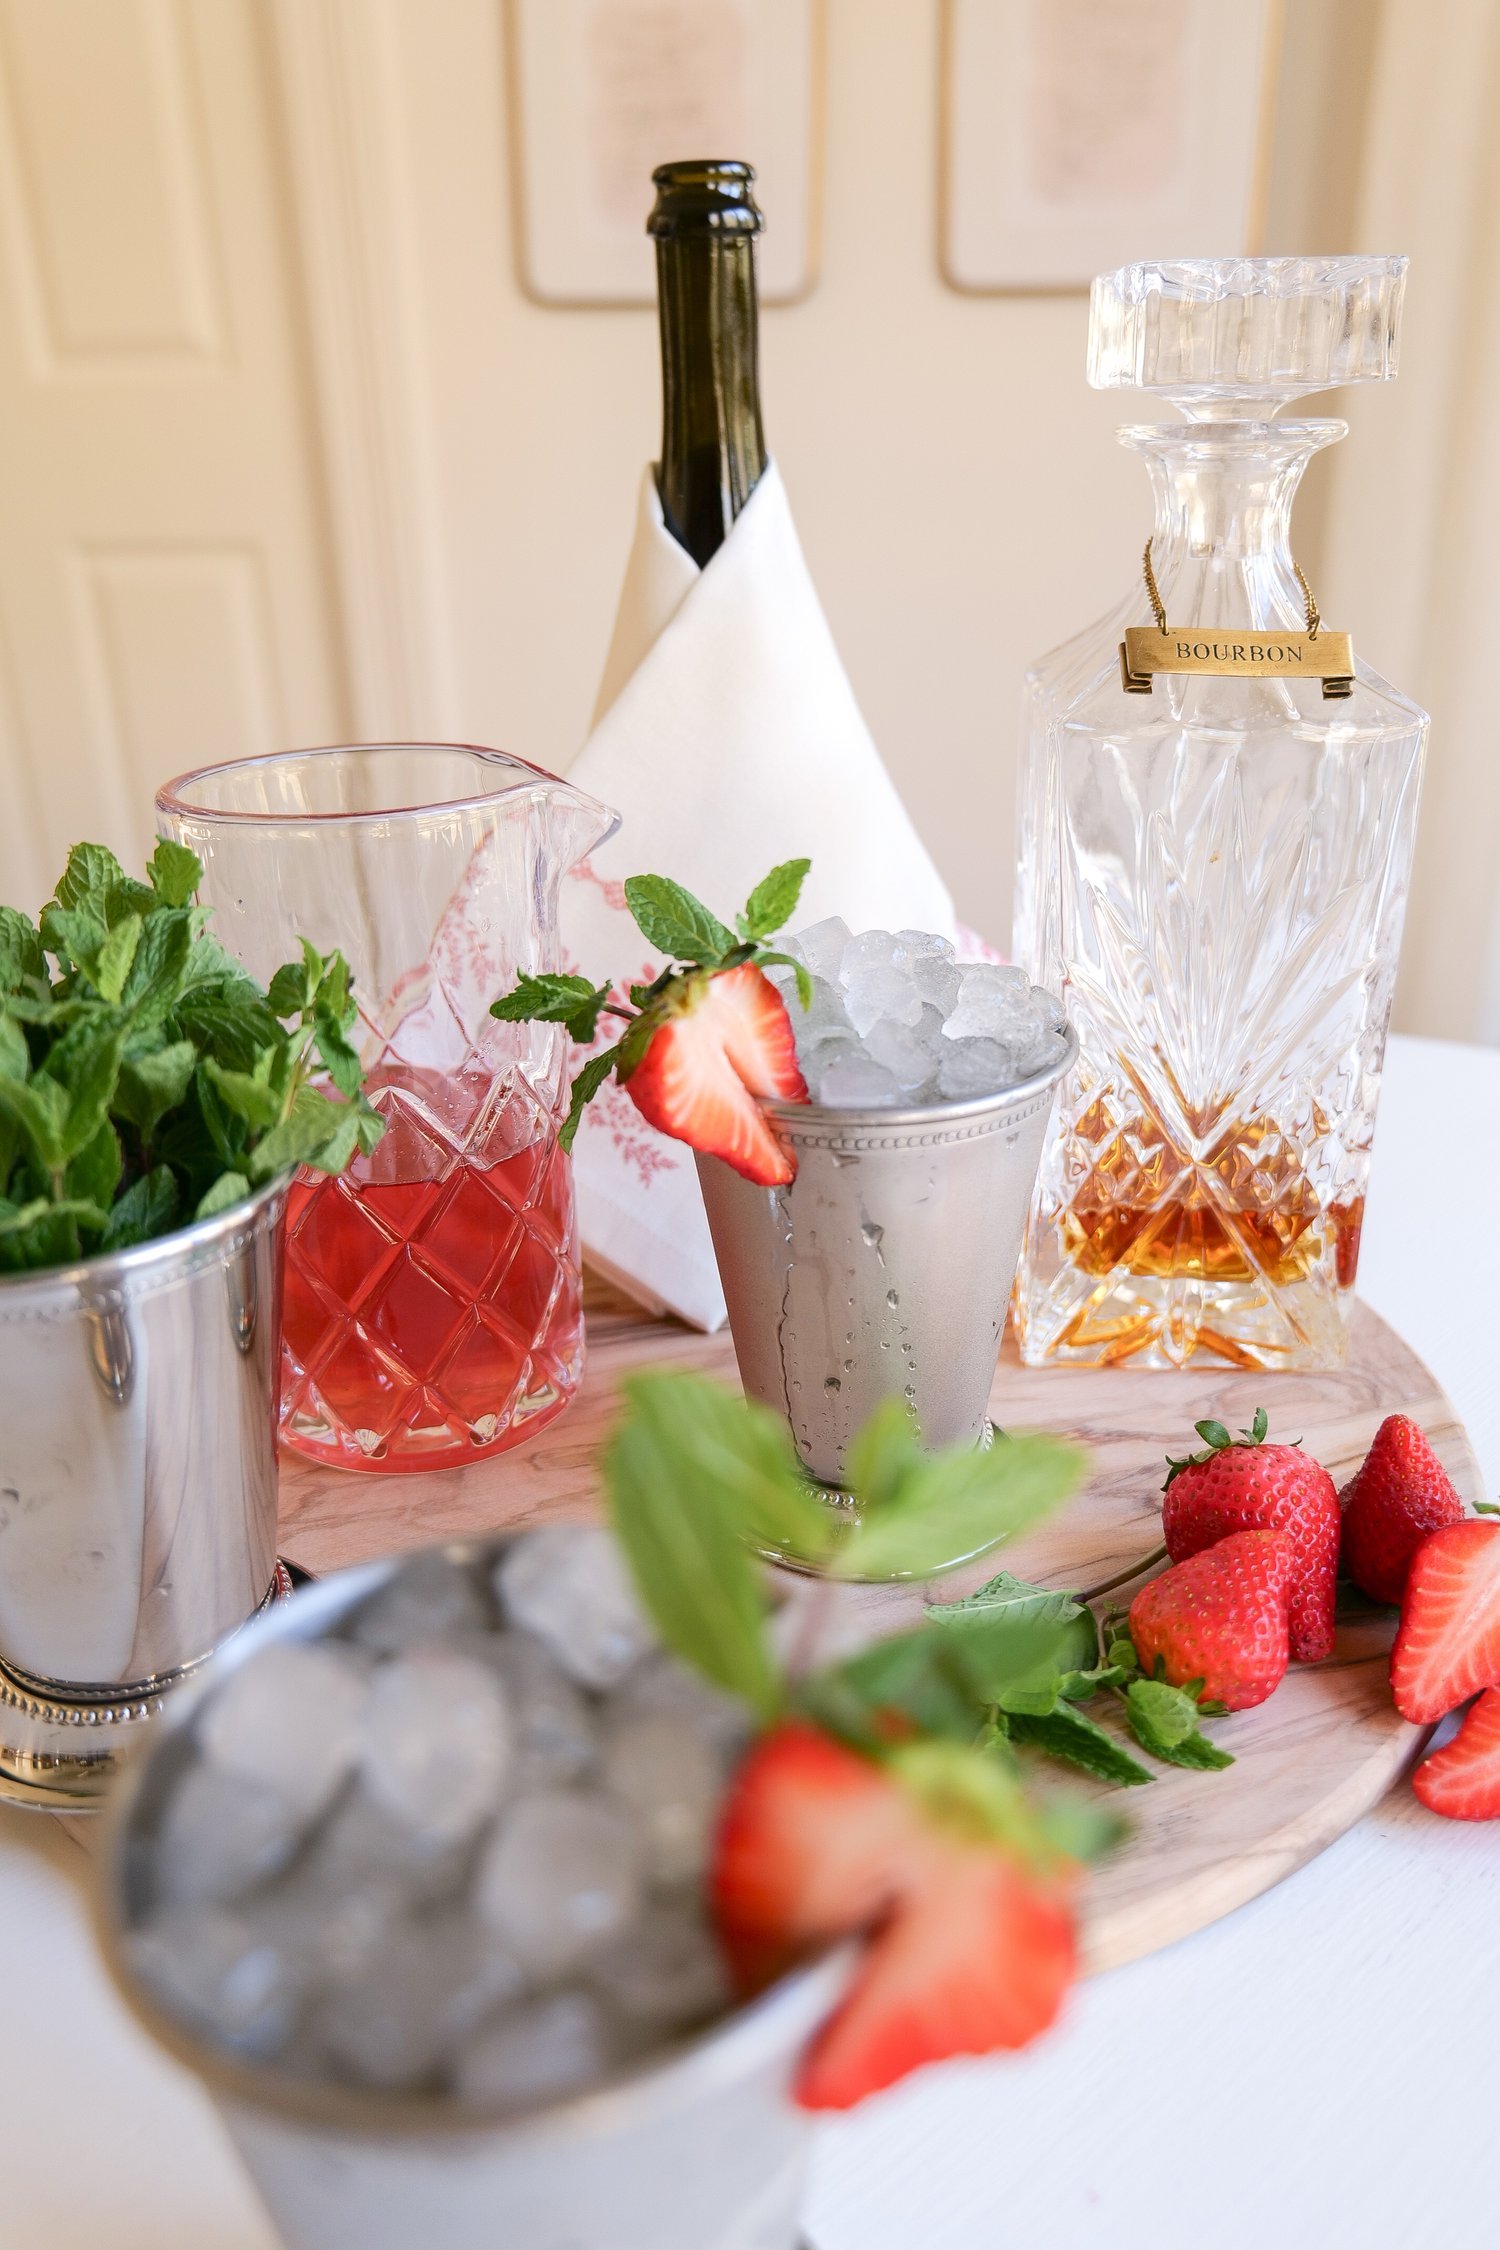
4. Champagne Mint Julep Cocktail

If you love a classic mint julep but want something a little lighter and more celebratory for summer, add champagne.

This version starts with a homemade strawberry simple syrup, fresh mint and whiskey before being packed with crushed ice and topped with champagne. The strawberry adds just enough summer flavor without taking away from everything I love about a mint julep.

Finish it with fresh strawberry and mint and you have a cocktail that works just as well for brunch as it does for an evening outside.

Strawberry champagne mint julep with crushed ice

Get the full Champagne Mint Julep Cocktail recipe.

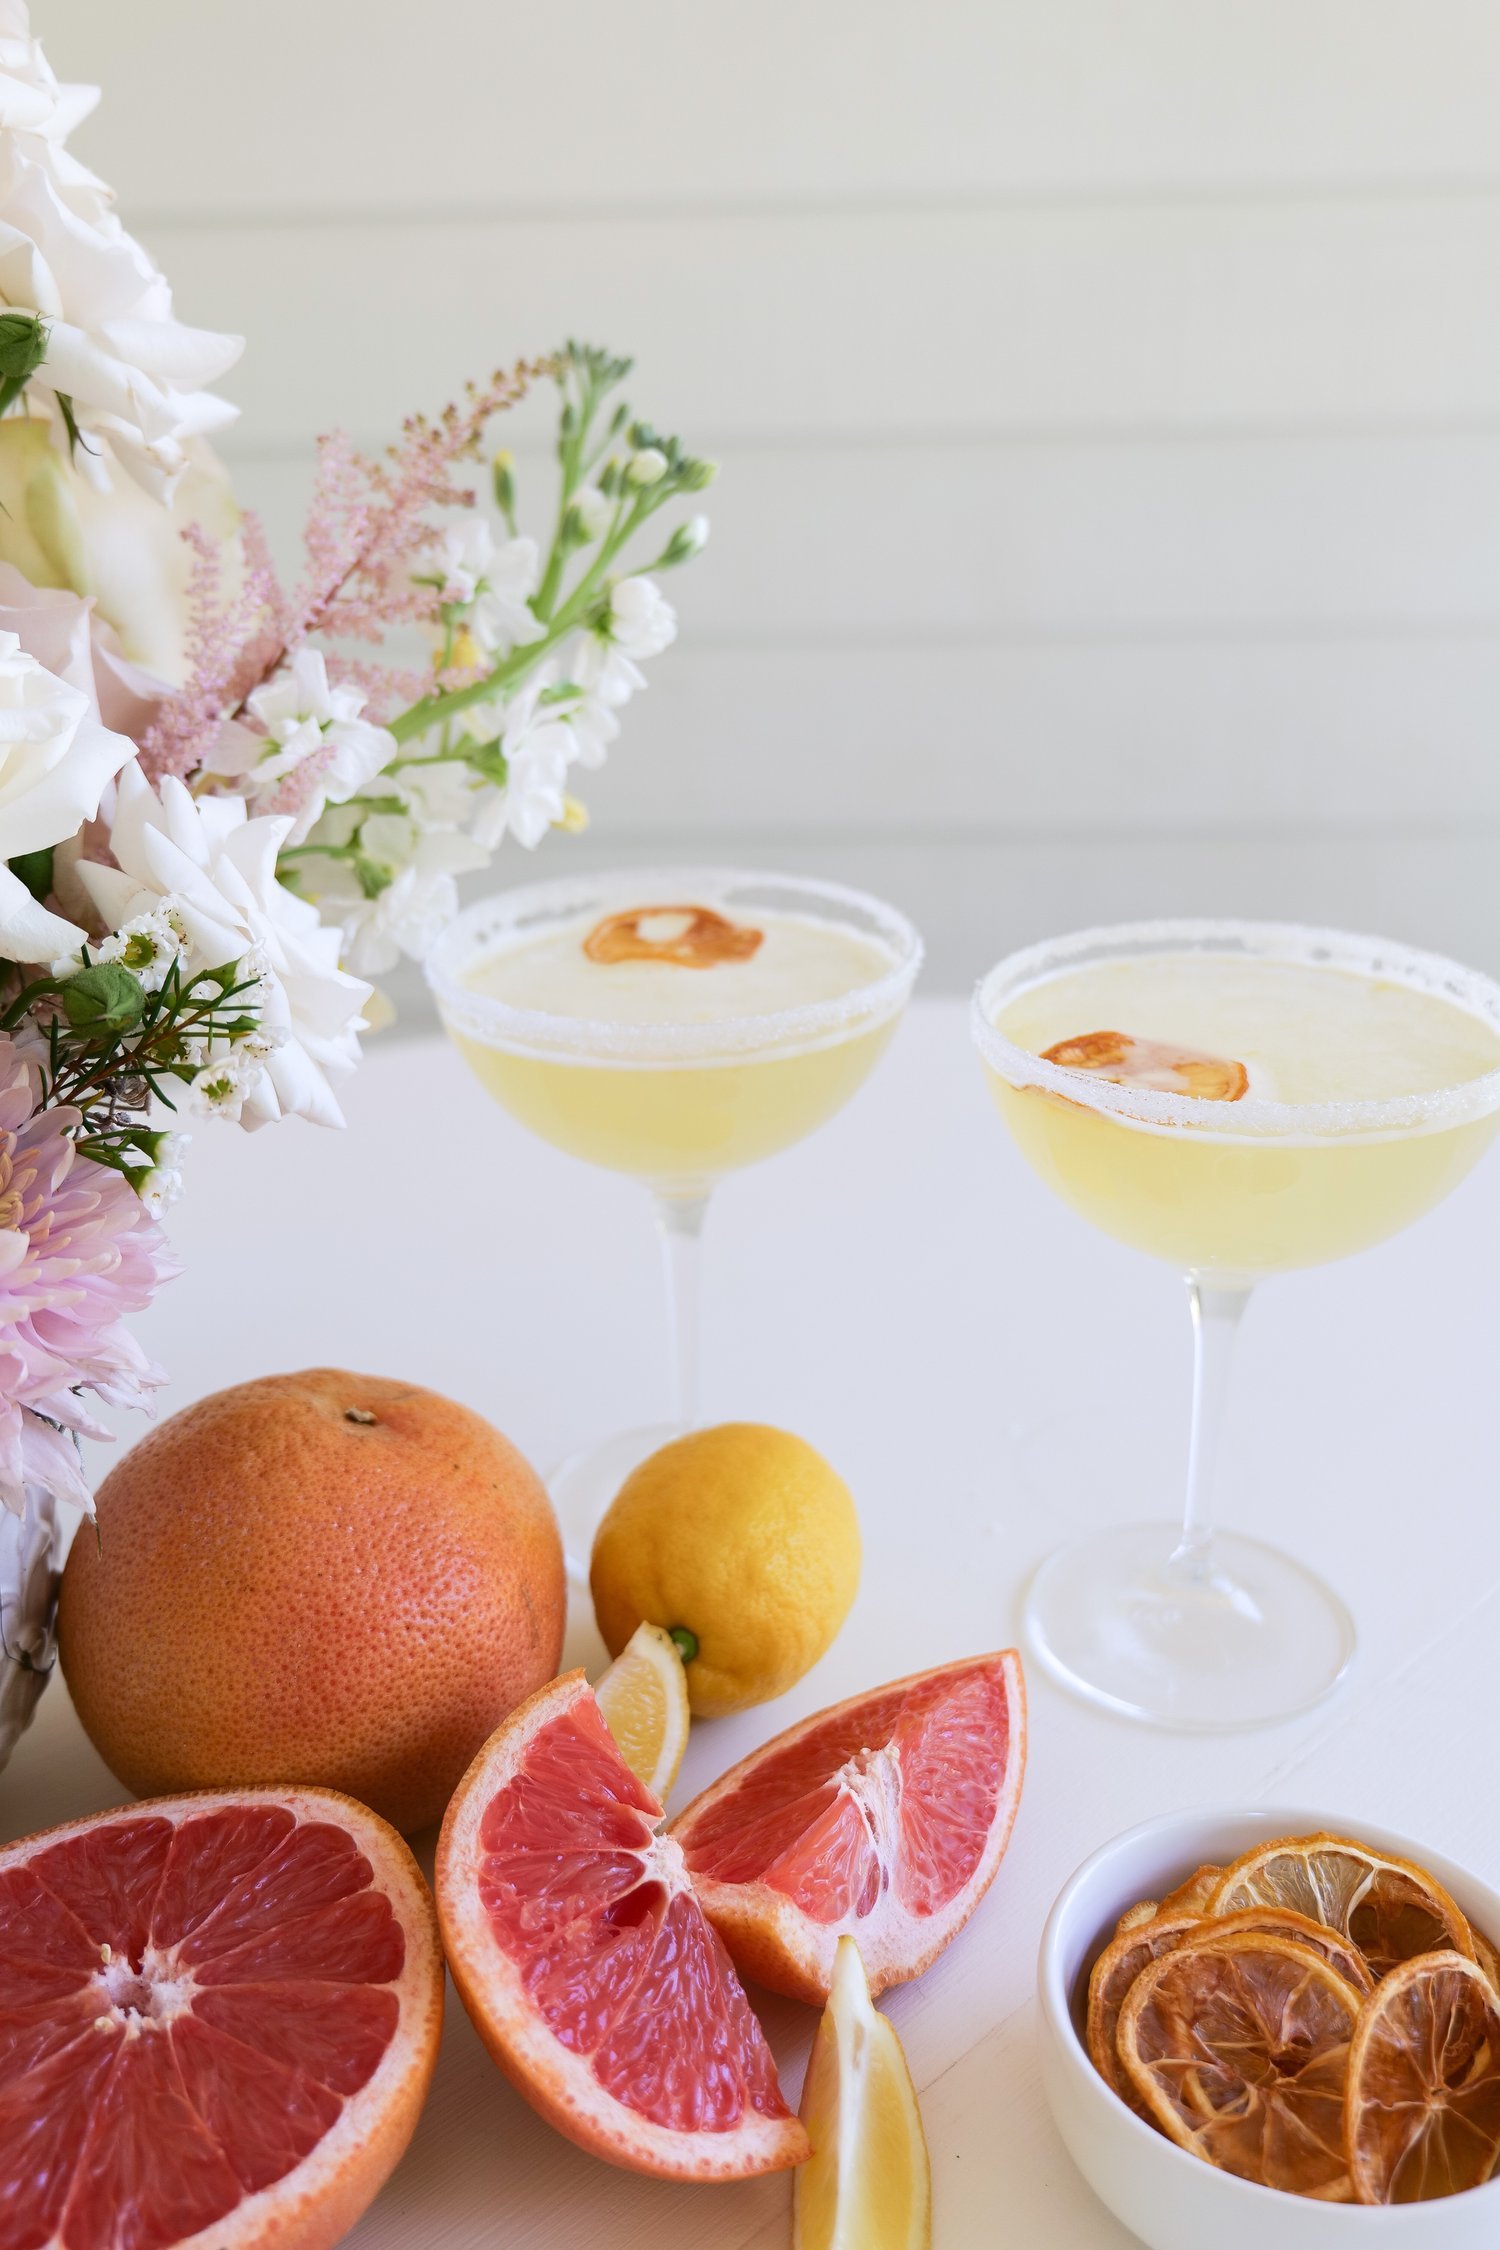
5. Lemon Drop Martini

This is one of those classic cocktails I come back to again and again because it only takes a few ingredients.

My Lemon Drop Martini uses vodka, simple syrup and freshly squeezed lemon juice, shaken over ice and poured into a sugar-rimmed glass. It’s sweet, tart and incredibly easy to make at home.

If you’re serving a few different cocktails at a party, I also love having something simple and citrus-forward like this alongside the sweeter and creamier drinks.

Lemon drop martini served in a sugar-rimmed glass

Make my Lemon Drop Martini

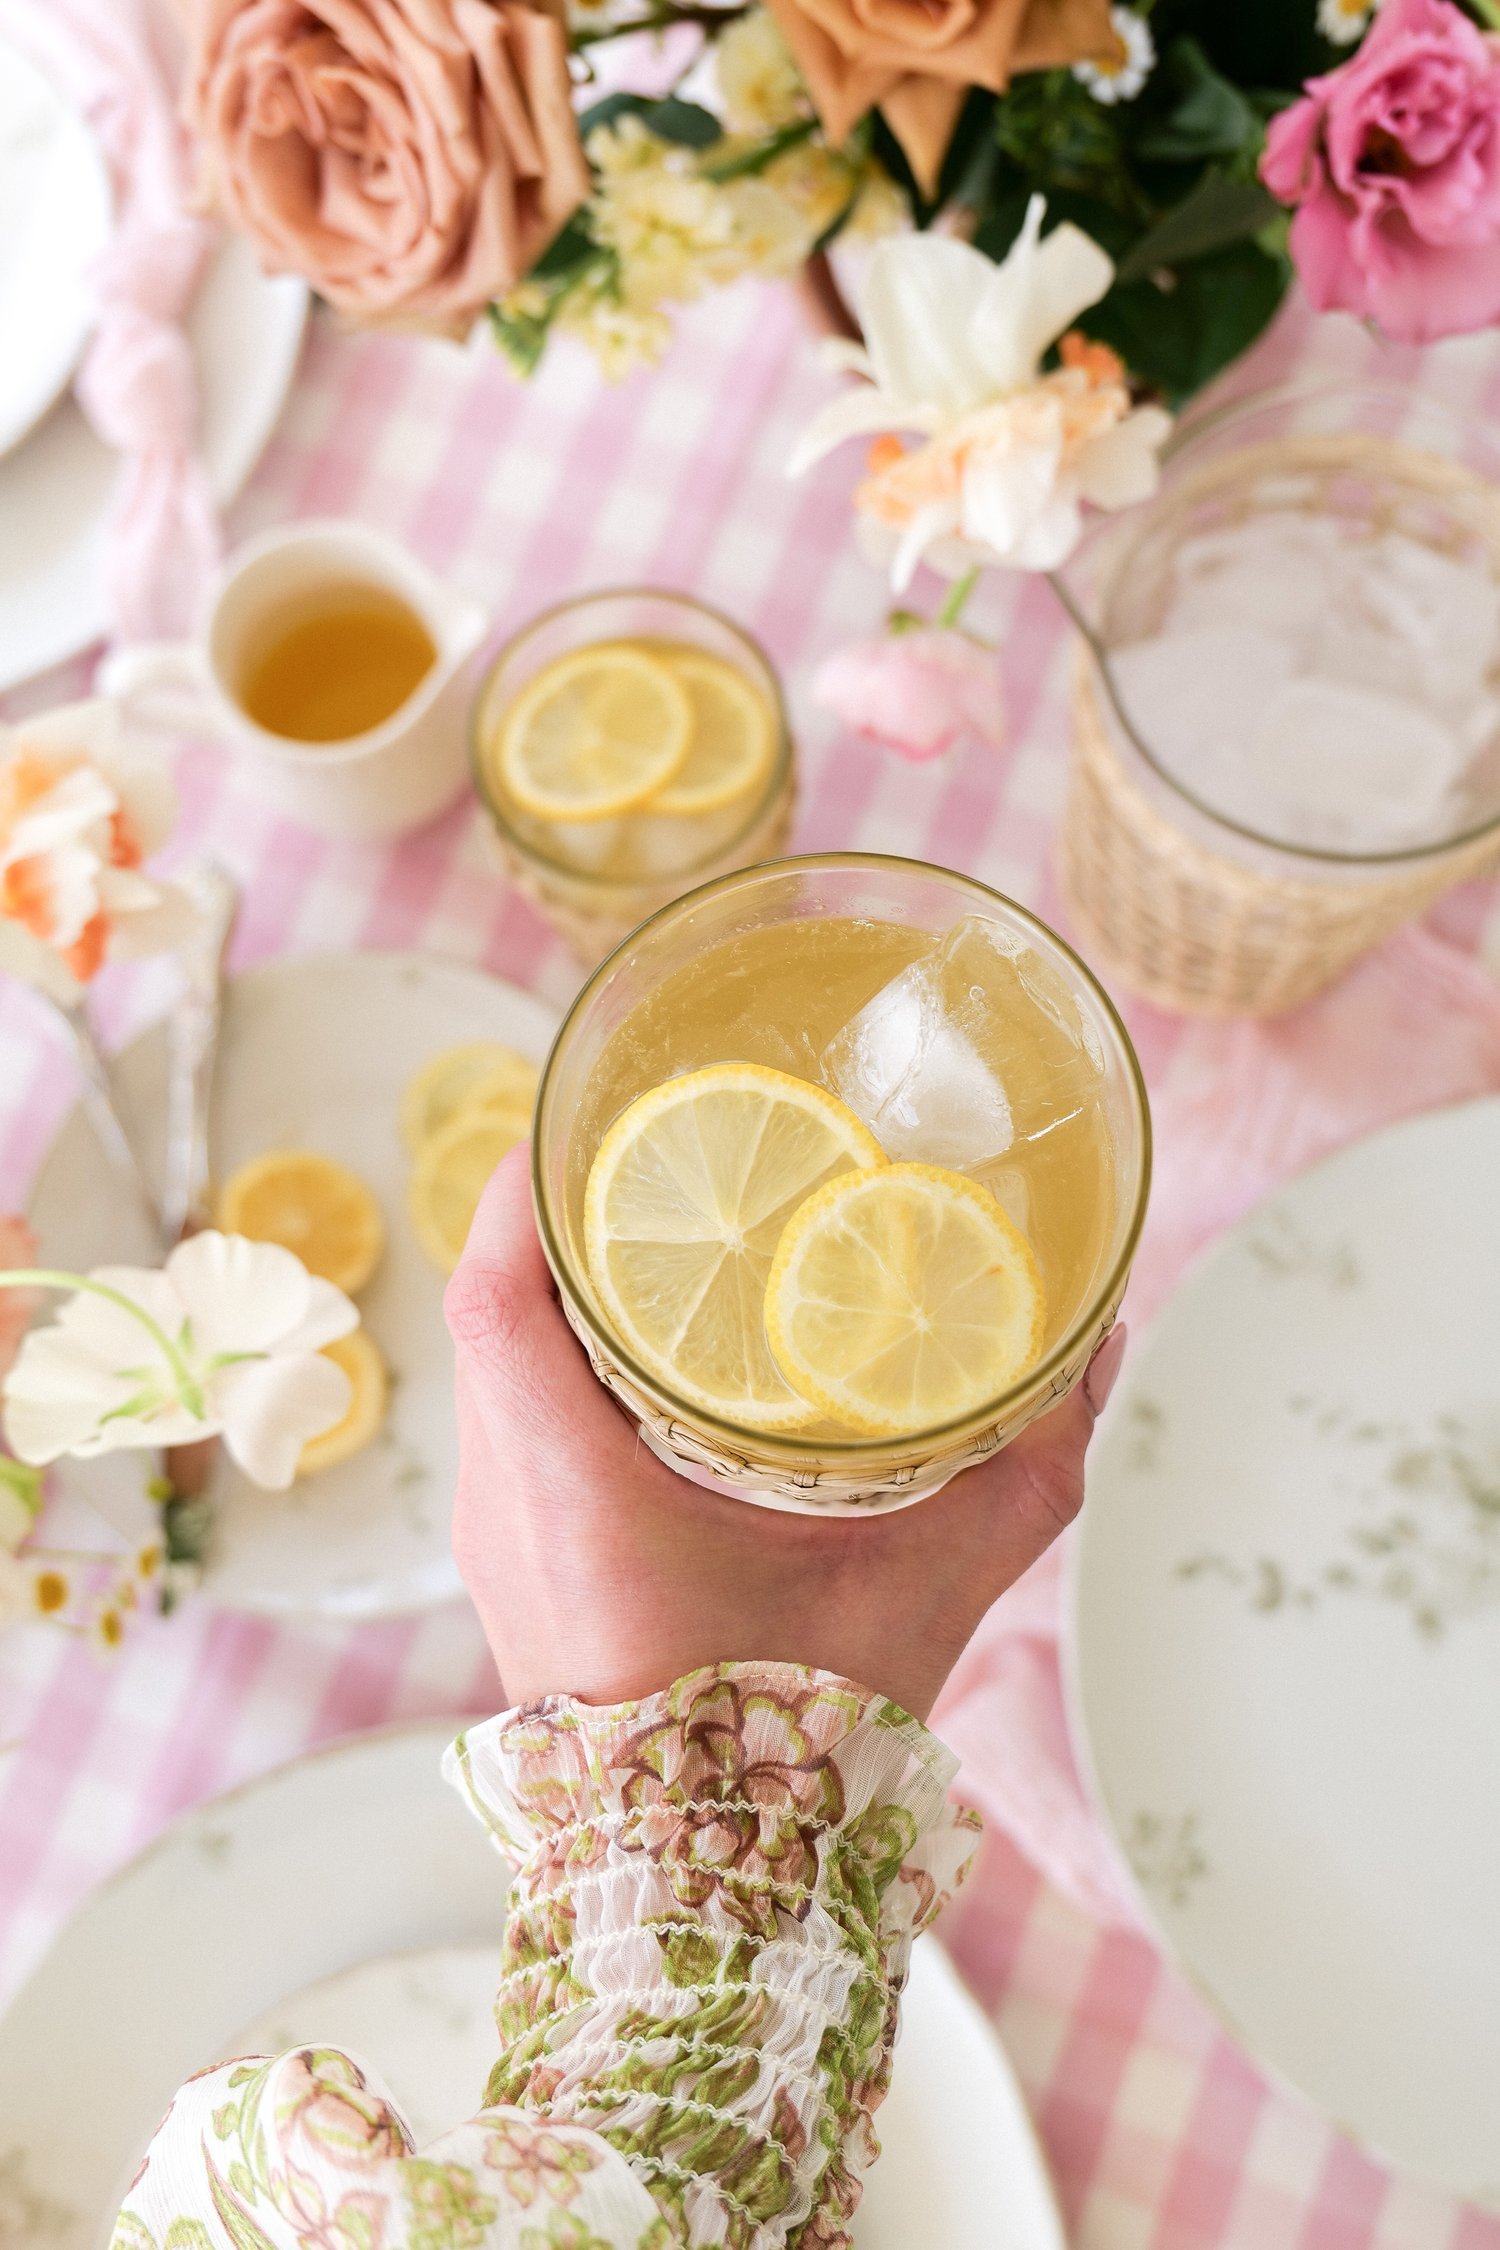
6. Refreshing Lemon Twist Cocktail

For something bubbly and citrusy, this Lemon Twist Cocktail combines fresh lemon juice, limoncello, ginger beer and champagne.

It’s one of the easiest drinks on this list: fill your glass with ice, add the lemon juice, limoncello and ginger beer, then top everything with champagne. A few fresh lemon slices are really all it needs to look beautiful.

This is exactly the kind of cocktail I’d serve for an outdoor summer lunch or an easy happy hour at home.

Lemon champagne cocktail with limoncello and ginger beer
Limoncello and ginger beer cocktail topped with champagne

Get the recipe for my Refreshing Lemon Twist Cocktail

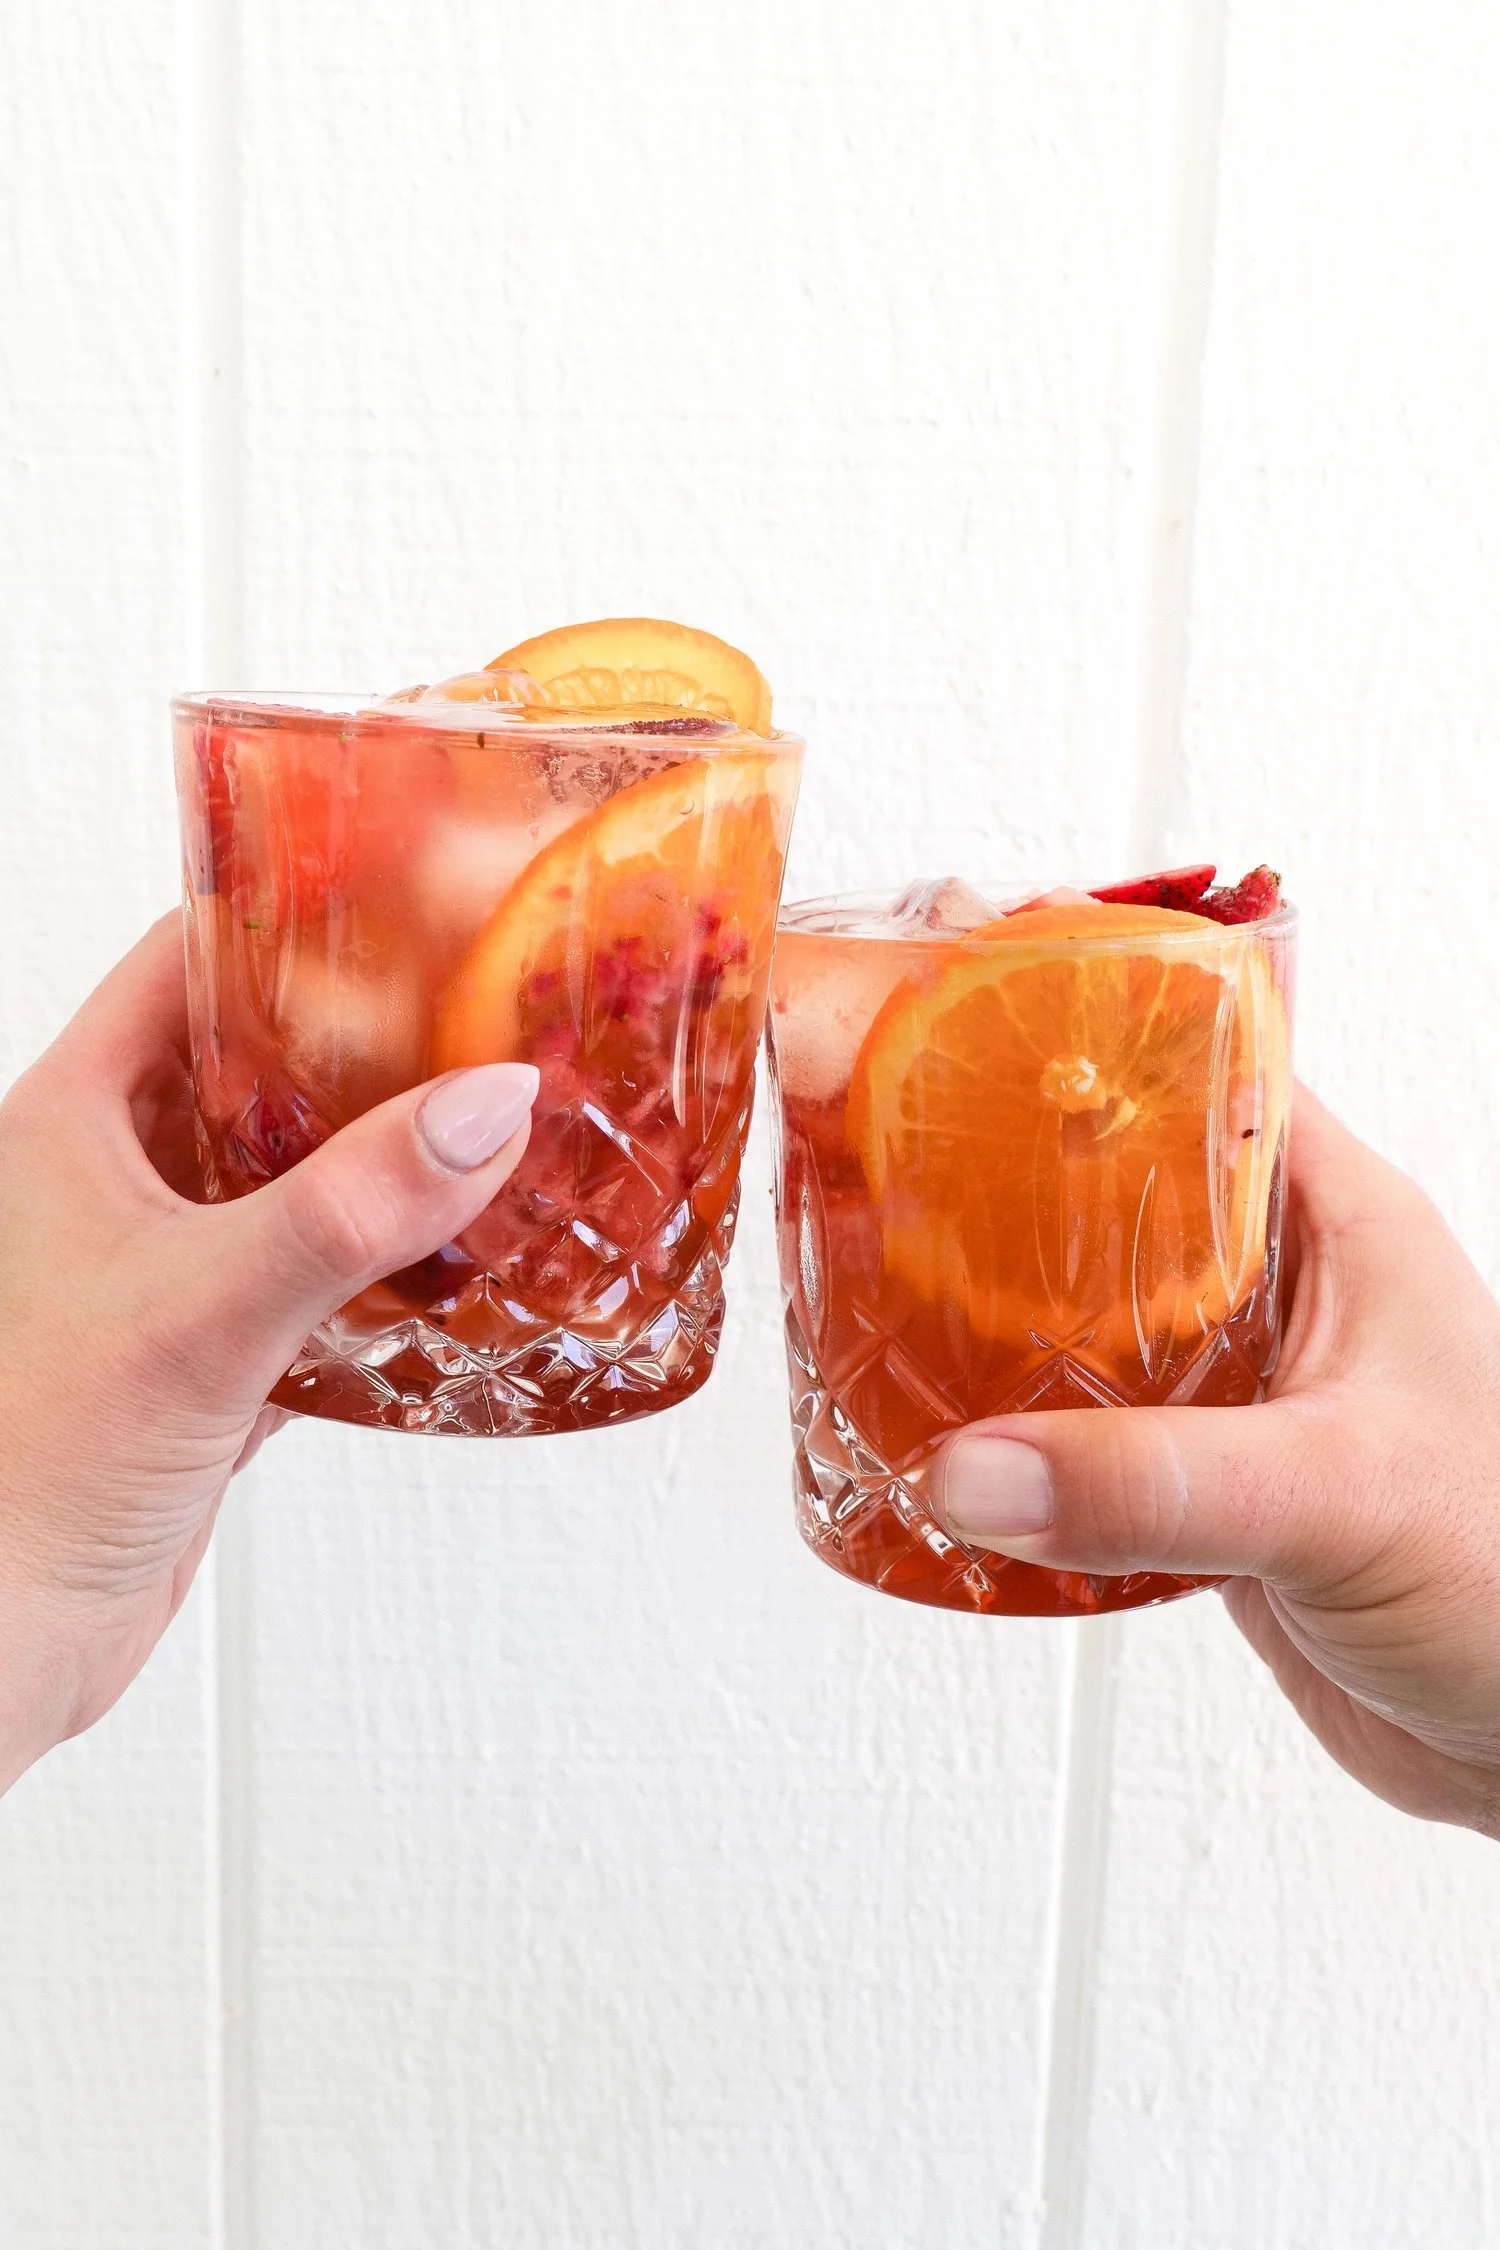
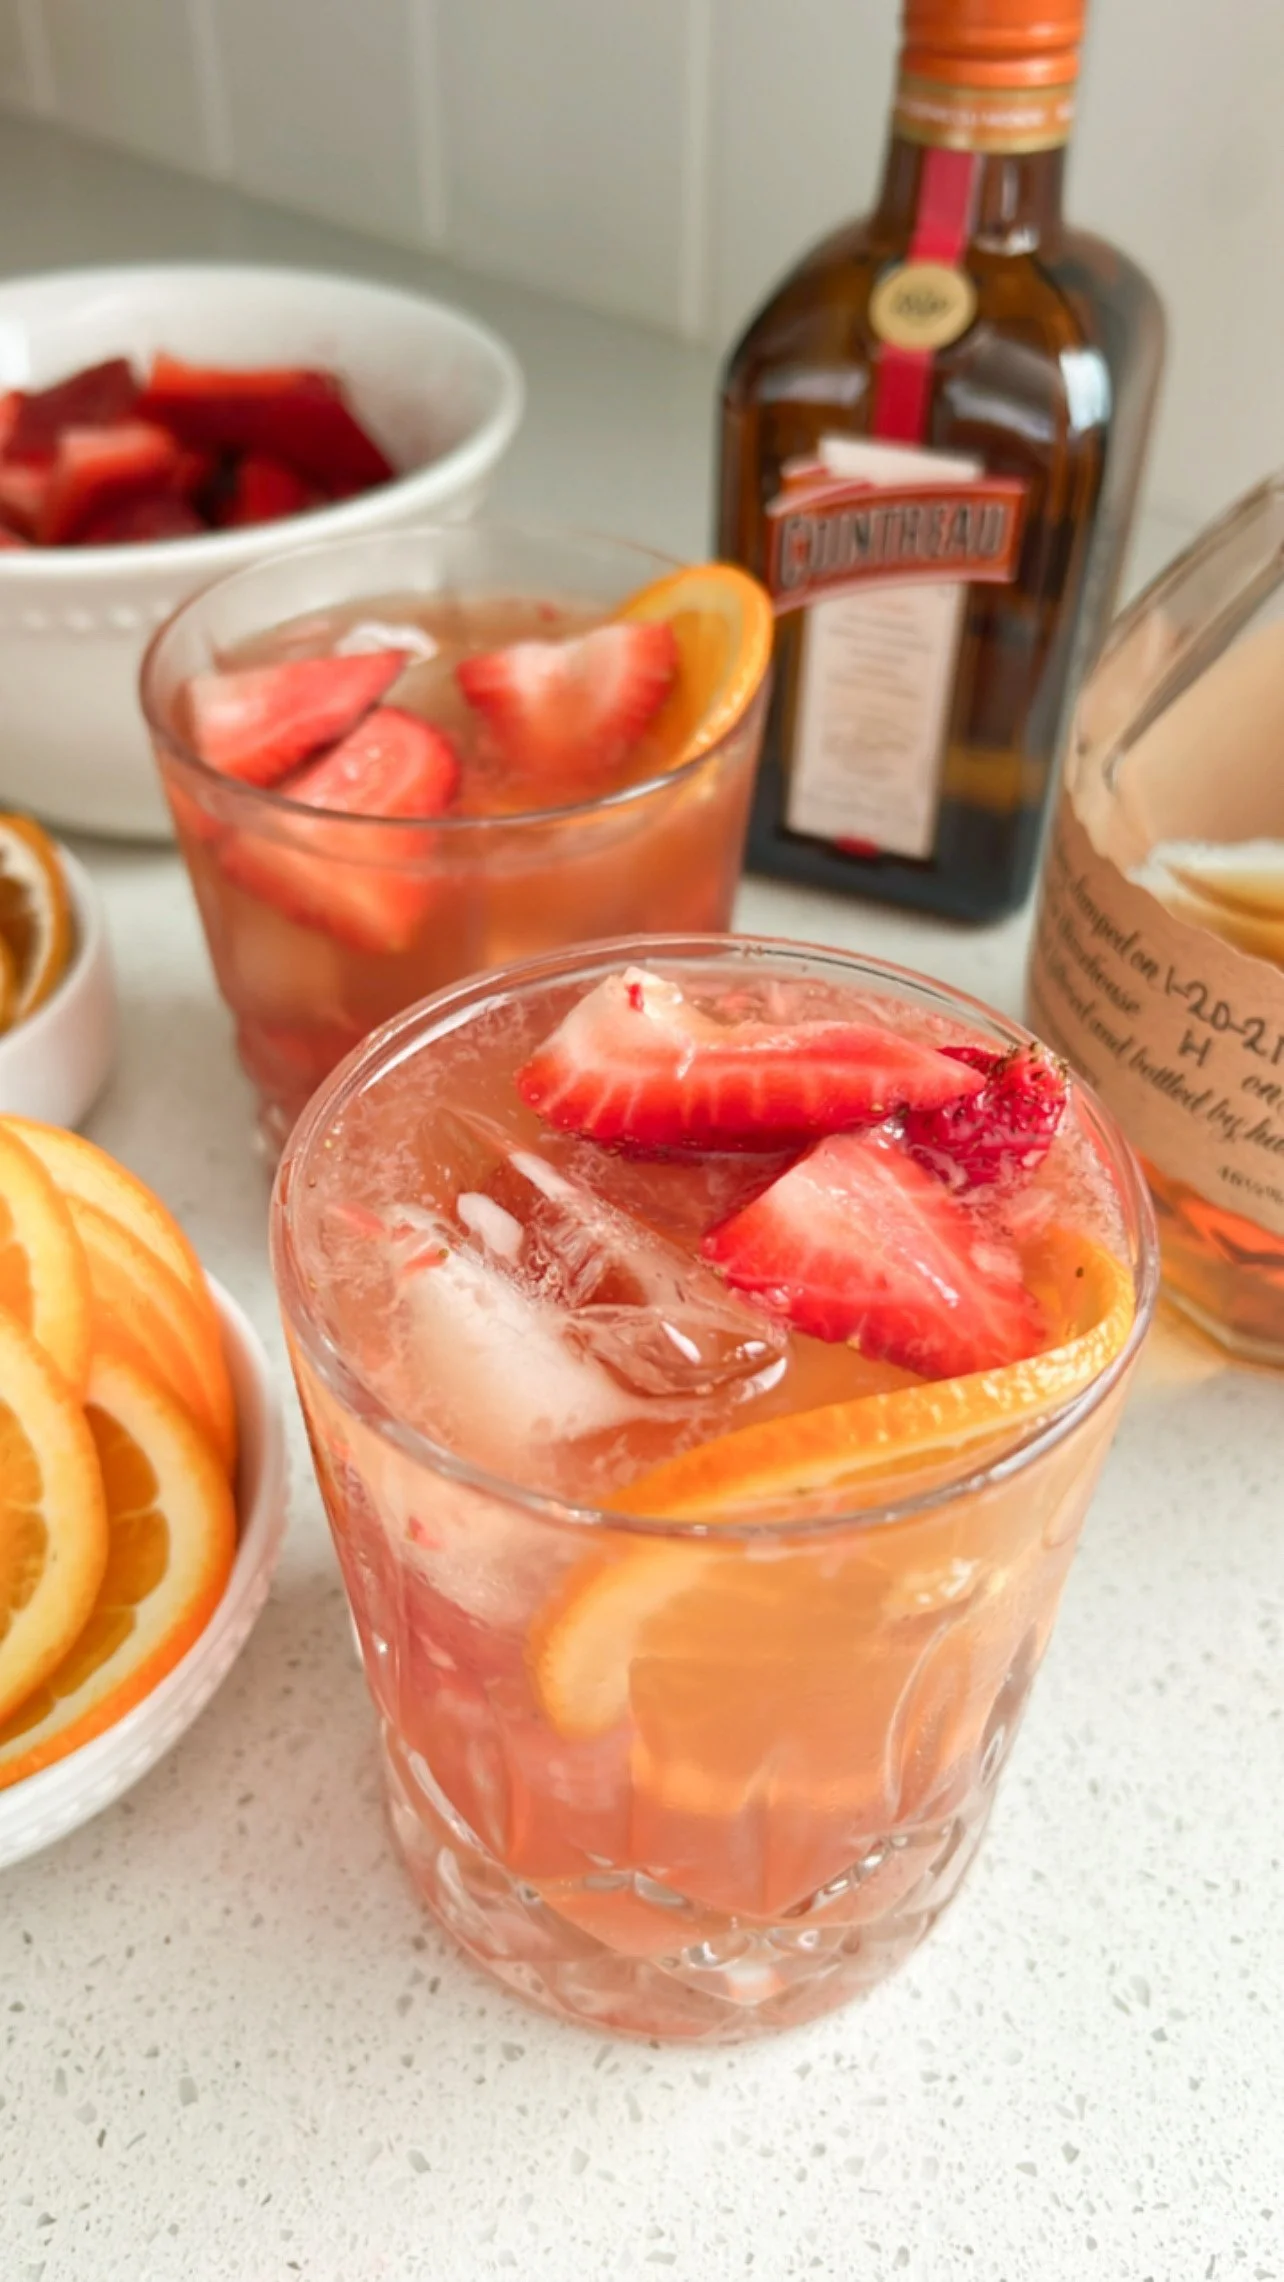
7. Strawberry Orange Bourbon Smash

Fresh strawberries and orange make this bourbon cocktail feel completely different from the heavier bourbon drinks we tend to think about during fall and winter.

The strawberries are muddled right in the glass before adding orange liqueur, bourbon and a blood orange sparkling drink. Finish it with fresh orange slices and strawberries for an easy cocktail that looks much more involved than it actually is.

I especially love this one for late summer when strawberries are still everywhere but I’m starting to want those slightly warmer flavors again.

Strawberry orange bourbon smash with fresh fruit
Bourbon cocktail with strawberries and fresh orange slices

Make the Strawberry Orange Bourbon Smash.

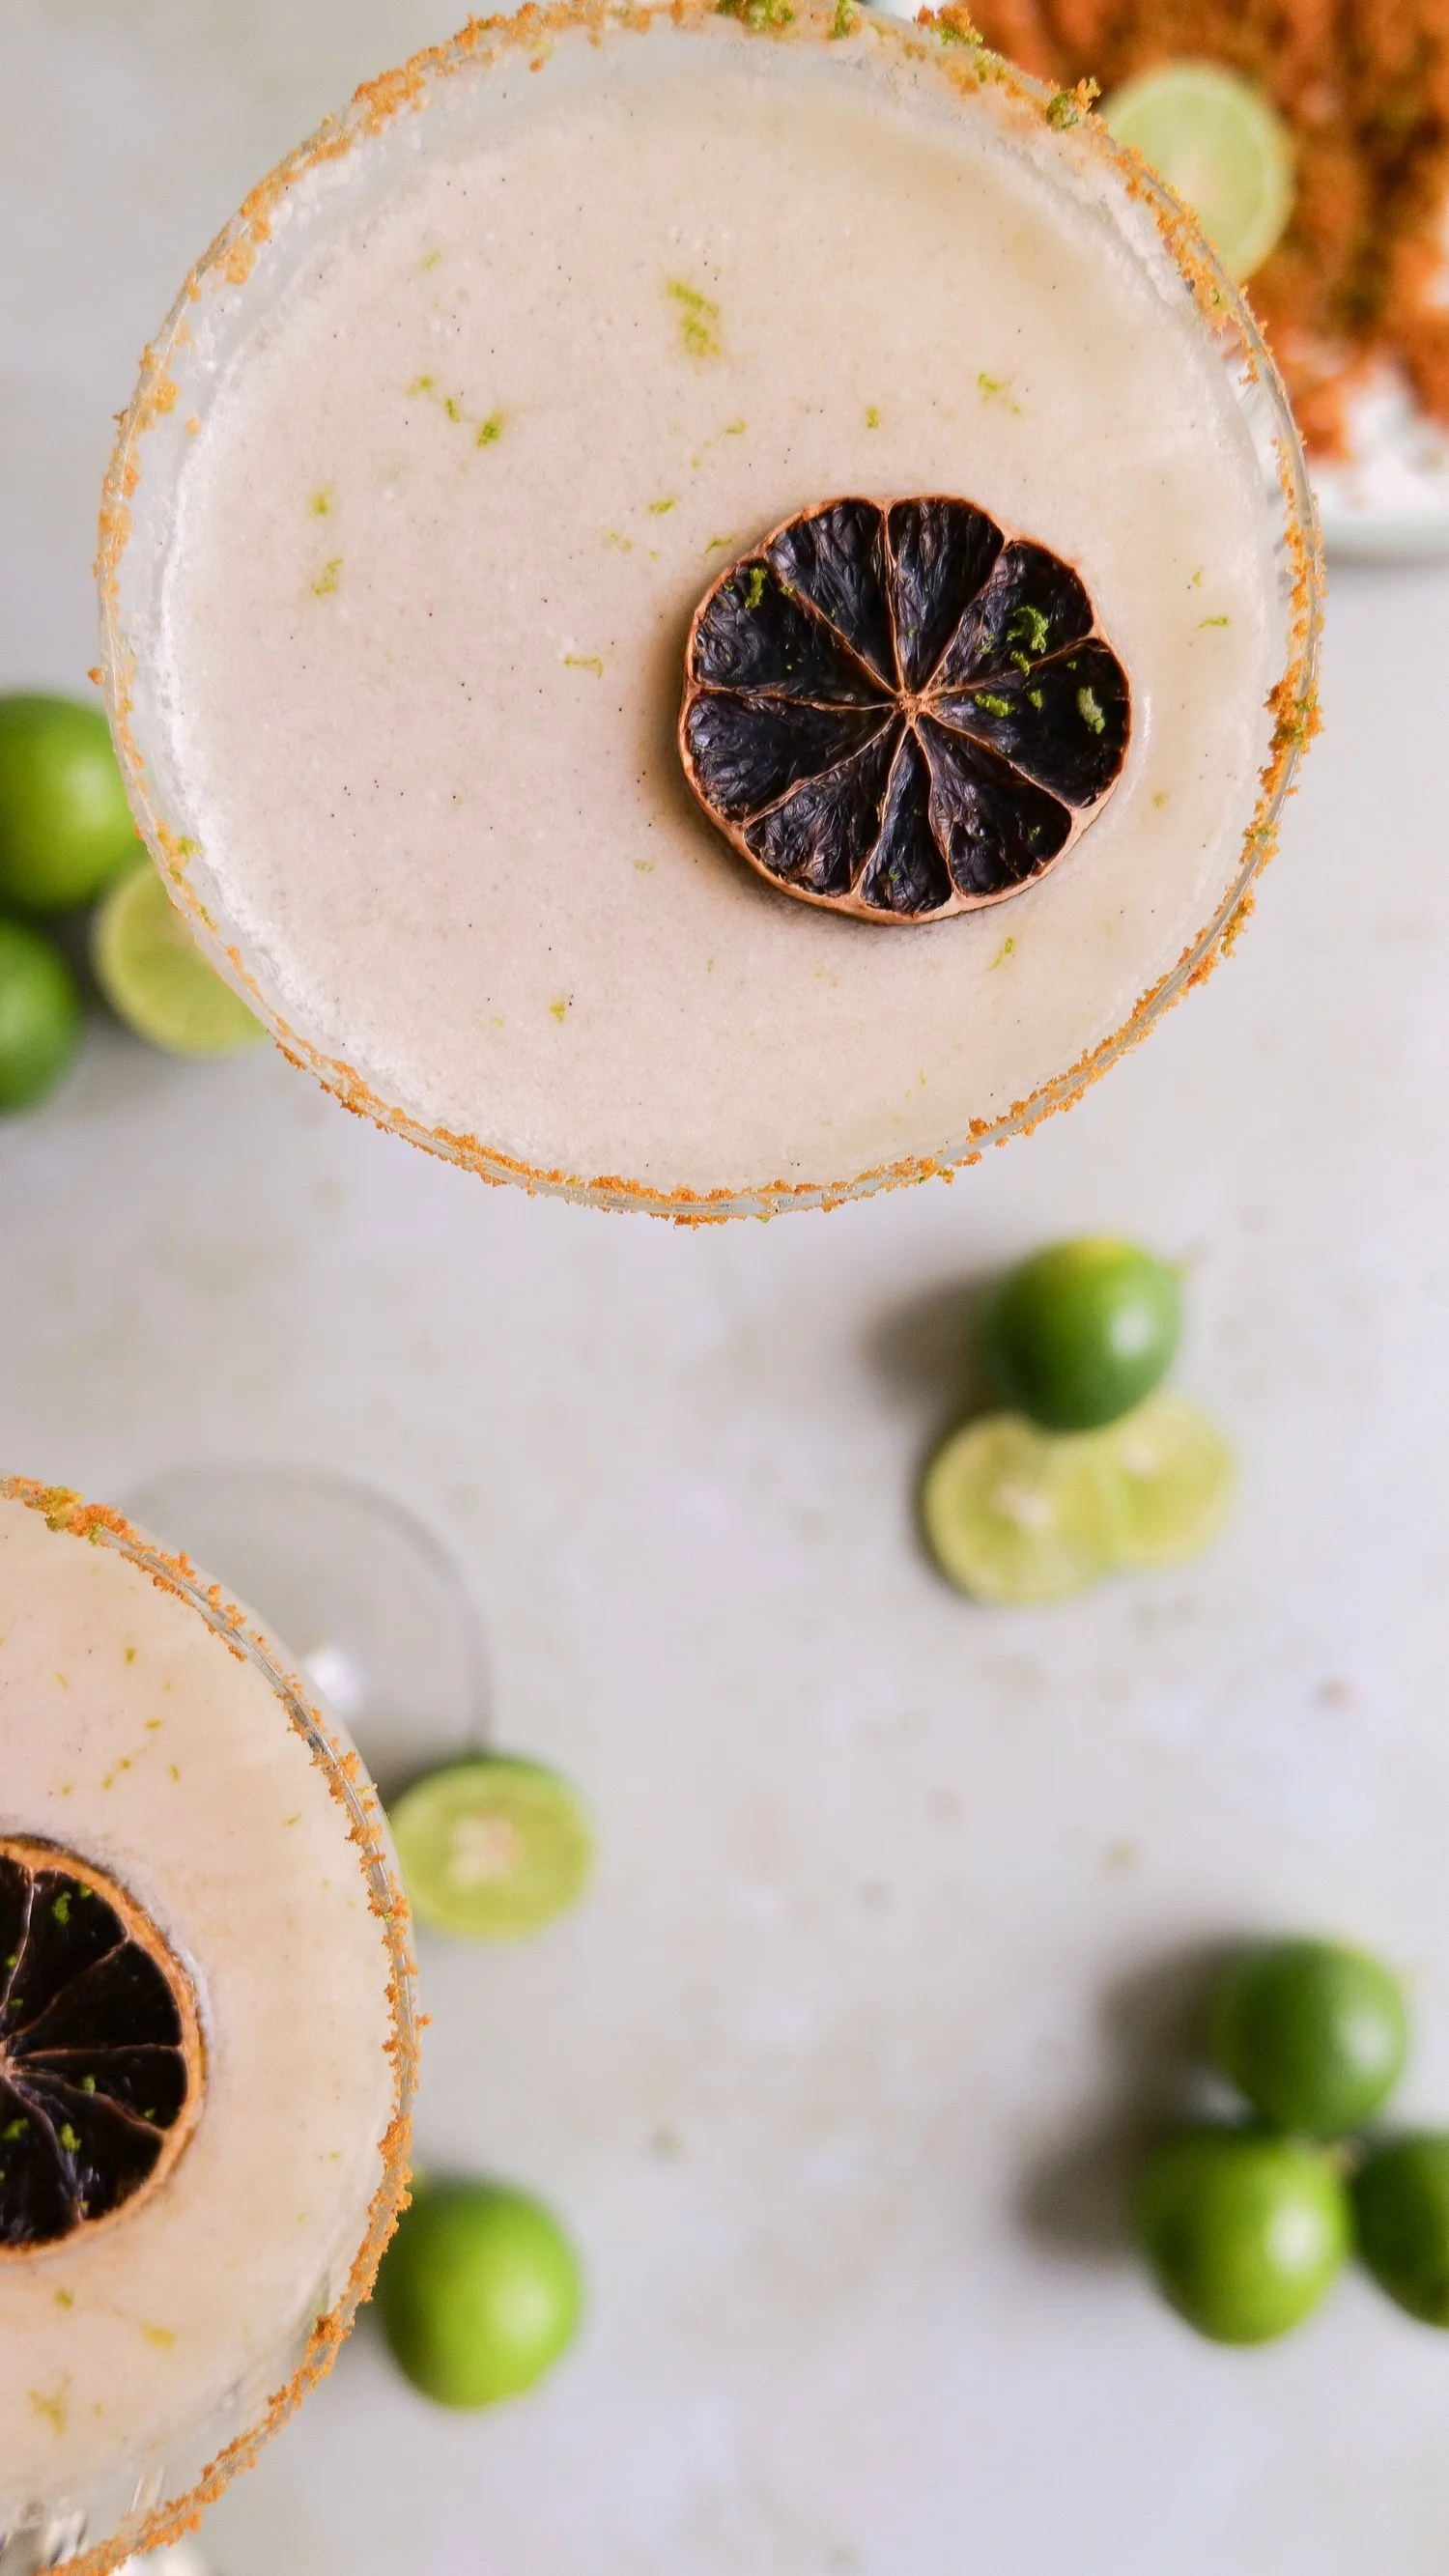
8. Key Lime Pie Martini

If dessert cocktails are more your thing, this one is basically key lime pie in cocktail form.

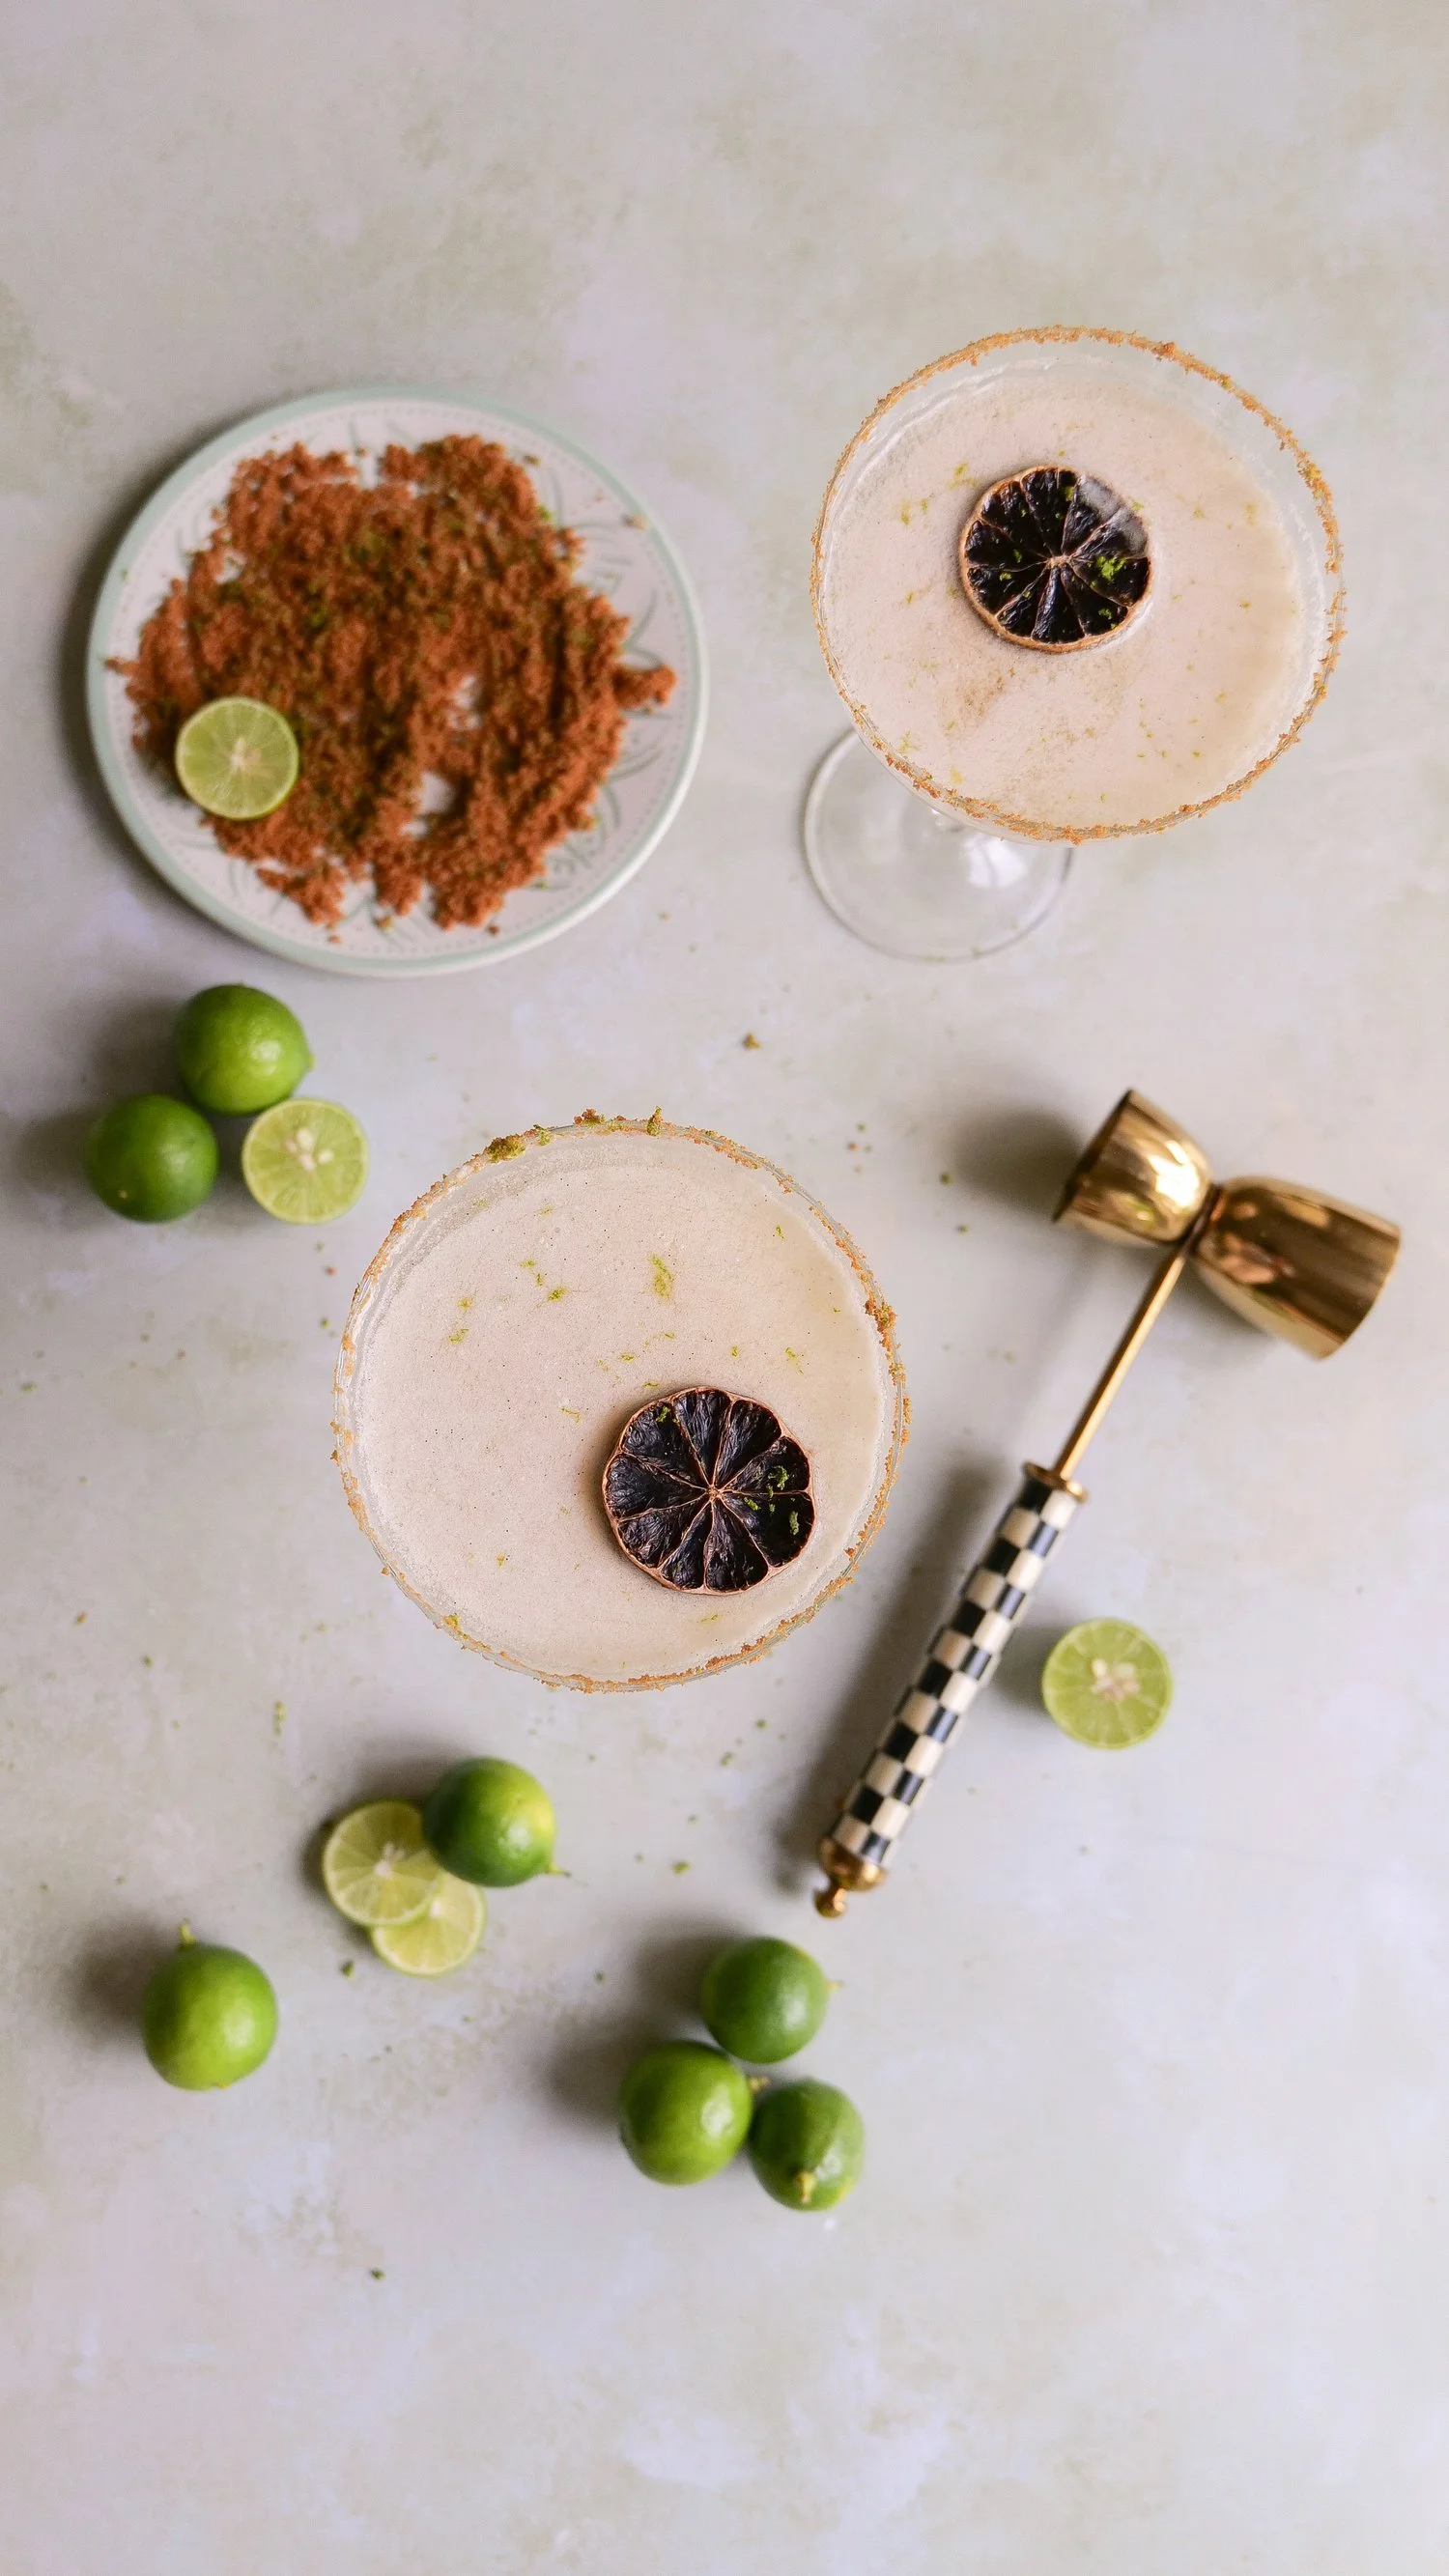
Vodka, lime juice, lemon juice, coconut milk, simple syrup and vanilla bean paste create the creamy citrus base. The graham cracker and lime zest rim is what really gives it that key lime pie feeling.

It’s sweet, tart and creamy all at once, and it makes such a fun after-dinner drink for a summer party.

Key lime pie martini with graham cracker and lime zest rim
Creamy key lime martini garnished with fresh lime

Get my Key Lime Pie Martini recipe.

9. Large Pitcher Melon & Cucumber Sangria

If I’m serving a crowd, a pitcher cocktail will almost always win.

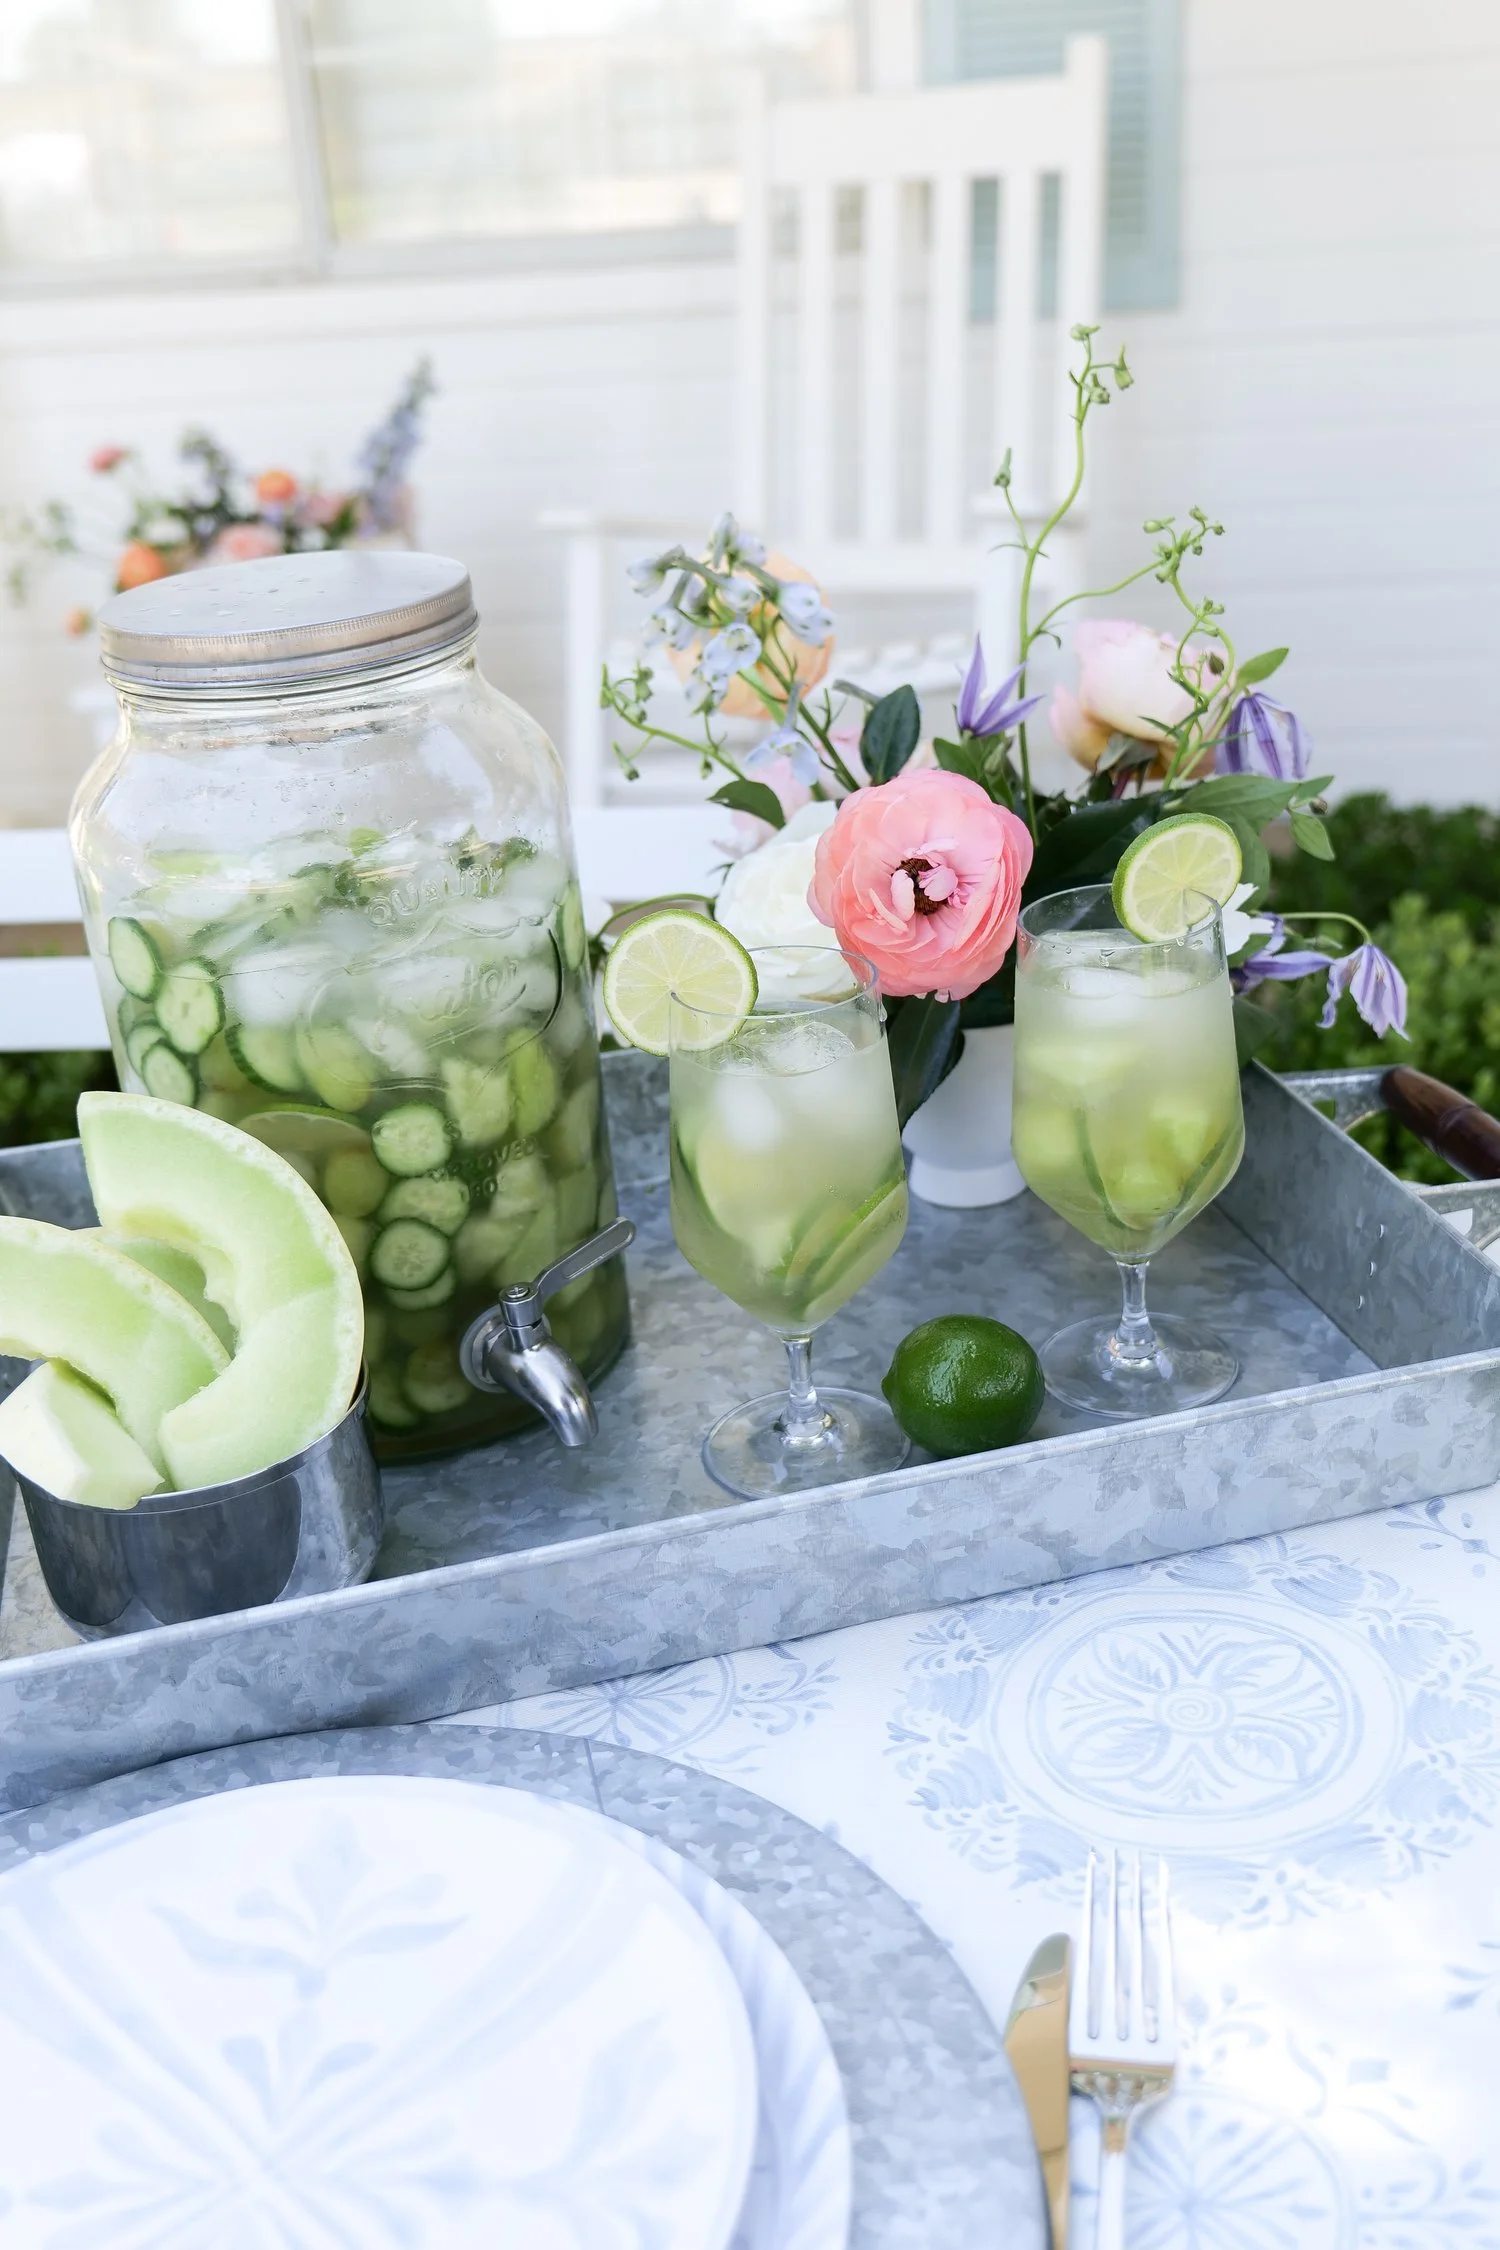
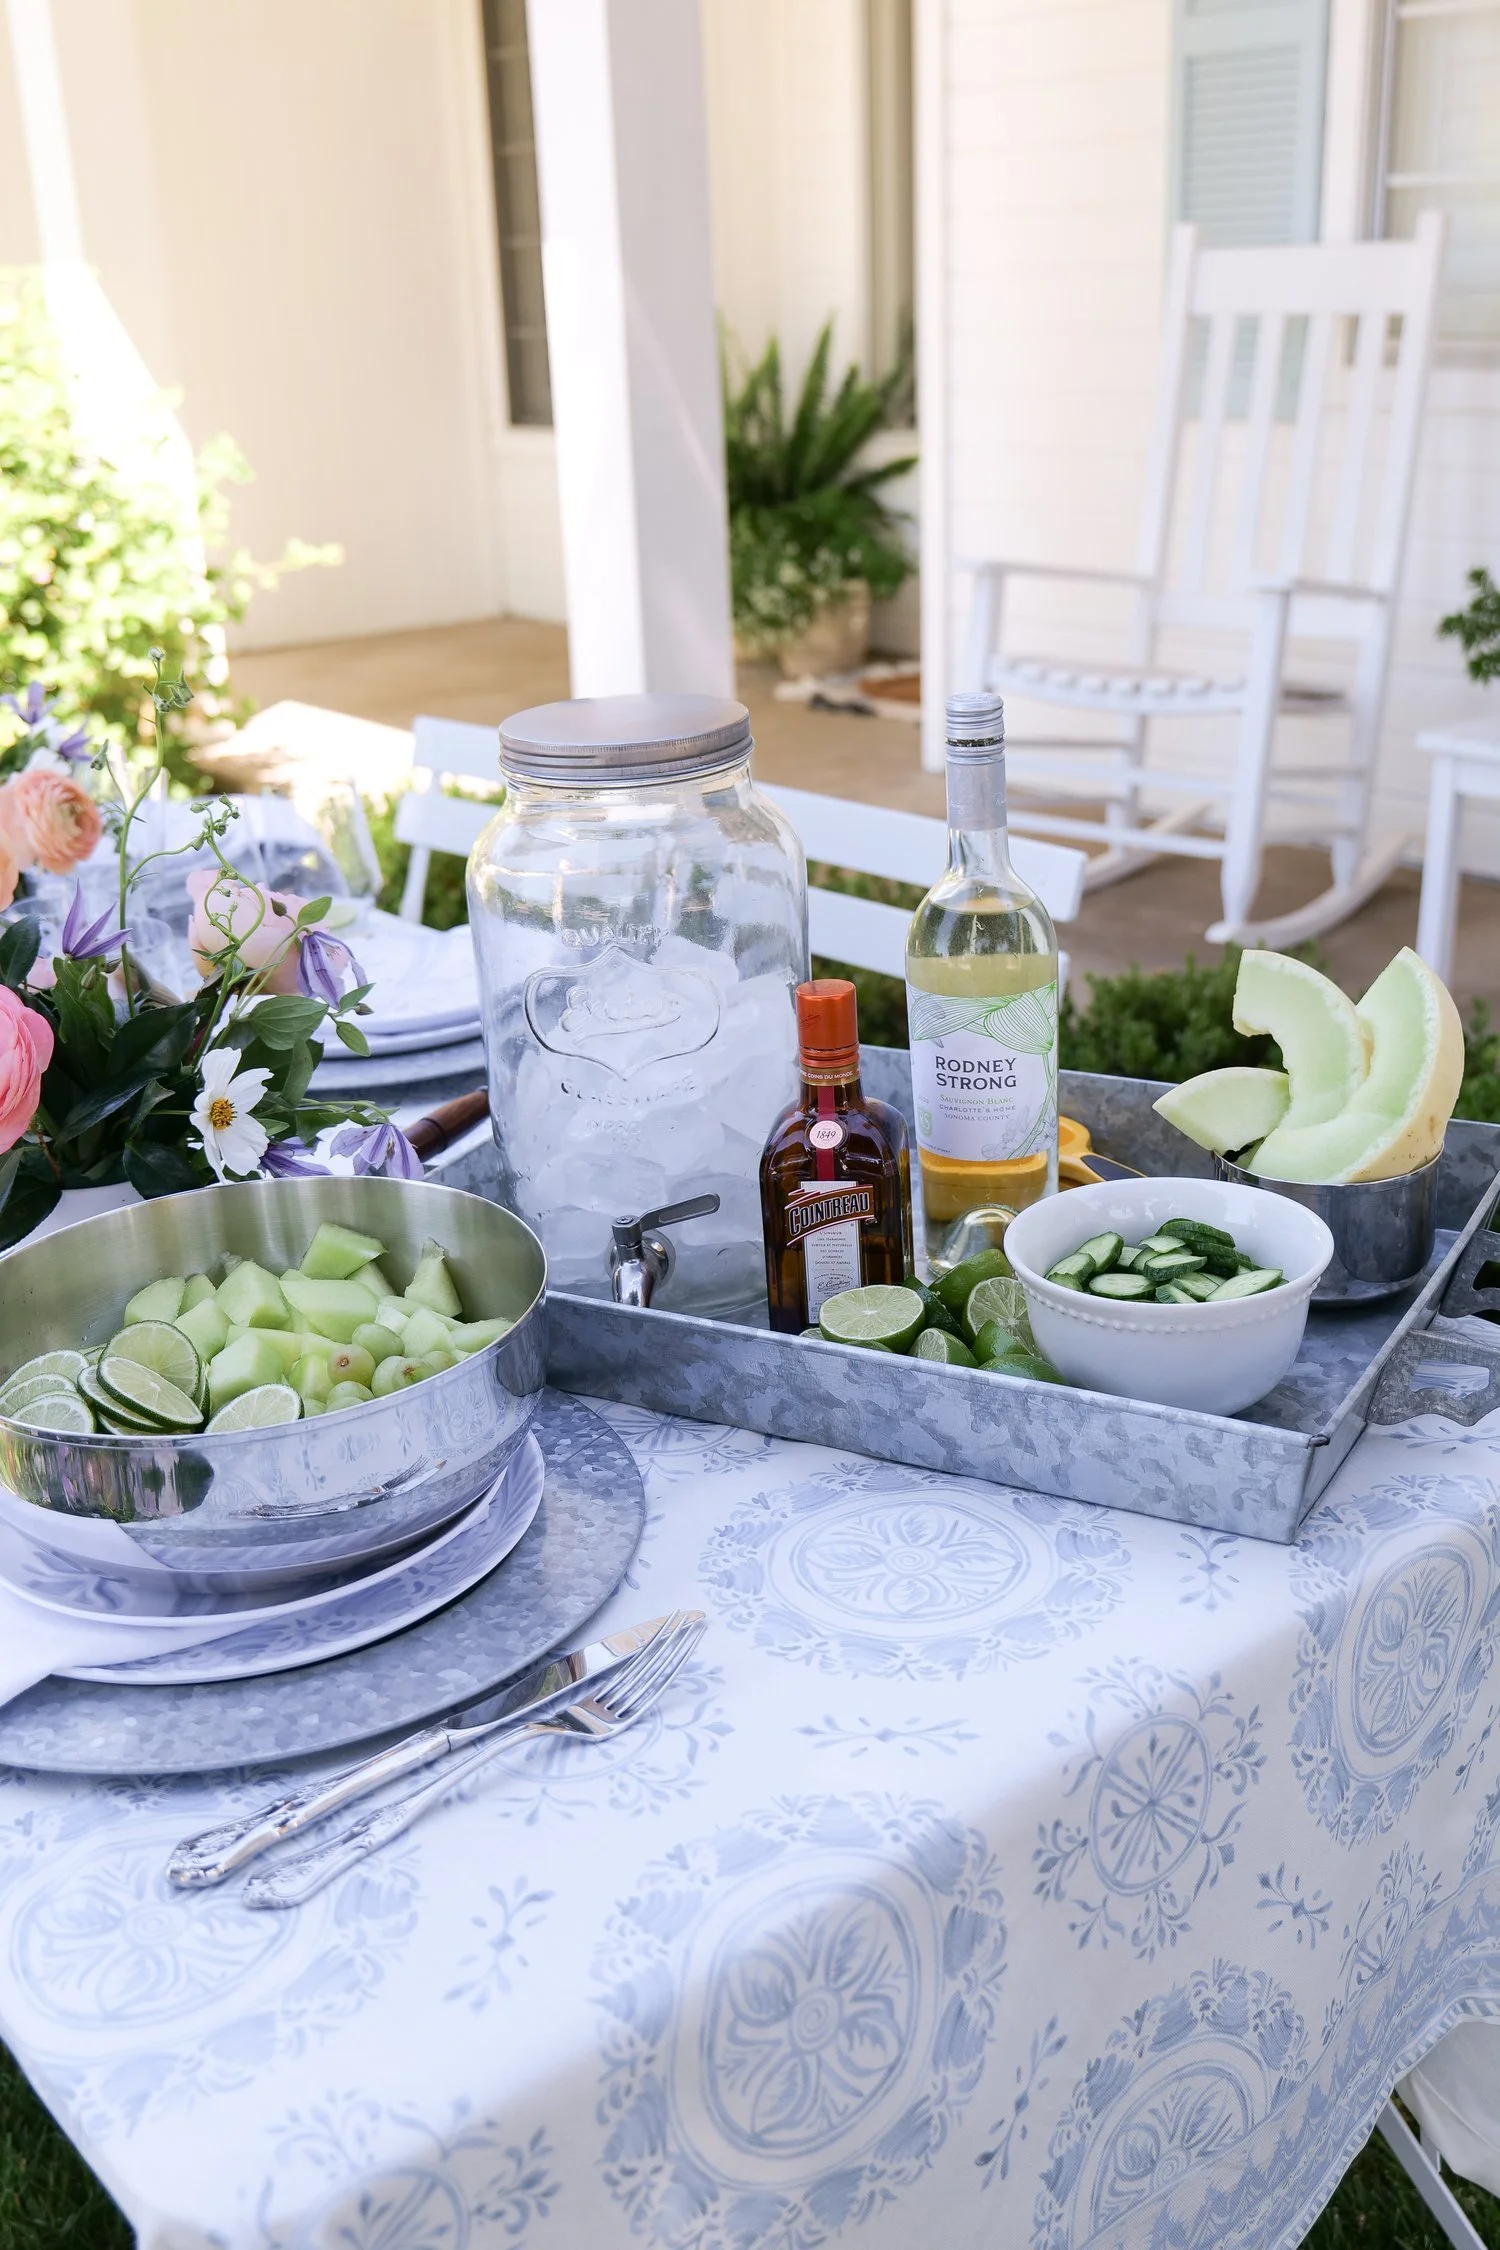
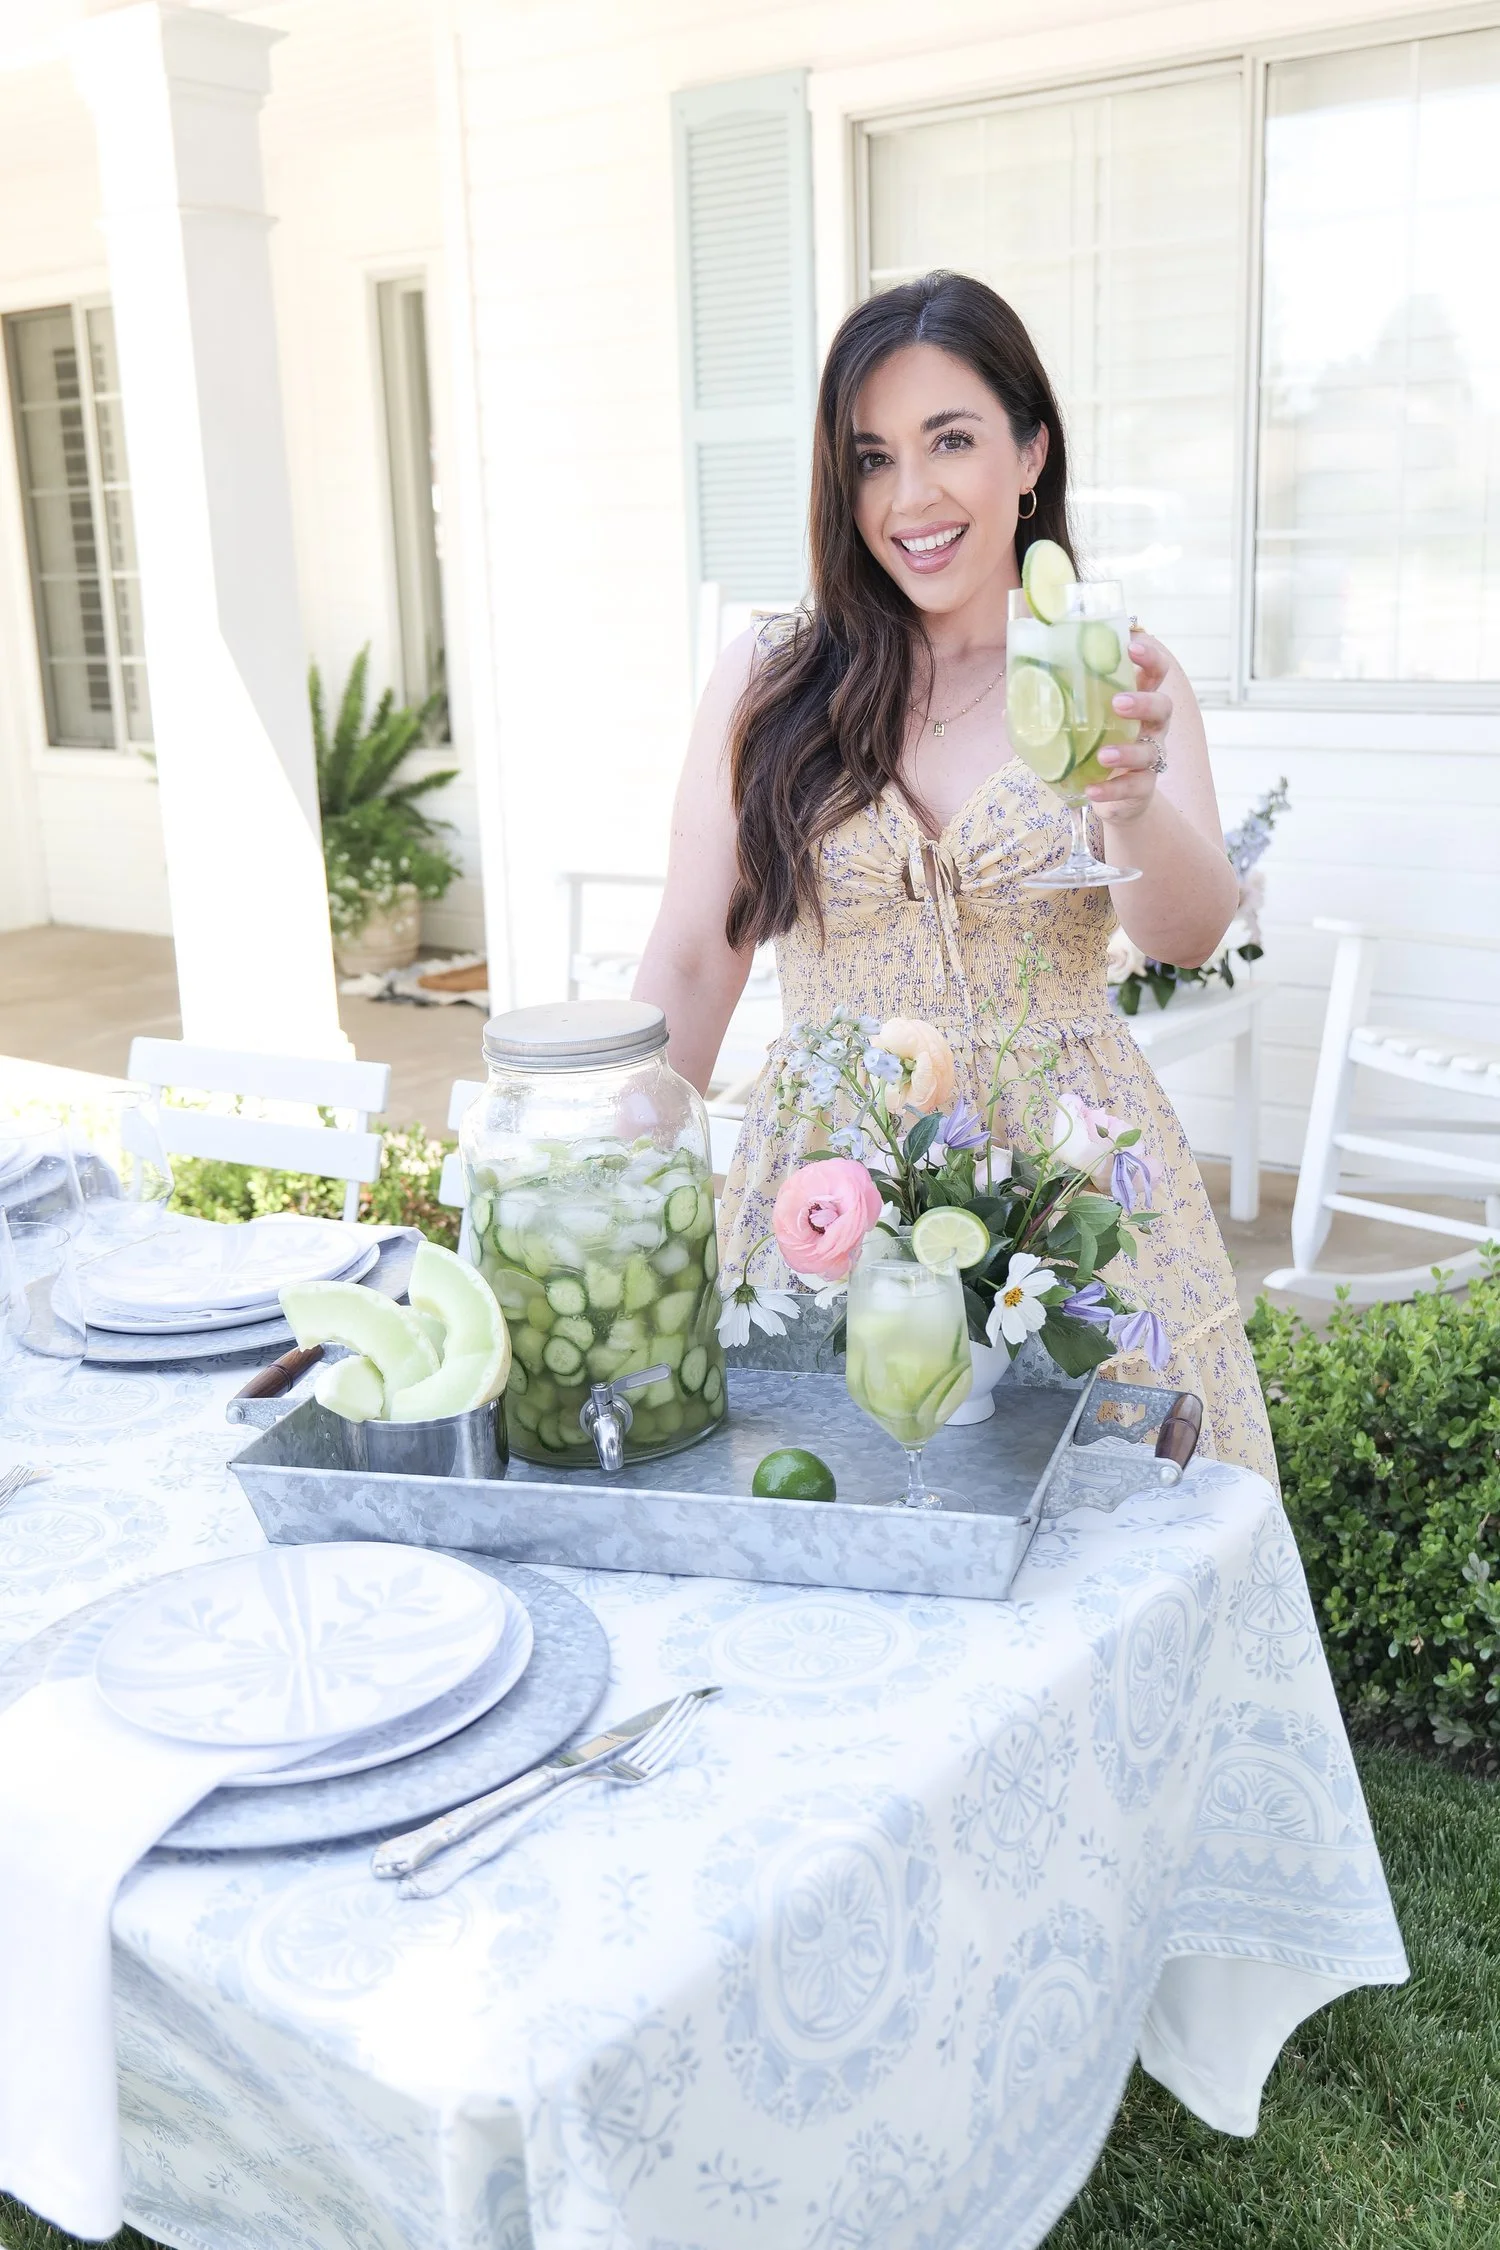
This Melon & Cucumber Sangria combines fresh melon, cucumber and green grapes with honey, orange liqueur and a bottle of Sauvignon Blanc or Pinot Grigio. Right before serving, sparkling cucumber-mint water is added for a little fizz.

I love that you can assemble most of it ahead of time, tuck the pitcher into the refrigerator and finish it just before everyone arrives. It’s exactly the kind of low-maintenance recipe that makes entertaining easier.

Melon and cucumber sangria pitcher with green grapes
Summer sangria with fresh melon, cucumber and grapes
White wine sangria pitcher for summer entertaining

Get the full Large Pitcher Melon & Cucumber Sangria recipe.

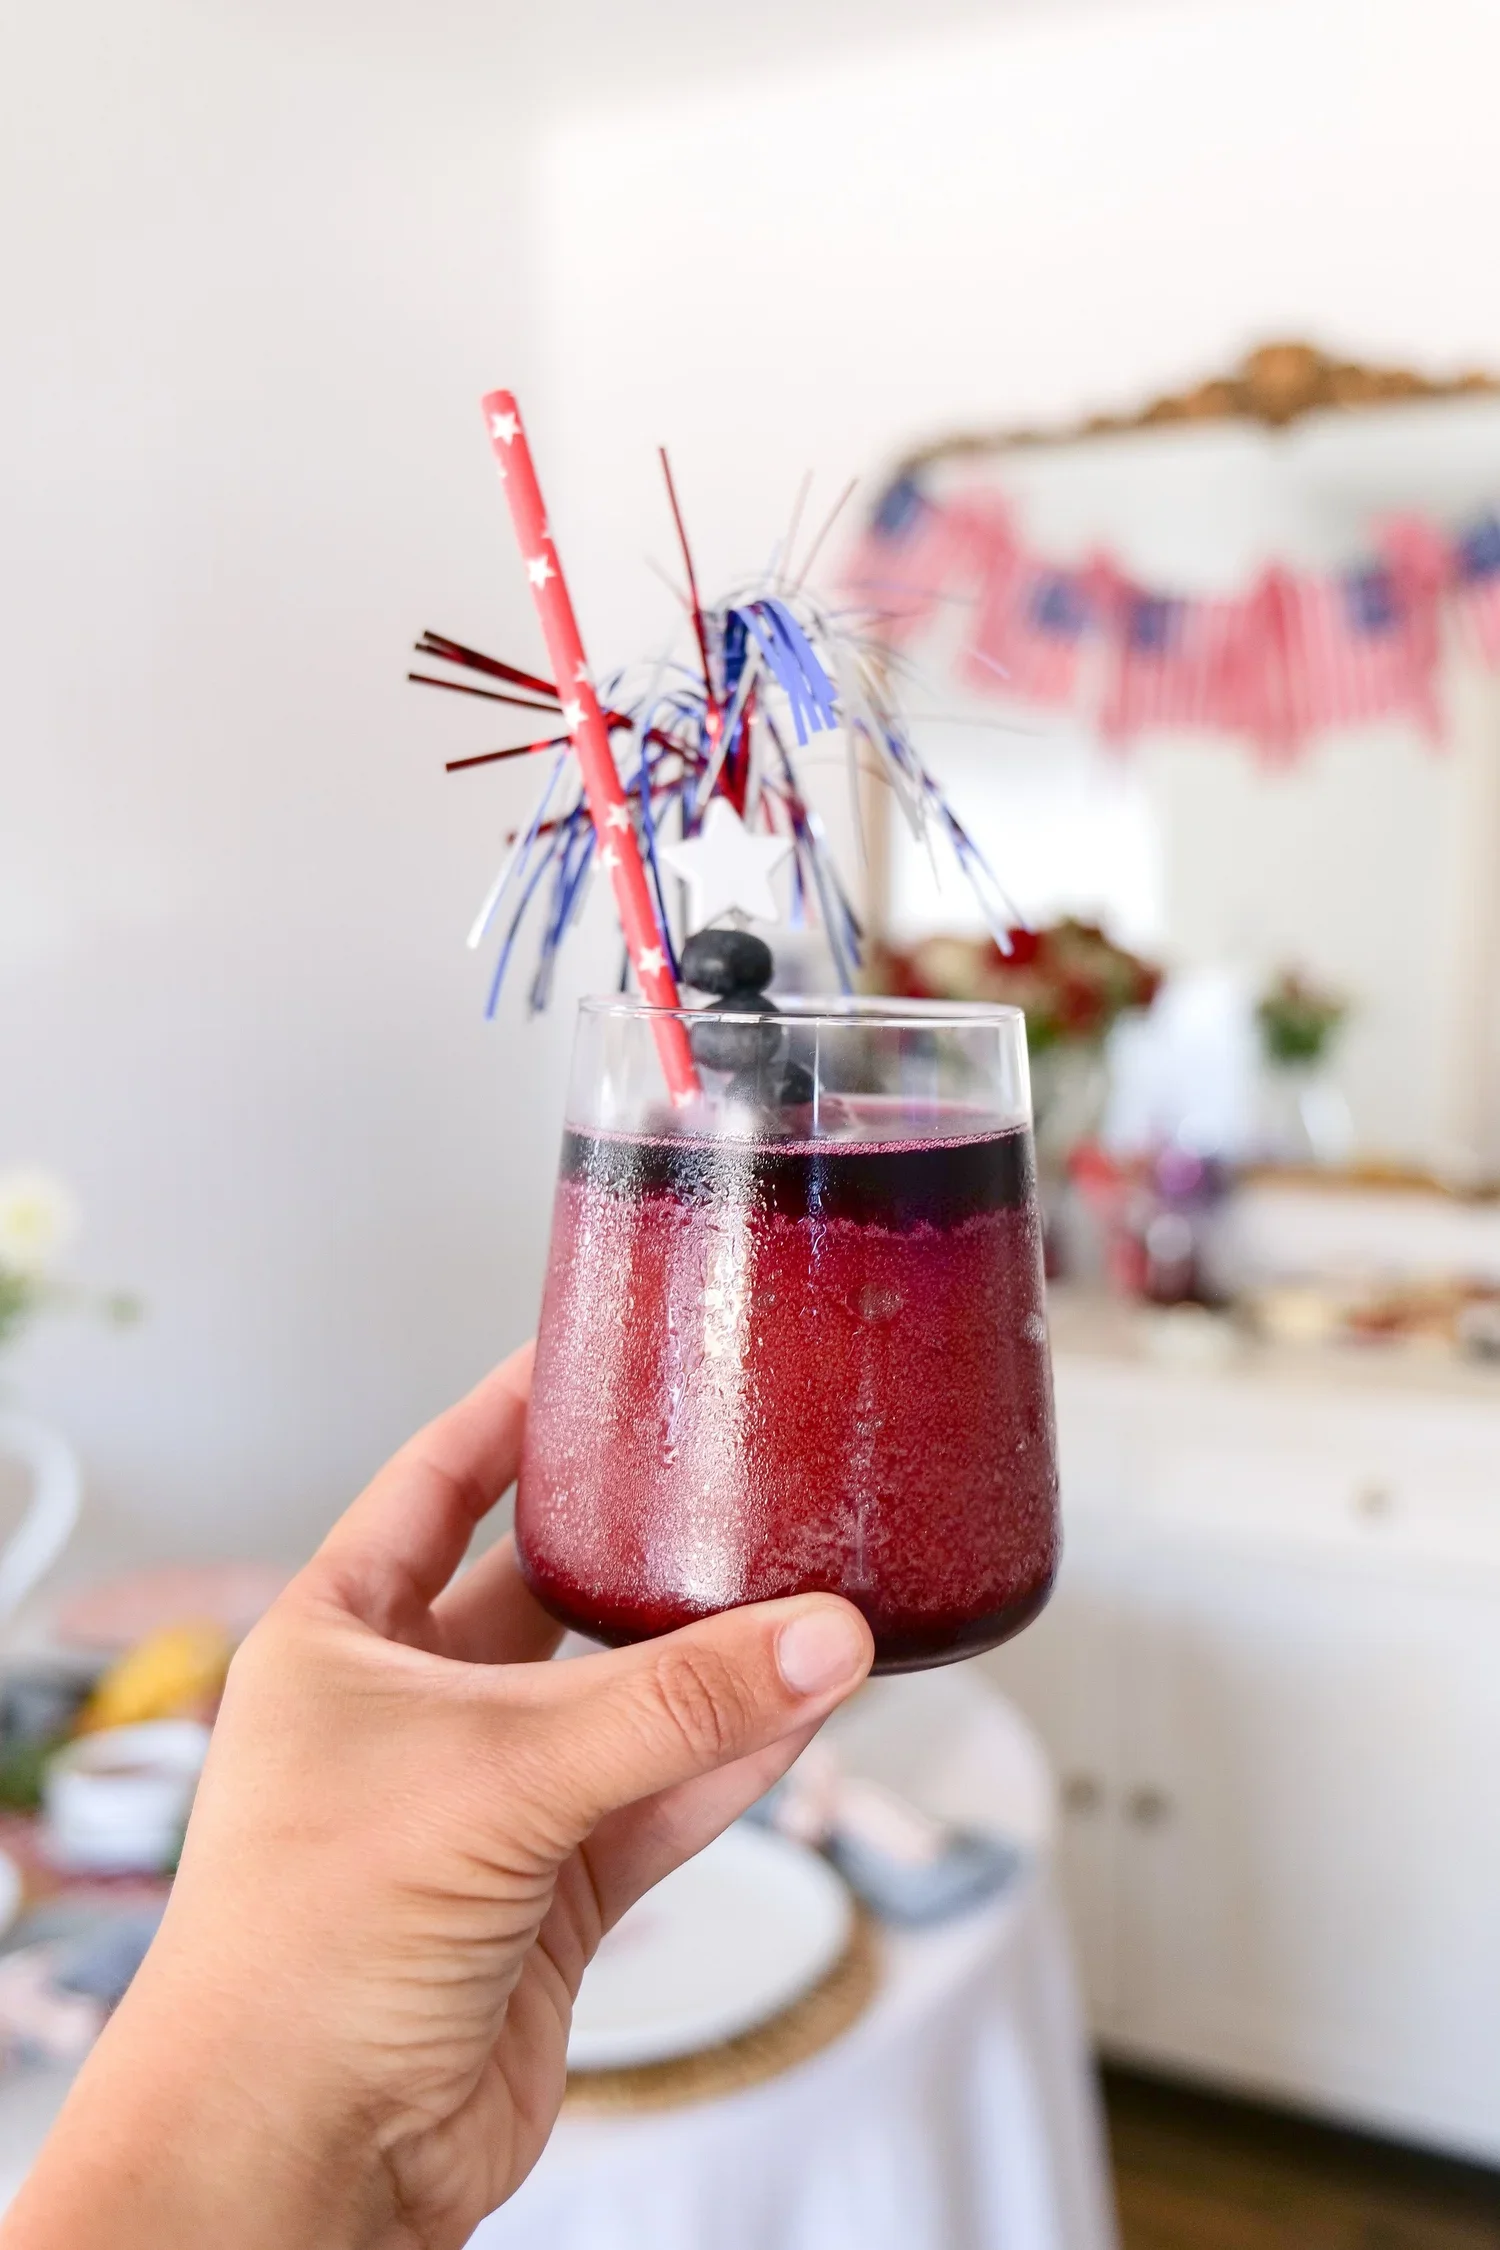
10. Cherry Berry Slushies

And finally, one of my newer summer favorites: Cherry Berry Slushies.

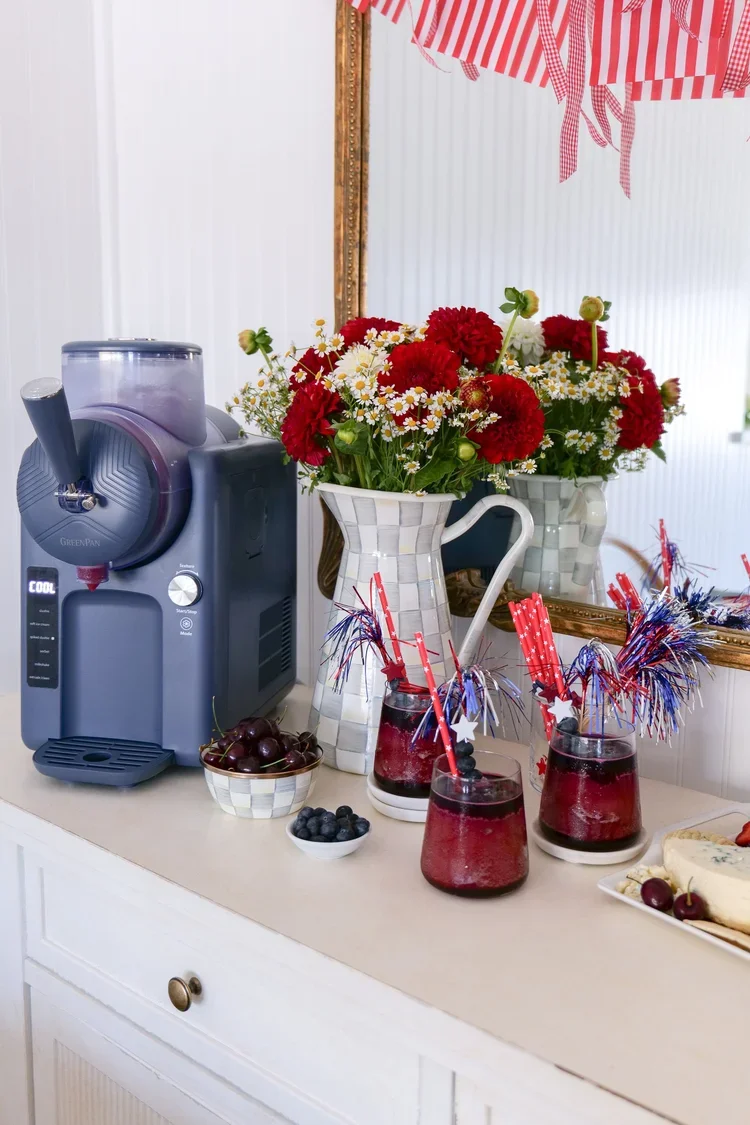
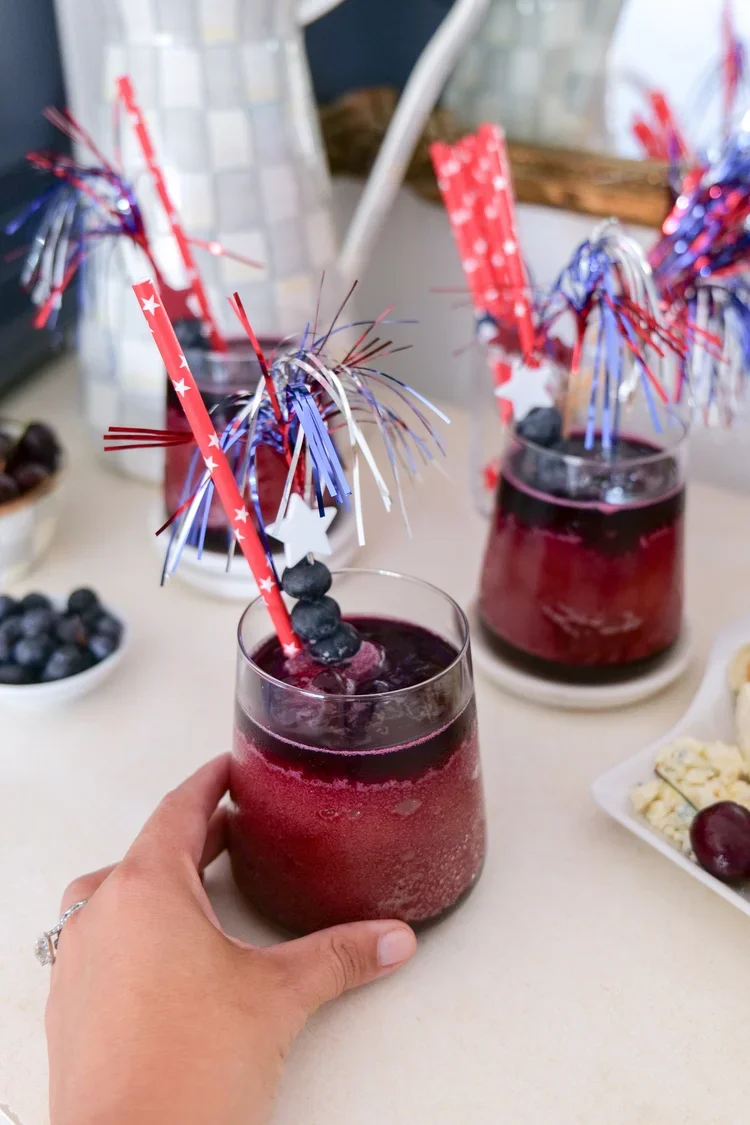
There’s something nostalgic about a cold cherry slush on a warm summer evening, and I originally made these as part of our Americana Summer table. The base combines cherry juice and lemonade with optional vodka, then gets topped with a homemade blueberry syrup and fresh summer fruit.

I especially love this one because you can make it as a cocktail or leave out the vodka for a kid-friendly summer slush. The blueberry syrup can also be made a day ahead, which is always a win when you’re entertaining.

Cherry berry slushies with blueberry syrup and fresh fruit
Frozen cherry berry slushie topped with homemade blueberry syrup

Get the full recipe for my Cherry Berry Slushies.

How to Choose a Cocktail for a Summer Party

If you’re trying to decide which one to make, I’d think about how you’re entertaining more than anything else.

For a larger group, the Piña Colada Pitcher and Melon & Cucumber Sangria are two of the easiest options because you aren’t making every drink individually. If it’s a smaller dinner or happy hour, the Lemon Drop Martini, Lemon Twist Cocktail or one of the bourbon drinks are easy to make as you go.

For the hottest days, I’d go frozen. The Raspberry Frozen Margarita and Cherry Berry Slushies are exactly what I want when it’s warm outside.

And if you’re planning an entire menu, start with the food. A margarita is an easy choice for taco night, the sangria works beautifully with a summer dinner outside, and the Champagne Mint Julep would be so pretty for brunch.

A Few Tips for Summer Cocktails

The easiest way to make cocktails feel special at home is usually in the little details. Chill your wine and champagne ahead of time, keep plenty of ice on hand and prep whatever you can before guests arrive.

Fresh garnishes make a huge difference too. Citrus slices, berries, pineapple, cherries and fresh mint are all used throughout these recipes, and they make even a simple drink feel finished.

I also like setting out beautiful glassware, a cocktail shaker and garnishes before everyone arrives. It turns the drinks into part of the table without creating more work once we’re actually entertaining.

FAQ

Frequently Asked Questions

What are the best cocktails for a summer party?

For a larger summer gathering, pitcher cocktails like piña coladas and melon cucumber sangria make serving a crowd easier. Frozen margaritas and slushies are especially refreshing for hot days, while citrus cocktails and sparkling drinks work beautifully for dinners and happy hours.

What cocktails can I make ahead for a party?

Pitcher-style drinks are generally the easiest choice when entertaining. Sangria can be assembled ahead and refrigerated, then finished with ice and the sparkling component just before serving. Some cocktail components, such as homemade syrups, can also be prepared ahead.

What are good frozen cocktails for summer?

The Raspberry Frozen Margarita, Piña Colada Pitcher and Cherry Berry Slushies in this roundup are all cold, frozen options for summer. The Cherry Berry Slushies can also be made without vodka for a nonalcoholic version.

What is a good summer cocktail for a crowd?

The Melon & Cucumber Sangria and Piña Colada Pitcher are especially useful when serving several people because they're prepared in larger batches rather than mixed one glass at a time.

What garnishes work well for summer cocktails?

Fresh summer fruit and herbs are an easy way to finish a cocktail. Depending on the drink, try pineapple wedges, fresh berries, citrus slices, lime wedges or fresh mint.

Shop My Entertaining Favorites

So many of these drinks are made even prettier with the right glassware, pitchers and serving pieces. I keep my favorite entertaining pieces together so they’re easy to find whenever we’re having people over.

More Summer Recipes & Entertaining Ideas

If you’re planning a summer gathering, here are a few more of my favorite recipes and entertaining ideas to bring everything together.

My Summer Shrimp Boil is one of my favorite ways to feed a crowd, especially when you want dinner to feel fun and relaxed. Add my Brown Butter Corn on the Cob alongside it for an easy summer side.

For something a little more casual, try my California Bacon-Wrapped Hot Dogs, then finish the night with Mini Cherry Cobblers for dessert.

And if you’re looking for inspiration beyond the menu, my America’s 250th Summer Tablescape has all the details for creating a festive summer table.

Final Thoughts

I don’t think summer entertaining needs to be complicated. Give me something good to eat, a cold drink, a table outside and people I love, and I’m happy.

That’s what I love about this list. There’s a cocktail for just about every kind of summer day—from frozen margaritas by the pool and pitcher sangria for a crowd to a Lemon Drop Martini after dinner.

Save a few favorites now and come back to this list the next time you’re planning a summer dinner, happy hour or weekend gathering. I have a feeling I’ll keep adding to it as new summer cocktail recipes make their way onto the blog.

Berry Goat Cheese Salad with Candied Walnuts & Strawberry Balsamic Vinaigrette

There are some recipes that are just as pretty on the table as they are delicious, and this berry goat cheese salad is absolutely one of them.

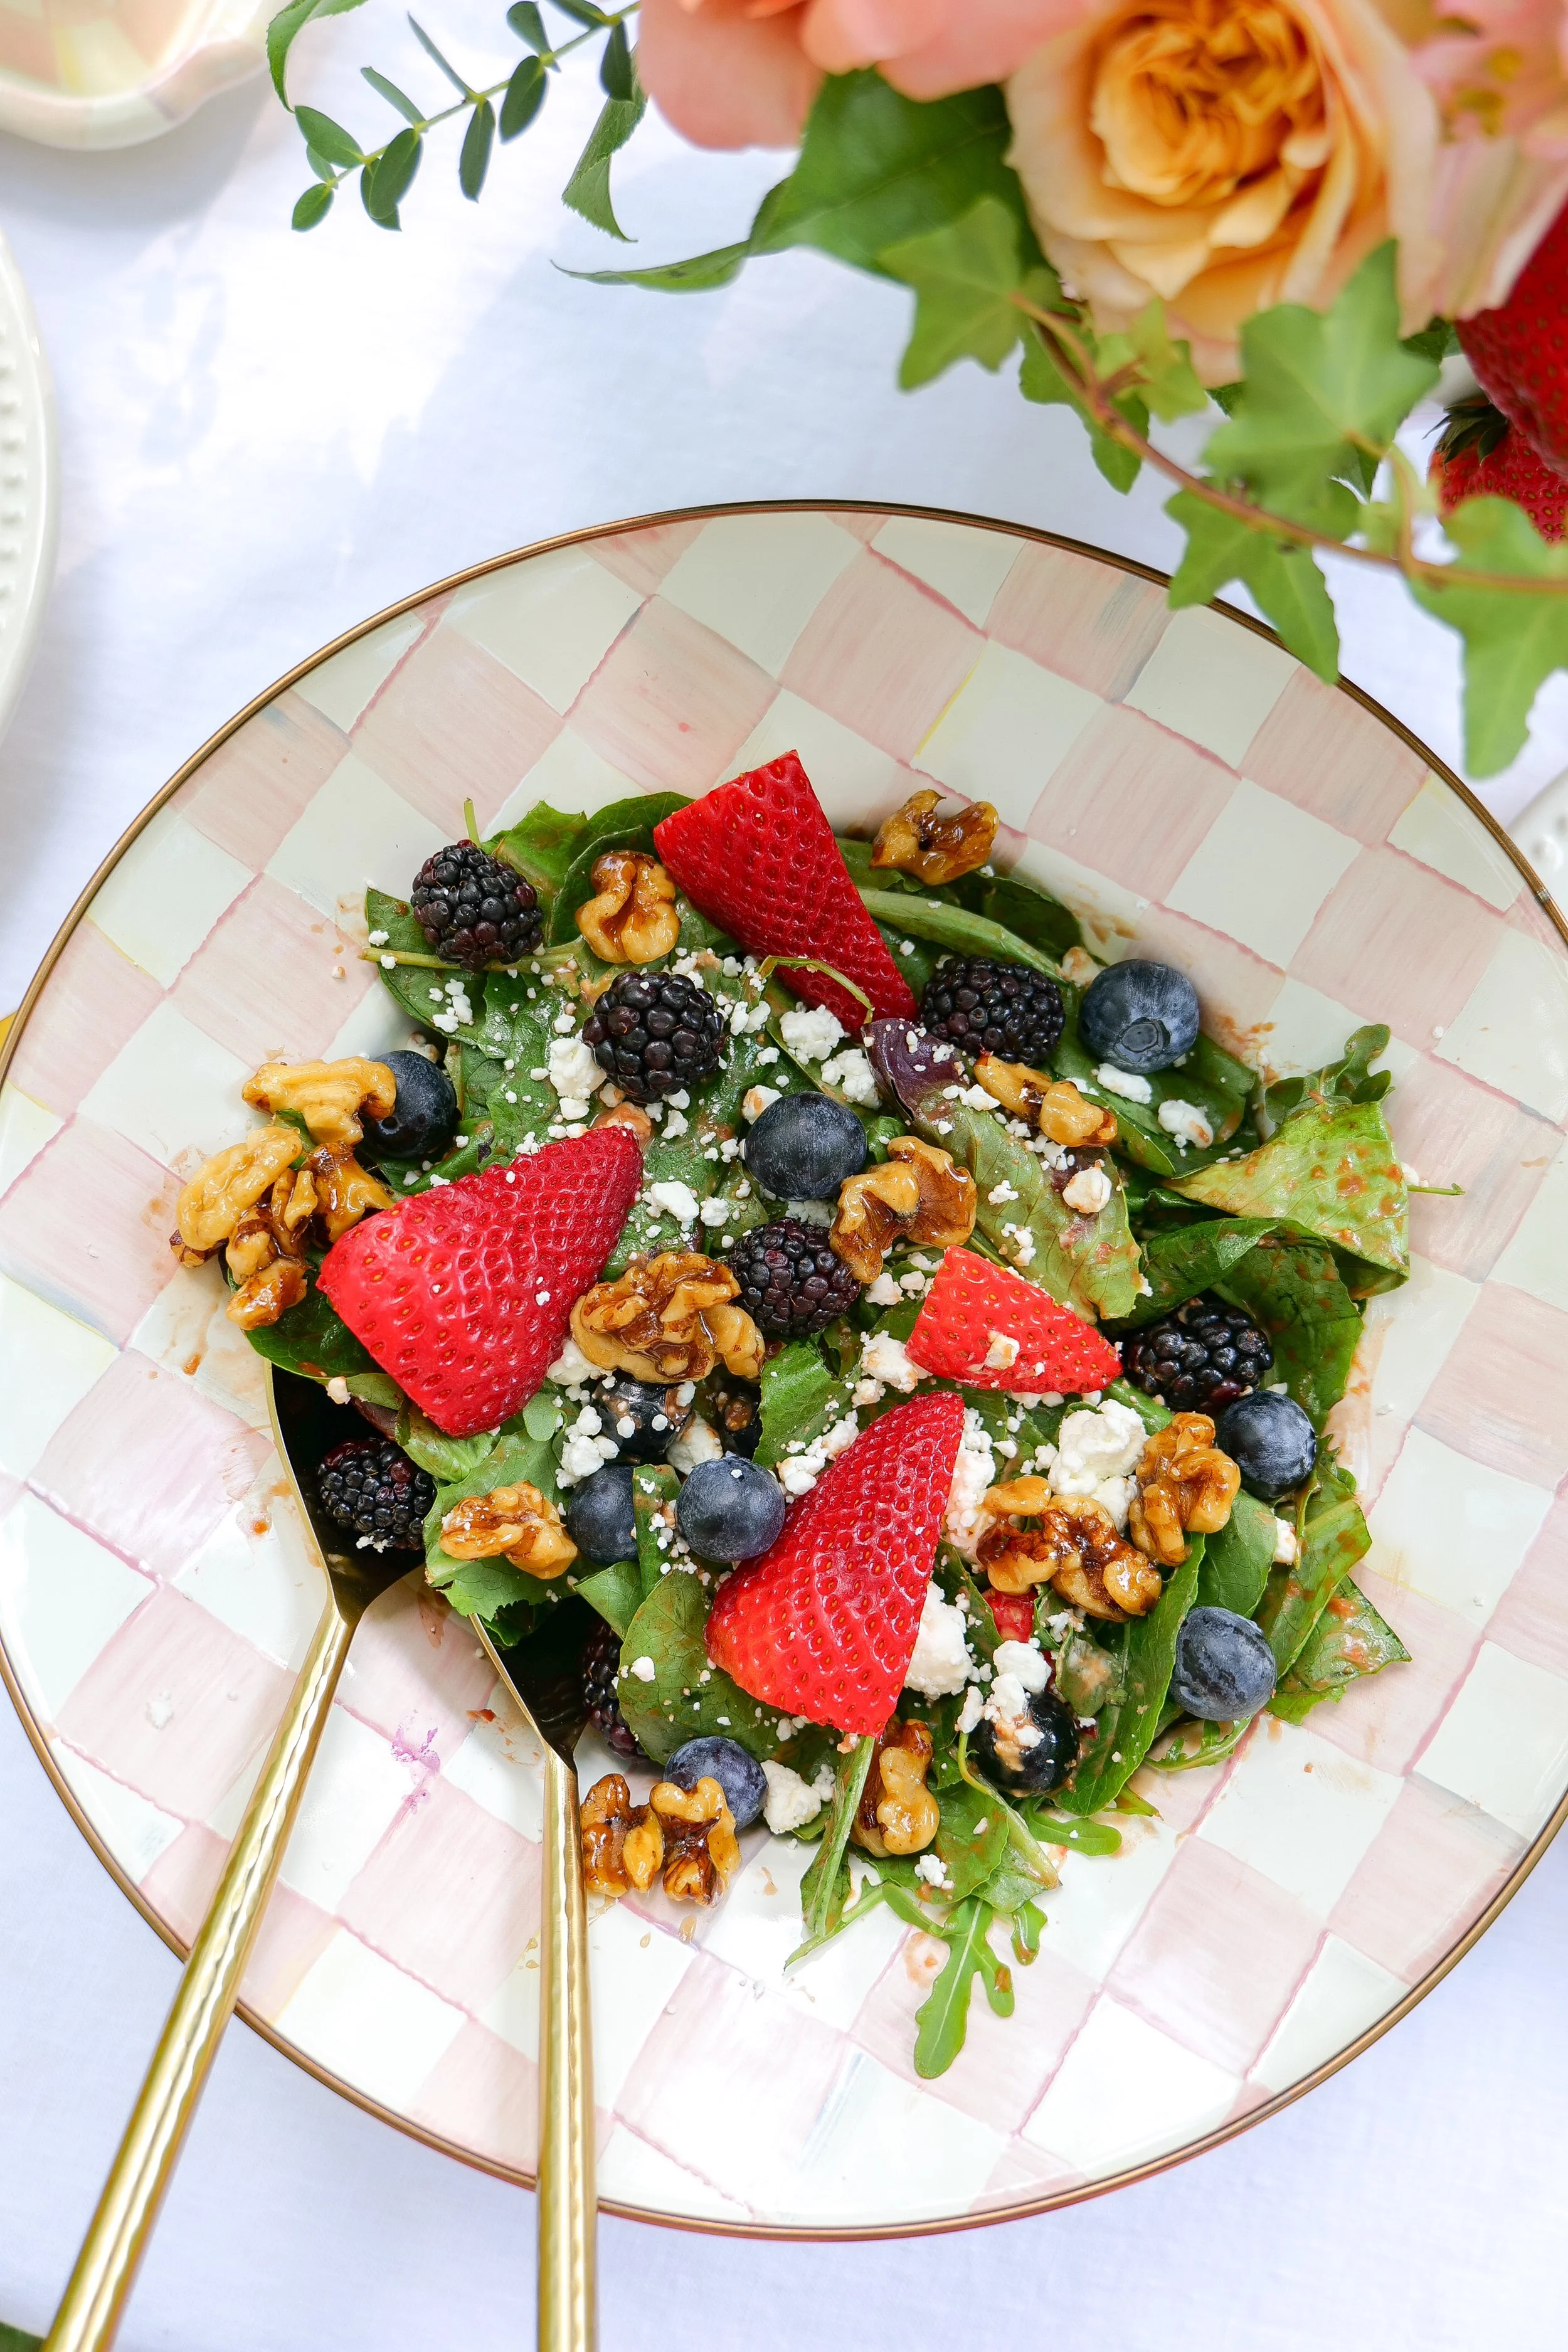
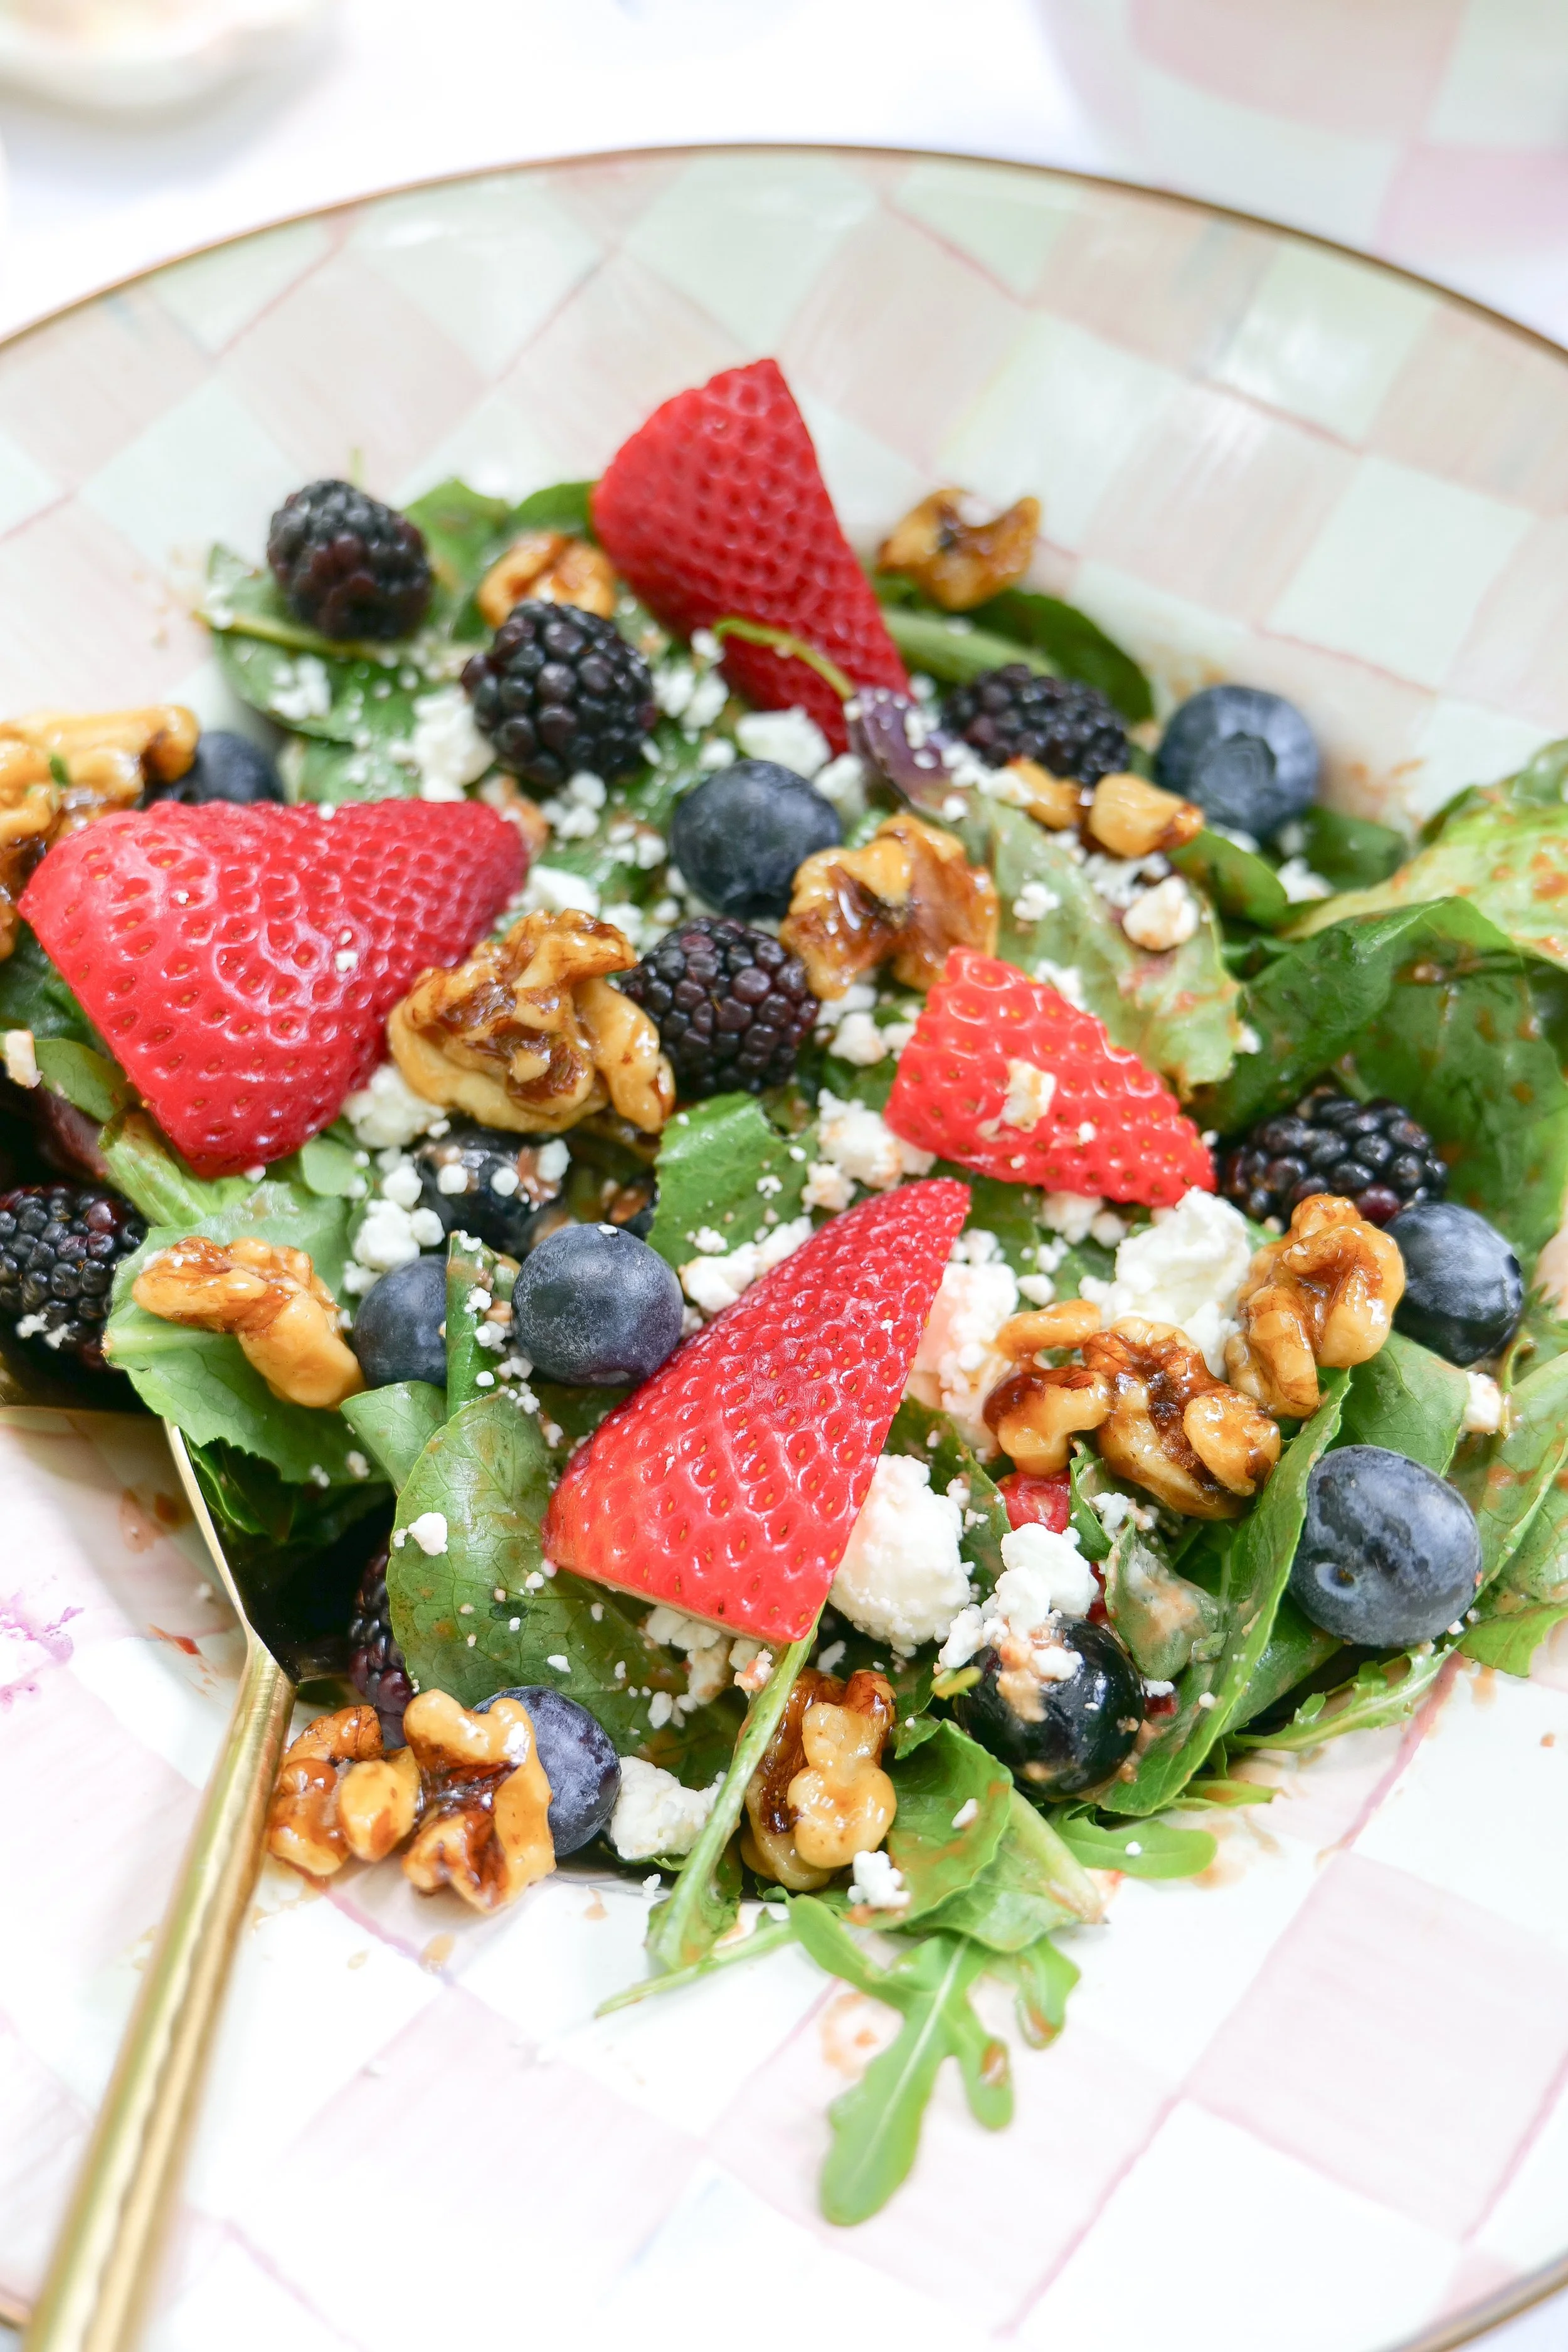
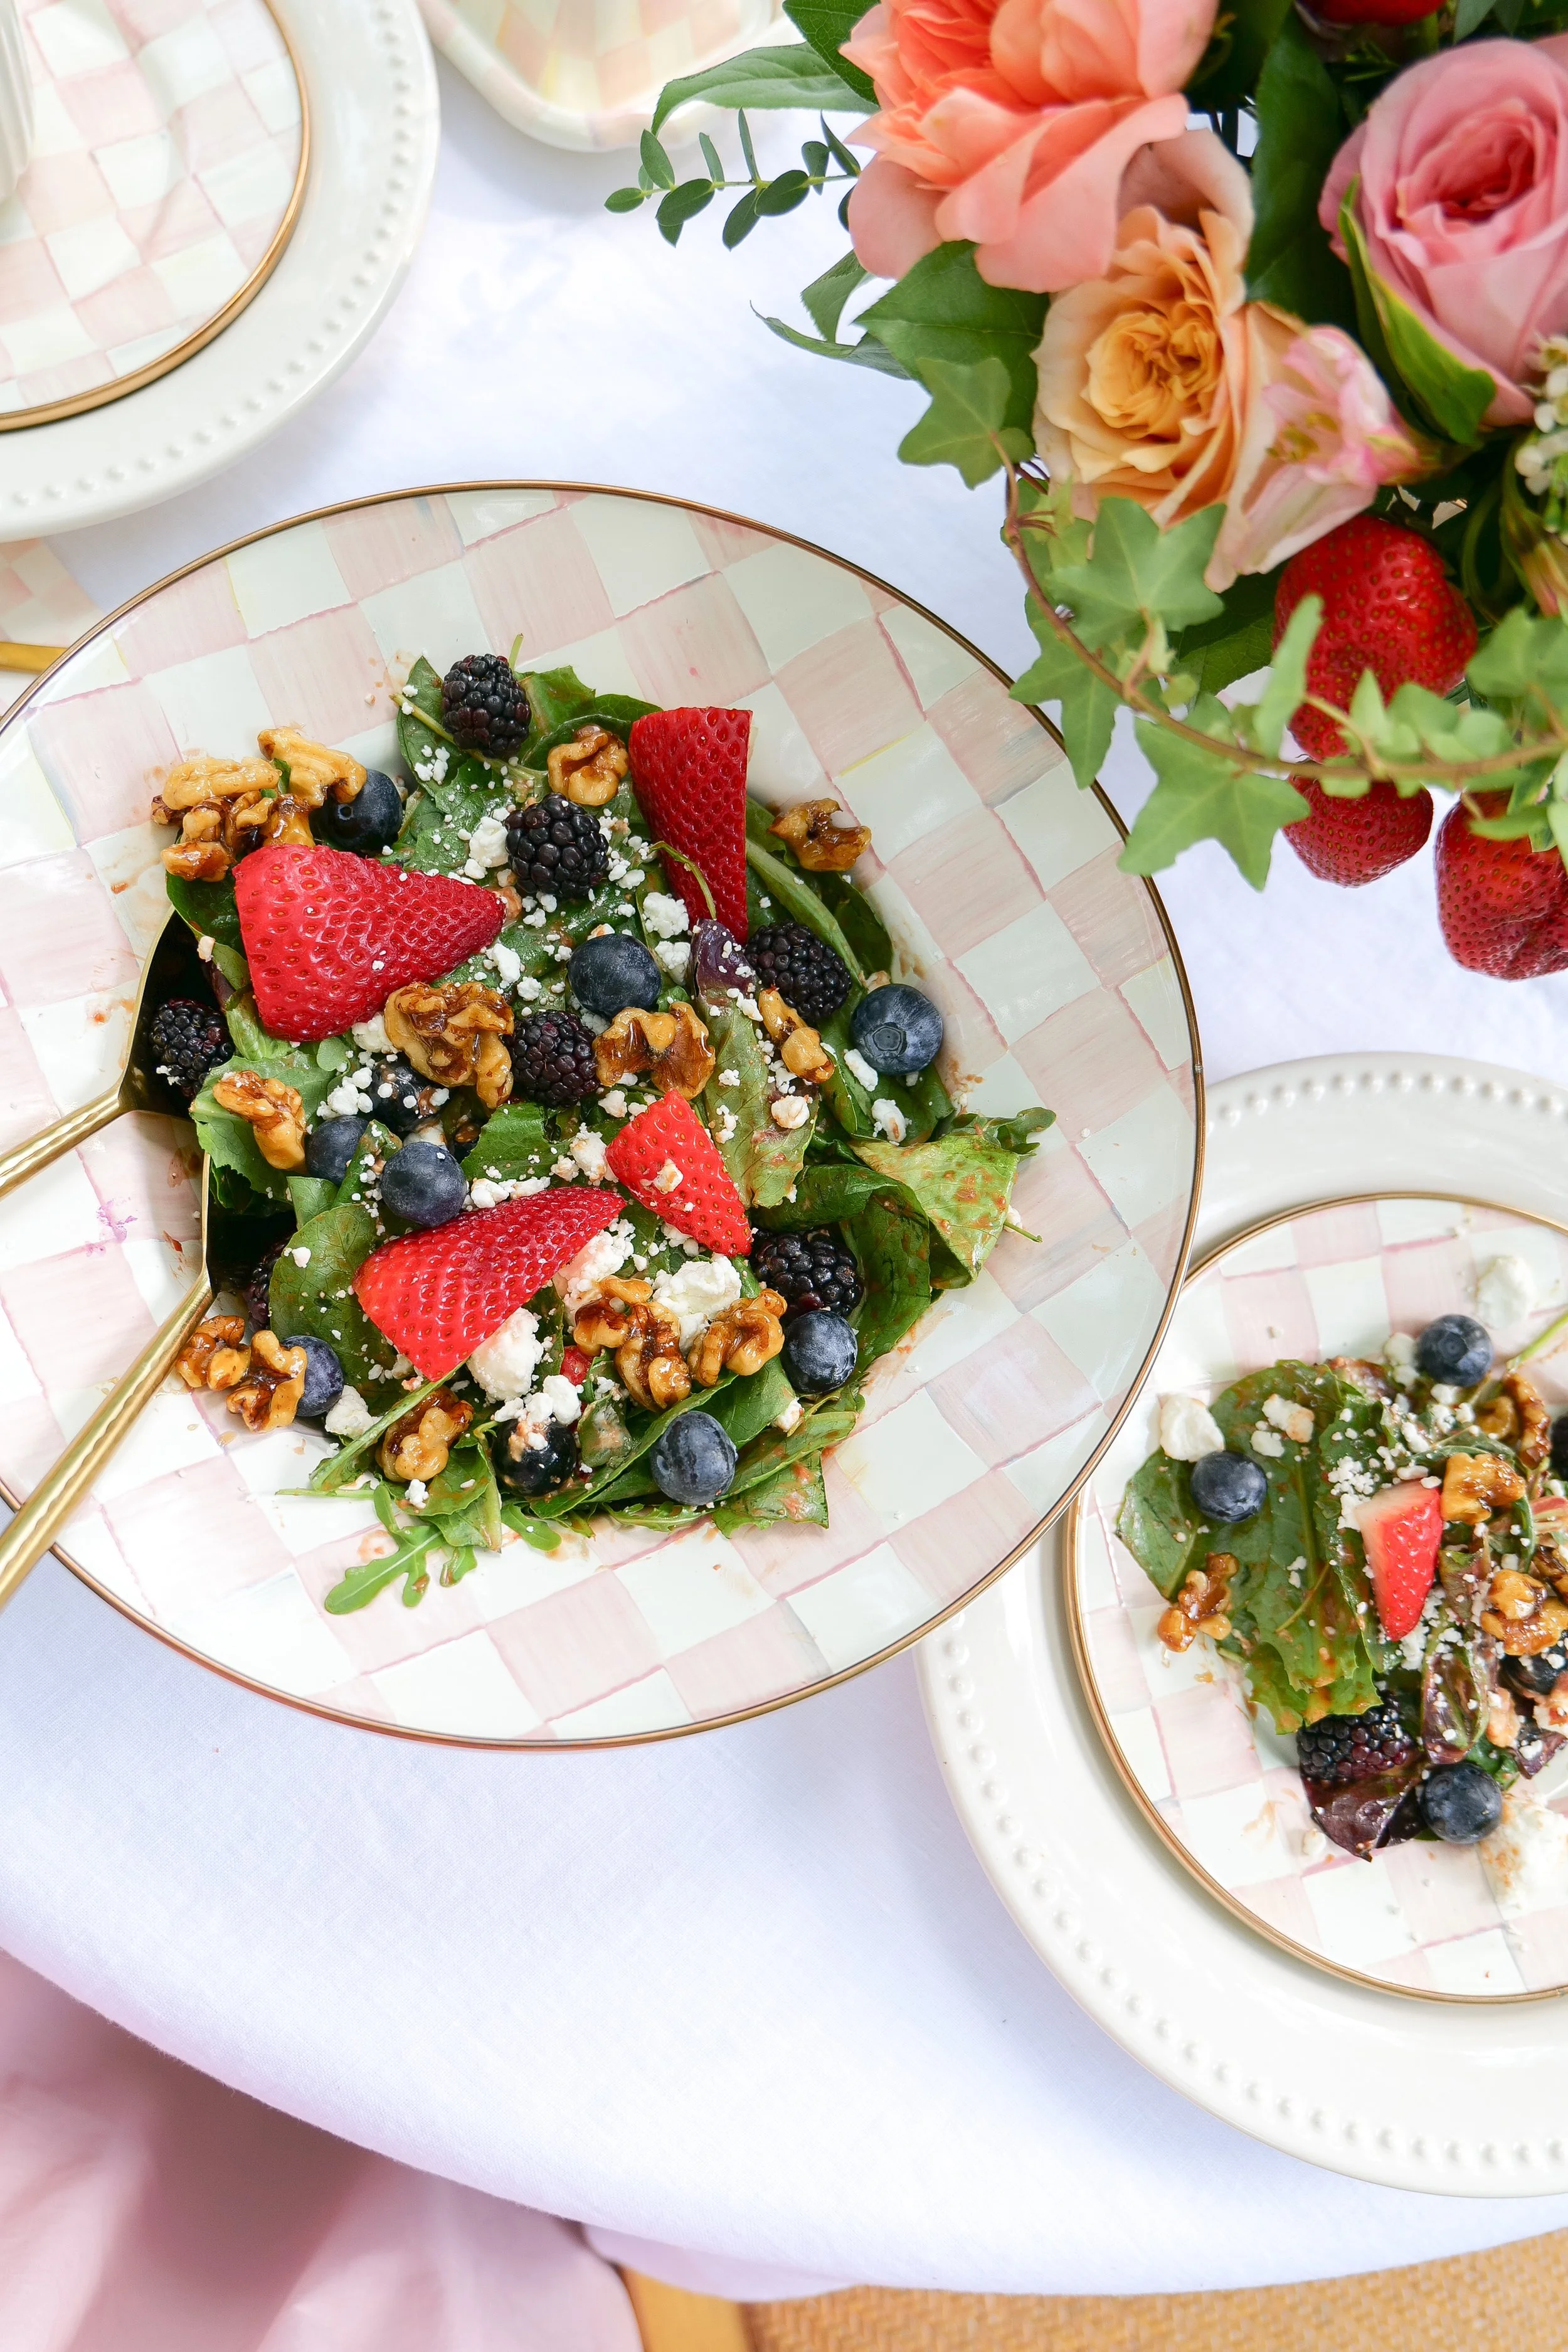
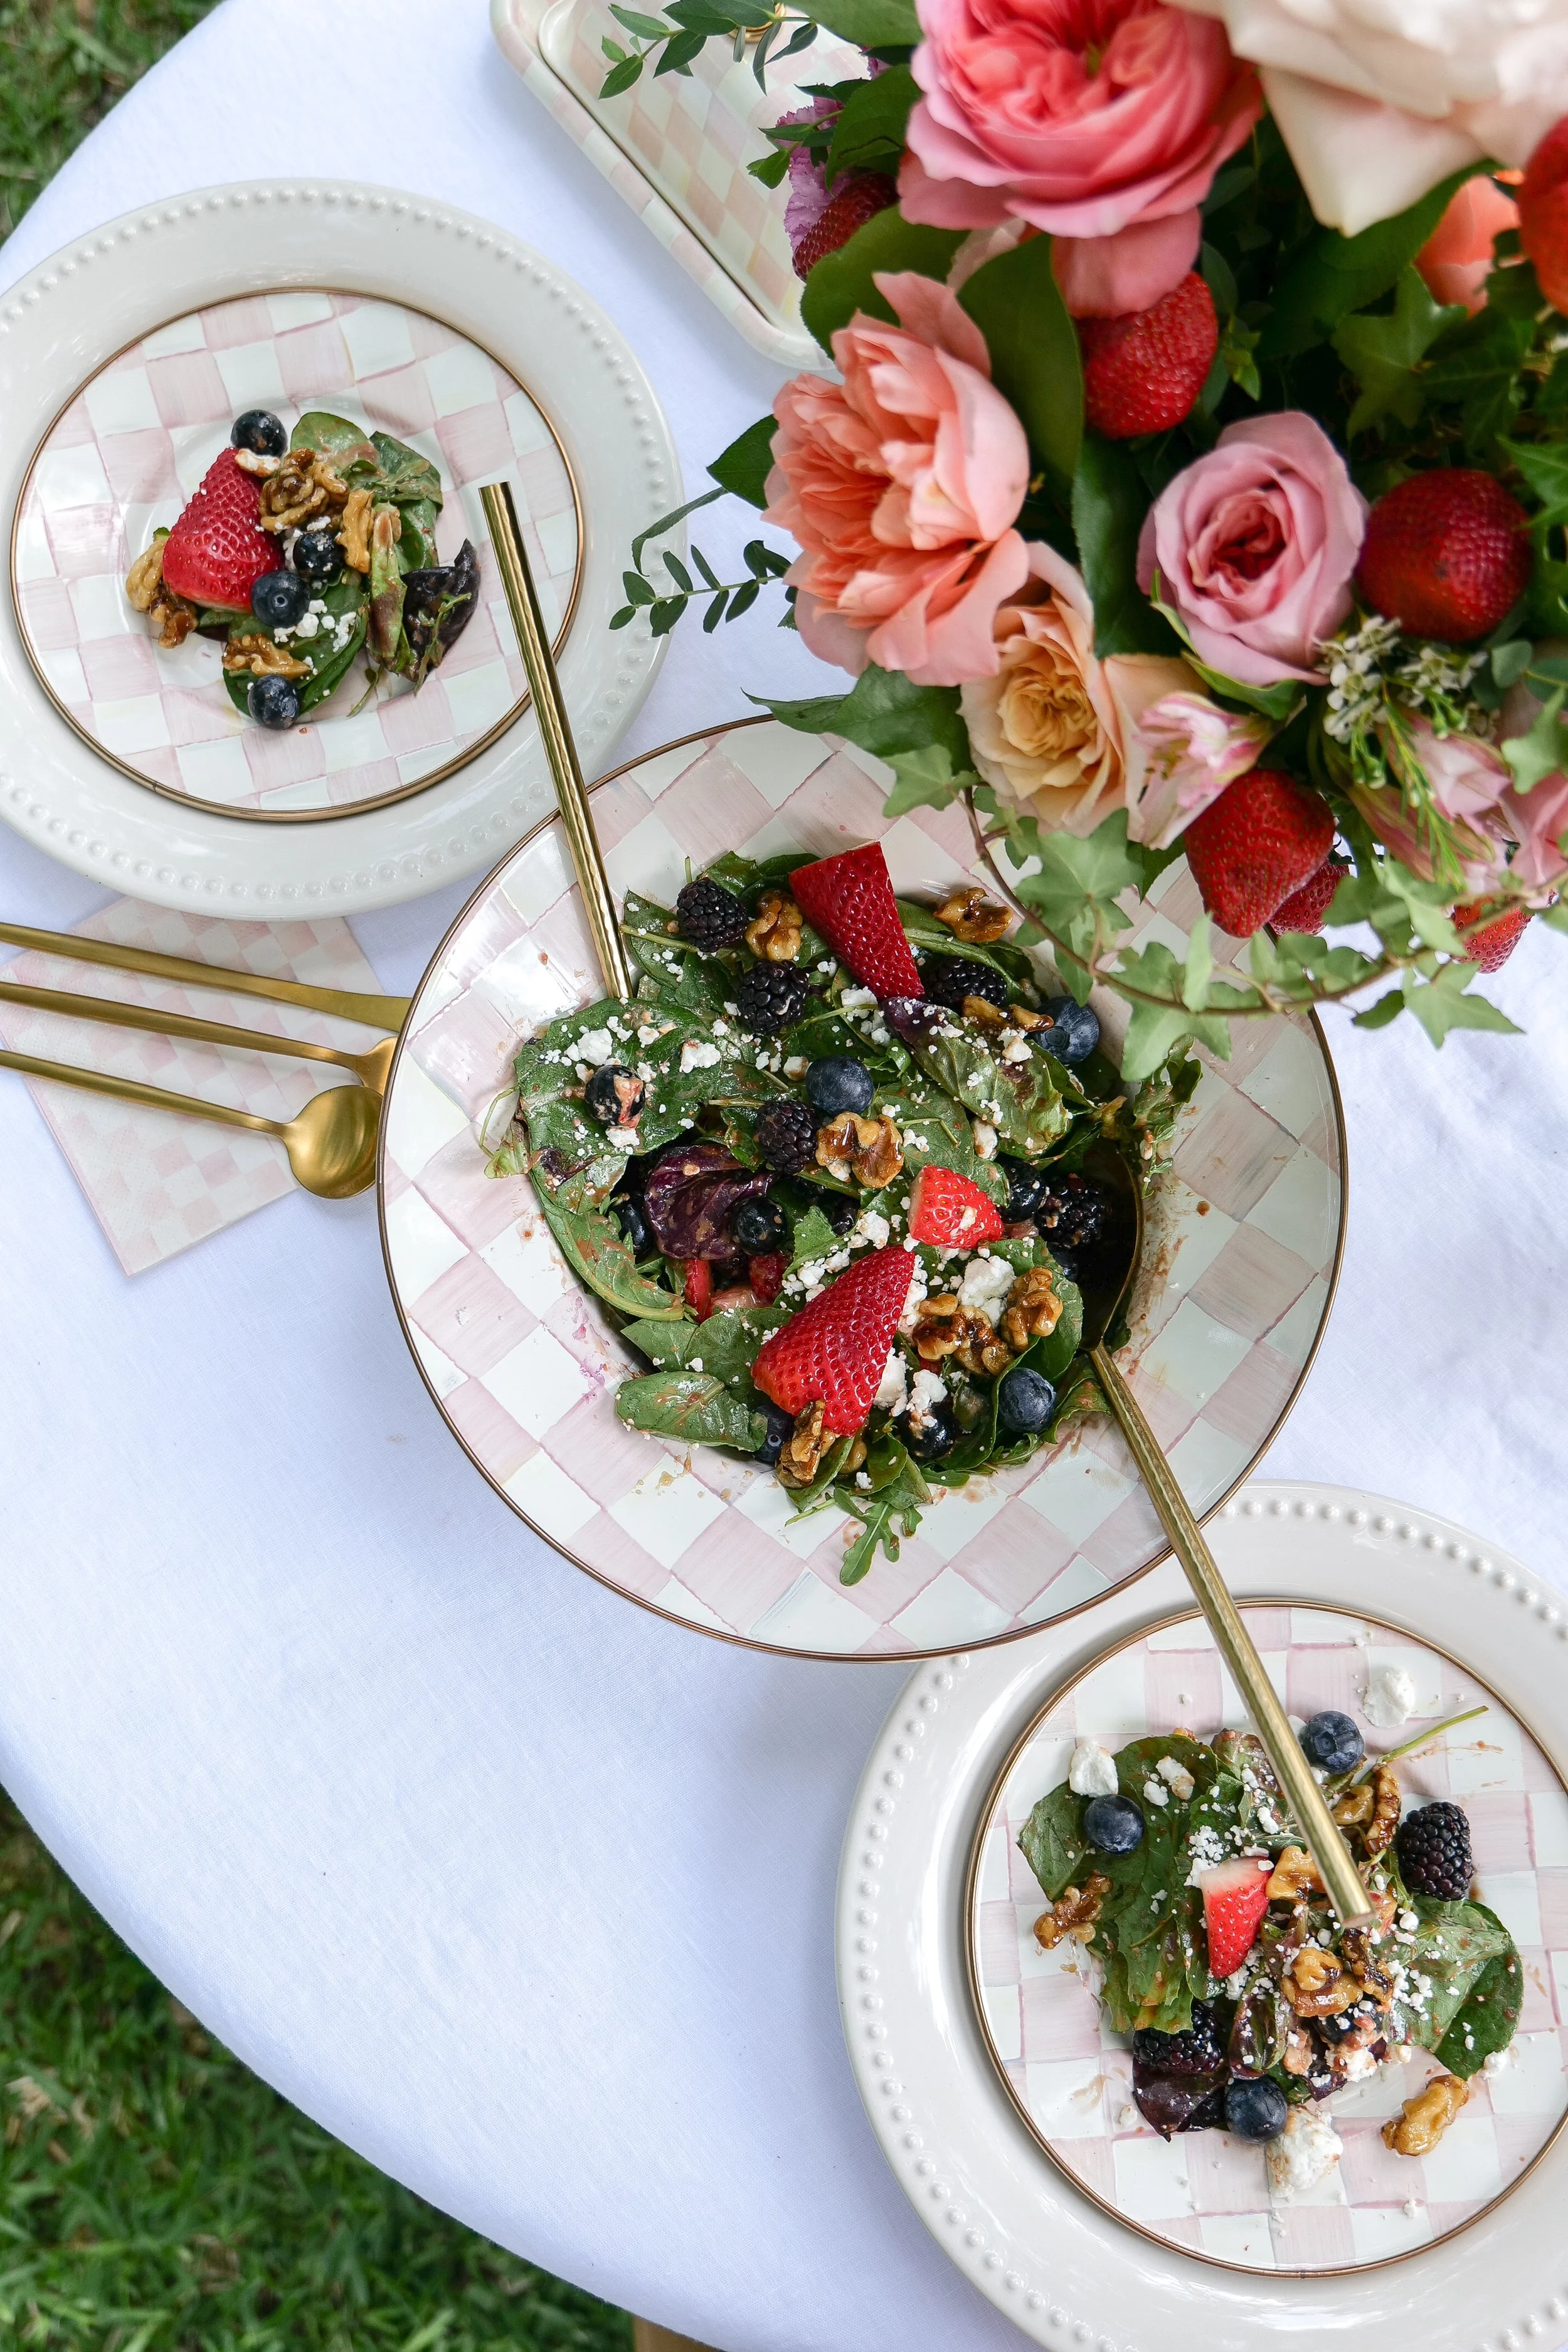
Fresh strawberries, blackberries and blueberries are layered over spinach with creamy goat cheese and sweet candied walnuts, then everything gets tossed in a homemade strawberry balsamic vinaigrette. It's fresh and colorful, with that perfect combination of sweet, tangy, creamy and crunchy in every bite.

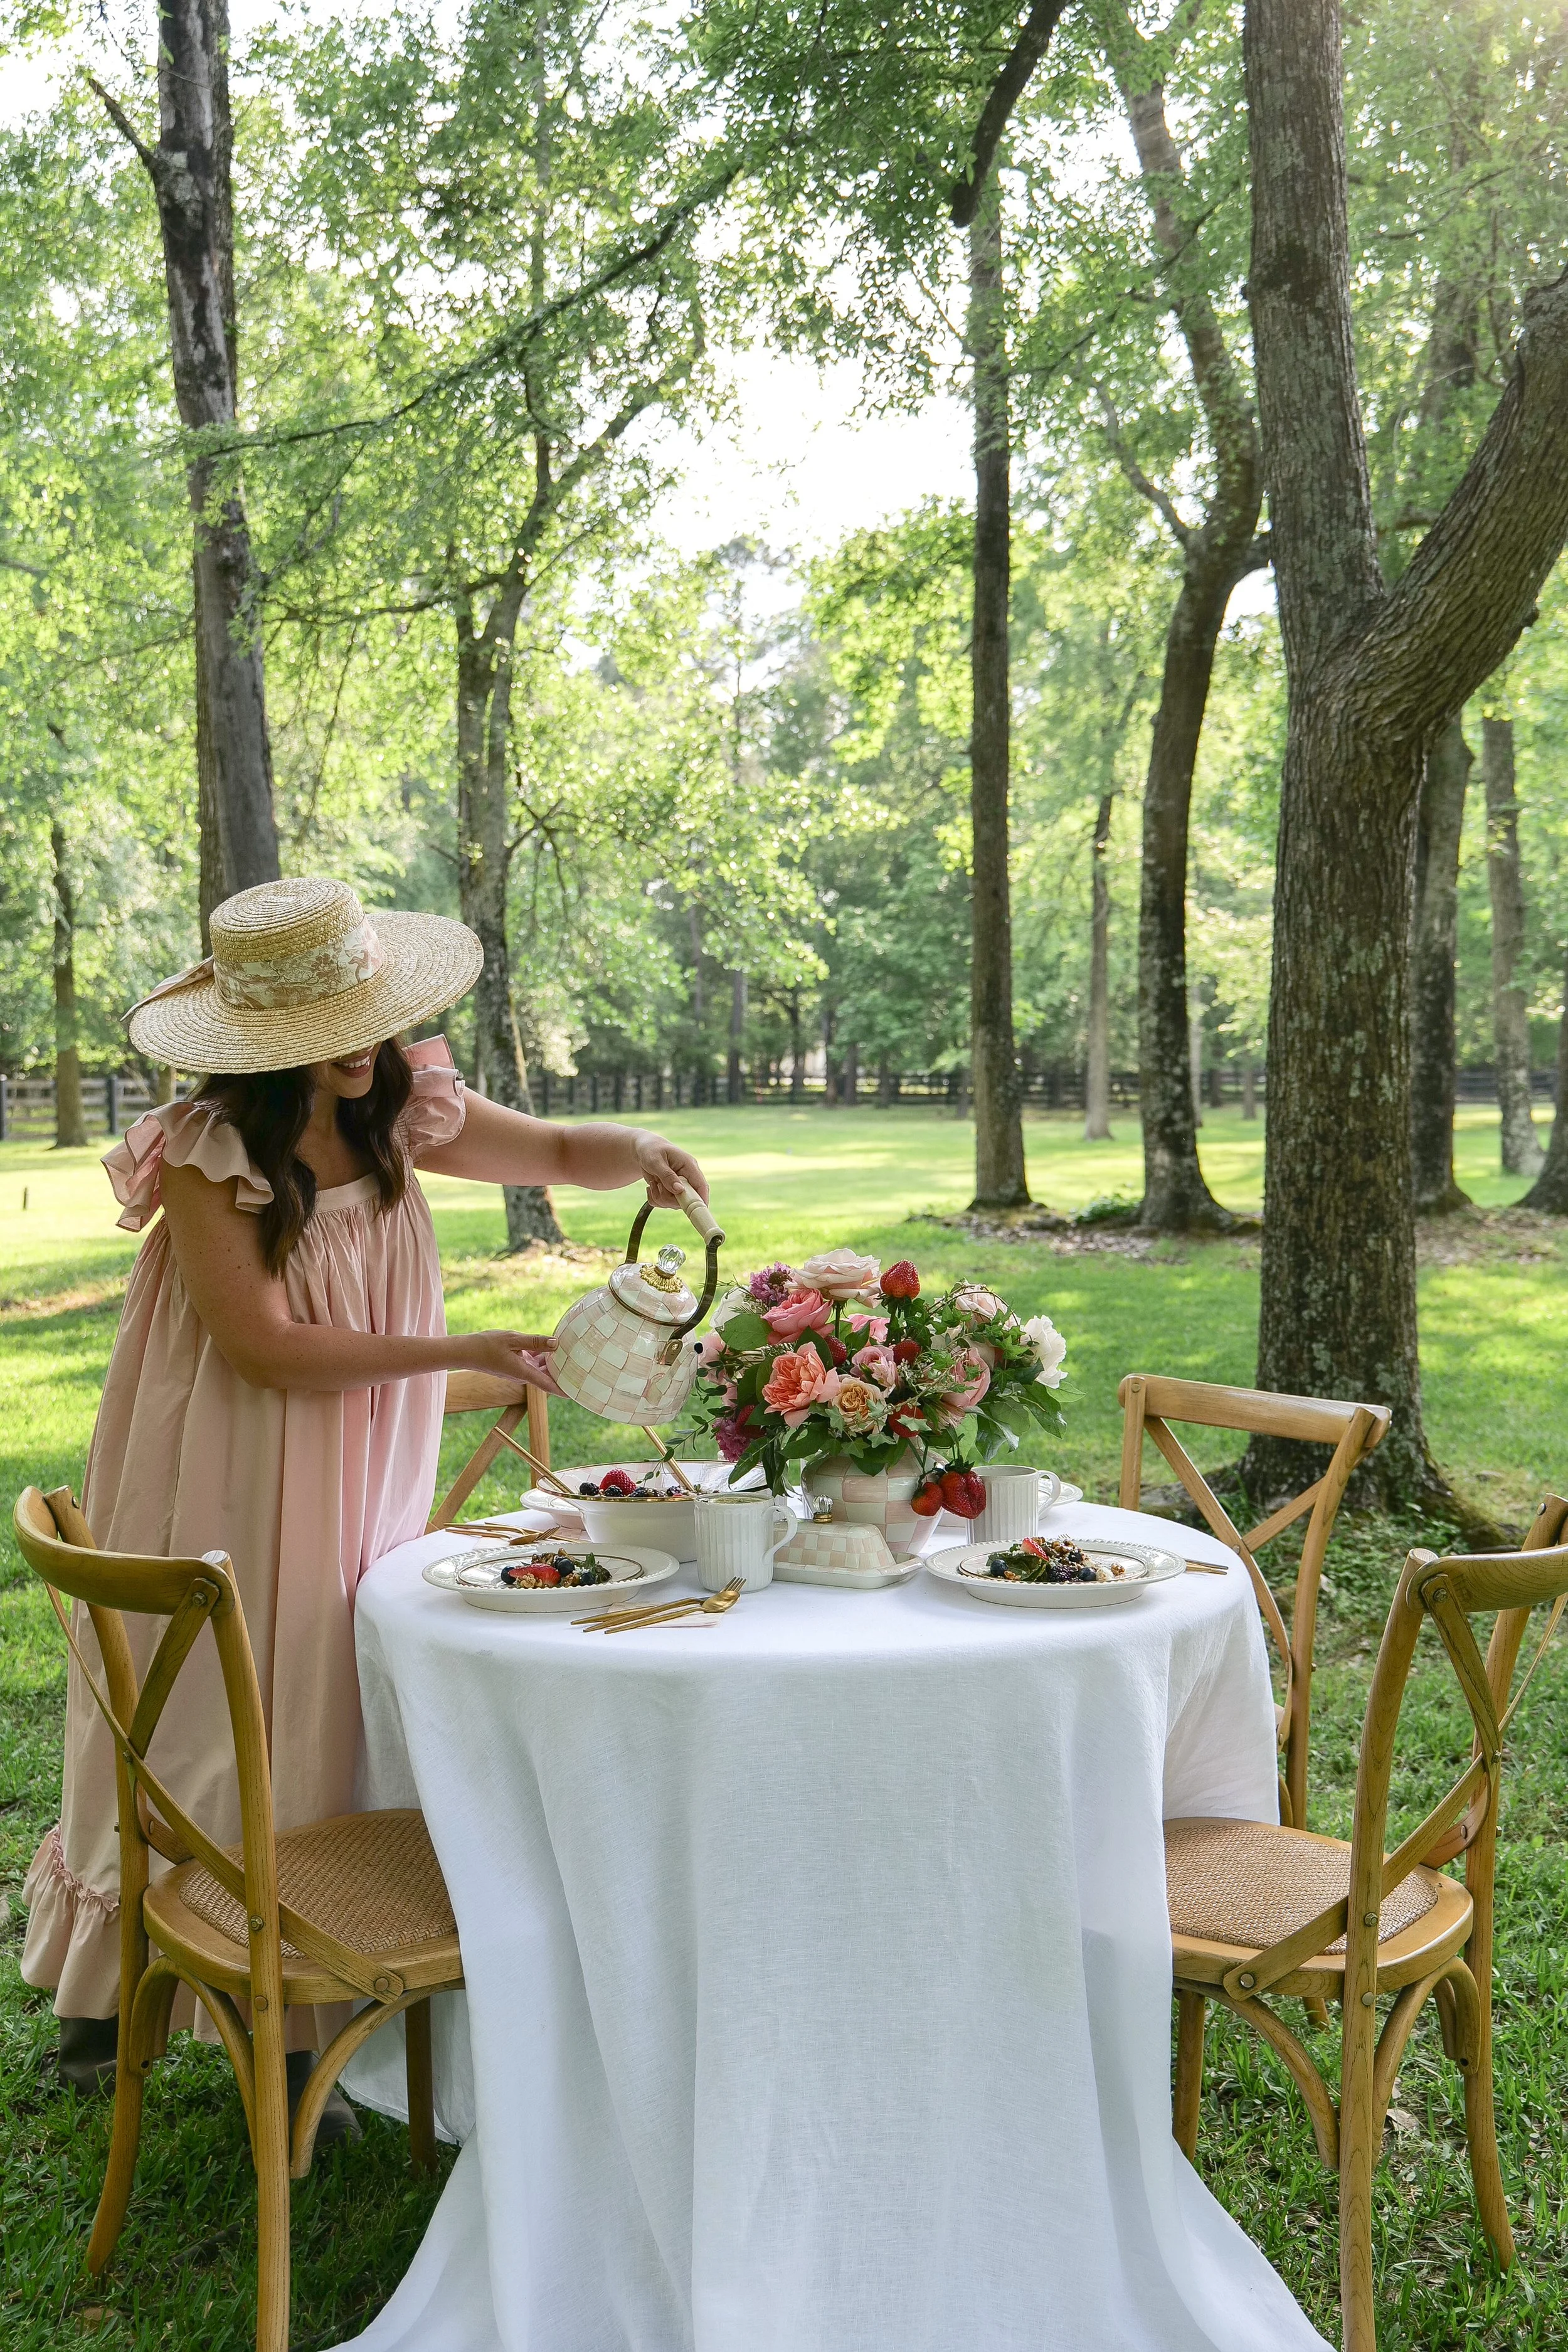
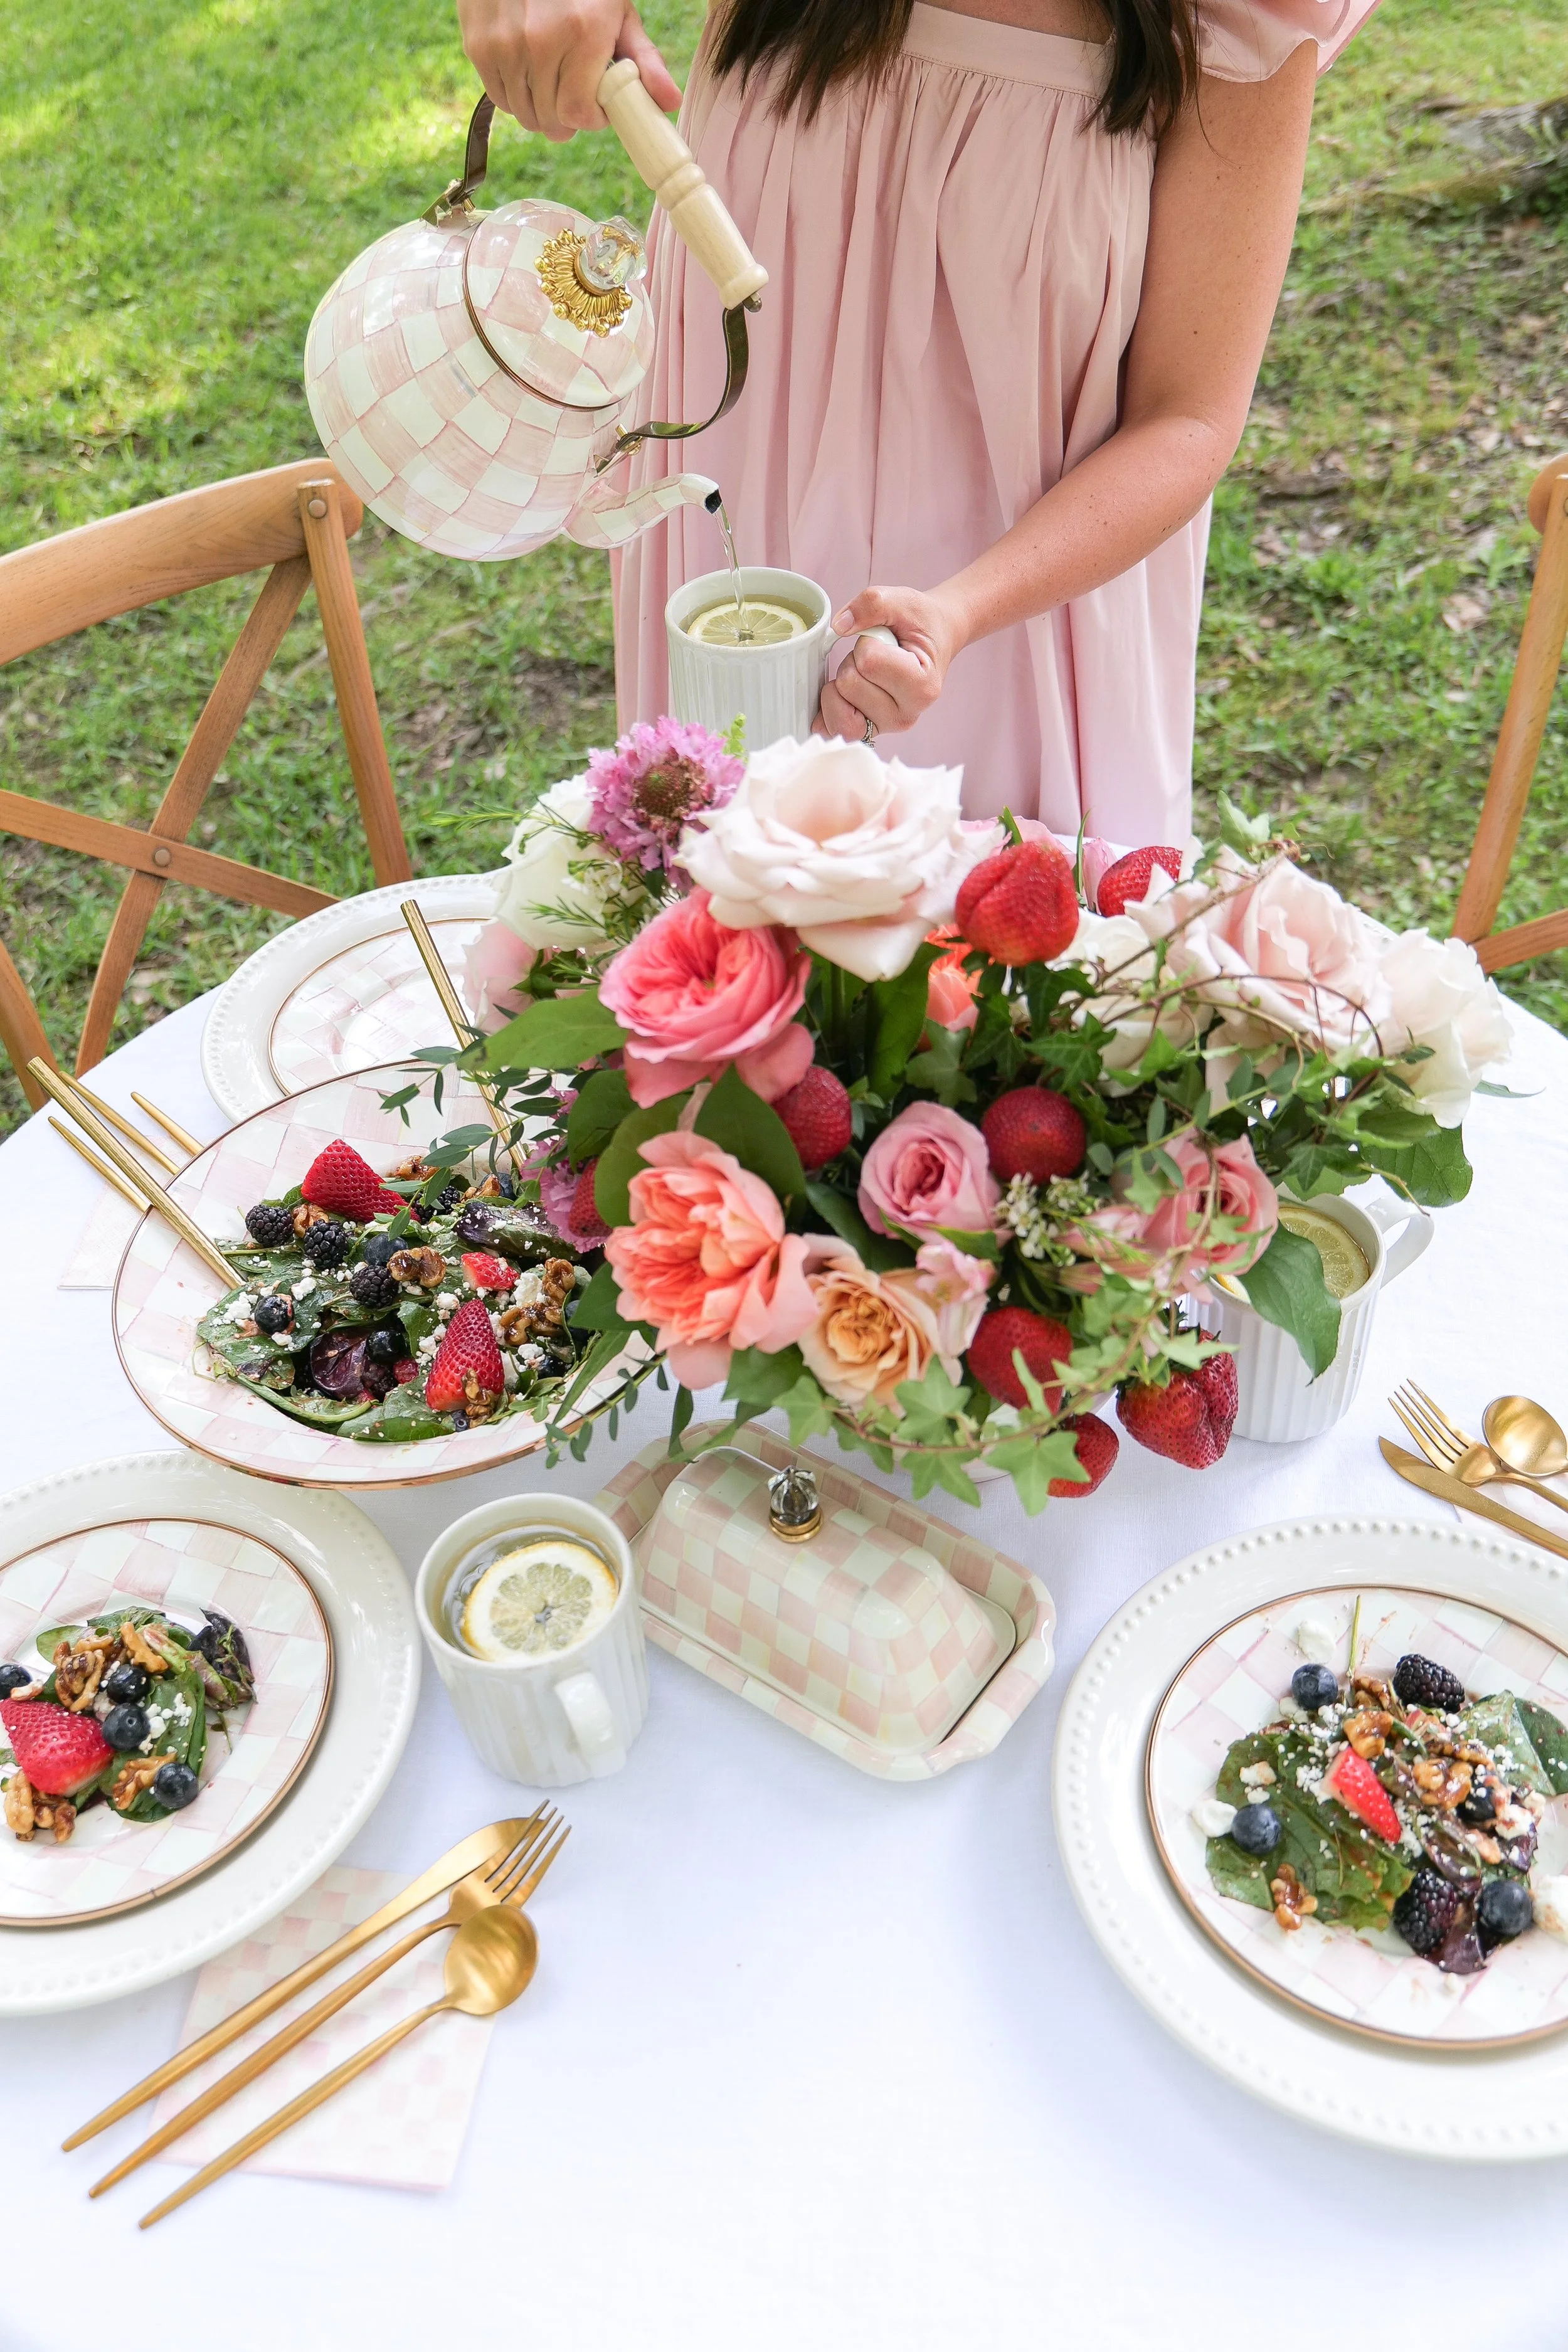
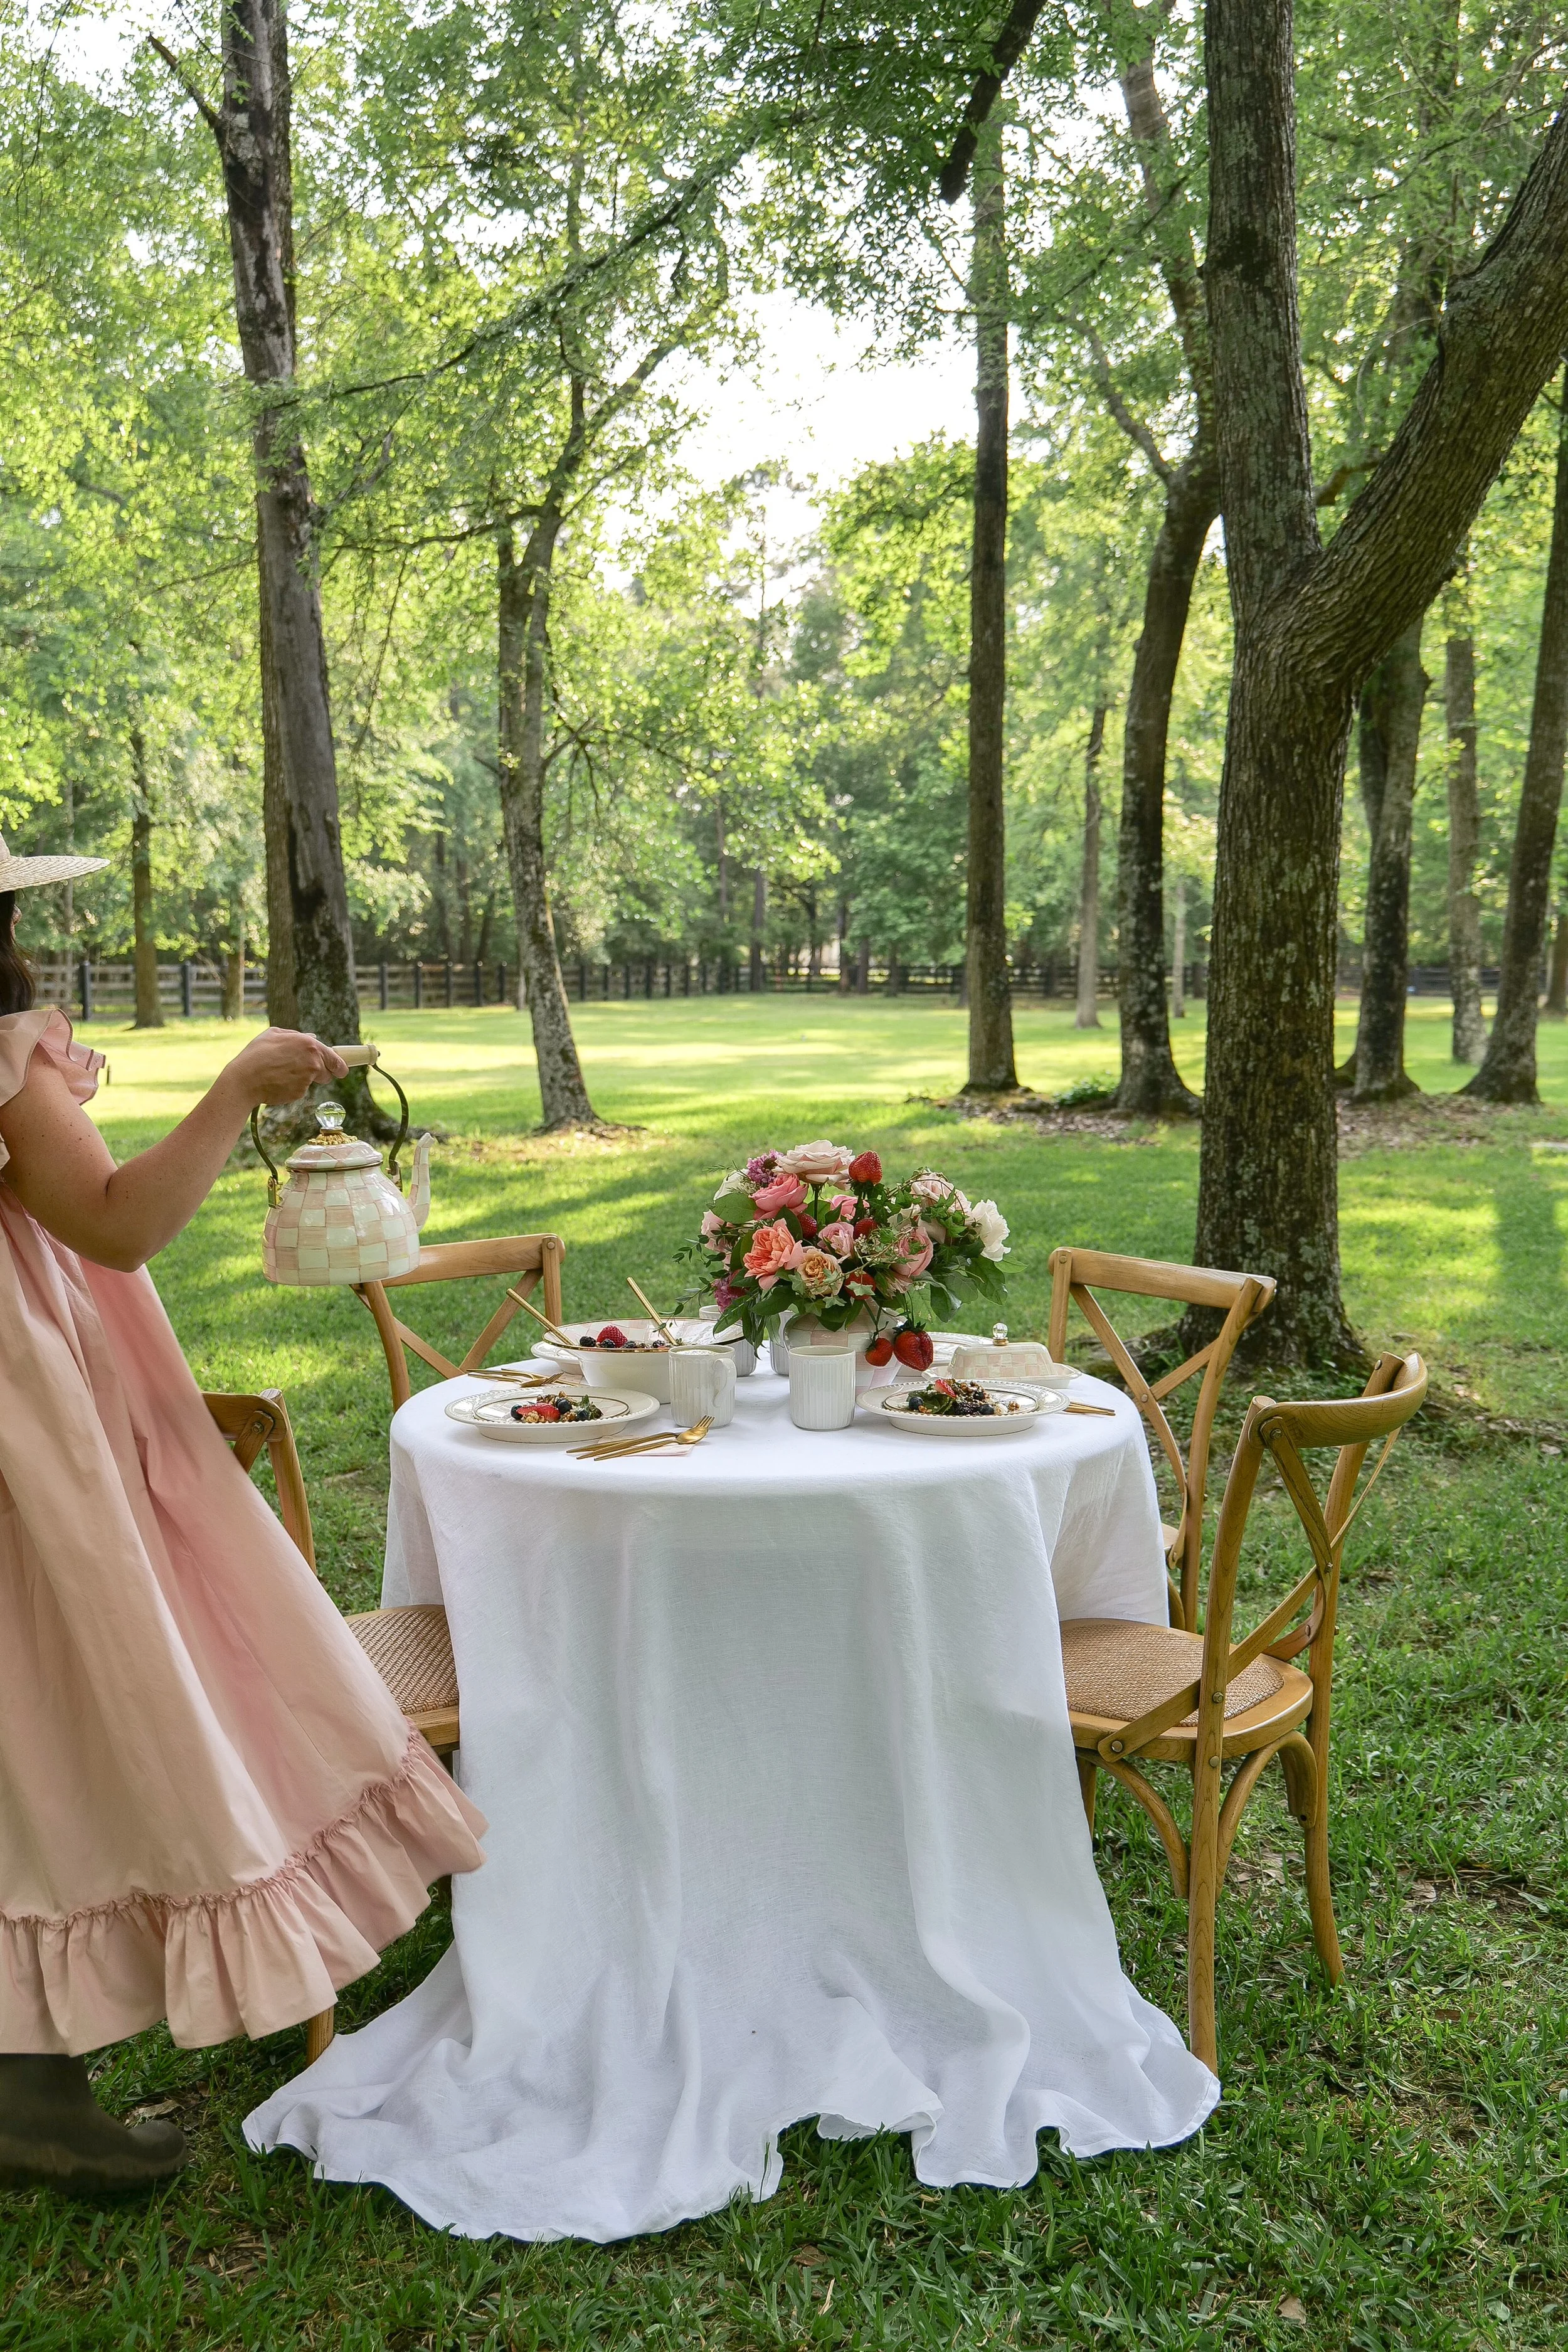
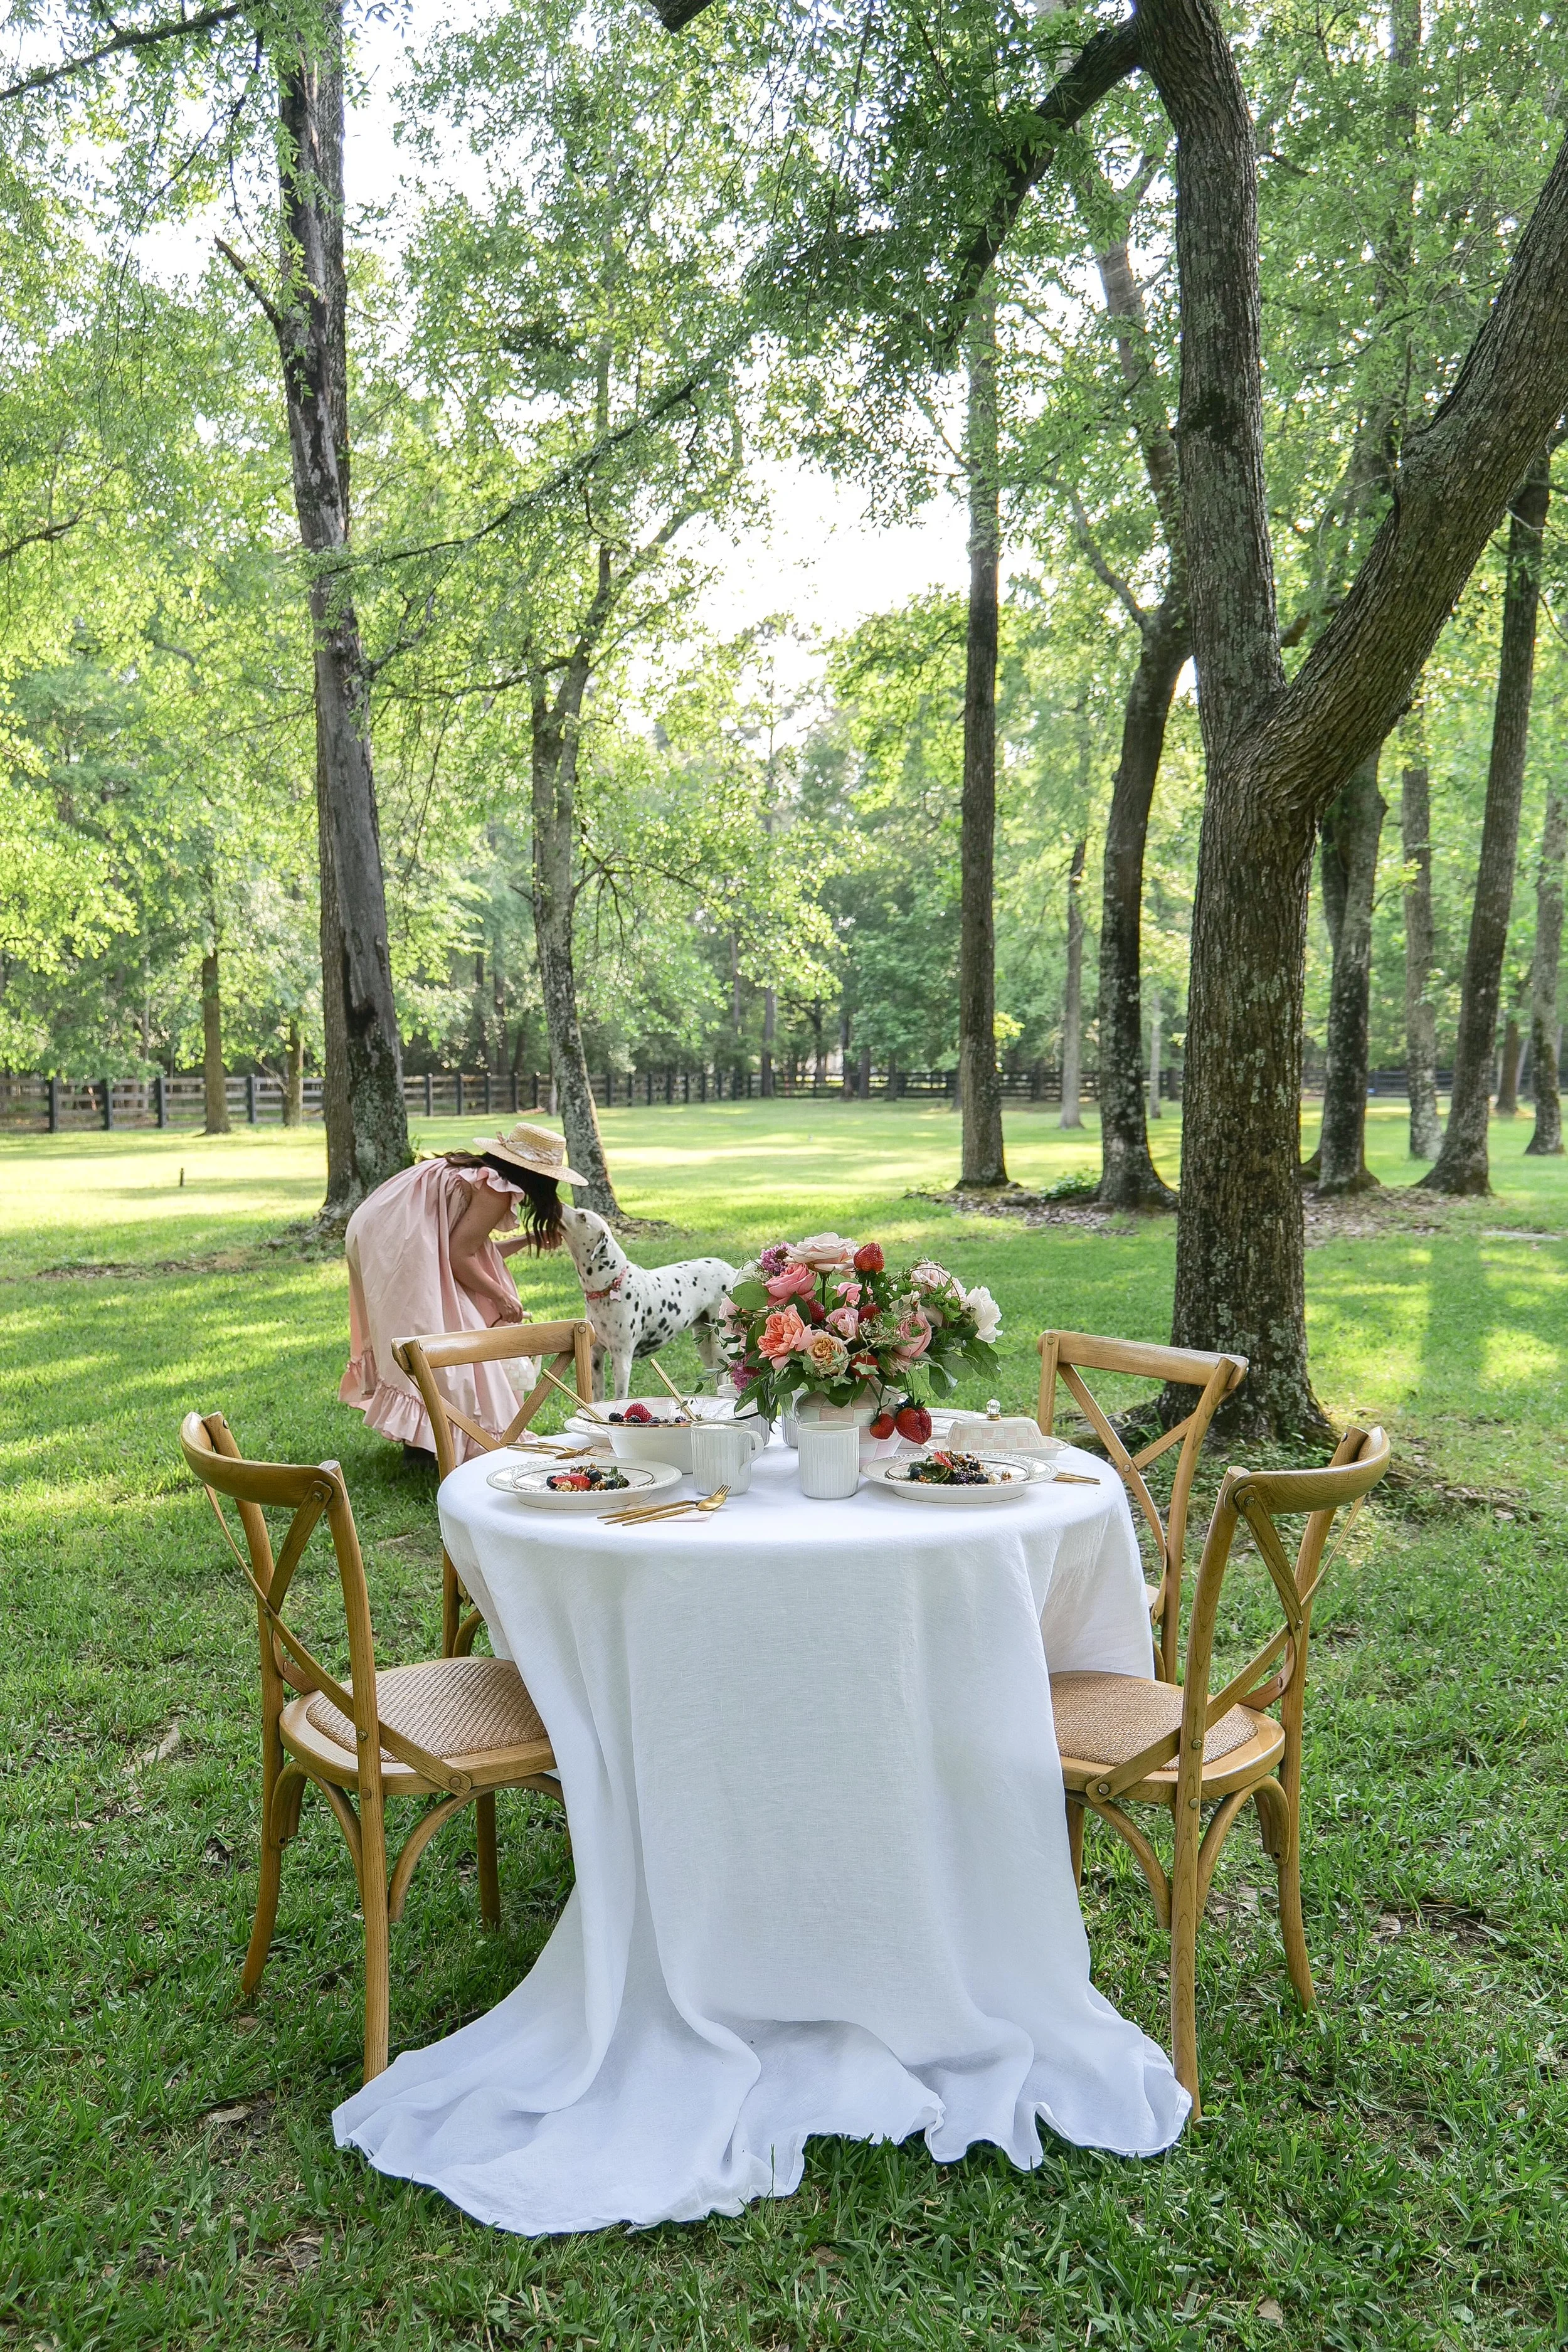
I originally made this salad for lunch outside, surrounded by trees and greenery, and looking back at these photos it almost feels like we were having lunch in a little wooded fairy garden. It's exactly the kind of meal I love serving when the weather is warm—beautiful enough for a spring or summer gathering but simple enough to make for lunch at home.

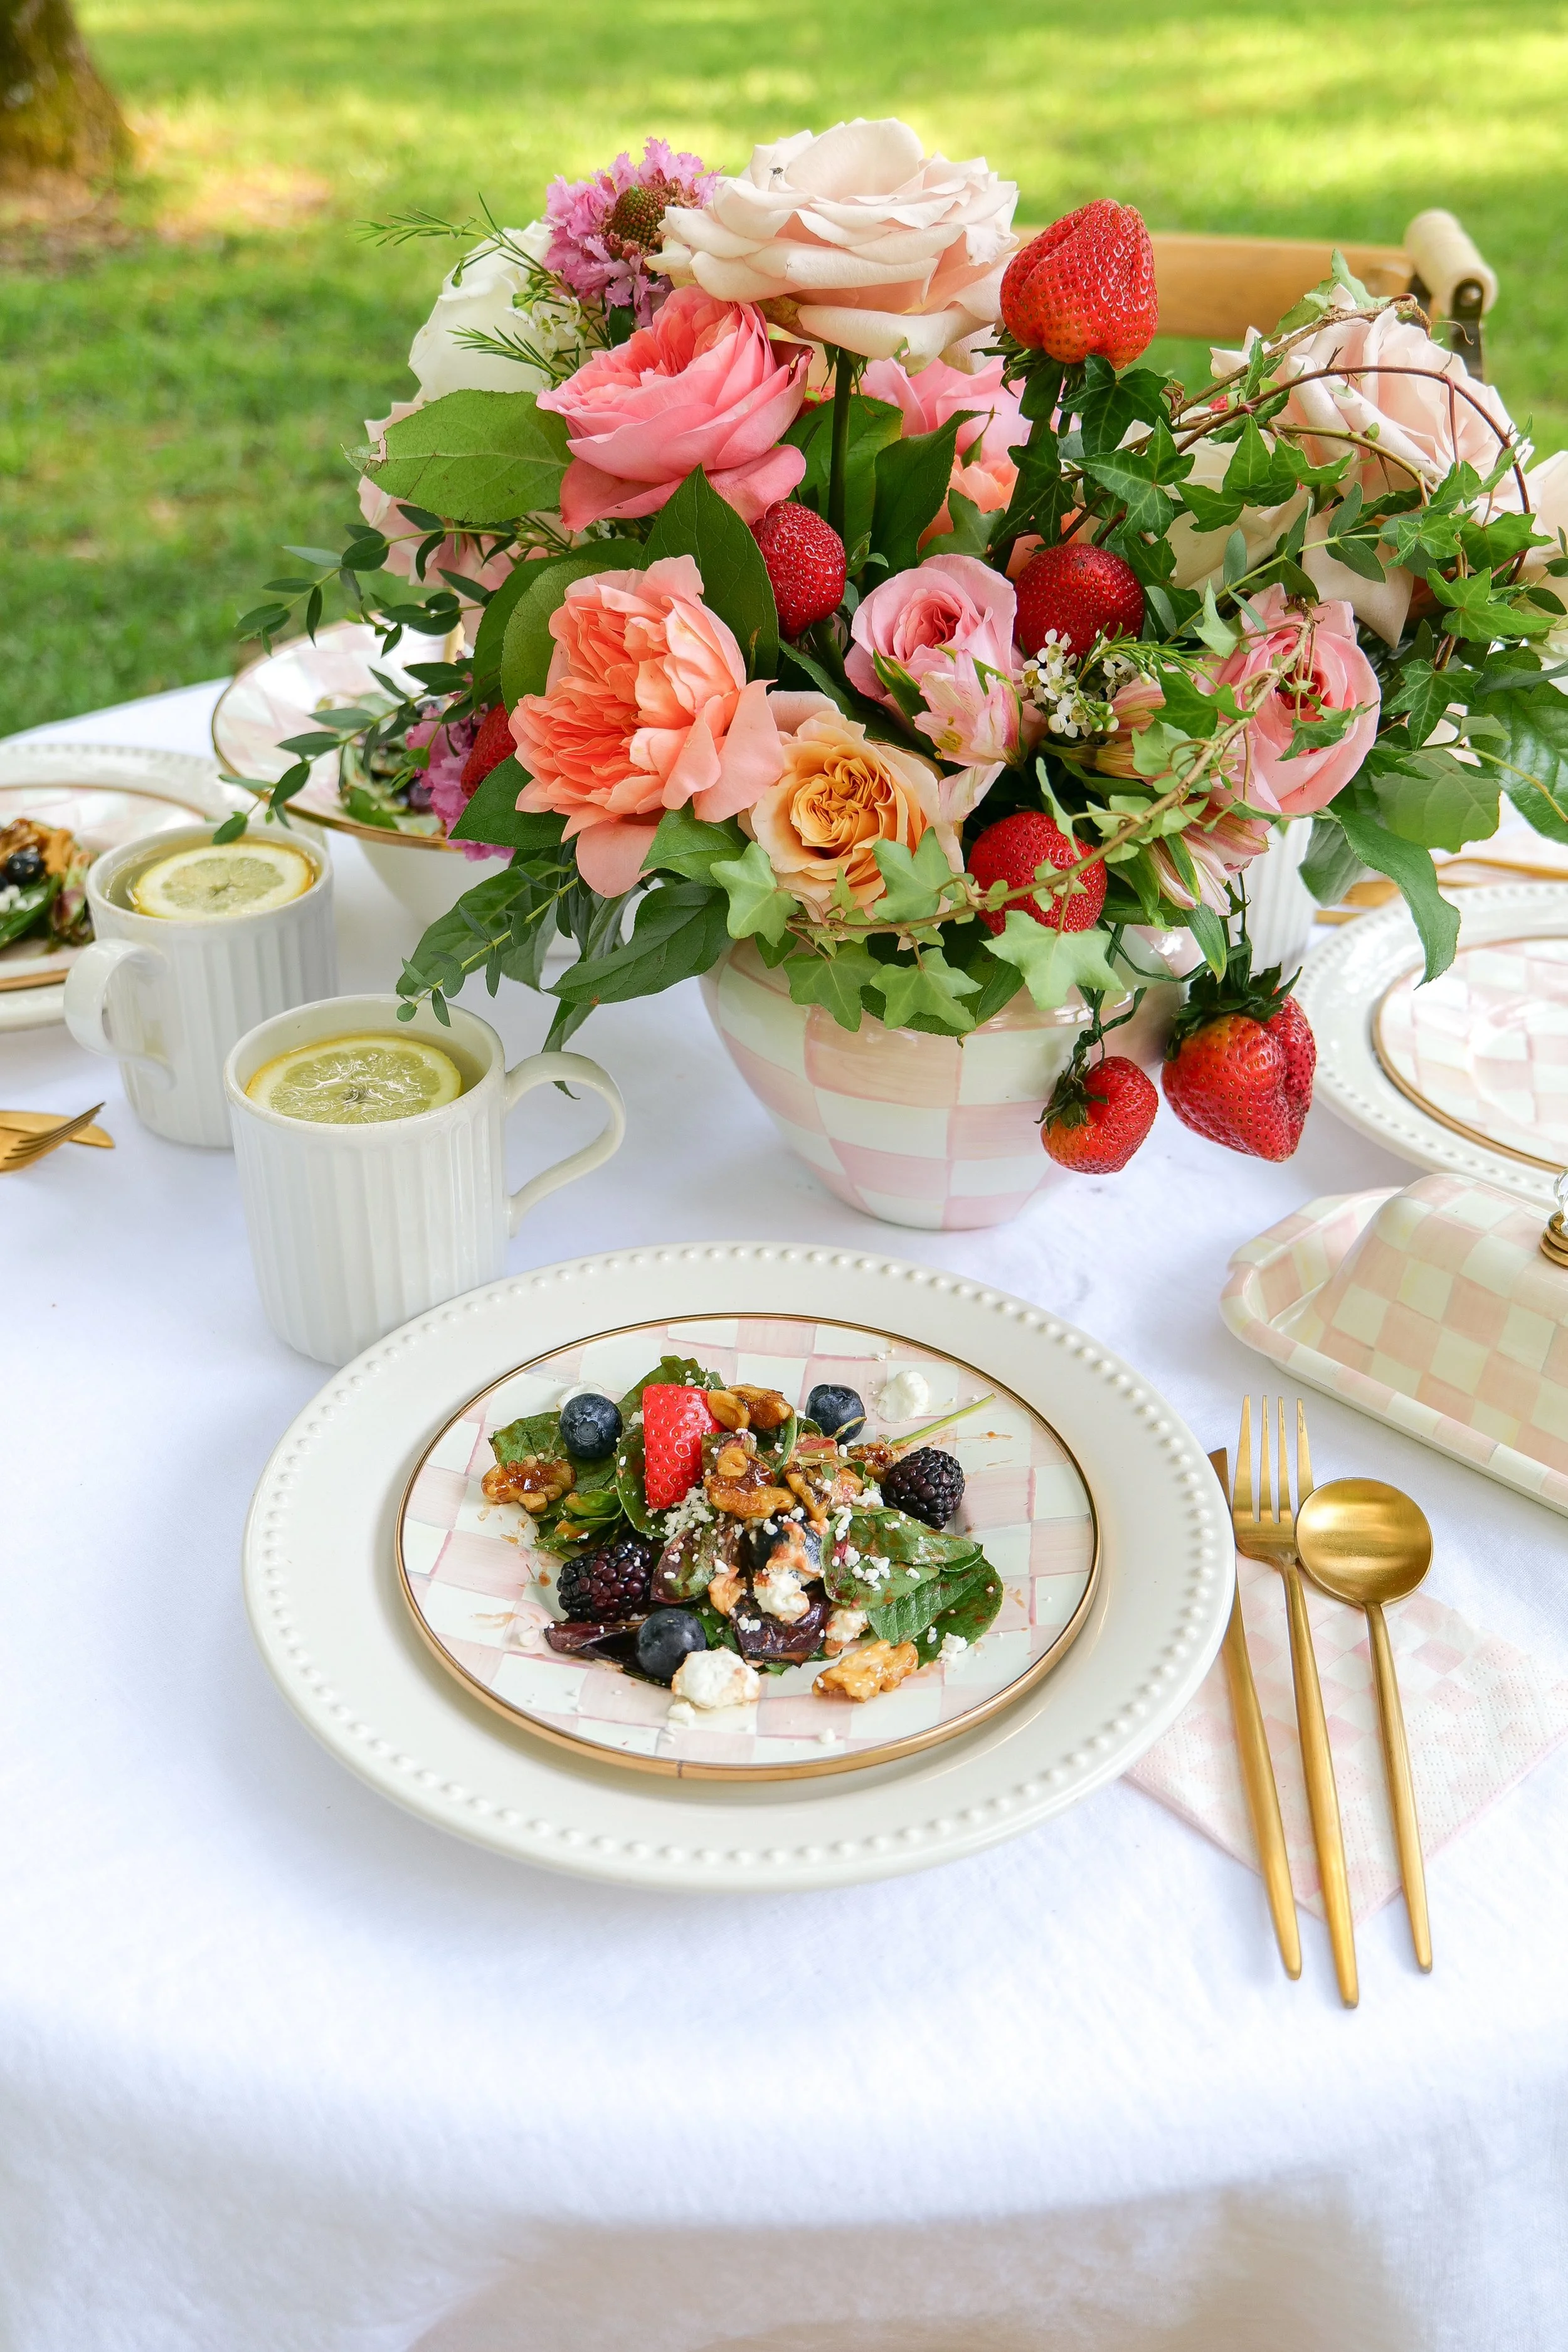
Berry goat cheese salad with strawberries, blueberries, blackberries and candied walnuts served at an outdoor garden table.

A Salad Made for Spring and Summer

One of my favorite things about this salad is how naturally beautiful it is.

You have deep green spinach, bright strawberries, blueberries and blackberries, creamy white goat cheese and glossy candied walnuts. It doesn't need much styling once it's assembled because the ingredients do all of the work.

That makes it especially good for entertaining.

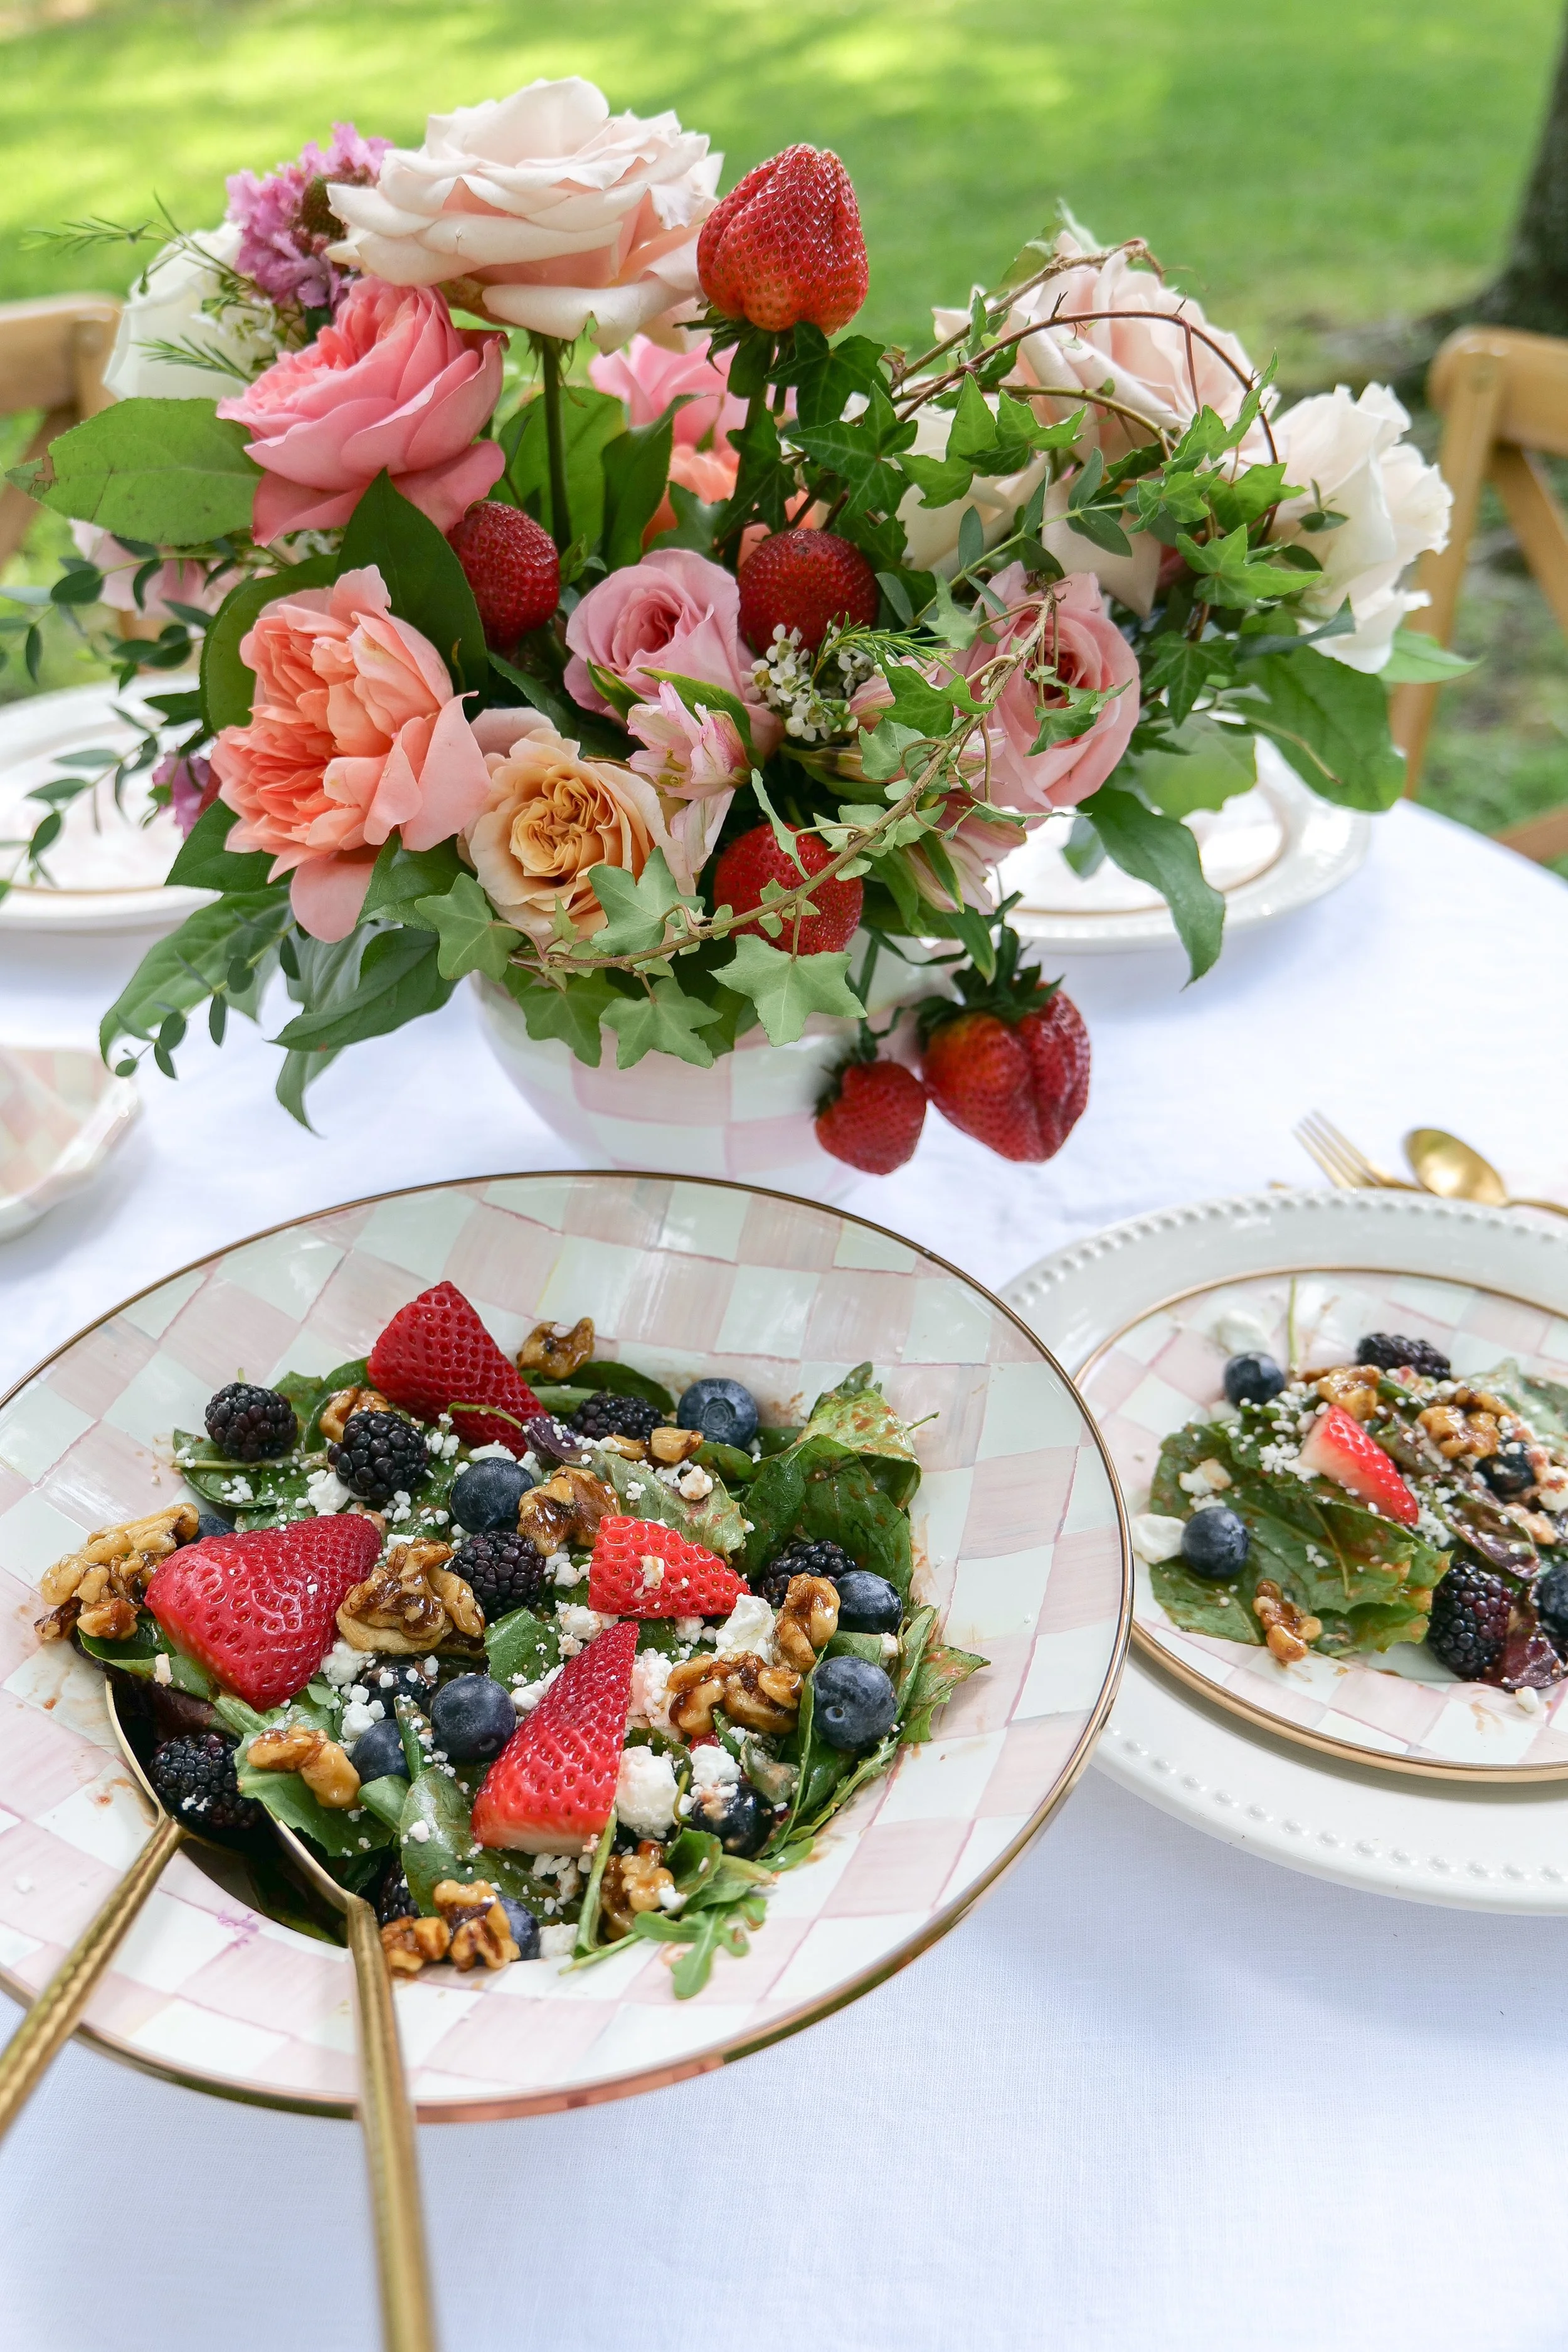
Fresh berry goat cheese salad with spinach, strawberries, blueberries, blackberries and candied walnuts.

Serve it for Easter, Mother's Day, a bridal or baby shower, a spring lunch or an easy summer dinner outside. It works beautifully as a side salad, but you can easily add grilled chicken or salmon and turn it into a complete meal.

Outdoor summer garden lunch table surrounded by trees and greenery with fresh berry salad.

What's in This Berry Goat Cheese Salad?

The ingredient list is simple, but each piece gives the salad something different.

Spinach creates a mild, fresh base that lets the berries stand out.

Strawberries, blueberries and blackberries add sweetness, color and a little tartness.

Goat cheese gives you that creamy, tangy contrast against the fruit.

And then there are the candied walnuts.

Those might be my favorite part.

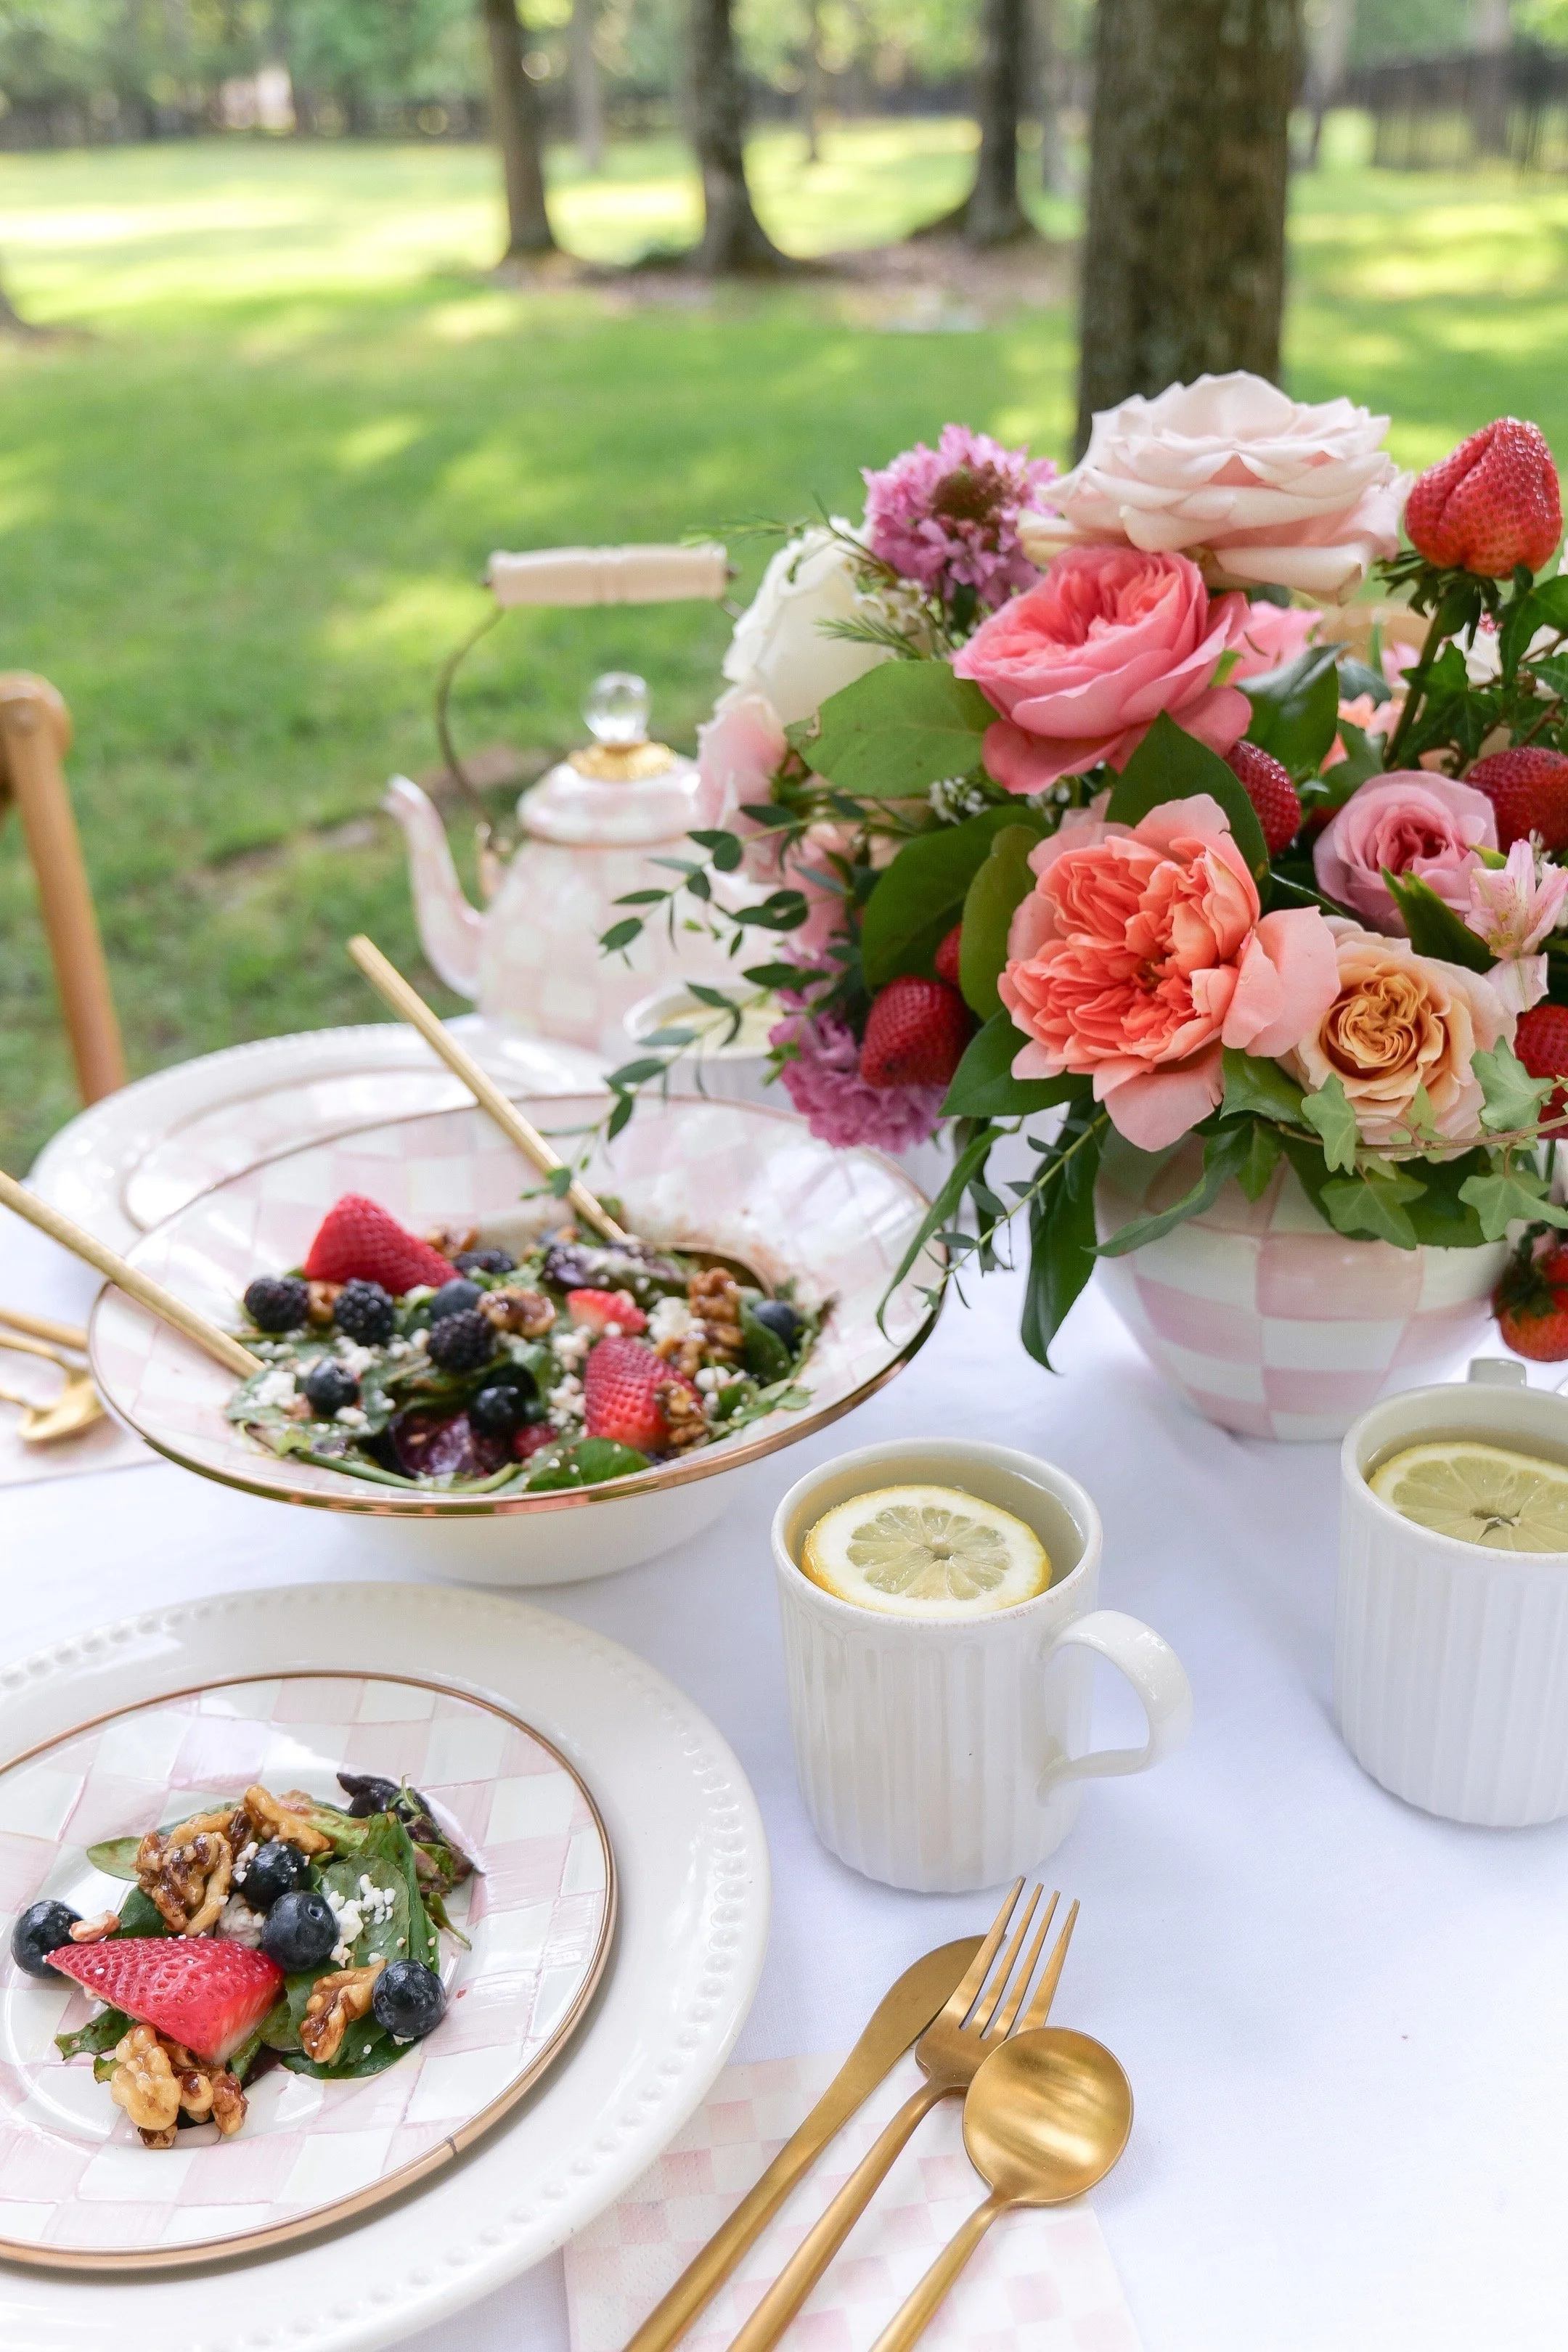
Spinach salad topped with fresh strawberries, blueberries, blackberries, goat cheese and candied walnuts.

Don't Skip the Candied Walnuts

You could absolutely use plain toasted walnuts, but taking a few extra minutes to candy them makes such a difference.

For this recipe, I cook the walnuts with maple syrup and brown sugar until they're glossy and coated, then spread them onto parchment paper to cool.

You get these little bites of sweet crunch throughout the salad that work so well against the creamy goat cheese and fresh berries.

Fresh spinach salad with berries, creamy goat cheese and homemade maple candied walnuts.

Amanda's Tip: Make the candied walnuts first. They'll have time to cool and crisp while you prepare the dressing and assemble the rest of the salad.

Homemade Strawberry Balsamic Vinaigrette

The dressing is what brings everything together.

Fresh strawberries are blended with balsamic vinegar, raw honey, extra virgin olive oil, salt and pepper to make a simple strawberry balsamic vinaigrette.

You still get the depth and tanginess of balsamic, but blending fresh strawberries directly into the dressing gives it a little natural sweetness and makes it perfect for this salad.

Berry spinach salad with goat cheese and candied walnuts served with homemade strawberry balsamic vinaigrette.

If you love homemade dressings, this is also an easy one to make ahead. Blend it, refrigerate it in a sealed container and give it a good shake or stir before serving.

Setting a Garden Table for Lunch

This salad always makes me think of eating outside.

When I photographed this particular lunch at our old house, the table was tucked into so much greenery that it felt almost like dining in the middle of a little wooded garden.

Beautiful outdoor lunch table set among trees and greenery for a spring or summer meal.

And honestly, the setting didn't need much.

When you're surrounded by that much natural greenery, I think it's prettier to let the setting do most of the decorating. A thoughtfully set table, pretty serving pieces and colorful food are enough.

Summer outdoor table setting surrounded by lush greenery for an elegant garden lunch.

This is one of the reasons I love recipes like this for entertaining. The salad itself becomes part of the tablescape.

Shop My Summer Table & Kitchen Favorites

I've linked some of my favorite pieces for serving salads, setting a simple outdoor table and making homemade dressings below.

How to Assemble the Salad

I have one little trick when assembling salads with lots of toppings: don't put everything on top at once.

Start with the spinach and add about half of the berries, goat cheese and candied walnuts. Add some dressing and gently toss everything together.

Then transfer the salad to your serving bowl or platter and scatter the remaining berries, goat cheese and walnuts over the top.

Overhead view of berry spinach salad topped with goat cheese, fresh berries and candied walnuts.

That way, every bite is actually dressed and has some of the toppings in it, but you still get that beautiful finished salad with all of the color visible on top.

Easy Variations

This is also a very forgiving salad.

Use raspberries when they're in season. Swap the goat cheese for feta if that's what you prefer. Pecans work beautifully in place of walnuts, and you can use mixed greens or arugula instead of spinach.

For a heartier salad, add grilled chicken, salmon or even quinoa.

Colorful summer spinach salad with mixed berries, goat cheese and candied walnuts.

I wouldn't change too much at once, though. The combination of berries + creamy cheese + candied nuts + balsamic is what makes this one so good.

What to Serve with Berry Goat Cheese Salad

For lunch, I could happily eat this with a crusty baguette and call it a meal.

For dinner or entertaining, serve it alongside grilled chicken or salmon. It's also a beautiful fresh contrast to a creamy soup.

Try it with my Creamy Basil Tomato Soup, Slow Cooker Italian Wedding Soup, French Onion & Shallot Soup, or Creamy Cheddar Cauliflower Soup.

Make It Ahead

Most of this salad can be prepared ahead, which is another reason I love it for entertaining.

Make the candied walnuts ahead and let them cool completely before storing them in an airtight container.

Blend the strawberry balsamic vinaigrette and refrigerate it separately.

Wash and dry your berries and greens, but keep all of the salad components separate until you're ready to serve.

Wait to add the dressing until just before serving. That's what keeps the spinach fresh instead of soggy.

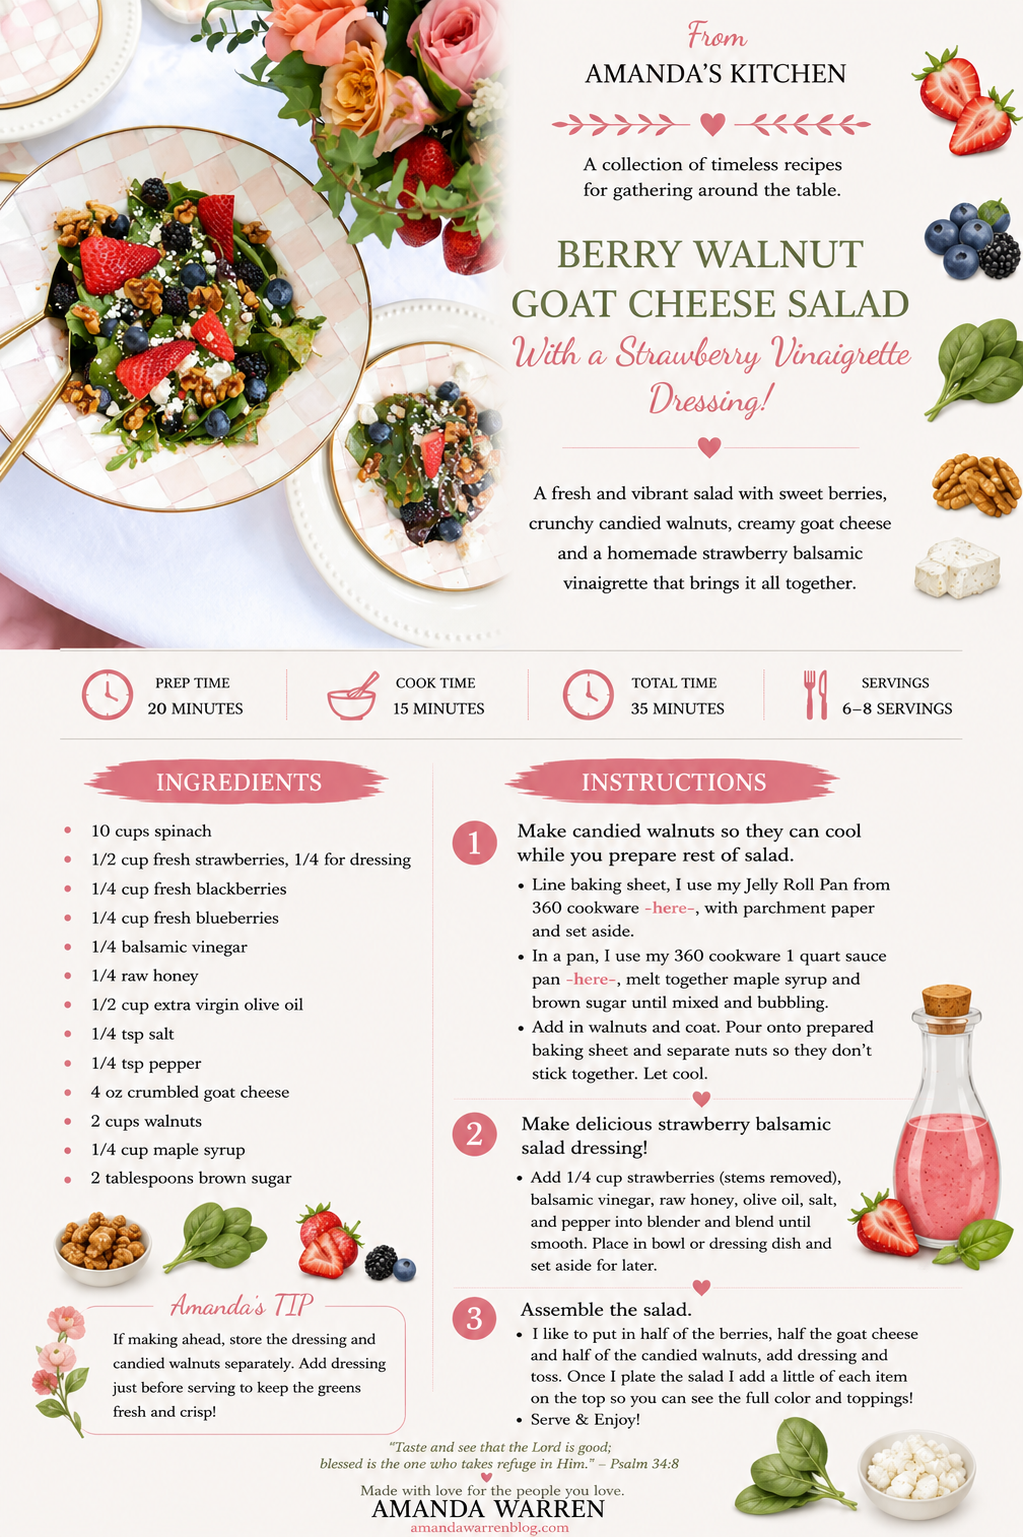
Berry Goat Cheese Salad with Candied Walnuts & Strawberry Balsamic Vinaigrette

Prep Time: 15 minutes
Cook Time: 5 minutes
Total Time: 20 minutes

Ingredients

For the Salad

  • 10 cups fresh spinach

  • ¼ cup fresh strawberries, sliced

  • ¼ cup fresh blackberries

  • ¼ cup fresh blueberries

  • 4 oz goat cheese, crumbled

For the Candied Walnuts

  • 2 cups walnuts

  • ¼ cup pure maple syrup

  • 2 tablespoons brown sugar

For the Strawberry Balsamic Vinaigrette

  • ¼ cup fresh strawberries, stems removed

  • ¼ cup balsamic vinegar

  • ¼ cup raw honey

  • ½ cup extra virgin olive oil

  • ¼ teaspoon salt

  • ¼ teaspoon freshly ground black pepper

Instructions

1. Make the Candied Walnuts

Line a baking sheet with parchment paper and set aside.

Add the maple syrup and brown sugar to a saucepan over medium heat. Cook, stirring, until the mixture is combined and bubbling.

Add the walnuts and stir until evenly coated.

Transfer the walnuts to the prepared parchment-lined pan and separate them so they don't cool in one large cluster. Let cool completely while you prepare the rest of the salad.

2. Make the Strawberry Balsamic Vinaigrette

Add ¼ cup strawberries, balsamic vinegar, raw honey, extra virgin olive oil, salt and pepper to a blender.

Blend until completely smooth. Set aside until you're ready to assemble the salad.

3. Assemble the Salad

Add the spinach to a large serving bowl.

Add approximately half of the sliced strawberries, blackberries, blueberries, goat cheese and candied walnuts.

Drizzle with your desired amount of strawberry balsamic vinaigrette and gently toss.

Top the salad with the remaining berries, goat cheese and candied walnuts so all of those beautiful colors and textures are visible.

Serve immediately with additional vinaigrette on the side.

Amanda's Notes

Make the walnuts first. Giving them time to cool allows the maple-brown sugar coating to set before you add them to the salad.

Dress just before serving. Don't toss the spinach with vinaigrette until you're ready to eat.

Add the toppings in two stages. Tossing half into the salad distributes everything evenly, while saving the other half for the top gives you that beautiful finished presentation.

Make it a meal. Add grilled chicken or salmon for an easy spring or summer dinner.

Swap the greens. Arugula or mixed greens are both delicious alternatives to spinach.

How to Store Leftovers

Once dressed, this salad is best enjoyed right away.

If you know you'll have leftovers, only dress the portion you're serving. Keep the spinach, berries, goat cheese, candied walnuts and dressing stored separately in the refrigerator.

Keep the candied walnuts in a sealed container at room temperature once completely cooled so they maintain their crunch.

Frequently Asked Questions

Can I make berry goat cheese salad ahead of time?

Yes. Prepare the candied walnuts and strawberry balsamic vinaigrette ahead of time and keep the salad ingredients separate. Assemble and dress the salad immediately before serving.

Can I substitute feta for goat cheese?

Yes. Feta will give the salad a slightly different flavor and texture but works beautifully with fresh berries and balsamic vinaigrette.

Can I use pecans instead of walnuts?

Absolutely. Candied pecans are an easy substitute for the walnuts and work well with the berries and goat cheese.

What protein goes well with berry salad?

Grilled chicken and salmon are both great additions if you'd like to turn this salad into a complete meal.

Can I use a different green instead of spinach?

Yes. Try arugula for a pepperier flavor or your favorite mixed greens for a lighter texture.

Why should I wait to dress the salad?

Adding vinaigrette too early can cause the spinach to wilt. For the freshest texture, toss the salad with dressing immediately before serving.

Elegant outdoor garden lunch table setting surrounded by trees and summer greenery.

More Salad Recipes

If you love a salad that's substantial enough to become part of the meal, try my Pear & Walnut Salad with Honey Mustard Dressing, Italian Chopped Salad Jars, Spinach Salad with Warm Shallot Dressing, Apples & Pistachios, or Shaved Brussels Sprout Salad with Apples, Goat Cheese & Candied Pecans.

Shop My Kitchen & Entertaining Favorites

I've linked some of my favorite pieces for making homemade dressings, serving big salads and setting a simple table for lunch outside.

Kitchen Favorites

Entertaining Favorites

Save This Recipe

Whether you're planning a spring lunch, summer dinner or simply want a new salad to add to your weekly rotation, save this one for later.

Printable Berry Goat Cheese Salad with Candied Walnuts and Strawberry Balsamic Vinaigrette recipe card.

Gather Around the Table

Some meals seem made for eating outside.

This is one of them.

A big bowl of colorful salad, something cold to drink, bread on the table and nowhere you need to be for a little while.

Looking back at these photos from our old home, I love how tucked away this table felt among all of the trees and greenery. It was the kind of spot that made an ordinary lunch feel a little magical.

And I think that's part of why I love setting a table—even for something as simple as salad.

The food brings everyone there. The setting makes you want to stay.

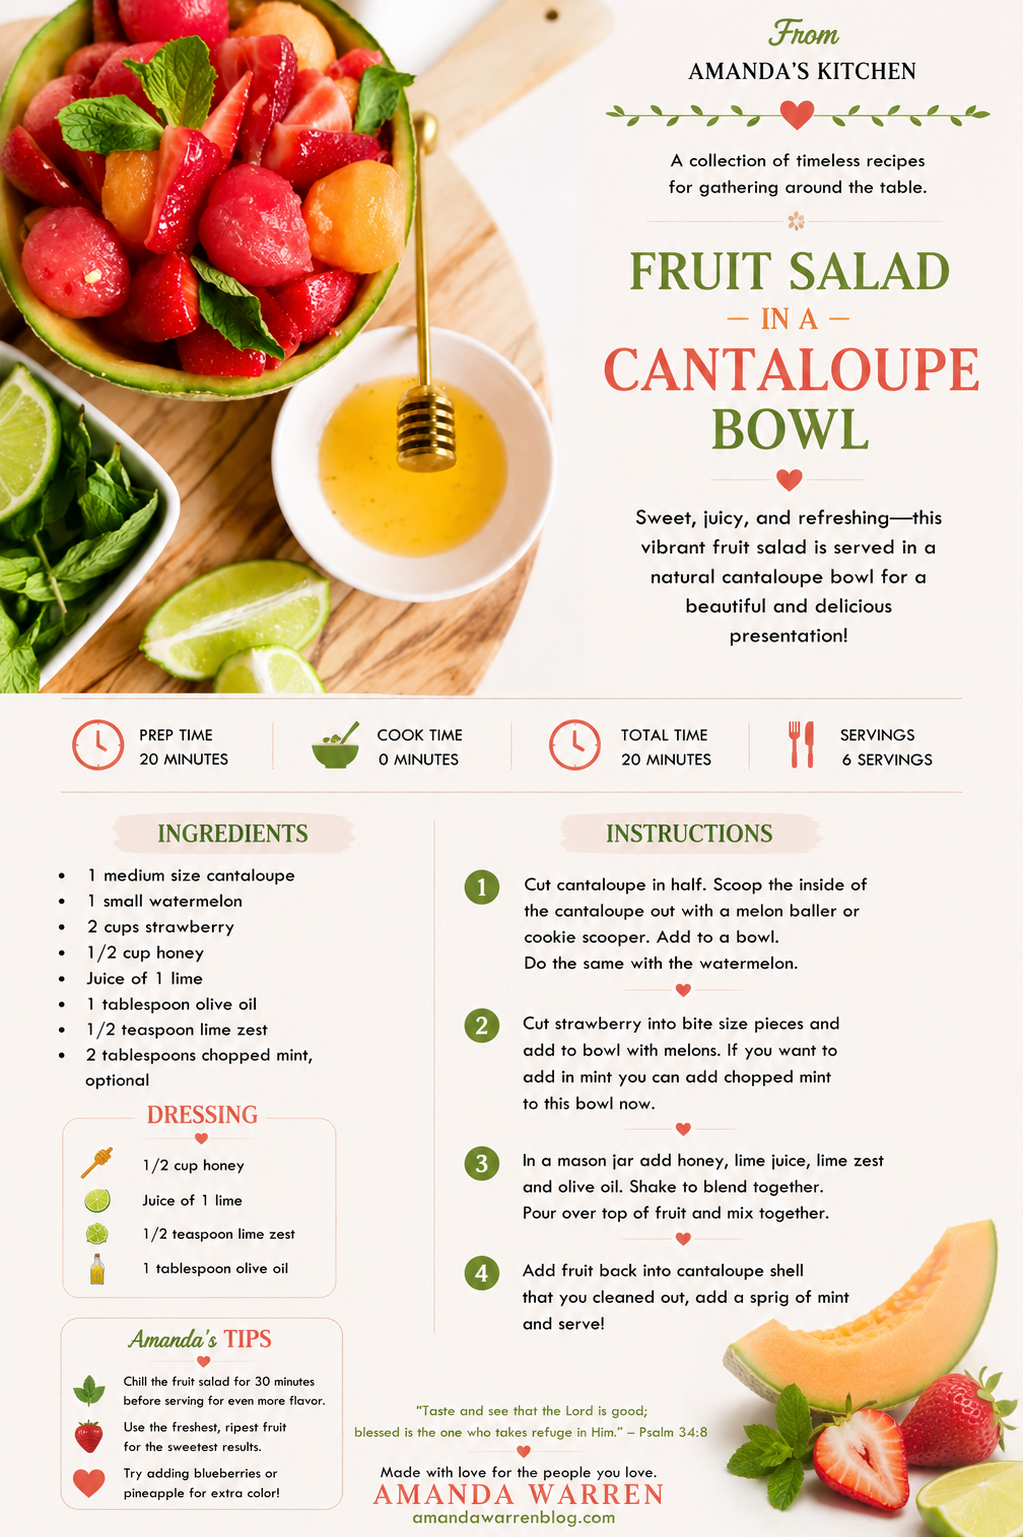
Delicious & Refreshing Fruit Salad in a Cantaloupe Bowl

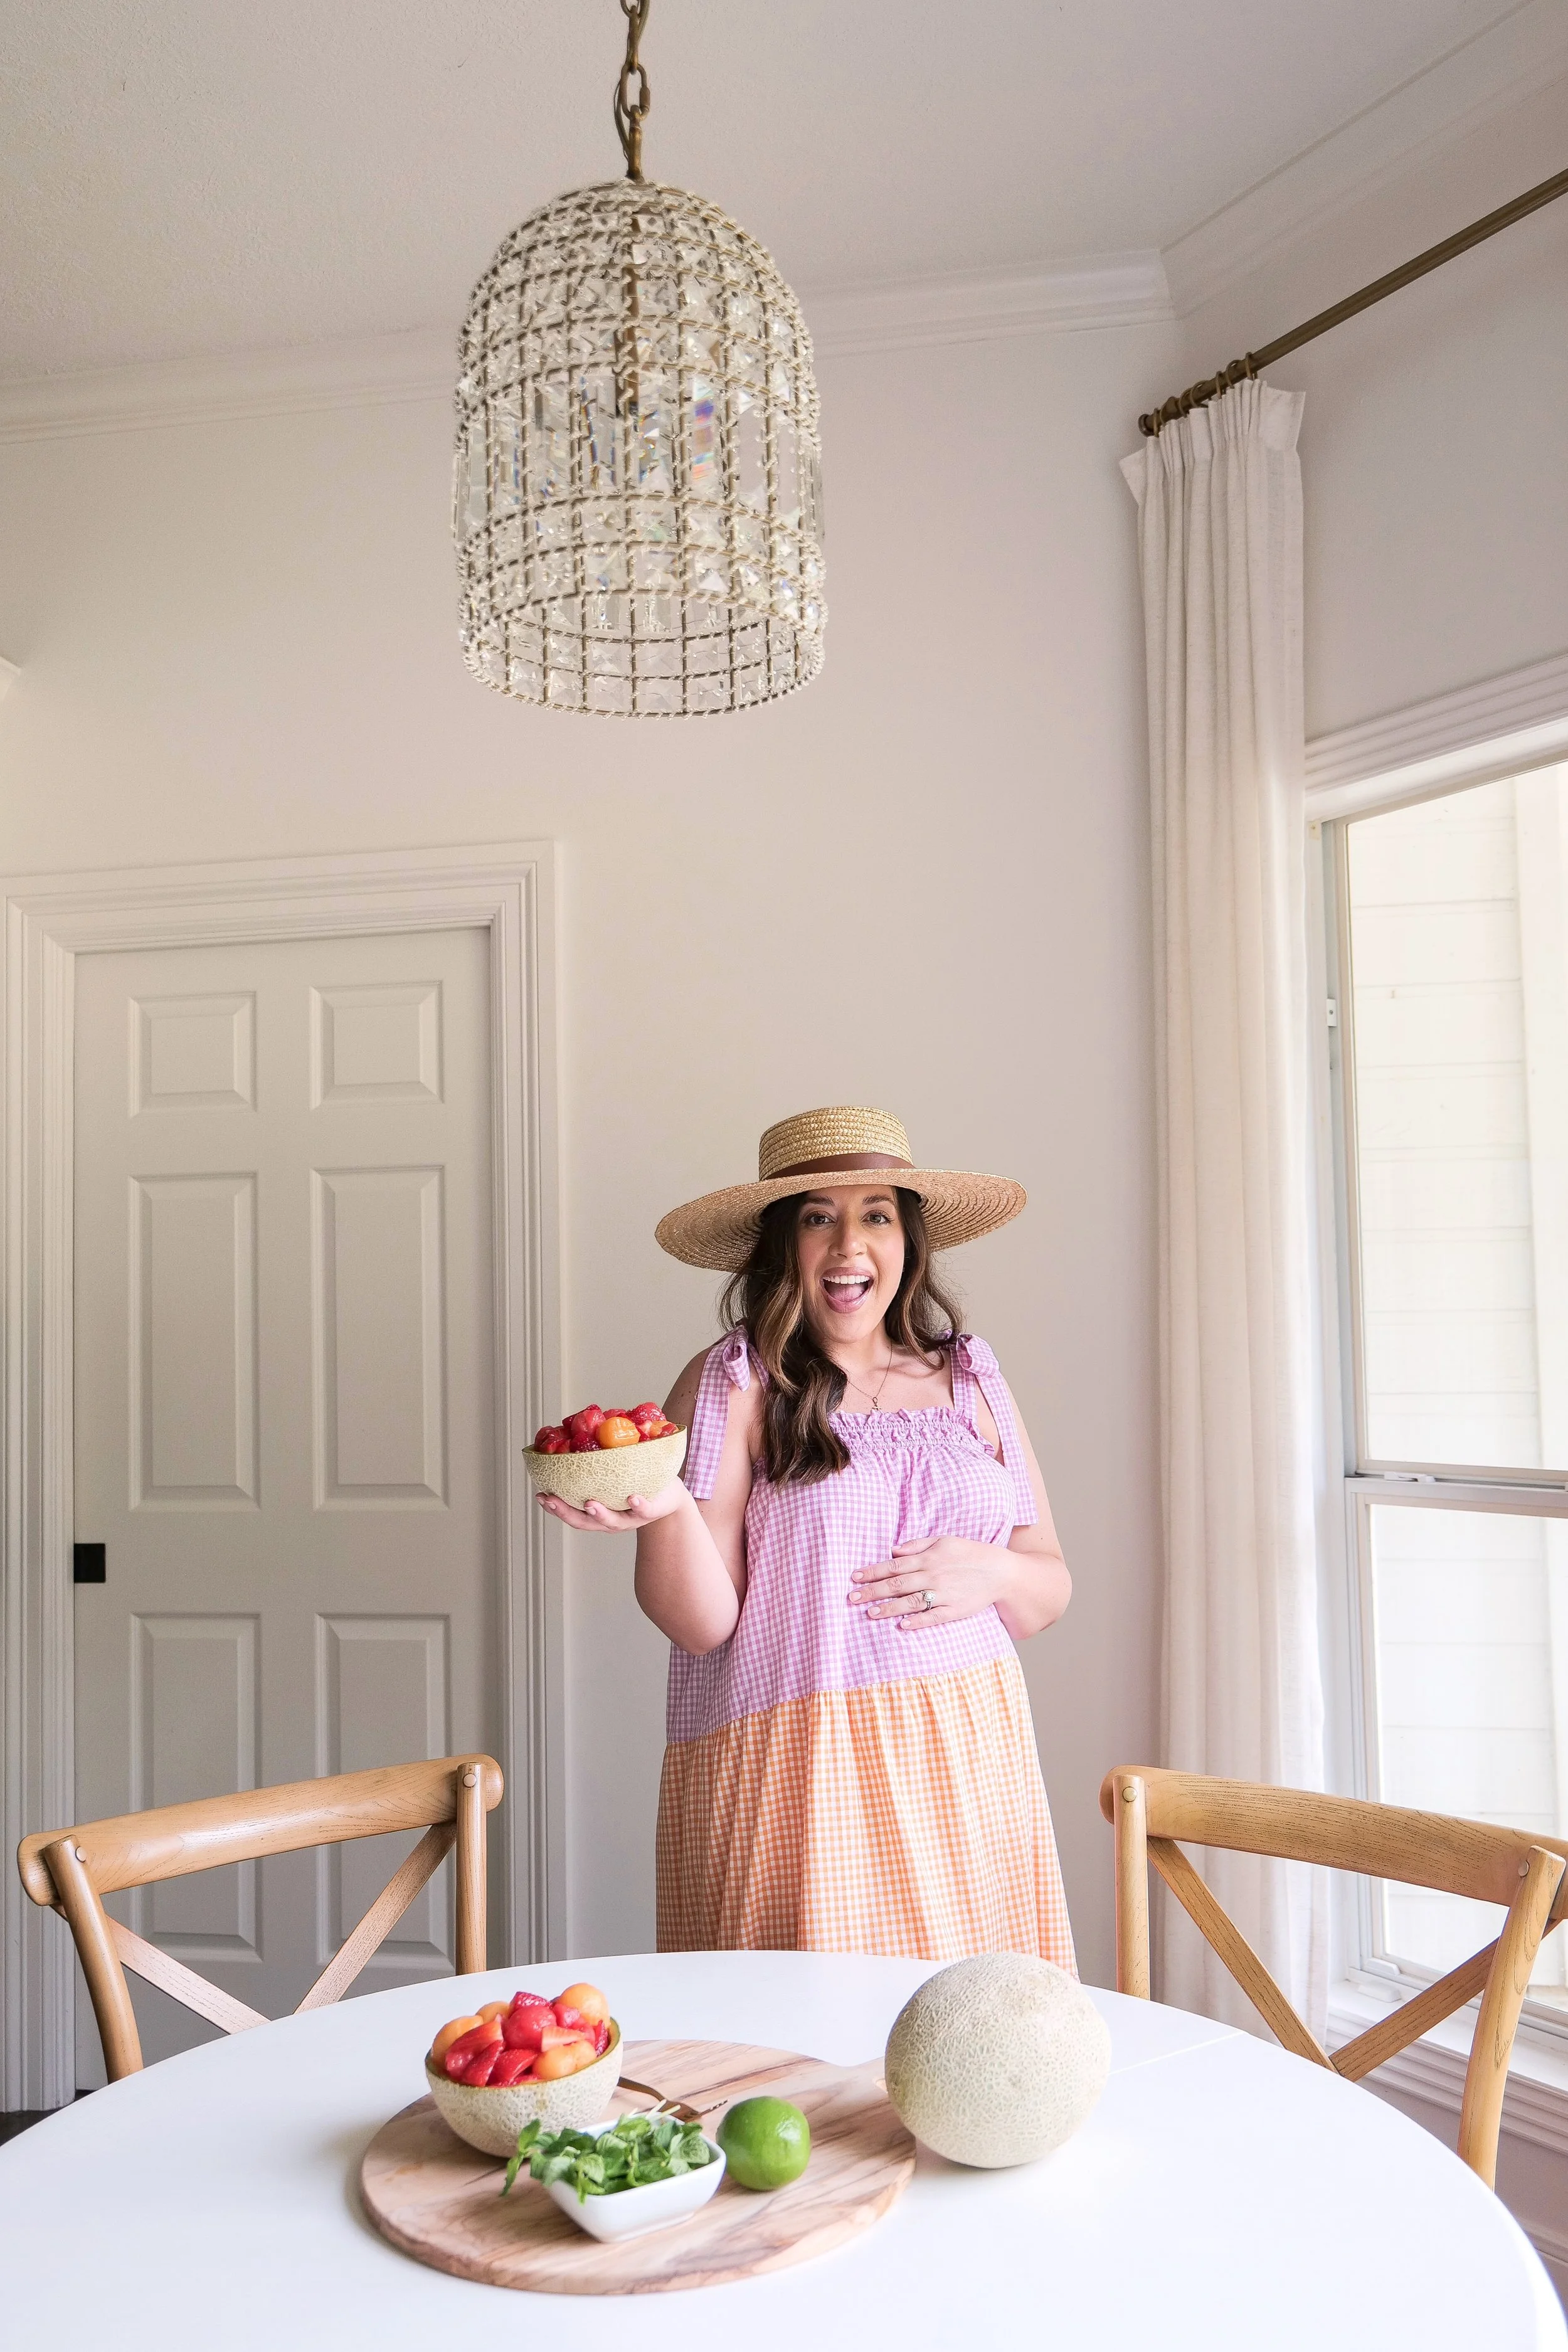
Awaken your palate and impress your guests with this sweet and colorful ultimate refreshment. This cantaloupe fruit bowl recipe that is as visually stunning as it is delectable. Let's journey through the creation of a natural fruit basket that not only captures the essence of summertime bliss but also serves as an beautiful and delicious centerpiece for any table.

Starting with a ripe and juicy cantaloupe, the art of transforming this humble melon into a fruit bowl is one of both simplicity and creativity. The key to this unique recipe lies in the selection of vibrant fruits that complement the cantaloupe's mild sweetness and create a harmonious blend of flavors and colors. Begin with a ripe cantaloupe and envision its transformation into a charming basket that carries nature's candy. With tender care, hollow out the melon and shape it to fashion a visually appealing bowl ready to cradle a medley of fruits. More on how to do this in the instructions below.

This recipe calls for cantaloupe, watermelon and strawberries but feel free to change out for any fruit of choice. You can add other berries like sapphire blueberries and ruby raspberries to offer a burst of tart fruit and a splash of color. Emerald kiwi slices and golden pineapple chunks bring a tropical zest to the bowl. Bunches of amethyst grapes will provide a juicy, bite-sized contrast.

The "Melon Fruit Bowl" stands as a testament to summer's bounty, an inspiring blend of flavors served in nature's own vessel. Assemble this delight while adding every scoop into the ripe, hollowed-out cantaloupe is a step closer to creating the perfect culinary treasure trove. With each addition of mixed fruits like strawberries, pineapple, and blueberries, the bowl evolves into tantalizing tastes everyone will be sure to love.

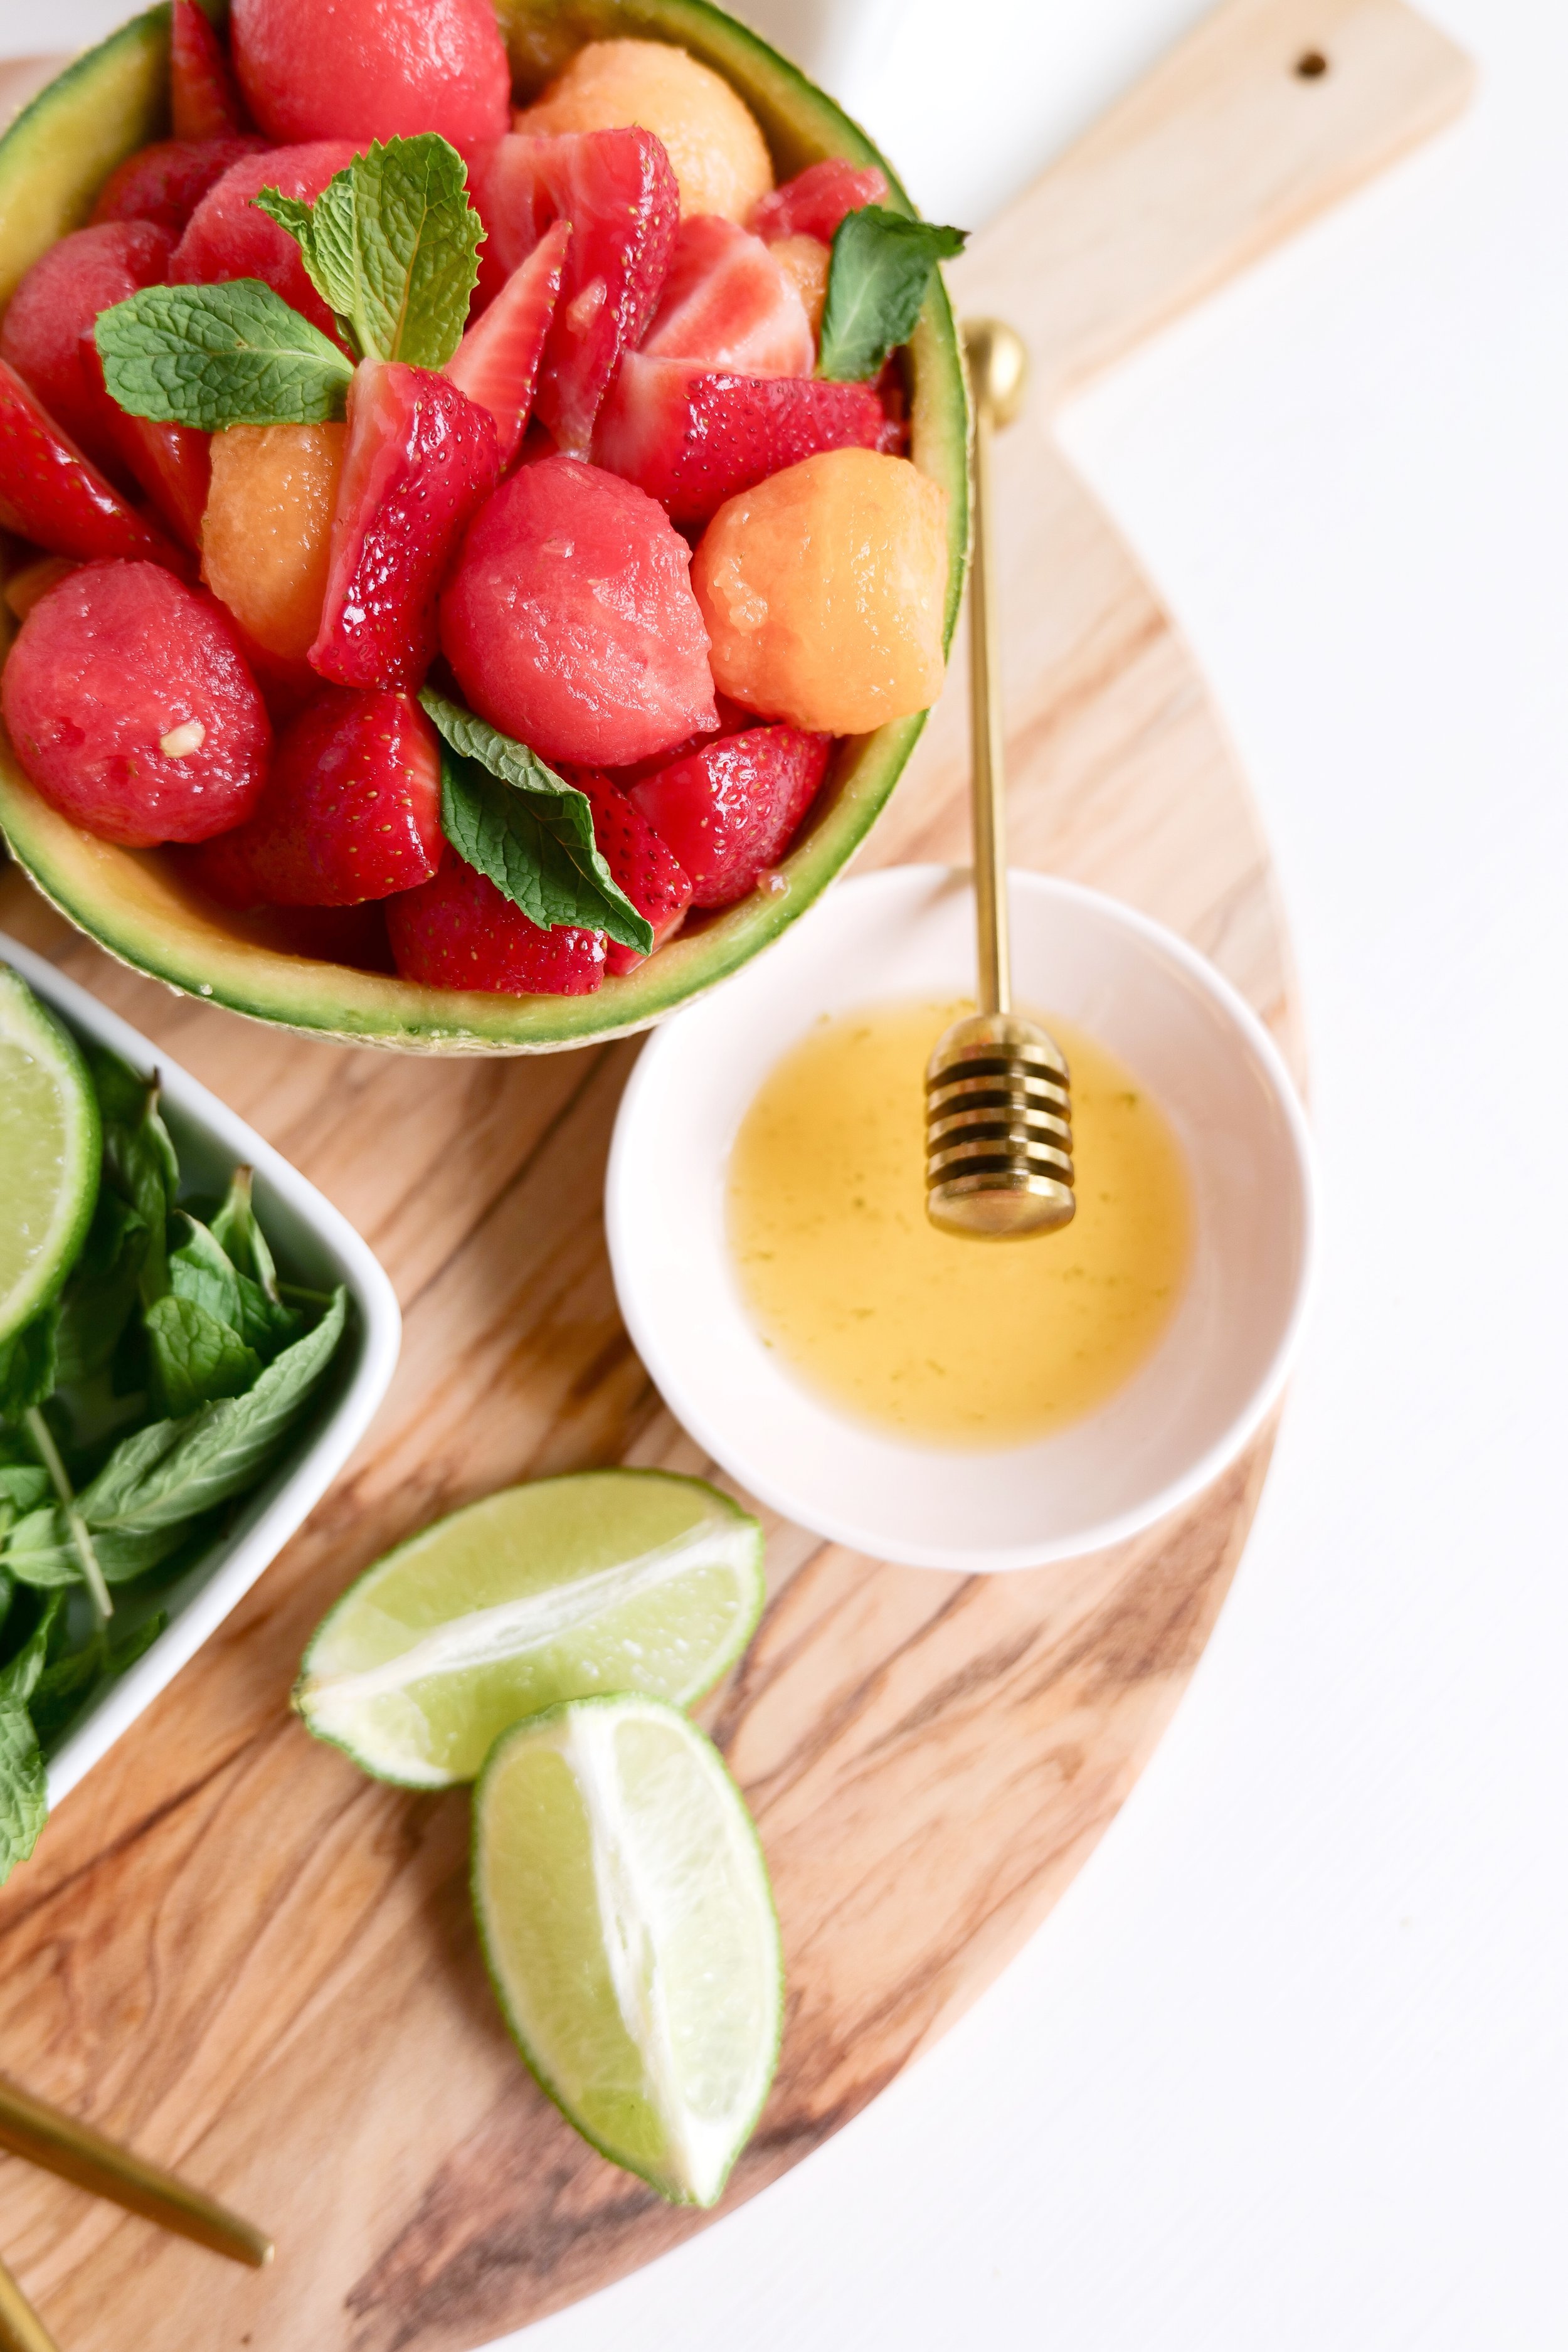
The citrusy lime or lemon dressing elevates the freshness factor and give an added hint of zest to the tart fruit. A light cascade of natural honey for sweetness or a sprig of mint to enhance the flavor profiles nicely. These elements not only add piquancy but also make for a nourishing snack or dessert that boasts both healthful benefits and palate-pleasing delights. Imagine the joy of serving such a simple, yet impressive recipe at your next outdoor feast. The presentation of the fruit mixture in the cantaloupe brings aesthetic joy and a promise of refreshing indulgence, making any occasion, from a casual picnic to an elegant soiree, an affair to remember.

Breakfast Cantaloupe Bowl

Envision beginning the day with an invigorating and nutritious Breakfast Cantaloupe Bowl. It's a harmonious concert of ripe cantaloupe, berries, bananas, and grapes that artfully marries eye-catching allure with a bevy of health benefits: Your morning routine is both simplified and elevated as the cantaloupe bowl lends itself to an endless array of customizations. Wanting to add some protein & grains to this dish for perfectly balanced nutrition to start your day? Leave room in the bowl to add some Greek yogurt & granola to top it off! This is truly a delicious meal and a great way to take fruit to the next level next breakfast! If you have any left over fruit from cutting be sure to add to a plastic bag or glass container and freeze it makes a great parenting hack for quick smoothies and fruit never goes to waste.

The breakfast cantaloupe bowl stands as a promise of a delightful, nutritious start to the day that bursts with the essence of freshness and fulfills your aspirations of a balanced lifestyle. Whether enjoying as an appetizing starter, an artistic centerpiece, or a health-conscious breakfast, this is one recipe that transcends the ordinary and brings joy to any culinary experience.

Ingredients

1 medium size cantaloupe

1 small watermelon

2 cups strawberry

1/2 cup honey

Juice of 1 lime

1 tablespoon olive oil

1/2 teaspoon lime zest

2 tablespoons Chopped mint, optional

Directions

1. Cut cantaloupe in half. Scoop the inside of the cantaloupe out with a melon baller or cookie scooper. Add to a bowl. Do the same with the watermelon.

2. Cut strawberry into bite size pieces and add to bowl with melons. If you want to add in mint you can add chopped mint to this bowl now.

3. In a mason jar add honey, lime juice, lime zest and olive oil. Shake to blend together. Pour over top of fruit and mix together.

4. Add fruit back into cantaloupe shell that you cleaned out, add a sprig of mint and serve!

Other Recipes Using Fruit:

Delightful Almond Grapefruit Ice Cream Recipe

Fruit & Goat Cheese Bruschetta

Discover the Bliss of Homemade Acai Bowls

Indulge in the Sweet & Salty Deliciousness of Peach Baked Brie

How to Make the Perfect Pear and Pomegranate Arugula Salad

An Irresistible Treat: The Delicious Berry Custard Puff Pastry Tart

The Perfect Peach Cobbler Recipe

Welcome To Summer Charcuterie Board for Your Next Gathering

A Refreshing and Delicious Melon Burrata Salad Recipe

Delicious, Nutritious Pear & Walnut Salad with Honey Mustard Dressing

Shaved Brussel Sprout Salad with Apples, Goat Cheese & Candied Pecans

Save This Recipe

Whether you're planning ahead for a special occasion or adding a new favorite to your recipe collection, I've included a printable recipe card below so it's easy to save, print, and share with the people you love.

The Perfect Recipe for an Authentic Chicago-Style Dog

If you’ve ever had a true Chicago-style hot dog, you know it’s not just a hot dog—it’s an experience. This authentic Chicago-style hot dog recipe is loaded with bold, fresh toppings and delivers that iconic “dragged through the garden” flavor in every bite.

Whether you’re recreating a classic street food favorite or just looking for an easy summer recipe, this is the best way to make a Chicago-style hot dog at home.

Chicago-style hot dogs have been a beloved delicacy of the Windy City since all the way back to the year 1893! Whether you’re a local, a tourist, or an aspiring home chef, this classic recipe is sure to take your taste buds on an unforgettable journey. Please do yourself a favor if you aren't from the Chicago area and try your next hot dog in this classic style. I promise you even if you think you aren't a fan of the individual ingredients that they come together perfectly for an amazing taste. From the unmistakable flavor of the all-beef hot dog to its signature toppings, a Chicago-style hot dog is a truly unique culinary experience of flavorful mastery in your mouth. In this post, I’ll walk you through the step-by-step instructions for creating your own delicious Chicago-style hot dog. Get ready to enjoy a truly unforgettable lunch or dinner!

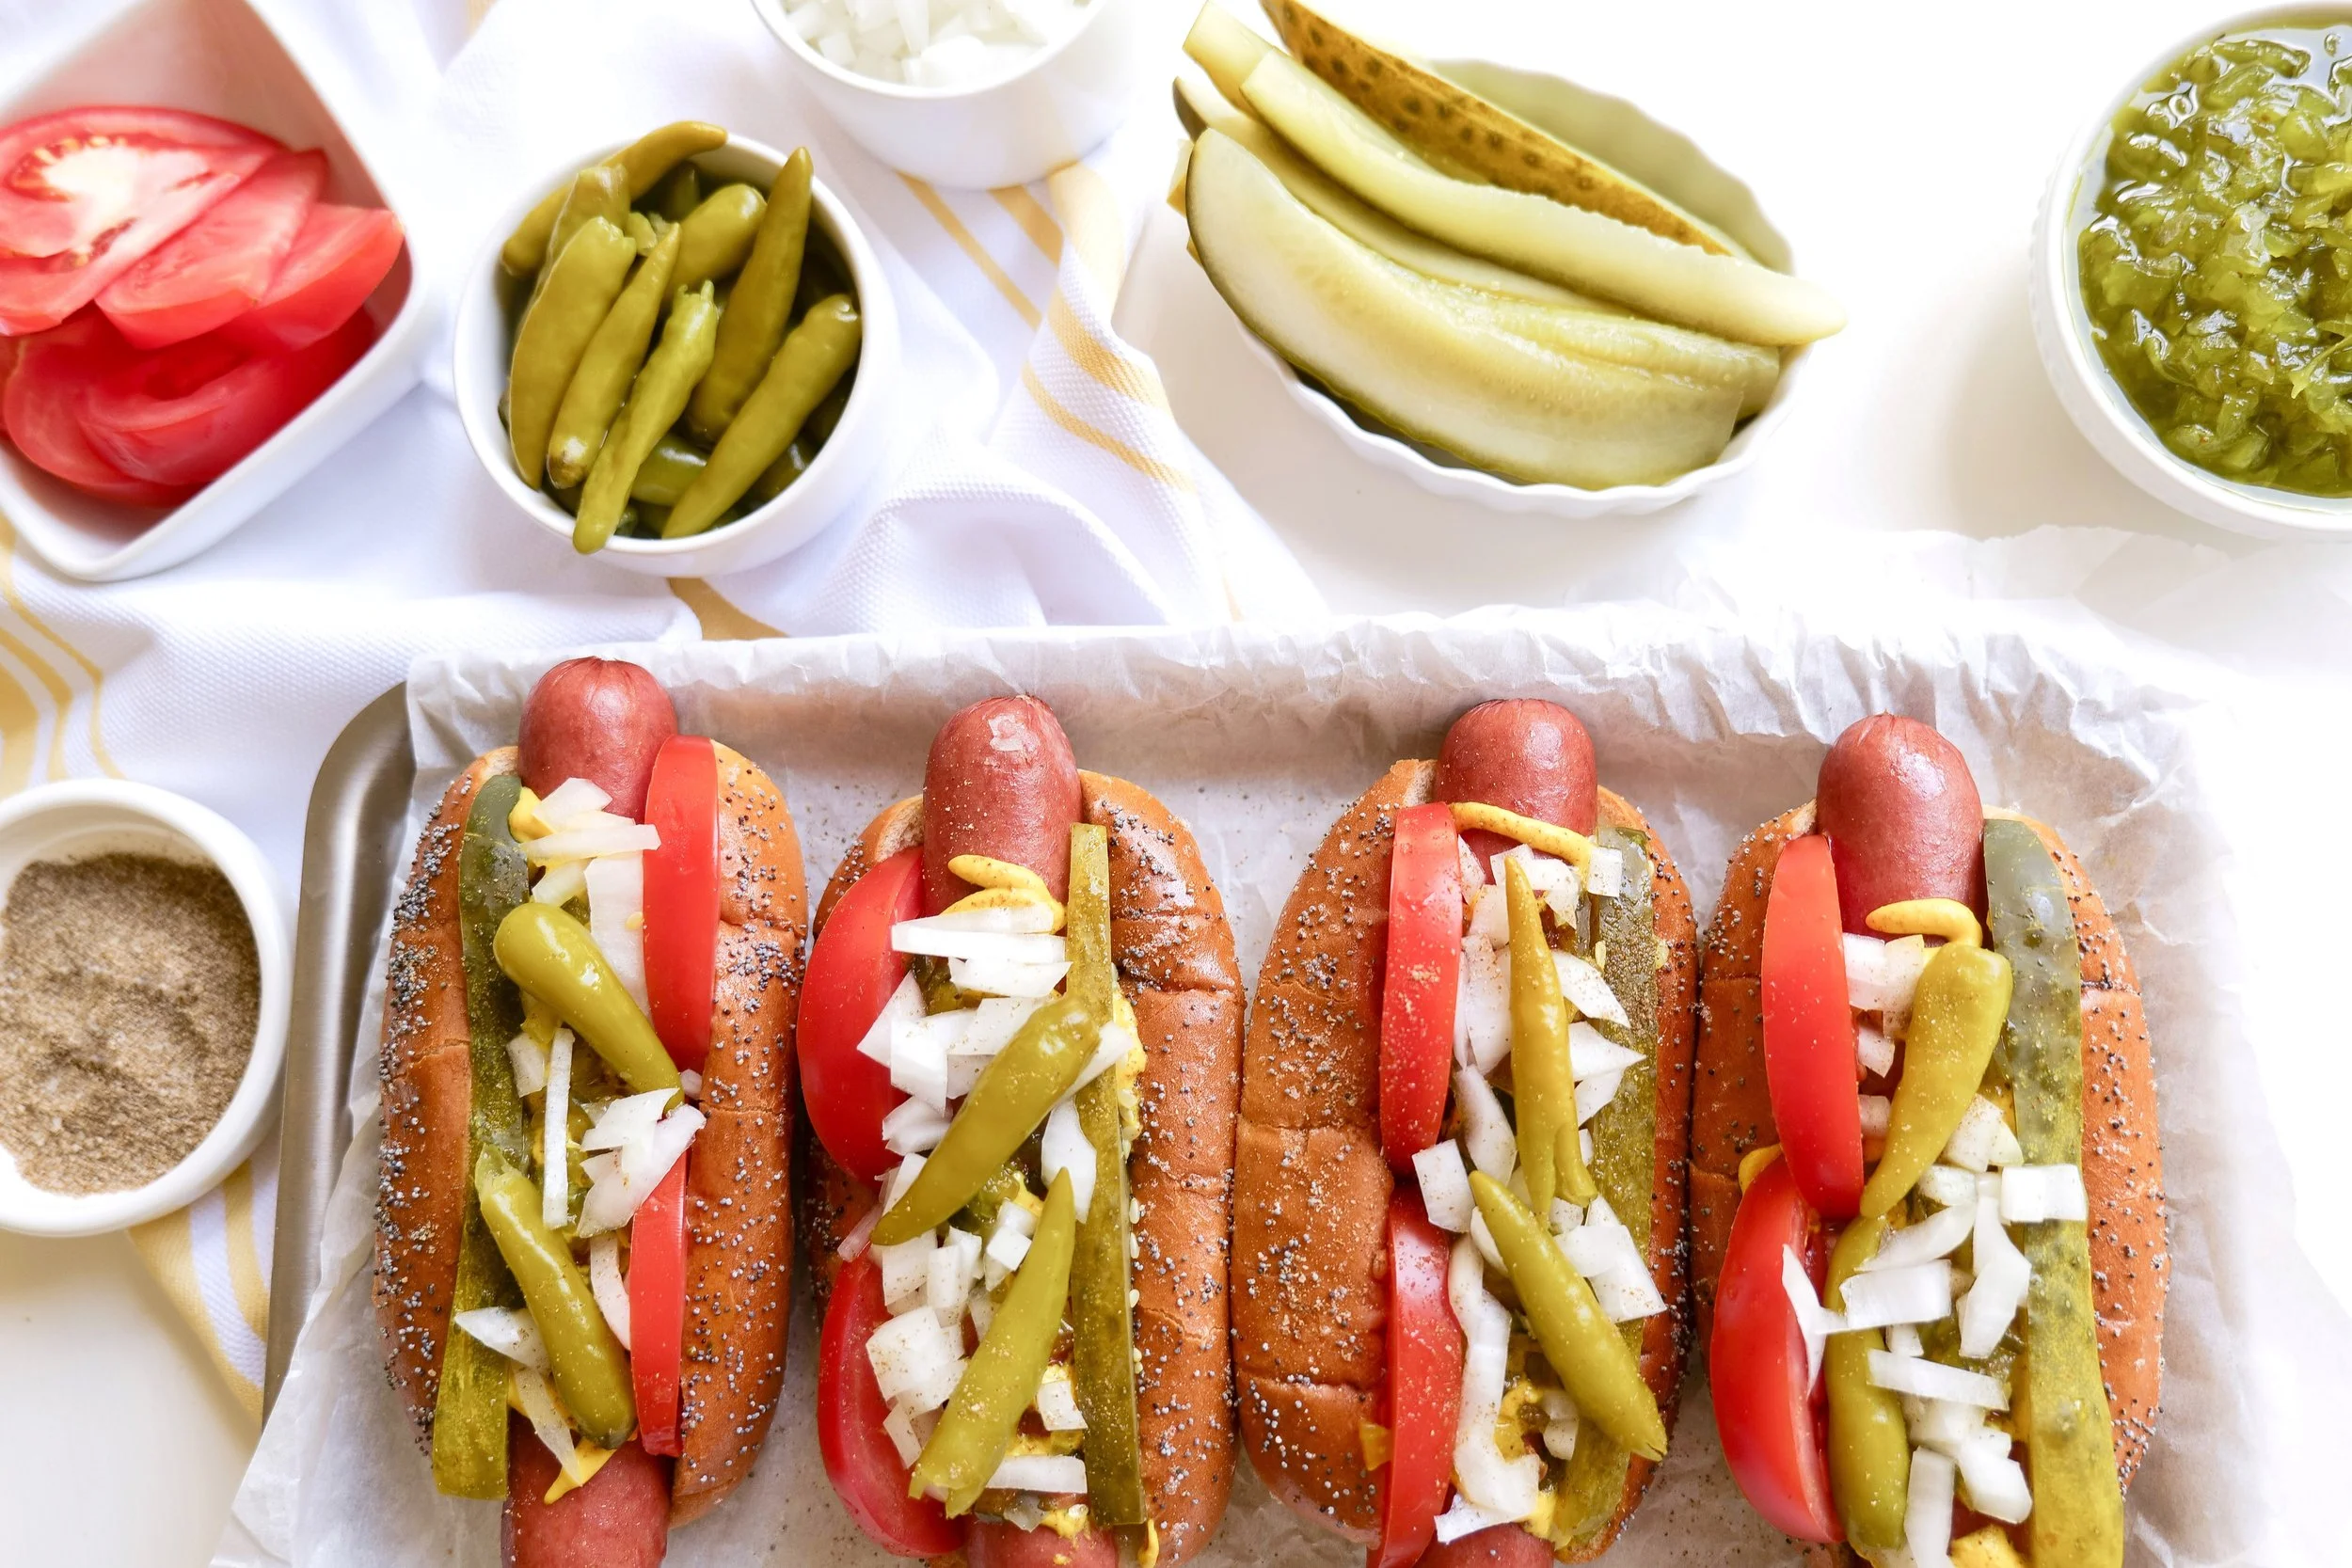
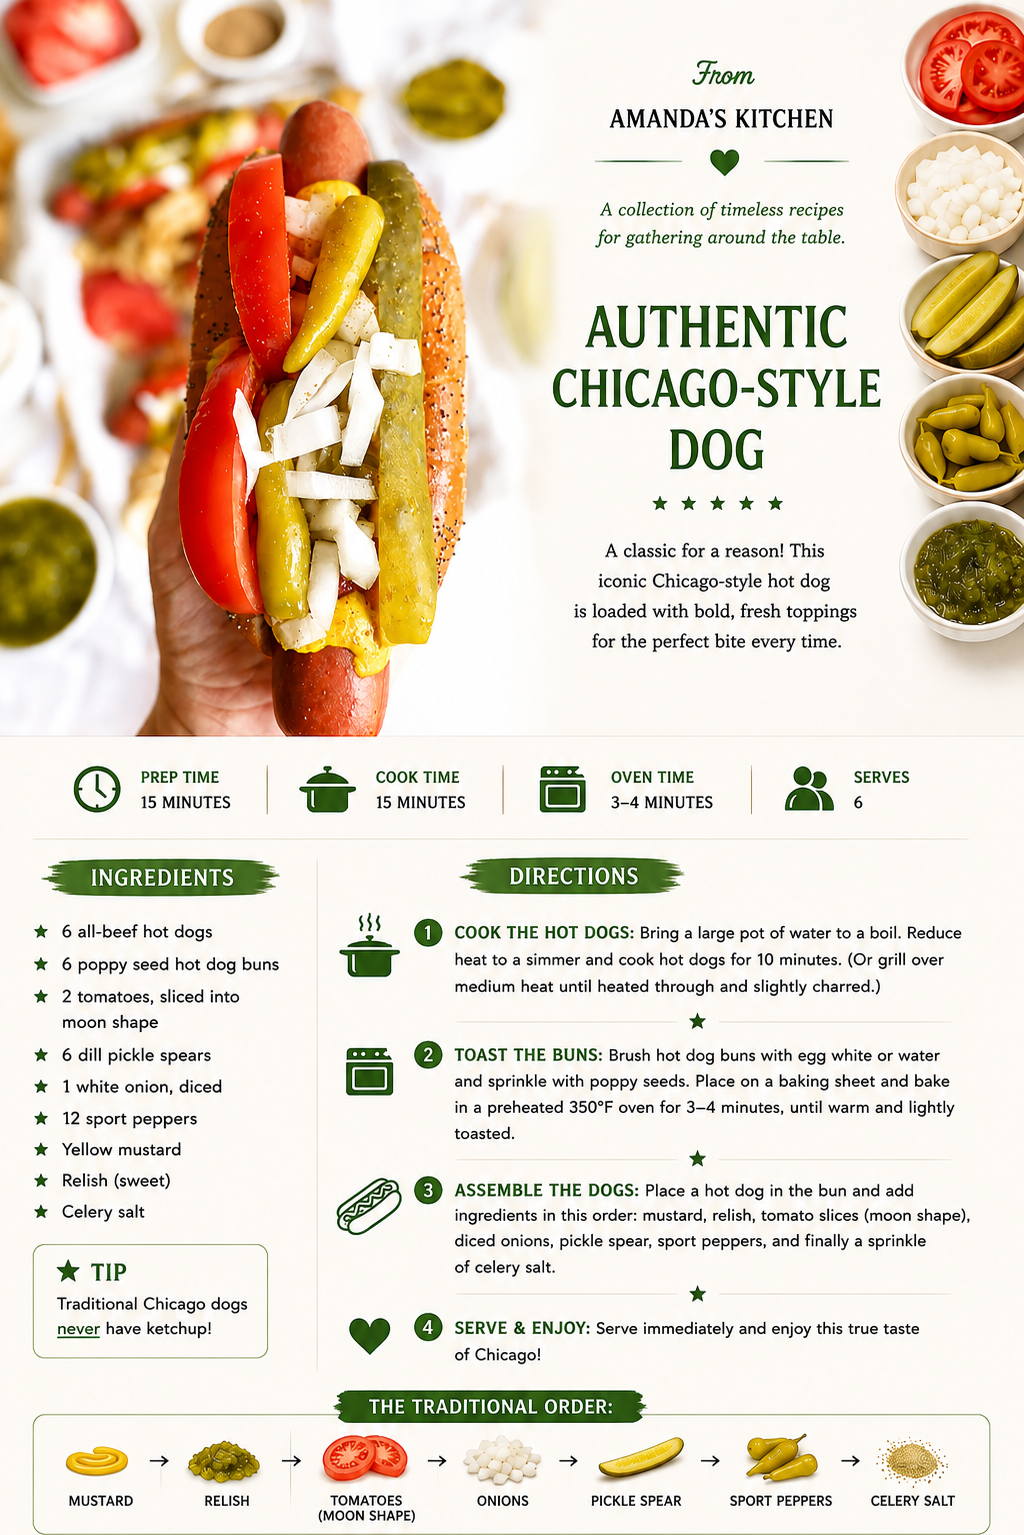
Traditionally, it includes:

  • Yellow mustard

  • Bright green sweet relish

  • Chopped white onions

  • Tomato wedges

  • A dill pickle spear

  • Sport peppers

  • Celery salt

And one important rule:
👉 No ketchup. Ever.

This combination creates a balance of sweet, salty, tangy, and spicy flavors that make it completely unique.

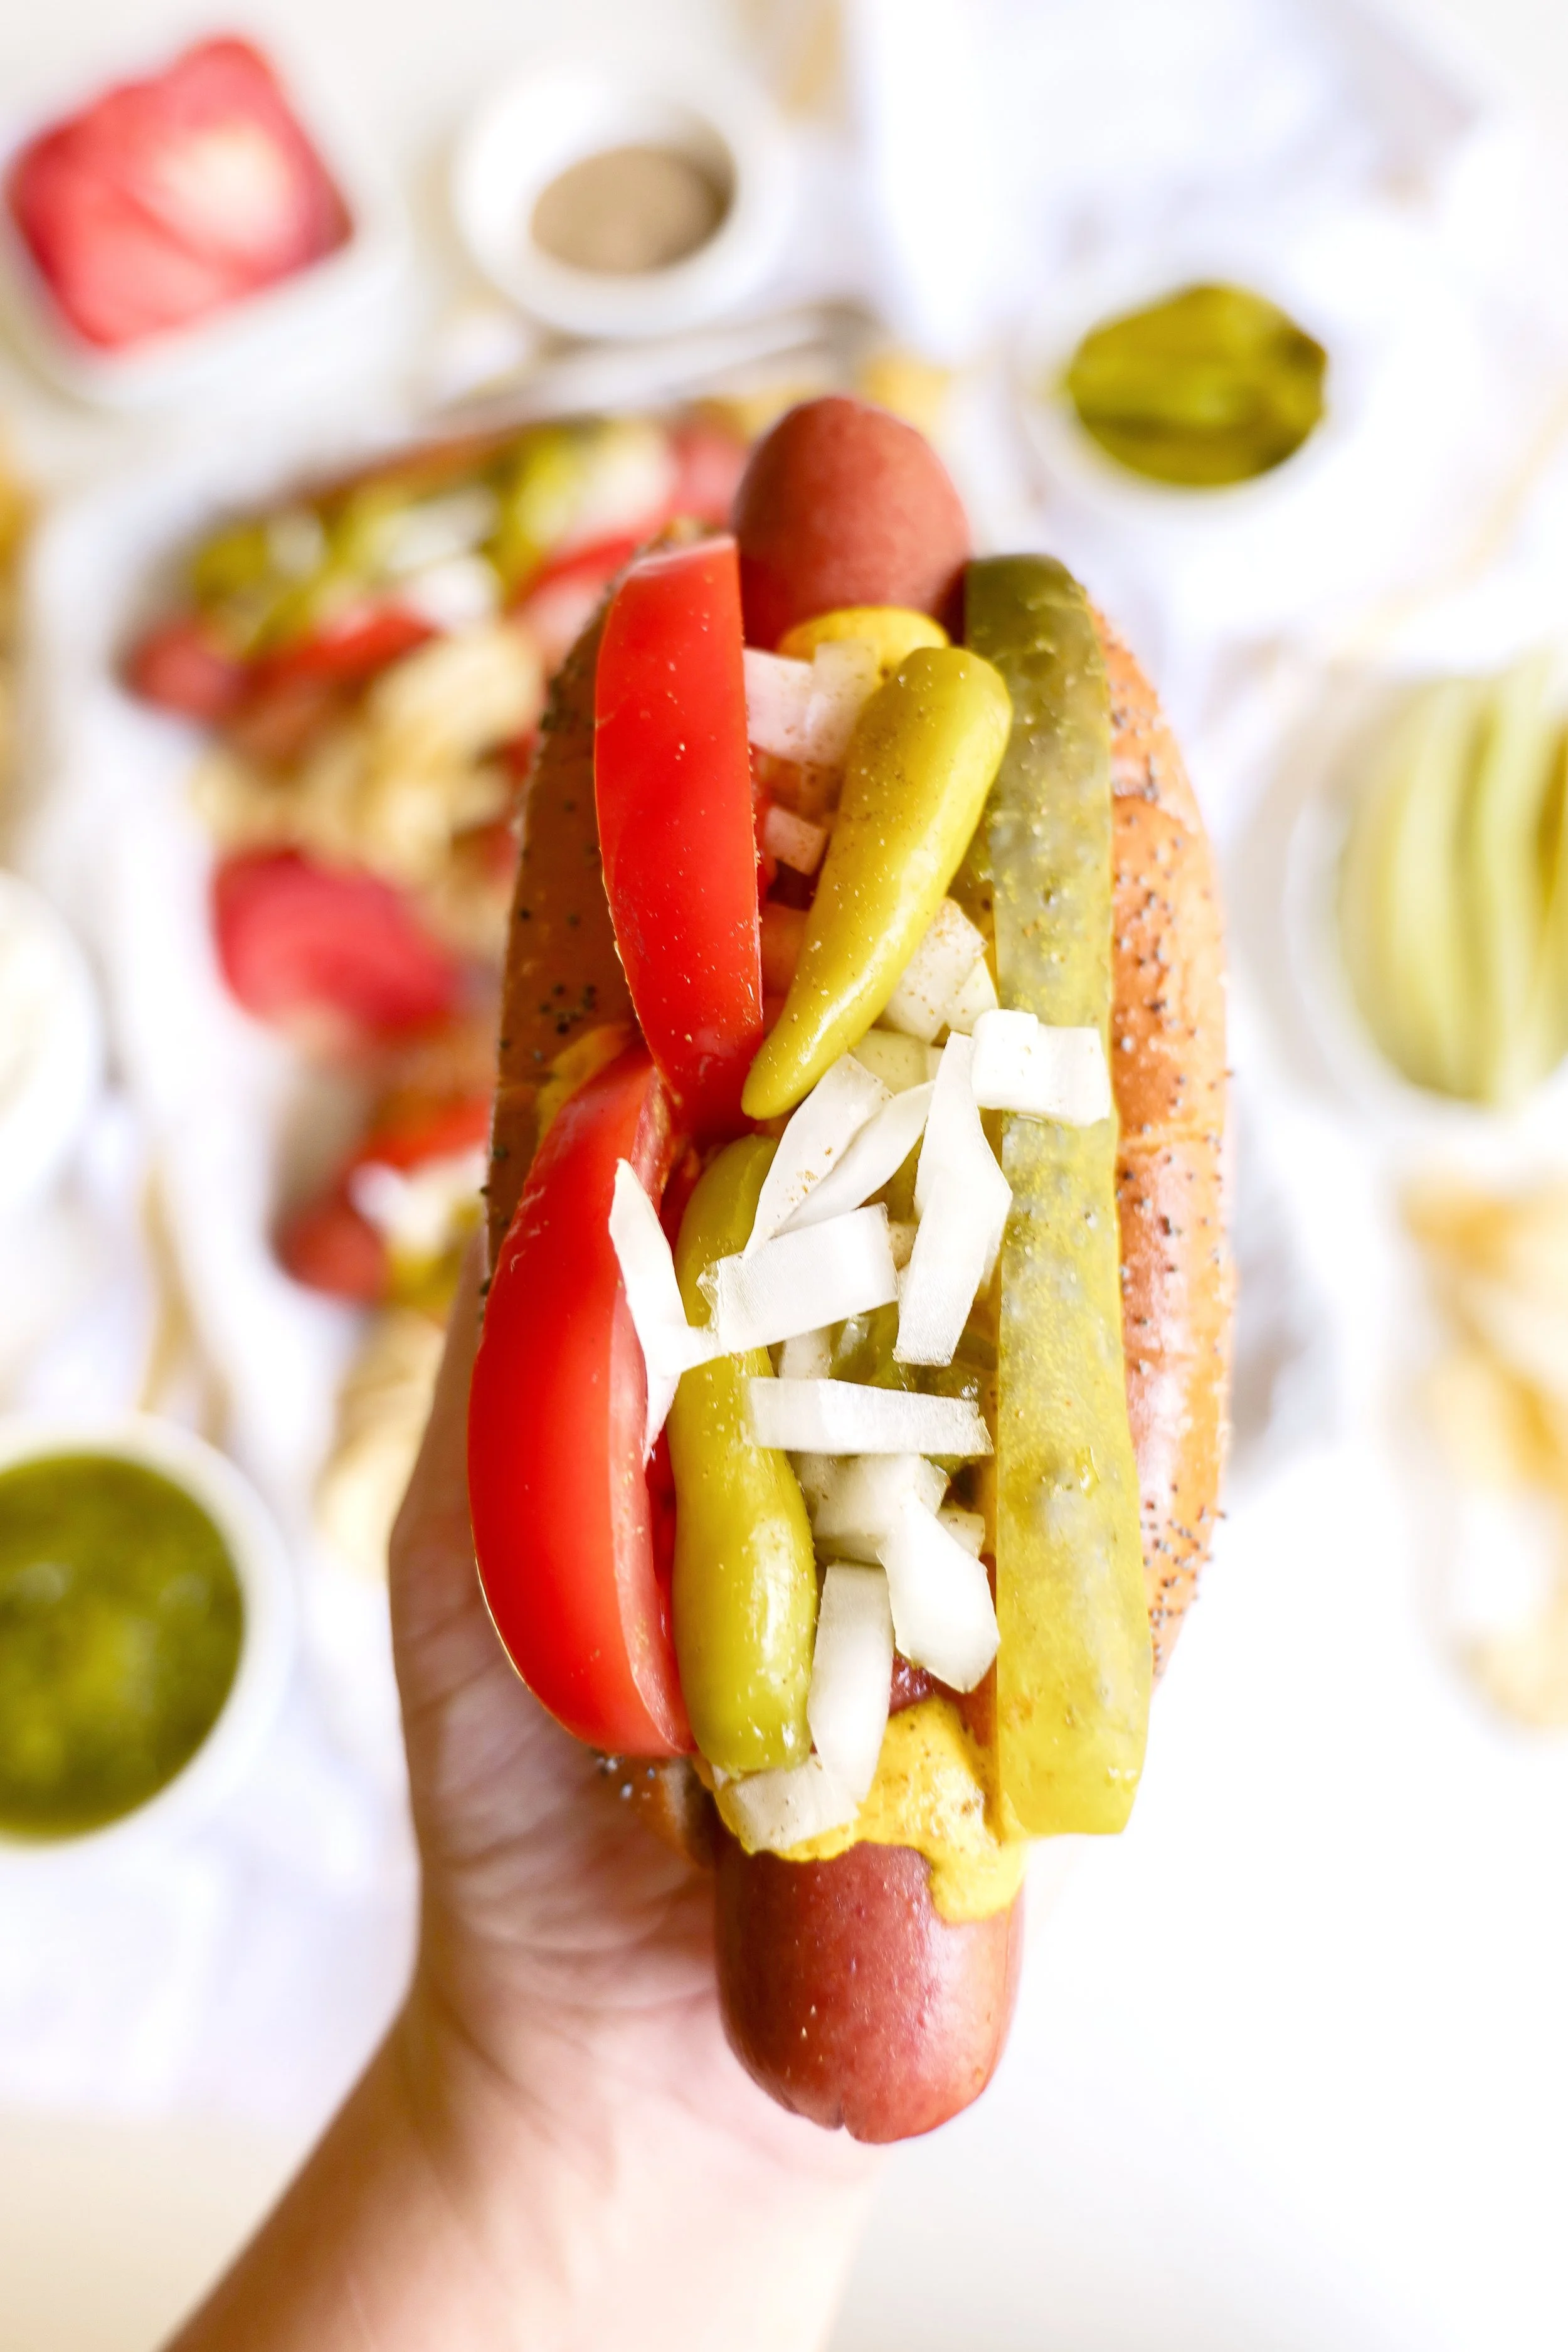
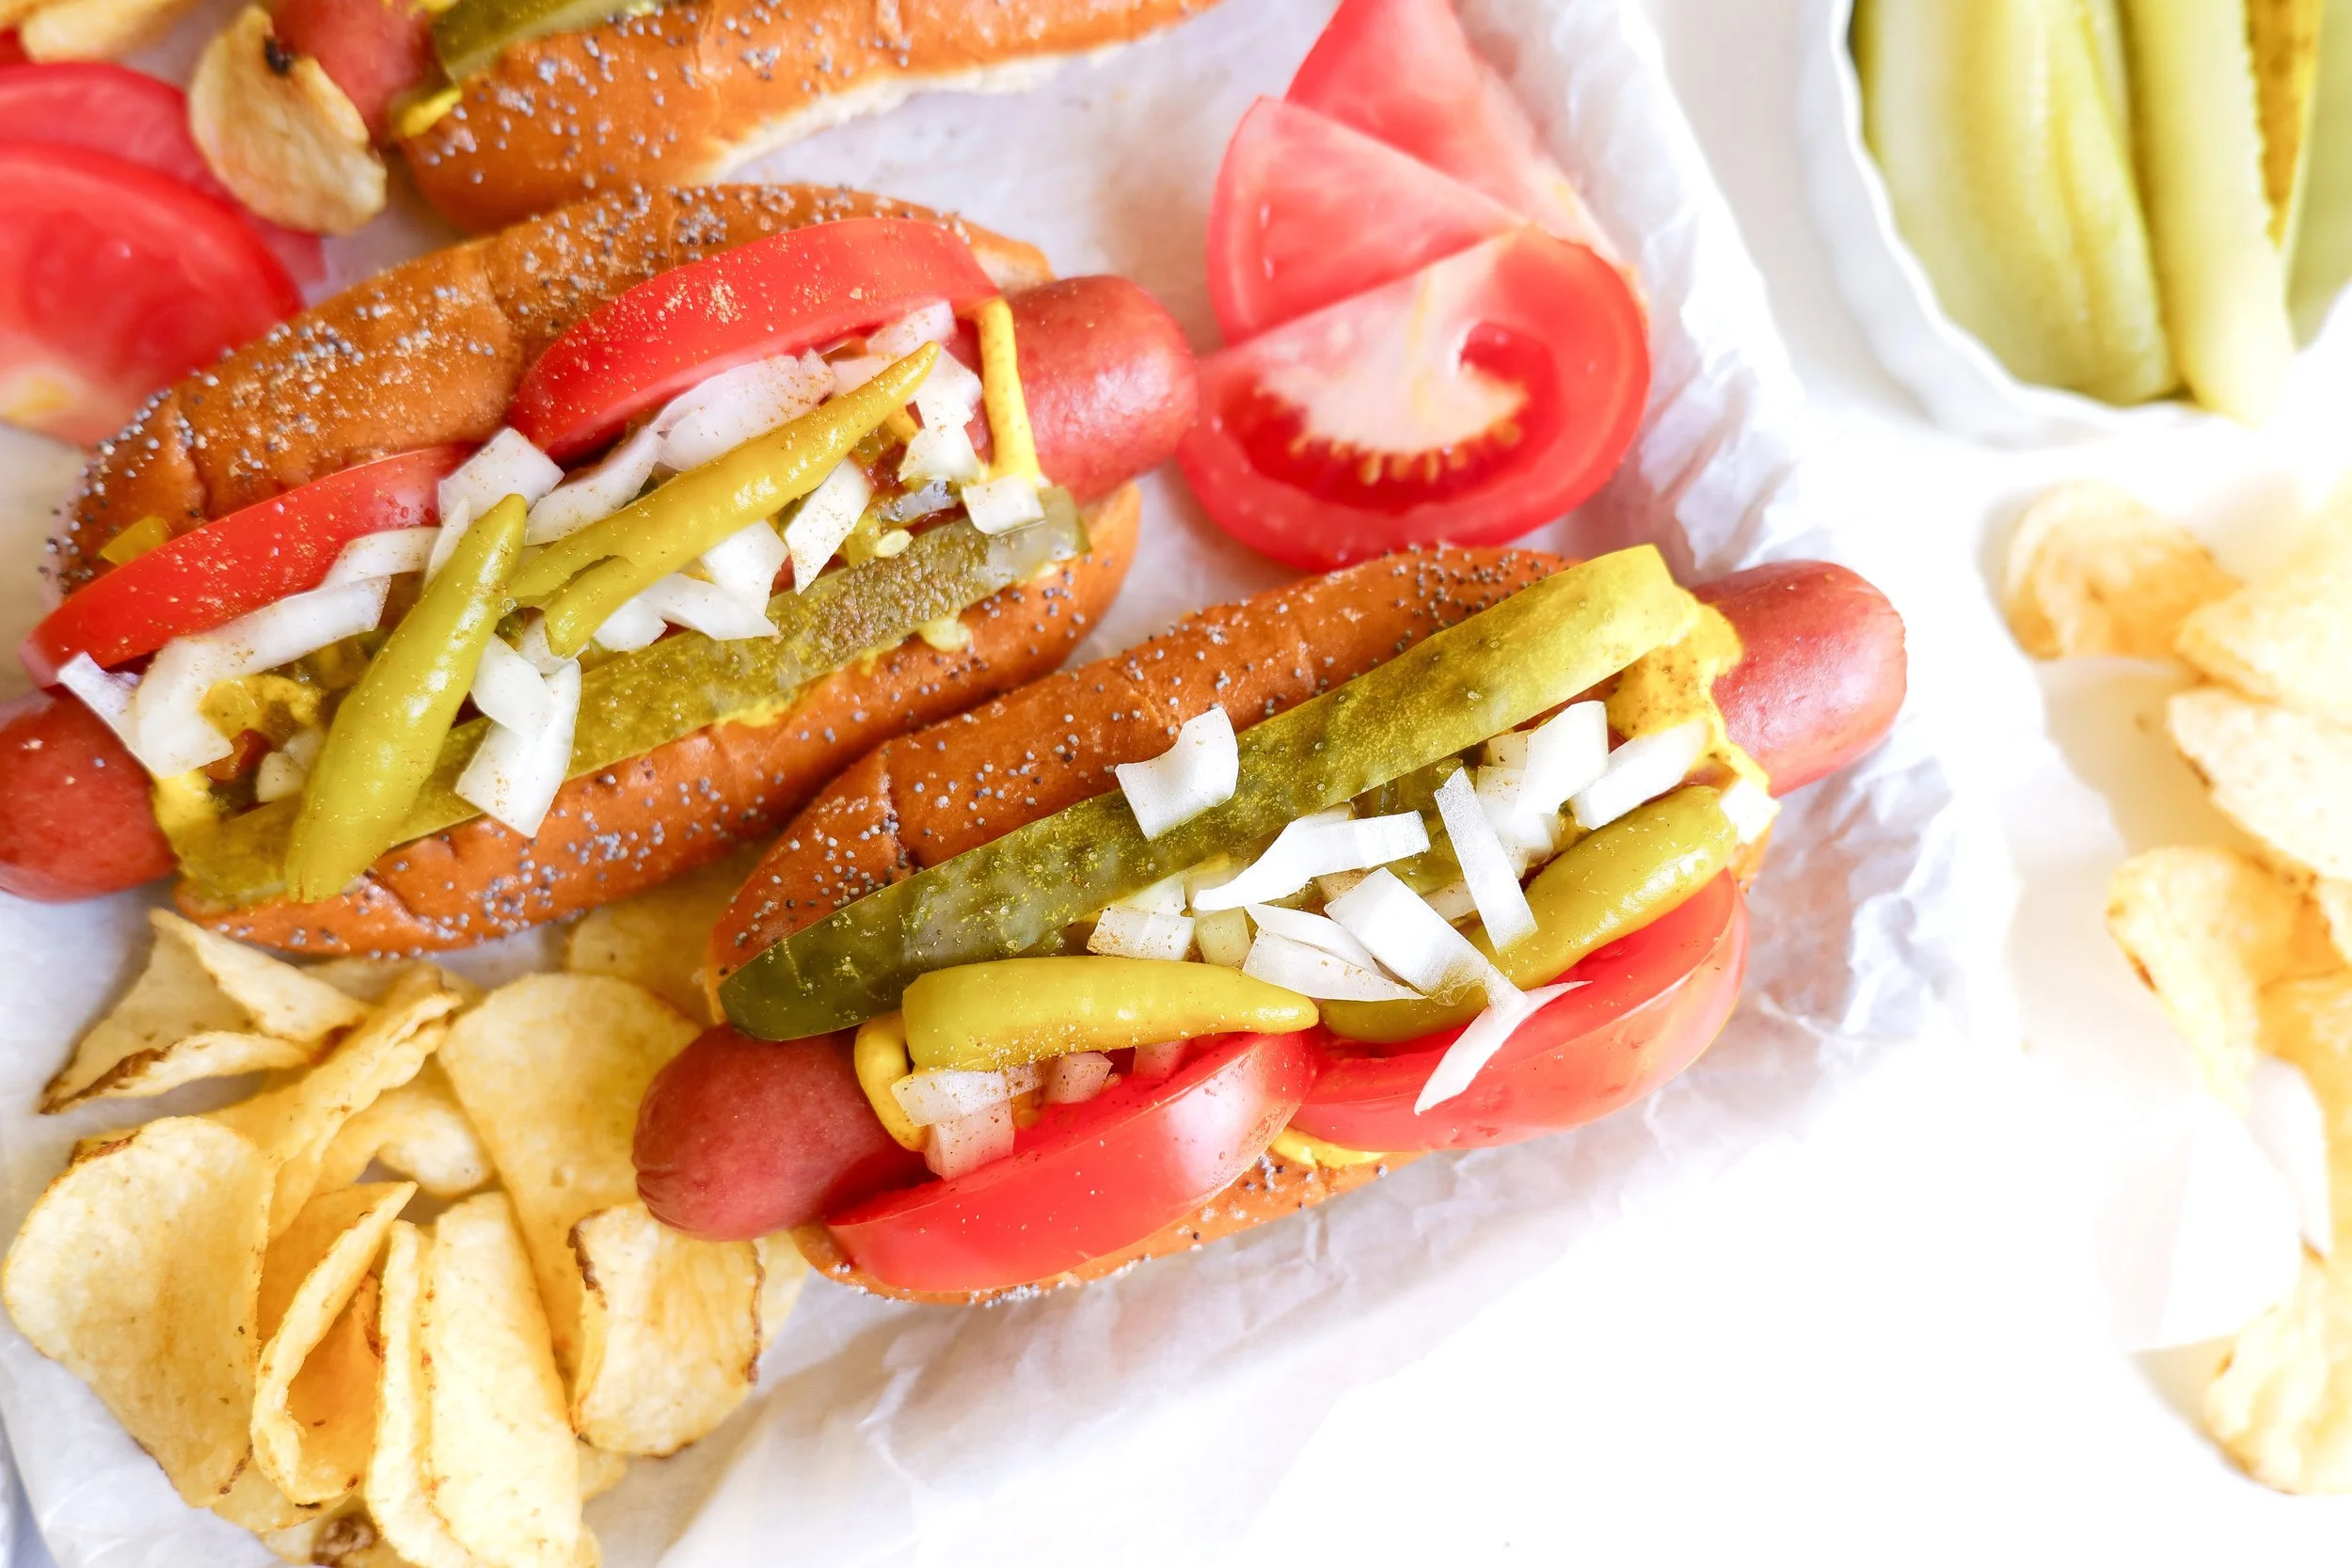
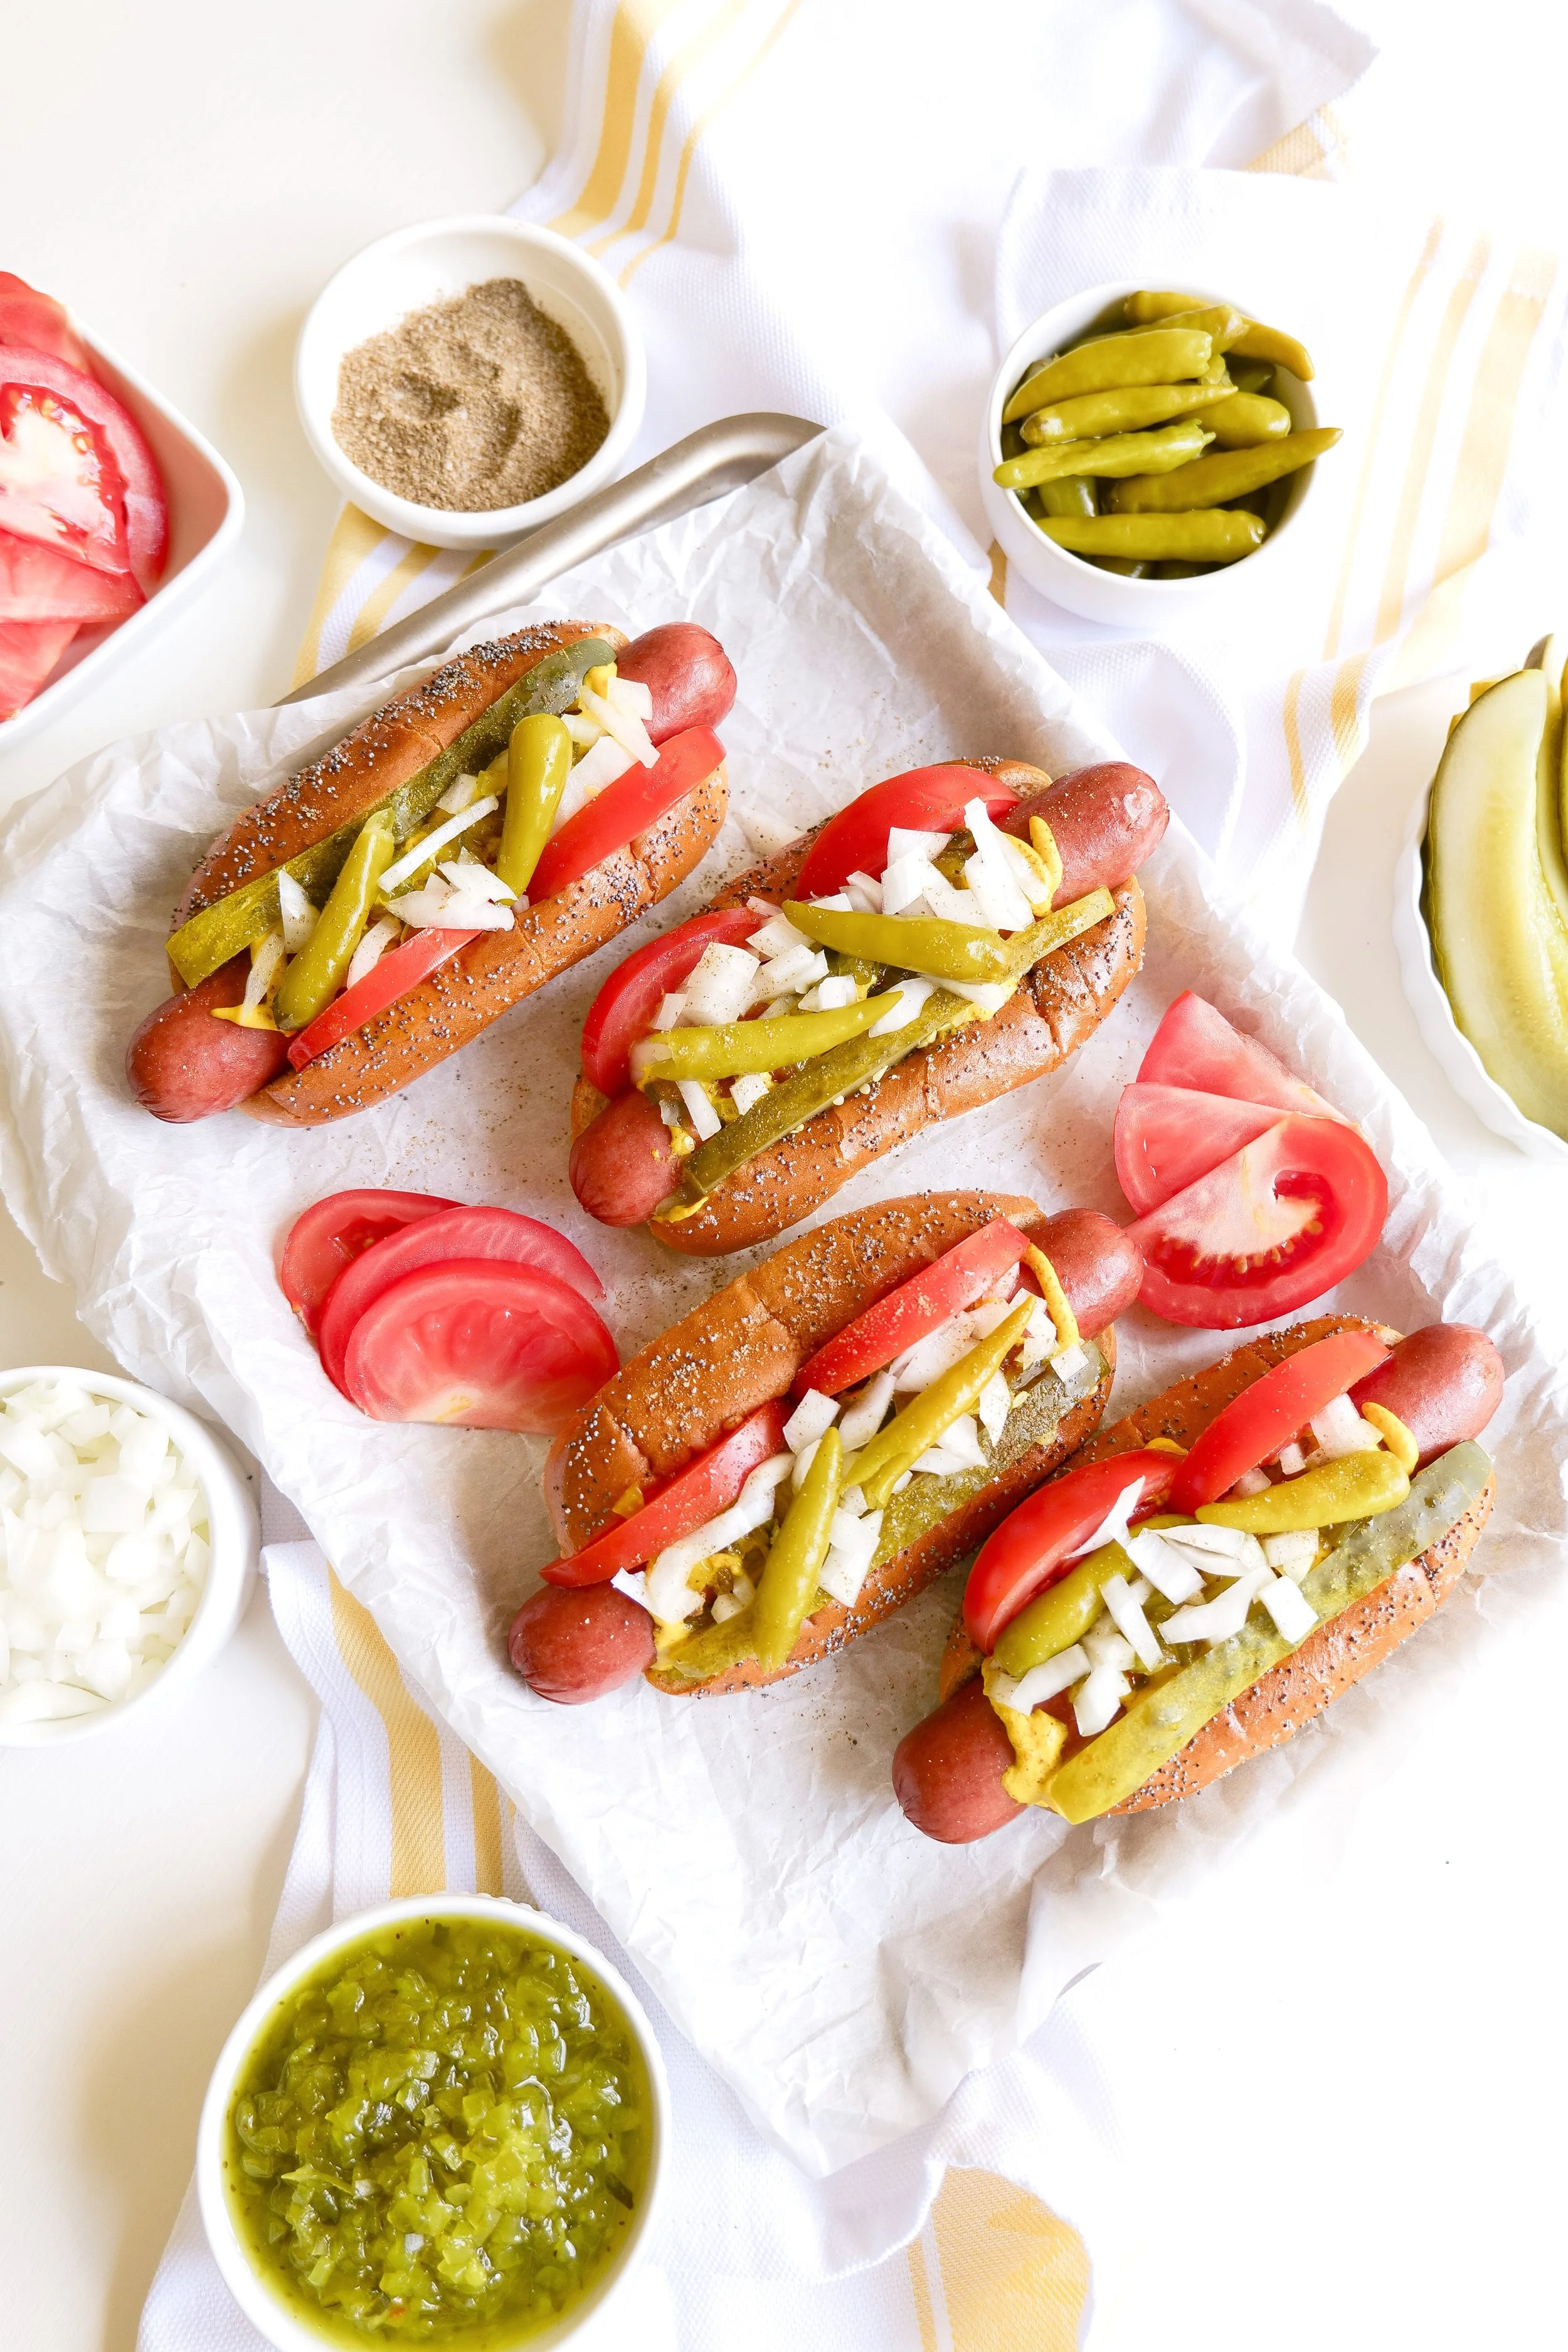
Authentic Chicago style hot dog topped with pickles, tomatoes, relish, peppers, onions, mustard, and celery salt.
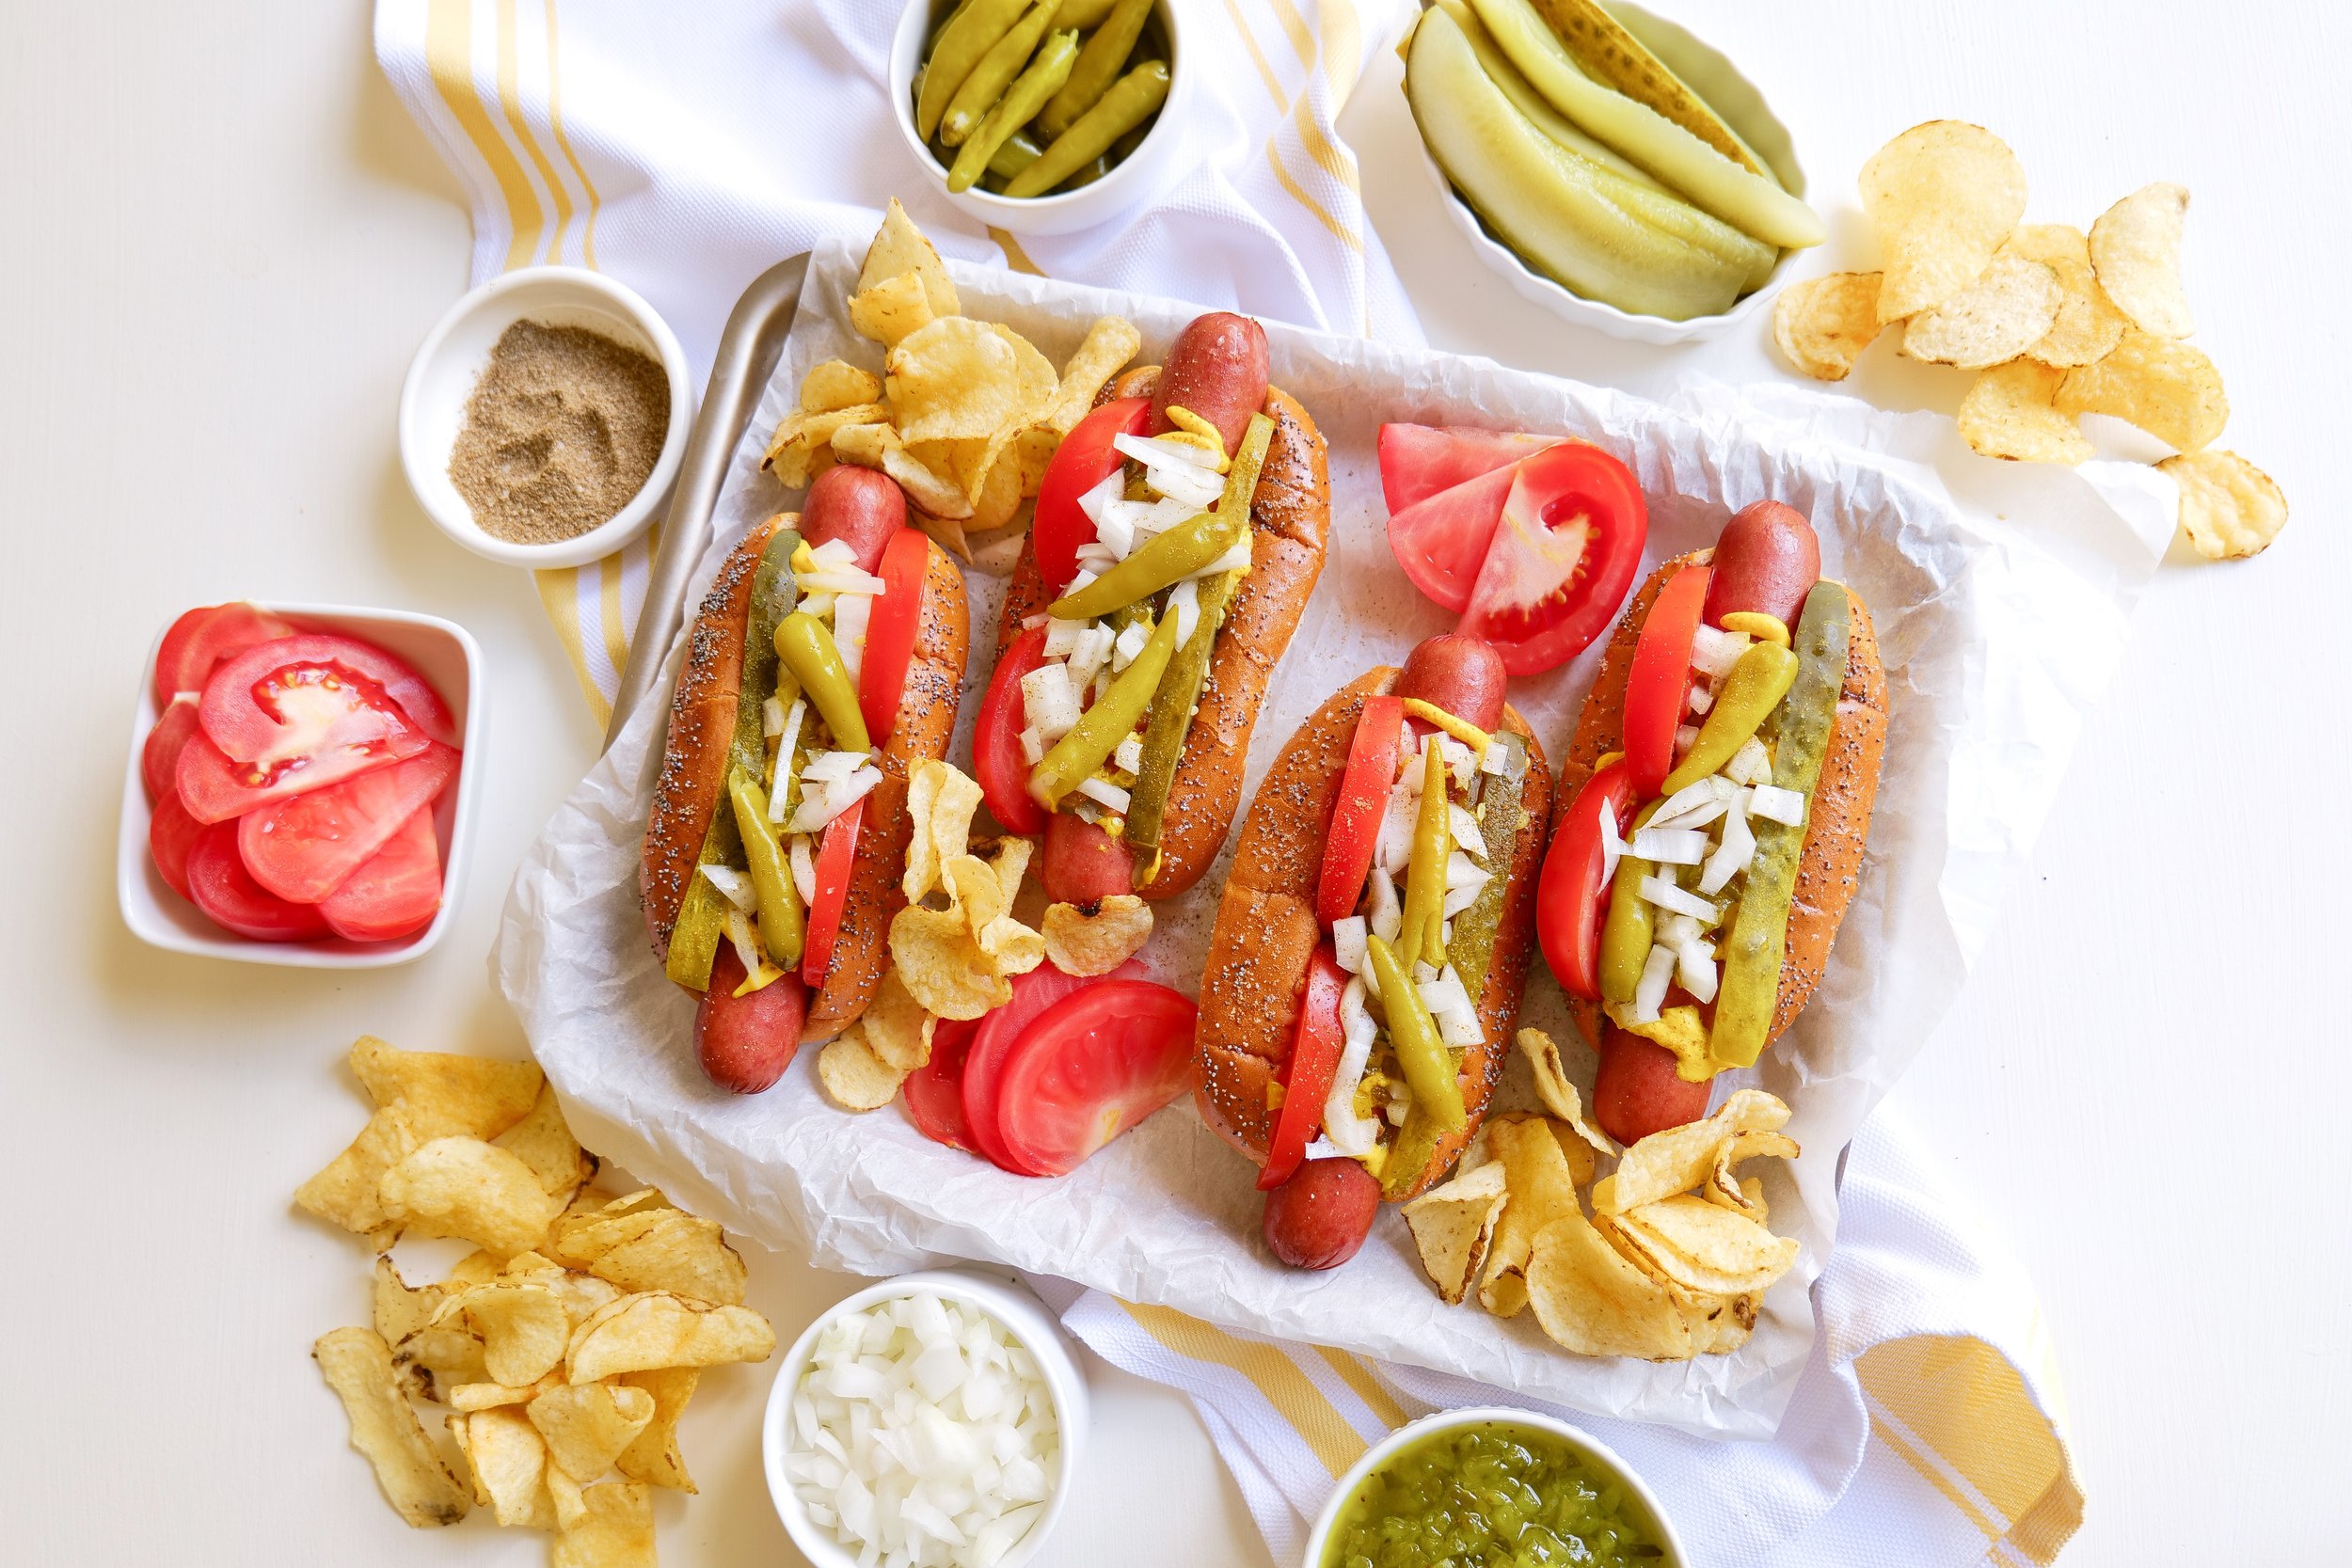
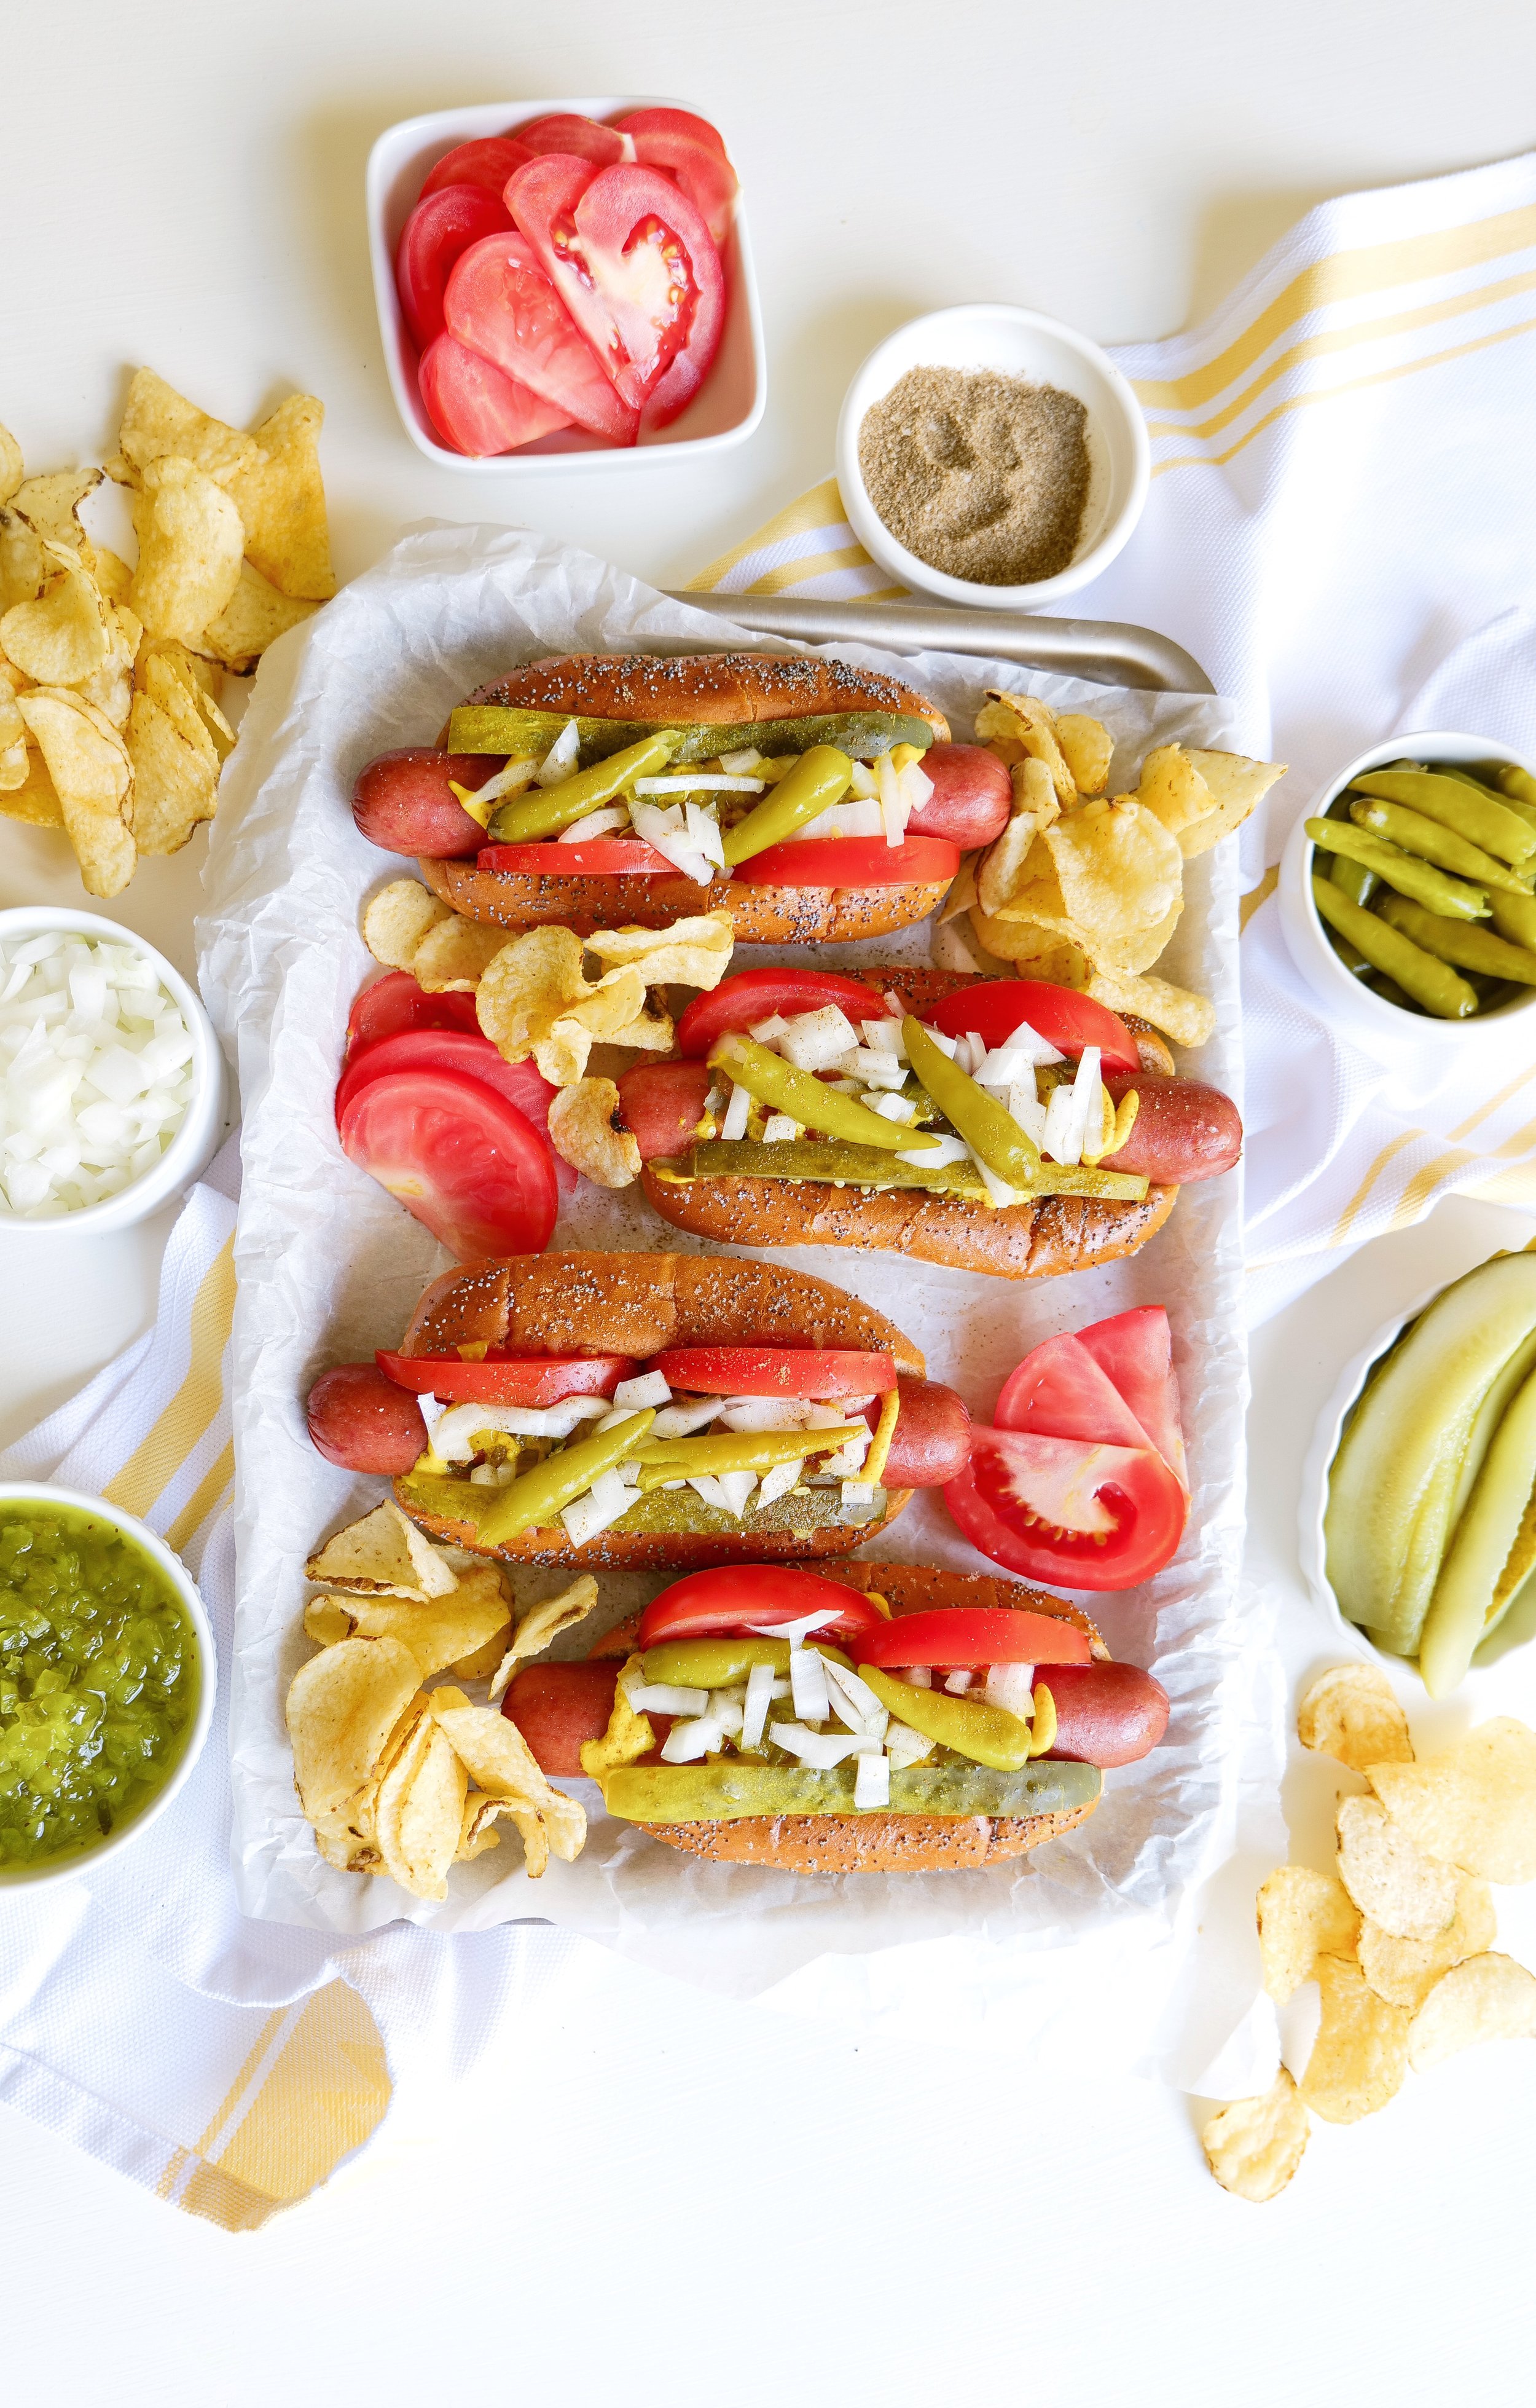
Chicago style hot dogs served for a summer cookout with classic toppings and chips.
Close-up of an authentic Chicago dog on a poppy seed bun with classic toppings.
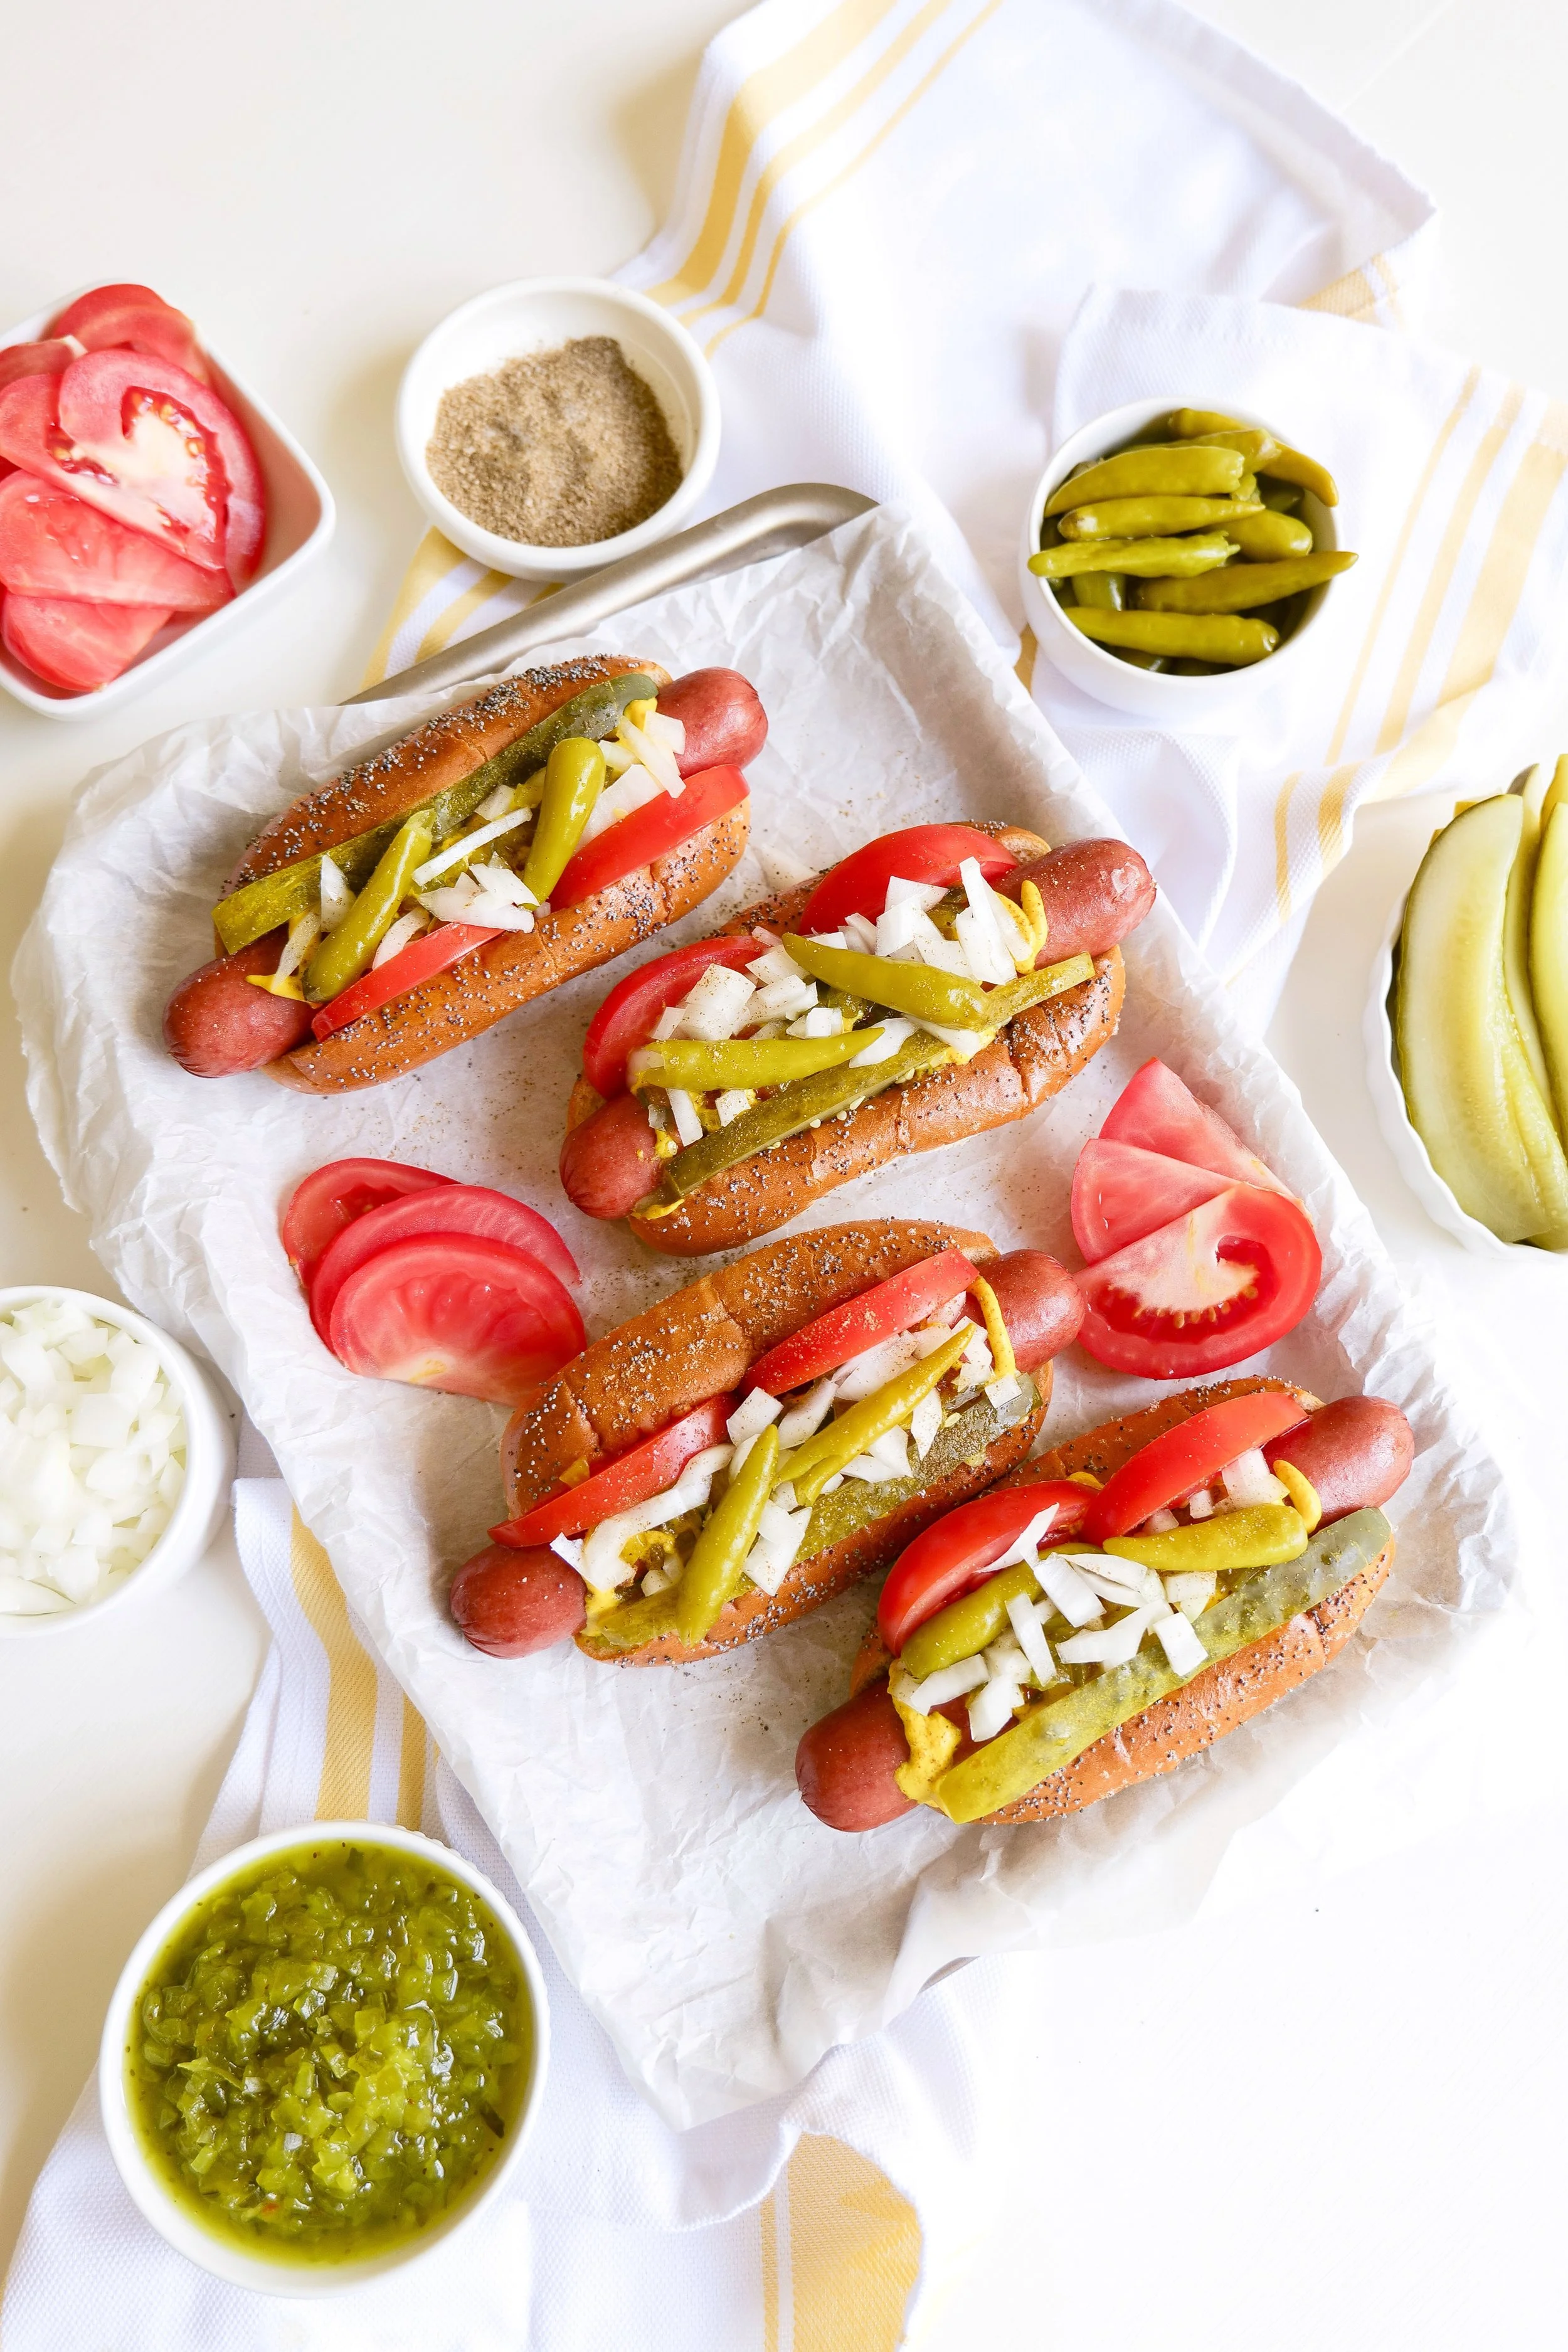
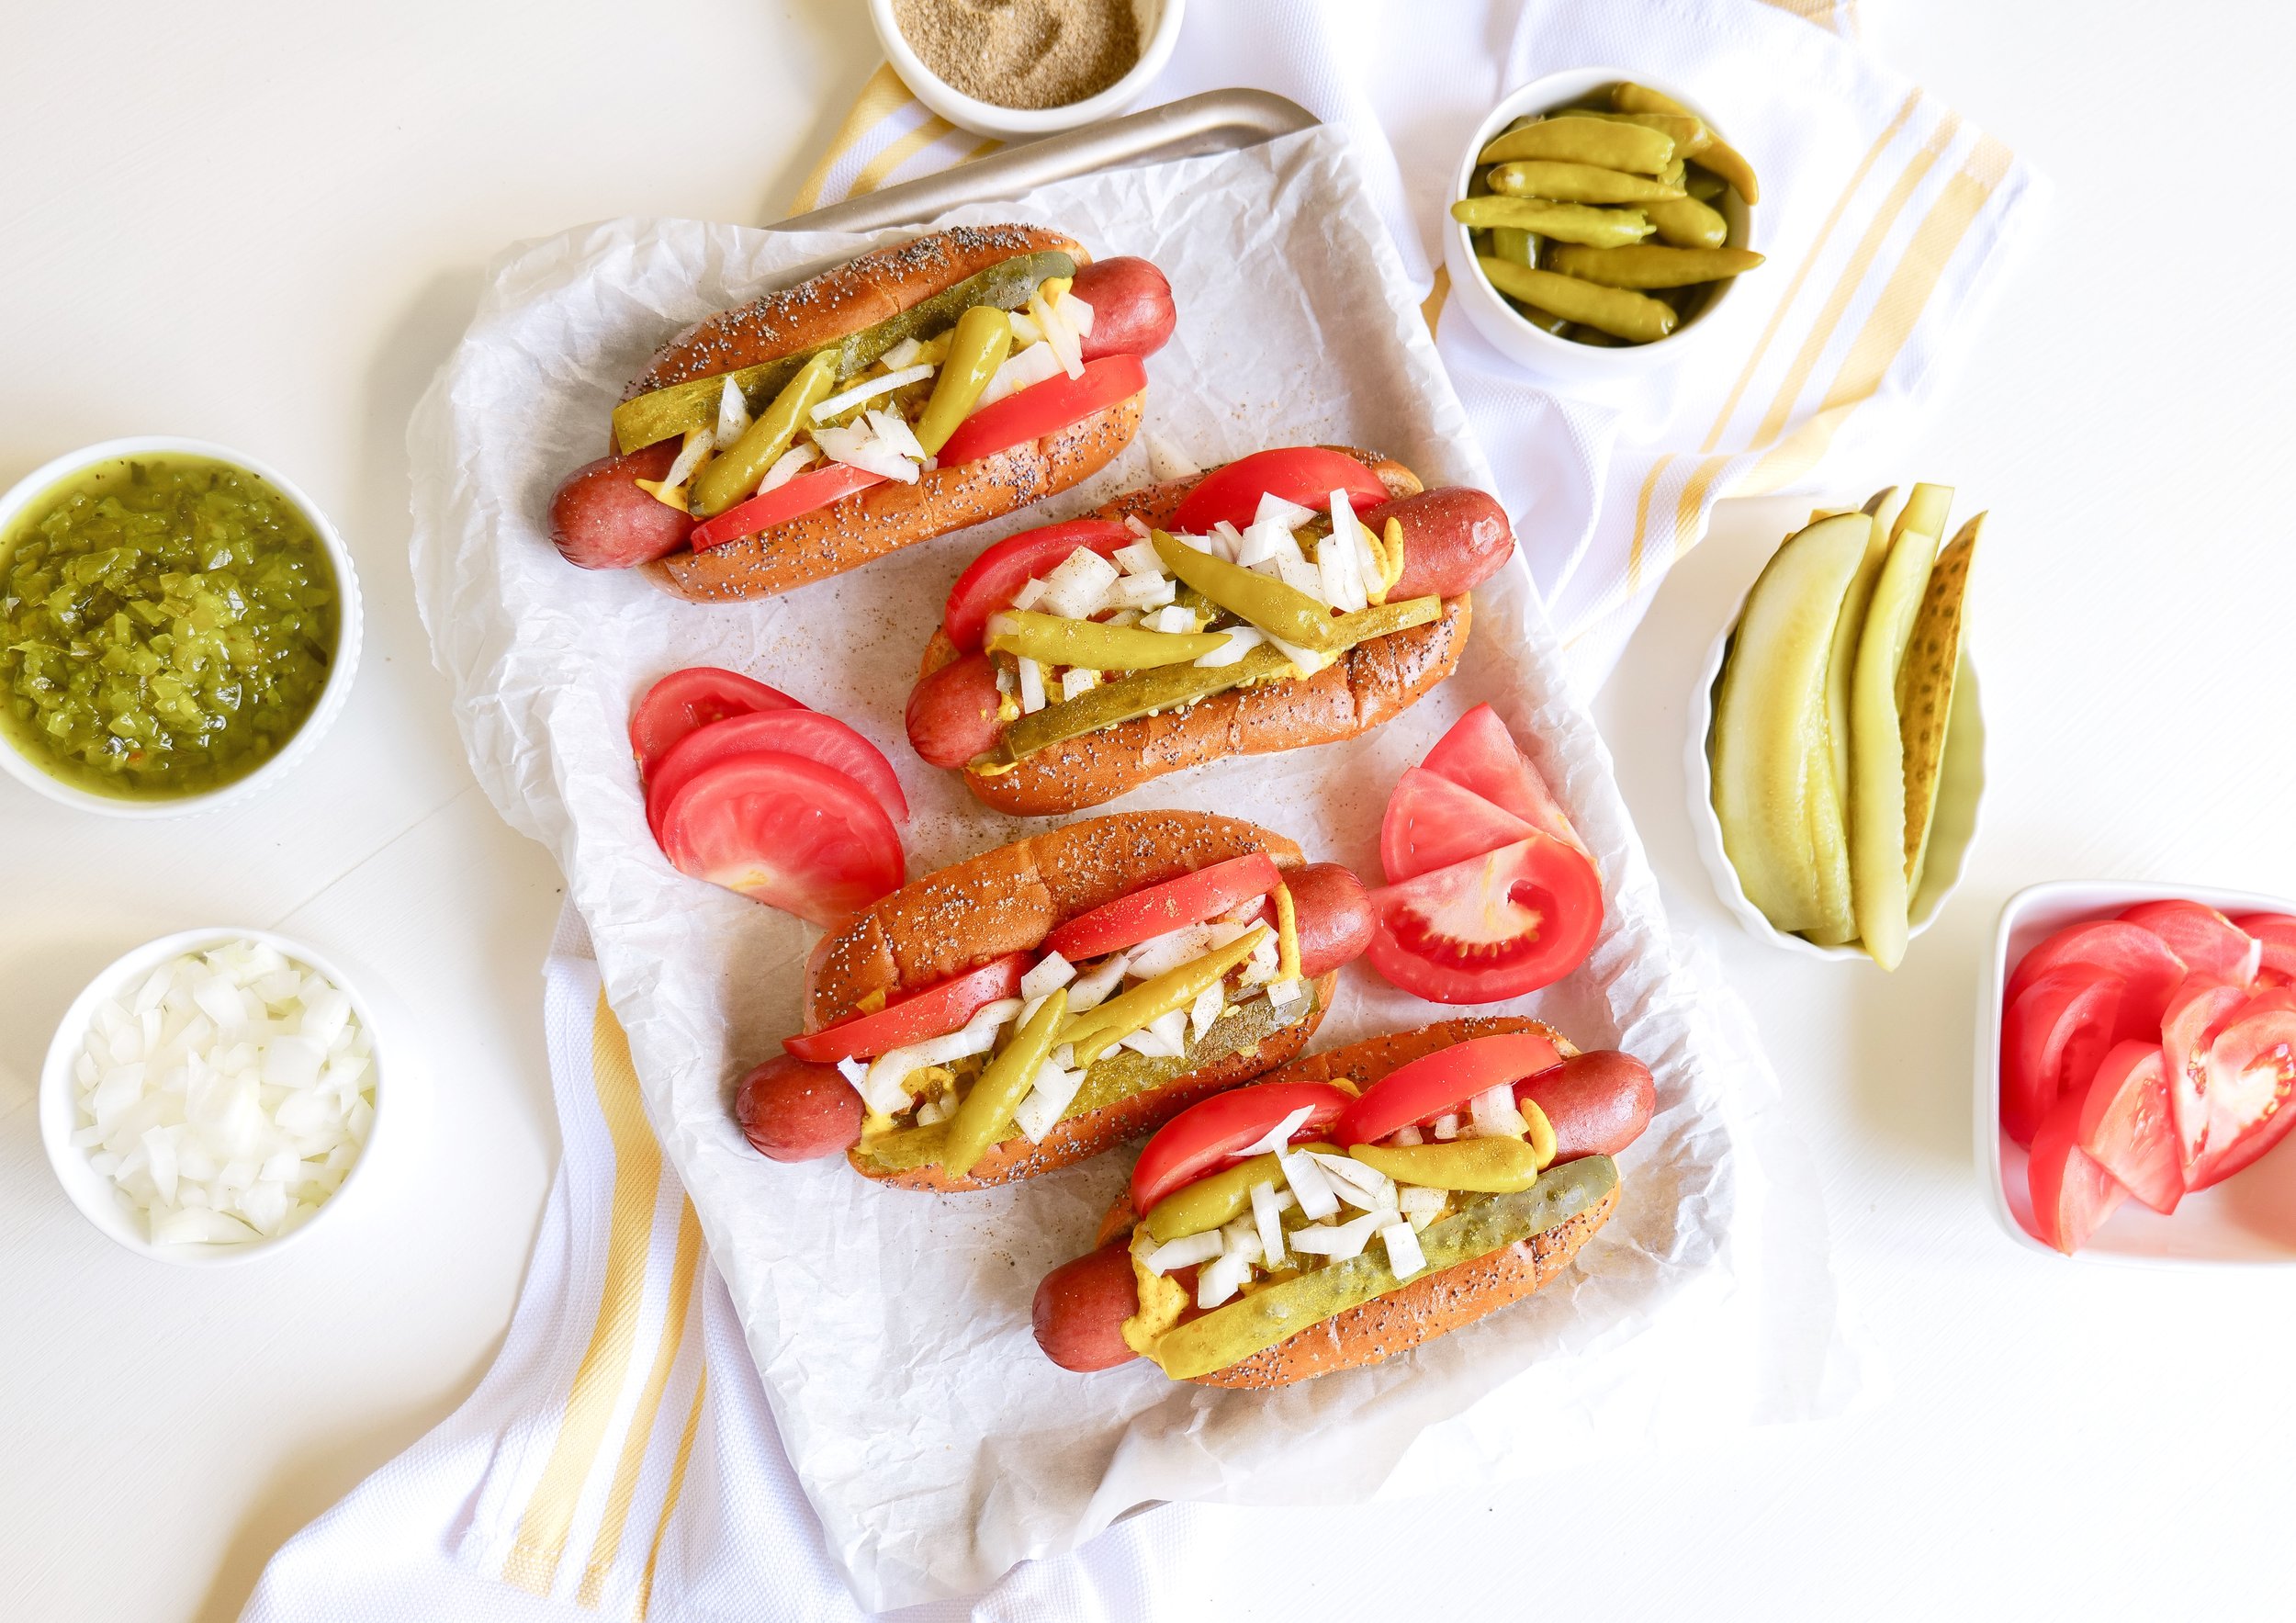
Overhead view of homemade Chicago style hot dogs for summer entertaining.

The Chicago Dog is a classic American hot dog with a unique flavor and texture, made with a combination of condiments and toppings. The traditional Chicago Dog is made with a Vienna Beef hot dog on a steamed poppy seed bun and is dressed in yellow mustard, sweet pickle relish, diced onions, tomato slices, pickle spear, sport peppers, and a dash of celery salt.

For a truly authentic Chicago-style hot dog, use an all-beef frankfurter, which is larger than the traditional pork and beef hot dog. When shopping for a hot dog, check the label to make sure the product is labeled “all-beef.” Next, choose a poppy seed bun to complete the classic Chicago-style experience. The bun is an extremely important part of the Chicago Dog. It should be lightly toasted and steamed, which gives it a light and fluffy texture. Making a Hot Dog at your next barbeque, and especially in the form of a Chicago Dog is a time-honored tradition that can be enjoyed at home with the help of the right classic ingredients. With the perfect combination of weiner, bun, and condiments, you can craft an authentic Chicago Dog that is sure to be a crowd favorite.

Authentic Chicago style hot dog loaded with classic toppings on a poppy seed bun.

Restaurants That Serve As Main Dish

From classic spots like Wiener & Still Champion and Portillo’s to more creative eateries like Franks ‘n' Dawgs and Flub A Dub Chub’s, there’s something for everyone when it comes to Chicago dogs.

Hot Dog Heaven has been around since 1967, serving up classic Chicago-style dogs with all the fixings. Wiener & Still Champion is a hip, retro eatery that offers up classic hot dogs and loaded fries with a gourmet twist. Red Hot Ranch, located in the heart of downtown Chicago, specializes in flame-grilled hot dogs with a variety of unique toppings. Portillo’s is an iconic Chicago chain known for their famous Chicago-style hot dogs and Italian beef sandwiches. At Franks ‘n' Dawgs, you’ll find unique gourmet hot dogs with inventive toppings like apple bacon relish and truffle oil. The Wiener's Circle is a no-nonsense spot that serves up classic Chicago dogs and French fries with plenty of attitude. And last but not least, Flub A Dub Chub’s is known for their classic Chicago dogs, Chicago-style Italian beef, and Maxwell Street Polish sausages. If you’re looking for a delicious Chicago-style hot dog the next time you're in the famous city, be sure to find one of these spots to satisfy your cravings. Chicago-style hot dogs are a classic American favorite, and they are easy to make at home. Just make sure you have the proper ingredients. The amazing people of Chicago take great pride in this style of hot dog, with precise ingredients, and rightfully so. So let's join them and make the best Chicago-style hot dog at home!

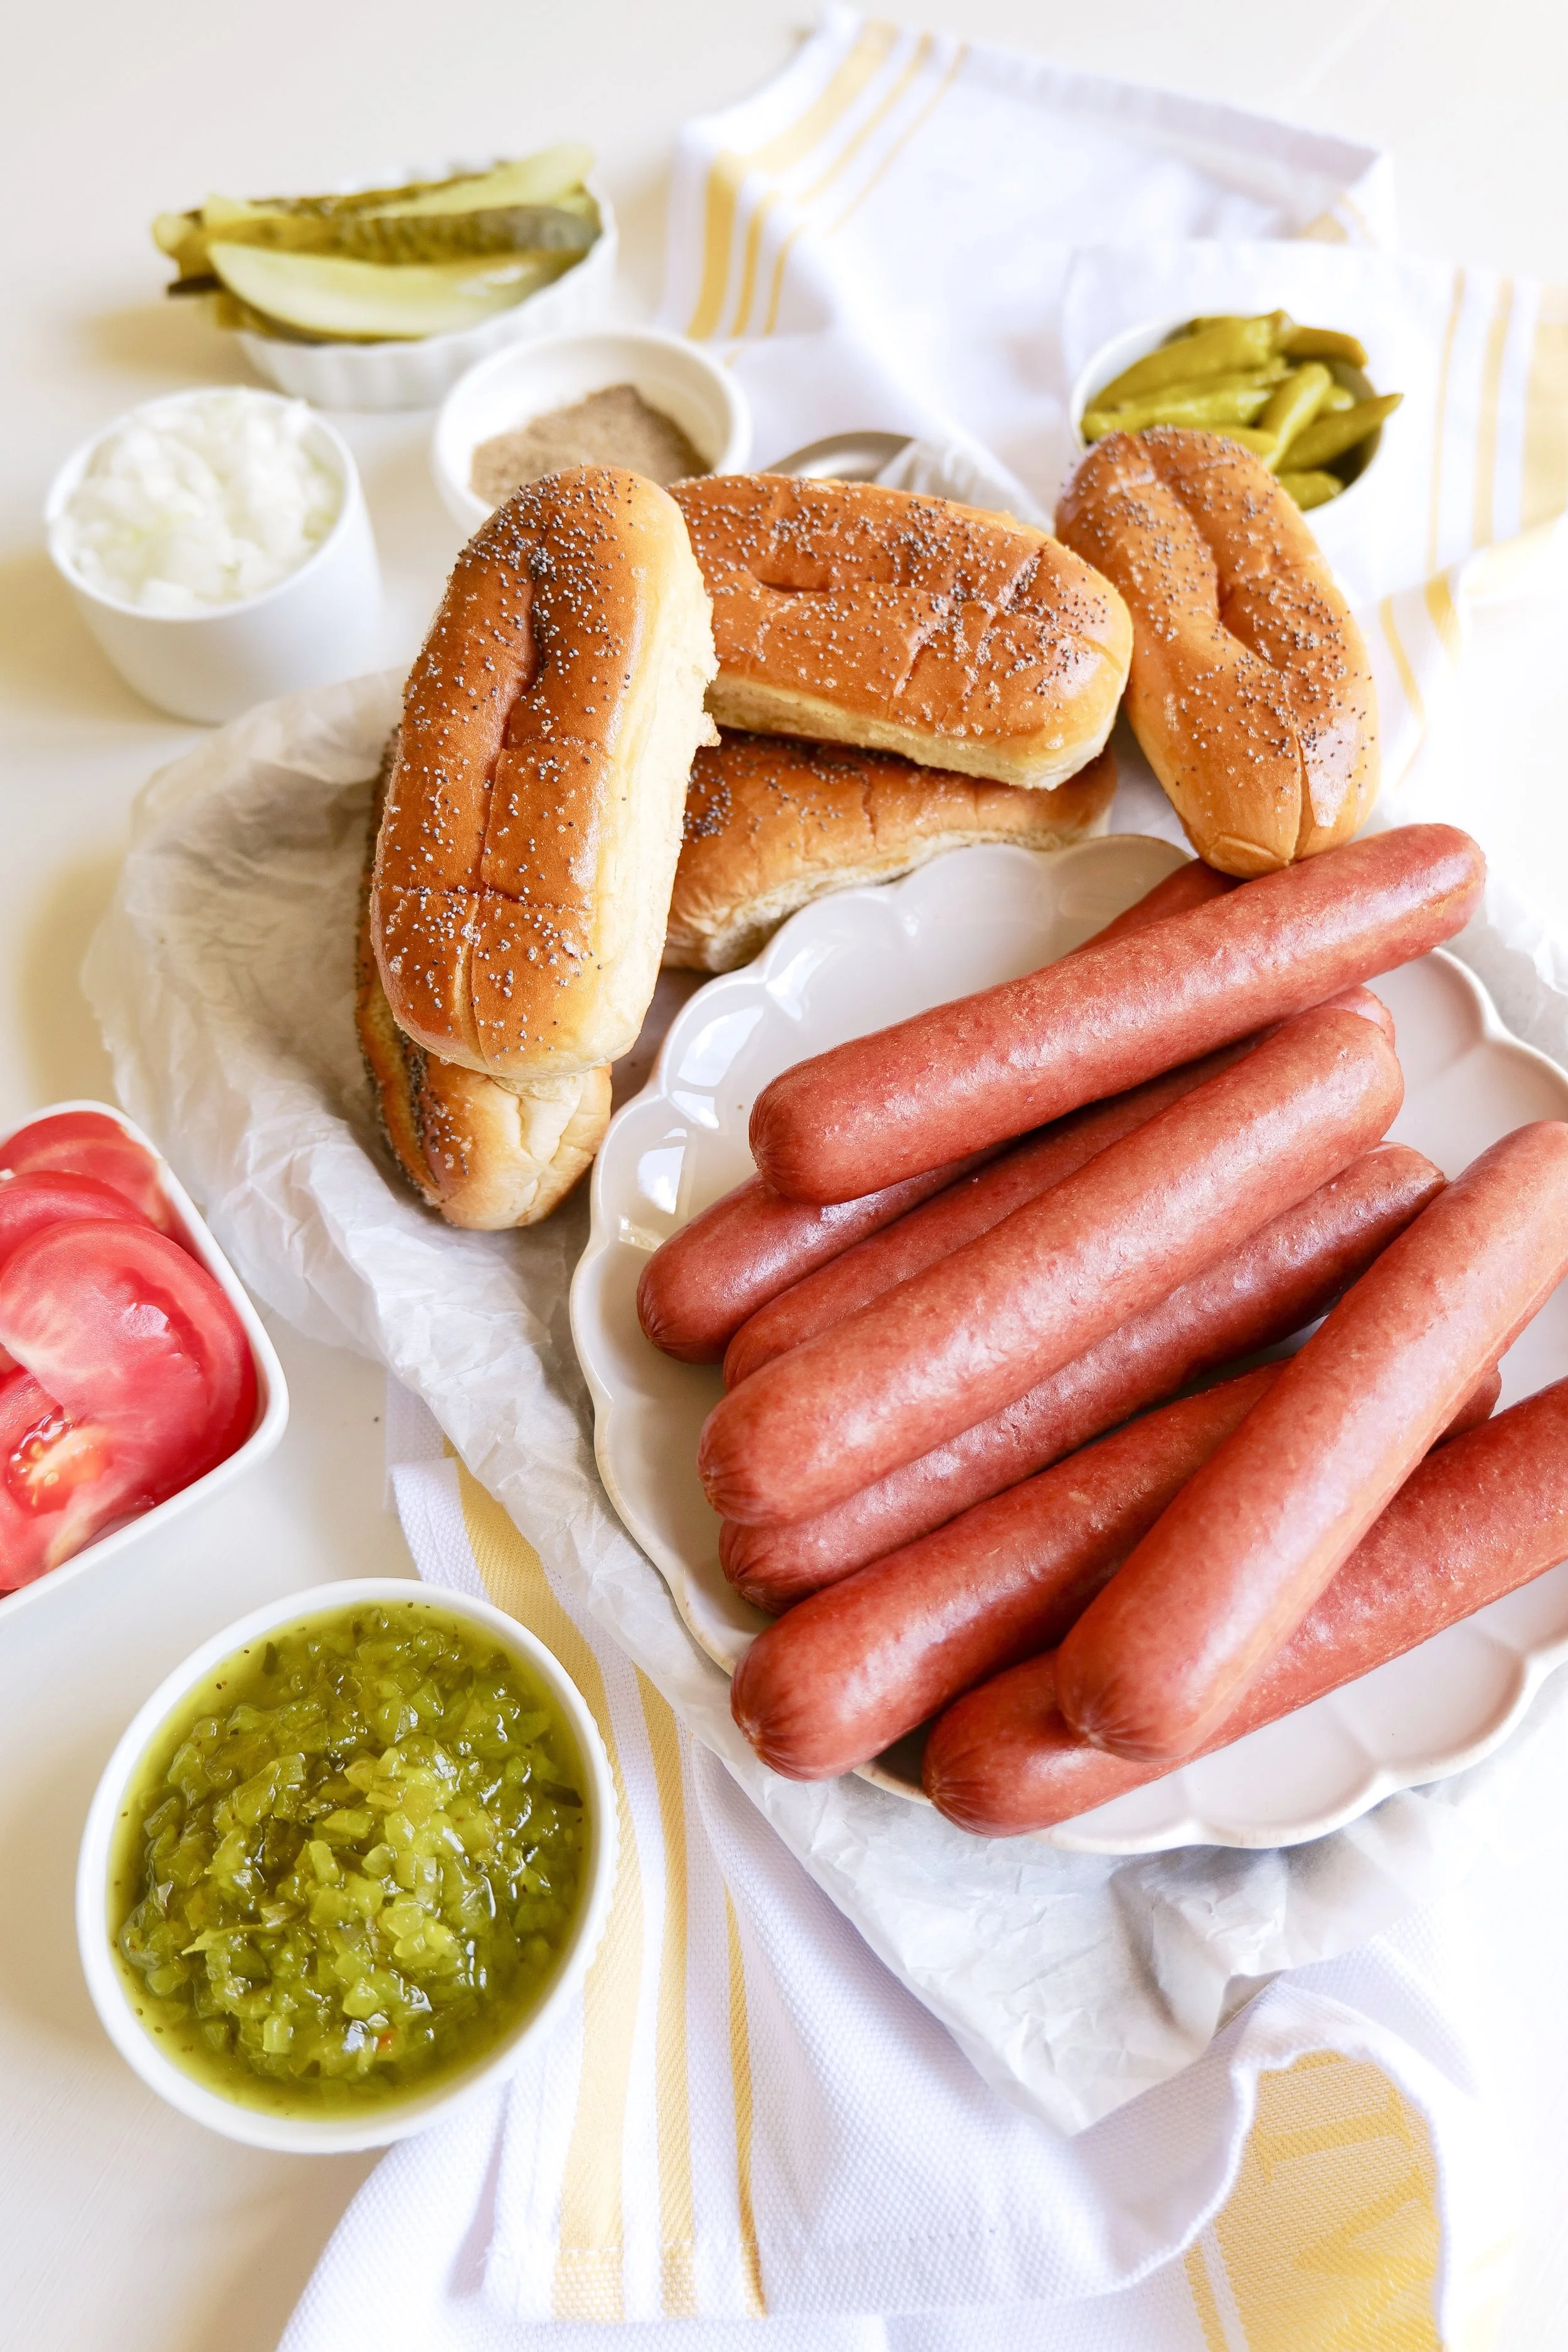
Ingredients for homemade Chicago style hot dogs arranged on a kitchen counter.
Homemade Chicago dog recipe served with tomatoes, pickles, relish, onions, and peppers.
Classic Chicago style hot dog recipe perfect for summer cookouts and backyard gatherings.
Close-up of a homemade Chicago hot dog with traditional toppings and mustard.

Grilling Up Sizzle

I linked some of my favorite grilling tools, summer cookout essentials, and kitchen finds I love using for recipes like this in my Grilling Up Sizzle collection.

Ingredients

6 all-beef hot dogs

6 poppy seed hot dog buns

2 tomatoes, sliced into moon shape

6 dill pickle spears

1 white onion, diced

12 sport peppers

Yellow mustard

Relish

Celery salt

Instructions

1. Cooking the hot dogs. You can do this 2 ways, on the grill if you are BBQing, or my usual way is bringing a large pot of water to a boil, lowering the heat to simmer and cooking dogs for 10 minutes.

2. Next, the buns. It is very hard to find poppy seed buns here in Texas. So I substitute for regular hot dog buns and brush with an egg white or water and sprinkle poppy seeds on top. Add to a preheated oven at 350 for 3-4 minutes. This gets buns warm and toasty and gets the poppy seeds to stick.

3. Assemble the hot dogs. Add cooked hot dog into bun and layer in this order; mustard, sweet relish, tomato slices (moon shape), diced onions, kosher pickle spear, sport peppers, and lastly celery salt.

4. Serve immediately and enjoy!

Pro Tips for the Best Chicago Dog

  • Use an all-beef hot dog for authentic flavor

  • Steam the bun—don’t skip this step

  • Keep toppings fresh and crisp

  • Balance is key: don’t overload one ingredient

  • Stick to the classics for the most authentic result

Common Mistakes to Avoid

Adding ketchup
This is the biggest mistake—traditional Chicago dogs never include ketchup.

Skipping the poppy seed bun
It’s a defining part of the recipe.

Overcooking the hot dog
Boiling too long can ruin the texture.

Using the wrong toppings
Substitutions can change the flavor balance significantly.

FAQs

What makes a Chicago-style hot dog different?

It’s the combination of toppings and the balance of flavors—sweet, tangy, salty, and spicy—all in one bite.

Can I make a Chicago hot dog without sport peppers?

Yes, but they add a signature heat. Pepperoncini can be a substitute.

Why is there no ketchup on a Chicago dog?

Ketchup is considered too sweet and disrupts the balance of flavors.

Can I grill the hot dog instead of boiling?

Yes, but traditional versions are boiled or steamed.

What is the Best Method for Cooking a Chicago Dog?

For those looking for a classic Chicago experience, look no further than the Chicago Dog. This iconic dish is a must-have for any visit to the Windy City. The key to a great Chicago Dog is in the cooking method. Boiling is the traditional method for cooking a Chicago Dog. Start by boiling a pot of water and adding the hot dogs. Boil for about 5 minutes, then remove the hot dogs. Grilling is another great way to cook a Chicago Dog. Heat up the grill and cook the hot dogs for about 5 minutes, turning them regularly until they’re golden brown and cooked through. For a slightly healthier option, try steaming the hot dogs. Place the hot dogs in a steamer basket and steam for about 10 minutes, for a juicy flavor. Baking is a quick and easy way to cook a Chicago Dog. To bake, preheat the oven to 350 degrees. Place the hot dogs on a baking sheet and bake for about 15 minutes. Lastly, for a truly quick fix, you can microwave the hot dogs. Place the hot dogs on a plate and microwave for about 1 minute.

Summer cookout hot dogs styled on a serving tray with classic Chicago toppings.
Traditional Chicago style hot dog recipe with celery salt and sport peppers.
Homemade Chicago dogs served for an Americana-inspired summer dinner.

What are Some of the Most Popular Condiments to Put on a Chicago Dog?

Mustard is a must-have condiment for a Chicago-style dog. It adds a tangy and slightly spicy flavor. Pickle relish is another classic topping for a Chicago-style dog. It is made from pickles, onions, and sweet peppers and adds a salty and sweet flavor. Chopped white onions are a classic topping for a Chicago-style dog that adds a crunchy texture and a bit of sweetness. Thinly sliced tomatoes are also a great topping for a Chicago-style dog; they provide a refreshing flavor and a juicy texture. Sport peppers, which are a type of pickled pepper that have mild to medium heat, are a traditional topping for a Chicago-style dog. They add a spicy and tangy flavor. Lastly, celery salt is a mixture of salt and ground celery seeds that adds a unique flavor.

Chicago hot dog toppings arranged on a freshly grilled hot dog in a poppy seed bun.

What Types of Buns are Traditionally Used In a Chicago Dog Recipe?

Creating the perfect Chicago Dog is a matter of experience and finesse. One of the most important elements of a traditional Chicago Dog recipe is the bun. A steamed poppy seed bun is the most popular choice, as it provides a soft and fluffy base for the hot dog. However, some recipes also call for the use of a sesame seed bun, as this provides an additional layer of flavor. If you're looking for a more flavorful bun, you may want to substitute it for a pretzel bun. For a truly authentic Chicago Dog experience, opt for an all-beef hot dog. This will give you a juicy, flavorful hot dog with a crunchy exterior that will be sure to satisfy you. No matter which bun you choose, make sure to steam it in order to achieve the perfect Chicago Dog.

Final Thoughts

This authentic Chicago-style hot dog recipe proves that simple ingredients can create something unforgettable. With its bold flavors and iconic toppings, it’s one of the easiest ways to bring a taste of Chicago into your own kitchen—perfect for cookouts, casual dinners, and summer gatherings.

Save This Recipe

Whether you're planning ahead for a special occasion or adding a new favorite to your recipe collection, I've included a printable recipe card below so it's easy to save, print, and share with the people you love.

If you’re planning a full menu, pair these with a few more fresh, seasonal dishes to round things out. Here are some great summer recipe ideas to serve alongside your hot dogs:

These recipes complement the flavors of a Chicago-style dog perfectly and help you build an easy, crowd-pleasing spread for any summer occasion.

Americana Summer Hosting

I linked some of my favorite summer hosting pieces, entertaining finds, and Americana-inspired kitchen and table decor I love using for gatherings like this in my Americana Summer Hosting collection.

Easy Chicago style hot dog recipe for summer grilling and entertaining.
Backyard barbecue spread featuring authentic Chicago style hot dogs.

The Perfect Mediterranean Pasta Salad Recipe for Summer Entertaining

If you're looking for a delicious and light meal, this Mediterranean Pasta Salad is the perfect dish. This flavorful salad is packed with fresh vegetables like tomatoes, cucumbers, and olives, and is combined with an Italian-inspired dressing and a variety of delicious cheeses. The combination of flavors in this dish creates an amazing variety of tastes and is sure to please everyone at the table. Not only is it a great entree, but its bright colors and unique flavors also make it a great side dish for any lunch or dinner. With just a few simple ingredients, you can whip up this Mediterranean Pasta Salad in no time. For a delicious and healthy dish that's perfect for summer picnics and barbecues, Mediterranean Pasta Salad is the way to go. It's an easy dish to prepare and can be served either warm or cold.

Not only is this salad full of delicious flavor, but it is also low in fat and calories. You can customize this dish to your liking by adding different vegetables, proteins, and dressings of your choice. Mediterranean Pasta Salad is a great way to get your daily dose of vegetables and healthy fats. It's a quick and easy meal that's sure to please everyone and have them coming back for a second scoop.

Popular Substitutions & Additions

Mediterranean pasta salad is a delicious and versatile dish that can be tailored to your tastes. It's easy to customize the ingredients for a unique set of flavors and textures. For a tangy kick, substitute feta cheese for Parmesan cheese. Olives and sun-dried tomatoes add a burst of flavor, while whole-wheat bowtie pasta gives it a healthier twist with fewer carbs. Olive oil is a great substitute for mayonnaise to reduce fat and calories. Chopped artichoke hearts give the dish a unique texture, while fresh basil for a more intense herb flavor. Add grilled chicken or shrimp for a protein-packed meal, and capers for an extra salty kick. For a creamier texture, substitute Greek yogurt for mayonnaise. Roasted red peppers bring a touch of sweetness, and arugula can be used instead of spinach for a peppery taste. With so many options, Mediterranean pasta salad is sure to be a crowd-pleaser.

What to Pair with Your Summer Pasta Salad

A Mediterranean pasta salad is a light and delicious dish that is perfect for Summertime meals. Its combination of fresh vegetables, olives, feta cheese, and herbs makes it a great way to enjoy the flavors of the Mediterranean. To complete the meal, a light, dry white wine like a Pinot Grigio or Sauvignon Blanc pairs perfectly with this salad. For a more flavorful drink, try a crisp, bubbly rosé or a chilled rosé Spritzer. Freshly baked garlic bread is also a great addition to this meal.

For a more complete meal, serve the Mediterranean pasta salad with a side of my delicious baked chicken drumsticks, steak, or salmon. For a vegan option, serve the salad with a side of lentils or roasted vegetables. To brighten the meal, add a side of freshly cut fruit or a fruit salad. Finally, top off the meal with a light dessert like a homemade fruit tart or ice cream.

How to Store Mediterranean Pasta Salad

When storing the Mediterranean pasta salad, make sure to let it cool completely before putting it in an airtight container. If possible, store the salad without the dressing and add it just before serving. The Mediterranean pasta salad can be stored in the refrigerator for up to 3-4 days. If you want to store the salad for a longer time, freeze it in a freezer-safe container.

To reheat the frozen Mediterranean pasta salad, thaw it in the refrigerator overnight and then cook it in a skillet over medium-high heat or serve cold. This will help to retain the flavor and texture of the salad. Enjoy the Mediterranean pasta salad as is or top it with a drizzle of olive oil and a sprinkle of fresh herbs.

How Long Will Pasta Salad Last In the Fridge?

A good pasta salad is a great way to use up leftover pasta, and the combination of flavors is sure to please any crowd. The best part is that you can store it in the fridge for up to 4 days, so it's perfect for meal prepping or making ahead of time. When storing your pasta salad in the fridge, make sure to keep it in an airtight container to prevent it from spoiling. If you're not planning to eat the pasta salad within 4 days, it's a good idea to freeze it to keep it fresh longer.

It's important to remember that if you notice that the pasta salad is starting to look or smell off, it's best to discard it. While it's okay to keep it in the fridge for up to 4 days, any longer than that and you may not be able to trust the quality of the dish. So make sure to store it properly and enjoy it while it's still fresh.

My Best Pasta Salad Tips

To make this delicious salad, start with your favorite type of pasta. Penne, shells, or rotini all work great. Then, mix in a light vinaigrette or Italian-style dressing to keep it light and flavorful. Add in some fresh, seasonal vegetables like tomatoes, cucumbers, peppers, and onions. If you're looking for a bit more protein, try adding some chickpeas, olives, feta cheese, or grilled chicken. Finish off the salad with some fresh herbs like basil, parsley, or oregano. Keep it chilled until ready to serve.

To ensure maximum flavor, use fresh ingredients when making Mediterranean Pasta Salad. For a salty kick, add a sprinkle of freshly grated Parmesan cheese. Top it off with a drizzle of extra-virgin olive oil for a hint of Mediterranean flavor. With a few simple ingredients and a few minutes of prep time, you can have a delicious and healthy Summertime meal

Served Warm or Cold?

Mediterranean Pasta Salad is a delicious and healthy meal option that can be served both warm and cold. If served warm, the flavors of the vegetables, herbs, and cheese will be more intense and the pasta will be more tender. If served cold, the salad will have a refreshing taste and the vegetables will be crunchy. Whichever way you choose to serve it, Mediterranean Pasta Salad is sure to be a hit at your next gathering.

The beauty of Mediterranean Pasta Salad is that it can be made with whatever ingredients you have on hand. From tomatoes, cucumbers, olives, and feta cheese for the classic version to adding artichoke hearts, roasted red peppers, and roasted garlic for a more intense flavor, the possibilities are endless! You can also easily customize the salad with your favorite herbs and spices.

Whether you’re looking for a light and healthy lunch or dinner option, or something that will feed a large crowd, Mediterranean Pasta Salad is an easy and delicious choice that the whole group will love. You can make it ahead of time and serve it warm or cold, so you don’t have to worry about last-minute meal prep. Plus, it’s a great way to use up any extra veggies you have in the fridge. Try making this Mediterranean Pasta Salad today – you won’t be disappointed with this family-friendly yummy dish!

Ingredients

16 ounces of favorite cooked pasta

1 pint cherry tomatoes

1 cup cucumber, sliced into quarters

1/2 a medium red onion

1/2 cup Kalamata olives, pitted

1 15.5 oz canned chickpeas, drained

1/2 cup sliced pepperoncini

2/3 cup crumbled feta cheese

Dressing

1/4 cup extra virgin olive oil

2 tablespoons red wine vinegar

1 tablespoon lemon juice

3 tablespoons mayo

2 teaspoons Dijon mustard

1 tablespoon maple syrup

sea salt & black pepper

Instructions

1. Prepare pasta according to package directions. Drain and set aside in bowl.

2. Mix together all dressing ingredients in mason jar and shake together until fully blended, adding sea salt & black pepper until desired taste.

3. Prepare vegtables; slice cherry tomatoes in half, cut cucumbers into quarters, cut red onion into slices, pit and cut in half kalamata olives, and slice pepperoncini into desired shapes. add ingredients into bowl with pasta and pour over dressing. Mix together. Serve topped with feta cheese & serve.

Save This Recipe

Whether you're planning ahead for a special occasion or adding a new favorite to your recipe collection, I've included a printable recipe card below so it's easy to save, print, and share with the people you love.