Sugar Free Angel Food Cake & 3 Creative Ways to Serve It

In the realm of desserts, angel food cake has always stood out for its light, airy texture and subtle sweetness. Unfortunately, not everyone can indulge in the traditional version due to dietary restrictions on sugar. Enter the Sugar Free Angel Food Cake, a fantastic alternative that maintains the delightful essence of the classic treat without the added sugars. This blog will guide you through how to make angel food cake, the benefits and intricacies of making it sugar-free, its storage tips, and creative ways to serve it.

How to Make Angel Food Cake

Making angel food cake might seem daunting at first, but with the right steps and ingredients, anyone can achieve a bakery-quality result. Here’s a step-by-step guide to ensure your cake comes out perfectly every time.

The backbone of any angel food cake is the whipped egg whites. Start by separating the egg whites from the yolks and placing the whites in a large, clean mixing bowl. Beat them using an electric mixer until they form soft peaks. This stage is crucial as it provides the cake with its proper light and airy texture. Soft peaks refer to the stage in beating egg whites where the whites are fluffy and hold their shape but still droop over slightly when the beaters are lifted. They form a peak that softly curls down, indicating that the egg whites are not overly stiff or dry.

Achieving soft peaks is vital for recipes like sugar-free angel food cake. It ensures the cake’s light and airy texture, making every bite a delight. Two things to look for are beating egg whites at a moderate speed and checking frequently to avoid overbeating. The perfect soft peak will look like a soft serve ice cream tip, gently folding over rather than standing upright. This visual cue is your green light to proceed with the rest of the recipe. When whipping egg whites for a sugar-free angel food cake, aiming for soft peaks rather than stiff peaks is essential. Soft peaks have a glossy appearance and gently fold over when the beaters are lifted. This ensures that your cake will be tender and airy. Using sugar substitutes can affect the whipping process, so it's important to monitor closely for the right consistency. Perfectly whipped soft peaks are crucial for the success of sugar-free angel food cake recipes. Achieving soft peaks ensures your cake isn't dense and chewy but light and fluffy. This step sets the foundation for a delightful baking experience and an even more delightful eating experience.

Once you have your stiff egg whites, the next step is to incorporate the dry ingredients carefully. Slowly fold in the sugar substitute you'll be using, flour, and other essential components like cream of tartar and vanilla extract. Gentle folding is key to maintaining the airiness of the batter. Overmixing can deflate the egg whites, resulting in a denser cake. Pour the batter into an ungreased tube pan. The ungreased surface allows the batter to cling to the sides as it bakes, enabling the cake to rise properly without collapsing. The design of the tube pan also ensures even baking. Place the cake in a preheated oven and bake until it turns a beautiful golden brown color. Typically, this takes about 45-60 minutes. You’ll know the cake is done when it springs back upon lightly touching the surface.

Creative Ways To Serve

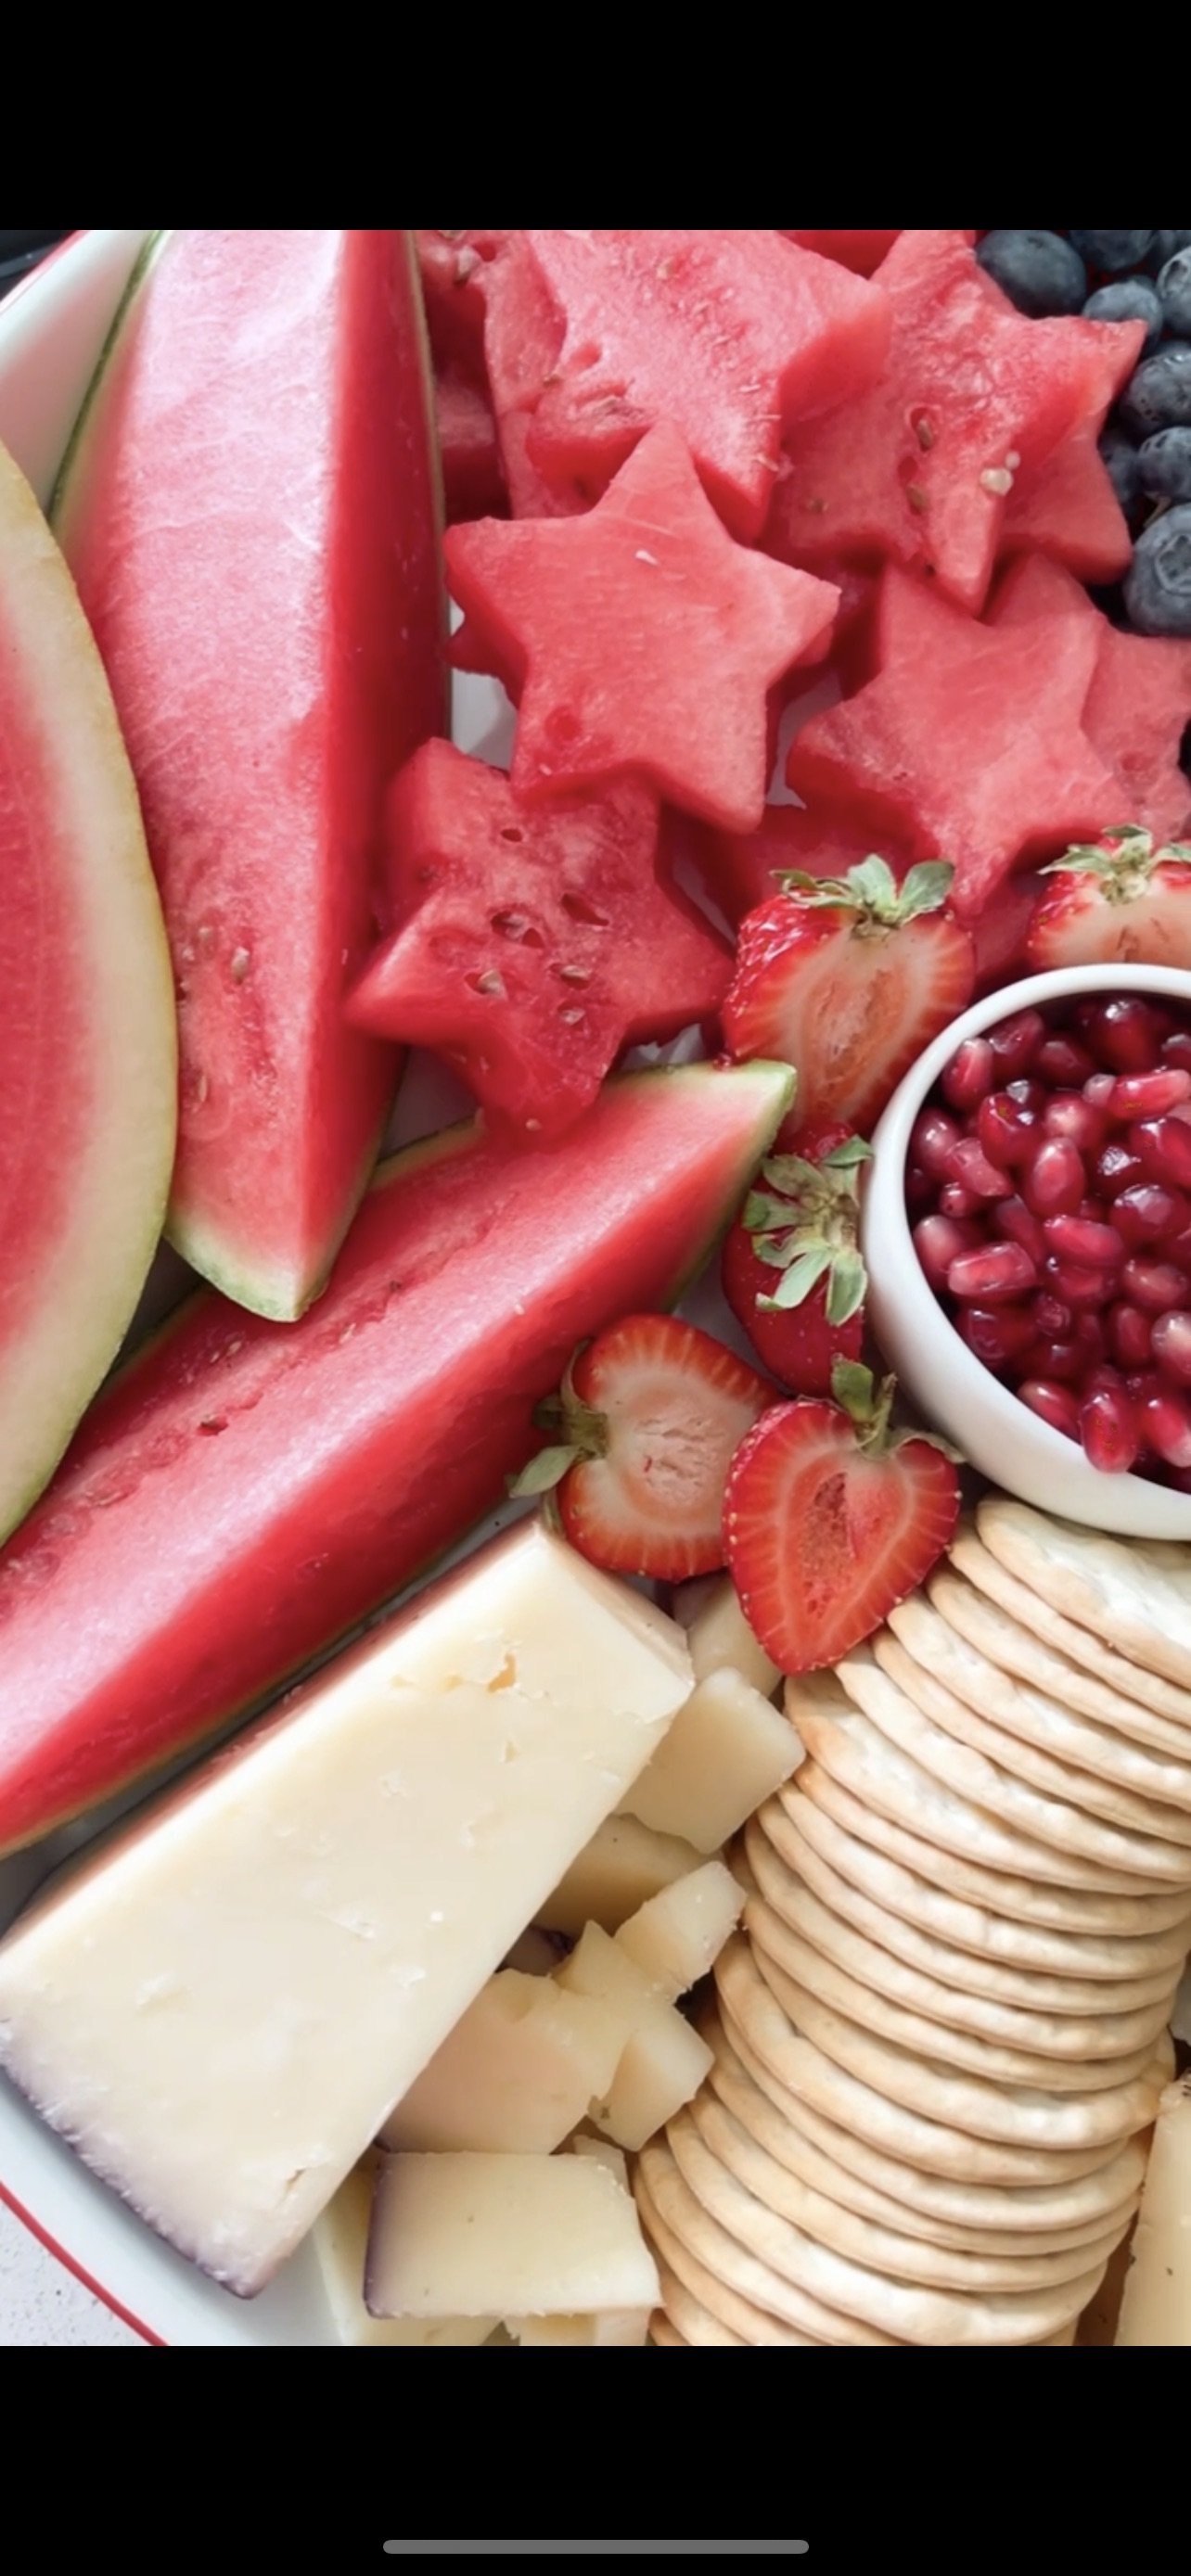
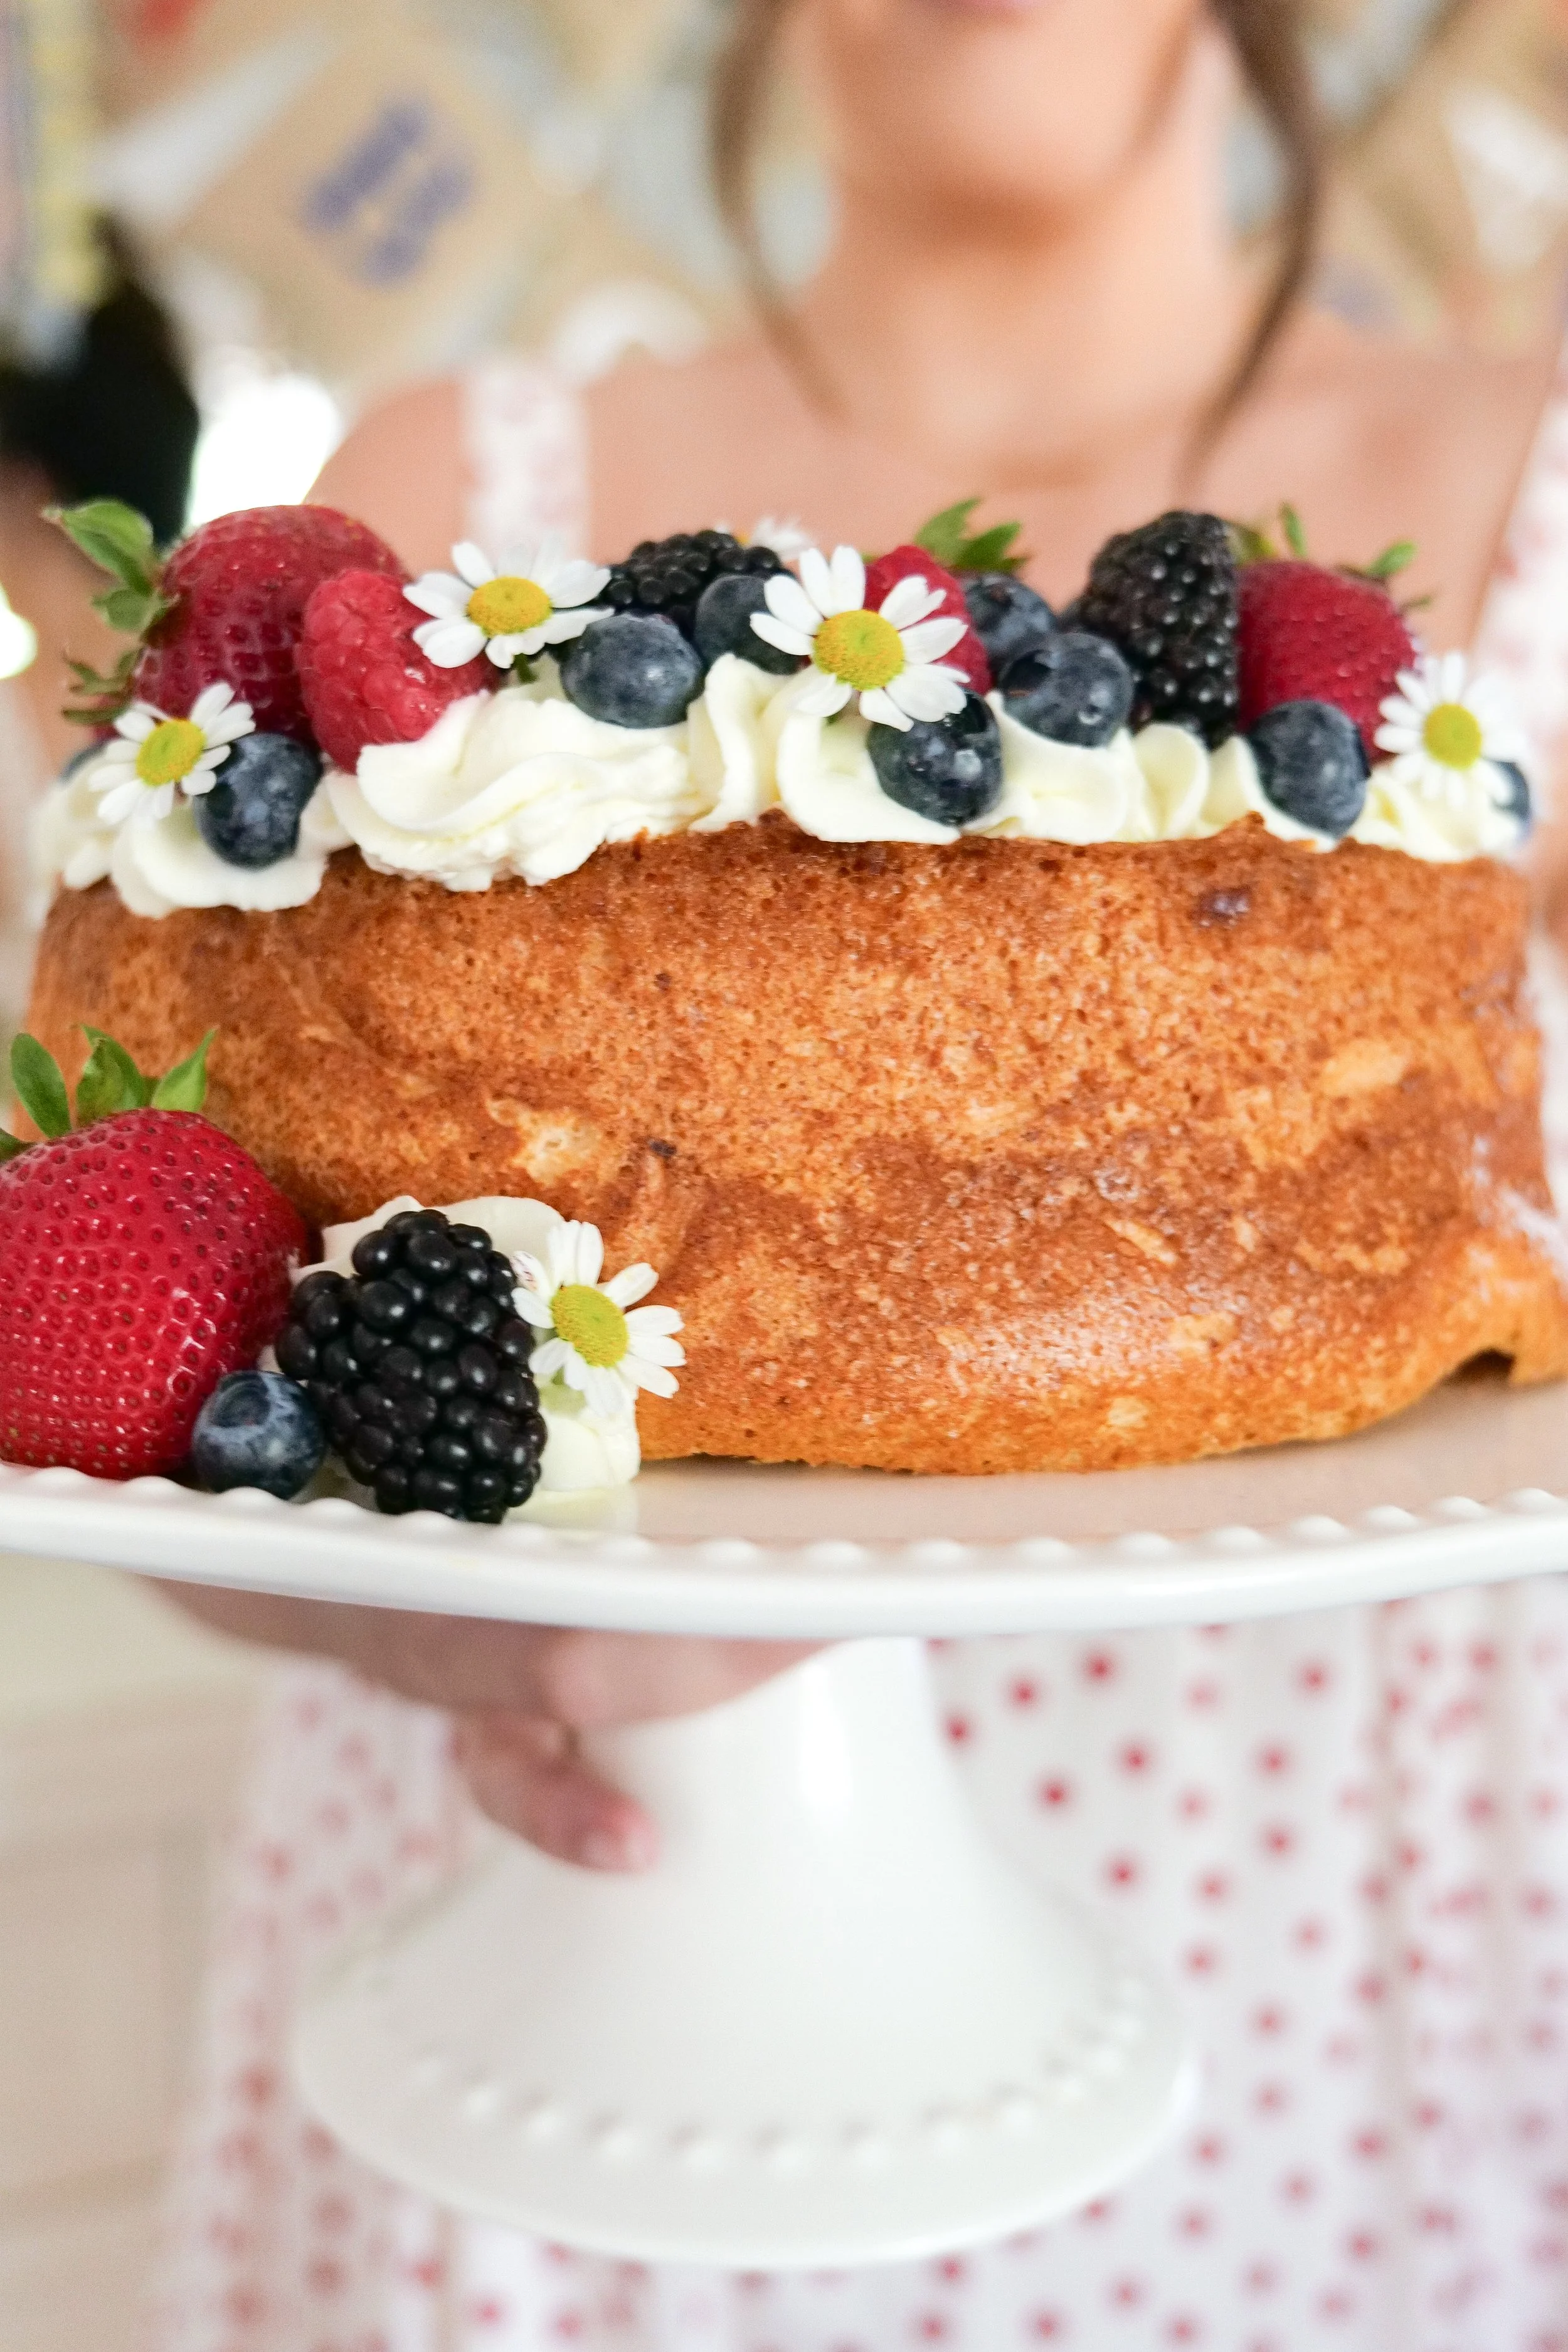
The versatility of sugar-free angel food cake makes it suitable for any event. It can be dressed up for festive celebrations or kept simple for a cozy family dinner. The possibilities of how to serve this delicious cake are endless but 3 ways I love to serve are: In its original form with fresh whipped cream, strawberries, blackberries, blueberries and raspberries. Cut into squares inside of a coupe (or other glass serving bowl) topped with fresh whipped cream and berries. My personal favorite for a large group with differing taste buds is a mixed tray for guests to put together their own toppings of their choice. Angel food cake cut into slices with whipped cream and berries separately so they can add it as they wish. A few other ways can be create a trifle by layering with sugar-free whipped cream and fresh fruits. Top with a sugar-free chocolate drizzle for an indulgent touch. Lastly, serve with a scoop of sugar-free ice cream.

One of the best things about sugar-free angel food cake is its versatility. It can serve as a base for an array of flavorful dessert combinations, making it a staple for various culinary experiments. Top with fresh strawberries for a nutritional sweetness. A medley of berries adds a burst of flavor, vitamins, and antioxidants. Add a dollop of sugar-free whipped cream is always a delicious treat. Drizzle with a sugar-free lemon glaze, this adds a tangy zesty twist. These ideas are simple yet sophisticated, ensuring you can enjoy this dessert in multiple exciting ways.

Storage Tips

Proper storage is key to maintaining the freshness and texture of your sugar-free angel food cake. After the cake has cooled completely, store it in an airtight container at room temperature if you plan to consume it within two days. This prevents the cake from drying out and keeps it tasting fresh. If you need to store the cake longer, consider refrigerating it. Ensure its well-wrapped to avoid drying out. The cool environment of the fridge keeps the cake fresh for up to a week.

Freezing is another great option for longer storage. Wrap the cake tightly in plastic wrap followed by a layer of aluminum foil. This double wrapping prevents freezer burn and ensures the cake retains its texture and flavor. Thaw frozen slices at room temperature or in the refrigerator before serving.

Substitutions

Making a sugar-free angel food cake involves some key substitutions to ensure it remains a healthier alternative without compromising on taste or texture. The sugar-free angel food cake offers a healthier alternative to traditional cakes, allowing those with dietary restrictions to still indulge guilt-free. Instead of sugar, natural low-calorie sweeteners like Splenda stevia is used in this recipe. These maintain the cake's light and fluffy texture while keeping it sweet. Stevia is a plant-based sweetener with no calories. Whether it’s a casual family meal or a festive celebration, the sugar-free angel food cake can be dressed up or down. Its adaptable nature makes it a perfect dessert choice for any event.

Understanding the differences between sugar-free angel food cake and its traditional counterpart can help you appreciate this healthier version. Sugar-free angel food cake, unlike the traditional version that relies on granulated sugar, is substituted with sweeteners like stevia or erythritol to achieve its sweetness. The absence of sugar obviously results in a lower calorie count for the sugar-free version, making it a healthier option for those watching their calorie intake. While both cakes are light and airy, the texture of the sugar-free variety may be slightly different due to the properties of sugar alternatives.

Creating a sugar-free angel food cake can seem like a detailed process, but the result is a dessert that is light, fluffy, and deliciously guilt-free. From mixing the batter to storing the cake and finally serving it in creative ways, each step is integral in achieving the perfect dessert. Whether you’re watching your sugar intake or just looking for a healthier alternative to traditional cakes, this lovely sugar-free angel food cake will meet your needs and delight your taste buds. You won't be disappointed. Experiment with the methods and tips provided, and enjoy this versatile, sweet treat at any time, for any occasion.

Ingredients

12 large egg whites, at room temperature

1 ½ teaspoons cream of tartar

1 teaspoon vanilla extract

1 cup Splenda Stevia

1 cup sifted cake flour

Instructions

  1. In a bowl using an electric mixer, beat egg whites, cream of tartar, and vanilla extract on high speed until soft peaks form.

  2. Gradually add ¼ cup Splenda Stevia and cake flour with spatula, being sure not to over mix and loose the soft peaks.

  3. Pour batter into an ungreased 10” tube pan and spread evenly. Run a knife through the batter to remove air bubbles or tap on table.

  4. Bake on lowest rack in oven for 40–45 minutes, or until cake springs back when lightly touched.

  5. Set pan upside down on a cooling rack; cool cake in pan for 30–40 minutes. Run a narrow knife around sides to loosen cake; remove from pan and cool completely on the wire rack. Serve with whipped cream, fresh berries and enjoy!

Other Delicious Desserts You Will Love:

How to Make Fall Chai Low Sugar Scones with Splenda

Indulge in Coziness: The Ultimate Homemade Gingerbread Latte Recipe with Splenda

A Deliciously Sweet Treat: Mini Key Lime Pies with Splenda

Banana Cake made with Brown Butter Frosting

Raspberry Low Sugar Scones made with Splenda

Easy 4th of July Centerpiece and Table Settings

With 4th of July coming soon, all over America people will be getting themselves ready for the summer holiday by watching fireworks, parades, and, of course, having a barbeque with a festive table setting. When hosting a 4th of July party, as with any other party, the centerpiece and table settings can play a crucial role in setting the mood for the celebration. Setting your 4th of July table with a yummy dip display doesn't have to be complicated. With a few simple tips, you can create a patriotic setting that will be the envy of the neighborhood. Let's march into the spirit of Independence Day with a guide to crafting an unforgettable display of the red, white and blue.

Introducing red, white, and blue to your table instantly ups the festive factor and pays homage to patriotism and our great American flag. Start by crafting a patriotic centerpiece using affordable materials and easy pick-ups from the hobby stores like small flags, ribbons, and don't forget your beautiful fresh flowers from your local grocery store or my favorite, Trader Joe's. Such a centerpiece anchors your table and spreads holiday spirit among your guests.

Always remember to focus on creating an immersive experience through your table settings. Use things like star themed plates and striped napkins, along with coordinating tablecloths. Your tablescape could feature little small touches of festive items like themed placeholders or star-spangled napkin rings. Imagine your guests' delight when they see American flags waving gently from your lovingly prepared table. Finish off this table setting with a well-positioned dip display. Think of using something like a tri-color pattern utilizing dips that reflect the colors of the flag and chips, veggies and more that accompany your favorite dips well. This not only serves as a culinary draw to your table but also reinforces your thematic choices. Your 4th of July table doesn't have to be just a feast for the stomach, but it can also be for the eyes.

To detail your patriotic decor even further you can position small flags in a mason jar for a simple, effective centerpiece or layer them on your place setting like I did here. Create a bouquet featuring florals in patriotic colors and a beautiful festive jar to tie them all together. Don't forget to get creative and make something you love, and it will therefore be loved by others! It's this attention to detail that will make your 4th of July gathering truly memorable and gorgeous.

Items Used for a July 4th Table Setting

Setting the stage for a 4th of July bash is all about the details. Selecting themed dishware and decorating with items that exude American pride will create a cohesive and eye-catching table.

Some other inspiration to consider for your table settings are as simple as they are impactful:

- Employ red, white, and blue table runners as racing stripes to victory.

- Set the mood with lanterns or sparklers (safety first!) for when dusk settles.

- Use bouquets of wildflowers nestled in tin cans for a rustic American vibe.

- Mason jars filled with layers of colored sand and a tea candle on top.

- A clear vase with a red, white, and blue-ribbon weave housing a vibrant arrangement.

- Star-spangled pinwheels sticking out among the food items for a playful touch.

- Create a burlap banner from paper cut-outs in star and stripe shapes.

- Stock up on red, white, and blue balloons for instant and inexpensive festive flair.

Such elements not only tie into the theme but also evoke the spirit of freedom and festivity inherent in America's Independence Day to celebrate. Setting your 4th of July table and dip display is about more than aesthetics, it's a tribute to tradition, community and country. As you decorate and drape your table in a flag-themed cloth, arrange your festive dishes adorned with the nation's colors, and provide a selection of dips that keep guests returning for more, you will be more than ready for the celebratory spirit of Independence Day. Remember, whether lavish or on a budget, your setting is the backdrop to a day of unity, remembrance, and festivity. Here's to an amazing 4th of July filled with joy, pride, and of course, plenty of good dips.

Creating a Festive 4th of July Tablescape for Your Celebration

As Independence Day is quickly approaching, it’s time to start planning for your 4th of July festivities! To me, one of the most important aspects of any successful holiday gathering is a well-crafted tablescape. Whether you’re hosting the typical backyard barbecue, an indoor dinner party, or a picnic on the beach, you can create a stunning tablescape to show off your patriotism and honor America’s birthday. In this blog post, we’ll explore some fun and creative ideas for designing the perfect 4th of July tablescape. This 4th of July, make your table sparkle, boom, and be the talk of the town!

When it comes to planning your 4th of July tablescape, white is always a good go-to base color for a classic look. Feature a centerpiece of white flowers, with a hint of blue mixed in for good measure. Utilize white china dishes and glassware for a timeless look, or find a beautiful blue or red print to make a statement. For added patriotic flair, add a few American flags to the décor. Place a bowl of red, white, and blue candy at each place setting to satisfy any sweet tooth. Include a small favor at each seat, such as a mini flag, to send your guests home with as a special touch they will appreciate. Finally, top off the look with a few star-shaped decorations to really show your spirit. With these few simple touches, your 4th of July tablescape will be a hit!

Red, White, and Blue Place Settings

The 4th of July is the perfect time to show your patriotic side with a festive tablescape. Whether you’re hosting a smaller gathering of family and friends or a large party, you can easily create a festive 4th of July tablescape with a few simple decorations. Start by creating red, white, and blue place settings. For this place setting I used the Marlow Thomas dishes from William Sonoma. I also used blue chargers, floral print blue plates and floral appetizer plates in different designs. The appetizer and dinner plates also come in red so you can do an alternating color for a fun and festive colorful look. I opted for gold silverware, which I use frequently, to match the gold around the rim of the dishes.

For a more luxurious touch, opt for cloth napkins. I did a simple white with red edging to give a subtle hint of red and added a nice wow statement with the napkin holder. I found the cutest star-shaped napkin holders on Etsy, and they also come in blue and other designs. You can also embellish the napkins with patriotic charms or ribbons for a special touch. You can also get creative and match the theme of your tablescape by using napkins with designs that reflect the holiday, such as fireworks, sparklers, or of course stars and stripes. Whatever you choose, make sure to choose napkins that show off your American spirit and give your 4th of July table an added festive touch.

Red, White and Blue Centerpieces for Tables

A 4th of July tablescape is the perfect way to celebrate this Independence Day. With the right decorations, you can create a festive and inviting atmosphere for your guests. Add a centerpiece to your table for an extra special touch. Red, white and blue centerpieces can be as simple as an arrangement of candles or as elaborate as a bouquet of flowers. You can even purchase pre-made centerpieces or make one yourself using items such as American flags, star-shaped balloons, and sparklers. For these patriotic table centerpieces, I did a matching blue and white pot from Williams-Sonoma that will double with a plant after the holiday. I filled it with white hydrangeas and small American flags. This was a very simple centerpiece to do and is right on the theme! One thing to be wiery of is hydrangeas get hot and can die quickly because of that, so be sure to purchase the day before or the day off and to spray them with water before taking them outside so they stay plenty wet and hydrated.

Drink Station

I wanted to add a fun element to this 4th of July table and the best way to do that is also something that helps guests help themselves. A drink station or food area allows guests to grab what they want as needed so you aren't asking them nonstop what you can get for them. I did a 3 drink station with Splenda's new Pour Pouch's and I loved how it turned out! Pink lemonade (with lemons), peach mango (with fresh peaches) and fruit punch (with strawberries, watermelon and blueberries) were beautiful colors to pick for this but also gave a variety of flavors for guests to choose from. Helpful tip if doing a drink station like this is to fill the jars with ice before adding cold water. This gives lots of room for ice to melt while keeping the drinks nice and cold. Adding fruit into each one also helps distinguish the flavors inside of each jar or you can also add names onto each glass drink dispenser.

How Can I Make My 4th of July Tablescape Stand Out?

The 4th of July is the perfect time to get creative and throw together a tablescape that celebrates the spirit of America and the spirit of your creativity. To get started, incorporate the colors of the American Flag (red, white, and blue) into your design. Utilize rustic elements like natural wood, mason jars, and burlap to add texture and charm. Create a centerpiece with festive decorations like stars, stripes, and fireworks to really bring the spirit of the Fourth of July to life.

For food and drinks, serve up some festive and delicious Fourth of July favorites like red, white, and blue popsicles, iced teas+, and cupcakes. To add some sparkle and shine, incorporate glittery accents like star garlands and banners. Finally, don’t forget to use festive, Fourth of July-themed plates, cups, and napkins for a fun touch that matches your tablecloth. With these decorative items, you’ll have the perfect Fourth of July tablescape that celebrates the traditional spirit of America.

Creating the Perfect Memorial Day Charcuterie Board

Memorial Day is a holiday dedicated to the remembrance of those brave heroes who have died in service of our country. In my world, anytime you have a gathering of close friends, family, and loved ones, a good charcuterie board is a great way to celebrate. On this day your board can follow the theme and help to show off your patriotism while bringing friends and family together for a special celebration of remembrance. This board is the perfect snack to enjoy while watching the parade or just spending valuable time with family. With its colorful array of fruits, veggies, meats, cheeses, and other items, this board will be sure to make your Memorial Day a special one.


Why We Love This Idea for Memorial Day

With the variety of meats, cheeses, and fruits available, you can create a unique charcuterie board that will be sure to impress your guests. Start by selecting a variety of meats, such as prosciutto, salami, and pepperoni. Add some cheeses, such as cheddar, brie, and blue cheese. Then, add some fruits and vegetables to your board, anything that adds reds, whites and blues is perfect for any patriotic celebration! Your Memorial Day Charcuterie Board will be a delicious way to share in the spirit of the holiday. Enjoy some quality time with your loved ones and savor the flavors of the season. Whether you’re hosting a backyard barbecue or just having a relaxing evening at home, a charcuterie board is the perfect way to mark the occasion. So, get creative and show off your patriotism with a Memorial Day Charcuterie Board.

How to Make Your Charcuterie Board a Patriotic Theme

Memorial Day is the perfect time to get creative with your charcuterie board. Start with a red, white, and blue background, like a red plate, a white plate, and a blue platter. Add some bright and festive fruits and vegetables to your board, such as strawberries, blueberries, pomegranates, blackberries and raspberries. Cheese is also an essential part of any charcuterie board, and classic varieties like cheddar, bleu cheese, and brie are sure to be a hit. Include some charcuterie meats like salami, prosciutto, and pepperoni for added flavor. Add some jams and spreads like strawberry jam, blueberry jam, cranberry jam or anything red or blue to your board for a sweet touch. Make sure to include some crackers and breads like baguettes, crostini, and crackers for scooping up all the deliciousness. Add in some nuts like almonds, cashews, and walnuts for a salty and crunchy element where you see any space on the board. Lastly, grab your star-shaped cookie cutter. You can cut out watermelon cubes as I did here, cheese slices, or a star in the middle of your brie and fill it with jelly or pomegranate seeds. With these tips, you'll have the perfect Memorial Day charcuterie board in no time.

What Type of Board to Use When Making a Charcuterie Board?

Memorial Day is the perfect time to get together with family and friends and enjoy a delicious charcuterie board. Whether you’re hosting a backyard barbecue or having a picnic in the park, a charcuterie board is sure to be the perfect centerpiece. When creating a charcuterie board, the first thing to consider is the board itself. A wooden board is the most ideal choice for creating a charcuterie board. Its natural surface provides an attractive backdrop for the food items and also makes it easier to clean once the board is finished. Ceramic, slate, and marble boards are also great options for making a charcuterie board. These materials all create a stunning presentation for the food and they are also easy to clean. For a truly unique charcuterie board, you can use a cutting board made of bamboo. Bamboo is a natural material that looks beautiful and is also easy to maintain. For this board, I used a large white tray with handles that made this a perfect “board” to travel outside with. It had a soft red edge that went with the theme. You can find similar boards that will be perfect for your Memorial Day charcuterie board by following the link below! So, this Memorial Day, make a charcuterie board to celebrate the occasion in style!

What Types of Drinks Pair Well with a Memorial Day Charcuterie Board?

For a festive start to the evening, why not try a glass of sparkling wine? Sparkling wine is a classic pairing for charcuterie boards, and for the best flavor choose a dry, high-acid sparkling wine. If you’re looking for festive cocktails, then why not opt for a classic gin and tonic or a Moscow mule? I also linked some delicious cocktail recipes below that I love to make in the summer months! Alternatively, a cold beer is always a great choice when enjoying a charcuterie board. If you’re a beer drinker, opt for something light and refreshing like a pilsner or pale ale.

For a truly memorable Memorial Day, creating a charcuterie board and pairing it with drinks is a great way to celebrate. Enjoy a glass of sparkling wine, a classic cocktail, or a cold beer with your board for the perfect Memorial Day celebration.

How Long Does a Memorial Day Charcuterie Board Take to Make?

A Memorial Day Charcuterie Board is the perfect way to celebrate the holiday in style. With minimal effort and some planning, you can make a beautiful board in as little as 15 minutes. If you plan ahead with a good grocery list, you can have your board ready in no time for a Memorial Day celebration. If you are pressed for time you can make ahead and refrigerate as well. All you need to do is pick out your favorite meats and cheeses, along with a variety of crackers, jams, and other accompaniments and start assembling. You can also incorporate some Memorial Day-themed items, such as American flags or red, white, and blue decorations, to make your board more festive. By getting creative, you can make your board something truly special. You can also add in a few special touches, like a festive flag or some festive desserts, like chocolate covered pretzels, to make your board even more special.

This Memorial Day, why not pay tribute to the holiday with a delicious charcuterie board? It's a great way to celebrate as friends and family come together, and you don't have to spend hours putting it together. In just 15 short minutes you can create a stunning and scrumptious board that will be the centerpiece of your celebration. So get ready to honor Memorial Day with a fabulous charcuterie board

Other Appetizers & Cocktails to give you inspiration this Holiday:

2023: Charcuterie Board Ideas to Help You Ring in the New Year

Celebrating Mother's Day with a Deliciously Decadent Charcuterie Board

Refreshing Lemon Twist Cocktail

Strawberry Orange Bourbon Smash

3 Mexican Mule Recipes with a Twist!