Celebrate the Size of your Growing Baby with Recipes for 40 Weeks

Pregnancy is a journey filled with excitement, anticipation, and plenty of changes. Each week, as your baby grows and develops, you have an opportunity to celebrate these milestones in a unique and delicious way. This idea is simple yet so fun. It involves creating a recipe each week that reflects the size of your growing baby. These recipes not only provide a sense of joy and celebration, but they also offer essential nutrients needed for both mother and baby, as long as you use a growth chart like this with healthy size comparison foods. This blog post will take you through 40 weeks of pregnancy with recipes inspired by the comparative size of your baby, turning each stage of your pregnancy into a culinary adventure. Weeks one to three of pregnancy you probably didn't know you were pregnant yet and the baby is so small, so we will start at Week four with recipes to celebrate!

4 Weeks Pregnant

Baby is the size of a Poppy Seed! They are about 0.04 inches and less than 0.04 oz. So small yet such a big change for mom and dad! Congratulations you may have just found out you are pregnant, and joy is everything right now! To celebrate this week, cook up A Sweet and Delicious Recipe for Lemon Poppyseed Bread

Other Delicious Recipes You Can Make:

Bagels with Poppy Seeds on top

All Types of dinner rolls

Poppy Seed Salad Dressing (I have this recipe in my week for kale below)

5 Weeks Pregnant

Baby is the size of an Apple Seed! You made it to 5 weeks and baby has grown. They are working hard on creating the brain, spinal cord, heart and blood vessels. They are about 0.05 inches now and it's time to celebrate! This week we are making A Taste of Heaven: Deliciously Easy Apple Pie!

Other Recipes You Can Make:

Apple Cider Loaf with Brown Butter Glaze

Shaved Brussel Sprout Salad with Apples, Goat Cheese & Candied Pecans

Homemade Apple Sauce

6 Weeks Pregnant

Baby is the size of a Pomegranate! They have tripled in size and are fully protected by amniotic fluid. Now the length of .13 inch they are still so small but still should be celebrated. This week we are making The Perfect Pear and Pomegranate Arugula Salad

Other Recipes You Can Make:

Pomegranate Relish

Festive Taste of Tradition: Sparkling Cider Punch for Christmas

Fruit Salad

7 Weeks Pregnant

Baby is the size of a Blueberry! You may be experiencing some morning sickness now.. which isn't limited to the morning. You also may be experiencing more bathroom trips, as I did, and happened to be my very first symptom of pregnancy. I was waking up every night to use the restroom and that never happened before for me. While you are getting the highs and lows of pregnancy symptoms your baby is growing. Now about .5 inches and still less than 0.04 oz. This week we are celebrating with making Delicious Blueberry Cake with Mascarpone Frosting

Other Recipes You Can Make:

Soft Cream Cheese Lemon Blueberry Scones

Delicious Berry Custard Puff Pastry Tart

Blueberry Crumble Streusel Loaf Recipe

8 Weeks Pregnant

Baby is the size of a Raspberry! Their hands and feet have webbed fingers and toes. Weighing in still below .04 oz they are still growing at around .63 in. You are still probably able to hide your bump at this point, but your jeans may be feeling a little tighter. Start those belly pictures now because baby will be here in just 32 weeks and growing every day. To celebrate we are making The Ultimate Raspberry Pistachio Cheesecake Recipe

Other Recipes You Can Make:

Delicious Frozen Raspberry Margarita (Skip the tequila)

Raspberry Trifle

Raspberry Crisp or Pie

9 Weeks Pregnant

Baby is the size of a Green Olive! They have graduated from an embryo to a fetus. The reproductive organs have formed but it is still too early to tell if you are having a boy or girl. They have grown to .9 inches and .07 oz. A small but mighty as the digestive track is also being formed. To celebrate I made Crafting a Herb Christmas Tree Focaccia Bread Masterpiece for the Holidays as you can tell I was pregnant during Christmas.

Other Recipes You Can Make:

Moroccan Chicken

Stuffing your own (I love feta in mine!)

Building A Charcuterie Board (leave out the soft cheese!)

10 Weeks Pregnant

Baby is the size of a Strawberry! Their eyes and eyelids are more developed, and eyebrows are even beginning to grow. They have made it to 1.22 in and .14 oz. This week marks you at a quarter of the way through your pregnancy. Many things are changing but you probably aren't seeing them or feeling the baby move just yet. Hold on tight because you will soon. This week we are making Chocolate Dipped Strawberries. As you can see it was still Christmas time for us and it took everything, I had to make this recipe with morning sickness. So, a blog post was never made but you can get extra creative this week if you wish!

Other Recipes You Can Make:

Shaved Brussel Sprout Salad with Apples, Goat Cheese & Candied Pecans (Strawberries are in the dressing)

Strawberry Cake

Strawberries and Cream

11 weeks Pregnant

Baby is the size of a Lime! Just over 1.5 inches from head to toe your baby is still tiny but they are moving. Kicking and stretching inside of your belly, you should feel it in the next month or two once they grow big enough. Celebrate this week with a Cranberry Key Lime Pie or if it's not the holidays for you Mini Key Lime Pies with Splenda both are delicious!

Other Recipes You Can Make:

Fruit & Goat Cheese Bruschetta ( lime is in the recipe)

Lime Fruit Dip

Fish Tacos with Lime

12 Weeks Pregnant

Baby is the size of a Plum! Now weighing over 2 oz and over 2 inches long it's a week to celebrate 2's! They are now able to open and close their hands and curl their toes. They are also growing fingernails. It was the last of the holiday season for us at week 12 and I made a "Sugar" Plum Cobbler it was deliciously good!

Other Recipes You Can Make:

Plum Tart or Galette

Plum Dumplings

Plum Butter or Jam

13 Weeks Pregnant

Baby is the size of a Lemon! Growing 1/2 an inch and 1/2 an ounce from last week your little one is making leaps and bounds. They have started swallowing amniotic fluid and their bones are beginning to harden. While you can't feel it yet you have started making colostrum, the fluid your baby will drink the first few days of life. You also may be getting some relief from those first trimester symptoms. A reason to celebrate with a new recipe. Zesty Delight: Mastering the Ultimate Cod Piccata Recipe at Home

Other Recipes You Can Make:

Lemon Cheesecake With An Amazing Glaze

Arnold Palmer Popsicle: A Delicious Summer Recipe

Lemon Poppy Seed bread, muffins or cake

14 Weeks Pregnant

Baby is the size of an Orange! Now weighing more than 3 oz and longer than 6 inches they can squint, frown and possibly even suck their thumb by now. Such a big week as baby is getting bigger and bigger and you are in the second trimester. This is, for most moms to be, the best time of their pregnancy. Enjoy and celebrate every minute. Orange Cake with Raspberry Mascarpone Frosting is the perfect recipe to bring in this week.

Other Recipes You Can Make:

Slow Cooker Orange Chicken

Blueberry Orange Glazed Muffins

Orange and Cream Smoothie

15 Weeks Pregnant

Baby is the size of a pear! This week could be a big one as an ultrasound can now find out the sex of your baby. Get ready to decorate and plan the nursery, parties, outfits and more once you know the gender. However, if you are wanting to be surprised and wait until birth like we did, get ready to remind them not to spoil the surprise at every doctor's appointment from here on out! This week baby's taste buds and nerves are beginning to connect to the brain. By 20 weeks they will be fully formed. Baby is also looking more like a little person with eyelids, eyebrows, eyelashes, nails, hair and defined fingers and toes. Such a cute little one your growing! We sure hope baby likes Pears because this week we are cooking up Delicious, Nutritious Pear & Walnut Salad with Honey Mustard Dressing

Other Recipes You Can Make:

How to Make the Perfect Pear and Pomegranate Arugula Salad

Indulge in Delicious Personal Pear Tarts

Pear Crisp

16 Weeks Pregnant

Baby is the size of an Avocado! Weighing 5 whole ounces and 7 inches long from head to bottom! Your baby's heart is now pumping about 25 quarts of blood each day and will continue to increase as your little one develops. Their hair follicles are forming a pattern they will have for the remainder of their life. Celebrate your little avocado with guac at your favorite restaurant this week or by making a delicious Slow Cooker Chicken Tortilla Soup Recipe!

Other Recipes You Can Make:

Delicious Sweet & Spicy Salmon Bowls

Salsa Verde Chicken Enchiladas

Lobster Sheet Pan Nachos

17 Weeks Pregnant

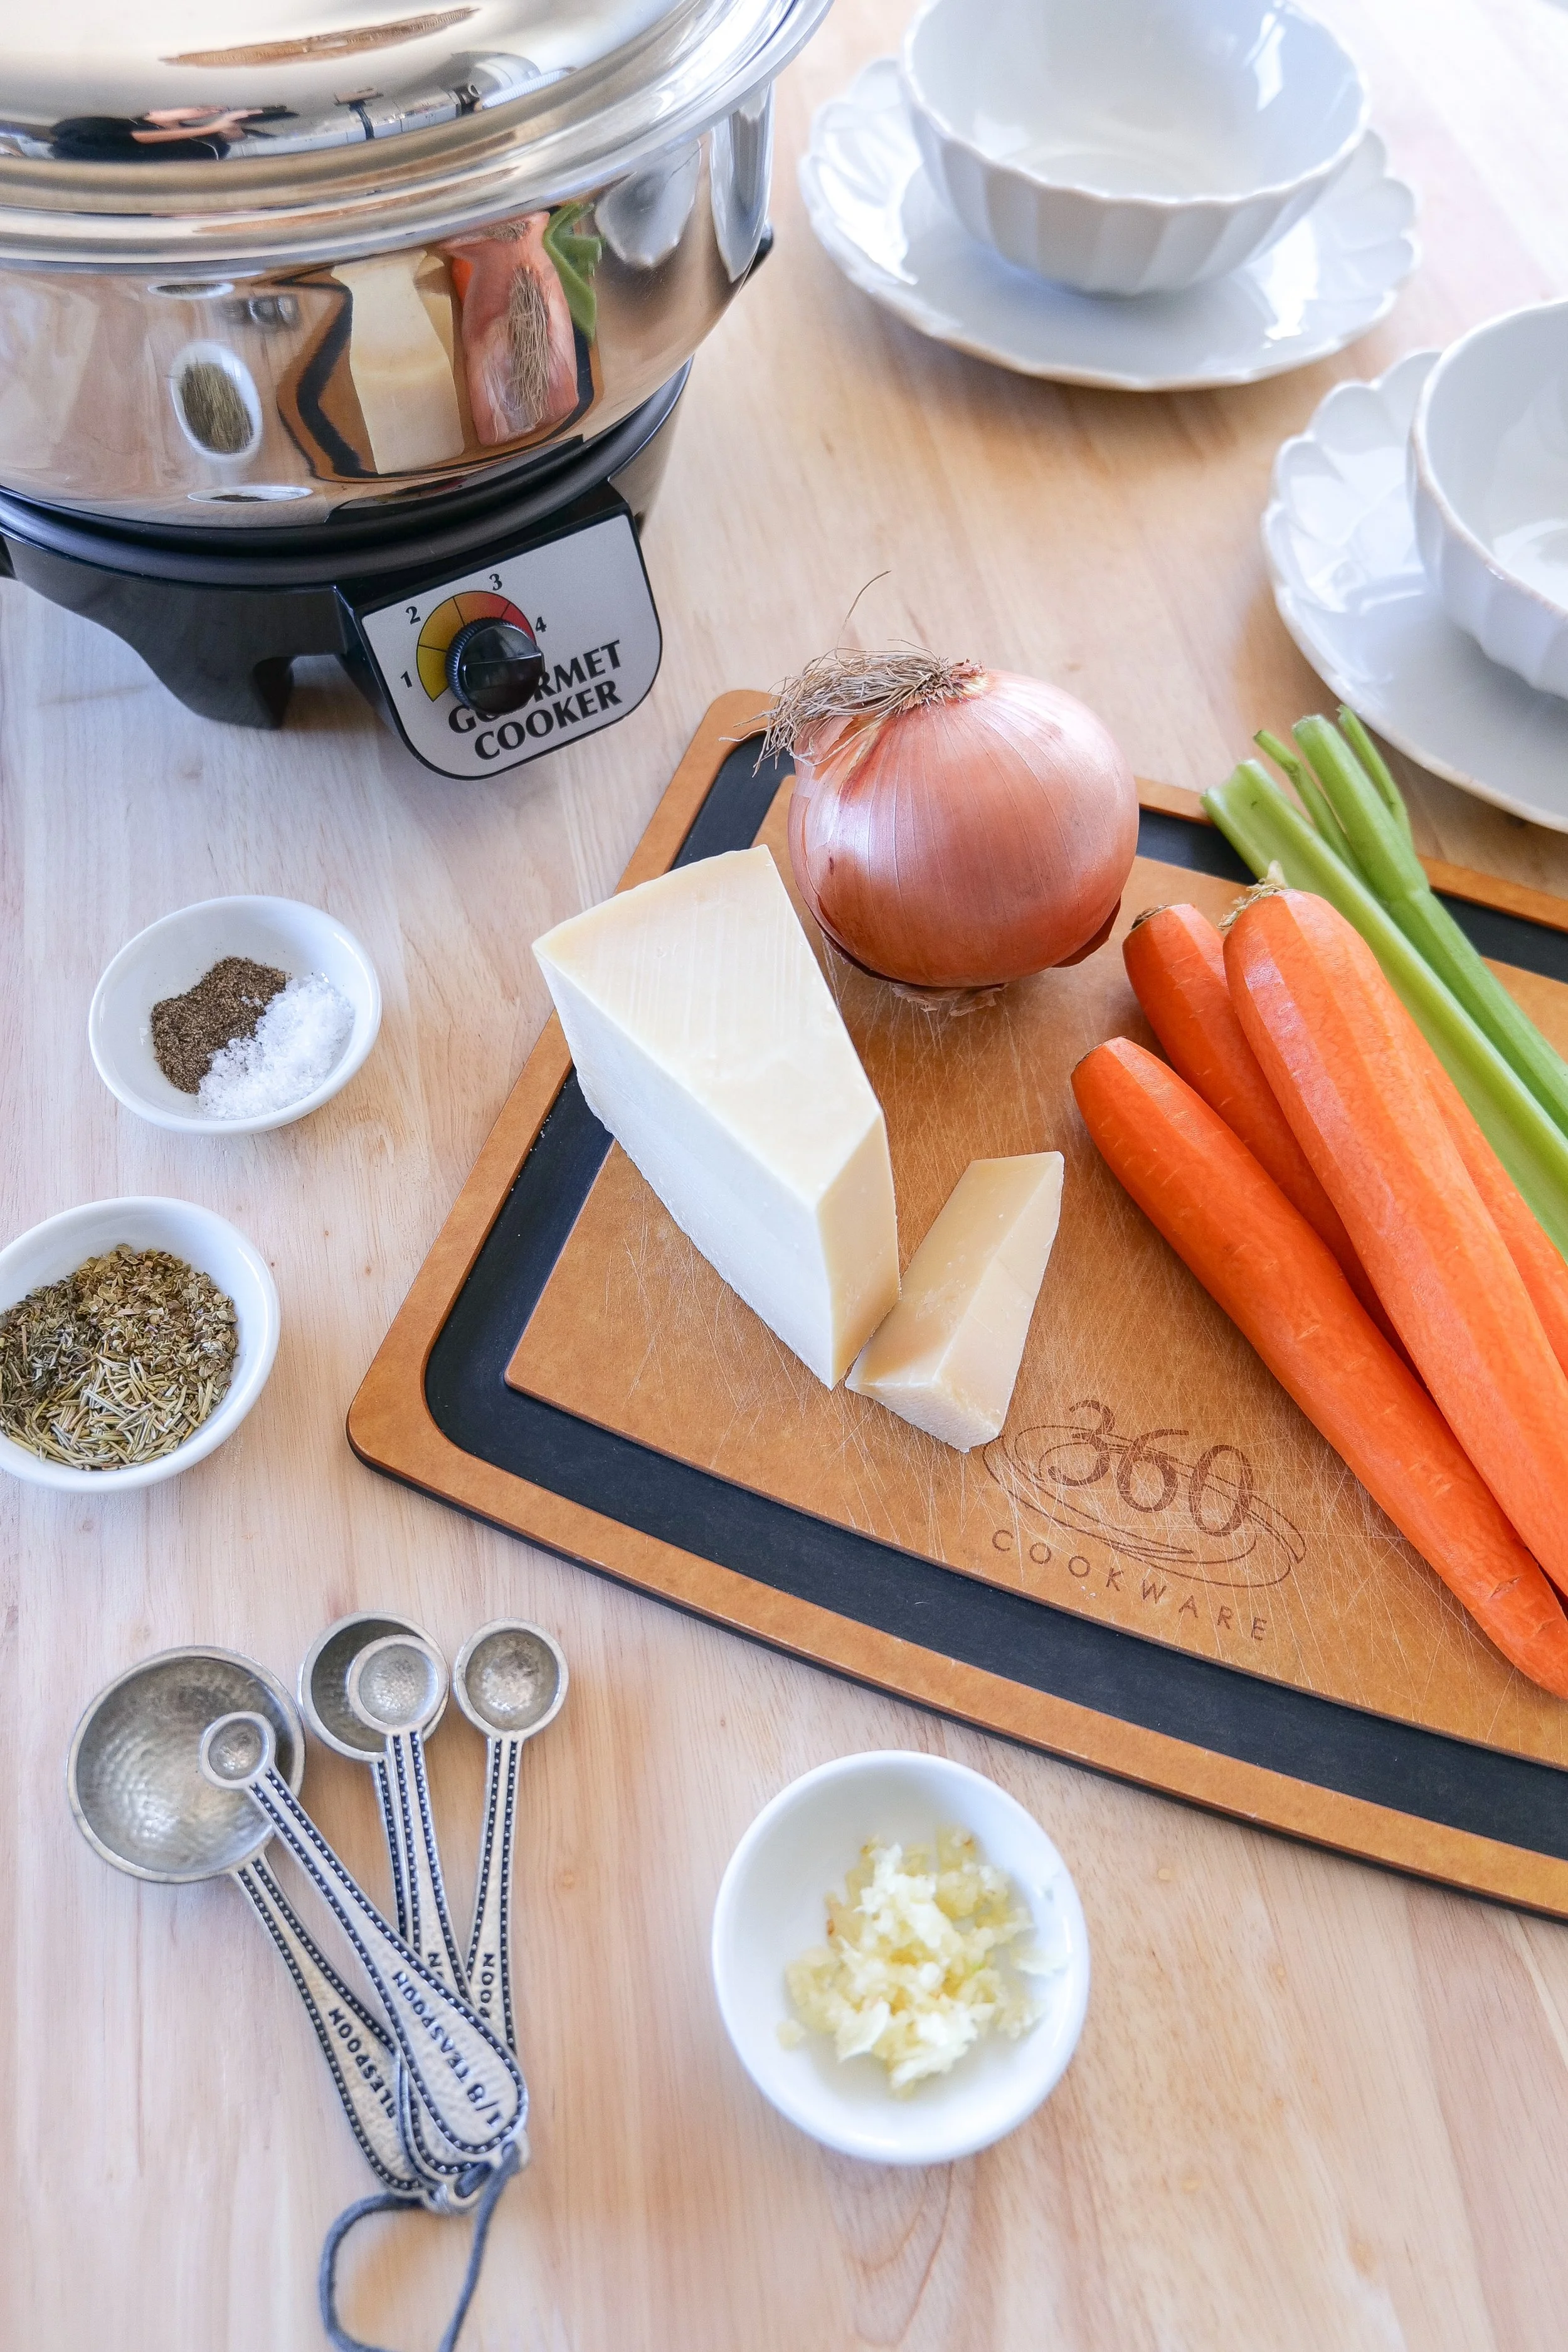
Baby is the size of an Onion! Baby has been hiccupping but this week you might start to actually feel it. Weighing in at almost 5 oz and growing to 5.12 inches in length they are becoming more noticeable and celebrated. This week we are making a Creamy Corn Chowder Soup

Other Recipes You Can Make:

French Onion & Shallot Soup

Blooming Onion or Onion Rings

Green Onion Dip

18 Weeks Pregnant

Baby is the size of a Bunch of Grapes! Your little one's tiny fingers now have unique fingerprints. Just wait until you feel their hands wrap around your one finger, it's a feeling like no other. This week we are making a delicious Chicken Salad Sandwich that you can actually eat. I missed sandwiches and deli meat so much during pregnancy, so this was a nice treat!

Other Recipes You Can Make:

Roasted Grape Crostini

Balsamic Steak with Red Grape Relish

Concord Grape Onion Jam

19 Weeks Pregnant

Baby is the size of a Mango! Their legs are now longer than their arms and you might be able to start feeling baby kick if this if your second or third pregnancy. If it's your first, you will most likely be feeling baby in the next few weeks. Celebrate this week's milestone of baby reaching almost 9 oz and 6 inches making Sweet & Spicy Mango Chicken Wings Recipe

Other Recipes You Can Make:

Sparkling Ice Mint Mango Mock-tail

Mango Habanero Salsa

Mango Slaw

20 Weeks Pregnant

Baby is the size of a Sweet Potato! If you start feeling subtle jerking movements in the womb don't worry baby has just start hiccupping. They also have taste buds and can start to send them to your brain... so if your craving different things that may be why. Some research indicates that what you eat during pregnancy can influence the foods your baby prefers later.

So with that in mind, we are keeping it fun and healthy with Sweet Potatoes being the size of baby we are making 3 Easy & Nourishing Stuffed Sweet Potato Recipes

Other Recipes You Can Make:

Sweet Potato Bisque

Sweet Potato Fries

Sweet Potato Gnocchi

21 Weeks Pregnant

Baby is the size of a Banana! Now 10.5 inches and 14 ounces your little one is getting long and will soon start to plump up in the coming weeks. We took an amazing trip to Hawaii for our babymoon, and I loved acai bowls and all the natural fruit while vacationing, so I wanted to come home and make delicious Homemade Acai Bowls. With this week being a banana it worked perfectly because it is in the recipe and can be used on top. Hope your loving fruit this week too because this is a fun one!

Other Recipes You Can Make:

Homemade Delicious Banana Bread

Banana Nut Pancakes

Banana Oat Breakfast Cookies

22 Weeks Pregnant

Baby is the size of a Carrot! Baby is officially over 1 pound and starting to look like a miniature newborn as their lips, eyelids, and eyebrows become more distinct. This week we are making Carrot Cake Cinnamon Rolls made with Sourdough Starter if you don't have a sourdough starter you can use yeast or one of the fun recipes below!

Other Recipes You Can Make:

Carrot Sheet Cake with Brown Butter Frosting

Apple Brown Sugar Glazed Carrots

Brandy Glazed Carrots

23 Weeks Pregnant

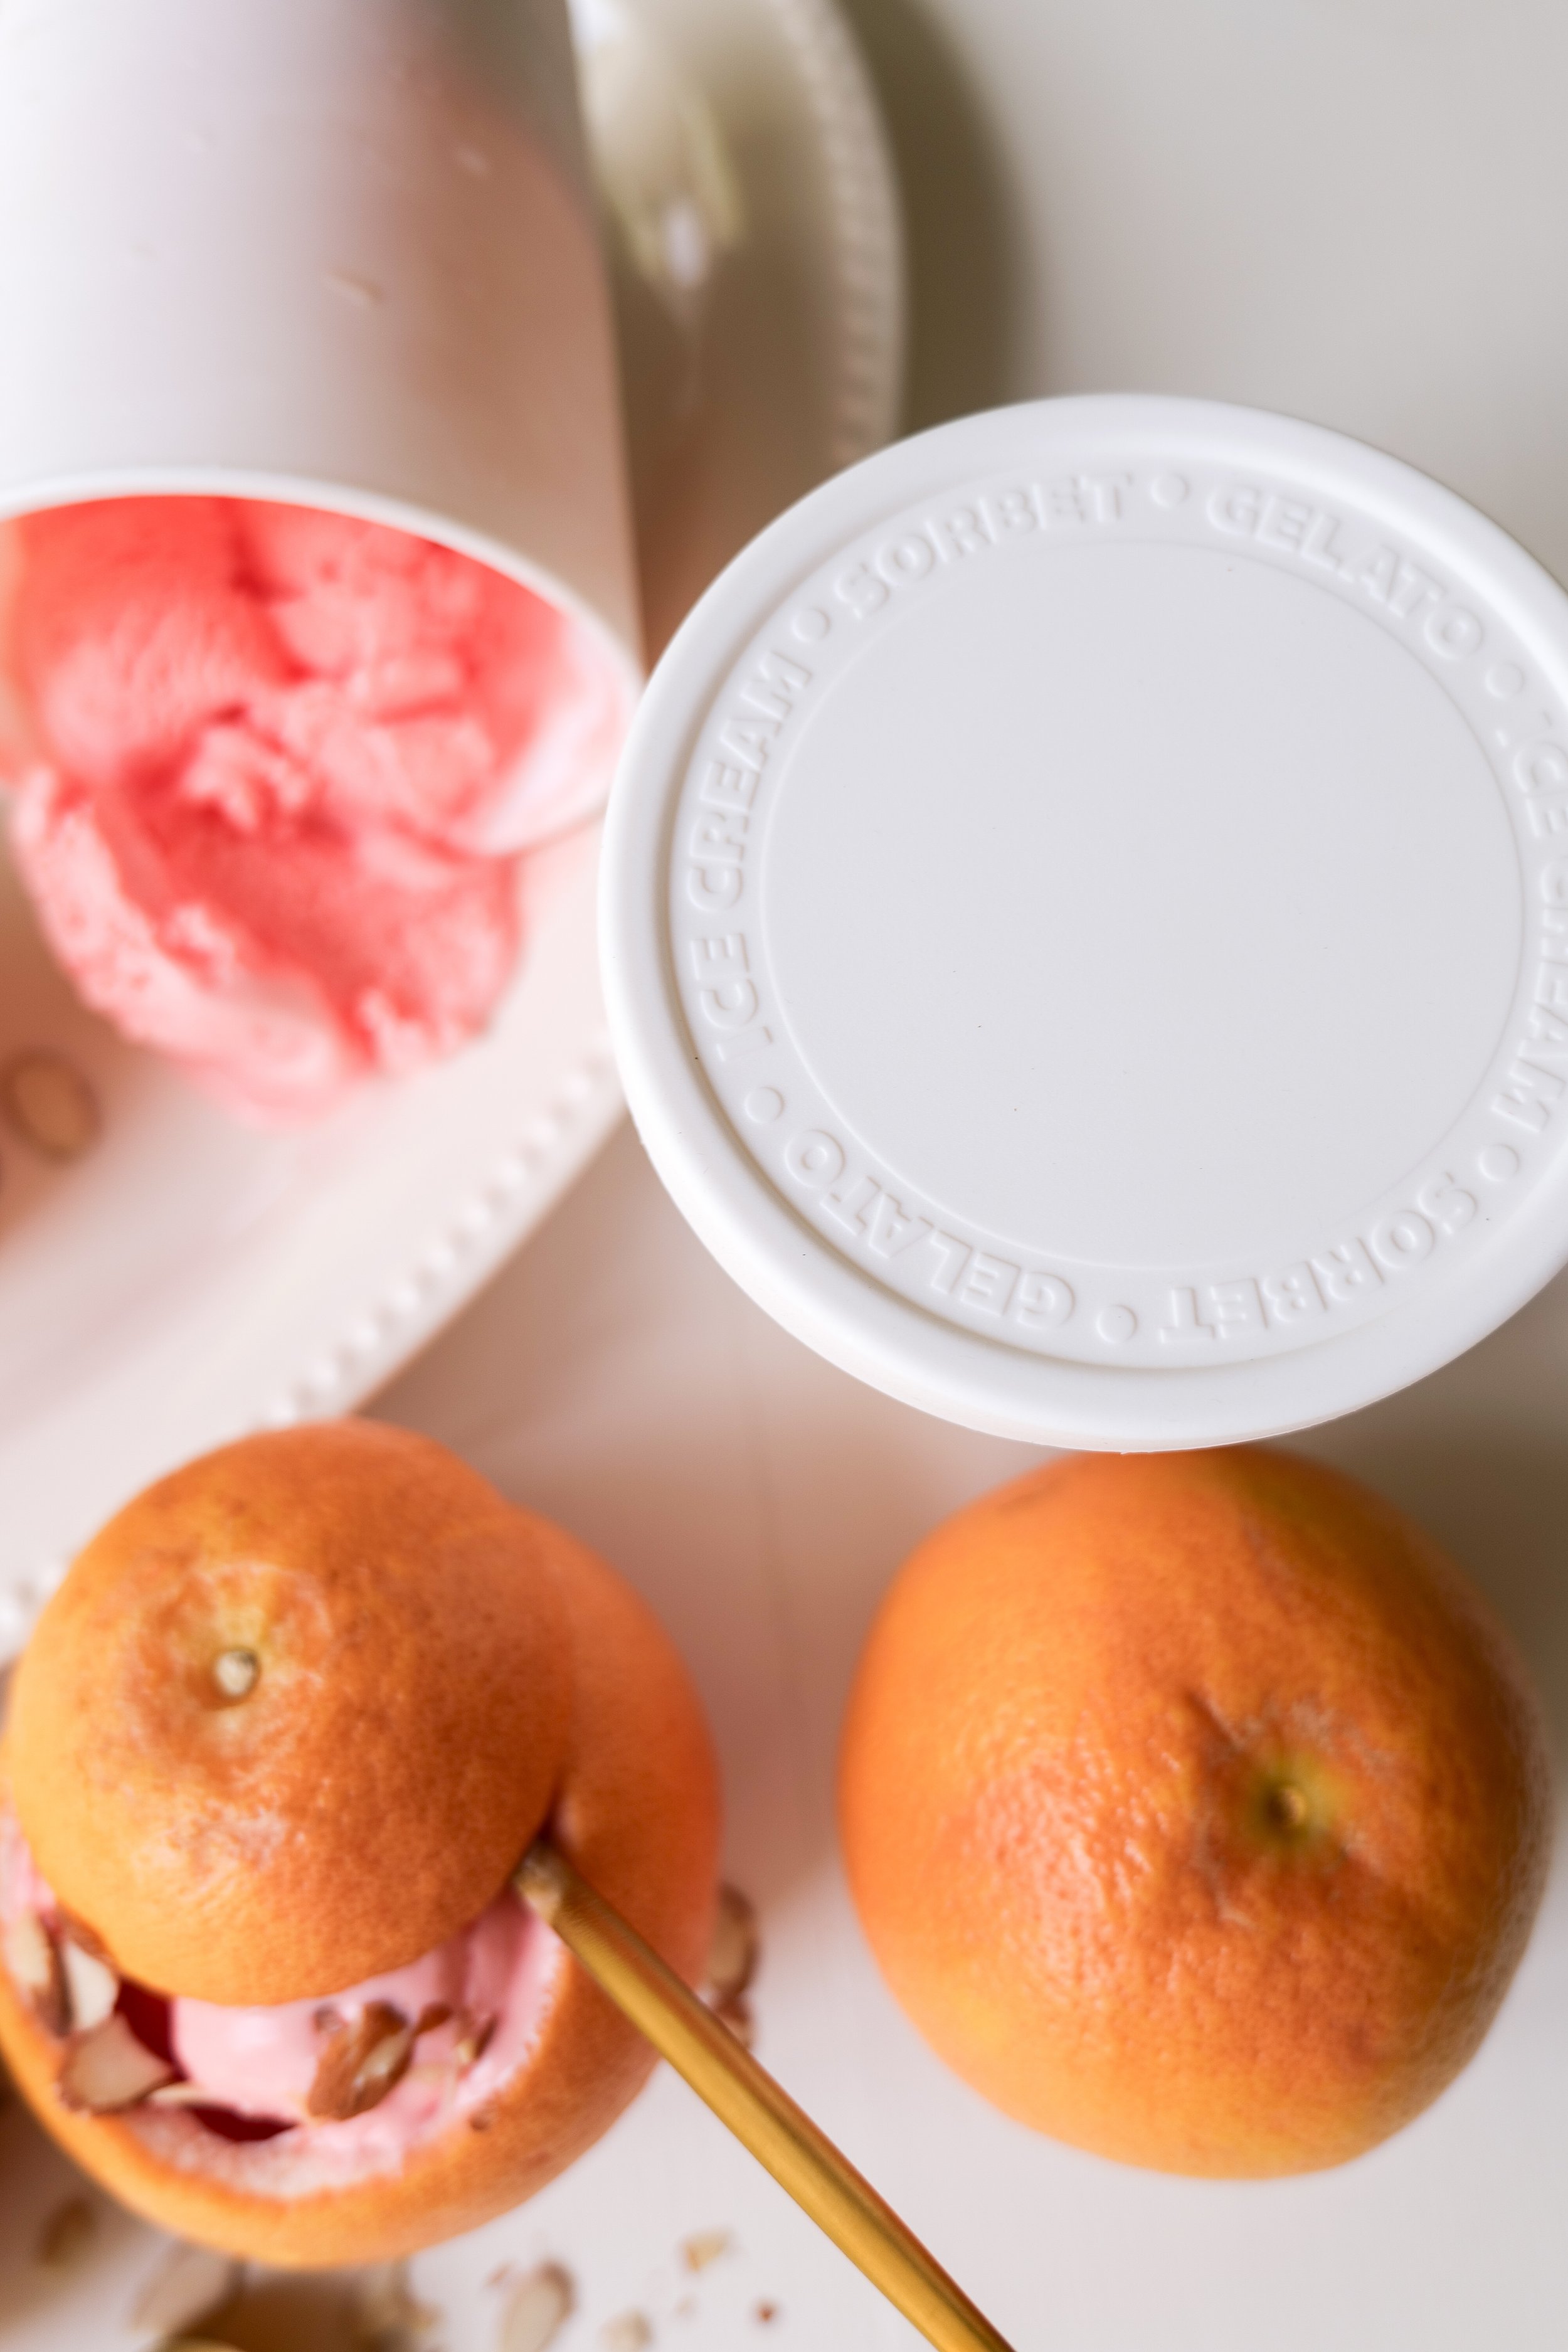
Baby is the size of a Grapefruit! Now more than a foot long they can feel your dancing. So, turn on the music and swing around the house. Grapefruit is the fruit of choice, and we usually aren't the biggest fans of grapefruit at our house, but this Delightful Almond Grapefruit Ice Cream Recipe was such a good one you will love it!

Other Recipes You Can Make:

Grapefruit Meringue Pie

South of the Boarder Citrus Salad

Grapefruit Poppy Seed Bread

24 Weeks Pregnant

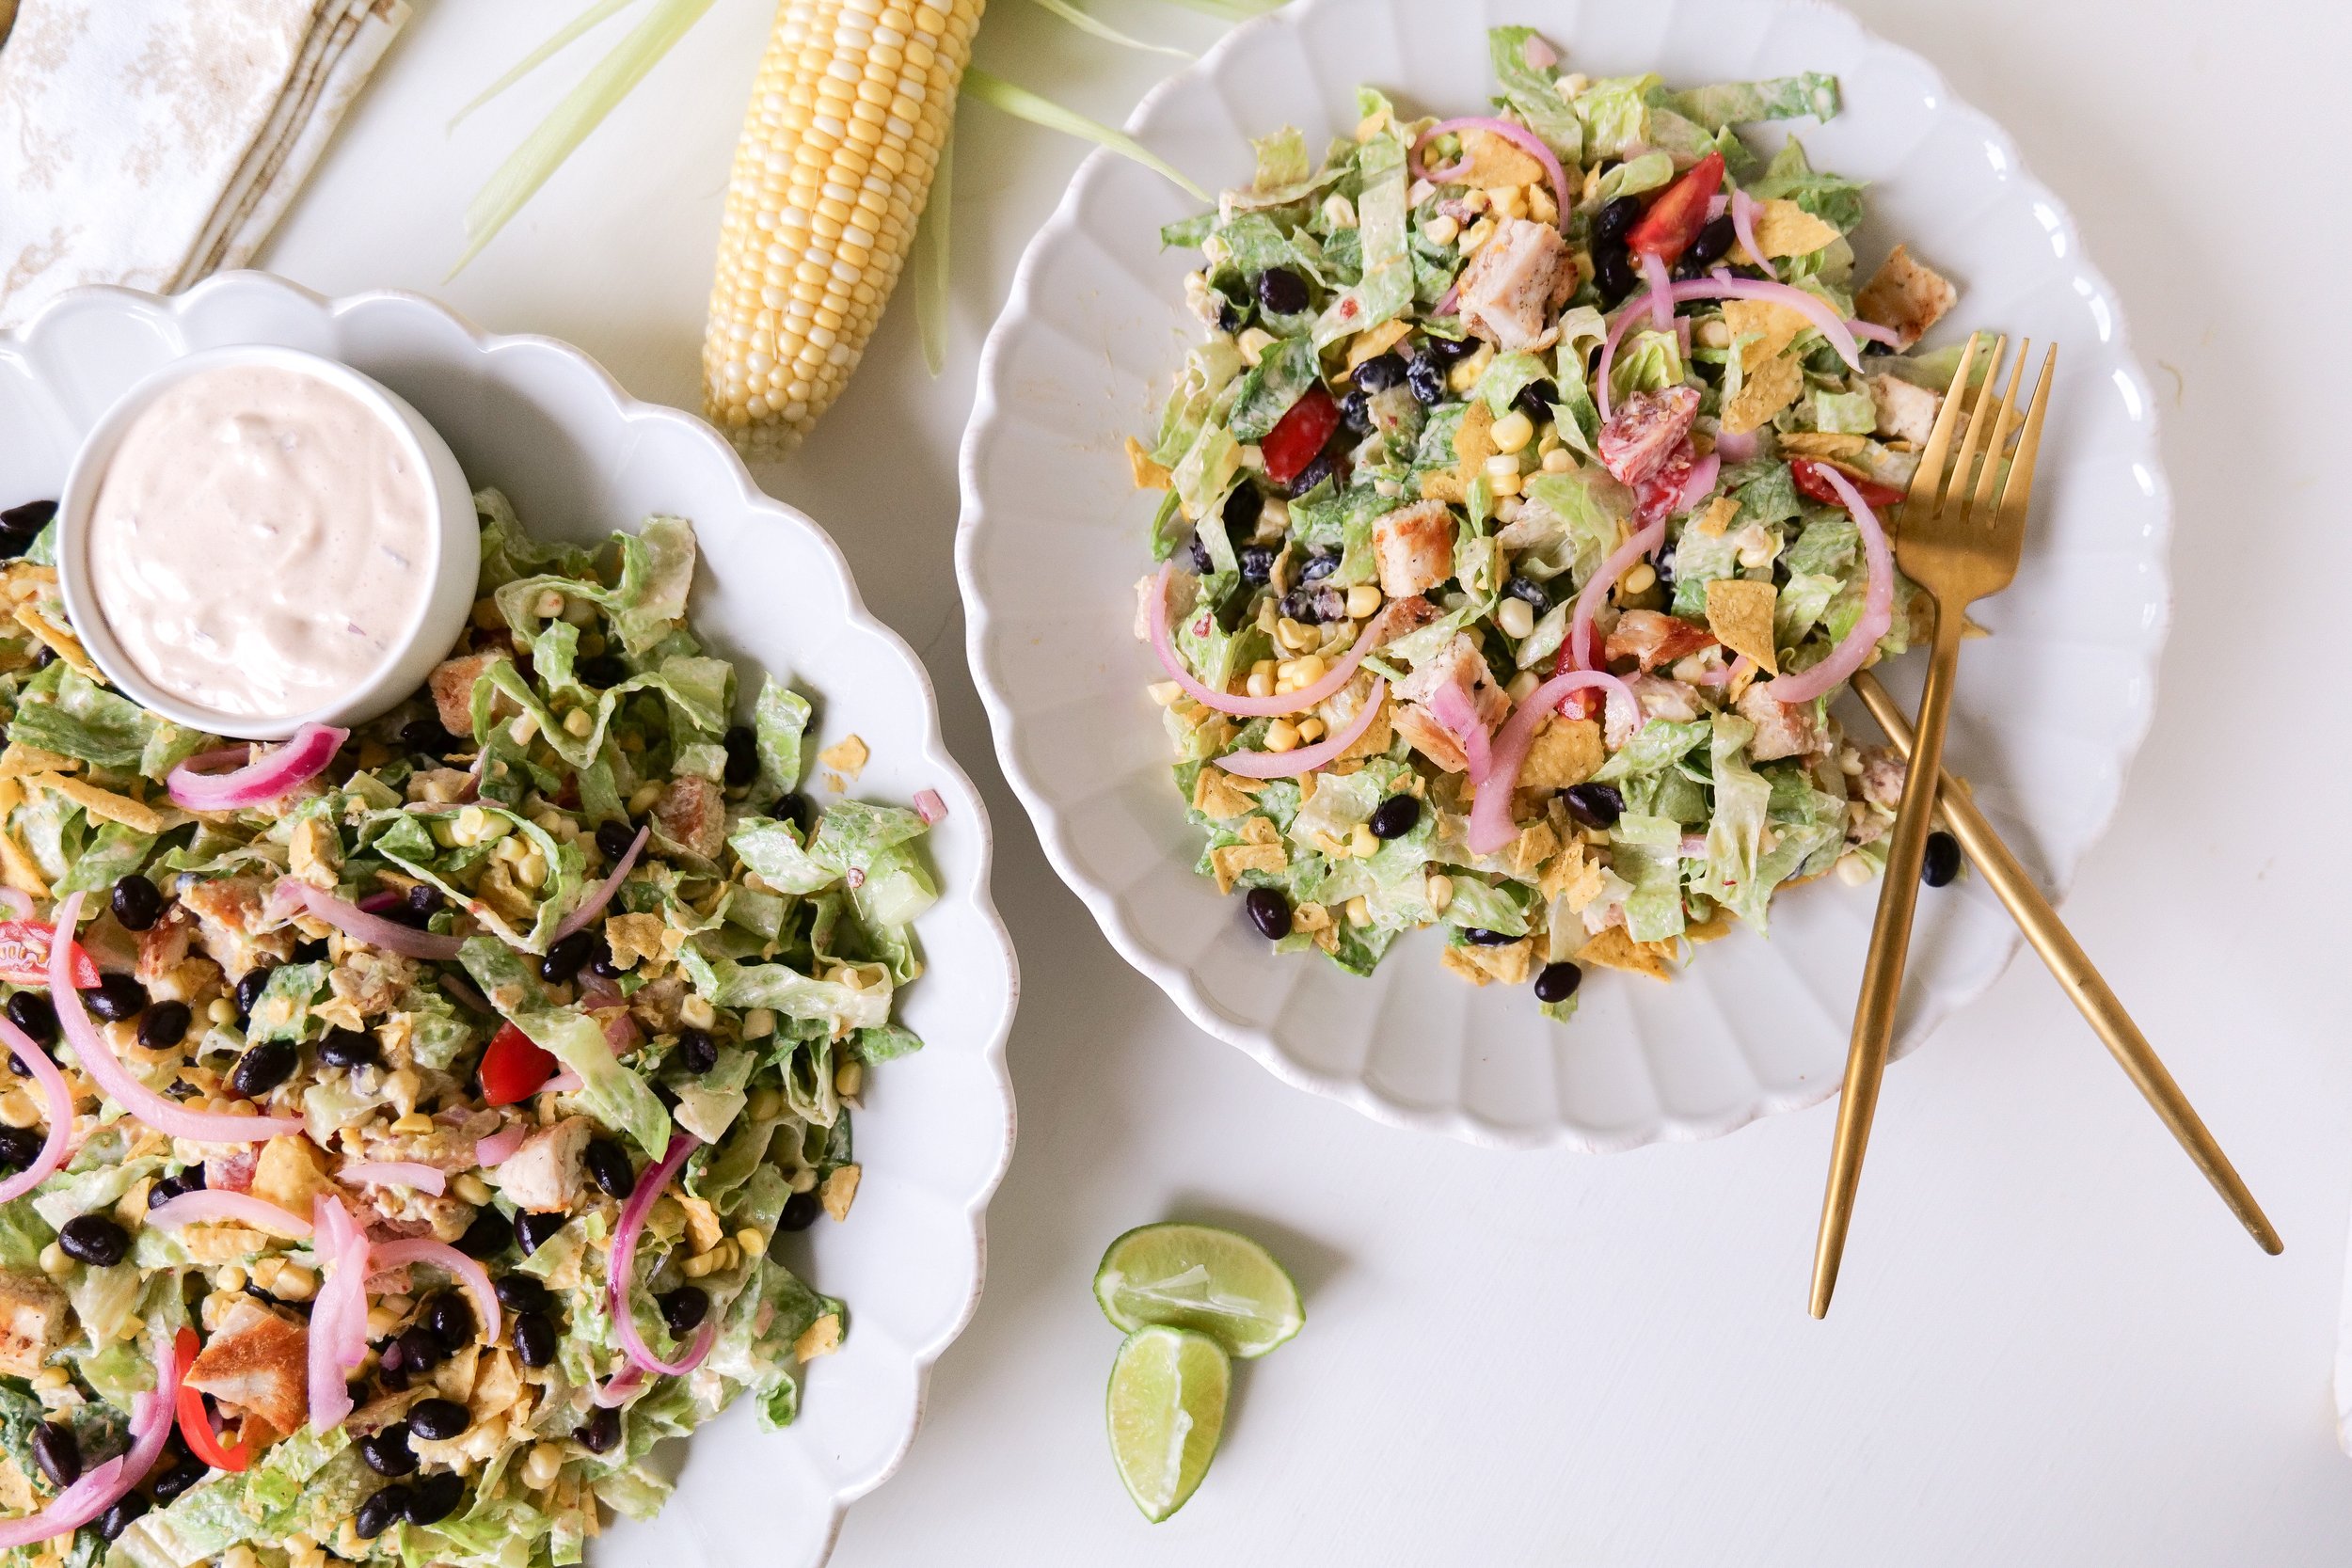
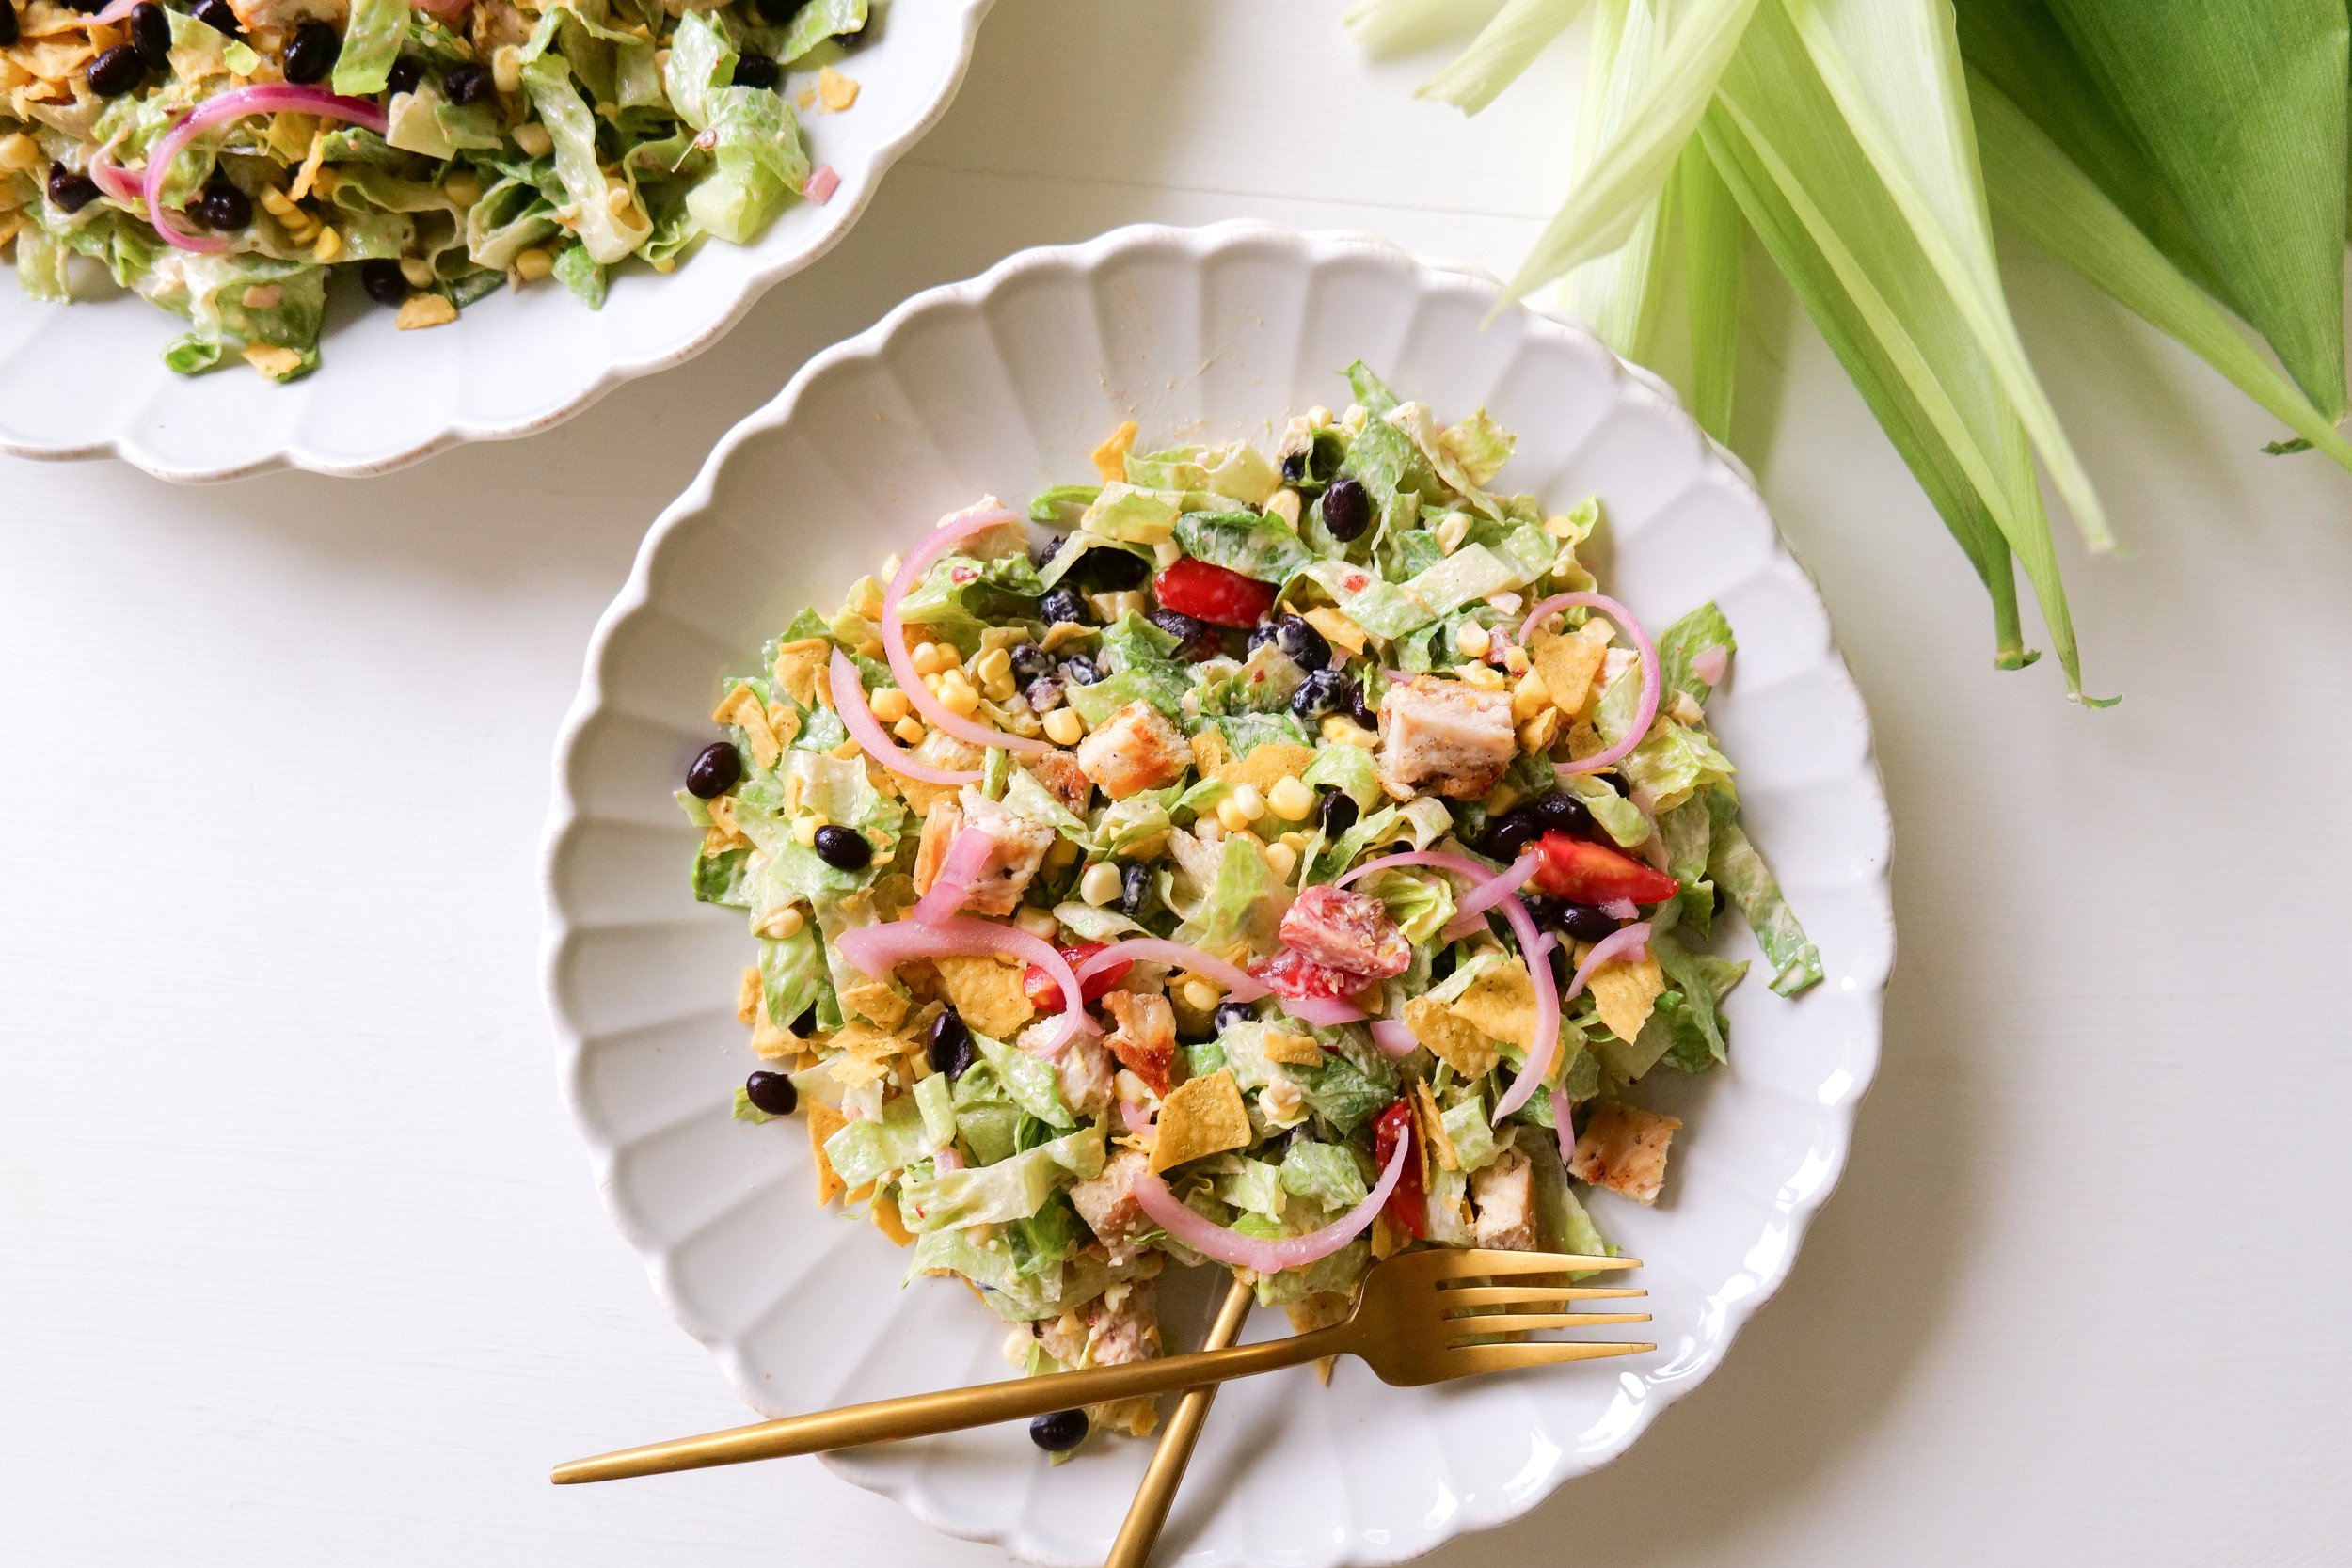
Baby is the size of an Ear of Corn! Baby still has thin and translucent skin as well as very thin and long. Don't worry they will start to plump up soon and become nice and round. Their nostrils are opening now for "practice breathing", so they'll go through the same motions of real breathing but inhale amniotic fluid instead of air. Enjoy a Southwestern Chop Salad Recipe with an Ear of Corn cut on top to celebrate this milestone!

Other Recipes You Can Make:

The Most Delicious Homemade Corn Bread Loaf Recipe

Grilled Chicken, Mexican Street Corn & Cucumber Salad

Creamy Corn Chowder Soup

25 Weeks Pregnant

Baby is the size of a Coconut! This week they may be able to distinguish between your voice and your partner's voice. So, start talking away because it will calm them later on as well to hear both of your voices as you begin to get to know each other. They're developing a firm grasp and may reach out and grab the umbilical cord. They can also stick out their tongue! Decadent Almond Joy Cookies are this weeks recipe and such a delicious treat!

Other Recipes You Can Make:

Coconut Rice

Coconut Curry Soup

Coconut Macaroons

26 Weeks Pregnant

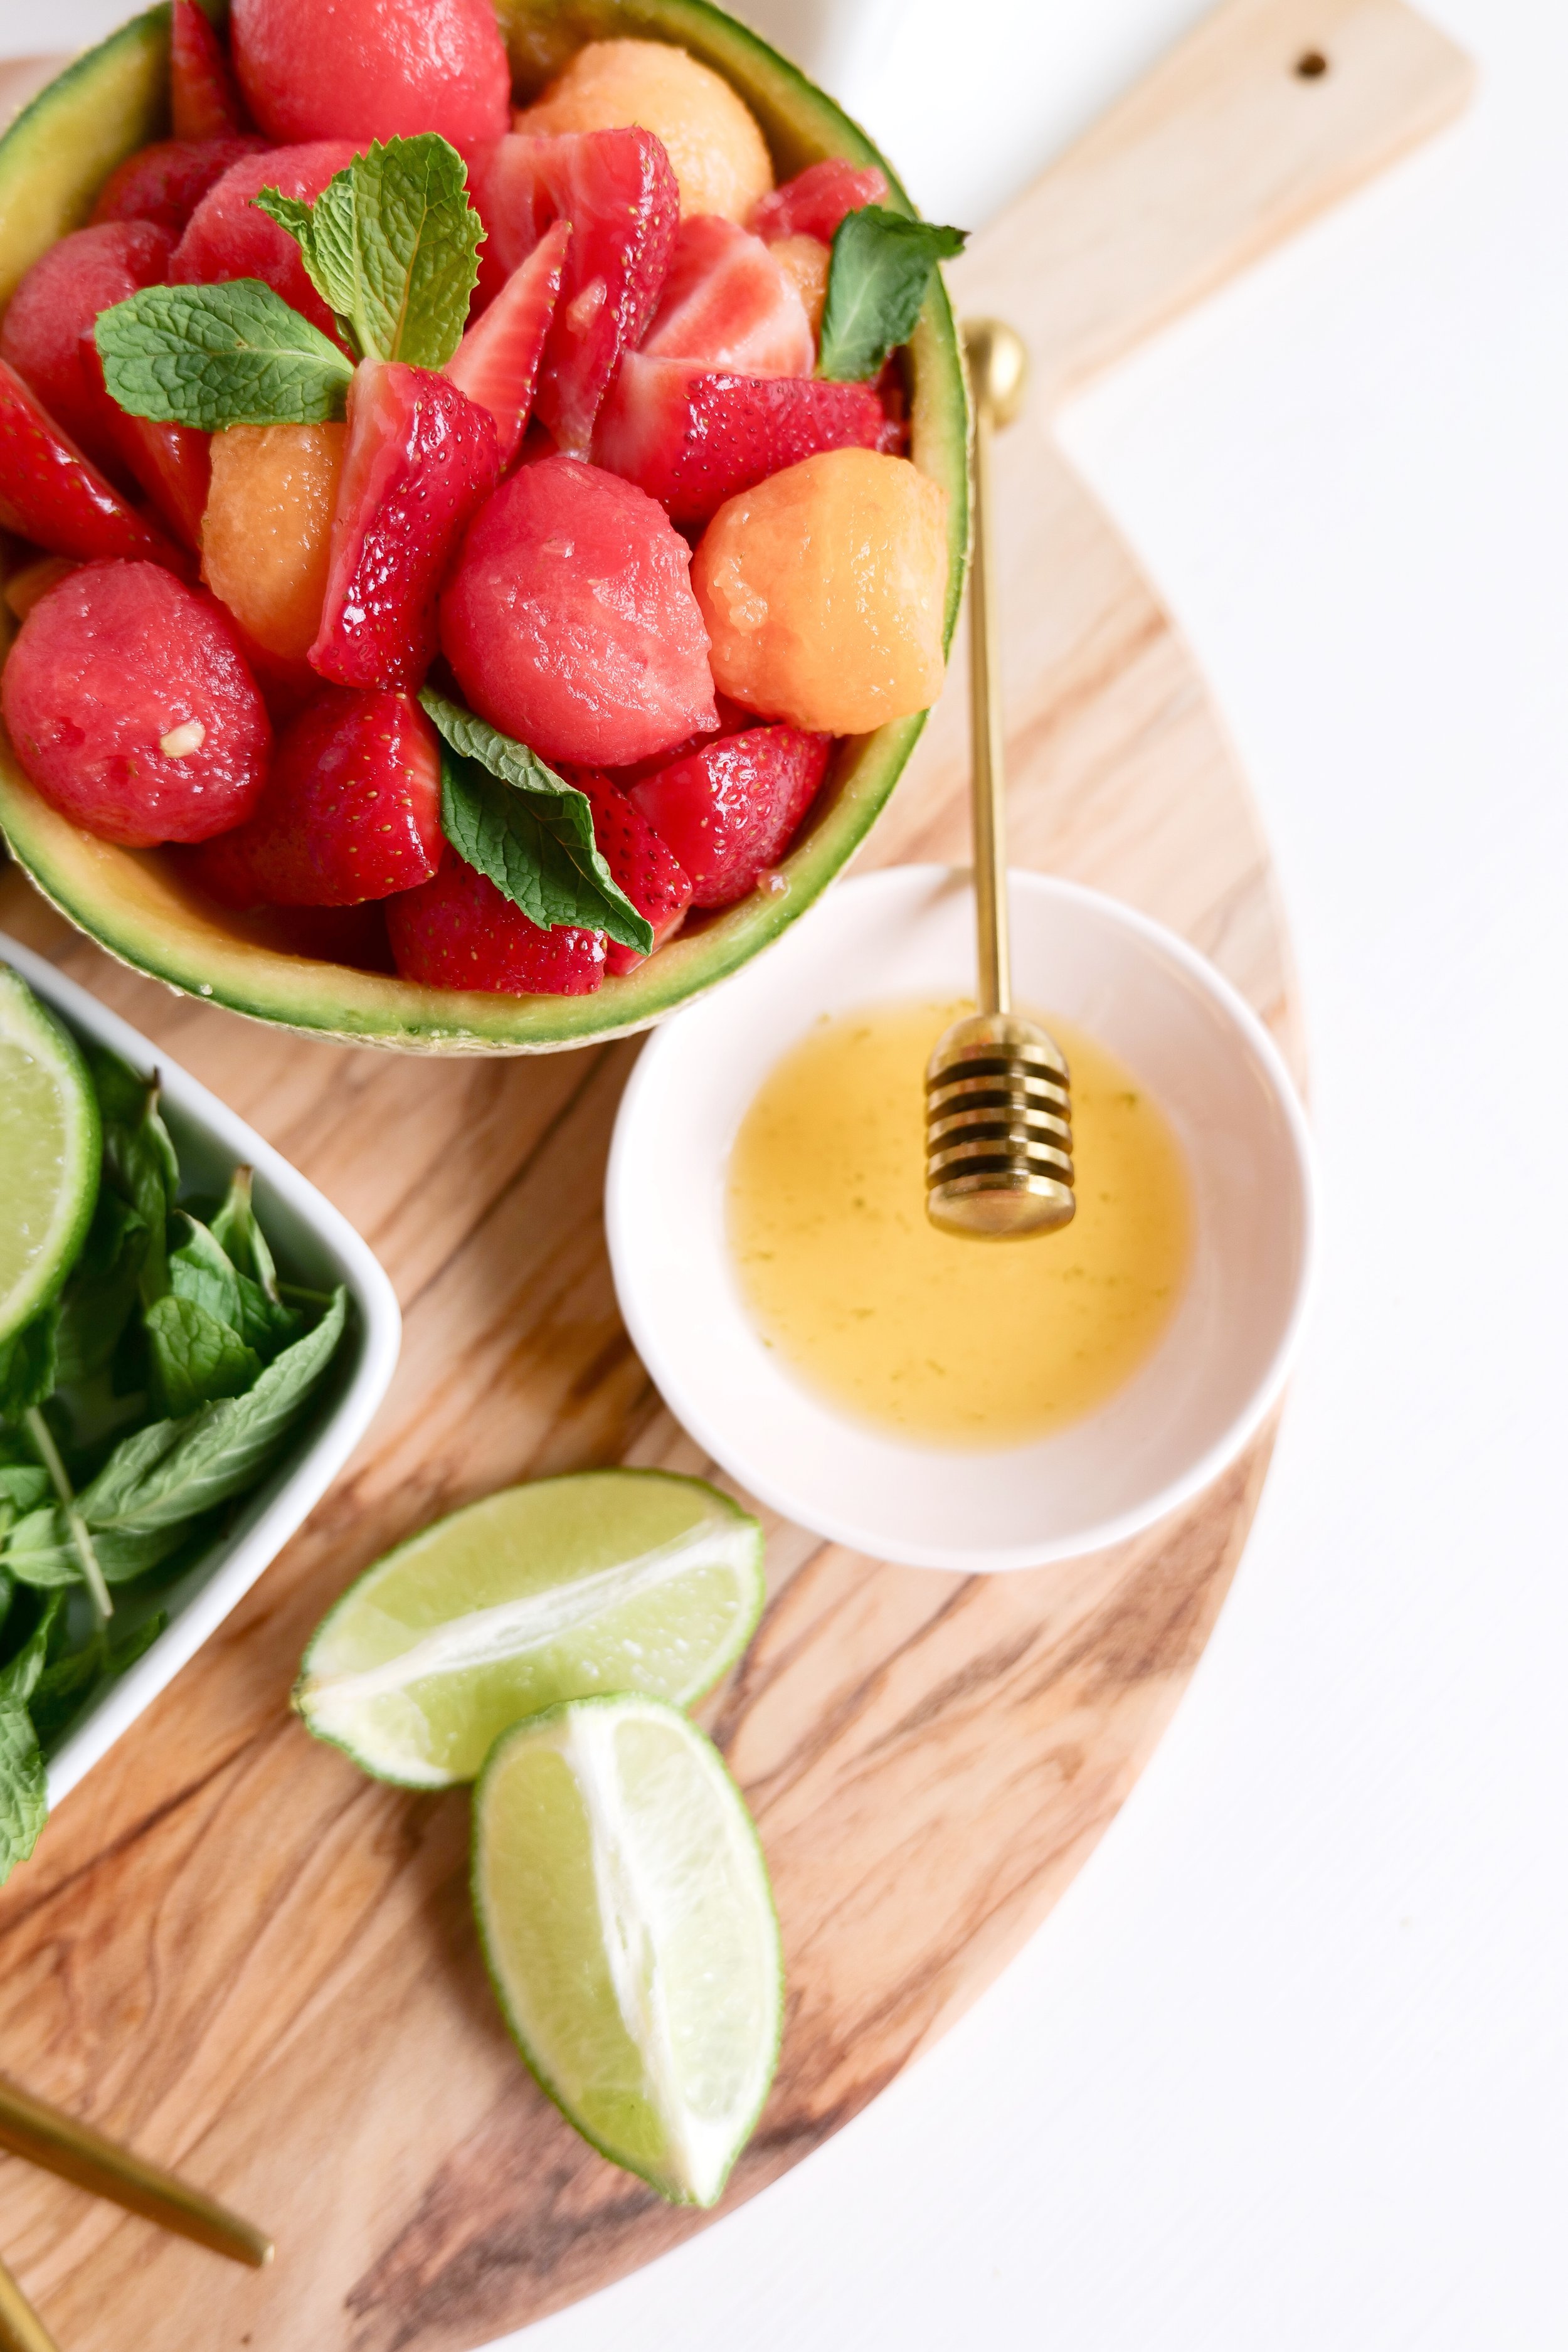
Baby is the size of a Cantaloupe! They are now about 1 3/4 pounds and roughly 13 1/4 inches long from head to heel. They are also able to open their eyes and blink! We are making a fun Delicious & Refreshing Fruit Salad in a Cantaloupe Bowl where you use the actual cantaloupe for the bowl!

Other Recipes You Can Make:

Melon Burrata Salad Recipe

Perfect Light & Fresh Italian Summer Charcuterie Board

Cantaloupe Salsa

27 Weeks Pregnant

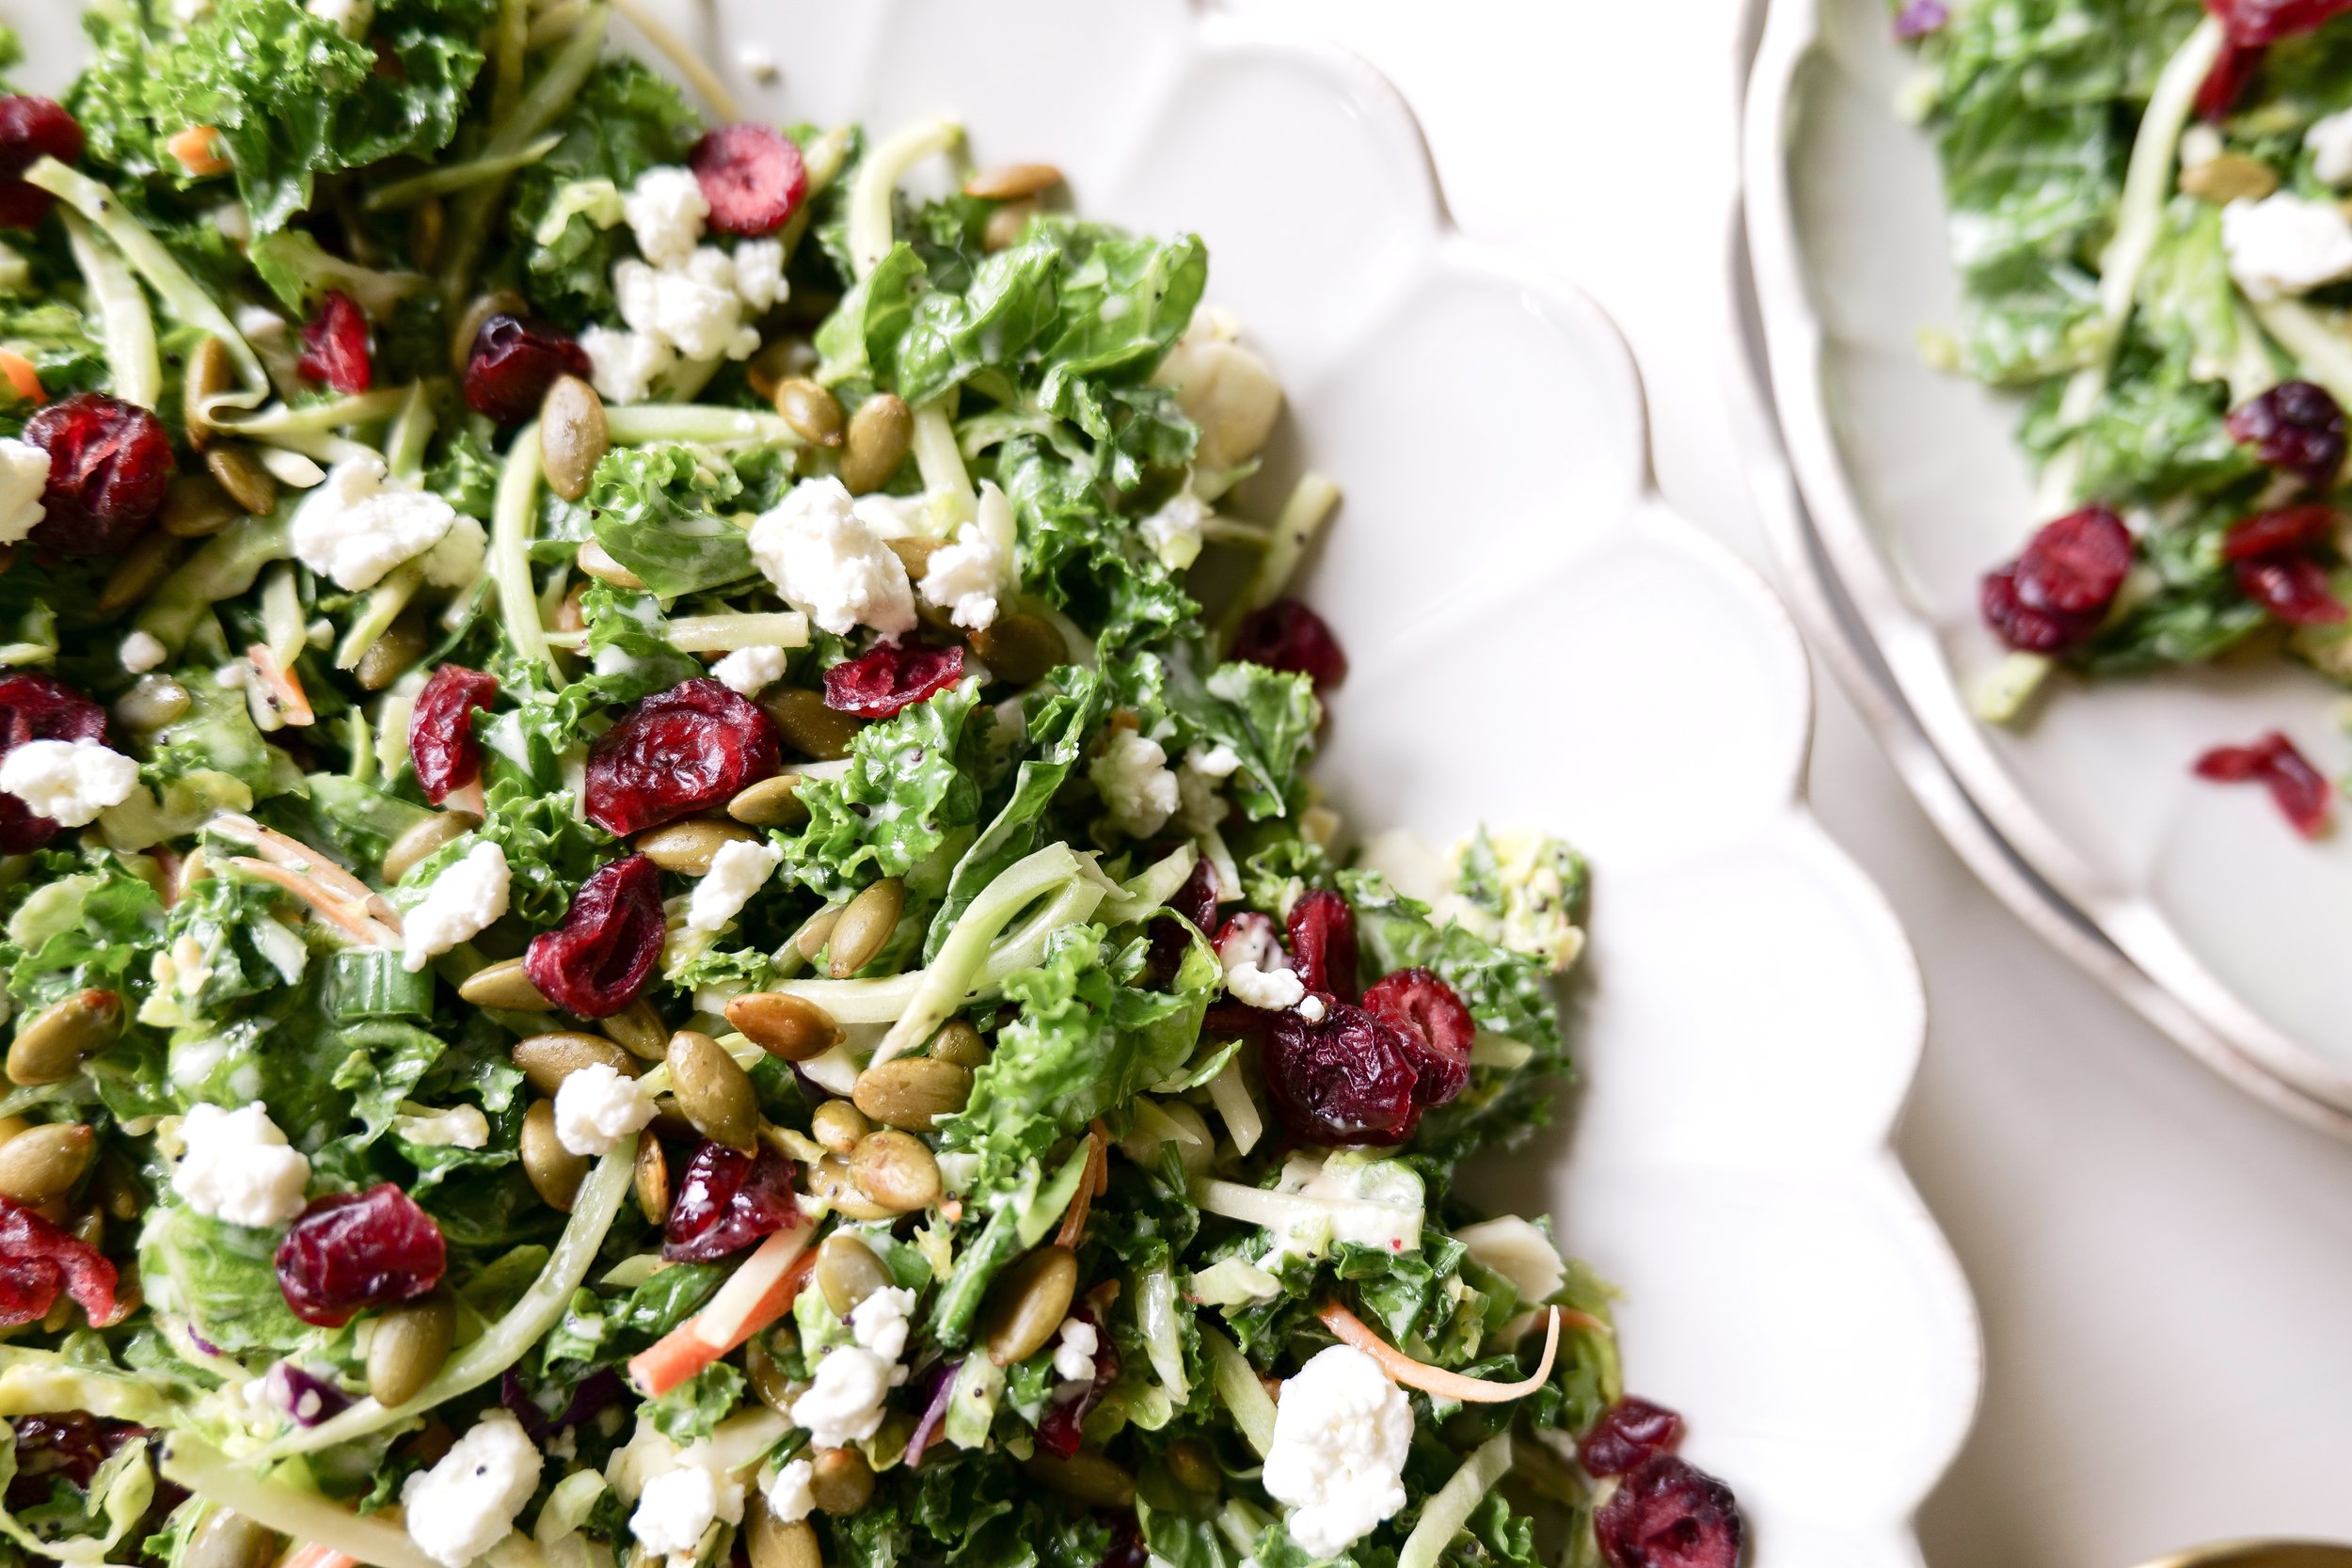
Baby is the size of a Bunch of Kale! Your baby can hear your voice and may even respond to it with changes in their heartbeat, breathing, and movement. If a noise is particularly loud, your baby may startle, and as they startle you might feel your baby move. Let's move to the kitchen to make a delicious Sweet Kale Salad with Poppy Seed Dressing this is also a good recipe if you plan to breast feed as kale is a great leafy green to have because and after pregnancy helping with supply.

Other Recipes You Can Make:

Italian Sausage, Potato & Kale Soup

Kale Pesto

Kale Smoothie

28 Weeks Pregnant

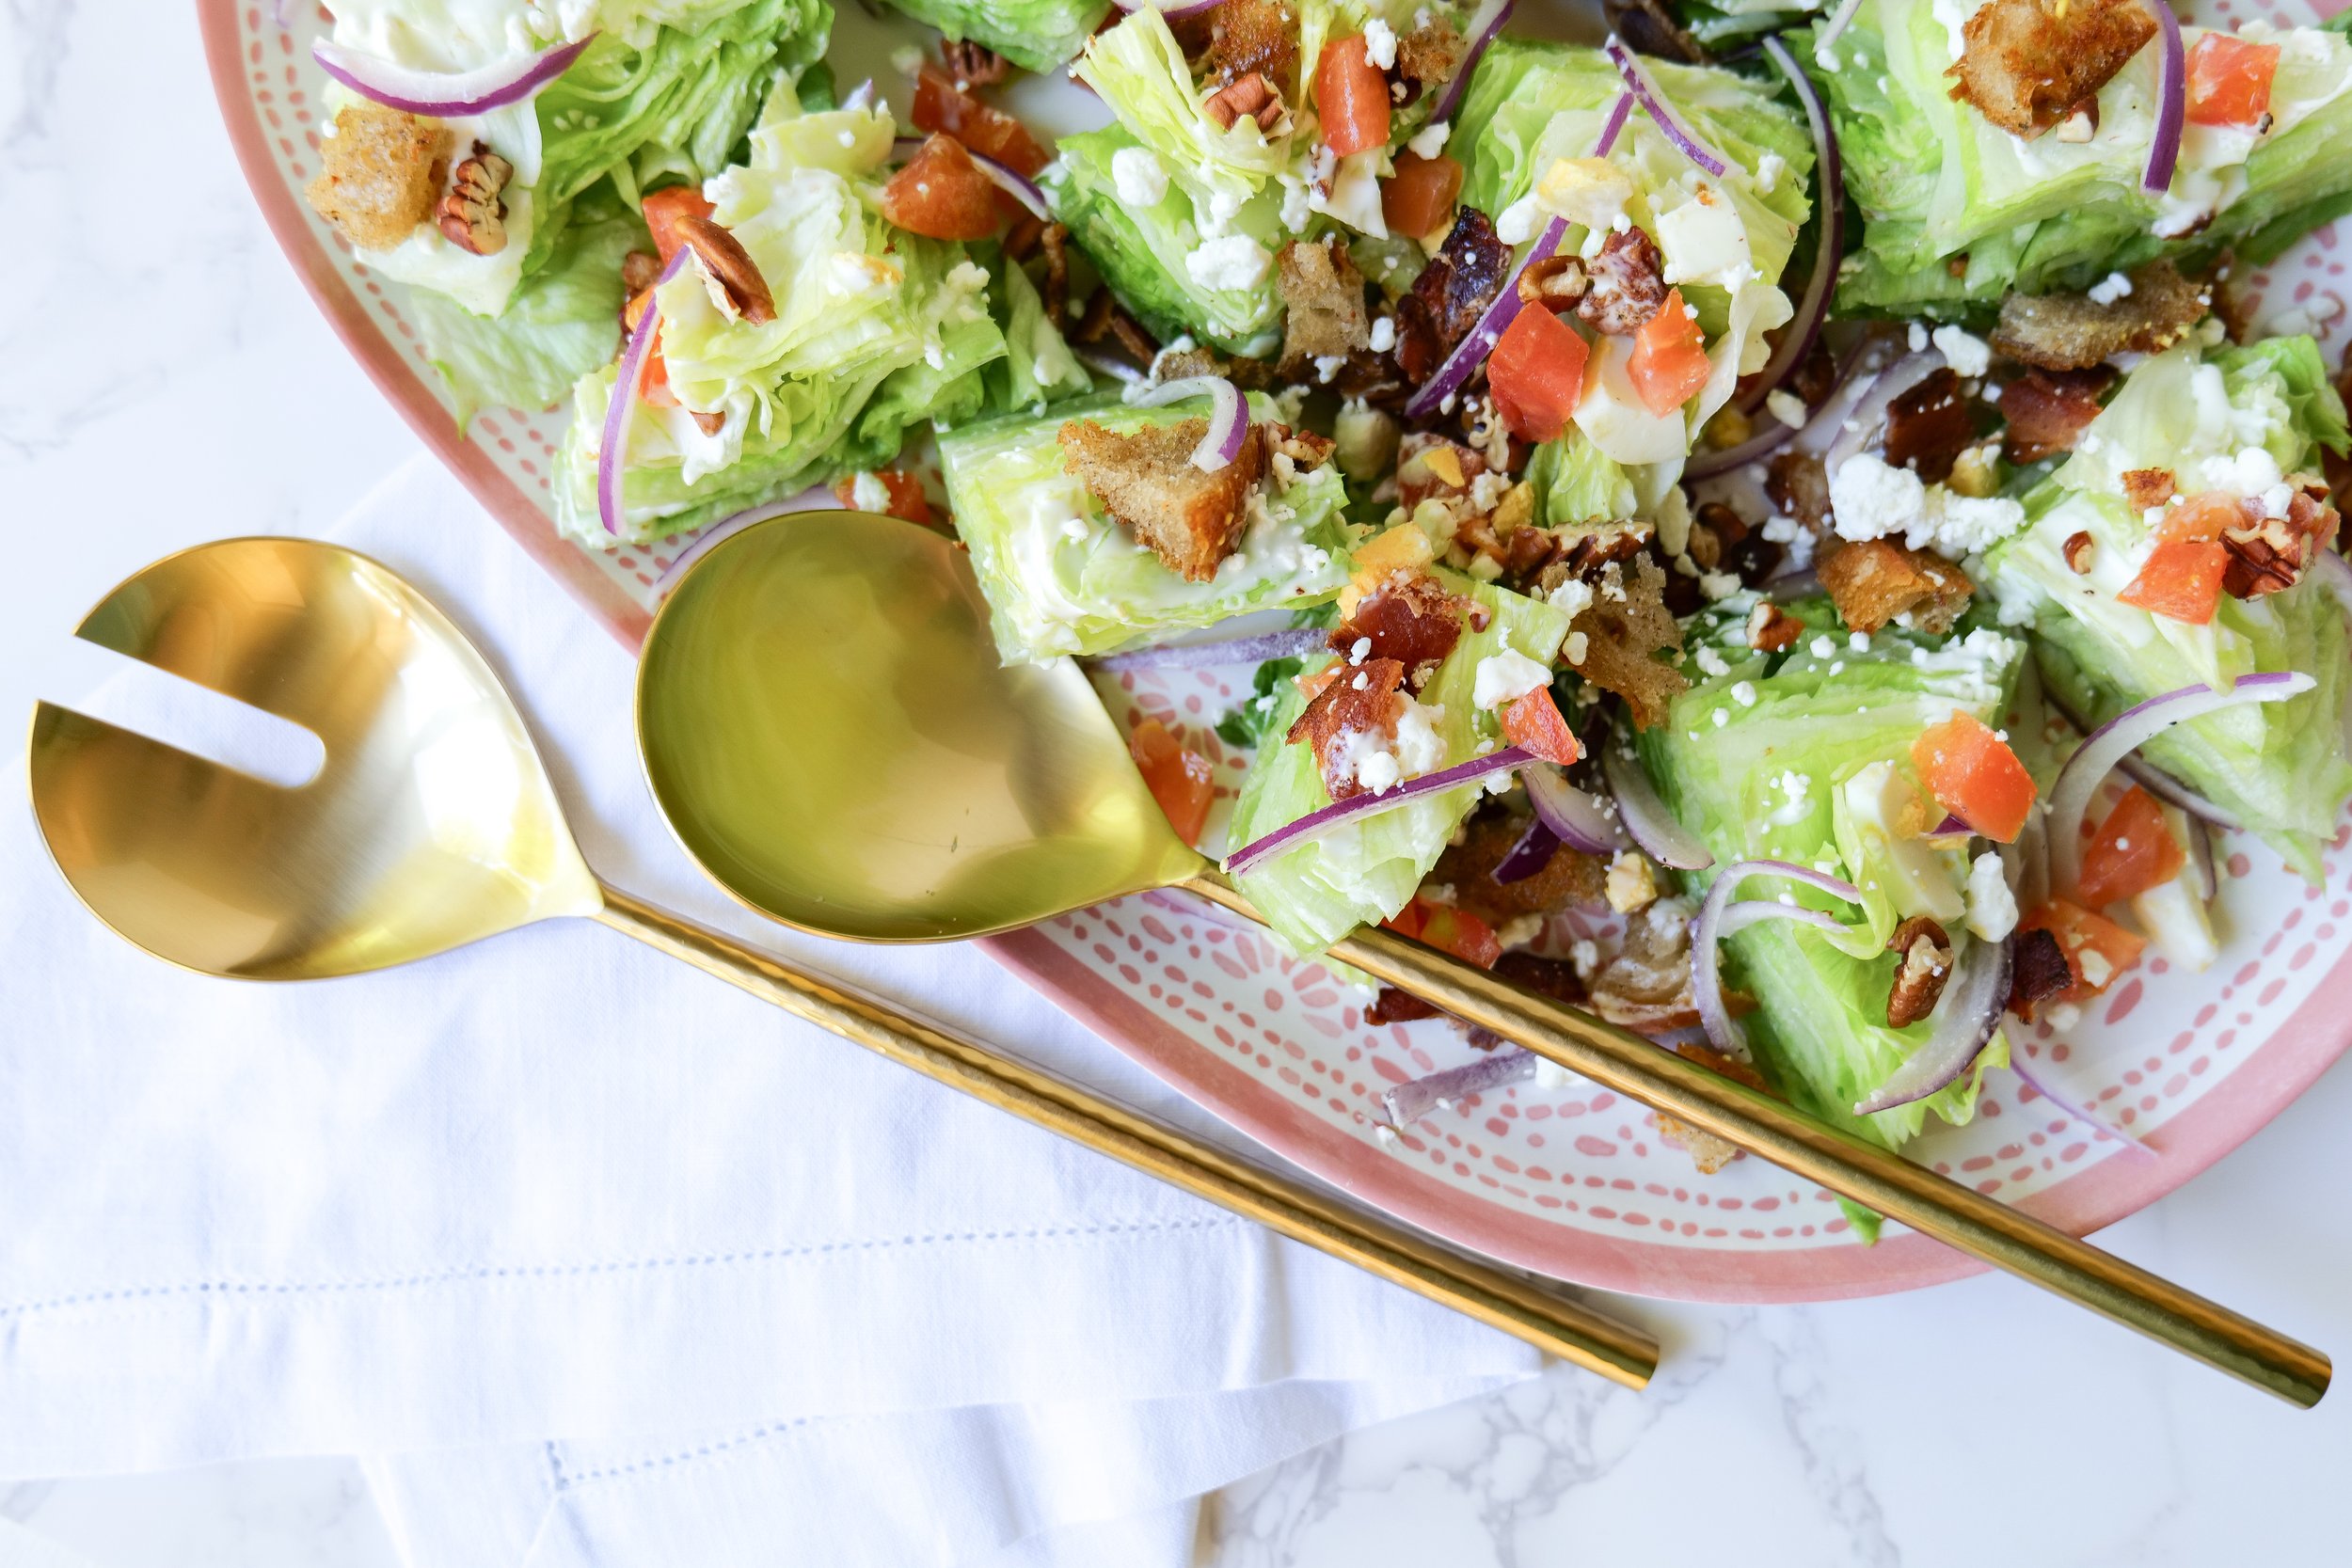
Baby is the size of a Head of Lettuce! Weighing in at about 2 1/3 pounds and measuring roughly 14 1/2 inches they are filling in slowly and leafy greens and lots of protein will help them grow even more. Making a Loaded Iceberg Wedge Salad that you can add to the side of a nice steak, salmon or chicken makes for a great dinner.

Other Recipes You Can Make:

Lettuce Wraps

BLT Wraps

Tostada Salad

29 Weeks Pregnant

Baby is the size of a Cauliflower! Your baby's bones are soaking up lots of calcium as they harden, so be sure to drink your milk or find other ways to get your calcium in.

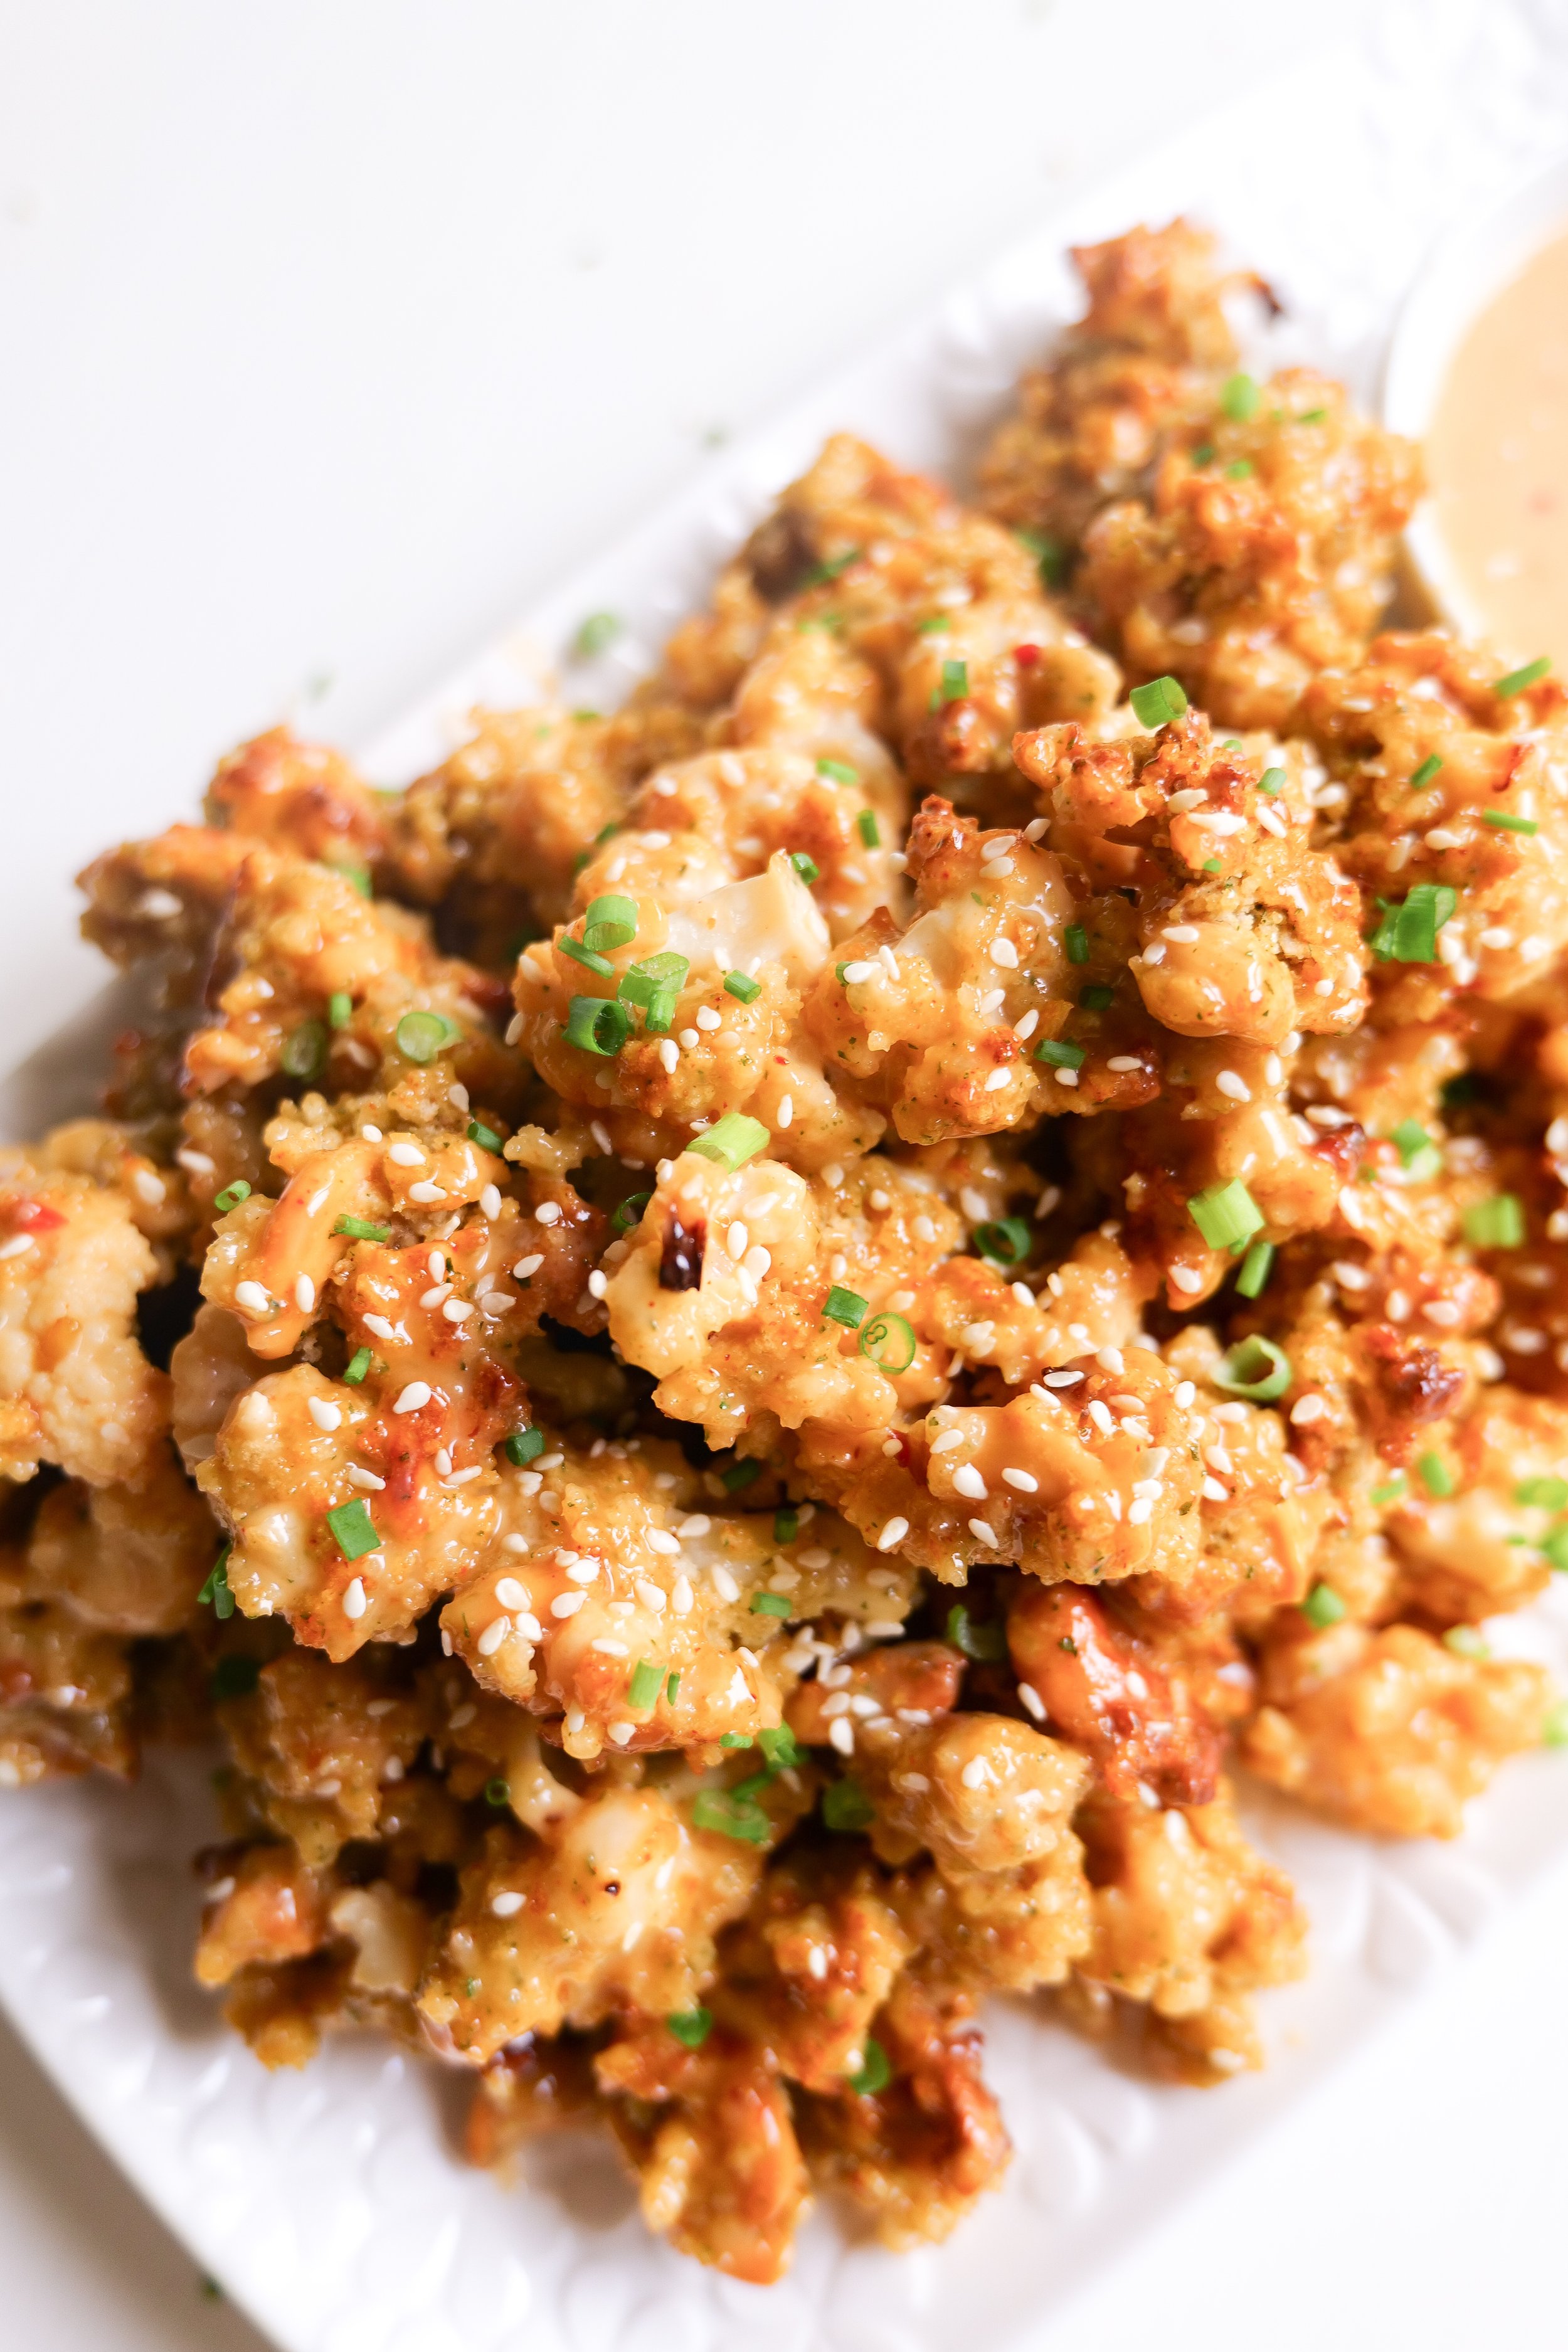
Cauliflower Bang Bang Cashew Recipe: A Sweet and Spicy Delight

Other Recipes You Can Make:

Creamy Cheddar Cauliflower Soup

Cauliflower Rice

Cauliflower Pizza

30 Weeks Pregnant

Baby is the size of a Zucchini! Your little one's brain is growing rapidly, and their lungs are continuing to develop. Baby is on a regular cycle of sleeping and waking. Every 30 to 90 minutes they will start to move around to let you know they have woken up, enjoy those little feet moving inside you. Soon you will see them dancing away during diaper changes. Zucchini Roll Ups Dinner is this weeks recipe and a great one for leftovers or freezing for meal prep after baby arrives if you want to make a double recipe.

Other Recipes You Can Make:

Mom's Favorite Minestrone Soup Recipe

Fried Zucchini

Walnut Zucchini Muffins

31 Weeks Pregnant

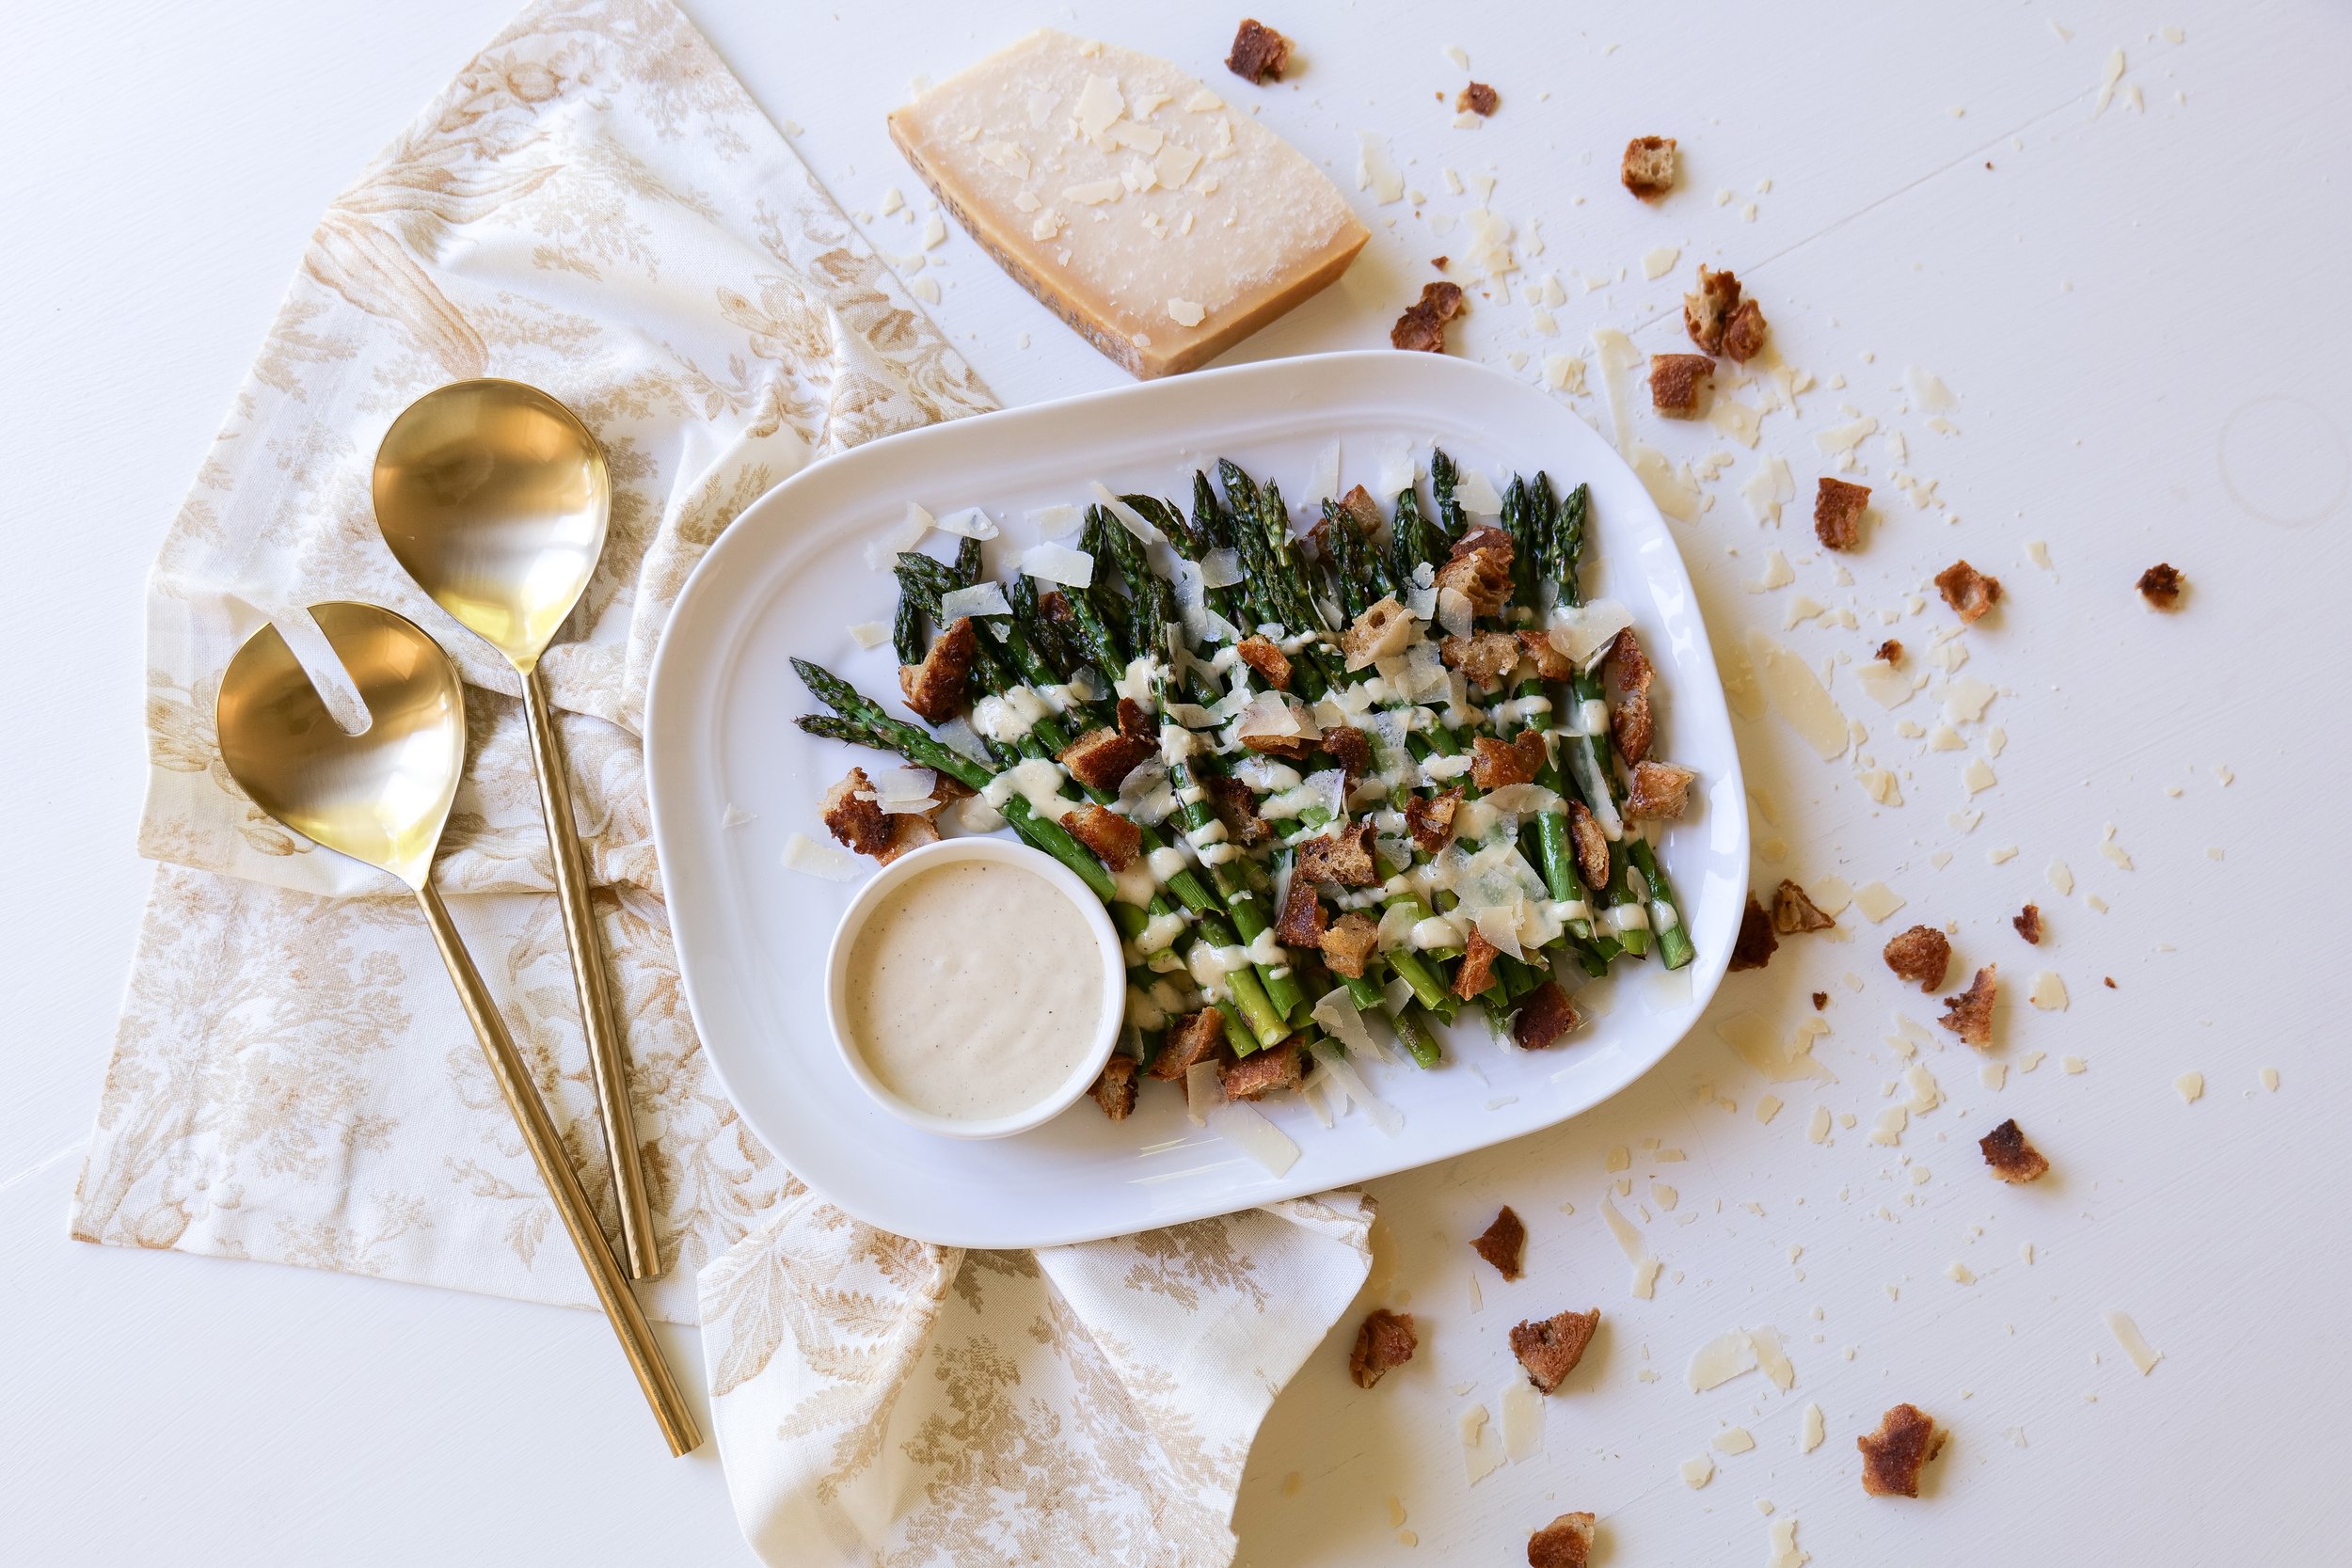
Baby is the size of a Bunch of Asparagus! From this week on baby will be gaining as much as half a pound per week until they are born!! Still a little one at 3.31lbs they still have a way to go so keep your nutrition up with lots of green veggies like this Baked Ceasar Asparagus Side Dish

Other Recipes You Can Make:

Fontina Asparagus Tart

Radish Asparagus Salad

Feta Asparagus Frittata

32 Weeks Pregnant

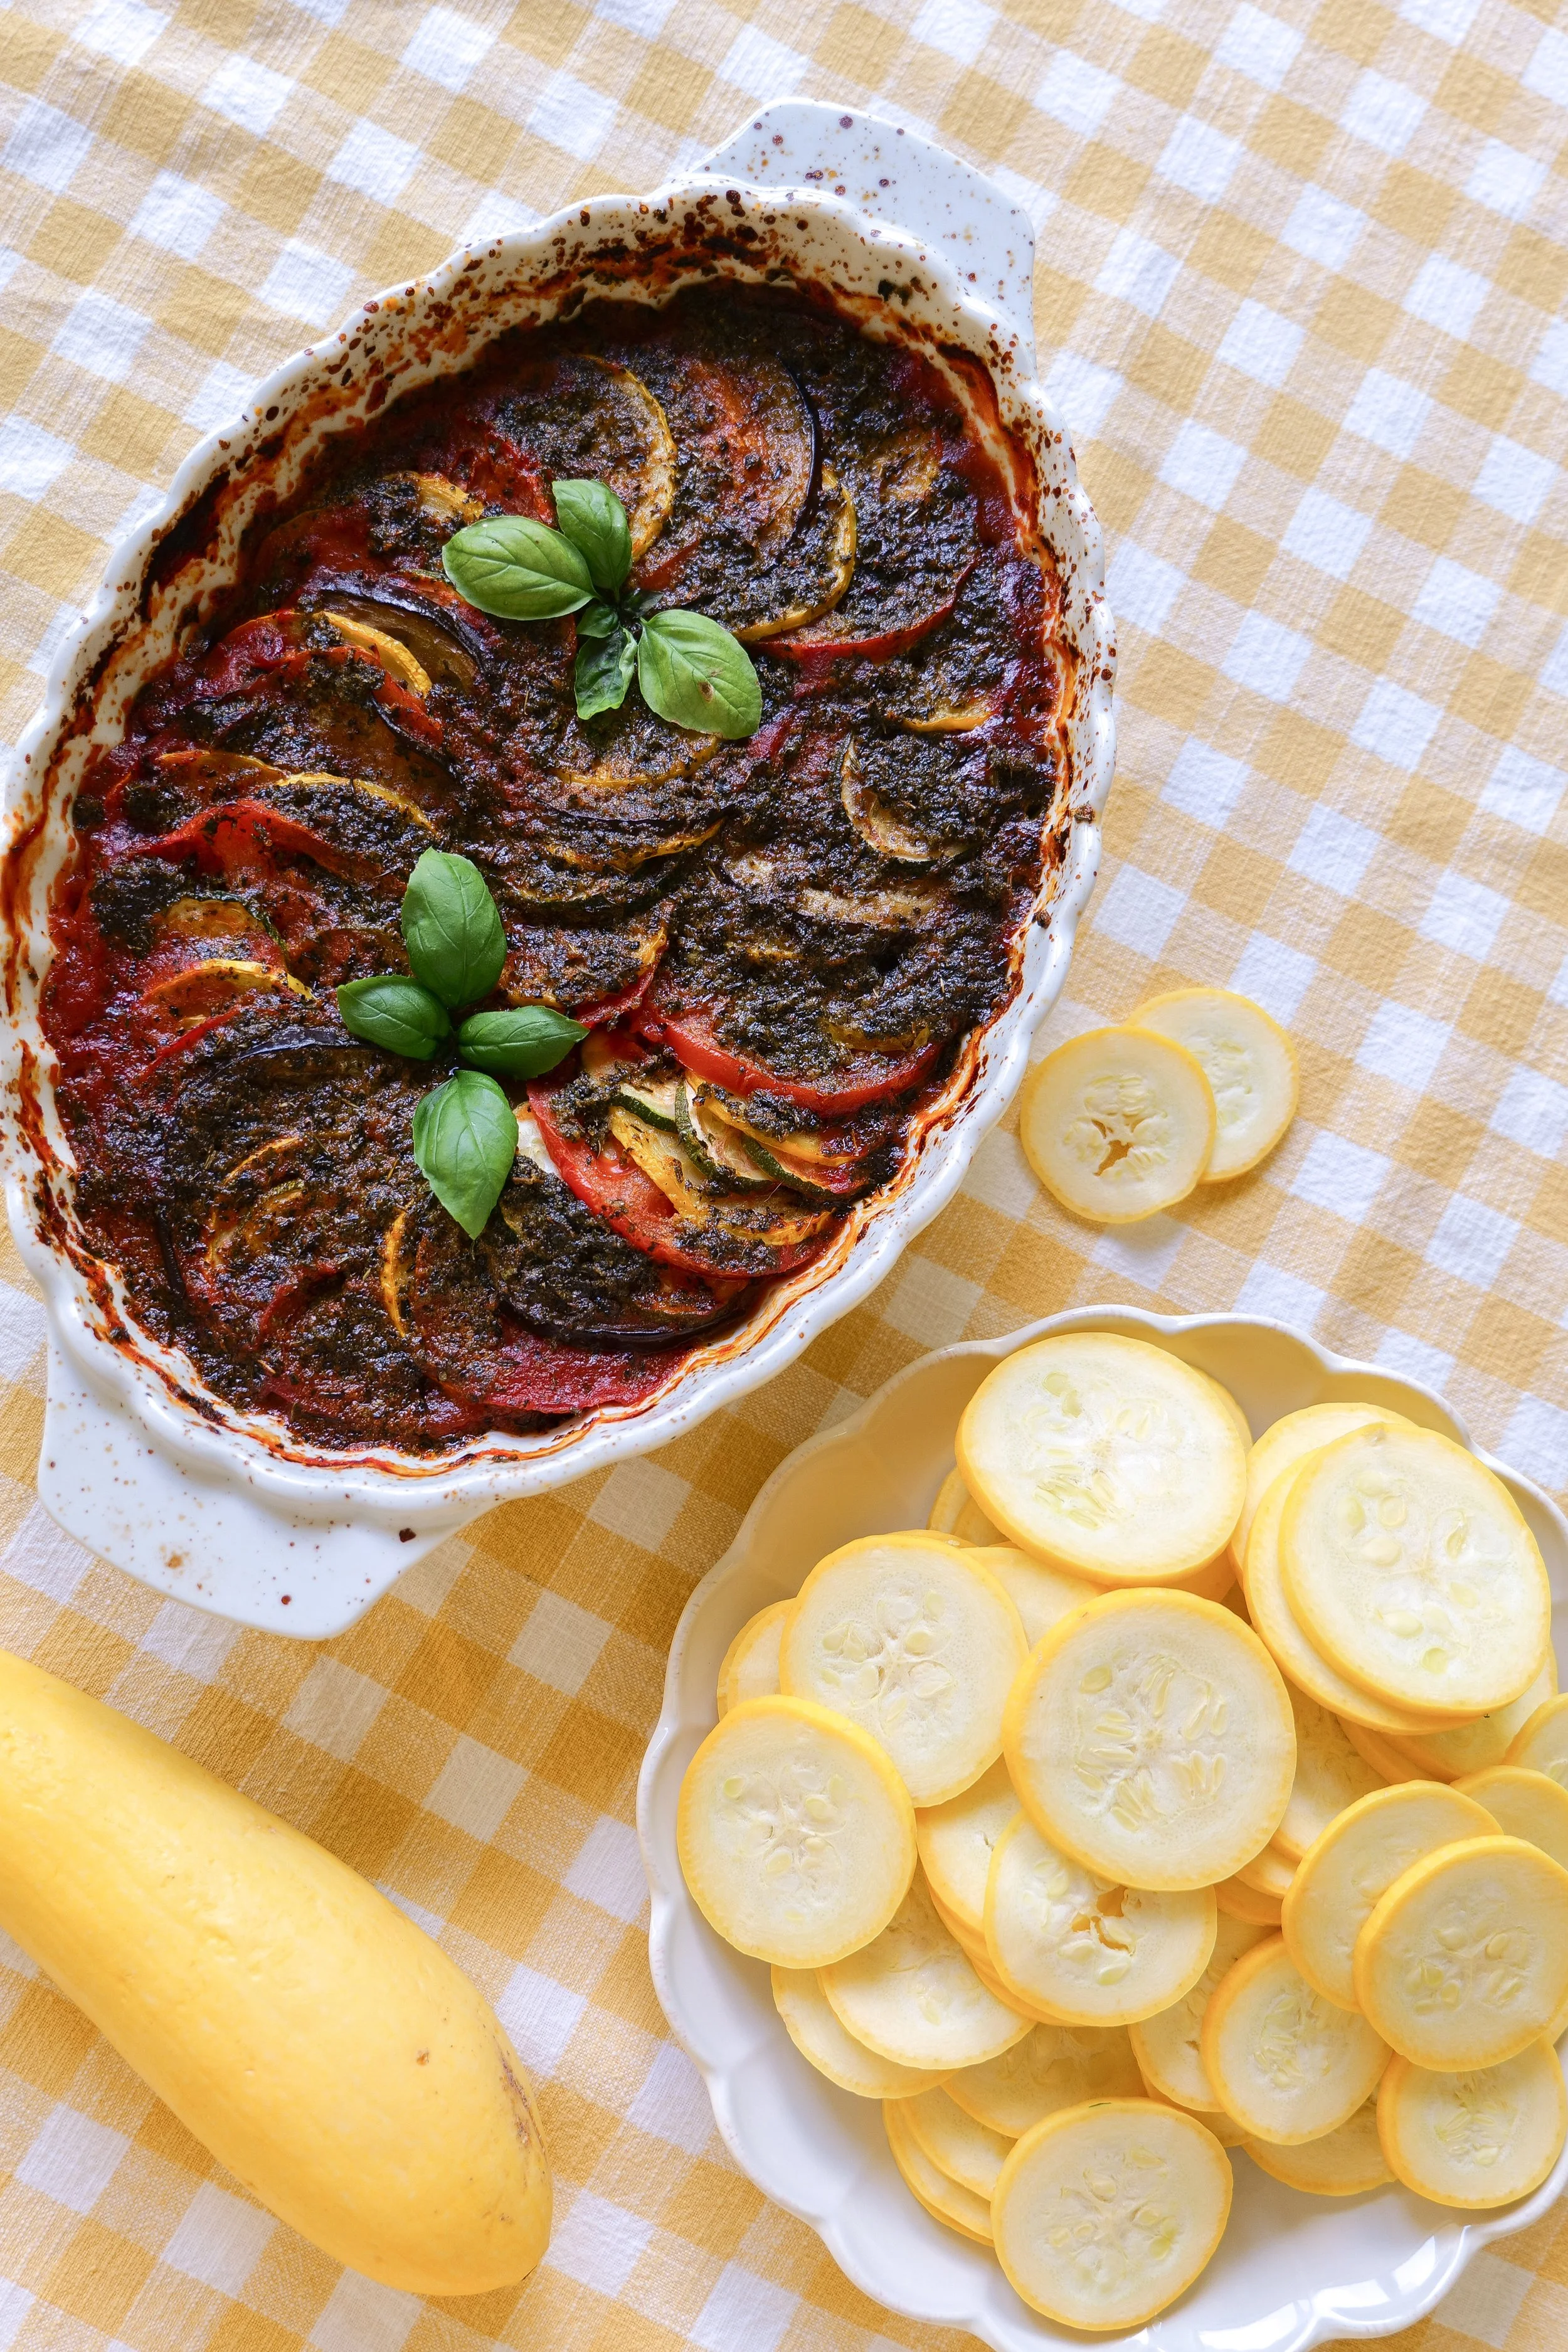
Baby is the size of a Squash! Baby's taste buds have fully developed, and they also may acquire a preference for the food you are eating. This week's meal is a nutritious one packed full of veggies, so we hope you and baby enjoy this Tastes of Classic Ratatouille.

Other Recipes You Can Make:

Yellow Squash Patties

Summer Squash Salad with Shrimp

Sauteed Squash Side Dish

33 Weeks Pregnant

Baby is the size of a Bunch of Celery! The Lanugo that covered their body to keep them warm is starting to disappear. You are officially 7 weeks to your dude date and 8 months pregnant. You may start preparing for baby soon with meal prepping, classes for birth and breastfeeding, and packing your hospital bags soon. Take a moment from all the preparation and celebrate baby with a delicious Deviled Egg Pasta Salad that you will truly enjoy and is great to have as leftovers too!

Other Recipes You Can Make:

Slow Cooker Braised Short Ribs

Minestrone Soup

Celery Root Soup

34 Weeks Pregnant

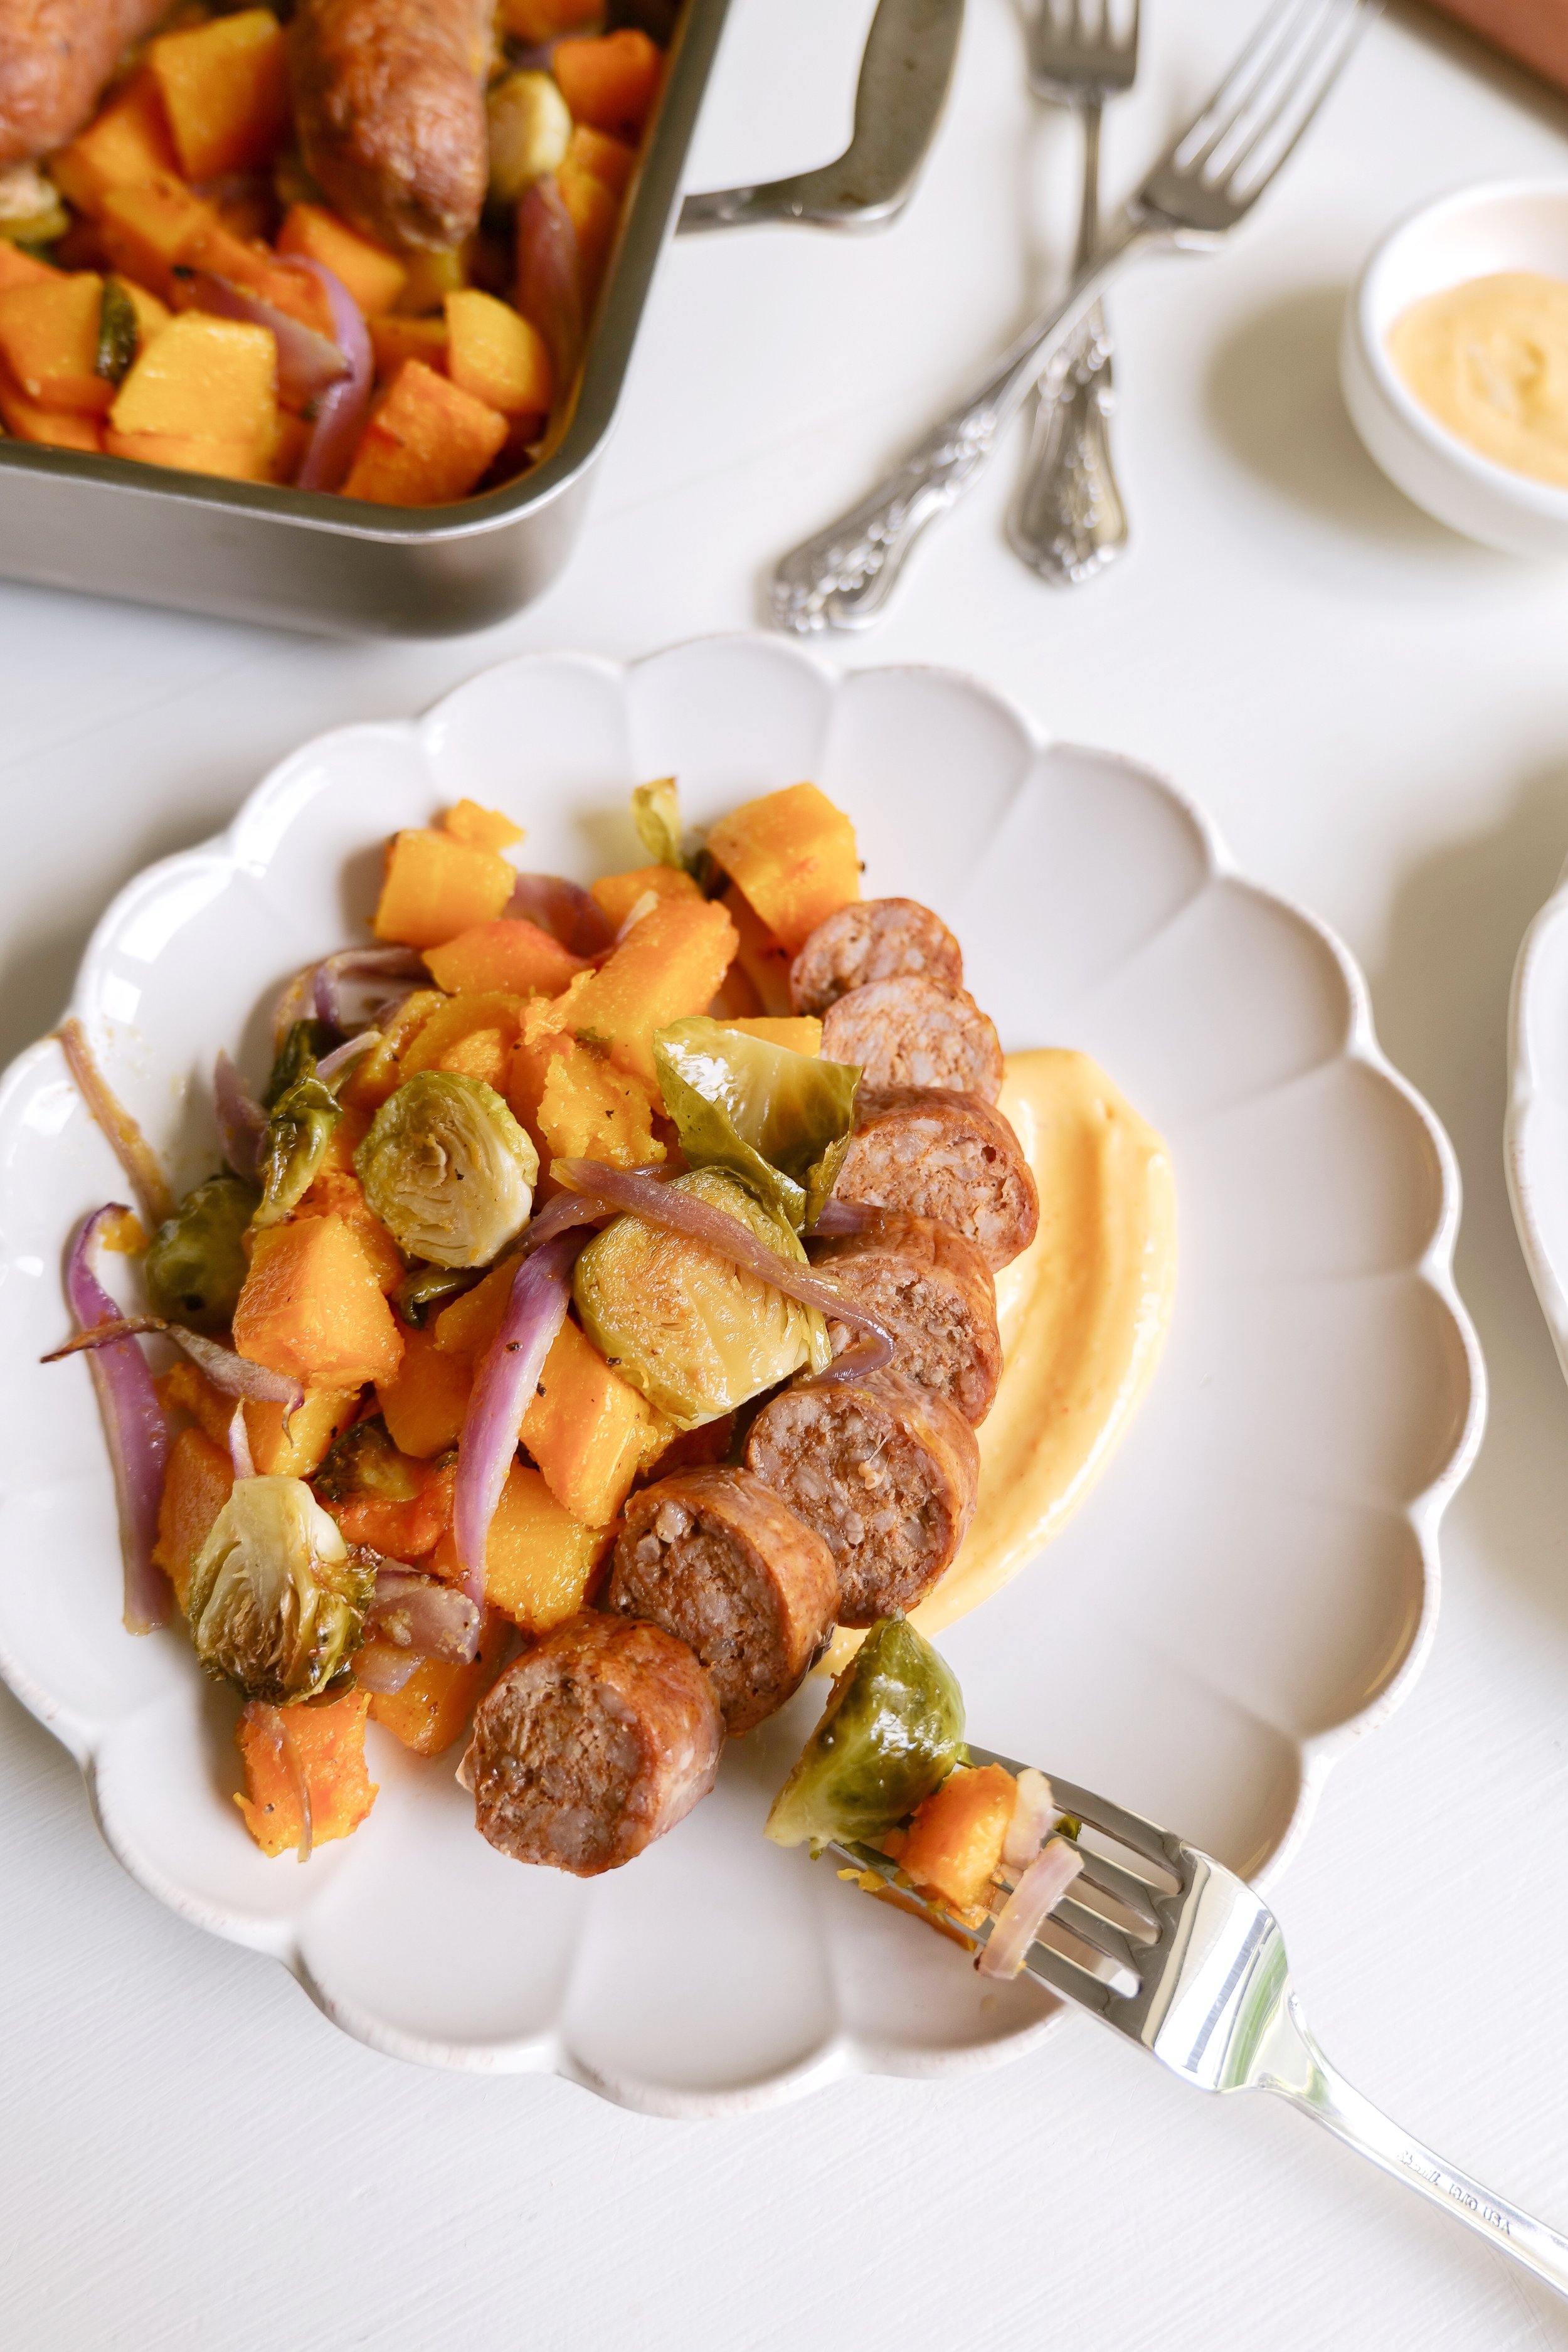
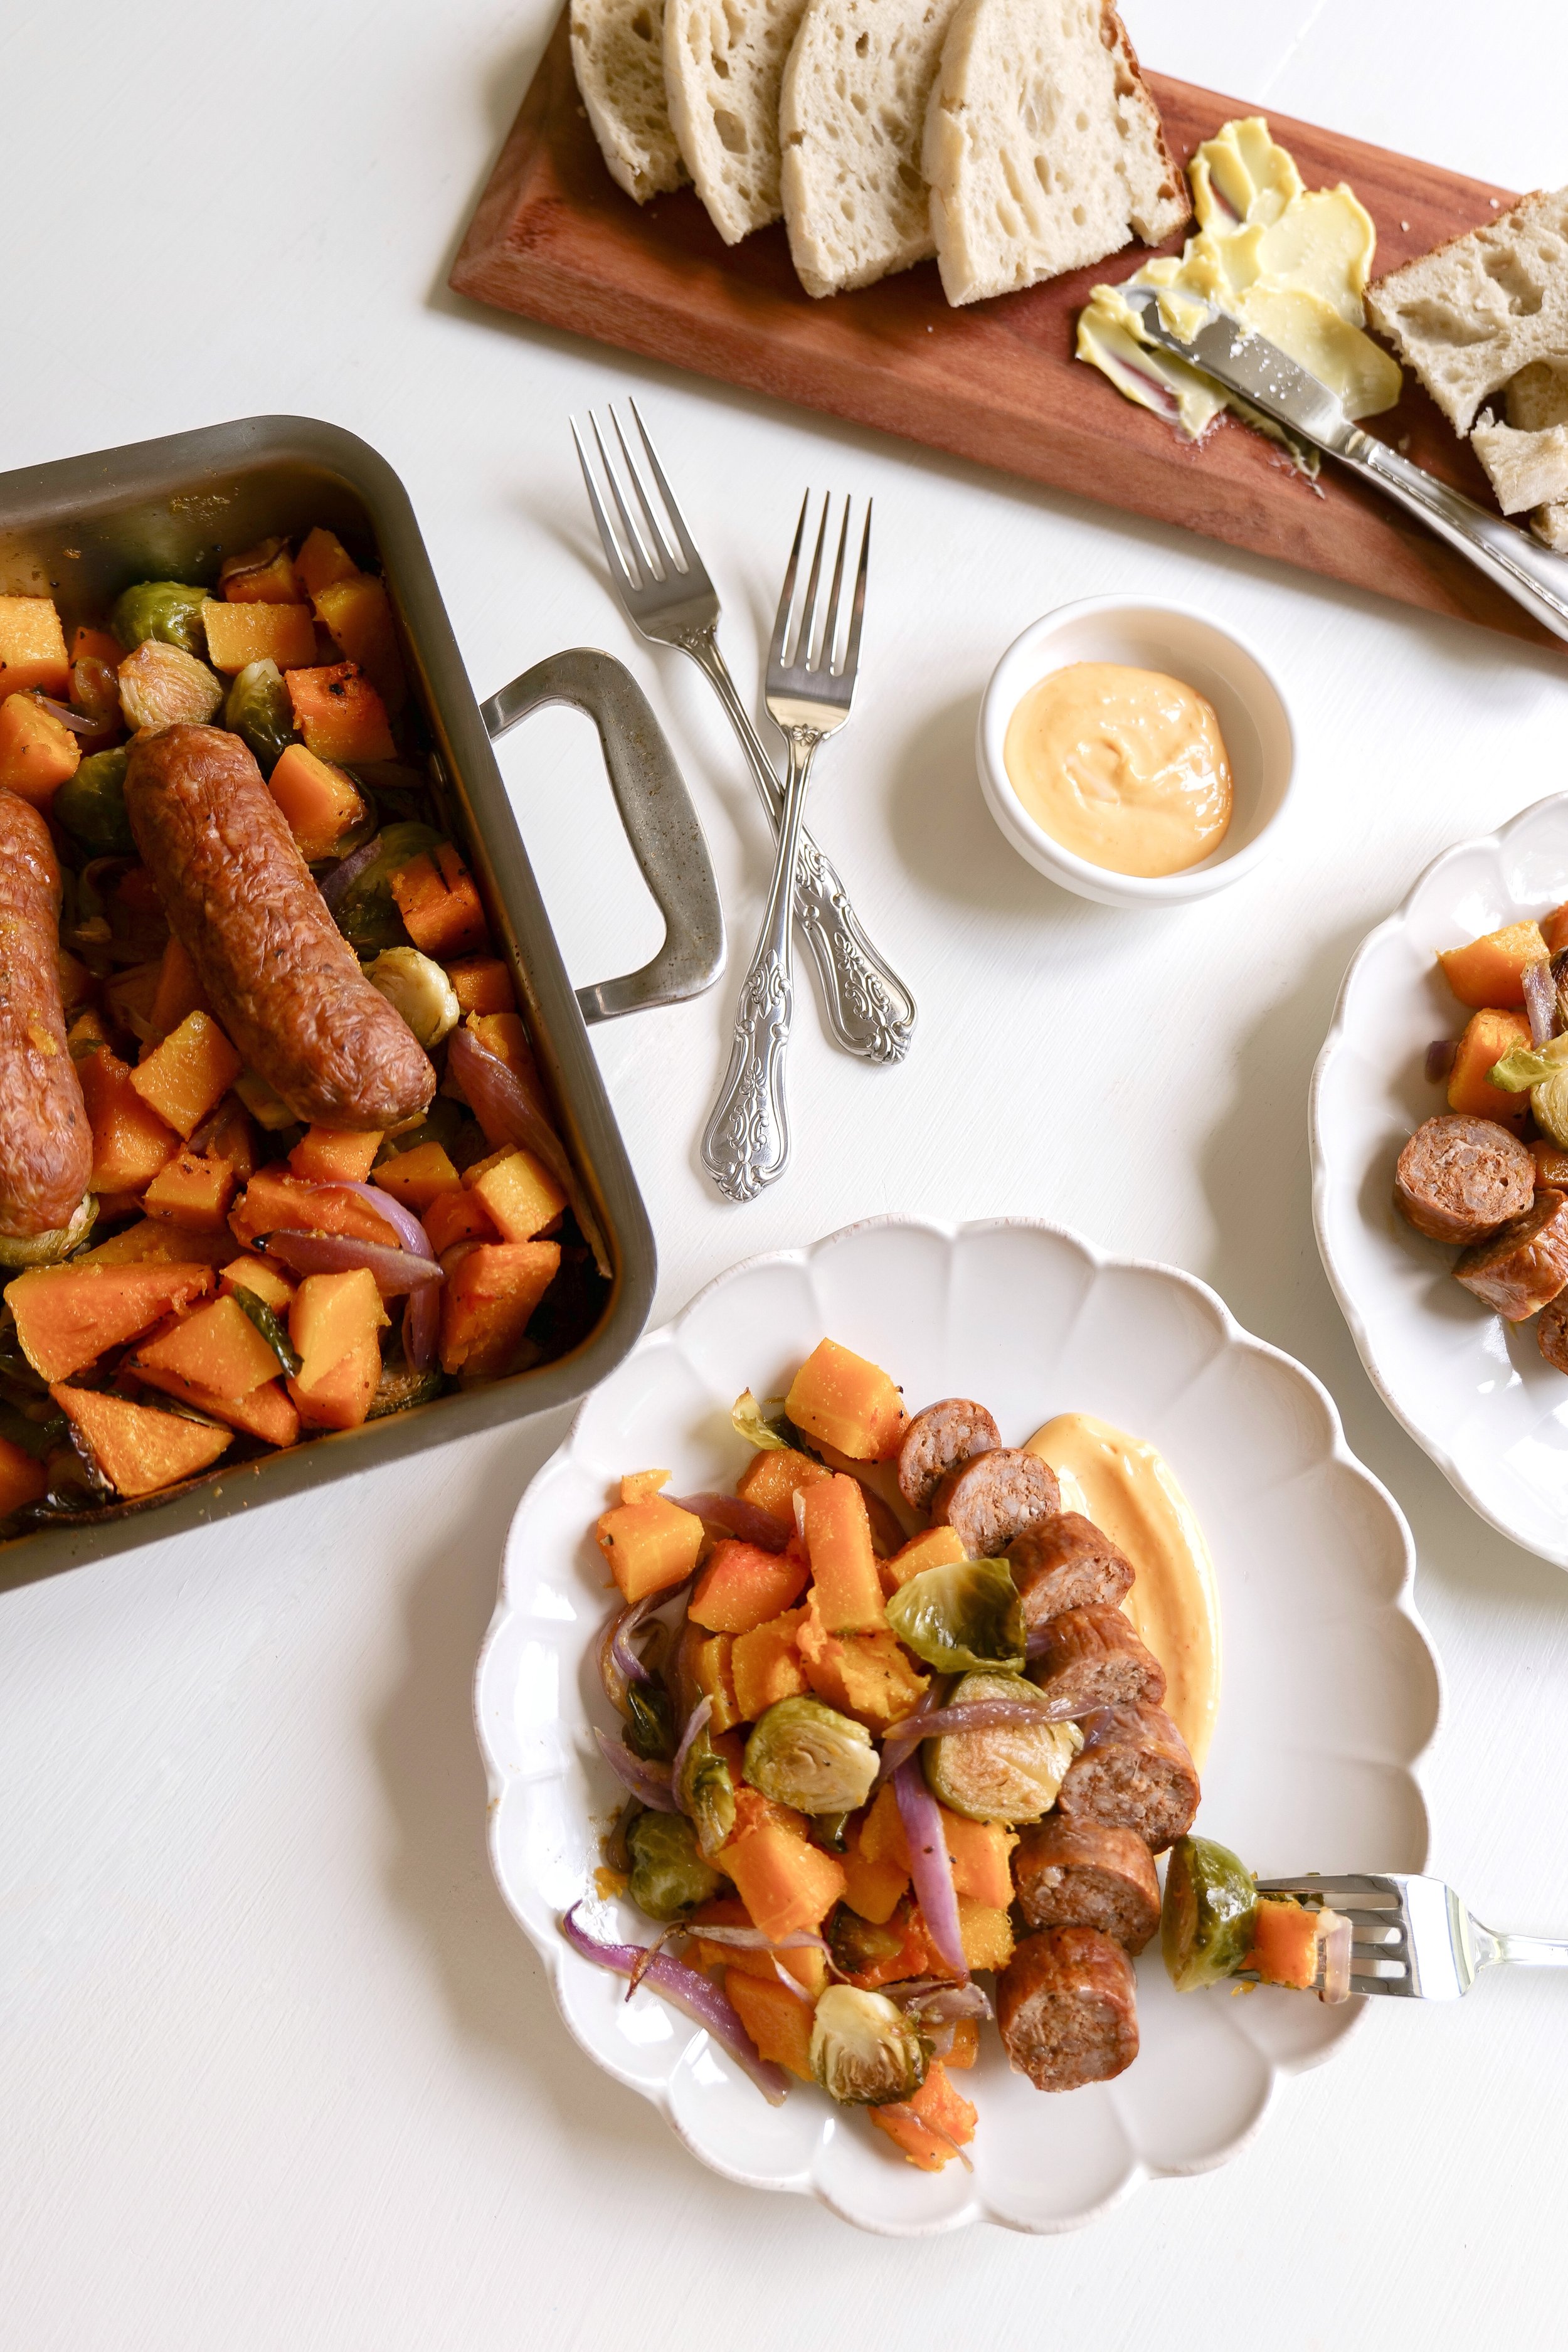
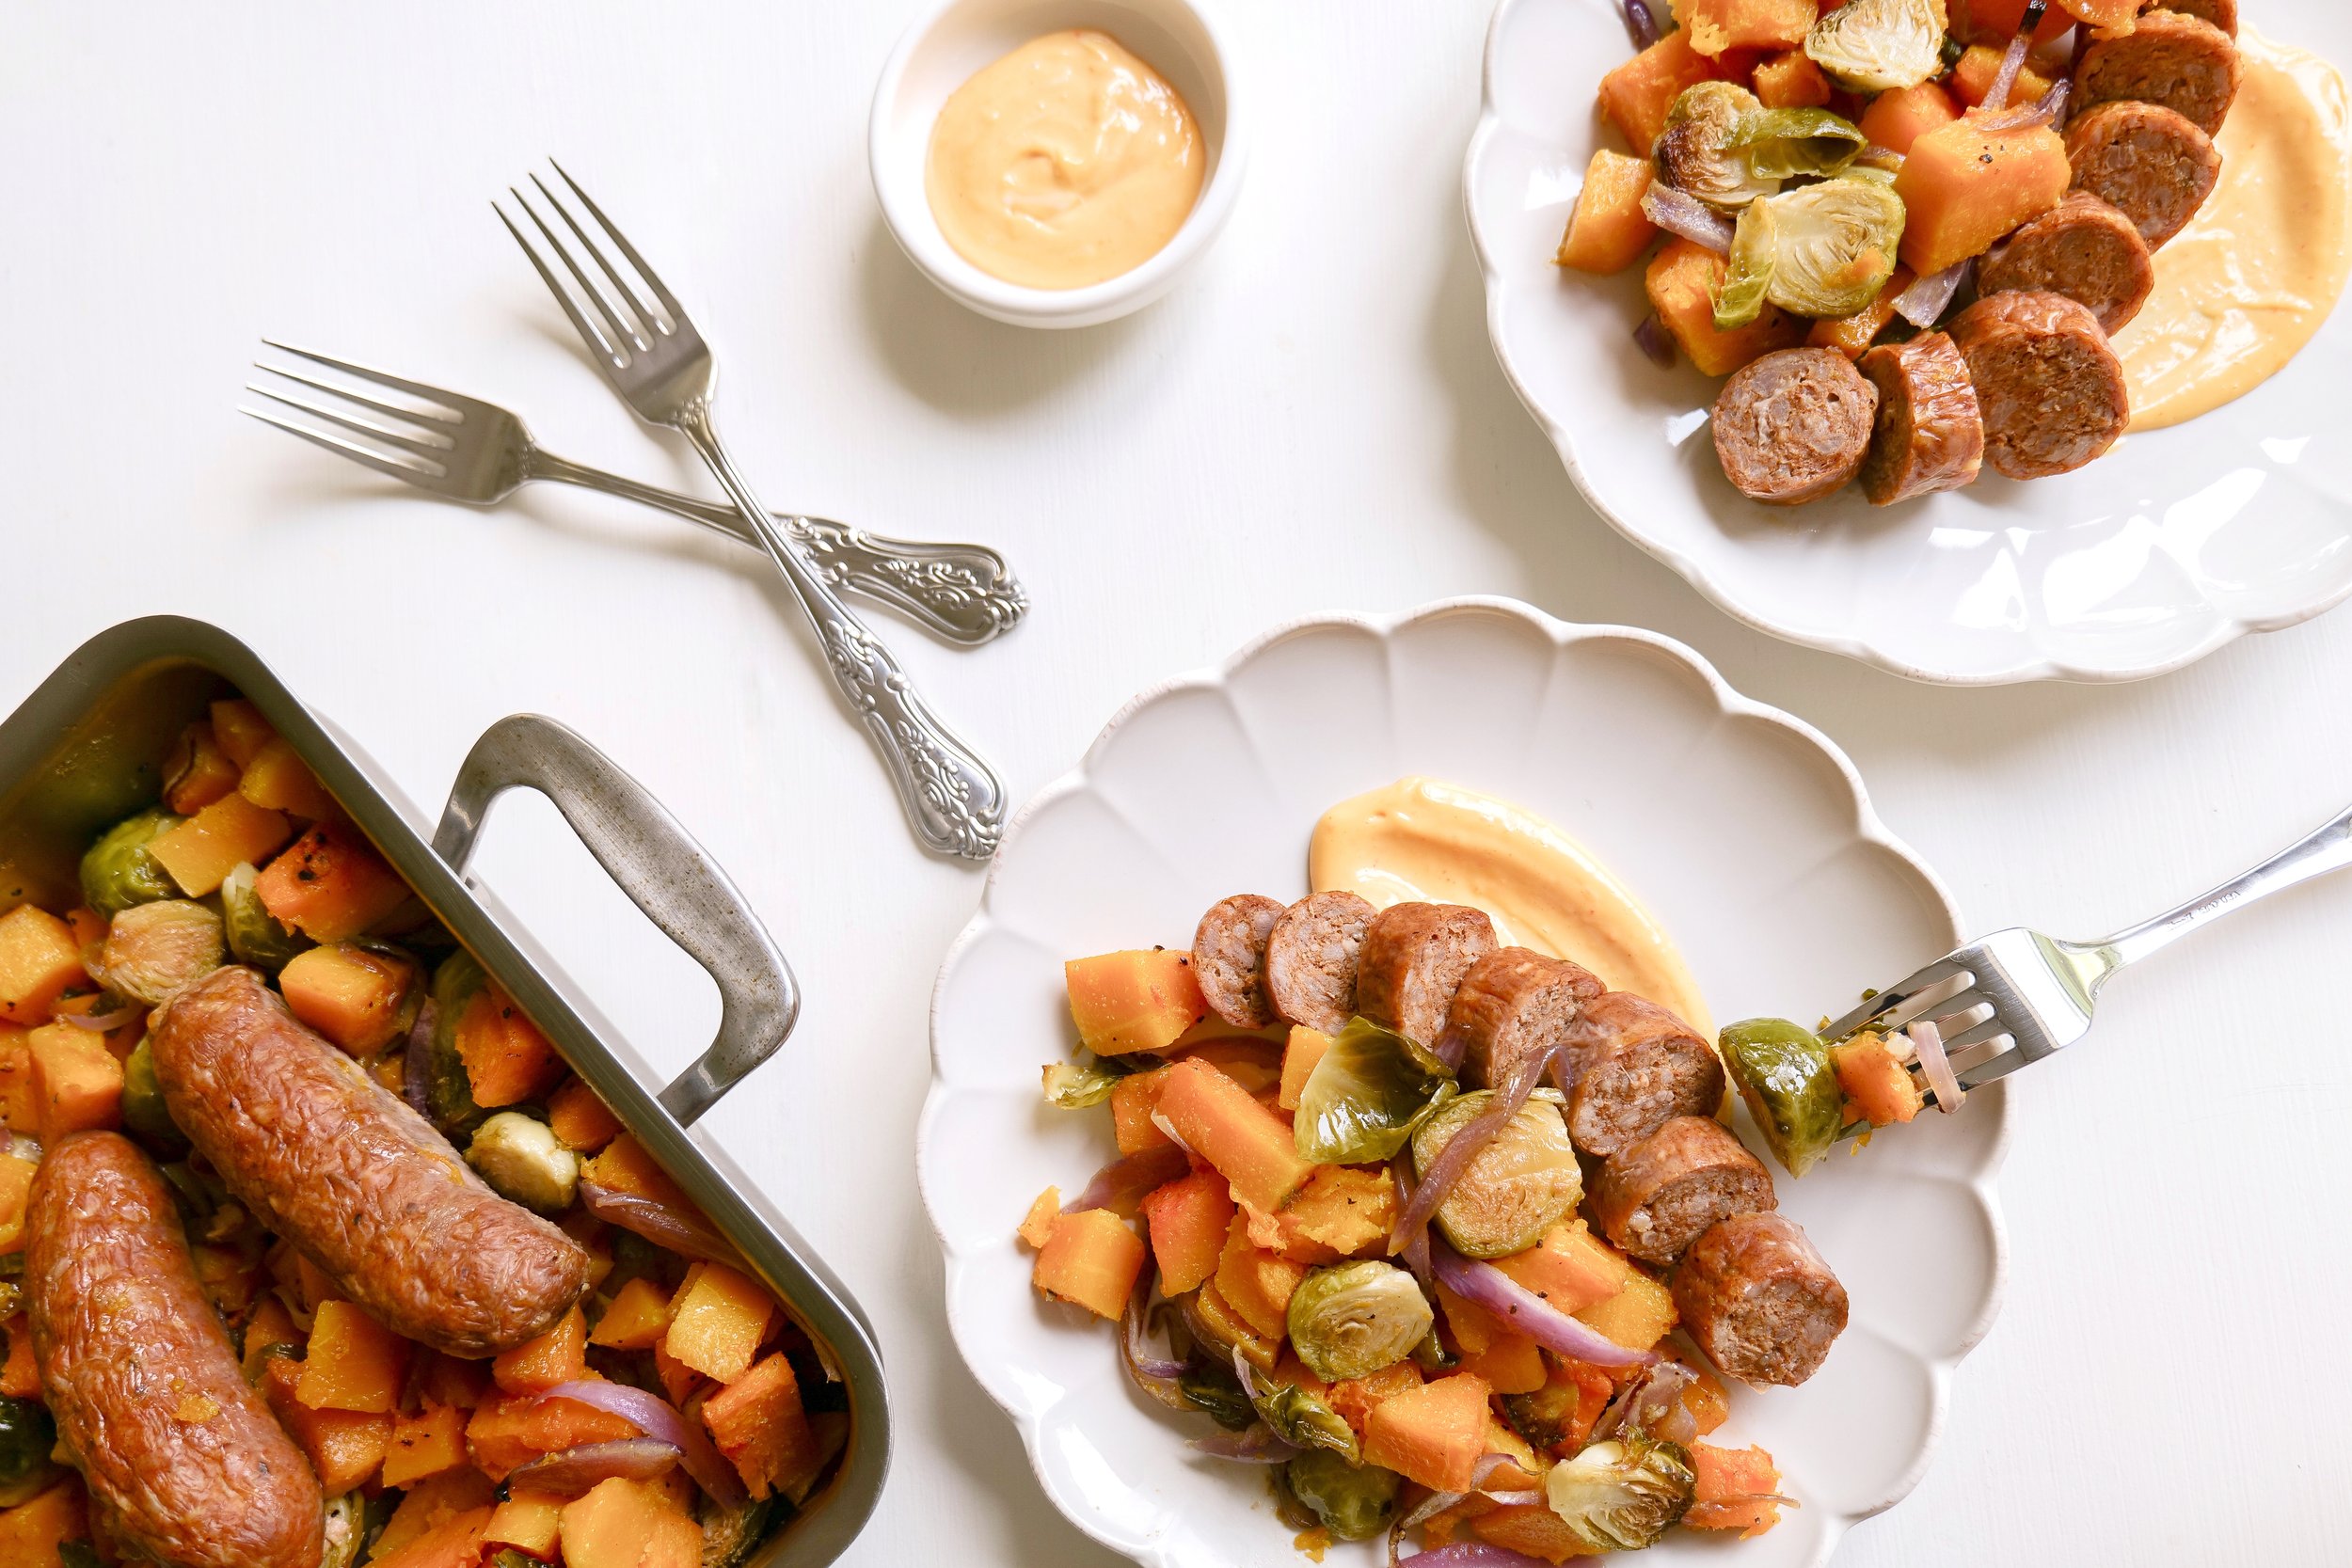
Baby is the size of a Butternut Squash! Their bones are fully developed by now, turning their head and moving their body from side to side. Weighing almost 5 pounds and 17-18 inches long they are growing big and strong! This meal is a delicious dinner you can enjoy while getting in great nutrition for you and baby. Chorizo & Butternut Squash Vegetable Sheet Pan Recipe

Other Recipes You Can Make:

Butternut Squash Soup

Butternut Squash and Turkey Chili

Autumn Spiced Butternut Squash Bread

35 Weeks Pregnant

Baby is the size of a Honeydew! To prepare itself for birth, baby is now making its way upside-down! Their digestive system is almost fully developed this week and now capable of digesting nutrients from your milk once they arrive. Celebrating this week we are making a Perfect Light & Fresh Italian Summer Charcuterie Board. I did include traditional meats on the board that I wasn't able to eat, but my husband had no problem finishing it off for me.

Other Recipes You Can Make:

Melon Burrata Salad

Minted Honeydew Salad

Fruit Skewers

36 Weeks Pregnant

Baby is the size of a Papaya! Their wrinkly skin is starting to fill in and get more plump. Average baby size is now 18.66 inches and 5.78 pounds. They are growing big and getting ready to make their big entrance. This week we are making the Tropical Creamsicle Smoothie and if you are eating dates to help soften your cervix this is a double win! I ate these daily the last month of pregnancy.

Other Recipe You Can Make:

Papaya Boat

Papaya Cheesecake

Papaya Salsa

37 Weeks Pregnant

Baby is the size of Romain Lettuce! By now you are starting to run out of room for baby in your uterus and they are almost about to make their big arrival! Because of this they are mostly stretching and wiggling instead of giving out big kicks. A nutritious recipe this week is the Italian Chopped Salad Jar Recipe and can be made into mini jars to enjoy throughout the week as a meal prep.

Other Recipes You Can Make:

Delicious Buttery Italian Croissant Sandwich

Caesar Salad

Thai Turkey Lettuce Wraps

38 Weeks Pregnant

Baby is the size of a Pineapple! Baby is growing week by week and preparing for their own arrival as you are too! Their brain is forming connections this week that will help them swallow and even sleep better once they are born. A Virgin Pina Colada Coconut & Pineapple Ice Pops are the recipe this week and the perfect treat if you are trying to eat pineapple to help soften your cervix.

Other Recipes You Can Make:

Pineapple Glazed Chicken Thighs

Pineapple Upside Down Cake

Pineapple Pancakes

39 Weeks Pregnant

Baby is the size of Spaghetti Squash! This stage is characterized by the final preparations for birth, with fully developed organs and a rapidly growing brain. Your baby’s lung development is typically complete, enabling their first breaths outside the womb. Your baby's 39 week baby weight is 7.25 pounds and they are almost 20 inches long. This week we are celebrating with Easy & Delicious Italian Sausage Spaghetti Squash Dinner

Other Recipes You Can Make:

Spaghetti Squash Casserole

Chicken Parmesan with Spaghetti Squash

Spaghetti Squash Lo Mein

40 Weeks Pregnant

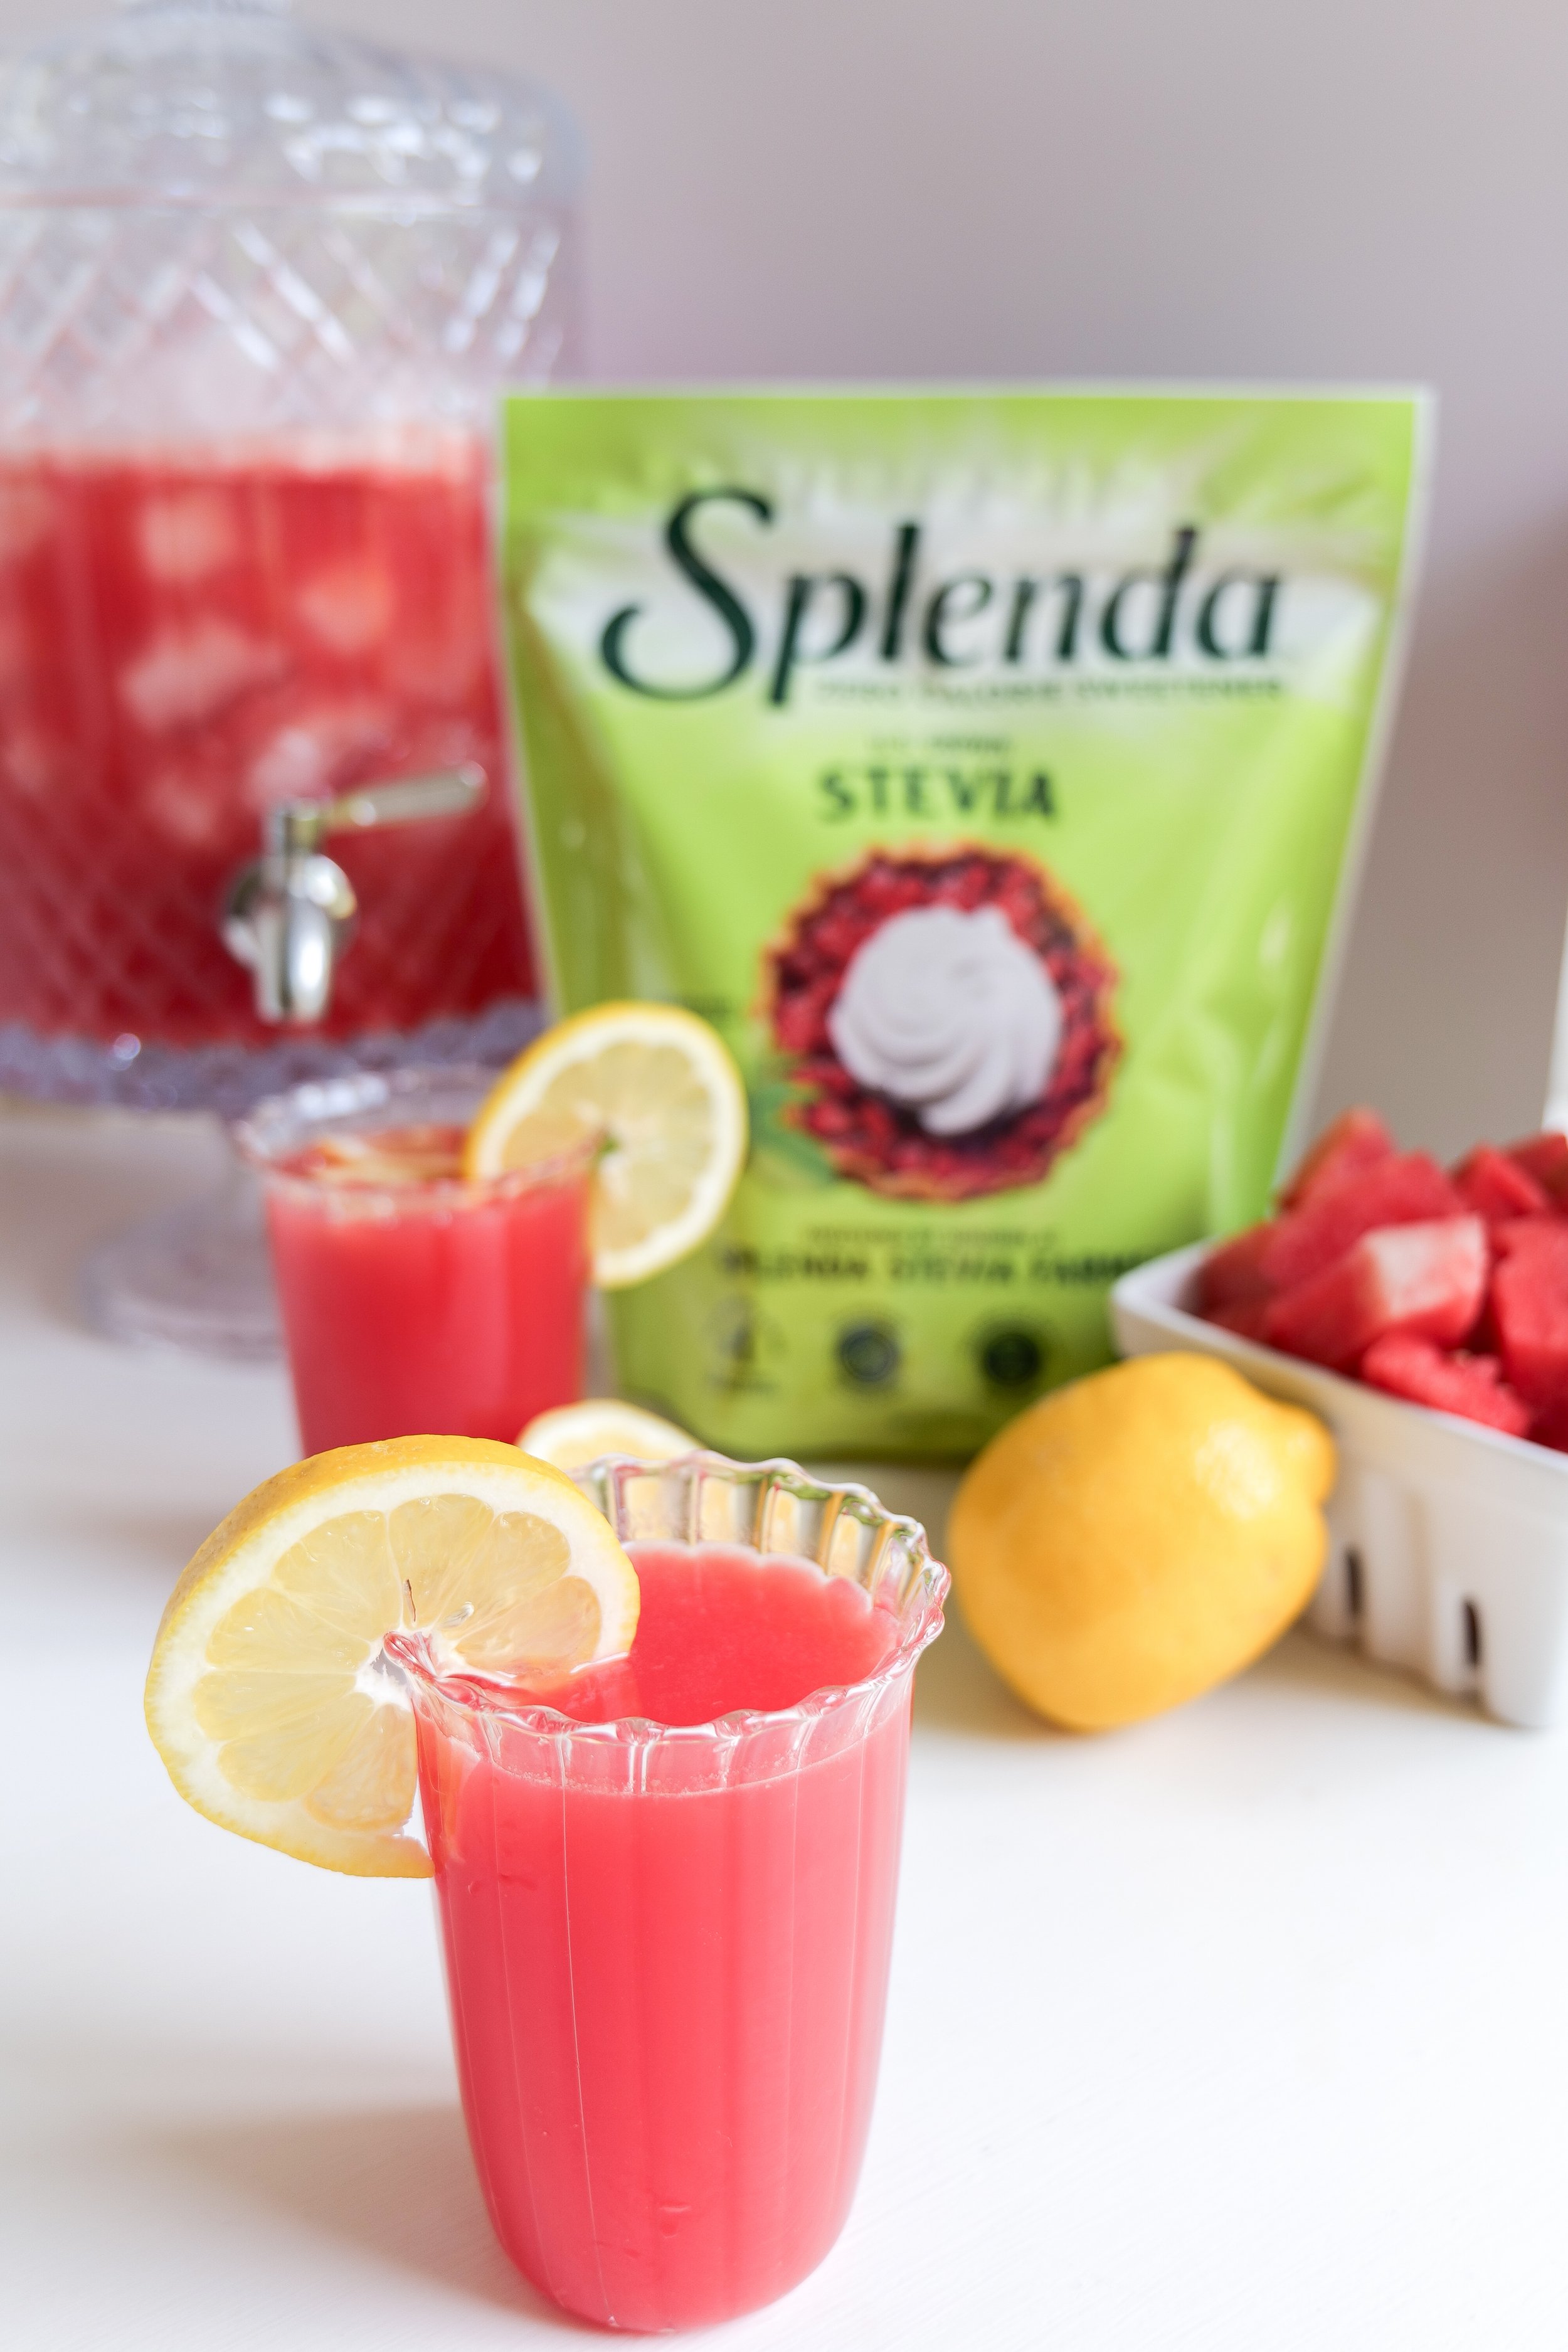
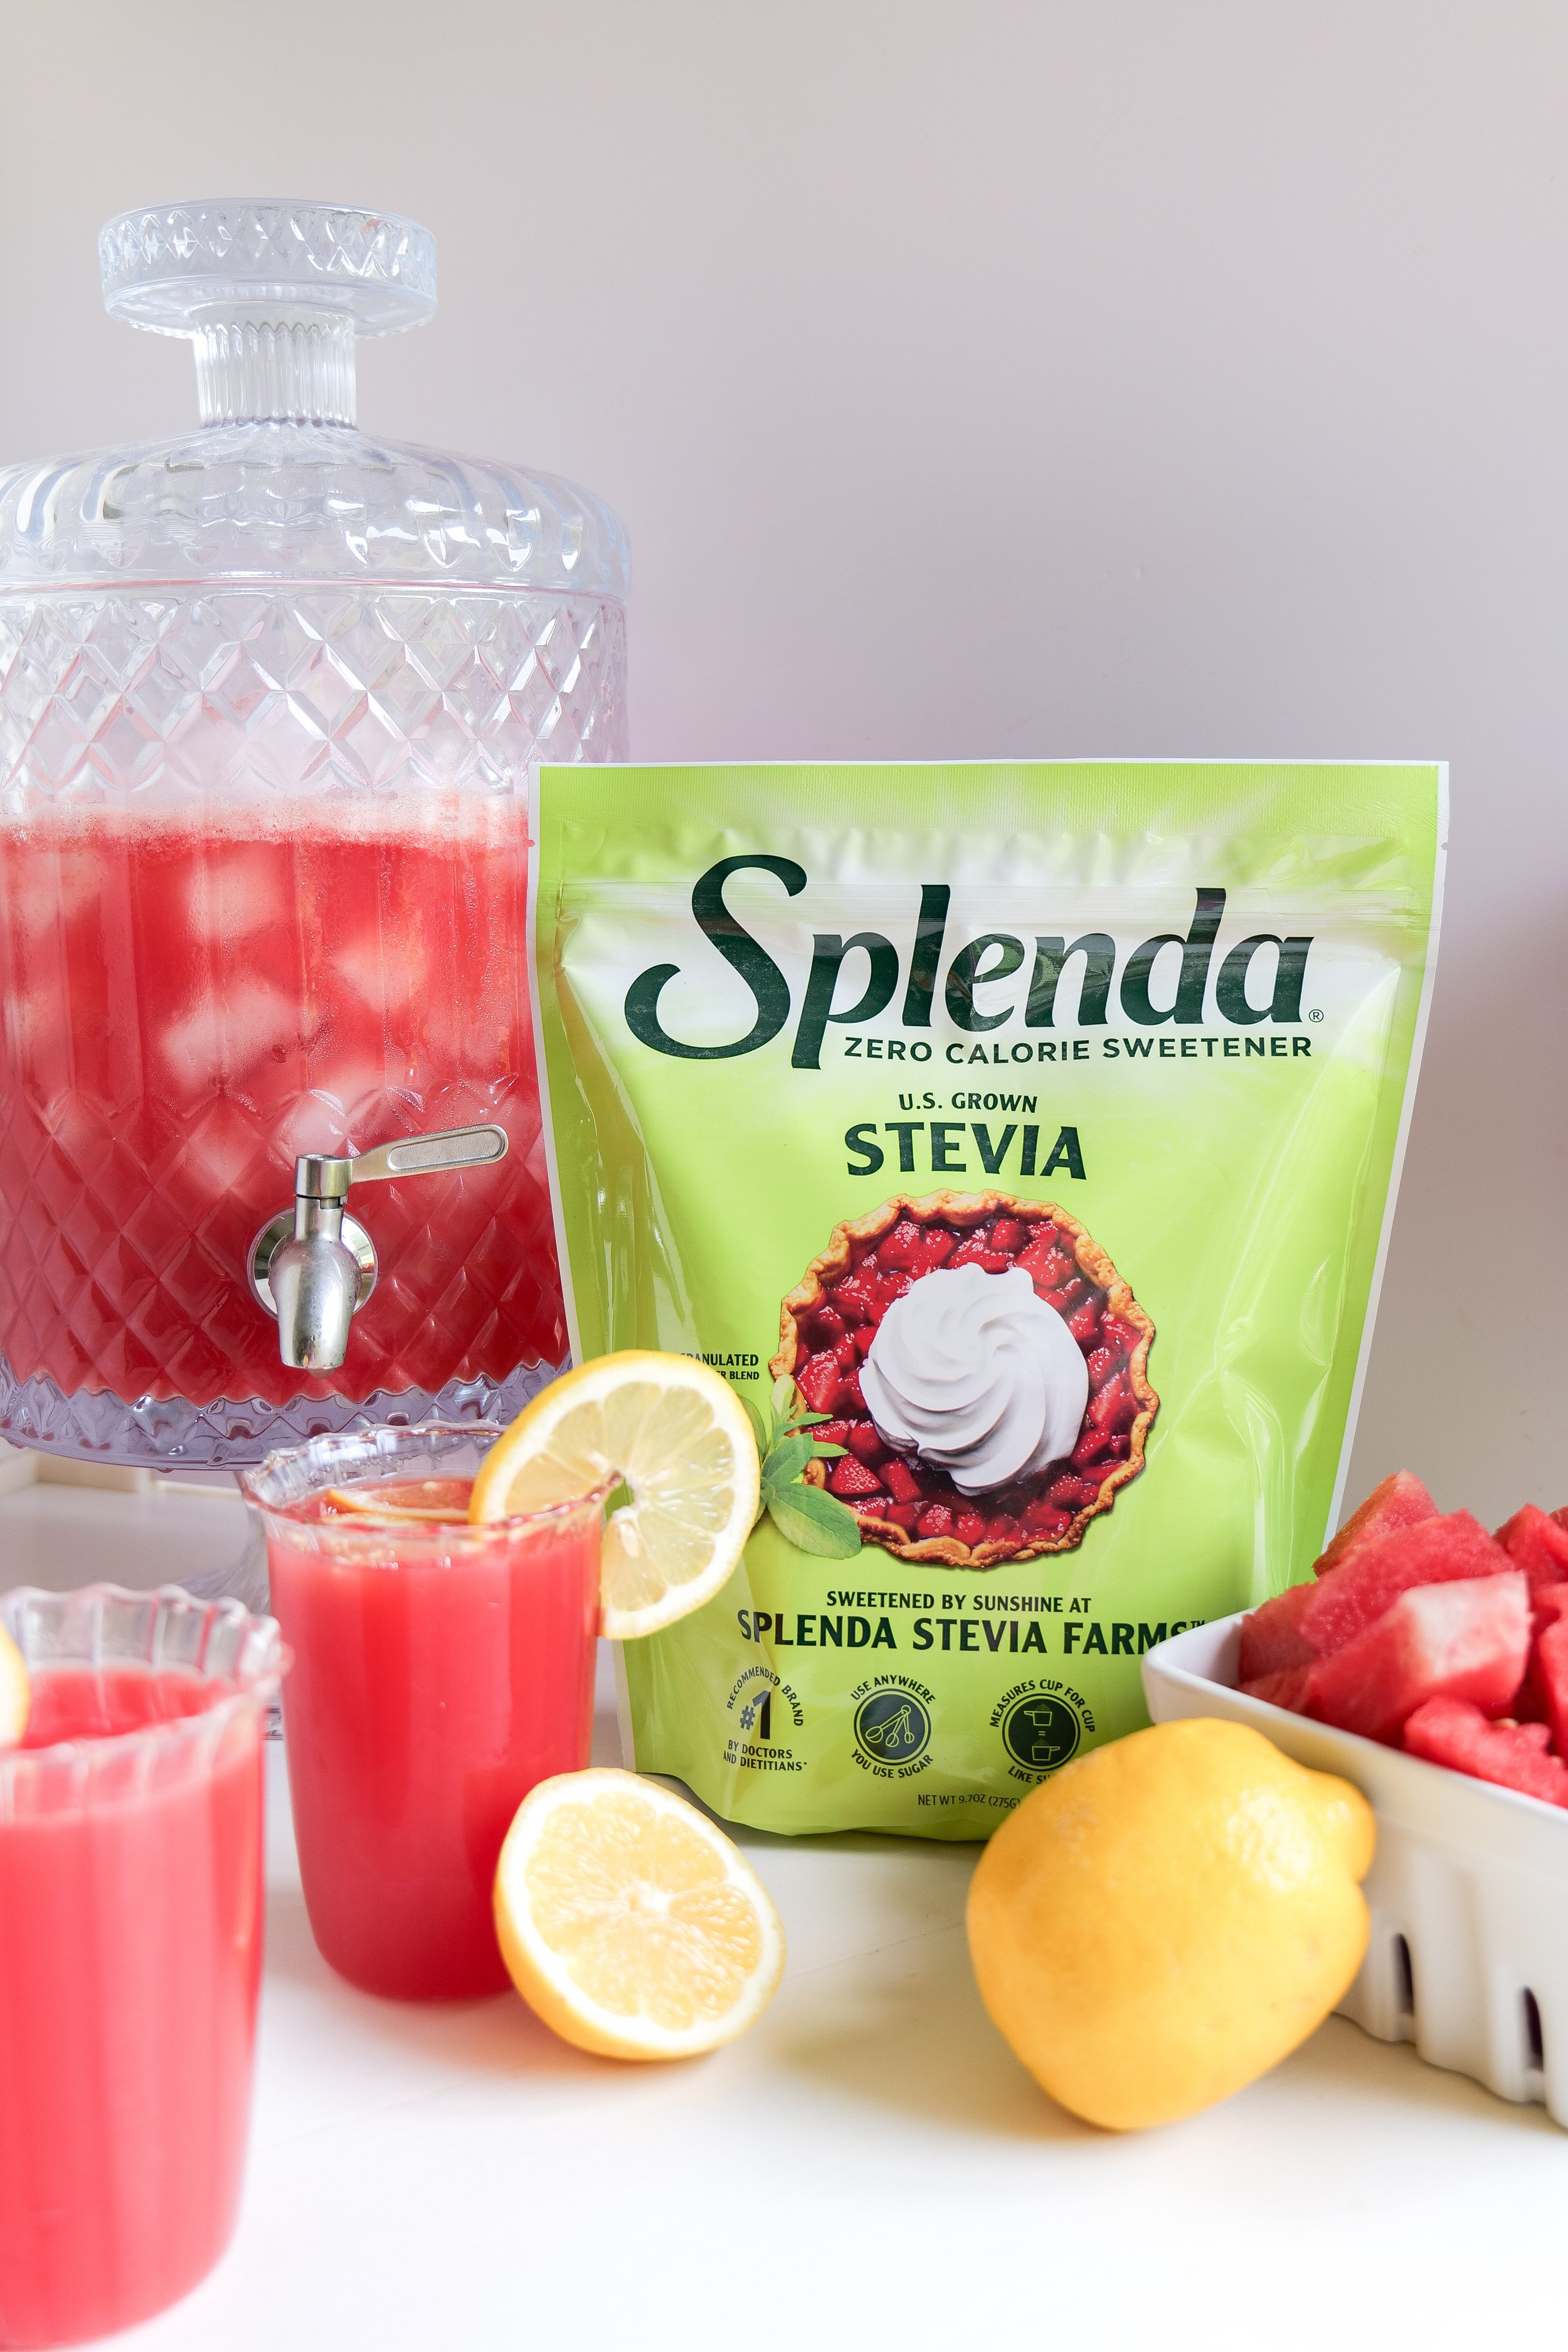
Baby is the size of a Watermelon! Reaching 40 weeks of pregnancy is a monumental milestone, marking your baby's imminent arrival. At this point, your baby, now about the size of a watermelon, is fully developed and ready to be born. Celebrate the soon to be bundle of joy this week with Sip into Summer: The Ultimate Sparkling Watermelon Punch

Other Recipes You Can Make:

Melon Burrata Salad Recipe

Grilled Watermelon

Watermelon Sorbet

Each week brings about a new recipe that not only symbolically represents your baby's growth but also incorporates nutrient-dense ingredients. These recipes are designed to be a fun way to support a healthy pregnancy, providing essential vitamins and minerals that nourish both you and your developing baby. Weeks 1-12: Think of small yet nutrient-rich foods such as poppy seed muffins or blueberry smoothies. Weeks 13-26: As your baby grows to the size of a lemon, peach, or mango, enjoy dishes like peach cobbler or mango salsa. Weeks 27-40: Celebrate larger milestones with meals that feature butternut squash, pineapple, or even a small watermelon. This 40-week journey transforms the ordinary act of eating into a celebration of life and growth.

Embracing the growth of your baby through weekly recipes not only makes the journey to motherhood fun and engaging but also ensures that you’re providing essential nutrients for both you and your baby. Each dish, inspired by the size of your little one, serves as a delicious reminder of the incredible transformation happening within you. Parents-to-be celebrate these moments, prepare nourishing meals, and share your experiences with a community of expectant mothers. Thus, with every bite, you are not just feeding your body but also cherishing the remarkable journey of bringing new life into the world.

Other Pregnancy Blog Posts:

Sail into Style: Nautical Maternity Looks for this Summer

My Must-Have Essentials for the First Two Months Postpartum as a First-Time Mom

Dresses Worn In Photos

Sip into Summer: The Ultimate Sparkling Watermelon Punch

As the temperatures rise and the days extend, there's nothing quite as refreshing as a deliciously chilled drink. This fun recipe calls for a cool glass of Summer Sparkling Watermelon Punch. This delightful concoction is more than just a drink, it's a perfect embodiment of summer itself. Featuring the sweetness of ripe watermelon and the bubbles of sparkling water, this punch is a must-have for any warm-weather pool party or barbeque. Let's dive into the magic that turns one of my personal favorite fresh fruits along with bubbles into the star of your next summer party.

Creating the Ultimate Summer Beverage

The Refreshing Summer Sparkling Watermelon Punch really captures the essence of the summer season by combining the luscious flavors of fruit with the lively tickle of carbonation. This summer staple is not only easy to prepare with simple ingredients like fresh watermelon and lemon juice, but it also allows you to get creative and customize your recipe by adding optional sweeteners to taste. Whether you're hosting a family picnic, a casual backyard barbecue, or a vibrant pool party, this non-alcoholic punch ensures that guests of all ages can partake in the colorful and festive flavors. If you're looking to cater to a more adult crowd, feel free to infuse your punch with a splash of vodka or tequila for an extra kick. Or if you want to make the sparkling even more adult and bubbly, feel free to switch it out for champagne! You can also give your guests the option of having alcohol or not by leaving sparkling water and champagne out of the original recipe and serving on the side for them to make their choice.

Refresh your guests with this yummy blend of pureed watermelon juice and sparkling water. Tailor your punch's sweetness with a touch of agave, simple syrup, or your preferred sweetener. Brighten the taste with the zesty zing of freshly squeezed lime juice over lemon or half lemon and half lime. Enjoying the perfect cup of Summer Sparkling Watermelon Punch is about more than quenching your thirst, it's also about celebrating the joys and relaxations of those long, bright summer days. This Sparkling Watermelon Punch Bowl is the centerpiece that will nicely elevate any summer festivity. At its core, this punch bowl is filled with the refreshing blend of pureed watermelon, chilled sparkling water, and fresh lemon juice. Adding in even more touches of summer fruits like strawberries, cucumbers, and mint leaves can embellish the punch with more fun flavors. It can also make for a stunning visual blended treat.

Want to get even more creative? Serving this punch in a hollowed-out watermelon creates a festive and functional vessel for the punch that will be sure to catch the attention of your guests. This is an imaginative twist that adds a natural charming touch to your table decor. For those balmy evenings when an adult beverage is called for, simply mix in your liquor of choice to create a tantalizing cocktail option. Utilize a hollowed-out watermelon as a natural and eye-catching punch bowl. Add a pop of color and flavor with a garnish of berries, pineapple chunks, citrus slices, or edible flowers. Keep the punch chilled and refreshing by adding a frozen watermelon ball skewer or ice cubes. The Sparkling Watermelon Punch Bowl isn't just a drink, it's an experience that allows you to get creative and promises to leave your guests in awe on those scorching summer days.

Delight in the essence of summery refreshment with this homemade Sparkling Watermelon Punch Recipe that's both simple and sophisticated. Start by pureeing fresh watermelon in a blender, then strain it to achieve a silky-smooth consistency. A tangy twist of lemon or lime juice cuts through the sweetness, creating a well-balanced flavor profile. Introduce the carbonation with a pour of sparkling water or opt for a lemon-lime soda or lemonade if you're looking for a sweeter note. Adjust the sweetness to your liking with simple syrup or your preferred alternative, ensuring your punch has the ideal sweetness for your palate. Serve this quintessential summer drink over ice, especially crushed ice, and garnish with fresh watermelon and fresh mint leaves for added flair and freshness. The result is one amazing drink.

Summer Sparkling Watermelon Punch isn't only a drink. Let this drink be a symbol of leisure, laughter, and making memories with friends and loved ones. Each sip is an invitation to feel like it's the weekend, and to slow down and savor the simple pleasures that the season brings. From backyard bashes to serene sunsets, this punch is sure to become a seasonal staple. So, grab a watermelon, a bottle of bubbles, and let the joy of summer unfold in a cascade of refreshing flavor. Cheers to summer, in all its sparkling glory!

Ingredients

8 lemons, with peel removed

16 cups of cubed watermelon

6 cups water

1-2 cups of Stevia Splenda

Sparkling Water or Champagne

Ice

Instructions

1. Start Preparing by blending watermelon until liquid and strain in pitcher.

2. After all watermelon is blended & strained. Blend whole lemons without peel with 1-2 cups of Stevia Splenda (depending on how sweet you would like your lemonade) and 3 cups of water. Strain into pitcher with watermelon.

3. Add in an additional 3 cups of water to pitcher & as much ice as desired. Stir & serve with sparkling water & champagne for added fizz and a festive drink!

Savor the Tradition: Easy & Delicious Italian Sausage Spaghetti Squash Dinner

Who says vegetable meals can't be hearty? Dive into this plate of Easy & Delicious Italian Sausage Spaghetti Squash Dinner. This is a traditional meal that nicely meets nutritional needs. This dish offers a symphony of flavors, blending the savory taste of Italian sausage with the subtly sweet undertones of spaghetti squash for a delightful meal your entire family will love. Packed with micronutrients such as vitamin A, vitamin C, and potassium, embracing this squash is a wellness decision you'll want to make more than once. With its versatility, spaghetti squash adapts to a spectrum of cuisines, even finding its place in signature dishes like this Italian sausage-infused delight we are making today.

This delicious meal is surprisingly scarce in calories yet abundant in fiber. The unique squash variant stands out with its pasta-like strands, making it a favorite in low-carb and keto circles. The squashes mildly sweet zest serves as an ideal backdrop for an array of ingredients, from rich marinara to spicy Italian sausage, crafting dishes that please the palate while also nourishing the body. They are easy to prepare by either roasting, microwaving, or boiling. Spaghetti squash emerges as a nice replacement to traditional noodles, seamlessly blending into recipes for the health-conscious and flavor-seekers alike. At first glance it may look daunting, but its preparation is straightforward. Start with cutting, deseeding, and cooking until the magic of its spaghetti-like interior is revealed. Let's not forget that this squash isn't just a sidekick, it's fully capable of playing the main role in a multitude of dishes while supporting various dietary lifestyles, from gluten-free to those aiming for fewer carbs on their plate.

Does Squash Taste Like Spaghetti?

With its fibrous insides, it's no wonder spaghetti squash has become such a popular and unique pasta substitute. Coupled with Italian sausage's juicy taste and with the marinara sauce many may wonder the difference between squash and actual noodles. You may start believing you're indulging in a classic bowl of spaghetti. The squash embodies the al dente quality we cherish in noodles and, when seasoned with a dusting of Italian herbs and with the rich sausage, it fulfills a flavor profile that traditional pasta dishes offer. The natural sweetness of the squash brings an unexpected note, complementing savory sauces and seasonings but also being quite different then pasta. Achieve a spaghetti sensation by twirling the forkfuls of squash strands. The familiarity of this action adds to the overall dining experience and gives a similar experience as pasta noodles. The texture is probably the biggest note you will notice a difference on. Squash is a little crunchier than pasta and thinner, but equally delicious in a whole new way. Skeptics turn to believers when greeted with a steamy serving, realizing that while nothing can truly replace the deliciousness of a spaghetti strand, this hearty rendition stands as a formidable and tasty substitute.

How To Cut Spaghetti Squash

The journey to a scrumptious spaghetti squash dish begins with preparing the squash itself. Preheat your oven to the sweet spot of 400Β°F as you ready your tools for the task. Make a firm, confident slice down the center of the squash. As the flesh separates it reveals its seed-speckled core, beckoning for a scoop and scrape until hollowed out neatly. If the squash itself is too hard, then pierce with a knife and warm in the microwave for 3-5 minutes to better able yourself to cut. Select a sizeable and stable cutting board, positioning the squash securely before making the first incision lengthwise. Next you will remove seeds and stringy bits and dab olive oil, sea salt and black pepper into the squash's flesh for added moisture and flavor during roasting. Remember to handle your squash with care as it transitions out of the oven, its steam carrying whispers of the culinary adventure ahead.

Do I Have To Use Italian Sausage?

While Italian sausage is the star of this show, the script can be rewritten to suit your casting preferences. Ground turkey or beef can stride onto the stage, or for a greater veggie act, mushrooms and plant-based crumbles can take the spotlight. It's your palate to play with, and the spices are your friends, guiding the overall flavor to maintain that Italian flair. This dish is more than a recipe, it's a template for creativity, catering to carnivores and vegetarians alike without compromising the show-stopping taste it promises. Swap in spicy chorizo for an unexpected kick, or crumbled tofu for a leaner plot twist. A lentil and walnut mixture can offer a nutty, earthy profile, surprising in texture and rich in protein. Cooking up shrimp with garlic and white wine brings a coastal spin that may just transport you to the Italian seaside. Whether gathering ingredients from the market or raiding the pantry, remember that this Italian Sausage Spaghetti Squash Dinner is as changeable, depending on your preference, as it is delicious.

A dish both simple and sophisticated, it waits for no special occasion, fitting seamlessly into weeknight meal plans. The oven routine makes for perfection in every bite. Other substitutions you can make to this dish are adding a dash of red pepper flakes. Adding this can introduce a gentle heat and offset the sweetness of the squash. A sprinkle of parsley brings freshness, coloring the dish with splashes of vibrant green. Whether opting for mozzarella's melt or parmesan's sharpness, cheese is a must, and seals the deal with its unifying richness. An added bell pepper vegetable lends a crunch and color, brightening the dish with a sweet veggie note. Adding spinach can infuse an iron-rich dimension to the plate. A secret sprinkle of nutmeg, barely noticeable yet undeniably present, elevates the flavor profile with its warm, aromatic touch. When this delectable Italian dinner graces your table, it promises nothing short of a communal culinary embrace. As you plant your spoon into the heaped squash half, brace for an eruption of flavors that promise to leave you, and your cherished dinner mates, pining for more.

Imagine a twirl of flavors where the earthy spaghetti squash, the hearty sausage, and a vivacious marinara sauce come together in a culinary whirlwind. It's a trinity of textures and tastes, uniting to form a comforting quilt of deliciousness. Optimal for those moments when the stomach yearns for a touch of Italy, but the mind is mindful of nutrition. This dish rises to the occasion, offering a gluten-free journey into the heart of Italian cuisine without ever having to step on a plane. Pair with a side salad, garlicky green beans or fresh bread to round out the meal, making it a balanced plate of vibrant variety.

How Long Will This Take?

Time is precious, but so is a delectable meal. With a total time clocking in at roughly 45 to 60 minutes, this Italian Sausage Spaghetti Squash Dinner fits into your busy schedule. The initial legwork of prepping the squash is a brief, while the roasting develops flavor. Concurrently, the sausage sizzles and by the time the squash is fork-ready to be shredded, you are mere moments from assembly. This meal keeps time on your side while ensuring a wholesome and nourishing dinner is on its way to your table with ease.

Some tips to help you finish faster are start the sausage and sauce as the squash begins its oven stint, coordinating efforts to streamline the process. Use those roasting minutes to clean as you go or set the table, transforming preparation into a multitasking marvel. The squash's heat once out of the oven is enough to warm the sausage mixture, ensuring every bite is at its peak warmth when it's time to dine. As the oven timer dings, satisfaction is not just in the flavors but also in the knowledge of time well-spent. You can also double up the recipe to make for great leftovers and your efforts for making this meal will take you even farther.

Last Minute Tips

The secret to a flawless execution of spaghetti squash lies within a handful of helpful hints. Roasting it cut-side down is key to unlocking a treasure chest, revealing perfectly steamed strands ready for twirling. Perfection lies in the details, ensuring the dish's canvas is ready for the rich colors and textures of the toppings it will soon proudly bear. Embrace patience in roasting by letting the oven do its work and the squash reward you with its best texture. Infuse personality into the squash's pre-roast rub with a kiss of garlic powder or a whisper of chili flakes. A post-roast rest allows for excess steam to escape, minimizing sogginess and maximizing flavor retention.

As we bring our culinary exploration to a close, we've journeyed through preparation tips, flavor fusions, and customization techniques for a divine Easy & Delicious Italian Sausage Spaghetti Squash Dinner. This is more than just a meal, it's an expression of honoring the rich tones of one of my Italian cuisine favorites. So get out your apron, armed with this new recipe, and take in the delight of every savory bite.

Ingredients

4 Servings

2 Spaghetti Squash

4 tablespoons Italian Sausage

1 teaspoon Sea Salt

1 teaspoon Black Pepper

4 Garlic Cloves

2 pounds Italian Sausage

1 White Onion

1 jar of your favorite marinara sauce

1 tablespoon Italian seasoning

2 cups Parmesan Cheese

Instructions

1. Slice Spaghetti squash in half and scoop out the inside seeds. Drizzle olive oil over tops of all 4 halves, sprinkle with sea salt and black pepper, place a garlic clove in the center and flip over onto a dish or sheet pan with sides. Bake at 400 degrees for 40 minutes.

2. While squash cooks, add onion & sausage to a stove top pan over medium head and cook until well combined and meat is no longer pink. Add in Italian seasoning and marinara & let come to a simmer.

3. Once spaghetti squash is cooked remove from oven flip over and smash garlic into squash. Using a fork twirl up squash to resemble noodles and remove from sides of the outer edge. Add in meat marinara mixture and stir together. Top with parmesan cheese and place back in oven for an additional 20 minutes. Meal is ready to serve, you can add additional cheese and basil if you desire. Serve & Enjoy!

Other Delicious Recipes You Will Love:

Italian Sausage, Potato & Kale Soup

Delicious One-Pot Italian Lasagna Soup for Busy Weeknights!

Enjoy Delicious Stuffed Italian Sausage Pasta Shells Tonight!

Garlic & Herb Focaccia Bread

Zesty Delight: Mastering the Ultimate Cod Piccata Recipe at Home

Zucchini Roll Ups Dinner: A Seasonal Delight at Your Table

The Perfect Pair: Chicken Picatta and J. Lohr Wine

Baked Burrata Pumpkin Ziti with Pork Sausage Recipe

Easy and Delicious Mushroom & Pea Risotto Recipe

Garlic Mushroom & Shrimp Pasta

Virgin Pina Colada Coconut & Pineapple Ice Pops: The Ultimate Summer Treat

As the sun beats down and the days grow longer, there's no better way to cool down from the heat than with a deliciously frozen treat. This Virgin Pina Colada Coconut & Pineapple Ice Pop recipe is the epitome of summer refreshment. Combining the creamy essence of coconut with the juicy sweetness of pineapple makes these ice pops a delightful escape to a tropical paradise. Whether you're looking for a fun activity with the kids or simply craving a wholesome indulgence, these popsicles are sure to satisfy.

Transform your kitchen into your very own tropical getaway with the easy-to-make Virgin PiΓ±a Colada Popsicles. These delightful frozen creations are perfect for any summertime cool-down, offering a burst of exotic flavors that everyone in the family can appreciate. Although traditionally a cocktail, these popsicles are entirely alcohol-free, making them a safe and enjoyable treat for individuals of all ages. However, if you want to spike things up a bit you can feel free to add in Rum for a fun adult treat. The secret in making this tasty treat lies in the blending of fresh or canned pineapple together with rich coconut milk, followed by a touch of natural sweetness derived from honey or sugar tailored to your personal taste preferences.

Upon achieving the perfect tropical blend, simply pour your concentrate into your preferred popsicle molds and let the freezer work its magic. Once solidified, you'll have a batch of refreshing snacks or desserts ready to be relished during those scorching hot days. These treats will keep you ready for a party or guests that drop-in last-minute craving a sweet treat. This takes your summer treat game to an entirely new tropical level.

This inclusive recipe is designed to be enjoyed by all, irrespective of age or dietary preference, thus becoming a versatile snack for any occasion. By being a virgin rendition of the classic cocktail, it caters to the health-conscious and those abstaining from alcohol alike, without compromising on the delightful tropical experience. Creamy coconut milk and ripe pineapples blend to recreate non-alcoholic Pina Colada flavors. Fresh ingredients guarantee a refreshing and wholesome snack. Smooth texture achieved through quick-freezing mimics traditional ice pops. Enjoyable for all ages, these popsicles are suitable for various events or as a casual treat. Not only are these ice pops an ideal companion for poolside lounging, but they're also a wonderful addition to any summer gathering. Imagine serving up these homemade goodies at your next barbeque or picnic! They are guaranteed to be a hit!

Tips I use to make these extra tasty:

- Use coconut milk for its creamy texture and tropical flavor and makes them dairy-free.

- Select ripe pineapple for that signature sweetness and a hint of acidity.

- Sweeten naturally with honey or maple syrup to keep things guilt-free.

- Get creative with add-ins like shredded coconut, diced pineapple or a splash of lime juice for a zesty twist.

- Serving as ice pops gives a delicious treat without special equipment needed and is easy to take on the go!

Virgin PiΓ±a Colada Popsicles stand as a testament to creativity in the kitchen for the pleasures of summer-inspired treats. They perfectly capture the essence of the season in a refreshing, family-friendly package, all the while maintaining the renowned piΓ±a colada taste that everybody loves. Each lick offers a cool reprieve from the heat, with a fantastic topical flair that demands to be savored.

These popsicles are crafted to bring a smile to faces young and old alike, savoring the simple joys that summer and good company bring. Whether served at a summer party, as a playful dessert, or a refreshing snack, Virgin Pina Colada Coconut & Pineapple Ice Pops add a deliciously sophisticated yet lighthearted touch to any occasion. Escape into a world of flavor where every icy nibble is a step closer to paradise. Serve these at your next outdoor gathering for a universally appealing treat. Enjoy as a solo pleasure after a long day, and take your mind back to your favorite tropical getaway. Keep a stash in your freezer for a quick, satisfying cool-down whenever desired.

These easy to make Virgin Pina Colada Coconut & Pineapple Ice Pops really stand out as the perfect summer treat. They hold a cherished spot in my kitchen because they are so good, so cold, and so much healthier than most other freezer treats. They really bring out the sweet, carefree essence of sunny days and fun-filled nights, and they promise a touch of tropical bliss with each and every tantalizing taste. This easily makes them one of my favorite summertime recipes.

Ingredients

1 can coconut milk

1 cup pineapple, plus 1/4 cup separately

2 tablespoons honey

1/4 cup coconut flakes

2 tablespoons lime juice

Ingredients

1. Blend together all ingredients in blender minus the 1/4 cup of chopped pinapple.

2. Once fully blended together add in chopped pineapple and add into ice pops.

3. Lay flat in freezer for 4 hours or overnight. Serve & Enjoy!

Savory Italian Chopped Salad Jar Recipe: A Symphony of Flavors in Every Bite

The salad in a jar trend is not just about being a trendy new aesthetic visual, it's also a practical solution to keeping your greens crisp and your dressings bold. This recipe is a harmonious mixture of flavors and textures, waiting to burst alive at your very first forkful. Imagine robust Italian salad dressing paired with a crunchy assortment of veggies, all neatly tucked into a portable glass jar. It's culinary creativity and convenience in a single jar, separating the juiciness of dressings from the crunch of your greens. The convenience factor is huge, and with a quick twist of the lid, you have access to a delightful, homemade meal that's easy on time. Like any other salad, this recipe is customizable to the core, and you can tweak the jars for each family member's preference or dietary needs.

Your Italian Chopped Salad is safe from ending up a soggy mess, thanks to the strategic stacking of ingredients. Be sure to layer like a pro with a base of dressing that ensures the leaves stay dry and fresh. Most importantly you seal in the goodness. The jar locks in the crispness, extending the crunch of vegetables. This recipe is perfectly designed for those that like to plan and prep ahead as well as those that meal prep for the week ahead. Prep today and enjoy a stress-free meal tomorrow. When hunger strikes, a good shake distributes your dressing evenly, coating each bite with flavor The compact design of jar salads means you can take your Italian indulgence from picnics to work desks and everywhere in between!

What’s the best dressing?

An Italian vinaigrette isn't just a dressing, it’s an essential piece of the Italian Chopped Salad Jar! I would opt for a homemade Italian vinaigrette, because it's the heart of the salad, and it promises a truly authentic taste. Your vinaigrette should be bold yet refined, providing a perfect counterbalance to your fresh ingredients. However, as always with my recipes, feel free to experiment. Personalize your dressing with a dollop of mustard or a drizzle of honey for that perfect zing. Once you make the perfect dressing be sure to keep your greens lively and flavored precisely at the moment of consumption by positioning the dressing at the bottom and your greens on the top.

How far in advance can I make this Italian chopped salad?

With an Italian chopped salad jar, you're looking at a prepped meal that's fresh ahead of time. With the readied salad jar, your ahead-of-time time frame will promise freshness for 3-5 days. Your most important factor to get the extended length in time is layering, this extends the life of your salad. The jar's versatility means that its layers act as barriers, preserving taste and texture. Toppings on top, always. Keep your greens and perishables away from wet layers until it's time to eat, guaranteeing perfect crispness. Next to that you must seal the deal. Tight lids keep air out and freshness in, protecting your salad's integrity. On the brink of enjoying your salad, a good shake blends the taste throughout, ensuring every bite is as intended. The Italian chopped salad jar is your best friend for a week's worth of ready-to-eat, delightful lunches.

Italian Chopped Salad Jar: What to Put Inside

Fresh, crunchy bites of romaine next to the burst of juicy tomatoes and fragrant basil. Italian meats like salami deliver depth and are filling, however you can opt for chicken for those who don't want a deli meat (or can't have it like me right now pregnant). I opted to leave meat out and add it in the day of and provide choices to whoever if grabbing the salad to go. Don't forget to add a colorful medley of veggies and fixings. Olives, pepperoncini, and creamy mozzarella will add visual allure and taste. An added crunch of chickpeas was perfect to finish of this salad and add in additional nutrition. Meats, cheeses, and veggies stack for a visually stunning, nutritious meal. Dressing on the down low, tie it all together with a zesty Italian dressing for that final, flavorful flourish. Whether meal-prepped or picnic-bound, your Italian chopped salad jar remains stellar. From weekday lunches to outdoor dining, the Italian Chopped Salad wide-mouth Jar is as functional as it is appetizing. Also giving flexibility to swap or add, making the jar salad truly yours.

Gather your flavors. Romaine and radicchio lay a crisp, tantalizing foundation. Grape tomatoes and red onions inject vibrancy and a touch of sharper notes. Cucumber and chickpeas bring a satisfying crunch and a protein punch. The Italian authenticity age-old salami or pepperoni coupled with the rich, familiar flavors of provolone. A homemade dressing with olive oil, wine vinegar, and a sprinkle of Italy's favored herbs are all it takes to bind it all in delicious harmony.

The best practices for serving your Italian chilled sensation are to chill to perfection, because the colder and the crisper, the better. When serving you can shake or invert, to let the flavors flow through each layer without being over saturated. Unleash the medley into a bowl, toss, and let the ingredients mix and mingle. Don't forget to add the final touches. Fresh basil or lemon zest will bring forth the brilliance of this salad before the first satisfying bite.

Each Italian Chopped Salad Jar is a testament to the joy of healthy eating, with great flavors, textures, and convenience. Whether you're looking to shake up your meal prep routine or seeking to transport yourself to the Mediterranean with every bite, this recipe offers a delicious solution. Skip the restaurant and craft each jar with love and let the fresh flavors of Italy grace your table in a simple, yet sophisticated way. Buon appetite!

Ingredients

3 cups Romain Lettuce

1 cup Arugula

1/2 cup Truly Grass Fed Cheddar Cheese, diced

1 cup Cherry Tomatoes, halved

1/2 cup English Cucumbers, chopped

1/2 cup Pepperoncini, chopped

1/2 cup red onion, diced

1 cup chickpeas

Dressing:

1/4 cup red wine vinegar

1/2 cup olive oil

1 teaspoon Dijon mustard

1 teaspoon dried oregano

1 cloved garlic, minced

1 tablespoon lemon juice

sea salt & black pepper to taste

Instructions

1. Add all dressing ingredients to bottom of jar and using a small whisk blend together.

2. Next start layering to make sure lettuce is farthest away from dressing. Add in cherry tomatoes, cucumbers, red onions, pepperoncini's, chickpeas, truly grass-fed cheddar cheese, and lastly lettuce.

3. Add lid and place in fridge until ready to enjoy. When ready to eat turn over and pour into plate or bowl letting dressing completely come out. Mix together and enjoy!

Other Delicious Salads You Will Love:

Delicious, Nutritious Pear & Walnut Salad with Honey Mustard Dressing

The Perfect Match: Grilled Steak & Blue Cheese Salad with Grilled Corn paired with J. Lohr Estates Seven Oaks Cabernet Sauvignon

Discover the Delightful Twist of Sweet Kale Salad with Poppy Seed Dressing

A Taste of the Southwest: Southwestern Chop Salad Recipe

Shaved Brussel Sprout Salad with Apples, Goat Cheese & Candied Pecans

The Perfect Summer Meal: Grilled Chicken, Mexican Street Corn & Cucumber Salad

The Fully Loaded Iceberg Wedge Salad

How to Make the Perfect Pear and Pomegranate Arugula Salad

Tropical Creamsicle Smoothie Recipe: The perfect Refreshing Summertime Treat

Escape to a tropical paradise with every sip of this luscious Tropical Creamsicle Smoothie Recipe. This smoothie perfectly captures the nostalgia of a creamsicle with an exotic twist. It is an indulgent yet refreshing treat sure to please palates of all ages. The Tropical Creamsicle Smoothie easily brings together the timeless appeal of a creamsicle with a fresh new burst of tropical fruitiness. It's a delicious blend that guarantees a sensory journey with its fusion of fruity flavors. The beauty is this smoothie arises from the perfect blend of frozen papaya, banana and pineapple juice. These ingredients not only contribute to the vivid flavor profile but also to the smoothie's vibrant color. Vanilla yogurt provides an additional layer of lush creaminess, inching the smoothie closer to the revered creamsicle experience. A hint of vanilla extract and just the right amount of sugar are added to accentuate the sweetness and intensify the indulgent creamsicle essence. The finishing touch comes from blending the ingredients with ice, ensuring the smoothie's texture mimics that of the iconic frozen dessert. Whether serving it up on a hot summer day or even still in colder months, this smoothie stands out with its fresh, zesty twist on a childhood favorite.

To give a more refreshing orange burst you can substitute the pineapple juice for freshly squeezed orange juice to infuse a bold citrus kick. Wanting to add in a tropical mango flavor? Incorporate ripe mango chunks for depth and sweetness by cutting the papaya in half and adding in frozen mango. Wanting even more of a pineapple zing? Toss in some fresh pineapple pieces to introduce an exotic tang. This blend of citrus and tropical fruits, combined with creamy vanilla yogurt and a touch of sweetness, makes for a shake that's both heartwarming and excitingly new and can be substituted but still give a delicious tropical flavor to your smoothies.

Tools Needed to Make This Smoothie

To whip up this tropical delight, certain tools will make your life easier, ensuring a smoothie that's, well, smooth! A high-powered blender is your best friend here, ensuring a texture that’s consistently creamy. Invest in a good quality blender to handle frozen fruits and ice. Precise measurements are crucial, so you'll be needing your measuring cups and spoons for your yogurt, fruits, and extracts. A rubber spatula is not just a necessary tool, but it's also key to making sure no delicious bit is left unblended by scraping the sides of your blender. Last but not least, serving glasses. Be sure to chill them in advance for creating the best smoothie-drinking experience.

Imagine sipping on a cold smoothie concoction that tastes like your favorite tropical paradise. This is what a well-made Tropical Creamsicle Smoothie feels like. Begin by gathering all the needed ingredients, prioritizing ripeness and freshness. Prepare the fruits (bananas, papaya) by peeling and slicing, and ensuring any seeds or extra fibers are discarded and they are frozen overnight. Into the blender they go, accompanied by a splash of sweet vanilla extract and a pour of creamy coconut milk. Remember, the more generous, the better the taste may be. A scoop of ice cubes joins the mix to chill and thicken. Once you blend it all up to a smooth creaminess, you're all set to pour and indulge in that tropical creamsicle flavor. Try various fruit combinations to find your preferred taste profile. You can adjust the amount of ice or frozen fruit for your desired thickness as well. Don't forget to sample and adjust sweetness or flavors as needed before serving. All of this work brings to life a drink that's a whirlwind of tropical flavors and is delicious on a hot day. Enjoy for an afternoon treat, breakfast or even as a nutritional dessert.

Ingredients

Servings 1

3 medjool dates

2/3 cup pineapple juice

1/2 cup vanilla Greek yogurt, plus more for glass

1/3 cup coconut milk, more optional to thin if needed

1 cup frozen papaya

1/2 frozen banana

1 teaspoon vanilla extract

Instructions

1. Add all ingredients to blender and blend until smoothed. Take your glass and add additional yogurt on the inside to add a creamy cloudy look. Pour in smoothie, serve with a straw and enjoy!

Other Delicious Drink Recipes:

Watermelon Twist Cocktail

Pitcher of Pina Colada’s

Discover the Bliss of Homemade Acai Bowls

Creating the Perfect Light & Fresh Italian Summer Charcuterie Board

As the summer heat sets in, there's no better way to enjoy the outdoors than with a light and fresh Italian Summer Charcuterie Board. Skillfully arranged with a variety of tastes and textures, this board provides the ultimate classy grazing experience. From the rich flavors of thinly sliced cured Italian meats to the creamy delights of Italian cheese, each element plays a role in crafting a board that's as visually appealing as it is delicious. Let's dive into the art of curating the perfect charcuterie board for those long, hot summer days.

Begin your summer parties with this exceptional Italian Charcuterie Board as the perfect appetizer. At the heart of this delicious board is a selection of thinly sliced Italian cured meats such as succulent prosciutto, savory salami, and delicate Coppa. These meats offer a delightful taste journey from the light and moist to the rich and dry. When considering the meats for your summer charcuterie board, choose ones that complement the light, fresh produce of the season. Select cured meats like prosciutto di Parma or bresaola, which have been thinly sliced for a delicate texture. These lighter meats are usually the main attractions of the board, as they are subtly flavored to perfectly suit a sunny day. Pair them with salads and chilled wines for a perfect summer afternoon. Other meats to use could be Prosciutto di Parma, which is a delicate meat that melts in the mouth, pairing perfect with melon. Another great option is Bresaola, a light and delicious option that enhances the fresh board offerings and is an ideal accompaniment to lighter cheeses and fruits. You can never go wrong with salami but use sparingly for its robust flavor that complements summer salads. Lighter options like bresaola or speck have their place, offering smoky undertones. Don't forget regional specialties like Coppa or Lardo which lend a unique Italian flair, both adding depth to the board with its tender texture. Lastly, mortadella that balances the board with its creamy taste and pistachio inclusions. A well-arranged charcuterie board is as visually appealing as it is delicious, providing a tasty journey for both the eyes and the palate. Each meat should be chosen carefully to reflect the lightness of warm summer days and complement the board's other elements.

Accompany these fine meats with cheeses that highlight the best of Italian dairy. A focus on Italian varietals like velvety fresh mozzarella, indulgent burrata, and delicate ricotta provides a creamy counterpart to the savory cured meats. Adding to the richness, an assortment of Italian cheeses such as these tantalizes your palate and complements the selection meats.

Italian cuisine is known for its delightful cheeses, and choosing the right ones are key for a summer charcuterie board. Each cheese brings a different sensory experience to the table. Mozzarella with its mellow taste and creamy texture is a refreshing addition. Ricotta gives its versatility and creaminess that is perfect for pairing with crisp summer fruits and vegetables. An unusual choice Pecorino adds a little zest without overpowering the other components on the board. My personal favorite burrata, with its oozing with creamy goodness, brings luxury and balance. These cheeses are ideal for crafting a charcuterie spread that sings with the notes of an Italian summer. Whether used in combinations or savored individually, they promise a palate-pleasing adventure.

A Whipped Feta Dip is a tangy, creamy, complement to any summer charcuterie board. This cheese is created through a simple blending of high-quality feta and the addition of flavorful Italian herbs. It pairs well with crisp veggies and artisan bread. Whipped Feta Dip is that unique element bringing a homemade touch to the charcuterie experience. Simple yet sophisticated, it's a must-have for your Light & Fresh Italian Summer Charcuterie Board.

In contrast, the board is brightened by fresh, seasonal fruits and vegetables. Imagine biting into a piece of juicy melon or a crispy bell pepper, the freshness balancing the savoriness of the meats. Seasonal fruits like melon, peaches or figs are ideal for making your board. Not only are they easier to find but they will be at prime season and the best flavor of all. Adding in crisp vegetables for crunch is always a great option. Bright colors and a diversity of flavors presented on the board make for an indulgent and healthy treat that appeals to all the senses.

No Italian charcuterie board is complete without olives, artichoke hearts, and stuffed peppers. These Mediterranean treasures epitomize the essence of Italian antipasti. Olives or pickled garnishes add in tanginess, while fresh herbs like basil or mint provide for an aromatic finish. These additions ensure your charcuterie board is a refreshing delight ideal for summer enjoyment. What better way to enjoy these flavors than with freshly baked focaccia or ciabatta bread slices brushed with olive oil? Olive oil and balsamic vinegar are perfect for dipping and tying the assortment of flavors together. The choice of bread is crucial. From grissini (breadsticks) to the pillowy texture of focaccia or crispy crostini, they all offer a satisfying crunch. Complete the arrangement with a drizzle of extra virgin olive oil and a sprinkle of fresh basil or oregano, lending a subtle hint of herbs and bringing the board full circle.

Accentuate your board with a medley of seasonal fruits and a selection of nuts which serve as a counterpoint to the savory elements. They are not just palate cleansers but add freshness and an element of surprise between savoring the meats and cheeses. Nuts like almonds and pistachios that add protein and satisfying crunch.

For this traditional Italian charcuterie board, focus on selecting meats that embody the lightness of summer. From the luscious lean cuts of prosciutto to the spiced layers of capocollo and the air-dried bresaola, each contributes to a bold yet balanced flavor profile without becoming overwhelming. Pairing these meats with fresh Italian cheeses such as mozzarella, creamy burrata, or fluffy ricotta elevates the board to new heights. Add a dash of natural sweetness and freshness with seasonal fruits like plump figs, juicy grapes, or succulent melon. Curating an Italian Charcuterie Board involves strategic selection and placement. Arrange everything on a wooden board, balancing colors, shapes, and types of food. This creates an inviting, rustic, and easy-to-enjoy offering perfect for any summer occasion.

In curating the best Italian charcuterie Board, the aim is to create a light and tasty mix of foods as fresh as traditional Italian cuisine. The careful selection of high-quality meats, cheeses, fruits, and accompaniments, presented with your own creativity, transforms a wooden board into a celebratory feast. This board is more than just summer barbeque food, it’s a classy grab and go for all to enjoy, and each bite is meant to be savored one at a time.

Ingredients I Used on This Board

Honeydew

Watermelon

Cherries

Truly Grass Fed Cheddar Cheese Slices

Mozzarella Pearl Balls

Rosemary Crackers

Artisan Bread Sticks

Local Honey

Prosciutto

Other Great Charcuterie Boards & Appetizers:

A Guide to Creating a Magical St Patrick's Day Charcuterie Board

Creating the Perfect Memorial Day Charcuterie Board

Welcome To Summer Charcuterie Board for Your Next Gathering

2023: Charcuterie Board Ideas to Help You Ring in the New Year

Celebrating Mother's Day with a Deliciously Decadent Charcuterie Board

Delicious & Refreshing Fruit Salad in a Cantaloupe Bowl

Delicious Buttery Italian Croissant Sandwich

Savor the Flavors: Chorizo & Butternut Squash Vegetable Sheet Pan Recipe

If you're on the hunt for a meal that's full of flavor but also offers convenience, let this Chorizo & Butternut Squash Vegetable Sheet Pan Recipe be your culinary endgame. This dish is a beautiful symphony of colors and tastes with spicy chorizo pairing with soft, slightly sweet butternut squash, coming together on an easy on a sheet pan. Let's embark on a flavor journey that transforms simple ingredients into a tasty delight.

Starting with the basics, preheat the oven while prepping everything else. This part is crucial to achieving an evenly cooked and caramelized perfection dish. The key to the perfect roast lies in chopping the butternut squash and other vegetables into equally sized morsels. A generous drizzle of olive oil and a sprinkle of seasonings not only aids in roasting but also brings out the delectable flavors of your produce. The sliced bite-sized chorizo among the vegetables adds a rich depth of flavor to every forkful. As the oven works its magic, what emerges is a tray adorned with tender veggies and succulently cooked chorizo, each bite ringing with crispy, savory notes. The simplicity of this roast makes it easy to create and easier to love, making your kitchen the heart of the home.

The weeknight dinner rush is real, and this one-pan wonder is the answer. Take the delicious flair of chorizo and meld it with the simple taste of butternut squash for a quick, scrumptious meal. This recipe boasts simplicity in preparation and versatility in ingredients, catering to the palate and schedule of the modern-day cook.

Whether you're a meal-prep maestro or a flavor-seeking foodie, the balance of textures and flavors across your palate confirms that easy can also mean irresistibly tasty. This One-pan convenience means less hassle in the kitchen and more enjoyment at the table. This dish is also customizable, meaning you call the shots. You can swap in your veggies of choice and meat of your liking as well. Although we think the choice of chorizo and butternut squash are perfect together, other meats can also do the job. When finishing off a long day with a dish that's as nourishing as it is delightful, life's daily hustle tastes a little better with this recipe by your side.

How to Peel and Cut Butternut Squash

Every masterpiece begins with preparation, and the canvas of our Chorizo & Butternut Squash Vegetable Sheet Pan Recipe starts with safely and successfully breaking down a butternut squash. Chopping off the ends grants stability, which is particularly helpful when navigating the squash's tough exterior. A good peeler is your friend here and with methodical strokes you will reveal the vibrant flesh hidden beneath. When it comes to dicing, remember that uniformity is very important for even cooking. Whether it's cubes for roasting or slices for layering, mastering the prep work ensures your Chorizo & Butternut Squash Vegetable Sheet Pan Recipe starts on a solid foundation.

A parchment-lined sheet pan is the perfect stage for your cubed squash and sliced chorizo to perform. Draped in olive oil and your chosen herbs and spices, they'll roast to tender, flavorful excellence. Fresh out of the oven, serve it garnished with herbs for a fresh pop of color and taste. A simple-yet-sophisticated meal, ready in just a snap!

What Kind of Chorizo Should I Use for This Recipe & Can I Use a Substitute If I Don't Have Chorizo?

When it comes to chorizo, the diversity between its Spanish and Mexican forms can lead to distinctly delicious outcomes. Whether you choose the rich smokiness of Spanish chorizo or the zesty punch of Mexican chorizo, the recipe accommodates both, providing an authentic flare to your sheet pan dish. If you don't have chorizo, alternatives like spicy Italian sausage or even a plant-based version can still pair beautifully with the earthly tones of the butternut squash. The key to the right taste is to balance spices and flavors to honor the chorizo's essence. Spices are key if you decide to change the meat selection you will need to adjust your seasoning to mirror chorizo's signature taste. So, whether it's with traditional chorizo or a savvy substitute, your Sheet Pan Chorizo & Butternut Squash experience can still be delectable. Enjoy the peaceful ease of a recipe that promises to be finished before your stomach starts to wonder what's for dinner.

Flexibility is the heart of this dish, welcoming variations that cater to an array of dietary needs without sacrificing taste. Whether it's replacing chorizo with a vegetarian protein, choosing a less starchy vegetable to cut carbs, or ensuring gluten-free elements, there's room for you to mold this meal to meet your dietary palate. Each adjustment opens a new door to flavor, proving that preferences or restrictions can lead to delicious discoveries. In crafting your version of this culinary creation, you're not just making dinner; you're making the recipe unmistakably yours.

How Should I Store Leftovers

In the unlikely event that you have leftovers, they can be the gift that keeps on giving. Tucked away in an airtight container, your meal will await its second act in the refrigerator. Enjoyed within 3-4 days and reheated to restore its fresh-roasted charm, leftovers make for a delicious encore. While freezing is an option, consider the textures at hand. Enjoying it fresh or slightly beyond is the best way to preserve the integrity of each savory morsel. Seal the deal with airtight containers to guarantee freshness. Consume within a few days for the best taste and safe eating.

Ingredients

4 chorizo links

1 butternut squash

1 red onion

2 cups brussel sprouts, halved

1/3 cup extra virgin olive oil

1 tablespoon garlic powder

1 teaspoon sea salt

1 teaspoon black pepper

Instructions

1. Preheat oven to 375 degrees. Lay chorizo links in 360 cookware bake & roast pan. Place in oven while you prep veggies, about 5 minutes.

2. Prep veggies by cutting them into bite sizes and placing them in a bowl to combine. Once they are all cut and ready add olive oil and seasoning and toss to fully coat.

3. Take out the pan in the oven with the chorizo and remove the chorizo to a clean plate. Layer veggie mixture into pan and place chorizo on top.

4. Return to oven and continue to bake for another 45 minutes to 1 hour or until a fork easily pokes into butternut squash and everything is a golden brown. Feel free to stir and toss half way through to evenly cook.

5. Slice chorizo and plate with veggies. Serve and Enjoy!

Other Dinner Recipes:

Easy and Delicious Mushroom & Pea Risotto Recipe

Garlic Mushroom & Shrimp Pasta

Pork Banh Mi Bowl : Deliciously Satisfying

Baked Burrata Pumpkin Ziti with Pork Sausage Recipe

Delicious and Easy Chorizo One Pan Dinner

Savor the Twist: Deviled Egg Pasta Salad

This Deviled Egg Pasta Salad is a culinary marvel that bridges the gap between two beloved classics: the creamy decadence of deviled eggs and the cold comfort of pasta salad. This makes for a dish that brings together delightful nostalgia and modern convenience in every bite. Ideal for gatherings of all kinds, from sunny picnics to homely potlucks, this unique side dish offers a versatile and flavorful experience that can be tailored to any palate.

Starting with a base of al dente pasta, the Deviled Egg Pasta Salad incorporates the essential pillars of its namesake: hard-boiled eggs, rich mayonnaise, tangy mustard, and a touch of spice. It is a testament to the simplicity of cooking, highlighting that food does not have to be overcomplicated to be delightful.

This recipe combines the traditional flavors of deviled eggs with the casual allure of pasta salad. This makes it Ideal for a wide range of events such as picnics, potlucks, and family dinners. Consisting of a mix of hard-boiled eggs, mayonnaise, mustard, and custom spices intertwined with your choice of pasta, this dish pairs perfectly along side burgers, bbq and sandwiches of all kinds. You can easily personalize this dish with tasty add-ons like savory bacon pieces, aromatic chives, or a dash of paprika for an extra layer of spice and flavor. Designed for convenience, you can prepare this dish in advance to let the mix of flavors blend and intensify. Think outside the box with add-ins such as tart diced pickles, crispy bacon, or assorted chesses to diversify the palate. Adjust the creaminess and zest of the dressing to your preference. The balance of mayonnaise and mustard can be played with, to strike the right creamy tang to your liking. A quick tip for making ahead is to mix the dressing with the pasta and let it sit in the refrigerator. For a burst of freshness, add your toppings right before serving. Remember that textures and flavors are key to reviving the classical taste of the Deviled Egg within your pasta salad!

Tips For Garnishing:

The Deviled Egg Pasta Salad invokes the coziness of home with its assembly of comforting ingredients. The pasta serves as the ideal vessel for the creamy and tangy dressing that is reminiscent of deviled eggs. Spruce it up with bacon bits for a crisp topping. Snip fresh chives over the top for a pop of color and freshness. Add a generous helping of shredded cheese for a luxurious finish. Always remember, the crowning glory of a Deviled Egg Pasta Salad is in its garnish, making it as visually appealing as it is palatable.

By honoring the key components which are pasta enveloped in a seasoned mayonnaise and mustard blend, this dish definitely celebrates familiarity. Textural contrast is achieved through the addition of chopped hard-boiled eggs and a final garnish of paprika. Its smokiness provides a subtle nod to traditional deviled eggs. Whether you’re savoring it as a hearty side or as a main, this Deviled Egg Pasta Salad stands tall as a testament to innovation grounded in classic tastes. For an elegant touch, consider serving individual portions, garnished with a sprig of dill, pickle relish or parsley for proof that simplicity can be sophisticated.

The Boiled Egg Pasta Salad is more than just a dish, it's a delightful melding of tradition and innovation. From casual picnics to elegant dinner spreads, it's a versatile delight that offers nostalgic tastes with contemporary flair. Indulge in its creamy goodness, celebrate its familiar flavors, and take pride in your own unique spin. As you embark on your deviled egg pasta salad journey, may your meals be joyous and your hearts and plates full. Bon appΓ©tit!

Ingredients

16 ounces elbow macaroni or any small noodles

10 hard-boiled eggs

1 cup mayonnaise

2 tablespoons Dijon Mustard

1 tablespoons lemon juice

1 clove garlic minced

Β½ teaspoon kosher salt

Β½ teaspoon smoked paprika

ΒΌ teaspoon black pepper

1/2 cup finely diced celery

1/2 cup finely diced red onion

sliced green onions & additional paprika

Instructions

1. Cook your preferred pasta until it’s al dente, then rinse under cool water. Hard-boil the eggs, chill them, peel, and proceed to chop for mixing and slice a few (setting aside) for garnishing the top.

2. Prepare a dressing in a medium mixing bowl add mayonnaise, mustard, lemon juice, minced garlic, salt, paprika, black pepper to craft a luscious dressing, seasoning to taste with additional salt & pepper. Whisk together and set aside.

4. Toss the chopped eggs, cooled pasta, celery, and red onion. Coating evenly with the dressing made above until combined well.

5. Chill for at least an hour, letting the flavors develop. Garnishing with additional sliced hard boiled eggs, bacon crumbles, green onions and paprika just before serving keeps it visually compelling and delicious.

See how it’s made on my Instagram Reel

A Journey Through the Aromas and Tastes of Classic Ratatouille

Ratatouille, a symphony of vegetables and herbs, sautéed to perfection and merged into a savory, comforting stew, is more than just an everyday recipe, it's a celebration of French Provençal cuisine that brings the Mediterranean sun to your dining table. In this guide, we'll wander through the key ingredients and steps to achieve the quintessential Classic Ratatouille Recipe, a dish that's uses the vibrant, fresh vegetables of summer.

At its core, Ratatouille is steeped in tradition, originating from the sunny city of Nice. It is a vibrant canvas showcasing a medley of summer vegetables including the robust flavors of eggplant, the succulence of zucchini, and the sweet chimes of bell peppers, all simmered with the earthiness of aromatic herbs like thyme and basil. Let us embark on a culinary journey to bring this classic dish to life.

Prepare your taste buds for a bounty of flavors, starting with fresh, ripe tomatoes that lay the juicy foundation. Onions and garlic are next, lending a gentle, aromatic base to which the robust eggplant, sweet bell peppers, and tender zucchini will sing in harmony.

Begin by gently cooking your onions and garlic in a shimmer of olive oil until they turn soft and inviting. Then introduce the diced tomatoes, and watch as they transform into a rich, fragrant base sauce, waiting to cradle the rest of the vegetables. Arrange the vegetables artfully over your tomato base, creating a layered tapestry of color with every slice. A cascade of herbs is then added, including thyme and basil, their flavors marrying under a gentle drizzle of olive oil. The dish enters the warmth of an oven, baking slowly to coax out tenderness from each vegetable, and finally basking under the broiler to achieve an enticing, roasted blush. Ratatouille's charm lies in its rustic elegance, a dish unassuming in its ingredients but lavish in flavor. The technique is simple, ensuring each vegetable retains its character while contributing to a greater, unified flavor profile.

Ratatouille is not a "serve immediately" kind of dish. It practices the art of patience, with flavors that deepen and express themselves more vividly over time. Like a fine wine, our Classic Ratatouille Recipe only improves with age. Prepare it a day or two in advance, and you'll thank yourself when the flavors have perfectly blended together into a deeper complexity. In the chill of your refrigerator, the dish will preserve its charm for up to 5 days, its aroma promising delightful meals ahead.

You can also freeze this delightful dish and you'll have a slice of summer waiting for you for as long as three months. When ready to thaw and reheat, slow and steady wins the race, ensuring it retains its majestic texture and taste. Each reheating is like a reunion of flavors, a little party where they all come together again, just as vibrant as the first time. Let come to room temperature first and then reheat in the oven at a low and slow temperature.

Ingredients

sliced veggies:

1 eggplant

2 zucchinis

2 yellow squashes

3 large tomatoes

2 red onions

1 red bell pepper

sauce:

1 tablespoon olive oil

5 cloves minced garlic

sea salt & freshly ground pepper to taste

1/2 teaspoon dry oregano

1/2 teaspoon dry thyme

1/2 teaspoon red pepper flakes

1 can crushed tomatoes

2 tbsp fresh basil

1 can tomato sauce

1 cup water

herb topping:

5 tbsp olive oil

2 tablespoons basil

2 tablespoons parsley

2 tablespoons garlic powder

1 teaspoon dry thyme

sea salt & freshly ground pepper to taste

Instructions

1. Slice all vegetables thinly and evenly and set aside. Preheat oven to 375 degrees.

2. In a round oven safe pan add olive oil to coat and garlic until fragrant. Pour in water and tomato paste string until well combined. Add in rest of ingredients for sauce and let simmer. Around 5-10 minutes.

3. While sauce is simmering in a small bowl add in all herb toppings ingredients and set aside.

4. Once base of the layered ratatouille recipe is ready start layering the thinly sliced vegetables round and round the pan. Alternate between different vegetables until entire pan is filled. Pour over top the herb topping and cover with foil. Place into preheated oven and bake for 40 minutes. Remove foil and let cook for another 15-20 minutes or until veggies are tender and tomato sauce is bubbling on the sides. Serve and enjoy!

Other Summer Vegetable Recipes:

The Perfect Summer Meal: Grilled Chicken, Mexican Street Corn & Cucumber Salad

3 Easy & Nourishing Stuffed Sweet Potato Recipes

Zucchini Roll Ups Dinner: A Seasonal Delight at Your Table

Mom's Favorite Minestrone Soup Recipe

Easy and Delicious Mushroom & Pea Risotto Recipe

Cauliflower Bang Bang Cashew Recipe: A Sweet and Spicy Delight

Salsa Verde Chicken Enchiladas

Elevate Your Plate with A Baked Ceasar Asparagus Side Dish

This Ceasar Asparagus Side Dish is more than just another item on the menu, it’s a culinary experience that gets you excited for your veggies and also adds elegance and flavor to any meal. This dish is the outcome of marrying the smoky, stalks of tender asparagus with the rich, savory allure of Caesar dressing, dusted generously with freshly grated Parmesan cheese. Whether you're hosting a sophisticated dinner party or looking for something special to add to your weeknight routine, the Baked Asparagus Caesar promises a refreshing twist on traditional greens perfect for a delicious springtime dish.

Imagine the alluring char of grilled asparagus lovingly embraced by the indulgent creaminess of traditional Caesar dressing, sprinkled with a confetti of freshly grated Parmesan cheese, and you've got a side dish that's as appetizing to look at as it is to savor. Baked Asparagus Caesar brings a flavor-packed makeover to the dinner table, featuring delightful smokiness along with a creamy and tangy Caesar dressing for a savory punch with a generous sprinkle of Parmesan cheese for added flavor. Let this side dish take center stage as it provides a unique way to enjoy the seasonal bounty of asparagus while adding a sophisticated touch to any meal. It's not just easy to prepare, whether on an outdoor grill or in the oven, but it also is a versatile option for any occasion.

There’s lots of Parmesan

Parmesan cheese and asparagus are a match made in culinary heaven, and the main ingredients in the Cesar Asparagus Side Dish. Blanketed with a lavish layer of parmesan, each bite melts into a fusion of nutty and earthy notes that are nothing short of divine. The use of freshly grated parmesan is not just about the taste, but it's also a visual and textural enjoyment. The cheese helps to provide a sumptuous, golden crust that's irresistible. The cheese’s rich flavors compliment the asparagus' natural savor. For those who love their side dishes cheesy, this variation of the Cesar Asparagus Side Dish is a dream come true. It's sublime for cheese aficionados and anyone aiming to add a dash of opulence to their greens. Select a high-quality parmesan for the best flavor. Grate it fresh to ensure the fullest, most aromatic experience. Don't hold back, generosity is key for that decadent cheese layer. After all, this isn't just about adding cheese, it's about creating a sensory experience that lingers long after the meal is over.

Drizzle of Decadence: Caesar Dressing for Asparagus

Caesar dressing isn't just a condiment, it's the soul of the Cesar Asparagus Side Dish, adding character and depth with every drizzle. Its creamy tanginess brought by the nuanced blend of garlic and lemon juice, offers the perfect counterpoint to the asparagus' smokiness. It's versatility allows you to opt for a mayo-based version for convenience, or to stick to tradition with raw coddled eggs. Drizzling the dressing over the grilled or blanched asparagus introduces a fine dining flair to the everyday meal. If you so choose you can craft your own homemade Caesar dressing, ensuring your side dish is free from the unnecessary additives typically found in store-bought varieties. Making your dressing allows you to control the quality and intensity of flavors, guaranteeing each spear of asparagus is enrobed in a rich, seasoned layer of deliciousness.

The construction of a Cesar Asparagus Side Dish begins with a firm base of fresh ingredients that all play pivotal roles in creating a harmonious ensemble. For a dish that's as robust in nutrients as it is in flavor, you obviously need firm, vibrant asparagus spears for their snappy texture. Freshly grated Parmesan cheese helps to meld the taste into delectable savory notes. The Creamy Caesar dressing will enliven the dish with a tangy zest. Crunchy croutons which offer a textual counterpoint. Just the right amount of seasoning to elevate the inherent flavors will take this dish over the top.

Breadcrumbs Reinvented: Ingredients for the Perfect Toast

Turning our attention to the crunchy breadcrumb, it's transformed into a standout feature within the Cesar Asparagus Side Dish. By choosing the right bread and seasoning them with herbs you can create a top layer that adds an irresistible crunch and depth of flavor to your perfectly cooked asparagus. Opt for a thick, day-old artisan loaf for optimal texture. Season with parsley, garlic, and parmesan for a complementary Caesar flavor. Toast to a perfect golden-brown and then sautΓ© to reach the right level of crunchiness. This isn't just about adding a garnish, it's also about enhancing every facet of the dish to create a symphony of flavors and textures that makes the Cesar Asparagus Side Dish sublime.

Mastering the Roast: How to Make Roasted Asparagus Caesar

Crafting the perfect Roasted Asparagus Caesar is an art that begins with preparation and timing. Here’s how you create magic in the kitchen. Kick things off by heating the oven and prepping the green spears. Toss with olive oil and seasoning, then spread them evenly, awaiting the transformative roast. Patiently roast, allowing time to perfect their tender-crisp nature. Whisk together a Caesar dressing that's as bold as it is indulgent, ready to drape over the asparagus. Effortlessly turn a simple dish of asparagus into a lush, flavor-laden marvel, destined to star beside any entrΓ©e.

In essence, the Caesar Asparagus Side Dish is an ode to versatility, seamlessly adapting to stand alongside any main course while singing its own high notes of flavor and elegance. Its readiness to embrace creative tweaks makes it an exciting dish to return to time and again, each variation offering a new experience. Whether you're wielding a spatula at a casual barbecue or setting the table for a formal affair, let the Grilled Asparagus Caesar rejuvenate your appreciation for side dishes. From its sumptuous parmesan embrace to the robust flavor of Caesar dressing, it's a side dish that leaves a memorable impression, each and every time.

Ingredients

2 Packages of Asparagus

1/2 cup large chunks of parmesan cheese

Croutons:

3 Sourdough bread slices, chopped into bite size pieces

1 tsp Italian seasoning

2 tbsp extra virgin olive oil

Ceasar Dressing

1 cup mayonnaise

4 garlic cloves, minced

2 tablespoons lemon juice

1 teaspoon dijon mustard

1 teaspoon Worcestershire sauce or coconut aminos

1/2 cup parmesan cheese, grated

1/2 teaspoon salt

1/2 teaspoon cracked black pepper

Instructions

1. Preheat oven to 425. Wash asparagus and lay out flat on baking sheet. Drizzle 3 tablespoons of olive oil over top and season with salt and pepper. Add to oven for 12-15 min or until the tip of a knife cuts easily into asparagus.

2. While Asparagus cooked add all dressing ingredients to a blender and mix together until smooth and creamy. Add to a jar and place in fridge.

3. Next chop bread into cube bite size pieces and add to a preheated pan with olive oil and seasoning. Let bake until crispy, stirring often.

4. Once asparagus is done cooking add to a platter and drizzle lightly with Ceasar dressing, putting rest in a small container on the side for guests who want more. Sprinkle top with croutons and large chunks of parmesan cheese. Serve immediately & Enjoy!

Zucchini Roll Ups Dinner: A Seasonal Delight at Your Table

As the green hues of zucchini begin to grace our gardens and farmers' markets, it's the perfect time to infuse more of this versatile vegetable into our dinners. Today, I'm excited to introduce a tasty dish that combines health consciousness with delectable flavors. This Zucchini Roll Ups dish isn't just about tasting good, it's about feeling good. So, get ready to roll up your sleeves and dive into a meal that’s as nourishing as it is delightful!

There's something about zucchini season that beckons us to get creative in the kitchen. A Zucchini Roll Ups Dinner is perfect for embracing this bountiful time. Made with fresh, garden-picked zucchinis, these roll-ups are not only delicious but also wholesome.

For many, the appeal lies in their light yet satisfying nature. Roll-ups can be easily customized and often feature a mixture of cheeses like ricotta and herbs such as basil, plus the addition of lean proteins like ground beef to create a balanced meal. What sets this dish apart is the use of thinly sliced zucchini in place of pasta, presenting a nutritious twist lower on carbs than the traditional roll-up dishes. Not only are they quick to prepare, but the visual appeal of vibrant green spirals makes these Zucchini Roll Ups a surefire hit for both casual family dinners and entertaining guests. Some specific perks include using zucchini as a pasta alternative for a nutritious, low-carb dinner. The flexibility to customize the filling according to dietary preferences is also a plus. Convenience in preparation makes this dish totally suitable for busy weeknights. After rolling up these beauties, you'll enjoy a dish that captivates with its simplicity and its ability to deliver both flavor and health benefits in every bite.

Imagine taking a bite of a lightly grilled zucchini slice, filled with a rich cheese and herb mixture. This Zucchini Roll Ups recipe brings this vision to life. Begin by selecting fresh zucchini that will be thinly sliced to create the perfect base for the roll-ups. The key to the exceptional taste of this dish is the savory center which is a blend of ricotta cheese mixed with fresh herbs and a sprinkle of Parmesan. Once the roll-ups are snugly filled, they are topped with a coating of marinara sauce followed by a generous sprinkling of mozzarella cheese, drawing inspiration from classic Italian flavors. As you bake these Zucchini Roll Ups until the cheese turns into bubbly golden goodness, the aroma itself will assure you of the delightful meal to come. The outcome is a vegetarian-friendly meal that doesn’t skimp on taste or satisfaction. The golden-brown color indicates the perfect level of baked cheesy joy. The balance of textures is perfectly delightful with the softness of the cheese against the tender zucchini. This meal is a feast for the eyes as much as for the palate and promises to impress any guest.

Easy Zucchini Lasagna Ricotta Rolls

If you adore lasagna but are watching your carbs, the Zucchini Roll Ups Dinner morphs into a guilt-free indulgence with my Easy Zucchini Lasagna Ricotta Rolls. These rolls are a game-changer, delivering the comfort of the classic dish but with the added goodness of vegetables. The genius lies in replacing pasta sheets with zucchini, creating a low-carb, gluten-free experience that doesn’t yell "diet food." The filling is a dreamy mixture of ricotta and herbs, ensconced in rolled zucchini ribbons. This dish is not just healthy; it's a testament to the flavor potential in mindful cooking.

Zucchini Lasagna Ricotta Rolls can be the centerpiece of your dinner in five simple steps:

1. Use a mandoline slicer for evenly sized zucchini strips.

2. Prepare the ricotta filling, mix in some freshly chopped herbs for burst of flavor.

3. Roll the herbed cheese in the zucchini strips with care.

4. Lay them beautifully in a baking dish, and top with more cheese if desired.

5. Bake and watch as it transforms into a bubbly, irresistible dish.

What makes this recipe a treasure is its make-ahead friendliness. Prep these rolls a day ahead and just bake when needed; they're that easy and stress-free! As we bring our culinary journey to a close, it's clear that Zucchini Roll Ups Dinner is more than just a meal, it’s also a celebration of zucchini’s versatility. Whether you're a seasoned chef or a budding home cook, this dish paves the way for endless creativity and wholesome dining. It not only promises a delectably light yet fulfilling dinner but also embodies the essence of healthy comfort food. So go ahead, roll up some joy and savor the flavors of seasonal freshness tonight!

Ingredients

6 large zucchini

1 pound ground Italian sausage or ground beef

1 cup ricotta cheese

1/3 cup freshly grated Parmesan

1 large egg

1/4 cup chopped fresh basil leaves

4 cloves garlic, minced

2 cups marinara sauce

1 cups shredded mozzarella

1 cup grated parmesan cheese

Instructions

1. Preheat oven to 375 degrees.

2. Wash & Dry zucchini and chop off both ends. Taking a potato peeler make thin strips of zucchini to roll. Pat dry with paper towels and set aside.

3. Cook ground Italian sausage and garlic cloves on stove. Once fully cooked and broken up into pieces strain out grease and add to a large bowl. Mix in ricotta cheese, parmesan, egg, and basil leaves.

4. In a large dish for the oven. I use the 9 x 13 bake & roast pan from 360 cookware. Pour 1/2 cup of the marinara sauce on bottom. Beginning making the roll ups. You Will take a zucchini slice add in filling mixture and roll. Lay flat with zucchini showing on top in the baking dish. Once entire pan is filled our marinara over the top of all zucchini roll ups. Sprinkle with both mozzarella and parmesan on top.

5. Add into oven and bake for 20 minutes or until the tops of the cheese are bubbling. Serve & Enjoy!

Other Delicious Recipes You Will Love:

The Ultimate Guide to Creamy Cheddar Cauliflower Soup

The Perfect Mediterranean Pasta Salad Recipe for Summer Entertaining

Delicious & Refreshing Fruit Salad in a Cantaloupe Bowl

A Refreshing and Delicious Melon Burrata Salad Recipe

Indulge in the Sweet & Salty Deliciousness of Peach Baked Brie

The Perfect Peach Cobbler Recipe

The Perfect Summer Meal: Grilled Chicken, Mexican Street Corn & Cucumber Salad

Welcome To Summer Charcuterie Board for Your Next Gathering

Create a Delicious Layered Hummus Dip for Your Next Snack or Appetizer

The Perfect Match: Grilled Steak & Blue Cheese Salad with Grilled Corn paired with J. Lohr Estates Seven Oaks Cabernet Sauvignon

Cauliflower Bang Bang Cashew Recipe: A Sweet and Spicy Delight

Cauliflower might just be the most versatile vegetable in the realm of culinary creations. This Cauliflower Bang Bang Cashew Recipe transforms the simple cauliflower into a dish bursting with flavor and texture. Whether you're catering to vegetarians, seeking out healthier snack alternatives, or simply in the mood for something irresistibly tangy and crispy, this recipe is the perfect choice. Let's dive into the steps that will guide you to create this mouth-watering masterpiece.

Begin by choosing a fresh head of cauliflower. These cloud-like florets are the stars of the show, providing a substantial yet neutral base that absorbs the dynamic flavors of the Bang Bang sauce beautifully. Start by cutting a head of cauliflower into bite-sized florets, ensuring they are uniform to cook evenly. The florets are then submerged in a light and airy batter blend. This step is crucial as it ensures that once fried, the pieces hold a heavenly crispiness that contrasts wonderfully with the creamy sauce. As the cauliflower cools slightly, you can whisk together the main event: the Bang Bang sauce. Key ingredients such as mayonnaise, sweet chili sauce, honey, and a touch of Sriracha come together to form a harmony of sweet, tangy, and spicy. Once your sauce is velvety and rich, it's time to combine it with the cauliflower. Toss the fried florets vigorously in the sauce to ensure every crack and cranny is filled with flavor. Finally, as a crowning touch, add crushed cashews for a satisfying crunch and depth of flavor.

How to Store

Should you be blessed with leftovers (although it's hard to imagine with a dish this tempting) be sure to store it properly to ensure you can enjoy this delectable meal for days to come. Cool completely before storage to prevent any sogginess. Store in an airtight container to keep the flavors intact and the crispiness alive. Prompt refrigeration will keep the dish fresh for 3–4 days, making it a great make-ahead option. For long-term preservation, freeze it up to a month. This piece of helpful info might come in handy for meal preppers. Reheat using an oven or stovetop to recapture the original taste and texture that made you fall in love with the dish. Conclusively, proper storage and reheating are essential for enjoying leftovers that remain as close to the original experience as possible.

Sauce Secrets for the Ultimate Flavor

Tailor the spiciness to your taste buds by adjusting the chili or hot sauce amount. However, don’t skimp on the creaminess; mayonnaise or a vegan alternative is what gives the sauce that luxuriously indulgent texture. Balance the heat with sweetness using honey or an alternative like agave syrup. Fresh garlic and lime juice inject an unmissable freshness that cuts through the creaminess, complementing the overall dish perfectly. Consider toasting the cashews to intensify their nuttiness, complementing the rich flavors in the sauce and cauliflower. The right sauce can elevate this recipe from great to unforgettable. Keep these tips in mind to tweak the sauce to perfection.

Looking for an alternative to this recipe? Serve next to lettuce to give guests a full meal of lettuce wraps with bang bang cauliflower and a topping of sauce. The Cauliflower Bang Bang Cashew recipe represents not just a dish but an experience. It is am a perfect combination of flavors and textures that tick every box for a satisfying meal. Whether as a standalone statement or paired with complementary sides, this recipe is set to spice up your culinary repertoire and impress at any table. Pairing Perfection: Don't forget that the dish's versatility means it can be adapted to any occasion, from casual weeknight dinners to the most elaborate of gatherings. Now, it's time to step into the kitchen and let the sweet and spicy symphony unfold on your own plate. Enjoy the process, indulge in the taste, and take pride as you serve this culinary creation that truly tastes phenomenal.

Ingredients

1 large head of cauliflower

1 cup cashews

2/3 cup milk

1 cup all-purpose flour

1 large egg

1/2 teaspoon salt

1/2 teaspoon pepper

1 teaspoon garlic powder

1 teaspoon onion powder

1 teaspoon smoked paprika

2 cups panko store-bought breadcrumbs

1 cup mayonnaise

1/2 cup sweet chili sauce

2 tablespoon siracha

2 tablespoon rice vinegar

2 tablespoon honey

Instructions

1. Preheat oven to 420 degrees. Cut cauliflower into bite size pieces and set aside.

2. In a large mixing bowl add together flour & milk. Add in egg and seasoning until batter is smooth. Add in cauliflower and cashews until evenly coated. Add in bread crumbs and mix again.

3. Lay out cauliflower and cashews on a parchment paper lined baking sheet. Place in oven for 25 minutes or until golden brown.

4. White cauliflower mixture is in oven make bang bang sauce in a large bowl by mixing together mayo, sweet chili sauce, siracha, rice vinegar and honey.

5. Once cauliflower & cashew mixture is cooked add to the large bowl of bang bang sauce to evenly coat. Place on a large dish and top with sesame seeds. Serve & Enjoy!

Other Delicious Vegetable Recipes You Will Love:

The Ultimate Guide to Creamy Cheddar Cauliflower Soup

Mom's Favorite Minestrone Soup Recipe

The Perfect Summer Meal: Grilled Chicken, Mexican Street Corn & Cucumber Salad

A Crowd-Pleasing Stuffed Mushroom Recipe

Easy and Delicious Mushroom & Pea Risotto Recipe

Deliciously Creamy Basil Tomato Soup: An Easy and Delicious Recipe

Create a Delicious Layered Hummus Dip for Your Next Snack or Appetizer

Discover the Delightful Twist of Sweet Kale Salad with Poppy Seed Dressing

The Fully Loaded Iceberg Wedge Salad

Everyone loves a classic wedge salad, especially one that comes with a tasty twist. Enter this Loaded Salad Wedge Recipe, where we'll be taking the humble iceberg lettuce and transforming it into a gourmet delight. Brimming with crispiness, creaminess, and a smorgasbord of flavors, this dish isn't just a salad, it also can be a centerpiece. Perfect for impressing guests or indulging yourself, this fully loaded wedge salad can make even the best of steakhouses drool. This salad boasts a stunning combination of textures and tastes to make your next meal unforgettable.

The Loaded Salad Wedge Recipe captivates health-conscious foodies and indulgent diners alike. The iceberg lettuce's crunchiness is the perfect companion to a bouquet of savory toppings and a thick drizzle of creamy dressing. This salad's allure isn't just in its taste but in its versatility and presentation. The symphony of flavors sings with salty bites of bacon and cheese meeting the tanginess of the dressing. Its customizable nature makes it an ultimate crowd-pleaser, catering to diverse palates and dietary restrictions. Whether as appetizers, on the side of sandwiches, or as a main dish, its ability to satisfy both appetites and nutritional requirements is unmatched.

The Art of Balancing Proportions

A perfect Loaded Salad Wedge Recipe isn't just about piling on ingredients; it's about finding an elegant balance. The iceberg lettuce should be the sturdy canvas, but the genius is in the array of toppings that crown it.

The wedge's fresh crispness is amplified with a plethora of savory and colorful adornments. How toppings are applied can turn the wedge into a spectacle or a muddled mess. It's crucial to strike the right visual and textural harmony. By opting for a whole wedge, each mouthful includes the crisp core and softer leafy parts, a satisfying interplay of densities.

Here are some specifics. Begin with a clean, firm iceberg lettuce wedge; its shape is vital for visual impact. Ensure the iceberg wedge is well-chilled for a refreshing bite. Choose a variety of toppings: think crunchy bacon, sharp blue cheese, and juicy tomatoes, for layers of flavor. Go for a dressing that's bold and creamy, but also willing to share the stage with other ingredients. A last-minute addition, like an avocado or egg, elevates the dish from great to extraordinary.

Tomato

Within the Loaded Salad Wedge, tomatoes play a star role. They're not just a splash of bright red against the green, but they bring a juicy, sweet acidity that completes the flavor profile of the dish. It's a natural source of antioxidants, providing health benefits while pleasing the palate. Their juiciness balances the richness of cheese and bacon, offering a refreshing respite. Chopped tomatoes intermingle with the dressing, enhancing it with their natural sweetness and tang. Dice them freshly before serving to retain their firmness. Scatter them generously for bursts of sweetness in every forkful. Choose ripe, firm tomatoes for the best taste and textural contrast. Tomatoes are thus the unsung heroes of the Loaded Salad Wedge, offering a burst of health and flavor in each bite.

Onion

The onion transforms the Loaded Salad Wedge, ensuring the flavor stays dynamic and exciting. Its sharpness cuts through the creaminess of the dressing and richness of the cheese and bacon, bringing its distinct zing to the mix. They add a crunch that's different from the iceberg lettuce, a more defined snap. Health-wise, onions introduce antioxidants and beneficial compounds that support overall well-being. Their diversity allows them to be used fresh or caramelized, offering different depths of flavor to the salad. Consider slicing onions thinly to distribute their flavor without overwhelming. Use them as a final topping for maximum impact. Experiment with different onion varieties, from sweet to sharp red onions. Onions, then, are not just a garnish but a component that brings balance and complexity to the Loaded Salad Wedge.

Bacon

Bacon is the showstopper in the Loaded Salad Wedge Recipe, offering a succulent juicy and smoky yet salty crunch that few can resist. It's a favorite of many for a reason β€” providing a rich, meaty counterpart to the crisp lettuce and creamy dressing. Crisp it up for texture, as it should offer a contrast to the soft dressings and cheeses. Use it as a topping that delivers both taste and a satisfying mouthfeel. For those mindful of their intake, turkey bacon or a veggie variant can stand in as a healthier twist. Cook bacon until it's just the right consistency for crumbling. Keep bacon pieces bite-sized, as they’re best enjoyed when they complement, not overpower, the salad. Bacon's inclusion elevates the Loaded Salad Wedge from a mere salad to a decadent, crave-worthy meal.

Toasted Bread Crumbs

Toasted bread crumbs are like the final brushstroke on a masterpiece, the element that completes the Loaded Salad Wedge Recipe. They deliver a satisfying crunch, elevating the entire dish. Crafting the ideal breadcrumb topping try sticking to homemade for full flavor control and a healthier option. Flavor your breadcrumbs with seasonings; experiment with garlic, herbs, or even a dab of parmesan. Toast them to the perfection of golden-brown β€” they should add flavor without overpowering the salad's other components. Use fresh, quality bread for the best taste and texture. Sprinkle liberally; they're not just garnish, they're an interactive element of the salad. Toasted breadcrumbs ingeniously add a new dimension to the Loaded Salad Wedge, offering textural diversity in every bite.

Ingredients and Substitutions

Crafting Your Perfect Wedge

The Loaded Salad Wedge is a playground for culinary creativity, with various combinations to suit any preference or dietary need.

Building your salad masterpiece:

- The core elements remain the same: crisp lettuce, juicy tomatoes, and a creamy dressing.

- For meat-free diners, alternatives like toasted nuts or seeds add texture and richness.

- Cheeses can be swapped out for dietary needs or taste β€” the choices are endless.

- Vary your dressing choice for an entirely new taste profile.

- Add extras like avocado or egg for a personal touch and an extra nutrient boost.

The Loaded Salad Wedge Recipe is an invitation to explore, adapt, and enjoy your culinary journey.

How to Cut Iceberg for a Wedge Salad

The foundation of any great wedge salad is, of course, the iceberg lettuce. Cutting it properly is an art that ensures the perfect base for your Loaded Salad Wedge Recipe. Start with a clean and dry head of lettuce, which helps the dressing adhere later on. A sharp knife is key you want smooth, clean cuts for the best presentation. Careful quartered head of lettuce is followed by dividing each quarter into smaller wedges, suitable for individual servings. The core doesn't have to be removed entirely, but trimming it down will ease consumption. These cutting steps are crucial to crafting the ideal wedge salad, where each piece is a vehicle for the range of toppings and flavors that define the Loaded Salad Wedge.

Personalize Your Wedge

- Cheeses: Mix it up with a selection like feta or goat cheese for a different tang.

- Dressings: A hearty ranch or light vinaigrette can change the profile of your wedge.

- Crunch Factors: Homestyle croutons or sunflower seeds offer a variety of textures.

- Proteins: Consider adding grilled chicken or shrimp to transform the salad into a meal.

- Herbs and Fruits: Fresh herbs and seasonal fruits add freshness and a nutritional punch.

Each variation brings its unique charm and can cater to a range of dietary preferences and flavor profiles. Embrace the versatility of the Loaded Salad Wedge.

What to Serve with a Loaded Wedge Salad

A Loaded Salad Wedge can stand alone, but it’s also a great team player. It can pair perfectly with bold proteins like grilled steak, salmon or chicken, and these all nicely complement the richness of the salad. Bread basics like a side of crusty bread is perfect for mopping up any leftover dressing. Soup sides are always a classic. A bowl of warm soup offers a comforting balance to the fresh salad. Whether you’re seeking a light lunch or a sumptuous supper, the Loaded Salad Wedge versatilely suits multiple meal choices.

Storing Loaded Wedge Salad

Keep your Loaded Salad Wedge fresh for future meals with the right storage tactics. Be sure to cover correctly. A tight seal prevents wilting and tasting like last night's leftovers. Distinguish each component to maintain taste integrity. Time is of the essence; enjoy your salad within 24-48 hours. Be sure to add dress just before serving to safeguard the salad’s crispiness. Lastly don't forget consistent coolness is key to prolonging your wedge's life. They say a good meal is ephemeral, but with careful storage, you can extend the joy of the Loaded Salad Wedge a little longer. If you want to cut down on day of prep time you can make everything for the salad ahead of time and store separately. Making this simple to put together for an event for the ultimate wedge salad recipe.

The Loaded Salad Wedge Recipe is more than a list of ingredients; it's a narrative of tastes, textures, and colors weaving together to make a simple meal extraordinary. Whether you opt for the traditional or venture into variations, this salad is a celebration of culinary creativity. Let your wedge be a canvas for your flavor fancies and enjoy every crunch, crumble, and crisp bite. Each salad is unique, much like its maker. So next time you seek a dish that's satisfying to the eyes as well as the tastebuds, remember the Loaded Salad Wedge β€” a recipe not just for a salad, but for joy on a plate.

Ingredients

1 large head of iceberg lettuce

1-2 cups of ranch or blue cheese dressing

2 slices of thick cut bacon

3 hard boiled eggs

1 cup of croutons, made from bread crumbs

1 tomato

1/4 of a red onion

1/2 cup of crumbled cheese (blue cheese, feta or goat)

1/4 cup of chopped pecans

Homemade Ranch

1 cup milk

1 cup mayonnaise

2 tablespoons ranch seasoning

Instructions

1. Cut iceberg lettuce in half on a cutting board. Cut those into 1/2 making 4 wedges. You can serve like this for a larger salad or to make like mine cut those again into half and then down the center to make small triangles. Lay these out on a platter.

2. Drizzle your creamy dressing of choice, I made a homemade ranch for mine if you choose to do this add all ingredients into a mason jar the night before blend together and store in fridge until ready.

3. Layer your toppings on top of your drizzle of dressing. Add a small bowl of extra dressing on the side for those that like more and serve!

Other Delicious Salad Recipes You Will Love:

Delicious, Nutritious Pear & Walnut Salad with Honey Mustard Dressing

The Perfect Match: Grilled Steak & Blue Cheese Salad with Grilled Corn paired with J. Lohr Estates Seven Oaks

How to Make the Perfect Pear and Pomegranate Arugula Salad

A Taste of the Southwest: Southwestern Chop Salad Recipe

Shaved Brussel Sprout Salad with Apples, Goat Cheese & Candied Pecans

The Perfect Summer Meal: Grilled Chicken, Mexican Street Corn & Cucumber Salad

The Perfect Mediterranean Pasta Salad Recipe for Summer Entertaining

A Refreshing and Delicious Melon Burrata Salad Recipe

Discover the Delightful Twist of Sweet Kale Salad with Poppy Seed Dressing

The concept of eating healthy often conjures images of bland and uninspiring dishes. However, this sweet kale salad beautifully shatters this misconception, offering a burst of flavors that pleases the palate while providing essential nutrients. At the heart of this dish is the poppy seed dressing, a creamy and tangy condiment that elevates the salad to new culinary heights. It perfectly complements the kale’s robustness and adds a surprising sweet note, making this salad far from ordinary. In this post, we will explore the world of sweet kale salad with poppy seed dressing and discover why it should be your go-to salad choice.

The Sweet Kale Salad with poppy seed dressing begins as a symphony of textures and tastes. Each bite is a revelation. The salad incorporates a vibrant mix of fresh kale leaves, which are nutritional powerhouses packed with vitamins A, K, and C. To balance the slight bitterness of greens and enhance the taste, this recipe introduces sweet elements such as dried cranberries or sliced apples if you'd rather. A necessary crunch is provided by the pumpkin seed nuts but can also be substituted for other nuts like almonds or walnuts. All of these add texture and healthy fats. Lastly of course, the main ingredient, a homemade poppy seed dressing drizzled over the salad to marry the ingredients with its impeccably sweet and tangy flavor.

Serving Suggestions

Looking to make your delicious kale salad with poppy seed dressing a more hearty, complete meal? This poppy seed kale salad pairs splendidly with proteins such as grilled chicken or salmon. If utilizing this recipe for an appetizer, it sets the stage nicely for any elegant meal. Serve it in individual cups for a charming presentation at large gatherings or in a large serving bowl to allow guests to help themselves and portion to their liking. By the end of your meal, the sweet kale salad will have delighted every palate. With its mingling of nutritious components and a luscious dressing, it stands as a testament to the perfect union of health and flavor.

Creamy Poppy Seed Dressing

The Creamy Poppy Seed Dressing is what truly sets this salad apart, enveloping every leaf in a luscious, flavor-packed embrace. The blend of mayonnaise and olive oil, enriched with vinegar, sugar, and poppy seeds, creates a beautiful dressing that’s velvety and rich. Its lavish consistency doesn't just sit atop but hugs every kale leaf intimately, ensuring no bite is left undressed. If serving this for a buffet I would suggest to keep dressing on the side to allow guests to pour on as they eat and not take away the crunch of the greens.

To craft the ideal poppy seed dressing. In a large mason jar add in mayonnaise, vinegar, and sugar, and shake them together into a harmonious blend. Add in the poppy seeds to introduce texture to the dressing. Fine-tune your dressing with seasoning adjustments, be it a pinch of salt or an extra drizzle of honey or garlic powder. Drizzle the dressing over your salad and witness how it transforms the robust nature of kale into a delicacy combination to be devoured. This meal is sure to keep your guests asking for more! A dish with this dressing is not soon forgotten; it's the element that lingers on the palate, marking the sweet kale salad as a culinary highlight.

Delicious Topping Add-Ins

Elevate your Sweet Kale Salad further with an array of tantalizing toppings. Here's some inspiration:

- Nuts like almonds or walnuts for a hearty crunch.

- Dried fruits in substitution of cranberries you can use raisins for a sweet chewiness.

- Fresh fruits like apple slices or pomegranate seeds for a juicy punch.

- Crumbled cheese variants will contribute a creamy, savory note.

- A sprinkle of homemade croutons adds yet another layer of texture.

- Opt for chickpeas or seeds in place of nuts for an allergy-friendly crunch.

- Dairy can be detoured with vegan cheeses, nutritional yeast, or simply omitted.

- Don't have Honey? Try out agave in lieu of sugar in the dressing for vegan friendliness.

- Pick gluten-free croutons or grains as a celiac-conscious choice.

- For soy and corn sensitivities, steer clear of such additions, opting instead for alternative proteins or veggies.

Every addition serves not merely as an extra but as an integral layer of complexity, enhancing the overall sensory experience of the salad.

Storing Your Creation

To preserve the radiance of your Delicious Kale Salad allow it to cool to room temperature to prevent wilting. Seal it in an airtight container, shielding it from the refrigerator meddling flavors. If uneaten with dressing, it remains delicious for 1-2 days. Store without dressing on top for prolonged crispness and garnish freshness upon serving. Even when the banquet ends, ensures your kale salad remains a treat for another day with these preservation tips. Leftovers cease to be a chore and transform into an anticipated encore with these storage tips, ensuring your sweet kale salad with poppy seed dressing remains a culinary delight.

Ingredients  

4 cups kale, stems removed and chopped

9 oz bag of broccoli slaw

2 cups shredded Brussels sprouts

1/2 cup dried cranberries

1/3 cup pumpkin seeds

1/3 cup green onion, sliced

1/2 cup goat cheese crumbles

Dressing

1/4 cup olive oil

1/2 cup mayonnaise

2 tablespoons honey

1 teaspoon apple cider vinegar

1/2 lemon juiced & zest

1/4 cup orange juice

1 tablespoon poppy seeds

1/2 teaspoon se salt

1/4 teaspoon garlic powder

Instructions 

1. Add all greens, cranberries & pumpkin seeds to large bowl. Make sure all greens are thinly sliced for a delicious salad, cut more if needed.

2. In a mason jar add all dressing ingredients and shake, you can also use a food processor if you prefer. Before serving pour over salad at your convenience and toss. Serve immediately and enjoy!

Delicious & Refreshing Fruit Salad in a Cantaloupe Bowl

Awaken your palate and impress your guests with this sweet and colorful ultimate refreshment. This cantaloupe fruit bowl recipe that is as visually stunning as it is delectable. Let's journey through the creation of a natural fruit basket that not only captures the essence of summertime bliss but also serves as an beautiful and delicious centerpiece for any table.

Starting with a ripe and juicy cantaloupe, the art of transforming this humble melon into a fruit bowl is one of both simplicity and creativity. The key to this unique recipe lies in the selection of vibrant fruits that complement the cantaloupe's mild sweetness and create a harmonious blend of flavors and colors. Begin with a ripe cantaloupe and envision its transformation into a charming basket that carries nature's candy. With tender care, hollow out the melon and shape it to fashion a visually appealing bowl ready to cradle a medley of fruits. More on how to do this in the instructions below.

This recipe calls for cantaloupe, watermelon and strawberries but feel free to change out for any fruit of choice. You can add other berries like sapphire blueberries and ruby raspberries to offer a burst of tart fruit and a splash of color. Emerald kiwi slices and golden pineapple chunks bring a tropical zest to the bowl. Bunches of amethyst grapes will provide a juicy, bite-sized contrast.

The "Melon Fruit Bowl" stands as a testament to summer's bounty, an inspiring blend of flavors served in nature's own vessel. Assemble this delight while adding every scoop into the ripe, hollowed-out cantaloupe is a step closer to creating the perfect culinary treasure trove. With each addition of mixed fruits like strawberries, pineapple, and blueberries, the bowl evolves into tantalizing tastes everyone will be sure to love.

The citrusy lime or lemon dressing elevates the freshness factor and give an added hint of zest to the tart fruit. A light cascade of natural honey for sweetness or a sprig of mint to enhance the flavor profiles nicely. These elements not only add piquancy but also make for a nourishing snack or dessert that boasts both healthful benefits and palate-pleasing delights. Imagine the joy of serving such a simple, yet impressive recipe at your next outdoor feast. The presentation of the fruit mixture in the cantaloupe brings aesthetic joy and a promise of refreshing indulgence, making any occasion, from a casual picnic to an elegant soiree, an affair to remember.

Breakfast Cantaloupe Bowl

Envision beginning the day with an invigorating and nutritious Breakfast Cantaloupe Bowl. It's a harmonious concert of ripe cantaloupe, berries, bananas, and grapes that artfully marries eye-catching allure with a bevy of health benefits: Your morning routine is both simplified and elevated as the cantaloupe bowl lends itself to an endless array of customizations. Wanting to add some protein & grains to this dish for perfectly balanced nutrition to start your day? Leave room in the bowl to add some Greek yogurt & granola to top it off! This is truly a delicious meal and a great way to take fruit to the next level next breakfast! If you have any left over fruit from cutting be sure to add to a plastic bag or glass container and freeze it makes a great parenting hack for quick smoothies and fruit never goes to waste.

The breakfast cantaloupe bowl stands as a promise of a delightful, nutritious start to the day that bursts with the essence of freshness and fulfills your aspirations of a balanced lifestyle. Whether enjoying as an appetizing starter, an artistic centerpiece, or a health-conscious breakfast, this is one recipe that transcends the ordinary and brings joy to any culinary experience.

Ingredients

1 medium size cantaloupe

1 small watermelon

2 cups strawberry

1/2 cup honey

Juice of 1 lime

1 tablespoon olive oil

1/2 teaspoon lime zest

2 tablespoons Chopped mint, optional

Directions

1. Cut cantaloupe in half. Scoop the inside of the cantaloupe out with a melon baller or cookie scooper. Add to a bowl. Do the same with the watermelon.

2. Cut strawberry into bite size pieces and add to bowl with melons. If you want to add in mint you can add chopped mint to this bowl now.

3. In a mason jar add honey, lime juice, lime zest and olive oil. Shake to blend together. Pour over top of fruit and mix together.

4. Add fruit back into cantaloupe shell that you cleaned out, add a sprig of mint and serve!

Other Recipes Using Fruit:

Delightful Almond Grapefruit Ice Cream Recipe

Fruit & Goat Cheese Bruschetta

Discover the Bliss of Homemade Acai Bowls

Indulge in the Sweet & Salty Deliciousness of Peach Baked Brie

How to Make the Perfect Pear and Pomegranate Arugula Salad

An Irresistible Treat: The Delicious Berry Custard Puff Pastry Tart

The Perfect Peach Cobbler Recipe

Welcome To Summer Charcuterie Board for Your Next Gathering

A Refreshing and Delicious Melon Burrata Salad Recipe

Delicious, Nutritious Pear & Walnut Salad with Honey Mustard Dressing

Shaved Brussel Sprout Salad with Apples, Goat Cheese & Candied Pecans

Decadent Almond Joy Cookies: A Tribute to the Classic Candy Bar

Who doesn't relish the thought of those sweet, coconut-filled Almond Joy candy bars. Now, imagine transforming that delicious taste into a warm, baked treat! These Chocolate Almond Joy Cookies capture the very essence of their namesake confection in a deliciously reimagined form. This recipe is an ode to the chocolate-coconut-almond trio that has won over palates for generations. Perfect for any occasion, these cookies are not just a mere dessert; they're a delightful journey with each bite harking back to the nostalgic moments of enjoying an Almond Joy bar. In every Almond Joy Cookie, you'll find melted butter that offers an irresistible base note of richness. Sugar that sweetens the tune, harmonizing with the melody of flavors. You'll also find flour, baking soda, and salt that compose the structural backbone. Crafting Almond Joy Cookies requires attention to detail and a nuanced understanding of the baking process. Here, I share the secrets to perfecting this culinary composition.

Consider the following instructions to fine-tune your recipe:

- Dry roast almonds beforehand, then let them cool.

- Opt for high-quality chocolate to establish your palate in a luxurious experience. Dark chocolate adds a rich counterbalance to the overarching sweetness.

- Select semi-sweet, milk, or dark chocolate as per your preference.

- Use parchment paper on baking trays for uniform heat distribution.

- Reduce sugar to balance the coconut's natural sweetness, if needed.

- Store these delights in an airtight container to keep the moisture intact.

- Out of almond extract? This can be substituted for vanilla. Taste will change the almond flavor slightly but still be delicious

End your baking session with a deep appreciation for the art of cookie-making, knowing that your Almond Joy Cookies are poised to offer joy with every note and in every bite.

How do I store Almond Joy Cookies to keep them fresh?

Storing Almond Joy Cookies properly ensures that the encore of their delectable performance is as impressive as the opening act. Once completely cooled, place the cookies in an airtight container. Sealing them at room temperature provides the ideal setting to keep your cookies ready for a repeat performance for up to 5 days of freshness, or if kept refrigerated can stay fresh for almost 2 weeks. Parchment paper between layers guards the individual textures of the cookies, ensuring no character is lost. For extended intervals, freezing the cookies prepares them for a grand return on a future stage. When you carefully store Almond Joy Cookies they are shielded from air that could snatch away their moisture. Storing your cookies in the freezer will preserve them for up to three months. Once ready to enjoy again simply let them come to room temperature.

These cookies, much like the classic bar, are a delicious blend of the fundamental trio of chocolate, coconut, and almonds. A testament to the simplicity yet perfection of mixing sweet and nutty tastes. Easily adaptable and warmly welcomed in any scenario where a sweet touch is desired. Almond Joy Cookies are a standing ovation in the dessert worldβ€”a cookie rendition that pays homage to the candy bars we've all adored.

INGREDIENTS

1 cup butter (2 sticks)

3/4 cup sugar

3/4 brown sugar

1 teaspoon almond extract

2 large eggs

2 1/4 cups flour

3 teaspoon baking powder

1 teaspoon salt

1 cup sliced almonds

1 cup shredded coconut

1 cup semi sweet chocolate chips

DIRECTIONS

1. Preheat oven to 375 degrees.

2. Melt the butter for 30 seconds in the microwave (if the butter is not at room temperature). Add sugar & brown sugar into butter and mix. Scrape sides and mix again immediately after. Mix in Almond Extract and eggs. Mix again.

3. Gradually add all-purpose Flour, Baking Soda, and salt. Mix well. Lastly add in chocolate chips, almonds and coconut.

4. Scoop dough onto a baking sheet or parchment paper. I use a pre-measured cookie scooper linked -here- works great to have even-sized cookies! Add 2 scoops right on top of each other to give a fuller cookie with a gooier middle.

5. Bake for 9 minutes until golden brown around the edges and remove from oven and place onto cooling racks. Serve & Enjoy!

Other Delicious Cookie Recipes You Will Love:

The Best Monster Cookie Recipe You'll Ever Try!

Indulge your Sweet Tooth: The Ultimate Guide to Making Brown Butter Maple Pecan Chocolate Chunk Cookies

Deliciously Sweet: Mastering the Perfect Pumpkin Molasses Cookie Recipe for the Autumn Season

How to Make Delicious Nutter Butter Cookies At Home

Decadent Brown Butter Shortbread Cookies with a Chocolate 'Wax' Seal – A Vintage Twist on a Classic Treat!

Birthday Cutout Sugar Cookies

Brown Sugar Toffee Cookies

Brown Butter Caramel Pretzel Cookies

A Taste of the Southwest: Southwestern Chop Salad Recipe

This Southwestern Chop Salad recipe is an escapade for the taste buds, brimming with bold and bright flavors rooted in the desert landscape. This robust salad melds the crunch of fresh vegetables with hearty beans and the warming blend of traditional Southwestern spices. It's not just a dish, it's a gesture to the culinary spirit of the American Southwest that is vibrant, satisfying, and utterly delightful. Southwestern cuisine is characterized by its variety of colorful flavors, and what better way to enjoy them than through a Southwestern Chopped Salad? This dish expertly combines the nutritional prowess of leafy greens with the rustic charm of black beans, sweet corn, and plum tomatoes, all seasoned with the distinctive flavors of this delicious dressing. One very important key to this dish lies in its vibrant appearance, which promises more than just visual pleasure. Each ingredient adds a layer of complexity to the flavor while providing essential nutrients. Romaine lettuce offers a crisp base that's low in calories and high in vitamins A and K. Black beans contribute to the heartiness of the dish, offering protein and fiber. Corn introduces a sweet crunch that contrasts wonderfully with the creamy beans. Diced tomatoes not only add a juicy freshness, but are also packed with antioxidants. When it all comes together with a tangy cilantro lime vinaigrette or a rich southwestern dressing, every bite becomes an exploration of textures and tastes. Whether you're seeking a light yet fulfilling main or a substantial side dish, this salad can easily be personalized with additional proteins like grilled chicken or juicy strips of beef for an excellent light dinner.

Amidst this rainbow of ingredients, Southwestern staples like cilantro, green onions, and ripe avocados join the mix, each elevating the signature taste and enhancing the salad's visual appeal. Flexible in its nature, the salad invites modifications to suit individual palates, embodying the spirit of inclusivity that characterizes Southwestern cuisine. To craft your very own Southwestern Salad masterpiece, you'll want to gather the freshest ingredients along with those that also excite your taste buds. So feel free to switch out my recipe for some things that you may enjoy a bit more! An assortment of colorful companions including black beans, sweet corn, cherry tomatoes, jalapeΓ±os and red bell pepper for added layers of flavors and textures. A ripe avocado adds a luxurious touch, contributing heart-healthy fats and a creamy counterpoint to the crunchier elements. For an aromatic punch add your fresh cilantro, green onions, and a diced jalapeΓ±o for just the right blend of zest and spice.

In crafting the ideal dressing for our salad, we seek to balance zest with substance. Whisk in some Southwestern soul with chili powder, cumin, and garlic powder. Introduce Greek yogurt or mayonnaise for a lush, creamy consistency and a touch of tartness. A hint of honey or agave syrup offers a counterpoint to the spice. Cilantro, finely chopped, enlivens the dressing with its unmistakable freshness. This delightfully vibrant blend of ingredients ensures that each forkful of salad is not just a meal but an experience.

How to Serve Your Salad Spectacularly

Presentation is key, and with a few thoughtful touches, you can transform your Southwestern Chop Salad into a feast for the eyes. Serve in a wide bowl or plate for a full display of the salad's colorful spectrum. Offer tortilla chips or warm pita bread on the side for textural contrast. A rich Southwestern dressing drizzled over the top just before serving heightens the fresh delicious flavors. You can even personalize it by allowing guests to add their choice of protein for a dish that caters to all tastes and dietary needs. Chicken, salmon, slow cooker pulled pork and steak are all great protein options for this dish. For a final flourish top with fresh avocado slices and a sprinkle of shredded cheese for that last note of richness and appeal.

Storage Savvy for Your Salad

Keep your Southwestern Salad vibrant and delicious with these storage insights. Use airtight containers or specially designed produce bags to extend the life of your chopped veggies in the fridge. Store the dressing separately to keep your salad from getting soggy, adding it just before indulgence. If you do have leftovers, remember they can be kept refrigerated for a day or two, though nothing beats the freshness of a newly tossed salad. For meals on the go, pre-portion the salad and dressing separately; a little meal prep makes for a convenient and nutritious choice throughout your busy week.

This salad is a reflection of the Southwestern ethos, from its bold, fresh ingredients to its inviting array of colors and textures. The dressing's zest, born of lime and spices, is a nod to the region's love for bold, clean flavors. As a stand-alone meal or shared as a side, it offers a well-rounded plate with protein, veggies, and good fats. Its adaptability is a testament to its place at any table - a true culinary chameleon for an irresistible salad.

When time is of the essence, rest assured that your Southwestern Chop Salad can materialize in mere minutes. Typically, you're looking at a tidy 15 to 25 minutes from start to finish. It's the ultimate time-saver, simplifying meal prep without sacrificing flavor or nutrition. The process has you merely chopping and tossing ingredients, sparing you from cooking and elaborate preparations. For those in a pinch, pre-washed greens and pre-made dressing can shortcut the process even further.

Ingredients

16 ounces of fresh greens of your choice

3 ears of corn, cut off of the cob

4 chicken breasts, chopped

1 avocado, chopped

1 cup cherry tomatoes, cut

1 cup black beans

1 cup crushed tortilla chips

1/2 cup pickled red onions

1 cup sour cream

1/2 cup mayo

3 chipotle peppers in adobo sauce

1 teaspoon garlic powder

1 teaspoon onion powder

1/2 teaspoon salt

1/2 teaspoon pepper

1 tbsp water

Instructions

1. Add all salad ingredients in a large bowl. You can leave out some of the toppings to add ontop for a pretty presentation at the end.

2. Mix together all dressing ingredients in a mason jar or small bowl until smooth and pour over top of salad. Tossing together. Ready to serve as is or you can add to a fresh large plate and add the toppings you left out for a pretty presentation. Both ways are equally delicious! Serve & Enjoy!

Delightful Almond Grapefruit Ice Cream Recipe

Indulge in this unique symphony of flavors with this tasty Almond Grapefruit Ice Cream Recipe. This is a sweet concoction that requires very little time yet delivers a gourmet dessert experience. This treat perfectly marries the creamy texture of ice cream, the tasty crunch of almonds, and the fresh zest of grapefruit, creating a delightful treat that's as simple to make as it is delicious to devour.

This almond grapefruit ice cream recipe transcends ordinary desserts by incorporating the best of both worlds: the invigorating zest of fresh grapefruit and the indulgent almond crunchy essence. Prepare your senses for a rich flavor journey, blending the silky texture of heavy cream with the authentic taste of raw almonds.

Our step-by-step instructions guide sharing the careful chilling before churning ensures each scoop is velvety smooth, an important step not to be overlooked in your culinary venture. Chill the well-mixed ingredients thoroughly before employing your ice cream maker, a critical phase for texture perfection. Savor each serving with thoughtful garnishes of crisp almond slices and fresh grapefruit zest, a move that presents not just a feast for the taste buds but for the eyes as well. The alchemy of these ingredients, when frozen to perfection, yields an ice cream that's not just a dessert but a reflection of your craftsmanshipβ€”a creamy canvas of tang and toastiness.

For those who appreciate the finesse of a well-churned ice cream, our Almond Grapefruit Ice Cream Recipe welcomes the whirl of an ice cream maker into the process. This union of kitchen technology with artisanal flavor profiles is a match made in dessert heaven. The ice cream maker introduces air into the blend, bestowing it with a fluffy, cloud-like texture that sets the stage for the melding of almond and grapefruit virtues. As our spoons dive into the cool, refreshing depths of this Almond Grapefruit Ice Cream, it's clear that every ingredient was chosen with intention, and every step has been thoughtfully designed to culminate in this moment of pure, frosty bliss.

Ingredients

1 1/2 Tbsp grapefruit zest

1/2 cup fresh grapefruit juice

1 cup sugar

3 eggs

1 1/2 cup whipping cream

1 cup whole milk

1 tsp almond extract

pinch of salt

sliced almonds to top

Instructions

1. In a pan mix together zest, juice, sugar, salt and eggs. Add in 1 cup whole milk and almond extract.

2. Cook this mixture over medium heat, stirring constantly until it comes to a simmer. Add to a stainless steel bowl and let cool. Add to refrigerator for 2 or more hours until cold.

3. Once completely chilled add in whipping cream pour into running ice cream maker. Linking mine below and believe me its so easy to use and makes the best ice cream! Once finished by following the tips according to your manufacture's directions on your ice cream makers timing, finish up and place final product in an ice cream container and freeze for at least 2 by hours. Serve with sliced almonds on top & enjoy!

Delight in the Fusion: Carrot Cake Cinnamon Rolls made with Sourdough Starter

When the comforting warmth of a cinnamon roll meets the spicy, moist sweetness of carrot cake, you have a culinary delight that promises to warm the heart. Introducing these yummy Carrot Cake Cinnamon Rolls made with Sourdough Starter. This is a sweet treat for your senses that's not just delicious but also deeply satisfying on a gourmet level. Imagine the blend of biting into a sweet, tangy cinnamon roll swirl infused with the allure of carrot cake spices, all brought together by the unique characteristics of a sourdough starter. This blog post will guide you through the instructions for baking this delectable treat. Trust me when i say, this is one that's sure to earn its stripes as a staple in your baking repertoire.

To prepare these Carrot Cake Cinnamon Rolls with Sourdough Starter, you'll need to obviously start with an active sourdough starter. This natural leavening agent is the soul of the rolls, providing them with not just their lift but also their unique tangy flavor profile. Before you begin mixing your dough, make sure your sourdough starter is ready to perform. Its lively bubbles and pleasant sour aroma will be your cues that it's primed to leaven the dough beautifully.

Tips To Making The Perfect Cinnamon Rolls

1.Let your sourdough starter sit at room temperature until it shows active fermentation.

2. Grate fresh carrots finely to integrate well into the dough without excess moisture.

3. Be generous with the cinnamon and sugar for that unmistakable carrot cake aroma.

4. Spread the filling evenly, leaving a slight border to seal the dough.

5. Roll the dough tightly to maintain the shape and integrity of the rolls.

Once you've crafted your rolls, let them rise until they're puffy, and after baking, you'll have golden-brown spirals wafting irresistible scents through your kitchen and breakfast table.

What is Sourdough Starter, and why is it used in making Carrot Cake Cinnamon Rolls?

A sourdough starter is a treasure in the world of artisan baking, a culture of natural yeast and bacteria that creates a leavening agent far more flavorful than any commercial yeast could offer. Employing sourdough starter in Carrot Cake Cinnamon Rolls not only imparts a distinctively tangy taste that complements the sweeter notes of the rolls; it also promises a texture that's light and pleasingly chewyβ€”a delight for the palate and the gut. This treat is truly a complex taste profile, marrying tanginess with the sweetness of carrot and spice. The starter also enhances and improves the texture, making for lighter and more digestible cinnamon rolls. Nutritional benefits like enhanced mineral absorption and possibly a lower glycemic index are also welcoming.

Can I use a store-bought Sourdough Starter for these rolls, or do I need to make my own?

Whether you opt for a store-bought sourdough starter or decide to cultivate your own, each choice comes with its unique flavors and merits. Store-bought starter can save time and offer consistency; however, a homemade variation might present a more rewarding baking journey, rich in deep flavors developed over time. Use a store-bought starter for convenience and consistency. Use a homemade starter for a hands-on experience and depth of flavor. Personal preference and experience dictate the starter choice. Either way, and active and bubbly starter is required for a successful rise and flavor.

How does the flavor of Carrot Cake Cinnamon Rolls differ from traditional cinnamon rolls?

Carrot Cake Cinnamon Rolls brings a basket of flavors vastly different from the traditional cinnamon roll, each bite whisking you away to an orchard of taste nuances. In these rolls, carrots introduce a mellow sweetness, while a rich spice blend elevates the flavor much beyond what regular cinnamon rolls offer. Folding in ingredients like shredded carrots or nuts, and the texture becomes as varied as the flavors themselvesβ€”with the sourdough starter adding a tangy baseline that accentuates the other ingredients. The rolls offer the perfect flavor distinctions of a unique sweetness from carrots, and a complex spice blend for a deep flavor profile. Once again, the flavors are brought together by the tanginess from the sourdough starter enhancing the overall sweetness.

Enjoy the adventure of baking these Carrot Cake Cinnamon Rolls with Sourdough Starter and share the delight with friends and family who'll marvel at your culinary prowess. With this guide, you have all you need to create rolls that are as nutritious as they are delicious. This breakfast treat is a true testament to the magic of sourdough baking and the everlasting charm of these beautiful delicious carrot cake cinnamon rolls made with sourdough starter.

Ingredients

8 tablespoons cold butter

3 cups all-purpose flour

1/2 cup active sourdough starter

1 cup whole milk

2 tablespoon honey 

1/2 teaspoon fine sea salt

1 cup shredded carrots

1 teaspoon baking powder (added in the next morning)

Β½ teaspoon baking soda (added in the next morning)

Filling

1/2 cup melted butter

1/2 cup sugar

2 tablespoons cinnamon

Frosting

8 oz cream cheese

1/2 cup butter

4 cups powdered sugar

4 tbsp milk

2 tsp vanilla extract

1/2 cup chopped walnuts

Directions

1. In a large bowl grate butter & mix together with flour. Make sure butter pieces are mixed in well no larger then a pea size.

2. Add in active sourdough, milk, honey, sea salt & grated carrots. Mix together until blended well. Cover with a clean dish towel and set aside overnight or for at least 10 hours.

3. The next morning, or once risen, add in baking soda & powder. Turn oven to 375 degrees. Mix together filling ingredients & set aside. Roll out the dough into a large rectangle. Spread filling mixture all over rolled dough.

4. Roll up from the largest side to the other making a log shape. Cut into 12 cinnamon rolls. Add into a large pan, My bake & roast pan from 360 cookware is the perfect size, linked below.

5. Bake in the oven center rack for 30-35 minutes. While its baking make frosting. Blend together softened cream cheese, softened butter, powdered sugar, milk, & vanilla extract in a bowl.

6. Once cinnamon rolls are done add frosting on top and sprinkle chopped walnuts on top. Serve & Enjoy!!

Other Cinnamon Roll & Pastry Recipes:

Sweet Perfection: Baking the Ultimate Cinnamon Roll Loaf with Espresso Glaze

Sweet Serenity: Mastering the Art of Pumpkin Cinnamon Rolls with Cream Cheese Icing

Blackberry Cinnamon Rolls with Mascarpone Frosting

An Irresistible Treat: The Delicious Berry Custard Puff Pastry Tart

Soft Cream Cheese Lemon Blueberry Scones

A Sweet and Delicious Recipe for Lemon Poppyseed Bread

Indulge in Delicious Personal Pear Tarts