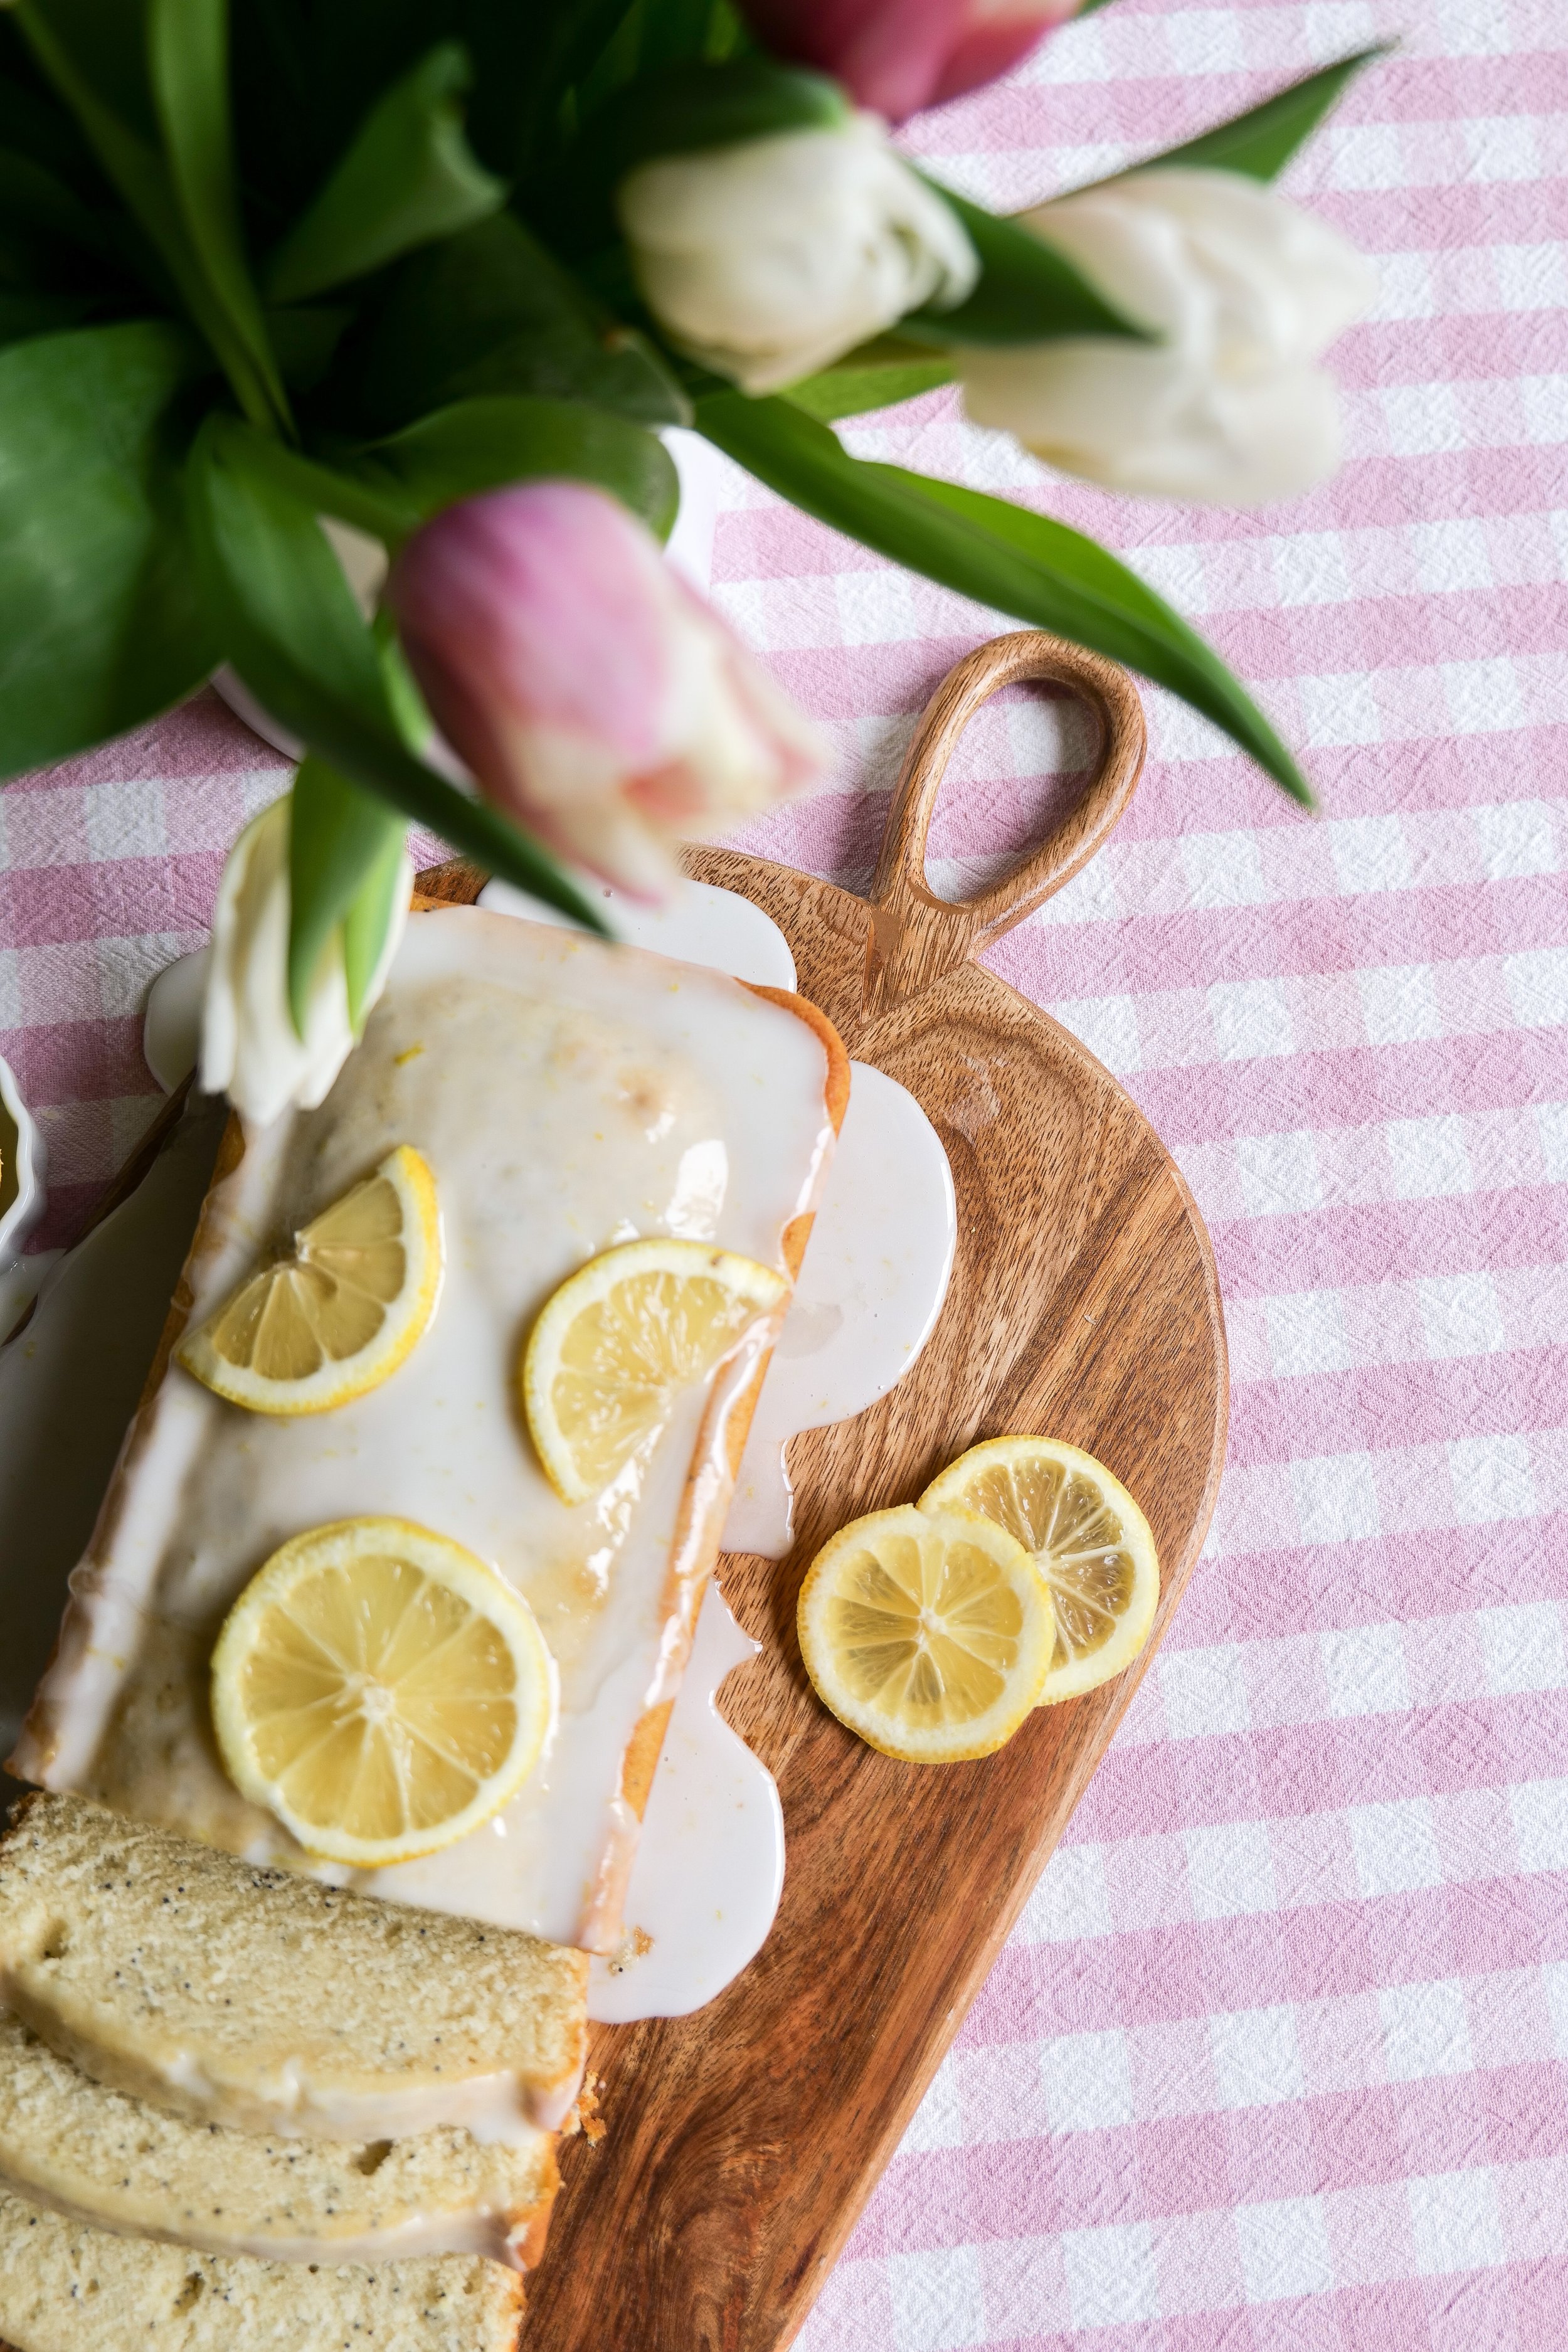
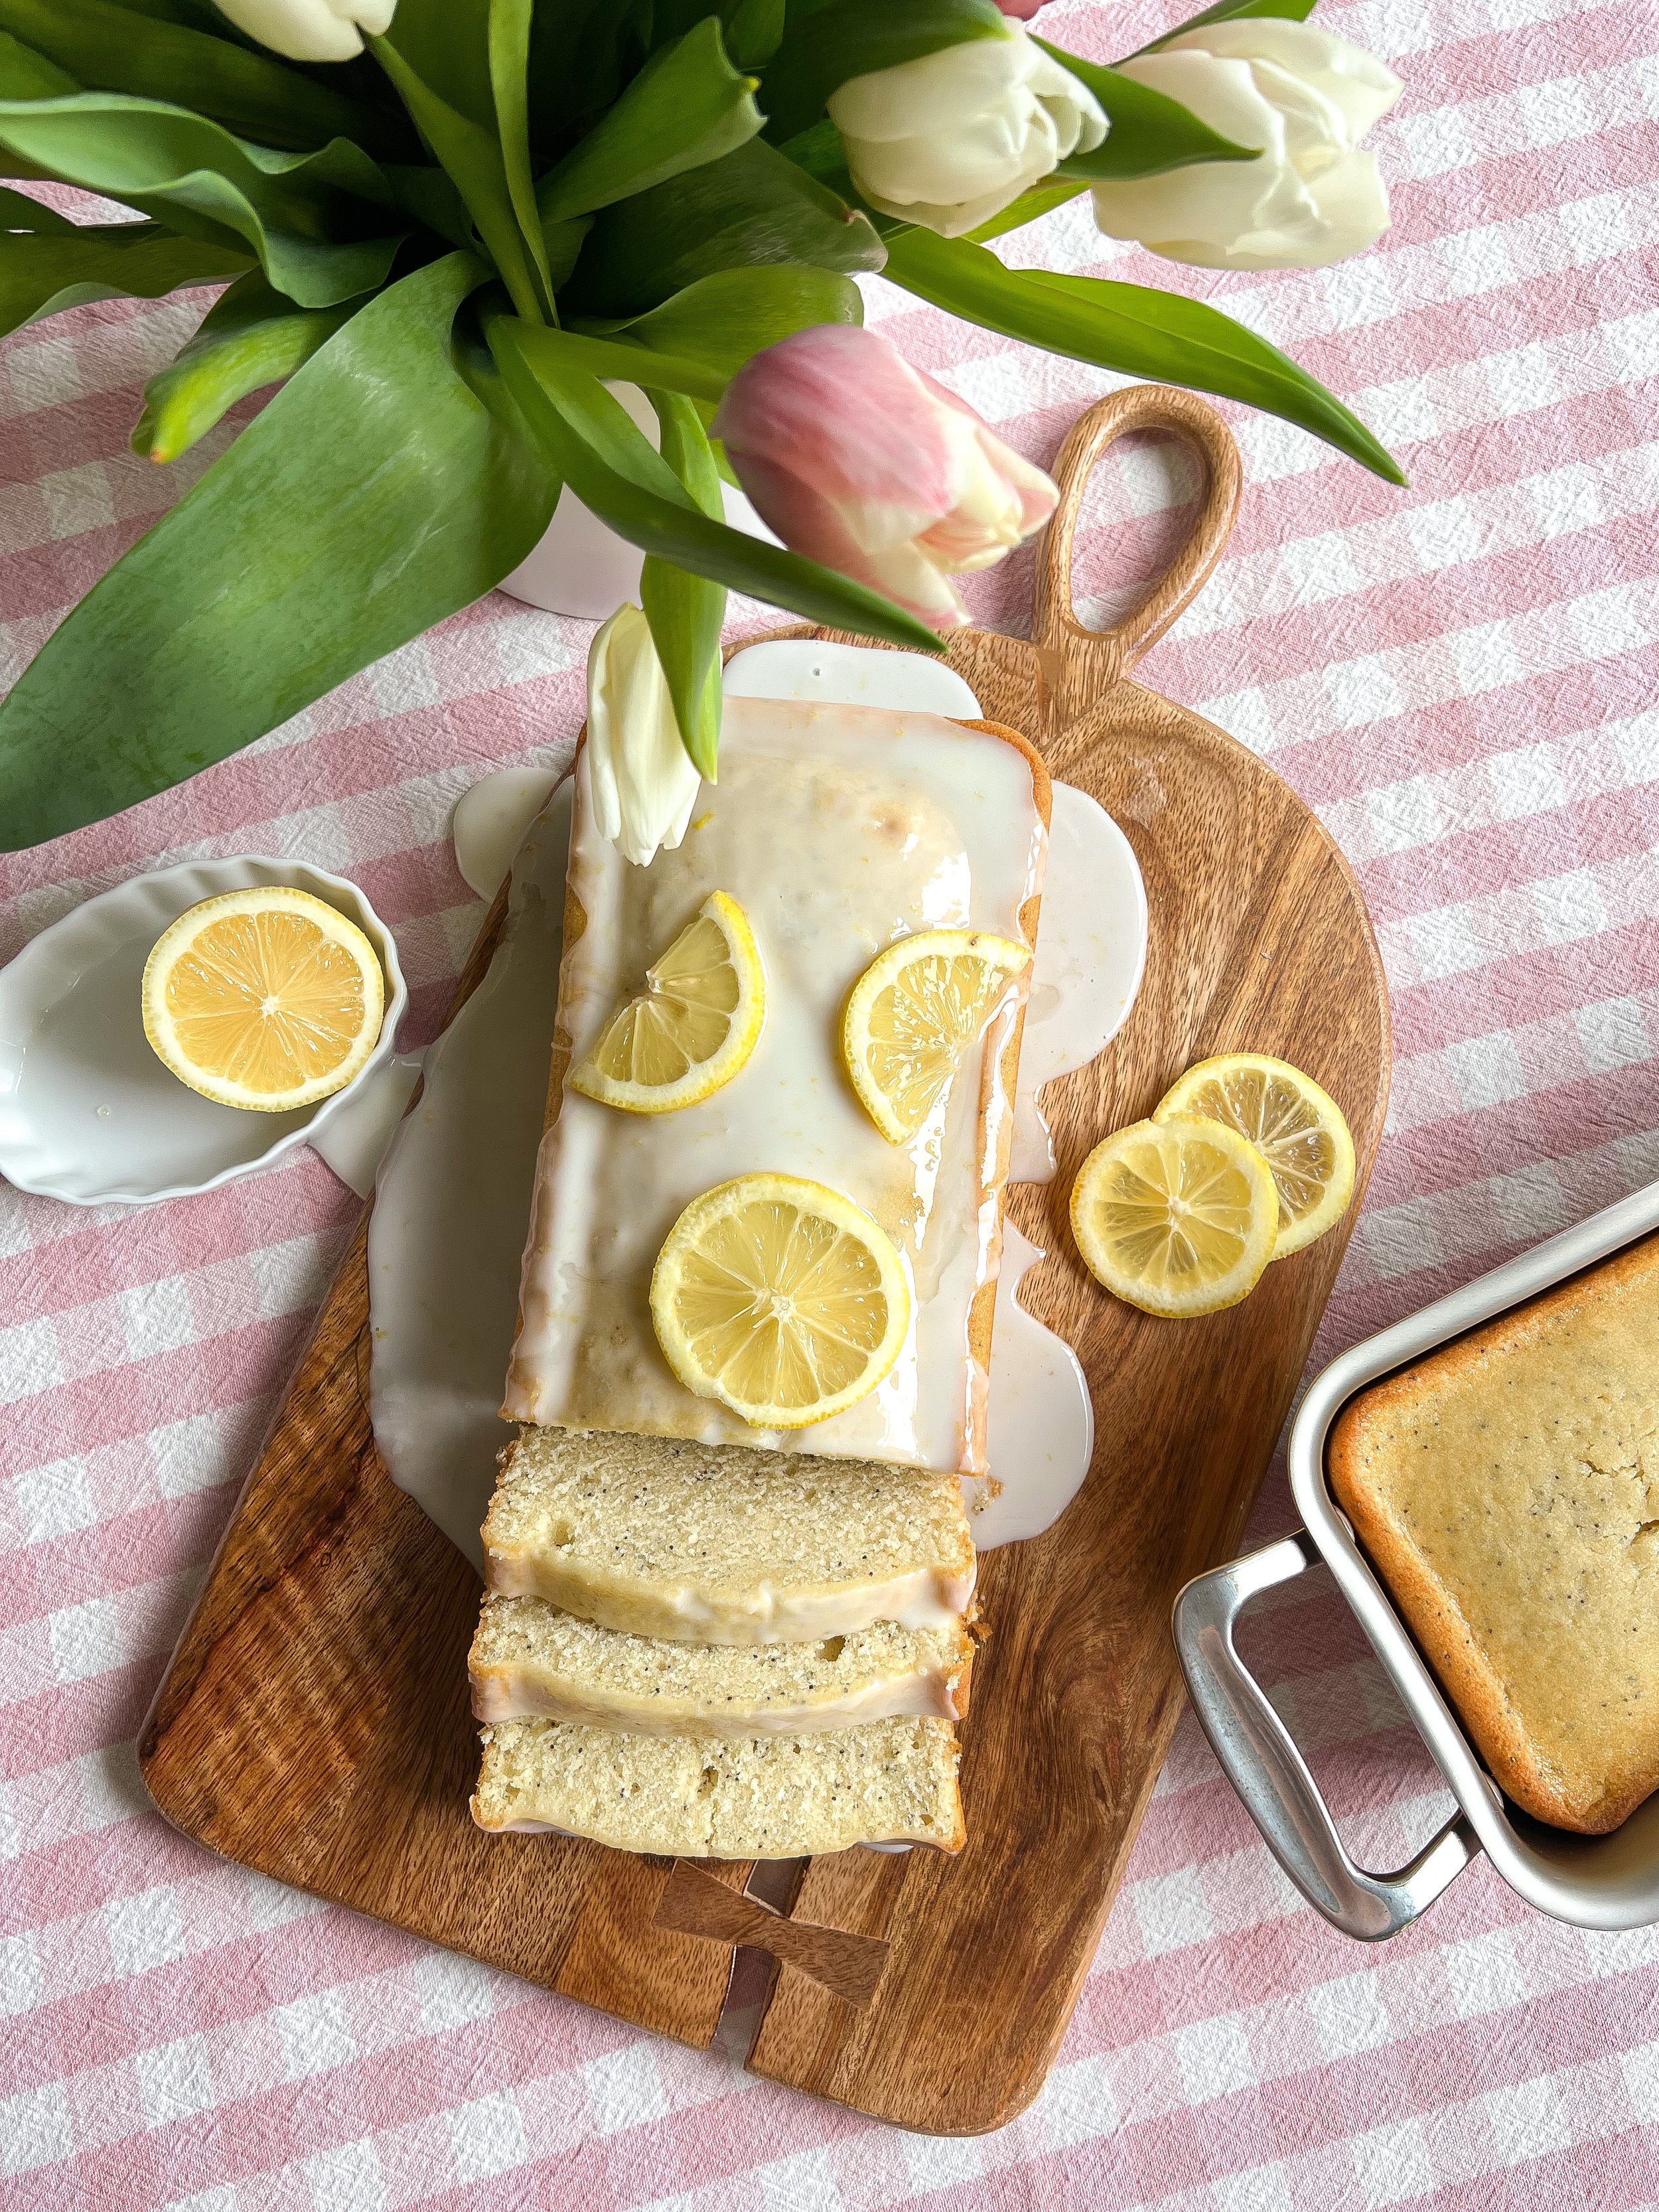
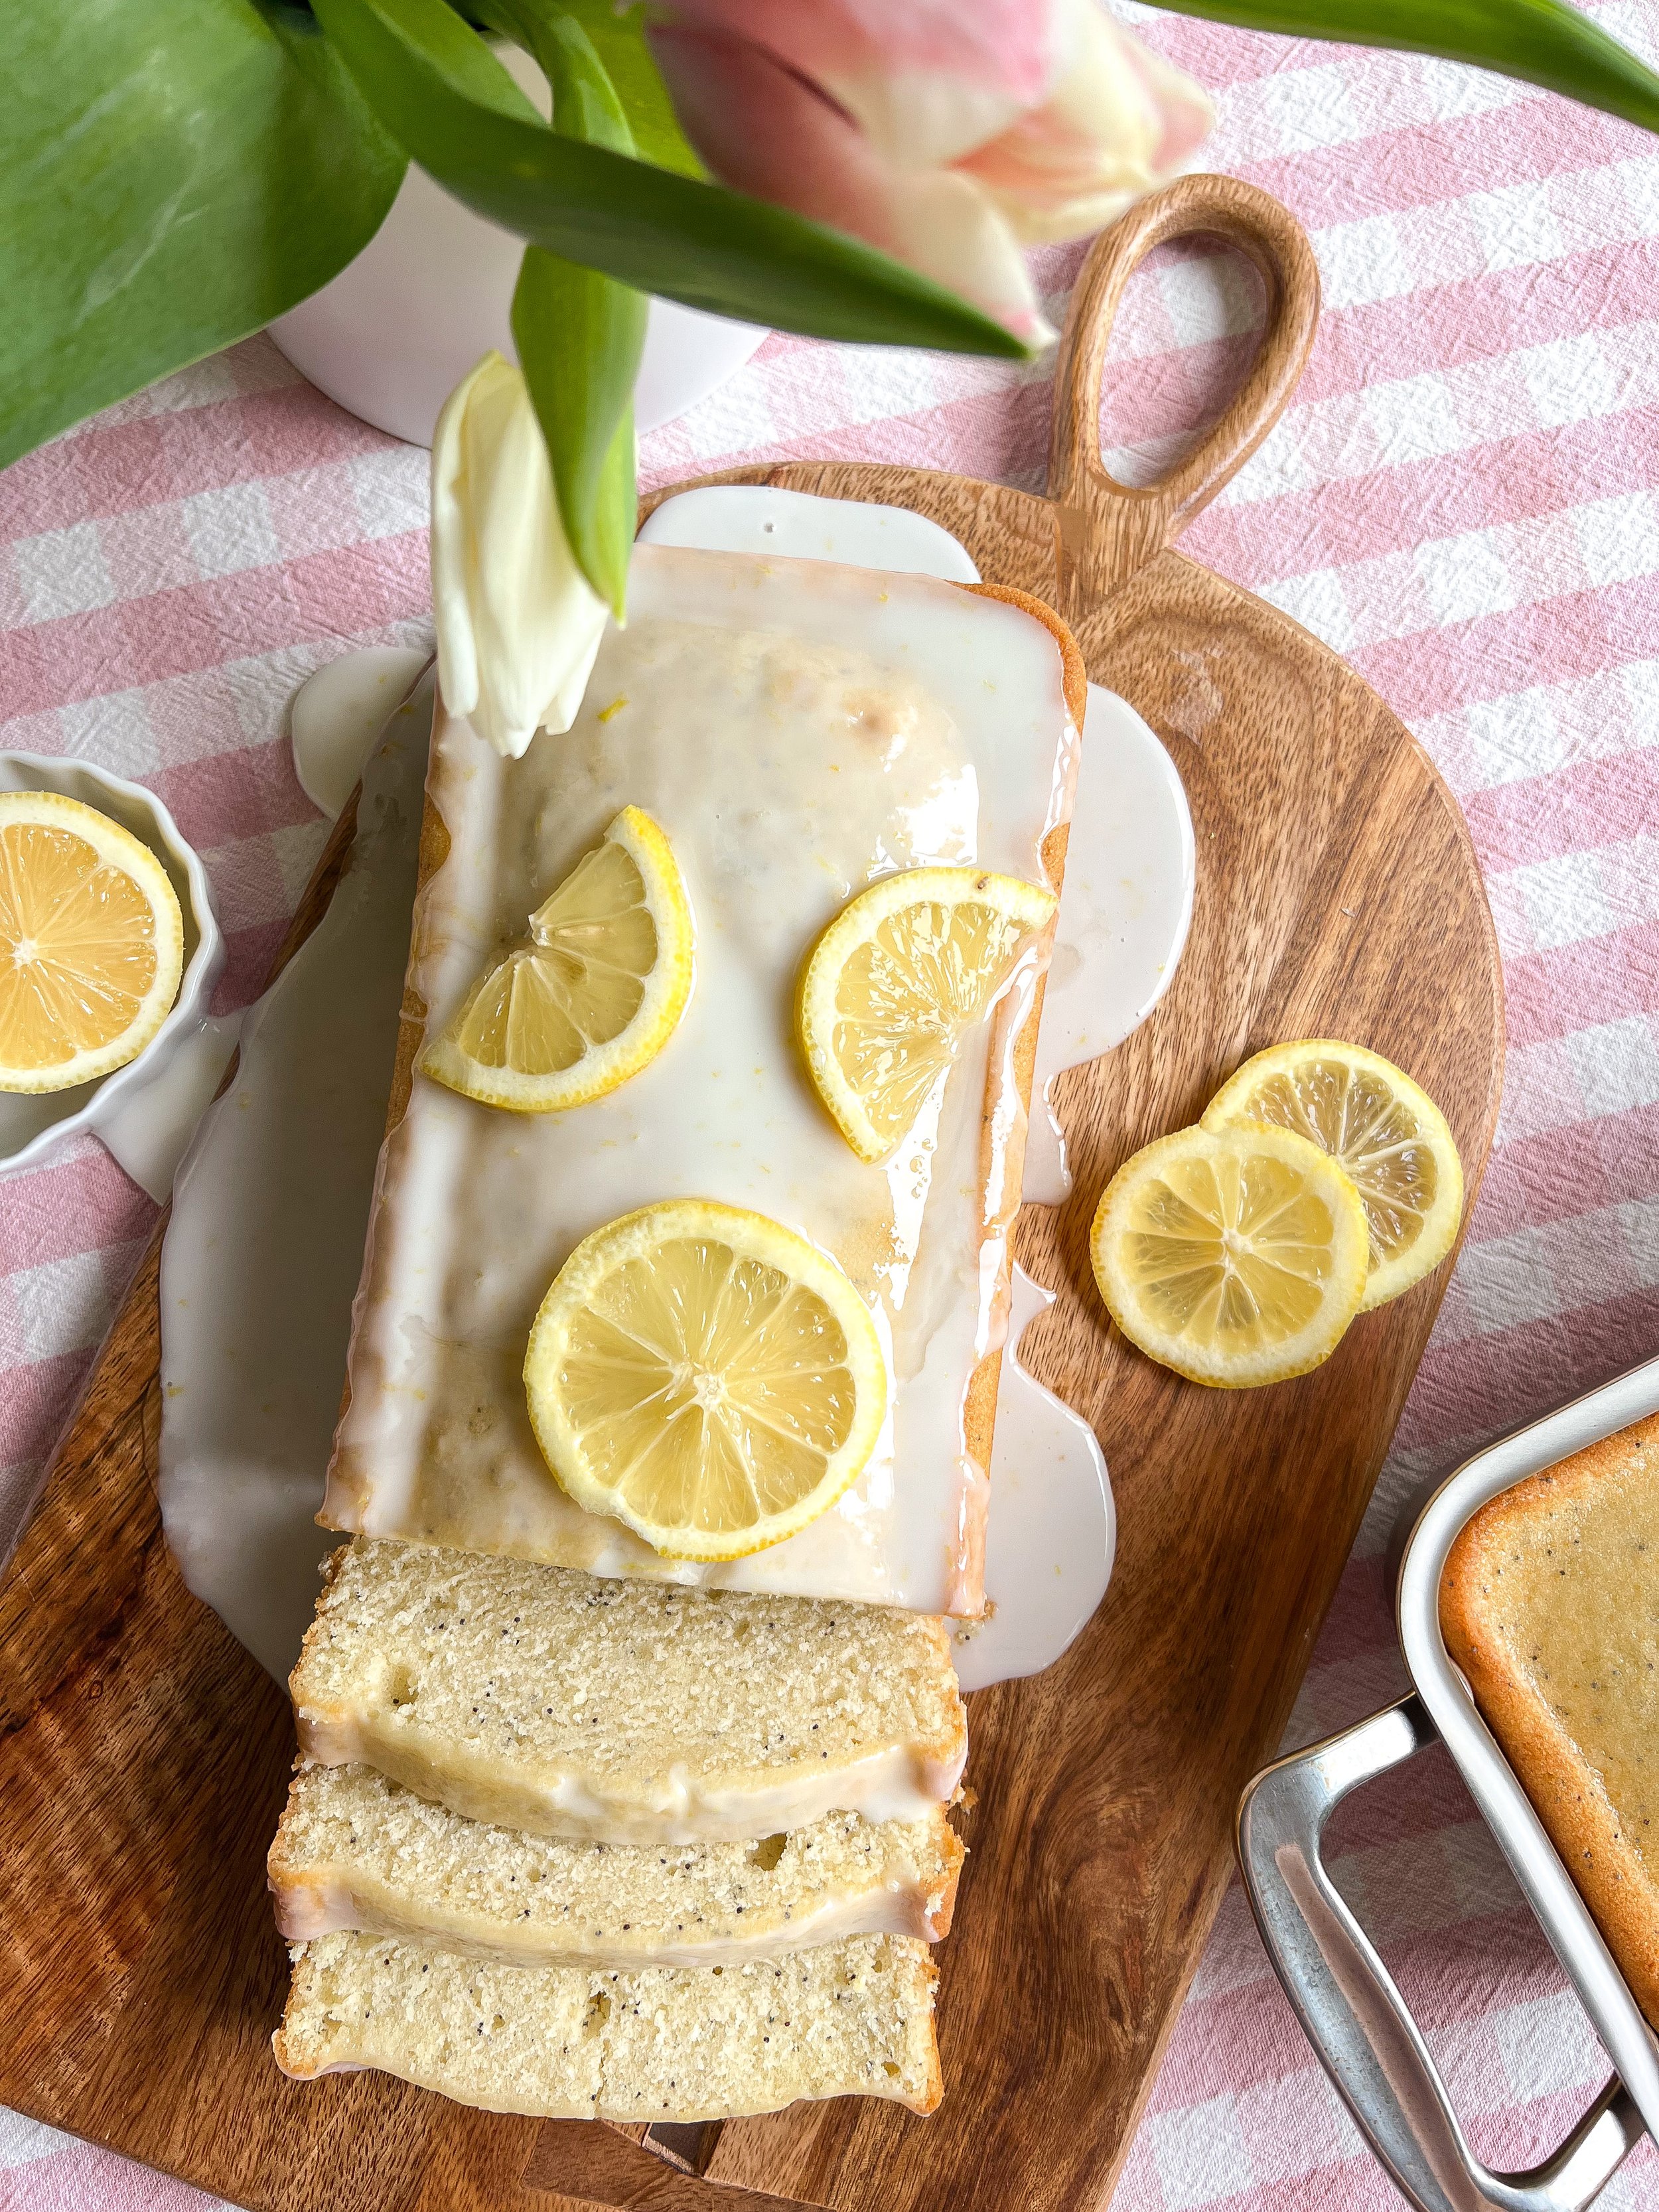
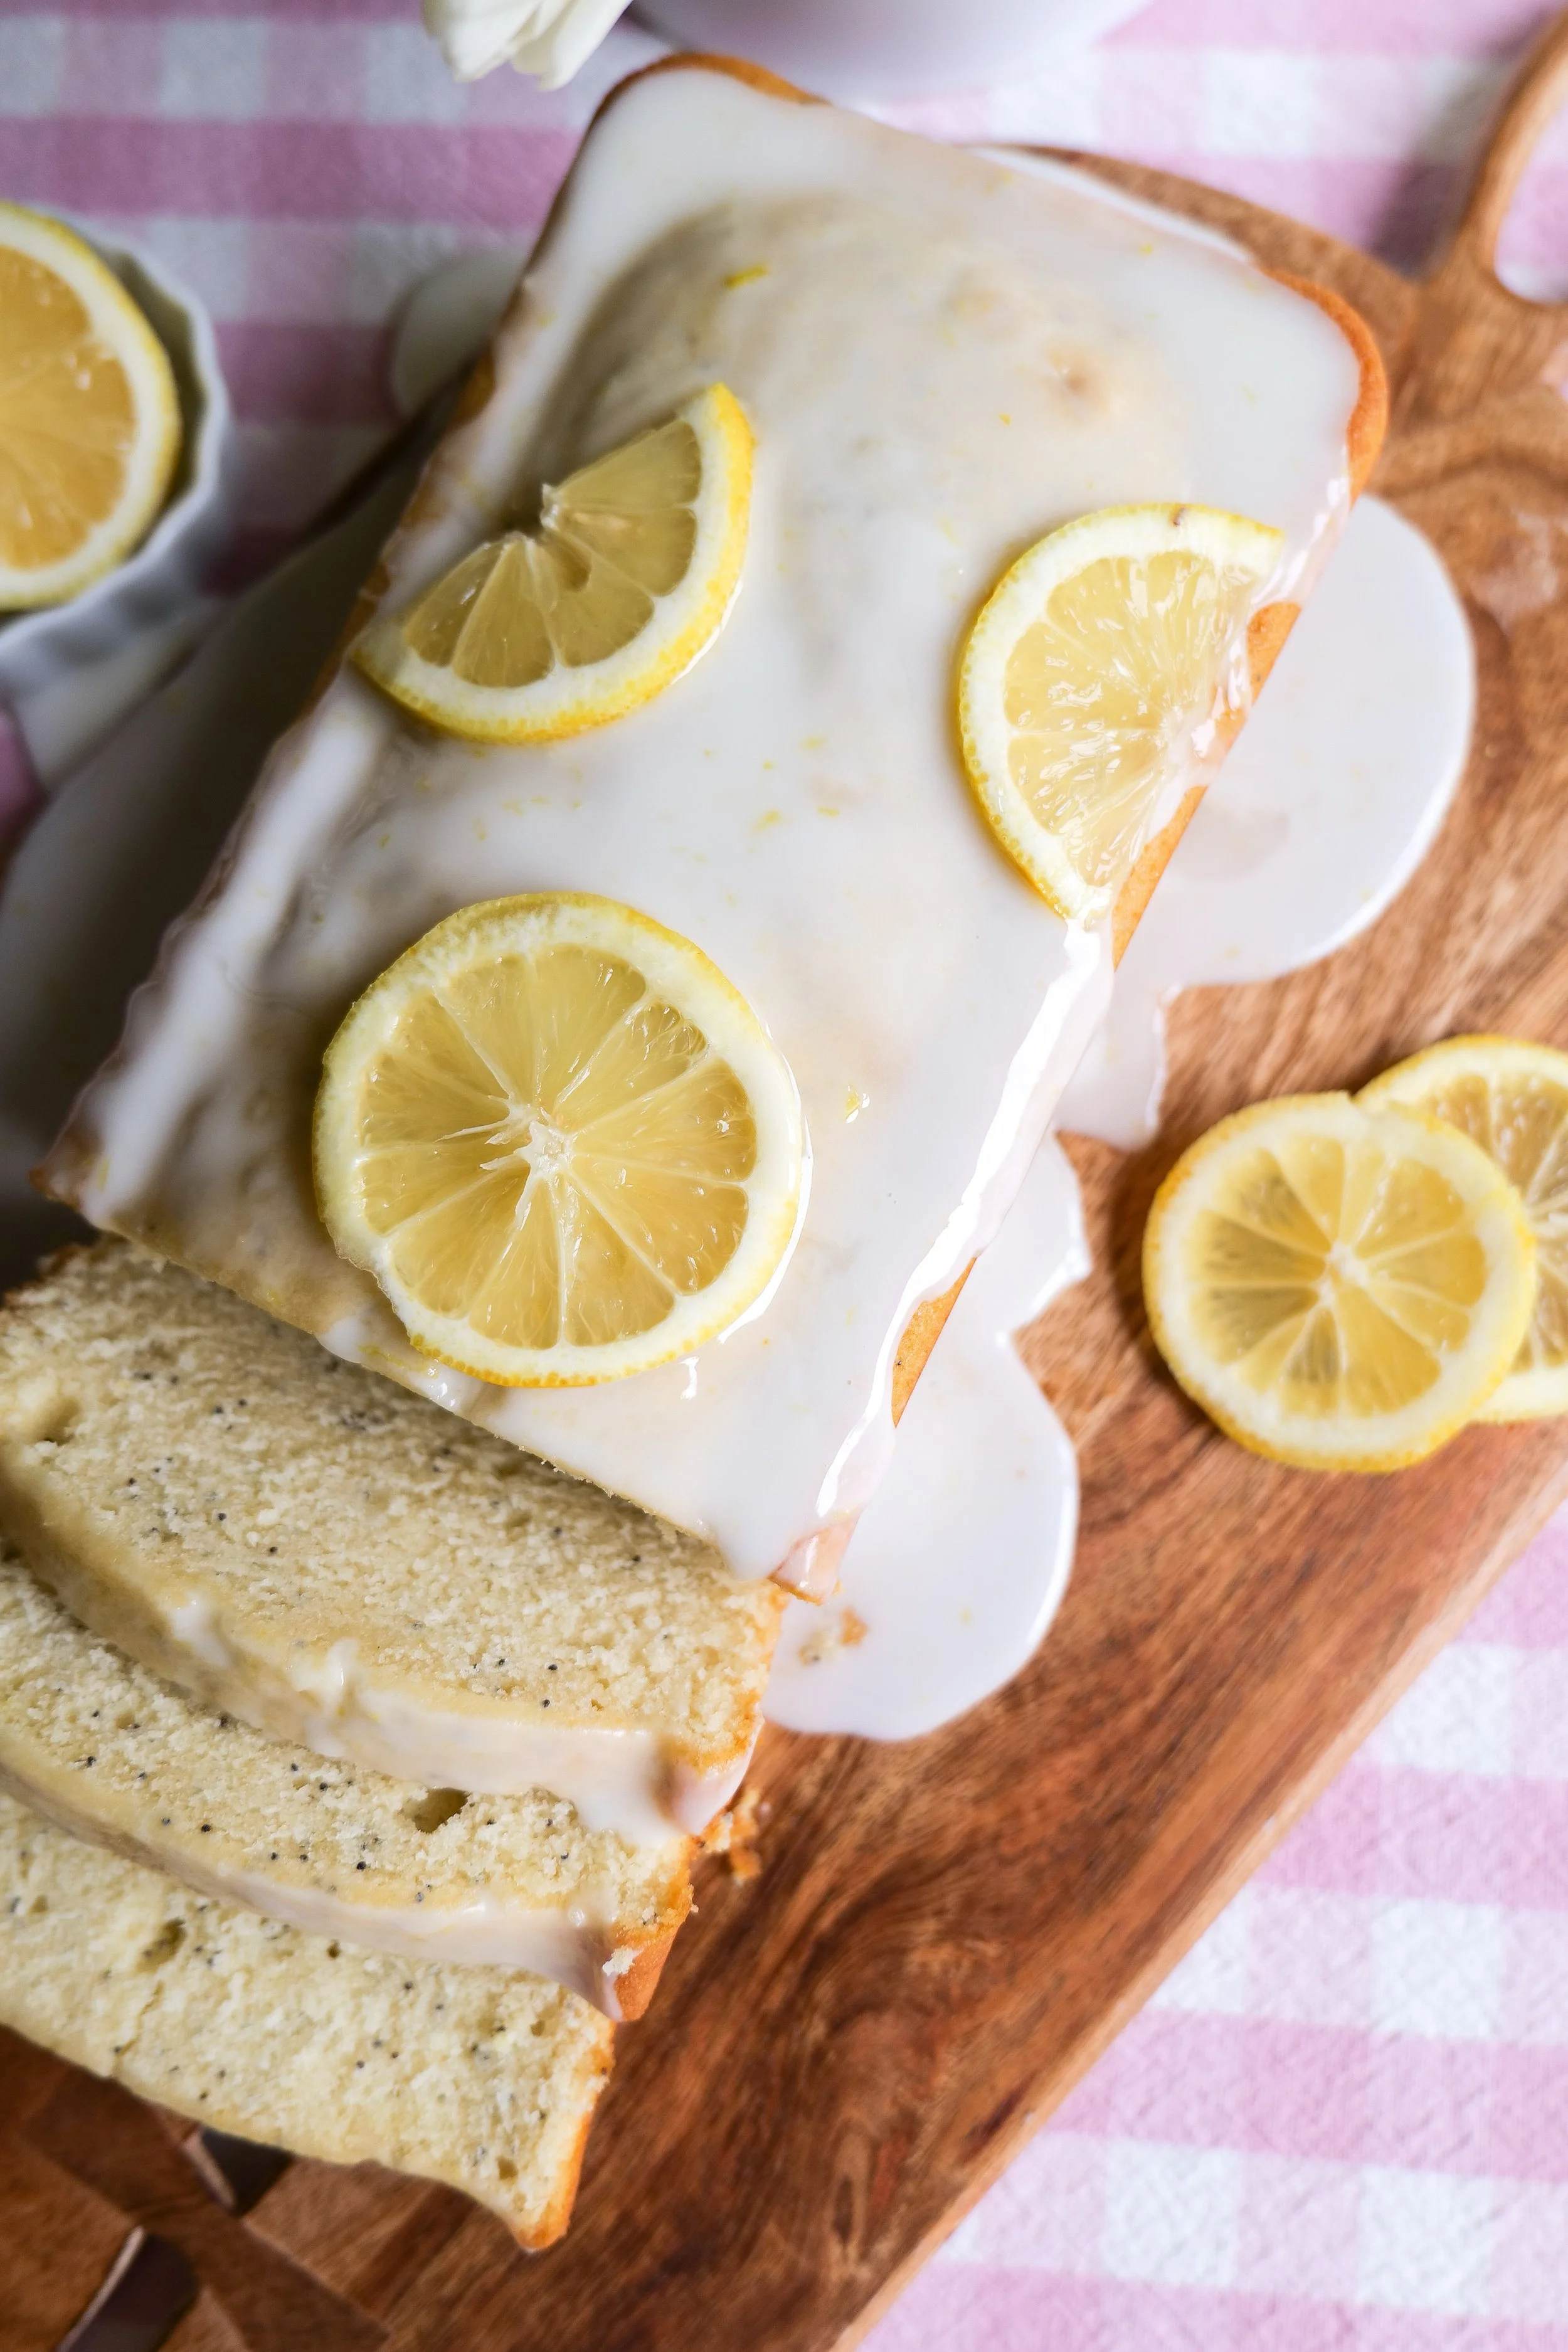
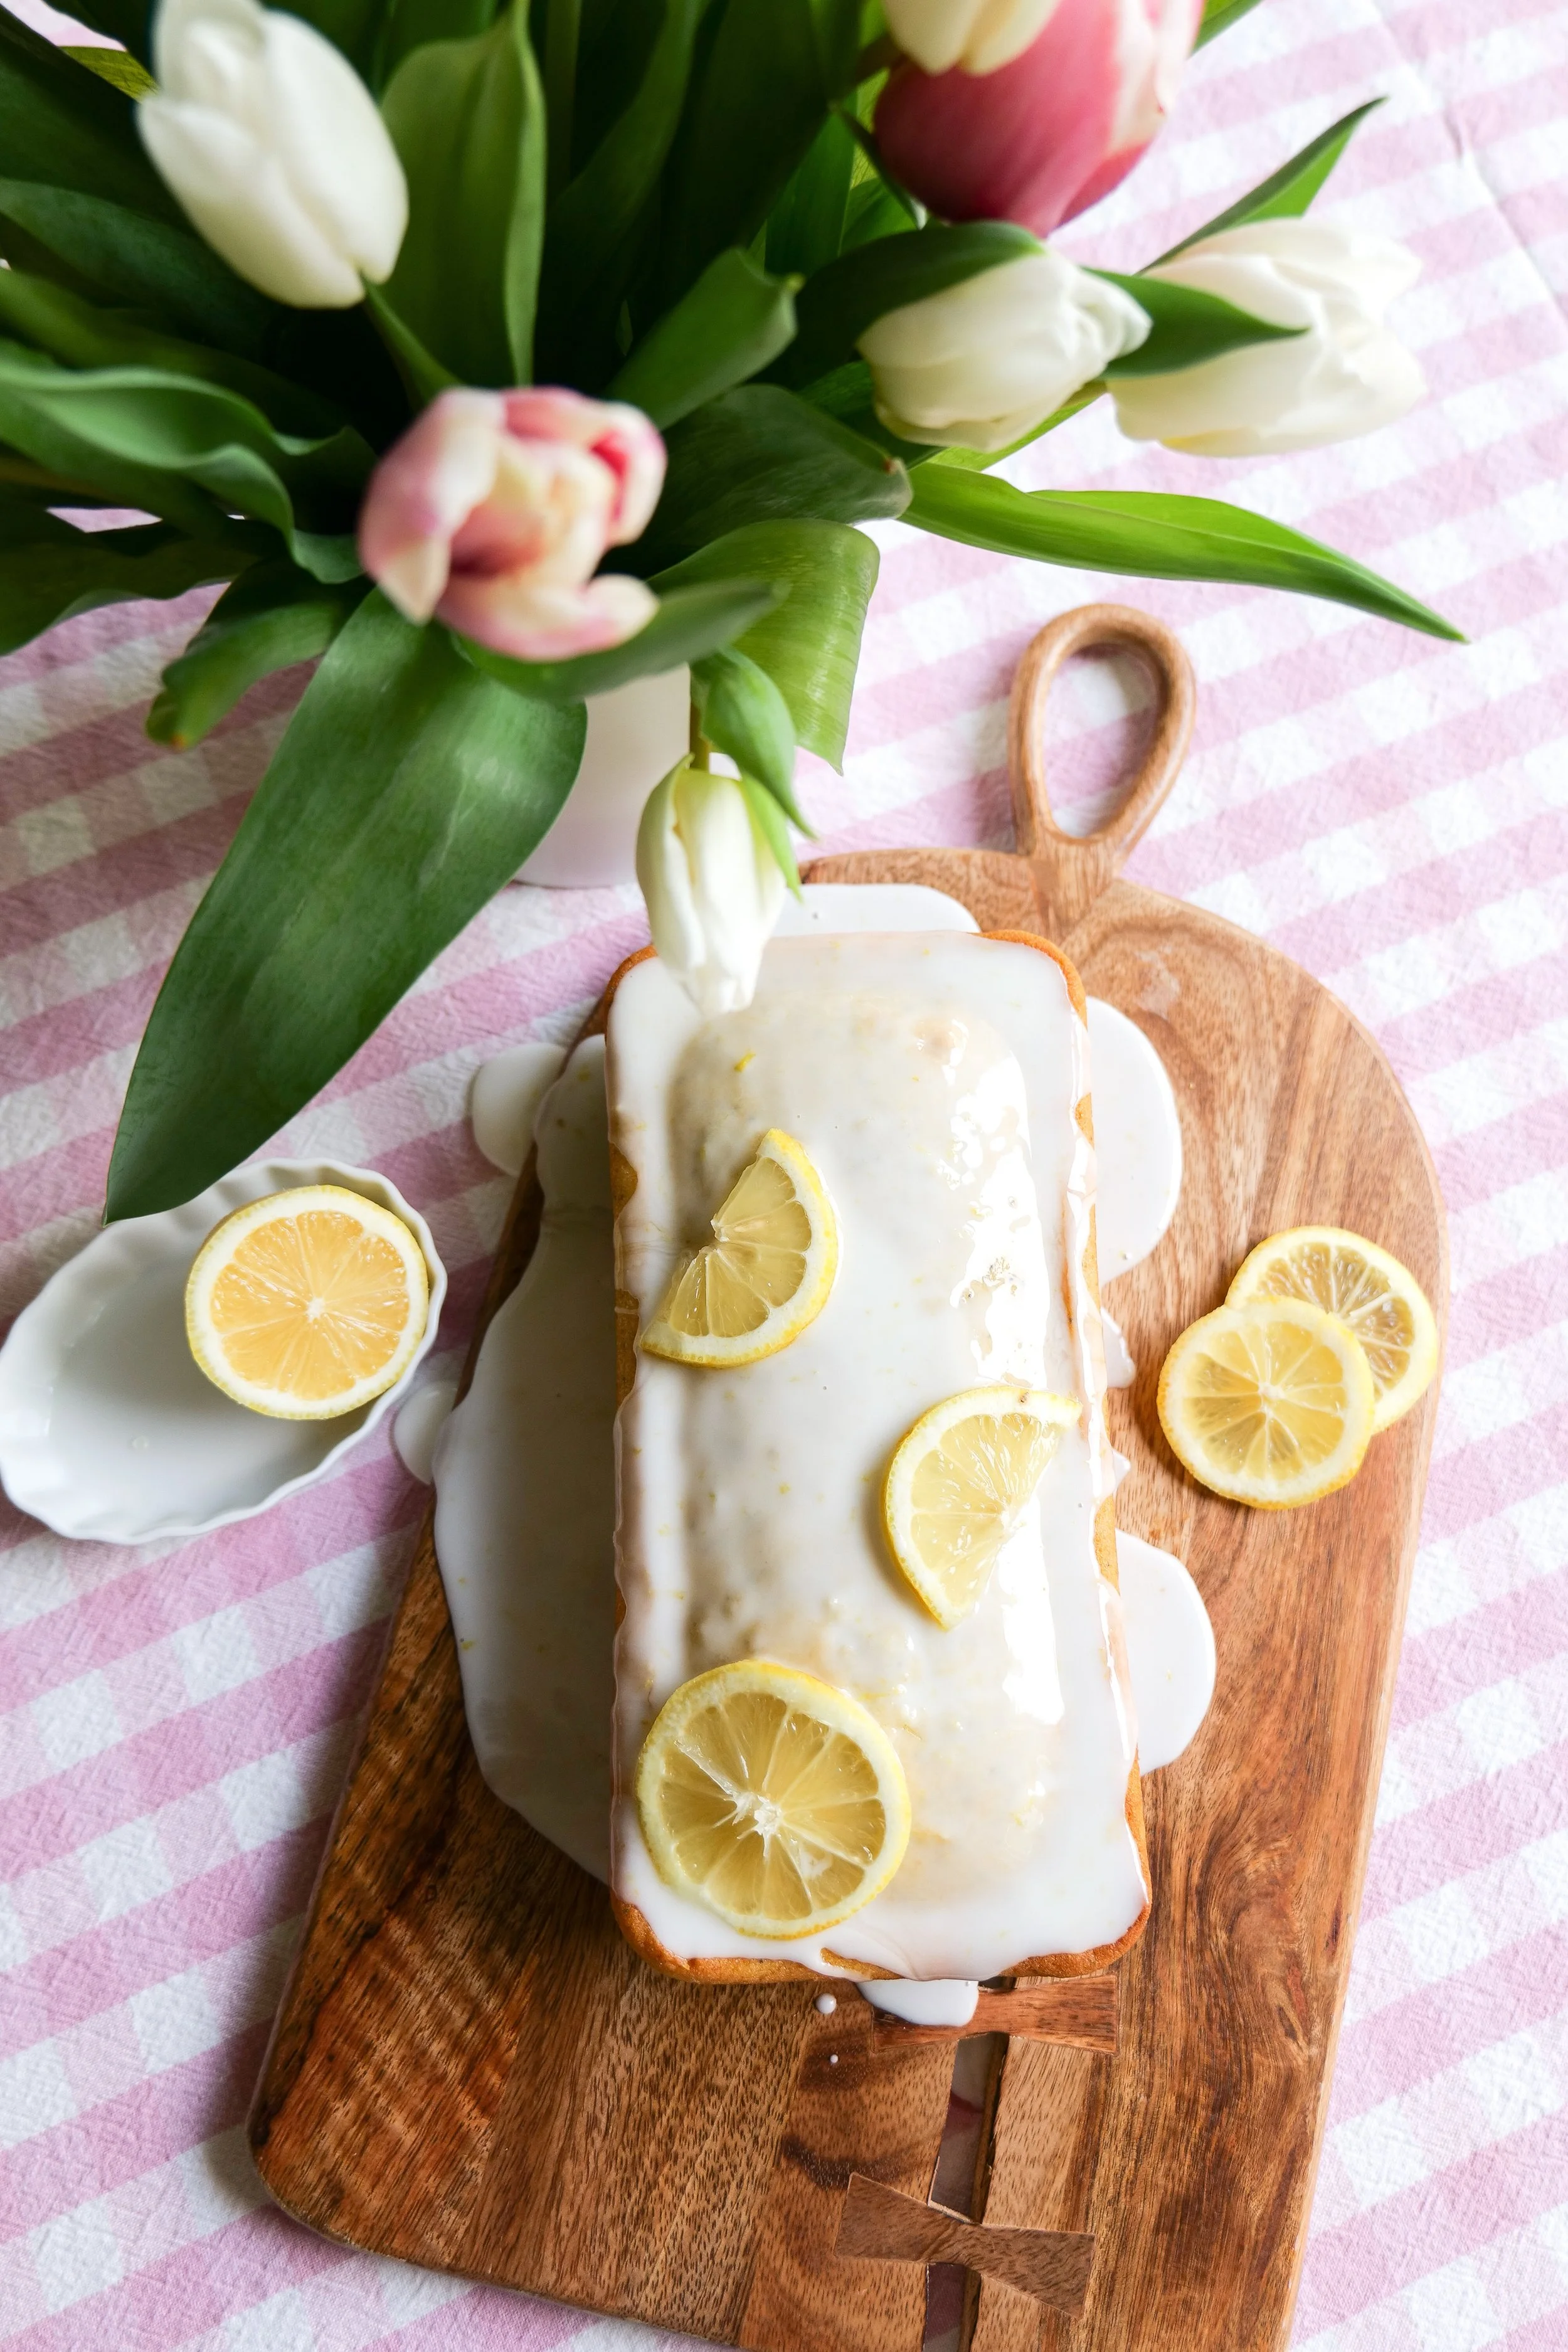
An Irresistible Treat: The Delicious Berry Custard Puff Pastry Tart
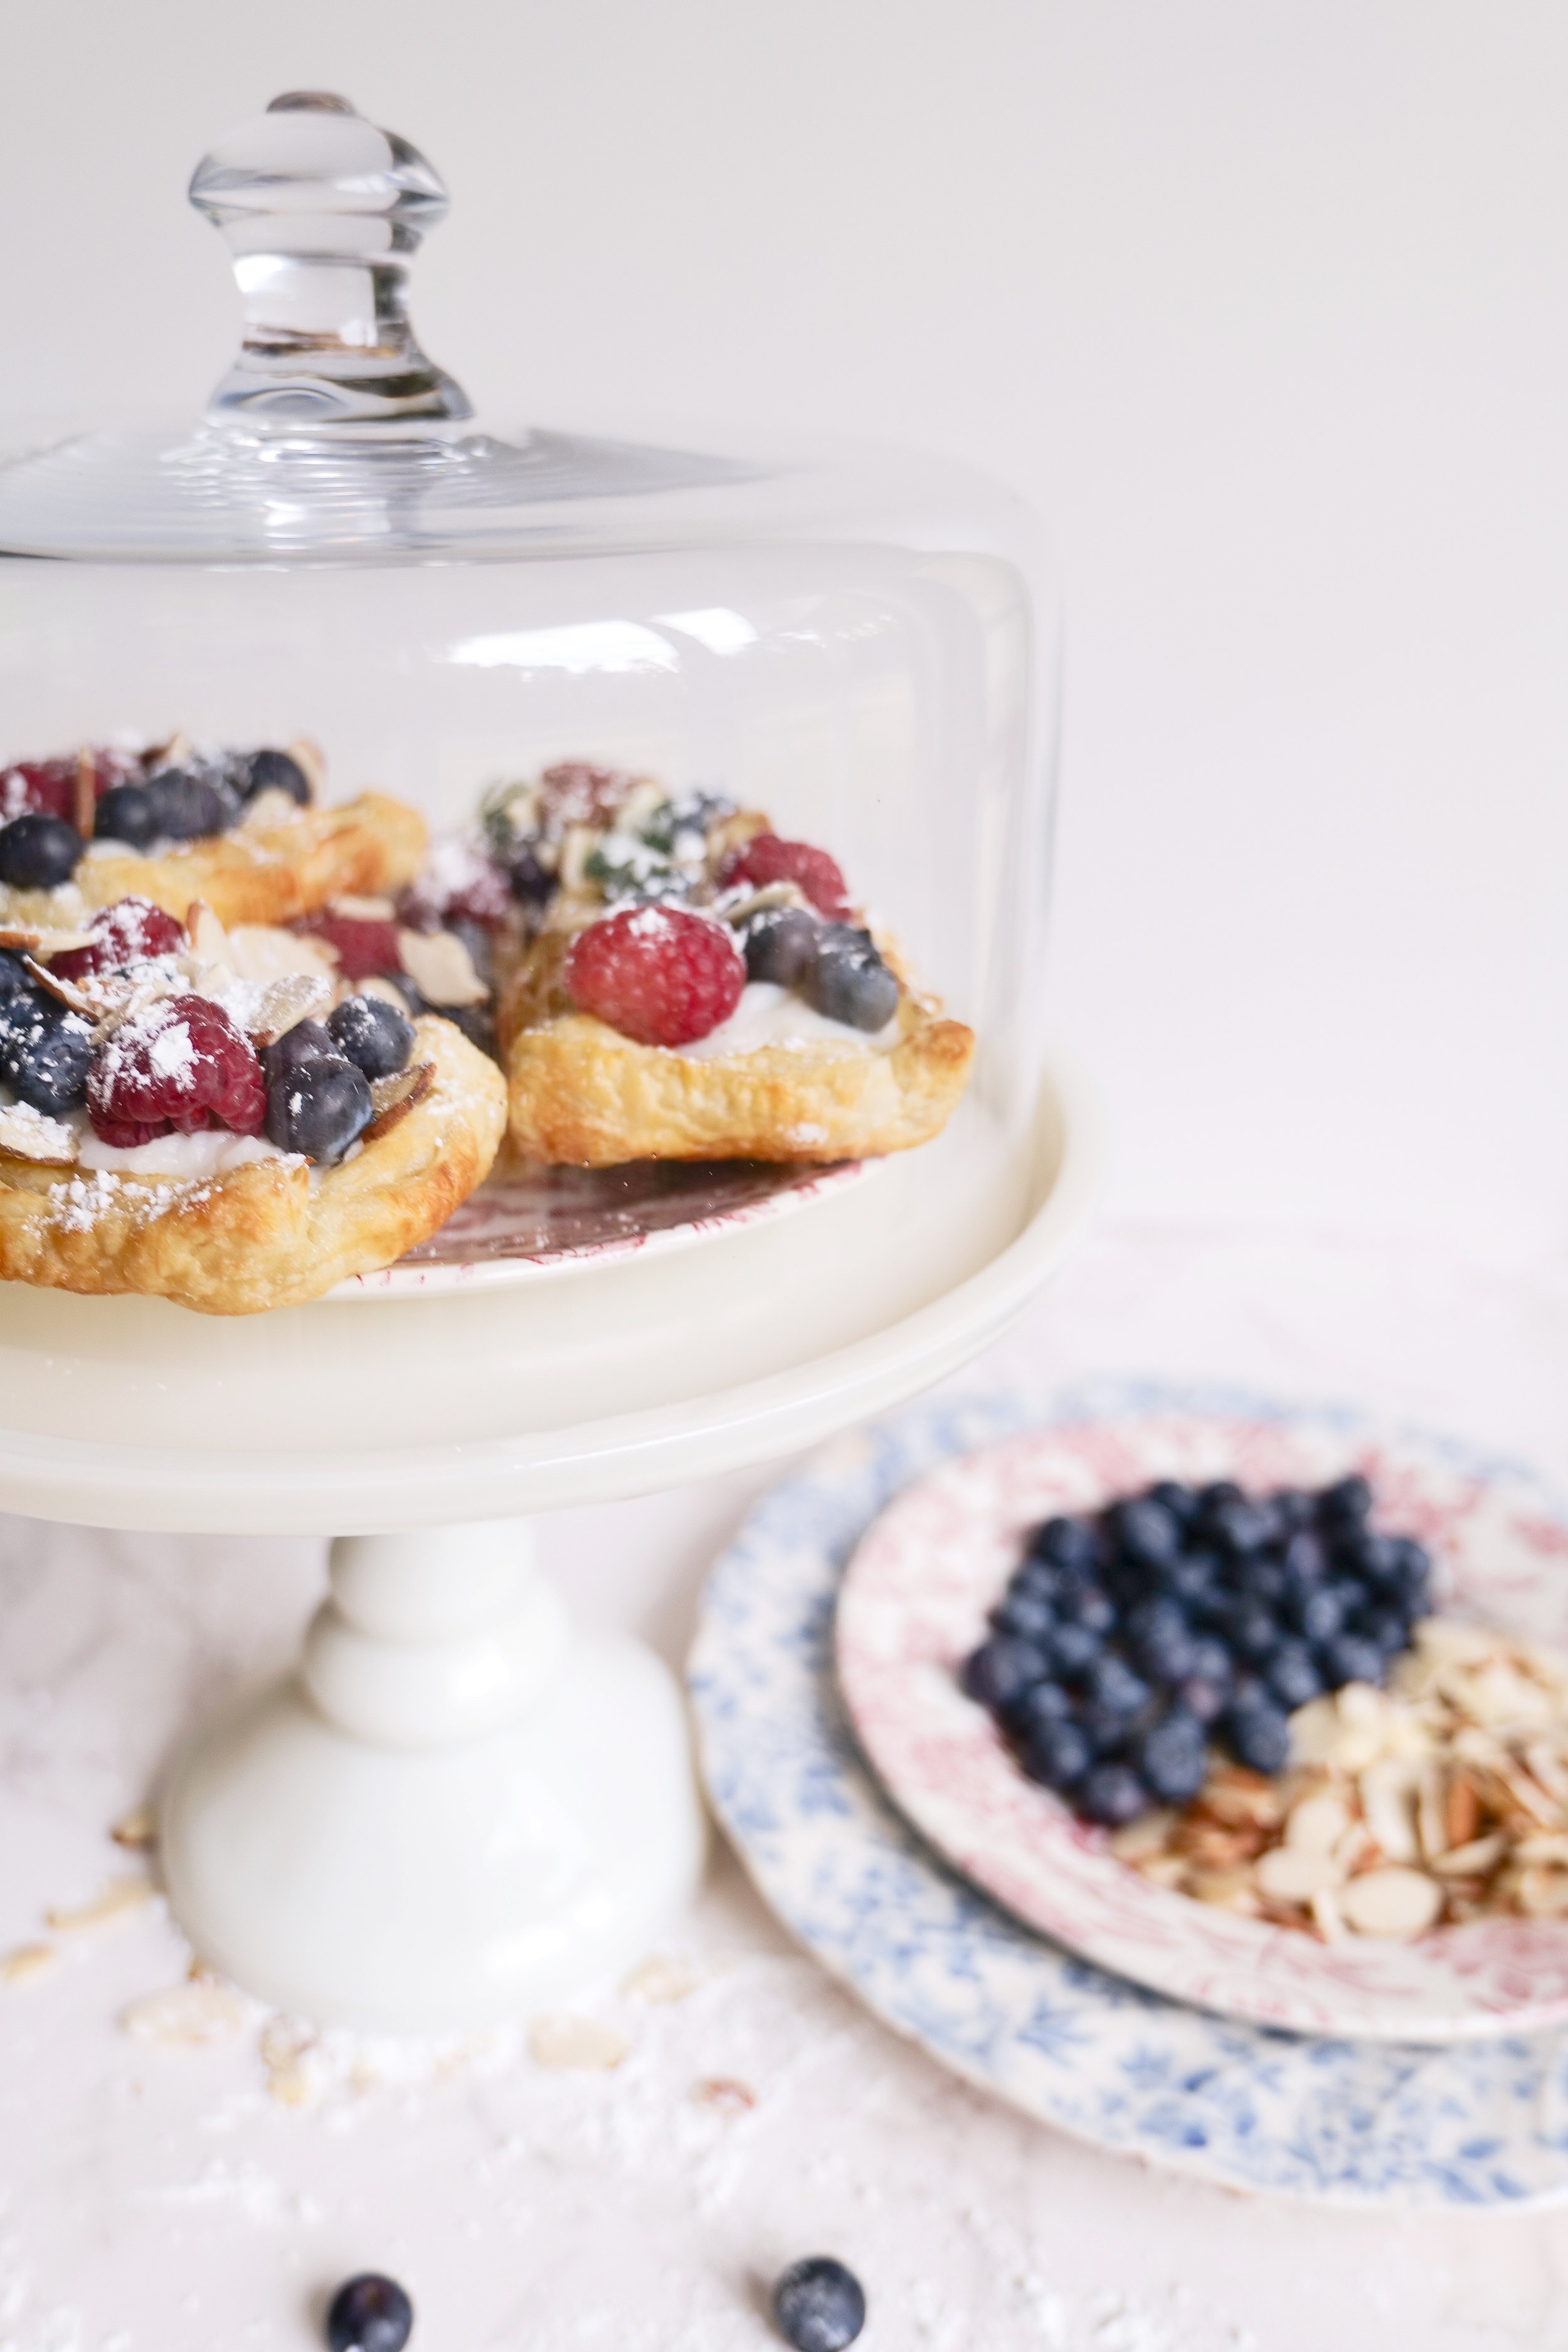
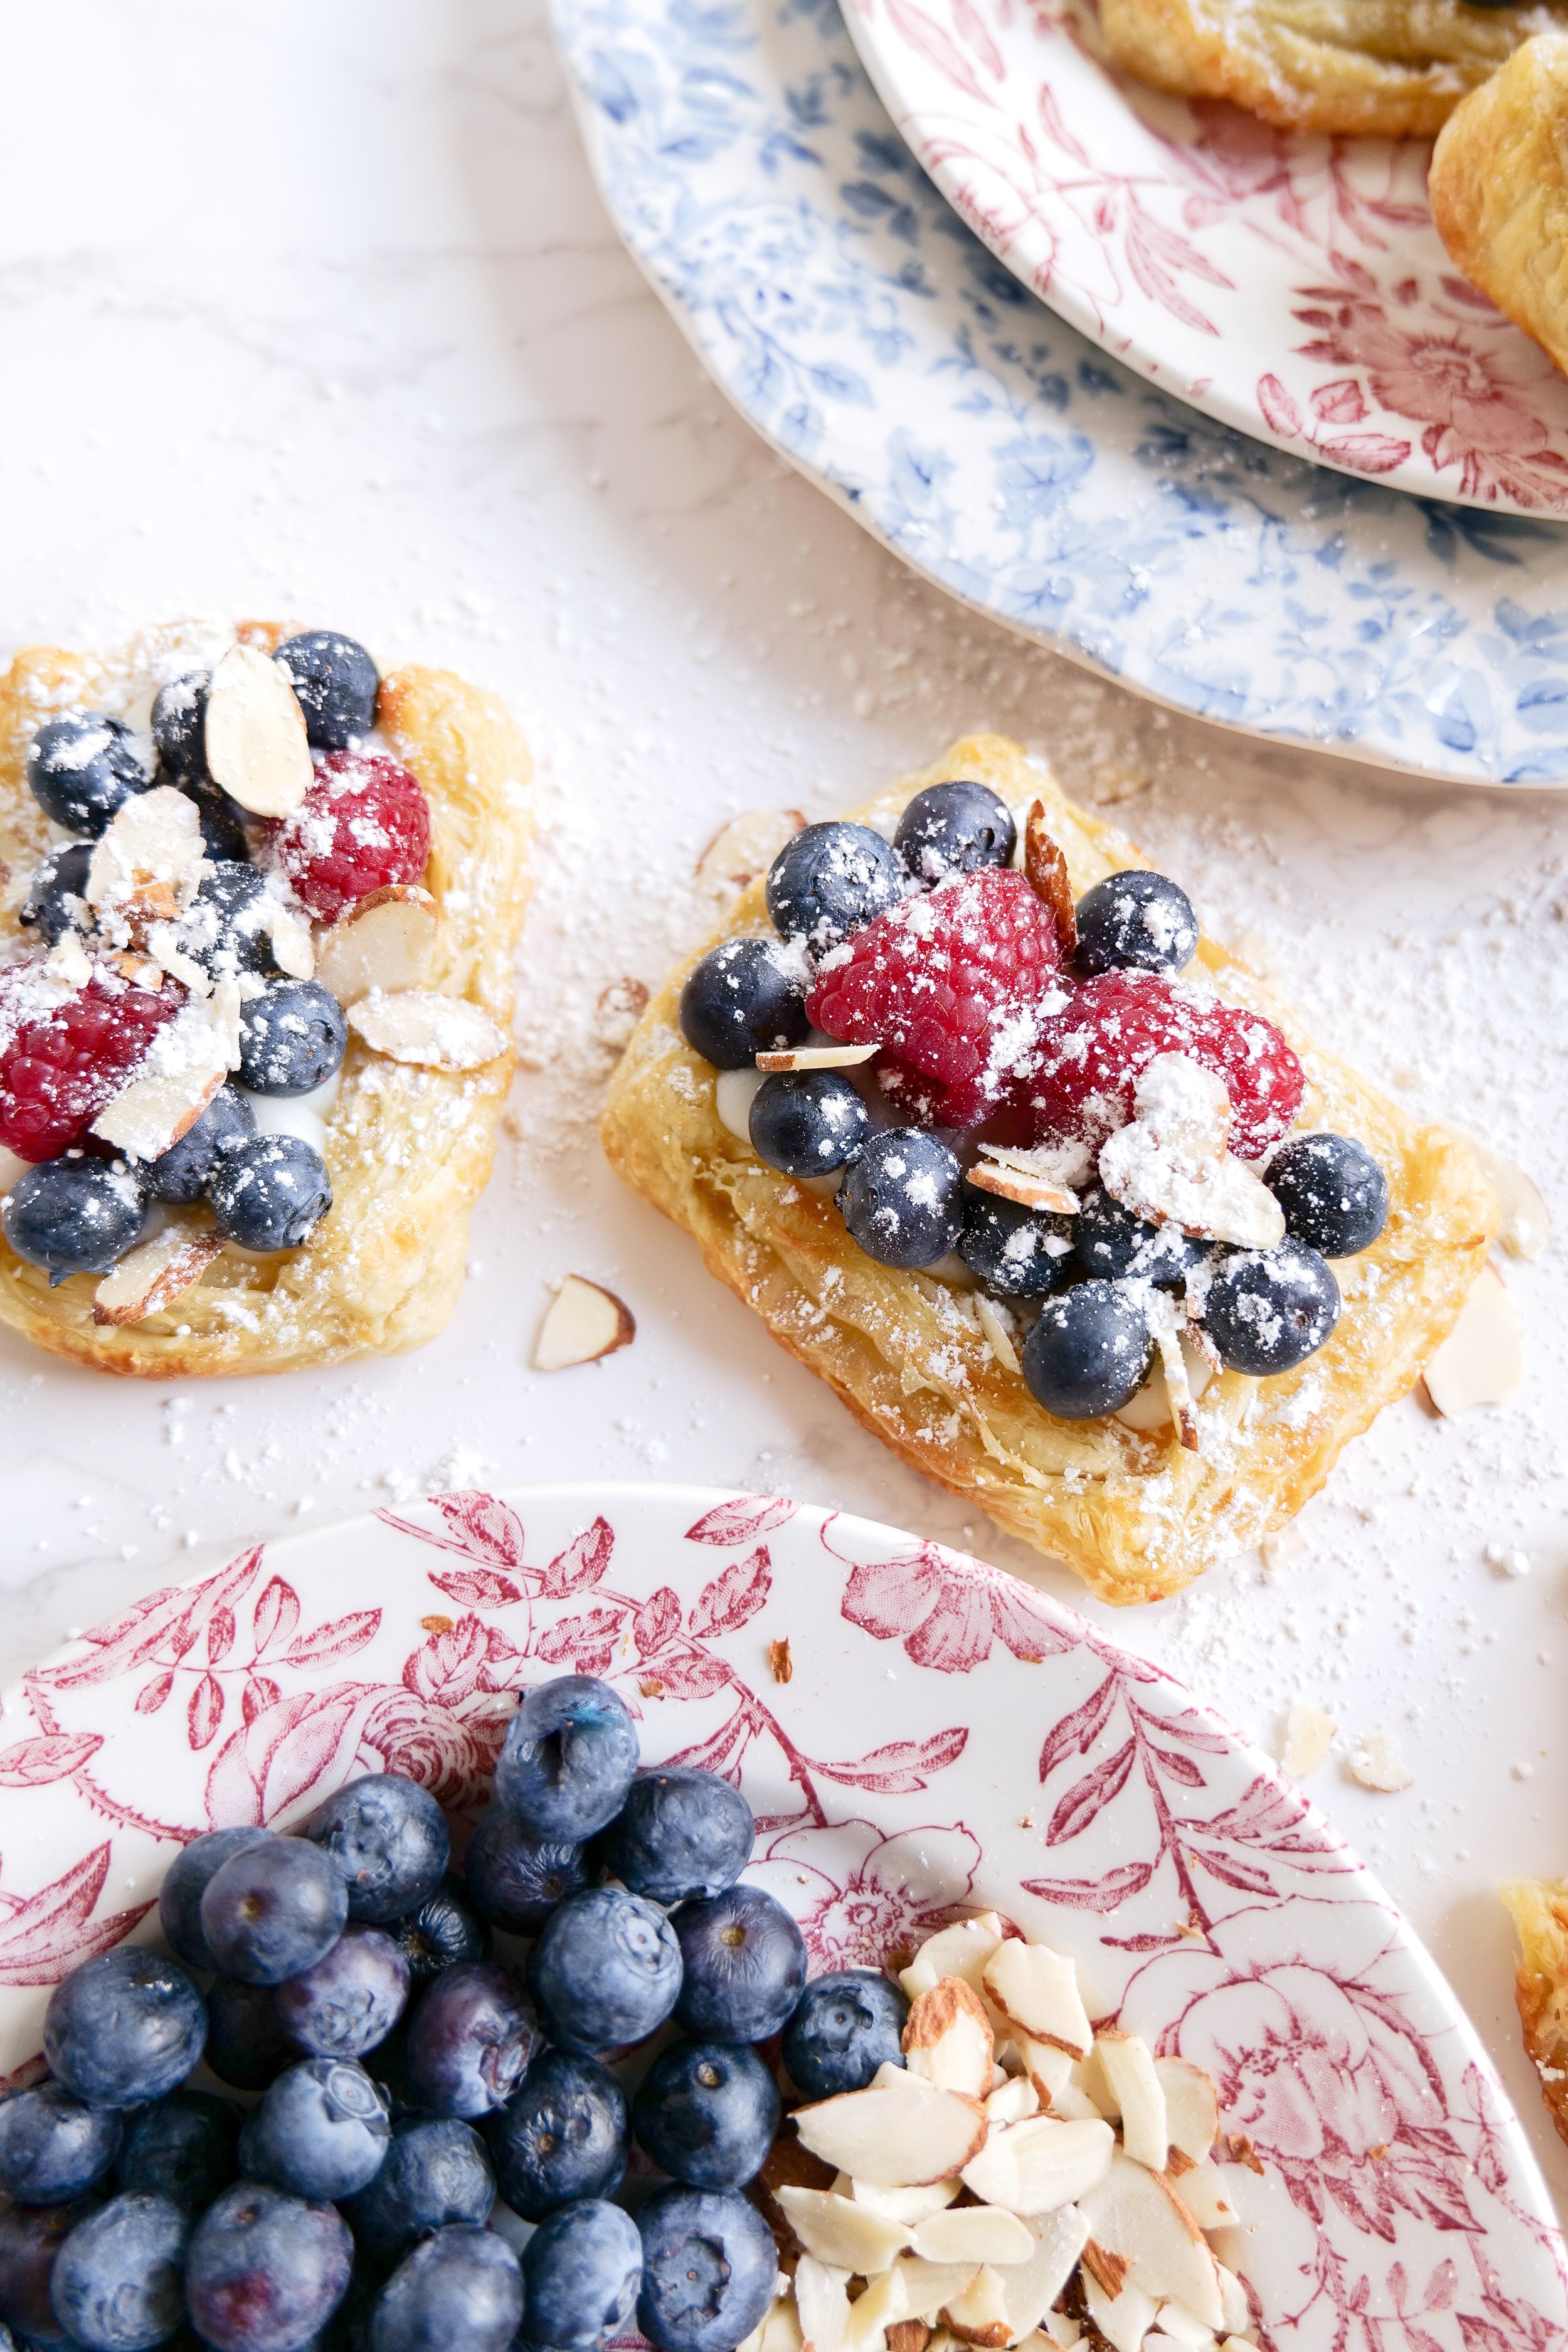
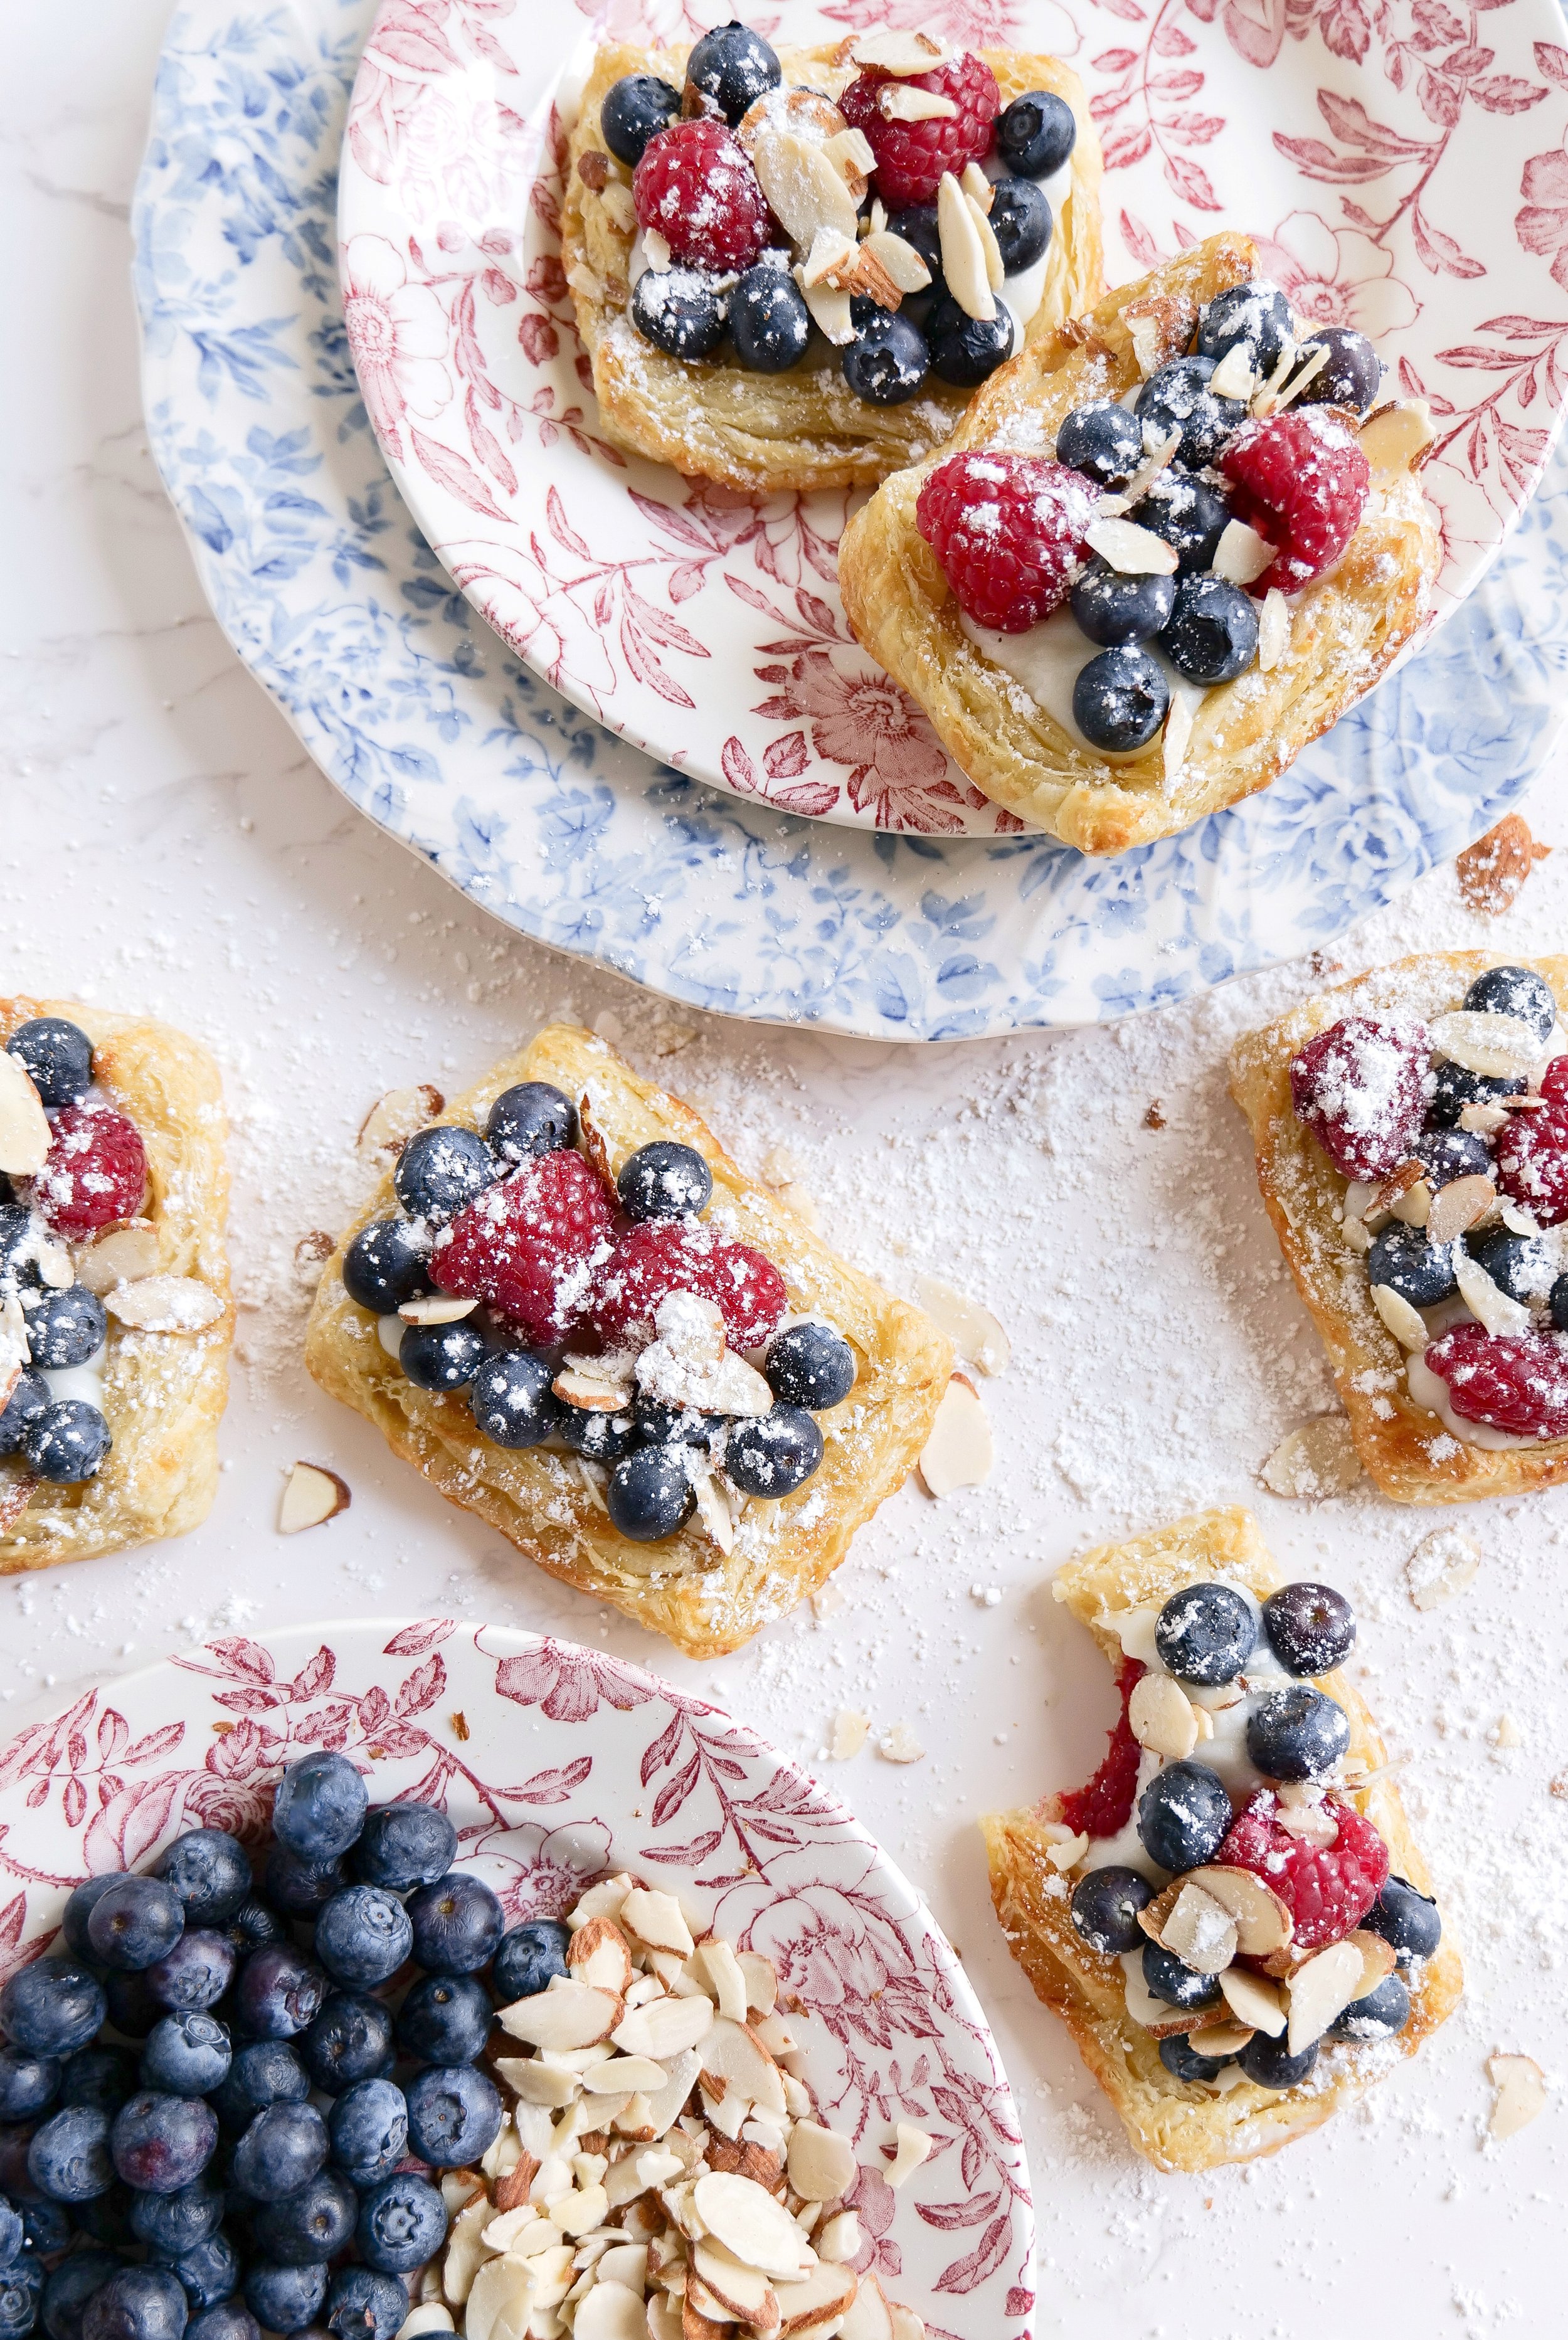
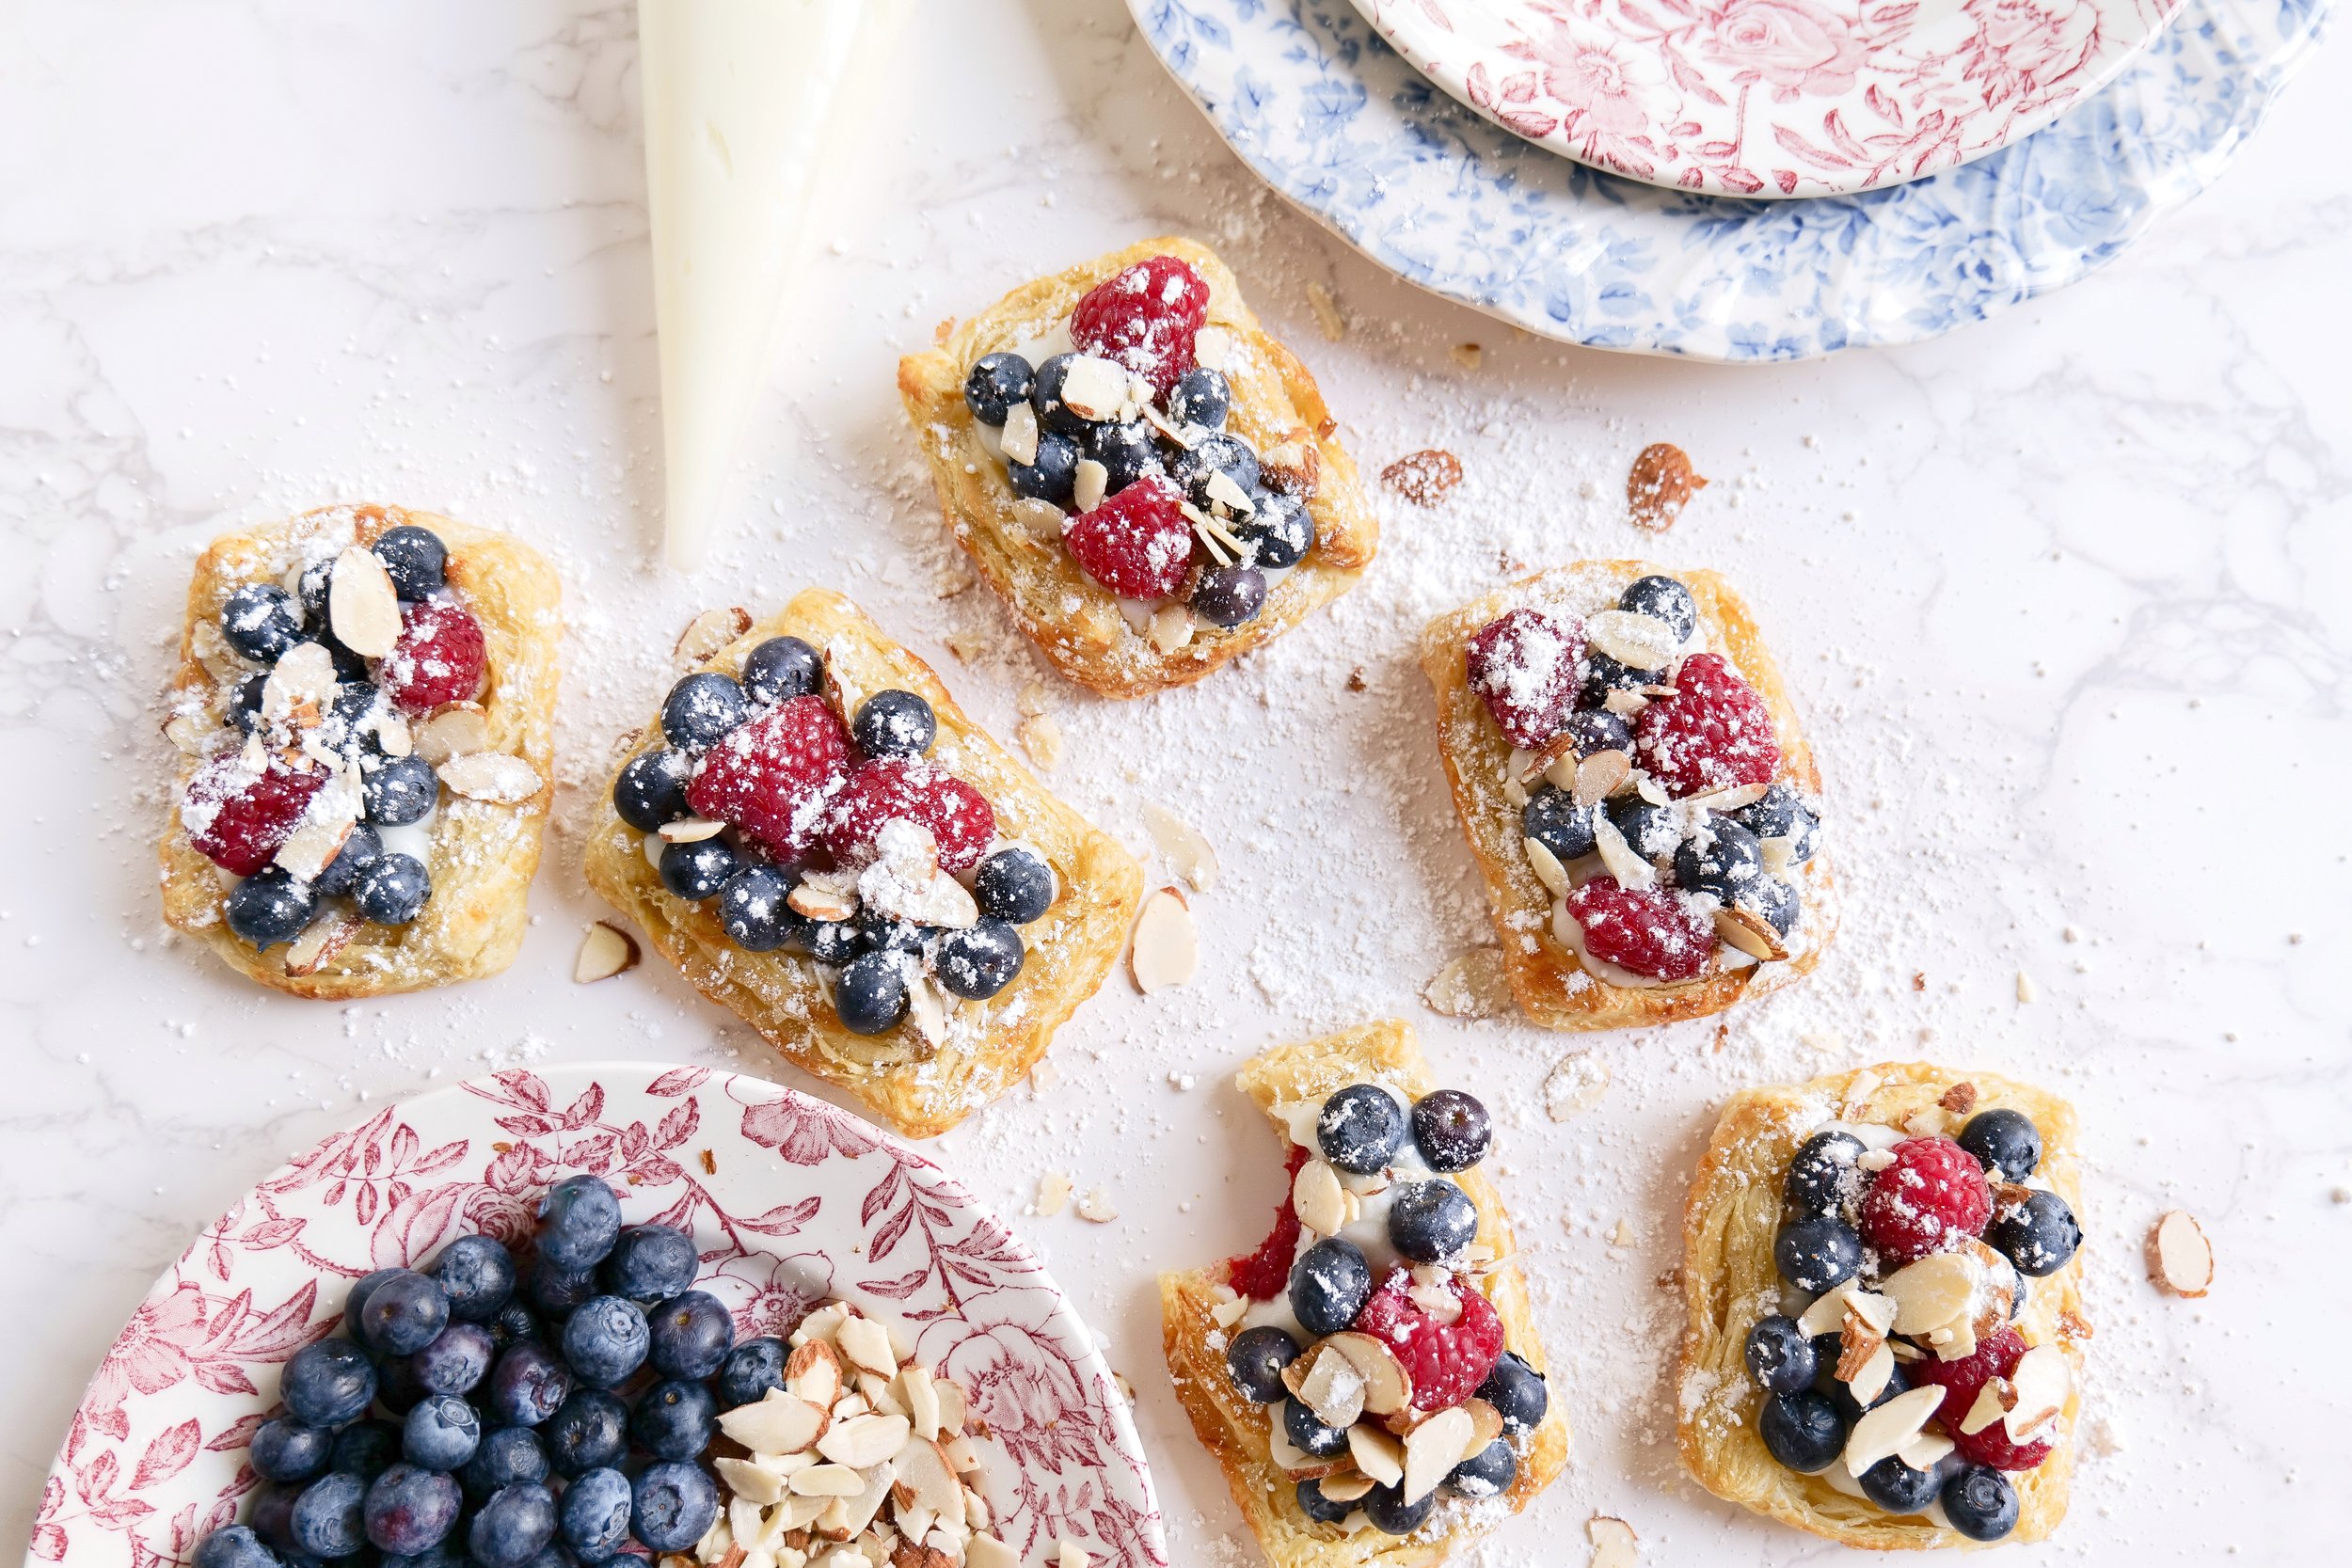
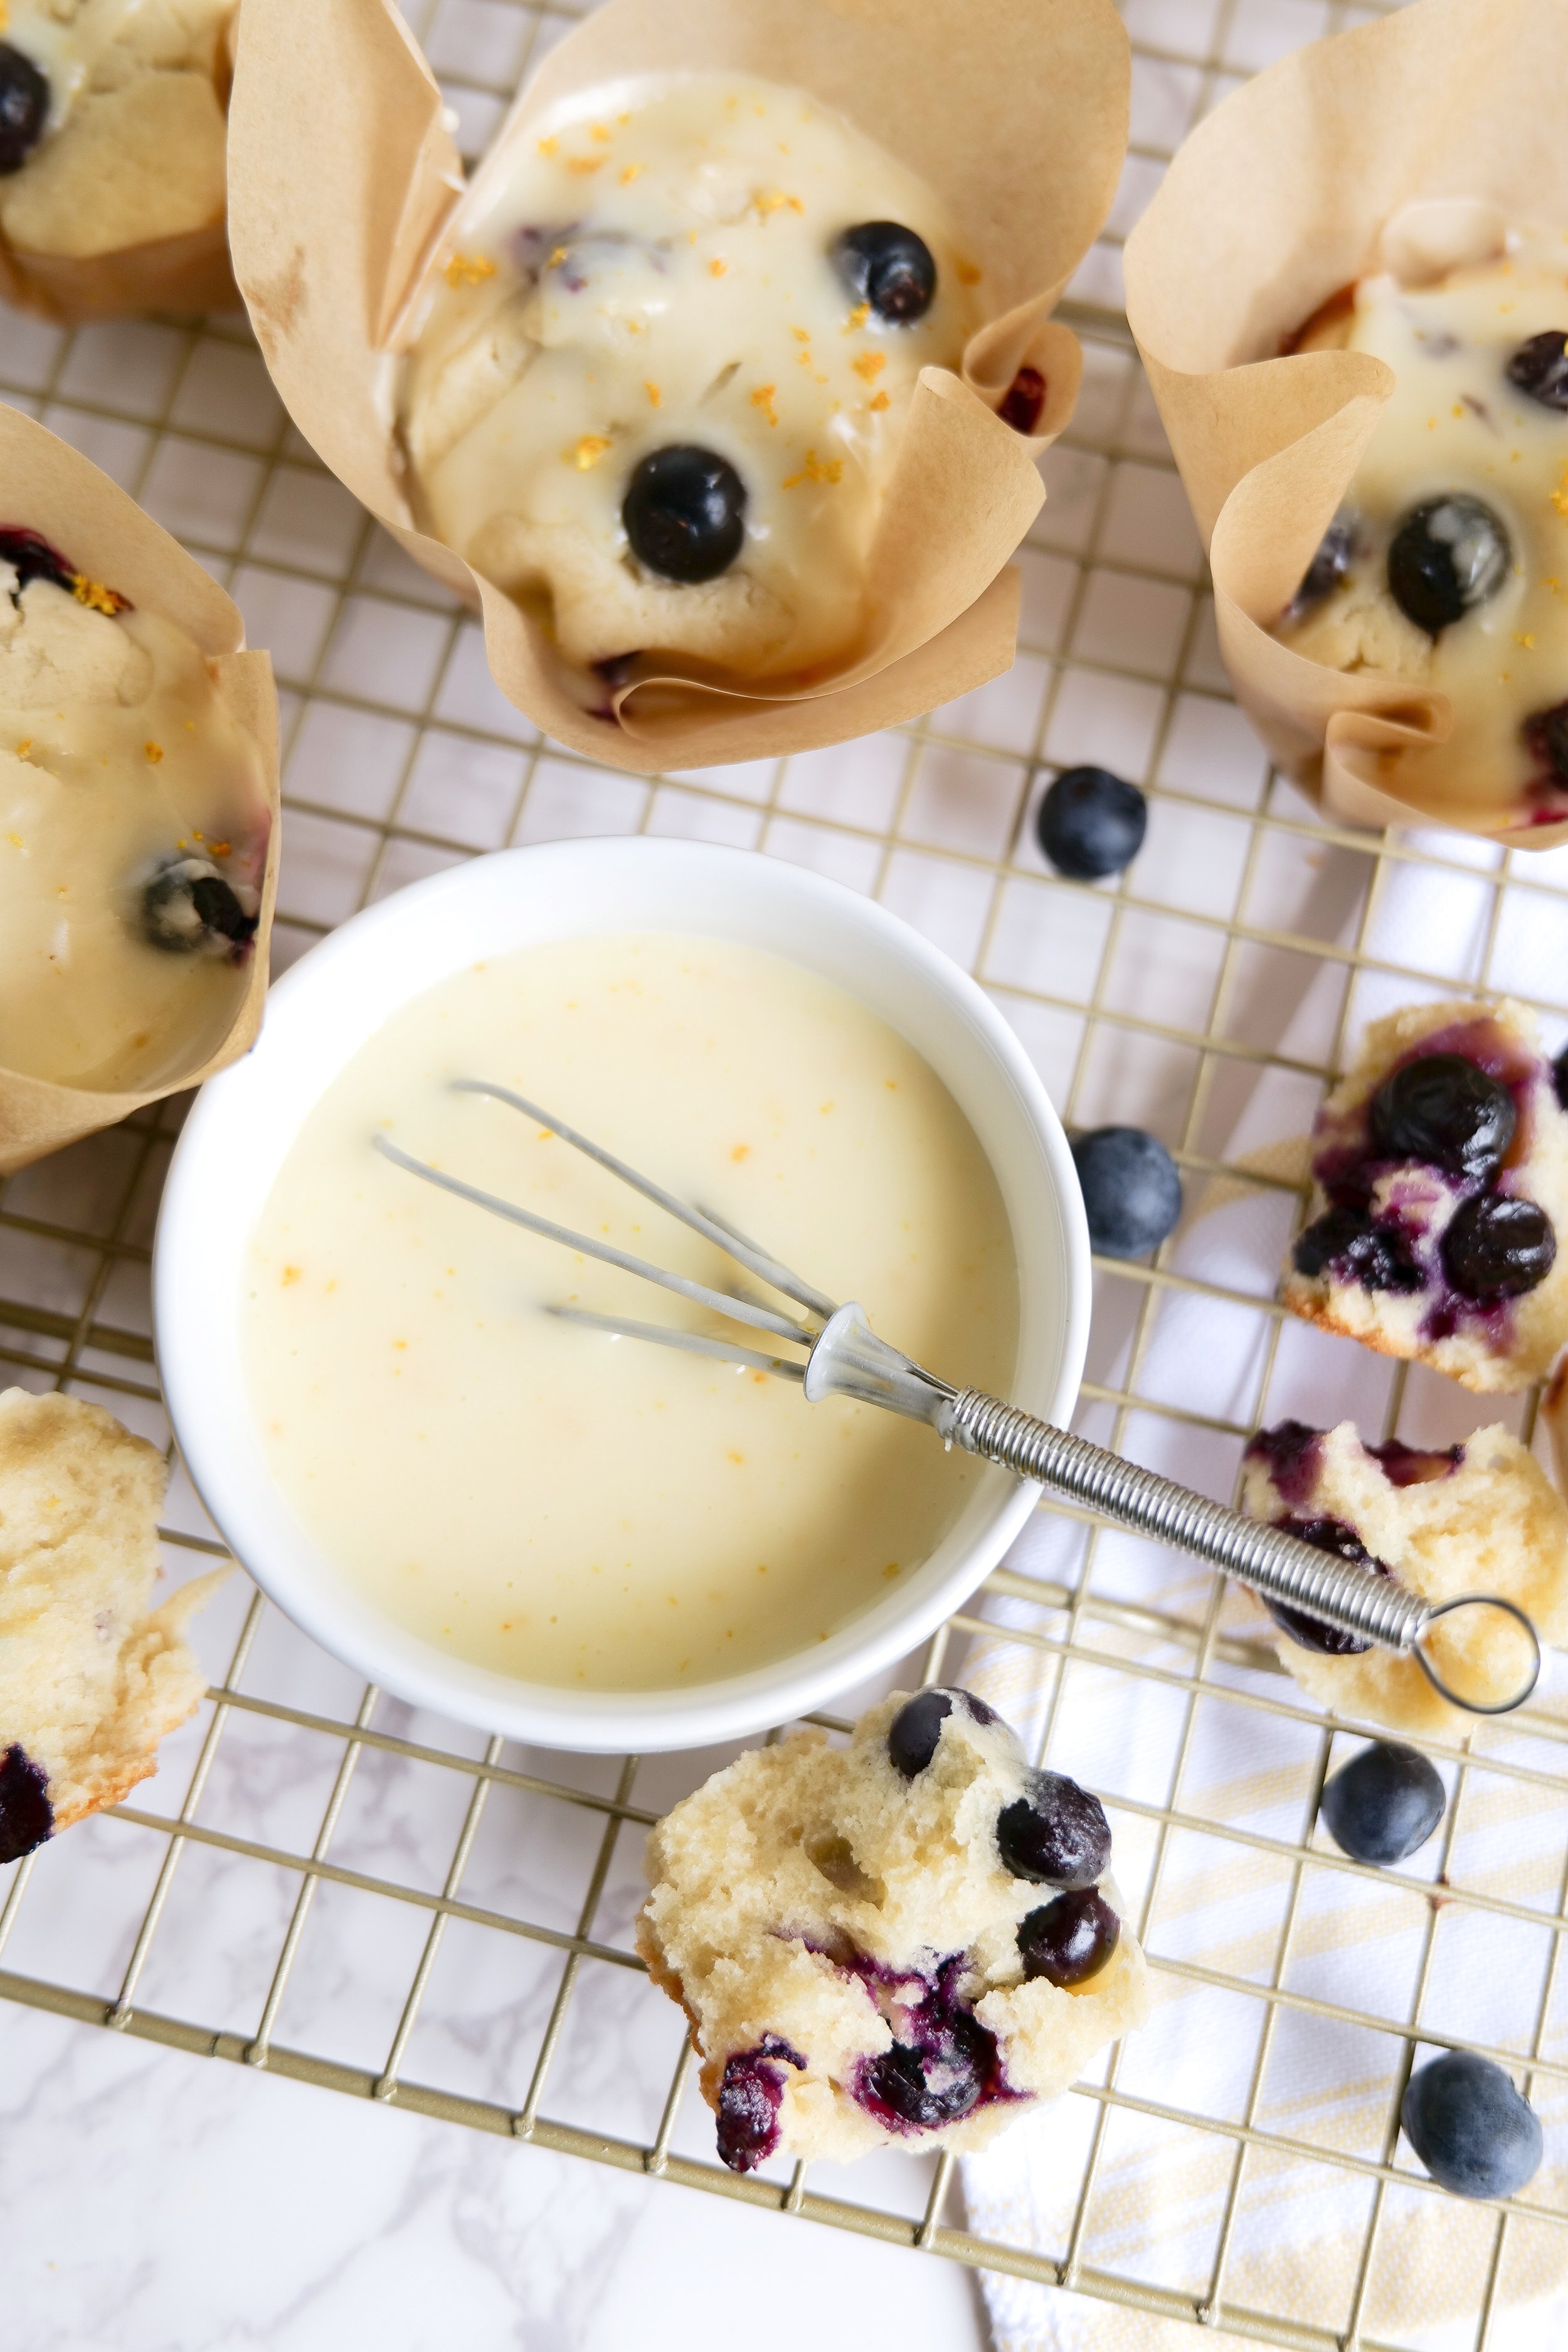
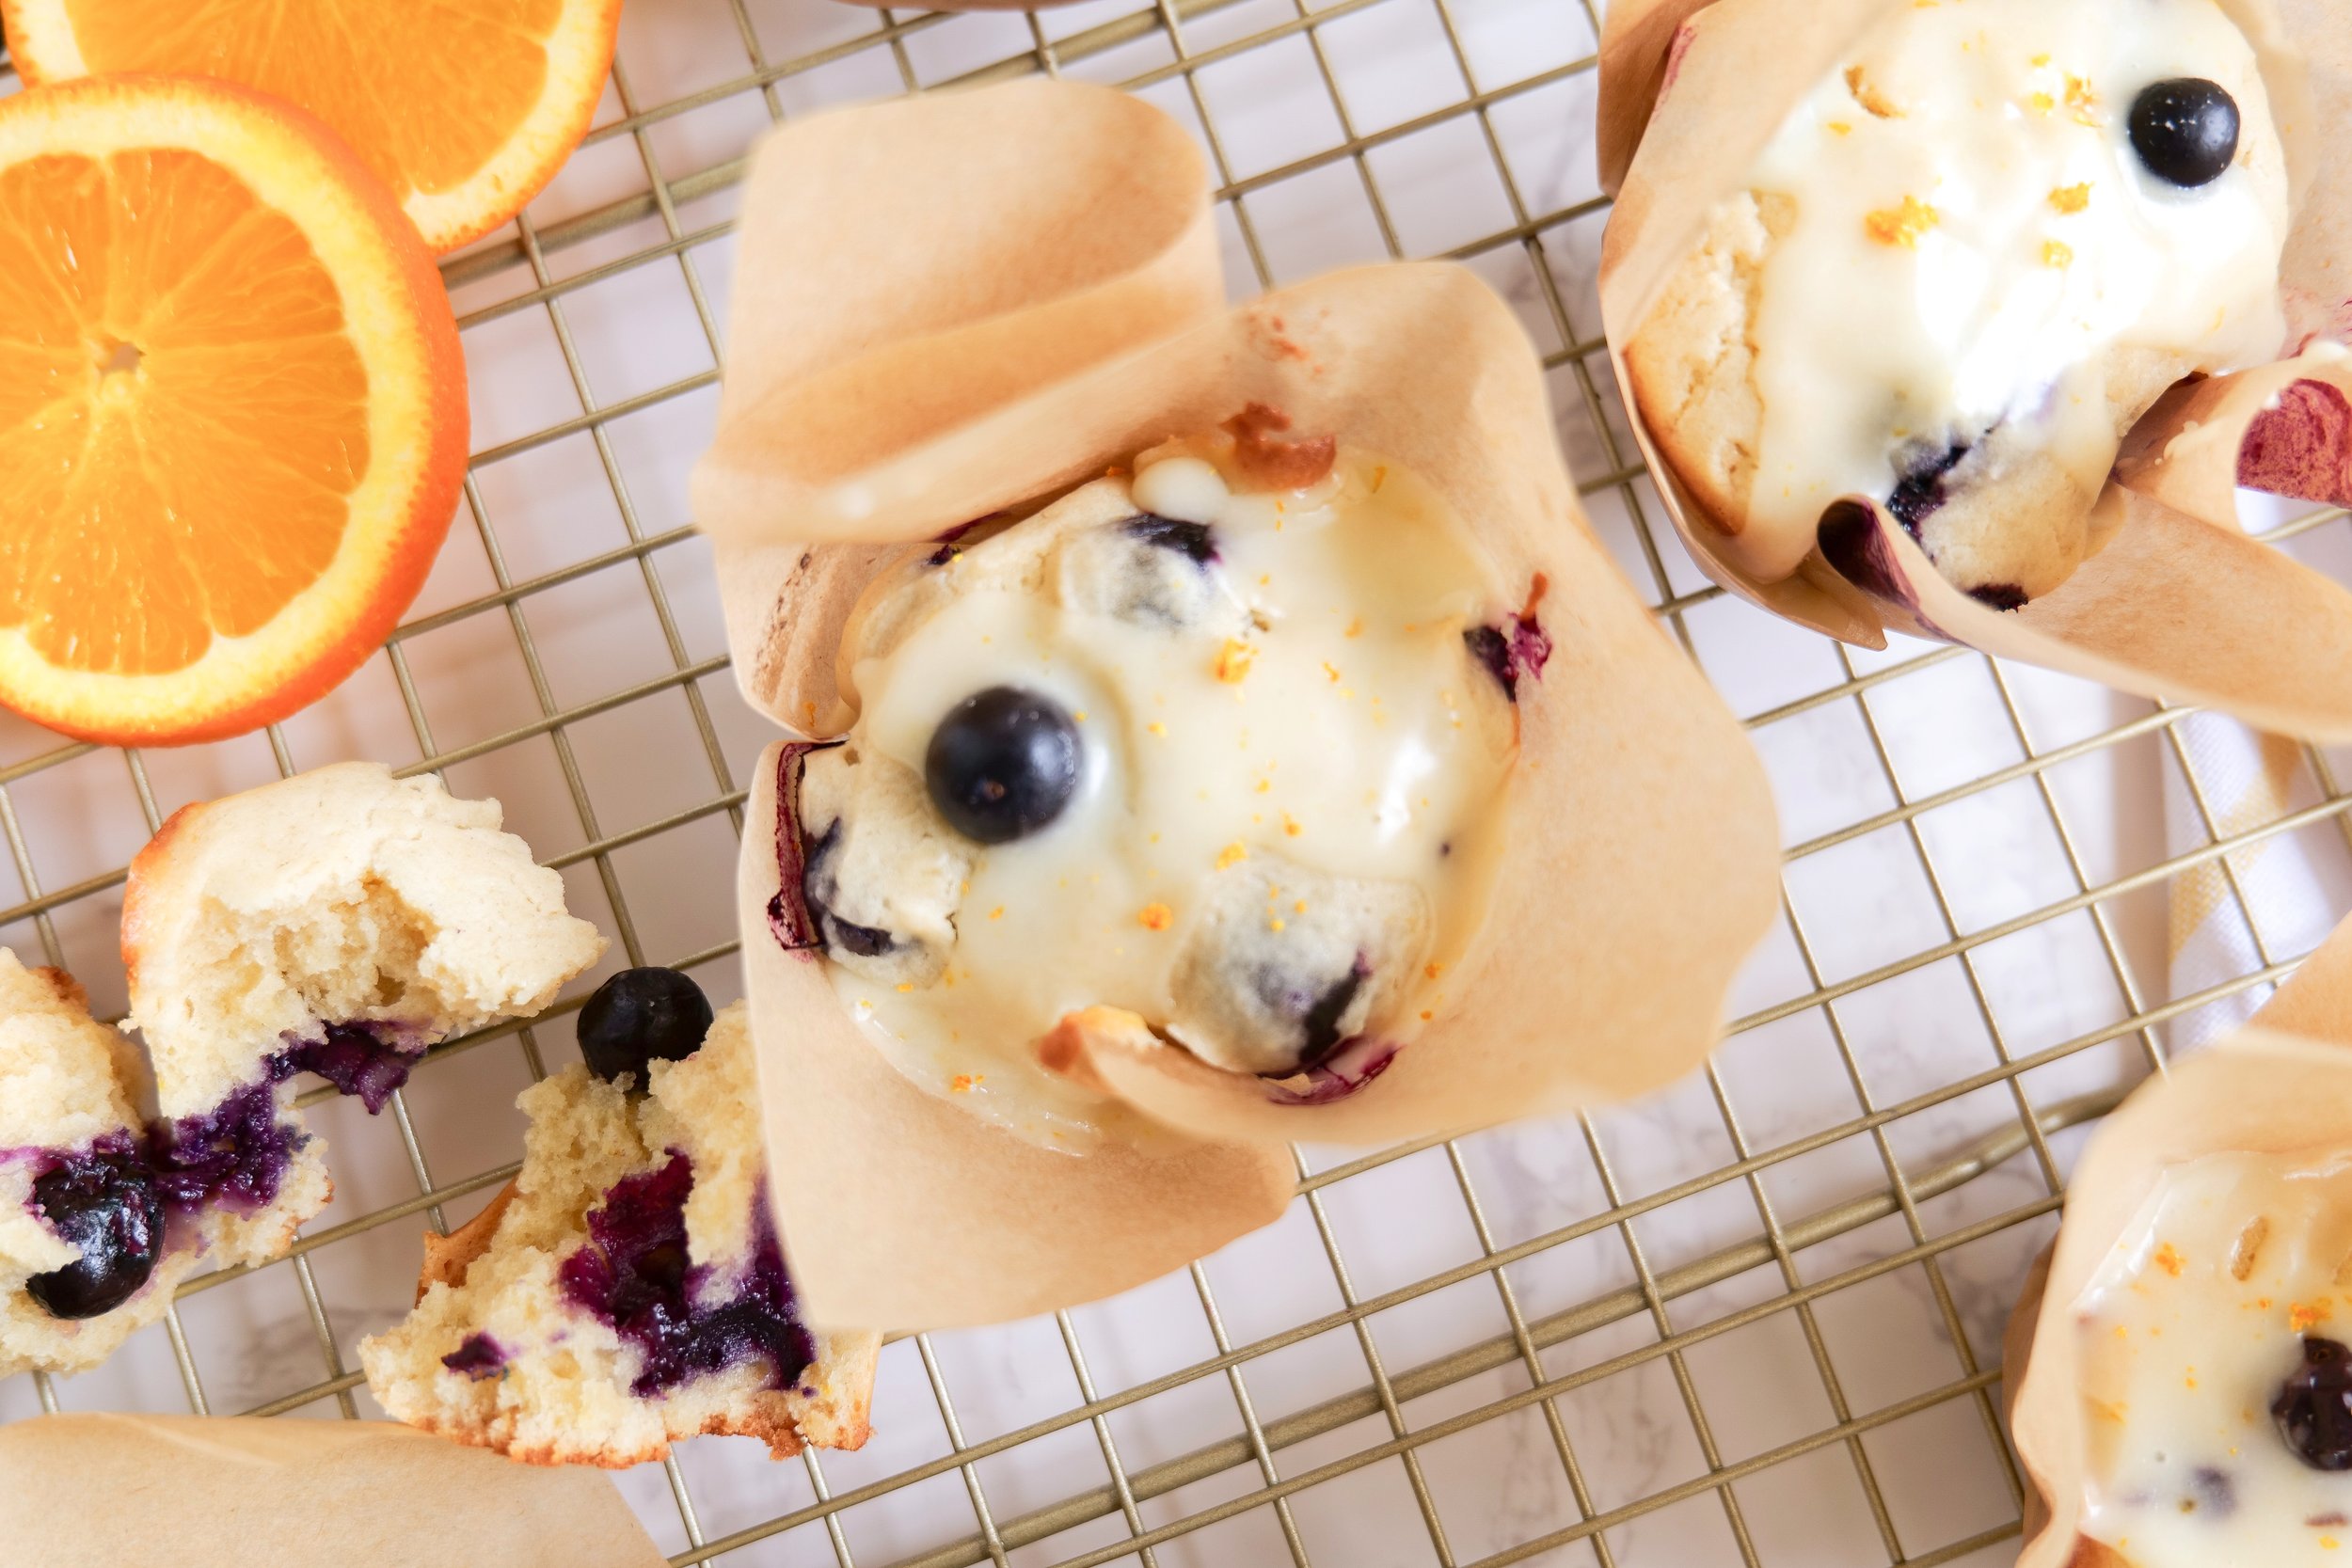
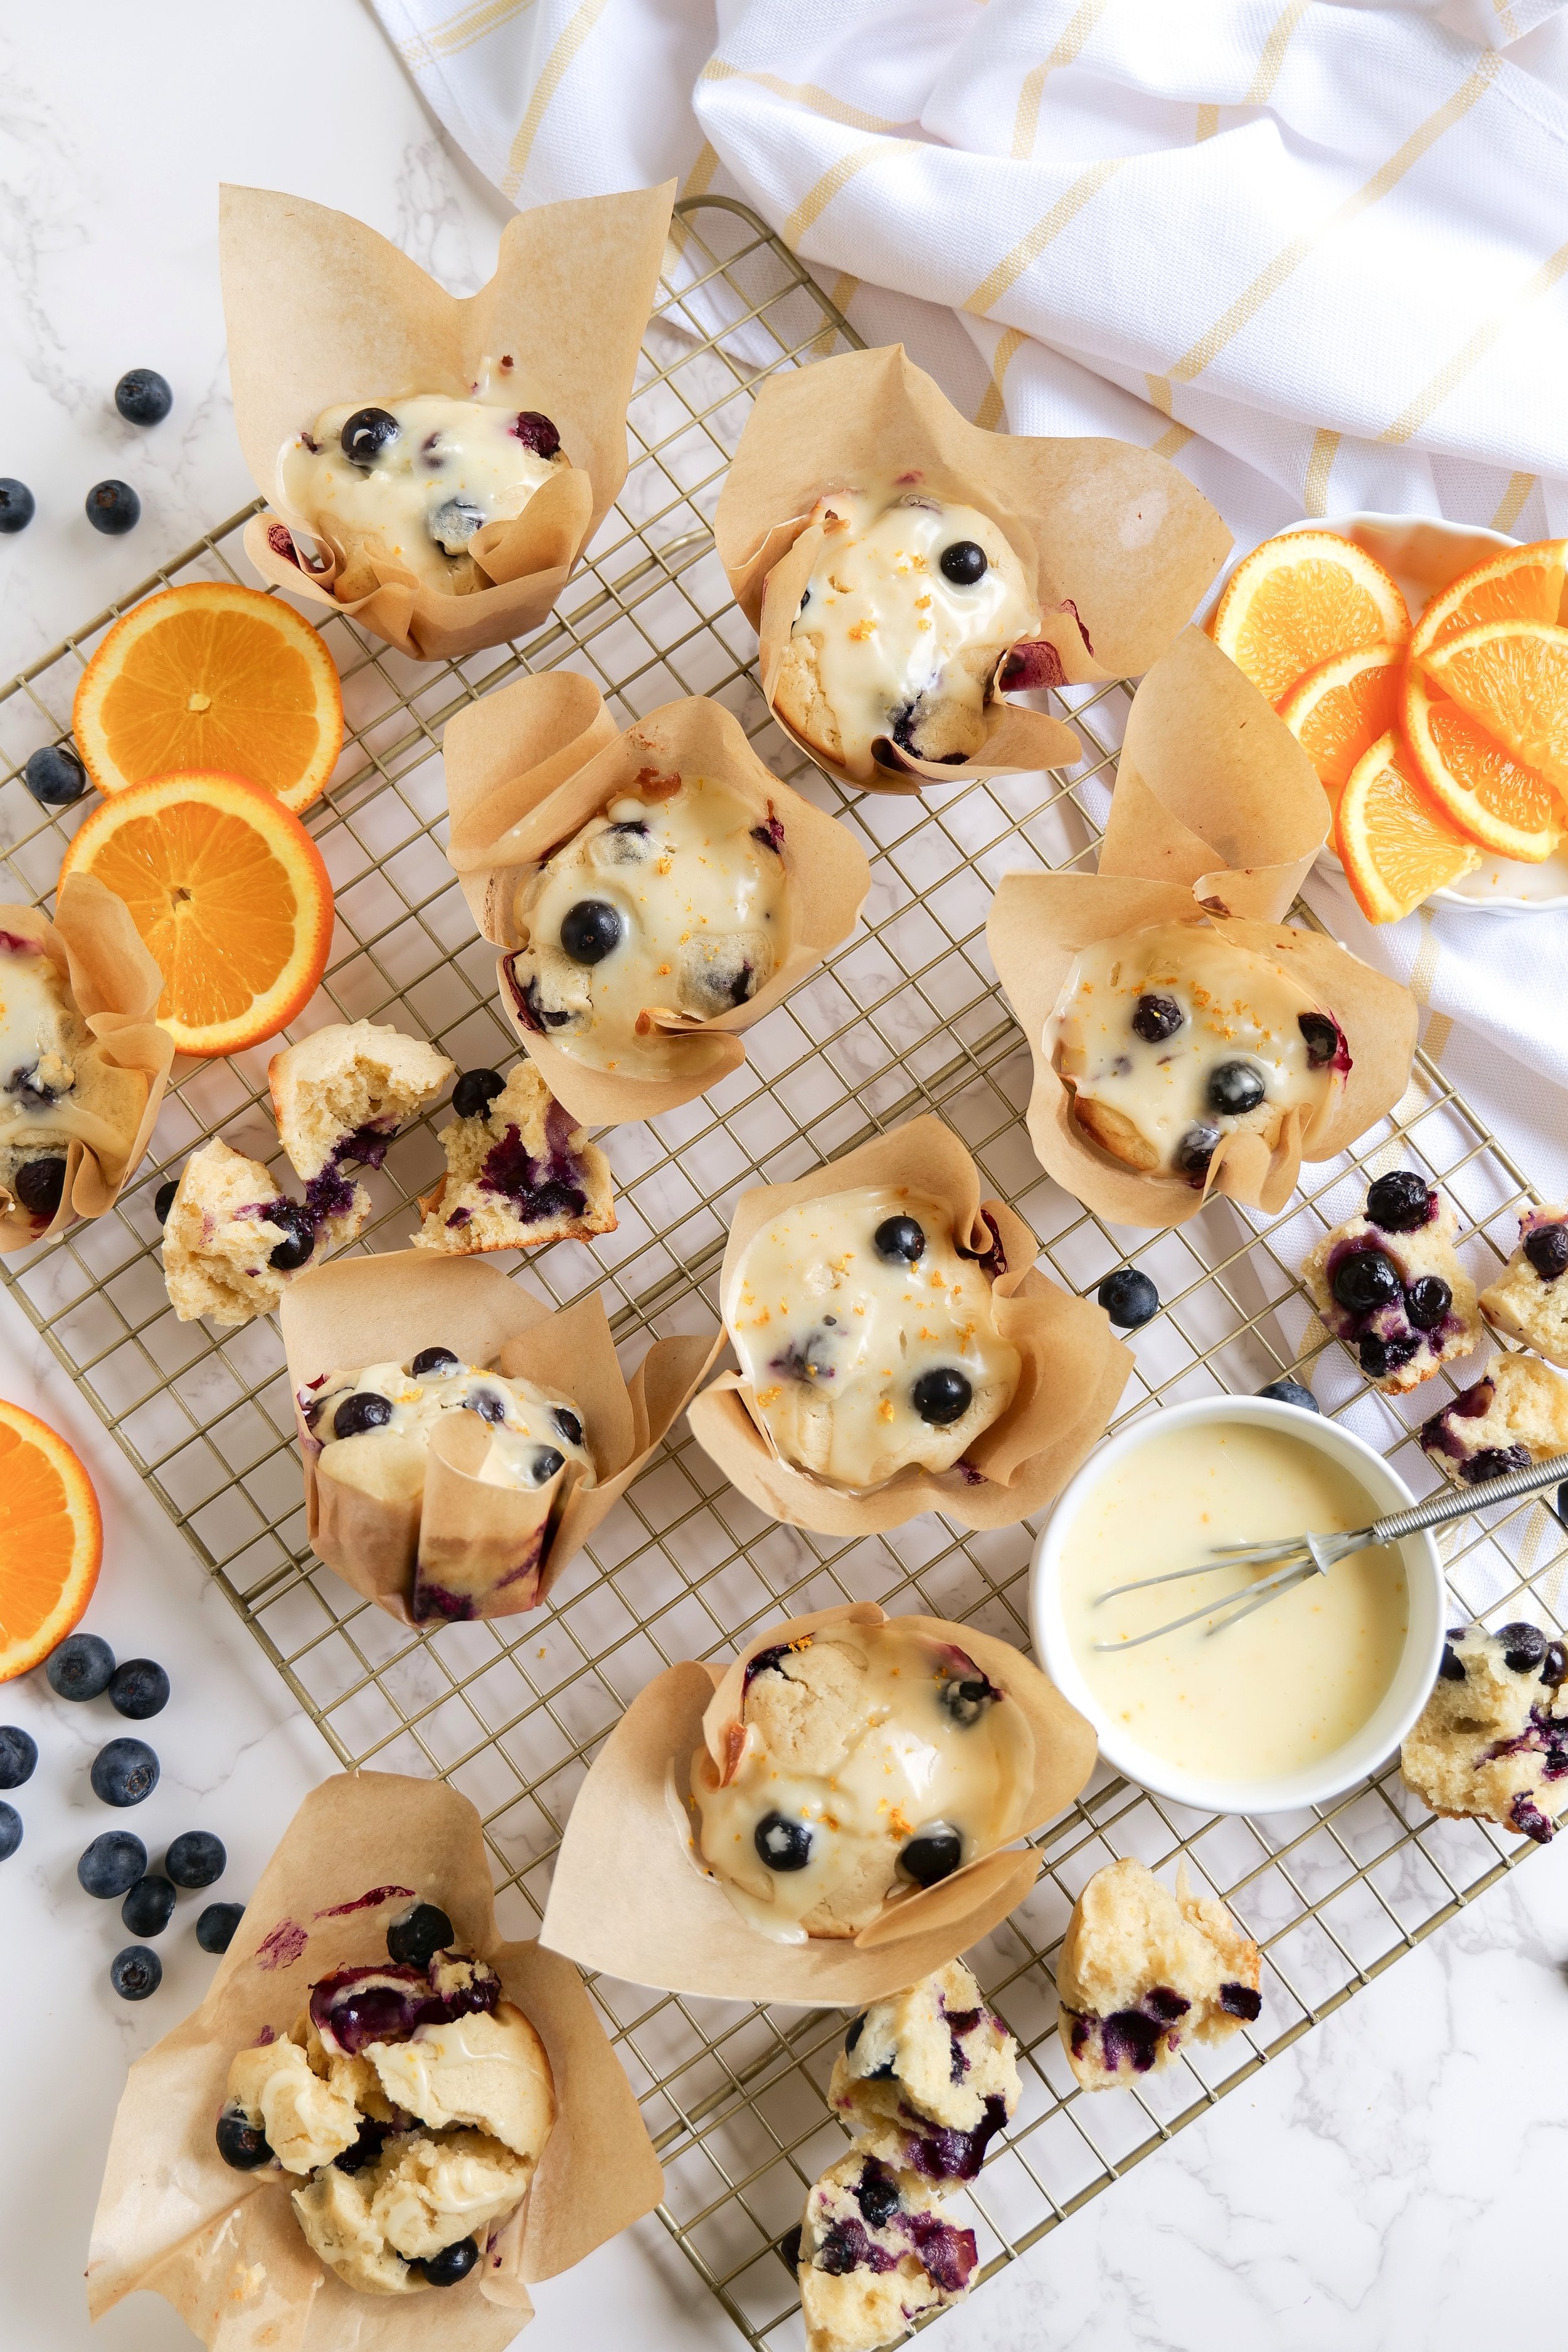
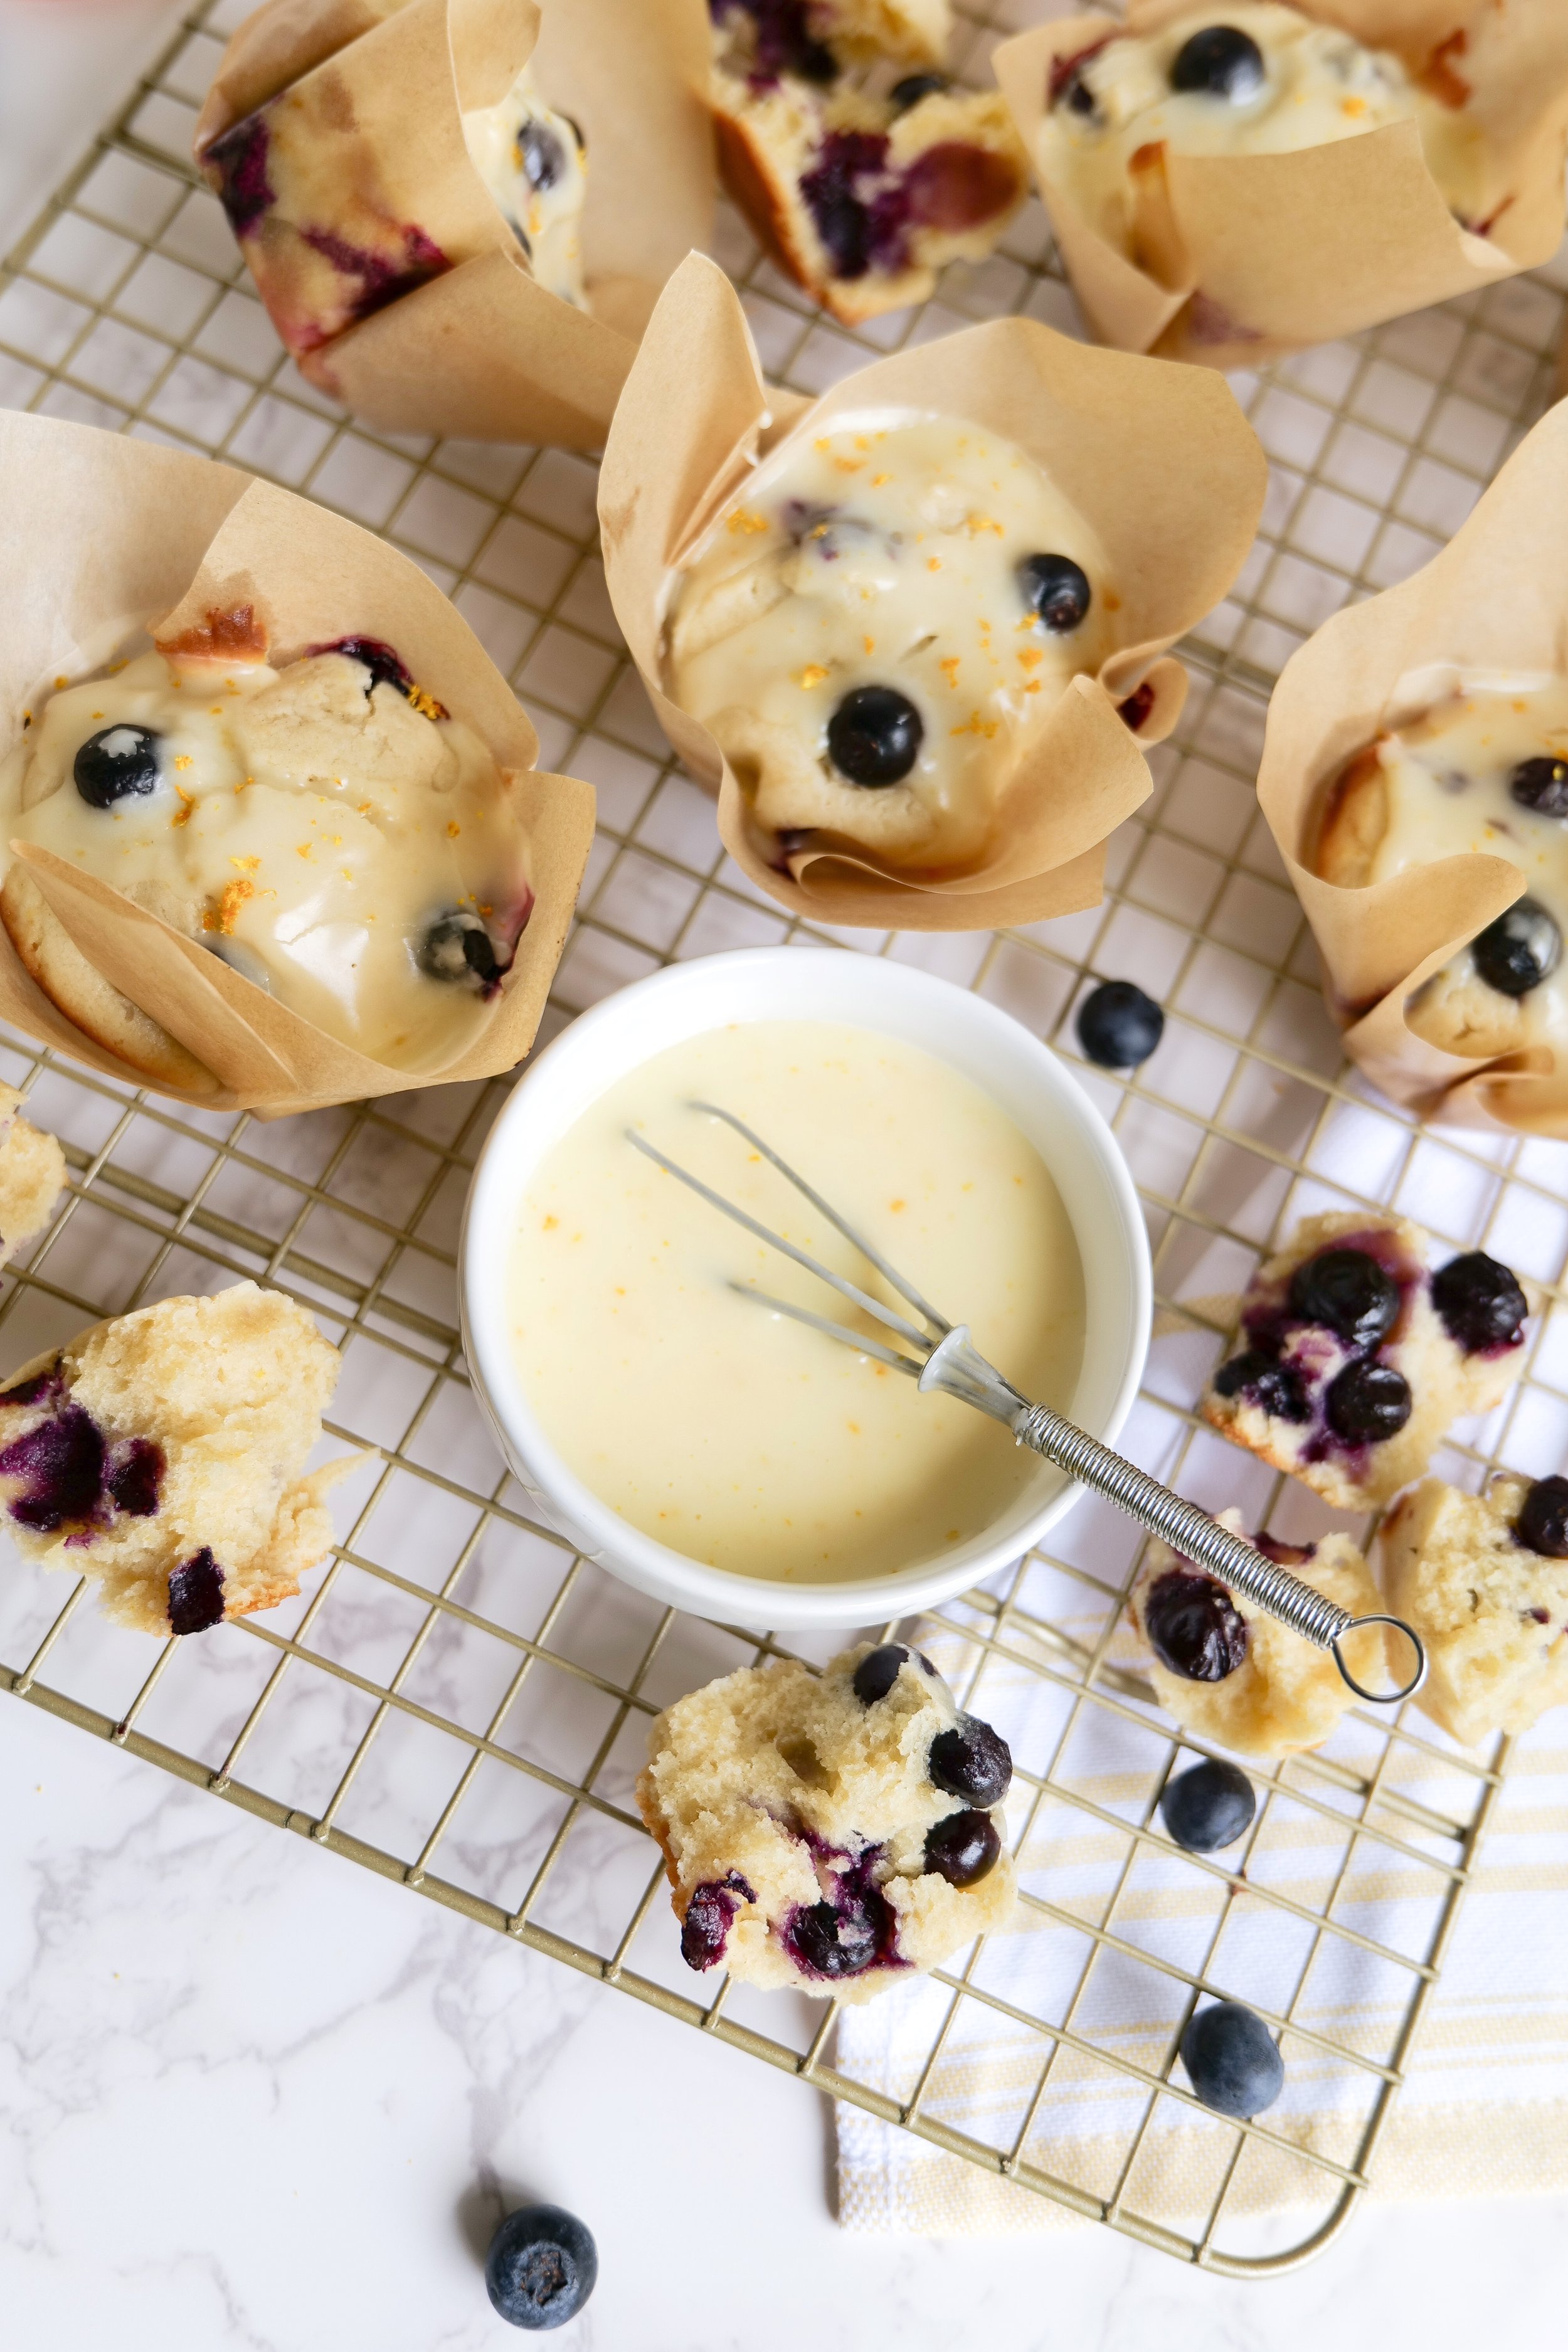
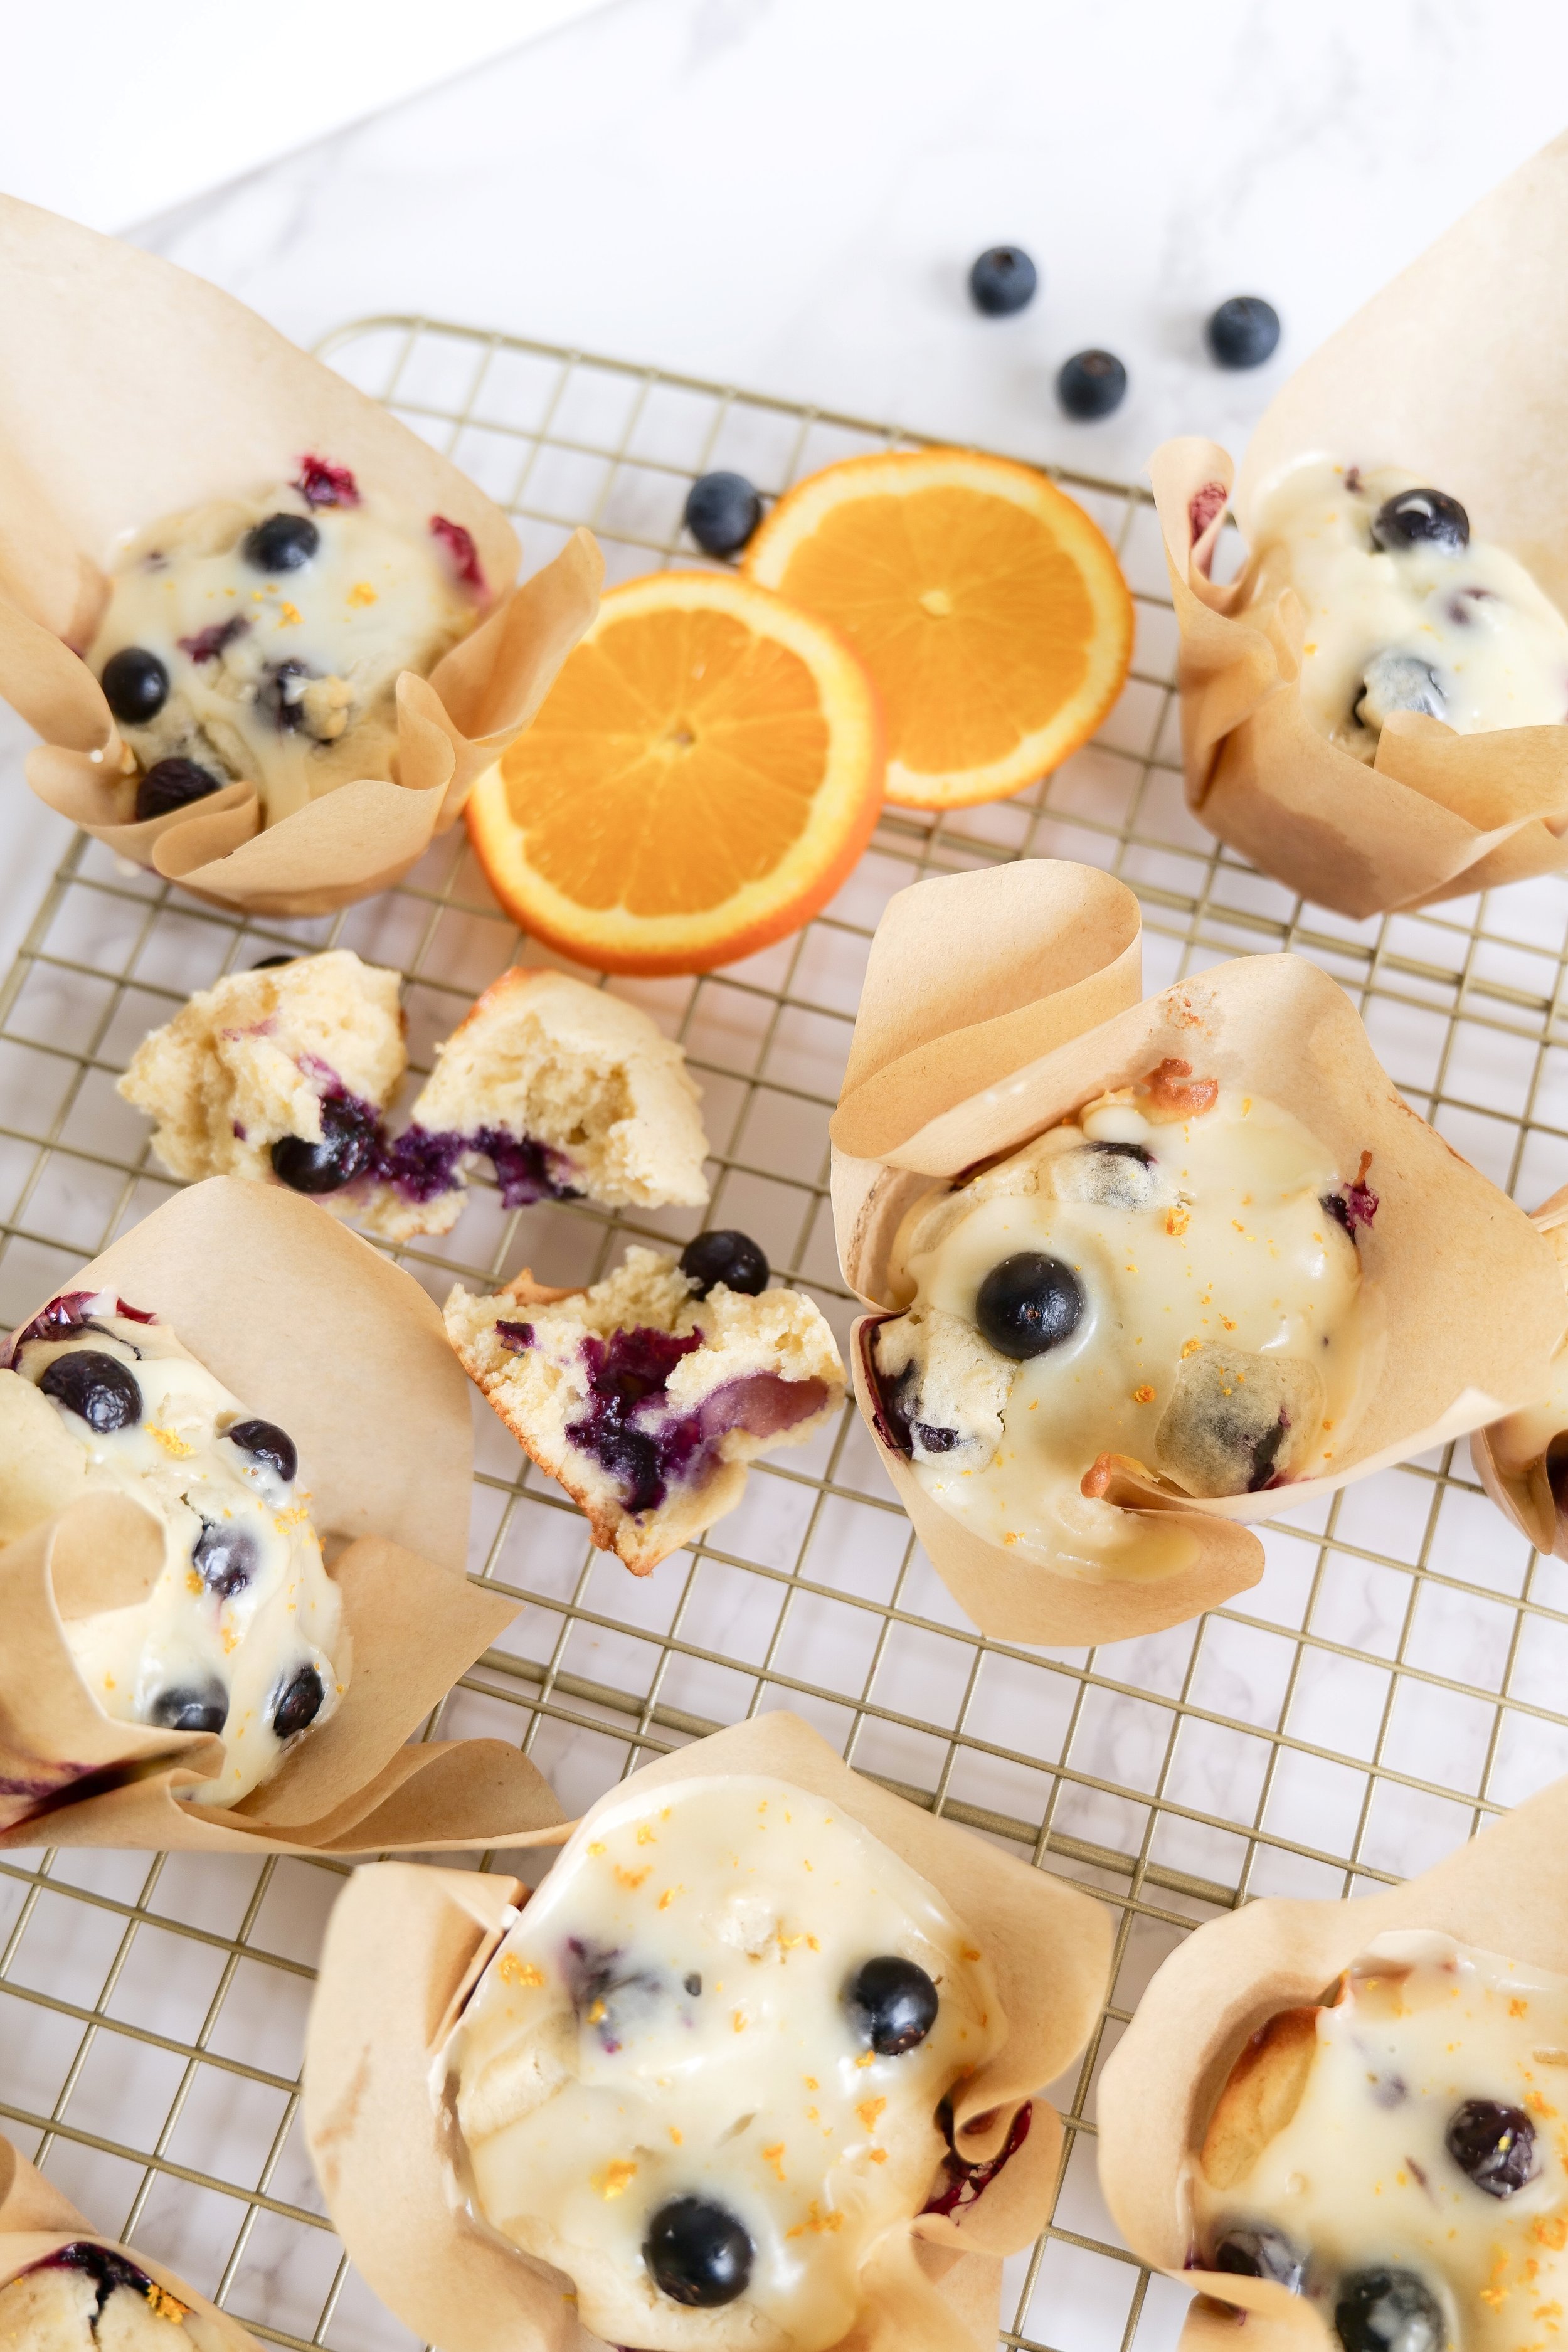
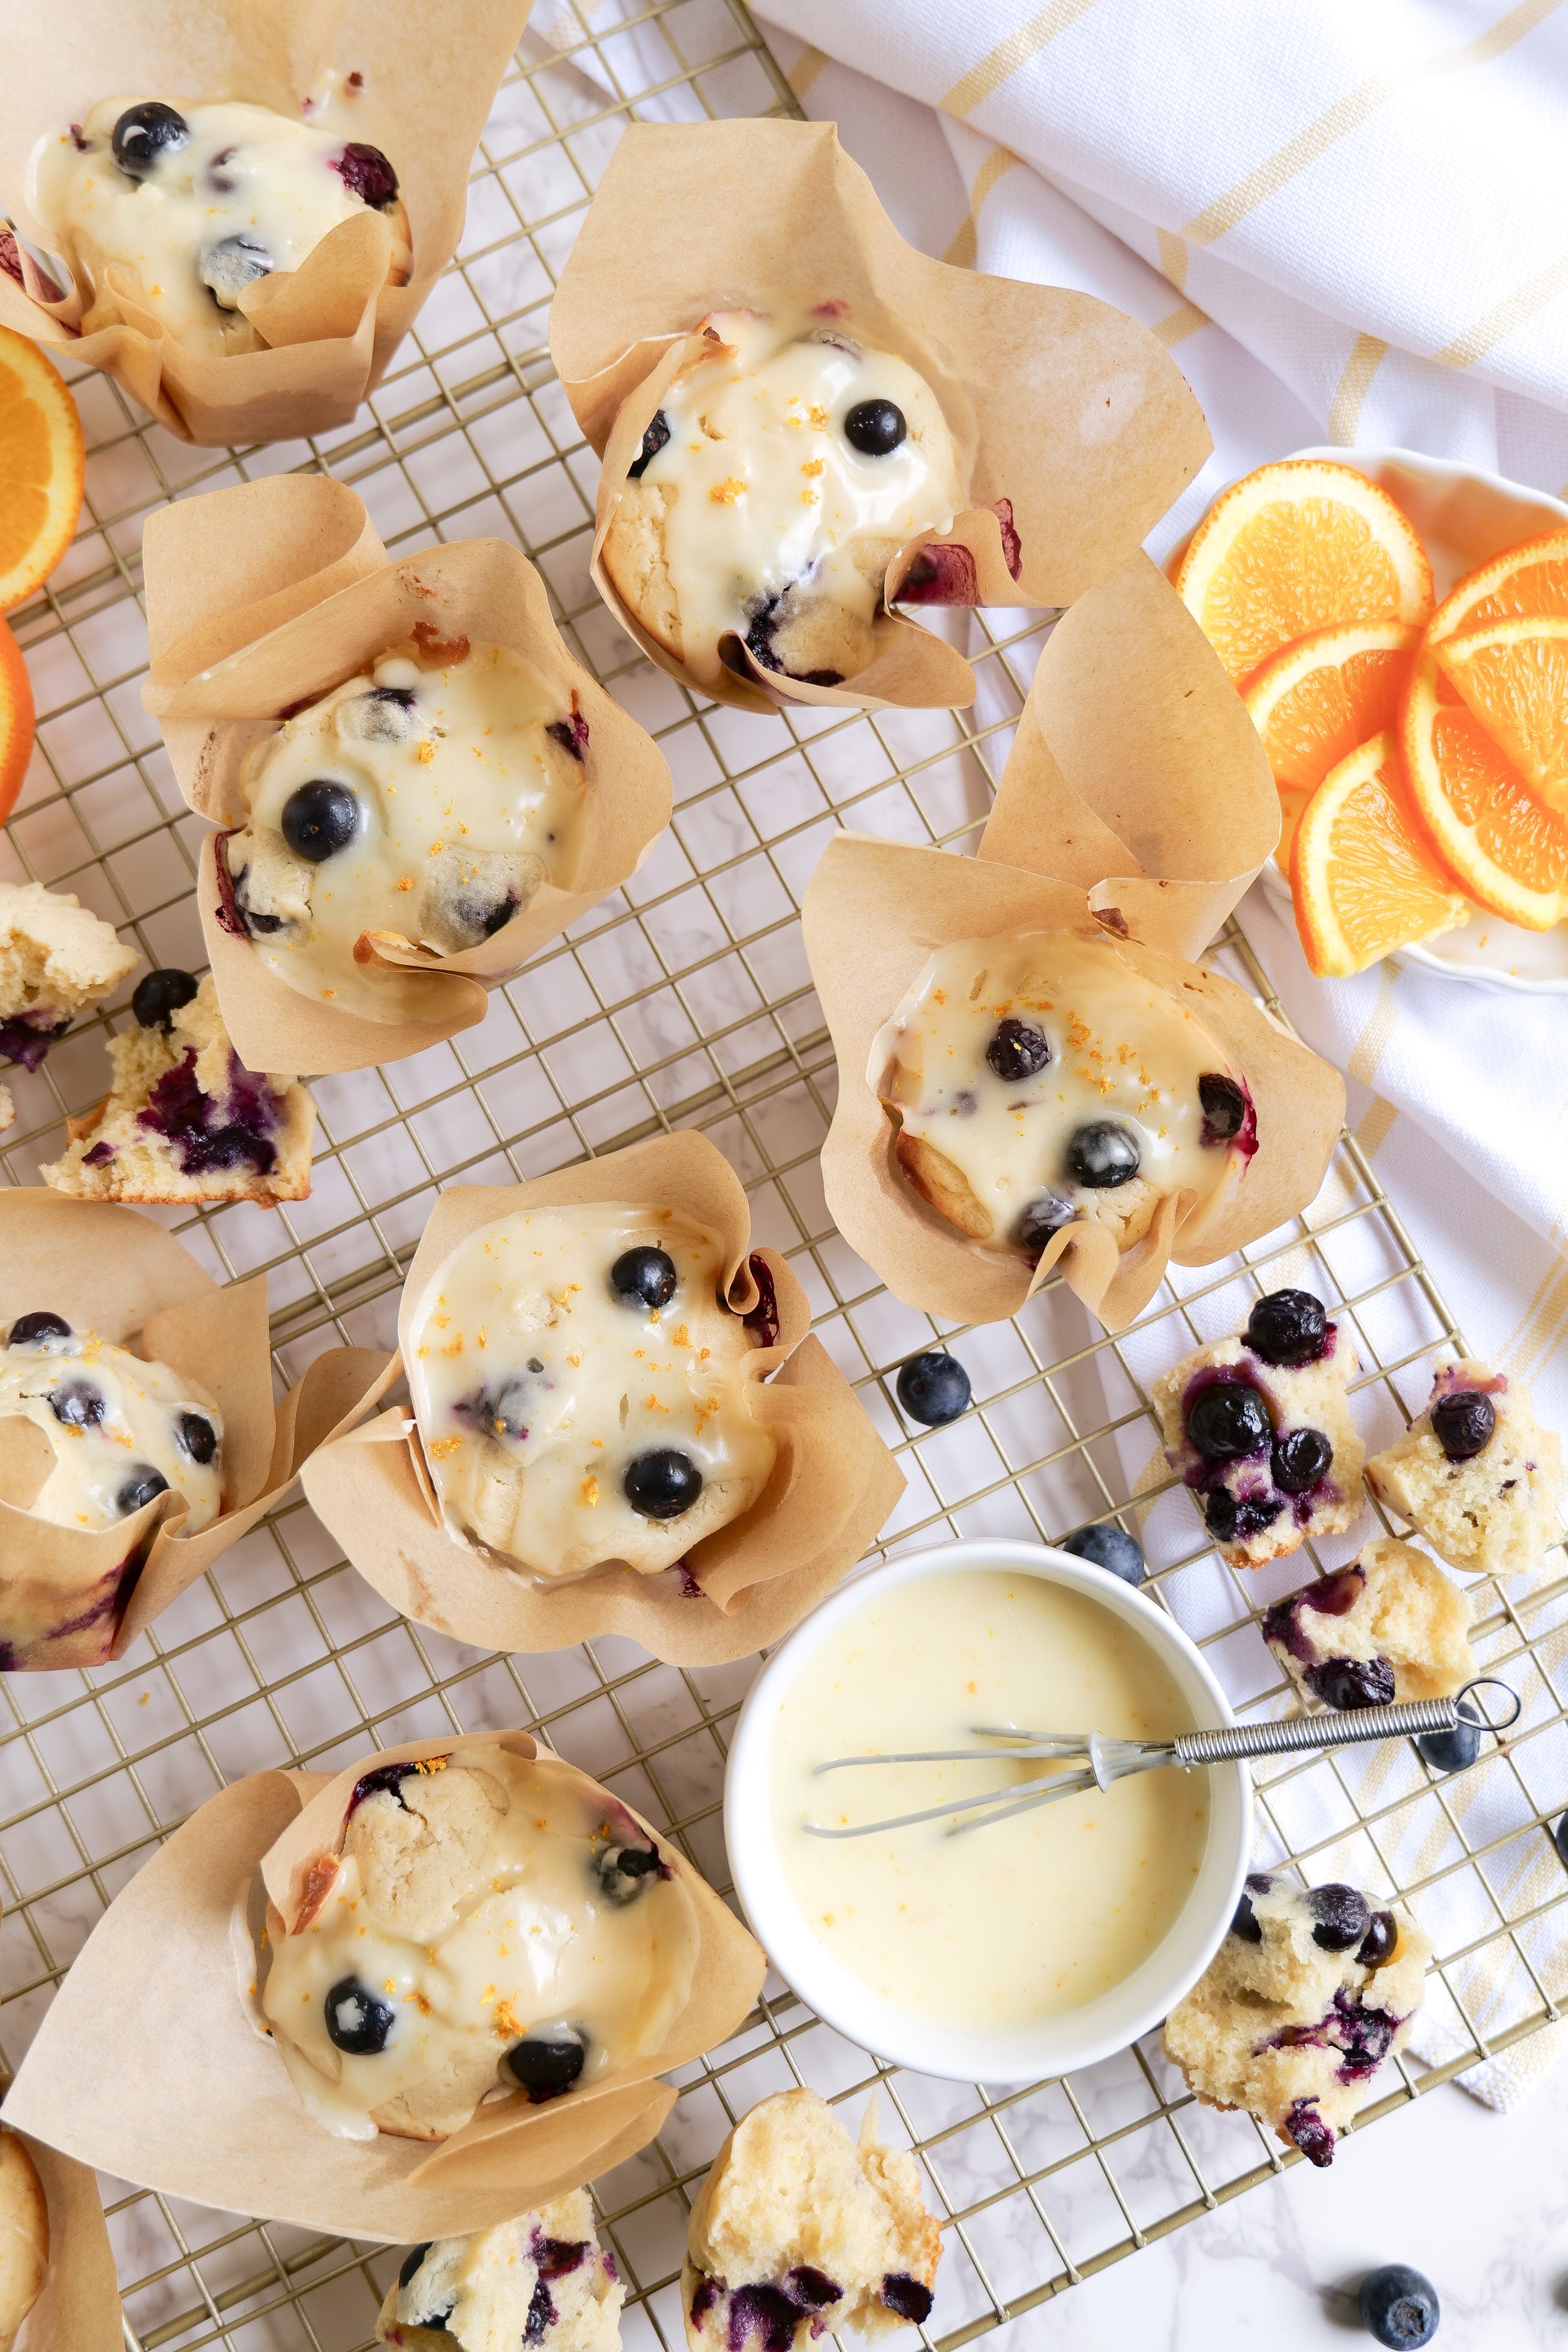
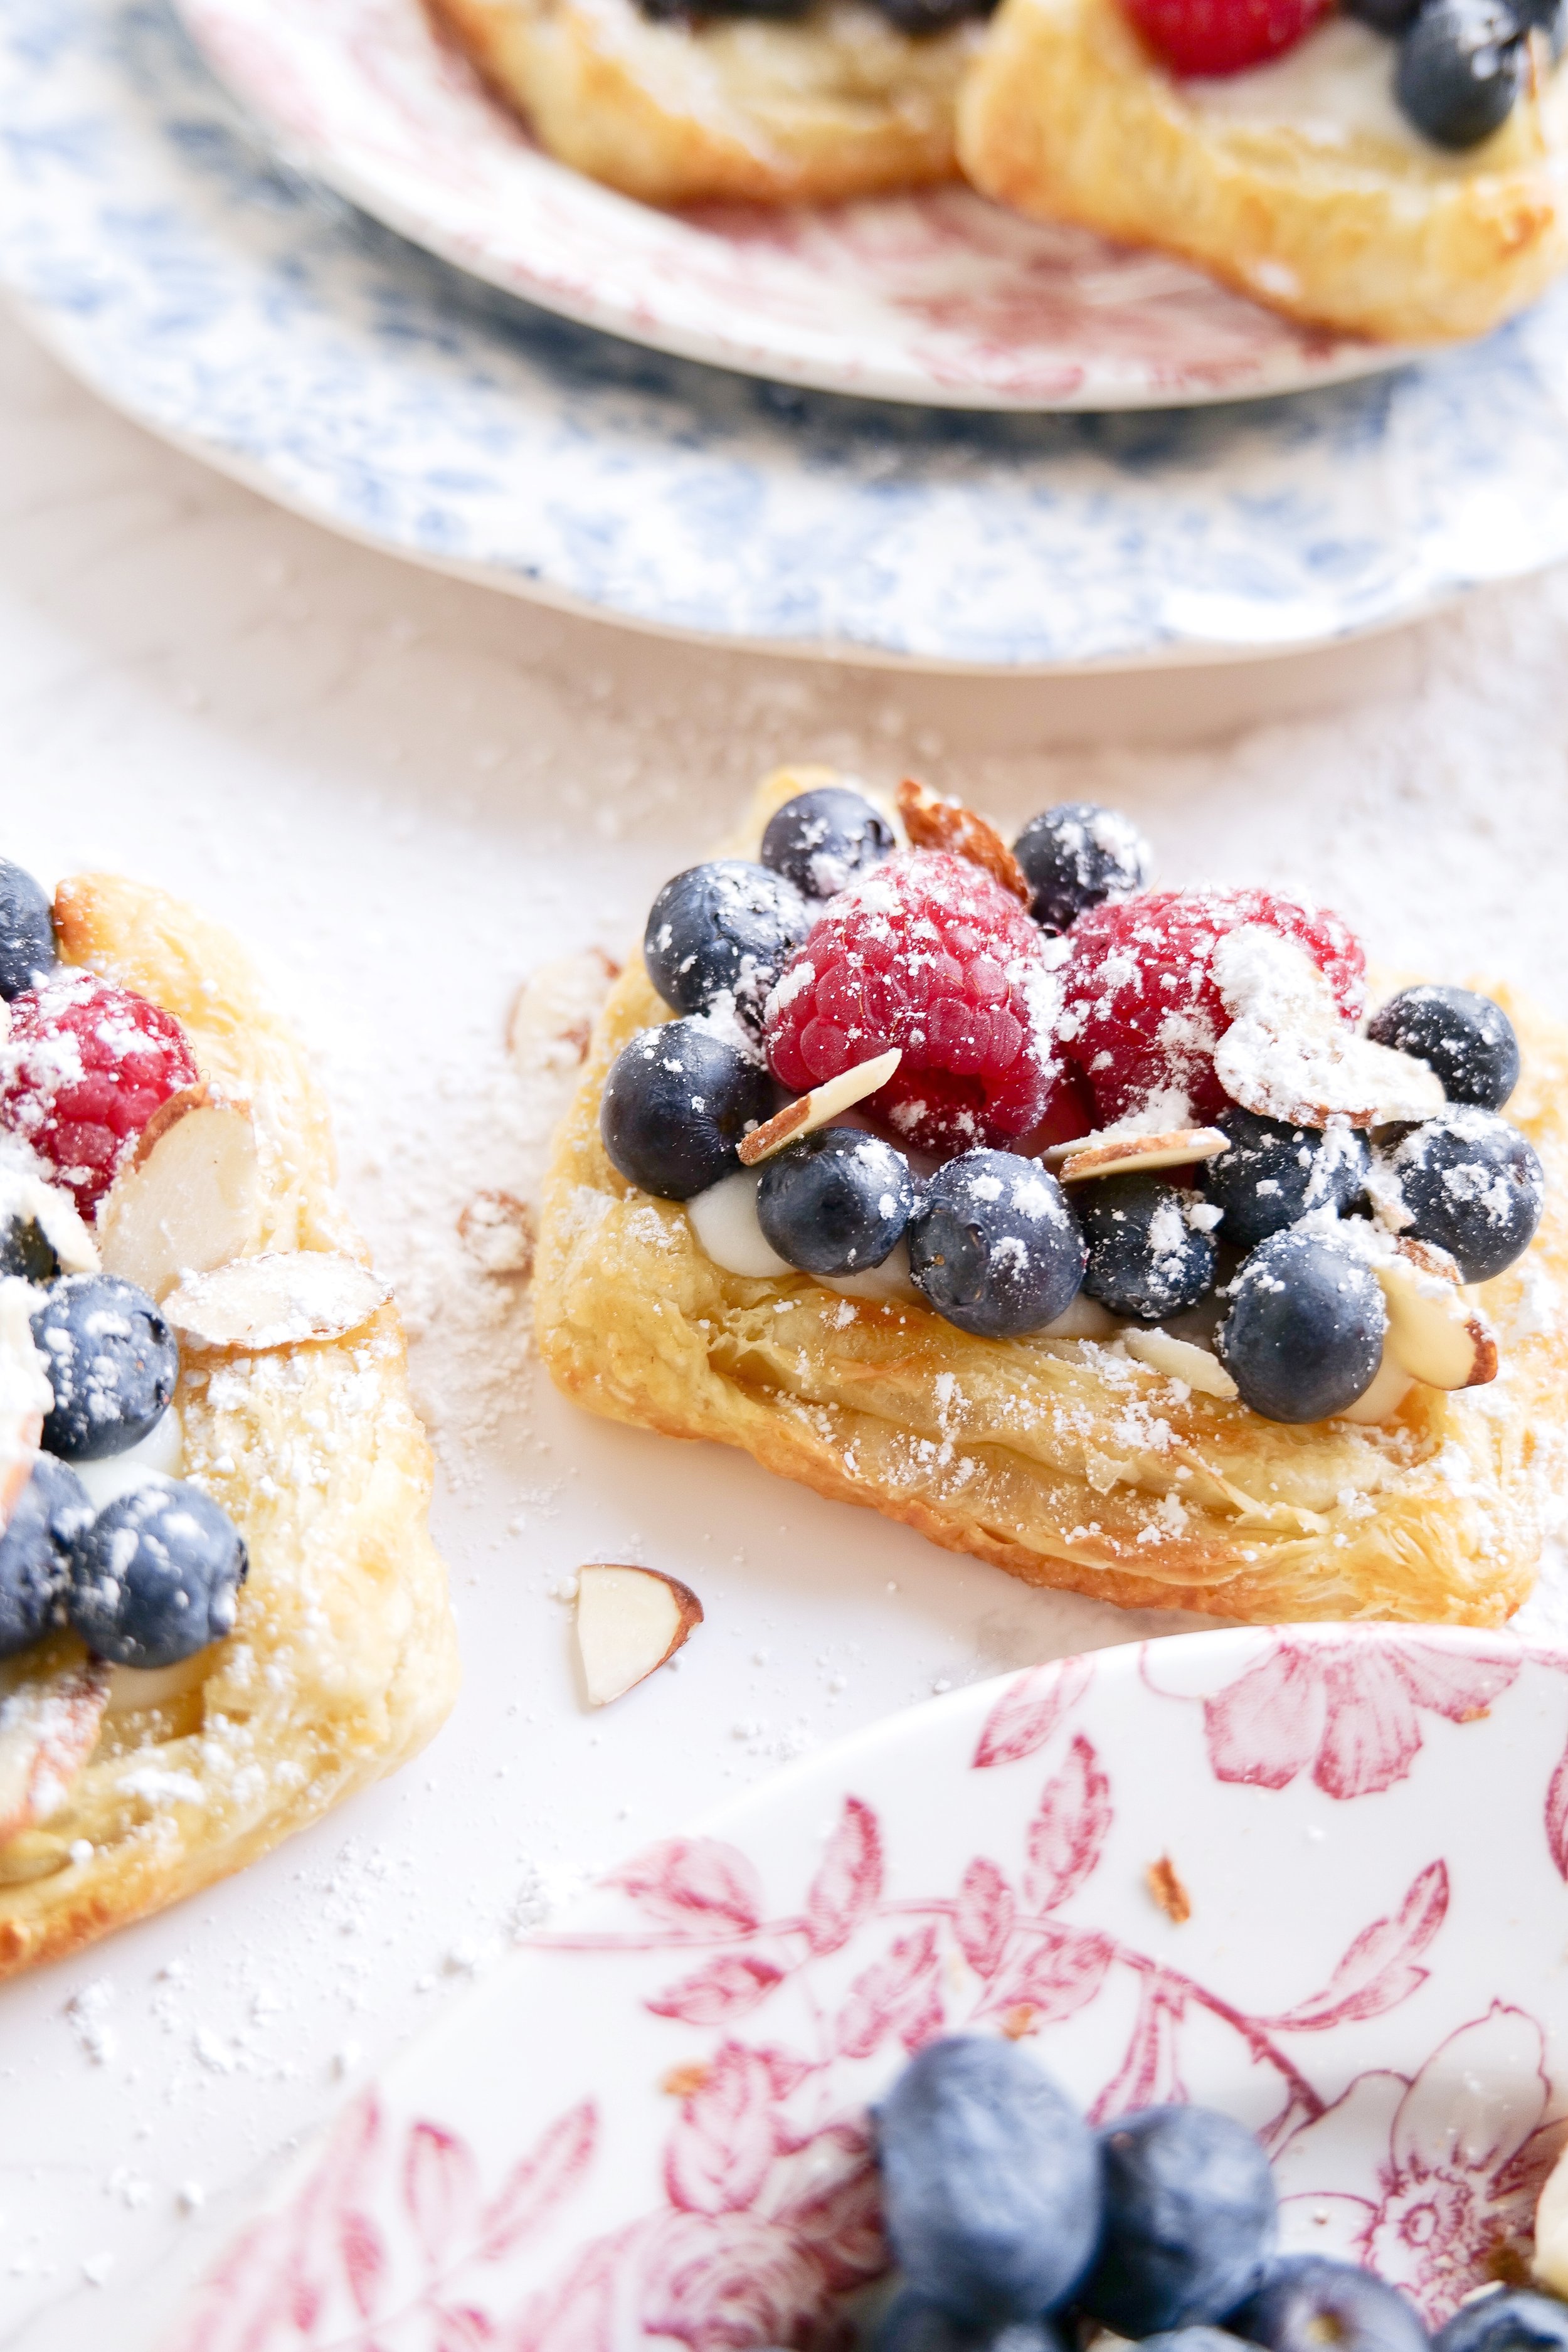
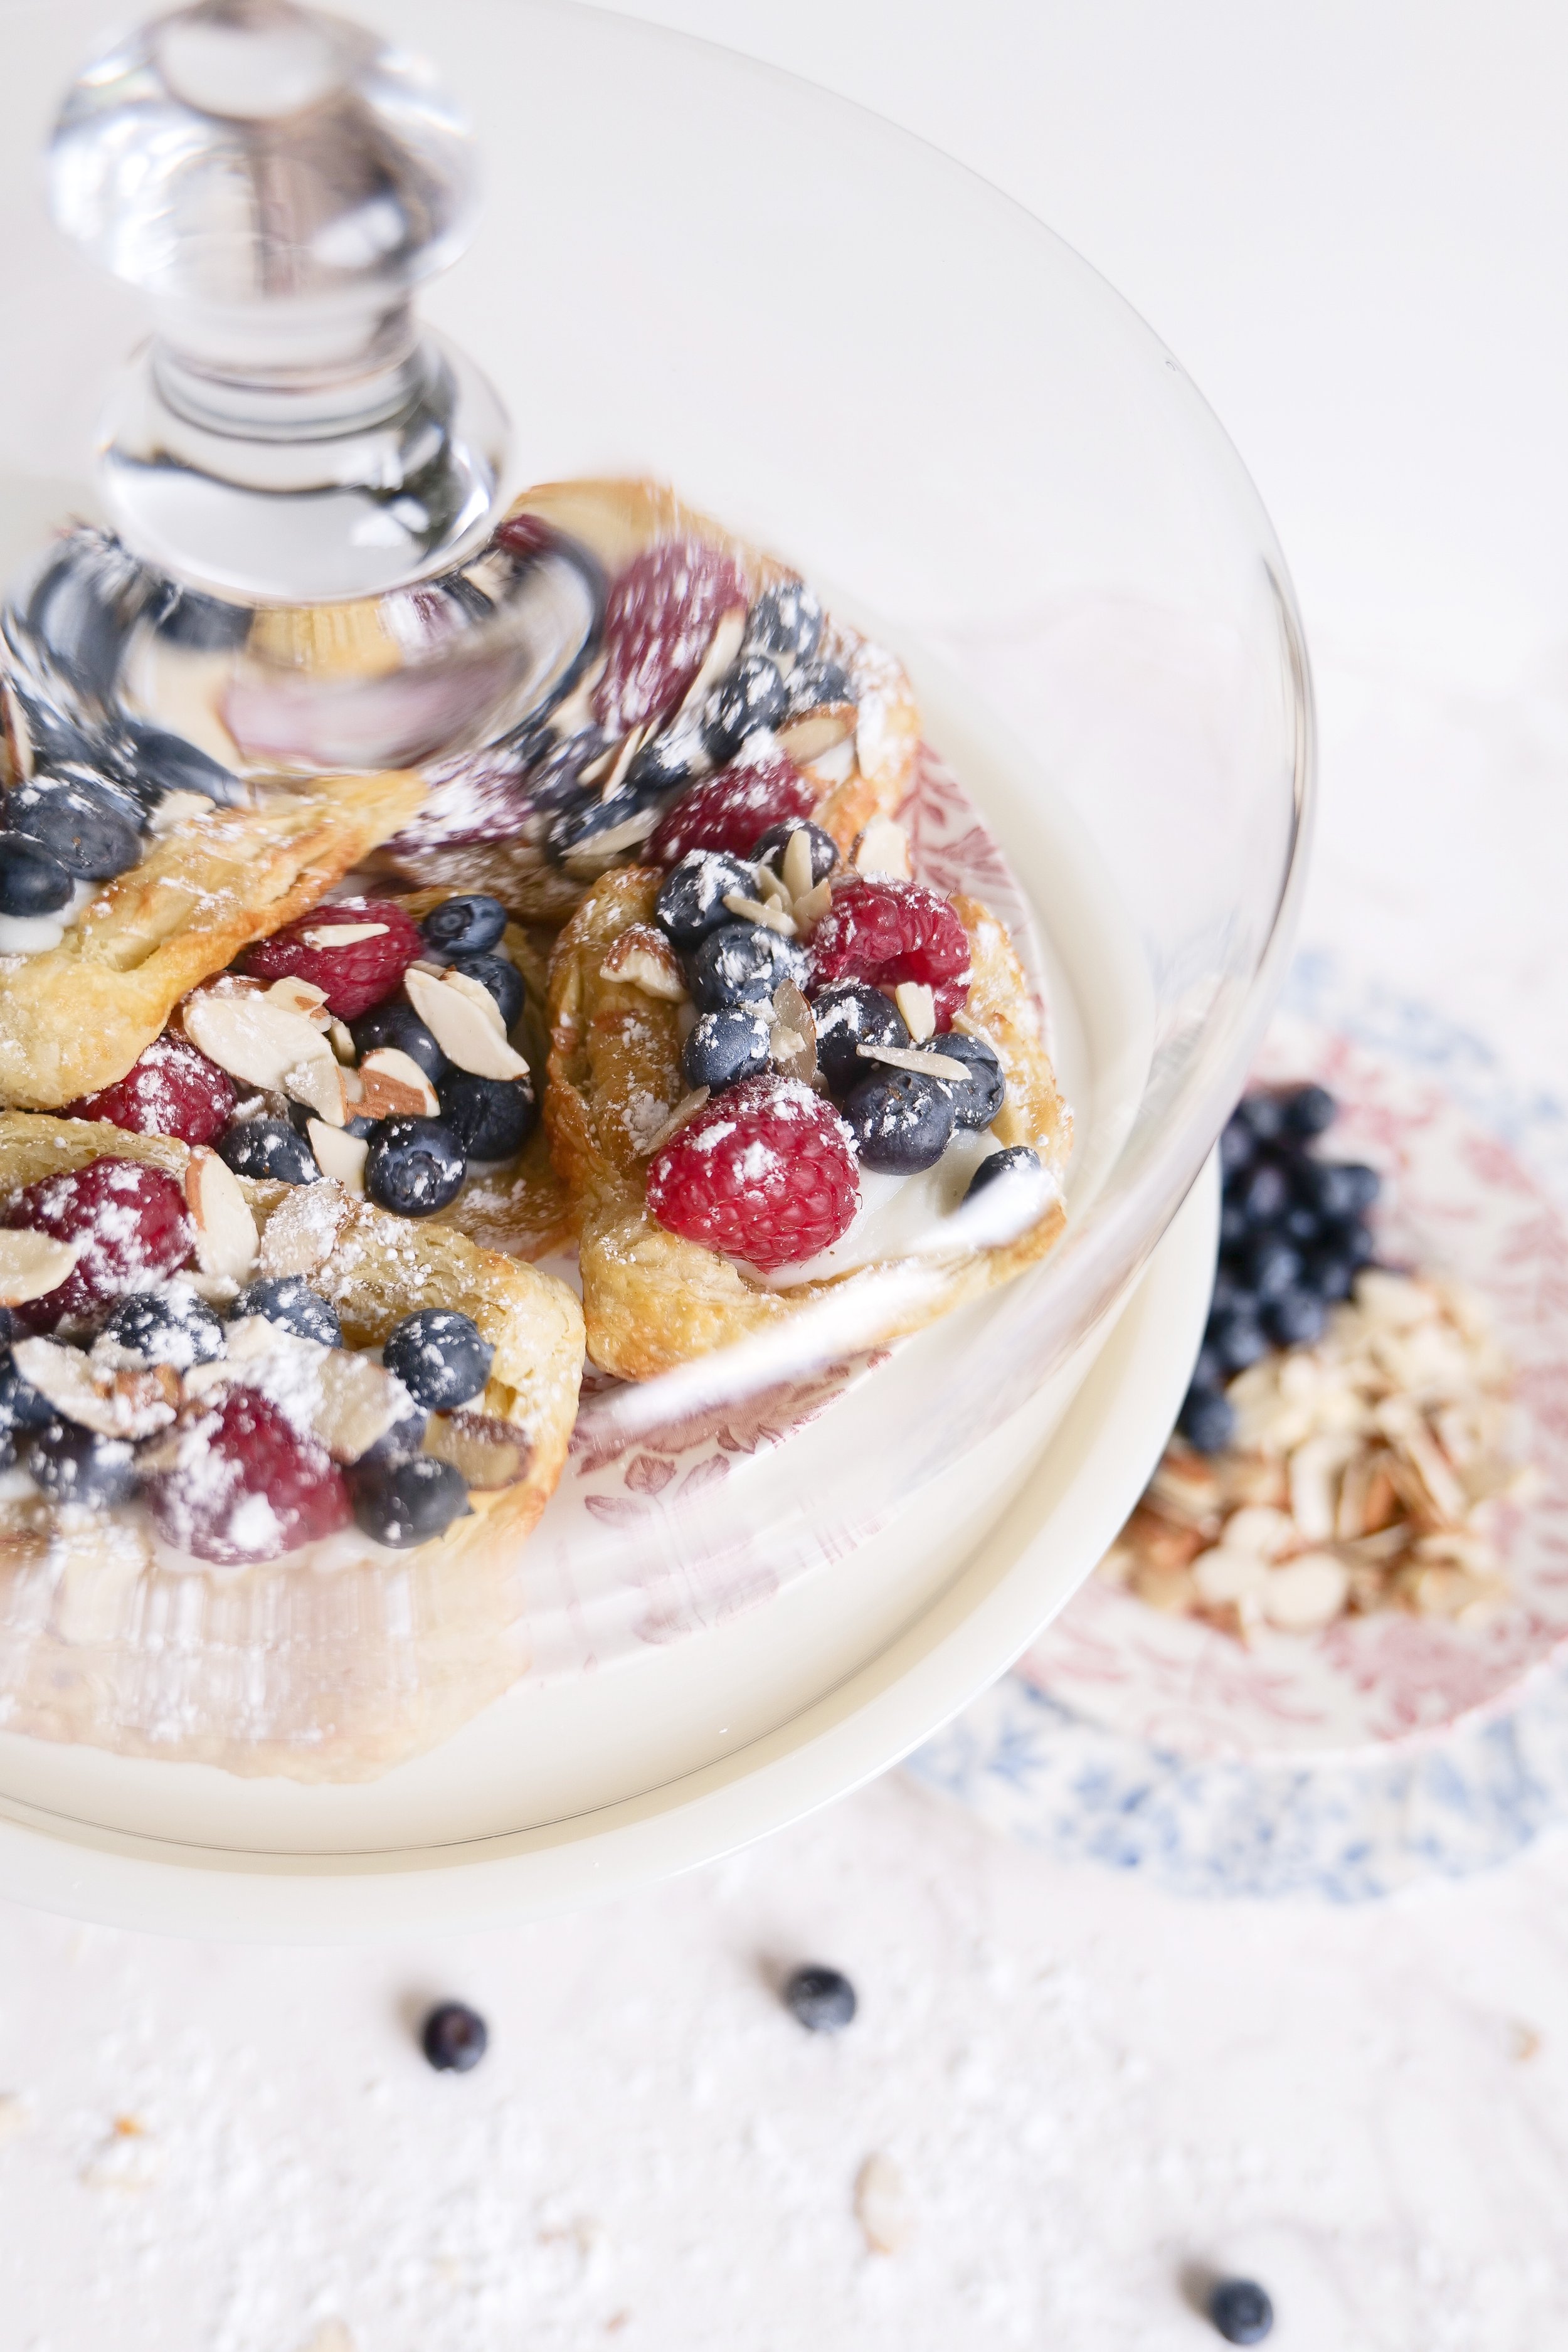
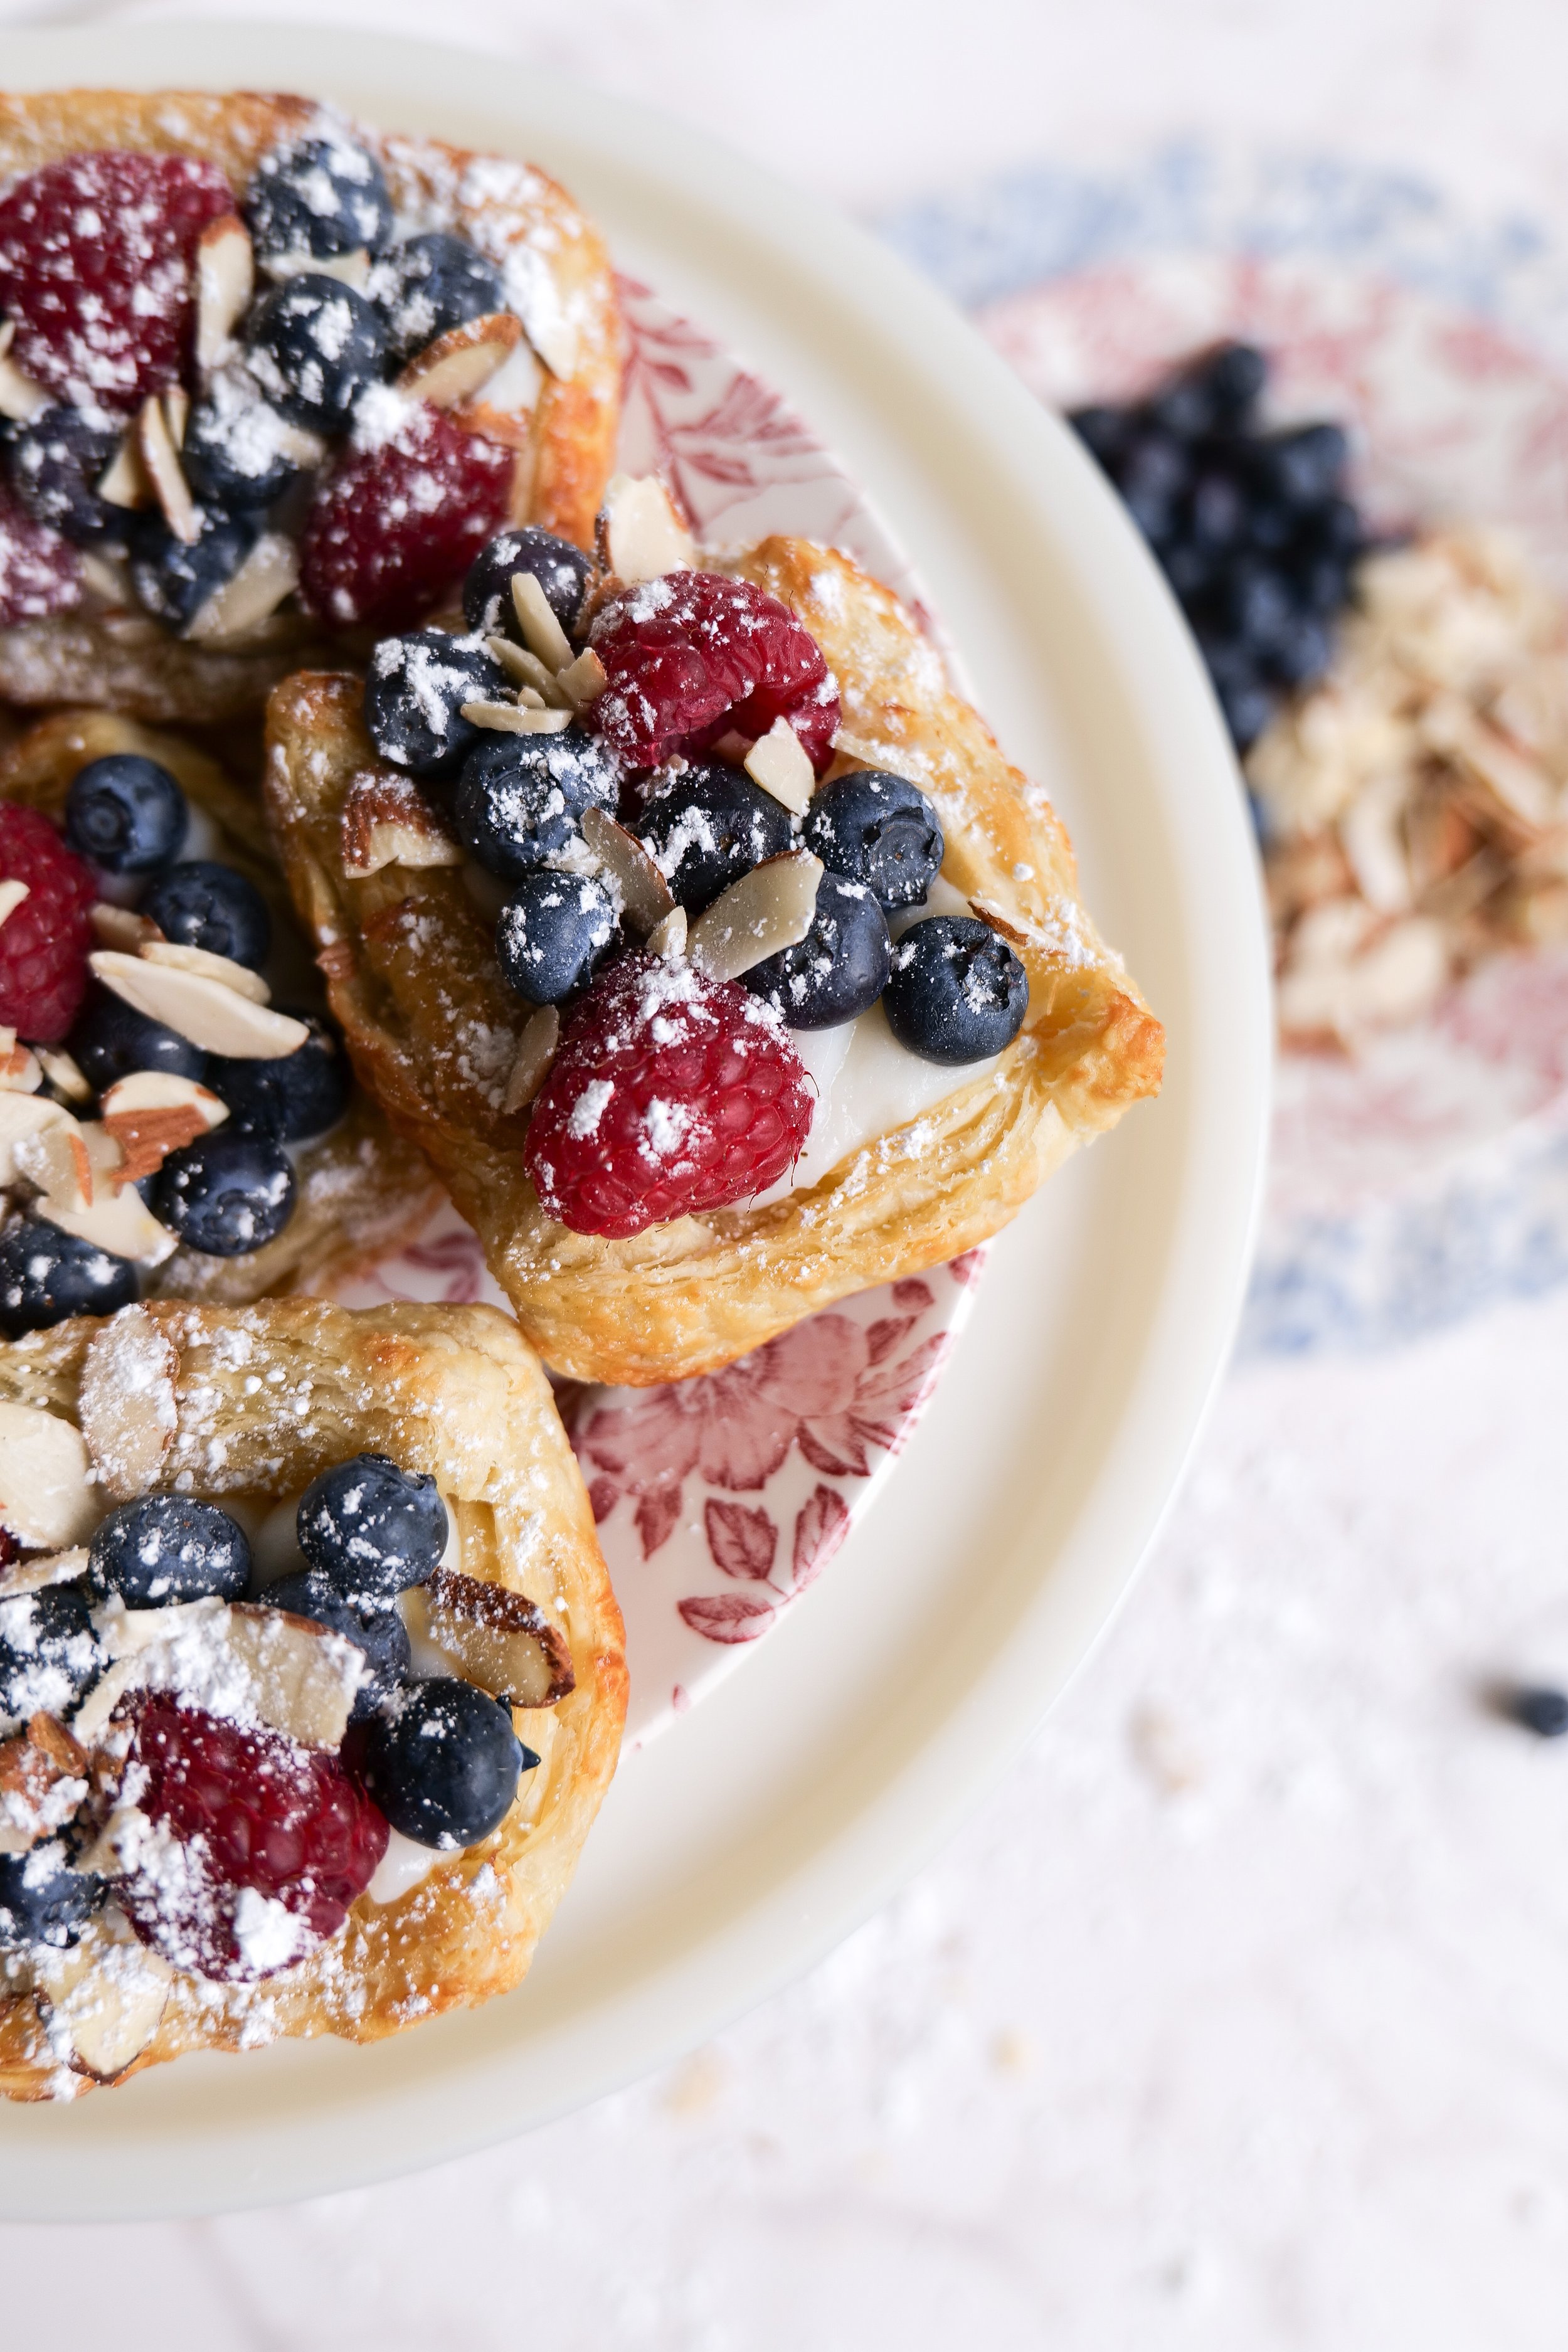
Treat your guests to a delicious classic dessert with a twist with this homemade Berry Custard Puff Pastry Tart. This dessert is an irresistible combination of custard, puff pastry, and fruit that looks and tastes like a gourmet dessert. The tart is filled with creamy custard and topped with fresh berries for a flavor combination that is sure to impress. The puff pastry custard Danish adds a flaky, crunchy texture to contrast the creamy custard and juicy berries. It's a sweet and tart balance that will please any crowd. The colors of the berries make this yummy dish visually appealing too, making it an impressive spread!

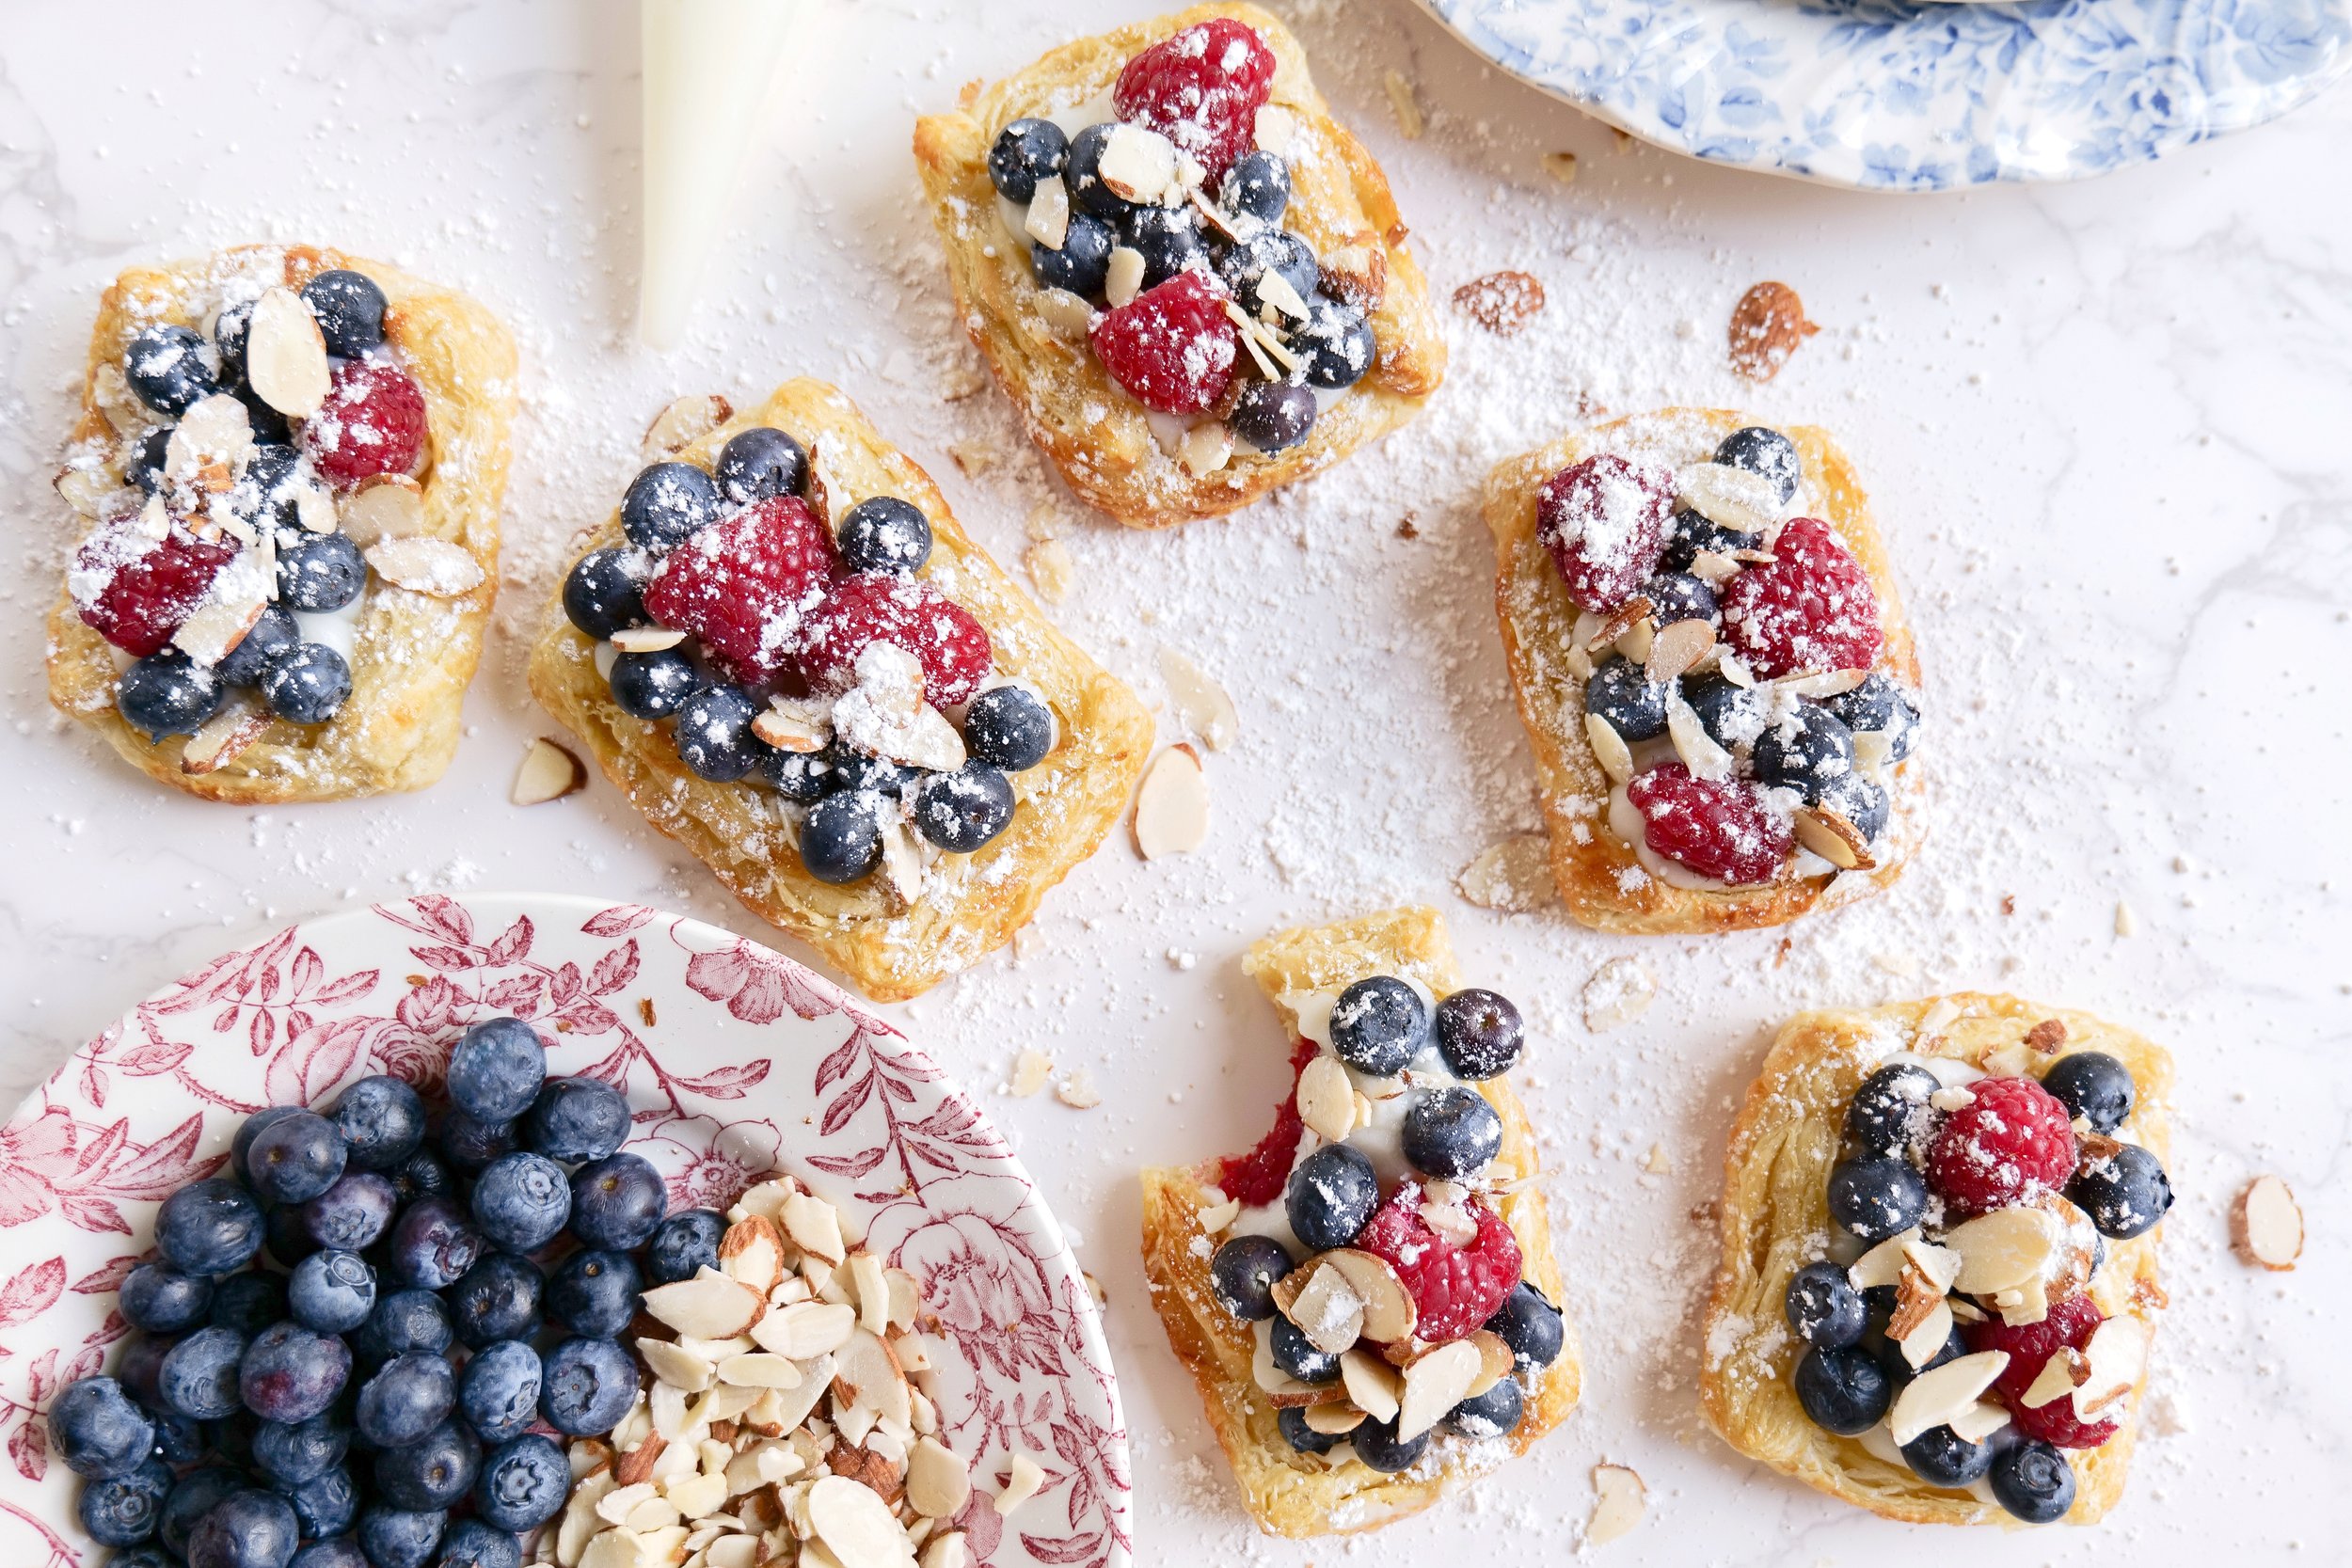
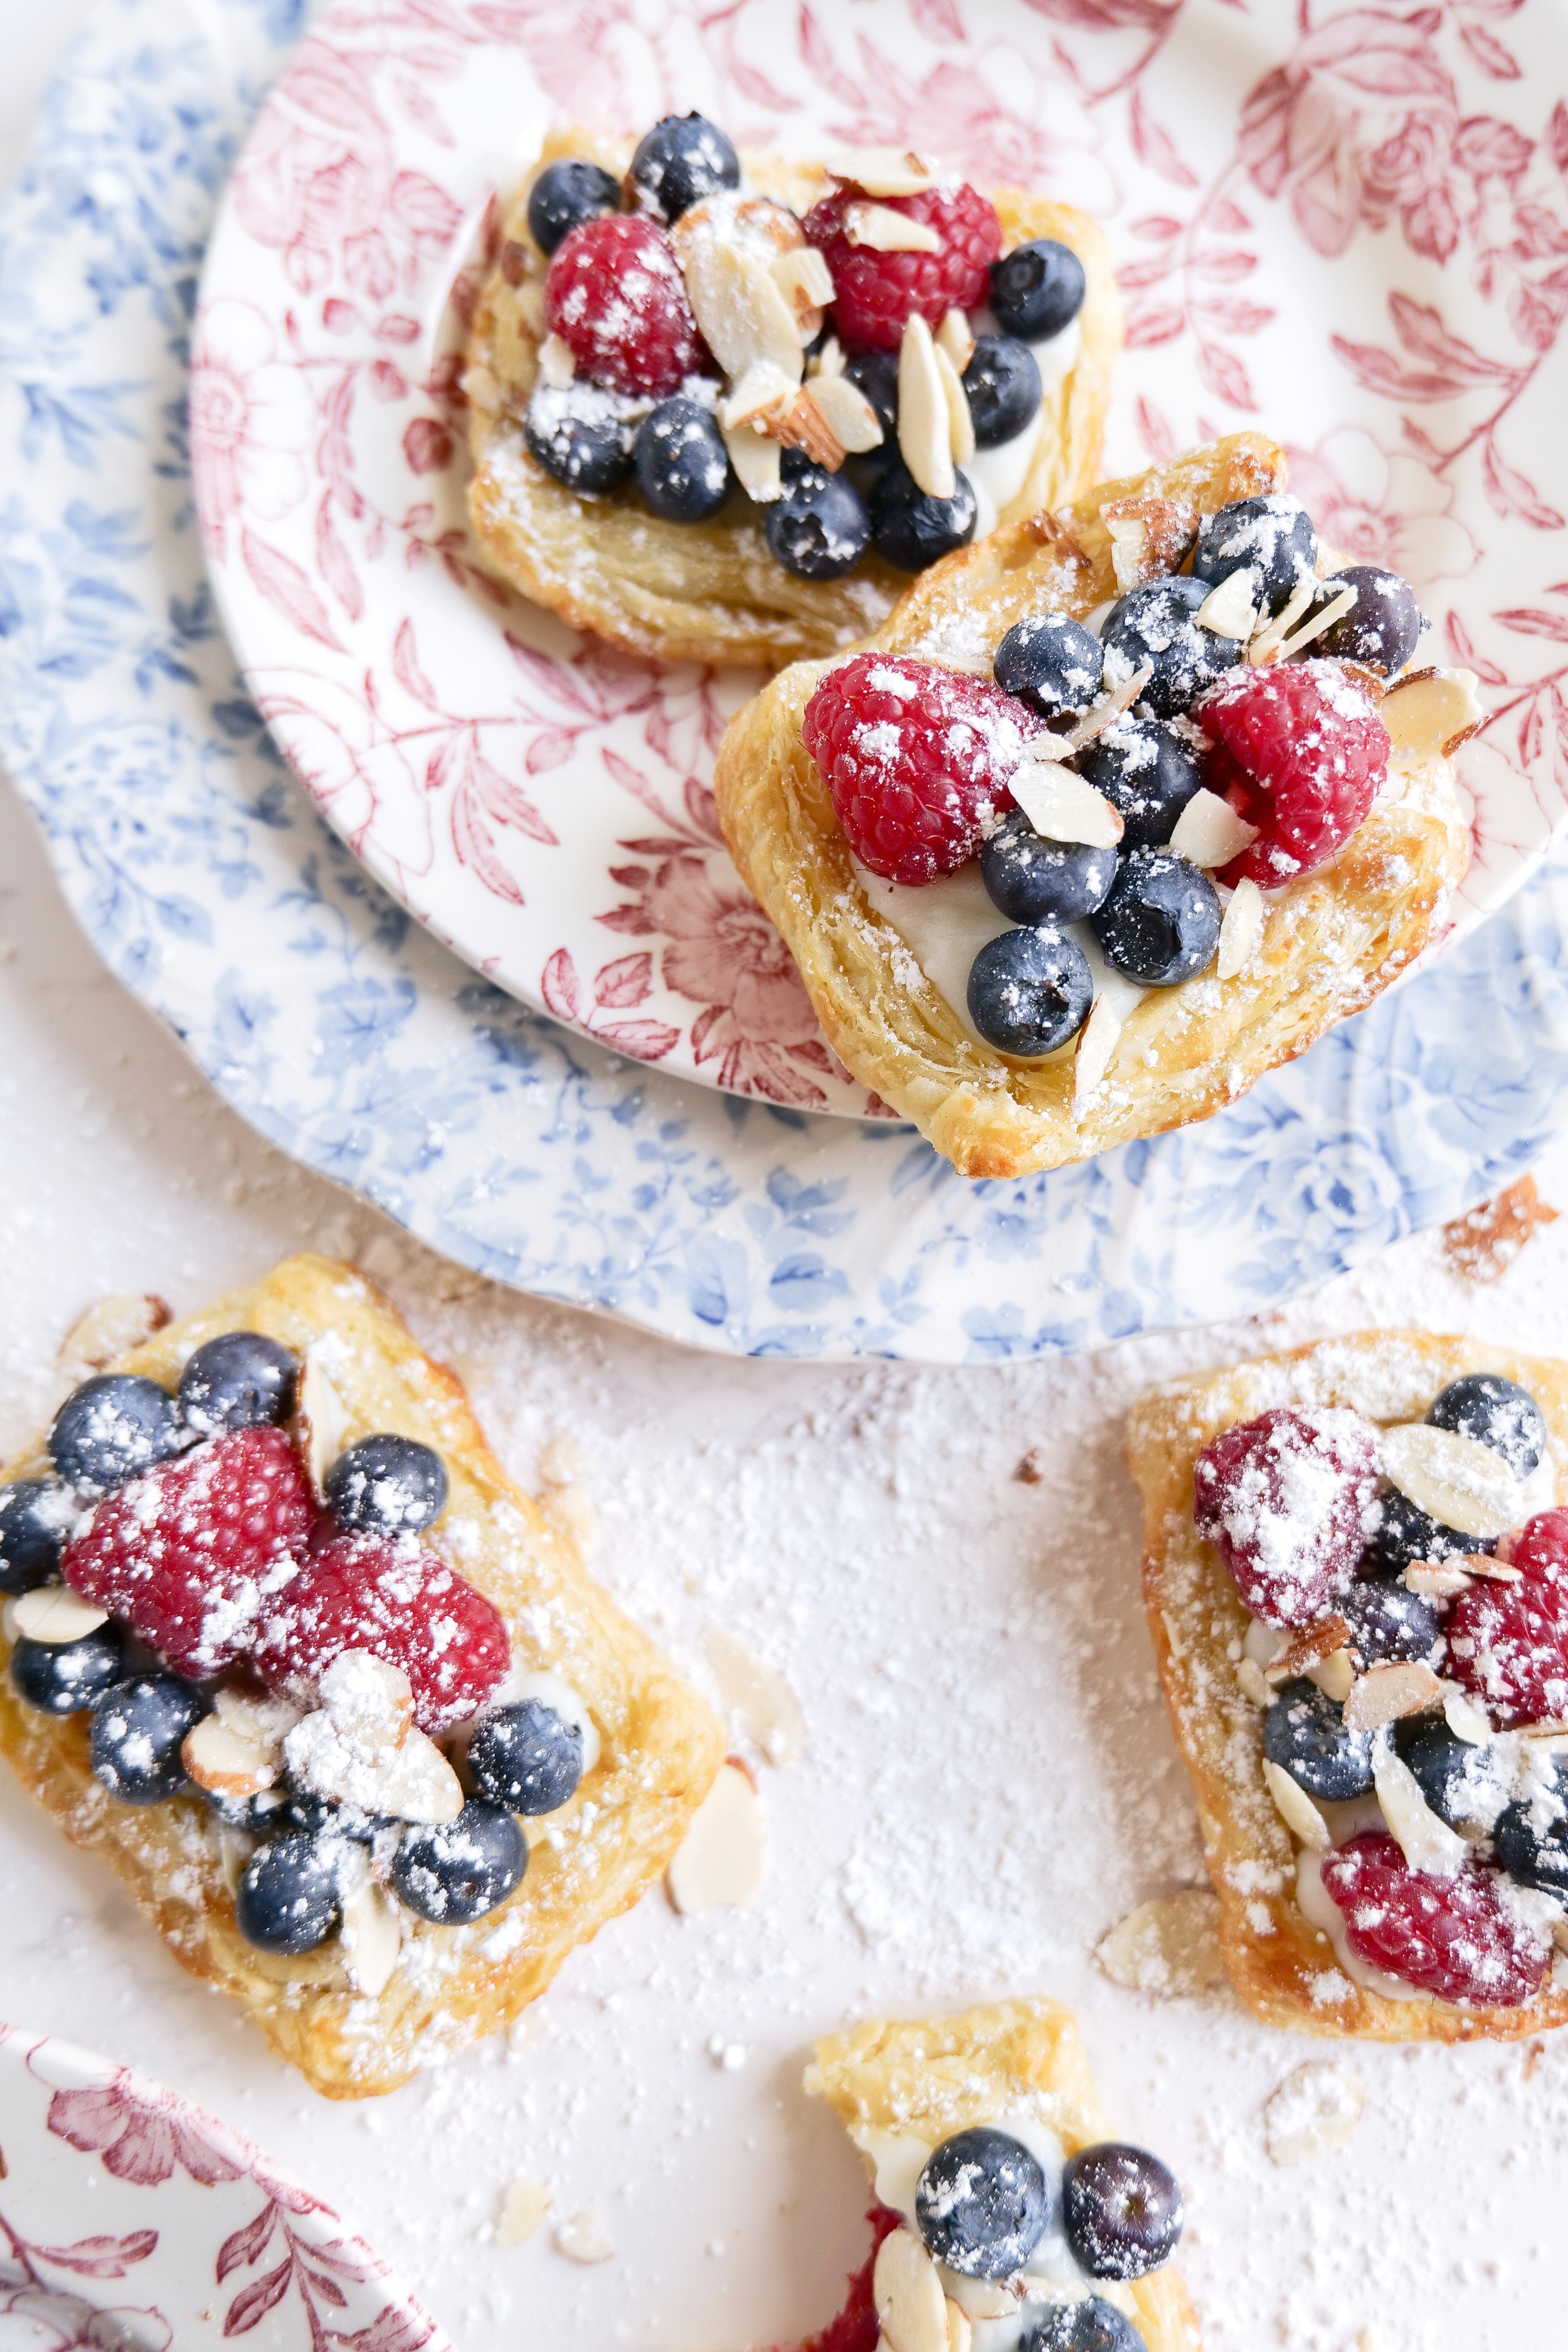
Making this tart is simple and easy. All you need is some puff pastry, custard, and fresh berries. You can serve it with a dollop of whip cream or powdered sugar sprinkled on top with almond slices. Not only is this pastry visually stunning, but it also has a delightful combination of sweet and savory flavors that will make your taste buds dance. In this blog post, I will provide step-by-step instructions on how to make this irresistible tart.

The custard pastry recipe can be made with either cream or milk, depending on your preference, and the berries of your choice added to the top. The tart can be served warm or chilled, depending on your preference. It can be stored in the refrigerator for up to four days, making it a great make-ahead dessert, or for breakfast quick grabs for the week. Berry Custard Puff Pastry Tart is perfect for any occasion and a great way to start a day or end the day as a dessert after your final meal. The combination of the light and flaky puff pastry and the sweet berries will have your guests asking for seconds. Whether you’re hosting a dinner party, throwing a birthday celebration, or just need a special treat for yourself, this simple homemade tart is sure to be a hit.

Ingredients

1 puff pastry sheet

1/2 cup raspberries

1/2 cup blueberries

Sliced Almonds

Powdered Sugar

2 cups milk

1/2 cup granulated sugar

1/3 cup cornstarch

4 large egg yolks

1 teaspoon almond extract

Instructions

1. Warm milk on stove until hot but not boiling. In a medium bowl whisk egg yolk, granulated sugar and cornstarch until light and fluffy. Add milk slowly being sure no lumps form. Pour back into pan used to heat milk and heat until a continuous boil begins and cream thickens. Make sure it does not stick to the bottom. Reduce heat and continue to cook until it reaches desired thickness. Pour into bowl and cover with plastic wrap placing in fridge to cool completely.

2. Preheat oven to 400 degrees. Let puff pastry warm at room temp until you are able to unroll without cracking. unroll on cookie sheet and cut into 6 individual puff pastries and fold edges over to make crust. Take fork and prick the middle of each pastry that is not folded. This is to help from "puffing" in the middle while baking. Brush side of the crust with egg yolk, milk or water and sprinkle with sugar if you desire.

3. Bake 10-12 minutes until pastry sheet is golden brown. Remove from oven.

4. Take custard from fridge and add to a piping bag or baggie you can cut tip from.Pipe Custard onto each pastry or use a spatula to evenly spread.

5. Add raspberries & blueberries ontop and sprinkle with slices almonds & powdered sugar if desired. Enjoy!

Is It Possible to Substitute the Puff Pastry for a Different Type of Dough?

If you're looking for a delicious and easy-to-make dessert, look no further than a Berry Custard Puff Pastry Tart. This classic tart is a delicious combination of a buttery puff pastry shell filled with a creamy custard and topped with fresh berries. While the puff pastry is the traditional dough used for this tart, there are a variety of other doughs that can be used as a substitute.

Shortcrust pastry is a great option to use as a substitute for puff pastry. It is a flaky, crumbly pastry dough that helps create a crisp tart shell. For a gluten-free option, almond flour dough is an excellent substitution for puff pastry. If you’re looking to add a bit of extra sweetness to your tart, chocolate dough is also a great option. Filo pastry can also be used to make a delicious Berry Custard Puff Pastry Tart. Filo pastry is a light and flaky dough that is perfect for creating a crunchy tart shell.

No matter which dough you choose, you’ll be sure to enjoy this delicious Berry Custard Puff Pastry Tart. With a variety of doughs to choose from, you can easily find the perfect option for your taste. So, what are you waiting for? Get baking and enjoy a delicious Berry Custard Puff Pastry Tart today!

Other Pastries & Desserts You Will Love:

The Perfect Peach Cobbler Recipe

Deliciously Sweet and Tangy: Blueberry Orange Glazed Muffins

Soft Cream Cheese Lemon Blueberry Scones

A Sweet and Delicious Recipe for Lemon Poppyseed Bread

Indulge in Delicious Personal Pear Tarts

Step-by-Step Guide to Making a Refreshingly Delicious Frozen Raspberry Margarita

For those looking for a refreshing and delicious cocktail to serve at their Summer BBQs, pool parties, or other gatherings, look no further than this Frozen Raspberry Margarita Recipe! This recipe is meant to fill an entire pitcher of goodness to keep the party going. It combines both the sweet and tart flavors of raspberries and lime, and this fun, fruity drink is sure to be a hit with everyone! The best part? It’s easy to make and requires minimal ingredients.

Blending

Creating the perfect frozen raspberry margarita is all about the correct blending. Blending is the key to achieving a smooth and creamy consistency. A high-speed blender is recommended as it will help to ensure that all of the ingredients are combined thoroughly and that there are no large chunks of ice or fruit. If you want to make a thicker margarita, adding a few ice cubes while blending will do the trick. To make a sweeter margarita, add a tablespoon of sugar or honey while blending. Adding a few drops of lime or lemon juice will also help to give the margarita an extra kick of flavor. Be sure to blend until the drink is completely smooth and enjoy! Below are my favorite blenders to make the perfect Margarita every time!

Decorating Glasses

Nothing says summertime like a delicious Frozen Raspberry Margarita! This fruity cocktail is easy to make and even easier to enjoy. To make your Margaritas look even more festive, use a glass rimming tray and a lime wedge to moisten the top of each glass. Then dip each glass into a plate of salt, sugar, or a combination of both. Use a brush or a spoon to spread the sugar or salt around the rim of the glass. You can even add a few drops of food coloring to give the glass a fun, festive look. Once the glasses are ready, you can pour the cocktail and some fruit to garnish. Here I used cocktail picks with lime and raspberries to give a great decorative finish!

Extra Tips

A Frozen Raspberry Margarita is a delicious and refreshing cocktail that is perfect for summer. This easy-to-make margarita recipe will be sure to impress your friends and family. When making a Frozen Raspberry Margarita, it is important to remember to use fresh lime juice for the most flavor. To achieve the perfect balance of sweet and tart, use an equal amount of raspberry puree and lime juice. Adding a few drops of orange liqueur to the margarita will help to enhance the raspberry flavors. To get the best texture, use crushed ice in the blender with the other ingredients. A few drops of agave nectar can help to sweeten the drink and make it more palatable. For an extra kick, top the margarita with a float of Grand Marnier or Cointreau. This Frozen Raspberry Margarita is sure to be a hit with everyone. So, get your blender ready and enjoy this icy treat!

Recipe Variations

There are plenty of ways to customize this fun drink with extra ingredients to make your own unique versions. To make the perfect frozen raspberry margarita, start by adding the raspberries, lime juice, and agave nectar to a blender. Blend until everything is smooth. Then add a cup of crushed ice and blend again until it's slushy. For a tart twist, add a splash of cranberry juice. For a sweeter version, try using raspberry-flavored simple syrup. For a spicy kick, add a few drops of hot sauce.

If you want to make a creamy version of the margarita, blend in a scoop of strawberry or raspberry ice cream. For a tropical twist, try using pineapple juice in place of the lime juice. For a smoky flavor, mix in a teaspoon of smoked paprika. For a festive look, garnish each glass with a sprig of mint and a slice of lime.

Tequila is the most popular type of alcohol used to make a frozen raspberry margarita, but other types of alcohol such as triple sec, vodka, or rum can also be used. Depending on your preference and the alcohol content you would like, you can choose the type of alcohol that best suits your needs. If you are looking for a more subtle flavor, you can opt for a light rum or vodka. For a more intense flavor, you can choose tequila or triple sec. It is important to note that the type of alcohol used will affect the flavor and alcohol content of your frozen raspberry margarita. If you are looking for a raspberry margarita mocktail remove the alcohol completely and add a dash of club soda in its place.

Can You Make Frozen Margaritas Ahead Of Time?

Beat the heat this summer by making a delicious frozen raspberry margarita! This easy-to-follow recipe can be made ahead of time and stored in the freezer, so you can always have a cold and refreshing drink at the ready. All you have to do is blend all of the ingredients together, pour the mixture into a container and freeze it. When it's time to drink, just scoop a few ounces of the frozen raspberry margarita mix into a glass, top it off with some extra ice, and enjoy!

The beauty of this frozen raspberry margarita recipe is that it only takes a few minutes to make and can be stored in the freezer for up to two days. This makes it ideal for entertaining, as it can be prepared ahead of time so that you can enjoy a cold, refreshing drink any time you want. And since it's a frozen margarita, you don't even have to worry about it getting watered down!

Ingredients

2 cups frozen rapberries

4 limes juiced

8 ounces tequila of choice

4 ounces Cointreau or orange liqueur of choice

3 - 7.5 oz cans of Q Mixers margarita mix

2 cups ice

lime wedge & fresh raspberries to garnish

salt & sugar

Instructions

1. Rim glasses by taking a lime wedge around the outer edge and dipping the glass upside down into sugar, salt or I did a 50/50 mix here.

2. Add frozen raspberries, ice, lime juice, tequila, orange liqueur, and margarita mix into a blender. Blend until smooth.

3. Pour into prepared glasses and garnish with fresh raspberries, lime wedge and serve!

Beat the Summer heat with a delicious Frozen Raspberry Margarita! This easy-to-make frozen treat is a perfect way to beat the heat and enjoy a refreshing Summer cocktail. The sweet flavor of raspberries blends perfectly with tequila and lime for a unique and delicious margarita. Serve this icy treat in a glass rimmed with margarita salt or sugar for a festive presentation. Make a big batch in a pitcher for easy outdoor entertaining. Keep the frozen margaritas in the freezer to have them ready to serve at a moment’s notice. Make a few extra batches for a pool party or picnic. This recipe is simple to make and requires minimal ingredients, so you don’t need to worry about having to buy too many items. Plus, it’s the perfect way to cool down after a hot Summer day. So grab your ingredients and start mixing up this frozen raspberry margarita recipe for your next Summer event!

Other Refreshing Cocktails You Will Love:

Strawberry Orange Bourbon Smash

The Perfect Lemon Drop Martini Recipe for a Refreshing and Delicious Cocktail

4 Deliciously Easy 4-Ingredient Tequila Cocktails

Watermelon Twist Cocktail

Refreshing Lemon Twist Cocktail

Creating a Festive 4th of July Tablescape for Your Celebration

As Independence Day is quickly approaching, it’s time to start planning for your 4th of July festivities! To me, one of the most important aspects of any successful holiday gathering is a well-crafted tablescape. Whether you’re hosting the typical backyard barbecue, an indoor dinner party, or a picnic on the beach, you can create a stunning tablescape to show off your patriotism and honor America’s birthday. In this blog post, we’ll explore some fun and creative ideas for designing the perfect 4th of July tablescape. This 4th of July, make your table sparkle, boom, and be the talk of the town!

When it comes to planning your 4th of July tablescape, white is always a good go-to base color for a classic look. Feature a centerpiece of white flowers, with a hint of blue mixed in for good measure. Utilize white china dishes and glassware for a timeless look, or find a beautiful blue or red print to make a statement. For added patriotic flair, add a few American flags to the dΓ©cor. Place a bowl of red, white, and blue candy at each place setting to satisfy any sweet tooth. Include a small favor at each seat, such as a mini flag, to send your guests home with as a special touch they will appreciate. Finally, top off the look with a few star-shaped decorations to really show your spirit. With these few simple touches, your 4th of July tablescape will be a hit!

Red, White, and Blue Place Settings

The 4th of July is the perfect time to show your patriotic side with a festive tablescape. Whether you’re hosting a smaller gathering of family and friends or a large party, you can easily create a festive 4th of July tablescape with a few simple decorations. Start by creating red, white, and blue place settings. For this place setting I used the Marlow Thomas dishes from William Sonoma. I also used blue chargers, floral print blue plates and floral appetizer plates in different designs. The appetizer and dinner plates also come in red so you can do an alternating color for a fun and festive colorful look. I opted for gold silverware, which I use frequently, to match the gold around the rim of the dishes.

For a more luxurious touch, opt for cloth napkins. I did a simple white with red edging to give a subtle hint of red and added a nice wow statement with the napkin holder. I found the cutest star-shaped napkin holders on Etsy, and they also come in blue and other designs. You can also embellish the napkins with patriotic charms or ribbons for a special touch. You can also get creative and match the theme of your tablescape by using napkins with designs that reflect the holiday, such as fireworks, sparklers, or of course stars and stripes. Whatever you choose, make sure to choose napkins that show off your American spirit and give your 4th of July table an added festive touch.

Red, White and Blue Centerpieces for Tables

A 4th of July tablescape is the perfect way to celebrate this Independence Day. With the right decorations, you can create a festive and inviting atmosphere for your guests. Add a centerpiece to your table for an extra special touch. Red, white and blue centerpieces can be as simple as an arrangement of candles or as elaborate as a bouquet of flowers. You can even purchase pre-made centerpieces or make one yourself using items such as American flags, star-shaped balloons, and sparklers. For these patriotic table centerpieces, I did a matching blue and white pot from Williams-Sonoma that will double with a plant after the holiday. I filled it with white hydrangeas and small American flags. This was a very simple centerpiece to do and is right on the theme! One thing to be wiery of is hydrangeas get hot and can die quickly because of that, so be sure to purchase the day before or the day off and to spray them with water before taking them outside so they stay plenty wet and hydrated.

Drink Station

I wanted to add a fun element to this 4th of July table and the best way to do that is also something that helps guests help themselves. A drink station or food area allows guests to grab what they want as needed so you aren't asking them nonstop what you can get for them. I did a 3 drink station with Splenda's new Pour Pouch's and I loved how it turned out! Pink lemonade (with lemons), peach mango (with fresh peaches) and fruit punch (with strawberries, watermelon and blueberries) were beautiful colors to pick for this but also gave a variety of flavors for guests to choose from. Helpful tip if doing a drink station like this is to fill the jars with ice before adding cold water. This gives lots of room for ice to melt while keeping the drinks nice and cold. Adding fruit into each one also helps distinguish the flavors inside of each jar or you can also add names onto each glass drink dispenser.

How Can I Make My 4th of July Tablescape Stand Out?

The 4th of July is the perfect time to get creative and throw together a tablescape that celebrates the spirit of America and the spirit of your creativity. To get started, incorporate the colors of the American Flag (red, white, and blue) into your design. Utilize rustic elements like natural wood, mason jars, and burlap to add texture and charm. Create a centerpiece with festive decorations like stars, stripes, and fireworks to really bring the spirit of the Fourth of July to life.

For food and drinks, serve up some festive and delicious Fourth of July favorites like red, white, and blue popsicles, iced teas+, and cupcakes. To add some sparkle and shine, incorporate glittery accents like star garlands and banners. Finally, don’t forget to use festive, Fourth of July-themed plates, cups, and napkins for a fun touch that matches your tablecloth. With these decorative items, you’ll have the perfect Fourth of July tablescape that celebrates the traditional spirit of America.

The Perfect Peach Cobbler Recipe

Who doesn't love a good peach cobbler? It really is the quintessential Summer dessert. A good peach cobbler is so perfectly sweet and deliciously crunchy and is sure to be a hit with your family and friends. Whether you’re using fresh or canned peaches, this recipe is sure to be a winner. Follow this simple step-by-step guide to make a delicious and easy peach cobbler that will have everyone begging for seconds.

Peach cobbler is a classic Southern dessert that is fairly easy to make and sure to please. This comforting dessert is a real fan favorite and is perfect for any occasion. The combination of fresh sweet peaches, a buttery biscuit-like topping, and a hint of cinnamon makes this cobbler truly irresistible.

To make this delicious cobbler, you will need fresh peaches, butter, sugar, and a biscuit-like topping. The peaches are the star of the show here, so be sure to use the freshest peaches you can find. Combine the peaches, butter, and sugar in a baking dish and spread the biscuit-like topping over the top. Bake in a preheated oven until the topping is golden and the peaches are bubbly and tender.

Once the cobbler is ready, it's best served warm with a scoop of vanilla ice cream. Enjoy the combination of sweet and buttery flavors and the hint of cinnamon. This cobbler is one of my most used recipes for guests. Every time I make it the crowd is so happy and it finishes off the meal perfectly. So, why not make this classic Southern dessert today?

Ingredients

10 Servings

6 cups fresh peaches

1 & 1/2 cups granulated sugar

1/4 teaspoon cinnamon

1/8 teaspoon nutmeg

2 teaspoons flour

Topping:

2 & 1/2 cups all-purpose flour

1 cup white sugar

1/2 cup dark brown sugar

2 teaspoons baking powder

1 teaspoon salt

1 cup heavy cream (can substitute for buttermilk)

1 egg

8 tbsp butter

Sugar Topping:

2 tablespoons granulated sugar

1/2 tablespoon cinnamon

Instructions

  1. Preheat oven to 375 degrees

  2. Remove skin from peaches by blanching. To do this you start by placing peaches in boiling water for 30-45 seconds. Immediately take out and place into a bowl of ice water. The peaches will peel perfectly.

  3. Once peaches are peeled slice and toss with sugar in a bowl. Once evenly coated add cinnamon, nutmeg and flour and toss again.

  4. Pour peaches into baking dish and place in oven for 10 min while making topping

  5. Begin Topping by mixing together dry ingredients; all-purpose flour, sugar, brown sugar, baking powder and salt. In another bowl whisk together heavy cream and egg gently pour into flour mixture and hand mix together to make a shaggy mixture that will crumble nicely on top of the peaches.

  6. Once the peaches have cooked for 10 min and the topping mixture is ready crumble evenly over the top of the peach mixture.

  7. Cut 8 tbsp of butter into even size cubes. Sprinkle over top of the crumble mixture so they are evenly spread over the pan. Lastly, Evenly sprinkle sugar topping of sugar and cinnamon over the entire pan.

  8. Place back in the oven and cook for 45-50 minutes, until topping is golden and peaches are tender. Top with fresh whipped cream or vanilla ice cream for a great dessert!

Canned Peaches Vs Fresh

When it comes to making a delicious peach cobbler, you have two main choices when deciding which type of peaches to use: fresh or canned. Canned peaches provide a pre-sweetened, convenient base for your cobbler that requires little to no additional preparation. However, fresh peaches provide a more vibrant flavor and texture that will really shine in your cobbler.

When it's not peach season and you may be forced to use canned peaches, don't worry! You can still enjoy this classic recipe year-round with the help of canned peaches. Canned peaches are a great way to make a delicious peach cobbler any time of year. Their soft texture makes them ideal for baking into a cobbler, and they can save you time and energy since they are already peeled and chopped. If you choose to use canned peaches for your cobbler, you have the option of using light or heavy syrup, while fresh peaches should be sweetened to taste. Canned peaches are usually slightly more firm than fresh peaches, so if you want a softer texture you’ll need to simmer the canned peaches a bit before adding them to the cobbler. Plus, you can even add a bit of extra sweetness to your cobbler by using canned peaches in syrup. Just be sure to drain the syrup from the canned peaches before adding them to your cobbler. So don't wait for peach season – you can make a delicious peach cobbler with canned peaches any time of year!

When using fresh peaches for your cobbler, you will need to do some extra preparation in the form of peeling, slicing, and sweetening. Canned peaches are a good option if you’re in a hurry, while fresh peaches require more time and effort to prepare. However, the taste and texture of fresh peaches will be worth the extra effort.

Is It Difficult to Make a Peach Cobbler?

No matter the season, nothing quite captures the flavors of Summer like a delicious homemade peach cobbler. Making a peach cobbler is surprisingly easy and requires only a few ingredients, so you don't need to be a professional chef to make a great-tasting cobbler. All you need is some fresh peaches, butter, sugar, flour, and spices. With just a few steps, you can whip up a delicious homemade peach cobbler in no time.

The combination of sweet peaches, buttery crust, and spices makes for a truly delicious dessert. The sweet and juicy peaches combined with the crunchy and buttery crust, create a flavor combination that is sure to please. The spices add a unique touch that complements the flavor of the peaches and gives the cobbler an extra layer of flavor.

Making a peach cobbler is a great way to enjoy the flavors of Summer all year round. Plus, it's such a simple recipe that even novice bakers can make a delicious cobbler with minimal effort. So, if you're looking for a delicious and easy dessert that captures the flavors of Summer, then why not try making a peach cobbler? With just a few ingredients and a few simple steps, you can have a delicious homemade cobbler ready to enjoy in no time.

Can I Freeze Leftover Peach Cobbler?

Freezing leftover peach cobbler is an easy way to enjoy this delicious dessert later on. To freeze the cobbler, simply place it in an airtight container or wrap it tightly in plastic wrap and aluminum foil. Be sure to label the container with the date it was frozen so you know how long it has been in the freezer. To reheat the cobbler, thaw it in the refrigerator overnight and then bake at 350Β°F (176Β°C) until it is heated through. You don’t have to wait until you warm up the cobbler to enjoy it. You can also enjoy it cold straight from the fridge or quickly microwave it to warm up. For extra indulgence, top your frozen cobbler with a scoop of creamy vanilla ice cream. Enjoy your frozen peach cobbler, even months later!

Other Summer Desserts You Will Love:

How to Make the Perfect Arnold Palmer Popsicle: A Delicious Summer Recipe

Indulge in Deliciousness: Cherry Chip Cake with Chunks of Dark Chocolate Recipe

Monster Cookie Recipe

Chocolate Peanut Butter Brownies

Deliciously Sweet and Tangy: Blueberry Orange Glazed Muffins

These blueberry-orange glazed muffins are the perfect combination of sweet and tart with a combination of fruit flavors. The orange glaze adds a bright and zesty flavor to the otherwise sweet blueberry muffins. These muffins are perfect for a quick breakfast on the go or for an after-school snack. Not only are they delicious, but they are also quick and easy to make. They are the perfect treat to bring to a breakfast party, and sure to be a hit with everyone. Whether you choose to make these muffins for breakfast, brunch, or dessert, the orange glaze and blueberry filling will make them a definite crowd-pleaser. If you're looking for a delicious breakfast treat that is also easy to make, Blueberry Orange Glazed Muffins are the perfect choice! These muffins are made with fresh blueberries and a zesty orange glaze and are sure to please the whole family.

Tips, Tricks and Techniques

The combination of fresh orange juice and juicy blueberries creates a delicious flavor sensation. To bring out the best flavor in the muffin batter, make sure to use fresh orange juice. If you are using frozen blueberries, make sure to rinse and pat them dry with a paper towel before adding them to the batter. For an extra moist muffin slightly undercook them and add additional sour cream. For even more zest you can add additional orange zest to the batter.

To make the glaze that packs a punch, mix together equal parts orange juice and powdered sugar. For a subtle nutty flavor, add a hint of almond extract to the glaze. Drizzle the glaze over the muffins while they are still warm so it will stick. Let the muffins cool completely before serving. Enjoy the delicious flavor of Blueberry Orange Glazed Muffins!

Use an Ice Cream Scoop

When it comes to making the perfect batch of blueberry-orange glazed muffins, an ice cream scoop is the best choice for portioning out the batter. Using an ice cream scoop ensures that each muffin is the same size and shape. This larger scoop also helps to create a nice round shape to the muffin. Additionally, an ice cream scoop is the quickest and most efficient way to make large batches of muffins.

By using an ice cream scoop to fill the muffin pans, you are also ensuring that the blueberry-orange glaze is evenly distributed among the muffins. This is especially important if you are looking to create a consistent flavor in each muffin. This makes the entire baking process much simpler and quicker. So be sure the next time you are baking a batch of blueberry-orange glazed muffins, reach for that trusty ice cream scoop. Not only will it make the process easier, but it will also ensure that each muffin is the same size and shape and that the glaze is evenly distributed.

How to Best Store Leftover Muffins

Nothing is quite as delicious as a freshly-baked blueberry orange glazed muffin. With the right storage techniques, you can enjoy these delicious treats for days to come.

It's best to store the muffins in an air-tight sealed container or wrap them in plastic wrap to keep them fresh. Place the muffins in a cool, dry place away from direct sunlight and out of reach of any critters that may be interested in your tasty treats. If you plan to store them for more than a few days, it's best to place them in the refrigerator, but allow them to come to room temperature before serving for optimal flavor. If you'd like to enjoy the muffins at a later date, freezing them is a great option. Wrap each muffin individually in plastic wrap or place them all in a plastic freezer bag. Be sure if you are freezing to wait to add glaze at the later date you are wishing to eat them. With the right storage techniques, you can enjoy delicious blueberry-orange glazed muffins for days to come.

How Long Does It Take to Bake Blueberry-Orange Glazed Muffins?

Preparing delicious Blueberry Orange Glazed Muffins is easy and quick! The entire process, from preparation to baking, takes only about 30 to 35 minutes.

To prepare the muffins, all you need to do is gather the necessary ingredients and mix them together. This should take you a maximum of 10 minutes. After that, you can start baking the muffins. The baking time for these muffins is approximately 25 minutes. Once the muffins are in the oven, you can set a timer so that you know when they're ready. To check if the muffins are done, you can insert a toothpick in the center of the muffin. If the toothpick comes out clean, then your muffins are ready to be served!

These Blueberry Orange Glazed Muffins are sure to be a crowd-pleaser. In just 30 to 35 minutes, you can have delicious homemade muffins that your family and friends will enjoy. So, don't wait any longer and try this yummy recipe today!

How Many Blueberry Orange Glazed Muffins Will This Recipe Yield?

The recipe yields 12 muffins and they can stay fresh in an airtight container for up to three days, so you can enjoy them all week long! If you are looking to make less you can cut the recipe in half. Along with making less if you are looking to feed more at your next family gathering you can double the recipe. Whether you're looking for a quick snack or a special treat, these Blueberry Orange Glazed Muffins are sure to be a hit with family and friends.

4. Can I Substitute the Orange Juice with a Different Type of Juice for the Glaze?

Blueberry orange glazed muffins are a delicious treat that can be enjoyed any time of the day. The orange glaze gives the muffins a sweet and tart flavor, but what to do if you don’t have orange juice on hand? Don’t worry! There are plenty of other types of juice that can be used in the glaze. Apple juice, pineapple juice, cranberry juice, and grapefruit juice are all great substitutes for orange juice in the glaze. Each type of juice will give the muffins a slightly different flavor, so you can experiment to find the one you like best. Adding a few tablespoons of lemon or lime juice to the glaze can also provide an extra zesty flavor. So the next time you’re craving blueberry orange glazed muffins, you don’t have to worry if you don’t have orange juice. There are plenty of other alternatives that will make the muffins taste just as good.

Ingredients

Muffins:

2/3 cup granulated sugar

1 large egg

1/2 cup melted butter

1/3 cup orange juice

1 teaspoon vanilla extract

1 & 1/4 cup all-purpose flour

1 teaspoon baking powder

1/4 teaspoon salt

1/2 cup sour cream

1 cup blueberries

Glaze:

1 & 1/3 cups powdered sugar

3 tablespoons orange juice

Instructions

1. Preheat oven to 375. Mix together granulated sugar, egg, melted butter, orange juice and vanilla extract until well combined.

2. Add in dry ingredients; all-purpose flour, baking powder, salt until smooth and no powder is showing. With a spatula mix in sour cream. Fold in half to 3/4 of the blueberries, leaving the rest to add on top.

3. Using an ice cream scoop dish out a spoon full into each baking tin. (if not using muffin cups or parchment paper on muffin pan be sure to oil before). Once muffin tins are full of muffin mixture add additional blueberries onto each muffin.

4. Bake for 25 minutes or until a toothpick comes out clean.

5. While muffins are baking mix powdered sugar and orange juice together for frosting. As soon as muffins are done place on a cooling rack and drizzle glaze mixture on top so that it will stick well to the warm muffins. Enjoy!

Alternatives you can make to this recipe could be substituting the blueberries for chunks of chocolate or cranberries. Depending on the time of year this may be a nice rich addition. You can also substitute the orange for lemon but use lemon zest and lemon juice instead. Alternatives to sour cream can be a greek yogurt or if looking for dairy free you can use coconut milk. This recipe is one of my favorites but feel free to customize it all on your own and most importantly have fun experimenting. That's what makes baking and cooking so fun!

If you're looking for a tasty treat that doesn't take long to make, Blueberry Orange Glazed Muffins are the perfect choice. With their sweet and tart flavor, these muffins are sure to be a hit with the whole family. So don't wait, try making these delicious muffins today!

Welcome To Summer Charcuterie Board for Your Next Gathering

As the heat of the Summer season approaches, it's time to start thinking about fun, creative ways to entertain. One way to do that is to create a unique and deliciously easy Summer charcuterie board. A charcuterie board is a beautiful presentation of cured meats, cheeses, nuts, fruits, crackers, and other items that you can put together to create a delectable snack or appetizer. With a few simple ingredients, you can create an impressive Summer charcuterie board that is sure to be a hit at any pool party or outdoor gathering. Read on to learn some tips and tricks on how to create your own Summer charcuterie board.

Welcome in the season with a delicious charcuterie board! Whether you’re hosting a backyard barbecue or just want to enjoy a night in, a charcuterie board is the perfect way to enjoy a variety of flavors. Start by choosing a selection of summer fruits like apricots, strawberries, watermelons, and raspberries. Then add your favorite cheese, like a soft Brie, goat cheese, and Havarti. For a bit of protein, include prosciutto, genoa salami, sopressata, or pepperoni. To add texture, grab an assortment of crackers and bread like baguettes and flatbread. For a bit of crunch, throw on some nuts and seeds like almonds, cashews, pepitas, and sunflower seeds. Finish off your board with a few sauces, jellies, and spreads like tapenade, pesto, hummus, and tzatziki. And don’t forget about the finishing touches - herbs and flowers! With a charcuterie board like this, your summer entertaining will be a breeze.

How to Arrange a Charcuterie Board:

Charcuterie boards are a great way to entertain friends and family in the summertime. Not only are they visually appealing, but they also provide a wide variety of flavors and textures that everyone can enjoy.

For this board, I started with a base salami folded to have a spot for the words WELCOME SUMMER. Then I used slices of cheese and small cookie cutters to create the letters. I added in crackers and a selection of cheeses from my Williams-Sonoma cheese order for a well-rounded charcuterie board. In addition, I added fresh watermelon, kiwi, & strawberries, as well as dried fruit to provide some sweetness. Make sure to top it off with some walnuts and pistachios to add some crunchy texture.

Make sure to have fun with your Summer charcuterie board! Don’t be afraid to experiment with different combinations. Try different types of cheeses, meats, fruits, and nuts to create the perfect board. If you’re feeling ambitious, you can even make your own crackers and dips. No matter what you choose, your charcuterie board is sure to be a hit with friends and family. So, get creative and welcome in the season with a delicious charcuterie board!

When assembling a charcuterie board, the sky is the limit. You can choose whatever meats, cheeses, and accompaniments you like. Salami, prosciutto, and ham are all popular options, as are a variety of hard and soft cheeses. To add depth of flavor, choose accompaniments like olives, pickles, jams, and mustard. For a Summer themed flair, add seasonal fruits like strawberries, watermelon, and peaches. To make it more like a complete meal, add some bread or crackers.

Charcuterie boards are fun to make and easy to customize. They’re perfect for entertaining guests, or just enjoying a snack all to yourself. Get creative and make a Summer charcuterie board that you and your family will love. I always love to visit our local farmers market to find the freshest fruit & vegetables for the season.

Types of Cheeses for a Summer Board

I loved using these cheeses from Williams-Sonoma. They have a ton of different options to choose from but the sky is the limit with cheese! Picking something that compliments your fruit and meats on the board is always key. From the nutty Manchego cheese from Spain to the crumbly Feta cheese from Greece, you’ll be sure to find something to please everyone. Robiola, a soft Italian cheese, is perfect for spreading on crackers and adding a delicious flavor. Goat cheese is a great addition, providing a tangy and creamy flavor. Dutch Gouda is mild and mellow, while French Brie is creamy and buttery. Blue cheese is a strong, robust cheese with a pungent flavor, and Camembert is a soft, creamy French cheese. Finally, no charcuterie board is complete without the classic sharp, tangy British cheddar or mozzarella cheese. Create a beautiful Summer charcuterie board with these delicious cheeses and let the celebration begin! welcome summer charcuterie board

When it comes to presentation, the sky’s the limit. For a truly eye-catching display, arrange the food in a variety of shapes and sizes. Use a cutting board, platter, or wooden board as your base and add some greenery or edible flowers to give it a summery feel. If you’re feeling creative, you can even create a design with the food itself. A Summer charcuterie board is the perfect way to show off your culinary skills and impress your guests. With its delicious flavors, beautiful presentation, and endless possibilities, a welcome to Summer charcuterie board is sure to be a hit.

How to Make the Perfect Arnold Palmer Popsicle: A Delicious Summer Recipe

Are you looking for a fun and delicious way to cool off during the hot summer months? Look no further than this Arnold Palmer Popsicle recipe! This classic combination of iced tea and lemonade is a refreshing and delicious treat for adults and kids alike. With just a few simple ingredients, you can substitute the classic drink and instead make these tasty popsicles in no time. Whether using them for a Summer BBQ or just a fun way to beat the heat, this easy recipe is sure to be a hit. Keep reading for all the details on how to make the perfect Arnold Palmer Popsicle.

Arnold Palmer Popsicle Tips and Tricks

Cool off this Summer with a classic Arnold Palmer popsicle recipe! It’s the perfect blend of lemonade and iced tea, and it’s sure to be a hit with the whole family. To make the popsicles, start with equal parts iced tea and lemonade. You can also add a splash of vodka for an "adult popsicle" or flavored syrup for extra sweetness to the flavor. For a more creamy popsicle, add a scoop of vanilla ice cream or Greek yogurt.

To make your own custom Arnold Palmer popsicles, try adding different fruits like chunks of strawberry, raspberries, or blueberries. For an extra tart flavor you can add in a splash of lime juice or sliced lemons ( I did this on a few of mine). If you’re looking for a sweeter treat, swap out the iced tea for a sweeter variety such as peach tea. The Saint James teas come in so many delicious flavors like passionfruit & peach, pineapple & mango, blueberry & raspberry, and blood orange & hibiscus!

Making homemade popsicles is a fun and easy activity that the whole family can enjoy. With this delicious Arnold Palmer popsicle recipe, you can find a unique way to cool off in the Summer heat while still enjoying a classic summertime treat. So, get creative and make your own custom Arnold Palmer popsicles today!

Can the Recipe be Made in Large Batches?

Making a delicious Arnold Palmer popsicle recipe is easy, and you can even make a larger batch for a special occasion. All you need to do is increase the amount of ingredients accordingly. You can make up to a double batch of this recipe without making any additional adjustments.

When making a larger batch of popsicles, it is important to store them properly. You can easily store the popsicles in a large airtight container. If you plan on making a larger batch of popsicles, you may also want to invest in a quality popsicle maker to help speed up the process. With a larger batch, you can also use different molds to create unique fun shapes and sizes of popsicles.

The Arnold Palmer popsicle recipe is a great treat for any occasion, and making them in larger batches is a great way to share them with friends and family. With the right ingredients and equipment, you can easily make these thirst-quenching popsicles at home.

Other Variations for the Arnold Palmer Popsicle Recipe?

You can also try spicing up the recipe by using flavored iced teas. For a unique flavor, add fresh fruit or citrus slices to the popsicles. For a refreshing twist, herbs like mint or basil can be added to the popsicles.

If you want to switch things up, try substituting the lemonade with limeade or other citrus juices. To make a gourmet popsicle, infuse simple syrups with herbs or fruits. For a frozen Arnold Palmer that is more like a slushie, use crushed ice instead of regular ice cubes. With these variations, you can suit everyone's taste buds.

Note on Popsicle Molds

There are a few important steps to follow to ensure that your popsicles come out perfectly. It's important to freeze the popsicles for at least four hours before serving to ensure that they are frozen all the way through. If you're using wooden popsicle sticks, be sure to soak them in water for about 10 minutes before adding them to the molds. This will help the popsicles to stay together and make it easier to remove them from the molds. When removing the popsicles from the molds, run the molds under warm water for a few seconds before taking them out. This will help to loosen the popsicles, making them easier to remove. Once they're out of the molds, you can enjoy your Arnold Palmer Popsicles immediately or store them in the freezer for a cool treat anytime.

Ingredients

Popsicle Mold (linked one just like mine and more options below)

1 16.9 oz Saint James Green Tea (if using regular tea you will need to sweeten)

Trader Joe's Sparkling Lemonade

Sliced Lemons (optional)

Instructions

1. Add sliced Lemon into the popsicle mold (optional but adds detail to the popsicle and a little sourness) and pour Green Tea into the popsicle molds. Add stick and lid to molds. Freeze for 1 hour. If you aren't using a sweetened tea I would add sugar to tea so you have sweetness throughout the popsicle or you can mix the tea & lemonade. I just love the layered look.

2. After Tea has hardened pour in sparkling lemonade slowly. The sparkling lemonade will bubble and need more added so go slow wait and then add more. Return to freezer and let harden for 4-8 hours.

3. Remove from the freezer and quickly run under warm water to help remove from the mold. Serve immediately or put in a container in the freezer until ready to serve!

Now your delicious Arnold Palmer Popsicles are ready to enjoy! This recipe is sure to be a hit with family and friends alike. So don't wait any longer, try this simple recipe and enjoy!

Creating the Perfect Summer Tablescape For more photos of this table set up and links to everything!

Other Summer Treats You Will Love:

Creamy Root Beer Popsicle

Sparkling Ice Mint Mango Mock-tail

Shaved Brussel Sprout Salad with Apples, Goat Cheese & Candied Pecans

Fruit & Goat Cheese Bruschetta

The Perfect Lemon Drop Martini Recipe for a Refreshing and Delicious Cocktail

Discovering the Best of Fort Worth: A Traveler's Guide

Welcome to Fort Worth, Texas! This vibrant city is full of culture, history, and entertainment. It is the perfect destination for a quick weekend getaway or a longer vacation. Whether you are looking for some country western fun at the Stockyards, outdoor activities, shopping, dining, or a unique cultural experience, you can find it all here in Fort Worth. In this blog post, I will share with you some of the best things to do and see in this amazing city. From must-see attractions to hidden gems, you will find plenty of ideas for your next trip to Fort Worth. So, let's get started!

Where to Stay

If you’re looking for the perfect destination for an urban adventure, look no further than the luxurious and stylish Kimpton Harper Hotel in the heart of downtown Fort Worth. Surrounded by amazing restaurants, shops, and entertainment venues, this is the ideal spot to explore the city It is also just a very short drive to the famous Fort Worth Stockyards. The hotel offers a variety of amenities, including complimentary Wi-Fi, daily social hour with complimentary wine and beer, bikes available for use, morning newspaper delivery, pets welcome, an on-site fitness center, and 24-hour room service. You can also enjoy a delicious meal at the hotel’s signature restaurant, Il Modo, which serves up modern American cuisine. The penthouse bar, Refinery 714, located on the top floor is the best place to have a drink with amazing views that seem to look out forever.

Whether you’re in town for business at the nearby Convention Center, or looking to simply explore the city while relaxing in luxurious comfort, Kimpton Harper Hotel is the perfect destination for your Fort Worth adventure. With its great amenities and convenient location, you’ll have everything you need for the perfect stay.

How to Get around

Traveling by car to Fort Worth is a great way to explore the city along with the surrounding cities of Dallas and Arlington to see all the amazing sights that are within a short drive of each other. When planning your trip, it's important to consider your transportation options. Here are some additional tips to help you get around while in Fort Worth.

Utilize the public transportation system: Fort Worth has an extensive public transportation system that includes: The T Bus, Trolley, and TRE train. The T Bus offers routes throughout the city, while the Trolley is a great way to get around downtown. The TRE train provides service to the Dallas-Fort Worth Airport and other cities in the area.

Look into ridesharing services: There are several ridesharing services in Fort Worth, such as Uber and Lyft, that can be great alternatives to driving. They are convenient and cost-effective, and you can use your smartphone to book a ride.

Take advantage of bike lanes: Fort Worth has over 100 miles of bike lanes and bike-friendly roads. This is a great option for those who want to explore the city on two wheels.

Consider a car rental: If you plan to stay in Fort Worth for a longer period of time, you may want to consider renting a car. This can be a great option for those who want to explore the city and its surrounding areas

What to Do

The beautiful city of Fort Worth, Texas is a great booming place to explore for travelers of all ages. From its vibrant culture and unique attractions to its delicious dining and shopping, there is something for everyone in Fort Worth. One of the best places to start your trip is the Fort Worth Stockyards National Historic District. This area is full of old-fashioned country western charm, with its cobblestone streets, brick buildings, shopping, restaurants and stockyards. Take a tour of the area and learn about its fascinating history – it’s sure to be a memorable Texas experience! Be sure to bring your cowboy hats and boots!

The Kimbell Art Museum is another must-see destination in Fort Worth. This world-renowned museum houses an impressive collection of art from around the world. Take a guided tour or explore on your own – either way, you’re sure to learn something new.

If you’re looking for a relaxing activity, take a stroll along the Trinity Trails. This network of trails winds through the city along the banks of the Trinity River and offers stunning views of the city skyline. Enjoy the natural beauty of the area and get some fresh air while you’re at it!

The Fort Worth Water Gardens is a great place to explore, too. This man-made oasis features several pools, fountains, and waterfalls

The Stockyards

Located in the heart of the historic Stockyards, visitors can enjoy a variety of attractions and activities that will transport them back in time. Twice a day, visitors can watch a live cattle drive, where cowboys move longhorns down Exchange Avenue. Every day at 11:30 am and 4:00 pm, the Fort Worth Herd drives a herd of Texas longhorn steers down Exchange Avenue. It's the world's only twice-daily cattle drive and is led by two mounted wranglers. The show is a sight to behold and a great way to get a feel for the history of the area. After the cattle drive, visitors can take a guided tour of the Stockyards to learn more. Don't forget to take a photo with one of the longhorn steers after the show! It's a great souvenir to take home and remember your trip to Fort Worth.

The Stockyards Museum is a great way to learn about the history of the area, and the Texas Cowboy Hall of Fame celebrates the pioneers of rodeo and ranching in the area. For those who want to shop, there are plenty of options at the Stockyards. Visitors can find Western-style apparel and accessories at one of the many stores in the area. Looking for a bite to eat? There are many restaurants that serve up classic Tex-Mex and BBQ. Afterward, stop by the White Elephant Saloon for a cold beer and a game of pool. For a unique and immersive experience, the Fort Worth Stockyards are definitely worth a visit. With its live cattle drive, museums, shops, and restaurants, it's easy to see why this area is so popular with both locals and visitors alike.

Go to a Rodeo

Are you looking for a unique and exciting Texas travel experience? Look no further than Fort Worth, Texas! With its rich history, vibrant culture, and thrilling rodeos, Fort Worth is the perfect destination for your next vacation.

The Fort Worth rodeo is a must-see experience! Enjoy the thrill of watching daring cowboys and cowgirls up close compete in bull riding, barrel racing, and other events for prizes and fame. You can also join in the festivities and take part in activities such as mutton busting and calf roping. After the excitement of the rodeo, take some time to enjoy the traditional music, dance, and food of the area.

The Cowgirl Hall of Fame and Museum

The Cowgirl Hall of Fame and Museum in Fort Worth, Texas is an amazing place to visit for anyone interested in learning about the history of the American West. With over 5,000 artifacts and memorabilia from the most influential women of the West, visitors will not be disappointed. There are numerous exhibits that feature the stories and artifacts of the most noteworthy cowgirls and women of the West, and even a special section dedicated to the legendary Annie Oakley.

The Cowgirl Hall of Fame and Museum also offers interactive activities and educational programs for both children and adults. Open for visitors year-round, there are many special events throughout the year that are sure to entertain and educate. Admission to the museum is free, making it an affordable option for anyone looking for things to do in Fort Worth. From learning about the history of the American West to exploring the artifacts of Annie Oakley, the Cowgirl Hall of Fame and Museum is sure to provide a wonderful experience for all who visit.

The Best Restaurants In Fort Worth

If you're looking for the perfect Fort Worth travel guide, look no further. Fort Worth has a lot to offer.

Toro Toro - This pan Latin restaurant in the heart of downtown Fort Worth. They offer delicious one-of-a-kind food, craft cocktails, and beautiful Western design. You'll want to eat here again and again! Not in Fort Worth, but loved their food? Not to worry! They also have locations in Houston & Miami!

Rise Souffle - Nestled in the shops at Clearfolk upscale shopping center this a unique one-of-a-kind Souffle & wine bar designed with French influence. They offer delicious souffles, an impeccable wine menu and amazing service you will remember forever. This place is so good, and such a unique experience that even Martha Stewart herself has dined here!

Il Modo - Where traditional Italian food meets modern design. When staying at the Harper Hotel in Fort Worth, Texas be sure to head downstairs for a delicious brunch or dinner at the Il Modo! Voted the Best New Restaurant & Best Italian in Fort Worth, Texas Magazine in 2022 this restaurant will be sure to knock your socks off!

The Best Bars In Fort Worth

Fort Worth is a great destination for a night out, and the city has plenty of bars to choose from. For a classic night of fun, start at The Flying Saucer. This bar offers an impressive selection of over 200 beers on tap and in bottles, making it the perfect spot for any cold beer-lover. If you’re looking for something a bit more classy, The Usual is the place to go. This chic and modern bar offers delicious food and craft cocktails, making it a great spot for a night out.

If you're a craft beer lover looking for an ideal spot to spend an afternoon while visiting Fort Worth, Texas, Second Rodeo Brewing is a must-see. Located in the revitalized Southside neighborhood, this brewery offers a wide variety of craft beers and ciders, including sours, IPAs, and lagers.

If you're looking for a great night out in Fort Worth, The Basement Bar is the perfect spot. Located in the historic West 7th Street district, this popular bar is known for its wide selection of craft beers and cocktails. The Basement Bar offers an extensive menu of bar snacks and small plates, perfect for sharing with friends. You can also take advantage of their happy hour specials and enjoy discounted drinks from 4-7 pm on weekdays. The bar has a cozy atmosphere and friendly staff, making it the ideal spot to unwind after a busy day exploring Fort Worth. Whether you're looking for a place to sit, relax, and enjoy a drink with friends, or for a lively evening of live music, The Basement Bar has you covered.

Fort Worth, Texas is full of history and culture, and one of the best ways to experience it is to visit the White Elephant Saloon. Located in the heart of the city, this establishment has been a staple in Fort Worth since 1887. The saloon has a rustic charm and a casual atmosphere that makes it the perfect spot to unwind after a long day of sightseeing. The White Elephant Saloon is known for its wide selection of local craft beers, as well as its delicious burgers and sandwiches. The saloon also hosts live music and other events throughout the year, making it a great honky tonk to catch some live entertainment. Be sure to visit the White Elephant Saloon when you're in Fort Worth and get a taste of the city's rich history and culture.

Whether you’re looking for a night of craft cocktails or a classic dive bar experience, Fort Worth has something for everyone. With so many great bars to choose from, you'll never run out of fun!

When to Visit Fort Worth

Depending on the Fort Worth weather and many events hosted in town is when you'll want to visit. Here is a breakdown of all the info for all the seasons. Spring in Fort Worth is a great time to explore the city. From March to May, Fort Worth offers a variety of festivals and outdoor activities. The mild weather is perfect for discovering the city's attractions. Summer in Fort Worth is also a great time to visit. From June to August, the days are long and the temperatures are warm, making it an ideal time to explore all the city has to offer.

Fall in Fort Worth is a beautiful time to visit. From September to November, the temperatures are perfect for outdoor activities, making it a great time to get a unique experience. Winter in Fort Worth is also mild and the city is decorated for the holidays. From December to February, it's a great time to explore the city and check out all the local attractions. What I'm getting at is no matter the season, Fort Worth is a great destination for travelers looking for a uniquely fun experience.

If you liked this guide here are more that will help you plan your next trip:

5 Essential Tips for an Unforgettable Visit to Magnolia Market

A Comprehensive Guide to Cambridge, Massachusetts

A weekend in Carmel, CA

Three Days in The Rainy City: A Seattle Washington City Guide

An Unforgettable Experience: The Perfect Surprise Trip To Denver

Paso Robles City Guide

Creating the Perfect Summer Tablescape

Summer is a time for outdoor gatherings with friends and family, and what better way to celebrate a memorable evening than with a beautiful Summer tablescape? With the right touches of vibrant colors, lush florals, and a touch of the outdoors, you can create a stunning tablescape that will be sure to impress your guests for any type of celebration you may be hosting. In this blog post, we'll explore some easy tips and tricks to create the perfect Summer tablescape. Ranging from the furniture I used to the floral centerpieces and everything in between. Let's dive right in!

Party around a Summer Theme

Nothing says Summer quite like a beautiful tablescape. Whether you’re hosting an outdoor picnic or an indoor dinner party, a Summer tablescape can help create a fun and festive atmosphere. One of the best ways to create a seasonal feel is to use bright, warm colors. Try combining bright oranges, greens, and pinks to create a cheerful and sunny atmosphere. For a garden-inspired look, use wildflowers and a variety of fruits. Bowls of fruit will not only add a lovely addition to your decor and centerpieces, but they also make for a great touch to a bar cart. This way when you run out of cut lemons or limes you have them ready to go for your next round of cocktails.

To make sure your guests stay refreshed throughout the evening, include a variety of refreshing drinks and snacks in your tablescape. Be sure to have some options available for both adults and children. From lemonades and teas to fresh fruit and popcorn, you can create a fun and inviting atmosphere for all of your guests to enjoy.

To add to the Summer feel, play music or create a playlist to set the perfect seasonal mood. This can help get everyone in the party mood and keep the energy up throughout the night. Also, to keep everyone entertained, add a few outdoor games like horseshoes, cornhole, badminton, or croquet. With a beautiful Summer tablescape, you can make sure your guests have a great time and create lasting memories.

Set an Easy Table

A great way to start is by choosing bright Summer colors for your tablecloth and napkins. Adding a few colorful blooms in vases will instantly create a cheerful atmosphere, and the vibrant scent will certainly add to the ambiance. Placemats are a great way to add even more color to the table, and they can protect your tabletop from spills. Place a few small dishes on the table to hold condiments, salt and pepper, and other items while utilizing them as a decorative element. And finally, top off the table with a centerpiece that reflects the season, such as a bowl of fruit or a vase of flowers. With a few simple touches, you’ll have a beautiful Summer tablescape that will be sure to impress your guests.

For this super simple tablescape idea, I went with small bistro tables. You can add several of these to your yard for intimate conversation and quiet areas to sit in between playing yard games or swimming in the pool. These come in multiple colors and are foldable making them a great addition to your party planning collection. Linked -here- and below for you.

Creating the perfect Summer tablescape is one of the most enjoyable parts of the season. To make it extra special, a centerpiece is a perfect way to liven up the table and my signature start to any table display I put together. To make a beautiful centerpiece, start with bright-colored flowers to create a garden variety display. To add a fragrant touch, incorporate some of your favorite herbs into the design. Place the centerpiece in the middle of your table to be the focal point of your Summer tablescape. Have extra flowers on hand? Make additional floral arrangements to add to your bar cart or drink area, inside of your home to keep the party going in all areas and in the bathroom for a pretty piece of decor when guests use the powder room.

What Colors are Popular for Summer Tablescapes?

Summer is the perfect time to get creative with your table settings. A beautiful tablescape can add a touch of elegance and sophistication to any gathering. When it comes to creating the perfect Summer tablescape, there are many different options to choose from. Bright and bold colors are a great way to add a cheerful, summery vibe to your table. Popular Summer colors include shades of pink, yellow, green, and terracotta. These colors create a vibrant and cheerful atmosphere that will be sure to brighten up your gathering. I added all of these colors in this tablescape to give a beautiful Summer presentation that also tied together with my drink of choice! For every table I put together I always find a place to start and for this bistro-inspired table setting I started with these colorful teas I was planning to serve from my bar cart. The green bistro set and colorful florals added to this color assortment as well!

Summer is the perfect time to get creative with your tablescape! Incorporating bright and bold colors into your tablescape will create a beautiful and inviting atmosphere. Mix and match different prints, patterns, and textures to create a unique and stylish place setting. You can also add some unexpected elements to your tablescape like colorful fruit, a collection of different textures and transitional furniture. With a little bit of creativity and attention to detail, you can create a Summer tablescape that will be sure to impress your guests.


What are Some Creative Ideas to Make My Summer Tablescape Unique?

When it comes to Summer tablescapes, there are so many creative ways to make your table stand out. One way to add a unique look is to incorporate unexpected colors, such as yellow, pink, or green. This will give the table a vibrant and eye-catching appearance. You can also add interesting textures to the table by mixing and matching different fabrics. Adding a centerpiece to the table is an easy way to create a beautiful and natural look. Consider filling a bowl with fresh fruits or flowers for a Summery atmosphere. Adding string lights to the ceiling or along the walls will create a romantic and outdoor-inspired feel to the space. These are just a few ways to create a stunning Summer tablescape, whether you are putting together a birthday celebration or just a fun get-together it will be sure to impress your guests.

Our Blue Guest Room Remodel & Tips On How To Remodel Your Guest Bedroom

If you're looking for an easy and affordable way to spruce up your home, a guest bedroom remodel is a great place to start. Whether you're looking to makeover your guest bedroom to create a cozy and inviting space for your visitors, or to just refresh the look of the room, a simple remodel can help transform the look and feel of your home. In this blog post, we'll be discussing what I did to our latest guest bedroom remodel and exploring design ideas to help you create the perfect guest bedroom. So let's get started!

Guest Bedroom Ideas & Designs

Remodeling a guest bedroom can be a great way to make your guests feel welcome and comfortable when they come to stay. To make sure the room is both inviting and comfortable, there are a few key elements to consider.

First, choose a calming color palette to decorate the room. Soft blues, lavenders, and greens are all great choices. This will help create a relaxing environment for your guests. For our remodel we went with a beautiful blue/green tone with some creams and touches of wood and gold. This gave a calming effect but also tied the room into the rest of our home well.

Next, invest in a quality bed and mattress. Your guests should not have to sleep on an uncomfortable bed. Make sure the bed and mattress fit the size of the room and can be used for multiple guests if needed. In addition, incorporate plenty of storage options. If your guests are staying for an extended period, they will need to store their belongings. You can put in drawers, shelves, or a wardrobe to provide them with enough space. We luckily have walk-in closets in all our rooms, but we still decided to add nightstands with drawers and a vintage armoire for both the right look and for their additional drawer space.

Also, consider adding a sitting area if you have the space for your guest bedroom decor. This will give your guests a nice place to relax and read in the mornings or evenings, while the rest of the house may be slowly rising. Also, a sitting area is always the perfect idea for some much-needed quiet time. Add special touches like fresh flowers or a basket of snacks to make the guests feel right at home and table books for them to read but also double as stylish decor.

Picking the Right Bedroom Colors and Decor Inspiration?

The guest bedroom is a special space that needs to be comfortable and inviting to your visitors. When remodeling the guest bedroom, it's important to choose a color palette that reflects the atmosphere you want to create in the room. Consider the existing furniture and accessories in the room when selecting colors, and use the 60-30-10 rule to ensure a balanced look: 60 percent of the room should be a dominant color, 30 percent should be a secondary color, and 10 percent should be an accent color. To add interest to the space, incorporate a mix of textures and patterns. The natural light in the room should also be taken into consideration when choosing wall colors. Finally, choose window treatments that frame the room and tie the colors together delightfully. With a few simple steps, your guest bedroom will be transformed into a welcoming and inviting space.

Provide Reading Material & A Place to Read

Remodeling a guest bedroom can be a daunting task. Creating a welcoming and comfortable space for visitors to stay in isn't easy, but it's well worth the effort. One of the easiest and most enjoyable ways to make a guest bedroom feel cozy and inviting is to stock it with interesting books and magazines. Providing easy-to-read books and magazines that cater to different interests, such as home dΓ©cor, travel, and interior design, is a great way to make visitors feel at home. It’s also a great idea to stock up on books about the local area, as these will be of interest to visitors and can serve as a great conversation starter. Additionally, placing an up-to-date guidebook in the guest bedroom can make exploring the city or town much easier for visitors.

They will also need a place to sit and read. With a comfortable place for them to relax and enjoy their stay, your guests will feel right at home. A well-designed sitting area can also make the room look larger and provide extra space for your guests to store their belongings. Our guest bedrooms both had a perfect nook where we could add a desk or dresser to provide storage and a workspace for our guests. We opted for sitting areas in both our guest rooms with small tables to set their coffee or glasses. Make the room cozy and inviting with the addition of colorful throw pillows and soft blankets. This will create a warm and inviting atmosphere that will make your guests feel right at home. With the right touches, you can create a space that will make your guests feel welcome and appreciated.

What Type of Furniture Should I Choose for a Guest Bedroom?

When it comes to remodeling a guest bedroom, comfort should be top of mind. Finding furniture that is both aesthetically pleasing and comfortable is key. Start with a bed with a plush mattress and headboard as the focal point of the room. If space allows, you may want to add a dresser or nightstand to provide a place for guests to store their belongings. Completing the look with a comfortable chair or loveseat will make the room inviting, and offer a cozy spot to relax. For something a bit more luxurious, an upholstered ottoman or chaise lounge is a great addition. Finally, don't forget the detailsβ€”a few decorative pillows, a cozy throw, candles or flowers can all help to make the room more welcoming and comfortable.

With a few simple changes, you can create a warm and inviting space for your guests to relax in. From a fresh coat of paint to new furniture, there are plenty of ways to update the look and feel of the room. With a little bit of creativity, you can create a cozy and inviting atmosphere for your guests to enjoy. With the right furniture and accessories, your guest bedroom will be one that your visitors will never want to leave!

What are the Best Ways to Decorate a Guest Bedroom on a Budget?

If you're looking to give your guest bedroom a fresh new look, but don't have a huge budget to work with, there are still plenty of ways to make it happen. Shopping for second-hand guest room furniture and accessories is a great place to start. You can often find pieces that look as good as new, for a fraction of the cost. I found our armoire for this room on Facebook marketplace and all it needed was little Bar-Keepers scrub on the handles and Old English on the wood and it looked brand new. I also found our nightstands/bedside tables on the Facebook marketplace. I decided to paint those to add to the color scheme but loved the similar design to the armoire.

Another way to save money is to utilize the materials you already have on hand. A fresh coat of paint in a neutral shade can give the room a completely new look with minimal effort. Adding a few accent pieces such as wall art or a throw rug is a great way to personalize the room. Incorporating items with multiple uses, like ottomans or benches, will give you the most bang for your buck. Placing a few plants around the room will bring in a natural element and create a cozy atmosphere. When it comes to linens and bedding, choosing classic styles in neutral colors will give it a timeless look. With the right combination of these tips, you'll be able to create a beautiful guest bedroom without breaking the bank.

What are the Benefits of Having a Guest Bedroom In the Home?

A guest bedroom remodel can be a great way to increase the comfort of your overnight guests, host family and friends, and add an extra room to your home. Whether you’re looking for a place to entertain, an extra bedroom to convert into a home office or exercise room, or a place to relax and unwind, a guest bedroom remodel can be the perfect solution. Not only will you have an attractive space to show off to your guests, but you’ll also have the potential to increase the value of your home should you decide to sell. Additionally, a guest bedroom remodel can be a great way to give an out-of-town family a place to stay during the holidays.

With a guest bedroom remodel, you can create a space that is both inviting and functional. Start by choosing the right furniture and decor to create the perfect atmosphere. Consider adding a comfortable bed and seating area, as well as storage for linens and clothing. You may also want to add a desk or table for working or hobbies or add a television for entertainment. Don’t forget to finish off the look with artwork, window treatments, and other accents.

A guest bedroom remodel can be a great way to make the most of a small space. Whether you’re looking for a place to entertain, an extra bedroom to convert into a home office or exercise room, or a place to relax and unwind, a guest bedroom remodel can give you the extra room you need. With the right design and decor, you can create a space that is both inviting and functional and one that will add value to your home.

What I did In Our Guest Bedroom Remodel:

I started this project for the One Room Challenge and re-did another upstairs bedroom for when guests come to visit from of town. I knew I wanted to make this room a traditional calming blue color and quickly found this gorgeous Sanna Light Blue wallpaper from Sandberg and fell in love. I added in Ballard Design pillows and the rest took off from there.

I wanted this room to differentiate from our other guest room we did with full wallpaper, so I decided to do fun molding and paint for the bottom half of the wall. Novo has some amazing pre-made molding designs that made it so easy to work with! This was our first time installing any molding and doing woodwork ourselves around the house, but with a few quick purchases like a Mitre saw and nail gun, the project went so well. I highly recommend looking at their options to give your room that creative custom architectural look without breaking the bank. They also have their brand at Home Depot as well.

After adding all the trim and molding next we needed to paint! When I first painted the Kelly Moore Ocean Cruise color I wasn't sure it would match with the wallpaper but once I got both coats and put the room together I knew I made the perfect choice.

Two things I decided I wanted to DIY myself to cut down on costs were the lampshade for the table lamp and the pictures above the bed. I ordered fabric from Ballard Designs to match the pillows and designed the look of the lampshades myself. I have more videos on how I did this on my Instagram under stories "guest bedroom 2". Then I worked on the frames above the bed. I wanted a similar style to a framed picture I loved that Ballard Designs has. However, the cost of the frames was a pretty penny and I didn't want to spend that on a guest bedroom. So, I tried recreating the look myself and I found frames from Target and Medallions on Etsy, then painted the cardboard on the frame the same "ocean cruise" color from Kelly Moore. I also added a small layer of rub & buff antique gold around the inside of the matt to give a vintage and more detailed look. I love how it all turned out and that it was a fraction of the cost and a rewarding DIY project at the same time!

I have linked everything I used below to hopefully give you the inspiration you need to create the most beautiful guest room!

Other Home Blog Posts You Will Love:

Guest Bedroom Makeover Reveal

Our Neutral (with pops of pink) Bedroom

White and Gold Modern Bathroom Remodel

Create a Delicious Layered Hummus Dip for Your Next Snack or Appetizer

If you're looking for a quick and easy healthy appetizer to bring to your next party, look no further than this delicious and creative layered hummus dip idea! This crowd-pleasing dip is easy to make and can be customized to fit the tastes of any crowd. With creamy layers of hummus, vegetables, and cheese, this dip is sure to be a hit at your next gathering. Not only is it delicious, but it's also full of nutrition and flavor. So, get ready to wow your guests with this delicious layered hummus dip!

This dip is perfect for an outdoor gathering or as part of a dinner party menu. The beauty of this dip is that it can be customized to fit any dietary restrictions or guest preferences. By layering hummus with other ingredients such as feta cheese, tomatoes, and olives, many unique flavor combinations can be created that are all sure to please. Hummus is rich in fiber, protein, and healthy fats, making it an excellent choice for a nutritious snack. Serve this layered hummus dip with warm pita bread or crackers for a crunchy contrast to the creamy hummus. Enjoy this dip as a healthy alternative to traditional chips and dip! Whether you’re entertaining or just having a snack for yourself, layered hummus dip is sure to please.

Assembling The Layered Hummus Dip

Assemble on a Small Platter Making All the Components Easy to See and Scoop. This delicious dip is made up of layers of hummus, diced tomatoes, thinly sliced radishes, olives, feta cheese, and a drizzle of olive oil. To make the dip easier to scoop and enjoy, layer the hummus dip on a small platter. Serve with pita chips, fresh vegetables, or crackers for the perfect appetizer or snack. All of these flavors and textures combine to create a unique and delicious dip that is sure to be the talk of the party.

The best part about this layered dip is the ability to customize it for your guest's tastebuds or dietary restrictions. You can add alternatives like roasted red peppers instead of tomatoes. Add the cucumbers onto the dip instead of a side for scooping. For a vegan option, omit the feta cheese and replace it with nutritional yeast. Need more protein? Add in grilled chicken. The possibilities are endless, so make it all your own!

Ingredients

Garlic Hummus (I went the easy route and chose store-bought you can make your own)

Kalamata Olives

Tomatoes

Radish

Feta Cheese Crumbles ( I did a Mediterranean flavor)

Olive Oil

English Cucumber

Pita Chips

Instructions

1. Layers of Hummus on a beautiful serving plate

2. Layer on your toppings. Like I said above make this all your own! If you prefer another topping then add that in or substitute it out. Drizzle olive oil after adding all toppings.

3. Arrange Pita Chips and Cucumbers around the dip for easy scooping and beautiful presentation.

4. I also added small bowls of 2 kinds of olives for those that don't want dip to have another option and add a finishing touch.

5. Refrigerate until you are ready to serve!

How to Store Leftovers

Layered hummus dip is the perfect appetizer for any gathering or special occasion. Not only is it simple to make, but it is also versatile and can be prepared ahead of time. To ensure that your dip is as delicious as possible, make sure to let it cool completely prior to storing it. Store any leftovers in a shallow container with a lid, making sure it is airtight to prevent spoilage. Enjoy your dip within 3-4 days, or freeze it for later use. To reheat leftovers, use the microwave or the stovetop. With a few easy steps, you can enjoy a delicious layered hummus dip that will be the talk of your next event!

I hope you loved this Greek Hummus Dip Recipe, here are a few other appetizers you will also love:

Fruit & Goat Cheese Bruschetta

A Crowd-Pleasing Stuffed Mushroom Recipe

5 Ingredient Bacon Ranch Football Shaped Cheese Ball

Deliciously Different: Pink Deviled Eggs to Spruce Up Your Easter Brunch

Delicious Buttery Italian Croissant Sandwich

Delight Your Guests with an Antipasto Christmas Wreath

The Perfect Lemon Drop Martini Recipe for a Refreshing and Delicious Cocktail

Are you looking for a delicious and refreshing cocktail recipe to spice up your next get-together? If so, you'll want to try a Lemon Drop Martini. This easy-to-make, zesty cocktail is sure to tantalize the taste buds of all your guests. Not only is it packed full of flavor, but it's a great way to show off your bartending skills. So if you're ready to achieve the perfect Lemon Drop Martini, read on to learn how to mix up this classic original cocktail.

The Lemon Drop Martini is a classic cocktail that is sure to please any crowd. Being both sweet and tart, this drink is the perfect balance of refreshing and flavorful. When making a Lemon Drop Martini, be sure to use freshly-squeezed lemon juice for the best flavor.

What’s In a Lemon Drop Martini?

Are you looking for a delicious and refreshing drink to enjoy during the hot summer days? Look no further than the Lemon Drop Martini! This classic cocktail is made with vodka, simple syrup, and fresh lemon juice, giving it a sweet and tart flavor that is perfect for sipping in the sun.

If you’re feeling adventurous, add a few drops of bitters to give the drink a subtle herbal finish. The key to a great Lemon Drop Martini is using fresh lemon juice and quality vodka. Once you’ve perfected your Lemon Drop Martini, serve it chilled in a martini glass and garnish with a fresh lemon wedge. Enjoy this delightful drink in the sun and savor its sweet and tart flavor!

How to Make a Sugar Rim

Starting a lemon drop martini is easy when you know the steps! Begin by ensuring you have a clean, dry glass. Take a plate and pour a small amount of sugar onto it. Take a wedge of lemon and run it around the rim of the glass and then press it into the sugar plate. This will give your finished drink a nice sugary sweetness.

If you are making a lot of glasses with the sugar rim, try dampening a clean new sponge with water on a plate instead of using a hundred lemons. This will save you time from too much water dripping down and glass as well as saving lemon juice. Once the glass is rimmed with sugar, you are ready to make your delicious lemon drop martini!

When to Serve a Lemon Drop Martini

A Lemon Drop Martini is the perfect drink for any special occasion. Whether you’re celebrating a wedding, anniversary, or birthday, this delicious martini is sure to be a hit. This classic drink is also a great choice for Summer barbecues and outdoor gatherings. It’s the perfect refreshing drink to get the party started before dinner is served.

For those looking for a quick and easy beverage to enjoy after a long day at work, a Lemon Drop Martini is a great choice. It’s light and refreshing and is sure to be a hit with your guests. It’s a great drink to serve at brunch or dinner parties, or even a girl’s night in. No matter what the occasion, a Lemon Drop Martini is sure to be a hit.

What Type of Vodka Should I Use to Make a Lemon Drop Martini?

When making a classic Lemon Drop Martini, the main ingredient is vodka. There are many different brands and types of vodka to choose from, and each one will give the drink a slightly different flavor. Tito's Vodka is a great choice for a Lemon Drop Martini because of its smooth, clean flavor and light citrus notes. Hanson Sonoma Meyer Lemon Vodka is also great for a Lemon Drop Martini because it is flavored with lemon. If you want a smooth, light vodka, Grey Goose is a great choice. Smirnoff Citrus Vodka is made with lemon and lime flavors and is perfect for mixing a Lemon Drop Martini. Ciroc Vodka is a smooth and creamy vodka with a light citrus flavor and is great for making a Lemon Drop Martini. Finally, Stolichnaya Citros Vodka is a citrus-flavored vodka that is perfect for making a Lemon Drop Martini. No matter what type of vodka you choose, you can make a delicious Lemon Drop Martini with a few simple ingredients.

What are Some Garnishes I Can Use to Dress Up a Lemon Drop Martini?

There are so many ways to garnish this lemon drop martini recipe. You can add a candied or dried lemon wheel. To add an extra colorful touch, you can also add a few blueberries and mint leaves. Or for an extra special touch, add a star anise and a lemon thyme sprig. If you decide to take it up a notch and add another flavor such as making it a raspberry lemon drop you can add fresh raspberries as well! The options and flavors are endless!

Can I Make a Virgin Lemon Drop Martini?

The Lemon Drop Martini is a classic cocktail that has been around for years. Made with vodka, simple syrup (or orange liqueur/cointreau), and freshly squeezed lemon juice, it is a refreshing and delicious drink. However, what if you don’t want to include alcohol in your drink? Don’t worry – it’s easy to make a non-alcoholic version of the classic Lemon Drop Martini. All you need to do is replace the vodka with a non-alcoholic substitute like sparkling water, cranberry juice, or even ginger ale. You can also use a sugar-free lemonade for a lighter, healthier option. Trader Joe's also had a delicious limoncello this time of year that is nonalcoholic and would make a great substitution for vodka in this lemon drop! Add some ice cubes and a slice of lemon for a zesty, delicious drink that’s perfect for any occasion.

Lemon Drop Martini Recipe

Ingredients

3 oz vodka

3 oz simple syrup

3 oz freshly squeezed lemon juice

Extra granulated sugar for rim garnish

Instructions

1. Rim your martini or cocktail glass. Take a lemon wedge and run around the edge of your glass to lightly dampen it. Then flip upside down and press into a plate of granulated superfine sugar.

2. Grab your cocktail shaker and add over ice your favorite vodka, homemade or store-bought simple syrup, and freshly squeezed lemon juice. Place lid on and vigorously shake! The harder you shake the icier the cocktails will become.

3. Strain into glass, add garnish, and ENJOY!

Other Cocktails You Will Love:

Watermelon Twist Cocktail

Refreshing Lemon Twist Cocktail

4 Deliciously Easy 4-Ingredient Tequila Cocktails (margarita, paloma & more)

Pitcher of Pina Colada’s

Strawberry Orange Bourbon Smash

Creating the Perfect Memorial Day Charcuterie Board

Memorial Day is a holiday dedicated to the remembrance of those brave heroes who have died in service of our country. In my world, anytime you have a gathering of close friends, family, and loved ones, a good charcuterie board is a great way to celebrate. On this day your board can follow the theme and help to show off your patriotism while bringing friends and family together for a special celebration of remembrance. This board is the perfect snack to enjoy while watching the parade or just spending valuable time with family. With its colorful array of fruits, veggies, meats, cheeses, and other items, this board will be sure to make your Memorial Day a special one.


Why We Love This Idea for Memorial Day

With the variety of meats, cheeses, and fruits available, you can create a unique charcuterie board that will be sure to impress your guests. Start by selecting a variety of meats, such as prosciutto, salami, and pepperoni. Add some cheeses, such as cheddar, brie, and blue cheese. Then, add some fruits and vegetables to your board, anything that adds reds, whites and blues is perfect for any patriotic celebration! Your Memorial Day Charcuterie Board will be a delicious way to share in the spirit of the holiday. Enjoy some quality time with your loved ones and savor the flavors of the season. Whether you’re hosting a backyard barbecue or just having a relaxing evening at home, a charcuterie board is the perfect way to mark the occasion. So, get creative and show off your patriotism with a Memorial Day Charcuterie Board.

How to Make Your Charcuterie Board a Patriotic Theme

Memorial Day is the perfect time to get creative with your charcuterie board. Start with a red, white, and blue background, like a red plate, a white plate, and a blue platter. Add some bright and festive fruits and vegetables to your board, such as strawberries, blueberries, pomegranates, blackberries and raspberries. Cheese is also an essential part of any charcuterie board, and classic varieties like cheddar, bleu cheese, and brie are sure to be a hit. Include some charcuterie meats like salami, prosciutto, and pepperoni for added flavor. Add some jams and spreads like strawberry jam, blueberry jam, cranberry jam or anything red or blue to your board for a sweet touch. Make sure to include some crackers and breads like baguettes, crostini, and crackers for scooping up all the deliciousness. Add in some nuts like almonds, cashews, and walnuts for a salty and crunchy element where you see any space on the board. Lastly, grab your star-shaped cookie cutter. You can cut out watermelon cubes as I did here, cheese slices, or a star in the middle of your brie and fill it with jelly or pomegranate seeds. With these tips, you'll have the perfect Memorial Day charcuterie board in no time.

What Type of Board to Use When Making a Charcuterie Board?

Memorial Day is the perfect time to get together with family and friends and enjoy a delicious charcuterie board. Whether you’re hosting a backyard barbecue or having a picnic in the park, a charcuterie board is sure to be the perfect centerpiece. When creating a charcuterie board, the first thing to consider is the board itself. A wooden board is the most ideal choice for creating a charcuterie board. Its natural surface provides an attractive backdrop for the food items and also makes it easier to clean once the board is finished. Ceramic, slate, and marble boards are also great options for making a charcuterie board. These materials all create a stunning presentation for the food and they are also easy to clean. For a truly unique charcuterie board, you can use a cutting board made of bamboo. Bamboo is a natural material that looks beautiful and is also easy to maintain. For this board, I used a large white tray with handles that made this a perfect β€œboard” to travel outside with. It had a soft red edge that went with the theme. You can find similar boards that will be perfect for your Memorial Day charcuterie board by following the link below! So, this Memorial Day, make a charcuterie board to celebrate the occasion in style!

What Types of Drinks Pair Well with a Memorial Day Charcuterie Board?

For a festive start to the evening, why not try a glass of sparkling wine? Sparkling wine is a classic pairing for charcuterie boards, and for the best flavor choose a dry, high-acid sparkling wine. If you’re looking for festive cocktails, then why not opt for a classic gin and tonic or a Moscow mule? I also linked some delicious cocktail recipes below that I love to make in the summer months! Alternatively, a cold beer is always a great choice when enjoying a charcuterie board. If you’re a beer drinker, opt for something light and refreshing like a pilsner or pale ale.

For a truly memorable Memorial Day, creating a charcuterie board and pairing it with drinks is a great way to celebrate. Enjoy a glass of sparkling wine, a classic cocktail, or a cold beer with your board for the perfect Memorial Day celebration.

How Long Does a Memorial Day Charcuterie Board Take to Make?

A Memorial Day Charcuterie Board is the perfect way to celebrate the holiday in style. With minimal effort and some planning, you can make a beautiful board in as little as 15 minutes. If you plan ahead with a good grocery list, you can have your board ready in no time for a Memorial Day celebration. If you are pressed for time you can make ahead and refrigerate as well. All you need to do is pick out your favorite meats and cheeses, along with a variety of crackers, jams, and other accompaniments and start assembling. You can also incorporate some Memorial Day-themed items, such as American flags or red, white, and blue decorations, to make your board more festive. By getting creative, you can make your board something truly special. You can also add in a few special touches, like a festive flag or some festive desserts, like chocolate covered pretzels, to make your board even more special.

This Memorial Day, why not pay tribute to the holiday with a delicious charcuterie board? It's a great way to celebrate as friends and family come together, and you don't have to spend hours putting it together. In just 15 short minutes you can create a stunning and scrumptious board that will be the centerpiece of your celebration. So get ready to honor Memorial Day with a fabulous charcuterie board

Other Appetizers & Cocktails to give you inspiration this Holiday:

2023: Charcuterie Board Ideas to Help You Ring in the New Year

Celebrating Mother's Day with a Deliciously Decadent Charcuterie Board

Refreshing Lemon Twist Cocktail

Strawberry Orange Bourbon Smash

3 Mexican Mule Recipes with a Twist!

A Sweet and Delicious Recipe for Lemon Poppyseed Bread

Are you looking for an easy and delicious treat to make? Lemon poppyseed bread is a classic that anyone can enjoy! This bread is a tried and true favorite that has been around forever, and it is sure to become a go-to recipe for your family. Whether you're looking for an afternoon snack, a sweet breakfast, or a unique and beautiful dessert, this bread will be a hit. With just a few ingredients, you can make a flavorful and moist bread that is perfect for any occasion. Let's dive into the recipe and see how to make the perfect lemon poppyseed bread!

Tips to Make the Best Lemon Poppy Seed Loaf

Lemon Poppyseed Bread is a classic dessert that's perfect for any occasion. Its bright, tangy flavor and light, fluffy texture make it a classic favorite treat. To make the best loaf of Lemon Poppyseed Bread, it’s important to use freshly squeezed lemon juice and zest. This will give your bread a bright and tangy flavor. Additionally, use white sugar instead of brown sugar to achieve a lighter loaf. To get the perfect texture, make sure you use the correct ratio of poppy seeds to batter. Additionally, preheat your oven and bake at the correct temperature for nice and even baking. Grease and flour your loaf pan to prevent sticking and let the bread cool completely before slicing. Once the bread is finished baking, store it in an airtight container to keep it fresh. With these tips, you’ll be sure to make the perfect loaf of Lemon Poppyseed Bread!

Can You Make This Recipe Without Poppy Seeds?

With its unique combination of sweet and tart lemon and crunchy poppy seeds, it's no wonder why this bread is so popular. But what if you don't have poppyseeds on hand or don't want to use them in your recipe? Not to worry - you can still make a delicious lemon poppyseed bread without the actual poppyseeds! All you need to do is replace the poppy seeds with a few other ingredients that will help to create a similar flavor and texture. Options include substituting chia seeds, crushed nuts, shredded coconut, or even raisins for the poppy seeds. You can also add a bit of almond extract or lemon zest to help bring out the lemony flavor. The result will still be a delicious, moist bread with a hint of lemon and crunch.

Making lemon poppyseed bread without poppyseeds is surprisingly easy and offers a great way to enjoy this classic treat. With just a few simple substitutions, you can create delicious bread that is just as flavorful and enjoyable as the original. So the next time you're in the mood for some lemon poppyseed bread, don't worry if you don't have poppyseeds - you can still make a delicious version without them!

Can This Lemon Poppyseed Bread Recipe Be Halved?

Halving a recipe can be a great way to save time and money, especially when it comes to baking. If you’re looking to make a smaller batch of Lemon Poppyseed Bread, you’ll need to adjust the ingredients. To halve the recipe, you’ll need to reduce the ingredients by half, including the eggs, sugar, and butter. Being this recipe makes 2 loaves you won't need to make any other adjustments to the temperature or cook time. I always do the full recipe because of how easy it is to freeze one loaf. Then I always have another loaf on hand for last-minute company or for something tart and sweet to have on hand when I get a craving.

How to Freeze Lemon Bread?

Lemon poppyseed bread is a delicious treat that can easily be frozen and enjoyed later. By freezing the bread, you can help to retain its moist texture and flavor so that it tastes just like it did when it was first baked. To freeze the bread, make sure to tightly wrap it in plastic wrap or aluminum foil and place it in an airtight container or ziplock bag. The bread can be frozen for up to 3 months.

When you are ready to enjoy the delicious lemon poppyseed bread, you can either thaw it in the refrigerator overnight & place it in a pre-heated 350-degree oven for 8-10 minutes. Alternatively, you can thaw it at room temperature for several hours before warming it in the oven. Reheating the bread will help to restore some of the moisture and make it taste as fresh as when it was first baked.

For those who love the taste of lemon poppyseed bread, freezing it is an excellent way to ensure that it stays fresh and retains its flavor and texture. Enjoy the deliciousness of lemon poppyseed bread anytime by following the simple steps outlined above.

How Do You Make Dairy-free Lemon Loaf?

Lemon poppyseed bread is an incredibly popular treat that is loved by many around the world. The combination of tart lemon and crunchy poppyseeds is a classic combination that creates an irresistible treat. Whether you’re looking for a delicious breakfast, snack, or even dessert, lemon poppyseed bread is a great option.

Making this delicious bread is surprisingly easy and can be adjusted to fit all dietary needs. If you are looking for a dairy-free option for this recipe you will need to make 2 small adjustments. Swap out butter for oil and the milk with coconut milk. These options still give the lemon poppyseed bread great flavor without sacrificing your dairy needs.

What is the Best Way to Store Lemon Poppy Seed Bread?

Lemon poppyseed bread is an easy-to-make and delicious treat. When you’ve baked this bread, the best way to store it is in an airtight container or wrapped in plastic wrap. To ensure its freshness, place the bread in a cool, dry area such as on the countertop, avoiding any direct sunlight. For longer storage, wrap the bread in plastic wrap and place it in the freezer. When it’s time to serve, thaw the bread overnight in the refrigerator, or for a few minutes in the microwave. Above all else, don’t forget to enjoy the bread within a few days of baking for the best flavor and texture.

Ingredients:

2 cups sugar

1 cup melted butter

3 eggs

1-1/2 teaspoons vanilla extract

1 teaspoon lemon zest

2 tablespoons poppy seeds

3 cups all purpose flour

1-1/2 teaspoons baking powder

1-1/2 teaspoons salt

1-1/2 cups milk

Icing:

2 tablespoons lemon juice

1/2 teaspoon lemon zest

3/4 cups powder sugar

Directions:

  1. Preheat oven to 350 degrees and grease 2 loaf pans

  2. Combine sugar, melted butter, eggs, vanilla and lemon zest.

  3. Stir in Poppy Seeds

  4. Mix in Flour, Baking Powder and Salt until well combined.

  5. Scrape down sides and add in Milk until mixed thoroughly.

  6. Divide batter evenly between prepared pans and bake for 45 min.

  7. Cool loaves for 10 min and prepare icing.

  8. Blend all icing ingredients and pour over warm loaves!

  9. ENJOY!

5 Essential Tips for an Unforgettable Visit to Magnolia Market

Visiting Magnolia Market in Waco, Texas is a truly unique experience for the entire family to enjoy. Whether you're a fan of the TV show Fixer Upper with Chip and Joanna Gaines, or just looking to explore an interesting and quaint destination, the silos and market is a one-of-a-kind experience that has a little something for everyone in your family. It's a must-visit with plenty of shopping, food, and fun activities such as cornhole boards and a baseball field for the kids to play. To make the most of your trip, here are my 5 tips when visiting Magnolia Market to help you plan the perfect visit.

waaco.jpg

2019 Visit

2023 Visit

1. Visit Early In the Morning

Visiting Magnolia Market is an exciting experience that can easily become overwhelming with the sheer number of visitors. To get the most out of your visit, follow these five tips for the perfect Magnolia Market adventure. Rise and shine early. The best way to beat the crowds and get the most out of your visit is to arrive early in the morning. Before the store opens, there’s usually a line of people waiting to get in. Get there early, and you’ll be the first one inside the store. Enjoy a peaceful shopping experience at their beautiful grounds. Once you’re inside, you can enjoy a peaceful shopping experience without the hustle and bustle of busy shoppers. You can take your time to explore the store and take advantage of the best deals before the rush hour.

2. Make Reservations In Advance for the Magnolia Table Restaurant

Visiting Magnolia Market is an experience that should not be missed! Plan ahead and make reservations at Magnolia Table. This popular restaurant also owned by the Gaines family can get busy, so making a reservation is necessary to ensure you get a table. You can make a reservation by calling the restaurant or booking online on Open Table. Magnolia Table offers a variety of delicious breakfast and lunch options. No matter what you choose, you won't be disappointed! If you're going with a large group, you can make reservations for up to 20 people. This is great for family reunions, work events, and other large gatherings. Get there early. Magnolia Market is a popular spot if you don't make reservations make sure you arrive before the crowds. That way, you can get the most out of your visit.

Don’t forget to try the bakery items! Magnolia Table has an amazing selection of freshly baked breads and pastries. Whether you’re in the mood for a sweet treat or a savory snack, you’re sure to find something to satisfy your taste buds. I highly recommend also ordering the strawberry lemonade, made with fresh strawberries, it's delicious and refreshing! Magnolia Market has a beautiful outdoor area where you can take a stroll and explore the grounds. With plenty of outdoor seating and plenty of greenery, it’s the perfect place to relax and take in the sights and sounds of Waco.

Here is the Magnolia Table Menu.

waco3.JPG
waco4.JPG
waco9.JPG

3. Go on Weekdays and try to avoid the Weekends

Visiting Magnolia Market can be an exciting and unique experience, but it is important to know the best times to go. I highly recommend visiting Magnolia Market during the weekdays, when the crowds are smaller and the lines are shorter. This way, you’ll be able to fully explore the market, take advantage of all the shops and attractions, and take photographs without having to worry about crowds of people in the background. Weekdays are also the best time to attend events like the Magnolia Market Movie Night, which is held on the lawn of the market. You won’t have to worry about pushing through crowds of people to find a spot to enjoy the movie.

If you’re looking to purchase items, the weekdays are also the best time to do so. With fewer people around, you’ll be able to browse the selection of items with ease and without having to worry about running into someone else’s cart. If you’re looking for a more relaxed experience, the weekday crowds make it easier to take in the beauty of Magnolia Market without being overwhelmed by the hustle and bustle of the weekend.

Finally, if you’re looking to get in some shopping, the smaller crowds and shorter lines on weekdays make it easier to get through the checkout process.

waco.JPG
wacooo.JPG
wacoooo.JPG
waco00.JPG
waco2.JPG

4. Best Time of Year to Visit Magnolia Silos

First, consider the time of year you're visiting. During the Springtime, visitors can enjoy the mild weather and blooming flowers, while the Summertime offers extended store hours and outdoor activities. The Fall months bring changing colors of the trees and a festive atmosphere, and Wintertime allows for holiday lights and decorations.

No matter when you visit, be sure to check the Magnolia Silos website for special events and activities being held during your visit. You might discover a special festival or a concert that you wouldn't want to miss. Additionally, you'll find the daily hours of operation and special deals that the store is offering.

Finally, don't forget to bring a camera! You'll want to capture the beauty of Magnolia Market and take pictures of your family and friends to remember it.

IMG_1500.JPG
IMG_1508.JPG

5. Places to Eat at Magnolia Market

Silos Baking Co. - for the best treats in town! Enjoy a selection of artisanal cupcakes, muffins, cookies and other sweet treats made fresh daily. Make sure to go early before they sell out of their more popular flavors like the lemon lavender.

Magnolia Table - the restaurant located off-site. Enjoy a menu of classic American comfort food like fried chicken, waffles, and burgers.

Magnolia Seed + Supply for a picnic lunch. Choose from a variety of snacks, sandwiches, salads, and more.

Magnolia Press - for a quick coffee and sandwich if you are looking for something light or a coffee for the drive home.

Finally, don't forget to check out the famous Magnolia Market's food trucks for delicious street eats. Enjoy tacos, burgers, hot dogs, and ice cream in the outdoor courtyard.

IMG_1525.JPG
IMG_1519.jpg

A Few Other Magnolia Market Tips

Visiting Magnolia Market is an exciting experience that the whole family should take part in. However, there are a few tips to keep in mind when planning your trip to ensure you get the most out of your visit.

Pack Light - Magnolia Market is a large area with lots of walking and stairs, so make sure you wear comfortable shoes and only bring what you need. This will make it easier to explore all the different areas without having to carry too much weight.

Take Lots of Pictures - Don't forget to bring your camera to capture all the amazing sights of Magnolia Market. There is so much to see, so take lots of pictures to remember your trip.

Check the Calendar - Magnolia Market has special events and activities throughout the year, so be sure to check the calendar before you go to make sure you don't miss out on anything. You don't want to miss out on any of the fun activities or special events that Magnolia Market has to offer.

Visiting Magnolia Market is an experience like no other. From the stunning grounds to the unique shopping experience, there is something for everyone. From inspiration for decorating your home, afternoon entertainment with the family, to enjoying the delicious restaurants everyone is sure to enjoy it!

If you liked this guide here are more that will help you plan your next trip:

A Comprehensive Guide to Cambridge, Massachusetts

A weekend in Carmel, CA

Three Days in The Rainy City: A Seattle Washington City Guide

An Unforgettable Experience: The Perfect Surprise Trip To Denver

Paso Robles City Guide

4 Deliciously Easy 4-Ingredient Tequila Cocktails

Summer is officially here and it’s time to get creative with those cool cocktails! If you’re looking for a quick and easy way to make a delicious drink, then look no further. Today, we’re bringing you four delicious tequila cocktails that use only four ingredients each. Whether you’re an experienced mixologist, or you just love playing bartender at home, you’re sure to find at least one perfect recipe for your next Summer gathering. So grab your tequila, mixers, and garnishes, and let’s get shaking!

Tips for Purchasing Tequila

When it comes to making delicious tequila cocktails, it’s important to choose the right kind of tequila. The best choice is to go for a tequila that is 100% agave, as it will give you a smooth flavor that is perfect for cocktails. Look for bottles with a label that indicates the type of agave used, as this will give you a better idea of the flavor you can expect. To get a more robust flavor, look for bottles labeled 'Reposado' or 'AΓ±ejo'. On the other hand, it’s best to avoid tequilas labeled 'Mixto', as these are a blend of agave and other sugars. The alcohol content of the tequila you choose can also make a difference in the flavor of your cocktails. For a more full flavor, purchase a bottle with a higher alcohol content. If you’re a beginner to the taste of tequila, it’s a good idea to experiment with different types to find the one that best suits your taste. With the right tequila in hand, you’ll be ready to make some delicious four-ingredient tequila cocktails.

Paloma

The Paloma is a classic tequila cocktail that is perfect for the Summer. It's a refreshing blend of tequila, grapefruit soda, and lime juice. For a more complex flavor and for additional carbonation, I add Q Mixers sparkling grapefruit flavor. You can also add agave nectar for a hint of sweetness. Looking for a twist? Try muddling fresh fruit like strawberries, cranberries or raspberries, this will give your Paloma a unique and flavorful twist.

My Deliciously Juicy Paloma Recipe

Ingredients:

Juice of 1 lime

Juice of 1/4 grapefruit

1.5 oz of tequila

1 can of Q Mixers Sparkling Grapefruit

Instructions:

Add fresh lime juice, tequila & grapefruit into mixer and shake. Pour into glass and enjoy! You can add garnish or salt & sugar rim if you choose.

Mexican Mule

The Mexican Mule is a four-ingredient tequila cocktail that is a great twist on the classic Moscow Mule. This easy-to-make cocktail only calls for tequila, lime juice and ginger beer. It is light and refreshing, perfect for summer days. To garnish the Mexican Mule, use a lime wedge or a sprig of mint. For an authentic experience, serve it with chips and salsa on the side. If you want to try something different, you can add other juices or simple syrup to give it more flavor or sweetness. No matter how you customize it, your Mexican Mule combination is sure to be a crowd-pleaser!

My Take on The Mexican Mule

Ingredients

Juice of 1 lime

1.5 oz of tequila

1 can of Q Mixers Ginger Beer

Instructions

Add ice to Copper mug. Add in fresh juice of lime, tequila & ginger beer. Stir and garnish!

Margarita

The Margarita is a classic tequila-based cocktail that is sure to please. Tequila lovers and newcomers alike will appreciate the simplicity and balance of this cocktail. Whether served on the rocks or frozen, the Margarita is the perfect way to enjoy tequila.

My Simple & Delicious Margarita

Ingredients

Juice of 1 lime

1.5 oz tequila

4-5 oz Q Mixers Margarita Mix

Salt or Sugar for rim

Instructions

Add fresh lime juice, tequila, Margarita mix over ice in shaker. Rim glass with salt or sugar your choice. Strain over fresh ice. Add garnish & enjoy!

Ranch Water

It's said that ranch hands in West Texas created ranch water back in the 1960s as a refreshing drink after a long day of hard work. Since its introduction in the Lone Star State, ranch water has become a Texas favorite and is now a staple in bars and lounges across the state. Whether you're beating the Summer heat at a casual dive bar, at a sophisticated cocktail lounge, or a refreshing poolside bar, you can always count on ranch water being on the menu. Tequila lovers and newcomers alike will appreciate the simplicity and balance of this cocktail.

My Refreshing Ranch Water Recipe

Ingredients

Juice of 4 lime slices

Juice of 4 grapefruit slices

1.5 oz of tequila

1 can of Q Mixers Club Soda

Instructions

Add limes & grapefruit to glass and muddle. Pour in tequila & club soda. Add ice & enjoy!

These four easy tequila drink recipes are sure to be a hit at your next gathering. With only four ingredients, these drinks are convenient and easy to make. So, grab a bottle of tequila and try one of these delicious tequila cocktails! To see me mixing them up as our home bartender head to my latest reel here.

Looking for other Cocktail recipes for the summer? Heres some of my favorites

Refreshing Lemon Twist Cocktail

Strawberry Orange Bourbon Smash

3 Mexican Mule Recipes with a Twist!

Creating a Beautiful & Memorable Mother’s Day Table & Celebration with Evite

This Mother’s Day, make sure your mom feels extra special with a beautiful tablescape that’s easy to create and even easier to share with your family and friends when you invite everyone to join the celebration with Evite! Read on to learn all the tips and tricks to creating a beautiful and memorable Mother’s Day table that your mom will never forget.

With Mother’s Day just around the corner, it’s time to start thinking about how to make the day special for the amazing moms in our lives. A great way to show your appreciation is to create a beautiful Mother's Day Table. With Evite, it’s easy to find the perfect invitation to inspire your party's tone, decor and tableware!

This Mother's Day, give your mom the special treatment she deserves with a beautiful Mother's Day table setting just for her! From the Mother's Day tablecloth to the plates, every last finish should be something that reminds you of her. Set the tone for the day with an eye-catching Evite invitation that adds an elevated touch to your celebration. When you are planning your table, make sure to select your Evite invitation first. This will help to set the theme of the Mother's Day Table in your head, and help to make everything flow cohesively. Find your invitations and get your theme started on evite.com now.

Make Mother’s Day even more special this year with a beautiful colorful table setting to celebrate her! Start with your mom’s favorite colors and create a lovely color palette for your Spring table. Choose an elegant centerpiece that she’ll love, whether it’s a bouquet of flower arrangements, a candle centerpiece, or something else. Incorporate festive decorations such as balloons and streamers for a celebratory touch to your tablescapes. Invite your guests with Evite and create beautiful digital invitations that are sure to wow! Don’t forget the sweet treats and make sure to serve up a stunning cake or colorful cupcakes to honor the guest of honor. Finally, have fun, and be creative with your decorations and table settings to make your mom’s day extra special. To show your appreciation, incorporate personalized decorations like framed photos and handmade cards. Place a hand-written menu card on each plate to make your guests feel extra special. With a few creative touches, you’ll have a beautiful Mother’s Day table that your mom will love!

To get started, choose seasonal, fresh flowers for the table centerpiece. Pick colors that complement each other for a look that is both elegant and inviting. Incorporate a few special touches, such as seasonal fruit, napkins that are her favorite color or dishes that were hers or heirloom pieces to make her feel extra special. Use candles and other decorations to create a warm atmosphere. Place a few appetizers or snacks on the table for guests to enjoy, and make sure there are plenty of beverages for everyone to find.

Creating the perfect Mother's Day celebration with Evite is easy and fun. With the right decorations and tableware, you can show your appreciation and create a memorable day for the special moms in your life.

A Few Budget-friendly Tips:

When it comes to decorating for Mother’s Day, there are plenty of options that won’t break the bank. Look for items that can be reused or repurposed, such as glassware, vases, and plates. I used my everyday white dishes here but added a new pop of color with fresh Mother's Day napkins that matched my invitation and florals. If you’re feeling crafty, you can also make your decorations from materials you may already have around the house. Lastly, adding in citrus to my table here made a cute addition to my centerpiece that is functional as well as cute. The grapefruit and orange slices can be added to water or to mimosas during the event.

Using Evite is a great way to make your Mother's Day celebration even easier. With Evite’s free RSVP tracking tool, you know exactly who is coming and how many guests to plan for! A great way to make it extra special? Upgrade your Evite design with stickers, stamps, liners, envelopes + backgrounds so you can customize your invitation to fit your party perfectly!

Creating a beautiful Mother's Day celebration with Evite is the perfect way to show your appreciation for the special women in your life. No matter the size of your gathering, Evite makes it easy to customize the details of your event and spread the word to your loved ones. With a few clicks, you can create and send out a beautiful invitation to make sure everyone is ready to join in the Mother's Day festivities. I hope this post was able to give you great inspiration for your Mother's Day table. Last year I used even more colors:  My Spring Tablescape which would be perfect with this beautiful Mother's Day table with this Evite invitation.

Unable to see mom for Mother's Day? Evite also has digital greeting cards to brighten your mom's dayβ€”you can send one instantly or schedule ahead of time so you don’t forget! Find all of their greeting cards here.

A Comprehensive Guide to Cambridge, Massachusetts

Welcome to Cambridge, Massachusetts! Located walking distance to downtown Boston. Cambridge is a vibrant city filled with unique attractions, activities and experiences. As one of the oldest cities in the United States, Cambridge has a long and storied history. From its roots as a colonial outpost to its current status as a world-renowned educational and cultural center, Cambridge is a destination that is sure to impress. This guide to Cambridge, Massachusetts offers an overview of the city’s history and highlights some of its best attractions. Whether you’re looking for a peaceful stroll through Harvard Square or a night out on the town, this guide will help you make the most of your visit to Cambridge.

What to Do

Cambridge, Massachusetts is a city full of history and culture, and may be most known for being home to two of the world's most prestigious universities, Harvard and MIT. Whether you're looking for a relaxing day of sightseeing or an adventurous day of exploration, Cambridge has something for everyone. Here's a guide to some of the best things to do when visiting Cambridge.

Visit Harvard University - Founded in 1636, Harvard University is one of the oldest and most prestigious universities in the world. Take a tour of the campus, visit the museums, and explore the libraries. You can also attend lectures, seminars, and other events that are open to the public.

Take a Stroll Along the Charles River - Enjoy a leisurely stroll along the Charles River, which offers stunning views of Boston's skyline. Stop along the way to take photos or just to take in the views.

Explore the MIT Museum - The MIT Museum is a great place to explore the history and culture of science, technology, and innovation. The museum is full of interactive exhibits and displays that are sure to keep you entertained.

Visit the Harvard Art Museums - Home to the world's largest collection of art from ancient to modern times, the Harvard Art Museums are a must-see. Take a tour of the galleries and learn about the works of art on display.

Attend a Performance at the American Repertory Theater - Enjoy a play or musical at the American Repertory Theater, a world-class theater located in Harvard Square. The theater offers a variety of performances from Broadway musicals to classic plays.

Shop at Harvard Square - Explore the unique shops and boutiques in Harvard Square. From clothing stores to bookstores, there's something for everyone to enjoy.

Freedom Trail - take a stroll along the Freedom Trail, a 2.5 mile walking tour of some of the city's most important historical sites. This will lead you into Boston where you have a whole other world of fun things to do, see and places to eat!

See A Game At Fenway - Now I know what you are thinking.. that's in Boston. However, staying at Kimpton Hotel Marlowe (more on that below) gave us the perfect walking distance to see a game during our trip! See how easy the walk was and the great time we had on this reel.

Whether you're a history buff, a culture enthusiast, or just looking for a fun day out, there are plenty of things to do in Cambridge. From exploring Harvard University to shopping in Harvard Square, this guide to Cambridge, Massachusetts will help you make the most of your visit.

Where To Stay

Cambridge, Massachusetts is a vibrant city full of culture and history in the United States. Located just steps outside of Boston, this city offers a unique combination of urban and suburban living with a touch of old-world charm. Whether you're visiting for a weekend or settling in for the long haul, there's something for everyone in Cambridge, including great hotels!

When looking for a hotel for our trip to Cambridge we found the perfect Kimpton Marlowe Hotel. With the most stunning views, spacious suites and an extremely delicious restaurant it's a truly great pick for exploring Cambridge and being an easy walk away from Downtown Boston as well.

The hotel is newly renovated with the usual great Kimpton amenities like nightly wine hour, a spacious hotel gym, morning coffee & tea bar, pet friendly, and so much more. Kimpton has always been a go-to for me when traveling anywhere, but the amazing views of the Boston Skyline over the Charles River at the Marlowe may be the best we have seen yet, just check it out yourself below.. or on this reel from our trip.

Where To Eat

Bambara Kitchen and Bar - Whether you are looking for a great cocktail or a delicious dinner, the Bambara Kitchen and Bar exemplifies Cambridge City's fine dining scene at its very best. For a taste of Boston across the river in Cambridge, head to this lively culinary destination that welcomes locals and travelers alike. We had different options across the menu to taste as much as possible, and I can truly say they were all delicious! Be sure to stop in and grab a bite on your next visit to Cambridge.

Cafe Luna - This is a must-stop for breakfast when in Cambridge. Delicious food and worth the wait! Scott had the roasted street corn omelet and I opted for the lemon ricotta pancakes. Both are popular dishes and both are delicious! If you are looking for savory or sweet this is the spot!

Tatte Bakery & Cafe - With locations all over Boston and Cambridge you won't be able to walk down the street and not see a Tatte Bakery... and for good reason too! These spots are as equally delicious as they are adorable. If you are looking for a quick bite or an afternoon coffee this is where you need to go. Don't forget to grab the pistachio croissant.. you'll thank me later!

What is the Best Time of Year to Visit Cambridge?

Cambridge, Massachusetts, located just north of Boston, is a vibrant city full of unique attractions and activities. Whether you are visiting in the Summer, Spring, Fall, or Winter, there is something to do for everyone.

In the Summer, you can enjoy the warm weather and take part in outdoor activities like biking, kayaking, and running. You can also participate in festivals like the Cambridge Carnival and the Cambridge River Festival.

During the Spring, take in the beautiful blooms of the season and attend the world-famous Harvard-Yale Boat Race. You can also visit Harvard University and enjoy the historic buildings and beautiful grounds.

In the Fall, you can take in the stunning seasonal foliage and attend the Cambridge Science Festival. You can also explore the restaurants and shops in Harvard Square or Central Square.

In the Winter, the city comes alive with holiday lights and festivities. You can enjoy the twinkling lights in Harvard Square or Central Square and take part in holiday activities like ice skating and caroling.

No matter what time of year you are visiting, Cambridge, Massachusetts is a great destination for a memorable vacation. From the unique attractions and activities to the beautiful scenery, you are sure to find something to do in this charming city.

Cambridge, Massachusetts is a vibrant city that offers an array of experiences for visitors and locals alike. Whether you want to explore the iconic Harvard University, take a stroll along the Charles River, or visit one of the many museums and galleries, Cambridge has something for everyone. With its world-class restaurants, shopping, and nightlife, Cambridge is the perfect place to explore New England culture. Take advantage of the public transportation system to get around the city quickly and easily. There are plenty of opportunities to get outside and enjoy the beautiful parks and trails in the area. Whether you’re looking for a relaxing weekend getaway or an exciting adventure, Cambridge is the perfect destination.

Other Travel Guide You May Enjoy:

"Making the Most of 3 Days in NOLA - A Guide to Exploring New Orleans

Paso Robles City Guide

Morro Bay Travel Tips

Nashville Travel Guide

A weekend in Tampa Bay

Three Days in The Rainy City: A Seattle Washington City Guide

Celebrating Mother's Day with a Deliciously Decadent Charcuterie Board

Mother's Day is the perfect time to show appreciation for all the amazing mothers in our lives. What better way to show it than with a beautiful and delicious charcuterie board? Whether you’re planning an intimate gathering with your mom or showing appreciation for all the mothers in your life, a charcuterie board is a perfect way to make all those special women feel extra special. This blog post will go over the steps required to create a stunning and delicious Mother's Day charcuterie board that can double as both a lovely gift, and as one of your appetizers for the day!

Tired of Creating Boring Charcuterie Boards??

Treat your mom to something special this Mother’s Day with a delicious and beautiful charcuterie board! With a little extra effort, you can up your charcuterie game and give your Mom a gift that keeps on giving. For an extra special personal touch, add some of your Mom’s favorite treats. Get creative with your board by adding colorful fruits, homemade dips, and spreads, as well as cookie cutters and garnishes. Transform your board into a work of art with thematic colors and decorations, and elevate it with unique charcuterie meats, cheeses, and crackers. Show your mom how much you love her this Mother’s Day with a charcuterie board made with love and care and personal touches.

This board I made spelled out MOM in pomegranate seeds! This can obviously be made into any word or number for a birthday party! This can help to highlight the guest of honor and feel very personal in a lovely way. To easily do this just buy the amount of small brie rounds needed, I found these at Trader Joe's. Then, I cut the word MOM out into each round. I first traced it out and then made a larger hole so the pomegranate seeds can easily fit in. If you don't do this it may cause the cheese to split. Place your seeds in the cutout letters and add them to your board. This gives a uniqueness to your Charcuterie board but also is using 3-dimensional characters that are so beautiful and fun! Next, you will Fill in the rest with delicious meats, cheeses and accouterments. Not sure what to put? Read on!

How to Make a Mother’s Day Charcuterie Board

A charcuterie board is the perfect way to show your love to the special Mom in your life. To assemble the perfect charcuterie board, gather a variety of cheeses, crackers, meats, fruits and vegetables. Arrange the items on a large wooden board or platter with the cheeses in the center and surround them with meats, crackers, fruits and vegetables. Small bowls of olives, nuts, jams and chutneys can be added for extra flavors and to make the board look even more impressive. Decorate the board with edible flowers, herbs or edible decorations to make the board look even more special. To make the board even more special, present it with a personalized card or gift for the special Mom.

Charcuterie boards are an easy way to feed a crowd without spending a lot of money. Plus, it is an activity that the whole family can enjoy together. You can take it a step further and get creative by adding a personalized message to the board like MOM spelled out in pomegranate seeds. Mom will love it!

If you’re ready to create the perfect charcuterie board for Mother’s Day, here are some tips for success. Start by gathering a variety of cheeses, meats, fruits, and vegetables. Place the items in an eye-catching pattern and add some decorations to make it look even more special. Finally, don’t forget to include some crackers, bread, or nuts to complete the board. I always start with the larger items on the board first, and then fill in with smaller ones in different areas. Another trick I do to make the board look cohesive (and not spend a lot on 100 different items) is to use the same item at different spots on the board. So if I am using strawberries, I put a few in one spot and a few in another spot on a different part of the board.

Ingredients Used:

Mother's Day is the perfect time to show your Mom just how much you appreciate her and all she has done for you. Whether your Mom is a just cheese and wine lover, or a charcuterie fan, a charcuterie board is a perfect way to show your love and appreciation. A charcuterie board is a great way to show your mom that you care and that you put lots of thought into her gift.

A charcuterie board typically consists of a variety of cheeses, cured meats, olives, fresh fruits, nuts, sweet treats, pickles, hummus, spreadable cheese, dried fruits, jam, cruditΓ©s, croutons, pesto, and dip or salsa. All these items can be found in the grocery store or your local specialty food shop. Some of my favorite places to go are Trader Joe's, HEB, Whole Foods and Kroger. They all have great cheese sections and the freshest produce!

Put together a charcuterie board for your Mom this Mother's Day. Start with a selection of crackers, then add a variety of cheeses like cheddar, brie, gouda, and blue cheese. Assemble a selection of cured meats like salami, pepperoni, and prosciutto. Add olives, fresh fruits, and nuts for a crunchy texture. Don't forget the sweet treats like chocolates and cookies. Include pickles, hummus, spreadable cheese, dried fruits, jam, cruditΓ©s, croutons, pesto, and dip or salsa. Lastly, don't be afraid of overlapping on the board. You want it to feel full not like you need more items. Overlapping adds even more added texture and beauty to your board.

Tools Needed:

To make a beautiful charcuterie board, you will need a few essential items. Start with a good quality cutting board, a cheese knife, and a charcuterie board. Other tools I sometimes use are a mixture of bowl sizes, cheese knives and honey stir. Once you add to this a variety of cheeses, cured meats, fresh and dried fruits, nuts, olives, crackers, bread slices, pickles, jam or honey, and dips and spreads you will be able to create the perfect board. This will give you a great selection of items to choose from and an easy way to build a board.

Now that your charcuterie board is ready, it’s time to enjoy! Serve the board with a selection of beverages and let everyone dig in. A tasty Mother's Day charcuterie board is sure to be a hit and will make the day even more special for Mom.

Charcuterie Board Tips & Tricks

This Mother's Day, treat your Mom to a special charcuterie board! Start with a variety of meats, such as salami, prosciutto, and ham, as the base of the board. Include items like nuts, olives, and crackers for crunch, as well as a mix of cheeses, like cheddar, brie, and goat cheese. Layer fresh fruit, such as grapes, strawberries, and blueberries for a burst of color and sweetness. Place a few sweet treats, like jams, honey, and dark chocolate, to add a little extra indulgence. Top it off with fresh herbs, edible flowers, and edible glitter to give it that special touch. For even more flavor, provide a variety of dips and spreads, such as hummus, pesto, and tapenade. To make your charcuterie board truly unique, include something unexpected, like pickled vegetables, dried fruit, and roasted nuts. Finally, use a variety of colors, shapes, and textures to create a visually appealing board that’s sure to impress. With this charcuterie board, your Mom is sure to have the most memorable Mothers Day ever!

A charcuterie board is a beautiful and fun way to show your Mom how much you care. Not only is it a beautiful centerpiece, but it allows Mom to pick and choose what she wants to snack on. I hope these charcuterie board ideas gave you inspiration for your Mother's Day festivities. Treat your Mom to a special show stopper charcuterie board this Mother's Day and let her know how much she means to you.

Other Charcuterie Board Inspiration:

2023: Charcuterie Board Ideas to Help You Ring in the New Year

Delight Your Guests with an Antipasto Christmas Wreath

How To Make A Christmas Holiday Dessert Board

Other Mothers Day Inspiration:

My Spring Tablescape

The Perfect Pair: Chicken Picatta and J. Lohr Wine

If you're looking for a delicious dinner option that pairs perfectly with a great bottle of wine, look no further than this Chicken Piccata recipe paired with the J. Lohr Estates Riverstone Chardonnay. This traditional Italian dish includes chicken breasts, butter, garlic, and white wine. It is served with a smooth, light lemon, caper, and butter sauce. The accompaniment of a glass of Riverstone Chardonnay makes for the perfect pairing, offering a unique flavor and aroma that will enhance the flavors of the dish. Whether you're hosting a dinner party or just looking to create a delicious dinner for two, this Chicken Piccata paired with the J. Lohr Wines Riverstone Chardonnay is sure to please!


Tips for Pairing Wine with Chicken Piccata

Chicken Piccata is a favorite dish of mine that combines butter, capers, and very subtle hints of lemon that creates a flavorful and acidic sauce, which pairs perfectly with a creamy white wine such as Chardonnay. For a classic pairing, I recommend enjoying a glass of the J. Lohr Estates Riverstone Chardonnay with this meal. With its light acidity and hints of lemon, you'll find that this wine perfectly complements the acidic and buttery sauce of the Chicken Piccata. As you will see in the recipe below, I don't add extra lemon juice or zest like many other traditional Chicken Piccata dishes because of the selected wine pairing. With this wine having a hint of ripe Meyer lemon in its flavor profile, I didn't want an overly lemony sauce to pair with it. If opting to exclude the extra lemon juice, you can substitute with some vegetable broth. This recipe, just like the wine, can be very versatile to suit your taste buds.

J. Lohr Vineyards & Wines produces some of the world's most popular and well-regarded Chardonnays, which they call REAL Chardonnay. What is REAL Chardonnay? It’s when the wine comes from perfectly sited, cool-climate, and sustainably farmed vineyards in Monterey's Arroyo Seco AVA. It's also using 10 different Chardonnay clones and aging using only the finest oak barrels. The range of flavors, from light and crisp to full-bodied and complex, makes each of J. Lohr's three Chardonnays the perfect accompaniment to this classic Italian dish.

The J. Lohr Estates Riverstone Chardonnay has aromas of orange, white peach, a little pear, and sweet oak with baking spices on the long finish, giving it a delicious flavor. The wine is medium-bodied, with a smooth and creamy finish. These flavors work perfectly with the lemon and caper sauce in Chicken Piccata, as the richness of the wine helps to balance the acidic nature of the sauce. The fruit flavors of the wine help to enhance the delicate flavors of the chicken. The medium body of the wine also helps to bring out the subtle flavors of the dish without overpowering it.

So, if you're looking for a delicious and easy-to-prepare meal to pair with a bottle of J. Lohr wine, Chicken Piccata is a perfect choice. The combination of the wine's rich and fruity flavors and the dish's tangy and delicate flavors will create a unique culinary experience that your guests are sure to love. Other pairings for the J. Lohr Estates Riverstone Chardonnay are seafood risotto, mussels in white wine sauce, roast chicken with apples, and holiday ham and turkey.

My Chicken Piccata Recipe

Serves 6

Ingredients

3 large chicken breasts, cut in half and pounded

Salt & Pepper to taste

1/2 teaspoon garlic powder

Flour (for dredging)

6 tablespoons butter, divided

2 tablespoons olive oil

1 shallot, diced

1/4 cup chicken broth 

Splash of white wine

1 lemon, thinly sliced

1 tablespoon brined capers, drained

1/2 cup heavy whipping cream

Freshly grated parmesan cheese


Instructions

1. Slice chicken breasts in half to make 6 smaller chicken pieces. Pound until thin. Season chicken generously with salt

and pepper. Place flour on a plate, add garlic powder and mix. Coat the chicken in your flour mixture.

2. Add 2 tablespoons of butter and olive oil to a skillet over medium-high heat.

3. Once the pan is hot, cook the chicken pieces for about 7-8 minutes per side or until golden.

4. Remove the chicken from the skillet and set aside on a plate layered with paper towels.

5. Take the pan and add a splash of white wine to help pick up the brown bits and add flavor. Once brown bits come up, add 2 tablespoons of butter and the shallots. Let shallots cook until they are transparent.

6. Add the chicken broth, the last 2 tablespoons of butter, and capers to the skillet. Stir until the butter is melted and turn off the heat. Stir in the cream. (If you want to make this recipe without cream, increase the chicken broth to 3/4 cup.) Mix and add lemon slices. 

7. Add the chicken to the pan and garnish with parmesan cheese. 

 To learn more about J. Lohr: REAL Chardonnay click -here-

Looking for other articles on wine?

The Bloggers Guide to Merlot for more on this wine & other J. Lohr wines click -here-