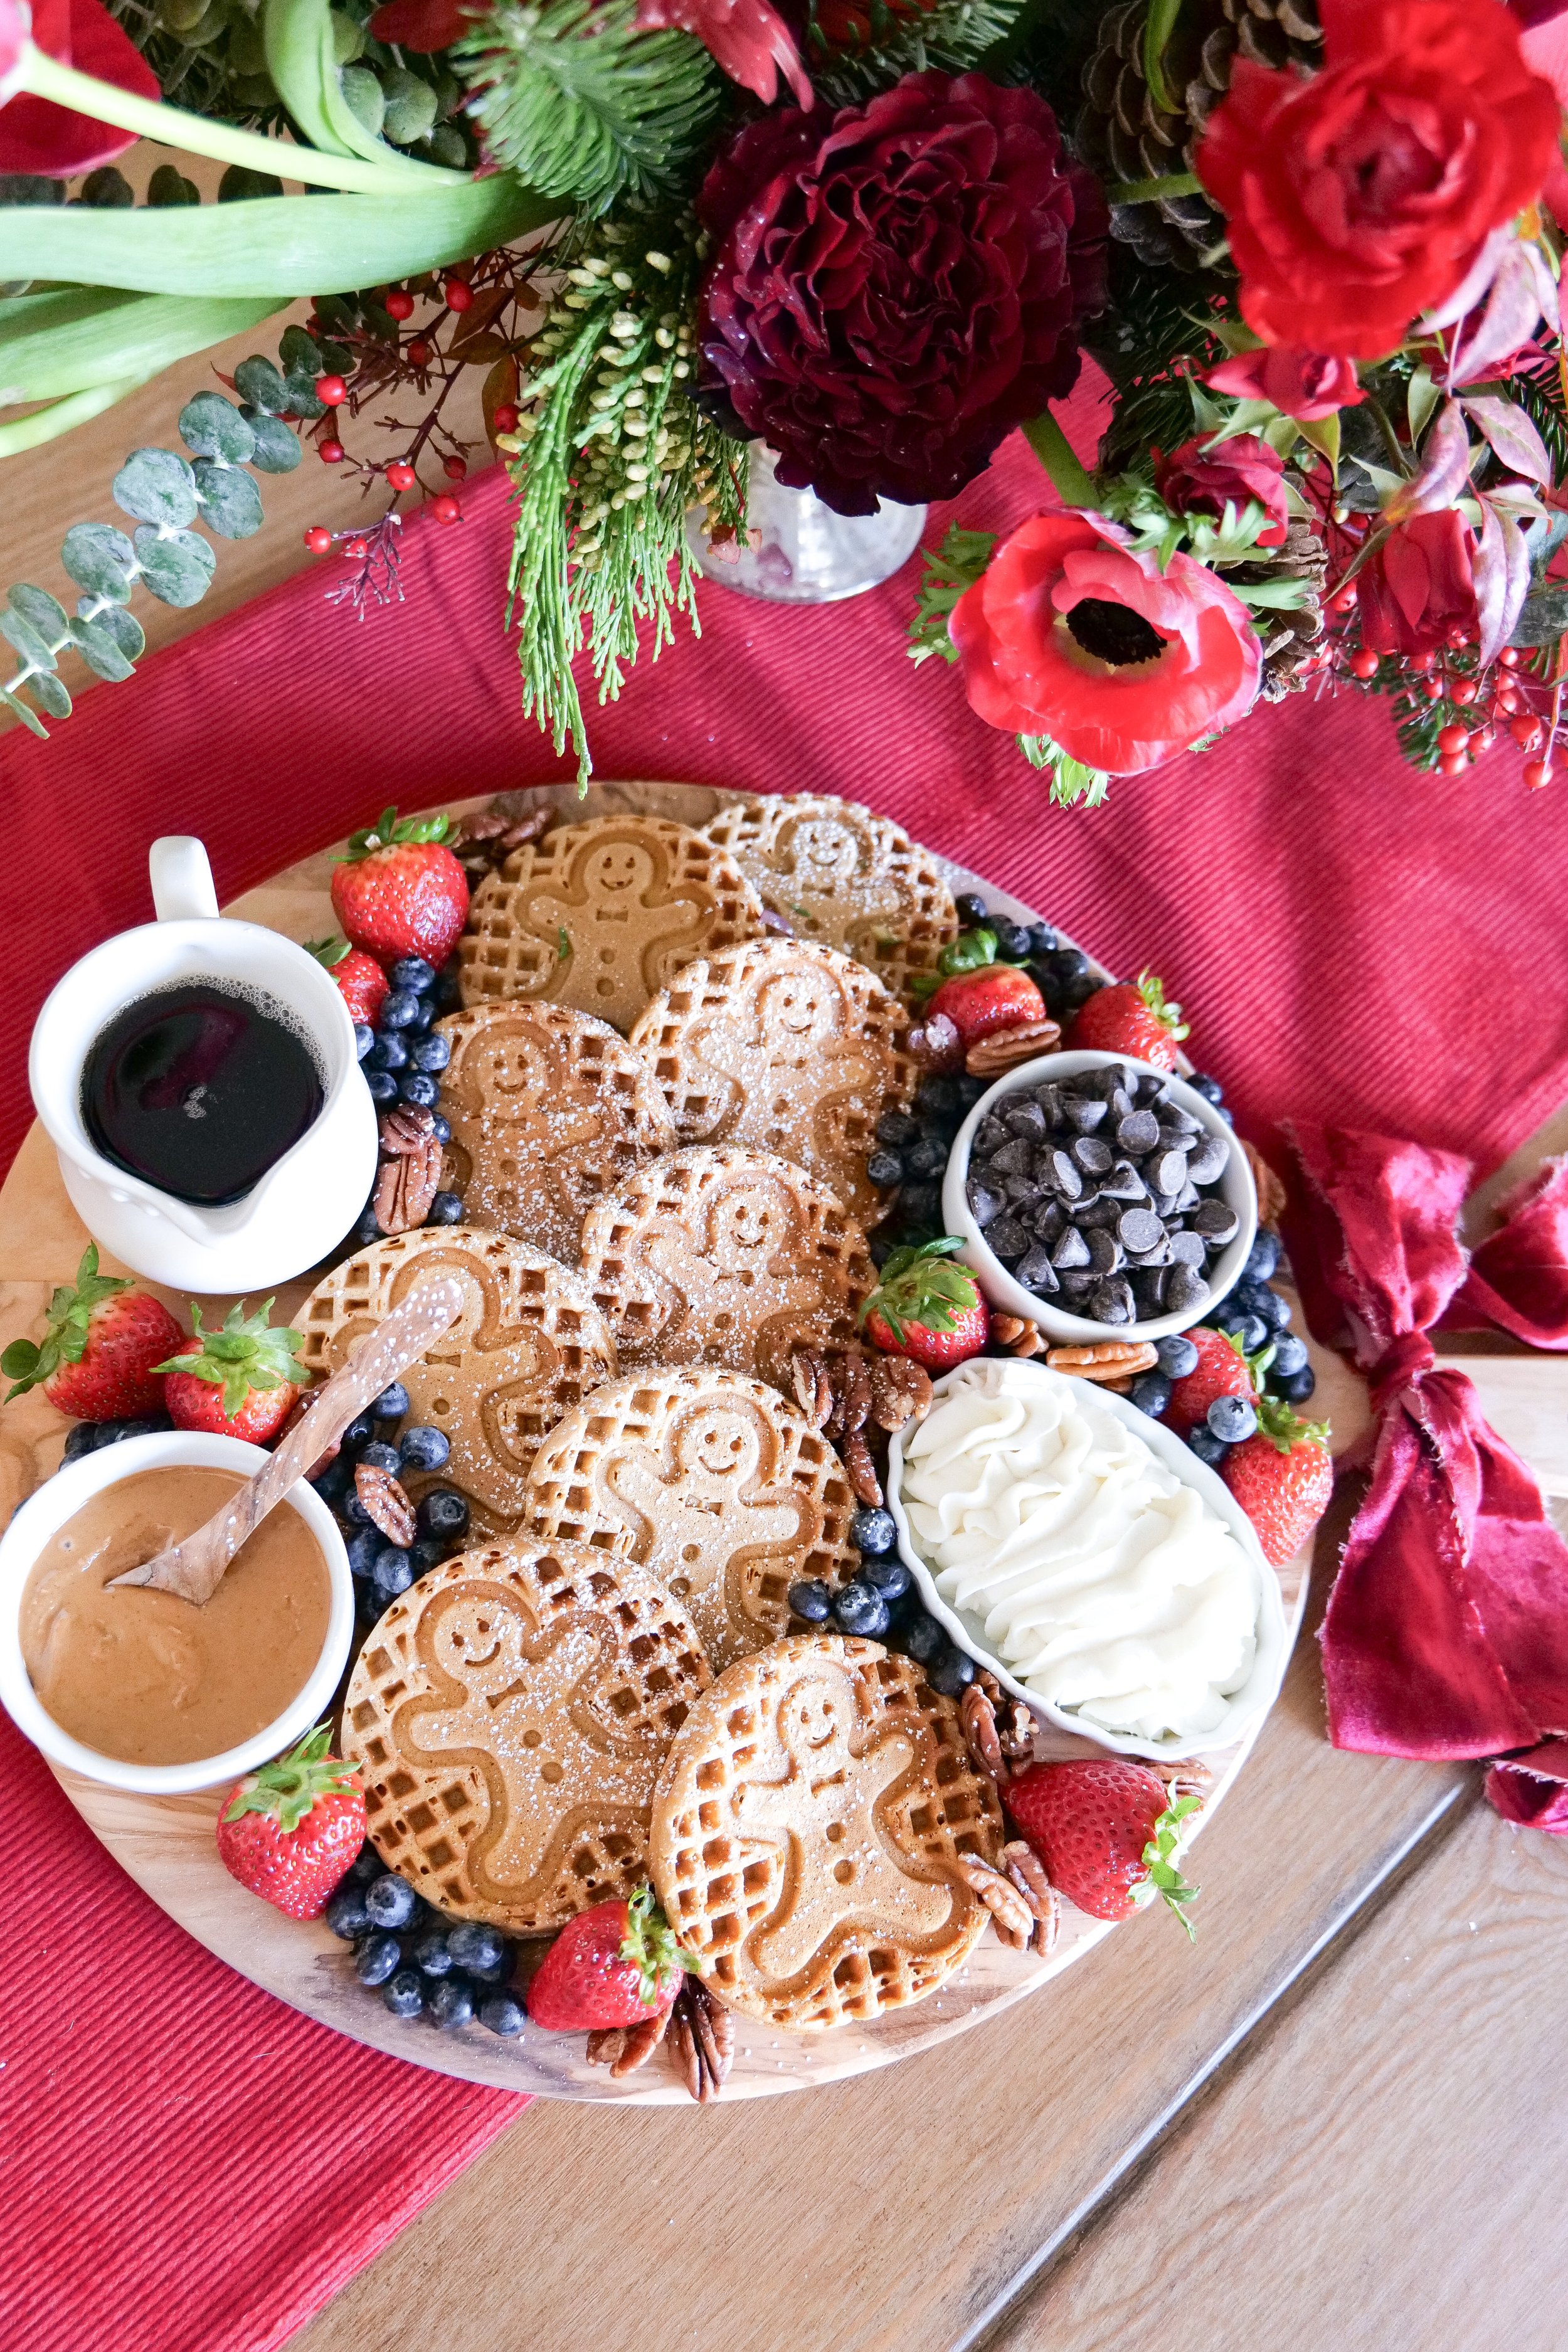
Crafting the Perfect Gingerbread Waffle Board: Delicious Recipes and Styling Tips!

As the aroma of warm spices fills the air and the holidays beckon us to indulge in delightful treats, a Gingerbread Waffle Board presents the perfect blend of cozy breakfast comfort and festive flair. This unique take on the traditional charcuterie board is where breakfast meets dessert, transforming the humble waffle into a canvas of holiday cheer. Whether you're gathering with loved ones on a chilly morning or looking for a showstopping centerpiece for your holiday brunch, our Gingerbread Waffle Board and accompanying recipe promises to enchant your senses and warm your heart. So grab your apron, preheat your waffle iron, and let's dive into the art of creating this sweetly spiced, irresistibly shareable delight.


Can I Also Make These as Gingerbread Pancakes?

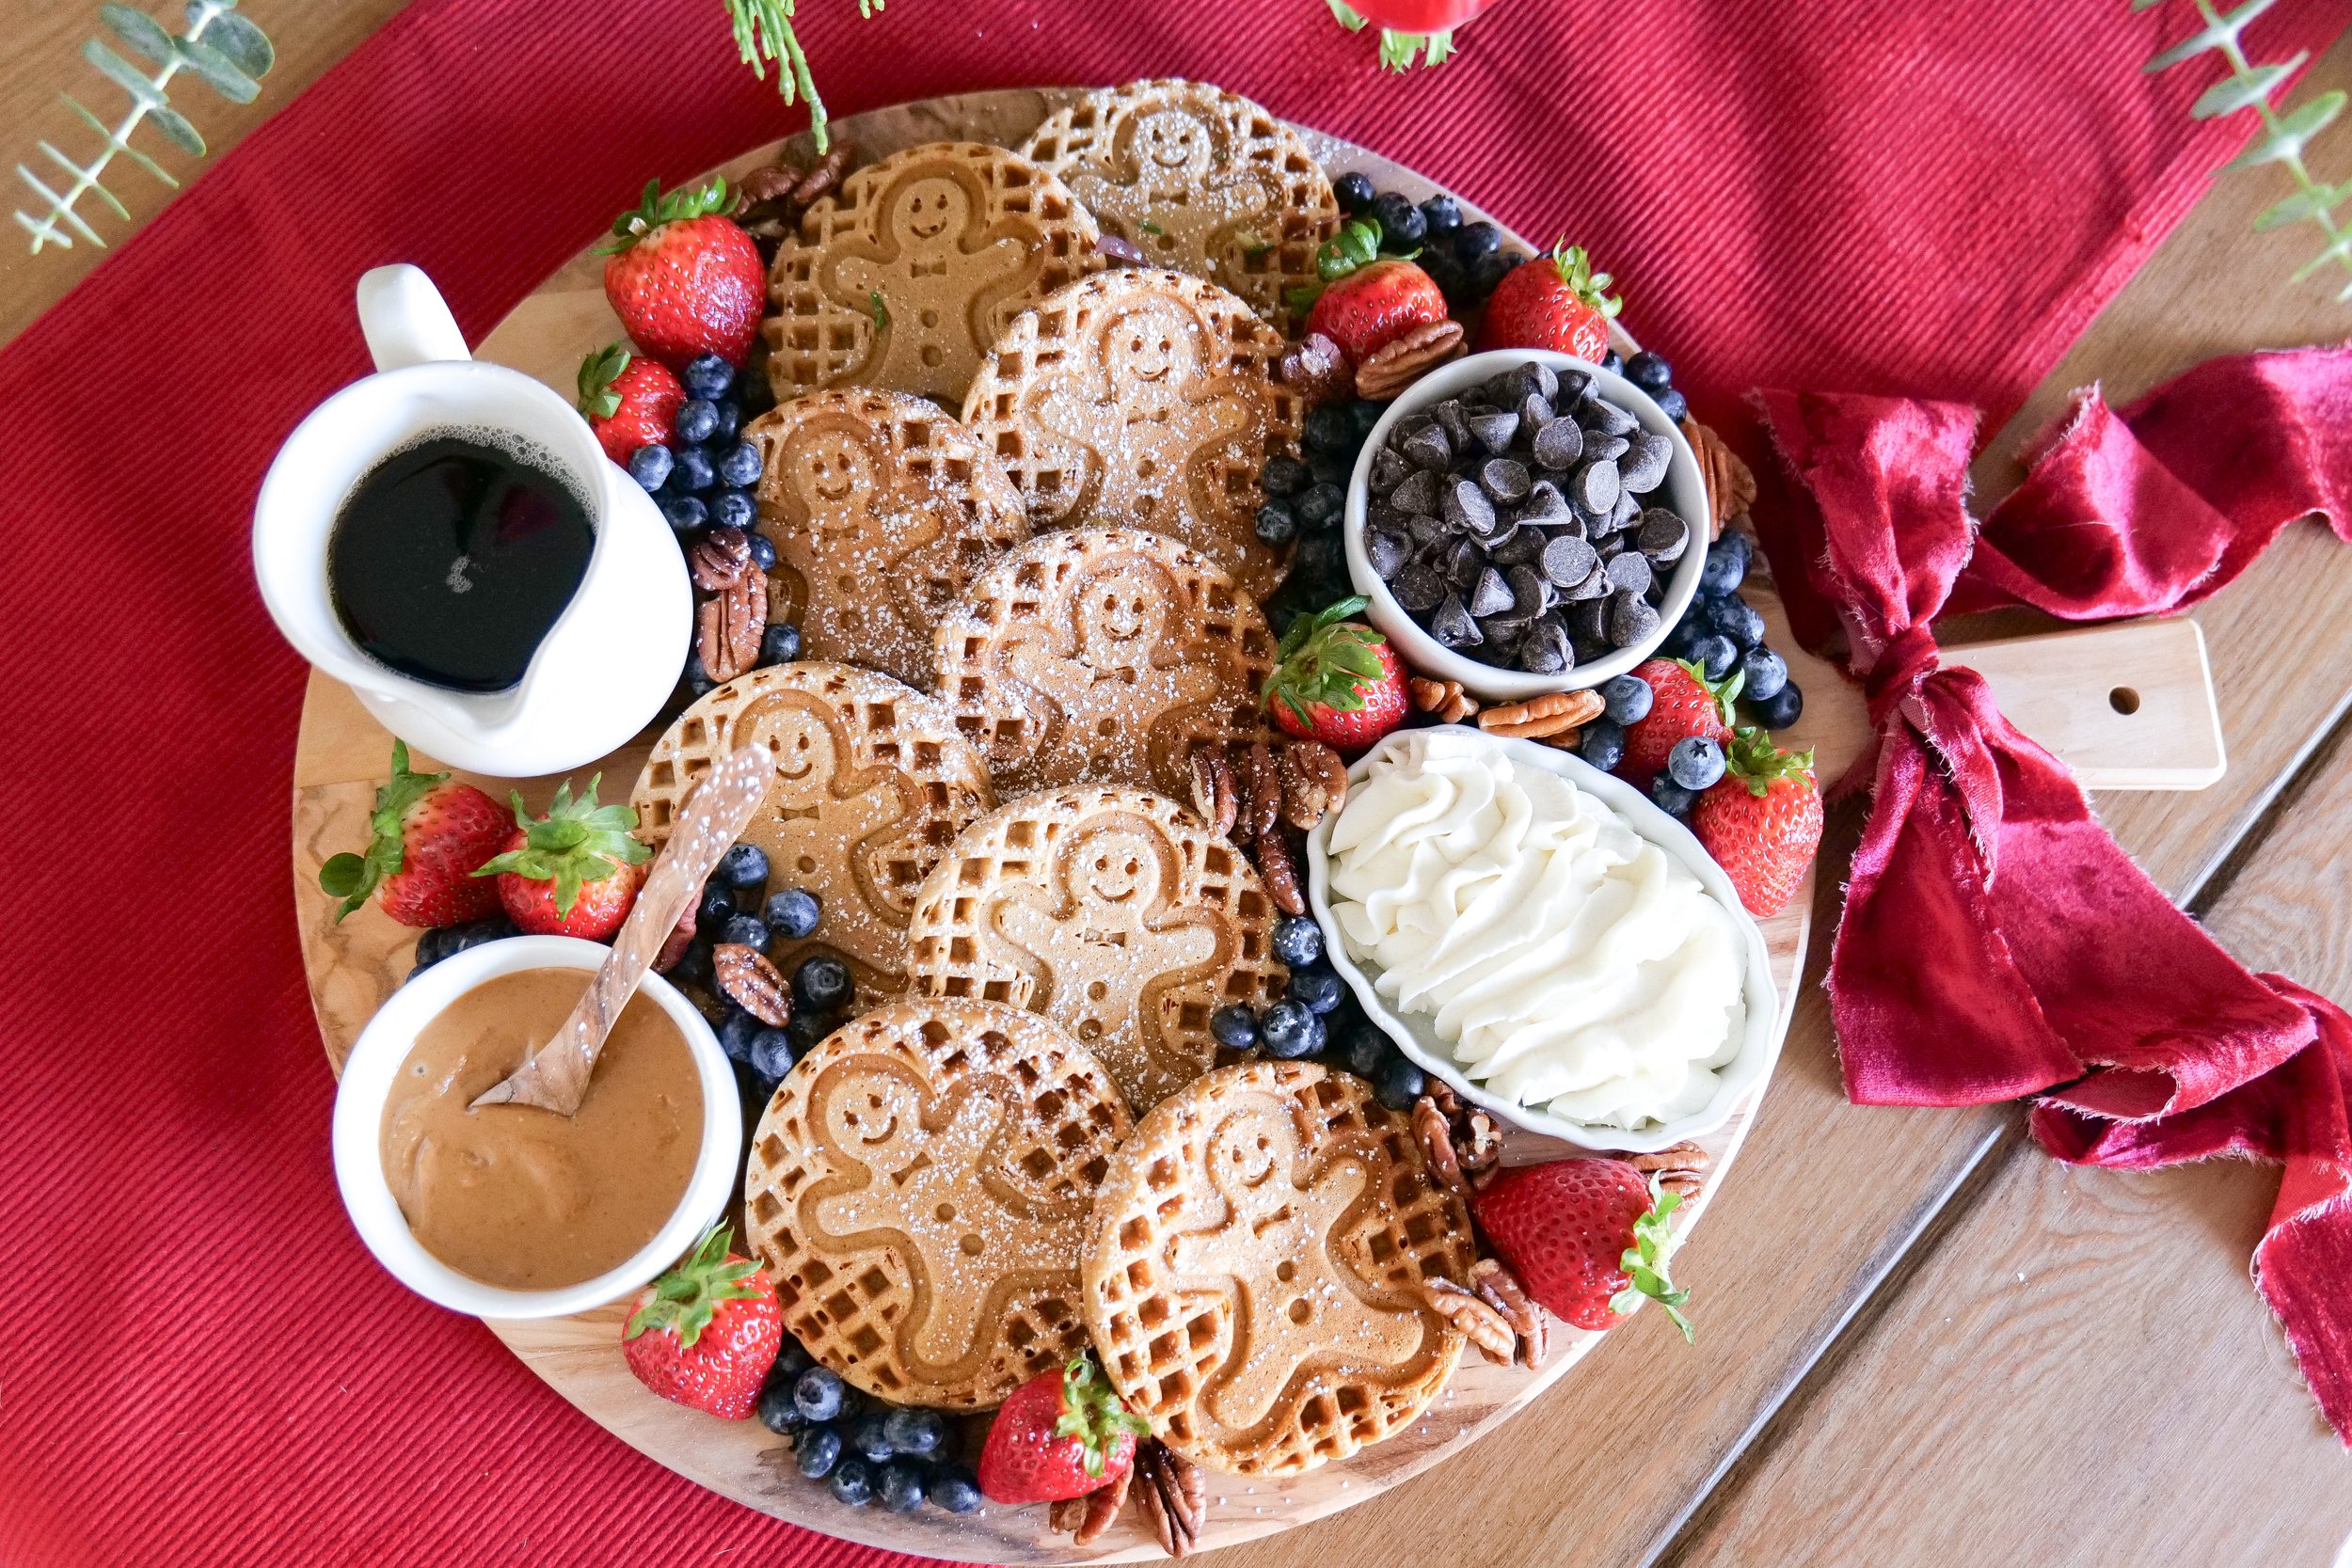
Gingerbread pancakes are the perfect way to add a festive twist to your holiday breakfast. They are easy to make and require the same ingredients. For a unique presentation, serve the pancakes the same as the waffle board. All you have to do is heat up a skillet instead of a waffle iron and cook with the pre-made batter. Decorate your board with some of your favorite toppings like whipped cream, fresh fruits, and syrup. Make sure everyone gets a chance to customize their own waffle or pancakes with the toppings they love.

How can I keep the waffles warm?

If you're looking for a delicious and easy snack, look no further than this Gingerbread Waffle Board and recipe. This dish is the perfect combination of crunchy waffles, warm spices and a sweet glaze. Not only is it a tasty treat, but it's also incredibly easy to make. Start by preheating your oven to 200°F and laying the waffles in a single layer on a baking sheet. Pop them in the oven for 5 minutes and then place a layer of parchment paper between the waffles and wrap the baking sheet in aluminum foil to keep them warm. You can also keep out a toaster oven or panini press for everyone to reheat for a few minutes when they are ready to eat at a later time so they are hot fresh and a little crispy on the edges.

Can I make these ahead of time and Store?

Gingerbread waffles are a delicious and festive treat for any holiday gathering! They are easy to make and even easier to enjoy when you use our foolproof gingerbread waffle board and recipe. Making gingerbread waffles ahead of time is a great way to save time when you’re in a rush. Not only can you make the waffles ahead of time, but you can also freeze them for up to two months. To make them ahead of time, prepare the batter and cook the waffles according to the recipe. Let the waffles cool to room temperature on a cooling rack and then wrap them in plastic wrap and store them in the refrigerator or freezer. When you’re ready to serve them, just pop them in the toaster or toaster oven until they’re warm and crispy. You can also prepare them in the oven as mentioned above. So don’t stress about holiday baking this year! With our gingerbread waffle board and recipe, you can make delicious gingerbread waffles that your friends and family will love. Investing your time in making our gingerbread waffle board and recipe is the perfect way to make your holiday baking more enjoyable and a fun twist on traditional waffles!

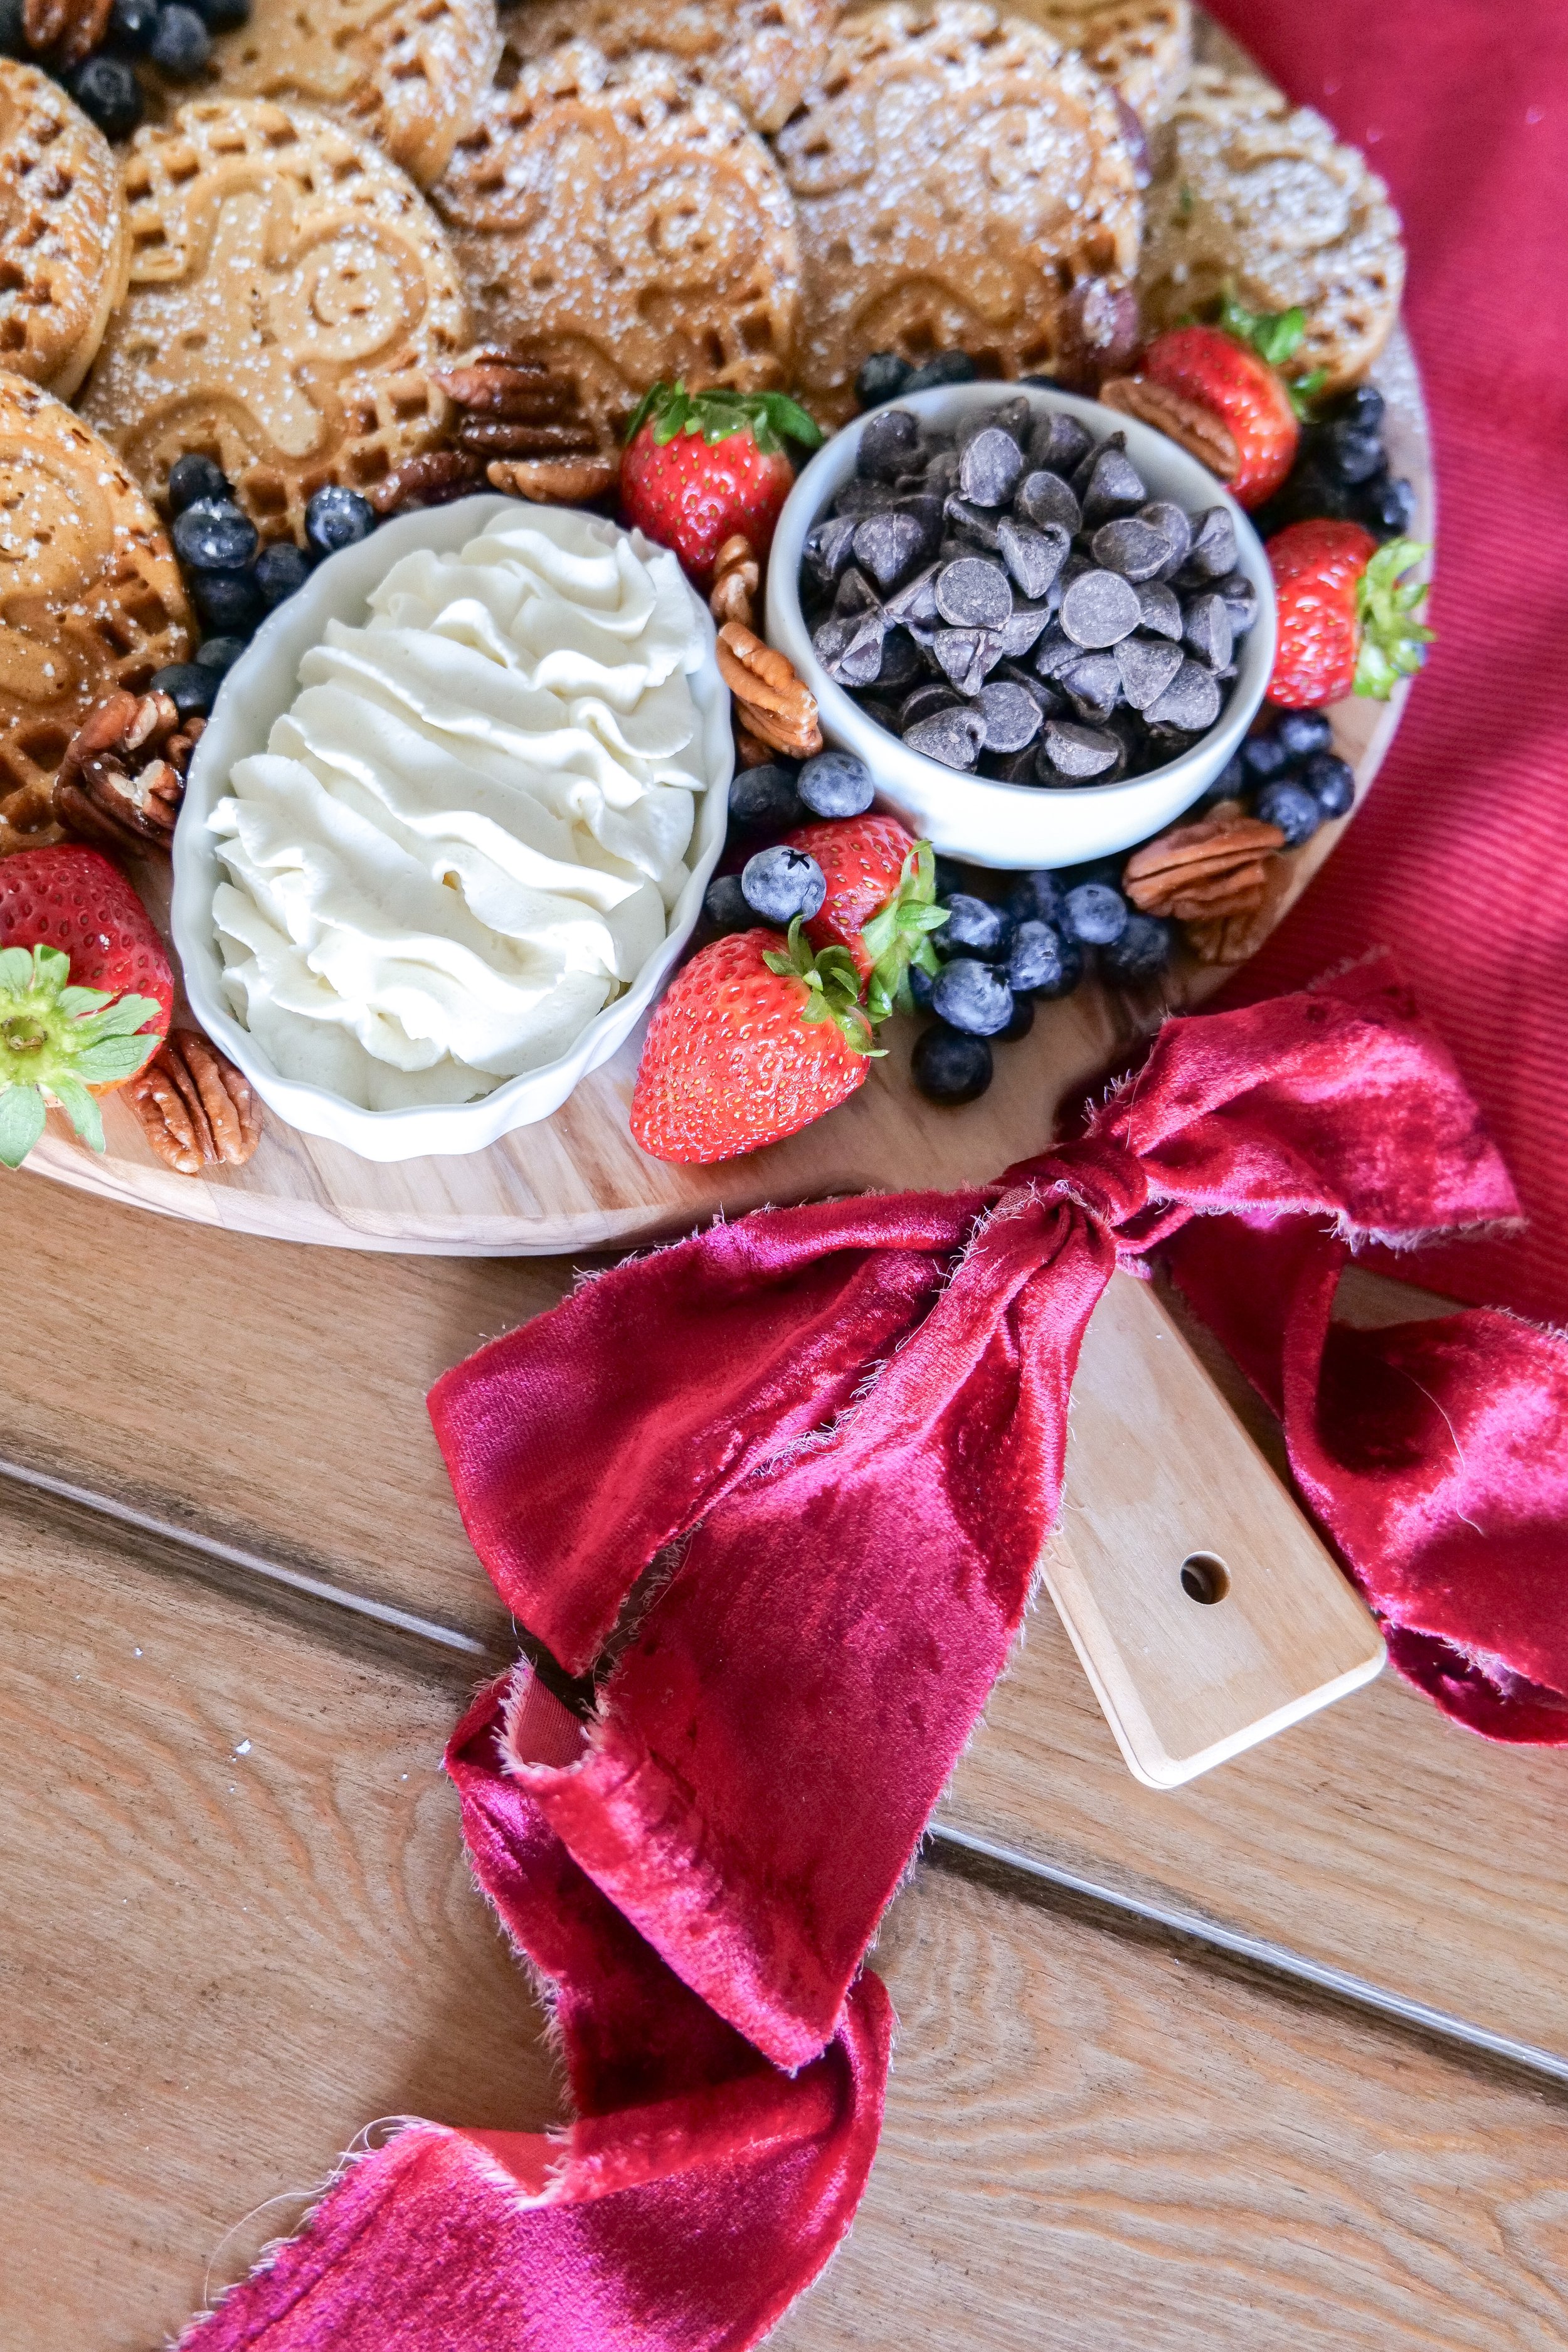
Gingerbread Waffle Toppings

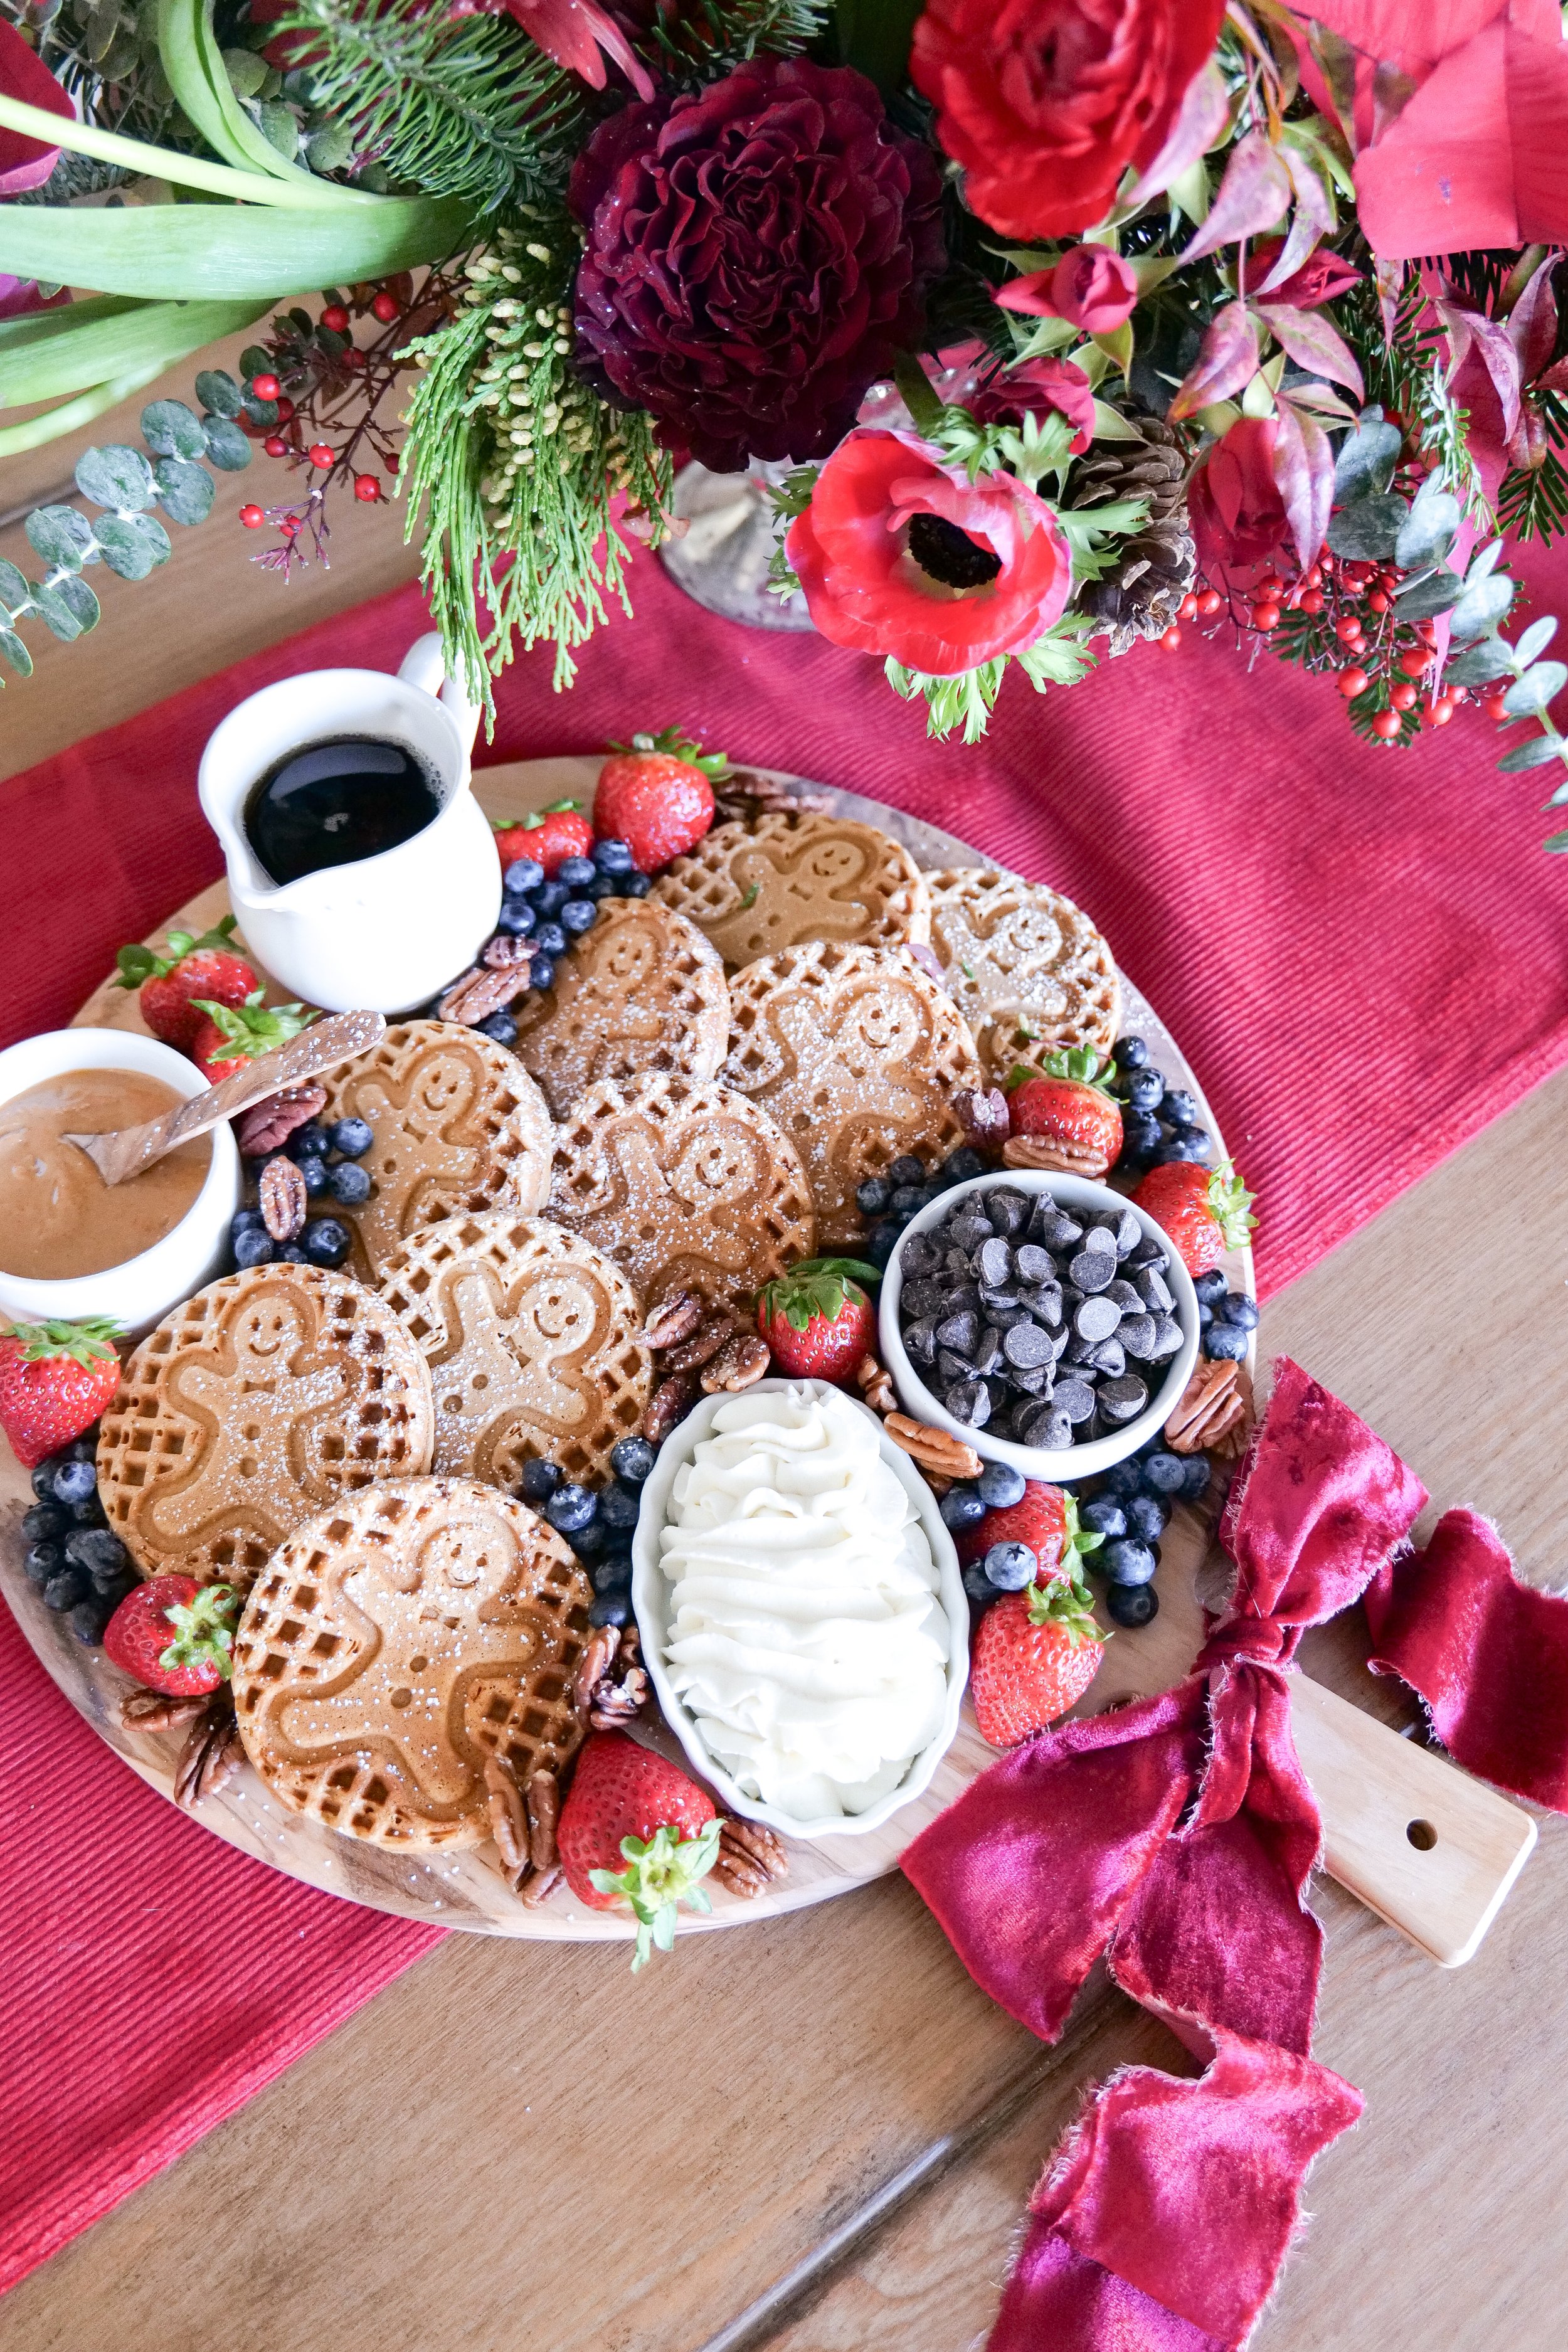
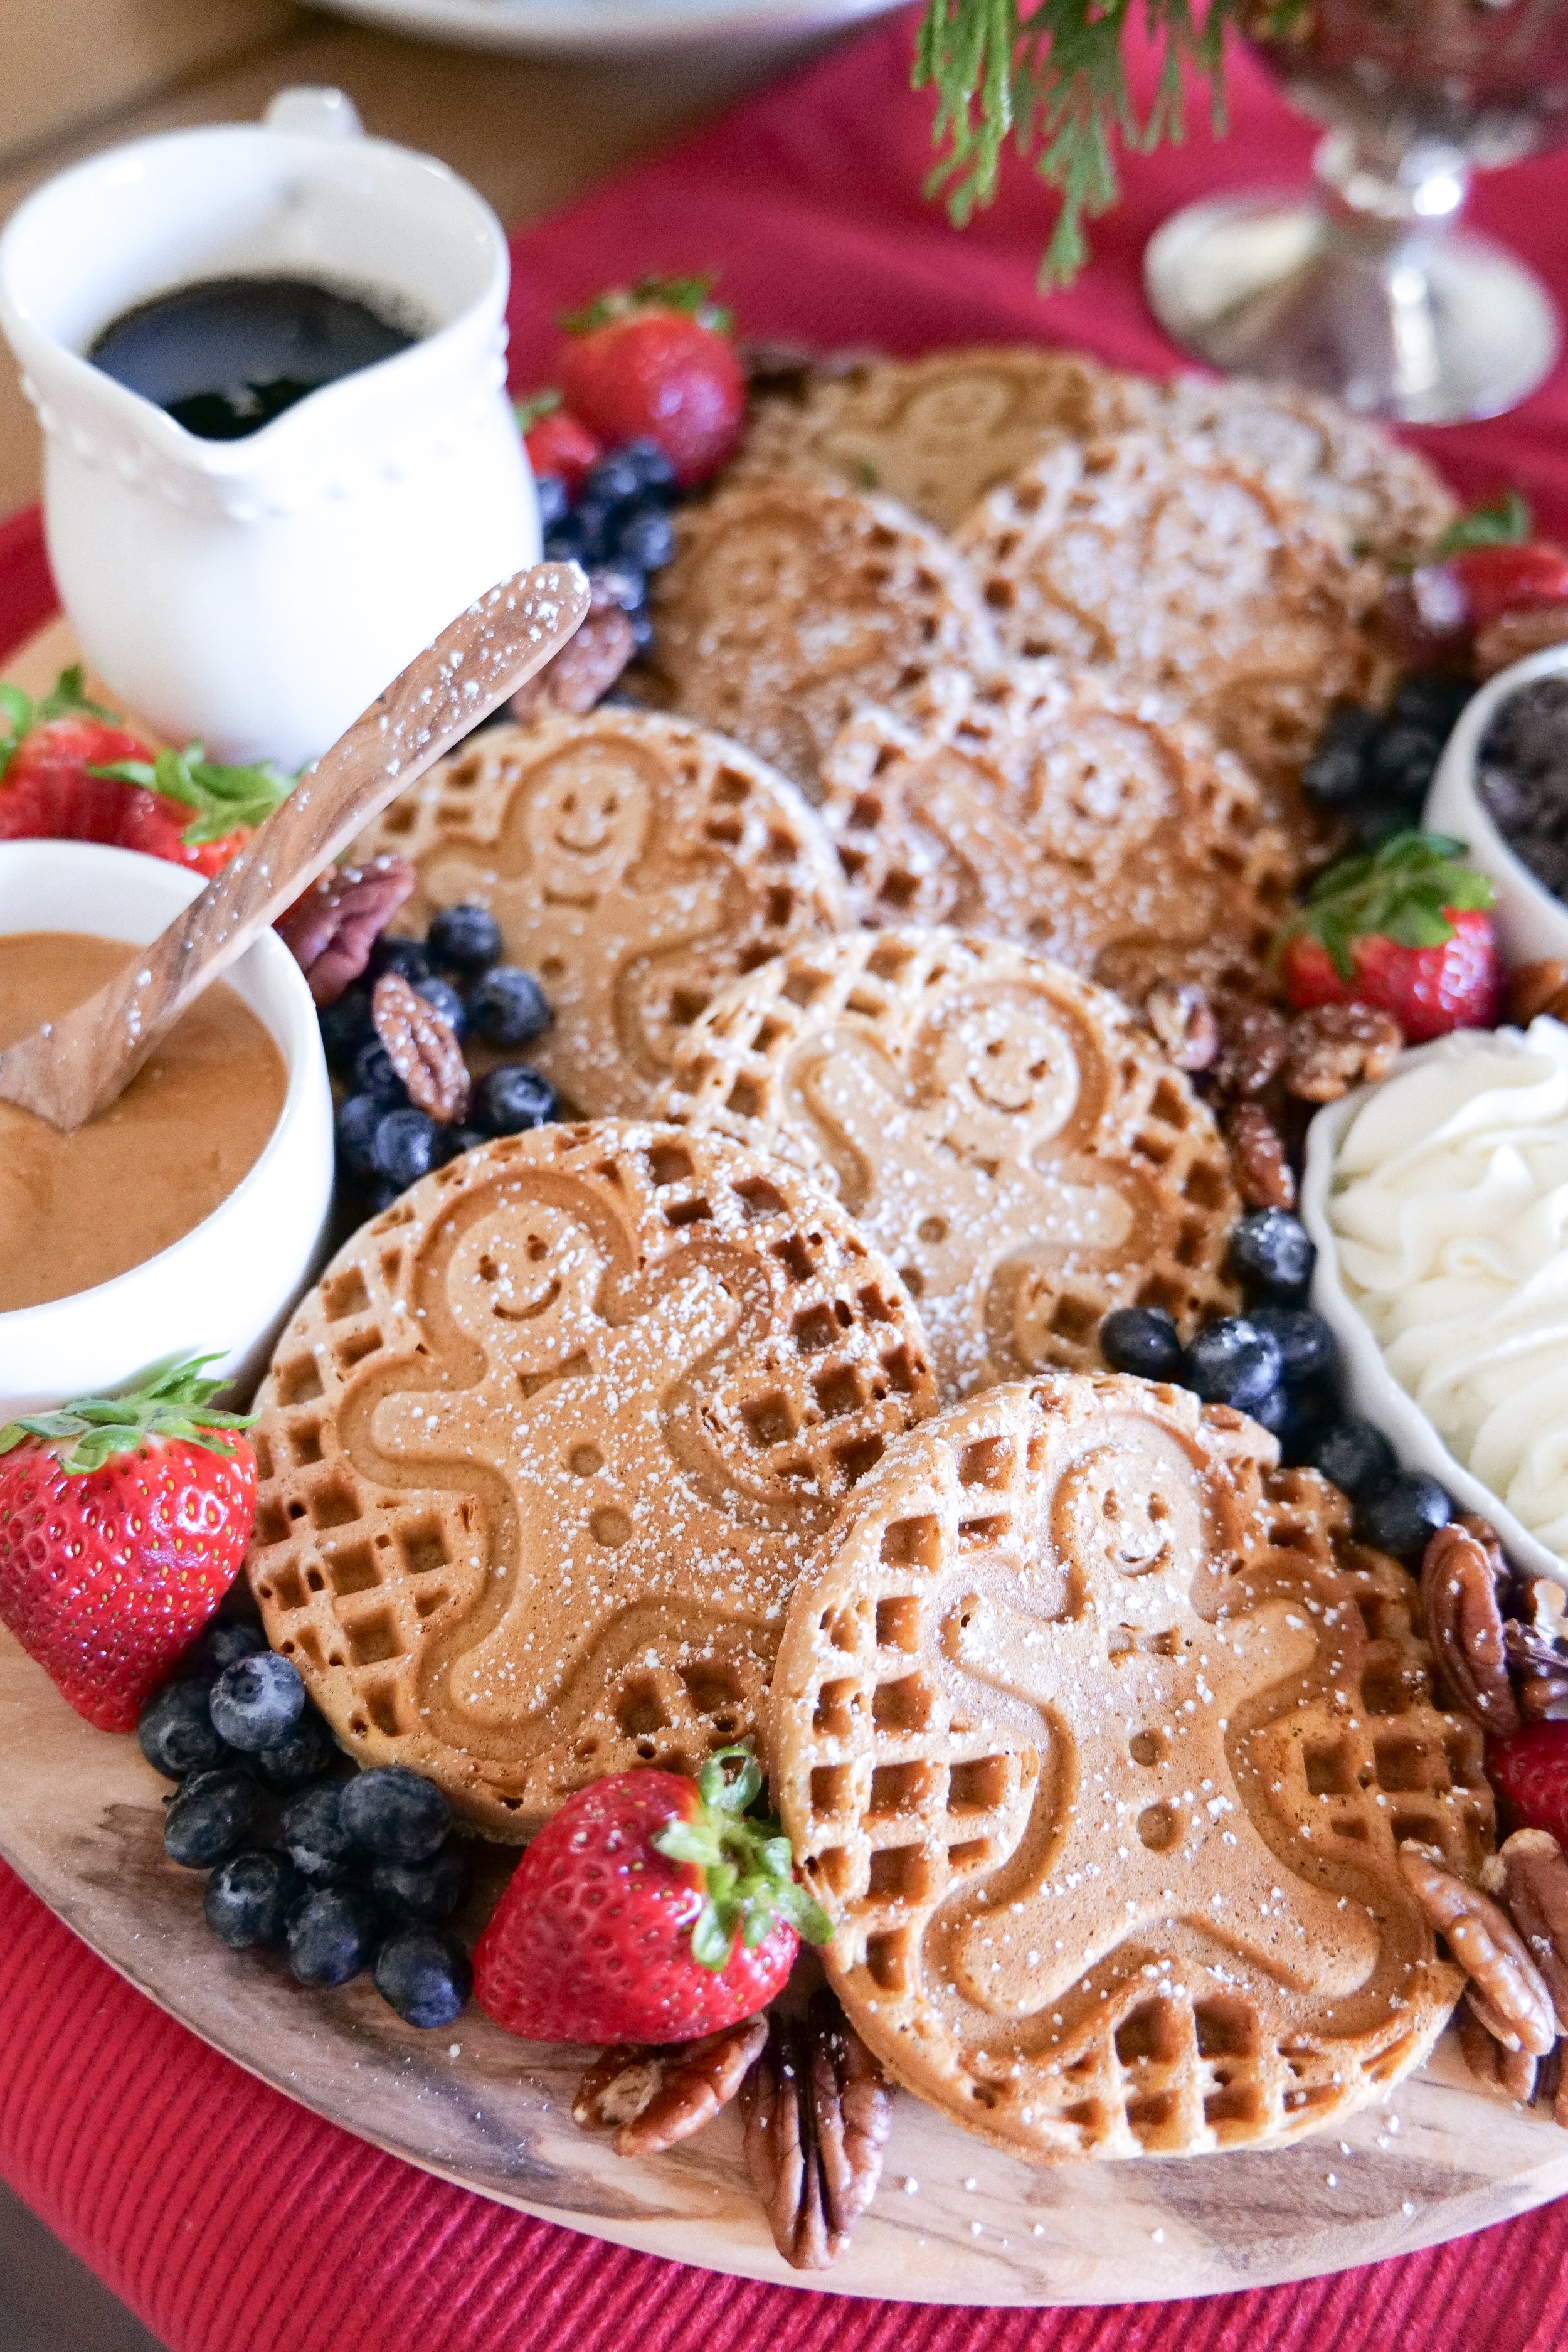
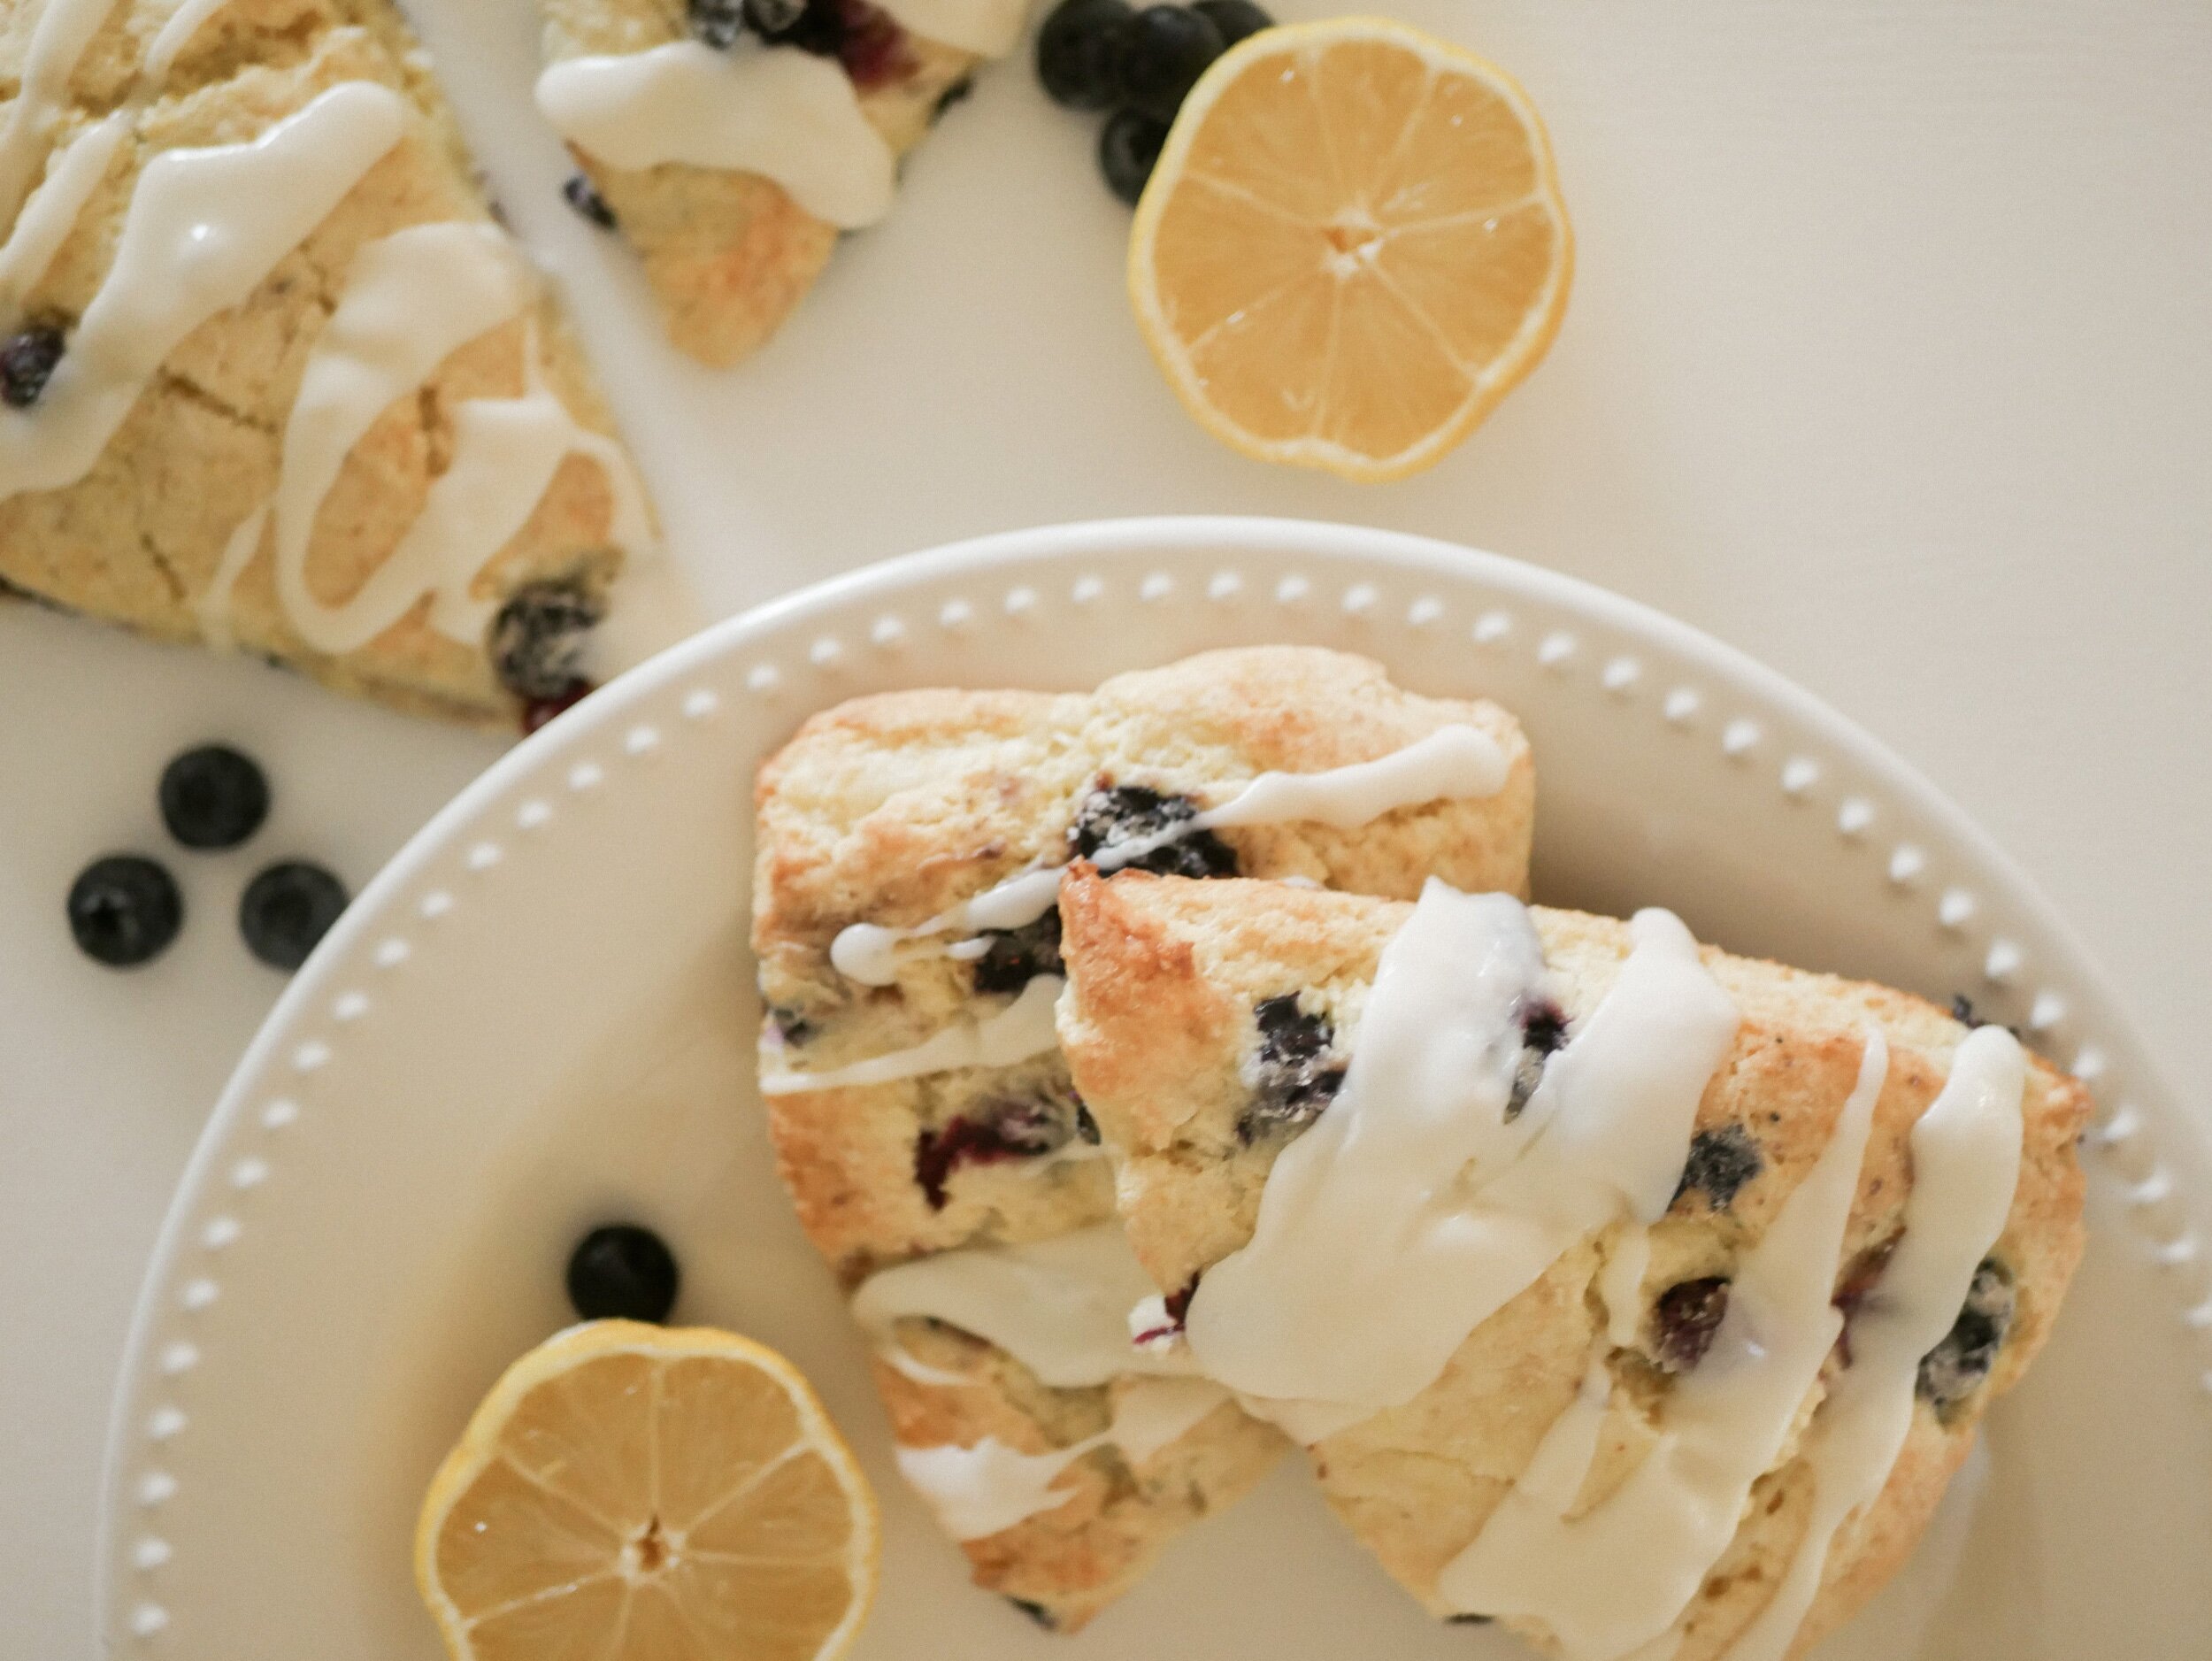
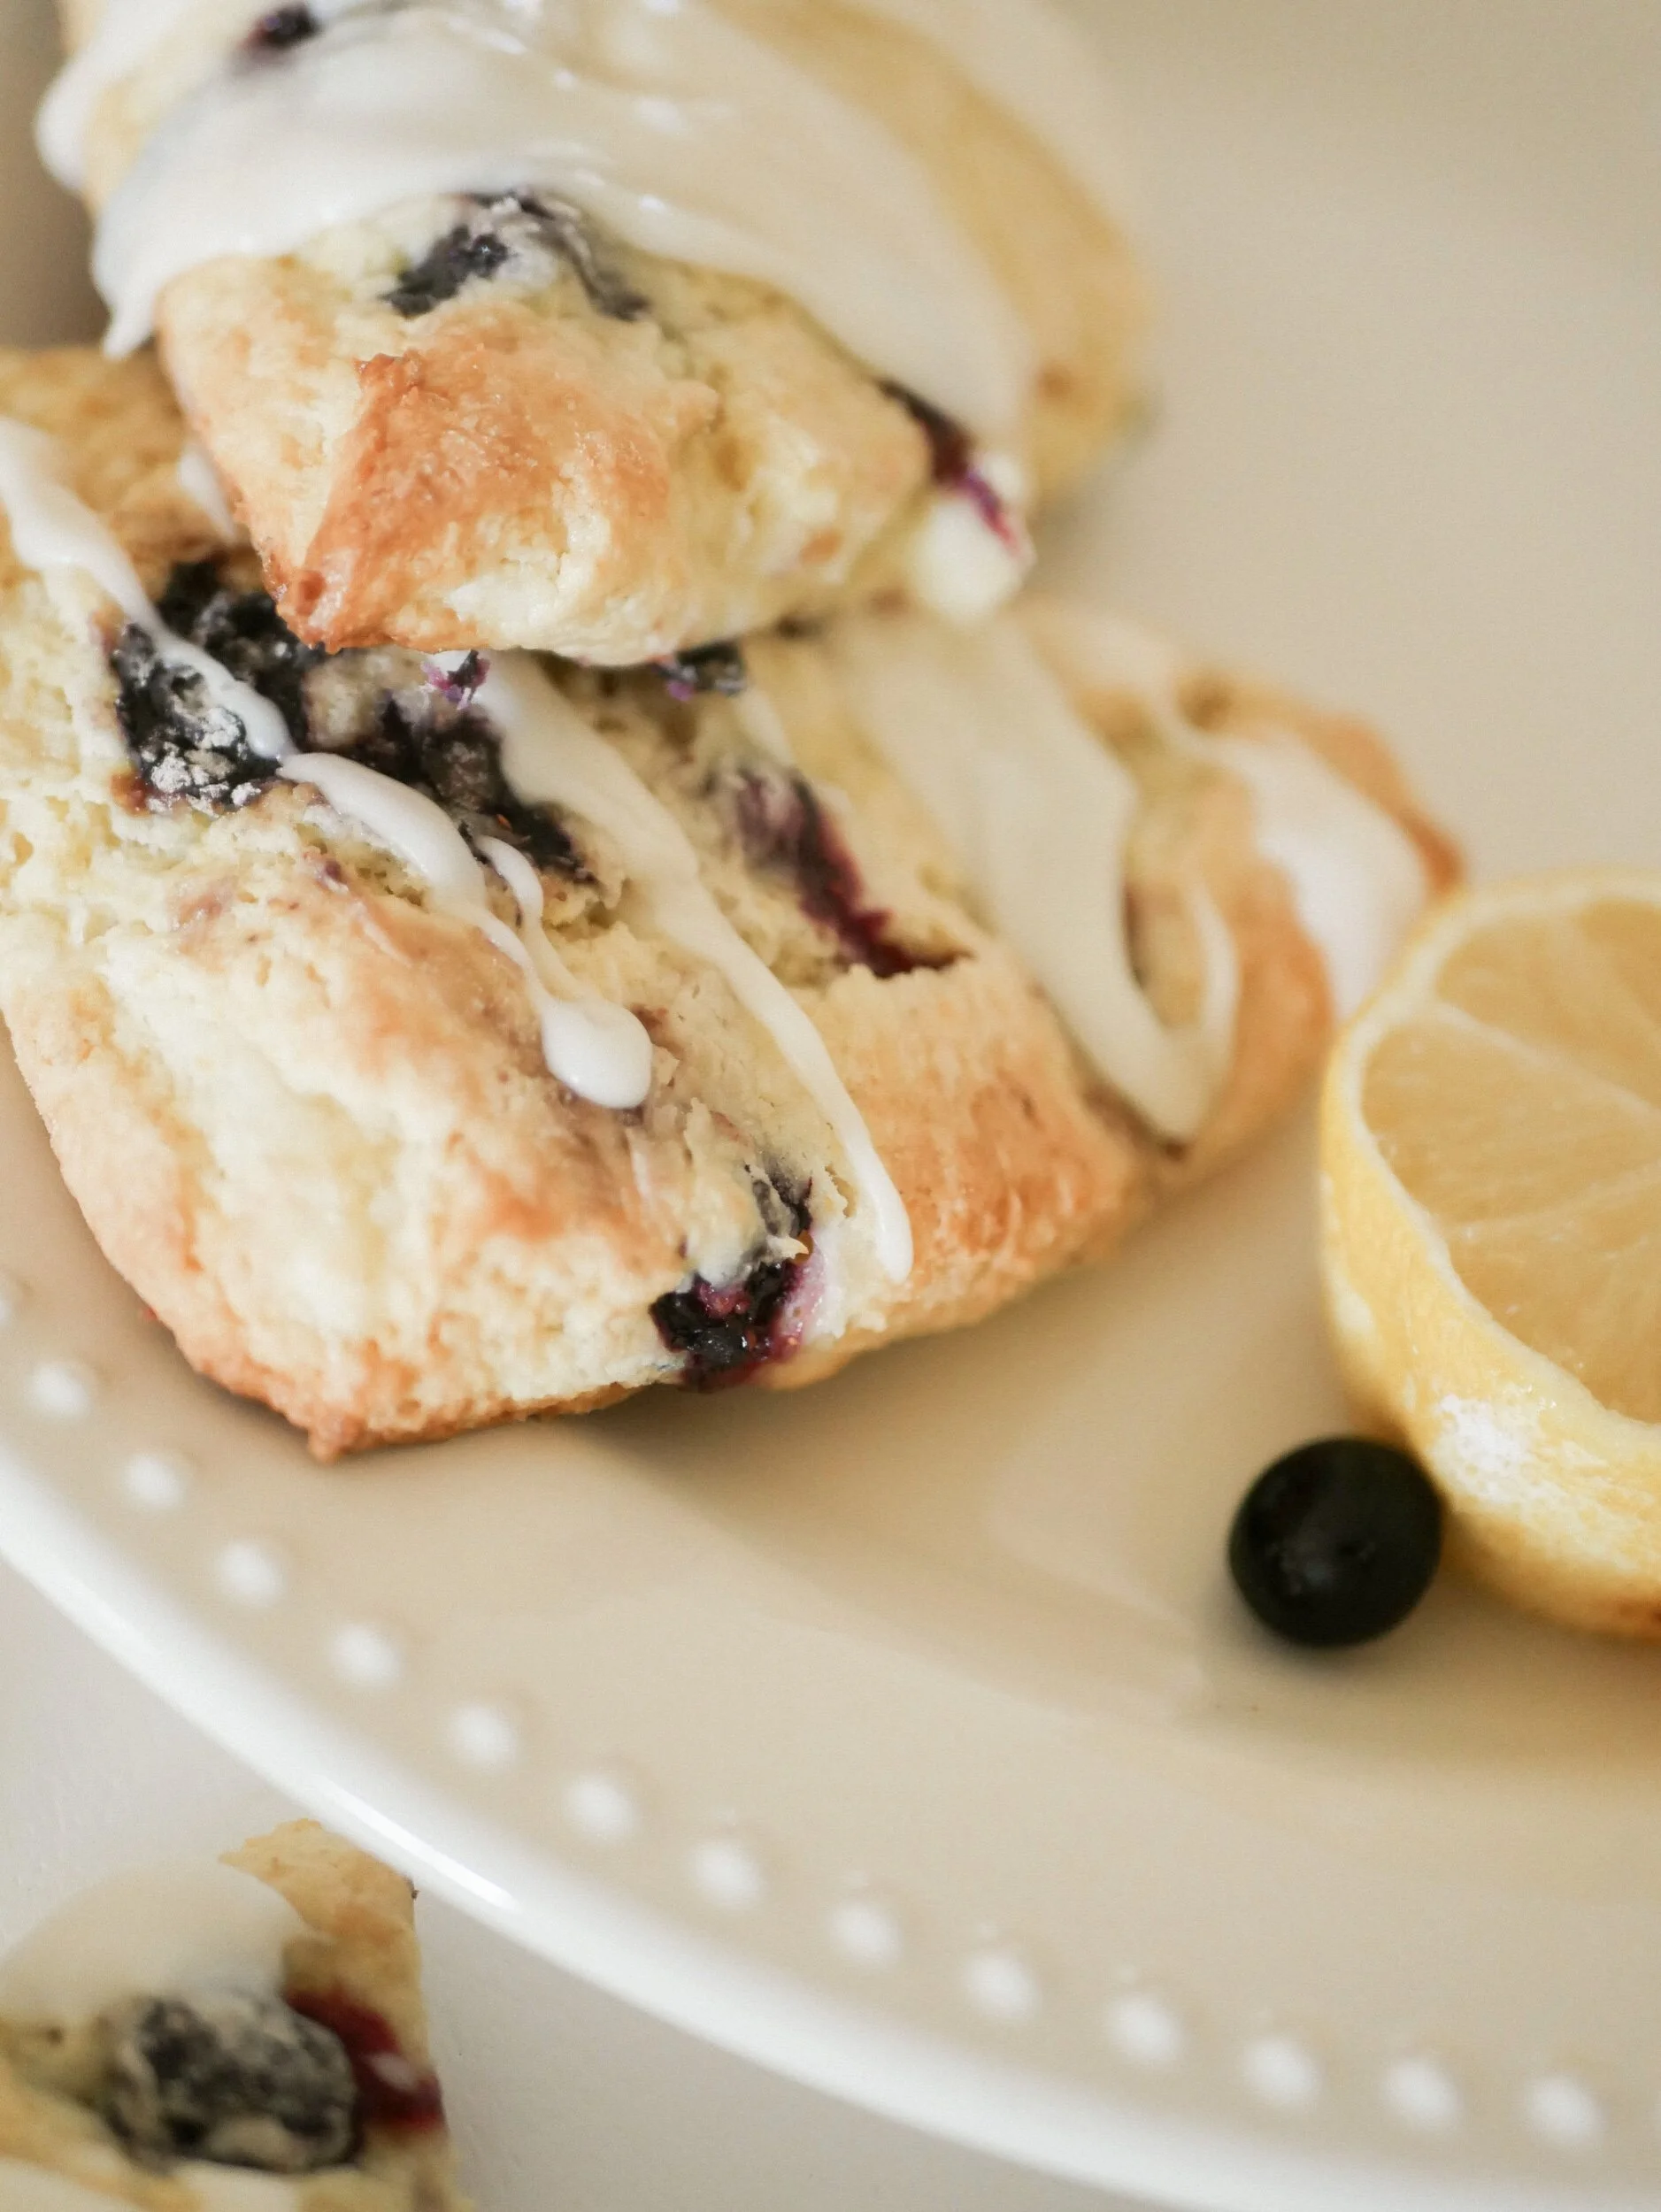
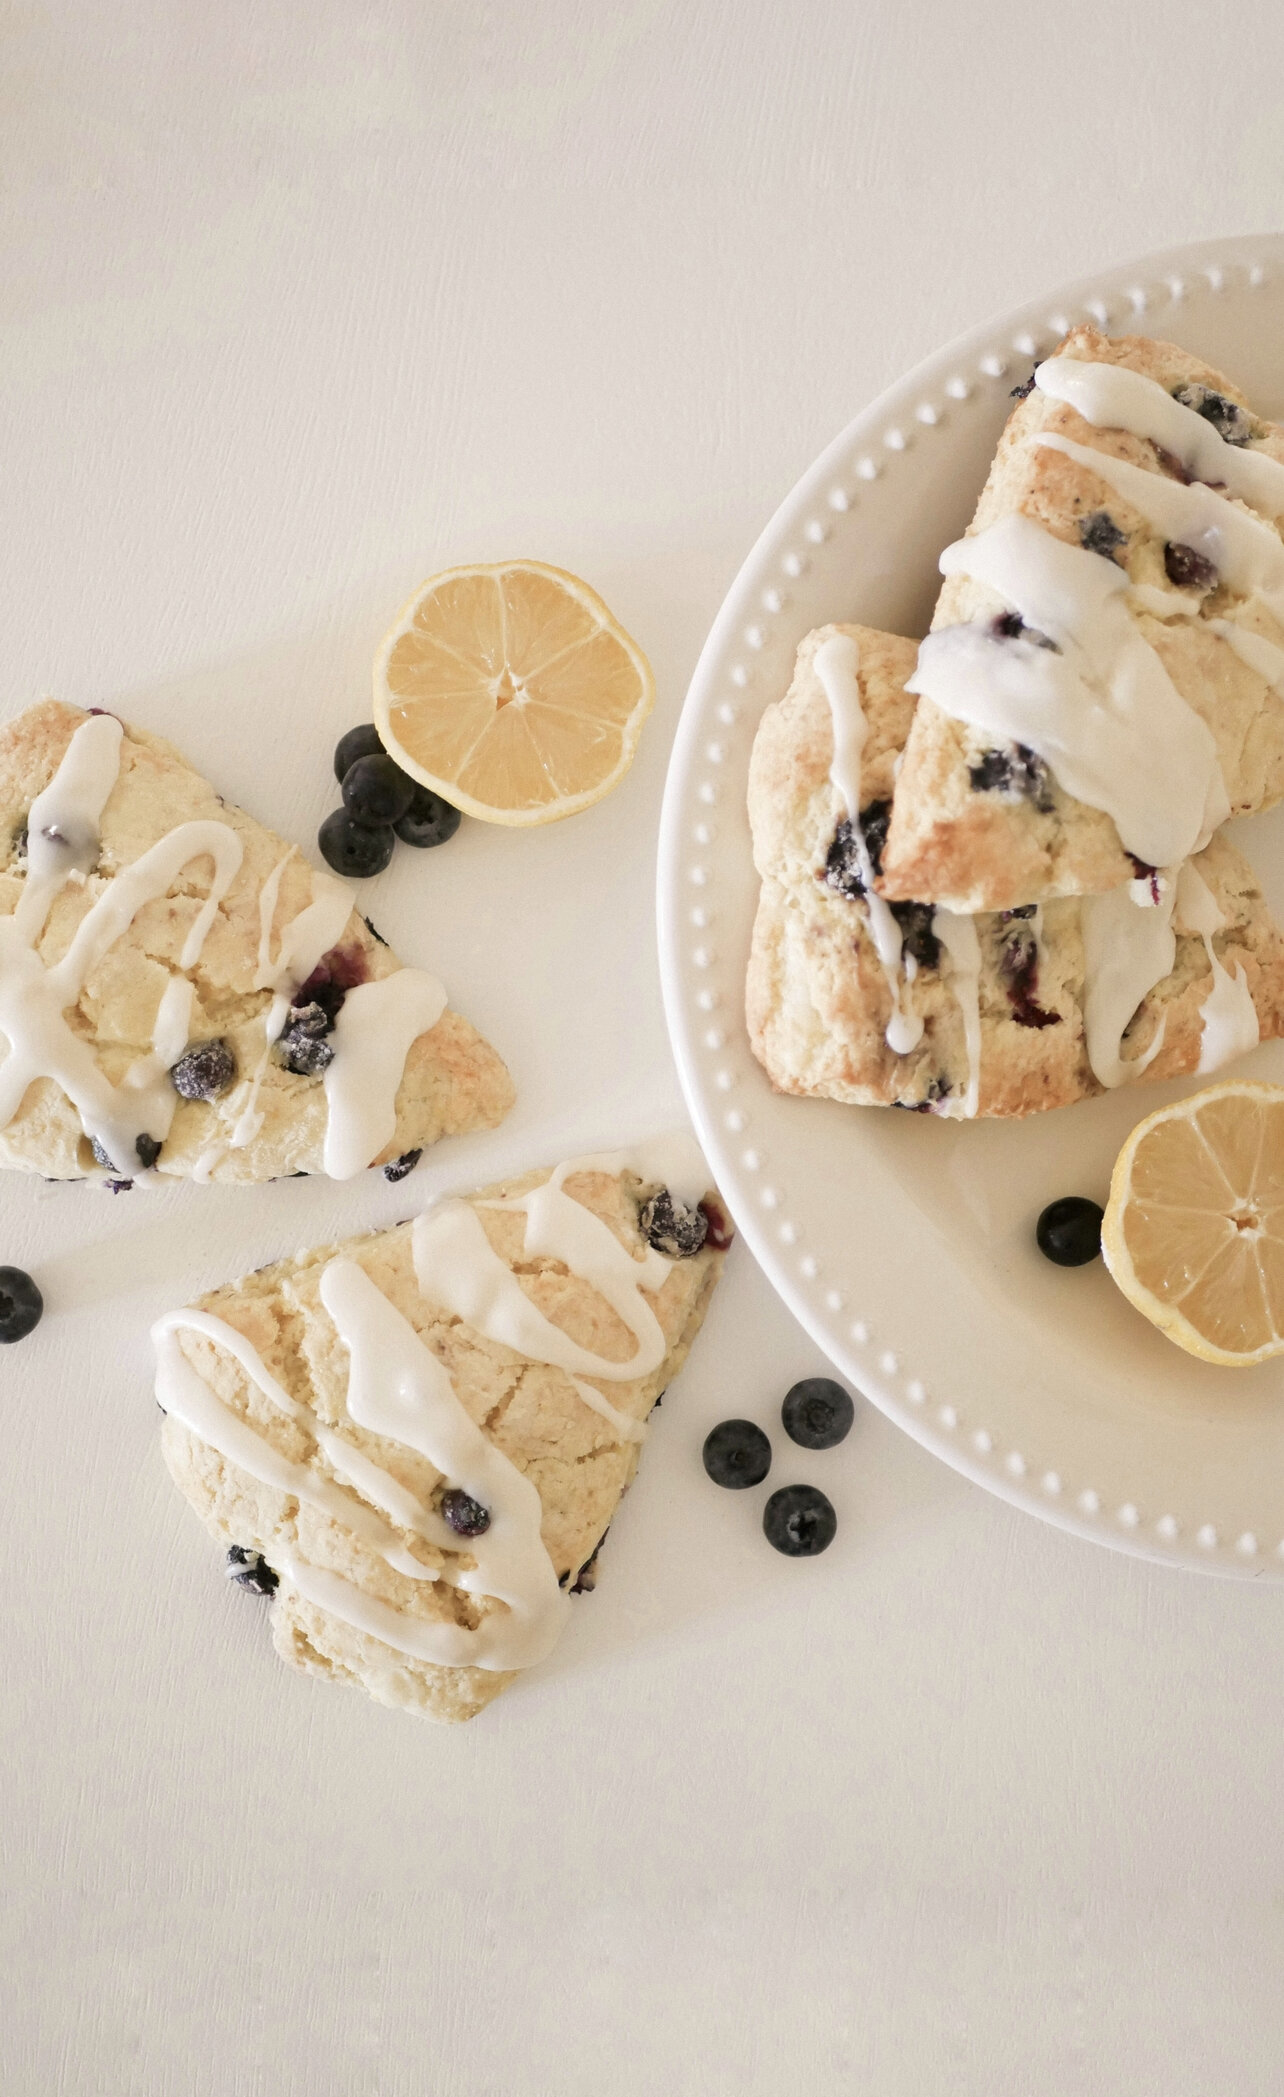
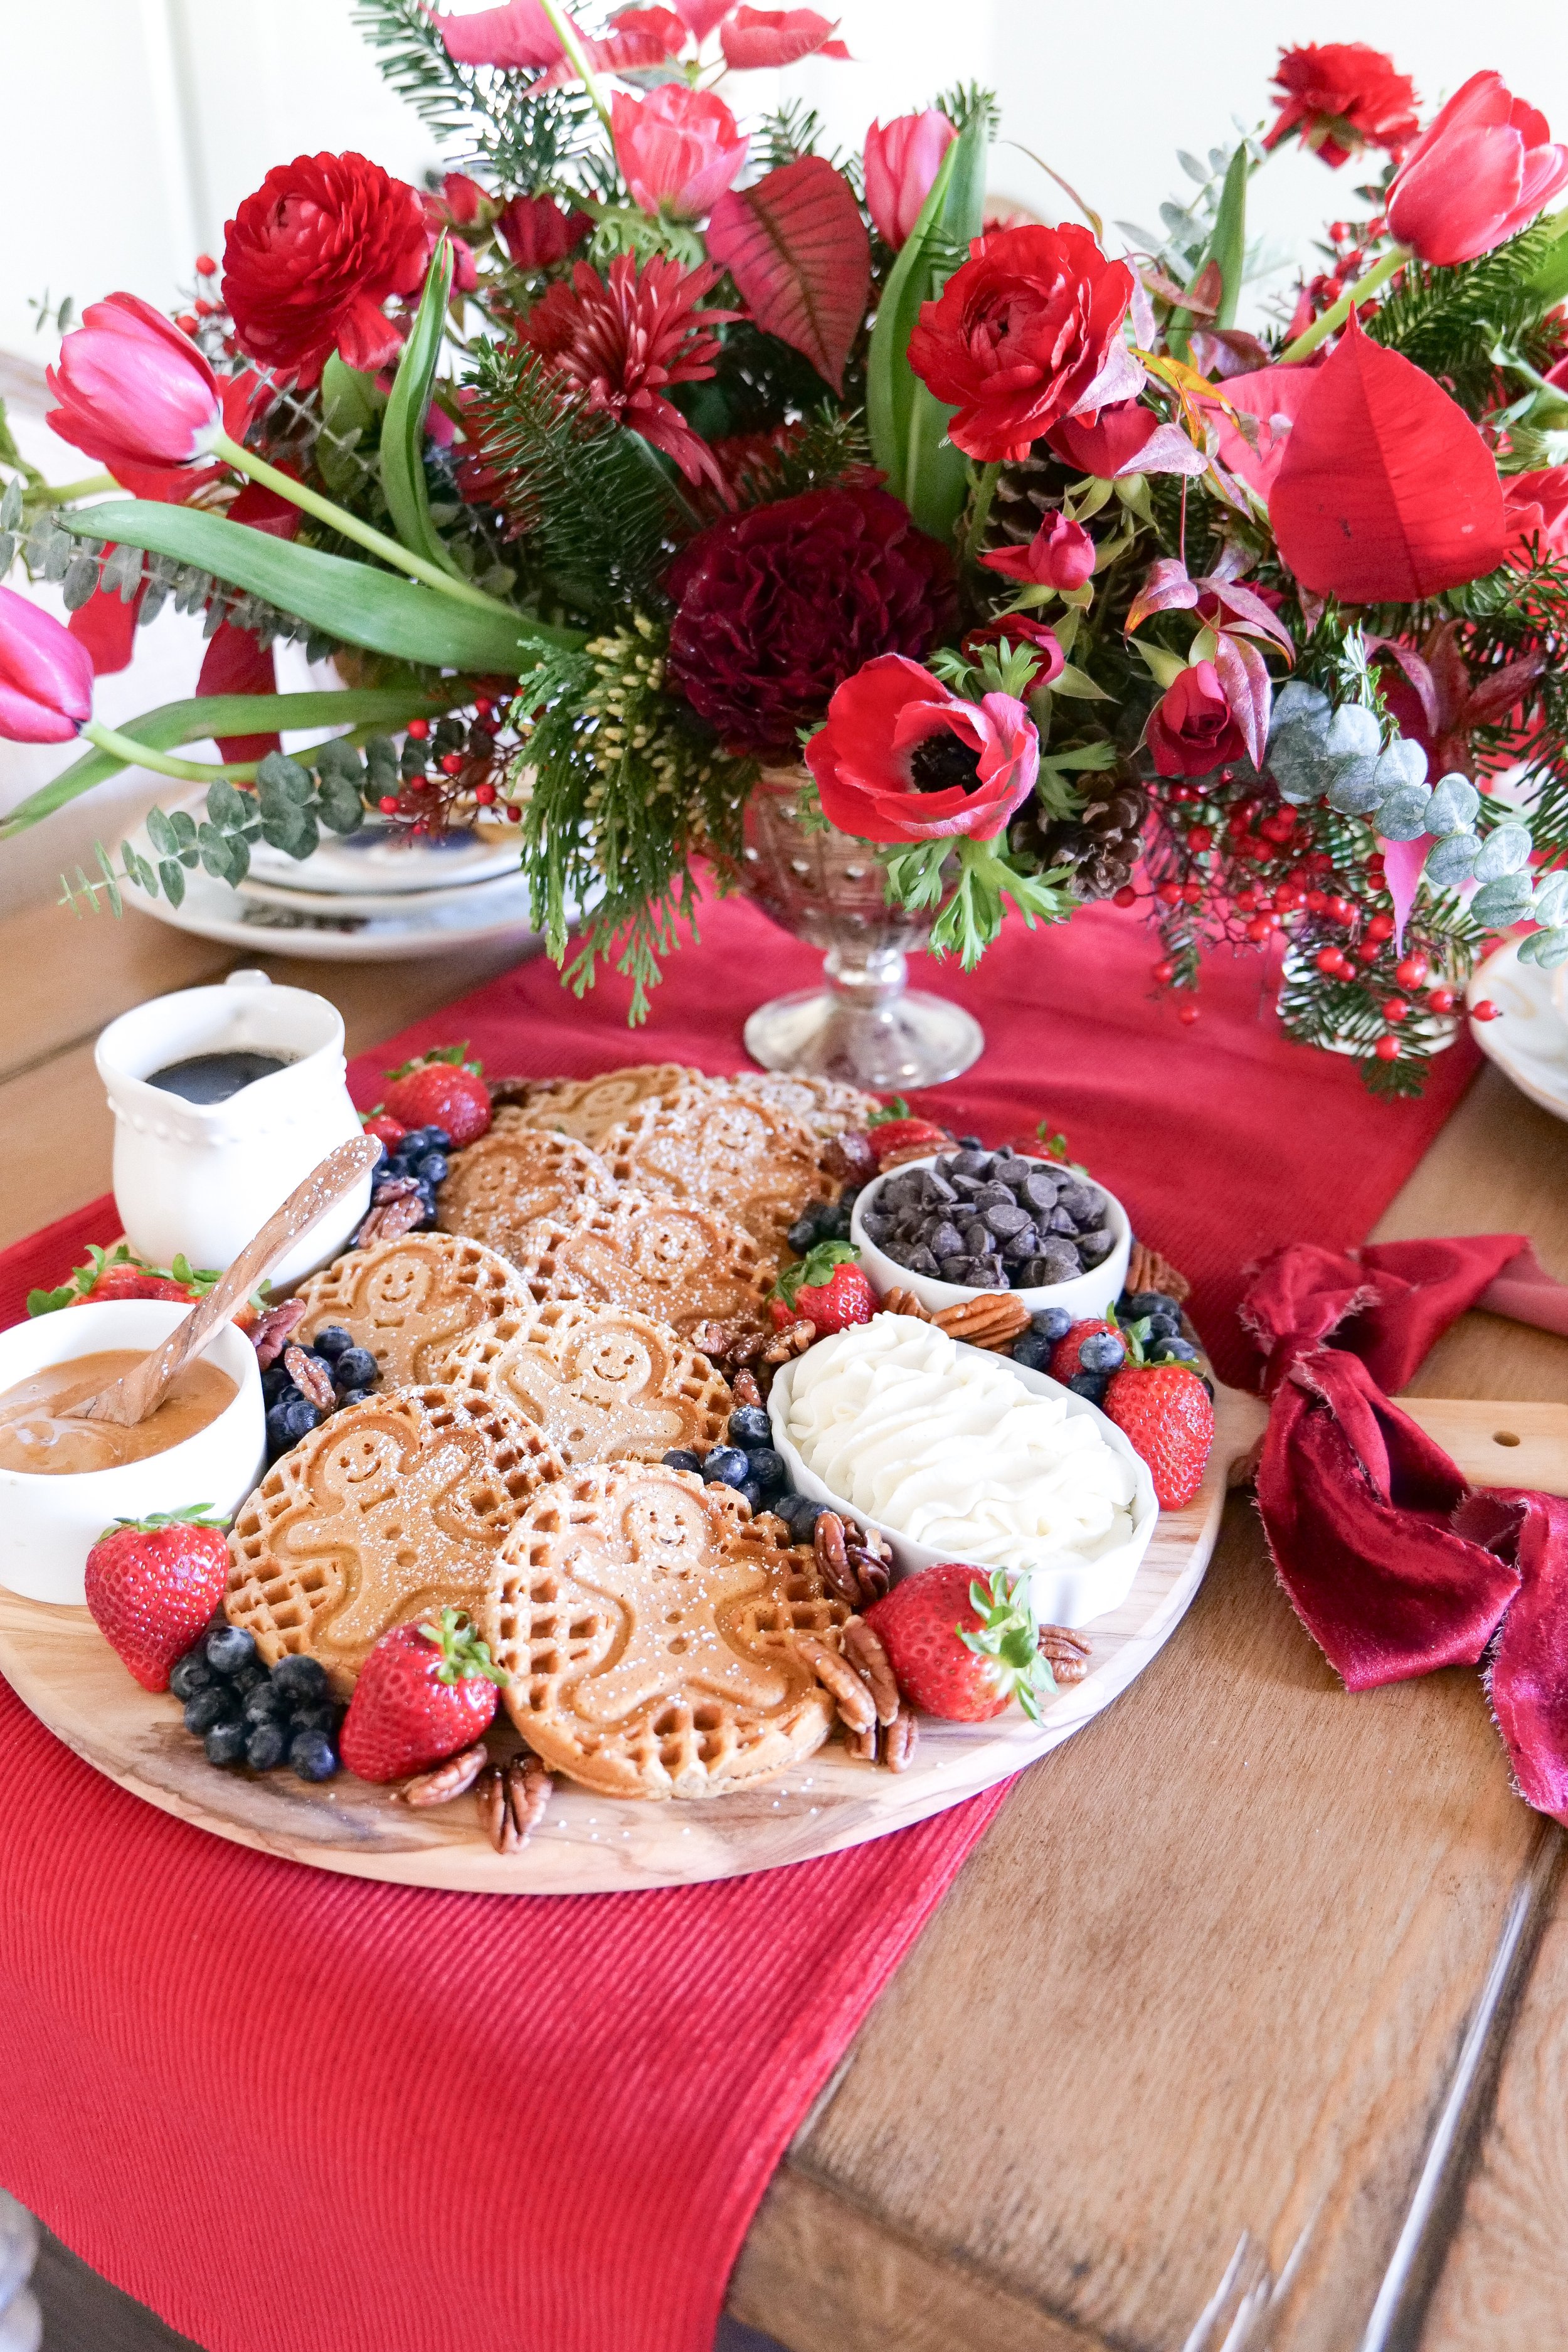
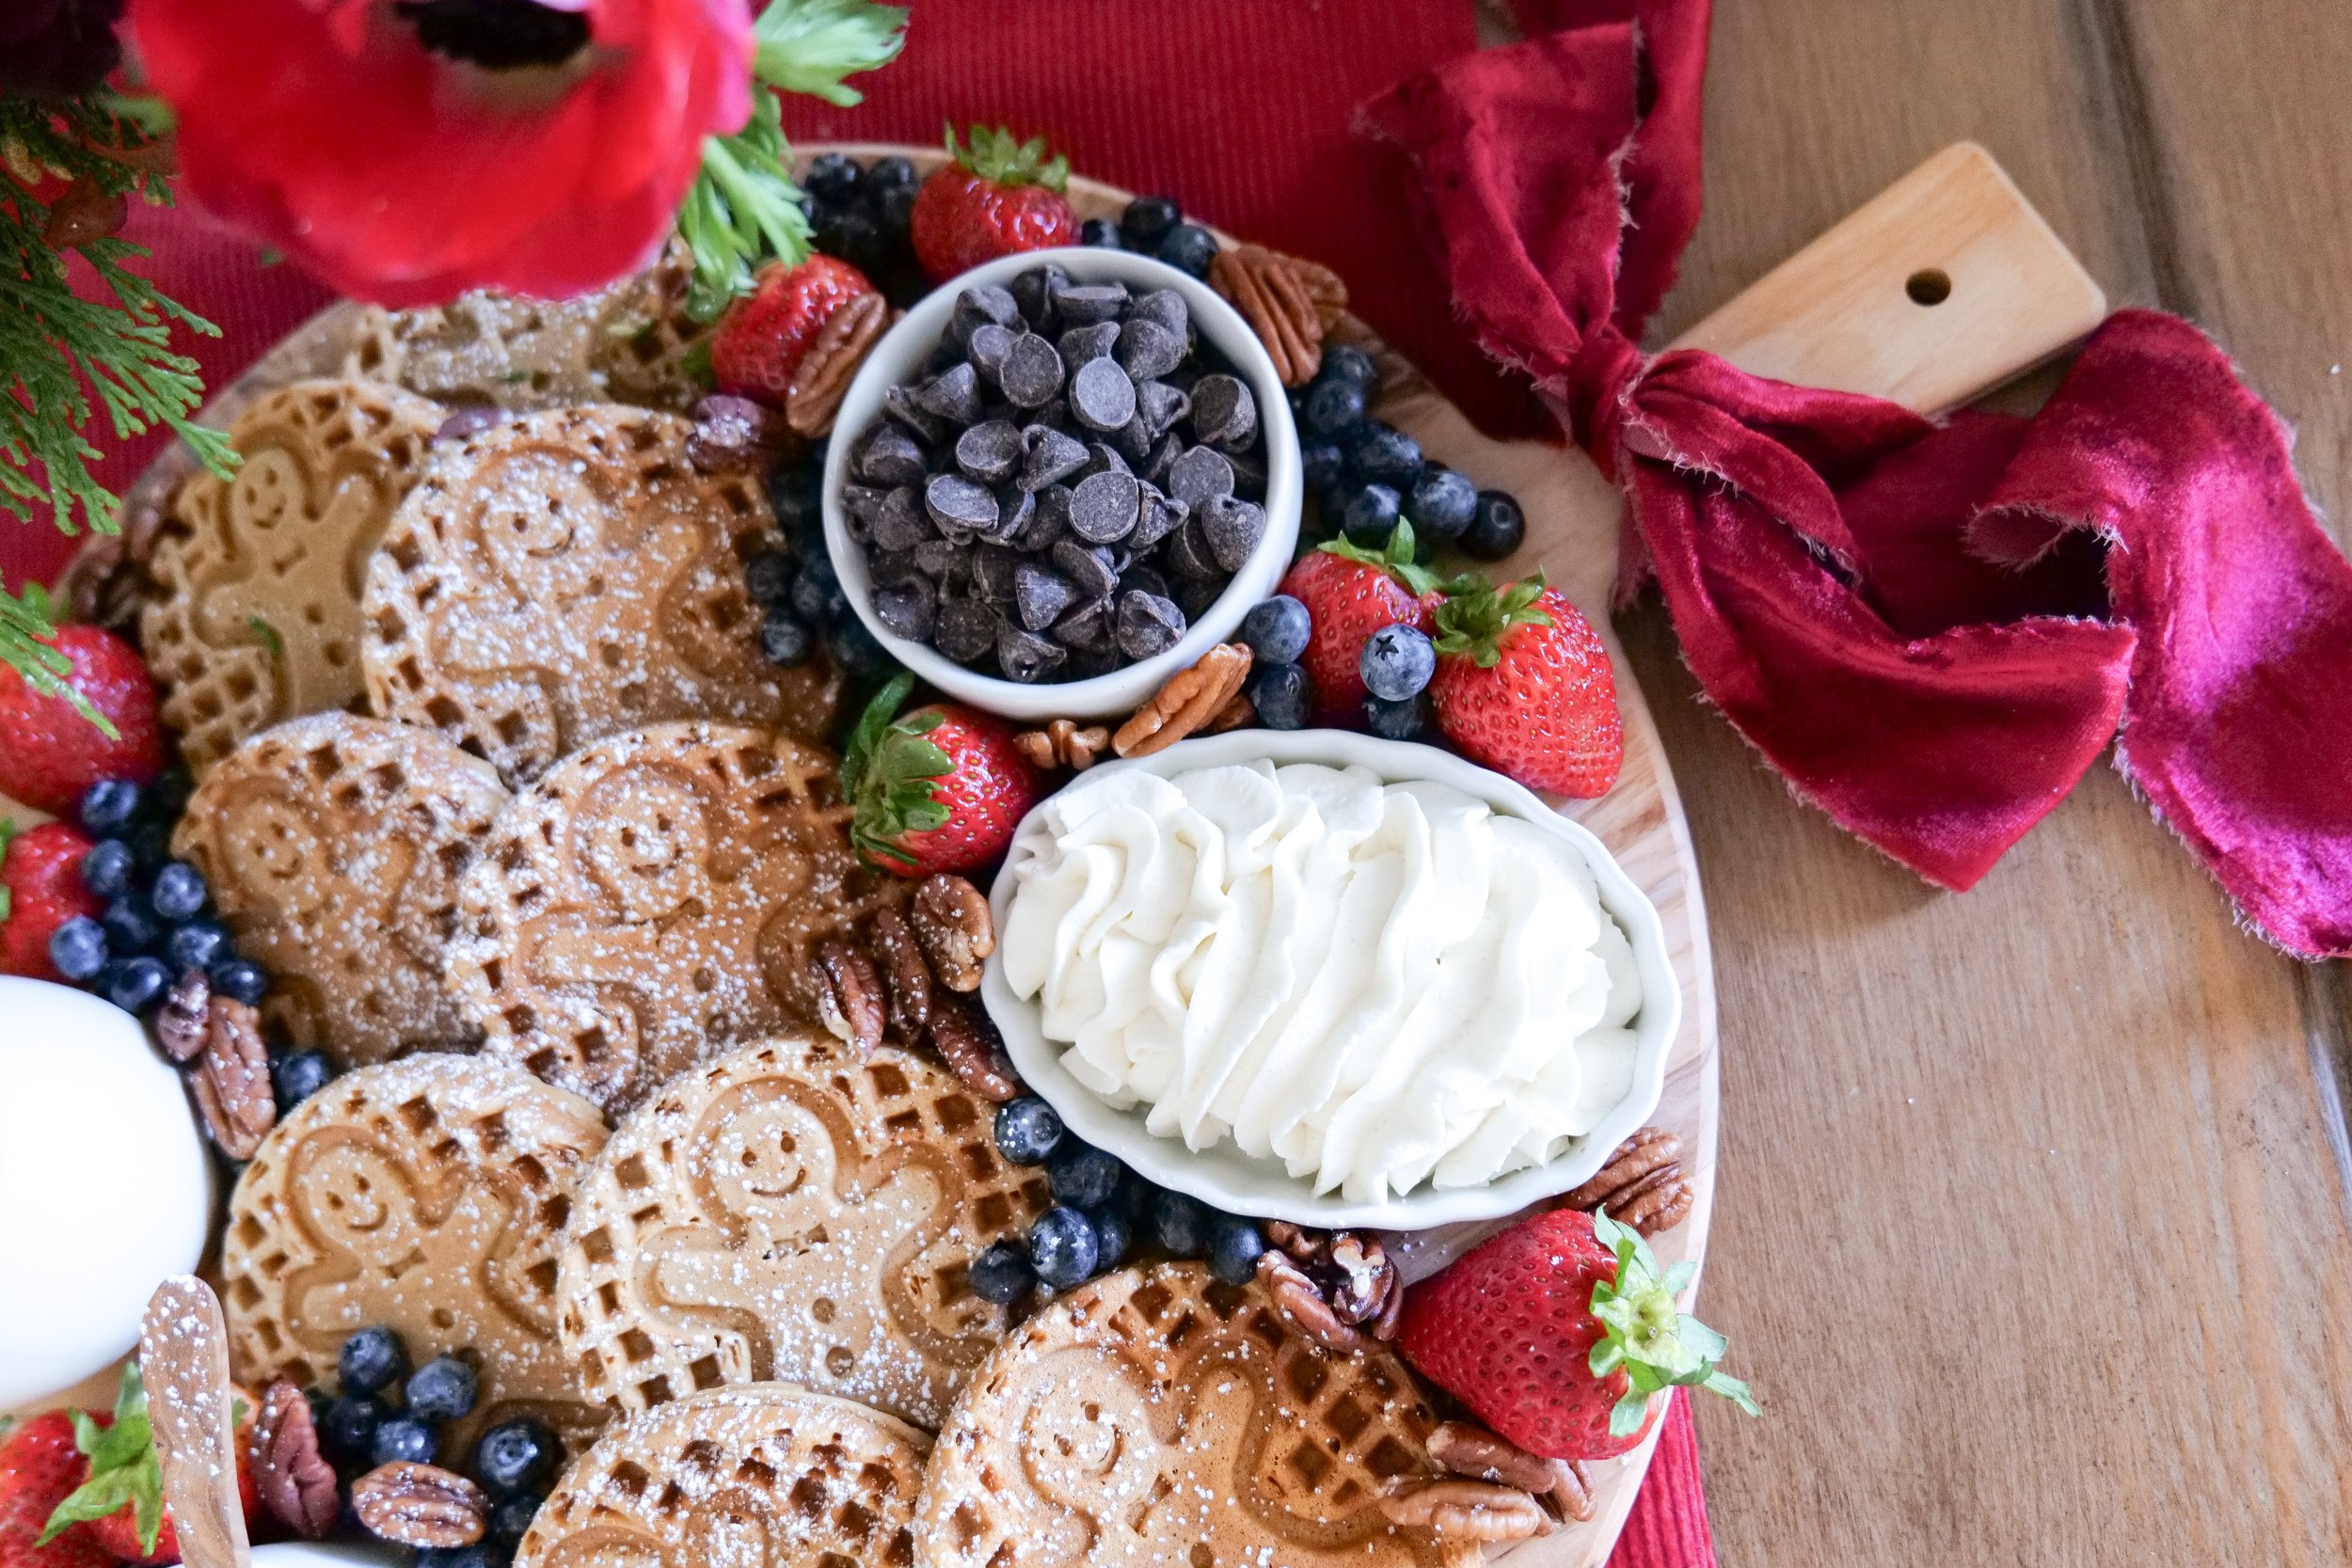
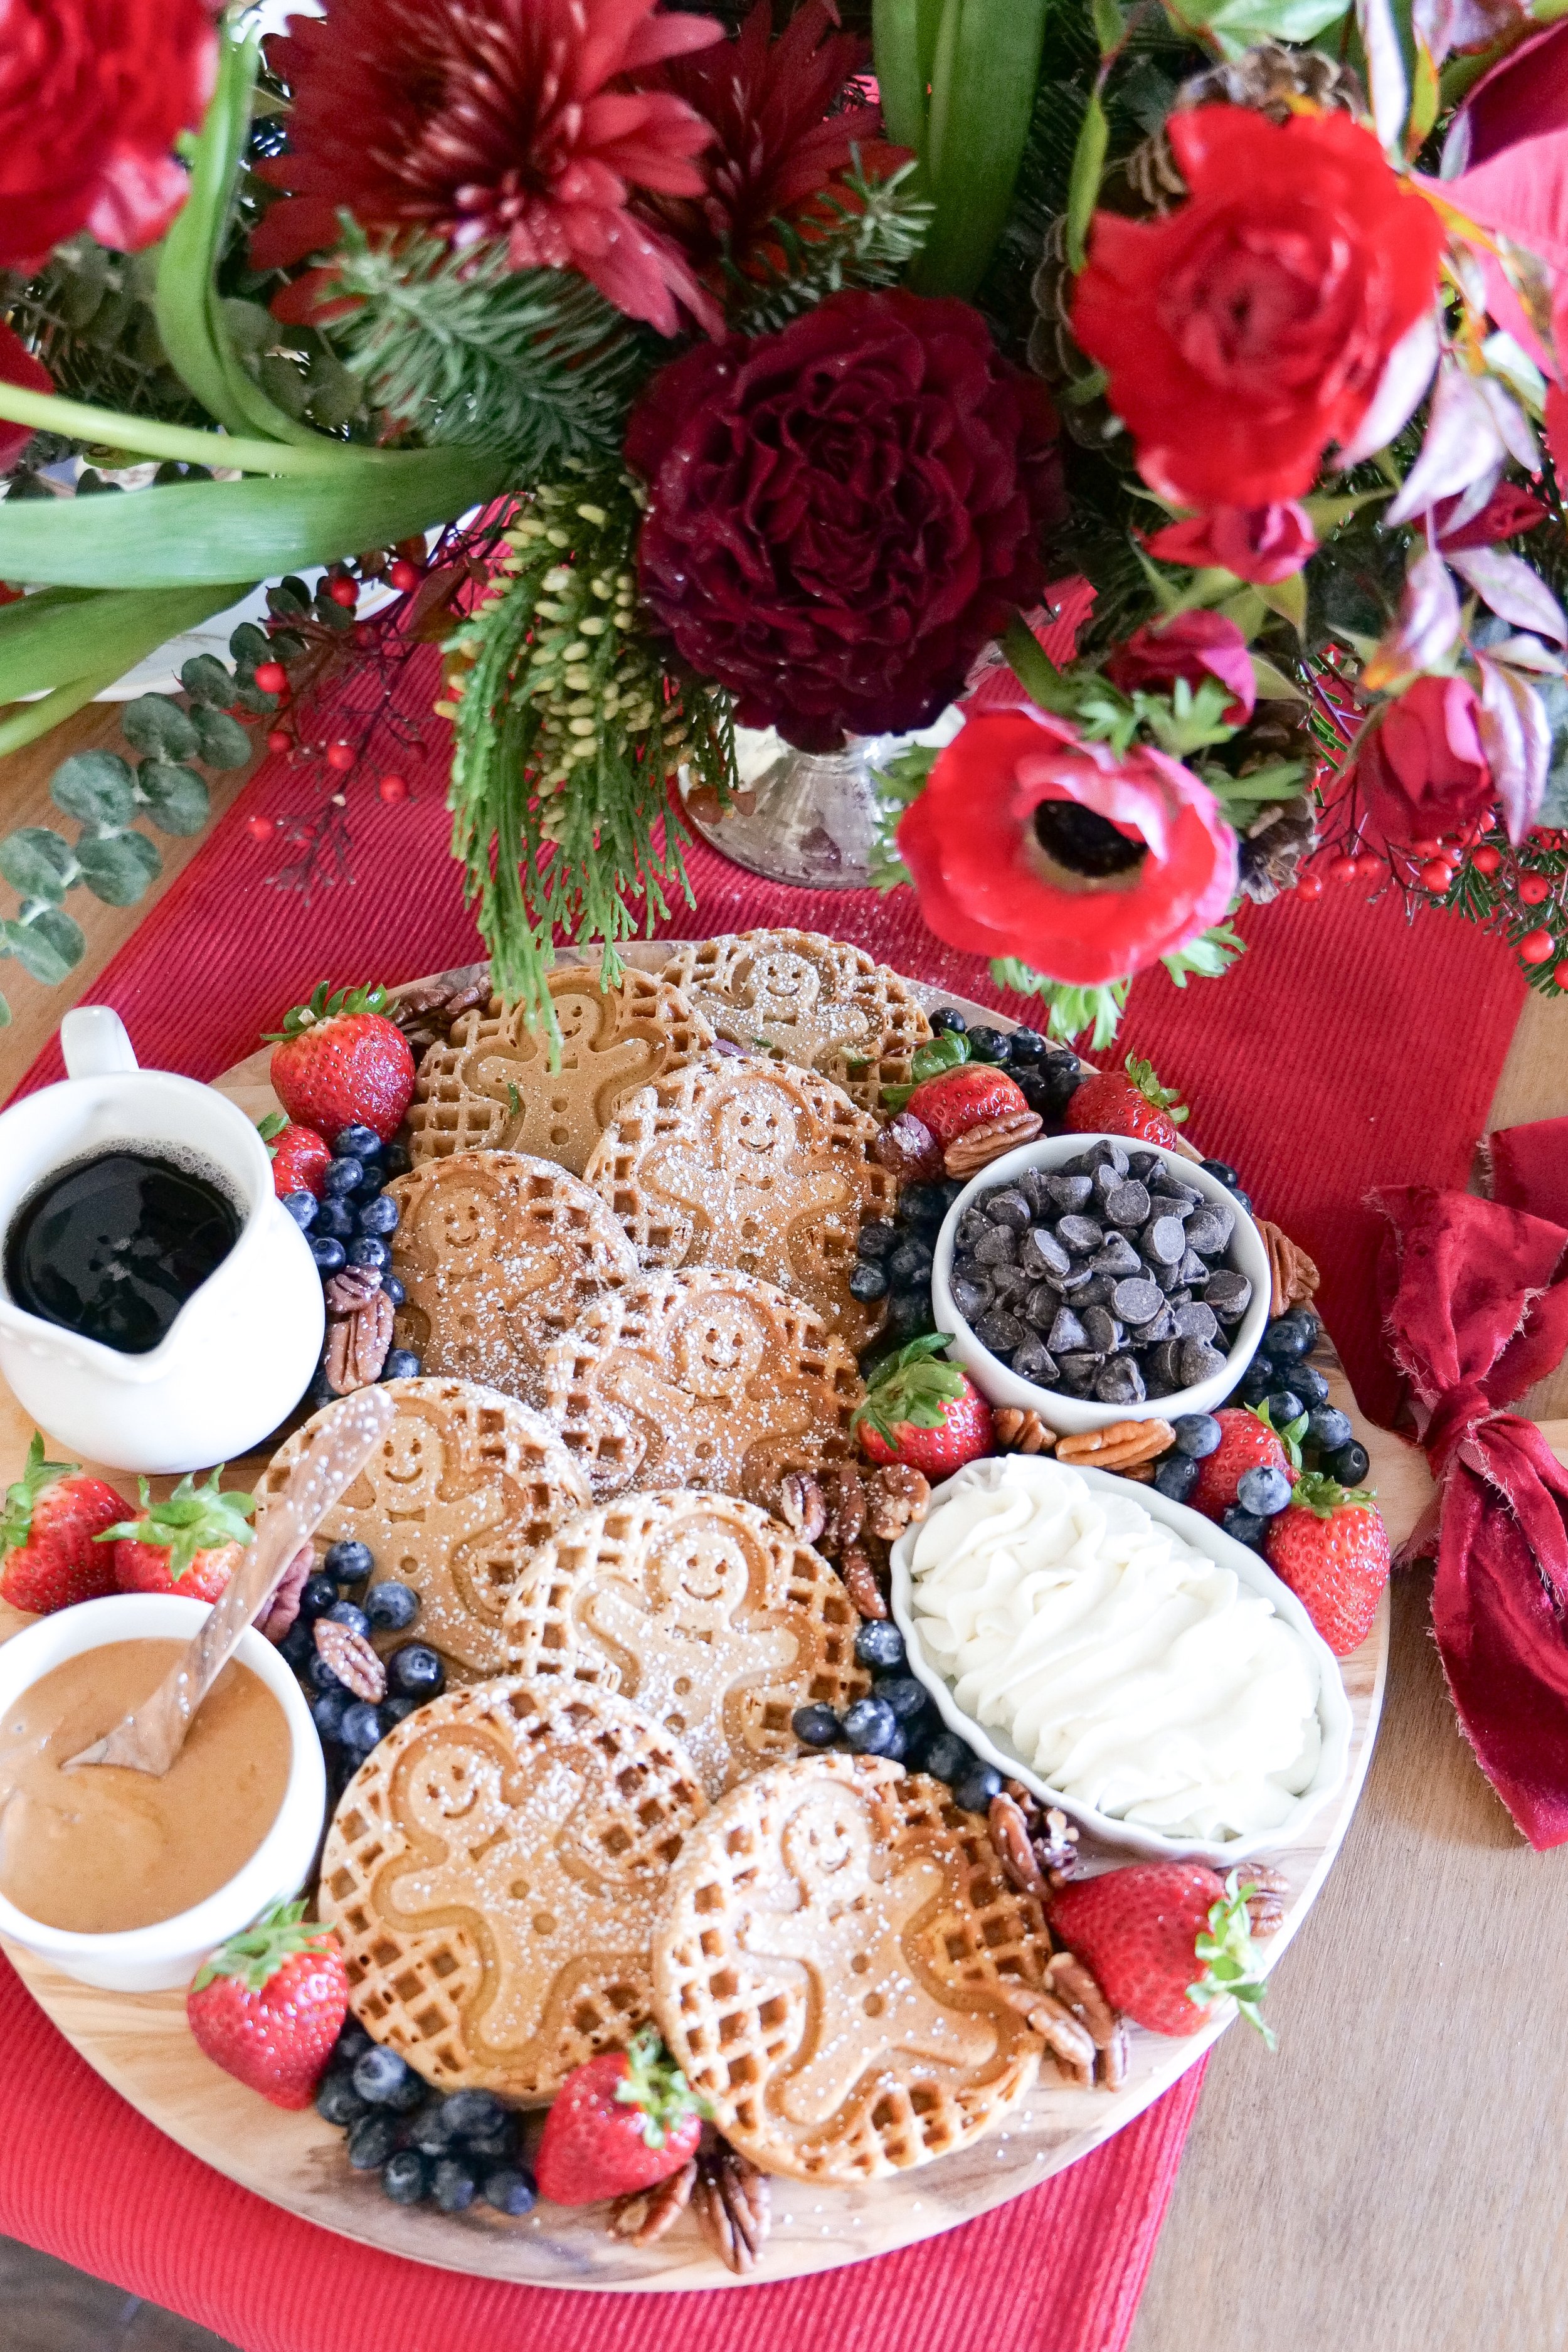
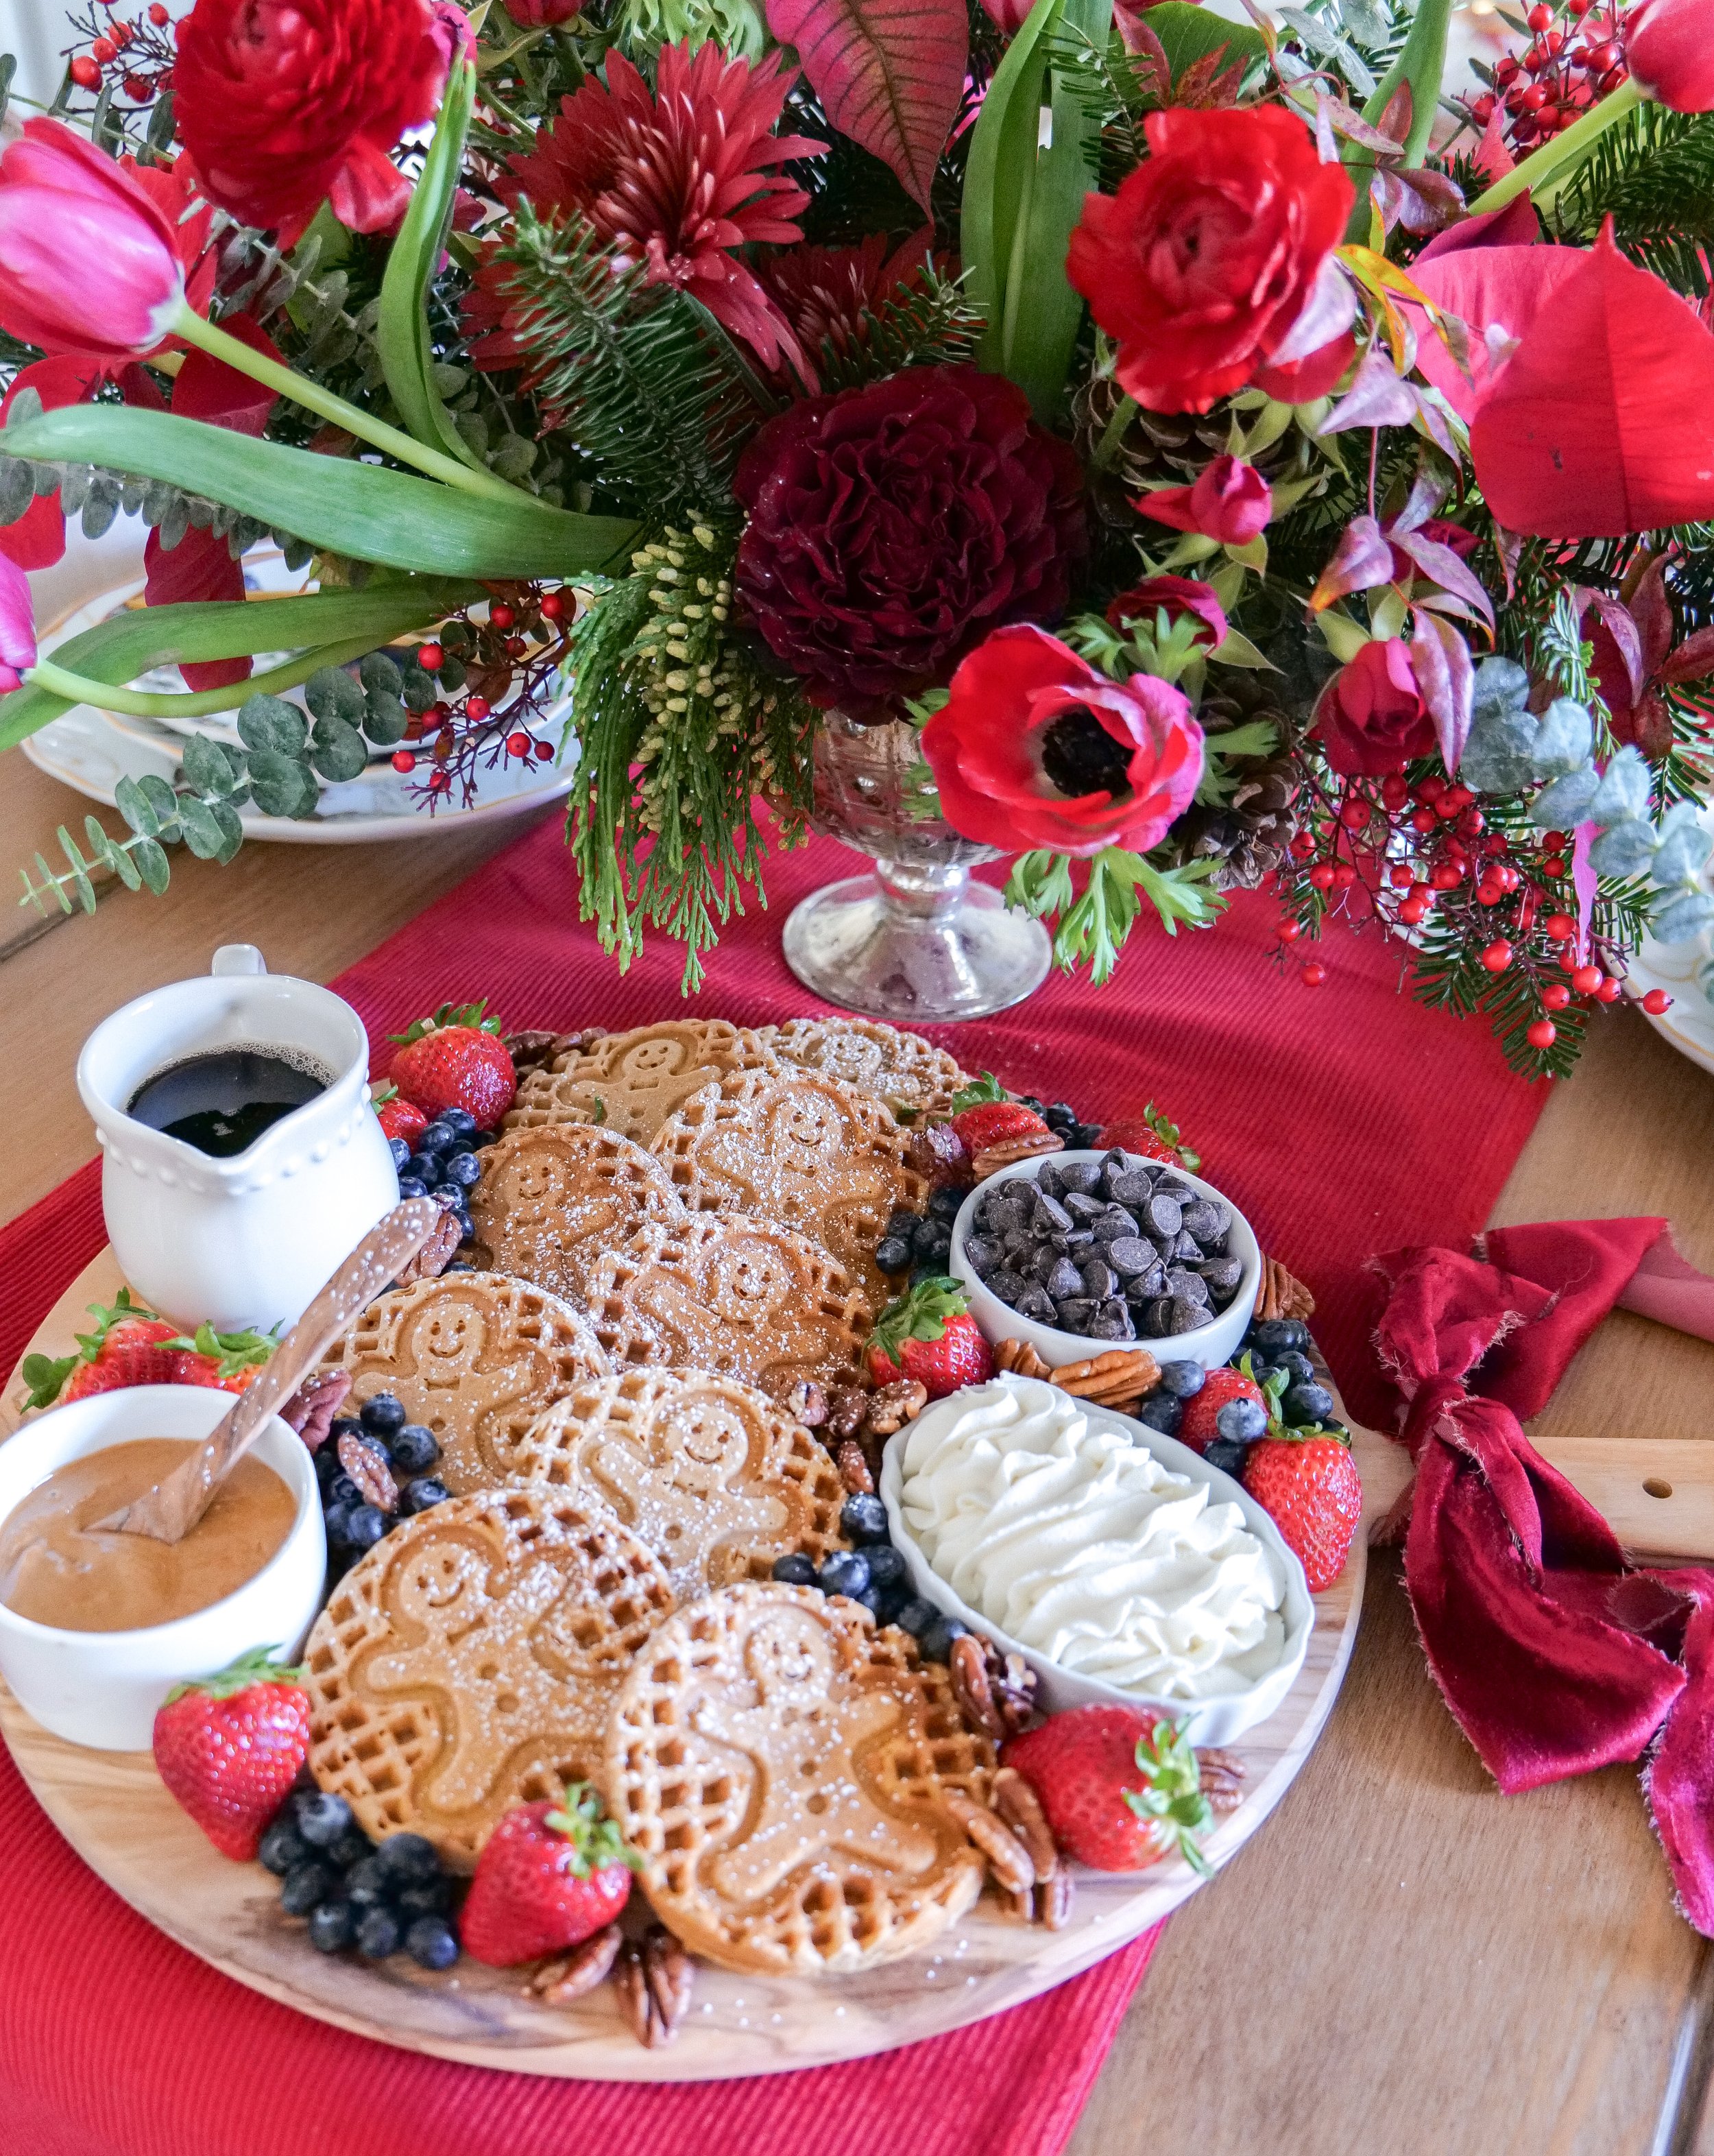
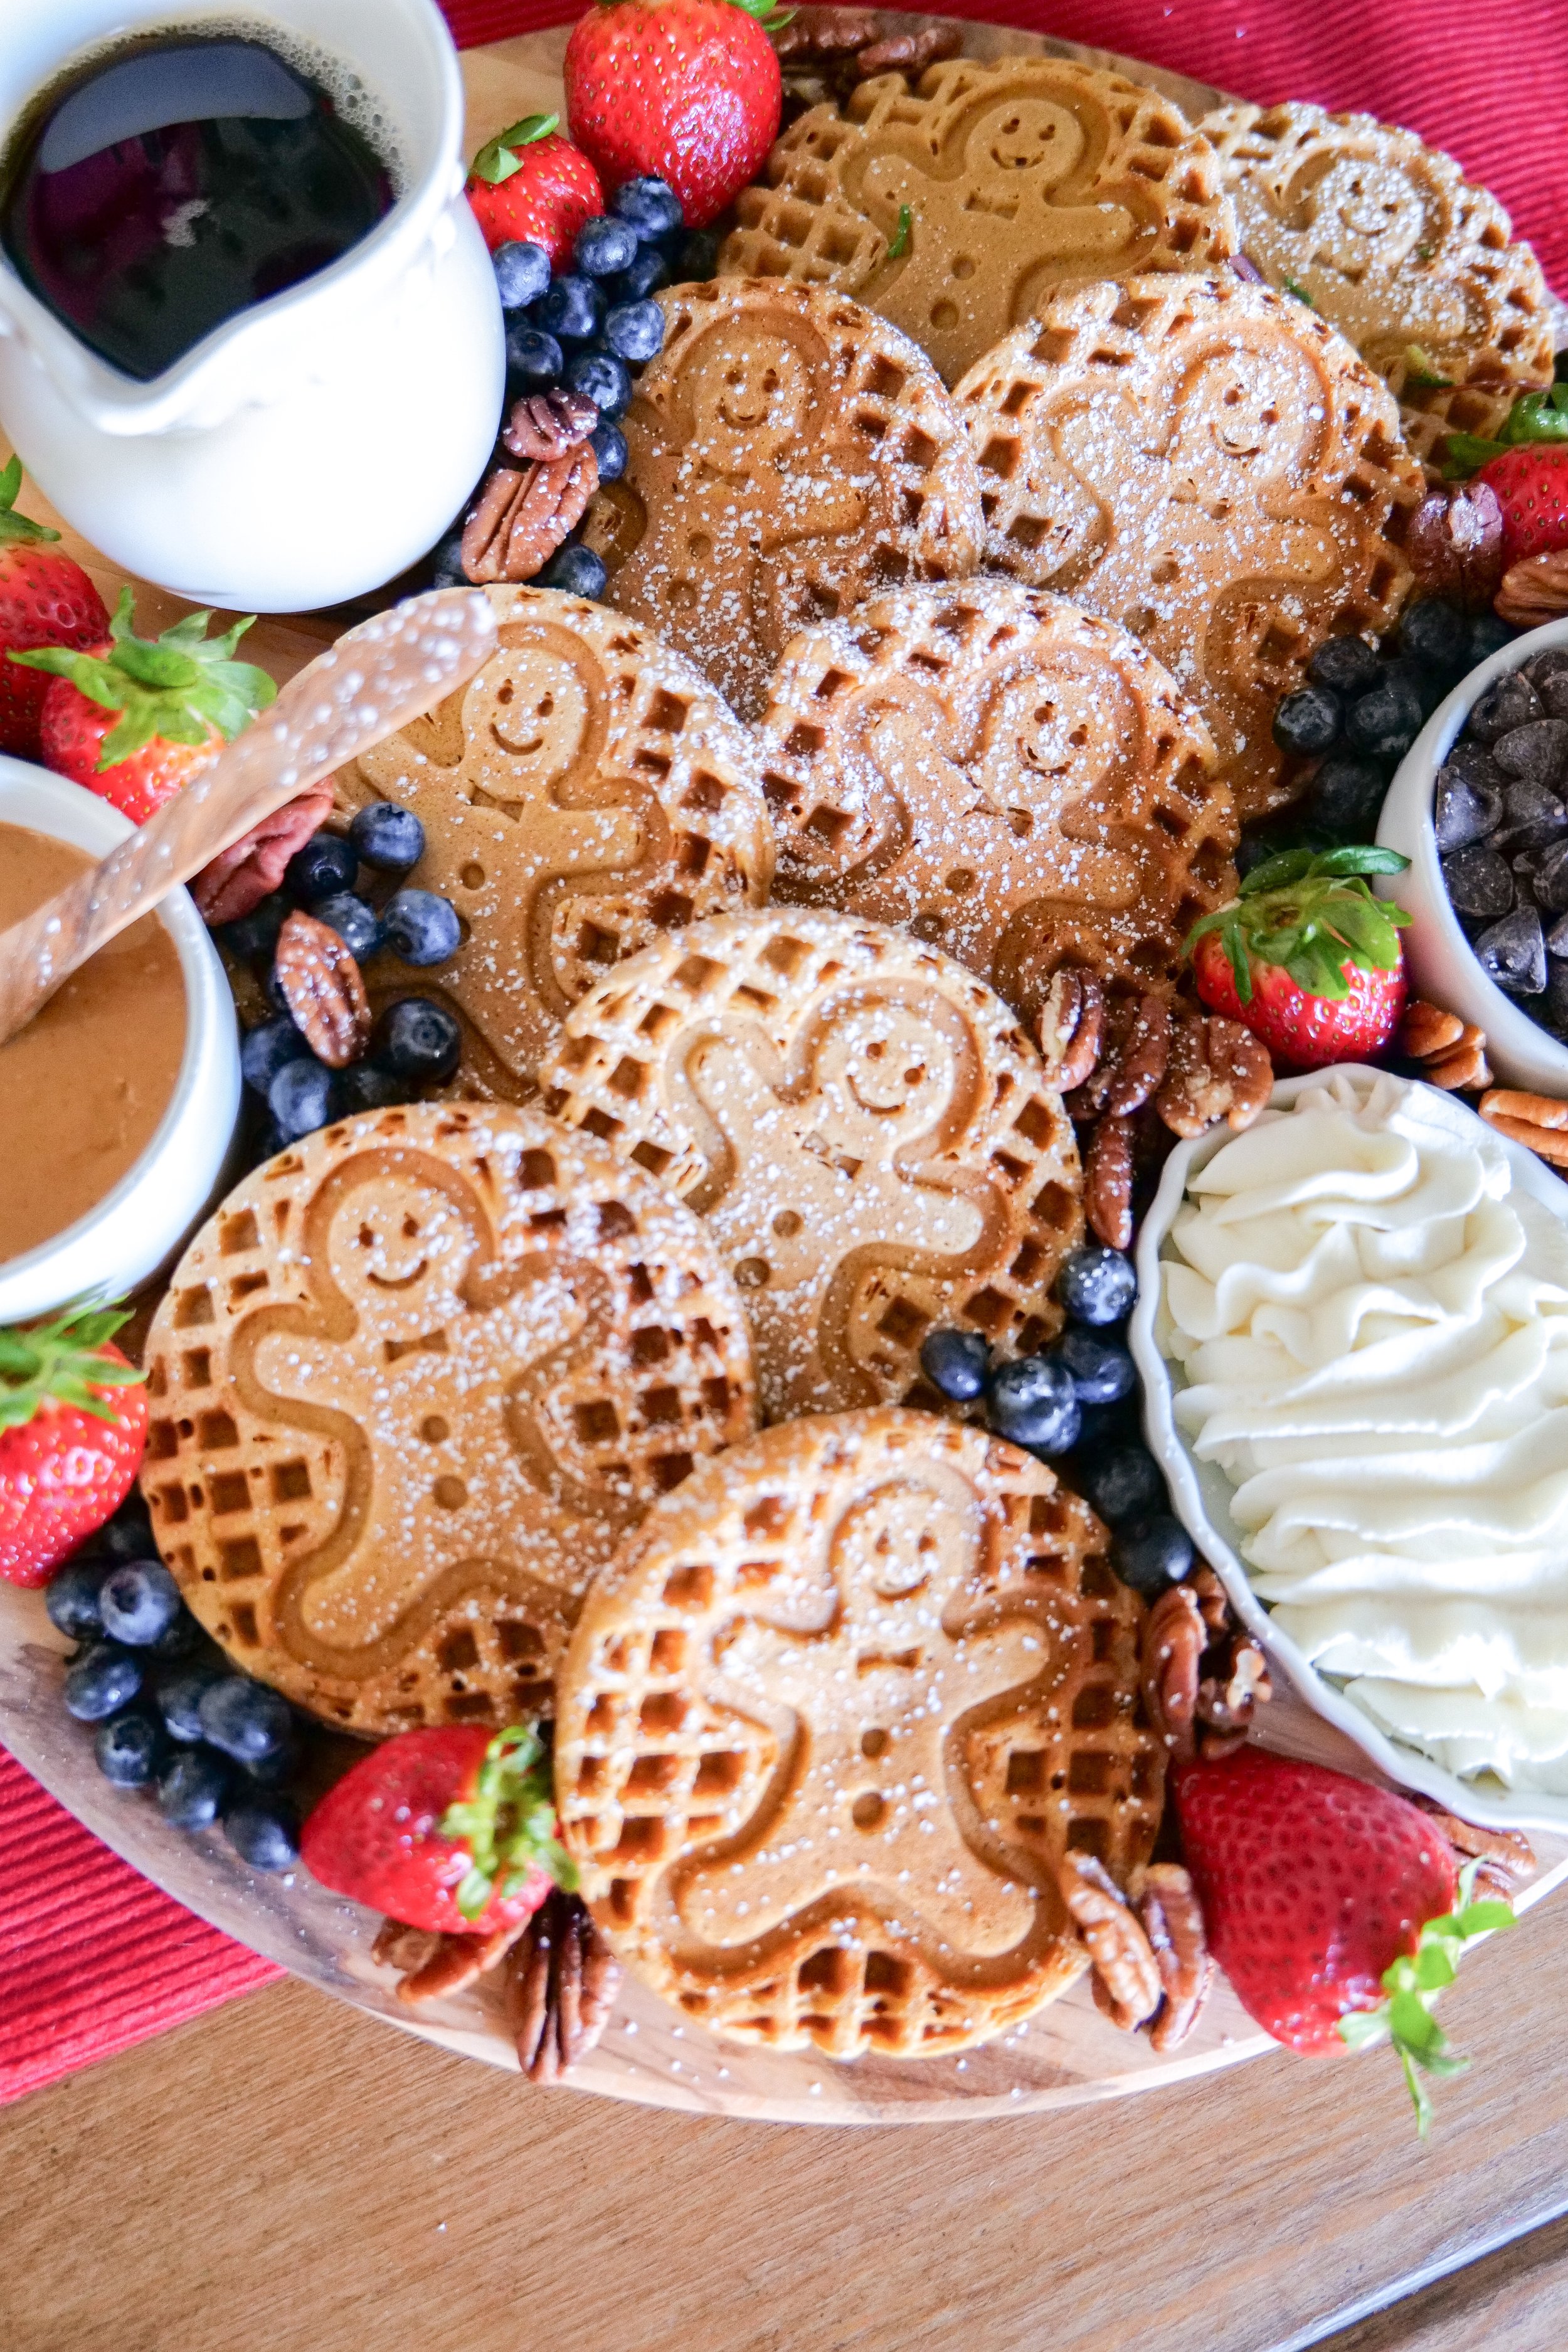
When it comes to creating the perfect gingerbread waffle board, the possibilities are endless. Topped with maple syrup, whipped cream, cinnamon sugar, apple compote, caramel sauce, chocolate sauce, or powdered sugar, this sweet treat is sure to tantalize your taste buds. For those looking to balance out the sweetness, top the waffles with fresh berries, whipped cream, yogurt, jam or preserves, peanut butter, sugared cranberries, pecans or chocolate chips. This is an ideal breakfast or snack to enjoy any time of day.

No matter what toppings you choose, the gingerbread waffle board and recipe will make your holiday season even sweeter. Enjoy your own special creation and share it with friends and family for the perfect breakfast or dessert. Make sure to have all the ingredients on hand before you start, so you can get creative and have a little fun. You can even get the kids involved in making their own gingerbread waffle creations.

Gingerbread Sourdough Holiday Waffle Recipe

Ingredients

3/4 cup sourdough starter

4 tablespoons melted butter

1 cup evaporated milk, extra if batter is too thick

1 egg

1 1/3 cup all-purpose flour

1/3 cup dark brown sugar

1/2 cup molasses

2 teaspoons baking powder

1/2 teaspoon salt

1 teaspoon ground cinnamon

1 1/2 teaspoon ground ginger

1/4 teaspoon ground cloves

Instructions

1. Heat the waffle iron and mix the ingredients.

2. In a large bowl add the sourdough starter, melted butter, evaporated milk and egg. Whisk together.

3. Add in the rest of the dry ingredients and whisk together again. If the batter is too thick add in additional evaporated milk until the batter is the right consistency. Pour 1/4 cup into the waffle iron if using the small iron like I am, it is linked below as well. Serve on waffle board & enjoy!

Other Breakfast Recipes You Will Love:

Blackberry Cinnamon Rolls with Mascarpone Frosting

An Irresistible Treat: The Delicious Berry Custard Puff Pastry Tart

Sweet Perfection: Baking the Ultimate Cinnamon Roll Loaf with Espresso Glaze

Deliciously Sweet: Pumpkin Coffee Cake with Pecan Crumbles

Soft Cream Cheese Lemon Blueberry Scones

A Sweet and Delicious Recipe for Lemon Poppyseed Bread

Are you looking for an easy and delicious treat to make? Lemon poppyseed bread is a classic that anyone can enjoy! This bread is a tried and true favorite that has been around forever, and it is sure to become a go-to recipe for your family. Whether you're looking for an afternoon snack, a sweet breakfast, or a unique and beautiful dessert, this bread will be a hit. With just a few ingredients, you can make a flavorful and moist bread that is perfect for any occasion. Let's dive into the recipe and see how to make the perfect lemon poppyseed bread!

Tips to Make the Best Lemon Poppy Seed Loaf

Lemon Poppyseed Bread is a classic dessert that's perfect for any occasion. Its bright, tangy flavor and light, fluffy texture make it a classic favorite treat. To make the best loaf of Lemon Poppyseed Bread, it’s important to use freshly squeezed lemon juice and zest. This will give your bread a bright and tangy flavor. Additionally, use white sugar instead of brown sugar to achieve a lighter loaf. To get the perfect texture, make sure you use the correct ratio of poppy seeds to batter. Additionally, preheat your oven and bake at the correct temperature for nice and even baking. Grease and flour your loaf pan to prevent sticking and let the bread cool completely before slicing. Once the bread is finished baking, store it in an airtight container to keep it fresh. With these tips, you’ll be sure to make the perfect loaf of Lemon Poppyseed Bread!

Can You Make This Recipe Without Poppy Seeds?

With its unique combination of sweet and tart lemon and crunchy poppy seeds, it's no wonder why this bread is so popular. But what if you don't have poppyseeds on hand or don't want to use them in your recipe? Not to worry - you can still make a delicious lemon poppyseed bread without the actual poppyseeds! All you need to do is replace the poppy seeds with a few other ingredients that will help to create a similar flavor and texture. Options include substituting chia seeds, crushed nuts, shredded coconut, or even raisins for the poppy seeds. You can also add a bit of almond extract or lemon zest to help bring out the lemony flavor. The result will still be a delicious, moist bread with a hint of lemon and crunch.

Making lemon poppyseed bread without poppyseeds is surprisingly easy and offers a great way to enjoy this classic treat. With just a few simple substitutions, you can create delicious bread that is just as flavorful and enjoyable as the original. So the next time you're in the mood for some lemon poppyseed bread, don't worry if you don't have poppyseeds - you can still make a delicious version without them!

Can This Lemon Poppyseed Bread Recipe Be Halved?

Halving a recipe can be a great way to save time and money, especially when it comes to baking. If you’re looking to make a smaller batch of Lemon Poppyseed Bread, you’ll need to adjust the ingredients. To halve the recipe, you’ll need to reduce the ingredients by half, including the eggs, sugar, and butter. Being this recipe makes 2 loaves you won't need to make any other adjustments to the temperature or cook time. I always do the full recipe because of how easy it is to freeze one loaf. Then I always have another loaf on hand for last-minute company or for something tart and sweet to have on hand when I get a craving.

How to Freeze Lemon Bread?

Lemon poppyseed bread is a delicious treat that can easily be frozen and enjoyed later. By freezing the bread, you can help to retain its moist texture and flavor so that it tastes just like it did when it was first baked. To freeze the bread, make sure to tightly wrap it in plastic wrap or aluminum foil and place it in an airtight container or ziplock bag. The bread can be frozen for up to 3 months.

When you are ready to enjoy the delicious lemon poppyseed bread, you can either thaw it in the refrigerator overnight & place it in a pre-heated 350-degree oven for 8-10 minutes. Alternatively, you can thaw it at room temperature for several hours before warming it in the oven. Reheating the bread will help to restore some of the moisture and make it taste as fresh as when it was first baked.

For those who love the taste of lemon poppyseed bread, freezing it is an excellent way to ensure that it stays fresh and retains its flavor and texture. Enjoy the deliciousness of lemon poppyseed bread anytime by following the simple steps outlined above.

How Do You Make Dairy-free Lemon Loaf?

Lemon poppyseed bread is an incredibly popular treat that is loved by many around the world. The combination of tart lemon and crunchy poppyseeds is a classic combination that creates an irresistible treat. Whether you’re looking for a delicious breakfast, snack, or even dessert, lemon poppyseed bread is a great option.

Making this delicious bread is surprisingly easy and can be adjusted to fit all dietary needs. If you are looking for a dairy-free option for this recipe you will need to make 2 small adjustments. Swap out butter for oil and the milk with coconut milk. These options still give the lemon poppyseed bread great flavor without sacrificing your dairy needs.

What is the Best Way to Store Lemon Poppy Seed Bread?

Lemon poppyseed bread is an easy-to-make and delicious treat. When you’ve baked this bread, the best way to store it is in an airtight container or wrapped in plastic wrap. To ensure its freshness, place the bread in a cool, dry area such as on the countertop, avoiding any direct sunlight. For longer storage, wrap the bread in plastic wrap and place it in the freezer. When it’s time to serve, thaw the bread overnight in the refrigerator, or for a few minutes in the microwave. Above all else, don’t forget to enjoy the bread within a few days of baking for the best flavor and texture.

Ingredients:

2 cups sugar

1 cup melted butter

3 eggs

1-1/2 teaspoons vanilla extract

1 teaspoon lemon zest

2 tablespoons poppy seeds

3 cups all purpose flour

1-1/2 teaspoons baking powder

1-1/2 teaspoons salt

1-1/2 cups milk

Icing:

2 tablespoons lemon juice

1/2 teaspoon lemon zest

3/4 cups powder sugar

Directions:

  1. Preheat oven to 350 degrees and grease 2 loaf pans

  2. Combine sugar, melted butter, eggs, vanilla and lemon zest.

  3. Stir in Poppy Seeds

  4. Mix in Flour, Baking Powder and Salt until well combined.

  5. Scrape down sides and add in Milk until mixed thoroughly.

  6. Divide batter evenly between prepared pans and bake for 45 min.

  7. Cool loaves for 10 min and prepare icing.

  8. Blend all icing ingredients and pour over warm loaves!

  9. ENJOY!

Tantalizingly Delicious Recipe For Lemon Cheesecake With An Amazing Glaze

If you love a dessert that is both tart and sweet, then you must try this tantalizingly delicious lemon cheesecake with an amazing glaze. Not only is this a crowd-pleaser, but it is also fairly easy to make. The sweet lemon cheesecake is perfectly balanced with a tangy tart glaze, making it the perfect end to any meal. This recipe is sure to please everyone at your next gathering. Not only is it incredibly delicious, but it's beautiful presentation will surely impress your guests. This rich and creamy confection offers a perfect balance of sweetness and citrus. The smooth and velvety texture is light and airy, yet dense enough to satisfy. The golden-brown crust is a delicious base for the perfectly balanced flavor of sweet and tart lemon, and to top it all off, a decadent and delectable topping of fresh lemon curd makes this amazing. Read on to learn how to make this delicious lemon cheesecake!

The perfect base of this sweet treat is a graham cracker crust that is incredibly easy to make with butter, graham crackers and pecans. This gives a great base for your cheesecake with a buttery and nutty crunch that is so scrumptious. This buttery crust will be a staple recipe to use on any cheesecake, I promise you that!

With its creamy and sweet lemon cheesecake filling made with fresh lemon juice, it has a rich and velvety smooth texture that melts in your mouth. The sweet light flavor is enhanced with a hint of vanilla and an aromatic citrus aroma that tantalizes your taste buds. This perfectly balanced flavor will make your mouth water and its light and airy texture will leave you craving for more. The amazing glaze adds the perfect finishing touch to this delightful dessert and adds an element of surprise from your traditional cheesecakes.

Making the glaze is also very simple and requires minimal ingredients. Once the glaze is finished, you can serve it on top of the cheesecake, or on the side so guests can add it themselves. The glaze gives the cheesecake an extra bit of texture and flavor that will make it truly irresistible. With a combination of eggs, sugar, butter, fresh lemon zest, and juice, the glaze adds a layer of sweetness to the creamy cheesecake that complements it perfectly. You can top the cheesecake and glaze with fresh berries, additional lemon zest or thinly sliced lemons like I have done here.

INGREDIENTS

Crust:

12 oz graham crackers

1 cup pecans

1 cup melted butter

Filling:

3 - 8 oz cream cheese ( room temperature )

1 stick salted butter

1/2 cup brown sugar

1/2 cup granulated sugar

1/4 teaspoons sea salt

3 eggs

1/2 cup heavy cream

1 tsp vanilla extract

3 tablespoons lemon zest

Glaze -

1 cup granulated sugar

2 eggs

1/4 cup fresh lemon juice

3 tablespoons lemon zest

6 tablespoons butter

INSTRUCTIONS

  1. Preheat oven to 375. Spray cheesecake pan with olive oil spray and wrap around the outside with foil.

  2. Make Crust by adding pecans & graham cracker to blender and processing until fine. Add in melted butter and blend again.

  3. Press crust mixture into bottom of pan until even all the way around. I use a flat bottom cup or a metal spoon to help.

  4. Bake in oven for 13-15 minutes. Once done remove and let cool before adding filling.

  5. Reduce oven temperature to 325 degrees.

  6. Make filling. Mix together softened cream cheese and butter with both sugars and salt until well combined.

  7. Add in eggs. One at a time. Making sure they are fully incorporated each time.

  8. Next add heavy cream, vanilla and lemon zest! Once well mixed add into cooled cheesecake pan.

  9. You will then add this onto a tray with a lip. I use this one -here-. (Code Amanda20 for 20% off any order at 360cookware.com) Place on oven rack and add in warm water until halfway full and push back rack and start timer.

  10. Cook the cheesecake for 1 hour. The center will still be a little jiggly, but side will be set. After baked for 1 hour you will turn oven off the oven and leave the cheesecake in the oven for an additional hour.

  11. Once baked for an hour and let sit for an hour in the oven, you can remove from the oven. Wrap cheesecake and let sit in your refrigerator overnight. Up to 24 hours before serving or adding glaze.

GLAZE INSTRUCTIONS

After Cheesecake has cooled overnight you will want to get the glaze ready for the finishing touch! You can add this onto each piece as you serve as you go just in case someone doesn’t want it, but I always add ahead of time, because it's so good everyone will!!

  1. Take a small saucepan over low/medium heat and whisk eggs, sugar, lemon peel & lemon juice.

  2. Add butter and continue whisking constantly. Mix until thickened. (It will stick the back of a wooden spoon)

  3. Remove from pan into a glass bowl and let cool for 15 min.

  4. Place in refrigerator until completely cooled. Then place on top of cheesecake and serve!

For those of us who are looking for a way to get creative in the kitchen, this recipe is the perfect choice. You can make this recipe your own by adding different flavors and ingredients. Plus, you can even top it off with a unique glaze. For those wanting a sweeter crust try adding in honey. Switch out the lemon zest and juice in the glaze for fresh berries and make a blueberry drizzle that is also amazing on a lemon cheesecake! For those wanting a keto option, change the graham cracker to additional nuts, either more pecans or almonds will do great. No matter what you do to make this your own this tantalizingly delicious: lemon cheesecake with amazing glaze is sure to be a hit!

If you’re looking for more delicious recipes like this one, make sure to follow me on Pinterest. I have lots of incredible delicious desserts that are perfect for any occasion. From cakes and pies to cookies and bars, you’ll find something that’s sure to be tantalizing your taste buds.

Here are a few others I think you will enjoy:

Indulge in Deliciousness: Cherry Chip Cake with Chunks of Dark Chocolate Recipe

Chocolate Peanut Butter Brownies

Brown Butter Caramel Pretzel Cookies

Delicious & Easy Apple Pie

Chocolate Peanut Butter Brownies

I love both chocolate and peanut butter so much, so naturally when mixed together and its doubly delicious. They both just melt in your mouth, and my sweet tooth just can't get enough. That's why I made these brownies for my friends and family. You won't be able to stop with just one, and I promise you wont be disappointed!

You can serve these up fresh out of the oven, or let come to room temperature and add-on a delicious peanut butter buttercream frosting topping making for a delicious cake brownie!

What Pan is Best for Baking Brownies?

I am using the newest 360 cookware brownie pan and its the absolute best pan for baking brownies to ensure even baking. I always use their stainless steel pans for the best non-toxic baking. All of their pots and pans are also made homegrown here in America which I love, and from my dealings with them they are the nicest company!! This recipe works perfect for this pan size only, but if you are wanting to make it in one of their other pans like the jelly roll -here- or bake and roast pan -here- you will need to double everything in the recipe. I would start the baking time the same and just check in adding 5 min increments until cooked to your liking.

Ingredients :

1/4 cup melted butter

2 oz melted chocolate

2 tablespoons unsweetened cocoa powder

1/2 cup granulated sugar

1/4 brown sugar

2 eggs

2 teaspoons pure vanilla extract

1/4 cup all-purpose flour

1/4 cup melted peanut butter

Instructions & Directions :

1. Add hot melted butter to chocolate and mix until chocolate melts. If it doesn't melt quick enough I put my mixing bowl -here- on top of my 2 quart sauce pot -here- on my stove. Stirring the entire time to prevent from burning.

2. After melted, mix into bowl eggs & vanilla ingredients.

Next add in unsweetened cocoa powder, granulated sugar, brown sugar, and flour ingredients until well blended.

3. Take your brownie pan of choice and pour 1 tbsp olive oil or melted butter and using a paper towel coat the entire pan evenly. Pour in brownie batter

4. In a new bowl melt peanut butter and add tablespoons of peanut butter into brownie mix. Taking a sharp knife swirl around peanut butter. Be sure not to over swirl or the peanut butter brown will start to blend with brownie batter. You want them to have a fun design and the peanut butter to be equally spread throughout, while still being separate from brownie batter.

5. Bake for 25 minutes at 350.

6. Remove from oven and let cool before cutting and ENJOY!

Substitute:

A few substitutions you can make are:

  • Regular brown sugar to dark brown sugar - this will give a more rich taste for this substitute.

  • Adding 1/4 cup chocolate chips into brownie batter - this will give you a richer and gooier brownie! This combination is amazing if you love a rich chocolate dessert!

  • Trading our butter for olive oil - I am always a fan of butter however if you cannot have butter switching to olive oil is the best switch to make in the directions.

I really hope you guys enjoy my Chocolate Peanut Butter Brownies recipe! This is one of my favorite baked goods to enjoy at home or to take to a party! If you are precutting to take to an event I suggest placing on parchment paper in an airtight container for the best presentation and taste!

For more recipes head -here- and come back soon for a delicious lemon cheesecake recipe!

Have a blessed day, Amanda

Pork Banh Mi Bowl : Deliciously Satisfying

Are you looking for an easy and delicious meal that will have everyone in your house coming back for more? Try the Pork Banh Mi Bowl! This flavorful dish is sure to satisfy your cravings with its combination of Vietnamese-inspired flavors and fresh ingredients. Not only is it packed with flavor, but it is also incredibly easy to make, making it the perfect go-to for busy weeknights. Whether you're hosting a dinner party or just looking for a quick and tasty meal, the Pork Banh Mi Bowl is sure to hit the spot!

I first started making this after getting it in a Home Chef box and thinking it was delicious. Then I thought…this was something different than we normally eat, but so yummy that I decided to make it with my own little twist! I took their recipe and tweaked it just a little by adding a little more garlic, and radishes, along with a few other different ingredients I normally have on hand! It came out super tasty and now is always a favorite in our home. I hope you enjoy it just as much as we do!! So here is my version of a pork banh mi bowl recipe.

A way to make this meal all your own.. You can always change this to a beef banh mi bowl with a change of meat or take our the meat and use even more vegetables to make a vegetarian banh mi bowl. If you are looking for a more low carbohydrates meal substitute the jasmine rice for lettuce wraps.


Ingredients:

2 lbs ground pork

4 garlic cloves diced

1/4 cup coconut aminos

1 tablespoons cornstarch

1/3 cup vegetable stock

1 tablespoons rice vinegar

2 tablespoons brown sugar

1 cup jasmine rice

Pickled Veggies:

1/2 cup cucumber

1/2 cup carrots

1/2 cup radish

1 cup warm water

1 cup rice vinegar

1/2 cup sugar

1 cup jasmine rice

Sauce: (my version of a sriracha mayo, you can always substitute if you want)

1/4 cup mayo

2 tablespoons chili garlic sauce

Instructions:

  1. Lets pickle the veggies first! Cut cucumbers, carrots and radish (add jalapenos in also if you want a little more spice) into slices and stir together with warm water, vinegar and sugar. Let sit in refrigerator while building your bowl.

  2. Making the pork. Start cooking pork in a stainless steel pan. As always I use 360 cookware and will link everything used below as well as my discount code!

  3. Heat 1 cup water in pan until boiling. Add 1 cup of jasmine rice and stir. Once comes to a boil reduce heat to low and cover with lid. Cooking until water has evaporated. Around 15 min,

  4. While pork is cooking on medium make sauce to pour onto pork. Combine all ingredients; minced garlic cloves, coconut aminos, corn starch, vegetable stock, rice vinegar and brown sugar in a bowl until well combined.

  5. Once pork is all cooked pour over sauce and stir. Let coat the pork until its combined and not runny. Set aside

  6. Lastly make spicy sauce by combining mayo and chili garlic!

  7. Now, Make your bowl! Layer rice, pork, veggies and sauce! ENJOY!

Items used for recipe from 360 Cookware linked below. When using code AmandaWarren20 you will receive 20% off entire order! Or by clicking -here-.

For more recipes make sure you are following along by signing up for emails and be the first to know when a recipe is posted. Sign up -here-.

Banh Mi Bowls are bursting with bold flavors and a variety of textures. The jasmine rice base is the perfect foundation for the bright, crunchy vegetables, savory marinated pork, and creamy Sriracha mayo dressing. To boost the flavor, top with pickled jalapeños and a sprinkle of sesame seeds. Delicious and healthy, Banh Mi Bowls are a great way to enjoy a satisfying meal. The combination of flavors and textures will delight your taste buds. Plus, it is a quick and easy meal to put together. Simply cook the ground pork and assemble all the ingredients in a bowl. Enjoy a delicious and satisfying meal in no time!

Other Dinners You May Enjoy:

Baked Burrata Pumpkin Ziti with Pork Sausage Recipe

Delicious and Easy Chorizo One Pan Dinner

Easy and Delicious Mushroom & Pea Risotto Recipe

Garlic Mushroom & Shrimp Pasta

Italian Sausage, Potato & Kale Soup

There is just something about cold, foggy, or rainy days that makes you want to curl up with a warm bowl of soup! I’ve been trying to add more greens creatively into recipes and meals I cook this year. So here is one of my favorite soups to make all year round, but especially right now as we finish off the cold of Winter.

Serves: 10 (2 cup Serving)

Ingredients:

2 lbs. of Italian Sausage

1 Onion

1/4 tsp. red pepper flakes

1 tsp sea salt

1 tsp italian seasoning

5 cloves of minced garlic

2 tbsp flour

4 cups vegetable broth

3 cups whole milk

3 large potatoes

6 cups chopped kale (if not fresh I get the pre chopped)

1-1/2 cups heavy cream

Parmesan Cheese to garnish

Directions:

  1. Grab your biggest pot! I use the 8 quart stockpot with cover from 360cookware so I have plenty of room. The 6 quart will work great too (discount code below!). Heat on Low-Medium.

  2. Add in Italian sausage and onion. Cooking and stirring until meat is cooked and onion is softened. Making sure to break up sausage into little bits.

  3. Once cooked add in seasonings (red pepper flakes, sea salt Italian seasoning). Stir. Add in garlic and stir until fragrant. About 1 minute.

  4. Next you will add the 2 tbsp. of flour and stir until well coated.

  5. Add in Vegetable broth nice and slow to incorporate into the meat mixture. Then the whole milk. Stirring until well combined.

  6. Take cut Potatoes (you can have these as small or as big as you like, but I do about an inch size) and add into pot. Stir to make sure they are all covered. Let come to a simmer and turn heat to low. Cover and let cook until fork can go through potatoes. 20-30 min.

  7. Once potatoes are done add in heavy cream and then kale. Making sure to stir all together and incorporate fully so kale can soften.

  8. Let cook for around 15 min until kale is soft.

  9. Serve in bowl with parmesan cheese for garnish! Enjoy!!

Macros: FAT=28.6 CARB=20.2 PROTEIN=21.8

For Discount on Pot used and the ENTIRE site of 360cookware use “AMANDA20” for 20% off!

www.360cookware.com

Soft Cream Cheese Lemon Blueberry Scones

The softest, melt in your mouth scones! So good you wont be able to just eat one!! this recipe is for lemon blueberry.. however feel free to mix it up and make it your own. Have strawberries and not blueberries? Swap it out! Want just lemon? Sounds Great!! They will taste amazing with anything you add or take out and you get to make it all your own!! Now lets get started!

Ingredients:

21/2 cups flour

1/2 cup sugar

1/2 tsp salt

1 tbsp baking powder

1/2 cup cold butter

1 egg

1 tsp vanilla extract

2/3 cup heavy cream

8 ounce package of cream cheese

1/2 cup sugar (to cover cream cheese with)

1 pint blueberries

2 tbsp lemon zest

Glaze:

1 tsp vanilla extract

1 cup powdered sugar

2 tbsp melted butter

2 tbsp lemon juice

Directions:

  • Mix together dry ingredients in a large bowl

  • Grate butter into bowl and blend with dry mixture. I use my hands to make sure that the butter doesn’t stick together any larger then a pea size amount.

  • After well mixed make a hole in the center of the mix and put all wet ingredients; egg, vanilla and heavy cream. Mix together. Be sure to not over mix or it will get too tough.

  • Cube cream cheese into dime size chunks. Coat in a small bowl with sugar and add into the dough. Don’t over mix just enough that its well spread out in the dough. Next add in blueberries and lemon zest (or whatever you decide to add in)

  • After all is mixed together, flour your work station and make dough into a pie looking around shape. I keep mine a little thicker so it stays soft. If you like your scones harder and more flaky then you can make it thinner. Mine is usually around an inch to an inch and a half thick. Once in a circle cut like a pizza into slices. I do about 8. Again if you prefer it to be smaller and not as soft you can do more.

  • Place on a cookie sheet and put in the fridge for 45 min to an hour. The last 10 min preheat oven to 400 degrees

  • Bake at 400 degrees for 15 min. Turn the temp down to 350 and bake for 10 min.

  • While baking make glaze! Melt butter completely in a bowl and add in the other ingredients. Mix with a fork until you have your desired consistency. Add more powdered sugar or water to achieve thickness. I like mine a little thicker so it will stick to the top of scones.

  • Transfer scones to cookie sheet and drizzle glaze on top. Let cool and enjoy!!

public.jpeg

My 3 Easy Homemade Seasoning Mixes

We never have a meal at our house without spices! I probably use my ranch seasoning the most, but other spices like Italian and taco seasoning are always important to have in the cabinet! What I love most about making my own seasonings instead of buying them is getting rid of all the extra unhealthy additives they put in store bought pre made spices. They mainly do this so the shelf life is a little longer. I am using spices to make these seasonings that I will also use in my other meals and recipes so when I buy a large glass jar of it at the store I’m sure to use the entire thing instead of it going bad before it can finish. I also can reuse the glass jars (usually Good and Gather) to make new seasonings. I like to change the color of the tops on the jars so they are bright and fun and fit with my house! Here I used a spray paint to make them all match and they came out ohhh so cute! Who doesn’t love that salmon color! Now lets get to the recipes!

image1 (12).jpeg

Ranch Seasoning Mix

1 tsp Garlic Powder

2 tbsp Parsley Flakes

1 tsp Onion Powder

1/2 tsp Basil

1 tsp Dill Weed

1/2 tsp Pepper

1/2 tsp sea salt

Directions:

Mix together and enjoy over EVERYTHING!! I also make my homemade ranch dressing by mixing with equal parts whole milk and mayo (Primal Kitchen is my favorite clean mayo brand)

image3.jpeg

Taco Seasoning Mix

2 tbsp Chipotle Chili Powder

2 tbsp Ground Cumin

1 1/2 tsp Onion Powder

1 1/2 tsp Garlic Powder

1 tsp Paprika

1/2 tsp Cayenne Pepper

1/2 tsp Sea Salt

1/2 tsp Oregano

Directions

Mix together and put in a new spice container! Add more Cayenne Pepper depending on how hot you would like it!!

image4.jpeg

Italian Seasoning Mix

1 tbsp Basil

1 tbsp Oregano

1 tbsp Rosemary

1 tbsp Thyme

1 tbsp Garlic Powder

1 tbsp Marjoram

Directions:

Mix together and enjoy! Add in 1 tbsp red pepper flakes if you want spicy Italian dishes also!

image0 (7).jpeg

Garlic Mushroom & Shrimp Pasta

This is one of my favorite quick and easy pastas to make. It’s deliciously light on sauce but full of great flavorful taste. Every time I make this dish Scotty easily cleans his plate and always tells me how delicious it was. Quotes like “It tastes like it’s from a fancy restaurant”… “Add this to the menu”…and “That was really good babe”.. always leaves me with a smile on my face. It’s such a great feeling when someone loves the food I cook. So I had to share for this months recipe because I want everyone leaving your table with a smile too!

public.jpeg

Ingredients:

For Pasta I always use Wild Grain’s pasta sent in a monthly membership that is fresh and so delicious! One package makes enough for 2-4 people

3 Cloves of Garlic

Olive Oil spray

8 oz Baby Bella Mushrooms

1/3 Pasta water

3 tbsp Butter

3 tbsp soy sauce

1/3 cup white wine

Shrimp (you can really use any amount you want here)

Directions:

1. Start water on medium heat for pasta. Once boiling add in pasta until Al dente.

2. While water is boiling spray skillet with olive oil cooking spray until fully coated and start on medium heat. Mince garlic and add into pan. Stirring until fragrant.

3. Add mushrooms to garlic pan and stir. Cooking for a few minutes then adding in wine. Let it cook while the liquid fully evaporates.

4. Once mushrooms are finished transfer to a plate for later. No need to wipe out pan just use another coating of olive oil spray and cook shrimp. Add a little salt and pepper onto shrimp and cook until done!

5. While mushroom and shrimp are cooking and pasta is done boiling. Drain and keep 1/3 cup pasta water.

6. Put pasta back into original pan and stir together with pasta water, butter and soy sauce.

7. Now that you have everyone ready to go.. plate your dish! pasta first, then add on your mushrooms and shrimp and serve!

8. Enjoy! Maybe even have a glass of that wine you opened!

To get $10 off your first order with Wild Grain and sourdough rolls in every box for life!!

Use code AMANDAWARREN

www.wildgrain.com

public.jpeg
public.jpeg
public.jpeg

Sparkling Ice Mint Mango Mock-tail

This shop has been compensated by Inmar Intelligence and its advertiser. All opinions are mine alone. #MySparklingIce #SparklingIceLife #SparklingIcePartner

Sparkling Ice Mock-tail Summer may be coming to a close but refreshing mock-tails will never end!! I am especially loving the Sparkling Ice Orange Mango sparkling water and enjoying it for a backyard brunch picnic. It can get pretty hot where we live, over 100 most August days and it’s always nice to find a refreshing drink we can enjoy before it’s too hot to be outside. I love enjoying a backyard brunch all year around but especially when the mornings are cooling down! Look below for the perfect mock-tail recipe to finish off your summer and head into fall! It’s great for brunch, lunch and anytime of day! I shopped for all of these ingredients at our local Save Mart. Cheers!

image0 (5).jpeg
image002 (1).jpg

Ingredients for 2 Orange Mango Mock-tails:

1 chilled Sparkling Ice Orange Mango

Sliced Mango

Fresh Mint

1 cup water

1 cup sugar + more for garnish

Ice

Directions:

1. Make simple syrup. Mix together water, sugar, 3 mint leaves in pot over fire. Continuously stir them together until sugar melts into water. Let cool and place in glass jar ready for use!

2. Fill bottom of glass with 3 mango slices and muddle with straw.

3. Add ice, 2 tbsp of simple syrup and fill rest of glass with Sparkling Ice Orange Mango.

4. Garnish with mint and a slice of mango.

5. Enjoy!

image0 (4).jpeg
image004.jpg
image003.jpg

The Best Monster Cookie Recipe You'll Ever Try!

Are you looking for a delicious and easy-to-make cookie recipe? Look no further—this Monster Cookie recipe is sure to satisfy anyone's sweet tooth! Packed with sweet and salty flavors, this amazing cookie is already a fan favorite and a classic that has universally loved cookie ingredients. This simple and delicious treat is made with oats, peanut butter, M&Ms, and chocolate chips, creating a classic flavor combination that nobody can turn down. Best of all, this cookie is super easy to make and takes no time at all. So, if you’re looking for a delicious and colorful cookie recipe that everyone will love, give this Monster Cookie recipe a try. You won't be disappointed!

I love making monster cookies so much because of how customizable they are.

Monster cookies are a classic treat that can be customized in countless ways. With the right ingredients, you can create a cookie that is perfect for any occasion. Whether you're looking for a classic monster cookie recipe or something a little unique to the ingredients, you can make a batch of delicious monster cookies that everyone will love. The best part about making monster cookies is that you can add whatever ingredients you like. Traditionally this cookie would start with classic favorites like chocolate chips and all-natural peanut butter, but delicious new twists to the recipe could include adding things like crushed pretzels and candy. Adding in colorful sprinkles or M&M's for the holidays is one of my favorite seasonal customizations as well. You can even get creative and mix and match different flavors to create the perfect monster cookie for you and your event!

What You’ll Need to Make Monster Cookies

For this recipe, you will need butter, sugar, brown sugar, vanilla extract, eggs, all-purpose flour, baking powder, salt, and 3 cups of your favorite goodies. I typically use chocolate chips, old-fashioned oats, chopped pecans or walnuts, M&M's and sprinkles. You can add in other things like peanut butter, butterscotch, or anything you have in your pantry to make this monster cookie recipe all your own.

In addition to these ingredients, you’ll likely need a few basic kitchen tools such as a large bowl, an electric mixer or stand mixer, a baking sheet, and measuring cups and spoons. You’ll also need an oven to bake the cookies. Preheat your oven to 375 degrees Fahrenheit before you begin. Finally, you’ll need a few minutes of free time to step-by-step mix, scoop, bake, and enjoy the delicious monster cookies you’ve created.

How to Store Leftover Cookies

If you don't plan on eating your leftovers right away, it's important to store them properly. When it comes to storing leftover cookies, there are a few key things to keep in mind. First, it's important to store them in an air-tight container, such as a plastic bag or airtight container. This will help to keep them as fresh as possible and keep out any moisture that could cause the cookies to spoil. Additionally, it's important to store the cookies in a cool, dry place. If you plan on storing them for more than a day or two, then it's best to put the container in the refrigerator or freezer. If you plan on keeping them in the freezer, make sure to use freezer-safe bags or containers. This will help to prevent the cookies from becoming soggy or developing freezer burn. Finally, make sure to label the containers with the date you stored them, so you can easily see when they need to be eaten. By following these simple steps, you can easily store your leftover cookies and enjoy them later.

monster 8.JPG

INGREDIENTS

1 cup butter (2 sticks)

3/4 cup sugar

3/4 brown sugar

1 tsp vanilla

2 large eggs

2 1/4 cups flour

3 tsp baking powder

1 tsp salt

3 cups of your favorite goodies

INSTRUCTIONS

1. Preheat oven to 375 degrees.

2. Melt the butter for 30 seconds in the microwave (if the butter is not at room temperature).

3. Add sugar & brown sugar into butter and mix. Scrape sides and mix again immediately after.

4. Mix in Vanilla Extract and eggs. Mix again.

5. Gradually add all-purpose Flour, Baking Soda, and salt. Mix well.

6. Now add in all your favorite treats! For these cookies, I did chunks of a milk chocolate bar, old-fashioned oats, colorful M&M’s, sprinkles, and walnuts (all equal to 3 cups)

7. I use a pre-measured cookie scooper linked -here- works great to have even-sized cookies! Scoop onto a baking sheet or parchment paper. Add 2 scoops right on top of each other to give a fuller cookie with a gooier middle.

8. Bake for 9 minutes and cool on a cookie sheet.

9. Enjoy!

Other Cookie Recipes You Will Love:

Birthday Cutout Sugar Cookies

Brown Sugar Toffee Cookies

Brown Butter Caramel Pretzel Cookies

How to Make Delicious Nutter Butter Cookies At Home