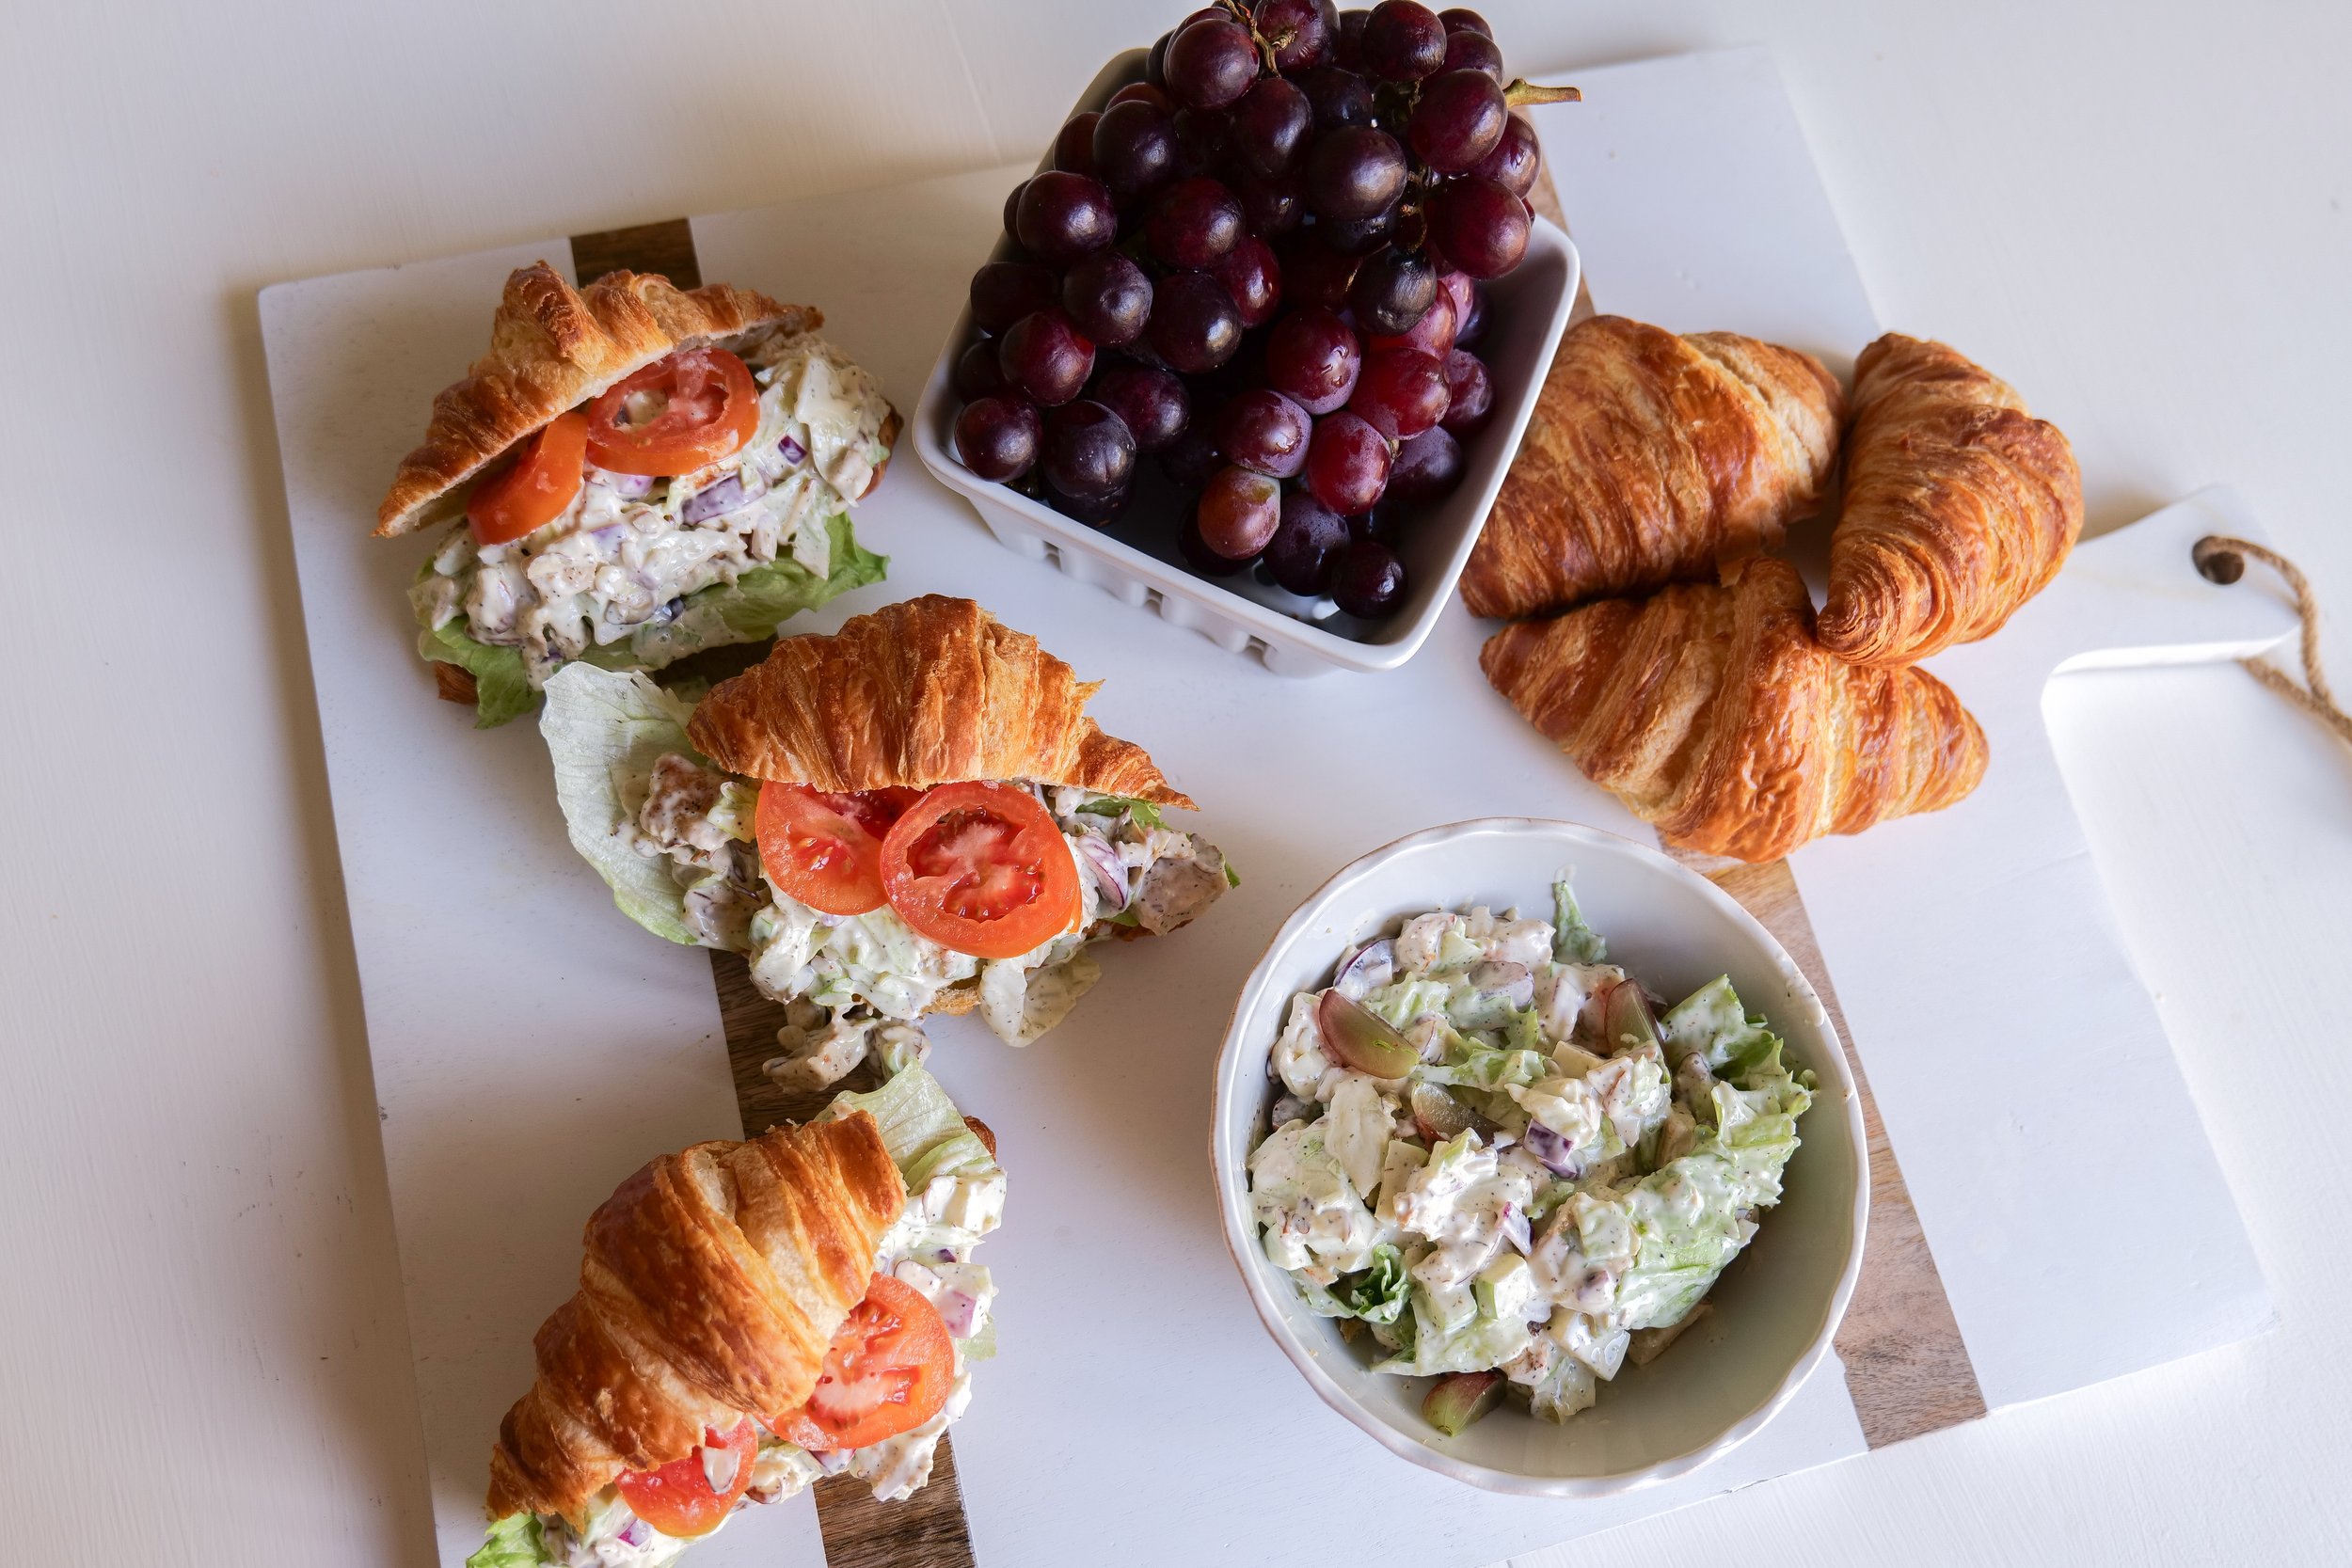
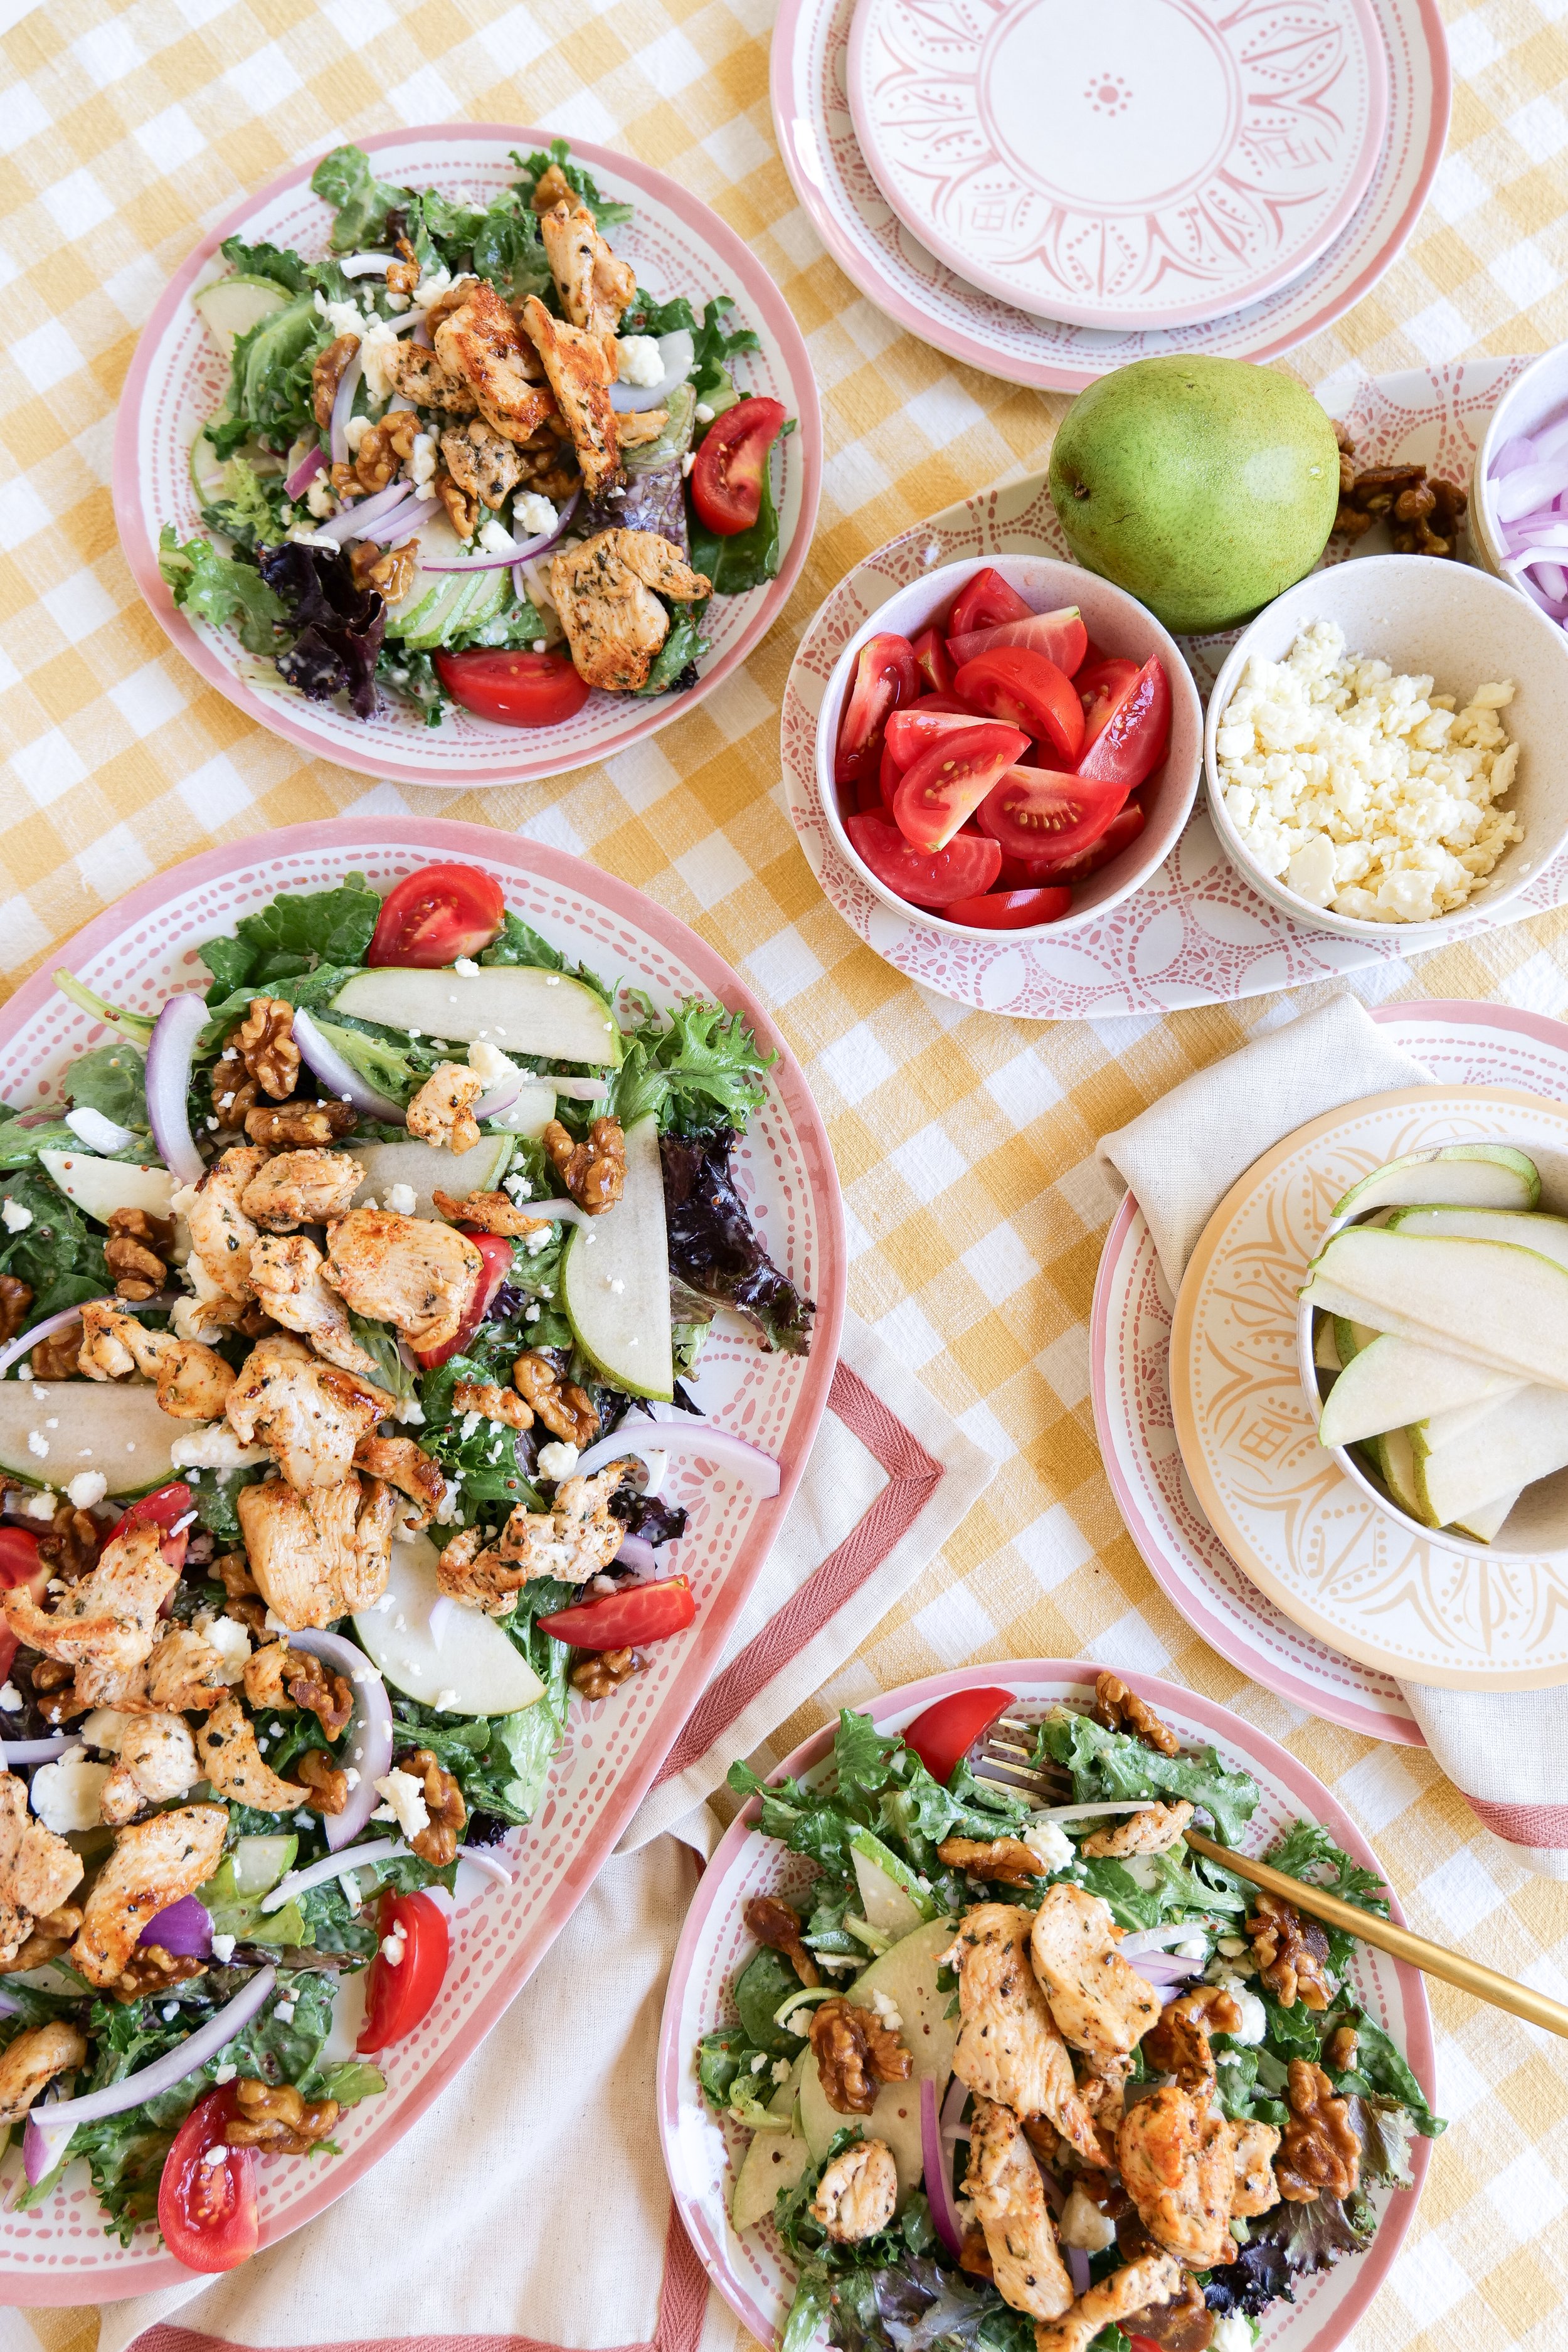
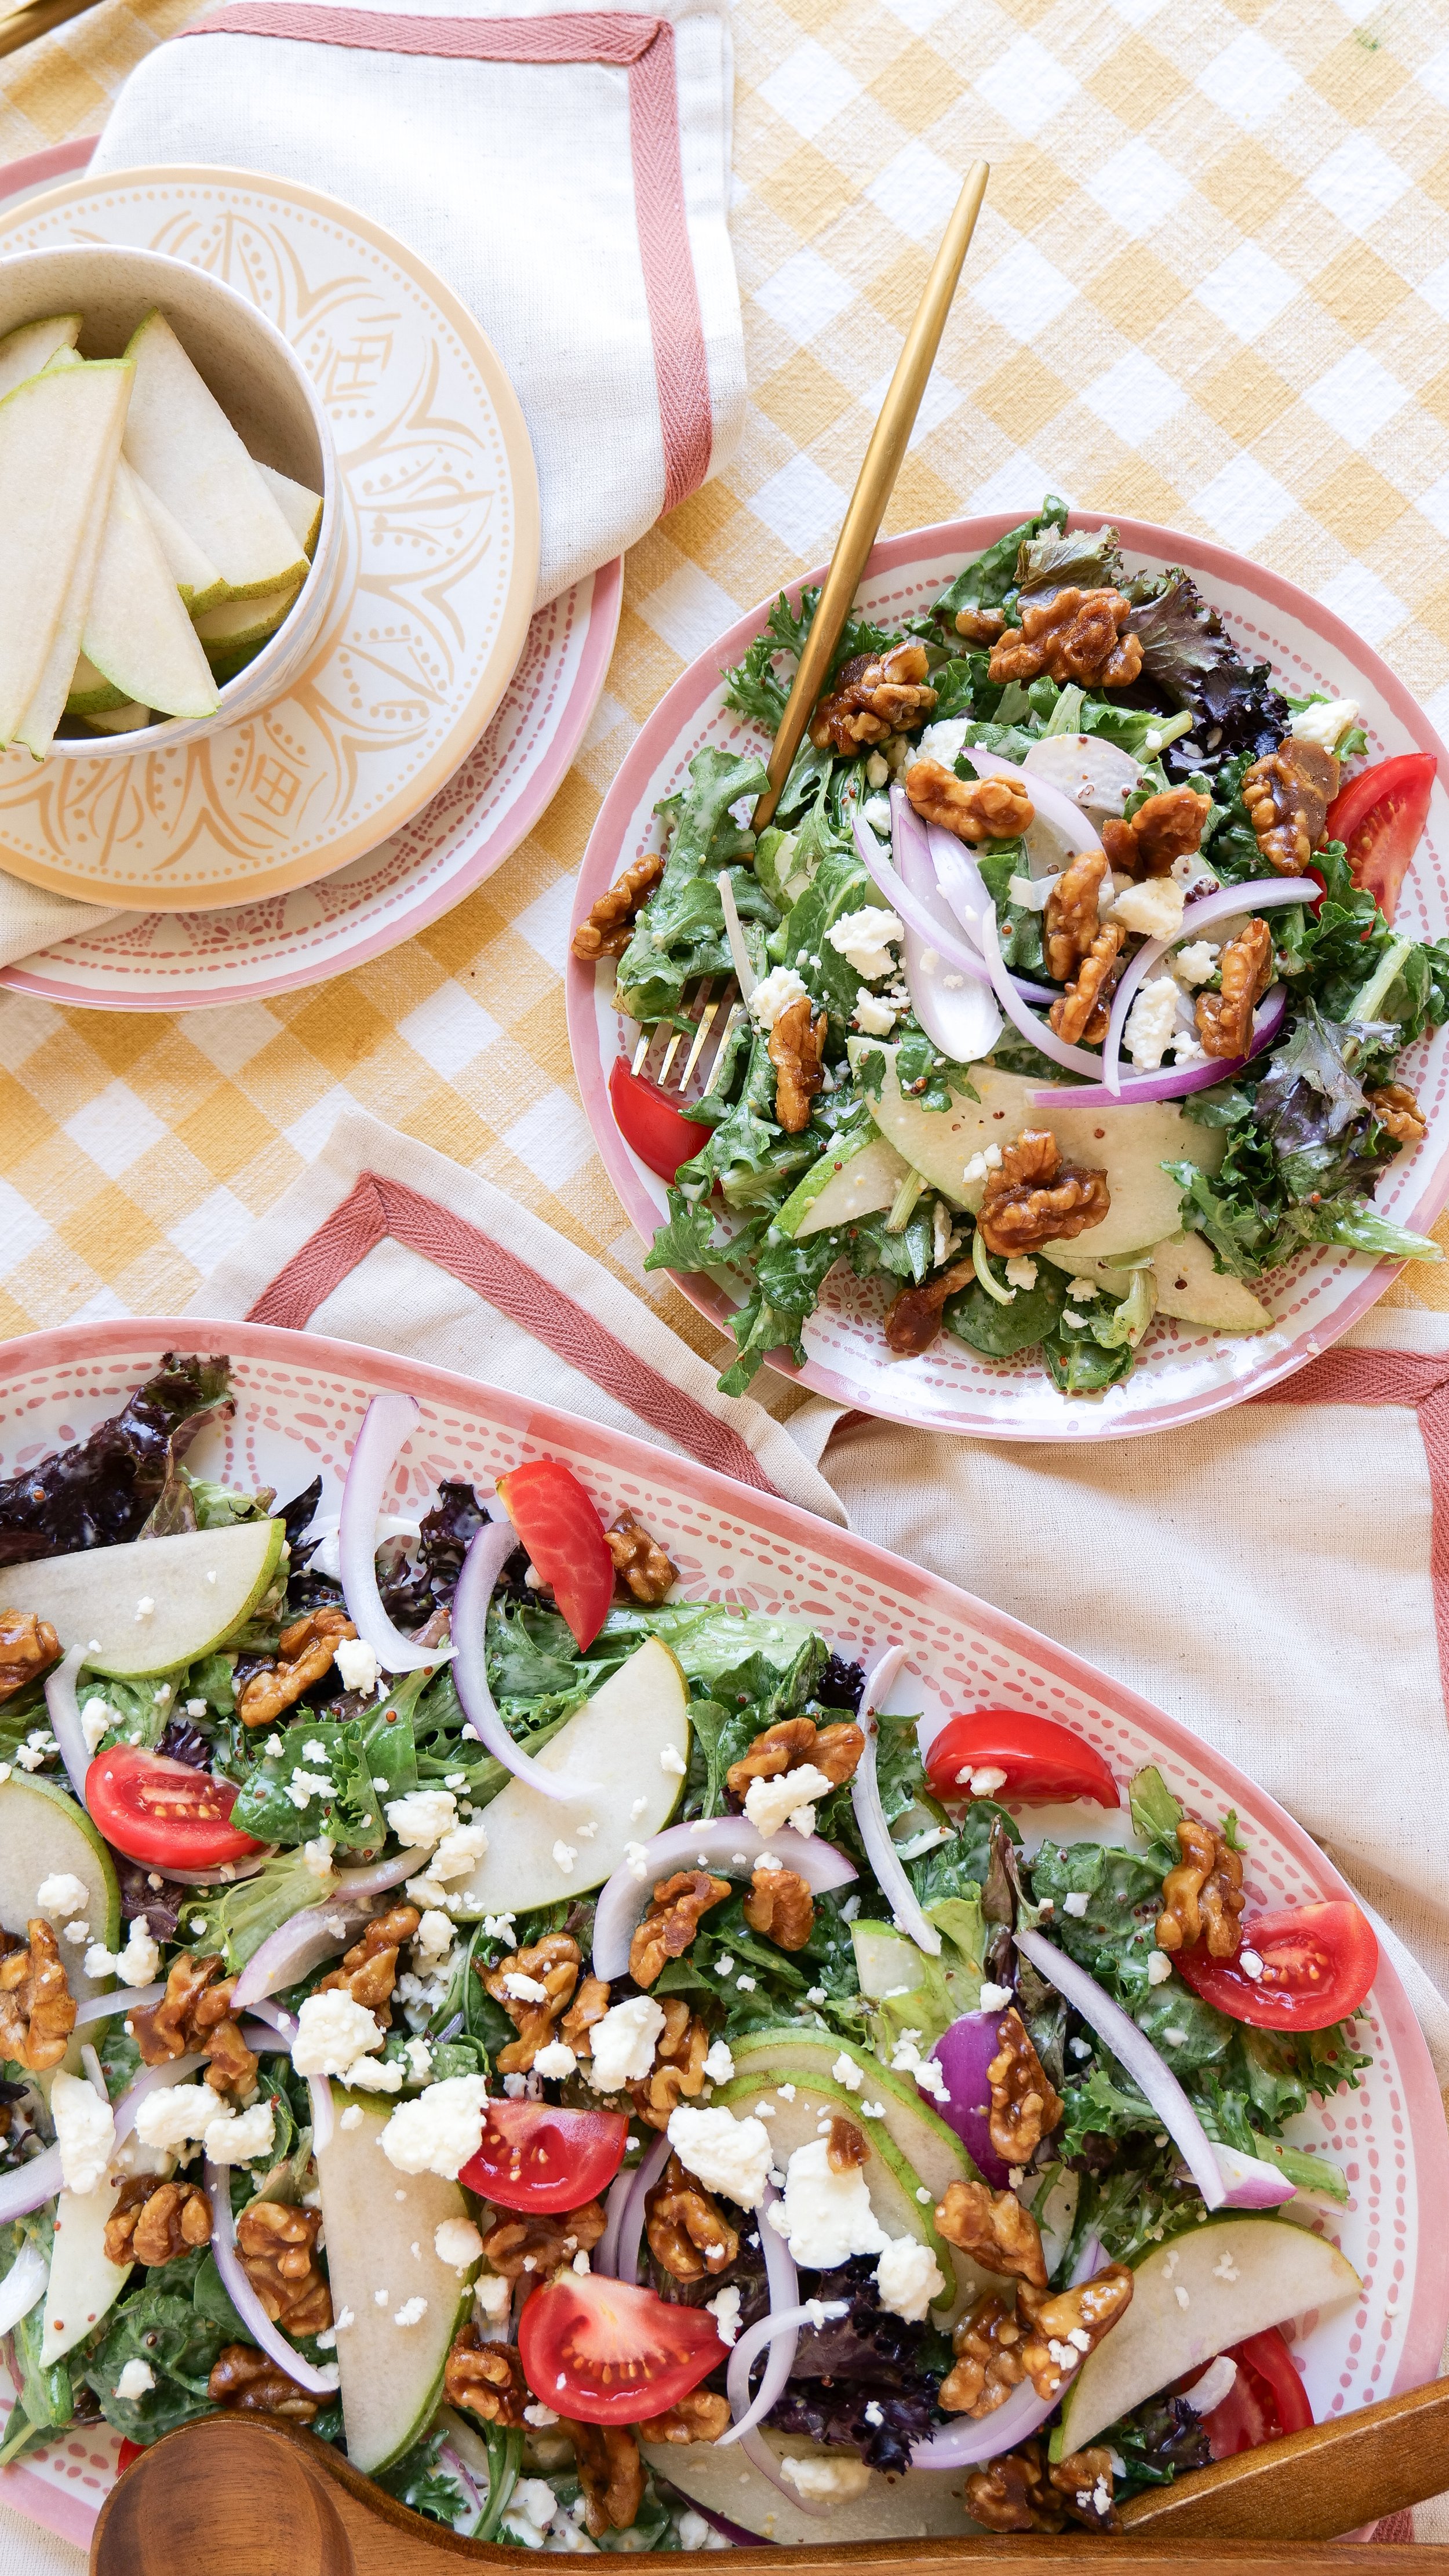
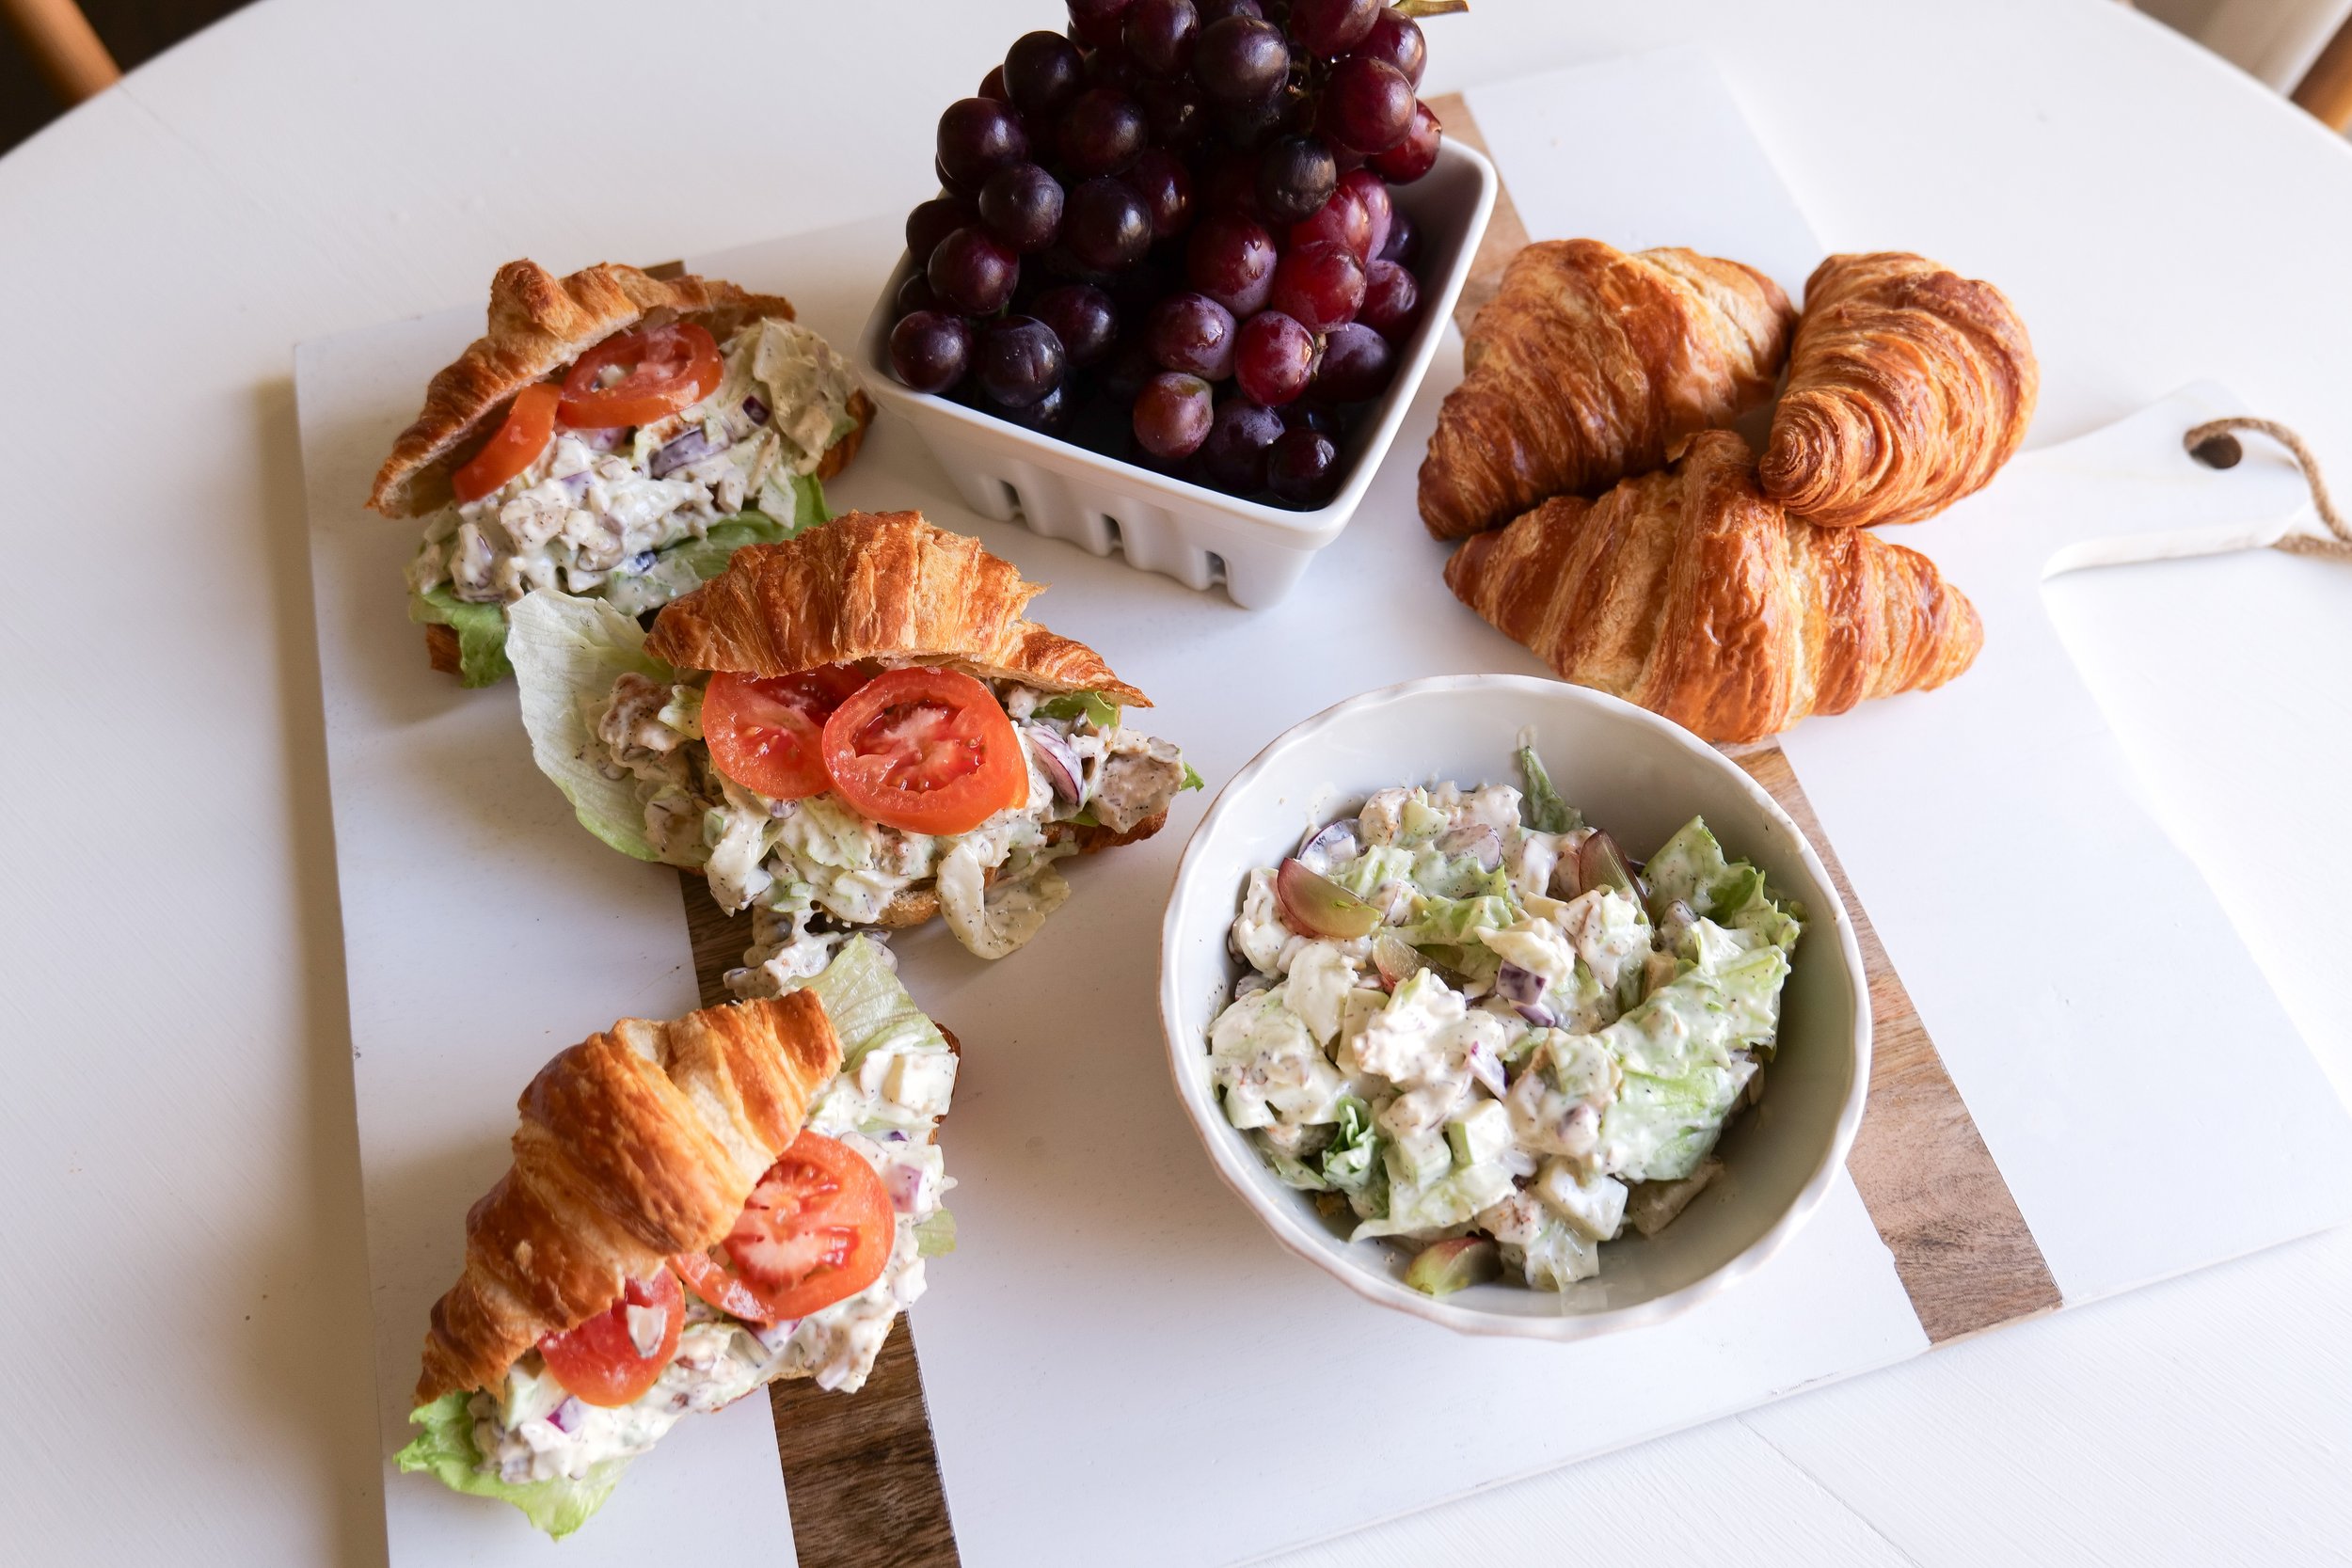
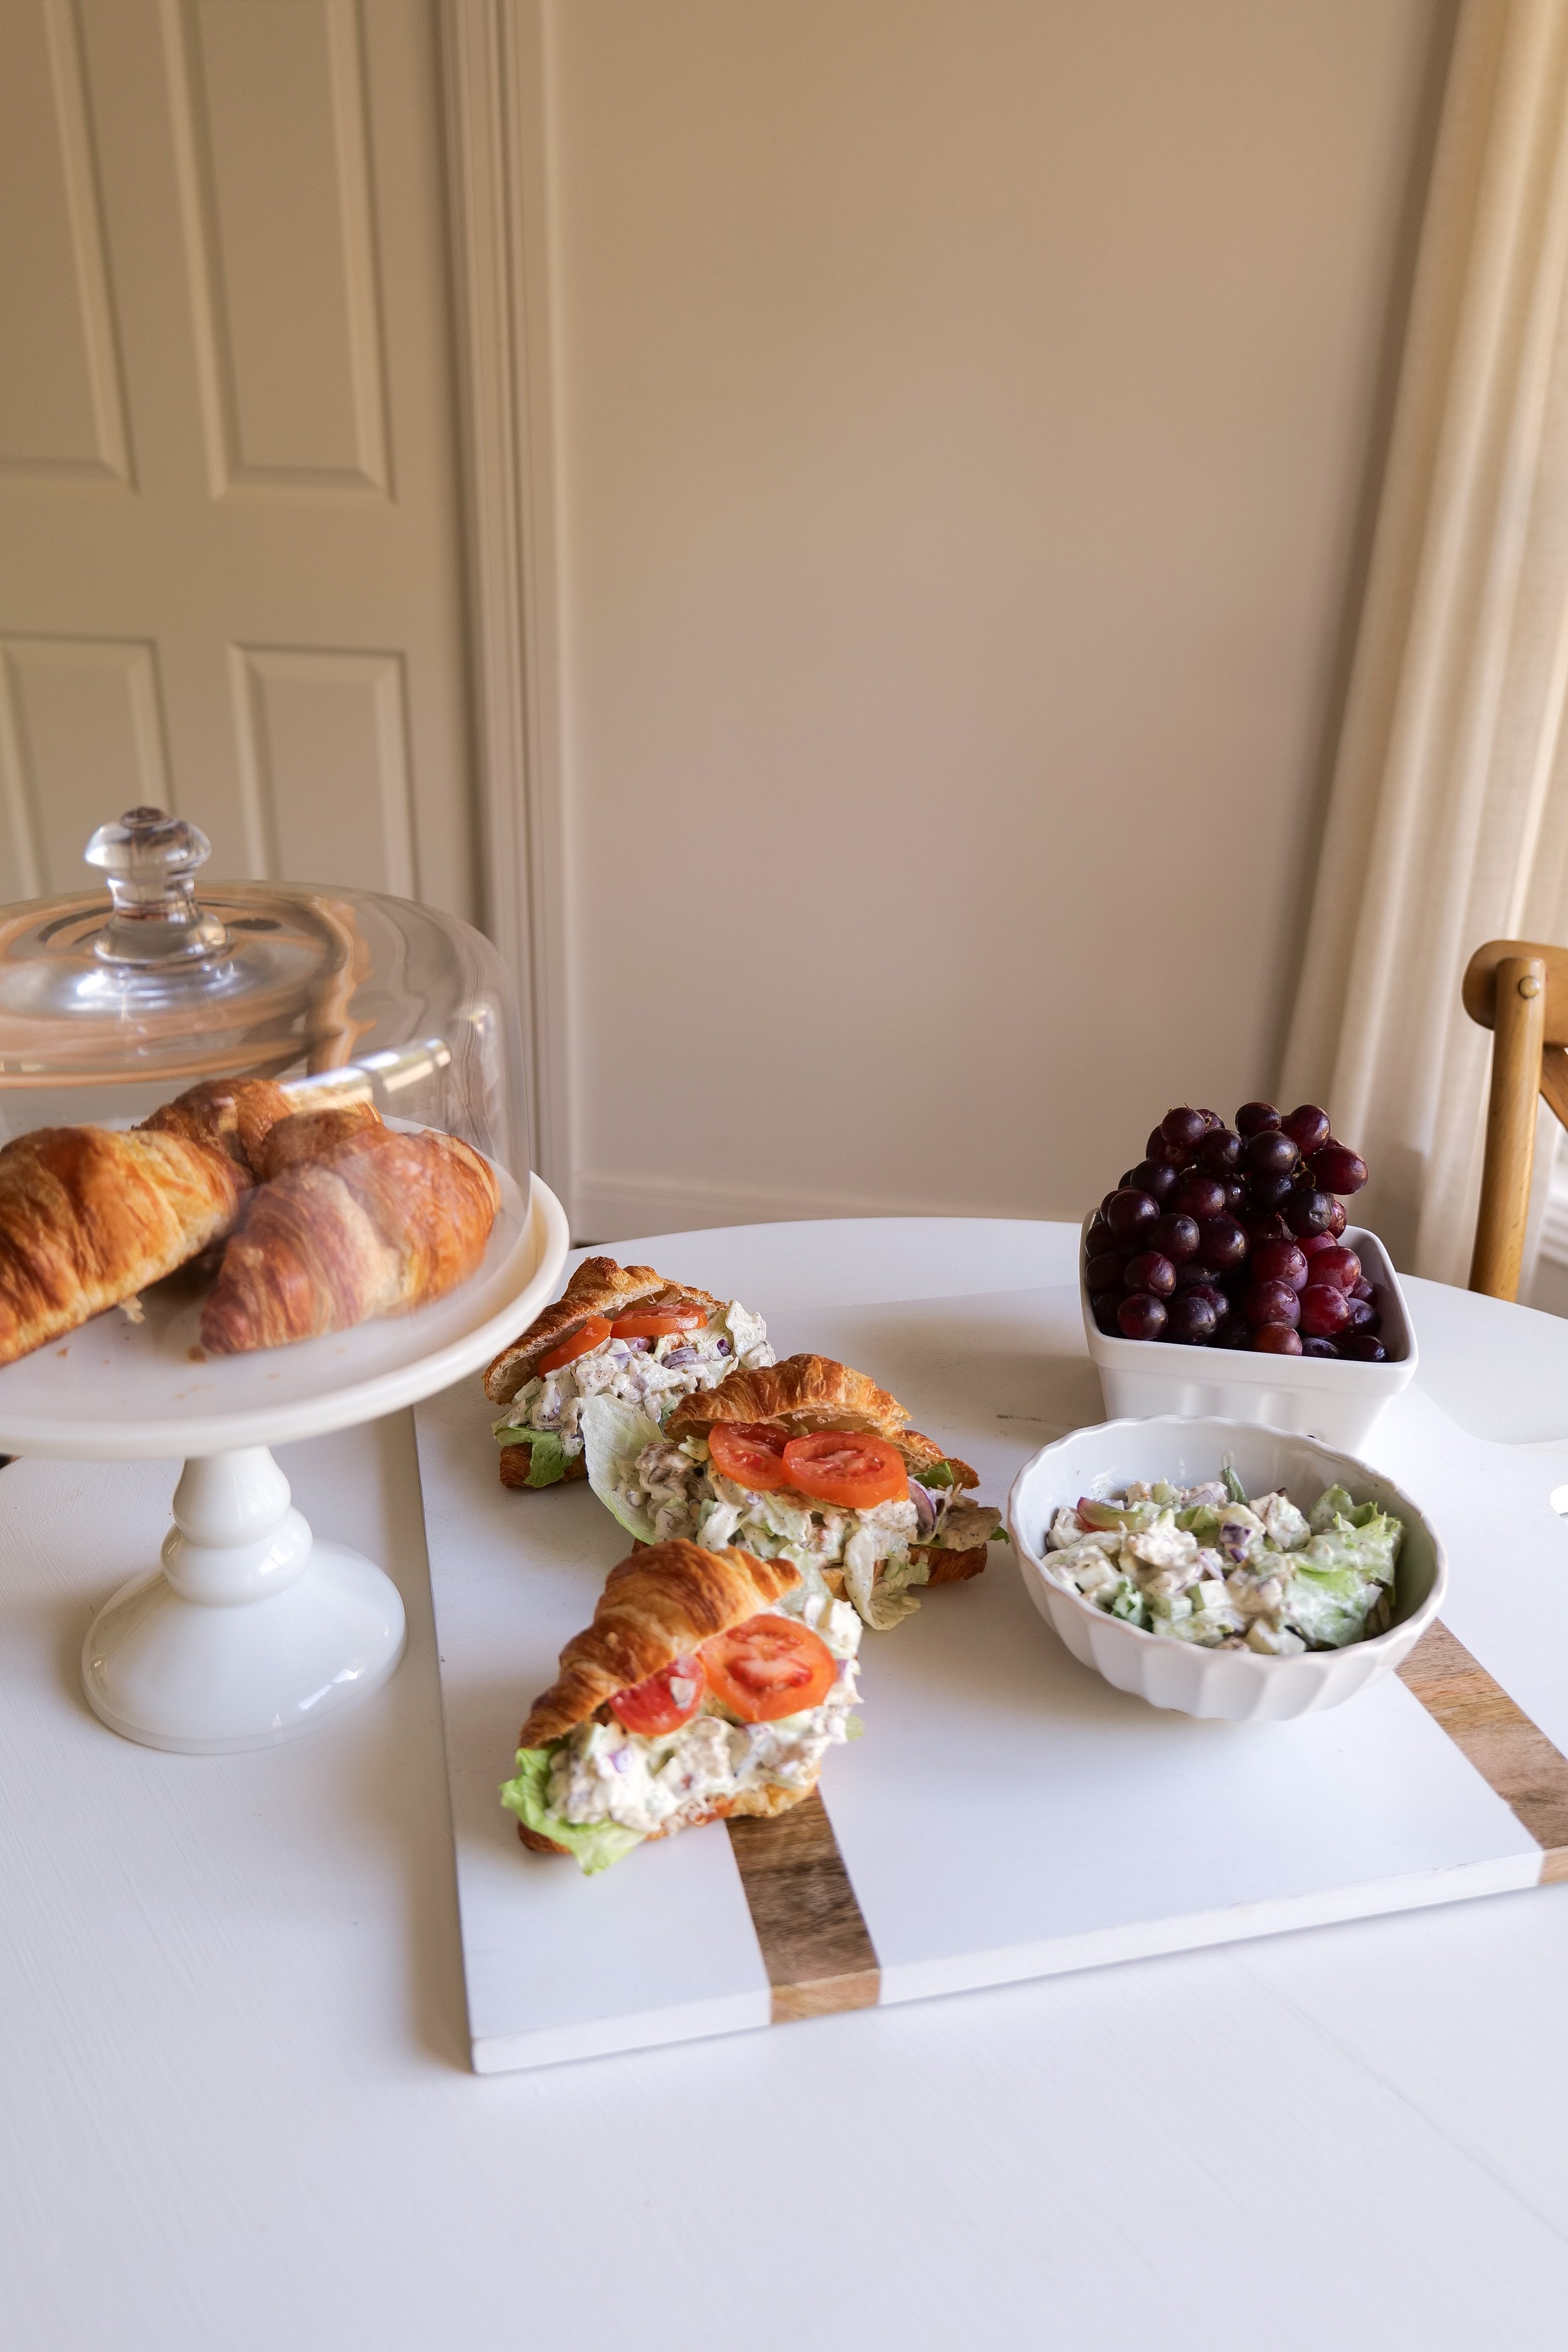
The Timeless Appeal of the Chicken Salad Sandwich
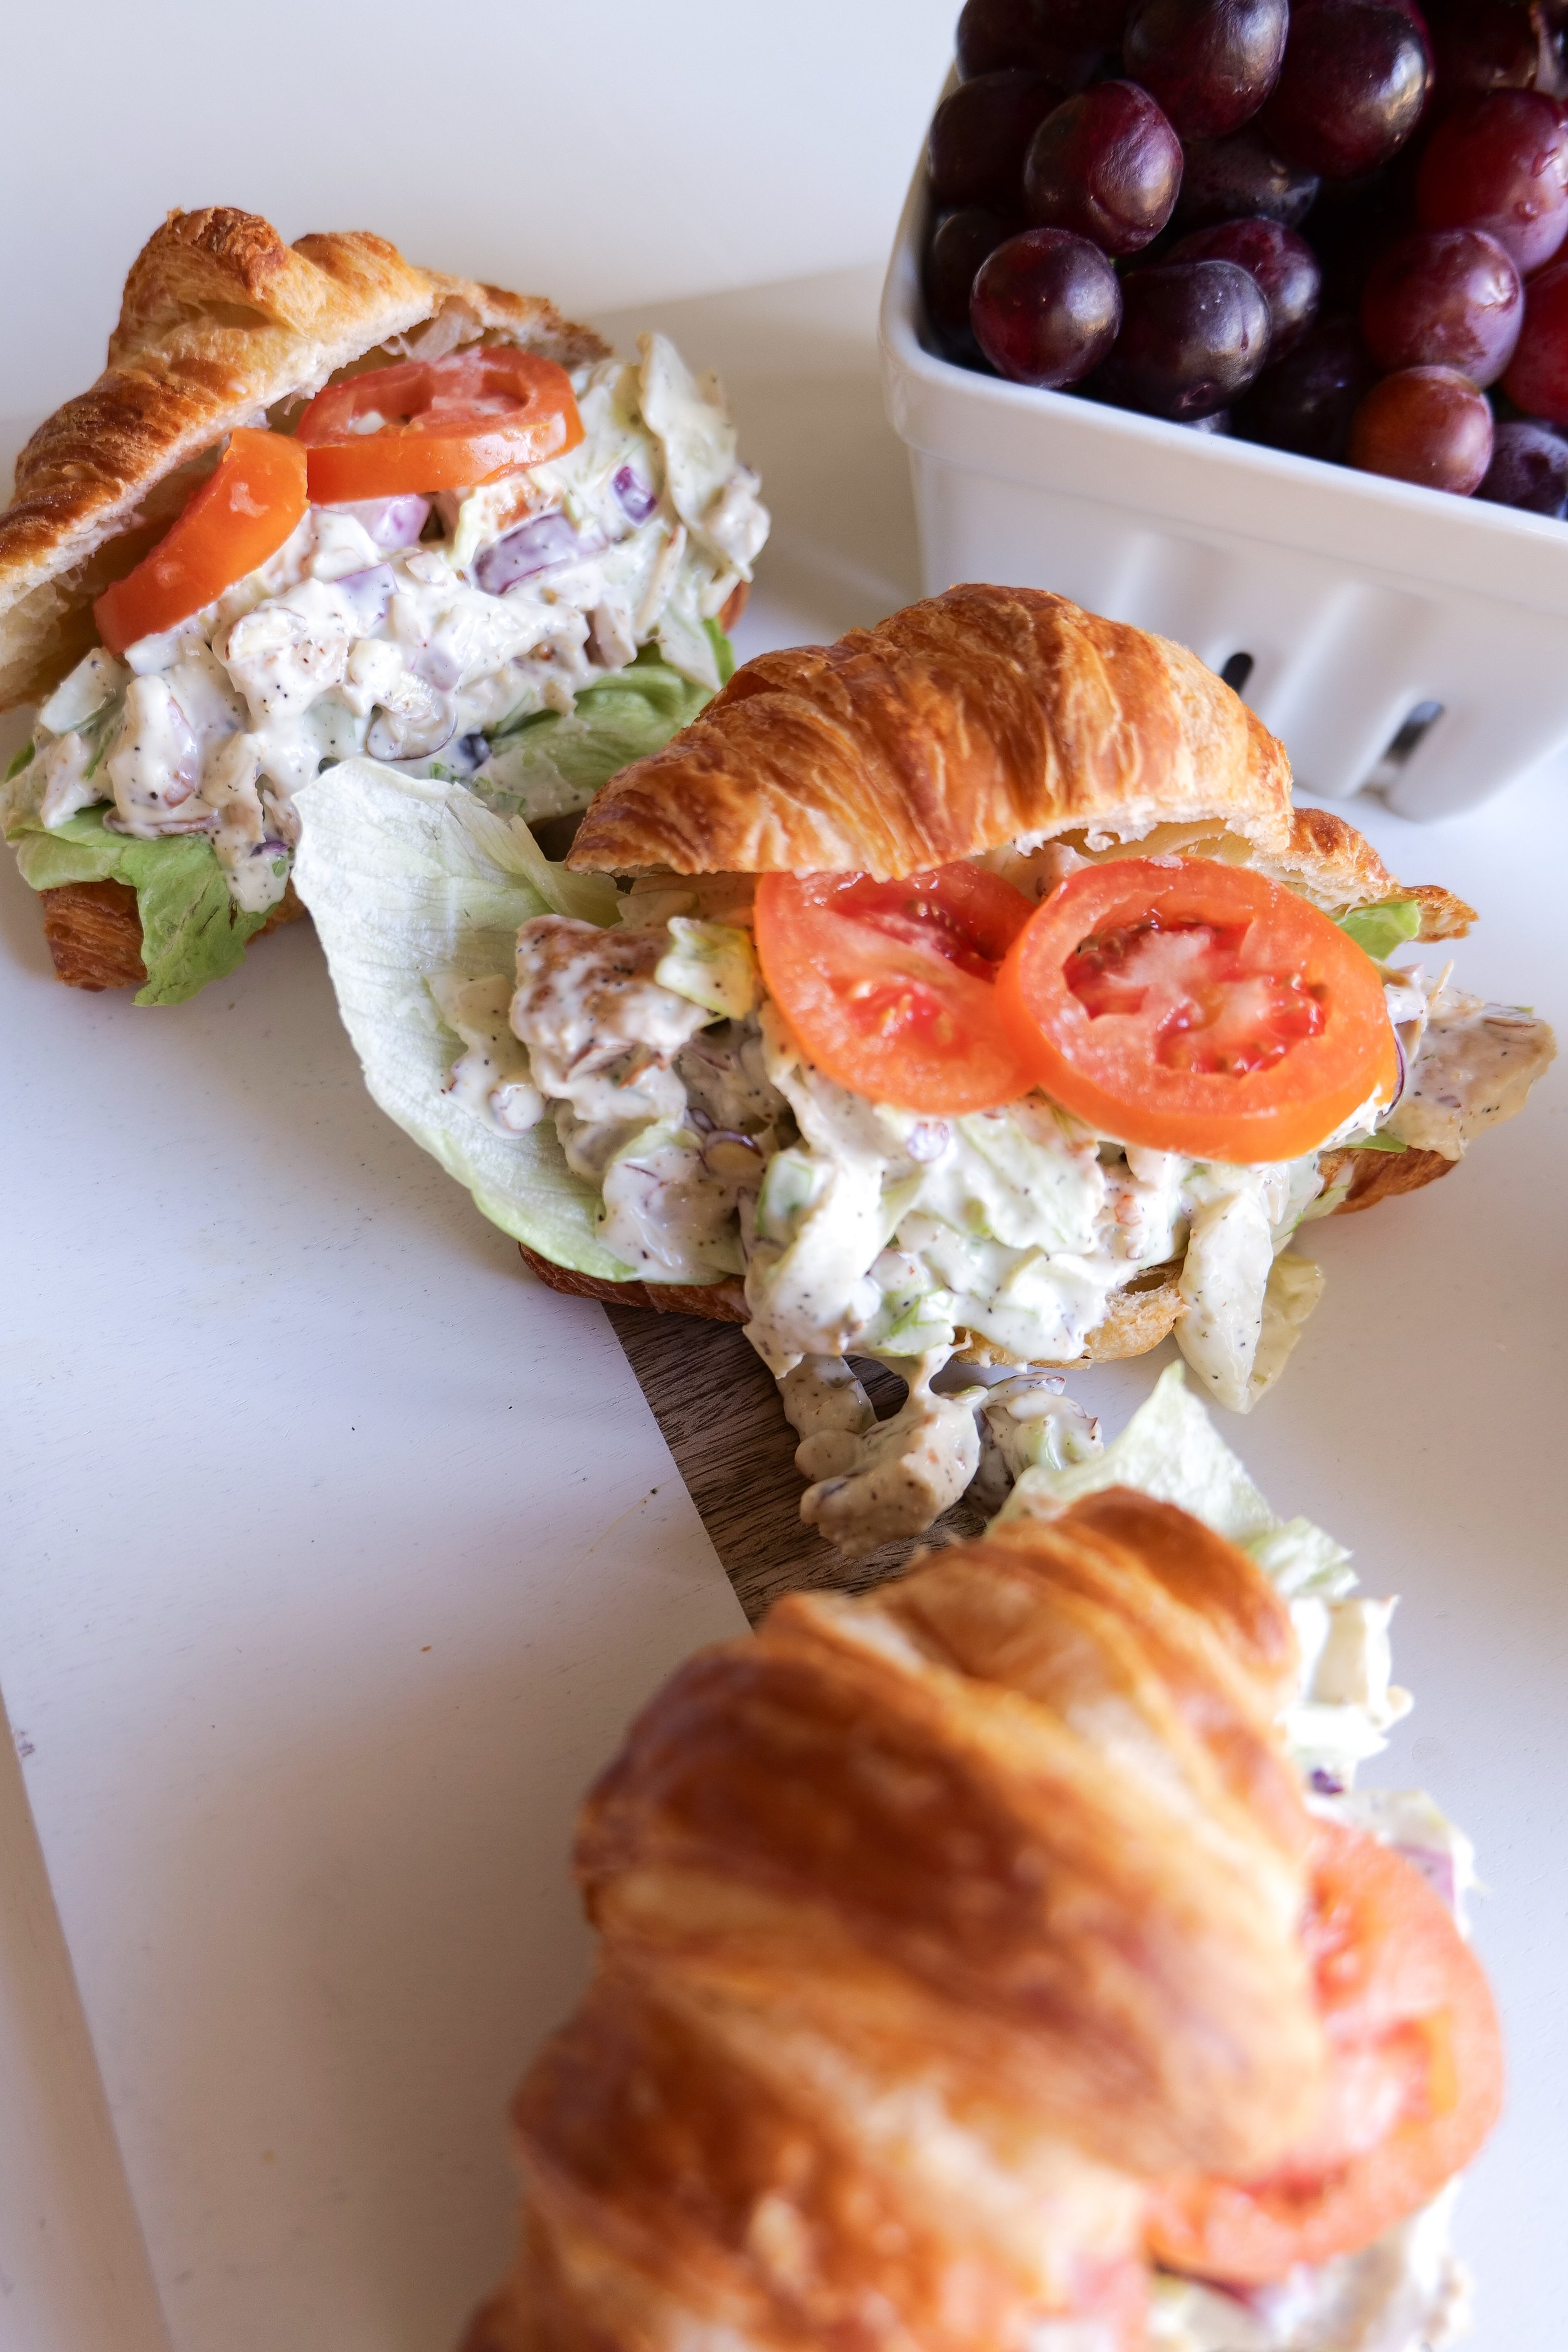
The chicken salad sandwich is a symphony of simple ingredients coming together to create a culinary classic lunchtime treat that has withstood the taste test of time. This homely delicacy offers a delicious blend of tender cooked chicken, creamy mayonnaise, crispy celery, piquant onions, and an array of seasonings, with each bite delivering a comforting and satisfying experience. Whether nestled between slices of freshly baked bread or perched atop a crisp bed of greens, the chicken salad sandwich is universally adored and endlessly customizable.

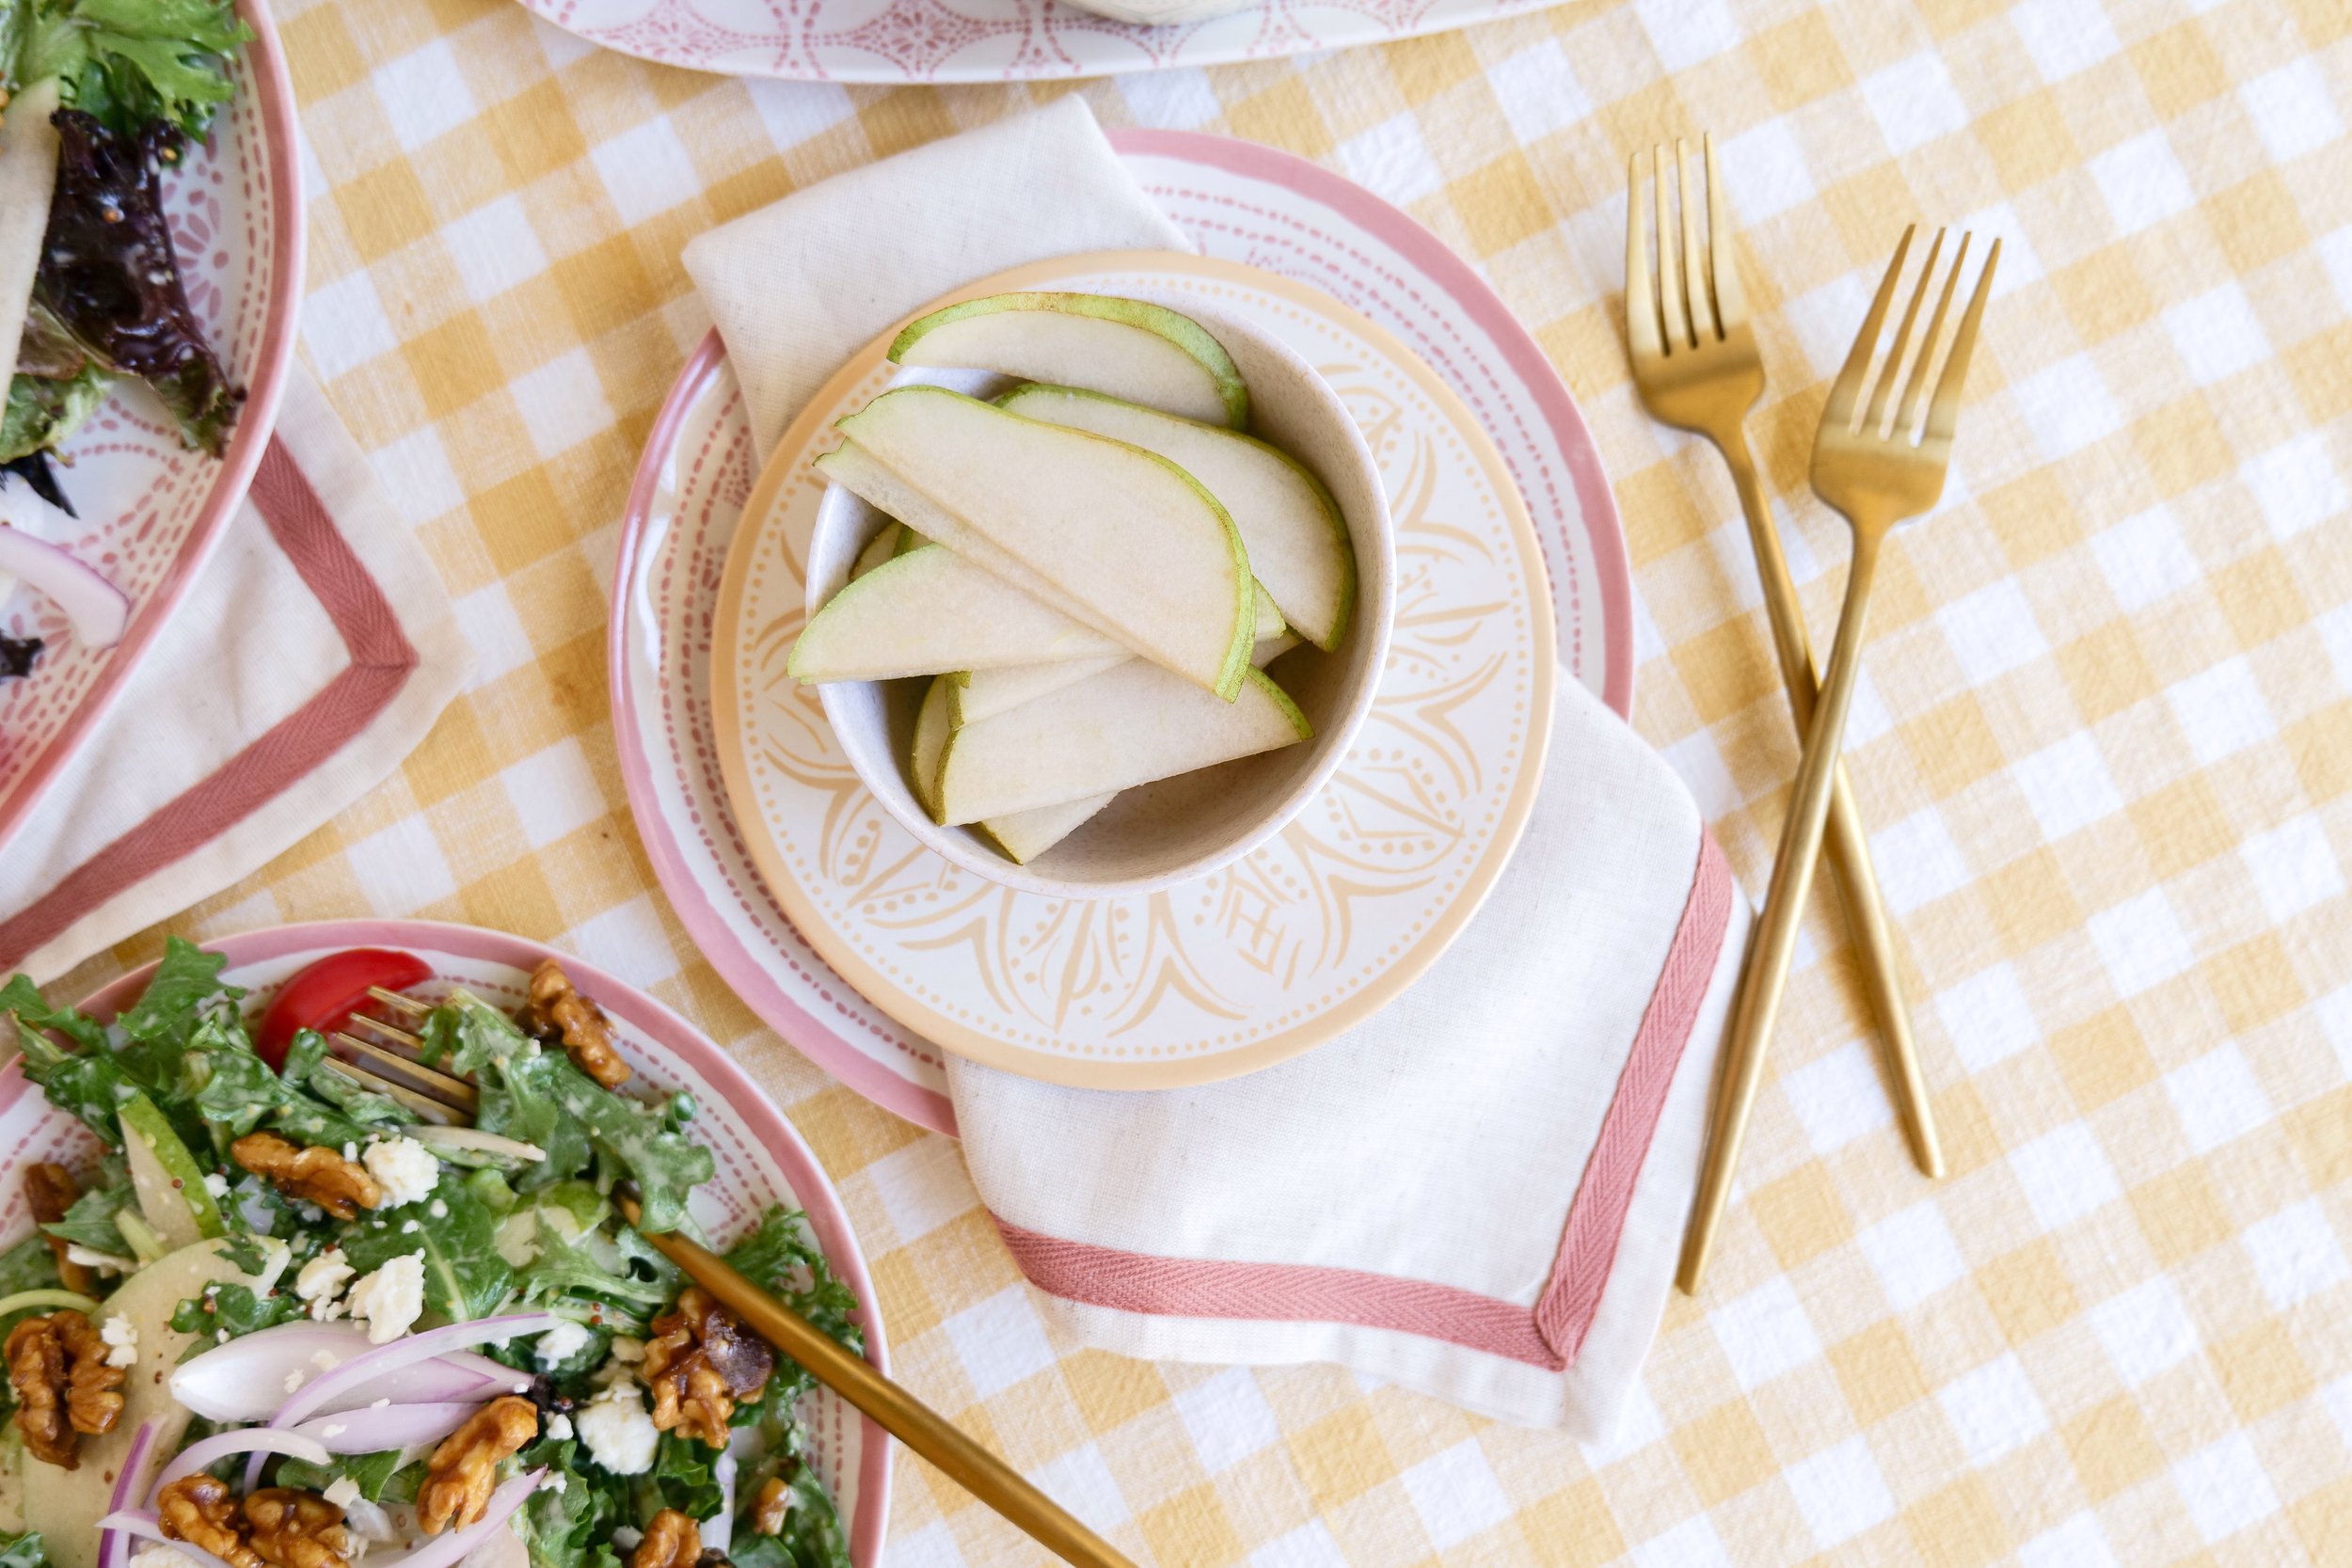
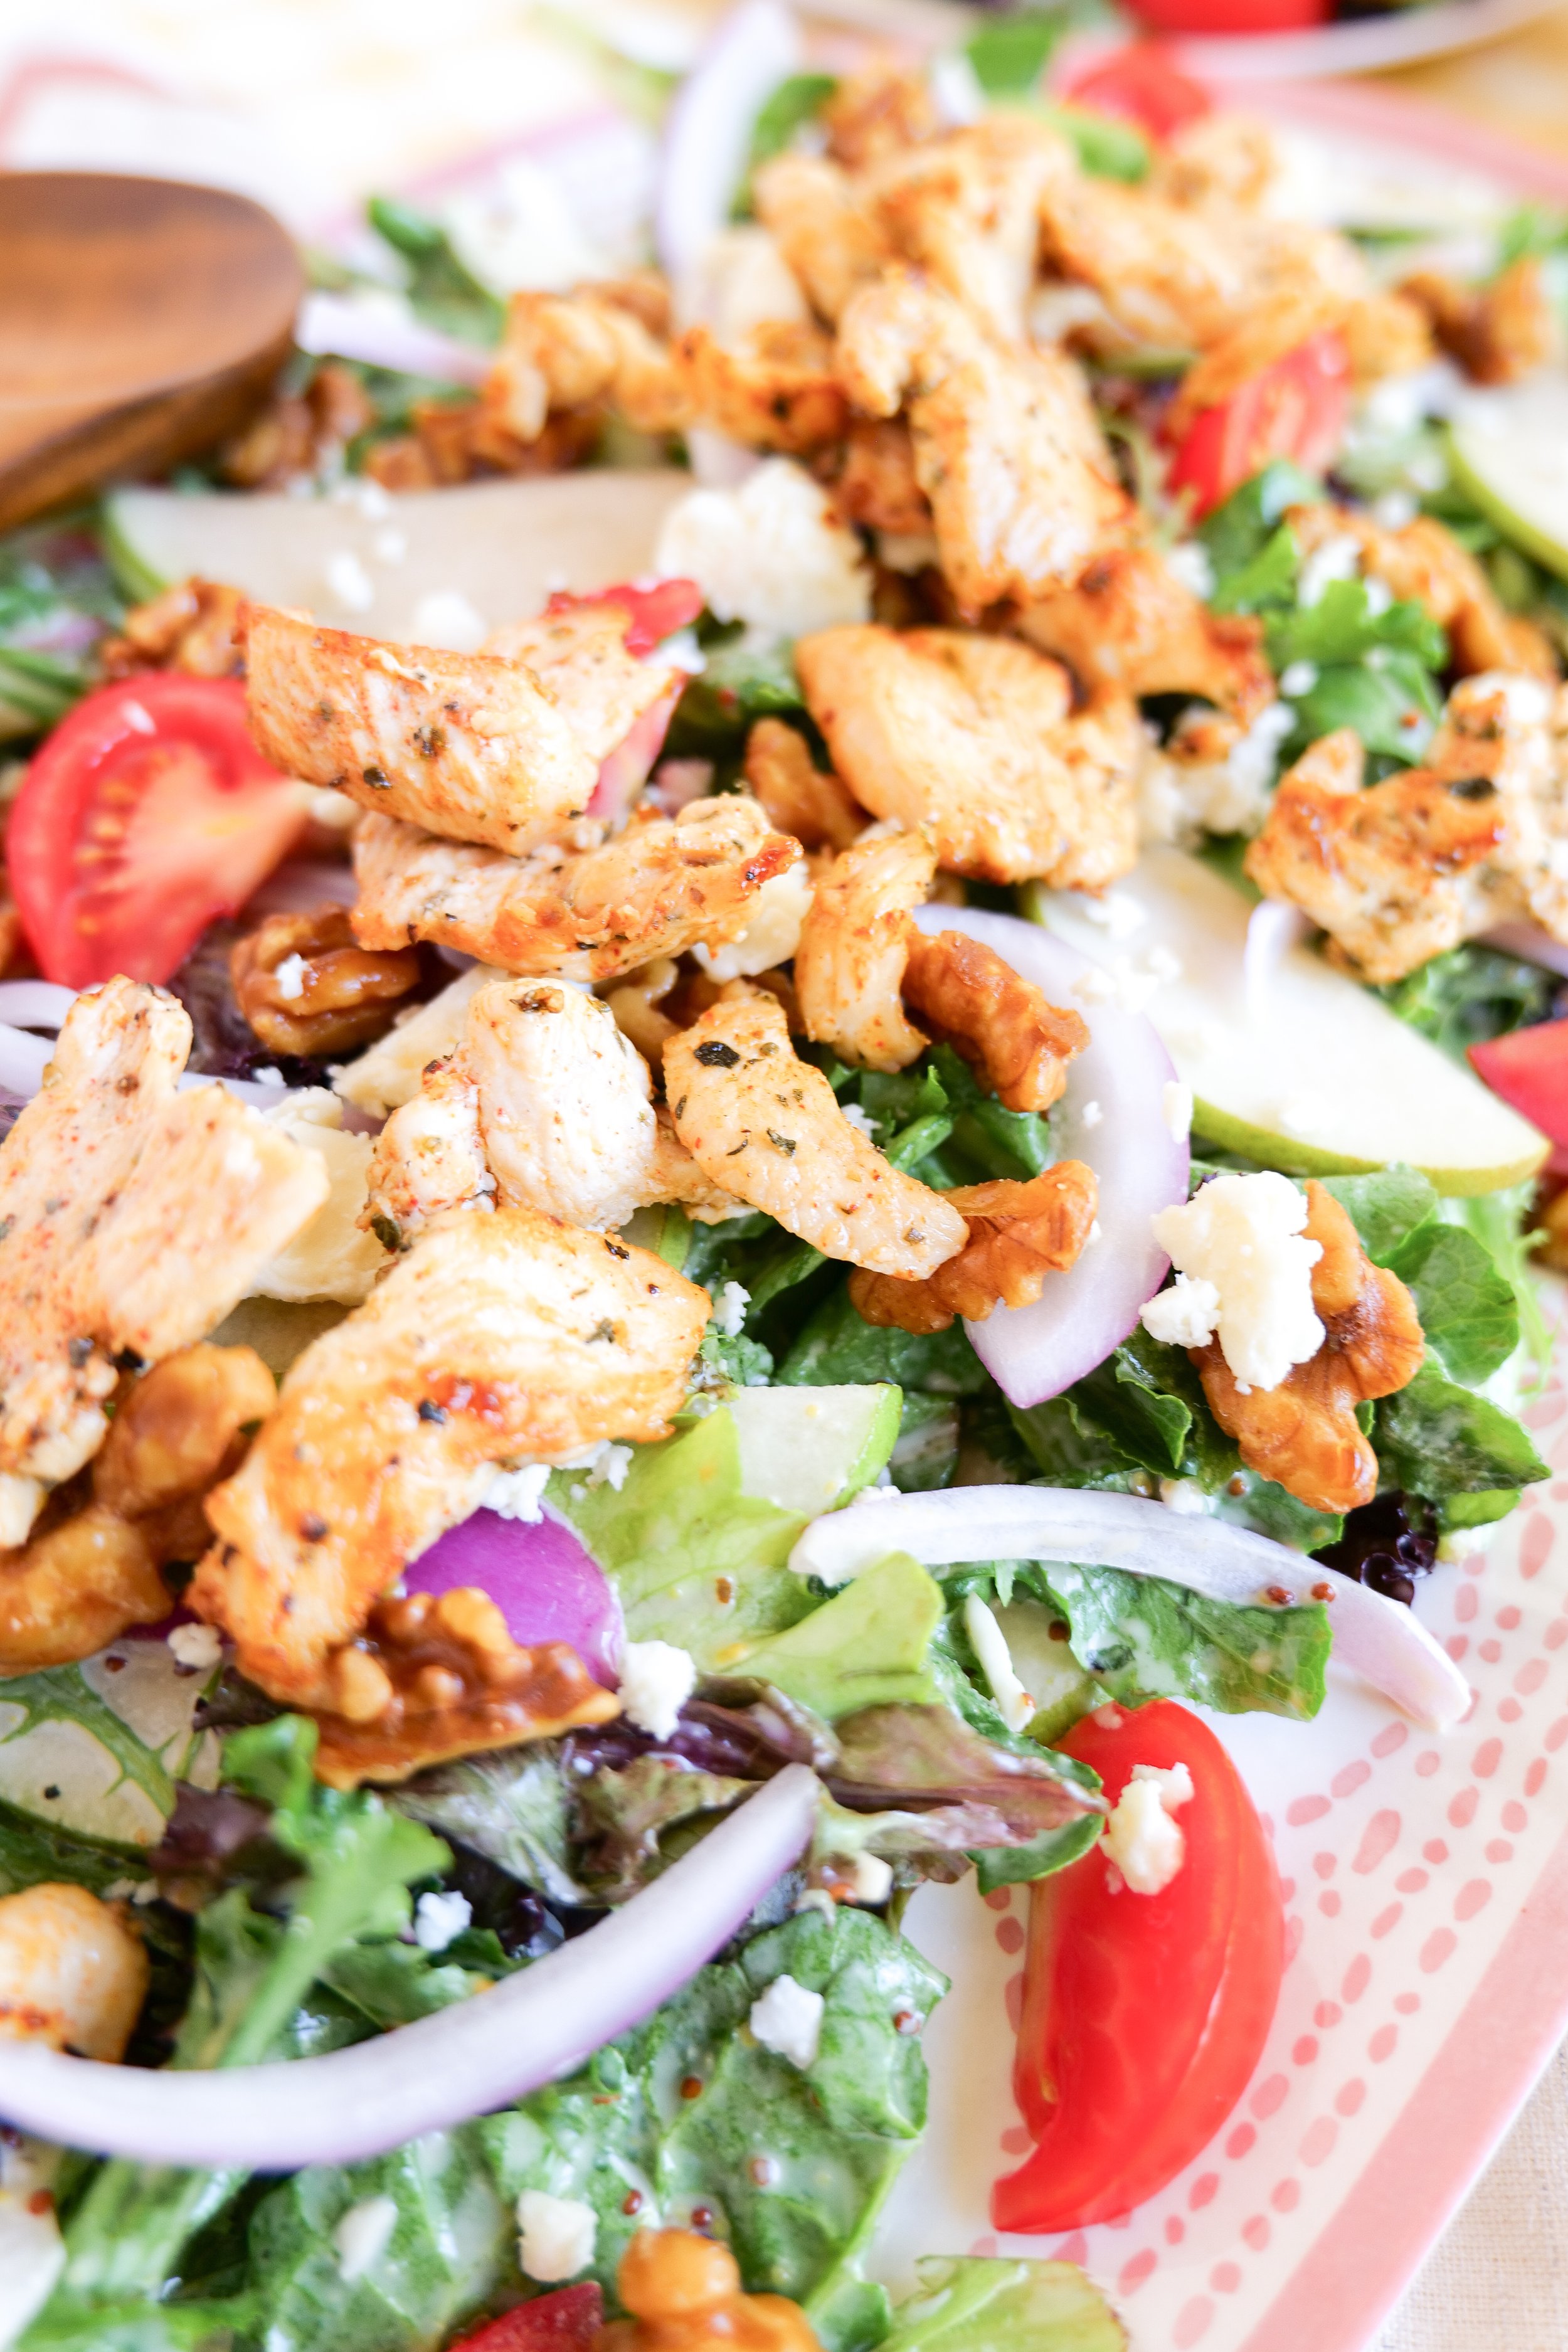
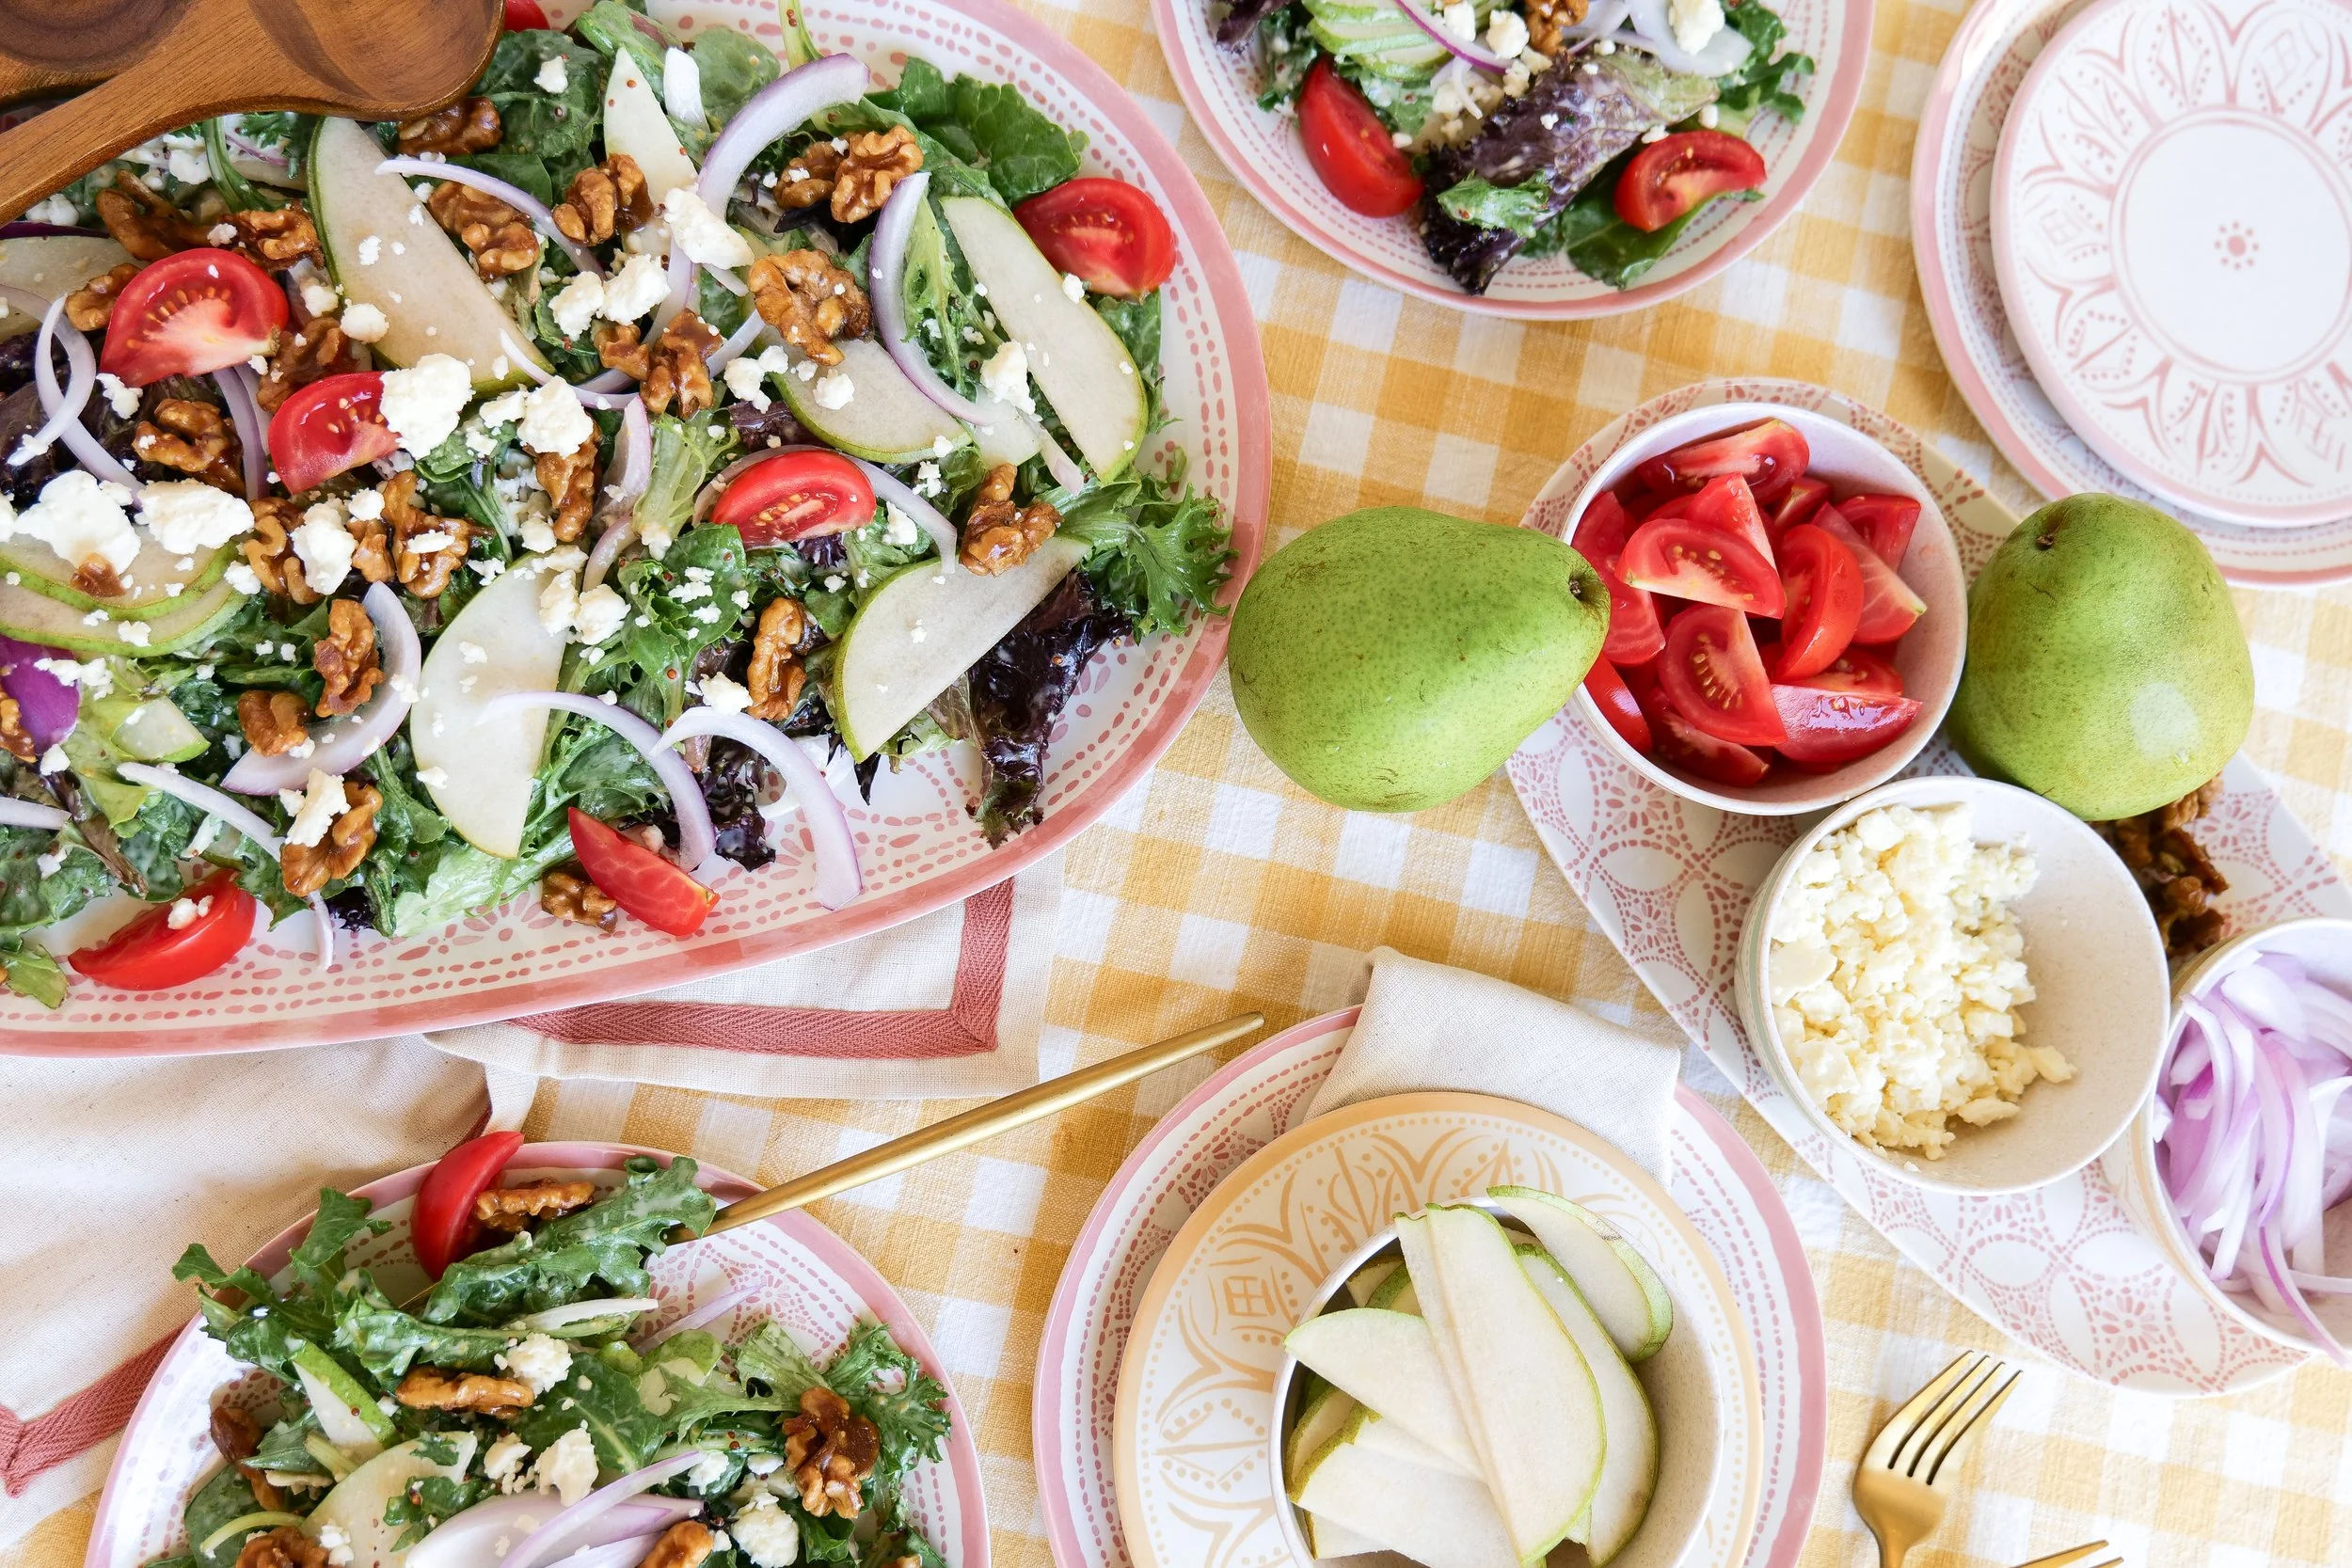
The classic chicken salad embodies a harmony of flavors. The tender chicken paired with mayo, accentuated by the crunch of fruit and/or vegetables and the sharpness of the onion, is what makes this dish a perennial favorite. Crafting this sandwich is a no-fuss endeavor, which resonates with the busy lives we lead.

Got Leftovers?

Transforming leftovers into a delectable chicken salad sandwich is a stroke of genius in the kitchen. It's a culinary rerun that can be as thrilling as the original meal. Whether packing it for lunch or enjoying a quick dinner, this sandwich is versatile, taking on a different character with every adaptation. Enhance the texture by throwing in some nuts, like pecans or sliced almonds. Mix in cranberries or raisins to balance the savoriness with a touch of sweetness. A squirt of lemon juice or a sprinkle of paprika can elevate the sandwich's flavor profile. Remember, with a touch of creativity, you can resurrect yesterday's leftovers into today's scrumptious treat. Be sure to put leftovers in an airtight container and store them in the refrigerator for up to four days. This is the blueprint for a lunch staple that never fails to delight, validating its status as an all-time favorite.

Is Chicken Salad Healthy?

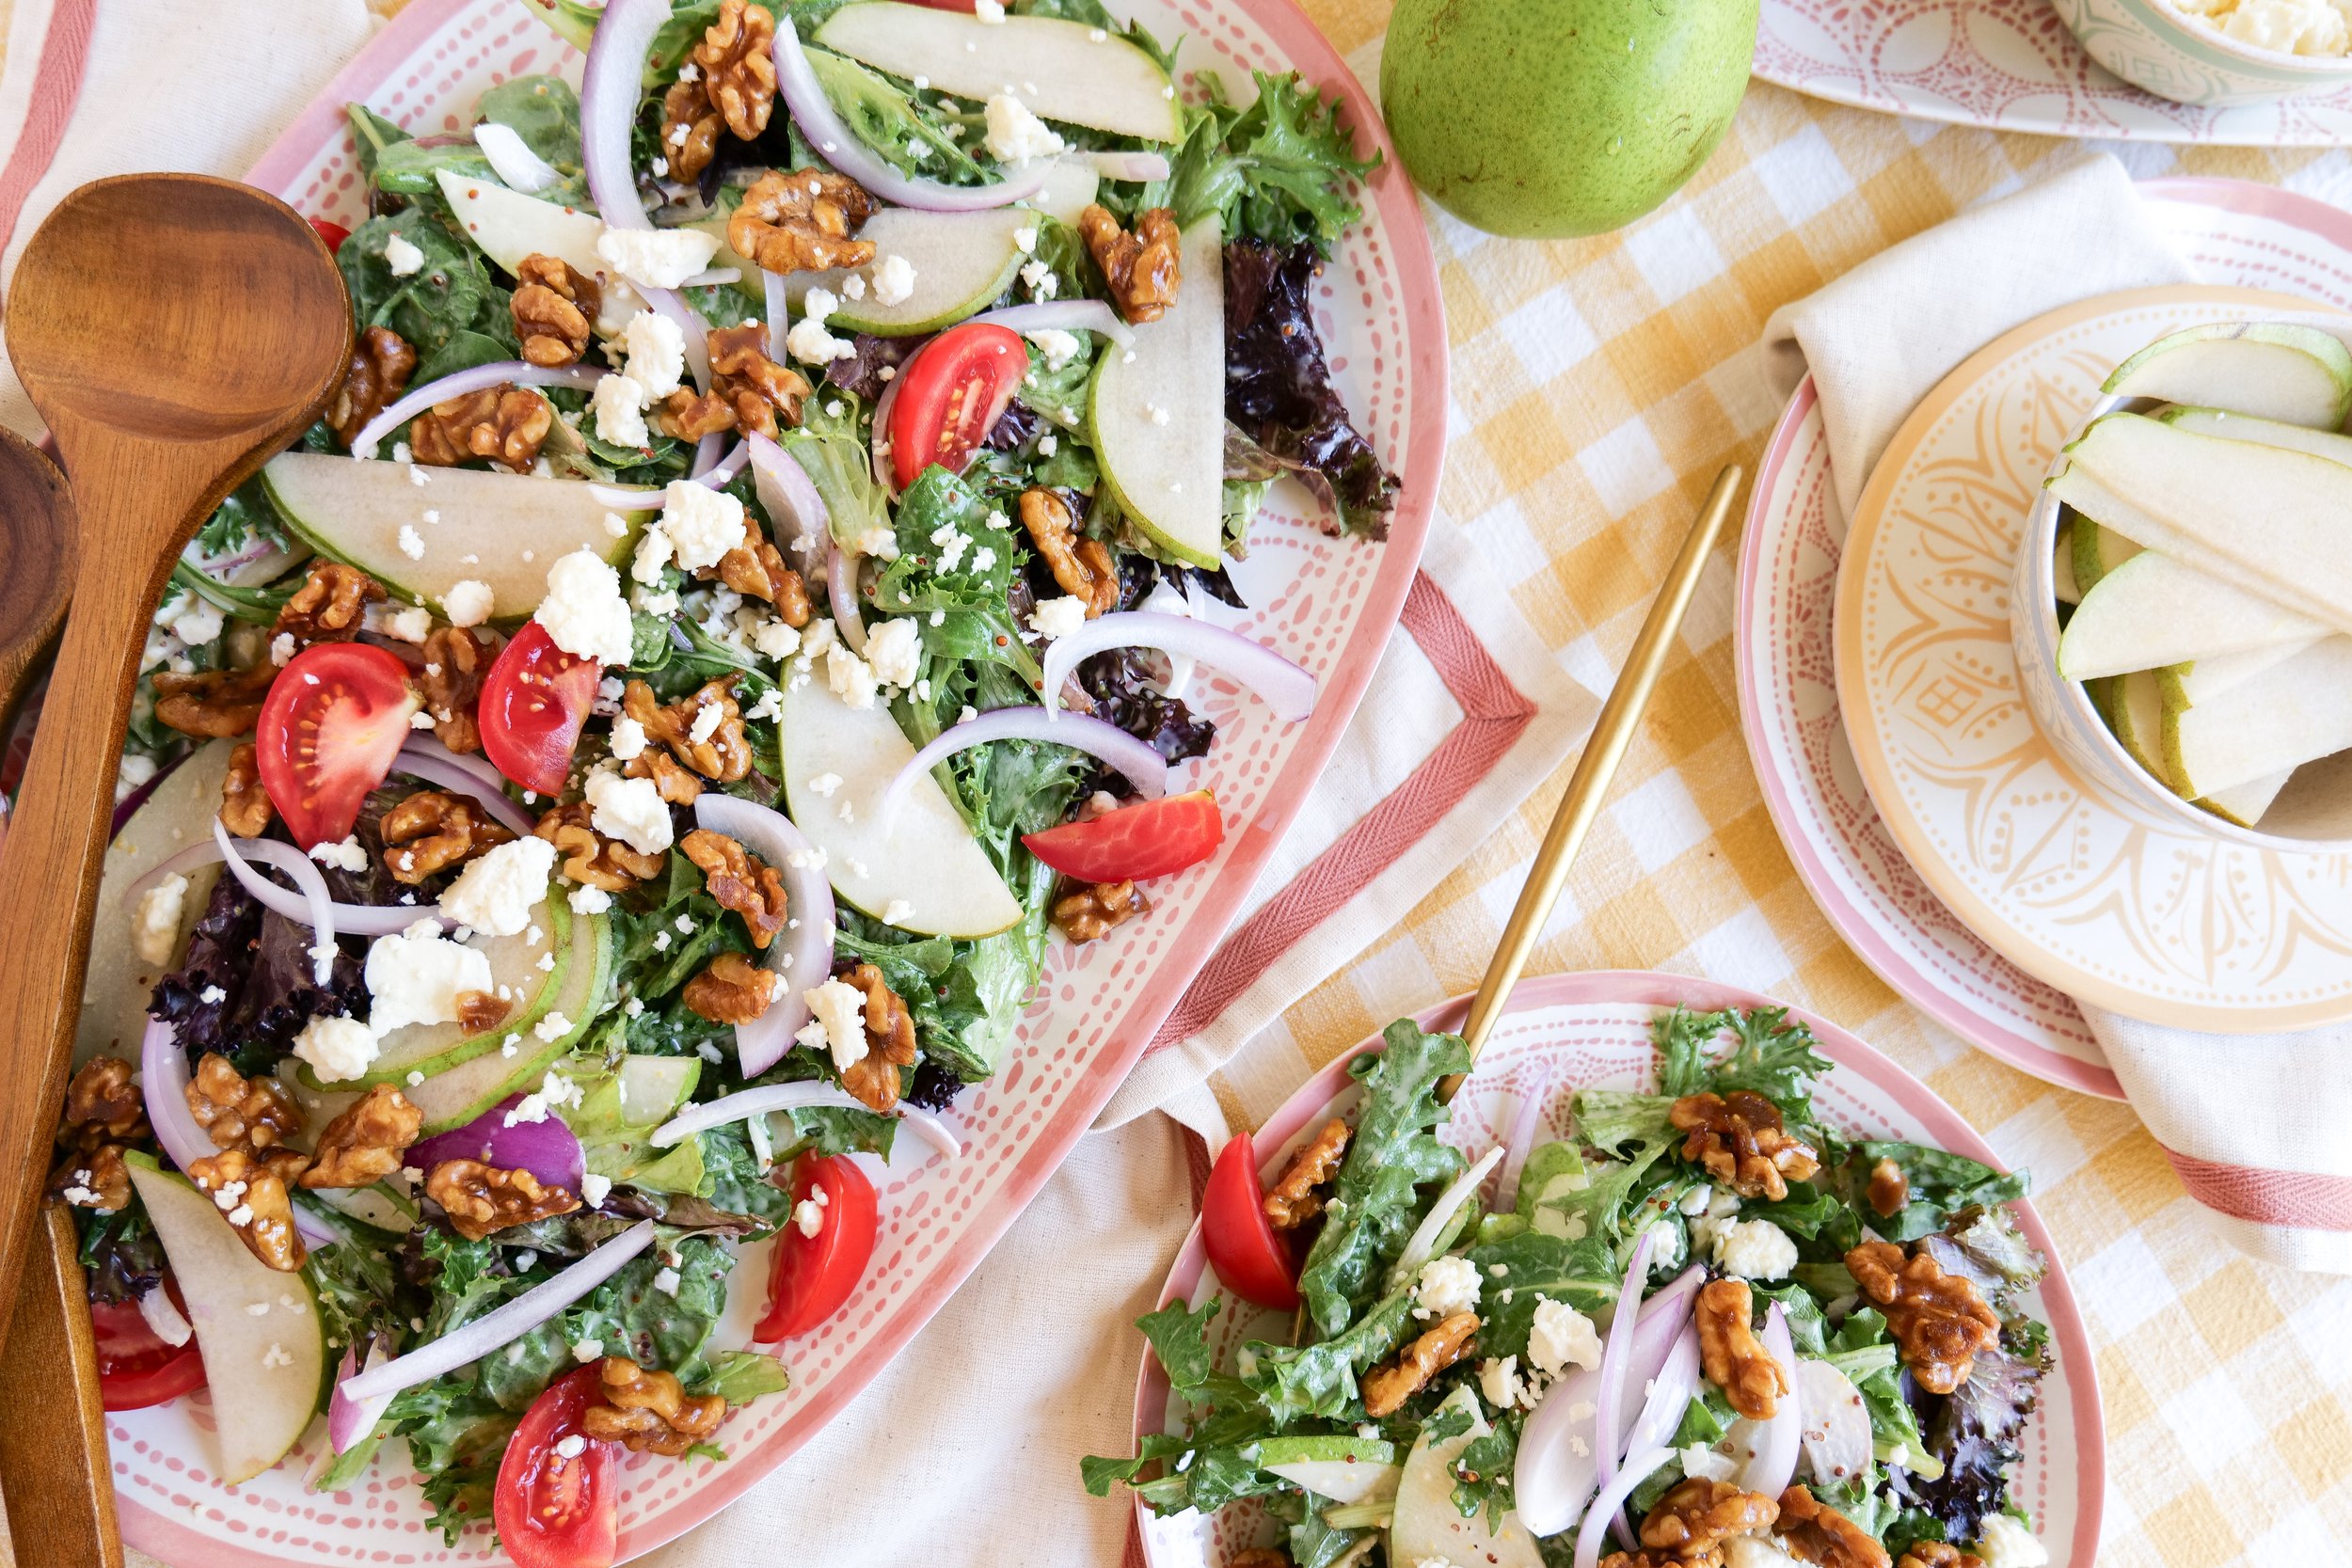
Approaching the notion of a hearty chicken salad sandwich from a wellness perspective, it’s clear that this dish can indeed be a healthy choice. You can substitute using lean chicken meat to reduce fat content while maintaining high protein. Integrate a bounty of diced veggies like bell peppers, cucumbers, and tomatoes for added nutrients and fiber. Consider swapping out traditional mayo for healthier alternatives like Greek yogurt or avocado. In terms of bread options, you can opt for many varieties, such as whole-grain bread to serve on or use as a salad topper on top of lettuce. Wrap your chicken salad in dark green lettuce leaves for a grain-free twist. Never be afraid to experiment with this recipe and use what you have on hand as well. It's a simple and delicious meal that you'll never be disappointed with. A thoughtful assembly of ingredients can easily steer a chicken salad sandwich into the realm of nutritious dining.

Ingredients

5 cups chopped or shredded chicken

1/2 cup sliced almonds

1/2 cup red grapes, quartered

1/2 cup granny smith apples cut into 1/2 inch small pieces

1-1/4 cup mayonnaise

1 tablespoon homemade ranch seasoning

1/4 cup chopped red onion

1 tablespoon lemon juice

8 croissants, or other bread for sandwiches

Directions

1. Cook chicken, or as a substitute, you can do a rotisserie or slow cooker chicken minus the skin. Shred or chop and add to a large bowl, let cool.

2. In a small bowl whisk together mayonnaise, ranch seasoning and lemon juice. Add to chicken with almonds, red grapes, apples and red onion. Fold together.

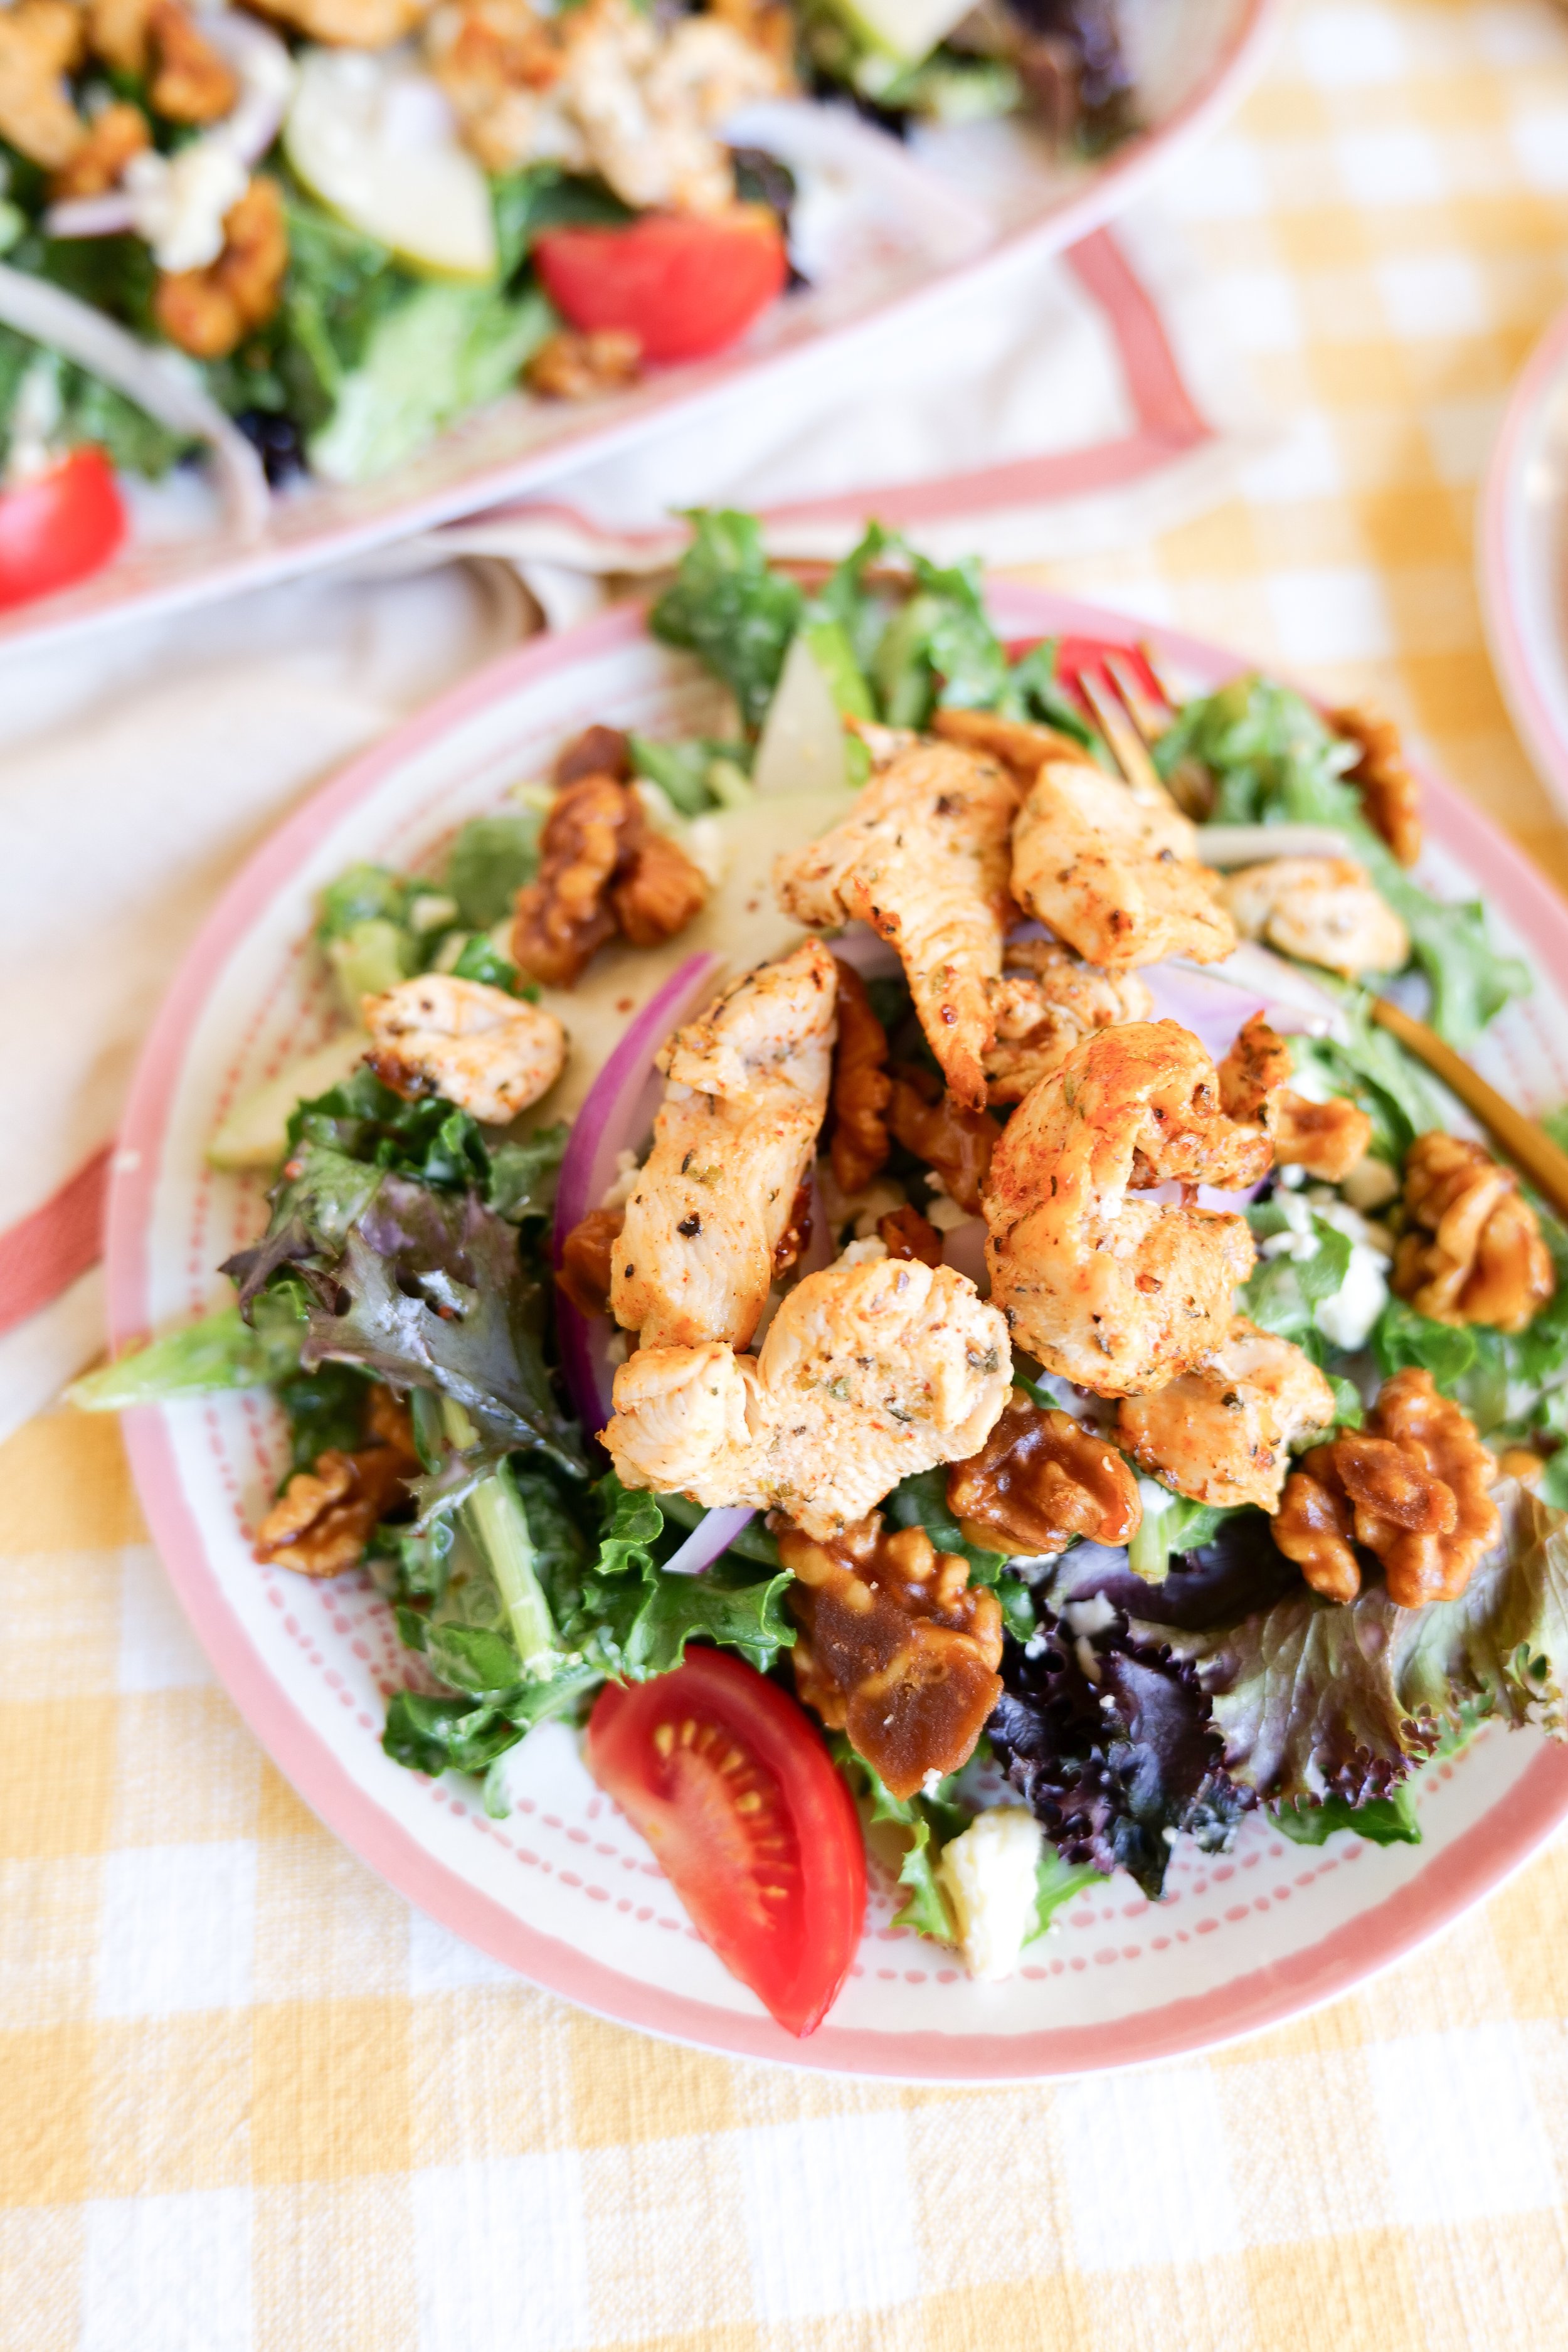
3. You can serve this as is or add in sandwiches with tomato and lettuce. Also is delicious as a salad on top of a bed of lettuce. Enjoy!

Other Delicious Recipes:

Delicious Buttery Italian Croissant Sandwich

The Perfect Match: Grilled Steak & Blue Cheese Salad with Grilled Corn paired with J. Lohr Estates Seven Oaks Cabernet Sauvignon

The Perfect Recipe for an Authentic Chicago-Style Dog

How to Make Delicious Lobster Sheet Pan Nachos At Home: A Step-by-Step Guide

Deliciously Warm Your Soul: Guide to Creamy Corn Chowder Soup

Welcome to the cozy corner of culinary delights, where today we're stirring up a pot of pure comfortβ€”Creamy Corn Chowder Soup. As the seasons change and a chill begins to whisper through the air, there's nothing quite like hugging a warm bowl of this velvety soup to soothe your soul and satisfy your taste buds. Infused with the natural sweetness of corn, enriched with a velvety broth, and accented with a symphony of delicate herbs and spices, this chowder is a harmonious blend designed to bring warmth and full-bodied flavor to your table. Whether you’re looking for a hearty meal to wind down a busy day or a lavish way to impress your guests, our Creamy Corn Chowder Soup is set to become a beloved recipe that transcends the seasons. Join us as we delve into the art of creating this comforting classic that promises to be much more than just a dishβ€”it's a bowlful of home.

When Corn is Not In Season

Creamy Corn Chowder Soup is a classic comfort food that is both easy to prepare and delicious to eat. Corn is of course the star ingredient of this dish, but when it’s not in season, there are some great substitutes. Frozen corn can be used in place of fresh corn, or you can use canned corn if you prefer. If you want to add some veggies to the soup, you can include carrots, celery, and potatoes for a delicious and nutritious meal. To make the soup even more flavorful, you can season it with garlic, onion, and herbs. Then, add some cream, milk, and cheese to make it creamy and delicious. This soup is sure to be a hit with the whole family. Enjoy!

Cutting Corn off the Cob

Making creamy corn chowder soup is a simple and delicious way to enjoy corn any time of the year. To get started, begin by cutting the corn off the cob. It's important to use a sharp knife and to hold the cob firmly in one hand while you use the other to hold the knife. Using a cutting board will help to catch the kernels as you cut them. Be sure to cut close to the cob, but not too deeply into it. Once all the kernels are cut, you can scrape the cob with the back of the knife to get all the juice and flavor from it. Then the kernels can be added to the soup, where they will cook and become tender. Adding the kernels to the soup will give it a delicious and creamy texture, making it the perfect meal to enjoy in the summertime as well as in the winter.

What Potatoes to Use

Creamy Corn Chowder Soup is a classic, comforting dish perfect for any time of year. The key to a great pot of chowder is the potatoes, as they provide a creamy texture and flavor. Yukon Gold potatoes are the most popular choice for this soup, as they have a buttery flavor and creamy texture. If you’re looking for a slightly firmer texture, Russet potatoes are also a great option. Red potatoes add a slightly sweeter, earthier flavor to the dish, while Fingerling potatoes are the perfect size for a chunky soup. For a quicker cooking time, try using small baby potatoes because they will break down faster and give the soup a thicker texture. To maximize flavor, sautΓ© the potatoes in butter before adding them to the soup. With the right potatoes, you can easily create the perfect bowl of creamy corn chowder soup.

Reheating Left Overs

Creamy Corn Chowder Soup is a comforting and delicious meal that can easily be reheated and enjoyed as leftovers. To reheat the soup, simply place it in a saucepan over low heat on the stovetop and stir occasionally to keep it from sticking to the bottom of the pan. To freeze the soup, let it cool completely before transferring it into an airtight container or a freezer-safe bag. When you’re ready to enjoy it, simply thaw it overnight in the refrigerator and reheat it on the stovetop or in the microwave. With its delicious combination of flavors, it’s sure to become a favorite in your household. Try this creamy corn chowder soup recipe today and see for yourself why it’s so popular.

What to Serve with Corn Chowder

Creamy Corn Chowder Soup is a delicious and hearty soup that can be paired with a variety of sides. To start, you can’t go wrong with a side of garlic bread to dip in the soup. Buttery crackers are also a great addition to the soup and can be topped with grated cheese or spices. A light and crunchy garden salad is a great contrast to the creaminess of the soup, and adding grilled cheese sandwiches or cornbread is a great way to make an entire meal out of the soup.

If you’re looking for some heartier sides options such as grilled shrimp, fried pickles, fried green tomatoes, potato skins, and biscuits and gravy are all great choices. The fried pickles and fried green tomatoes provide a crunchy texture, while the potato skins & biscuits and gravy are great for adding a bit of comfort food flavor. No matter what sides you choose to serve with your Creamy Corn Chowder Soup, you’re guaranteed to have a delicious and comforting meal.

Ingredients

6 slices of thick-cut bacon

3 cloves minced garlic

1 yellow onion

6 red potatoes, cut into 1-inch cubes

6 ears of sweet corn, cut from cob

1 teaspoon sea salt

1/2 teaspoon fresh cracked pepper

1 teaspoon parsley

1 teaspoon thyme

1/2 tsp paprika

2 tablespoons flour

5 cups vegetable broth

1 cup half and half

Instructions

1. Add bacon to Dutch oven over medium heat. Let cook completely and remove from Dutch oven. Add in minced garlic and cook until fragrant, around 30 seconds.

2. Once garlic is done add in chopped onion and sautee until softened, around 4-5 minutes. Add in red potatoes and corn. Let bacon grease coat and cook for a few minutes to let oils come together.

3. Add into dutch oven sea salt, pepper, parsley, thyme, paprika and flour. Coat onion, potatoes and corn evenly.

4. Pour in broth and using a wooden spoon break up any bits that have stuck to the bottom of the pan. Let come to a simmer. Cover and turn heat to medium-low. Let cook for 30 minutes or until potatoes are softened and a fork goes through easily.

5. Take out 3 cups of soup and add to blender. Blend to a creamy consistency and pour back into Dutch Oven. This will give the chowder-like consistency.

6. Turn off the heat and add back in crumbled bacon, leaving a couple of slices out to top each bowl. Pour in heavy cream and stir together. Pour into bowls, and top with bacon bits and fresh thyme. Serve and Enjoy!

Other Delicious Soup Favorites:

Deliciously Creamy Basil Tomato Soup: An Easy and Delicious Recipe

Bring the Heat with this Deliciously Spicy Tortellini Soup

An Alluring Combination: French Onion & Shallot Soup Recipe

Mom's Favorite Minestrone Soup Recipe

Italian Sausage, Potato & Kale Soup

Easy & Flavorful Fiesta in a Bowl: Ultimate Slow Cooker Chicken Tortilla Soup Recipe!

Looking for a cozy and flavorful meal that practically cooks itself? Dive into the rich aromas and hearty warmth of a classic Mexican-inspired dish with our Slow Cooker Tortilla Soup recipe. This beloved soup combines the ease of a slow cooker with a symphony of spices, tender chicken, and delectable vegetables, all simmered to perfection. Whether you're longing for the comfort of a home-cooked meal after a long day, seeking a simple yet satisfying dish to share with family and friends, or just in need of a healthy, no-fuss dinner option, this tortilla soup promises to deliver bold flavors with minimal effort. So grab your slow cooker, and let's embark on a culinary journey that will bring the essence of a fiesta right to your table with every spoonful.

Slow cooker tortilla soup is an easy and delicious meal that the whole family can enjoy. This crock pot version of a classic soup calls for simple ingredients such as tomatoes, chicken broth, and spices, that are cooked together to create a flavorful and hearty meal. To make it even more delicious, you can add any of your favorite toppings such as avocado, sour cream, cheese, and tortilla chips. The great thing about this slow cooker soup recipe is that it can be customized to suit your own personal tastes and dietary preferences. Whether you like it spicy or mild, this recipe is sure to be a hit with the entire family. With just a few minutes of prep time and minimal ingredients, you can have a delicious and comforting meal that is ready when you are.

My Favorite Toppings for Crock Pot Chicken Tortilla Soup

Slow-cooker tortilla soup is a delicious and easy-to-make dish that is perfect for any occasion. This hearty soup is full of flavor and requires minimal effort. All you need is a slow cooker and some fresh ingredients like cilantro, lime wedges, avocado slices, shredded cheese, crushed tortilla chips, sliced jalapenos, sour cream, chopped onions, green onions and diced tomatoes. The slow cooker helps to infuse the flavors of the ingredients, making the soup savory and delicious. To make the dish, simply add all the ingredients to the slow cooker and cook on low for four to six hours. Once the cooking process is done, the soup is ready to be served.

Can I Freeze Any Leftovers?

This meal is perfect for busy weeknights, and you can even freeze leftovers for later on when you need a meal in a pinch. To freeze the soup, let it cool completely before transferring it into an airtight container or a freezer-safe bag. When you’re ready to enjoy it, simply thaw it overnight in the refrigerator and reheat it on the stovetop or in the microwave. With its delicious combination of flavors, it’s sure to become a favorite in your household. Try this slow cooker tortilla soup recipe today and see for yourself why it’s so popular.

Tips for making the Tortilla Soup More Spicy

Slow cooker tortilla soup is a quick and easy dish that is sure to please the whole family. With just a few simple ingredients and a slow cooker, you can have a delicious bowl of soup on the table in no time. To give the soup a subtle kick, add a pinch of cayenne pepper to the slow cooker before cooking. For a more intense spice, add more chopped jalapeΓ±os to the slow cooker. Substitute vegetable broth with chicken broth to provide a smoky flavor. To top off the soup, add a dollop of sour cream and chopped cilantro for a cool, creamy contrast to the spice. For an extra zing, sprinkle chili powder on top of the soup. With just a few simple steps, you can make a delicious slow-cooker tortilla soup that the whole family will love.

Ingredients

4 Skinless Chicken Breast

2 tablespoon salted butter

2 garlic cloves, minced

1 or 2 teaspoons olive oil

1 yellow onion

1 jalapeno, plus more for topping

1 tablespoon taco seasoning

1 - 15oz can of corn

1 - 15.5 oz can black beans

1 - 14.5 oz can diced tomatoes, with juice

1 - 15 oz can enchilada sauce (as spicy as you want)

4 cup vegetable soup

Toppings

jalapeno slices

avocado

tortilla chips

limes

sour cream

cheddar cheese or Monterey jack

Directions

1. Using your 360 slow cooker add the pot top to your countertop stove on medium heat. Once the pot is heated add butter and melt. Layer chicken searing on both sides for 5 minutes. Remove chicken to a clean plate and add in garlic. Add olive oil if needed and saute until fragrant. Add in onion, jalapeno, and taco seasoning. Let saute for 2-3 minutes. Pour in broth and scrape up any brown bit on the bottom of the pan.

2. Place the Slow cooker pot to the 360 base, on medium-high heat. Add back in chicken and the rest of the ingredients; corn, beans, diced tomatoes, and red enchilada sauce.

3. Place the slow cooker top on and let cook for 4-5 hours. Once ready shred chicken in pot and serve with favorite toppings. Enjoy!

Other Delicious Soup Favorites:

Deliciously Creamy Basil Tomato Soup: An Easy and Delicious Recipe

Bring the Heat with this Deliciously Spicy Tortellini Soup

An Alluring Combination: French Onion & Shallot Soup Recipe

Mom's Favorite Minestrone Soup Recipe

Italian Sausage, Potato & Kale Soup

Delicious One-Pot Italian Lasagna Soup for Busy Weeknights!

Enjoy Delicious Stuffed Italian Sausage Pasta Shells Tonight!

If you're looking for a deliciously hearty dinner idea, you have come to the right place! Italian Sausage Stuffed Pasta Shells are the perfect meal for any occasion. Not only are these stuffed shells incredibly flavorful, but they are also very easy to make. The combination of tasty Italian sausage, creamy ricotta, and gooey mozzarella cheese will make this dish a hit at your table!

Ground Beef Versus Ground Sausage

Ground beef is the perfect addition to the dish as it adds a hearty texture and flavor. Ground sausage is a more concentrated flavor and provides more spices and herbs, although it is a bit higher in fat and calories than ground beef in some cases. Ground beef is also a great source of protein and helps to make the dish more filling. For added depth of flavor, ground sausage adds a rich, smoky flavor. It is easy to substitute ground beef for ground sausage, as it is a less expensive alternative. Ground beef still provides all of the protein and texture of ground sausage, as well as a delicious flavor. No matter what protein you decide to add the result is sure to be a delicious, hearty dish that is sure to be a hit with the whole family.

Serving and Storage

Italian Sausage Stuffed Pasta Shells are a delicious and hearty meal that can be enjoyed for any dinner or lunch. This easy-to-make dish is made by stuffing pasta shells with Italian sausage, cheese, and vegetables, and then baking it in the oven until it’s golden and bubbly. For a flavorful and beautiful presentation, this easy Italian dish can be garnished with extra parmesan cheese, parsley, and/or red pepper flakes.

The Italian Sausage Stuffed Pasta Shells should be served warm. Any leftovers can be stored in an airtight container in the refrigerator and reheated in the oven or microwave. You can also freeze the Italian Sausage Stuffed Shells for up to 3 months. To do this, place the stuffed pasta shells in a single layer on a baking sheet and freeze until solid. Then, place them in a freezer-safe container or bag and store them in the freezer. When ready to enjoy, thaw the Italian Sausage Stuffed Pasta Shells in the refrigerator overnight before reheating.

Ingredients

1 package of jumbo pasta shells

2 tbsp butter

2 cloves of garlic, minced

1/2 yellow onion diced

1 pound of Italian sausage

3 cups ricotta cheese

2 cups of shredded mozzarella cheese

1/2 cup of grated parmesan cheese

1 large egg

1 tsp Italian seasoning

1 jar of marinara sauce

Fresh basil for garnish

Instructions

1. Start by preheating the oven to 350Β°F (176Β°C).

2. Bring a large pot of water to boil and cook the pasta shells until al dente.

3. While shells are boiling, take a large skillet and melt butter. Add in garlic and onion and cook until fragrant and the onion is opaque and the sausage is cooked through. Add half the pasta sauce.

3. In another bowl mix together ricotta, parmesan cheese, egg, Italian seasoning, salt and pepper. Add ricotta mixture to the sausage mixture.

4. Next, spoon the sausage mixture into the cooked (and drained) pasta shells and place them in a greased baking dish.

5. Pour the remainder of the pasta sauce over top of shells until evenly saturated and sprinkle the mozzarella cheese on top of the pasta shells.

6. Bake in the preheated oven for 20-25 minutes, or until the cheese is melted and bubbly. Serve warm and enjoy!

This Italian Sausage Stuffed Pasta Shells dish combines the flavors of Italian sausage, garlic, onion, bell pepper, tomato sauce, cream cheese, and Parmesan cheese. It's an easy and delicious meal that is sure to be a hit with the whole family. The pasta shells are stuffed with the sausage mixture and topped with mozzarella cheese. The end result is an ooey-gooey hearty and cheesy dish that is sure to satisfy any craving for Italian comfort food.

For a delicious Italian dinner, try these Italian Sausage Stuffed Pasta Shells. This easy and flavorful dish is sure to become a family favorite. With just a few simple ingredients, you can have a delicious meal on the table in no time. Preheat the oven, cook the pasta shells, and stuff with the sausage mixture. Top with cheese and bake until the cheese is melted and bubbly. Serve warm with a side salad and warm garlic bread for a complete meal and enjoy!

Recipe Shortcuts

Italian Sausage Stuffed Pasta Shells are a delicious and easy meal that you can make in no time. The pre-cooked Italian sausage makes this recipe a breeze, as you don't have to worry about cooking it before adding it to the dish. To save even more time, you can buy a jar of your favorite store-bought tomato sauce, instead of making your own. Ricotta cheese adds a creamy texture to the dish without too much extra effort. To top it all off, you can use pre-shredded cheese and pre-cooked pasta shells to make this dish come together quickly and easily.

Other Pasta Dishes You Will Love:

The Ultimate Guide to Making A Delicious White Pasta Sauce

Garlic Mushroom & Shrimp Pasta

Baked Burrata Pumpkin Ziti with Pork Sausage Recipe

Delicious, Nutritious Pear & Walnut Salad with Honey Mustard Dressing

This pear and walnut salad with honey mustard dressing is an easy and delicious salad to make. This is my take on one of my Mom and I's favorite local hometown restaurants. We've ordered a similar salad to this for lunch together more times than I can count. This salad is the perfect way to get your daily dose of greens and vitamins while still satisfying your sweet tooth. The combination of crunchy caramelized walnuts, sweet pears, and tangy honey mustard dressing make this salad an impressive yet simple dish to prepare. Plus, the ingredients are all easy to find and affordable. So, if you're looking for a flavorful and nutritious salad, look no further than this pear and walnut salad with honey mustard dressing. You can add some grilled chicken or salmon to the salad to make it a more complete and filling meal. This pear and walnut salad with honey mustard dressing is a great way to enjoy the flavors of Fall. Being full of nutrition-packed ingredients and delicious flavor combinations, this meal is sure to become a regular in your rotation, especially on those days when you're feeling like you need a healthier option.

Can I Use a Different Cheese or Nuts?

Of course! You don’t have to use feta cheese as I did, so you can experiment with different cheeses to create your favorite unique flavor. Consider using a sharp cheddar for a tangy kick, or a creamy goat cheese for a salty flavor. You can also try blue cheese or gorgonzola for a pungent flavor, or brie for a buttery taste. Have fun with it and find the cheese that best suits your salad. To top it off, a honey mustard dressing is a great way to bring all the flavors together.

Another substitution choice for this salad is changing out the nut that you use for that amazing crunch. I personally love the mix of walnuts and pears, however, you can use pecans or hazelnuts here as well.

What Type of Pear is Best?

Anjou pears are the perfect choice for a pear and walnut salad. This variety of pear is sweet and juicy, adding a delicious sweetness to the dish. Bosc pears are also a good option, as their firm texture and honey-like flavor bring a great depth to the salad. Bartlett pears are great for salads, as their mild sweetness will be balanced out nicely by the tartness of the dressing. Comice pears are a great choice as well, as their buttery texture and sweet flavor will perfectly complement the honey mustard dressing. Lastly, Seckel pears are the ideal choice for a pear and walnut salad, as their sweet flavor and crisp texture will provide a great contrast to the crunchy walnuts. With such an array of pears to choose from, you're sure to create an amazing salad that everyone will love!

How to tell when pears are ripe?

First, look for pears that are slightly soft to the touch and avoid pears that are firm and have green tints. The best pears for this dish will have a rich yellow or golden color. To test for ripeness, tap the pear lightly with your finger and if it yields to pressure then it is ripe. Additionally, smell the pear near the stem; if it has a sweet, fragrant smell, it is ripe. Lastly, test for ripeness by gently pressing the neck of the pear with your thumb; if it yields slightly, the pear is ripe. With these tips, you can easily find the perfect pear to make your pear & walnut salad with honey mustard dressing.

Ingredients

10 ounces of mixed greens

1/2 cup caramelized walnuts

1/3 cup thinly sliced red onions

1 tomato sliced

1/2 cup feta cheese

2 thinly sliced pears

Dressing

1 teaspoon apple cider vinegar

2 tablespoons raw honey

2 tablespoons Dijon mustard

1/2 cup mayonnaise or extra virgin olive oil

1/4 tsp kosher salt

1/4 tsp pepper

Instructions

1. Rinse and pat dry all fruit and vegetables. Sliced pears thinly, onions into strips and tomatoes into thin wedges.

2. Add all dressing ingredients into a mixer or mason jar and shake until smooth. This dressing can be premade in an airtight container in the refrigerator up to 5 days ahead of time.

3. Now it's time to assemble the pear and walnut salad with honey mustard. Add half the onions, half the feta cheese, and half of the thinly sliced pears. Pour dressing over top and mix up! Dish out salad in a single layer onto plates and then layer the remainder of the pears and onions on top. Sprinkle feta cheese and add tomato wedges on the side and serve!

This salad is also a great way to get a healthy dose of fiber, vitamins, and minerals. Pears are a great source of fiber, walnuts are high in antioxidants, and honey mustard dressing adds a nice touch of sweetness. Plus, the walnuts provide a nice crunchy texture to the salad. Whether you're having this as a shareable appetizer, a light lunch or a full-course dinner, this salad is a great way to add a variety of flavors and textures to your meal. It's sure to be a hit with everyone at the table! So why not give it a try and see for yourself just how delicious this Honey Mustard, Pear and Walnut Salad can be?

Other Salad Recipes You Will Love:

How to Make the Perfect Pear and Pomegranate Arugula Salad

Shaved Brussel Sprout Salad with Apples, Goat Cheese & Candied Pecans

The Perfect Summer Meal: Grilled Chicken, Mexican Street Corn & Cucumber Salad

A Refreshing and Delicious Melon Burrata Salad Recipe

Delicious One-Pot Italian Lasagna Soup for Busy Weeknights!

Imagine the rich, comforting flavors of a classic Italian lasagna mingling in a warm, savory broth, bringing all the delight of the traditional oven-baked favorite in a fraction of the time. Our One-Pot Italian Lasagna Soup is the perfect way to indulge in the layers of cheesy goodness, hearty meat, and herb-infused tomato sauce without lengthy preparation and baking time. This deconstructed twist on the beloved dish transforms it into an easy-to-make, cozy and heartwarming soup that's ideal for cold nights, busy weeknights, casual gatherings, or simply when the craving for Italian cuisine strikes. Grab your spoon and your appetite as we dive into the bubbling pot of this irresistible Italian Lasagna Soup that promises to please your palate and simplify your dinner routine.

This delicious and comforting soup is quick and easy to make and can all be done in 30 minutes or less. The convenient part of preparing this meal is that you can find all the ingredients you need in most pantries. It is also extremely versatile and can be easily adapted to your taste. It is full of all the flavors of lasagna which makes it the perfect way to use up any leftovers you have in the fridge. Furthermore, it is a great way to impress your friends and family with a hearty and flavorful dish. So, the next time you are looking for a hearty and comforting meal, try out this delicious One-Pot Italian Lasagna Soup. You won't be disappointed!

Lasagna Soup Variations

A few ways you can easily make substitutions to fit your liking of this soup are as follows. For an extra kick of spice, try adding some spicy Italian sausage to the soup. If you're looking for a heartier soup, stir in some cooked ground beef. Diced carrots and celery add a boost of healthy vegetables to the soup. Crushed red pepper flakes or bell peppers provide a nice spicy touch. For a gluten-free version, use gluten-free lasagna noodles or zucchini noodles. For a smoky flavor, use fire-roasted tomatoes. For a less creamy version, take out some or all of the heavy cream. For a vegan version, use vegan cheese and remove pork sausage for a flavorful and meat-free meal. Finally, to add protein and texture, add a can of white beans. One Pot Italian Lasagna Soup is an easy and delicious meal that is perfect for busy weeknights. With its simple ingredients and hearty flavors, this soup is sure to become a family favorite.

What Is The Best Pot For Soup

For those looking for a simple and flavorful meal with minimal effort, One-Pot Italian Lasagna Soup is the perfect dish. One important key to a successful soup is using the right pot. When it comes to making this soup, my recommendation for the best pot to use is a Dutch oven. A Dutch oven is a heavy-bottomed pot with a tight-fitting lid, ideal for evenly distributing the heat which allows the flavors to meld together perfectly. It also has a large enough capacity to accommodate all of the ingredients, making it a great choice for a one-pot meal. Additionally, Dutch ovens are easy to clean and can be used for a variety of other recipes. So, if you’re looking for a delicious and effortless meal, One-Pot Italian Lasagna Soup is the perfect choice.

Lasagna Soup Recipe Easy storage

This soup is packed with flavor from Italian sausage, tomatoes, herbs, and cheese. You can also use any leftover meats or vegetables that you have on hand to make the dish even more delicious. The recipe is simple to make and can be served with a side of crusty bread or Caesar salad for a complete meal. This Italian-inspired meal is easy to prepare and can be stored in the fridge for up to four days. It is a great way to use up leftovers and make a delicious dinner in no time. Lasagna soup makes a great main course or side dish, and can also be made ahead of time and frozen for up to three months. To freeze, let the soup cool completely and then transfer it to an airtight container or freezer-safe bag. When ready to enjoy, thaw overnight in the refrigerator and then heat it up in a pot on the stovetop. If you're looking for a delicious and easy meal that is sure to please even the pickiest of eaters, look no further than One-Pot Lasagna Soup. The combination of savory Italian flavors and easy prep make this soup a family favorite. Make a batch today and enjoy all the flavors of lasagna without the work.

Can I use a different kind of pasta if I don't have lasagna noodles?

To make this dish even more interesting, you can switch up the traditional lasagna noodles for any kind of pasta of your choice. Penne, shells, macaroni, and other smaller-sized pasta can all be used for a unique and tasty twist. If you’re feeling creative, you can even mix and match different types of pasta for a one-of-a-kind lasagna soup. Just make sure to adjust the cooking time accordingly to make sure the pasta is cooked properly. With a few easy swaps, you can take your One-Pot Italian Lasagna Soup to the next level.

Is it possible to make this Italian Lasagna Soup Vegetarian?

One-Pot Italian Lasagna Soup is the perfect meal for anyone looking for an easy and delicious Italian dish. This hearty soup is made with a variety of delicious and nutritious ingredients such as ground beef, lasagna noodles, diced tomatoes, and cheese. It's also easy to customize to make it vegetarian if desired. Yes, it is possible to make this Italian Lasagna Soup vegetarian! Simply substitute the beef for a vegetarian option such as crumbled tofu, mushrooms, or extra vegetables. To add more flavor, consider adding garlic, Italian seasoning, and a bit of red pepper flakes. This will make the soup even more flavorful and satisfying. Vegetarian lasagna soup is a great dish for those who are trying to reduce their meat intake or follow a vegetarian diet. This One-Pot Italian Lasagna Soup is easy to make and is sure to please even the pickiest eaters. With a few simple ingredients and some creativity, you can have a delicious meal in no time. Serve it with a side salad for a complete meal that will keep everyone coming back for more.

Ingredients

12 ounces Lasagna Pasta, broken into pieces

1 pound Italian Ground Pork Sausage

1 whole Onion, chopped

4 cloves Garlic, minced

2 tablespoons all-purpose flour

1/2 tsp basil

1 teaspoon thyme

1teaspoon oregano

1 (14.5 ounces) can Petite Diced Tomatoes

1 - 8 oz can of tomato paste

5 cups Vegteble Stock

1 teaspoon Sea Salt, plus more to taste

1-1/2 cups heavy whipping cream

Basil leaves for garnish

1/2 cup Ricotta Cheese

1/4 cup grated Parmesan Cheese

Instructions

1. Grab your soup pot and turn to medium-high heat. Add spicy Italian sausage, garlic and onion cooking until the onion is transparent and the sausage is cooked. Adding in Flour, red pepper flakes, sea salt, and herbs.

2. Pour in broth, diced tomatoes and paste. Stir and let come together. Add in lasagna noodles broken into large chunks and let come to a simmer. Cover and lower heat to medium-low for 15-25 min. Stirring Occasionally.

3. Once noodles are cooked add in heavy cream. Let simmer an additional 5 minutes until warmed throughout.

4. Mix together ricotta and parmesan cheese for topping. Top each soup with ricotta mixture and basil. Serve and Enjoy!

Other Delicious Soup Recipes:

Bring the Heat with this Deliciously Spicy Tortellini Soup

Deliciously Creamy Basil Tomato Soup: An Easy and Delicious Recipe

An Alluring Combination: French Onion & Shallot Soup Recipe

Mom's Favorite Minestrone Soup Recipe

Zesty Indulgence: Crafting the Perfect Layered Orange Cake with Raspberry Mascarpone Frosting

Indulge your senses with a delightful symphony of flavors as we explore the making of a heavenly Layered Orange Cake, perfectly paired with a luscious Raspberry Mascarpone Frosting. This culinary masterpiece is more than just a dessertβ€”it's an elegant centerpiece, a conversation starter, and a testament to the magic that happens when bright citrus notes marry the creamy, tangy richness of mascarpone and the sweet, subtle tartness of raspberries. Whether you're a seasoned baker looking for a new challenge or a dessert lover on the hunt for your next favorite treat, this recipe promises to deliver a stunning and sumptuous experience, layer by delicious layer. Join us on this zesty adventure as we dive into the art of creating a cake that's as visually impressive as it is tantalizing to the taste buds.

This cake is an excellent dessert to serve at special occasions such as birthdays or anniversaries, or just to enjoy in the comfort of your own home. The combination of oranges, raspberries, and mascarpone creates a flavor that is both unique and delicious. The moist and tender oranges add a subtle sweetness that is balanced by the tartness of the raspberries. The raspberry mascarpone frosting adds even more sweetness and creates a creamy texture that is simply divine.

Can I make the Layered Orange Cake ahead of time before adding the Raspberry Mascarpone Frosting?

Making a delicious Layered Orange Cake with Raspberry Mascarpone Frosting is a great way to impress your guests. With its unique flavor combination of tart raspberry, creamy mascarpone, and sweet orange, this cake will be sure to make a lasting impression.

For those looking to save time and prepare ahead of time, the Layered Orange Cake portion of this recipe can be made up to 3 days ahead of time. To ensure freshness, the cake should be stored in an airtight container or loosely wrapped in plastic wrap at room temperature until ready to serve. The Raspberry Mascarpone Frosting, however, should be prepared shortly before assembling and serving the cake for optimal freshness. If desired, the components of the cake can be made ahead of time and stored separately. The cake can be stored in an airtight container or loosely wrapped in plastic wrap at room temperature, and the Raspberry Mascarpone Frosting can be stored in an airtight container in the refrigerator. This Layered Orange Cake with Raspberry Mascarpone Frosting is sure to be a hit at any gathering. With its unique flavor profile and ability to be prepared ahead of time, this cake is a great choice for any occasion.

How do I store the Layered Orange Cake with Raspberry Mascarpone Frosting if I have leftovers?

To make this cake, simply mix together the cake ingredients, layer the cake in a pan, and bake until golden. Once cooled, frost the cake with the raspberry mascarpone frosting. To store any leftovers, make sure to separate the cake and frosting layers and place them in an airtight container in the refrigerator. If you are not planning to eat the leftovers within a few days, freeze the cake in an airtight container. When ready to serve, thaw the cake in the refrigerator overnight, and if desired, microwave for a few seconds to re-crisp the cake before serving. Treat yourself to an unforgettable experience with this delicious Layered Orange Cake with Raspberry Mascarpone Frosting.

Is there a substitute for mascarpone cheese in the Raspberry Mascarpone Frosting if I can't find it at my local grocery store?

Layered orange cake with raspberry mascarpone frosting is an indulgent dessert that is sure to please. To make it even more delectable, the raspberry mascarpone frosting is the perfect finishing touch. For those who don’t have mascarpone cheese on hand, there are several substitutes that can be used. Cream cheese is a great substitute for mascarpone cheese in the raspberry mascarpone frosting and will make a delicious cream cheese frosting for the orange cake. Ricotta cheese can also be used instead of mascarpone cheese to create the raspberry mascarpone frosting. NeufchΓ’tel cheese can be used as a substitute for mascarpone cheese in the raspberry mascarpone frosting. The best part of this layered orange cake with raspberry mascarpone frosting is that it can be tailored to each person’s tastes. If you like your desserts sweeter, you can add more sugar to the raspberry mascarpone frosting. If you prefer a lighter frosting, you can use cream cheese in the raspberry mascarpone frosting. No matter what type of sweet tooth you have, you can make this layered orange cake with raspberry mascarpone frosting to suit your taste buds. Whether you’re using mascarpone cheese or one of its substitutes, this layered orange cake with raspberry mascarpone frosting is sure to be a hit.

Are there any tips for achieving even layers in the Layered Orange Cake?

When baking a delicious layered orange cake with raspberry mascarpone frosting, preparation is key. Before beginning, make sure to pre-measure all ingredients to ensure accuracy. Once all ingredients are measured, preheat the oven to the correct temperature before adding the cake batter to the pans. It is important to grease the pans thoroughly so that the cake layers won’t stick. After adding the cake batter to the pans, make sure to evenly spread the batter and tap each pan on the countertop to remove any air bubbles. Finally, bake the cake layers for the same amount of time and allow them to cool before adding the raspberry mascarpone frosting. Following these steps will ensure a delicious cake that everyone will love!

Ingredients

Serving Size 10 people

3 large eggs

3 large egg whites

1/2 cup heavy cream

1/2 cup juice orange

2 teaspoons orange zest

2 tablespoons melted butter

3 teaspoons vanilla

1 - 1/2 cup sugar

2-1/4 cups cake flour

1 tablespoon baking powder

3/4 tsp salt

1 cup grated butter

Icing

1 cup salted butter

2 teaspoons vanilla extract

5 cups powdered sugar

8 oz mascarpone

1/2 cup mashed raspberries

Instructions

1. Prep by oiling 2 circle pans (8 or 9 inches) and preheat oven to 350 degrees.

2. Blend eggs, heavy cream, melted butter, and vanilla completely.

3. Add dry ingredients in a different bowl until combined. Grate 1 cup of butter on top of dry ingredients. Combined by hand until butter is no larger than pea sizes.

5. Next up add wet ingredients and blend with a hand mixer until you achieve a smooth consistency. Once combined batter into 2 pans that are oiled and put into the oven. 22-27 min, if you want a 4-layer cake do 4 pans for 10-12 min only or until a toothpick inserted comes out clean.

7. Blend all frosting ingredients until incorporated. (butter should be at room temp if not heated in the microwave for 30 sec at a time). If doubling the cake recipe for a taller cake be sure to double the frosting recipe.

8. Once cake is done baking let cool in pan for 15 mins and transfer to wire rack for another 15 minutes.

9. Ice layers of cake and do a thin layer around for a β€œcrumb layer” that will catch all the crumbs and make a base for the final layer. Place in fridge for 30 mins and then do another final layer. Smooth, textured, whatever you desire! Add the raspberries and orange peels to decorate and Enjoy!

Other Delicious Cake Recipes:

Taste the Deliciousness of Pistachio Cake: A Treat for Any Occasion

Savor the Sweetness: A Guide to Making Carrot Sheet Cake with Brown Butter Frosting

My Favorite White Cake Recipe

Indulge in Deliciousness: Cherry Chip Cake with Chunks of Dark Chocolate Recipe

Indulge Your Sweet Tooth with This Delicious Brown Butter Spice Cake with Honey & Fig Jam Frosting

Zesty Delight: Mastering the Ultimate Cod Piccata Recipe at Home

Welcome to our culinary corner, where today we're featuring an exquisite twist on a classic Italian seafood dish that's sure to delight your taste buds – Cod Piccata! This light, yet flavor-packed entrΓ©e marries the delicate flakiness of perfectly cooked cod with the bright, tangy notes of lemon and capers. Cod Piccata is not only a stunning dish to serve but also a wonderfully simple recipe to elevate your weeknight dinners or impress guests at your next gathering. With a few expert tips and the right ingredients, you'll be ready to transform this seafood staple into a gourmet masterpiece. So tie on your apron, and let's dive into creating a dish that balances the succulence of the sea with the zest of Italian cuisine.

This delicious Cod Piccata is a simple yet elegant dish that's sure to please any palate. The combination of the crispy cod fillets with the fragrant creamy lemon sauce creates a delicious flavor and texture that will have everyone at the dinner table asking for more. The best part is that it's easy to make and doesn't take a lot of time. Whether you're looking for a simple weeknight dinner or a special meal for a special occasion, this Cod Piccata recipe is sure to be a hit.

What is Piccata?

Cod Piccata is an Italian classic that can add a flavorful and elegant touch to any meal. The word piccata is Italian for "sliced thin," and is typically used to describe a dish prepared with butter, lemon juice, and capers. This classic Cod Piccata dish is made with pan-fried cod fillets cooked in a light lemon butter sauce with capers. The cod fillets are then garnished with fresh parsley and lemon slices for a bright and flavorful dish. For a delicious and easy meal, try making this Cod Piccata. The bright flavors of the lemon butter sauce and the capers are sure to bring a touch of Italian elegance to your table. Enjoy this classic Italian dish with your family and friends for an unforgettable culinary experience.

Is Cod Fish healthy?

Cod is an excellent choice for those looking to improve their health and nutrition. Not only is it a lean, white fish packed with protein and omega-3 fatty acids, but it is also low in calories and rich in iron, calcium, magnesium, phosphorus, potassium, vitamin B-12, vitamin D, and folate. Eating cod can help lower cholesterol levels and reduce the risk of heart disease, making it a great choice for a healthy diet. For those looking for a delicious way to include cod in their diet, try this easy cod piccata recipe. The ingredients in this recipe are simple and include butter, capers, garlic, broth, and lemon juice, which combine to create a rich, savory sauce. The cod is lightly pan-fried in butter for a crispy texture, while the capers and garlic add a zesty flavor. The lemon juice creates a bright, acidic sauce that pairs perfectly with the cod. Serve over a bed of pasta or with a side of roasted vegetables for a satisfying, healthy meal.

Storing leftovers

This cod piccata recipe is a delicious and easy-to-make meal that will have your family asking for seconds. Not only is it bursting with flavor, but it's also a great way to make dinner in a hurry. Once it's cooked, you can store the cod in an airtight container in the refrigerator for up to three days. To make sure that you don't waste any of the delicious sauce, keep it in a separate sealed container in the refrigerator for up to three days as well. When you're ready to enjoy the cod piccata leftovers, simply reheat the cod in a skillet over medium heat or in an oven preheated to 350Β°F. To reheat the sauce, put it in a small saucepan over medium heat and stir occasionally. However, make sure to discard any leftovers that have been in the refrigerator for more than three days just to be safe. Enjoy!

What to serve with Cod Piccata

Cod Piccata is a classic Italian dish that is sure to delight your taste buds! This delicious recipe is made with white fish fillets that are lightly seasoned and cooked in a lemon, butter, and caper sauce. To complete the meal, serve it with a variety of side dishes. A great option is to serve it with a light and fluffy Rice Pilaf. You can also add a side of warm French Bread for a delicious accompaniment. If you’re looking for a flavorful vegetable side dish, try steamed broccoli, roasted asparagus, sautΓ©ed green beans, roasted tomatoes, mashed potatoes, roasted sweet potatoes, garlic-sauteed spinach, or roasted cauliflower. All of these vegetables pair perfectly with the Cod Piccata and are sure to add an extra layer of flavor to the dish. For a complete meal, serve your Cod Piccata with one of these delicious side dishes and a glass of white wine. Your family and friends will love this classic Italian dish that is sure to become a regular favorite in your home.

Ingredients

4 cod fillets

1/3 cup flour (can also use almond flour is you want gluten free)

1/2 teaspoon salt

1/4 teaspoon black pepper

1/4 cup butter or extra virgin olive oil

3 garlic cloves, minced

3/4 cup chicken stock

1/4 cup heavy cream

3 tablespoons lemon juice

1/4 cup capers, drained

1 lemon thinly sliced

2 tbsp fresh parsley, chopped

Instructions

1. Mix these three ingredients together on a large plate or shallow bowl: flour, salt and pepper. Pat dry cod and set aside. Add skillet to stove top over medium-high heat. Add in butter and let melt while pan heats.

2. Add cod one piece at a time to the flour mixture making sure to lightly cover every inch. Once the pan is fully heated and the butter is melted add cod pieces.

3. Cook cod for 5-6 minutes per side (more or less depending on the thickness of the cod) Once cooked on both sides set aside.

4. Add minced garlic to a hot buttery pan and saute until fragrant, around 30 seconds. Pour in chicken stock into the hot pan, do not clean out beforehand. Using a spatula or wooden spoon scrape up and cod bits that may have stuck to the pan. Add in lemon juice and capers. Let come to a low simmer and completely comes together. Turn off the heat and add in heavy cream. Stir completely to incorporate. Add back in cod and place sliced lemons on top. Serve over a bed of pasta, rice, or mashed potatoes pouring additional liquid in a pan over top and enjoy!

Other Delicious Dinner Recipes:

The Perfect Pair: Chicken Picatta and J. Lohr Wine

Delicious and Easy Chorizo One Pan Dinner

The Perfect Summer Meal: Grilled Chicken, Mexican Street Corn & Cucumber Salad

An Alluring Combination: French Onion & Shallot Soup Recipe

Indulge in a Festive Treat: The Ultimate Guide to Making the Perfect "Sugar" Plum Cobbler

As the chill of winter wraps around us, there's nothing quite like the warm embrace of a freshly baked dessert to lift our spirits. Enter the sublime Sugar Plum Cobbler, a festive twist on a classic comfort food that captures the essence of the holiday season in every mouthful. This delightful treat, brimming with the tender sweetness of plums and crowned with a golden, buttery topping, is not just a dessertβ€”it's a nostalgic journey that conjures up memories of cozy evenings and joyful celebrations. So grab your favorite apron and join us as we dive into the enchanting world of Sugar Plum Cobbler, where each bite is a festive celebration fit for a yuletide feast.

Sugar Plum Cobbler is a heavenly dessert that can be enjoyed year-round but is extra festive during Christmas time when the famous Nutcracker Ballet, featuring the Sugar Plum Fairy comes to life. This easy-to-make recipe only requires a few simple ingredients and is guaranteed to delight your taste buds. The cobbler is made with fresh plums and a buttery, sweet dough that is lightly spiced. The result is a delicious, comforting dessert that tastes like a sugar-plum fairy came and sprinkled it with magic. This cobbler can be served warm with a scoop of ice cream or a dollop of whipped cream for an extra special treat. This is an easy and delicious way to enjoy the fresh flavors of summer in a cozy dessert. Make this Sugar Plum Cobbler recipe for your next special occasion or just to treat yourself. You won't regret it!

How to Store

Sugar plum cobbler is a delicious dessert that is loved by many. Did you know that this plum cobbler can be frozen? That's right - sugar plum cobbler can be frozen and enjoyed for up to 3 months, making it easier to store and transport. To freeze the cobbler, spread it into an airtight container, seal and place it in the freezer. When ready to enjoy, thaw in the refrigerator overnight and reheat in the oven or microwave. Freezing the cobbler can help extend its shelf life and make it easier to transport. So, if you’re looking for a way to enjoy the warm and delicious taste of sugar plum cobbler even when time is limited, consider freezing it beforehand. You’ll be glad you did – nothing beats the taste of a freshly baked sugar plum cobbler!

Canned plums instead of fresh ones for my cobbler?

Canned plums can provide a more intense plum flavor, as the syrup they are stored in can add an extra layer of sweetness. This makes them perfect for adding to cakes, cobblers, pies, and other desserts. If you decide to use canned instead of fresh you will want to limit the intake of sugar on the recipe to balance the flavors.

Ingredients

10 Servings

6 cups fresh plums

1 & 1/2 cups granulated sugar

1/4 teaspoon ground cinnamon

1/8 teaspoon nutmeg

2 teaspoons flour

1/2 cup red wine

Topping:

2 & 1/2 cups all-purpose flour

1 cup white sugar

1/2 cup dark brown sugar

2 teaspoons baking powder

1 teaspoon salt

1 cup heavy cream (can substitute for buttermilk)

1 egg

8 tbsp butter

Sugar Topping:

2 tablespoons granulated sugar

1/2 tablespoon cinnamon

Instructions

  1. Preheat oven to 375 degrees

  2. Once plums are sliced toss them with sugar cinnamon, nutmeg and flour and toss evenly to coat the plums.

  3. Pour plums into stove top pan and pour in red wine. Stir for 10 minutes until mixture comes together. Pour into baking dish in a single layer and set aside.

  4. Begin Topping by mixing dry ingredients; all-purpose flour, sugar, brown sugar, baking powder and salt. In another bowl whisk together heavy cream and egg gently pour into the flour mixture and hand mix together to make a shaggy mixture that will crumble nicely on top of the plums. Crumble evenly over the top of the plum mixture.

  5. Cut 8 tbsp of butter into even size cubes. Sprinkle over top of the crumble mixture so they are evenly spread over the pan. Lastly, evenly sprinkle sugar topping of sugar and cinnamon over the entire pan.

  6. Place back in the oven and cook for 45-50 minutes, until the topping is golden and plums are tender. Top with fresh whipped cream or vanilla ice cream for a great dessert!

Other Delicious Fruit Recipes You Will Love:

The Perfect Peach Cobbler Recipe

Blackberry Cinnamon Rolls with Mascarpone Frosting

An Irresistible Treat: The Delicious Berry Custard Puff Pastry Tart

Indulge in Delicious Personal Pear Tarts

Perfect Pour: The Ultimate Guide to Choosing and Wrapping Wine as a Hostess Gift

Selecting the ideal wine for a hostess gift is a graceful art, a thoughtful gesture that conveys appreciation and elevates the dining experience. Whether you're attending a casual dinner party or an elegant soirΓ©e, the right bottle can serve as a delightful expression of good taste and gratitude for the evening's hospitality. In my view, the presentation of your gift is just as significant as the wine itself. In this blog post, we'll unveil the secrets to choosing the perfect wine (with a few of my favorites hailing from J. Lohr Vineyards & Wines) for your gracious host. We'll also explore creative and stylish wrapping techniques that will ensure your gift stands out, exuding sophistication and personal flair. Let's raise our glasses to the art of selecting and presenting wine, ensuring your hostess gift is as unforgettable as the occasion itself. 

Wine is a great way to show your hostess how much you appreciate them. There are a variety of blends, flavors, and styles to choose from, so you can pick a bottle that best suits the tastes of your hostess. When deciding on the perfect bottle, it is important to consider the occasion and the number of people attending the gathering. Choose a bottle of wine that is made from a grape variety the hostess enjoys and select one that is of good quality but is also reasonably priced. To make the gift extra special, include a personal note along with the bottle to show you put a little extra thought into your gift. Wrap the wine bottle in festive paper or tulle with a bow to give it a beautiful presentation. To complete the gift, you can include a special bottle opener or corkscrew with the wine. When selecting a bottle of wine for a hostess gift, there are a few other things to consider.

First, choose a bottle of wine that you would enjoy yourself. The hostess is likely to open the bottle and share it with their guests, so make sure you pick something you would personally enjoy. Also consider the occasion and the hostess’s personal preferences. Consider a duo or trio of wine bottles with different flavors and styles to fit a crowd. You could consider selecting a bottle with a beautiful decorative label for a fantastic special touch that is pleasing to the eye. Depending on what is being served, you could consider a red or white varietal to fit the occation. If you’re not sure of the hostess’ preference, play it safe and go for a sparkling rosΓ© or a light, fruity white.

Once you’ve chosen the perfect bottle of wine, make sure to properly wrap it. Use tissue paper, tulle, ribbons, or a gift bag to give the gift an extra touch of thoughtfulness. You can make your wrapping paper using butcher paper and stamps, markers, or even paint. For a more luxurious presentation, consider wrapping the wine bottle in a cloth napkin or a decorative scarf. You can also add a few accessories such as a corkscrew, wine charms, or a wine aerator. Always include a card with a special message to make the gift even more meaningful.

What types of wine make the best hostess gifts for a dinner party or gathering?

Red wines, such as Cabernet Sauvignon are full-bodied and complex, making it a great option for a dinner party. Two of my favorites,  at great price points, are the J. Lohr Hilltop & J. Lohr Estates Seven Oaks Cabernet Sauvignon The J. Lohr Hilltop is 95% Cabernet Sauvignon and pairs well with Ribeye steaks, a classic Christmas dish. The retail price for this wine is around  $35. For a more budget-friendly option without compromising on the great taste I love, I opt for the J. Lohr Estates Seven Oaks Cabernet Sauvignon.With 89% cabernet and fruit-forward notes, this medium-bodied red wine is another great choice for a hostess gift everyone will love!

For white wine, try a crisp and light chardonnay or a fruity sauvignon blanc. My personal go-to is the J. Lohr Arroyo Vista Chardonnay. This wine is comprised of 100% Chardonnay with tropical fruit notes and bright acidity. It's an amazing wine that is food-versatile, making it a great gift no matter what they serve. If you are looking to pair this wine, I recommend a crΓ¨me brie cheese, creamy mushroom polenta, chicken with Dijon mustard sauce, lobster, or crab with lemon butter. These dishes, celebrated for their rich and indulgent flavors, are often served throughout the holiday season. Another white wine that is a personal go-to is the J. Lohr Estates Riverstone Chardonnay which is also 100% Chardonnay and comes in under $15. This versatile wine pairs with a wide variety of foods, including fresh seafood risotto, mussels in white wine sauce, roast chicken with apples, and holiday ham or turkey. These wines from California’s Central Coast are perfect choices for gifting your hostess or for treating yourself this year!

These are all personal favorites of mine, which I like to keep readily available to express my gratitude for my hostess' hospitality, not only during the holiday season but throughout the year. These wines are excellent choices for any celebration. I hope you found some inspiring ideas for creatively wrapping your wine bottles to showcase the label and add a festive touch. Here's to a joyful and enchanting holiday season! Cheers!

Other Wine-Related Blog Posts:

The Bloggers Guide to Merlot

Planning the Perfect Romantic Picnic with J. Lohr Wines

Uncork the Perfect Evening: Discover the Optimal Three-Course Meal to Pair with J. Lohr

The Perfect Pair: Chicken Picatta and J. Lohr Wine

Experience Exquisite Sips and Join the Wine Club and tasting Journey at J. Lohr Vineyard & Winery

The Perfect Match: Grilled Steak & Blue Cheese Salad with Grilled Corn paired with J. Lohr Estates Seven Oaks

Pumpkin Shaped Baked Brie Paired with J. Lohr Carol's Vineyard Cabernet Sauvignon

Crafting the Perfect Gingerbread Waffle Board: Delicious Recipes and Styling Tips!

As the aroma of warm spices fills the air and the holidays beckon us to indulge in delightful treats, a Gingerbread Waffle Board presents the perfect blend of cozy breakfast comfort and festive flair. This unique take on the traditional charcuterie board is where breakfast meets dessert, transforming the humble waffle into a canvas of holiday cheer. Whether you're gathering with loved ones on a chilly morning or looking for a showstopping centerpiece for your holiday brunch, our Gingerbread Waffle Board and accompanying recipe promises to enchant your senses and warm your heart. So grab your apron, preheat your waffle iron, and let's dive into the art of creating this sweetly spiced, irresistibly shareable delight.


Can I Also Make These as Gingerbread Pancakes?

Gingerbread pancakes are the perfect way to add a festive twist to your holiday breakfast. They are easy to make and require the same ingredients. For a unique presentation, serve the pancakes the same as the waffle board. All you have to do is heat up a skillet instead of a waffle iron and cook with the pre-made batter. Decorate your board with some of your favorite toppings like whipped cream, fresh fruits, and syrup. Make sure everyone gets a chance to customize their own waffle or pancakes with the toppings they love.

How can I keep the waffles warm?

If you're looking for a delicious and easy snack, look no further than this Gingerbread Waffle Board and recipe. This dish is the perfect combination of crunchy waffles, warm spices and a sweet glaze. Not only is it a tasty treat, but it's also incredibly easy to make. Start by preheating your oven to 200Β°F and laying the waffles in a single layer on a baking sheet. Pop them in the oven for 5 minutes and then place a layer of parchment paper between the waffles and wrap the baking sheet in aluminum foil to keep them warm. You can also keep out a toaster oven or panini press for everyone to reheat for a few minutes when they are ready to eat at a later time so they are hot fresh and a little crispy on the edges.

Can I make these ahead of time and Store?

Gingerbread waffles are a delicious and festive treat for any holiday gathering! They are easy to make and even easier to enjoy when you use our foolproof gingerbread waffle board and recipe. Making gingerbread waffles ahead of time is a great way to save time when you’re in a rush. Not only can you make the waffles ahead of time, but you can also freeze them for up to two months. To make them ahead of time, prepare the batter and cook the waffles according to the recipe. Let the waffles cool to room temperature on a cooling rack and then wrap them in plastic wrap and store them in the refrigerator or freezer. When you’re ready to serve them, just pop them in the toaster or toaster oven until they’re warm and crispy. You can also prepare them in the oven as mentioned above. So don’t stress about holiday baking this year! With our gingerbread waffle board and recipe, you can make delicious gingerbread waffles that your friends and family will love. Investing your time in making our gingerbread waffle board and recipe is the perfect way to make your holiday baking more enjoyable and a fun twist on traditional waffles!

Gingerbread Waffle Toppings

When it comes to creating the perfect gingerbread waffle board, the possibilities are endless. Topped with maple syrup, whipped cream, cinnamon sugar, apple compote, caramel sauce, chocolate sauce, or powdered sugar, this sweet treat is sure to tantalize your taste buds. For those looking to balance out the sweetness, top the waffles with fresh berries, whipped cream, yogurt, jam or preserves, peanut butter, sugared cranberries, pecans or chocolate chips. This is an ideal breakfast or snack to enjoy any time of day.

No matter what toppings you choose, the gingerbread waffle board and recipe will make your holiday season even sweeter. Enjoy your own special creation and share it with friends and family for the perfect breakfast or dessert. Make sure to have all the ingredients on hand before you start, so you can get creative and have a little fun. You can even get the kids involved in making their own gingerbread waffle creations.

Gingerbread Sourdough Holiday Waffle Recipe

Ingredients

3/4 cup sourdough starter

4 tablespoons melted butter

1 cup evaporated milk, extra if batter is too thick

1 egg

1 1/3 cup all-purpose flour

1/3 cup dark brown sugar

1/2 cup molasses

2 teaspoons baking powder

1/2 teaspoon salt

1 teaspoon ground cinnamon

1 1/2 teaspoon ground ginger

1/4 teaspoon ground cloves

Instructions

1. Heat the waffle iron and mix the ingredients.

2. In a large bowl add the sourdough starter, melted butter, evaporated milk and egg. Whisk together.

3. Add in the rest of the dry ingredients and whisk together again. If the batter is too thick add in additional evaporated milk until the batter is the right consistency. Pour 1/4 cup into the waffle iron if using the small iron like I am, it is linked below as well. Serve on waffle board & enjoy!

Other Breakfast Recipes You Will Love:

Blackberry Cinnamon Rolls with Mascarpone Frosting

An Irresistible Treat: The Delicious Berry Custard Puff Pastry Tart

Sweet Perfection: Baking the Ultimate Cinnamon Roll Loaf with Espresso Glaze

Deliciously Sweet: Pumpkin Coffee Cake with Pecan Crumbles

Soft Cream Cheese Lemon Blueberry Scones

Zesty Twist on a Classic: Unveiling the Ultimate Cranberry Key Lime Pie Recipe!

Welcome to the world of zesty indulgence where tart meets sweet in a perfect symphony of flavors that dance on your palate! Our focus today is the irresistible Cranberry Key Lime Pie, a delightful twist on two classic desserts that unites the tangy zest of key limes with the vibrant, tart punch of cranberries. Wrapped in a buttery graham cracker crust and topped with a dollop of soft whipped cream, this dessert is poised to take your taste buds on an unforgettable journey. Whether you're a pie connoisseur or a curious baker looking for your next kitchen adventure, join us as we dive into this mouth-watering creation that's perfect for any season, but especially cherished during Thanksgiving & Christmas. Cranberries are everywhere and oftentimes underused, making many people look for more ways to incorporate them into fun desserts.

Combining tart cranberries, zesty limes, and creamy condensed milk creates an explosion of flavor that simply can't be beaten. The crust of this pie is made with a graham cracker and butter base, while the filling is a combination of cranberry sauce, condensed milk, lime juice, lime zest, and eggs. After baking the pie is served with a dollop of sweet whipped cream. This delicious dessert is perfect for any occasion and is always a hit with guests. Whether you're looking for a show-stopping holiday treat, a summertime favorite, or just a delicious holiday dessert, Cranberry Key Lime Pie is sure to please.

Can I use bottled key lime juice instead of fresh key limes for the pie?

For the perfect Cranberry Key Lime Pie, key limes are essential for their tart and citrusy flavor. If you don't have access to fresh key limes, however, don't fret - because bottled key lime juice can be a great substitute. To get the best flavor, look for a high-quality brand and read the ingredients list to make sure there are no added preservatives or sugars. Measure your key lime juice accurately, as it can be easy to add too much and make your pie overly tart. With the right key lime juice, you'll be able to make a delicious Cranberry Key Lime Pie that is sure to impress.

What type of crust is recommended for cranberry key lime pie?

One of the most popular pies to make any time of the year is a key lime pie. Since we added cranberries to give this pie a delicious tart and sweet lime flavor, it is sure to be a hit. The first step to making a delicious cranberry key lime pie is to choose the right crust.

The traditional graham cracker crust is a classic and easy choice for this type of pie. It pairs perfectly with the tartness of the cranberries and the sweetness of the lime. For a more elegant option, you could try a shortbread crust. The buttery texture and flavor of the shortbread crust will showcase the delicious flavors of cranberry and lime.

For a fun twist on the classic flavor combination, you can also try using a cookie crust with cookies of your choice. A cookie crust made with familiar favorites such as crushed vanilla wafers or Oreos would also surely be a hit. With these three options, you can choose the perfect crust to customize your cranberry key lime pie.

Ingredients

Crust:

1.5 cups or 12 sheets of crumbled gram crackers

6 tbsp melted butter

2 tablespoons granulated sugar

Filling:

8 oz cranberries

1 cup sugar

1/4 cup water

8oz cream cheese

1 can condensed milk, sweetened

2 large egg yolks

3/4 cup lime juice

1 tbsp lime zest

1 tsp vanilla

Whipped Topping:

2 cups cold heavy whipping cream

2 cups powdered sugar

1 teaspoon vanilla extract

Directions

1. Preheat oven to 350 degrees and oil pie pans.

2. Mix together crust ingredients, graham crackers, melted butter and Splenda. Portion out into 6 individual pie pans and press down on the bottom and around sides to form into pans. Bake in the oven for 5-7 minutes or until golden brown.

3. While crust bakes make filling. Start by adding cranberries, sugar and water to a stovetop pan and let them come together to a pasty jam-like mixture. Add to blender with 1/4 cup of lime juice and blend.

4. Blend cream cheese with a hand mixer until smooth. Add in egg yolks and blend again until fully incorporated. Add in remaining ingredients; condensed milk, remaining 1/2 cup lime juice, cranberry mixture and vanilla until all is mixed and fully blended.

5. Once the crust is done baking remove from the oven and let come to room temp. Then add filling to each pan. Place back in the oven to bake for another 15-17 minutes or until the filling is set. Remove from oven and let come to room temperature. Place in refrigerator for at least 4 hours or overnight.

6. Before serving top the pie with homemade whipped cream. With an electric hand mixer set on high blend the whipping cream, powdered sugar, and vanilla extract. Whip until peaks form and add to key lime pies. Top with a lime wedge, cranberries or lime zest and serve.

Other Deliciously Zesty Desserts:

A Deliciously Sweet Treat: Mini Key Lime Pies with Splenda

Tantalizingly Delicious Recipe For Lemon Cheesecake With An Amazing Glaze

Indulge Your Taste Buds with The Ultimate Raspberry Pistachio Cheesecake Recipe

An Irresistible Treat: The Delicious Berry Custard Puff Pastry Tart

Step-by-Step Guide to Making a Refreshingly Delicious Frozen Raspberry Margarita

Indulge in Coziness: The Ultimate Homemade Gingerbread Latte Recipe with Splenda

Step into the warmth of your kitchen and embrace the festive cheer as we delve into the world of spiced beverages with our homemade Gingerbread Latte recipe. As winter wraps its chilly fingers around us, what better way to fend off the cold than with a cup of this heartwarming drink that combines the richness of coffee with the nostalgic flavors of gingerbread? In this blog post, we'll guide you through the simple steps to crafting the perfect Gingerbread Latte, complete with the sweet and spicy notes of ginger, cinnamon, and nutmeg, topped with a luxurious swirl of heavy cream. So, pull out your favorite mug and get ready to fill your home with the enchanting aroma of a holiday classic, transformed into a soul-soothing concoction that's sure to become your go-to for cozy nights staying in.

Gingerbread Latte is a delicious and easy-to-make holiday beverage that is perfect for this time of year. With just a few simple ingredients, you can make a delicious gingerbread latte right in the comfort of your own home. This recipe is sure to become a family favorite and is a great way to get into the holiday spirit.

The ingredients for this recipe are simple and easy to find. All you need is espresso or strong-brewed coffee, milk, gingerbread syrup, and whipped cream. Once you have the ingredients, the recipe is incredibly simple to follow. Start by brewing your espresso or coffee. Then, add the gingerbread syrup and milk to the espresso or coffee and stir until combined.

Why You Need to Make This Recipe

Are you looking for a delicious and festive holiday beverage to enjoy throughout the winter season? Look no further than the Gingerbread Latte! This easy-to-make recipe requires minimal ingredients and can be customized to suit individual preferences. The combination of coffee, spices, and molasses creates a unique flavor that will leave you wanting more. The warm, comforting aroma of the gingerbread spices will fill the air and get you in the holiday spirit. The rich and creamy texture of the latte is sure to provide a cozy, indulgent experience. The presentation of this beverage is sure to be a hit and make a great addition to any holiday party. Try this easy-to-make Gingerbread Latte recipe today and enjoy a comforting and festive drink this winter season!

Ingredients

Coffee or Espresso

Heavy Cream or Milk

Gingerbread Syrup Recipe

1 Cup Water

3/4 Cup Splenda Monk Fruit

1 tsp vanilla extract

1 tsp cinnamon

1/2 tsp ginger

1/2 tsp nutmeg

3 tablespoons molasses

Instructions

1. Mix together all gingerbread syrup recipe ingredients in a saucepan over medium heat until it reaches a slow simmer. Let cool and put into a glass container. If you are looking for a non-sugar-free version you can substitute monk fruit for granulated sugar.

2. Add gingerbread syrup into coffee or espresso and top with frothy milk or heavy cream. I like to add additional gingerbread syrup to my heavy cream before I froth.

3. Top with a sprinkle of cinnamon or nutmeg and a gingerbread cookie for a delicious treat.


Other Holiday Blog Posts You Will Love:

My Dining Room Decor For Christmas: How I Made My Dining Room Festive

How to Make the Perfect Pear and Pomegranate Arugula Salad

A Festive Taste of Tradition: Sparkling Cider Punch for Christmas!

Slow Cooker Hot Cocoa Bar Station

Indulge Your Sweet Tooth: The Ultimate Guide to Making Gingerbread Whoopie Pies at Home

Welcome to a world where the warm, nostalgic spices of gingerbread unite with the creamy, indulgent fluffy comfort of whoopie pies. This sweet treat promises to teleport your taste buds to a festive winter wonderland! Are you looking for the perfect, unique treat this holiday season? Gingerbread whoopie pies are the perfect dessert that is sure to wow your friends and family! This delightful confection, with its soft, cake-like gingerbread cookies and luscious filling, offers the perfect balance of spice and sweetness, making it a hit for any fall gathering, holiday party, or simply a quiet evening at home with a cup of tea. So tie on your apron, preheat your oven, and let's embark on the culinary adventure of creating these charming and irresistibly tasty treats that are certain to become a beloved addition to your baking repertoire.

Gingerbread whoopie pies are a delicious and unique twist on a classic dessert. The combination of gingerbread and the Spiced Cream Cheese Filling is a match made in flavor heaven! The cream cheese filling is so easy to make - and it can be prepared ahead of time, making it a great option for busy bakers. The cream cheese filling is also very versatile and can be used to fill other desserts such as cupcakes or as a topping for cakes. It’s a great way to add an extra layer of flavor to any dessert. So if you’re looking for a unique twist on a classic dessert, give gingerbread whoopie pies with Spiced Cream Cheese Filling a try! It’s sure to be a hit with family and friends.

How Do I Store For the freshest results?

Gingerbread whoopie pies are a delightful treat that can be enjoyed year-round. For those who are looking to store them for later, there are a few tips to ensure their freshness. To store for up to 4 days, feel free to place whoopie pies in an airtight container and store in the refrigerator. For longer storage, place in an airtight container and freeze. If freezing, be sure to thaw the whoopie pies overnight in the refrigerator before serving. To keep them from sticking, place parchment paper or wax paper between each whoopie pie and place in a single layer in the container. For optimal freshness, always store them in a cool and dry place. Enjoy these delicious gingerbread whoopie pies!

Gingerbread whoopie pies are the perfect dessert for any occasion. They are easy to make, can be made ahead of time, and can be stored for later use. So the next time you’re looking for a sweet and delicious treat, look no further than these holiday gingerbread whoopie pies!

Ingredients

1 cup salted butter

1/2 cup dark brown sugar

1/2 cup granulated sugar

2 egg

1 teaspoon vanilla extract

1/4 cup molasses

2 1/2 cups all-purpose flour

2 teaspoons baking soda

1 teaspoon ground cinnamon

1 teaspoon ground ginger

1/2 teaspoon ground cloves

1/2 teaspoon sea salt

Cream Cheese Filling

4 ounces cream cheese

1/4 cup salted butter, softened

1 1/2 cups powdered sugar

1 teaspoon vanilla extract

Instructions

1. Preheat oven to 375 degrees. Line a large cookie sheet with parchment paper and set aside.

2. In a large bowl mix together melted butter and sugar. Add in eggs and vanilla until smooth. Mix in molasses until well combined.

3. Mix in all-purpose flour, baking soda, cinnamon, ginger and cloves to batter until consistency is smooth. Cover and chill for 15-30 minutes in the fridge.

4. Take refrigerated cookie dough and scoop large scoops (around 1 1/2-2 tablespoons) and place onto prepared baking sheet 2 - 21/2 inches apart. Flatten the top with a flat bottom of a glass.

5. Bake for 8-10 minutes. Let cool for 1 minute and transfer to a cooling sheet. While cooling make cream cheese filling

6. Whip together cream cheese, melted salted butter, powdered sugar and vanilla extract. Fill each cookie and top with another, serve & enjoy!

Decadent Brown Butter Shortbread Cookies with a Chocolate 'Wax' Seal – A Vintage Twist on a Classic Treat!

Imagine the irresistible aroma of butter melting slowly into a golden, nutty essence, filling your kitchen with a delicious smell and warmth that promises something truly special. This is the beginning of our journey to creating the ultimate brown butter shortbread cookiesβ€”a classic treat reinvented with a sophisticated twist. Each cookie, a masterpiece of simplicity, is made with care, transforming traditional shortbread into a decadent experience with its rich depth of flavor. To elevate this delight to a realm of elegance, we'll crown every cookie with a chocolate "wax" seal, reminiscent of an age when such a seal was a mark of distinction and quality. This whimsical touch not only adds visual intrigue but infuses each bite with a smooth chocolate finish. So, preheat your ovens and ready your parchment paper as we embark on a culinary adventure to bake these irresistible brown butter shortbread cookies. They are a perfect blend of nostalgia and modern flair.

The best part about this recipe is that it is so easy to make with just a few simple ingredients. Not only that, but you can easily customize the chocolate topping with many other alternatives, such as white, milk, or colored chocolate to match the occasion. Also, the wax seal can say anything you'd like for different holidays, occasions and celebrations. With the right balance of sweet and salty, you can enjoy this delicious treat in a simple way. So impress your guests at your next party with these delightful cookies or package them as a sweet gift during the different holiday seasons.

What is the best type of chocolate to use for the "wax" seal?

Brown butter shortbread cookies are a delicious treat that can be made with ease and look great as a presentation. To add a unique touch to the cookie, we are adding a customized β€œwax” seal made of melted chocolate. When choosing the type of chocolate to use for the seal, it is important to choose one that will not overpower the flavor of the shortbread cookie. Dark chocolate is the best type of chocolate to use for the β€œwax” seal because it has a richer flavor and is less sweet. It will provide a nice contrast of flavors and a fresh look to the shortbread cookie. Semi-sweet chocolate chips also work well but are slightly sweeter than dark chocolate. White chocolate has a very sweet flavor and may overpower the flavor of the shortbread cookie however if you are looking for a sweet treat that is also colorful this is the best way to dye your chocolate to match the decor of your party or the holiday you are celebrating.

Can I make the dough for these brown butter shortbread cookies ahead of time?

Making the dough ahead of time is an excellent option if you want to prepare for a special occasion, but are routinely pressed for time. The dough can be made up to one week ahead of time and stored in plastic wrap in an airtight container in your refrigerator. When you are ready to bake the cookies, let the dough come to room temperature, roll it out and cut them into desired shapes. The chocolate wax seal can also be made ahead of time and stored in an airtight container at room temperature. This will save you time and energy when you are ready to bake. The brown butter shortbread cookies are a delicious treat that will be sure to impress. The buttery flavor of the cookie combined with the rich chocolate wax seal creates a unique flavor that everyone will enjoy. The chocolate wax seal gives the cookies a special touch that will make them stand out at any gathering. You won't regret taking the extra time to make these cookies for your next special occasion.

How long can I store the brown butter shortbread cookies with the chocolate seal, and how should I store them?

When stored correctly, these cookies can surprisingly last up to two weeks. To store these cookies, it is best to use an airtight container, preferably glass or a food-grade plastic container. Keep them in a cool, dry place away from direct sunlight. Place a paper towel or parchment paper between the layers of cookies to prevent them from sticking together. Enjoy the cookies within two weeks of making them for the best flavor and texture.

Ingredients:

1 cup unsalted brown butter

1tsp vanilla extract

2 1/4 cups all-purpose flour

1/2 tsp sea salt

1/4 granulated sugar

1/2 cup powdered sugar

4 tbsp whole milk

bittersweet chocolate & wax seal of choice

Step-By-Step Instructions:

  1. Add butter to stove top pan to brown. Butter will melt and begin to get a nutty smell. Turning brown when it’s ready! Pour into a bowl and let come to room temp. After room temp place in fridge for 30 min to fully cool.

  2. While butter is cooling whisk together sugars, all-purpose flour and sea salt. Add in brown butter and vanilla extract with rubber spatula. Mix with an electric mixer until well combined.

  3. Dough with be flaky at this step. Add 1 tablespoon of milk at a time until the dough is incorporated and starts to stick together. Usually needing 4 tablespoons of milk total.

  4. Wrap with plastic wrap and keep refrigerated for at least 1 hour and up to 1 week.

  5. Remove from fridge when ready to make cookies. Flour the surface and roll out to 1/4 inch thick. Cut dough with your favorite cookie cutters and bake at 325.

  6. Baking for 12-14 min in oven. Remove and place cookies on the cookie sheet to cool.

  7. Once the cookies are cooled you can add the wax seal by two options. One way you can drizzle chocolate in the center of the cookie, let it cool for a few seconds and stamp it with your wax seal. The other option I did here was to make a wax seal on parchment paper and add it onto the cookie with a small drop of a full drizzle like I did to adhere to the cookie. Prep your wax seal by cooling it in the freezer for at least an hour to fully cool through. Between each stamp place in an ice bowl to continue to keep cool. Once finished, serve and enjoy your Brown Butter Shortbread Cookies with Chocolate "Wax" Seal

Other Cookie Recipes You Will Love:

How to Make Delicious Nutter Butter Cookies At Home

Indulge your Sweet Tooth: The Ultimate Guide to Making Brown Butter Maple Pecan Chocolate Chunk Cookies

The Best Monster Cookie Recipe You'll Ever Try!

Deliciously Sweet: Mastering the Perfect Pumpkin Molasses Cookie Recipe for the Autumn Season

Birthday Cutout Sugar Cookies

Brown Sugar Toffee Cookies

Brown Butter Caramel Pretzel Cookies

Perfect Pairings: Savor the Flavor with Our Ultimate Steak and Feta Crostini Recipe!

Welcome to this culinary delight where the rich, savory flavors of a perfectly grilled juicy steak meet the tangy punch of feta cheese, all piled atop a crisp, golden crostini. In this blog post, we'll take your taste buds on an adventure by marrying the hearty comfort of steak with the sharp, creamy essence of one of Greece's most famous cheeses. Whether you're planning an upscale appetizer for your next dinner party or simply seeking to jazz up your at-home snack game, these steak and feta crostinis promise to be a crowd-pleaser. Join us as we explore the simple yet sophisticated world of creating this mouth-watering combination, where each bite is a symphony of textures and flavors that are sure to leave you craving more.

Bread Alternatives

When making steak and feta crostini, the type of bread used is an important factor to consider. Ciabatta bread is a great option, as it has a slightly chewy texture that helps hold the toppings well. French baguettes are also an excellent choice, as their crisp crust and fluffy interior make them well-suited for crostini. Sourdough bread is a good choice as well, as its slightly tangy flavor helps balance out the savory flavors of the steak and feta. For those looking to add a bit of nutrition to their crostini, whole wheat bread is a great option. Rye bread can be a nice option if you prefer its flavor to the crostini, for those looking to experiment with different flavors. It is important to choose a bread that you like, and one that will complement the flavors of the steak and feta. These are all great options.

Steak Preparation

To make the perfect steak for topping crostini, heat a skillet over medium-high heat and season the steak with salt and pepper. Sear the steak on both sides for 2-4 minutes, or until it’s cooked to your desired doneness. Once the steak is cooked, remove it from the skillet and let it rest for 3-5 minutes. Slice the steak against the grain into thin strips. Serve the steak on crostini, along with feta cheese, fresh herbs and other desired toppings. The combination of steak and feta on a crispy crostini is a powerful flavor combination that will tantalize your taste buds.

Cheese Alternatives

If you're looking for an alternative cheese to top your steak and feta crostini, you should consider trying crumbled goat cheese, blue cheese, or gorgonzola. All of these cheeses provide a creamy, tangy flavor that pairs well with steak and makes a delicious alternative to feta. Goat cheese and blue cheese are milder in flavor than feta, while gorgonzola is a bit stronger but still delicious. Additionally, if you're looking for a more mild cheese, you could opt for a brie or mozzarella. Whichever cheese you choose, you can be sure that your steak and feta crostini will be a delicious and flavorful dish.

Ingredients

1 pound ribeye steak

1 French baguette

3 tablespoons melted Butter

6 oz feta cheese

4 oz Greek yogurt

3 tablespoons extra virgin olive oil

2–3 tablespoons water

Salt & pepper, to taste

Basil pesto spread

Instructions

1. Arrange the baguette slices on a large baking sheet. Lightly brush both sides of the bread with melted butter. Place bread under the broiler for 1-2 minutes on each side until lightly brown. Briefly set the crostini aside to cool.

2. Pat both sides of the steak with a paper towel. Season with salt and Pepper to taste. Add 1 tablespoon of butter to a heated skillet and add prepped Ribeye steak cooking both sides for three minutes. Remove the steaks to a cutting board and let them rest for 10 minutes before thinly slicing them against the grain.

3. While the steak is resting, make the whipped feta. Add crumbled feta, greek yogurt, olive oil, and water and blend until smooth and well blended. Prepare the crostini by layering bread, feta mixture, a thinly sliced steak, and pesto on top. Serve & enjoy your steak crostini!

Other Hearty Appetizer Recipes:

A Crowd-Pleasing Stuffed Mushroom Recipe

5 Ingredient Bacon Ranch Football Shaped Cheese Ball

Create a Delicious Layered Hummus Dip for Your Next Snack or Appetizer

Delight Your Guests with an Antipasto Christmas Wreath

Festive Flavors Unveiled: Crafting a Herb Christmas Tree Focaccia Bread Masterpiece for the Holidays

'Tis the season for savory scents and festive flavors! As the holiday cheer begins to fill the air, what could be more delightful than combining the comfort of freshly baked bread with the spirit of a lovely Christmas tree? Enter the Herb Christmas Tree Focaccia Bread – a holiday twist on a classic Italian favorite bread that's sure to dazzle your dinner guests. Whether you're hosting a cozy family gathering or looking to impress at a yuletide potluck, this aromatic blend of rosemary, thyme, and other herbs arranged in a charming Christmas tree shape will not only be a feast for the eyes but a treat for the taste buds as well. So don your aprons, preheat your ovens, and let’s embark on a culinary journey to craft the perfect focaccia recipe for Christmas!

How to Store Focaccia

To store the Herb Christmas Tree Focaccia Bread, you have a few options. For short-term storage, an airtight container will keep the focaccia fresh for up to two days at room temperature. For longer-term storage, wrap the focaccia tightly in plastic wrap and store it in the refrigerator for up to five days. You can also store it in a freezer-safe bag for up to three months in the freezer. When it’s time to reheat the Herb Christmas Tree Focaccia Bread, wrap it in a damp paper towel and place it in the microwave for 30-45 seconds. Enjoy your delicious and unique holiday treat!

What To Pair With Festive Christmas Tree Focaccia

Herb Christmas Tree Focaccia Bread can be served as a side dish with any holiday main course, or as an appetizer served on a cheese plate. For a hearty cold-weather meal, serve it with a tomato and mozzarella salad, soup, or stew. To add even more flavor, top it with a variety of your choice of herbs and seasonings. This delicious bread is sure to be a hit with friends and family during the holidays. It also makes a great homemade gift for those special people in your life. So, this holiday season, make sure to give your loved ones the gift of Herb Christmas Tree Focaccia Bread.

Making Herb Christmas Tree Focaccia Bread is easy and customizable. You can experiment and use your favorite herbs and spices to create a flavor that you and your family will love. Topping the bread with cheese and your favorite vegetables is a great way to add a few extra special touches. Serve with a side of olive oil and balsamic vinegar for dipping, and you’ve got the perfect holiday treat.

Can I make the Herb Christmas Tree Focaccia Bread ahead of time for my holiday gathering?

Making Herb Christmas Tree Focaccia Bread is simple and hassle-free. All you need to do is bake the focaccia dough, assemble the tree, and bake one final time. The process is incredibly easy and requires very little preparation. Plus, you can make it slightly ahead of time so you can enjoy the festivities without worrying about last minute prepping. Herb Christmas Tree Focaccia Bread is the perfect addition to any holiday gathering. It’s a flavorful and unique treat that everyone will love. Plus, it looks so festive and inviting and it really stands out. Your guests are sure to be impressed with your creative and delicious holiday dish.

Are there any variations or substitutions I can make to the traditional Herb Christmas Tree Focaccia Bread recipe?

Herb Christmas Tree Focaccia Bread is a delicious way to bring some festive spirit to your holiday table. This easy-to-make focaccia bread is a great way to surprise your guests with a unique and delicious twist on the traditional focaccia. The classic focaccia is made with rosemary, cherry tomatoes, green olives and thyme, but you can easily change up the flavors by using different herbs such as basil, chives, or parsley. You can also add Parmesan cheese and mozzarella for an extra layer of flavor. To add some festive Christmas flair to your focaccia, try adding cranberries or cranberry sauce.

You can also change up the ingredients by using different vegetables as toppings such as bell peppers, carrots, or mushrooms. Also, don't be afraid to experiment with different types of cheeses such as feta, cheddar, or blue cheese. With so many options available, the possibilities are endless when it comes to creating this unique and delicious Herb Christmas Tree Focaccia Bread.

Ingredients:

8 Cups Flour

4 teaspoons salt

4 teaspoons instant yeast

4 cups warm water

Olive Oil spray to grease the pan

6 tbsp olive oil

1 tsp flaky sea salt

Herbs & Veggies of choice - I used:

Rosemary Sprigs, Thyme, Cherry Tomatoes & Green Olives

Instructions:

  1. Mix flour, salt, yeast and warm water in a mixing bowl. Combine well and cover with a towel or plastic wrap. Put in fridge overnight in the mixing bowl. (9 hours or Up to 24 hours)

  2. The next morning take out the pan to bake. I like this -Jelly Roll- pan the most from 360. The sides are the perfect amount and it's a great size to bake this bread in. Drizzle oil on pan and oil on bread mixture.

  3. Lay oiled bread mixture onto the pan and let rise for 20 min covered with a towel. If your home is cooler inside I suggest warming the oven up for 1 minute while prepping bread and turning it off. Then place the pan with bread in to feel warmth and rise.

  4. After risen. Move bread into a longer shape to fill the pan and poke. Using fingers you will make small indentions along the bread. Let rise again for 20 min to 1 hour until the bread has risen enough for you to see it past the jelly roll line.

  5. Next, poke more holes and then sprinkle over the oil mixture; add in your Christmas focaccia art however you would like to arrange for decorating.

  6. Bake at 425 for 25 to 30 min until the bottom is crisp and the top is a golden color. Let cool and enjoy your gorgeous homemade focaccia bread art!

Other Delicious Bread Recipes You Will Love:

The Perfect Beginners Sourdough Bread Recipe for Delicious Homemade Bread

The Most Delicious Homemade Corn Bread Loaf Recipe

Garlic & Herb Focaccia Bread

Delight in Every Bite: Making the Ultimate Apple Cider Loaf with Brown Butter Glaze

Indulge Your Taste Buds with The Ultimate Raspberry Pistachio Cheesecake Recipe

Welcome to a yummy world where the perfect blend of the tart tastes of raspberries meets the distinctive nutty flavor of pistachios, all wrapped up in the creamy decadence of cheesecake. If you're ready to elevate your dessert game to new heights of delicious sophistication, our Raspberry Pistachio Cheesecake is the ultimate indulgence that promises to please every palate. Whether you're celebrating any special occasion or simply looking to treat yourself, this stunning dessert brings together the perfect blend of textures and flavors to create a symphony for the senses. So, preheat your oven, grab your apron, and let's embark on the culinary journey to crafting the perfect slice of heaven that's sure to become your new favorite sweet obsession.

Can I make the raspberry pistachio cheesecake ahead of time?

Making a raspberry pistachio cheesecake is a great way to impress your guests. Not only is the flavor combination of raspberries and pistachios delicious, but you can make the cheesecake ahead of time to save on time and stress. If you're making the cheesecake in advance, you can safely refrigerate it for up to 5 days. Alternatively, you can cover it with plastic wrap and freeze it for up to 3 months. If you are freezing the cheesecake, be sure to let it thaw overnight in the refrigerator before serving. To make sure the cheesecake does not dry out in the refrigerator, cover it tightly with plastic wrap or foil. If you want to make the cheesecake even further in advance, you can make the crust only, then prepare the filling separately, and assemble the cheesecake just before serving. This way, you can be sure that your raspberry pistachio cheesecake is as fresh as can be when you serve it.

Is there a gluten-free version of the raspberry pistachio cheesecake?

To make a gluten-free version of this raspberry pistachio cheesecake you can feel free to swap out the graham crackers for gluten-free variations perfect for those with gluten allergies or sensitivities. The great thing about this gluten-free version is that it tastes just as delicious as the original but without the gluten. The combination of raspberry and pistachio is a match made in heaven, and the light and creamy texture of the cheesecake is sure to please.

What's the best way to store leftovers of the raspberry pistachio cheesecake?

This delicious Raspberry Pistachio Cheesecake is sure to tantalize your taste buds and leave you wanting more! To make sure you can enjoy this sweet treat for multiple days, it's important to properly store the leftovers. To keep your cheesecake fresh, store it in an airtight container in the refrigerator for up to five days. If you want to keep it longer, make sure to properly wrap the container with plastic wrap or aluminum foil. If storing for more than five days, freeze the leftovers in a freezer-safe container for up to two months. To enjoy a slice, simply let come to room temperature before serving. Enjoy!

Can I use frozen raspberries for the cheesecake instead of fresh ones?

Making a delicious raspberry pistachio cheesecake doesn't have to be time-consuming or difficult. You can easily use frozen raspberries in place of fresh ones in the recipe, which can save you time and effort. Frozen raspberries may not have the same flavor and texture as fresh ones, but they can still make a delicious filling. When using frozen raspberries, be sure to thaw them completely and drain any excess liquid before adding them to the cheesecake. This can help to ensure that your raspberry pistachio cheesecake is both flavorful and moist. You may still want to use fresh raspberries for the topping of the cake to elevate the aesthetic look of the cake.

Ingredients

Crust:

12 oz graham crackers

1 cup pistachios

1 cup melted butter

Filling:

3 - 8 oz cream cheese ( room temperature )

1 stick unsalted butter

1/2 cup brown sugar or light brown sugar

1/2 cup granulated sugar

1/4 teaspoon sea salt

3 eggs

1/2 cup heavy cream

1 tsp almond extract

1 cup mashed fresh raspberries

Topping -

2 cups fresh raspberries

1/3 cup pistachios

powdered sugar

Instructions

1. Preheat oven to 375. Spray the cheesecake pan with olive oil spray and wrap around the outside with foil.

2. Make the graham cracker crust by adding pecans & graham crackers to a blender and processing until fine. Gradually add in melted butter and blend again.

3. Press the crust mixture into the bottom of the springform cheesecake pan until even all the way around. I use a flat-bottom cup or a metal spoon to help.

4. Bake in the oven for 13-15 minutes. Once done remove and let cool completely on the cooling rack before adding filling. Reduce oven temperature to 325 degrees.

5. Make the filling. Mix softened cream cheese and butter with both sugars and salt until well combined with a stand mixer or hand mixer.

6. Gradually add in eggs. Making sure they are fully incorporated each time. Add heavy cream, vanilla and lemon zest! Once well-mixed pour into a cooled springform cheesecake pan. Also, add aluminum foil around the edges of the cheesecake pan.

7. You will then add this onto a tray with a lip. Place on oven rack and add in warm water until halfway full. Push back the rack and start the timer.

8. Cook the cheesecake for 1 hour. The center will still be a little jiggly, but the side will be set. After baking for 1 hour you will turn oven off the oven and leave the cheesecake in the oven for an additional hour.

9. Once baked for an hour and let sit for an hour in the oven, you can remove it from the oven. Wrap the cheesecake and let sit in your refrigerator overnight. Wait for up to 24 hours before serving or adding raspberry, pistachios and powdered sugar topping.

When looking for a delicious and easy dessert to make for your next dinner party or special occasion, look no further than the raspberry pistachio cheesecake! This delectable treat combines a sweet and tangy flavor with a creamy texture that will leave your guests wanting more. This is the perfect dessert for the Christmas season. The crust is made with crushed pistachios, giving it a crunchy texture that pairs perfectly with the creamy filling. The combination of flavors is both sweet and tangy, making it a great dessert for any occasion. Plus, the raspberry pistachio cheesecake is easy to make, making it a great dessert to whip up for a dinner party or special occasion. So, if you want to impress your guests with a delicious and easy dessert, the raspberry pistachio cheesecake is the perfect option.

Other Raspberry Recipes You Will Love:

An Irresistible Treat: The Delicious Berry Custard Puff Pastry Tart

Step-by-Step Guide to Making a Refreshingly Delicious Frozen Raspberry Margarita

Other Cheesecakes You Will Love:

A Divine Caramel Cheesecake with a Graham Cracker Pecan Crust

Tantalizingly Delicious Recipe For Lemon Cheesecake With An Amazing Glaze

Yummy Pumpkin Ice Cream Recipe with a Twist: Pumpkin Molasses Cookie Chunks!

Welcome all Autumn enthusiasts to a culinary journey where the earthy richness of pumpkin blends perfectly with the dreamy creaminess of ice cream. From the hearty aromatic spices to the soul-soothing temperatures, the Fall season brings about a comfort that we all eagerly crave. Today, we are taking this comfort to another level by introducing a swoon-worthy pumpkin spice ice cream recipe. This recipe is a twist on the seasonal favorite, laced with delectable chunks of pumpkin molasses cookies. This ice cream has intense flavors, and is incredibly satisfying, making it the ultimate celebration of all things Fall. It is truly a symphony of flavors that caters to the essence of the season. The molasses cookie chunks are also being combined from my last recipe. Following both these fun recipes means you can potentially utilize any leftovers of the chunks and create new variations of lovely Fall desserts!

Can I use store-bought cookies instead of making pumpkin molasses cookie chunks from scratch?

Making homemade ice cream is a great way to show off your culinary skills, and the addition of pumpkin molasses cookie chunks makes this pumpkin ice cream recipe truly special. If you don't have the time to make the cookie chunks from scratch, store-bought cookies are a great time-saver. There is a wide variety of store-bought cookies available, so you can choose one that best suits your taste. Be sure to chop the store-bought cookies into chunks before adding them to the ice cream mixture. Store-bought cookies may not be as fun of a story, or have the same flavor or texture as cookies made from scratch, but they can still add a delicious crunch to your pumpkin ice cream.

How long does this pumpkin ice cream with pumpkin molasses cookie chunks stay fresh?

This recipe is easy to store in your freezer and can last for up to two weeks. However, before serving, it is important to allow the ice cream to thaw for about 10 minutes to make it easier to scoop. This will also help ensure that the ice cream does not dry out and the cookie chunks remain crunchy. It is best to use the ice cream within two weeks of making it, otherwise, the texture and flavor may not be optimal. After two weeks, the pumpkin ice cream may start to dry out and the pumpkin molasses cookie chunks may become soggy.

Do I need an ice cream maker to make this pumpkin ice cream with pumpkin molasses cookie chunks?

You don't have to worry about needing an ice cream maker to make this delicious dessert! This recipe is simple and easy to make without an ice cream maker. All you need is an ice cream container, an electric mixer, and some basic ingredients. The process is quite simple and requires only a few steps for a delicious homemade pumpkin ice cream with pumpkin molasses cookie chunks.

Ingredients

2 Cups Heavy Cream

14 oz Sweetened Condensed Milk (1 Can)

1 Cup Pumpkin Puree

2 teaspoons Vanilla Extract

1 teaspoon Cinnamon

1 teaspoon Pumpkin Pie Spice

1 cup pumpkin molasses cookies

Instructions

  1. In a large bowl whisk together 2 cups heavy cream until stiff peaks form. I use my hand mixer for this but you can use a whisk or electric mixer with a whisk attachment.

  2. In a separate bowl, stir together the sweetened condensed milk, pumpkin puree, vanilla, salt, cinnamon, and pumpkin pie spice.

  3. Take 1 cup of the whipped cream and stir it into the sweetened condensed milk mixture.

  4. Now add the sweetened condensed milk mixture and fold it gently into the remaining whipped cream bowl. Add in molasses cookie chunks. You can add in more, less or any variation of this you like.

  5. Pour ice cream into a freezer-safe container, cover the top and freeze for at least 6 hours, or overnight.

  6. Serve in ice cream cones or bowls and Enjoy!

Your delicious homemade pumpkin ice cream with pumpkin molasses cookie chunks is now ready to enjoy! This delicious dessert is perfect for any occasion. Whether it's a family get-together or a special occasion, this ice cream is sure to please. So gather your ingredients, follow the steps, and enjoy this delicious homemade pumpkin ice cream recipe with pumpkin molasses cookie chunks.

Other Fall Desserts You Will Love:

Deliciously Sweet: Pumpkin Coffee Cake with Pecan Crumbles

Indulge Your Sweet Tooth with This Delicious Brown Butter Spice Cake with Honey & Fig Jam Frosting

A Taste of Heaven: Deliciously Easy Apple Pie!

Savor the Fall Season with the Perfect Pumpkin Espresso Martini

Calling all lovers of coffee, cocktails, and yummy Fall pumpkin flavors. We have a festive, Fall festive treat for you! Immerse yourself in a unique fusion of silky frothed espresso, warm spices, and a cool tang of vodka that will surprise your palate and elevate your cocktail game. This blog post will guide you through this fun recipe, introducing you to the magical infusion that is a Pumpkin Espresso Martini. This concoction is guaranteed to warmly welcome you into the toppling russet leaves and crisp air of Autumn. Uncover how to perfectly blend these tantalizing flavors into an indulgent, adult-themed, mocha-pumpkin-spice froth of goodness!

This drink is a great way to enjoy the flavors of the season without the added calories of an actual pumpkin pie. To make this martini, simply mix together pumpkin puree, espresso, vodka, and a splash of cream. The combination of espresso and vodka creates a smooth and creamy texture, while the pumpkin puree adds a sweet and spicy flavor. To complete the flavors of this drink, add a touch of cinnamon and coffee grinds to the top of the martini for a festive garnish. Serve the Pumpkin Spice Espresso Martini in a martini glass and enjoy! Whether you’re hosting Thanksgiving this year or just looking for a delicious seasonal cocktail to enjoy, the Pumpkin Spice Espresso Martini is sure to be a hit.

Why will you need to strain this drink?

The key to making the perfect pumpkin espresso martini is to strain it after it's mixed. Straining your pumpkin spice martini ensures that the drink is smooth and free of any lumps or bits of pumpkin puree. Straining also helps to keep the drink at the perfect temperature since it removes any ice that may have been used during the mixing process. Additionally, straining helps to keep the flavors of your pumpkin spice martini from becoming too muddled or watered down. Straining helps to separate the alcohol from the flavors of the pumpkin puree and other ingredients, allowing for a more balanced and refined flavorful cocktail. Finally, straining also helps to ensure that your pumpkin spice martini is free of any debris. With the right straining technique, you can enjoy a smooth and delicious pumpkin espresso martini that is sure to be a hit with your friends and family!

Choosing the best coffee roast

Another key to making the perfect pumpkin espresso martini is choosing the right espresso roast. A dark roast is usually the best coffee roast for espresso, as it has a more intense flavor and a higher caffeine content. However, medium-dark roasts are also popular for espresso, as they have a more balanced flavor and lower acidity. Some people prefer a lighter roast for their espresso, as it has a brighter flavor and more subtle notes. For a pumpkin espresso martini, a medium-dark roast is recommended, as it has a slightly sweet flavor that pairs well with the pumpkin and espresso. If you prefer a bolder coffee taste, a dark roast would be ideal, as its deep flavor complements the robust espresso and pumpkin flavors.

Once you’ve chosen the best espresso roast for you, the rest of the ingredients are easy to find. A good quality vodka, a sweet coffee liqueur, and some pumpkin puree are all you'll need to create this delicious seasonal cocktail. The result is a creamy, smooth cocktail that will have you wishing Autumn could last forever.

What tools do I need to make an espresso martini?

To make a pumpkin espresso martini, you will need a coffee grinder, an espresso or coffee machine, a shaker, a strainer, pumpkin puree, vanilla or vanilla vodka, coffee liqueur, espresso (or cold brew coffee), heavy cream, and ice. Start by grinding your coffee beans and brewing your espresso. Once you have your espresso ready, you can begin making the martini. A pumpkin espresso martini is the perfect way to enjoy a cozy fall night this holiday season. With the right ingredients and equipment, this delicious cocktail is easy to make and even easier to enjoy.

When to serve this martini

The pumpkin espresso martini is the perfect signature cocktail for a Thanksgiving or Friendsgiving party. Its sweet and creamy flavor combined with the warm, spicy notes of pumpkin and espresso makes it a festive and delicious choice. If you're looking for a cozy night in, look no further than this cozy Autumn cocktail. Enjoy a pumpkin espresso martini on a chilly evening for a festive and relaxing evening.

For a special dinner party, the pumpkin espresso martini is a great after-dinner drink. Its mix of pumpkin, espresso, and vodka makes it a rich and flavorful end to any meal. It also makes a great dessert drink for a fall-themed brunch. For those looking for a pick-me-up on a chilly Autumn day, the pumpkin espresso martini is a great choice. The combination of espresso and vodka gives this cocktail an energy boost while still providing a cozy and comforting flavor. Perfect for an early afternoon treat. This festive and flavorful cocktail is sure to make your restaurant or bar stand out from the rest.

So, as the days get colder and the leaves start to change, it's the perfect time to enjoy the cozy, festive flavor of a Pumpkin Espresso Martini. This easy-to-make cocktail combines espresso, pumpkin puree, vodka, and simple syrup for a deliciously smooth and creamy drink. The pumpkin puree gives the drink a creamy texture and the vodka adds a nice kick. The espresso adds a rich flavor that perfectly complements the pumpkin and vodka. To make this drink even more festive, top it off with some whipped cream and a sprinkle of nutmeg or cinnamon.

One of the great things about this drink is that it's perfect for both Fall and eventually Winter celebrations. It's a great way to add a festive touch to any party or gathering. If you want to make this drink even more customized, feel free to tinker and add different types of liquors or syrups. For instance, a cinnamon-flavored vodka or spiced rum are great options to add to a seasonal irresistible touch.

Ingredients

1 oz Vodka

2 oz Coffee Liqueur

2 oz Espresso

2 oz Heavy Cream

2 teaspoons pumpkin puree

1/4 teaspoon pumpkin pie spice

Ice

Instructions

1. Add all ingredients to the shaker, if espresso is hot, add last.

2. Shake vigorously for 10-15 seconds. Make sure to do this to make the foam for the top of the martini.

3. Pour into martini glass and garnish. I sprinkled pumpkin pie or cinnamon on top with 3 coffee beans. Serve and Enjoy immediately.

What flavors can you add to an espresso martini?

To make a truly delicious pumpkin espresso martini, start with a shot of espresso and a shot of vodka. Add a few drops of vanilla, caramel, hazelnut, cinnamon, and pumpkin spice. Stir it all together and add a dash of nutmeg for an extra kick. Top off with a dollop of whipped cream and a sprinkling of chocolate for a truly decadent treat.

For an extra special twist, add a splash of Irish cream, coconut, amaretto, or Kahlua. Each of these flavors will add a unique depth and complexity to your martini. Whether your guests prefer something sweet or something a little more daring, the pumpkin espresso martini has something for everyone.

Want to turn this cocktail into a little Christmas magic. Substitute the pumpkin puree for peppermint extract and you quickly and easily have the most delicious peppermint espresso martini for happy hour!

Can a pumpkin espresso martini be served both cold and warm?

A pumpkin espresso martini can be served both cold and warm, depending on the preference of the person drinking it. If served cold, the vodka and espresso are mixed together with pumpkin puree or syrup, and shaken vigorously. This mixture can then be strained into a martini glass and garnished with a sprinkle of pumpkin pie spice for a traditional cold pumpkin espresso martini. Alternatively, for those who prefer a warm variation, a warm pumpkin espresso martini can be served with a dollop of whipped cream, a sprinkle of pumpkin pie spice, and a cinnamon stick. This warm variation is perfect for those chilly autumn nights, providing a warm and cozy feeling. Regardless of how you choose to serve it, a pumpkin espresso martini is a delicious and unique twist on the classic martini. Whether you’re looking for a unique way to impress your guests or just want to enjoy a delicious cocktail, a pumpkin espresso martini is the perfect choice.