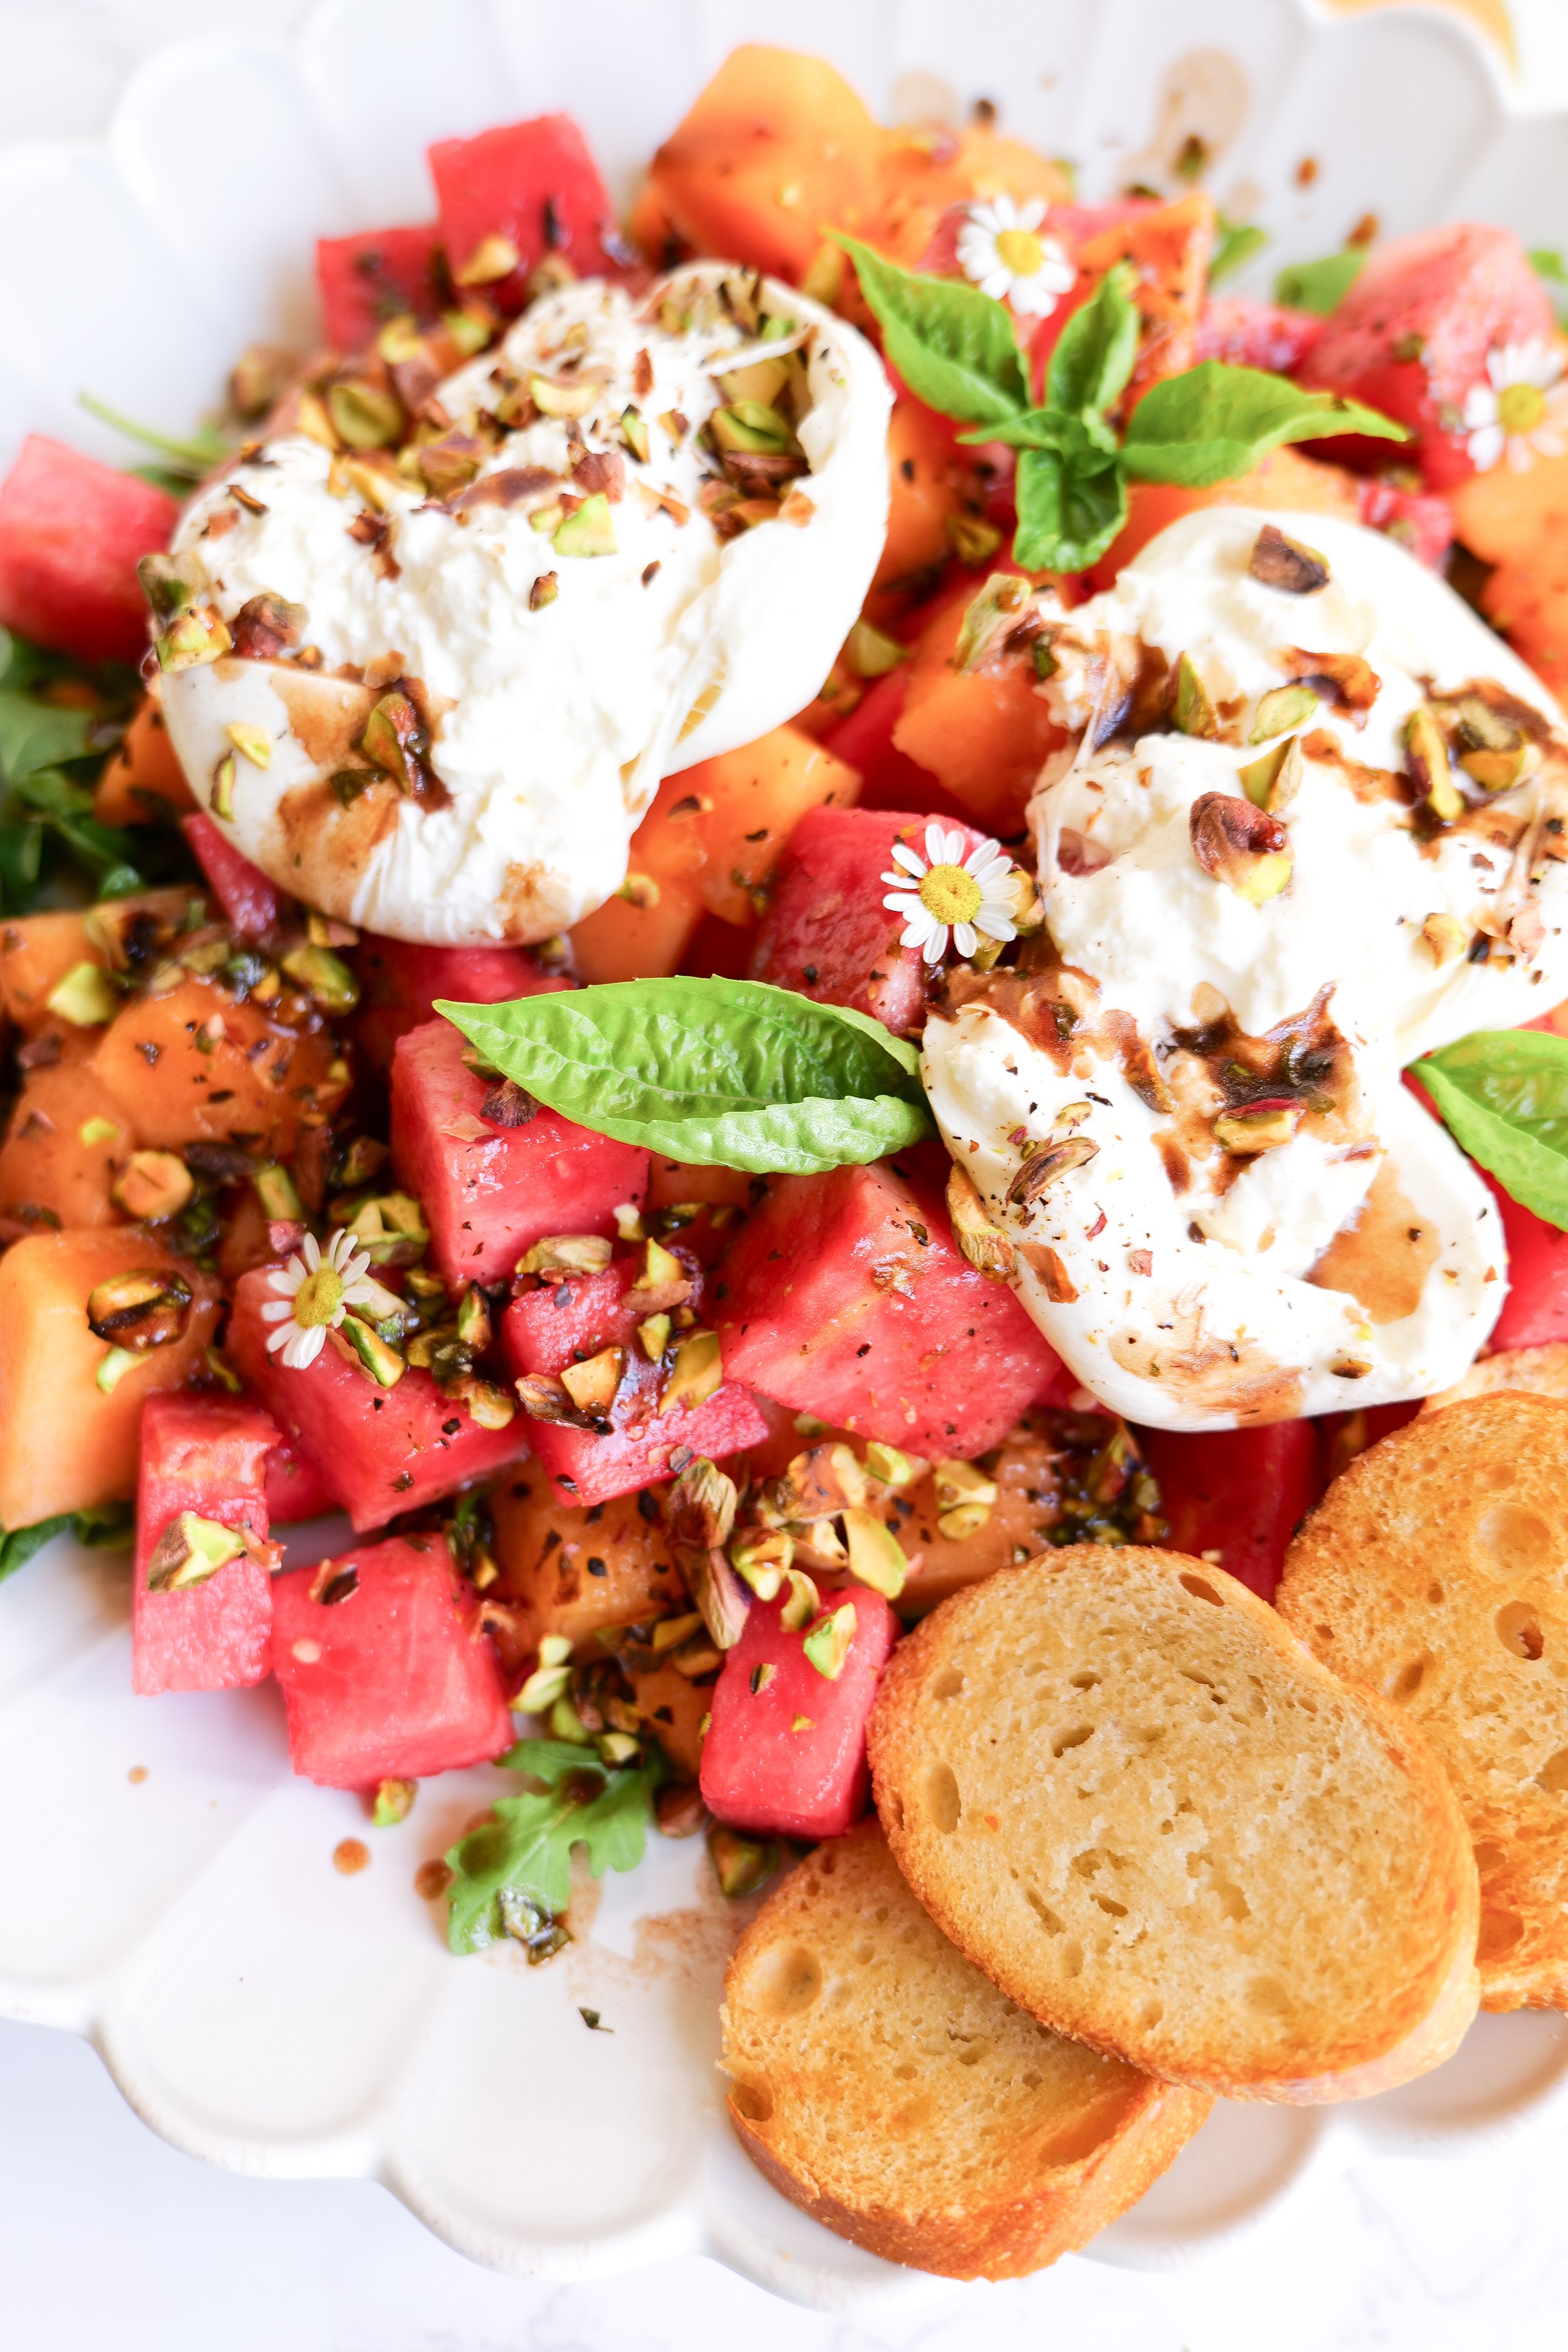
The Perfect Mediterranean Pasta Salad Recipe for Summer Entertaining
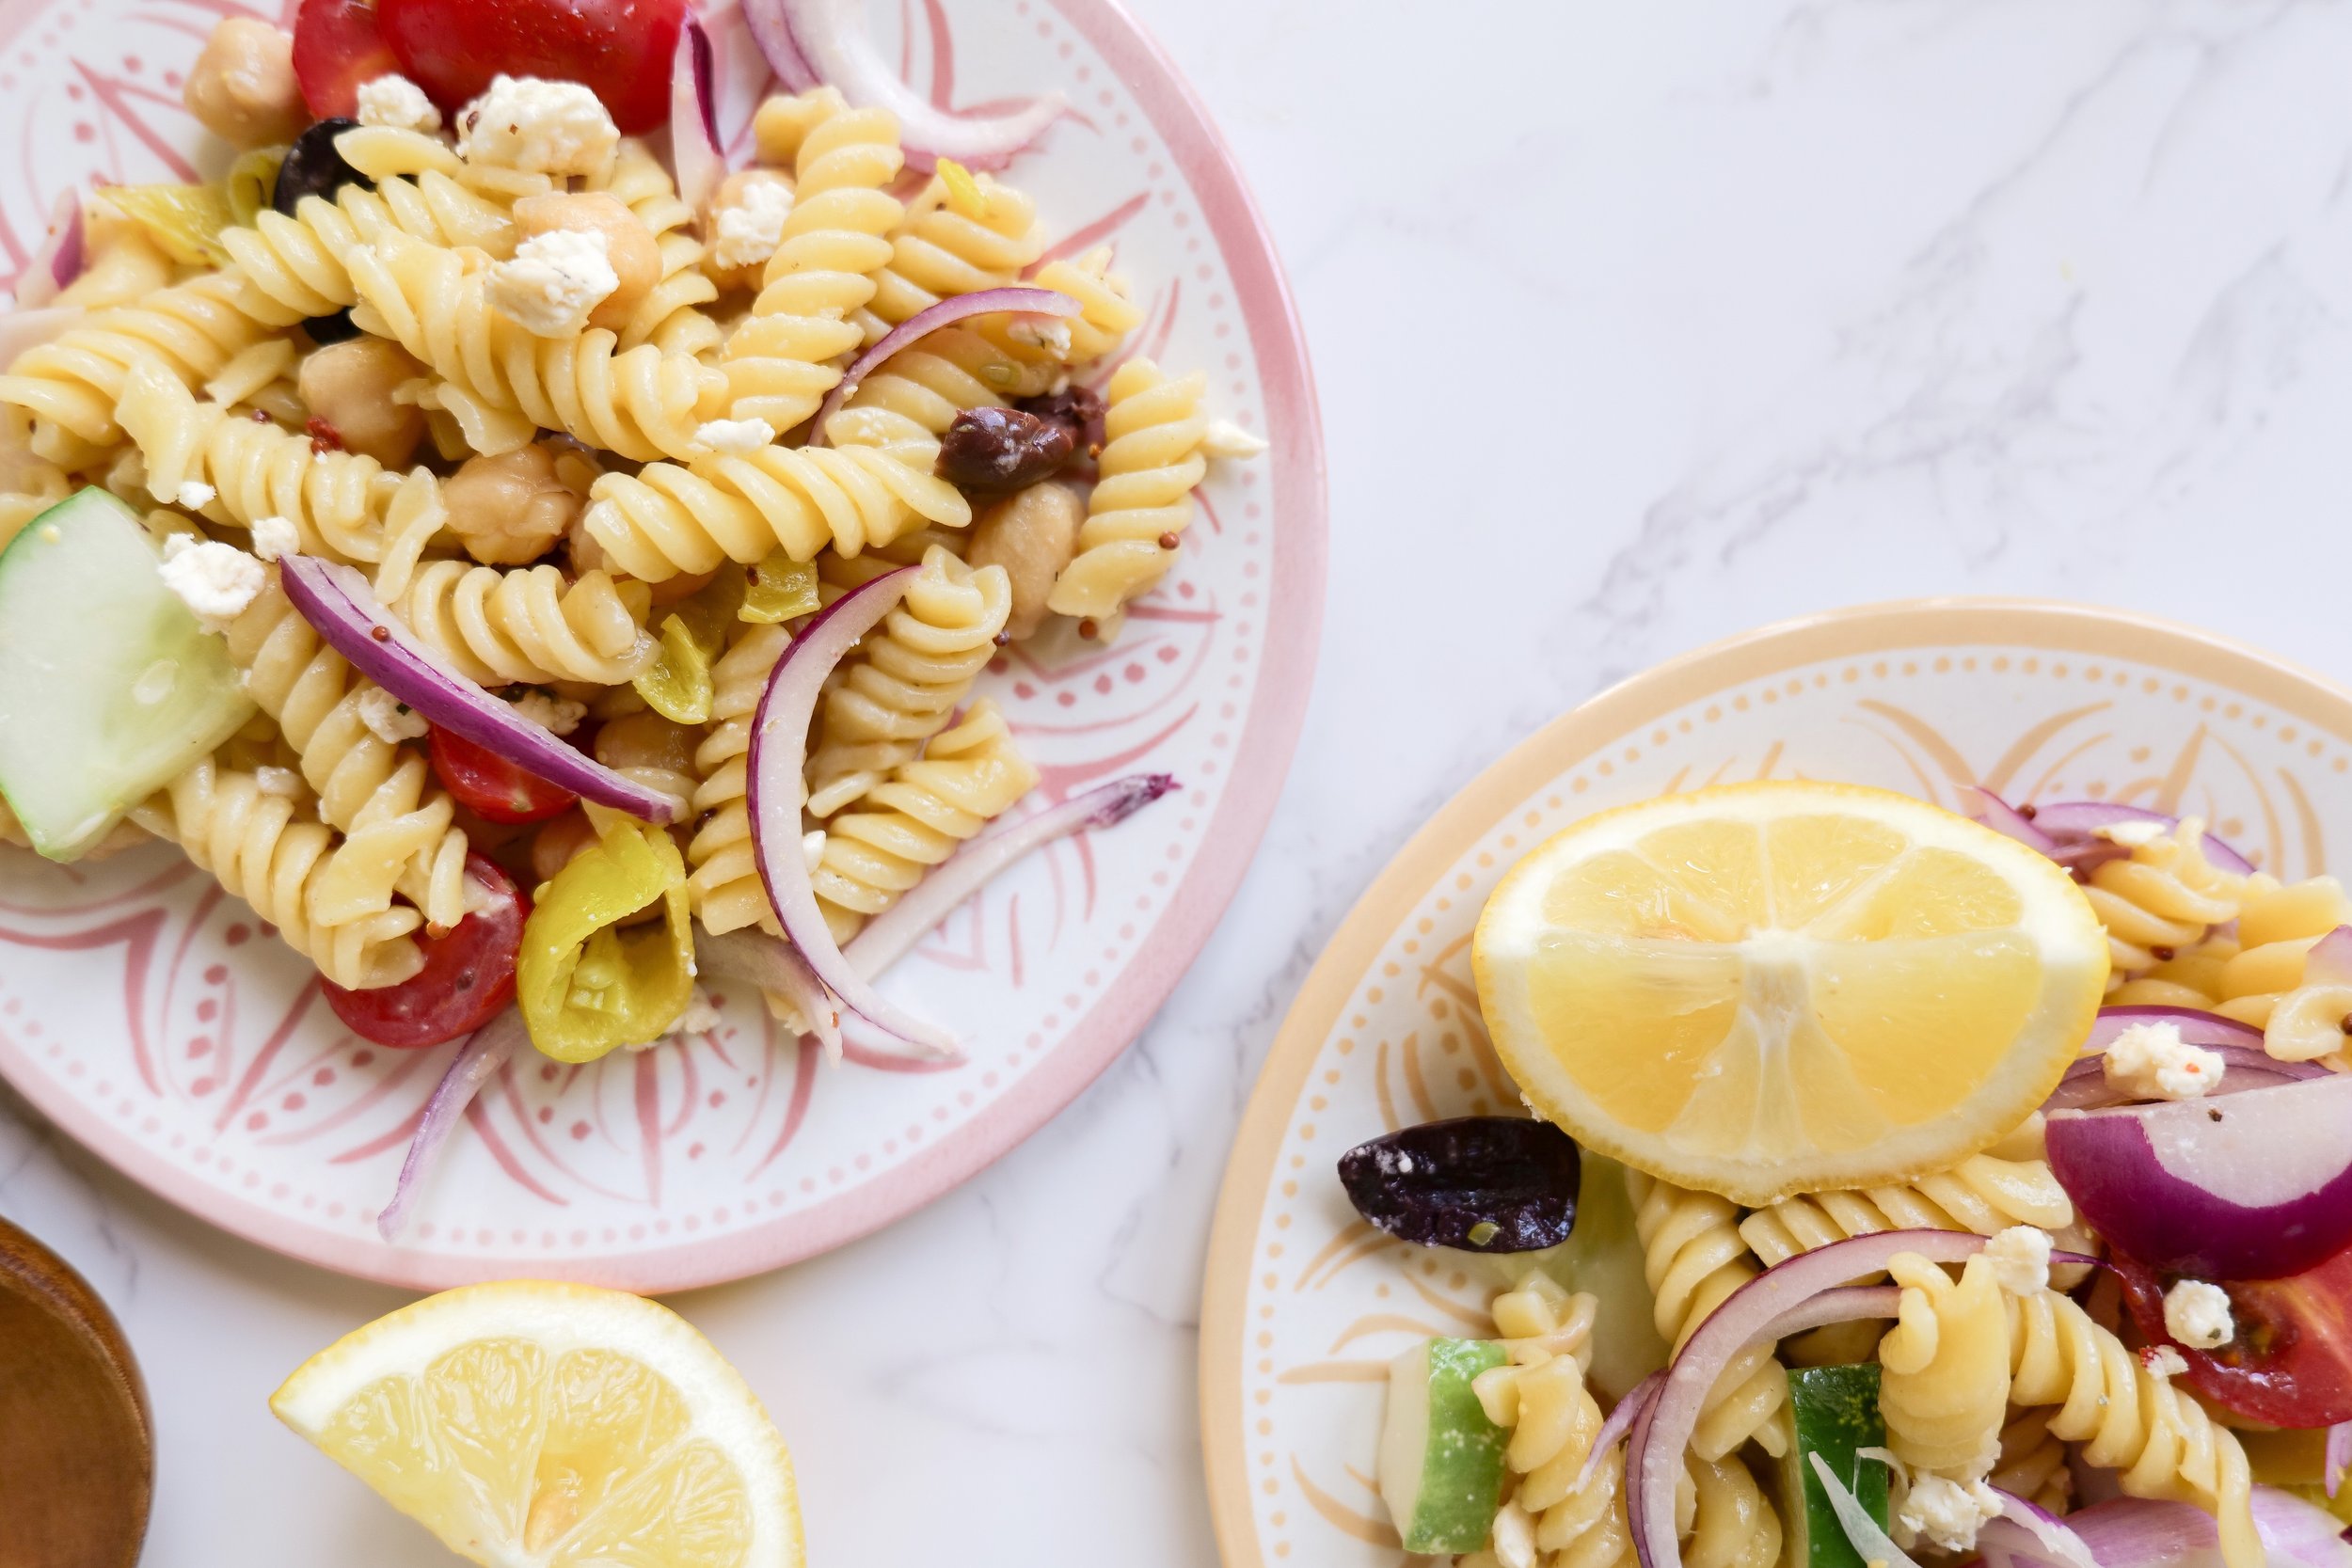
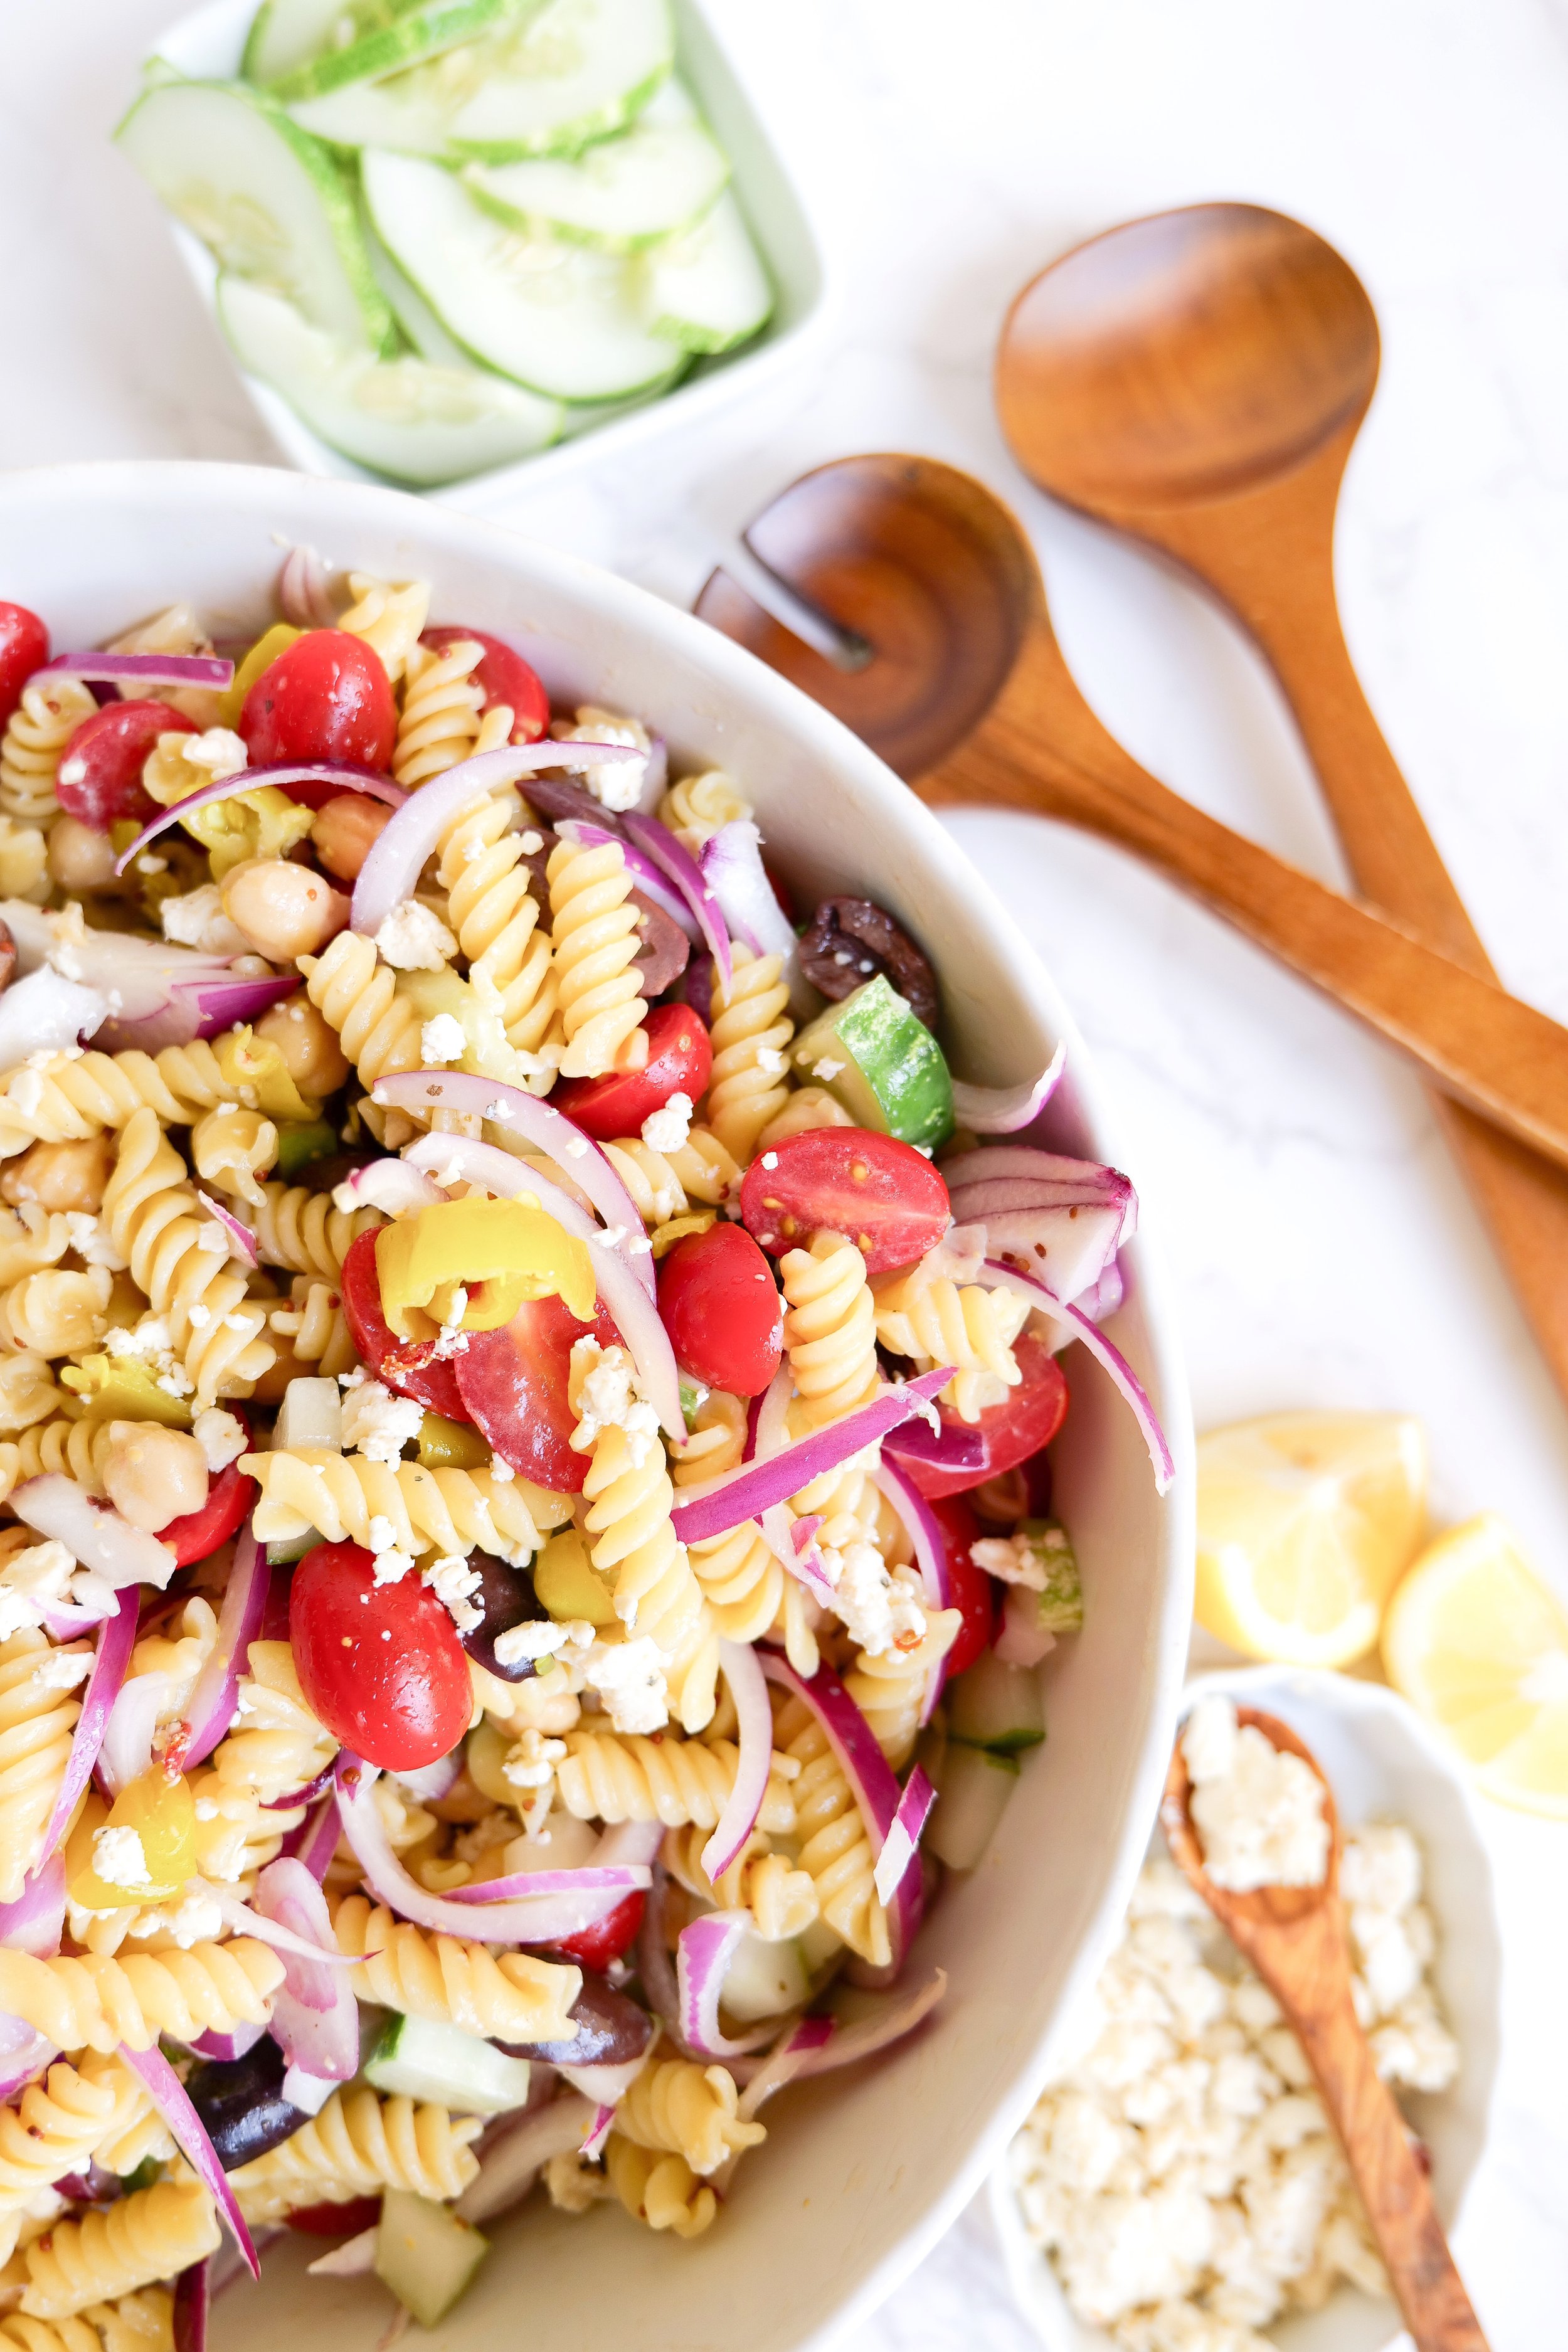
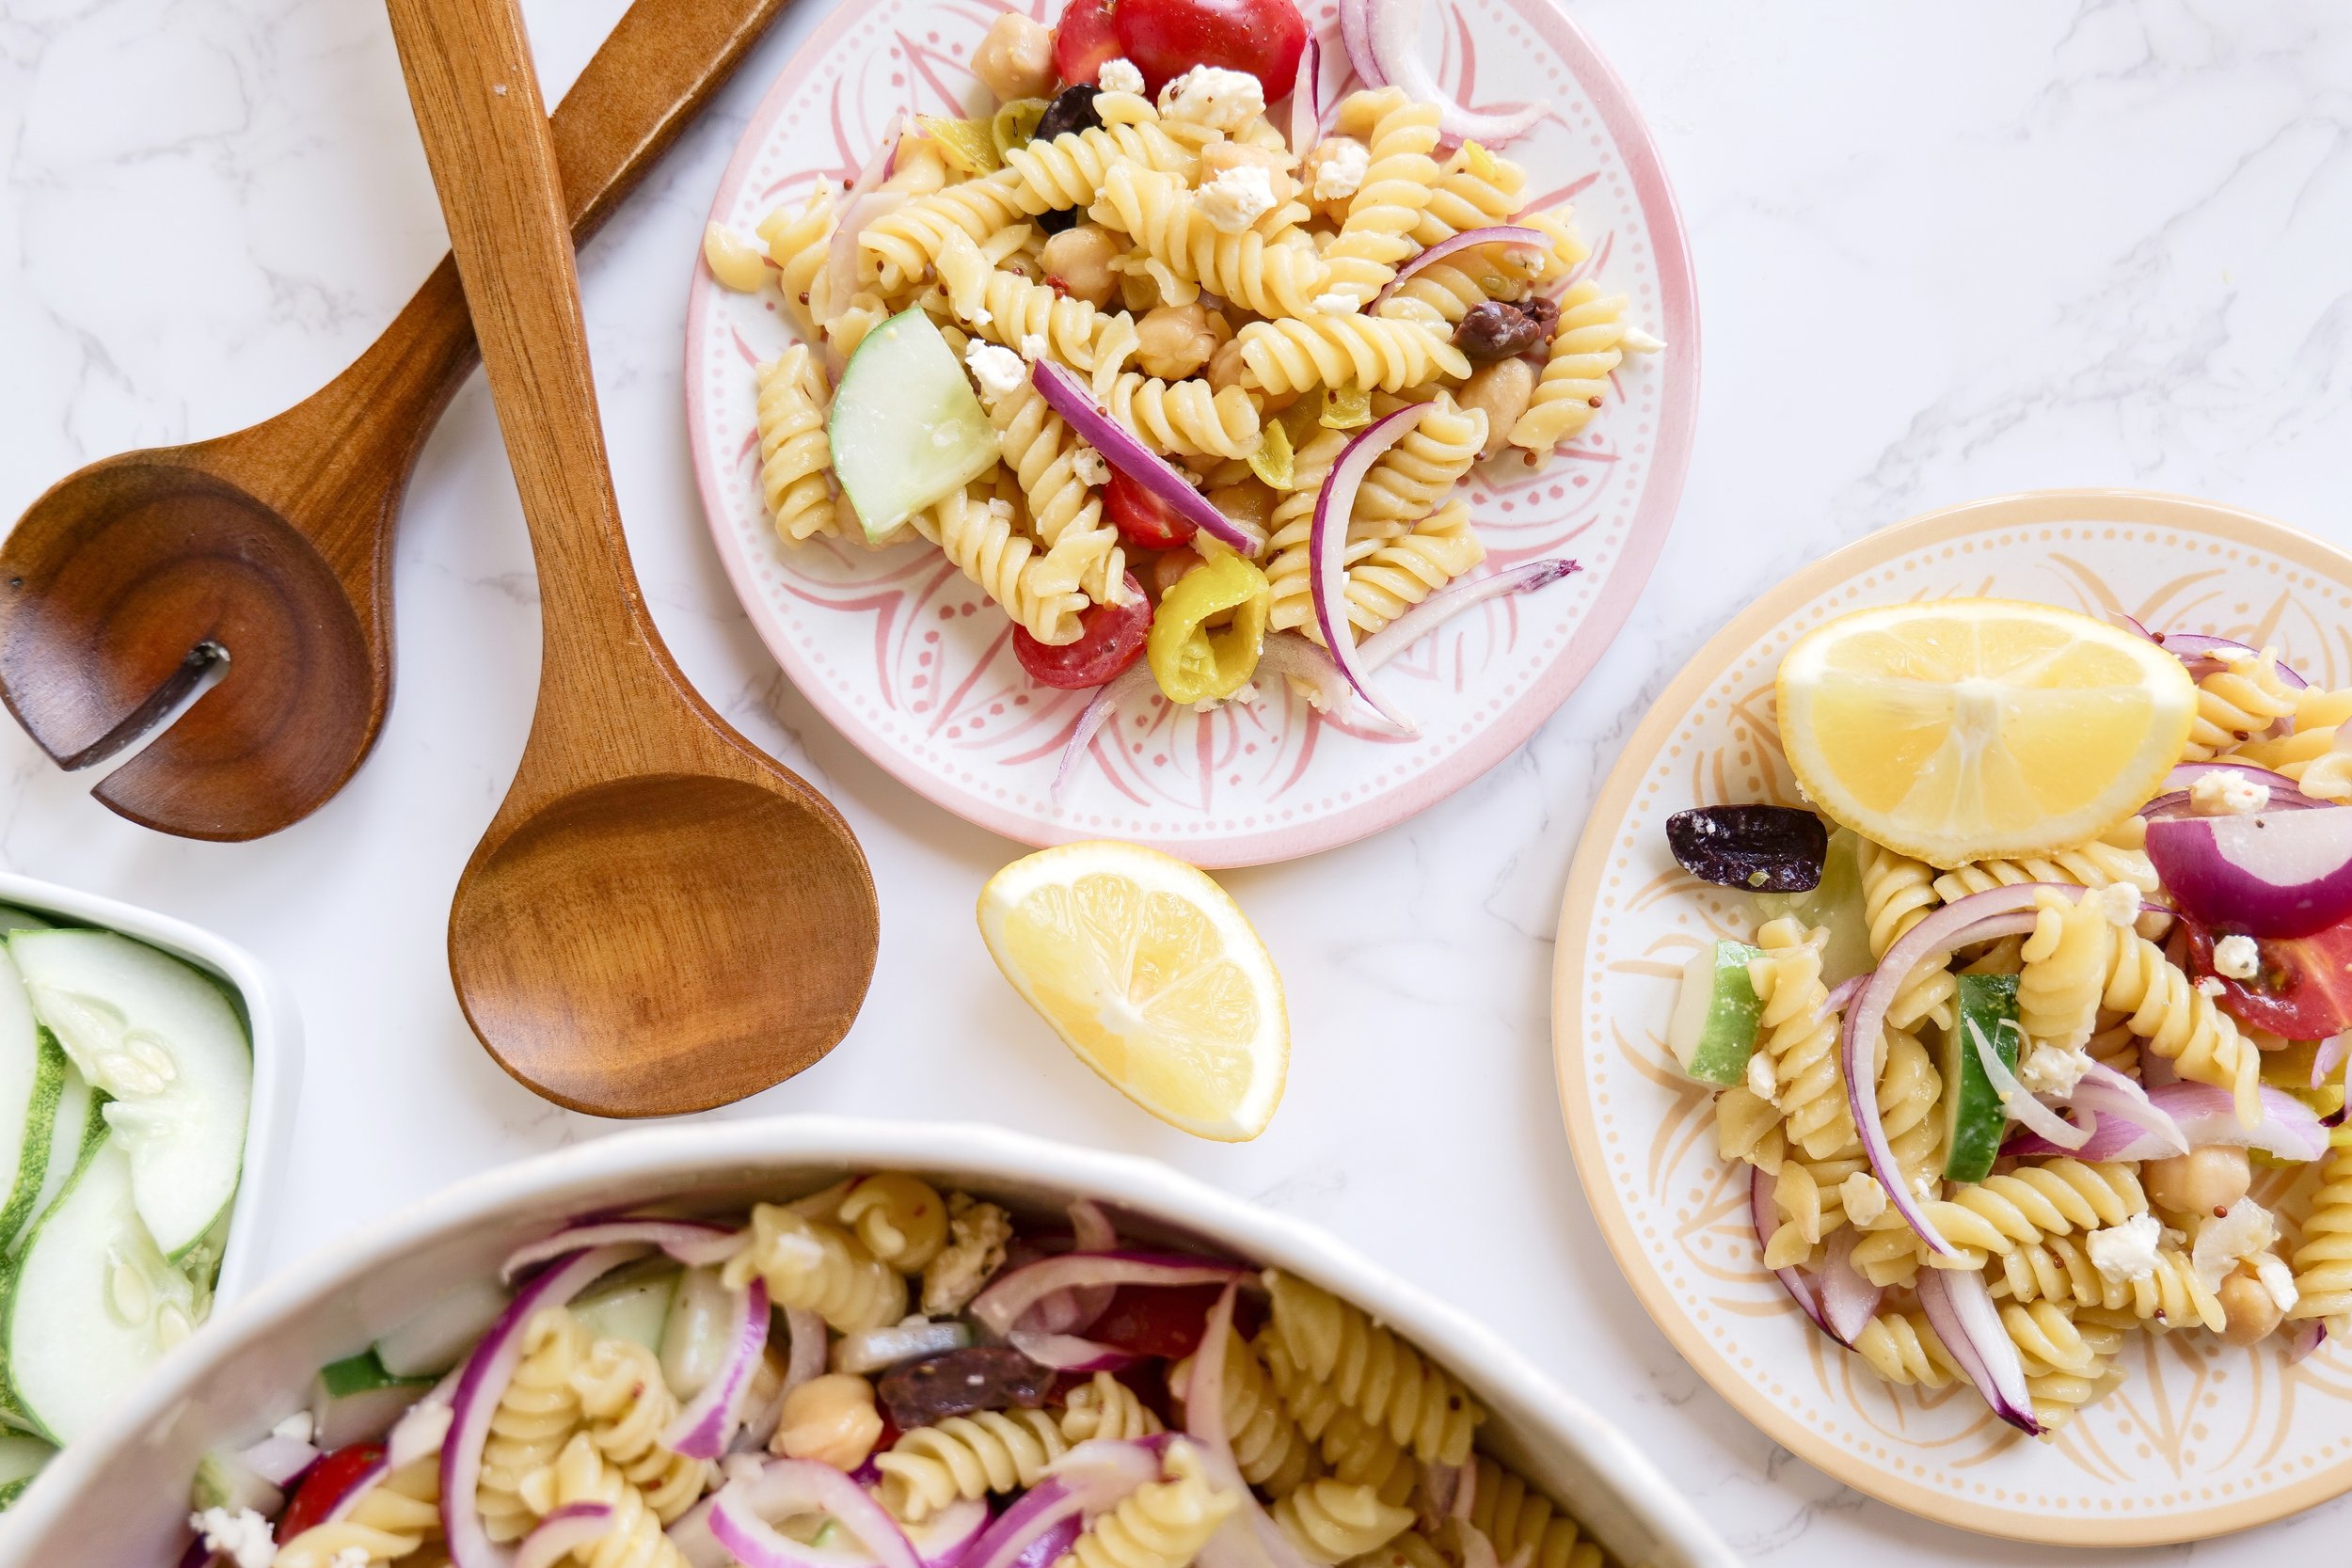
If you're looking for a delicious and light meal, this Mediterranean Pasta Salad is the perfect dish. This flavorful salad is packed with fresh vegetables like tomatoes, cucumbers, and olives, and is combined with an Italian-inspired dressing and a variety of delicious cheeses. The combination of flavors in this dish creates an amazing variety of tastes and is sure to please everyone at the table. Not only is it a great entree, but its bright colors and unique flavors also make it a great side dish for any lunch or dinner. With just a few simple ingredients, you can whip up this Mediterranean Pasta Salad in no time. For a delicious and healthy dish that's perfect for summer picnics and barbecues, Mediterranean Pasta Salad is the way to go. It's an easy dish to prepare and can be served either warm or cold.

Not only is this salad full of delicious flavor, but it is also low in fat and calories. You can customize this dish to your liking by adding different vegetables, proteins, and dressings of your choice. Mediterranean Pasta Salad is a great way to get your daily dose of vegetables and healthy fats. It's a quick and easy meal that's sure to please everyone and have them coming back for a second scoop.

Popular Substitutions & Additions

Mediterranean pasta salad is a delicious and versatile dish that can be tailored to your tastes. It's easy to customize the ingredients for a unique set of flavors and textures. For a tangy kick, substitute feta cheese for Parmesan cheese. Olives and sun-dried tomatoes add a burst of flavor, while whole-wheat bowtie pasta gives it a healthier twist with fewer carbs. Olive oil is a great substitute for mayonnaise to reduce fat and calories. Chopped artichoke hearts give the dish a unique texture, while fresh basil for a more intense herb flavor. Add grilled chicken or shrimp for a protein-packed meal, and capers for an extra salty kick. For a creamier texture, substitute Greek yogurt for mayonnaise. Roasted red peppers bring a touch of sweetness, and arugula can be used instead of spinach for a peppery taste. With so many options, Mediterranean pasta salad is sure to be a crowd-pleaser.

What to Pair with Your Summer Pasta Salad

A Mediterranean pasta salad is a light and delicious dish that is perfect for Summertime meals. Its combination of fresh vegetables, olives, feta cheese, and herbs makes it a great way to enjoy the flavors of the Mediterranean. To complete the meal, a light, dry white wine like a Pinot Grigio or Sauvignon Blanc pairs perfectly with this salad. For a more flavorful drink, try a crisp, bubbly rosΓ© or a chilled rosΓ© Spritzer. Freshly baked garlic bread is also a great addition to this meal.

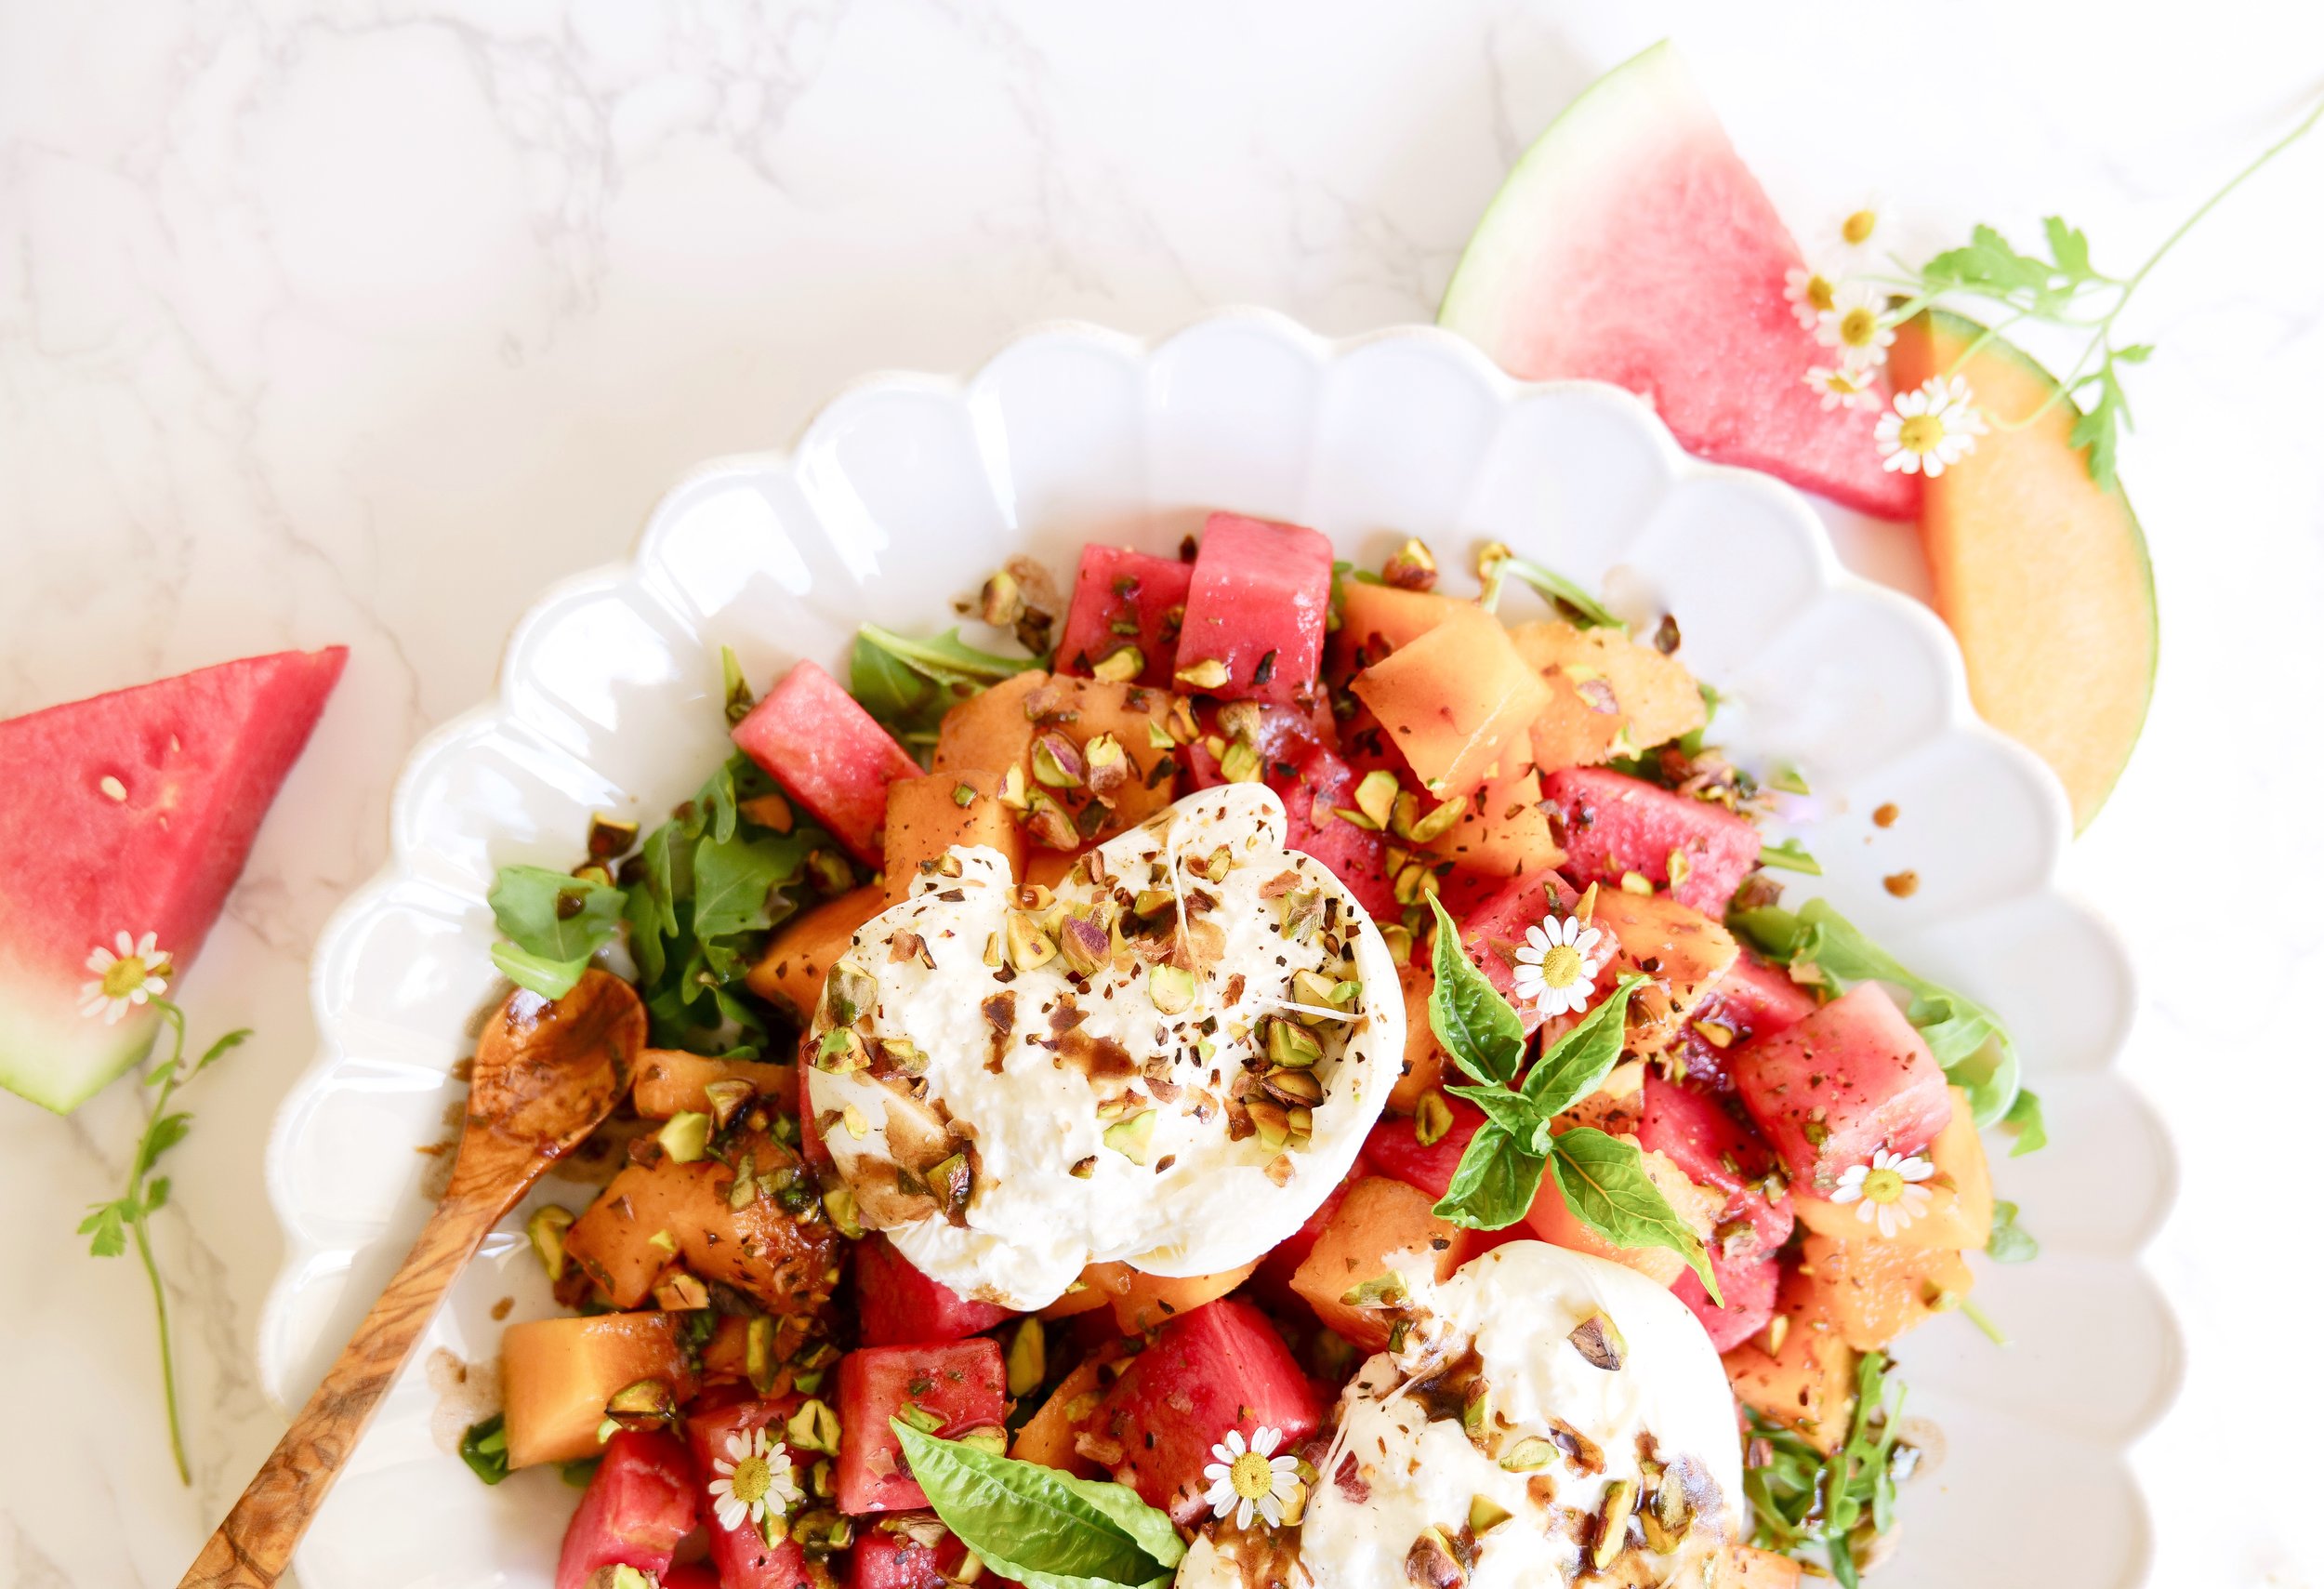
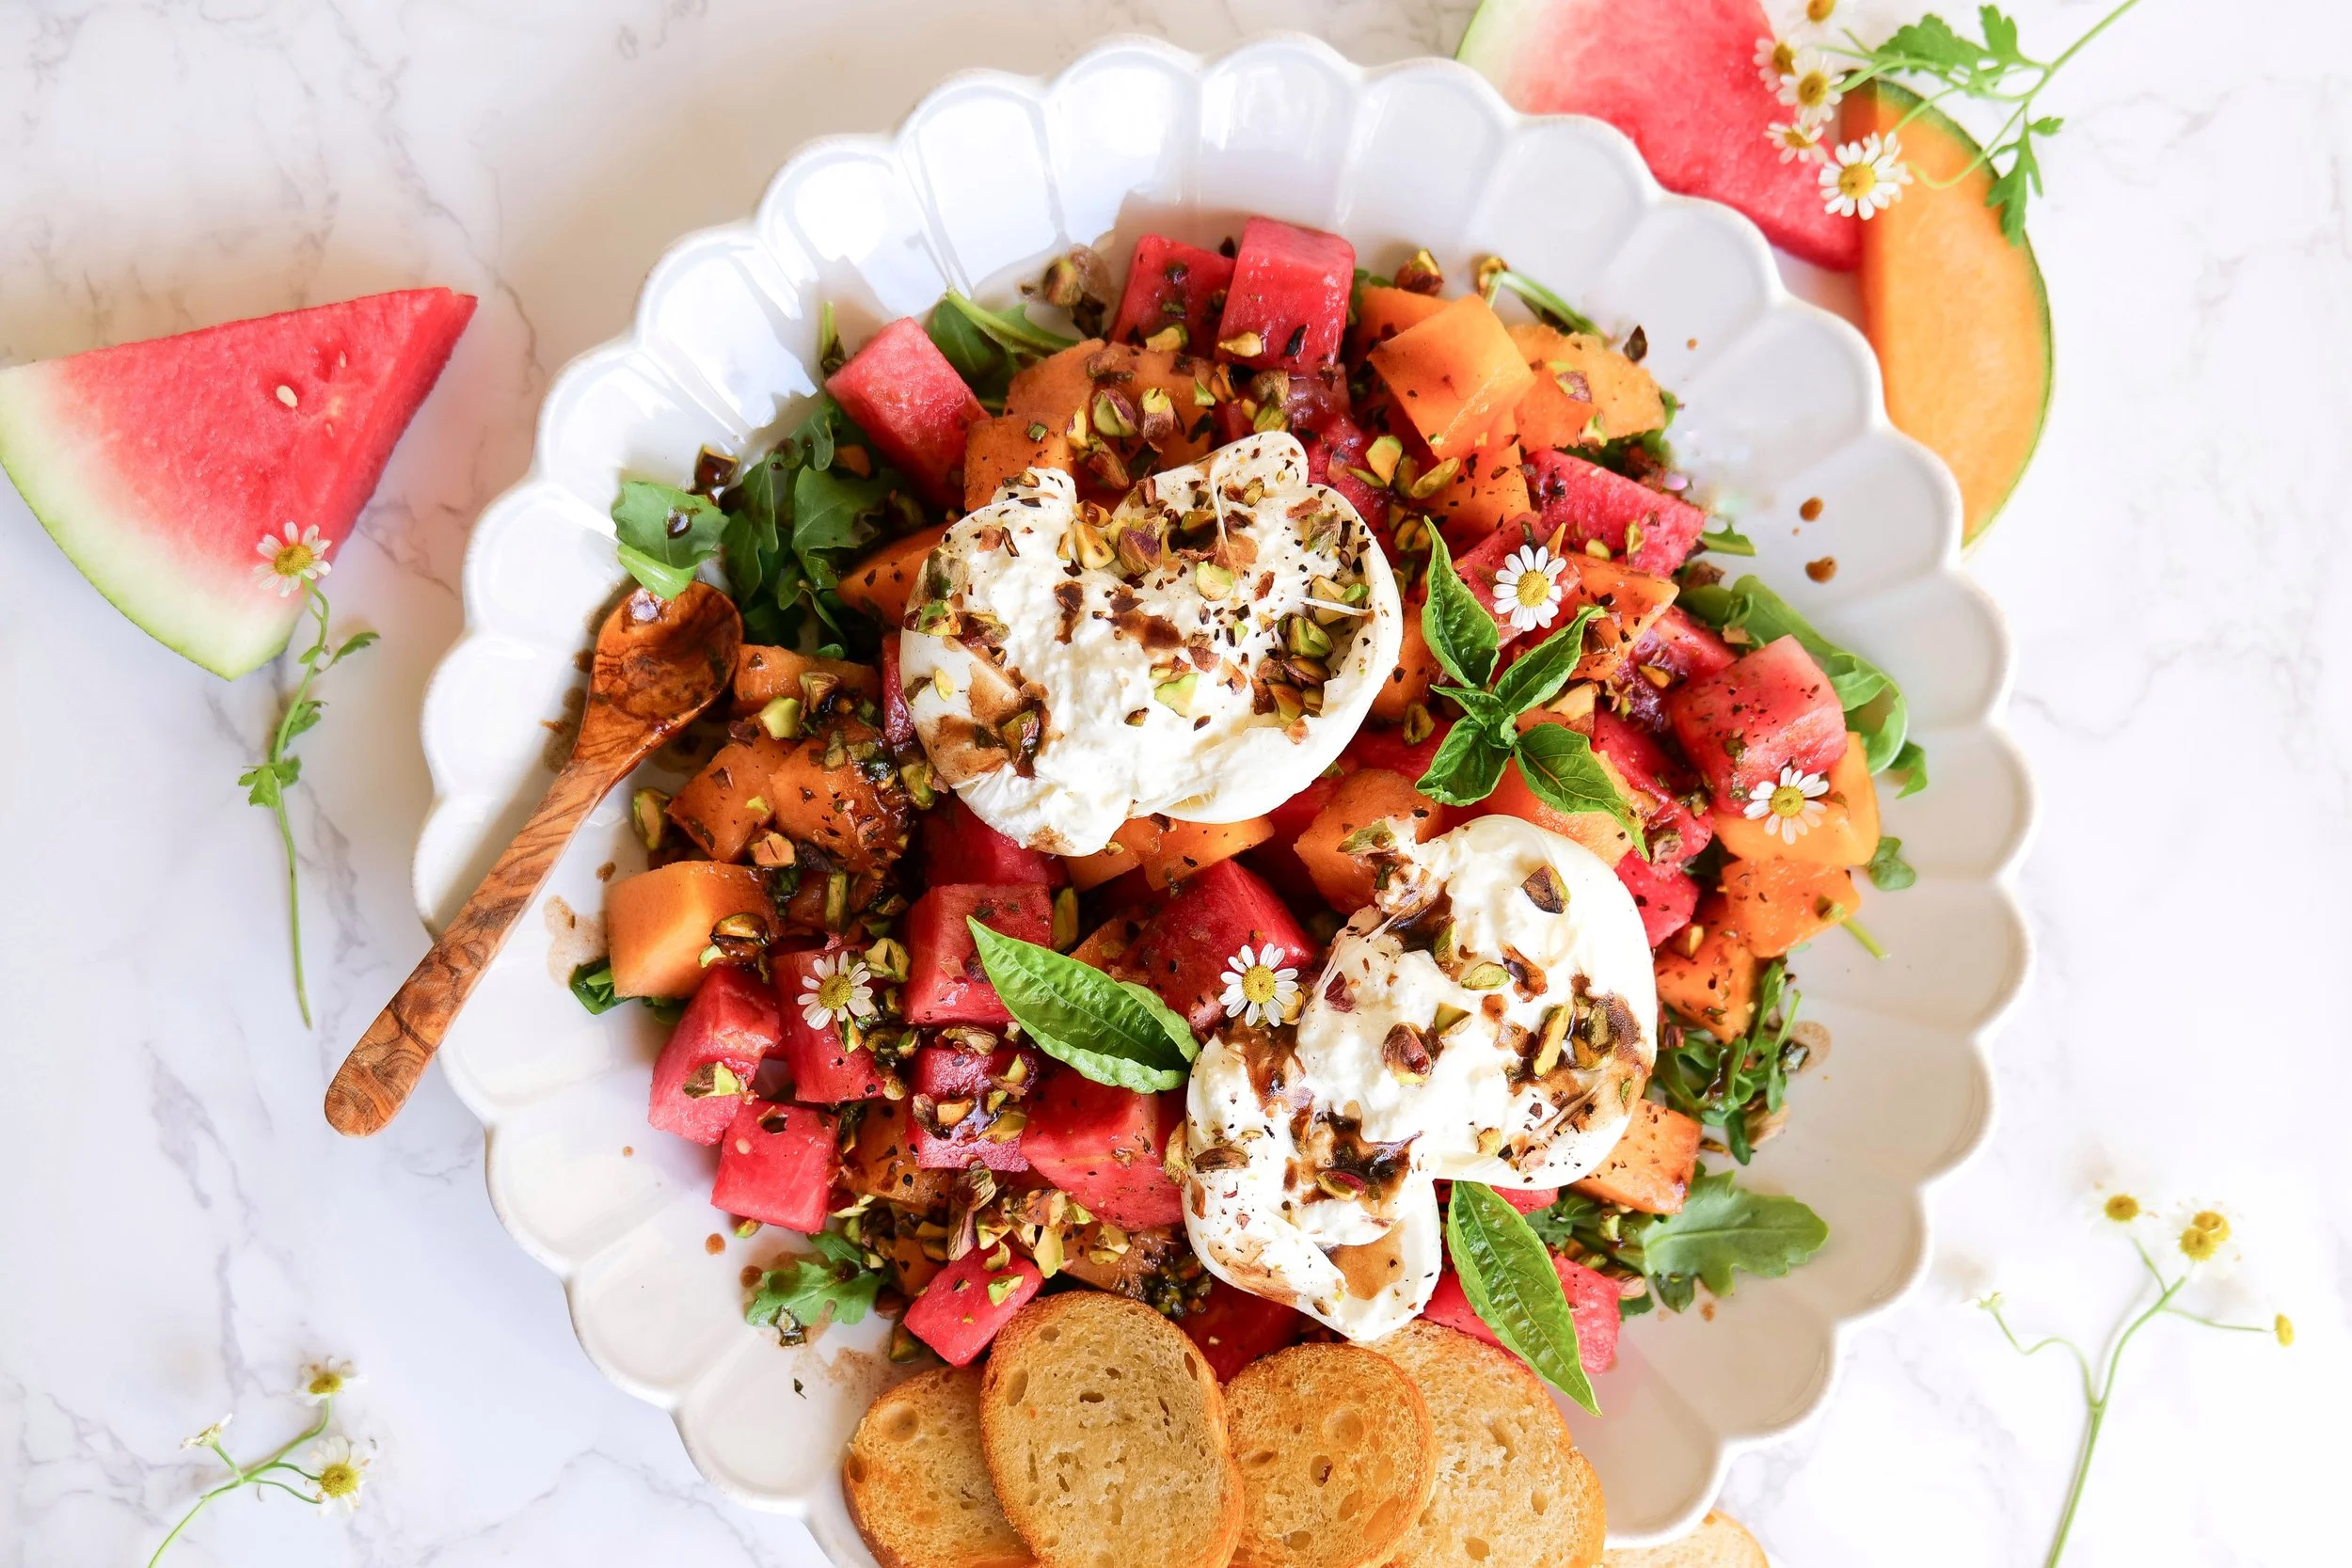
For a more complete meal, serve the Mediterranean pasta salad with a side of my delicious baked chicken drumsticks, steak, or salmon. For a vegan option, serve the salad with a side of lentils or roasted vegetables. To brighten the meal, add a side of freshly cut fruit or a fruit salad. Finally, top off the meal with a light dessert like a homemade fruit tart or ice cream.

How to Store Mediterranean Pasta Salad

When storing the Mediterranean pasta salad, make sure to let it cool completely before putting it in an airtight container. If possible, store the salad without the dressing and add it just before serving. The Mediterranean pasta salad can be stored in the refrigerator for up to 3-4 days. If you want to store the salad for a longer time, freeze it in a freezer-safe container.

To reheat the frozen Mediterranean pasta salad, thaw it in the refrigerator overnight and then cook it in a skillet over medium-high heat or serve cold. This will help to retain the flavor and texture of the salad. Enjoy the Mediterranean pasta salad as is or top it with a drizzle of olive oil and a sprinkle of fresh herbs.

How Long Will Pasta Salad Last In the Fridge?

A good pasta salad is a great way to use up leftover pasta, and the combination of flavors is sure to please any crowd. The best part is that you can store it in the fridge for up to 4 days, so it's perfect for meal prepping or making ahead of time. When storing your pasta salad in the fridge, make sure to keep it in an airtight container to prevent it from spoiling. If you're not planning to eat the pasta salad within 4 days, it's a good idea to freeze it to keep it fresh longer.

It's important to remember that if you notice that the pasta salad is starting to look or smell off, it's best to discard it. While it's okay to keep it in the fridge for up to 4 days, any longer than that and you may not be able to trust the quality of the dish. So make sure to store it properly and enjoy it while it's still fresh.

My Best Pasta Salad Tips

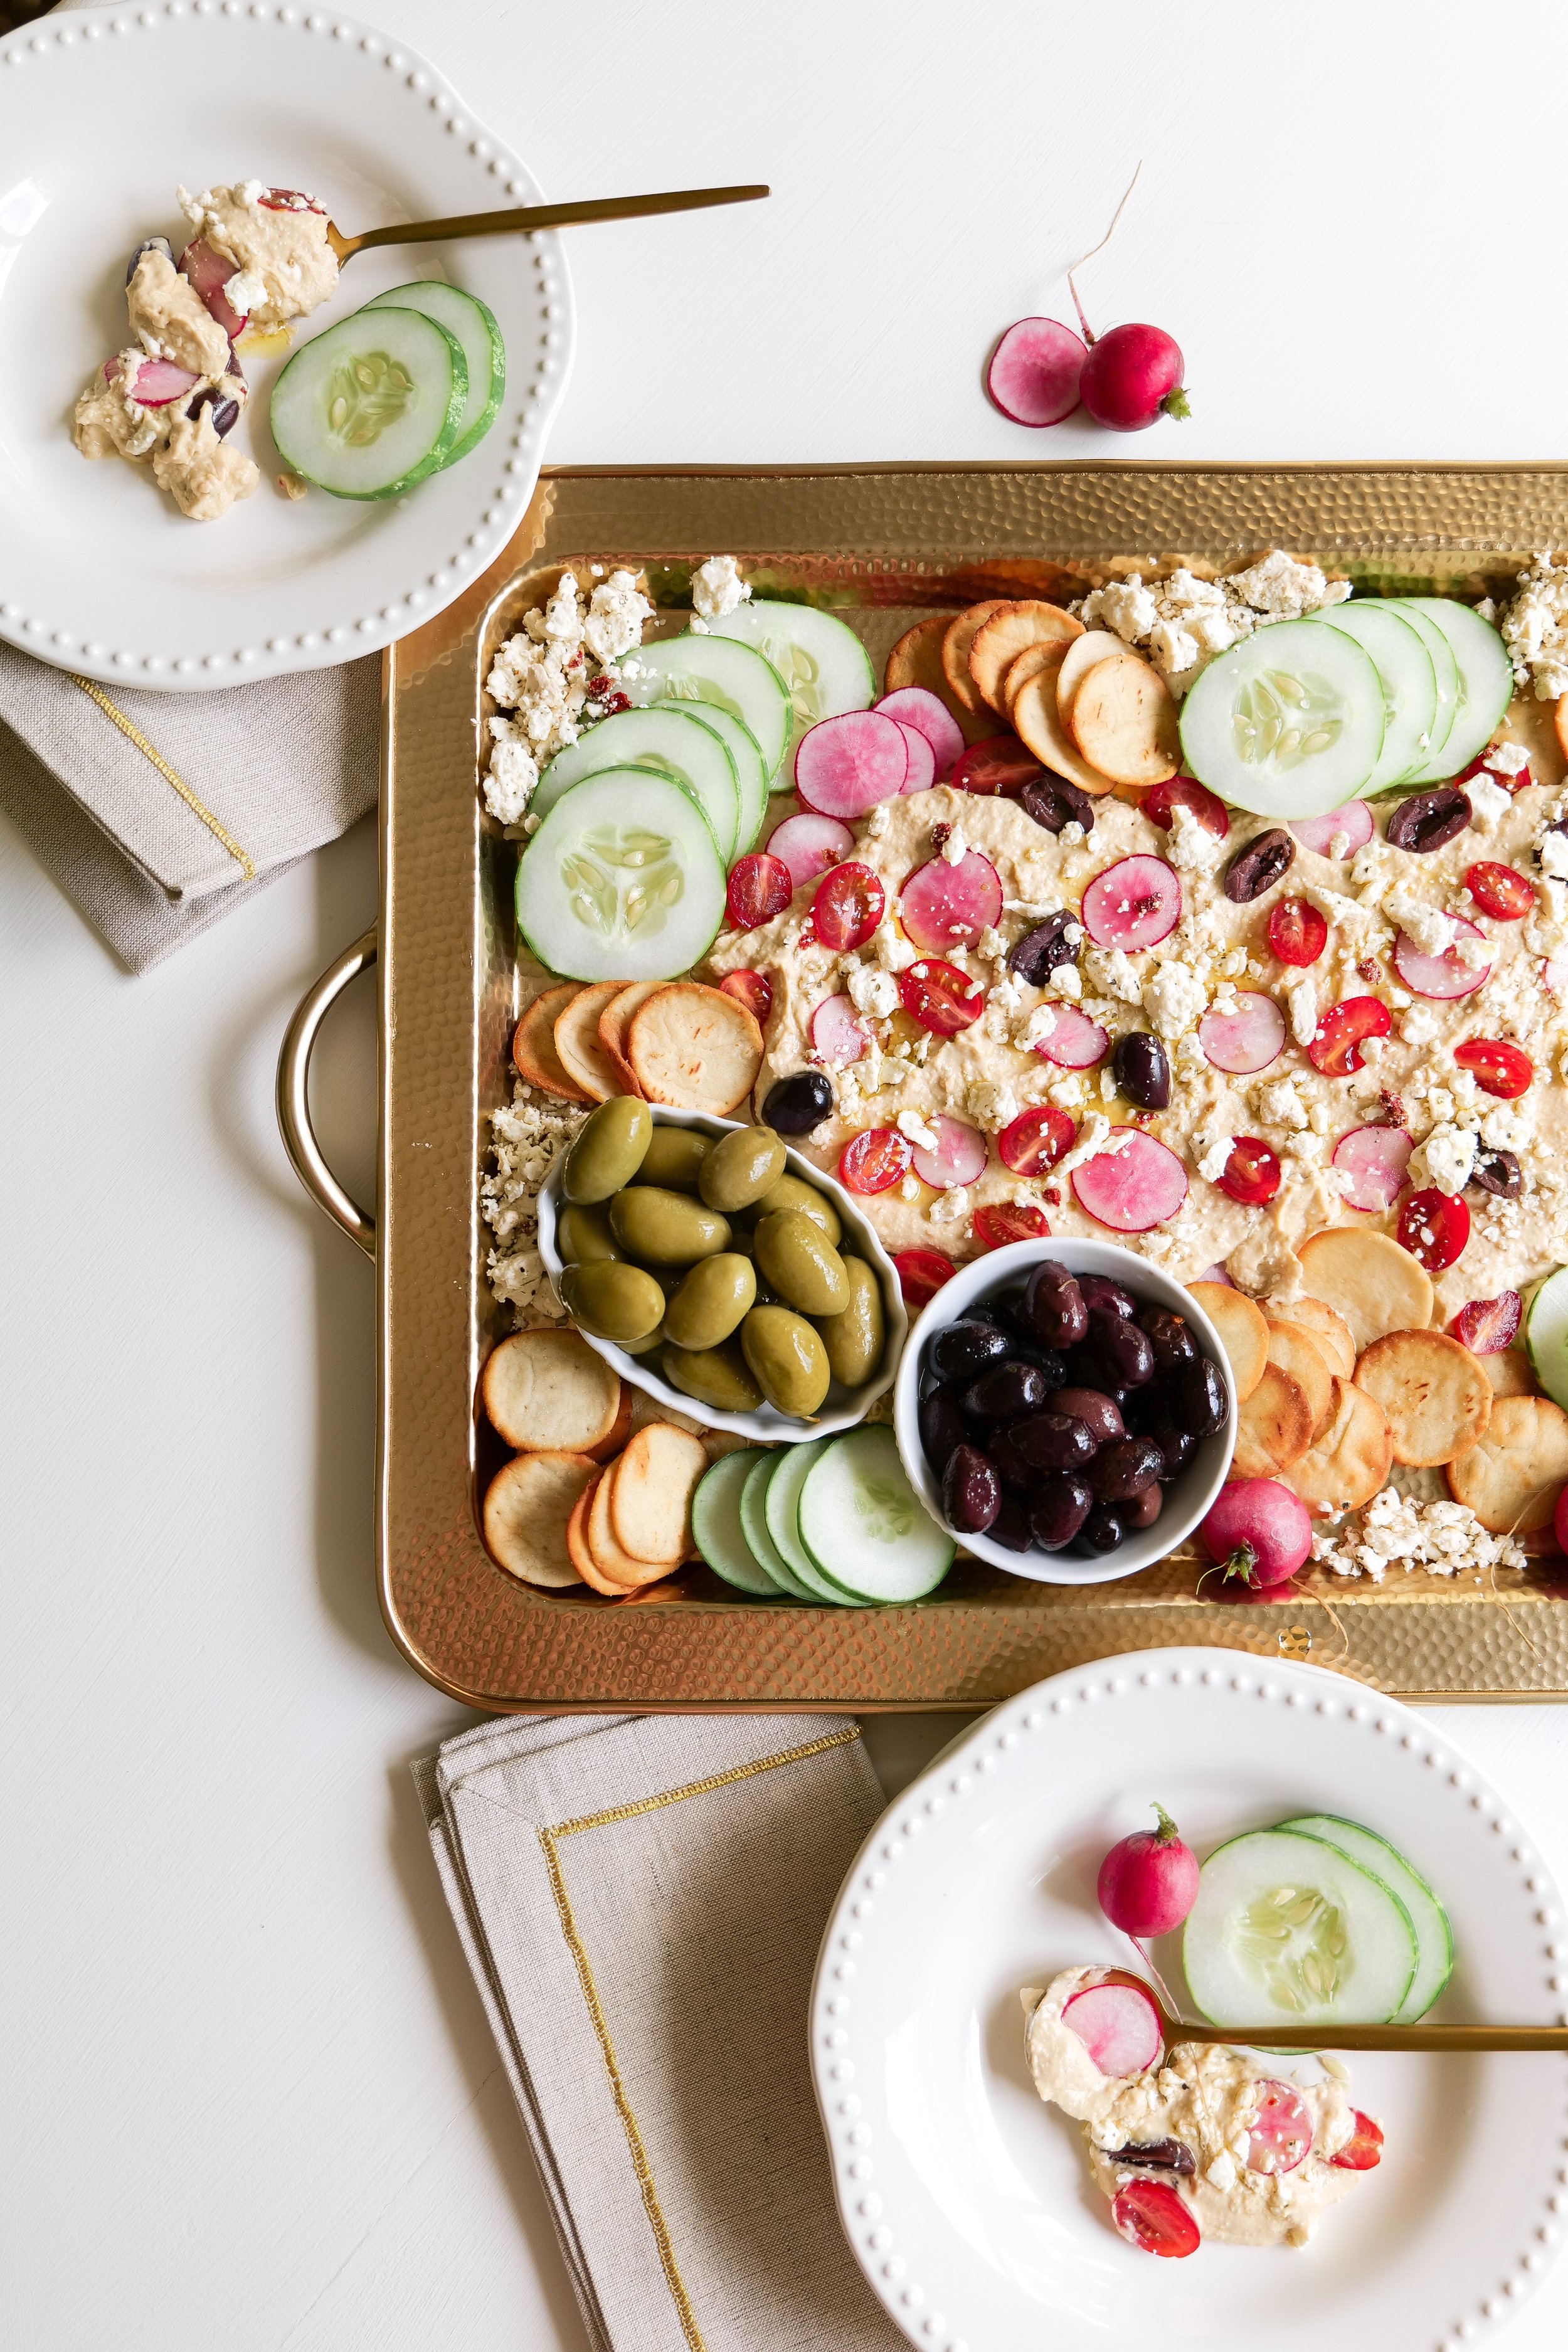
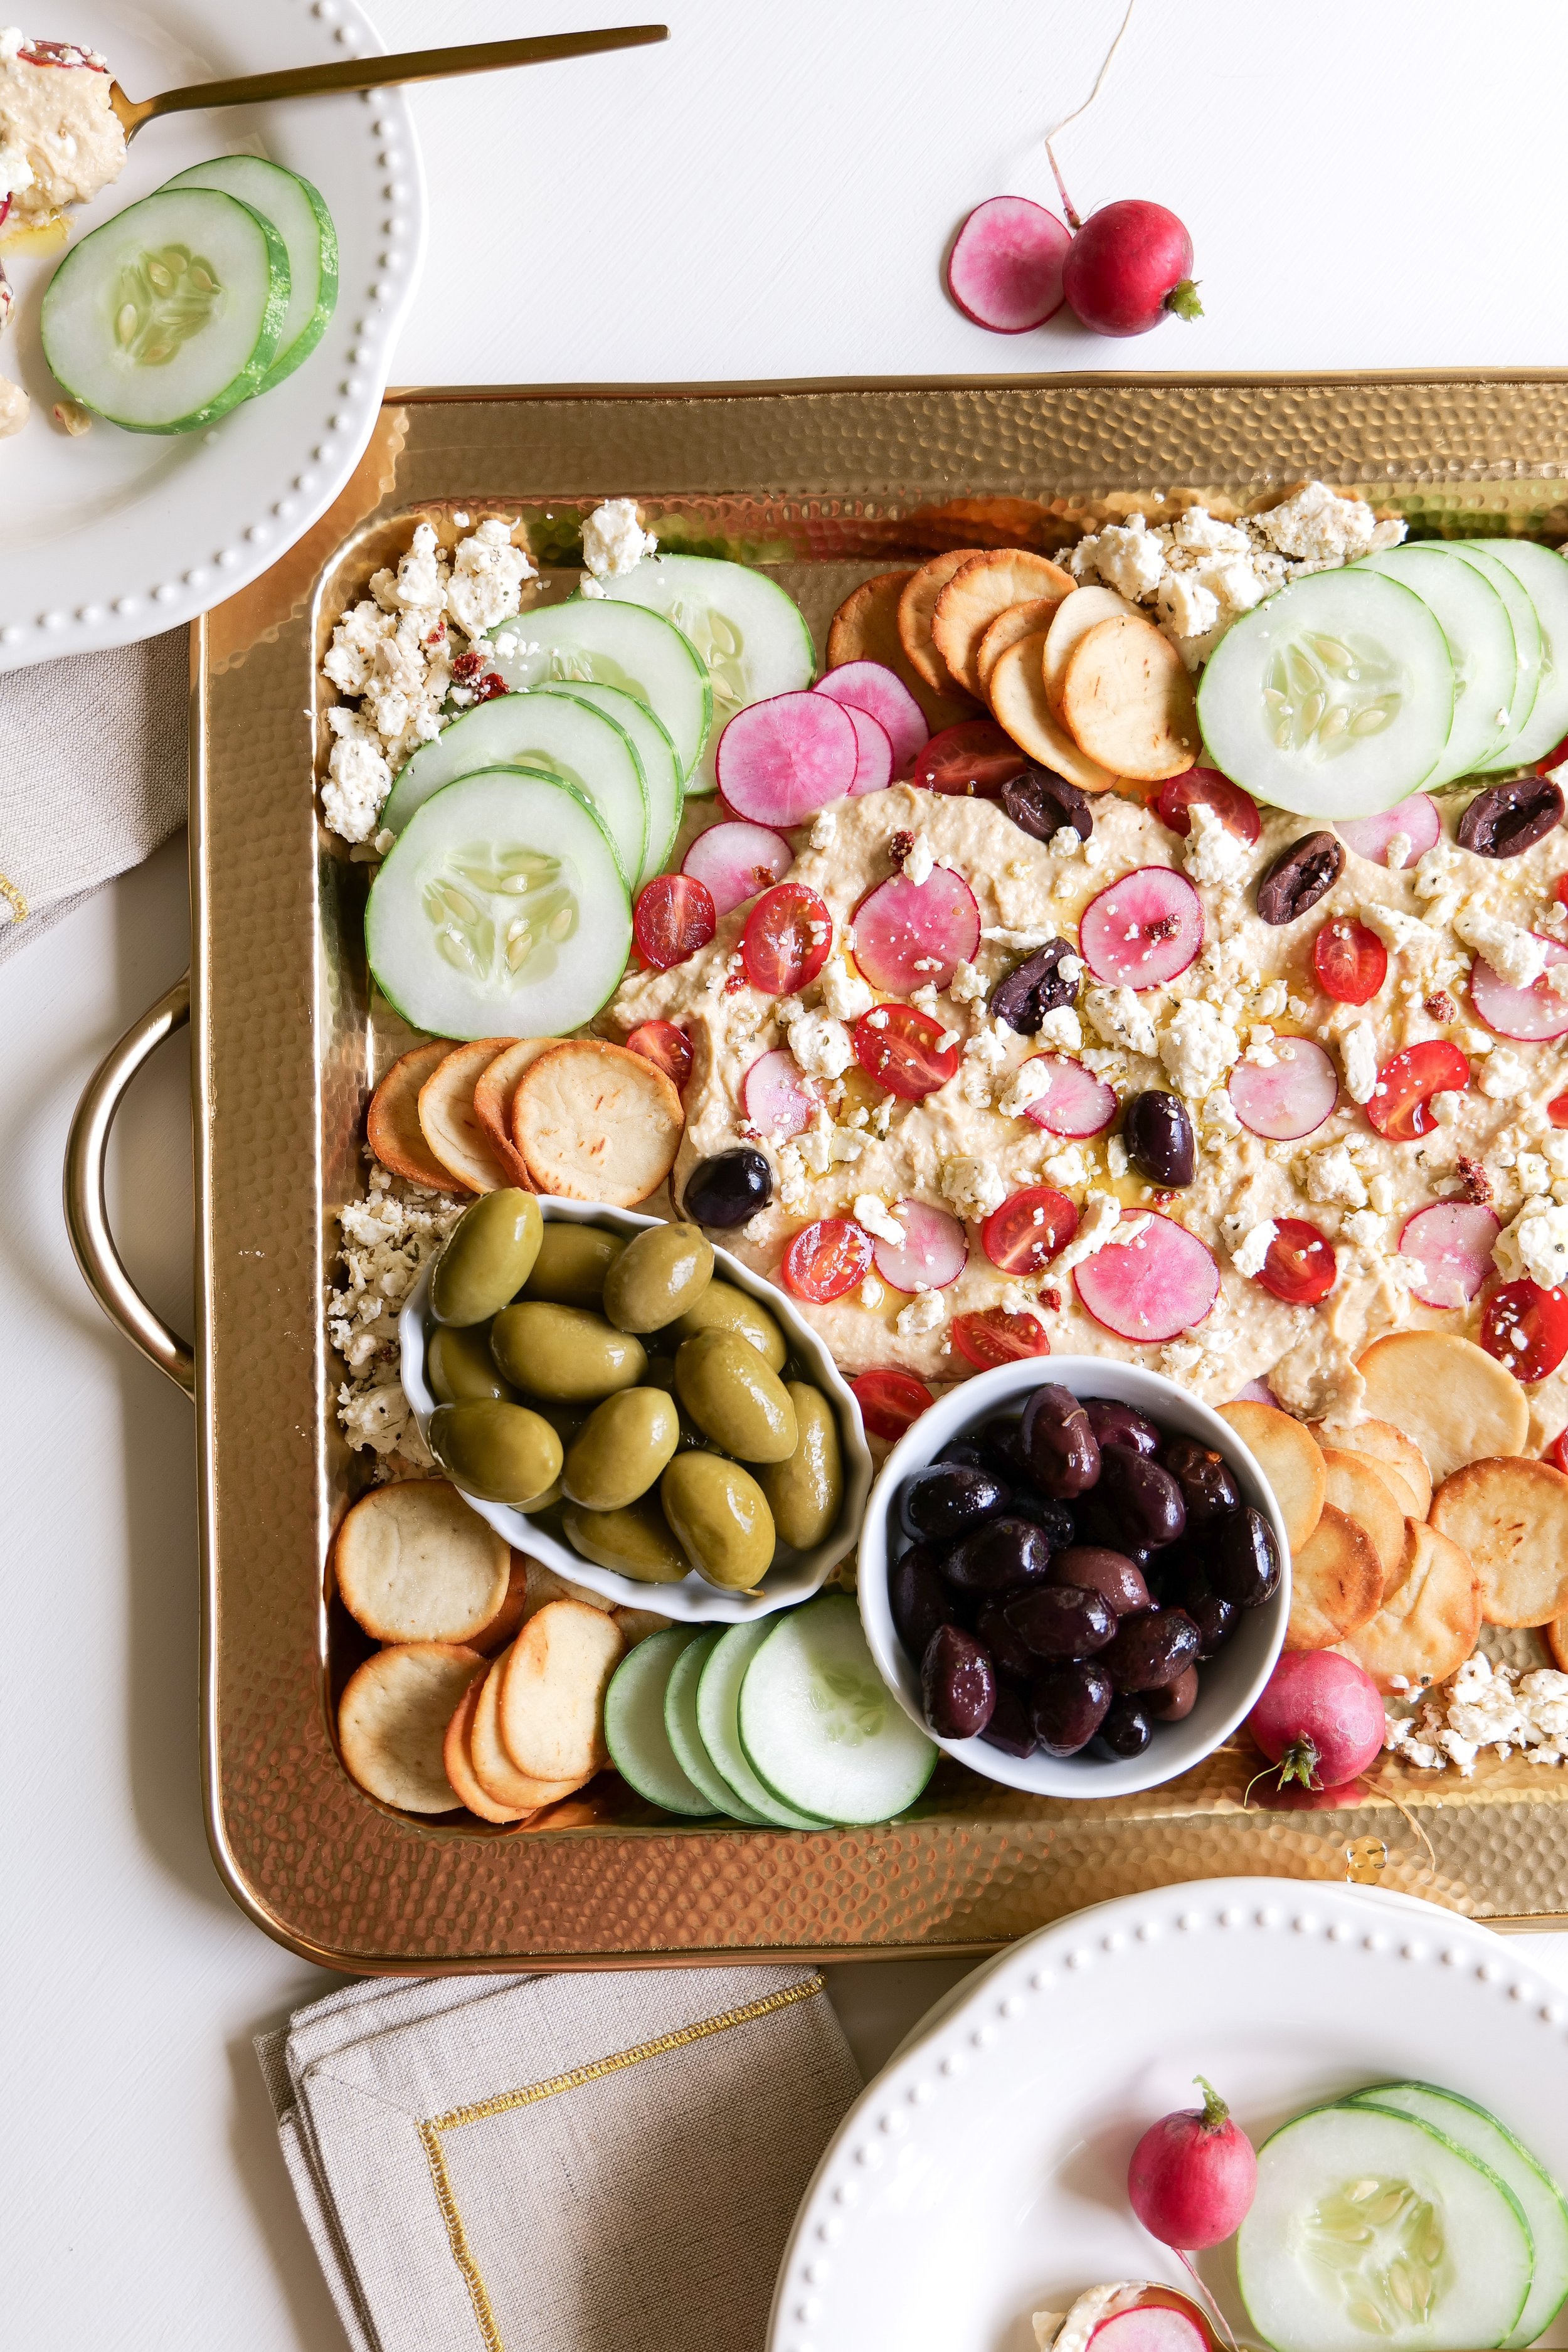
To make this delicious salad, start with your favorite type of pasta. Penne, shells, or rotini all work great. Then, mix in a light vinaigrette or Italian-style dressing to keep it light and flavorful. Add in some fresh, seasonal vegetables like tomatoes, cucumbers, peppers, and onions. If you're looking for a bit more protein, try adding some chickpeas, olives, feta cheese, or grilled chicken. Finish off the salad with some fresh herbs like basil, parsley, or oregano. Keep it chilled until ready to serve.

To ensure maximum flavor, use fresh ingredients when making Mediterranean Pasta Salad. For a salty kick, add a sprinkle of freshly grated Parmesan cheese. Top it off with a drizzle of extra-virgin olive oil for a hint of Mediterranean flavor. With a few simple ingredients and a few minutes of prep time, you can have a delicious and healthy Summertime meal

Served Warm or Cold?

Mediterranean Pasta Salad is a delicious and healthy meal option that can be served both warm and cold. If served warm, the flavors of the vegetables, herbs, and cheese will be more intense and the pasta will be more tender. If served cold, the salad will have a refreshing taste and the vegetables will be crunchy. Whichever way you choose to serve it, Mediterranean Pasta Salad is sure to be a hit at your next gathering.

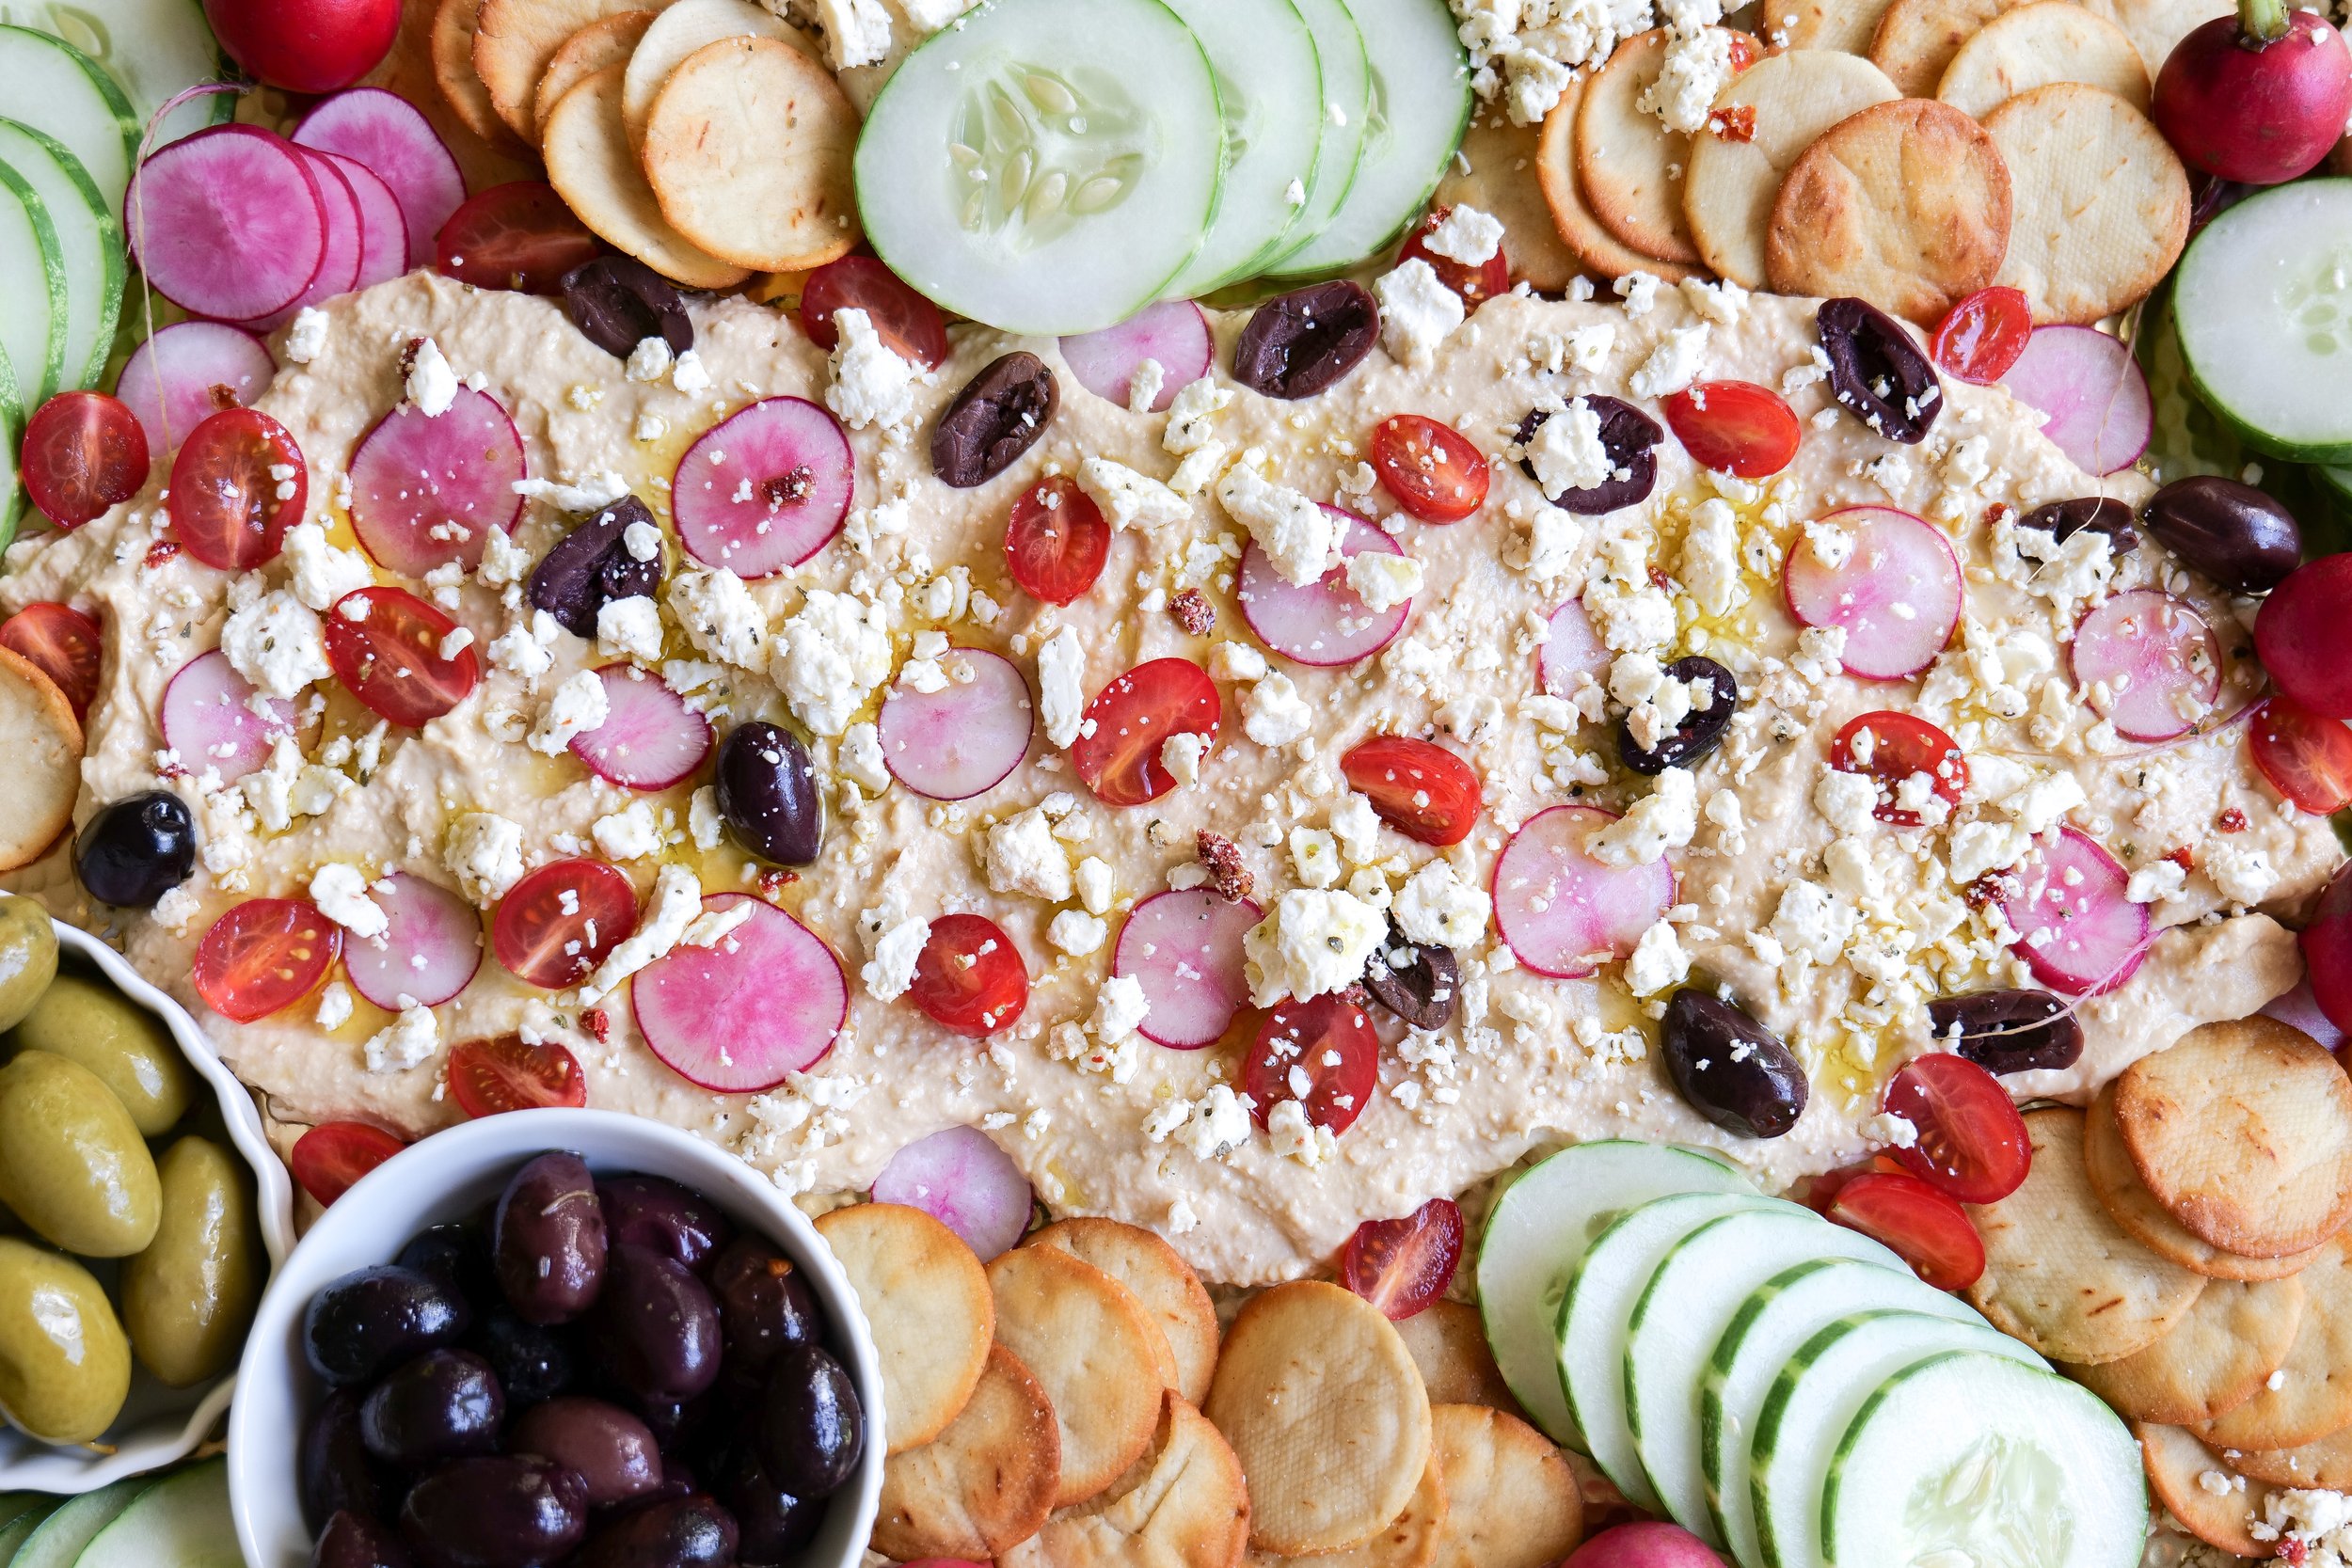
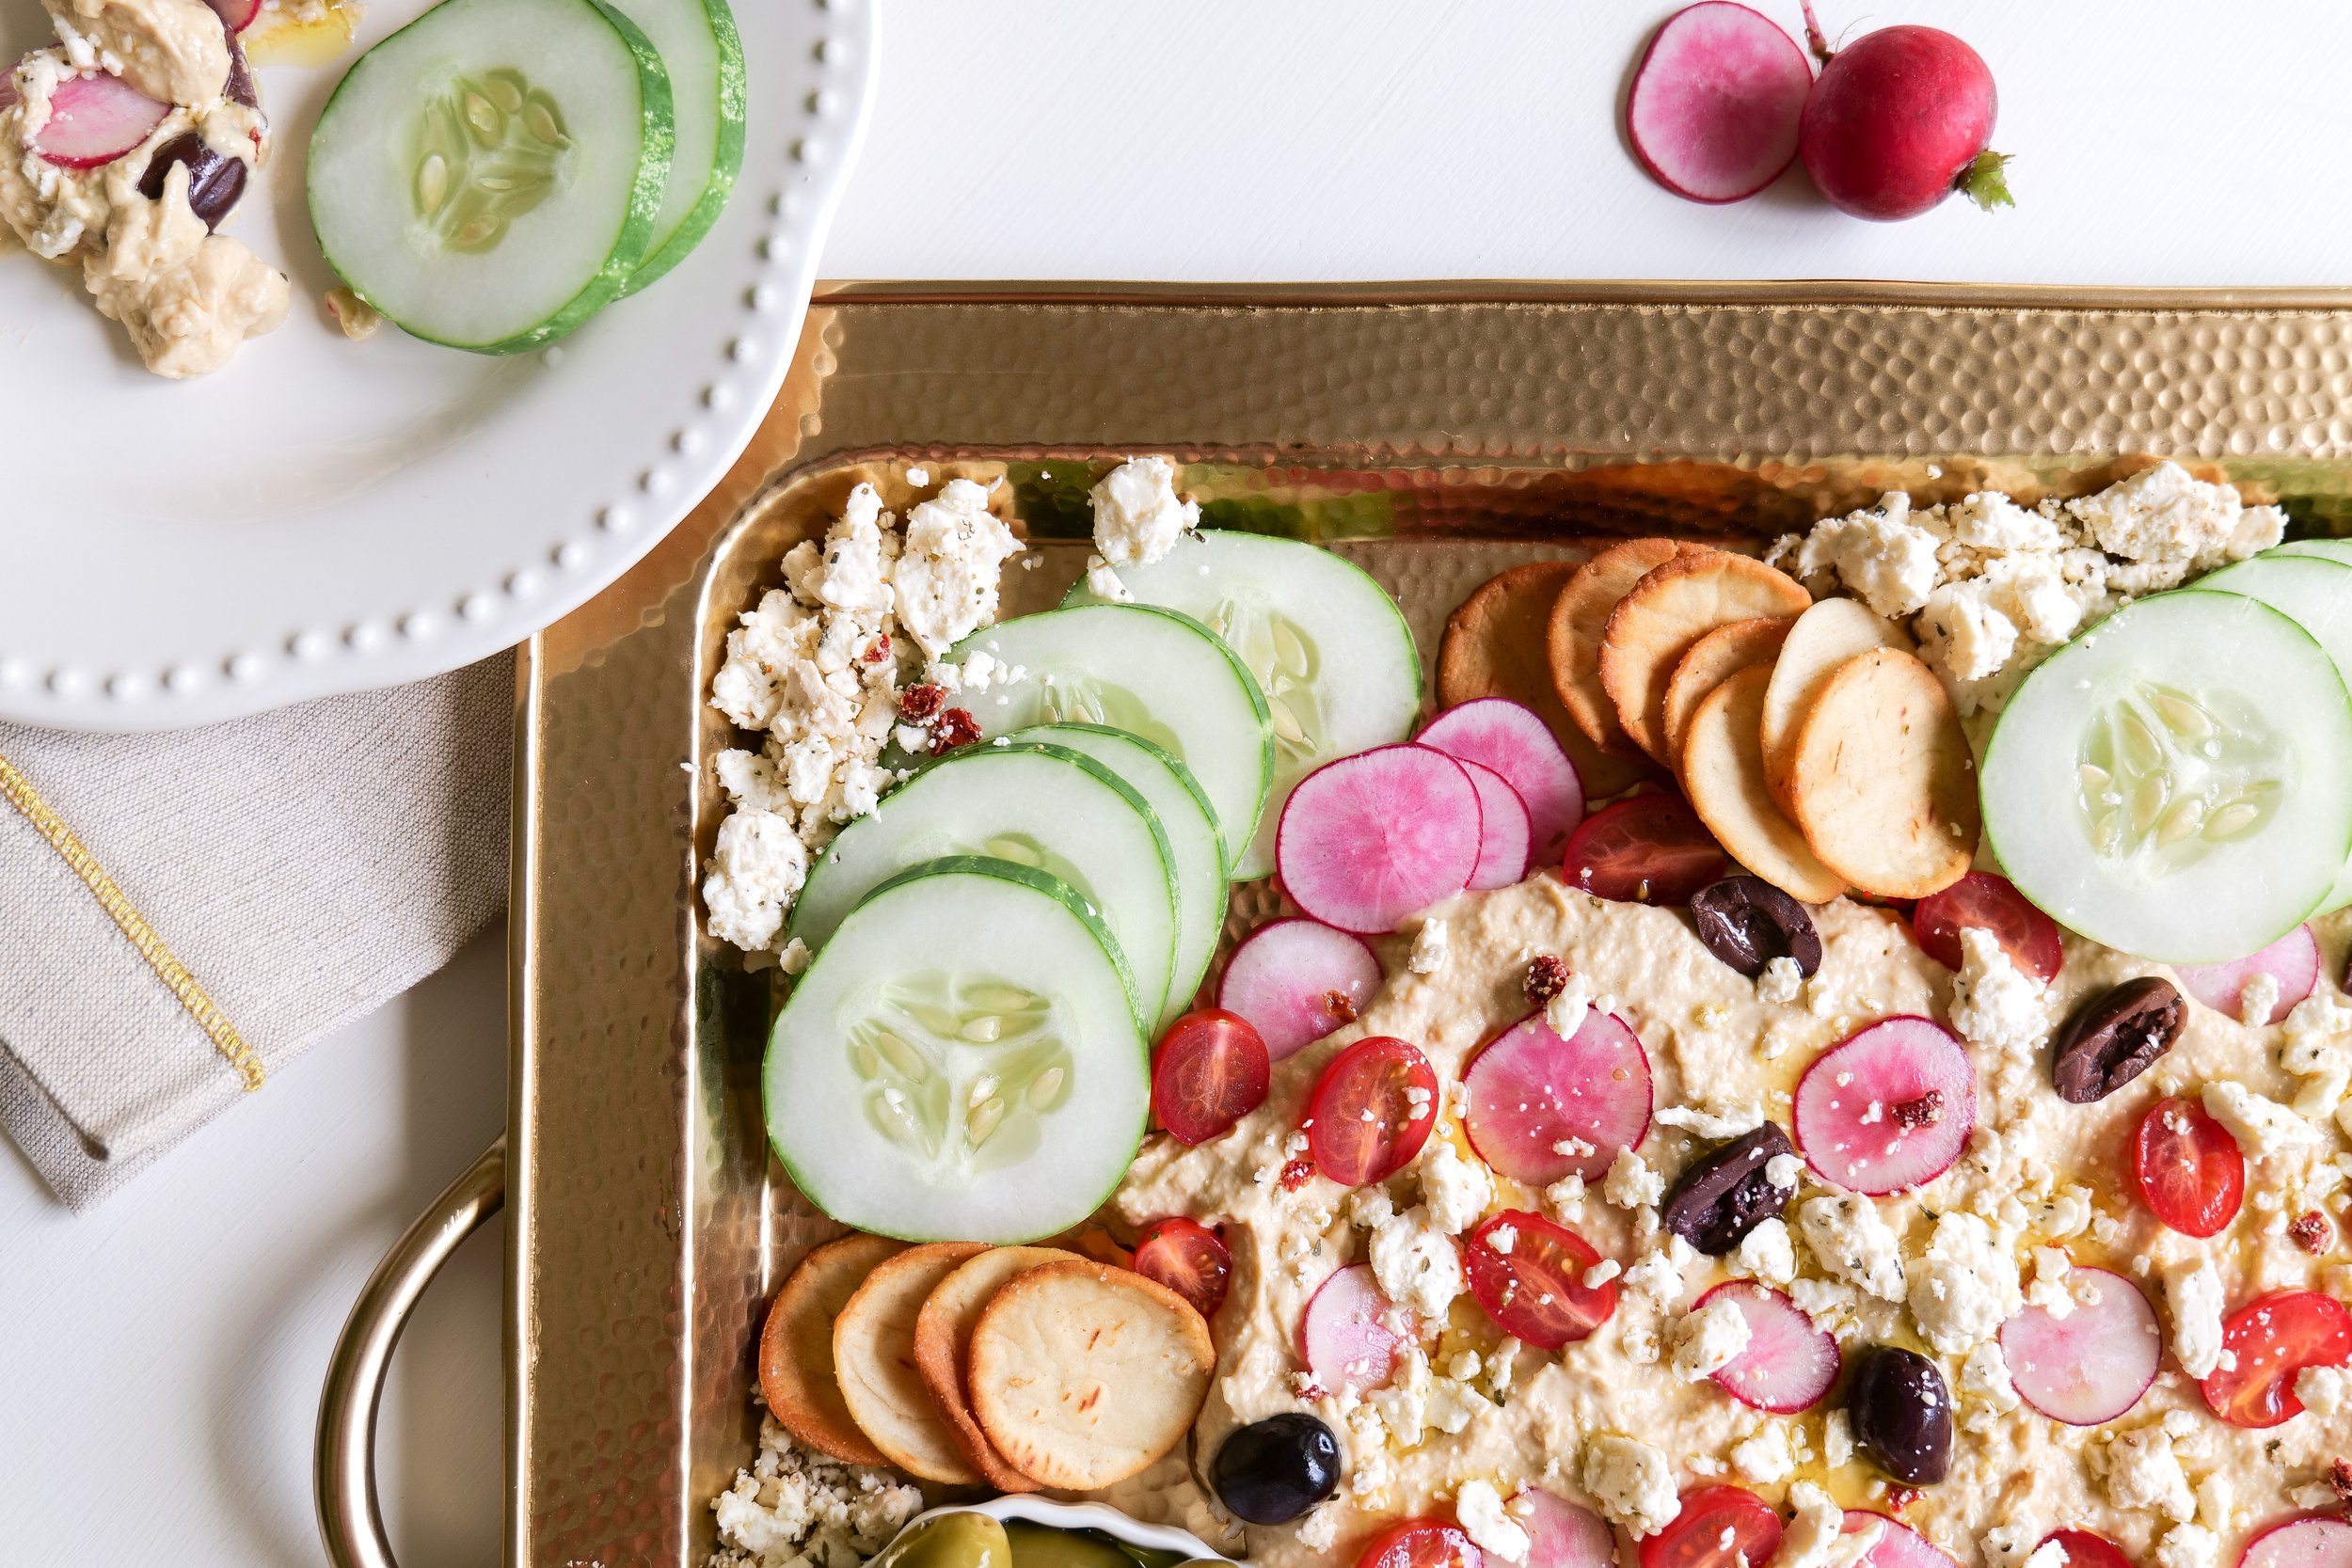
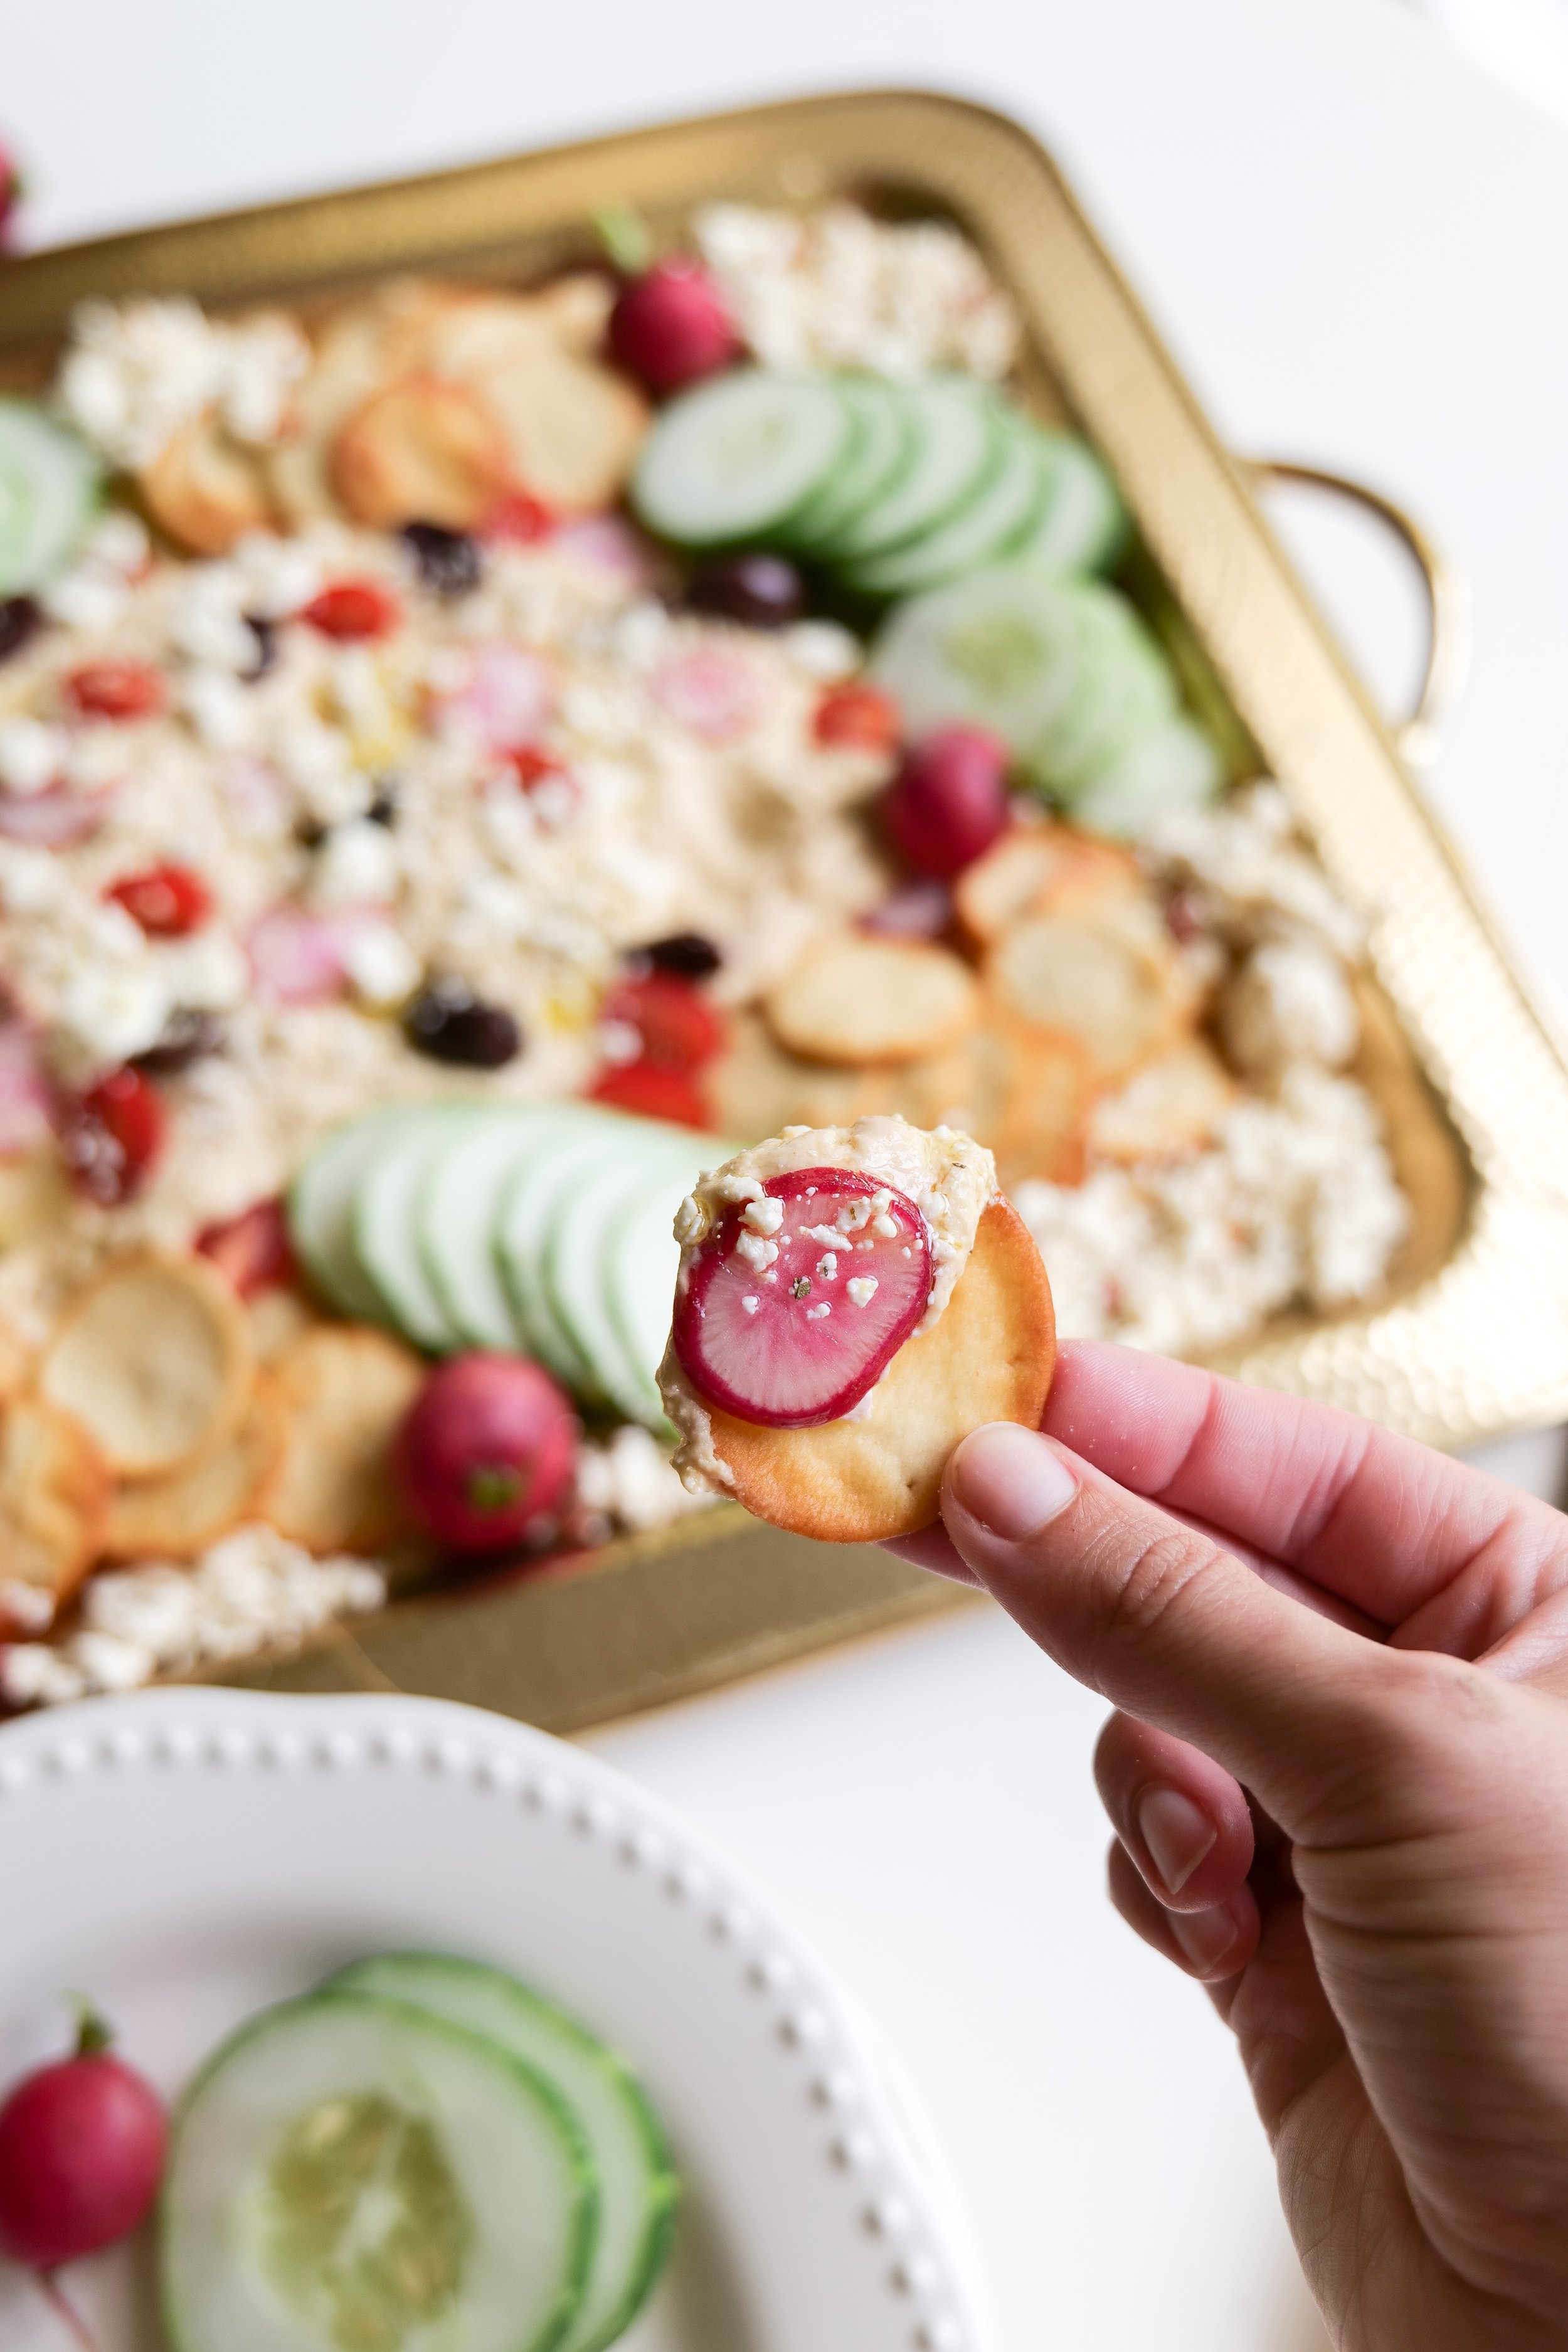
The beauty of Mediterranean Pasta Salad is that it can be made with whatever ingredients you have on hand. From tomatoes, cucumbers, olives, and feta cheese for the classic version to adding artichoke hearts, roasted red peppers, and roasted garlic for a more intense flavor, the possibilities are endless! You can also easily customize the salad with your favorite herbs and spices.

Whether you’re looking for a light and healthy lunch or dinner option, or something that will feed a large crowd, Mediterranean Pasta Salad is an easy and delicious choice that the whole group will love. You can make it ahead of time and serve it warm or cold, so you don’t have to worry about last-minute meal prep. Plus, it’s a great way to use up any extra veggies you have in the fridge. Try making this Mediterranean Pasta Salad today – you won’t be disappointed with this family-friendly yummy dish!
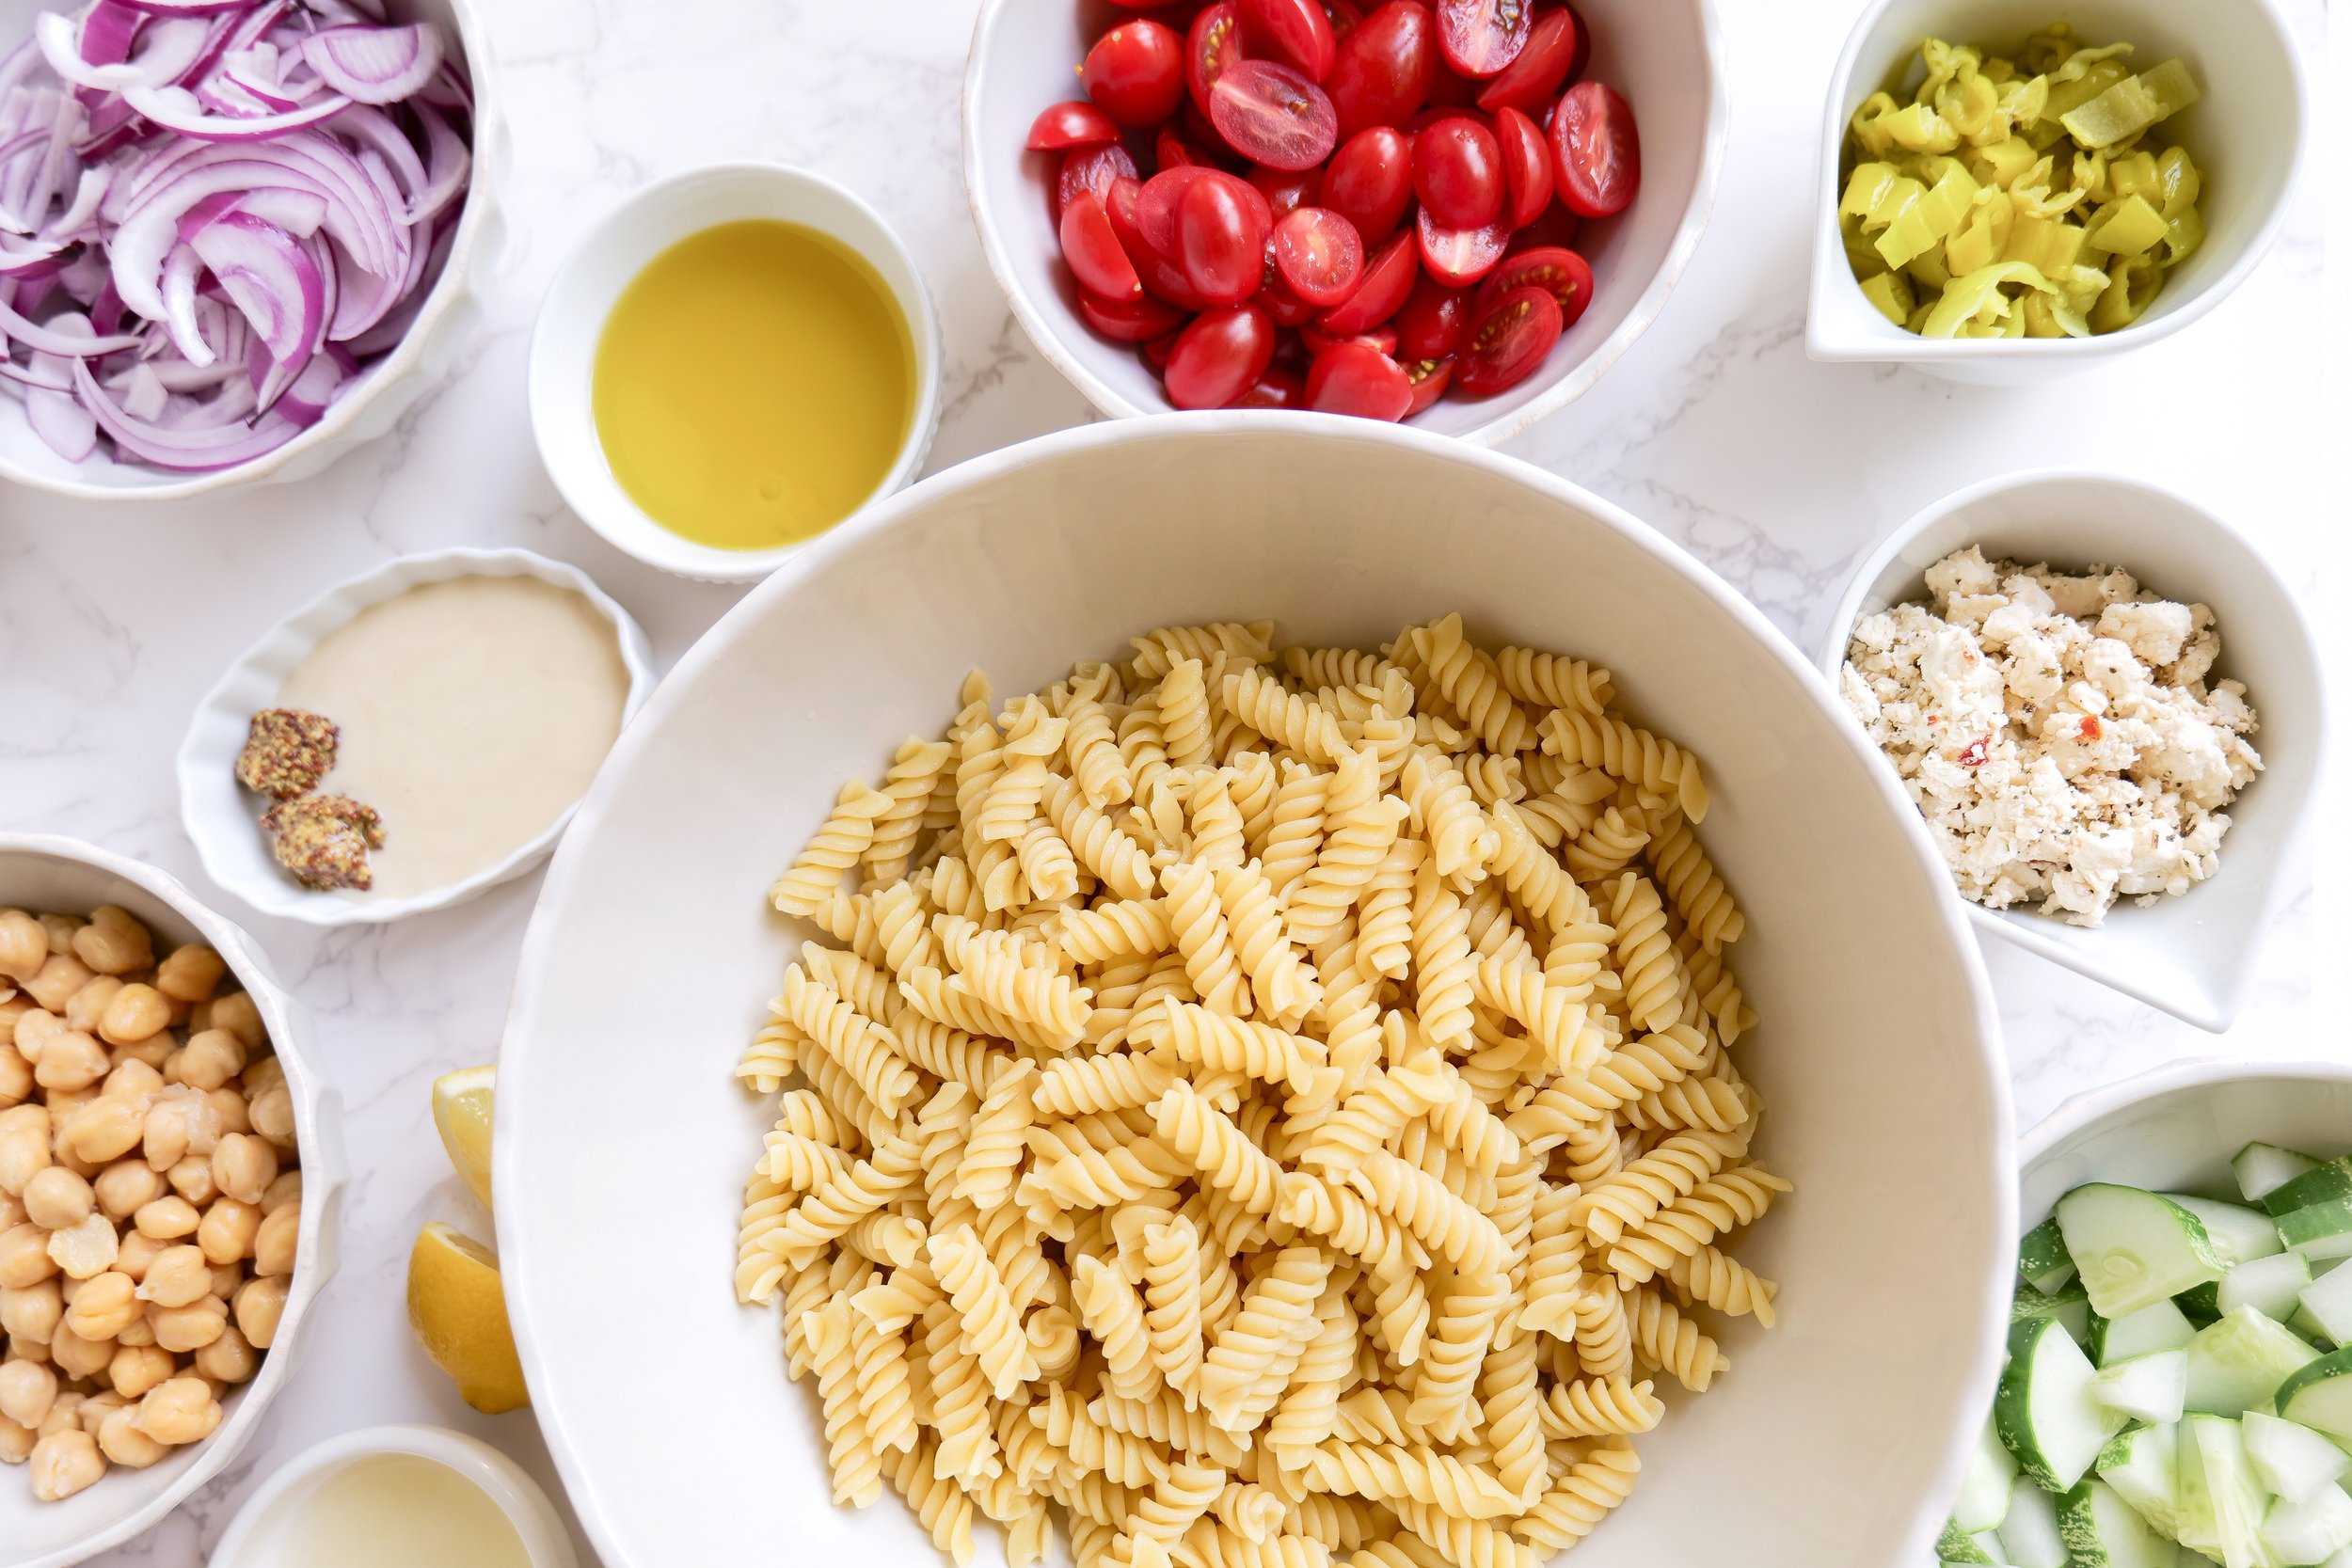
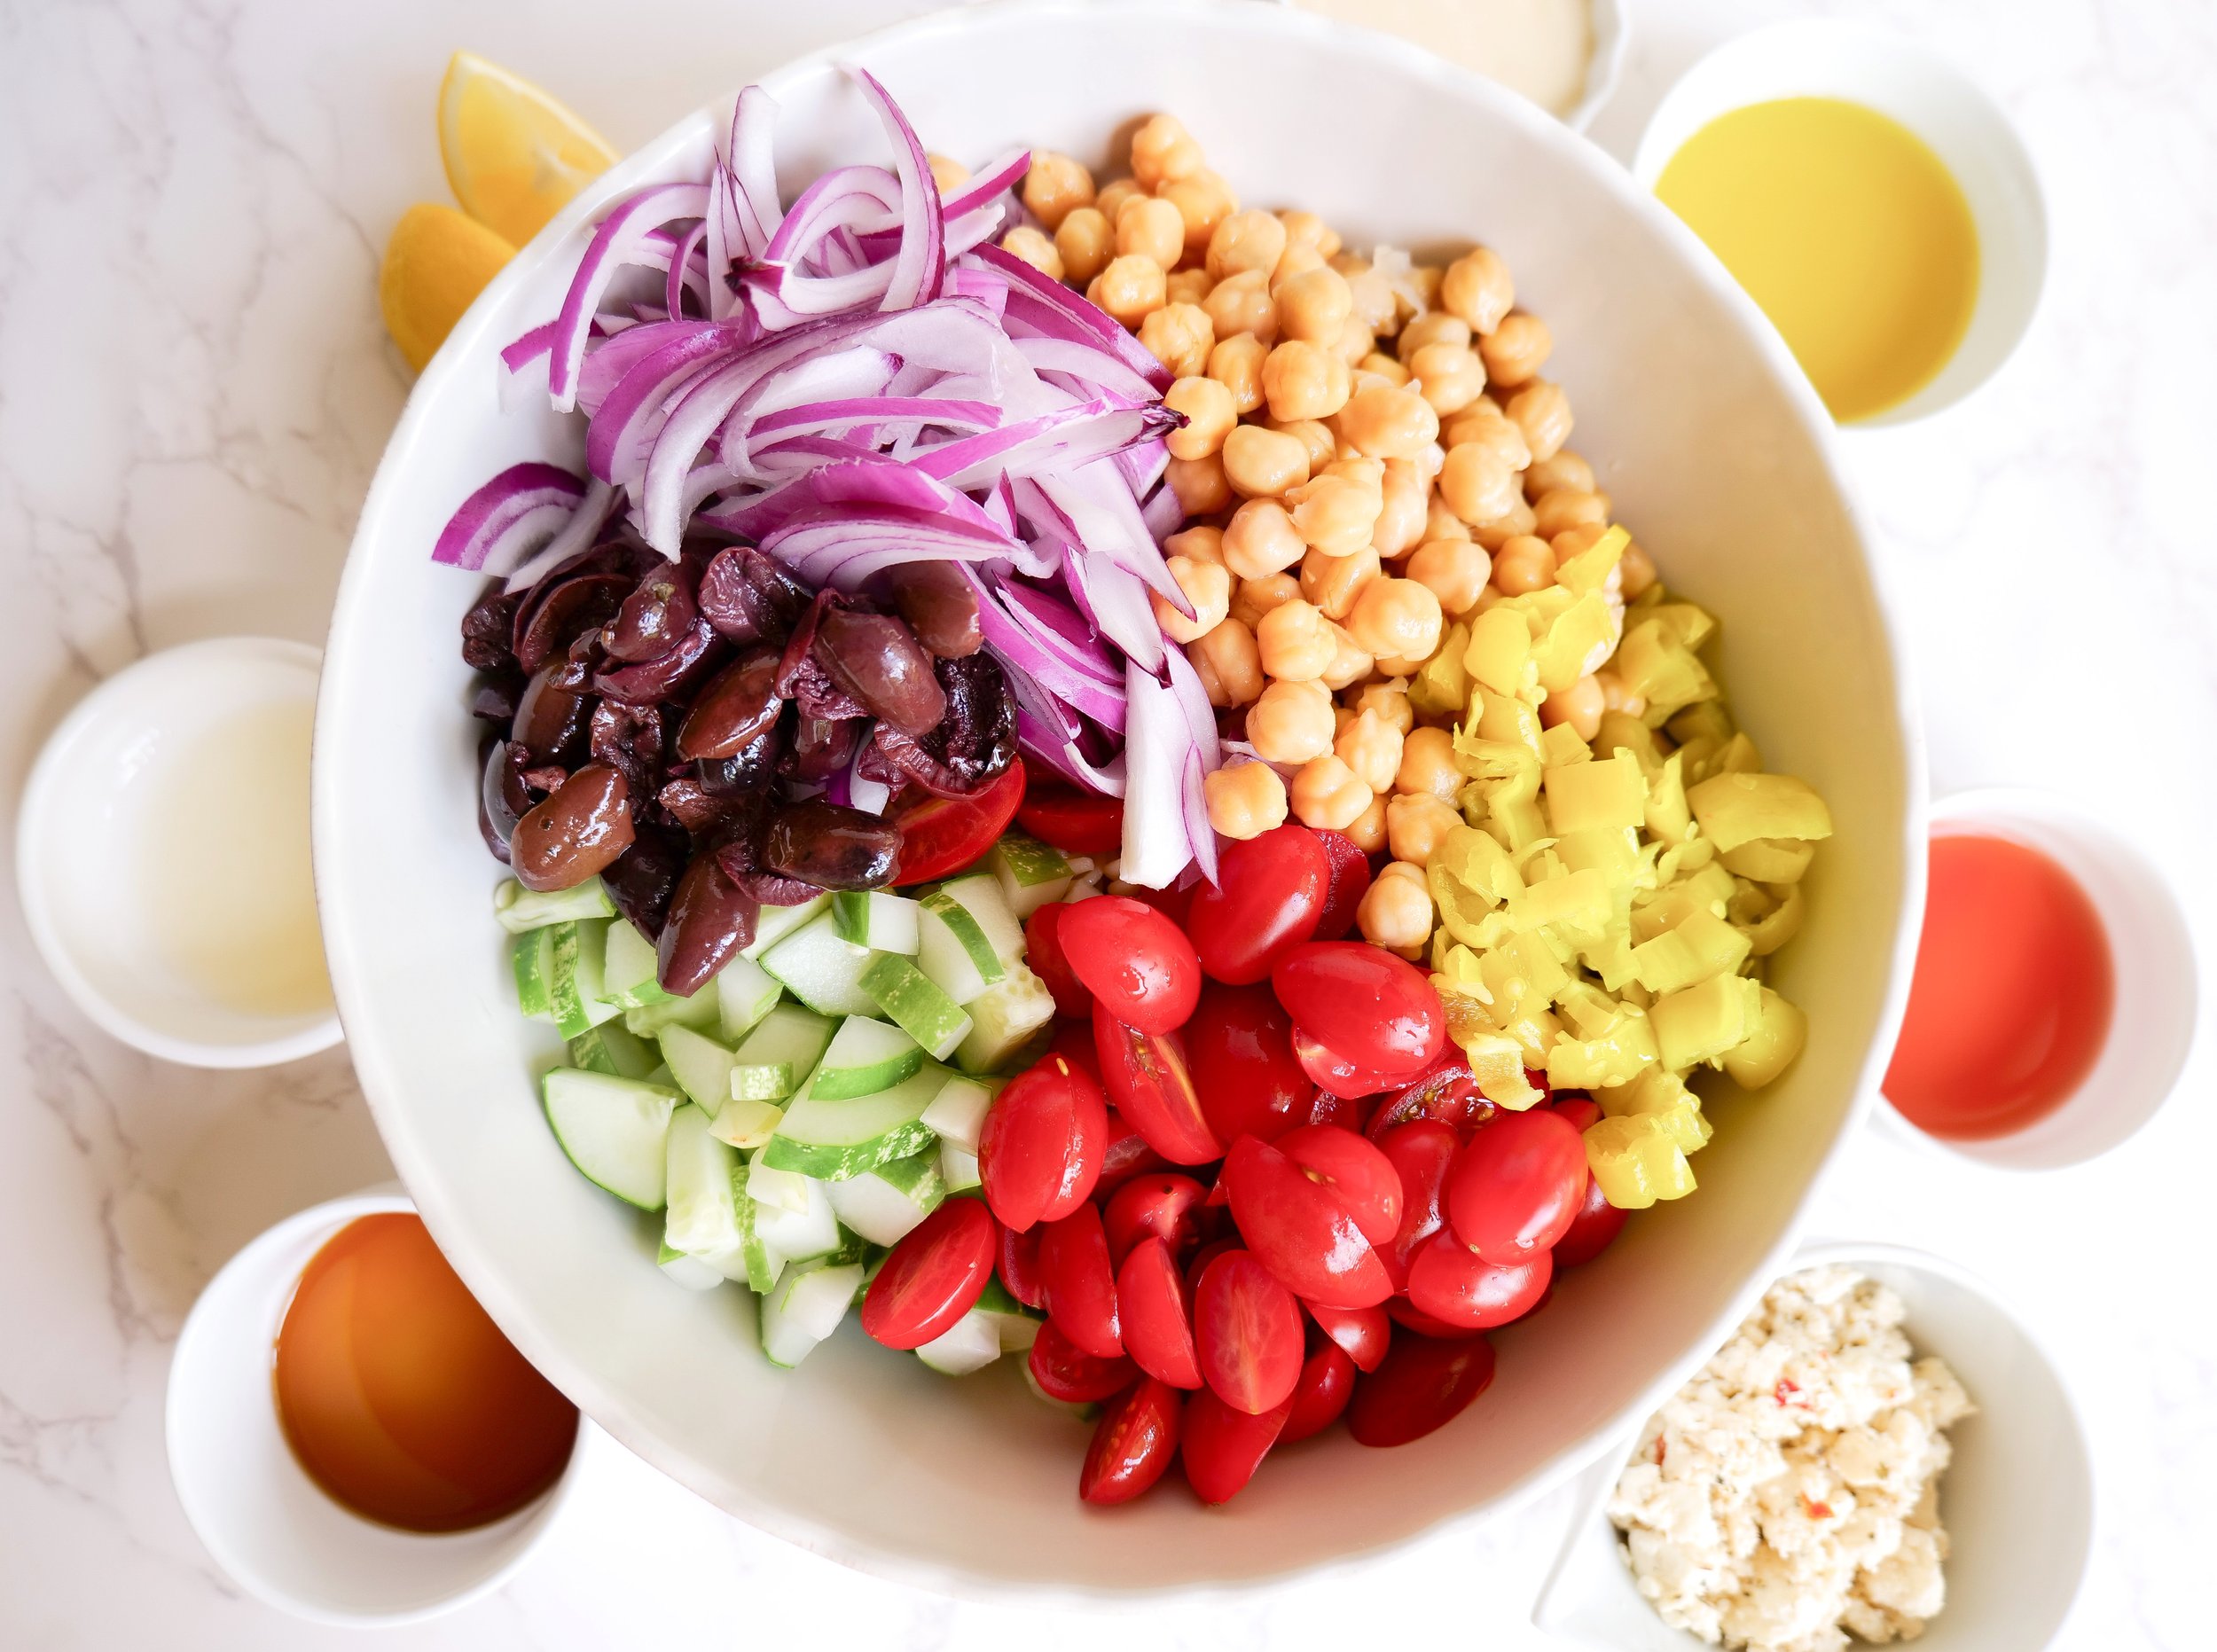
Ingredients

16 ounces of favorite cooked pasta

1 pint cherry tomatoes

1 cup cucumber, sliced into quarters

1/2 a medium red onion

1/2 cup Kalamata olives, pitted

1 15.5 oz canned chickpeas, drained

1/2 cup sliced pepperoncini

2/3 cup crumbled feta cheese

Dressing

1/4 cup extra virgin olive oil

2 tablespoons red wine vinegar

1 tablespoon lemon juice

3 tablespoons mayo

2 teaspoons Dijon mustard

1 tablespoon maple syrup

sea salt & black pepper

Instructions

1. Prepare pasta according to package directions. Drain and set aside in bowl.

2. Mix together all dressing ingredients in mason jar and shake together until fully blended, adding sea salt & black pepper until desired taste.

3. Prepare vegtables; slice cherry tomatoes in half, cut cucumbers into quarters, cut red onion into slices, pit and cut in half kalamata olives, and slice pepperoncini into desired shapes. add ingredients into bowl with pasta and pour over dressing. Mix together. Serve topped with feta cheese & serve.

3 Refreshing Summertime Bourbon Cocktails to Beat the Heat

Summertime is the perfect time to enjoy a refreshing and delicious cold bourbon cocktail. Whether you're gathering with friends for an outdoor barbeque or simply having a lazy day at home, these three bourbon cocktails are sure to please your taste buds and give you the perfect Summertime buzz. From a classic mint julep to a paper plane, to a fruity and fizzy combination, these drinks are sure to add a special touch to your Summer celebrations. So, grab your favorite bottle of bourbon and let's get mixing these 3 Summertime bourbon cocktails!

Cherry Bourbon Smash

A Cherry Bourbon Smash is a fruity and delicious sip that is sure to be a hit with your friends and family. The name automatically catches your interest and makes you want this delicious drink. This delightful cocktail requires only a few simple ingredients – bourbon, muddled cherries, and a splash of lemon juice – and can easily be made at home. The combination of bourbon and juicy cherries creates a refreshingly fruity flavor that will have you reaching for another glass. Plus, you can switch up these fruity bourbon cocktails by using other types of smashed or finely chopped fruit such as grapefruit, pomegranate, strawberries or raspberries if you wish.

Ingredients

2 oz Bourbon

Fresh Mint

1/4 cup cherries

1 oz freshly squeezed lemon juice

1/2 oz simple syrup

Instructions

1. Muddle a fresh mint sprig and 1/4 cup chopped fresh cherries in a cocktail shaker. Add in bourbon, freshly squeezed lemon juice, simple syrup, and ice.

2. Shake until the ice has mostly dissolved or your wrist hurts. Strain into a cocktail glass of choice. Add cherries & mint sprig to garnish and enjoy!

Blueberry Basil Bourbon Refresher

When that Summer heat starts to climb, it's time to switch up your beverage selection! Try out a Blueberry Basil Bourbon refresher for a cool and refreshing summertime cocktail. The mix of sweet and tart blueberries, fresh basil, and bold bourbon is sure to make your taste buds dance. Plus, with just a few simple ingredients, whipping up a Blueberry Basil Bourbon Refresher is easy and fast. Serve up your Blueberry Basil Bourbon Refresher in a glass with a few sprigs of basil for a classic presentation. Or, for a cool and unique twist, blend the ingredients with some crushed ice for a slushy-style drink. Either way, it's sure to be a hit with your friends and family. They'll be raving about their favorite mixologist in no time.

Instructions

1/4 cup blueberries

2 oz bourbon

1/2 oz simple syrup

fresh basil

club soda

Ingredients

1. Muddle blueberries, 1 basil leaf, and simple syrup in a cocktail shaker until the blueberries have burst and you can smell the basil.

2. Add in bourbon and ice. Shake until the ice has broken up and dissolved.

3. Grab your fresh glass and fill it with ice. Strain the cocktail shaker over a glass of ice. Fill the remainder of the glass with club soda (or ginger beer if you want more of a kick) and garnish with blueberries and fresh basil leaf.

Coconut Lime Bourbon Creamsicle

The Coconut Lime Bourbon Creamsicle is a perfect Summertime drink that takes you to a place in your mind where you're relaxing on a tropical beach. This lovely drink packs a creamy punch with its combination of coconut milk, limeade, lime juice, and simple syrup. The smooth, creamy texture of the coconut blends perfectly with the tartness of the lime juice, creating a unique flavor that is both sweet and tangy. The addition of lime juice gives the cocktail a zesty kick that perfectly complements the sweetness of the coconut and the smoky flavor of the bourbon. This is probably one of my top favorite Summer cocktails and the perfect drink to enjoy while lounging by the pool or relaxing on the beach.

Ingredients

2 oz bourbon

1 cup limeade

1/2 cup coconut cream

1/2 oz simple syrup

1/2 oz freshly squeezed lime juice

Instructions

1. Add bourbon, limeade, coconut cream, simple syrup and lime juice into a cocktail shaker and stir together over ice.

2. Strain out into a freshly chilled cocktail glass removing all ice. Add a lime wedge and coconut shavings to garnish and enjoy!

What Type of Bourbon is Best for These Cocktails?

Whether you want to sip on something light and easy or mix up a bold and flavorful concoction, there's a perfect bourbon for every occasion. For a classic Old Fashioned, reach for Maker’s Mark. This wheat bourbon is easy to sip and adds a great flavor to classic drinks. If you want something a bit more interesting, try Bulleit. This rye-forward bourbon is bold and spicy, making it perfect for a Mint Julep or a bourbon rickey. If you're looking for something more indulgent, try a Manhattan with Woodford Reserve. This rich, full-flavored bourbon adds great depth to this classic cocktail. If you want to mix up something a bit sweeter, Knob Creek is a great choice. This smooth, sweet bourbon is perfect for a classic Suffering Bastard drink or a Boulevardier. And if you're looking for something classic, grab a bottle of Wild Turkey. This classic bourbon is great in a Whiskey Sour or a Bourbon Highball. So grab your favorite bottle of bourbon and get to mixing because these 3 Summertime bourbon cocktails are the best way to chill, relax, and beat the heat!

Can These Cocktails Be Made with Other Types of Liquor?

It's no surprise that bourbon cocktails are the perfect drink to enjoy on a Summer day. Whether you prefer a classic Mint Julep or an Old Fashioned, bourbon-based cocktails are sure to make your hot days that much better. However, if you don't like bourbon, you don't have to miss out on all the fun. Yes, these Summertime bourbon cocktails can be made with other types of liquor to accommodate different tastes and preferences. If you don't like bourbon, you can substitute these drinks with other liquors like vodka, gin, tequila, or rum. By making these cocktails with different types of liquor, you can create unique flavor profiles and make the cocktails even more enjoyable. Additionally, using different types of liquor can make the cocktails more accessible to those who don't usually drink bourbon. Whether you decide to make a bourbon-based cocktail or one with a different type of liquor, you're sure to find a Summertime favorite that you can enjoy all season long. So, don't be afraid to get creative with your cocktails and mix things up this summer!

These three Summertime bourbon cocktails are sure to make your hot days more enjoyable. Whether you're looking for a refreshing drink to cool off on a hot Summer day, or a classic cocktail to sip on while relaxing in the backyard, bourbon is the perfect spirit to make your days even more enjoyable.

Other Cocktail Recipes You Will Enjoy

Strawberry Orange Bourbon Smash

The Perfect Lemon Drop Martini Recipe for a Refreshing and Delicious Cocktail

4 Deliciously Easy 4-Ingredient Tequila Cocktails

Watermelon Twist Cocktail

Refreshing Lemon Twist Cocktail

Step-by-Step Guide to Making a Refreshingly Delicious Frozen Raspberry Margarita

A Refreshing and Delicious Melon Burrata Salad Recipe

This refreshing Melon Burrata Salad is the perfect way to enjoy the fresh Summer produce in a fun and unique way! This meal is a surprisingly perfect combination of sweet and savory flavors, making this salad a great appetizer or side dish for any meal. The freshness and sweetness of the melon along with the creamy burrata create a delicious balance, while the addition of mint and basil provides a bright flavor. The light vinaigrette dressing brings out the flavor of all the components, tying the dish together. This salad is incredibly simple yet flavorful, making it an ideal Summer side dish. I've been loving recipes lately with a refreshing mix of different flavors that blend well together and are a little different than the normal dishes everybody knows and uses!

Balsamic Strawberry Vinaigrette

The Melon Burrata Salad is a classic recipe that is elevated to the next level when paired with a delicious Balsamic Strawberry Vinaigrette. This vinaigrette adds a perfect balance of sweetness from the Strawberries and acidity from the balsamic vinegar to the salad. This combination of flavors brings out the best in the melon and the creaminess of the burrata. The Balsamic Strawberry Vinaigrette adds a depth of flavor to the Melon Burrata Salad that is not found in other salad dressings.

Can I Make This Salad Ahead of Time?

Not only is it a delicious combination of flavors, but it's also simple to make ahead of time. Simply prepare all the ingredients ahead of time and keep in mind that if adding basil and/or balsamic glaze, then wait to add it until just before serving. To keep the salad fresh, store the ingredients in an airtight container in the refrigerator. Be sure to store pre-cut melon separately to prevent it from becoming soggy. If you're looking to preserve the creamy texture of the burrata, wait to add it as well until you're ready to serve. This melon burrata salad is the perfect dish to get started on in your free time to plan ahead and tackle the busy work week with less stress.

What Ingredients Are Needed to Make a Melon Burrata Salad?

This Summer, try a delicious and refreshing Melon Burrata Salad. This light and flavorful dish is sure to become a new favorite! Start by selecting a ripe and juicy melon such as cantaloupe, honeydew, or watermelon. Then add a soft and creamy cheese, like burrata, for a delightful burst of flavor. Layer melon and cheese with a few handfuls of arugula, spinach, or mixed greens. Finally, drizzle the salad with balsamic dressing (recipe below), and season with salt and pepper to taste. For a little extra crunch, top with a sprinkle of roasted pistachios.

For this salad, you will need cantaloupe, honeydew, watermelon, burrata, and your favorite vinaigrette. If you can't find all the melons, don't fret! Fresh strawberries, cherries, or figs make a wonderful substitute that will still yield a very sweet and delicious flavor. If you are out of burrata and need another cheese to substitute, mozzarella balls are a great flavor choice and give a similar look and texture to this salad. For a sweeter salad, add a tablespoon of honey to the dressing. To add a salty, smoky flavor, add a few slices of prosciutto. For a hint of herbal flavor, sprinkle with fresh herbs such as basil, mint, or thyme.

This salad pairs well with a light white or rosΓ© wine, making it a perfect accompaniment to any summertime meal. Serve this tasty dish with toasted sourdough bread on the side for a delightful crunch. Serve it at your next gathering and watch it disappear in no time!

Ingredients

2 or 3 handfuls of lettuce (optional but makes a pretty display)

3 Cups cubed Watermelon

2 Cups cubed Honeydew

2 Cups cubed Cantelope

8 ounces of burrata cheese, at room temperature

1/4 cup roasted pistachios, chopped

Balsamic Strawberry Vinaigrette

1/4 cup olive oil

1/4 cup balsamic vinegar

1/4 cup fresh basil

1 tablespoon strawberry preserves

1 tablespoon raw honey

kosher salt & fresh black pepper

Instructions

1. Mix together all Balsamic Strawberry Vinaigrette ingredients in a mason jar and shake together until the ingredients come together. Toast chopped pistachios in a pan over the stove until slightly toasty and set aside. Cube all watermelon, honeydew and cantelope. Let burrata come to room temperature.

2. Start assembling the melon burrata salad. Lay down a bed of 2 or 3 handfuls of your favorite lettuce I am using arugula. Add melons. Top with burrata, using your fingers or a fork break apart and spread over the melons.

3. Drizzle Balsamic strawberry vinaigrette and sprinkle pistachios. Add additional basil for color and serve!

This melon burrata salad is easy to make and truly delicious. It's the perfect way to start any Summer meal or have as an amazing appetizer. Either way, it will be a burst of flavor that will surprise your guests and have them coming back for seconds.

Other Salads You Will Love:

How to Make the Perfect Pear and Pomegranate Arugula Salad

Shaved Brussel Sprout Salad with Apples, Goat Cheese & Candied Pecans

The Perfect Summer Meal: Grilled Chicken, Mexican Street Corn & Cucumber Salad

The Perfect Summer Meal: Grilled Chicken, Mexican Street Corn & Cucumber Salad

Summer is the perfect time to enjoy fresh garden produce and a delicious grilled meal. This Grilled Chicken, Mexican Street Corn & Cucumber Salad is the perfect way to enjoy some of Summer's offerings. The combination of grilled chicken, Mexican street corn, and cucumber salad provides a delicious and unique mix of flavors and textures that will have your family and friends begging for more. Not only is this meal delicious, but it is also fairly simple to make and can be served as a main course, or served as a side at your Summer BBQ. This recipe is sure to be a hit! Let's get to grilling!

This Mexican Street Corn Chicken Salad Has All the Grilled Corn Flavor In a Bowl of Greens and Veggies with Chicken. This delicious Grilled Chicken Mexican Street Corn & Cucumber Salad is the perfect meal for any lunch or dinner. It combines the creamy, crunchy, and savory flavors of grilled chicken, Mexican street corn, and fresh cucumbers for an ideal balance of tastes and textures. Not only is this meal bursting with flavor but it’s also packed with protein and veggies for a tasty and nutritious meal. Plus, you can have it ready in just 15 minutes for an incredibly quick and easy dish.

This versatile recipe can be easily customized with your favorite proteins and veggies. Whether you’re looking for something to serve at a Summer barbecue or a potluck, this Grilled Chicken Mexican Street Corn & Cucumber Salad is sure to be a hit. Try it today and enjoy a delicious and nutritious meal that’s sure to please everyone.

What is Mexican Street Corn?

Mexican Street Corn or "Elote" is a type of grilled corn that is often served in Mexico. This classic Mexican dish is often served as an appetizer or side dish. It's a simple yet delicious combination of fresh sweet corn, mayonnaise, parmesan or cotija cheeses, chili powder, and lime juice that creates a unique and pleasing flavor. If you're looking for a fun twist on this traditional dish, try my Grilled Chicken Mexican Street Corn & Cucumber Salad! I've taken the classic Mexican Street Corn recipe and added grilled chicken and a crisp cucumber salad to the mix for an extra boost of flavor. The result is a delicious and satisfying meal that is sure to be a hit at any gathering. The combination of flavors in this dish is truly something special, making it a great addition to any meal. So if you're looking for a unique and flavorful dish, give this Street Corn Salad a try!

This tasty salad is made with fresh ingredients like grilled chicken, Mexican street corn, cucumbers, arugula, avocado, cilantro, olive oil, lime juice, garlic, and cumin. The chicken is cooked to perfection, while the Mexican street corn adds a delightful sweetness and spice. The cucumbers give the salad a nice crunch, while the avocado adds a bit of creaminess. The olive oil, lime juice, garlic, and cumin provide an extra layer of flavor that makes this salad irresistible. This dish is easy to make and can be enjoyed as a main or side dish. It is a great way to get in your daily serving of vegetables in a flavorful and satisfying way. The combination of flavors is sure to please the whole family.

Ingredients

1 lbs Grilled Chicken

1/4 teaspoon paprika

1/4 teaspoon garlic powder

7 oz. Arugula Lettuce

3 cups corn

2 cups cucumber

1 tbsp olive oil

1 bunch of fresh cilantro

1/2 large red onion

2/3 cup parmesan or cotija cheese

1 large avocado

Dressing

1/4 cup mayonnaise

3 tablespoons fresh lime juice

1/2 teaspoon cumin

1/2 teaspoon paprika

1/4 teaspoon chili powder

sea salt & black pepper to taste

Instructions

1. Season chicken with paprika, garlic powder and salt & pepper to taste. Grill on bbq or on the stovetop. 6 minutes on each side or until fully cooked. Set aside to rest for 10 min while preparing salad. Slice thinly once it has rested.

2. Prepare dressing by mixing together all ingredients above until fully blended; mayonnaise, lime juice, cumin, paprika, chili powder and salt & pepper to taste.

3. Mix together street corn. Add corn to pan used to cook chicken toast lightly on the outside to give a grilled flavor or if BBQing add to grill with chicken. Slice cucumbers in half and thinly slice. Same with red onion. Add cucumber, red onion and corn to bowl and mix together with olive oil 1 tsp fresh chopped cilantro 1/3 cup of shredded cheese. Mix together until fully saturated and blended well.

4. Assemble salad. Lay down lettuce, add sliced grilled chicken, slices of avocado and Mexican street corn mix. Drizzle dressing on top and sprinkle additional cilantro on top. Serve immediately and enjoy!

Is This Dish Suitable for Vegetarians?

Unfortunately, it is not suitable for vegetarians, as it includes grilled chicken. However, the dish can be easily modified to make it vegetarian-friendly. To make the dish vegetarian-friendly, simply replace the chicken with a plant-based protein such as tofu or beans. The salad can also be served without the chicken, and still be packed with flavor and nutrients.

To make the dish vegan-friendly, be sure to choose vegan-friendly ingredients such as vegan mayonnaise and vegan cheese. Additionally, you can also use plant-based milk, vegan margarine, and vegan yogurt to make the salad vegan-friendly. With these simple modifications, you can create an incredibly delicious and nutritious vegan version of this dish. Feel free to make it all your own! Whether you choose to make it vegetarian or vegan, this dish is packed with flavor and nutrition, and it is sure to become a family favorite.

Can I Make the Salad Spicier?

This Grilled Chicken Mexican Street Corn & Cucumber Salad is a delicious and easy meal to make for the whole family. Not only is it healthy and flavorful, but it can also be easily customized to suit everyone’s taste. For those who like a little bit of heat, try adding extra chili powder to the dressing. Or, for an even more spicy crunch, add diced jalapeΓ±os to the salad. If you’re looking for a smoky flavor, add diced chipotle peppers. To add a subtle spicy flavor, sprinkle red pepper flakes over the salad. Finally, for a burst of flavor, add a few dashes of your favorite hot sauce to the dressing. No matter which additions you choose, this Grilled Chicken Mexican Street Corn & Cucumber Salad is sure to be a hit!

Other Salad Recipes You Will Love:

How to Make the Perfect Pear and Pomegranate Arugula Salad

Shaved Brussel Sprout Salad with Apples, Goat Cheese & Candied Pecans

An Irresistible Treat: The Delicious Berry Custard Puff Pastry Tart

Treat your guests to a delicious classic dessert with a twist with this homemade Berry Custard Puff Pastry Tart. This dessert is an irresistible combination of custard, puff pastry, and fruit that looks and tastes like a gourmet dessert. The tart is filled with creamy custard and topped with fresh berries for a flavor combination that is sure to impress. The puff pastry custard Danish adds a flaky, crunchy texture to contrast the creamy custard and juicy berries. It's a sweet and tart balance that will please any crowd. The colors of the berries make this yummy dish visually appealing too, making it an impressive spread!

Making this tart is simple and easy. All you need is some puff pastry, custard, and fresh berries. You can serve it with a dollop of whip cream or powdered sugar sprinkled on top with almond slices. Not only is this pastry visually stunning, but it also has a delightful combination of sweet and savory flavors that will make your taste buds dance. In this blog post, I will provide step-by-step instructions on how to make this irresistible tart.

The custard pastry recipe can be made with either cream or milk, depending on your preference, and the berries of your choice added to the top. The tart can be served warm or chilled, depending on your preference. It can be stored in the refrigerator for up to four days, making it a great make-ahead dessert, or for breakfast quick grabs for the week. Berry Custard Puff Pastry Tart is perfect for any occasion and a great way to start a day or end the day as a dessert after your final meal. The combination of the light and flaky puff pastry and the sweet berries will have your guests asking for seconds. Whether you’re hosting a dinner party, throwing a birthday celebration, or just need a special treat for yourself, this simple homemade tart is sure to be a hit.

Ingredients

1 puff pastry sheet

1/2 cup raspberries

1/2 cup blueberries

Sliced Almonds

Powdered Sugar

2 cups milk

1/2 cup granulated sugar

1/3 cup cornstarch

4 large egg yolks

1 teaspoon almond extract

Instructions

1. Warm milk on stove until hot but not boiling. In a medium bowl whisk egg yolk, granulated sugar and cornstarch until light and fluffy. Add milk slowly being sure no lumps form. Pour back into pan used to heat milk and heat until a continuous boil begins and cream thickens. Make sure it does not stick to the bottom. Reduce heat and continue to cook until it reaches desired thickness. Pour into bowl and cover with plastic wrap placing in fridge to cool completely.

2. Preheat oven to 400 degrees. Let puff pastry warm at room temp until you are able to unroll without cracking. unroll on cookie sheet and cut into 6 individual puff pastries and fold edges over to make crust. Take fork and prick the middle of each pastry that is not folded. This is to help from "puffing" in the middle while baking. Brush side of the crust with egg yolk, milk or water and sprinkle with sugar if you desire.

3. Bake 10-12 minutes until pastry sheet is golden brown. Remove from oven.

4. Take custard from fridge and add to a piping bag or baggie you can cut tip from.Pipe Custard onto each pastry or use a spatula to evenly spread.

5. Add raspberries & blueberries ontop and sprinkle with slices almonds & powdered sugar if desired. Enjoy!

Is It Possible to Substitute the Puff Pastry for a Different Type of Dough?

If you're looking for a delicious and easy-to-make dessert, look no further than a Berry Custard Puff Pastry Tart. This classic tart is a delicious combination of a buttery puff pastry shell filled with a creamy custard and topped with fresh berries. While the puff pastry is the traditional dough used for this tart, there are a variety of other doughs that can be used as a substitute.

Shortcrust pastry is a great option to use as a substitute for puff pastry. It is a flaky, crumbly pastry dough that helps create a crisp tart shell. For a gluten-free option, almond flour dough is an excellent substitution for puff pastry. If you’re looking to add a bit of extra sweetness to your tart, chocolate dough is also a great option. Filo pastry can also be used to make a delicious Berry Custard Puff Pastry Tart. Filo pastry is a light and flaky dough that is perfect for creating a crunchy tart shell.

No matter which dough you choose, you’ll be sure to enjoy this delicious Berry Custard Puff Pastry Tart. With a variety of doughs to choose from, you can easily find the perfect option for your taste. So, what are you waiting for? Get baking and enjoy a delicious Berry Custard Puff Pastry Tart today!

Other Pastries & Desserts You Will Love:

The Perfect Peach Cobbler Recipe

Deliciously Sweet and Tangy: Blueberry Orange Glazed Muffins

Soft Cream Cheese Lemon Blueberry Scones

A Sweet and Delicious Recipe for Lemon Poppyseed Bread

Indulge in Delicious Personal Pear Tarts

Step-by-Step Guide to Making a Refreshingly Delicious Frozen Raspberry Margarita

For those looking for a refreshing and delicious cocktail to serve at their Summer BBQs, pool parties, or other gatherings, look no further than this Frozen Raspberry Margarita Recipe! This recipe is meant to fill an entire pitcher of goodness to keep the party going. It combines both the sweet and tart flavors of raspberries and lime, and this fun, fruity drink is sure to be a hit with everyone! The best part? It’s easy to make and requires minimal ingredients.

Blending

Creating the perfect frozen raspberry margarita is all about the correct blending. Blending is the key to achieving a smooth and creamy consistency. A high-speed blender is recommended as it will help to ensure that all of the ingredients are combined thoroughly and that there are no large chunks of ice or fruit. If you want to make a thicker margarita, adding a few ice cubes while blending will do the trick. To make a sweeter margarita, add a tablespoon of sugar or honey while blending. Adding a few drops of lime or lemon juice will also help to give the margarita an extra kick of flavor. Be sure to blend until the drink is completely smooth and enjoy! Below are my favorite blenders to make the perfect Margarita every time!

Decorating Glasses

Nothing says summertime like a delicious Frozen Raspberry Margarita! This fruity cocktail is easy to make and even easier to enjoy. To make your Margaritas look even more festive, use a glass rimming tray and a lime wedge to moisten the top of each glass. Then dip each glass into a plate of salt, sugar, or a combination of both. Use a brush or a spoon to spread the sugar or salt around the rim of the glass. You can even add a few drops of food coloring to give the glass a fun, festive look. Once the glasses are ready, you can pour the cocktail and some fruit to garnish. Here I used cocktail picks with lime and raspberries to give a great decorative finish!

Extra Tips

A Frozen Raspberry Margarita is a delicious and refreshing cocktail that is perfect for summer. This easy-to-make margarita recipe will be sure to impress your friends and family. When making a Frozen Raspberry Margarita, it is important to remember to use fresh lime juice for the most flavor. To achieve the perfect balance of sweet and tart, use an equal amount of raspberry puree and lime juice. Adding a few drops of orange liqueur to the margarita will help to enhance the raspberry flavors. To get the best texture, use crushed ice in the blender with the other ingredients. A few drops of agave nectar can help to sweeten the drink and make it more palatable. For an extra kick, top the margarita with a float of Grand Marnier or Cointreau. This Frozen Raspberry Margarita is sure to be a hit with everyone. So, get your blender ready and enjoy this icy treat!

Recipe Variations

There are plenty of ways to customize this fun drink with extra ingredients to make your own unique versions. To make the perfect frozen raspberry margarita, start by adding the raspberries, lime juice, and agave nectar to a blender. Blend until everything is smooth. Then add a cup of crushed ice and blend again until it's slushy. For a tart twist, add a splash of cranberry juice. For a sweeter version, try using raspberry-flavored simple syrup. For a spicy kick, add a few drops of hot sauce.

If you want to make a creamy version of the margarita, blend in a scoop of strawberry or raspberry ice cream. For a tropical twist, try using pineapple juice in place of the lime juice. For a smoky flavor, mix in a teaspoon of smoked paprika. For a festive look, garnish each glass with a sprig of mint and a slice of lime.

Tequila is the most popular type of alcohol used to make a frozen raspberry margarita, but other types of alcohol such as triple sec, vodka, or rum can also be used. Depending on your preference and the alcohol content you would like, you can choose the type of alcohol that best suits your needs. If you are looking for a more subtle flavor, you can opt for a light rum or vodka. For a more intense flavor, you can choose tequila or triple sec. It is important to note that the type of alcohol used will affect the flavor and alcohol content of your frozen raspberry margarita. If you are looking for a raspberry margarita mocktail remove the alcohol completely and add a dash of club soda in its place.

Can You Make Frozen Margaritas Ahead Of Time?

Beat the heat this summer by making a delicious frozen raspberry margarita! This easy-to-follow recipe can be made ahead of time and stored in the freezer, so you can always have a cold and refreshing drink at the ready. All you have to do is blend all of the ingredients together, pour the mixture into a container and freeze it. When it's time to drink, just scoop a few ounces of the frozen raspberry margarita mix into a glass, top it off with some extra ice, and enjoy!

The beauty of this frozen raspberry margarita recipe is that it only takes a few minutes to make and can be stored in the freezer for up to two days. This makes it ideal for entertaining, as it can be prepared ahead of time so that you can enjoy a cold, refreshing drink any time you want. And since it's a frozen margarita, you don't even have to worry about it getting watered down!

Ingredients

2 cups frozen rapberries

4 limes juiced

8 ounces tequila of choice

4 ounces Cointreau or orange liqueur of choice

3 - 7.5 oz cans of Q Mixers margarita mix

2 cups ice

lime wedge & fresh raspberries to garnish

salt & sugar

Instructions

1. Rim glasses by taking a lime wedge around the outer edge and dipping the glass upside down into sugar, salt or I did a 50/50 mix here.

2. Add frozen raspberries, ice, lime juice, tequila, orange liqueur, and margarita mix into a blender. Blend until smooth.

3. Pour into prepared glasses and garnish with fresh raspberries, lime wedge and serve!

Beat the Summer heat with a delicious Frozen Raspberry Margarita! This easy-to-make frozen treat is a perfect way to beat the heat and enjoy a refreshing Summer cocktail. The sweet flavor of raspberries blends perfectly with tequila and lime for a unique and delicious margarita. Serve this icy treat in a glass rimmed with margarita salt or sugar for a festive presentation. Make a big batch in a pitcher for easy outdoor entertaining. Keep the frozen margaritas in the freezer to have them ready to serve at a moment’s notice. Make a few extra batches for a pool party or picnic. This recipe is simple to make and requires minimal ingredients, so you don’t need to worry about having to buy too many items. Plus, it’s the perfect way to cool down after a hot Summer day. So grab your ingredients and start mixing up this frozen raspberry margarita recipe for your next Summer event!

Other Refreshing Cocktails You Will Love:

Strawberry Orange Bourbon Smash

The Perfect Lemon Drop Martini Recipe for a Refreshing and Delicious Cocktail

4 Deliciously Easy 4-Ingredient Tequila Cocktails

Watermelon Twist Cocktail

Refreshing Lemon Twist Cocktail

The Perfect Peach Cobbler Recipe

Who doesn't love a good peach cobbler? It really is the quintessential Summer dessert. A good peach cobbler is so perfectly sweet and deliciously crunchy and is sure to be a hit with your family and friends. Whether you’re using fresh or canned peaches, this recipe is sure to be a winner. Follow this simple step-by-step guide to make a delicious and easy peach cobbler that will have everyone begging for seconds.

Peach cobbler is a classic Southern dessert that is fairly easy to make and sure to please. This comforting dessert is a real fan favorite and is perfect for any occasion. The combination of fresh sweet peaches, a buttery biscuit-like topping, and a hint of cinnamon makes this cobbler truly irresistible.

To make this delicious cobbler, you will need fresh peaches, butter, sugar, and a biscuit-like topping. The peaches are the star of the show here, so be sure to use the freshest peaches you can find. Combine the peaches, butter, and sugar in a baking dish and spread the biscuit-like topping over the top. Bake in a preheated oven until the topping is golden and the peaches are bubbly and tender.

Once the cobbler is ready, it's best served warm with a scoop of vanilla ice cream. Enjoy the combination of sweet and buttery flavors and the hint of cinnamon. This cobbler is one of my most used recipes for guests. Every time I make it the crowd is so happy and it finishes off the meal perfectly. So, why not make this classic Southern dessert today?

Ingredients

10 Servings

6 cups fresh peaches

1 & 1/2 cups granulated sugar

1/4 teaspoon cinnamon

1/8 teaspoon nutmeg

2 teaspoons flour

Topping:

2 & 1/2 cups all-purpose flour

1 cup white sugar

1/2 cup dark brown sugar

2 teaspoons baking powder

1 teaspoon salt

1 cup heavy cream (can substitute for buttermilk)

1 egg

8 tbsp butter

Sugar Topping:

2 tablespoons granulated sugar

1/2 tablespoon cinnamon

Instructions

  1. Preheat oven to 375 degrees

  2. Remove skin from peaches by blanching. To do this you start by placing peaches in boiling water for 30-45 seconds. Immediately take out and place into a bowl of ice water. The peaches will peel perfectly.

  3. Once peaches are peeled slice and toss with sugar in a bowl. Once evenly coated add cinnamon, nutmeg and flour and toss again.

  4. Pour peaches into baking dish and place in oven for 10 min while making topping

  5. Begin Topping by mixing together dry ingredients; all-purpose flour, sugar, brown sugar, baking powder and salt. In another bowl whisk together heavy cream and egg gently pour into flour mixture and hand mix together to make a shaggy mixture that will crumble nicely on top of the peaches.

  6. Once the peaches have cooked for 10 min and the topping mixture is ready crumble evenly over the top of the peach mixture.

  7. Cut 8 tbsp of butter into even size cubes. Sprinkle over top of the crumble mixture so they are evenly spread over the pan. Lastly, Evenly sprinkle sugar topping of sugar and cinnamon over the entire pan.

  8. Place back in the oven and cook for 45-50 minutes, until topping is golden and peaches are tender. Top with fresh whipped cream or vanilla ice cream for a great dessert!

Canned Peaches Vs Fresh

When it comes to making a delicious peach cobbler, you have two main choices when deciding which type of peaches to use: fresh or canned. Canned peaches provide a pre-sweetened, convenient base for your cobbler that requires little to no additional preparation. However, fresh peaches provide a more vibrant flavor and texture that will really shine in your cobbler.

When it's not peach season and you may be forced to use canned peaches, don't worry! You can still enjoy this classic recipe year-round with the help of canned peaches. Canned peaches are a great way to make a delicious peach cobbler any time of year. Their soft texture makes them ideal for baking into a cobbler, and they can save you time and energy since they are already peeled and chopped. If you choose to use canned peaches for your cobbler, you have the option of using light or heavy syrup, while fresh peaches should be sweetened to taste. Canned peaches are usually slightly more firm than fresh peaches, so if you want a softer texture you’ll need to simmer the canned peaches a bit before adding them to the cobbler. Plus, you can even add a bit of extra sweetness to your cobbler by using canned peaches in syrup. Just be sure to drain the syrup from the canned peaches before adding them to your cobbler. So don't wait for peach season – you can make a delicious peach cobbler with canned peaches any time of year!

When using fresh peaches for your cobbler, you will need to do some extra preparation in the form of peeling, slicing, and sweetening. Canned peaches are a good option if you’re in a hurry, while fresh peaches require more time and effort to prepare. However, the taste and texture of fresh peaches will be worth the extra effort.

Is It Difficult to Make a Peach Cobbler?

No matter the season, nothing quite captures the flavors of Summer like a delicious homemade peach cobbler. Making a peach cobbler is surprisingly easy and requires only a few ingredients, so you don't need to be a professional chef to make a great-tasting cobbler. All you need is some fresh peaches, butter, sugar, flour, and spices. With just a few steps, you can whip up a delicious homemade peach cobbler in no time.

The combination of sweet peaches, buttery crust, and spices makes for a truly delicious dessert. The sweet and juicy peaches combined with the crunchy and buttery crust, create a flavor combination that is sure to please. The spices add a unique touch that complements the flavor of the peaches and gives the cobbler an extra layer of flavor.

Making a peach cobbler is a great way to enjoy the flavors of Summer all year round. Plus, it's such a simple recipe that even novice bakers can make a delicious cobbler with minimal effort. So, if you're looking for a delicious and easy dessert that captures the flavors of Summer, then why not try making a peach cobbler? With just a few ingredients and a few simple steps, you can have a delicious homemade cobbler ready to enjoy in no time.

Can I Freeze Leftover Peach Cobbler?

Freezing leftover peach cobbler is an easy way to enjoy this delicious dessert later on. To freeze the cobbler, simply place it in an airtight container or wrap it tightly in plastic wrap and aluminum foil. Be sure to label the container with the date it was frozen so you know how long it has been in the freezer. To reheat the cobbler, thaw it in the refrigerator overnight and then bake at 350Β°F (176Β°C) until it is heated through. You don’t have to wait until you warm up the cobbler to enjoy it. You can also enjoy it cold straight from the fridge or quickly microwave it to warm up. For extra indulgence, top your frozen cobbler with a scoop of creamy vanilla ice cream. Enjoy your frozen peach cobbler, even months later!

Other Summer Desserts You Will Love:

How to Make the Perfect Arnold Palmer Popsicle: A Delicious Summer Recipe

Indulge in Deliciousness: Cherry Chip Cake with Chunks of Dark Chocolate Recipe

Monster Cookie Recipe

Chocolate Peanut Butter Brownies

Deliciously Sweet and Tangy: Blueberry Orange Glazed Muffins

These blueberry-orange glazed muffins are the perfect combination of sweet and tart with a combination of fruit flavors. The orange glaze adds a bright and zesty flavor to the otherwise sweet blueberry muffins. These muffins are perfect for a quick breakfast on the go or for an after-school snack. Not only are they delicious, but they are also quick and easy to make. They are the perfect treat to bring to a breakfast party, and sure to be a hit with everyone. Whether you choose to make these muffins for breakfast, brunch, or dessert, the orange glaze and blueberry filling will make them a definite crowd-pleaser. If you're looking for a delicious breakfast treat that is also easy to make, Blueberry Orange Glazed Muffins are the perfect choice! These muffins are made with fresh blueberries and a zesty orange glaze and are sure to please the whole family.

Tips, Tricks and Techniques

The combination of fresh orange juice and juicy blueberries creates a delicious flavor sensation. To bring out the best flavor in the muffin batter, make sure to use fresh orange juice. If you are using frozen blueberries, make sure to rinse and pat them dry with a paper towel before adding them to the batter. For an extra moist muffin slightly undercook them and add additional sour cream. For even more zest you can add additional orange zest to the batter.

To make the glaze that packs a punch, mix together equal parts orange juice and powdered sugar. For a subtle nutty flavor, add a hint of almond extract to the glaze. Drizzle the glaze over the muffins while they are still warm so it will stick. Let the muffins cool completely before serving. Enjoy the delicious flavor of Blueberry Orange Glazed Muffins!

Use an Ice Cream Scoop

When it comes to making the perfect batch of blueberry-orange glazed muffins, an ice cream scoop is the best choice for portioning out the batter. Using an ice cream scoop ensures that each muffin is the same size and shape. This larger scoop also helps to create a nice round shape to the muffin. Additionally, an ice cream scoop is the quickest and most efficient way to make large batches of muffins.

By using an ice cream scoop to fill the muffin pans, you are also ensuring that the blueberry-orange glaze is evenly distributed among the muffins. This is especially important if you are looking to create a consistent flavor in each muffin. This makes the entire baking process much simpler and quicker. So be sure the next time you are baking a batch of blueberry-orange glazed muffins, reach for that trusty ice cream scoop. Not only will it make the process easier, but it will also ensure that each muffin is the same size and shape and that the glaze is evenly distributed.

How to Best Store Leftover Muffins

Nothing is quite as delicious as a freshly-baked blueberry orange glazed muffin. With the right storage techniques, you can enjoy these delicious treats for days to come.

It's best to store the muffins in an air-tight sealed container or wrap them in plastic wrap to keep them fresh. Place the muffins in a cool, dry place away from direct sunlight and out of reach of any critters that may be interested in your tasty treats. If you plan to store them for more than a few days, it's best to place them in the refrigerator, but allow them to come to room temperature before serving for optimal flavor. If you'd like to enjoy the muffins at a later date, freezing them is a great option. Wrap each muffin individually in plastic wrap or place them all in a plastic freezer bag. Be sure if you are freezing to wait to add glaze at the later date you are wishing to eat them. With the right storage techniques, you can enjoy delicious blueberry-orange glazed muffins for days to come.

How Long Does It Take to Bake Blueberry-Orange Glazed Muffins?

Preparing delicious Blueberry Orange Glazed Muffins is easy and quick! The entire process, from preparation to baking, takes only about 30 to 35 minutes.

To prepare the muffins, all you need to do is gather the necessary ingredients and mix them together. This should take you a maximum of 10 minutes. After that, you can start baking the muffins. The baking time for these muffins is approximately 25 minutes. Once the muffins are in the oven, you can set a timer so that you know when they're ready. To check if the muffins are done, you can insert a toothpick in the center of the muffin. If the toothpick comes out clean, then your muffins are ready to be served!

These Blueberry Orange Glazed Muffins are sure to be a crowd-pleaser. In just 30 to 35 minutes, you can have delicious homemade muffins that your family and friends will enjoy. So, don't wait any longer and try this yummy recipe today!

How Many Blueberry Orange Glazed Muffins Will This Recipe Yield?

The recipe yields 12 muffins and they can stay fresh in an airtight container for up to three days, so you can enjoy them all week long! If you are looking to make less you can cut the recipe in half. Along with making less if you are looking to feed more at your next family gathering you can double the recipe. Whether you're looking for a quick snack or a special treat, these Blueberry Orange Glazed Muffins are sure to be a hit with family and friends.

4. Can I Substitute the Orange Juice with a Different Type of Juice for the Glaze?

Blueberry orange glazed muffins are a delicious treat that can be enjoyed any time of the day. The orange glaze gives the muffins a sweet and tart flavor, but what to do if you don’t have orange juice on hand? Don’t worry! There are plenty of other types of juice that can be used in the glaze. Apple juice, pineapple juice, cranberry juice, and grapefruit juice are all great substitutes for orange juice in the glaze. Each type of juice will give the muffins a slightly different flavor, so you can experiment to find the one you like best. Adding a few tablespoons of lemon or lime juice to the glaze can also provide an extra zesty flavor. So the next time you’re craving blueberry orange glazed muffins, you don’t have to worry if you don’t have orange juice. There are plenty of other alternatives that will make the muffins taste just as good.

Ingredients

Muffins:

2/3 cup granulated sugar

1 large egg

1/2 cup melted butter

1/3 cup orange juice

1 teaspoon vanilla extract

1 & 1/4 cup all-purpose flour

1 teaspoon baking powder

1/4 teaspoon salt

1/2 cup sour cream

1 cup blueberries

Glaze:

1 & 1/3 cups powdered sugar

3 tablespoons orange juice

Instructions

1. Preheat oven to 375. Mix together granulated sugar, egg, melted butter, orange juice and vanilla extract until well combined.

2. Add in dry ingredients; all-purpose flour, baking powder, salt until smooth and no powder is showing. With a spatula mix in sour cream. Fold in half to 3/4 of the blueberries, leaving the rest to add on top.

3. Using an ice cream scoop dish out a spoon full into each baking tin. (if not using muffin cups or parchment paper on muffin pan be sure to oil before). Once muffin tins are full of muffin mixture add additional blueberries onto each muffin.

4. Bake for 25 minutes or until a toothpick comes out clean.

5. While muffins are baking mix powdered sugar and orange juice together for frosting. As soon as muffins are done place on a cooling rack and drizzle glaze mixture on top so that it will stick well to the warm muffins. Enjoy!

Alternatives you can make to this recipe could be substituting the blueberries for chunks of chocolate or cranberries. Depending on the time of year this may be a nice rich addition. You can also substitute the orange for lemon but use lemon zest and lemon juice instead. Alternatives to sour cream can be a greek yogurt or if looking for dairy free you can use coconut milk. This recipe is one of my favorites but feel free to customize it all on your own and most importantly have fun experimenting. That's what makes baking and cooking so fun!

If you're looking for a tasty treat that doesn't take long to make, Blueberry Orange Glazed Muffins are the perfect choice. With their sweet and tart flavor, these muffins are sure to be a hit with the whole family. So don't wait, try making these delicious muffins today!

Welcome To Summer Charcuterie Board for Your Next Gathering

As the heat of the Summer season approaches, it's time to start thinking about fun, creative ways to entertain. One way to do that is to create a unique and deliciously easy Summer charcuterie board. A charcuterie board is a beautiful presentation of cured meats, cheeses, nuts, fruits, crackers, and other items that you can put together to create a delectable snack or appetizer. With a few simple ingredients, you can create an impressive Summer charcuterie board that is sure to be a hit at any pool party or outdoor gathering. Read on to learn some tips and tricks on how to create your own Summer charcuterie board.

Welcome in the season with a delicious charcuterie board! Whether you’re hosting a backyard barbecue or just want to enjoy a night in, a charcuterie board is the perfect way to enjoy a variety of flavors. Start by choosing a selection of summer fruits like apricots, strawberries, watermelons, and raspberries. Then add your favorite cheese, like a soft Brie, goat cheese, and Havarti. For a bit of protein, include prosciutto, genoa salami, sopressata, or pepperoni. To add texture, grab an assortment of crackers and bread like baguettes and flatbread. For a bit of crunch, throw on some nuts and seeds like almonds, cashews, pepitas, and sunflower seeds. Finish off your board with a few sauces, jellies, and spreads like tapenade, pesto, hummus, and tzatziki. And don’t forget about the finishing touches - herbs and flowers! With a charcuterie board like this, your summer entertaining will be a breeze.

How to Arrange a Charcuterie Board:

Charcuterie boards are a great way to entertain friends and family in the summertime. Not only are they visually appealing, but they also provide a wide variety of flavors and textures that everyone can enjoy.

For this board, I started with a base salami folded to have a spot for the words WELCOME SUMMER. Then I used slices of cheese and small cookie cutters to create the letters. I added in crackers and a selection of cheeses from my Williams-Sonoma cheese order for a well-rounded charcuterie board. In addition, I added fresh watermelon, kiwi, & strawberries, as well as dried fruit to provide some sweetness. Make sure to top it off with some walnuts and pistachios to add some crunchy texture.

Make sure to have fun with your Summer charcuterie board! Don’t be afraid to experiment with different combinations. Try different types of cheeses, meats, fruits, and nuts to create the perfect board. If you’re feeling ambitious, you can even make your own crackers and dips. No matter what you choose, your charcuterie board is sure to be a hit with friends and family. So, get creative and welcome in the season with a delicious charcuterie board!

When assembling a charcuterie board, the sky is the limit. You can choose whatever meats, cheeses, and accompaniments you like. Salami, prosciutto, and ham are all popular options, as are a variety of hard and soft cheeses. To add depth of flavor, choose accompaniments like olives, pickles, jams, and mustard. For a Summer themed flair, add seasonal fruits like strawberries, watermelon, and peaches. To make it more like a complete meal, add some bread or crackers.

Charcuterie boards are fun to make and easy to customize. They’re perfect for entertaining guests, or just enjoying a snack all to yourself. Get creative and make a Summer charcuterie board that you and your family will love. I always love to visit our local farmers market to find the freshest fruit & vegetables for the season.

Types of Cheeses for a Summer Board

I loved using these cheeses from Williams-Sonoma. They have a ton of different options to choose from but the sky is the limit with cheese! Picking something that compliments your fruit and meats on the board is always key. From the nutty Manchego cheese from Spain to the crumbly Feta cheese from Greece, you’ll be sure to find something to please everyone. Robiola, a soft Italian cheese, is perfect for spreading on crackers and adding a delicious flavor. Goat cheese is a great addition, providing a tangy and creamy flavor. Dutch Gouda is mild and mellow, while French Brie is creamy and buttery. Blue cheese is a strong, robust cheese with a pungent flavor, and Camembert is a soft, creamy French cheese. Finally, no charcuterie board is complete without the classic sharp, tangy British cheddar or mozzarella cheese. Create a beautiful Summer charcuterie board with these delicious cheeses and let the celebration begin! welcome summer charcuterie board

When it comes to presentation, the sky’s the limit. For a truly eye-catching display, arrange the food in a variety of shapes and sizes. Use a cutting board, platter, or wooden board as your base and add some greenery or edible flowers to give it a summery feel. If you’re feeling creative, you can even create a design with the food itself. A Summer charcuterie board is the perfect way to show off your culinary skills and impress your guests. With its delicious flavors, beautiful presentation, and endless possibilities, a welcome to Summer charcuterie board is sure to be a hit.

How to Make the Perfect Arnold Palmer Popsicle: A Delicious Summer Recipe

Are you looking for a fun and delicious way to cool off during the hot summer months? Look no further than this Arnold Palmer Popsicle recipe! This classic combination of iced tea and lemonade is a refreshing and delicious treat for adults and kids alike. With just a few simple ingredients, you can substitute the classic drink and instead make these tasty popsicles in no time. Whether using them for a Summer BBQ or just a fun way to beat the heat, this easy recipe is sure to be a hit. Keep reading for all the details on how to make the perfect Arnold Palmer Popsicle.

Arnold Palmer Popsicle Tips and Tricks

Cool off this Summer with a classic Arnold Palmer popsicle recipe! It’s the perfect blend of lemonade and iced tea, and it’s sure to be a hit with the whole family. To make the popsicles, start with equal parts iced tea and lemonade. You can also add a splash of vodka for an "adult popsicle" or flavored syrup for extra sweetness to the flavor. For a more creamy popsicle, add a scoop of vanilla ice cream or Greek yogurt.

To make your own custom Arnold Palmer popsicles, try adding different fruits like chunks of strawberry, raspberries, or blueberries. For an extra tart flavor you can add in a splash of lime juice or sliced lemons ( I did this on a few of mine). If you’re looking for a sweeter treat, swap out the iced tea for a sweeter variety such as peach tea. The Saint James teas come in so many delicious flavors like passionfruit & peach, pineapple & mango, blueberry & raspberry, and blood orange & hibiscus!

Making homemade popsicles is a fun and easy activity that the whole family can enjoy. With this delicious Arnold Palmer popsicle recipe, you can find a unique way to cool off in the Summer heat while still enjoying a classic summertime treat. So, get creative and make your own custom Arnold Palmer popsicles today!

Can the Recipe be Made in Large Batches?

Making a delicious Arnold Palmer popsicle recipe is easy, and you can even make a larger batch for a special occasion. All you need to do is increase the amount of ingredients accordingly. You can make up to a double batch of this recipe without making any additional adjustments.

When making a larger batch of popsicles, it is important to store them properly. You can easily store the popsicles in a large airtight container. If you plan on making a larger batch of popsicles, you may also want to invest in a quality popsicle maker to help speed up the process. With a larger batch, you can also use different molds to create unique fun shapes and sizes of popsicles.

The Arnold Palmer popsicle recipe is a great treat for any occasion, and making them in larger batches is a great way to share them with friends and family. With the right ingredients and equipment, you can easily make these thirst-quenching popsicles at home.

Other Variations for the Arnold Palmer Popsicle Recipe?

You can also try spicing up the recipe by using flavored iced teas. For a unique flavor, add fresh fruit or citrus slices to the popsicles. For a refreshing twist, herbs like mint or basil can be added to the popsicles.

If you want to switch things up, try substituting the lemonade with limeade or other citrus juices. To make a gourmet popsicle, infuse simple syrups with herbs or fruits. For a frozen Arnold Palmer that is more like a slushie, use crushed ice instead of regular ice cubes. With these variations, you can suit everyone's taste buds.

Note on Popsicle Molds

There are a few important steps to follow to ensure that your popsicles come out perfectly. It's important to freeze the popsicles for at least four hours before serving to ensure that they are frozen all the way through. If you're using wooden popsicle sticks, be sure to soak them in water for about 10 minutes before adding them to the molds. This will help the popsicles to stay together and make it easier to remove them from the molds. When removing the popsicles from the molds, run the molds under warm water for a few seconds before taking them out. This will help to loosen the popsicles, making them easier to remove. Once they're out of the molds, you can enjoy your Arnold Palmer Popsicles immediately or store them in the freezer for a cool treat anytime.

Ingredients

Popsicle Mold (linked one just like mine and more options below)

1 16.9 oz Saint James Green Tea (if using regular tea you will need to sweeten)

Trader Joe's Sparkling Lemonade

Sliced Lemons (optional)

Instructions

1. Add sliced Lemon into the popsicle mold (optional but adds detail to the popsicle and a little sourness) and pour Green Tea into the popsicle molds. Add stick and lid to molds. Freeze for 1 hour. If you aren't using a sweetened tea I would add sugar to tea so you have sweetness throughout the popsicle or you can mix the tea & lemonade. I just love the layered look.

2. After Tea has hardened pour in sparkling lemonade slowly. The sparkling lemonade will bubble and need more added so go slow wait and then add more. Return to freezer and let harden for 4-8 hours.

3. Remove from the freezer and quickly run under warm water to help remove from the mold. Serve immediately or put in a container in the freezer until ready to serve!

Now your delicious Arnold Palmer Popsicles are ready to enjoy! This recipe is sure to be a hit with family and friends alike. So don't wait any longer, try this simple recipe and enjoy!

Creating the Perfect Summer Tablescape For more photos of this table set up and links to everything!

Other Summer Treats You Will Love:

Creamy Root Beer Popsicle

Sparkling Ice Mint Mango Mock-tail

Shaved Brussel Sprout Salad with Apples, Goat Cheese & Candied Pecans

Fruit & Goat Cheese Bruschetta

The Perfect Lemon Drop Martini Recipe for a Refreshing and Delicious Cocktail

Create a Delicious Layered Hummus Dip for Your Next Snack or Appetizer

If you're looking for a quick and easy healthy appetizer to bring to your next party, look no further than this delicious and creative layered hummus dip idea! This crowd-pleasing dip is easy to make and can be customized to fit the tastes of any crowd. With creamy layers of hummus, vegetables, and cheese, this dip is sure to be a hit at your next gathering. Not only is it delicious, but it's also full of nutrition and flavor. So, get ready to wow your guests with this delicious layered hummus dip!

This dip is perfect for an outdoor gathering or as part of a dinner party menu. The beauty of this dip is that it can be customized to fit any dietary restrictions or guest preferences. By layering hummus with other ingredients such as feta cheese, tomatoes, and olives, many unique flavor combinations can be created that are all sure to please. Hummus is rich in fiber, protein, and healthy fats, making it an excellent choice for a nutritious snack. Serve this layered hummus dip with warm pita bread or crackers for a crunchy contrast to the creamy hummus. Enjoy this dip as a healthy alternative to traditional chips and dip! Whether you’re entertaining or just having a snack for yourself, layered hummus dip is sure to please.

Assembling The Layered Hummus Dip

Assemble on a Small Platter Making All the Components Easy to See and Scoop. This delicious dip is made up of layers of hummus, diced tomatoes, thinly sliced radishes, olives, feta cheese, and a drizzle of olive oil. To make the dip easier to scoop and enjoy, layer the hummus dip on a small platter. Serve with pita chips, fresh vegetables, or crackers for the perfect appetizer or snack. All of these flavors and textures combine to create a unique and delicious dip that is sure to be the talk of the party.

The best part about this layered dip is the ability to customize it for your guest's tastebuds or dietary restrictions. You can add alternatives like roasted red peppers instead of tomatoes. Add the cucumbers onto the dip instead of a side for scooping. For a vegan option, omit the feta cheese and replace it with nutritional yeast. Need more protein? Add in grilled chicken. The possibilities are endless, so make it all your own!

Ingredients

Garlic Hummus (I went the easy route and chose store-bought you can make your own)

Kalamata Olives

Tomatoes

Radish

Feta Cheese Crumbles ( I did a Mediterranean flavor)

Olive Oil

English Cucumber

Pita Chips

Instructions

1. Layers of Hummus on a beautiful serving plate

2. Layer on your toppings. Like I said above make this all your own! If you prefer another topping then add that in or substitute it out. Drizzle olive oil after adding all toppings.

3. Arrange Pita Chips and Cucumbers around the dip for easy scooping and beautiful presentation.

4. I also added small bowls of 2 kinds of olives for those that don't want dip to have another option and add a finishing touch.

5. Refrigerate until you are ready to serve!

How to Store Leftovers

Layered hummus dip is the perfect appetizer for any gathering or special occasion. Not only is it simple to make, but it is also versatile and can be prepared ahead of time. To ensure that your dip is as delicious as possible, make sure to let it cool completely prior to storing it. Store any leftovers in a shallow container with a lid, making sure it is airtight to prevent spoilage. Enjoy your dip within 3-4 days, or freeze it for later use. To reheat leftovers, use the microwave or the stovetop. With a few easy steps, you can enjoy a delicious layered hummus dip that will be the talk of your next event!

I hope you loved this Greek Hummus Dip Recipe, here are a few other appetizers you will also love:

Fruit & Goat Cheese Bruschetta

A Crowd-Pleasing Stuffed Mushroom Recipe

5 Ingredient Bacon Ranch Football Shaped Cheese Ball

Deliciously Different: Pink Deviled Eggs to Spruce Up Your Easter Brunch

Delicious Buttery Italian Croissant Sandwich

Delight Your Guests with an Antipasto Christmas Wreath

The Perfect Lemon Drop Martini Recipe for a Refreshing and Delicious Cocktail

Are you looking for a delicious and refreshing cocktail recipe to spice up your next get-together? If so, you'll want to try a Lemon Drop Martini. This easy-to-make, zesty cocktail is sure to tantalize the taste buds of all your guests. Not only is it packed full of flavor, but it's a great way to show off your bartending skills. So if you're ready to achieve the perfect Lemon Drop Martini, read on to learn how to mix up this classic original cocktail.

The Lemon Drop Martini is a classic cocktail that is sure to please any crowd. Being both sweet and tart, this drink is the perfect balance of refreshing and flavorful. When making a Lemon Drop Martini, be sure to use freshly-squeezed lemon juice for the best flavor.

What’s In a Lemon Drop Martini?

Are you looking for a delicious and refreshing drink to enjoy during the hot summer days? Look no further than the Lemon Drop Martini! This classic cocktail is made with vodka, simple syrup, and fresh lemon juice, giving it a sweet and tart flavor that is perfect for sipping in the sun.

If you’re feeling adventurous, add a few drops of bitters to give the drink a subtle herbal finish. The key to a great Lemon Drop Martini is using fresh lemon juice and quality vodka. Once you’ve perfected your Lemon Drop Martini, serve it chilled in a martini glass and garnish with a fresh lemon wedge. Enjoy this delightful drink in the sun and savor its sweet and tart flavor!

How to Make a Sugar Rim

Starting a lemon drop martini is easy when you know the steps! Begin by ensuring you have a clean, dry glass. Take a plate and pour a small amount of sugar onto it. Take a wedge of lemon and run it around the rim of the glass and then press it into the sugar plate. This will give your finished drink a nice sugary sweetness.

If you are making a lot of glasses with the sugar rim, try dampening a clean new sponge with water on a plate instead of using a hundred lemons. This will save you time from too much water dripping down and glass as well as saving lemon juice. Once the glass is rimmed with sugar, you are ready to make your delicious lemon drop martini!

When to Serve a Lemon Drop Martini

A Lemon Drop Martini is the perfect drink for any special occasion. Whether you’re celebrating a wedding, anniversary, or birthday, this delicious martini is sure to be a hit. This classic drink is also a great choice for Summer barbecues and outdoor gatherings. It’s the perfect refreshing drink to get the party started before dinner is served.

For those looking for a quick and easy beverage to enjoy after a long day at work, a Lemon Drop Martini is a great choice. It’s light and refreshing and is sure to be a hit with your guests. It’s a great drink to serve at brunch or dinner parties, or even a girl’s night in. No matter what the occasion, a Lemon Drop Martini is sure to be a hit.

What Type of Vodka Should I Use to Make a Lemon Drop Martini?

When making a classic Lemon Drop Martini, the main ingredient is vodka. There are many different brands and types of vodka to choose from, and each one will give the drink a slightly different flavor. Tito's Vodka is a great choice for a Lemon Drop Martini because of its smooth, clean flavor and light citrus notes. Hanson Sonoma Meyer Lemon Vodka is also great for a Lemon Drop Martini because it is flavored with lemon. If you want a smooth, light vodka, Grey Goose is a great choice. Smirnoff Citrus Vodka is made with lemon and lime flavors and is perfect for mixing a Lemon Drop Martini. Ciroc Vodka is a smooth and creamy vodka with a light citrus flavor and is great for making a Lemon Drop Martini. Finally, Stolichnaya Citros Vodka is a citrus-flavored vodka that is perfect for making a Lemon Drop Martini. No matter what type of vodka you choose, you can make a delicious Lemon Drop Martini with a few simple ingredients.

What are Some Garnishes I Can Use to Dress Up a Lemon Drop Martini?

There are so many ways to garnish this lemon drop martini recipe. You can add a candied or dried lemon wheel. To add an extra colorful touch, you can also add a few blueberries and mint leaves. Or for an extra special touch, add a star anise and a lemon thyme sprig. If you decide to take it up a notch and add another flavor such as making it a raspberry lemon drop you can add fresh raspberries as well! The options and flavors are endless!

Can I Make a Virgin Lemon Drop Martini?

The Lemon Drop Martini is a classic cocktail that has been around for years. Made with vodka, simple syrup (or orange liqueur/cointreau), and freshly squeezed lemon juice, it is a refreshing and delicious drink. However, what if you don’t want to include alcohol in your drink? Don’t worry – it’s easy to make a non-alcoholic version of the classic Lemon Drop Martini. All you need to do is replace the vodka with a non-alcoholic substitute like sparkling water, cranberry juice, or even ginger ale. You can also use a sugar-free lemonade for a lighter, healthier option. Trader Joe's also had a delicious limoncello this time of year that is nonalcoholic and would make a great substitution for vodka in this lemon drop! Add some ice cubes and a slice of lemon for a zesty, delicious drink that’s perfect for any occasion.

Lemon Drop Martini Recipe

Ingredients

3 oz vodka

3 oz simple syrup

3 oz freshly squeezed lemon juice

Extra granulated sugar for rim garnish

Instructions

1. Rim your martini or cocktail glass. Take a lemon wedge and run around the edge of your glass to lightly dampen it. Then flip upside down and press into a plate of granulated superfine sugar.

2. Grab your cocktail shaker and add over ice your favorite vodka, homemade or store-bought simple syrup, and freshly squeezed lemon juice. Place lid on and vigorously shake! The harder you shake the icier the cocktails will become.

3. Strain into glass, add garnish, and ENJOY!

Other Cocktails You Will Love:

Watermelon Twist Cocktail

Refreshing Lemon Twist Cocktail

4 Deliciously Easy 4-Ingredient Tequila Cocktails (margarita, paloma & more)

Pitcher of Pina Colada’s

Strawberry Orange Bourbon Smash

Creating the Perfect Memorial Day Charcuterie Board

Memorial Day is a holiday dedicated to the remembrance of those brave heroes who have died in service of our country. In my world, anytime you have a gathering of close friends, family, and loved ones, a good charcuterie board is a great way to celebrate. On this day your board can follow the theme and help to show off your patriotism while bringing friends and family together for a special celebration of remembrance. This board is the perfect snack to enjoy while watching the parade or just spending valuable time with family. With its colorful array of fruits, veggies, meats, cheeses, and other items, this board will be sure to make your Memorial Day a special one.


Why We Love This Idea for Memorial Day

With the variety of meats, cheeses, and fruits available, you can create a unique charcuterie board that will be sure to impress your guests. Start by selecting a variety of meats, such as prosciutto, salami, and pepperoni. Add some cheeses, such as cheddar, brie, and blue cheese. Then, add some fruits and vegetables to your board, anything that adds reds, whites and blues is perfect for any patriotic celebration! Your Memorial Day Charcuterie Board will be a delicious way to share in the spirit of the holiday. Enjoy some quality time with your loved ones and savor the flavors of the season. Whether you’re hosting a backyard barbecue or just having a relaxing evening at home, a charcuterie board is the perfect way to mark the occasion. So, get creative and show off your patriotism with a Memorial Day Charcuterie Board.

How to Make Your Charcuterie Board a Patriotic Theme

Memorial Day is the perfect time to get creative with your charcuterie board. Start with a red, white, and blue background, like a red plate, a white plate, and a blue platter. Add some bright and festive fruits and vegetables to your board, such as strawberries, blueberries, pomegranates, blackberries and raspberries. Cheese is also an essential part of any charcuterie board, and classic varieties like cheddar, bleu cheese, and brie are sure to be a hit. Include some charcuterie meats like salami, prosciutto, and pepperoni for added flavor. Add some jams and spreads like strawberry jam, blueberry jam, cranberry jam or anything red or blue to your board for a sweet touch. Make sure to include some crackers and breads like baguettes, crostini, and crackers for scooping up all the deliciousness. Add in some nuts like almonds, cashews, and walnuts for a salty and crunchy element where you see any space on the board. Lastly, grab your star-shaped cookie cutter. You can cut out watermelon cubes as I did here, cheese slices, or a star in the middle of your brie and fill it with jelly or pomegranate seeds. With these tips, you'll have the perfect Memorial Day charcuterie board in no time.

What Type of Board to Use When Making a Charcuterie Board?

Memorial Day is the perfect time to get together with family and friends and enjoy a delicious charcuterie board. Whether you’re hosting a backyard barbecue or having a picnic in the park, a charcuterie board is sure to be the perfect centerpiece. When creating a charcuterie board, the first thing to consider is the board itself. A wooden board is the most ideal choice for creating a charcuterie board. Its natural surface provides an attractive backdrop for the food items and also makes it easier to clean once the board is finished. Ceramic, slate, and marble boards are also great options for making a charcuterie board. These materials all create a stunning presentation for the food and they are also easy to clean. For a truly unique charcuterie board, you can use a cutting board made of bamboo. Bamboo is a natural material that looks beautiful and is also easy to maintain. For this board, I used a large white tray with handles that made this a perfect β€œboard” to travel outside with. It had a soft red edge that went with the theme. You can find similar boards that will be perfect for your Memorial Day charcuterie board by following the link below! So, this Memorial Day, make a charcuterie board to celebrate the occasion in style!

What Types of Drinks Pair Well with a Memorial Day Charcuterie Board?

For a festive start to the evening, why not try a glass of sparkling wine? Sparkling wine is a classic pairing for charcuterie boards, and for the best flavor choose a dry, high-acid sparkling wine. If you’re looking for festive cocktails, then why not opt for a classic gin and tonic or a Moscow mule? I also linked some delicious cocktail recipes below that I love to make in the summer months! Alternatively, a cold beer is always a great choice when enjoying a charcuterie board. If you’re a beer drinker, opt for something light and refreshing like a pilsner or pale ale.

For a truly memorable Memorial Day, creating a charcuterie board and pairing it with drinks is a great way to celebrate. Enjoy a glass of sparkling wine, a classic cocktail, or a cold beer with your board for the perfect Memorial Day celebration.

How Long Does a Memorial Day Charcuterie Board Take to Make?

A Memorial Day Charcuterie Board is the perfect way to celebrate the holiday in style. With minimal effort and some planning, you can make a beautiful board in as little as 15 minutes. If you plan ahead with a good grocery list, you can have your board ready in no time for a Memorial Day celebration. If you are pressed for time you can make ahead and refrigerate as well. All you need to do is pick out your favorite meats and cheeses, along with a variety of crackers, jams, and other accompaniments and start assembling. You can also incorporate some Memorial Day-themed items, such as American flags or red, white, and blue decorations, to make your board more festive. By getting creative, you can make your board something truly special. You can also add in a few special touches, like a festive flag or some festive desserts, like chocolate covered pretzels, to make your board even more special.

This Memorial Day, why not pay tribute to the holiday with a delicious charcuterie board? It's a great way to celebrate as friends and family come together, and you don't have to spend hours putting it together. In just 15 short minutes you can create a stunning and scrumptious board that will be the centerpiece of your celebration. So get ready to honor Memorial Day with a fabulous charcuterie board

Other Appetizers & Cocktails to give you inspiration this Holiday:

2023: Charcuterie Board Ideas to Help You Ring in the New Year

Celebrating Mother's Day with a Deliciously Decadent Charcuterie Board

Refreshing Lemon Twist Cocktail

Strawberry Orange Bourbon Smash

3 Mexican Mule Recipes with a Twist!

A Sweet and Delicious Recipe for Lemon Poppyseed Bread

Are you looking for an easy and delicious treat to make? Lemon poppyseed bread is a classic that anyone can enjoy! This bread is a tried and true favorite that has been around forever, and it is sure to become a go-to recipe for your family. Whether you're looking for an afternoon snack, a sweet breakfast, or a unique and beautiful dessert, this bread will be a hit. With just a few ingredients, you can make a flavorful and moist bread that is perfect for any occasion. Let's dive into the recipe and see how to make the perfect lemon poppyseed bread!

Tips to Make the Best Lemon Poppy Seed Loaf

Lemon Poppyseed Bread is a classic dessert that's perfect for any occasion. Its bright, tangy flavor and light, fluffy texture make it a classic favorite treat. To make the best loaf of Lemon Poppyseed Bread, it’s important to use freshly squeezed lemon juice and zest. This will give your bread a bright and tangy flavor. Additionally, use white sugar instead of brown sugar to achieve a lighter loaf. To get the perfect texture, make sure you use the correct ratio of poppy seeds to batter. Additionally, preheat your oven and bake at the correct temperature for nice and even baking. Grease and flour your loaf pan to prevent sticking and let the bread cool completely before slicing. Once the bread is finished baking, store it in an airtight container to keep it fresh. With these tips, you’ll be sure to make the perfect loaf of Lemon Poppyseed Bread!

Can You Make This Recipe Without Poppy Seeds?

With its unique combination of sweet and tart lemon and crunchy poppy seeds, it's no wonder why this bread is so popular. But what if you don't have poppyseeds on hand or don't want to use them in your recipe? Not to worry - you can still make a delicious lemon poppyseed bread without the actual poppyseeds! All you need to do is replace the poppy seeds with a few other ingredients that will help to create a similar flavor and texture. Options include substituting chia seeds, crushed nuts, shredded coconut, or even raisins for the poppy seeds. You can also add a bit of almond extract or lemon zest to help bring out the lemony flavor. The result will still be a delicious, moist bread with a hint of lemon and crunch.

Making lemon poppyseed bread without poppyseeds is surprisingly easy and offers a great way to enjoy this classic treat. With just a few simple substitutions, you can create delicious bread that is just as flavorful and enjoyable as the original. So the next time you're in the mood for some lemon poppyseed bread, don't worry if you don't have poppyseeds - you can still make a delicious version without them!

Can This Lemon Poppyseed Bread Recipe Be Halved?

Halving a recipe can be a great way to save time and money, especially when it comes to baking. If you’re looking to make a smaller batch of Lemon Poppyseed Bread, you’ll need to adjust the ingredients. To halve the recipe, you’ll need to reduce the ingredients by half, including the eggs, sugar, and butter. Being this recipe makes 2 loaves you won't need to make any other adjustments to the temperature or cook time. I always do the full recipe because of how easy it is to freeze one loaf. Then I always have another loaf on hand for last-minute company or for something tart and sweet to have on hand when I get a craving.

How to Freeze Lemon Bread?

Lemon poppyseed bread is a delicious treat that can easily be frozen and enjoyed later. By freezing the bread, you can help to retain its moist texture and flavor so that it tastes just like it did when it was first baked. To freeze the bread, make sure to tightly wrap it in plastic wrap or aluminum foil and place it in an airtight container or ziplock bag. The bread can be frozen for up to 3 months.

When you are ready to enjoy the delicious lemon poppyseed bread, you can either thaw it in the refrigerator overnight & place it in a pre-heated 350-degree oven for 8-10 minutes. Alternatively, you can thaw it at room temperature for several hours before warming it in the oven. Reheating the bread will help to restore some of the moisture and make it taste as fresh as when it was first baked.

For those who love the taste of lemon poppyseed bread, freezing it is an excellent way to ensure that it stays fresh and retains its flavor and texture. Enjoy the deliciousness of lemon poppyseed bread anytime by following the simple steps outlined above.

How Do You Make Dairy-free Lemon Loaf?

Lemon poppyseed bread is an incredibly popular treat that is loved by many around the world. The combination of tart lemon and crunchy poppyseeds is a classic combination that creates an irresistible treat. Whether you’re looking for a delicious breakfast, snack, or even dessert, lemon poppyseed bread is a great option.

Making this delicious bread is surprisingly easy and can be adjusted to fit all dietary needs. If you are looking for a dairy-free option for this recipe you will need to make 2 small adjustments. Swap out butter for oil and the milk with coconut milk. These options still give the lemon poppyseed bread great flavor without sacrificing your dairy needs.

What is the Best Way to Store Lemon Poppy Seed Bread?

Lemon poppyseed bread is an easy-to-make and delicious treat. When you’ve baked this bread, the best way to store it is in an airtight container or wrapped in plastic wrap. To ensure its freshness, place the bread in a cool, dry area such as on the countertop, avoiding any direct sunlight. For longer storage, wrap the bread in plastic wrap and place it in the freezer. When it’s time to serve, thaw the bread overnight in the refrigerator, or for a few minutes in the microwave. Above all else, don’t forget to enjoy the bread within a few days of baking for the best flavor and texture.

Ingredients:

2 cups sugar

1 cup melted butter

3 eggs

1-1/2 teaspoons vanilla extract

1 teaspoon lemon zest

2 tablespoons poppy seeds

3 cups all purpose flour

1-1/2 teaspoons baking powder

1-1/2 teaspoons salt

1-1/2 cups milk

Icing:

2 tablespoons lemon juice

1/2 teaspoon lemon zest

3/4 cups powder sugar

Directions:

  1. Preheat oven to 350 degrees and grease 2 loaf pans

  2. Combine sugar, melted butter, eggs, vanilla and lemon zest.

  3. Stir in Poppy Seeds

  4. Mix in Flour, Baking Powder and Salt until well combined.

  5. Scrape down sides and add in Milk until mixed thoroughly.

  6. Divide batter evenly between prepared pans and bake for 45 min.

  7. Cool loaves for 10 min and prepare icing.

  8. Blend all icing ingredients and pour over warm loaves!

  9. ENJOY!

4 Deliciously Easy 4-Ingredient Tequila Cocktails

Summer is officially here and it’s time to get creative with those cool cocktails! If you’re looking for a quick and easy way to make a delicious drink, then look no further. Today, we’re bringing you four delicious tequila cocktails that use only four ingredients each. Whether you’re an experienced mixologist, or you just love playing bartender at home, you’re sure to find at least one perfect recipe for your next Summer gathering. So grab your tequila, mixers, and garnishes, and let’s get shaking!

Tips for Purchasing Tequila

When it comes to making delicious tequila cocktails, it’s important to choose the right kind of tequila. The best choice is to go for a tequila that is 100% agave, as it will give you a smooth flavor that is perfect for cocktails. Look for bottles with a label that indicates the type of agave used, as this will give you a better idea of the flavor you can expect. To get a more robust flavor, look for bottles labeled 'Reposado' or 'AΓ±ejo'. On the other hand, it’s best to avoid tequilas labeled 'Mixto', as these are a blend of agave and other sugars. The alcohol content of the tequila you choose can also make a difference in the flavor of your cocktails. For a more full flavor, purchase a bottle with a higher alcohol content. If you’re a beginner to the taste of tequila, it’s a good idea to experiment with different types to find the one that best suits your taste. With the right tequila in hand, you’ll be ready to make some delicious four-ingredient tequila cocktails.

Paloma

The Paloma is a classic tequila cocktail that is perfect for the Summer. It's a refreshing blend of tequila, grapefruit soda, and lime juice. For a more complex flavor and for additional carbonation, I add Q Mixers sparkling grapefruit flavor. You can also add agave nectar for a hint of sweetness. Looking for a twist? Try muddling fresh fruit like strawberries, cranberries or raspberries, this will give your Paloma a unique and flavorful twist.

My Deliciously Juicy Paloma Recipe

Ingredients:

Juice of 1 lime

Juice of 1/4 grapefruit

1.5 oz of tequila

1 can of Q Mixers Sparkling Grapefruit

Instructions:

Add fresh lime juice, tequila & grapefruit into mixer and shake. Pour into glass and enjoy! You can add garnish or salt & sugar rim if you choose.

Mexican Mule

The Mexican Mule is a four-ingredient tequila cocktail that is a great twist on the classic Moscow Mule. This easy-to-make cocktail only calls for tequila, lime juice and ginger beer. It is light and refreshing, perfect for summer days. To garnish the Mexican Mule, use a lime wedge or a sprig of mint. For an authentic experience, serve it with chips and salsa on the side. If you want to try something different, you can add other juices or simple syrup to give it more flavor or sweetness. No matter how you customize it, your Mexican Mule combination is sure to be a crowd-pleaser!

My Take on The Mexican Mule

Ingredients

Juice of 1 lime

1.5 oz of tequila

1 can of Q Mixers Ginger Beer

Instructions

Add ice to Copper mug. Add in fresh juice of lime, tequila & ginger beer. Stir and garnish!

Margarita

The Margarita is a classic tequila-based cocktail that is sure to please. Tequila lovers and newcomers alike will appreciate the simplicity and balance of this cocktail. Whether served on the rocks or frozen, the Margarita is the perfect way to enjoy tequila.

My Simple & Delicious Margarita

Ingredients

Juice of 1 lime

1.5 oz tequila

4-5 oz Q Mixers Margarita Mix

Salt or Sugar for rim

Instructions

Add fresh lime juice, tequila, Margarita mix over ice in shaker. Rim glass with salt or sugar your choice. Strain over fresh ice. Add garnish & enjoy!

Ranch Water

It's said that ranch hands in West Texas created ranch water back in the 1960s as a refreshing drink after a long day of hard work. Since its introduction in the Lone Star State, ranch water has become a Texas favorite and is now a staple in bars and lounges across the state. Whether you're beating the Summer heat at a casual dive bar, at a sophisticated cocktail lounge, or a refreshing poolside bar, you can always count on ranch water being on the menu. Tequila lovers and newcomers alike will appreciate the simplicity and balance of this cocktail.

My Refreshing Ranch Water Recipe

Ingredients

Juice of 4 lime slices

Juice of 4 grapefruit slices

1.5 oz of tequila

1 can of Q Mixers Club Soda

Instructions

Add limes & grapefruit to glass and muddle. Pour in tequila & club soda. Add ice & enjoy!

These four easy tequila drink recipes are sure to be a hit at your next gathering. With only four ingredients, these drinks are convenient and easy to make. So, grab a bottle of tequila and try one of these delicious tequila cocktails! To see me mixing them up as our home bartender head to my latest reel here.

Looking for other Cocktail recipes for the summer? Heres some of my favorites

Refreshing Lemon Twist Cocktail

Strawberry Orange Bourbon Smash

3 Mexican Mule Recipes with a Twist!

Celebrating Mother's Day with a Deliciously Decadent Charcuterie Board

Mother's Day is the perfect time to show appreciation for all the amazing mothers in our lives. What better way to show it than with a beautiful and delicious charcuterie board? Whether you’re planning an intimate gathering with your mom or showing appreciation for all the mothers in your life, a charcuterie board is a perfect way to make all those special women feel extra special. This blog post will go over the steps required to create a stunning and delicious Mother's Day charcuterie board that can double as both a lovely gift, and as one of your appetizers for the day!

Tired of Creating Boring Charcuterie Boards??

Treat your mom to something special this Mother’s Day with a delicious and beautiful charcuterie board! With a little extra effort, you can up your charcuterie game and give your Mom a gift that keeps on giving. For an extra special personal touch, add some of your Mom’s favorite treats. Get creative with your board by adding colorful fruits, homemade dips, and spreads, as well as cookie cutters and garnishes. Transform your board into a work of art with thematic colors and decorations, and elevate it with unique charcuterie meats, cheeses, and crackers. Show your mom how much you love her this Mother’s Day with a charcuterie board made with love and care and personal touches.

This board I made spelled out MOM in pomegranate seeds! This can obviously be made into any word or number for a birthday party! This can help to highlight the guest of honor and feel very personal in a lovely way. To easily do this just buy the amount of small brie rounds needed, I found these at Trader Joe's. Then, I cut the word MOM out into each round. I first traced it out and then made a larger hole so the pomegranate seeds can easily fit in. If you don't do this it may cause the cheese to split. Place your seeds in the cutout letters and add them to your board. This gives a uniqueness to your Charcuterie board but also is using 3-dimensional characters that are so beautiful and fun! Next, you will Fill in the rest with delicious meats, cheeses and accouterments. Not sure what to put? Read on!

How to Make a Mother’s Day Charcuterie Board

A charcuterie board is the perfect way to show your love to the special Mom in your life. To assemble the perfect charcuterie board, gather a variety of cheeses, crackers, meats, fruits and vegetables. Arrange the items on a large wooden board or platter with the cheeses in the center and surround them with meats, crackers, fruits and vegetables. Small bowls of olives, nuts, jams and chutneys can be added for extra flavors and to make the board look even more impressive. Decorate the board with edible flowers, herbs or edible decorations to make the board look even more special. To make the board even more special, present it with a personalized card or gift for the special Mom.

Charcuterie boards are an easy way to feed a crowd without spending a lot of money. Plus, it is an activity that the whole family can enjoy together. You can take it a step further and get creative by adding a personalized message to the board like MOM spelled out in pomegranate seeds. Mom will love it!

If you’re ready to create the perfect charcuterie board for Mother’s Day, here are some tips for success. Start by gathering a variety of cheeses, meats, fruits, and vegetables. Place the items in an eye-catching pattern and add some decorations to make it look even more special. Finally, don’t forget to include some crackers, bread, or nuts to complete the board. I always start with the larger items on the board first, and then fill in with smaller ones in different areas. Another trick I do to make the board look cohesive (and not spend a lot on 100 different items) is to use the same item at different spots on the board. So if I am using strawberries, I put a few in one spot and a few in another spot on a different part of the board.

Ingredients Used:

Mother's Day is the perfect time to show your Mom just how much you appreciate her and all she has done for you. Whether your Mom is a just cheese and wine lover, or a charcuterie fan, a charcuterie board is a perfect way to show your love and appreciation. A charcuterie board is a great way to show your mom that you care and that you put lots of thought into her gift.

A charcuterie board typically consists of a variety of cheeses, cured meats, olives, fresh fruits, nuts, sweet treats, pickles, hummus, spreadable cheese, dried fruits, jam, cruditΓ©s, croutons, pesto, and dip or salsa. All these items can be found in the grocery store or your local specialty food shop. Some of my favorite places to go are Trader Joe's, HEB, Whole Foods and Kroger. They all have great cheese sections and the freshest produce!

Put together a charcuterie board for your Mom this Mother's Day. Start with a selection of crackers, then add a variety of cheeses like cheddar, brie, gouda, and blue cheese. Assemble a selection of cured meats like salami, pepperoni, and prosciutto. Add olives, fresh fruits, and nuts for a crunchy texture. Don't forget the sweet treats like chocolates and cookies. Include pickles, hummus, spreadable cheese, dried fruits, jam, cruditΓ©s, croutons, pesto, and dip or salsa. Lastly, don't be afraid of overlapping on the board. You want it to feel full not like you need more items. Overlapping adds even more added texture and beauty to your board.

Tools Needed:

To make a beautiful charcuterie board, you will need a few essential items. Start with a good quality cutting board, a cheese knife, and a charcuterie board. Other tools I sometimes use are a mixture of bowl sizes, cheese knives and honey stir. Once you add to this a variety of cheeses, cured meats, fresh and dried fruits, nuts, olives, crackers, bread slices, pickles, jam or honey, and dips and spreads you will be able to create the perfect board. This will give you a great selection of items to choose from and an easy way to build a board.

Now that your charcuterie board is ready, it’s time to enjoy! Serve the board with a selection of beverages and let everyone dig in. A tasty Mother's Day charcuterie board is sure to be a hit and will make the day even more special for Mom.

Charcuterie Board Tips & Tricks

This Mother's Day, treat your Mom to a special charcuterie board! Start with a variety of meats, such as salami, prosciutto, and ham, as the base of the board. Include items like nuts, olives, and crackers for crunch, as well as a mix of cheeses, like cheddar, brie, and goat cheese. Layer fresh fruit, such as grapes, strawberries, and blueberries for a burst of color and sweetness. Place a few sweet treats, like jams, honey, and dark chocolate, to add a little extra indulgence. Top it off with fresh herbs, edible flowers, and edible glitter to give it that special touch. For even more flavor, provide a variety of dips and spreads, such as hummus, pesto, and tapenade. To make your charcuterie board truly unique, include something unexpected, like pickled vegetables, dried fruit, and roasted nuts. Finally, use a variety of colors, shapes, and textures to create a visually appealing board that’s sure to impress. With this charcuterie board, your Mom is sure to have the most memorable Mothers Day ever!

A charcuterie board is a beautiful and fun way to show your Mom how much you care. Not only is it a beautiful centerpiece, but it allows Mom to pick and choose what she wants to snack on. I hope these charcuterie board ideas gave you inspiration for your Mother's Day festivities. Treat your Mom to a special show stopper charcuterie board this Mother's Day and let her know how much she means to you.

Other Charcuterie Board Inspiration:

2023: Charcuterie Board Ideas to Help You Ring in the New Year

Delight Your Guests with an Antipasto Christmas Wreath

How To Make A Christmas Holiday Dessert Board

Other Mothers Day Inspiration:

My Spring Tablescape

The Perfect Pair: Chicken Picatta and J. Lohr Wine

If you're looking for a delicious dinner option that pairs perfectly with a great bottle of wine, look no further than this Chicken Piccata recipe paired with the J. Lohr Estates Riverstone Chardonnay. This traditional Italian dish includes chicken breasts, butter, garlic, and white wine. It is served with a smooth, light lemon, caper, and butter sauce. The accompaniment of a glass of Riverstone Chardonnay makes for the perfect pairing, offering a unique flavor and aroma that will enhance the flavors of the dish. Whether you're hosting a dinner party or just looking to create a delicious dinner for two, this Chicken Piccata paired with the J. Lohr Wines Riverstone Chardonnay is sure to please!


Tips for Pairing Wine with Chicken Piccata

Chicken Piccata is a favorite dish of mine that combines butter, capers, and very subtle hints of lemon that creates a flavorful and acidic sauce, which pairs perfectly with a creamy white wine such as Chardonnay. For a classic pairing, I recommend enjoying a glass of the J. Lohr Estates Riverstone Chardonnay with this meal. With its light acidity and hints of lemon, you'll find that this wine perfectly complements the acidic and buttery sauce of the Chicken Piccata. As you will see in the recipe below, I don't add extra lemon juice or zest like many other traditional Chicken Piccata dishes because of the selected wine pairing. With this wine having a hint of ripe Meyer lemon in its flavor profile, I didn't want an overly lemony sauce to pair with it. If opting to exclude the extra lemon juice, you can substitute with some vegetable broth. This recipe, just like the wine, can be very versatile to suit your taste buds.

J. Lohr Vineyards & Wines produces some of the world's most popular and well-regarded Chardonnays, which they call REAL Chardonnay. What is REAL Chardonnay? It’s when the wine comes from perfectly sited, cool-climate, and sustainably farmed vineyards in Monterey's Arroyo Seco AVA. It's also using 10 different Chardonnay clones and aging using only the finest oak barrels. The range of flavors, from light and crisp to full-bodied and complex, makes each of J. Lohr's three Chardonnays the perfect accompaniment to this classic Italian dish.

The J. Lohr Estates Riverstone Chardonnay has aromas of orange, white peach, a little pear, and sweet oak with baking spices on the long finish, giving it a delicious flavor. The wine is medium-bodied, with a smooth and creamy finish. These flavors work perfectly with the lemon and caper sauce in Chicken Piccata, as the richness of the wine helps to balance the acidic nature of the sauce. The fruit flavors of the wine help to enhance the delicate flavors of the chicken. The medium body of the wine also helps to bring out the subtle flavors of the dish without overpowering it.

So, if you're looking for a delicious and easy-to-prepare meal to pair with a bottle of J. Lohr wine, Chicken Piccata is a perfect choice. The combination of the wine's rich and fruity flavors and the dish's tangy and delicate flavors will create a unique culinary experience that your guests are sure to love. Other pairings for the J. Lohr Estates Riverstone Chardonnay are seafood risotto, mussels in white wine sauce, roast chicken with apples, and holiday ham and turkey.

My Chicken Piccata Recipe

Serves 6

Ingredients

3 large chicken breasts, cut in half and pounded

Salt & Pepper to taste

1/2 teaspoon garlic powder

Flour (for dredging)

6 tablespoons butter, divided

2 tablespoons olive oil

1 shallot, diced

1/4 cup chicken broth 

Splash of white wine

1 lemon, thinly sliced

1 tablespoon brined capers, drained

1/2 cup heavy whipping cream

Freshly grated parmesan cheese


Instructions

1. Slice chicken breasts in half to make 6 smaller chicken pieces. Pound until thin. Season chicken generously with salt

and pepper. Place flour on a plate, add garlic powder and mix. Coat the chicken in your flour mixture.

2. Add 2 tablespoons of butter and olive oil to a skillet over medium-high heat.

3. Once the pan is hot, cook the chicken pieces for about 7-8 minutes per side or until golden.

4. Remove the chicken from the skillet and set aside on a plate layered with paper towels.

5. Take the pan and add a splash of white wine to help pick up the brown bits and add flavor. Once brown bits come up, add 2 tablespoons of butter and the shallots. Let shallots cook until they are transparent.

6. Add the chicken broth, the last 2 tablespoons of butter, and capers to the skillet. Stir until the butter is melted and turn off the heat. Stir in the cream. (If you want to make this recipe without cream, increase the chicken broth to 3/4 cup.) Mix and add lemon slices. 

7. Add the chicken to the pan and garnish with parmesan cheese. 

 To learn more about J. Lohr: REAL Chardonnay click -here-

Looking for other articles on wine?

The Bloggers Guide to Merlot for more on this wine & other J. Lohr wines click -here-

Indulge in Delicious Personal Pear Tarts

If you're looking for a fun and delicious dessert to make for your next gathering, look no further than these Personal Pear Tarts! The flakey crust on these tarts is perfectly complemented by the sweet, juicy pears with just a sprinkle of cinnamon and sugar. Each tart is the perfect size for a single serving and makes a wonderful treat or dessert. Enjoy them either warm or cold and savor every bite of this delightful combination of flavors! Not only is this recipe easy to make and customize, but it's also a great way to showcase seasonal fruits. Read on to find out how to whip up this mini pear tart recipe that is sure to be the star of your next gathering.

Individual Pear Tartlets are a delicious and easy-to-make dessert that can make any meal special from breakfast to dessert. Their sweet and flaky crust pairs perfectly with tender pears and fragrant spices, making a unique and tasty dish. With minimal effort, you can show off your baking skills by creating individual tartlets that can be customized to suit your taste.

The combination of the sweet pears and the crisp crust is delicious together and can be substituted for other fruits such as strawberry, apple or seasonal fruits. Add some spices and you have a unique and flavorful dessert. These tartlets are a great way to end a special meal and make a statement that your guests will remember. Whether you’re looking for a signature dessert for a dinner party or just a simple treat for your family, these individual tartlets are sure to please. For making this quick pear tart recipe ahead of events you can also refrigerate and microwave when ready to serve.

Ingredients

( serving size 6 )

1 sheet of frozen puff pastry

2-3 pears, thinly sliced

1 tablespoon sugar or brown sugar

1 tablespoons cane sugar

Pinch or two of ground cinnamon

1 egg

Directions:

  1. Preheat oven to 375 and let puff pastry start to defrost for 5-10 minutes while thinly slicing pears.

  2.  Mix together sugars and cinnamon in a bowl. In another bowl whisk together the egg.

  3. Once puff pastry has softened, unfold and cut into 6 squares

  4. Layer sliced pears onto puff pastry and brush whisked eggs over the pear and pastry.

  5. Sprinkle sugar mixture all over and place pastries on parchment paper lined cookie sheet.

  6. Place in oven for 15-17 minutes or until edges are golden brown.

  7. Remove once edges are browned and place on cooling rack until ready to serve.

  8. You can serve warm and sprinkle with powdered sugar and/or top with vanilla ice cream, honey, or caramel for a delicious treat.

Delicious and Easy Chorizo One Pan Dinner

This easy and delicious chorizo one-pan dinner is a great way to get a hearty meal on the table in no time. With just a few simple ingredients, you can create a flavorful meal that the whole family will love. The combination of chorizo, potatoes, and veggies gives this dish a wonderful balance of flavors, and the one-pan preparation makes it a breeze to clean up after. So if you're looking for a quick and tasty dinner that won't break the bank, this chorizo one-pan dinner is a perfect choice.

Are you looking for a quick and easy meal to make on a busy night? Look no further than a chorizo one-pan dinner! This delicious meal only requires one pan, so you won't have to worry about cleaning multiple dishes afterward. The chorizo adds a smoky flavor to the meal that your whole family will love. You won't even have to worry about leftovers - all of the ingredients are cooked in the same pan!

Chorizo one-pan dinners is the perfect meal for busy days. They are quick, easy and delicious meals that the whole family will love. With only one pan needed, you can make a delicious dinner without having to clean multiple dishes. The chorizo adds a delicious smoky flavor to the meal that will make your taste buds happy! Plus, you don't have to worry about leftovers when making chorizo one-pan dinner - all of the ingredients are cooked in the same pan!

If you're looking for a quick and easy meal that the whole family will love, chorizo one-pan dinner is a perfect choice. Not only is it delicious, but it also only requires one pan - so you can spend less time cleaning and more time enjoying a delicious meal. Give it a try and you won't be disappointed!

What Ingredients Do I Need to Make a Chorizo One Pan Dinner?

To make this one-pan dinner for 4 people, you'll need: 4 links of chorizo sausage, 4 red potatoes, 1 red onion, 4 cups broccoli, 16 oz mushrooms, 1/3 cup olive oil, 2 tbsp Homemade Ranch Seasoning, and Spicy Mayo.

Your Chorizo One Pan Dinner is now ready to enjoy with your favorite group of people, but can be made for as many or as few people as desired! Serve it up "as is", or with a great sauce such as a yummy spicy mayo or creamy sauce. This one-pan dinner is a great way to get a healthy and delicious meal on the table in no time! Another way to make it your own is changing out the veggies to your family's favorites!

Ingredients

4 chorizo links

4 red potatoes

1 red onion

4 cups broccoli

16 oz mushrooms

1/3 cup olive oil

2 tablespoons Homemade Ranch Seasoning

Spicy Mayo

Directions

1. Preheat oven to 375

2. Lay chorizo links in 360 cookware bake & roast pan. Place in oven while you prep veggies, about 15 minutes.

3. Prep veggies by cutting them into bite sizes and placing them in a bowl to combine. Once it's all cut and ready add olive oil and seasoning and toss to fully coat.

4. Take out the pan with the chorizo and remove the chorizo to a clean plate. Layer veggie mixture into pan and place chorizo on top.

5. Return to oven and continue to bake for another 30-45 minutes or until a fork easily pokes into potatoes

6. Slice chorizo and plate with veggies and spicy mayo (you can omit if you don't prefer sauce)

Other Dinner Recipes:

Easy and Delicious Mushroom & Pea Risotto Recipe

Garlic Mushroom & Shrimp Pasta

Pork Banh Mi Bowl : Deliciously Satisfying

Baked Burrata Pumpkin Ziti with Pork Sausage Recipe

Deliciously Different: Pink Deviled Eggs to Spruce Up Your Easter Brunch

Nothing says springtime like a picnic with friends, and a plate of colorful pink deviled eggs. If you know me you know pink is my favorite color, so these pink eggs make for the perfect addition to any outdoor gathering. Not only are these deviled eggs a visually stunning food to share, but they are also packed with flavor. Whether you’re a fan of the classic deviled egg recipe or you’re looking for something new, this pink version is sure to become a favorite. Read on to learn the easy steps for making this fun twist on a classic picnic favorite.

Pink Easter Deviled Eggs

Pink Easter Deviled Eggs are an easy, creative, and delicious way to celebrate the Easter holiday. With a natural vegetable dye, you can create a beautiful pastel hue for your eggs. The creamy, tangy filling is the perfect complement to the eggs and will leave your guests wanting more! They are an easy and inexpensive dish making them the perfect dish for a family gathering or Easter party. The eggs can be served as an appetizer, snack, or even as a main dish. Have fun decorating the eggs and make them as creative as you wish. Whether you're hosting an Easter brunch or a dinner, Pink Easter Deviled Eggs will be sure to impress your guests.

If you're looking for a unique and fun way to celebrate the Easter holiday, Pink Easter Deviled Eggs are the perfect option. With easy preparation and affordable ingredients, you can have a delicious dish that will wow your guests. Add a bit of creativity to the eggs and you have the perfect appetizers or main dish to serve. Take the time to make these beautiful eggs and you'll have a memorable Easter celebration!

How to Make Colorful Deviled Eggs

Pink deviled eggs are a great way to add a personal pop of color to any gathering! Making them is surprisingly easy and does not take too much time.

To get started, you'll need twelve large eggs. Boil them until they are hard-boiled, then peel the shells off. In a medium-sized bowl, mix 1/3 cup mayonnaise, 1 tablespoon chopped pickles, 1 tablespoon pickle juice, 1/2 teaspoon paprika, and a pinch of salt and pepper. Once the ingredients are combined, add the egg yolks and mash them with a fork or potato masher until the mixture is creamy.

Next, you'll need to dye the egg whites. To make pink deviled eggs, use beet juice and water. Place the egg whites in the dye for one minute or longer, depending on how deep of a pink you are trying to achieve. Fill the dyed egg whites with the yolk mixture.

For the final touch, you can add small flowers or more paprika to the tops of the eggs. Serve the pink deviled eggs immediately or store them in the fridge for later. Enjoy!

What are Other Ways to Hard Boiled Eggs?

Using my 360 2 Quart Saucepan to make my hard-boiled eggs without water. First you will wet a paper towel and your eggs. Fold the paper towel to fit into the saucepan, wet it with water, and place it in the pot. Make sure the towel isn't sitting in a pool of water but that all the water is held in the towel. Carefully place the eggs in a single layer on top of the wet towel. Cover the pot and heat it over medium heat until steam just begins to escape from under the lid, about 3 minutes. Spin the lid to engage the vapor seal then immediately reduce the heat to low. The cooking time will vary depending on the desired doneness of the eggs. For soft-cooked eggs, cook 5 to 6 minutes; for medium-cooked eggs, cook 7 to 8 minutes; and for hard-cooked eggs, cook 13 to 15 minutes.

How to Dye the Eggs

To make your own Pink Deviled Eggs, gather the supplies: hard-boiled eggs, food coloring, water, a shallow bowl, and a slotted spoon. Then, fill the bowl with equal parts water and beet juice or food coloring. Submerge the hard-boiled eggs in the colored water and let them sit for about 1 minute or more depending on the depth of color you are looking for. Carefully remove the eggs from the liquid and pat them dry with a paper towel. Now you have festive Pink Deviled Eggs!

These eggs can be served as a colorful appetizer at a party, or you can use them as deviled egg filling. The possibilities are endless! Try adding a bit of color to your classic deviled eggs for a festive twist. Pink Deviled Eggs are sure to be a hit at your next gathering!

INGREDIENTS

(Serving Size 12)

12 large eggs

1/3 cup mayonnaise

1 tbsp chopped pickles

1 tbsp pickle juice

1/2 tsp Salt

1/2 tsp black pepper

1/2 Paprika

INSTRUCTIONS

  1. Hard boil the eggs first. Fold the paper towel to fit into the 2 Quart Saucepan.

  2. Wet the paper towel with water and place it in the pot. (The towel shouldn’t be sitting in a pool of water. All the water should be held in the towel.) Place the eggs in a single layer on top of the wet towel.

  3. Cover the pot and heat over medium heat until steam just begins to escape from under the lid, about 3 minutes.

  4. Spin the lid to engage the vapor seal then immediately reduce the heat to low for 15 minutes.

  5. Remove from heat and put eggs in an ice-cold bath. This makes it easier to peel them.

  6. Once you peel the shell of the egg cut it in half lengthwise and remove egg yolk in a bowl. Put egg whites in another bowl and cover with 1 cup beet juice and 1 cup water until completely submerged. Leave for 1 minute and rinse with water and lay on a paper towel to dry. You can add more beet juice or leave it for longer to achieve a deeper pink.

  7. In the egg yolk bowl mush eggs and add in pickle juice, chopped pickles, salt, pepper and paprika. Once mixed add to a piping bag and fill with egg yolks.

Adjustments you can make for this meal would be adding in dijon mustard in exchange for pickles if you want less of a pickled flavor. If you like a pickled flavor and are out of juice you can additionally use apple cider vinegar. Seasoning can also be changed for your taste buds as well as mayo ratio. I always encourage making all my recipes into your own to fit your diets and taste buds. Deviled eggs are a classic appetizer perfect for any occasion. Pink deviled eggs are a fun twist on a classic dish and are sure to be a hit at any gathering. Whether you’re hosting a dinner party or celebrating a special occasion, pink deviled eggs are an easy and delicious addition to your menu. Here are a few other recipes I think you will love this Easter season:

Easy and Delicious Mushroom & Pea Risotto Recipe

Tantalizingly Delicious Recipe For Lemon Cheesecake With An Amazing Glaze

Indulge in Deliciousness: Cherry Chip Cake with Chunks of Dark Chocolate Recipe

Shaved Brussel Sprout Salad with Apples, Goat Cheese & Candied Pecans

Blackberry Cinnamon Rolls with Mascarpone Frosting