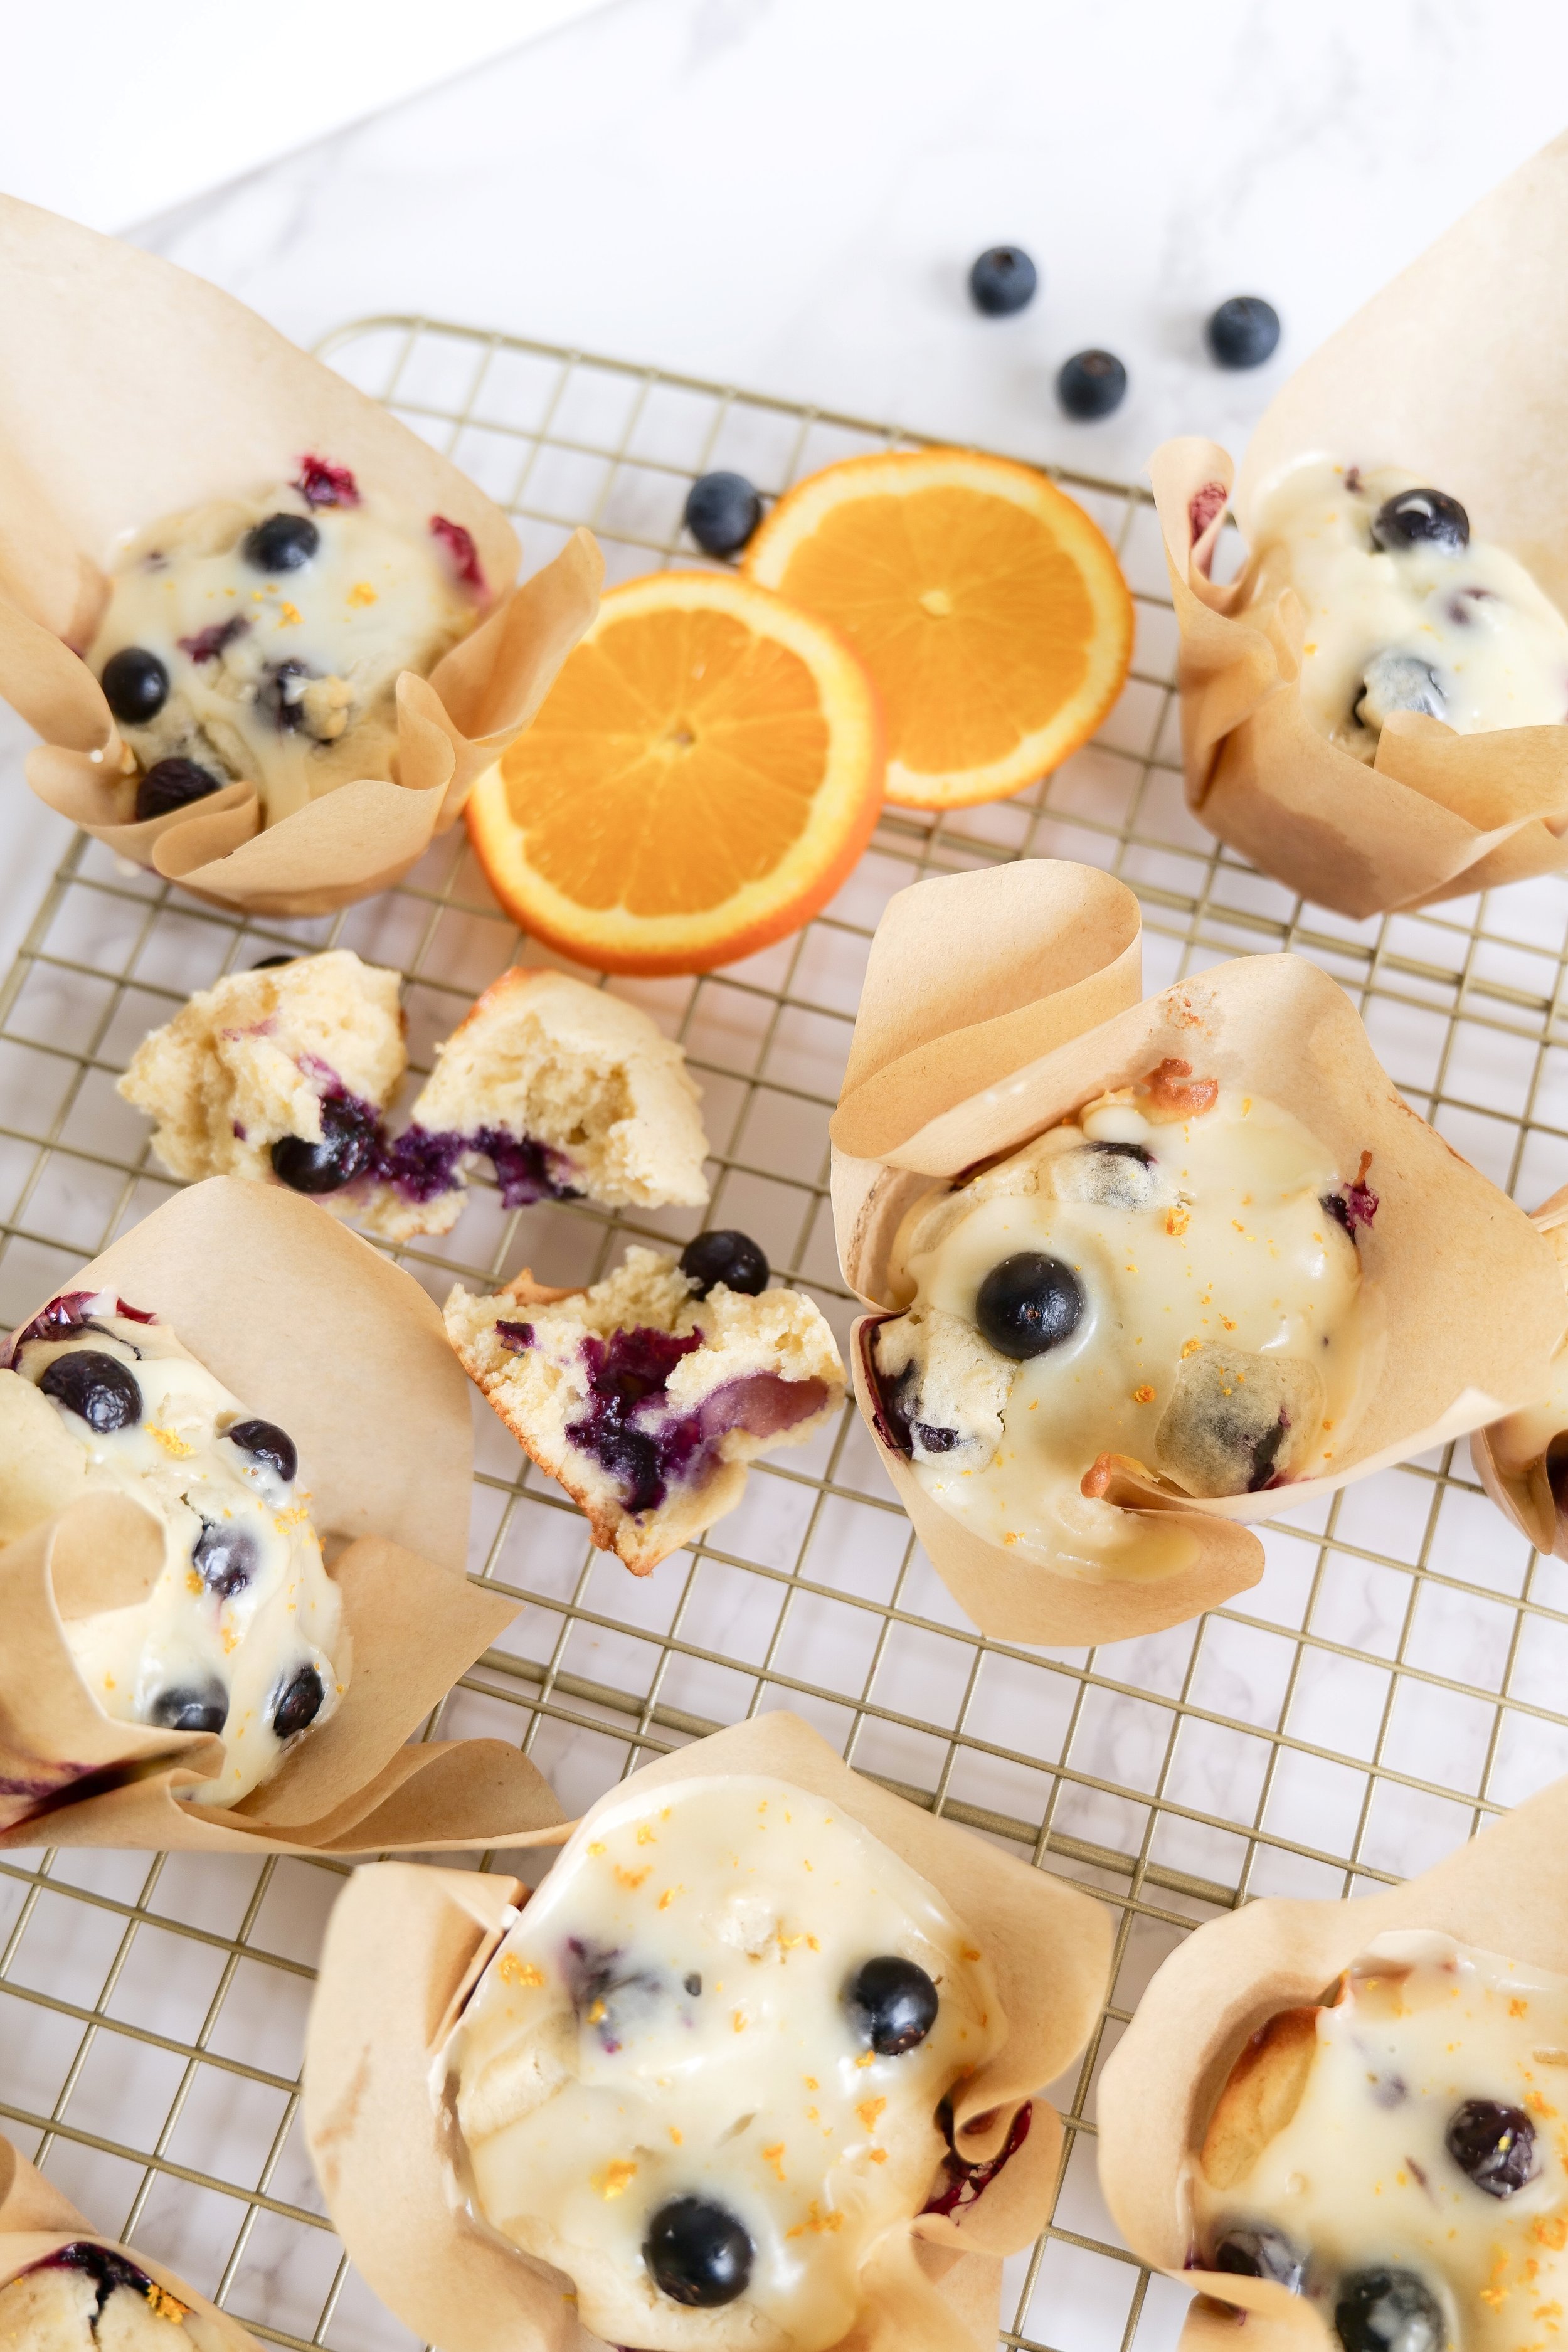
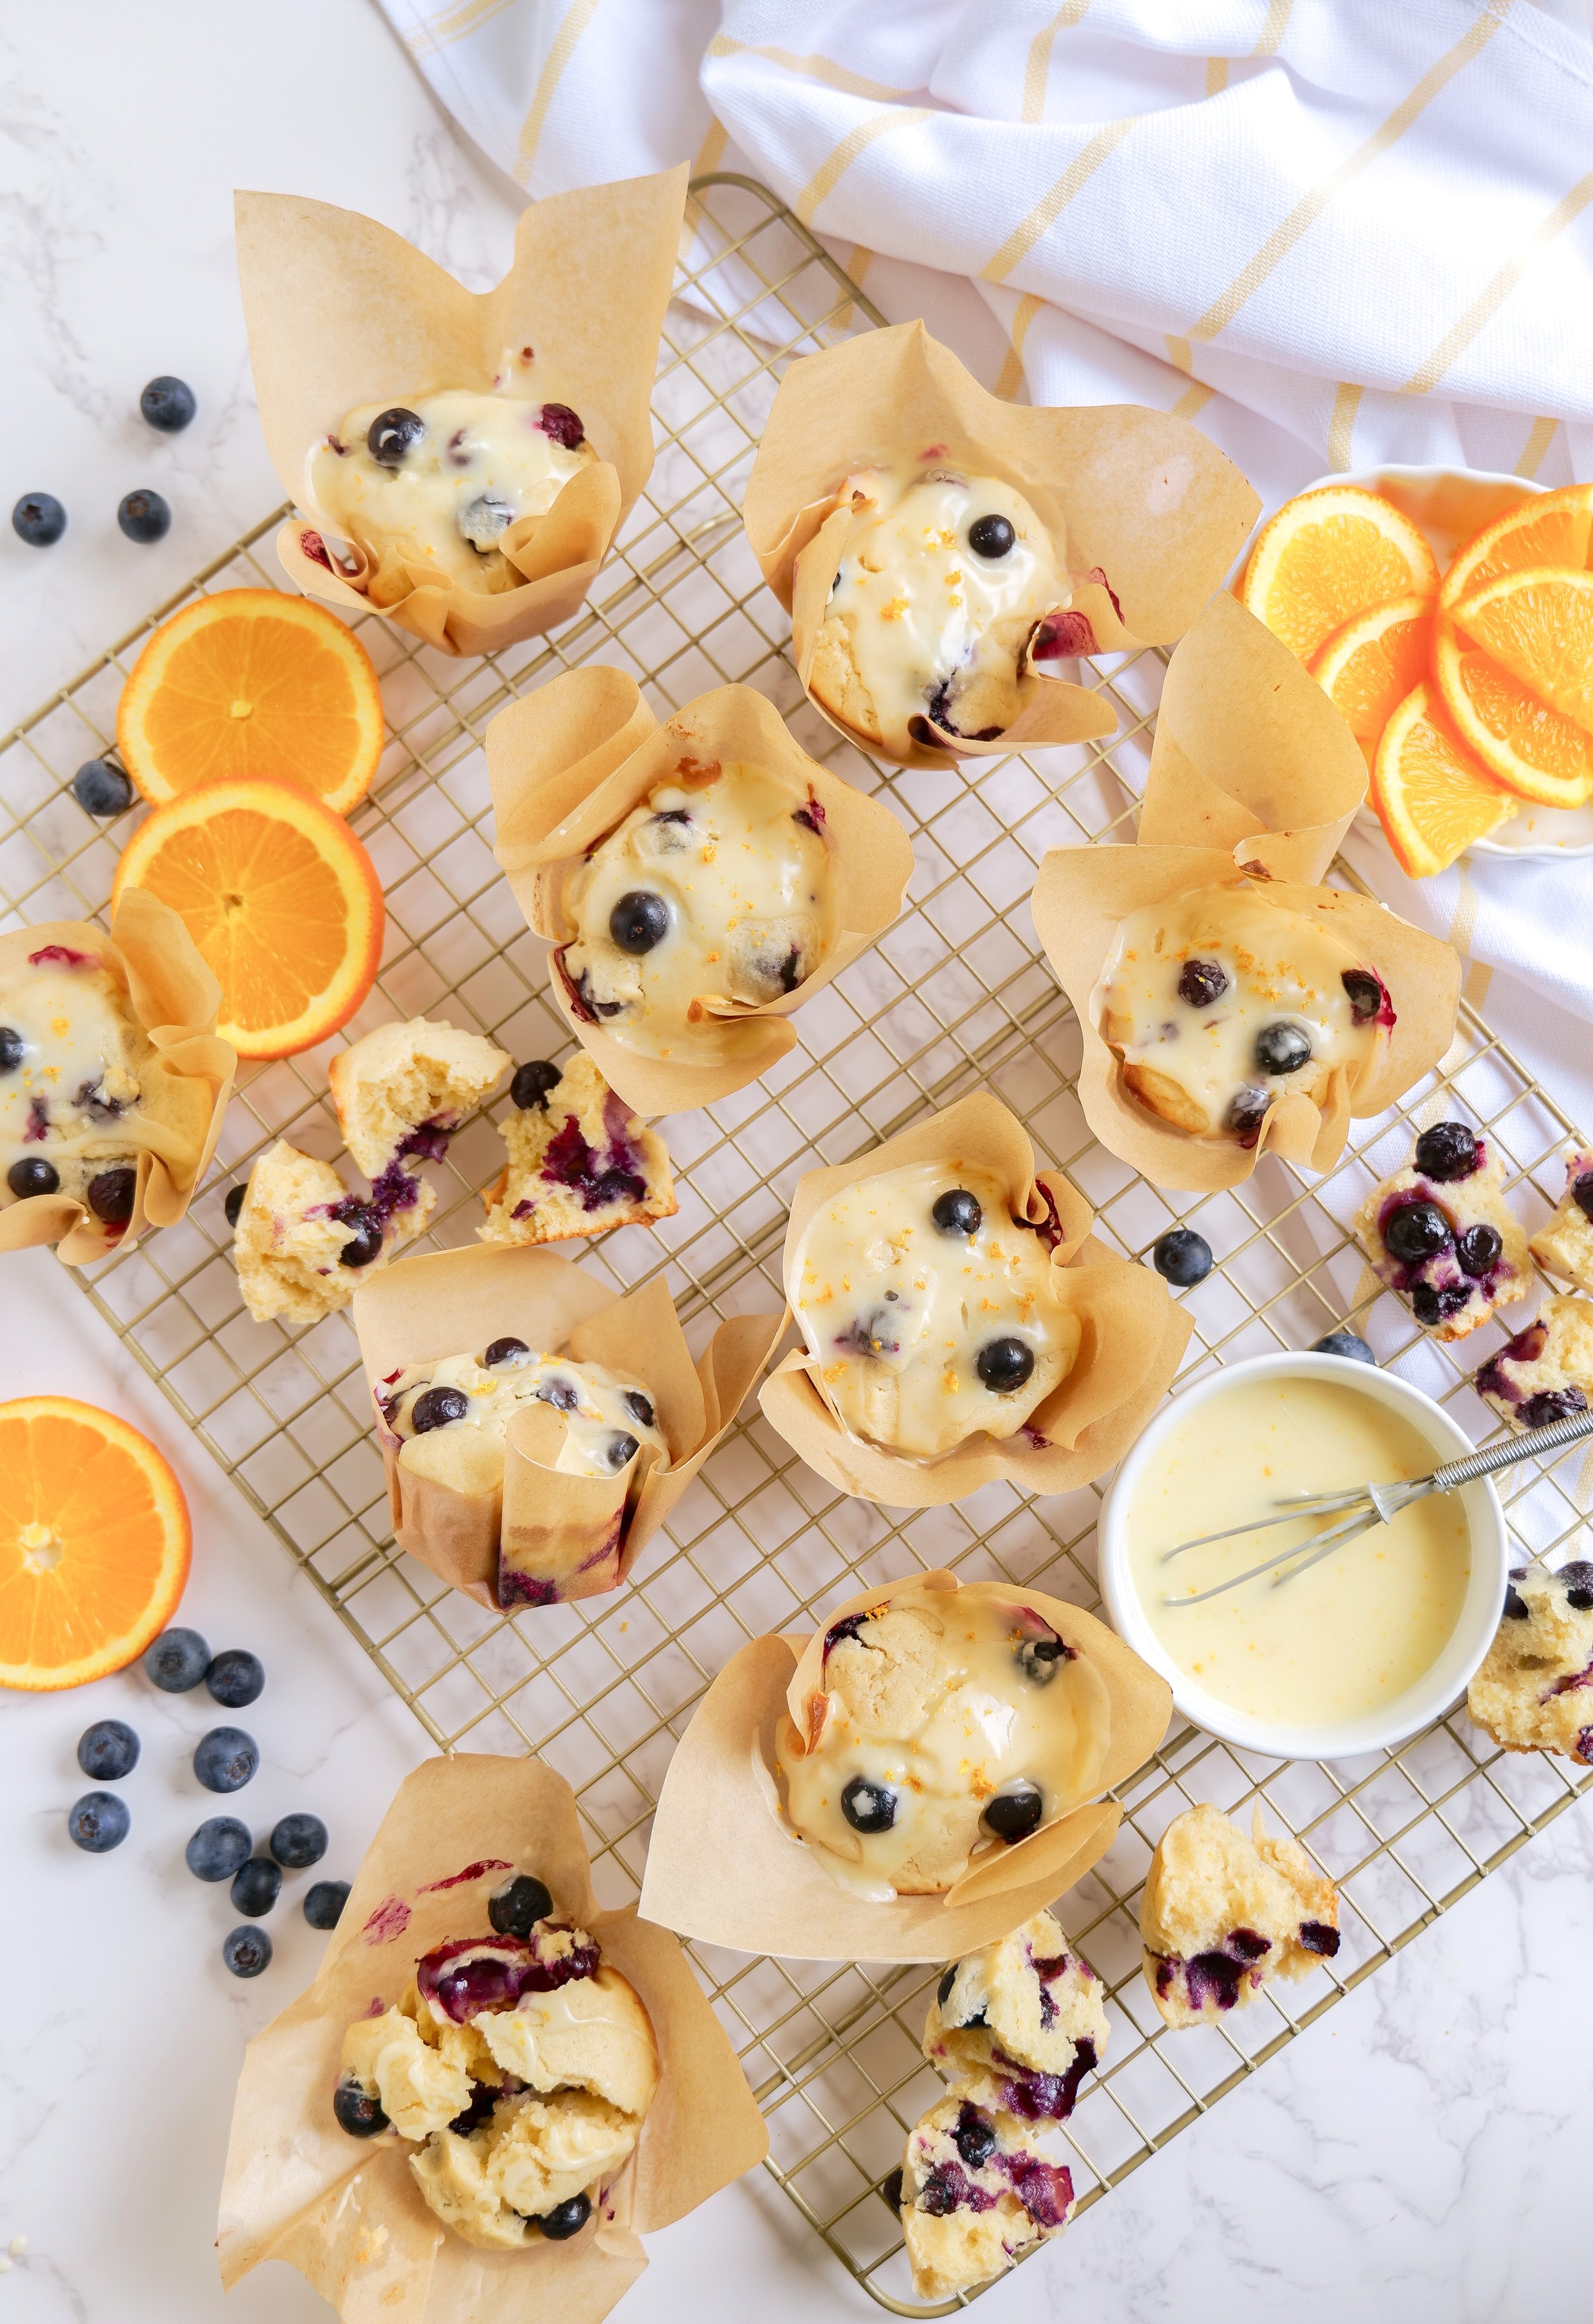
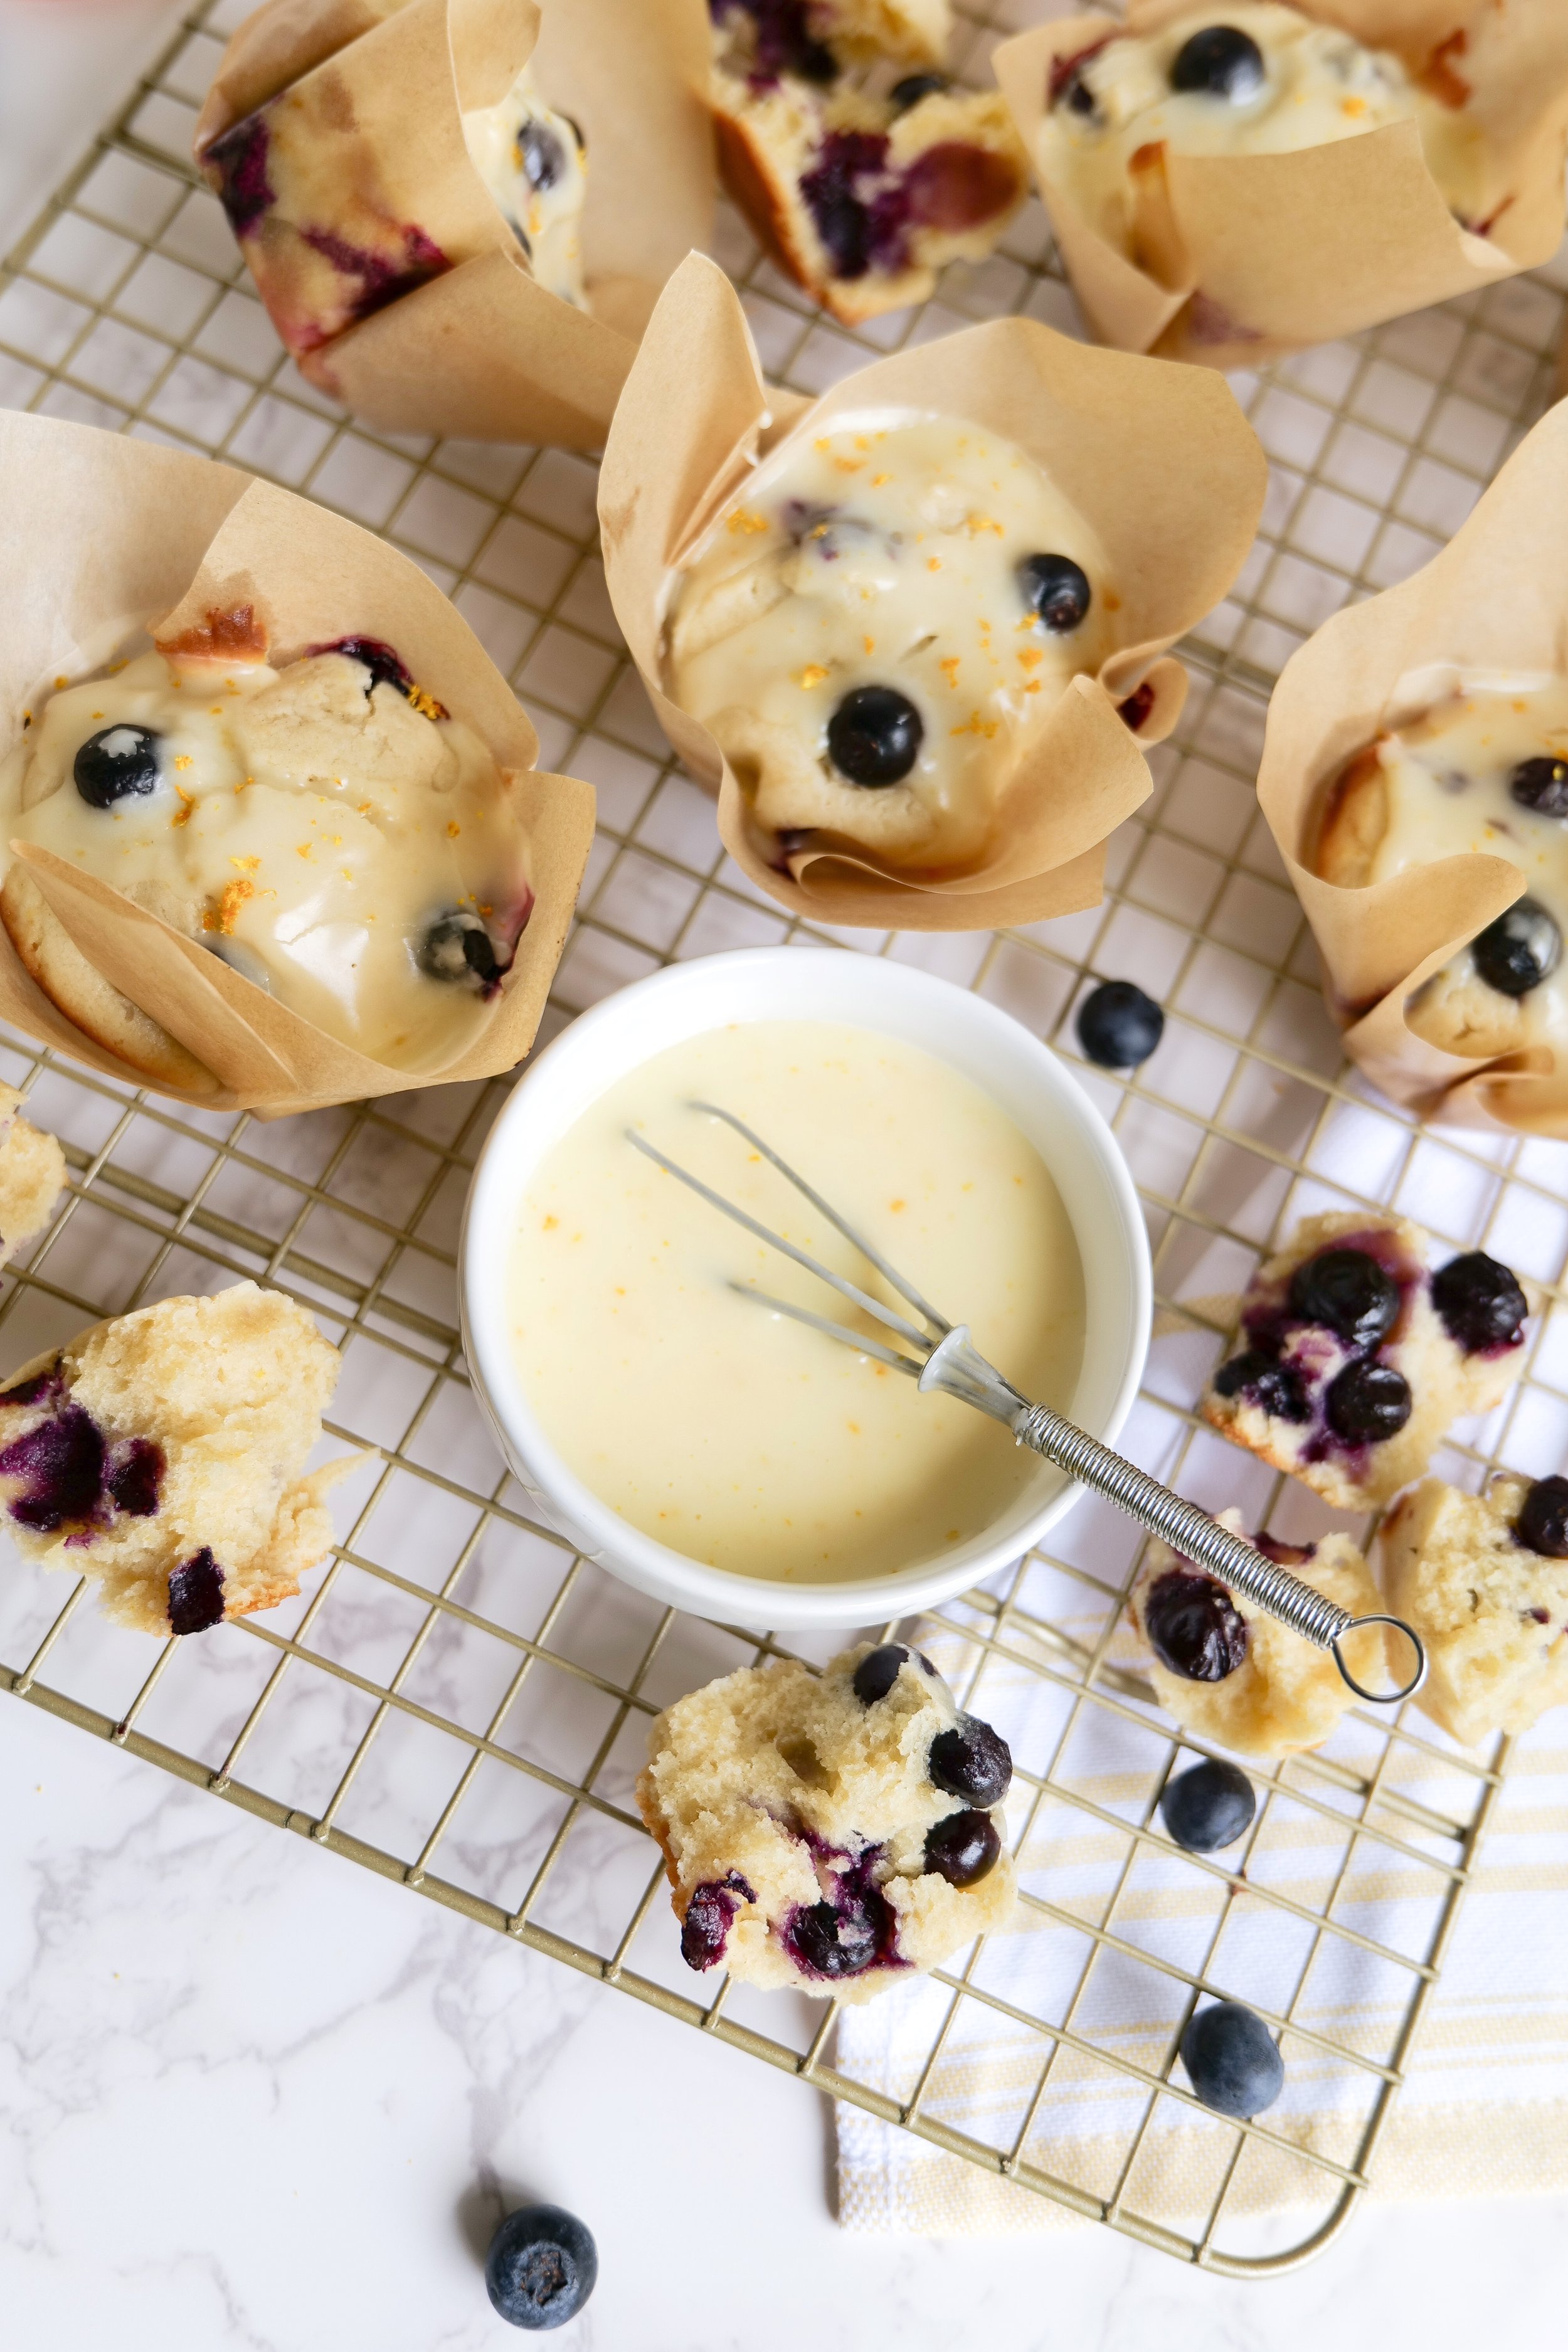
Deliciously Sweet and Tangy: Blueberry Orange Glazed Muffins

These blueberry-orange glazed muffins are the perfect combination of sweet and tart with a combination of fruit flavors. The orange glaze adds a bright and zesty flavor to the otherwise sweet blueberry muffins. These muffins are perfect for a quick breakfast on the go or for an after-school snack. Not only are they delicious, but they are also quick and easy to make. They are the perfect treat to bring to a breakfast party, and sure to be a hit with everyone. Whether you choose to make these muffins for breakfast, brunch, or dessert, the orange glaze and blueberry filling will make them a definite crowd-pleaser. If you're looking for a delicious breakfast treat that is also easy to make, Blueberry Orange Glazed Muffins are the perfect choice! These muffins are made with fresh blueberries and a zesty orange glaze and are sure to please the whole family.

Tips, Tricks and Techniques

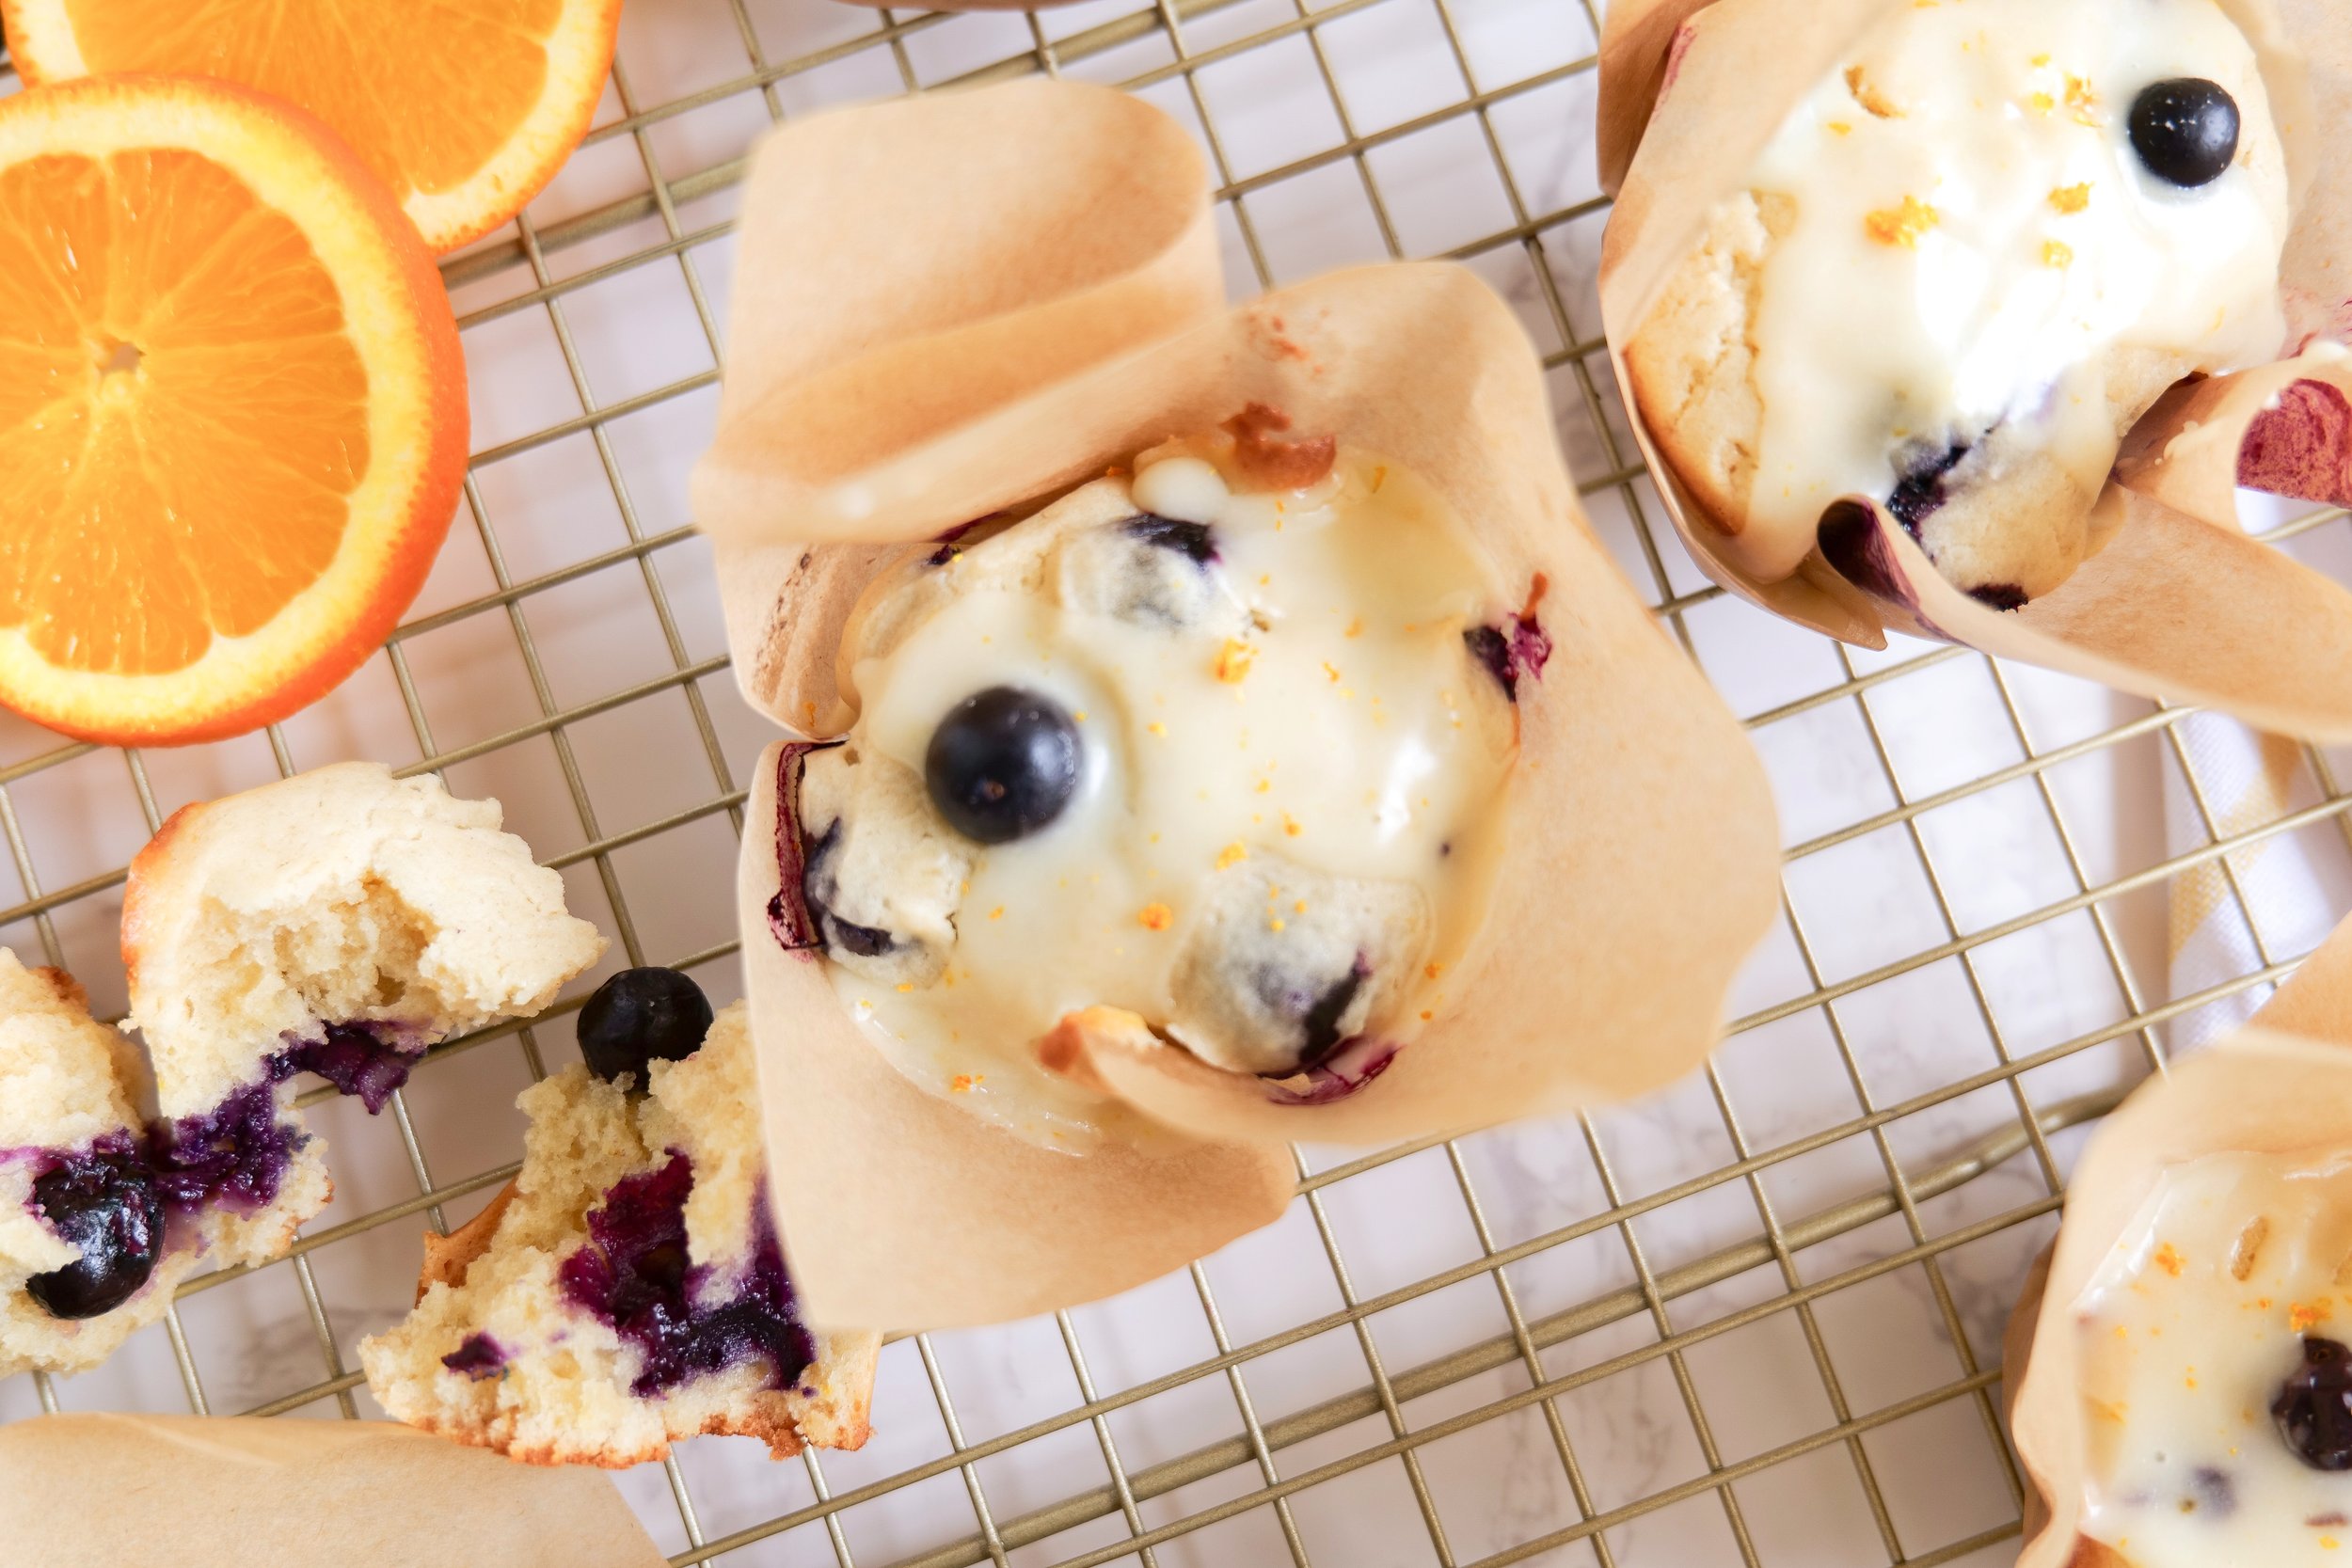
The combination of fresh orange juice and juicy blueberries creates a delicious flavor sensation. To bring out the best flavor in the muffin batter, make sure to use fresh orange juice. If you are using frozen blueberries, make sure to rinse and pat them dry with a paper towel before adding them to the batter. For an extra moist muffin slightly undercook them and add additional sour cream. For even more zest you can add additional orange zest to the batter.

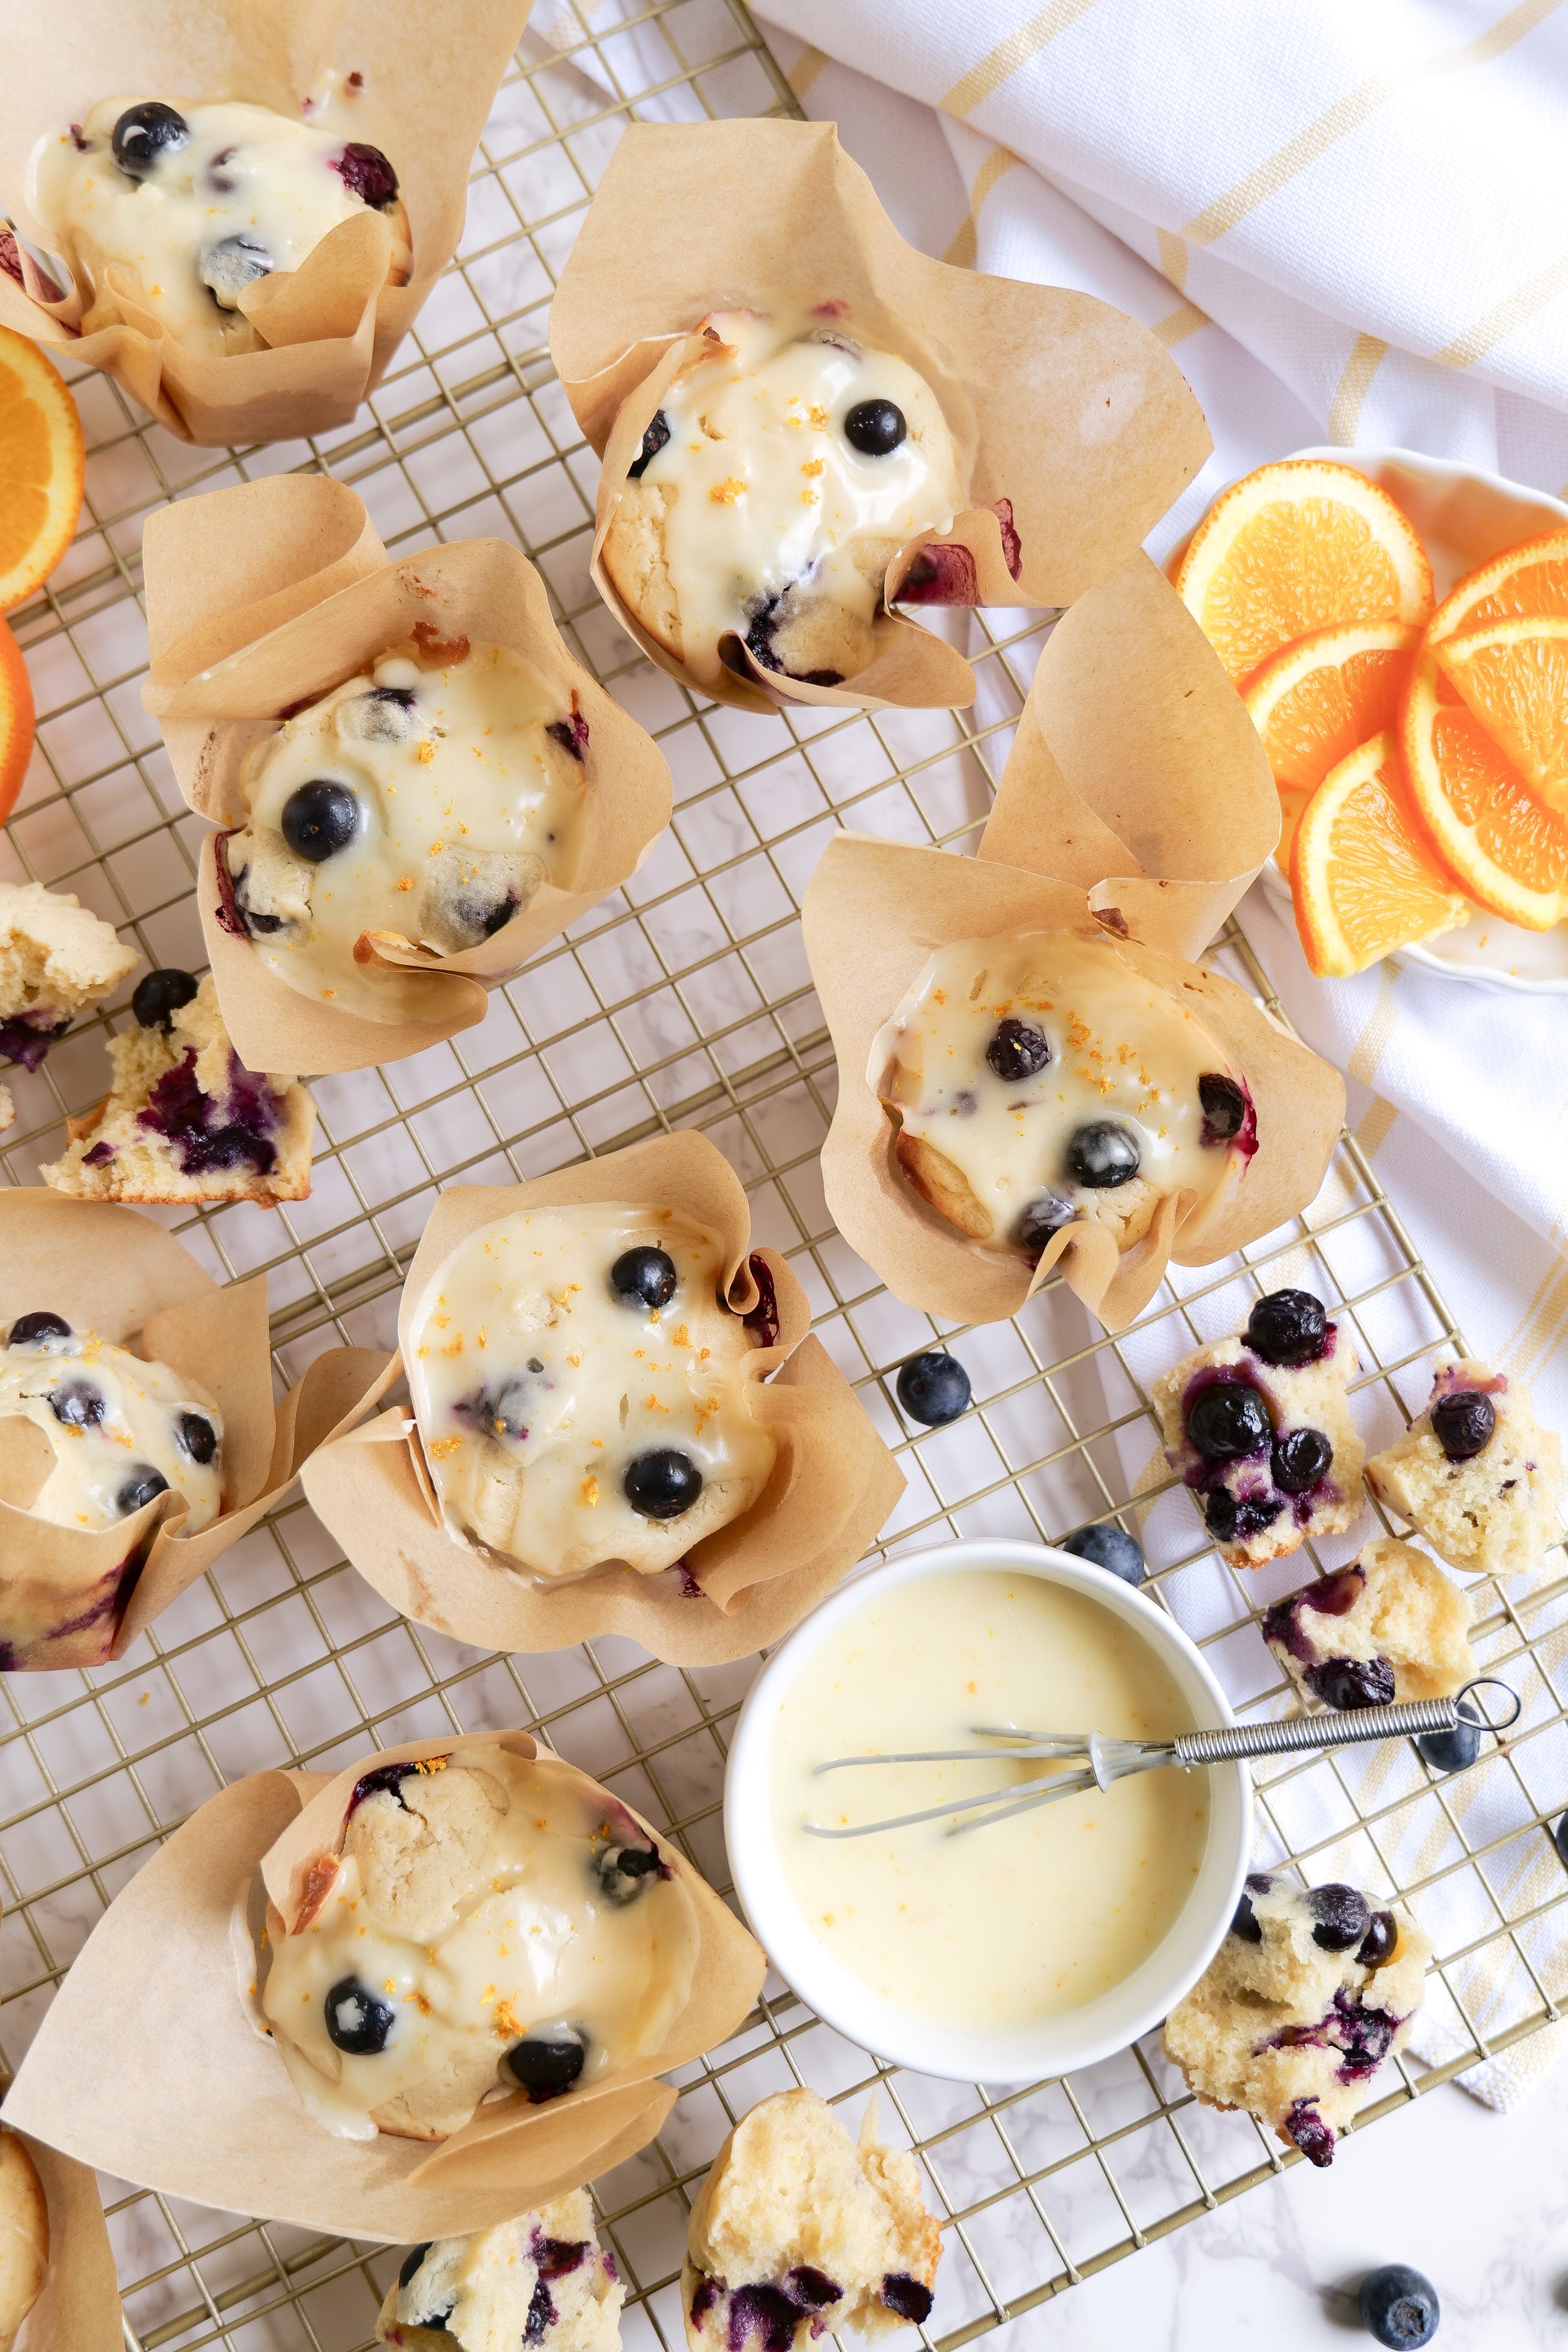
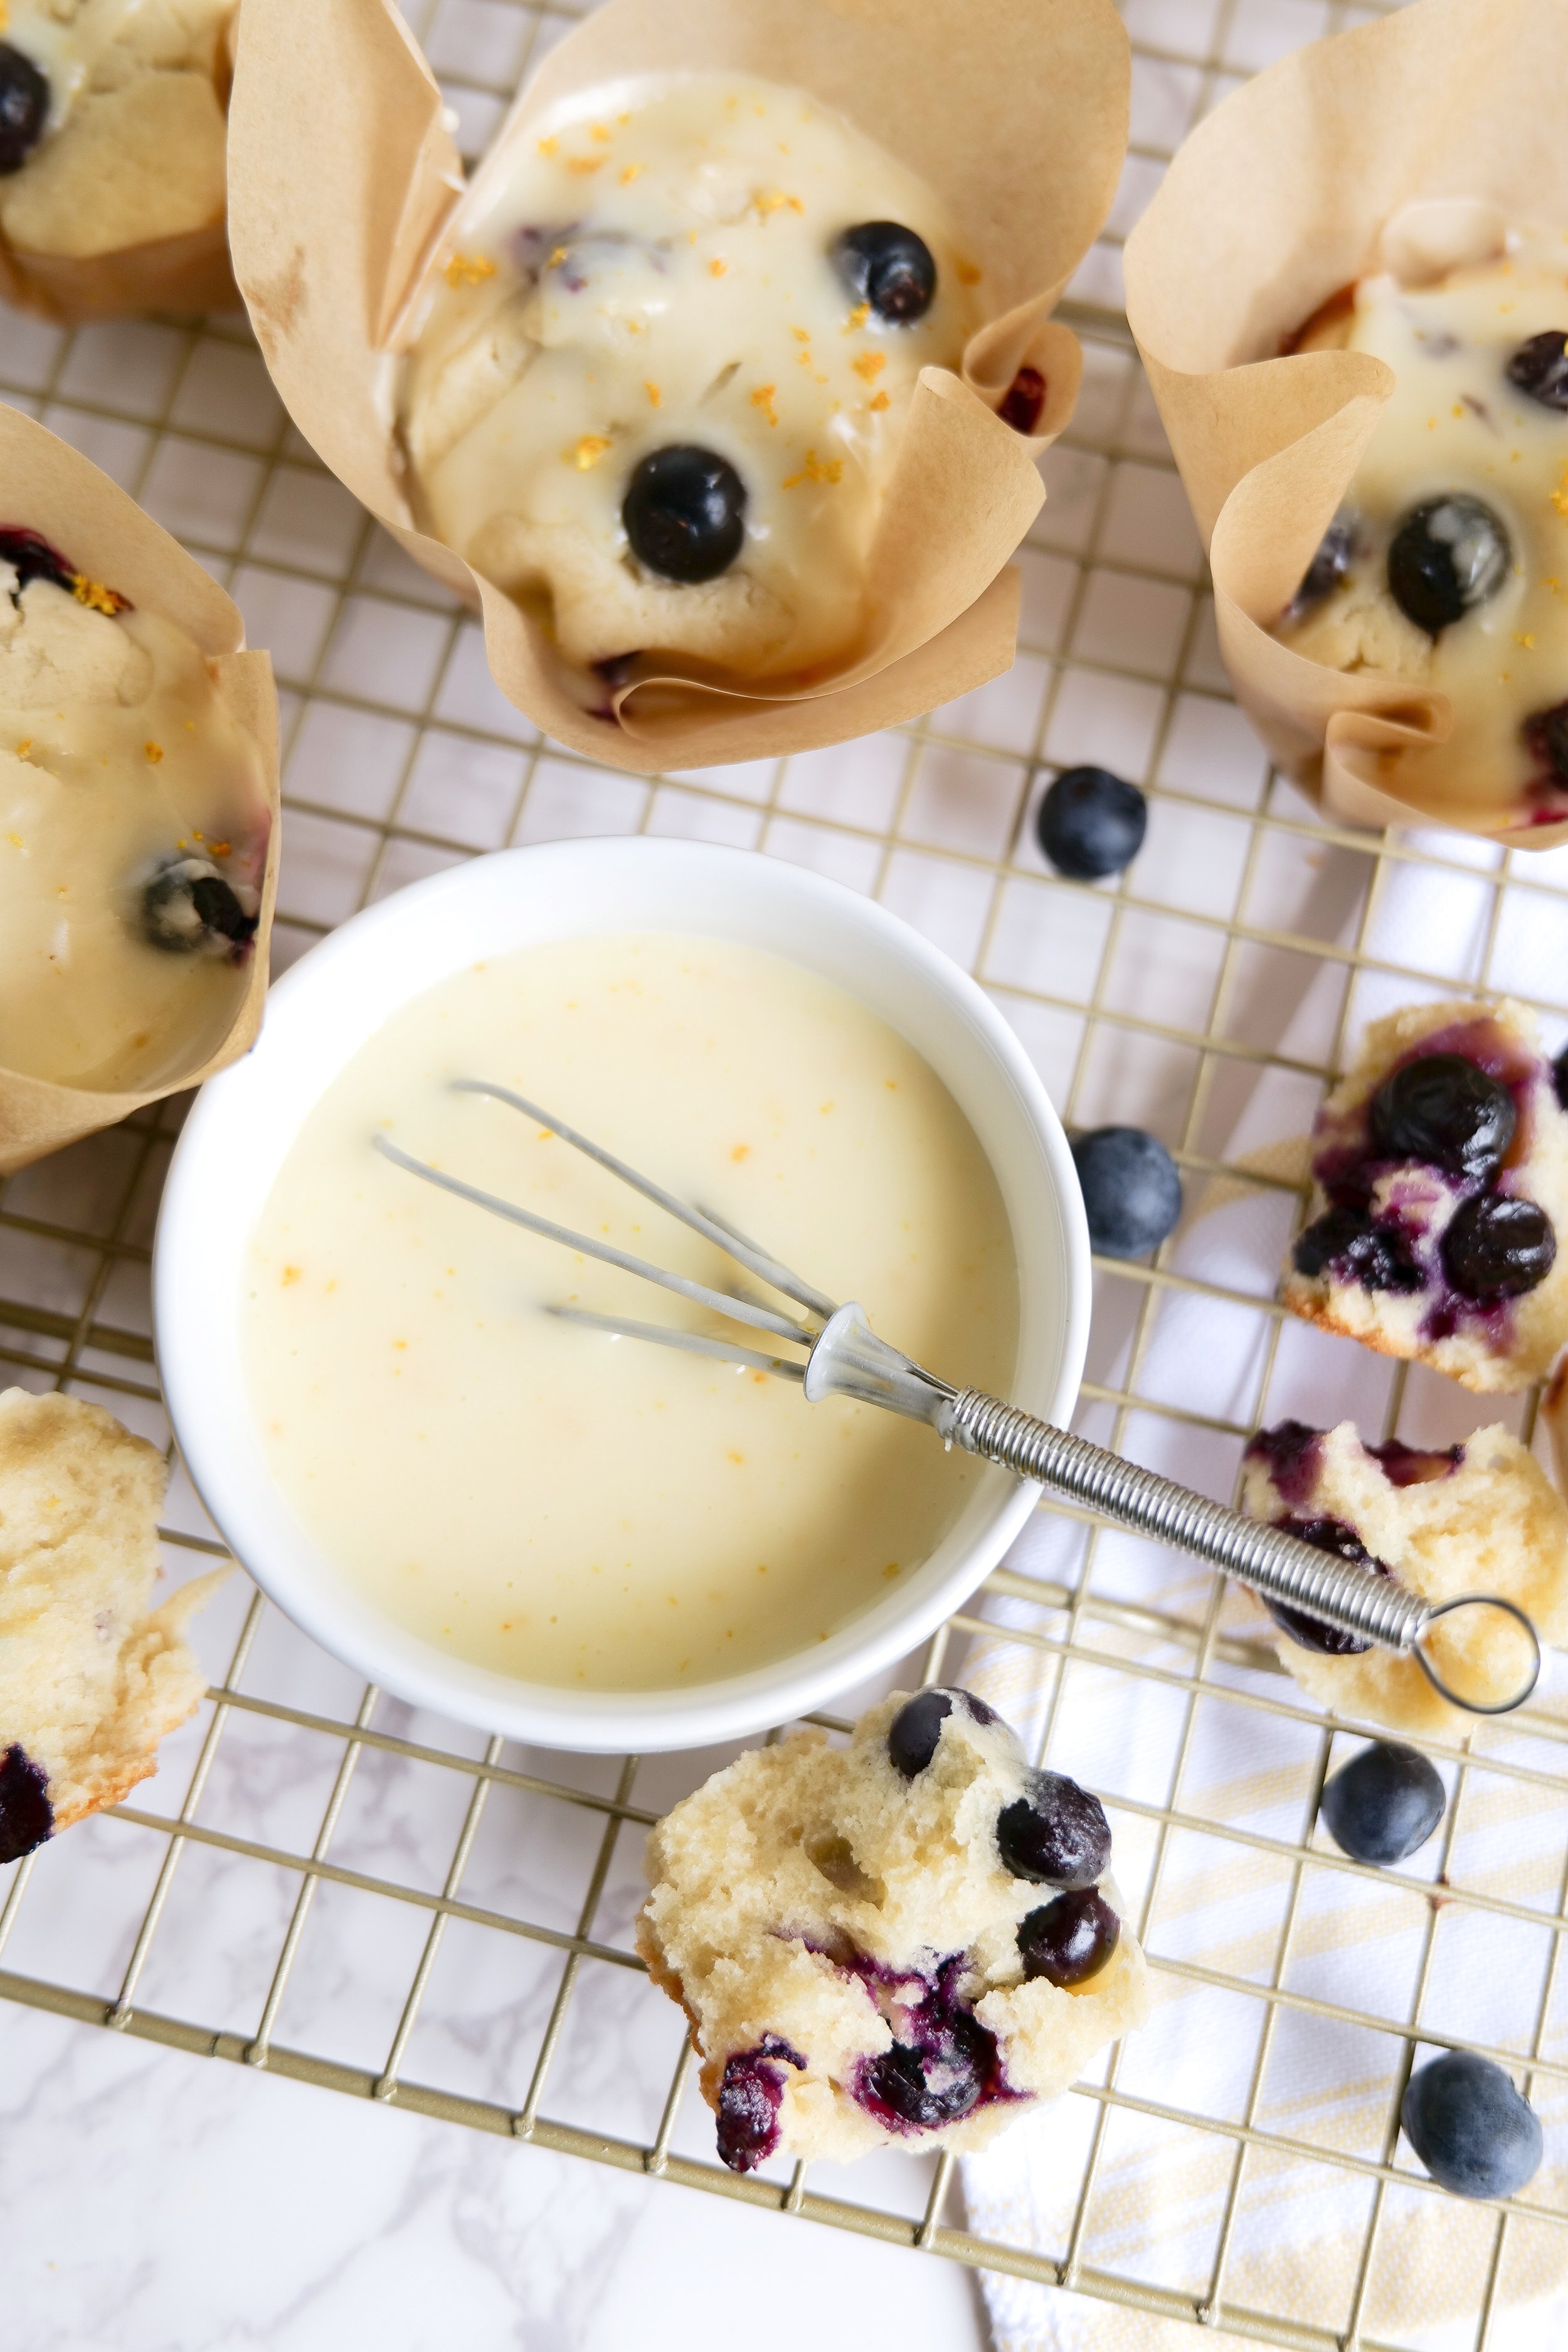
To make the glaze that packs a punch, mix together equal parts orange juice and powdered sugar. For a subtle nutty flavor, add a hint of almond extract to the glaze. Drizzle the glaze over the muffins while they are still warm so it will stick. Let the muffins cool completely before serving. Enjoy the delicious flavor of Blueberry Orange Glazed Muffins!

Use an Ice Cream Scoop

When it comes to making the perfect batch of blueberry-orange glazed muffins, an ice cream scoop is the best choice for portioning out the batter. Using an ice cream scoop ensures that each muffin is the same size and shape. This larger scoop also helps to create a nice round shape to the muffin. Additionally, an ice cream scoop is the quickest and most efficient way to make large batches of muffins.

By using an ice cream scoop to fill the muffin pans, you are also ensuring that the blueberry-orange glaze is evenly distributed among the muffins. This is especially important if you are looking to create a consistent flavor in each muffin. This makes the entire baking process much simpler and quicker. So be sure the next time you are baking a batch of blueberry-orange glazed muffins, reach for that trusty ice cream scoop. Not only will it make the process easier, but it will also ensure that each muffin is the same size and shape and that the glaze is evenly distributed.

How to Best Store Leftover Muffins

Nothing is quite as delicious as a freshly-baked blueberry orange glazed muffin. With the right storage techniques, you can enjoy these delicious treats for days to come.

It's best to store the muffins in an air-tight sealed container or wrap them in plastic wrap to keep them fresh. Place the muffins in a cool, dry place away from direct sunlight and out of reach of any critters that may be interested in your tasty treats. If you plan to store them for more than a few days, it's best to place them in the refrigerator, but allow them to come to room temperature before serving for optimal flavor. If you'd like to enjoy the muffins at a later date, freezing them is a great option. Wrap each muffin individually in plastic wrap or place them all in a plastic freezer bag. Be sure if you are freezing to wait to add glaze at the later date you are wishing to eat them. With the right storage techniques, you can enjoy delicious blueberry-orange glazed muffins for days to come.

How Long Does It Take to Bake Blueberry-Orange Glazed Muffins?

Preparing delicious Blueberry Orange Glazed Muffins is easy and quick! The entire process, from preparation to baking, takes only about 30 to 35 minutes.

To prepare the muffins, all you need to do is gather the necessary ingredients and mix them together. This should take you a maximum of 10 minutes. After that, you can start baking the muffins. The baking time for these muffins is approximately 25 minutes. Once the muffins are in the oven, you can set a timer so that you know when they're ready. To check if the muffins are done, you can insert a toothpick in the center of the muffin. If the toothpick comes out clean, then your muffins are ready to be served!

These Blueberry Orange Glazed Muffins are sure to be a crowd-pleaser. In just 30 to 35 minutes, you can have delicious homemade muffins that your family and friends will enjoy. So, don't wait any longer and try this yummy recipe today!

How Many Blueberry Orange Glazed Muffins Will This Recipe Yield?

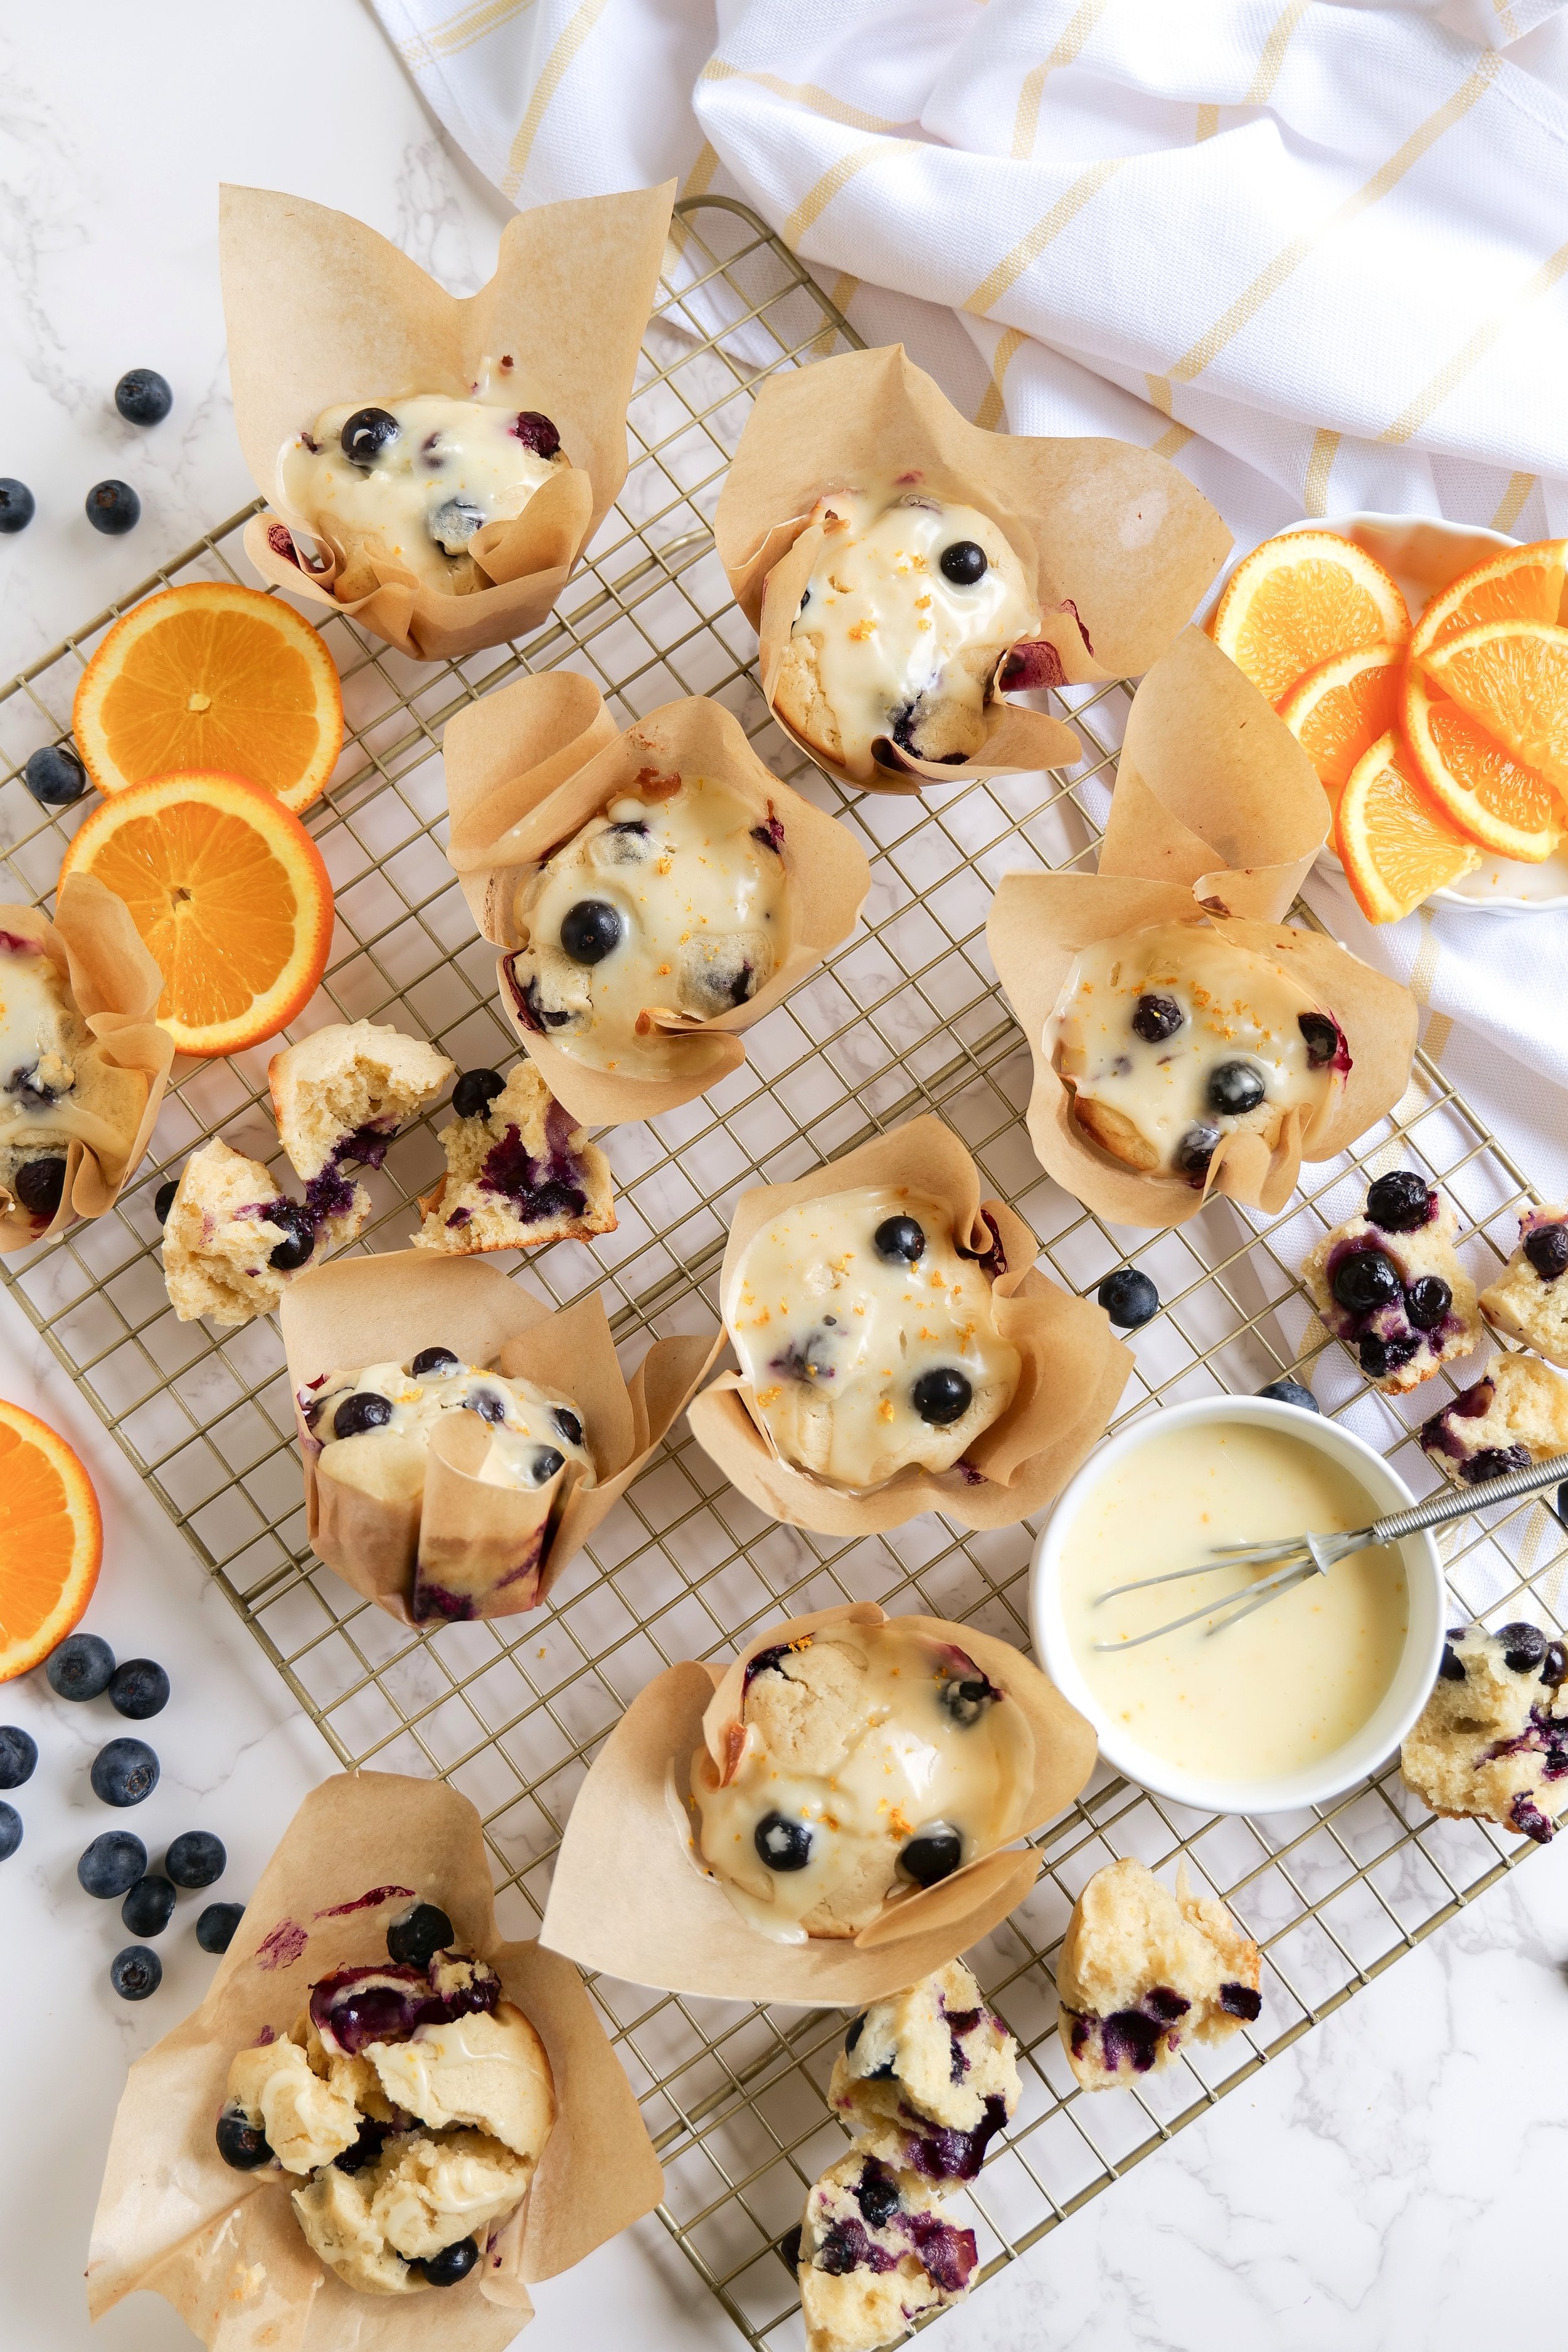
The recipe yields 12 muffins and they can stay fresh in an airtight container for up to three days, so you can enjoy them all week long! If you are looking to make less you can cut the recipe in half. Along with making less if you are looking to feed more at your next family gathering you can double the recipe. Whether you're looking for a quick snack or a special treat, these Blueberry Orange Glazed Muffins are sure to be a hit with family and friends.

4. Can I Substitute the Orange Juice with a Different Type of Juice for the Glaze?

Blueberry orange glazed muffins are a delicious treat that can be enjoyed any time of the day. The orange glaze gives the muffins a sweet and tart flavor, but what to do if you don’t have orange juice on hand? Don’t worry! There are plenty of other types of juice that can be used in the glaze. Apple juice, pineapple juice, cranberry juice, and grapefruit juice are all great substitutes for orange juice in the glaze. Each type of juice will give the muffins a slightly different flavor, so you can experiment to find the one you like best. Adding a few tablespoons of lemon or lime juice to the glaze can also provide an extra zesty flavor. So the next time you’re craving blueberry orange glazed muffins, you don’t have to worry if you don’t have orange juice. There are plenty of other alternatives that will make the muffins taste just as good.

Ingredients

Muffins:

2/3 cup granulated sugar

1 large egg

1/2 cup melted butter

1/3 cup orange juice

1 teaspoon vanilla extract

1 & 1/4 cup all-purpose flour

1 teaspoon baking powder

1/4 teaspoon salt

1/2 cup sour cream

1 cup blueberries

Glaze:

1 & 1/3 cups powdered sugar

3 tablespoons orange juice

Instructions

1. Preheat oven to 375. Mix together granulated sugar, egg, melted butter, orange juice and vanilla extract until well combined.

2. Add in dry ingredients; all-purpose flour, baking powder, salt until smooth and no powder is showing. With a spatula mix in sour cream. Fold in half to 3/4 of the blueberries, leaving the rest to add on top.

3. Using an ice cream scoop dish out a spoon full into each baking tin. (if not using muffin cups or parchment paper on muffin pan be sure to oil before). Once muffin tins are full of muffin mixture add additional blueberries onto each muffin.

4. Bake for 25 minutes or until a toothpick comes out clean.

5. While muffins are baking mix powdered sugar and orange juice together for frosting. As soon as muffins are done place on a cooling rack and drizzle glaze mixture on top so that it will stick well to the warm muffins. Enjoy!

Alternatives you can make to this recipe could be substituting the blueberries for chunks of chocolate or cranberries. Depending on the time of year this may be a nice rich addition. You can also substitute the orange for lemon but use lemon zest and lemon juice instead. Alternatives to sour cream can be a greek yogurt or if looking for dairy free you can use coconut milk. This recipe is one of my favorites but feel free to customize it all on your own and most importantly have fun experimenting. That's what makes baking and cooking so fun!

If you're looking for a tasty treat that doesn't take long to make, Blueberry Orange Glazed Muffins are the perfect choice. With their sweet and tart flavor, these muffins are sure to be a hit with the whole family. So don't wait, try making these delicious muffins today!

Welcome To Summer Charcuterie Board for Your Next Gathering

As the heat of the Summer season approaches, it's time to start thinking about fun, creative ways to entertain. One way to do that is to create a unique and deliciously easy Summer charcuterie board. A charcuterie board is a beautiful presentation of cured meats, cheeses, nuts, fruits, crackers, and other items that you can put together to create a delectable snack or appetizer. With a few simple ingredients, you can create an impressive Summer charcuterie board that is sure to be a hit at any pool party or outdoor gathering. Read on to learn some tips and tricks on how to create your own Summer charcuterie board.

Welcome in the season with a delicious charcuterie board! Whether you’re hosting a backyard barbecue or just want to enjoy a night in, a charcuterie board is the perfect way to enjoy a variety of flavors. Start by choosing a selection of summer fruits like apricots, strawberries, watermelons, and raspberries. Then add your favorite cheese, like a soft Brie, goat cheese, and Havarti. For a bit of protein, include prosciutto, genoa salami, sopressata, or pepperoni. To add texture, grab an assortment of crackers and bread like baguettes and flatbread. For a bit of crunch, throw on some nuts and seeds like almonds, cashews, pepitas, and sunflower seeds. Finish off your board with a few sauces, jellies, and spreads like tapenade, pesto, hummus, and tzatziki. And don’t forget about the finishing touches - herbs and flowers! With a charcuterie board like this, your summer entertaining will be a breeze.

How to Arrange a Charcuterie Board:

Charcuterie boards are a great way to entertain friends and family in the summertime. Not only are they visually appealing, but they also provide a wide variety of flavors and textures that everyone can enjoy.

For this board, I started with a base salami folded to have a spot for the words WELCOME SUMMER. Then I used slices of cheese and small cookie cutters to create the letters. I added in crackers and a selection of cheeses from my Williams-Sonoma cheese order for a well-rounded charcuterie board. In addition, I added fresh watermelon, kiwi, & strawberries, as well as dried fruit to provide some sweetness. Make sure to top it off with some walnuts and pistachios to add some crunchy texture.

Make sure to have fun with your Summer charcuterie board! Don’t be afraid to experiment with different combinations. Try different types of cheeses, meats, fruits, and nuts to create the perfect board. If you’re feeling ambitious, you can even make your own crackers and dips. No matter what you choose, your charcuterie board is sure to be a hit with friends and family. So, get creative and welcome in the season with a delicious charcuterie board!

When assembling a charcuterie board, the sky is the limit. You can choose whatever meats, cheeses, and accompaniments you like. Salami, prosciutto, and ham are all popular options, as are a variety of hard and soft cheeses. To add depth of flavor, choose accompaniments like olives, pickles, jams, and mustard. For a Summer themed flair, add seasonal fruits like strawberries, watermelon, and peaches. To make it more like a complete meal, add some bread or crackers.

Charcuterie boards are fun to make and easy to customize. They’re perfect for entertaining guests, or just enjoying a snack all to yourself. Get creative and make a Summer charcuterie board that you and your family will love. I always love to visit our local farmers market to find the freshest fruit & vegetables for the season.

Types of Cheeses for a Summer Board

I loved using these cheeses from Williams-Sonoma. They have a ton of different options to choose from but the sky is the limit with cheese! Picking something that compliments your fruit and meats on the board is always key. From the nutty Manchego cheese from Spain to the crumbly Feta cheese from Greece, you’ll be sure to find something to please everyone. Robiola, a soft Italian cheese, is perfect for spreading on crackers and adding a delicious flavor. Goat cheese is a great addition, providing a tangy and creamy flavor. Dutch Gouda is mild and mellow, while French Brie is creamy and buttery. Blue cheese is a strong, robust cheese with a pungent flavor, and Camembert is a soft, creamy French cheese. Finally, no charcuterie board is complete without the classic sharp, tangy British cheddar or mozzarella cheese. Create a beautiful Summer charcuterie board with these delicious cheeses and let the celebration begin! welcome summer charcuterie board

When it comes to presentation, the sky’s the limit. For a truly eye-catching display, arrange the food in a variety of shapes and sizes. Use a cutting board, platter, or wooden board as your base and add some greenery or edible flowers to give it a summery feel. If you’re feeling creative, you can even create a design with the food itself. A Summer charcuterie board is the perfect way to show off your culinary skills and impress your guests. With its delicious flavors, beautiful presentation, and endless possibilities, a welcome to Summer charcuterie board is sure to be a hit.

How to Make the Perfect Arnold Palmer Popsicle: A Delicious Summer Recipe

Are you looking for a fun and delicious way to cool off during the hot summer months? Look no further than this Arnold Palmer Popsicle recipe! This classic combination of iced tea and lemonade is a refreshing and delicious treat for adults and kids alike. With just a few simple ingredients, you can substitute the classic drink and instead make these tasty popsicles in no time. Whether using them for a Summer BBQ or just a fun way to beat the heat, this easy recipe is sure to be a hit. Keep reading for all the details on how to make the perfect Arnold Palmer Popsicle.

Arnold Palmer Popsicle Tips and Tricks

Cool off this Summer with a classic Arnold Palmer popsicle recipe! It’s the perfect blend of lemonade and iced tea, and it’s sure to be a hit with the whole family. To make the popsicles, start with equal parts iced tea and lemonade. You can also add a splash of vodka for an "adult popsicle" or flavored syrup for extra sweetness to the flavor. For a more creamy popsicle, add a scoop of vanilla ice cream or Greek yogurt.

To make your own custom Arnold Palmer popsicles, try adding different fruits like chunks of strawberry, raspberries, or blueberries. For an extra tart flavor you can add in a splash of lime juice or sliced lemons ( I did this on a few of mine). If you’re looking for a sweeter treat, swap out the iced tea for a sweeter variety such as peach tea. The Saint James teas come in so many delicious flavors like passionfruit & peach, pineapple & mango, blueberry & raspberry, and blood orange & hibiscus!

Making homemade popsicles is a fun and easy activity that the whole family can enjoy. With this delicious Arnold Palmer popsicle recipe, you can find a unique way to cool off in the Summer heat while still enjoying a classic summertime treat. So, get creative and make your own custom Arnold Palmer popsicles today!

Can the Recipe be Made in Large Batches?

Making a delicious Arnold Palmer popsicle recipe is easy, and you can even make a larger batch for a special occasion. All you need to do is increase the amount of ingredients accordingly. You can make up to a double batch of this recipe without making any additional adjustments.

When making a larger batch of popsicles, it is important to store them properly. You can easily store the popsicles in a large airtight container. If you plan on making a larger batch of popsicles, you may also want to invest in a quality popsicle maker to help speed up the process. With a larger batch, you can also use different molds to create unique fun shapes and sizes of popsicles.

The Arnold Palmer popsicle recipe is a great treat for any occasion, and making them in larger batches is a great way to share them with friends and family. With the right ingredients and equipment, you can easily make these thirst-quenching popsicles at home.

Other Variations for the Arnold Palmer Popsicle Recipe?

You can also try spicing up the recipe by using flavored iced teas. For a unique flavor, add fresh fruit or citrus slices to the popsicles. For a refreshing twist, herbs like mint or basil can be added to the popsicles.

If you want to switch things up, try substituting the lemonade with limeade or other citrus juices. To make a gourmet popsicle, infuse simple syrups with herbs or fruits. For a frozen Arnold Palmer that is more like a slushie, use crushed ice instead of regular ice cubes. With these variations, you can suit everyone's taste buds.

Note on Popsicle Molds

There are a few important steps to follow to ensure that your popsicles come out perfectly. It's important to freeze the popsicles for at least four hours before serving to ensure that they are frozen all the way through. If you're using wooden popsicle sticks, be sure to soak them in water for about 10 minutes before adding them to the molds. This will help the popsicles to stay together and make it easier to remove them from the molds. When removing the popsicles from the molds, run the molds under warm water for a few seconds before taking them out. This will help to loosen the popsicles, making them easier to remove. Once they're out of the molds, you can enjoy your Arnold Palmer Popsicles immediately or store them in the freezer for a cool treat anytime.

Ingredients

Popsicle Mold (linked one just like mine and more options below)

1 16.9 oz Saint James Green Tea (if using regular tea you will need to sweeten)

Trader Joe's Sparkling Lemonade

Sliced Lemons (optional)

Instructions

1. Add sliced Lemon into the popsicle mold (optional but adds detail to the popsicle and a little sourness) and pour Green Tea into the popsicle molds. Add stick and lid to molds. Freeze for 1 hour. If you aren't using a sweetened tea I would add sugar to tea so you have sweetness throughout the popsicle or you can mix the tea & lemonade. I just love the layered look.

2. After Tea has hardened pour in sparkling lemonade slowly. The sparkling lemonade will bubble and need more added so go slow wait and then add more. Return to freezer and let harden for 4-8 hours.

3. Remove from the freezer and quickly run under warm water to help remove from the mold. Serve immediately or put in a container in the freezer until ready to serve!

Now your delicious Arnold Palmer Popsicles are ready to enjoy! This recipe is sure to be a hit with family and friends alike. So don't wait any longer, try this simple recipe and enjoy!

Creating the Perfect Summer Tablescape For more photos of this table set up and links to everything!

Other Summer Treats You Will Love:

Creamy Root Beer Popsicle

Sparkling Ice Mint Mango Mock-tail

Shaved Brussel Sprout Salad with Apples, Goat Cheese & Candied Pecans

Fruit & Goat Cheese Bruschetta

The Perfect Lemon Drop Martini Recipe for a Refreshing and Delicious Cocktail

Create a Delicious Layered Hummus Dip for Your Next Snack or Appetizer

If you're looking for a quick and easy healthy appetizer to bring to your next party, look no further than this delicious and creative layered hummus dip idea! This crowd-pleasing dip is easy to make and can be customized to fit the tastes of any crowd. With creamy layers of hummus, vegetables, and cheese, this dip is sure to be a hit at your next gathering. Not only is it delicious, but it's also full of nutrition and flavor. So, get ready to wow your guests with this delicious layered hummus dip!

This dip is perfect for an outdoor gathering or as part of a dinner party menu. The beauty of this dip is that it can be customized to fit any dietary restrictions or guest preferences. By layering hummus with other ingredients such as feta cheese, tomatoes, and olives, many unique flavor combinations can be created that are all sure to please. Hummus is rich in fiber, protein, and healthy fats, making it an excellent choice for a nutritious snack. Serve this layered hummus dip with warm pita bread or crackers for a crunchy contrast to the creamy hummus. Enjoy this dip as a healthy alternative to traditional chips and dip! Whether you’re entertaining or just having a snack for yourself, layered hummus dip is sure to please.

Assembling The Layered Hummus Dip

Assemble on a Small Platter Making All the Components Easy to See and Scoop. This delicious dip is made up of layers of hummus, diced tomatoes, thinly sliced radishes, olives, feta cheese, and a drizzle of olive oil. To make the dip easier to scoop and enjoy, layer the hummus dip on a small platter. Serve with pita chips, fresh vegetables, or crackers for the perfect appetizer or snack. All of these flavors and textures combine to create a unique and delicious dip that is sure to be the talk of the party.

The best part about this layered dip is the ability to customize it for your guest's tastebuds or dietary restrictions. You can add alternatives like roasted red peppers instead of tomatoes. Add the cucumbers onto the dip instead of a side for scooping. For a vegan option, omit the feta cheese and replace it with nutritional yeast. Need more protein? Add in grilled chicken. The possibilities are endless, so make it all your own!

Ingredients

Garlic Hummus (I went the easy route and chose store-bought you can make your own)

Kalamata Olives

Tomatoes

Radish

Feta Cheese Crumbles ( I did a Mediterranean flavor)

Olive Oil

English Cucumber

Pita Chips

Instructions

1. Layers of Hummus on a beautiful serving plate

2. Layer on your toppings. Like I said above make this all your own! If you prefer another topping then add that in or substitute it out. Drizzle olive oil after adding all toppings.

3. Arrange Pita Chips and Cucumbers around the dip for easy scooping and beautiful presentation.

4. I also added small bowls of 2 kinds of olives for those that don't want dip to have another option and add a finishing touch.

5. Refrigerate until you are ready to serve!

How to Store Leftovers

Layered hummus dip is the perfect appetizer for any gathering or special occasion. Not only is it simple to make, but it is also versatile and can be prepared ahead of time. To ensure that your dip is as delicious as possible, make sure to let it cool completely prior to storing it. Store any leftovers in a shallow container with a lid, making sure it is airtight to prevent spoilage. Enjoy your dip within 3-4 days, or freeze it for later use. To reheat leftovers, use the microwave or the stovetop. With a few easy steps, you can enjoy a delicious layered hummus dip that will be the talk of your next event!

I hope you loved this Greek Hummus Dip Recipe, here are a few other appetizers you will also love:

Fruit & Goat Cheese Bruschetta

A Crowd-Pleasing Stuffed Mushroom Recipe

5 Ingredient Bacon Ranch Football Shaped Cheese Ball

Deliciously Different: Pink Deviled Eggs to Spruce Up Your Easter Brunch

Delicious Buttery Italian Croissant Sandwich

Delight Your Guests with an Antipasto Christmas Wreath

The Perfect Lemon Drop Martini Recipe for a Refreshing and Delicious Cocktail

Are you looking for a delicious and refreshing cocktail recipe to spice up your next get-together? If so, you'll want to try a Lemon Drop Martini. This easy-to-make, zesty cocktail is sure to tantalize the taste buds of all your guests. Not only is it packed full of flavor, but it's a great way to show off your bartending skills. So if you're ready to achieve the perfect Lemon Drop Martini, read on to learn how to mix up this classic original cocktail.

The Lemon Drop Martini is a classic cocktail that is sure to please any crowd. Being both sweet and tart, this drink is the perfect balance of refreshing and flavorful. When making a Lemon Drop Martini, be sure to use freshly-squeezed lemon juice for the best flavor.

What’s In a Lemon Drop Martini?

Are you looking for a delicious and refreshing drink to enjoy during the hot summer days? Look no further than the Lemon Drop Martini! This classic cocktail is made with vodka, simple syrup, and fresh lemon juice, giving it a sweet and tart flavor that is perfect for sipping in the sun.

If you’re feeling adventurous, add a few drops of bitters to give the drink a subtle herbal finish. The key to a great Lemon Drop Martini is using fresh lemon juice and quality vodka. Once you’ve perfected your Lemon Drop Martini, serve it chilled in a martini glass and garnish with a fresh lemon wedge. Enjoy this delightful drink in the sun and savor its sweet and tart flavor!

How to Make a Sugar Rim

Starting a lemon drop martini is easy when you know the steps! Begin by ensuring you have a clean, dry glass. Take a plate and pour a small amount of sugar onto it. Take a wedge of lemon and run it around the rim of the glass and then press it into the sugar plate. This will give your finished drink a nice sugary sweetness.

If you are making a lot of glasses with the sugar rim, try dampening a clean new sponge with water on a plate instead of using a hundred lemons. This will save you time from too much water dripping down and glass as well as saving lemon juice. Once the glass is rimmed with sugar, you are ready to make your delicious lemon drop martini!

When to Serve a Lemon Drop Martini

A Lemon Drop Martini is the perfect drink for any special occasion. Whether you’re celebrating a wedding, anniversary, or birthday, this delicious martini is sure to be a hit. This classic drink is also a great choice for Summer barbecues and outdoor gatherings. It’s the perfect refreshing drink to get the party started before dinner is served.

For those looking for a quick and easy beverage to enjoy after a long day at work, a Lemon Drop Martini is a great choice. It’s light and refreshing and is sure to be a hit with your guests. It’s a great drink to serve at brunch or dinner parties, or even a girl’s night in. No matter what the occasion, a Lemon Drop Martini is sure to be a hit.

What Type of Vodka Should I Use to Make a Lemon Drop Martini?

When making a classic Lemon Drop Martini, the main ingredient is vodka. There are many different brands and types of vodka to choose from, and each one will give the drink a slightly different flavor. Tito's Vodka is a great choice for a Lemon Drop Martini because of its smooth, clean flavor and light citrus notes. Hanson Sonoma Meyer Lemon Vodka is also great for a Lemon Drop Martini because it is flavored with lemon. If you want a smooth, light vodka, Grey Goose is a great choice. Smirnoff Citrus Vodka is made with lemon and lime flavors and is perfect for mixing a Lemon Drop Martini. Ciroc Vodka is a smooth and creamy vodka with a light citrus flavor and is great for making a Lemon Drop Martini. Finally, Stolichnaya Citros Vodka is a citrus-flavored vodka that is perfect for making a Lemon Drop Martini. No matter what type of vodka you choose, you can make a delicious Lemon Drop Martini with a few simple ingredients.

What are Some Garnishes I Can Use to Dress Up a Lemon Drop Martini?

There are so many ways to garnish this lemon drop martini recipe. You can add a candied or dried lemon wheel. To add an extra colorful touch, you can also add a few blueberries and mint leaves. Or for an extra special touch, add a star anise and a lemon thyme sprig. If you decide to take it up a notch and add another flavor such as making it a raspberry lemon drop you can add fresh raspberries as well! The options and flavors are endless!

Can I Make a Virgin Lemon Drop Martini?

The Lemon Drop Martini is a classic cocktail that has been around for years. Made with vodka, simple syrup (or orange liqueur/cointreau), and freshly squeezed lemon juice, it is a refreshing and delicious drink. However, what if you don’t want to include alcohol in your drink? Don’t worry – it’s easy to make a non-alcoholic version of the classic Lemon Drop Martini. All you need to do is replace the vodka with a non-alcoholic substitute like sparkling water, cranberry juice, or even ginger ale. You can also use a sugar-free lemonade for a lighter, healthier option. Trader Joe's also had a delicious limoncello this time of year that is nonalcoholic and would make a great substitution for vodka in this lemon drop! Add some ice cubes and a slice of lemon for a zesty, delicious drink that’s perfect for any occasion.

Lemon Drop Martini Recipe

Ingredients

3 oz vodka

3 oz simple syrup

3 oz freshly squeezed lemon juice

Extra granulated sugar for rim garnish

Instructions

1. Rim your martini or cocktail glass. Take a lemon wedge and run around the edge of your glass to lightly dampen it. Then flip upside down and press into a plate of granulated superfine sugar.

2. Grab your cocktail shaker and add over ice your favorite vodka, homemade or store-bought simple syrup, and freshly squeezed lemon juice. Place lid on and vigorously shake! The harder you shake the icier the cocktails will become.

3. Strain into glass, add garnish, and ENJOY!

Other Cocktails You Will Love:

Watermelon Twist Cocktail

Refreshing Lemon Twist Cocktail

4 Deliciously Easy 4-Ingredient Tequila Cocktails (margarita, paloma & more)

Pitcher of Pina Colada’s

Strawberry Orange Bourbon Smash

Creating the Perfect Memorial Day Charcuterie Board

Memorial Day is a holiday dedicated to the remembrance of those brave heroes who have died in service of our country. In my world, anytime you have a gathering of close friends, family, and loved ones, a good charcuterie board is a great way to celebrate. On this day your board can follow the theme and help to show off your patriotism while bringing friends and family together for a special celebration of remembrance. This board is the perfect snack to enjoy while watching the parade or just spending valuable time with family. With its colorful array of fruits, veggies, meats, cheeses, and other items, this board will be sure to make your Memorial Day a special one.


Why We Love This Idea for Memorial Day

With the variety of meats, cheeses, and fruits available, you can create a unique charcuterie board that will be sure to impress your guests. Start by selecting a variety of meats, such as prosciutto, salami, and pepperoni. Add some cheeses, such as cheddar, brie, and blue cheese. Then, add some fruits and vegetables to your board, anything that adds reds, whites and blues is perfect for any patriotic celebration! Your Memorial Day Charcuterie Board will be a delicious way to share in the spirit of the holiday. Enjoy some quality time with your loved ones and savor the flavors of the season. Whether you’re hosting a backyard barbecue or just having a relaxing evening at home, a charcuterie board is the perfect way to mark the occasion. So, get creative and show off your patriotism with a Memorial Day Charcuterie Board.

How to Make Your Charcuterie Board a Patriotic Theme

Memorial Day is the perfect time to get creative with your charcuterie board. Start with a red, white, and blue background, like a red plate, a white plate, and a blue platter. Add some bright and festive fruits and vegetables to your board, such as strawberries, blueberries, pomegranates, blackberries and raspberries. Cheese is also an essential part of any charcuterie board, and classic varieties like cheddar, bleu cheese, and brie are sure to be a hit. Include some charcuterie meats like salami, prosciutto, and pepperoni for added flavor. Add some jams and spreads like strawberry jam, blueberry jam, cranberry jam or anything red or blue to your board for a sweet touch. Make sure to include some crackers and breads like baguettes, crostini, and crackers for scooping up all the deliciousness. Add in some nuts like almonds, cashews, and walnuts for a salty and crunchy element where you see any space on the board. Lastly, grab your star-shaped cookie cutter. You can cut out watermelon cubes as I did here, cheese slices, or a star in the middle of your brie and fill it with jelly or pomegranate seeds. With these tips, you'll have the perfect Memorial Day charcuterie board in no time.

What Type of Board to Use When Making a Charcuterie Board?

Memorial Day is the perfect time to get together with family and friends and enjoy a delicious charcuterie board. Whether you’re hosting a backyard barbecue or having a picnic in the park, a charcuterie board is sure to be the perfect centerpiece. When creating a charcuterie board, the first thing to consider is the board itself. A wooden board is the most ideal choice for creating a charcuterie board. Its natural surface provides an attractive backdrop for the food items and also makes it easier to clean once the board is finished. Ceramic, slate, and marble boards are also great options for making a charcuterie board. These materials all create a stunning presentation for the food and they are also easy to clean. For a truly unique charcuterie board, you can use a cutting board made of bamboo. Bamboo is a natural material that looks beautiful and is also easy to maintain. For this board, I used a large white tray with handles that made this a perfect “board” to travel outside with. It had a soft red edge that went with the theme. You can find similar boards that will be perfect for your Memorial Day charcuterie board by following the link below! So, this Memorial Day, make a charcuterie board to celebrate the occasion in style!

What Types of Drinks Pair Well with a Memorial Day Charcuterie Board?

For a festive start to the evening, why not try a glass of sparkling wine? Sparkling wine is a classic pairing for charcuterie boards, and for the best flavor choose a dry, high-acid sparkling wine. If you’re looking for festive cocktails, then why not opt for a classic gin and tonic or a Moscow mule? I also linked some delicious cocktail recipes below that I love to make in the summer months! Alternatively, a cold beer is always a great choice when enjoying a charcuterie board. If you’re a beer drinker, opt for something light and refreshing like a pilsner or pale ale.

For a truly memorable Memorial Day, creating a charcuterie board and pairing it with drinks is a great way to celebrate. Enjoy a glass of sparkling wine, a classic cocktail, or a cold beer with your board for the perfect Memorial Day celebration.

How Long Does a Memorial Day Charcuterie Board Take to Make?

A Memorial Day Charcuterie Board is the perfect way to celebrate the holiday in style. With minimal effort and some planning, you can make a beautiful board in as little as 15 minutes. If you plan ahead with a good grocery list, you can have your board ready in no time for a Memorial Day celebration. If you are pressed for time you can make ahead and refrigerate as well. All you need to do is pick out your favorite meats and cheeses, along with a variety of crackers, jams, and other accompaniments and start assembling. You can also incorporate some Memorial Day-themed items, such as American flags or red, white, and blue decorations, to make your board more festive. By getting creative, you can make your board something truly special. You can also add in a few special touches, like a festive flag or some festive desserts, like chocolate covered pretzels, to make your board even more special.

This Memorial Day, why not pay tribute to the holiday with a delicious charcuterie board? It's a great way to celebrate as friends and family come together, and you don't have to spend hours putting it together. In just 15 short minutes you can create a stunning and scrumptious board that will be the centerpiece of your celebration. So get ready to honor Memorial Day with a fabulous charcuterie board

Other Appetizers & Cocktails to give you inspiration this Holiday:

2023: Charcuterie Board Ideas to Help You Ring in the New Year

Celebrating Mother's Day with a Deliciously Decadent Charcuterie Board

Refreshing Lemon Twist Cocktail

Strawberry Orange Bourbon Smash

3 Mexican Mule Recipes with a Twist!

A Sweet and Delicious Recipe for Lemon Poppyseed Bread

Are you looking for an easy and delicious treat to make? Lemon poppyseed bread is a classic that anyone can enjoy! This bread is a tried and true favorite that has been around forever, and it is sure to become a go-to recipe for your family. Whether you're looking for an afternoon snack, a sweet breakfast, or a unique and beautiful dessert, this bread will be a hit. With just a few ingredients, you can make a flavorful and moist bread that is perfect for any occasion. Let's dive into the recipe and see how to make the perfect lemon poppyseed bread!

Tips to Make the Best Lemon Poppy Seed Loaf

Lemon Poppyseed Bread is a classic dessert that's perfect for any occasion. Its bright, tangy flavor and light, fluffy texture make it a classic favorite treat. To make the best loaf of Lemon Poppyseed Bread, it’s important to use freshly squeezed lemon juice and zest. This will give your bread a bright and tangy flavor. Additionally, use white sugar instead of brown sugar to achieve a lighter loaf. To get the perfect texture, make sure you use the correct ratio of poppy seeds to batter. Additionally, preheat your oven and bake at the correct temperature for nice and even baking. Grease and flour your loaf pan to prevent sticking and let the bread cool completely before slicing. Once the bread is finished baking, store it in an airtight container to keep it fresh. With these tips, you’ll be sure to make the perfect loaf of Lemon Poppyseed Bread!

Can You Make This Recipe Without Poppy Seeds?

With its unique combination of sweet and tart lemon and crunchy poppy seeds, it's no wonder why this bread is so popular. But what if you don't have poppyseeds on hand or don't want to use them in your recipe? Not to worry - you can still make a delicious lemon poppyseed bread without the actual poppyseeds! All you need to do is replace the poppy seeds with a few other ingredients that will help to create a similar flavor and texture. Options include substituting chia seeds, crushed nuts, shredded coconut, or even raisins for the poppy seeds. You can also add a bit of almond extract or lemon zest to help bring out the lemony flavor. The result will still be a delicious, moist bread with a hint of lemon and crunch.

Making lemon poppyseed bread without poppyseeds is surprisingly easy and offers a great way to enjoy this classic treat. With just a few simple substitutions, you can create delicious bread that is just as flavorful and enjoyable as the original. So the next time you're in the mood for some lemon poppyseed bread, don't worry if you don't have poppyseeds - you can still make a delicious version without them!

Can This Lemon Poppyseed Bread Recipe Be Halved?

Halving a recipe can be a great way to save time and money, especially when it comes to baking. If you’re looking to make a smaller batch of Lemon Poppyseed Bread, you’ll need to adjust the ingredients. To halve the recipe, you’ll need to reduce the ingredients by half, including the eggs, sugar, and butter. Being this recipe makes 2 loaves you won't need to make any other adjustments to the temperature or cook time. I always do the full recipe because of how easy it is to freeze one loaf. Then I always have another loaf on hand for last-minute company or for something tart and sweet to have on hand when I get a craving.

How to Freeze Lemon Bread?

Lemon poppyseed bread is a delicious treat that can easily be frozen and enjoyed later. By freezing the bread, you can help to retain its moist texture and flavor so that it tastes just like it did when it was first baked. To freeze the bread, make sure to tightly wrap it in plastic wrap or aluminum foil and place it in an airtight container or ziplock bag. The bread can be frozen for up to 3 months.

When you are ready to enjoy the delicious lemon poppyseed bread, you can either thaw it in the refrigerator overnight & place it in a pre-heated 350-degree oven for 8-10 minutes. Alternatively, you can thaw it at room temperature for several hours before warming it in the oven. Reheating the bread will help to restore some of the moisture and make it taste as fresh as when it was first baked.

For those who love the taste of lemon poppyseed bread, freezing it is an excellent way to ensure that it stays fresh and retains its flavor and texture. Enjoy the deliciousness of lemon poppyseed bread anytime by following the simple steps outlined above.

How Do You Make Dairy-free Lemon Loaf?

Lemon poppyseed bread is an incredibly popular treat that is loved by many around the world. The combination of tart lemon and crunchy poppyseeds is a classic combination that creates an irresistible treat. Whether you’re looking for a delicious breakfast, snack, or even dessert, lemon poppyseed bread is a great option.

Making this delicious bread is surprisingly easy and can be adjusted to fit all dietary needs. If you are looking for a dairy-free option for this recipe you will need to make 2 small adjustments. Swap out butter for oil and the milk with coconut milk. These options still give the lemon poppyseed bread great flavor without sacrificing your dairy needs.

What is the Best Way to Store Lemon Poppy Seed Bread?

Lemon poppyseed bread is an easy-to-make and delicious treat. When you’ve baked this bread, the best way to store it is in an airtight container or wrapped in plastic wrap. To ensure its freshness, place the bread in a cool, dry area such as on the countertop, avoiding any direct sunlight. For longer storage, wrap the bread in plastic wrap and place it in the freezer. When it’s time to serve, thaw the bread overnight in the refrigerator, or for a few minutes in the microwave. Above all else, don’t forget to enjoy the bread within a few days of baking for the best flavor and texture.

Ingredients:

2 cups sugar

1 cup melted butter

3 eggs

1-1/2 teaspoons vanilla extract

1 teaspoon lemon zest

2 tablespoons poppy seeds

3 cups all purpose flour

1-1/2 teaspoons baking powder

1-1/2 teaspoons salt

1-1/2 cups milk

Icing:

2 tablespoons lemon juice

1/2 teaspoon lemon zest

3/4 cups powder sugar

Directions:

  1. Preheat oven to 350 degrees and grease 2 loaf pans

  2. Combine sugar, melted butter, eggs, vanilla and lemon zest.

  3. Stir in Poppy Seeds

  4. Mix in Flour, Baking Powder and Salt until well combined.

  5. Scrape down sides and add in Milk until mixed thoroughly.

  6. Divide batter evenly between prepared pans and bake for 45 min.

  7. Cool loaves for 10 min and prepare icing.

  8. Blend all icing ingredients and pour over warm loaves!

  9. ENJOY!

4 Deliciously Easy 4-Ingredient Tequila Cocktails

Summer is officially here and it’s time to get creative with those cool cocktails! If you’re looking for a quick and easy way to make a delicious drink, then look no further. Today, we’re bringing you four delicious tequila cocktails that use only four ingredients each. Whether you’re an experienced mixologist, or you just love playing bartender at home, you’re sure to find at least one perfect recipe for your next Summer gathering. So grab your tequila, mixers, and garnishes, and let’s get shaking!

Tips for Purchasing Tequila

When it comes to making delicious tequila cocktails, it’s important to choose the right kind of tequila. The best choice is to go for a tequila that is 100% agave, as it will give you a smooth flavor that is perfect for cocktails. Look for bottles with a label that indicates the type of agave used, as this will give you a better idea of the flavor you can expect. To get a more robust flavor, look for bottles labeled 'Reposado' or 'Añejo'. On the other hand, it’s best to avoid tequilas labeled 'Mixto', as these are a blend of agave and other sugars. The alcohol content of the tequila you choose can also make a difference in the flavor of your cocktails. For a more full flavor, purchase a bottle with a higher alcohol content. If you’re a beginner to the taste of tequila, it’s a good idea to experiment with different types to find the one that best suits your taste. With the right tequila in hand, you’ll be ready to make some delicious four-ingredient tequila cocktails.

Paloma

The Paloma is a classic tequila cocktail that is perfect for the Summer. It's a refreshing blend of tequila, grapefruit soda, and lime juice. For a more complex flavor and for additional carbonation, I add Q Mixers sparkling grapefruit flavor. You can also add agave nectar for a hint of sweetness. Looking for a twist? Try muddling fresh fruit like strawberries, cranberries or raspberries, this will give your Paloma a unique and flavorful twist.

My Deliciously Juicy Paloma Recipe

Ingredients:

Juice of 1 lime

Juice of 1/4 grapefruit

1.5 oz of tequila

1 can of Q Mixers Sparkling Grapefruit

Instructions:

Add fresh lime juice, tequila & grapefruit into mixer and shake. Pour into glass and enjoy! You can add garnish or salt & sugar rim if you choose.

Mexican Mule

The Mexican Mule is a four-ingredient tequila cocktail that is a great twist on the classic Moscow Mule. This easy-to-make cocktail only calls for tequila, lime juice and ginger beer. It is light and refreshing, perfect for summer days. To garnish the Mexican Mule, use a lime wedge or a sprig of mint. For an authentic experience, serve it with chips and salsa on the side. If you want to try something different, you can add other juices or simple syrup to give it more flavor or sweetness. No matter how you customize it, your Mexican Mule combination is sure to be a crowd-pleaser!

My Take on The Mexican Mule

Ingredients

Juice of 1 lime

1.5 oz of tequila

1 can of Q Mixers Ginger Beer

Instructions

Add ice to Copper mug. Add in fresh juice of lime, tequila & ginger beer. Stir and garnish!

Margarita

The Margarita is a classic tequila-based cocktail that is sure to please. Tequila lovers and newcomers alike will appreciate the simplicity and balance of this cocktail. Whether served on the rocks or frozen, the Margarita is the perfect way to enjoy tequila.

My Simple & Delicious Margarita

Ingredients

Juice of 1 lime

1.5 oz tequila

4-5 oz Q Mixers Margarita Mix

Salt or Sugar for rim

Instructions

Add fresh lime juice, tequila, Margarita mix over ice in shaker. Rim glass with salt or sugar your choice. Strain over fresh ice. Add garnish & enjoy!

Ranch Water

It's said that ranch hands in West Texas created ranch water back in the 1960s as a refreshing drink after a long day of hard work. Since its introduction in the Lone Star State, ranch water has become a Texas favorite and is now a staple in bars and lounges across the state. Whether you're beating the Summer heat at a casual dive bar, at a sophisticated cocktail lounge, or a refreshing poolside bar, you can always count on ranch water being on the menu. Tequila lovers and newcomers alike will appreciate the simplicity and balance of this cocktail.

My Refreshing Ranch Water Recipe

Ingredients

Juice of 4 lime slices

Juice of 4 grapefruit slices

1.5 oz of tequila

1 can of Q Mixers Club Soda

Instructions

Add limes & grapefruit to glass and muddle. Pour in tequila & club soda. Add ice & enjoy!

These four easy tequila drink recipes are sure to be a hit at your next gathering. With only four ingredients, these drinks are convenient and easy to make. So, grab a bottle of tequila and try one of these delicious tequila cocktails! To see me mixing them up as our home bartender head to my latest reel here.

Looking for other Cocktail recipes for the summer? Heres some of my favorites

Refreshing Lemon Twist Cocktail

Strawberry Orange Bourbon Smash

3 Mexican Mule Recipes with a Twist!

Celebrating Mother's Day with a Deliciously Decadent Charcuterie Board

Mother's Day is the perfect time to show appreciation for all the amazing mothers in our lives. What better way to show it than with a beautiful and delicious charcuterie board? Whether you’re planning an intimate gathering with your mom or showing appreciation for all the mothers in your life, a charcuterie board is a perfect way to make all those special women feel extra special. This blog post will go over the steps required to create a stunning and delicious Mother's Day charcuterie board that can double as both a lovely gift, and as one of your appetizers for the day!

Tired of Creating Boring Charcuterie Boards??

Treat your mom to something special this Mother’s Day with a delicious and beautiful charcuterie board! With a little extra effort, you can up your charcuterie game and give your Mom a gift that keeps on giving. For an extra special personal touch, add some of your Mom’s favorite treats. Get creative with your board by adding colorful fruits, homemade dips, and spreads, as well as cookie cutters and garnishes. Transform your board into a work of art with thematic colors and decorations, and elevate it with unique charcuterie meats, cheeses, and crackers. Show your mom how much you love her this Mother’s Day with a charcuterie board made with love and care and personal touches.

This board I made spelled out MOM in pomegranate seeds! This can obviously be made into any word or number for a birthday party! This can help to highlight the guest of honor and feel very personal in a lovely way. To easily do this just buy the amount of small brie rounds needed, I found these at Trader Joe's. Then, I cut the word MOM out into each round. I first traced it out and then made a larger hole so the pomegranate seeds can easily fit in. If you don't do this it may cause the cheese to split. Place your seeds in the cutout letters and add them to your board. This gives a uniqueness to your Charcuterie board but also is using 3-dimensional characters that are so beautiful and fun! Next, you will Fill in the rest with delicious meats, cheeses and accouterments. Not sure what to put? Read on!

How to Make a Mother’s Day Charcuterie Board

A charcuterie board is the perfect way to show your love to the special Mom in your life. To assemble the perfect charcuterie board, gather a variety of cheeses, crackers, meats, fruits and vegetables. Arrange the items on a large wooden board or platter with the cheeses in the center and surround them with meats, crackers, fruits and vegetables. Small bowls of olives, nuts, jams and chutneys can be added for extra flavors and to make the board look even more impressive. Decorate the board with edible flowers, herbs or edible decorations to make the board look even more special. To make the board even more special, present it with a personalized card or gift for the special Mom.

Charcuterie boards are an easy way to feed a crowd without spending a lot of money. Plus, it is an activity that the whole family can enjoy together. You can take it a step further and get creative by adding a personalized message to the board like MOM spelled out in pomegranate seeds. Mom will love it!

If you’re ready to create the perfect charcuterie board for Mother’s Day, here are some tips for success. Start by gathering a variety of cheeses, meats, fruits, and vegetables. Place the items in an eye-catching pattern and add some decorations to make it look even more special. Finally, don’t forget to include some crackers, bread, or nuts to complete the board. I always start with the larger items on the board first, and then fill in with smaller ones in different areas. Another trick I do to make the board look cohesive (and not spend a lot on 100 different items) is to use the same item at different spots on the board. So if I am using strawberries, I put a few in one spot and a few in another spot on a different part of the board.

Ingredients Used:

Mother's Day is the perfect time to show your Mom just how much you appreciate her and all she has done for you. Whether your Mom is a just cheese and wine lover, or a charcuterie fan, a charcuterie board is a perfect way to show your love and appreciation. A charcuterie board is a great way to show your mom that you care and that you put lots of thought into her gift.

A charcuterie board typically consists of a variety of cheeses, cured meats, olives, fresh fruits, nuts, sweet treats, pickles, hummus, spreadable cheese, dried fruits, jam, crudités, croutons, pesto, and dip or salsa. All these items can be found in the grocery store or your local specialty food shop. Some of my favorite places to go are Trader Joe's, HEB, Whole Foods and Kroger. They all have great cheese sections and the freshest produce!

Put together a charcuterie board for your Mom this Mother's Day. Start with a selection of crackers, then add a variety of cheeses like cheddar, brie, gouda, and blue cheese. Assemble a selection of cured meats like salami, pepperoni, and prosciutto. Add olives, fresh fruits, and nuts for a crunchy texture. Don't forget the sweet treats like chocolates and cookies. Include pickles, hummus, spreadable cheese, dried fruits, jam, crudités, croutons, pesto, and dip or salsa. Lastly, don't be afraid of overlapping on the board. You want it to feel full not like you need more items. Overlapping adds even more added texture and beauty to your board.

Tools Needed:

To make a beautiful charcuterie board, you will need a few essential items. Start with a good quality cutting board, a cheese knife, and a charcuterie board. Other tools I sometimes use are a mixture of bowl sizes, cheese knives and honey stir. Once you add to this a variety of cheeses, cured meats, fresh and dried fruits, nuts, olives, crackers, bread slices, pickles, jam or honey, and dips and spreads you will be able to create the perfect board. This will give you a great selection of items to choose from and an easy way to build a board.

Now that your charcuterie board is ready, it’s time to enjoy! Serve the board with a selection of beverages and let everyone dig in. A tasty Mother's Day charcuterie board is sure to be a hit and will make the day even more special for Mom.

Charcuterie Board Tips & Tricks

This Mother's Day, treat your Mom to a special charcuterie board! Start with a variety of meats, such as salami, prosciutto, and ham, as the base of the board. Include items like nuts, olives, and crackers for crunch, as well as a mix of cheeses, like cheddar, brie, and goat cheese. Layer fresh fruit, such as grapes, strawberries, and blueberries for a burst of color and sweetness. Place a few sweet treats, like jams, honey, and dark chocolate, to add a little extra indulgence. Top it off with fresh herbs, edible flowers, and edible glitter to give it that special touch. For even more flavor, provide a variety of dips and spreads, such as hummus, pesto, and tapenade. To make your charcuterie board truly unique, include something unexpected, like pickled vegetables, dried fruit, and roasted nuts. Finally, use a variety of colors, shapes, and textures to create a visually appealing board that’s sure to impress. With this charcuterie board, your Mom is sure to have the most memorable Mothers Day ever!

A charcuterie board is a beautiful and fun way to show your Mom how much you care. Not only is it a beautiful centerpiece, but it allows Mom to pick and choose what she wants to snack on. I hope these charcuterie board ideas gave you inspiration for your Mother's Day festivities. Treat your Mom to a special show stopper charcuterie board this Mother's Day and let her know how much she means to you.

Other Charcuterie Board Inspiration:

2023: Charcuterie Board Ideas to Help You Ring in the New Year

Delight Your Guests with an Antipasto Christmas Wreath

How To Make A Christmas Holiday Dessert Board

Other Mothers Day Inspiration:

My Spring Tablescape

The Perfect Pair: Chicken Picatta and J. Lohr Wine

If you're looking for a delicious dinner option that pairs perfectly with a great bottle of wine, look no further than this Chicken Piccata recipe paired with the J. Lohr Estates Riverstone Chardonnay. This traditional Italian dish includes chicken breasts, butter, garlic, and white wine. It is served with a smooth, light lemon, caper, and butter sauce. The accompaniment of a glass of Riverstone Chardonnay makes for the perfect pairing, offering a unique flavor and aroma that will enhance the flavors of the dish. Whether you're hosting a dinner party or just looking to create a delicious dinner for two, this Chicken Piccata paired with the J. Lohr Wines Riverstone Chardonnay is sure to please!


Tips for Pairing Wine with Chicken Piccata

Chicken Piccata is a favorite dish of mine that combines butter, capers, and very subtle hints of lemon that creates a flavorful and acidic sauce, which pairs perfectly with a creamy white wine such as Chardonnay. For a classic pairing, I recommend enjoying a glass of the J. Lohr Estates Riverstone Chardonnay with this meal. With its light acidity and hints of lemon, you'll find that this wine perfectly complements the acidic and buttery sauce of the Chicken Piccata. As you will see in the recipe below, I don't add extra lemon juice or zest like many other traditional Chicken Piccata dishes because of the selected wine pairing. With this wine having a hint of ripe Meyer lemon in its flavor profile, I didn't want an overly lemony sauce to pair with it. If opting to exclude the extra lemon juice, you can substitute with some vegetable broth. This recipe, just like the wine, can be very versatile to suit your taste buds.

J. Lohr Vineyards & Wines produces some of the world's most popular and well-regarded Chardonnays, which they call REAL Chardonnay. What is REAL Chardonnay? It’s when the wine comes from perfectly sited, cool-climate, and sustainably farmed vineyards in Monterey's Arroyo Seco AVA. It's also using 10 different Chardonnay clones and aging using only the finest oak barrels. The range of flavors, from light and crisp to full-bodied and complex, makes each of J. Lohr's three Chardonnays the perfect accompaniment to this classic Italian dish.

The J. Lohr Estates Riverstone Chardonnay has aromas of orange, white peach, a little pear, and sweet oak with baking spices on the long finish, giving it a delicious flavor. The wine is medium-bodied, with a smooth and creamy finish. These flavors work perfectly with the lemon and caper sauce in Chicken Piccata, as the richness of the wine helps to balance the acidic nature of the sauce. The fruit flavors of the wine help to enhance the delicate flavors of the chicken. The medium body of the wine also helps to bring out the subtle flavors of the dish without overpowering it.

So, if you're looking for a delicious and easy-to-prepare meal to pair with a bottle of J. Lohr wine, Chicken Piccata is a perfect choice. The combination of the wine's rich and fruity flavors and the dish's tangy and delicate flavors will create a unique culinary experience that your guests are sure to love. Other pairings for the J. Lohr Estates Riverstone Chardonnay are seafood risotto, mussels in white wine sauce, roast chicken with apples, and holiday ham and turkey.

My Chicken Piccata Recipe

Serves 6

Ingredients

3 large chicken breasts, cut in half and pounded

Salt & Pepper to taste

1/2 teaspoon garlic powder

Flour (for dredging)

6 tablespoons butter, divided

2 tablespoons olive oil

1 shallot, diced

1/4 cup chicken broth 

Splash of white wine

1 lemon, thinly sliced

1 tablespoon brined capers, drained

1/2 cup heavy whipping cream

Freshly grated parmesan cheese


Instructions

1. Slice chicken breasts in half to make 6 smaller chicken pieces. Pound until thin. Season chicken generously with salt

and pepper. Place flour on a plate, add garlic powder and mix. Coat the chicken in your flour mixture.

2. Add 2 tablespoons of butter and olive oil to a skillet over medium-high heat.

3. Once the pan is hot, cook the chicken pieces for about 7-8 minutes per side or until golden.

4. Remove the chicken from the skillet and set aside on a plate layered with paper towels.

5. Take the pan and add a splash of white wine to help pick up the brown bits and add flavor. Once brown bits come up, add 2 tablespoons of butter and the shallots. Let shallots cook until they are transparent.

6. Add the chicken broth, the last 2 tablespoons of butter, and capers to the skillet. Stir until the butter is melted and turn off the heat. Stir in the cream. (If you want to make this recipe without cream, increase the chicken broth to 3/4 cup.) Mix and add lemon slices. 

7. Add the chicken to the pan and garnish with parmesan cheese. 

 To learn more about J. Lohr: REAL Chardonnay click -here-

Looking for other articles on wine?

The Bloggers Guide to Merlot for more on this wine & other J. Lohr wines click -here-

Indulge in Delicious Personal Pear Tarts

If you're looking for a fun and delicious dessert to make for your next gathering, look no further than these Personal Pear Tarts! The flakey crust on these tarts is perfectly complemented by the sweet, juicy pears with just a sprinkle of cinnamon and sugar. Each tart is the perfect size for a single serving and makes a wonderful treat or dessert. Enjoy them either warm or cold and savor every bite of this delightful combination of flavors! Not only is this recipe easy to make and customize, but it's also a great way to showcase seasonal fruits. Read on to find out how to whip up this mini pear tart recipe that is sure to be the star of your next gathering.

Individual Pear Tartlets are a delicious and easy-to-make dessert that can make any meal special from breakfast to dessert. Their sweet and flaky crust pairs perfectly with tender pears and fragrant spices, making a unique and tasty dish. With minimal effort, you can show off your baking skills by creating individual tartlets that can be customized to suit your taste.

The combination of the sweet pears and the crisp crust is delicious together and can be substituted for other fruits such as strawberry, apple or seasonal fruits. Add some spices and you have a unique and flavorful dessert. These tartlets are a great way to end a special meal and make a statement that your guests will remember. Whether you’re looking for a signature dessert for a dinner party or just a simple treat for your family, these individual tartlets are sure to please. For making this quick pear tart recipe ahead of events you can also refrigerate and microwave when ready to serve.

Ingredients

( serving size 6 )

1 sheet of frozen puff pastry

2-3 pears, thinly sliced

1 tablespoon sugar or brown sugar

1 tablespoons cane sugar

Pinch or two of ground cinnamon

1 egg

Directions:

  1. Preheat oven to 375 and let puff pastry start to defrost for 5-10 minutes while thinly slicing pears.

  2.  Mix together sugars and cinnamon in a bowl. In another bowl whisk together the egg.

  3. Once puff pastry has softened, unfold and cut into 6 squares

  4. Layer sliced pears onto puff pastry and brush whisked eggs over the pear and pastry.

  5. Sprinkle sugar mixture all over and place pastries on parchment paper lined cookie sheet.

  6. Place in oven for 15-17 minutes or until edges are golden brown.

  7. Remove once edges are browned and place on cooling rack until ready to serve.

  8. You can serve warm and sprinkle with powdered sugar and/or top with vanilla ice cream, honey, or caramel for a delicious treat.

Delicious and Easy Chorizo One Pan Dinner

This easy and delicious chorizo one-pan dinner is a great way to get a hearty meal on the table in no time. With just a few simple ingredients, you can create a flavorful meal that the whole family will love. The combination of chorizo, potatoes, and veggies gives this dish a wonderful balance of flavors, and the one-pan preparation makes it a breeze to clean up after. So if you're looking for a quick and tasty dinner that won't break the bank, this chorizo one-pan dinner is a perfect choice.

Are you looking for a quick and easy meal to make on a busy night? Look no further than a chorizo one-pan dinner! This delicious meal only requires one pan, so you won't have to worry about cleaning multiple dishes afterward. The chorizo adds a smoky flavor to the meal that your whole family will love. You won't even have to worry about leftovers - all of the ingredients are cooked in the same pan!

Chorizo one-pan dinners is the perfect meal for busy days. They are quick, easy and delicious meals that the whole family will love. With only one pan needed, you can make a delicious dinner without having to clean multiple dishes. The chorizo adds a delicious smoky flavor to the meal that will make your taste buds happy! Plus, you don't have to worry about leftovers when making chorizo one-pan dinner - all of the ingredients are cooked in the same pan!

If you're looking for a quick and easy meal that the whole family will love, chorizo one-pan dinner is a perfect choice. Not only is it delicious, but it also only requires one pan - so you can spend less time cleaning and more time enjoying a delicious meal. Give it a try and you won't be disappointed!

What Ingredients Do I Need to Make a Chorizo One Pan Dinner?

To make this one-pan dinner for 4 people, you'll need: 4 links of chorizo sausage, 4 red potatoes, 1 red onion, 4 cups broccoli, 16 oz mushrooms, 1/3 cup olive oil, 2 tbsp Homemade Ranch Seasoning, and Spicy Mayo.

Your Chorizo One Pan Dinner is now ready to enjoy with your favorite group of people, but can be made for as many or as few people as desired! Serve it up "as is", or with a great sauce such as a yummy spicy mayo or creamy sauce. This one-pan dinner is a great way to get a healthy and delicious meal on the table in no time! Another way to make it your own is changing out the veggies to your family's favorites!

Ingredients

4 chorizo links

4 red potatoes

1 red onion

4 cups broccoli

16 oz mushrooms

1/3 cup olive oil

2 tablespoons Homemade Ranch Seasoning

Spicy Mayo

Directions

1. Preheat oven to 375

2. Lay chorizo links in 360 cookware bake & roast pan. Place in oven while you prep veggies, about 15 minutes.

3. Prep veggies by cutting them into bite sizes and placing them in a bowl to combine. Once it's all cut and ready add olive oil and seasoning and toss to fully coat.

4. Take out the pan with the chorizo and remove the chorizo to a clean plate. Layer veggie mixture into pan and place chorizo on top.

5. Return to oven and continue to bake for another 30-45 minutes or until a fork easily pokes into potatoes

6. Slice chorizo and plate with veggies and spicy mayo (you can omit if you don't prefer sauce)

Other Dinner Recipes:

Easy and Delicious Mushroom & Pea Risotto Recipe

Garlic Mushroom & Shrimp Pasta

Pork Banh Mi Bowl : Deliciously Satisfying

Baked Burrata Pumpkin Ziti with Pork Sausage Recipe

Deliciously Different: Pink Deviled Eggs to Spruce Up Your Easter Brunch

Nothing says springtime like a picnic with friends, and a plate of colorful pink deviled eggs. If you know me you know pink is my favorite color, so these pink eggs make for the perfect addition to any outdoor gathering. Not only are these deviled eggs a visually stunning food to share, but they are also packed with flavor. Whether you’re a fan of the classic deviled egg recipe or you’re looking for something new, this pink version is sure to become a favorite. Read on to learn the easy steps for making this fun twist on a classic picnic favorite.

Pink Easter Deviled Eggs

Pink Easter Deviled Eggs are an easy, creative, and delicious way to celebrate the Easter holiday. With a natural vegetable dye, you can create a beautiful pastel hue for your eggs. The creamy, tangy filling is the perfect complement to the eggs and will leave your guests wanting more! They are an easy and inexpensive dish making them the perfect dish for a family gathering or Easter party. The eggs can be served as an appetizer, snack, or even as a main dish. Have fun decorating the eggs and make them as creative as you wish. Whether you're hosting an Easter brunch or a dinner, Pink Easter Deviled Eggs will be sure to impress your guests.

If you're looking for a unique and fun way to celebrate the Easter holiday, Pink Easter Deviled Eggs are the perfect option. With easy preparation and affordable ingredients, you can have a delicious dish that will wow your guests. Add a bit of creativity to the eggs and you have the perfect appetizers or main dish to serve. Take the time to make these beautiful eggs and you'll have a memorable Easter celebration!

How to Make Colorful Deviled Eggs

Pink deviled eggs are a great way to add a personal pop of color to any gathering! Making them is surprisingly easy and does not take too much time.

To get started, you'll need twelve large eggs. Boil them until they are hard-boiled, then peel the shells off. In a medium-sized bowl, mix 1/3 cup mayonnaise, 1 tablespoon chopped pickles, 1 tablespoon pickle juice, 1/2 teaspoon paprika, and a pinch of salt and pepper. Once the ingredients are combined, add the egg yolks and mash them with a fork or potato masher until the mixture is creamy.

Next, you'll need to dye the egg whites. To make pink deviled eggs, use beet juice and water. Place the egg whites in the dye for one minute or longer, depending on how deep of a pink you are trying to achieve. Fill the dyed egg whites with the yolk mixture.

For the final touch, you can add small flowers or more paprika to the tops of the eggs. Serve the pink deviled eggs immediately or store them in the fridge for later. Enjoy!

What are Other Ways to Hard Boiled Eggs?

Using my 360 2 Quart Saucepan to make my hard-boiled eggs without water. First you will wet a paper towel and your eggs. Fold the paper towel to fit into the saucepan, wet it with water, and place it in the pot. Make sure the towel isn't sitting in a pool of water but that all the water is held in the towel. Carefully place the eggs in a single layer on top of the wet towel. Cover the pot and heat it over medium heat until steam just begins to escape from under the lid, about 3 minutes. Spin the lid to engage the vapor seal then immediately reduce the heat to low. The cooking time will vary depending on the desired doneness of the eggs. For soft-cooked eggs, cook 5 to 6 minutes; for medium-cooked eggs, cook 7 to 8 minutes; and for hard-cooked eggs, cook 13 to 15 minutes.

How to Dye the Eggs

To make your own Pink Deviled Eggs, gather the supplies: hard-boiled eggs, food coloring, water, a shallow bowl, and a slotted spoon. Then, fill the bowl with equal parts water and beet juice or food coloring. Submerge the hard-boiled eggs in the colored water and let them sit for about 1 minute or more depending on the depth of color you are looking for. Carefully remove the eggs from the liquid and pat them dry with a paper towel. Now you have festive Pink Deviled Eggs!

These eggs can be served as a colorful appetizer at a party, or you can use them as deviled egg filling. The possibilities are endless! Try adding a bit of color to your classic deviled eggs for a festive twist. Pink Deviled Eggs are sure to be a hit at your next gathering!

INGREDIENTS

(Serving Size 12)

12 large eggs

1/3 cup mayonnaise

1 tbsp chopped pickles

1 tbsp pickle juice

1/2 tsp Salt

1/2 tsp black pepper

1/2 Paprika

INSTRUCTIONS

  1. Hard boil the eggs first. Fold the paper towel to fit into the 2 Quart Saucepan.

  2. Wet the paper towel with water and place it in the pot. (The towel shouldn’t be sitting in a pool of water. All the water should be held in the towel.) Place the eggs in a single layer on top of the wet towel.

  3. Cover the pot and heat over medium heat until steam just begins to escape from under the lid, about 3 minutes.

  4. Spin the lid to engage the vapor seal then immediately reduce the heat to low for 15 minutes.

  5. Remove from heat and put eggs in an ice-cold bath. This makes it easier to peel them.

  6. Once you peel the shell of the egg cut it in half lengthwise and remove egg yolk in a bowl. Put egg whites in another bowl and cover with 1 cup beet juice and 1 cup water until completely submerged. Leave for 1 minute and rinse with water and lay on a paper towel to dry. You can add more beet juice or leave it for longer to achieve a deeper pink.

  7. In the egg yolk bowl mush eggs and add in pickle juice, chopped pickles, salt, pepper and paprika. Once mixed add to a piping bag and fill with egg yolks.

Adjustments you can make for this meal would be adding in dijon mustard in exchange for pickles if you want less of a pickled flavor. If you like a pickled flavor and are out of juice you can additionally use apple cider vinegar. Seasoning can also be changed for your taste buds as well as mayo ratio. I always encourage making all my recipes into your own to fit your diets and taste buds. Deviled eggs are a classic appetizer perfect for any occasion. Pink deviled eggs are a fun twist on a classic dish and are sure to be a hit at any gathering. Whether you’re hosting a dinner party or celebrating a special occasion, pink deviled eggs are an easy and delicious addition to your menu. Here are a few other recipes I think you will love this Easter season:

Easy and Delicious Mushroom & Pea Risotto Recipe

Tantalizingly Delicious Recipe For Lemon Cheesecake With An Amazing Glaze

Indulge in Deliciousness: Cherry Chip Cake with Chunks of Dark Chocolate Recipe

Shaved Brussel Sprout Salad with Apples, Goat Cheese & Candied Pecans

Blackberry Cinnamon Rolls with Mascarpone Frosting

Easy and Delicious Mushroom & Pea Risotto Recipe

This Mushroom & Pea Risotto Recipe is a classic Italian dish that is sure to satisfy. Combining creamy Arborio rice, sautéed mushrooms, and sweet peas, this dish is packed with flavor and is surprisingly easy to make. This delicious risotto comes together in just 30 minutes, making it a great choice for any weeknight meal. As a bonus, it is also vegetarian-friendly! If you're looking for a tasty and quick meal, this is the best risotto recipe and is simply a must-try.

Mushroom and Pea Risotto is a delicious, creamy, and hearty dish that is perfect for a cozy night with family or friends. This easy-to-follow recipe takes no more than 30 minutes to make and is budget friendly as it is made with simple and affordable ingredients. Not only is it delicious, but it is also healthy and nutritious, and packed full of flavor. It is also a great option for vegetarians and vegans if you omit parmesan cheese at the end and swap the butter for olive oil. To make this dish, you will need your favorite mushrooms, peas, arborio rice, vegetable stock, garlic, olive oil, and parmesan cheese. You will also need some butter, parsley and salt to season. This creamy mushroom risotto recipe is a delicious and easy-to-make dish that is sure to become a family favorite. Below I will show you exactly how to make this.

INGREDIENTS

(Serving Size 8)

6 tablespoons butter

16 oz baby bella mushrooms

2 cloves minced garlic

3 finely chopped shallots

2 cups arborio rice

1/2 cup white wine

6 cups vegetable broth

1 1/2 cups frozen or fresh peas

2 teaspoons sea salt

1 cup grated parmesan cheese

1 teaspoon thyme

1 teaspoon rosemary

INSTRUCTIONS

1. To begin, heat the butter in a large pan ( I am using 3.5 Quart Sauté Pan with Short Handles

from 360cookware) over medium heat. Once melted, add the mushrooms and cook for about 3 minutes until softened. Then, add the peas and cook for an additional 5 minutes until well mixed and the mushrooms have shrunk in size. Remove the mixture to a clean plate and set aside.

2. Return the pan to the stove and add additional butter and shallots. Sautee until the shallots are transparent. Then, add the rice and cook for 1 minute. After that, reduce heat to medium-low heat and add the white wine and stir to scrape up any browned bits from the bottom of the pan. Slowly add in the stock, one cup at a time, stirring frequently.

3. When the rice is almost cooked through, stir in the peas and mushroom mixture for an additional 2 minutes. Taste and season with salt, thyme, and rosemary.

4. Finally, stir in the butter and Parmesan cheese until fully melted. Serve the risotto with a sprinkle of Parmesan cheese and fresh herbs. Enjoy!

Substitutions You Can Make:

Mushrooms are a key ingredient in this Mushroom & Pea Risotto recipe, as they add a savory and earthy flavor. Any type of wild mushroom or even a mixture of mushrooms can be used, such as porcini, shiitake, and oyster mushrooms. The main ingredient in this risotto recipe are peas, however, they can be swapped out for any other type of green vegetable such as spinach, kale, or asparagus. The type of rice used in this recipe can be swapped out for any type of short-grain white rice or even a mixture of different types, such as basmati or jasmine rice. The type of broth used in the recipe can be swapped out for chicken or beef broth, or white wine can be omitted for additional broth. Parmesan cheese is the main cheese used in this recipe, but it can be swapped out for any other type of hard cheese such as pecorino or cheddar.

This Mushroom & Pea Risotto recipe is a versatile dish that can be customized according to preference. With its delicious combination of mushrooms, peas, and cheese, it is sure to be a crowd-pleaser.

Tantalizingly Delicious Recipe For Lemon Cheesecake With An Amazing Glaze

If you love a dessert that is both tart and sweet, then you must try this tantalizingly delicious lemon cheesecake with an amazing glaze. Not only is this a crowd-pleaser, but it is also fairly easy to make. The sweet lemon cheesecake is perfectly balanced with a tangy tart glaze, making it the perfect end to any meal. This recipe is sure to please everyone at your next gathering. Not only is it incredibly delicious, but it's beautiful presentation will surely impress your guests. This rich and creamy confection offers a perfect balance of sweetness and citrus. The smooth and velvety texture is light and airy, yet dense enough to satisfy. The golden-brown crust is a delicious base for the perfectly balanced flavor of sweet and tart lemon, and to top it all off, a decadent and delectable topping of fresh lemon curd makes this amazing. Read on to learn how to make this delicious lemon cheesecake!

The perfect base of this sweet treat is a graham cracker crust that is incredibly easy to make with butter, graham crackers and pecans. This gives a great base for your cheesecake with a buttery and nutty crunch that is so scrumptious. This buttery crust will be a staple recipe to use on any cheesecake, I promise you that!

With its creamy and sweet lemon cheesecake filling made with fresh lemon juice, it has a rich and velvety smooth texture that melts in your mouth. The sweet light flavor is enhanced with a hint of vanilla and an aromatic citrus aroma that tantalizes your taste buds. This perfectly balanced flavor will make your mouth water and its light and airy texture will leave you craving for more. The amazing glaze adds the perfect finishing touch to this delightful dessert and adds an element of surprise from your traditional cheesecakes.

Making the glaze is also very simple and requires minimal ingredients. Once the glaze is finished, you can serve it on top of the cheesecake, or on the side so guests can add it themselves. The glaze gives the cheesecake an extra bit of texture and flavor that will make it truly irresistible. With a combination of eggs, sugar, butter, fresh lemon zest, and juice, the glaze adds a layer of sweetness to the creamy cheesecake that complements it perfectly. You can top the cheesecake and glaze with fresh berries, additional lemon zest or thinly sliced lemons like I have done here.

INGREDIENTS

Crust:

12 oz graham crackers

1 cup pecans

1 cup melted butter

Filling:

3 - 8 oz cream cheese ( room temperature )

1 stick salted butter

1/2 cup brown sugar

1/2 cup granulated sugar

1/4 teaspoons sea salt

3 eggs

1/2 cup heavy cream

1 tsp vanilla extract

3 tablespoons lemon zest

Glaze -

1 cup granulated sugar

2 eggs

1/4 cup fresh lemon juice

3 tablespoons lemon zest

6 tablespoons butter

INSTRUCTIONS

  1. Preheat oven to 375. Spray cheesecake pan with olive oil spray and wrap around the outside with foil.

  2. Make Crust by adding pecans & graham cracker to blender and processing until fine. Add in melted butter and blend again.

  3. Press crust mixture into bottom of pan until even all the way around. I use a flat bottom cup or a metal spoon to help.

  4. Bake in oven for 13-15 minutes. Once done remove and let cool before adding filling.

  5. Reduce oven temperature to 325 degrees.

  6. Make filling. Mix together softened cream cheese and butter with both sugars and salt until well combined.

  7. Add in eggs. One at a time. Making sure they are fully incorporated each time.

  8. Next add heavy cream, vanilla and lemon zest! Once well mixed add into cooled cheesecake pan.

  9. You will then add this onto a tray with a lip. I use this one -here-. (Code Amanda20 for 20% off any order at 360cookware.com) Place on oven rack and add in warm water until halfway full and push back rack and start timer.

  10. Cook the cheesecake for 1 hour. The center will still be a little jiggly, but side will be set. After baked for 1 hour you will turn oven off the oven and leave the cheesecake in the oven for an additional hour.

  11. Once baked for an hour and let sit for an hour in the oven, you can remove from the oven. Wrap cheesecake and let sit in your refrigerator overnight. Up to 24 hours before serving or adding glaze.

GLAZE INSTRUCTIONS

After Cheesecake has cooled overnight you will want to get the glaze ready for the finishing touch! You can add this onto each piece as you serve as you go just in case someone doesn’t want it, but I always add ahead of time, because it's so good everyone will!!

  1. Take a small saucepan over low/medium heat and whisk eggs, sugar, lemon peel & lemon juice.

  2. Add butter and continue whisking constantly. Mix until thickened. (It will stick the back of a wooden spoon)

  3. Remove from pan into a glass bowl and let cool for 15 min.

  4. Place in refrigerator until completely cooled. Then place on top of cheesecake and serve!

For those of us who are looking for a way to get creative in the kitchen, this recipe is the perfect choice. You can make this recipe your own by adding different flavors and ingredients. Plus, you can even top it off with a unique glaze. For those wanting a sweeter crust try adding in honey. Switch out the lemon zest and juice in the glaze for fresh berries and make a blueberry drizzle that is also amazing on a lemon cheesecake! For those wanting a keto option, change the graham cracker to additional nuts, either more pecans or almonds will do great. No matter what you do to make this your own this tantalizingly delicious: lemon cheesecake with amazing glaze is sure to be a hit!

If you’re looking for more delicious recipes like this one, make sure to follow me on Pinterest. I have lots of incredible delicious desserts that are perfect for any occasion. From cakes and pies to cookies and bars, you’ll find something that’s sure to be tantalizing your taste buds.

Here are a few others I think you will enjoy:

Indulge in Deliciousness: Cherry Chip Cake with Chunks of Dark Chocolate Recipe

Chocolate Peanut Butter Brownies

Brown Butter Caramel Pretzel Cookies

Delicious & Easy Apple Pie

Delicious Buttery Italian Croissant Sandwich

Do you have a craving for a savory and delicious sandwich that you can make at home and feel like you got a famous deli experience? Look no further than this Buttery Italian Croissant Sandwich! This sandwich is the perfect combination of Italian flavors, buttery croissants, and fresh ingredients, making it the perfect lunch time meal. Whether you’re looking for that perfect lunch or a great dish to bring as an appetizer, this sandwich will satisfy your cravings. Keep reading to find out how to make this buttery Italian croissant sandwich and why it’s so delicious!

Buttery Italian Croissant Sandwich is a unique twist on the classic sub sandwich. The buttery croissant roll adds an extra crunch and flavor to the sandwich, making it different from a classic roll taste, and just truly irresistible. Topped with a ranch butter, this yummy croissant it's a surefire hit. Adding in a variety of Italian deli meats, cheeses, and condiments to choose from, you can customize your sandwich to your heart's delight. It's a great choice for any lunch or party. I will be serving them at my Superbowl party, but these are perfect for summer parties or the office potlucks. Trust me, they will be gone before you know it. These sandwiches are so easy to make and are perfect for picnics and outdoor gatherings. Serve them up with a side of chips or fresh fruit for a complete classic meal.

INGREDIENTS

12 croissants (I did mini ones for a perfect grab size for Superbowl)

1/4 cup melted butter

3 teaspoons ranch seasoning

4 oz. Pepperoni

4 oz. Hard Salami

7 oz Ham

7 slices provolone cheese

2 cups cut iceberg lettuce

1/2 red onion

1/4 cup pepperoncini's

1 tablespoon white wine vinegar

1/3 cup mayonnaise

3 teaspoons ranch seasoning

INSTRUCTIONS

1. Preheat oven to 350 degrees. While heating whisk together butter and Italian seasoning and butter tops of croissant rolls. Place in oven for 5 minutes or until golden. This helps the butter to melt into rolls and toast slightly.

2. While rolls cook mix together lettuce mixture of chopped iceberg, sliced red onion, pepperoncini's, white wine vinegar, mayonnaise and ranch seasoning. Stirring to evenly coat.

3. Cut rolls in half and start filling with provolone, pepperoni, hard salami, ham and lettuce mixture.

4. Insert toothpicks in middle to hold together and serve! You can make ahead to refrigerate as well. Enjoy!

If you're a sandwich lover, you simply must try these Buttery Italian Croissant Sandwiches. You won't regret it! The crunchy roll, savory meats, and tasty condiments come together in a delicious combination that will leave your mouth watering. Plus, with the ease of customization, you'll be able to make the perfect sandwich, with the perfect meats, cheeses, and vegetables that you crave each and every time.

As always I love to share some easy substitutions to every recipe I post. Some easy subtle changes to this recipe would be to change the cheese to a mozzarella, or any other favorite of yours. Changing meats to your liking is easy as well. Prosciutto is a great addition to this one as well. If you want to use a bigger sandwich size croissant you can add other additions like bell peppers, avocado, tomatoes, or any other of your favorite tastes. Depending on the crowd size you are serving you could even custom cater each sandwich to the wants of your crowd, with the same basic idea for each.

Side Dishes you can serve with these Sandwiches

How to Make the Perfect Pear and Pomegranate Arugula Salad

Mom's Favorite Minestrone Soup Recipe

Shaved Brussel Sprout Salad with Apples, Goat Cheese & Candied Pecans

Deliciously Creamy Basil Tomato Soup: An Easy and Delicious Recipe

5 Ingredient Bacon Ranch Football Shaped Cheese Ball

Super Bowl is here and that means it's time to break out the snacks! If you're looking for the most festive and delicious appetizer for your football party, then you should try making a Bacon Ranch Football Shaped Cheese Ball. This delightful snack is easy to make and is sure to be a hit with your friends and family. The crowd will definitely gather around the dish, and because of its fun shape it's sure the be the memorable meal of the party. The tasty combination of bacon, ranch flavor, and the football shape make this cheese ball the perfect addition to your tailgating spread. Read on for the recipe for this delicious appetizer!

This delicious appetizer combines the creamy texture of cheese with the crunchy texture of bacon and the savory flavor of ranch. Not only is it tasty, but it can also be made ahead of time and stored in the refrigerator for easy party prep. When it comes time to serve, this football shaped cheese ball is sure to be a touchdown! Enjoy it with pantry staples like crackers, chips or sliced vegetables. With its football-shaped presentation, it's the perfect way to bring together friends and family for a delicious game-day themed snack. It’s the perfect dish for any game day gathering and is sure to be a crowd favorite. So, grab your cheeseball, kick back and enjoy the game!

The Bacon Cheddar Football Cheese Ball is sure to be a hit at any tailgate or game-day gathering. It's a great way to show your team spirit while enjoying a savory and delicious snack. So don't wait until the last minute, get your cheese ball ready now and get ready for a winning season! All you need to do is mix together cream cheese, ranch dressing mix, bacon bits, and sharp cheddar cheese. Then shape the mixture into a football shape and roll it in more bacon bits. Refrigerate until firm and you're ready to serve!

INGREDIENTS

16 oz cream cheese

8 oz shredded sharp cheddar cheese

2 tablespoons ranch seasoning

8 slices of bacon

1/2 cup chopped pecans

Provolone or Mozzarella Cheese


INSTRUCTIONS

1. Bring cream cheese to room temperature before beginning mixing process. Chop pecans and cooked bacon. You will use these both as 2-part ingredients.

2. In a large bowl mix together room temperature cream cheese, sharp cheddar cheese, ranch seasoning, a fourth of the bacon and pecans and mix together. You can mix with a fork or a hand mixer. If cream cheese is soft enough, then the hand mixer is good enough.

3. Once cheese ball is mixed together roll out plastic wrap large enough to shape your football. Pour cheese mixture into plastic wrap and full wrap around cheese. Now that the cheese mixture is fully covered its less messy when forming into a football.

4. Once football shape is formed you can remove plastic wrap from the bottom of the cheeseball and place on plate.

5. Add remainder of pecans and bacon together and press into football shape cheeseball. This is fairly easy just press into cheese and all around edges.

6. Using any type of white sliced cheese to make thin strips to create the look of laces for the football. Add your pairings of vegetables, crackers, chips or pretzels and serve!

The Bacon Cheddar Football Cheese Ball is sure to be a crowd-pleasing appetizer at any tailgate or game-day gathering. It's a great way to show your team spirit while enjoying a savory and delicious snack. So don't wait until the last minute, get your cheese ball ready now and get ready for a winning season!

This recipe is also incredibly customizable. You can switch up the ingredients to make it your own. If you're looking for a bite-sized snack, you can make small cheeseball bites. Simply roll the cheeseball mixture into small balls, then roll each ball in bacon bits and refrigerate until firm. When ready to serve, arrange the mini cheeseballs on a platter and serve with crackers or baguette slices. If you want to take it up a notch, you can even add a chip, buttery crackers or pretzel to the top of each ball for easy grabbing at your next football theme party! No matter how you make it, this Bacon Ranch Football Shaped Cheese Ball is sure to be a hit at your next game day gathering.

Other Game Day Appetizers You Will Love

A Crowd-Pleasing Stuffed Mushroom Recipe

Fruit & Goat Cheese Bruschetta

Oven Baked Drumsticks

Indulge in Deliciousness: Cherry Chip Cake with Chunks of Dark Chocolate Recipe

If you're looking for an indulgent and delicious dessert that's sure to please, then look no further than this amazing cherry chip cake with chunks of dark chocolate. This moist and flavorful cake is full of sweet and tart cherry flavor, and the addition of dark chocolate adds an extra layer of richness and decadence. Whether you make this for a special occasion or just a regular weeknight treat, this cake is sure to be a hit with everyone.

This cake is loaded with tart cherries and dark chocolate chunks, creating an irresistible flavor combination that’s sure to impress your family and friends. Whether you’re making it for a holiday, birthday, to celebrate valentines this year or just for a fun dessert, this cherry chip cake is perfect for any occasion. To top it off, this cake is finished with a simple cherry buttery cream cheese frosting. The frosting adds a subtle tanginess to the cake and ties together all of the flavors nicely. Read on for the full recipe and instructions for making this delicious dessert.

Ingredients

6 large eggs

6 large egg whites

2 cup heavy cream

4 tablespoons melted butter

1 tablespoon vanilla extract

1 tsp almond extract

1/2 cup maraschino cherry juice

3 cups sugar

4 1/2 cups cake flour (additional for coating cherries)

2 tablespoon baking powder

1 1/2 teaspoon salt

2 cups grated butter

8 oz dark chocolate chunks

1/2 cup chopped cherries (you will need 10-12 with stems for topping)

Frosting:

1 cup butter

8 oz cream cheese

8 cups powdered sugar

1/4 cup heavy cream

1/4 cup cherry juice

Instructions:

1. Prep by oiling 3 circle pans (8 or 9 inch) and preheat oven to 350 degrees.

2. Whisk gently together eggs, heavy cream, melted butter, and vanilla in mixing bowl.

3. In a separate mixing bowl combine dry ingredients.

4. Grate butter on top of dry ingredients. Combined by hand until butter is no larger than pea sizes.

5. Next up add in wet ingredients and blend together with electric mixer until well combined on medium speed. Then add in dark chocolate chunk and coarsely chopped flour coated cherries. Coating the cherries will make sure they don't sink to the bottom of the cake while baking in the oven. Using electric mixer until blended once more, making sure to keep on low and not over mixing.

6. Once combined put into 3 pans that are oiled and put into oven. 22-27 min or until wooden pick inserted comes out clean. Once cake is done baking let cool in pan for 15 min and transfer to cooling rack for another 15.

7. Blend together all frosting ingredients until well combined. (butter and cream cheese should be room temp if not heat in microwave for 30 sec at a time) You can add more heavy cream or powdered sugar depending on desired consistency. I sometimes choose to double the recipe for an even thicker layer on the outside.

8. Ice layers of cake and do a thin later around for a “crumb layer” that will catch all the crumbs and then make a base for the final layer. Place in fridge for 30 min and then do another layer of frosting. I enjoy piping small circles on top with a piping bag and adding cherries to each one. This also helps when cutting so I know how big to make each slice. Cut, Serve and Enjoy!


Notes

Baking a cherry chip cake with chunks of dark chocolate can be a delicious treat for any occasion. Taking notes while baking is an essential part of achieving the desired outcome especially the next time you cook the same recipe. Keeping track of the times for mixing the batter, the temperature of the oven, and the size of the cake pan you use can help you achieve the perfect cake. No two ovens are created equal, so be sure to check on your cake periodically when making it for the first time. Writing down any adjustments you made along the way can help you replicate the recipe or make improvements for when you choose to make the same cake again. Following the above steps and taking notes can help you bake a delicious cherry chip cake with chunks of dark chocolate.

Other Incredible Cakes

My Favorite White Cake Recipe

is a simple but delicious crowd pleaser. Light, airy and easily adaptable with a filling of jam or fresh fruit makes it one of my first go to cakes.

Scotty's Birthday Pistachio Cake

Another fantastic option for a summertime celebration for that pistachio lover in your life. This light and refreshing cake has layers of pistachio cake and is filled and topped with an outstanding mascarpone frosting that you are going to crave! This is my husband's favorite cake, and I make it every year for his birthday. So that's how we got its name.

No matter which cakes you choose, you can be sure that any of these will be a hit at any occasion. Whether you are looking for a classic like Cherry Chip Cake or something a bit more unique like Pistachio Cake, you can rest assured that your guests will be delighted.

An Alluring Combination: French Onion & Shallot Soup Recipe

French Onion & Shallot Soup is a classic French dish that has been delighting people for centuries. This hearty, flavorful soup is perfect for a cold winter day and is sure to warm you up while still delighting your taste buds. This soup is easy to make and is filled with ingredients that are sure to tantalize your taste buds. Whether you're a novice in the kitchen or a professional chef, French Onion & Shallot Soup is a great dish to make for your next dinner. In this blog post, I will walk you through the steps for making this delicious soup.

Best French Onion and Shallot Soup

The combination of the two creates a delicious flavor and texture. The sweetness of the caramelized onions and shallots pairs perfectly with the beef broth and creates a rich, flavorful soup. Caramelizing the onions and shallots is key to getting the most out of this simple dish.

The process of caramelizing the onions and shallots for this soup is straightforward and easy. To start, heat up a large skillet over medium heat and add a few tablespoons of butter. Once the butter melts, add the onions and shallots and cook until they are lightly browned. This will take close to an hour. Once the onions and shallots are caramelized, add the beef broth and bring to a boil. To make the soup even more flavorful, add wine, a pinch of thyme or a bay leaf. Once the soup is boiling, reduce the heat to a simmer and cook for about 15 minutes. After 15 minutes, the soup should be thick and flavorful. To top the soup off, pour into individual bowls and add a crunchy baguette and cheese. This adds a nice contrast and texture to the soup. You will pop in the oven until cheese is melted and browning on top.

French Onion and Shallot Soup is a classic French dish that is easy to make and bursting with flavor. Topping the soup off with crunchy croutons or cheese croutons adds texture and a nice contrast. French Onion and Shallot Soup is a great way to use up leftover onions and shallots and is a comforting meal for any time of year. With its rich and hearty flavor profile, it's no wonder why it's a popular choice whenever you're looking for something comforting and delicious. Beef stock, garlic, and herbs give the soup an added depth of flavor that takes it to the next level.

The best French onion and shallot soup is made with freshly caramelized onions and shallots. This caramelization process takes time but is well worth the effort as it brings out the sweet flavor of the onions and shallots. Adding a dash of brandy or cognac is a great way to enhance the flavor, or you can also add wine or sherry to the soup for a rich, complex flavor. Topping the soup with a generous sprinkling of grated cheese enhances the flavor and gives the soup a cheesy crust. My favorite way to top off this meal is with a glass of Decoy Chardonnay. The Gruyère cheese topping with the french onion & shallot soup pairs very well with Chardonnay, and makes this a delicious combo.

Ingredients

1/2 cup butter

4 yellow onions, thinly sliced

3 shallots, thinly sliced

1 teaspoon salt

2 sprigs of fresh thyme, additional for topping

2 bay leaves

2 cloves minced garlic

1/2 cup white wine

6 cups chicken or beef broth

salt & black pepper to taste

6-12 sourdough baguette slices

8 oz shredded gruyère cheese

Instructions

1. First you will add butter to hot pan. Letting melt before starting to add in Shallots. I like to brown mine a little bit to add additional flavor. Once butter is ready add in shallots and coat with butter. Let sauté in pan for 5 minutes & add onions. Stirring frequently (every 5 minutes) over medium-high heat for an hour until onions and shallots are fully caramelized and cooked down. Make sure as you are stirring you scrape up any brown bits that might start to form each time. If they are too hard to rise off the pan, you can pour in some of the wine that we use later now to help.

2. Add in salt, thyme, bay leaves and garlic. Stir together to incorporate. Slowly pour in white wine and chicken or beef broth. Let come to a boil and reduce heat to medium-low. Let simmer for 15 minutes.

3. While soup is simmering preheat oven to broil and lightly butter baguette let toast while oven is preheating. Grate cheese for next step.

4. Now that soup is ready pour equally into oven safe bowls. Top each bowl with sourdough baguette slices. This could be 1-2 per bowl depending on the size of bowl and baguette. Top that with your gruyere cheese and place of a baking sheet.

5. Put soup bowls on baking sheet in the oven and bake for 5-10 minutes or until cheese is melted and starting to become a deep golden on tops.

6. Remove from oven, top with additional fresh thyme salt and black pepper. Serve and Enjoy!

French onion and shallot soup is best served with a side of crusty French bread or delicious Cesar salad. The combination of the savory soup and the crunchy bread makes for the perfect incredible bite. You'll be sure to enjoy every last spoonful of this classic soup.

Notes

French Onion & Shallot Soup is a classic French comfort food dish that is sure to please anyone who enjoys the sweet and savory flavor of caramelized onions. The soup’s flavor comes primarily from the combination of caramelized onions and shallots, along with a variety of herbs and spices. However, if you’re not a fan of shallots, they can be substituted by removing them and adding two additional onions to the soup. You can also add in mushrooms for an even richer flavor.

For other ways to substitute, I recommend using beef or chicken stock but if you’re looking for a vegetarian option, you can use vegetable stock instead. The soup is usually served topped with a baguette and melted gruyere cheese, but croutons topping instead of a baguette make for an added crunch, which I occasionally prefer. For a healthier version, use low-sodium broth and skip the cheese and croutons. For an added touch of protein, you can top with crispy bacon and additional herbs. French Onion & Shallot Soup is a delicious meal that can be adapted to meet a variety of dietary needs. Whether you’re looking for a comforting meal or a first course, this dish will be sure to please.

Other Soups You’ll Love!

For those looking for a creamier option, there is also the classic Italian Sausage, Potato & Kale Soup. This dish combines sausage, potatoes, kale, blended of herbs and is finished off with a hint of cream for a truly decadent experience. Or, for those looking for something a bit more substantial, there is always Mom's Favorite Minestrone Soup Recipe, a protein-packed dish that is sure to fill you up on even the coldest of days. Needing something with a little kick? Bring the Heat with this Deliciously Spicy Tortellini Soup. Finally, there is the classic Deliciously Creamy Basil Tomato Soup, which combines tomatoes and basil with a hint of cream for an unforgettable flavor. Whether you’re looking for a comforting soup or something a bit more substantial one of these recipes is sure to hit the spot.

I truly hope you enjoy this recipe and all my others. If you are looking for a recipe on amandawarrenblog.com you can search in my search bar for anything you can't find. I am always sharing more videos on my Instagram, Pinterest and Tik Tok as well so you can see the exact process of how each meal is made. Thank you again for stopping by and I hope to see you again soon!

Deliciously Creamy Basil Tomato Soup: An Easy and Delicious Recipe

If you're looking for a warm and comforting meal, look no further than creamy tomato basil soup. This creamy and delicious soup is packed full of flavor provided by fresh tomatoes, garlic, basil, and a hint of cream. A side of crusty bread or grilled cheese makes this soup a complete meal that is sure to please. A great perk to this recipe is that it is vegetarian-friendly and gluten-free. It can also be made easily vegan by changing out heavy cream for coconut milk and omitting any cheese.

This soup is also a great way to use up any leftover vegetables and herbs from the fridge. It's a great way to make sure that nothing goes to waste. Plus, it's a perfect dish to enjoy on a chilly evening. Rich and creamy tomato basil soup is a great way to warm you up and fill your belly. So, if you're looking for a delicious and comforting meal, give this creamy tomato basil soup a try.

Ingredients

2 tablespoons butter

1 yellow onion, chopped

4 garlic cloves, minced

9 roma tomatoes

1 tablespoons Italian seasoning

1 cup vegetable broth

8 oz tomato paste

1/4 cup basil pesto

3/4 cup heavy cream

sea salt & freshly ground black pepper to taste

basil & parmesan cheese for toppings

Instructions

1. To make this soup, start by melting 2 tablespoons of butter in a dutch oven over medium heat. Once melted, add the chopped yellow onion and minced garlic and sauté for about 5 minutes until the onions are softened and slightly golden brown.

2. Next, add 9 roma tomatoes and bring the mixture to a simmer, cover and let sit simmer for 15 minutes, stirring often. Add 1 tablespoon of Italian seasoning and stir to combine.

3. Once the tomatoes are softened, use an immersion blender to blend the mixture until you get a smooth consistency. If you don't have an immersion blender, you can transfer the mixture to a blender and blend until smooth. Once blended, pour back into pot and add 1 cup of vegetable broth, 8 oz of tomato paste, 1/4 cup of basil pesto and parmesan rind. Let come together but turning heat to medium low and cover. Simmer for 15 minutes, stirring often.

4. Finally, stir in 3/4 cups of heavy cream and simmer the soup for another 5 minutes until warmed through. Serve the Creamy Basil Tomato Soup hot with a sprinkle of fresh basil, parmesan cheese and a slice of warm crusty bread. Enjoy!

What to Serve with Tomato Basil Soup?

Creamy Basil Tomato Soup is a classic comfort meal that is sure to please everyone in the family. It’s perfect for warming up on a cold winter’s day, or for enjoying as a light and nutritious lunch. The creamy texture and flavorful blend of basil, tomatoes, and other ingredients make this soup a favorite in households around the world.

For the perfect accompaniment to your soup, try pairing it with some of your favorite comfort food classics. Grilled cheese sandwiches are a tasty option for dipping into the soup, as are crusty French bread, croutons, and even garlic bread. For a healthier side and bit of freshness, serve a simple green salad on the side. Grilled vegetables such as zucchini, squash, and bell peppers also make an excellent side dish. Or, for a bit of extra flavor, try serving focaccia bread with your creamy basil tomato soup.

No matter which accompaniments you choose, you’ll be sure to enjoy this creamy basil tomato soup. With a few simple ingredients and a few minutes of preparation, this classic comfort food is the perfect meal for any occasion.

Other great soup recipes

Mom's Minestrone Soup and Italian Sausage, Potato & Kale Soup are great options for a cold winter day, but for something a bit lighter and more refreshing, Creamy Basil Tomato Soup is a delicious choice. This creamy soup has a hint of basil that adds a hint of complexity to the flavor. The creamy tomato base is combined with garlic, herbs, and a variety of delicious vegetables to make a hearty soup that is both comforting and surprisingly satisfying. The basil adds a unique flavor to the soup that will have you coming back for more. Whether you are looking for a light lunch or a hearty dinner, Creamy Basil Tomato Soup is a great option for any meal.