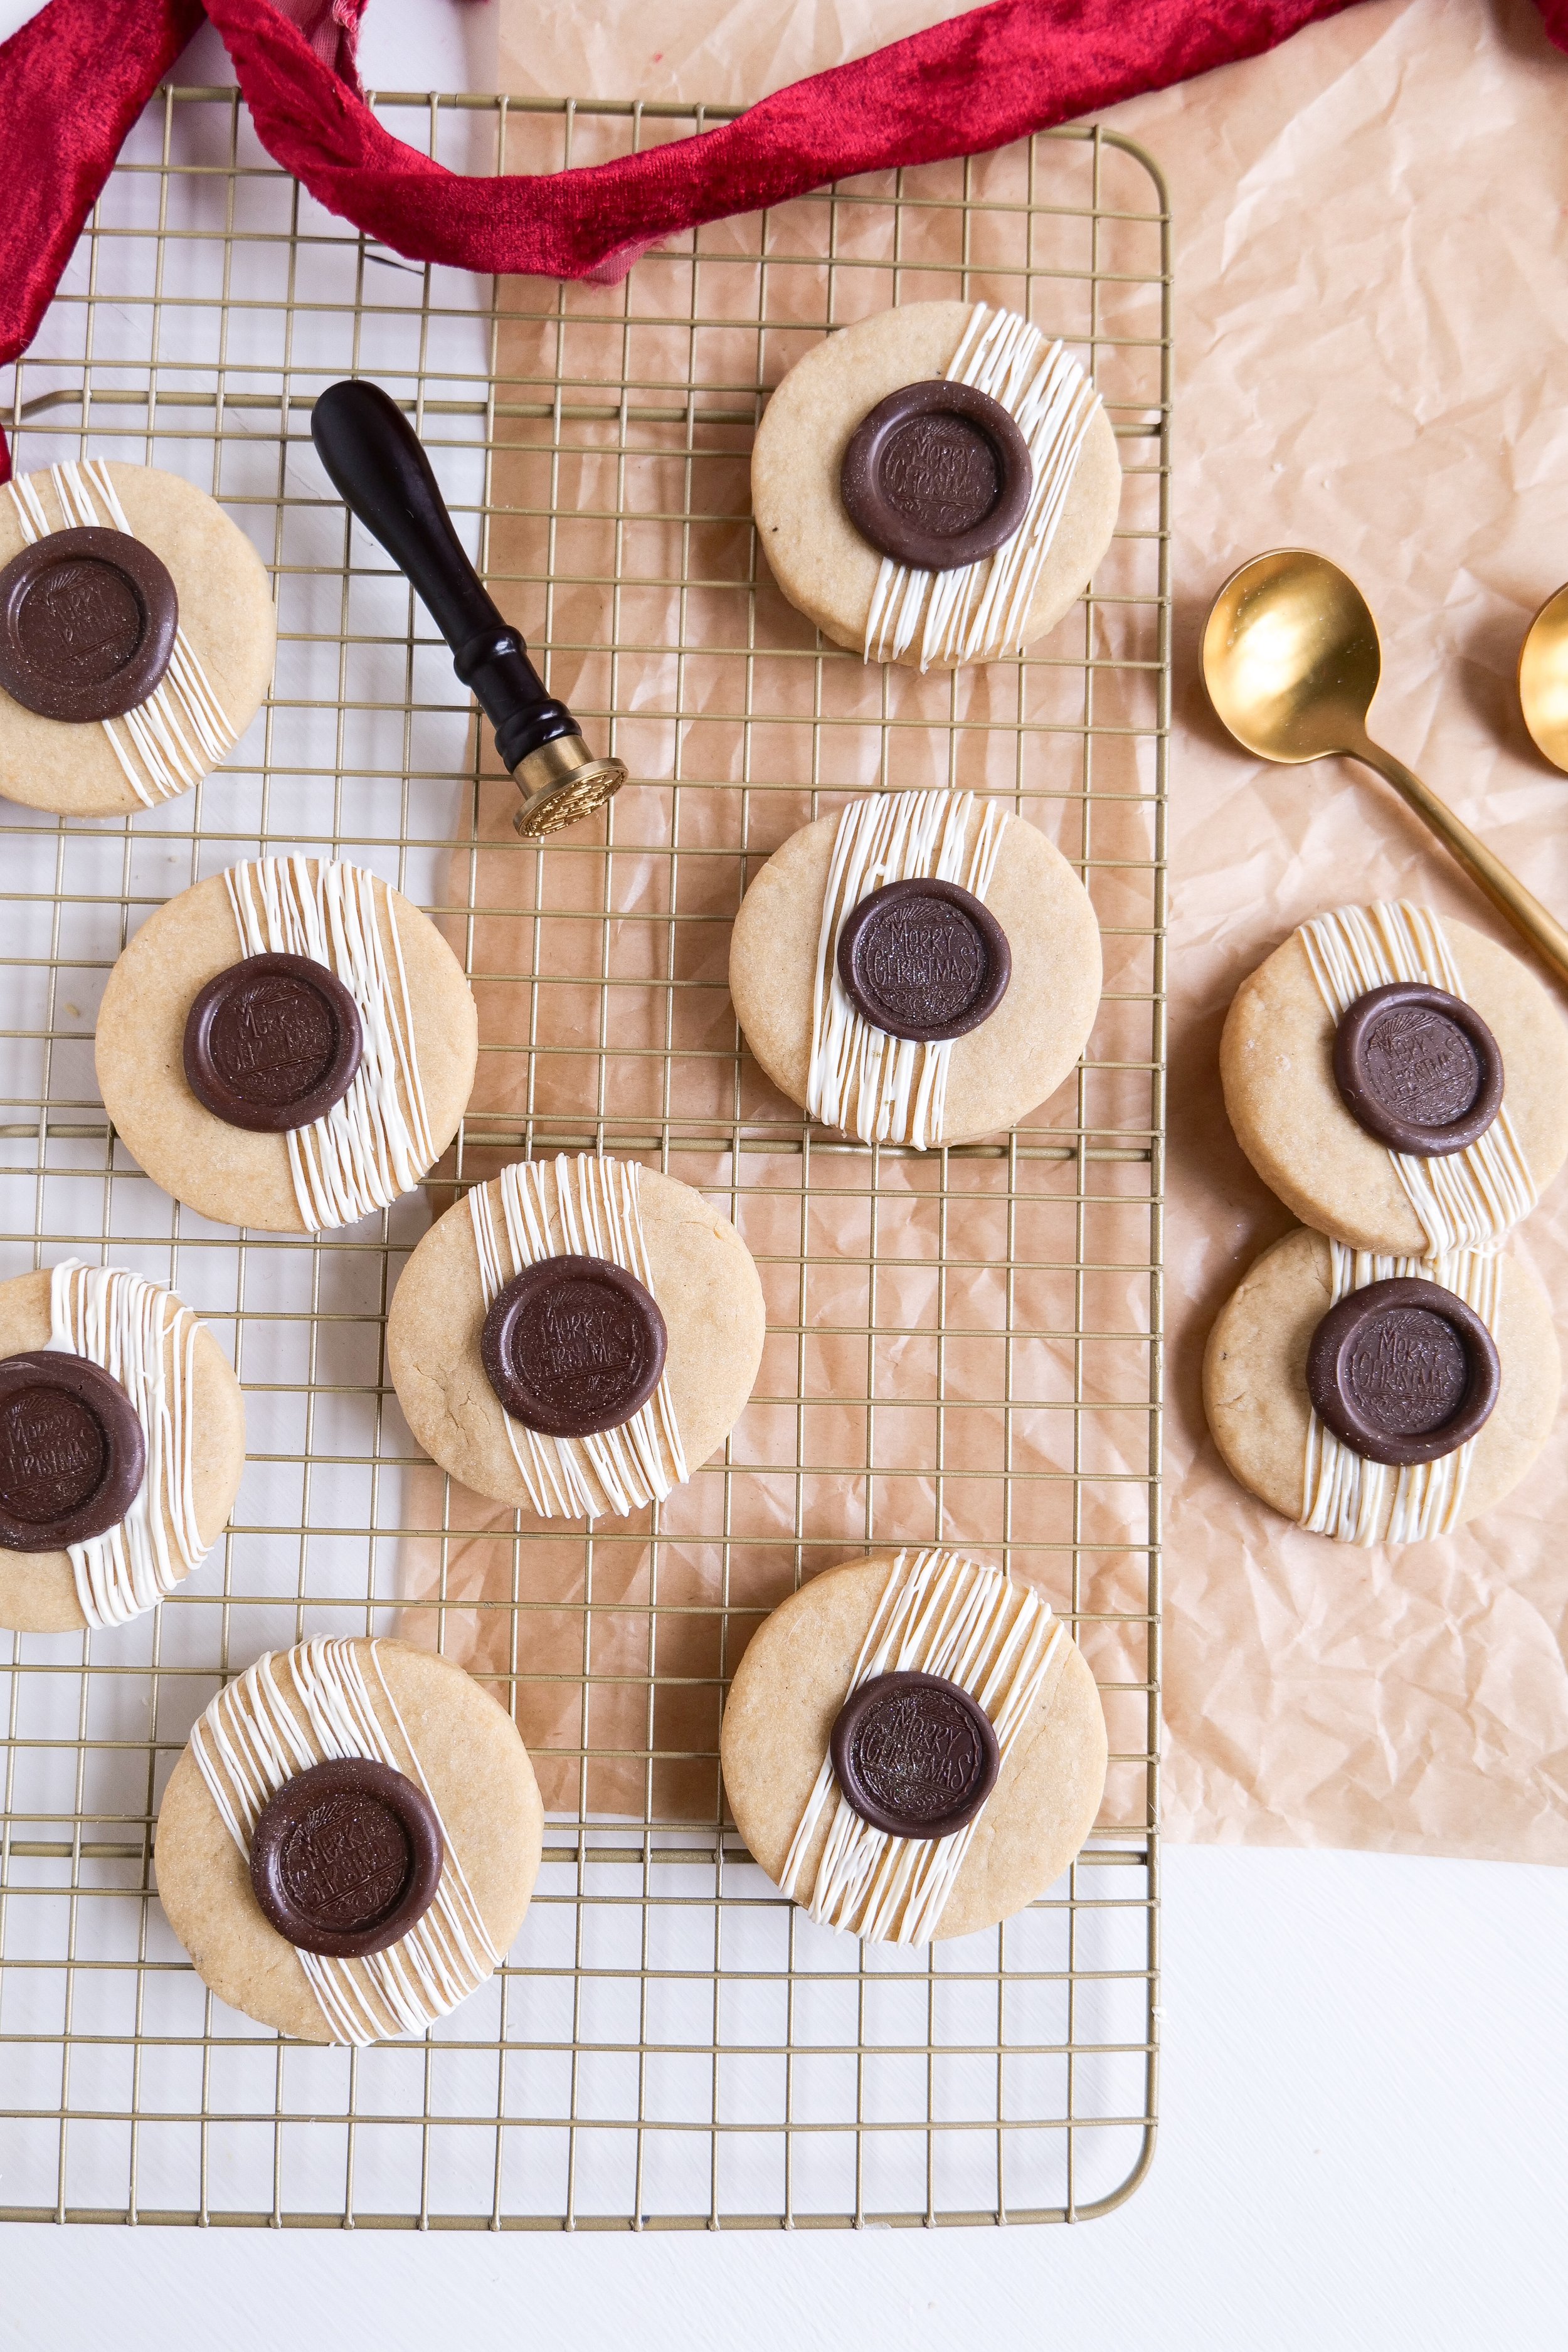
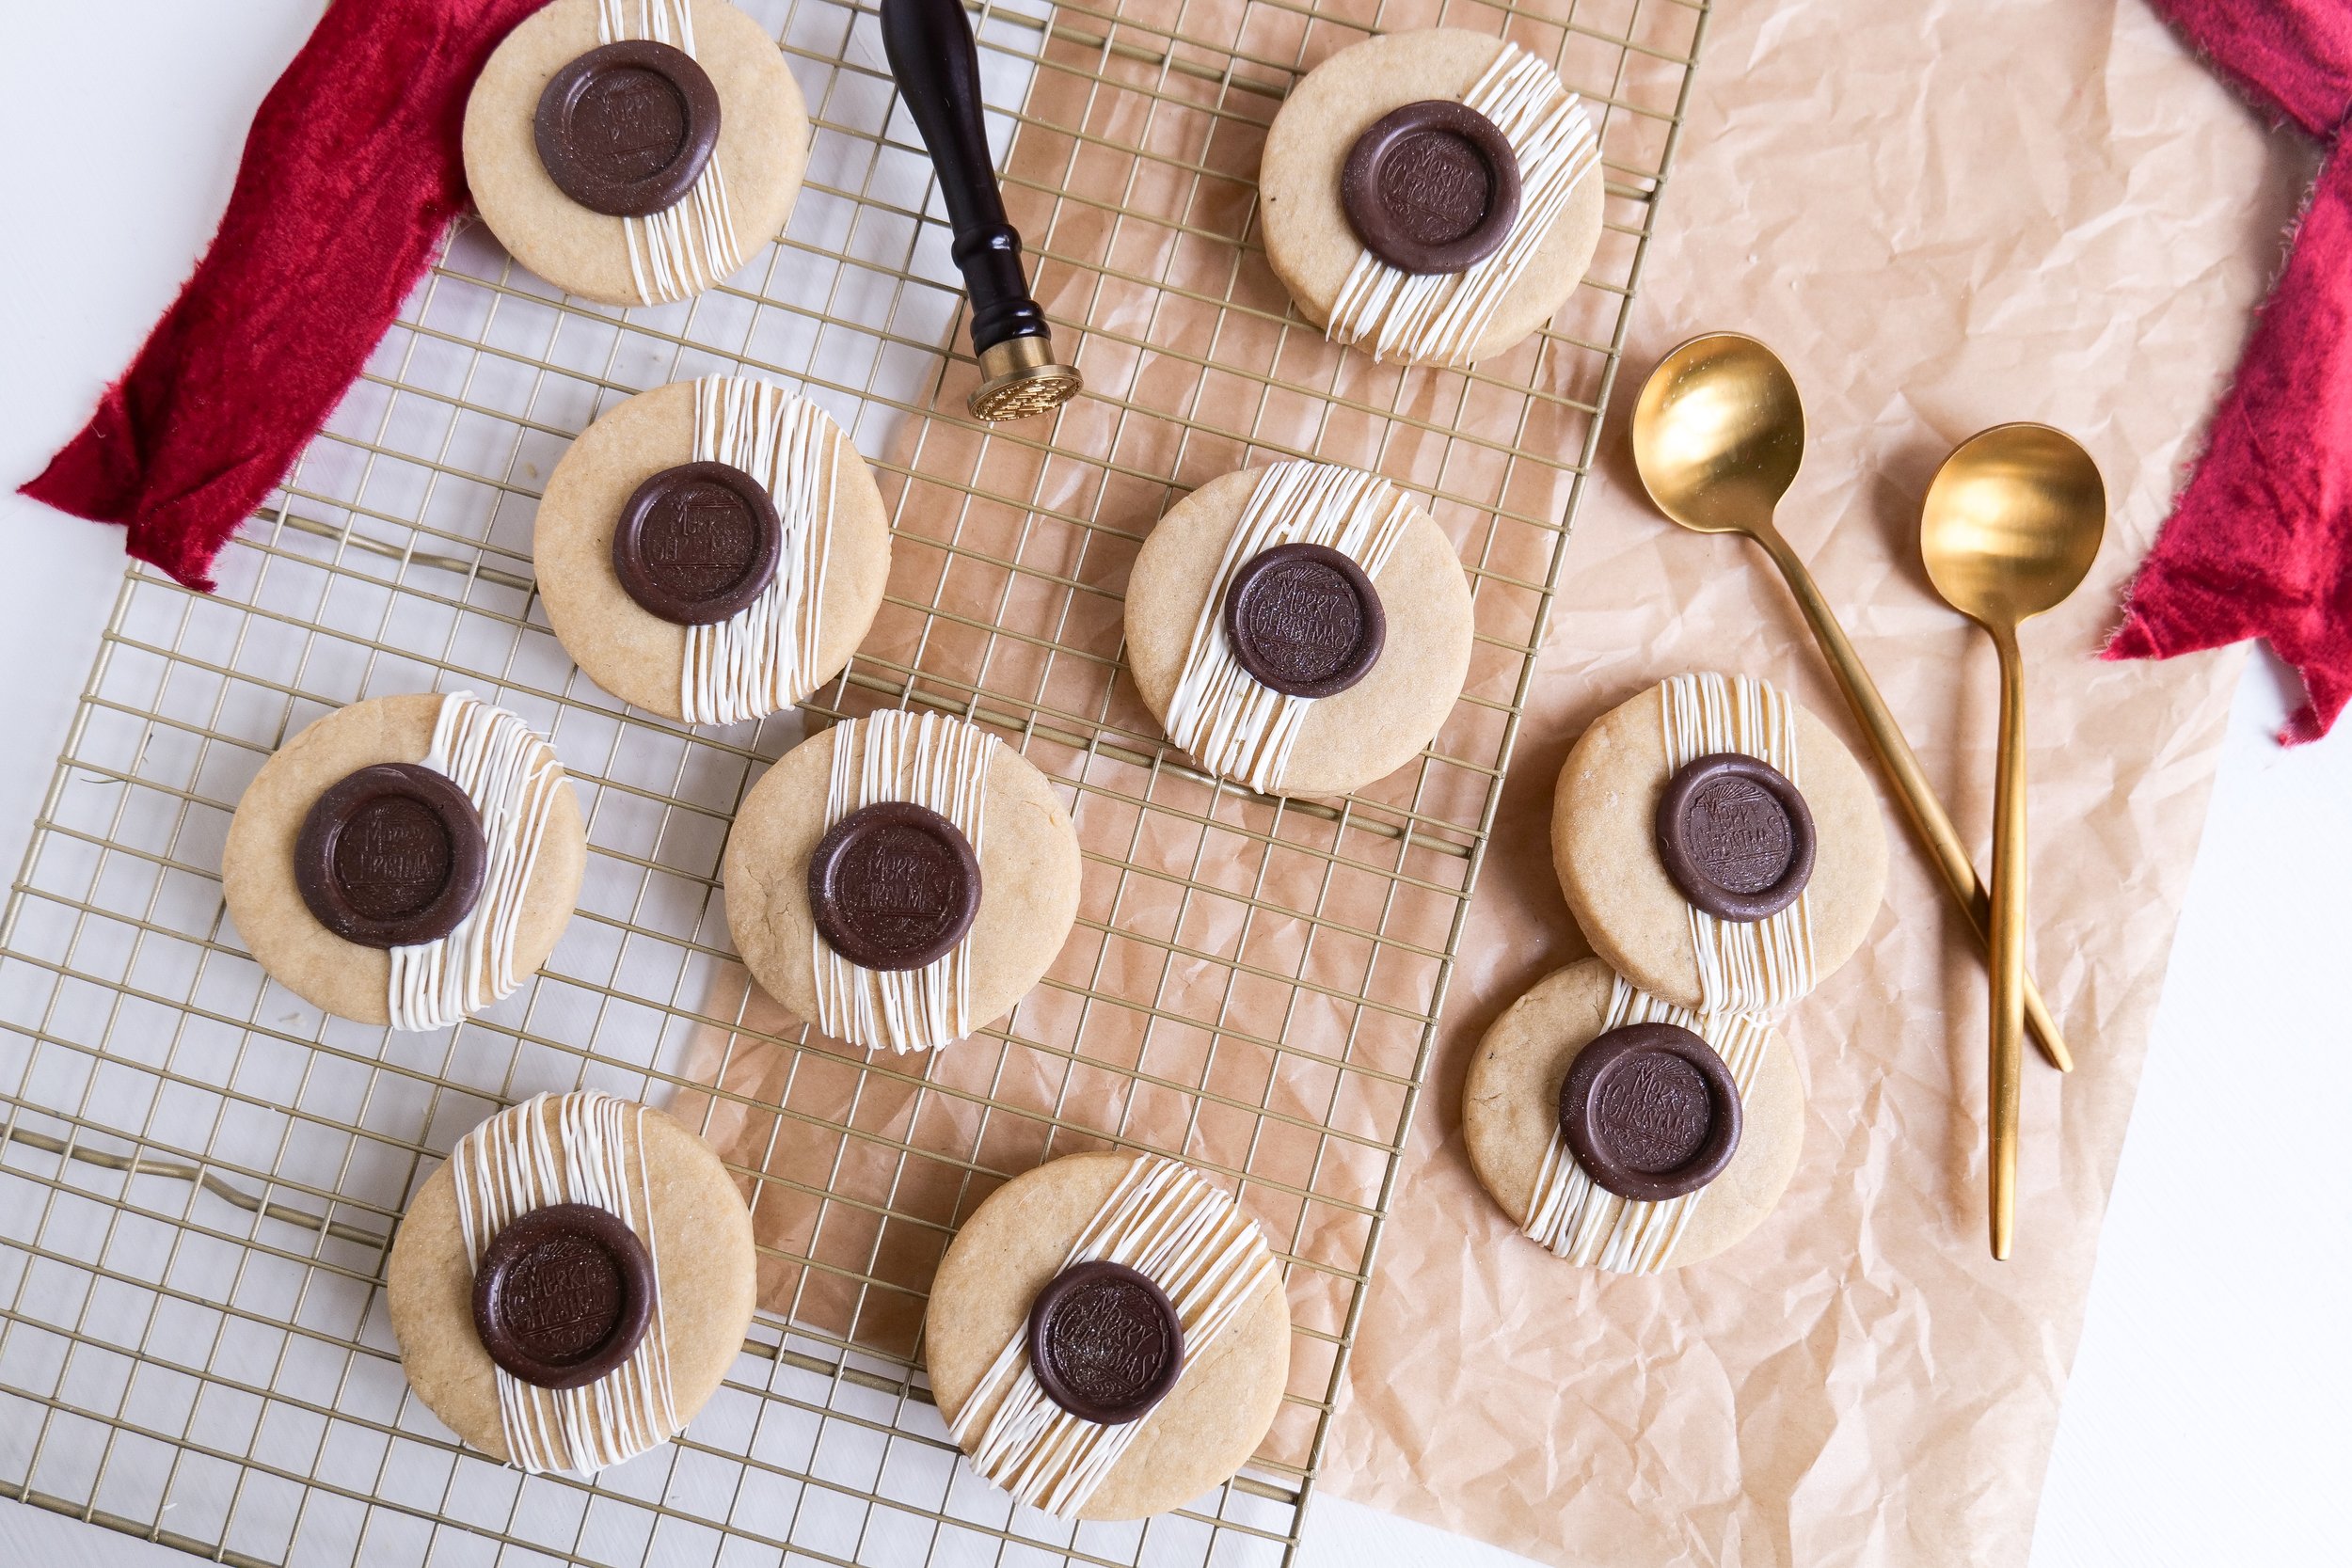
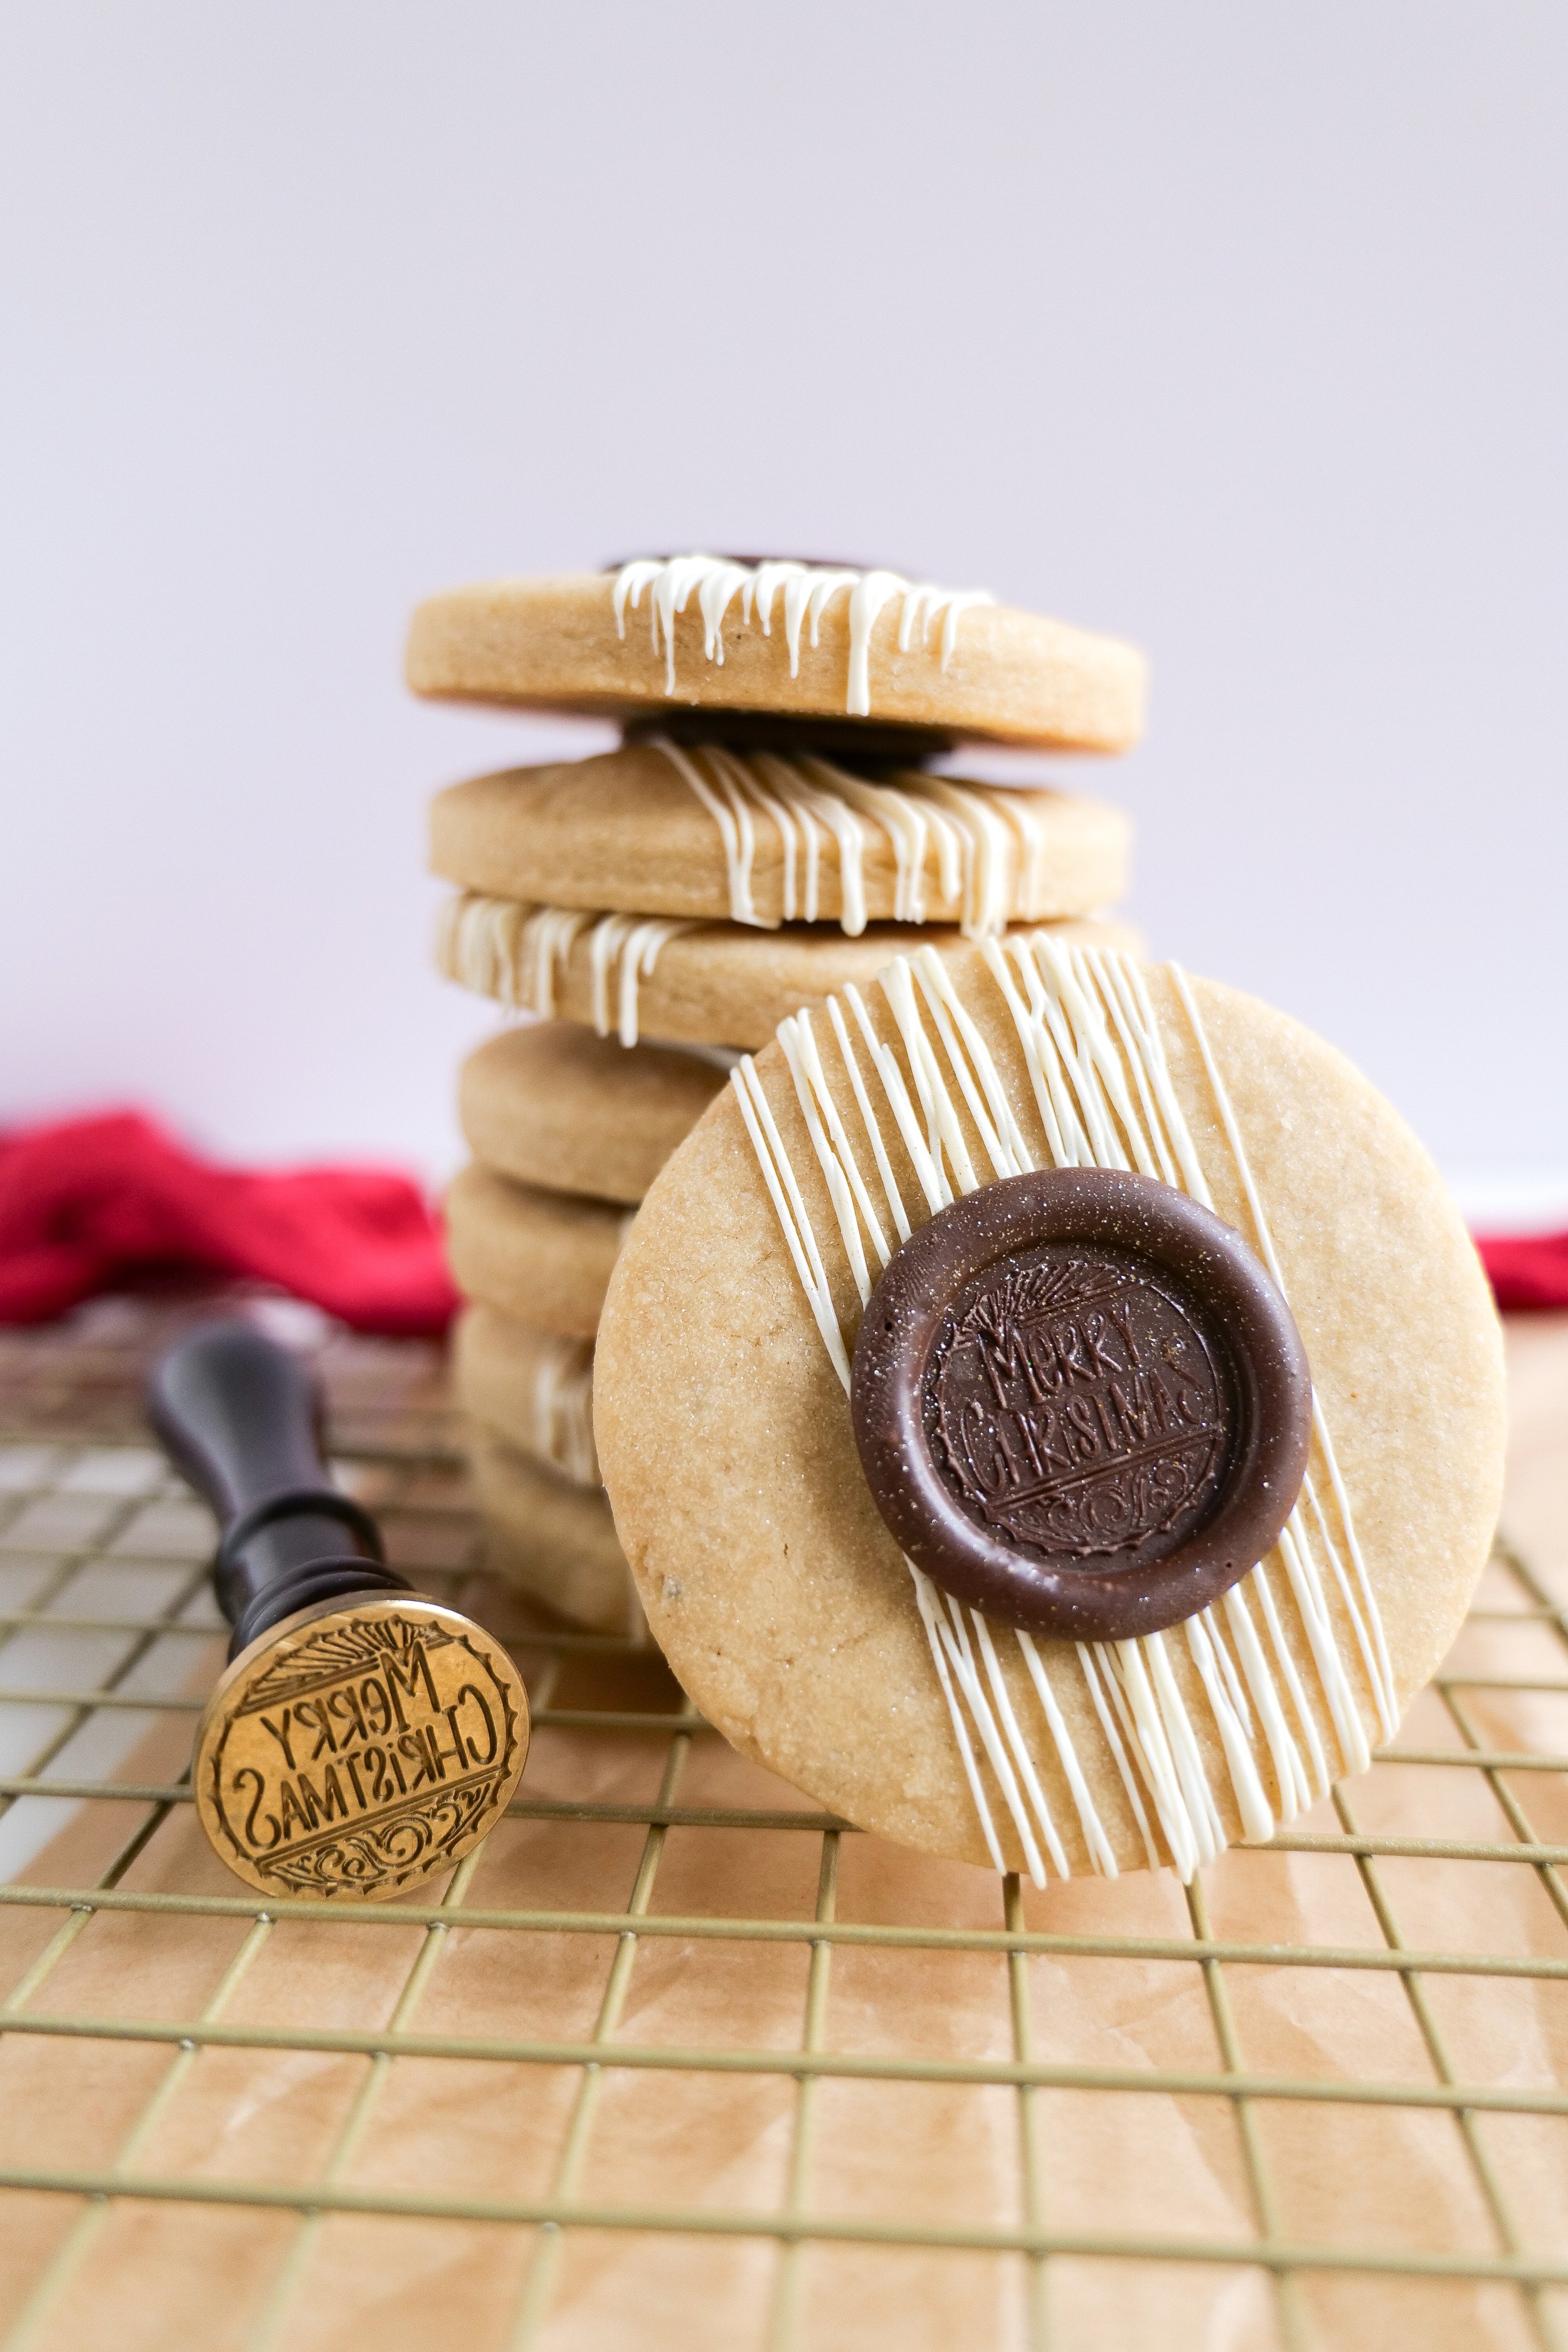
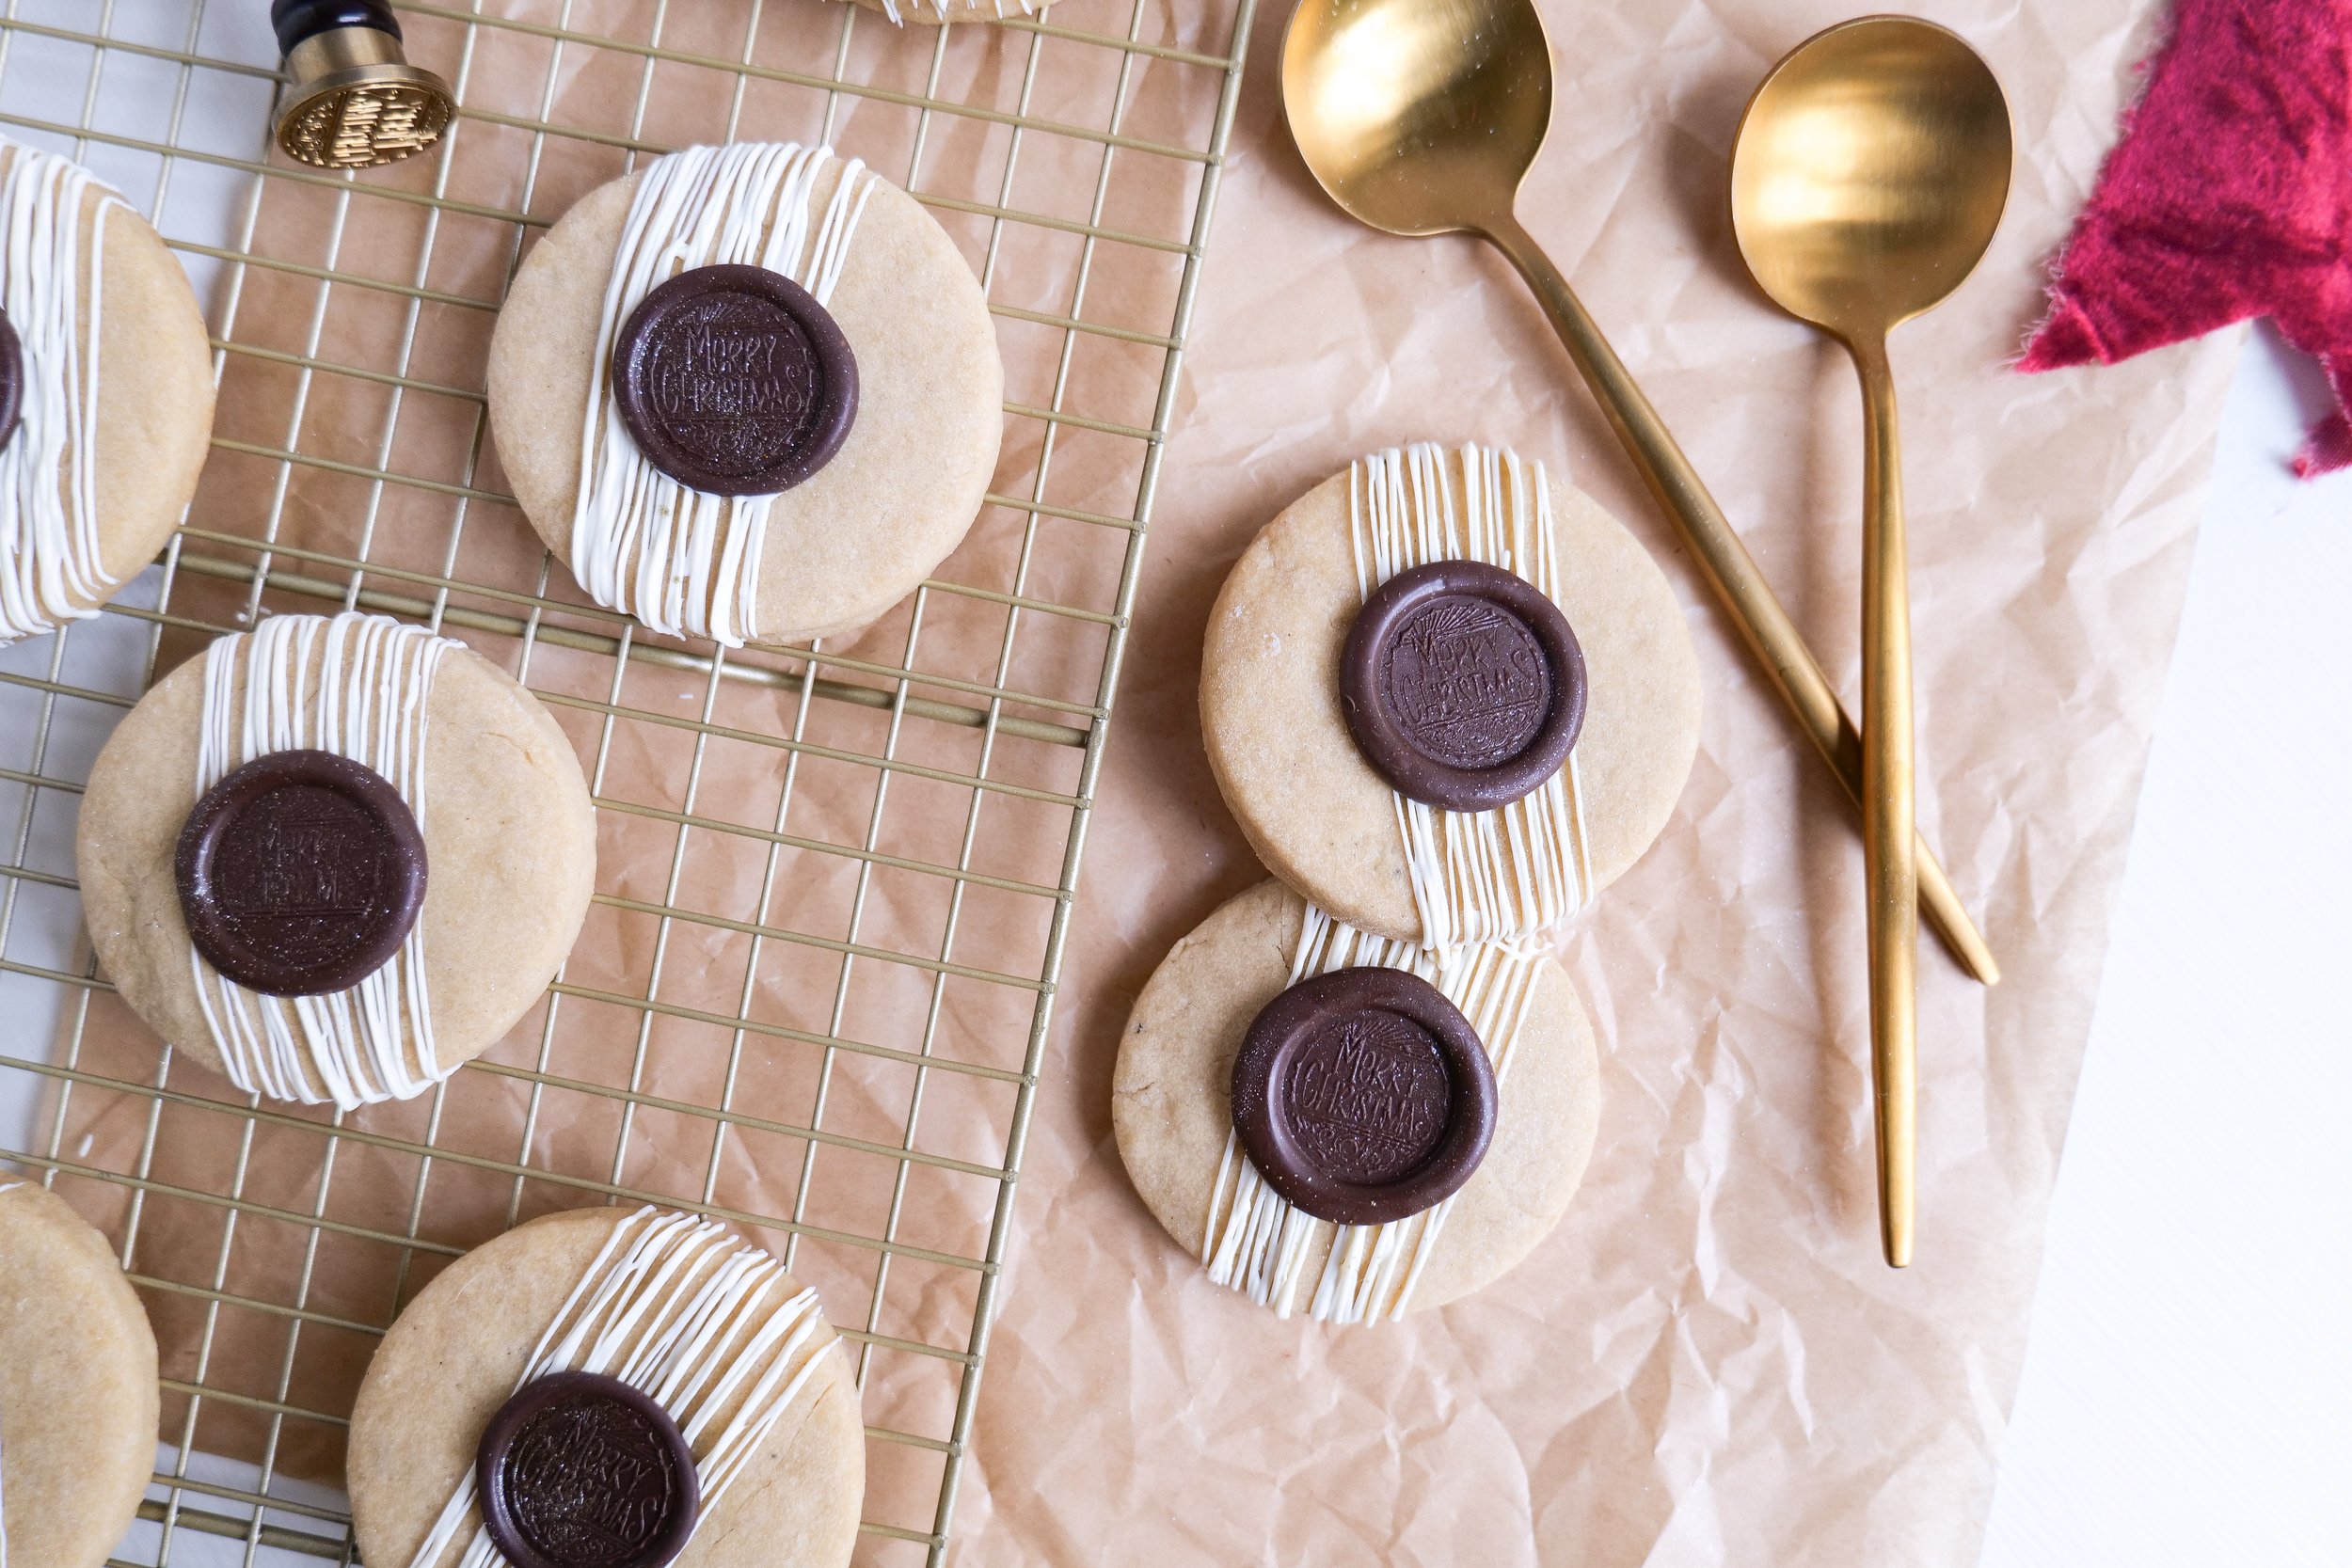
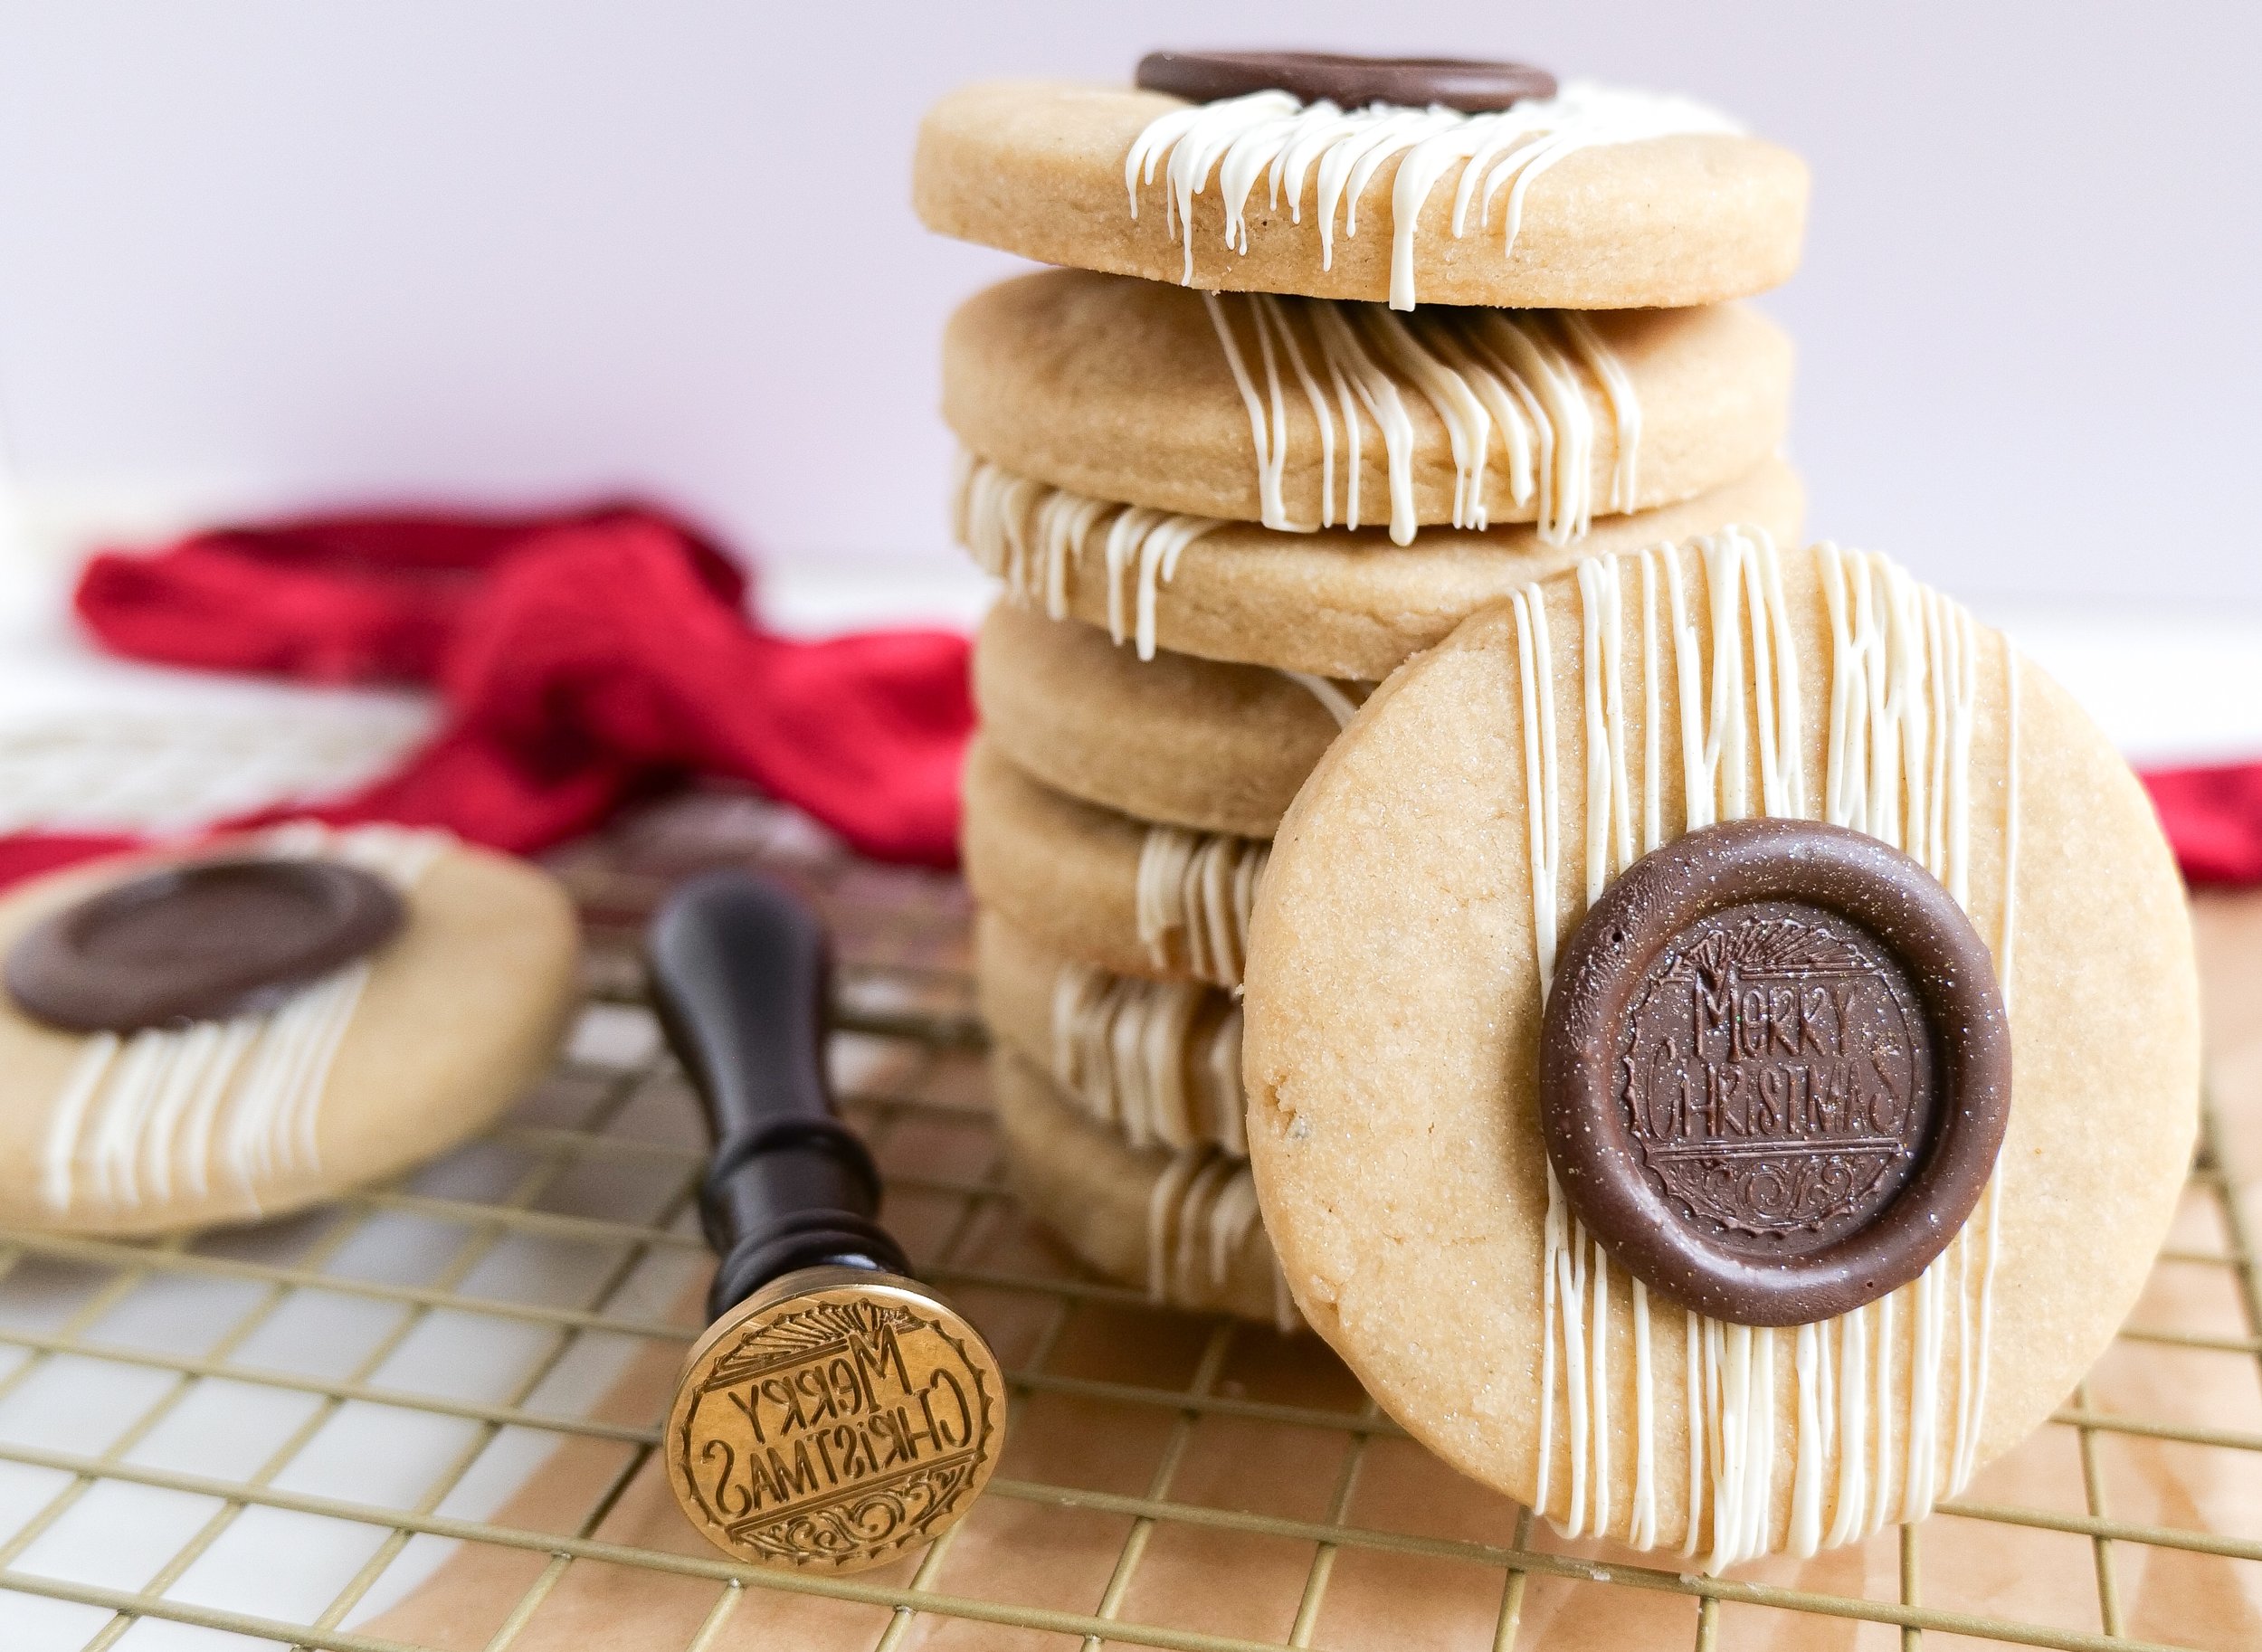
Decadent Brown Butter Shortbread Cookies with a Chocolate 'Wax' Seal – A Vintage Twist on a Classic Treat!
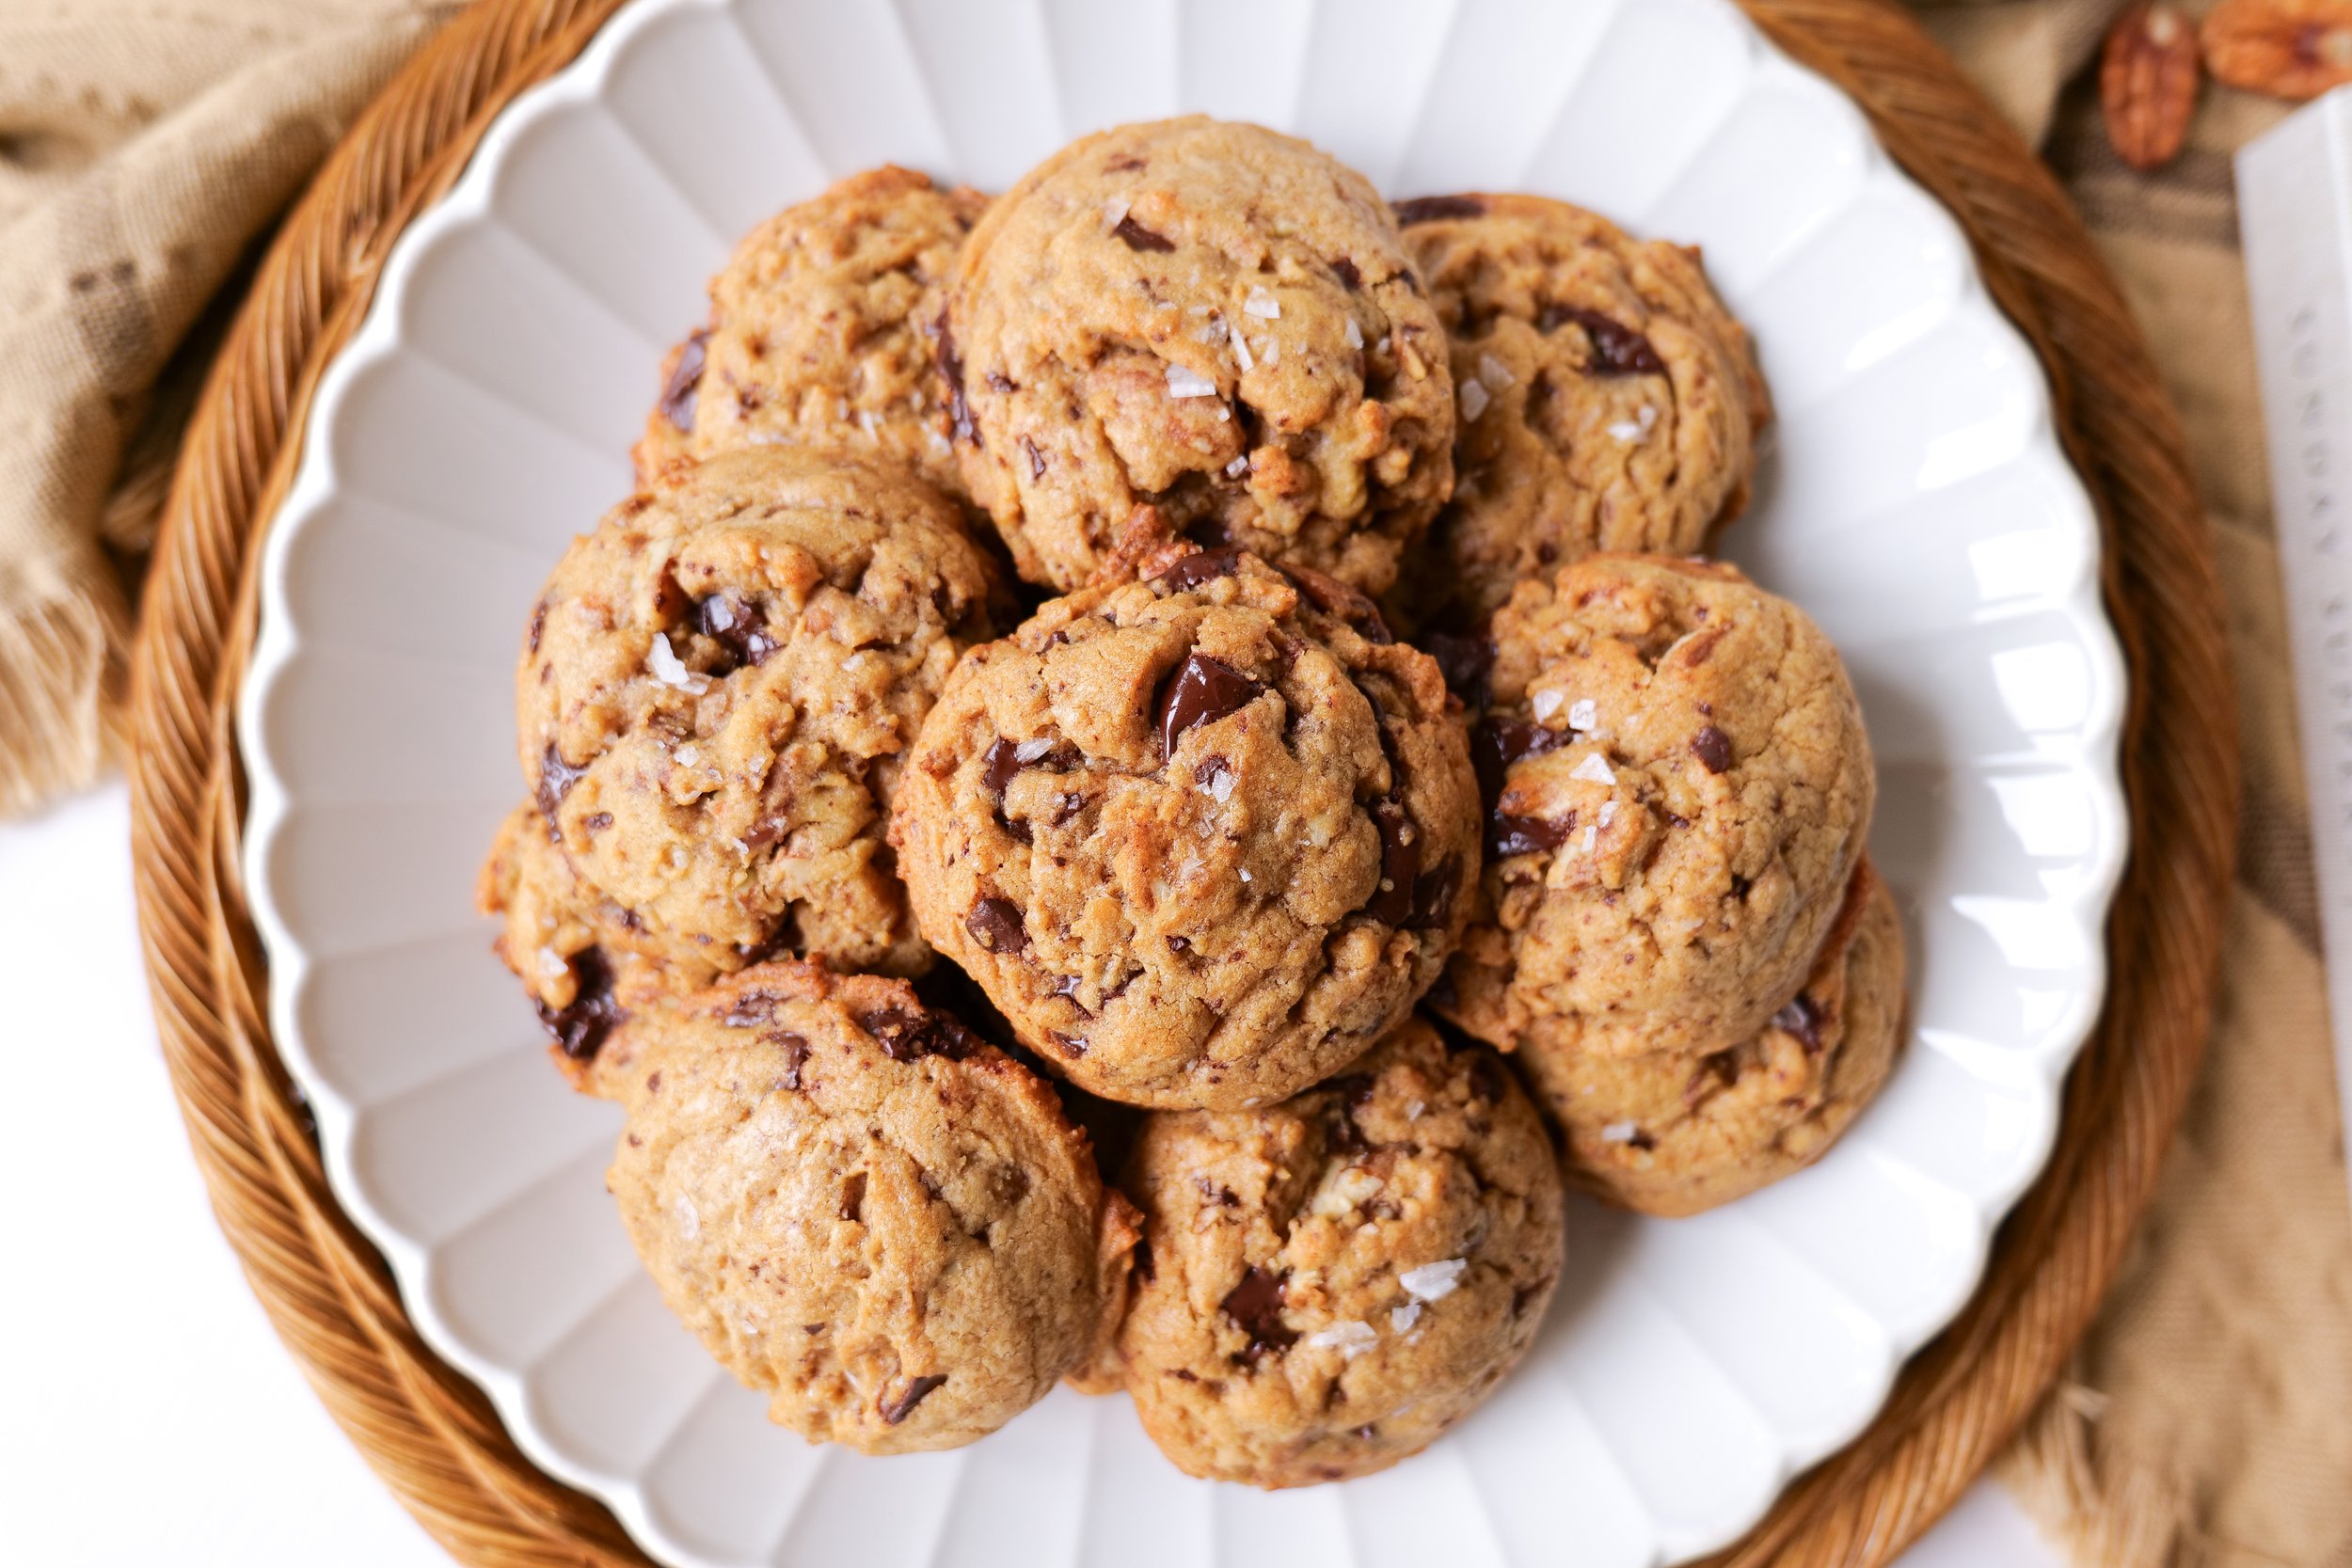
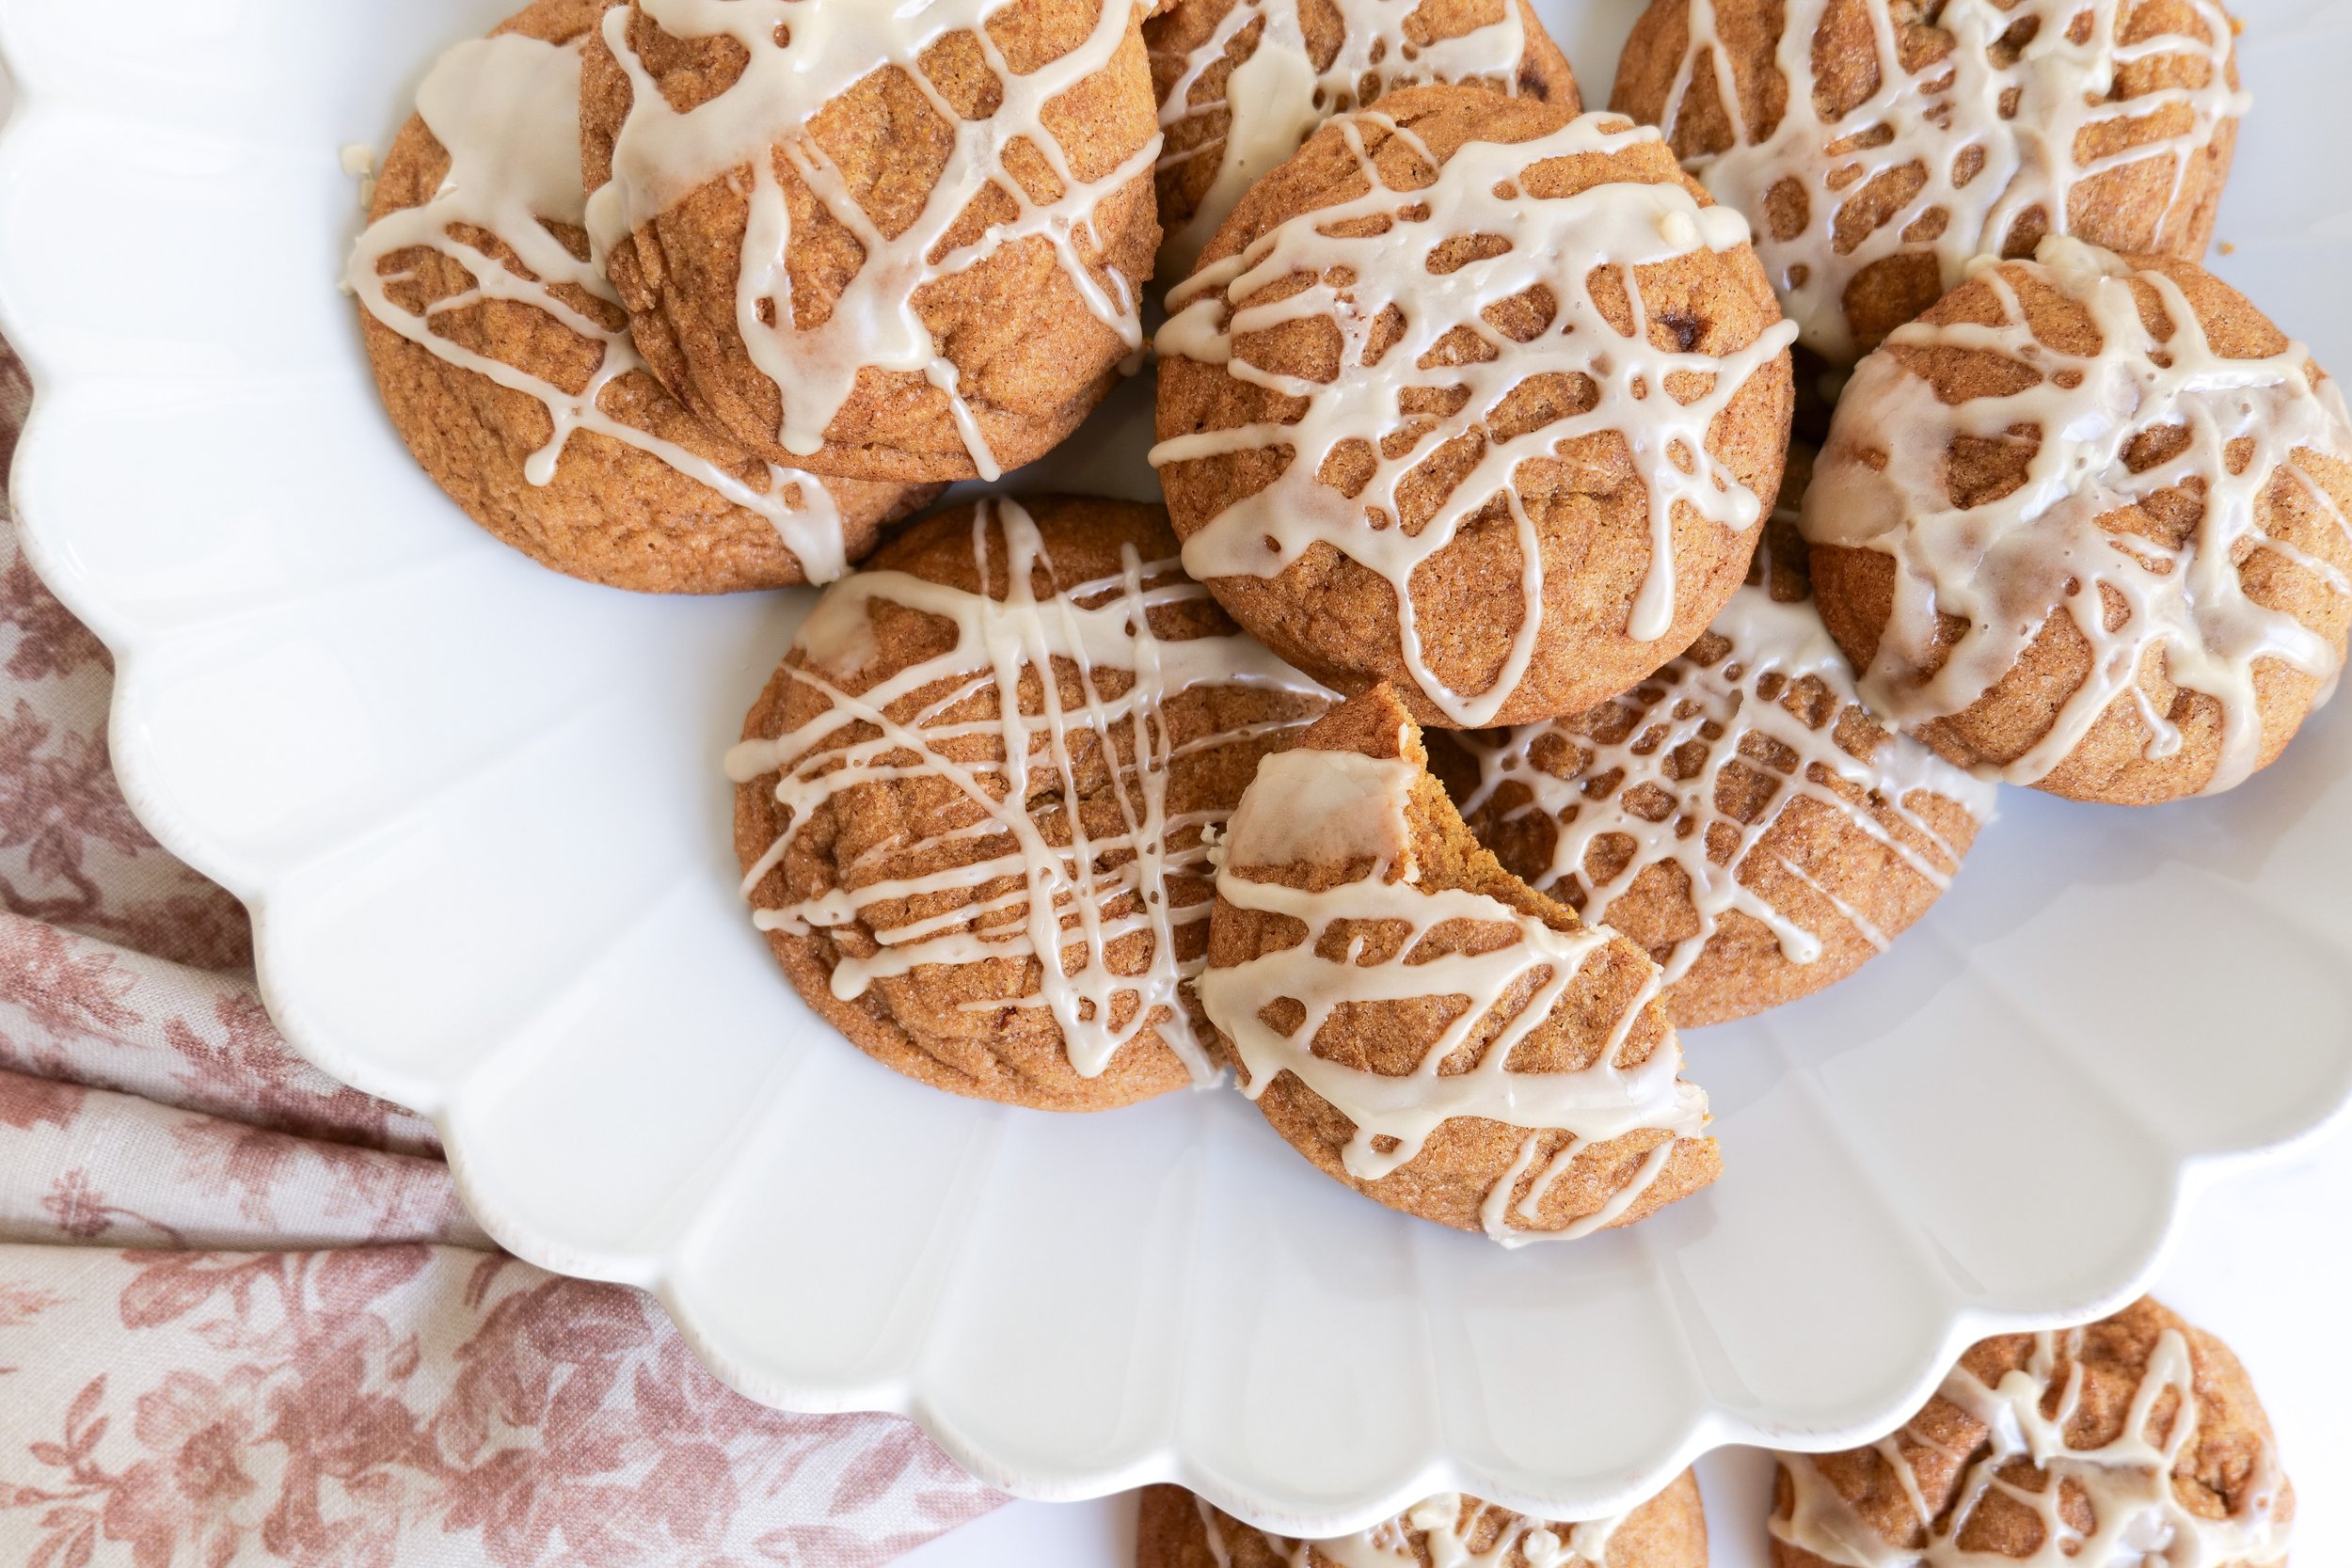
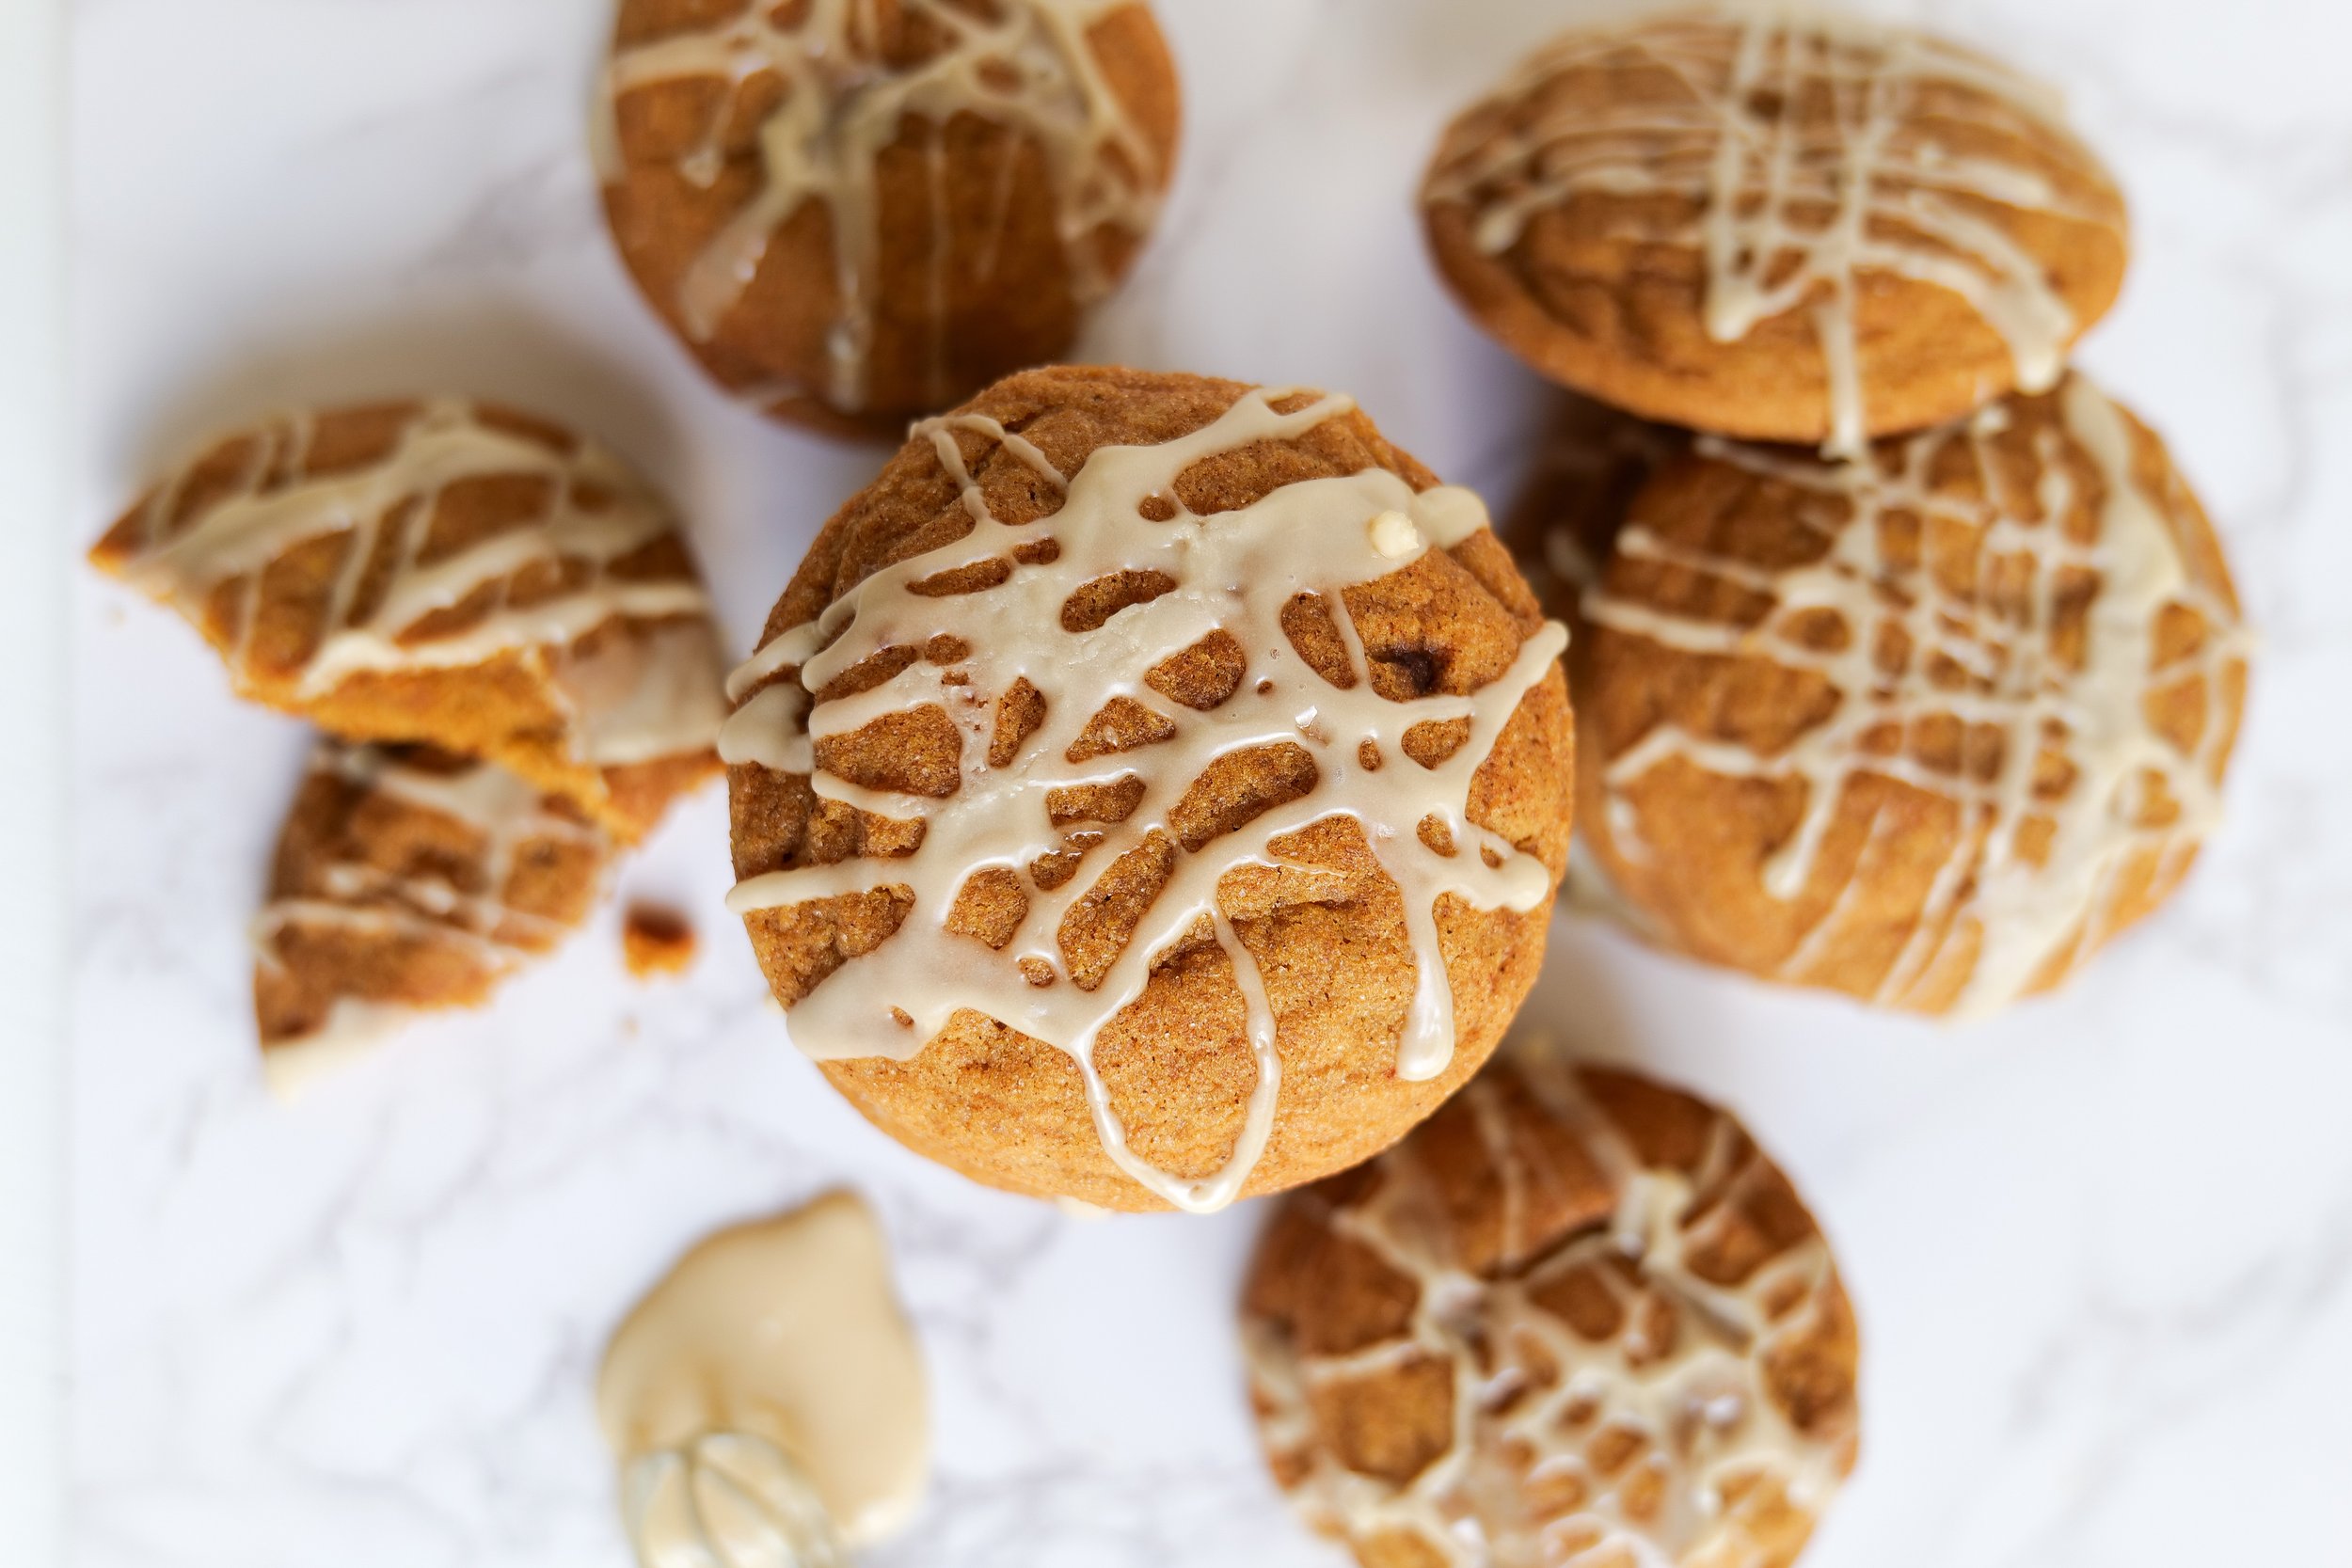
Imagine the irresistible aroma of butter melting slowly into a golden, nutty essence, filling your kitchen with a delicious smell and warmth that promises something truly special. This is the beginning of our journey to creating the ultimate brown butter shortbread cookies—a classic treat reinvented with a sophisticated twist. Each cookie, a masterpiece of simplicity, is made with care, transforming traditional shortbread into a decadent experience with its rich depth of flavor. To elevate this delight to a realm of elegance, we'll crown every cookie with a chocolate "wax" seal, reminiscent of an age when such a seal was a mark of distinction and quality. This whimsical touch not only adds visual intrigue but infuses each bite with a smooth chocolate finish. So, preheat your ovens and ready your parchment paper as we embark on a culinary adventure to bake these irresistible brown butter shortbread cookies. They are a perfect blend of nostalgia and modern flair.

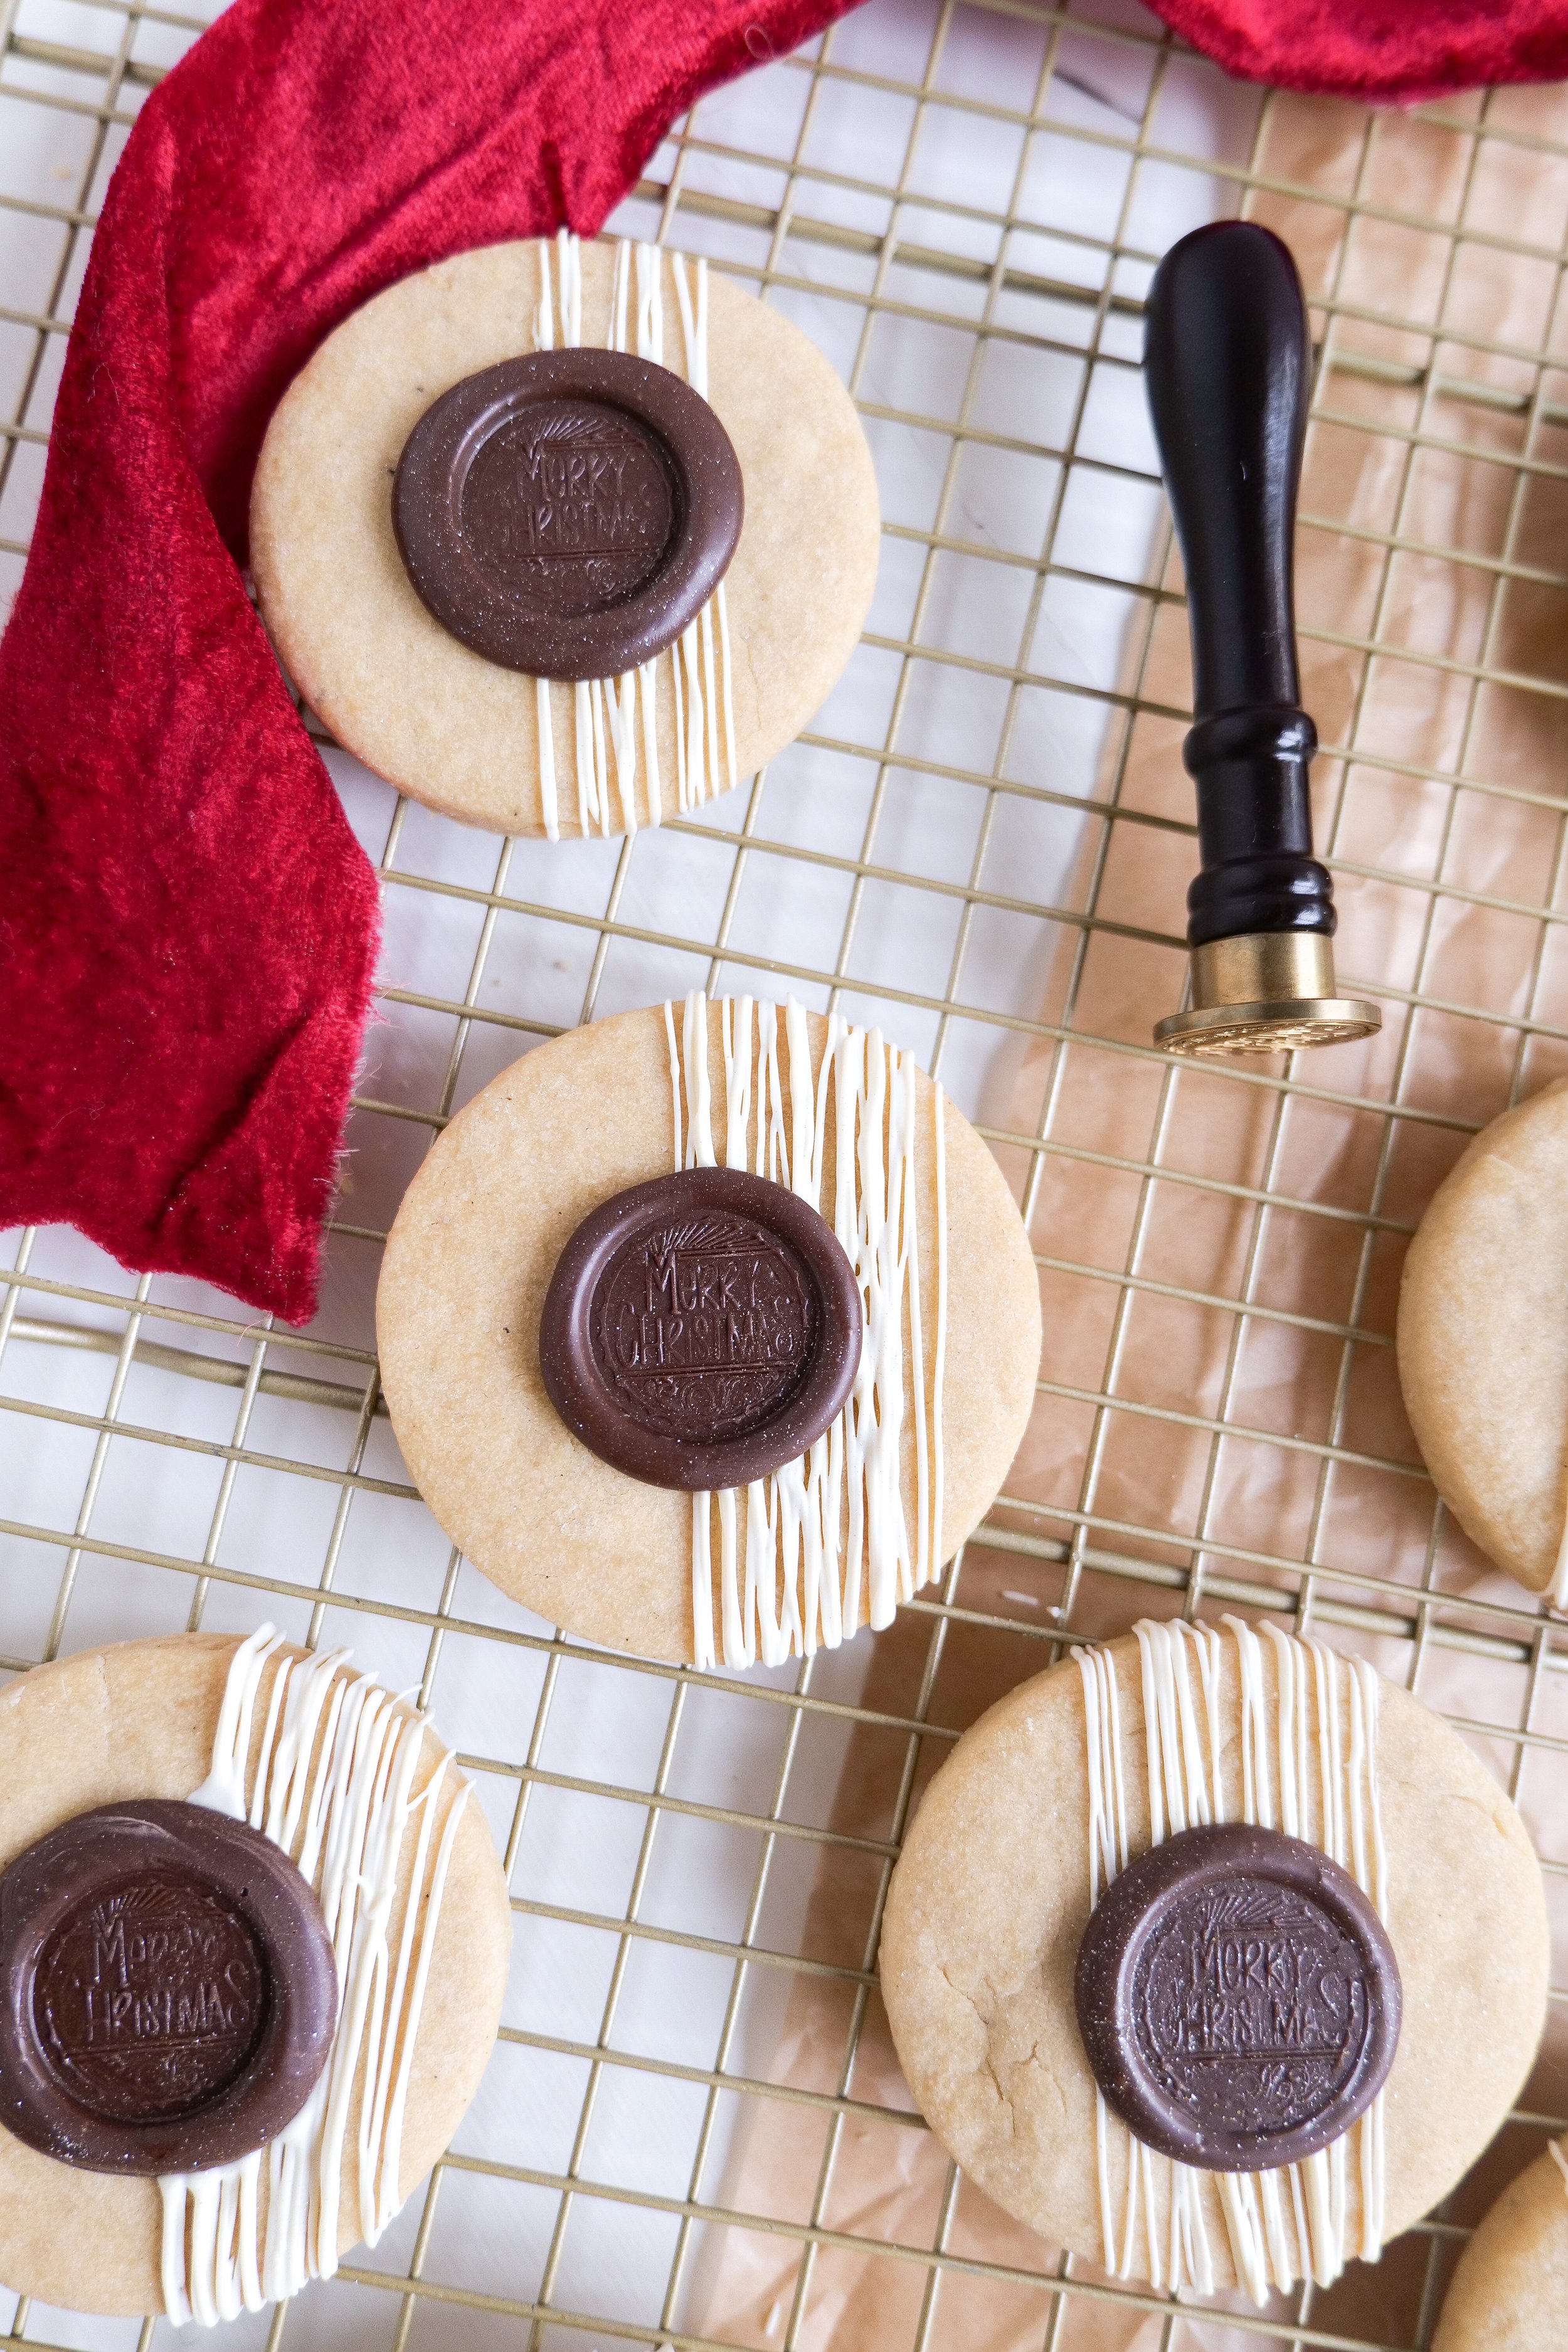
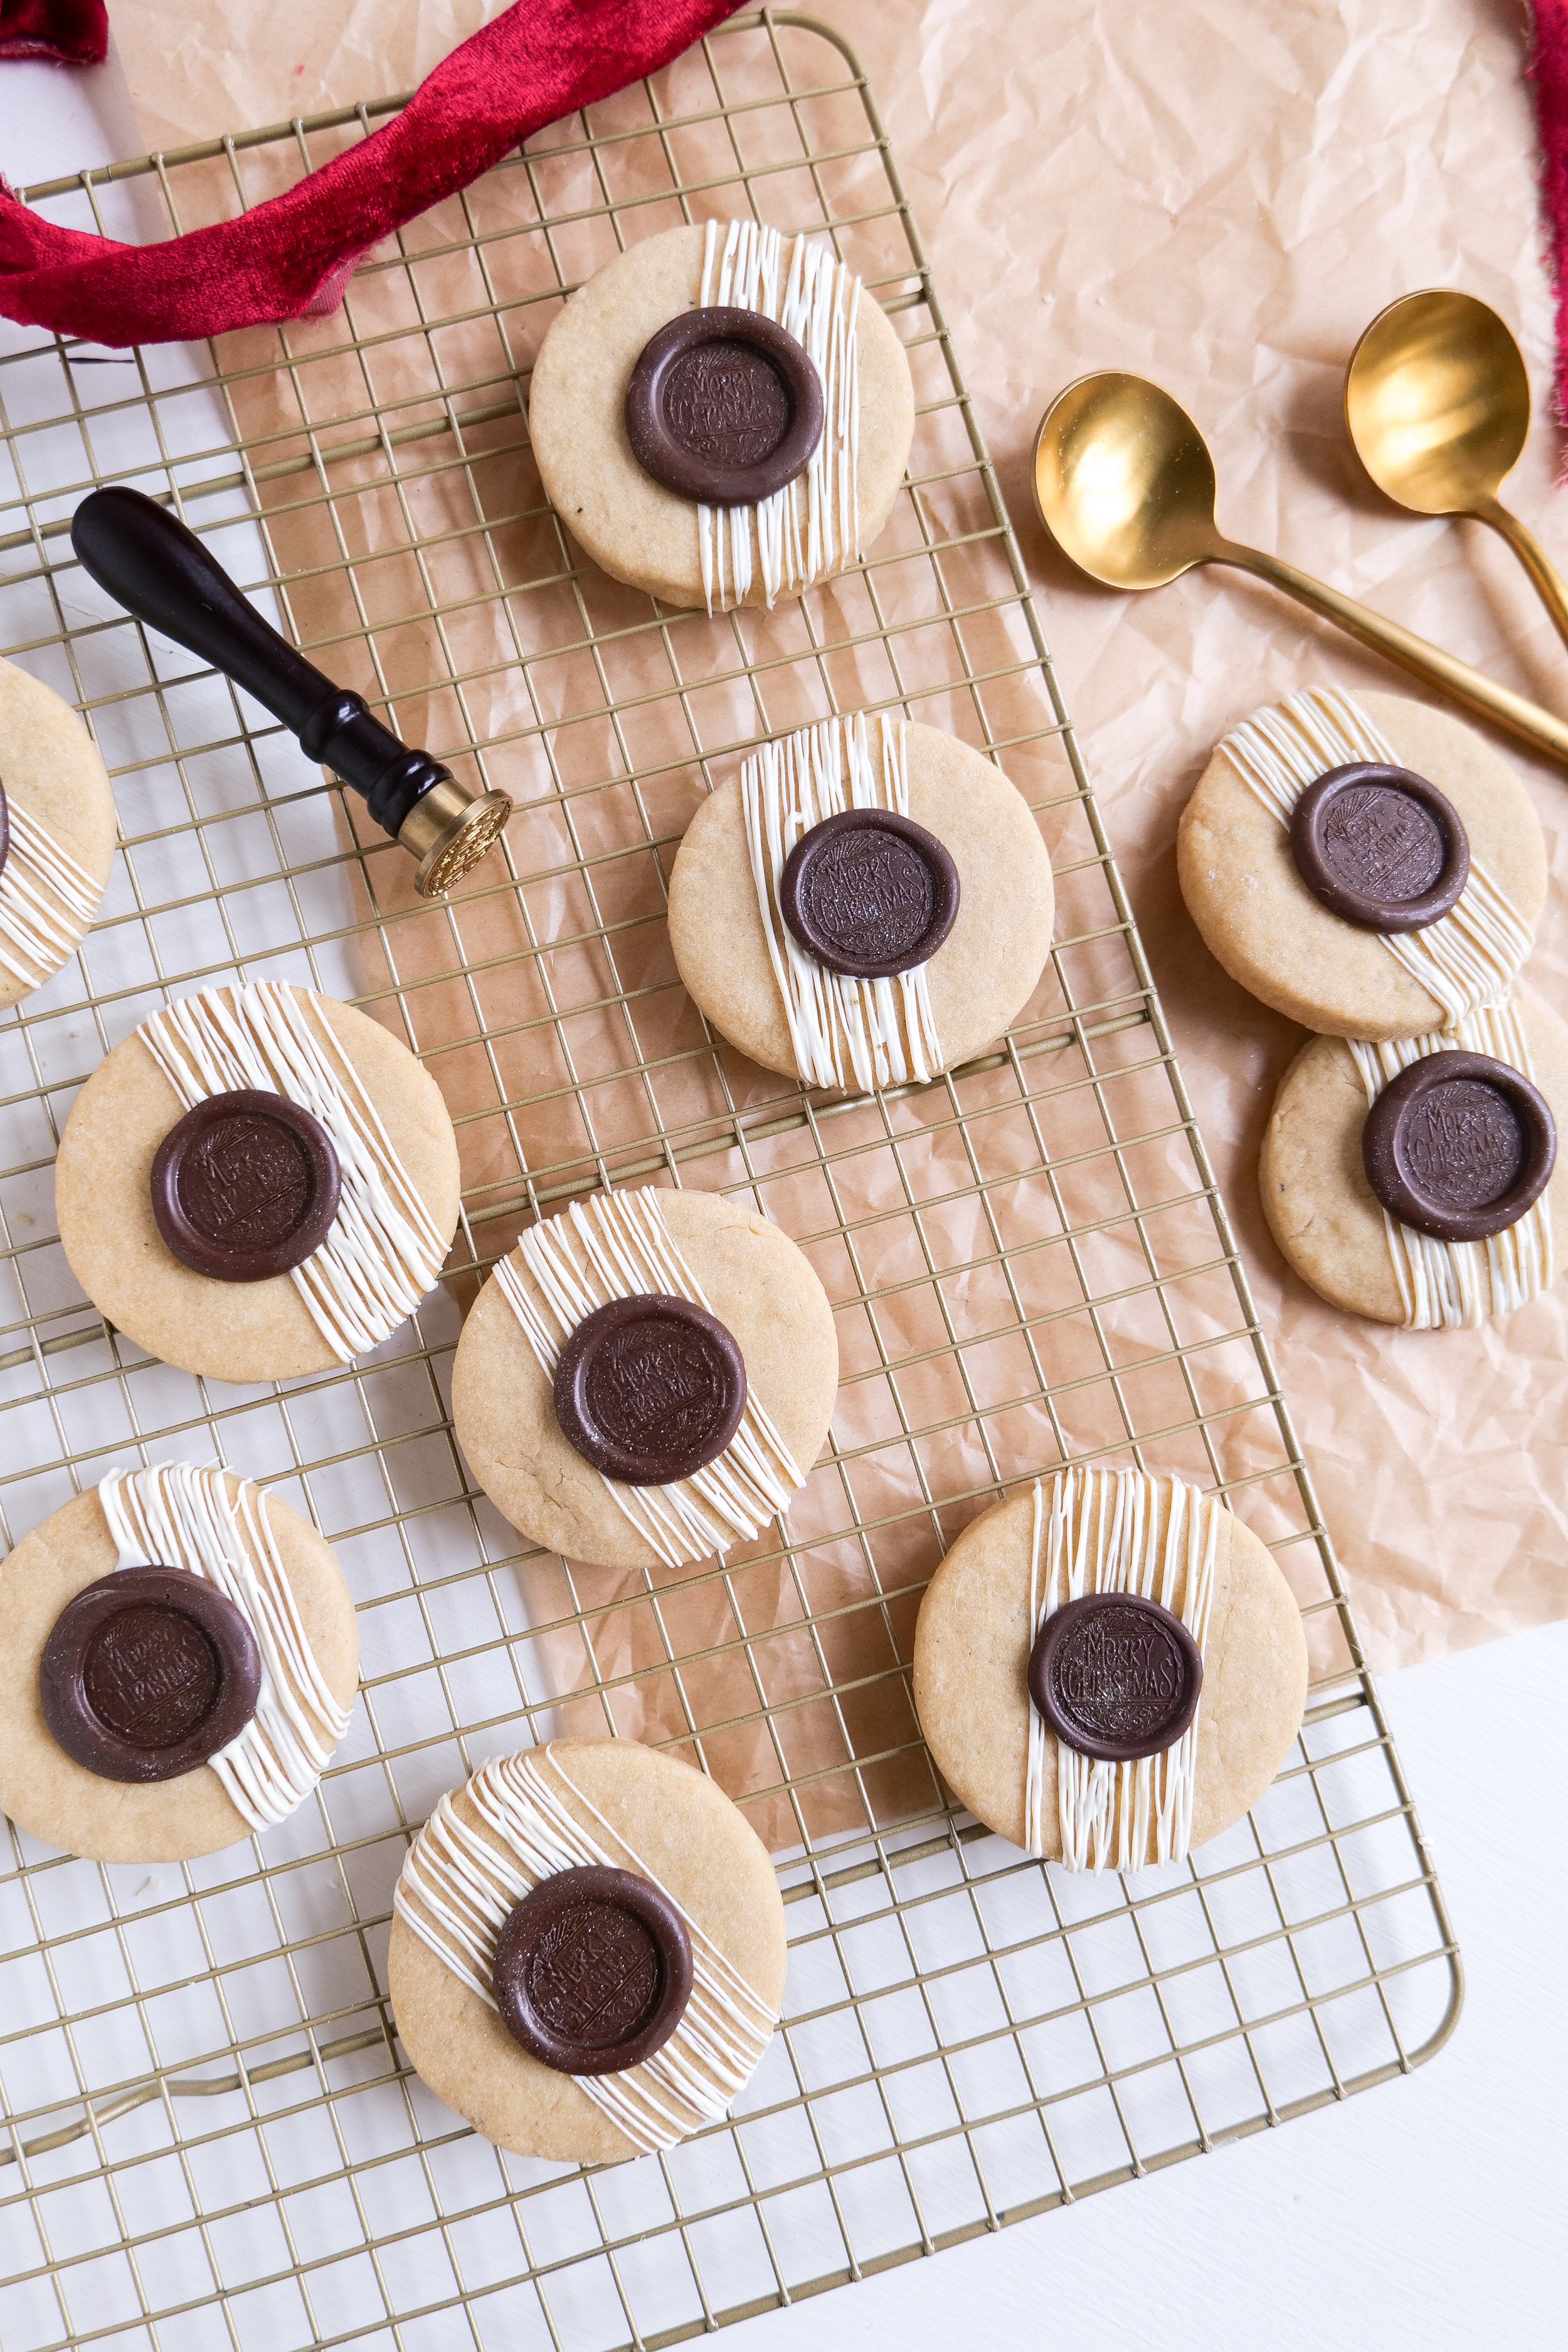
The best part about this recipe is that it is so easy to make with just a few simple ingredients. Not only that, but you can easily customize the chocolate topping with many other alternatives, such as white, milk, or colored chocolate to match the occasion. Also, the wax seal can say anything you'd like for different holidays, occasions and celebrations. With the right balance of sweet and salty, you can enjoy this delicious treat in a simple way. So impress your guests at your next party with these delightful cookies or package them as a sweet gift during the different holiday seasons.

What is the best type of chocolate to use for the "wax" seal?

Brown butter shortbread cookies are a delicious treat that can be made with ease and look great as a presentation. To add a unique touch to the cookie, we are adding a customized “wax” seal made of melted chocolate. When choosing the type of chocolate to use for the seal, it is important to choose one that will not overpower the flavor of the shortbread cookie. Dark chocolate is the best type of chocolate to use for the “wax” seal because it has a richer flavor and is less sweet. It will provide a nice contrast of flavors and a fresh look to the shortbread cookie. Semi-sweet chocolate chips also work well but are slightly sweeter than dark chocolate. White chocolate has a very sweet flavor and may overpower the flavor of the shortbread cookie however if you are looking for a sweet treat that is also colorful this is the best way to dye your chocolate to match the decor of your party or the holiday you are celebrating.

Can I make the dough for these brown butter shortbread cookies ahead of time?

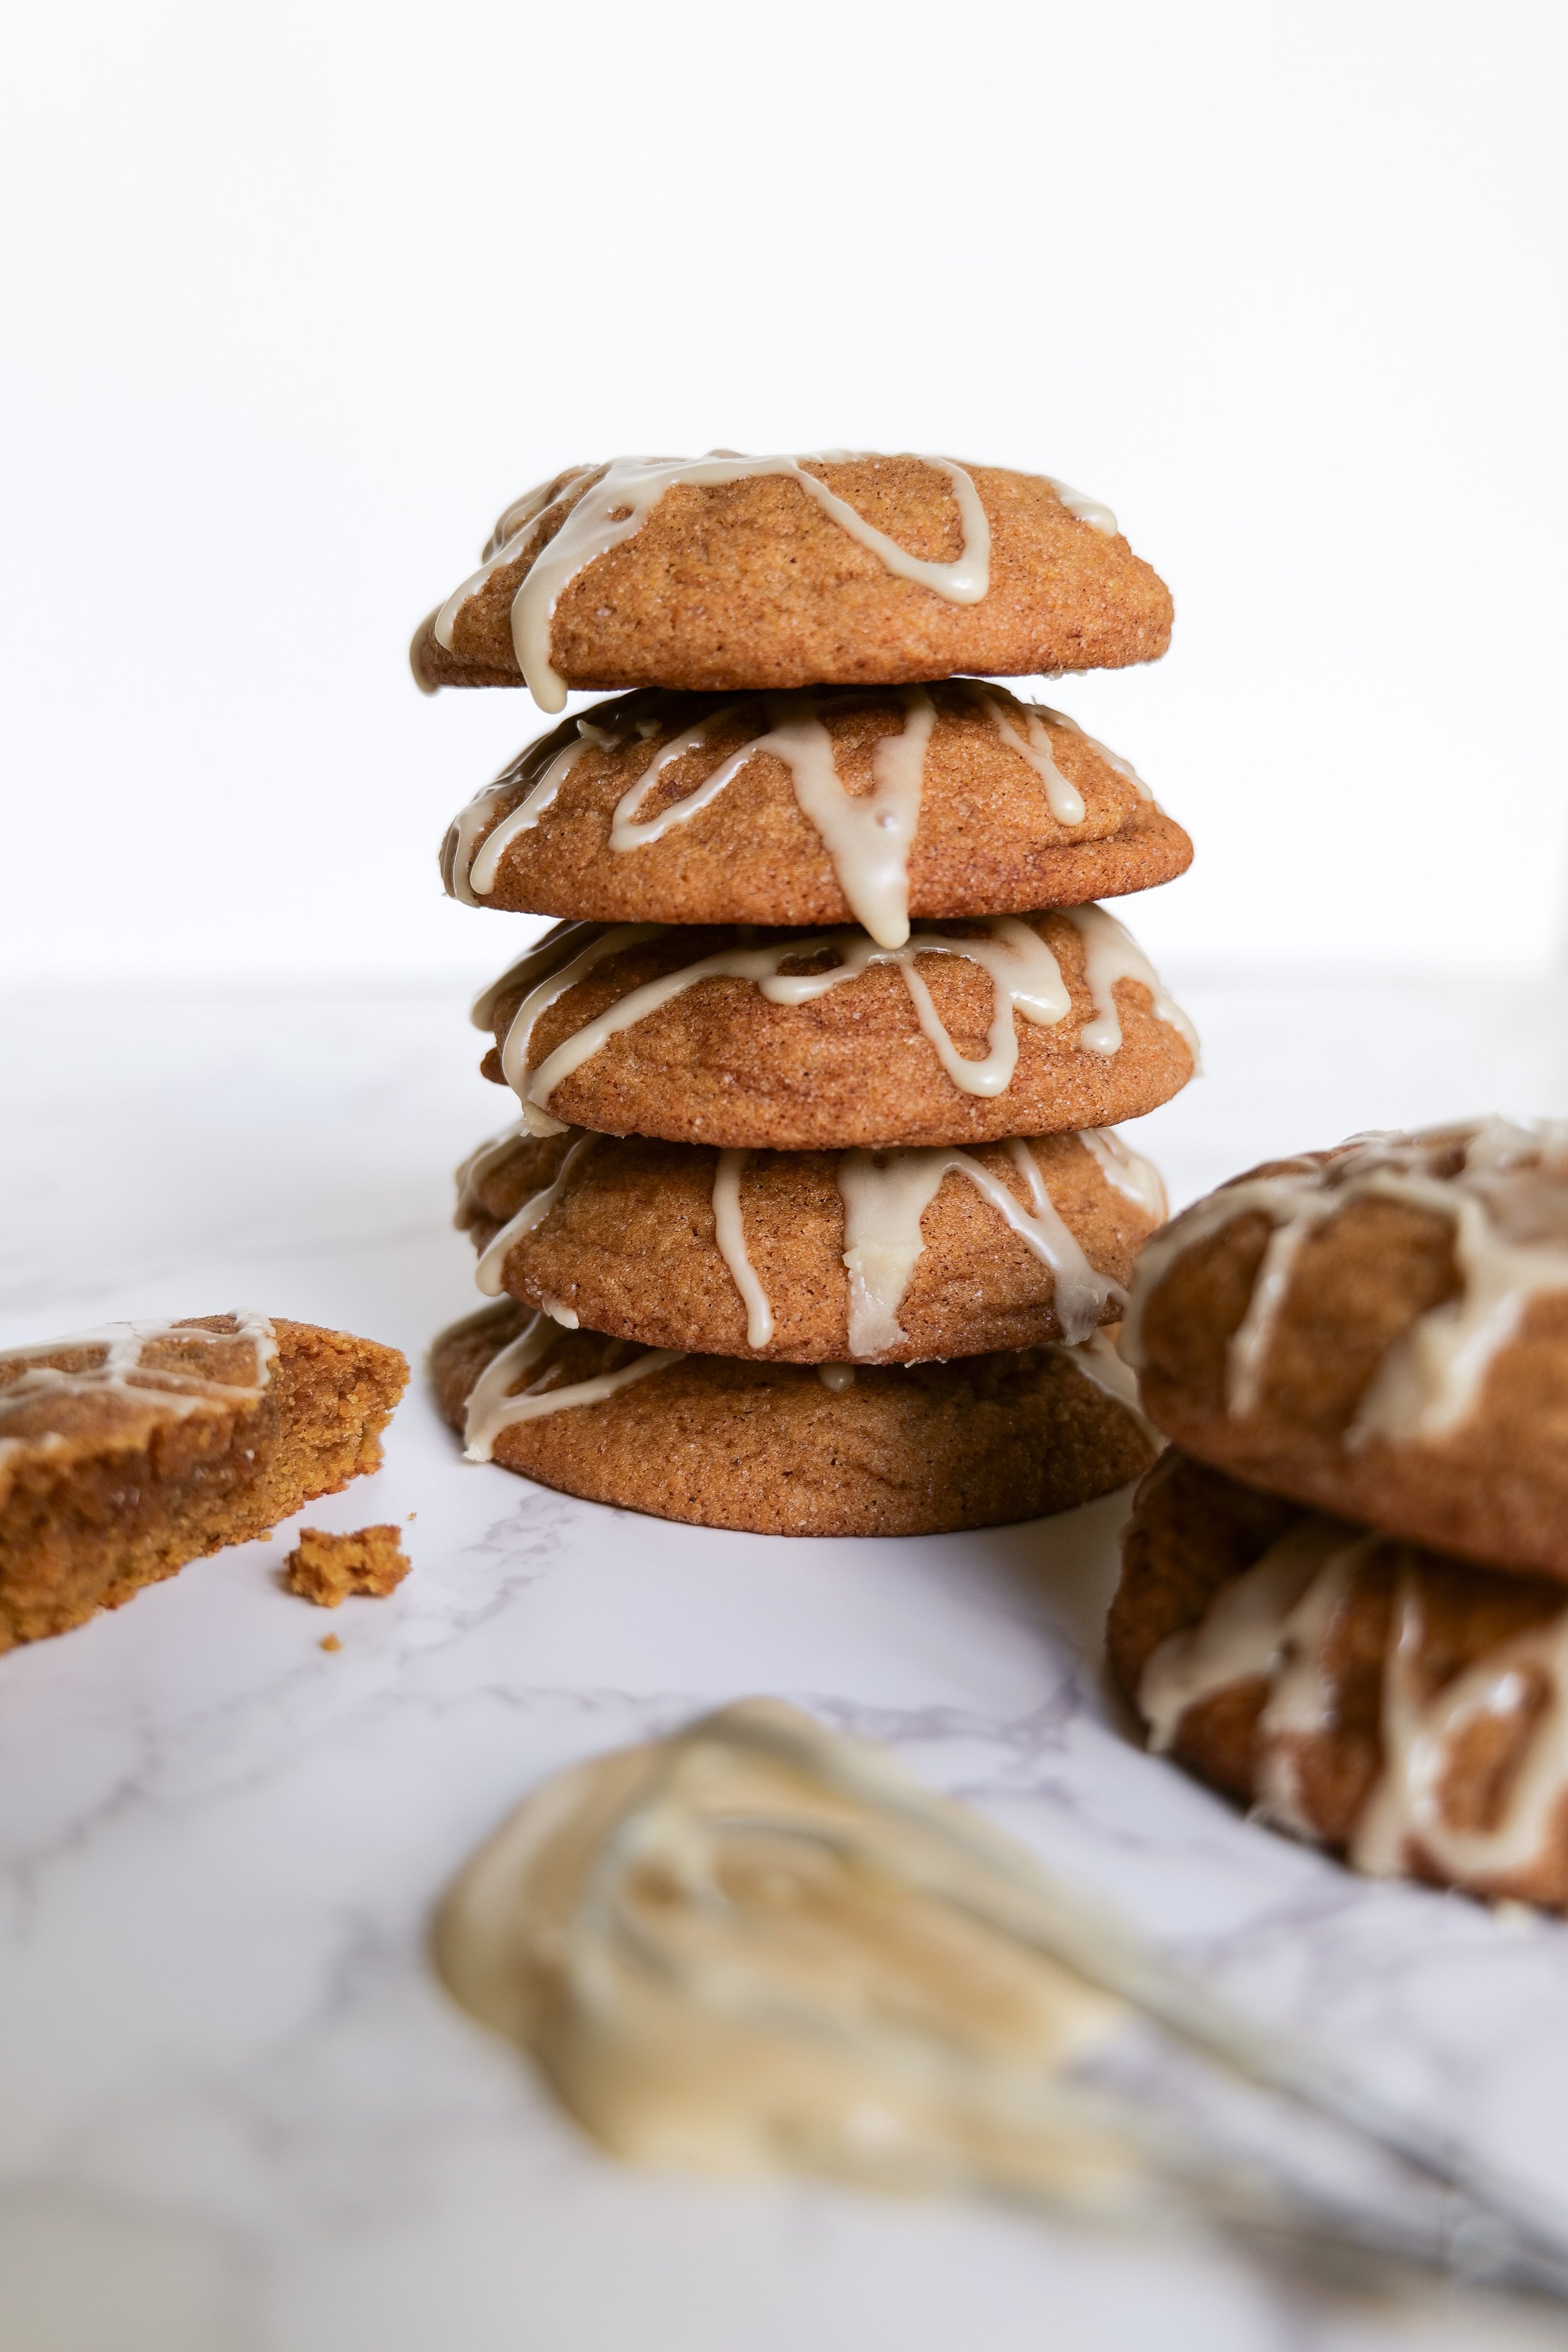
Making the dough ahead of time is an excellent option if you want to prepare for a special occasion, but are routinely pressed for time. The dough can be made up to one week ahead of time and stored in plastic wrap in an airtight container in your refrigerator. When you are ready to bake the cookies, let the dough come to room temperature, roll it out and cut them into desired shapes. The chocolate wax seal can also be made ahead of time and stored in an airtight container at room temperature. This will save you time and energy when you are ready to bake. The brown butter shortbread cookies are a delicious treat that will be sure to impress. The buttery flavor of the cookie combined with the rich chocolate wax seal creates a unique flavor that everyone will enjoy. The chocolate wax seal gives the cookies a special touch that will make them stand out at any gathering. You won't regret taking the extra time to make these cookies for your next special occasion.

How long can I store the brown butter shortbread cookies with the chocolate seal, and how should I store them?

When stored correctly, these cookies can surprisingly last up to two weeks. To store these cookies, it is best to use an airtight container, preferably glass or a food-grade plastic container. Keep them in a cool, dry place away from direct sunlight. Place a paper towel or parchment paper between the layers of cookies to prevent them from sticking together. Enjoy the cookies within two weeks of making them for the best flavor and texture.

Ingredients:

1 cup unsalted brown butter

1tsp vanilla extract

2 1/4 cups all-purpose flour

1/2 tsp sea salt

1/4 granulated sugar

1/2 cup powdered sugar

4 tbsp whole milk

bittersweet chocolate & wax seal of choice

Step-By-Step Instructions:

  1. Add butter to stove top pan to brown. Butter will melt and begin to get a nutty smell. Turning brown when it’s ready! Pour into a bowl and let come to room temp. After room temp place in fridge for 30 min to fully cool.

  2. While butter is cooling whisk together sugars, all-purpose flour and sea salt. Add in brown butter and vanilla extract with rubber spatula. Mix with an electric mixer until well combined.

  3. Dough with be flaky at this step. Add 1 tablespoon of milk at a time until the dough is incorporated and starts to stick together. Usually needing 4 tablespoons of milk total.

  4. Wrap with plastic wrap and keep refrigerated for at least 1 hour and up to 1 week.

  5. Remove from fridge when ready to make cookies. Flour the surface and roll out to 1/4 inch thick. Cut dough with your favorite cookie cutters and bake at 325.

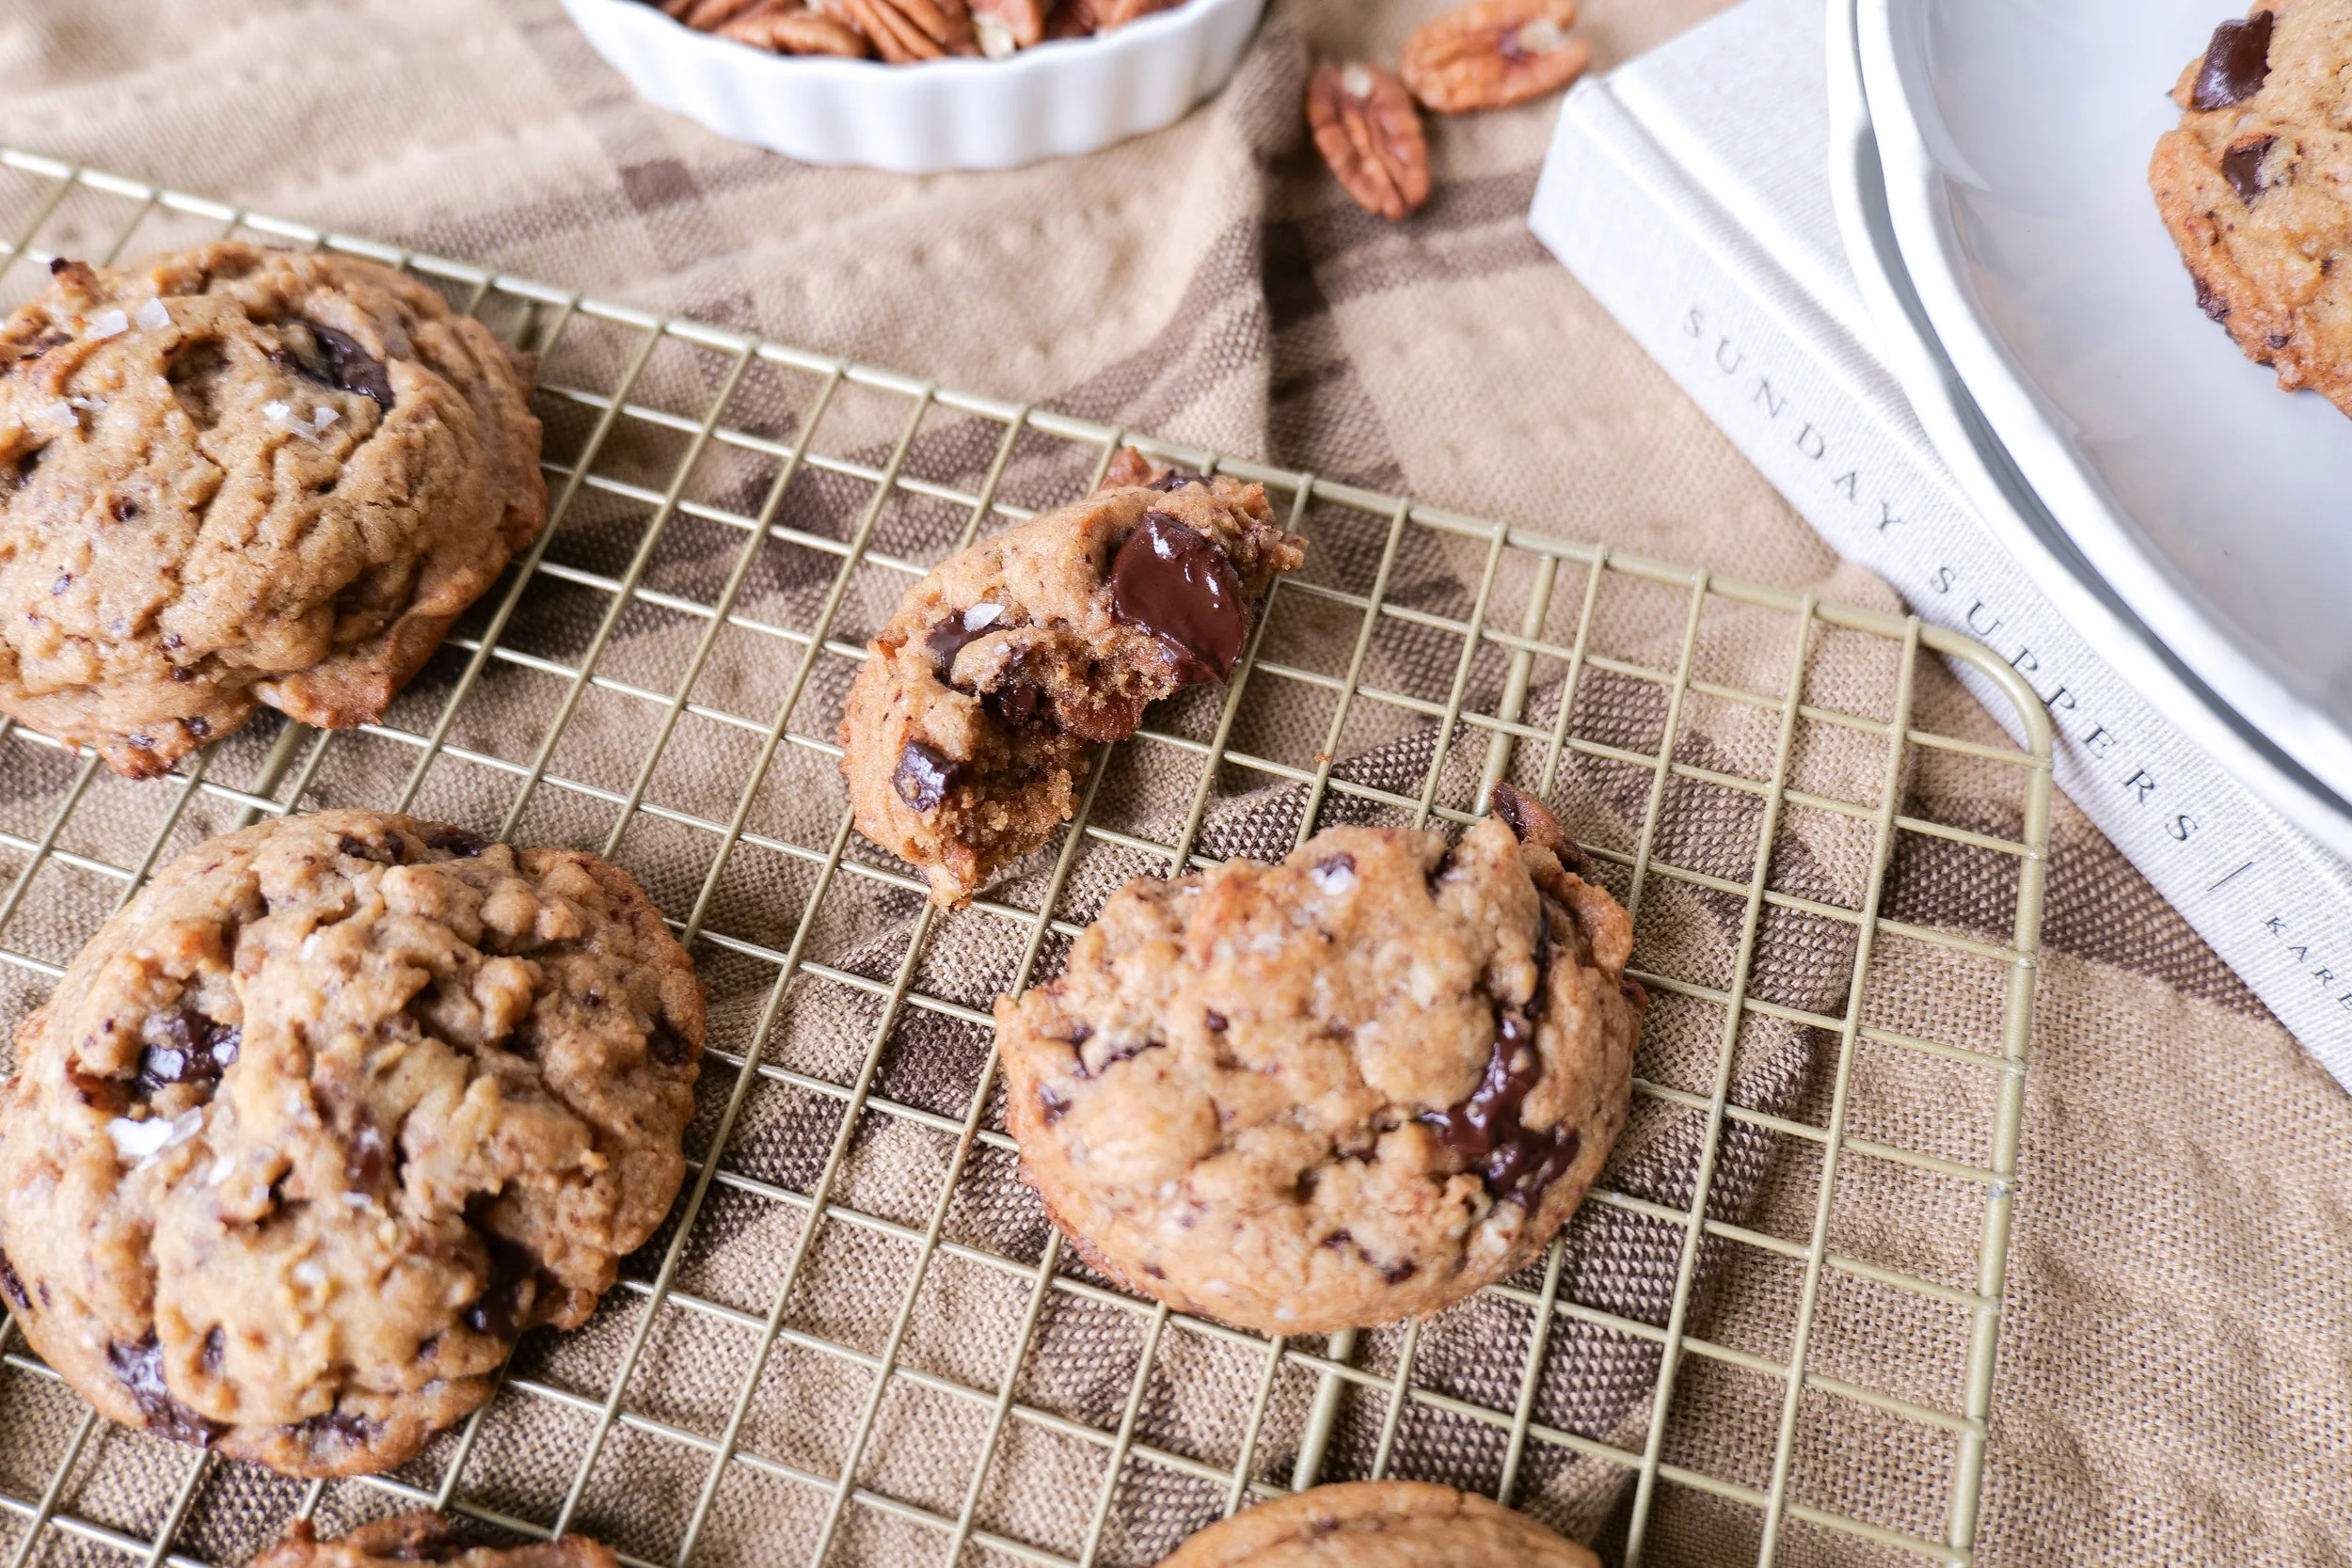
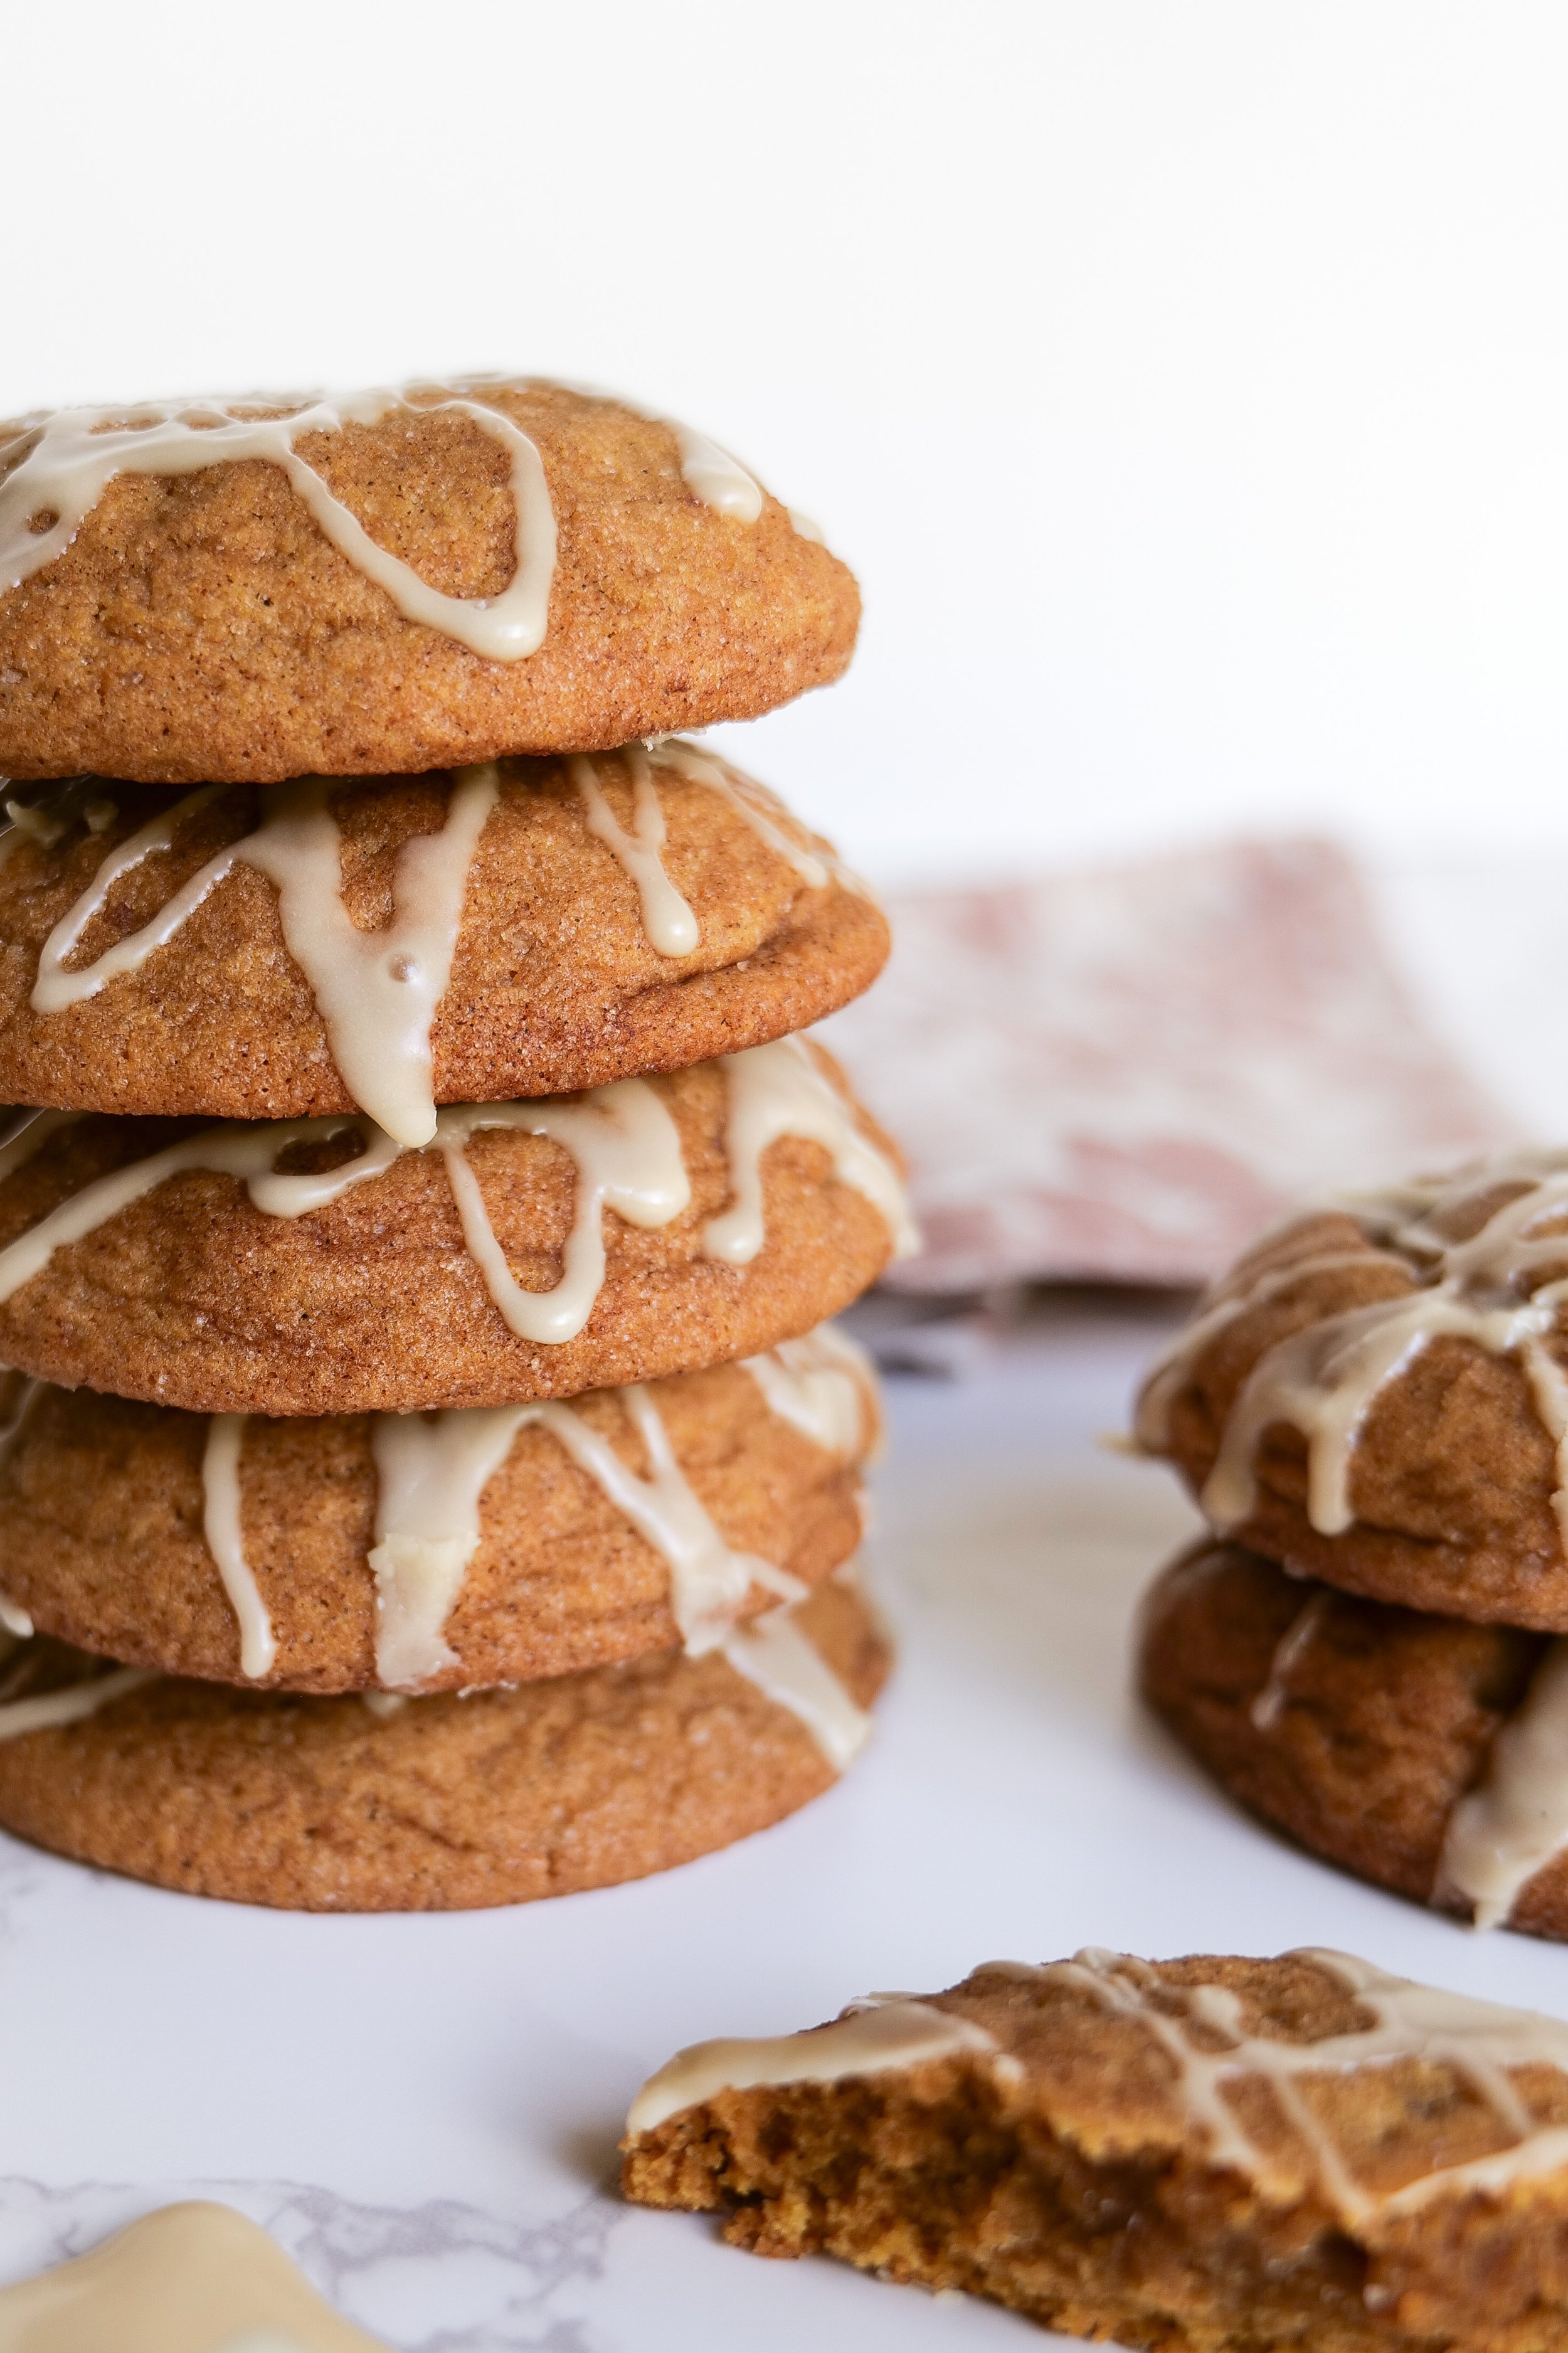
  6. Baking for 12-14 min in oven. Remove and place cookies on the cookie sheet to cool.

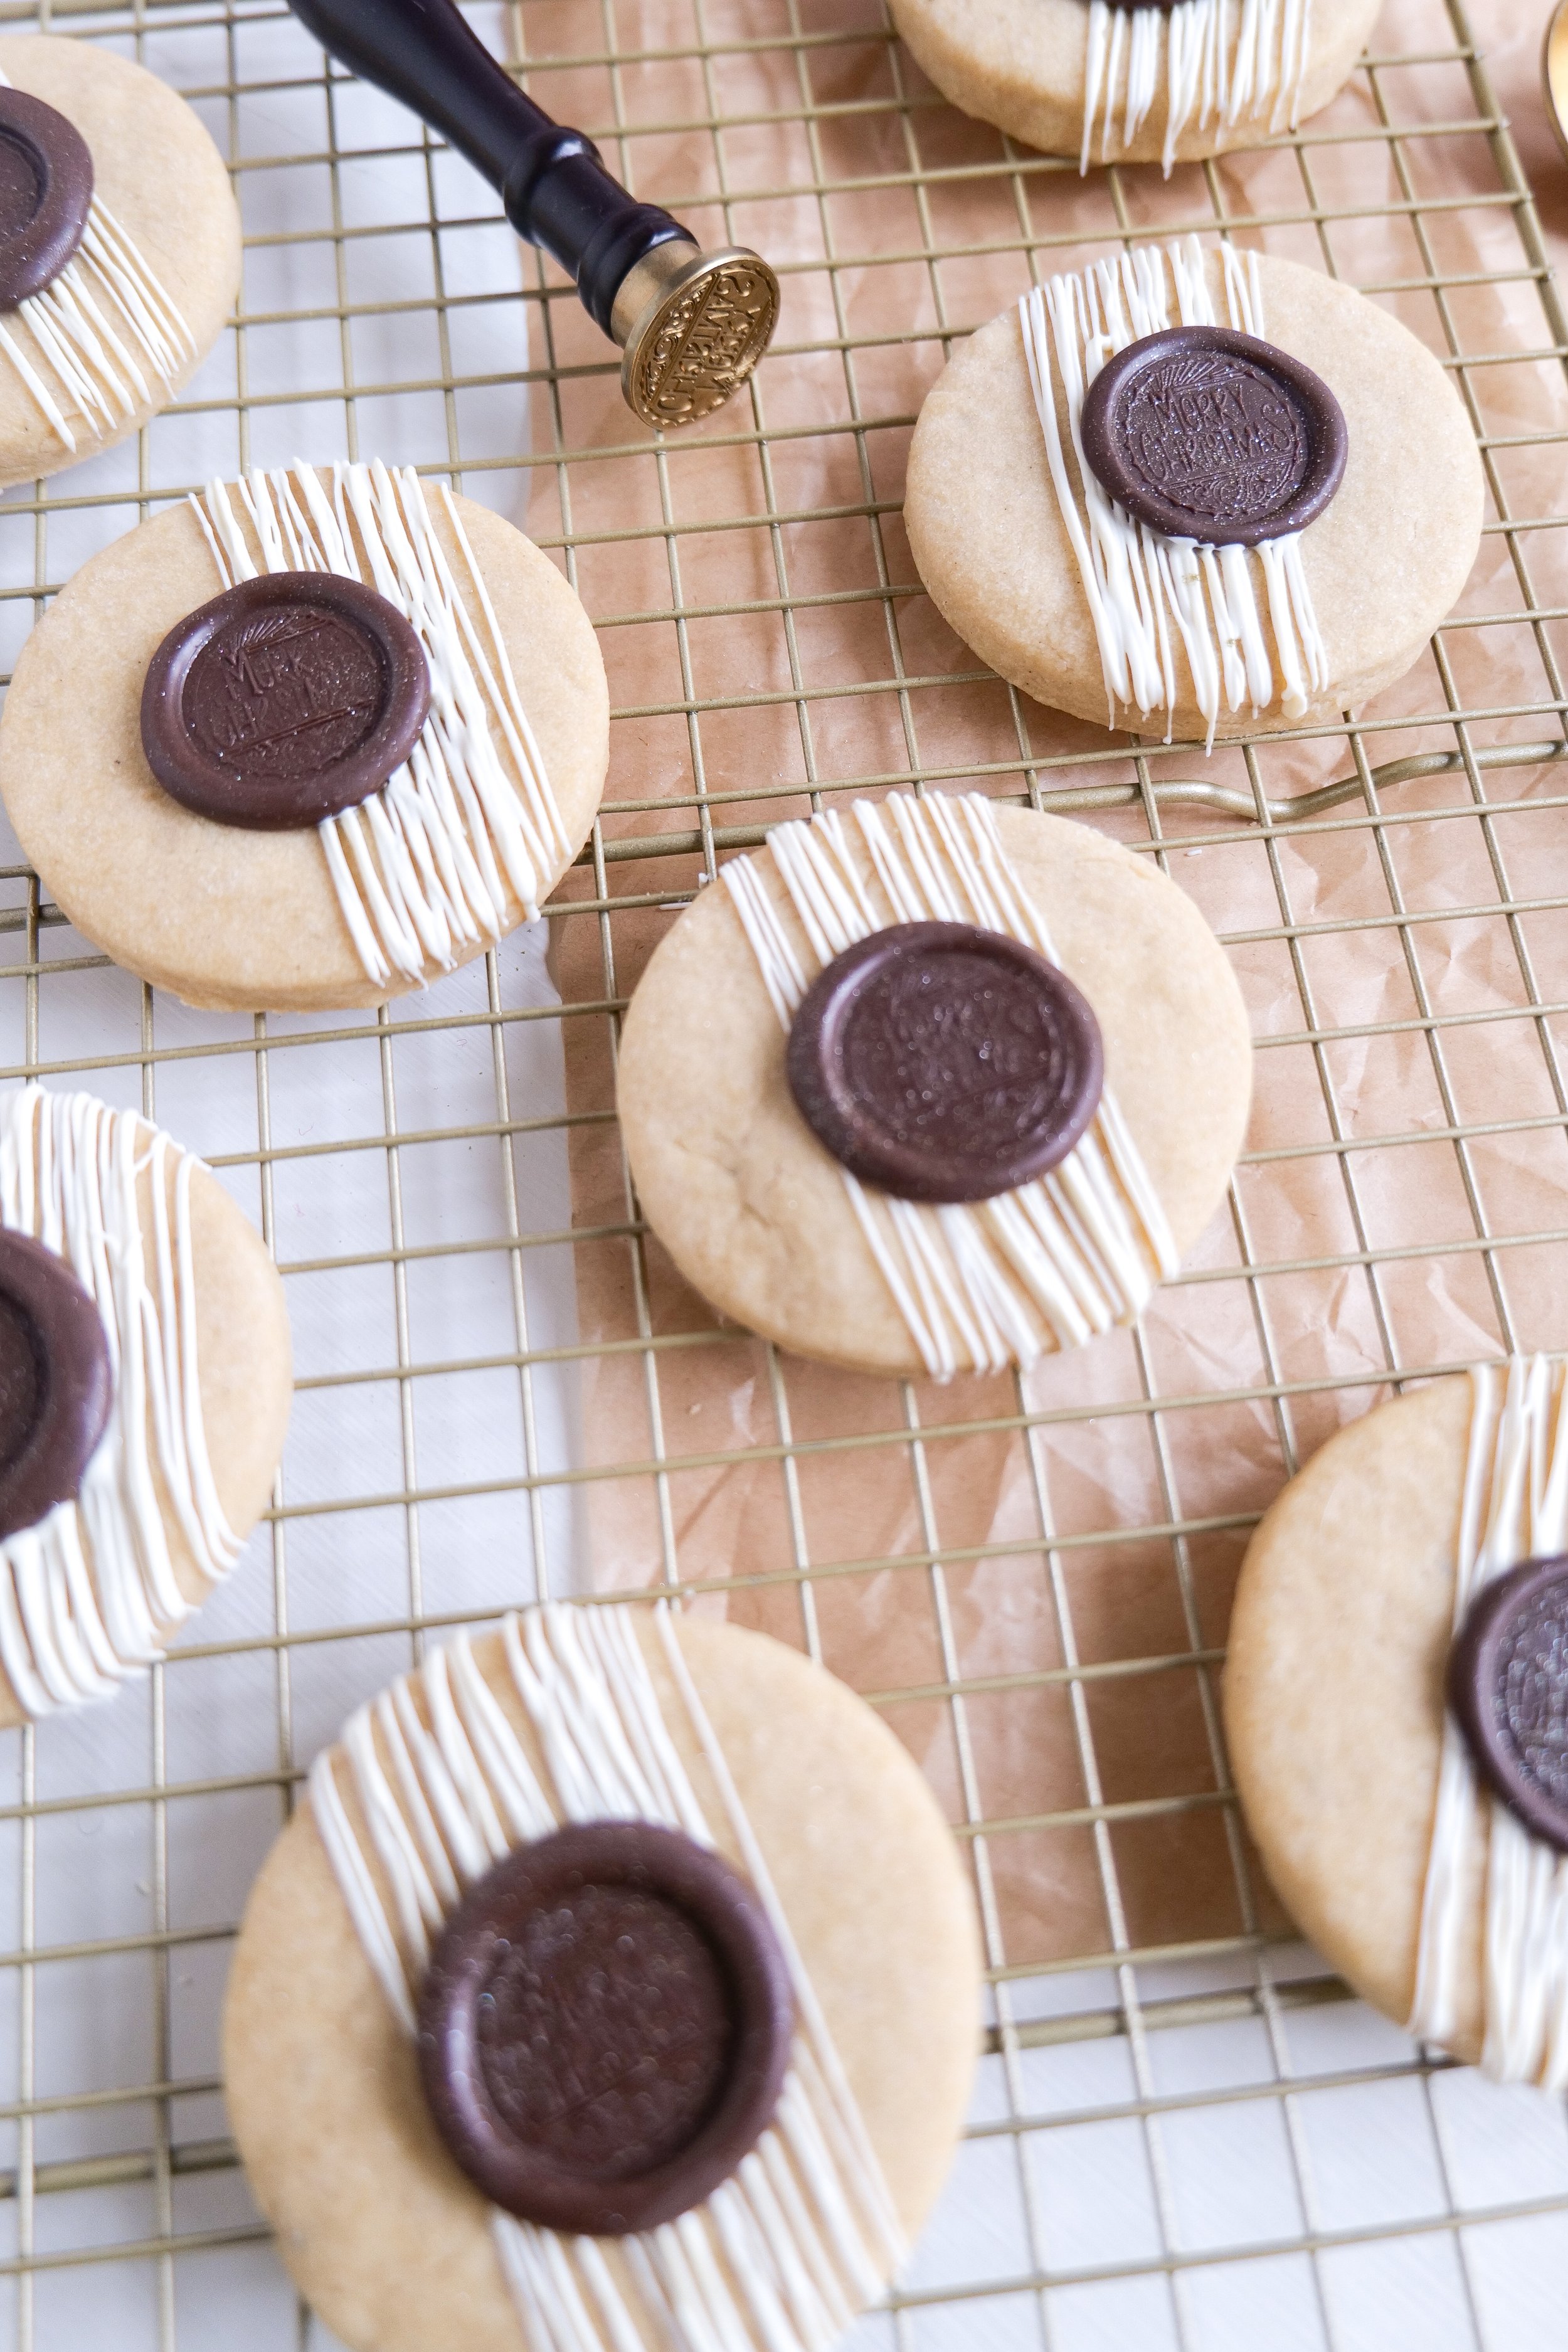
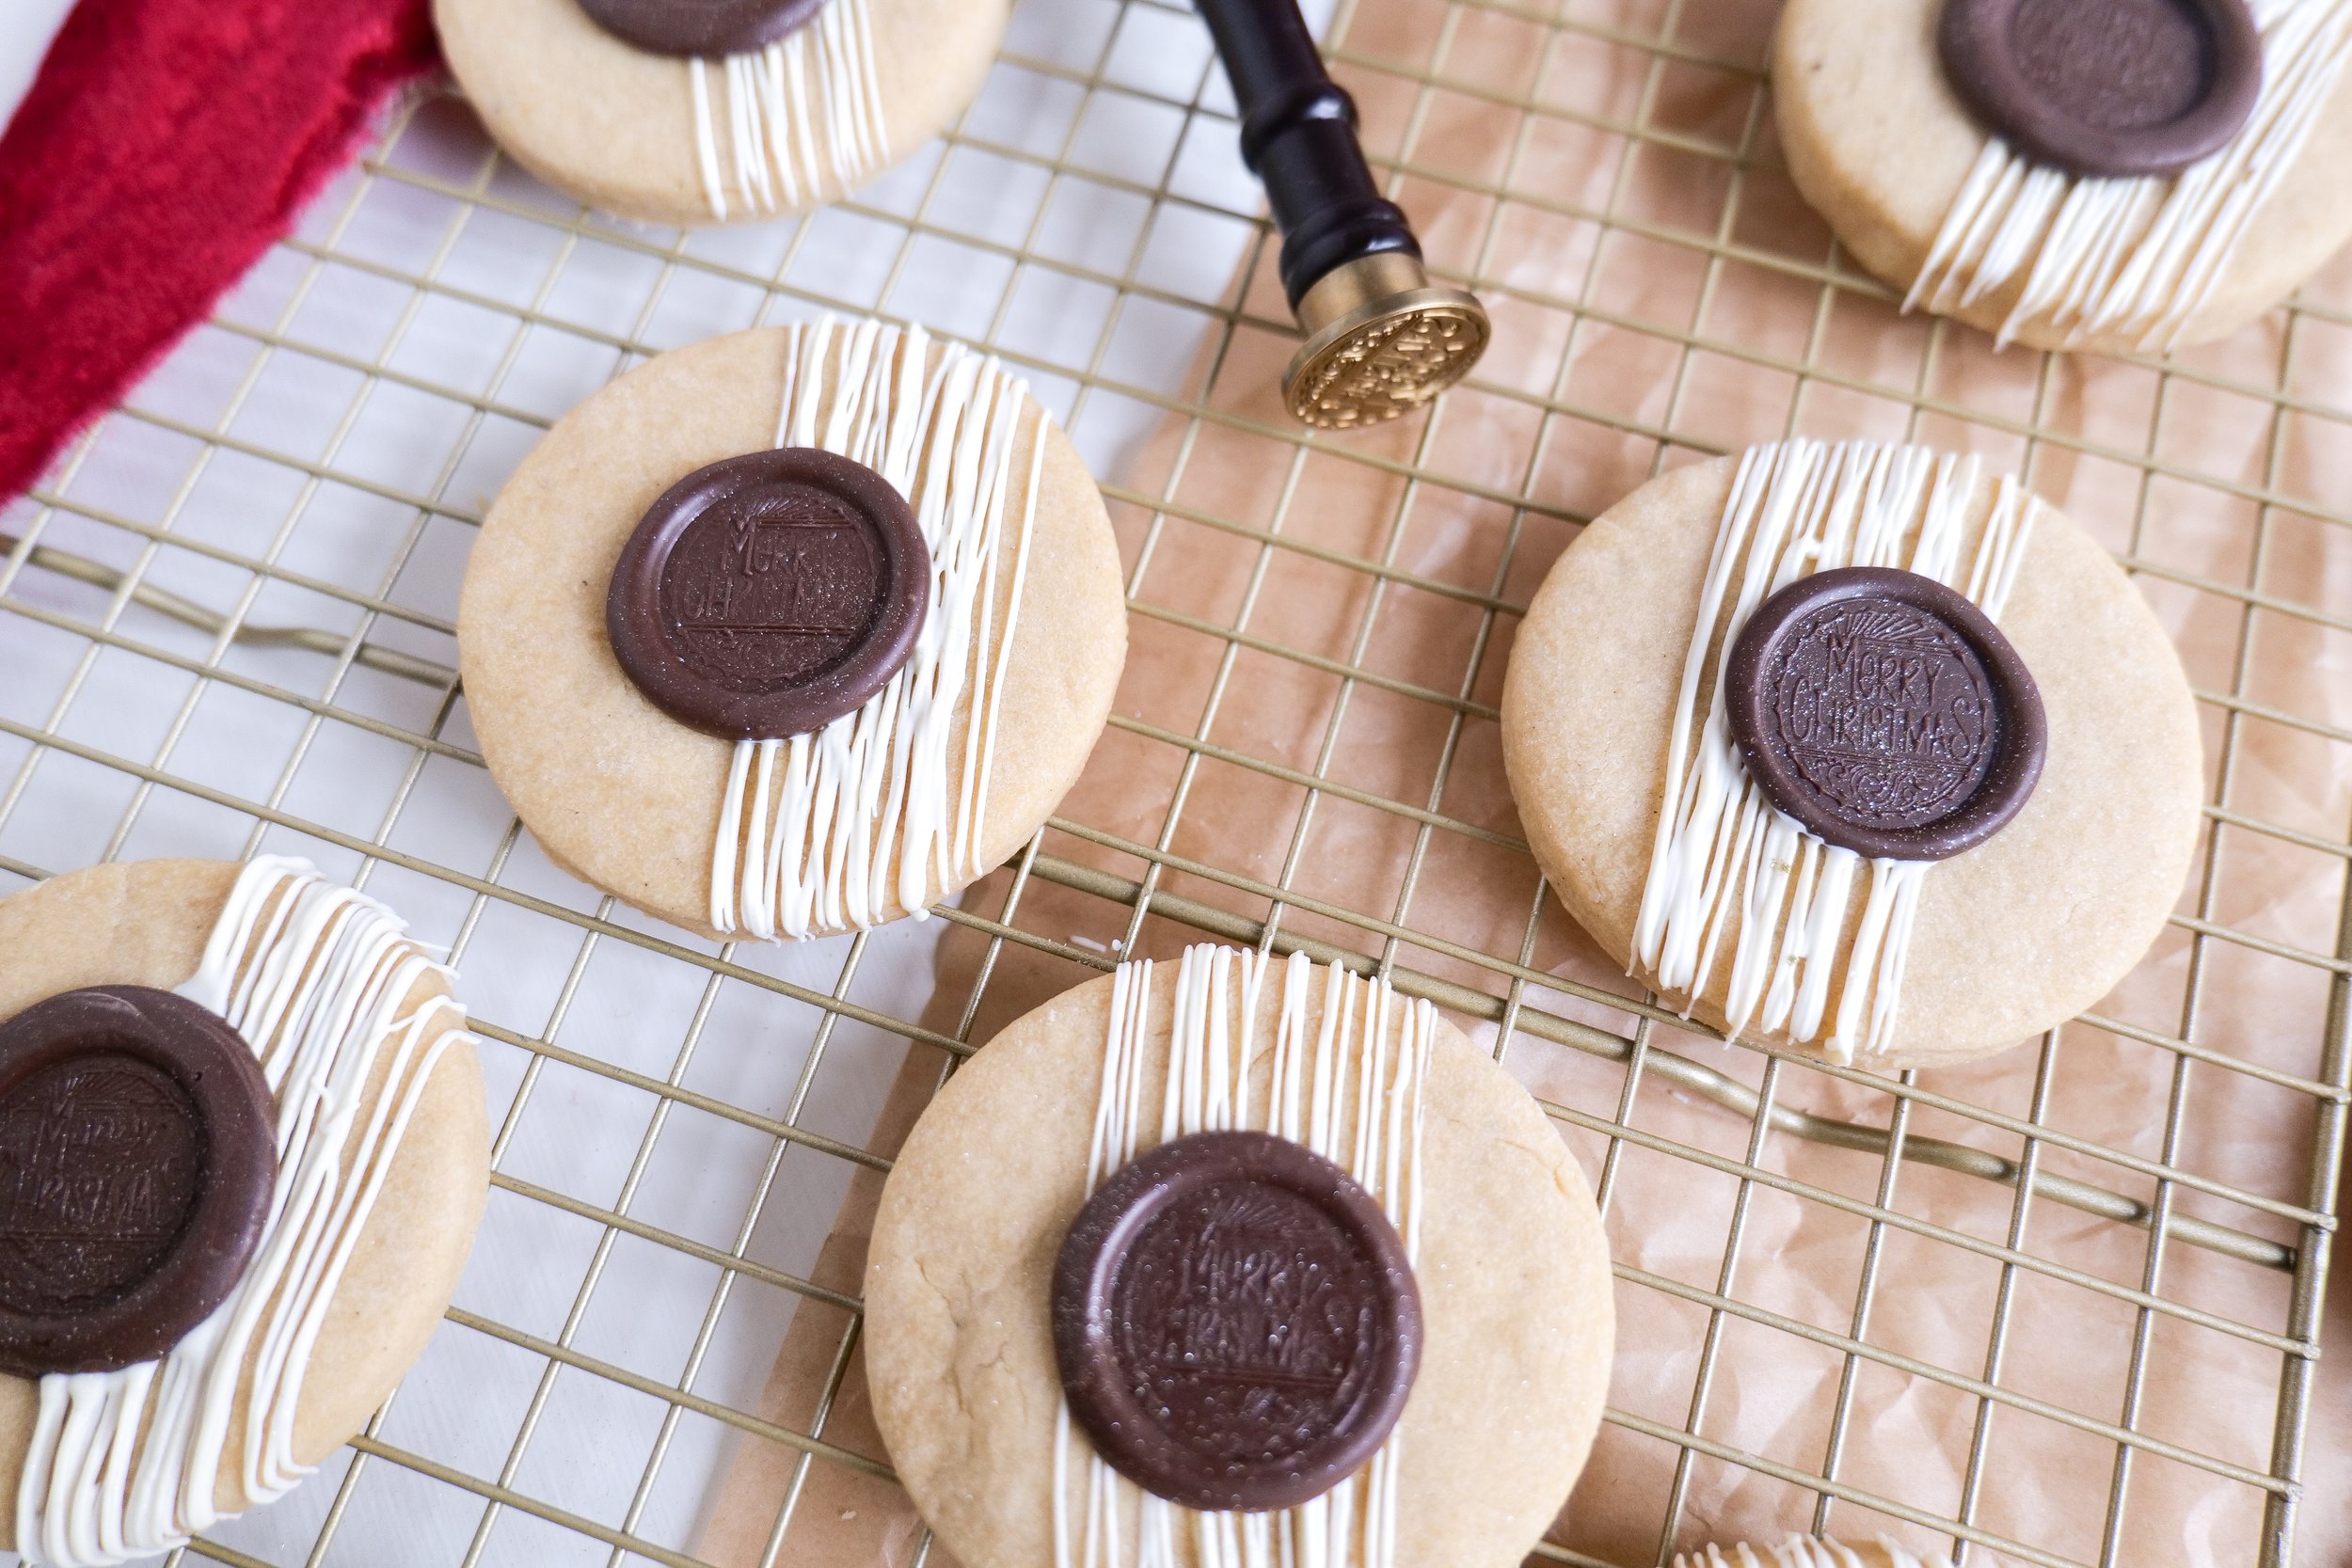
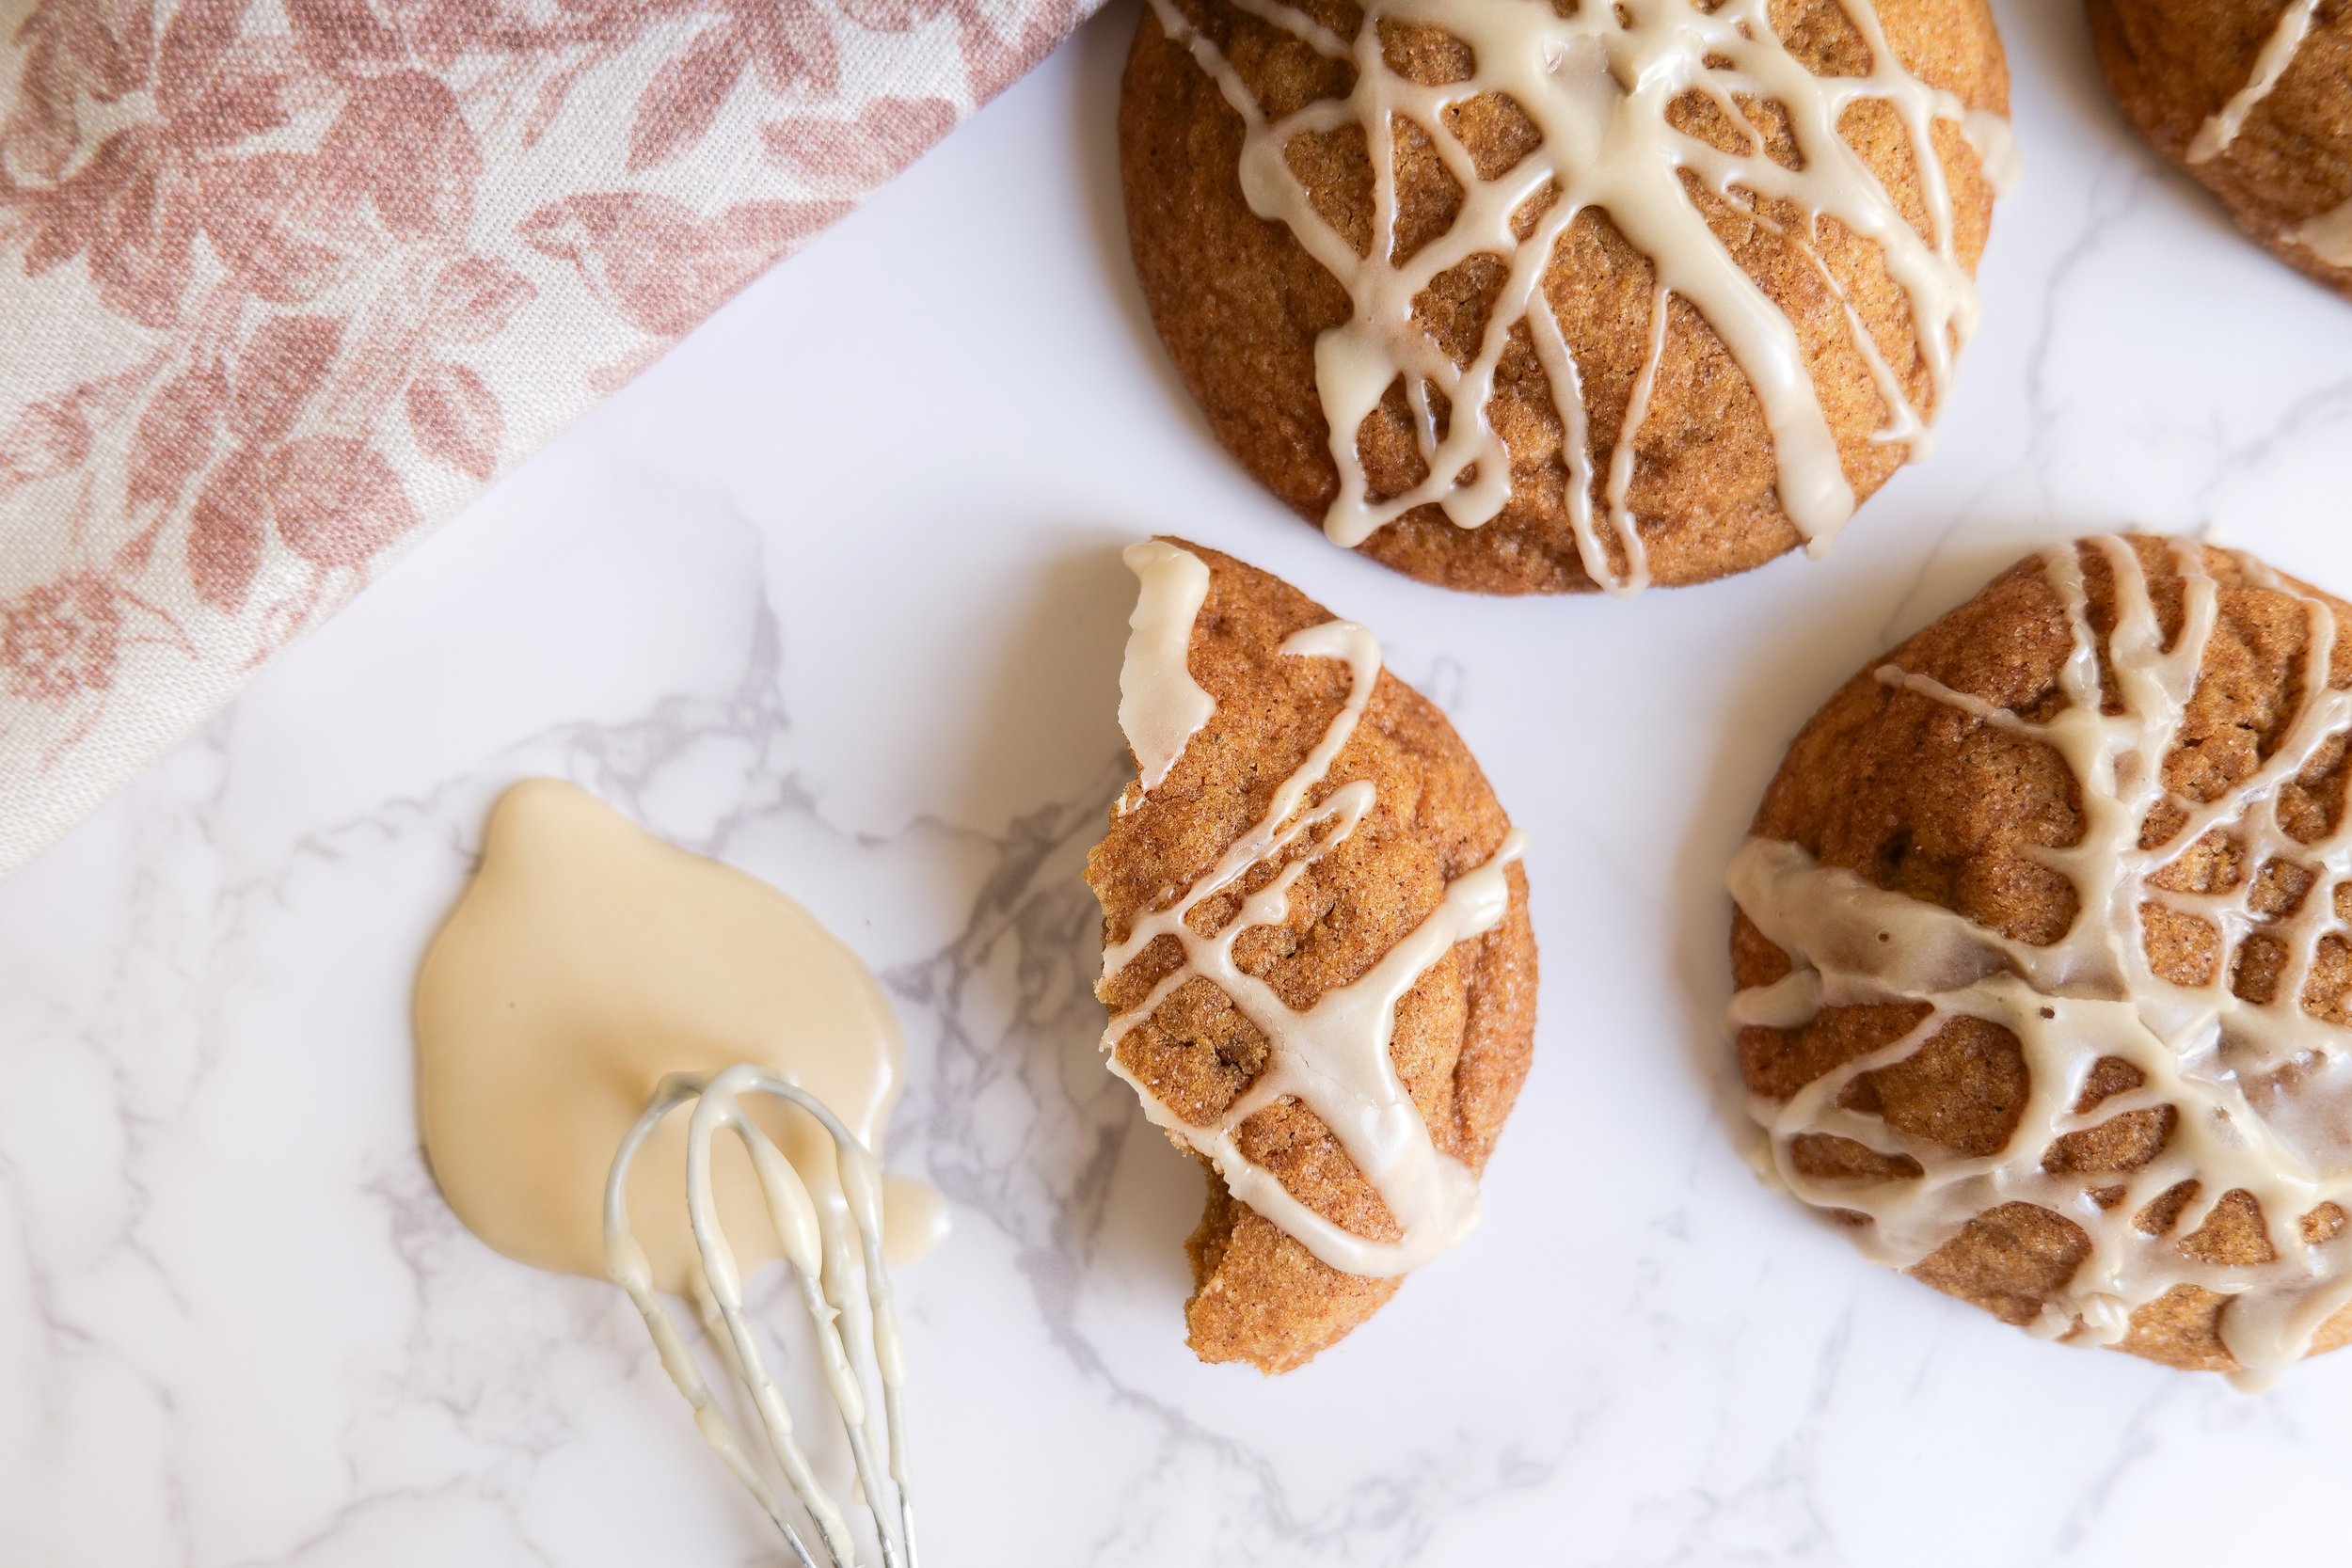
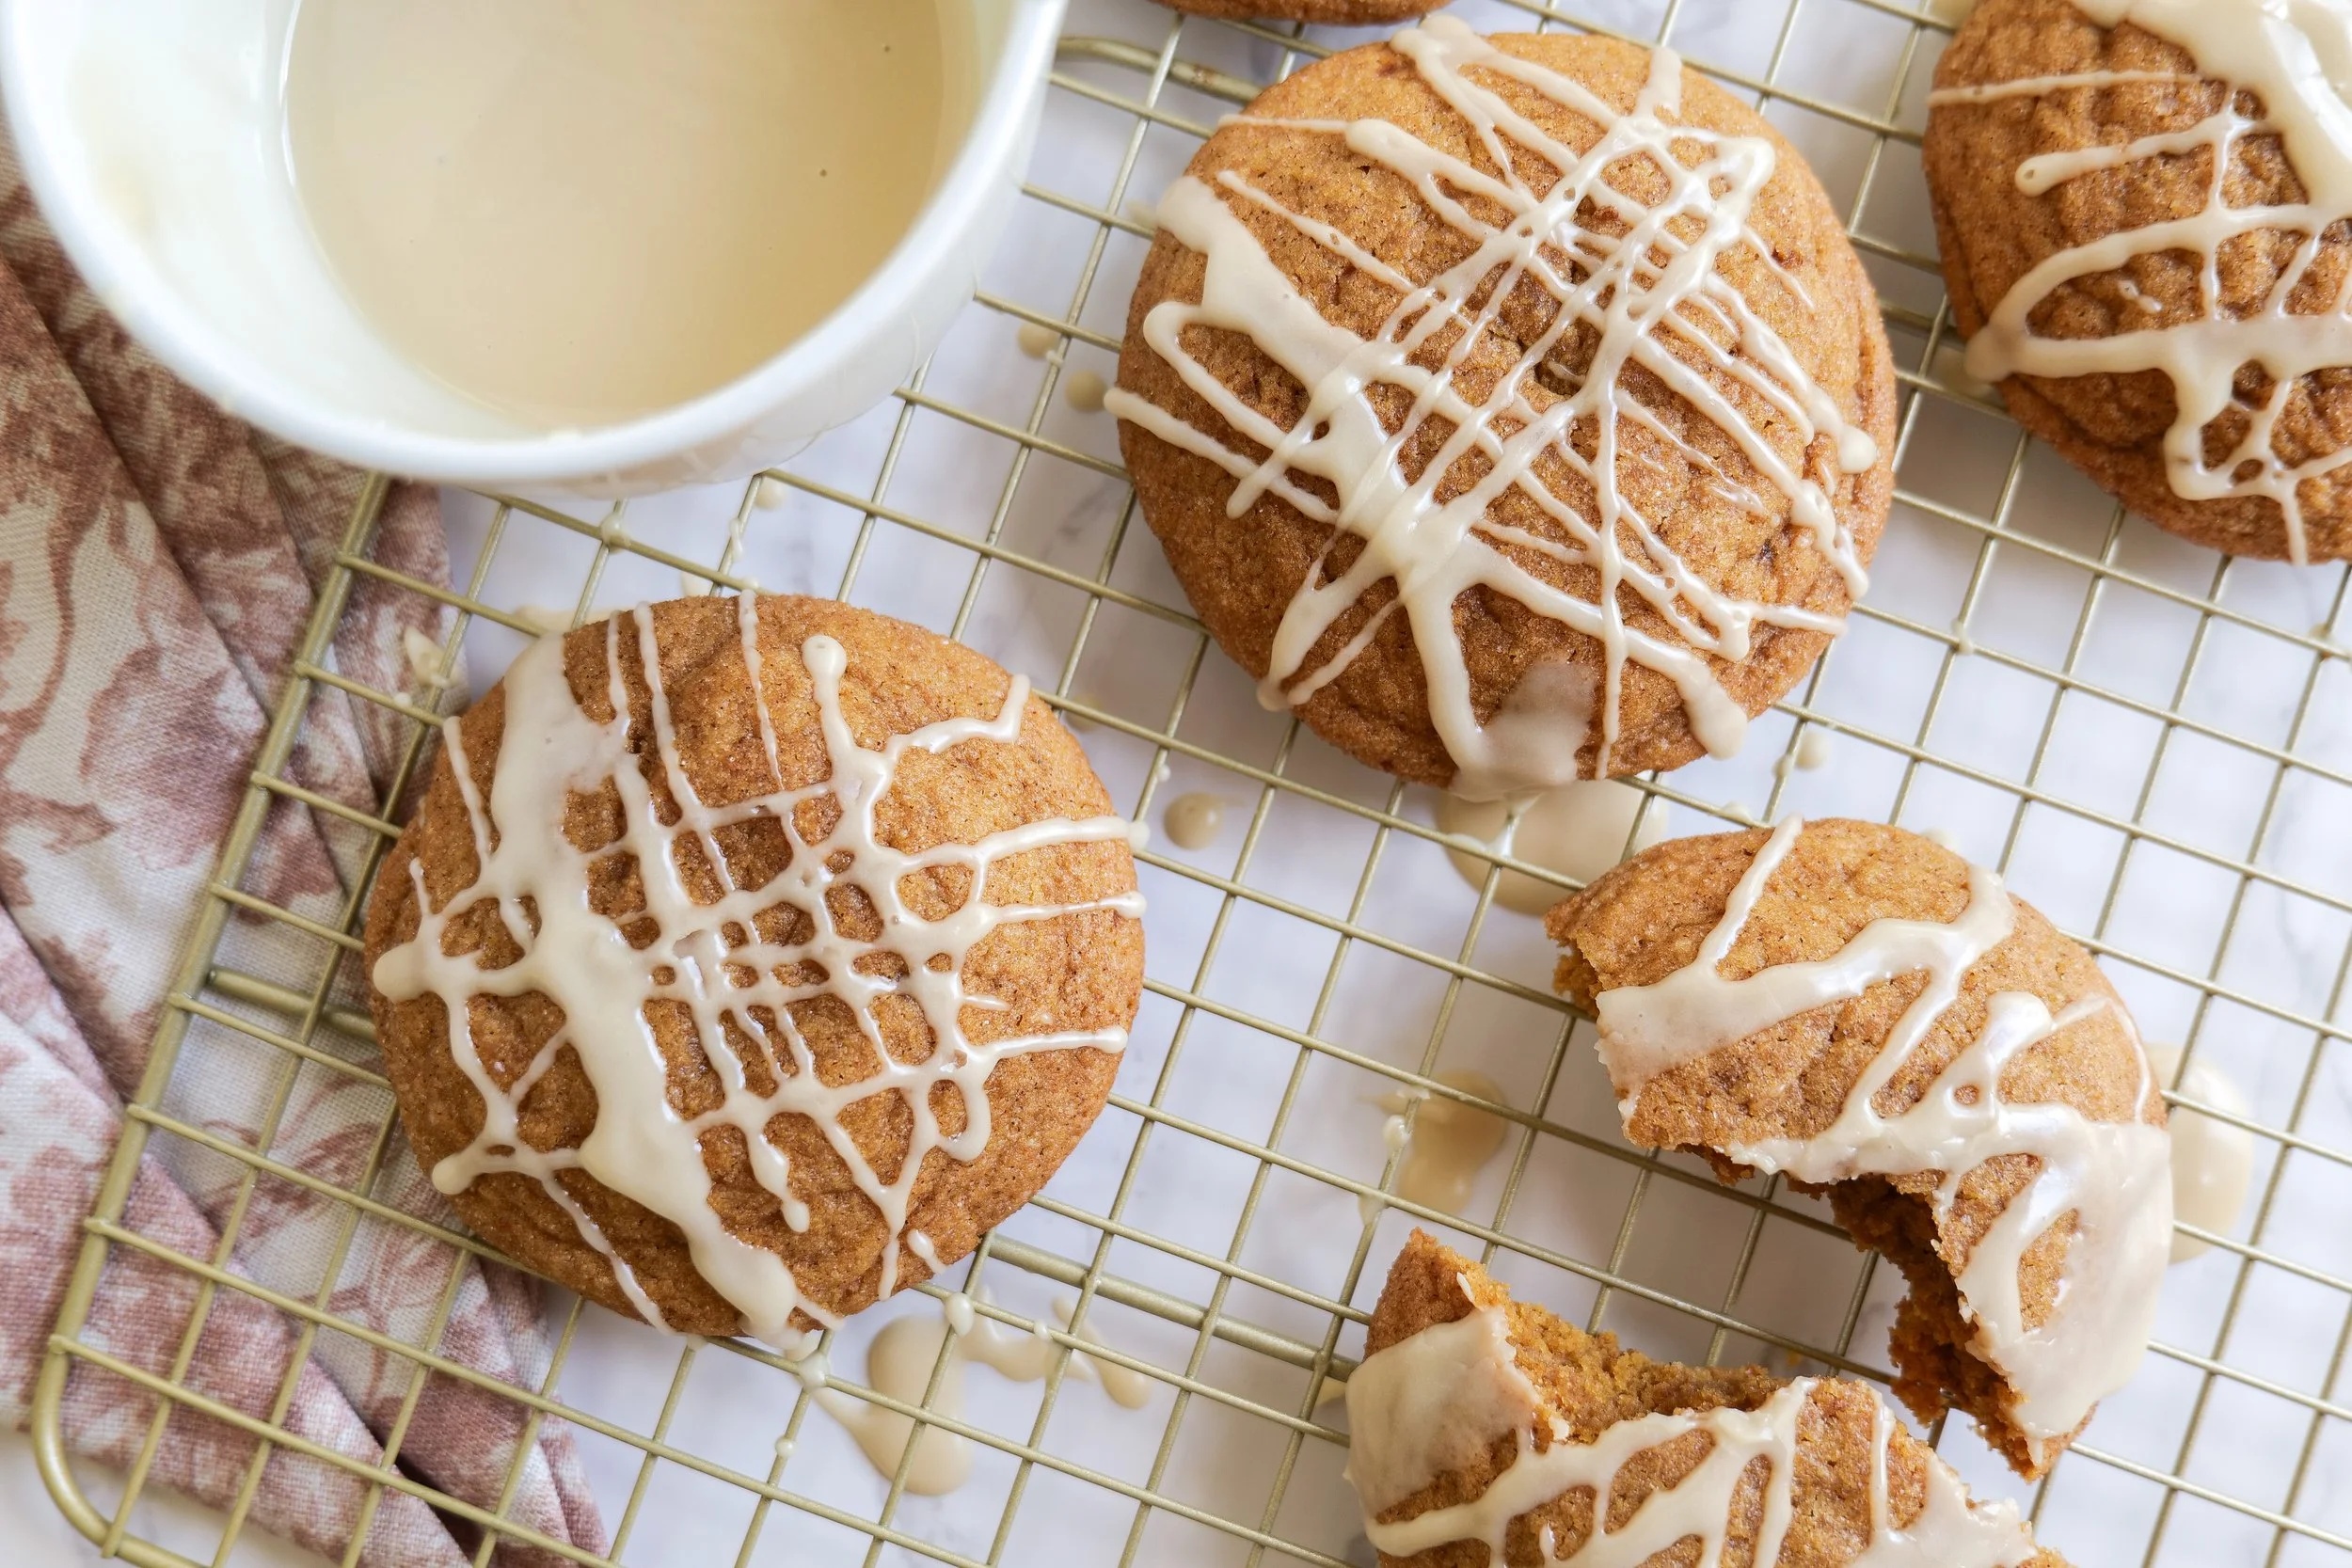
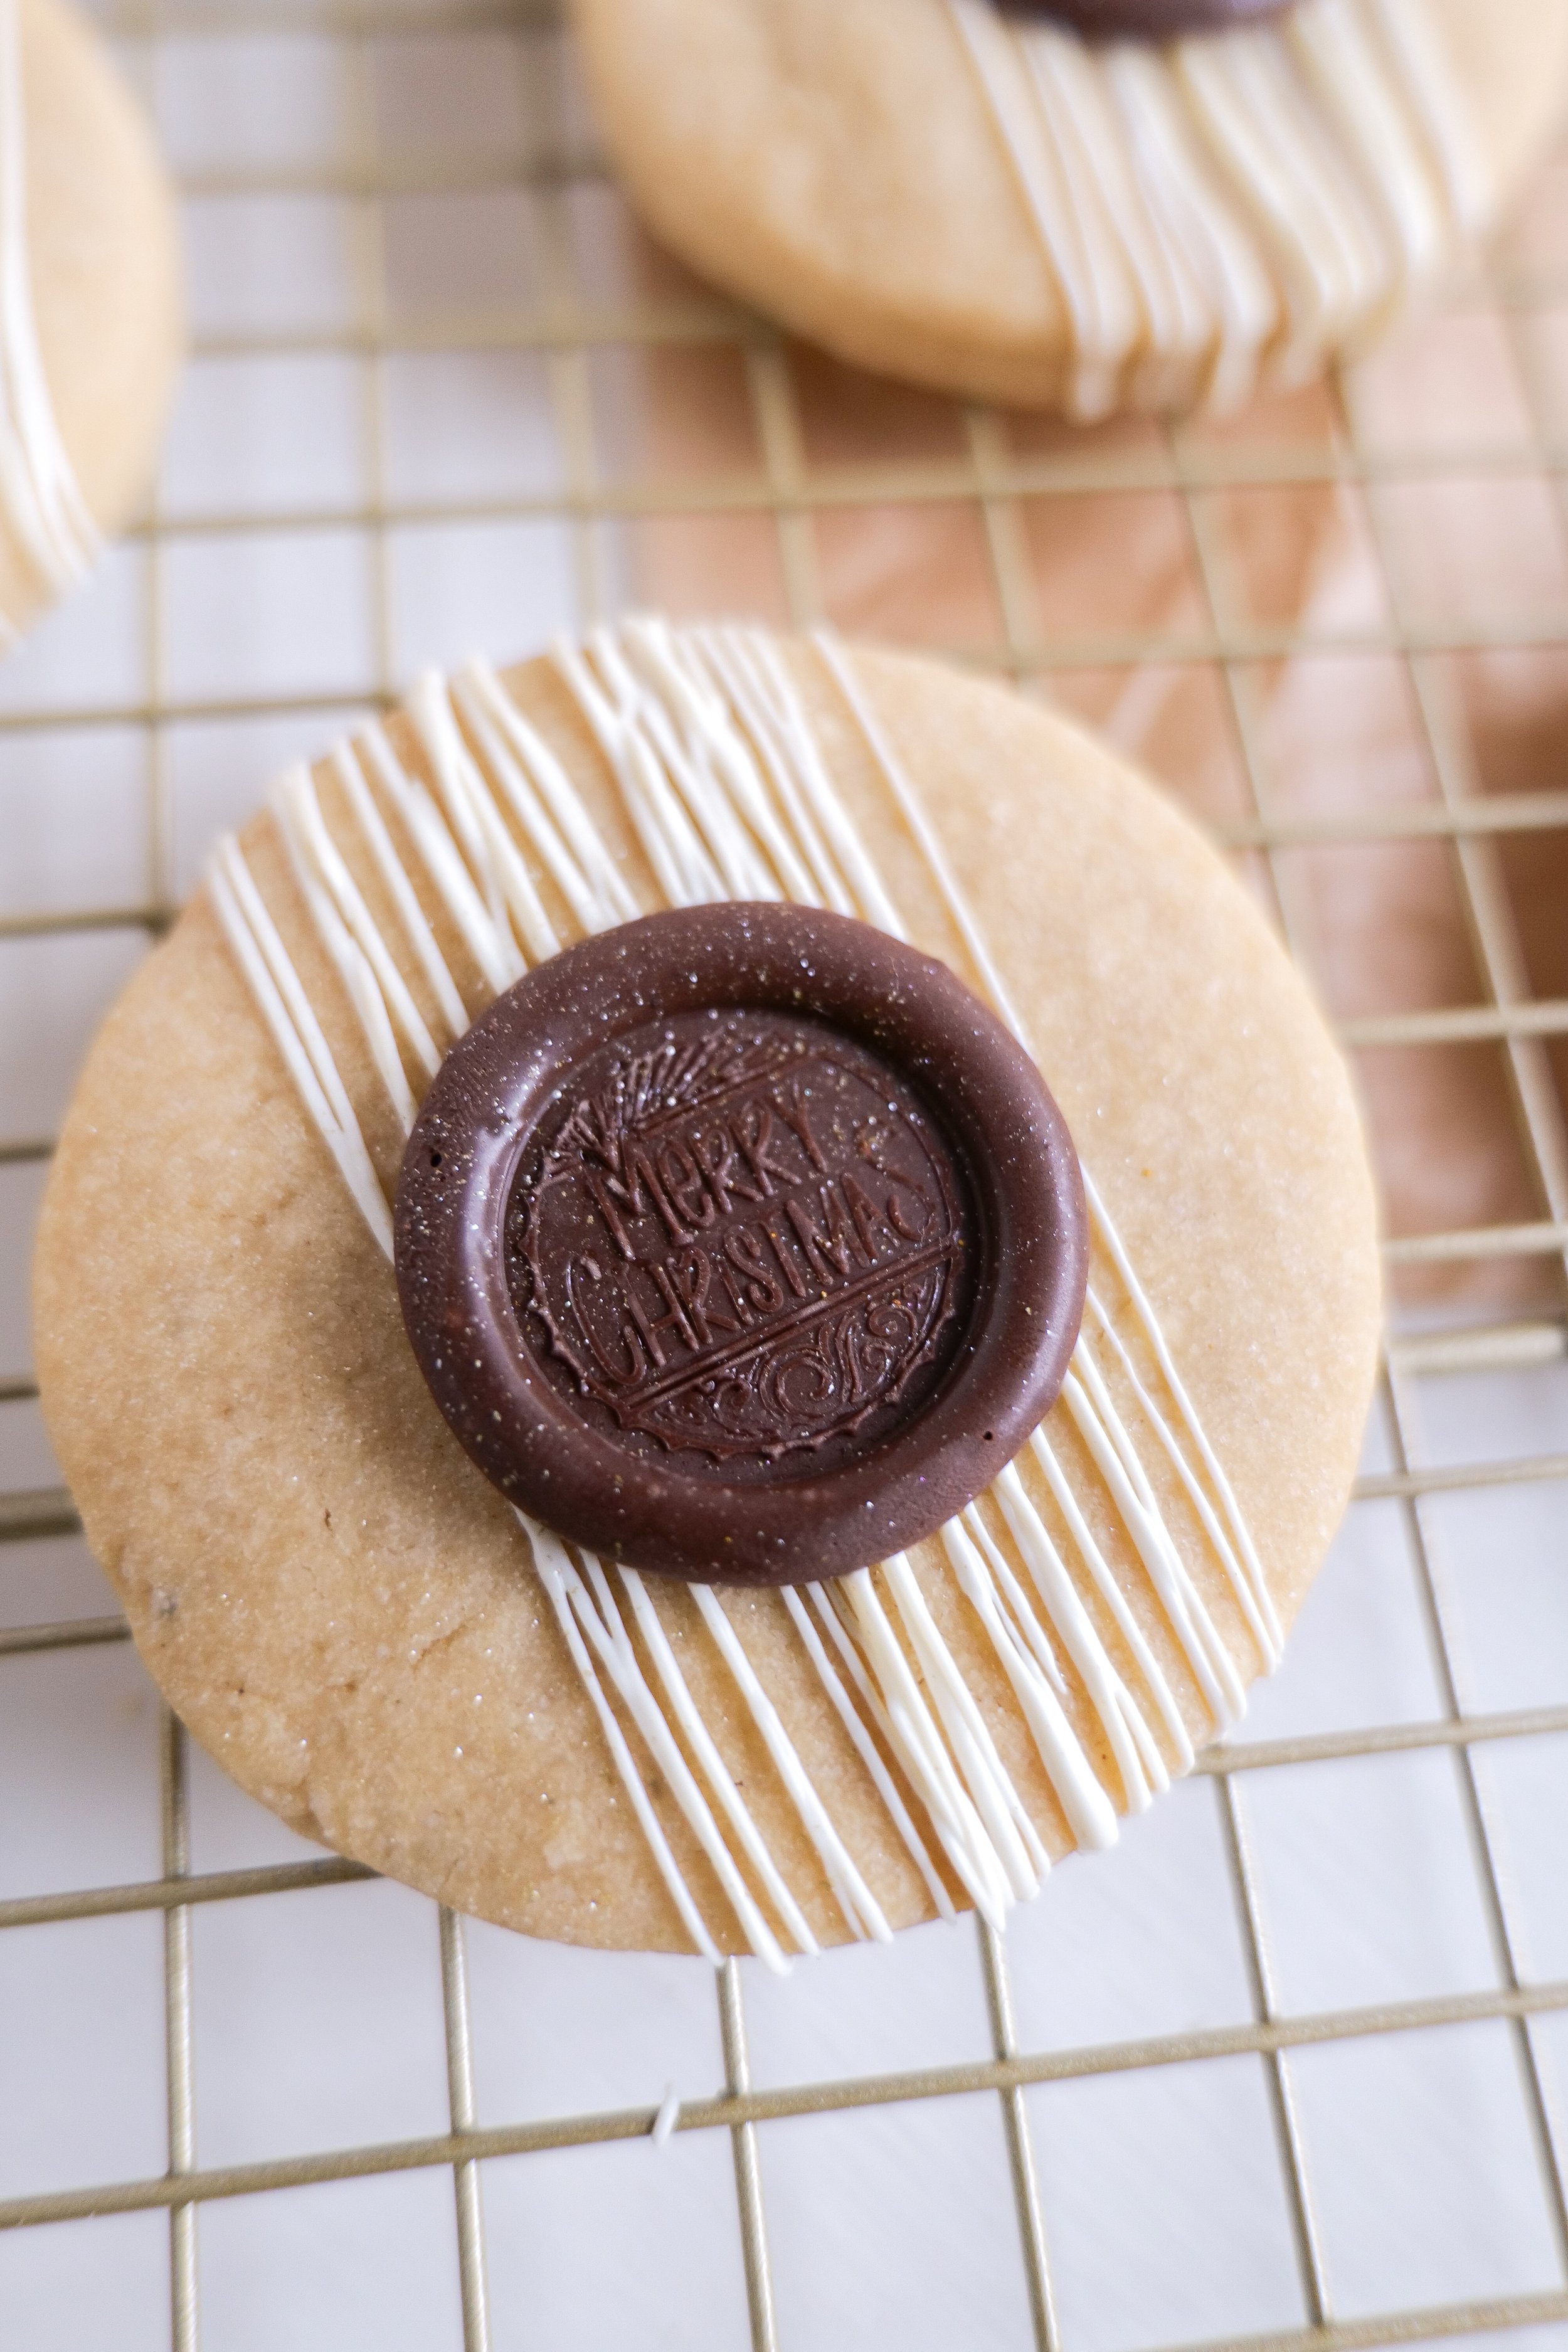
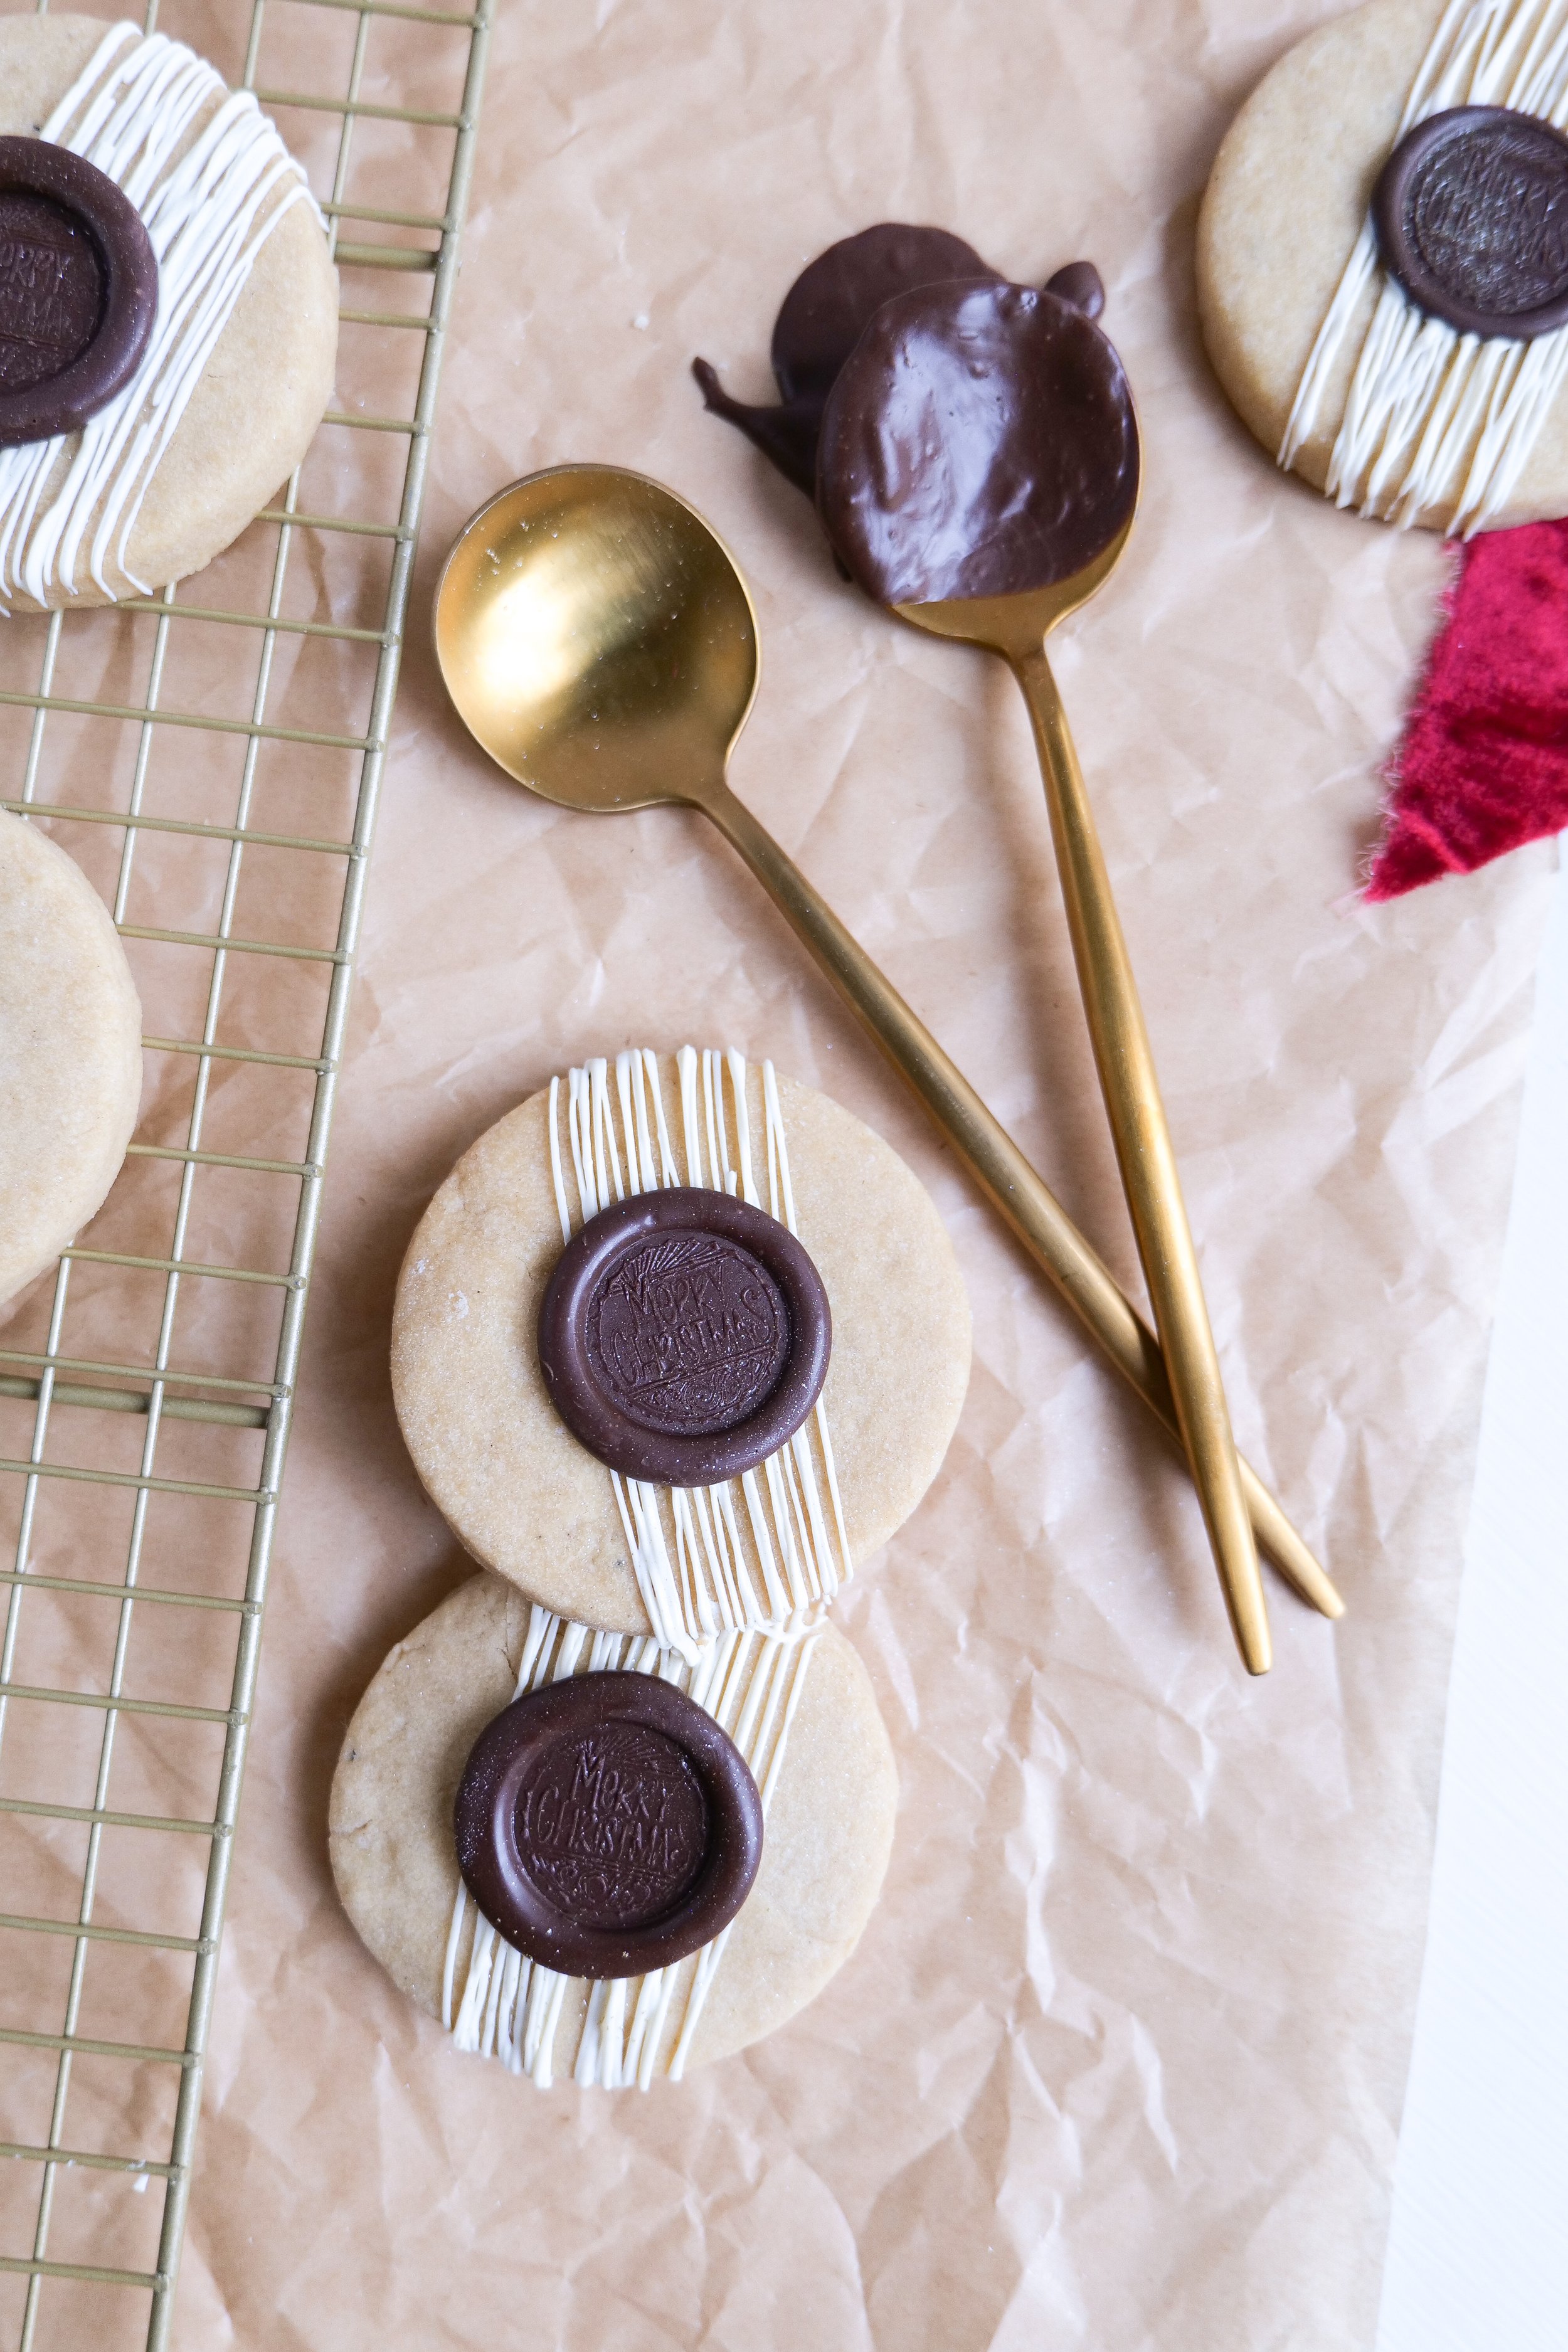
  7. Once the cookies are cooled you can add the wax seal by two options. One way you can drizzle chocolate in the center of the cookie, let it cool for a few seconds and stamp it with your wax seal. The other option I did here was to make a wax seal on parchment paper and add it onto the cookie with a small drop of a full drizzle like I did to adhere to the cookie. Prep your wax seal by cooling it in the freezer for at least an hour to fully cool through. Between each stamp place in an ice bowl to continue to keep cool. Once finished, serve and enjoy your Brown Butter Shortbread Cookies with Chocolate "Wax" Seal

Other Cookie Recipes You Will Love:

How to Make Delicious Nutter Butter Cookies At Home

Indulge your Sweet Tooth: The Ultimate Guide to Making Brown Butter Maple Pecan Chocolate Chunk Cookies

The Best Monster Cookie Recipe You'll Ever Try!

Deliciously Sweet: Mastering the Perfect Pumpkin Molasses Cookie Recipe for the Autumn Season

Birthday Cutout Sugar Cookies

Brown Sugar Toffee Cookies

Brown Butter Caramel Pretzel Cookies

Stylish Sipping: The Ultimate Guide To a Fashionable Winery Wardrobe in Fall & Winter

When it comes to enjoying the transcendent flavors of high-quality vino, the venue often matters just as much as the vintage, and there's no more engaging and peaceful of a setting than an actual winery. However, as the golden hues of autumn turn to the chilly blank canvas of winter, the question of what to wear to such an exquisite location often pops up. In this blog post discussing what to wear to a winery in fall and winter, we'll settle your sartorial concerns, guiding you on outfit choices that marry elegance and comfort for your winery visits, whether in the heart of fall or in the depths of winter. So, pour yourself a glass of your favorite wine and get ready to strut in style at the vineyard.

If you’re looking for the perfect outfit to wear to a winery this fall or winter, you’ll want to choose something that is comfortable, stylish and still appropriate for the season. Layers are key to never getting too cold or too hot in the colder months, so try to incorporate sweaters, blazers, and boots to your look. It’s also a good idea to avoid wearing white. Spills can happen, and it’s much easier to clean darker clothing. Additionally, you should consider bringing a light jacket as temperatures may fluctuate inside the winery. Make sure to wear comfortable shoes that you can walk in and avoid wearing strong perfumes, as they may interfere with the winery's tasting experience. Below I go over each of these more and why I picked my outfits. You'll also see my husband in some photos to help give you ideas on winery outfits for guys. For the most part, he goes with button-downs and jeans during winter months and polos in summer.

1. Lipstick

When it comes to lipstick, it is best to avoid wearing heavy lipstick when wine tasting. This can stain the glasses. Instead, focus on choosing a light lip color or colorless balm. Lip gloss, lip stains, and light lipsticks are all good options. Darker lip colors may affect the color of the wine, so it is best to avoid them. Lipstick will also come off on the glass, so it is important to keep a tissue handy to quickly wipe it off. By following these tips, you can ensure that you look and feel great while enjoying your wine-tasting experience. Heavy dark lipstick also may smug and smear on your lips so it's just easier to go lighter today knowing you will be drinking out of wine glasses and possibly eating.

2. Take a Small Handbag

When deciding what to wear to a winery in the fall and winter months, a small handbag is a must-have accessory. Not only is it practical for carrying your essentials, such as your phone, wallet, and keys, but it also keeps your hands free so you can fully enjoy your wine-tasting experience. Small handbags are both comfortable and stylish, so you won’t have to worry about compromising on either. When selecting a handbag, choose a neutral color such as black, brown, or gray, which will probably go with any outfit you take on your trip. For added convenience, opt for a handbag with a crossbody strap that you can easily wear all day. It also will help if you don't have room to set it down if you are doing a standing tasting or a tour where you need your hands to hold your wine when walking. A small handbag is the perfect accessory for a winery visit, so be sure to pick one up before your next outing.

3. Skip your Perfume

When wine tasting it’s best to skip the perfumes to avoid overwhelming the smell of the wine. It also could compromise your sense of smell when picking up notes of flavor, as well as those around you. If you can't help but wear some opt for only a squirt or two.

4. Wearing Jeans

Denim jeans are a classic look that won’t show too much dirt if you are walking through the vineyards. They also look great with almost any top and can be dressed up or down for chich or casual winery outfits. A statement coat is a great way to make an entrance and can really dress up an outfit with a pair of flattering jeans. Wine tasting is a whole experience and you want to dress a little more like a business lunch than as you would for an afternoon hike. Although you will see people wearing all sorts of things, I tend to dress up a bit for the part and enjoy the fun in it! If you opt for denim jeans I say dress up the top and shoes to give a beautiful look.

5. Dresses

If you’re looking to dress up or if you are like me and personally feel more comfortable in dresses, an elevated dress can be the perfect look. If you’re looking for something more comfortable if it's cold, a sweatshirt dress is a cozy option perfect for lounging at the winery. Boots are a must for a winery outing. Whether you prefer ankle boots or knee-highs, you’ll look stylish and be comfortable pairing them with a dress. Fall in California in the regions of Paso Robles & Napa doesn't get too chilly, so a light dress with sleeves is usually enough for the day of wine tasting. I would still recommend bringing a sweater or coat to add over top. In Winter months it does get a bit colder, so you will need leggings or tights for a dress option and a coat that you can add if it gets even colder.

6. Shoes

When it comes to shoes, boots are a great choice for a winery visit in the cooler months. Choose a pair that you can walk comfortably in for several hours if you plan on exploring the grounds. For example, ankle boots or riding boots are a great option that can be dressed up or down. If it’s especially cold, you can even opt for lined boots for extra warmth. Some may say no high heels but it depends on the type of wine tasting you are doing. In most wineries, you sit in one spot and you are fine with any kind of shoe. If you are planning a tour inside of the barrel rooms or out in the fields you will most likely need a closed-toed shoe. I typically opt for a thicker high heel if I am going to wear them that way if I need to walk on dirt or rocks I am more stable. If it's winter months I opt for a closed-toe bootie with a small chunky heel that you will see in photos.

7. Accessories

To keep you extra warm and on-trend, a wide-brimmed hat is a great option. A leather jacket is also a stylish way to add some edge to your outfit and a great layering piece to be ready for all weather. If it’s really cold out, tights are a great way to keep your legs warm and stylish in dresses or with long knit sweaters. A cozy scarf is the perfect way to add a bit of warmth and style. If you are looking for something simple to elevate your look fun earrings are always a great idea! They are also a really cool way to get creative and add a touch of sparkle to your outfit. Lastly, don't forget your sunglasses. Many wineries have outside seating and usually have beautiful sunny skies. You will want to be able to have sunglasses to stylishly enjoy the rolling heels of the winery without squinting.

Is it necessary to wear a heavy coat to a winery during winter?

Visiting a winery during the colder months of fall and winter can be a great way to enjoy a different kind of outdoor adventure. However, it’s important to dress appropriately for the weather conditions so you can fully enjoy the experience. A heavy coat is not always necessary, depending on the winery’s location and the weather conditions. A light jacket or sweater may do the trick. If you are visiting a winery in an area with colder temperatures, it’s a good idea to pack a warm coat or jacket to wear outside. Layering is always a good option for fall and winter winery visits. Wear your light jacket or sweater and add a heavier coat when the temperature drops. Consider bringing a blanket or scarf to wrap up in if you find yourself in a particularly cold spot. Don’t forget to bring along some comfortable shoes or boots for exploring the winery grounds. In areas like Paso Robles, it gets very windy and cold at night, making for great wine, but also as a reason you will need a coat more at night than during the day.

Suitable clothing color schemes for a winery visit in fall and winter

Fall and winter are great times to visit a winery, and what you wear should reflect the season. For fall, the changing leaves provide an array of colors to work with. Earthy tones like burgundy, brown, deep greens and shades of gray are perfect for this time of year. To create a more sophisticated look, you can add texture by layering pieces such as a blazer, scarf, or cardigan. Accessories like hats, scarves, and boots will also help to keep you warm and stylish.

When it comes to winter, it's easy to stick with neutrals such as shades of black, white, and beige. This creates a more elegant look that will keep you warm without sacrificing style. If you want to add a pop of color, choose one color and stick with it for a monochromatic look. Cool shades of light pink or deep romantic tones are a great look as well. Layering a jacket that matches the same color as your top always gives an elevated look and helps when knowing what to wear to a winery in fall and winter. A capsule wardrobe always comes in handy here and is a really great way to pack for trips in general.

No matter what season you’re visiting a beautiful winery in, you can look stylish and stay comfortably warm. Choose colors and textures that work with the season, and accessorize to add the perfect finishing touches. With the right outfit, you’ll be ready to enjoy a beautiful day at the winery!

Other Wine-Related Blog Posts:

Paso Robles City Guide

The Bloggers Guide to Merlot

Uncork the Perfect Evening: Discover the Optimal Three-Course Meal to Pair with J. Lohr

Planning the Perfect Romantic Picnic with J. Lohr Wines

The Perfect Match: Grilled Steak & Blue Cheese Salad with Grilled Corn paired with J. Lohr Estates Seven Oaks

The Perfect Pair: Chicken Picatta and J. Lohr Wine

You can also see on my Instagram highlight under "Paso Robles" or "J. Lohr Trip" additional looks I have worn over the years wine tasting and some of my favorite places.

Perfect Pairings: Savor the Flavor with Our Ultimate Steak and Feta Crostini Recipe!

Welcome to this culinary delight where the rich, savory flavors of a perfectly grilled juicy steak meet the tangy punch of feta cheese, all piled atop a crisp, golden crostini. In this blog post, we'll take your taste buds on an adventure by marrying the hearty comfort of steak with the sharp, creamy essence of one of Greece's most famous cheeses. Whether you're planning an upscale appetizer for your next dinner party or simply seeking to jazz up your at-home snack game, these steak and feta crostinis promise to be a crowd-pleaser. Join us as we explore the simple yet sophisticated world of creating this mouth-watering combination, where each bite is a symphony of textures and flavors that are sure to leave you craving more.

Bread Alternatives

When making steak and feta crostini, the type of bread used is an important factor to consider. Ciabatta bread is a great option, as it has a slightly chewy texture that helps hold the toppings well. French baguettes are also an excellent choice, as their crisp crust and fluffy interior make them well-suited for crostini. Sourdough bread is a good choice as well, as its slightly tangy flavor helps balance out the savory flavors of the steak and feta. For those looking to add a bit of nutrition to their crostini, whole wheat bread is a great option. Rye bread can be a nice option if you prefer its flavor to the crostini, for those looking to experiment with different flavors. It is important to choose a bread that you like, and one that will complement the flavors of the steak and feta. These are all great options.

Steak Preparation

To make the perfect steak for topping crostini, heat a skillet over medium-high heat and season the steak with salt and pepper. Sear the steak on both sides for 2-4 minutes, or until it’s cooked to your desired doneness. Once the steak is cooked, remove it from the skillet and let it rest for 3-5 minutes. Slice the steak against the grain into thin strips. Serve the steak on crostini, along with feta cheese, fresh herbs and other desired toppings. The combination of steak and feta on a crispy crostini is a powerful flavor combination that will tantalize your taste buds.

Cheese Alternatives

If you're looking for an alternative cheese to top your steak and feta crostini, you should consider trying crumbled goat cheese, blue cheese, or gorgonzola. All of these cheeses provide a creamy, tangy flavor that pairs well with steak and makes a delicious alternative to feta. Goat cheese and blue cheese are milder in flavor than feta, while gorgonzola is a bit stronger but still delicious. Additionally, if you're looking for a more mild cheese, you could opt for a brie or mozzarella. Whichever cheese you choose, you can be sure that your steak and feta crostini will be a delicious and flavorful dish.

Ingredients

1 pound ribeye steak

1 French baguette

3 tablespoons melted Butter

6 oz feta cheese

4 oz Greek yogurt

3 tablespoons extra virgin olive oil

2–3 tablespoons water

Salt & pepper, to taste

Basil pesto spread

Instructions

1. Arrange the baguette slices on a large baking sheet. Lightly brush both sides of the bread with melted butter. Place bread under the broiler for 1-2 minutes on each side until lightly brown. Briefly set the crostini aside to cool.

2. Pat both sides of the steak with a paper towel. Season with salt and Pepper to taste. Add 1 tablespoon of butter to a heated skillet and add prepped Ribeye steak cooking both sides for three minutes. Remove the steaks to a cutting board and let them rest for 10 minutes before thinly slicing them against the grain.

3. While the steak is resting, make the whipped feta. Add crumbled feta, greek yogurt, olive oil, and water and blend until smooth and well blended. Prepare the crostini by layering bread, feta mixture, a thinly sliced steak, and pesto on top. Serve & enjoy your steak crostini!

Other Hearty Appetizer Recipes:

A Crowd-Pleasing Stuffed Mushroom Recipe

5 Ingredient Bacon Ranch Football Shaped Cheese Ball

Create a Delicious Layered Hummus Dip for Your Next Snack or Appetizer

Delight Your Guests with an Antipasto Christmas Wreath

Festive Flavors Unveiled: Crafting a Herb Christmas Tree Focaccia Bread Masterpiece for the Holidays

'Tis the season for savory scents and festive flavors! As the holiday cheer begins to fill the air, what could be more delightful than combining the comfort of freshly baked bread with the spirit of a lovely Christmas tree? Enter the Herb Christmas Tree Focaccia Bread – a holiday twist on a classic Italian favorite bread that's sure to dazzle your dinner guests. Whether you're hosting a cozy family gathering or looking to impress at a yuletide potluck, this aromatic blend of rosemary, thyme, and other herbs arranged in a charming Christmas tree shape will not only be a feast for the eyes but a treat for the taste buds as well. So don your aprons, preheat your ovens, and let’s embark on a culinary journey to craft the perfect focaccia recipe for Christmas!

How to Store Focaccia

To store the Herb Christmas Tree Focaccia Bread, you have a few options. For short-term storage, an airtight container will keep the focaccia fresh for up to two days at room temperature. For longer-term storage, wrap the focaccia tightly in plastic wrap and store it in the refrigerator for up to five days. You can also store it in a freezer-safe bag for up to three months in the freezer. When it’s time to reheat the Herb Christmas Tree Focaccia Bread, wrap it in a damp paper towel and place it in the microwave for 30-45 seconds. Enjoy your delicious and unique holiday treat!

What To Pair With Festive Christmas Tree Focaccia

Herb Christmas Tree Focaccia Bread can be served as a side dish with any holiday main course, or as an appetizer served on a cheese plate. For a hearty cold-weather meal, serve it with a tomato and mozzarella salad, soup, or stew. To add even more flavor, top it with a variety of your choice of herbs and seasonings. This delicious bread is sure to be a hit with friends and family during the holidays. It also makes a great homemade gift for those special people in your life. So, this holiday season, make sure to give your loved ones the gift of Herb Christmas Tree Focaccia Bread.

Making Herb Christmas Tree Focaccia Bread is easy and customizable. You can experiment and use your favorite herbs and spices to create a flavor that you and your family will love. Topping the bread with cheese and your favorite vegetables is a great way to add a few extra special touches. Serve with a side of olive oil and balsamic vinegar for dipping, and you’ve got the perfect holiday treat.

Can I make the Herb Christmas Tree Focaccia Bread ahead of time for my holiday gathering?

Making Herb Christmas Tree Focaccia Bread is simple and hassle-free. All you need to do is bake the focaccia dough, assemble the tree, and bake one final time. The process is incredibly easy and requires very little preparation. Plus, you can make it slightly ahead of time so you can enjoy the festivities without worrying about last minute prepping. Herb Christmas Tree Focaccia Bread is the perfect addition to any holiday gathering. It’s a flavorful and unique treat that everyone will love. Plus, it looks so festive and inviting and it really stands out. Your guests are sure to be impressed with your creative and delicious holiday dish.

Are there any variations or substitutions I can make to the traditional Herb Christmas Tree Focaccia Bread recipe?

Herb Christmas Tree Focaccia Bread is a delicious way to bring some festive spirit to your holiday table. This easy-to-make focaccia bread is a great way to surprise your guests with a unique and delicious twist on the traditional focaccia. The classic focaccia is made with rosemary, cherry tomatoes, green olives and thyme, but you can easily change up the flavors by using different herbs such as basil, chives, or parsley. You can also add Parmesan cheese and mozzarella for an extra layer of flavor. To add some festive Christmas flair to your focaccia, try adding cranberries or cranberry sauce.

You can also change up the ingredients by using different vegetables as toppings such as bell peppers, carrots, or mushrooms. Also, don't be afraid to experiment with different types of cheeses such as feta, cheddar, or blue cheese. With so many options available, the possibilities are endless when it comes to creating this unique and delicious Herb Christmas Tree Focaccia Bread.

Ingredients:

8 Cups Flour

4 teaspoons salt

4 teaspoons instant yeast

4 cups warm water

Olive Oil spray to grease the pan

6 tbsp olive oil

1 tsp flaky sea salt

Herbs & Veggies of choice - I used:

Rosemary Sprigs, Thyme, Cherry Tomatoes & Green Olives

Instructions:

  1. Mix flour, salt, yeast and warm water in a mixing bowl. Combine well and cover with a towel or plastic wrap. Put in fridge overnight in the mixing bowl. (9 hours or Up to 24 hours)

  2. The next morning take out the pan to bake. I like this -Jelly Roll- pan the most from 360. The sides are the perfect amount and it's a great size to bake this bread in. Drizzle oil on pan and oil on bread mixture.

  3. Lay oiled bread mixture onto the pan and let rise for 20 min covered with a towel. If your home is cooler inside I suggest warming the oven up for 1 minute while prepping bread and turning it off. Then place the pan with bread in to feel warmth and rise.

  4. After risen. Move bread into a longer shape to fill the pan and poke. Using fingers you will make small indentions along the bread. Let rise again for 20 min to 1 hour until the bread has risen enough for you to see it past the jelly roll line.

  5. Next, poke more holes and then sprinkle over the oil mixture; add in your Christmas focaccia art however you would like to arrange for decorating.

  6. Bake at 425 for 25 to 30 min until the bottom is crisp and the top is a golden color. Let cool and enjoy your gorgeous homemade focaccia bread art!

Other Delicious Bread Recipes You Will Love:

The Perfect Beginners Sourdough Bread Recipe for Delicious Homemade Bread

The Most Delicious Homemade Corn Bread Loaf Recipe

Garlic & Herb Focaccia Bread

Delight in Every Bite: Making the Ultimate Apple Cider Loaf with Brown Butter Glaze

Indulge Your Taste Buds with The Ultimate Raspberry Pistachio Cheesecake Recipe

Welcome to a yummy world where the perfect blend of the tart tastes of raspberries meets the distinctive nutty flavor of pistachios, all wrapped up in the creamy decadence of cheesecake. If you're ready to elevate your dessert game to new heights of delicious sophistication, our Raspberry Pistachio Cheesecake is the ultimate indulgence that promises to please every palate. Whether you're celebrating any special occasion or simply looking to treat yourself, this stunning dessert brings together the perfect blend of textures and flavors to create a symphony for the senses. So, preheat your oven, grab your apron, and let's embark on the culinary journey to crafting the perfect slice of heaven that's sure to become your new favorite sweet obsession.

Can I make the raspberry pistachio cheesecake ahead of time?

Making a raspberry pistachio cheesecake is a great way to impress your guests. Not only is the flavor combination of raspberries and pistachios delicious, but you can make the cheesecake ahead of time to save on time and stress. If you're making the cheesecake in advance, you can safely refrigerate it for up to 5 days. Alternatively, you can cover it with plastic wrap and freeze it for up to 3 months. If you are freezing the cheesecake, be sure to let it thaw overnight in the refrigerator before serving. To make sure the cheesecake does not dry out in the refrigerator, cover it tightly with plastic wrap or foil. If you want to make the cheesecake even further in advance, you can make the crust only, then prepare the filling separately, and assemble the cheesecake just before serving. This way, you can be sure that your raspberry pistachio cheesecake is as fresh as can be when you serve it.

Is there a gluten-free version of the raspberry pistachio cheesecake?

To make a gluten-free version of this raspberry pistachio cheesecake you can feel free to swap out the graham crackers for gluten-free variations perfect for those with gluten allergies or sensitivities. The great thing about this gluten-free version is that it tastes just as delicious as the original but without the gluten. The combination of raspberry and pistachio is a match made in heaven, and the light and creamy texture of the cheesecake is sure to please.

What's the best way to store leftovers of the raspberry pistachio cheesecake?

This delicious Raspberry Pistachio Cheesecake is sure to tantalize your taste buds and leave you wanting more! To make sure you can enjoy this sweet treat for multiple days, it's important to properly store the leftovers. To keep your cheesecake fresh, store it in an airtight container in the refrigerator for up to five days. If you want to keep it longer, make sure to properly wrap the container with plastic wrap or aluminum foil. If storing for more than five days, freeze the leftovers in a freezer-safe container for up to two months. To enjoy a slice, simply let come to room temperature before serving. Enjoy!

Can I use frozen raspberries for the cheesecake instead of fresh ones?

Making a delicious raspberry pistachio cheesecake doesn't have to be time-consuming or difficult. You can easily use frozen raspberries in place of fresh ones in the recipe, which can save you time and effort. Frozen raspberries may not have the same flavor and texture as fresh ones, but they can still make a delicious filling. When using frozen raspberries, be sure to thaw them completely and drain any excess liquid before adding them to the cheesecake. This can help to ensure that your raspberry pistachio cheesecake is both flavorful and moist. You may still want to use fresh raspberries for the topping of the cake to elevate the aesthetic look of the cake.

Ingredients

Crust:

12 oz graham crackers

1 cup pistachios

1 cup melted butter

Filling:

3 - 8 oz cream cheese ( room temperature )

1 stick unsalted butter

1/2 cup brown sugar or light brown sugar

1/2 cup granulated sugar

1/4 teaspoon sea salt

3 eggs

1/2 cup heavy cream

1 tsp almond extract

1 cup mashed fresh raspberries

Topping -

2 cups fresh raspberries

1/3 cup pistachios

powdered sugar

Instructions

1. Preheat oven to 375. Spray the cheesecake pan with olive oil spray and wrap around the outside with foil.

2. Make the graham cracker crust by adding pecans & graham crackers to a blender and processing until fine. Gradually add in melted butter and blend again.

3. Press the crust mixture into the bottom of the springform cheesecake pan until even all the way around. I use a flat-bottom cup or a metal spoon to help.

4. Bake in the oven for 13-15 minutes. Once done remove and let cool completely on the cooling rack before adding filling. Reduce oven temperature to 325 degrees.

5. Make the filling. Mix softened cream cheese and butter with both sugars and salt until well combined with a stand mixer or hand mixer.

6. Gradually add in eggs. Making sure they are fully incorporated each time. Add heavy cream, vanilla and lemon zest! Once well-mixed pour into a cooled springform cheesecake pan. Also, add aluminum foil around the edges of the cheesecake pan.

7. You will then add this onto a tray with a lip. Place on oven rack and add in warm water until halfway full. Push back the rack and start the timer.

8. Cook the cheesecake for 1 hour. The center will still be a little jiggly, but the side will be set. After baking for 1 hour you will turn oven off the oven and leave the cheesecake in the oven for an additional hour.

9. Once baked for an hour and let sit for an hour in the oven, you can remove it from the oven. Wrap the cheesecake and let sit in your refrigerator overnight. Wait for up to 24 hours before serving or adding raspberry, pistachios and powdered sugar topping.

When looking for a delicious and easy dessert to make for your next dinner party or special occasion, look no further than the raspberry pistachio cheesecake! This delectable treat combines a sweet and tangy flavor with a creamy texture that will leave your guests wanting more. This is the perfect dessert for the Christmas season. The crust is made with crushed pistachios, giving it a crunchy texture that pairs perfectly with the creamy filling. The combination of flavors is both sweet and tangy, making it a great dessert for any occasion. Plus, the raspberry pistachio cheesecake is easy to make, making it a great dessert to whip up for a dinner party or special occasion. So, if you want to impress your guests with a delicious and easy dessert, the raspberry pistachio cheesecake is the perfect option.

Other Raspberry Recipes You Will Love:

An Irresistible Treat: The Delicious Berry Custard Puff Pastry Tart

Step-by-Step Guide to Making a Refreshingly Delicious Frozen Raspberry Margarita

Other Cheesecakes You Will Love:

A Divine Caramel Cheesecake with a Graham Cracker Pecan Crust

Tantalizingly Delicious Recipe For Lemon Cheesecake With An Amazing Glaze

Experience Exquisite Sips and Join the Wine Club & Tasting Journey at J. Lohr Vineyard & Winery

Cheers to an exclusive journey for wine lovers! Last month I had the pleasure of visiting J. Lohr Vineyards & Wines in Paso Robles, CA. I love wine tasting in the beautiful, majestic golden hills of Paso Robles, and my husband and I were very excited to visit J. Lohr for the very first time. We greatly enjoyed the knowledge we gained about the brand as well as getting to taste unique wines sold exclusively at the winery that we had never had before. J. Lohr has been producing award-winning wines along the Central Coast since the 1970s. The winery sits in a picturesque location, featuring a charming tasting room and sprawling vineyards as far as the eye can see. They have a second location in downtown San Jose, with both tasting rooms open seven days a week offering  a variety of experiences to suit any palate. Make the most of your visit by exploring the rich history of the family-owned winery and sampling their award-winning wines. Come to taste seasonal selections and winery-exclusive wines in their newly remodeled Paso Robles tasting room or outside on the scenic veranda, perfect for bringing your furry friends. With multiple limited-release wines to sample as you take in the breathtaking estate views, this is the perfect spot to spend an afternoon in Paso Robles. Plus, their knowledgeable staff can help you find the perfect selection for your taste while they educate you on the winemaking process and share insights into the different varietals you’re tasting.

As mentioned before, if you aren't near the Paso Robles area you can still visit J. Lohr's other California tasting room. Located in the heart of Silicon Valley, San Jose is the original home to J. Lohr Vineyards & Wines. The J. Lohr San Jose wine center is a must-visit for wine connoisseurs looking to sample a wide variety of wines, from light whites to full-bodied reds.With wines from six distinct tiers, each wine comes with its own story and focus.

For those looking to get a deeper understanding of the winemaking process, J. Lohr planteda demonstration vineyard off the newly constructed patio where hosts will walk you through the vines and explain the difference of each varietalGuests will also be able to observe, touch and feel the leaves, and depending on the time of year, you might even be lucky enough to taste the grapes while learning more about the entire production process from start to finish. For those looking for an even more VIP experience, J. Lohr has different levels of membership offerings to join its Wine Club. Members become part of the winery where they enjoy exclusive benefits such as complimentary tastings, first access to new, small-lot wines, discounts on wine purchases, and access to special events throughout the year. Join the Wine Club to experience exquisite sips and discover the unique flavors and aromas that make J. Lohr wines so special. Whether you are a seasoned sommelier or a casual enthusiast looking for a remarkable wine-tasting experience, J. Lohr Vineyards & Wines is the destination for you.

BENEFITS OF MEMBERSHIP

J. Lohr offers three membership options to choose from: the Vineyard Select Society Club, the Barrel Society Club, and the Winemaker Selection Club. With each club, you will receive three shipments throughout the year in February, May and October. Additionally, with each club you have access to all the wine tiers, including J. Lohr Gesture, the winery-exclusive Vineyard Series, Cuvée Series, and Signature. What makes this wine club even better, is that you can customize your club releases! With the Vineyard Select Society Club, you'll receive a selection of eight wines every three months with a 25% discount on case purchases and a 20% discount on single bottle purchases You will also receive four seasonal tastings or legacy tastings per visit and priority access to small-lot wines and library verticals.The Barrel Society has six bottles in each shipment and the Winemaerks’ Selection Club has three club releases per shipment.

As a member, you will gain access to exclusive members-only events, and priority access to wine pairings, special dinners, and winemaker events. You'll have exclusive access to rare and limited-edition wines, as well as first access to new releases. With J. Lohr's wine club options, you can embark on a wine-tasting journey that will leave you with unforgettable memories. Enjoy a truly extraordinary wine-tasting experience by signing up for the J. Lohr Vineyards & Wines Wine Club today.

WHERE TO BUY

If you're looking to experience exquisite sips but can't get to one of the two J. Lohr tasting rooms, you can easily find J. Lohr wines near you, as they are available in stores, restaurants, and online. Some wines like my new favorite "October Nights" Chardonnay are only available at a select number of stores, at the winery itself, or through the wine club. To see if you are able to find a particular product online, J. Lohr has a ‘Find J. Lohr near you’ link on their website, making it easy to find all your favorite wines at the click of a button. Not able to locate your favorite J. Lohr wine? Simply reach out to their Hospitality Team and they can easily help arrange a shipment for you.

Other Blog Posts About J. Lohr Wine and Food Pairings:

The Bloggers Guide to Merlot

Planning the Perfect Romantic Picnic with J. Lohr Wines

The Perfect Match: Grilled Steak & Blue Cheese Salad with Grilled Corn paired with J. Lohr Estates Seven Oaks

The Perfect Pair: Chicken Picatta and J. Lohr Wine

Uncork the Perfect Evening: Discover the Optimal Three-Course Meal to Pair with J. Lohr

Yummy Pumpkin Ice Cream Recipe with a Twist: Pumpkin Molasses Cookie Chunks!

Welcome all Autumn enthusiasts to a culinary journey where the earthy richness of pumpkin blends perfectly with the dreamy creaminess of ice cream. From the hearty aromatic spices to the soul-soothing temperatures, the Fall season brings about a comfort that we all eagerly crave. Today, we are taking this comfort to another level by introducing a swoon-worthy pumpkin spice ice cream recipe. This recipe is a twist on the seasonal favorite, laced with delectable chunks of pumpkin molasses cookies. This ice cream has intense flavors, and is incredibly satisfying, making it the ultimate celebration of all things Fall. It is truly a symphony of flavors that caters to the essence of the season. The molasses cookie chunks are also being combined from my last recipe. Following both these fun recipes means you can potentially utilize any leftovers of the chunks and create new variations of lovely Fall desserts!

Can I use store-bought cookies instead of making pumpkin molasses cookie chunks from scratch?

Making homemade ice cream is a great way to show off your culinary skills, and the addition of pumpkin molasses cookie chunks makes this pumpkin ice cream recipe truly special. If you don't have the time to make the cookie chunks from scratch, store-bought cookies are a great time-saver. There is a wide variety of store-bought cookies available, so you can choose one that best suits your taste. Be sure to chop the store-bought cookies into chunks before adding them to the ice cream mixture. Store-bought cookies may not be as fun of a story, or have the same flavor or texture as cookies made from scratch, but they can still add a delicious crunch to your pumpkin ice cream.

How long does this pumpkin ice cream with pumpkin molasses cookie chunks stay fresh?

This recipe is easy to store in your freezer and can last for up to two weeks. However, before serving, it is important to allow the ice cream to thaw for about 10 minutes to make it easier to scoop. This will also help ensure that the ice cream does not dry out and the cookie chunks remain crunchy. It is best to use the ice cream within two weeks of making it, otherwise, the texture and flavor may not be optimal. After two weeks, the pumpkin ice cream may start to dry out and the pumpkin molasses cookie chunks may become soggy.

Do I need an ice cream maker to make this pumpkin ice cream with pumpkin molasses cookie chunks?

You don't have to worry about needing an ice cream maker to make this delicious dessert! This recipe is simple and easy to make without an ice cream maker. All you need is an ice cream container, an electric mixer, and some basic ingredients. The process is quite simple and requires only a few steps for a delicious homemade pumpkin ice cream with pumpkin molasses cookie chunks.

Ingredients

2 Cups Heavy Cream

14 oz Sweetened Condensed Milk (1 Can)

1 Cup Pumpkin Puree

2 teaspoons Vanilla Extract

1 teaspoon Cinnamon

1 teaspoon Pumpkin Pie Spice

1 cup pumpkin molasses cookies

Instructions

  1. In a large bowl whisk together 2 cups heavy cream until stiff peaks form. I use my hand mixer for this but you can use a whisk or electric mixer with a whisk attachment.

  2. In a separate bowl, stir together the sweetened condensed milk, pumpkin puree, vanilla, salt, cinnamon, and pumpkin pie spice.

  3. Take 1 cup of the whipped cream and stir it into the sweetened condensed milk mixture.

  4. Now add the sweetened condensed milk mixture and fold it gently into the remaining whipped cream bowl. Add in molasses cookie chunks. You can add in more, less or any variation of this you like.

  5. Pour ice cream into a freezer-safe container, cover the top and freeze for at least 6 hours, or overnight.

  6. Serve in ice cream cones or bowls and Enjoy!

Your delicious homemade pumpkin ice cream with pumpkin molasses cookie chunks is now ready to enjoy! This delicious dessert is perfect for any occasion. Whether it's a family get-together or a special occasion, this ice cream is sure to please. So gather your ingredients, follow the steps, and enjoy this delicious homemade pumpkin ice cream recipe with pumpkin molasses cookie chunks.

Other Fall Desserts You Will Love:

Deliciously Sweet: Pumpkin Coffee Cake with Pecan Crumbles

Indulge Your Sweet Tooth with This Delicious Brown Butter Spice Cake with Honey & Fig Jam Frosting

A Taste of Heaven: Deliciously Easy Apple Pie!

Sprucing Up Your Feast: My Thanksgiving Tablescape for 2023

As we anticipate the arrival of Thanksgiving 2023, there's an undeniable buzz of excitement around not only the delicious food and the joyful reunions to take place. This time of year is also the perfect opportunity to show off your creative side and design a captivating Thanksgiving tablescape. Welcome to my blog post, where we take a sneak peek into predicted trends, product suggestions, and ingenious styling ideas for your Thanksgiving tablescape 2023! Whether you're a minimalist, maximalist, or somewhere in between, join us as we explore the unique and creative ways to create a memorable ambiance for your cherished Thanksgiving dinner gathering, making it an emblem of gratitude and togetherness.

Thanksgiving is just around the corner, and that means it’s time to start planning your tablescape for the big day. Whether you’re hosting a small family gathering or a large dinner party, creating a memorable tablescape is a great way to show off your style and make the holiday extra special. For Thanksgiving 2023, why not try creating a stunning tablescape that incorporates traditional Thanksgiving colors with natural elements for a truly eye-catching display? I'll be sharing photos of my Thanksgiving table for 2023 and ideas to incorporate into your table.

Start by creating a color scheme that incorporates traditional Thanksgiving colors like deep oranges, vibrant greens and golden yellows. You can add textures to your tablescape by combining these colors with natural elements such as tree branches, dried leaves, and wheat stalks. To add a more modern touch, incorporate a mix of both classic and modern tableware. For a seasonal touch, incorporate natural elements like pumpkins, gourds, and pomegranates. You can also create unique centerpieces with seasonal flowers. To make your tablescape stand out, add small touches like candles, napkin rings, and name cards for each guest that complement your table.

In 2023, a popular trend for the perfect Thanksgiving tablescape is to incorporate natural elements with a focus on flowers, neutral shades, and natural materials. Opt for natural elements like wood and stone to bring a touch of nature into the home. Flowers are an essential part of any tablescape. Incorporating a variety of flower sizes and colors will create a cozy atmosphere that will be sure to add a touch of elegance to any dining space. Choose a variety of colors and sizes to add differing dimensions and textures to the table. These elements will provide a rustic charm and will create a beautiful contrast to the other elements on the table.

Tableware is always an important element to consider when creating a Thanksgiving tablescape. Neutral monochromatic shades like white and cream will let other elements stand out and will bring a sense of balance to the table. For an intricate look, choose tableware with unique shapes and textures or even specialized themed pieces for Thanksgiving with pumpkins & birds like mine. For a unique look, you can consider mismatched dinnerware and glassware. To add some metallic touches, opt for brass, copper, and iron. Whatever you decide to do as far as color always make sure you have enough of everything for all the courses you serve and drinks you have available. If you don't have enough room to put coffee out you can add a coffee station like I did here for after-dinner coffee & desserts. This allows your guests to help themselves when they are ready for their last course.

Online shopping is a great way to find a wide selection of Thanksgiving table decorations. Websites like Williams Sonoma offer a great selection of unique decorations that are timeless heritage pieces. I will link everything I used for this year's Thanksgiving tablescape 2023. You can add small pieces such as one pumpkin-themed plate into your neutral everyday dishes, or go all out like I did this year. When creating your tablescape, use a variety of shapes and sizes to add interest and texture to the table. Choose an assortment of patterns for the place settings, such as gold-rimmed plates, white chargers, and patterned napkins. This will help to create unique alternatives and the most memorable tablescape.

A 2023 tablescape should be unique to you and reflect your personal style. Choose colors, textures, and elements that will make your table stand out and be memorable. You can create a modern, classic, or romantic feeling and vibe with your tablescape. Incorporate natural elements such as pumpkins, gourds, leaves, and other seasonal items for a truly authentic look. Make your Thanksgiving table the talk of the group this season. With a 2023 tablescape, you can create a unique and beautiful setting for your family and friends to enjoy. Incorporate natural elements, colors, textures, and creative elements to make your table stand out and be remembered long after the holiday celebrations are over.

Take your Thanksgiving table to the next level in 2023 with a stunning trending tablescape. Start off by choosing an earthy color palette consisting of sage green, mustard yellow, and burnt umber. Bring in a seasonal touch to the table by adding gourds and pumpkins. Layer tablecloths, napkins, and table runners in coordinating colors and patterns to create a beautiful display. For added texture and visual interest, use multiple layers of flowers in different vases and sizes, or scatter pumpkins around the table. Accessorize the space with a festive wreath, a garland of greenery, and a few autumn leaves. For a special touch, arrange small potted plants and succulents as place settings for each guest, this can also be a favor for them when they leave. To add a pop of color and texture, use decorative serving dishes. Finally, place a few scented candles around the table for a cozy atmosphere. This tablescape will be sure to wow your guests and add a unique touch of your creative side to your Thanksgiving celebration. When it comes to Thanksgiving tablescape 2023 ideas, the possibilities are endless. Get creative and think outside the box. I hope this gave you some inspiration on how to put together a beautifully decorated autumnal tablescape that you will absolutely love.

Savor the Fall Season with the Perfect Pumpkin Espresso Martini

Calling all lovers of coffee, cocktails, and yummy Fall pumpkin flavors. We have a festive, Fall festive treat for you! Immerse yourself in a unique fusion of silky frothed espresso, warm spices, and a cool tang of vodka that will surprise your palate and elevate your cocktail game. This blog post will guide you through this fun recipe, introducing you to the magical infusion that is a Pumpkin Espresso Martini. This concoction is guaranteed to warmly welcome you into the toppling russet leaves and crisp air of Autumn. Uncover how to perfectly blend these tantalizing flavors into an indulgent, adult-themed, mocha-pumpkin-spice froth of goodness!

This drink is a great way to enjoy the flavors of the season without the added calories of an actual pumpkin pie. To make this martini, simply mix together pumpkin puree, espresso, vodka, and a splash of cream. The combination of espresso and vodka creates a smooth and creamy texture, while the pumpkin puree adds a sweet and spicy flavor. To complete the flavors of this drink, add a touch of cinnamon and coffee grinds to the top of the martini for a festive garnish. Serve the Pumpkin Spice Espresso Martini in a martini glass and enjoy! Whether you’re hosting Thanksgiving this year or just looking for a delicious seasonal cocktail to enjoy, the Pumpkin Spice Espresso Martini is sure to be a hit.

Why will you need to strain this drink?

The key to making the perfect pumpkin espresso martini is to strain it after it's mixed. Straining your pumpkin spice martini ensures that the drink is smooth and free of any lumps or bits of pumpkin puree. Straining also helps to keep the drink at the perfect temperature since it removes any ice that may have been used during the mixing process. Additionally, straining helps to keep the flavors of your pumpkin spice martini from becoming too muddled or watered down. Straining helps to separate the alcohol from the flavors of the pumpkin puree and other ingredients, allowing for a more balanced and refined flavorful cocktail. Finally, straining also helps to ensure that your pumpkin spice martini is free of any debris. With the right straining technique, you can enjoy a smooth and delicious pumpkin espresso martini that is sure to be a hit with your friends and family!

Choosing the best coffee roast

Another key to making the perfect pumpkin espresso martini is choosing the right espresso roast. A dark roast is usually the best coffee roast for espresso, as it has a more intense flavor and a higher caffeine content. However, medium-dark roasts are also popular for espresso, as they have a more balanced flavor and lower acidity. Some people prefer a lighter roast for their espresso, as it has a brighter flavor and more subtle notes. For a pumpkin espresso martini, a medium-dark roast is recommended, as it has a slightly sweet flavor that pairs well with the pumpkin and espresso. If you prefer a bolder coffee taste, a dark roast would be ideal, as its deep flavor complements the robust espresso and pumpkin flavors.

Once you’ve chosen the best espresso roast for you, the rest of the ingredients are easy to find. A good quality vodka, a sweet coffee liqueur, and some pumpkin puree are all you'll need to create this delicious seasonal cocktail. The result is a creamy, smooth cocktail that will have you wishing Autumn could last forever.

What tools do I need to make an espresso martini?

To make a pumpkin espresso martini, you will need a coffee grinder, an espresso or coffee machine, a shaker, a strainer, pumpkin puree, vanilla or vanilla vodka, coffee liqueur, espresso (or cold brew coffee), heavy cream, and ice. Start by grinding your coffee beans and brewing your espresso. Once you have your espresso ready, you can begin making the martini. A pumpkin espresso martini is the perfect way to enjoy a cozy fall night this holiday season. With the right ingredients and equipment, this delicious cocktail is easy to make and even easier to enjoy.

When to serve this martini

The pumpkin espresso martini is the perfect signature cocktail for a Thanksgiving or Friendsgiving party. Its sweet and creamy flavor combined with the warm, spicy notes of pumpkin and espresso makes it a festive and delicious choice. If you're looking for a cozy night in, look no further than this cozy Autumn cocktail. Enjoy a pumpkin espresso martini on a chilly evening for a festive and relaxing evening.

For a special dinner party, the pumpkin espresso martini is a great after-dinner drink. Its mix of pumpkin, espresso, and vodka makes it a rich and flavorful end to any meal. It also makes a great dessert drink for a fall-themed brunch. For those looking for a pick-me-up on a chilly Autumn day, the pumpkin espresso martini is a great choice. The combination of espresso and vodka gives this cocktail an energy boost while still providing a cozy and comforting flavor. Perfect for an early afternoon treat. This festive and flavorful cocktail is sure to make your restaurant or bar stand out from the rest.

So, as the days get colder and the leaves start to change, it's the perfect time to enjoy the cozy, festive flavor of a Pumpkin Espresso Martini. This easy-to-make cocktail combines espresso, pumpkin puree, vodka, and simple syrup for a deliciously smooth and creamy drink. The pumpkin puree gives the drink a creamy texture and the vodka adds a nice kick. The espresso adds a rich flavor that perfectly complements the pumpkin and vodka. To make this drink even more festive, top it off with some whipped cream and a sprinkle of nutmeg or cinnamon.

One of the great things about this drink is that it's perfect for both Fall and eventually Winter celebrations. It's a great way to add a festive touch to any party or gathering. If you want to make this drink even more customized, feel free to tinker and add different types of liquors or syrups. For instance, a cinnamon-flavored vodka or spiced rum are great options to add to a seasonal irresistible touch.

Ingredients

1 oz Vodka

2 oz Coffee Liqueur

2 oz Espresso

2 oz Heavy Cream

2 teaspoons pumpkin puree

1/4 teaspoon pumpkin pie spice

Ice

Instructions

1. Add all ingredients to the shaker, if espresso is hot, add last.

2. Shake vigorously for 10-15 seconds. Make sure to do this to make the foam for the top of the martini.

3. Pour into martini glass and garnish. I sprinkled pumpkin pie or cinnamon on top with 3 coffee beans. Serve and Enjoy immediately.

What flavors can you add to an espresso martini?

To make a truly delicious pumpkin espresso martini, start with a shot of espresso and a shot of vodka. Add a few drops of vanilla, caramel, hazelnut, cinnamon, and pumpkin spice. Stir it all together and add a dash of nutmeg for an extra kick. Top off with a dollop of whipped cream and a sprinkling of chocolate for a truly decadent treat.

For an extra special twist, add a splash of Irish cream, coconut, amaretto, or Kahlua. Each of these flavors will add a unique depth and complexity to your martini. Whether your guests prefer something sweet or something a little more daring, the pumpkin espresso martini has something for everyone.

Want to turn this cocktail into a little Christmas magic. Substitute the pumpkin puree for peppermint extract and you quickly and easily have the most delicious peppermint espresso martini for happy hour!

Can a pumpkin espresso martini be served both cold and warm?

A pumpkin espresso martini can be served both cold and warm, depending on the preference of the person drinking it. If served cold, the vodka and espresso are mixed together with pumpkin puree or syrup, and shaken vigorously. This mixture can then be strained into a martini glass and garnished with a sprinkle of pumpkin pie spice for a traditional cold pumpkin espresso martini. Alternatively, for those who prefer a warm variation, a warm pumpkin espresso martini can be served with a dollop of whipped cream, a sprinkle of pumpkin pie spice, and a cinnamon stick. This warm variation is perfect for those chilly autumn nights, providing a warm and cozy feeling. Regardless of how you choose to serve it, a pumpkin espresso martini is a delicious and unique twist on the classic martini. Whether you’re looking for a unique way to impress your guests or just want to enjoy a delicious cocktail, a pumpkin espresso martini is the perfect choice.

Guide to Making A Delicious Decadence: The Perfect Caramel Pear Galette

Today we are happily inviting the coziness of the Fall season into your kitchen with our exquisite Caramel Pear Galette recipe. This delightful dessert combines the gentle sweetness of pears, the rich decadence of caramel, and the rustic charm of a free-formed crust in a symphony of flavors that encapsulate the essence of Autumn. Baking a galette may sound and seem complex, but our step-by-step guide will demonstrate just how easy it is to conjure up this impressive treat. This galette is perfect for indulging on a chilly evening or impressing guests at any gathering. So get ready to embark on this delicious journey together.

Combining ripe pears, a flaky pastry crust, and a simple caramel sauce, this classic French dessert is sure to please any crowd. The caramel sauce adds a rich sweetness to the tartness of the pears, for a perfectly balanced flavor. This galette recipe is also incredibly simple to assemble, requiring no special baking skills or equipment. Enjoy the galette on its own or pair it with a sweet scoop of vanilla ice cream or whipped cream for an added indulgence. This simple and delicious dessert is sure to become a favorite in your home. Try this Caramel Pear Galette recipe today for a classic French dessert that is sure to please everyone.

What is a galette?

When it comes to French pastries, a Caramel Pear Galette is a classic dessert that will leave your guests wanting more and more. A galette is an unleavened dough that is folded over the filling and is similar to a tart, though the dough is usually thicker and not as flaky. Galettes are versatile and can be made with a variety of fillings, but the Caramel Pear Galette stands out for its delicious combination of poached pears, caramel, sugar, and spices.

This dessert is surprisingly easy to make and perfect for any celebratory occasion. The crust is made with a simple pastry dough that contains butter, flour, salt, and water. The pears are poached in a mixture of caramel, sugar, and spices such as cinnamon and nutmeg. The pears are then placed onto the pastry dough and the edges are folded up and over the pears. Finally, the Caramel Pear Galette is brushed with melted butter and baked until golden and bubbly.

The Caramel Pear Galette is a delicious and easy-to-make dessert that will leave your guests satisfied and wanting more. Whether you’re looking for something quick and tasty to bring to a party, or you’re in the mood for a classic French dessert, the Caramel Pear Galette is sure to please.

Ingredients

1 store-bought pie crust

2 tablespoons Caramel Sauce

3-4 Pears, cores removed, sliced into 1/8” slices

3 tablespoons White Sugar

2 teaspoon Cinnamon

1/4 tablespoons Nutmeg

4 tablespoons Cold Butter, cut into small cubes

1 teaspoon melted butter for edges

Turbinado or granulated Sugar, for sprinkling on the crust (optional)

Caramel Topping

1 cup granulated sugar

6 tablespoons unsalted butter, cut into pieces

1/2 cup heavy cream

1 teaspoon vanilla

Instructions

1. Preheat oven to 375°F. Remove dough from the freezer and let come to room temperature. In a small bowl, combine sugar, cinnamon, and nutmeg. Set aside.

2. Sprinkle all-purpose flour and roll out the dough, place on parchment paper and cookie sheet. Spread a layer of caramel along with the bottom of the galette dough, leaving a 2-inch border around the edges. Then place the sliced pears in a single, even, and relatively compact layer on top of the apple butter. Sprinkle the pears with the sugar mixture, then top with the cubed cold butter.

3. Gently fold the bare edge of the dough over the filling, overlapping the dough as necessary. Press gently to seal the edges.

4. In a small dish melt the butter and brush across the edges of the galette, then sprinkle with turbinado sugar.

5. Place the Rustic Spiced Pear Galette into the oven, and bake for 35 minutes. Serve warm with vanilla ice cream and extra caramel sauce on top or on the side.

Caramel Sauce

  1. Put 1 cup granulated sugar in a saucepan and heat it over medium heat for about 10-15 minutes, constantly stirring. The sugar will start melting and form clumps, which will turn into amber/brown liquid.

  2. When the sugar is completely melted, add 6 tbsp cubed butter and stir. At this point, the mixture will start to bubble. Stir for a couple of minutes until the butter is melted. First, it will look like the sugar and butter are separated, there is nothing wrong with that.

  3. Gradually add ½ cup heavy cream and stir. It will bubble again.

  4. Stir for another minute, then remove from the heat and add vanilla. You can also add salt at this time if you wish.

Other Fall-Inspired Sweet Treat Recipes:

Satisfy Your Sweet Tooth: A Guide to Making Irresistible Salted Pecan Brownies

Mastering the Ultimate "Kitchen Sink" Rice Krispie Treat Recipe

Indulge your Sweet Tooth: The Ultimate Guide to Making Brown Butter Maple Pecan Chocolate Chunk Cookies

How to Make Fall Chai Low Sugar Scones with Splenda

Savor the Sweetness: A Guide to Making Carrot Sheet Cake with Brown Butter Frosting

Sweet Serenity: Mastering the Art of Pumpkin Cinnamon Rolls with Cream Cheese Icing

Mastering the Ultimate "Kitchen Sink" Rice Krispie Treat Recipe

Welcome to our latest blog post where we're diving into the deliciousness of Kitchen Sink Rice Krispie Treats! If you thought that Rice Krispie treats were only meant to be plain, ordinary, and traditional, then prepare to be amazed. This isn't your run-of-the-mill dessert, but a sensational mix of flavors and textures that elevate this beloved classic to a whole new level. And what earned our variant the name "Kitchen Sink"? Well, we've thrown in just about everything in the pantry but that! So, fasten your apron strings, and get ready to join us as we embark on a mouth-watering journey to create the ultimate sweet delight.

Kitchen Sink Rice Krispie Treats are the perfect way to satisfy your sweet tooth. This delectable treat is made by combining Rice Krispies, marshmallows, and an array of mix-ins like chocolates, butterscotch chips, coconut, peanut butter, candies, pretzels, chips caramel and nuts. It is a great option for any occasion, from a birthday party to a movie night. Plus, the recipe is easy to follow and highly customizable. You can mix and match different flavors and textures to create a signature flavor that suits your tastes and occasion. Whether you’re looking for something sweet or savory, these treats are sure to please. They are perfect for a party, potluck, or just a fun afternoon treat for the family. These treats are sure to be gone in no time! All you need to do is melt your marshmallows and butter, mix in the remaining ingredients, press the mixture into a pan, and let them cool. The full recipe for the kitchen sink rice krispie treat is below.

Variations I can make with the base recipe of Rice Krispie Treats

Kitchen Sink Rice Krispie Treats are delicious and easy treats that can be customized to suit any taste. Start by making a classic Rice Krispie Treats recipe with butter, marshmallows, and Rice Krispies cereal. For a delicious twist, add some peanut butter or Nutella for a delicious twist. Sprinkle some mini chocolate chips into the mix for a sweet and salty combination, or use butterscotch chips for a rich flavor. If you’re looking for extra crunch, top the treats with some chopped nuts. For a unique flavor, try using your favorite cereals instead of Rice Krispies. Add some dried fruit for a slightly tart and chewy texture and make it extra special with a drizzle of melted white or dark chocolate over the top. If you’re feeling adventurous, use mini colorful marshmallows instead of regular-sized marshmallows for a fun and colorful twist. For a tropical flavor, add some shredded coconut to the mix. Kitchen Sink Rice Krispie Treats are a delicious and extremely customizable treat that everyone will love.

Ingredients

3 tbsp Butter, Melted

11oz Marshmallows

5 cups Rice Krispies Cereal

1/4 cup chunks of caramel

1/2 cup crushed pretzels

1/2 cup salty wavy potato chips

1/2 cup chocolate chunks

1/2 cup chopped pecans

Instructions

1. In a large microwavable bowl add marshmallows and butter. Microwave for 1 minute, stir and continue this until the marshmallows are soft and the butter is melted.

2. Add in rice krispies cereal, all of the caramel chunks, 3/4 of the pretzels, potato chips, chocolate chunks, and chopped pecans. Leave a little of each aside to add on the very top. Combine all ingredients.

3. Once all combined. Prepare a rectangular or square pan by rubbing butter all over the sides and bottom. Rub butter on your hands and on a spatula. Pour krispie ingredients into the prepared pan and flatten together until the top is almost smooth. Sprinkle on the remainder of the pretzels, potato chips, chocolate chunks and pecans. Press into the krispie mixture and let sit for 5-10 minutes to harden.

4. Once hardened slightly flip the pan over and let the rice krispie come out onto a cutting board. Cut into squares, serve and enjoy!

How to store leftover Kitchen Sink Rice Krispie Treats to keep them fresh

Once prepared, these treats can last for several days if stored properly. To keep your Kitchen Sink Rice Krispie Treats fresh, store them in a cool, dry place such as a pantry or cupboard. The best way to preserve the freshness of these treats is to place them in an airtight container. When stored this way, they can last for up to a week. If you need them to last longer, wrap each individual treat in plastic wrap or aluminum foil and refrigerate for up to a week. Alternatively, you can wrap them in plastic wrap place them in a resealable freezer bag and freeze them for up to three months.

Whether you choose to store them in the cupboard or freezer, Kitchen Sink Rice Krispie Treats are sure to be a hit with the whole family. With the ease of preparation and extended storage time, these treats can be enjoyed for days to come.

Other Easy Desserts You Will Love:

A Deliciously Sweet Treat: Mini Key Lime Pies with Splenda

The Best Monster Cookie Recipe You'll Ever Try!

How to Make the Perfect Arnold Palmer Popsicle: A Delicious Summer Recipe

Indulge Your Sweet Tooth with This Delicious Brown Butter Spice Cake with Honey & Fig Jam Frosting

Pumpkin Shaped Baked Brie Paired with J. Lohr Carol's Vineyard Cabernet Sauvignon

Welcome to this gourmet food and wine pairing blog post, featuring my lovely mom as our special guest! Today, we're exploring the rich flavors and refined elegance of - a delicious Pumpkin-shaped brie Puff Pastry with blackberry, pumpkin butter and rosemary shallot flavors. I know that's already a lot of flavors to say, but we aren't stopping there. We're pairing this indulgent pastry with the sophisticated, full-bodied taste of J. Lohr Carol’s Vineyard Cabernet Sauvignon. So, whether you're getting ready to impress your guests at your next Fall dinner party or simply indulging in an evening of delicacies for yourself, now is the time to sit back, and let us guide you through this amazing taste sensation. Get ready to discover how a classic wine, bursting with black currant, cherry, and dark chocolate notes, can enliven the taste buds when paired with this delectable pastry. So uncork that bottle, and preheat your oven, as we introduce you to this perfect, palatable pairing.

2021 J. Lohr Carol's Vineyard Cabernet Sauvignon

The 2021 J. Lohr Carol's Vineyard Cabernet Sauvignon is a full-bodied, robust red wine sourced from St. Helena in the Napa Valley. Aromatically, the wine presents complex notes of blackberry, black cherry, and mocha. On the palate, the wine is creamy and structured with a long, smooth finish. This wine is delicious in every way and pairs perfectly with a grilled ribeye steak with rosemary and shallots, or porcini pork tenderloin. Of course, these 3 pumpkin-shaped bries we are sharing with you today pair exquisitely well.

Now, you may be wondering why I have my Mom as a special guest today, and it's not just because she loves this recipe. I have her here because along with Jerry Lohr’s late wife, Carol Waldorf Lohr, she too has had breast cancer. Unfortunately, breast cancer runs on  my mother’s side of the family. Along with my Mom, my Grandmother and Aunt have also had breast cancer. We have been blessed that my Mom is now a survivor, and has been for the past 15 years. However, we know the importance of early detection and love the story behind this beautiful Cabernet Sauvignon which was named after Carol Lohr. Carol passed from complications from breast cancer, which is why the J. Lohr family is devoted to advocating for breast self-care and early detection. Through the J. Lohr Touching Lives® initiative, they have surpassed $1 million in support of crucial services to help prevent breast cancer. and have proudly funded more than 8,000 mammograms for women in need. Coming from a family that has a long history of this terrible disease, I am so proud to be working with J. Lohr and proud to be sharing my passion for good food and recipes along with great wine pairings. I truly hope you can enjoy making yourself this yummy meal when sipping on a glass of this wine with a cause in honor of Carol Lohr. You can give back in 3 ways this October and beyond with the J. Lohr family:

1. ENJOYING A BOTTLE OF CAROL’S VINEYARD CABERNET

A $3 donation from every purchase of J. Lohr Carol’s Vineyard Cabernet Sauvignon, whether at your local restaurant, wine shop, online, or at our Wine Centers, is donated to NBCF’s important programs.

2. ATTEND A J. LOHR TOUCHING LIVES WINE DINNER

Join and raise a glass in support of this worthy cause at top restaurants across the country. Upcoming dinners are listed on their website.

3. DONATE DIRECTLY TO NBCF

Donating directly to National Breast Cancer Foundation, Inc.® puts you on the front line in the fight against this deadly disease. Joining in whatever way you can means the world to women, men, and families impacted by breast cancer.

3 Delicious Pumpkin Shaped Brie Flavors

Pumpkin Butter

The Carol’s  Cabernet pairs perfectly with this brie & pumpkin stuffed puff pastry. With its creamy texture and nutty flavor, the food perfectly complements the boldness of the wine. The nutty notes of the brie and pumpkin are the perfect accompaniment to the bold, robust flavors of the wine.

Ingredients

1 regular-sized brie or 3 mini

1 tbsp melted butter

1/3 cup pumpkin butter

1 puff pastry for regular or 1 1/2 for 3 mini

Sage

Cinnamon Sticks

Instructions

  • 1) Preheat oven to 375 degrees and line a baking sheet with parchment paper

  • 2) Lay a puff pastry sheet on parchment paper then add the pumpkin butter in the center and place the brie on top. Same for mini just divide evenly.

  • 3) Wrap puff pastry around the brie and fold over the bottom.

  • 4) Cut about 6 stripes of baker’s twine and lay them crossed over each other evenly to form the pumpkin shape. Flip over the brie so the non-folded part is on top and tie each string together. Cut the extra string off.

  • 5) Brush melted butter around the pastry sheet and then bake in the oven for about 20 minutes or until the pumpkin is golden brown for regular size and 12-15 for mini.

  • 6) Allow the brie to cool for a few then carefully cut and remove the strings and add the sage leaves and cinnamon stick for the pumpkin look

  • 7) Serve with desired crackers, apples or pretzels and J. Lohr wine! Enjoy!

Dark Blackberry

The combination of a blackberry brie puff pastry and Carol's Vineyard Cabernet is a match made in heaven. The deep berry flavors of the cabernet are balanced perfectly with the creamy brie cheese and flaky puff pastry. The tannins of the wine will provide a nice contrast to the richness of the brie, while the bright acidity will help to balance the sweetness of the blackberry sauce. The puff pastry is light and flaky, while the combination of blackberry and brie gives it a creamy and sweet flavor. Whether you’re serving this as an appetizer or dessert, your guests will be sure to enjoy it.

Ingredients

1 regular-sized brie or 3 mini

1 tbsp melted butter

1/3 cup blackberries, smashed

1 puff pastry for regular or 1 1/2 for 3 mini

Sage

Cinnamon Sticks

Instructions

  • 1) Preheat oven to 375 degrees and line a baking sheet with parchment paper

  • 2) Lay a puff pastry sheet on parchment paper then add the smashed blackberries in the center and place the brie on top. Same for mini just divide evenly.

  • 3) Wrap puff pastry around the brie and fold over the bottom.

  • 4) Cut about 6 stripes of baker’s twine and lay them crossed over each other evenly to form the pumpkin shape. Flip over the brie so the non-folded part is on top and tie each string together. Cut the extra string off.

  • 5) Brush melted butter around the pastry sheet and then bake in the oven for about 20 minutes or until the pumpkin is golden brown for regular size and 12-15 for mini.

  • 6) Allow the brie to cool for a few then carefully cut and remove the strings and add the sage leaves and cinnamon stick for the pumpkin look

  • 7) Serve with desired crackers, apples or pretzels and J. Lohr wine! Enjoy!

Rosemary and Shallot

The savory flavors of the rosemary and shallot brie puff pastry provide a perfect complement to the spice notes of cinnamon, nutmeg, and cocoa in the Carol’s Vineyard Cabernet. The delicate and slightly sweet flavor of the brie is balanced by the intense flavor of the Cabernet Sauvignon. The combination of the two brings out the subtle notes of blackberry and dark chocolate in the wine, making for a delightful pairing. All the while the herbal notes of the rosemary and the sweetness of the shallot bring out the complexity of the wine. With this pairing, you are sure to have one memorable evening with your guests.

Ingredients

1 regular-sized brie or 3 mini

2 tbsp melted butter

2 shallots finely chopped

1 tablespoon rosemary finely chopped

1 puff pastry for regular or 1 1/2 for 3 mini

Sage

Cinnamon Sticks

Instructions

  • 1) Preheat oven to 375 degrees and line a baking sheet with parchment paper

  • Over medium heat add 1 tbsp butter, finely chopped shallot and rosemary to the pan. Let cook until shallots are transparent.

  • 2) Lay a puff pastry sheet on parchment paper then add the shallot mixture in the center and place the brie on top. Same for mini just divide evenly.

  • 3) Wrap puff pastry around the brie and fold over the bottom.

  • 4)Cut about 6 stripes of baker’s twine and lay them crossed over each other evenly to form the pumpkin shape. Flip over the brie so the non-folded part is on top and tie each string together. Cut the extra string off.

  • 5) Brush extra melted butter around the pastry sheet and then bake in the oven for about 20 minutes or until the pumpkin is golden brown for regular size and 12-15 for mini.

  • 6) Allow the brie to cool for a few then carefully cut and remove the strings and add the sage leaves and cinnamon stick for the pumpkin look

  • 7) Serve with desired crackers, apples or pretzels and J. Lohr wine! Enjoy!

For those looking to jazz up their next cheese and wine night, this Pumpkin-Shaped Brie paired with the  J. Lohr Carol's Vineyard Cabernet Sauvignon should be at the top of the list. This combination is sure to please the most discerning foodies and is sure to be a hit at any gathering. With its bold flavors and complex notes, this pairing will elevate any cheesy and pumpkin flavors you decide to make. If you end up making all 3 of these pumpkin flavors, for a creative and festive holiday feel, I suggest plating them in a cute way such as positioning them into an adorable-looking pumpkin patch like my Mom and I did. Now, you have a beautiful meal, and a festive design, ready for any flavor profiles at the party! For an unforgettable pairing experience, reach for these delicious brie pumpkin's paired with J. Lohr Carol’s Vineyard amazing Cabernet Sauvignon.

Other Wine Blog Posts:

Uncork the Perfect Evening: Discover the Optimal Three-Course Meal to Pair with J. Lohr

The Bloggers Guide to Merlot

Planning the Perfect Romantic Picnic with J. Lohr Wines

The Perfect Match: Grilled Steak & Blue Cheese Salad with Grilled Corn paired with J. Lohr Estates Seven Oaks

The Perfect Pair: Chicken Picatta and J. Lohr Wine

Satisfy Your Sweet Tooth: A Guide to Making Irresistible Salted Pecan Brownies

Get ready to delve into the world of rich chocolatey decadent desserts again with our current star of the day - Salted Pecan Brownies! This combination of creamy salted caramel and crunchy pecans creates a truly mouth-watering treat. These brownies are moist and rich, with a texture that melts in your mouth. Topping these brownies off with a sprinkle of sea salt adds a layer of flavor and crunch, creating a unique combination of deep chocolate flavor combined perfectly with salty and sweet elements. The result is a harmonious touch of all the right taste buds perfectly at once. Salted caramel pecan brownies are perfect for any occasion, from a casual family gathering to an elegant dinner party. Whether you’re looking for a delicious dessert to enjoy with your family or to impress your guests, these brownies are sure to make your mouth water.

Equipment

Making a delicious batch of salted pecan brownies doesn't require a lot of fancy equipment. All you need is an 8 x 8-inch baking dish, a mixing bowl, a whisk, a rubber spatula, a wooden spoon, a baking sheet, parchment paper, an oven mitt, and an oven.

To begin, preheat the oven to 350°F. Then, you'll need to prepare the ingredients for the salted pecan brownies. Start by mixing all of the dry ingredients in a bowl with a whisk. Once the dry ingredients are blended, add the wet ingredients and mix them all with a wooden spoon.

Next, you'll need to get the baking dish ready. Line it with parchment paper and lightly grease it with butter or cooking spray. Pour the brownie batter into the 8 x 8-inch baking dish and spread it out evenly. Sprinkle a generous handful of salted pecans over the top of the batter, and then place the baking dish in the oven. Bake the salted pecan brownies for 15-20 minutes, or until they are golden brown.

Once the brownies are done, it’s time to make the topping. Start by melting the butter and brown sugar together in a small saucepan. Add the pecans and stir until the caramel is thick and bubbly. Pour the topping over the brownies and sprinkle with sea salt. Let the brownies cool before cutting into slices and serving. Enjoy your Salted Pecan Pie Brownies with a scoop of vanilla or your favorite ice cream or a drizzle of chocolate syrup. Enjoy!

Brownie Batter

½ cup dark brown sugar packed

1 cup granulated sugar

3 large eggs

2 teaspoons vanilla extract

1/2 cup salted butter

1 cup all-purpose flour 

1/2 cup unsweetened cocoa powder

1/2 tsp baking powder

¼ teaspoon salt

1/3 cup heavy whipping cream

Salted Pecan Topping

1/2 cup Granulated Sugar

1/2 cup Dark Brown Sugar

2 tablespoons All-Purpose Flour

1/2 cup Dark Corn Syrup

2 Large Eggs

1/2 cup salted Butter

2 teaspoon Vanilla Extract

1 cup Chopped Pecans

1/2 cup whole pecans

1/2 tablespoon Sea Salt Flakes (sprinkled on before baking)

Instructions

  1. Preheat the oven to 350 degrees and oil and line an 8 x 8 pan with cooking spray and parchment paper. 

  2. In a large mixing bowl, whisk together the melted butter, dark brown sugar, and granulated sugar until light and fluffy. Add in eggs and vanilla and mix again. Set aside.

  3. In another medium bowl, whisk together the all-purpose flour, salt, baking powder and unsweetened cocoa powder. Gradually mix in wet ingredients into dry. Lastly, add in heavy whipping cream.

  4. Pour the batter into the prepared pan & smooth the top to an even level.

  5. Place into oven and bake for 20 minutes. While this is baking prepare the pecan topping.

  6. In a small stovetop saucepan, combine the sugar, dark brown sugar, flour, corn syrup, lightly whisked egg and vanilla. Stir constantly over medium heat until the sugar dissolves. This will be about 5 minutes. Stir in the pecans and butter until well combined.

  7. Once the brownies are done baking pull out of the oven and pour the pecan mixture over top. Add whole pecans on top of the pecan mixture evenly over top and sprinkle with sea salt. Bake for an additional 25-30 minutes or until the pecan layer is starting to set. It will still be slightly jiggly in the middle.

  8. Once baked remove from oven and let cool for 10-15 minutes. Remove brownies from the pan with parchment paper and place on a cookie sheet to let cool completely. Place in fridge for 30-45 minutes to let set and cool.

  9. Remove from refrigerator and cut into squares with a warm sharp knife. Enjoy!

These brownies are easy to make and are a guaranteed crowd-pleaser! With just a few simple ingredients, you can have this delicious treat in no time. Not only are they delicious, but they also make a great gift idea for any occasion. So, the next time you're looking for a special treat that will satisfy everyone, Salted Pecan Pie Brownies are the perfect choice.

Can I freeze the salted pecan brownies for later consumption?

Ever found yourself in a situation where you craved brownies so bad but you weren't going to be able to enjoy the whole batch over the next few days? Maybe it's because you are leaving town. Well, we have a solution for you! The rest of these Salted pecan brownies can be frozen for later consumption! To freeze the brownies, place them in an airtight container or wrap them in plastic wrap or aluminum foil. If you choose to wrap them in plastic wrap, make sure to remove as much air as possible before sealing. To thaw the brownies, place them in the refrigerator overnight or for several hours. Enjoy your delicious salted pecan brownies whenever you are ready! With this simple freezing and thawing hack, you can still have the rest of your delicious treat whenever you want!

Other Delicious Desserts You Will Love:

Deliciously Sweet: Pumpkin Coffee Cake with Pecan Crumbles

Tantalizingly Delicious Recipe For Lemon Cheesecake With An Amazing Glaze

Brown Butter Caramel Pretzel Cookies

Delicious & Easy Apple Pie

Indulge your Sweet Tooth: The Ultimate Guide to Making Brown Butter Maple Pecan Chocolate Chunk Cookies

Welcome to an utterly scrumptious journey into the world of baking! Today, we're indulging in the divine fusion of flavors that is none other than Brown Butter Maple Pecan Chocolate Chunk Cookies. The name might be a mouthful, but so is every bite of these glorious treats! These are not your typical chocolate chip cookies. They are packed with loads of different great flavors and textures that all hit you at the perfect time. With the sophistication of brown butter, the earthy sweetness of maple, the nutty crunch of pecans, and the gooey richness of chocolate chunks, these little pieces of sweet heavenly tastes and textures will make your taste buds dance in delight. So, put your apron on and get ready to be the star of any bake sale, class party, or family gathering with these irresistible delights!

What is brown butter?

The secret ingredient that sets these cookies apart from the rest is brown butter. Brown butter is a cooking technique that adds a rich and nutty flavor to recipes. To make brown butter, simply melt butter in a saucepan over medium heat until the butter foams and the milk solids turn golden brown. This technique can add an extra layer of flavor to a variety of dishes, from sauces and soups to baked goods. The brown butter in these cookies is what gives them such an incredible depth of flavor, and it is further enhanced by the addition of maple syrup, pecans, and chocolate chunks. With a combination of sweet and savory flavors, these Brown Butter Maple Pecan Chocolate Chunk Cookies will quickly become a favorite.

INGREDIENTS

1 cup pecans

2 tablespoons pure maple syrup

1 cup butter (2 sticks)

3/4 cup granulated sugar

3/4 brown sugar

1 teaspoon maple extract

2 large eggs

2 1/4 cups flour

3 teaspoons baking powder

1 teaspoon salt

1 1/2 cups of chopped semi-sweet chocolate

INSTRUCTIONS

1. Start by making brown butter in a pan, once browned pour into a new bowl and let come to room temperature. In another pan add in maple syrup & pecans toasting until browned (usually around 4-7 minutes). Then set aside and let come to room temp. Once cooled chop and set aside.

2. Preheat oven to 375 degrees. Melt the butter for 30 seconds in the microwave (if the butter is not at room temperature).

3. Add sugar & brown sugar into butter and mix. Scrape sides and mix again immediately after. Mix in Vanilla Extract and eggs. Mix again.

4. Gradually add all-purpose Flour, Baking Soda, and salt. Mix well. Once mixed well add in chopped chocolate bar that equals 1-1/2 cups and chopped pecans made above.

5. Using an ice cream scooper scoop onto a baking sheet or parchment paper 2 -3 inches apart. Sprinkle with flaky sea salt and place in oven.

6. Bake for 9 minutes and cool on a cookie sheet. Once cooked through move cookies to cooling rack. Enjoy!

Feel free to use plastic wrap to cover or if in need of longer storage an airtight container to keep cookies as fresh as possible! These make a great cookie for any time of the year, but they're especially great now for the Fall, Thanksgiving or Christmas gatherings for everyone to come! Serve with a nice hot drink for a perfect treat for the holidays!

Other Delicious Cookie Recipes:

How to Make Delicious Nutter Butter Cookies At Home

The Best Monster Cookie Recipe You'll Ever Try!

Deliciously Sweet: Mastering the Perfect Pumpkin Molasses Cookie Recipe for the Autumn Season

Brown Sugar Toffee Cookies

Brown Butter Caramel Pretzel Cookies

Birthday Cutout Sugar Cookies

How to Make Fall Chai Low Sugar Scones with Splenda

Delight your palate and satisfy your sweet tooth with a healthier twist on a classic treat. Introducing Chai Scones, crafted especially for those who yearn for sweet and spicy flavors married together, but minus the guilt. What is the secret ingredient in these scones making them a healthier choice? Splenda! Through our wonderful recipe, you can enjoy these warm, spicy scones that are beautifully balanced with the mild sweetness of frosting, without worrying about your sugar content. Get ready to embark on an unforgettable culinary journey as we dive into the world of guilt-free baking with this indulgent Splenda-infused creation that brings in Fall flavors. Let's learn how to turn this traditional teatime delight into a health-friendly delicacy that is just as delicious!

Enjoy a cozy afternoon with a cup of hot tea and a chai scone for a delicious treat. Make a decadent dessert plate by adding a few of these sweet treats, and top it off with a dollop of fresh whipped cream or the delicious frosting recipe below. For a lighter snack, serve the chai scones with a glass of cold almond milk. If you’re feeling creative, make “tea sandwiches” by cutting the scones in half, spreading a thin layer of frosting, and adding a layer of fresh fruit. Enjoy a chai scone as a morning treat with a cup of coffee or espresso for a delicious combination to start your day. With Splenda, you can indulge without the guilt. Try chai scones with maple frosting made with Splenda and enjoy a sweet treat without all the calories!

INGREDIENTS:

21/2 cups flour

1/4 cup splenda

1/2 tsp salt

1 tbsp baking powder

1/2 cup cold butter

2 eggs

1 tsp vanilla extract

1 cup heavy cream

8 ounce package of light cream cheese

1/4 cup splenda (to cover cream cheese with)

1 tablespoon chai spice blend

1/2 teaspoon ground cloves

Frosting:

3 tbsp splenda

4 oz light cream cheese

1 tsp vanilla

1 tablespoon splenda multi-use syrup

2 teaspoons chai spice blend

INSTRUCTIONS:

1. Mix together dry ingredients in a large bowl

Grate butter into bowl and blend with dry mixture. I use my hands to make sure that the butter doesn’t stick together any larger then a pea size amount.

2. After well mixed make a hole in the center of the mix and put all wet ingredients; egg, vanilla and heavy cream. Mix together.

3. Cube cream cheese into cube size chunks. Coat in a small bowl with Splenda and add into the dough. Don’t over mix just enough that its well spread out in the dough.

4. After all is mixed together, flour your work station and make dough into a pie looking round shape. Once in a circle cut like a pizza into slices. I do about 8. Place on a cookie sheet and put in the fridge for 45 min to an hour.

5. The last 10 min preheat oven to 400 degrees

Bake at 400 degrees for 15 min. Turn the temp down to 350 and bake for 10 min.

6. While baking make glaze! Melt cream cheese completely in a bowl and add in the other ingredients. Mix with a fork until you have your desired consistency. You can add heavy cream to make runnier if needed.

7. Transfer scones to cookie sheet and drizzle glaze on top. Let cool and enjoy!!

Unveiling the Beauty of Fall Foliage: Your Ultimate Fall Guide to Manchester, Vermont

As the golden hue of Autumn begins to envelop the landscapes of New England, there's no better place to enjoy the spectacular aura of Fall foliage than in Manchester, Vermont. Nestled amidst the majestic Taconic and Green mountain ranges, Manchester's montage of vibrant colors, crisp air, charming local businesses, and unique historical attractions make it a quintessential Fall destination. In our Fall guide, we bring you a plethora of activities to explore and make the most of your experience in this seasonal wonderland. Any time of the year is beautiful in this quaint town, but Fall in Manchester, Vermont takes the beauty of this town to another level. The mountains are full of a beautiful blast of colors and the leaf change really brings the tourists from all over the world, and for great reason.

Fall in Manchester, Vermont is one of the most beautiful times of the year. With the changing of the leaves and crisp autumn air, there’s no better way to spend an afternoon than exploring the area and taking in the sights and sounds of nature. Here’s your guide to some of the best things to do in Manchester this Fall:

Get the Best Views of the Foliage on the Equinox Skyline Drive

Manchester, Vermont is the perfect place to enjoy the changing of the seasons. One of the best ways to take in the beauty of the fall foliage is by taking a scenic drive along Equinox Skyline Drive. This scenic drive up to the top of the mountain offers breathtaking views at the top of the mountainside, as it follows the ridge line of the Green Mountains. Along the drive, you will find plenty of turnouts providing the perfect backdrop for some of the most beautiful nature you will ever see in your life. During the peak of the Fall foliage season, the mountainsides are ablaze with red, orange, and yellow, providing a stunning backdrop for hikers and photographers alike.

The drive culminates at the summit of Mount Equinox, the highest peak in the state of Vermont. Here, you can find plenty of opportunities for outdoor activities such as hiking, biking, and horseback riding. Whether you're looking for a peaceful stroll or an adrenaline-filled adventure, you can find something to suit your needs. Whether you are looking for a leisurely drive through the countryside or an opportunity to take in the beauty of the season, the Equinox Skyline Drive is the perfect way to experience Fall in Manchester, Vermont.

Explore Downtown Shops Like Northshire Book Store

Fall is a great time to visit Manchester, Vermont and there's no better place to start your journey than a trip to Northshire Book Store. This charming shop looks like it is straight out of a Hallmark movie. It has a wide selection of books, magazines, games and many other items to help you explore new ideas in the world of literature. But it doesn't stop there; Northshire Book Store also has a great selection of gifts, including jewelry, home decor, and so much more. After a full day of exploring the town of Manchester, you can also enjoy a hot beverage or a snack at the store's cafe. The knowledgeable staff is always available to help you find the perfect book for your Fall adventures. The store also hosts a variety of events, such as author readings and book signings, so you can stay up to date on the best books and authors. Northshire Book Store is the perfect place to stop and spend your fall days in Manchester, Vermont.

Visit The Lincoln Family Home (Hildene)

Manchester, Vermont is a beautiful town full of rich history and stunning natural landscapes. During the fall season, the town takes on a special beauty as the surrounding meadows and woodlands fill with vibrant colors of red, yellow, and orange. One of the most beautiful places to experience this Fall landscape is on the grounds of Hildene. This property was once the summer home of Robert Todd Lincoln, the son of President Abraham Lincoln, and is now a museum filled with artifacts from the Lincoln family. Today, Hildene is open to the public and offers a variety of activities that visitors can enjoy. Guided tours of the main house, gardens, train museum, farms and other sites throughout the estate are available, as well as the opportunity to simply walk around the massive beautiful grounds and take in the picturesque mountain views on your own. The estate also features a nature center, hiking trails, and a farm store.

In addition to the natural beauty, Hildene hosts a variety of educational programs, lectures, and workshops throughout the year at the Robert Todd Lincoln Center. These programs and events are designed to provide visitors with an insight into the history of the estate and the region. This Fall, experience the beauty of Manchester, Vermont and take in the stunning views of the changing landscape from the scenic overlook at Hildene.

Bike riding through Manchester Village

Fall is the perfect time to explore Manchester Village in Vermont. The village is surrounded by the stunning Green Mountains, and the roads are lined with vibrant Autumn foliage. Start your day by hopping on a bike and taking a leisurely ride through the village. You'll be rewarded with the picturesque views of the mountains and the vibrant colors of the foliage. Make sure to stop by the shops and restaurants in the village for a bite to eat or to browse the unique offerings. Afterward, why not enjoy a picnic in the village park or take a stroll along the peaceful waterfalls along the river. Make sure to relax and soak in the atmosphere.

Learn to Fly Fish and it's History at the American Museum of Fly Fishing

For those looking to experience all that Manchester, Vermont has to offer, the American Museum of Fly Fishing is the perfect place to start. Since 1965, it has been the world's leading institution dedicated to the sport of fly fishing and its impact on the environment. Through interactive exhibits, programs, and events, visitors can learn about the history, techniques, and culture of fly fishing. The museum's exhibitions are full of rare artifacts, photographs, artwork, and archival materials that span centuries of history. It also offers educational programs for all ages, from beginner fly fishing classes to conservation and stewardship programs. Visitors can take a guided tour of the museum, or explore the many interactive exhibits and activities. It also has an extensive library with a large collection of books and periodicals on fly fishing, as well as art and artifacts.

The Fall months are the perfect time to visit the American Museum of Fly Fishing. During this time, visitors can take part in fly-tying classes, workshops on conservation, and special events. Whether you're a beginner or an expert, there is something for everyone to enjoy at the museum.

Roam Around Equinox Pond

Fall in Manchester, Vermont is a magical time of year. The vibrant red, yellow, and orange hues of the trees, combined with the crisp autumn air, create a picturesque backdrop for your fall getaway. One of the most popular spots to take in the beauty of the season is Equinox Pond. Equinox Pond is an idyllic spot on the outskirts of Manchester, Vermont, perfect for a romantic stroll or a leisurely day of fishing. The tranquil waters of the pond are surrounded by picturesque mountains, and the leaves of the surrounding trees turn brilliant shades of red, yellow, and orange during the fall months. As you stroll around the pond, you will be surrounded by wildlife, including deer, birds, and other animals.

Enjoy a picnic lunch on the shoreline as you take in the stunning views of the pond and the surrounding landscape. If you’re feeling adventurous, take a canoe or kayak out on the pond and explore the area's many hidden coves. Pack a fishing rod and try your luck at catching bass and other fish in the pond. If you’re feeling up for a bit of exercise, take a hike around the pond and explore the nearby trails that wind through the woods.

Stay at the Kimpton Taconic Hotel

The Kimpton Taconic Hotel in Manchester Village, Vermont is the perfect place to stay while visiting to experience the beauty of the Green Mountains in the Fall. Enjoy the classic charm of Vermont with modern amenities on the property while you take in the stunning foliage. The boutique hotel offers luxurious amenities such as plush bedding, spa-like bathrooms, and evening social hours from 5 pm to 6 pm nightly. Take advantage of the hotel's many activities and amenities, such as a fitness center, heated outdoor pool, lawn games, board games and complimentary bike rentals. The hotel also offers guests two complimentary tickets to Hildene as part of their stay. Their pet-friendly accommodations allow you to bring your favorite pets of any size or weight at no additional cost. Make the most of your stay in Vermont with the quintessential New England Kimpton Taconic Hotel. And to end your day, unwind with a relaxing evening at the Taconic Hotel by a cozy fireplace. We chose the king room with a fireplace in the lobby, or in the hotel’s library which is partly curated by Northshire Book Store! We chose the king room with a fireplace in our room and loved the added romantic amenity! Manchester, Vermont is the perfect destination for any Fall getaway with plenty of activities to enjoy and Kimpton Taconic is the perfect spot to call home while visiting.

Great Places to Eat in Manchester VT (and surrounds)

Pearl's Place & Pantry has a focus on authentic southern cooking and barbeque. This cozy spot also nestled along the picturesque mountainside has something for everyone with a full bar, outdoor dining and a pantry full of gourmet specialties and unique gifts. Enjoy a meal in a cozy atmosphere and experience the best of southern cooking cuisine in the Green mountains.

Zoey's Deli & Bakery is the perfect spot in Vermont to grab a quick meal and is another great spot for a delicious meal this fall. This popular spot features creative takes on classic sandwiches, all made with fresh, local ingredients. Enjoy a flavorful breakfast or lunch at Zoey's Deli & Bakery or grab it to go for your hike or bike ride around Manchester.

The Copper Grouse Restaurant & Bar located inside of the Kimpton Taconic Hotel and is a wonderful spot for a slightly more dressy, yet still cozy and refined modern meal. The menu, courtesy of new chef Nicolas Houlbert, features creative takes on classic dishes as well as a rotating selection of craft beers, wines, and cocktails. The cozy and inviting Copper Grouse restaurant is the perfect place to enjoy a warm meal during the cooler Fall months. Copper Grouse is open for breakfast and dinner, so you can enjoy a delicious meal no matter what time of day. With a menu full of seasonal and local flavors and a cozy atmosphere, Copper Grouse is the perfect spot to enjoy a delicious meal this fall.

Fall in Manchester, Vermont is the perfect time to explore all that this quaint New England town has to offer. Whether you’re looking for a wealth of outdoor activities, and cultural experiences, or simply to relax and take in the beauty of the changing leaves, Manchester has something for everyone. I hope you enjoyed this Fall guide to Manchester, Vermont and enjoy your trip as much as we did.

Savor the Sweetness: A Guide to Making Carrot Sheet Cake with Brown Butter Frosting

Delight your taste buds with the incredible flavor fusion of our Carrot Sheet Cake with a Brown Butter Frosting. Carrot Cake happens to be one of my personal all-time favorite desserts!! This delectable dessert breaks away from the traditional carrot cake recipes with its light and fluffy sheet cake-like texture combined with the rich indulgence of the creamy brown butter frosting. This cake is perfect for any special occasion or just a mid-week treat, and it offers an irresistible blend of sweet carrots, fragrant spices, and that heavenly frosting that will have you coming back for more. We can't wait to guide you through all the delicious details!

Carrot Sheet Cake with Browned Butter Frosting is a classic dessert that is perfect for any special occasion. From birthday parties to family reunions, this moist cake is sure to be a crowd-pleaser. The cake is made with freshly grated carrots and cinnamon, giving it a delicious traditional flavor. To top it off, a Browned Butter Frosting adds a rich and creamy sweetness to the cake, making it even more scrumptious. The best part about this cake is that it is easy to make and can be prepared in advance. This makes it a great option for busy home cooks who need to get a dessert on the table quickly. The combination of flavors in this cake are sure to be a hit, so be sure to make it a double batch for your next get-together!

How to store carrot cake

To ensure that the cake retains its freshness, wrap it in plastic wrap or place it in an airtight container. If you choose to store it in the refrigerator, add a layer of wax paper or parchment paper to the top of the cake to prevent it from drying out.

If you want to save some for later, you can also freeze the cake. Wrap it tightly in plastic wrap and then place it in a freezer-safe container. It will stay fairly fresh in the freezer for up to 3 months. When you are ready to enjoy it, allow the cake to thaw in the refrigerator overnight before serving.

Can I substitute any of the ingredients in the recipe?

To make the recipe even easier to prepare, you can substitute fresh grated carrots with canned carrots for convenience. For the glaze, you can substitute regular butter instead of brown butter for a less intense flavor. If you are looking for a healthier version, you can use whole wheat flour or almond flour in place of the all-purpose flour. You can also use honey, maple syrup, or agave syrup in lieu of the granulated sugar. To make the recipe vegan, you can use a flax egg in place of the eggs. For a hint of sweetness, add dried fruits like raisins or cranberries to the cake. For an extra crunchy topping, top the cake with toasted nuts or coconut flakes.

For those looking to switch up the flavor profile, substitute the carrots in the cake with a different root vegetable such as sweet potatoes or parsnips. The possibilities are endless with this recipe, so have some fun and get creative in the kitchen!

Brown butter

Brown butter is butter that has been cooked longer than regular butter, resulting in a nutty, rich flavor that can be used to enhance the flavor of a variety of dishes, such as pastas, sauces, and cakes. The nutty flavor of brown butter pairs perfectly with the earthy sweetness of carrots in this Carrot Sheet Cake with Brown Butter Frosting. The brown butter glaze is made by melting the butter over the stove until browning. The butter will give off a perfect nutty aroma when it is ready and will add so much flavor to this delicious cake and frosting.

Ingredients

Cake

2 cups all-purpose flour

3 teaspoons baking powder

1/2 teaspoon salt

2 teaspoons ground cinnamon

1/2 teaspoon ground cloves

1/2 teaspoon ginger

1 cup brown butter

1 cup dark brown sugar

1 cup granulated sugar

4 eggs

2 teaspoons vanilla

1/2 cup greek yogurt

2 1/2 cups finely grated carrots

Brown Butter Cream Cheese Frosting

8 oz cream cheese, softened

1/2 cup brown butter

2 tsp vanilla extract

5 cups powdered sugar

Instructions

1. First prepare carrots by washing and peeling them. Grate with the small holes on a grater. The carrots will resemble grated cheese. Set aside.

2. Preheat oven to 350 degrees and prep cake pan by oiling and adding parchment paper if you prefer.

2. Prepare the cake by adding all dry ingredients; all-purpose flour, baking powder, salt, cinnamon, cloves, and ginger into a bowl and whisking together, set aside.

3. In a large bowl mix together brown butter and both dark brown sugar and granulated sugar together. Add in eggs, vanilla and Greek yogurt.

4. Slowly add in dry ingredient mixture to bowl until well blended. Add in grated carrots and if you wish to have pecans or walnuts you can add them in now as well.

5. Pour batter into prepared pan and bake in the oven for 40-45 minutes or until a toothpick inserted comes out clean.

6. Once fully baked let cool in a pan for 20 minutes and transfer to a cooling rack for another 30 minutes to fully cool to room temperature while you make the delicious frosting.

7. Make frosting by blending all ingredients together until fully incorporated. Ice cake and add walnuts or fun carrots like I did here. If adding decorative carrots you will just take a small portion of frosting and dye half green and half orange. Place in a piping bag and pipe carrots on top of the frosting of the frosted cake. Enjoy!

This simple and delicious Carrot Sheet Cake with Brown Butter Frosting will quickly become a go-to dessert. With its wonderfully moist and flavorful cake and rich and creamy brown butter glaze, it’s sure to be a hit with family and friends.

Sweet Serenity: Mastering the Art of Pumpkin Cinnamon Rolls with Cream Cheese Icing

Welcome to another delicious recipe post! As the leaves start to crinkle and colors change, there's almost nothing more iconic of the coming Autumn season than pumpkin-flavored delicacies. Today, we are going to add a twist to one of your favorite traditional breakfast treats. We're going places where the savory pumpkin harmonically frolics with the spicy warmth of cinnamon, all under the creamy, velvety robe of cream cheese icing. So, buckle up for the ultimate guide to making heavenly Pumpkin Cinnamon Rolls with Cream Cheese Icing - a scrumptious indulgence that brings the best of fall flavors to your morning table!

Which yeast is best for cinnamon rolls + how to know when yeast is activated

The key to success is using the right type of yeast. Active dry yeast is the best choice for this recipe. To ensure that the yeast is activated, look for bubbles forming on the surface of the mixture. You will pre-check this after adding the yeast to water in this recipe. Once the yeast is activated, the mixture will expand and become foamy. If your mixture does not foam, the yeast may be old or not activated properly. To avoid disappointment, always check the expiration date on your yeast package before using it. With the right yeast and a few simple steps, you can enjoy delicious pumpkin cinnamon rolls with cream cheese icing in no time.

Making Ahead, Storing, and Freezing Pumpkin Cinnamon Rolls:

These pumpkin cinnamon rolls with cream cheese icing are the perfect treat for any chilly Autumn morning. Plus, with the make-ahead and storing options, you can enjoy these sweet treats any day of the week. To make these pumpkin cinnamon rolls easy, you can prepare them up to a day ahead of time. Simply assemble the rolls and refrigerate them in their pan overnight. The next morning, bake them as directed and enjoy. If you have any leftovers, store the rolls in an airtight container for up to 2 days. For those who like to plan ahead, you can also freeze these pumpkin cinnamon rolls for up to 3 months. Allow the rolls to cool completely before freezing. Wrap each one individually in plastic wrap and place them in a freezer bag. When you’re ready to enjoy them, thaw the rolls overnight in the refrigerator. To reheat, place the rolls in the microwave for 15-20 seconds or in the oven at 350°F for 5-10 minutes. If you want to freeze the rolls for later, wrap them tightly in plastic wrap and aluminum foil, then place them in a freezer-safe container or bag.

Are there any variations available for Pumpkin Cinnamon Rolls with Cream Cheese Icing recipe?

Pumpkin cinnamon rolls with cream cheese icing are a delicious way to enjoy the flavors of Fall. This sweet treat is packed with all the flavors of Autumn. With a few variations, you can take these pumpkin cinnamon rolls to the next level.

Variation 1: Add your favorite spices such as nutmeg, allspice, and cinnamon to the dough for a more spicy flavor. This will amp up the flavor of the rolls and give them a unique twist.

Variation 2: Use pumpkin puree instead of regular milk for a richer and denser texture. The pumpkin puree will add a subtle sweetness and depth of flavor to the rolls.

Variation 3: Swap out the cream cheese icing for pumpkin cream cheese icing for an extra-special treat by adding in pumpkin puree again. The pumpkin cream cheese icing adds a unique flavor and pairs perfectly with the pumpkin cinnamon rolls. You can also add maple to the cream cheese frosting to make a maple cream cheese for an even more unique flavor.

Variation 4: Top the rolls with a streusel topping for a crunchy addition. The streusel topping adds texture and a slight sweetness to the rolls.

Variation 5: Add dried cranberries or chunks of chocolate chips for a sweet surprise. The dried cranberries or raisins add a hint of sweetness and texture to the rolls.

Variation 6: Substitute the granulated sugar for light brown or dark bown sugar for a deeper flavor. The light brown sugar adds a deep molasses flavor to the rolls and makes them even more delicious.

These variations make pumpkin cinnamon rolls with cream cheese icing a delicious and unique treat. With these variations, you can enjoy the flavors of Fall deliciously and uniquely.

Can the Pumpkin Cinnamon Rolls be made without Cream Cheese Icing?

If you're looking for a delicious Fall treat, look no further than these Pumpkin Cinnamon Rolls! These delicious rolls are made with pumpkin puree and are spiced with cinnamon, making them the perfect way to enjoy the flavors of the season. But what if you don't want to use cream cheese icing? Can these rolls still be made without the icing? The answer is yes! To make the rolls without the cream cheese icing, simply omit the cream cheese and icing ingredients from the recipe. You can still enjoy a delicious treat without the cream cheese icing by adding a bit of cinnamon and sugar to the top of the rolls or even some melted butter for a delicious glaze. You can also serve the cream cheese frosting on the side for an option to guests. These Pumpkin Cinnamon Rolls are a great way to enjoy the flavors of the season. With or without the cream cheese icing, these delicious rolls are sure to be a hit with your family and friends.

Ingredients

Dough

4 1/2 tsp fact-acting dry yeast

1/2 cup sugar

1/2 cup butter

1 egg

1 tsp salt

4 cups flour

1/4 cup warm water

1 cup milk

1 tsp pumpkin spice

Filling

1/2 cup melted butter

1/2 cup pumpkin puree

1/2 cup sugar

2 tbsp cinnamon

Icing

8 oz cream cheese

1/2 cup butter

4 cups powdered sugar

4 tbsp milk

2 tsp vanilla extract

1 tsp pumpkin spice

Step-by-step Instructions

  1. Mix lukewarm water and yeast, and let sit for around 10 minutes to make sure the yeast is still active. You will notice the yeast growing in size.

  2. While the yeast is growing whisk together in another bowl sugar, butter (softened for 15-20 sec on microwave) egg, milk and salt. Add into yeast mixture.

  3. Slowly add in flour and pumpkin spice, once you have added in all 4 cups make sure the dough is slightly sticky and looks like dough. Once you see this mix for another few minutes. If you still don’t see the dough looking proper, add in more flour, 1/4 cup at a time, until you do.

  4. Once you have tipped the bowl over and poured out the dough lightly flour the top and cover with a clean kitchen towel. Form into a ball in your bowl, cover, and let rise in a warm place for 2 hours.

  5. Once you are about ready to roll dough, soften butter and mix in cinnamon and sugar for filling. When the dough is ready roll out to about 1/4 inch thick rectangular shape. Add filling to the middle making sure to cover all of the dough

  6. Roll dough from one side of the rectangle to the other and place it on a baking sheet lined with parchment paper. Cut along the middle and crisscross the dough from one side to the other. Tuck both ends under.

  7. Bake at 350 for 20-25 minutes or until golden brown on the top.

Frosting:

  1. Mix softened cream cheese and butter until smooth. (If not in the room temp warm it for 30 seconds in the microwave before)

  2. Add powdered sugar, milk, and vanilla extract.

A Divine Caramel Cheesecake with a Graham Cracker Pecan Crust

Welcome to our latest dessert delight - Caramel Cheesecake with a Graham Cracker Pecan Crust! If your mouth isn't watering yet, prepare for it to start. This exquisite treat promises a perfect fusion of a luscious, creamy caramel cheesecake layer beautifully married with an incredibly flavorful, buttery graham cracker and pecan crust that adds a beautiful taste of crunchiness and nuttiness. Whether you are a cheesecake aficionado and it is your go-to dessert, or simply someone who appreciates any well-prepared desserts, this recipe offers a glorious culinary adventure you’ll surely enjoy. Buckle up, fellow sweet tooths, we're about to embark on the ultimate cheesecake journey.

How to Store Cheesecake

Proper Care for Your Caramel Cheesecake Masterpiece – Once you have indulged in your homemade Caramel Cheesecake with a Graham Cracker Pecan Crust, remember to store any leftovers appropriately to maintain its freshness and deliciousness. Firstly, let your cheesecake cool entirely at room temperature before thinking about storing it. Then, place it preferably in an airtight container, or a cake box if you must, and store it in the refrigerator. Avoid slicing it into portions until you are ready to serve, to prevent drying and hardening. The best temperature to store your cheesecake is below 40°F, optimum for preserving its texture and taste. With proper care, your succulent caramel cheesecake will last for up to five days in the fridge. If you wish to store it for a longer duration, consider freezing your cheesecake. Wrapped tightly in foil or plastic wrap, your cheesecake can last up to six months in the freezer without losing its delightful caramel and pecan charm.

INGREDIENTS

Crust:

12 oz graham crackers

1 cup pecans

1 cup melted butter

Filling:

3 - 8 oz cream cheese ( room temperature )

1 stick salted butter

1/2 cup brown sugar or light brown sugar

1/2 cup granulated sugar

1/4 teaspoon sea salt

3 eggs

1/2 cup heavy cream

1 tsp vanilla extract

Caramel Topping -

1 cup granulated sugar

6 tablespoons unsalted butter, cut into pieces

1/2 cup heavy cream

1 teaspoon vanilla

INSTRUCTIONS

  1. Preheat oven to 375. Spray the cheesecake pan with olive oil spray and wrap around the outside with foil.

  2. Make Crust by adding pecans & graham crackers to a blender and processing until fine. Add in melted butter and blend again.

  3. Press the crust mixture into the bottom of the pan until even all the way around. I use a flat-bottom cup or a metal spoon to help.

  4. Bake in the oven for 13-15 minutes. Once done remove and let cool completely on cooling rack before adding filling.

  5. Reduce oven temperature to 325 degrees.

  6. Make filling. Mix softened cream cheese and butter with both sugars and salt until well combined with stand mixer or hand mixer.

  7. Add in eggs. One at a time. Making sure they are fully incorporated each time.

  8. Next add heavy cream, vanilla and lemon zest! Once well-mixed pour into cooled cheesecake pan. Also, add aluminum foil around the edges of the cheesecake pan.

  9. You will then add this onto a tray with a lip. Place on oven rack and add in warm water until halfway full. Push back rack and start timer.

  10. Cook the cheesecake for 1 hour. The center will still be a little jiggly, but the side will be set. After baking for 1 hour you will turn oven off the oven and leave the cheesecake in the oven for an additional hour.

  11. Once baked for an hour and let sit for an hour in the oven, you can remove it from the oven. Wrap the cheesecake and let sit in your refrigerator overnight. Up to 24 hours before serving or adding caramel topping.

Caramel Sauce

  1. Put 1 cup granulated sugar in a saucepan and heat it over medium heat for about 10-15 minutes, constantly stirring. The sugar will start melting and form clumps, which will turn into amber/brown liquid.

  2. When the sugar is completely melted, add 6 tbsp cubed butter and stir. At this point, the mixture will start to bubble. Stir for a couple of minutes until the butter is melted. First, it will look like the sugar and butter are separated, there is nothing wrong with that.

  3. Gradually add ½ cup heavy cream and stir. It will bubble again.

  4. Stir for another minute, then remove from the heat and add vanilla. You can also add salt at this time if you wish.

  5. Remove the refrigerated cheesecake from the fridge at this time. Do not take the round edge off of the pan but pour caramel sauce over the top, making sure to smooth quickly because it will hardenly fast. Remove the edge and place the cheesecake on a new plate, cut, serve and enjoy!

For those of us who are looking for inspiration to get creative in the kitchen, this recipe is the perfect choice. You can make this traditional family favorite recipe uniquely your own by adding different flavors and ingredients. Plus, you can even top it off with a customizable glaze. For those wanting a sweeter crust, try adding in honey. Switch out the caramel topping for fresh berries and make a blueberry drizzle that is also amazing on this cheesecake! For those wanting a keto option, change the graham cracker crust to add additional nuts, either more pecans or almonds will do great. No matter what you do to make this your own, this caramel cheesecake with a graham cracker pecan crust is sure to be a hit!

Other Delicious Desserts You Will Love:

Tantalizingly Delicious Recipe For Lemon Cheesecake With An Amazing Glaze

Indulge in Deliciousness: Cherry Chip Cake with Chunks of Dark Chocolate Recipe

Chocolate Peanut Butter Brownies

Brown Butter Caramel Pretzel Cookies

Delicious & Easy Apple Pie

A Deliciously Sweet Treat: Mini Key Lime Pies with Splenda

Indulge Your Sweet Tooth with This Delicious Brown Butter Spice Cake with Honey & Fig Jam Frosting

Deliciously Sweet: Mastering the Perfect Pumpkin Molasses Cookie Recipe for the Autumn Season

As the leaves change color and you begin to feel that crisp autumn chill in the air, there's no better time to indulge in some home-baked goodness and what could be more fitting than pumpkin molasses cookies. This recipe, with the delightful combination of pumpkin and molasses, embodies the warm, comforting flavors we associate with the fall season. They are incredibly soft and perfectly spiced and every bite brings in a heavenly mix of flavors that will make your taste buds sing. In this blog post about our wonderful pumpkin molasses cookie recipe, we're not just focusing on the delectable end product. We're also highlighting the joy and the warming sense of comfort that the baking process itself brings. So, without further ado, let's sink our teeth deeper into this recipe.

Tips To Make The BEST Pumpkin Molasses Cookies!

To get the best results, it is important to use quality ingredients such as butter, molasses, and pumpkin puree. For an even richer flavor, try using dark brown sugar and brown butter. It is also essential to chill your cookie dough for at least 30 minutes before baking. This will help prevent spreading and make sure your cookies are the same size and bake evenly. To prevent your cookies from sticking, bake them on a parchment-lined baking sheet. Finally, don’t forget to pull your cookies out of the oven when they’re just beginning to brown. The recipe is quick and easy to make, making it a great way to use up any leftover pumpkin puree. They are perfect to enjoy with a hot cup of coffee or tea during the fall and winter months. They make a great addition to holiday cookie trays or as a homemade gift. Pumpkin molasses cookies are guaranteed to be a delicious and festive treat that everyone will love.

How to Store Pumpkin Molasses Cookies

When it comes to pumpkin molasses cookies, the key to keeping them fresh and delicious is proper storage. To ensure that your pumpkin molasses cookies remain soft and flavorful, store them in an airtight container. Place a baking sheet at the bottom of the container before adding the cookies. This will help absorb any moisture that may have accumulated during baking or storage. Place a piece of parchment paper between the layers of cookies. This will prevent them from sticking together and will keep them from drying out. Store the container in a cool, dry place, away from direct sunlight. If storing for more than a few days, place the container in the refrigerator for longer-term storage. Pumpkin molasses cookies can be stored for up to one month. However, they are best enjoyed fresh.

If you decide to freeze the cookie dough, shape it into balls and place them on a baking sheet. Place the baking sheet in the freezer until the dough is frozen and then transfer it to a freezer-safe container. When you’re ready to bake the cookies, remove the desired amount of cookie dough balls from the freezer and place them on a baking sheet. Allow the cookie dough to thaw completely before baking and you’ll have fresh pumpkin molasses cookies in no time! They can be stored this way for up to 3 months.

Can I Use Gluten-Free Flour?

Cooking with gluten-free flour can be a challenge, but it is possible to make delicious pumpkin molasses cookies with the help of this alternative to all-purpose flour. Gluten-free flour is made from different ingredients such as rice flour, almond flour, or garbanzo bean flour, and does not contain the protein gluten which can be found in wheat, barley, and rye.

When using gluten-free flour to make pumpkin molasses cookies, it is important to use a combination of flours, as well as a thickener such as xanthan gum, to achieve the desired texture. The combination of flour and thickener helps to replicate the texture of regular all-purpose flour. Gluten-free flour can be found in most health food stores and some regular grocery stores. While it is more expensive than regular all-purpose flour, it is a great substitute for those with gluten sensitivity or allergies.

Can I substitute any ingredients in the pumpkin molasses cookie recipe?

You can easily substitute ingredients to make it more flavorful or to accommodate personal preferences. For example, you can replace the butter with a vegan alternative such as coconut oil or margarine. You can also substitute the molasses for honey or maple syrup for a slightly different flavor. Additionally, you can add different spices such as nutmeg, allspice, or ginger for an extra kick. If you’re looking for a healthier option, you can replace the refined white sugar with coconut sugar or other natural sweetener. If you are looking to add chocolate to this already delicious cookie you can add 1/2 cup of chocolate chip chunks to the dough right before adding to the fridge for an added chocolate taste. With so many options to choose from, you’ll find a pumpkin molasses dessert that you’ll love!

Ingredients

For the cookies

1 cup butter, room temperature

1/2 cup dark brown sugar

1/2 cup sugar plus

¼ cup molasses

¼ cup pumpkin puree

1 egg

1 teaspoon vanilla extract

1 teaspoon baking soda

1 teaspoon kosher salt

1 teaspoon cinnamon

3/4 teaspoon pumpkin pie spice

1/4 teaspoon cloves

¼ teaspoon ground ginger

2¼ cups all-purpose flour

Cinnamon Sugar Coating

1/2 cup sugar

1 tablespoon cinnamon

Directions

  1. Whisk together flour, spices, baking soda and salt in a small bowl.

  2. In a separate bowl add the butter and both sugars and mix with a hand mixer or stand mixer on medium speed for 2 minutes until fluffy and light.

  3. Add in the molasses, pumpkin, egg and vanilla extract. Mix on medium speed until combined and smooth, scraping the sides of the bowl as needed

  4. Turn the mixer to low and add in the flour mixture mixing until just combined.

  5. Place into the fridge for 30 min to 1 hour until the dough hardens slightly and mix cinnamon sugar coating in a bowl. Preheat oven to 350°F. Line a cookie sheet with parchment paper and set aside.

  6. Portion out the dough using a large cookie scoop or ice cream scoop, and roll each into a ball. Roll each ball into the cinnamon sugar mixture and place on cookie sheets.

  7. Bake on a parchment-lined cookie sheet for 10-12 minutes. Cookies are done when they look slightly dry on top but still somewhat moist in the cracks. 

  8. Transfer cookies to a cooling rack and Enjoy!

Other Delicious Cookie Recipes You Will Love:

Brown Butter Caramel Pretzel Cookies

The Best Monster Cookie Recipe You'll Ever Try!

Birthday Cutout Sugar Cookies

Brown Sugar Toffee Cookies

How to Make Delicious Nutter Butter Cookies At Home