Taste the Deliciousness of Pistachio Cake: A Treat for Any Occasion

Every June for quite a few years now I have been making this Pistachio Birthday Cake for My husband Scotty. My idea for this cake all started with his love for pistachio ice cream. It is his go-to ice cream when out at an ice cream shop. So, being that he seemingly never could think of a favorite cake for himself, I thought one year I’d go ahead and make a Pistachio Cake along with pistachio ice cream, and it's been our tradition ever since! Let me know in the comments below if I should share the ice cream recipe too! I hope you enjoy this just as much as the birthday boy himself!

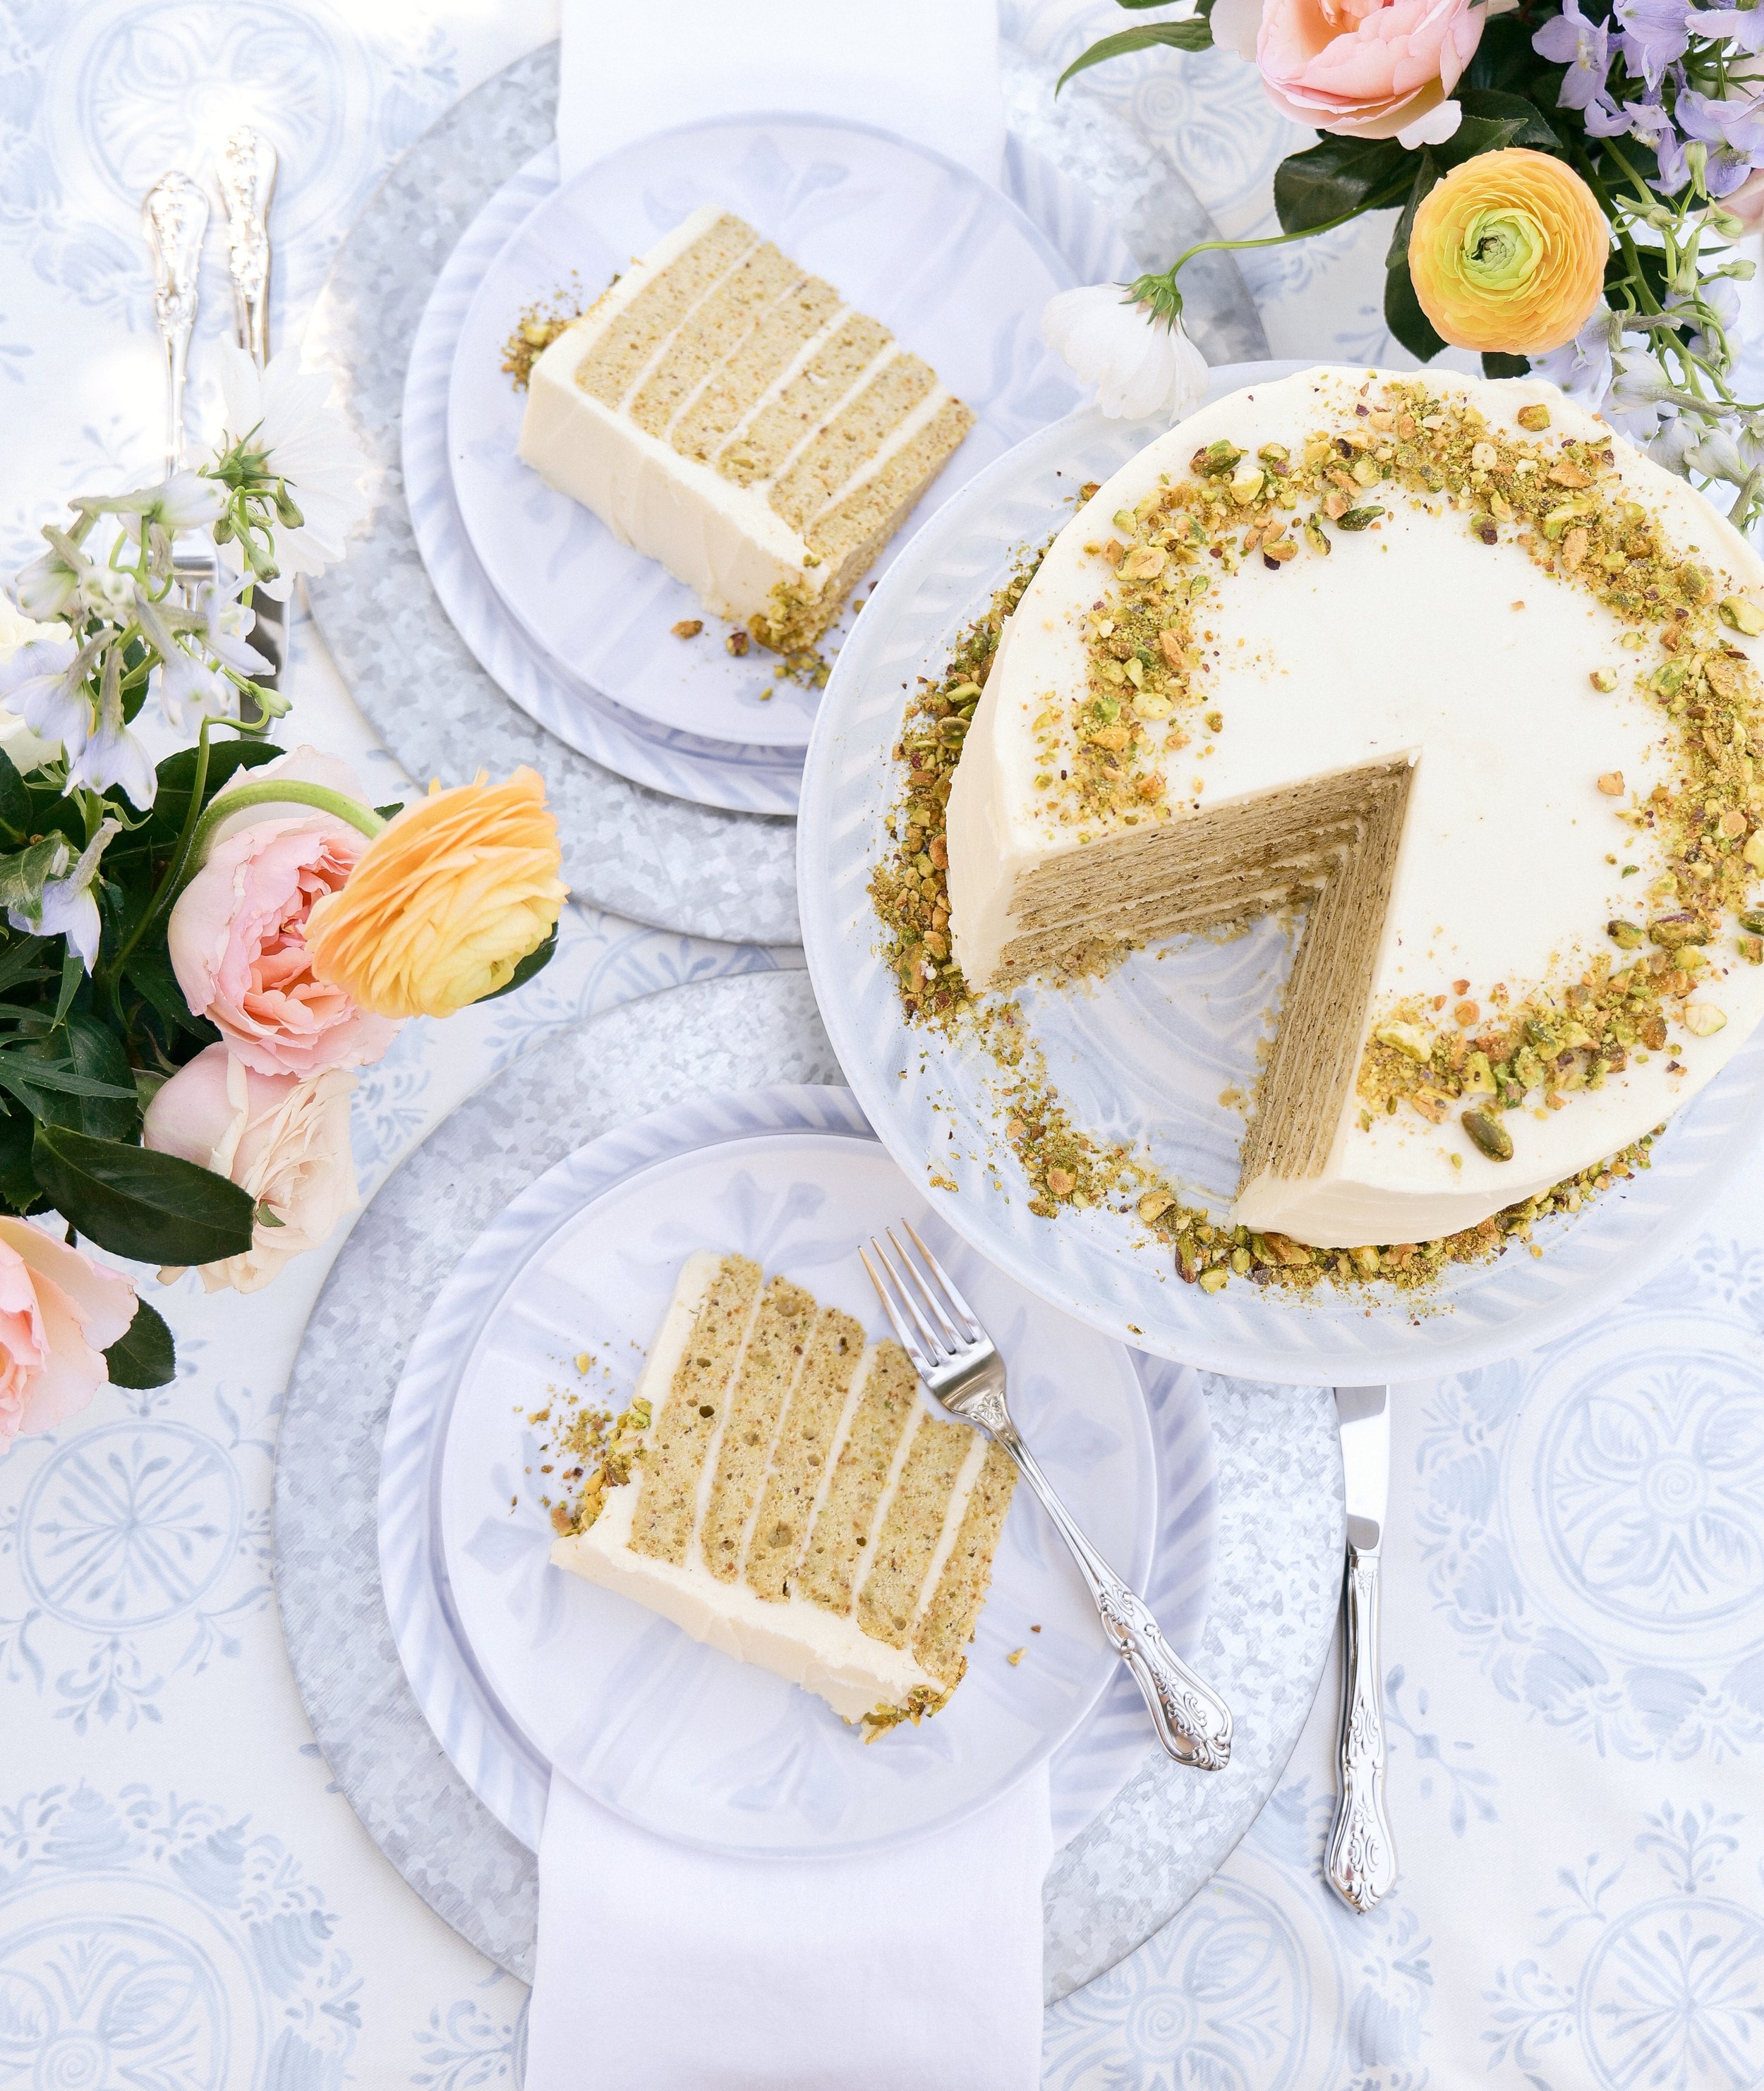
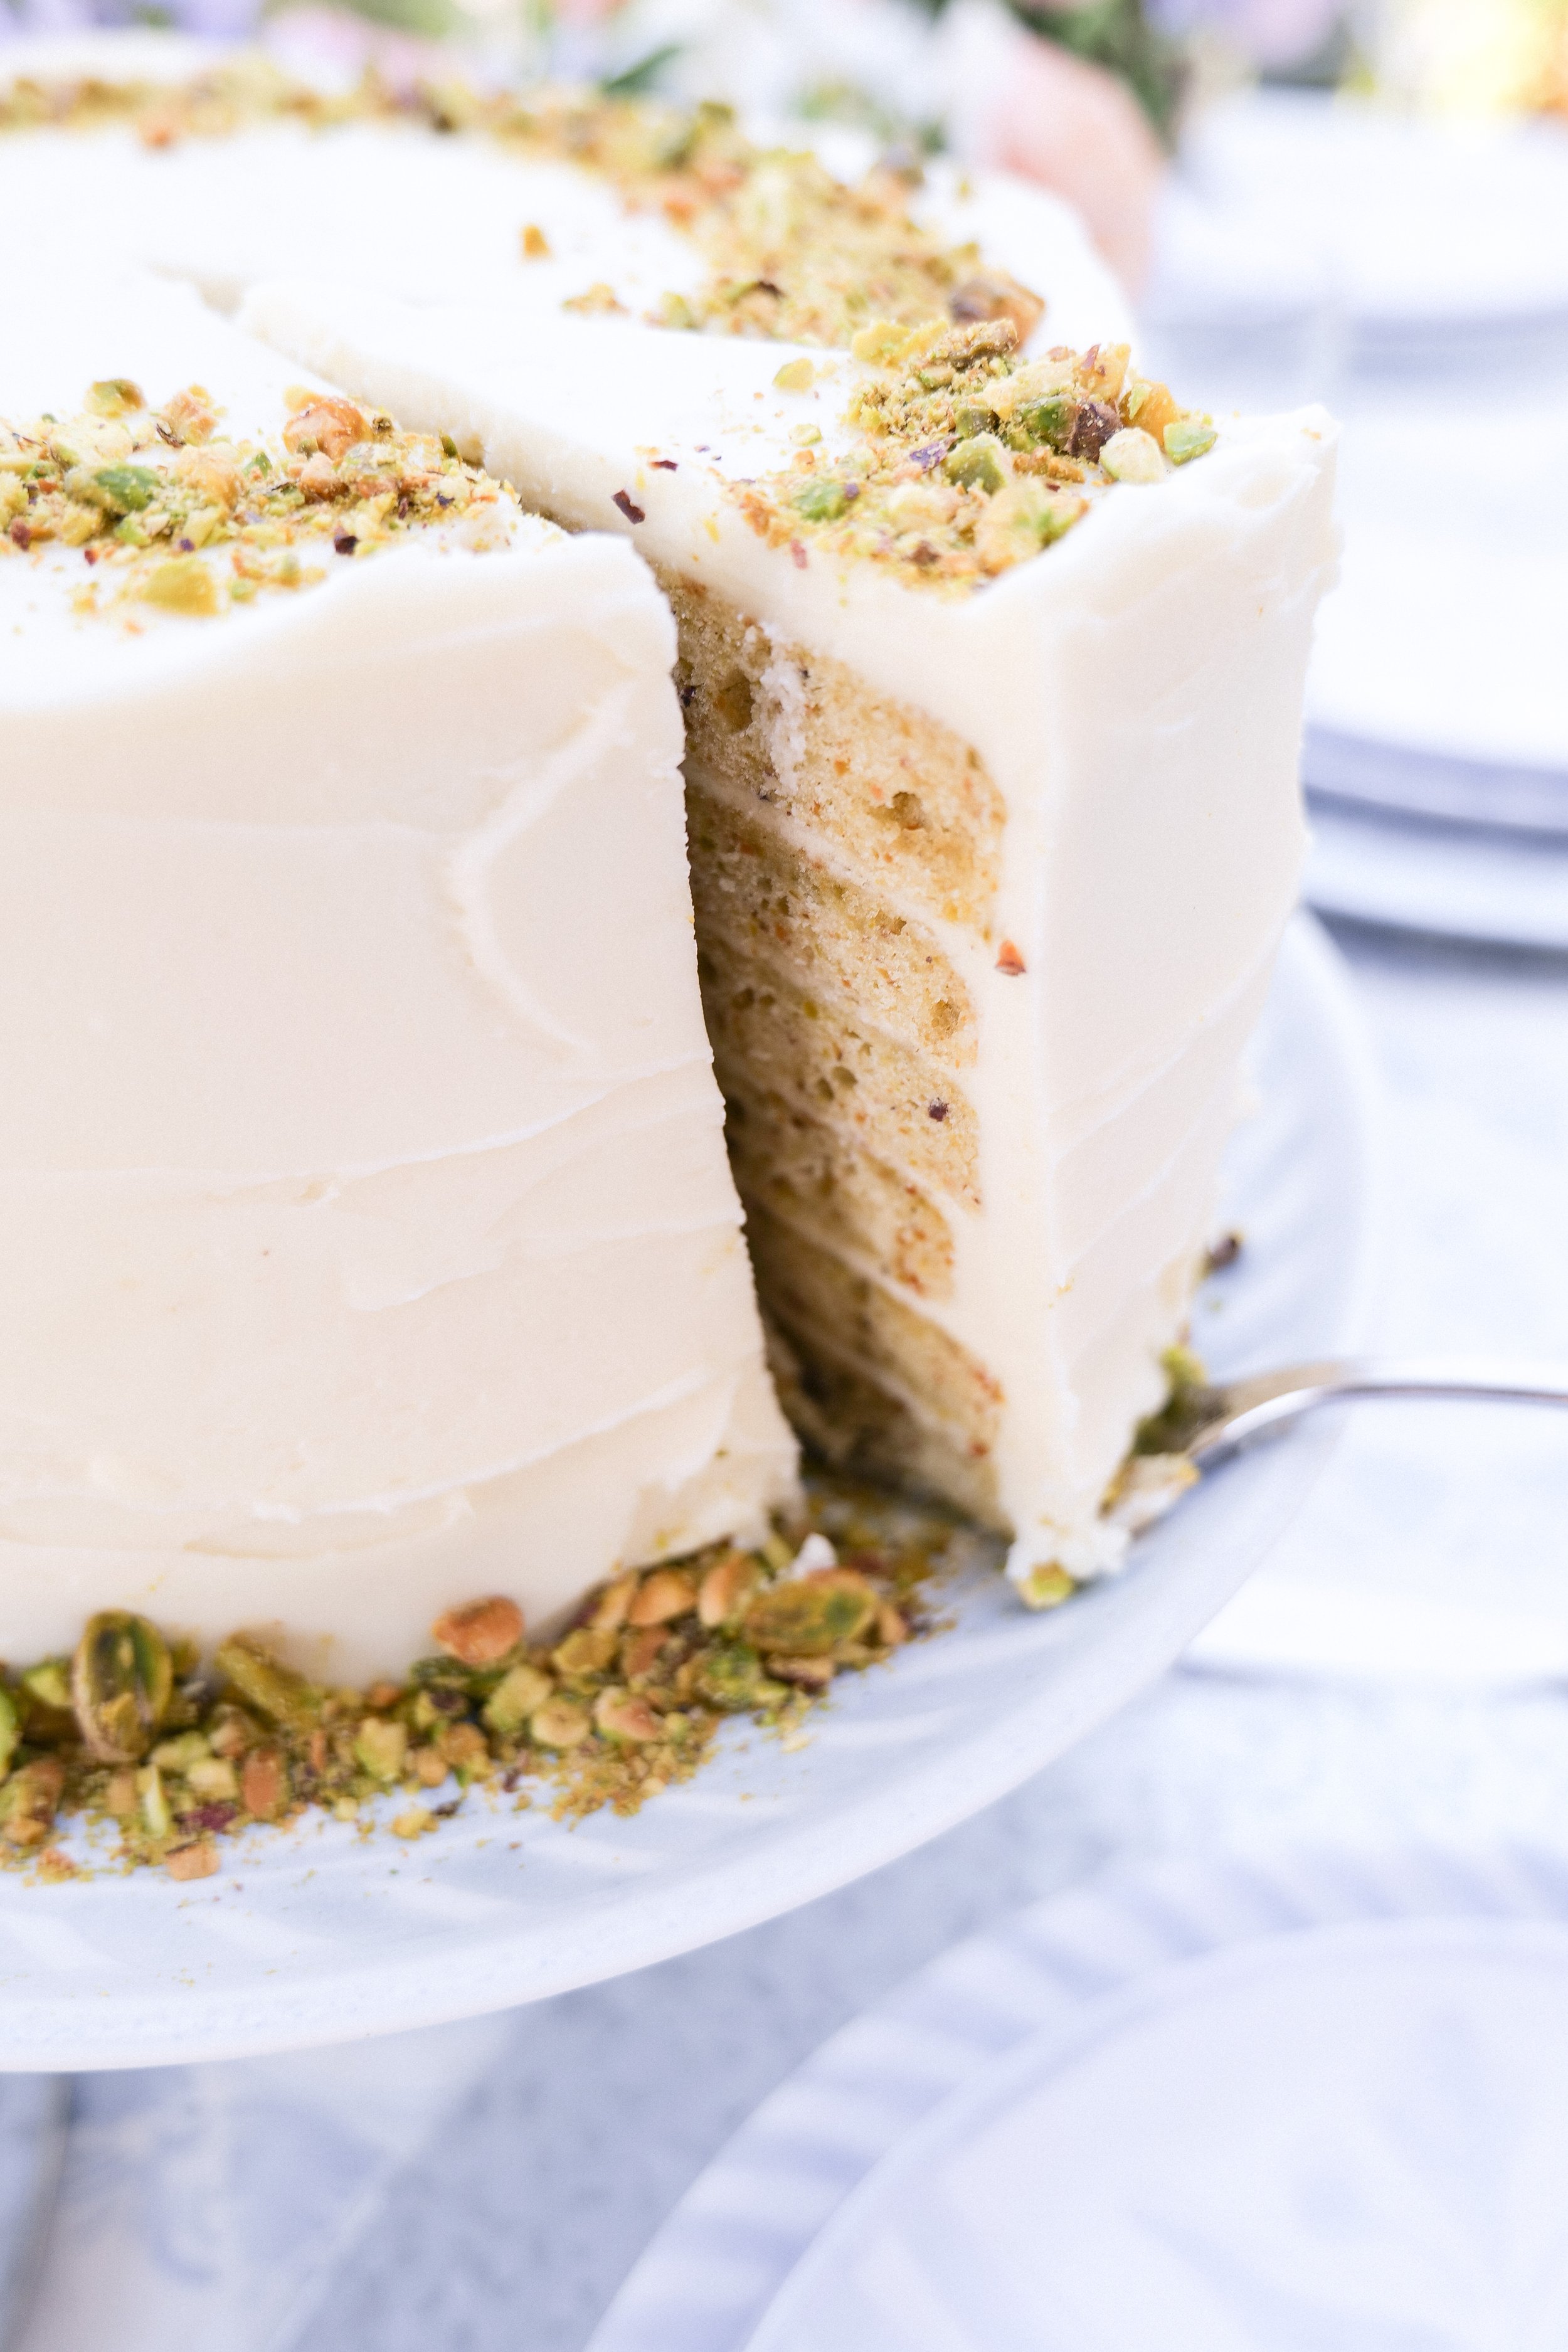
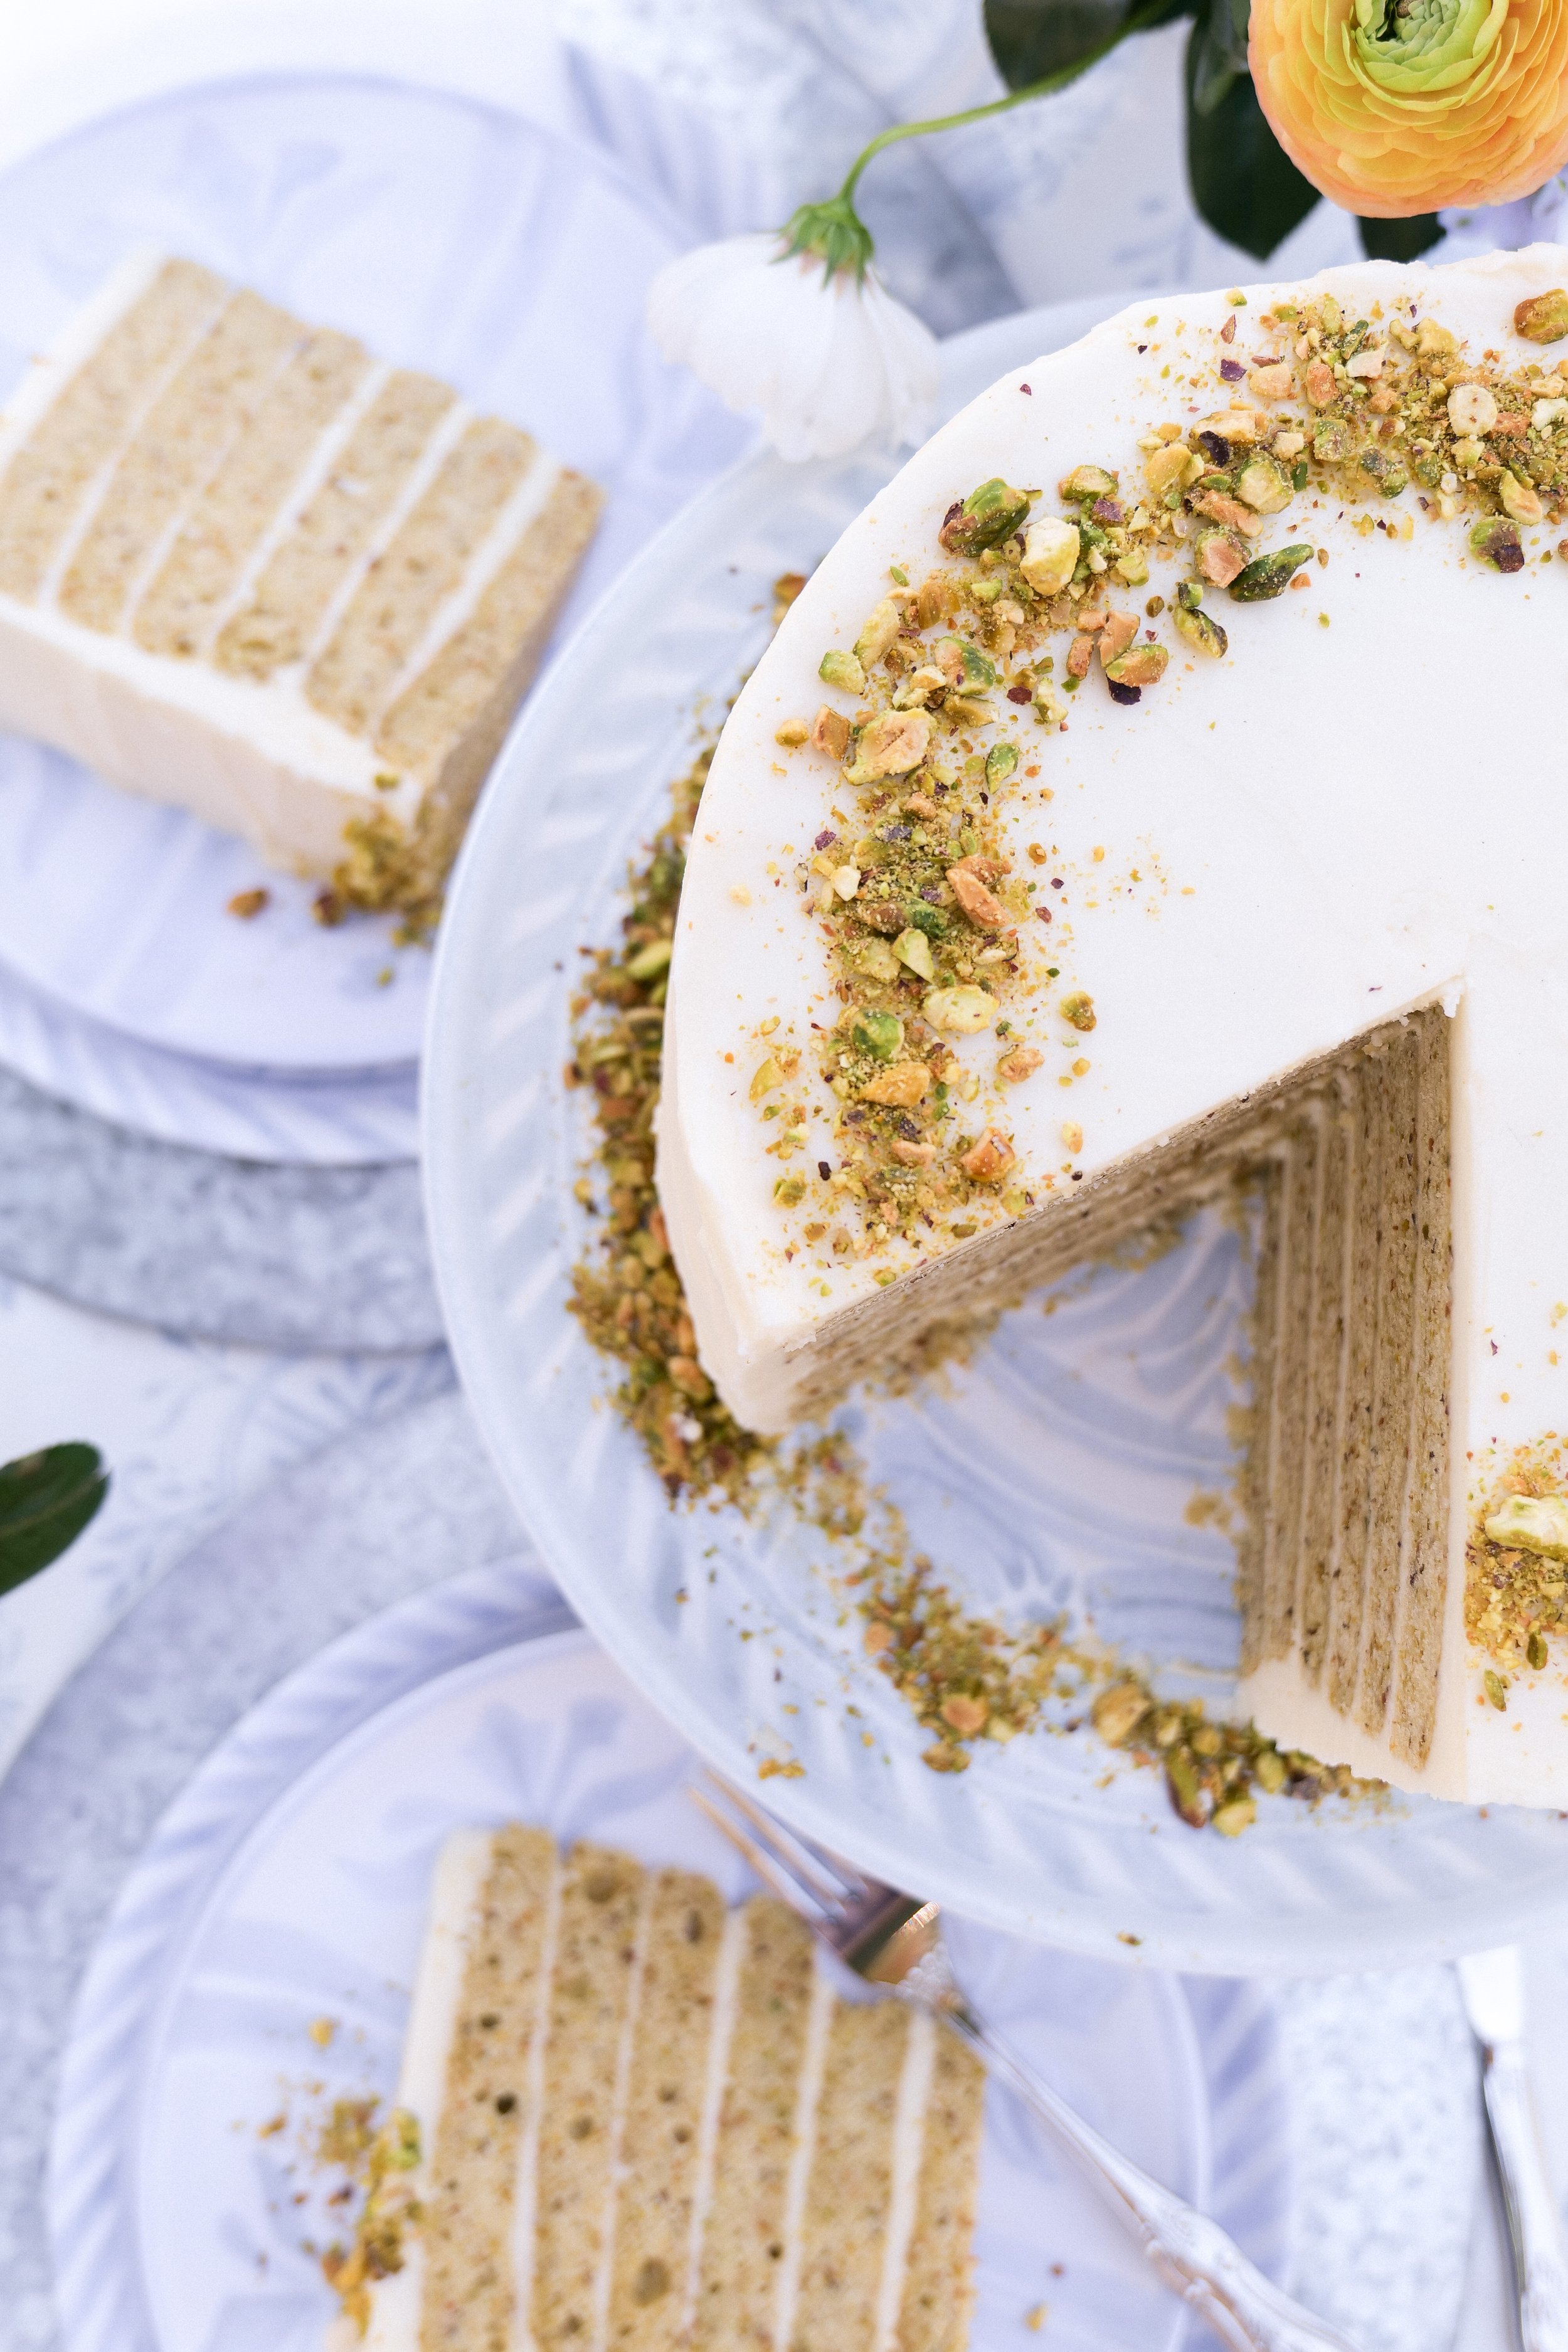
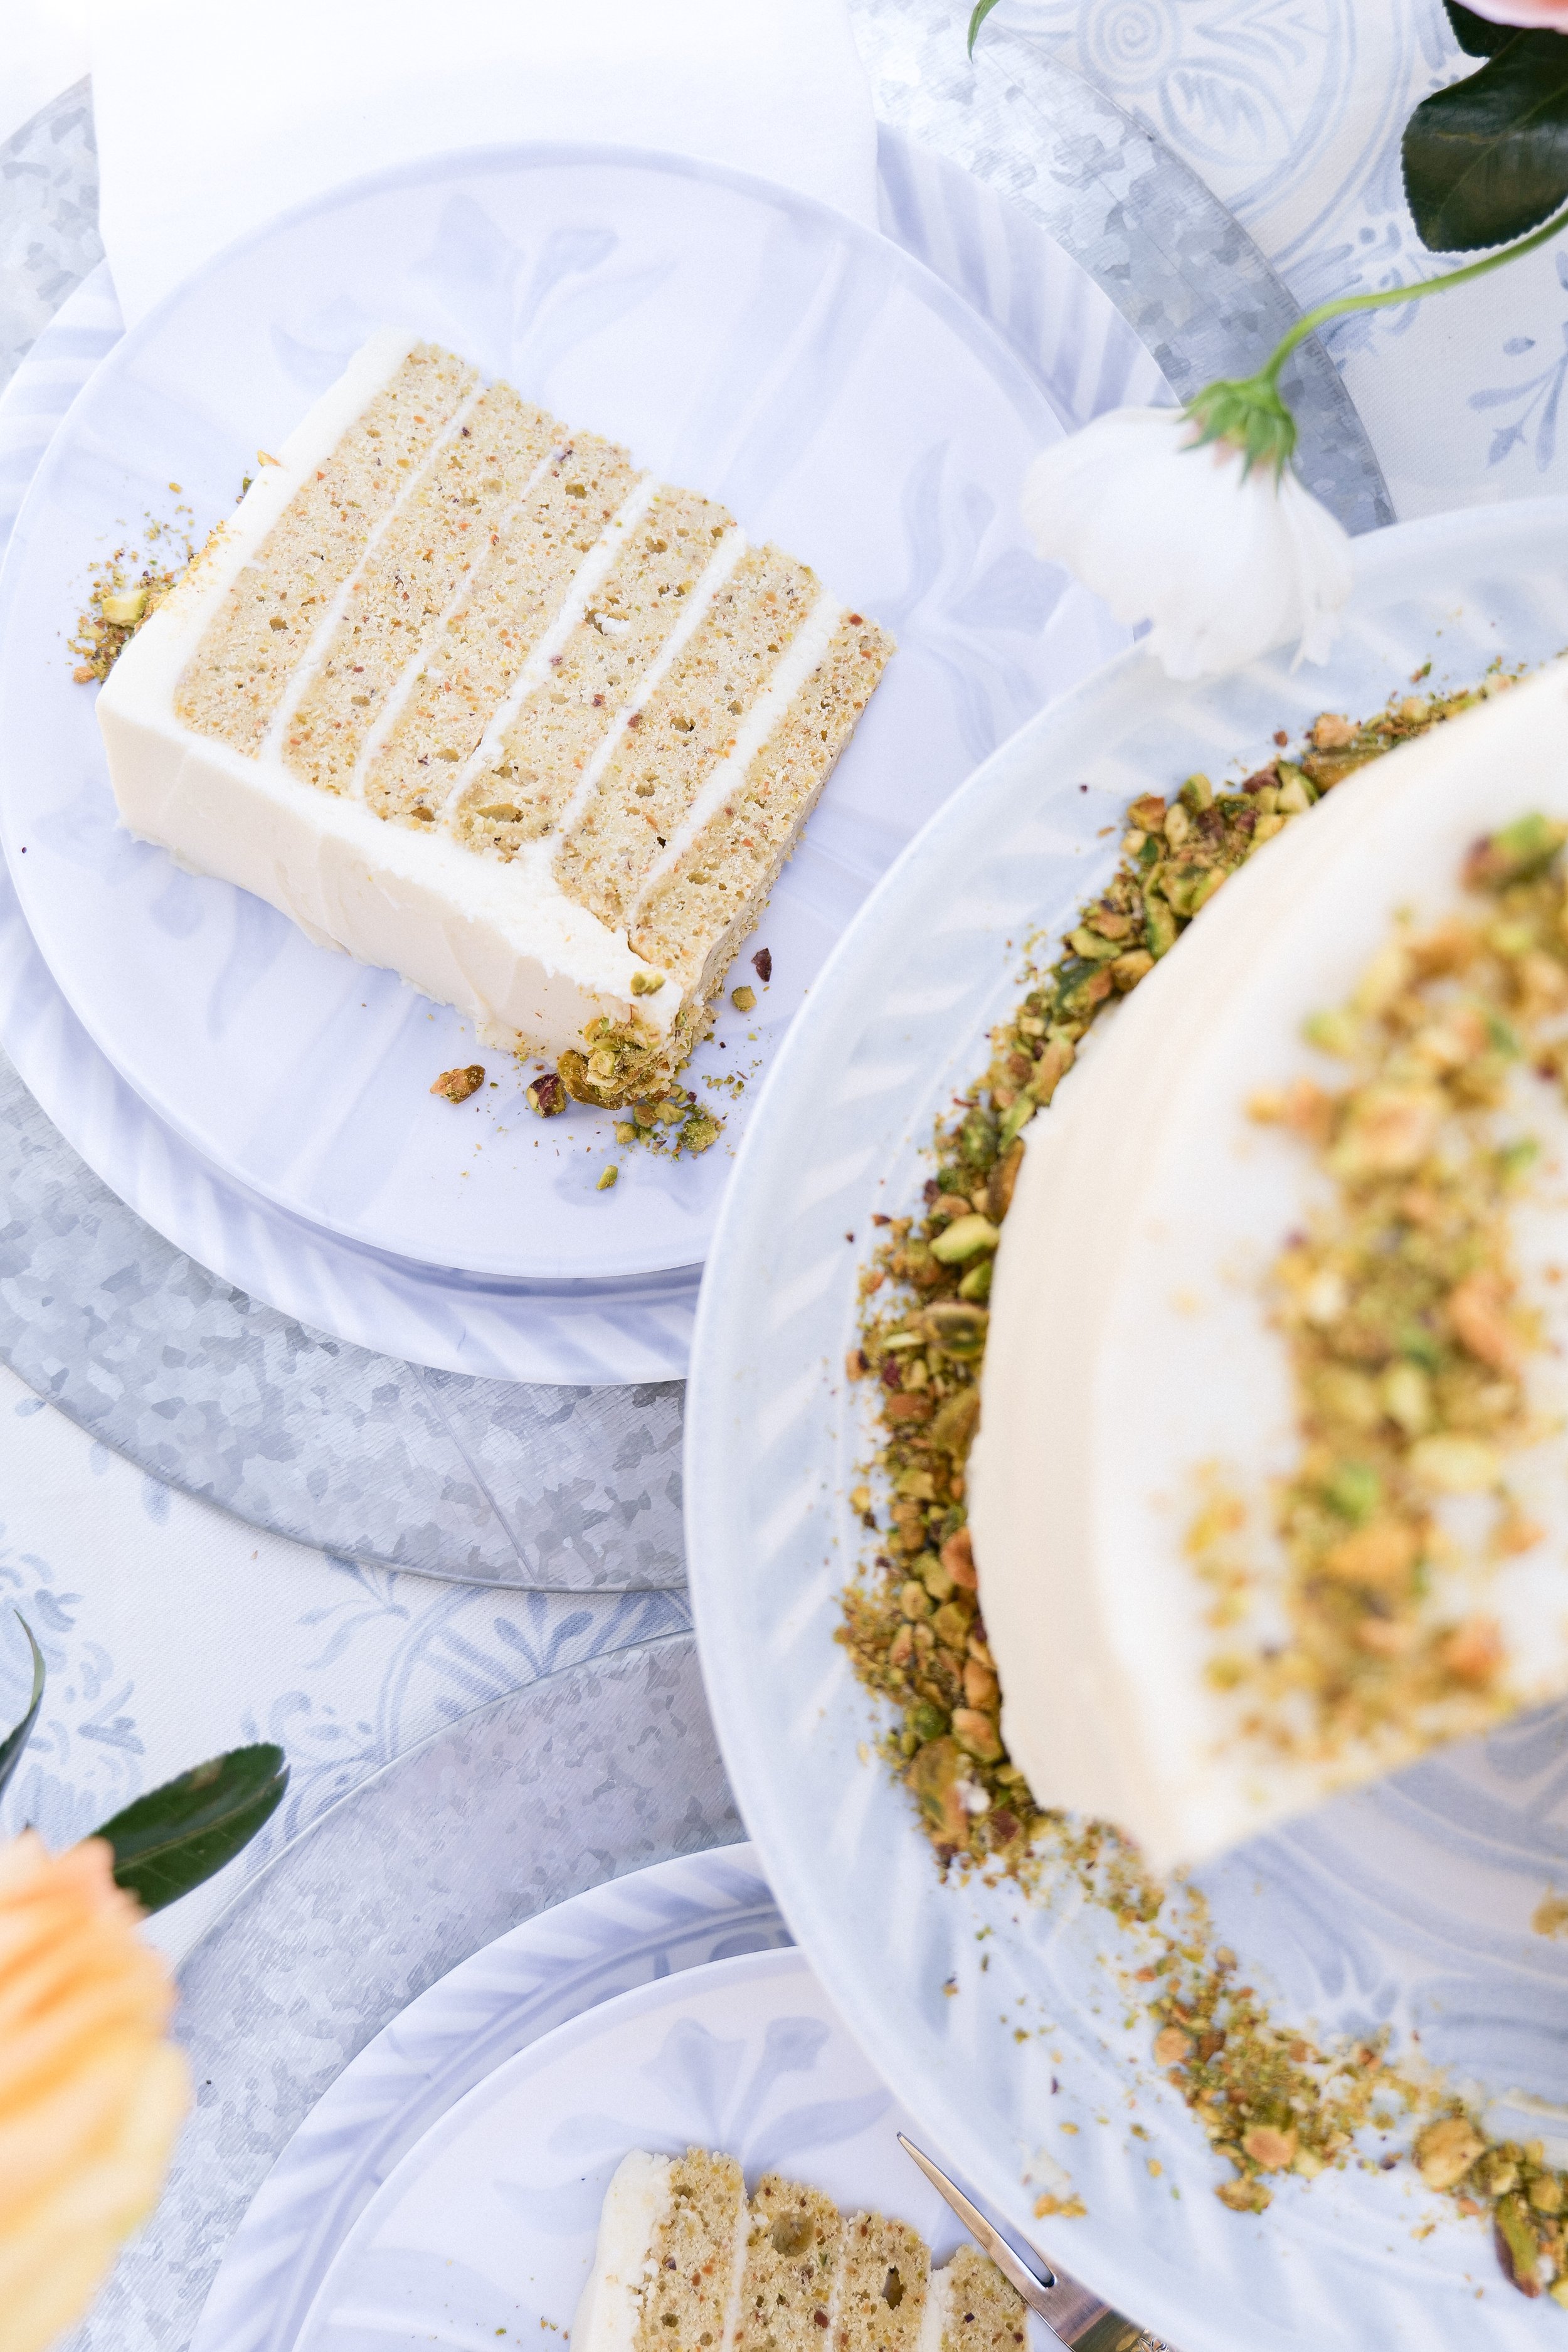
Pistachio cake is a delicious dessert that is perfect for special occasions like birthdays or holidays. It is made from scratch with just a few simple ingredients, making it easy to make without too many complicated steps. The result is a moist and flavorful cake with a crunchy nutty topping that everyone will love! Plus, it’s a great way to use up leftover pistachios. The base is a simple cake batter with pistachios mixed in. For the topping, you have a combination of butter, mascarpone, powdered sugar, and sprinkled nuts on top to create a crunchy texture.

The final product is a moist and flavorful cake with a crunchy nutty topping. It’s perfect for special occasions and makes a great gift for family and friends. Everyone will love the sweet and nutty flavor of this cake. So if you’re looking for a delicious dessert that is easy to make and sure to please, you must make this pistachio cake. With just a few simple ingredients and no complicated steps, you can make a sweet treat that everyone will love!

How to Enhance the Pistachio Flavor Into Cake

Pistachio cake is a delicious dessert that is perfect for any special occasion. The nutty flavor of pistachios pairs perfectly with moist cake and creamy frosting. I incorporate some lightly-crushed pistachios into the cake batter as well as further enhance the flavor of the cake by adding a few teaspoons of almond extract. To get the most intense pistachio flavor, you can use real pistachio paste or extract in your cake batter. For a toasty twist on the flavor, toast the nuts before adding them to the cake batter as well.

Key Ingredients

This cake is made with all-purpose flour, eggs, butter, sugar, baking powder, salt, vanilla extract, milk, pistachios, and cream cheese. The all-purpose flour provides the cake with a light, airy texture and structure. The eggs act as a binding agent and help keep the cake moist. Butter adds flavor and richness to the cake while the sugar helps to sweeten it and create a tender crumb. Baking powder helps the cake to rise and gives it a nice texture, while salt enhances the flavor of the cake. The addition of vanilla extract adds a nice flavor to the cake, while the milk helps to keep it moist. With these ingredients, you're sure to have a delicious Pistachio Cake that will be a hit with everyone!

Decorating Inspiration

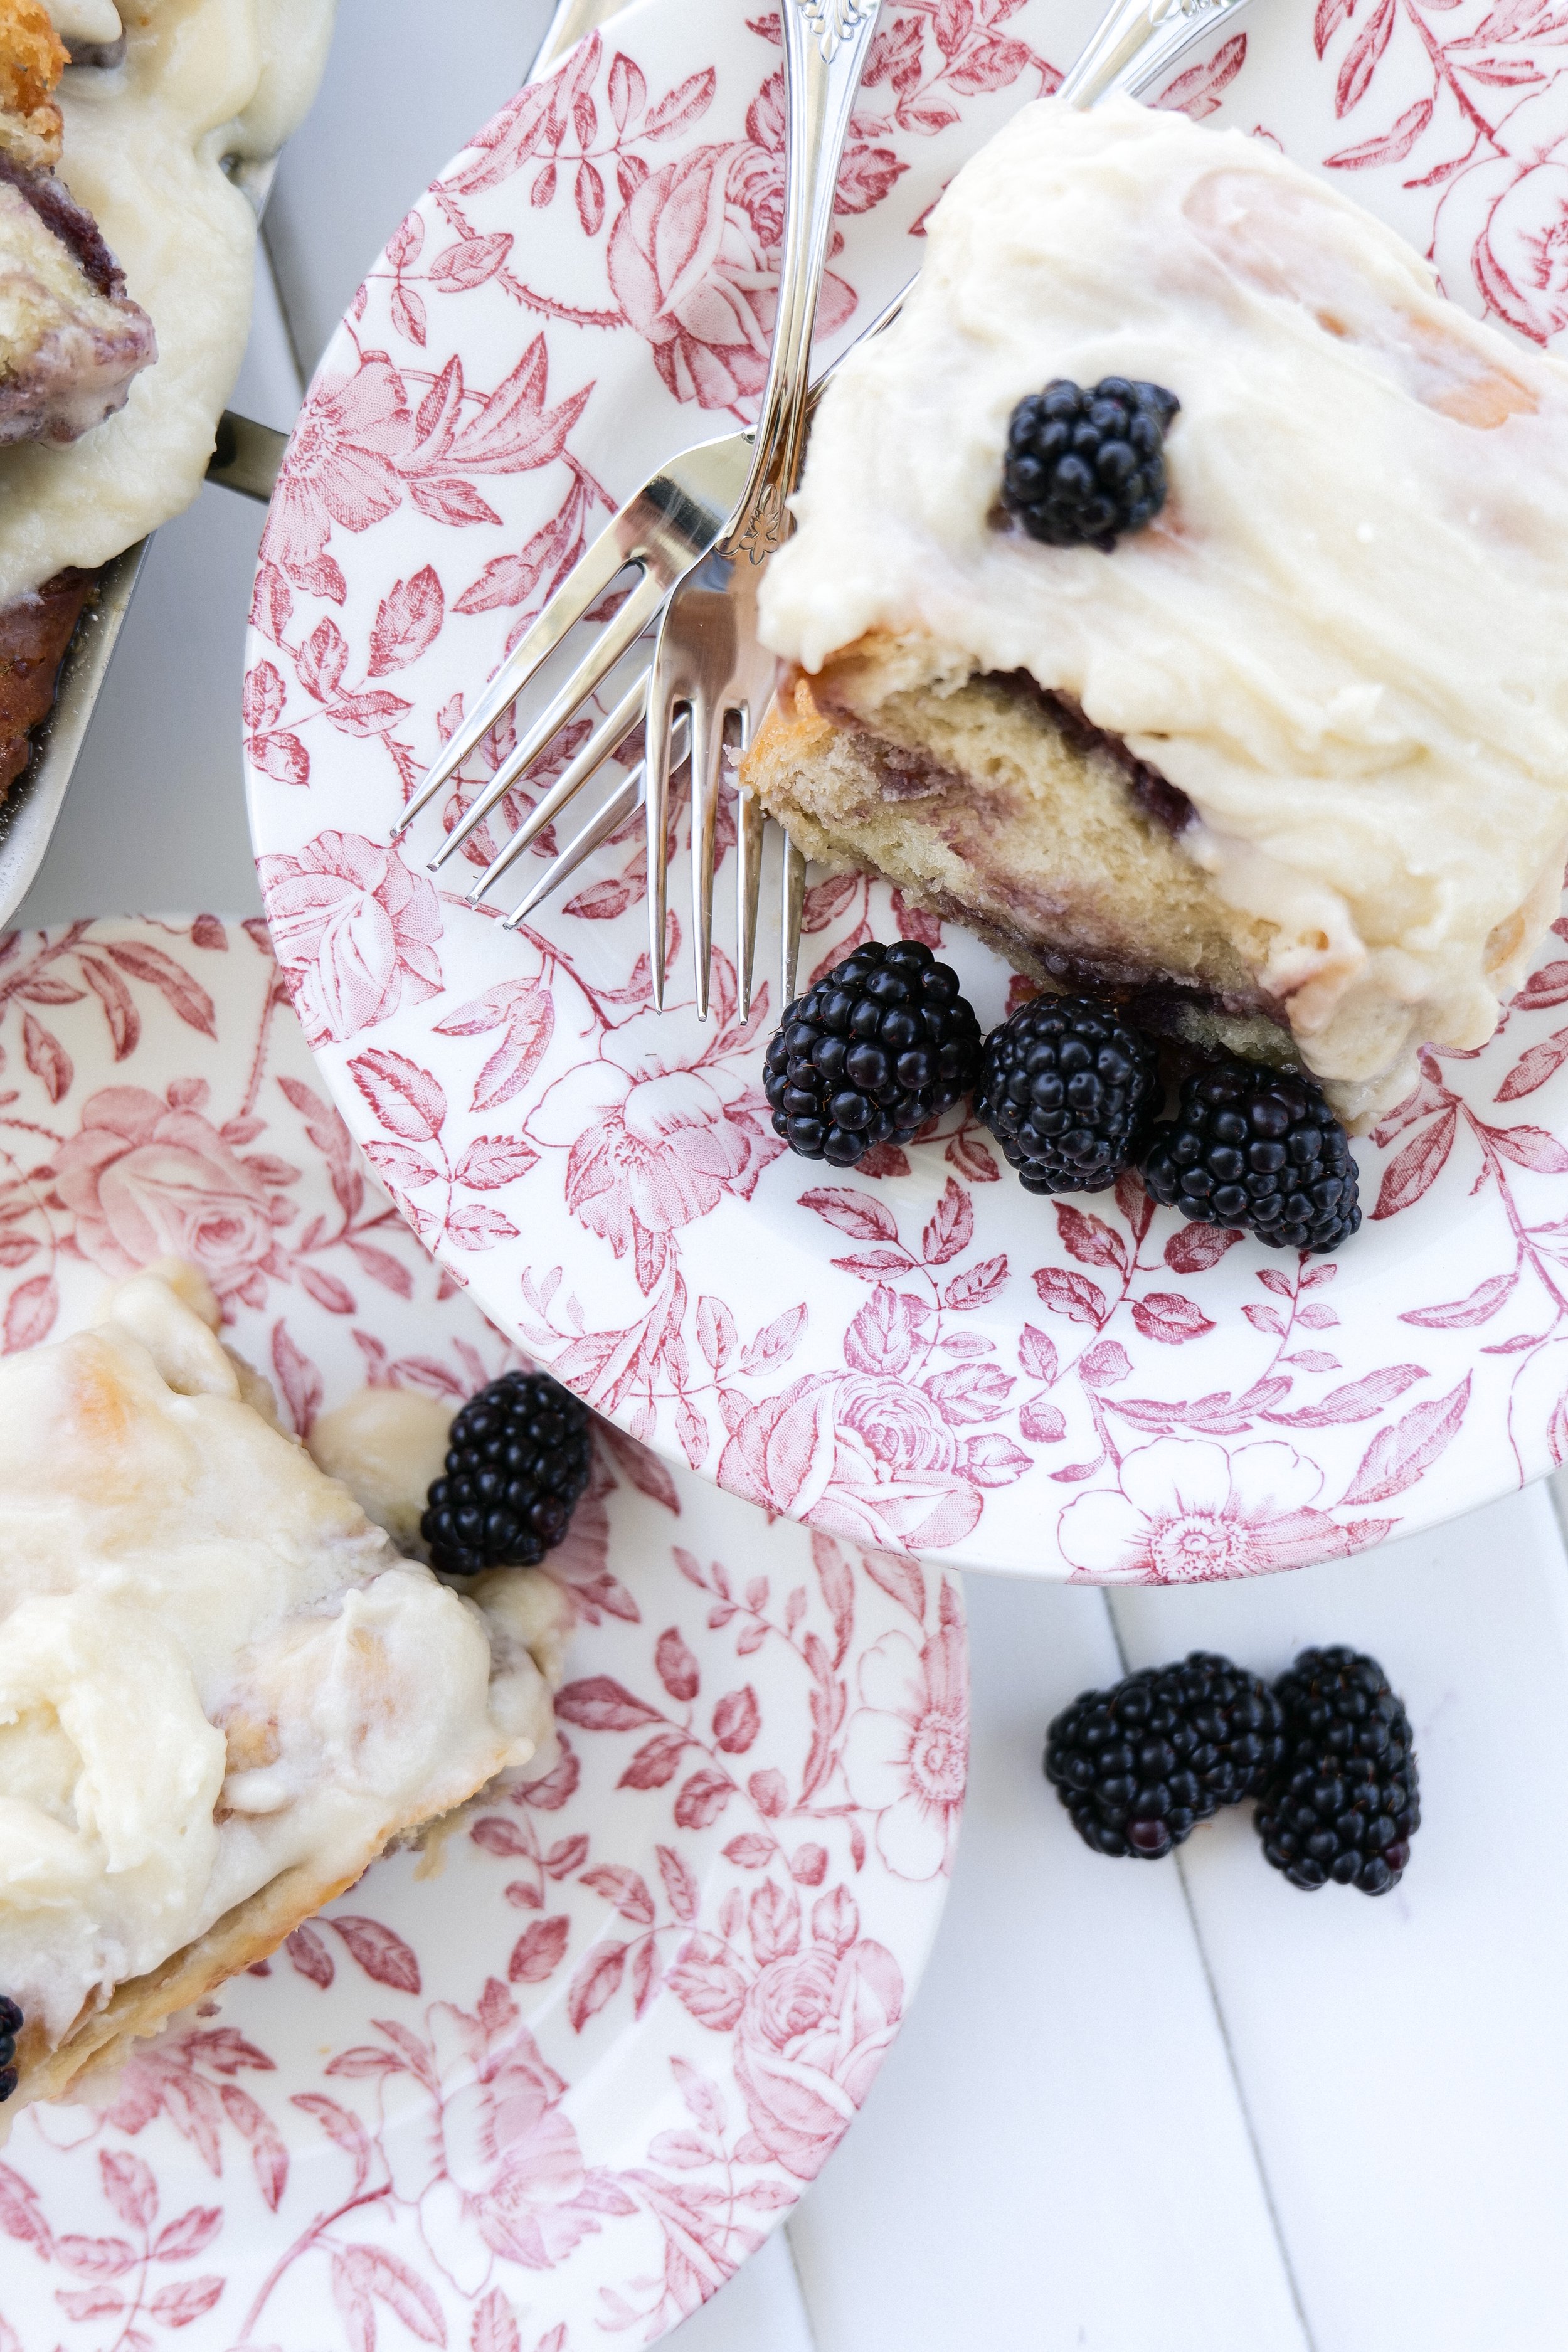
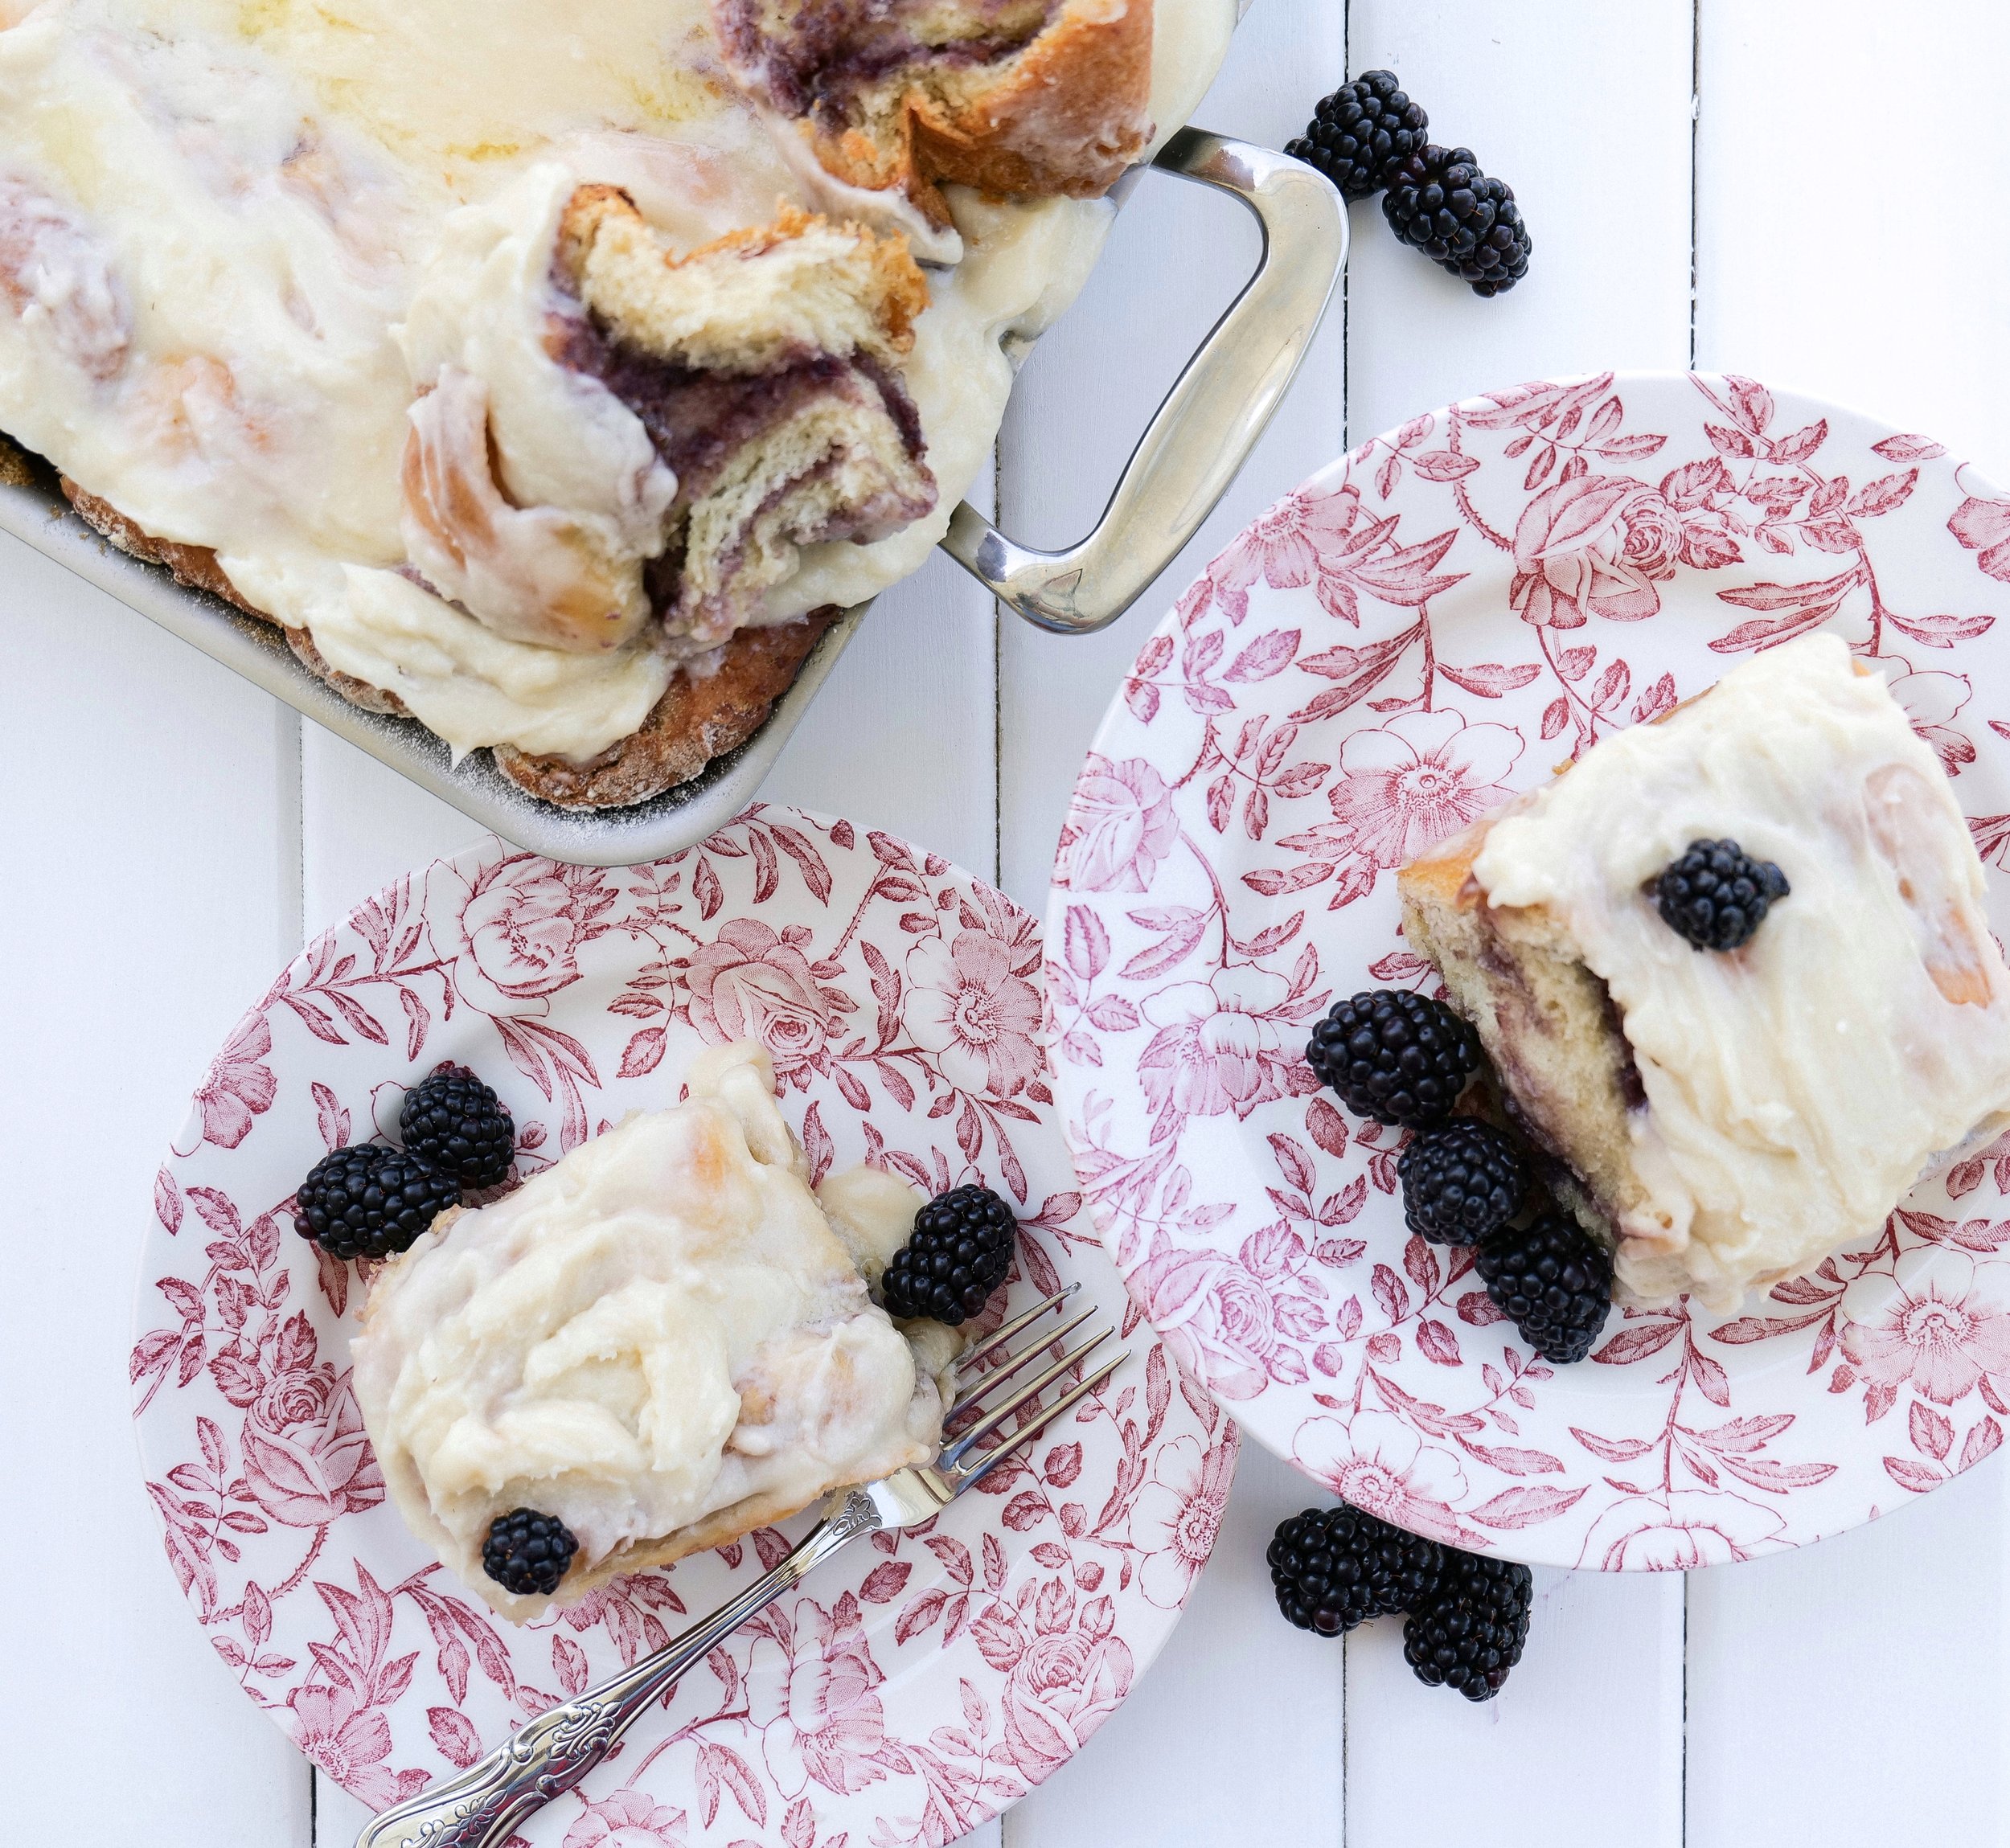
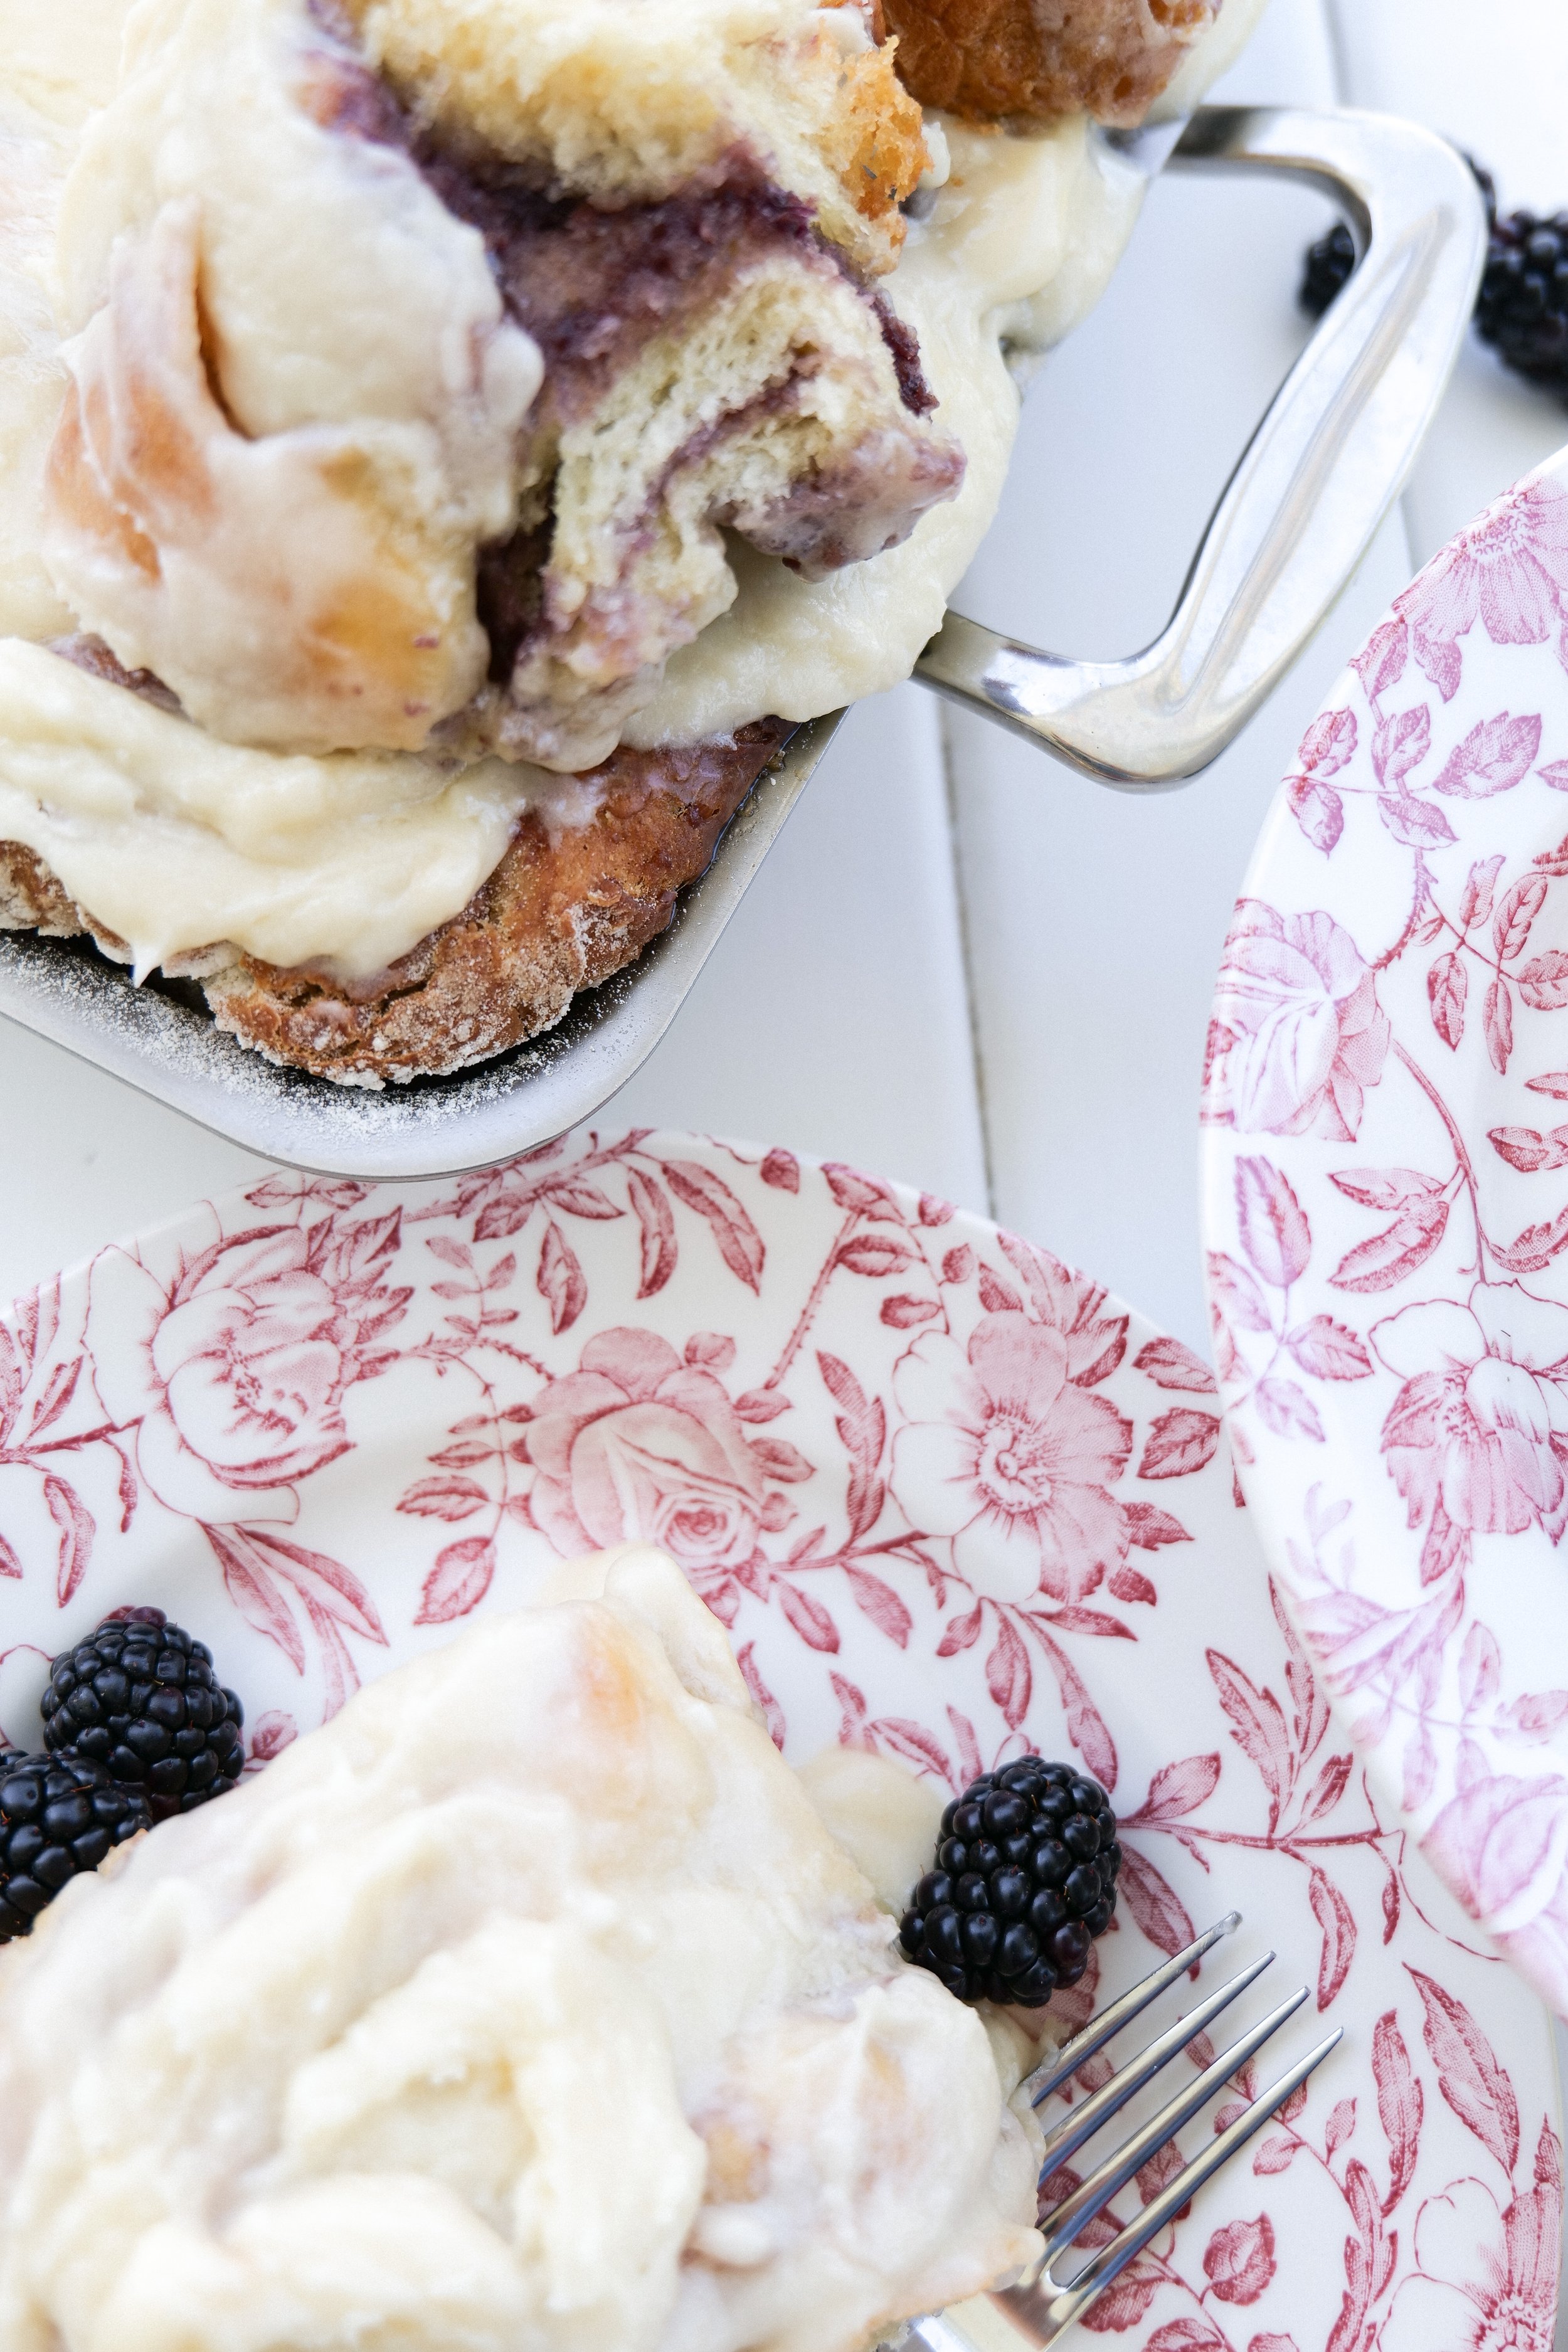
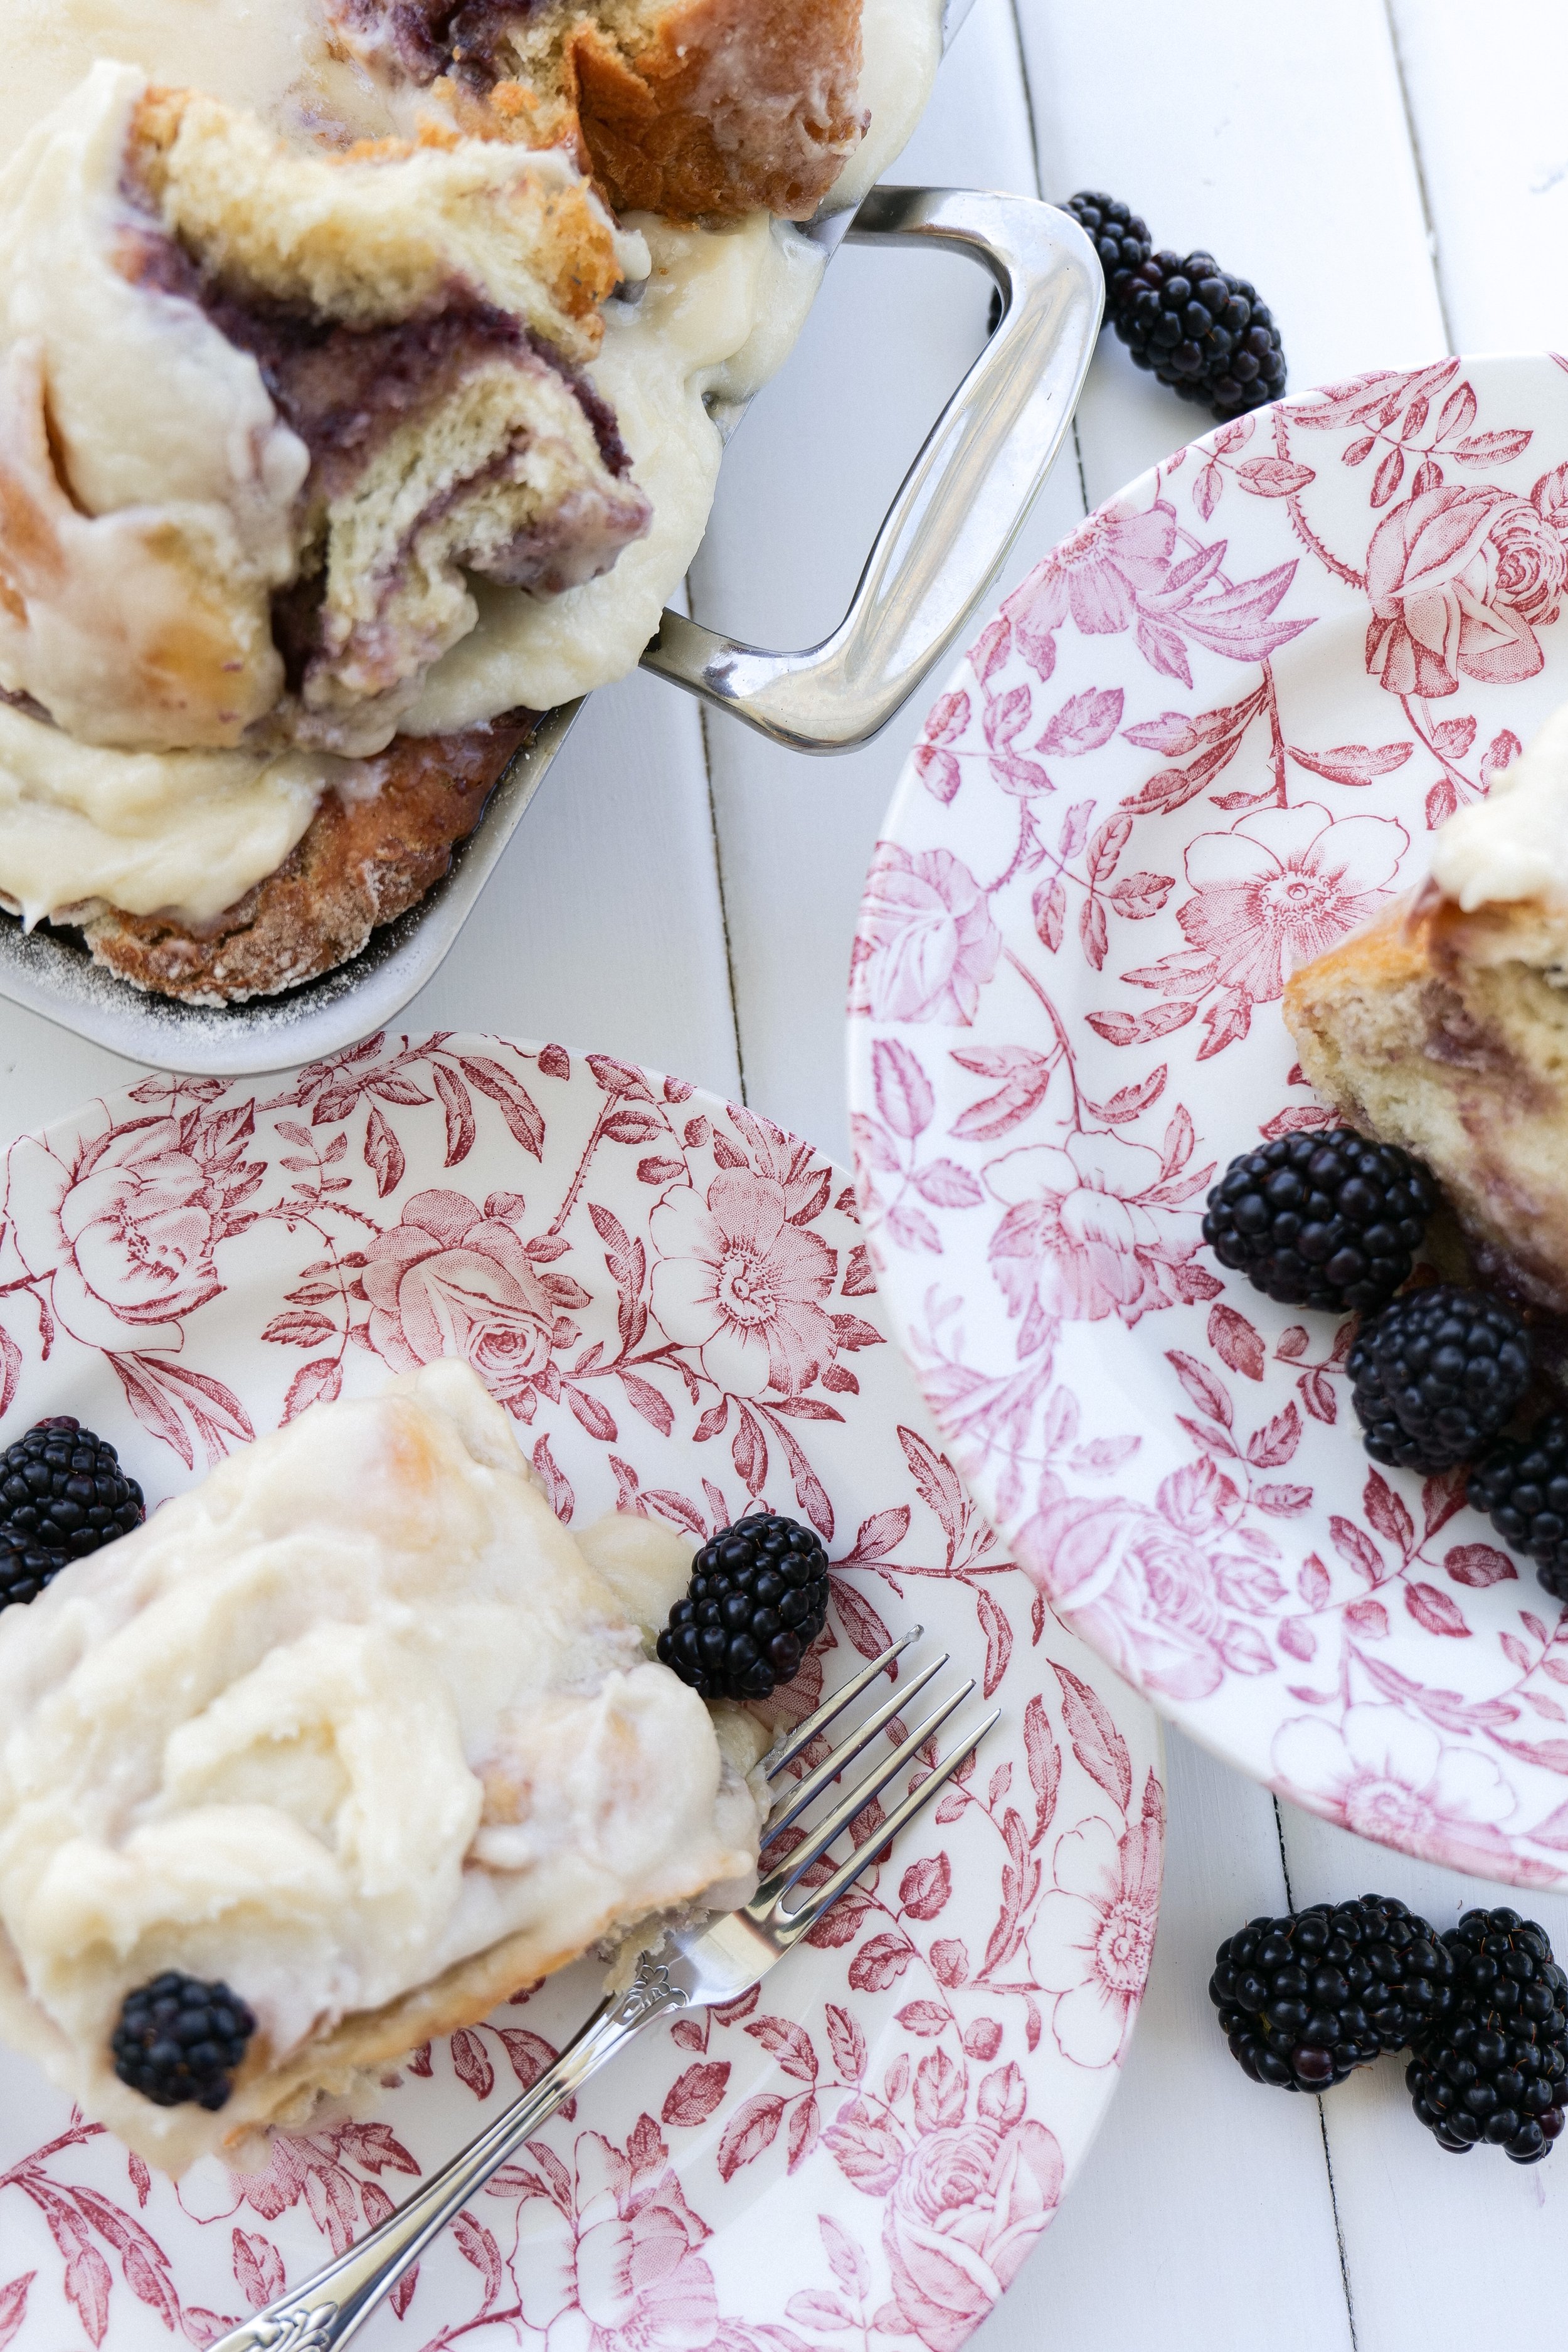
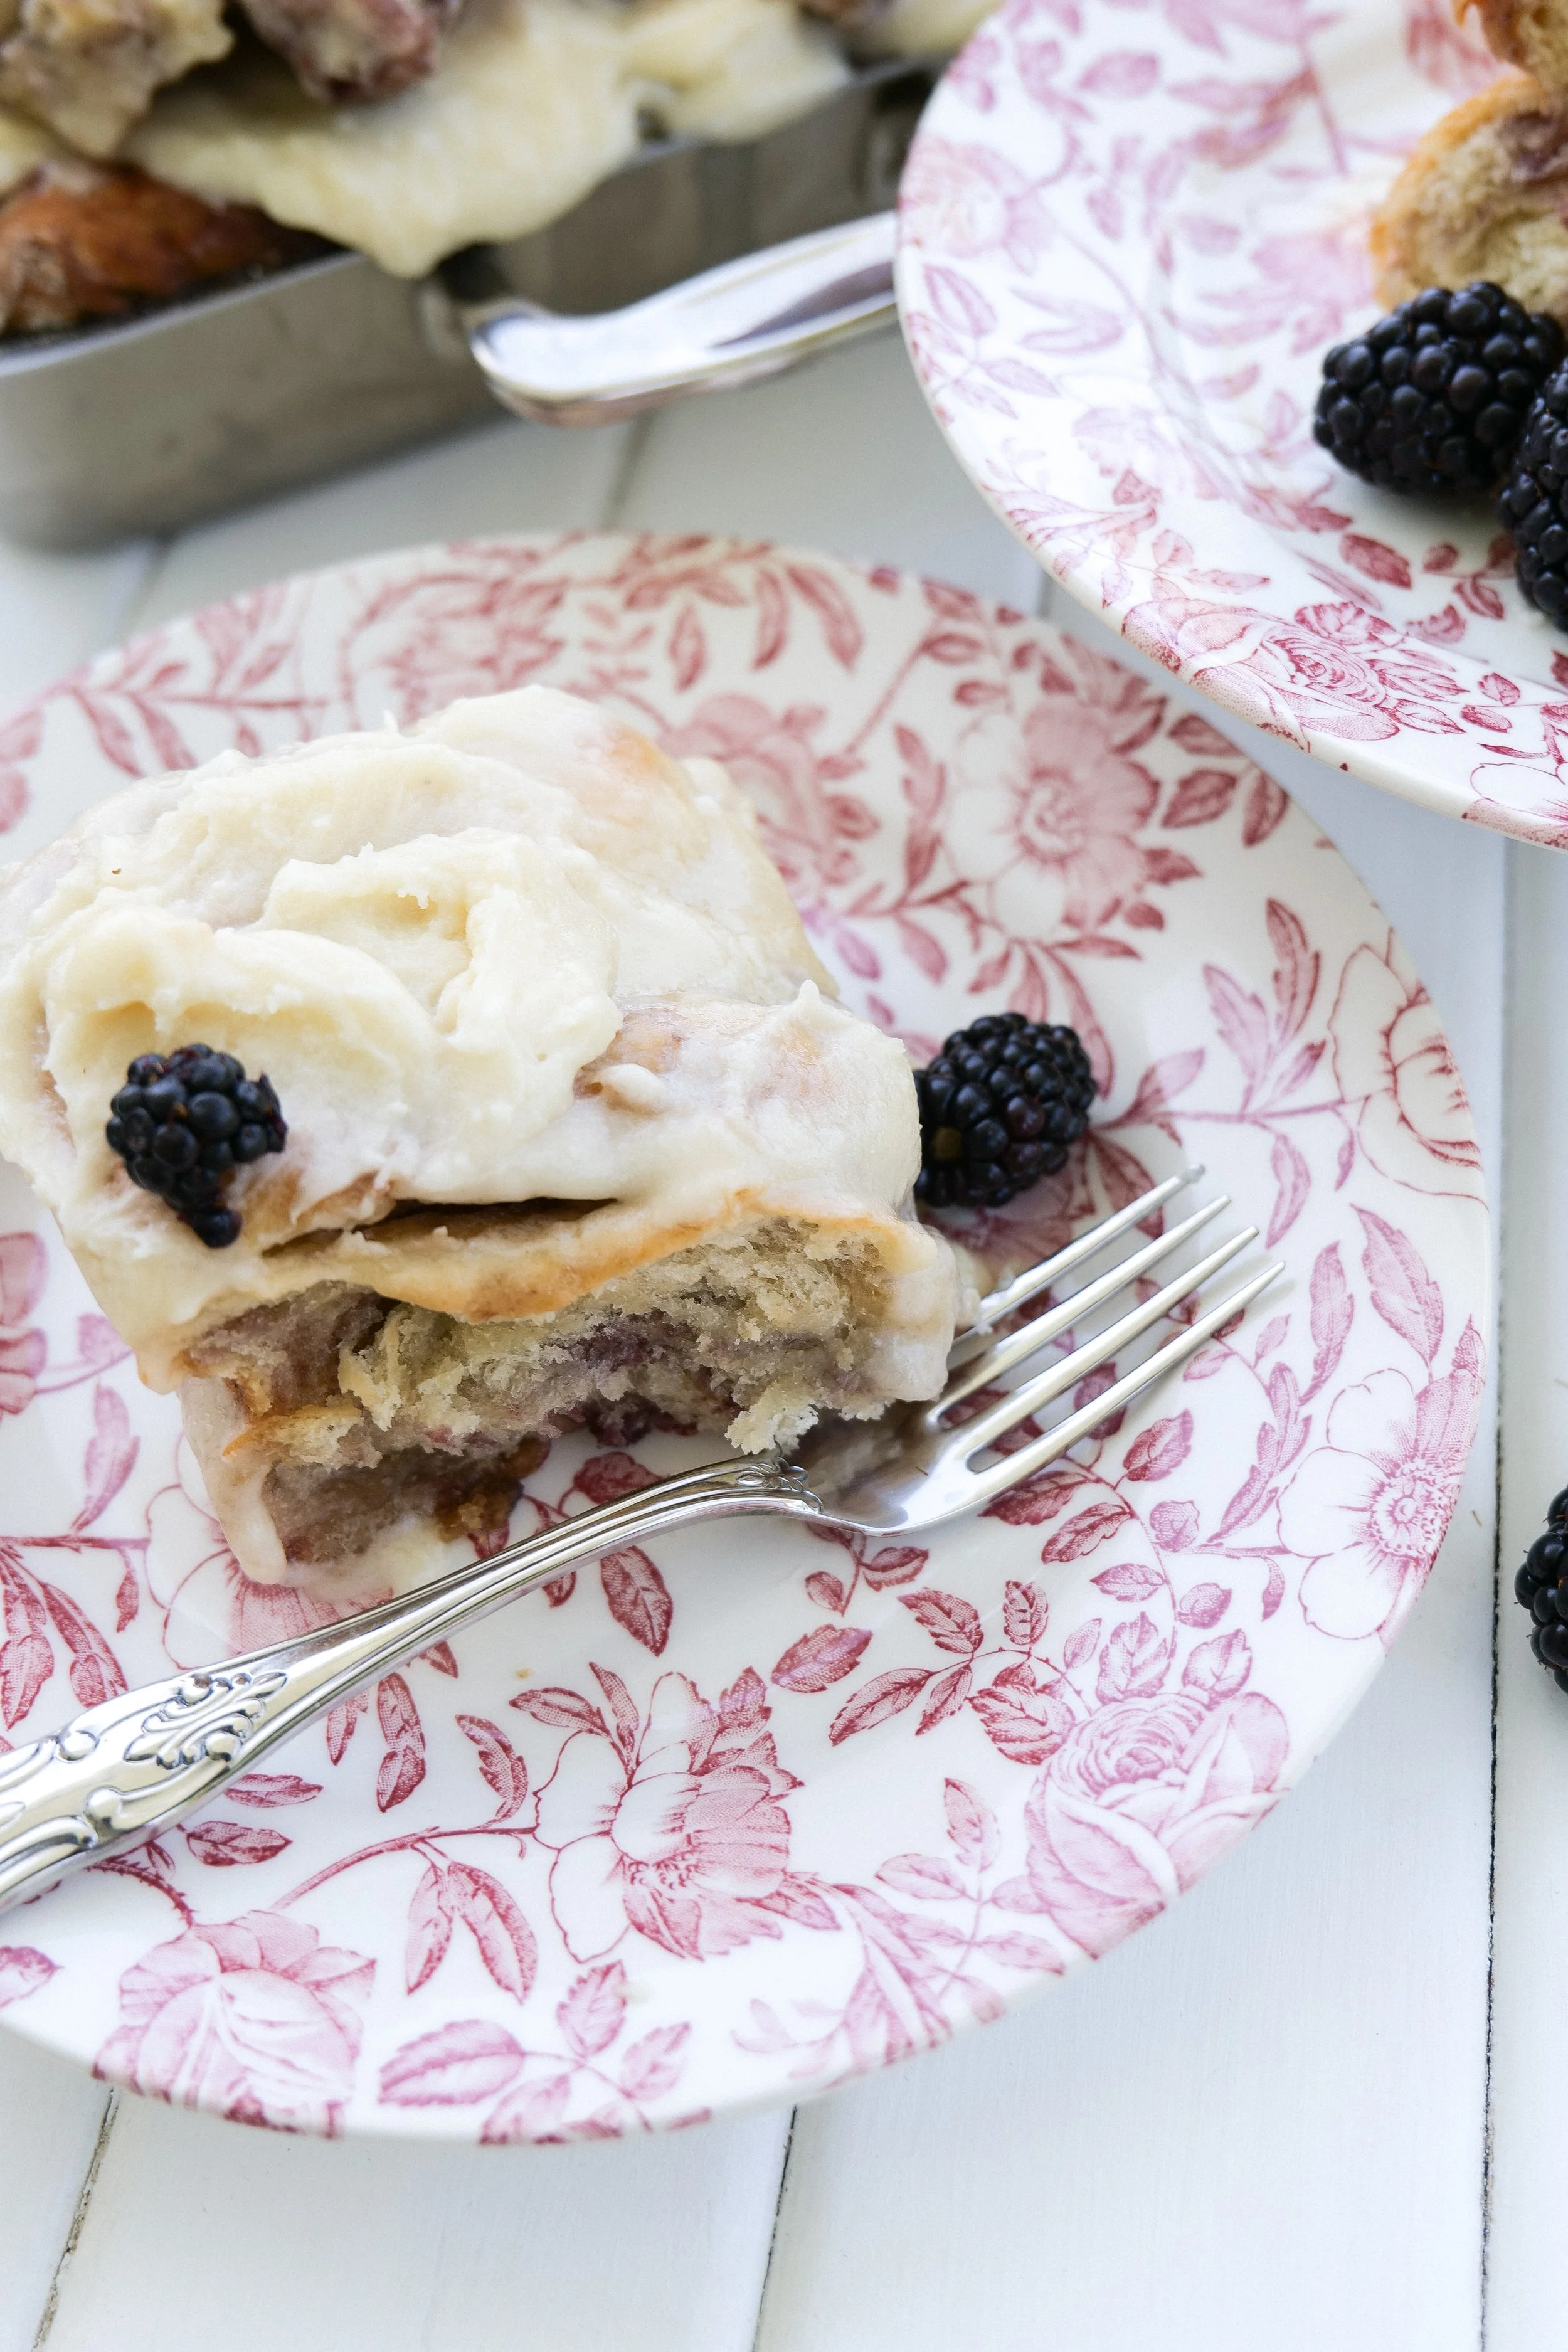
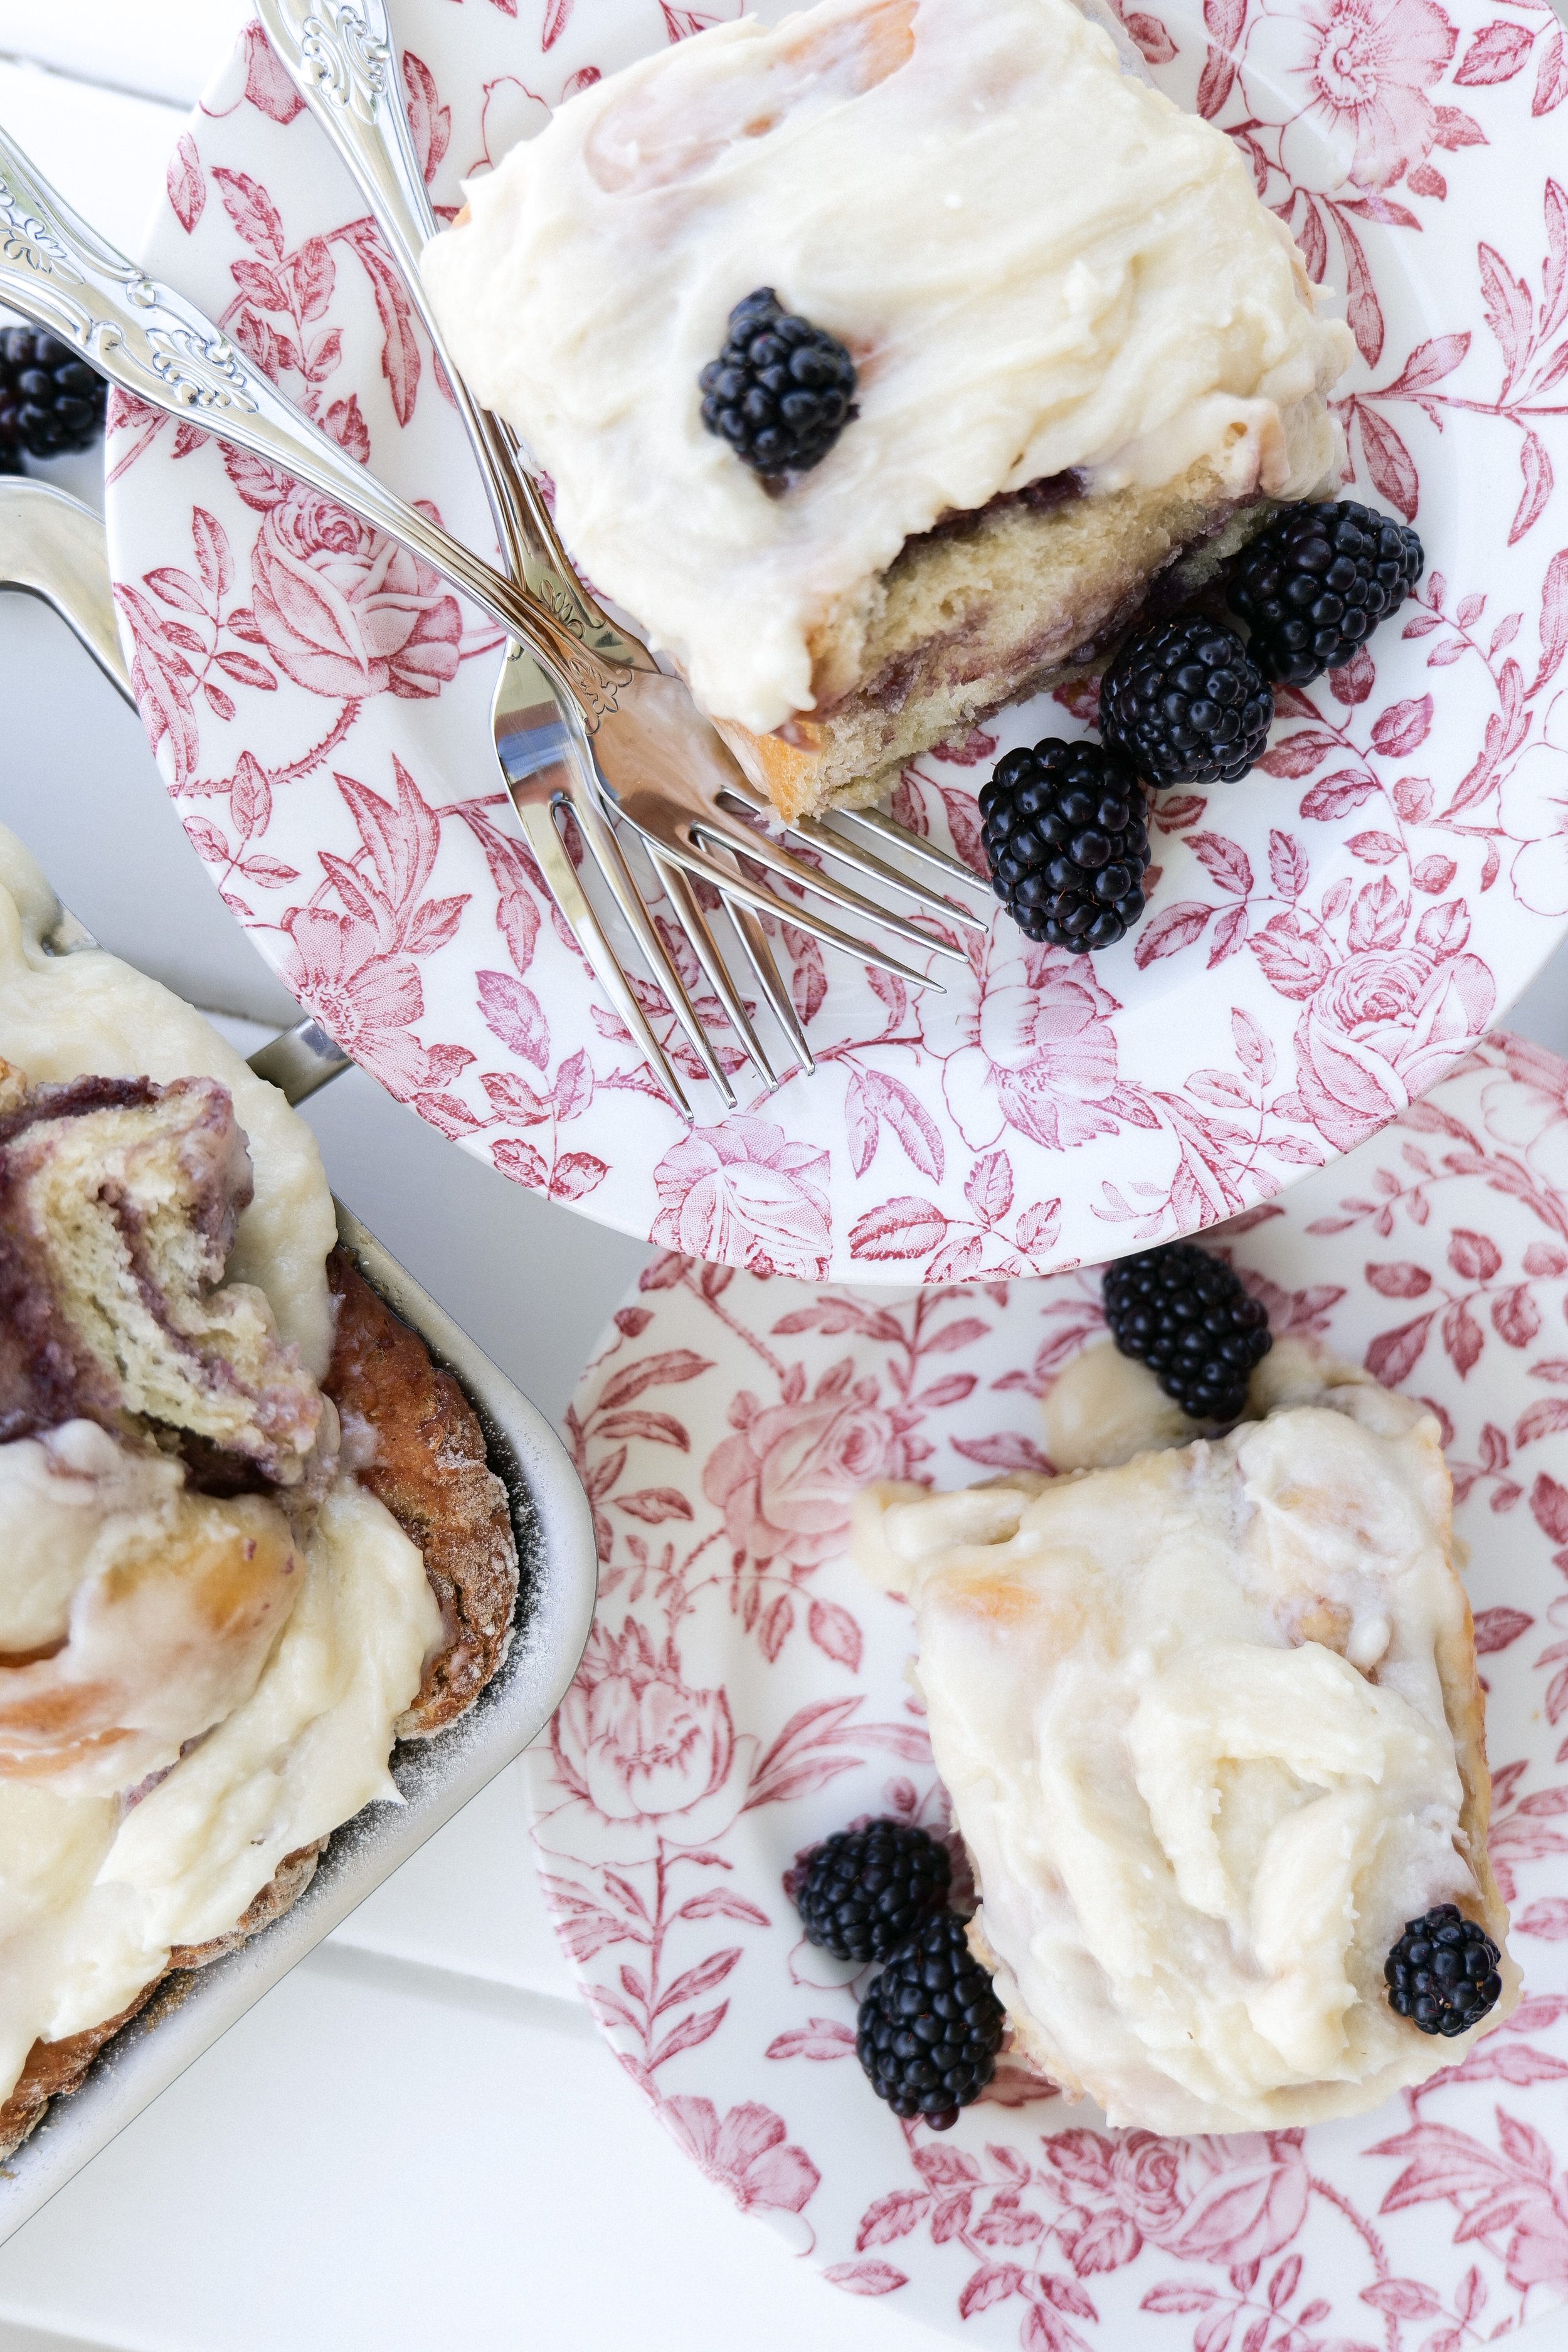
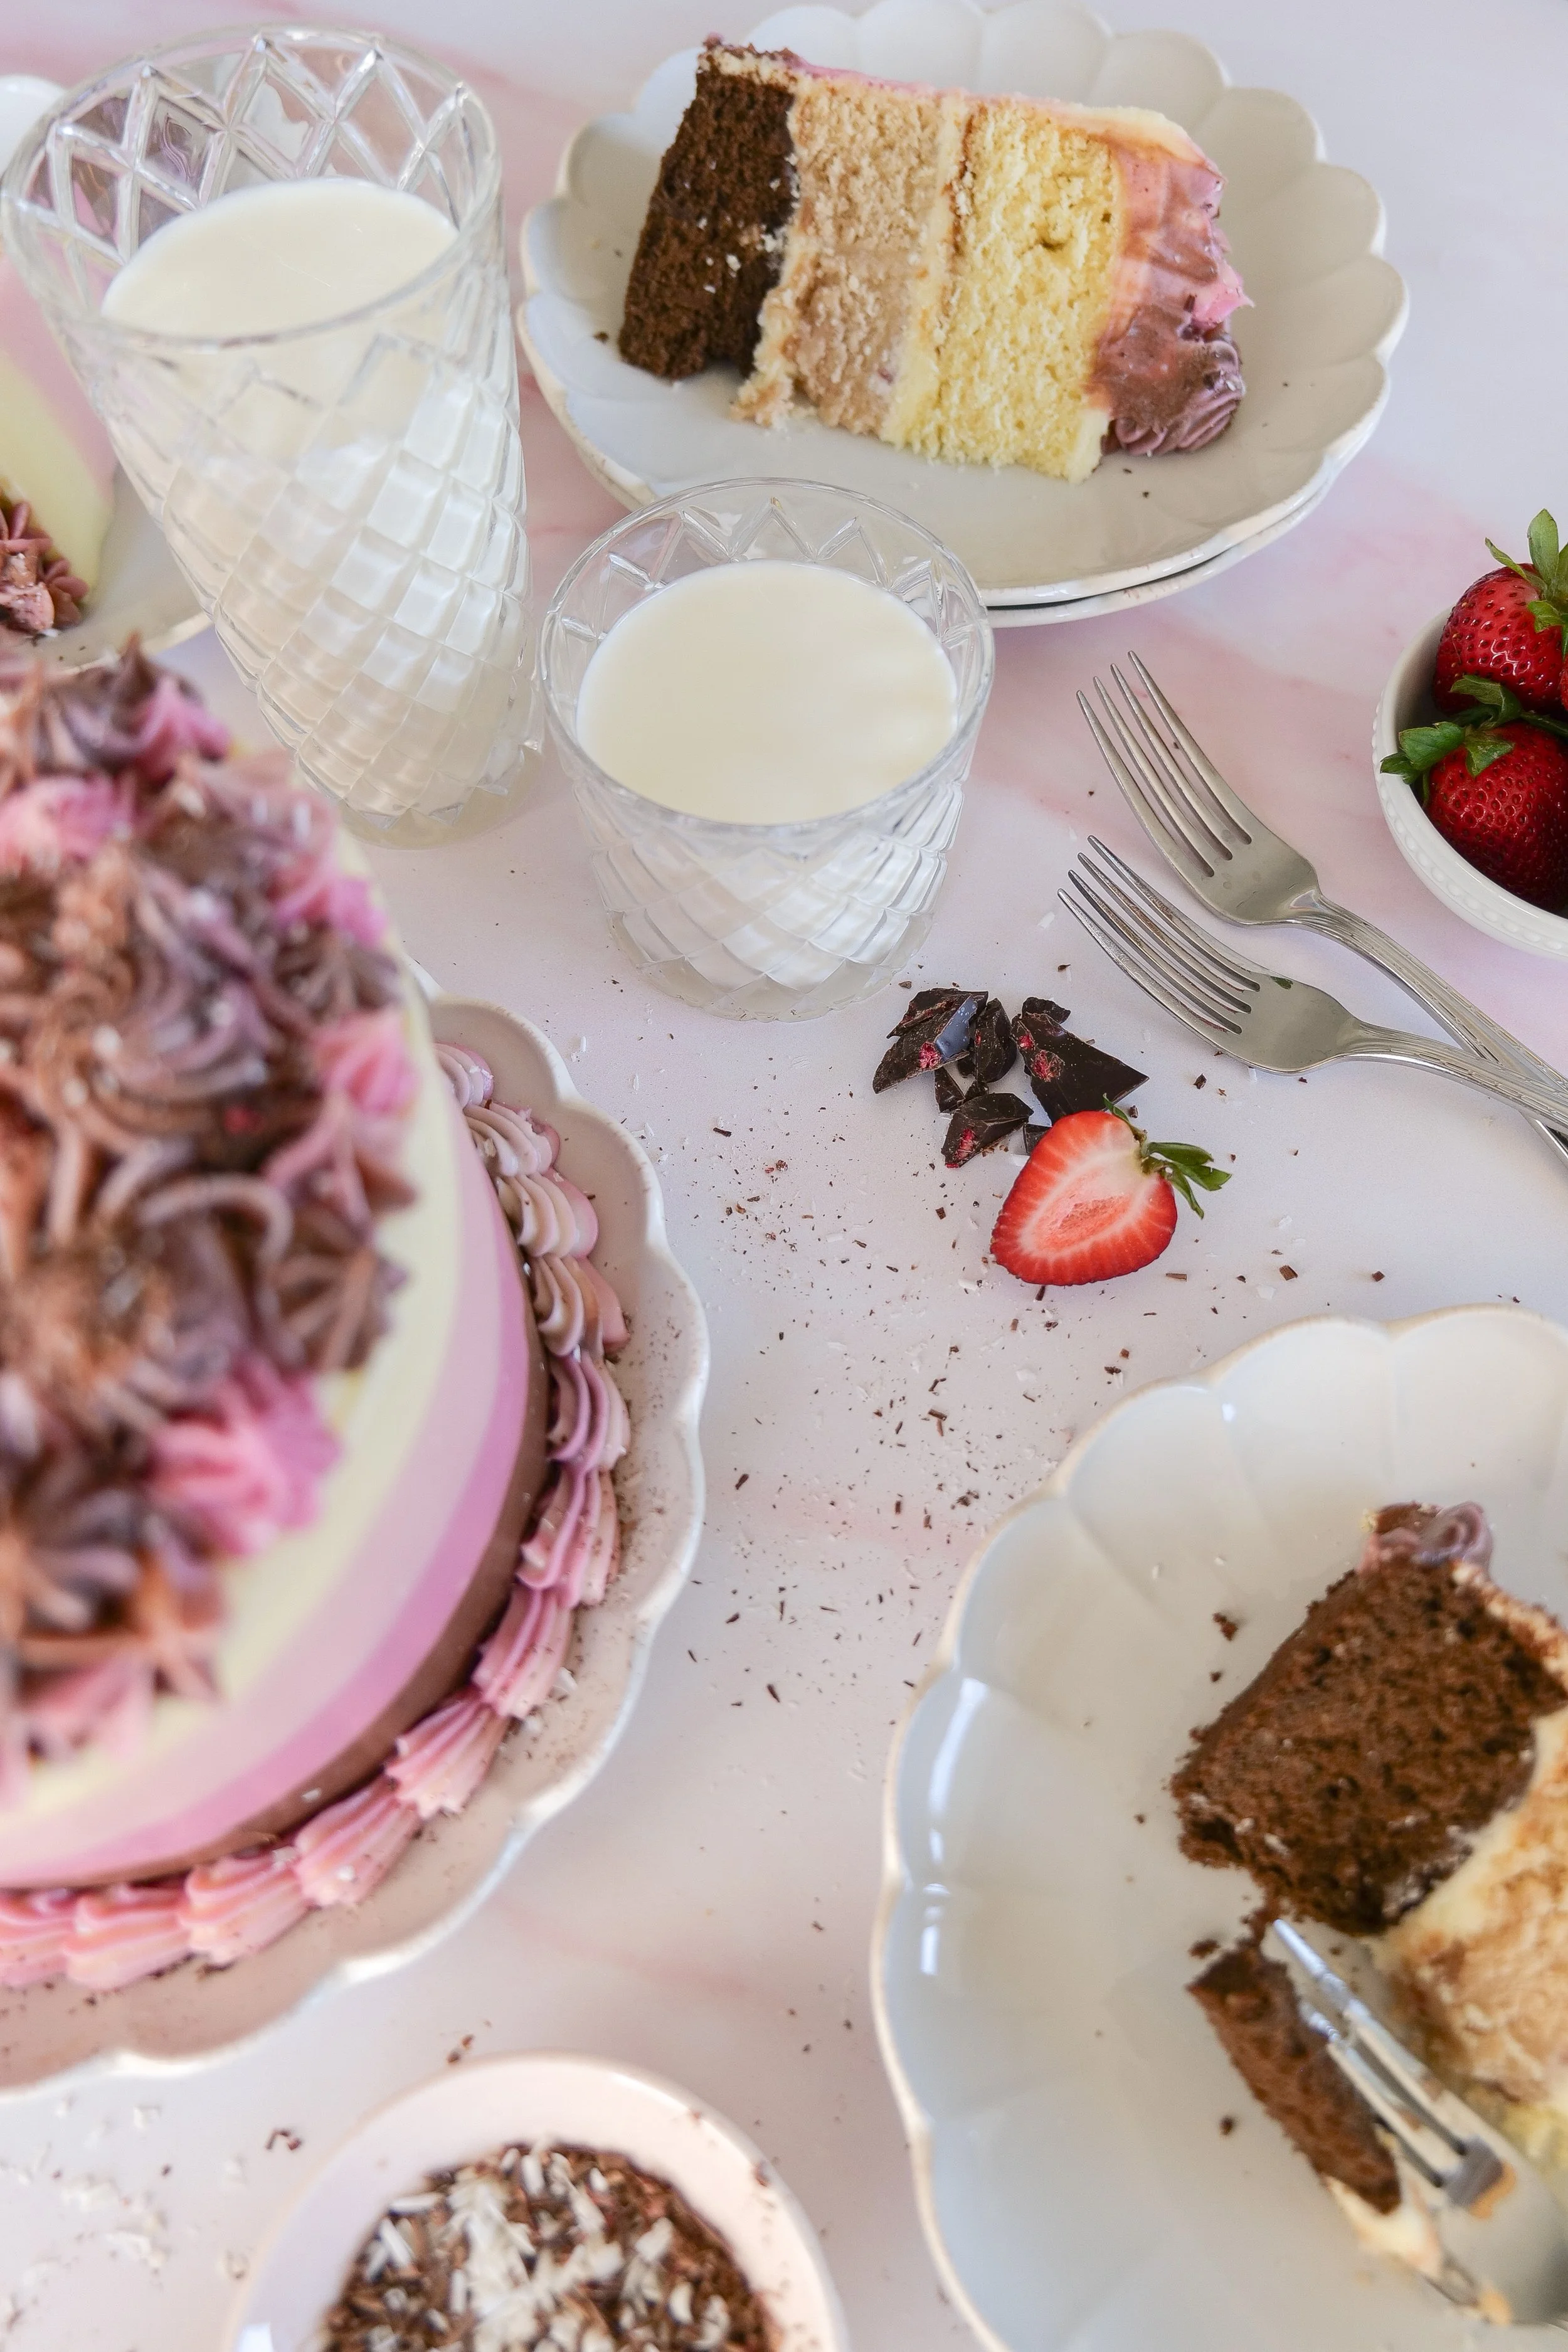
Pistachio Cake is a delicious dessert that is perfect for any occasion. Adding crushed nuts and fresh berries to the top of the cake is an easy way to add a colorful layer of flavor. For an extra special touch, consider drizzling a rich chocolate sauce over the top of the cake. This simple step adds a decadent finish that will have your guests coming back for seconds.

Pistachio Cake is a truly unique dessert that combines the nutty flavor of pistachios with the sweet and fluffy texture of a traditional cake. This delicious cake is made with crushed pistachios in the batter, giving it an extra crunchy and nutty texture. The crushed pistachios are also used as a topping, giving the cake a beautiful decorative element and an extra layer of flavor. Pistachio Cake has a delicate, creamy flavor that pairs well with a variety of other flavors, such as chocolate, strawberries, and caramel.

The unique flavor of pistachio makes it a great choice for special occasions, such as birthdays or anniversaries. Whether you’re looking for a unique and delicious cake for a special occasion or just want to try something new, Pistachio Cake is sure to be a hit. Its unique flavor and texture make it a great choice for any event or party. So if you’re looking to impress your guests, Pistachio Cake is the perfect dessert to make.

Does Pistachio Cake Need to Be Refrigerated?

Pistachio Cake is the perfect dessert for those days when you want to enjoy something sweet but don't want to worry about it spoiling. This delicate cake has a light and moist texture that can easily be kept at room temperature, so you don't have to worry about refrigerating it. However, the frosting does need to be refrigerated. If you want to use this recipe to make a pistachio bundt cake without frosting you can leave it out at room temperature. If you are making it as a cake with this delicious frosting then you will need to keep it in the fridge after serving due to the mascarpone in the frosting. It can stay at room temp for a few hours, just not overnight. The ease of keeping Pistachio Cake at room temperature makes it a great choice for picnics and outdoor events. You can easily transport the cake and enjoy it without worrying about it spoiling. So the next time you are looking for a delicious dessert to take to a gathering, Pistachio Cake should definitely be on the menu.

An Easy Pistachio Cake Recipe

Recipe feeds 20-24

Ingredients

2 cups shelled pistachios

2 3/4 cups cake flour

2 teaspoons baking powder

1 teaspoon sea salt

1 cup salted butter

3/4 cup granulated sugar

1 large egg

2 teaspoons pure vanilla extract

1 teaspoon almond extract

1 cup whole milk

1/2 cup sour cream

3 large eggs white

Icing

1 cup salted butter

1 teaspoon vanilla extract

1 teaspoon almond extract

5 cups powdered sugar

8 oz mascarpone

Chopped Pistachios for decorating top

Instructions

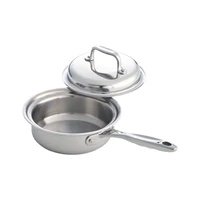
  1. Prep by oiling 3 circle pans (8 or 9 inch - my favorite are the 360 cookware with handles I will link below) and preheat oven to 350 degrees.

  2. Finely grind 1-1/2 cups pistachios in a food processor. Chop the remaining 1/2 cup for decorating cake

  3. Beat butter until creamy. Add in sugar, vanilla & almond extract, and eggs until combined

  4. Next, whisk together finely ground pistachios, flour, baking powder and sea salt.

  5. Alternate adding in dry ingredients & Milk/sour cream until all blended.

  6. In another dry bowl you will beat 3 egg whites until stiff peaks show. Fold this into the batter mixture

  7. Once combined pour into baking dish. I use 3 pans that are oiled and put into oven. 20-30 min or until a toothpick put into center comes out clean. For a taller cake like in my photos you can double this recipe making 6 layers (which will also feed more!)

  8. Blend together all frosting ingredients until incorporated. (butter should be room temp if not heat in microwave for 30 sec at a time). If doubling the cake recipe for a taller cake be sure to double the recipe for frosting.

  9. Once cake is done baking let cool in pan for 15 mins and transfer to wire rack for another 15.

  10. Ice layers of cake and do a thin layer around for a “crumb layer” that will catch all the crumbs and make a base for the final layer. Place in fridge for 30 mins and then do another final layer. Smooth, textured, whatever you desire! Add the remaining pistachios to decorate!

  11. Enjoy!

Pistachio cake is the perfect way to end a special occasion and show your guests your baking talents. Its unique flavor and texture make it an ideal choice for birthdays, weddings, and other special occasions. Pistachio cake is also incredibly easy to make and can be customized with different toppings to suit any particular occasion. The nutty flavor of pistachios makes it a great way to end an evening with friends and family. Whether you’re looking for an elegant dessert to serve on a special day or just want to add a little extra something to your next gathering, pistachio cake is sure to be a hit. Its unique flavor and texture make it a great way to show your guests that you care. The nutty flavor of pistachios is sure to add a little bit of extra flair to your next gathering. Best of all, it’s easy to make and can be customized with different toppings to make it unique and special.

Other Recipes For Your Sweet Tooth:

My Favorite White Cake Recipe

Indulge in Deliciousness: Cherry Chip Cake with Chunks of Dark Chocolate Recipe

The Most Delicious Pumpkin Coffee Cake

Tantalizingly Delicious Recipe For Lemon Cheesecake With An Amazing Glaze

Blackberry Cinnamon Rolls with Mascarpone Frosting

There is nothing I love more on a Sunday morning then hot cinnamon rolls with some fresh brewed coffee! I am always trying to create new recipes with varieties of flavors to make it unique! For this recipe I used my tried and true cinnamon roll recipe but added a small twist of blackberry ( which is delicious even by itself) filling and a marscapone frosting that is OUT OF THIS WORLD!

A couple of tips when using this recipe:

1. You can make them overnight or same day. You will bake less same day because they won’t be cold. Check on them around 25 mins and every 5 mins after.

2. These may be softer then other cinnamon rolls you make when curing and rolling dough. Don’t be worried, this is normal!

3. Don’t worry if you eat more than one.. they are addicting 😉

Ingredients:

Dough

  • 3 cups lukewarm water

  • 2 tbsp instant yeast

  • 2 tbsp sugar

  • 1 cup sugar

  • 1/2 cup butter

  • 1 egg

  • 1 tsp salt

  • 8 cups flour (may need more)

Filling

  • 1 cup melted butter

  • 1 cup blackberries

  • 1/2 cup sugar

  • 1 tsp vanilla

Icing

  • 8 oz marscapone

  • 1/2 cup butter

  • 4 cups powdered sugar

  • 4 tbsp milk

  • 2 tsp vanilla

Directions:

  1. Mix luke warm water, yeast and 2 tbsp of sugar. Let sit for around 10 minutes to make sure yeast is good. You will notice the yeast growing in size.

  2. Once you see yeast grow add in sugar, butter (softened for 15-20 sec in microwave) egg, salt.

  3. Slowly add in flour, once you have added in all 6 cups make sure the dough is slightly sticky and looking like dough. Once you see this, mix for another few minutes. It will start to pull away from the bowl, and If you don’t see this add in more flour until you do.

  4. Sift flour over a clean counter top. Make sure to flour the area outside of where dough is. You will be rolling it out here and you don’t want it to stick later.

  5. Once you have tipped the bowl over and poured out the dough lightly flour the top and cover with a clean kitchen towel.

  6. Let rise for 3 hours.

  7. Once you are about ready to roll dough, melt butter in bowl. Add butter and rest of filling ingredients to blender and milk until it looks like a smoothie.

  8. When dough is ready roll out to about 1/4 inch thick rectangular form.

  9. Pour over the filling mix and evenly spread over the dough.

  10. Next roll dough up for cinnamon rolls! My dough recipe is a little softer than some you may have tried in the past, so if you feel its so soft don’t worry, its going to be delicious!

  11. Cut about 2 inch apart and place on pan. They will grow in size so pay attention to spacing.

  12. Wrap top with saran wrap and put in fridge overnight. Next morning take out and let sit at room temp for 1 hour.

  13. Bake at 350. Put cinnamon rolls in as the oven is heating to help pan and rolls adjust to the heat from the fridge (1 hour room temperature they will still be cool to touch)

  14. Bake an additional 45 min. Check at 25 min if tops are a golden brown layer foil for rest of cooking!

  15. Once cooked to your liking pour frosting on rolls and enjoy!

Frosting:

  1. Mix mascarpone and butter until smooth. (if not at room temp warm for 30 seconds in microwave before)

  2. Add powdered sugar, milk, and vanilla until smooth.

Refreshing Lemon Twist Cocktail

If you’re looking for a refreshing cocktail and the perfect drink to sip on all those hot Summer days.. look no further! This is my take on the lemon cocktails I was enjoying all over Broadway St. on our Nashville trip! It’s super easy to make for a group by starting with mixing the first 3 ingredients and then topping with your favorite sparkling wine or champagne! This will forever me by goto! Can’t wait to see what you all think! Cheer’s Friends!

2 oz lemon juice

2 oz limoncello

2 oz ginger beer

champagne

  1. Grab your favorite glasses and fill with ice

  2. Pour in fresh squeezed lemon juice, limoncello, ginger beer and stir with spoon.

  3. Pour over champagne to fill glass.

  4. Top with lemon slices and Enjoy!

Shaved Brussel Sprout Salad with Apples, Goat Cheese & Candied Pecans

The weather is warming up and with it those big, heavy, filling cold weather dishes may be slowly transitioning into !ighter and healthier colorful plates. This delicious salad is one of my favorites to enjoy anytime of year but especially in the Spring and Summer. I love to pair it with salmon or have it as a nice side dish for those Summer cookouts that are sure to come! This recipe will provide you with everything you need to make the dressing from scratch and to add in the candied pecans that are so addicting on any meal!

Ingredients:

10 -12 cups shaved Brussel sprouts

1/2 cup fresh strawberries

1/4 balsamic vinegar

1/4 raw honey

1/2 cup olive oil

1/4 tsp salt

1/4 tsp pepper

1 large apple ( I like the pink lady)

4 oz crumbled goat cheese

2 cups pecans

1/4 cup maple syrup

2 tbsp brown sugar

Directions:

  1. Make Candied Pecans so they can cool while you prepare rest of salad.

    1. line baking sheet, I use my Jelly Roll Pan from 360 cookware -here-, with parchment paper and set aside.

    2. In a pan, I use my 360 cookware 1 quart sauce pan -here-, melt together maple syrup and brown sugar until mixed and bubbling.

    3. Add in pecans and coat. Pour onto prepared baking sheet and separate nuts so they don’t stick together. Let cool.

  2. Make delicious strawberry balsamic salad dressing!

    1. Add strawberries, balsamic vinegar, raw honey, cup olive oil, tsp salt, tsp pepper into blender and blend until smooth.

    2. Place in bowl or dressing dish and set aside for later.

  3. Shave brussel sprouts. (You can always buy pre shaved however they are always a little thicker and I prefer the shavings small to taste more like a salad and less like brussel’s) To shave them I use my Mandoline slicer on 1/8th. If I am not wanting to slice it, I just buy extra bags of pre sliced and pull out all the thick chunks and use for a side of brussels later in the week.

  4. Assemble the salad. I like to put in half of the apples, half the goat cheese and half of the candied pecans add dressing and toss. Once I plate the salad I add a little of each item on the top so you can see the full color and toppings!

  5. Enjoy!

All the 360 cookware products I used in making this salad and the beautiful flatware are linked below. For a 20% discount use code AMANDA20. Works off the entire site!

Strawberry Orange Bourbon Smash

While visiting Nashville last month we told ourselves we had to take in the local tradition of bourbon tasting. Bourbon has never been our first drink of choice, but ever since going Scotty has definitely been experimenting with different brands and ways to prepare a drink, and it is definitely growing on him. Your girl still needs a little something mixed with it because I just can’t quite acquire the taste yet 😝! So, I went ahead and grabbed some fresh fruit and got to making something colorful and pretty I would drink while he has his on the rocks! Funny thing is.. he loves it my way too! This recipe is delicious. It’s not overly sweet but not too strong either! If you want to make it less strong or more strong just use the blood orange sparkling water as much as you need for your desired taste.

Strawberry Orange Bourbon Smash Recipe

Ingredients:

Handful of sliced strawberries

1 oz orange liqueur

2 oz bourbon of choice

blood orange sparkling sanpellegrino

sliced oranges for garnish

Instructions:

  1. Muddle a handful of strawberries in cocktail glass

  2. Pour in orange liqueur and bourbon of choice

  3. Add ice and pour over blood orange sparkling drink until full!

  4. Stir. Garnish with orange slices and extra strawberries.

  5. Enjoy!

For more of my cocktail recipes head to search and you'll find Pina Colada pitchers, Vodka Cocktails and so much more! For videos go to my Pinterest or Instagram account where you get more behind the scenes of creating these cocktails. To be the first to see be sure to sign up by leaving you email address and signing up for our newsletter.

Slow Cooker Orange Chicken

There is just something so convenient about making a meal in a slow cooker, especially on a busy schedule! There is so much less clean up and dinner is always ready by the time you get home from work! This super easy and delicious orange chicken recipe pairs so good with rice and is sure to be a family favorite! You can even add in cut up peppers and onions to make sure you get those veggies in! I hope you enjoy this as much as our family does!

Cook Time: 5 hours

Prep Time: 15 min

Feeds 4 people

Ingredients:

1 - 1 1/2 pounds chicken

1/3 cup cornstarch

1/2 tsp. Salt

1/2 tsp. Pepper

1/2 cup orange marmalade

2 tbsp coconut aminos

1/2 tsp rice vinegar

1/2 tsp sesame oil

2 garlic cloves (minced)

1/2 tsp chili garlic sauce

Toppings:

sesame seeds

green onions

orange slices

Instructions:

  1. Cut thawed chicken into 1inch cubes and toss with corn starch salt and pepper.

  2. Spray slow cooker with olive oil spray and layer chicken into bottom.

  3. In a bowl whisk together rest of ingredients (excluding toppings)

  4. Pour whisk sauce over chicken and toss.

  5. Turn on slow cooker to 2 and cook for 5 hrs.

I love using the 360 slow cooker! It’s so easy to use and everything comes out perfect! I love it’s stainless steel look and of course love that it’s made in the good ol’ USA! For more info Click -HERE-. To shop entire site with 20% off use code AMANDA20

Garlic & Herb Focaccia Bread

I am so excited for this one! I have been expanding the varieties of food I have been cooking and baking and I love sharing these new recipes with you guys. To start the new year, I have been on a total bread making kick, and lots of you have been wanting to try my recipes!! I have been trying my best to perfect different types and flavors of bread and I think this is the one that is finally ready to share! It’s SUPER easy and so tasty it’s addicting! Just takes a little time in the fridge over night but my goodness do you have a yummy bread once its done!! Amazing for sandwiches, side dishes with dinner, and honestly it’s just perfectly good on it own maybe even with a nice glass of wine. So let’s get to baking!

I am using my 360 Cookware Jelly Roll Pan linked -here- . The perfect size for this and so many other things! You can use my code AMANDA20 for 20% off the entire website!

Ingredients:

4 Cups Flour

2 teaspoons salt

2 teaspoons instant yeast

2 cups warm water

Olive Oil spray to grease pan

3 tbsp olive oil

1/2 tsp flaky sea salt

2 tsp Italian seasoning

3 minced garlic cloves

Directions:

  1. Mix flour, salt, yeast and warm water in bowl. Combined well and cover with a towel or plastic wrap. Put in fridge over night. (9 hours or Upto 24)

  2. The next morning take out pan to bake in. I like this -Jelly Roll- the most from 360 the sides are the perfect amount and its a great size to bake this bread in. Oil pan and oil bread mixture.

  3. Lay oiled bread mixture onto pan and let rise for 20 min covered with towel. If your home is cool I suggest warming the oven up for 1 minute while prepping bread and turning off. Then placing pan with bread in to feel warmth and rise.

  4. After risen. Move bread into a longer shape to fill the pan and poke. Using fingers you will make small indentions along the bread. Let rise again for 20 min to 1 hour until bread has risen enough for you see it past the jelly roll line.

  5. Next poke more holes and then sprinkle over oil mixture; Mixture of minced garlic, olive oil, Italian seasoning and sea salt.

  6. Bake at 425 for 25 to 30 min until the bottom is crisp and the top is a golden color. Let cool and enjoy!

Watermelon Twist Cocktail

This is such great drink to have really any time of the year, but being that its pink I had to share the recipe near Valentines day! It’s an easy drink to make with only 4 ingredients! You can also easily double or triple this recipe to make for parties with bigger groups. Trust me you will find yourself needing to do this because it is quite the crowd pleaser!

Ingredients:

2 oz Watermelon Pucker

2 oz Sweet & Sour Mix

2 oz Vanilla Vodka (regular will work too)

Lemon Sparkling Water

Directions:

  1. Grab a cocktail shaker! Add ice and the first 3 ingredients! SHAKE IT UP!

  2. Grab your cocktail glass. I like to add a little sugar rim to add some fun to this but total preference on this one! Add Ice and strain over mixture from cocktail shaker.

  3. Finish off with bubbles! I like to add lemon sparkling water for a lighter refreshing drink. You can also do 7up or Champagne!

  4. Enjoy!!

To make this into multiple drinks you would just double, triple or quadruple the first 3 ingredients in the shaker and then follow instructions as above!

Italian Sausage, Potato & Kale Soup

There is just something about cold, foggy, or rainy days that makes you want to curl up with a warm bowl of soup! I’ve been trying to add more greens creatively into recipes and meals I cook this year. So here is one of my favorite soups to make all year round, but especially right now as we finish off the cold of Winter.

Serves: 10 (2 cup Serving)

Ingredients:

2 lbs. of Italian Sausage

1 Onion

1/4 tsp. red pepper flakes

1 tsp sea salt

1 tsp italian seasoning

5 cloves of minced garlic

2 tbsp flour

4 cups vegetable broth

3 cups whole milk

3 large potatoes

6 cups chopped kale (if not fresh I get the pre chopped)

1-1/2 cups heavy cream

Parmesan Cheese to garnish

Directions:

  1. Grab your biggest pot! I use the 8 quart stockpot with cover from 360cookware so I have plenty of room. The 6 quart will work great too (discount code below!). Heat on Low-Medium.

  2. Add in Italian sausage and onion. Cooking and stirring until meat is cooked and onion is softened. Making sure to break up sausage into little bits.

  3. Once cooked add in seasonings (red pepper flakes, sea salt Italian seasoning). Stir. Add in garlic and stir until fragrant. About 1 minute.

  4. Next you will add the 2 tbsp. of flour and stir until well coated.

  5. Add in Vegetable broth nice and slow to incorporate into the meat mixture. Then the whole milk. Stirring until well combined.

  6. Take cut Potatoes (you can have these as small or as big as you like, but I do about an inch size) and add into pot. Stir to make sure they are all covered. Let come to a simmer and turn heat to low. Cover and let cook until fork can go through potatoes. 20-30 min.

  7. Once potatoes are done add in heavy cream and then kale. Making sure to stir all together and incorporate fully so kale can soften.

  8. Let cook for around 15 min until kale is soft.

  9. Serve in bowl with parmesan cheese for garnish! Enjoy!!

Macros: FAT=28.6 CARB=20.2 PROTEIN=21.8

For Discount on Pot used and the ENTIRE site of 360cookware use “AMANDA20” for 20% off!

www.360cookware.com

Brown Sugar Toffee Cookies

This cookie recipe has 3 of my favorite yummy ingredients: Brown Sugar, Brown Butter & Toffee!! That’s a lot of delicious goodness all cooked on my 360 cookware!! I love using 360 because for one its all made in the USA! I always love supporting companies and products made in the USA and work hard to find them. Second.. they are the best pans I have used particularly for making cookies hands down! They all are non toxic and so easy to clean. I cant say enough good things about them..They also have bowls that are just as amazing. To share my love I have a code for 20% off! Use code AMANDA20 to get 20% off your next purchase. Start shopping -here-

Brown Sugar Toffee Cookie Recipe

Toffee Recipe :

1 cup cubed salted butter

1 cup white sugar

1 tsp vanilla

  1. On low heat mix cubed butter and sugar. Using a spatula continue to stir to prevent from burning

  2. Once color starts to change add in vanilla

  3. Once color starts to look like peanut butter pour onto parchment paper

  4. Let cook for 10-20 min.

  5. Crack! You are ready to enjoy AND add into cookies!

Cookie Recipe:

1 cup brown butter

2 cups brown sugar (I do one of these dark brown but totally optional)

2 eggs

1 tsp vanilla

4 cups flour

1 tsp salt

4 tsp baking powder

1/2 cup milk

toffee

sea salt for topping

  1. Brown butter in a sauce pan. I do this first because it needs to cool. Once butter starts browning in color and smells nutty you can put in a bowl to cool

  2. Preheat oven to 375

  3. Once butter is cooled enough (I usually give it at least 20-30 min, while I am making toffee) blend butter and brown sugar.

  4. Add in eggs and vanilla and mix well.

  5. Stir dry ingredients in a separate bowl. Alternating between dry and milk adding into wet ingredients.

  6. Lastly add in toffee. You can use as much of the recipe from toffee as you want! Save some to add on the side of cookies, eat, or enjoy it all in the cookies.

  7. I take a cookie scoop and do 2 scoops one on top of each other then sprinkle the top with sea salt. This gives a nice fluffy cookie.

  8. Bake for 11-13 min.

  9. ENJOY!

Hearty Ground Beef Chili

The temps are cooling down outside and I am going crazy with the one pot warm dishes that make my belly happy and so ready for the Fall season! I received my first box from “Good Chop” and knew I had to share a yummy recipe using their delicious meats. Luckily, my box came with ground beef and chili was on my mind. There is nothing better than a warm, tasty, hearty ground beef chili on these cool nights! I hope you enjoy this recipe as much as me and my family did:)

66AB1F89-E03D-4709-93EE-44427ABB8F71.jpeg

Ingredients:

2 tbsp butter

1 onion

2 chopped peppers

2 lbs ground beef

6 oz tomato paste

2- 15.5 oz kidney beans

15.5 oz black beans

14.5 oz diced tomatoes

2 Tbs taco seasoning (my recipe is here)

2 cups beef or chicken broth

Directions:

  1. Grab your biggest pot and heat butter.

  2. Chop onion and peppers and add to melted butter. Stir until vegetables soften.

  3. Add in ground beef to softened vegetables and cook/stir until cooked.

  4. Once beef is all cooked add in all the rest of ingredients. Stir then add lid to pot.

  5. Let cook on low for 30 min. Stir every 5-10 min.

  6. Enjoy! Add all the toppings you love and maybe pair with some delicious corn bread on the side!

C57CC516-1802-46F6-868A-82C888C2D1B1.jpeg

For discount on your box of Good Chop use code WARREN100 to receive $100 off your first 3 orders

3 Mexican Mule Recipes with a Twist!

Taking my favorite social drink and making it even BETTER! The Moscow Mule has been one of my favorite drinks for a while now. The popular drink actually came out in the 1940’s… but boy has it become extra trendy just over the last decade! There are so many different tasty spins on the drink. The Mexican Mule for you tequila loving fans using 21seeds is a great way to drink it! 21seeds makes the most delicious infused tequilas that are amazing on their own, but I always love an adorable cocktail. Here are my 3 favorite drink recipes! The most convenient part of these signature cocktails are that 2 of the ingredients are in each of the 3 drinks, making it even easier to have a variety at parties without needing too many different ingredients!

The Valencia Orange Mule

3 oz Ginger Beer

1.5 oz Valencia Orange 21Seeds

.5 oz Fresh Orange Juice

.5 oz Simple Syrup

Directions:

Add all ingredients over ice in a shaker and shake. Strain in cocktail glass and add garnish. I thinly slice oranges to add on top for the cutest garnish.

The Grapefruit Hibiscus Mule

3 oz. Ginger Beer

1 oz. Grapefruit Juice

1.5 oz Grapefruit Hibiscus 21Seeds Tequila

.5 oz Simple Syrup

Directions:

Add all ingredients over ice in a shaker and shake. Strain in cocktail glass and add garnish. I thinly slice grapefruit to add on sides for the cutest garnish. You could also do like above cocktail if the glass is wide enough.

The Spicy Cucumber Jalapeno Mule

4 oz Ginger Beer

1.5 oz Cucumber Jalapeno 21Seeds Tequila

.5 oz Simple Syrup

2 tbsp of Jalapeno Slices from jar with juice

Directions:

Add all ingredients over ice in a glass and stir. Strain over fresh ice, in mule glass and add garnish. I like to add sliced cucumber and jalapeno for garnish.

Hope you enjoy these drinks as much as me and the hubby have been!

For more info on 21Seeds and to purchase head -here-

For more Halloween recipes on the 21Seeds blog -here-

@21seeds

Cheer’s, Amanda

Salsa Verde Chicken Enchiladas

I’ve been making this delicious dish for as long as I’ve been married! It’s a perfect Mexican treat for lunch or dinner that can be enjoyed fresh out of the oven, frozen and saved for later, or as a tasty treat to take to family gatherings or to friends in need of a good home cooked meal. Let’s be honest…who doesn’t love some delicious Mexican food?

Ingredients:

2 ears of sweet corn

1 red onion

2 large peppers

1 lb chicken

1 cup rice (1 cup water)

2 tbsp salted butter

16 oz shredded mozzarella cheese

6 oz blended cheese

24 oz salsa verde

12 corn tortillas

Directions:

  1. Preheat oven to 425

  2. Cut onion in 4ths and cut peppers in half and deseed. Toss onion, peppers and corn in olive oil and place in oven for 25 mins.

  3. Rinse chicken and pat dry (I like to use strips of chicken to cook faster, you can pre cut now if you didn’t purchase that way). Take a pan with olive oil and heat on medium. Once pan is heated up add chicken and let cook on both sides.

  4. While chicken is cooking take another pan out and melt butter. Once melted add in rice and stir until toasted. Then add in water. It will quickly boil so add lid and reduce heat to low. Let simmer for 15 min.

  5. While rice and vegetables are finishing up moving chicken to cutting board and cutting into small 1/2 inch pieces. Add to a bowl.

  6. Once veggies are done cooking remove from oven and let cool. Once cooled and able to touch cut corn off the cobb and cut small almost minced size onion and jalapenos.

  7. After taking out veggies turn temp down to 350 in oven.

  8. Add veggies, chicken, almost all mozzarella (leave 1 cup out), 1 cup of salsa verde and cooked rice to a bowl. Mix well.

  9. Take 2 damp paper towels and wrap around tortillas. Place in microwave for 30 seconds. This helps tortillas from breaking while rolling. Sometimes I do half at a time so they stay warm.

  10. Put 1 cup of salsa verde on bottom of pan and start placing enchiladas. I try to stuff about 1 cup into each tortillas and roll.

  11. Once all tortillas are rolled I put rest of salsa Verde over top. Then add on the blended cheese and left over mozarella.

  12. Bake for 25 min and its ready!

  13. Add any toppings you desire! Avocado, Feta, Cilantro, Lime, Sour Cream.. you name it!!

public.jpeg

This is one of my favorite recipes to enjoy all year long. Its light, crispy and delicious for Summer, and come Winter I love to get creative and change the chicken out for left-over Thanksgiving and Christmas turkey. It is just as delicious and a great Holiday dish to add to the parties! I also love to double the recipe and freeze half for easy dinners on busy work nights or if I’m out of town and Scotty needs a quick meal. I do everything up until it goes into the oven. I freeze until I am ready to eat and take out then put right into the oven adding an extra 20 min to bake time.

Hope you love these as much as our family does!

Xo, Amanda

My Favorite White Cake Recipe

So deliciously moist, soft and full of creamy flavor! My favorite white cake to make for everyone’s birthdays!! Super easy to make it your own by also changing the filling to any jam, peanut butter, nutella, cream or anything else to add a different flavor for your party! Another way to add flavor is change the vanilla extract to lemon, orange, or almond. Just a few ways to mix it up BUT its so good just the way it is! Sure to be a crowd pleaser at your next celebration!

9678.jpg

Ingredients:

3 large eggs

3 large egg whites

1 cup heavy cream

2 tbsp. melted butter

3 tsp. vanilla

1 - 1/2 cup sugar

2-1/4 cups cake flour

1 tbsp. baking powder

3/4 tsp salt

1 cup grated butter

Frosting:

1 cup butter

8 oz cream cheese

4 cups powdered sugar

1 tbsp. heavy cream

1 tsp. vanilla

Instructions:

1. Prep by oiling 2 circle pans (8 or 9 inch) and preheat oven to 350 degrees.

2. Blend together eggs, heavy cream, melted butter, and vanilla completely.

3. Add dry ingredients in a different bowl until combined.

4. Grate 1 cup of butter on top of dry ingredients. Combined by hand until butter is no larger then pea sizes.

5. Next up add in wet ingredients and blend together with hand mixer.

6. Once combined put into 2 pans that are oiled and put into oven. 22-27 min, if you want a 4 layer cake do 4 pans t 10-12 min only.

7. Blend together all frosting ingredients until well combined. (butter and cream cheese should be room temp if not heat in microwave for 30 sec at a time) You can add more heavy cream or powdered sugar depending on desired consistency. I sometimes also double the recipe to a thick layer on the outside.

8. Once cake is done baking let cool in pan for 15 min and transfer to cooling rack for another 15.

9. Ice layers of cake and do a thin later around for a “crumb layer” that will catch all the crumbs and make a base for the final layer. Place in fridge for 30 min and then do another final layer. Smooth, textured, whatever you desire!

10. Enjoy!

9679.jpg

Soft Cream Cheese Lemon Blueberry Scones

The softest, melt in your mouth scones! So good you wont be able to just eat one!! this recipe is for lemon blueberry.. however feel free to mix it up and make it your own. Have strawberries and not blueberries? Swap it out! Want just lemon? Sounds Great!! They will taste amazing with anything you add or take out and you get to make it all your own!! Now lets get started!

Ingredients:

21/2 cups flour

1/2 cup sugar

1/2 tsp salt

1 tbsp baking powder

1/2 cup cold butter

1 egg

1 tsp vanilla extract

2/3 cup heavy cream

8 ounce package of cream cheese

1/2 cup sugar (to cover cream cheese with)

1 pint blueberries

2 tbsp lemon zest

Glaze:

1 tsp vanilla extract

1 cup powdered sugar

2 tbsp melted butter

2 tbsp lemon juice

Directions:

  • Mix together dry ingredients in a large bowl

  • Grate butter into bowl and blend with dry mixture. I use my hands to make sure that the butter doesn’t stick together any larger then a pea size amount.

  • After well mixed make a hole in the center of the mix and put all wet ingredients; egg, vanilla and heavy cream. Mix together. Be sure to not over mix or it will get too tough.

  • Cube cream cheese into dime size chunks. Coat in a small bowl with sugar and add into the dough. Don’t over mix just enough that its well spread out in the dough. Next add in blueberries and lemon zest (or whatever you decide to add in)

  • After all is mixed together, flour your work station and make dough into a pie looking around shape. I keep mine a little thicker so it stays soft. If you like your scones harder and more flaky then you can make it thinner. Mine is usually around an inch to an inch and a half thick. Once in a circle cut like a pizza into slices. I do about 8. Again if you prefer it to be smaller and not as soft you can do more.

  • Place on a cookie sheet and put in the fridge for 45 min to an hour. The last 10 min preheat oven to 400 degrees

  • Bake at 400 degrees for 15 min. Turn the temp down to 350 and bake for 10 min.

  • While baking make glaze! Melt butter completely in a bowl and add in the other ingredients. Mix with a fork until you have your desired consistency. Add more powdered sugar or water to achieve thickness. I like mine a little thicker so it will stick to the top of scones.

  • Transfer scones to cookie sheet and drizzle glaze on top. Let cool and enjoy!!

public.jpeg

Creamy Root Beer Popsicle

The temperature is starting to heat up here in Cali.. which means Summer is almost here! Time to start having some of those yummy cool down treats! I am a huge fan of Zevia and had to come up with a delicious recipe using their new root beer!! Their drink is creamy and delicious on its own, but why not make it into a delish treat the whole family can enjoy all Summer long! They are SOOO quick and easy to make! Just two ingredients and a little time!

Ingredients:

1 can of Zevia Root Beer

Heavy Cream

Popsicle forms

Directions:

  1. Add 1 tbsp of heavy cream into each form

  2. Top off with Root Beer until full

  3. Put in the freezer until hard!

  4. ENJOY!

My 3 Easy Homemade Seasoning Mixes

We never have a meal at our house without spices! I probably use my ranch seasoning the most, but other spices like Italian and taco seasoning are always important to have in the cabinet! What I love most about making my own seasonings instead of buying them is getting rid of all the extra unhealthy additives they put in store bought pre made spices. They mainly do this so the shelf life is a little longer. I am using spices to make these seasonings that I will also use in my other meals and recipes so when I buy a large glass jar of it at the store I’m sure to use the entire thing instead of it going bad before it can finish. I also can reuse the glass jars (usually Good and Gather) to make new seasonings. I like to change the color of the tops on the jars so they are bright and fun and fit with my house! Here I used a spray paint to make them all match and they came out ohhh so cute! Who doesn’t love that salmon color! Now lets get to the recipes!

image1 (12).jpeg

Ranch Seasoning Mix

1 tsp Garlic Powder

2 tbsp Parsley Flakes

1 tsp Onion Powder

1/2 tsp Basil

1 tsp Dill Weed

1/2 tsp Pepper

1/2 tsp sea salt

Directions:

Mix together and enjoy over EVERYTHING!! I also make my homemade ranch dressing by mixing with equal parts whole milk and mayo (Primal Kitchen is my favorite clean mayo brand)

image3.jpeg

Taco Seasoning Mix

2 tbsp Chipotle Chili Powder

2 tbsp Ground Cumin

1 1/2 tsp Onion Powder

1 1/2 tsp Garlic Powder

1 tsp Paprika

1/2 tsp Cayenne Pepper

1/2 tsp Sea Salt

1/2 tsp Oregano

Directions

Mix together and put in a new spice container! Add more Cayenne Pepper depending on how hot you would like it!!

image4.jpeg

Italian Seasoning Mix

1 tbsp Basil

1 tbsp Oregano

1 tbsp Rosemary

1 tbsp Thyme

1 tbsp Garlic Powder

1 tbsp Marjoram

Directions:

Mix together and enjoy! Add in 1 tbsp red pepper flakes if you want spicy Italian dishes also!

image0 (7).jpeg

Garlic Mushroom & Shrimp Pasta

This is one of my favorite quick and easy pastas to make. It’s deliciously light on sauce but full of great flavorful taste. Every time I make this dish Scotty easily cleans his plate and always tells me how delicious it was. Quotes like “It tastes like it’s from a fancy restaurant”… “Add this to the menu”…and “That was really good babe”.. always leaves me with a smile on my face. It’s such a great feeling when someone loves the food I cook. So I had to share for this months recipe because I want everyone leaving your table with a smile too!

public.jpeg

Ingredients:

For Pasta I always use Wild Grain’s pasta sent in a monthly membership that is fresh and so delicious! One package makes enough for 2-4 people

3 Cloves of Garlic

Olive Oil spray

8 oz Baby Bella Mushrooms

1/3 Pasta water

3 tbsp Butter

3 tbsp soy sauce

1/3 cup white wine

Shrimp (you can really use any amount you want here)

Directions:

1. Start water on medium heat for pasta. Once boiling add in pasta until Al dente.

2. While water is boiling spray skillet with olive oil cooking spray until fully coated and start on medium heat. Mince garlic and add into pan. Stirring until fragrant.

3. Add mushrooms to garlic pan and stir. Cooking for a few minutes then adding in wine. Let it cook while the liquid fully evaporates.

4. Once mushrooms are finished transfer to a plate for later. No need to wipe out pan just use another coating of olive oil spray and cook shrimp. Add a little salt and pepper onto shrimp and cook until done!

5. While mushroom and shrimp are cooking and pasta is done boiling. Drain and keep 1/3 cup pasta water.

6. Put pasta back into original pan and stir together with pasta water, butter and soy sauce.

7. Now that you have everyone ready to go.. plate your dish! pasta first, then add on your mushrooms and shrimp and serve!

8. Enjoy! Maybe even have a glass of that wine you opened!

To get $10 off your first order with Wild Grain and sourdough rolls in every box for life!!

Use code AMANDAWARREN

www.wildgrain.com

public.jpeg
public.jpeg
public.jpeg

Brown Butter Caramel Pretzel Cookies

These cookies are probably my all time favorite homemade ones.. That’s a big statement being that I love to bake so much, but I’m pretty sure they can hold up the pressure of it! They have all the tastes with the salt, the sweet, and the crunch! So good that the hubby even agrees with me! You may think he’s just being nice because he is my husband. He is sweet.. but he would never lie about my cooking to save face! If I ever need to know if a recipe is good enough to share online.. I call on him and my mom. They both without a doubt will give me their honest opinions no matter what!

Now that I hyped these cookies up.. I have to tell you the bad news. They do take a few hours to make!! (Sorry!!) However the hours that it takes are mostly spent with them in the fridge cooling. So in reality its not too bad and it just means you get more done during that time!

Let’s Get Cooking!

IMG_0467.JPG
IMG_0464.JPG

Recipe:

1 cup butter (2 sticks)

3/4 cup sugar

3/4 dark brown sugar

1 tsp vanilla

2 large eggs

2 1/4 cups flour

1 tsp baking powder

1 tsp salt

1 package of chocolate covered caramels

1 cup crushed pretzels + more to add in later

Sea Salt

Directions:

1. Making brown butter! You want to melt the 2 sticks of butter in a pan until they boil, change in color and start to smell a nutty delicious flavor! The entire house will smell like this and its heavenly. Once the butter gets brown in color and is a yummy nutty smell put into a bowl and let sit cool 5 min. Next, put that bowl into the fridge for 1 hour. I suggest to stir at the 30 min mark just to make sure its cooling evenly and as fast as possible. Once the butter is more like butter and not melted you are ready!

2. While the butter is in the fridge this is the perfect time to get the goodies ready for the end. The chocolate covered caramels I typically use are the Dove brand (if you are a fan of another kind any will work). Unwrap and cut each candy into 4 pieces. Fill a plastic bag with 1 cup of pretzels and crush them!

3. Blend in both sugars and vanilla completely

4. Add in eggs, one at a time

5. Slowly add in all dry ingredients a little at a time until well blended.

6. Now the dough is all ready add in the chocolate caramels and pretzels. Don’t over blend of the chocolate and caramel will over mix and not be in whole chunks.

7. Roll into dough balls, sprinkle with sea salt and add extra pieces of pretzel on corners for extra crunch!

8. Bake at 375 for 9-11 min.

9. Let cool and enjoy!

IMG_0453.JPG

A Taste of Heaven: Deliciously Easy Apple Pie!

If you are looking for a sweet and delicious dessert that is easy to make, look no further than this delicious & easy apple pie recipe! This classic treat tops the list as the #1 favorite for many dessert lovers, and it doesn't have to be difficult to make. In this blog post, we will be going over all the steps to make a delicious and easy apple pie that you and your family can enjoy. We'll also be discussing some of the tips and tricks to make sure your pies come out perfect every time. So, get ready to make the most scrumptious apple pie you've ever tasted!

Everyone loves this classic and timeless treat that can be quickly and easily whipped up with minimal ingredients. All you need is apples, sugar, flour, butter, and cinnamon. To make the pie even more special, you can add different toppings such as nuts, raisins, or of course a scoop of ice cream. As the delicious aroma of baking apples and spices fills your home, your family and anyone coming over will surely be delighted!

Easy Part 1: Store-Bought Crust

Apple pie is a classic dessert that is sure to please any crowd. But it can be time-consuming to make from scratch, especially when it comes to making the pie crust. Luckily, there is an easy and delicious way to make an apple pie with minimal effort - using a store-bought pre-made pie crust. This easy apple pie recipe requires minimal ingredients and is great for those who are short on time or are new to baking. The trick to making this recipe successful is to use a good quality store-bought crust. This makes this recipe easier and even more enjoyable. I love to get the double pack and make fun designs on the top with cookie cutters and crisscrossing them. This also makes your pie unique and special.

I always try my hardest to make the best homemade desserts, but I know when the experts have some things figured out better then me.. Like pie crust. I had a hard time trying to make the perfect pie crust so I finally gave up and focused all my energy on the filling! One delicious filling, a store-bought crust and the best pie pan make for a killer apple pie everyone will rave over!!

I am using the 360 cookware pie pan. The pan is made with 5-Ply construction and has a T-304 surgical stainless steel baking surface. No other bakeware cooks so evenly and perfectly as this pie pan! The Pie Pan is covered by a Lifetime Warranty like all of their products making this a legacy pan you can pass down for years to come. Better yet, they are all 100% American Made! Every pan I have used from them has cooked everything so well. This pie pan was nothing short of amazing and not one piece stuck to the pan! That was always irritating for me in the past, but now those worries are gone!

The Best Apples for Apple Pie

Apple pie is a classic dessert that is loved by many. The key to making a great apple pie is to choose the right type of apple. Granny Smith apples are a tart and firm classic choice for a delicious apple pie. Sweet, juicy, and crisp Honeycrisp apples are the perfect balance of tart and sweet. Braeburn apples are full of flavor and hold their shape when baked, making them an ideal choice. For a sweeter pie, Golden Delicious apples add a hint of tartness and are great for baking pies. Finally, Jonathan apples are sweet and tart, making them a great addition of flavor and texture to your apple pie. I like to mix 2 or 3 different apple types to give each bite a unique and delicious flavor. Two of my favorites are the Granny Smith and Golden Delicious together. With these apples in hand, you’re ready to make a delicious & easy apple pie.

20201114-warren-laurenwestra-175.jpg

Apple Pie Ingredients

2 store-bought roll-out crusts

7 cups thinly sliced apples (I like to do a mix of two different types of apples)

1 1/2 teaspoons cinnamon

1/2 cup melted butter

3 tablespoons all-purpose flour

1/4 cup water

1 cup sugar

1 egg with 1 tablespoons water mixed for egg washing

Instructions

1. Take out pie crust and pre-heat oven to 425

2. Peel and cut apples into evenly thinly sliced pieces. Place in a large bowl with cinnamon and toss.

3. Melt butter in the microwave until completely melted. Whisk in flour, water and lastly sugar blending until it all comes together. After fully mixed pour in the apple mixture and fully blend.

4. Take pie crusts that have been sitting out and roll over a sprinkle of flour. Take store-bought crust and lay it over a pre-oiled pie pan. Fill the pan with the apple mixture. Lastly, for the design of your pie the options are endless! I did a crisscross pie here and used extra dough with leaf cookie cutters to make the top even more fun!

5. Once the top is all designed and ready to go use egg wash mixture (1 egg and 1 tbsp water whisked) and brush onto dough.

6. Bake at 425 for 15 min and then reduce heat to 350 and bake for another 45 min or until apples are a soft consistency.

20201114-warren-laurenwestra-195.jpg

You can enjoy your pie right away with vanilla ice cream, let it come to room temperature, or keep refrigerated for the next day. Anyway that you enjoy it I promise you wont be disappointed! The combination of sweet apples, cinnamon, and sugar make this pie a heavenly treat. Whether you are looking for something to end a meal on a sweet note or just a special treat, this apple pie is the perfect choice.

Other Desserts and Comfort Food you will love:

The Ultimate Thanksgiving Dessert - My Pumpkin Crisp Recipe

Chocolate Peanut Butter Brownies

Scotty's Birthday Pistachio Cake

My Favorite White Cake Recipe

Brown Butter Caramel Pretzel Cookies

The Most Delicious Pumpkin Coffee Cake

I hope you enjoy this apple pie just as much as I do! Click -HERE- for my favorite pie pan for the perfect pie all year long! You can also use code “Amanda20” for 20% off the entire 360 cookware site!

20201114-warren-laurenwestra-171.jpg
20201114-warren-laurenwestra-65.jpg
20201114-warren-laurenwestra-170.jpg
20201114-warren-laurenwestra-67.jpg