Orange Olive Oil Cake with Mascarpone Cream & Fresh Fall Fruit

Orange Olive Oil Cake with Mascarpone Cream & Fresh Fall Fruit

A beautifully moist orange olive oil layer cake with fresh citrus, lightly sweetened mascarpone cream, and seasonal figs, blackberries, and champagne grapes. Simple enough to make at home but beautiful enough for birthdays and fall gatherings.

Read More

Easy Slow Cooker Pulled Pork

Tender, Juicy & Perfect Every Time

There are certain recipes that become staples in our home because they make life just a little easier, and this Easy Slow Cooker Pulled Pork is one of them.

With just a few minutes of prep, the slow cooker transforms a simple pork shoulder into incredibly tender, flavorful pulled pork that's perfect for everything from busy weeknight dinners to backyard barbecues and family gatherings. It's one of those recipes that fills the house with the most incredible aroma and always brings everyone into the kitchen asking when dinner will be ready.

One of my favorite things about this recipe is how versatile it is. We pile it onto toasted brioche buns, tuck it into tacos, spoon it over baked potatoes, or use the leftovers for nachos the next day. It freezes beautifully, reheats wonderfully, and somehow tastes even better after the flavors have had more time to come together.

If you're looking for a dependable recipe that's simple enough for everyday dinners but special enough for entertaining, this slow cooker pulled pork is one you'll find yourself making again and again.

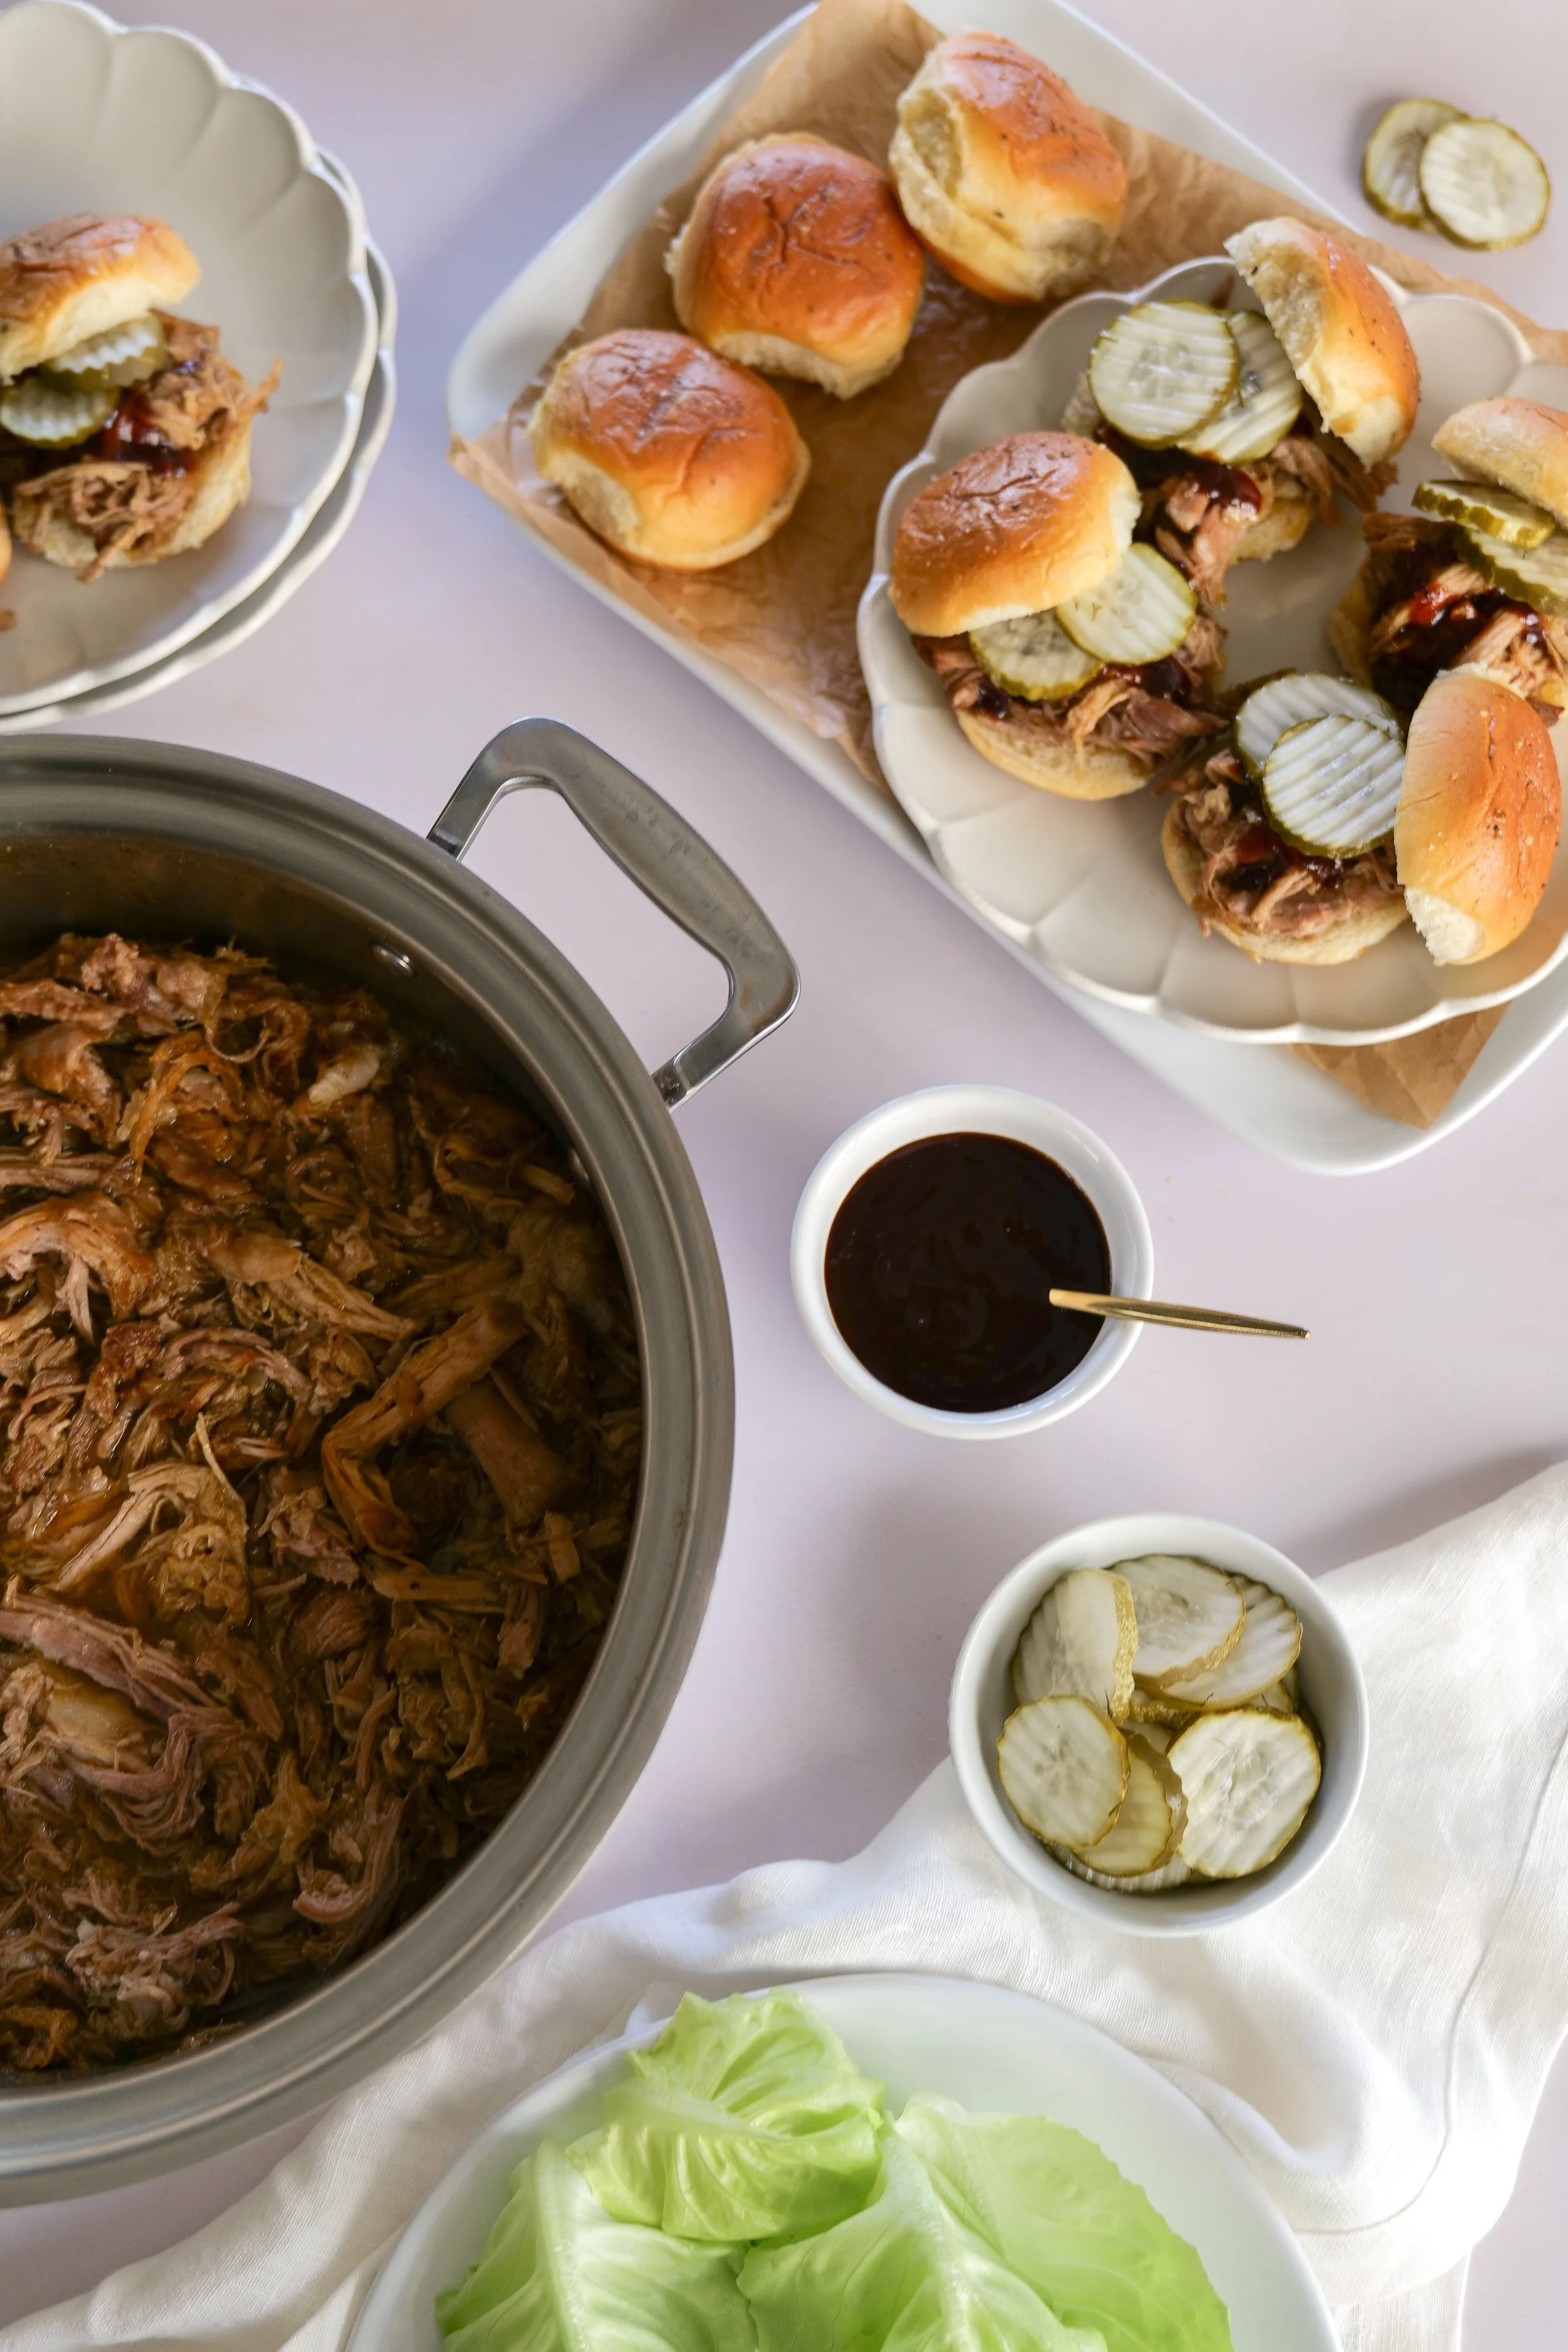
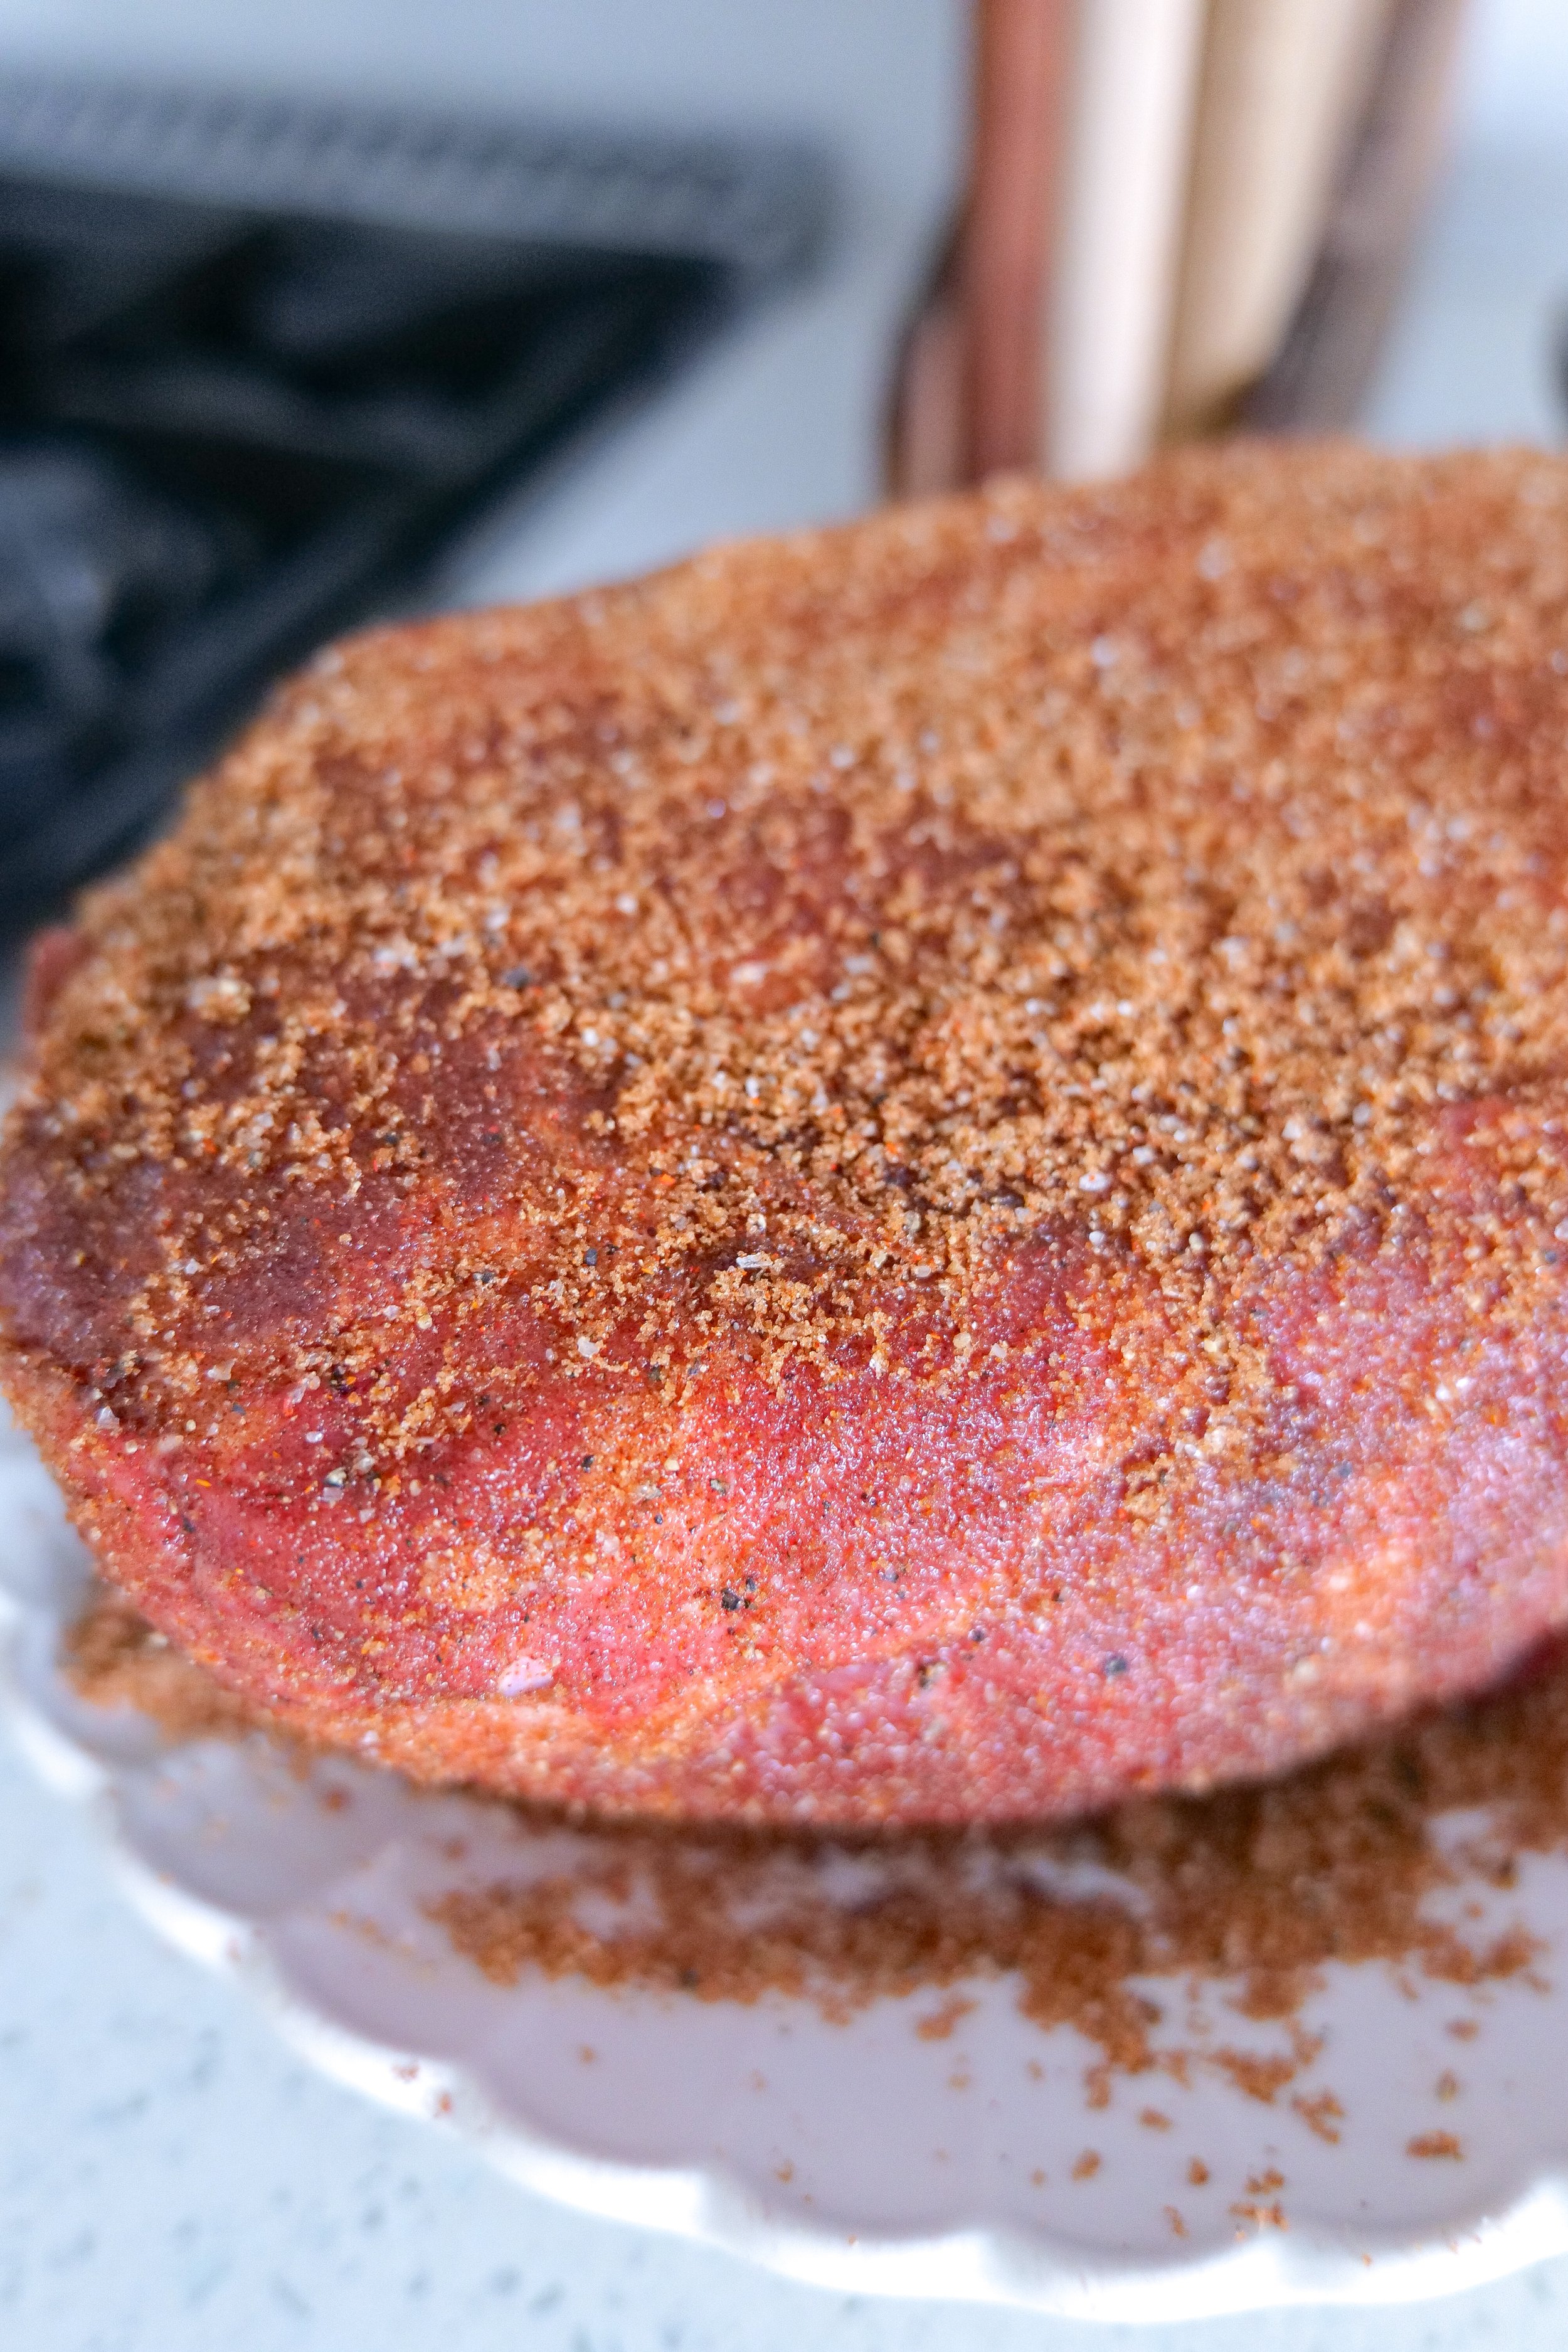
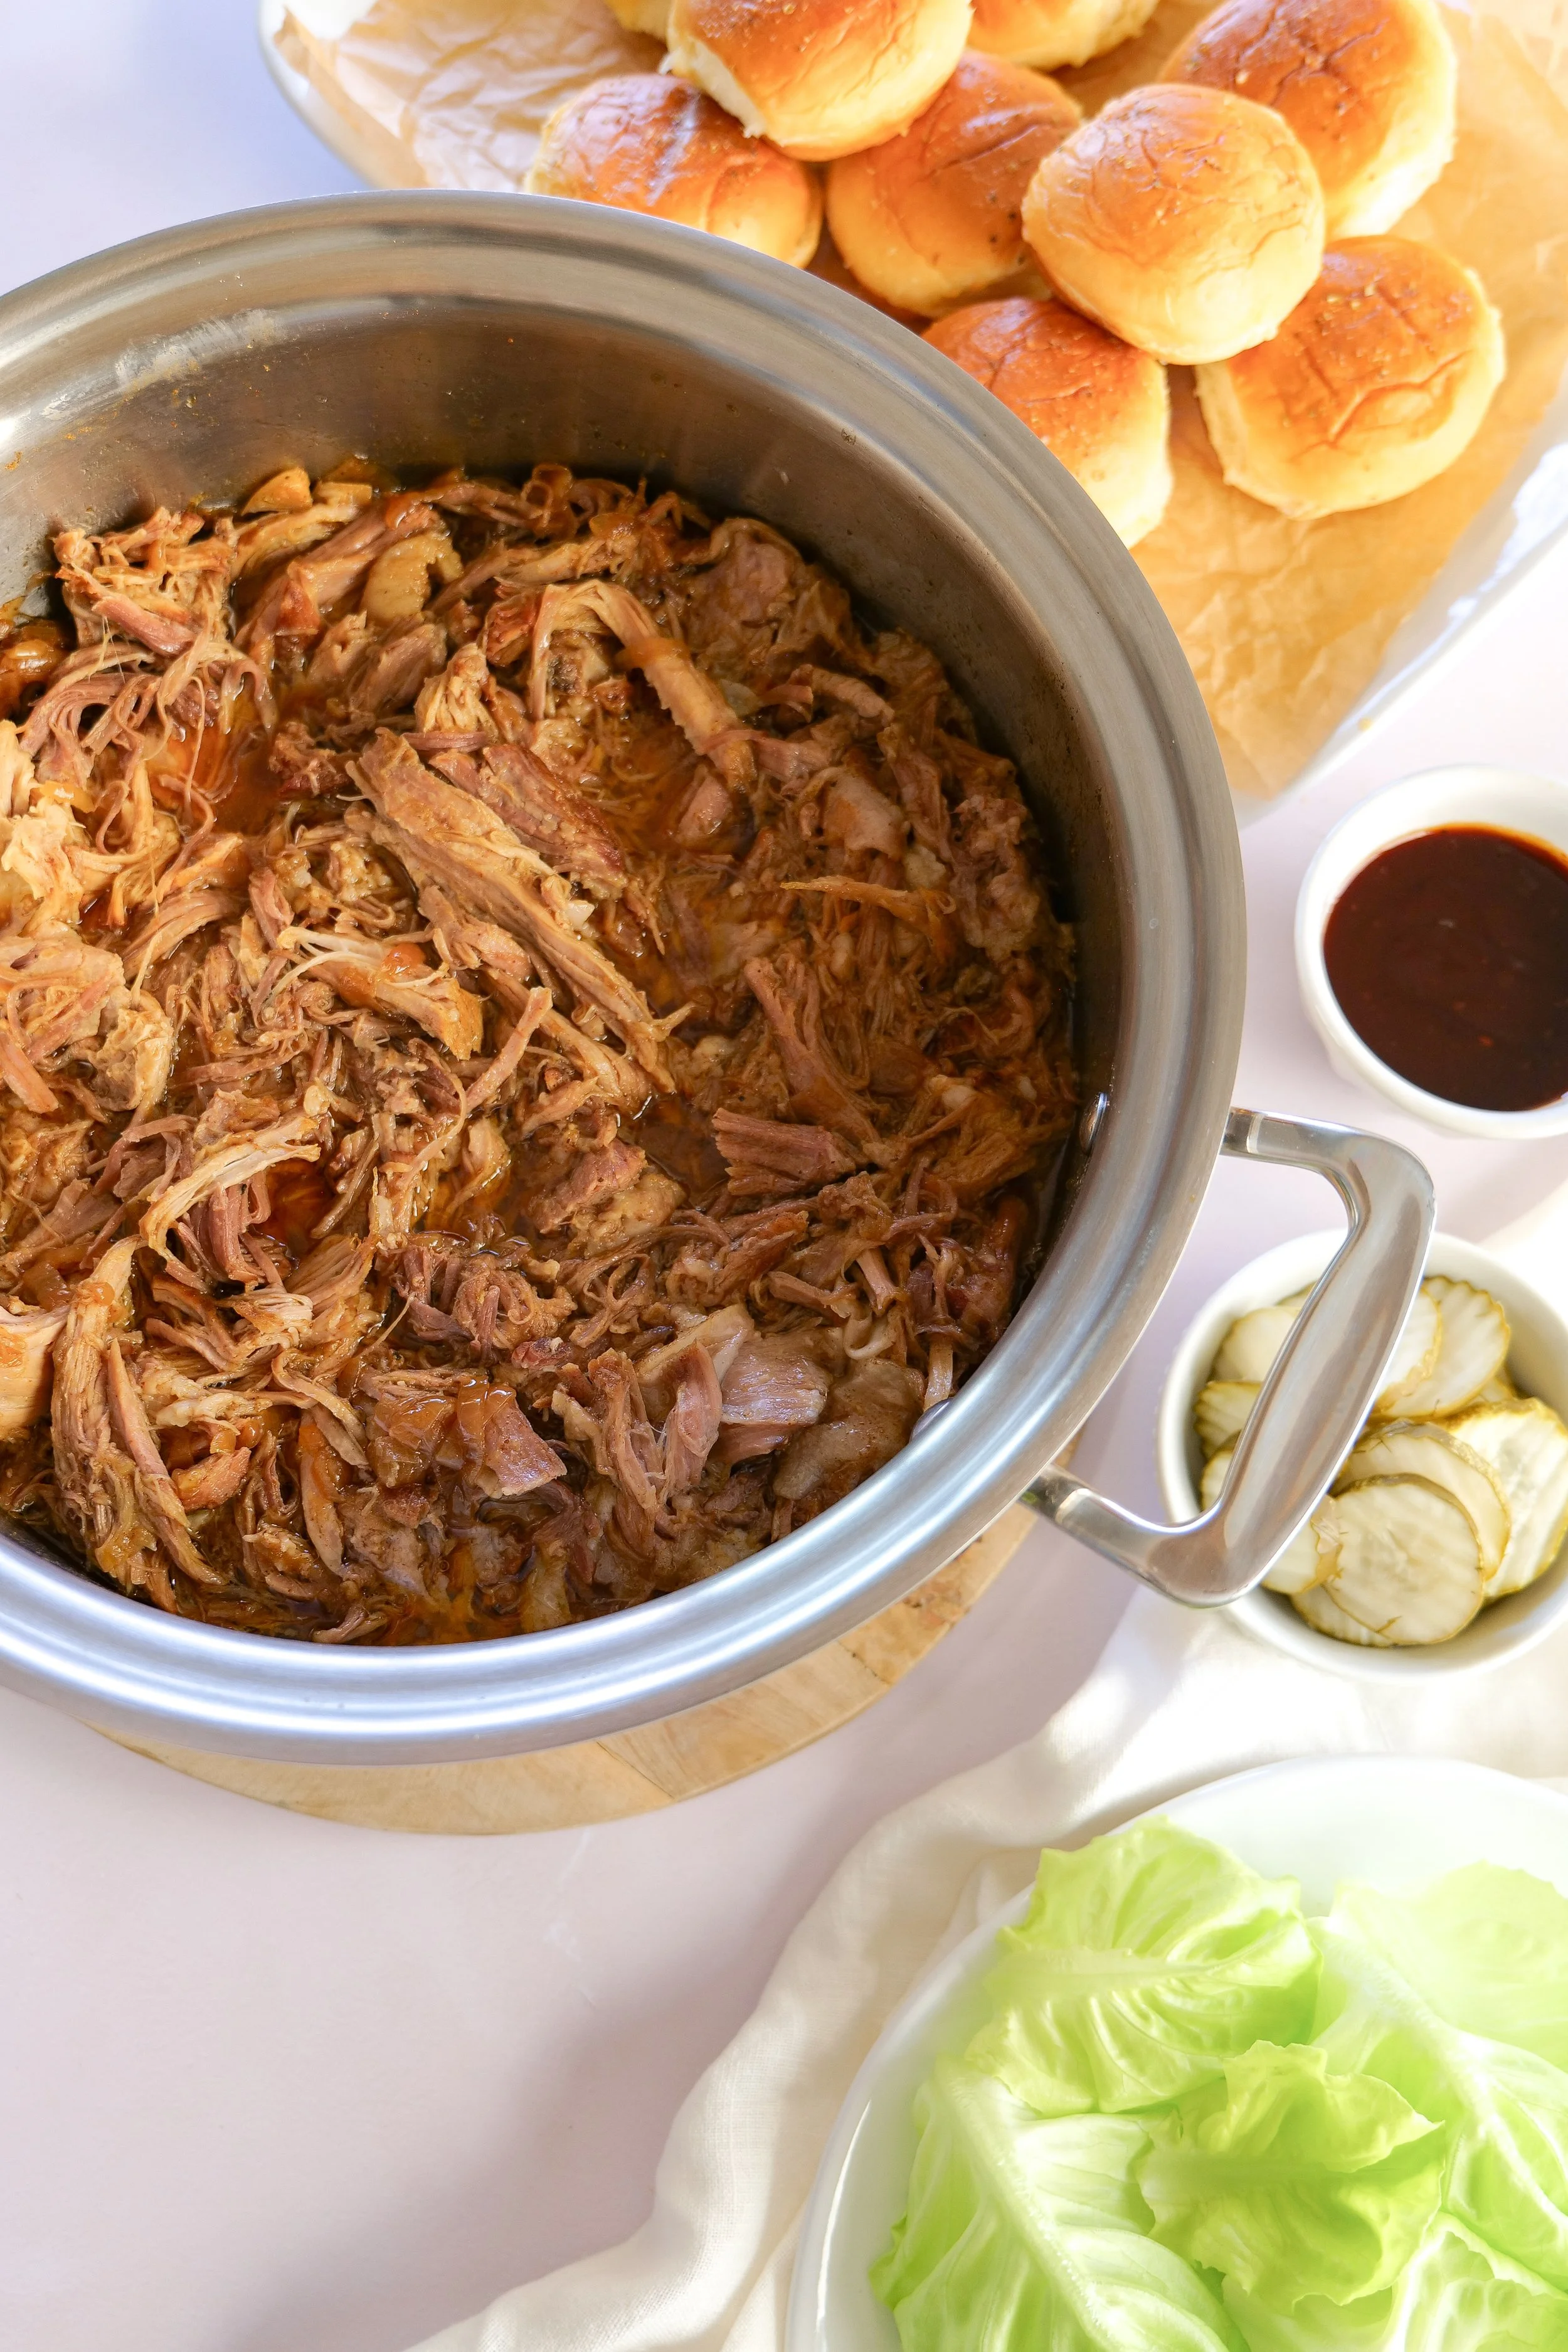
Tender homemade slow cooker pulled pork seasoned with a brown sugar and spice dry rub.

Why You'll Love This Recipe

This recipe has become one of my favorite meals because it's almost effortless while delivering incredible flavor every single time.

You'll love it because it's:

  • Made with simple pantry ingredients

  • Perfect for meal prep

  • Great for feeding a crowd

  • Tender, juicy, and flavorful

  • Freezer friendly

  • Easy enough for busy weeknights

  • Perfect for sandwiches, tacos, rice bowls, nachos, and baked potatoes

  • A wonderful recipe for summer barbecues, football season, and family gatherings

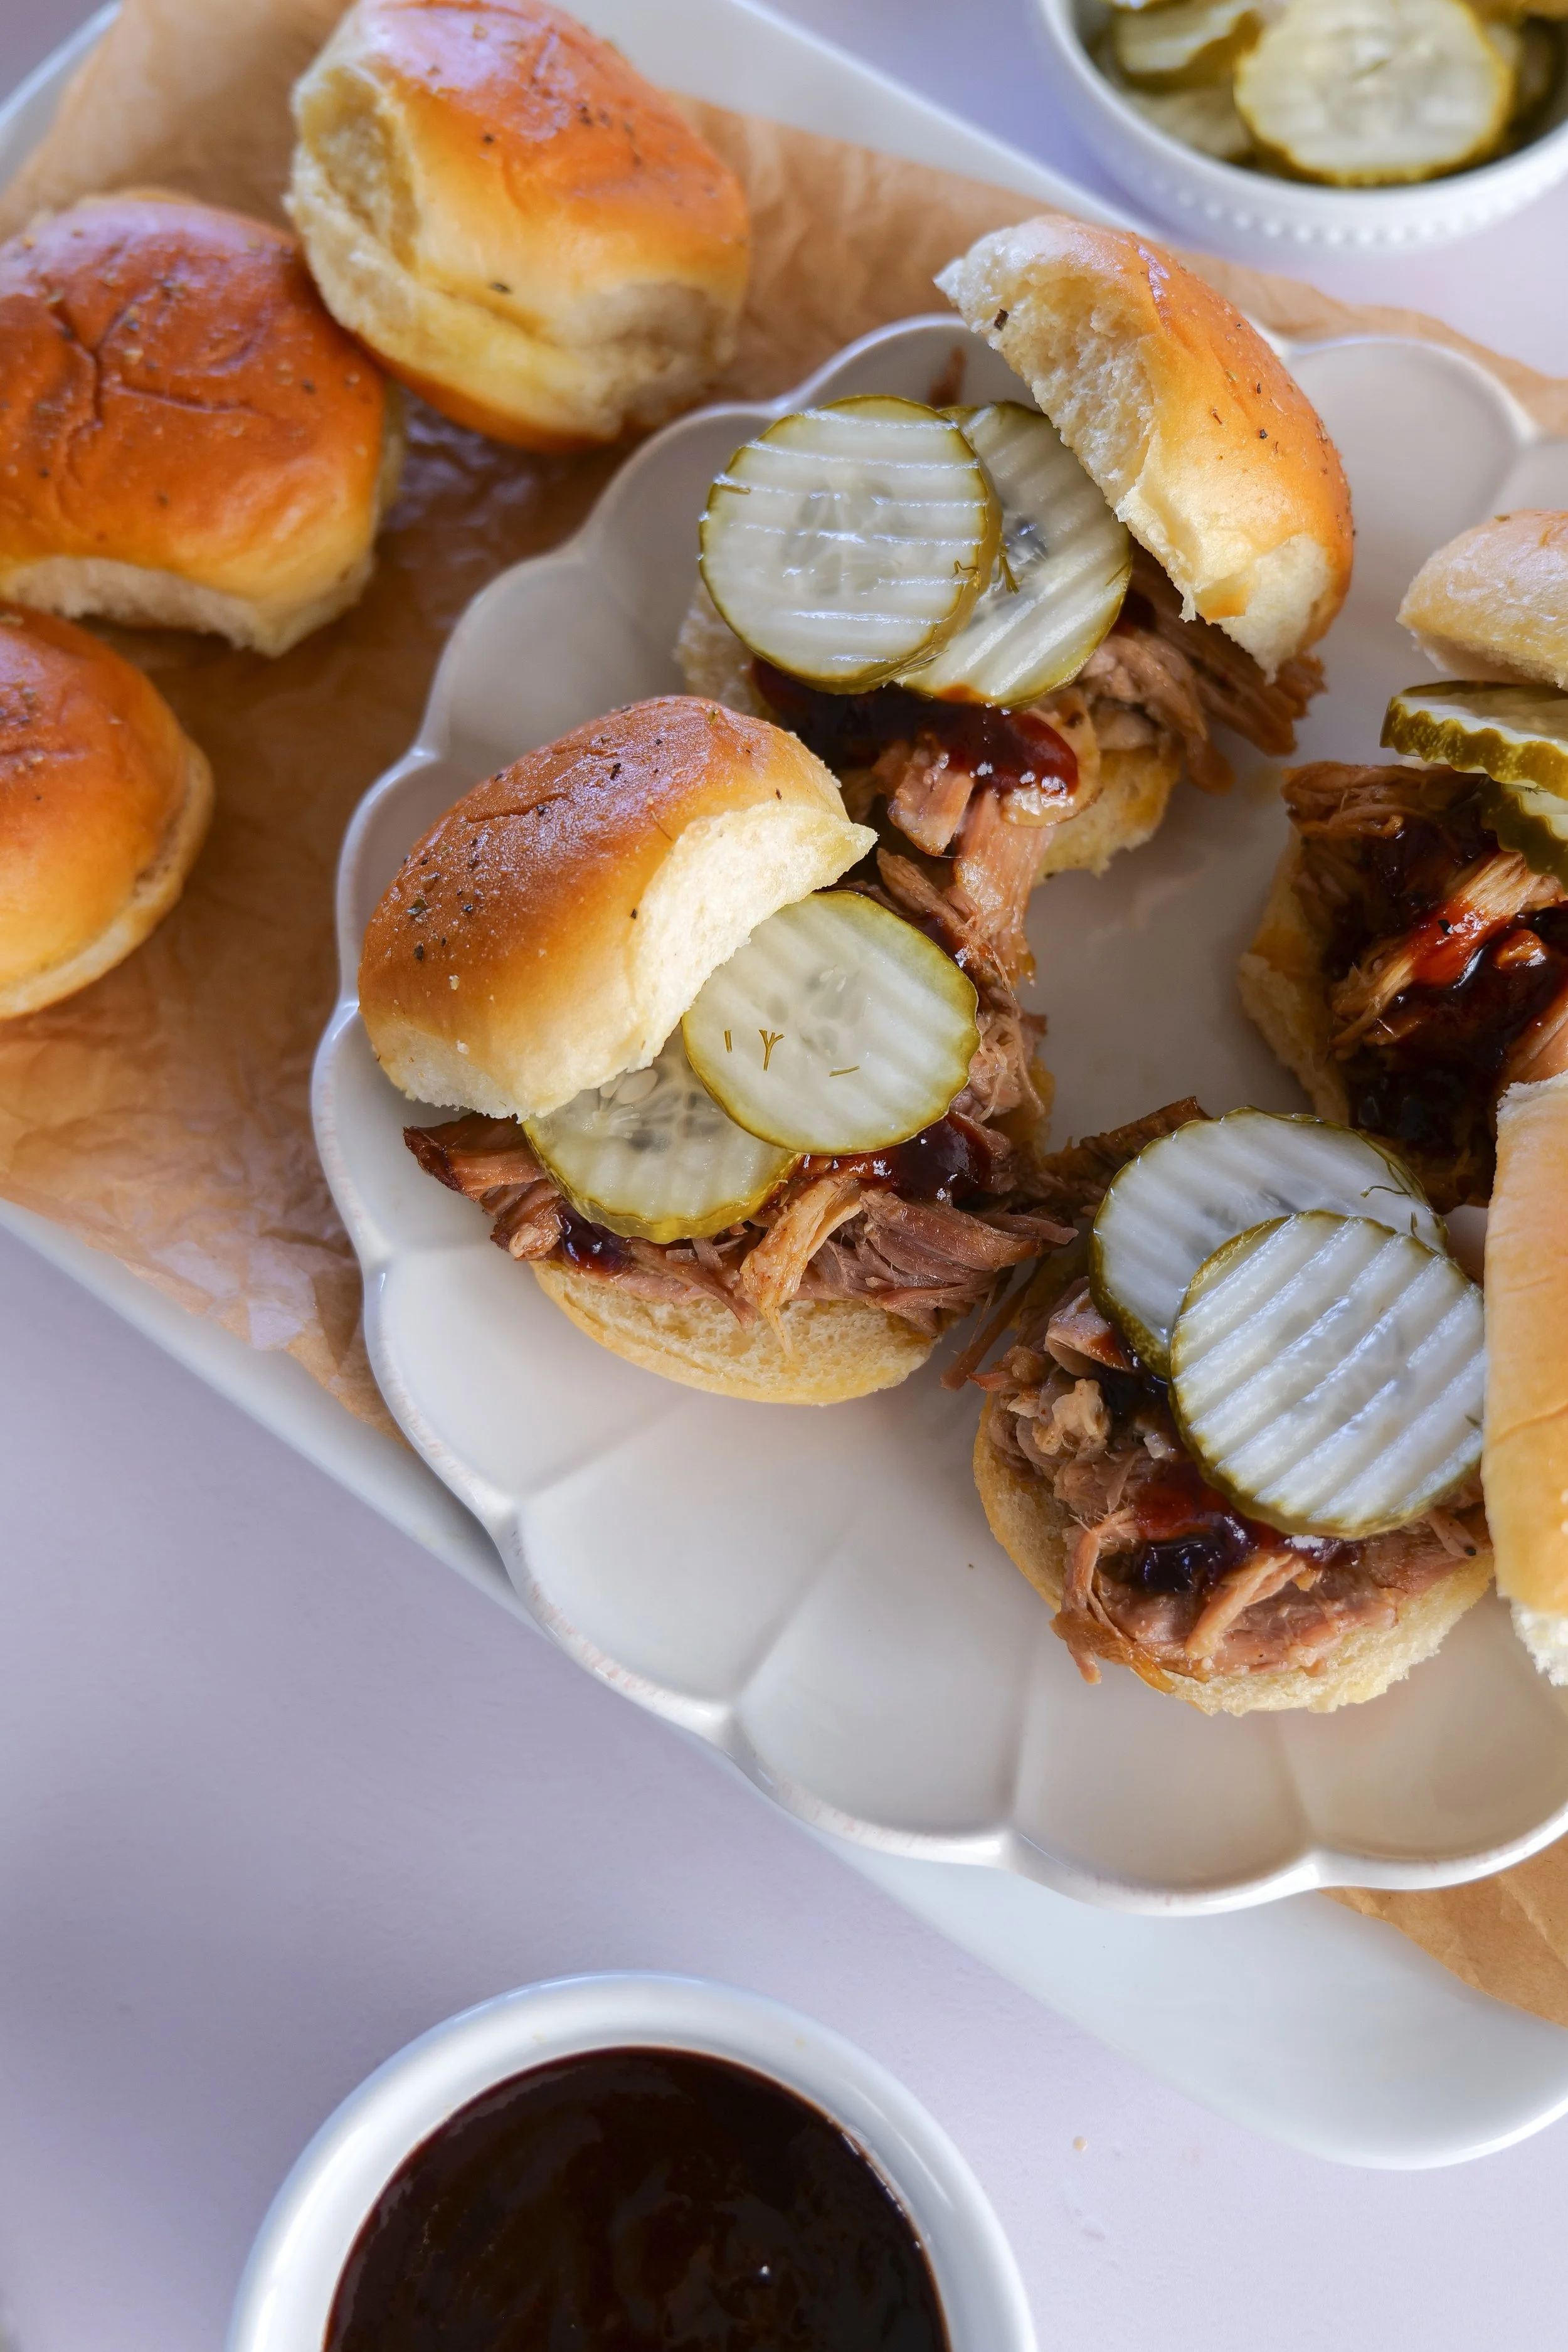
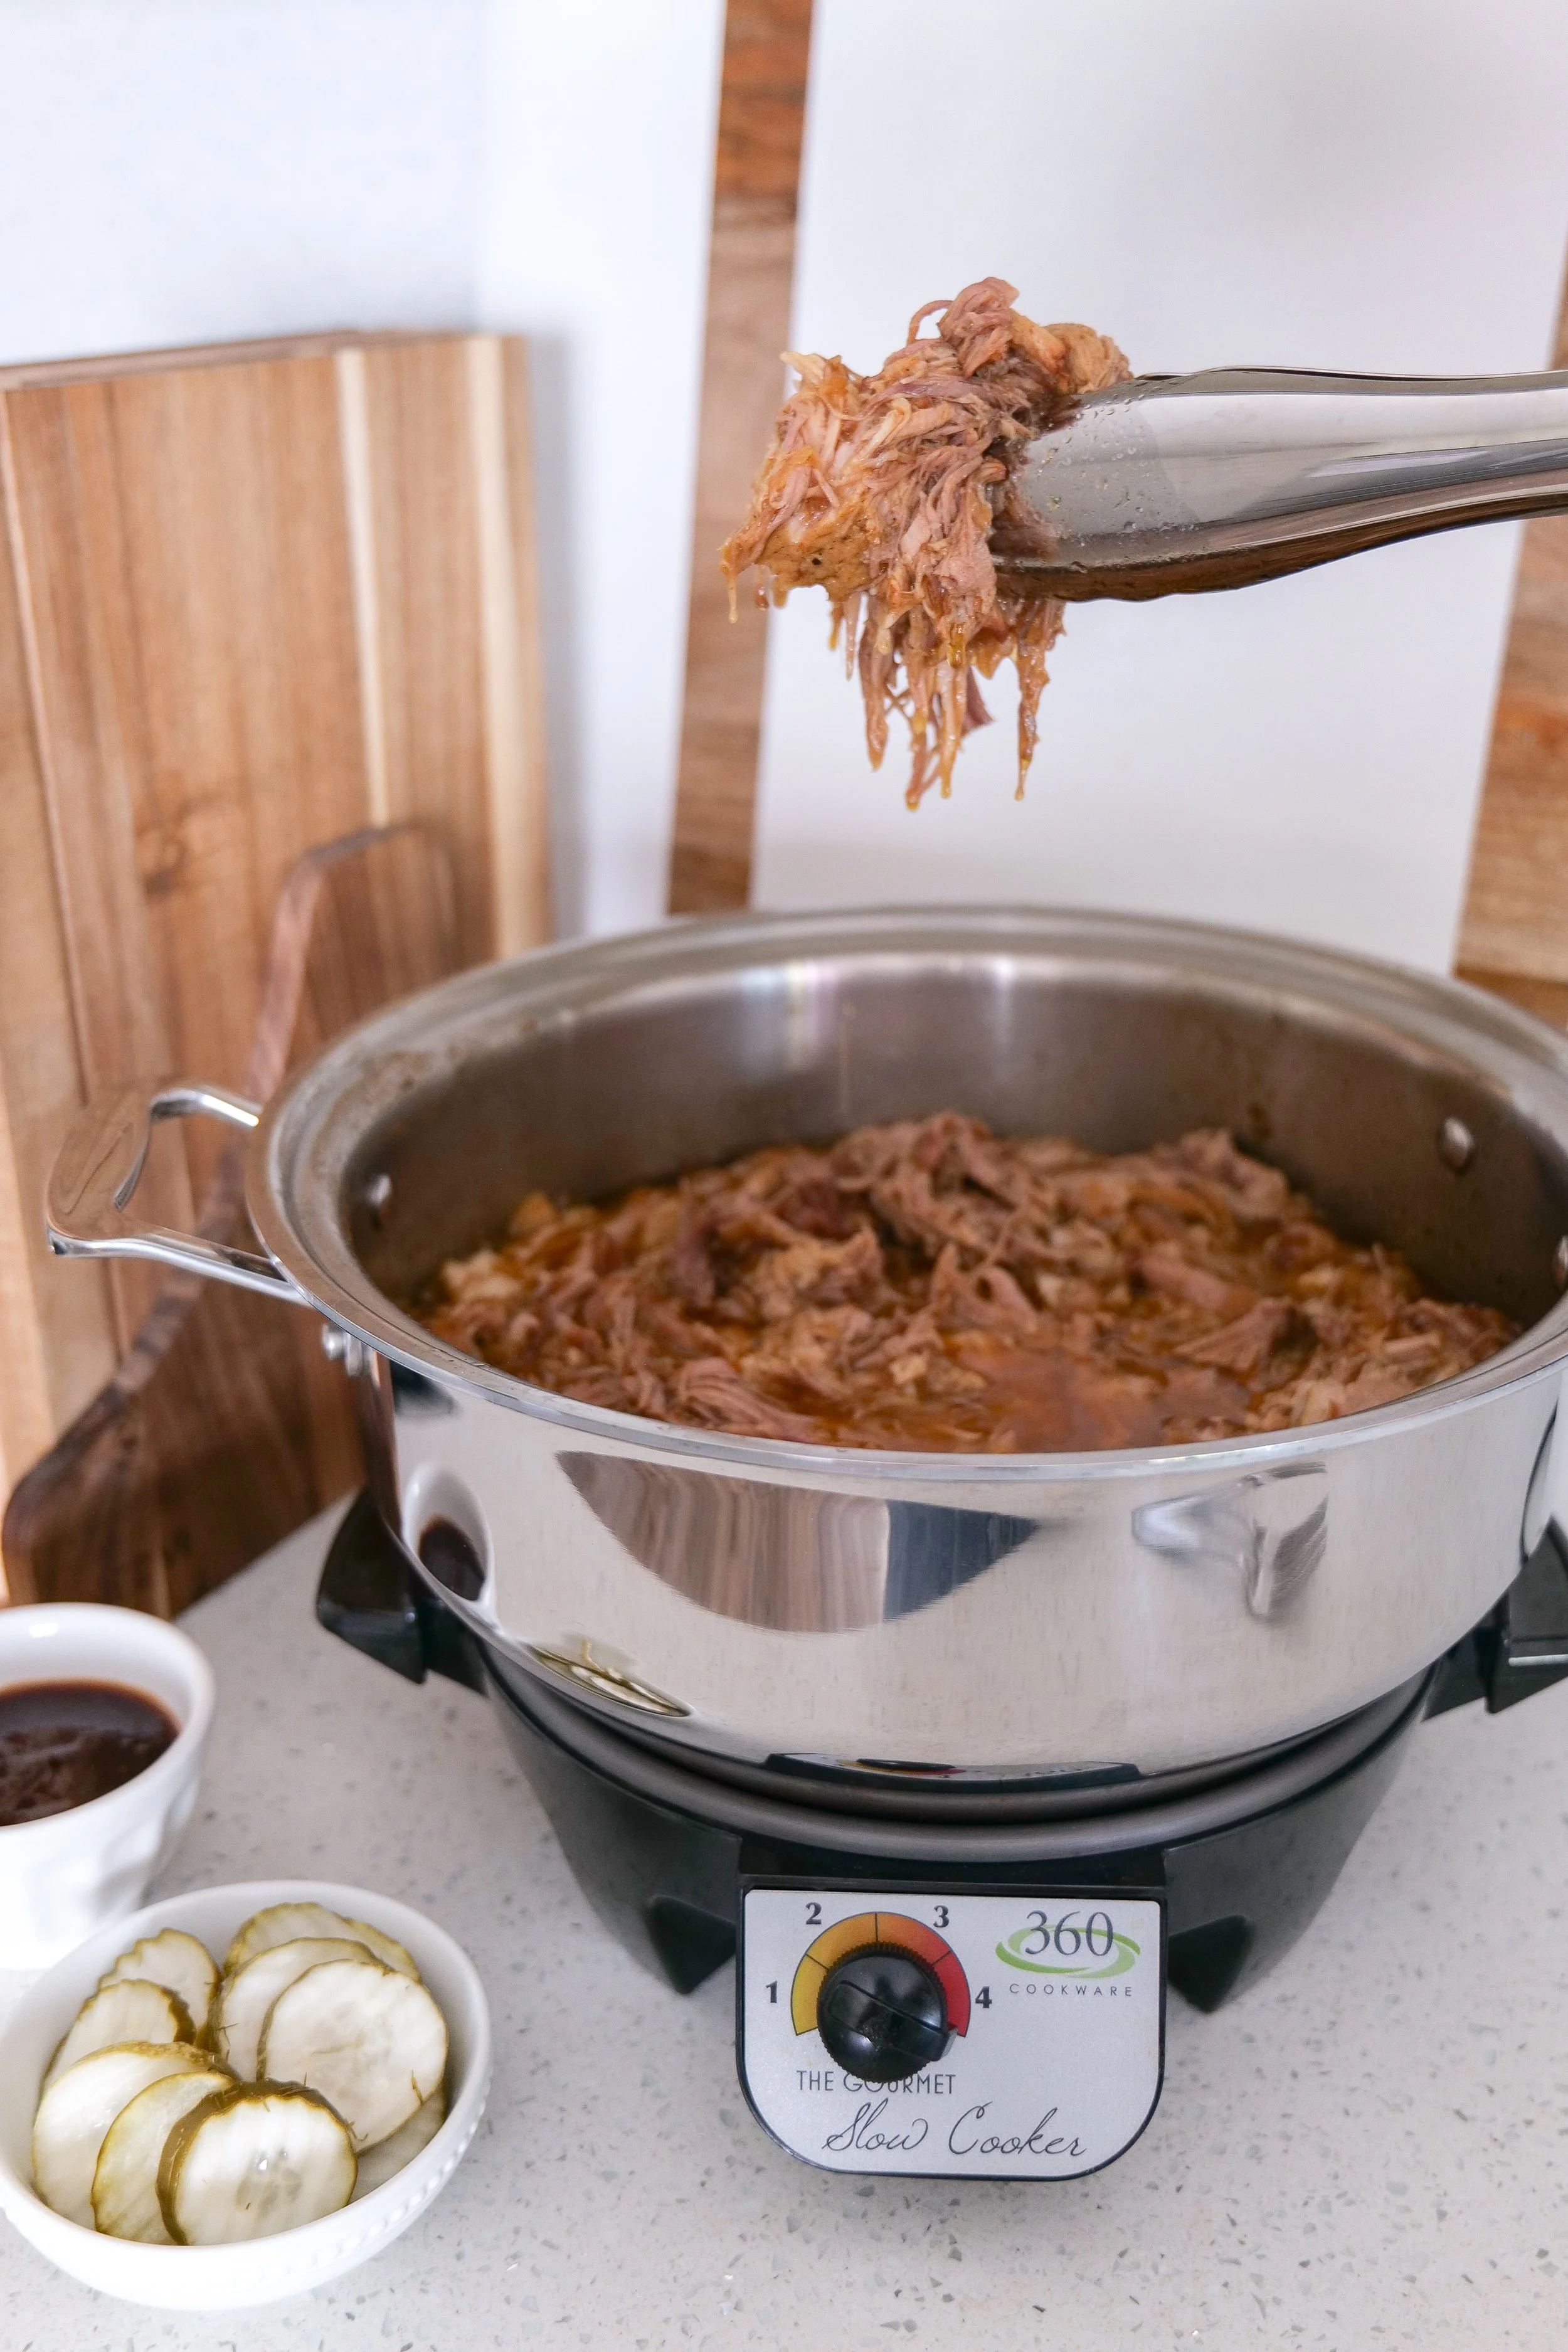
Tender slow cooker pulled pork shredded and ready to serve for an easy family dinner.

Ingredient Notes

Simple ingredients come together to create rich, slow-cooked flavor.

Pork Shoulder

Pork shoulder (also called pork butt or Boston butt) is my favorite cut because of its beautiful marbling. As it cooks low and slow, the fat melts into the meat, creating incredibly tender pulled pork.

Chicken Broth

A little broth helps keep the pork moist while creating flavorful cooking juices you'll want to stir back into the shredded meat.

Brown Sugar

Brown sugar balances the smoky spices while helping develop a beautiful caramelized crust during searing.

Red Onion

As the onion slowly cooks, it melts into the juices, adding sweetness and another layer of flavor.

The Spice Blend

Paprika, cumin, garlic, onion powder, and just a touch of cayenne create a smoky seasoning that's flavorful without being overly spicy.

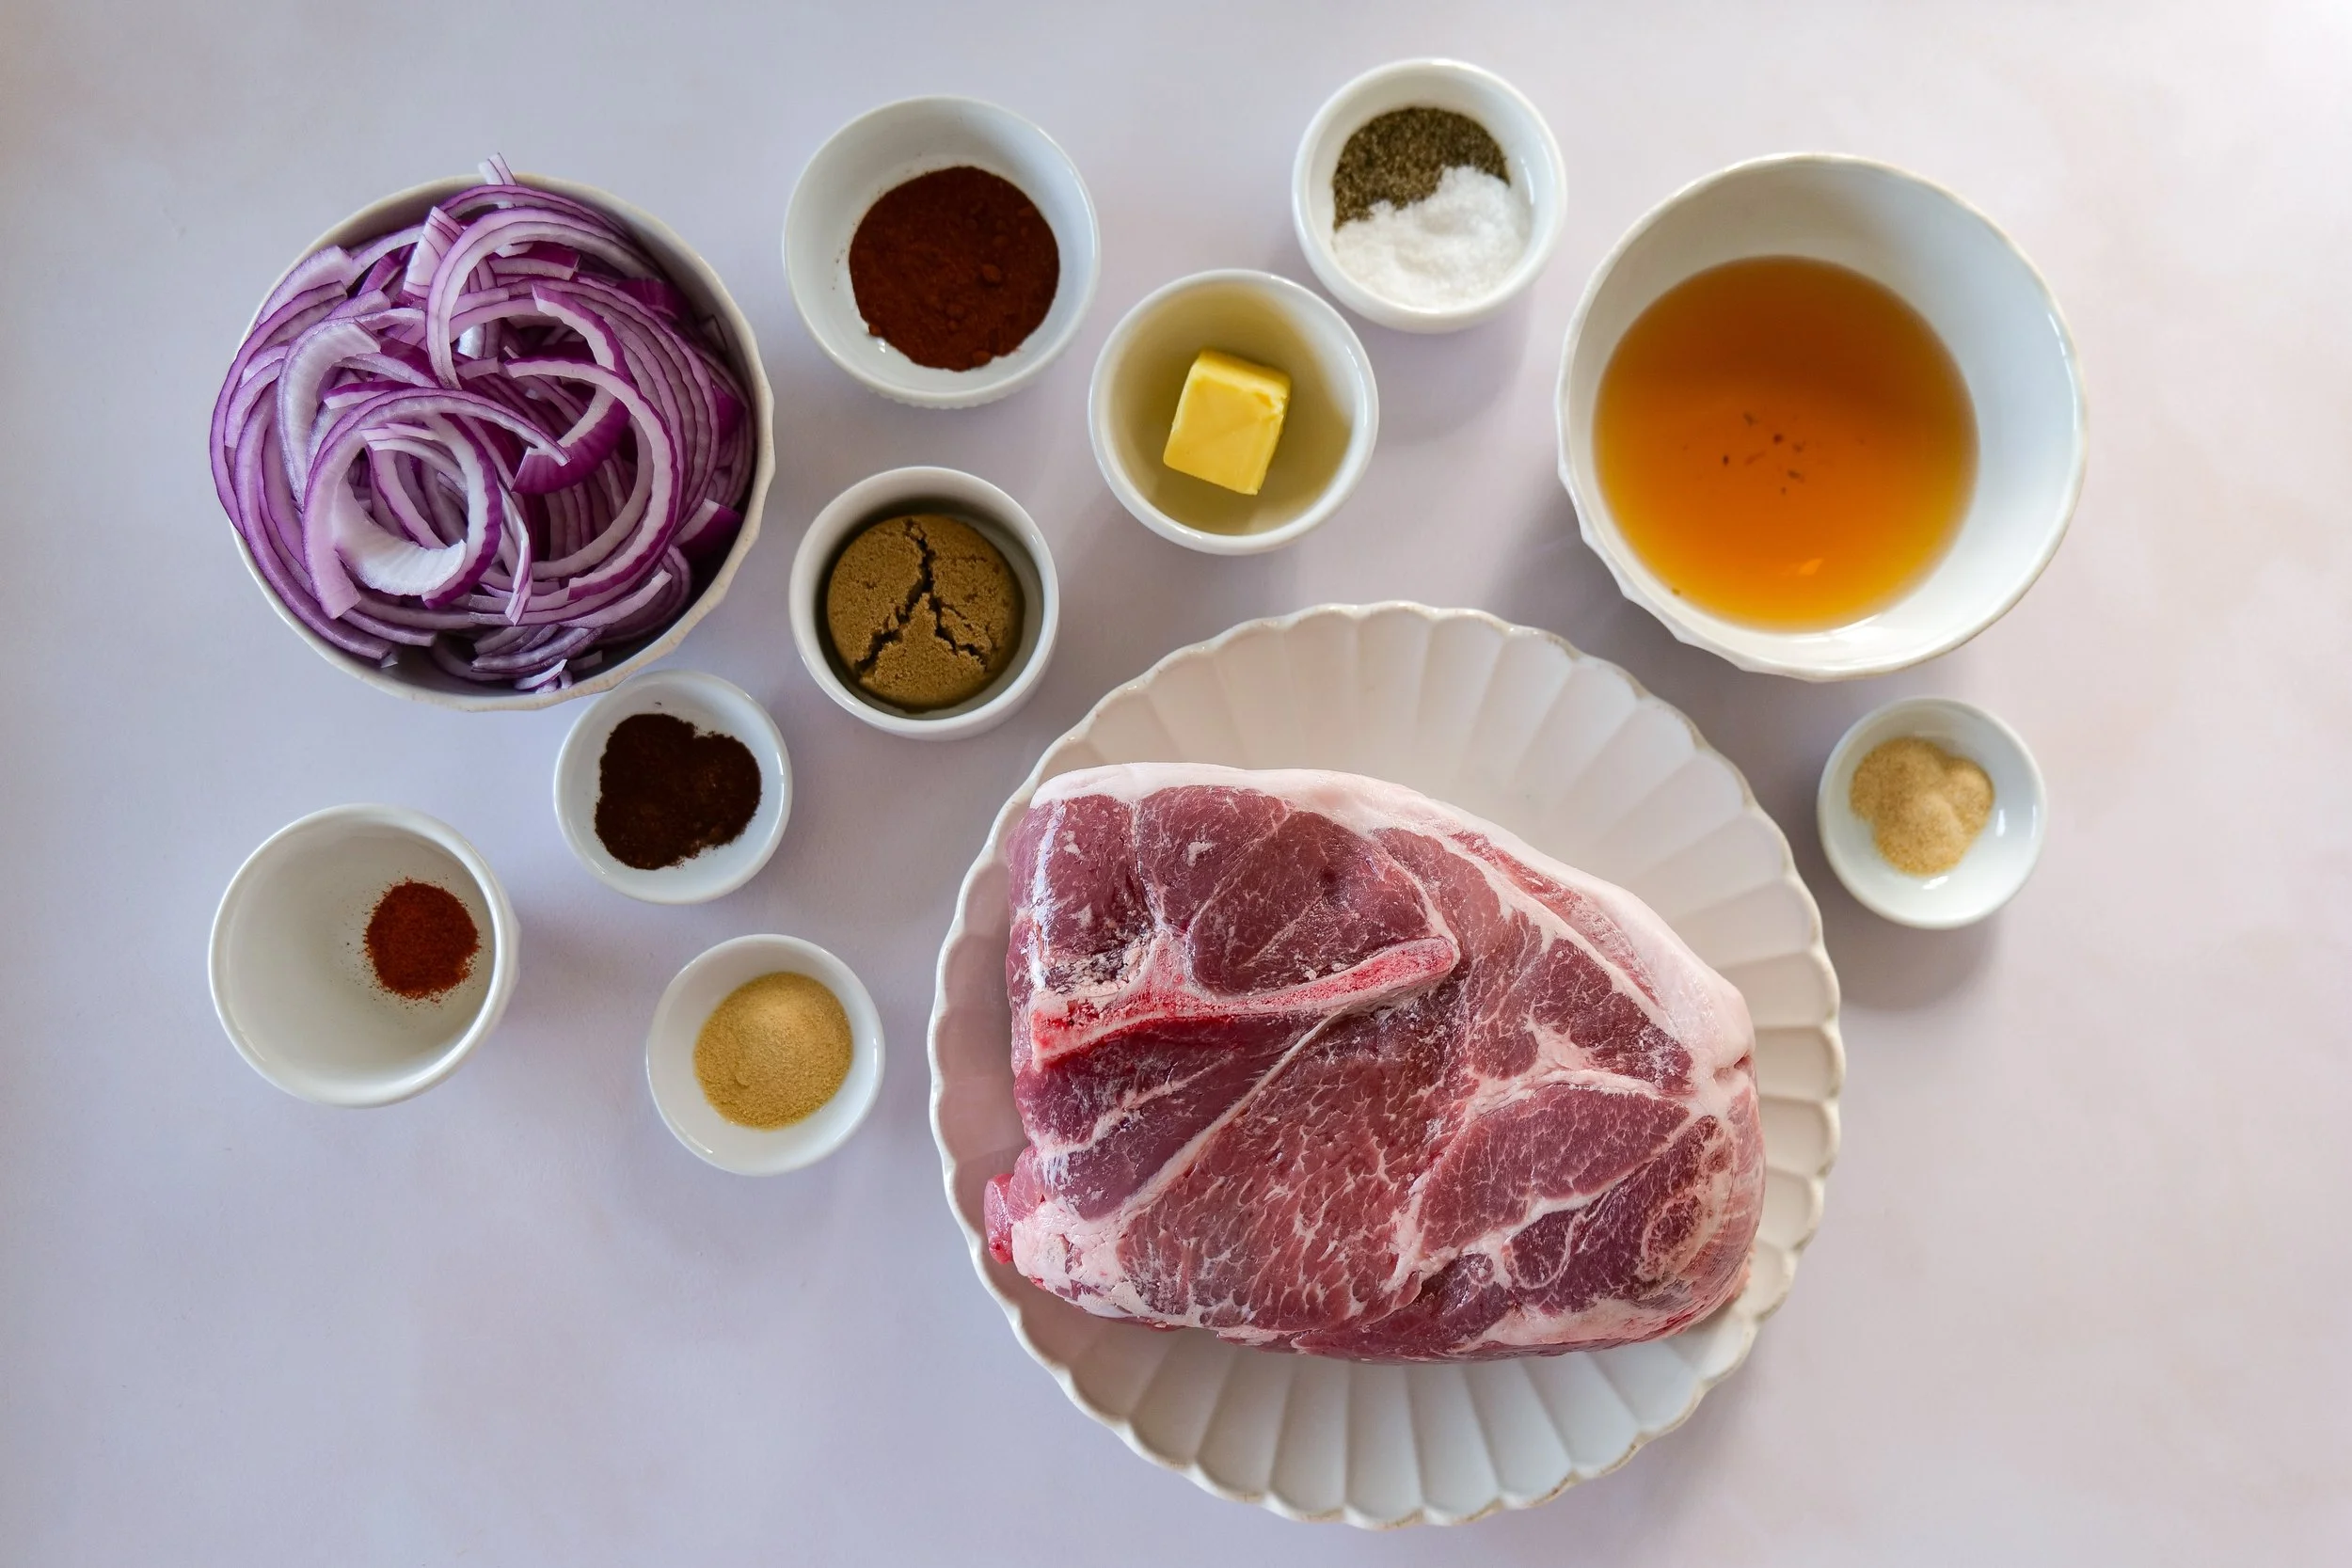
Ingredients for easy slow cooker pulled pork including pork shoulder, red onion, chicken broth, olive oil and dry rub seasonings.

Kitchen Tools

You'll only need a few kitchen staples.

  • Slow cooker

  • Chef's knife

  • Cutting board

  • Small mixing bowl

  • Measuring spoons

  • Two forks for shredding

I've linked all of my favorite slow cooker essentials, knives, and everyday kitchen tools in my Kitchen Essentials below.

SHOP MY KITCHEN FAVORITES

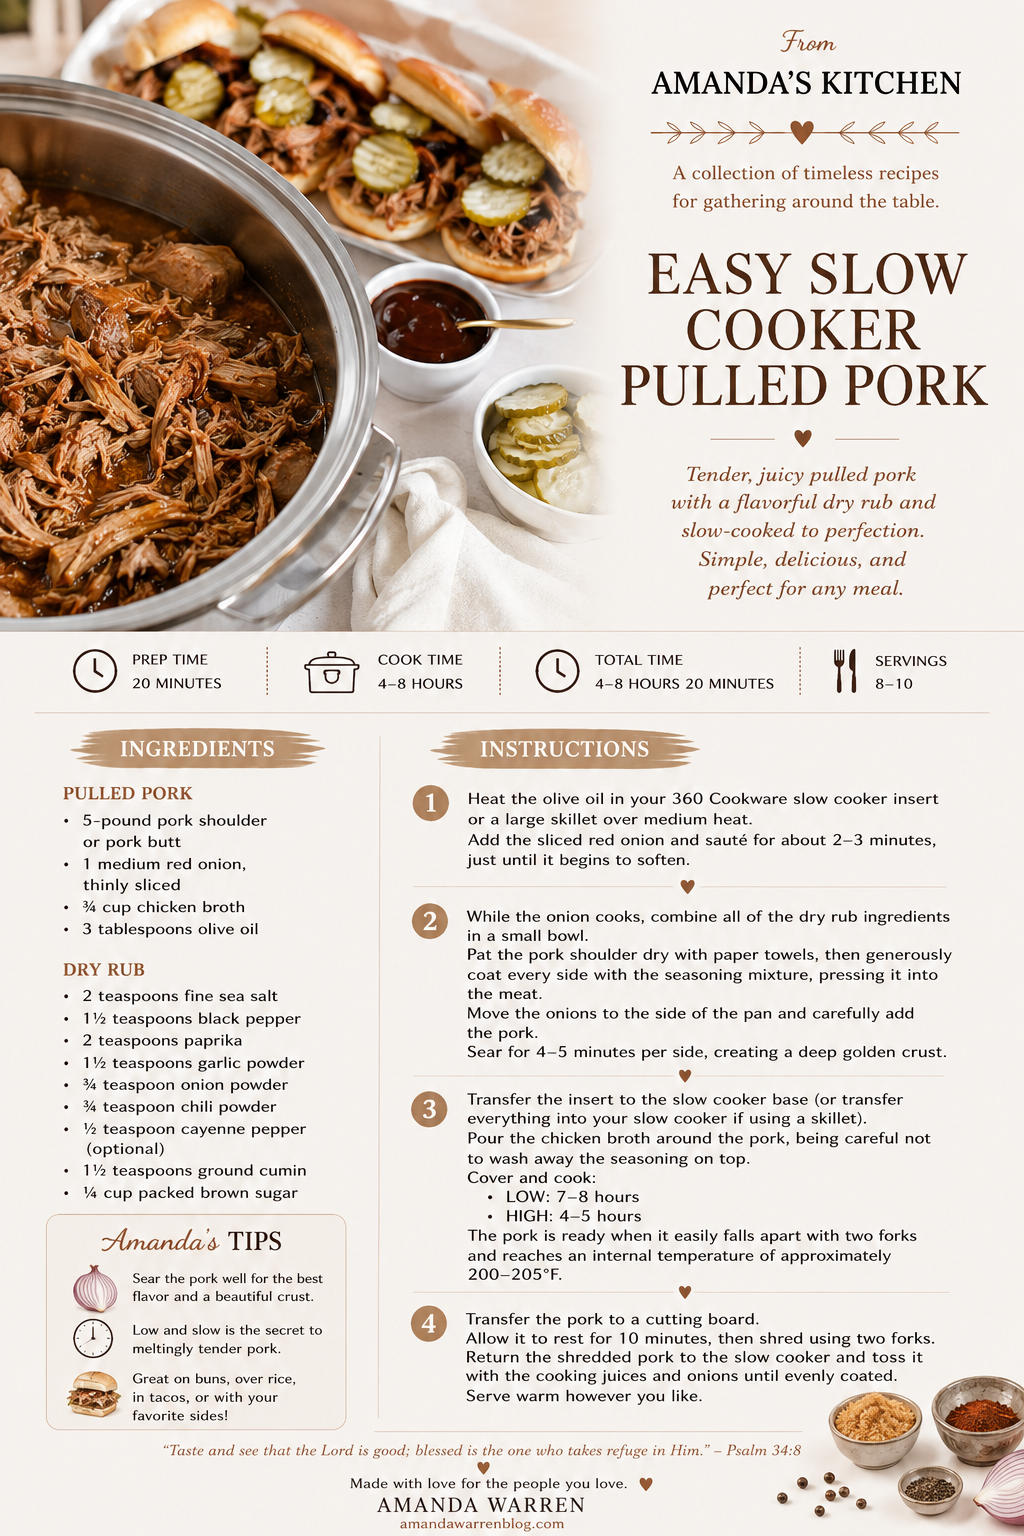
Easy Slow Cooker Pulled Pork Recipe

Ingredients

Pulled Pork

  • 5-pound pork shoulder or pork butt

  • 1 medium red onion, thinly sliced

  • ¾ cup chicken broth

  • 3 tablespoons olive oil

Dry Rub

  • 2 teaspoons fine sea salt

  • 1½ teaspoons black pepper

  • 2 teaspoons paprika

  • 1½ teaspoons garlic powder

  • ¾ teaspoon onion powder

  • ¾ teaspoon chili powder

  • ½ teaspoon cayenne pepper (optional)

  • 1½ teaspoons ground cumin

  • ¼ cup packed brown sugar

Instructions

Step 1

Heat the olive oil in your 360 Cookware slow cooker insert or a large skillet over medium heat.

Add the sliced red onion and sauté for about 2–3 minutes, just until it begins to soften.

Step 2

While the onion cooks, combine all of the dry rub ingredients in a small bowl.

Pat the pork shoulder dry with paper towels, then generously coat every side with the seasoning mixture, pressing it into the meat.

Move the onions to the side of the pan and carefully add the pork.

Sear for 4–5 minutes per side, creating a deep golden crust.

Step 3

Transfer the insert to the slow cooker base (or transfer everything into your slow cooker if using a skillet).

Pour the chicken broth around the pork, being careful not to wash away the seasoning on top.

Cover and cook:

  • LOW: 7–8 hours

  • HIGH: 4–5 hours

The pork is ready when it easily falls apart with two forks and reaches an internal temperature of approximately 200–205°F.

Step 4

Transfer the pork to a cutting board.

Allow it to rest for 10 minutes, then shred using two forks.

Return the shredded pork to the slow cooker and toss it with the cooking juices and onions until evenly coated.

Serve warm however you like.

Amanda's Quick Tips

  • Don't skip the searing—it adds incredible flavor.

  • Shred the pork directly into the cooking juices.

  • If the pork isn't shredding easily, let it cook a little longer.

  • Brioche buns make incredible pulled pork sandwiches.

  • Leftovers taste even better the next day.

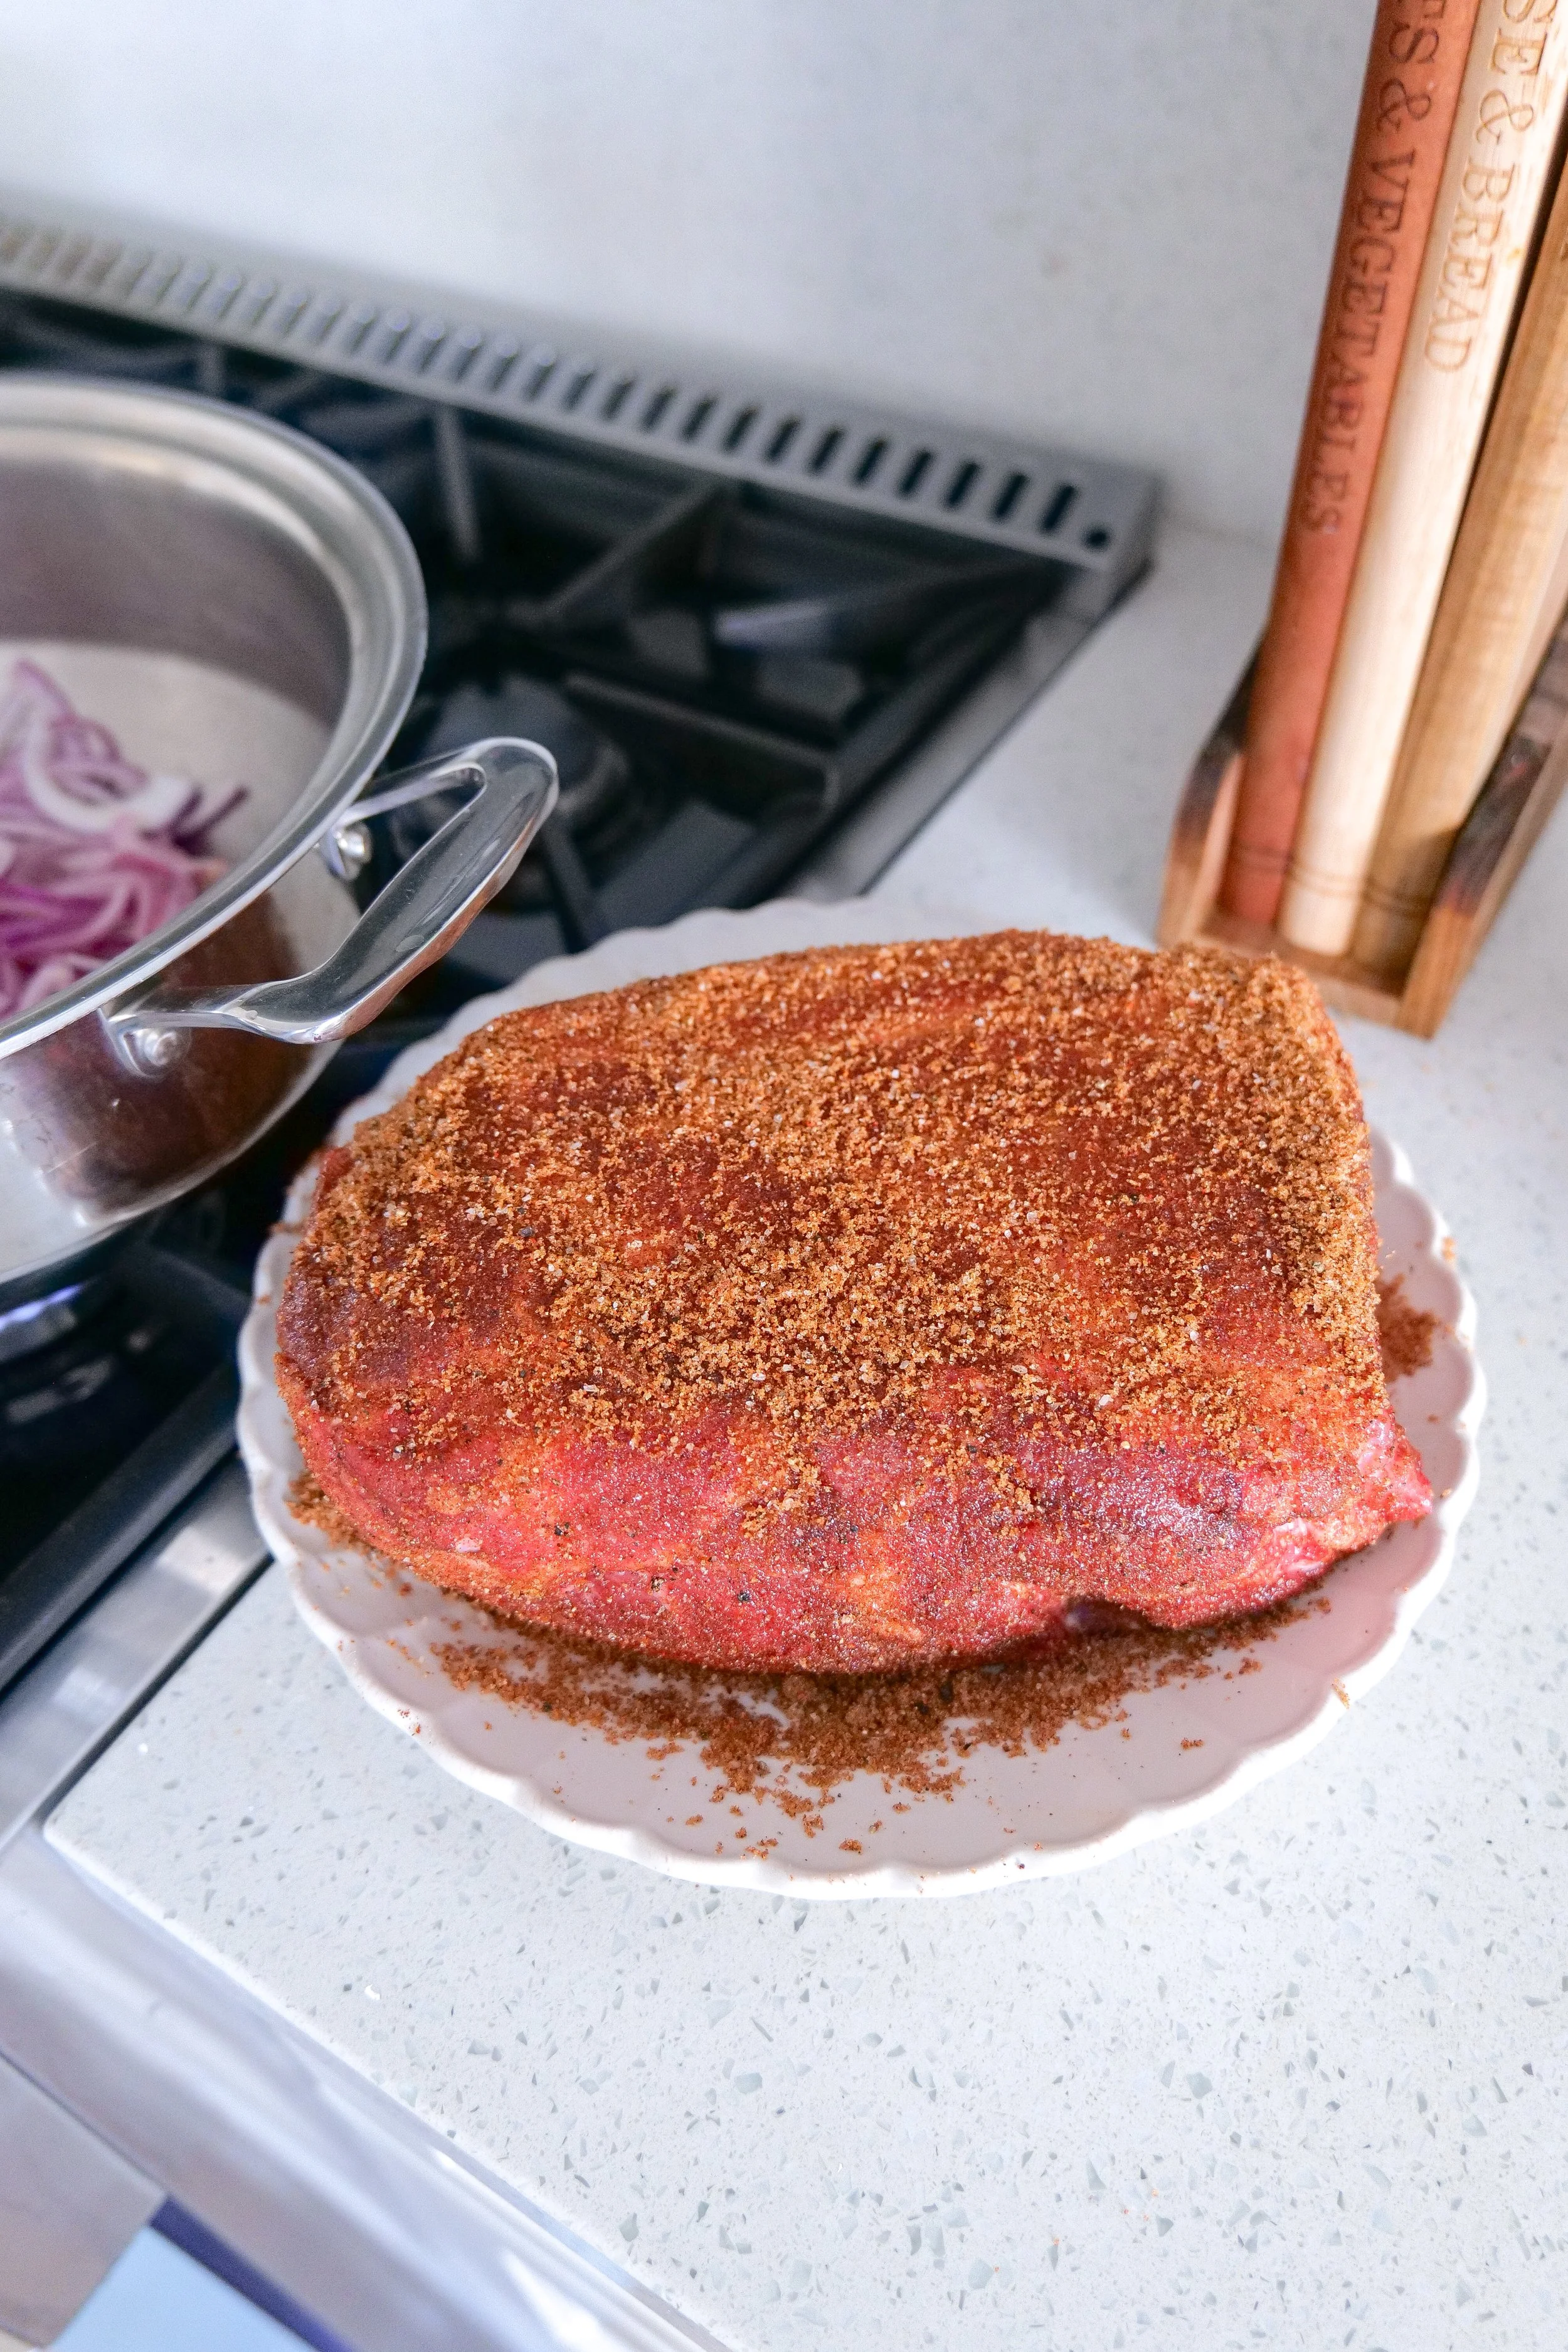
Seasoned pork shoulder with sliced red onion prepared in the slow cooker before cooking.
Pork shoulder coated in homemade brown sugar dry rub and placed in the slow cooker.

Amanda's Tips

One of the reasons I love this recipe so much is because it's incredibly forgiving, but these simple tips will help you make the best pulled pork every single time.

Sear Before Slow Cooking

Although it's tempting to skip this step, searing the pork creates a flavorful crust that adds richness to the finished dish. It only takes a few extra minutes and is well worth the effort.

Let It Rest Before Shredding

Once the pork has finished cooking, allow it to rest for about 10 minutes before shredding. This helps the juices redistribute throughout the meat, keeping every bite tender and flavorful.

Toss It Back Into the Juices

After shredding, return the pork to the slow cooker and mix it into the cooking juices and onions. This is my favorite trick for keeping pulled pork incredibly juicy.

Taste Before Serving

Every pork shoulder is a little different. Taste the finished pork before serving and add an extra pinch of salt or black pepper if needed.

Perfect for Meal Prep

This recipe makes a generous amount and reheats beautifully, making it one of my favorite meals to prepare ahead for busy weeks.

Homemade pulled pork slow cooked until tender and easily shredded.

Easy Variations

This recipe is wonderfully versatile and can be used in so many different ways.

BBQ Pulled Pork

Stir your favorite barbecue sauce into the shredded pork just before serving.

Mexican-Inspired Pulled Pork

Add fresh lime juice and chopped cilantro after shredding. Serve in tacos, burritos, quesadillas, or rice bowls.

Hawaiian Pulled Pork

Top with grilled pineapple and pickled red onions for a sweet and savory combination.

Carolina Style

Skip the barbecue sauce and serve with a tangy vinegar-based sauce instead.

Spicy Pulled Pork

Add additional cayenne pepper or stir in chopped chipotle peppers in adobo sauce after shredding.

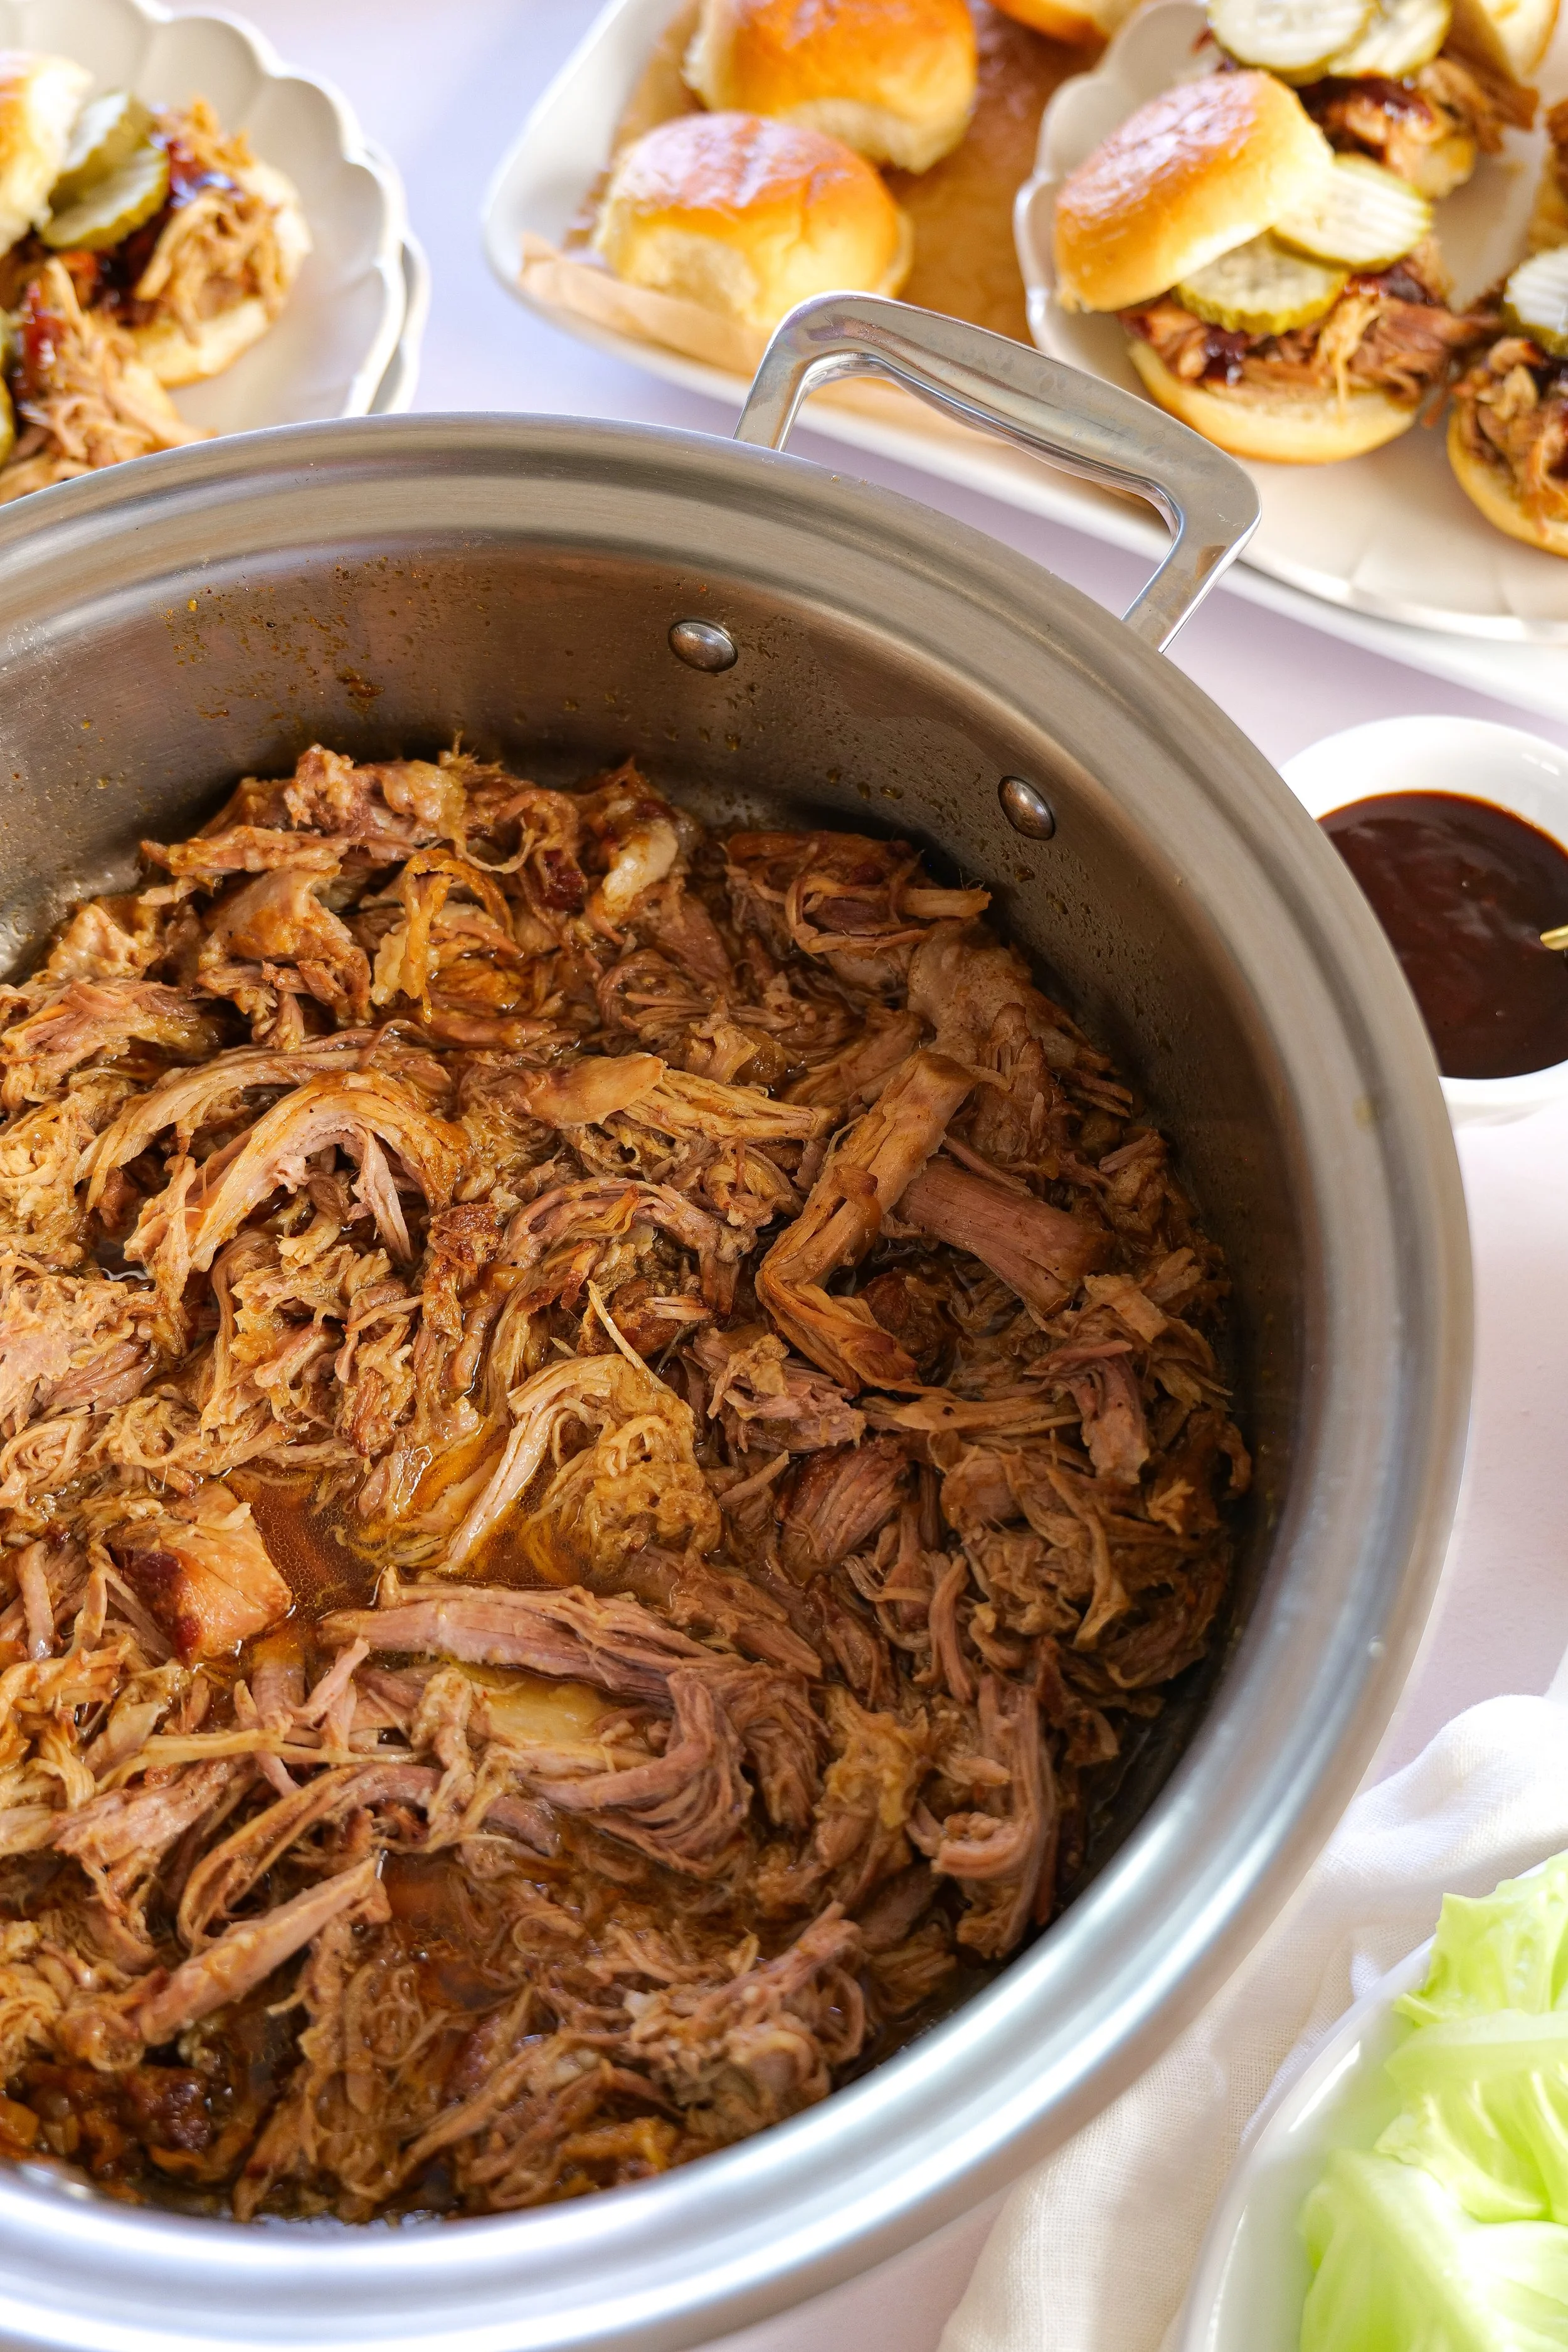
Easy homemade pulled pork made from slow-cooked pork shoulder with a flavorful dry rub.

Make Ahead Tips

This is one of my favorite recipes for entertaining because almost all of the work can be done ahead of time.

Cook the pork the day before, shred it, and store it in the refrigerator with all of the cooking juices.

The next day, simply warm everything together in the slow cooker on the Warm setting until heated through.

It's one less thing to worry about when hosting family or friends.

Storage & Freezing

Store leftover pulled pork in an airtight container in the refrigerator for up to 4 days.

For longer storage, freeze portions with some of the cooking juices for up to 3 months.

To reheat, thaw overnight in the refrigerator and warm gently on the stovetop or in the slow cooker until heated through.

Slow-cooked pulled pork served tender and shredded for an easy dinner.

Frequently Asked Questions

What's the best cut of pork for pulled pork?

Pork shoulder or pork butt are the best choices because they have enough marbling to become incredibly tender during slow cooking.

Can I skip searing the pork?

Yes, but I highly recommend taking a few extra minutes to sear it first for the best flavor.

How do I know when it's done?

The pork should easily pull apart with two forks and reach an internal temperature of about 200–205°F.

Can I cook it overnight?

Absolutely. Cooking on LOW overnight works beautifully.

Can I freeze leftovers?

Yes! Freeze the shredded pork with some of the cooking juices to help it stay moist when reheated.

Can I use barbecue sauce?

Definitely. Stir it in after shredding or serve it on the side so everyone can customize their meal.

Why isn't my pork shredding?

It simply needs more time. Continue cooking until it falls apart effortlessly.

What's the best bread for sandwiches?

Soft brioche buns are my favorite, but potato rolls, ciabatta, or Kaiser rolls are all excellent options.

Can I make this ahead for a party?

Yes! In fact, I think it tastes even better the next day after the flavors have had more time to develop.

Is this recipe spicy?

Not really. The cayenne adds a subtle warmth, but you can reduce or omit it if you prefer.

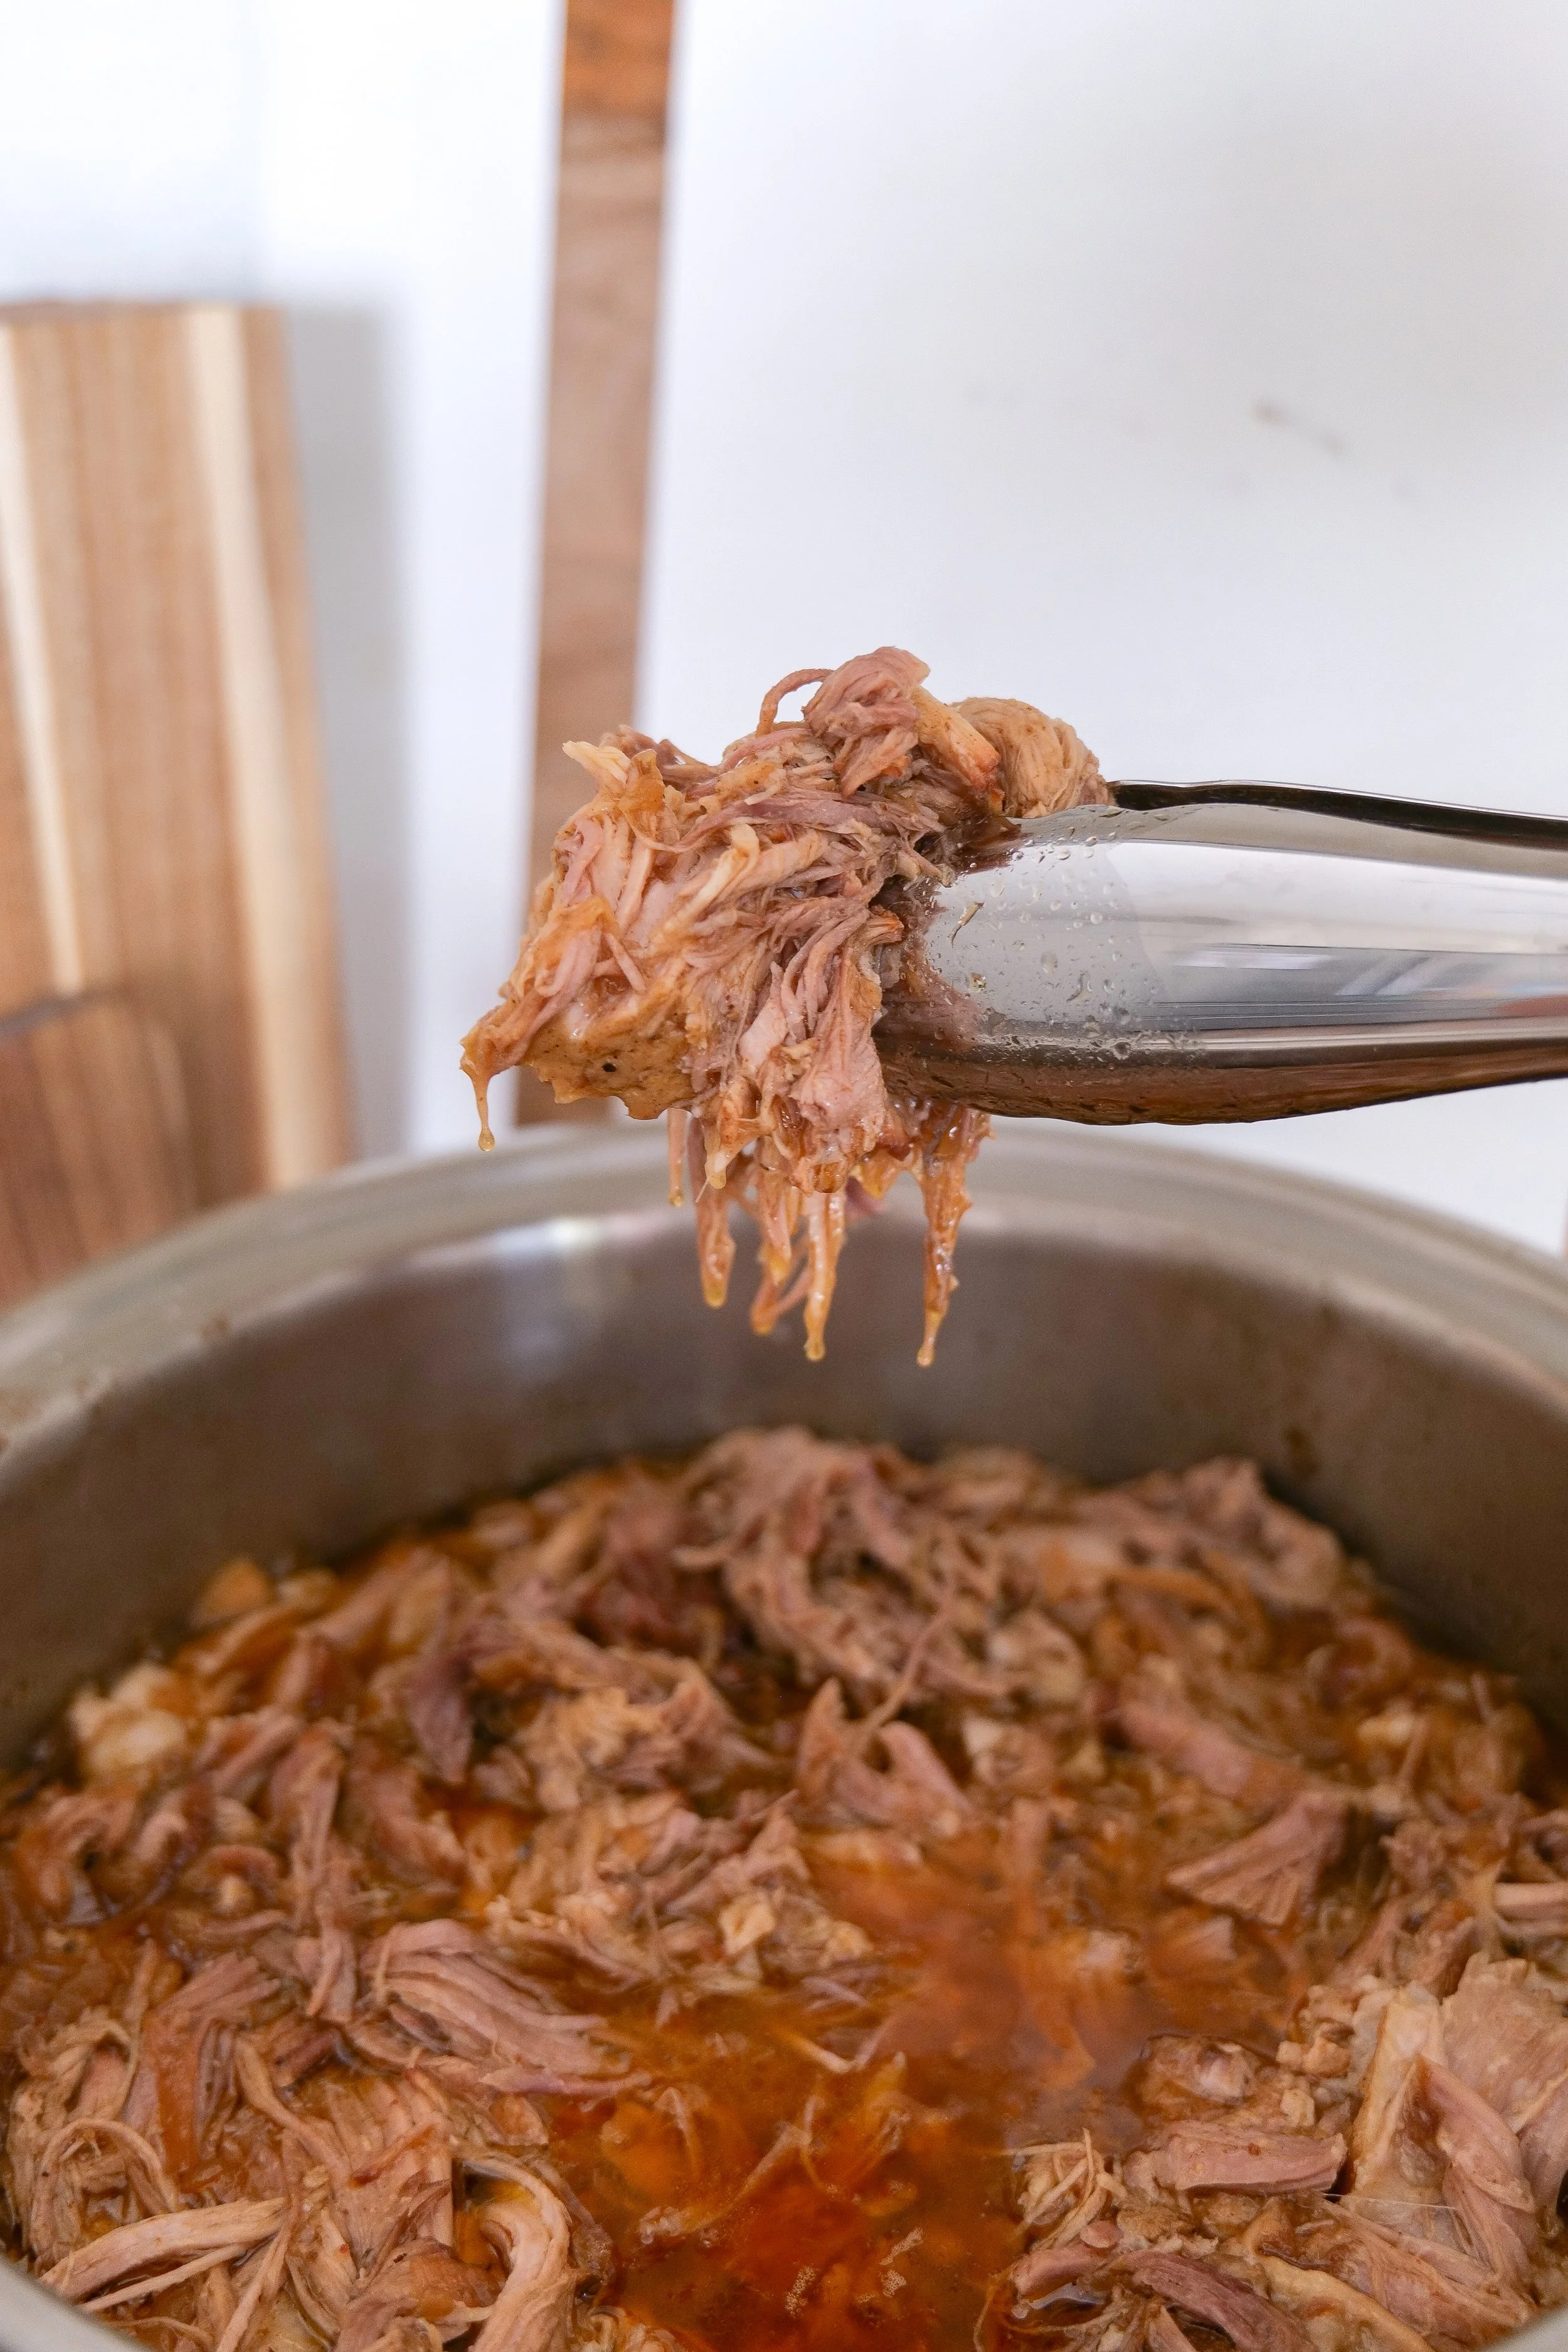
Tender pulled pork made with a homemade brown sugar, paprika and cumin dry rub.

Ways to Serve Pulled Pork

One of the best things about this recipe is how many meals you can make from it.

Try serving it:

  • On toasted brioche buns

  • In tacos

  • On nachos

  • Over baked potatoes

  • In rice bowls

  • Inside quesadillas

  • On flatbread pizzas

  • In sliders for parties

  • Stuffed into baked sweet potatoes

  • Over macaroni and cheese

It's one of those recipes that never gets old because every meal feels a little different.

What to Serve with Pulled Pork

Complete your meal with one (or several) of these favorite sides:

  • Creamy coleslaw

  • Slow Cooker Baked Beans

  • Macaroni and cheese

  • Cornbread

  • Potato salad

  • Roasted vegetables

  • Sweet potato fries

  • Watermelon slices

  • Fresh fruit salad

  • Pickles

Juicy shredded slow cooker pulled pork made with pork shoulder and simple seasonings.

More Dinner Recipes You'll Love

If your family enjoys comforting, easy dinners like this one, here are a few more favorites from Amanda's Kitchen:

  • Easy Skillet Chicken Pot Pie with Biscuits

  • Apple-Glazed Chicken Thighs

  • Italian Lasagna Soup

  • Chicken Tortilla Soup

  • Stuffed Italian Sausage Pasta Shells

  • Chorizo One Pan Dinner

  • Slow Cooker Braised Short Ribs

Shop My Kitchen Favorites

I've linked my favorite slow cooker, Dutch oven, knives, cutting boards, measuring tools, and everyday kitchen essentials that I use to make recipes like this one.

SHOP MY KITCHEN FAVORITES

Save This Recipe

Whether you're planning a backyard barbecue, feeding a crowd, or simply looking for an easy family dinner, I've included the printable recipe card below so it's easy to save, print, and make again whenever you need it.

This is one of those timeless recipes that always earns a spot back on the menu.

Printable From Amanda’s Kitchen recipe card for easy slow cooker pulled pork.

A Note From Amanda

Some of my favorite recipes aren't the ones that require fancy ingredients or hours in the kitchen. They're the ones that bring people together around the table, leave plenty of leftovers to enjoy the next day, and become part of family traditions.

This pulled pork is one of those recipes in our home. It's simple enough for an ordinary Tuesday night but special enough for birthdays, holidays, game days, and backyard gatherings with the people we love most.

I hope it becomes one of those dependable recipes your family asks for again and again.

"Taste and see that the Lord is good; blessed is the one who takes refuge in Him."
Psalm 34:8

Made with love for the people you love.

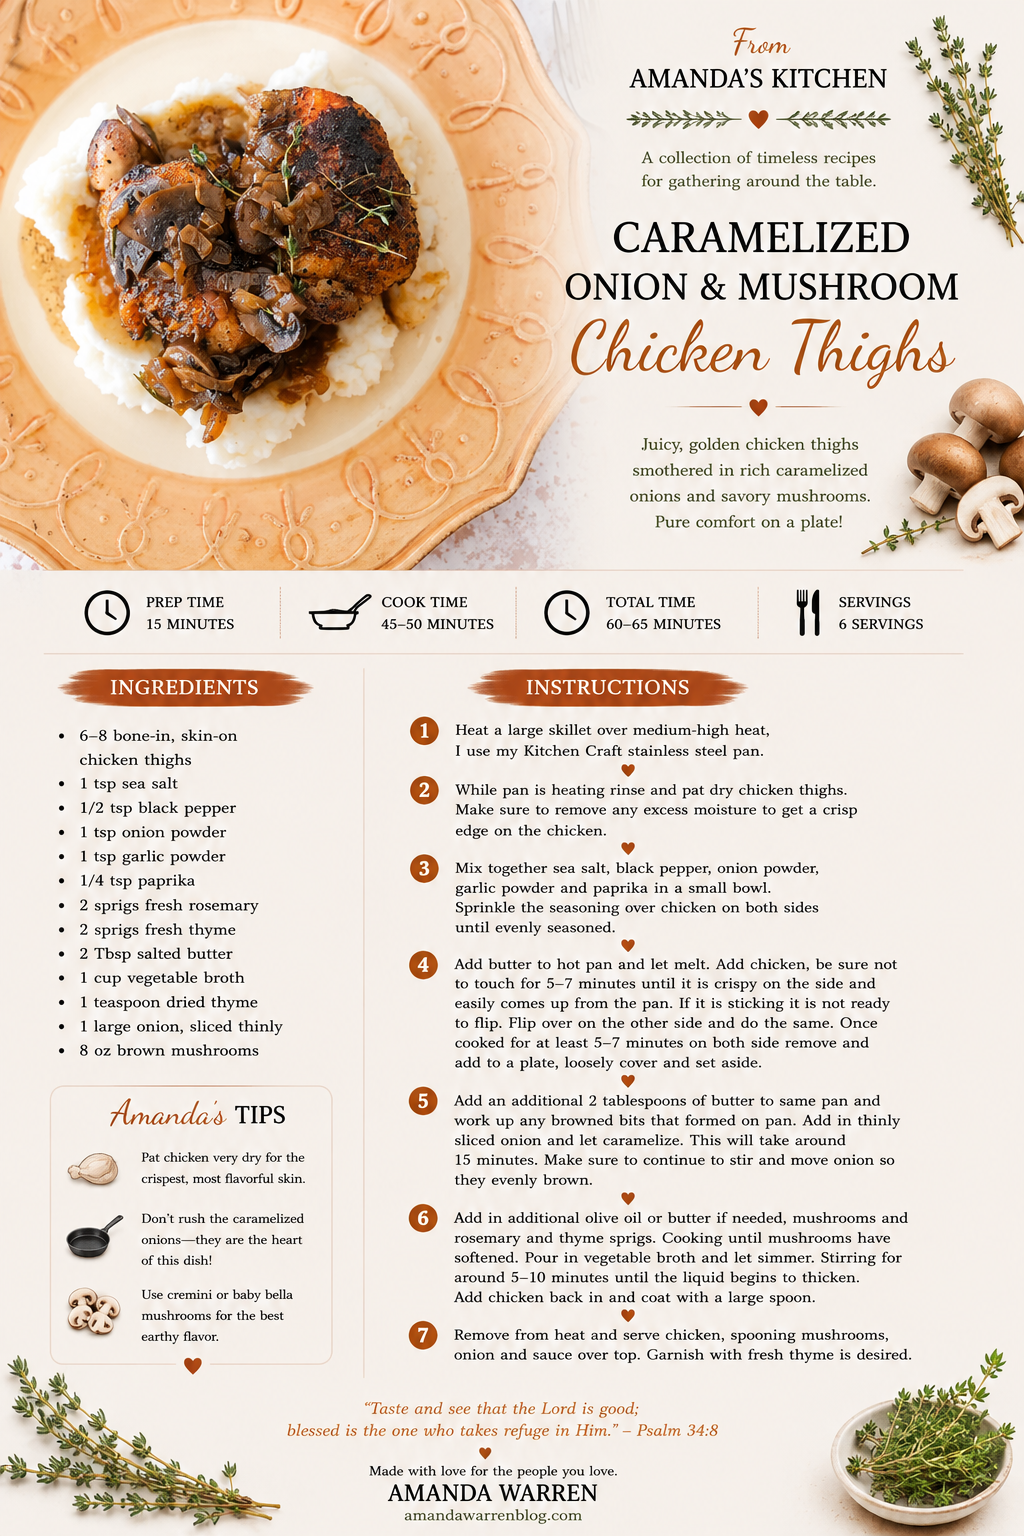
Caramelized Onion & Mushroom Chicken Thighs

A Cozy One-Pan Chicken Dinner

There are certain dinners that feel a little special without requiring an entire afternoon in the kitchen, and these Caramelized Onion & Mushroom Chicken Thighs are exactly that.

Bone-in, skin-on chicken thighs are seasoned simply and seared until the skin is beautifully golden and crisp. In the same skillet, thinly sliced onions slowly caramelize before mushrooms, fresh rosemary, thyme, and broth are added to create a rich, savory pan sauce.

Everything comes together in one skillet, allowing all of those browned bits from the chicken to become part of the sauce. The result is tender, juicy chicken surrounded by buttery mushrooms and sweet caramelized onions that taste like something you might order at a cozy little restaurant.

Serve it over creamy mashed potatoes, buttered noodles, or rice to soak up every bit of the sauce. Add a simple green vegetable or salad and you have a comforting family dinner that feels just as appropriate for a weeknight as it does for Sunday dinner with family.

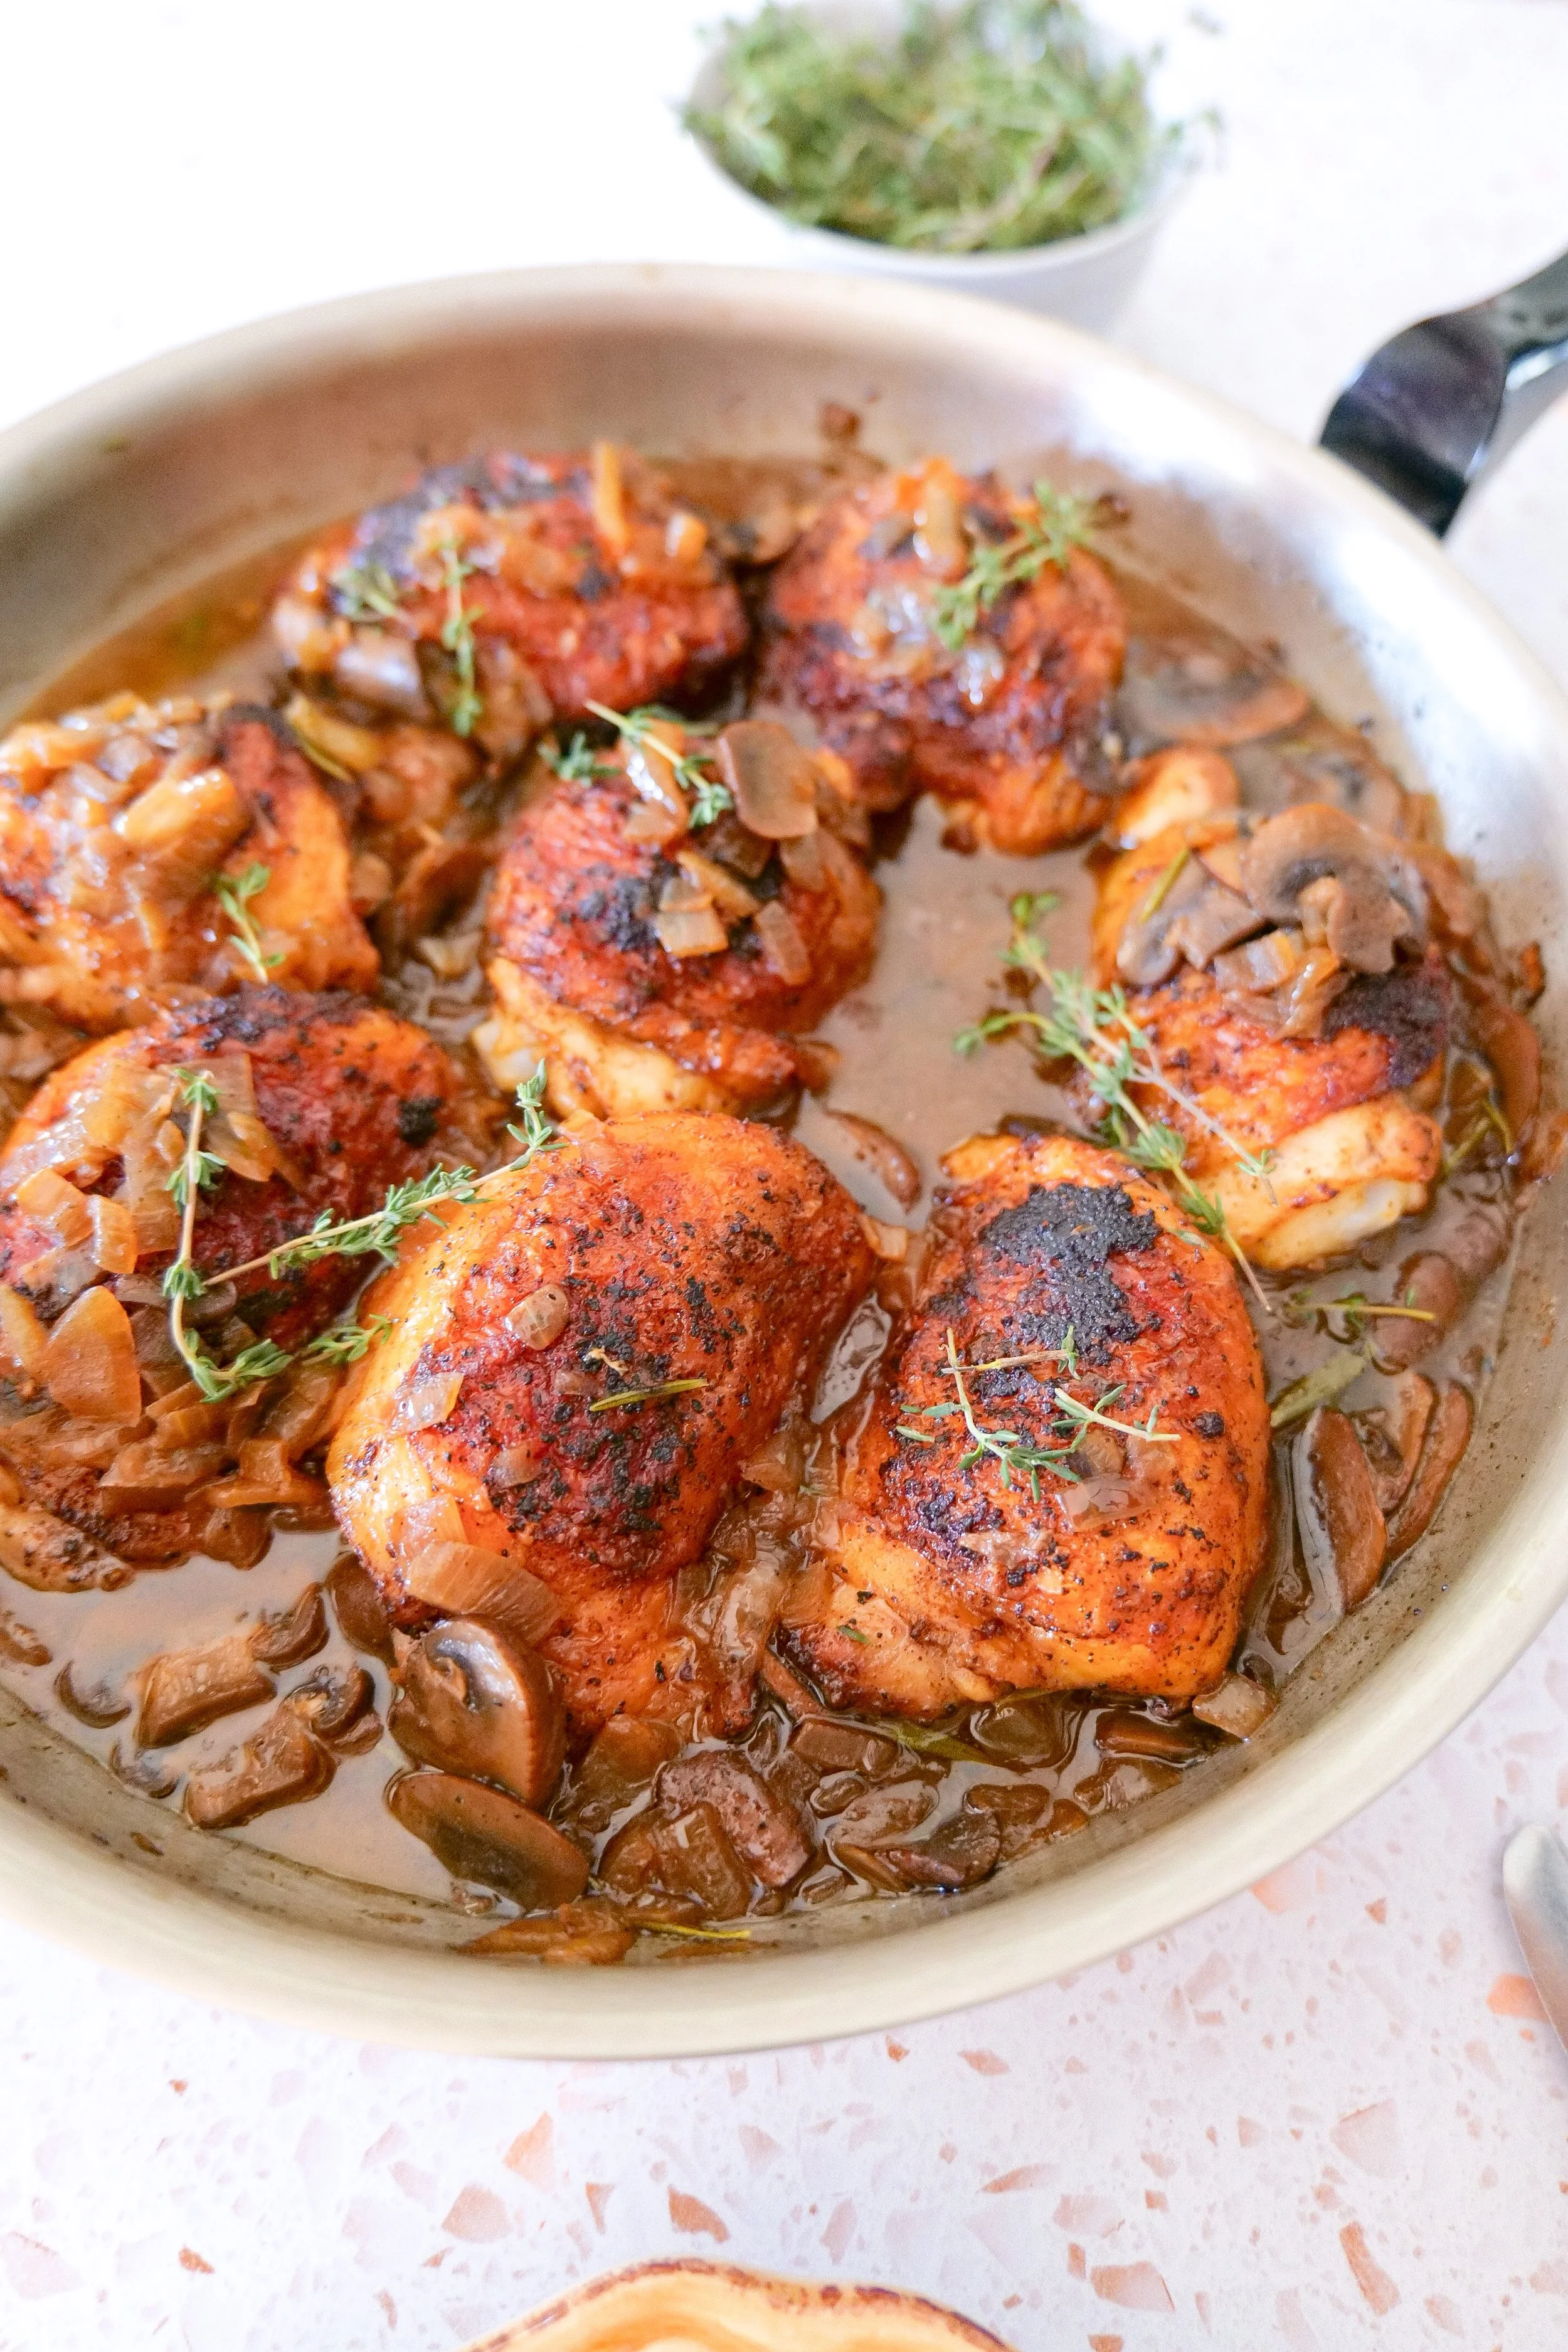
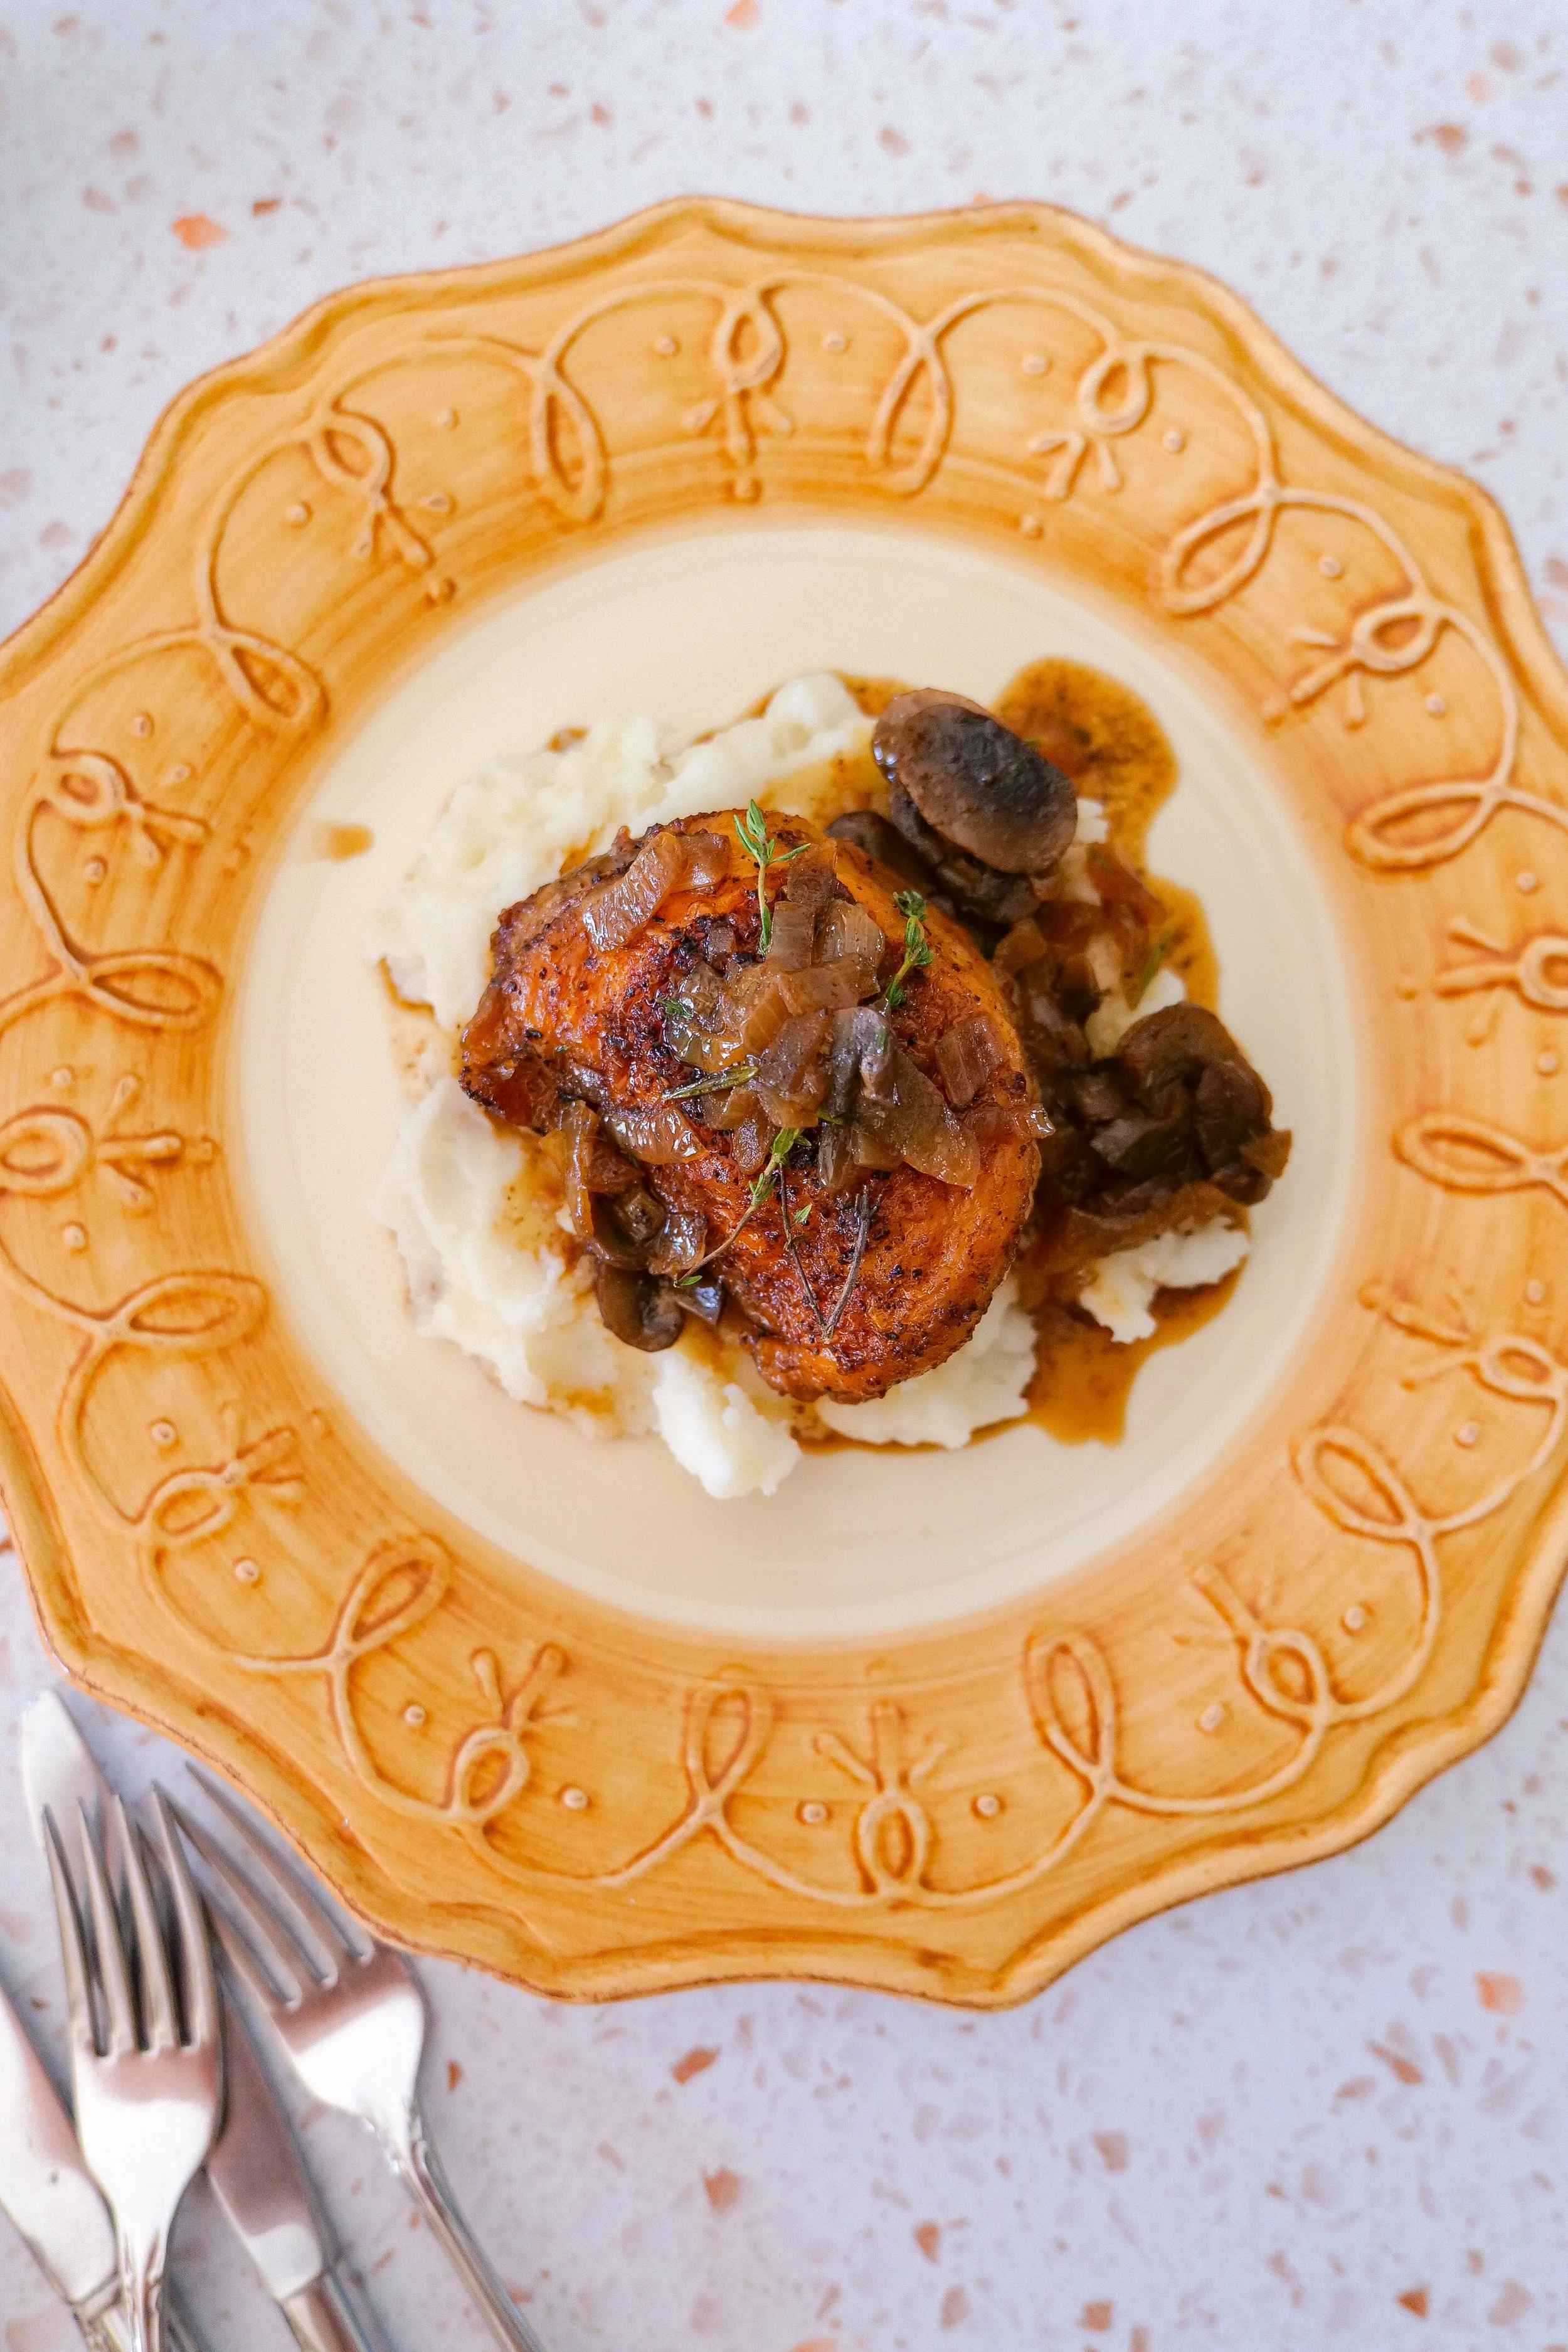
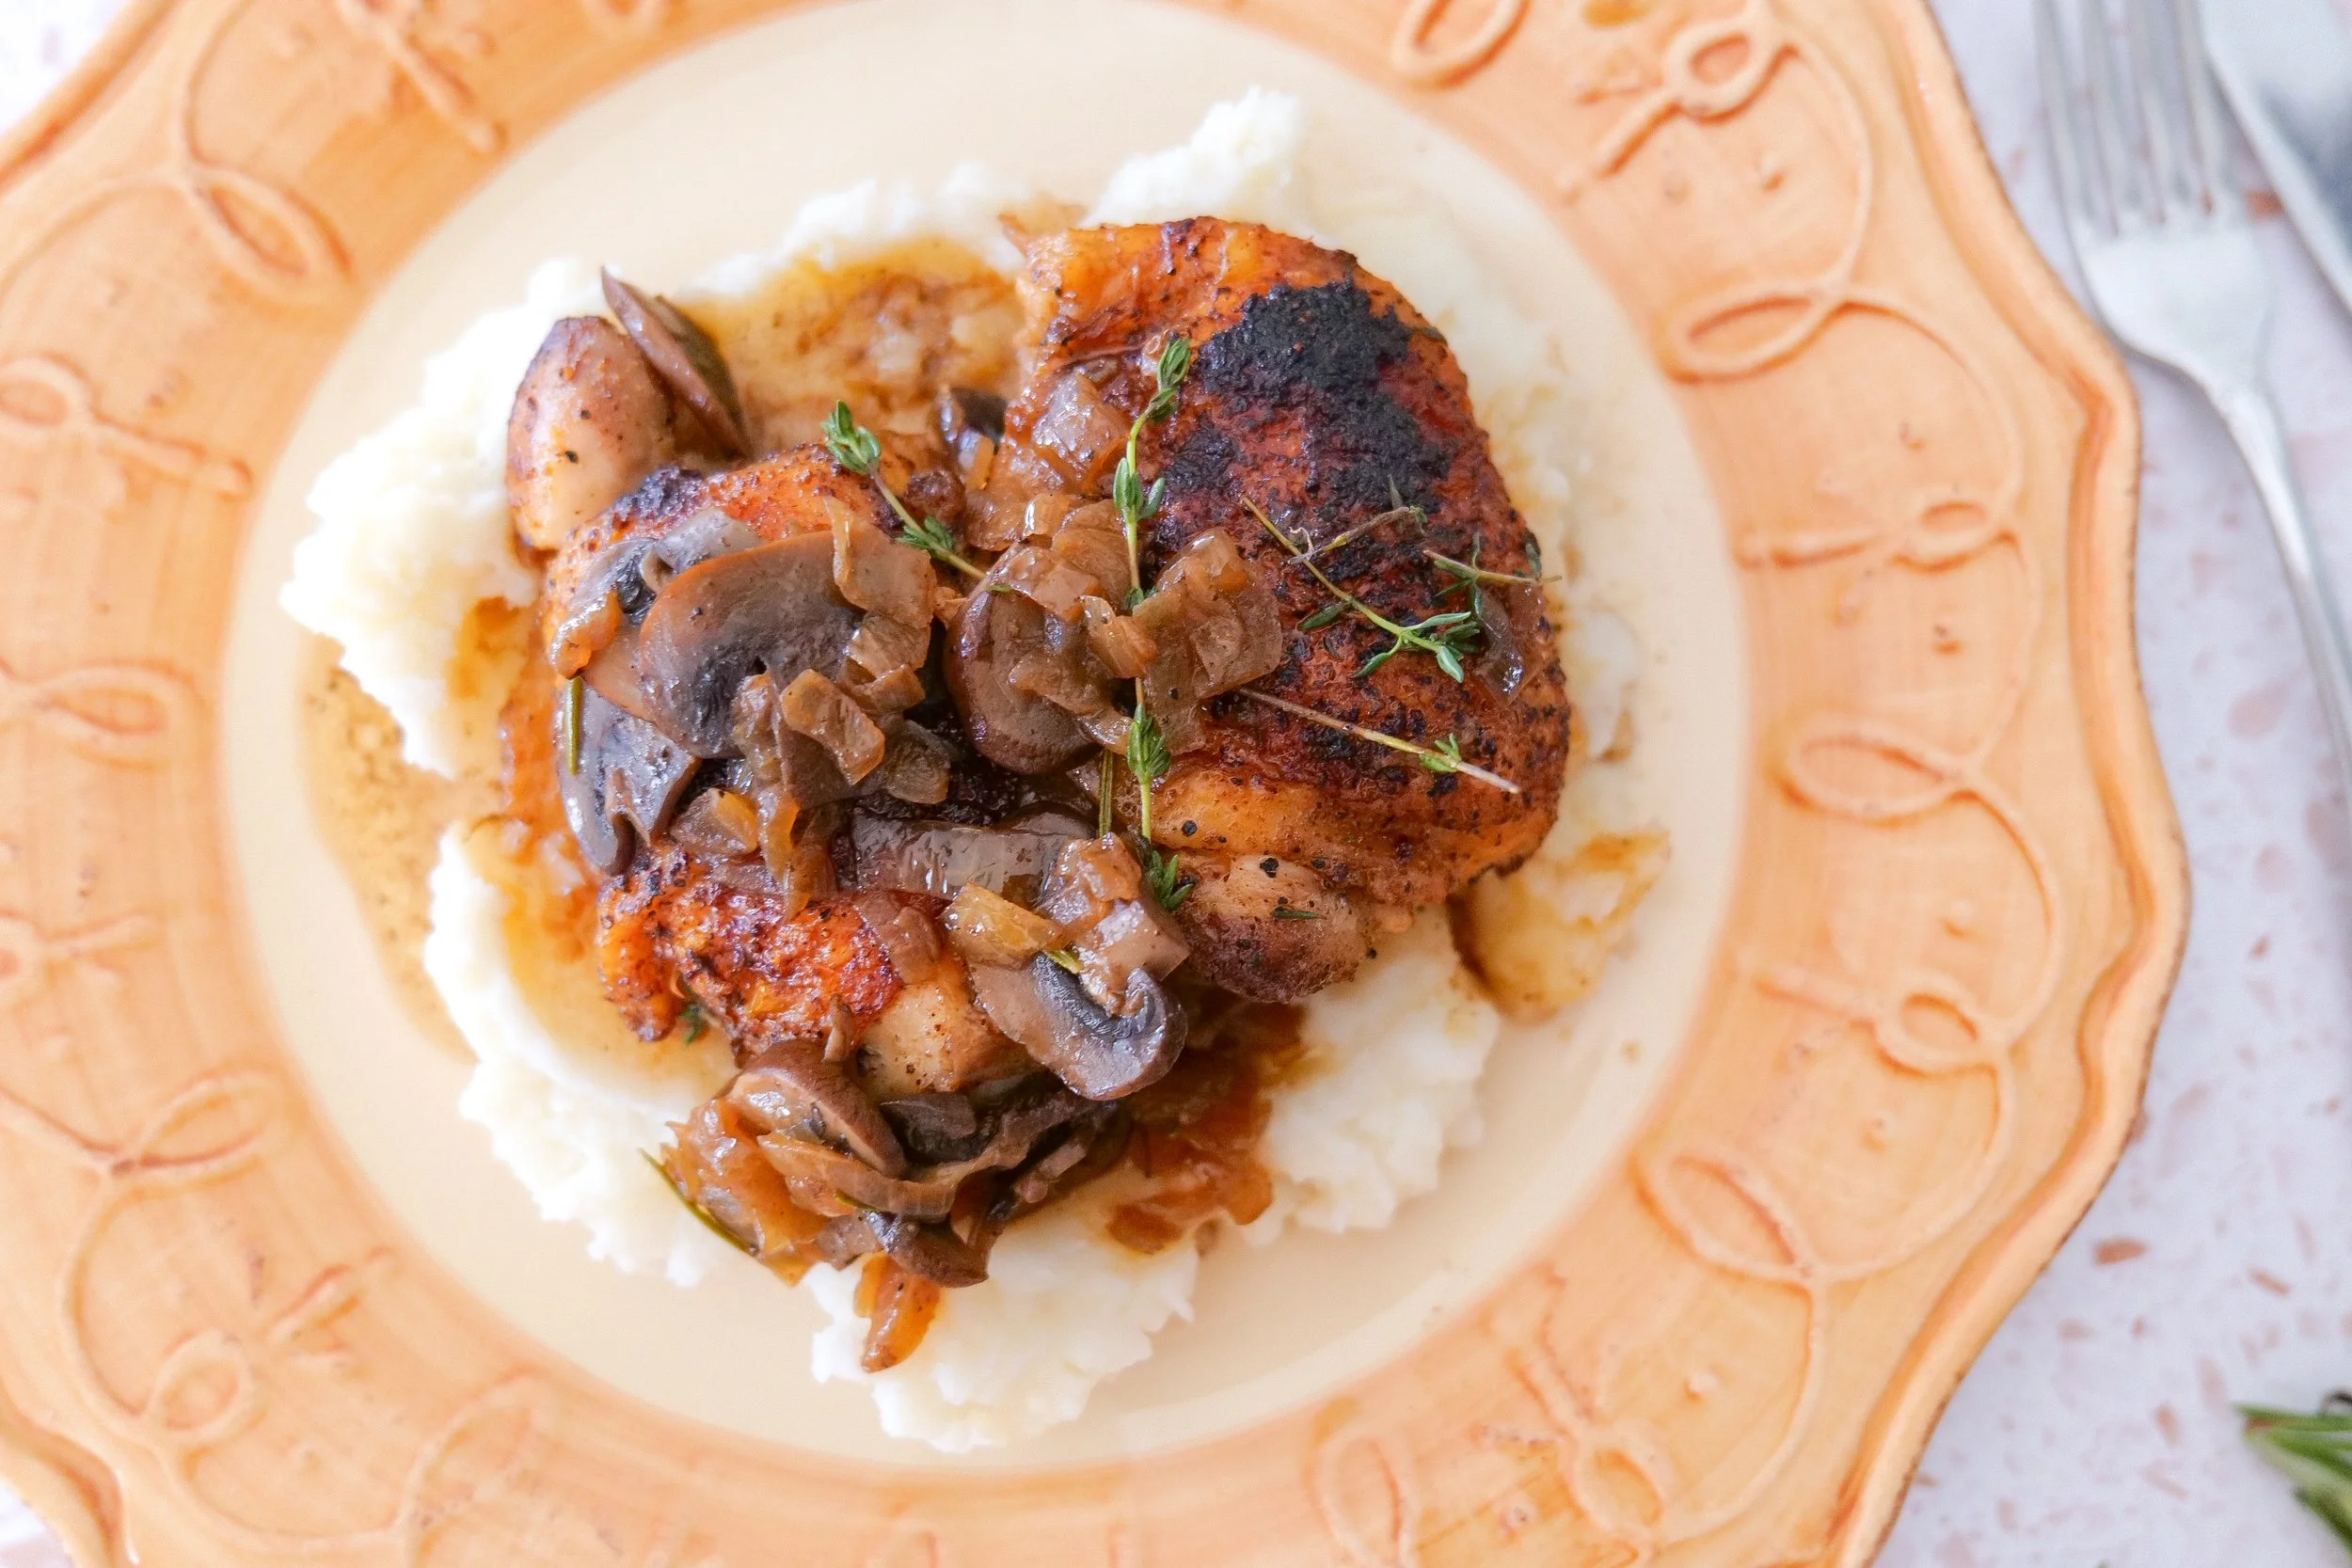
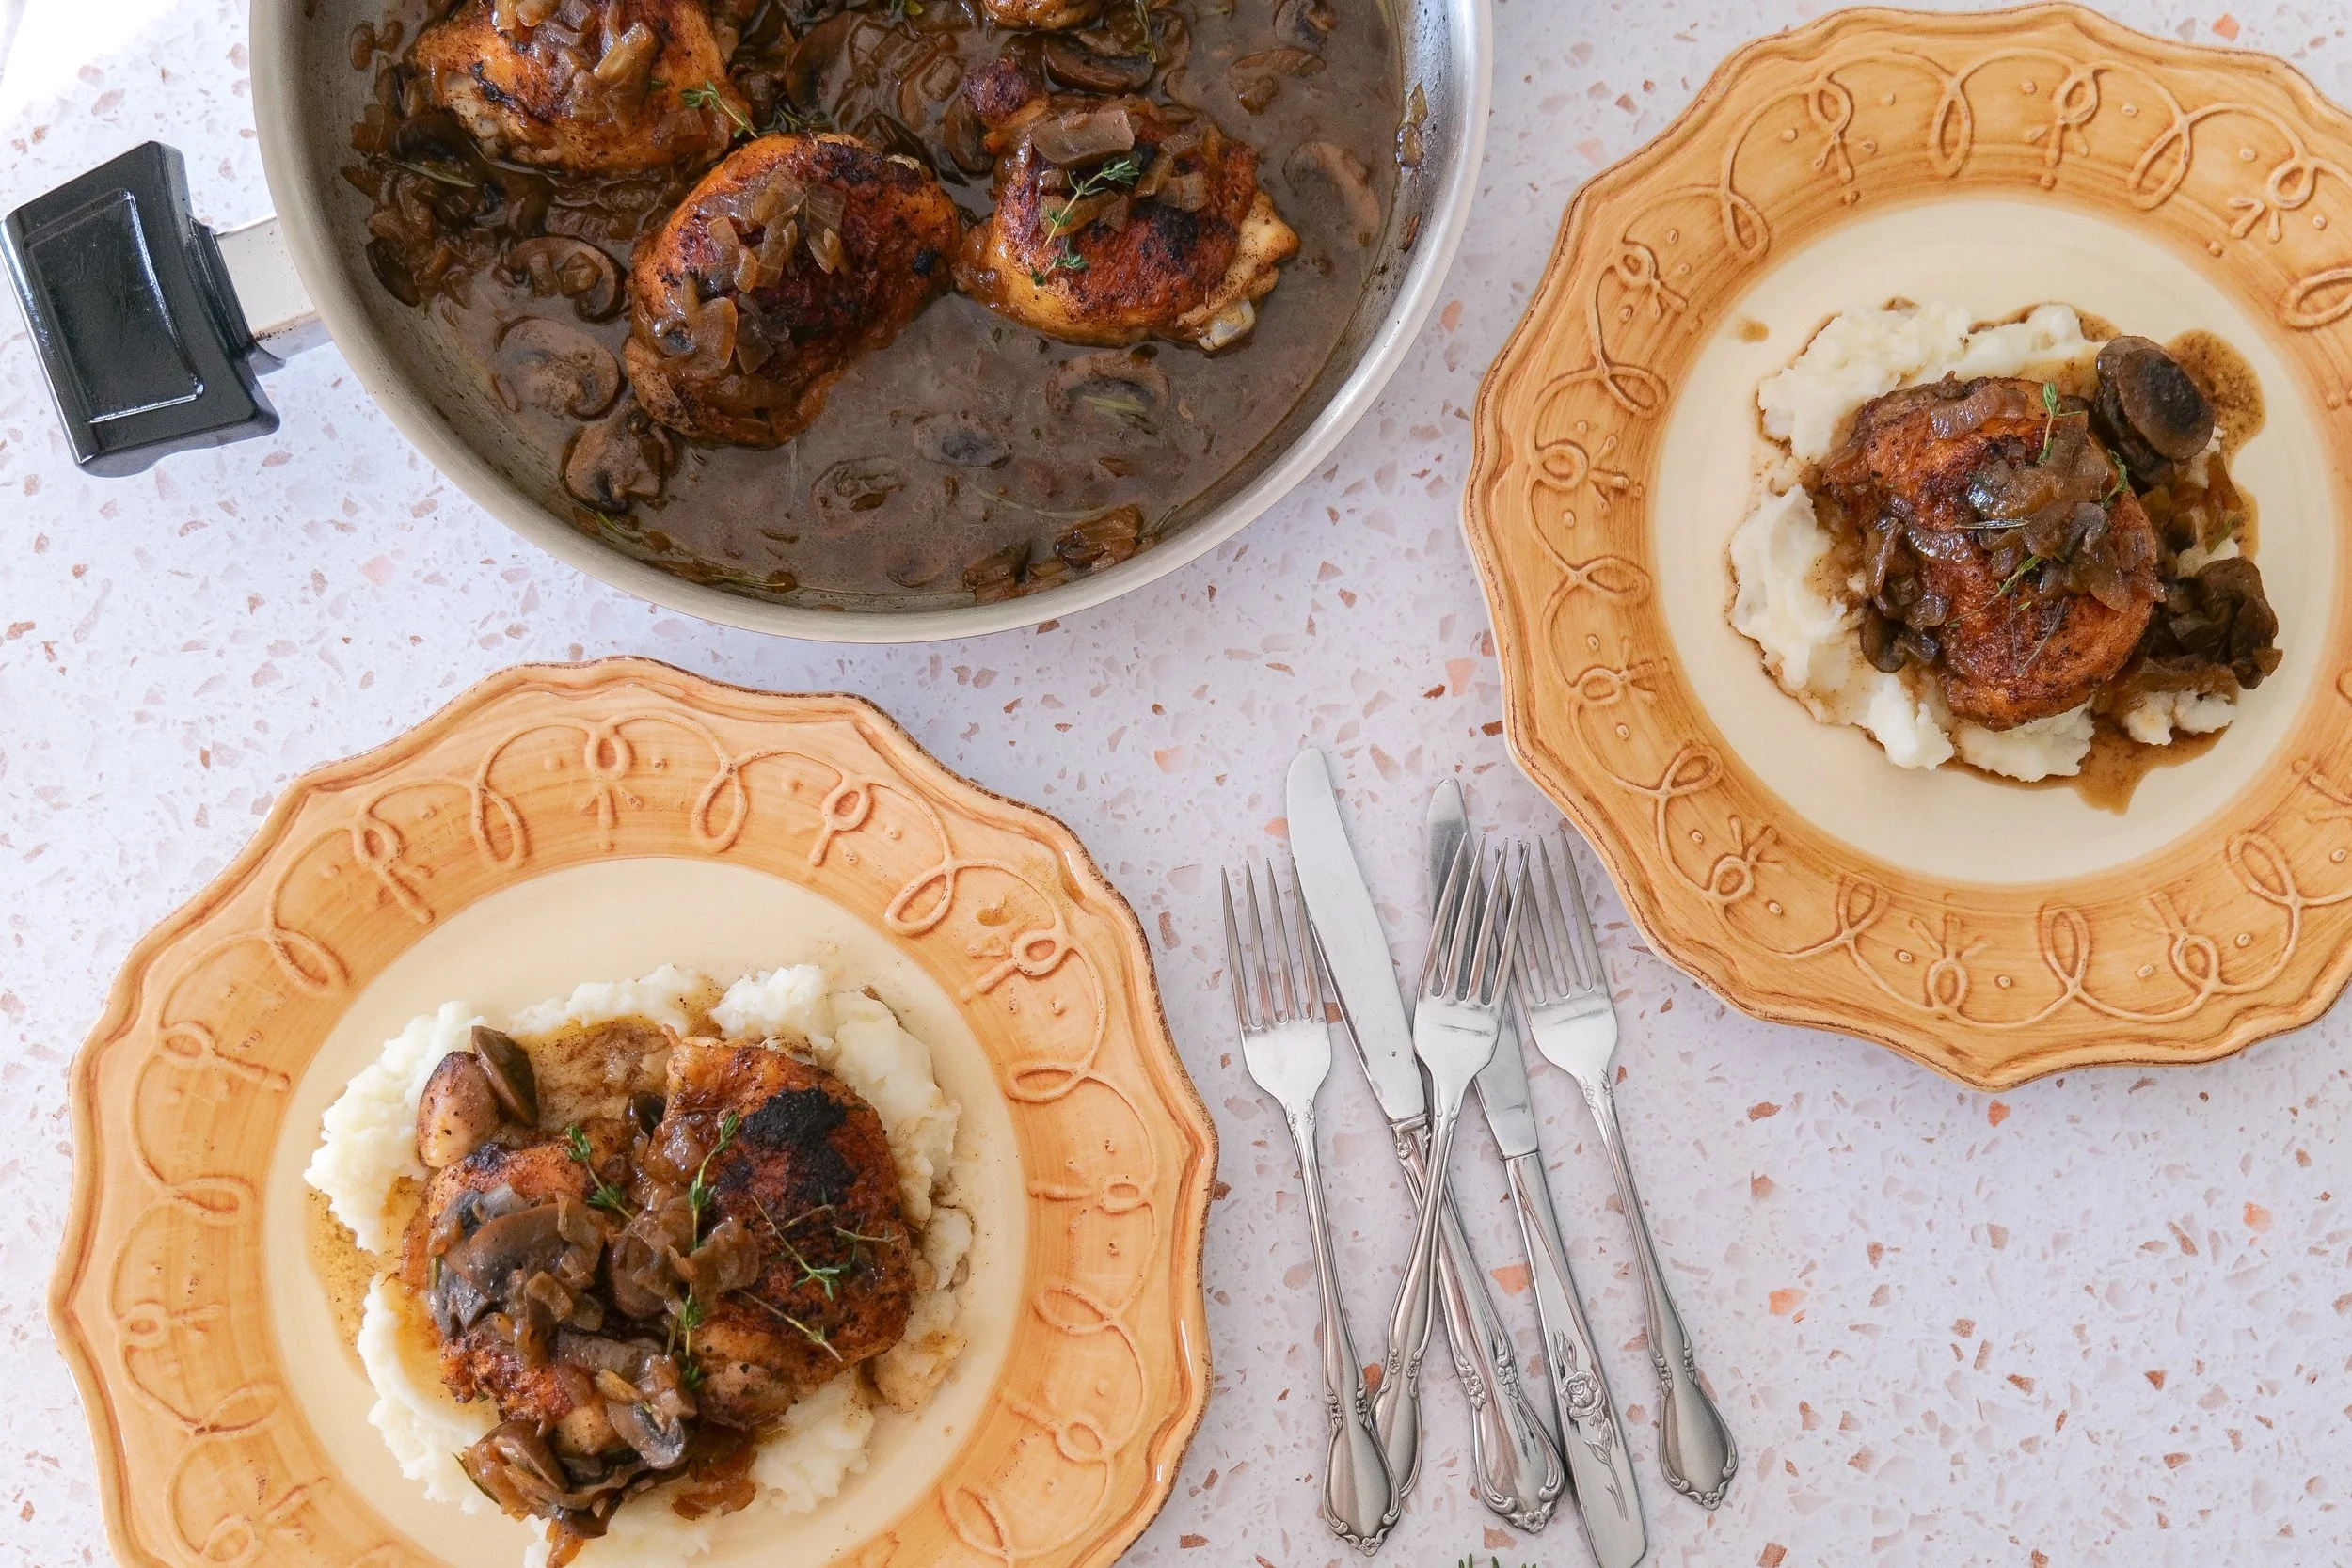
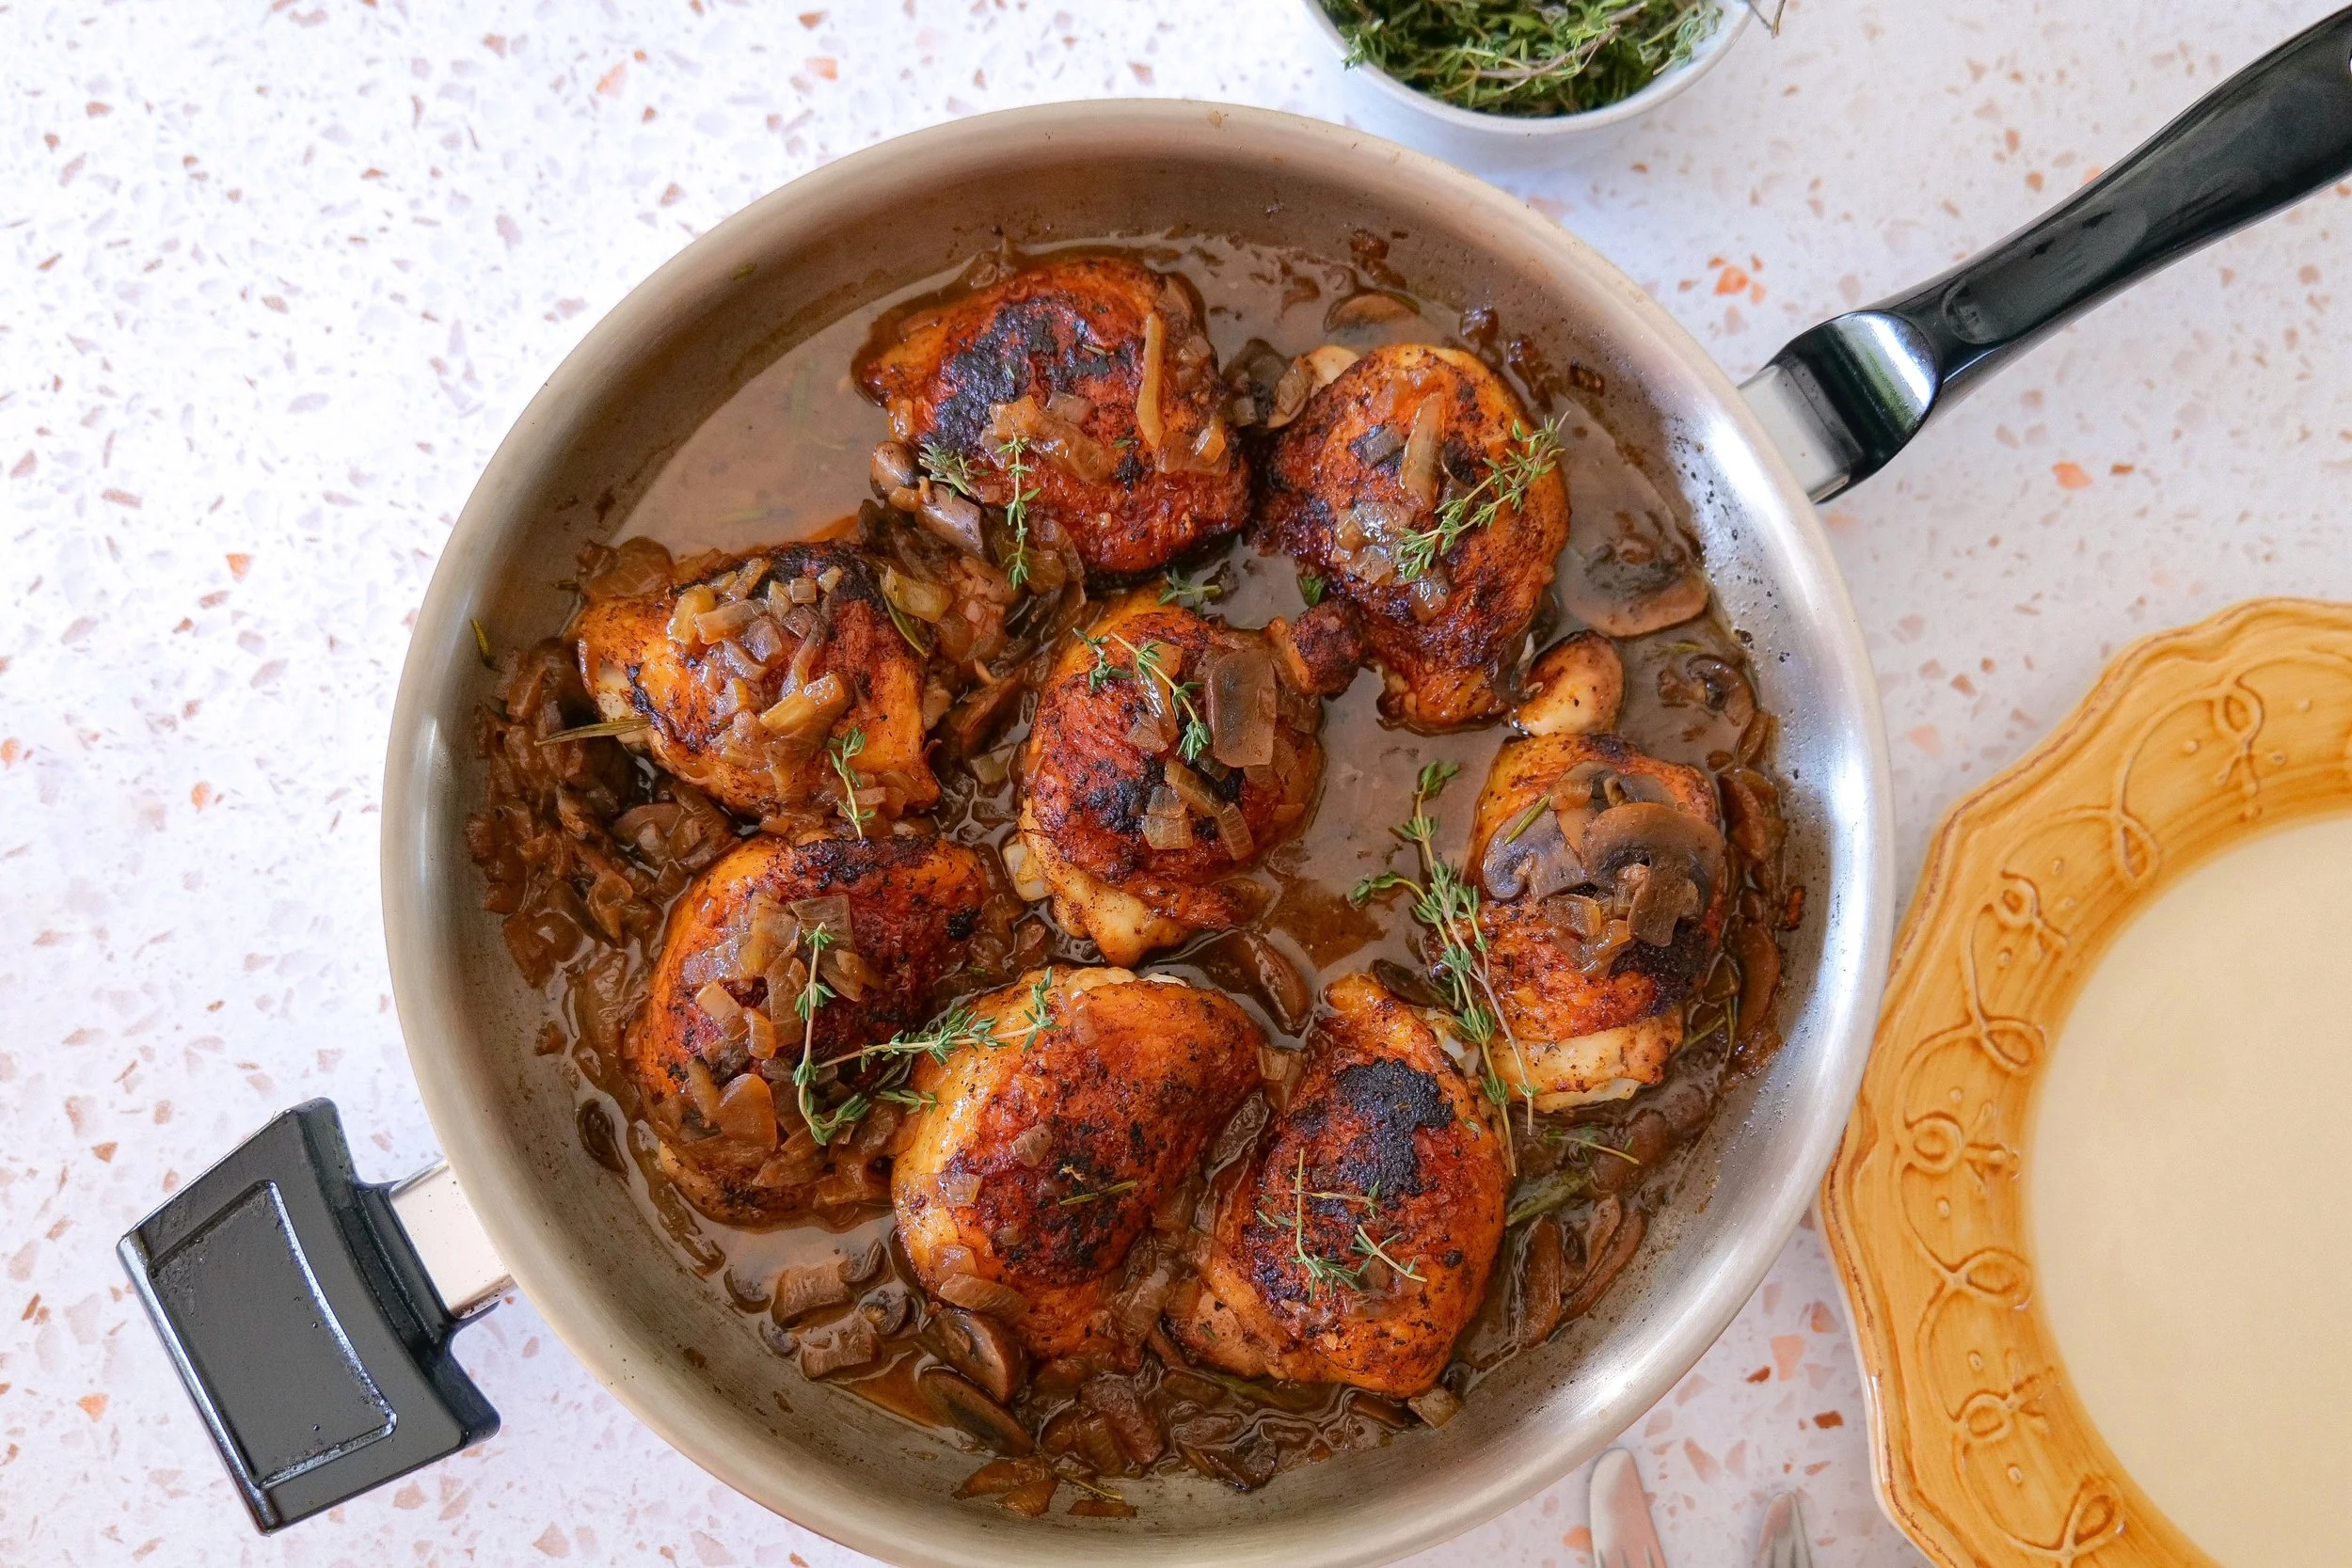
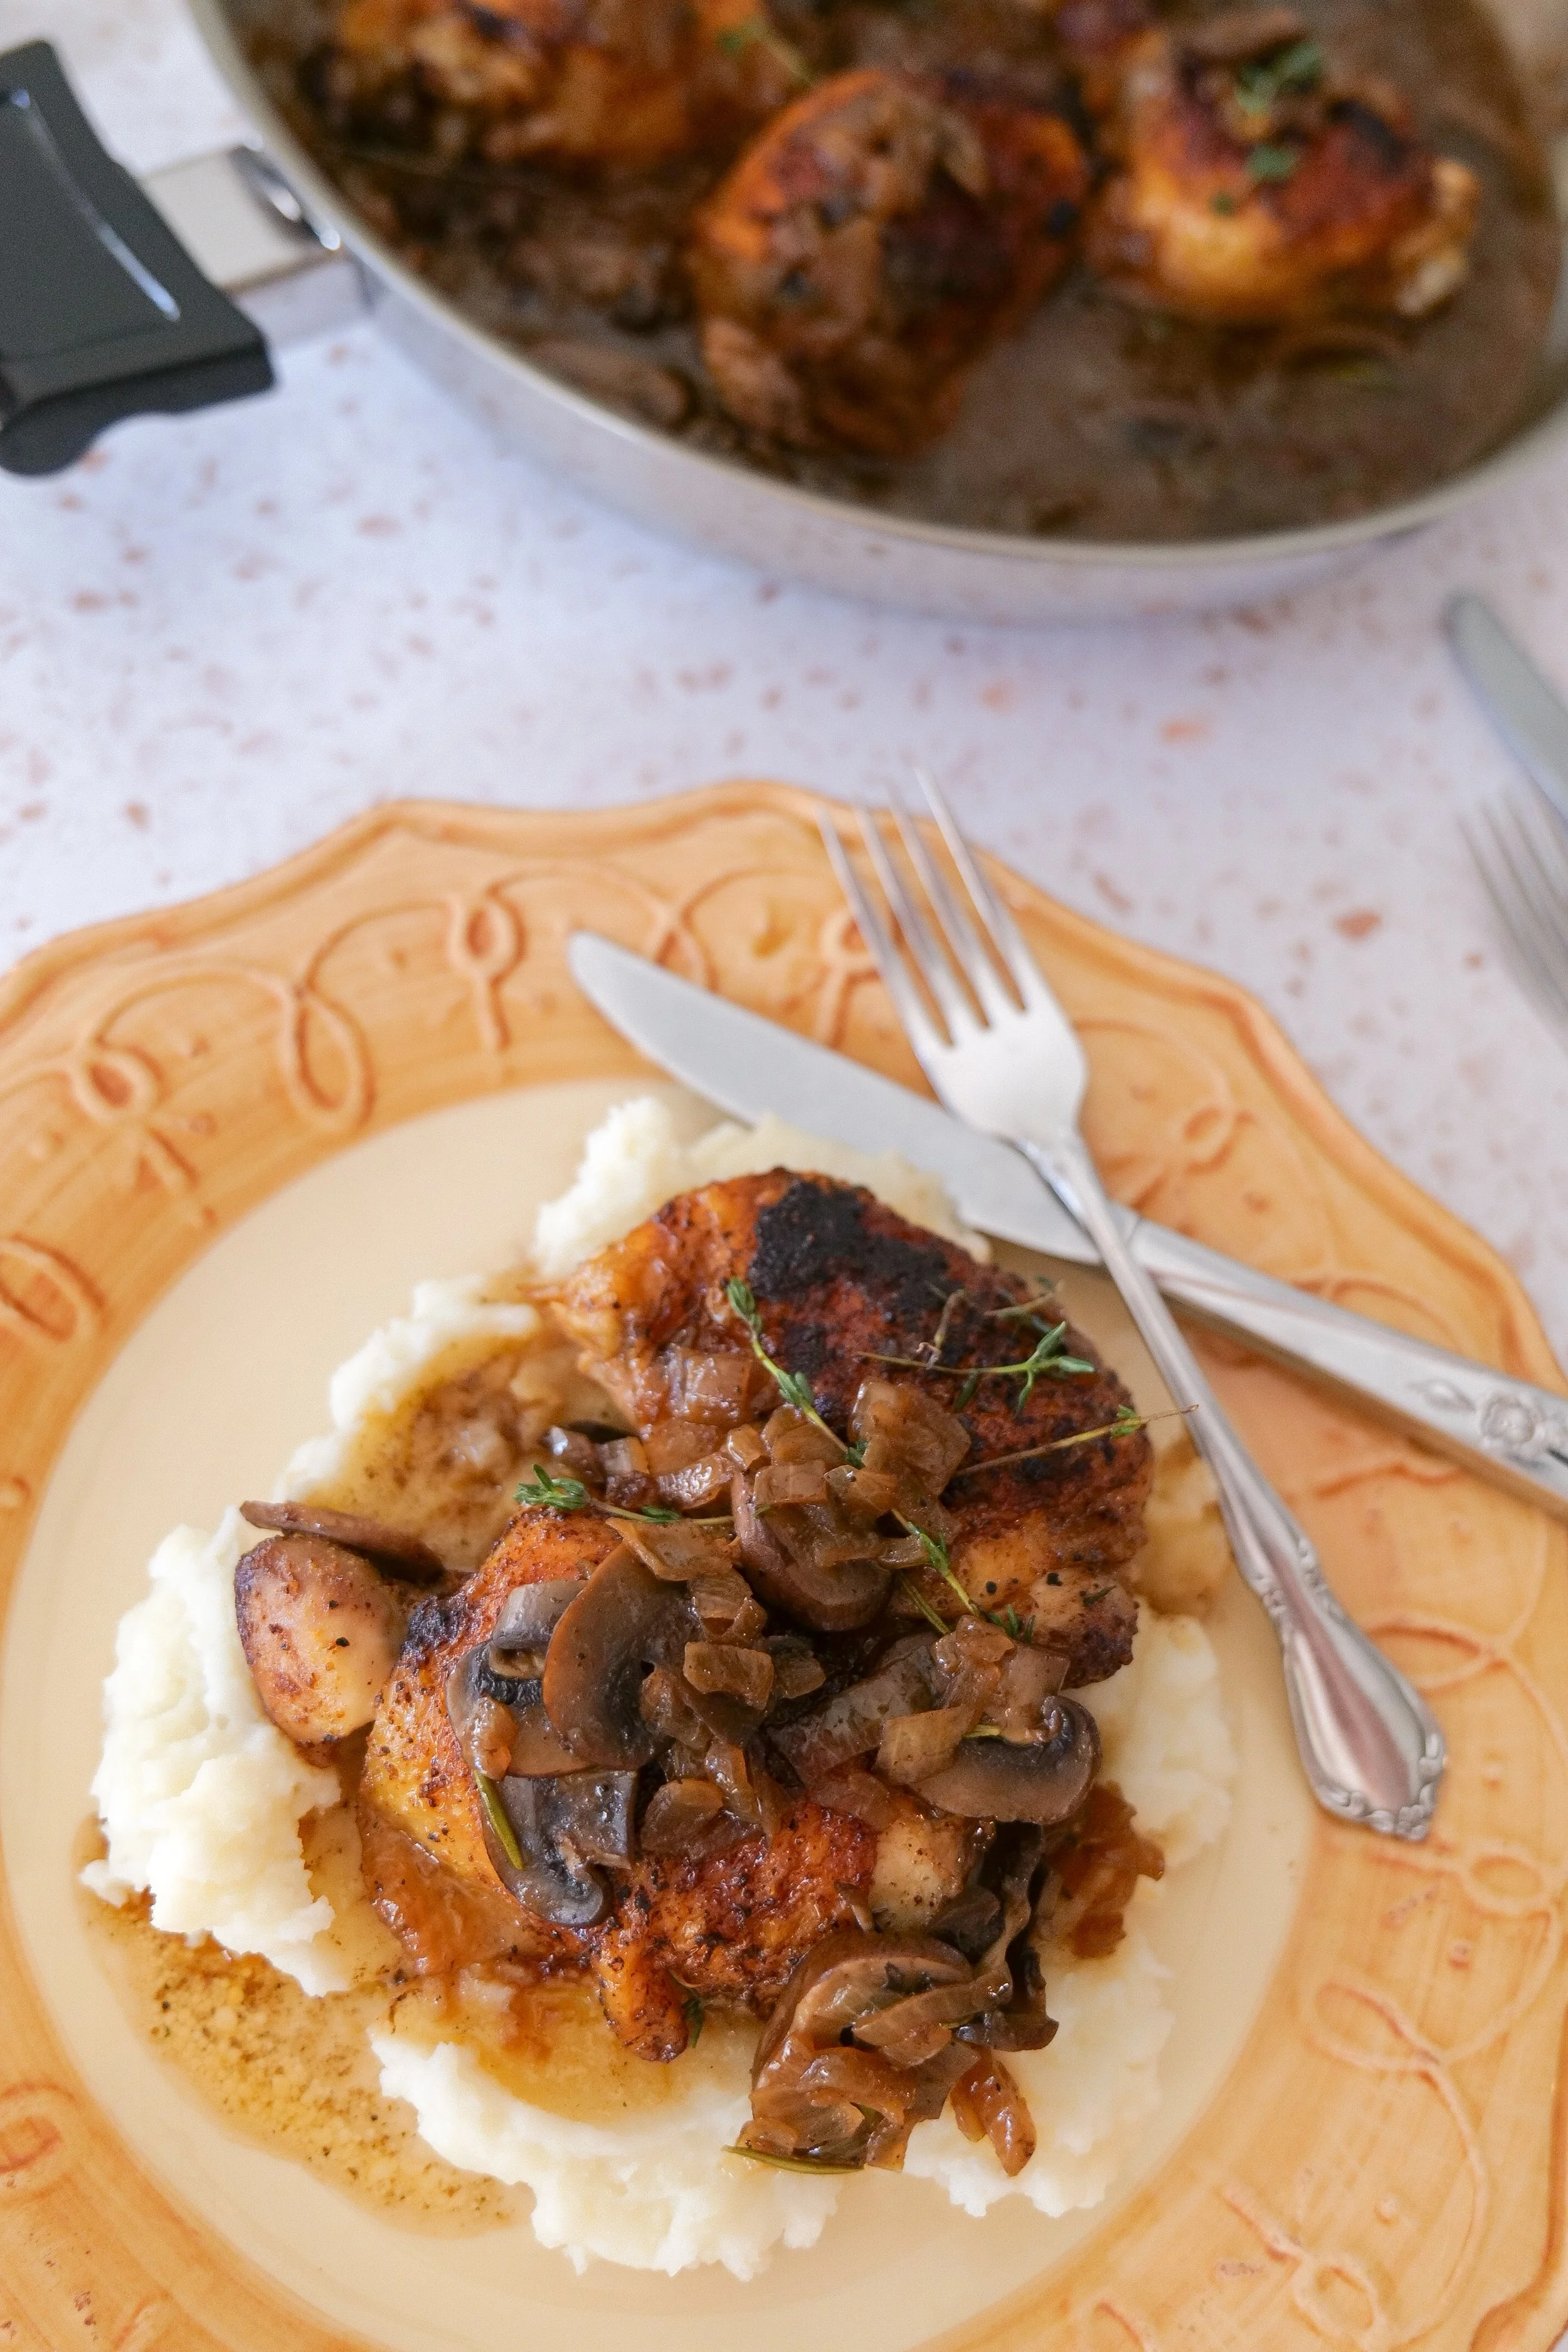
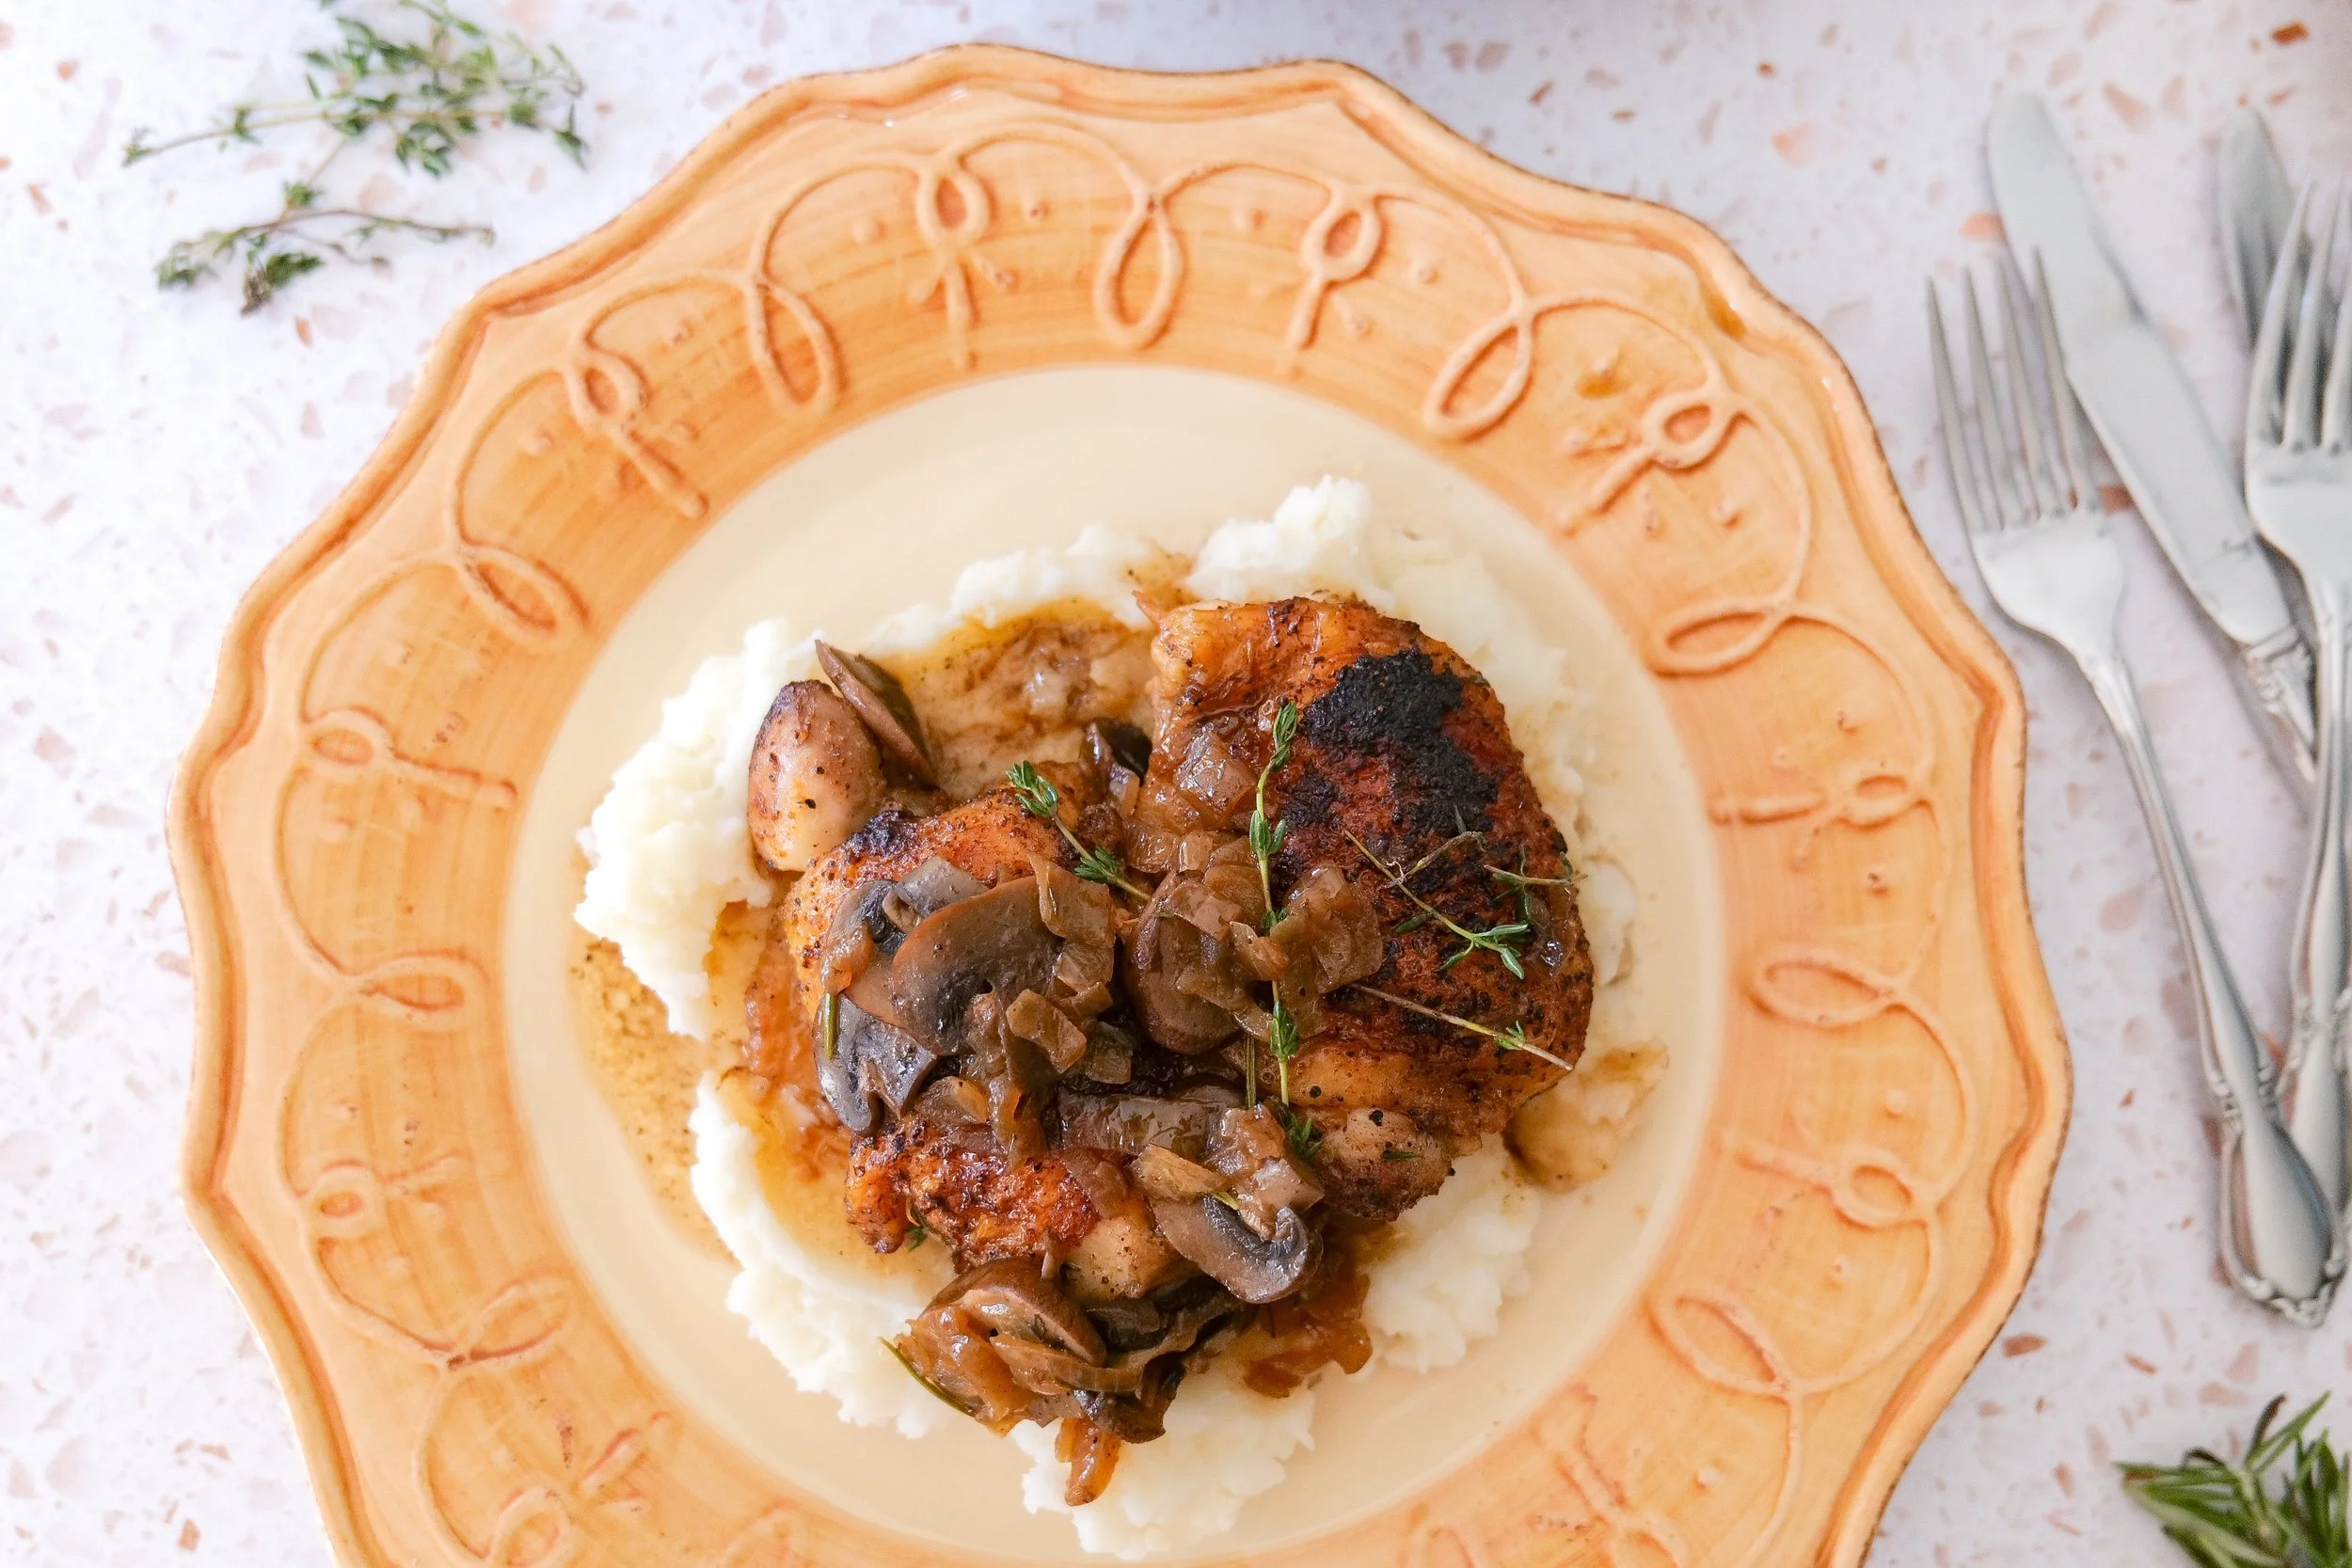
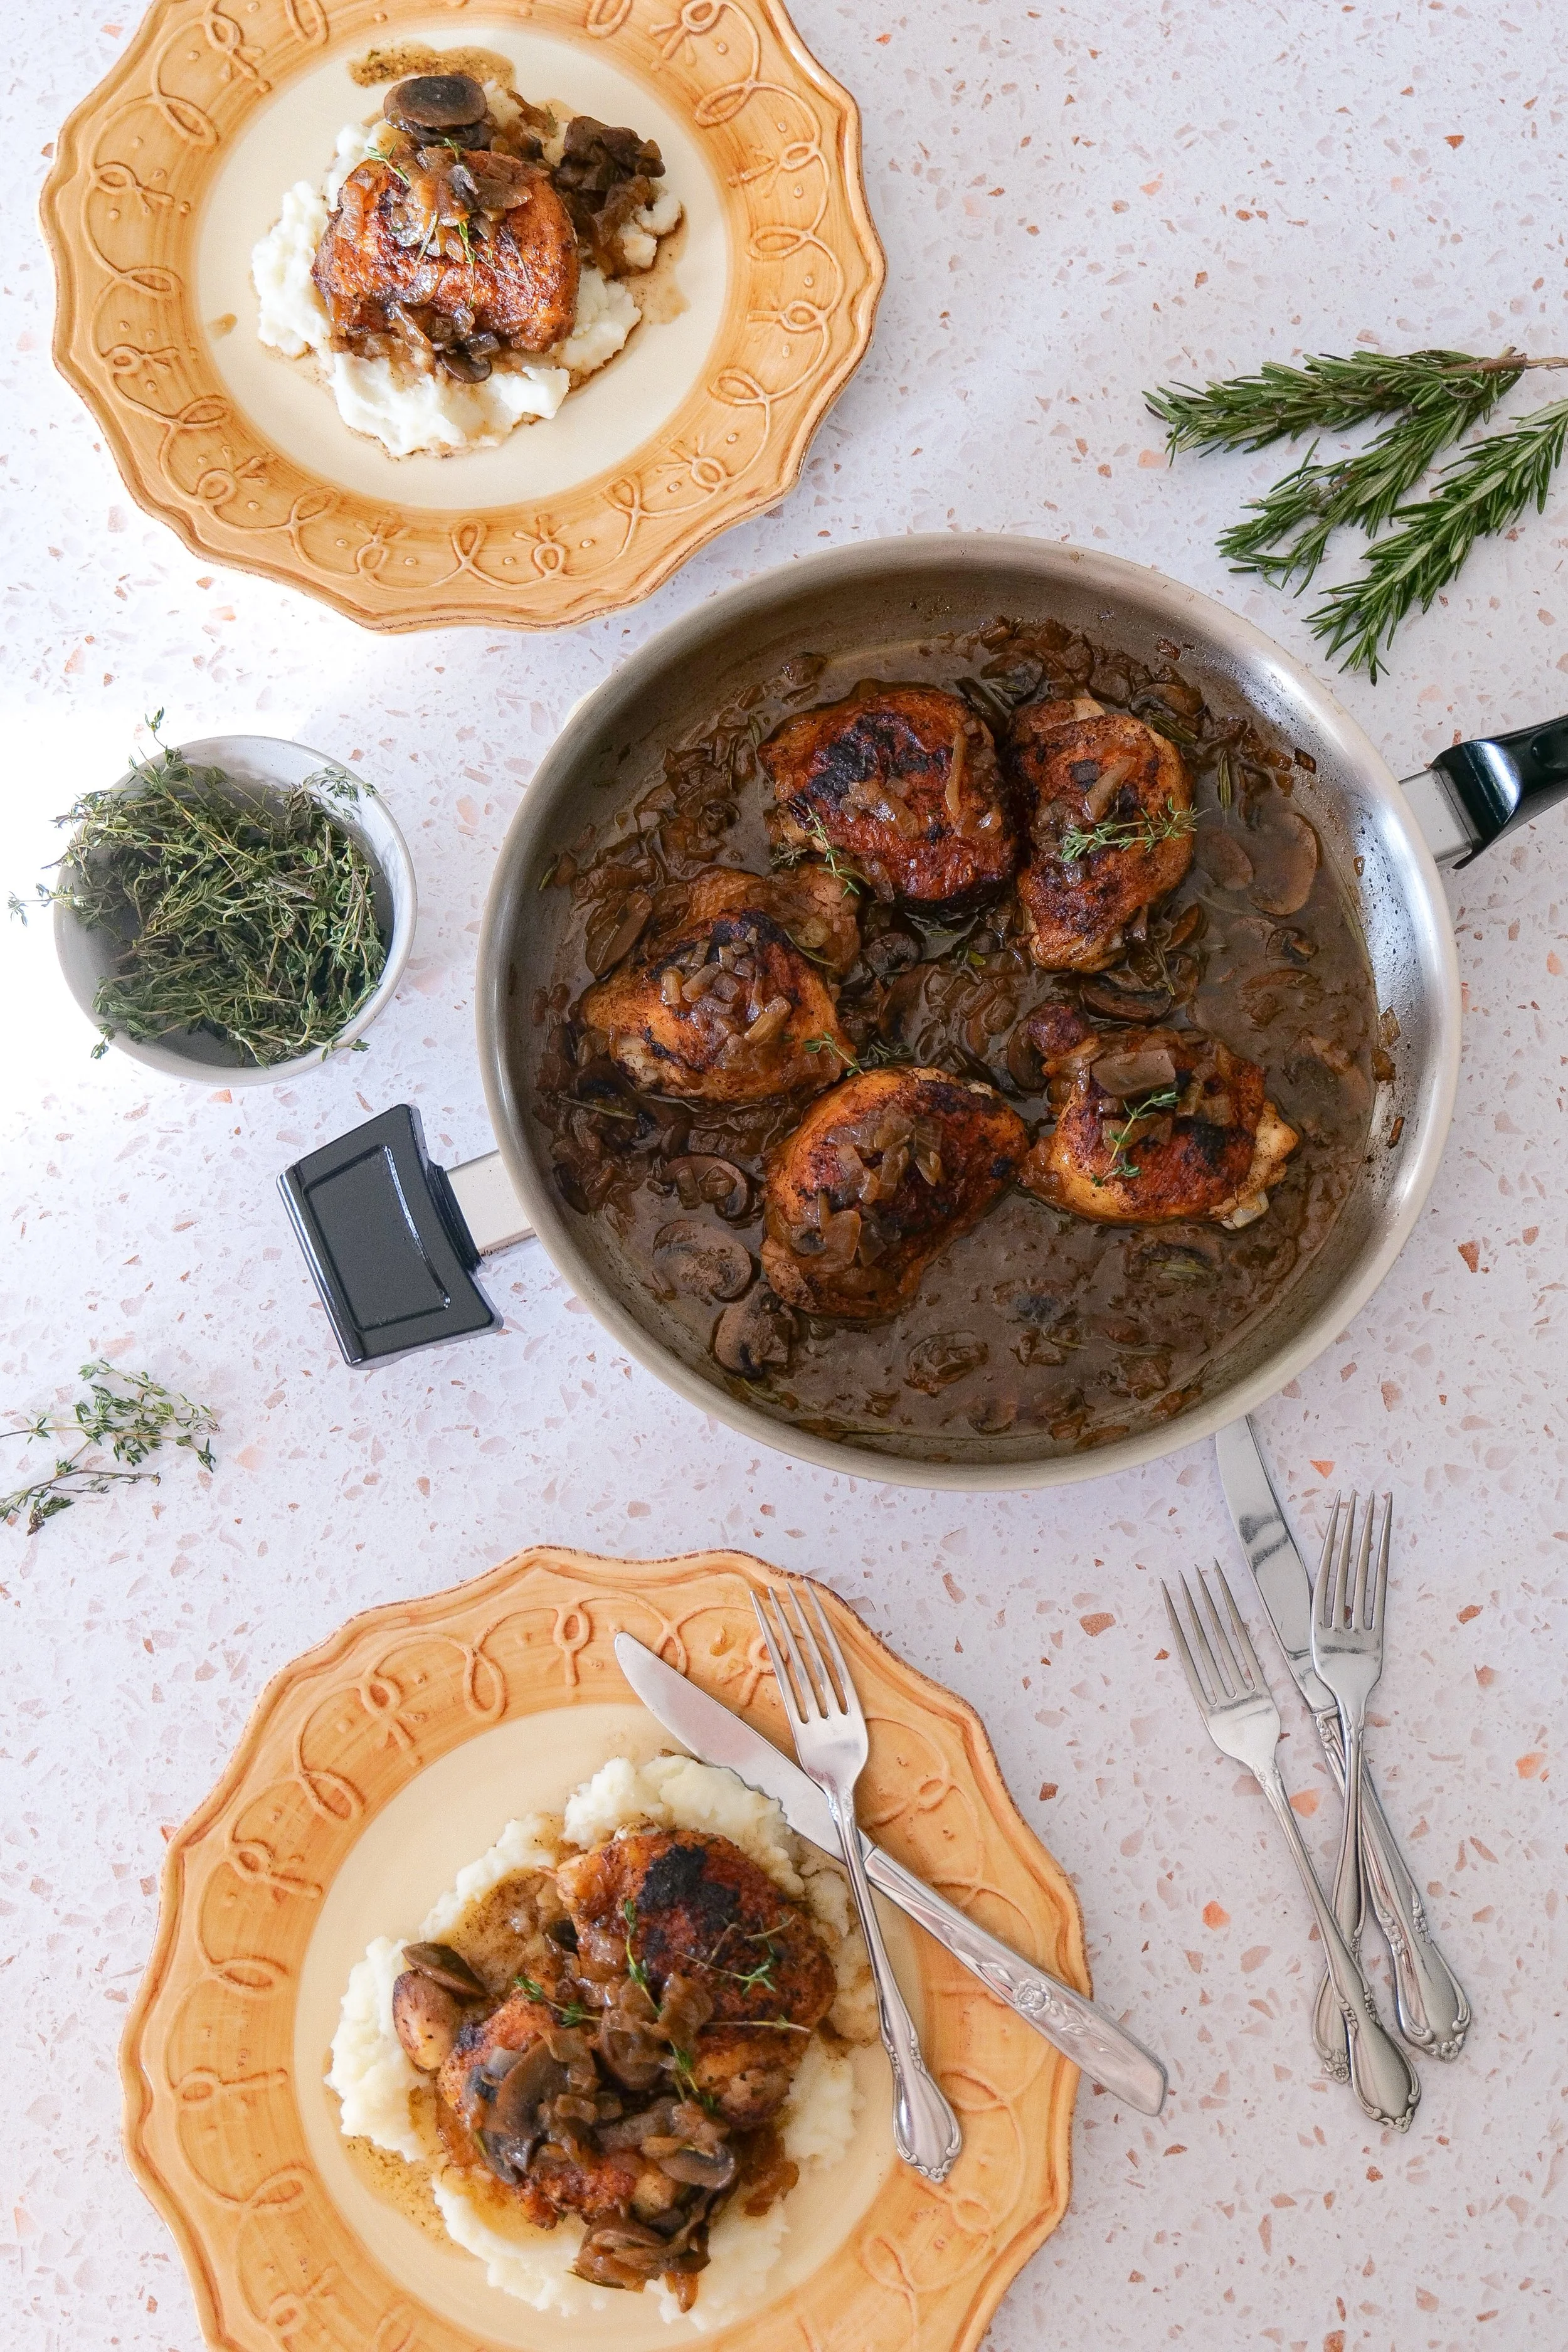
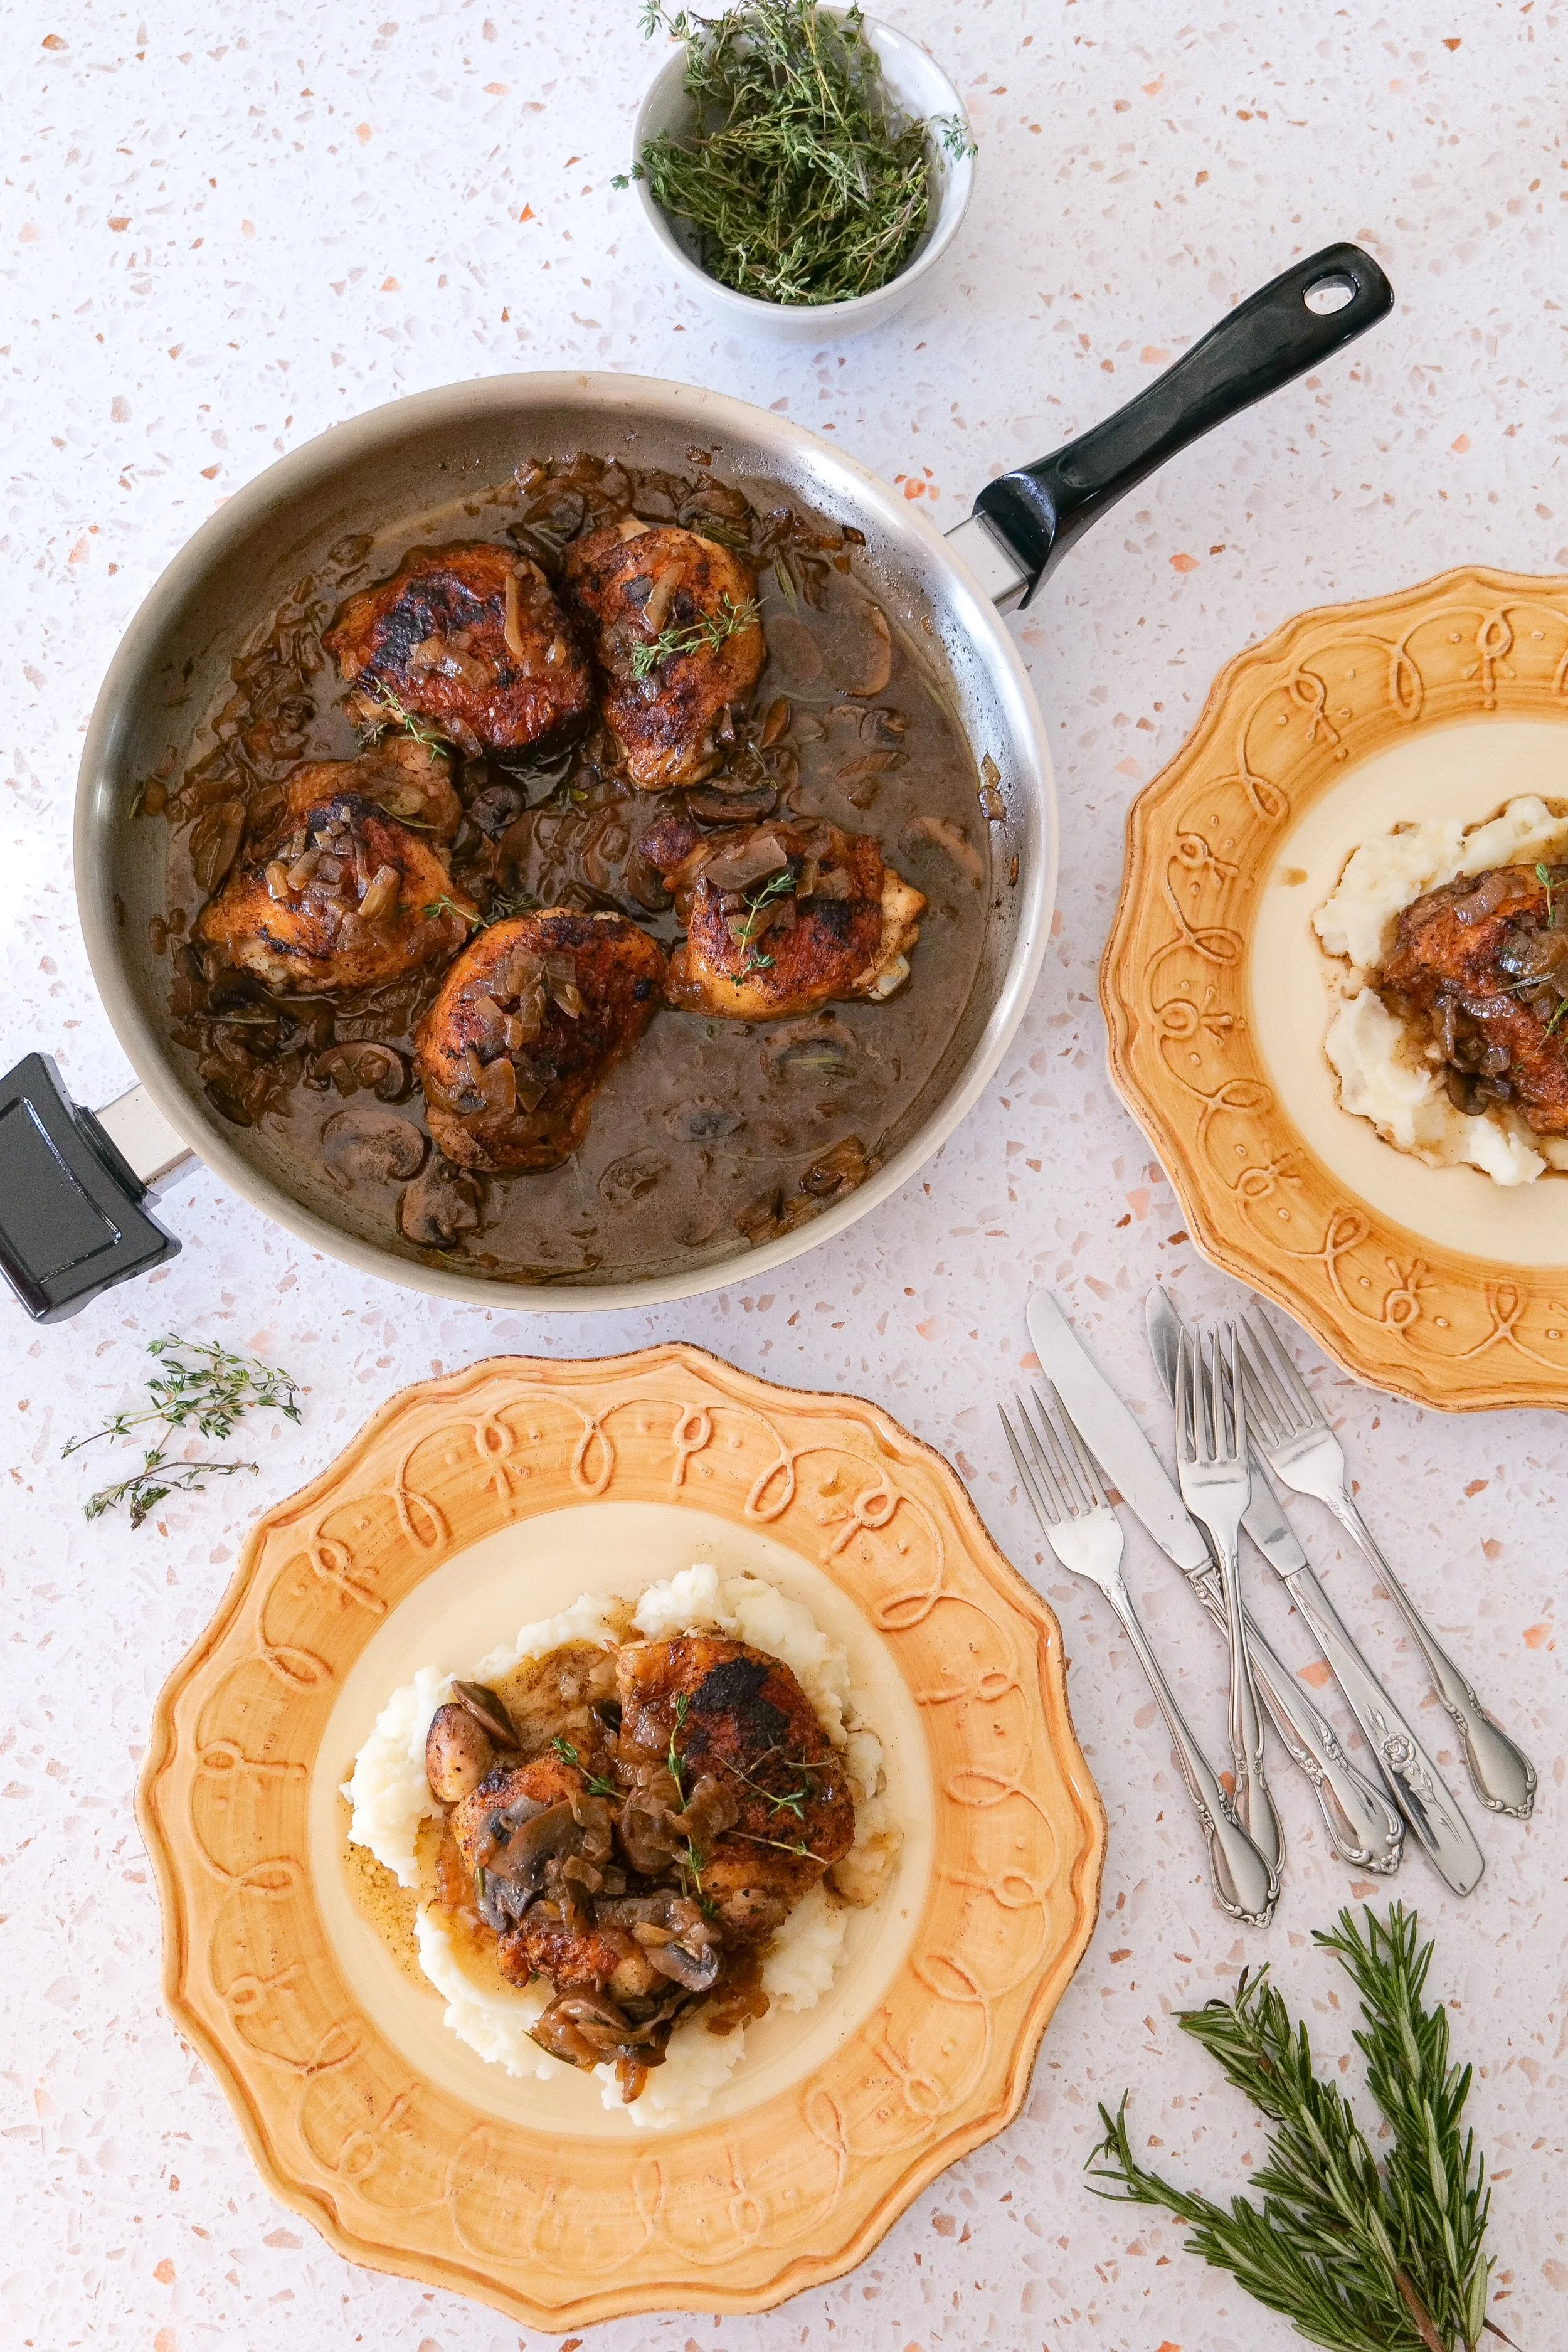
Bone-in chicken thighs with caramelized onions, mushrooms, rosemary and a savory skillet pan sauce.

Why You'll Love This Recipe

This is one of those recipes that takes simple ingredients and turns them into something incredibly comforting.

You'll love it because it's:

  • Made primarily in one skillet

  • Full of rich, savory flavor

  • Made with simple ingredients

  • Perfect for cozy fall and winter dinners

  • Easy enough for a weeknight

  • Beautiful enough to serve when entertaining

  • Delicious with mashed potatoes, rice, or noodles

  • Made with bone-in chicken thighs that stay wonderfully juicy

  • Finished with an easy pan sauce rather than a heavy cream sauce

The combination of crispy chicken, sweet onions, earthy mushrooms, and fresh herbs makes every bite feel much more special than the amount of work involved.

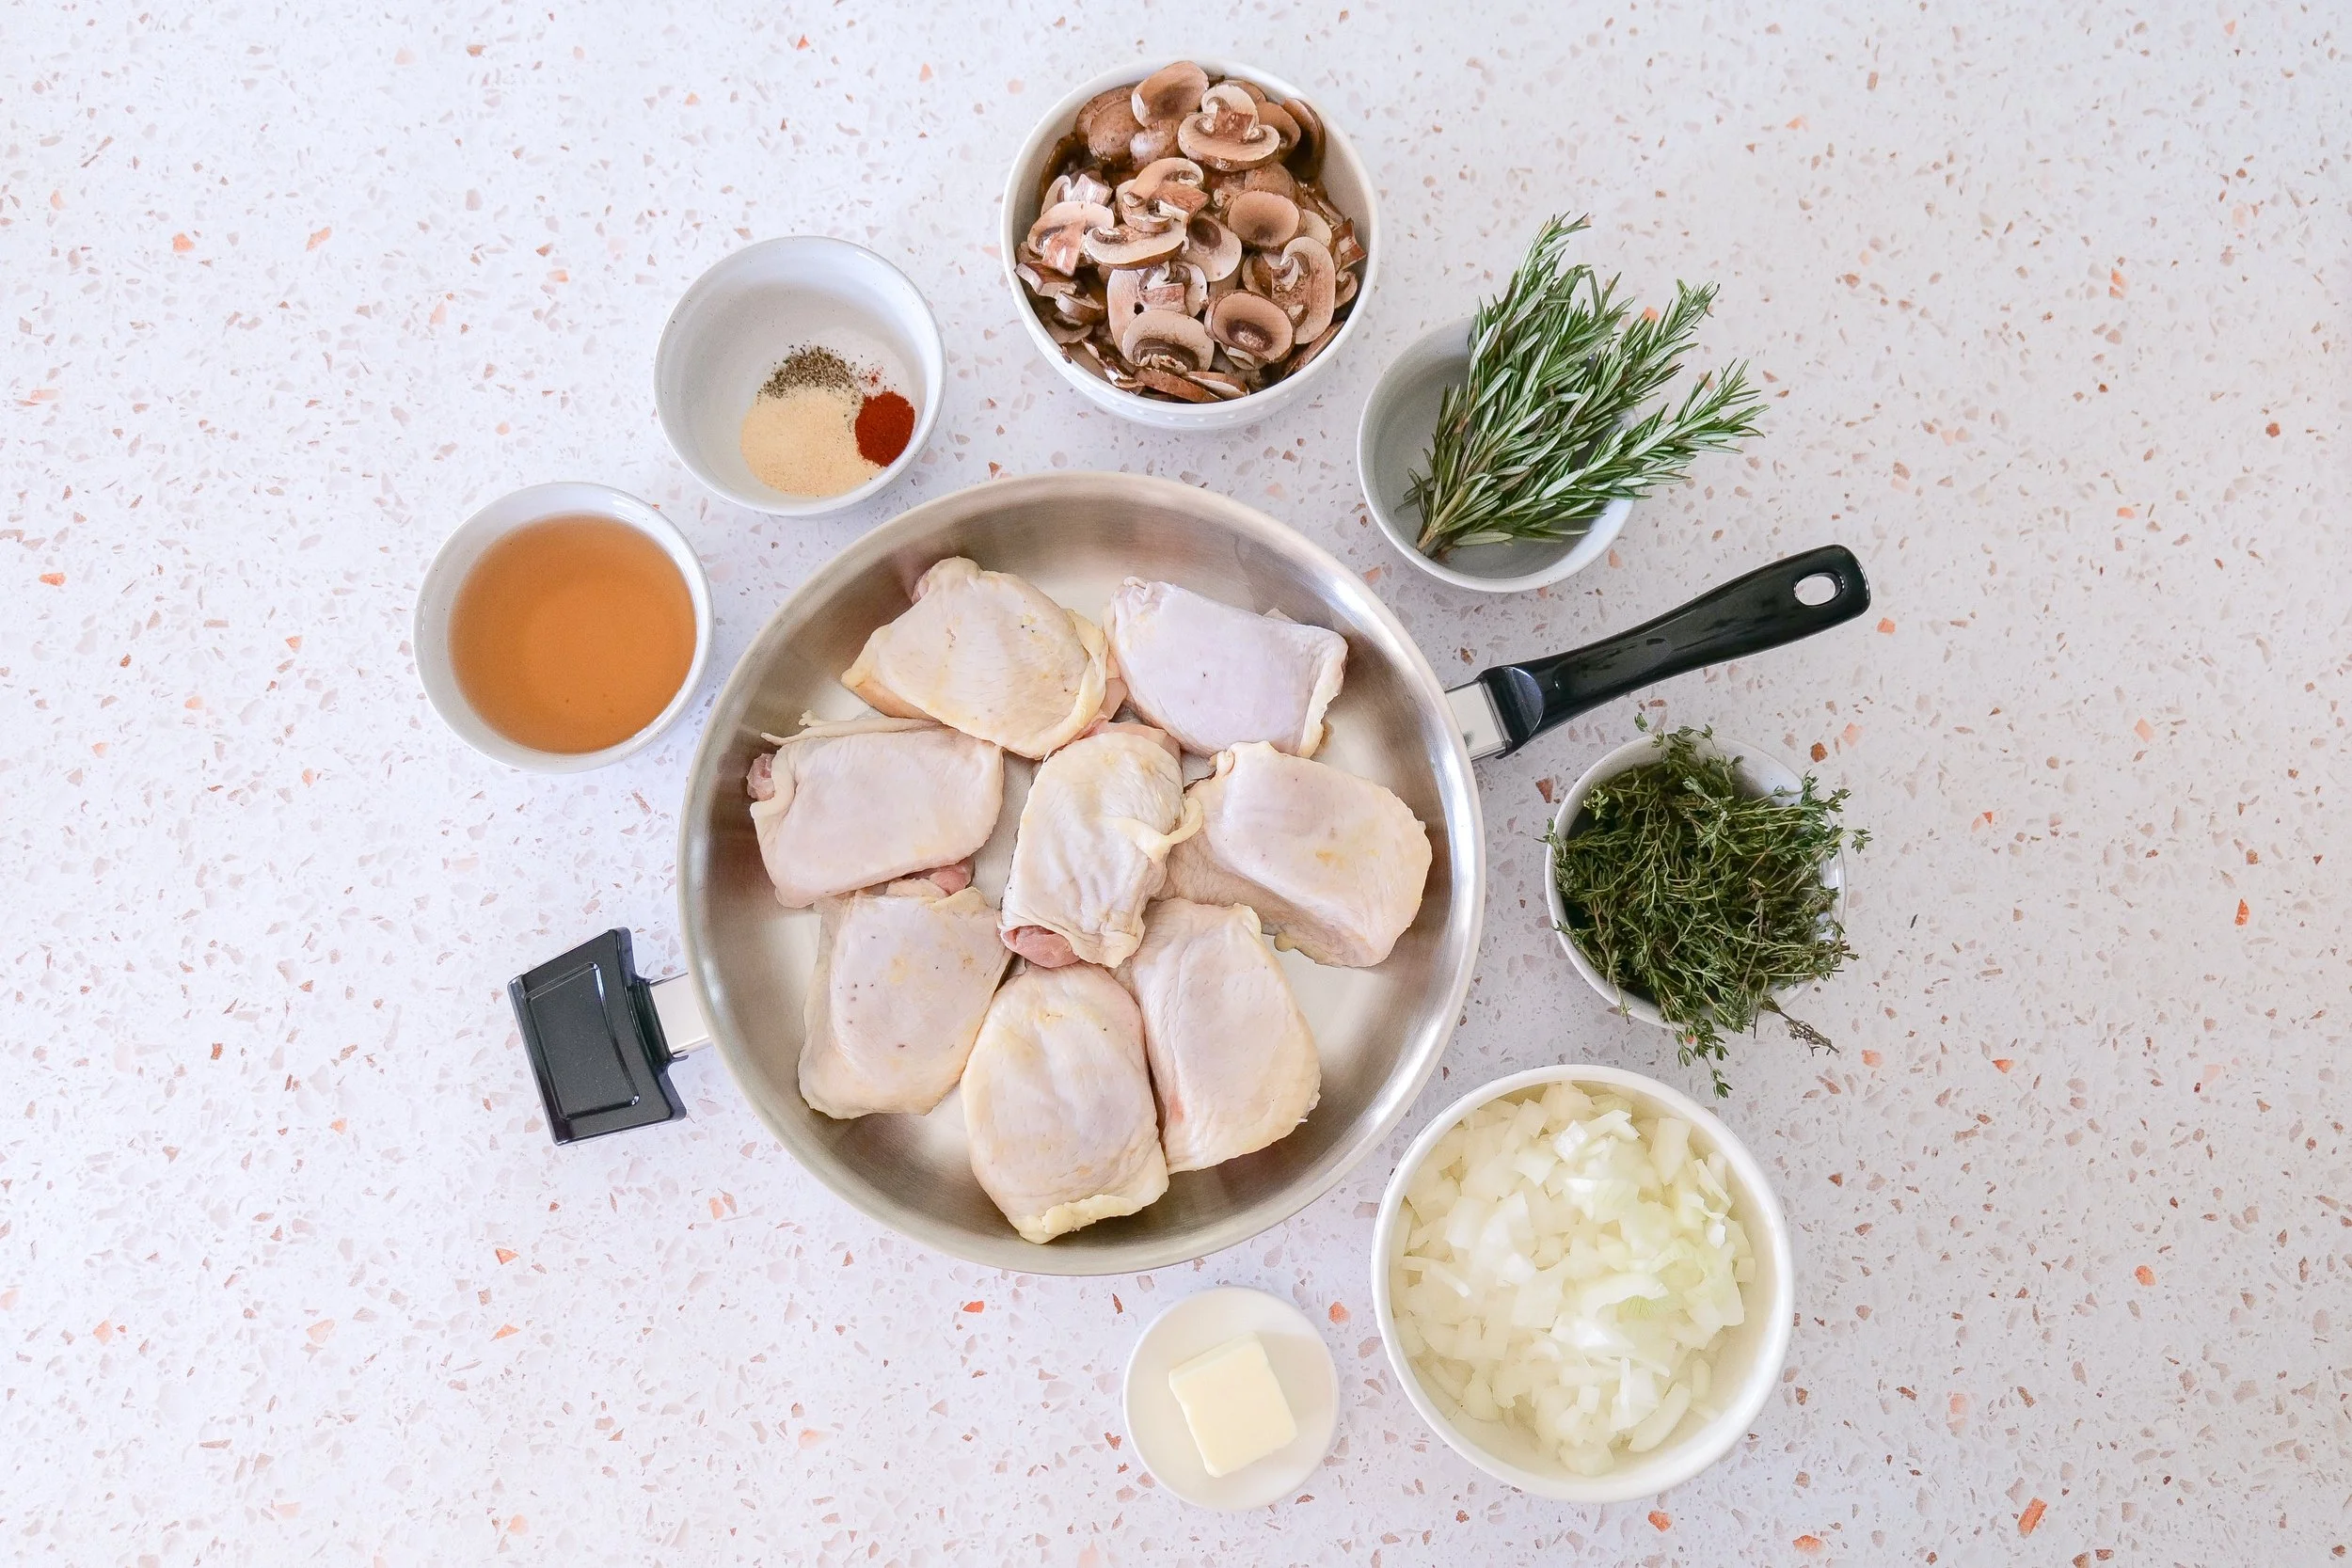
Ingredients for caramelized onion and mushroom chicken thighs with fresh herbs and seasonings.
Golden skillet chicken thighs served with sautéed brown mushrooms and caramelized onions.

Why Chicken Thighs Work So Well

Bone-in, skin-on chicken thighs are perfect for skillet recipes like this because they stay tender and juicy as they cook.

Searing them skin-side down also creates a beautifully crisp exterior while leaving behind flavorful browned bits in the skillet.

Don't clean that pan.

Those little browned pieces are exactly what you want when you begin cooking the onions. As you add the butter, onions, mushrooms, and broth, all of that flavor works its way into the sauce.

Crispy bone-in chicken thighs surrounded by savory mushrooms and onions.

Ingredient Notes

Chicken Thighs

I use bone-in, skin-on chicken thighs for the best flavor and texture. Pat them very dry before seasoning so the skin can become crisp when it hits the hot skillet.

Onion

Use one large onion sliced thinly. Giving the onion enough time to slowly turn golden brings out its natural sweetness and creates much more flavor than simply sautéing it for a few minutes.

Mushrooms

I like brown mushrooms, such as cremini or baby bella mushrooms, because they have a slightly deeper flavor than white button mushrooms.

Butter

Butter helps brown the chicken and gives the onions and mushrooms a rich flavor. The recipe uses 4 tablespoons total, divided between the chicken and vegetables.

Fresh Rosemary & Thyme

Fresh herbs give the pan sauce that cozy, savory flavor that works so beautifully with chicken and mushrooms.

Vegetable Broth

Broth loosens all of the flavorful browned bits from the skillet and creates the simple sauce surrounding the chicken.

Mushroom chicken thighs in a skillet with caramelized onions and fresh herbs.

Kitchen Tools

You don't need many tools for this dinner, which is another reason I love it.

  • Large stainless steel or oven-safe skillet

  • Sharp chef's knife

  • Cutting board

  • Small bowl for seasoning

  • Tongs

  • Wooden spoon

  • Meat thermometer

I've linked some of the pans, knives, utensils, and other everyday pieces I use most often in my Kitchen Essentials shelf.

SHOP MY KITCHEN ESSENTIALS

Caramelized Onion & Mushroom Chicken Thighs Recipe

Prep Time: 15 minutes
Cook Time: Approximately 45 minutes
Total Time: Approximately 1 hour
Servings: 6

Ingredients

  • 6–8 bone-in, skin-on chicken thighs

  • 1 teaspoon sea salt

  • ½ teaspoon freshly ground black pepper

  • 1 teaspoon onion powder

  • 1 teaspoon garlic powder

  • ¼ teaspoon paprika

  • 4 tablespoons salted butter, divided

  • 1 large onion, thinly sliced

  • 8 ounces brown mushrooms, sliced

  • 2 sprigs fresh rosemary

  • 2 sprigs fresh thyme

  • 1 cup vegetable broth

  • 1 teaspoon dried thyme

  • Olive oil, if needed

  • Fresh thyme, for garnish

Instructions

Step 1: Prepare the Chicken

Heat a large skillet over medium-high heat.

While the skillet heats, pat the chicken thighs thoroughly dry with paper towels. Removing as much surface moisture as possible is one of the keys to achieving beautifully crisp skin.

In a small bowl, combine the sea salt, black pepper, onion powder, garlic powder, and paprika.

Season the chicken generously on both sides.

Step 2: Sear the Chicken

Add 2 tablespoons of salted butter to the hot skillet and allow it to melt.

Place the chicken thighs skin-side down in the skillet, being careful not to overcrowd the pan. Work in batches if necessary.

Leave the chicken undisturbed for approximately 5–7 minutes. When the skin has developed a deep golden crust, it should release easily from the skillet.

Flip and sear the second side for another 5–7 minutes.

Transfer the chicken to a plate and loosely cover while you prepare the onions and mushrooms.

The chicken does not need to be completely cooked through at this point.

Step 3: Caramelize the Onion

Reduce the heat to medium-low and add the remaining 2 tablespoons of butter to the same skillet.

Use a wooden spoon to gently loosen the flavorful browned bits left behind from the chicken.

Add the thinly sliced onion.

Cook for approximately 15 minutes, stirring regularly, until the onion becomes soft, golden, and caramelized.

If the skillet begins to look dry, add a small drizzle of olive oil.

Step 4: Add the Mushrooms & Herbs

Add the sliced mushrooms, rosemary sprigs, fresh thyme sprigs, and dried thyme.

Cook until the mushrooms soften and begin to brown, approximately 5–7 minutes.

Step 5: Make the Pan Sauce

Pour in the vegetable broth.

Use your wooden spoon to scrape the bottom of the skillet so all of those flavorful browned bits become part of the sauce.

Bring the mixture to a gentle simmer and cook for approximately 5 minutes.

Step 6: Finish the Chicken

Return the chicken thighs to the skillet, nestling them into the onions and mushrooms while keeping as much of the crispy skin above the liquid as possible.

Continue cooking gently until the thickest part of each chicken thigh reaches a safe internal temperature of 165°F.

Depending on the size of your chicken thighs and how far they cooked during searing, this will generally take another 10–15 minutes.

Spoon some of the sauce over the chicken as it cooks, avoiding the crispy skin when possible.

Step 7: Serve

Remove the rosemary and thyme stems.

Taste the sauce and adjust the salt and pepper if needed.

Serve the chicken warm with plenty of caramelized onions, mushrooms, and pan sauce spooned around it.

Finish with fresh thyme if desired.

Enjoy!

Amanda's Quick Tips

  • Pat the chicken completely dry before seasoning.

  • Don't move the chicken while the skin is searing.

  • If it sticks to the skillet, give it another minute before trying to flip it.

  • Don't rush the onions; their slow caramelization is where so much of the flavor develops.

  • Cook mushrooms until their moisture has released and they begin to brown.

  • Keep the crispy chicken skin mostly above the sauce.

  • Always use the internal temperature rather than cooking time alone to determine when chicken is done.

Savory skillet chicken thighs with golden skin, mushrooms and onions.

How to Get Crispy Chicken Thigh Skin

The difference between good skillet chicken and really good skillet chicken often comes down to the skin.

First, make sure your chicken is dry. Moisture creates steam, which works against browning.

Next, make sure the skillet is hot before adding the chicken.

Once the chicken goes into the pan, resist the temptation to move it around. Let it develop a crust.

One of my favorite tricks when cooking with stainless steel is simply waiting. If your chicken is firmly stuck to the skillet when you try to flip it, it often hasn't developed its crust yet. Give it another minute and try again.

Finally, when the chicken returns to the sauce, keep the skin above the liquid as much as possible so you don't lose all of that beautiful texture you just created.

Juicy chicken thighs topped with sweet caramelized onions and sautéed mushrooms.

How to Caramelize Onions for Chicken

Caramelized onions aren't difficult, but they do require a little patience.

Keep the heat around medium-low and allow the onions to cook gradually rather than trying to brown them quickly over high heat.

Stir them regularly so they cook evenly and pick up the browned bits from the chicken.

You'll know they're ready when they're soft, deeply golden, and noticeably sweeter than when they went into the pan.

Those 15 minutes make a huge difference in the finished dish, so this is one step I wouldn't rush.

One-pan mushroom chicken thighs served in a savory herb pan sauce.

Amanda's Tips

Don't Overcrowd the Skillet

If your chicken thighs don't comfortably fit without touching, sear them in batches. Overcrowding lowers the temperature of the pan and can cause the chicken to steam instead of brown.

Give the Mushrooms Time to Brown

Just like the chicken, mushrooms develop more flavor when they're given time to brown.

Use a Meat Thermometer

Chicken thighs vary considerably in size, which makes an internal temperature much more reliable than an exact cooking time.

Taste Your Sauce at the End

The chicken, butter, and broth all contribute salt to the final sauce. Wait until everything has cooked together before deciding whether it needs more seasoning.

Can I Use Boneless Chicken Thighs?

Yes.

Boneless, skinless chicken thighs can be used, but they'll cook more quickly and you won't get the same crispy-skin element.

Sear them until browned and begin checking their internal temperature earlier when you return them to the skillet.

If you have the choice, I prefer bone-in, skin-on thighs for this particular recipe because their richness works beautifully with the caramelized onions and mushrooms.

Easy Variations

Creamy Mushroom Chicken

After the chicken is fully cooked, remove it briefly and stir a splash of heavy cream into the sauce. Simmer gently until slightly thickened, then return the chicken to the skillet.

Garlic Mushroom Chicken

Add 2–3 cloves of minced garlic during the final minute of cooking the mushrooms.

White Wine Mushroom Chicken

Replace part of the broth with a dry white wine. Allow the wine to simmer for a few minutes before adding the remaining broth.

Extra Herb Chicken

Add additional rosemary and thyme for a more pronounced herb flavor.

Parmesan Mushroom Chicken

Finish the mushrooms and onions with freshly grated Parmesan just before serving.

What to Serve with Caramelized Onion & Mushroom Chicken

The sauce is one of the best parts of this recipe, so I especially love sides that can soak it up.

Try serving it with:

  • Creamy mashed potatoes

  • Buttered egg noodles

  • Steamed rice

  • Roasted potatoes

  • Creamy polenta

  • Crusty bread

  • Roasted asparagus

  • Green beans

  • Roasted broccoli

  • Simple arugula salad

  • Mixed greens with lemon vinaigrette

For a particularly cozy dinner, mashed potatoes and a simple green vegetable would be my first choice.

Easy skillet mushroom chicken dinner made with bone-in chicken thighs and caramelized onions.

Make Ahead Tips

You can slice the onions and mushrooms and mix the seasoning blend earlier in the day to make dinner prep faster.

I prefer cooking the chicken fresh so the skin stays as crisp as possible.

If you're making the entire meal ahead, store the chicken and sauce together and use the reheating method below.

How to Store Leftovers

Allow leftovers to cool before transferring them to an airtight container.

Store in the refrigerator for up to 3–4 days.

For longer storage, the cooked chicken and sauce can be frozen in an airtight freezer-safe container for up to 3 months.

Keep in mind that mushrooms may have a slightly softer texture after freezing and reheating.

How to Reheat Chicken Thighs

For the best texture, place the chicken and sauce in an oven-safe dish, cover loosely with foil, and warm in a 350°F oven until heated through.

You can remove the foil toward the end of reheating to help the chicken skin regain some of its texture.

Individual portions can also be reheated gently on the stovetop.

Frequently Asked Questions

What mushrooms are best with chicken thighs?

Cremini or baby bella mushrooms are my first choice because their deeper, earthy flavor works particularly well with caramelized onions and chicken.

Can I use white mushrooms?

Absolutely. White button mushrooms will also work.

Can I use chicken breasts?

You can, although you'll need to adjust the cooking time carefully because chicken breasts are leaner and can dry out more easily.

Do I have to use bone-in chicken thighs?

No. Boneless thighs work, but bone-in, skin-on chicken thighs give this recipe its best flavor and texture.

How do I know when chicken thighs are done?

Use an instant-read thermometer inserted into the thickest portion of the chicken without touching the bone. Chicken is safe once it reaches 165°F.

Why is my chicken skin not crispy?

The most common causes are excess moisture on the chicken, a skillet that wasn't hot enough, overcrowding, or moving the chicken before a crust had time to form.

How long does it take to caramelize the onions?

For this recipe, plan on approximately 15 minutes. We're looking for soft, deeply golden onions rather than the much darker onions used in something like French onion soup.

Can I make this dairy-free?

Yes. Replace the butter with your preferred cooking oil or dairy-free butter.

Can I make the sauce creamy?

Yes. A splash of heavy cream added at the end creates a delicious creamy mushroom sauce.

What should I serve with mushroom chicken thighs?

Mashed potatoes, rice, noodles, polenta, or crusty bread are especially good because they soak up the pan sauce.

Golden chicken thighs with caramelized onions, brown mushrooms, rosemary, and thyme in a savory skillet sauce.

More Cozy Dinner Recipes You'll Love

If you enjoyed these Caramelized Onion & Mushroom Chicken Thighs, you may also enjoy these comforting recipes from Amanda's Kitchen:

Easy Skillet Chicken Pot Pie with Biscuits

A cozy one-pan chicken dinner topped with golden, flaky biscuits.

Apple-Glazed Chicken Thighs

Another simple chicken thigh dinner with a sweet and savory seasonal glaze.

Creamy Chicken & Mushroom Couscous Soup

Perfect if you love the chicken and mushroom combination in this recipe.

Italian Penicillin Soup

A warm, comforting soup that's perfect for cooler evenings.

Italian Lasagna Soup

All of the cozy flavors of lasagna in an easy soup.

Slow Cooker Pulled Pork

An easy make-ahead dinner that's perfect for busy weeks and feeding a crowd.

Shop My Kitchen Favorites

I've gathered the cookware, knives, serving pieces, and everyday kitchen essentials I reach for when making recipes like this in my Kitchen Essentials shelf.

SHOP MY KITCHEN ESSENTIALS

Save This Recipe

Whether you're looking for a cozy weeknight dinner or something a little special to make for family and friends, save these Caramelized Onion & Mushroom Chicken Thighs for the next time you're craving a warm, savory skillet dinner.

I've included my printable From Amanda's Kitchen recipe card below so you can save it, print it, and come back to the recipe whenever you need it.

Printable recipe card for caramelized onion and mushroom chicken thighs from Amanda's Kitchen.

A Note From Amanda

Some of my favorite dinners are the ones that turn simple ingredients into something that feels a little more special.

Chicken, onions, and mushrooms aren't complicated ingredients, but giving each one the time to develop its flavor completely changes the finished dish. The crispy chicken, sweet onions, earthy mushrooms, and warm herbs make this one of those meals that feels comforting from the moment it starts cooking.

I hope this becomes one of those recipes you pull out on cool evenings when you want something warm on the table and everyone gathered around it.

"Taste and see that the Lord is good."
Psalm 34:8

Made with love for the people you love.

Brown Butter Chocolate Drizzle Shortbread Cookies

Brown Butter Chocolate Drizzle Shortbread Cookies

An Easy Christmas Shortbread Cookie

There are certain recipes that instantly make the kitchen feel like Christmas, and these Brown Butter Chocolate Drizzle Shortbread Cookies are one of them.

Classic shortbread is already one of my favorite cookies to make during the holidays because it's simple, buttery, and perfect for cutting into festive shapes. Browning the butter first takes these cookies somewhere completely different. It gives them a warm, nutty flavor that makes such a simple cookie taste incredibly special.

Once baked, I drizzle each shortbread cookie with melted milk chocolate and finish it with a sprinkle of sparkling cane sugar. I love cutting mine into Christmas trees, but you can use this dough with your favorite holiday cookie cutters and make them your own.

They're beautiful enough to set out at a Christmas party or package up as a homemade gift, but they're also the kind of cookie I love having in the kitchen throughout December with a cup of coffee.

If you're looking for an easy Christmas cookie that's a little different from traditional sugar cookies, these brown butter shortbread cookies deserve a place on your holiday baking list.

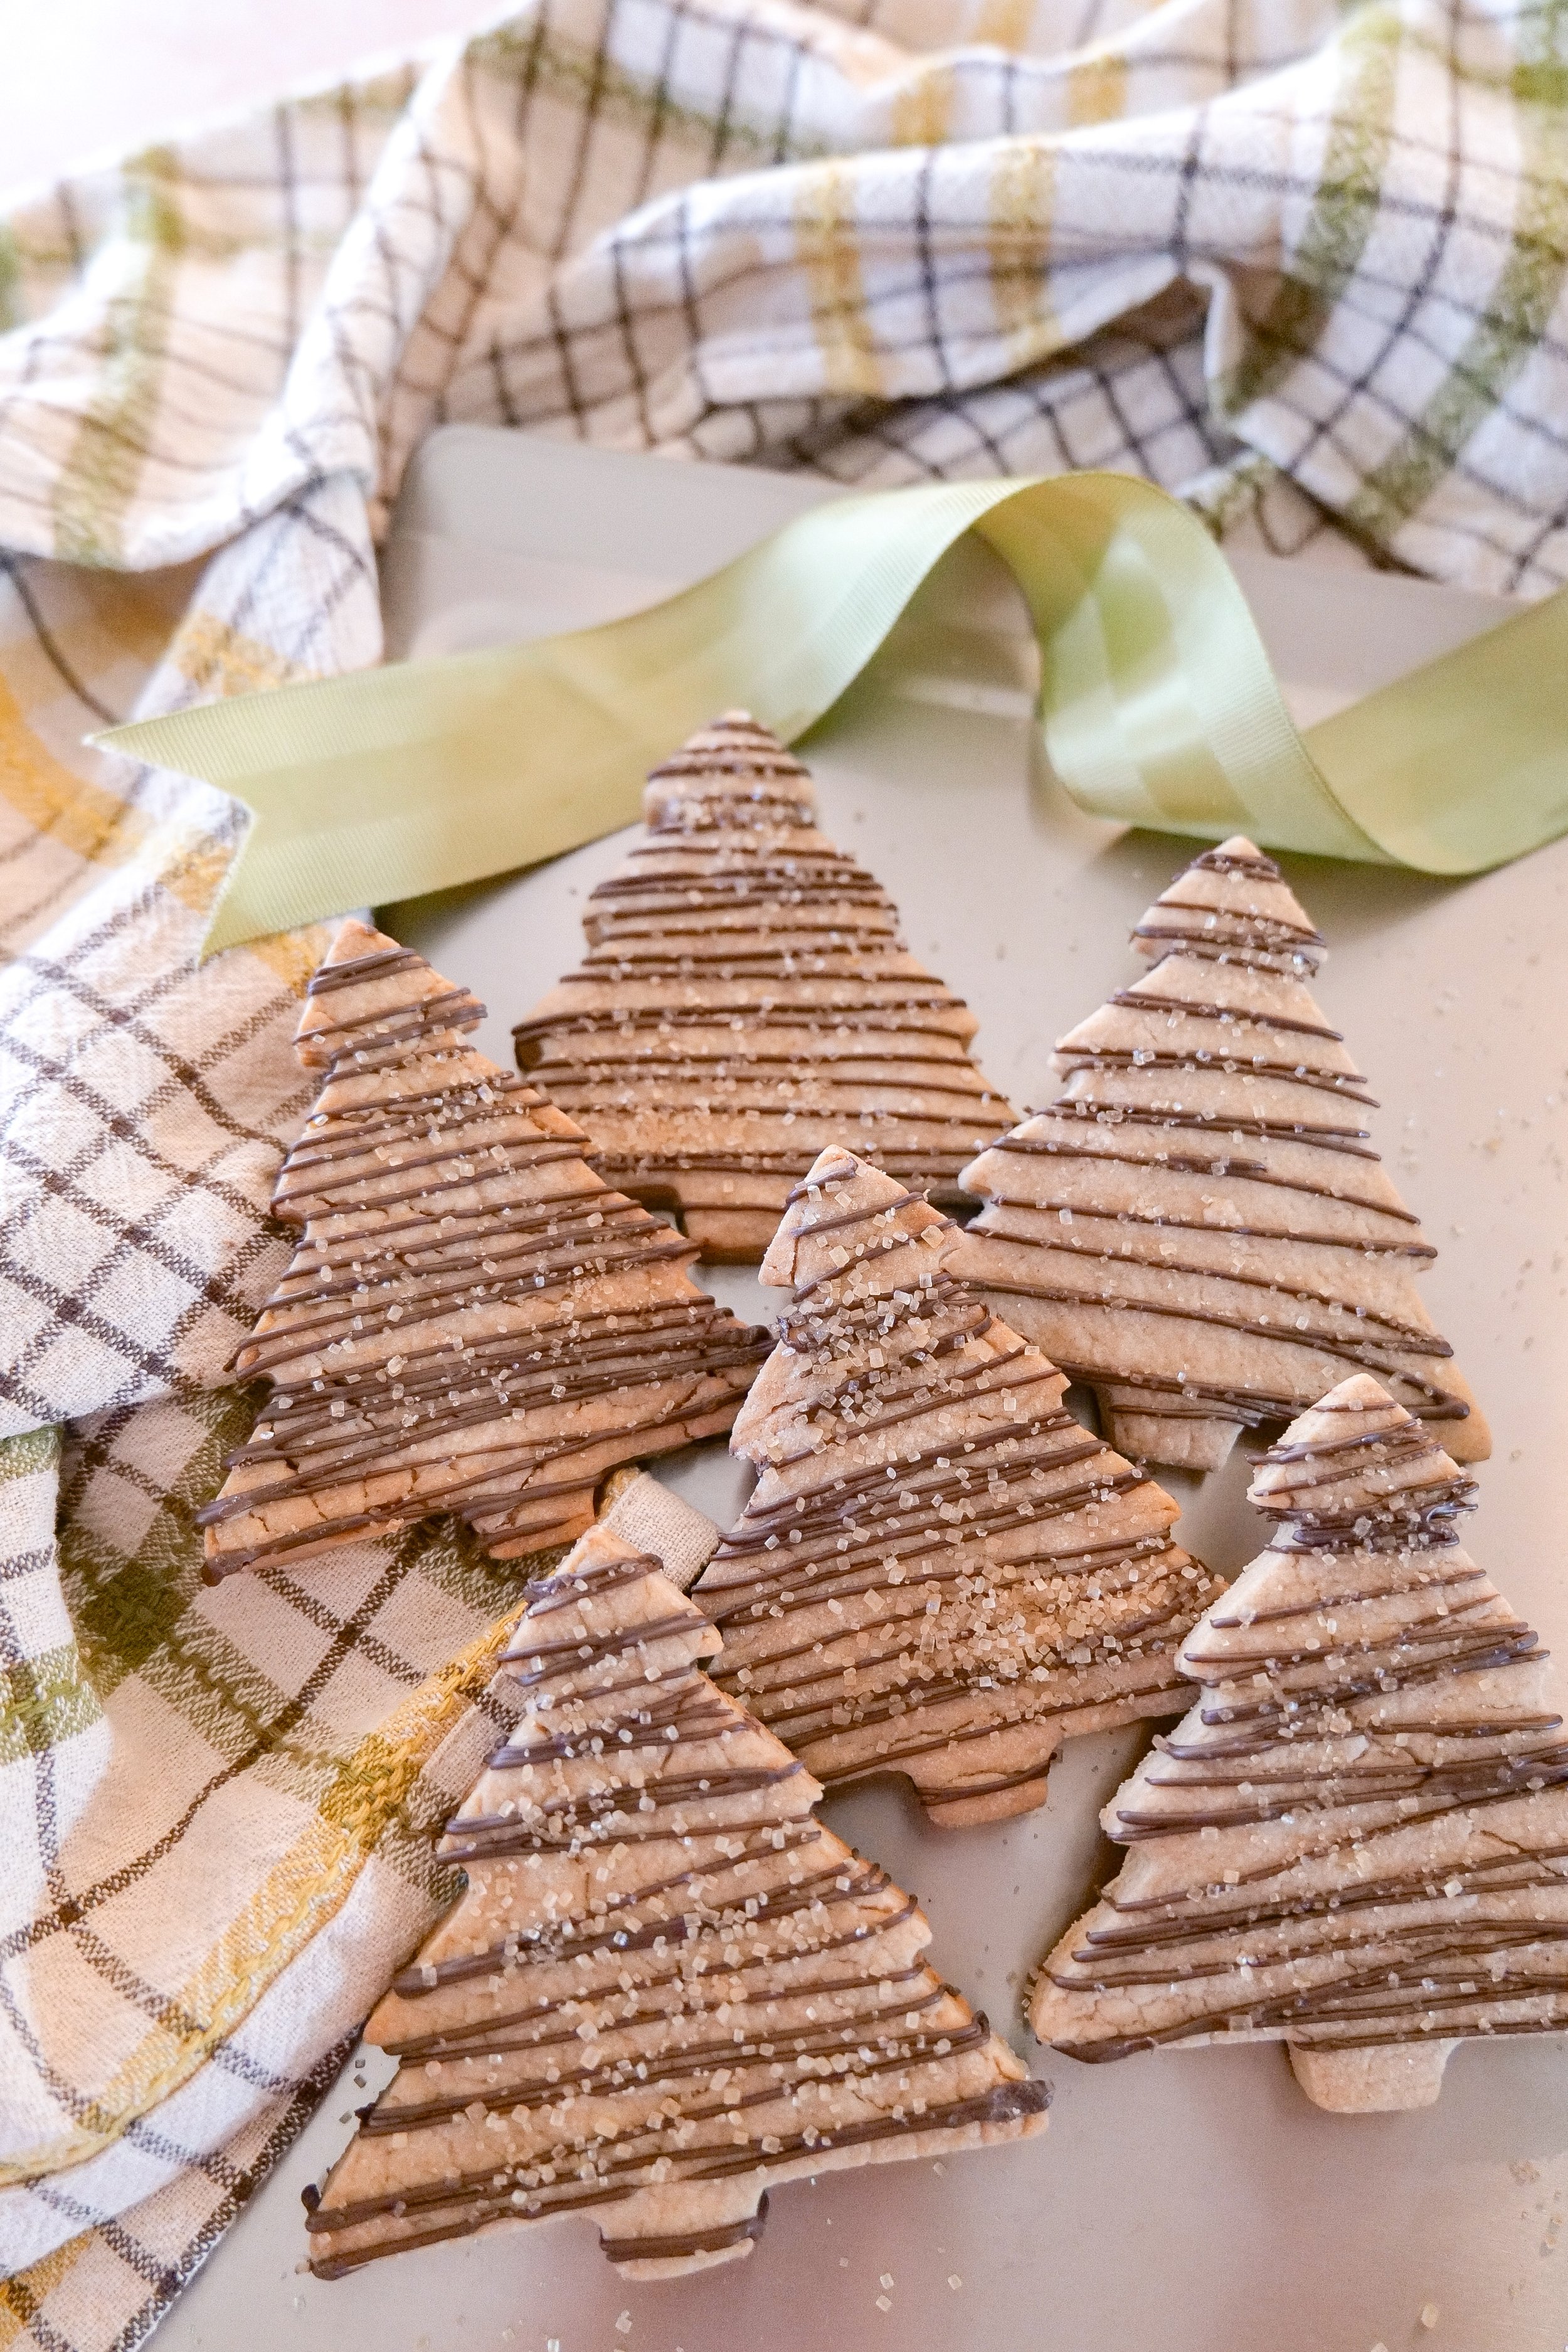
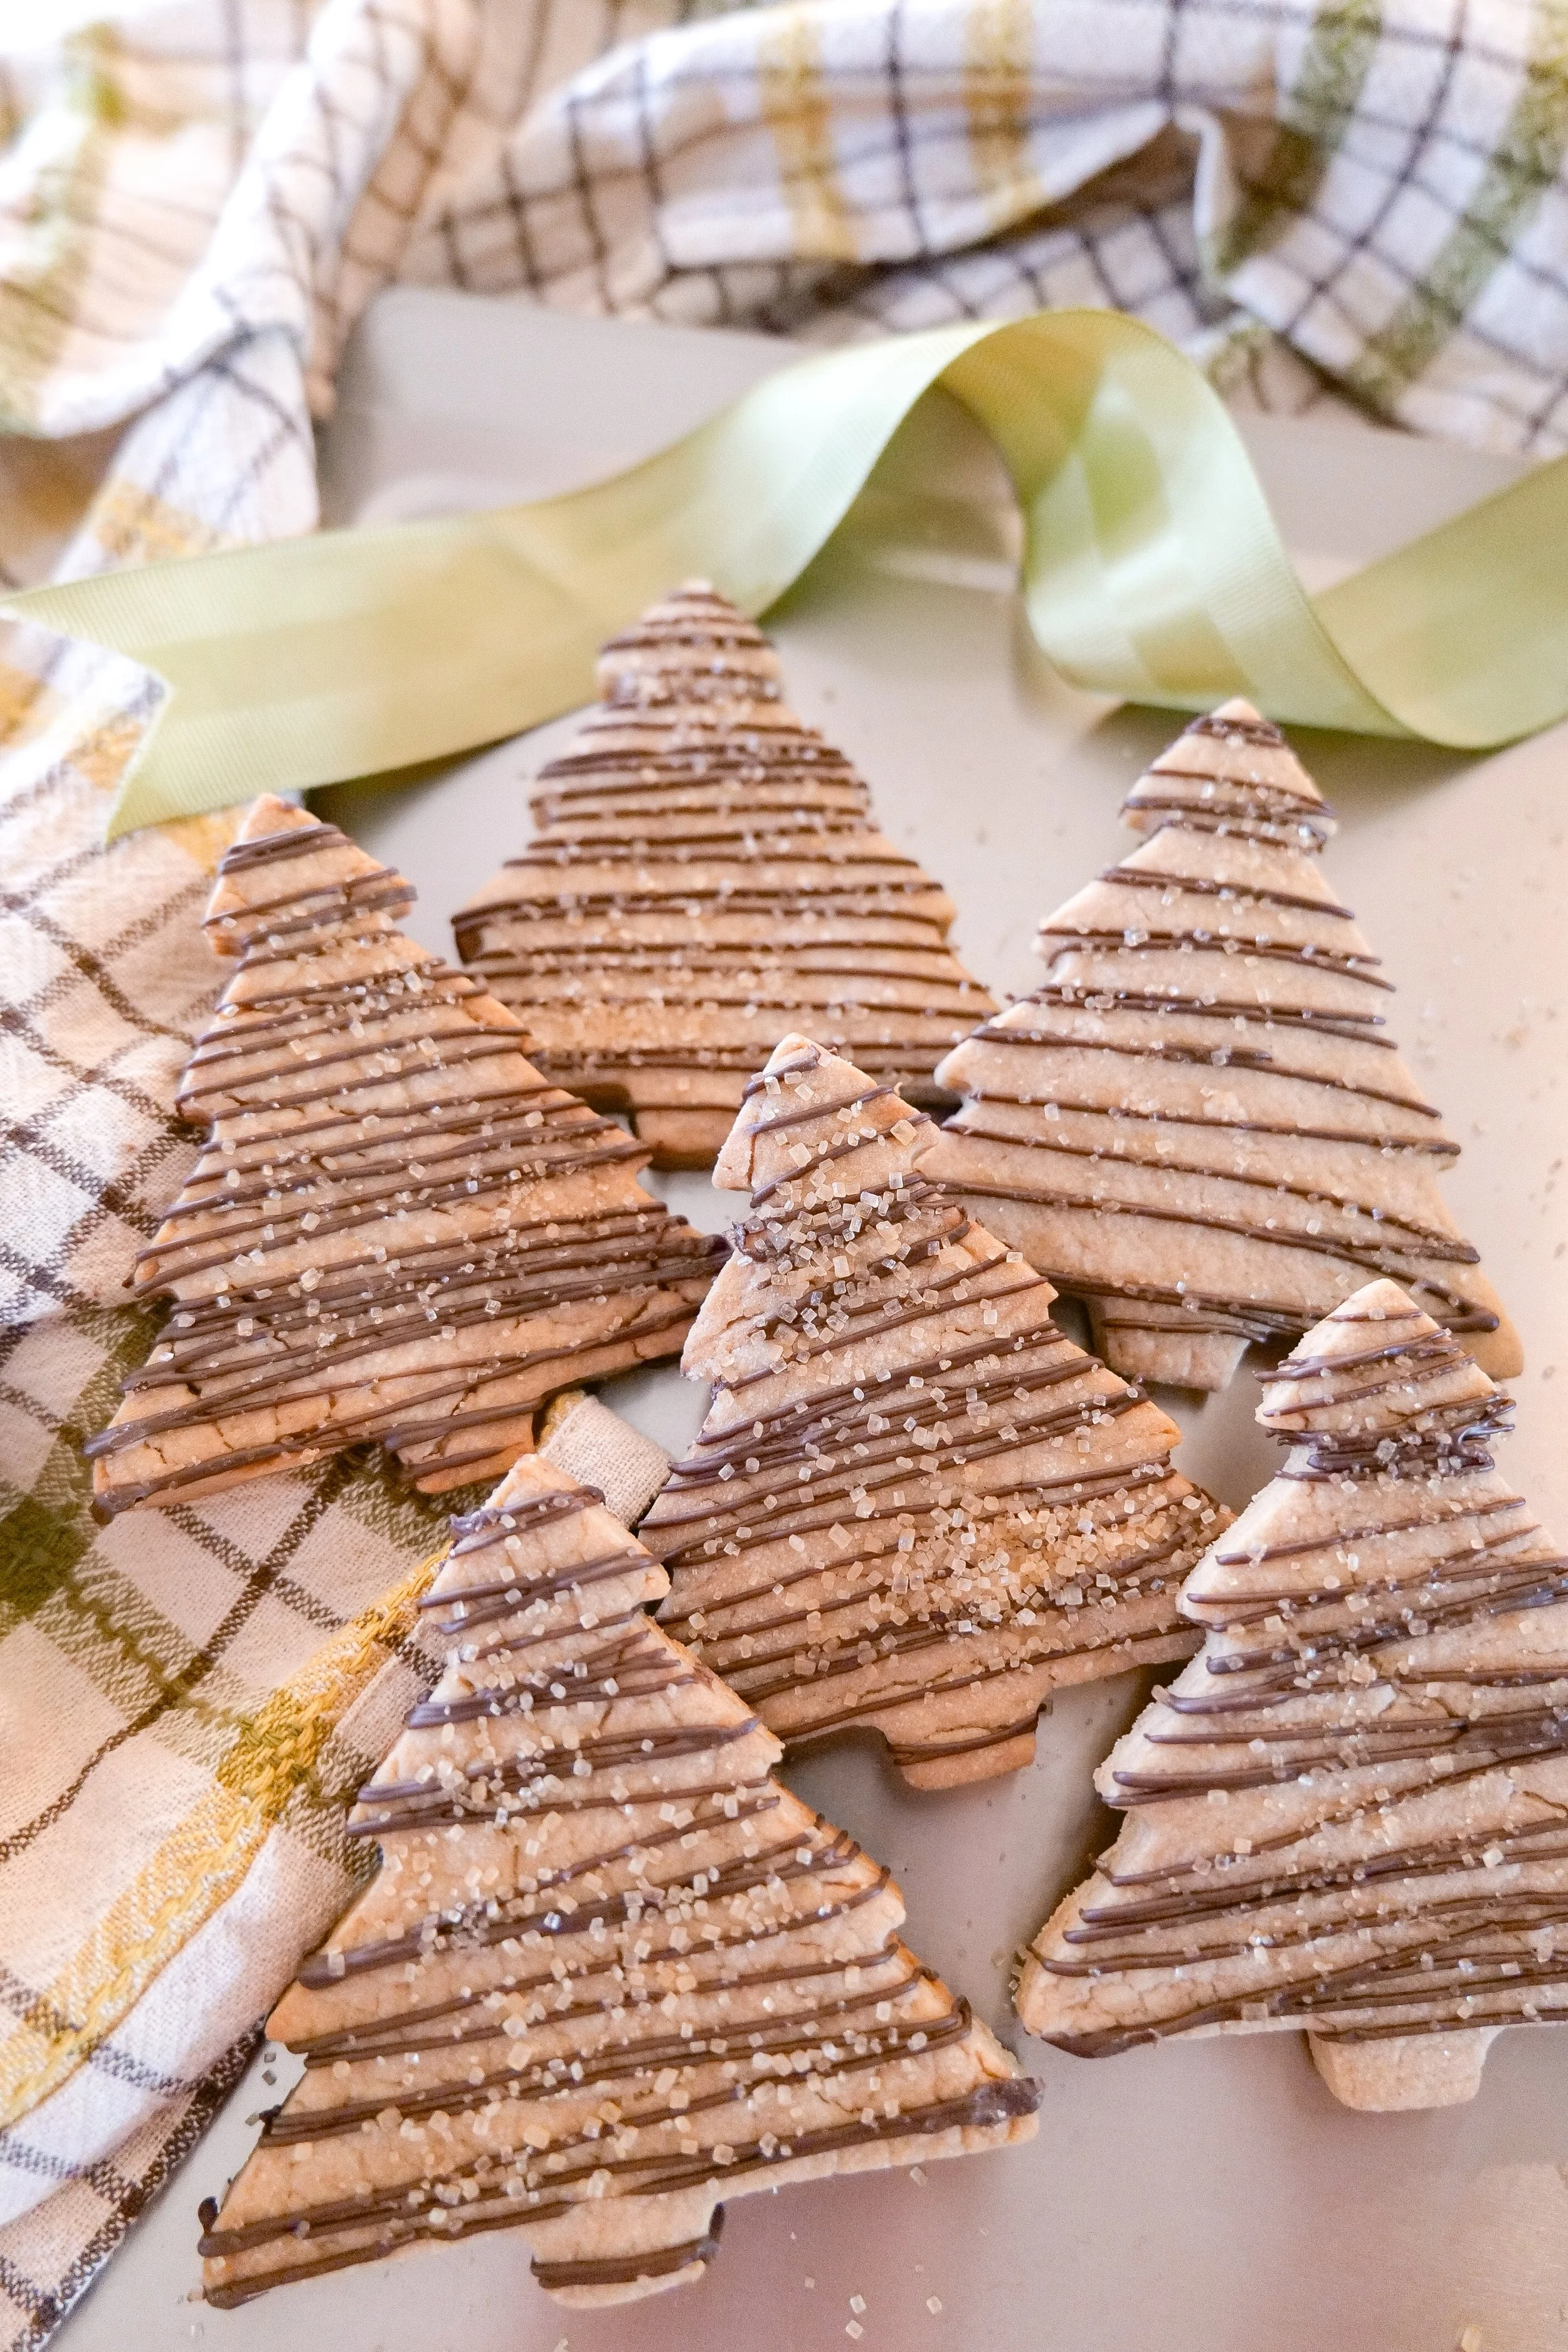
Brown butter chocolate drizzle shortbread cookies cut into Christmas tree shapes and topped with sparkling cane sugar.

Why You'll Love These Brown Butter Shortbread Cookies

These cookies have everything I want in a Christmas cookie without requiring complicated decorating.

You'll love them because they're:

  • Rich and buttery with a slightly nutty brown butter flavor

  • Made with simple pantry ingredients

  • Easy to cut into different holiday shapes

  • Finished with milk chocolate and sparkling cane sugar

  • Beautiful for Christmas cookie trays

  • Perfect for gifting

  • Easy to make ahead

  • Delicious alongside coffee, tea, or hot chocolate

They also look much more elaborate than they actually are, which is always a win during the busiest time of year.

Christmas tree shaped brown butter shortbread cookies decorated with a milk chocolate drizzle and coarse sugar.

What Makes Brown Butter So Good in Shortbread?

Traditional shortbread gets most of its flavor from butter, which makes browning that butter particularly worthwhile.

As butter cooks, the milk solids begin to toast and turn golden brown. The flavor changes from simply buttery to rich, nutty, and almost caramel-like.

Because shortbread has so few ingredients, you can really taste that difference in the finished cookie.

The important part is allowing the brown butter to cool and become solid again before making the dough. Using it while it's still warm and liquid would change the texture of the shortbread.

Ingredient Notes

These cookies only require a handful of ingredients, so each one has a purpose.

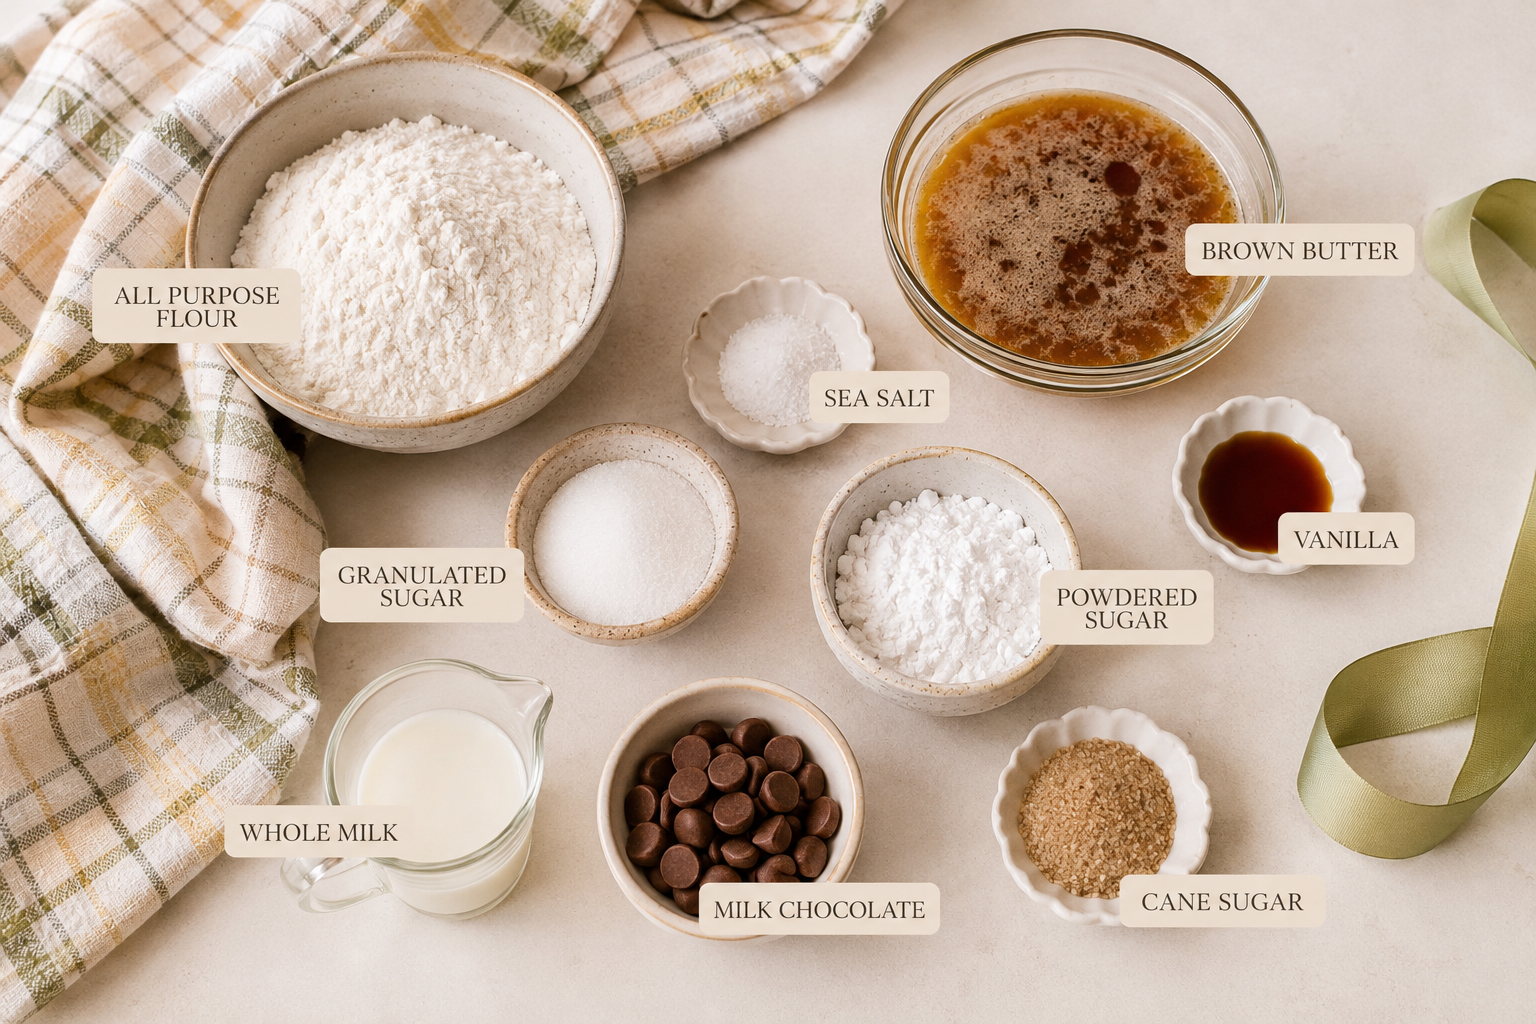
Ingredients for homemade brown butter shortbread cookies including flour, butter, sugar, vanilla, milk, and chocolate.

Brown Butter

This is what makes the recipe special. Brown the butter until the milk solids turn golden and it smells wonderfully nutty, then cool it completely before making your dough.

All-Purpose Flour

Regular all-purpose flour gives the cookies their classic tender, crumbly shortbread texture.

Granulated + Powdered Sugar

I use both sugars here. Granulated sugar provides sweetness and a little structure, while powdered sugar contributes to that delicate, melt-in-your-mouth texture.

Vanilla

Vanilla complements the warm flavor of the brown butter without overpowering it.

Whole Milk

Shortbread dough naturally looks crumbly. Add the milk one tablespoon at a time, stopping as soon as the dough holds together.

Milk Chocolate

The chocolate drizzle makes these feel extra special for Christmas. Milk chocolate is my favorite with the brown butter, although semi-sweet or dark chocolate would also work.

Cane Sugar

A final sprinkle of coarse cane sugar adds a beautiful sparkle and a subtle crunch.

Kitchen Tools

You don't need anything complicated for this recipe.

  • Small saucepan

  • Stand mixer or electric hand mixer

  • Large mixing bowl

  • Measuring cups and spoons

  • Rolling pin

  • Christmas cookie cutters

  • Baking sheets

  • Parchment paper

  • Cooling rack

  • Microwave-safe bowl or double boiler for chocolate

  • Piping bag or small zip-top bag for drizzling

I've gathered my favorite holiday baking pieces, cookie cutters, serving platters, linens, and Christmas kitchen finds in my Christmas in the Kitchen collection.

Brown Butter Chocolate Drizzle Shortbread Cookies Recipe

Prep Time: 25 minutes
Chill Time: 1 hour 30 minutes
Bake Time: 12–14 minutes per batch
Servings: Approximately 20–24 cookies, depending on cookie cutter size

Ingredients

Brown Butter Shortbread

  • 1 cup brown butter, cooled

  • 1 teaspoon vanilla extract

  • 2¼ cups all-purpose flour

  • ½ teaspoon sea salt

  • ¼ cup granulated sugar

  • ½ cup powdered sugar

  • 3 tablespoons whole milk, as needed

For Topping

  • Milk chocolate, melted, for drizzling

  • Coarse cane sugar, for sprinkling

Instructions

Step 1: Brown the Butter

Add butter to a light-colored saucepan over medium heat.

Allow the butter to melt completely. Continue cooking, stirring or swirling the pan frequently.

The butter will foam and then begin to develop golden-brown specks along the bottom of the pan. Once it smells nutty and toasted and the milk solids are golden brown, immediately remove it from the heat.

Be careful during these final moments because browned butter can go from perfectly toasted to burned quickly.

Pour the brown butter, including all of those flavorful browned bits, into a heat-safe bowl.

Allow it to come to room temperature, then refrigerate for approximately 30 minutes, or until cooled and no longer liquid.

Step 2: Make the Shortbread Dough

In a large mixing bowl, combine the flour, sea salt, granulated sugar, and powdered sugar.

Add the cooled brown butter and vanilla.

Mix until everything is combined. The dough will look crumbly at this stage.

Step 3: Add the Milk

Add whole milk 1 tablespoon at a time, mixing after each addition.

Stop adding milk as soon as the dough begins to come together when pressed between your fingers.

I typically use about 3 tablespoons, but you may need slightly less depending on your flour and butter.

Avoid adding too much milk—the dough should still feel like shortbread rather than a soft sugar-cookie dough.

Step 4: Chill

Form the dough into a flattened disc and place it in a zip-top bag or wrap tightly.

Refrigerate for 1 hour.

Step 5: Roll and Cut

Preheat the oven to 325°F.

Line baking sheets with parchment paper.

Lightly flour your work surface and rolling pin.

Roll the chilled dough to approximately ¼-inch thick.

Cut the dough using your favorite Christmas cookie cutters. I love using Christmas trees for this recipe.

Transfer the cookies carefully to the prepared baking sheets.

Step 6: Bake

Bake for 12–14 minutes, or until the cookies are set and the edges are just beginning to turn a very light golden color.

Shortbread should remain fairly pale, so don't wait for the cookies to become deeply browned.

Allow them to cool on the baking sheet for several minutes before carefully transferring them to a cooling rack.

Step 7: Decorate

Allow the cookies to cool completely.

Melt the milk chocolate until smooth and drizzle it back and forth across each cookie.

Immediately sprinkle with coarse cane sugar while the chocolate is still wet.

Allow the chocolate to set before serving or storing.

Enjoy!

Amanda's Quick Tips

  • Watch the butter closely once you begin seeing golden flecks.

  • Cool the brown butter before adding it to the dough.

  • Add milk gradually rather than pouring it in all at once.

  • Don't overwork your shortbread dough.

  • Roll the dough evenly so all of the cookies bake at approximately the same rate.

  • Let the cookies cool completely before adding chocolate.

  • Add the cane sugar immediately after drizzling so it sticks to the chocolate.

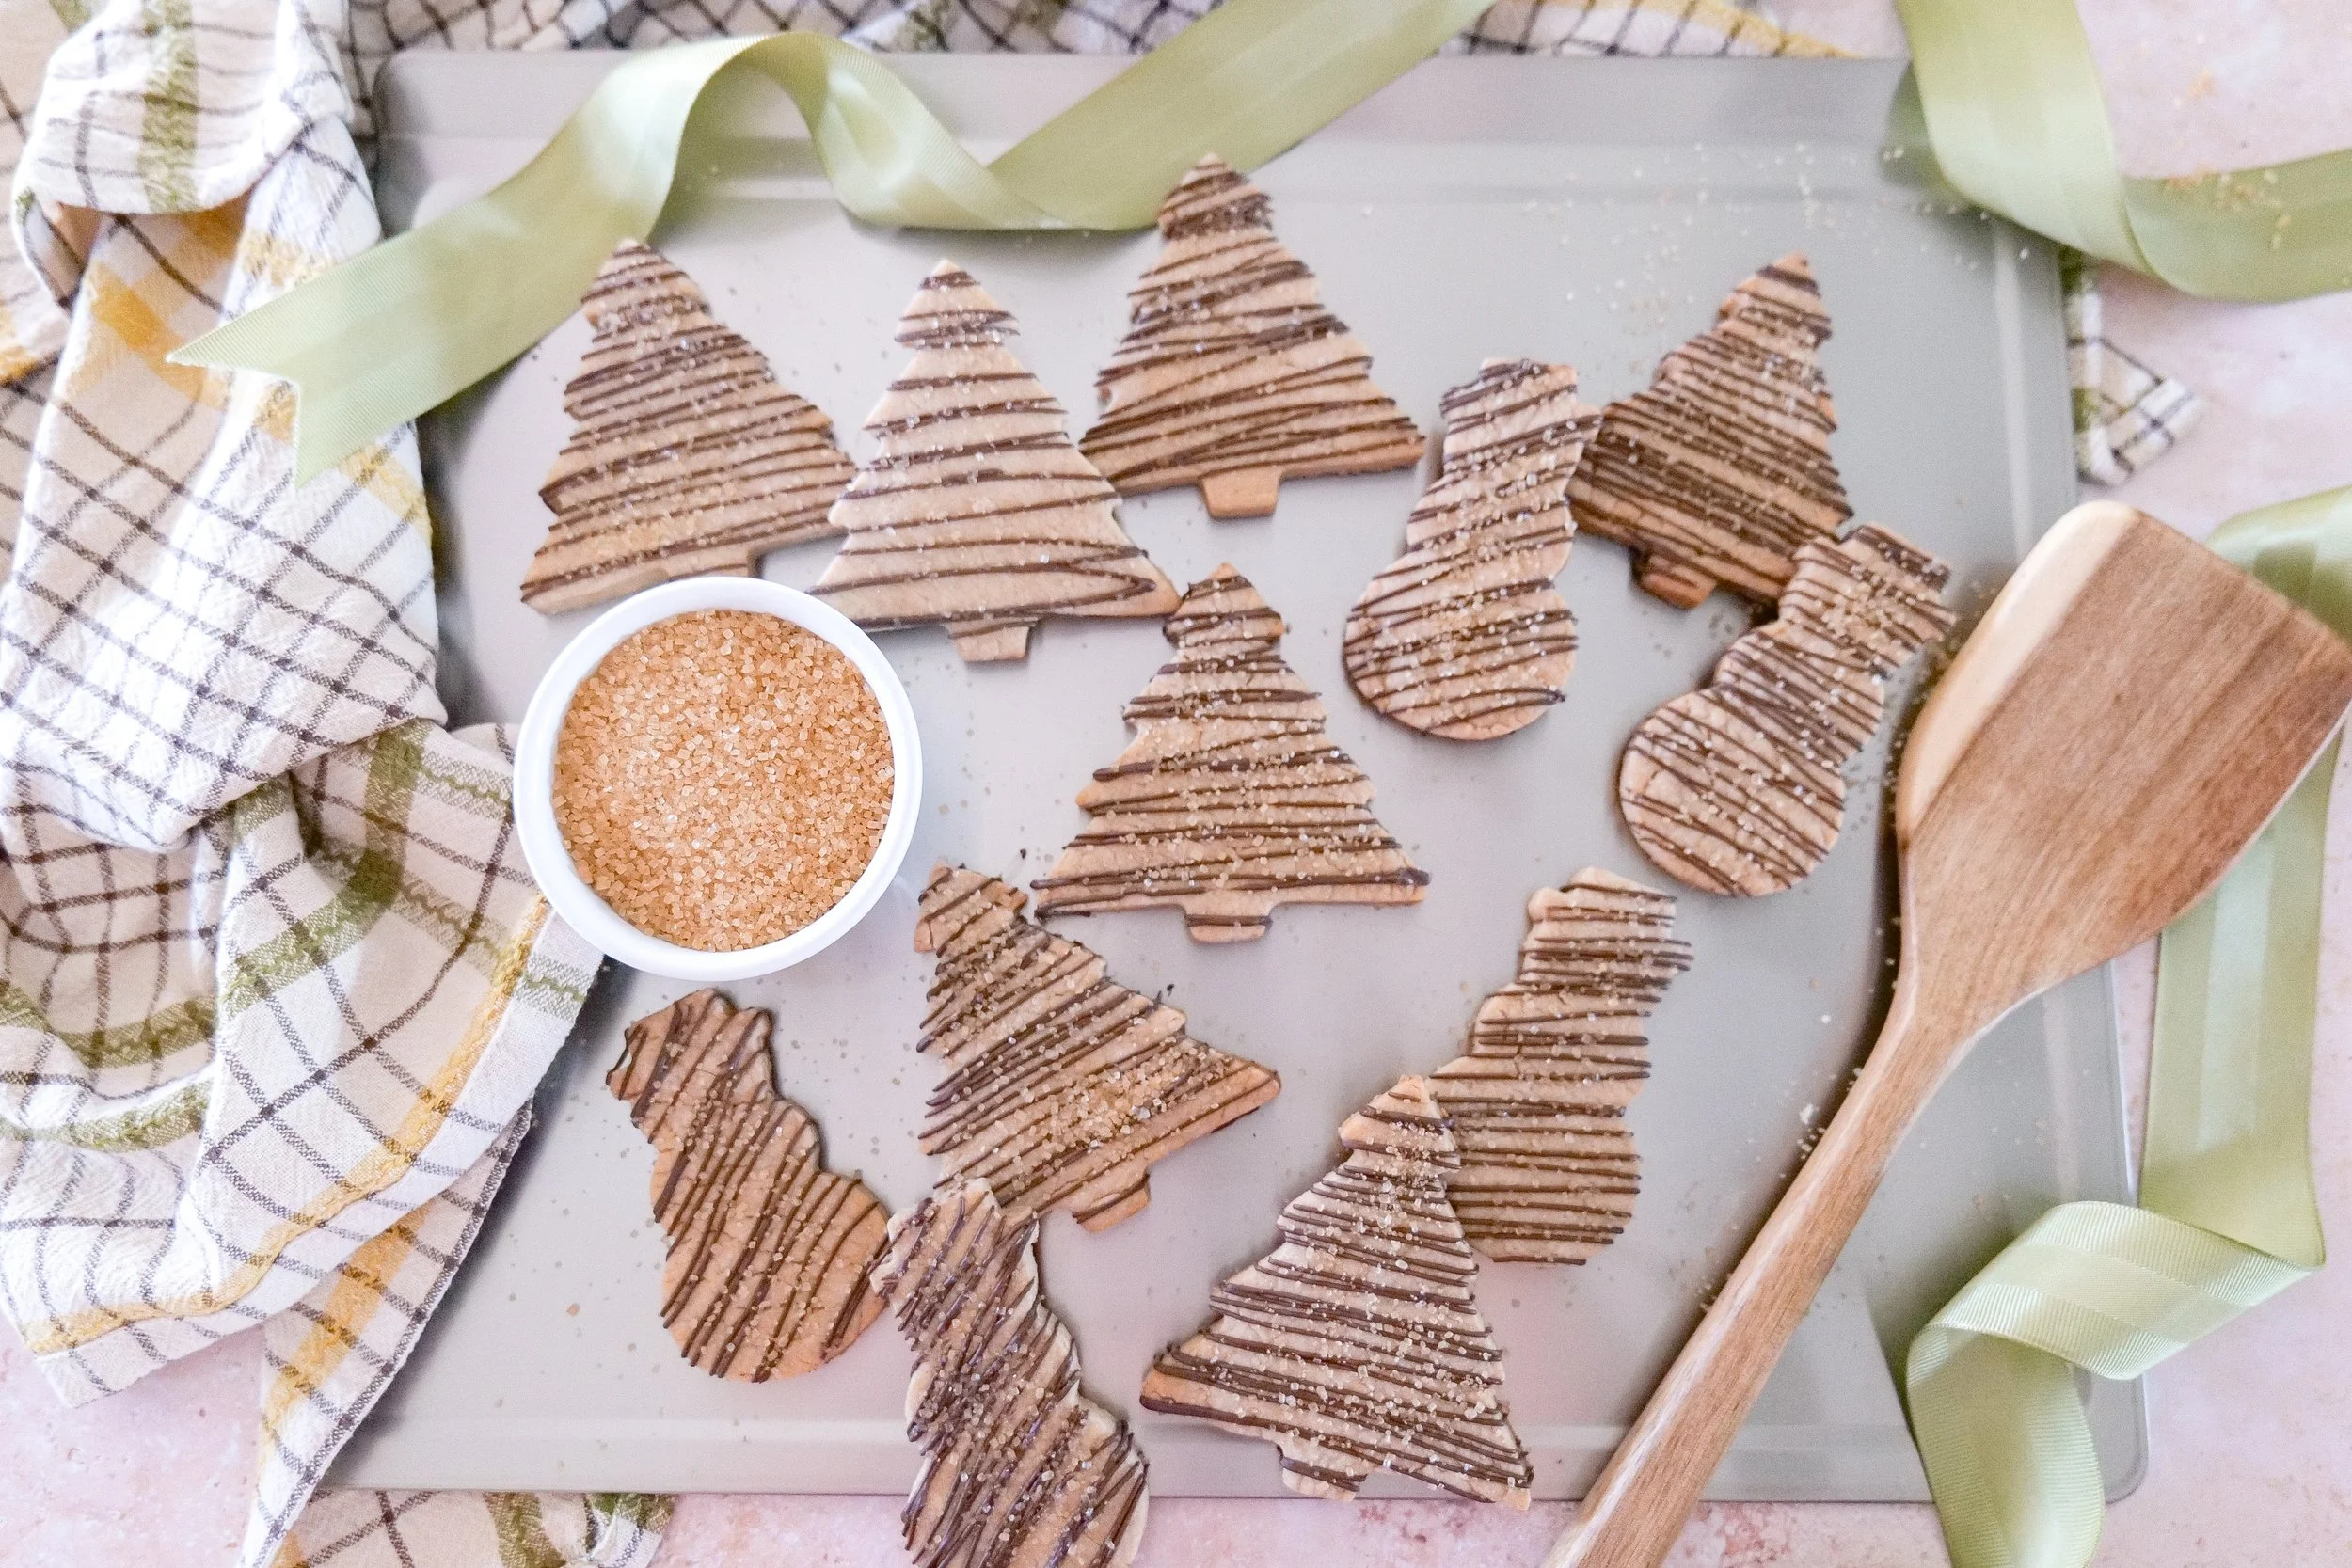
Homemade shortbread Christmas cookies finished with thin lines of melted milk chocolate and sparkling sugar.

How to Know When Brown Butter Is Ready

Brown butter sounds fancy, but once you know what you're looking for, it's incredibly simple.

As the butter cooks, you'll notice three stages:

First, it melts.

Then it begins to foam.

Finally, you'll see little golden-brown milk solids forming at the bottom of the pan and notice a distinctly toasted, nutty aroma.

That's your cue to remove it from the heat.

I recommend using a light-colored saucepan when possible because it makes those browned milk solids much easier to see.

Amanda's Tips for Perfect Shortbread

Don't Add Too Much Milk

This is probably the most important tip.

Shortbread dough is naturally more crumbly than traditional cookie dough. Don't keep adding milk simply because it doesn't look like sugar-cookie dough.

When you squeeze a little dough in your hand and it stays together, you're ready.

Keep the Dough Cold

Chilling helps the butter firm back up and keeps your Christmas shapes more defined while baking.

If the dough becomes particularly warm while you're rolling and cutting, place the cut cookies in the refrigerator for 10–15 minutes before baking.

Don't Overbake

You want the cookies set with just the faintest hint of golden color around the edges.

Shortbread that is baked too long can lose its wonderfully tender texture.

Let Them Cool Before Decorating

Warm cookies can cause your chocolate drizzle to melt and spread. Wait until the shortbread is completely cool before decorating.

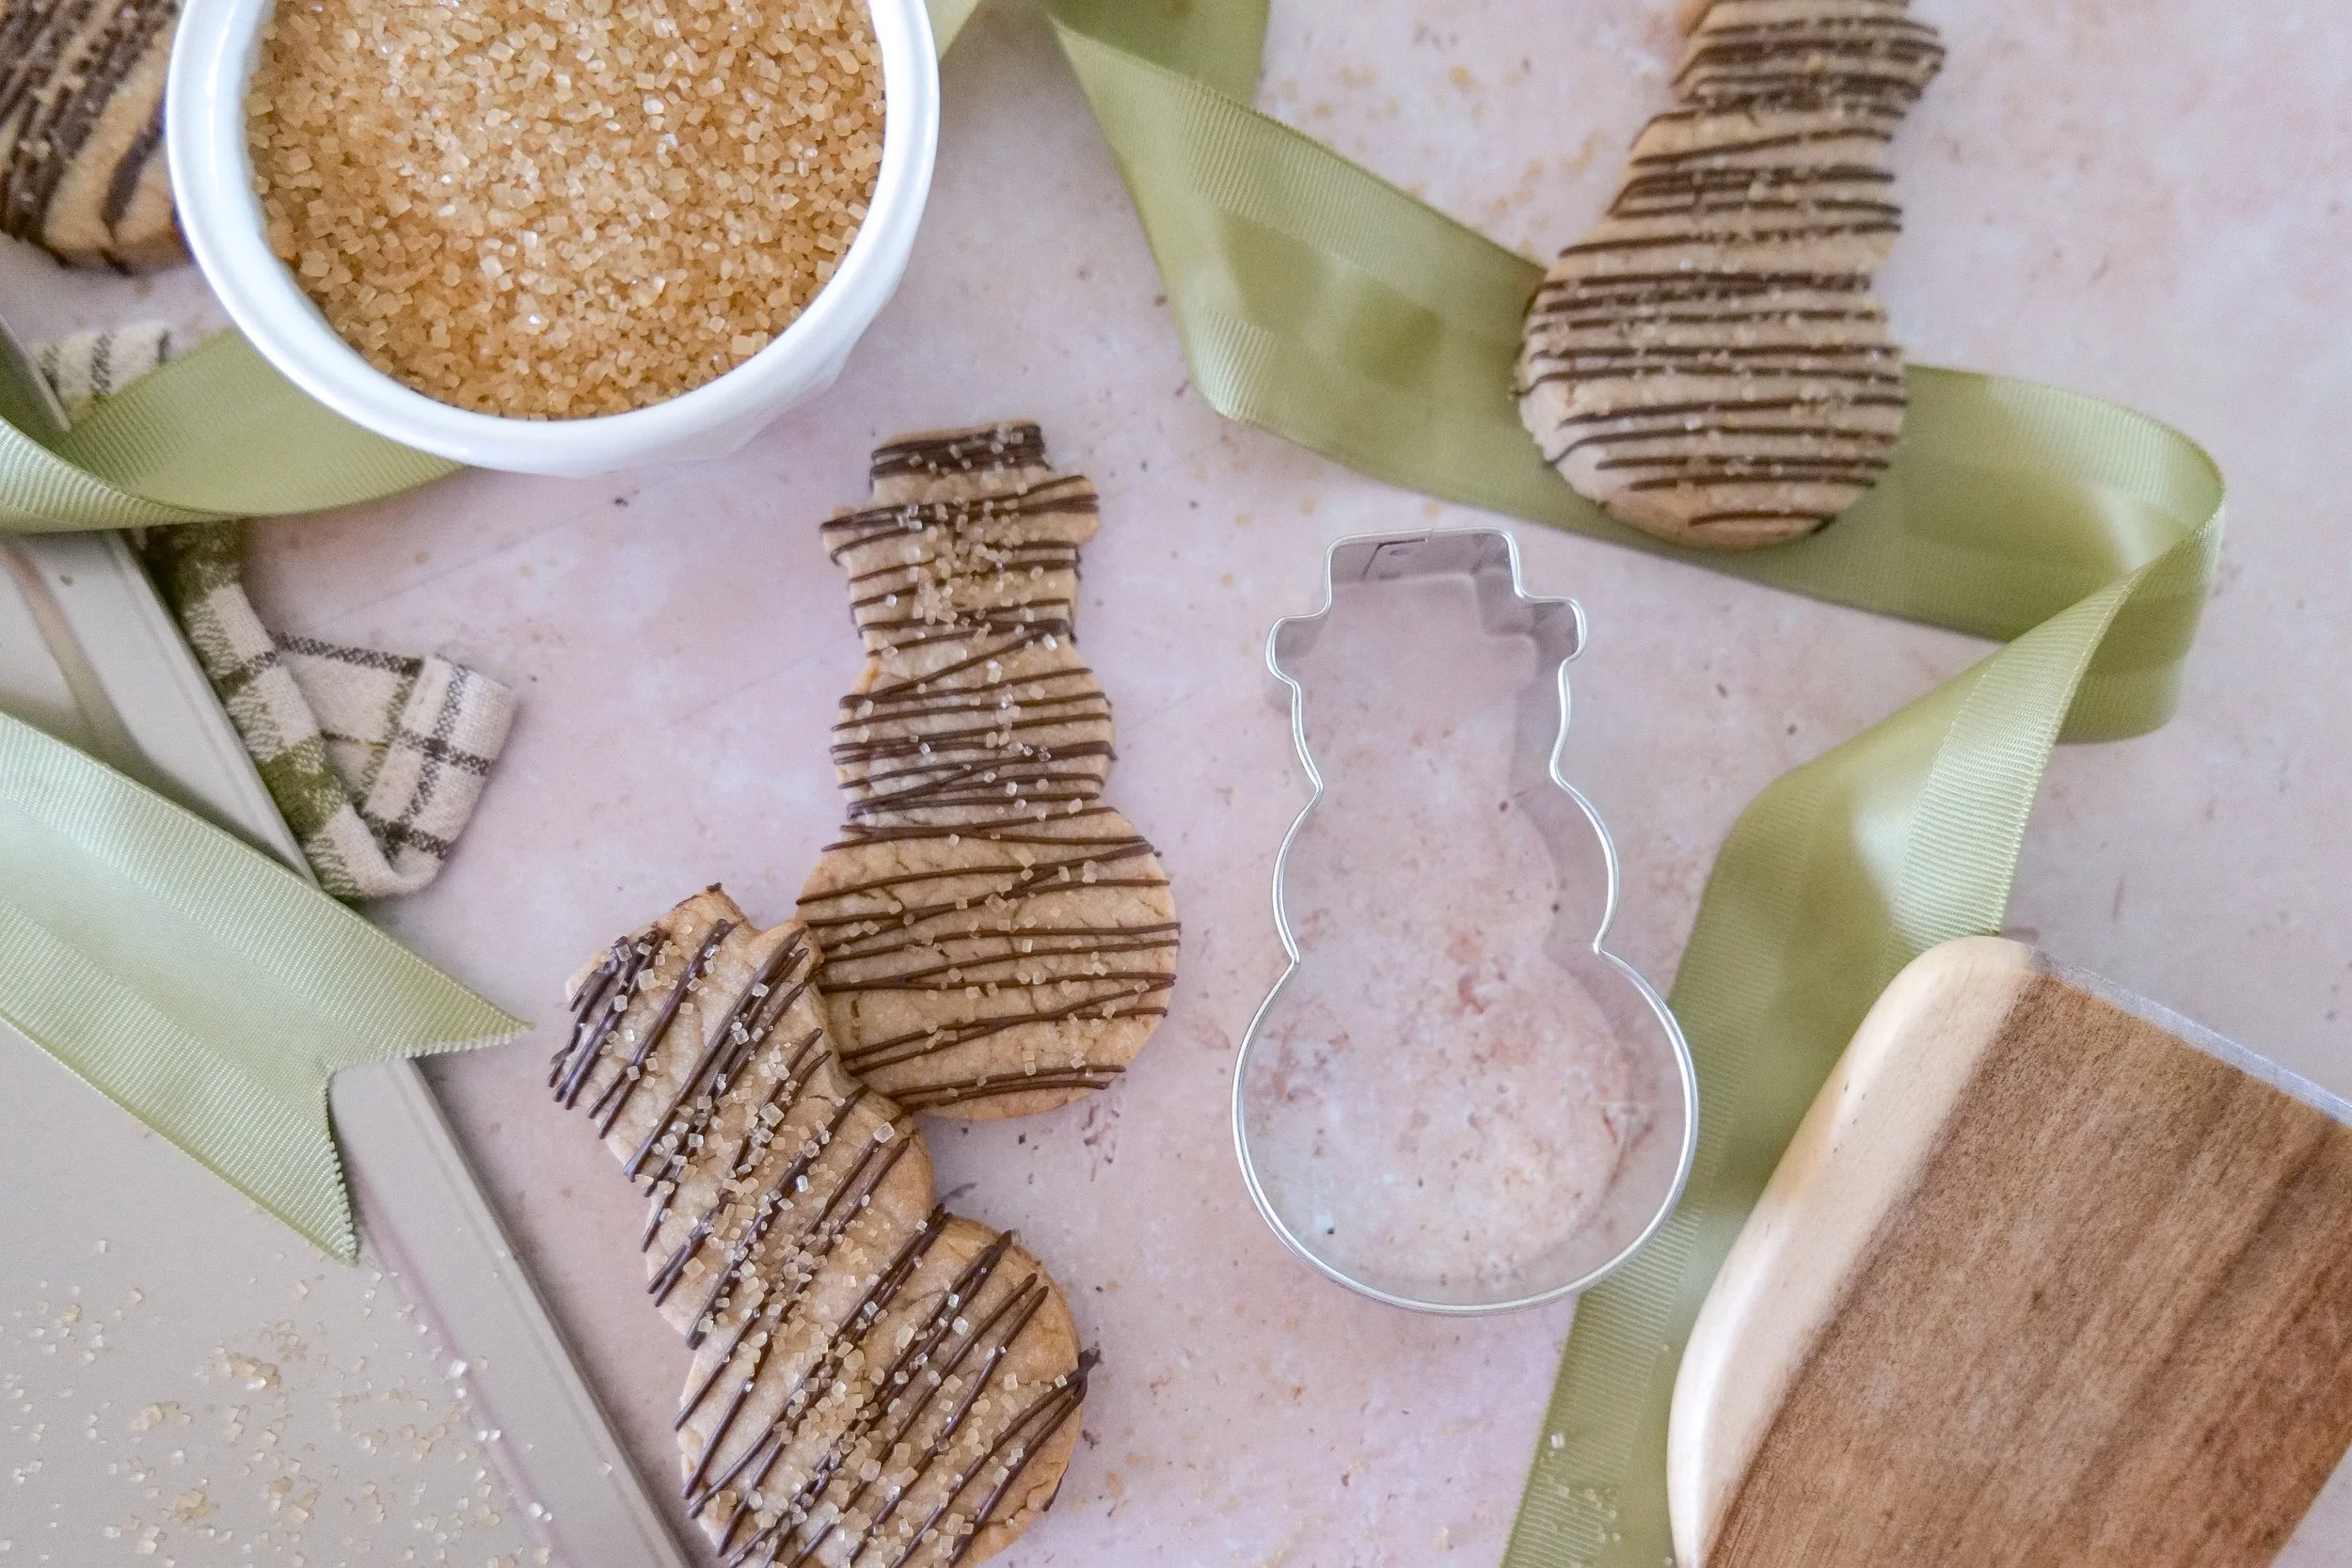
snowman Christmas tree shortbread cookies made with brown butter and decorated with chocolate drizzle for holiday baking.

Brown Butter Shortbread for Christmas Gifting

These cookies make such a beautiful homemade Christmas gift because they're sturdy enough to package while still feeling special.

Once the chocolate has completely set, arrange them in:

  • A Christmas cookie tin

  • A kraft bakery box tied with ribbon

  • A glass cookie jar

  • Cellophane treat bags

  • A small basket with coffee or tea

I especially love the idea of pairing them with a pretty holiday mug for a simple hostess or neighbor gift.

What to Serve with Christmas Shortbread Cookies

These cookies are wonderful on their own, but I especially love them alongside:

  • Hot coffee

  • Cappuccino

  • Hot chocolate

  • Tea

  • Warm apple cider

  • A Christmas dessert board

  • Fresh berries

  • Other Christmas cookies

They would also be beautiful arranged on a dessert table after Christmas dinner.

Christmas in the Kitchen

Christmas is one of my favorite times to make the kitchen feel extra special.

I've gathered the pieces I reach for during holiday baking and entertaining—from Christmas cookie cutters and baking essentials to pretty serving pieces, festive linens, mugs, and little details that make an afternoon of baking feel like part of the celebration.

SHOP CHRISTMAS IN THE KITCHEN

Frequently Asked Questions

Why is my shortbread dough crumbly?

Shortbread dough is supposed to be somewhat crumbly. Add the whole milk one tablespoon at a time until the dough holds together when pressed.

Why do I need to chill the brown butter?

Browning melts the butter completely. Cooling it allows the fat to firm again so the shortbread maintains the proper texture.

Can I use regular butter instead?

Yes, although you'll lose the deep toasted flavor that makes this recipe special.

Can I make the dough ahead?

Yes. Prepare the dough, wrap it tightly, and refrigerate it until you're ready to roll and bake.

How thick should I roll shortbread cookies?

Approximately ¼ inch thick works beautifully for cut-out shortbread.

How do I keep the cookies from spreading?

Keep the dough chilled and avoid placing cookie dough onto warm baking sheets.

Can I use different chocolate?

Absolutely. Milk, semi-sweet, dark, and white chocolate all work.

When are shortbread cookies done?

The cookies should be set and still fairly pale, with perhaps a very light golden color around the edges.

Can I freeze the dough?

Yes. Wrap it tightly before freezing, thaw it overnight in the refrigerator, and then roll, cut, and bake.

Are these good for Christmas cookie boxes?

Yes. Shortbread is an especially good cookie-box choice because it holds its shape and travels well.

More Christmas Recipes You'll Love

Sparkling Cider Punch for Christmas

Gingerbread Whoopie Pies at Home

Gingerbread Cinnamon Rolls Made with Sourdough Starter

Gingerbread Cake with a Brown Butter Caramel Frosting

Everything I use to make Christmas baking a little prettier and easier is gathered in my Christmas in the Kitchen shelf, including my favorite cookie cutters, baking tools, serving pieces, and holiday kitchen finds.

Save This Recipe

Whether you're starting your Christmas baking early, putting together cookie boxes for friends and neighbors, or simply looking for something sweet to enjoy at home, save this Brown Butter Chocolate Drizzle Shortbread Cookie recipe for the holiday season.

I've included my printable From Amanda's Kitchen recipe card below so you can save it, print it, and bring it back out every Christmas.

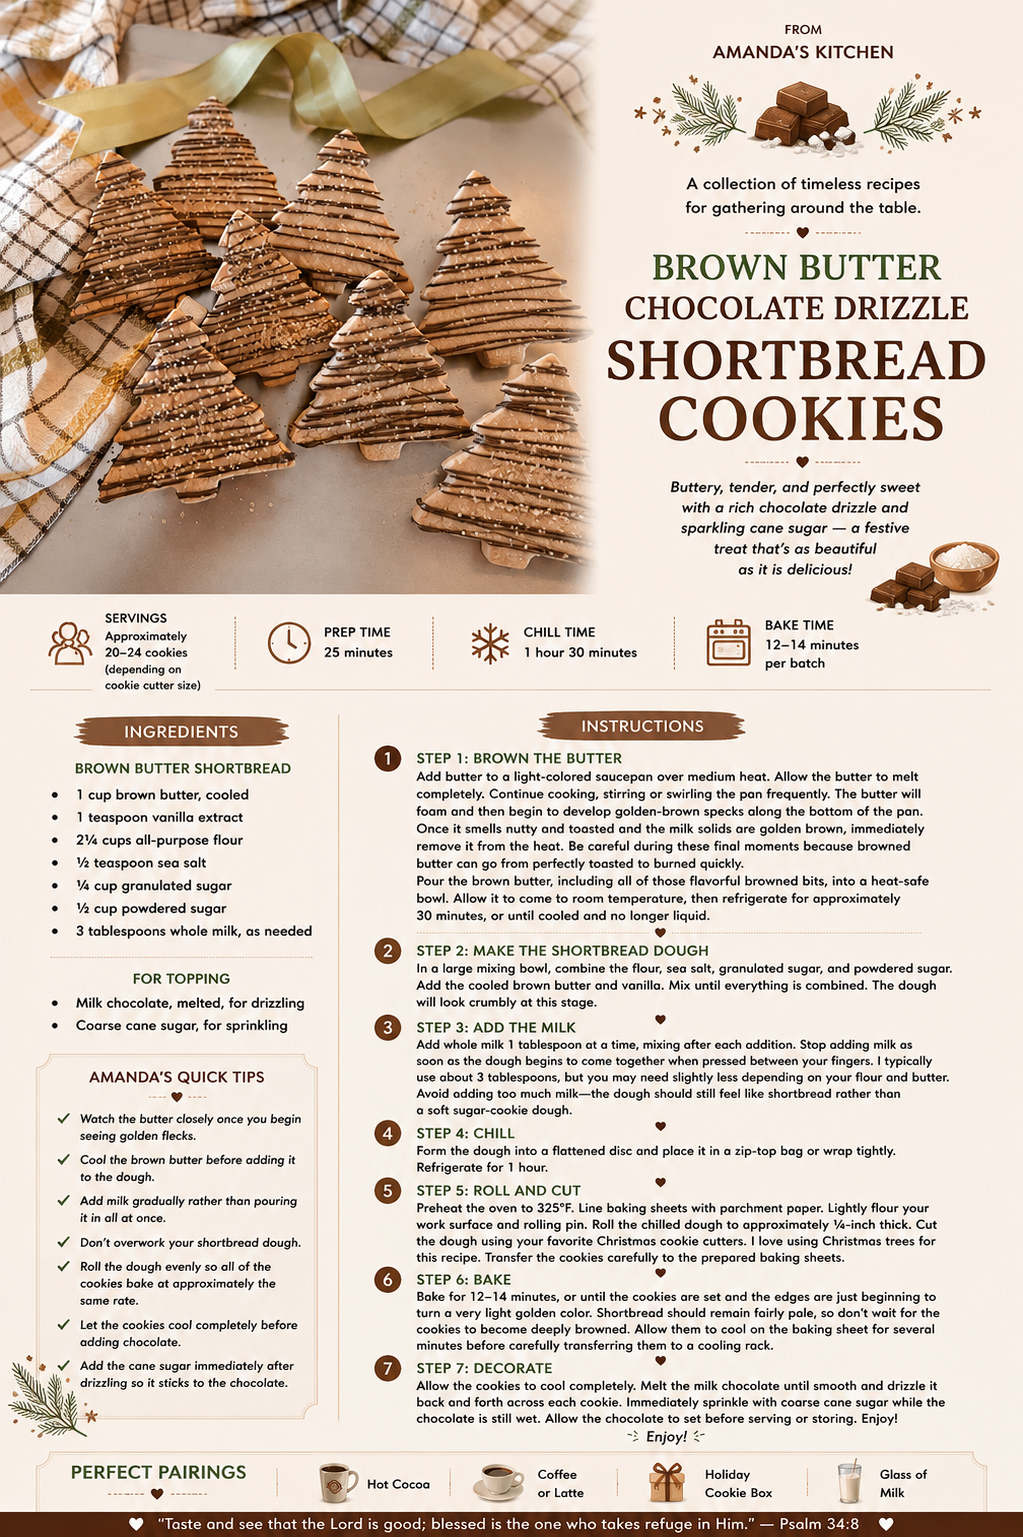
Printable recipe card for brown butter chocolate drizzle shortbread cookies from Amanda's Kitchen.

A Note From Amanda

Some of my favorite Christmas traditions are the simplest ones: turning on Christmas music, pulling out the cookie cutters, covering the kitchen counter in flour, and making something sweet for the people we love.

These shortbread cookies feel like exactly that kind of recipe.

They're simple enough for an afternoon of baking at home, but the brown butter, chocolate drizzle, and sparkling sugar make them feel a little more special for Christmas. I hope they become a recipe you bring back to your kitchen year after year.

"Taste and see that the Lord is good."
Psalm 34:8

Made with love for the people you love.

Easy Bacon Apple Baked Brie (The Ultimate Fall Party Appetizer)

Easy Bacon Apple Baked Brie

The Ultimate Fall Party Appetizer

There are a handful of appetizers that disappear almost as quickly as they're set on the table, and this Easy Bacon Apple Baked Brie is always one of them.

Warm, creamy baked brie topped with crispy bacon, tender caramelized apples, and a touch of brown sugar feels like everything we love about fall wrapped into one beautiful appetizer. It's elegant enough for Thanksgiving, Christmas, and holiday parties, yet simple enough to make for a cozy weekend at home or a football gathering with friends.

One of my favorite things about this recipe is that nearly all of the prep can be done ahead of time. When guests begin arriving, simply bake the brie, warm the bacon apple topping, and dinner—or at least everyone's favorite part before dinner—is ready in just a few minutes.

Whether you're building a fall charcuterie board, hosting Friendsgiving, or looking for an appetizer that's guaranteed to impress, this baked brie is always the first thing to disappear.

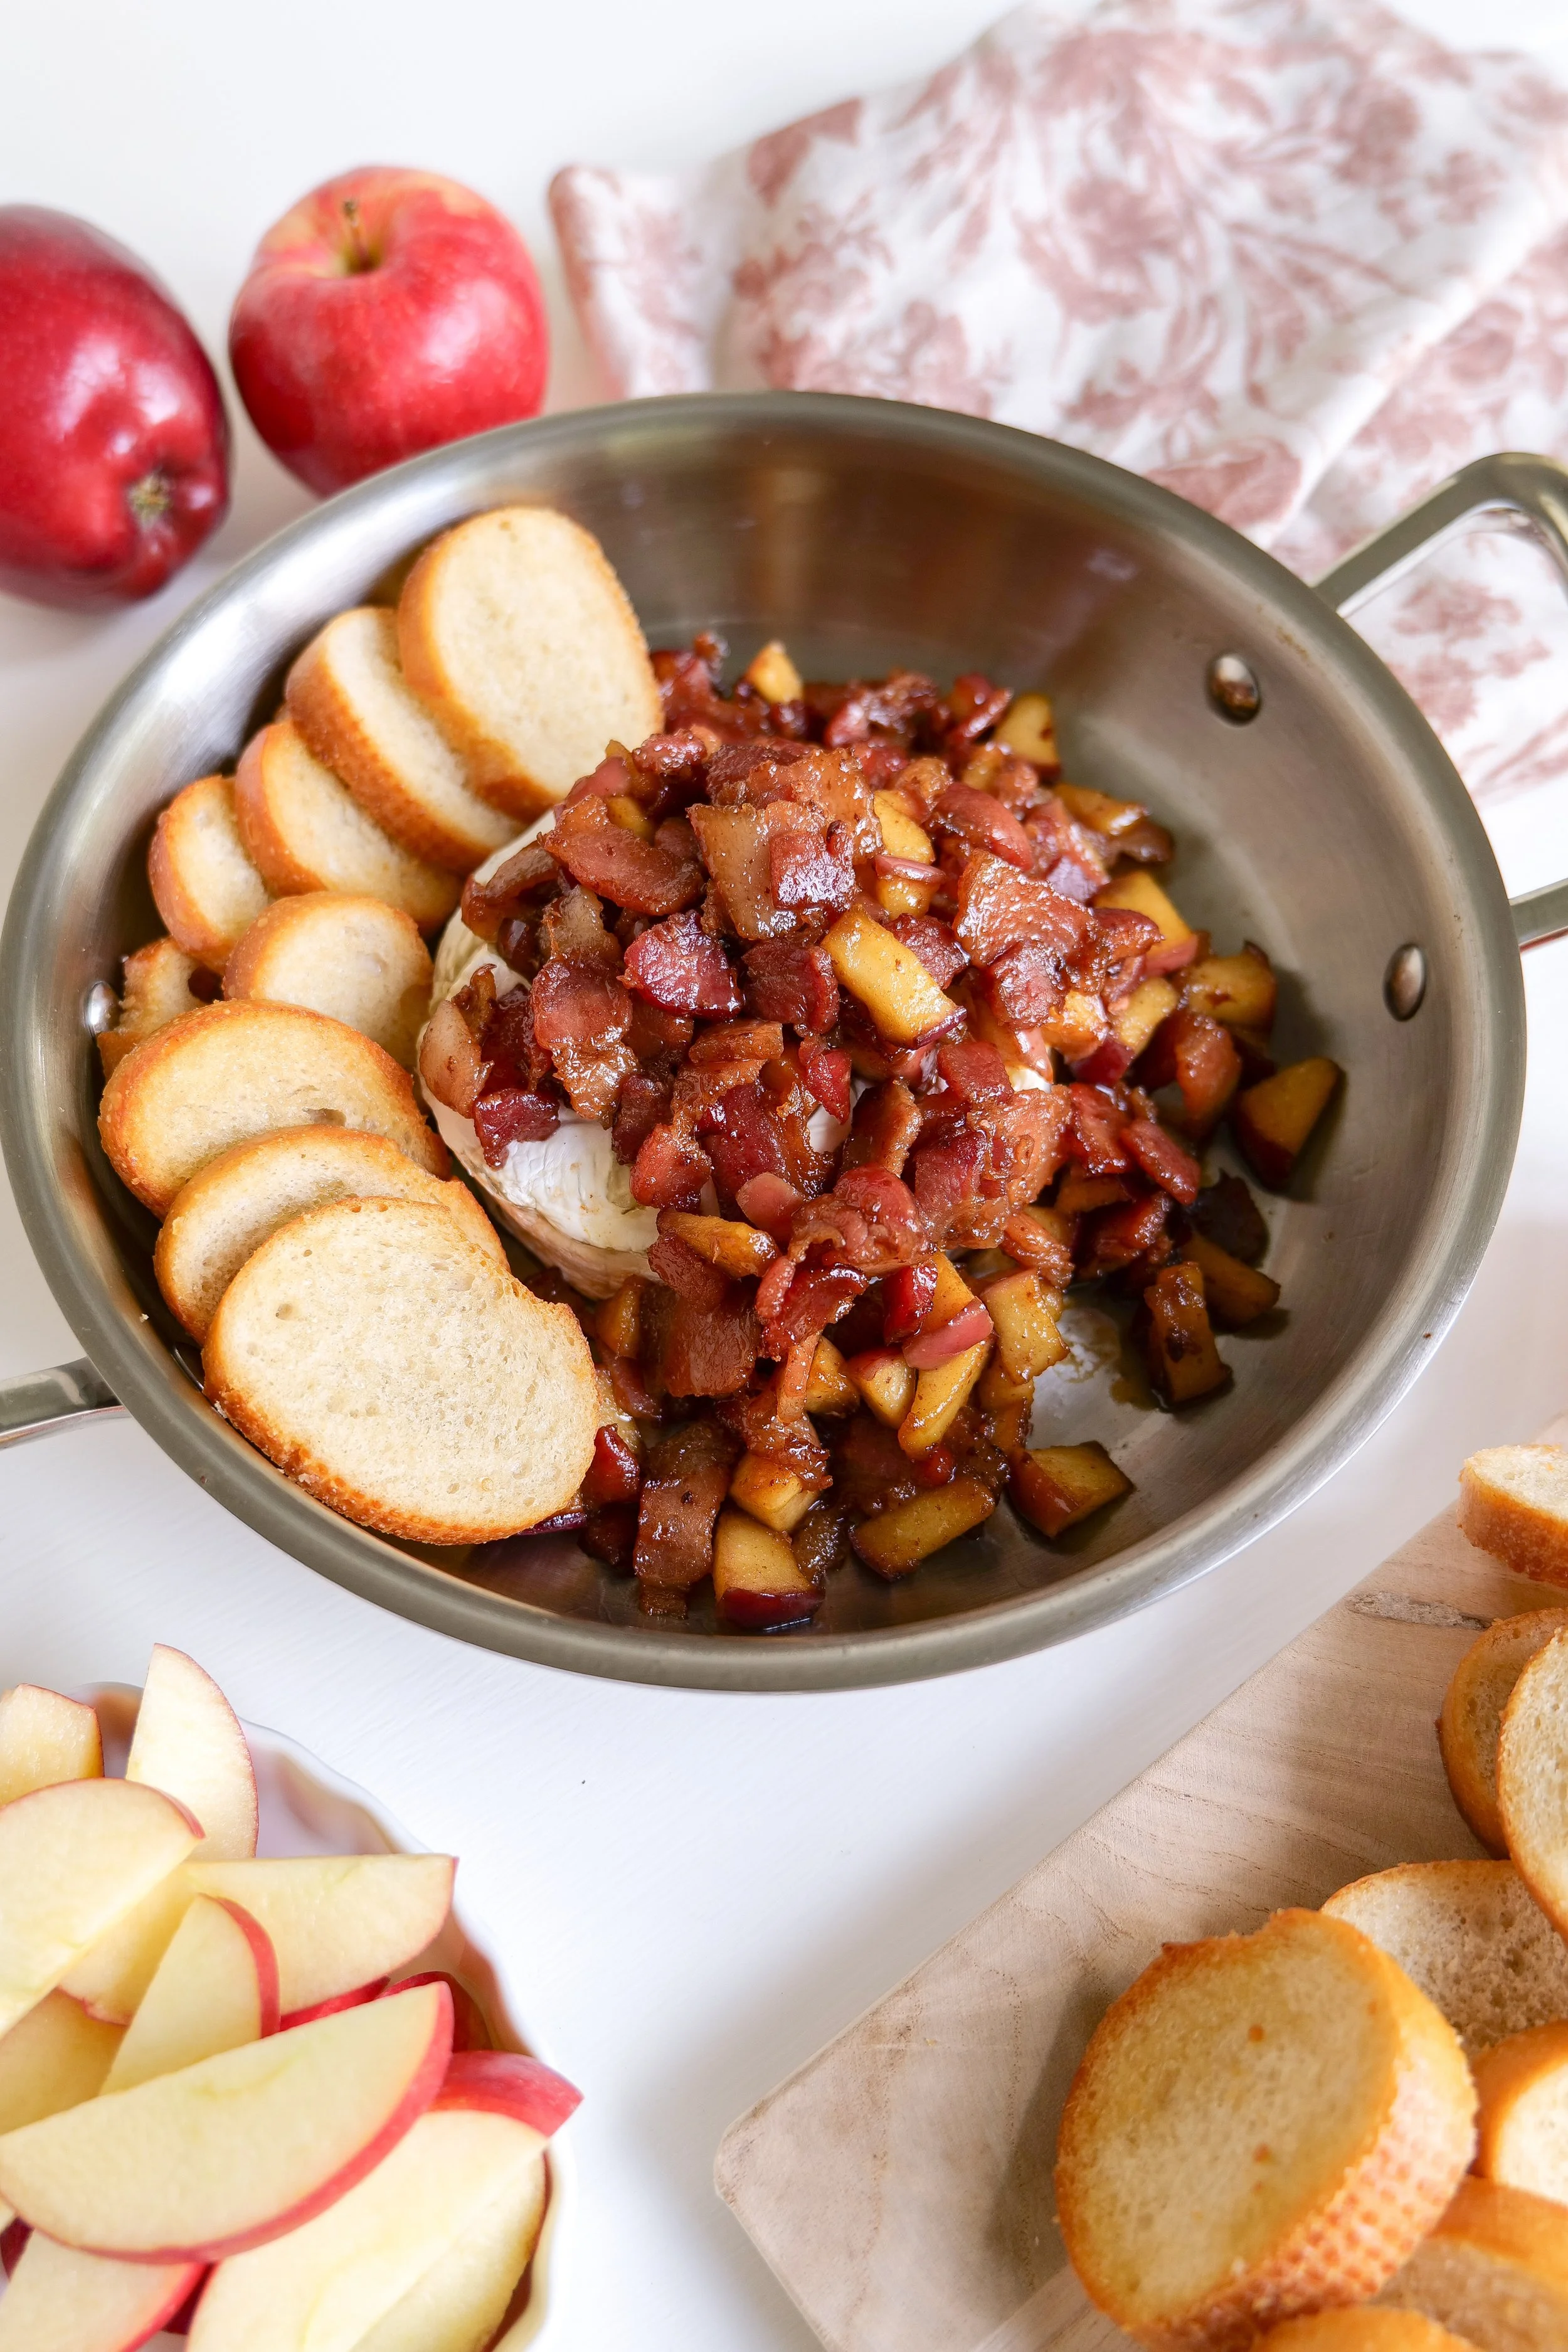
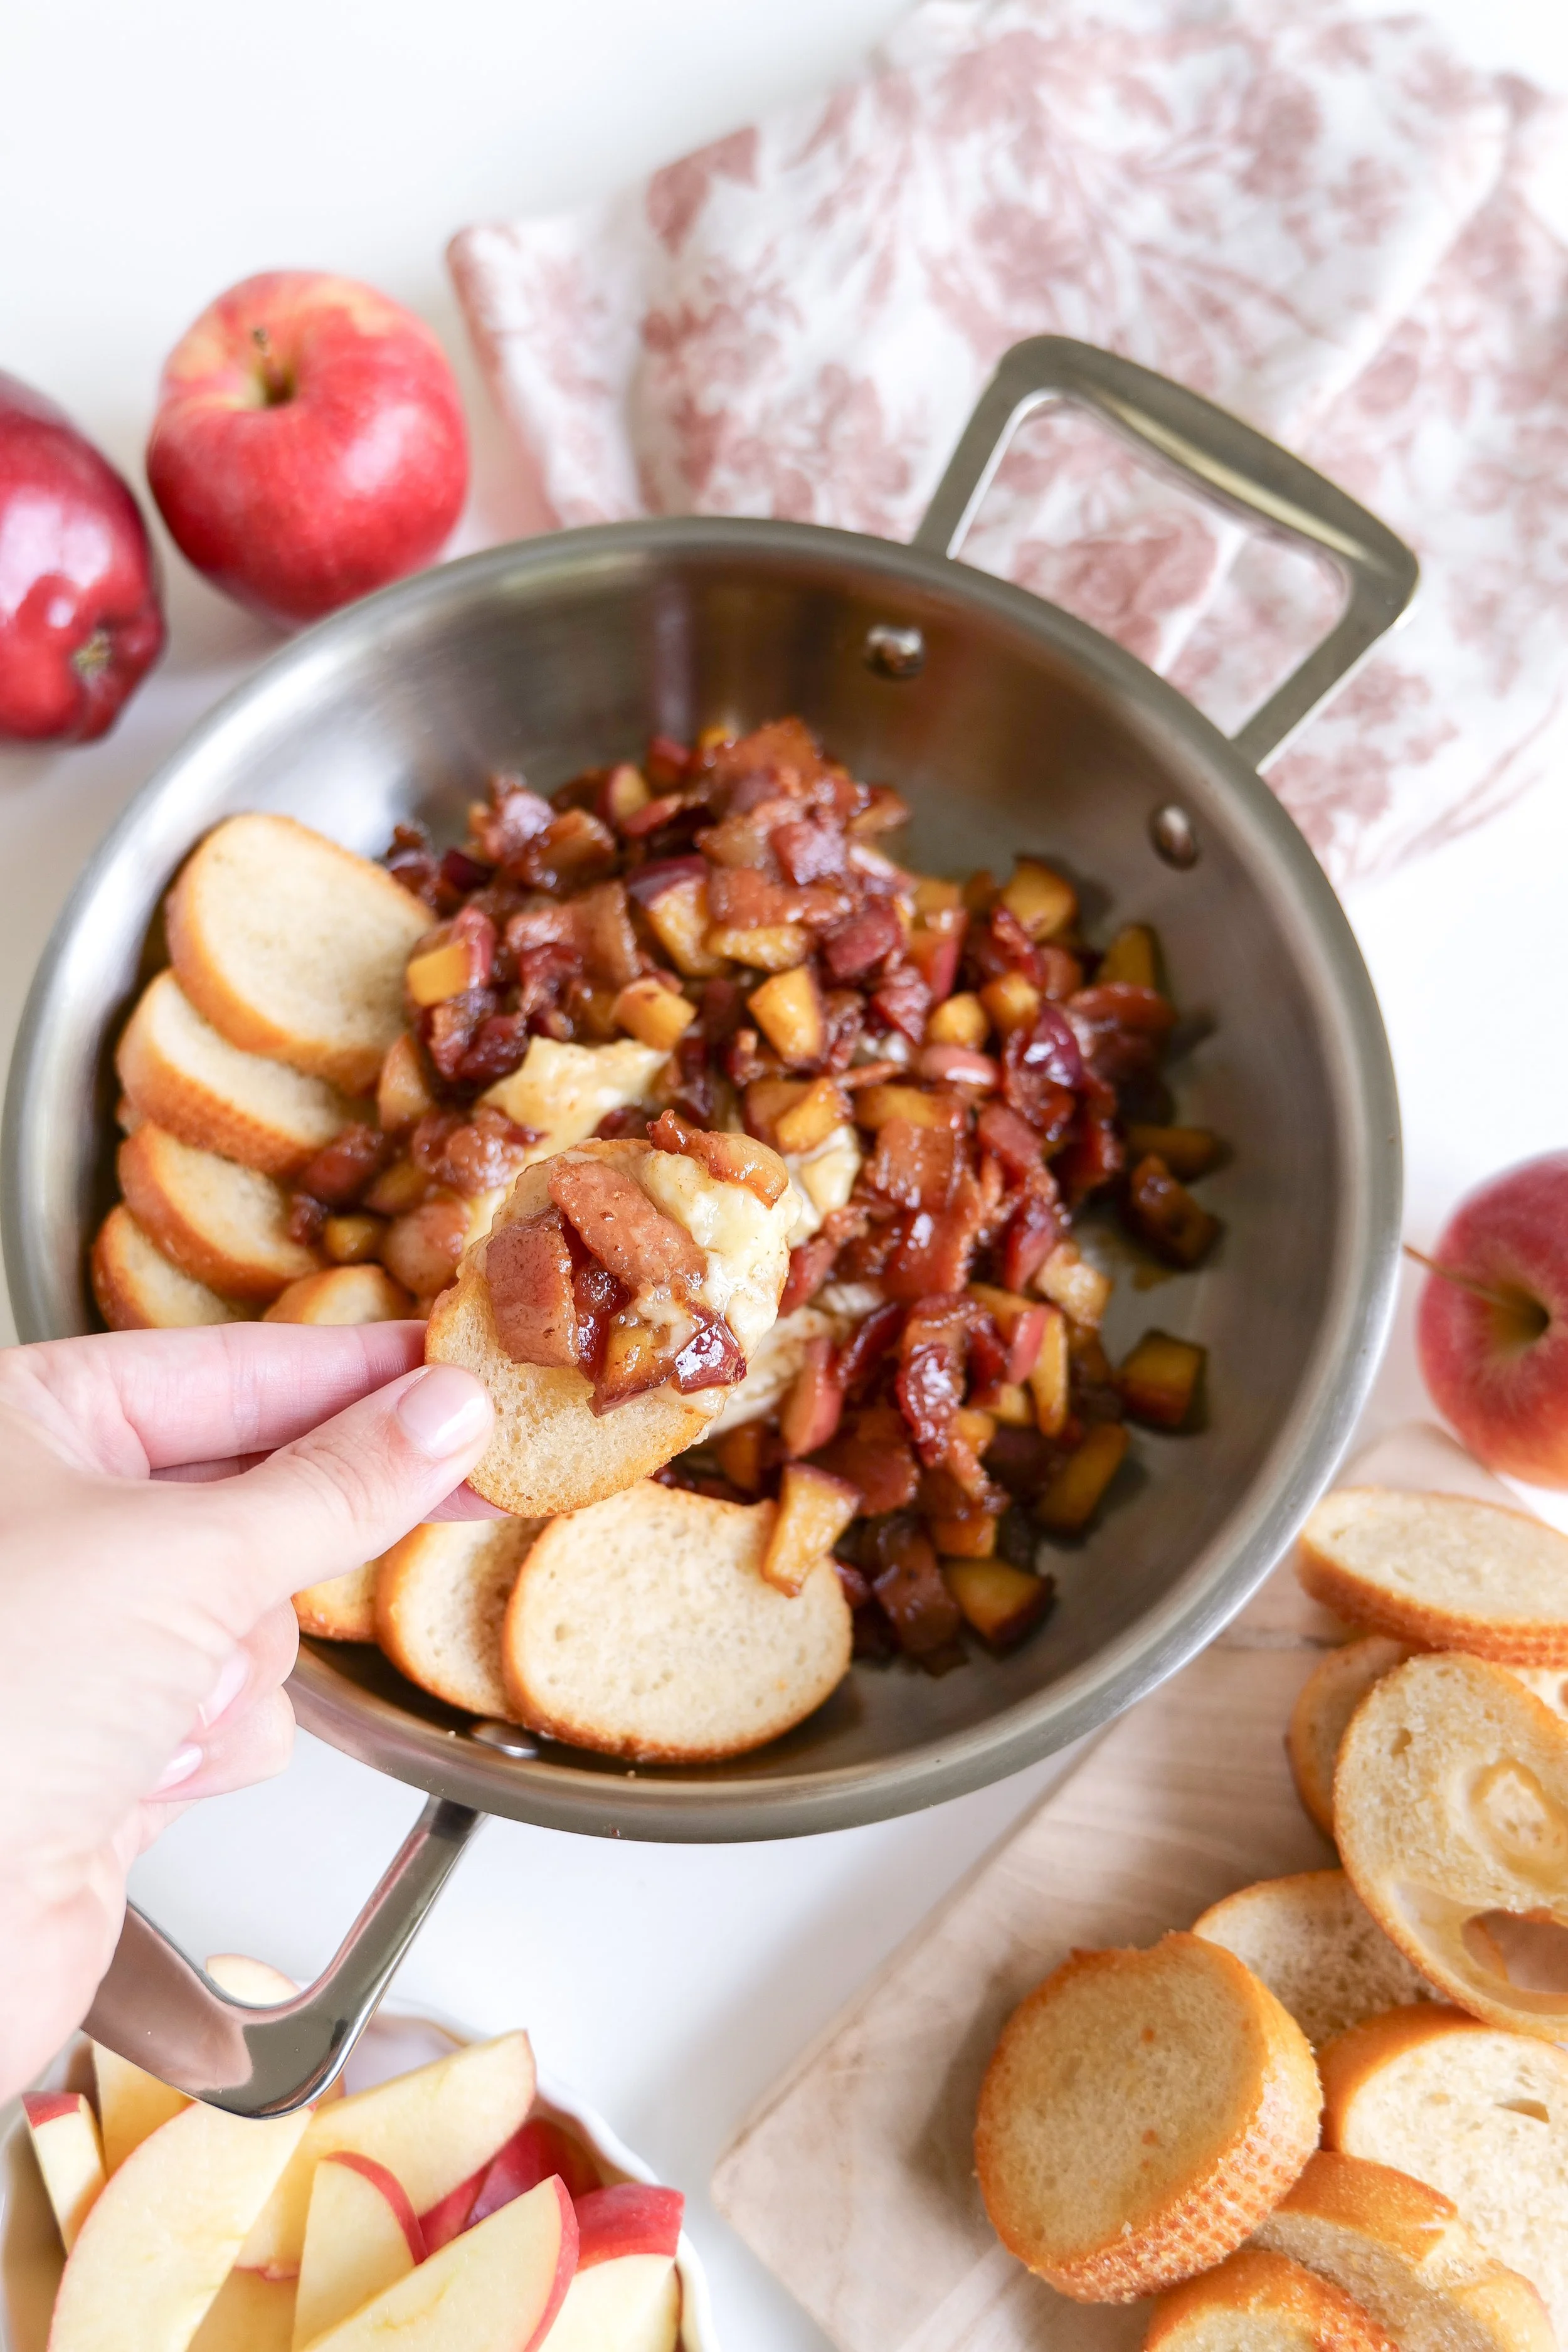
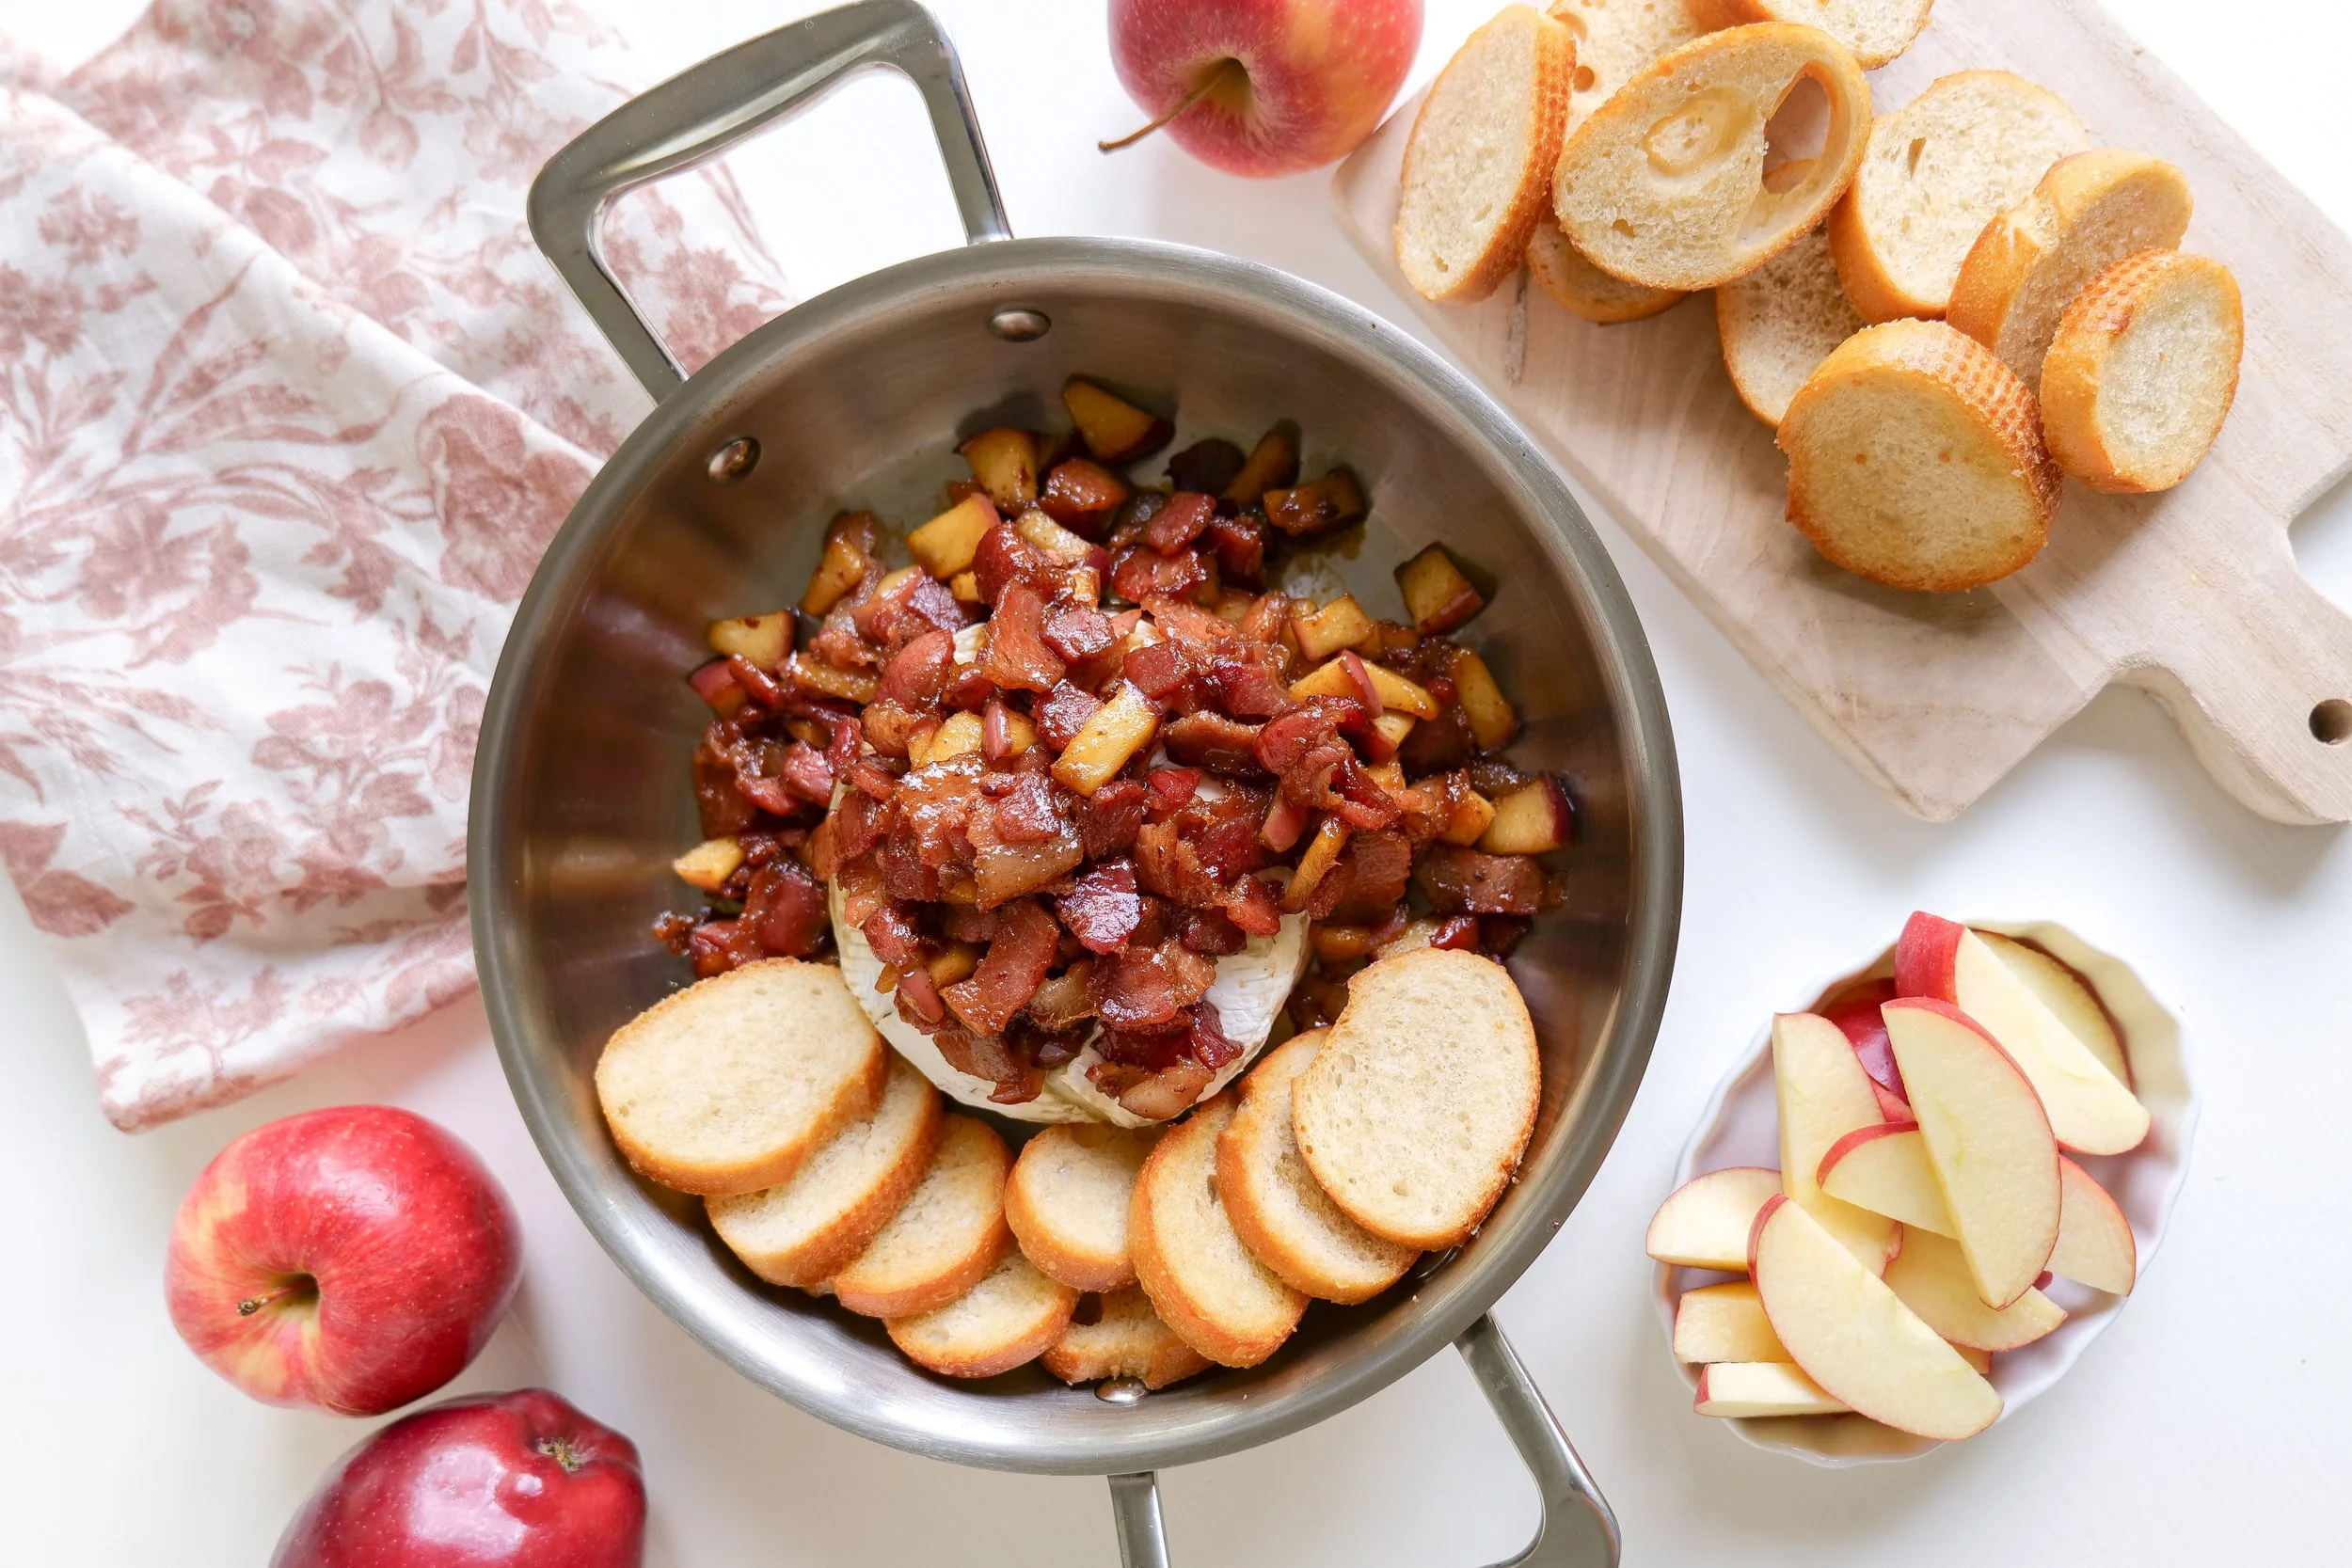
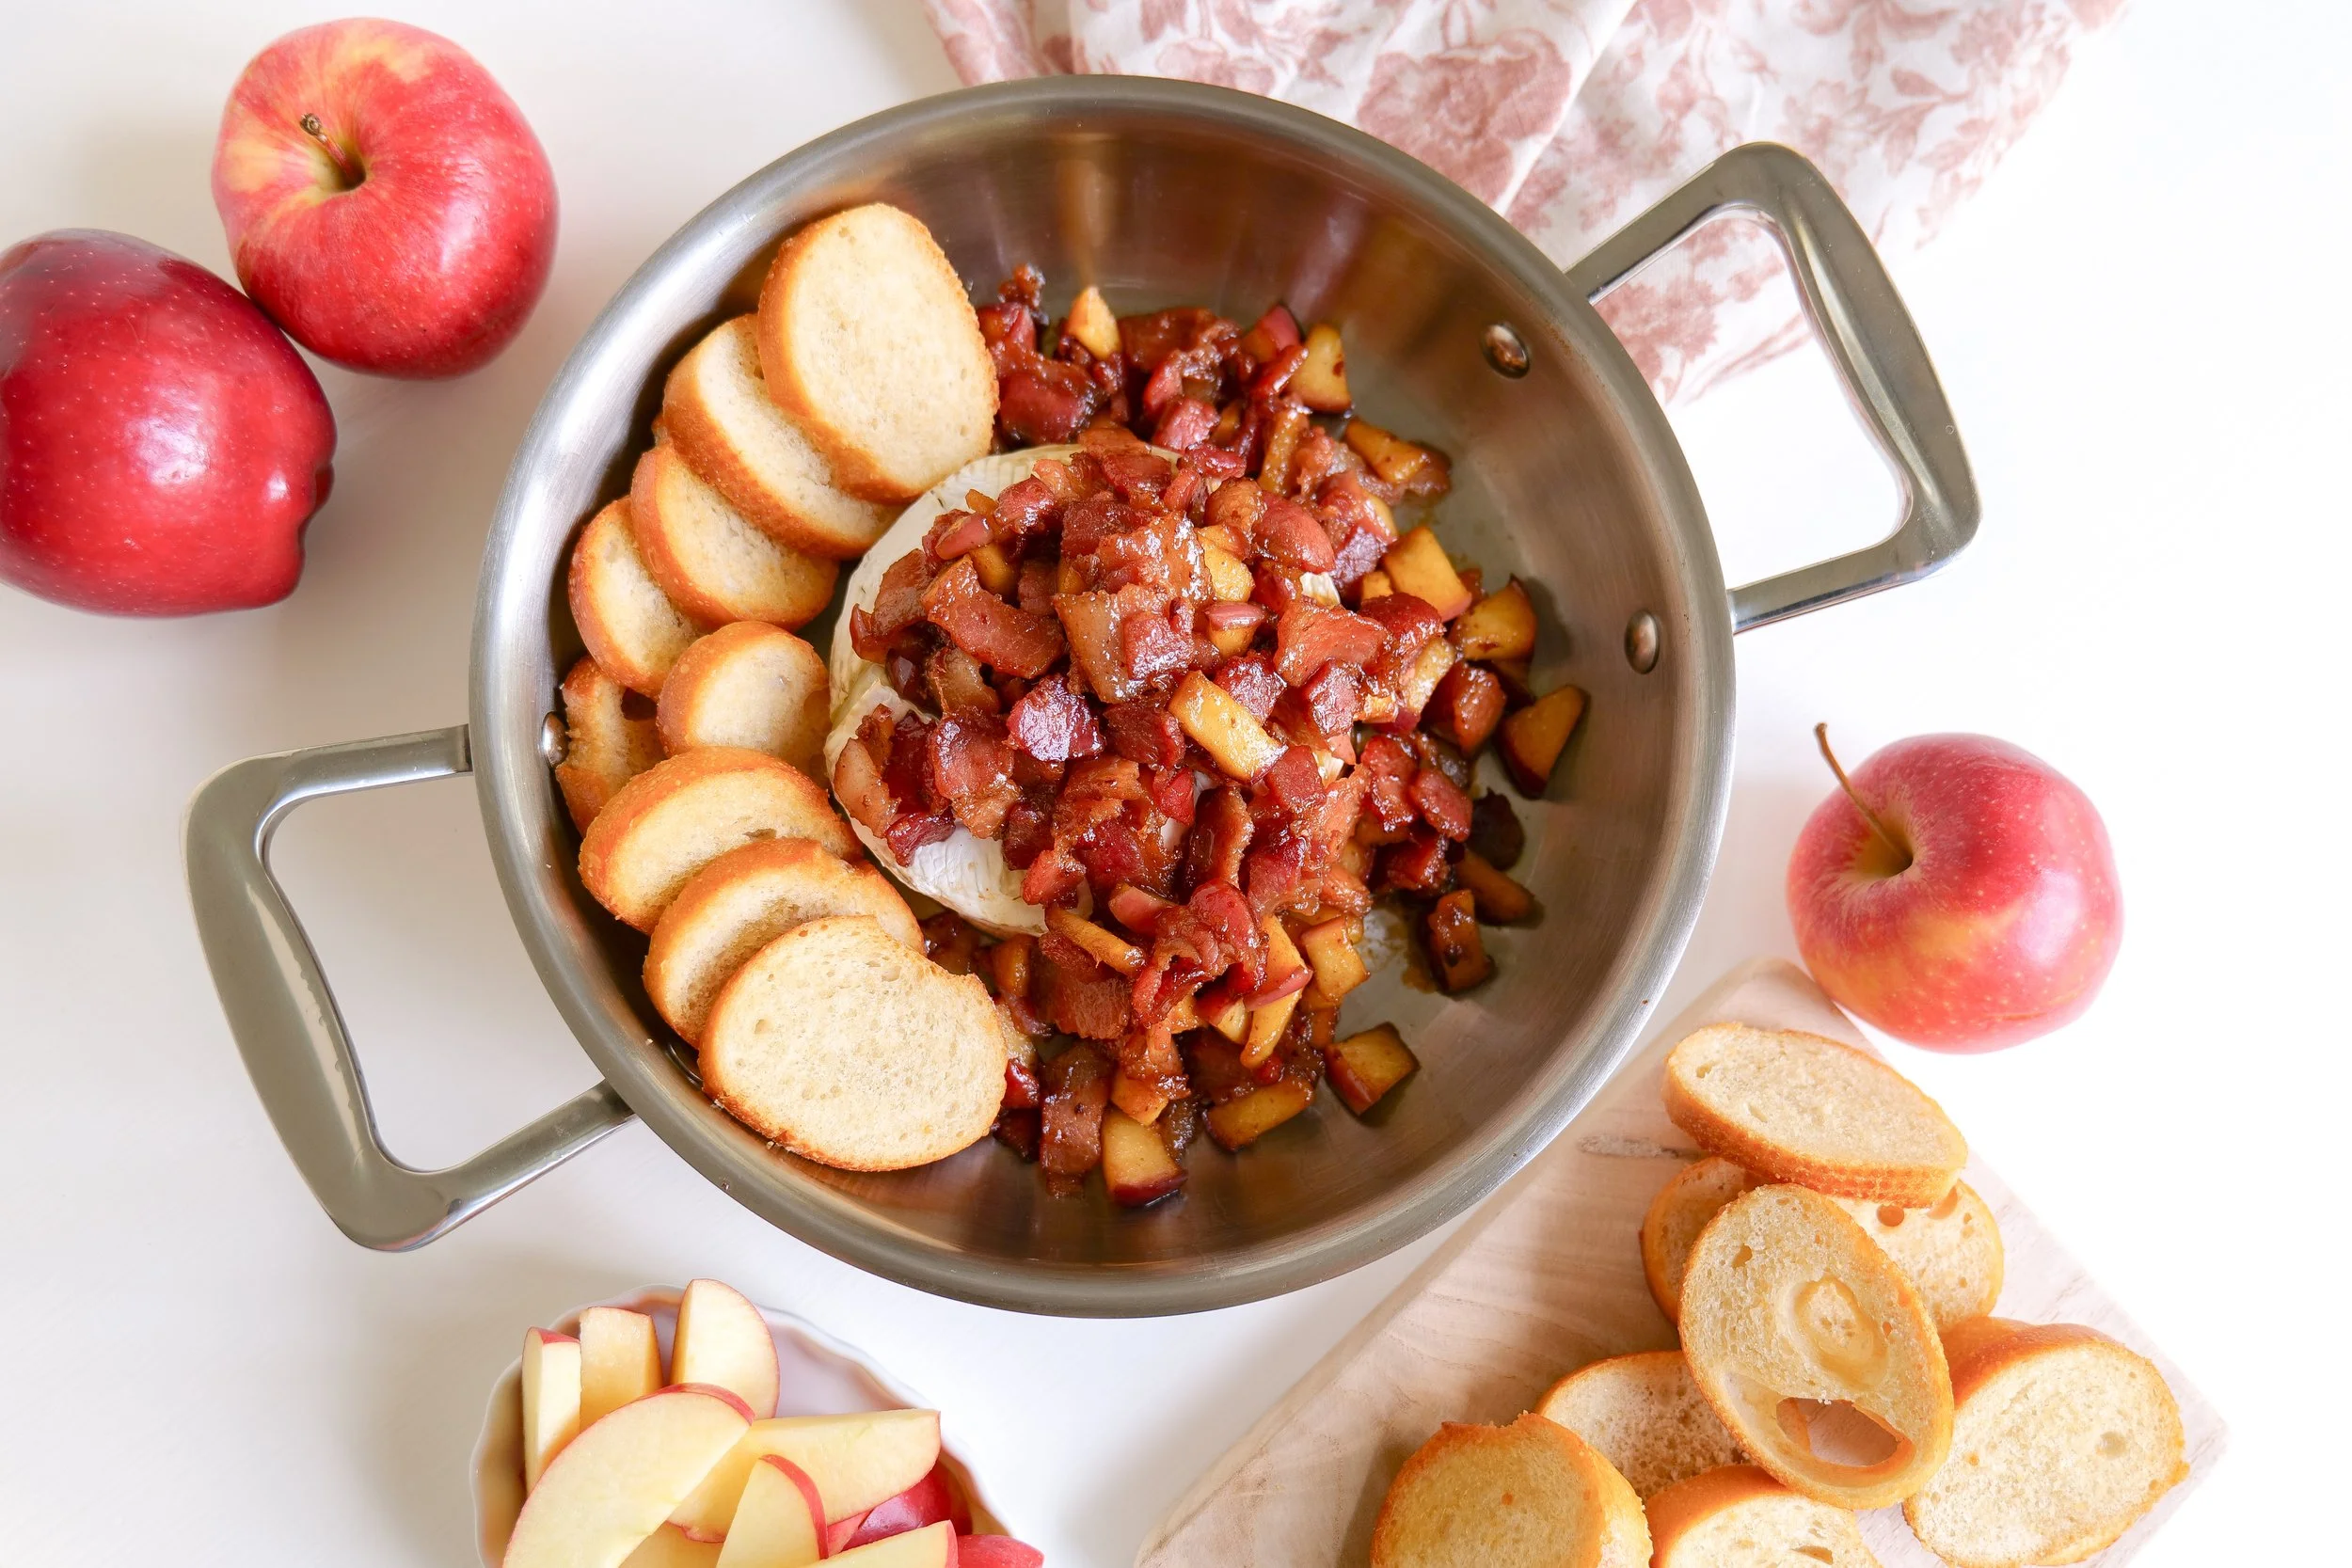
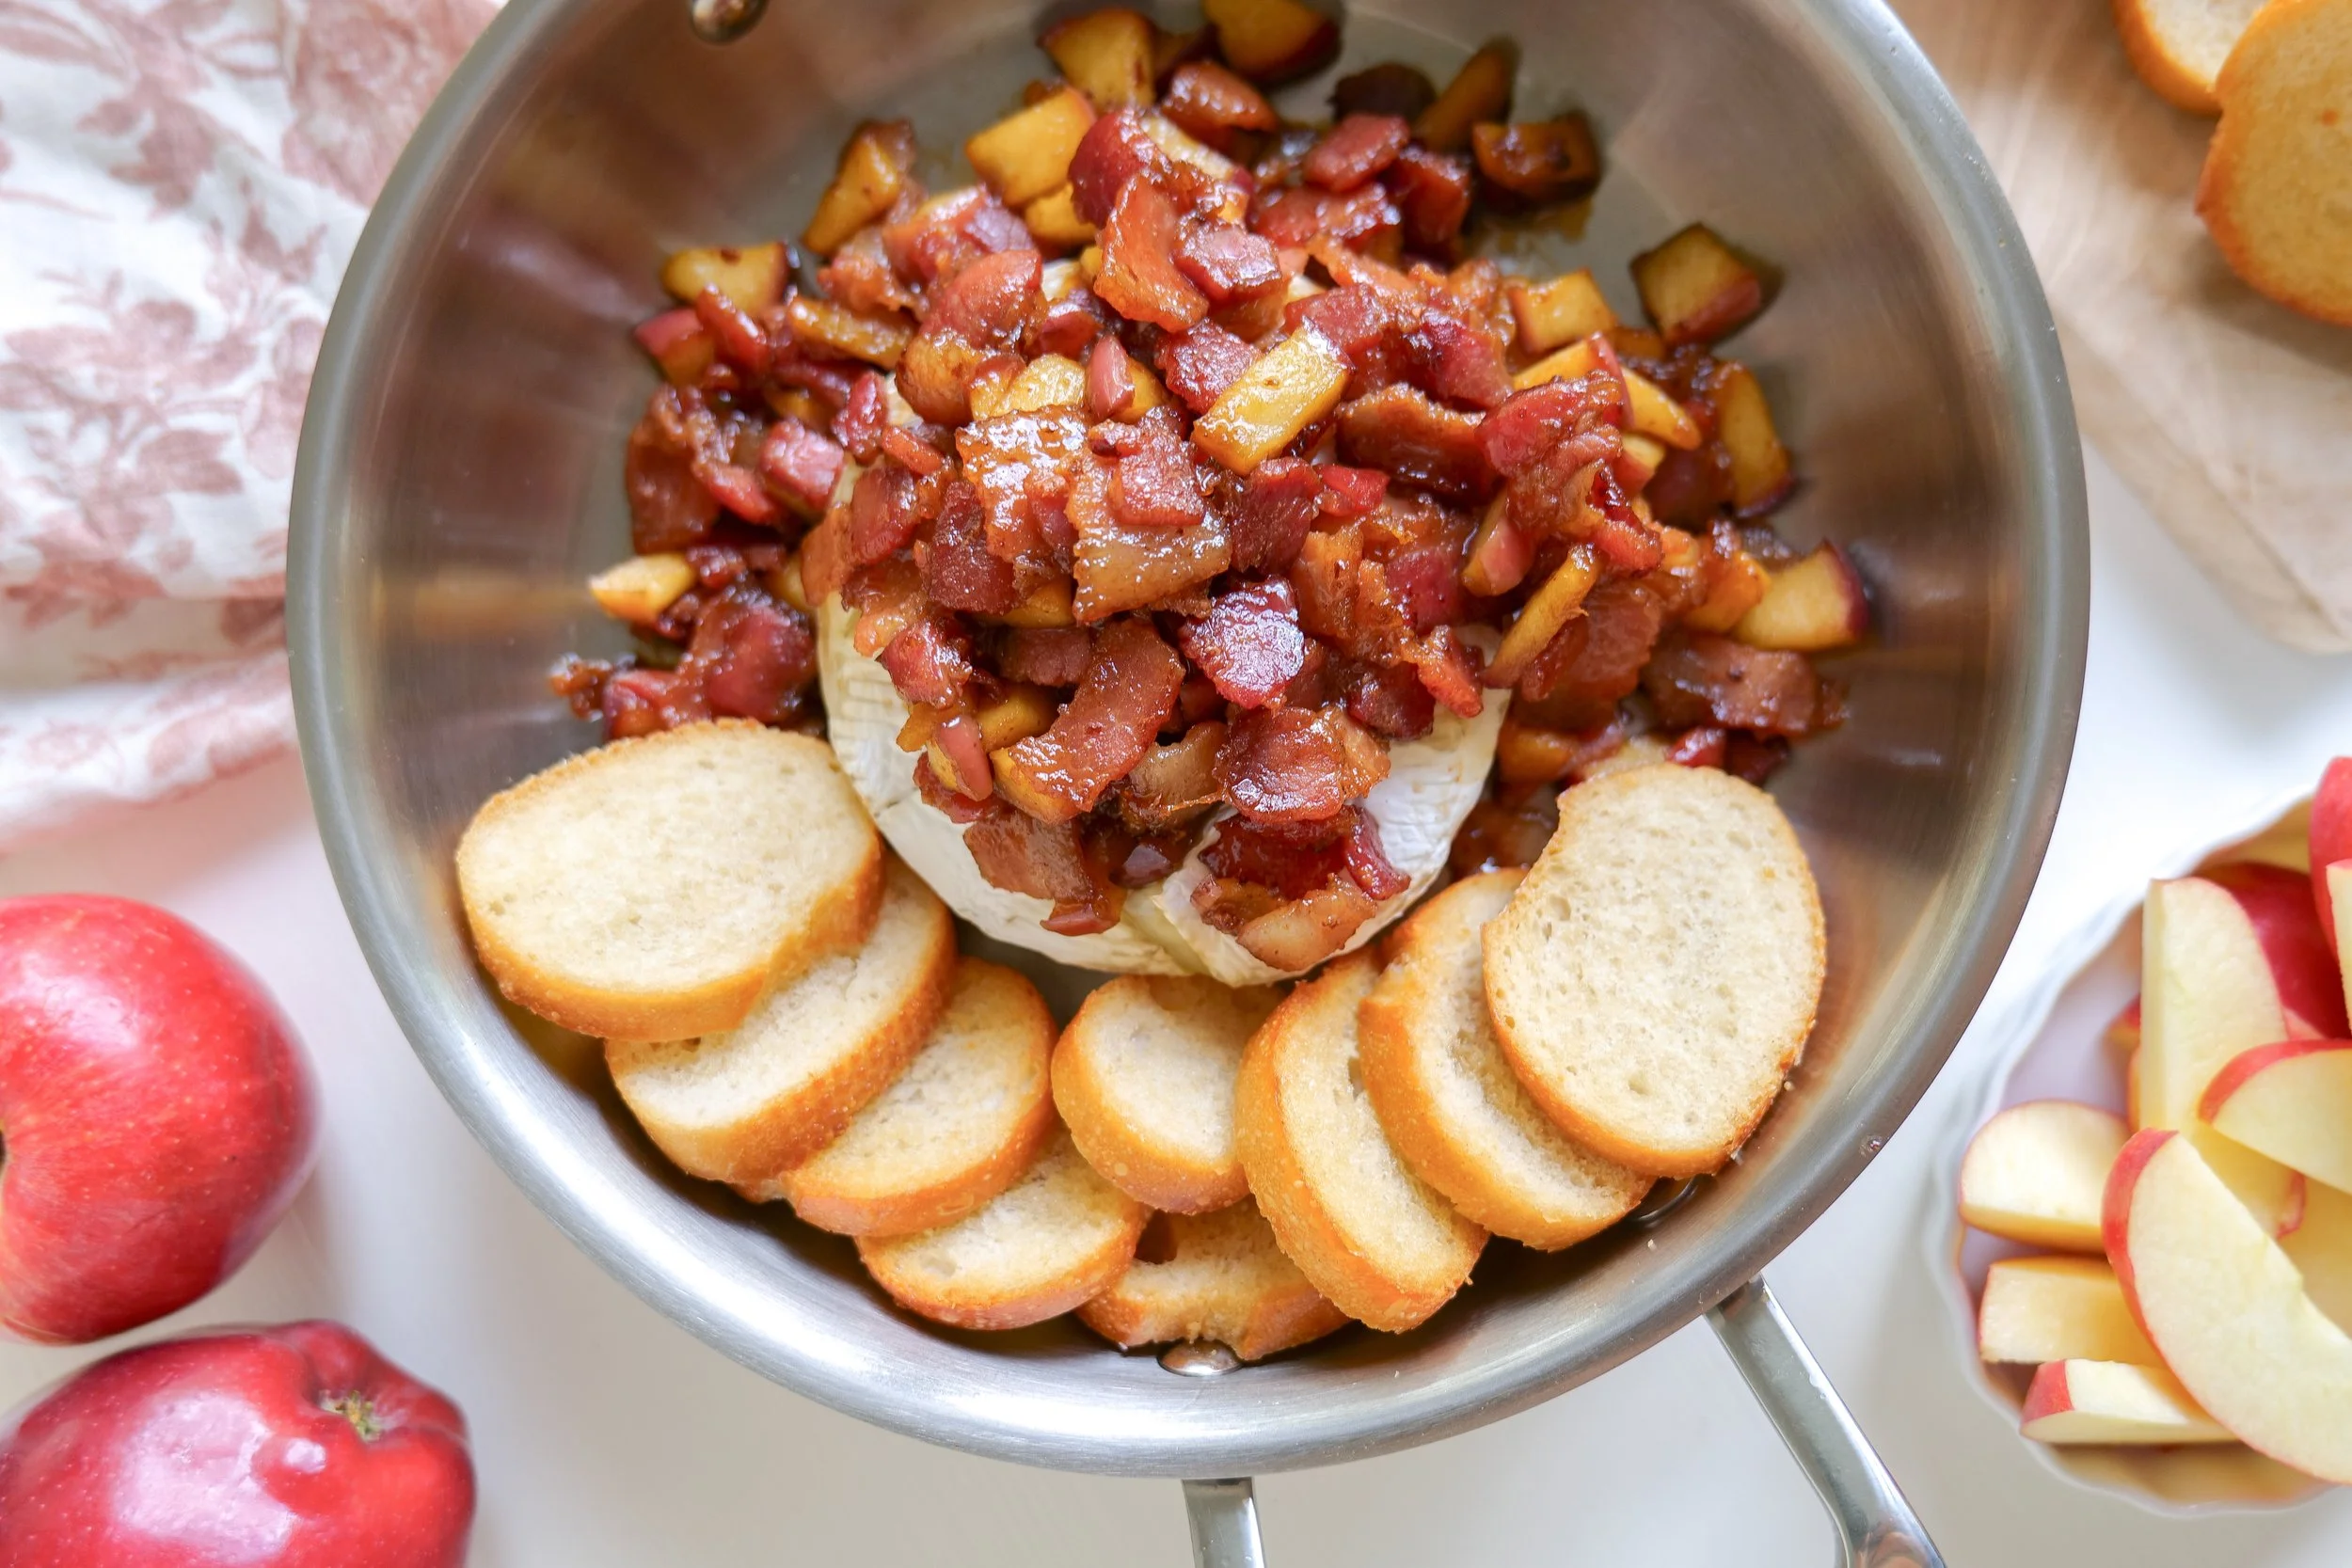
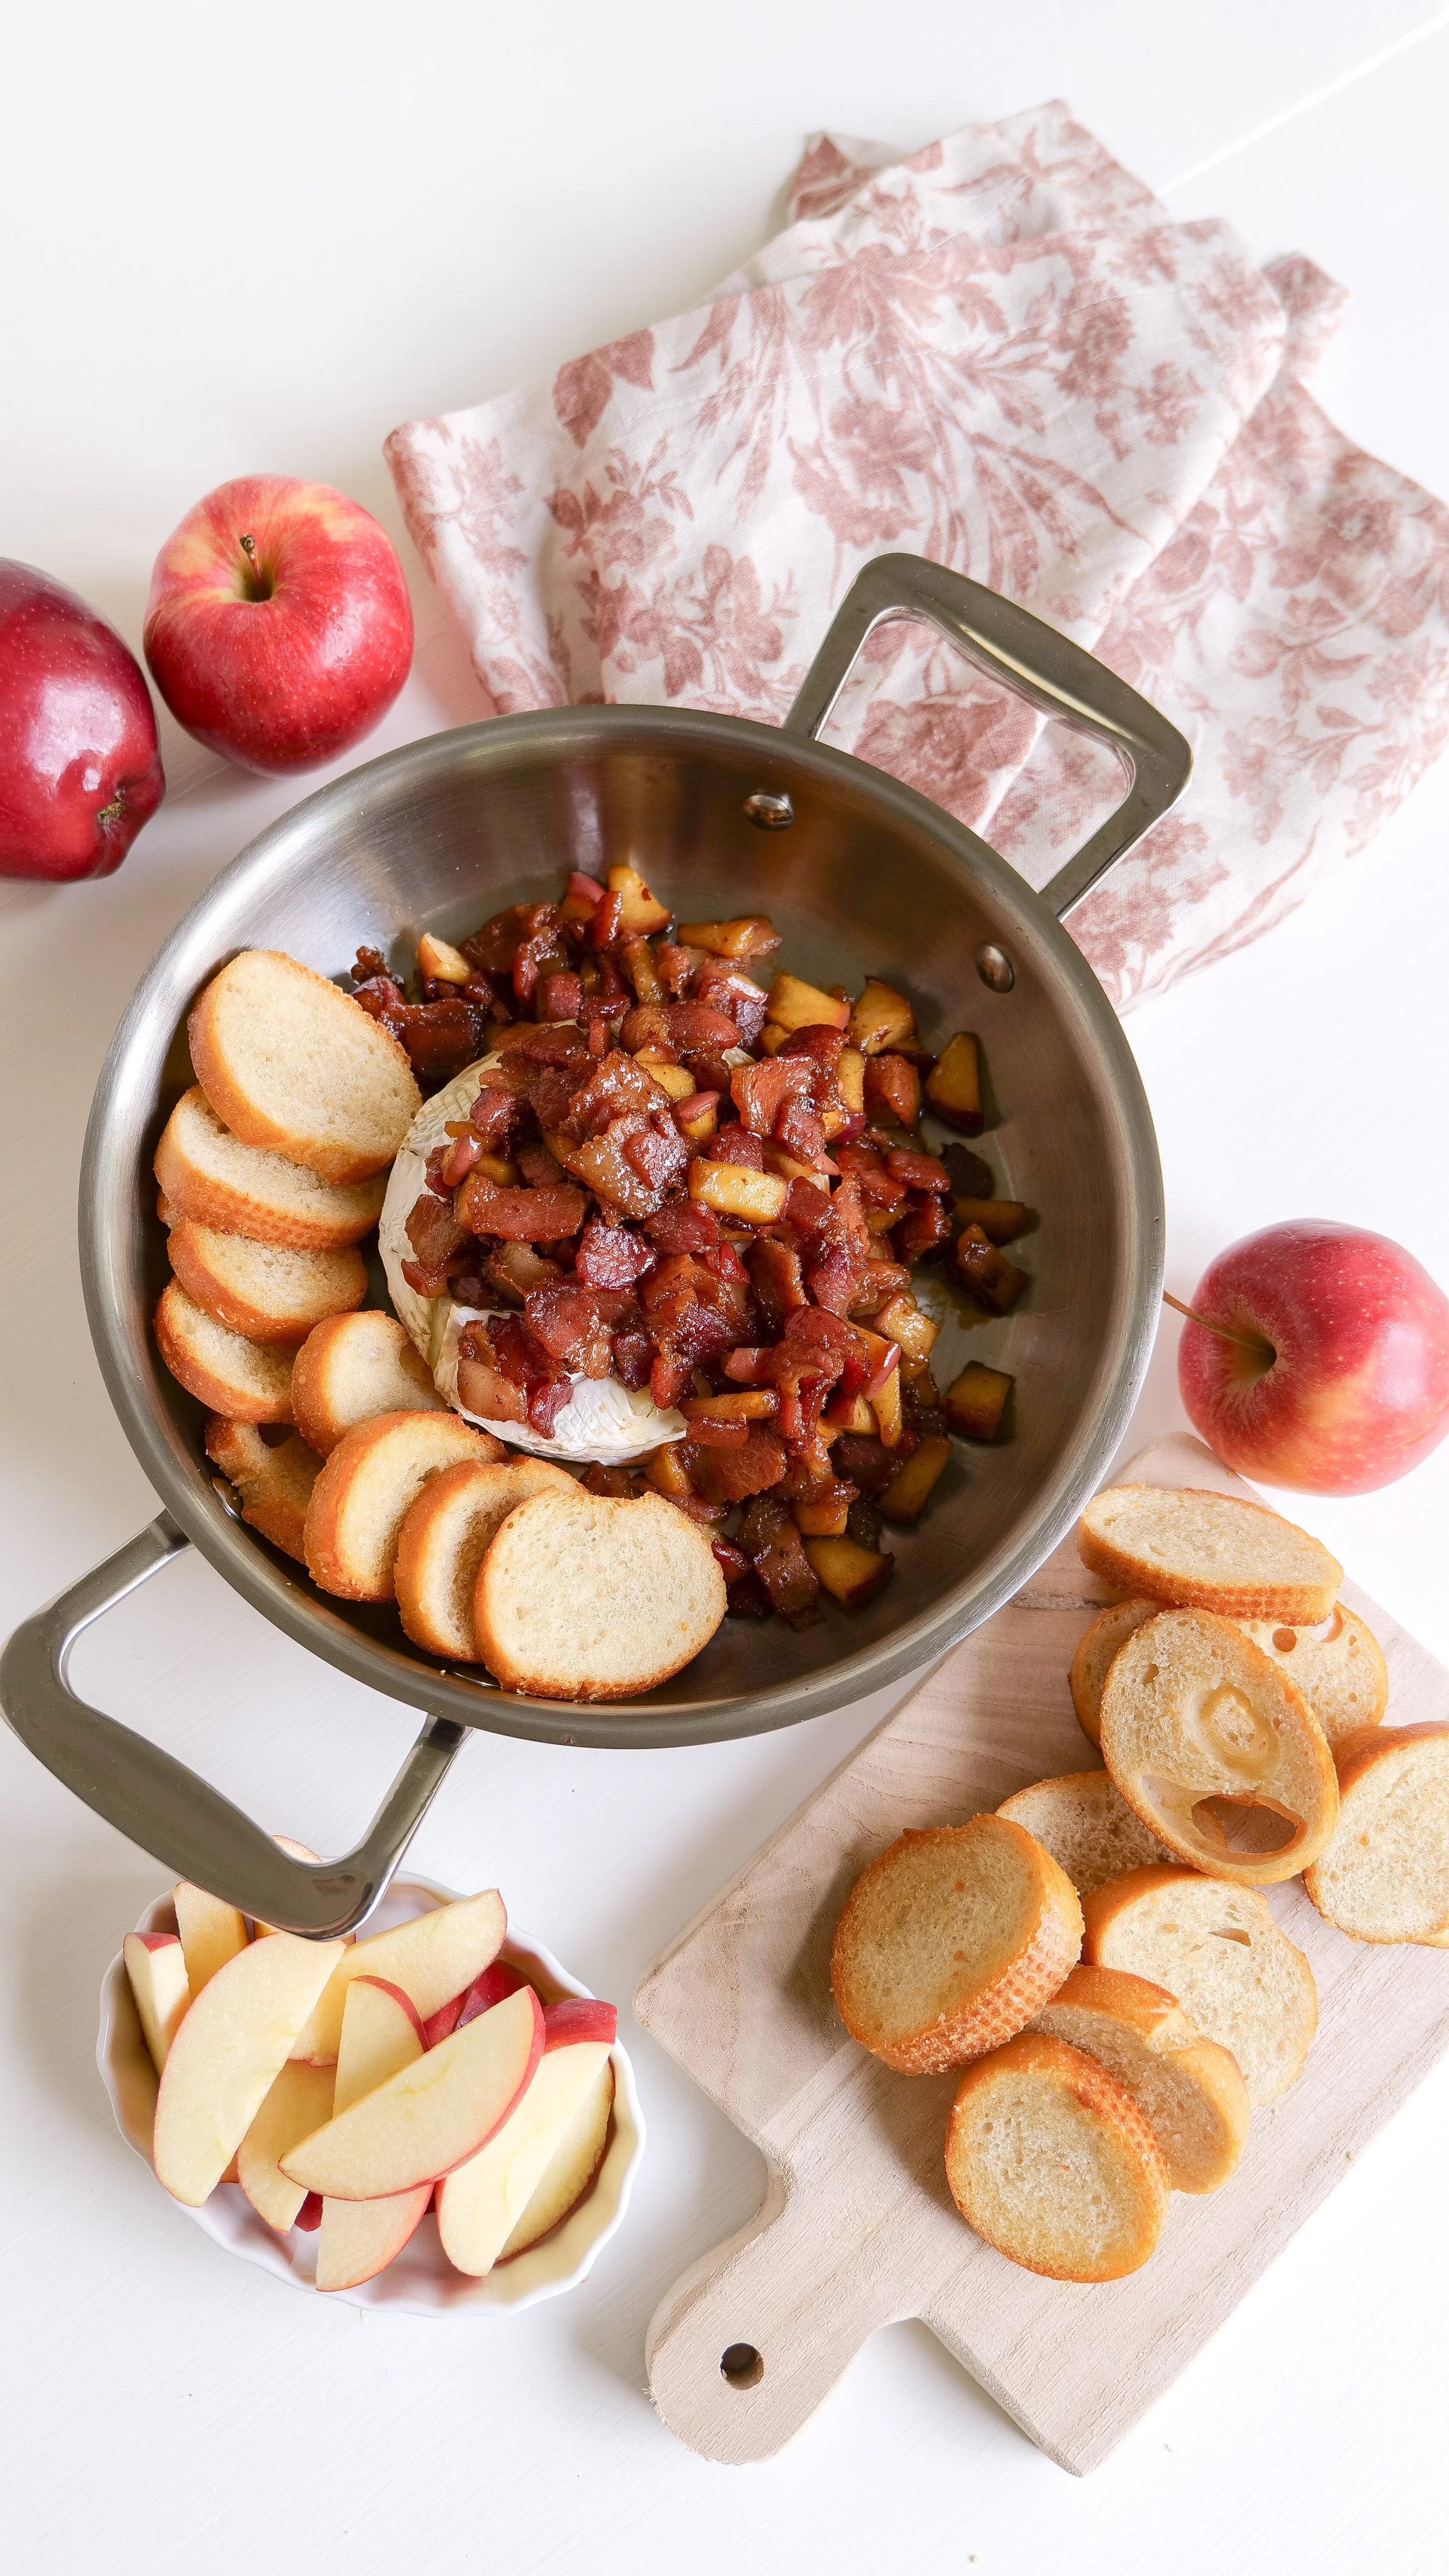
Easy bacon apple baked brie topped with crispy bacon, caramelized apples, and brown sugar served warm with crackers.

Why You'll Love This Recipe

If you're looking for an appetizer that looks impressive without spending hours in the kitchen, this is it.

You'll love this recipe because it's:

• Ready in under 30 minutes

• Perfect for holiday entertaining

• Sweet, savory, creamy, and crunchy

• Easy to prepare ahead

• Beautiful on any charcuterie board

• Made with just a handful of ingredients

• Great for Thanksgiving, Christmas, football parties, and fall gatherings

• Always the first appetizer to disappear

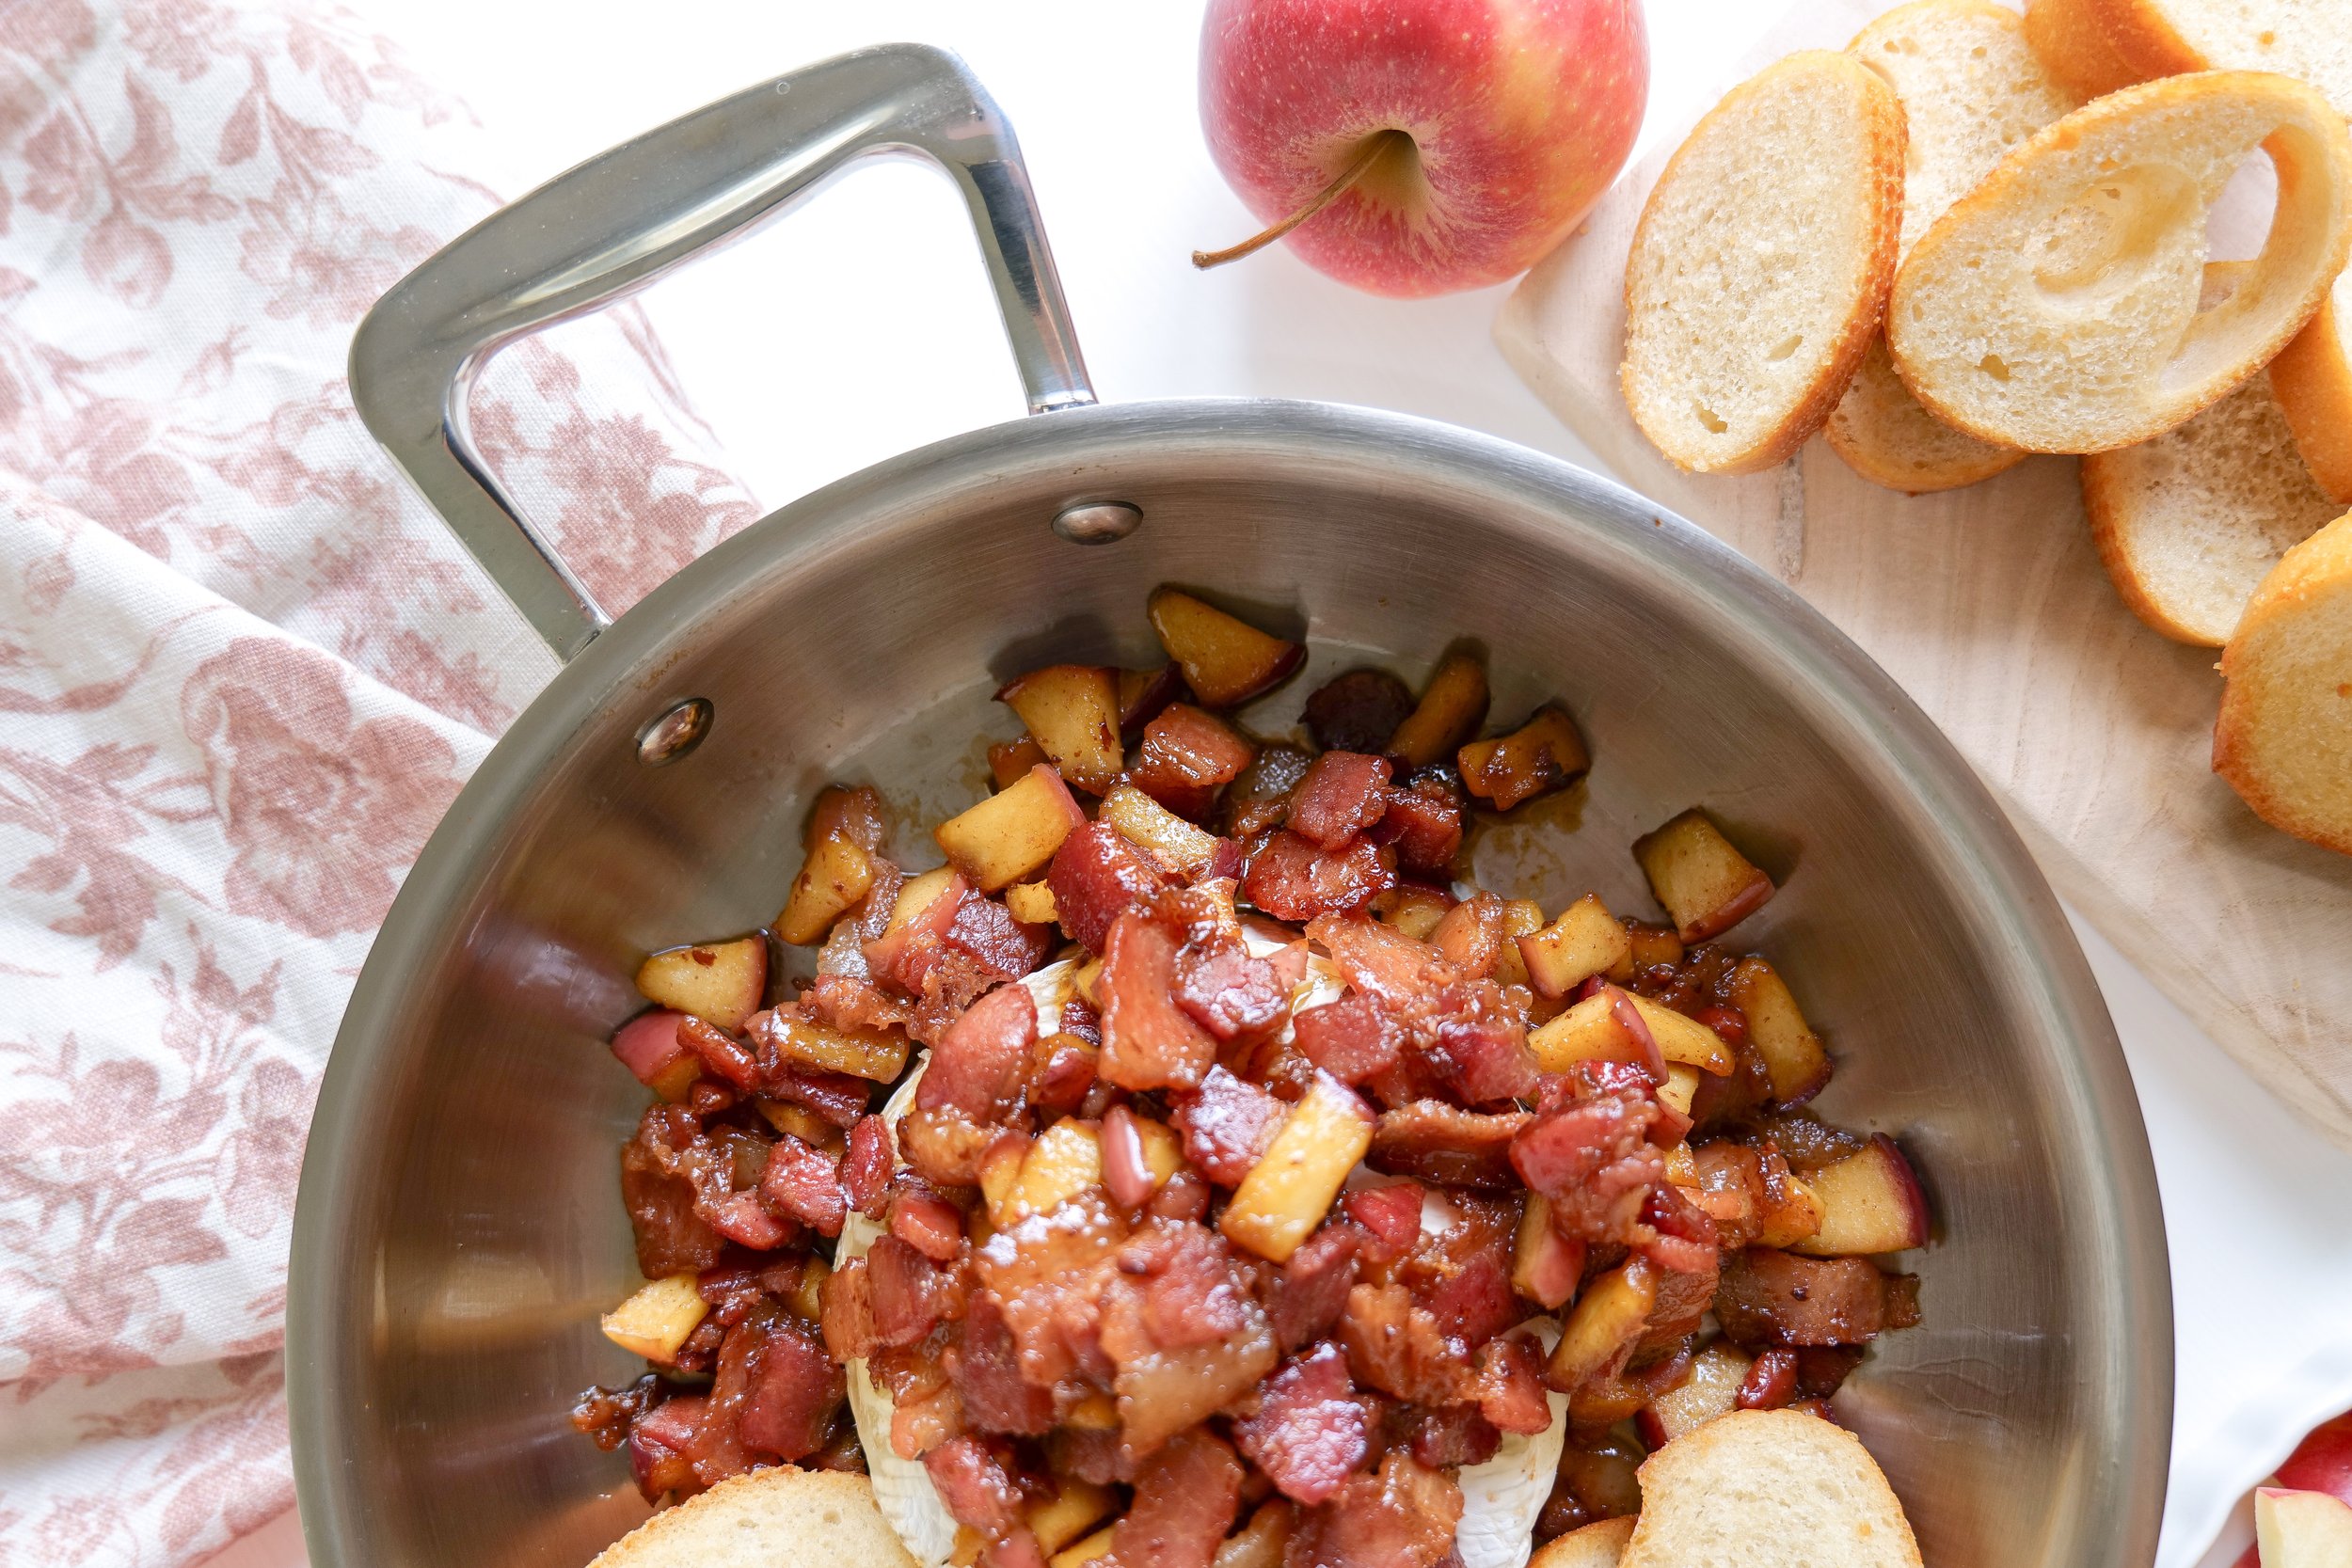
Warm baked brie topped with caramelized apples and crispy bacon on a serving platter.

Ingredient Notes

Simple ingredients make this recipe feel extra special.

Brie

Use one whole wheel of double cream brie. It becomes perfectly soft and creamy while baking without becoming runny.

Apples

Granny Smith apples are my favorite because they balance the richness of the cheese with just the right amount of tartness.

Honeycrisp also works beautifully if you prefer a sweeter bite.

Bacon

Thick-cut bacon gives the topping the best texture and smoky flavor.

Brown Sugar

Dark brown sugar creates a rich caramel-like sweetness as it melts into the apples.

Optional Additions

Although this recipe is wonderful exactly as written, chopped pecans, walnuts, fresh thyme, or a drizzle of hot honey make beautiful additions for holiday entertaining.

Creamy baked brie appetizer with bacon and apples for Thanksgiving and holiday entertaining.

Kitchen Tools

You'll only need a few kitchen staples.

  • Small oven-safe baking dish

  • Medium skillet

  • Cutting board

  • Sharp chef's knife

  • Wooden spoon

  • Serving platter

I've linked all of my favorite entertaining pieces, serving boards, cheese knives, and kitchen essentials in my Kitchen Favorites shelf.

SHOP MY KITCHEN FAVORITES

Ingredients

  • 1 (8-ounce) wheel brie cheese

  • 2 Granny Smith apples, diced

  • 3 slices thick-cut bacon, chopped

  • 2 tablespoons dark brown sugar

Optional

  • Fresh thyme

  • Chopped pecans

  • Honey

  • Crackers

  • Crostini

  • Fresh baguette

How to Make Bacon Apple Baked Brie

Preheat your oven to 350°F.

Place the wheel of brie into a small oven-safe baking dish. Using a sharp knife, lightly score the top of the cheese in a crisscross pattern.

Bake for 10–15 minutes, or until the cheese feels soft and slightly puffed.

While the brie bakes, cook the chopped bacon in a skillet over medium heat until crispy.

Remove most of the bacon grease, leaving just enough to coat the pan.

Add the diced apples and dark brown sugar.

Cook for 3–5 minutes, stirring occasionally, until the apples begin to soften and become lightly caramelized.

Carefully transfer the warm baked brie to a serving platter.

Spoon the bacon apple mixture over the top.

Serve immediately with crackers, crostini, or sliced baguette.

Easy baked brie recipe served with crackers for a simple holiday appetizer.

Amanda's Tips

Bake the Brie Just Until Soft

The brie should feel soft to the touch and slightly puffed but still hold its shape. Overbaking can cause the cheese to lose too much of its creamy center.

Cook the Apples Until They're Just Tender

You want the apples to soften while still keeping a little bite. They continue to soften slightly after they're spooned over the warm brie.

Serve Immediately

Baked brie is at its absolute best fresh from the oven while it's perfectly warm and creamy.

Make It Your Own

A sprinkle of chopped pecans, fresh thyme, or a drizzle of hot honey makes this recipe feel even more special during the holidays.

Build a Beautiful Board

Arrange crackers, sliced baguette, grapes, apple slices, and a handful of nuts around the baked brie for an effortless appetizer everyone will gather around.

Close-up of creamy baked brie topped with crispy bacon and tender apples.

Easy Variations

One of my favorite things about this recipe is how easy it is to customize depending on the season or the occasion.

Maple Bacon Baked Brie

Replace the brown sugar with pure maple syrup for an even richer fall flavor.

Cranberry Bacon Brie

Swap the apples for homemade cranberry sauce during Thanksgiving and Christmas.

Pear & Brie

Use diced ripe pears instead of apples for a softer, sweeter topping.

Candied Pecan Brie

Top with chopped candied pecans for extra crunch.

Hot Honey Brie

Finish with a drizzle of hot honey for a sweet and spicy twist.

Bacon apple baked brie served as part of a fall cheese board with crackers.

Make Ahead Tips

This appetizer is perfect for entertaining because almost everything can be prepared ahead of time.

Cook the bacon and apple mixture earlier in the day and refrigerate until you're ready to serve.

Just before guests arrive, bake the brie, gently reheat the topping, and spoon it over the warm cheese.

You'll have an appetizer that tastes freshly made without spending the entire party in the kitchen.

Storage & Reheating

If you happen to have leftovers, transfer the baked brie to an airtight container and refrigerate for up to 3 days.

To reheat, place it in a 350°F oven for about 10 minutes, or until warmed through.

I don't recommend microwaving it, as the cheese can separate and become oily.

Warm baked brie with apples and bacon served for a Thanksgiving appetizer.

Frequently Asked Questions

Can I prepare baked brie ahead of time?

Yes! Prepare the bacon apple topping in advance, then bake the brie just before serving.

What apples work best?

Granny Smith is my favorite because the tartness balances the rich cheese beautifully.

Honeycrisp is another wonderful option.

Should I remove the rind?

No.

The rind is completely edible and helps the brie hold its shape while baking.

Can I use a different cheese?

Brie is definitely the best option, but Camembert also works well.

Can I make this without bacon?

Absolutely.

Simply leave it out for a delicious vegetarian baked brie.

Can I add nuts?

Yes!

Pecans and walnuts are both delicious additions.

Can I freeze baked brie?

I don't recommend freezing it because the texture of the cheese changes after thawing.

How long can it sit out?

Plan to enjoy it within about 2 hours of serving.

What crackers are best?

I love serving it with butter crackers, crostini, toasted baguette slices, or hearty artisan crackers.

Can I make this for Thanksgiving?

Absolutely.

This is one of my favorite appetizers for Thanksgiving, Christmas, Friendsgiving, and holiday parties.

Holiday baked brie appetizer topped with apples and bacon for entertaining guests.

What to Serve with Bacon Apple Baked Brie

This appetizer pairs beautifully with:

  • Fresh sliced baguette

  • Crostini

  • Artisan crackers

  • Apple slices

  • Pear slices

  • Grapes

  • Candied pecans

  • Mixed nuts

  • Charcuterie meats

  • Sparkling apple cider

For a complete appetizer spread, I also love serving it alongside:

Easy fall cheese appetizer featuring baked brie with bacon and apples.

More Appetizers You'll Love

If you're planning a party, holiday gathering, or cozy evening at home, here are a few more favorites from Amanda's Kitchen:

Shop My Entertaining Favorites

If you loved this recipe, you can shop my favorite serving boards, cheese knives, baking dishes, entertaining pieces, and kitchen essentials that I use for hosting family and friends.

SHOP MY ENTERTAINING FAVORITES

Printable Recipe Card

Whether you're hosting Thanksgiving dinner, Christmas appetizers, Friendsgiving, or simply enjoying a cozy evening at home, I've included the printable recipe card below so you can easily save, print, and make this recipe again and again.

It's one of those appetizers that always disappears first.

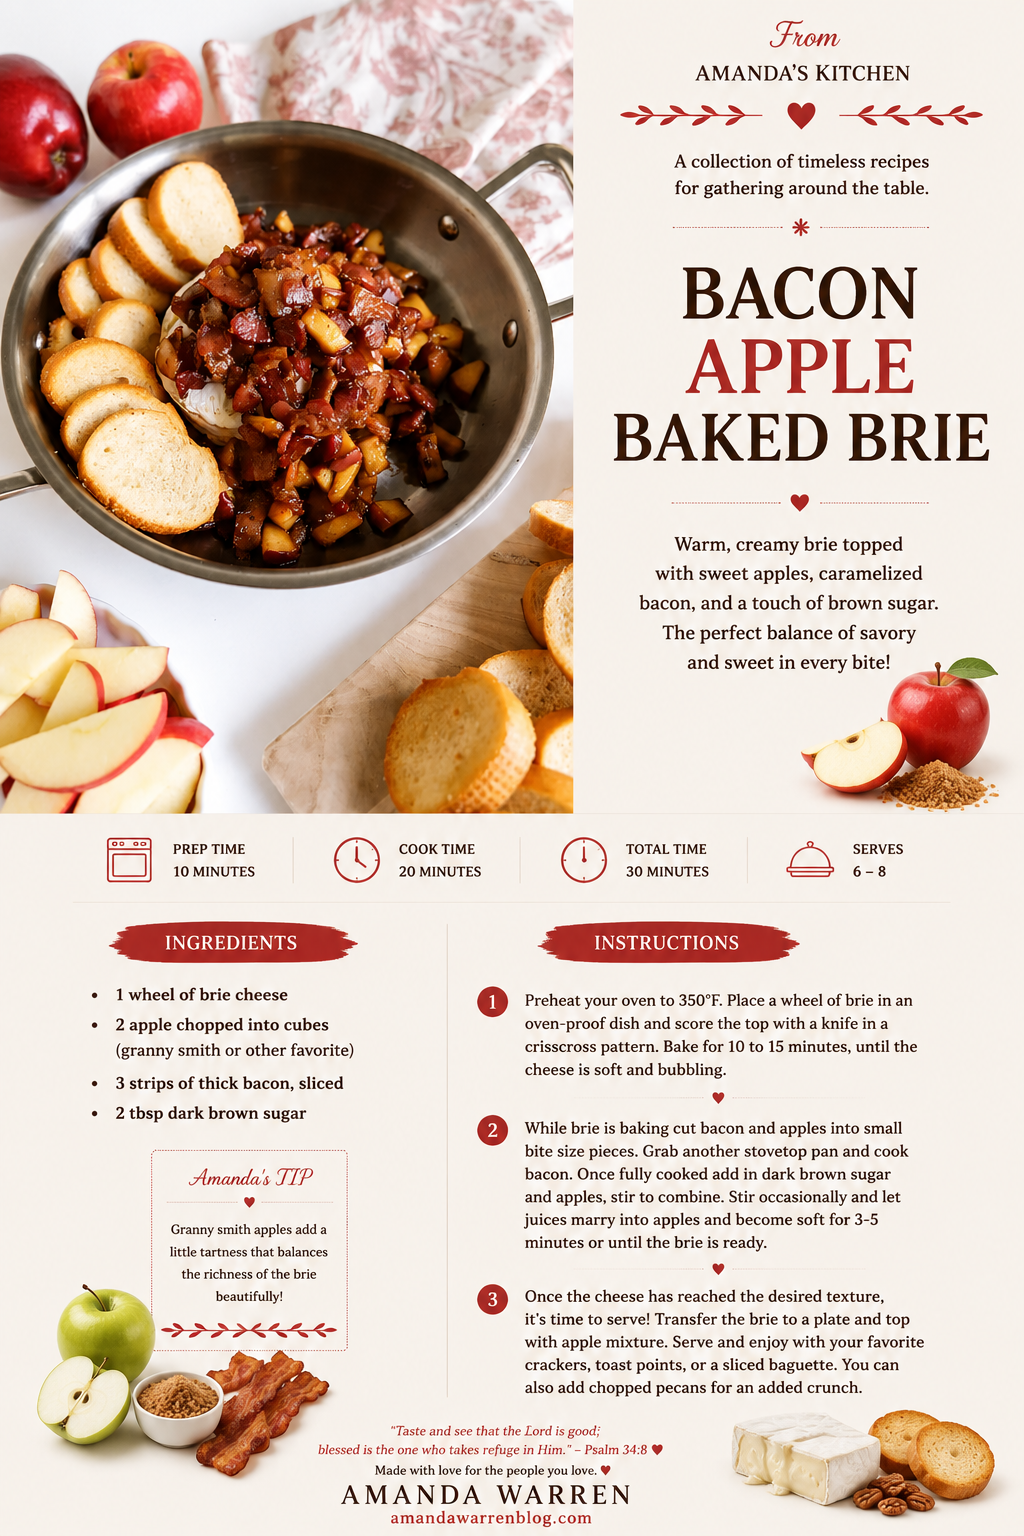
Printable recipe card for easy bacon apple baked brie with step-by-step instructions.

A Note From Amanda

There is something special about gathering people around good food.

Some recipes become traditions because they're complicated, but I think the very best ones are often the simplest. This baked brie has become one of those recipes I know I can count on. It comes together quickly, looks beautiful on the table, and somehow always seems to be the first thing everyone reaches for.

Whether you're hosting a holiday gathering, celebrating with friends, or simply slowing down for a cozy evening at home, I hope this recipe brings a little extra warmth to your table and reminds you that some of life's sweetest moments begin with sharing a meal.

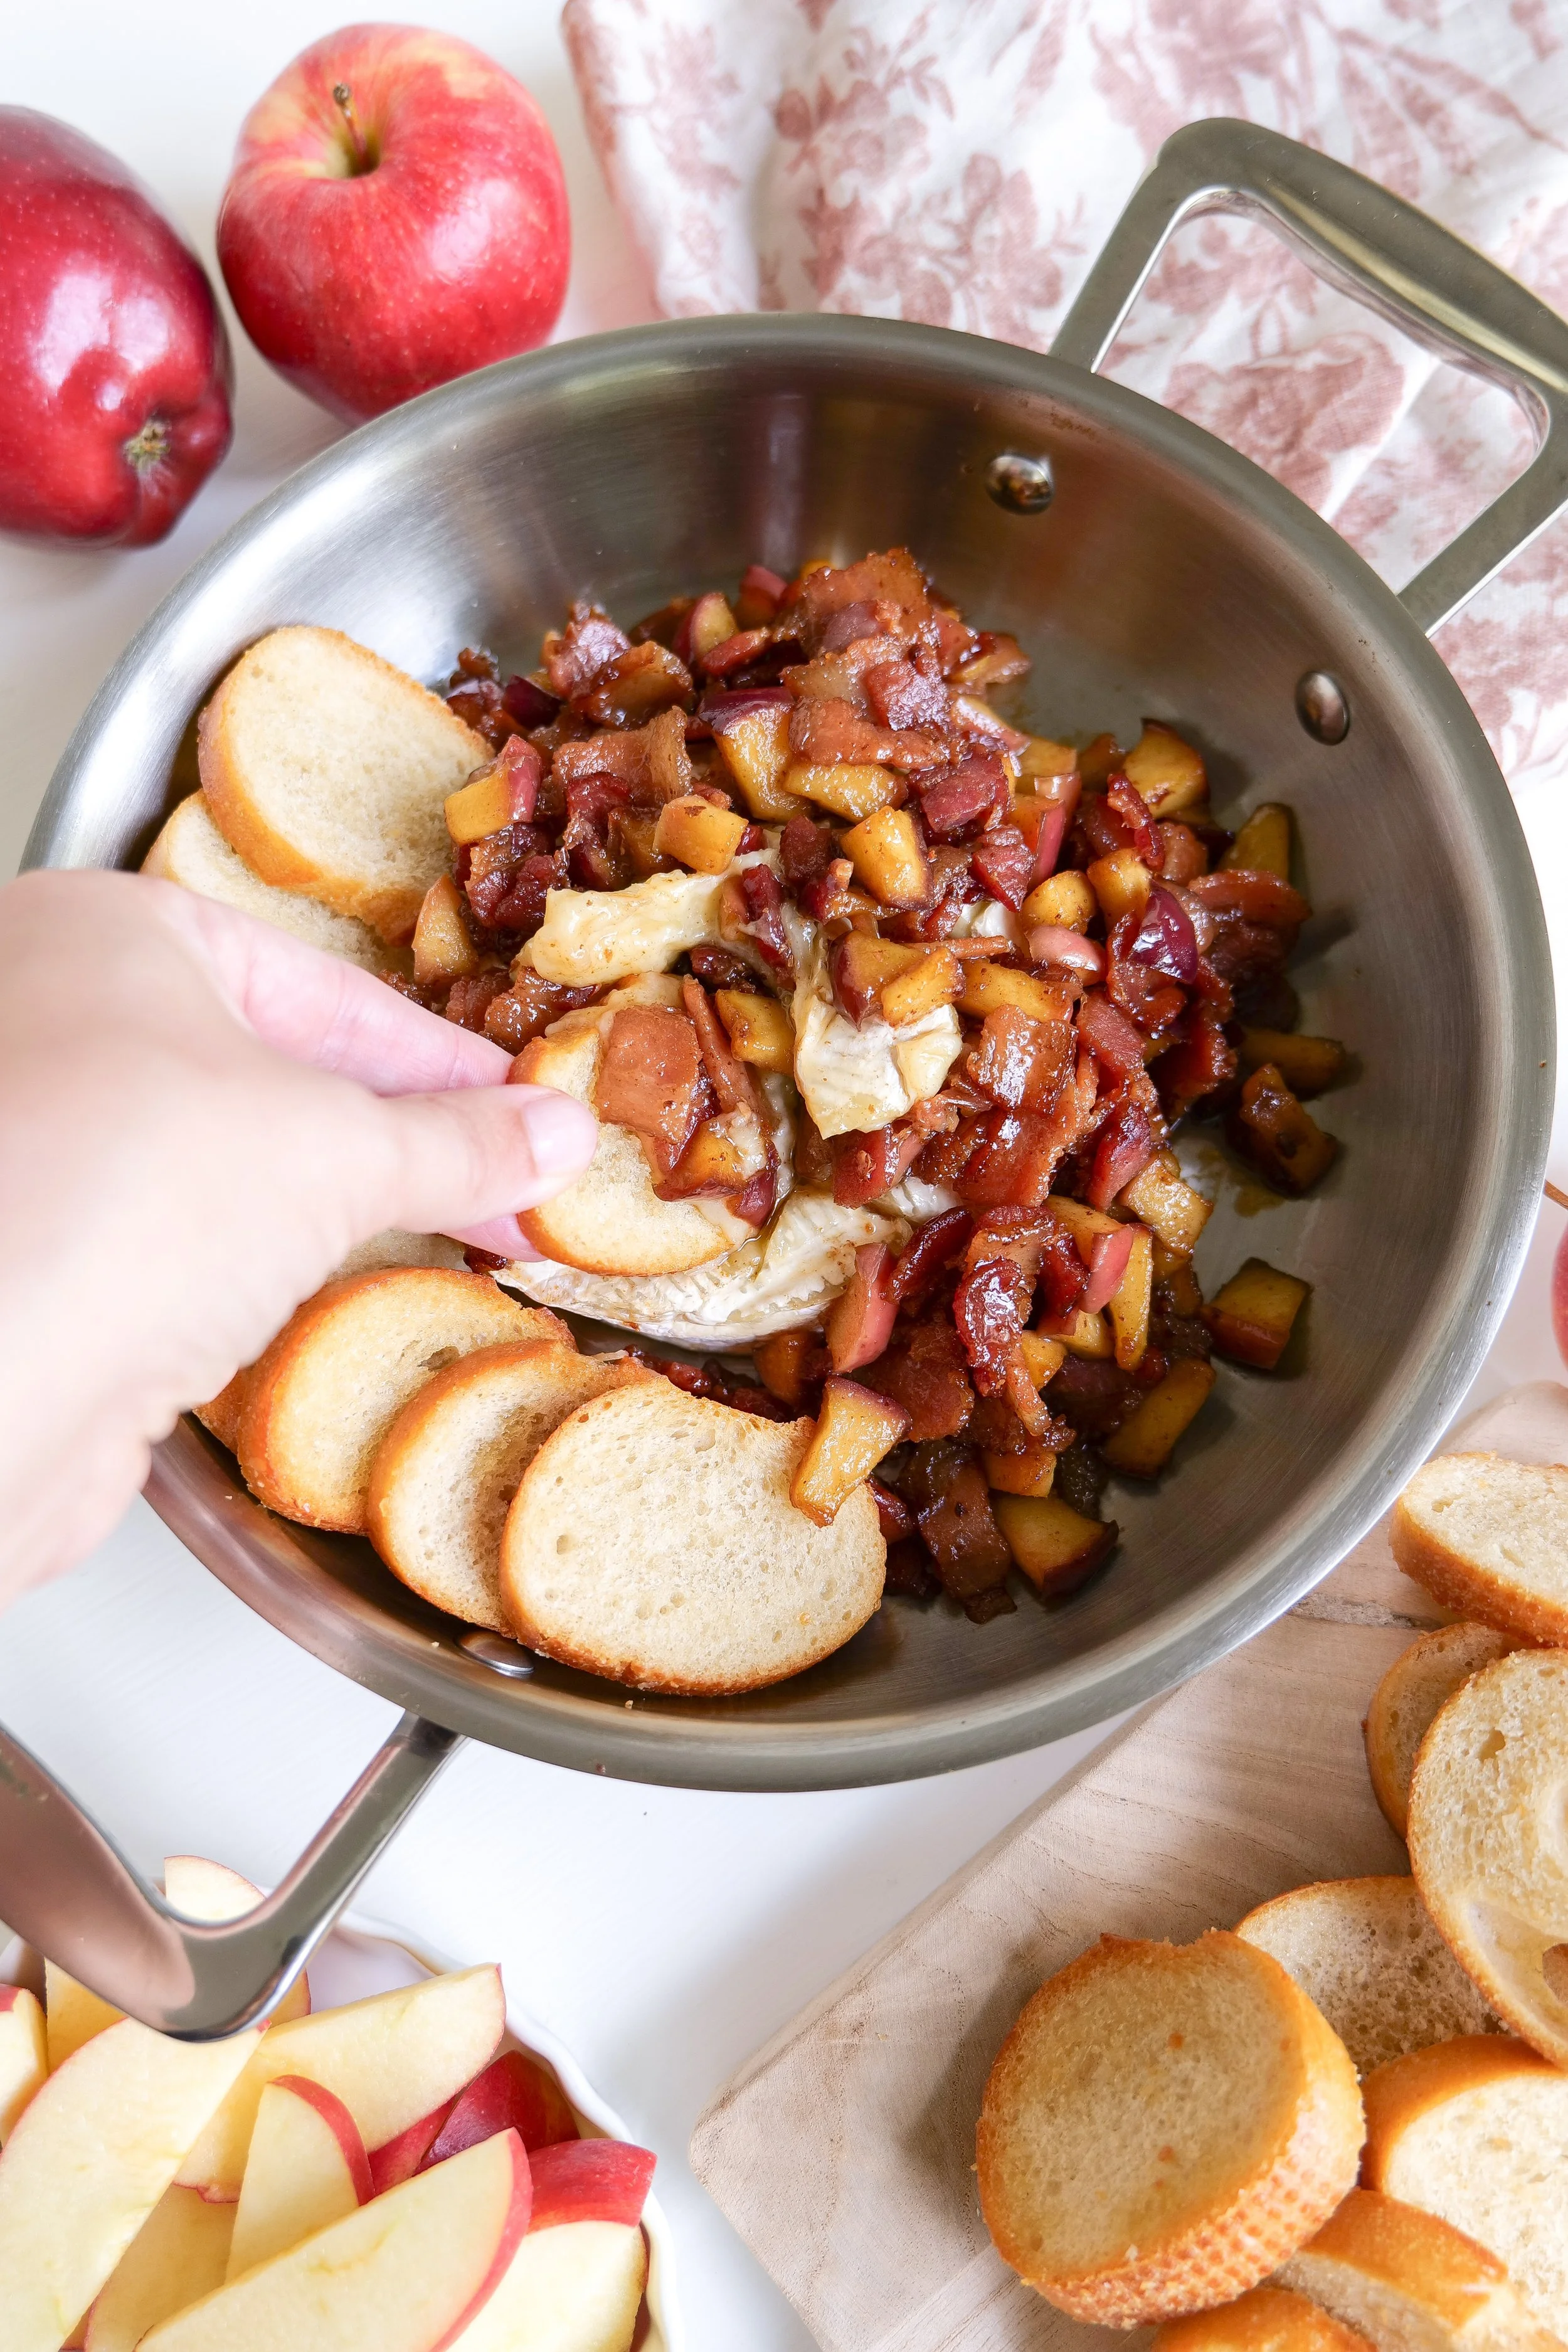
Creamy cheese pull from warm baked brie topped with crispy bacon and caramelized apples.

Butternut Squash Breakfast Hash with Apples, Bacon & Eggs

A Cozy Sweet-and-Savory Breakfast for Fall

There are some breakfasts that feel made for slow fall mornings, and this Butternut Squash Breakfast Hash is one of them.

Roasted butternut squash, crisp bacon, sweet apples, and golden onions come together in one hearty skillet, then everything is finished with fried eggs on top. The combination is savory, a little sweet, and exactly the kind of breakfast I crave once the mornings start getting cooler.

I especially love how the apples soften just enough to become tender while still keeping a little texture, and the butternut squash adds that cozy caramelized flavor that makes this feel so seasonal.

It works beautifully for breakfast or brunch, but honestly, I would happily serve this for dinner too.

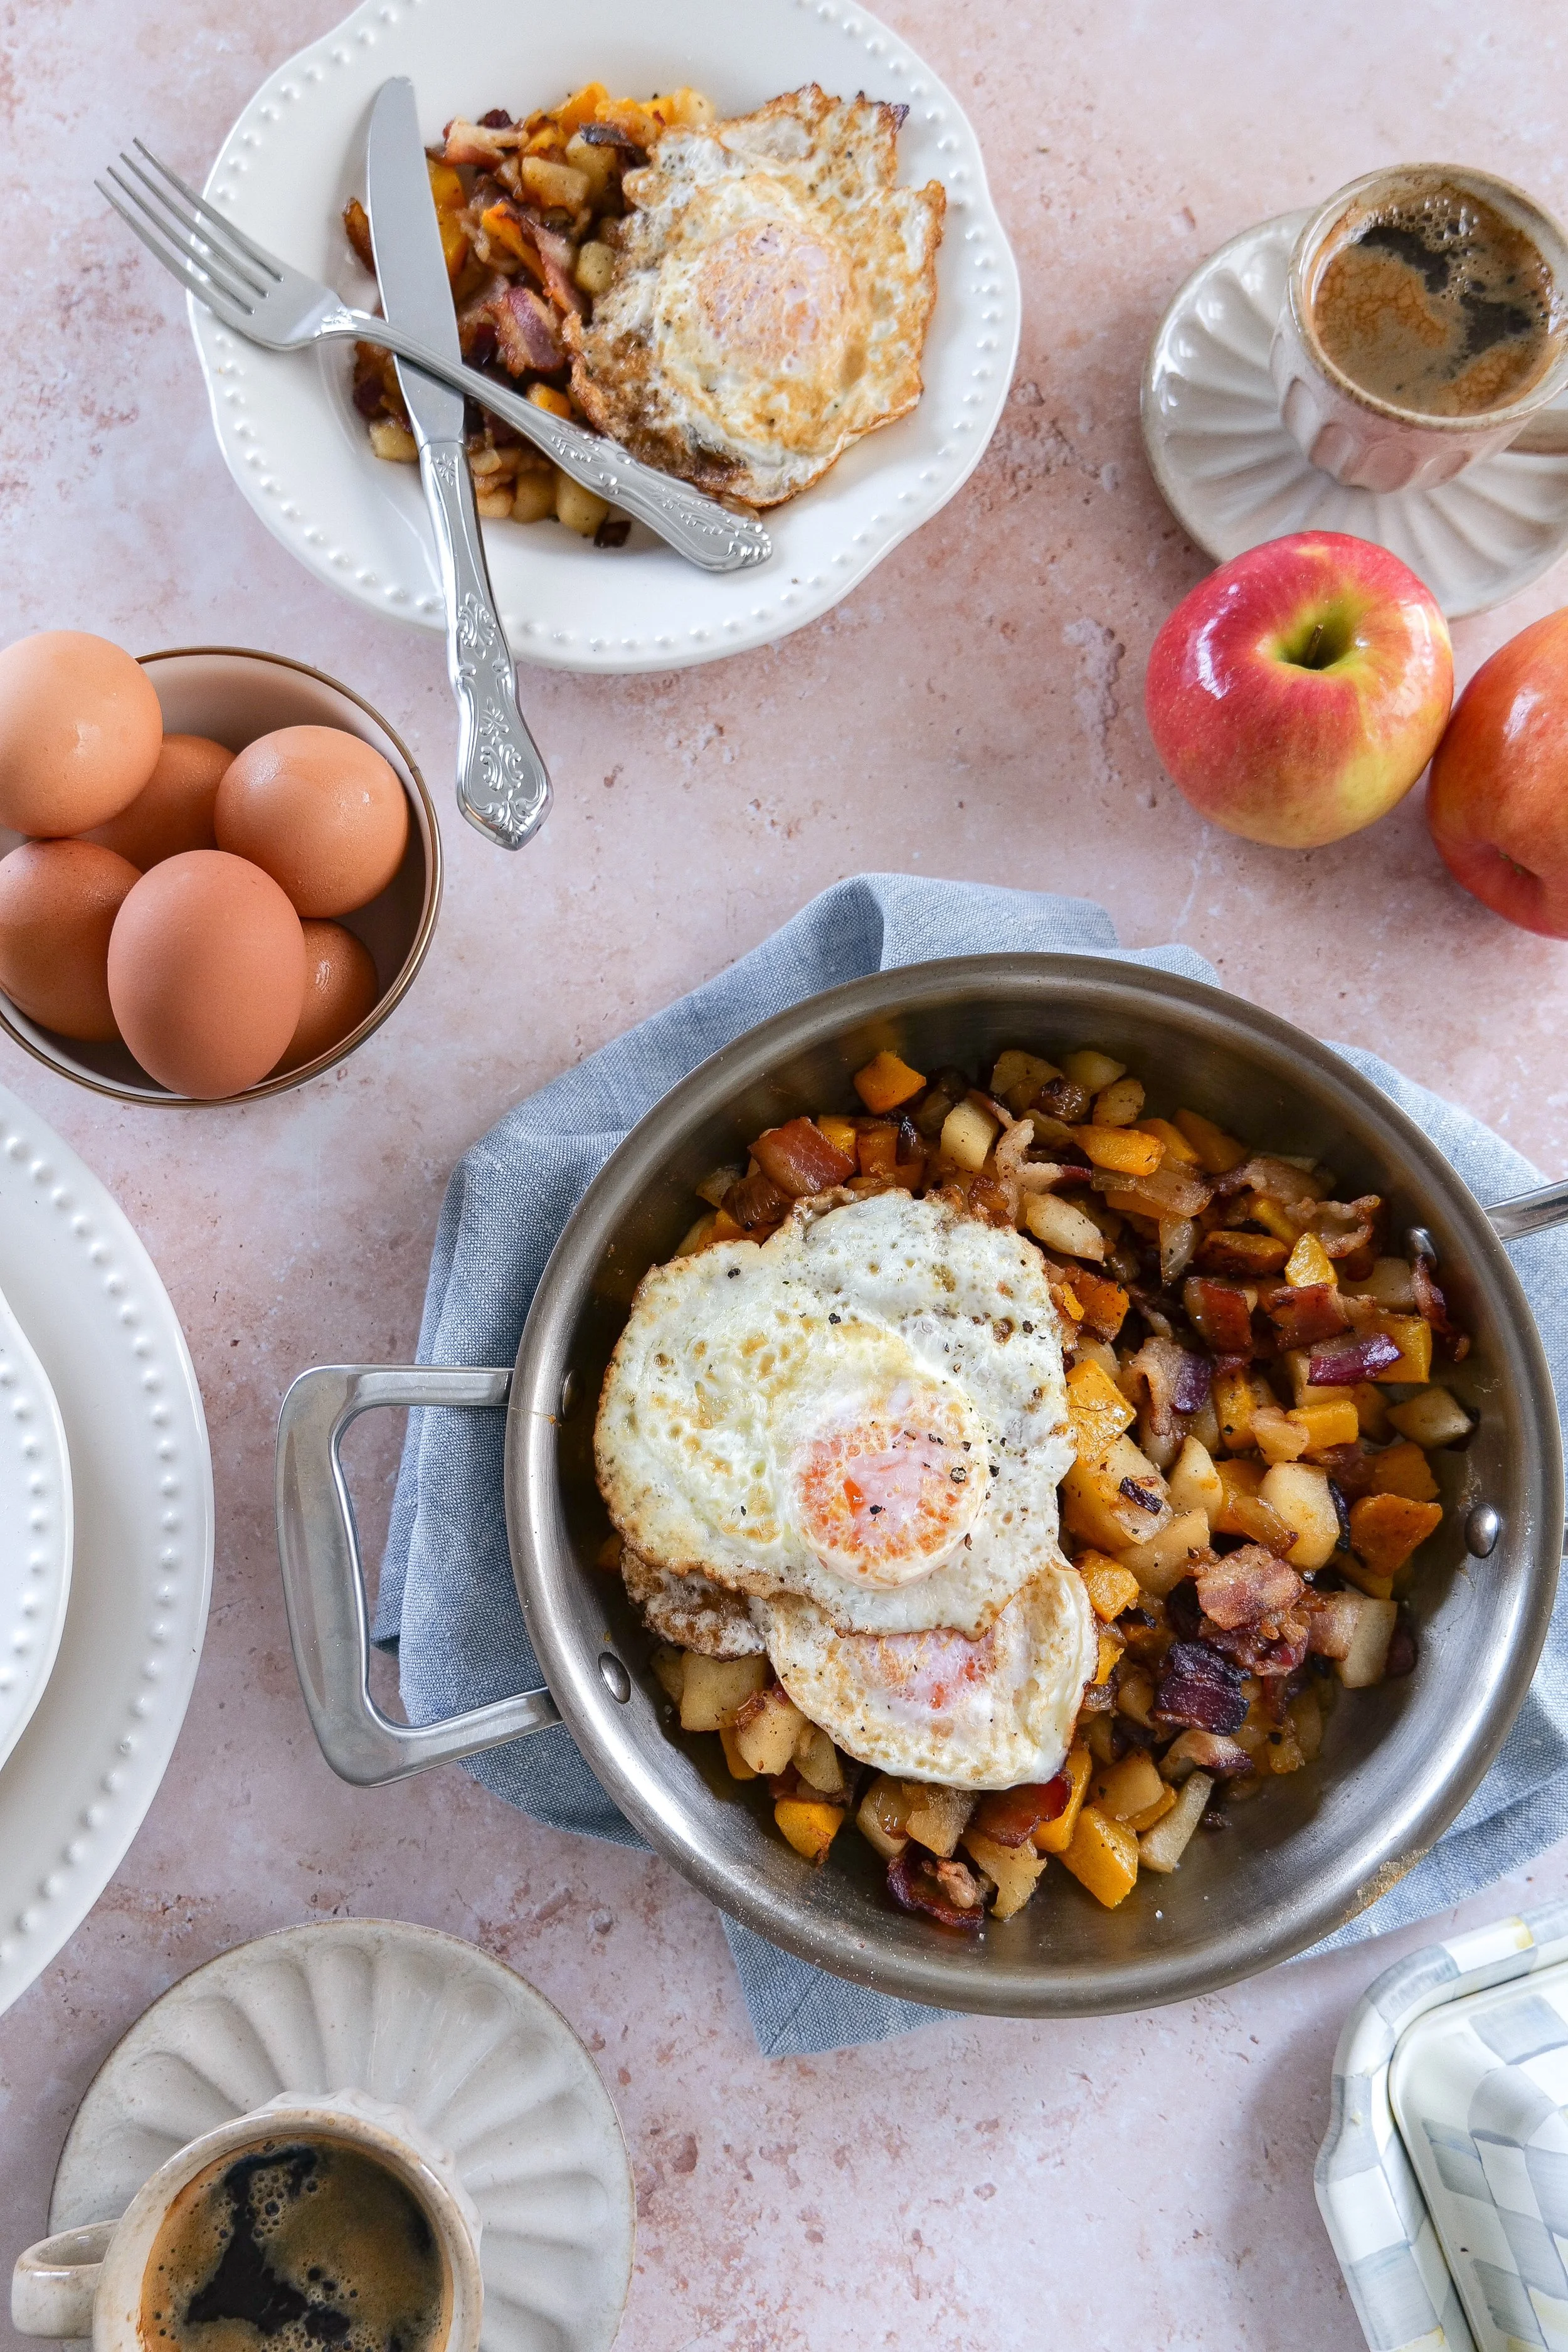
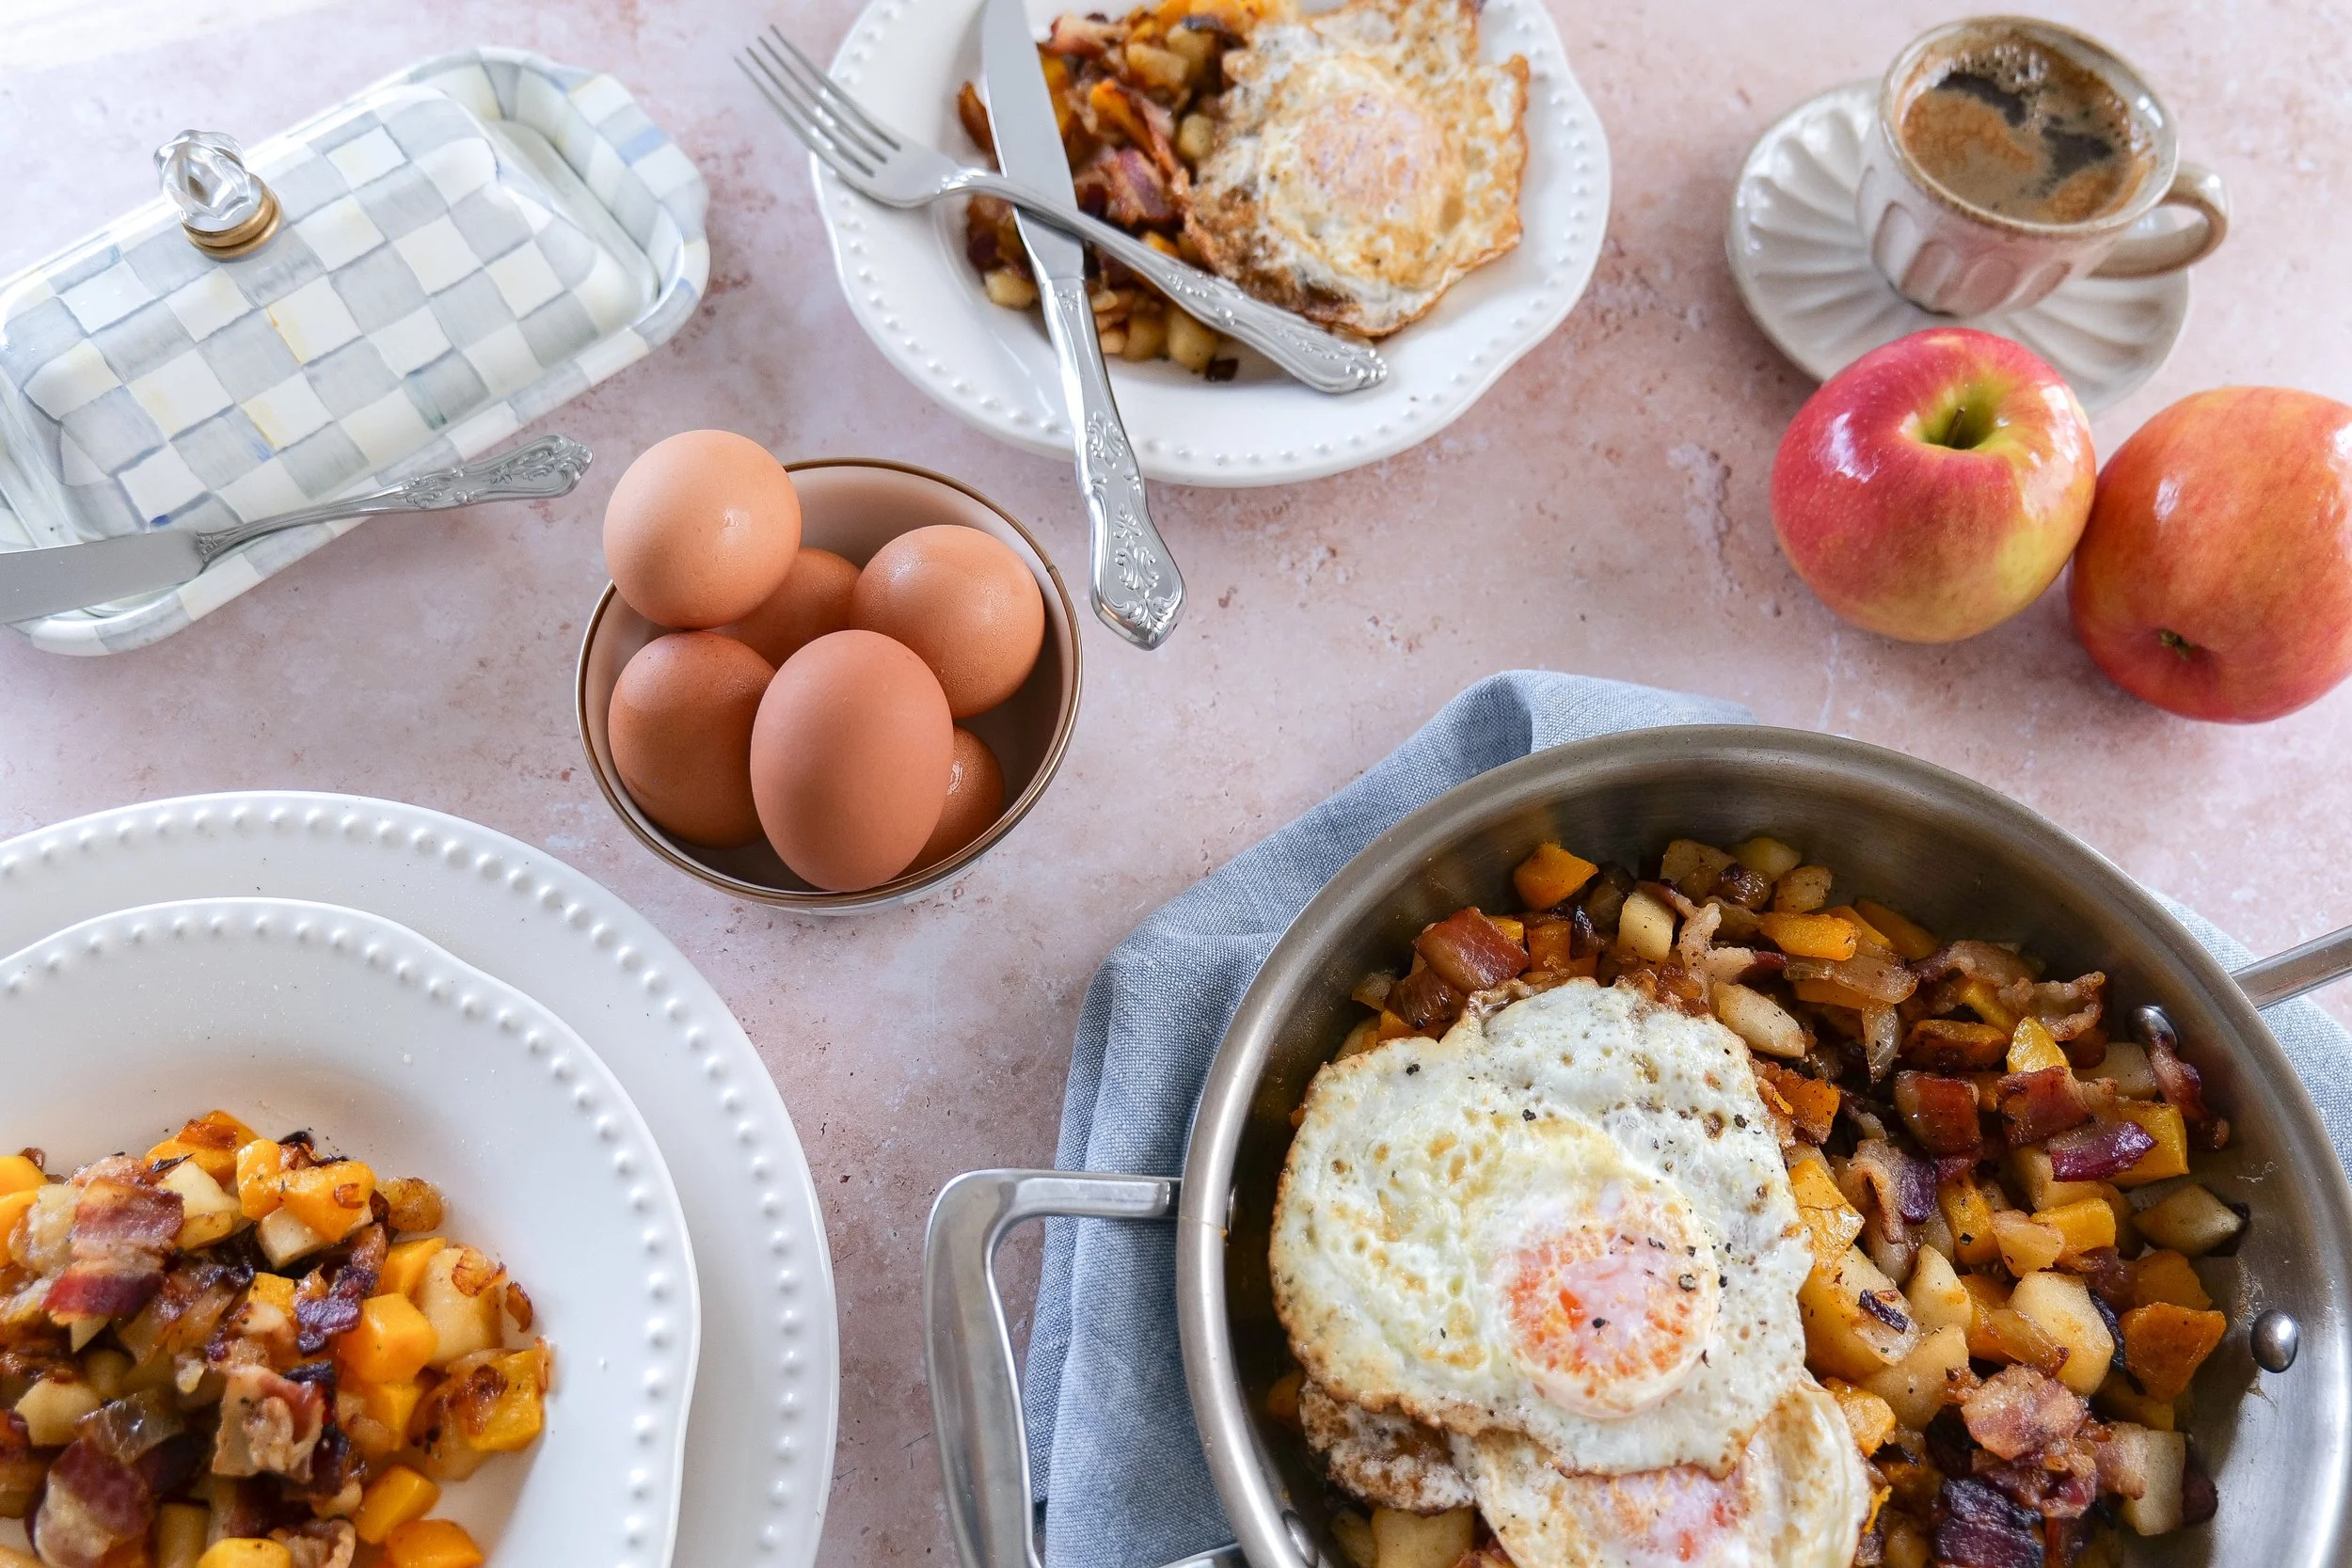
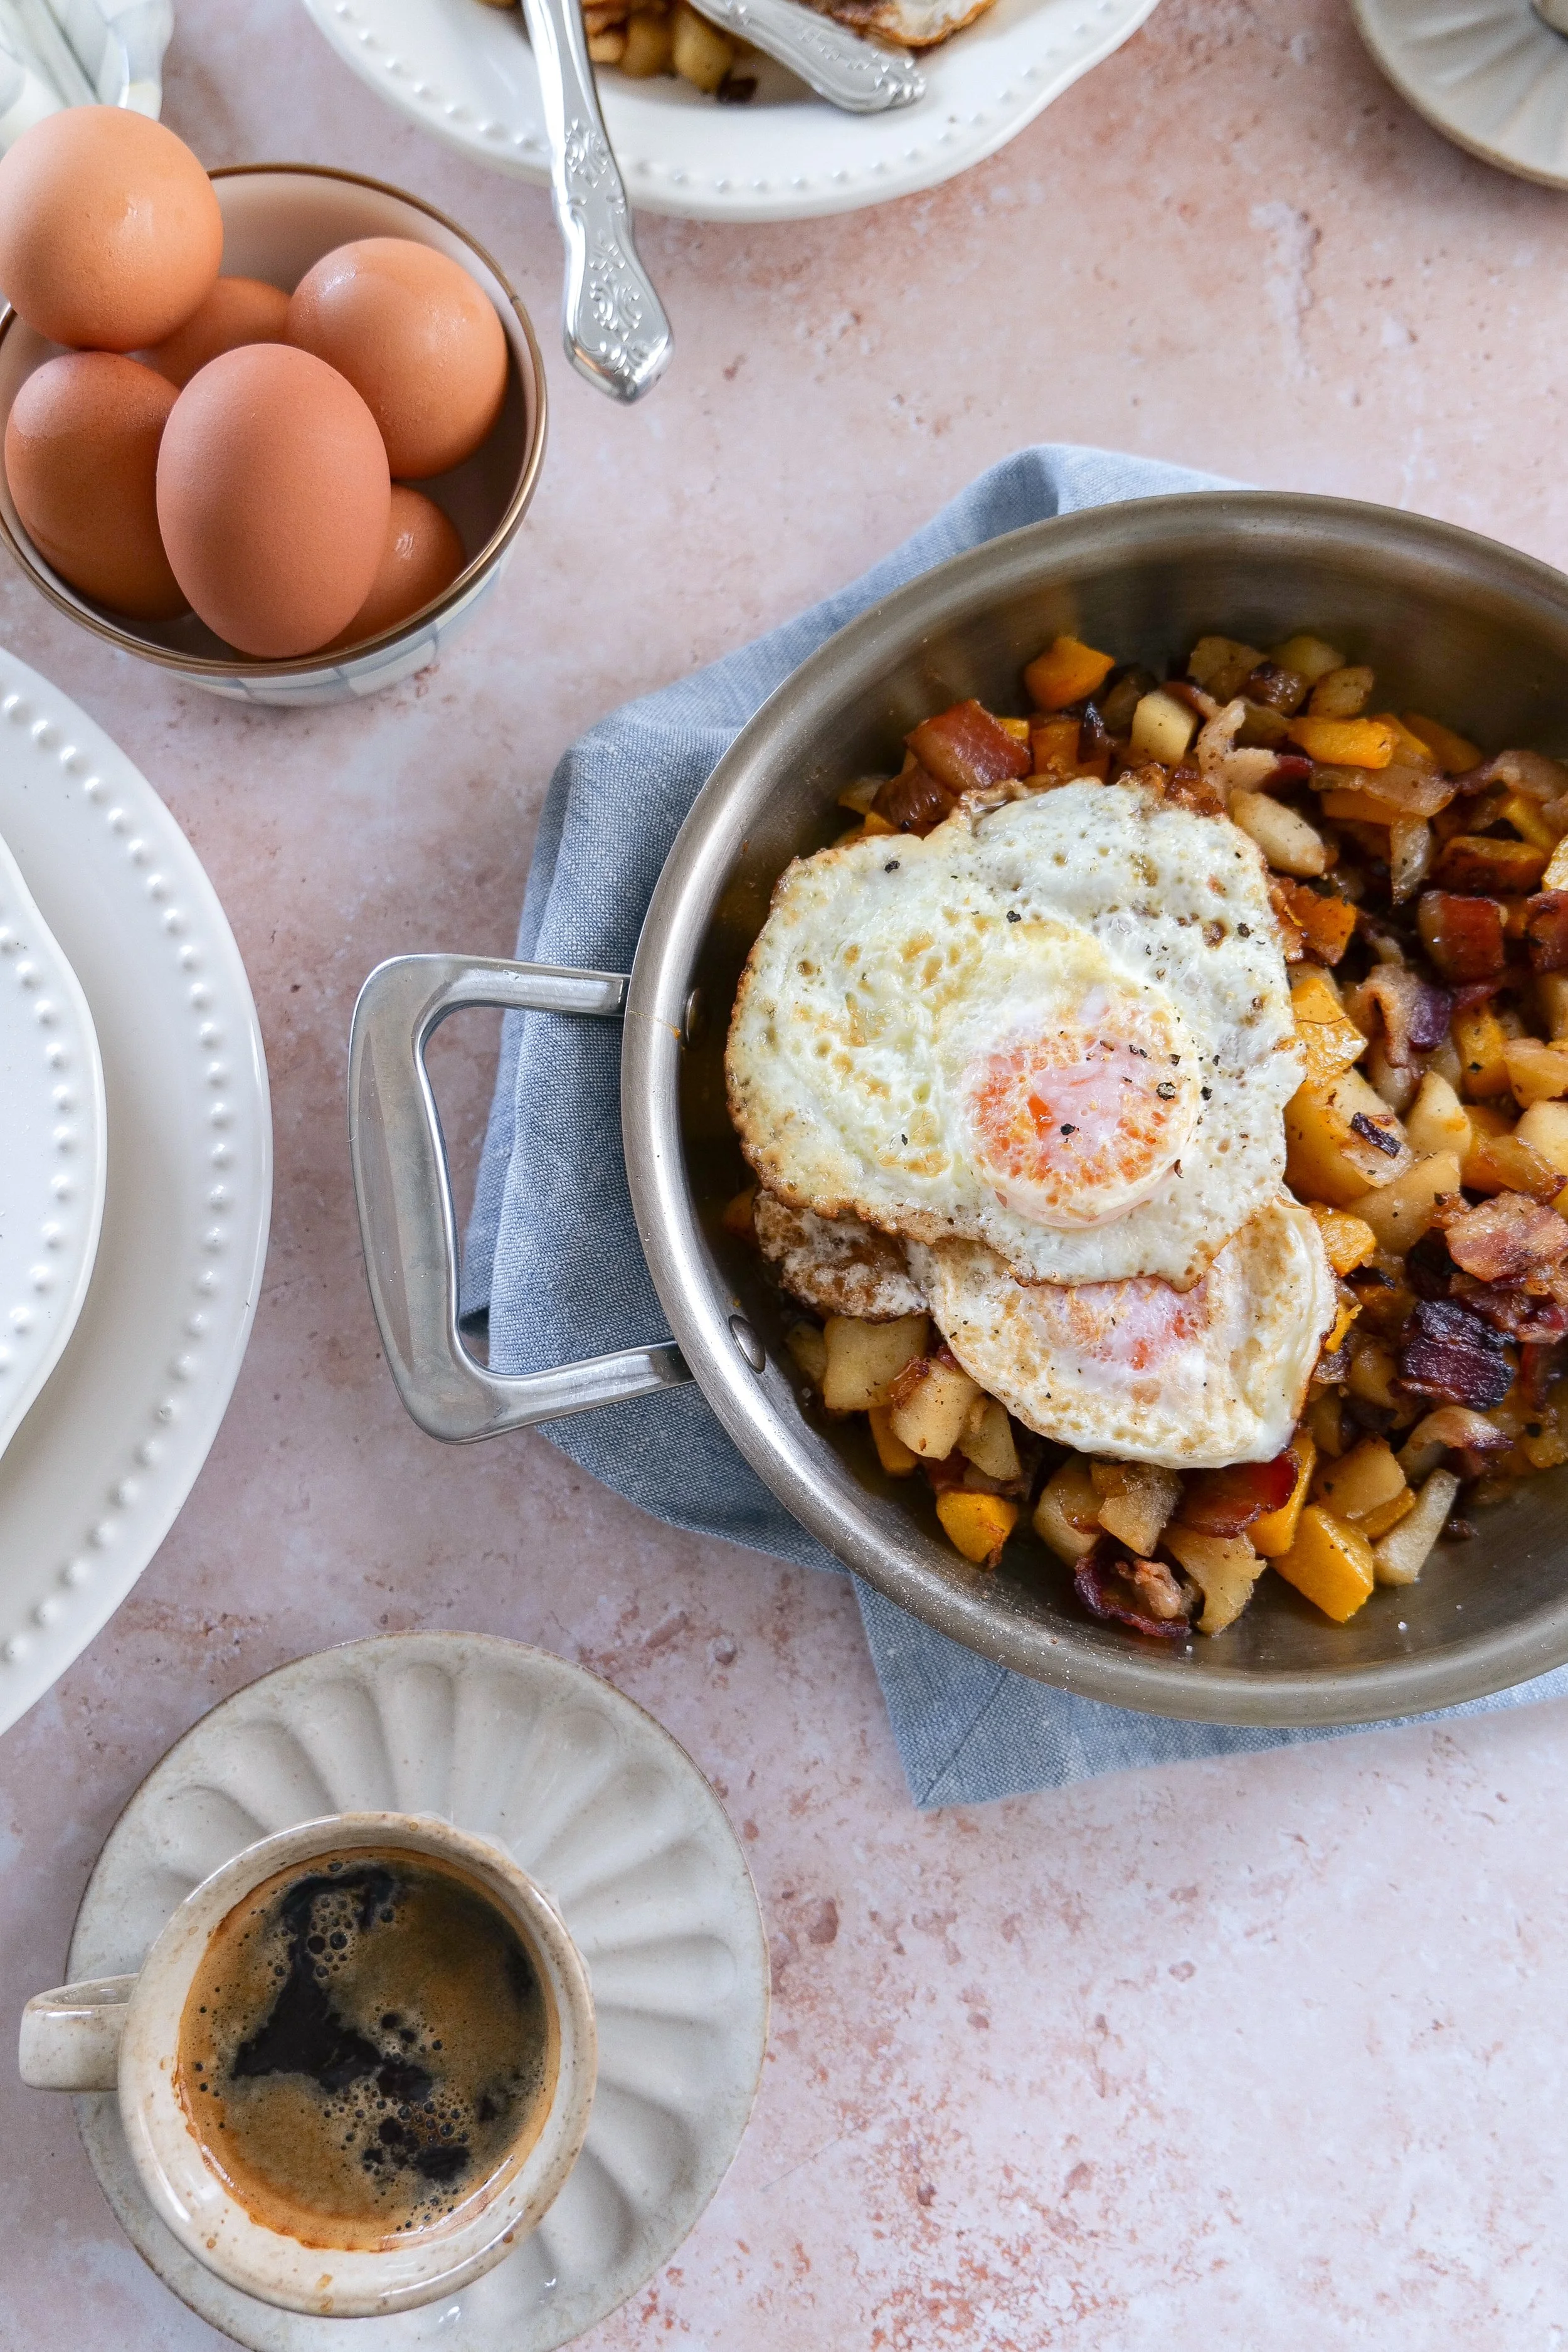
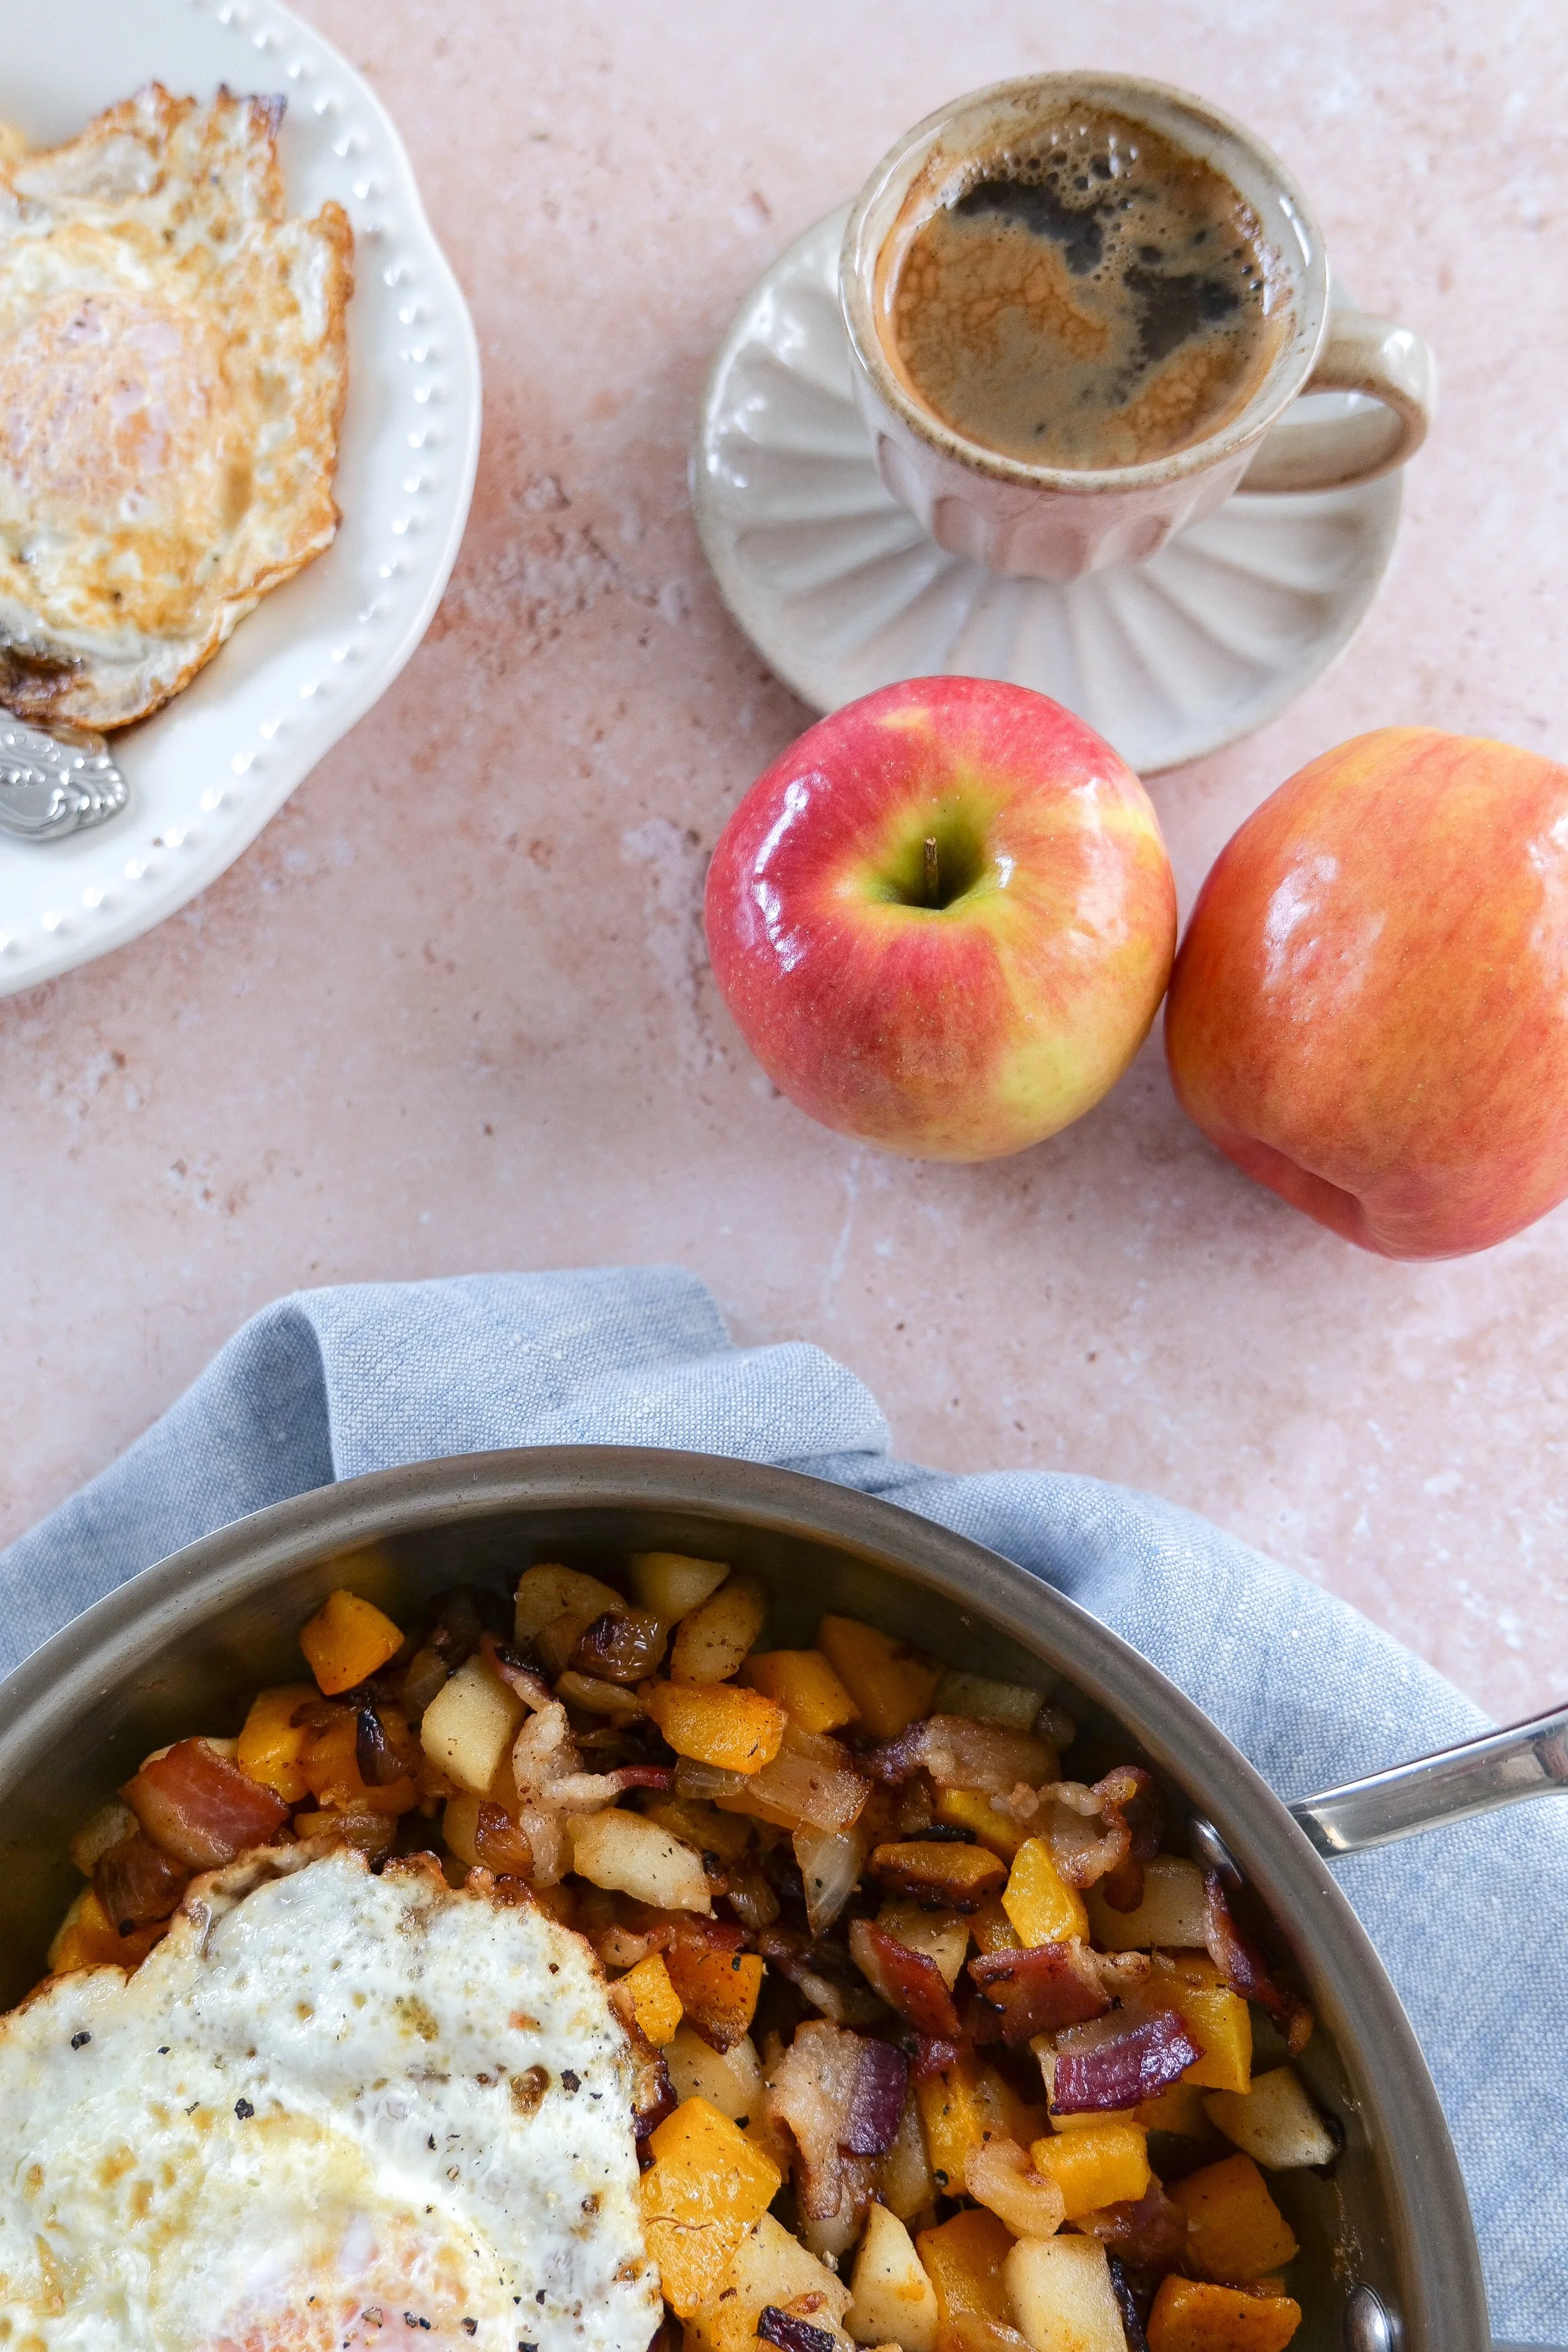
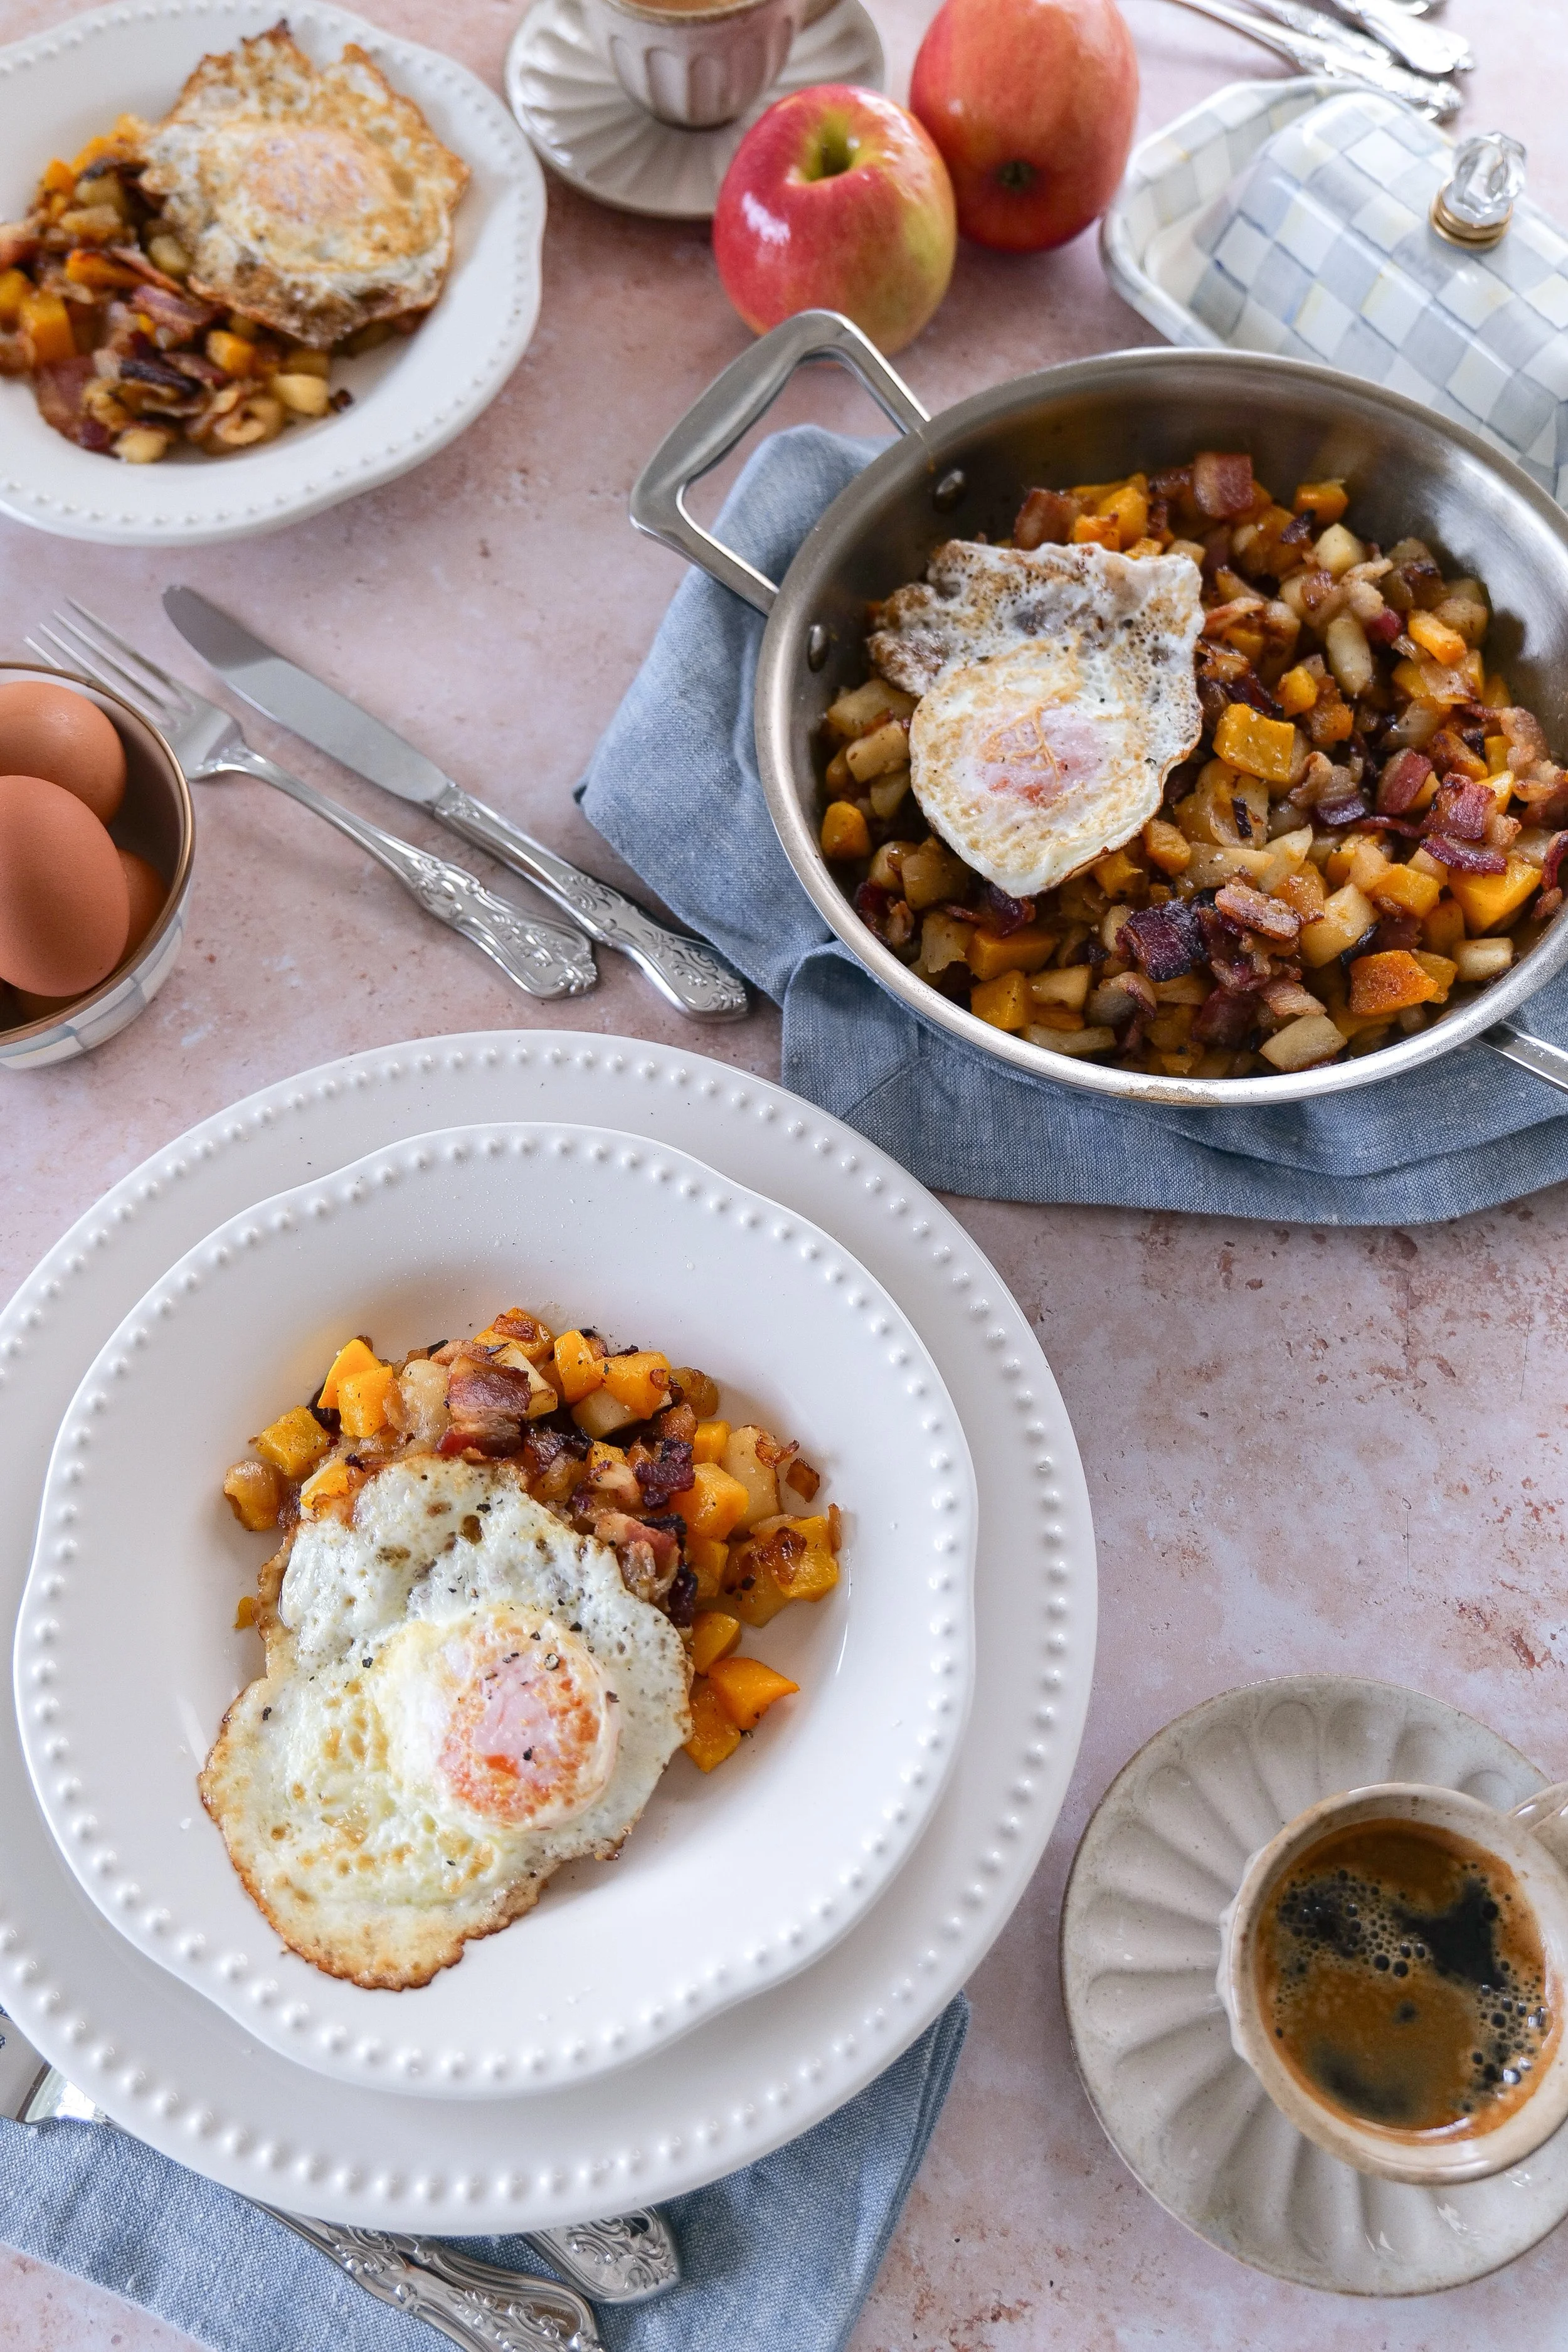
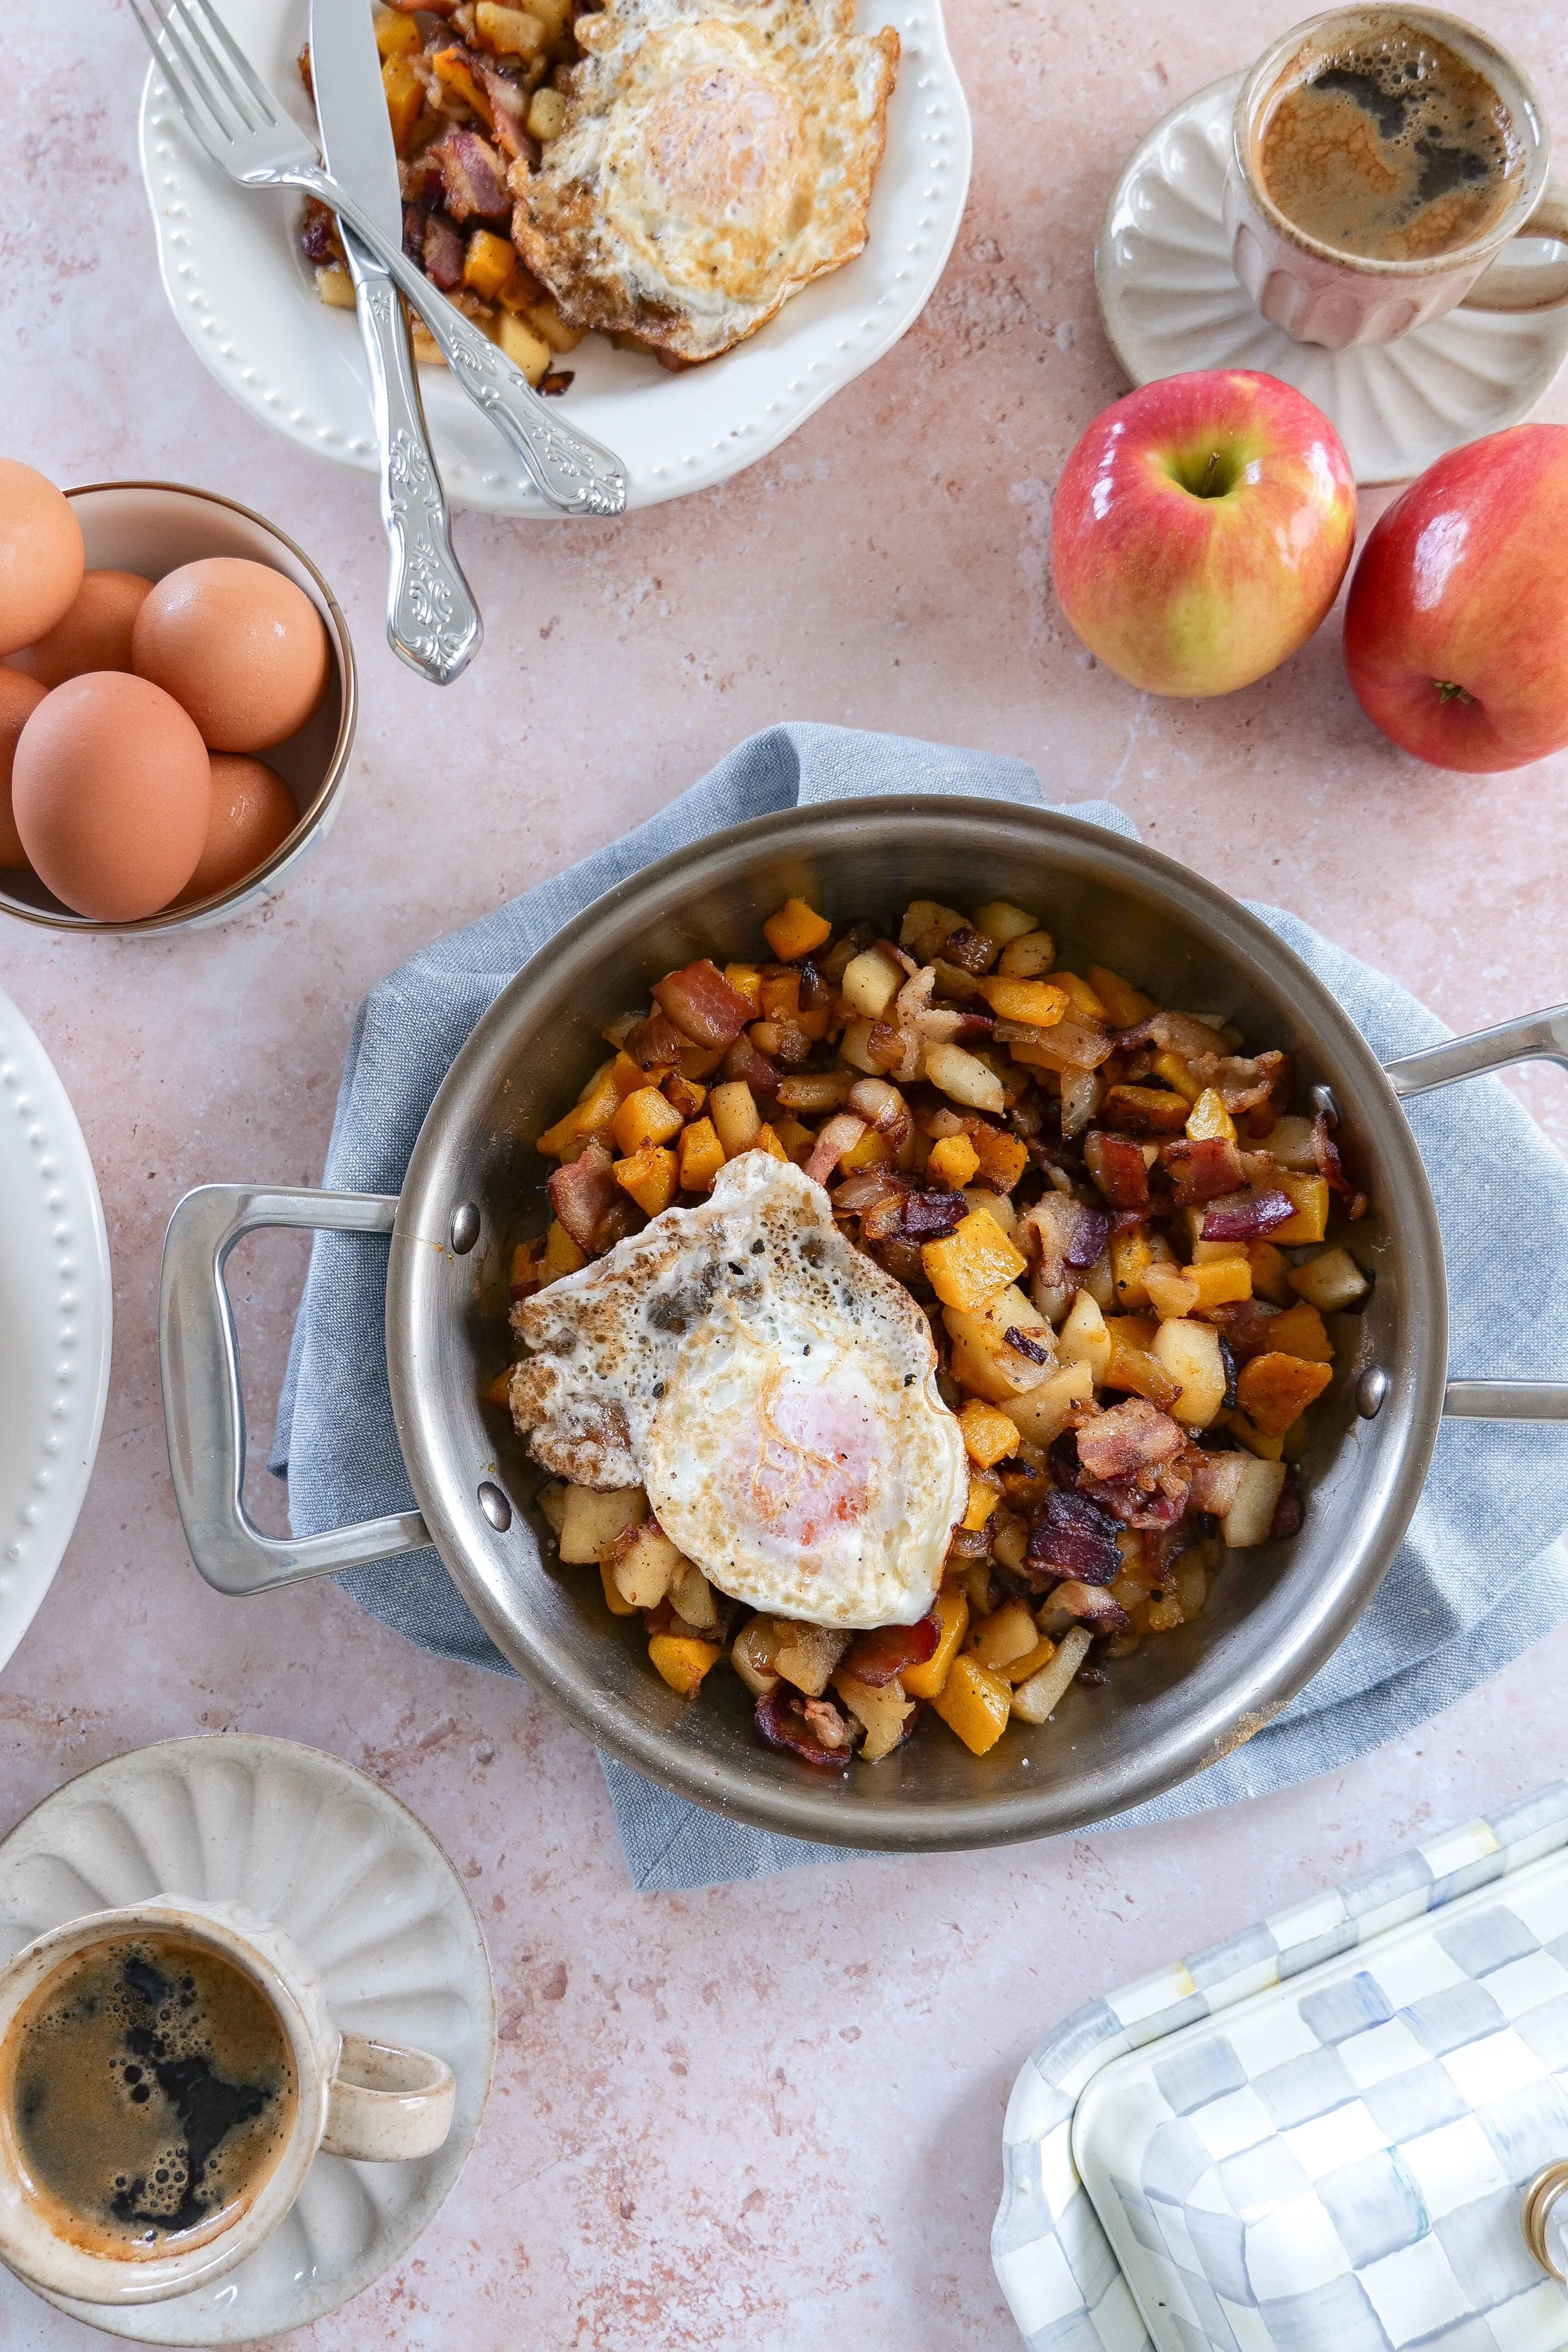
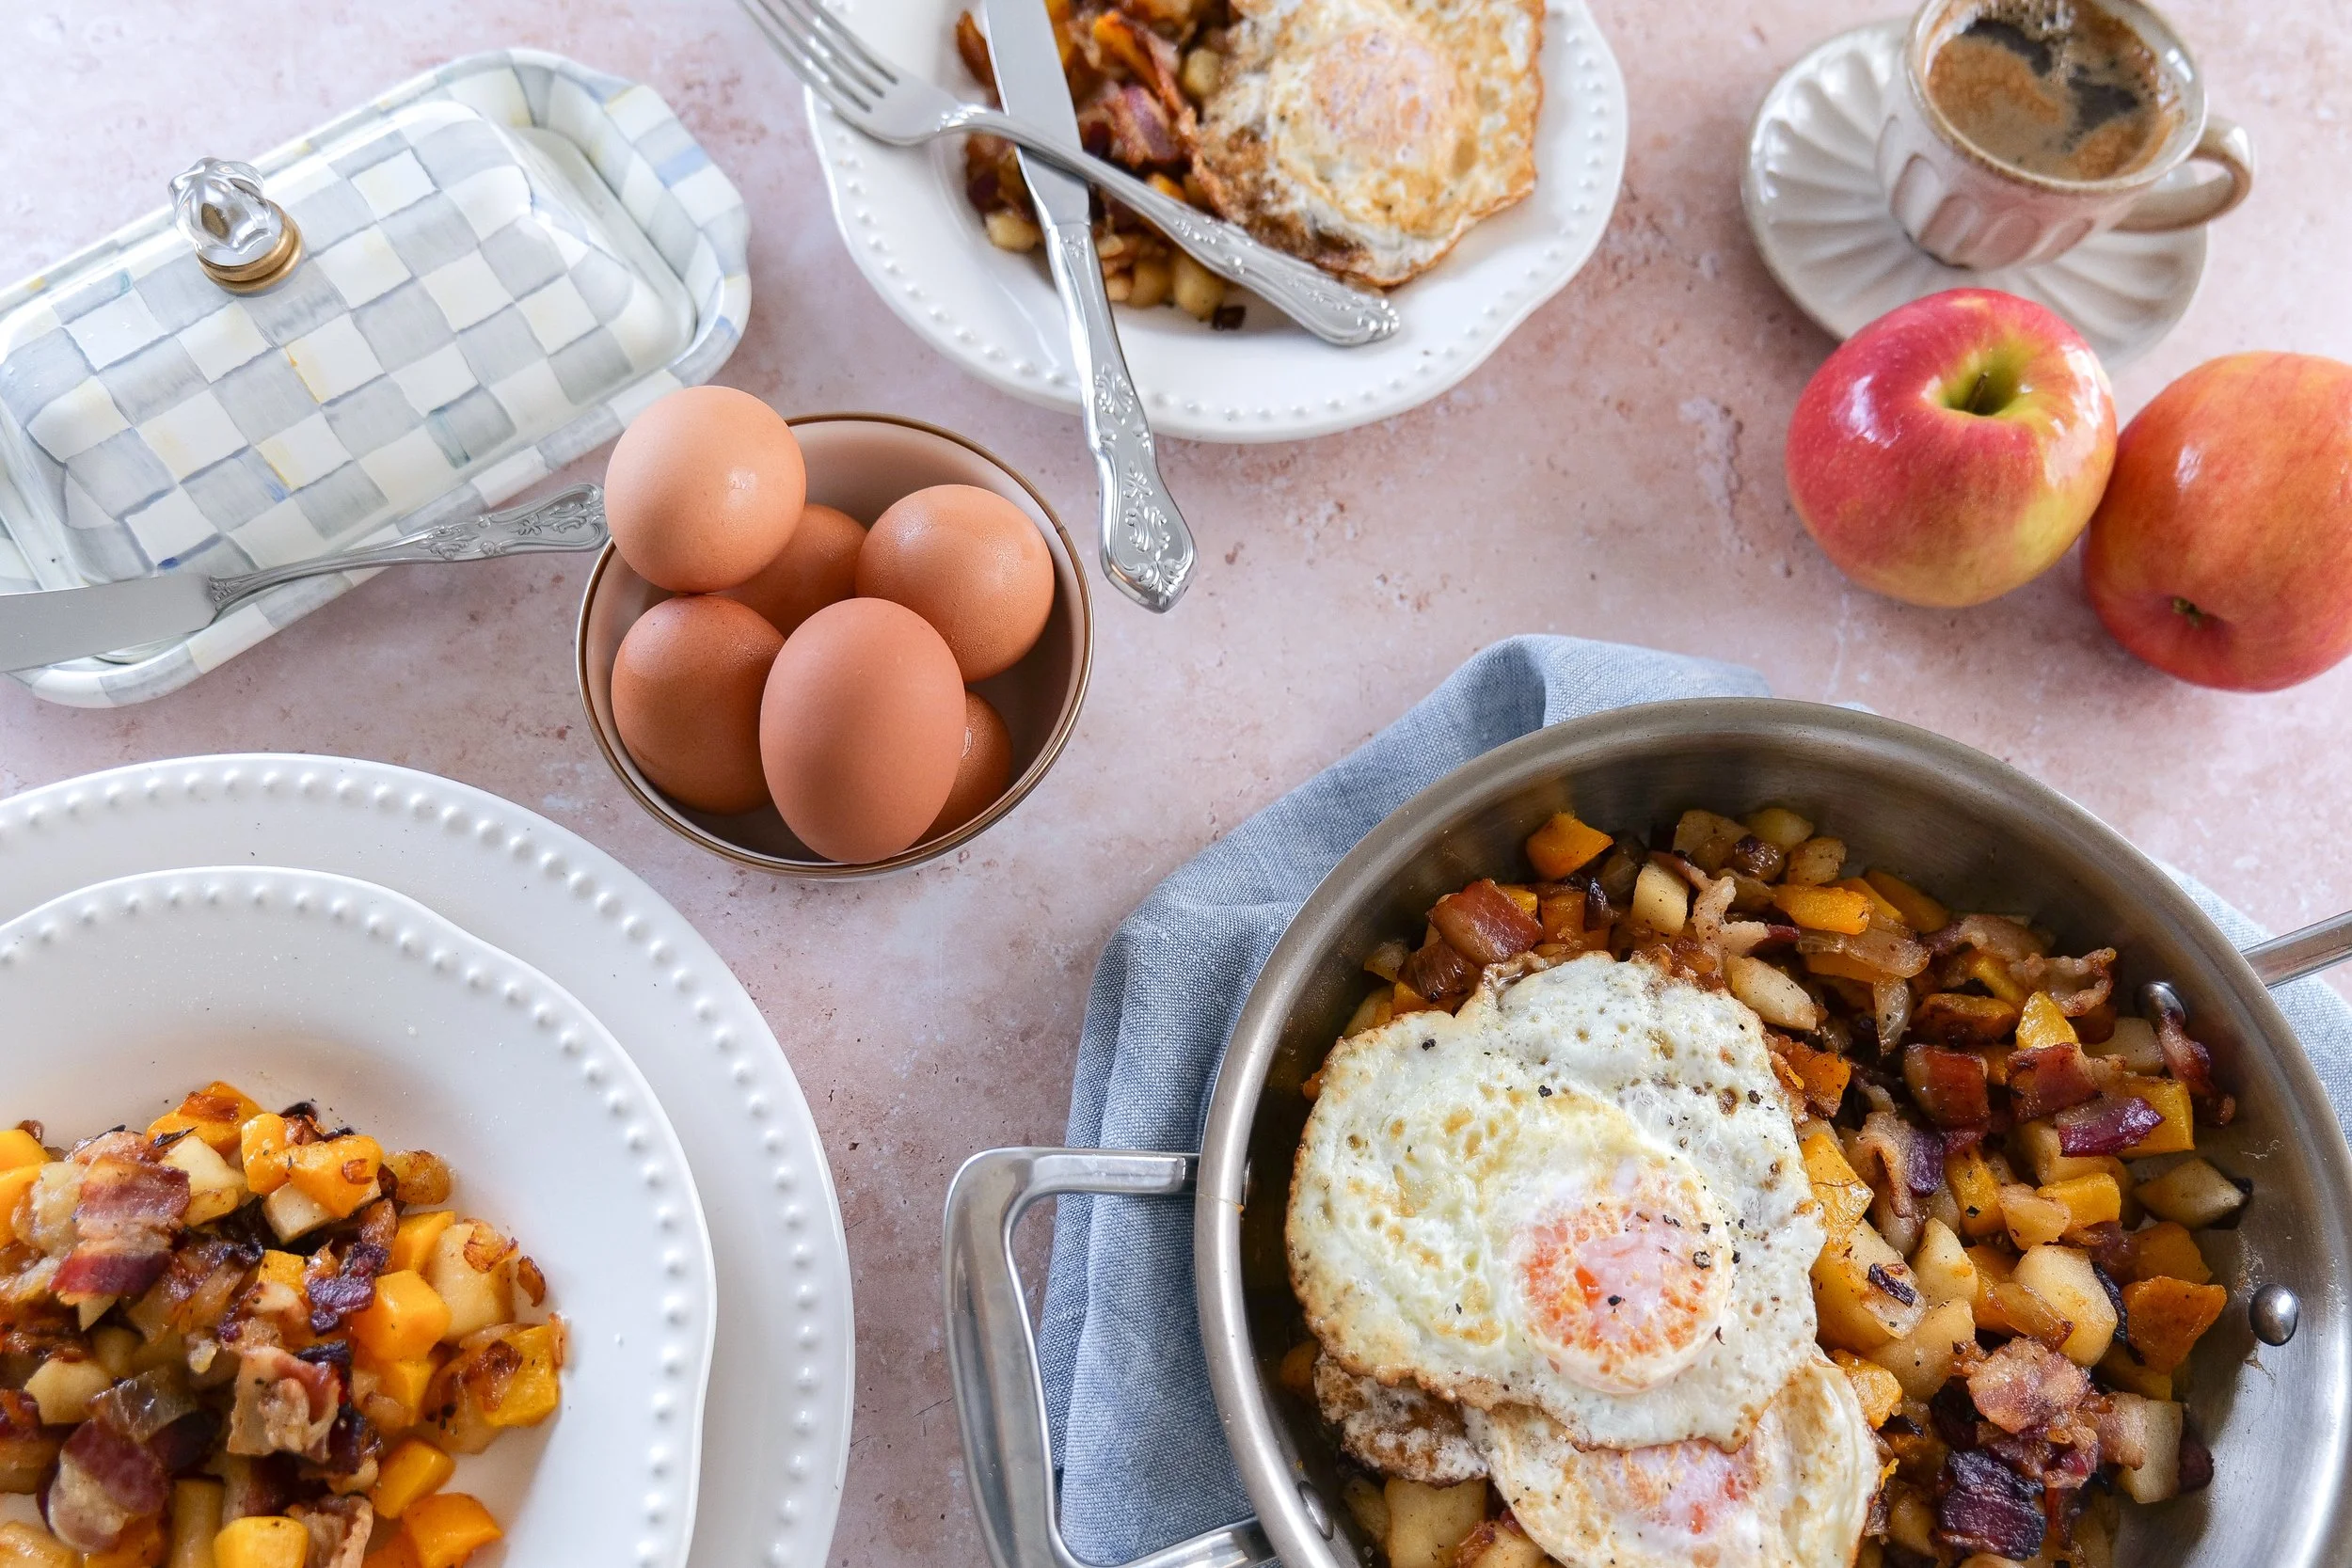
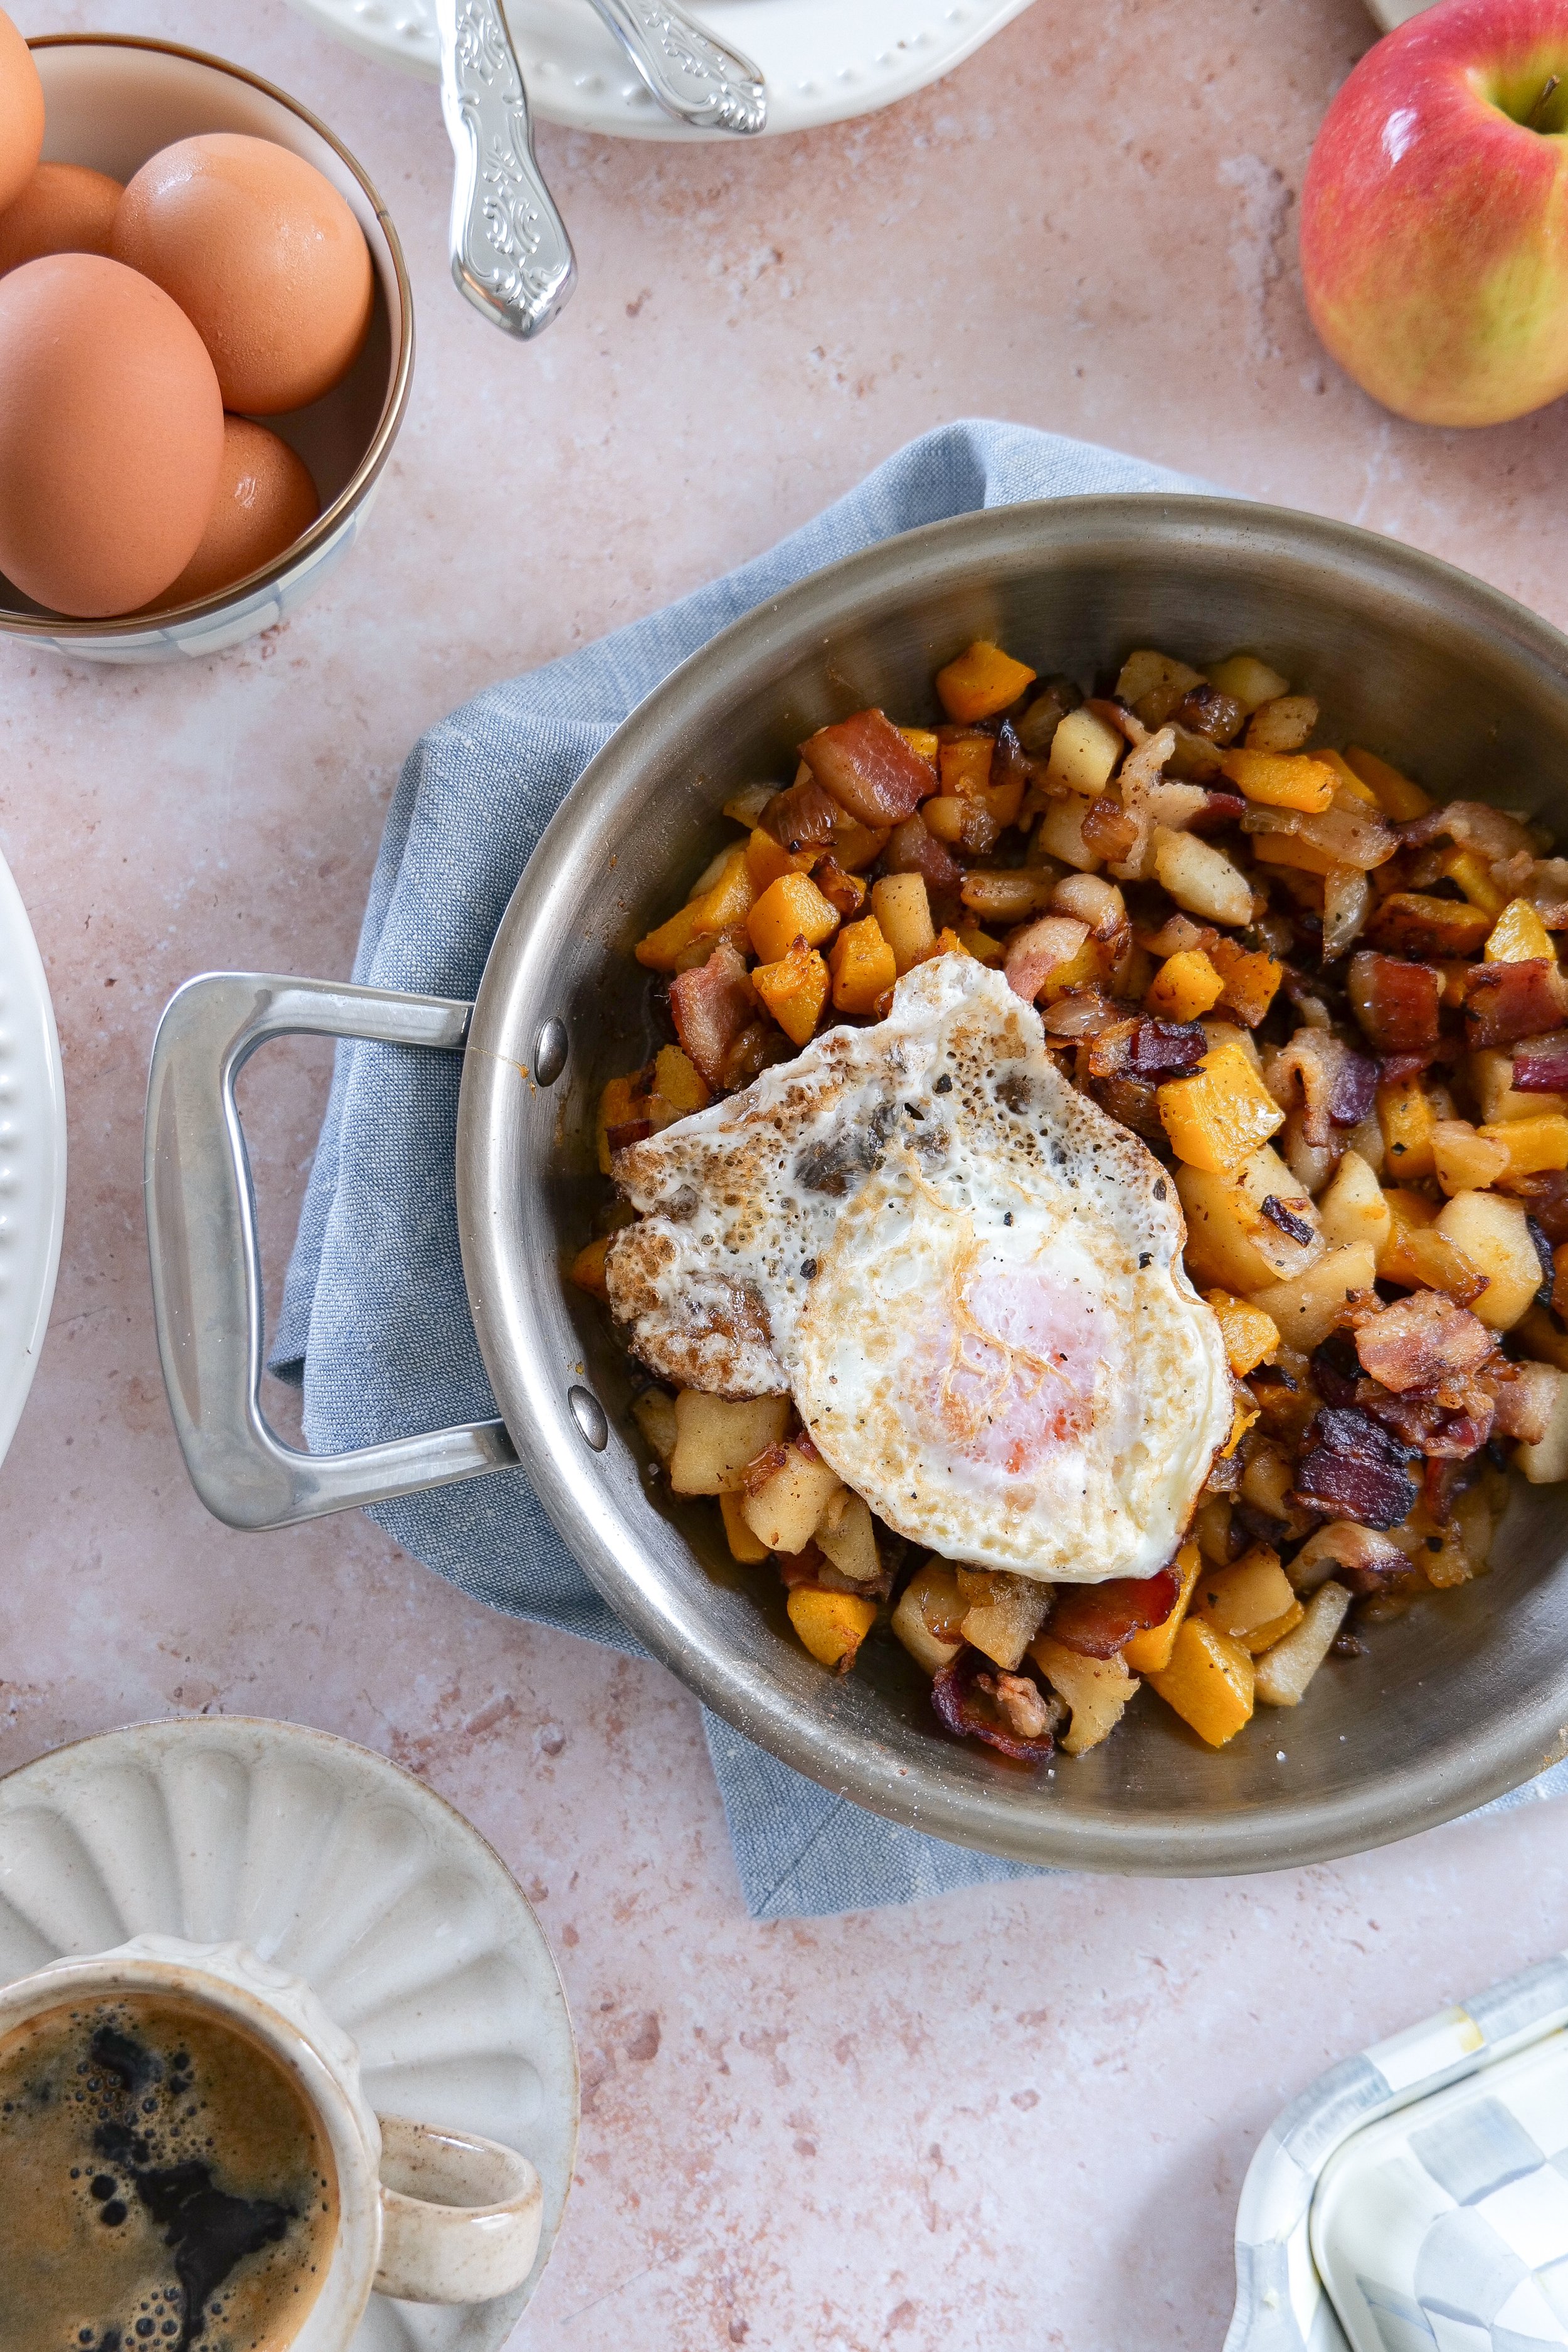
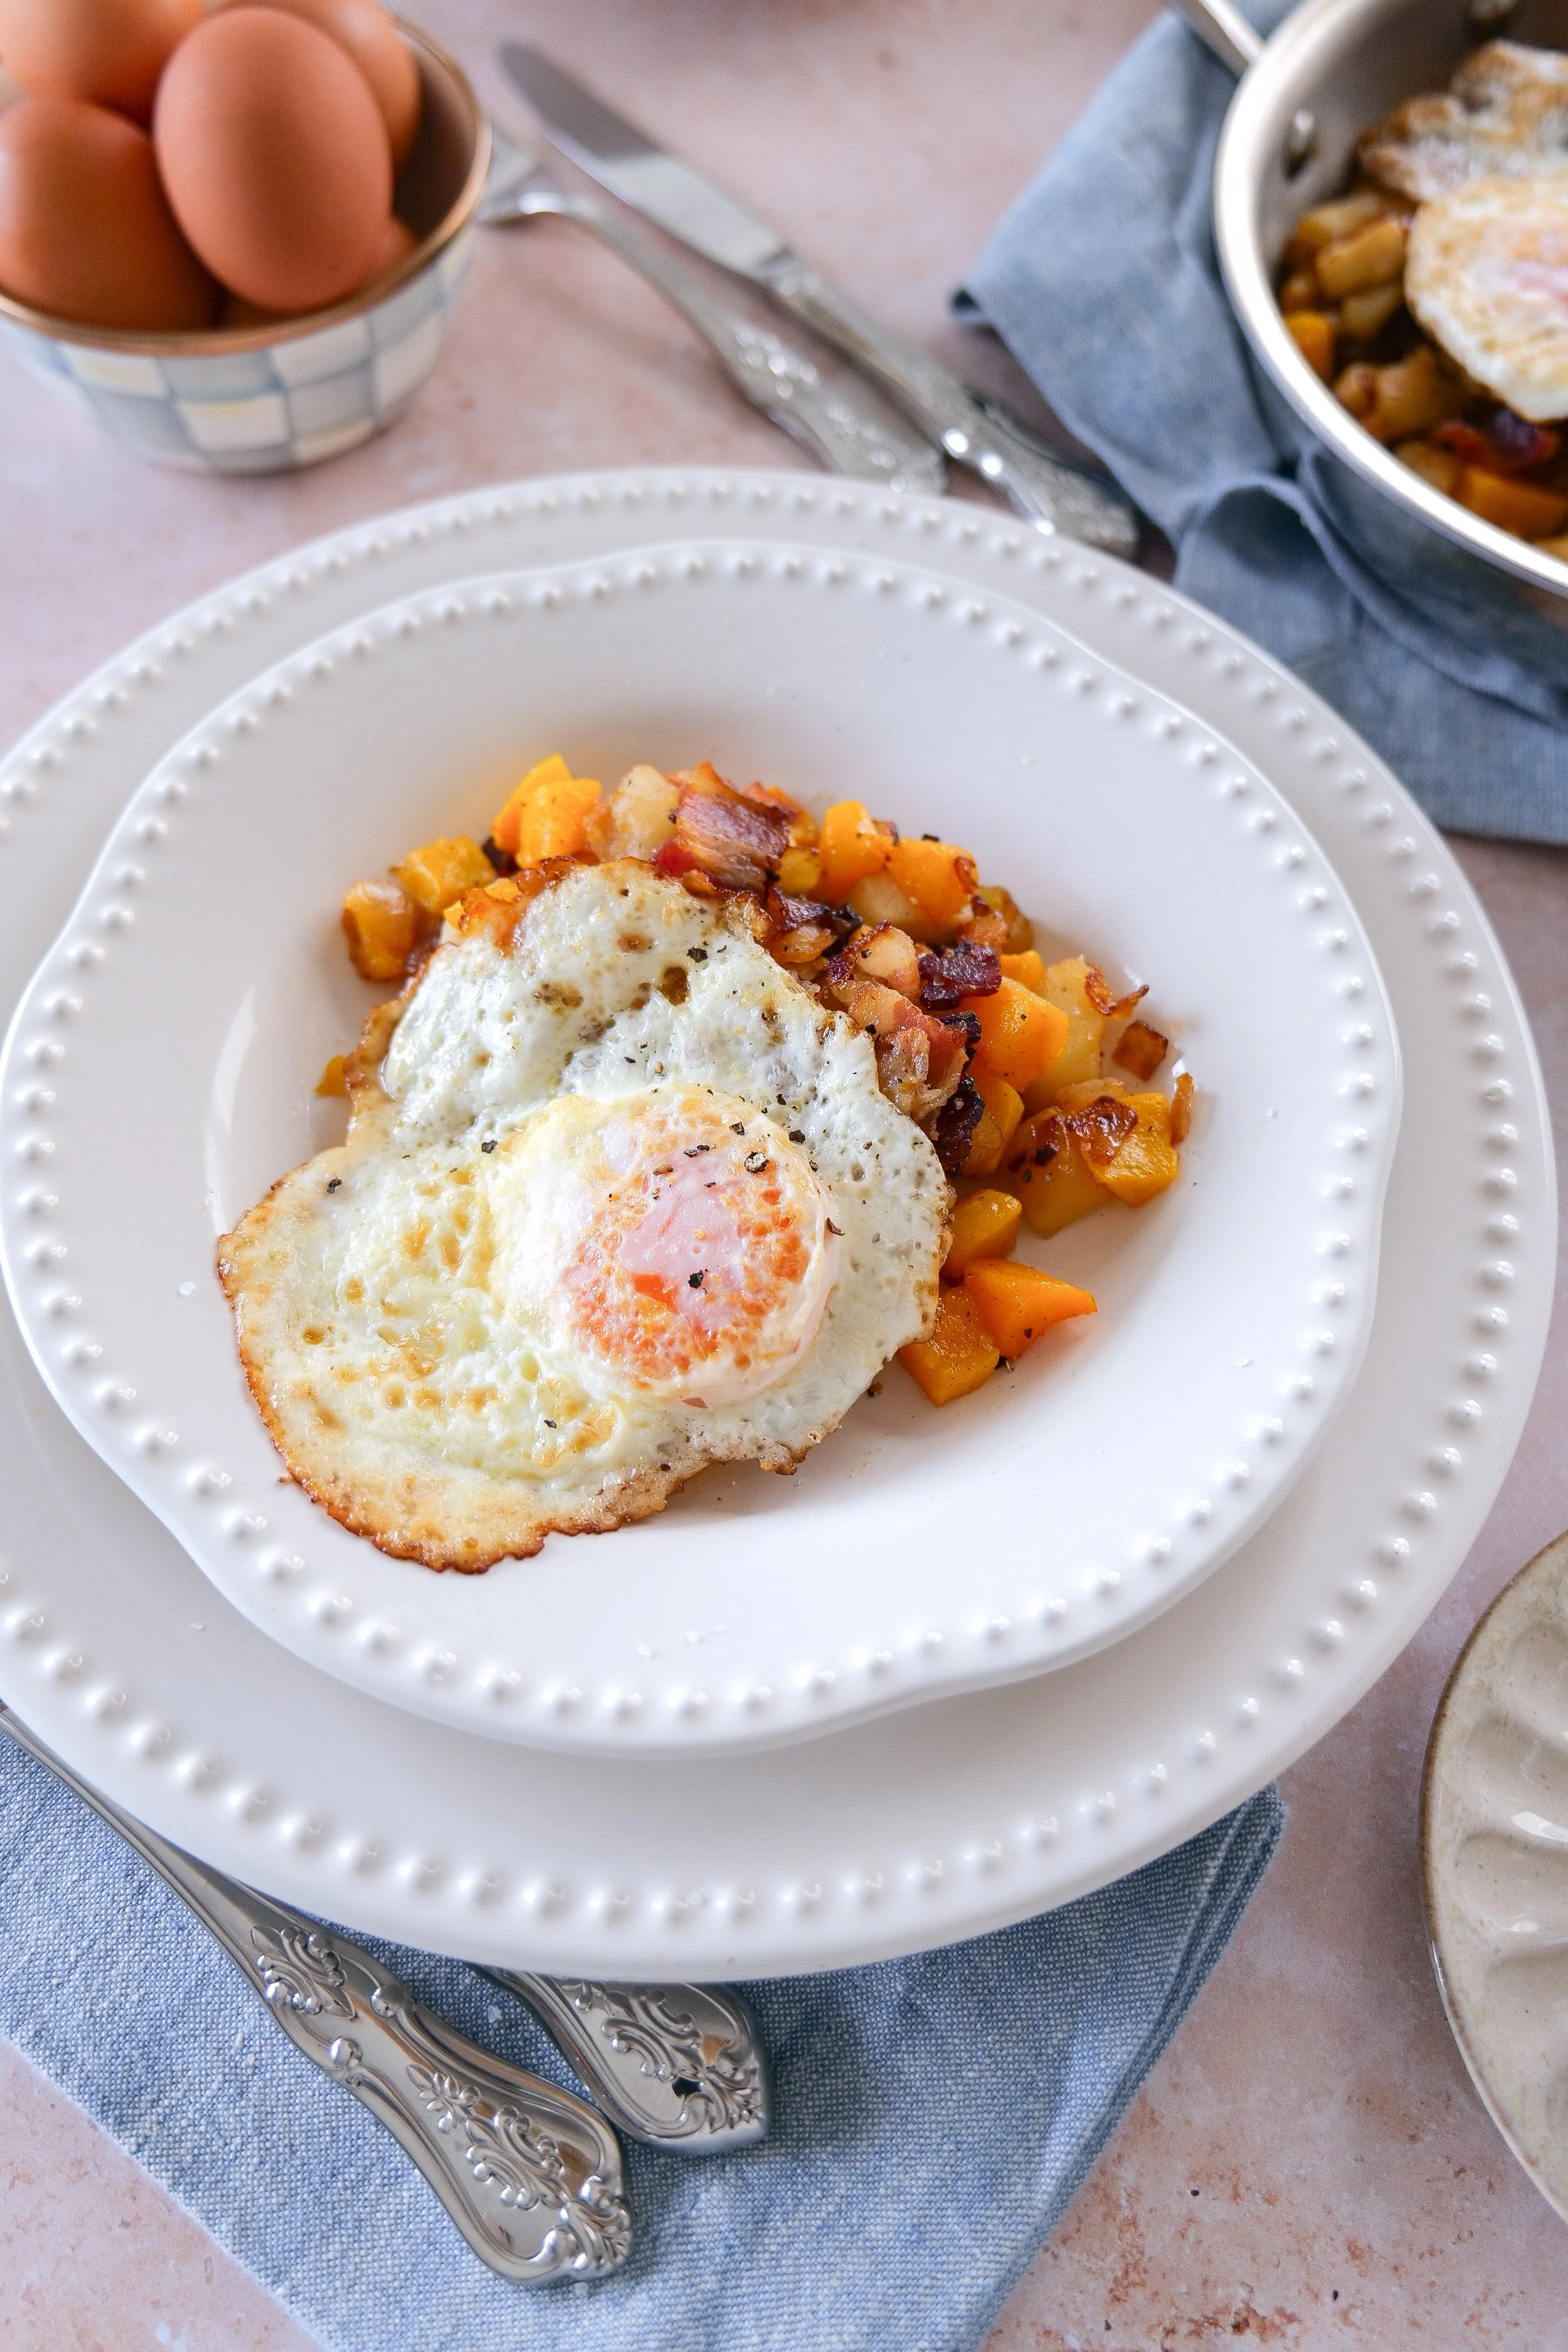
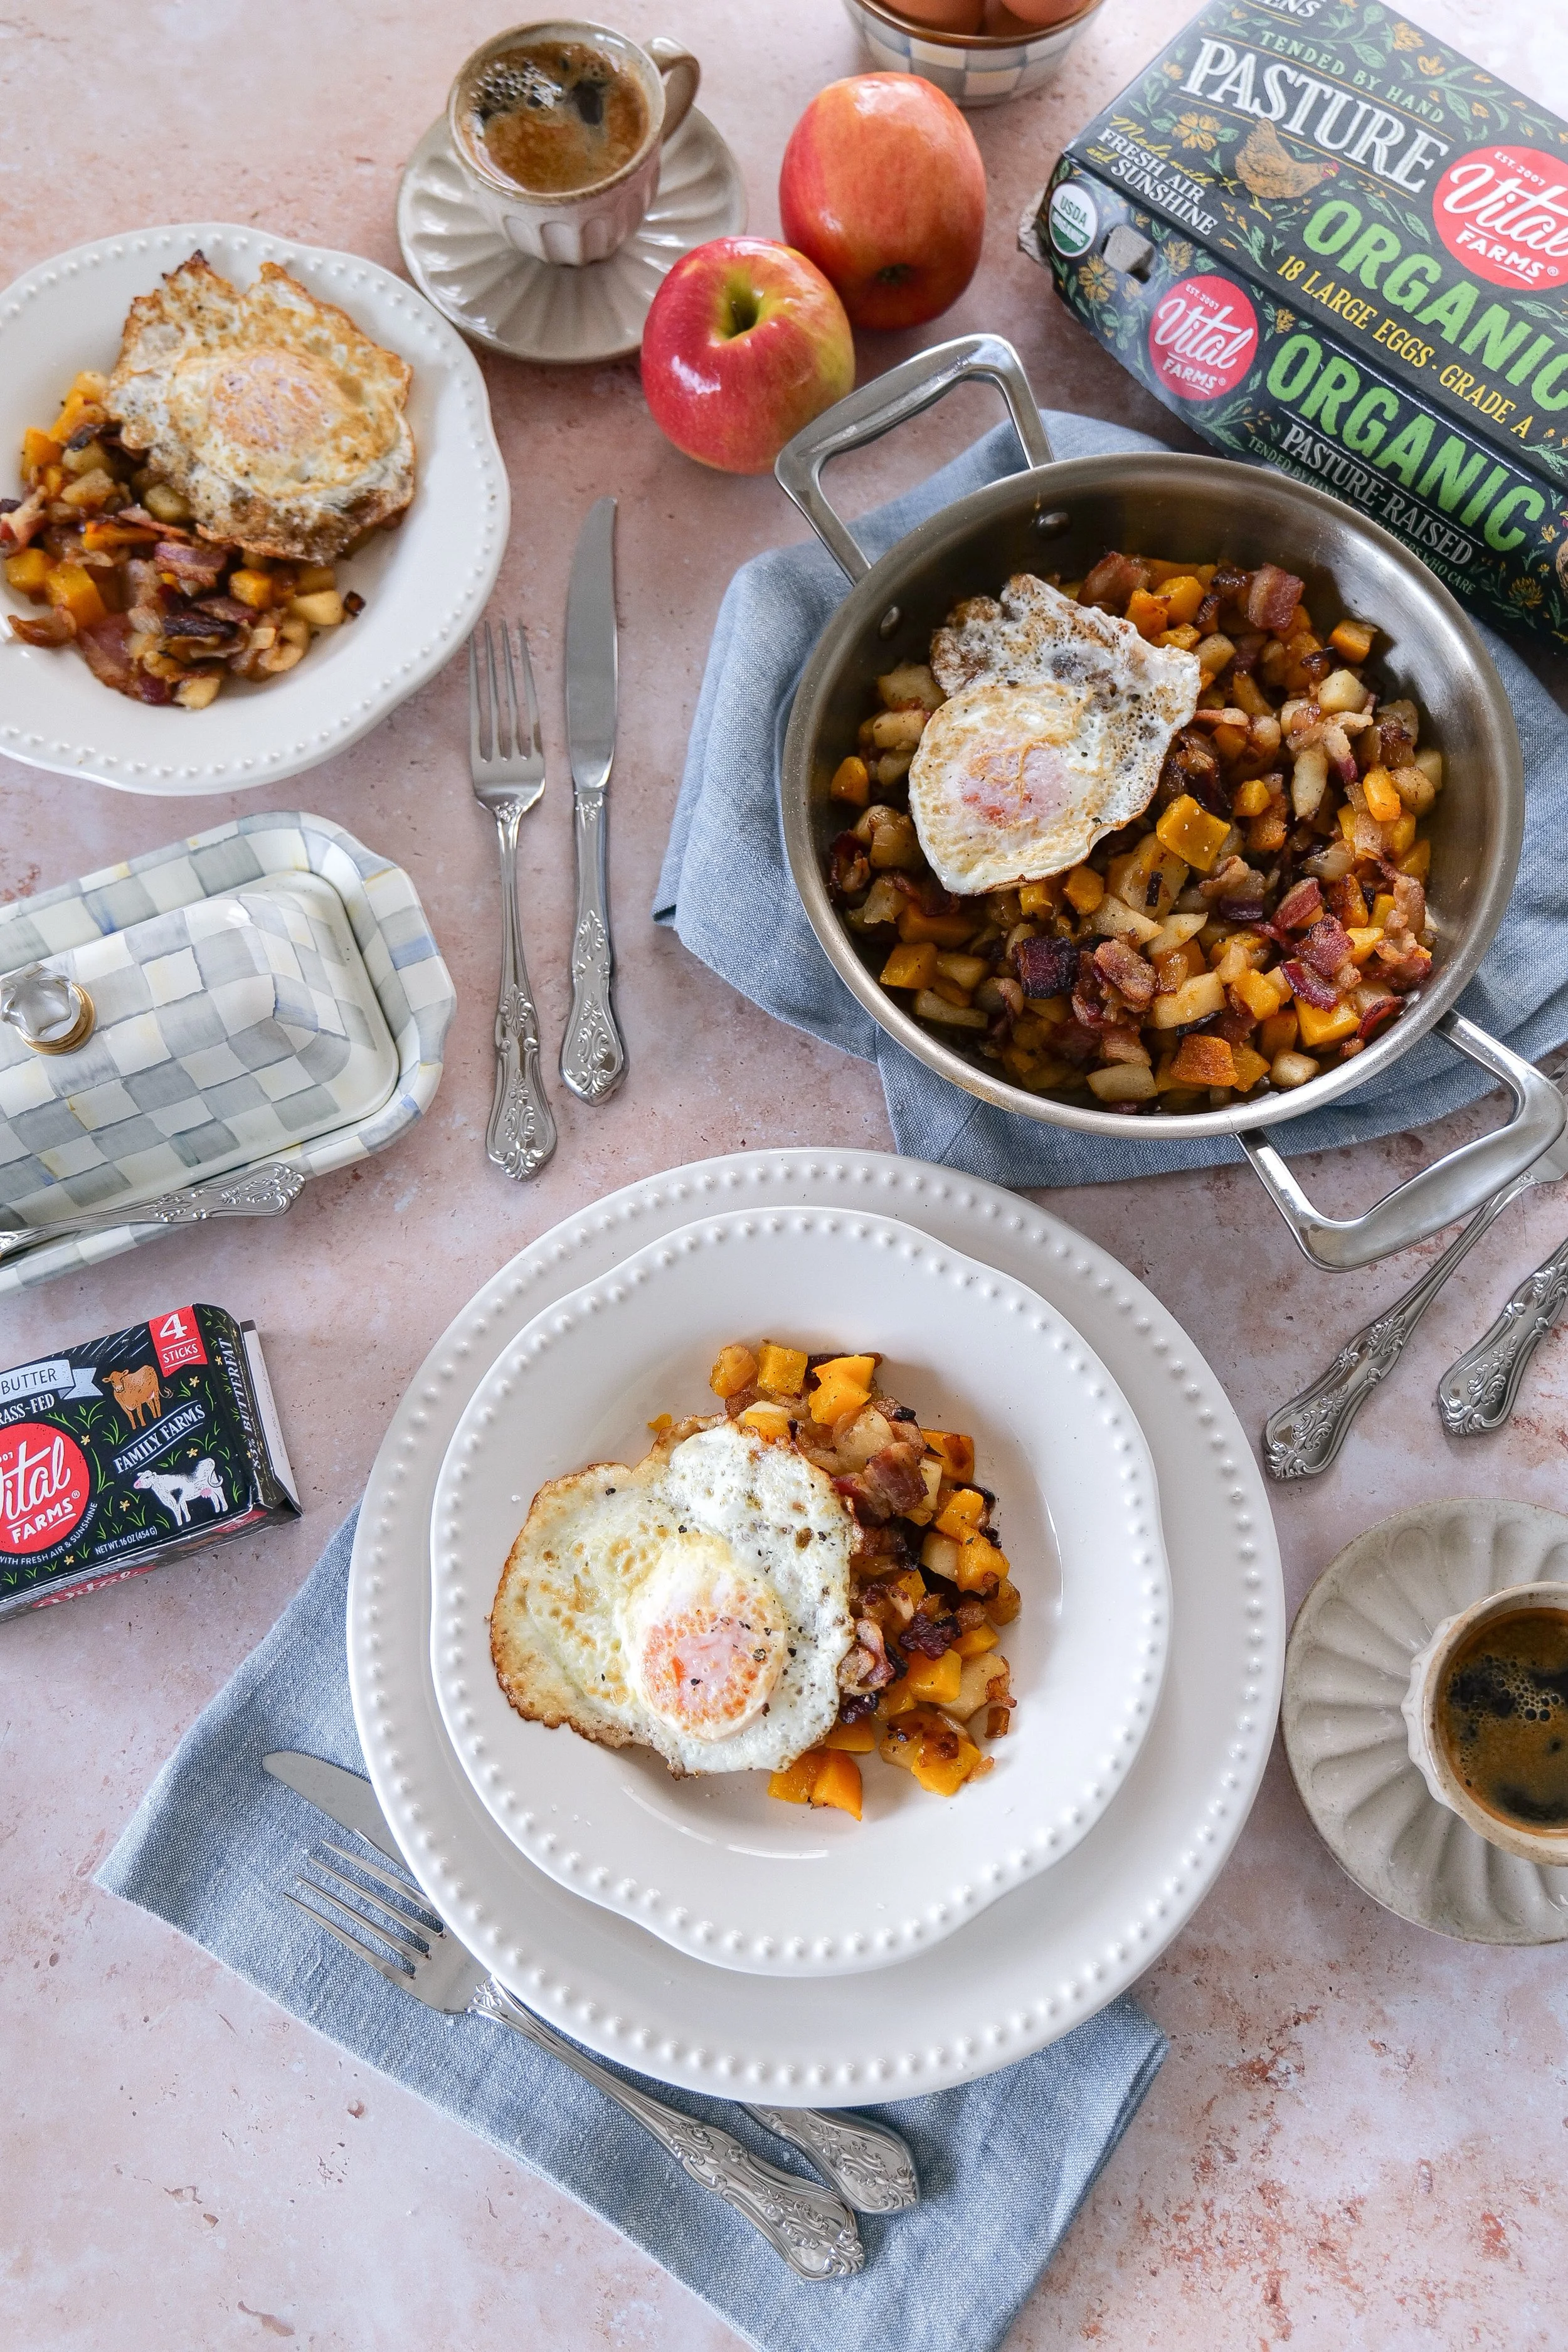
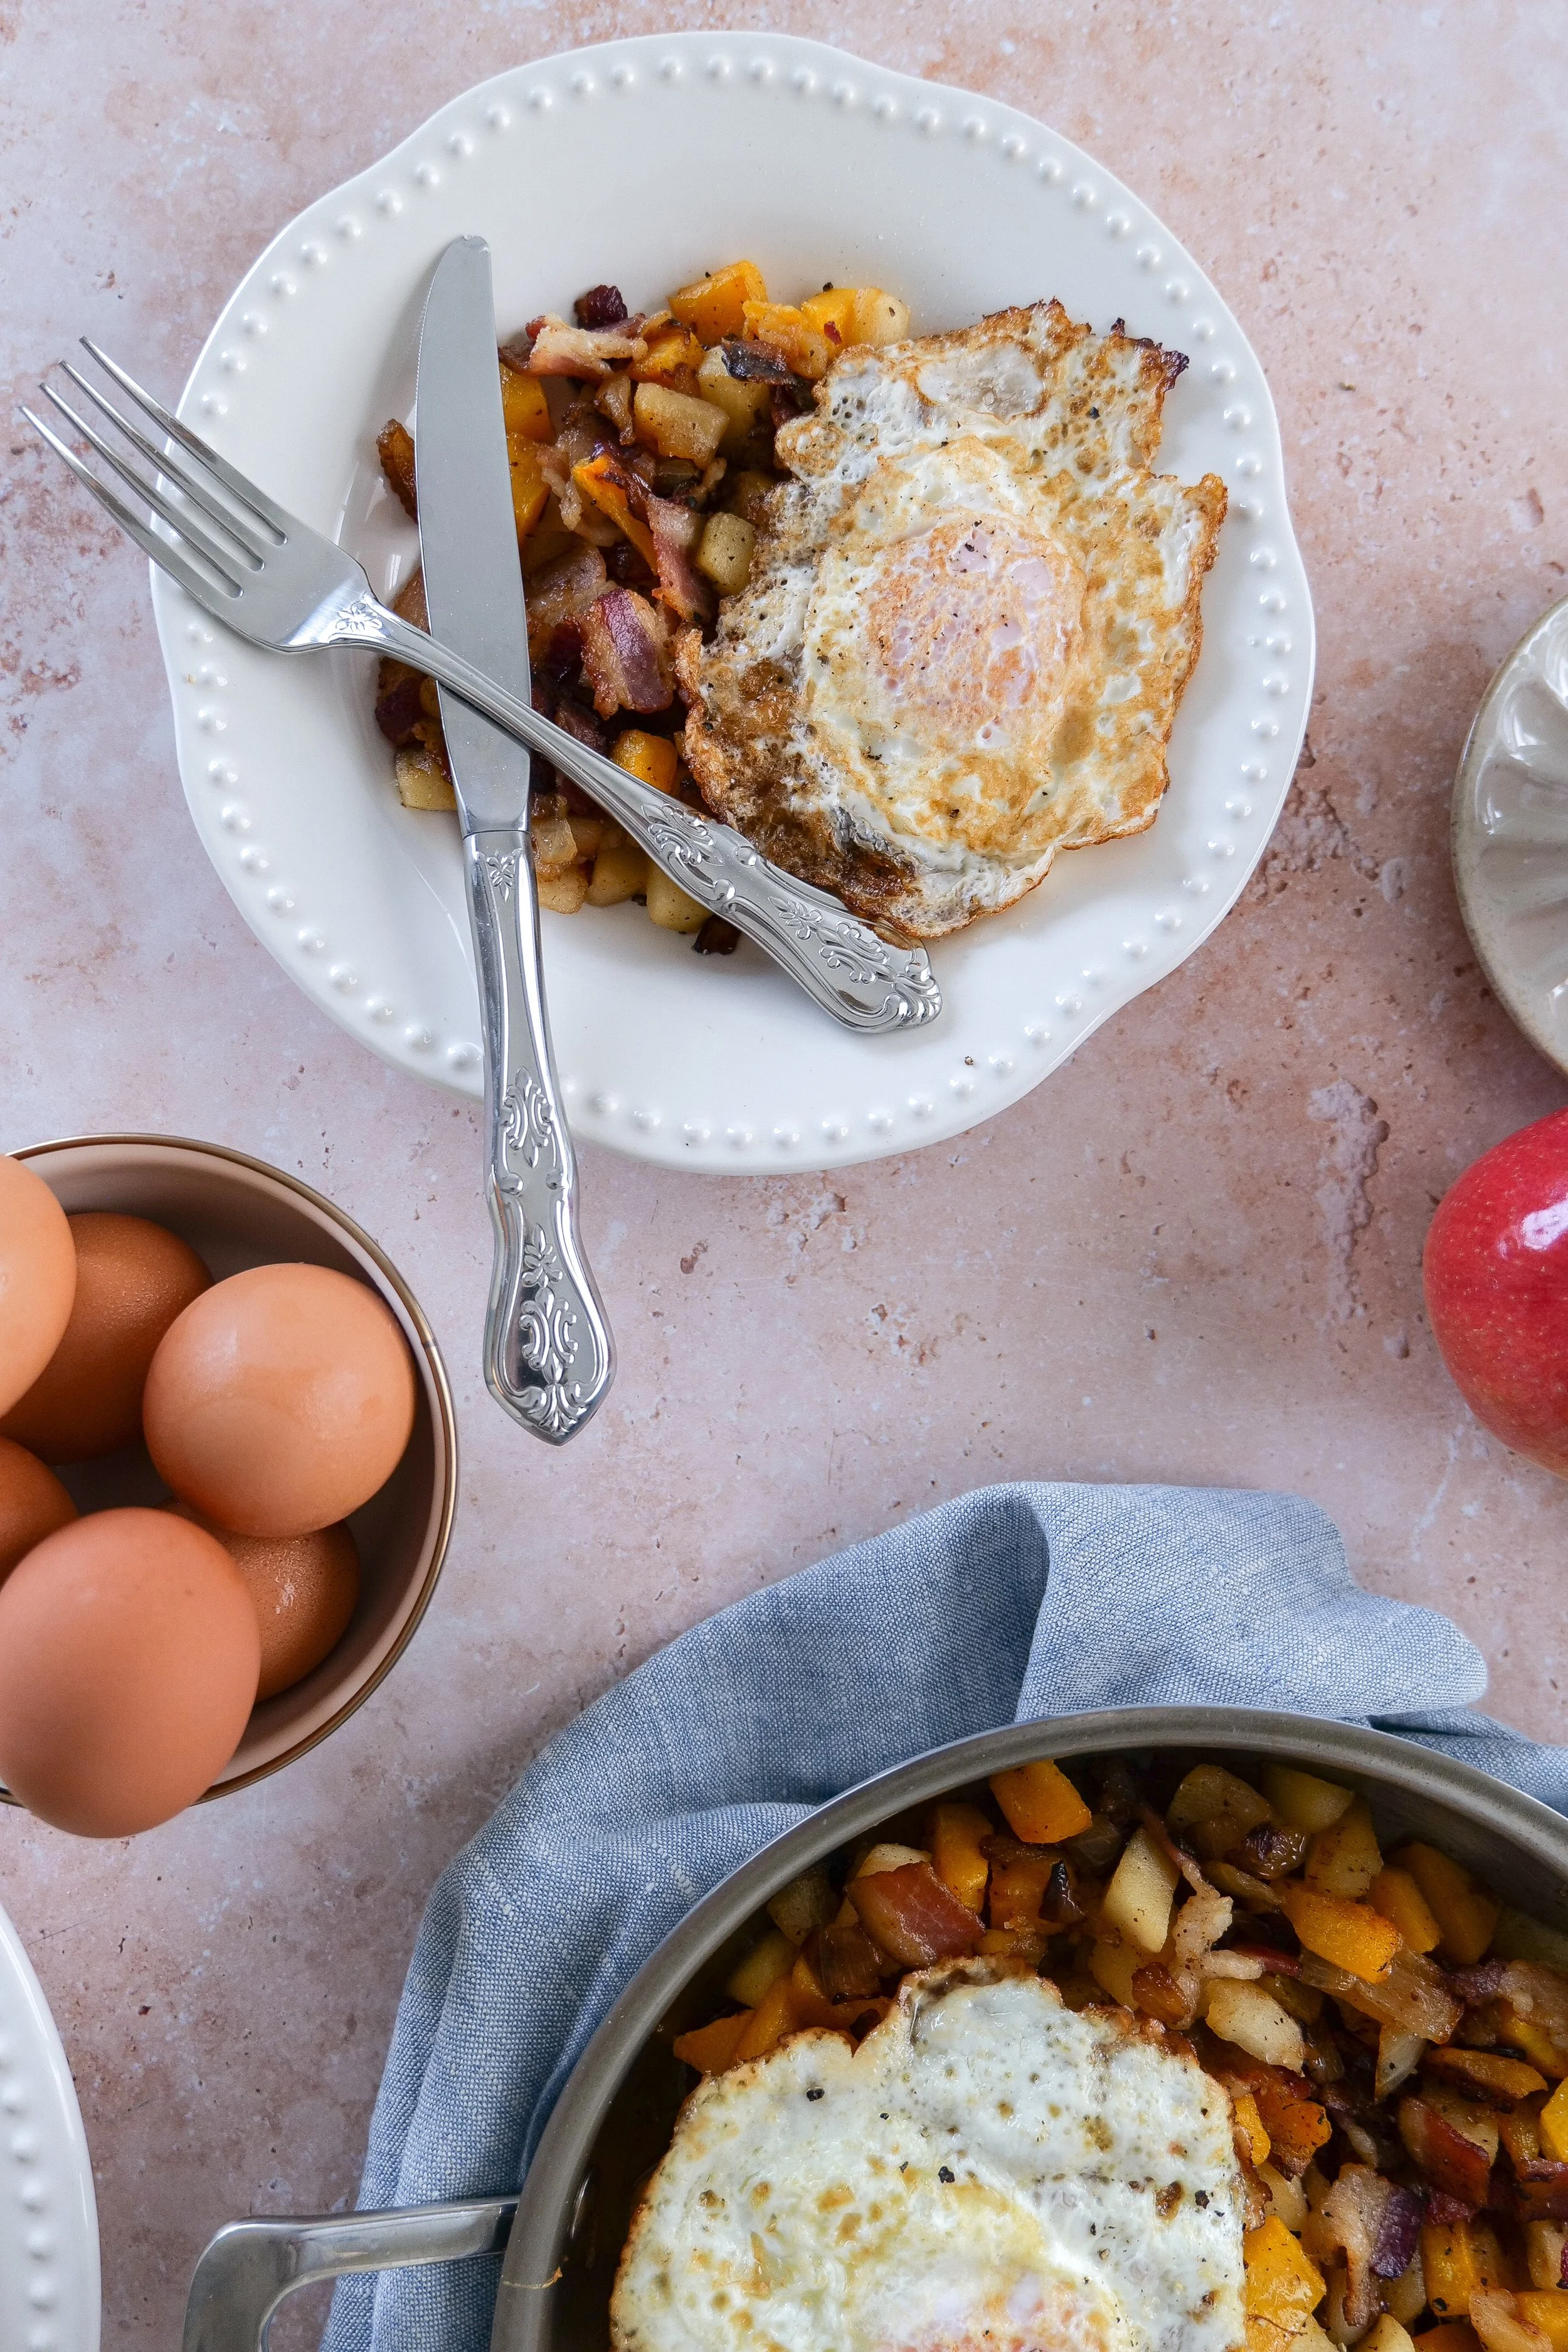
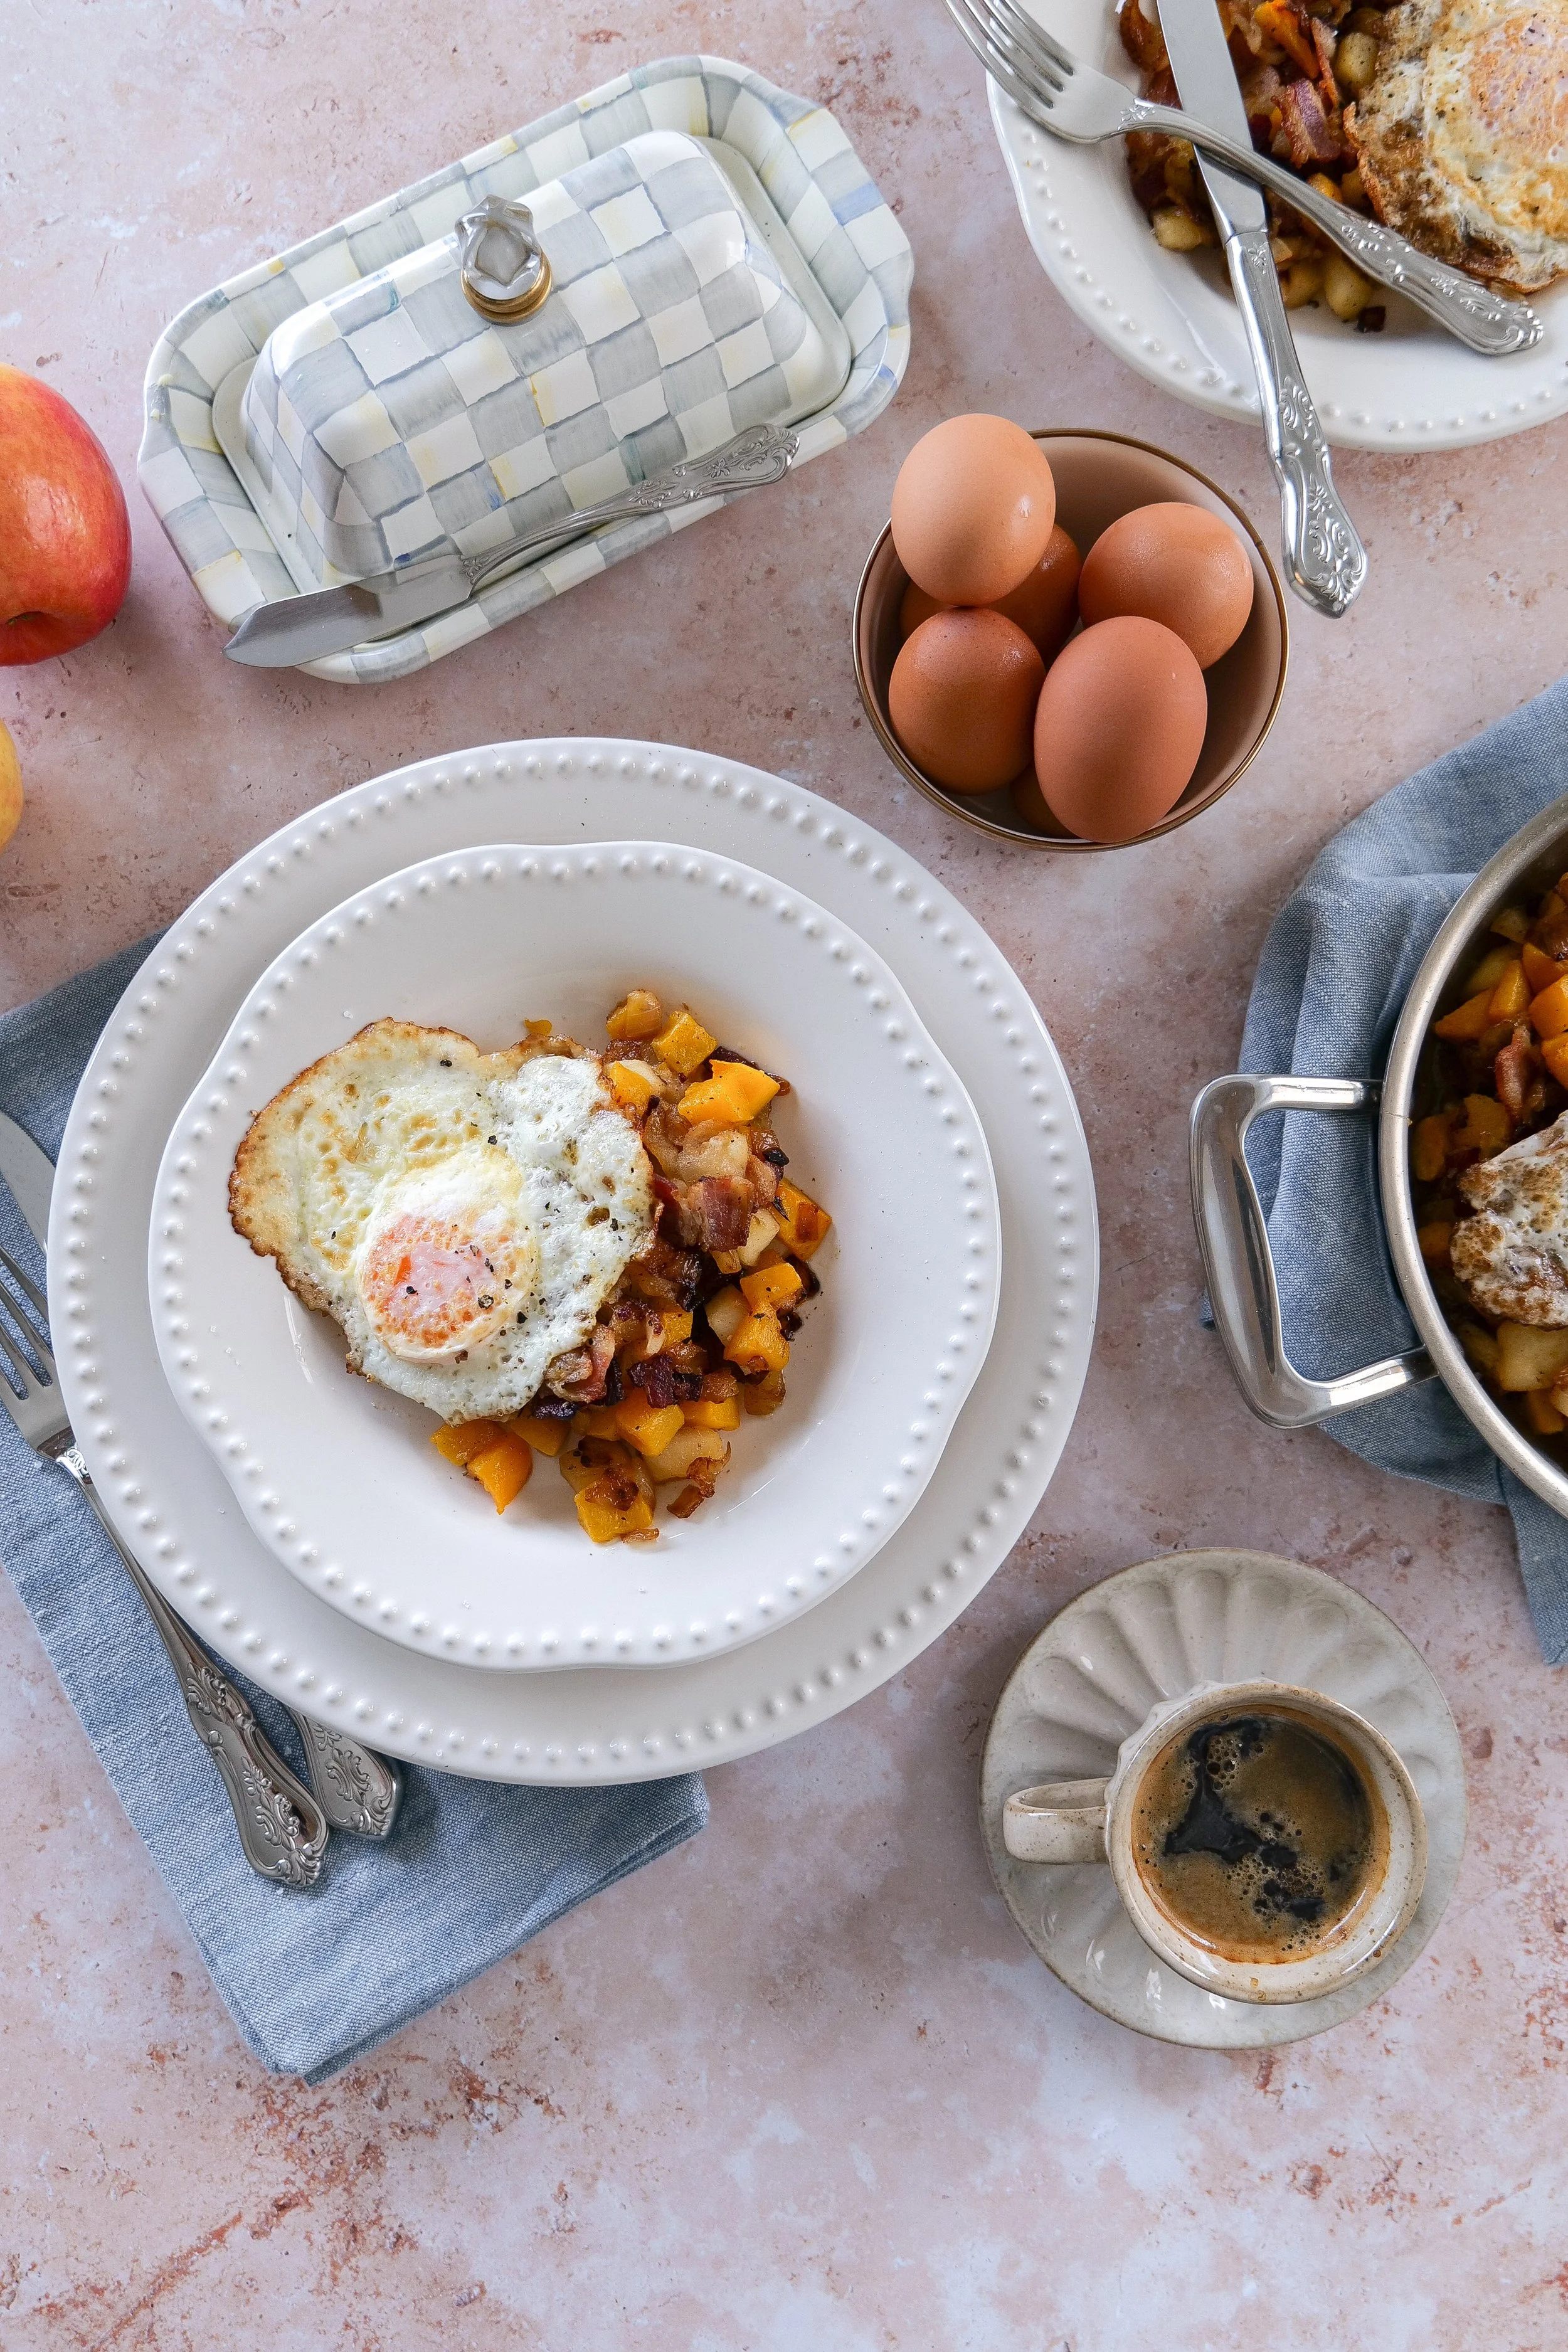
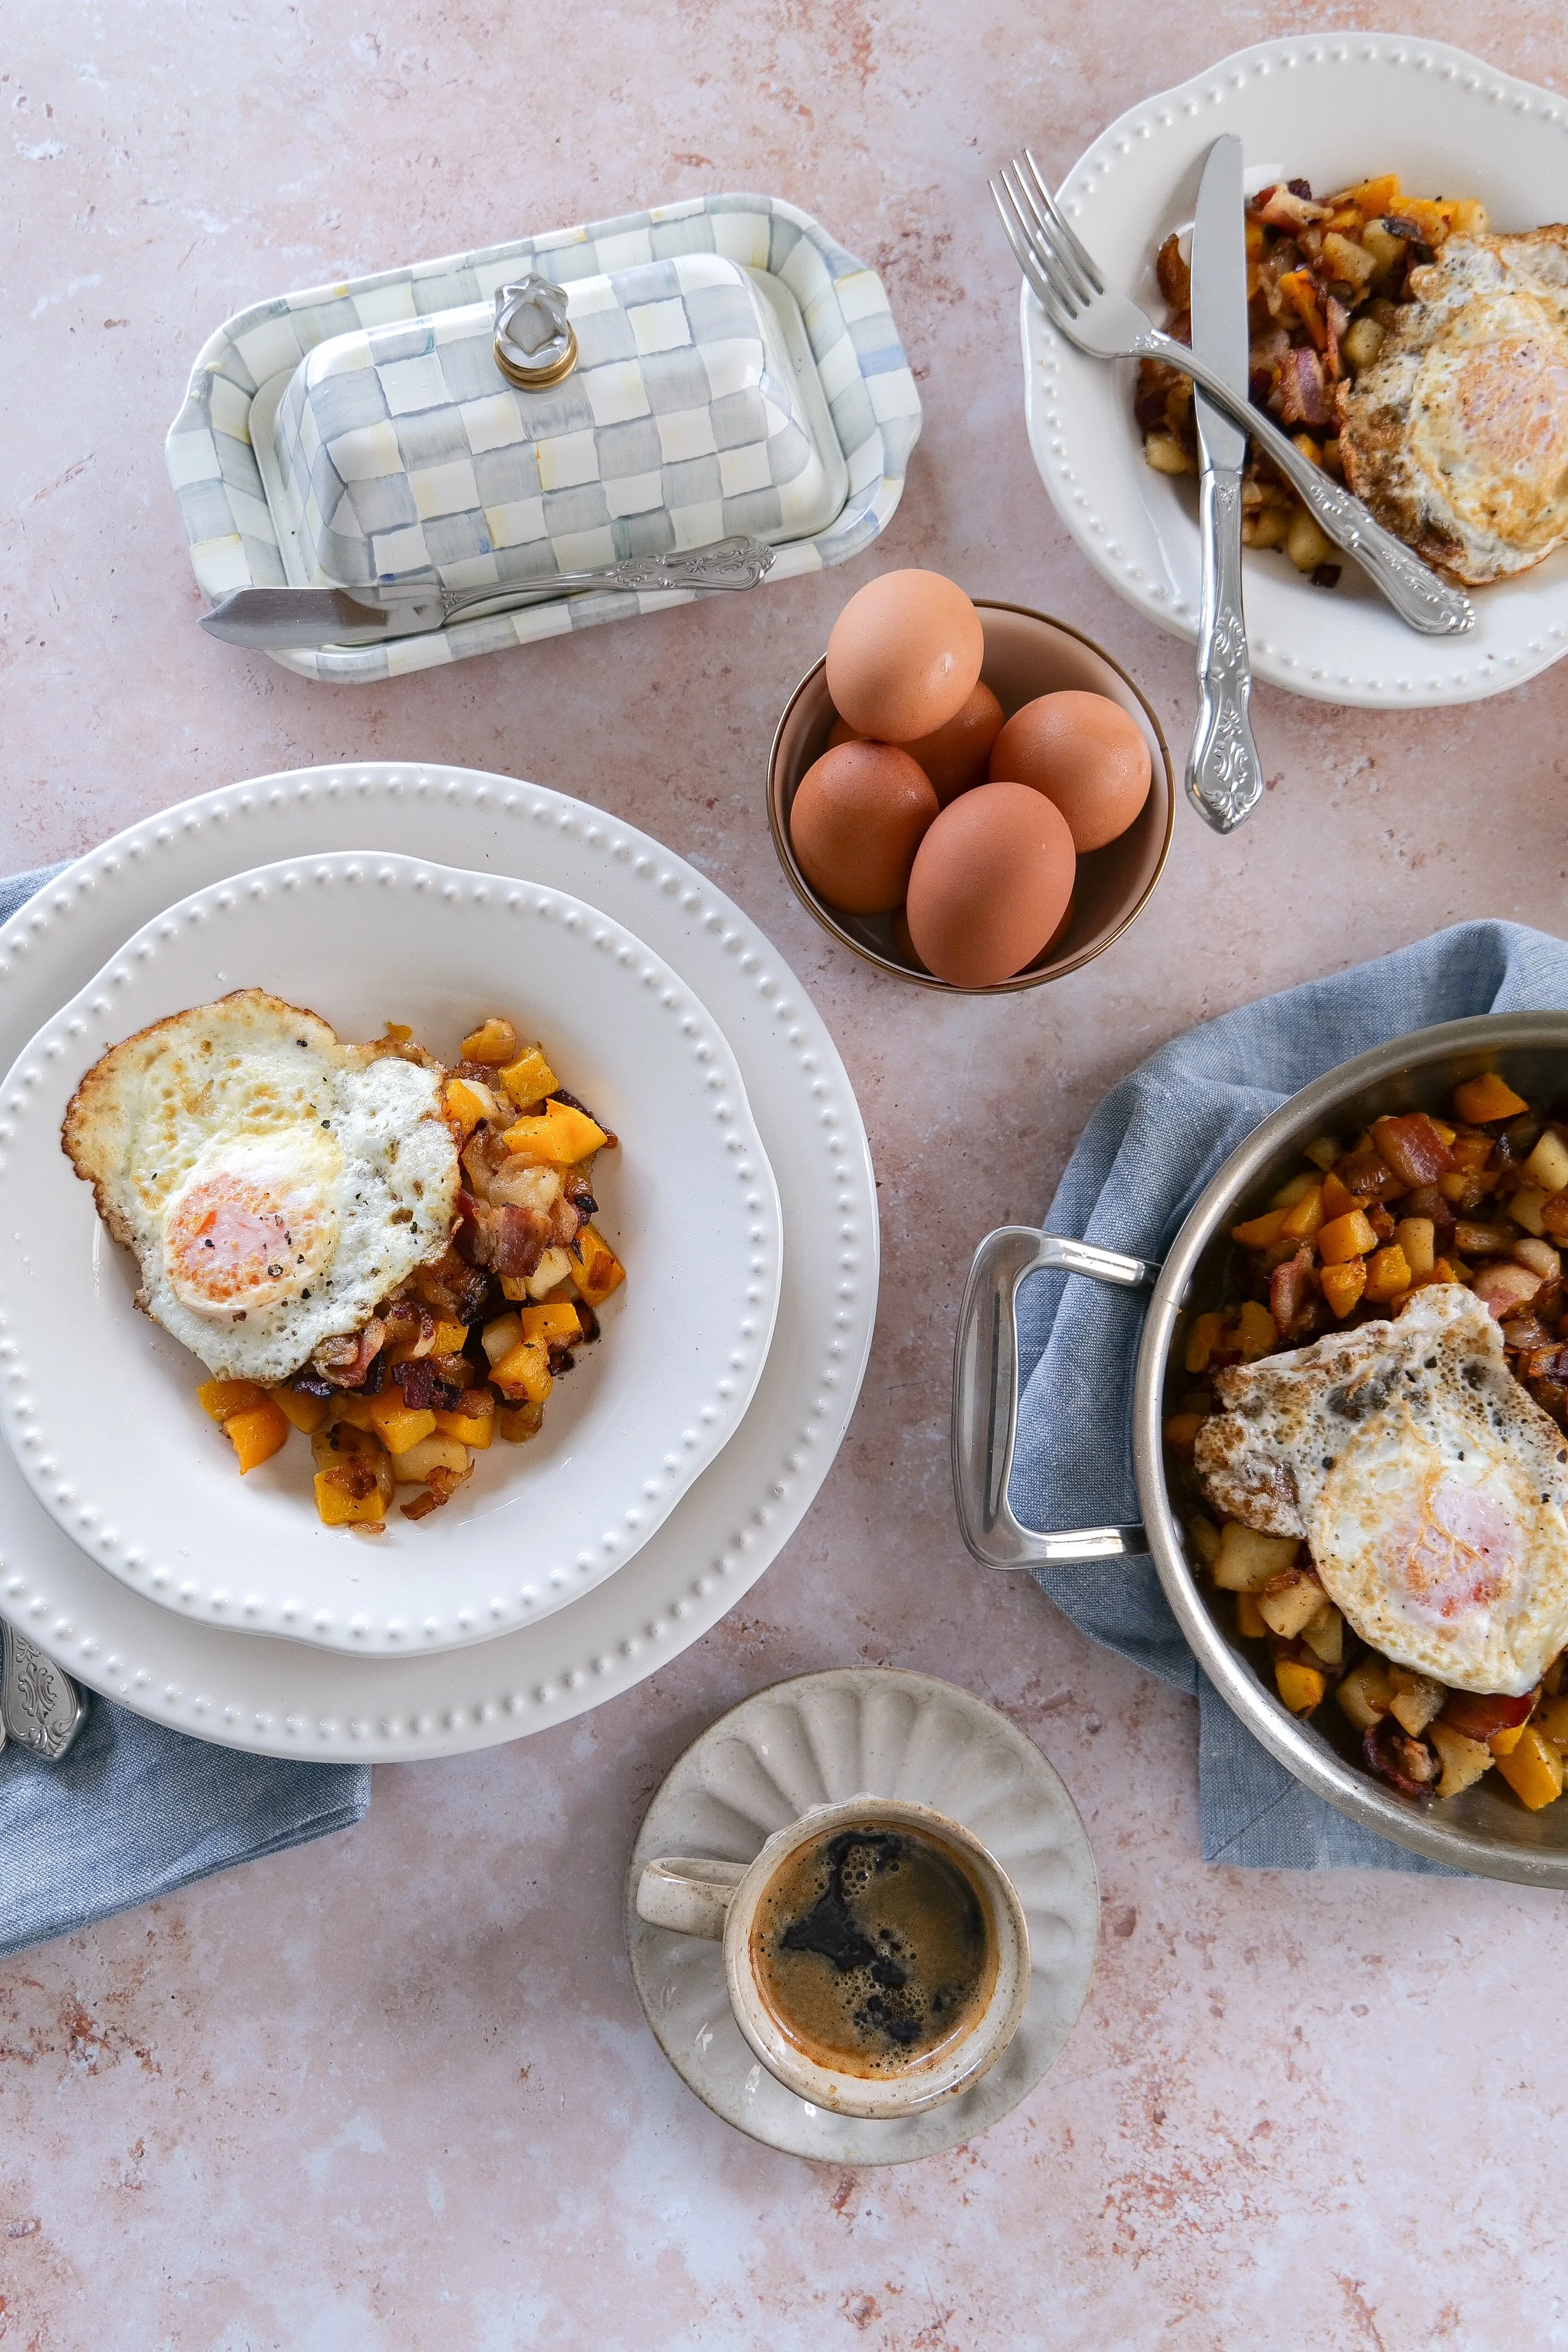
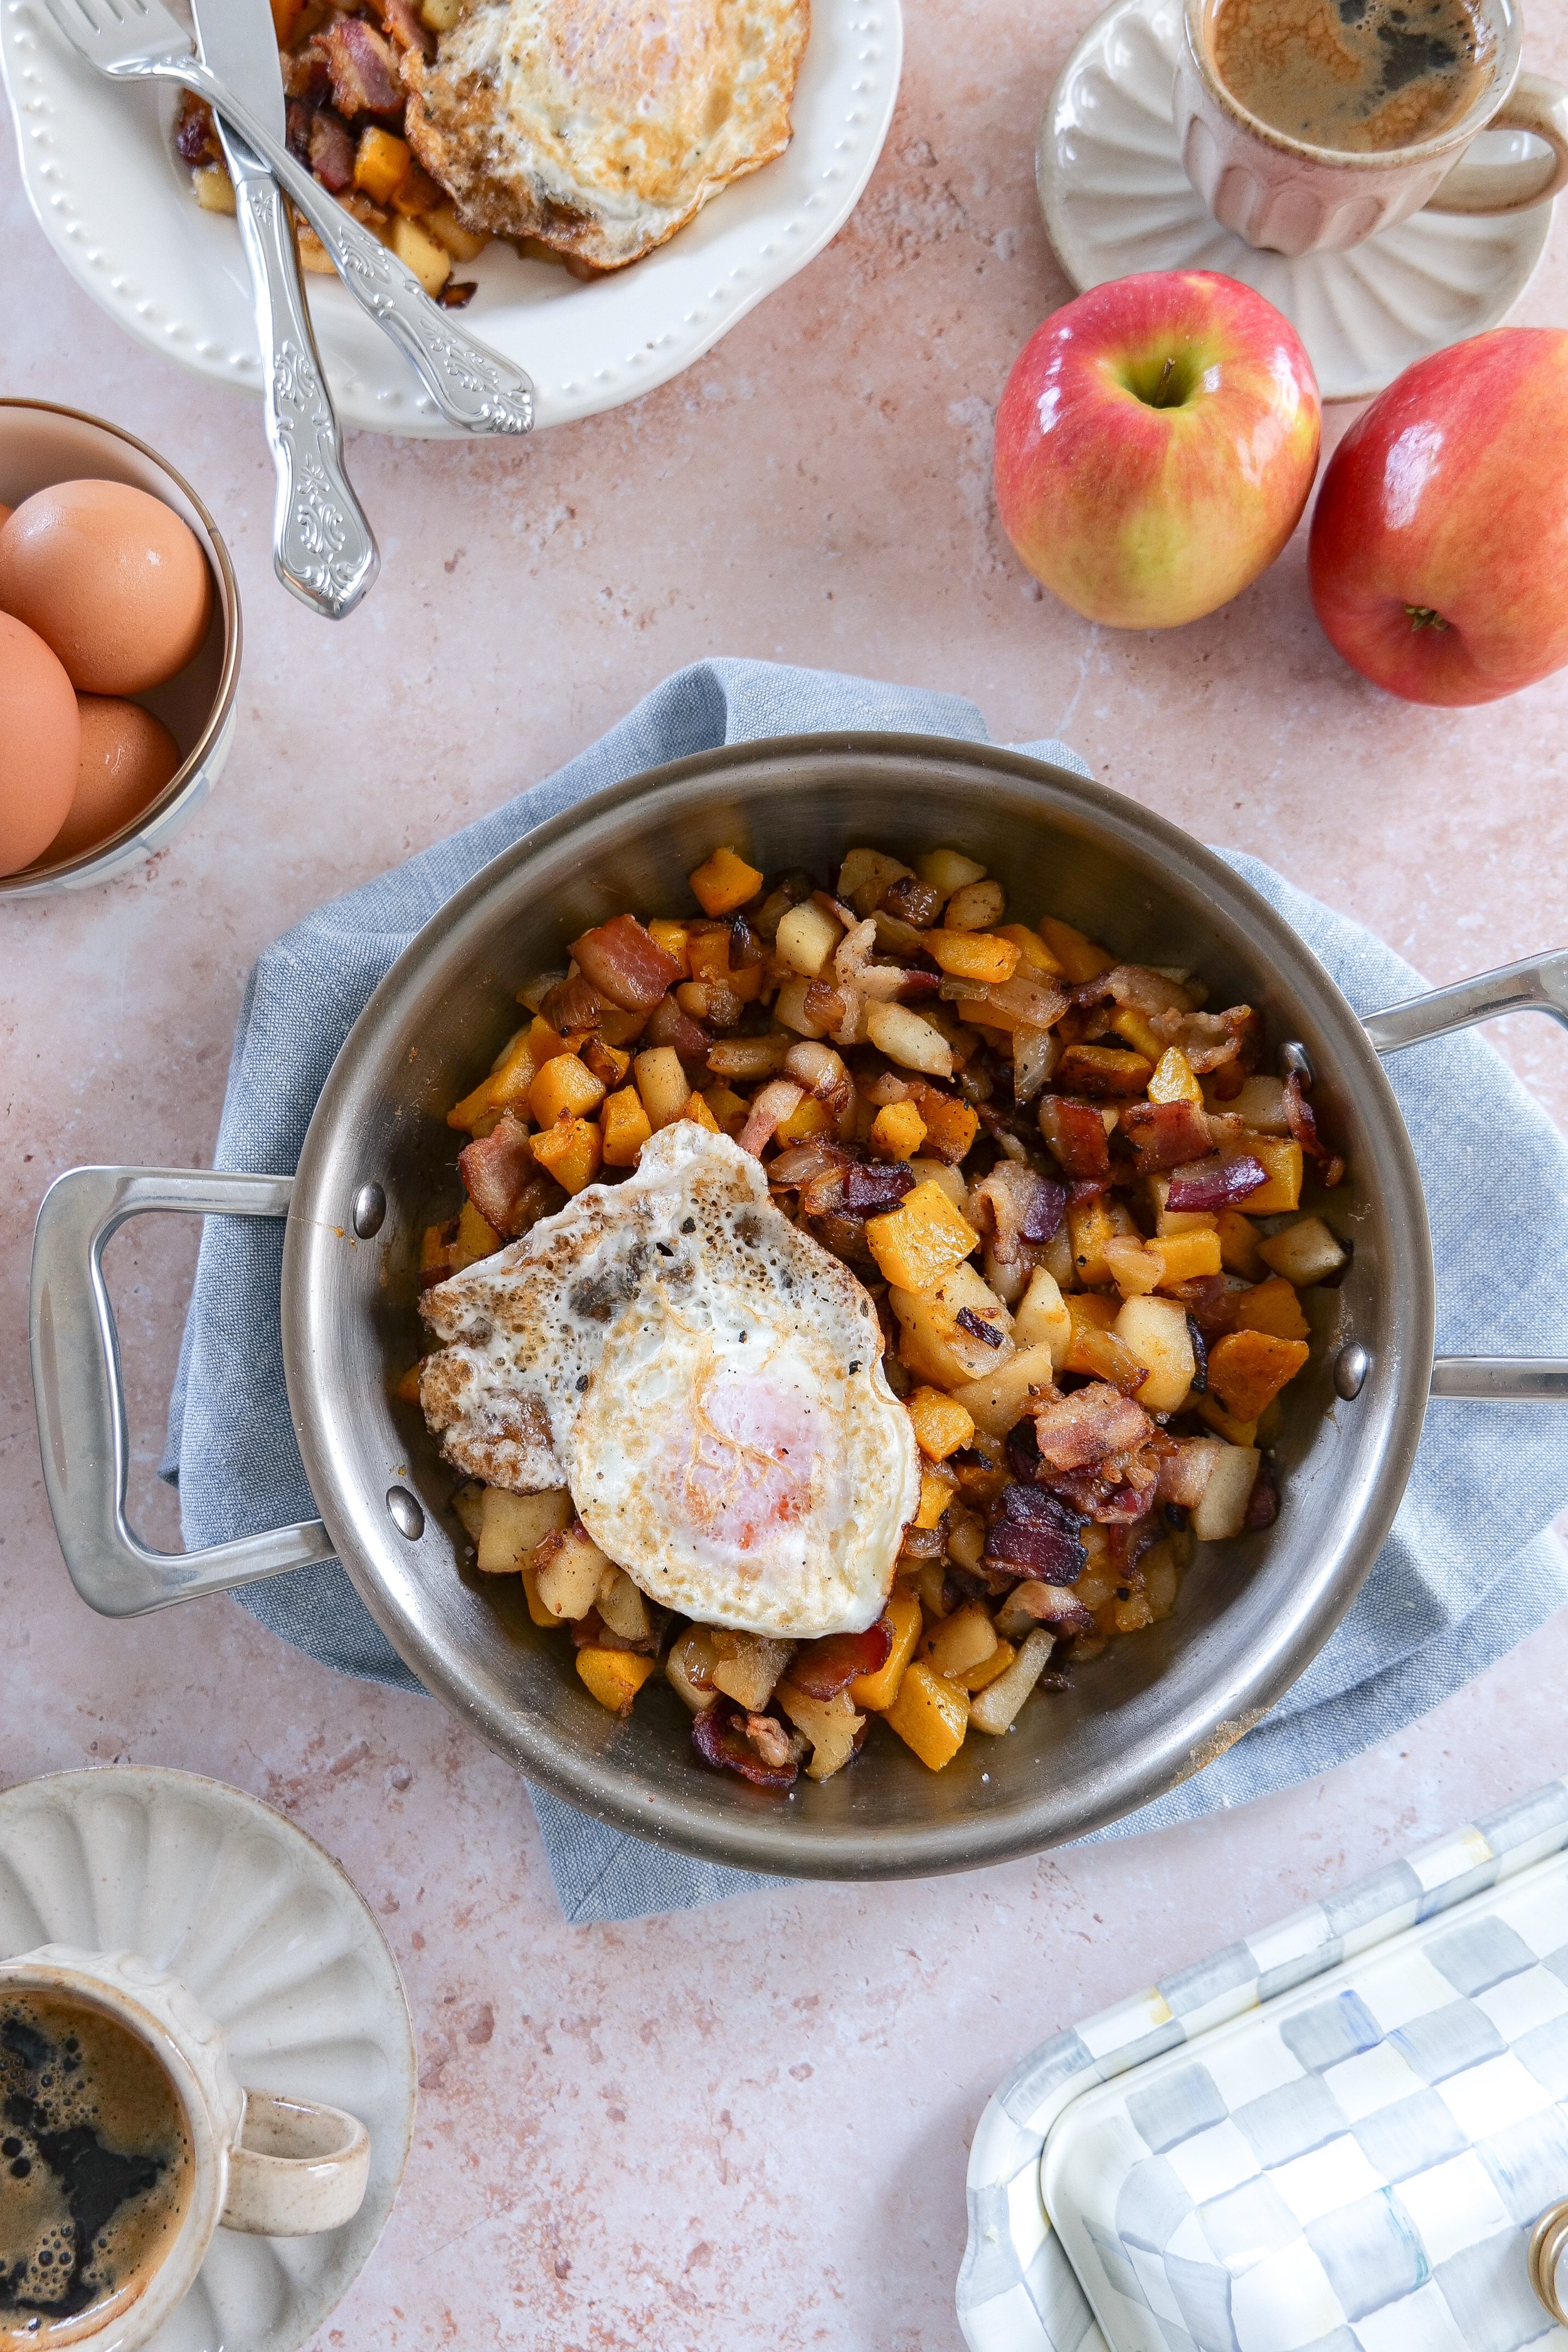
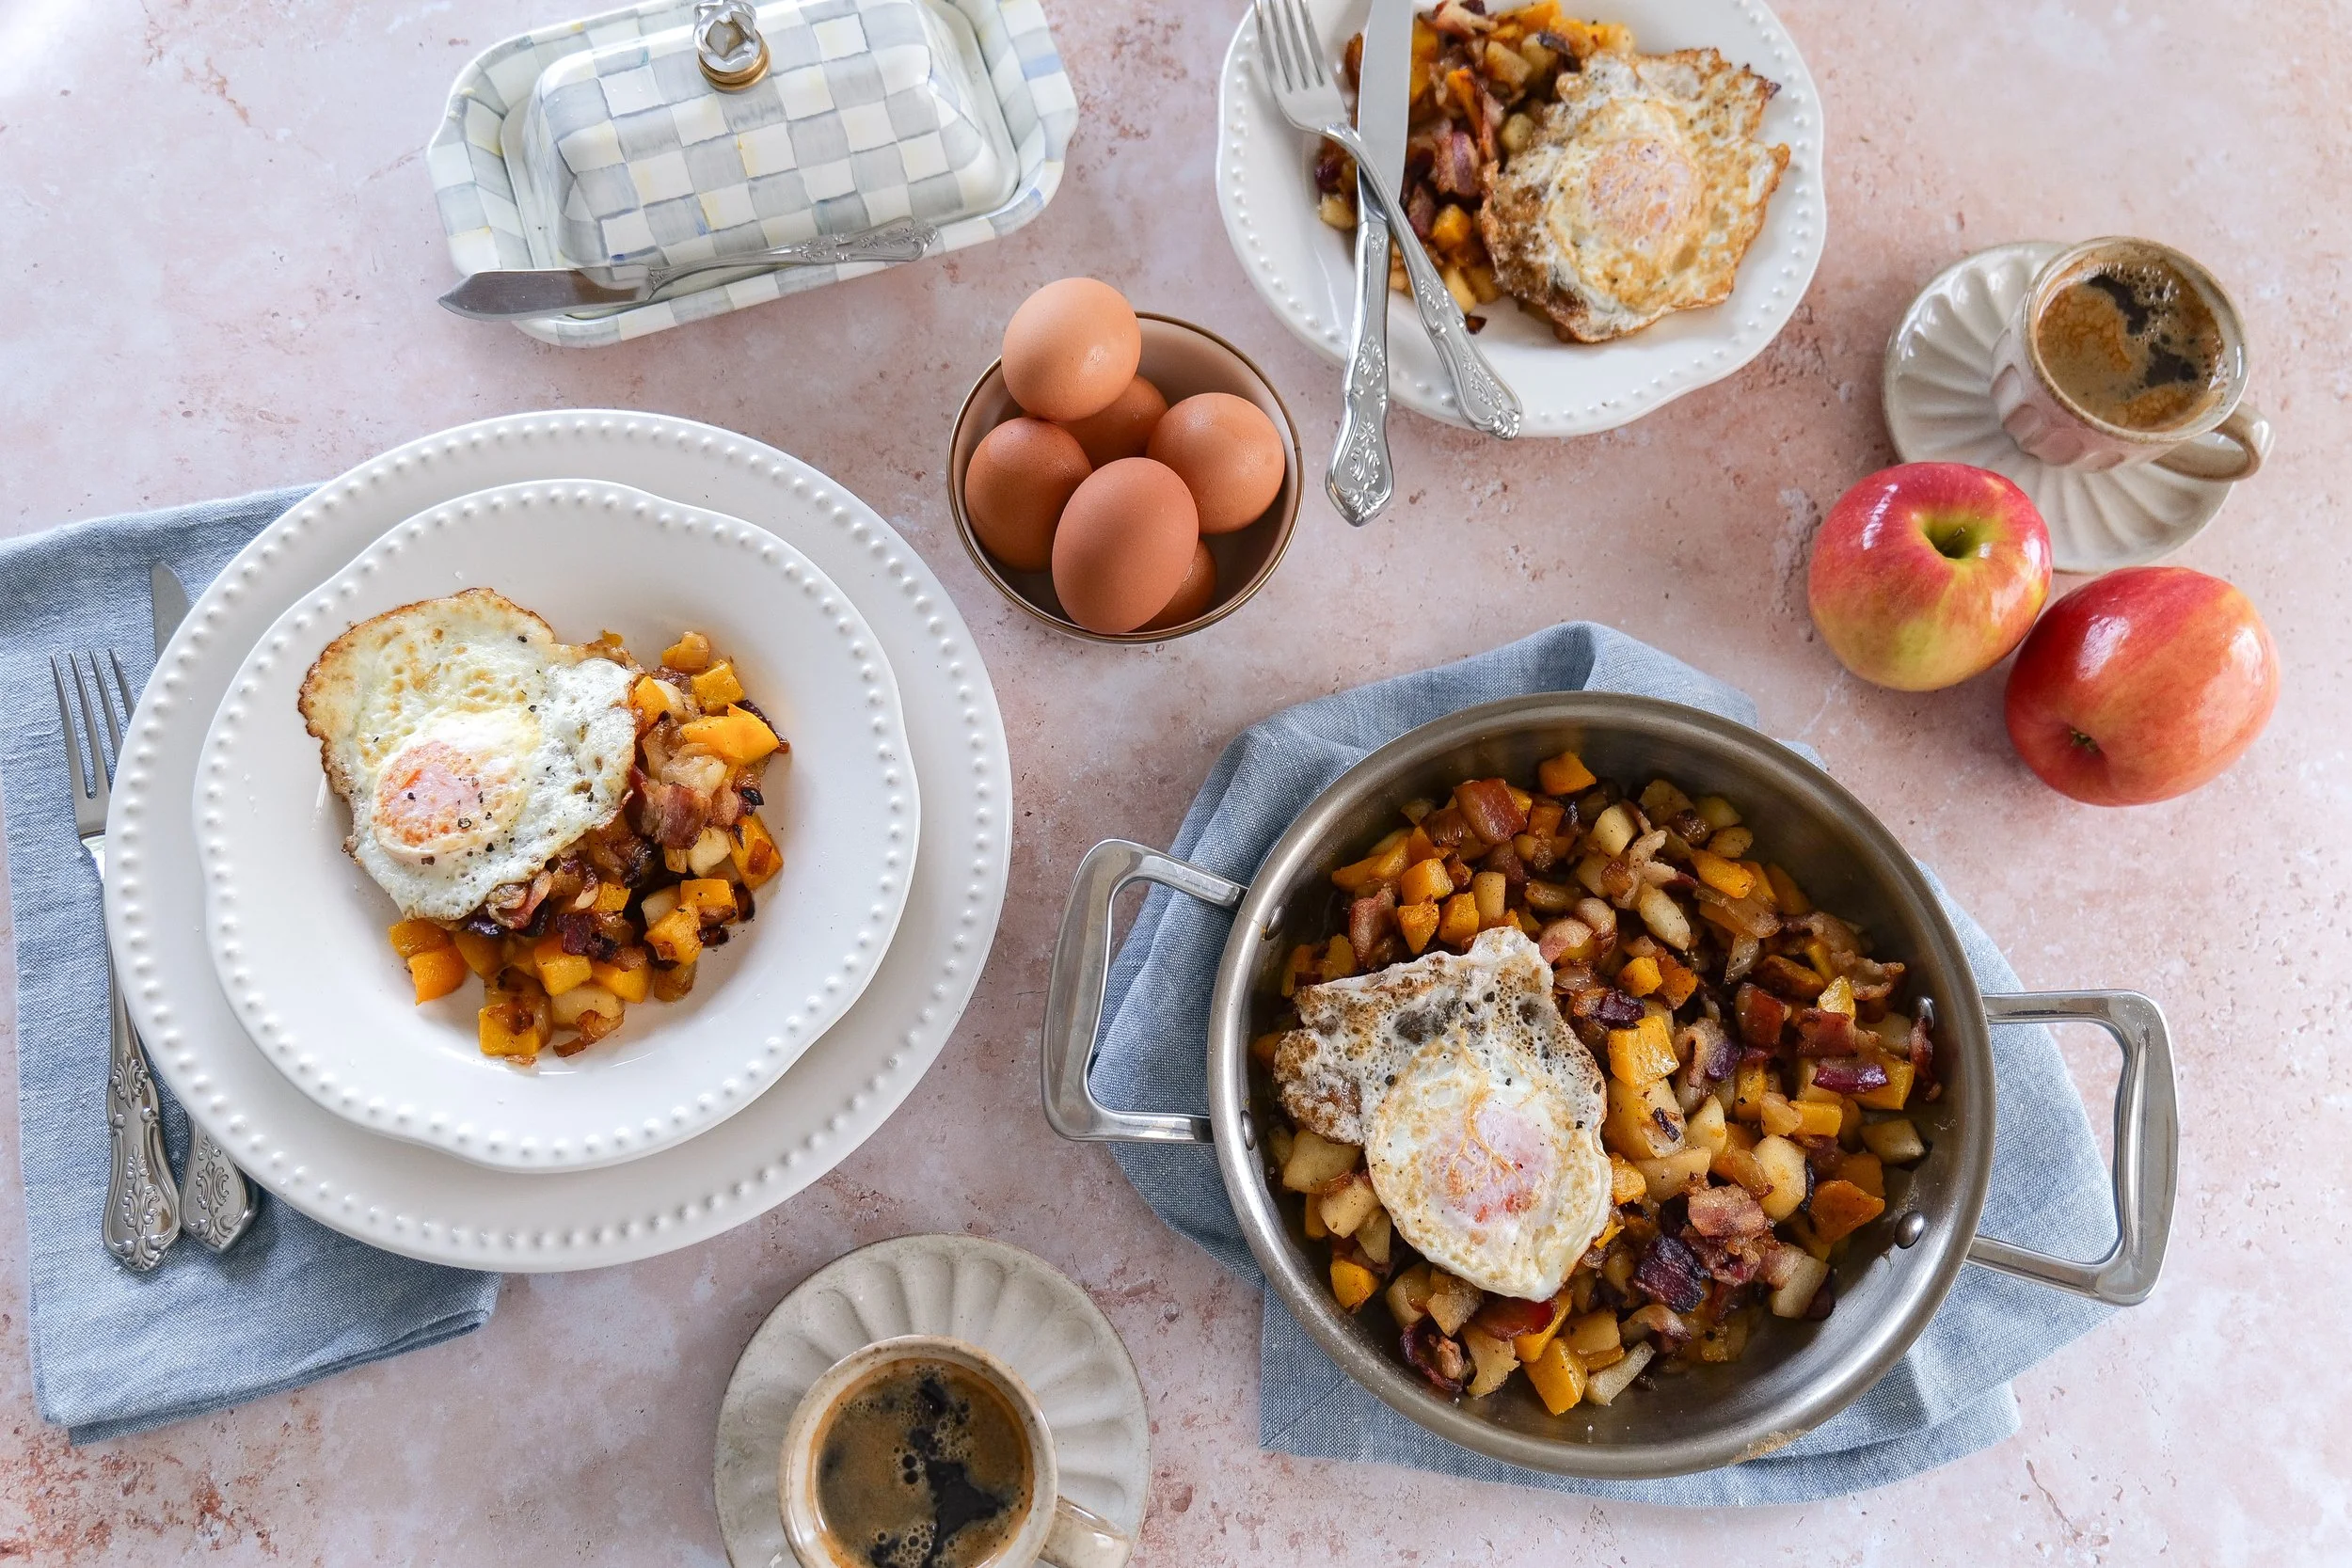
Butternut squash breakfast hash with roasted squash, apples, crispy bacon, onions, and fried eggs.
↓ Skip to Recipe

Why You'll Love This Breakfast Hash

This is one of those recipes that feels hearty and special without being complicated.

You'll love it because it's:

  • Sweet and savory in every bite

  • Perfect for fall and winter mornings

  • Made with simple ingredients

  • Easy to customize

  • Great for breakfast, brunch, or breakfast-for-dinner

  • Naturally full of texture

  • Easy to serve family-style

  • Delicious with runny fried eggs on top

The bacon, apples, onions, and roasted squash all bring something different to the skillet, which is what makes the finished dish so satisfying.

Homemade butternut squash hash with sweet apples, crispy bacon, onions, and fried eggs.

Ingredient Notes

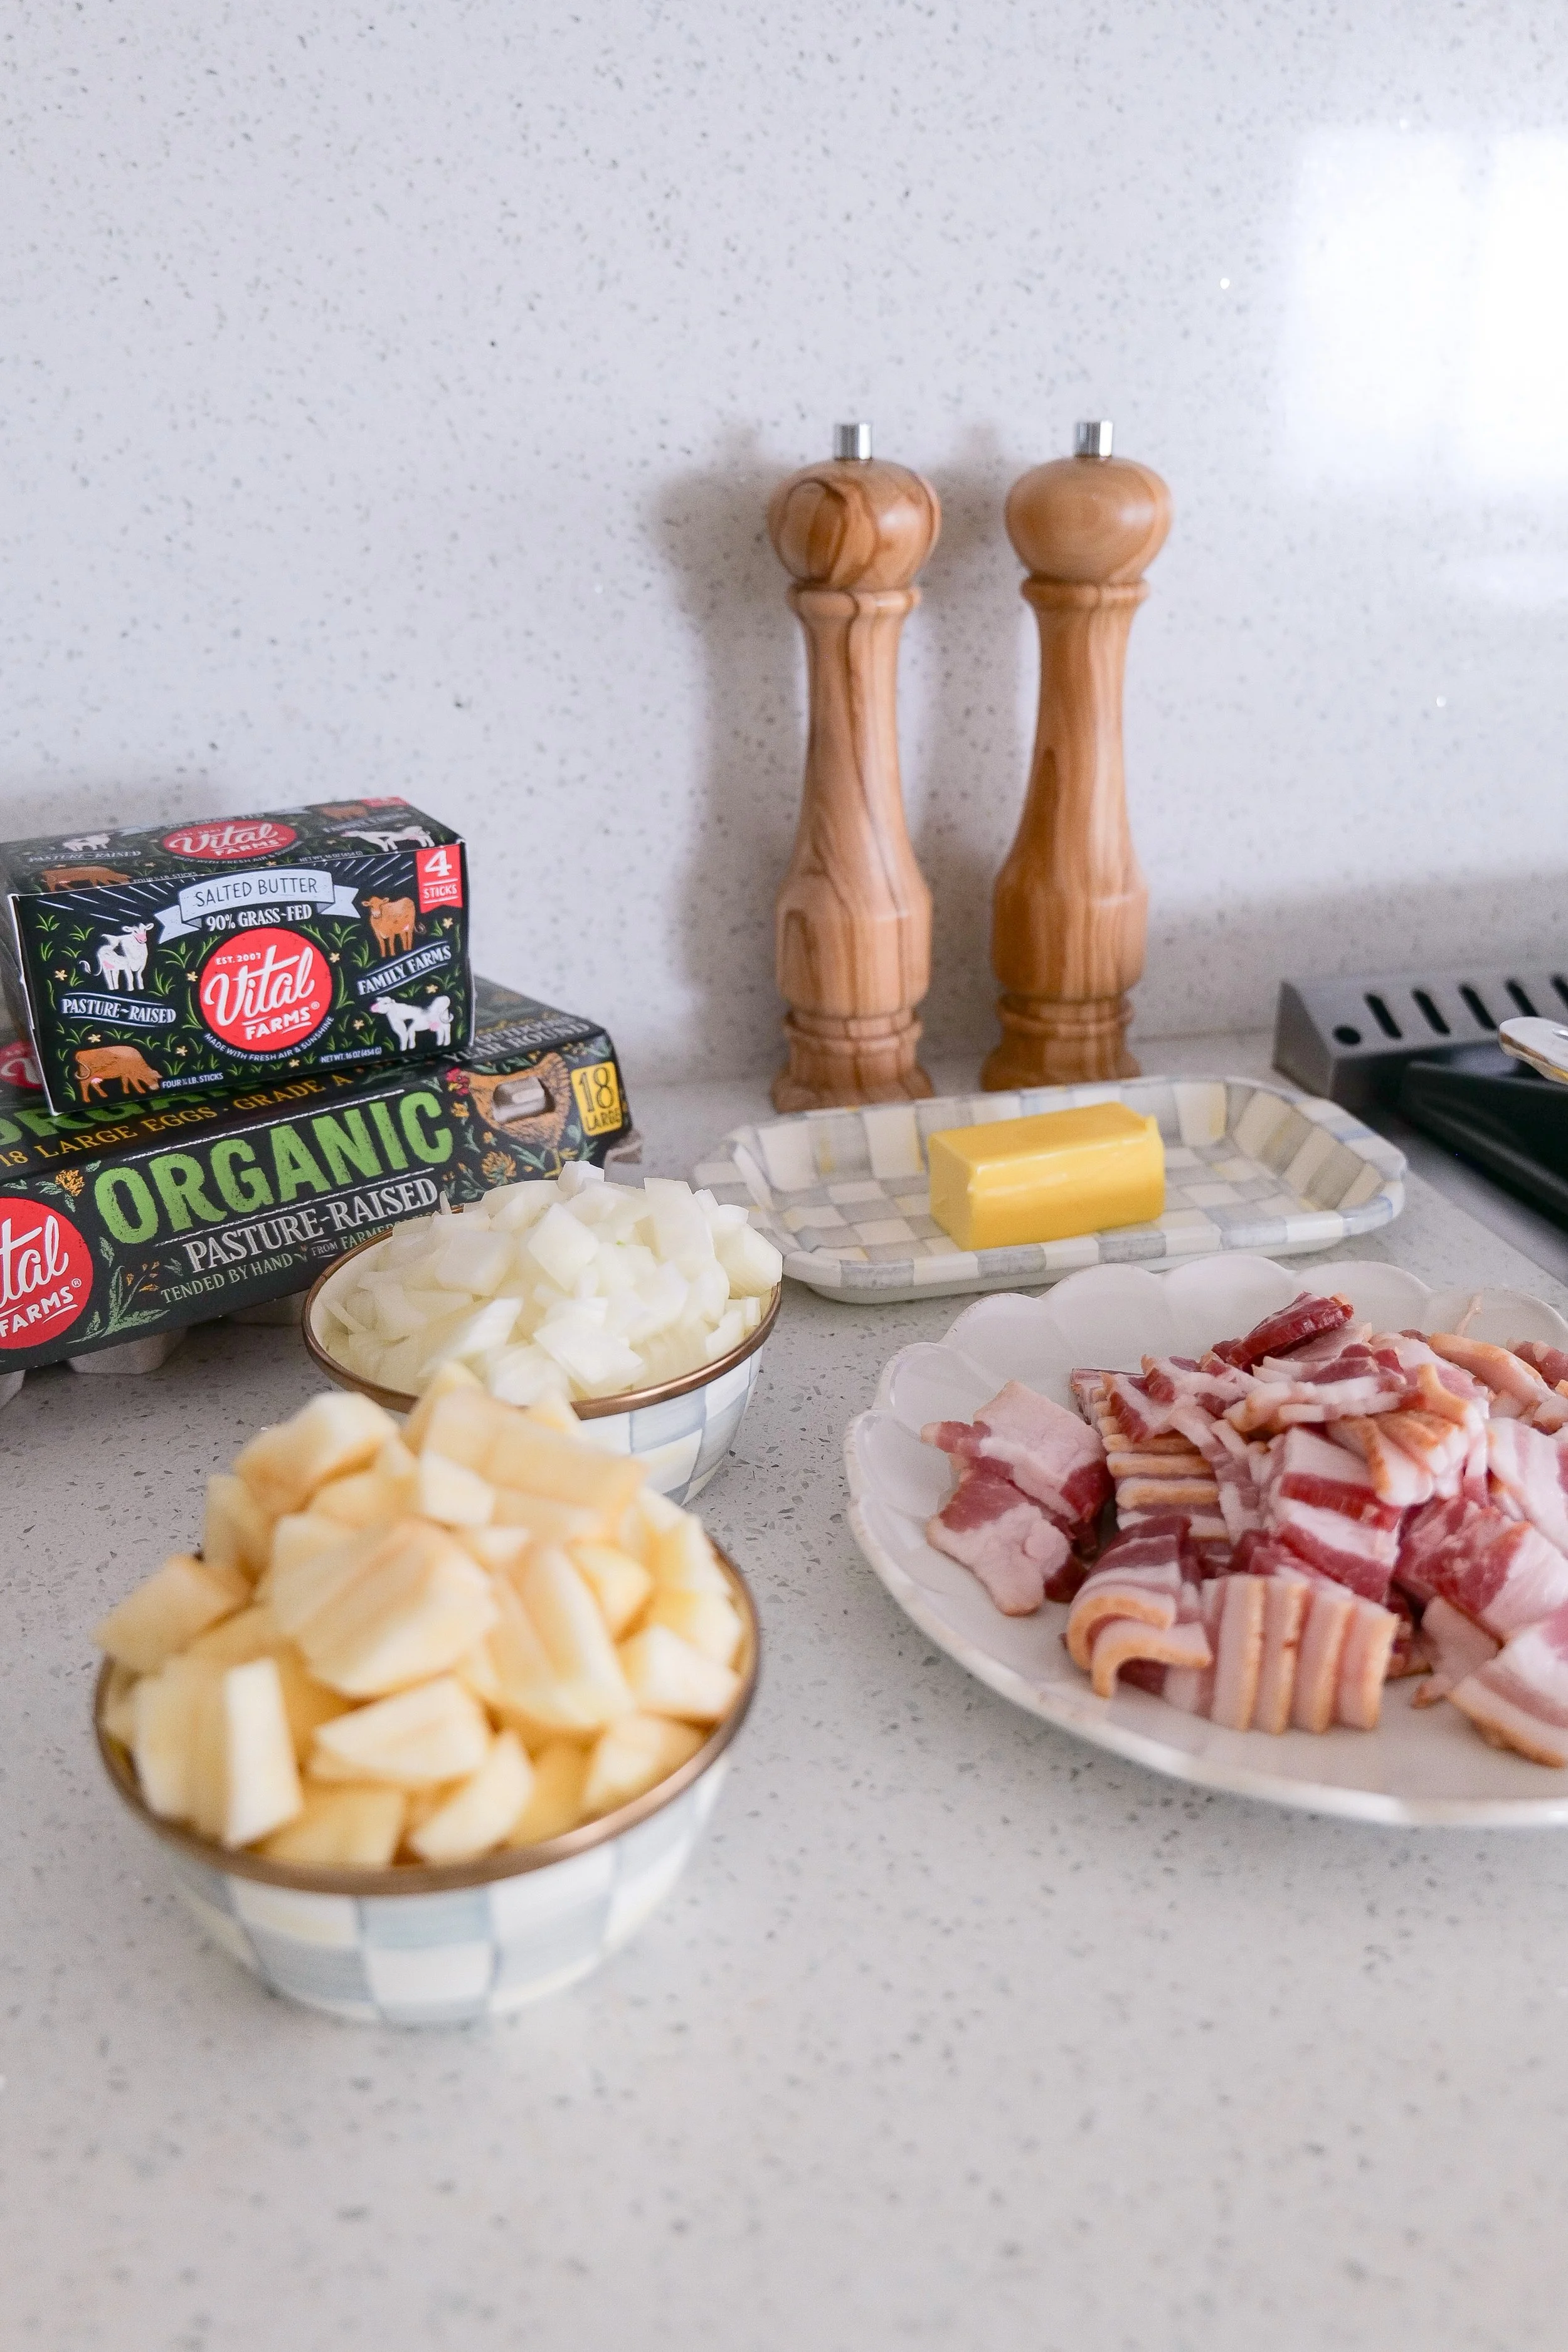
Ingredients for butternut squash breakfast hash with apples, bacon, onions, eggs, butter, and sea salt.

Butternut Squash

Butternut squash is the base of the hash and gives the recipe its warm, slightly sweet flavor.

Cut it into roughly 1-inch cubes so the pieces roast evenly and develop golden edges.

Bacon

Use your favorite bacon and cut it into bite-size pieces before cooking.

As the bacon cooks, it releases fat that becomes part of the flavor base for the onions, apples, and eggs.

Apples

Pink Lady and Granny Smith both work beautifully.

Pink Lady gives you a slightly sweeter result, while Granny Smith adds more tartness.

Choose an apple that holds its shape well when cooked.

Onion

Yellow onion adds savory sweetness and balances the fruit and squash.

Eggs

Four eggs finish the dish and make it feel like a complete breakfast.

Cook them however you like, but I especially love a runny yolk because it creates almost a sauce over the hash.

Butter

A little melted salted butter helps the butternut squash caramelize while roasting.

Sea Salt

The squash is seasoned simply so the natural flavors of all the ingredients can shine.

Fresh ingredients used to make apple bacon butternut squash breakfast hash.

Kitchen Tools

You only need a few basic kitchen tools:

  • Large baking sheet

  • Parchment paper

  • Large skillet

  • Small skillet for eggs

  • Large mixing bowl

  • Sharp chef's knife

  • Cutting board

  • Spatula or wooden spoon

  • Measuring spoons

You can find more of my favorite skillets, baking sheets, knives, and everyday kitchen tools in my Kitchen Essentials shelf.

Butternut squash, apples, bacon, onion, and eggs for homemade breakfast hash.

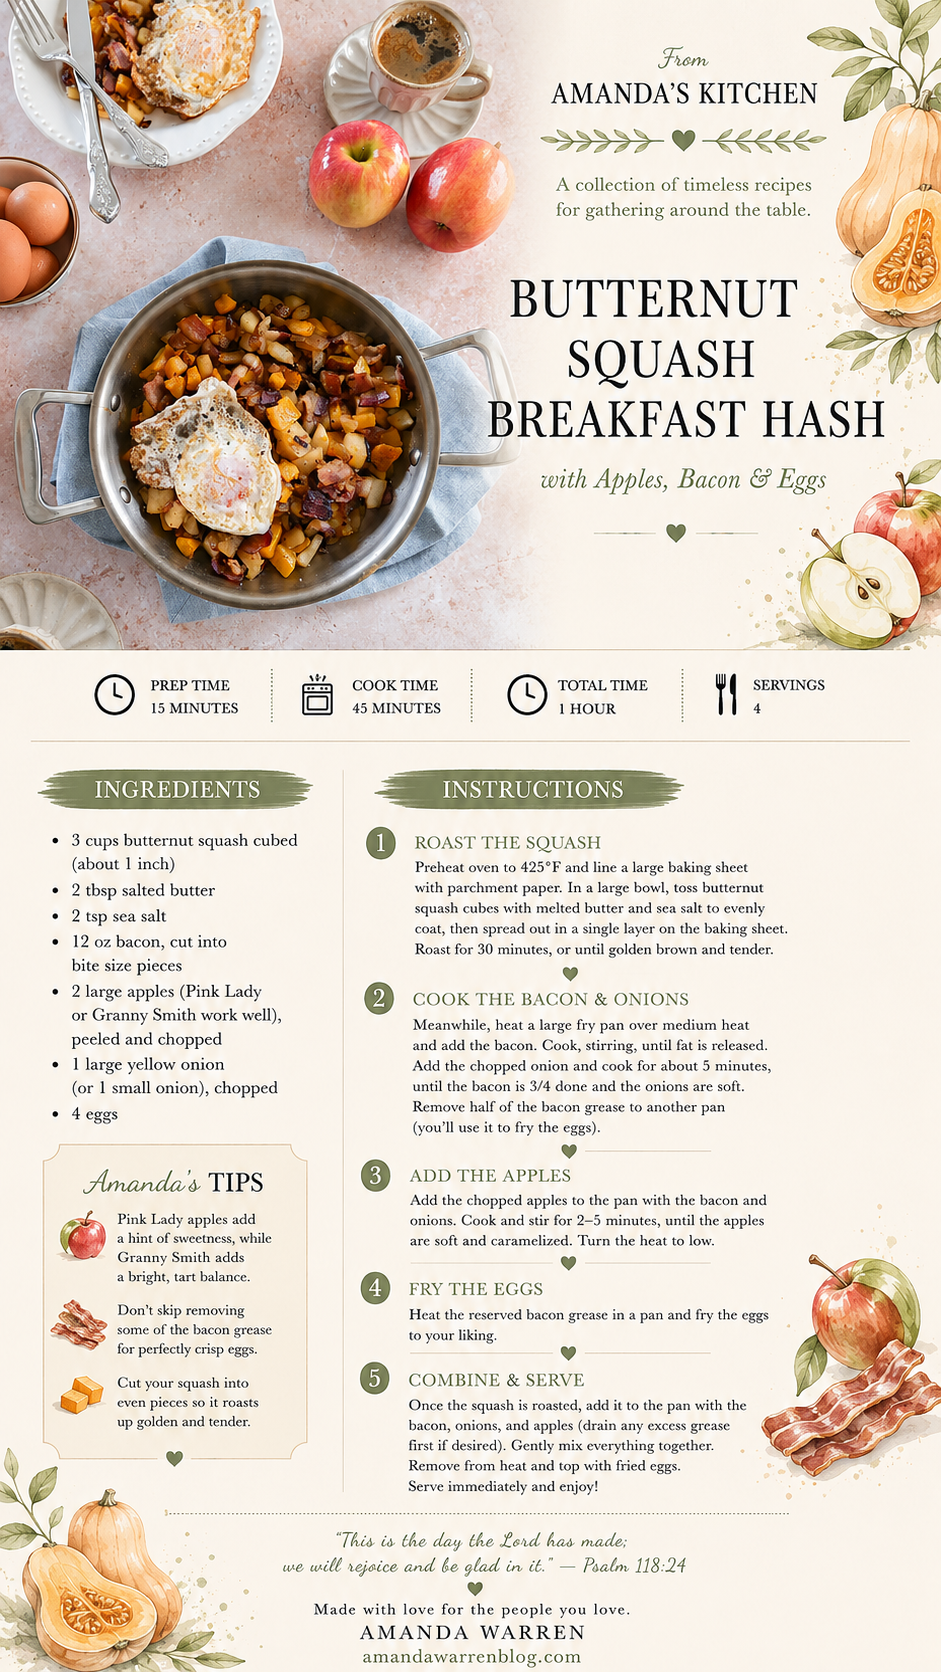
Butternut Squash Breakfast Hash Recipe

Prep Time: 15 minutes
Cook Time: 30–35 minutes
Total Time: About 50 minutes
Servings: 4

Ingredients

  • 3 cups butternut squash, peeled and cut into approximately 1-inch cubes

  • 2 tablespoons salted butter, melted

  • 2 teaspoons sea salt

  • 12 ounces bacon, cut into bite-size pieces

  • 2 large apples, peeled and chopped

  • 1 large yellow onion, chopped

  • 4 large eggs

Instructions

Step 1: Roast the Butternut Squash

Preheat the oven to 425°F.

Line a large baking sheet with parchment paper.

Add the butternut squash to a large bowl and toss with the melted butter and sea salt until evenly coated.

Spread the squash into a single layer on the prepared baking sheet.

Roast for approximately 30 minutes, or until tender and golden around the edges.

Step 2: Cook the Bacon

While the squash roasts, heat a large skillet over medium heat.

Add the chopped bacon and cook, stirring occasionally, until the fat begins to render.

Step 3: Add the Onion

Once the bacon has released some of its fat, add the chopped yellow onion.

Cook for approximately 5 minutes, stirring occasionally, until the onion softens and the bacon is about three-quarters cooked.

Carefully transfer a small amount of bacon grease to a separate skillet to use for frying the eggs.

Step 4: Add the Apples

Add the chopped apples to the bacon and onion mixture.

Cook for approximately 2–5 minutes, stirring gently, until the apples are slightly softened but still hold their shape.

Reduce the heat to low.

Step 5: Fry the Eggs

Heat the reserved bacon grease in a separate skillet over medium heat.

Crack in the eggs and cook to your preferred doneness.

I especially love them with set whites and soft, runny yolks.

Step 6: Finish the Hash

Once the butternut squash is roasted, add it to the skillet with the bacon, onions, and apples.

If there is more grease in the skillet than you prefer, carefully drain some before adding the squash.

Gently toss everything together until evenly combined.

Remove from the heat.

Step 7: Serve

Top the warm hash with the fried eggs.

Serve immediately and enjoy!

Amanda's Quick Tips

  • Cut the squash into evenly sized pieces so it roasts at the same rate.

  • Roast in a single layer instead of crowding the baking sheet.

  • Choose a firm apple that won't turn mushy in the skillet.

  • Add the apples toward the end so they keep some texture.

  • Reserve a little bacon grease for frying the eggs.

  • Drain excess grease before adding the squash if desired.

  • Serve immediately while the eggs and hash are warm.

Roasted butternut squash breakfast hash topped with freshly fried eggs.
Cozy fall breakfast hash made with roasted butternut squash, apples, bacon, and eggs.

How to Get Caramelized Butternut Squash

The best breakfast hash starts with properly roasted squash.

The most important thing is giving the squash enough room on the baking sheet.

If the cubes are piled on top of one another, they'll steam rather than roast.

Spread them into a single layer and let the high oven temperature create those golden, caramelized edges.

You also want the pieces relatively similar in size so smaller cubes don't burn before larger pieces become tender.

Sweet and savory apple bacon breakfast hash with roasted butternut squash.

What Apples Work Best in Breakfast Hash?

I like using apples that can handle a few minutes of cooking without completely breaking down.

My favorites are:

  • Pink Lady

  • Granny Smith

  • Honeycrisp

  • Fuji

Granny Smith creates the most contrast against the sweetness of the butternut squash, while Pink Lady and Honeycrisp give the finished hash a slightly sweeter flavor.

Avoid very soft apples that are more likely to turn mushy during cooking.

Why Bacon Works So Well Here

Bacon gives this recipe both flavor and texture.

The crisp pieces add a salty, smoky element that balances the natural sweetness of the squash and apples.

I also love using a little of the rendered bacon fat to cook the onions and fry the eggs because it carries that flavor throughout the entire dish.

If the skillet becomes too greasy, simply drain off some of the excess before combining everything at the end.

Breakfast hash with golden roasted butternut squash, bacon, apples, onions, and eggs.

Amanda's Tips for the Best Breakfast Hash

Don't Overcook the Apples

You're looking for tender—not applesauce.

Add them after the onions and bacon have had time to cook, then give them just a few minutes.

Keep the Squash Separate Until the End

Roasting the squash separately allows it to caramelize rather than steaming in the skillet.

Use the Bacon Grease

A little bacon grease makes wonderfully flavorful fried eggs.

Taste Before Adding More Salt

Both the bacon and salted butter contribute salt, so taste the finished hash before adding additional seasoning.

Serve It Right Away

This breakfast is at its best when the hash is warm and the eggs are freshly cooked.

Easy Variations

Sweet Potato Breakfast Hash

Swap the butternut squash for cubed sweet potato.

Potato Breakfast Hash

Use Yukon Gold or red potatoes instead of squash.

Sausage Breakfast Hash

Replace the bacon with breakfast sausage.

Vegetarian Breakfast Hash

Leave out the bacon and sauté the onion and apples in olive oil or butter.

Mushroom Breakfast Hash

Add sliced mushrooms with the onions for a more savory version.

Herb Breakfast Hash

Add fresh rosemary, thyme, or sage to give the recipe an even stronger fall flavor.

Spicy Breakfast Hash

Add crushed red pepper flakes or serve with hot sauce.

Butternut squash bacon and egg hash served warm for a hearty breakfast or brunch.

What to Serve with Butternut Squash Breakfast Hash

This hash is filling enough to stand on its own, but it also works beautifully as part of a larger brunch.

Serve it with:

  • Toasted sourdough

  • Biscuits

  • Fresh fruit

  • Simple green salad

  • Scones

  • Muffins

  • Cinnamon rolls

  • Fresh coffee

  • Iced lattes

  • Apple cider

For a fall brunch, I love pairing it with something sweet like coffee cake or cinnamon rolls.

Can I Make Breakfast Hash Ahead?

You can prepare several components ahead of time.

The butternut squash can be roasted in advance and refrigerated.

You can also chop the apples and onion ahead, although I recommend tossing chopped apples with a little lemon juice to help prevent browning.

Cook the eggs fresh just before serving.

For the best texture, reheat the hash in a skillet rather than the microwave.

Sweet and savory fall breakfast hash with butternut squash, apples, bacon, and fried eggs.
Butternut squash and apple breakfast skillet with crispy bacon and eggs.

How to Store Leftovers

Allow the hash to cool before transferring it to an airtight container.

Store the squash, bacon, apple, and onion mixture in the refrigerator for up to 3–4 days.

I recommend storing leftover eggs separately whenever possible.

For the best texture, reheat the hash in a skillet over medium heat until warmed through.

You can also reheat it in a 350°F oven for approximately 10–15 minutes.

Can You Freeze Butternut Squash Breakfast Hash?

You can freeze the hash mixture, although the apples and squash may become slightly softer after thawing.

I would freeze the hash without the eggs.

Transfer cooled portions to freezer-safe containers and freeze for up to approximately 2–3 months.

Thaw overnight in the refrigerator and reheat in a skillet or oven.

Make fresh eggs when you're ready to serve.

Easy butternut squash breakfast hash with apples and bacon topped with fried eggs.

Frequently Asked Questions

Can I use pre-cut butternut squash?

Absolutely. Pre-cut squash is a great shortcut.

Do I have to peel the butternut squash?

Yes. Remove the tough outer skin before cubing unless you're purchasing prepared squash that's already peeled.

What apples are best for breakfast hash?

Pink Lady, Granny Smith, Honeycrisp, and Fuji all work well because they hold their texture when cooked.

Can I use sweet potatoes instead?

Yes. Sweet potatoes are an easy substitute.

Can I leave out the bacon?

Absolutely. Use butter or olive oil to sauté the vegetables instead.

Can I add more vegetables?

Yes. Mushrooms, bell peppers, spinach, kale, and Brussels sprouts would all work.

What kind of eggs are best?

Cook them however you like. Fried eggs with soft yolks are my favorite because the yolk mixes into the hash as you eat.

Can I make this for dinner?

Definitely. Breakfast-for-dinner is one of my favorite ways to serve a hearty hash like this.

Can I prepare it for meal prep?

Yes. Prepare the hash ahead and cook fresh eggs when you're ready to eat.

How do I keep the squash from getting mushy?

Roast it in a single layer and avoid overcooking it before combining with the other ingredients.

Apple and butternut squash hash with savory bacon and caramelized onions.
Fall breakfast hash topped with fried eggs and filled with roasted squash, apples, and bacon.

More Breakfast Recipes You'll Love

If you're looking for more breakfast and brunch inspiration, try another favorite from Amanda's Kitchen:

Freezer Meal Prep Breakfast Burritos

Perfect for stocking the freezer for busy mornings.

Chorizo, Egg & Potato Breakfast Bowls

Another hearty savory breakfast that's easy to customize.

Nana's Apple Pancakes

A sweet family breakfast with plenty of apple flavor.

Breakfast Croissants with Sausage, Bacon & Maple Dijon

A savory breakfast sandwich that's perfect for brunch.

Pumpkin Coffee Cake with Pecan Crumbles

A beautiful fall pairing for this breakfast hash.

Soft Cream Cheese Lemon Blueberry Scones

Perfect alongside coffee for a weekend brunch.

Savory butternut squash breakfast with bacon, onions, apples, and fried eggs.
Butternut squash hash served with fried eggs for an easy fall brunch.
Homemade fall breakfast hash with caramelized butternut squash, apples, bacon, and eggs.

Shop My Breakfast & Kitchen Favorites

I've gathered my favorite skillets, baking sheets, knives, serving pieces, and everyday tools for recipes like this in my Kitchen Essentials shelf.

Keep the same shopping structure as the other posts: one subtle shelf link earlier, one actual shoppable shelf here.

Save This Recipe

Whether you're planning a cozy fall brunch, looking for a hearty breakfast-for-dinner idea, or simply want something new for the weekend, save this Butternut Squash Breakfast Hash for later.

I've included my printable From Amanda's Kitchen recipe card below so it's easy to print, save, and make again.

Printable Butternut Squash Breakfast Hash with Apples, Bacon and Eggs recipe card from Amanda's Kitchen.

A Note From Amanda

There is something about fall mornings that makes me want to slow down and cook something warm.

This breakfast hash combines so many of the flavors I love during the season—sweet apples, roasted butternut squash, smoky bacon, and eggs fresh from the skillet.

It's simple, comforting, and exactly the kind of meal that makes an ordinary morning feel a little more special.

I hope it becomes one of those recipes your family looks forward to when the weather begins to cool.

"Taste and see that the Lord is good."
Psalm 34:8

Made with love for the people you love.

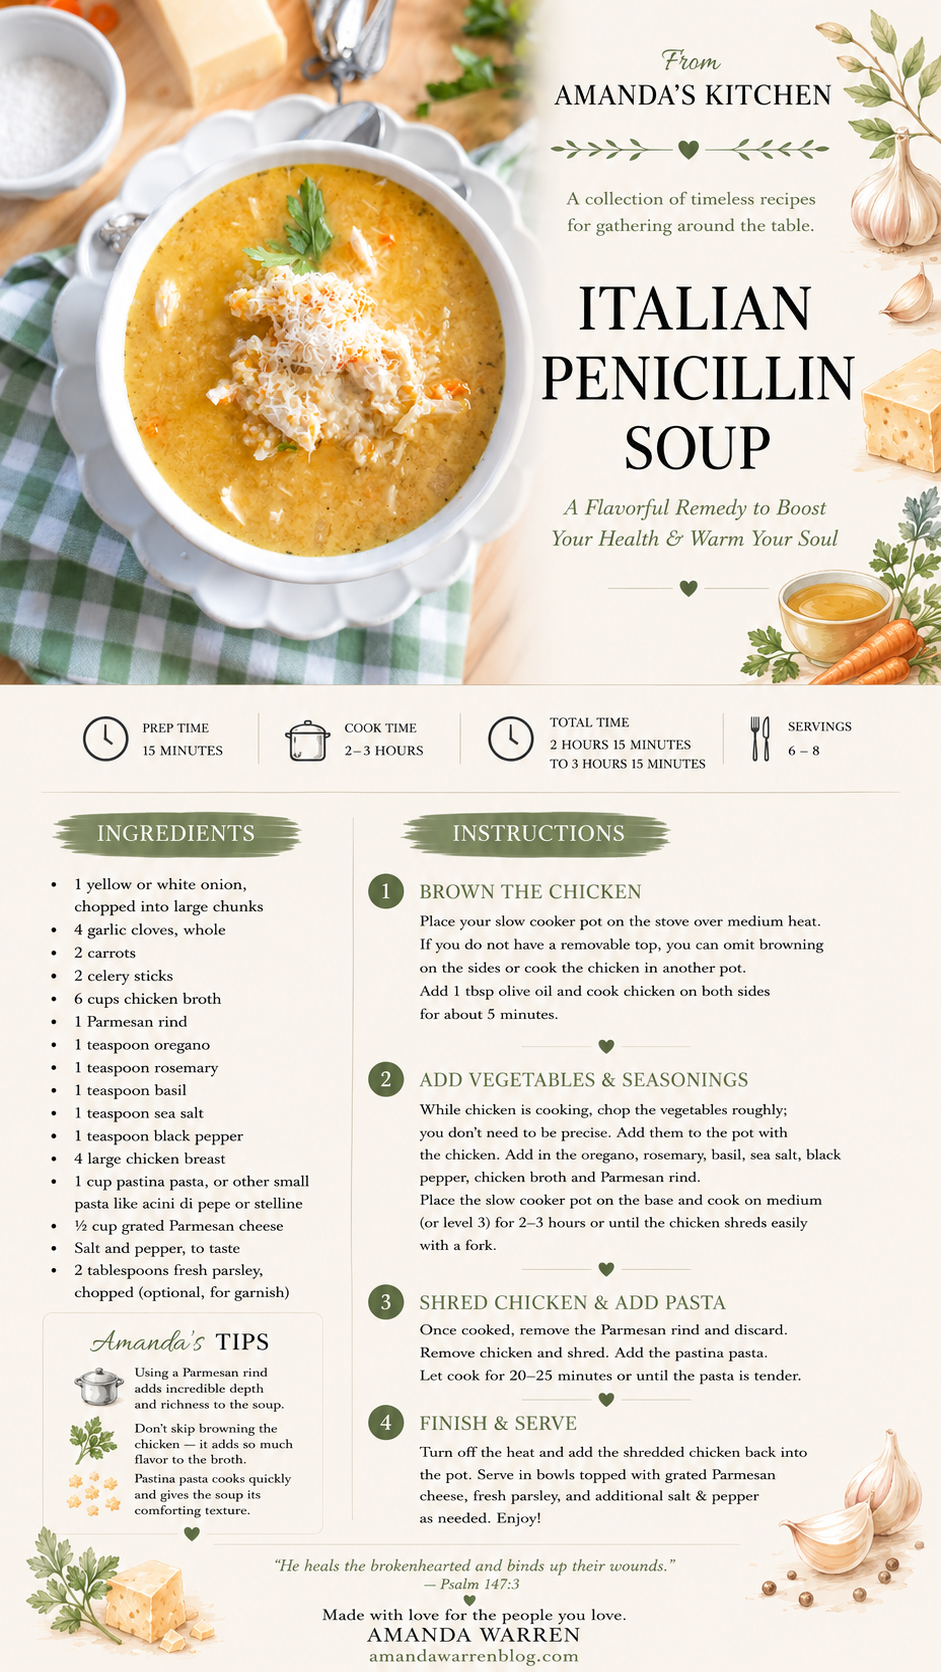
Slow Cooker Italian Penicillin Soup with Chicken & Pastina

A Cozy Italian-Inspired Chicken Soup with Vegetables, Parmesan & Tiny Pasta

There are some recipes that simply feel like comfort in a bowl, and this Italian Penicillin Soup is one of them.

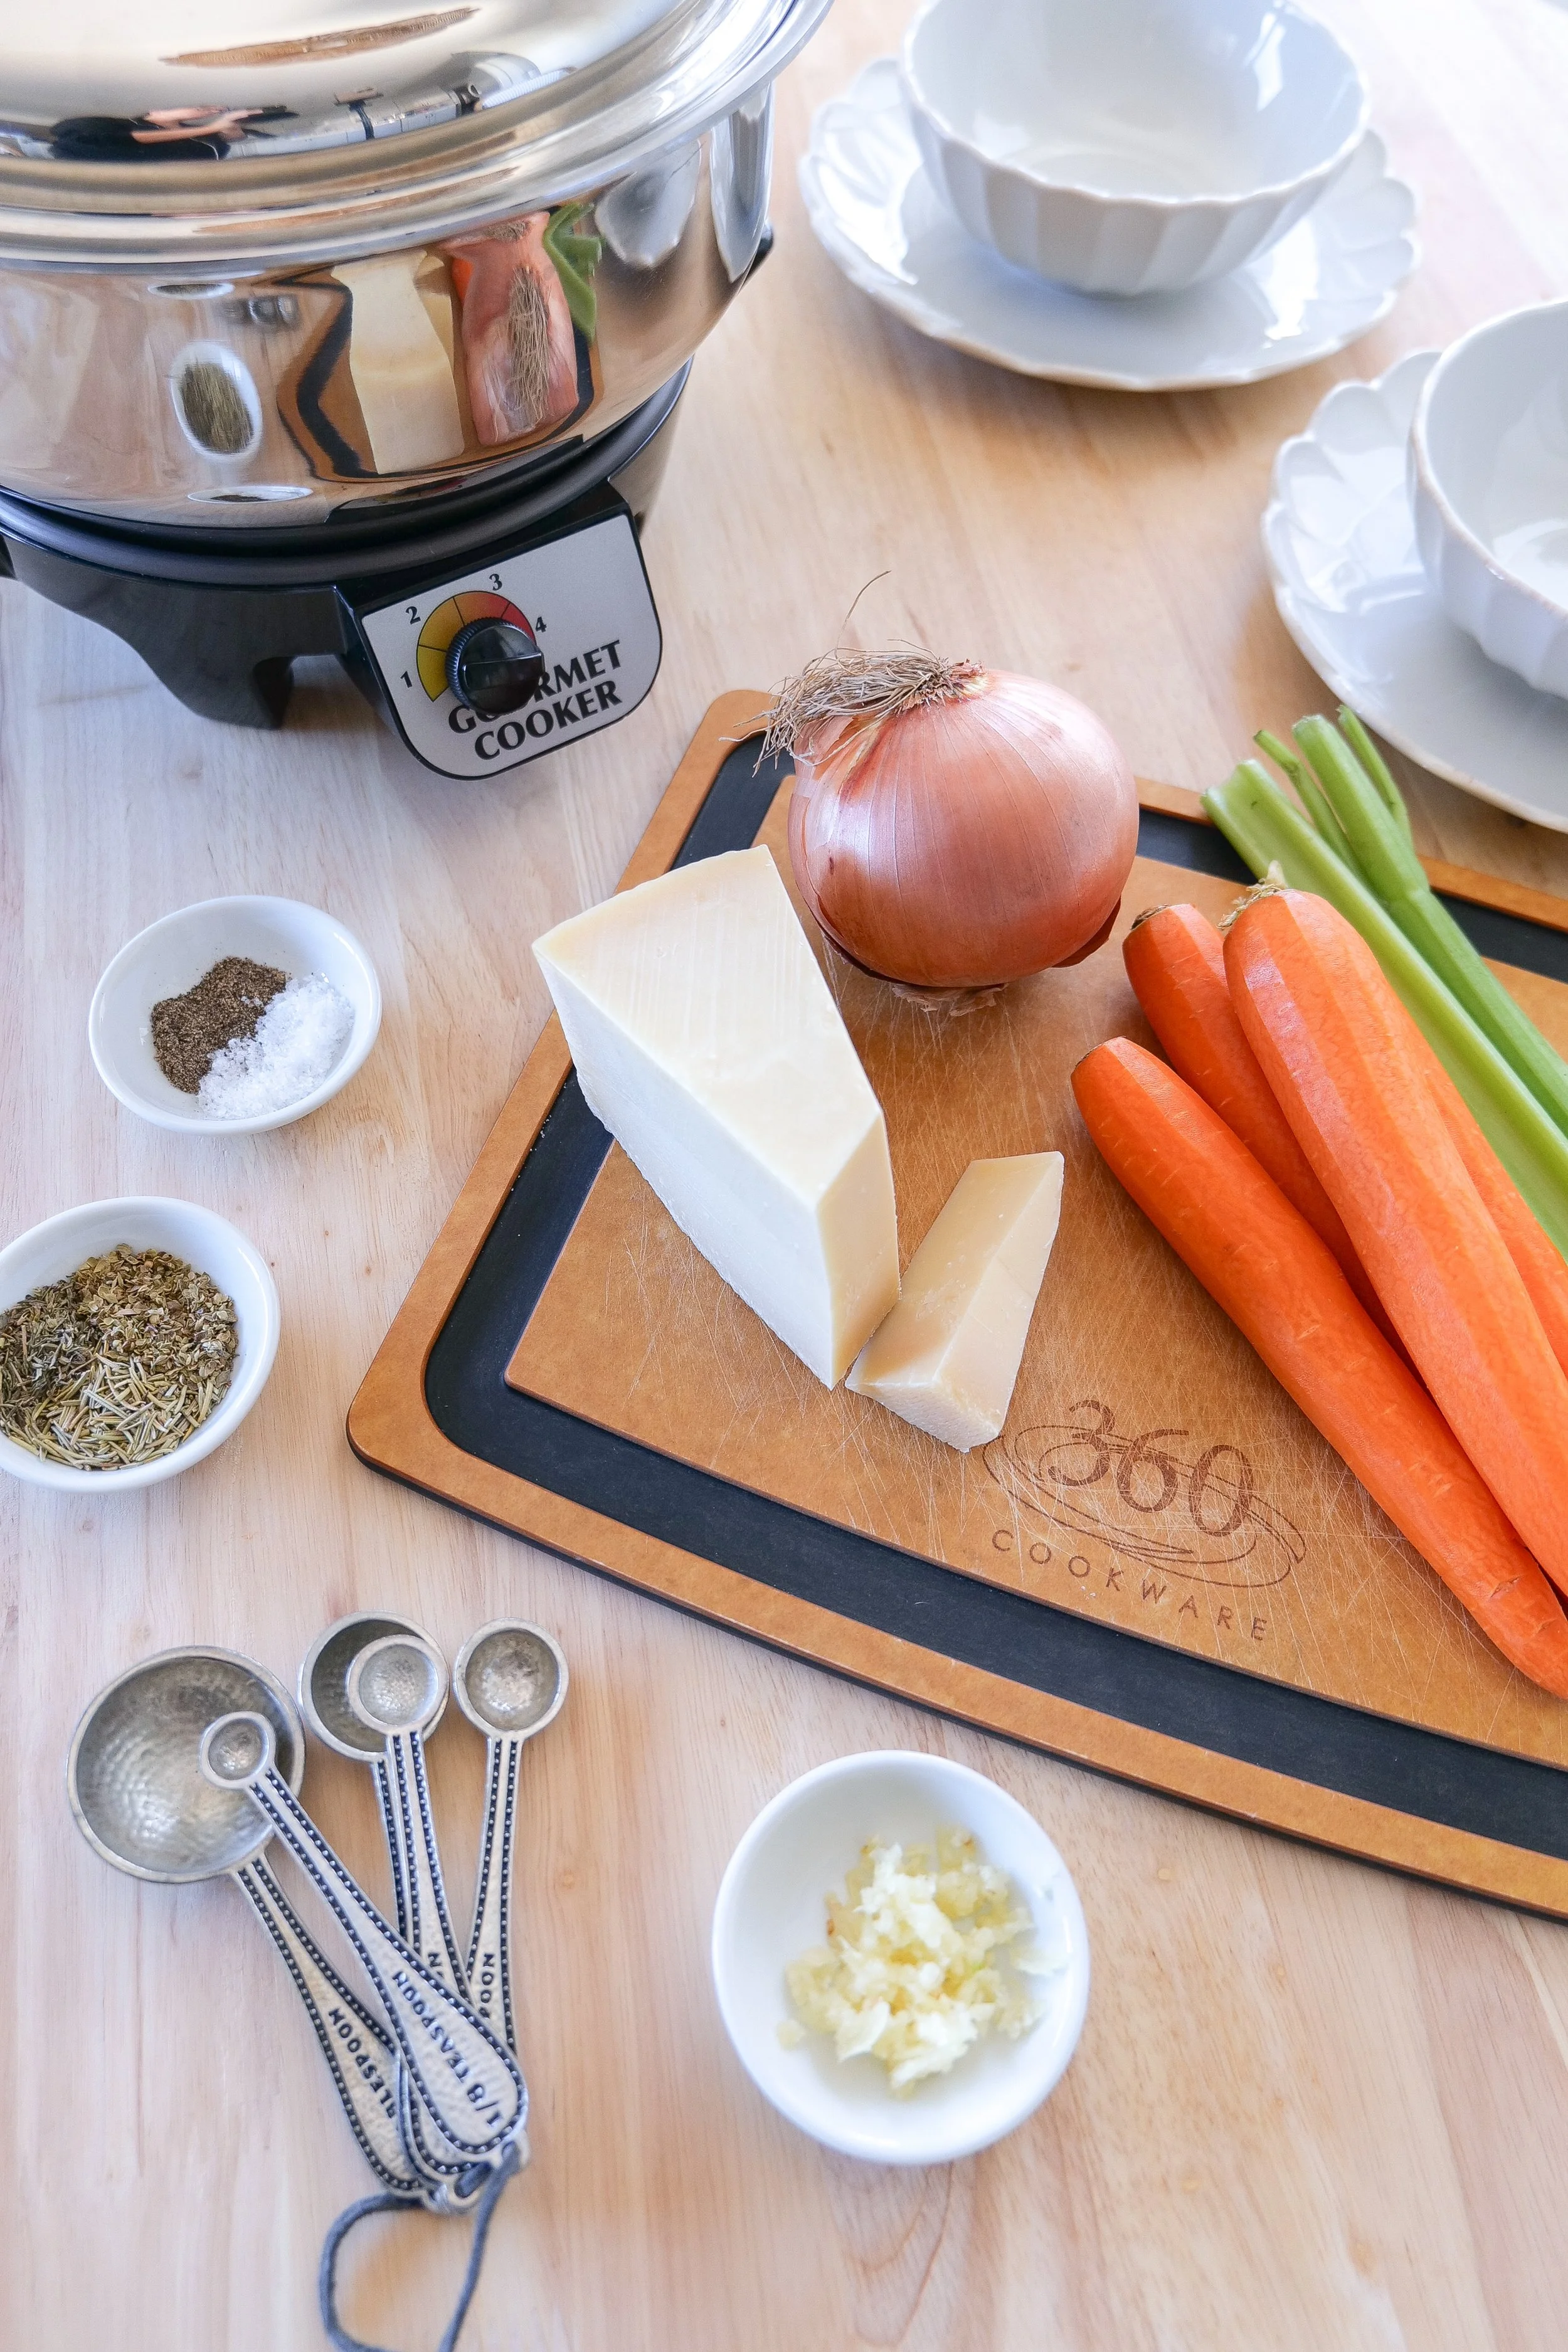
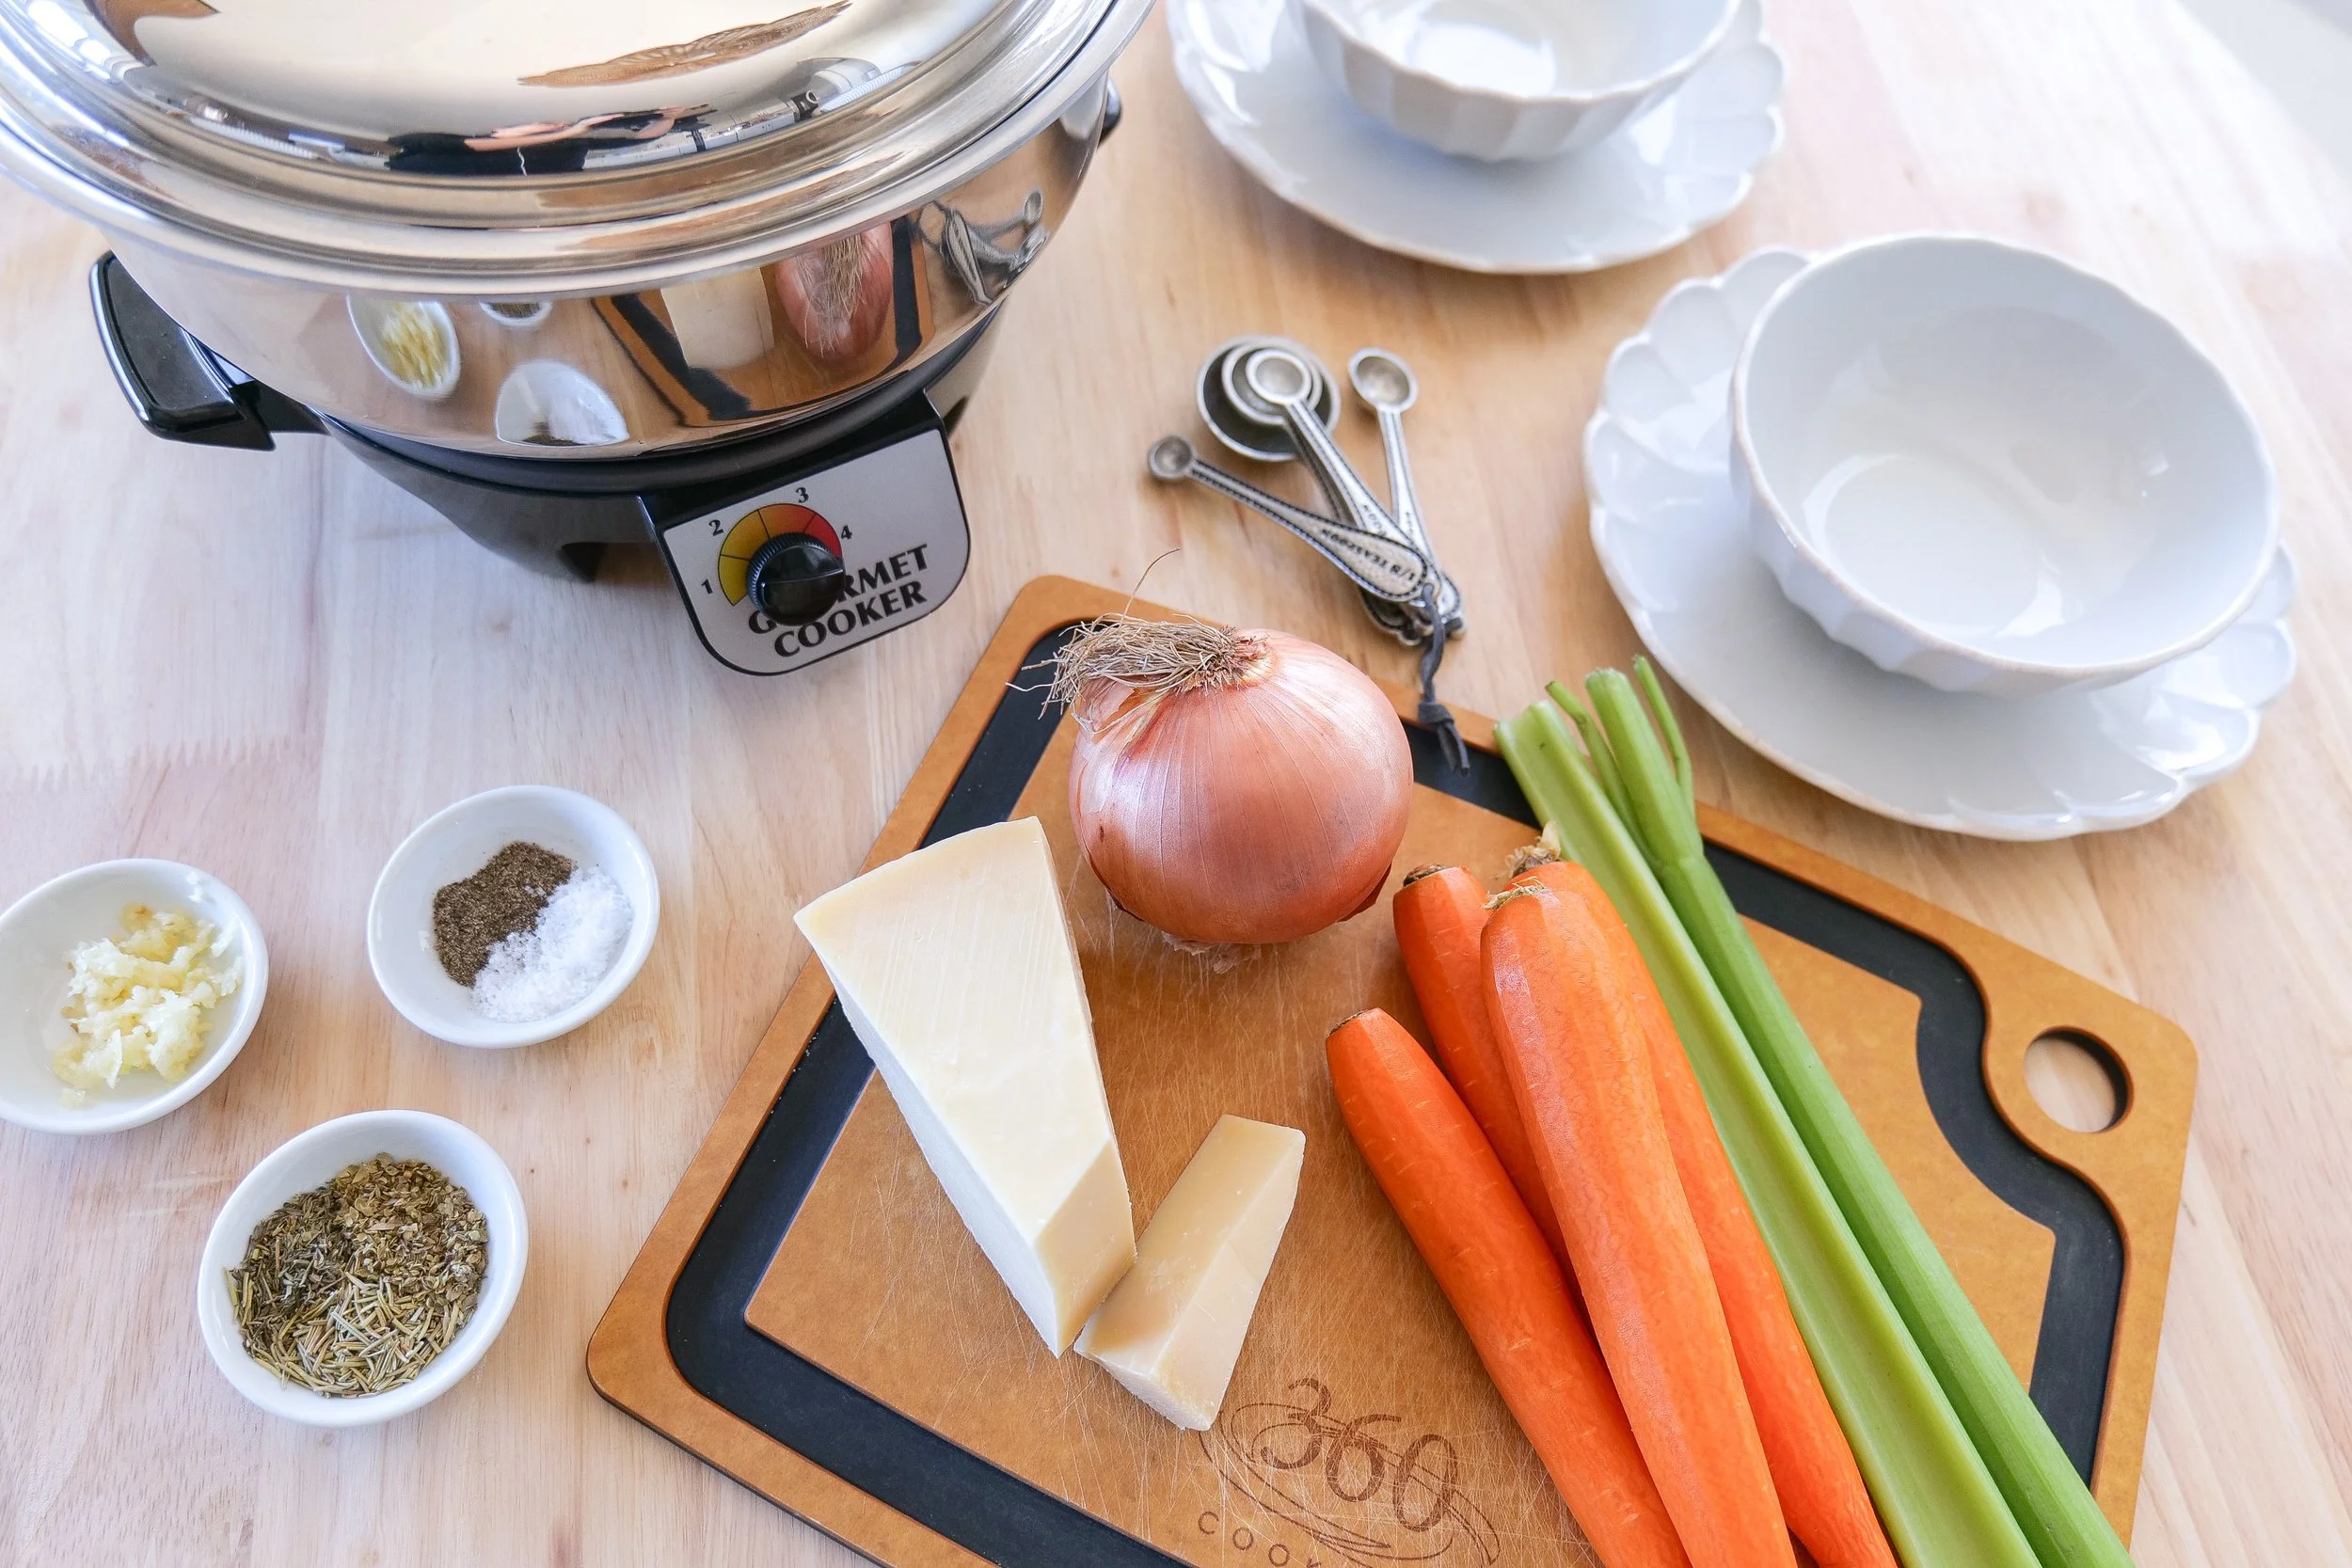
Tender chicken, carrots, celery, onion, garlic, herbs, Parmesan, and tiny pastina pasta slowly cook together in a savory chicken broth for the kind of cozy meal you want on a chilly evening or anytime you're craving something warm and homemade.

Sometimes called Italian Nonna's Penicillin Soup, this comforting chicken soup gets its nickname from generations of Italian families turning to simple bowls of chicken broth, vegetables, and tiny pasta when someone needed a little extra comfort.

My version makes the process especially easy by using the slow cooker. I brown the chicken first for additional flavor, then let the chicken, vegetables, herbs, broth, and a Parmesan rind slowly cook together. Pastina gets added toward the end so those tiny pieces of pasta can soak up all that delicious broth without becoming overcooked.

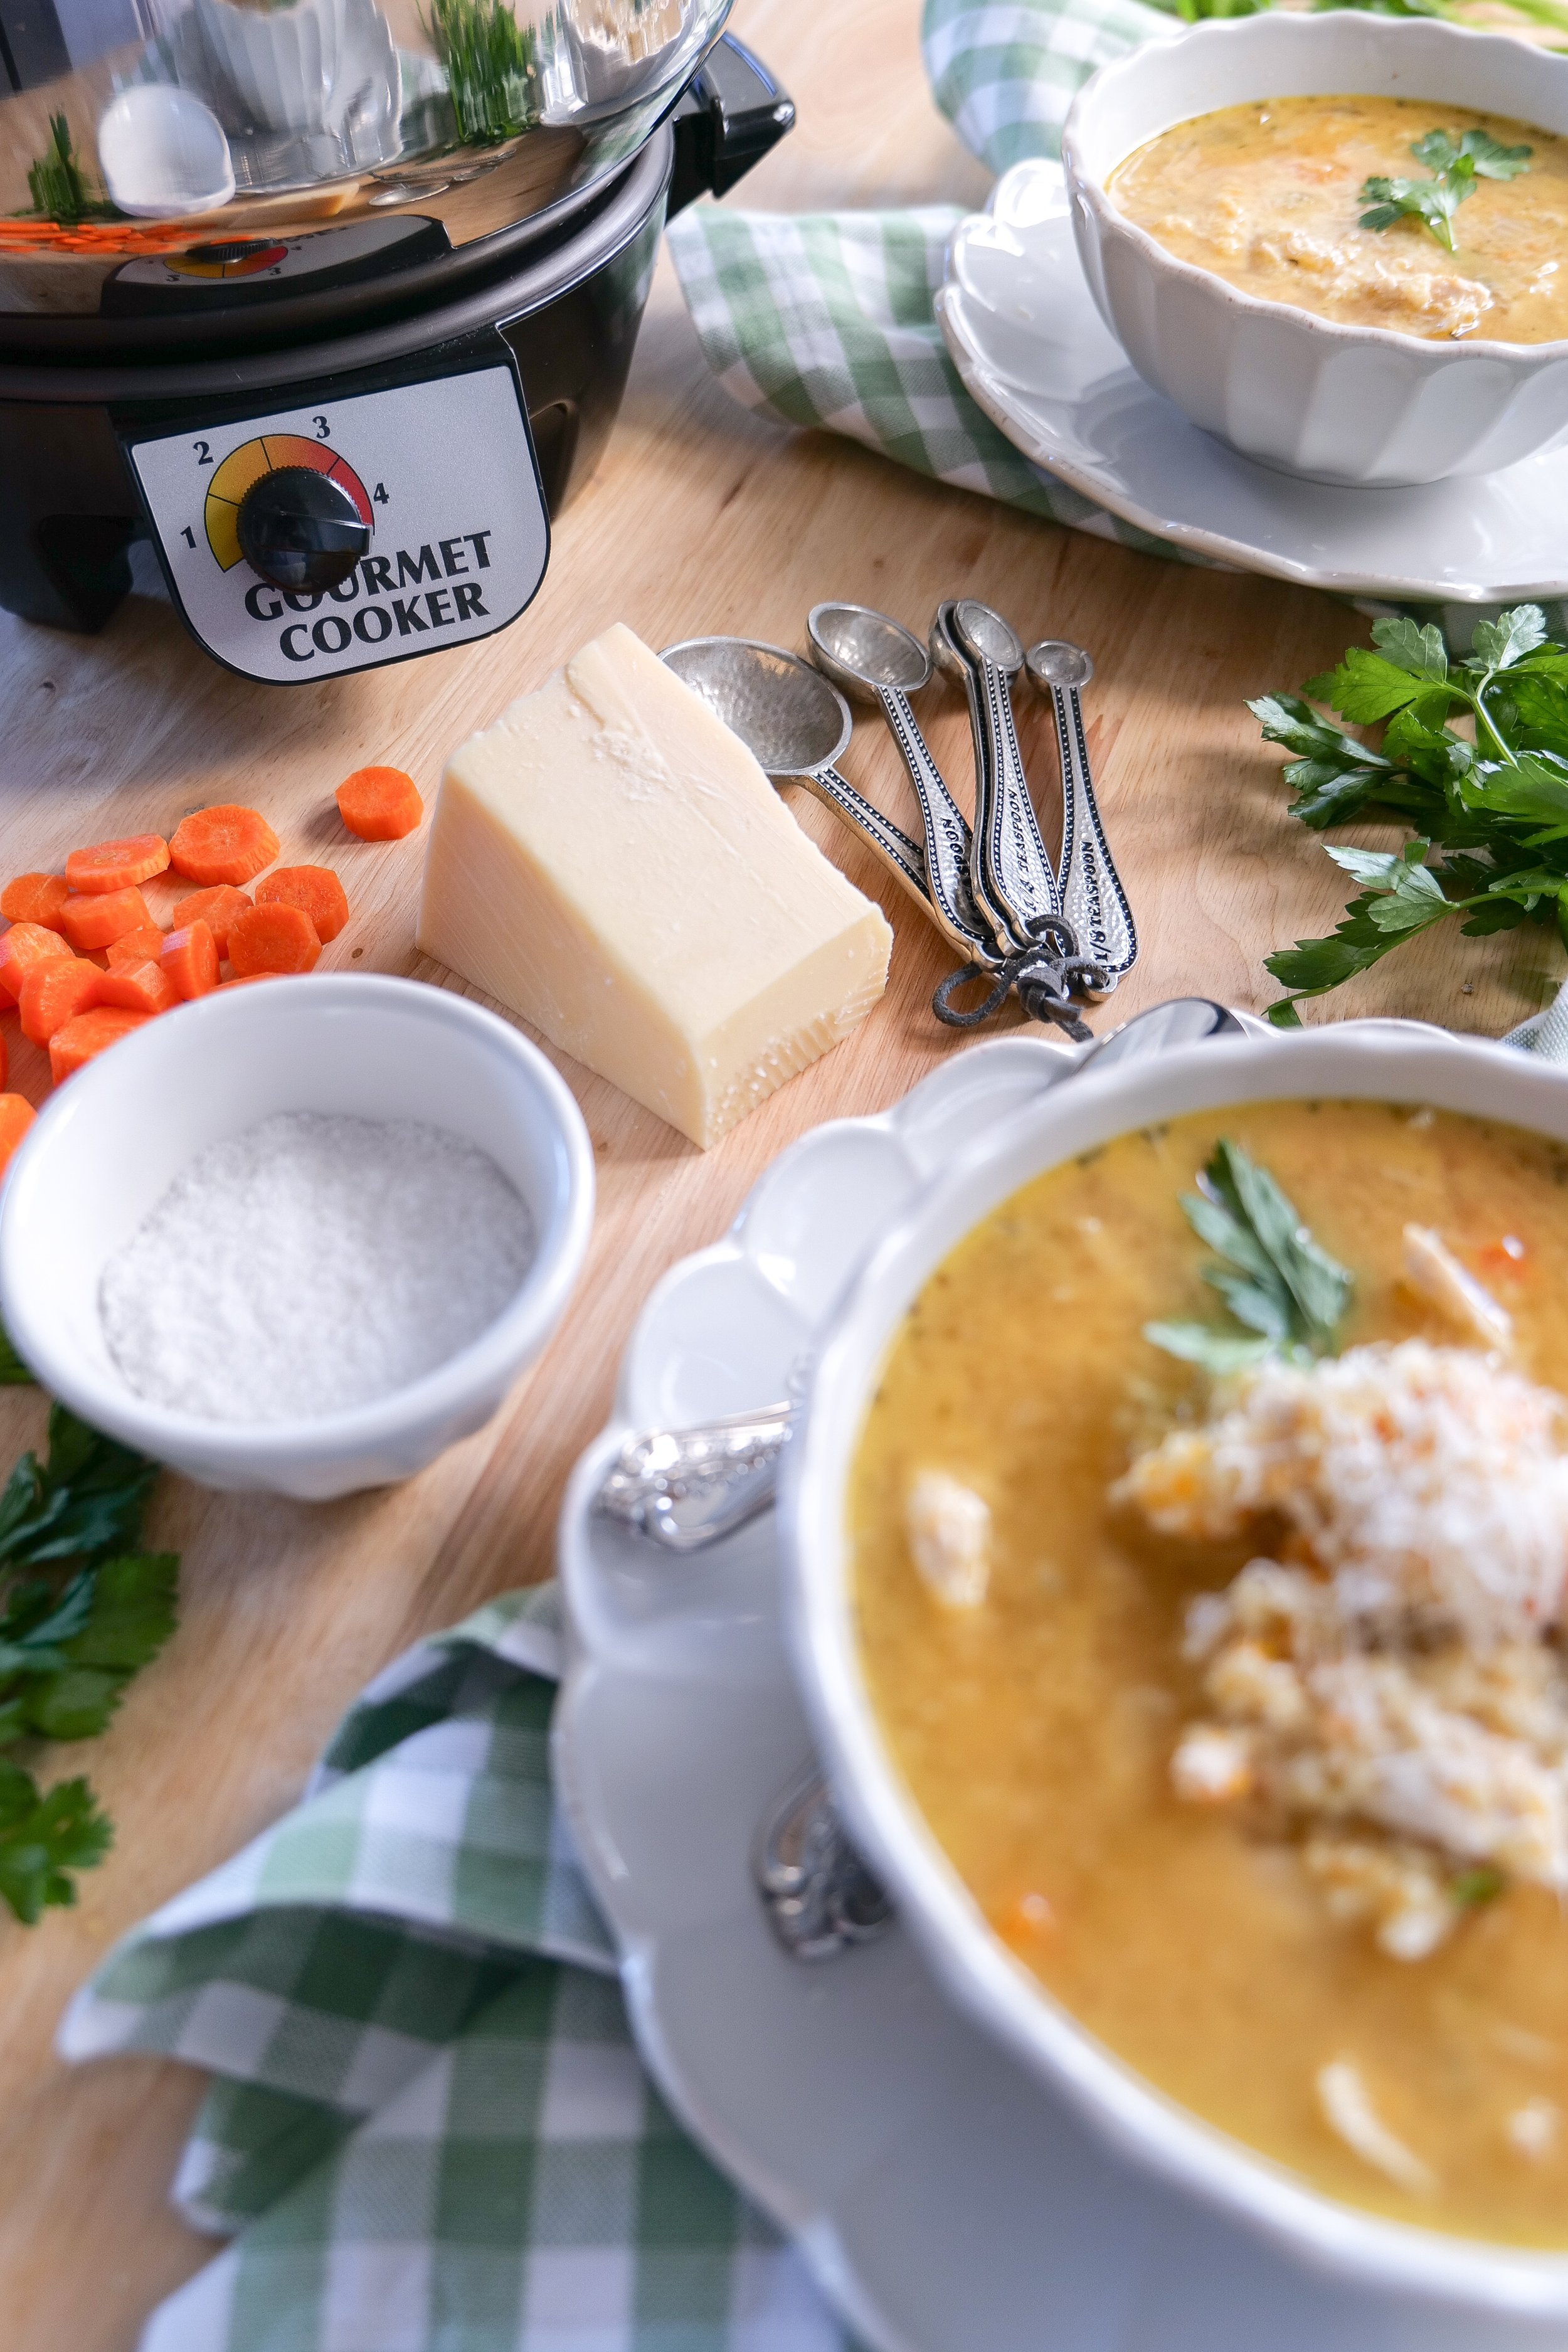
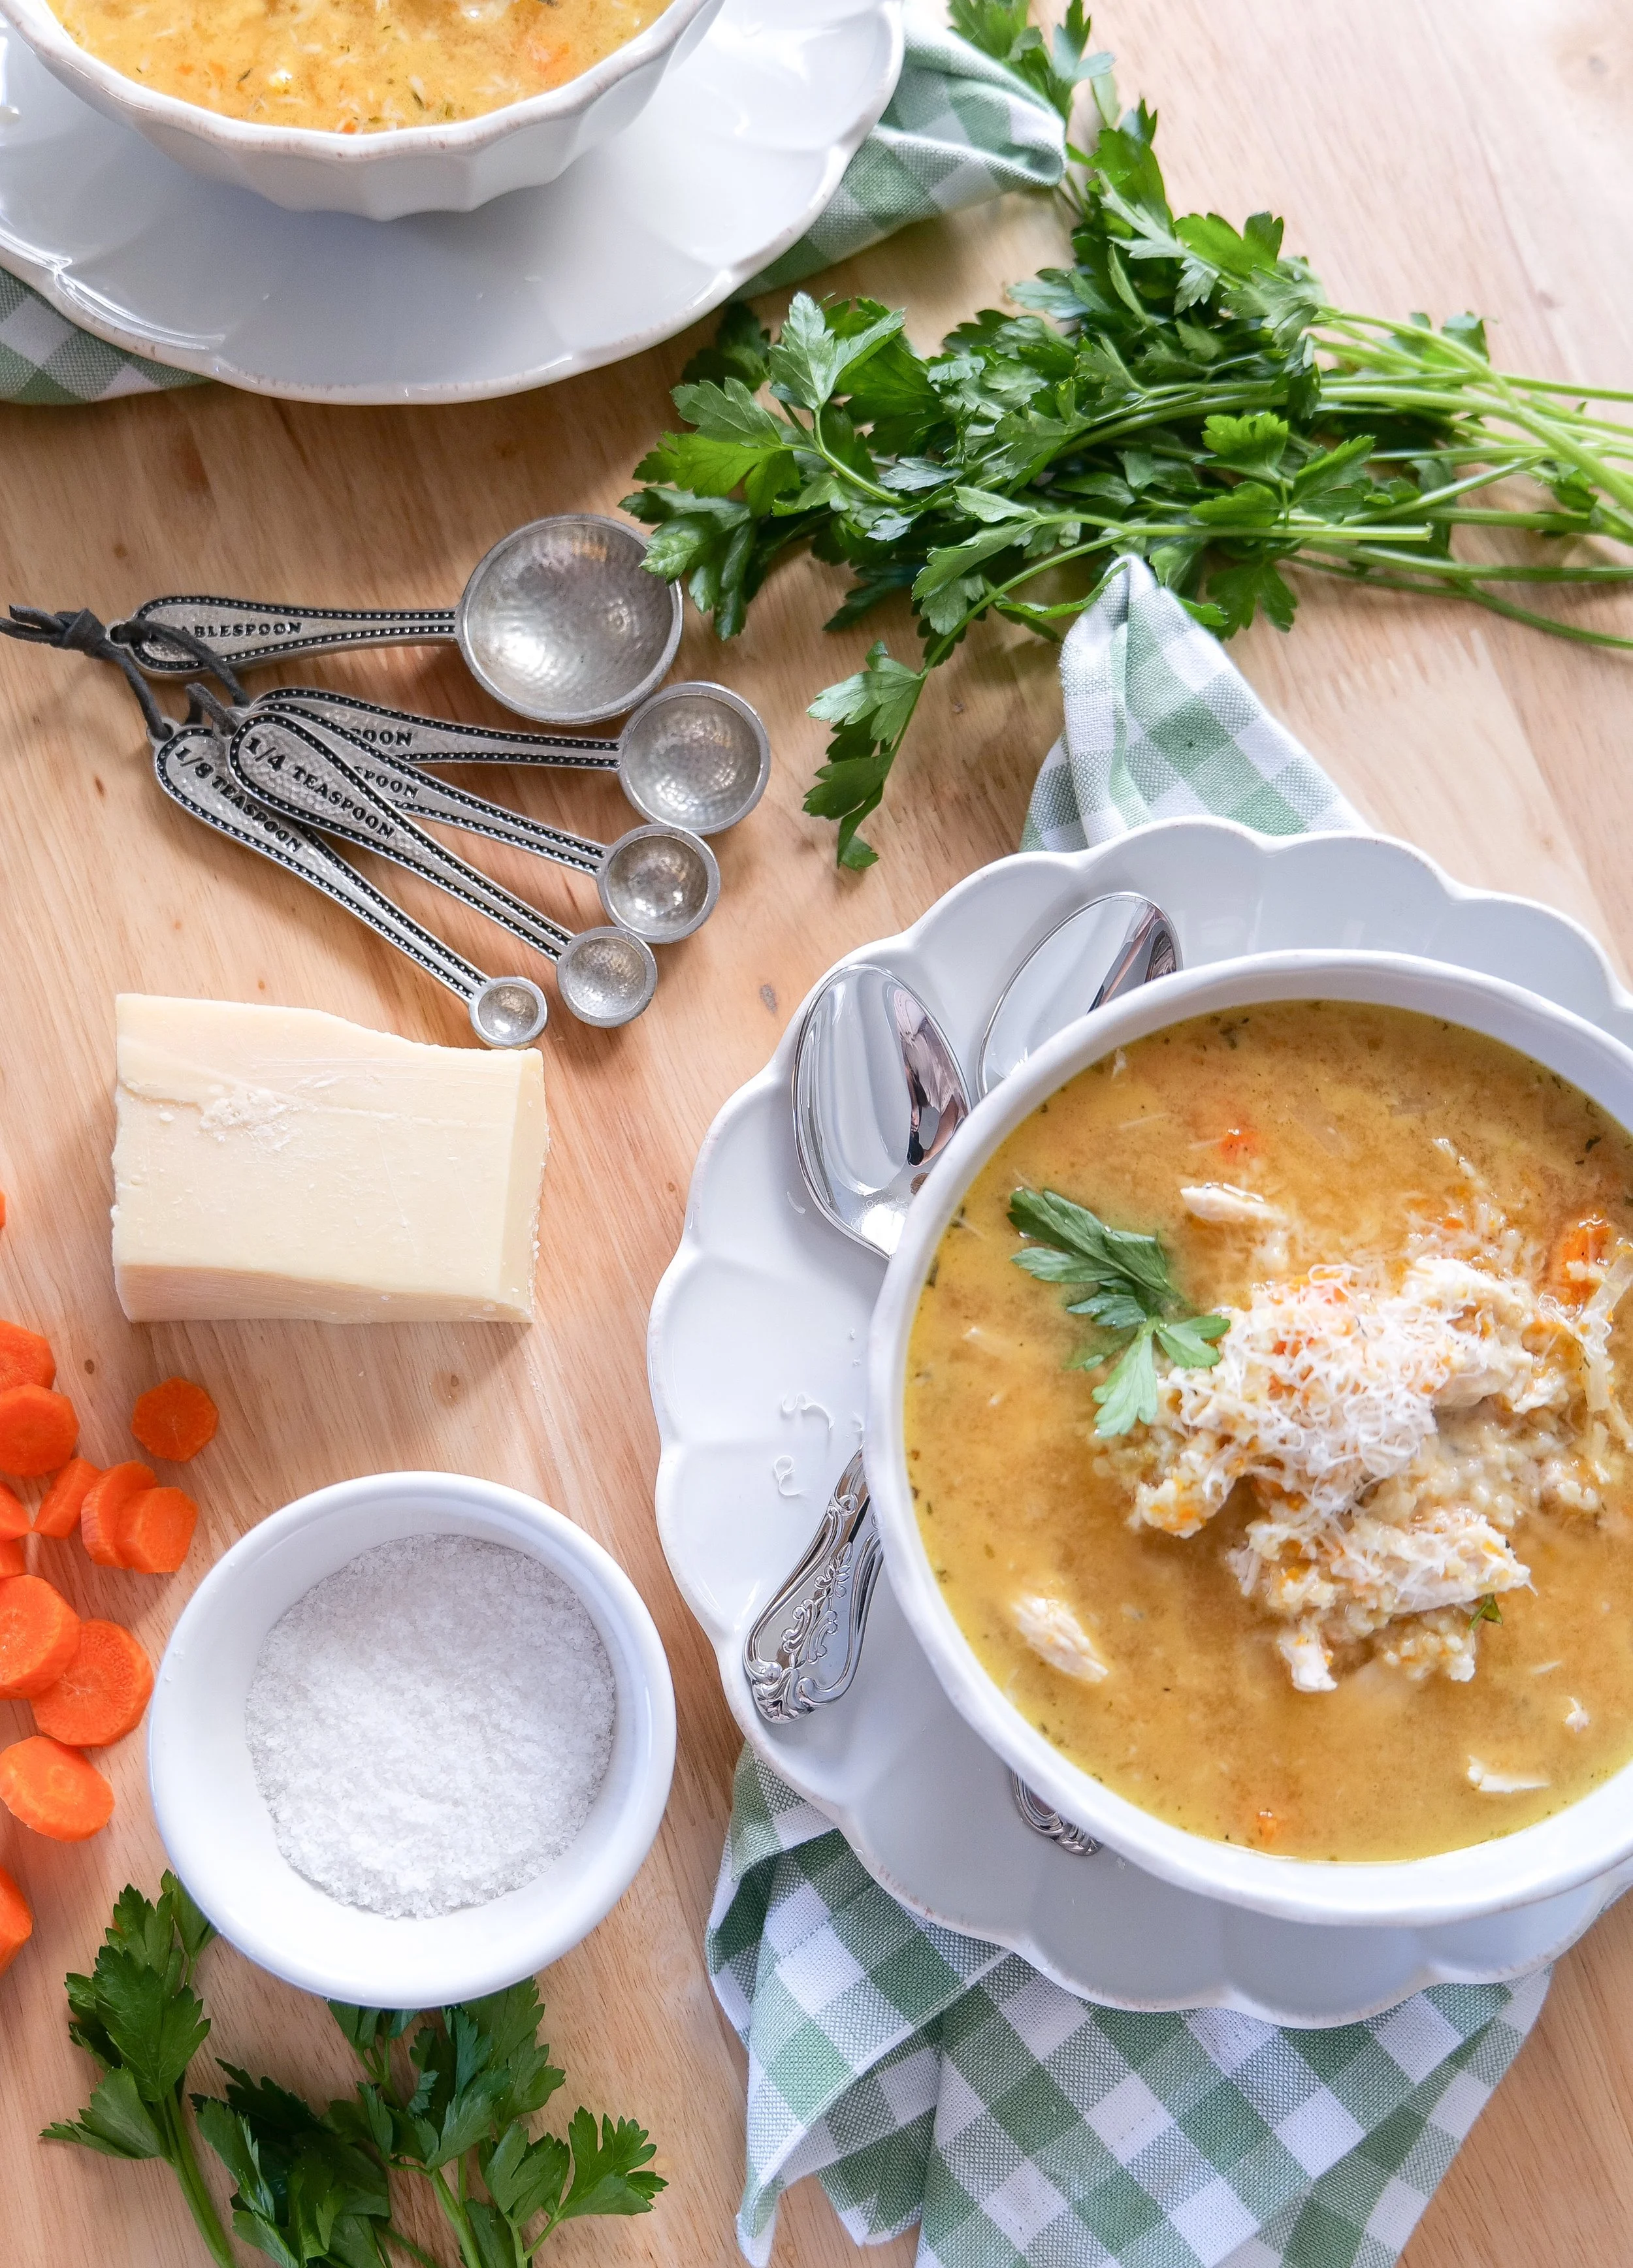
Finish each bowl with plenty of freshly grated Parmesan and a little parsley, and you have a simple, hearty soup that tastes like it has been simmering in the kitchen all day—because it has.

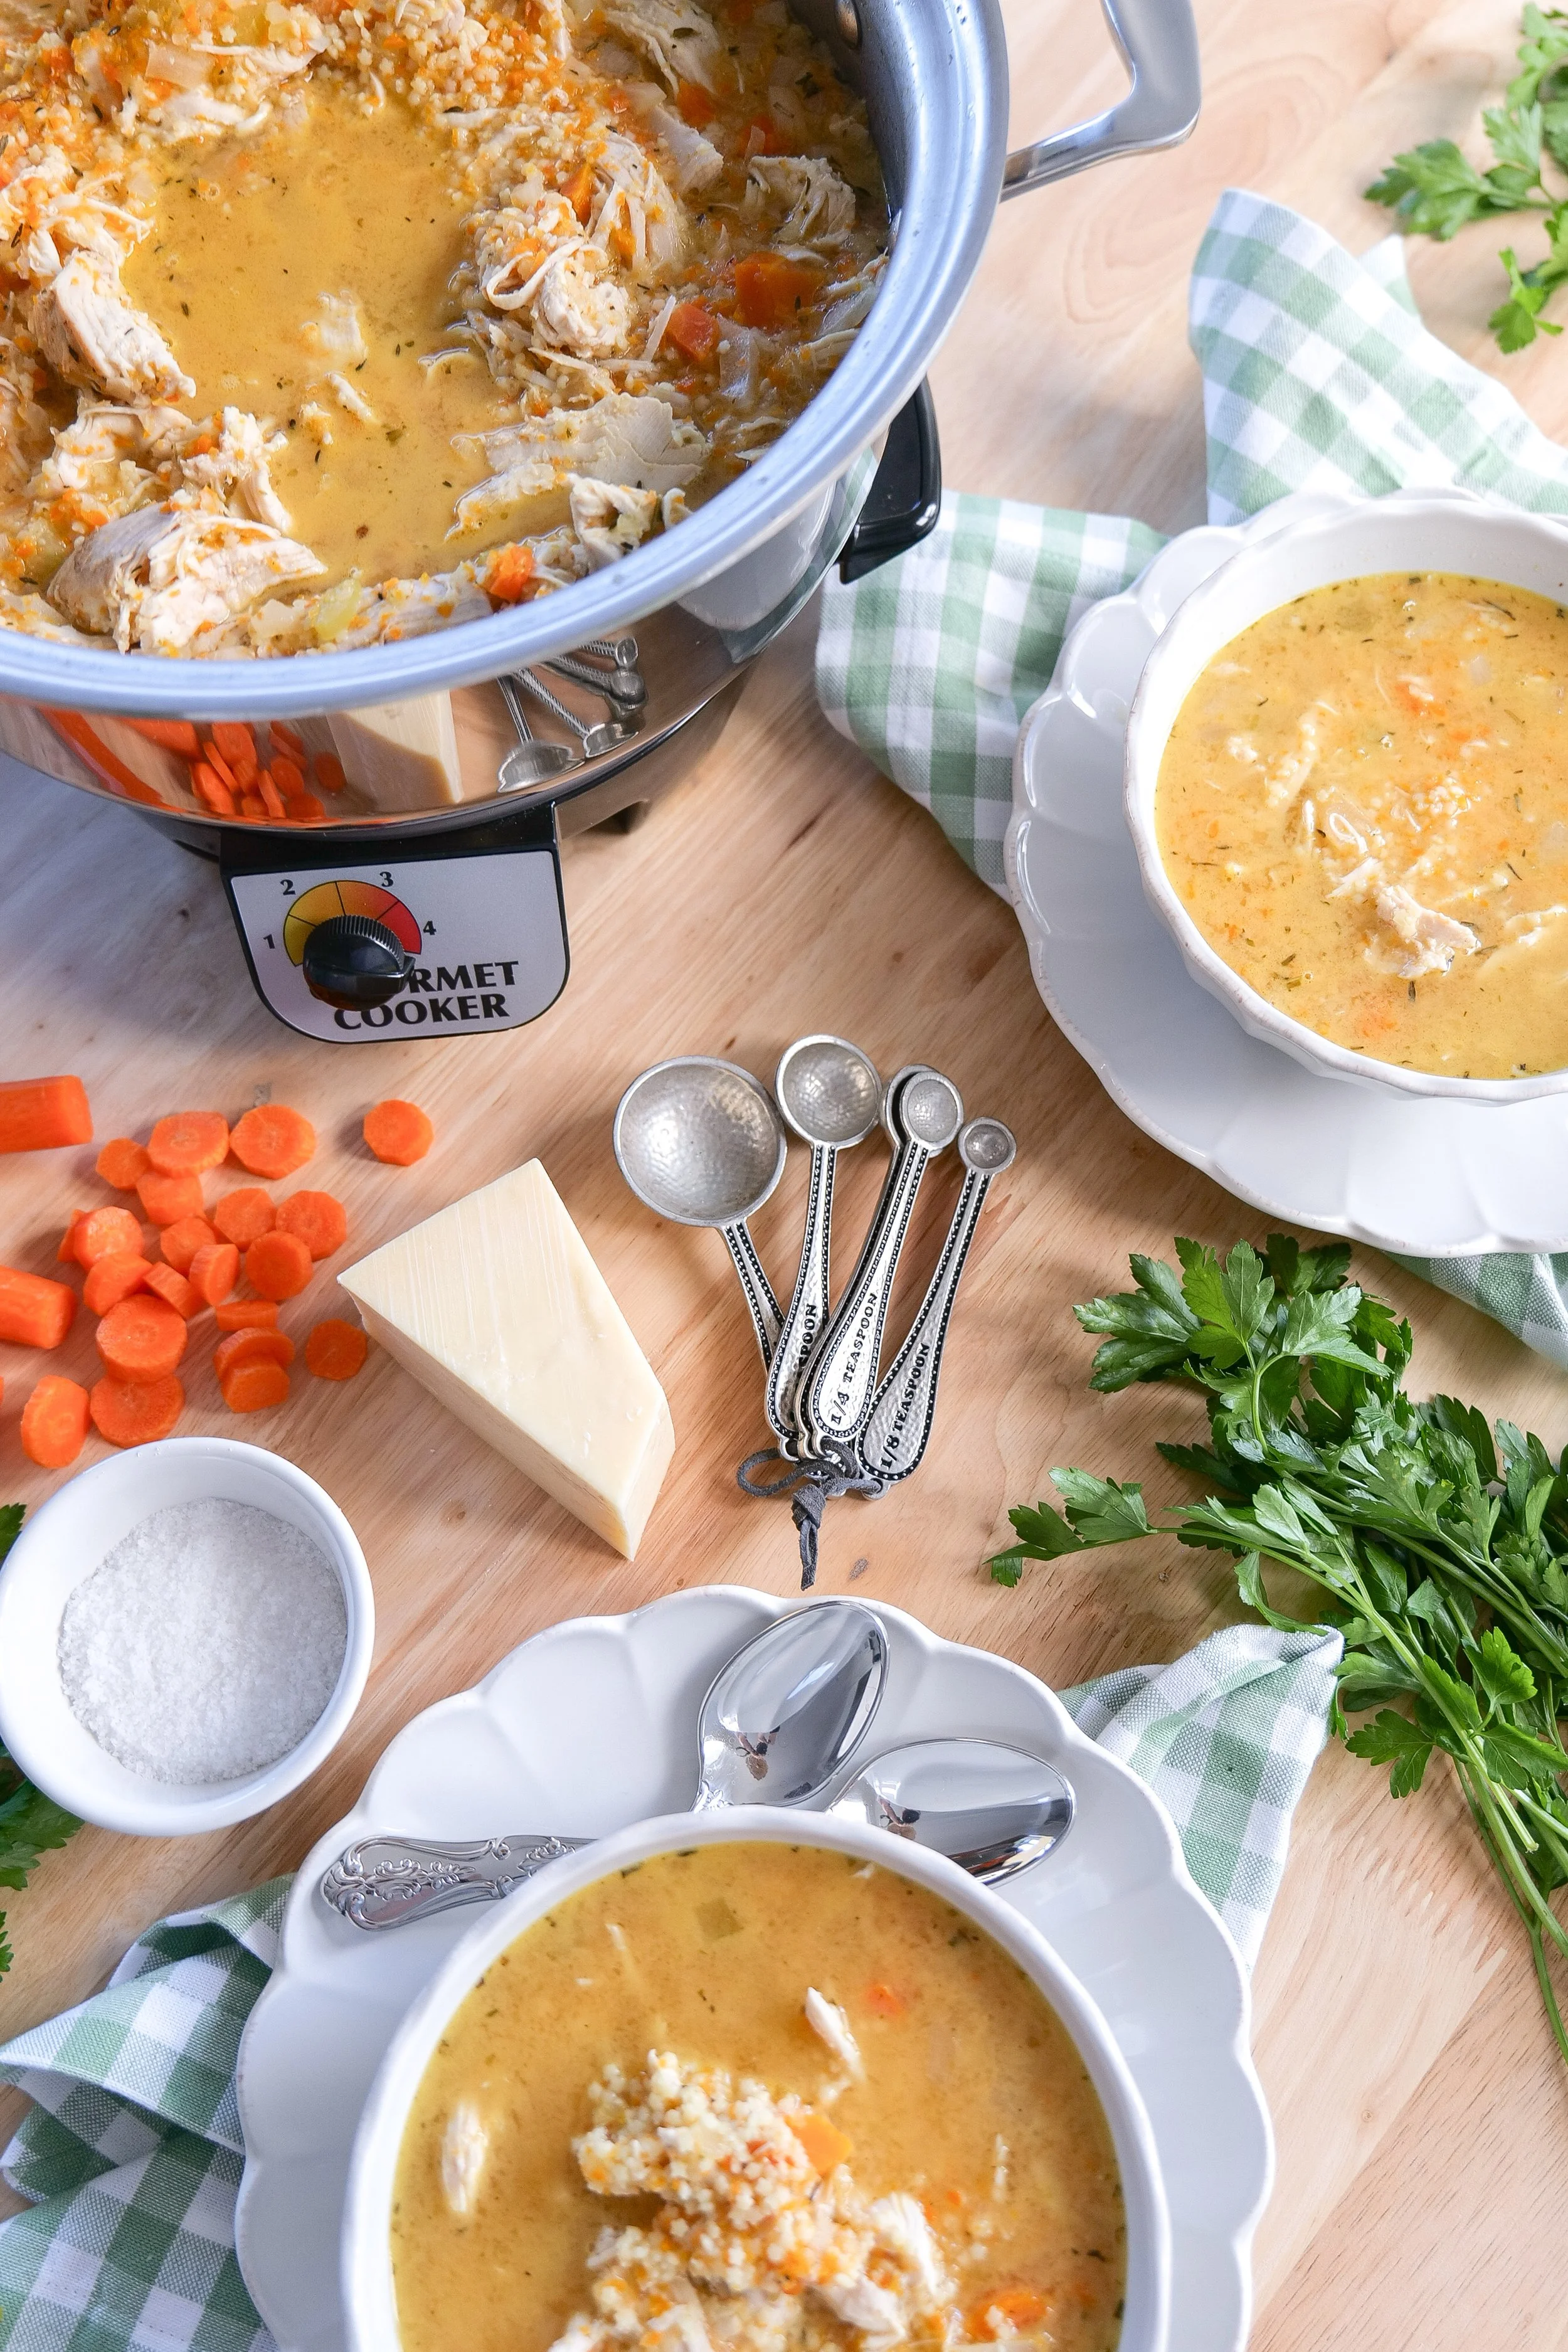
Bowl of slow cooker Italian Penicillin Soup with tender chicken, vegetables, pastina, Parmesan and fresh parsley.
↓ Skip to Recipe

What Is Italian Penicillin Soup?

Italian Penicillin Soup isn't actually medicine. It's an affectionate nickname for the type of comforting chicken soup Italian families have made for generations.

Recipes vary from family to family, but you'll commonly find a flavorful chicken broth filled with vegetables, chicken, herbs, Parmesan, and some form of small pasta.

In this version, I use pastina, which gives the soup that wonderfully cozy texture while soaking up the homemade broth.

The combination reminds me of the kind of recipe that doesn't need to be complicated to be memorable. It's simple food made with good ingredients and given enough time to develop plenty of flavor.

Homemade Italian Penicillin Soup filled with shredded chicken, vegetables and tiny pastina pasta.
Cozy Italian chicken pastina soup finished with freshly grated Parmesan and parsley.

Why You'll Love This Italian Penicillin Soup

This has become one of those recipes I want to make as soon as the weather cools down.

You'll love it because it's:

  • Made primarily in the slow cooker

  • Filled with chicken and vegetables

  • Cozy without being overly heavy

  • Made with simple, familiar ingredients

  • Flavored with a Parmesan rind

  • Finished with tiny pastina pasta

  • Easy to make ahead

  • Delicious for leftovers

  • Perfect for fall and winter dinners

And because everything spends a few hours cooking together, you get a much deeper flavor without needing to stand over the stove all afternoon.

Slow cooker chicken soup with vegetables, tiny pastina pasta and Parmesan cheese.

What Is Pastina?

Pastina literally means "little pasta" in Italian and refers to very small pasta shapes traditionally used in soups and simple comfort dishes.

You may find pastina in tiny stars, rounds, or other petite shapes. Stelline and acini di pepe are also great options for this soup if that's what you can find.

The small size works especially well here because the pasta cooks right in the broth toward the end of the recipe and absorbs some of its flavor.

If you're unable to find something labeled specifically as pastina, don't worry. Just look for a very small pasta shape.

Homemade Italian Penicillin Soup served warm with chicken, vegetables, herbs and Parmesan.

The Secret Ingredient: A Parmesan Rind

If you've never saved your Parmesan rinds for soup, start now.

I add one Parmesan rind to the slow cooker along with the chicken broth, vegetables, and herbs. As everything slowly cooks, the rind adds another savory layer to the broth.

You aren't going to eat the rind. Once the soup has finished cooking, simply remove and discard it before shredding the chicken and adding the pastina.

It's such a simple addition, but it's one of my favorite ways to make a homemade soup taste like it has been simmering for hours.

Which, conveniently, this one has.

Italian pastina chicken soup with tender shredded chicken and vegetables in a savory broth.
Warm bowl of cozy Italian chicken soup with pastina, carrots, celery and fresh Parmesan.

Why I Brown the Chicken First

Technically, you could put everything straight into your slow cooker.

But I prefer browning the chicken first.

My slow cooker has a removable pot that can go directly onto the stovetop, so I add 1 tablespoon olive oil and brown the chicken breasts for approximately five minutes per side before adding the remaining ingredients.

That extra step creates more flavor before the slow cooking even begins.

If your slow cooker insert isn't stovetop-safe, you can brown the chicken in a separate skillet or skip this step when you need an especially easy dinner.

Easy slow cooker Italian soup made with chicken, vegetables, herbs, Parmesan and pastina.

What You'll Need

One of my favorite things about this recipe is how simple the ingredient list is.

You'll need:

Chicken

Chicken breasts cook until tender enough to shred right into the soup.

Onion, Carrots & Celery

The classic combination that gives our broth its base of flavor.

Garlic

I use four whole garlic cloves and let them slowly cook into the broth.

Chicken Broth

This creates the base of the soup.

Parmesan Rind

One of the easiest ways to add savory Parmesan flavor while the soup cooks.

Herbs

Oregano, rosemary, and basil give the broth plenty of Italian-inspired flavor.

Pastina

Tiny pasta makes every spoonful extra cozy.

Parmesan

Freshly grated Parmesan finishes each bowl.

Fresh Parsley

Optional, but beautiful for a little freshness and color right before serving.

Comforting chicken soup with tiny pastina pasta, vegetables and freshly grated Parmesan.

Making Italian Penicillin Soup in the Slow Cooker

This is where this recipe becomes especially easy.

After browning the chicken, roughly chop your vegetables. There is no need to worry about getting perfectly uniform pieces.

Add the onion, garlic, carrots, celery, seasonings, chicken broth, and Parmesan rind to the chicken.

Then let your slow cooker do the work.

I cook mine on medium, or setting 3, for approximately 2–3 hours, until the chicken is tender enough to easily shred with a fork.

Once it's ready, remove the Parmesan rind and chicken. Shred the chicken while the pastina cooks directly in the broth.

Then add the chicken back in and you're ready to serve.

I’ve gathered the slow cooker, soup pots, bowls, serving pieces and kitchen tools I reach for when making cozy recipes like this one in my Soup & Slow Cooker Essentials collection.

Slow Cooker Italian Penicillin Soup Recipe

Prep Time: Approximately 15 minutes
Cook Time: Approximately 2½–3½ hours
Servings: Approximately 6

Ingredients

  • 1 tablespoon olive oil

  • 4 large chicken breasts

  • 1 yellow or white onion, roughly chopped

  • 4 garlic cloves, whole

  • 2 carrots, roughly chopped

  • 2 celery stalks, roughly chopped

  • 6 cups chicken broth

  • 1 Parmesan rind

  • 1 teaspoon dried oregano

  • 1 teaspoon dried rosemary

  • 1 teaspoon dried basil

  • 1 teaspoon sea salt

  • 1 teaspoon black pepper

  • 1 cup pastina pasta, or another small pasta such as acini di pepe or stelline

  • ½ cup freshly grated Parmesan cheese

  • Additional salt and pepper, to taste

  • 2 tablespoons chopped fresh parsley, optional for garnish

Instructions

Step 1: Brown the Chicken

If your slow cooker has a stovetop-safe removable insert, place it over medium heat.

Add 1 tablespoon olive oil.

Add the chicken breasts and brown for approximately 5 minutes on each side.

If your slow cooker insert isn't stovetop-safe, you can complete this step in a separate skillet or skip browning and add the chicken directly to the slow cooker.

Step 2: Prepare the Vegetables

While the chicken browns, roughly chop the onion, carrots, and celery.

The vegetables don't need to be perfectly cut or uniform.

Step 3: Fill the Slow Cooker

Add the chopped onion, whole garlic cloves, carrots, celery, chicken broth, Parmesan rind, oregano, rosemary, basil, sea salt, and black pepper to the chicken.

Place the slow cooker insert onto its base.

Step 4: Slow Cook

Cook on medium, or approximately setting 3 depending on your slow cooker, for 2–3 hours, or until the chicken is completely cooked and easily shreds with a fork.

Step 5: Remove the Chicken & Parmesan Rind

Once the chicken is tender, remove the Parmesan rind and discard it.

Transfer the chicken breasts to a plate or cutting board and shred them using two forks.

Step 6: Cook the Pastina

Add the pastina directly to the broth and vegetables.

Continue cooking for approximately 20–25 minutes, or until the pasta is tender.

Step 7: Finish the Soup

Return the shredded chicken to the soup and stir everything together.

Taste and add additional salt and pepper as needed.

Step 8: Serve

Ladle the soup into bowls and finish with freshly grated Parmesan cheese and chopped parsley.

Serve warm and enjoy.

Amanda's Tips

Save your Parmesan rinds.
Whenever you finish a wedge of Parmesan, wrap the rind and save it for soups like this one.

Don't add the pastina at the beginning.
Pastina cooks quickly, so adding it toward the end keeps it from becoming overly soft.

Brown the chicken when you have time.
It adds another layer of flavor, but you can skip it when you need a true dump-and-go slow cooker dinner.

Cut the vegetables roughly.
This is rustic soup. There's no need for perfect little pieces.

Taste before adding additional salt.
Chicken broth and Parmesan can both contribute saltiness, so adjust the finished soup to your preference.

Italian Penicillin chicken soup with shredded chicken, vegetables and small pasta in savory broth.

Can I Make Italian Penicillin Soup Ahead of Time?

Absolutely.

In fact, soup is one of my favorite things to make ahead because the flavors have even more time to come together.

If you're intentionally making this for meal prep, however, I would consider cooking the pastina separately and adding it to individual portions.

Pasta continues absorbing liquid as it sits, so keeping it separate can help preserve more of that beautiful broth.

If you've already made the entire recipe together, that's completely fine too. Just expect the pastina to absorb additional broth in the refrigerator.

Homemade Italian chicken soup topped with Parmesan cheese and fresh chopped parsley.
Pastina soup with shredded chicken, carrots and celery served in a flavorful chicken broth.

How to Store Leftovers

Allow the soup to cool and transfer it to an airtight container.

Store it in the refrigerator and enjoy within approximately 3–4 days.

As the soup sits, the pastina may continue soaking up some of the broth.

When reheating, simply add a splash of additional chicken broth if you'd like to loosen the consistency.

Warm gently on the stovetop or in the microwave until heated through.

Can You Freeze Italian Penicillin Soup?

Yes, but I prefer freezing this soup without the pastina whenever possible.

Pasta can become softer after freezing, thawing, and reheating.

If you're preparing a batch specifically for the freezer, make the soup through the chicken and vegetable portion, freeze it, and add freshly cooked pastina when reheating.

Store the cooled soup in freezer-safe airtight containers, leaving a little room for expansion.

Freeze for up to approximately 3 months.

Thaw overnight in the refrigerator before reheating.

Cozy slow cooker pastina soup with chicken, vegetables and Parmesan ready to serve.

What to Serve with Italian Penicillin Soup

This soup is hearty enough to be a meal on its own, but I love serving it with something simple on the side.

Try it with:

  • Warm crusty bread

  • Garlic bread

  • Homemade focaccia

  • A simple green salad

  • Caesar salad

  • Roasted vegetables

  • Extra Parmesan for the table

And don't forget a good piece of bread for soaking up the broth at the bottom of the bowl.

Easy Variations

The beauty of a cozy chicken soup like this is that it's easy to adapt to what you already have.

Change the Pasta

Use stelline, acini di pepe, or another very small pasta in place of pastina.

Add More Vegetables

Spinach, kale, or zucchini can be added if you'd like additional vegetables.

Use Leftover Chicken

If you're starting with cooked chicken, make the broth and vegetables first and stir the shredded chicken in toward the end.

Make It Extra Lemony

Finish individual bowls with a squeeze of fresh lemon juice for a brighter flavor.

Add a Little Heat

A sprinkle of red pepper flakes is an easy addition for anyone who likes a little spice.

Frequently Asked Questions

Why is it called Italian Penicillin Soup?

It's a nickname for comforting Italian-style chicken soup traditionally associated with being cared for when you're feeling under the weather. It isn't actual medicine—the name reflects the comfort and tradition surrounding dishes like this.

What pasta is used in Italian Penicillin Soup?

I use pastina, but stelline, acini di pepe, or another very small pasta can work beautifully.

Can I make Italian Penicillin Soup without pastina?

Yes. You can omit the pasta entirely or substitute another small pasta.

Do I have to brown the chicken?

No. Browning adds flavor, but you can place the chicken directly into the slow cooker if you're short on time.

What does the Parmesan rind do?

It slowly infuses the broth with savory Parmesan flavor as the soup cooks. Remove and discard the rind before serving.

Can I cook the pastina separately?

Yes, and it's actually a great option if you're planning on storing or freezing the soup.

Can I use rotisserie chicken?

Yes. Make the broth and vegetable portion first, then stir shredded cooked chicken into the soup toward the end.

Can I freeze Italian Penicillin Soup?

Yes. For the best texture, freeze the soup without the pastina and add freshly cooked pasta when reheating.

How do I keep pastina from soaking up all the broth?

Either cook it separately or add additional chicken broth when reheating leftovers.

Is Italian Penicillin Soup the same as pastina soup?

They're closely related, and recipes vary widely by family. This version combines chicken, vegetables, herbs, Parmesan, and pastina in a slow-cooked broth.

More Cozy Soup Recipes

Slow Cooker Italian Wedding Soup

Italian Sausage, Potato & Kale Soup

Mom's Favorite Minestrone Soup

One-Pot Italian Lasagna Soup

Creamy Basil Tomato Soup

Shepherd's Pie Soup

Warm Italian comfort soup with tender chicken, tiny pasta, vegetables and fresh Parmesan.

Shop My Soup & Slow Cooker Essentials

I've gathered some of my favorite slow cookers, soup pots, bowls, ladles, and everyday kitchen pieces for making cozy recipes like this one in my Soup & Slow Cooker Essentials list.

Save This Recipe

Whether you're planning ahead for a chilly weeknight or simply adding another cozy dinner to your recipe collection, I've included a printable recipe card below so it's easy to save, print, and make again.

Printable Italian Penicillin Soup recipe card with chicken, vegetables, pastina, Parmesan and slow cooker instructions.

A Note From Amanda

There's something I love about recipes that spend a few hours quietly cooking in the kitchen while life happens around them.

This is one of those meals.

It's simple ingredients—chicken, vegetables, broth, Parmesan, herbs, and tiny pasta—but given a little time, they turn into something that feels especially comforting.

Serve it steaming hot with plenty of Parmesan on top, gather everyone around the table, and enjoy.

"Taste and see that the Lord is good." — Psalm 34:8

Made with love for the people you love.

Slow Cooker Chicken Enchilada Dip with Cream Cheese & Black Beans

An Easy Cheesy Chicken Dip for Game Day, Parties & Gatherings

There are certain appetizers that belong right in the middle of the table where everyone can gather around them, and this Slow Cooker Chicken Enchilada Dip is one of those recipes.

Made with tender shredded chicken, cream cheese, black beans, enchilada sauce, plenty of melted cheese, and taco seasoning, it's warm, creamy, hearty, and perfect for scooping up with tortilla chips.

Even better, the slow cooker does most of the work and keeps everything warm while you're entertaining.

The chicken slowly cooks until tender enough to shred, while the cream cheese, black beans, enchilada sauce, shredded cheese, and seasoning melt together into an incredibly creamy dip. Once the chicken is ready, shred it directly into the cheesy mixture and let everything come together.

Serve it straight from the slow cooker surrounded by tortilla chips, tortillas, or fresh vegetables and let everyone help themselves.

Creamy chicken enchilada dip with shredded chicken, black beans and melted Mexican-style cheese.
↓ Skip to Recipe

What's in Chicken Enchilada Dip?

This dip uses simple ingredients that come together into one warm, creamy appetizer.

Chicken Breasts

Chicken breasts slowly cook in the enchilada mixture until tender enough to easily shred.

Cream Cheese

Two blocks of cream cheese create the rich, creamy base.

Black Beans

Drain and rinse the beans before adding them to the slow cooker.

Enchilada Sauce

This brings that classic enchilada flavor to the entire dip.

Mexican-Style Shredded Cheese

Three cups melt into the dip and the remaining cup goes over the top.

Onion

Diced white onion adds another layer of savory flavor.

Taco Seasoning

Two tablespoons season the chicken and creamy base without needing a long list of spices.

Easy slow cooker chicken dip made with enchilada sauce, cream cheese, black beans and shredded cheese.
Warm cheesy chicken enchilada dip ready to serve as an easy party appetizer.

Why This Recipe Works So Well in the Slow Cooker

This is exactly the kind of recipe the slow cooker was made for.

The chicken can slowly cook alongside the creamy enchilada ingredients until it's tender enough to shred. Once the chicken is done, everything gets stirred together into one cheesy dip.

I especially love using the slow cooker for party appetizers because once the dip is finished, I can switch it to warm and let everyone serve themselves.

That means less time reheating food while people are over and more time actually enjoying whoever is gathered around the table.

I use my slow cooker constantly for recipes like this, and I've gathered some of my favorite slow cookers, kitchen tools, serving pieces, and other essentials in my Soup & Slow Cooker Essentials collection.

Creamy chicken enchilada party dip made in the slow cooker with tender shredded chicken and melted cheese.

How to Serve Chicken Enchilada Dip

Tortilla chips are my first choice, but you have plenty of options.

Serve it with:

  • Tortilla chips

  • Corn chips

  • Mini tortillas

  • Toasted tortilla wedges

  • Bell pepper slices

  • Celery

  • Carrot sticks

You can also set out toppings like cilantro, green onions, diced tomatoes, jalapeños, avocado, sour cream, or olives.

For a party, place the slow cooker right in the middle of the spread and arrange your chips and toppings around it.

Slow Cooker Chicken Enchilada Dip Recipe

Prep Time: Approximately 15 minutes
Cook Time: Approximately 2–3 hours
Servings: A crowd-sized appetizer

Ingredients

  • 4 pounds boneless, skinless chicken breasts

  • 2 tablespoons olive oil

  • 1 white onion, diced

  • 2 (8-ounce) blocks cream cheese

  • 2 cans black beans, rinsed and drained

  • 1 can enchilada sauce

  • 4 cups Mexican-style shredded cheese, divided

  • 2 tablespoons taco seasoning

  • Tortilla chips, tortillas, or fresh vegetables, for serving

  • Optional toppings such as cilantro, green onions, jalapeños, tomatoes, avocado, sour cream, or olives

Instructions

Step 1: Prepare the Onion

Add the olive oil and diced onion to a skillet or the stovetop-safe insert of your slow cooker.

Cook over medium heat for a few minutes, until the onion begins to soften.

Step 2: Add the Chicken

Place the chicken breasts into the slow cooker with the softened onion.

Sprinkle the taco seasoning over the chicken.

Step 3: Add the Remaining Ingredients

Add the cream cheese, drained black beans, enchilada sauce, and 3 cups of the shredded cheese.

Cover with the lid.

Step 4: Slow Cook

Cook for approximately 2–3 hours, or until the chicken reaches 165°F internally and is tender enough to easily shred.

Because slow cookers vary, use the chicken's temperature and tenderness rather than the clock alone to determine when it's finished.

Step 5: Shred the Chicken

Remove the cooked chicken breasts and shred them using two forks.

Return the shredded chicken to the slow cooker and stir thoroughly so the chicken, cream cheese, beans, enchilada sauce, and melted cheese are evenly combined.

Step 6: Finish with Cheese

Sprinkle the remaining 1 cup shredded cheese over the top.

Replace the lid briefly and allow the cheese to melt.

Step 7: Serve

Add your favorite toppings and serve warm with tortilla chips, tortillas, or fresh vegetables.

Enjoy!

Amanda's Tips

Don't overcook the chicken.
Once it reaches 165°F and shreds easily, it's ready.

Cut the cream cheese into smaller pieces.
This helps it melt more evenly throughout the dip.

Drain and rinse your black beans.
You don't want the extra liquid from the cans thinning out your dip.

Save one cup of cheese for the top.
That final layer gives you the beautiful melted-cheese finish.

Shred the chicken before the final stir.
Once returned to the slow cooker, the shredded chicken will soak up all that creamy enchilada flavor.

Keep it warm for serving.
After everything is cooked, switch the slow cooker to its warm setting if your model has one.

Warm chicken enchilada dip with black beans and cheese for an easy game day appetizer.

Can I Make Chicken Enchilada Dip Ahead of Time?

Yes. This is one of the reasons it's such a great recipe for entertaining.

You can prepare the dip ahead of time and gently reheat it in the slow cooker before serving.

If I'm serving it for a party, however, I prefer making it the same day. Once the chicken is completely cooked and shredded and the cheeses are melted, I can simply switch the slow cooker to warm and leave it ready for everyone to enjoy.

If the dip thickens while sitting, give everything a good stir.

How to Keep Chicken Enchilada Dip Warm for a Party

Once the chicken is fully cooked and everything is hot and melted together, switch your slow cooker to its warm setting if it has one.

Give the dip an occasional stir while serving.

That's one of the biggest reasons I love a slow cooker appetizer. You don't have to worry about your warm dip becoming cold halfway through the party.

Crockpot chicken enchilada dip with creamy cheese, shredded chicken and black beans.

How to Store Leftover Chicken Enchilada Dip

Allow the dip to cool before transferring leftovers to an airtight container.

Store in the refrigerator and enjoy within 3–4 days.

Reheat individual servings in the microwave or gently warm a larger portion on the stovetop or in your slow cooker until heated through.

Because this recipe makes a large amount, you can also divide leftovers into smaller containers before refrigerating them.

Can You Freeze Chicken Enchilada Dip?

Yes, although cream cheese and other dairy products can change slightly in texture after freezing.

Allow the dip to cool completely and transfer it to freezer-safe containers.

Freeze for up to approximately 2 months.

When you're ready to use it, thaw the dip overnight in the refrigerator and reheat it slowly, stirring well as it warms to help the creamy mixture come back together.

Easy Chicken Enchilada Dip Variations

One of the easiest things about this recipe is customizing it to your family's preferences.

Make It Spicy

Use hot enchilada sauce or add diced jalapeños for a little extra heat.

Add Green Chiles

Stir in a can of diced green chiles for another layer of flavor.

Add Corn

Drain a can of corn and stir it into the dip along with the black beans.

Make It Extra Cheesy

Sprinkle a little additional shredded cheese over the top before serving.

Use Rotisserie Chicken

For a shortcut, you can substitute cooked shredded rotisserie chicken.

Because the chicken is already cooked, you'll only need enough slow-cooker time to thoroughly heat the dip and completely melt the cheeses.

Turn Leftovers Into Dinner

This might be my favorite variation because nothing goes to waste.

Use leftover Chicken Enchilada Dip inside:

  • Tacos

  • Burritos

  • Quesadillas

  • Enchiladas

  • Nachos

  • Mexican-inspired rice bowls

Suddenly yesterday's party appetizer becomes tonight's easy dinner.

360 Cookware slow cooker preparing a Chicken Enchilada Dip

Frequently Asked Questions

Can I make Chicken Enchilada Dip in a slow cooker?

Yes. That's exactly how I make this recipe. The chicken cooks directly in the slow cooker with the enchilada sauce, cream cheese, black beans, cheese, and seasoning before being shredded and stirred back into the dip.

Can I put raw chicken in the slow cooker?

Yes. Make sure the chicken reaches a safe internal temperature of 165°F before shredding and serving.

How do I know when the chicken is finished?

The chicken should reach 165°F internally and easily shred with two forks.

Can I use rotisserie chicken?

Yes. Cooked shredded rotisserie chicken is a great shortcut. Since the chicken is already cooked, reduce the slow-cooker time and cook only until everything is thoroughly heated and the cheeses have melted.

What do you eat with Chicken Enchilada Dip?

Tortilla chips are my favorite, but you can also serve it with corn chips, tortillas, toasted tortilla wedges, bell peppers, celery, or carrots.

Can I make Chicken Enchilada Dip ahead?

Yes. Prepare the dip ahead and gently reheat it before serving, or make it earlier the same day and keep it warm in your slow cooker.

How do I keep Chicken Enchilada Dip warm?

Once everything is fully cooked and melted together, switch your slow cooker to its warm setting.

Can I freeze Chicken Enchilada Dip?

Yes, although the texture of the dairy ingredients may change slightly. Thaw overnight in the refrigerator and reheat gently while stirring.

What can I make with leftover Chicken Enchilada Dip?

Use leftovers in tacos, burritos, quesadillas, nachos, enchiladas, or rice bowls.

More Appetizers & Slow Cooker Recipes

If you're planning a party or looking for another easy recipe, here are a few more favorites:

5 Ingredient Bacon Ranch Football Shaped Cheese Ball

A natural pairing for this recipe, especially for a game-day spread.

Layered Hummus Dip

Another easy dip that's perfect for setting out when you're entertaining.

Steak & Feta Crostini

A delicious appetizer when you want to add something a little more elevated to the table.

Slow Cooker Chicken Tortilla Soup

Another cozy Tex-Mex-inspired recipe that puts your slow cooker to work.

Slow Cooker Braised Short Ribs

A comforting slow-cooker dinner to make when you want something beyond appetizers.

Shop My Soup & Slow Cooker Essentials

From my favorite slow cooker and everyday cooking tools to serving pieces and other kitchen essentials, I've gathered the pieces I reach for when making slow-cooker recipes like this one in my Soup & Slow Cooker Essentials collection.

Save This Recipe

Whether you're planning a game-day spread, having friends and family over, or simply adding another easy slow-cooker appetizer to your recipe collection, I've included a printable recipe card below so it's easy to save, print, and make again.

Printable Slow Cooker Chicken Enchilada Dip recipe card with chicken, cream cheese, black beans, enchilada sauce and cheese.

A Note From Amanda

I love an appetizer that lets everyone gather around the table and help themselves, and this is exactly that kind of recipe.

It's warm, cheesy, hearty, and easy to keep ready in the slow cooker while everyone visits. Add a big bowl of tortilla chips and a few fresh toppings and you have an appetizer that requires very little fuss once everyone arrives.

Those are usually my favorite kinds of recipes—the ones that let the food be part of bringing everyone together without keeping me stuck in the kitchen.

“Taste and see that the Lord is good.” — Psalm 34:8

Made with love for the people you love.

Linguiça & Kale Portuguese Soup — Our Family's Recipe

There are some recipes that are more than just dinner. They're tied to family, memories, and the foods you grew up eating.

This Linguiça & Kale Portuguese Soup is one of those recipes for me.

If you've searched for Portuguese kale soup before, you've probably come across Caldo Verde, the traditional Portuguese soup made with potatoes, greens, and sausage. This isn't exactly that.

This is our family's version.

It's hearty and rustic, filled with smoky linguiça, Yukon Gold potatoes, white kidney beans, plenty of kale, and just a little heavy cream stirred in at the end. It's the Portuguese soup I grew up eating and the version that still feels like home to me.

And while it may not follow every rule of a traditional Caldo Verde, that's part of what makes family recipes so special. They change a little from kitchen to kitchen and generation to generation until they become something uniquely yours.

Portuguese kale soup with linguiça, Yukon Gold potatoes, white beans and chopped kale.
↓ Skip to Recipe

What Is Portuguese Kale Soup?

Portuguese kale soup comes in many forms, especially once you start looking at recipes passed through Portuguese and Portuguese-American families.

The best-known traditional version is Caldo Verde, a simple Portuguese soup generally built around potatoes, greens, olive oil, and sausage.

Our family's version is heartier.

Instead of a smooth potato-based soup with finely sliced greens, ours is filled with chunks of Yukon Gold potatoes, sliced linguiça, white kidney beans, chopped kale, and a touch of heavy cream.

It's rustic, filling, and substantial enough to be dinner all on its own.

Hearty linguiça and kale Portuguese soup with potatoes and white kidney beans.

Why This Portuguese Soup Is Special to Our Family

This isn't a recipe I created because Portuguese kale soup happened to be popular online.

It's the kind of food I grew up with.

Our version has been made and adjusted within my family over the years, which is why I'm not trying to present it as the definitive or most traditional way to make Portuguese kale soup.

It's simply our way.

And that's one of my favorite things about recipes passed through families. Two households can make what they call the same dish and end up with something completely different.

For us, that means plenty of linguiça, hearty potatoes, beans, kale, and a rich broth that's finished with just enough cream to bring everything together.

Homemade Portuguese linguiça soup filled with kale, potatoes and white beans.

What Is Linguiça?

Linguiça is a Portuguese sausage that's seasoned with ingredients such as garlic and paprika and has a distinctive smoky, savory flavor.

It's really the ingredient that gives this soup its personality.

I start by browning the sliced linguiça in olive oil before building the rest of the soup in the same pot. That allows some of the flavor from the sausage to remain behind and become part of the base for the onion, garlic, potatoes, and broth.

If you can find authentic linguiça where you live, that's what I recommend using for this recipe.

Portuguese sausage and kale soup made with sliced linguiça and tender Yukon Gold potatoes.

Ingredients You'll Need

One of the things I love about this soup is that the ingredient list isn't complicated.

Linguiça

You'll need 1 pound of linguiça, sliced. Browning it first adds even more flavor before it goes back into the soup.

Yukon Gold Potatoes

I use 2 pounds of Yukon Gold potatoes. They become beautifully tender while still giving the soup plenty of texture.

Kale

You'll need one bunch with the stems removed and leaves finely chopped.

White Kidney Beans

A 15-ounce can of white kidney beans adds another hearty element and makes this soup even more filling.

Onion & Garlic

A large yellow onion and four cloves of garlic form the aromatic base.

Vegetable Broth

Eight cups of vegetable broth create the soup's broth.

Heavy Cream

This might not be traditional, but remember—this is our family's version.

I stir in 1/4 cup of heavy cream at the very end. It's not enough to turn this into a heavy cream soup; it simply gives the broth a little richness and brings everything together.

Seasonings

Sea salt, black pepper, and paprika complement the smoky flavor of the linguiça without overcomplicating things.

Linguiça potato and kale soup served warm with white beans in a savory broth.

How to Make Linguiça & Kale Portuguese Soup

The entire soup comes together in one Dutch oven or large pot.

First, brown the sliced linguiça in olive oil. Remove it temporarily and use the same pot to cook the onion and garlic.

Then add the potatoes and seasonings before pouring in the broth and adding the beans and browned linguiça.

The potatoes simmer until they're nearly fork-tender before the kale goes in.

The final step is the heavy cream.

Turn off the heat first, stir in the cream, and you're ready to serve.

Simple ingredients, one pot, and so much flavor.

Portuguese kale and potato soup with smoky linguiça and white kidney beans.

Linguiça & Kale Portuguese Soup Recipe

Prep Time: 15 minutes
Cook Time: Approximately 35–40 minutes
Servings: Approximately 6

Ingredients

  • 2 tablespoons extra-virgin olive oil

  • 1 pound linguiça, sliced

  • 1 large yellow onion, diced

  • 4 cloves garlic, minced

  • 8 cups vegetable broth

  • 2 pounds Yukon Gold potatoes, peeled and diced

  • 1 teaspoon sea salt or kosher salt

  • 1/2 teaspoon black pepper

  • 1/2 teaspoon paprika

  • 1 (15-ounce) can white kidney beans, drained

  • 1 bunch kale, stems removed and finely chopped

  • 1/4 cup heavy cream

Instructions

Step 1: Brown the Linguiça

Place a large Dutch oven or saucepan over medium heat.

Add the olive oil and sliced linguiça. Cook until the sausage is lightly browned on both sides.

Remove the linguiça from the pot and set aside.

Step 2: Cook the Onion & Garlic

Add the diced onion and minced garlic to the same pot.

Cook until the onion becomes soft and translucent, stirring occasionally.

Step 3: Add the Potatoes

Add the diced Yukon Gold potatoes, salt, black pepper, and paprika.

Stir until the potatoes are evenly coated in the seasonings.

Step 4: Build the Soup

Pour in the vegetable broth.

Add the drained white kidney beans and browned linguiça back into the pot.

Bring the soup to a gentle simmer and cook for approximately 20 minutes, stirring occasionally, until the potatoes are almost fork-tender but aren't falling apart.

Step 5: Add the Kale

Stir in the chopped kale.

Continue cooking for approximately 8–10 minutes, or until the kale is tender but still has good color.

Step 6: Finish with Cream

Turn off the heat.

Pour in the heavy cream and stir until completely incorporated.

Taste and adjust the seasonings if desired.

Serve warm and enjoy.

Amanda's Tips for the Best Portuguese Kale Soup

Brown the linguiça first.
Don't skip this step. Browning develops flavor in the sausage and leaves all those flavorful bits behind in the pot.

Use good linguiça.
Because it's one of the main flavors in the soup, the sausage you choose matters.

Don't let the potatoes fall apart.
Cook them until they're tender enough to pierce with a fork but still hold their shape.

Add the kale toward the end.
It doesn't need to cook for the entire time. Adding it later helps preserve its texture and color.

Add the cream after turning off the heat.
It's the finishing touch rather than part of the long cooking process.

Let the soup rest for a few minutes.
I love giving it about 10–15 minutes before serving so everything settles together.

Hearty Portuguese kale soup with chunks of potato, linguiça and tender kale.

What to Serve with Portuguese Kale Soup

This soup is hearty enough to stand on its own, but warm bread alongside it is hard to beat.

Try serving it with:

  • Crusty Portuguese-style bread

  • Sourdough

  • Dinner rolls

  • A simple green salad

  • Roasted vegetables

Honestly, give me a big bowl of this and a piece of bread for dipping and I'm happy.

Portuguese kale soup with white beans, sliced linguiça and Yukon Gold potatoes.

Can I Make Portuguese Kale Soup Ahead of Time?

Yes—and this is one of those soups that's wonderful the next day.

Prepare it as written, let it cool, and store it covered in the refrigerator.

As everything sits together, the flavors have even more time to develop.

When reheating, warm it gently on the stovetop until heated through.

How to Store Leftovers

Allow leftover soup to cool before transferring it to an airtight container.

Store it in the refrigerator for approximately 3–4 days.

Reheat individual portions in the microwave or gently warm the soup on the stovetop.

I've gathered some of my favorite soup pots, slow cookers, serving bowls, and everyday kitchen tools in my Soup & Slow Cooker Essentials collection.

Homemade Portuguese linguiça soup served warm with kale, potatoes and beans.

Can You Freeze Linguiça & Kale Soup?

You can freeze this soup, although the potatoes and cream can change texture slightly after freezing and thawing.

If you're intentionally preparing the soup for the freezer, I would consider making it through the broth, linguiça, beans, and vegetables and adding the cream after reheating.

For ordinary leftovers, freezing the finished soup is still an option. Cool completely before transferring it to freezer-safe containers and leave some room at the top for expansion.

Easy Variations

Even though this is our family's version, you can absolutely adjust your bowl to fit yours.

Make It Spicy

Add crushed red pepper flakes for a little heat.

Add More Greens

If you're a kale lover, add extra.

Try Another Hearty Green

Collard greens can be substituted if kale isn't available.

Use Chicken Broth

I use vegetable broth, but chicken broth works too.

Leave Out the Cream

The 1/4 cup of cream is part of how we make ours, but you can omit it if you'd prefer a brothier soup.

Family-style Portuguese kale soup made with linguiça, potatoes, white beans and kale.

Frequently Asked Questions

Is this traditional Caldo Verde?

No. This recipe is inspired by the Portuguese kale soups my family has made for years, but it isn't intended to be a traditional Caldo Verde recipe.

Our version is chunkier and includes linguiça, white kidney beans, kale, Yukon Gold potatoes, and a small amount of heavy cream.

What's the difference between linguiça and chouriço?

Both are Portuguese sausages, but recipes, seasoning, texture, and preparation can vary. For this family recipe, I use linguiça.

Can I make this soup ahead of time?

Yes. It's an excellent make-ahead soup and the flavors are wonderful after sitting overnight.

Can I substitute the vegetable broth?

Yes. Chicken broth can be substituted.

Can I leave out the beans?

Yes. The beans are part of our version and make it heartier, but you can omit them if desired.

When should I add kale to soup?

Add the kale toward the end of cooking. For this recipe, approximately 8–10 minutes is enough time for it to become tender without cooking it for the entire duration.

Why is there heavy cream in Portuguese kale soup?

It's simply part of our family's version. I use only 1/4 cup, which adds a little richness without turning the soup into a heavy cream-based soup.

More Cozy Soup Recipes

Italian Sausage, Potato & Kale Soup

Slow Cooker Italian Penicillin Soup

Slow Cooker Creamy Chicken & Mushroom Couscous Soup

Slow Cooker Italian Wedding Soup

Creamy Basil Tomato Soup

Mom's Favorite Minestrone Soup

Shop My Soup & Slow Cooker Essentials

From my favorite soup pots and slow cookers to serving bowls and everyday kitchen tools, I've gathered some of the pieces I reach for throughout soup season in my Soup & Slow Cooker Essentials collection.

Save This Recipe

Family recipes are some of my favorites to preserve and share. I've included a printable recipe card below so you can save this Linguiça & Kale Portuguese Soup, print it, and hopefully gather your own family around a warm pot of it someday.

Printable Portuguese Kale Soup with Linguiça recipe card with potatoes, white beans and kale.

A Note From Amanda

Food has such a special way of carrying pieces of our families with it.

This may not be traditional Caldo Verde, and I'm perfectly okay with that. It's the Portuguese kale soup I remember, the version our family loves, and the one I want to continue making in my own kitchen.

Sometimes the recipes worth keeping aren't the ones made exactly according to tradition. They're the ones that taste like home.

“Taste and see that the Lord is good.” — Psalm 34:8

Made with love for the people you love.

Creamy Broccoli Cheddar Soup Recipe

There is something about a warm bowl of homemade broccoli cheddar soup that instantly feels like comfort food. Creamy, cheesy, filled with tender broccoli and carrots, and hearty enough to make a meal on its own, this is one of those soup recipes I come back to when we want something warm and satisfying.

My version is made with fresh broccoli, shredded carrots, chicken bone broth, heavy cream, and plenty of cheddar cheese. I also use a simple butter and flour base to give the soup that thick, creamy consistency you want from broccoli cheddar soup without making it overly complicated.

It's easy enough for a weeknight dinner but also one of those recipes that feels especially good on a cold or rainy day. Add warm bread on the side and dinner is done.

Creamy homemade broccoli cheddar soup with fresh broccoli, carrots and shredded cheddar cheese.
↓ Skip to Recipe

Why You’ll Love This Broccoli Cheddar Soup

There are plenty of versions of broccoli cheddar soup, but I love keeping mine relatively simple and letting the broccoli and cheddar be the stars.

Fresh broccoli gives the soup texture and heartiness, while shredded carrots add just a little natural sweetness. I use chicken bone broth or chicken stock instead of water for a more flavorful base, and heavy cream gives everything that rich, creamy consistency.

Then, of course, there’s the cheddar.

Once it melts into the broth, everything comes together into a thick, cheesy soup that feels substantial enough to serve as dinner rather than just a starter.

You can also adjust the texture depending on what your family prefers. Leave all of the vegetables intact for a chunky broccoli cheddar soup, or use an immersion blender to blend some of the broccoli into the broth for a smoother, thicker consistency.

Homemade broccoli cheddar soup served warm with tender broccoli and carrots.

What You’ll Need to Make Broccoli Cheddar Soup

One of the things I love about this recipe is that you don’t need a huge ingredient list.

Fresh broccoli is the base of the soup, so I like to cut the florets fairly small. They’ll cook more evenly and you’ll get broccoli in every spoonful rather than having to navigate huge pieces.

Shredded carrots add color, texture, and a subtle sweetness that works so well with the sharp cheddar.

For the liquid, I use chicken bone broth or chicken stock. Either works beautifully, although bone broth can add a little extra richness.

And for that signature creamy texture, I use heavy cream along with a simple roux made from salted butter and flour.

Finally, freshly shredded cheddar cheese melts into the soup at the end.

Easy broccoli cheddar soup with a rich and creamy cheddar cheese broth.
Fresh ingredients for homemade broccoli cheddar soup arranged in the kitchen.
Broccoli, carrots, cheddar cheese and other ingredients for creamy broccoli cheddar soup.

The Secret to a Creamy Broccoli Cheddar Soup

The texture is one of the most important parts of a good broccoli cheddar soup. You want it creamy and thick enough to feel indulgent without turning it into cheese sauce.

The butter and flour create a simple roux at the beginning of this recipe. Once the broth and heavy cream are added, that roux helps thicken the entire soup as it simmers.

If you want an even thicker soup, an immersion blender is one of my favorite tricks.

Once the broccoli is tender, blend just a portion of the soup before adding the cheddar. This thickens the broth naturally while still leaving plenty of broccoli and carrots intact.

Of course, if your family prefers a completely smooth soup, you can blend more of it. If you love a chunky broccoli cheddar soup, skip the blender altogether.

There really isn’t a wrong answer here.

Close-up of creamy broccoli cheese soup with tender pieces of fresh broccoli.

What Is the Best Cheese for Broccoli Cheddar Soup?

I recommend using a flavorful cheddar cheese and shredding it yourself.

Sharp cheddar will give you a stronger cheese flavor, while medium cheddar will make the soup a little milder. Either works, so use whichever your family prefers.

Whenever possible, I like to start with a block of cheddar rather than pre-shredded cheese. Freshly grated cheddar generally melts more smoothly into soups and sauces.

Another important tip is to keep your heat low once you add the cheese.

You don’t want the soup rapidly boiling while the cheddar melts. Instead, stir it into the hot soup over low heat until it becomes smooth and creamy.

Rich broccoli cheddar soup made with heavy cream and freshly shredded cheddar.

What to Serve With Broccoli Cheddar Soup

My favorite way to serve broccoli cheddar soup is with something warm and crusty for dipping. A loaf of homemade bread turns a bowl of soup into such a simple but comforting dinner.

My Garlic & Herb Focaccia Bread would be delicious alongside it, or you can make my Beginner’s Sourdough Bread if you want a classic crusty loaf.

For something lighter on the side, try my Pear & Walnut Salad with Honey Mustard Dressing or Shaved Brussels Sprout Salad with Apples, Goat Cheese & Candied Pecans.

You can also keep things incredibly simple with a warm baguette, crackers, or even a grilled cheese sandwich on the side.

Warm bowl of homemade broccoli cheddar soup ready to serve for dinner.

My Favorite Soup-Making Essentials

I make homemade soup all throughout the cooler months, so there are a few kitchen pieces I find myself reaching for again and again. A good pot, immersion blender, ladle, soup bowls, and a few simple prep tools make everything from creamy soups to hearty slow cooker recipes so much easier.

I gathered my favorite soup-making essentials together below if you’re looking for any of the pieces I use in my own kitchen.

Classic broccoli cheddar soup with a thick creamy texture and fresh vegetables.

Tips for the Best Broccoli Cheddar Soup

A few simple things will help give you the best texture and flavor every time you make it.

Cut your broccoli into smaller florets. This helps it cook evenly and makes the finished soup much easier to eat.

Give the flour a minute to cook. After adding it to the butter and onions, let it cook for about a minute before adding your liquid. This helps eliminate the raw flour flavor.

Shred your own cheese if possible. Freshly grated cheddar tends to melt much more smoothly.

Blend before adding the cheese. If you want to use an immersion blender, blend the soup once the broccoli is tender and then add your cheddar.

Keep the heat low once the cheddar goes in. Gentle heat helps the cheese melt into a smooth, creamy soup.

Taste before adding additional salt. Broth and cheddar both contribute saltiness, so taste the finished soup and adjust if needed.

Thick and creamy broccoli cheddar soup made from scratch with cheddar cheese.

How to Make Broccoli Cheddar Soup

Making homemade broccoli cheddar soup is much easier than you might think.

Start by melting your butter in a large pot over medium heat. Add the diced onion and let it cook until softened and translucent.

Next, add the flour and seasonings. Stir everything together and allow the flour to cook for about one minute.

Slowly pour in your chicken bone broth or chicken stock, stirring as you go. Then add the heavy cream, broccoli, and carrots.

Cover the pot, reduce the heat, and let everything gently simmer until the broccoli is tender.

At this point, you can use an immersion blender if you want a smoother or thicker soup. Once you have the texture you like, lower the heat and gradually stir in the shredded cheddar.

As soon as the cheese is melted and the soup is creamy, it’s ready to serve.

Homemade broccoli cheddar soup from scratch served warm in a bowl.

Creamy Broccoli Cheddar Soup Recipe

Ingredients

  • 2 heads broccoli, florets cut into small pieces

  • 1 yellow onion, diced

  • 1 cup shredded carrots

  • 1 teaspoon sea salt

  • 1 teaspoon freshly ground black pepper

  • 1 teaspoon garlic powder

  • 32 ounces chicken bone broth or chicken stock

  • ¼ cup salted butter

  • 2 tablespoons all-purpose flour

  • 2 cups heavy cream

  • 6 ounces cheddar cheese, freshly shredded

Instructions

1. Sauté the onion.
Add the butter to a large pot or Dutch oven over medium heat. Once melted, add the diced onion and cook for approximately 3–4 minutes, or until softened and translucent.

2. Make the roux.
Sprinkle the flour, sea salt, black pepper, and garlic powder over the onions. Stir continuously for approximately 1 minute to coat the onions and cook the flour.

3. Add the liquids.
Slowly pour in the chicken bone broth while stirring to help keep the soup smooth. Add the heavy cream and stir until combined.

4. Add the vegetables.
Add the broccoli florets and shredded carrots. Stir everything together.

5. Simmer.
Cover the pot and reduce the heat to low. Allow the soup to gently simmer for approximately 20–30 minutes, or until the broccoli is tender.

6. Blend, if desired.
For a smoother and slightly thicker soup, use an immersion blender to blend some or all of the vegetables directly in the pot. For a chunkier broccoli cheddar soup, leave the vegetables as they are.

7. Add the cheddar.
Keep the soup over low heat and gradually stir in the freshly shredded cheddar cheese. Continue stirring until the cheese has completely melted and the soup is creamy.

8. Taste and serve.
Taste and adjust the seasoning if needed. Spoon into bowls, top with a little additional shredded cheddar if desired, and serve warm.

Creamy cheesy broccoli soup filled with broccoli florets and shredded carrots.

How to Store and Reheat Broccoli Cheddar Soup

If you have leftovers, transfer the soup to an airtight container and refrigerate it promptly. It will keep well in the refrigerator for about 3–4 days.

Because this soup contains heavy cream and cheddar, I recommend reheating it gently rather than bringing it to a hard boil.

Add your leftovers to a saucepan and warm over low to medium-low heat, stirring occasionally until heated through. If the soup has thickened considerably in the refrigerator, you can add a small splash of broth or cream until it reaches the consistency you like.

You can freeze broccoli cheddar soup, although cream-and-cheese-based soups can sometimes have a slightly different texture once thawed.

If you do freeze it, let the soup cool, transfer it to a freezer-safe airtight container, and leave a little room for expansion. Thaw overnight in the refrigerator before gently reheating it on the stovetop.

Easy homemade broccoli cheese soup with a creamy cheddar broth.

Frequently Asked Questions

Can I make broccoli cheddar soup ahead of time?

Yes. You can make this soup ahead and keep it refrigerated in an airtight container for about 3–4 days. Reheat it gently on the stovetop before serving.

Can I use frozen broccoli?

Fresh broccoli is my preference for this recipe, but frozen broccoli can work when needed. Because frozen broccoli is already partially softened, you may find that it cooks more quickly than fresh.

Do I have to blend broccoli cheddar soup?

Not at all. Blending is completely optional. Leave the vegetables whole for a chunkier soup, blend a small portion for a thicker broth, or blend more for a smoother consistency.

Why isn't my cheddar melting smoothly?

High heat can make cheese-based soups grainy. Lower the heat before adding the cheddar and stir it in gradually. Freshly shredded cheese also tends to melt more smoothly than packaged shredded cheese.

Cozy bowl of creamy broccoli cheddar soup topped with additional cheddar cheese.

More Cozy Soup Recipes You’ll Love

If you loved this creamy broccoli cheddar soup, here are a few more cozy soup recipes to make next:

There’s something so comforting about having a collection of homemade soup recipes to turn to when the weather cools down. Whether you’re looking for something creamy and cheesy like this broccoli cheddar soup or a hearty soup that can serve as dinner on its own, these are the kinds of recipes I love gathering around the table with my family.

Shop My Favorite Soup Essentials

If you're working your way through more of my soup recipes, you can find the cookware, serving pieces, and kitchen essentials I use for homemade soup all together under my Soup & Slow Cooker Essential guide.

Save This Recipe

Whether you're planning ahead for a cozy weeknight dinner or adding a new favorite to your recipe collection, I've included a printable recipe card below so it's easy to save, print, and share with the people you love.

Printable creamy broccoli cheddar soup recipe card from Amanda’s Kitchen.

Sausage English Muffin Breakfast Sandwiches

Homemade sausage English muffin breakfast sandwiches with egg and melted cheese for an easy make-ahead breakfast.

There is something so helpful about opening the refrigerator or freezer on a busy morning and already having breakfast waiting for you. These sausage English muffin breakfast sandwiches are one of my favorite breakfasts to prep ahead because they're hearty, easy to reheat, and made with simple ingredients my family actually enjoys.

Each sandwich has a toasted English muffin layered with a homemade sausage patty, egg, and melty cheese. You can enjoy them right away, refrigerate a batch for the week, or freeze them individually for mornings when cooking breakfast simply isn't happening.

They're especially useful during busy seasons of life when having something homemade already prepared makes the morning feel just a little easier.

Make-ahead sausage breakfast sandwich with egg and cheese on a toasted English muffin.
↓ Skip to Recipe

Why You'll Love These Make-Ahead Breakfast Sandwiches

I love a breakfast recipe that makes the rest of the week easier, and these sandwiches are exactly that. I can make several at once, wrap them individually, and have breakfast ready whenever we need it.

They're also easy to customize. Change the cheese, swap the sausage, add vegetables, or season the eggs differently depending on what your family likes.

A few reasons I keep coming back to them:

  • Easy to make ahead for busy mornings

  • Freezer-friendly

  • Filling enough to actually keep you satisfied

  • Made with simple ingredients

  • Easy to customize for everyone in the family

  • Reheat well in either the microwave or oven

Sausage, egg and melted cheese layered inside a toasted English muffin.

What You Need to Make Sausage English Muffin Breakfast Sandwiches

One of the best things about this recipe is how simple the ingredient list is.

I make the sausage patties myself using ground pork sausage from our local meat locker. You can absolutely use prepared sausage patties if that's what works for you, but making my own lets me know exactly what I'm using and gives these such good flavor.

You'll also need English muffins, eggs, and cheese. I usually use American or cheddar because both melt beautifully.

For the eggs, my favorite little shortcut is actually my mini waffle maker. I pour the liquid eggs directly into it and get perfectly portioned eggs that fit right onto the English muffins. It's easy, there's very little cleanup, and it makes assembling several sandwiches at once so simple.

Shop My Breakfast & Meal Prep Favorites

English muffin breakfast sandwich prepared with sausage, egg and cheese for meal prep.

How to Make Breakfast Sandwiches for Meal Prep

Start by dividing one pound of ground pork sausage into four equal portions and forming each into a patty. Remember that the sausage will shrink slightly as it cooks, so I like to make the patties a little wider than the English muffins.

Cook the patties in a skillet over medium heat until they're nicely browned and completely cooked through.

While the sausage cooks, split and toast your English muffins and prepare the eggs. I use about ½ cup of liquid eggs per sandwich in my mini waffle maker, but you can also scramble or fry individual eggs if you prefer.

Then it's just a matter of assembling everything: English muffin, cheese, hot sausage patty, egg, and the top half of the muffin.

Close-up of a homemade sausage breakfast sandwich with egg and melted cheese.

How to Store Breakfast Sandwiches for the Week

If you're meal prepping these for the refrigerator, the most important thing is allowing the ingredients to cool before wrapping the sandwiches.

Wrapping hot sandwiches immediately can trap steam, which can make your English muffins soggy.

Once cooled, wrap each sandwich individually in parchment paper or foil and place them in an airtight container. Store them in the refrigerator and reheat as needed throughout the week.

I love having them already individually wrapped because there's nothing to portion out in the morning. Just grab one, warm it up, and breakfast is done.

How to Freeze Sausage Breakfast Sandwiches

These are also wonderful freezer breakfast sandwiches.

Allow everything to cool completely, assemble the sandwiches, and wrap each one individually. Place the wrapped sandwiches together in a freezer-safe container or bag and label it with the date.

For best texture and flavor, I like to use frozen breakfast sandwiches within about a month.

This is also one of the recipes I made while stocking our freezer before having a baby. Having hearty breakfasts already made was one less thing to think about during those early days.

Freezer-friendly English muffin breakfast sandwich made with sausage, egg and cheese.

How to Reheat a Breakfast Sandwich

You can reheat these in either the microwave or oven depending on how much time you have.

The microwave is obviously the fastest option for busy mornings. If the sandwich is frozen, thawing it overnight in the refrigerator first will help it reheat more evenly.

My husband prefers them reheated in the oven because the English muffin gets crispier. If you have a few extra minutes, the oven or toaster oven definitely gives you more of that freshly made texture.

Easy Breakfast Sandwich Variations

Once you have the basic method down, these are incredibly easy to change.

Try pepper jack with jalapeños for something spicy, swap pork sausage for turkey sausage, or add spinach, peppers, or sautéed onions.

You can also change the egg preparation. Scrambled, fried, or waffle-maker eggs all work.

For the cheese, cheddar and American are our easy classics, but Swiss, pepper jack, mozzarella, or another good melting cheese can completely change the flavor.

That's one reason this is such a useful meal-prep recipe—you can make several variations in the same batch instead of eating the exact same sandwich every morning.

Easy make-ahead breakfast sandwich served on a toasted English muffin.

What to Serve with Sausage English Muffin Sandwiches

These sandwiches are filling enough to enjoy on their own, but I especially like serving them with something fresh on the side.

Fresh berries or sliced fruit are easy for weekday mornings. For a bigger weekend breakfast, serve them alongside breakfast potatoes or another breakfast favorite.

And, of course, coffee.

More Easy Breakfast Recipes

If you're prepping breakfasts for the week, here are a few more recipes to try next:

  • Freezer Meal Prep Breakfast Burritos

  • Chorizo, Egg & Potato Breakfast Bowls

  • Butternut Squash Breakfast Hash with Apples, Bacon & Eggs

  • Blueberry Pie Overnight Oats

  • Peach Cobbler Overnight Oats

I would link each of those directly to its post here. This is a much tighter internal-link section than a giant list of unrelated breakfast recipes.

Homemade sausage English muffin sandwich for an easy meal prep breakfast.

Sausage English Muffin Breakfast Sandwiches

These easy sausage English muffin breakfast sandwiches are made with homemade sausage patties, eggs, and melty cheese. Make them ahead for an easy breakfast during the week or freeze them individually for busy mornings.

Ingredients

  • 4 English muffins, split and toasted

  • 1 lb ground pork breakfast sausage

  • 2 cups liquid eggs

  • 4 slices American or cheddar cheese

  • Salt and pepper or preferred seasoning, optional

Instructions

  1. Make the sausage patties. Divide the ground pork sausage into four equal portions and shape each into a round patty slightly wider than an English muffin. The patties will shrink a little as they cook.

  2. Cook the sausage. Heat a skillet over medium heat. Add the sausage patties and cook for approximately 4–5 minutes per side, or until browned and completely cooked through.

  3. Prepare the eggs. My favorite method is using a mini waffle maker. Pour approximately ½ cup of liquid eggs into the waffle maker and cook until completely set. Repeat until you have four portions. You can also scramble or fry the eggs if preferred.

  4. Toast the English muffins. Split the English muffins and toast them to your preferred level of crispness.

  5. Assemble the sandwiches. Place one slice of cheese onto the bottom half of each English muffin. Top with a hot sausage patty followed by the cooked egg. Season the egg if desired and finish with the remaining English muffin half.

  6. Serve or store. Enjoy immediately, or allow the sandwiches to cool completely before wrapping individually in parchment paper or foil. Refrigerate for meal prep or place the wrapped sandwiches into a freezer-safe container or bag for longer storage.

Amanda's Tip

If you're making these specifically for the freezer, let every component cool before wrapping the sandwiches. It helps prevent trapped steam from making the English muffins soggy.

Sausage, egg and cheese breakfast sandwich made with a toasted English muffin.

A Note From Amanda

Recipes like this are exactly why I love meal prepping. I'm not trying to make every morning perfectly organized—I just love doing little things ahead of time that make life easier later.

These breakfast sandwiches have become one of those recipes for us. They're simple, hearty, and something my family actually wants to eat. Whether I'm making them for the week ahead or filling the freezer during an especially busy season, I'm always happy to see a few waiting for us.

I hope they make one of your busy mornings a little easier too.

Save This Recipe

Whether you're planning ahead for a busy week or adding a new favorite to your breakfast rotation, I've included a printable recipe card below so it's easy to save, print, and share with the people you love.

Printable recipe card for homemade sausage English muffin breakfast sandwiches.

A Note From Amanda

Some of my favorite recipes aren’t necessarily the fanciest ones—they’re the ones that make everyday life a little easier. Taking the time to make a batch of these breakfast sandwiches means there’s something homemade waiting in the refrigerator or freezer on the mornings when we need it most.

I love knowing exactly what went into them, especially when I make the sausage patties myself, and I can easily change them depending on what my family is enjoying. They’re simple, filling, and one of those little things I’m always thankful I took the time to prep ahead.

I hope these become one of those recipes you make for your family again and again, too.

“Taste and see that the Lord is good.”
Psalm 34:8

Made with love for the people you love.

Apple Pie Overnight Oats

Creamy cinnamon overnight oats layered with homemade apple pie filling and vanilla Greek yogurt swirled with almond butter and maple syrup for an easy make-ahead fall breakfast.

There are few flavors that make a kitchen feel more like fall than warm apples and cinnamon.

These Apple Pie Overnight Oats take those cozy flavors and turn them into an easy breakfast you can make the night before. Instead of simply stirring diced apples into oatmeal, we're making a quick homemade apple pie filling with cinnamon, vanilla and just a touch of sugar.

Then we layer it with creamy cinnamon-maple overnight oats and a vanilla Greek yogurt mixture made with almond butter and maple syrup.

I especially love putting some of the apples at the bottom of the jar and more on top. That way you don't eat all the best part first — there's a little apple pie flavor waiting for you all the way through.

Make them at night, refrigerate and breakfast is already waiting the next morning.

Apple pie overnight oats layered with cinnamon apples, creamy oats and almond butter Greek yogurt.
↓ Skip to Recipe

Why You'll Love These Apple Pie Overnight Oats

This is one of those breakfasts that feels special without making your morning more complicated.

Make them the night before. Everything gets assembled ahead of time and goes straight into the refrigerator.

They really taste like fall. Apples, cinnamon, vanilla and maple give you those familiar apple-pie flavors in breakfast form.

There are three delicious layers. Instead of one bowl of oats, you get homemade apple filling, cinnamon overnight oats and creamy almond-butter yogurt.

The apples are actually cooked. Cooking the apples first gives them that soft, cinnamon-filled texture I wanted rather than simply adding raw apple chunks.

They're easy to customize. Add walnuts, pecans, extra cinnamon or another favorite topping before eating.

They work for meal prep. Make several jars at once and you've already done some of the work for future mornings.

Cinnamon apple overnight oats topped with homemade apple pie filling.

Ingredients You'll Need

Ingredients for homemade apple pie overnight oats with apples, rolled oats, cinnamon, Greek yogurt and almond butter.

Apples

Use an apple you enjoy eating and baking with. We're peeling and dicing four cups of apples before cooking them with cinnamon, vanilla and a little sugar.

I like keeping the pieces fairly small so you get apple in almost every spoonful.

Old-Fashioned Rolled Oats

Use old-fashioned rolled oats rather than instant oats. They soften overnight while still giving the finished breakfast some texture.

Cinnamon

Cinnamon goes into both the apple mixture and the oatmeal itself, tying all three layers together.

Maple Syrup

Maple syrup adds sweetness to both the oats and the almond-butter yogurt layer.

Chia Seeds

A tablespoon of chia seeds goes into the oat mixture and helps everything come together as it rests overnight.

Vanilla Greek Yogurt

This becomes our creamy middle layer and is mixed with almond butter and maple syrup.

Almond Butter

I love the nutty flavor almond butter adds alongside the apples and cinnamon. It makes the yogurt layer feel like its own part of the recipe rather than simply adding yogurt on top.

Layered apple pie overnight oats with cinnamon apples, oatmeal and creamy Greek yogurt.

How to Make the Apple Pie Filling

Start by peeling and dicing your apples.

Add them to my favorite saucepan with cinnamon, sugar, vanilla extract, a pinch of sea salt and water.

Cook everything together, stirring occasionally, as the apples begin to soften.

You're looking for tender pieces of apple surrounded by those cinnamon and vanilla juices — almost like a quick stovetop apple pie filling.

You don't need to completely break down the apples. I like leaving some texture so you can still get little bites of apple throughout the oats.

Let the apple mixture cool before assembling your jars.

Creamy overnight oats with soft cinnamon apples for an easy make-ahead breakfast.

Make the Cinnamon Overnight Oats

In a large bowl, combine:

  • old-fashioned rolled oats

  • milk

  • cinnamon

  • maple syrup

  • chia seeds

Stir until everything is evenly incorporated.

That's it.

The refrigerator does the rest of the work for us.

As the oats sit, they absorb the milk and all of that cinnamon-maple flavor, giving you a creamy breakfast without having to cook oatmeal in the morning.

Apple cinnamon overnight oats layered in a glass jar and topped with cooked apples.

Make the Almond Butter Yogurt Layer

In a separate bowl, combine the vanilla Greek yogurt, almond butter and maple syrup.

Stir until creamy and completely combined.

This might be my favorite little addition to the recipe.

The tangy vanilla yogurt, nutty almond butter and maple syrup are such a good contrast to the cinnamon apples, and having that creamy layer between the oats and fruit makes these feel much more special than your everyday overnight oats.

Close-up of creamy apple pie overnight oats with cinnamon apple topping.

How to Layer Apple Pie Overnight Oats

Here's where I do things a little differently.

Start with a spoonful of the cooked apple mixture at the bottom of your jar.

Then add a layer of cinnamon overnight oats.

Spoon the almond-butter Greek yogurt mixture over the oats.

Finish with another generous spoonful of those cinnamon apples.

Now you have apple pie flavor on the top and waiting at the bottom.

Add the lid and refrigerate overnight or for at least 4–6 hours before eating.

I like assembling mine in these glass jars with lids because I can make several at once, refrigerate them and grab one when I'm ready for breakfast.

Fall overnight oats with tender cinnamon apples and a creamy yogurt layer.

Do You Eat Overnight Oats Hot or Cold?

Either works.

Overnight oats are traditionally eaten cold straight from the refrigerator, and that's certainly the easiest way to enjoy them.

But because these have warm apple-pie flavors, you may prefer them slightly warmed — especially on a cool fall morning.

If you plan to heat yours, make sure you're using a microwave-safe container and warm the oats according to your preference.

You can also add the yogurt layer after warming if you'd rather keep it cool and creamy.

Make-ahead apple overnight oats prepared in a glass jar for an easy breakfast.

Amanda's Quick Tips

Dice the apples fairly small. Smaller pieces distribute throughout the jars much better than large chunks.

Don't cook the apples into applesauce. Soften them while leaving some texture.

Let the apples cool before assembling. I wouldn't put piping-hot fruit directly into your yogurt and oats.

Use old-fashioned rolled oats. They're my choice for the best overnight texture.

Don't skip the apples on the bottom. It's a small thing, but it means there's apple flavor throughout the entire jar.

Give the oats enough time. Refrigerate for at least 4–6 hours, although overnight is ideal.

Wait to add crunchy toppings. If you're using walnuts or pecans, add them shortly before eating so they stay crunchy.

Adjust the milk if needed. If your oats are thicker than you prefer the next morning, stir in a small splash of milk.

Shop My Breakfast & Baking Essentials

These are some of the kitchen essentials I reach for when making breakfasts, baked goods and meal-prep recipes for my family.

Apple pie oats layered with vanilla Greek yogurt, almond butter and cinnamon apples.

Apple Pie Overnight Oats

Creamy cinnamon overnight oats layered with homemade apple pie filling and an almond-butter vanilla Greek yogurt layer.

Ingredients

Apple Pie Filling

  • 4 cups apples, peeled and diced

  • 1 teaspoon cinnamon

  • 1 teaspoon granulated sugar

  • 1 teaspoon vanilla extract

  • Pinch of sea salt

  • 1/4 cup water

Overnight Oats

  • 2 cups old-fashioned rolled oats

  • 3 cups whole milk, or milk of choice

  • 1 1/2 teaspoons cinnamon

  • 3 teaspoons maple syrup

  • 1 tablespoon chia seeds

Almond Butter Yogurt Layer

  • 2 cups vanilla Greek yogurt

  • 4 tablespoons almond butter

  • 2 tablespoons maple syrup

Instructions

1. Make the Apple Pie Filling

Peel and dice the apples into small pieces.

Add the apples, cinnamon, sugar, vanilla extract, sea salt and water to a saucepan.

Cook over medium heat, stirring occasionally, until the apples begin to soften and the mixture resembles a chunky apple pie filling.

Remove from the heat and allow to cool.

2. Make the Overnight Oats

Add the old-fashioned rolled oats, milk, cinnamon, maple syrup and chia seeds to a large bowl.

Stir until thoroughly combined.

3. Make the Almond Butter Yogurt

In a separate bowl, combine the vanilla Greek yogurt, almond butter and maple syrup.

Stir until smooth and creamy.

4. Assemble

Add a spoonful of the cooled apple mixture to the bottom of each jar.

Layer the oatmeal mixture over the apples.

Add a layer of almond-butter yogurt.

Finish with another spoonful of apple mixture on top.

Cover each jar with a lid.

5. Refrigerate

Refrigerate overnight or for at least 4–6 hours.

When ready to serve, top with walnuts, pecans, additional cinnamon or your favorite toppings.

Enjoy!

Easy apple overnight oats topped with homemade cinnamon apple pie filling.

How Long Do Apple Pie Overnight Oats Last?

For make-ahead breakfasts, keep the oats covered in the refrigerator.

Because the recipe contains cooked fruit, milk and Greek yogurt, keep everything properly refrigerated rather than leaving the jars sitting at room temperature.

I personally prefer these within the first few days, when the apple texture and layers are at their best.

If you're adding walnuts or pecans, wait until serving rather than storing them on top so you don't lose that crunch.

Can I Make These Ahead for the Week?

That's exactly what makes overnight oats so convenient.

You can prepare multiple jars during one kitchen prep session and have breakfast waiting in the refrigerator.

If you're planning several days ahead, another option is to prepare the apple mixture separately and assemble additional jars as needed.

Easy Topping Ideas

You don't need anything else, but toppings are an easy way to make each jar a little different.

Try chopped walnuts or pecans for crunch, another drizzle of almond butter, a sprinkle of cinnamon, a little extra Greek yogurt or a small drizzle of maple syrup.

For me, pecans + cinnamon are particularly good with the apple pie flavors.

Frequently Asked Questions

Can I use a different milk?

Yes. I use whole milk, but you can use your preferred milk in the oat mixture.

Can I use quick oats?

I recommend old-fashioned rolled oats because they hold their texture well as they soak overnight.

Do the apples need to be cooked first?

For this recipe, yes. Cooking the apples with cinnamon, vanilla and a little sugar gives us the soft apple-pie-style layer that makes these overnight oats different.

How long do overnight oats need to soak?

Give them at least 4–6 hours in the refrigerator. I prefer making them the night before so they're ready for breakfast in the morning.

Can I eat apple pie overnight oats warm?

Yes. They can be enjoyed cold or warmed according to your preference. If warming them, use an appropriate heat-safe container.

Can I make these without almond butter?

You can omit or substitute the almond butter if necessary, although it will change the flavor of the creamy yogurt layer.

More Apple Recipes You'll Love

If you have plenty of apples to use this fall, try one of these next:

Nana's Apple Pancakes
A family breakfast recipe that's especially perfect during apple season.

Easy Apple Pie
A classic fall dessert and the inspiration behind all those cinnamon-apple flavors.

Apple Cider Loaf with Brown Butter Glaze
A cozy fall loaf that's perfect alongside morning coffee.

Apple-Glazed Chicken Thighs
For something savory, this is one of my favorite ways to bring apple flavor to the dinner table.

Save This Recipe

Whether you're meal prepping for busy mornings, making the most of apple season or simply want breakfast waiting for you when you wake up, I've included a printable recipe card below so it's easy to save, print and make again.

Printable From Amanda’s Kitchen recipe card for homemade apple pie overnight oats.

A Note From Amanda

Some mornings call for a big breakfast around the table, and some mornings call for opening the refrigerator and being very thankful that you thought ahead the night before.

These overnight oats are for those mornings.

I love that something as simple as oats can still feel special when you layer them with warm cinnamon apples and creamy almond-butter yogurt. And there's something particularly cozy about having those apple pie flavors waiting for you on a fall morning.

I hope they make one of your busy mornings a little sweeter.

"This is the day that the Lord has made; let us rejoice and be glad in it."
Psalm 118:24

Made with love for the people you love.

13 Best Pumpkin Recipes to Make This Fall

From cozy pumpkin coffee cake and soft pumpkin cookies to overnight oats, creamy pasta and pumpkin tiramisu, these are some of my favorite sweet and savory pumpkin recipes for fall.

There’s something about the first pumpkin recipe of the year that makes it officially feel like fall in our kitchen.

Over the years, I’ve made pumpkin into just about everything — cookies, cakes, breakfast recipes, cocktails and even a creamy pasta dinner. So instead of making you search through the blog for all of them, I wanted to gather some of my favorites into one place.

These 13 pumpkin recipes include a little bit of everything. There are easy treats to bake with the kids, cozy recipes for slow fall mornings, desserts worthy of Thanksgiving and even a savory pumpkin dinner when you want something completely different.

If you have a can of pumpkin waiting in the pantry, start here.

Pumpkin swirl brownies with rich chocolate brownie batter and a spiced pumpkin swirl for fall.

What Can You Make With Pumpkin?

Pumpkin is one of those ingredients that can go in so many directions. Pair it with cinnamon, brown sugar and warm spices and it instantly feels like fall baking, but pumpkin is just as good in savory recipes with cheese, herbs and sausage.

In this collection you'll find:

  • Pumpkin cookies and bars

  • Cakes, muffins and sweet breads

  • Fall breakfast recipes

  • Pumpkin desserts

  • A pumpkin cocktail

  • A savory pumpkin pasta

Most importantly, these are recipes that have actually made their way into my kitchen over the years — and several have become recipes I look forward to making again when fall comes around.

Here are 13 to save for the season.

1. Pumpkin Molasses Cookies

Soft pumpkin molasses cookies made with warm fall spices.
Soft pumpkin sugar cookies for an easy fall baking recipe.

If you want a cookie that tastes unmistakably like fall, start with these Pumpkin Molasses Cookies.

Pumpkin and molasses make them soft and chewy, while cinnamon, ginger and cloves bring in all of those warm flavors I want once fall baking begins. They're especially good with a cup of coffee or cider and make such a cozy afternoon treat.

And there's a reason I'm putting these first: if you have any left over, you can use them again in the pumpkin ice cream further down this list.

→ GET THE RECIPE: Pumpkin Molasses Cookies

2. Pumpkin Sugar Cookies

These Pumpkin Sugar Cookies are one of the newest additions to my fall recipe collection, and they're such a fun one to make when pumpkin season begins.

They have that classic soft sugar-cookie feel with a seasonal pumpkin twist, making them perfect for everything from an afternoon of fall baking to Halloween and Thanksgiving treats.

They're also such a sweet recipe to make with little helpers in the kitchen.

→ GET THE RECIPE: Pumpkin Sugar Cookies

3. Pumpkin Chocolate Chunk Loaf

Moist pumpkin chocolate chunk loaf filled with melted chocolate for fall.

Pumpkin bread gets even better when you add plenty of chocolate.

This Pumpkin Chocolate Chunk Loaf is moist, warmly spiced and filled with pockets of melted chocolate. Serve a slice alongside your morning coffee, pack it up for an afternoon treat or warm it slightly for dessert.

You can use milk or dark chocolate depending on what you love — or whatever happens to already be in the pantry.

→ GET THE RECIPE: Pumpkin Chocolate Chunk Loaf

4. Pumpkin Espresso Martini

Pumpkin espresso martini garnished for a festive fall cocktail.

Pumpkin recipes don't have to stop at baking.

This Pumpkin Espresso Martini combines espresso, pumpkin and warm fall flavors for a seasonal spin on a classic espresso martini. It's a fun cocktail for fall dinner parties, Halloween gatherings or Thanksgiving when you want to serve something a little more special after dinner.

Finish it with a sprinkle of cinnamon or nutmeg and a few coffee beans for that cocktail-bar finishing touch.

→ GET THE RECIPE: Pumpkin Espresso Martini

5. Pumpkin Cream Cheese Muffins with Streusel Topping

Pumpkin cream cheese muffins with creamy centers and buttery streusel topping.

There is a lot happening in these Pumpkin Cream Cheese Muffins, in the very best way.

You get soft pumpkin muffins, a creamy cheesecake-style center and buttery streusel on top. They're somewhere between breakfast and dessert, which is exactly where some of my favorite fall baking recipes belong.

Make them for a slow weekend breakfast or add them to a fall brunch spread.

→ GET THE RECIPE: Pumpkin Cream Cheese Muffins with Streusel Topping

6. Pumpkin Ice Cream Recipe with Pumpkin Molasses Cookie Chunks

Homemade pumpkin ice cream with chunks of pumpkin molasses cookies.

Remember those Pumpkin Molasses Cookies from the beginning?

This is what you can make with the leftovers.

My Pumpkin Ice Cream with Pumpkin Molasses Cookie Chunks takes pumpkin ice cream and folds in pieces of those soft, spiced cookies for a fall dessert that's completely different from the usual pumpkin pie.

It's also a fun way to turn one fall baking day into two separate desserts.

Creamy pumpkin ice cream filled with pieces of spiced pumpkin molasses cookies.
Pumpkin pie overnight oats topped with a hard chocolate shell.

For the pumpkin lovers who want to start before dessert, these Pumpkin Pie Overnight Oats bring fall flavor straight to breakfast.

The oats have the cozy pumpkin-pie flavors you expect, but my favorite part is the hard chocolate shell on top. Crack through the chocolate to get to the creamy pumpkin oats underneath.

Prep them the night before and breakfast is already waiting in the refrigerator the next morning.

→ GET THE RECIPE: Pumpkin Pie Overnight Oats with a Chocolate Shell

8. Brown Butter Pumpkin & Chocolate Chip Cookie Skillet

Warm brown butter pumpkin chocolate chip cookie skillet for a cozy fall dessert.

Brown butter, pumpkin and chocolate in one warm skillet is pretty hard to beat.

This Brown Butter Pumpkin Chocolate Chip Cookie Skillet is baked until the edges are golden while the center stays soft and gooey. The brown butter adds that deep, nutty flavor that works so well with pumpkin and chocolate.

Serve it warm from the oven with vanilla ice cream on top and let everyone dig in.

→ GET THE RECIPE: Brown Butter Pumpkin Chocolate Chip Cookie Skillet

9. Pumpkin Cinnamon Rolls with Cream Cheese Icing

Homemade pumpkin cinnamon rolls topped with cream cheese icing.

If there's ever a season for homemade cinnamon rolls, it's fall.

These Pumpkin Cinnamon Rolls with Cream Cheese Icing take one of my favorite breakfast treats and give it a pumpkin-season spin. They're soft, sweet and filled with those warm flavors that make the entire kitchen smell amazing while they're baking.

Save these for a cozy weekend morning, fall brunch or holiday breakfast.

→ GET THE RECIPE: Pumpkin Cinnamon Rolls with Cream Cheese Icing

10. Pumpkin Coffee Cake with Pecan Crumble

Moist pumpkin coffee cake topped with a buttery pecan crumble.

This Pumpkin Coffee Cake with Pecan Crumble is one of those recipes that works just as well for breakfast as it does sitting on the counter for everyone to sneak a piece throughout the afternoon.

The pumpkin cake is soft and moist, while the buttery pecan crumble gives the top a little crunch.

It's especially good alongside a hot cup of coffee — hence the name — and makes a beautiful addition to a fall brunch.

Slice of pumpkin coffee cake with a crunchy pecan crumble topping.
Rich chocolate pumpkin swirl brownies with a marbled spiced pumpkin topping.

If you can't decide whether you're craving chocolate or pumpkin, don't.

These Pumpkin Swirl Brownies combine rich chocolate brownie batter with a warmly spiced pumpkin mixture, swirled together before baking. The marbled top makes them particularly pretty for fall entertaining, but they're just as welcome for an ordinary night at home.

Chocolate may not be the first flavor you think of when you hear “pumpkin spice,” but these make a very good argument for the combination.

→ GET THE RECIPE: Pumpkin Swirl Brownies

12. Baked Burrata Pumpkin Ziti with Pork Sausage

Baked pumpkin ziti with pork sausage and creamy burrata cheese.

Finally, something savory.

This Baked Burrata Pumpkin Ziti with Pork Sausage is for the nights when you want pumpkin season to make its way onto the dinner table, too.

Pumpkin sauce, pasta, pork sausage and creamy burrata come together in a hearty baked pasta that's especially good once the evenings start getting colder. If you've only ever used pumpkin for baking, this is a fun way to try it in a completely different direction.

→ GET THE RECIPE: Baked Burrata Pumpkin Ziti with Pork Sausage

13. Pumpkin Tiramisu

Pumpkin tiramisu layered with mascarpone, pumpkin and coffee-soaked ladyfingers.

And we're ending with one that feels worthy of the holiday table.

This Pumpkin Tiramisu gives the classic Italian dessert a fall-inspired twist with pumpkin, mascarpone, warm spices and coffee-soaked ladyfingers.

It's creamy, rich and beautiful enough to serve for Thanksgiving, but you can also prepare it ahead of time — which is exactly the kind of dessert I appreciate when I'm hosting.

→ GET THE RECIPE: Pumpkin Tiramisu

Which Pumpkin Recipe Should You Make First?

If you're staring at this list wondering where to begin, here's how I'd choose:

For a cozy fall breakfast:
Pumpkin Coffee Cake or Pumpkin Cinnamon Rolls

For baking with the kids:
Pumpkin Sugar Cookies

For the chocolate lover:
Pumpkin Swirl Brownies or Brown Butter Pumpkin Chocolate Chip Cookie Skillet

For an easy make-ahead breakfast:
Pumpkin Pie Overnight Oats

For fall entertaining:
Pumpkin Espresso Martinis

For a cozy dinner:
Baked Burrata Pumpkin Ziti

For Thanksgiving dessert:
Pumpkin Tiramisu

For something completely different:
Pumpkin Ice Cream with Pumpkin Molasses Cookie Chunks

My Favorite Pumpkin Baking Tips

A few little things make pumpkin recipes even better:

Don't confuse pumpkin purée with pumpkin pie filling. Unless a recipe specifically calls for pie filling, you generally want plain pumpkin purée so you can control the sweetness and spices yourself.

Measure the pumpkin according to the individual recipe. A little extra pumpkin can change the moisture level of baked goods more than you might expect.

Give warm spices a chance to shine. Cinnamon, ginger, cloves and nutmeg are some of the flavors that pair especially well with pumpkin.

Don't forget the chocolate. Pumpkin and chocolate are such a good combination, especially in the loaf, brownies and cookie skillet in this collection.

Save your leftovers. The Pumpkin Molasses Cookies becoming cookie chunks for Pumpkin Ice Cream might be my favorite example in this entire roundup.

Shop My Fall Baking Favorites

My favorite pieces I use in every recipe:

More Fall Recipes to Make This Season

Once pumpkin season starts, there are plenty of other fall recipes worth bringing back into the kitchen.

My picks would be:

Maple Bacon Fall Salad with Apples, Feta & Maple Walnuts
A savory fall recipe with crisp apples, bacon, feta and maple walnuts.

Apple Pie Overnight Oats
A make-ahead breakfast filled with cinnamon apples and maple flavor.

Walnut Chicken Stuffed Pumpkins
One of the more unique savory recipes to make when pumpkins are in season.

Blood Orange & Rosé Sangria

Perfect for cozy evenings and festive celebrations.

A Note From Amanda

I love having posts like this to come back to when a new season begins. Instead of trying to remember which pumpkin recipe I made a few years ago or searching through old posts, they're all here in one place.

Some are recipes for slow fall mornings, some are meant for sharing around the table, and some are simply an excuse to open that first can of pumpkin and make the kitchen smell like fall.

I hope you find a few to make this season — and maybe one that becomes a recipe you come back to every fall.

“Taste and see that the Lord is good.”
Psalm 34:8

Made with love for the people you love.

Pumpkin Tiramisu with Espresso and Mascarpone

Pumpkin Tiramisu with Espresso and Mascarpone

Espresso-soaked ladyfingers layered with creamy pumpkin mascarpone filling and finished with cocoa and pumpkin spice for a beautiful make-ahead fall dessert.

Pumpkin season has a way of finding its way into just about everything in my kitchen, and this Pumpkin Tiramisu is one of my favorite ways to turn those cozy fall flavors into a dessert that feels a little more special.

It starts with ladyfingers quickly dipped in sweetened, pumpkin-spiced espresso. They're layered with a rich mascarpone filling made with pumpkin purée, pumpkin pie spice and freshly whipped cream, then the entire dessert chills until all of those layers come together.

The result is creamy and rich with plenty of coffee flavor, but still unmistakably fall.

And possibly my favorite part? You can make it ahead. Give it at least four hours in the refrigerator before serving, or prepare it the night before Thanksgiving or a fall dinner party and have dessert completely taken care of before your guests arrive. The original recipe calls for at least four hours of chilling after assembly.

Pumpkin tiramisu with espresso-soaked ladyfingers, creamy pumpkin mascarpone layers and cocoa.

Why You'll Love This Pumpkin Tiramisu

It's a fun twist on classic tiramisu. You still get mascarpone, espresso-soaked ladyfingers and cocoa, with pumpkin and pumpkin pie spice bringing in the fall flavor.

It's made for pumpkin and coffee lovers. The pumpkin doesn't replace the espresso flavor — the two work together.

You can make it ahead. Assemble it earlier in the day or the night before and let the refrigerator do the rest.

There's no last-minute baking. Once the components are prepared and layered, the dessert simply needs to chill.

It's beautiful enough for Thanksgiving. The layers and cocoa-dusted top make this one of those desserts that looks impressive without needing elaborate decorating.

Homemade pumpkin tiramisu finished with a dusting of cocoa and pumpkin spice.

What Is Pumpkin Tiramisu?

Traditional tiramisu is an Italian dessert built around layers of coffee-soaked ladyfingers and a creamy mascarpone mixture.

This recipe is a fall-inspired variation rather than a traditional Italian tiramisu. I add pumpkin purée and pumpkin pie spice to the mascarpone filling and another touch of pumpkin pie spice to the espresso mixture.

The top is finished simply with cocoa powder and a little more pumpkin spice.

You still get the creamy mascarpone, tender coffee-soaked ladyfingers and cocoa that make tiramisu so good, but with a seasonal pumpkin layer running through it.

Pumpkin mascarpone tiramisu layered with espresso-soaked ladyfingers.

Pumpkin Tiramisu Ingredients

Ingredients for pumpkin tiramisu including mascarpone, pumpkin purée, espresso, ladyfingers and pumpkin pie spice.

There aren't many complicated ingredients here, but a few are especially important.

Ladyfingers

Ladyfingers — also called savoiardi — are light sponge biscuits traditionally used for tiramisu. Their dry, airy texture makes them especially good at absorbing espresso while still providing structure for the layers.

For this recipe, you'll need 2 packages of ladyfingers.

Mascarpone Cheese

Mascarpone gives tiramisu its signature rich and creamy texture. You'll use 16 ounces in this recipe.

Pumpkin Purée

Use ½ cup plain pumpkin purée, not pumpkin pie filling. The pumpkin gets mixed directly into the mascarpone layer.

Espresso

You'll need ¾ cup cooled espresso for dipping the ladyfingers.

Let it cool before you begin assembling the tiramisu.

Pumpkin Pie Spice

Pumpkin pie spice is used in several parts of the dessert: in the pumpkin mascarpone filling, in the espresso mixture and as part of the finishing dusting on top.

Heavy Whipping Cream

Whipping the cream separately until stiff peaks form gives the pumpkin mascarpone layer a lighter texture once it's folded together.

Pumpkin tiramisu ingredients arranged for making the pumpkin mascarpone filling and espresso-soaked ladyfingers.

How to Make Pumpkin Tiramisu

There are a few separate components, but none of them are particularly complicated. I find it easiest to prepare everything first and then assemble the tiramisu all at once.

1. Cook the Egg Yolks and Sugar

Add 3 room-temperature egg yolks and ⅔ cup granulated sugar to a heat-safe bowl and whisk until combined.

Place the bowl over a saucepan of simmering water, making sure the bottom of the bowl doesn't touch the water.

Continue whisking the mixture constantly until it thickens and feels hot to the touch, approximately 10 minutes. Constant whisking also prevents a film from developing over the top.

Remove the bowl from the heat and allow the mixture to cool to room temperature.

Amanda's Tip

Don't walk away from the egg mixture while it's over the simmering water. Keep whisking the entire time. You want it to thicken gently without the bowl touching the water underneath.

2. Whip the Heavy Cream

In a separate bowl, whip ¾ cup cold heavy whipping cream with a hand mixer until stiff peaks form.

Place the whipped cream in the refrigerator while you prepare the mascarpone mixture.

Pumpkin spice tiramisu with creamy mascarpone filling and cocoa topping.

3. Make the Pumpkin Mascarpone Filling

In a third bowl, mix the mascarpone until smooth.

Whisk in the cooled egg mixture until everything is combined, being careful not to overmix it to the point that it becomes runny.

Add the pumpkin purée and pumpkin pie spice.

Finally, gently fold in the cold whipped cream until the filling is fully incorporated.

This is what creates that thick, creamy pumpkin layer between the espresso-soaked ladyfingers.

Close-up of pumpkin tiramisu showing layers of espresso-soaked ladyfingers and pumpkin mascarpone.

4. Make the Pumpkin-Spiced Espresso

Add the cooled espresso to a wide, shallow bowl with:

  • 2 tablespoons granulated sugar

  • ½ teaspoon pumpkin pie spice

Stir until the sugar dissolves.

A wide bowl makes dipping the ladyfingers much easier.

How Long Should You Dip Ladyfingers for Tiramisu?

This little step can make a big difference.

You want the ladyfingers to absorb the espresso, but you don't want to leave them sitting in it.

Dip each ladyfinger into the espresso mixture for no more than about one second per side, making sure it gets coated, and then immediately transfer it to your baking dish. That's the timing used in the original recipe.

If they're soaked for too long, they'll become overly soft before the tiramisu has even had time to chill.

Quick dip → flip → quick dip → into the pan.

Easy pumpkin tiramisu made with espresso, mascarpone, pumpkin purée and warm fall spices.

5. Assemble the Pumpkin Tiramisu

Arrange the dipped ladyfingers in a single layer across the bottom of your dish. Fit them together so the bottom is completely covered.

Spread half of the pumpkin mascarpone filling evenly over the ladyfingers.

Then repeat:

Espresso-soaked ladyfingers → pumpkin mascarpone filling.

Smooth the top, cover the dish and place it in the refrigerator. The original method uses two layers and calls for refrigerating the assembled tiramisu for four hours before serving.

Shop the Pan I Use

I make my tiramisu in my 360 Cookware Bake & Roast Pan — the same pan referenced in my original recipe.

Creamy pumpkin tiramisu served as a fall dessert with cocoa and pumpkin spice.

How Long Does Pumpkin Tiramisu Need to Chill?

Give your tiramisu at least 4 hours in the refrigerator before serving.

This gives the dessert time to set and allows the espresso-soaked ladyfingers and creamy pumpkin mascarpone layers to come together.

You can also prepare it the night before, which is one of the reasons I love this dessert for entertaining.

Finish with Cocoa and Pumpkin Spice

Once the tiramisu has chilled, finish the top with 2 tablespoons cocoa powder and ¼ teaspoon pumpkin spice seasoning.

That simple dusting gives you the classic cocoa finish while tying the top back into the pumpkin-spiced filling underneath.

Then slice, serve and enjoy.

Slice of pumpkin tiramisu with espresso-soaked ladyfingers and creamy pumpkin filling.

Make Pumpkin Tiramisu Ahead for Thanksgiving

This may be my favorite reason to make this for Thanksgiving.

The dessert needs refrigerator time anyway, so there's no benefit to waiting until the last minute to prepare it.

Make the tiramisu the day before, cover it and refrigerate it overnight. Then you have one less thing to think about while you're making everything else for Thanksgiving dinner.

I'd wait to give the top its final cocoa and pumpkin-spice dusting until closer to serving so it looks freshly finished.

Amanda's Quick Tips for the Best Pumpkin Tiramisu

Cool the espresso. Don't dip your ladyfingers into piping-hot espresso.

Dip quickly. About one second per side is enough.

Let the cooked egg mixture cool. It should come back to room temperature before you combine it with the mascarpone.

Don't overmix the mascarpone filling. Once everything is smooth and incorporated, stop mixing.

Fold in the whipped cream. Don't aggressively beat it into the filling.

Plan for at least four hours of chilling. This isn't a dessert to assemble right before dinner.

Overnight is even easier for entertaining. Get dessert out of the way the day before.

Pumpkin tiramisu with mascarpone and espresso for a make-ahead Thanksgiving dessert.

What to Serve with Pumpkin Tiramisu

Because tiramisu already has coffee incorporated into the dessert, serving it with a fresh cup of coffee or espresso is an obvious choice.

For a fall dinner party, I also love the idea of ending the night with Pumpkin Tiramisu while serving Pumpkin Espresso Martinis for anyone who wants a cocktail.

And if you're planning your fall baking list, I just gathered 13 of my favorite pumpkin recipes in one place, from cookies and cinnamon rolls to pumpkin coffee cake, brownies and savory pumpkin pasta.

Make-ahead pumpkin tiramisu layered with coffee-soaked ladyfingers and pumpkin mascarpone cream.

Shop My Fall Baking Favorites

These are the kitchen and baking pieces I reach for throughout fall baking season.

Pumpkin Tiramisu Recipe

Ingredients

Pumpkin Mascarpone Filling

  • 3 large egg yolks, room temperature

  • ⅔ cup granulated sugar

  • ¾ cup cold heavy whipping cream

  • 16 ounces mascarpone cheese

  • 1 teaspoon vanilla extract

  • 2 teaspoons pumpkin pie spice

  • ½ cup pumpkin purée

Espresso Ladyfingers

  • ¾ cup espresso, cooled

  • 2 tablespoons granulated sugar

  • ½ teaspoon pumpkin pie spice

  • 2 packages ladyfingers

For Finishing

  • 2 tablespoons cocoa powder

  • ¼ teaspoon pumpkin spice seasoning

These quantities preserve the original recipe exactly.

Instructions

1. Prepare the Egg Mixture

In a heat-safe bowl, whisk together the egg yolks and ⅔ cup granulated sugar until well combined.

Place the bowl over a saucepan of simmering water, making sure the bowl doesn't touch the water.

Whisk continuously until the mixture thickens and feels hot to the touch, approximately 10 minutes.

Remove from the heat and allow it to cool to room temperature.

2. Whip the Cream

Add the cold heavy whipping cream to a separate bowl.

Using a hand mixer, whip until stiff peaks form.

Place in the refrigerator to keep cold while you prepare the mascarpone.

3. Make the Pumpkin Mascarpone Filling

In another bowl, mix the mascarpone until smooth.

Whisk in the cooled egg mixture until combined, taking care not to overmix.

Add the vanilla extract, pumpkin pie spice and pumpkin purée and mix until incorporated.

Gently fold in the whipped cream until evenly combined.

4. Prepare the Espresso Mixture

Pour the cooled espresso into a wide bowl.

Add 2 tablespoons granulated sugar and ½ teaspoon pumpkin pie spice. Stir until the sugar has dissolved.

5. Build the First Layer

Quickly dip each ladyfinger into the espresso mixture for no more than approximately one second per side.

Arrange the dipped ladyfingers in a single layer across the bottom of your dish.

Spread half of the pumpkin mascarpone filling evenly over the ladyfingers.

6. Repeat

Add another layer of quickly dipped ladyfingers followed by the remaining pumpkin mascarpone mixture.

Smooth the top.

Cover and refrigerate for at least 4 hours before serving.

7. Finish and Serve

Before serving, dust the top with the cocoa powder and pumpkin spice.

Slice and enjoy.

Fall pumpkin tiramisu topped with cocoa powder and pumpkin pie spice.

Frequently Asked Questions

Can I make Pumpkin Tiramisu the night before?

Yes. In fact, this is one of my favorite things about the recipe. It needs at least four hours to chill, so making it the night before works especially well when you're serving it for a holiday or dinner party.

Do I need to use espresso?

Espresso is what the original recipe uses and gives the ladyfingers their coffee flavor. The recipe calls for ¾ cup cooled espresso.

How long should I dip the ladyfingers?

Very quickly — approximately one second on each side. You want them saturated with flavor without allowing them to sit in the liquid and become overly soft.

Is this a traditional Italian tiramisu?

No. This is my fall-inspired pumpkin variation on tiramisu. It uses recognizable tiramisu ingredients like mascarpone, ladyfingers, espresso and cocoa while adding pumpkin purée and pumpkin pie spice.

Can I make Pumpkin Tiramisu for Thanksgiving?

Absolutely. It's especially convenient for Thanksgiving because you can assemble it ahead of time and leave it in the refrigerator while you prepare the rest of dinner.

How should I store leftovers?

Keep leftover Pumpkin Tiramisu covered and refrigerated.

More Pumpkin Recipes for Fall

13 Best Pumpkin Recipes to Make This Fall

Pumpkin Molasses Cookies

Pumpkin Coffee Cake with Pecan Crumble

Pumpkin Sugar Cookies

Pumpkin Espresso Martini

Save This Recipe

Whether you're making this for Thanksgiving, a fall dinner party or simply because pumpkin and coffee sounded too good to resist, save the recipe card below so it's easy to come back to whenever you're ready to make it.

Printable From Amanda’s Kitchen recipe card for Pumpkin Tiramisu with Espresso and Mascarpone.

A Note From Amanda

Some of my favorite recipes are the ones that take something we already love and give it just enough of a seasonal twist to make it feel new again.

Tiramisu already has so many of my favorite things — espresso, mascarpone, layers of ladyfingers and that dusting of cocoa on top. Adding pumpkin and warm spices makes it feel right at home on a fall table.

And because it can be waiting in the refrigerator before everyone arrives, it's exactly the kind of dessert I love for gathering around the table.

I hope it becomes one you look forward to making when pumpkin season comes around, too.

“Taste and see that the Lord is good.”
Psalm 34:8

Made with love for the people you love.

Banana Chocolate Chip Cake with Whipped Chocolate Ganache

Moist banana cake filled with chocolate chips and layered with fluffy whipped chocolate ganache for a rich banana-and-chocolate dessert.

There are some recipes that seem to start with one very specific kitchen situation: a bunch of bananas sitting on the counter getting a little too ripe.

And while banana bread is always a good answer, sometimes those bananas deserve to become cake.

This Banana Chocolate Chip Cake combines a soft banana cake with plenty of chocolate chips and a rich whipped chocolate ganache. The banana keeps the cake moist while chocolate runs throughout the layers, and the fluffy ganache turns it into a dessert that feels special enough for a birthday or gathering.

It's banana and chocolate in one very decadent cake — and a pretty good reason to let those bananas sit on the counter for another day.

Banana chocolate chip layer cake with whipped chocolate ganache frosting and chocolate shavings.

Why You'll Love This Banana Chocolate Chip Cake

It's incredibly moist. Overripe bananas, brown butter and heavy cream give the cake a soft, rich texture.

Banana and chocolate belong together. Chocolate chips are baked right into the cake, and there's even more chocolate in the ganache.

The frosting is different from traditional buttercream. Instead of a standard chocolate frosting, this cake is covered in whipped chocolate ganache made from chocolate and heavy whipping cream.

You can make it as a two- or four-layer cake. The same batter can be divided between two standard cake pans or four pans for thinner layers.

It's the perfect use for overripe bananas. The browner and softer those forgotten bananas become, the better excuse you have to make cake.

Banana chocolate chip cake layered and frosted with whipped chocolate ganache.

Why Overripe Bananas Are Best for Banana Cake

If your bananas are covered in brown spots and looking a little past their prime for snacking, don't throw them away.

Those are the bananas I want for this cake.

As bananas ripen, they become softer and sweeter, which makes them easy to mash and incorporate into cake batter. That ripe banana flavor also comes through much more strongly than it would with firm yellow bananas.

For this recipe, you'll need 4–5 overripe bananas.

If I know I won't use my ripe bananas right away, I'll also freeze them for another baking day.

Banana Chocolate Chip Cake Ingredients

Ingredients for making banana chocolate chip cake with whipped chocolate ganache.

This cake uses familiar baking ingredients, but there are a few that really make the recipe what it is.

Overripe Bananas

You'll need 4–5 large overripe bananas. The softer and more spotted they are, the easier they'll be to mash into the cake batter.

Brown Butter

This cake uses 1 cup brown butter rather than plain melted butter.

Browning the butter adds a deeper, toasted flavor that works especially well with banana and chocolate.

Cake Flour

You'll need 2¼ cups cake flour.

Cake flour helps give the finished layers a softer cake texture.

Chocolate Chips

There are 1½ cups chocolate chips in the recipe. One cup gets folded into the batter, while the remaining ½ cup is sprinkled over the cake before baking.

Heavy Cream

Heavy cream appears in both parts of this recipe.

You'll use 1 cup in the banana cake and another 2 cups heavy whipping cream for the chocolate ganache.

Chocolate Melts

The whipped ganache uses 16 ounces chocolate melts with the heavy whipping cream.

How to Make Banana Chocolate Chip Cake

1. Prepare Your Cake Pans

Preheat your oven to 350°F.

Oil two 8- or 9-inch round cake pans and set them aside.

You can also divide the batter between four pans if you'd like a taller four-layer cake.

2. Mash the Bananas

Add the overripe bananas to a large mixing bowl and mash them well.

Add the eggs, heavy cream, melted brown butter and vanilla and mix until everything is completely combined.

Moist banana cake with chocolate chips and rich chocolate ganache frosting.

3. Add the Dry Ingredients

In a separate bowl, combine the cake flour, sugar, baking powder and sea salt.

Add the dry ingredients to the banana mixture and blend with a hand mixer until the batter comes together.

Fold in 1 cup of the chocolate chips.

Amanda's Tip

Once the dry and wet ingredients come together, mix only until everything is well incorporated. There's no need to keep beating the cake batter once it's smooth.

4. Bake the Banana Cake

Divide the batter evenly between your prepared cake pans.

Sprinkle the remaining ½ cup chocolate chips over the batter.

For two 8- or 9-inch cake layers, bake for 22–27 minutes, or until a toothpick inserted into the center comes out clean.

If you're making four thinner layers, the original recipe calls for approximately 10–12 minutes, checking for doneness with a toothpick.

Homemade banana layer cake covered with fluffy whipped chocolate ganache.

How to Make Whipped Chocolate Ganache Frosting

This is what takes the cake from a simple chocolate chip banana cake to something a little more special.

And unlike traditional ganache that's poured over a cake while glossy and fluid, we're going to cool and whip this ganache so it becomes light enough to spread between and around the cake layers.

You'll need just:

  • 16 ounces chocolate melts

  • 2 cups heavy whipping cream

These are the quantities from the original recipe.

1. Heat the Cream

Heat the heavy whipping cream in a saucepan until it is nearly boiling.

You want it very hot, but there's no need to bring it to a rolling boil.

2. Pour Over the Chocolate

Place the chocolate melts in a heat-safe bowl and pour the hot cream over them.

Allow the mixture to sit untouched for 2–3 minutes.

Then gently stir until the chocolate has completely melted and the ganache is smooth.

3. Cool Completely

Set the ganache aside and allow it to cool completely for approximately 2 hours.

This step is important because we're going to whip the ganache rather than pour it over the cake.

4. Whip the Ganache

Once completely cooled, use a hand mixer or stand mixer to whip the ganache until it becomes light and fluffy. I use my hand mixer for this step because it makes it easy to whip the ganache until it's light and fluffy.

The full ganache recipe makes enough to fill the cake and frost the outside. If you're only planning to use ganache between the layers or on top, the original recipe notes that you can cut the ganache recipe in half.

Let the Cake Layers Cool Completely

Once the cakes are finished baking, let them cool in their pans for approximately 15 minutes.

Transfer the layers to a cooling rack and allow them to cool for another 15–30 minutes, or until they're completely cool and your whipped ganache is ready.

Don't rush this part.

Frosting a warm cake with whipped ganache is a recipe for a very messy cake. Give both components the time they need to cool before you start assembling.

Slice of banana chocolate chip layer cake showing banana cake and chocolate ganache layers.

How to Assemble the Cake

Place your first banana cake layer on a cake plate or stand.

Spread a generous layer of whipped chocolate ganache over the top.

Add your second cake layer and finish with more ganache.

You can keep the frosting simple with chocolate ganache between the layers and across the top, or cover the entire outside of the cake like I did here.

Finish with chocolate shavings if you'd like, then slice and serve.

Brown butter banana chocolate chip cake with whipped chocolate frosting.

Two Layers or Four?

One thing I love about this recipe is that you can change the presentation depending on the occasion.

For a classic cake, divide the batter between two 8- or 9-inch round cake pans and bake for 22–27 minutes.

For a taller cake with more ganache between each bite, divide the batter between four cake pans. Those thinner layers bake much faster, so begin checking them around 10–12 minutes.

Either way, use the toothpick test rather than relying solely on the clock.

Can I Use Frozen Bananas?

Yes. If you've been saving overripe bananas in the freezer, you can use them for this cake.

Let the bananas thaw completely before mashing them.

If they've released a significant amount of excess liquid while thawing, drain that excess liquid before adding the bananas to your batter.

It's one of my favorite ways to keep overripe bananas from going to waste — freeze them now and turn them into cake later.

Tips for the Best Banana Chocolate Chip Cake

Use truly ripe bananas. Brown spots are a good thing here.

Let the brown butter cool slightly. You don't want extremely hot butter going directly into your eggs.

Don't forget to reserve some chocolate chips. One cup goes into the batter and the remaining ½ cup goes over the top before baking.

Don't overbake the cake. Begin checking within the recipe's baking window and use a toothpick to determine when it's ready.

Cool the cake completely before frosting. Warm cake and whipped ganache are not friends.

Give the ganache its full cooling time. It needs to cool before you whip it into that light, fluffy frosting.

Shop My Cake Baking Favorites

These are some of the baking tools I reach for when I'm making layer cakes at home.

Banana Chocolate Chip Cake with Whipped Chocolate Ganache

Ingredients

Banana Chocolate Chip Cake

  • 4 large eggs

  • 1 cup heavy cream

  • 2 tablespoons melted butter

  • 3 teaspoons vanilla

  • 1½ cups granulated sugar

  • 2¼ cups cake flour

  • 1 tablespoon baking powder

  • ¾ teaspoon sea salt

  • 1 cup brown butter

  • 4–5 overripe bananas

  • 1½ cups chocolate chips

Whipped Chocolate Ganache

  • 16 ounces chocolate melts

  • 2 cups heavy whipping cream

Instructions

1. Prepare the Pans

Preheat oven to 350°F.

Oil two 8- or 9-inch round cake pans.

2. Make the Banana Mixture

Mash the overripe bananas in a large mixing bowl.

Add the eggs, heavy cream, brown butter and vanilla. Blend until completely combined.

3. Add the Dry Ingredients

In a separate bowl, combine the sugar, cake flour, baking powder and sea salt.

Add the dry ingredients to the wet ingredients and mix until combined.

Fold in 1 cup chocolate chips.

4. Bake

Divide the batter evenly between the prepared pans.

Sprinkle the remaining ½ cup chocolate chips over the batter.

Bake for 22–27 minutes, or until a toothpick inserted into the center comes out clean.

For four thinner cake layers, begin checking the cakes around 10–12 minutes.

5. Make the Whipped Chocolate Ganache

While the cakes bake, place the chocolate melts in a heat-safe bowl.

Heat the heavy whipping cream in a saucepan until nearly boiling and pour it over the chocolate.

Allow it to stand for 2–3 minutes, then stir until completely smooth.

Set aside to cool completely for approximately 2 hours.

Once cooled, whip with a hand or stand mixer until light and fluffy.

6. Cool the Cakes

Allow the finished cakes to cool in their pans for approximately 15 minutes.

Transfer to cooling racks and continue cooling for another 15–30 minutes, or until completely cool.

7. Assemble

Place one cake layer on your serving plate or cake stand.

Spread whipped chocolate ganache over the top.

Add the second layer and frost the top and sides with the remaining ganache.

Finish with chocolate shavings if desired.

Slice, serve and enjoy.

Frequently Asked Questions

What bananas are best for banana cake?

Very ripe or overripe bananas are best. Look for bananas that are soft with plenty of brown spots on their peels.

Can I use frozen bananas?

Yes. Thaw them completely first and drain significant excess liquid before mashing and adding them to the batter.

Can I make this into a four-layer cake?

Yes. Divide the batter between four cake pans instead of two. Because the layers are thinner, the original recipe calls for approximately 10–12 minutes of baking time, or until a toothpick comes out clean.

What is whipped chocolate ganache?

Whipped ganache starts with chocolate and hot heavy cream, just like traditional ganache. For this recipe, the mixture cools completely and is then whipped until it becomes lighter and fluffier, making it easy to spread over a layer cake.

How long does the chocolate ganache need to cool?

The ganache in this recipe cools for approximately 2 hours before being whipped.

Can I make less chocolate ganache?

Yes. The full recipe makes enough ganache to fill and frost the cake. If you only want ganache between the layers or across the top, the original recipe notes that you can cut the ganache recipe in half.

More Cake Recipes to Bake

If you're looking for another cake to make next, here are a few of my favorites.

Banana Cake with Brown Butter Cream Cheese Frosting

Another way to turn overripe bananas into cake, this time paired with rich brown butter cream cheese frosting.

Espresso Chocolate Cake with Raspberry Cream Cheese Frosting

A rich chocolate cake with espresso and a bright raspberry cream cheese frosting.

Blueberry Cake with Mascarpone Frosting

A beautiful fruit-forward layer cake finished with creamy mascarpone frosting.

Carrot Sheet Cake with Brown Butter Frosting

A cozy cake with another one of my favorite frosting flavors: brown butter.

Save This Recipe

Whether you're saving a few overripe bananas from going to waste or planning a cake for someone you love, save the recipe card below so it's easy to come back to whenever you're ready to bake.

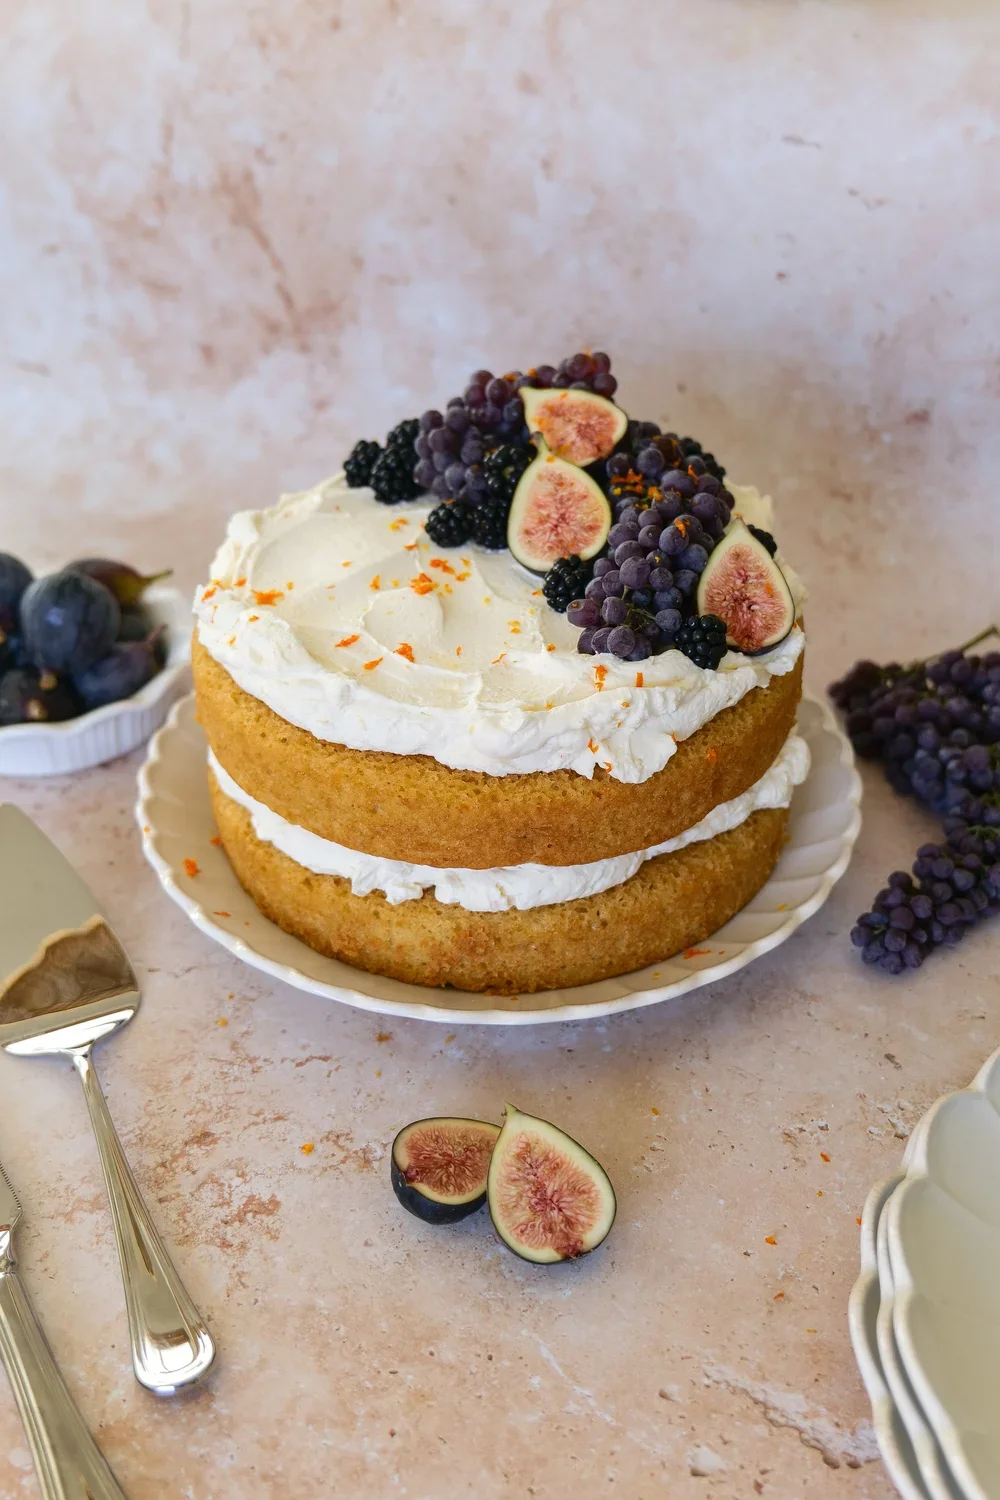
Printable From Amanda’s Kitchen recipe card for Banana Chocolate Chip Cake with Whipped Chocolate Ganache.

A Note From Amanda

I think overripe bananas might be one of the best excuses to bake something.
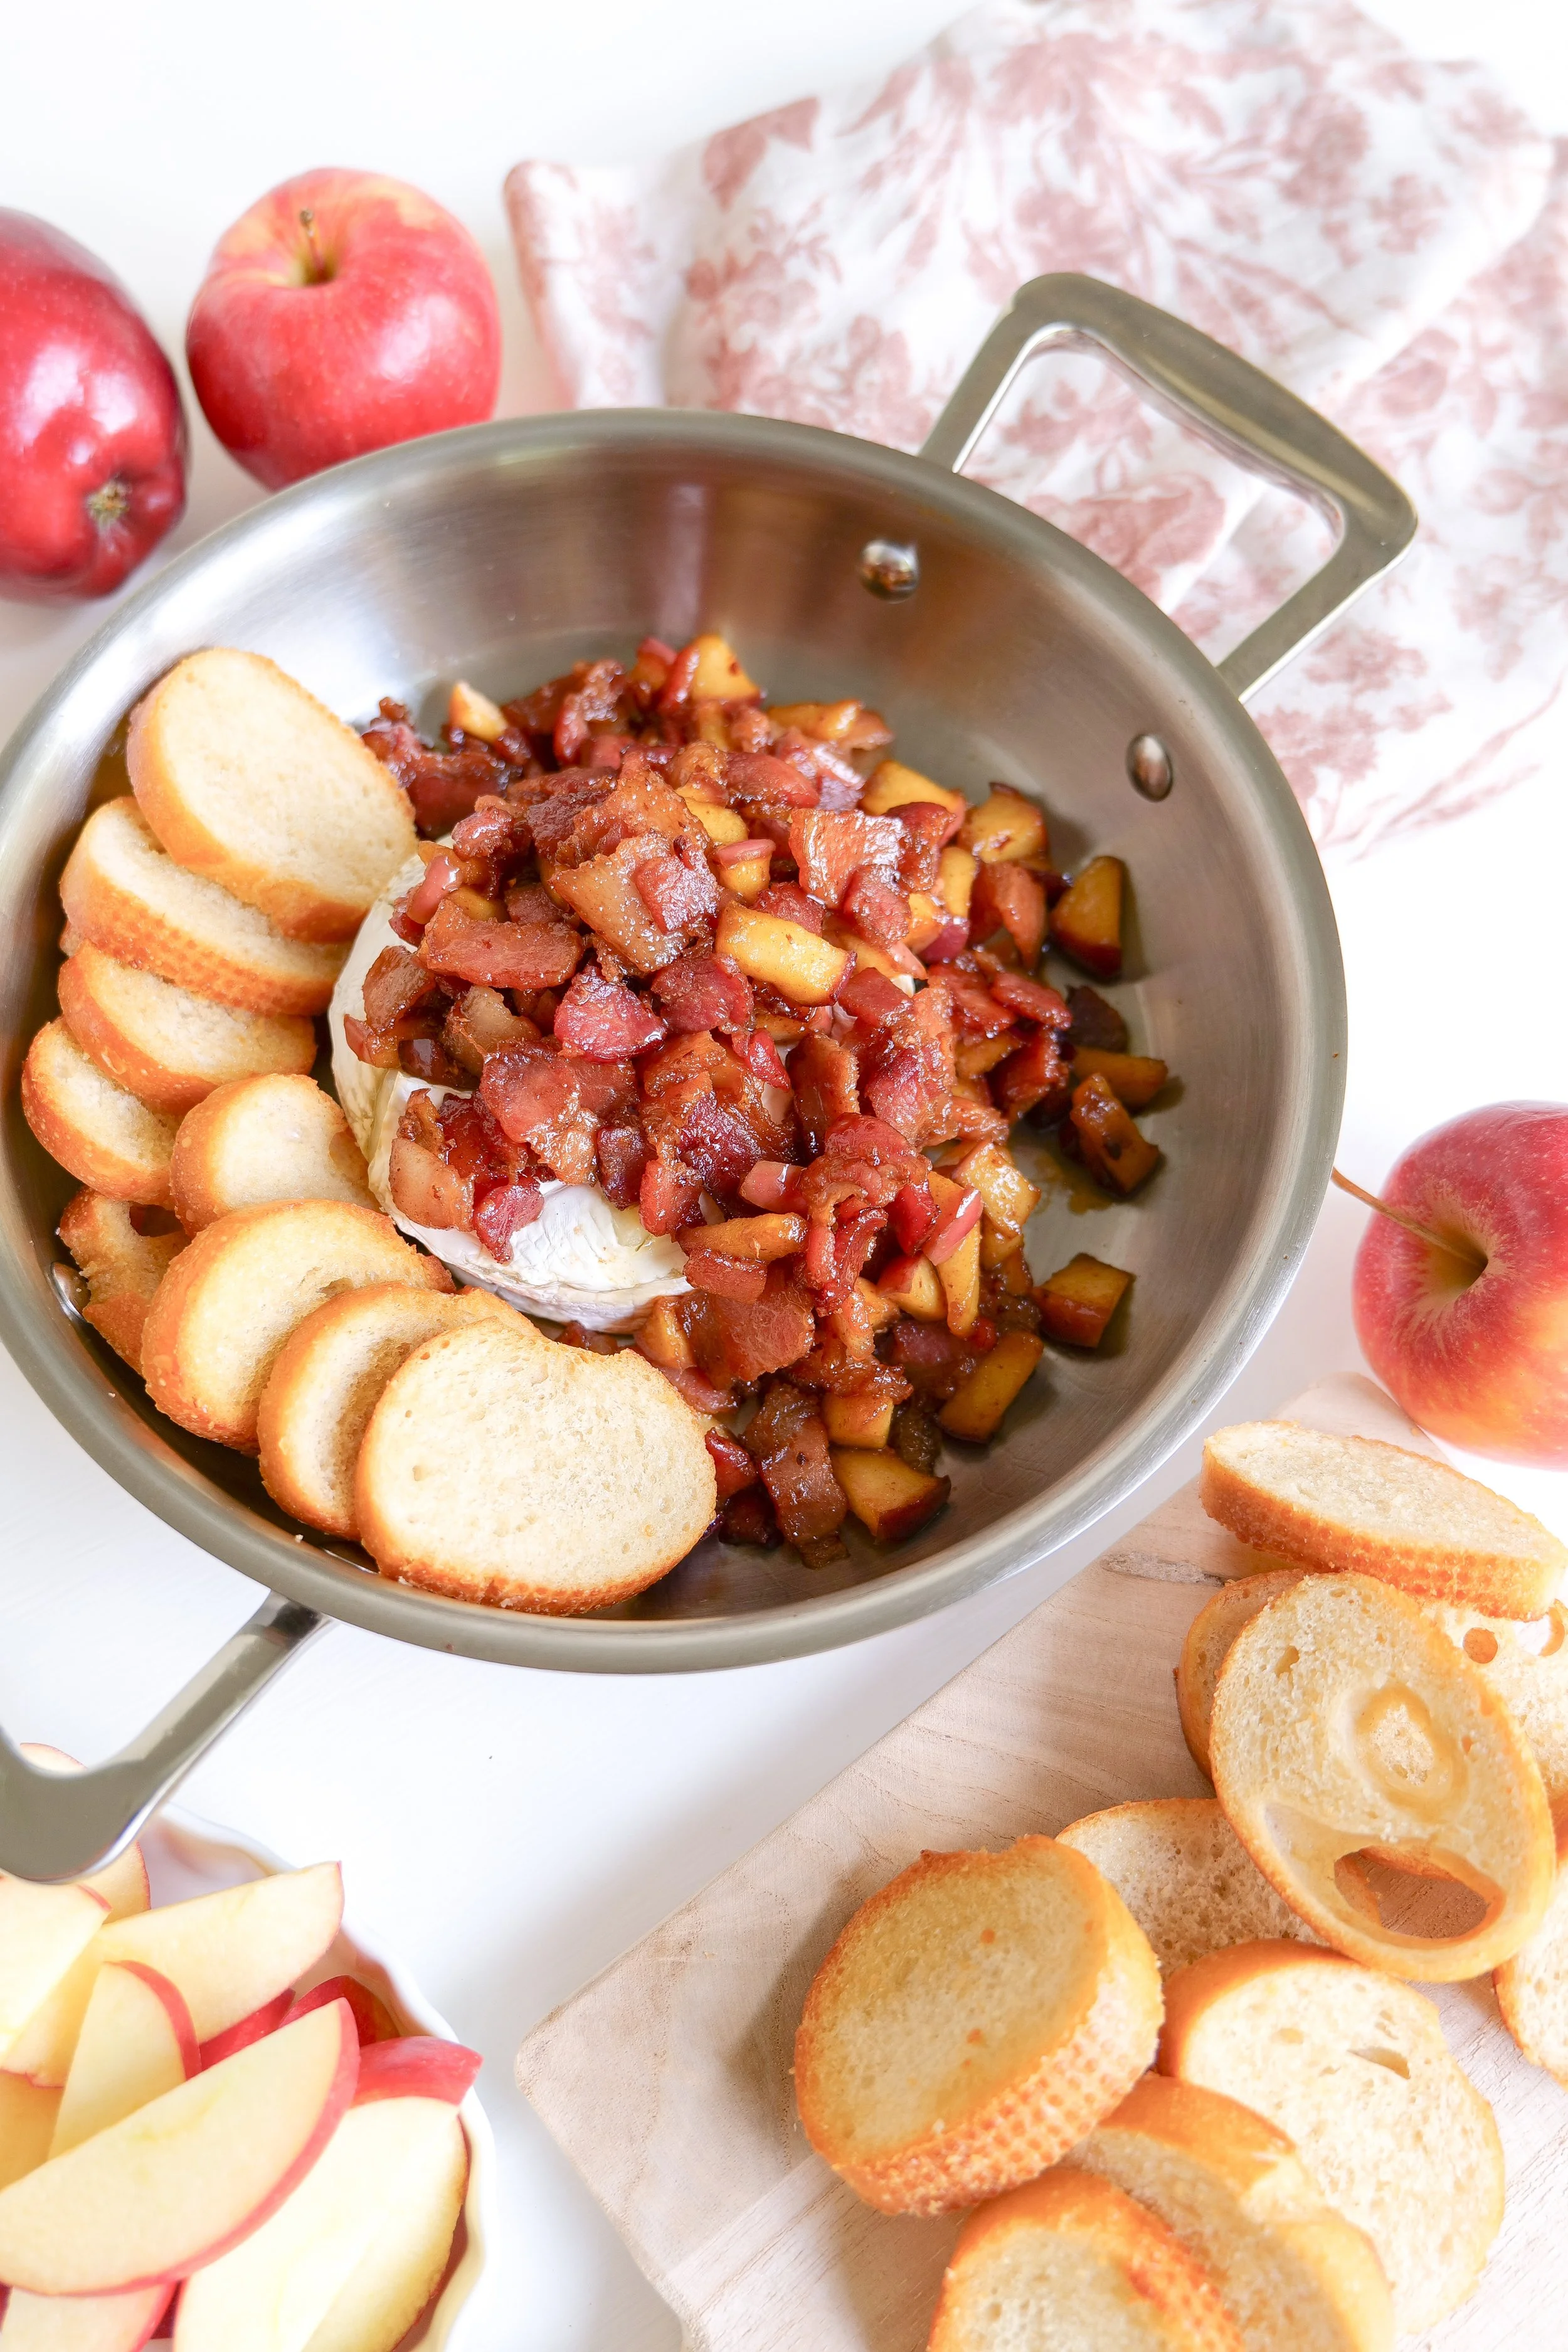
There are always a few sitting on our counter that suddenly go from perfectly yellow to we need to do something with these today, and while I love a classic banana bread, sometimes turning them into a layer cake feels a little more fun.

The banana cake is soft and full of chocolate chips, but that fluffy whipped chocolate ganache is what really makes this one special. It's rich, a little over the top, and exactly the kind of cake meant to be sliced and shared around the table.
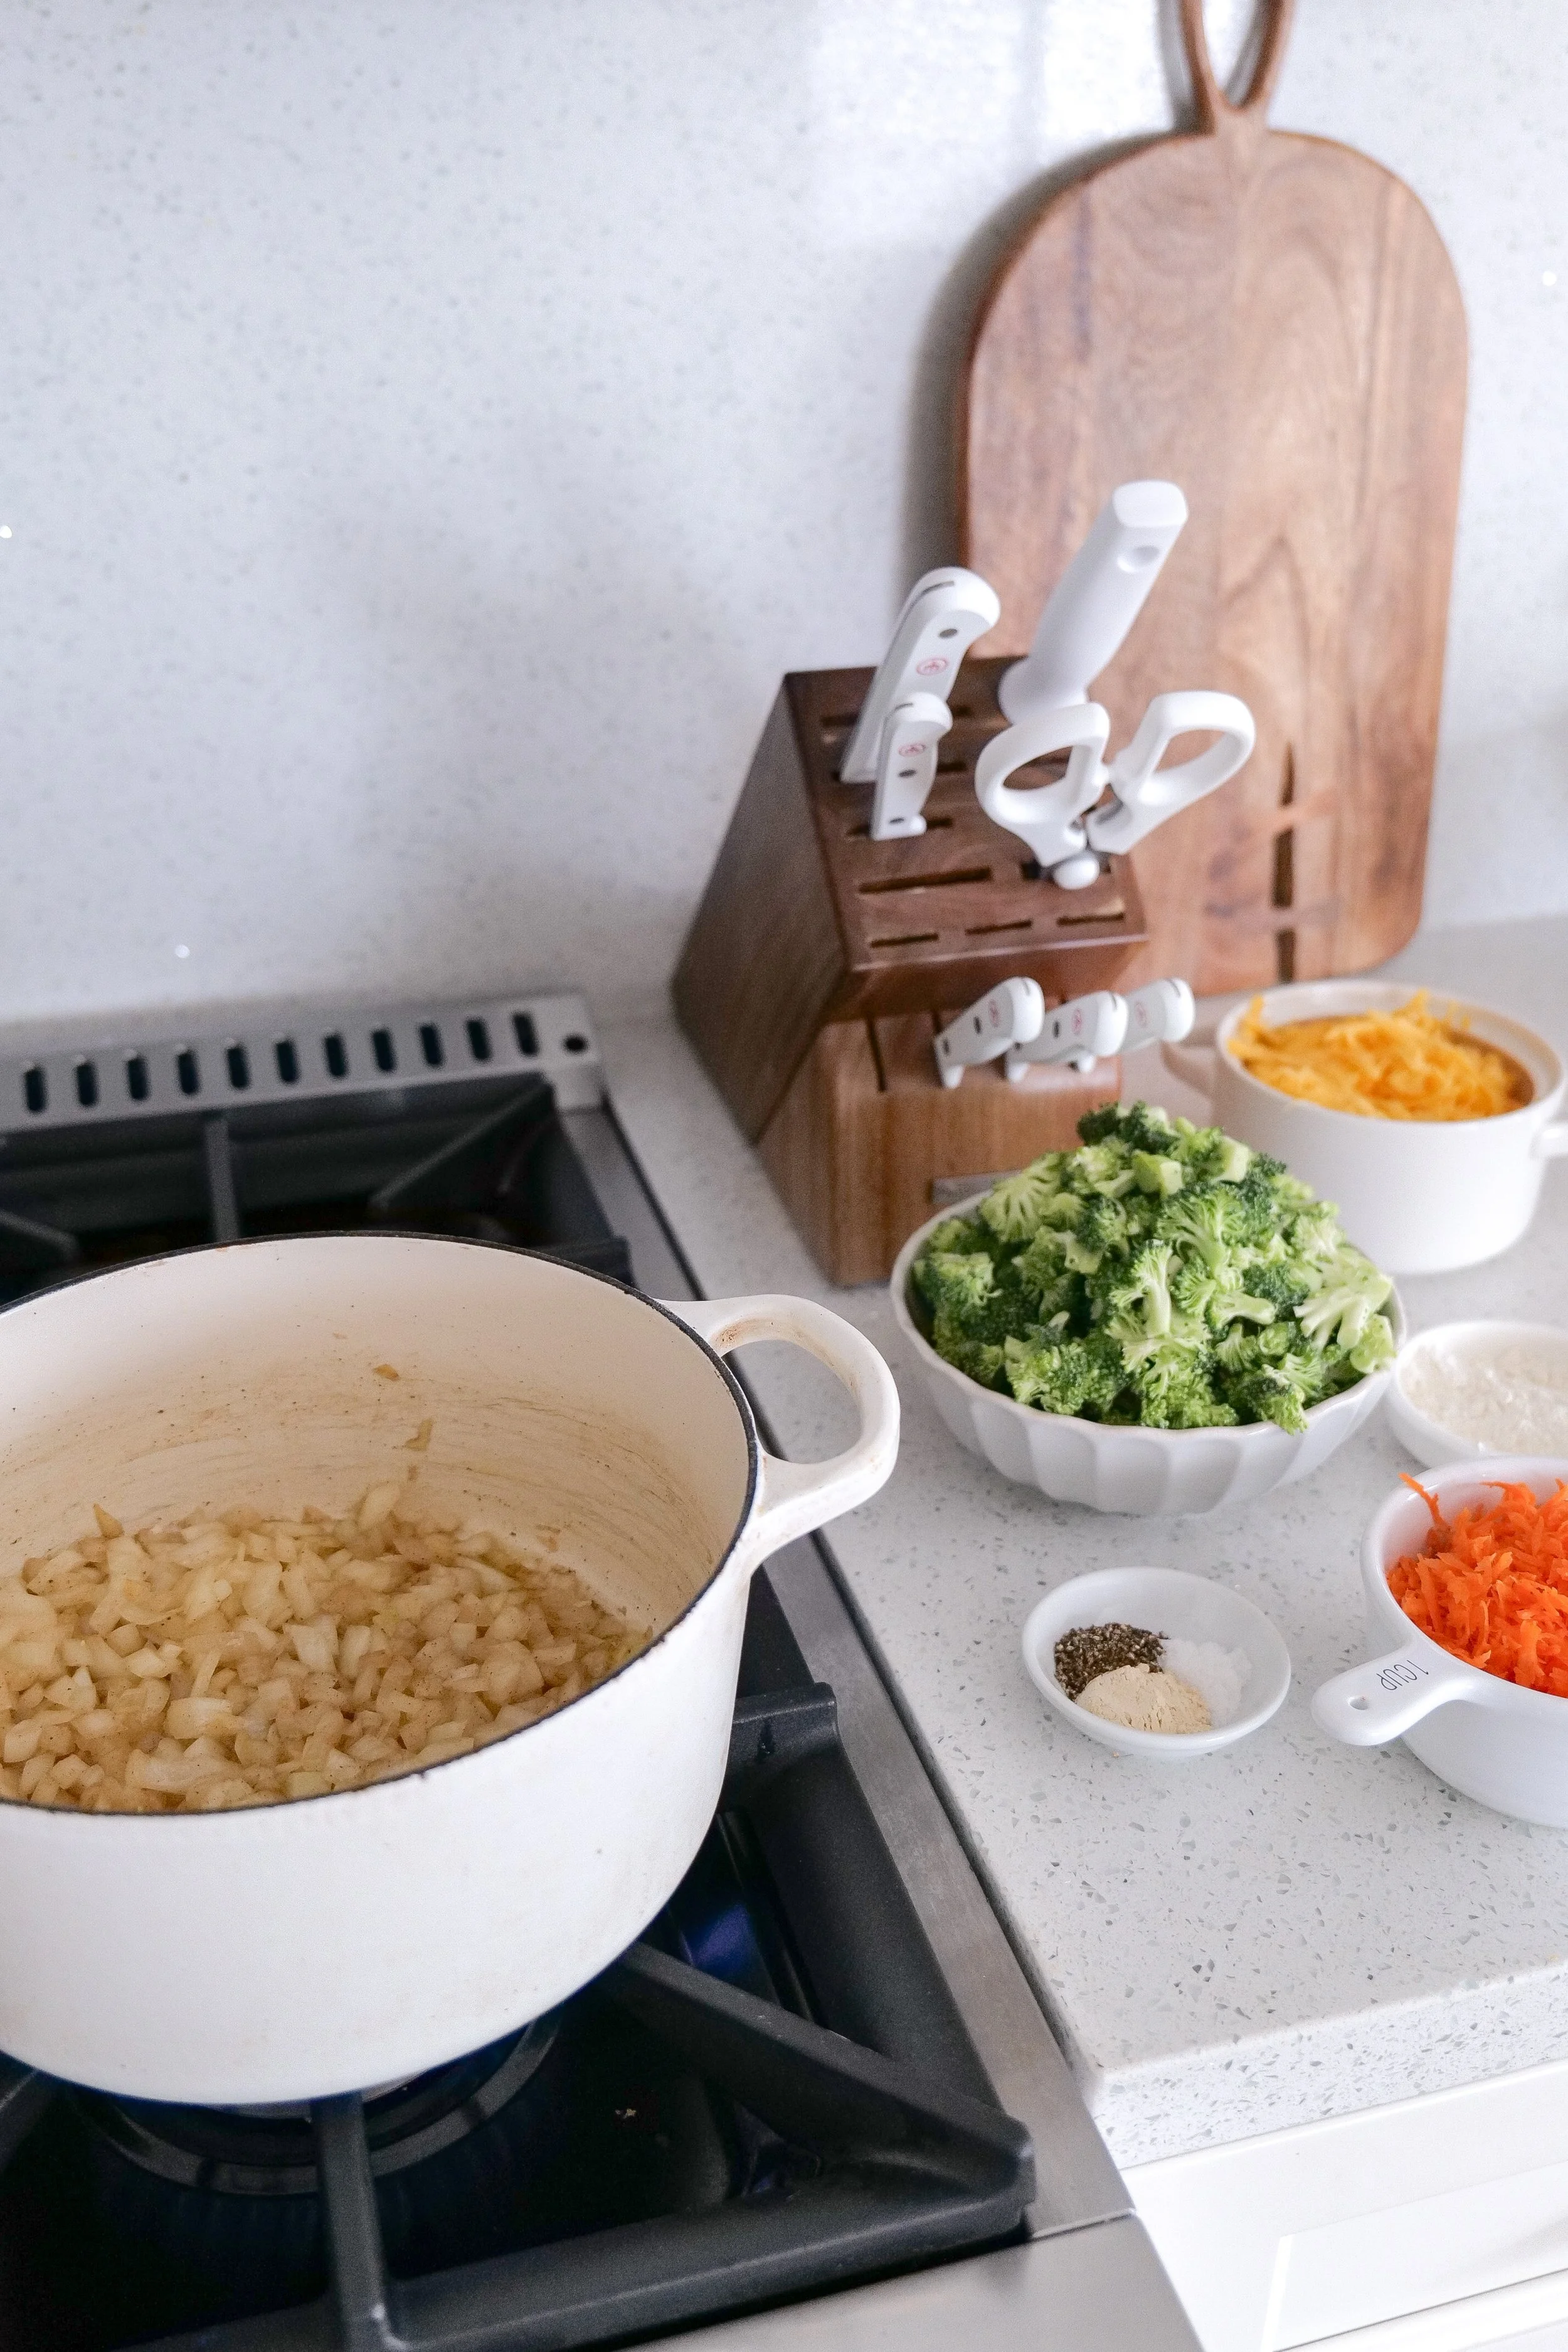
I hope the next time you spot a few brown bananas on your counter, you think of this one.
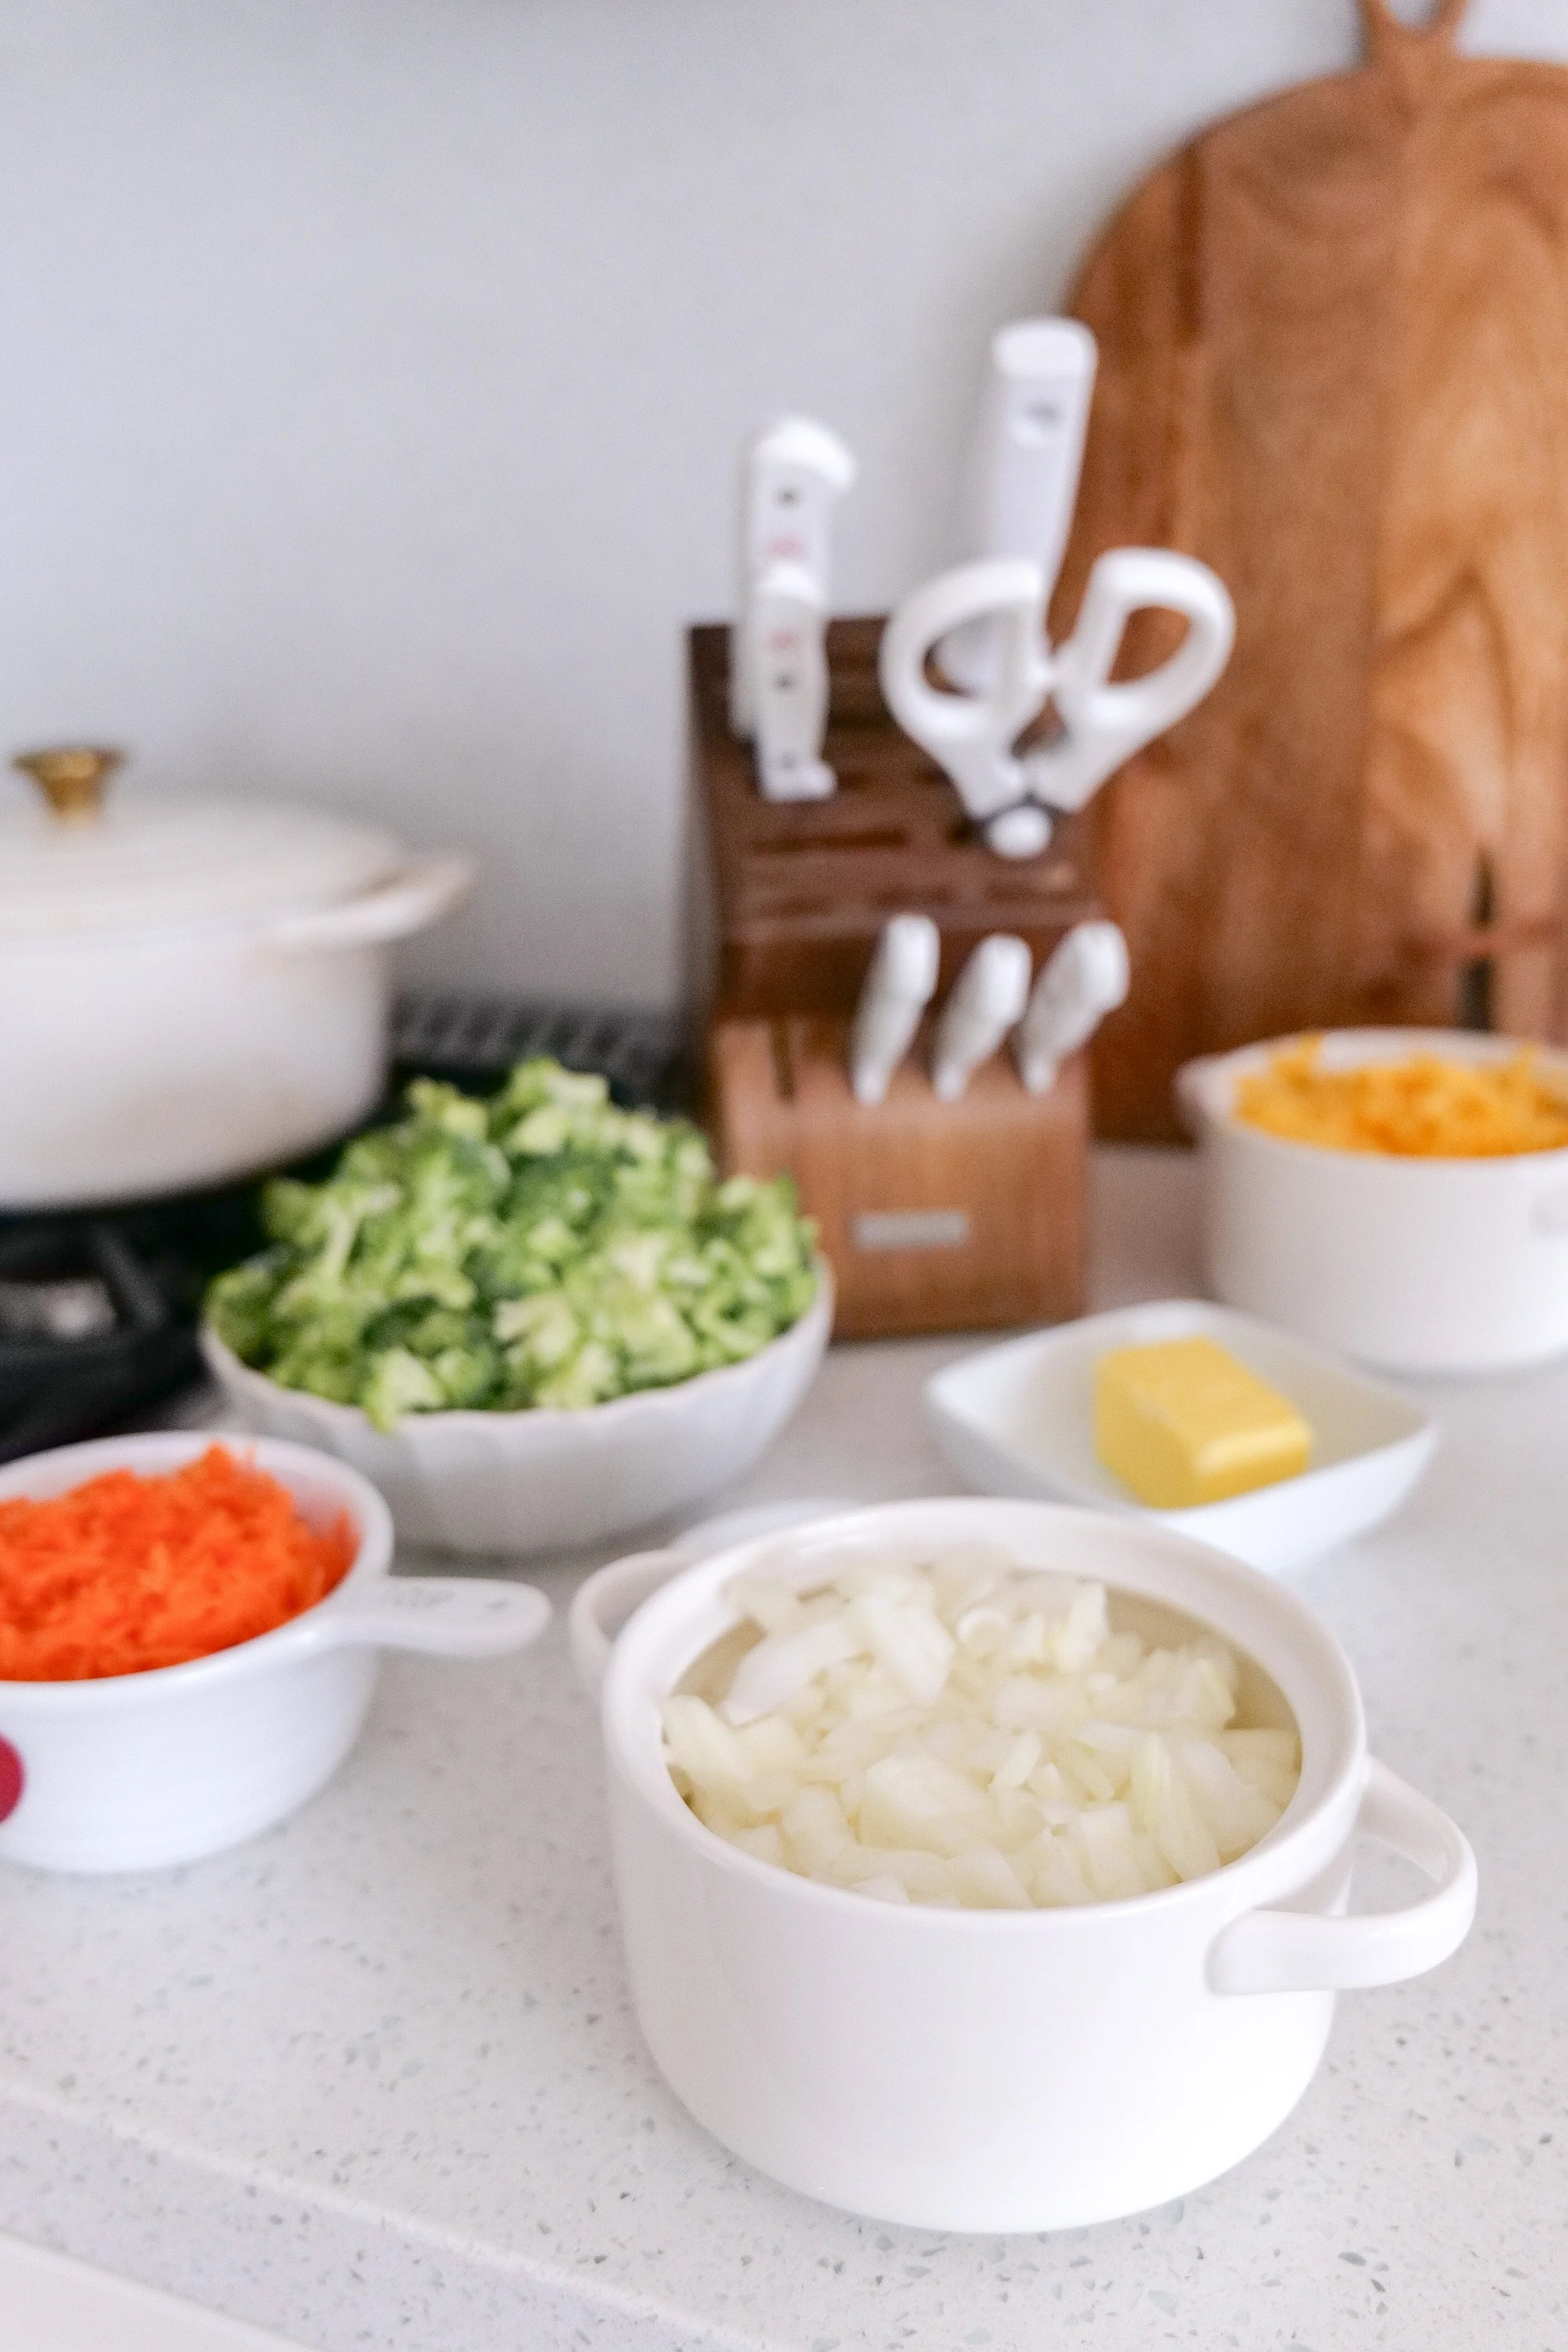
“Taste and see that the Lord is good.”
Psalm 34:8

Made with love for the people you love.

Fresh Tomato Bruschetta with Basil & Parmesan

Fresh tomatoes at the end of summer are one of those ingredients that really don't need much help.

This bruschetta is one of my favorite ways to use them because it's incredibly simple but still feels special enough to put out when we're having people over. Ripe tomatoes are tossed with fresh basil, garlic, extra virgin olive oil, and balsamic vinegar, then spooned over warm, buttery toasted bread and finished with Parmesan.

It's fresh, garlicky, a little tangy, and exactly the kind of appetizer that disappears from the table faster than you expect.

I originally made this as part of an Italian-inspired dinner built around all of those beautiful summer tomatoes. We had bruschetta to start, followed by salad and lasagna, and I loved carrying those fresh tomato and basil flavors through the meal. That's still one of my favorite ways to serve it, but honestly, a platter of bruschetta and a glass of wine is pretty hard to beat on its own too.

Fresh tomato bruschetta with basil and Parmesan served on toasted bread

Why You'll Love This Tomato Bruschetta

There is a reason bruschetta is one of those appetizers we come back to again and again.

It uses just a handful of ingredients, comes together quickly, and most of the work can be done before anyone arrives.

I especially love it during tomato season when tomatoes are sweet and flavorful enough to really be the star.

A few more reasons to make it:

  • It comes together with simple, fresh ingredients.

  • The tomato mixture can be prepared ahead of serving.

  • Using both Roma and cherry tomatoes gives the topping great flavor and texture.

  • Toasting the bread with butter gives you a crisp, golden base.

  • Fresh basil and garlic make the whole thing taste like summer.

  • It's easy to make for a larger gathering.

  • You can serve the tomato mixture separately and let everyone build their own bruschetta so the bread stays crisp.

Tomato and basil bruschetta topped with Parmesan on slices of golden toasted bread

Ingredients You'll Need

The ingredient list is short, which means the quality of those ingredients really does make a difference here.

For the Tomato Bruschetta

  • 1 pound Roma tomatoes, diced

  • 1/2 pound cherry tomatoes, quartered

  • 1/2 cup fresh basil leaves, roughly chopped

  • 3 garlic cloves, finely minced

  • 2 tablespoons extra virgin olive oil

  • 1 tablespoon balsamic vinegar

  • 1/2 teaspoon sea salt

  • Freshly ground black pepper, to taste

  • 1/4 cup shaved or freshly grated Parmesan cheese

For the Toasted Bread

  • 1 large French baguette or French bread loaf

  • 2 tablespoons salted butter, melted

Fresh tomatoes, basil, baguette, garlic, olive oil, balsamic vinegar, Parmesan, salt and pepper for bruschetta

The Best Tomatoes for Bruschetta

Good tomatoes are really what make this recipe.

I like using a combination of Roma tomatoes and cherry tomatoes rather than choosing just one.

Roma tomatoes are meaty and don't release quite as much liquid as some larger slicing tomatoes, which helps keep the bruschetta from becoming watery. Cherry tomatoes bring a little extra sweetness and juiciness.

If you have beautiful heirloom tomatoes from the farmers market or garden, you can absolutely use those too. Just remove some of the excess seeds and juice if they're especially watery.

This is definitely one of those recipes where I would choose the tomatoes that look and smell the best rather than worrying too much about using one exact variety.

How to Make Fresh Tomato Bruschetta

1. Prepare the Tomatoes

Dice the Roma tomatoes into small, bite-sized pieces and quarter the cherry tomatoes.

If your tomatoes are especially juicy, let them sit in a colander for a few minutes to drain away some of the excess liquid. You want them juicy, just not swimming in tomato water.

Add the tomatoes to a medium mixing bowl.

2. Add the Basil and Garlic

Roughly chop the fresh basil and finely mince the garlic.

Add both to the bowl with the tomatoes.

I like having little pieces of basil throughout rather than chopping it so finely that it disappears into the tomatoes.

3. Dress the Bruschetta

Pour the extra virgin olive oil and balsamic vinegar over the tomato mixture.

Season with sea salt and freshly ground black pepper, then gently toss everything together.

Taste and adjust the salt and pepper if needed.

Cover the bowl and refrigerate for about 30 minutes to give the tomatoes, basil, garlic, olive oil, and balsamic a chance to come together.

I wouldn't skip this little rest. The bruschetta tastes noticeably better once everything has had a chance to mingle.

Close-up of fresh tomato bruschetta with chopped basil, garlic and Parmesan

How to Make the Toasted Bread

When you're almost ready to serve, preheat the oven to 400°F.

Slice the baguette into pieces about 1/2-inch thick.

Arrange the slices in a single layer on a rimmed baking sheet and lightly brush the tops with melted salted butter.

Toast for about 3 minutes, flip, lightly brush the second side if needed, and return to the oven for another 3 minutes, or until the bread is lightly golden and crisp around the edges.

Keep an eye on it toward the end. You want the bread crisp enough to hold the juicy tomatoes without becoming hard.

Platter of homemade tomato bruschetta served on crisp toasted bread

How to Assemble Bruschetta

You have two options here, and I actually use both depending on how I'm serving it.

For a platter like the one pictured, spoon the tomato mixture onto each piece of warm toasted bread shortly before serving.

Let a little of the tomato juice drain from the spoon before adding it to the bread so the crostini stay crisp.

Finish each piece with shaved or freshly grated Parmesan and a little additional fresh basil.

Then arrange everything on a large platter and serve right away.

Bruschetta appetizer platter on a summer table with fresh tomatoes, basil and wine

If I'm making this for a party and don't know exactly when everyone is going to eat, I'll sometimes put the tomato mixture in a pretty serving bowl with the toasted bread alongside it instead.

Everyone can spoon the tomatoes onto their own bread, and you don't have to worry about the bruschetta getting soggy while it sits on the table.

Can I Make Bruschetta Ahead of Time?

You can definitely get a head start, but I wouldn't make the entire assembled bruschetta a day or two ahead.

The tomato mixture actually benefits from resting for about 30 minutes before serving, and you can prepare it a few hours ahead and keep it covered in the refrigerator.

As tomatoes sit, though, they continue releasing liquid and begin losing some of their fresh texture. For that reason, I think this is at its best the day you make it.

The bread can also be sliced ahead of time, but I prefer to toast it closer to serving so it's crisp and warm.

Most importantly, don't spoon the tomatoes onto the toasted bread until you're ready to serve.

How to Keep Bruschetta From Getting Soggy

A few little things make a big difference:

Choose good tomatoes that aren't overly soft. Very ripe tomatoes can release a lot of liquid.

Drain excess tomato juice if necessary. You don't need bone-dry tomatoes, but you also don't want your topping swimming in liquid.

Toast the bread well. That crisp surface helps it stand up to the tomato topping.

Use a slotted spoon if your tomato mixture becomes particularly juicy.

Assemble just before serving. This is the biggest one.

If I'm serving bruschetta for a party where people will be grazing for a while, I prefer keeping the tomatoes and bread separate.

What to Serve With Tomato Bruschetta

Bruschetta makes such an easy beginning to an Italian-inspired dinner.

When I originally made this recipe, I built the meal around tomatoes and served the bruschetta as our appetizer before salad and lasagna.

You could also serve it alongside pasta, grilled chicken, an antipasto board, a simple green salad, or other small bites for an easy dinner with friends.

And in the summer, I love the idea of setting out a big platter with wine and letting it be the beginning of a long dinner outside.

Homemade bruschetta with ripe tomatoes, fresh basil and shaved Parmesan

Can I Use a Different Cheese?

Yes.

Parmesan is my favorite here because its salty, nutty flavor adds something to the tomatoes without making the bruschetta feel heavy.

Fresh mozzarella would give you more of a Caprese-style bruschetta, while crumbled feta would make it saltier and a little tangier.

You can also leave the cheese off entirely if you want the tomatoes and basil to be the focus.

Can I Use Balsamic Glaze Instead of Balsamic Vinegar?

I prefer balsamic vinegar in the tomato mixture because it adds acidity without making the bruschetta overly sweet.

If you love balsamic glaze, you can add a very light drizzle over the finished bruschetta just before serving. I would still use the balsamic vinegar in the tomato mixture and treat the glaze as an optional finishing touch rather than a replacement.

How to Store Leftover Bruschetta

Store leftover tomato mixture in an airtight container in the refrigerator for up to 2 days.

The tomatoes will continue to release liquid as they sit, so give everything a gentle stir and drain away excess liquid before serving again.

Store the toasted bread separately at room temperature in an airtight container.

I don't recommend freezing the tomato mixture.

Shop My Kitchen Favorites

A good baking sheet, sharp knife, cutting board, serving platter, and a few pretty serving bowls are the kinds of kitchen pieces I use constantly for simple recipes like this one.

More Recipes to Make Next

If you're in the mood for more tomato-filled or Italian-inspired recipes, here are a few more from my kitchen.

Creamy Basil Tomato Soup

A cozy tomato soup with plenty of fresh basil that's especially good with warm bread alongside it.

Classic Ratatouille

A beautiful way to turn seasonal vegetables and tomatoes into a simple, comforting dish.

Garlic Mushroom & Shrimp Pasta

An easy pasta dinner with garlic, mushrooms, and shrimp that's perfect when you want to carry the Italian-inspired flavors into the main course.

Ready to Make It?

Fresh Tomato Bruschetta is one of those recipes that proves you don't need very many ingredients to make something really good.

Start with ripe tomatoes, add plenty of fresh basil and garlic, give everything a little time to sit together, and pile it onto warm, buttery toasted bread.

It's simple enough for an afternoon snack but pretty enough to be the first thing you put on the table when friends come over.

You can find the easy-to-save version of the recipe in the printable card below.

Printable recipe card for Fresh Tomato Bruschetta with Basil and Parmesan

A Note From Amanda

Some of my favorite recipes are the ones that start with whatever looks especially beautiful and fresh that week.

For this one, it was tomatoes.

There is something about a table filled with ripe tomatoes, bunches of basil, good bread, and people you love that feels like summer in the simplest way. And I think that's why recipes like bruschetta never really need to be complicated.

Give me a warm piece of bread piled high with tomatoes and basil, a little Parmesan on top, and a table where no one is in a hurry to leave, and I'm pretty happy.

I hope you make this one while tomatoes are at their best, and I hope you get to share it around a table with people you love.

“Taste and see that the Lord is good.”
Psalm 34:8

Made with love for the people you love.