Brown Butter Chocolate Drizzle Shortbread Cookies

Brown Butter Chocolate Drizzle Shortbread Cookies

An Easy Christmas Shortbread Cookie

There are certain recipes that instantly make the kitchen feel like Christmas, and these Brown Butter Chocolate Drizzle Shortbread Cookies are one of them.

Classic shortbread is already one of my favorite cookies to make during the holidays because it's simple, buttery, and perfect for cutting into festive shapes. Browning the butter first takes these cookies somewhere completely different. It gives them a warm, nutty flavor that makes such a simple cookie taste incredibly special.

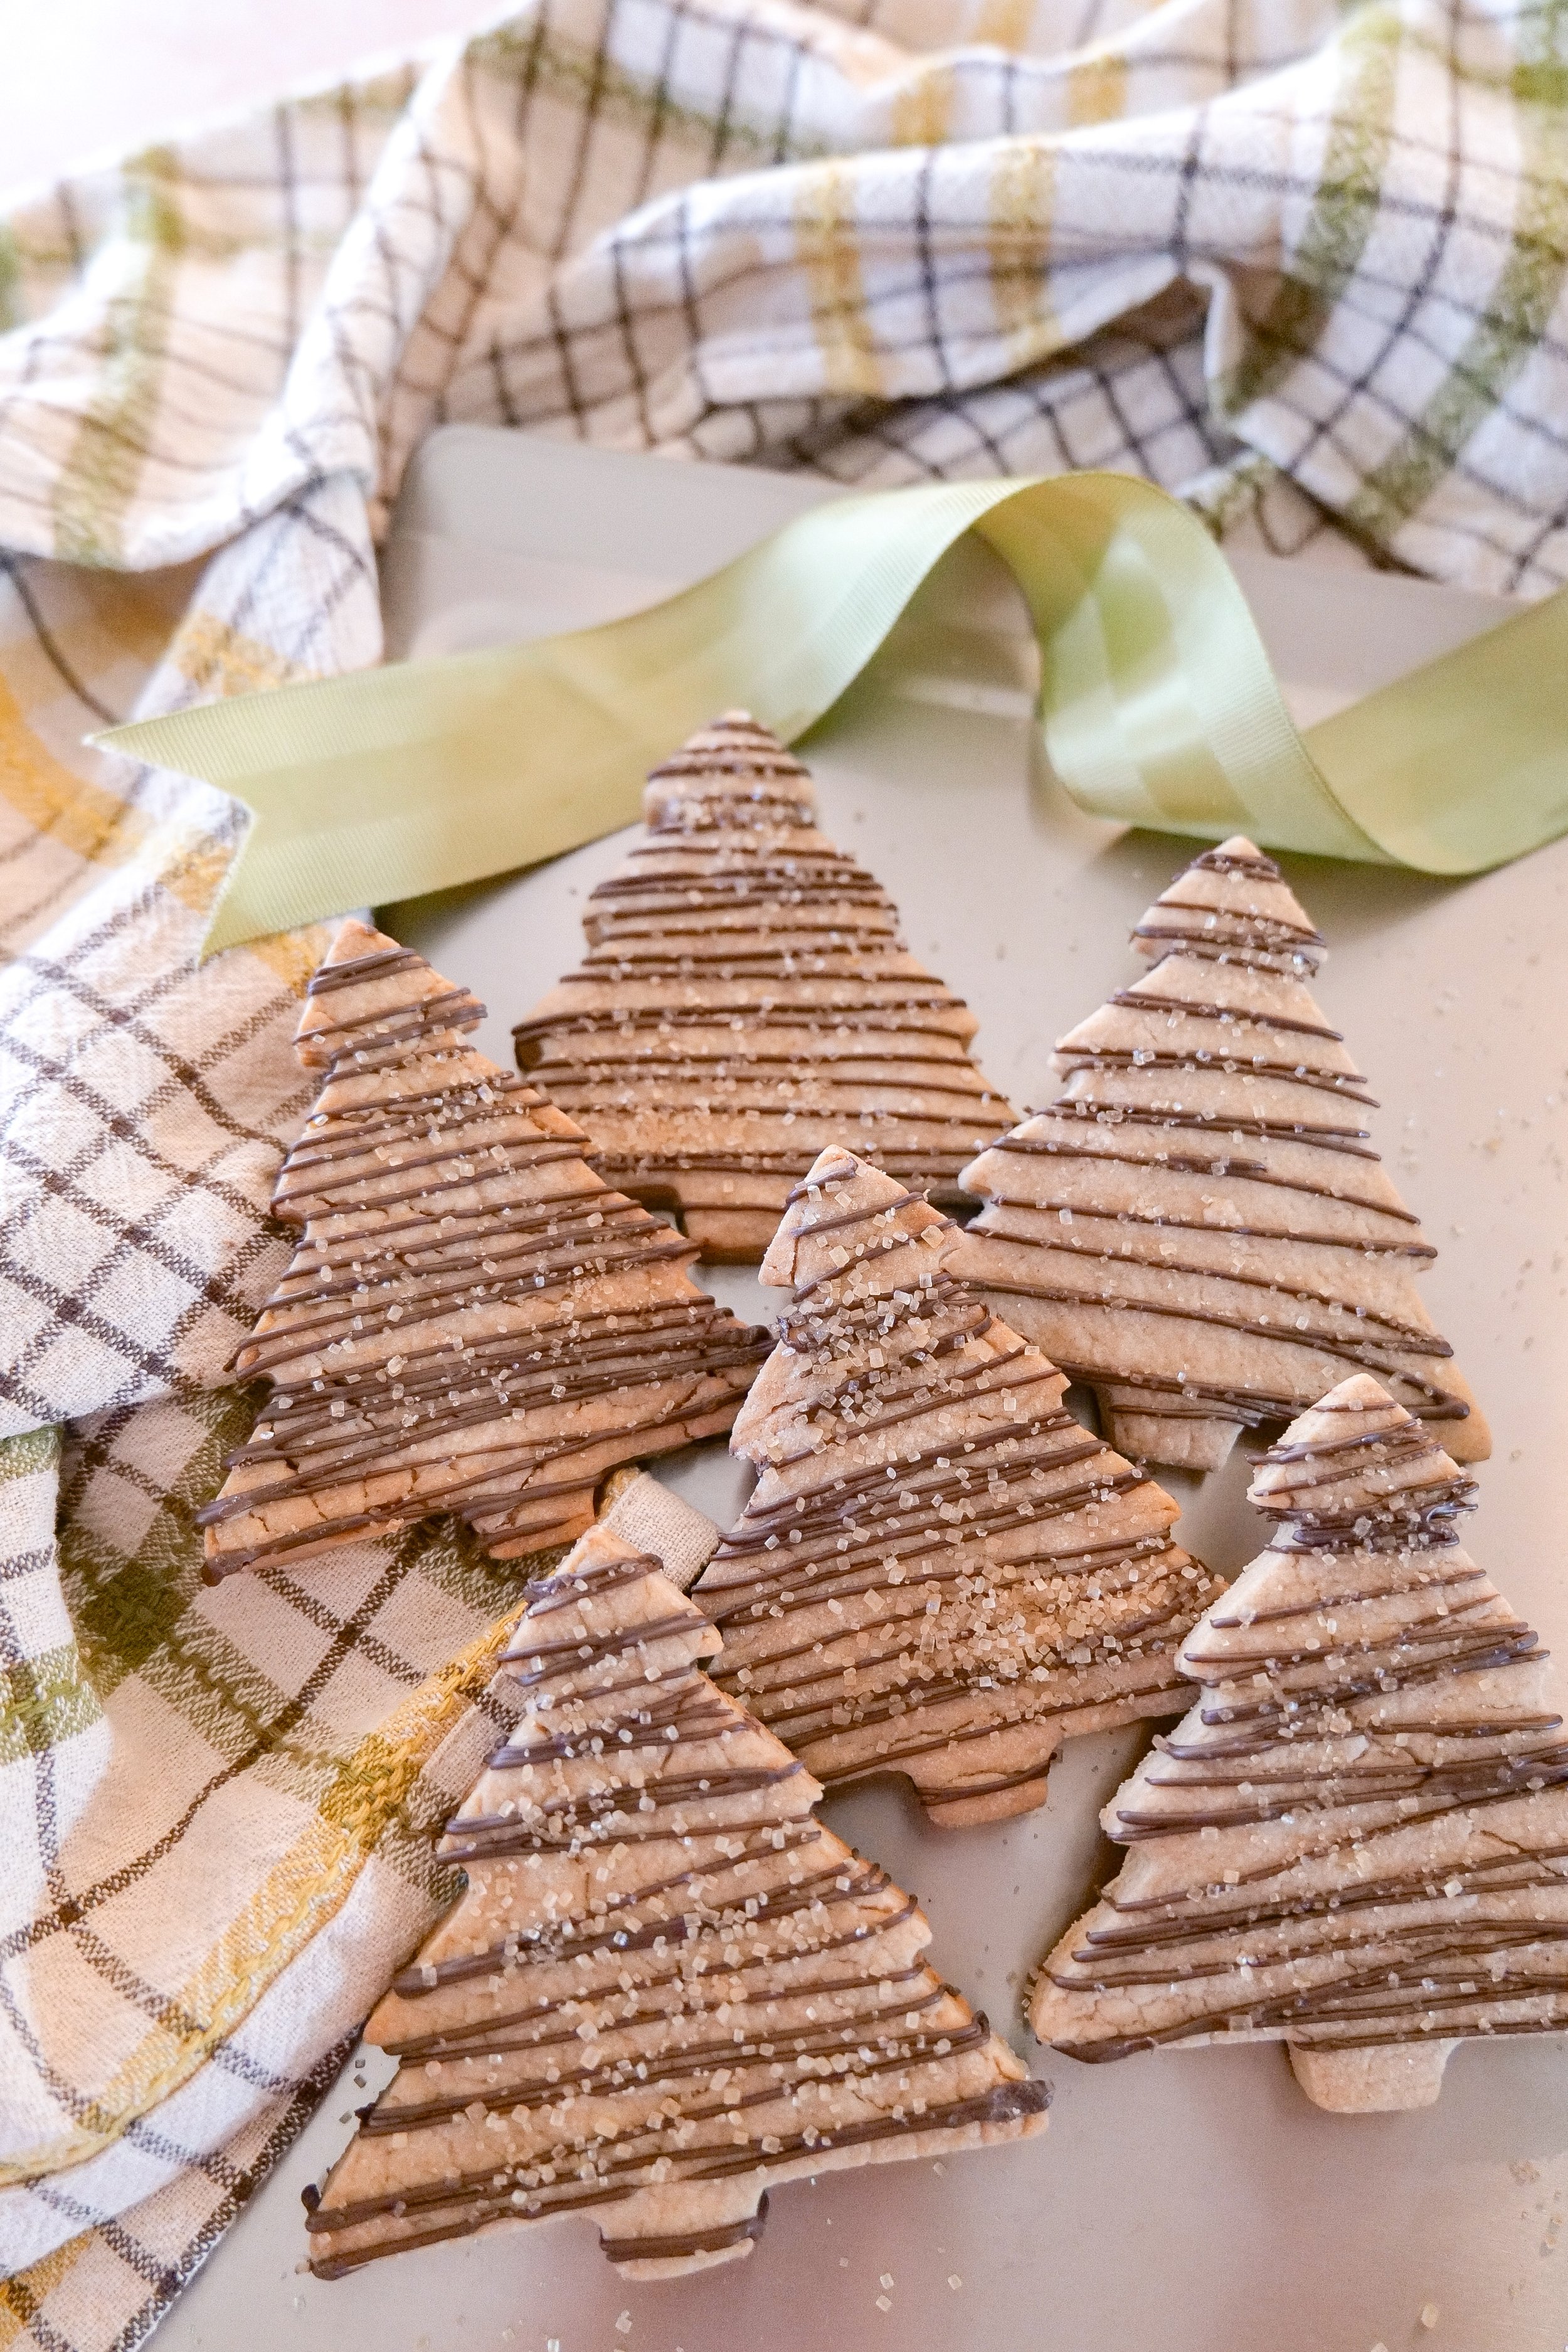
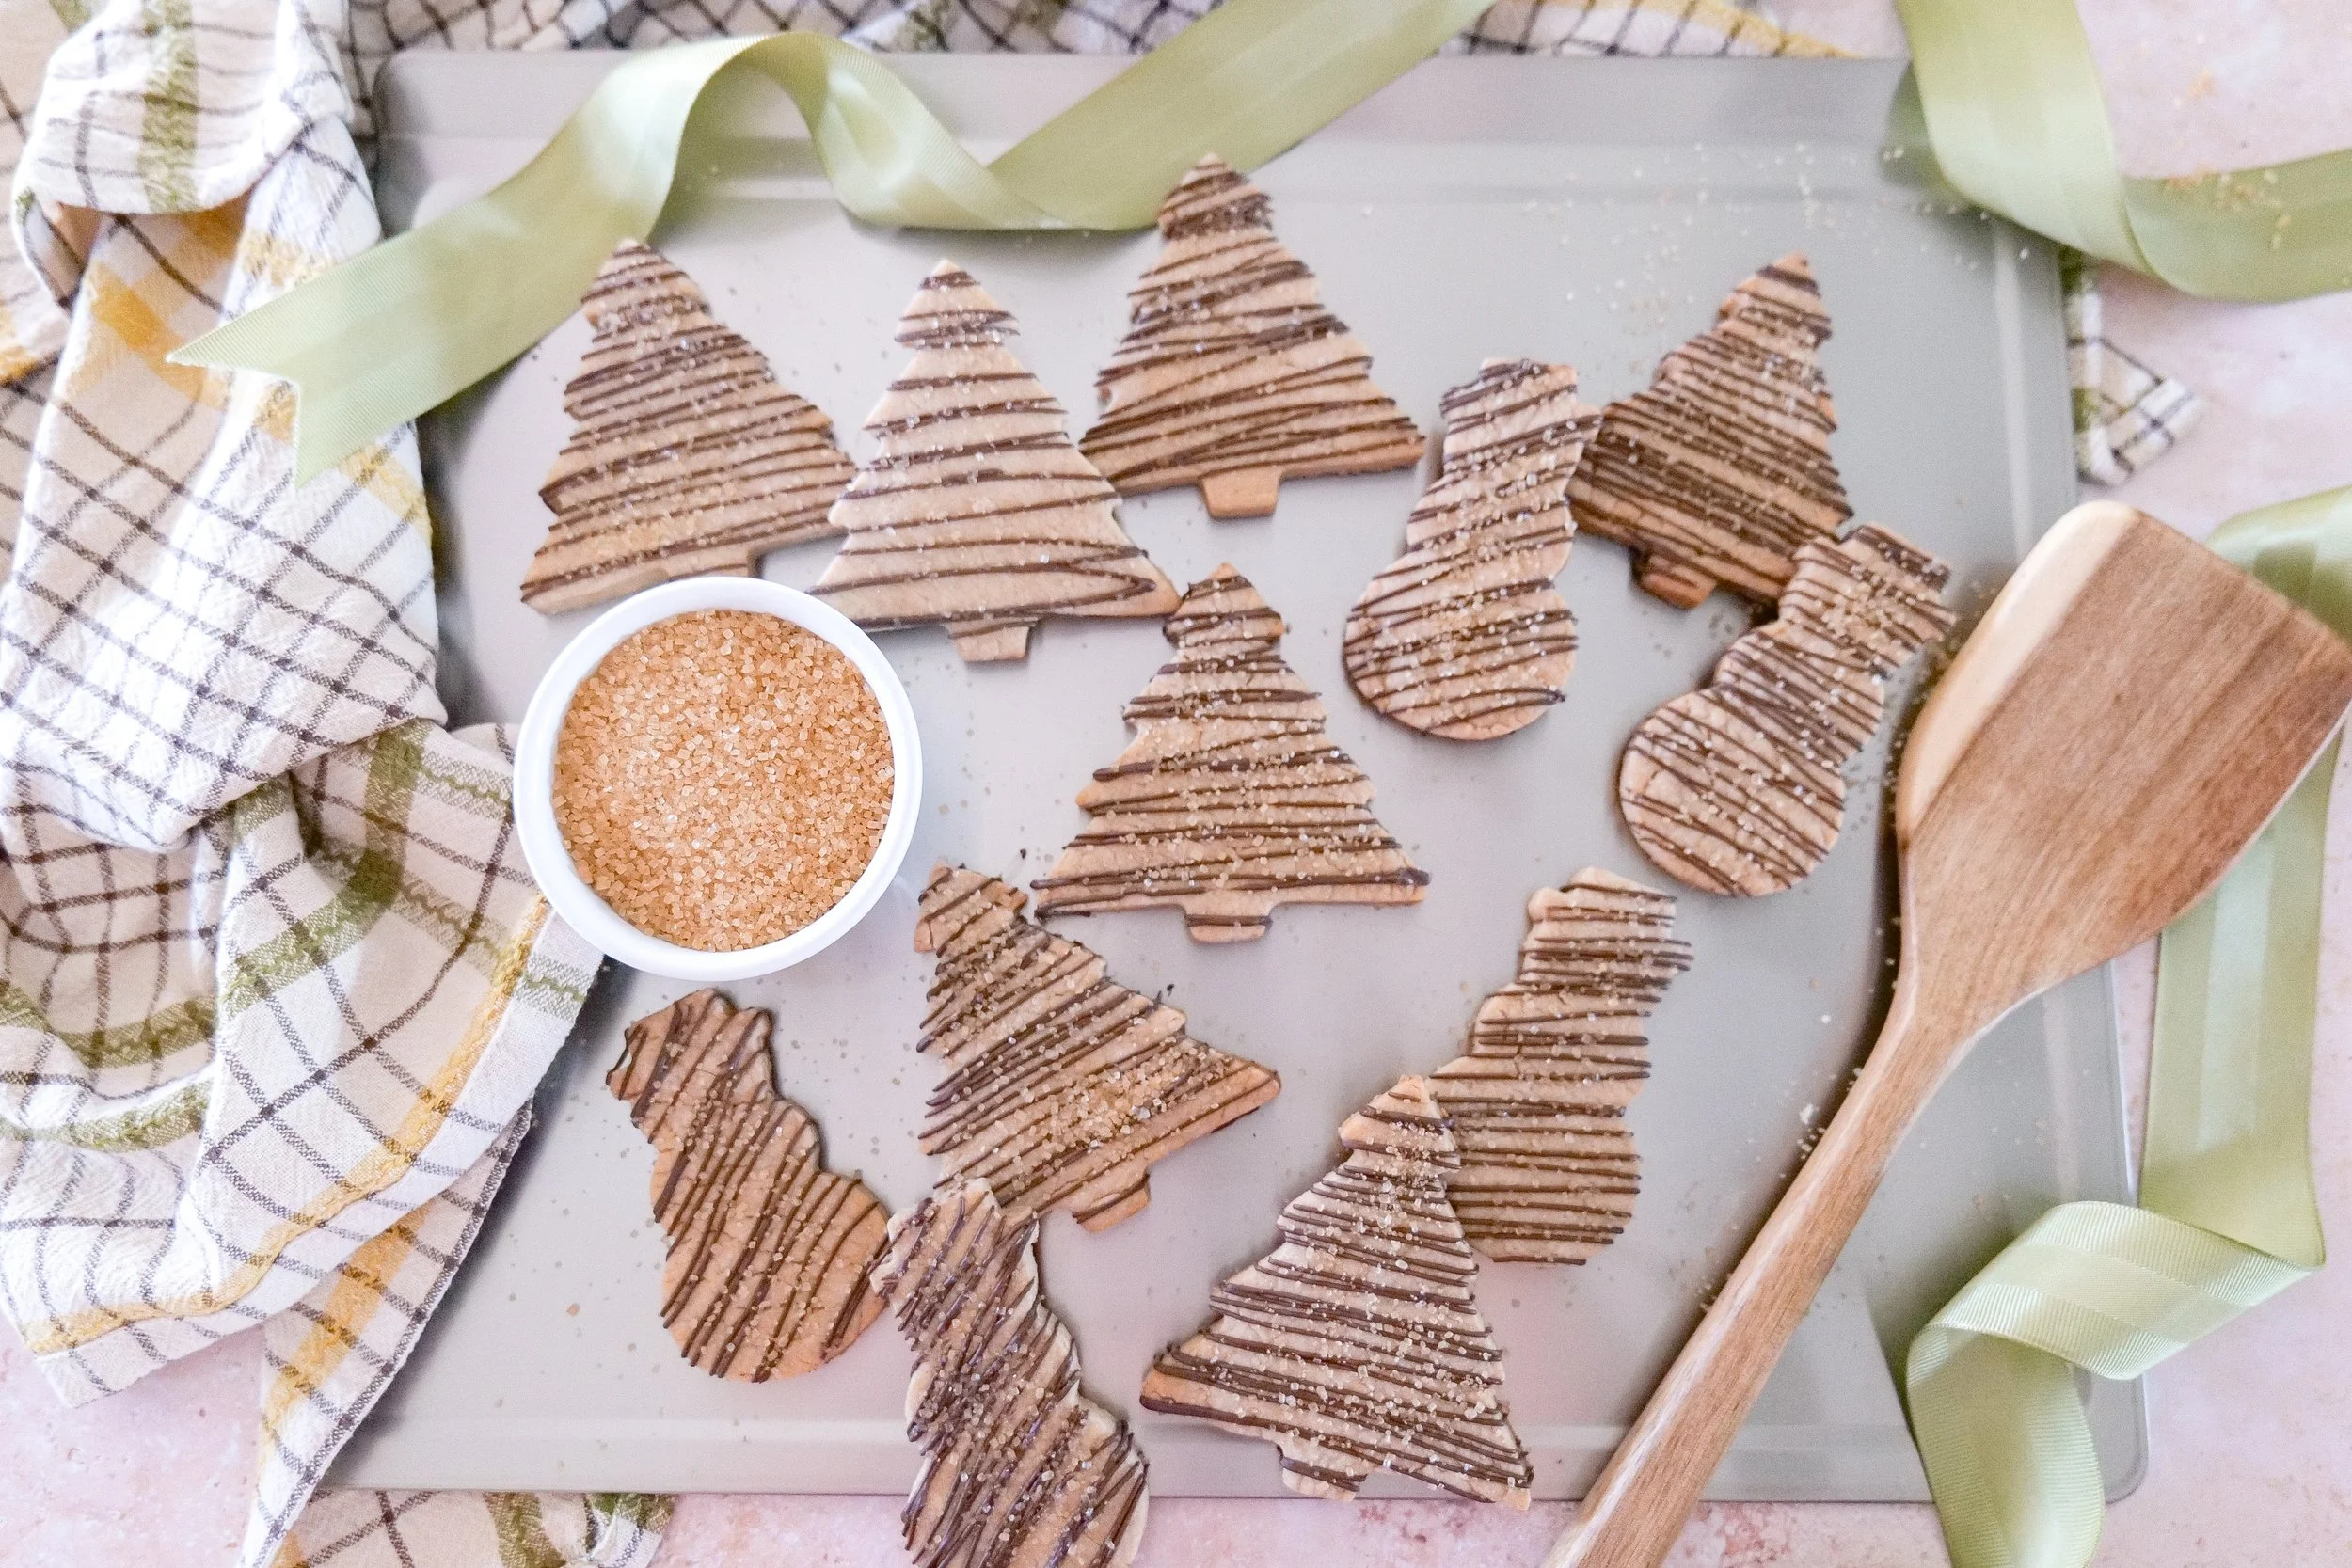
Once baked, I drizzle each shortbread cookie with melted milk chocolate and finish it with a sprinkle of sparkling cane sugar. I love cutting mine into Christmas trees, but you can use this dough with your favorite holiday cookie cutters and make them your own.

They're beautiful enough to set out at a Christmas party or package up as a homemade gift, but they're also the kind of cookie I love having in the kitchen throughout December with a cup of coffee.

If you're looking for an easy Christmas cookie that's a little different from traditional sugar cookies, these brown butter shortbread cookies deserve a place on your holiday baking list.

Brown butter chocolate drizzle shortbread cookies cut into Christmas tree shapes and topped with sparkling cane sugar.

Why You'll Love These Brown Butter Shortbread Cookies

These cookies have everything I want in a Christmas cookie without requiring complicated decorating.

You'll love them because they're:

  • Rich and buttery with a slightly nutty brown butter flavor

  • Made with simple pantry ingredients

  • Easy to cut into different holiday shapes

  • Finished with milk chocolate and sparkling cane sugar

  • Beautiful for Christmas cookie trays

  • Perfect for gifting

  • Easy to make ahead

  • Delicious alongside coffee, tea, or hot chocolate

They also look much more elaborate than they actually are, which is always a win during the busiest time of year.

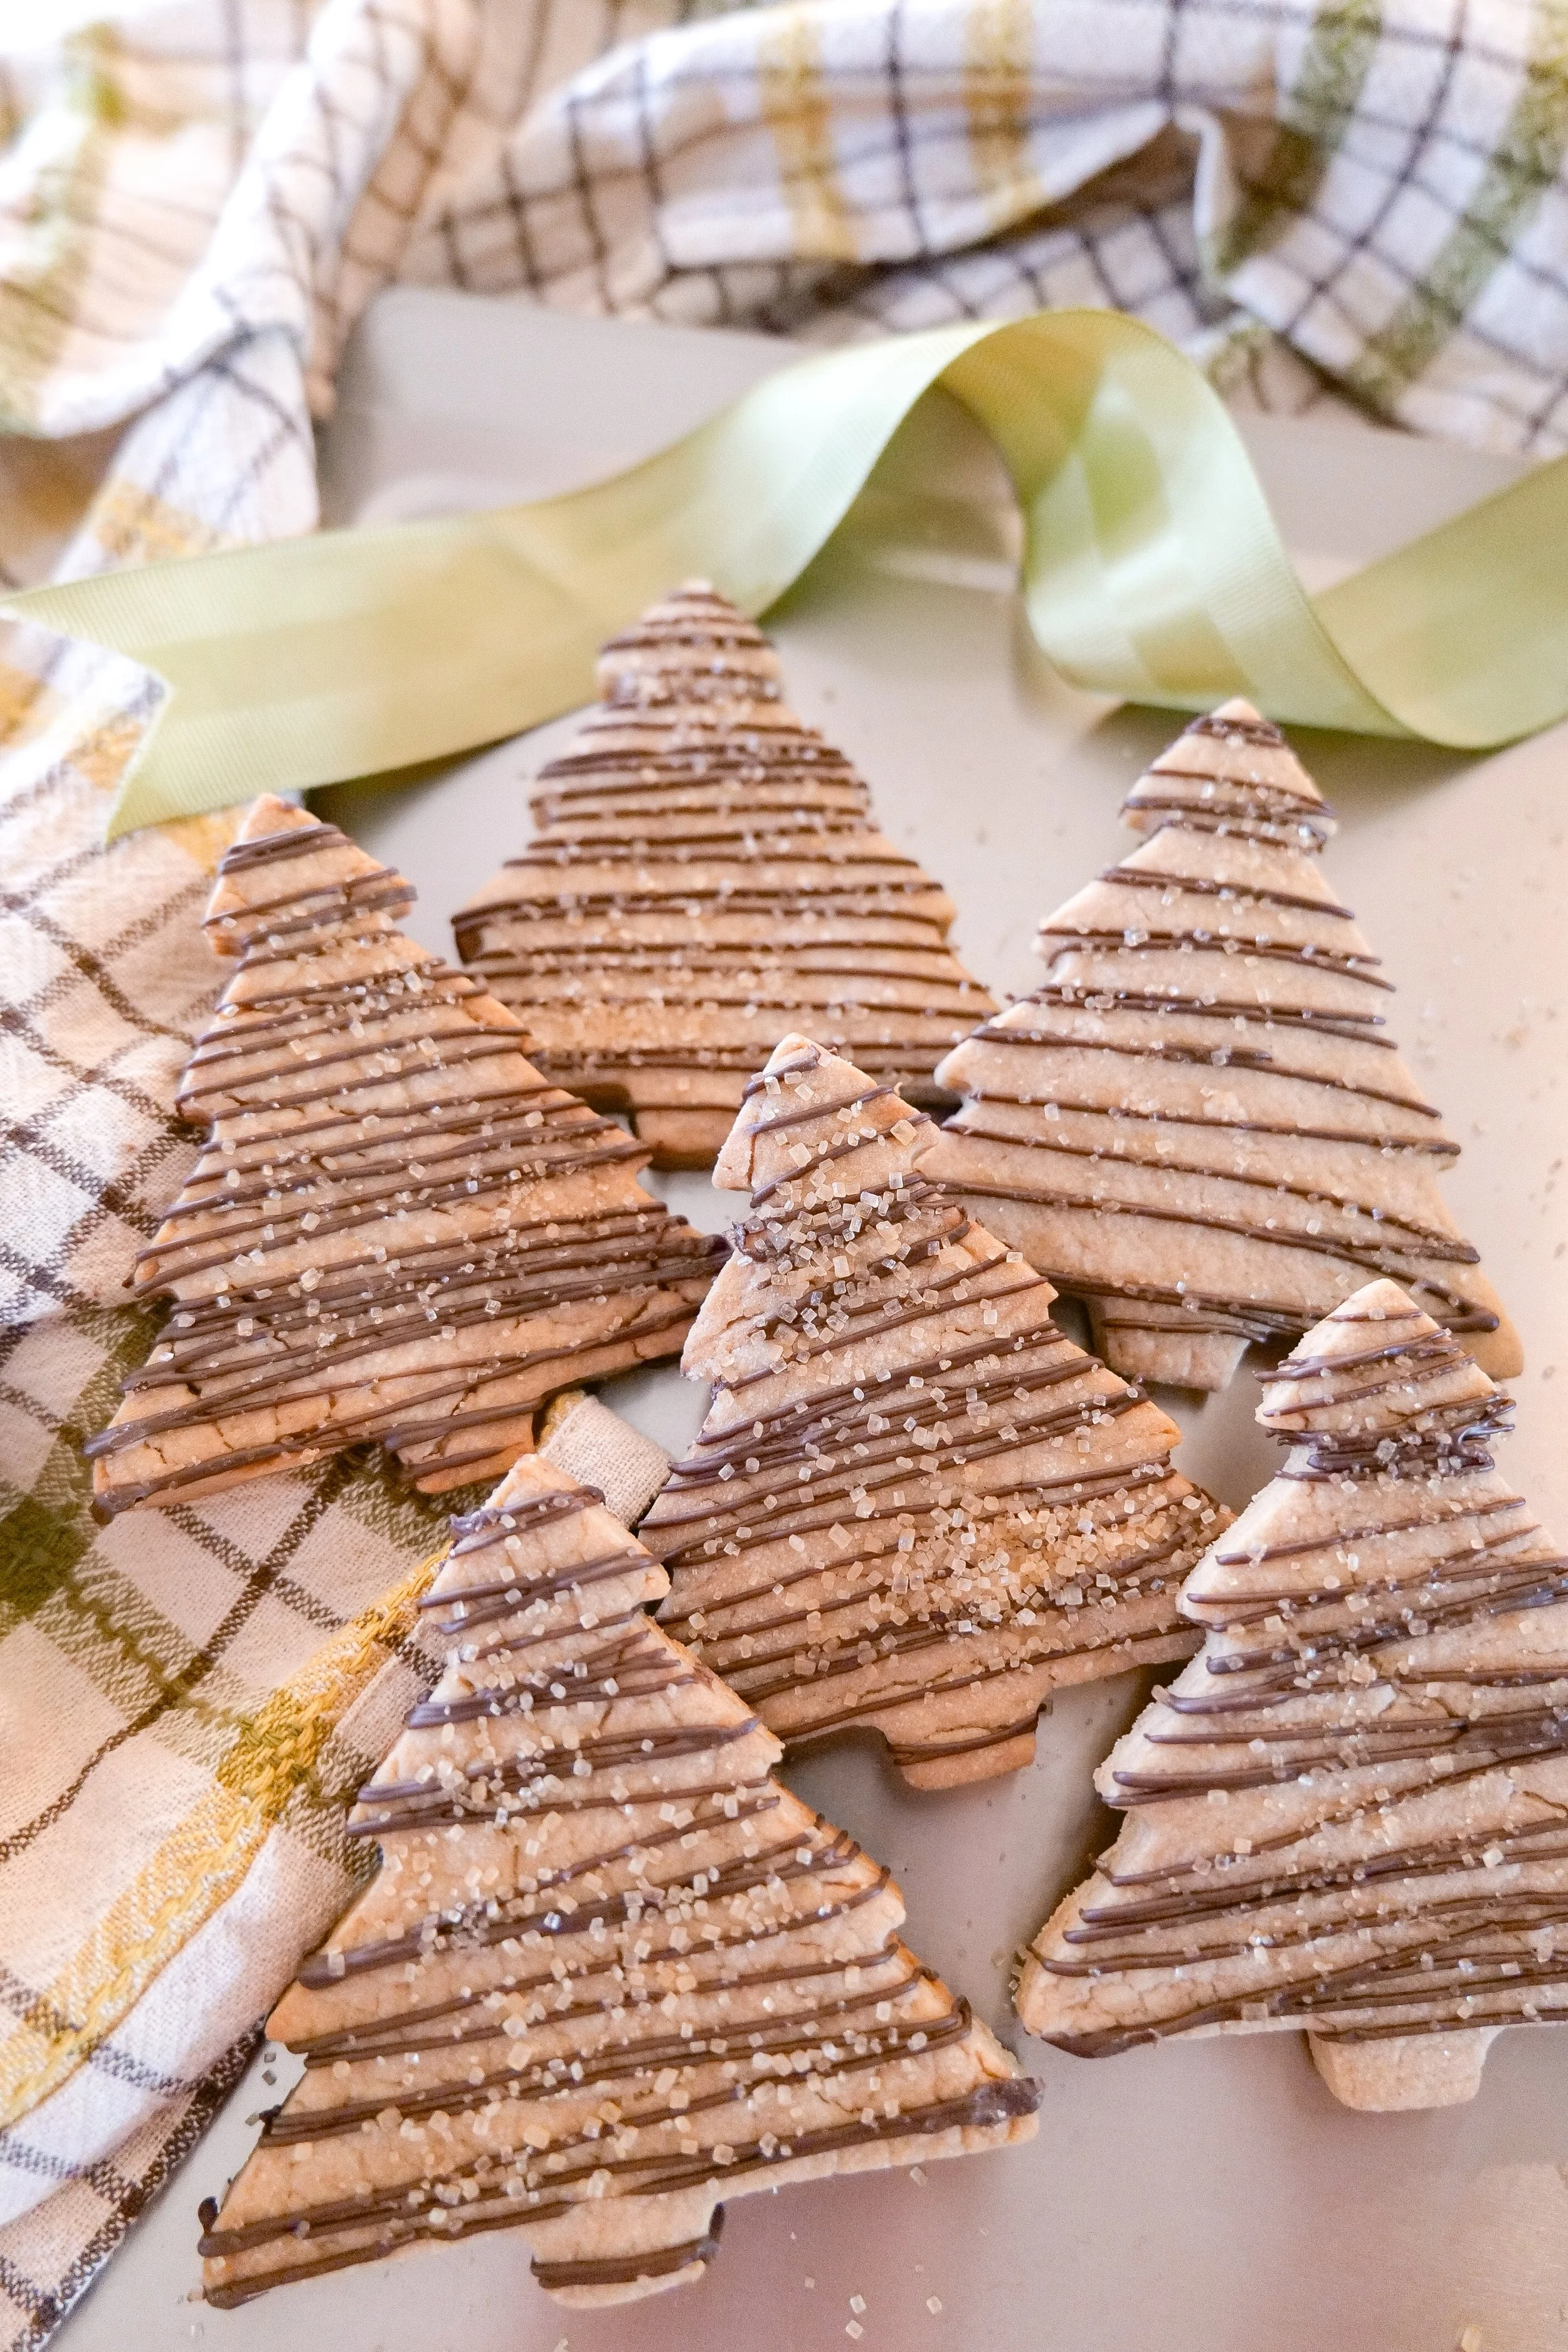
Christmas tree shaped brown butter shortbread cookies decorated with a milk chocolate drizzle and coarse sugar.

What Makes Brown Butter So Good in Shortbread?

Traditional shortbread gets most of its flavor from butter, which makes browning that butter particularly worthwhile.

As butter cooks, the milk solids begin to toast and turn golden brown. The flavor changes from simply buttery to rich, nutty, and almost caramel-like.

Because shortbread has so few ingredients, you can really taste that difference in the finished cookie.

The important part is allowing the brown butter to cool and become solid again before making the dough. Using it while it's still warm and liquid would change the texture of the shortbread.

Ingredient Notes

These cookies only require a handful of ingredients, so each one has a purpose.

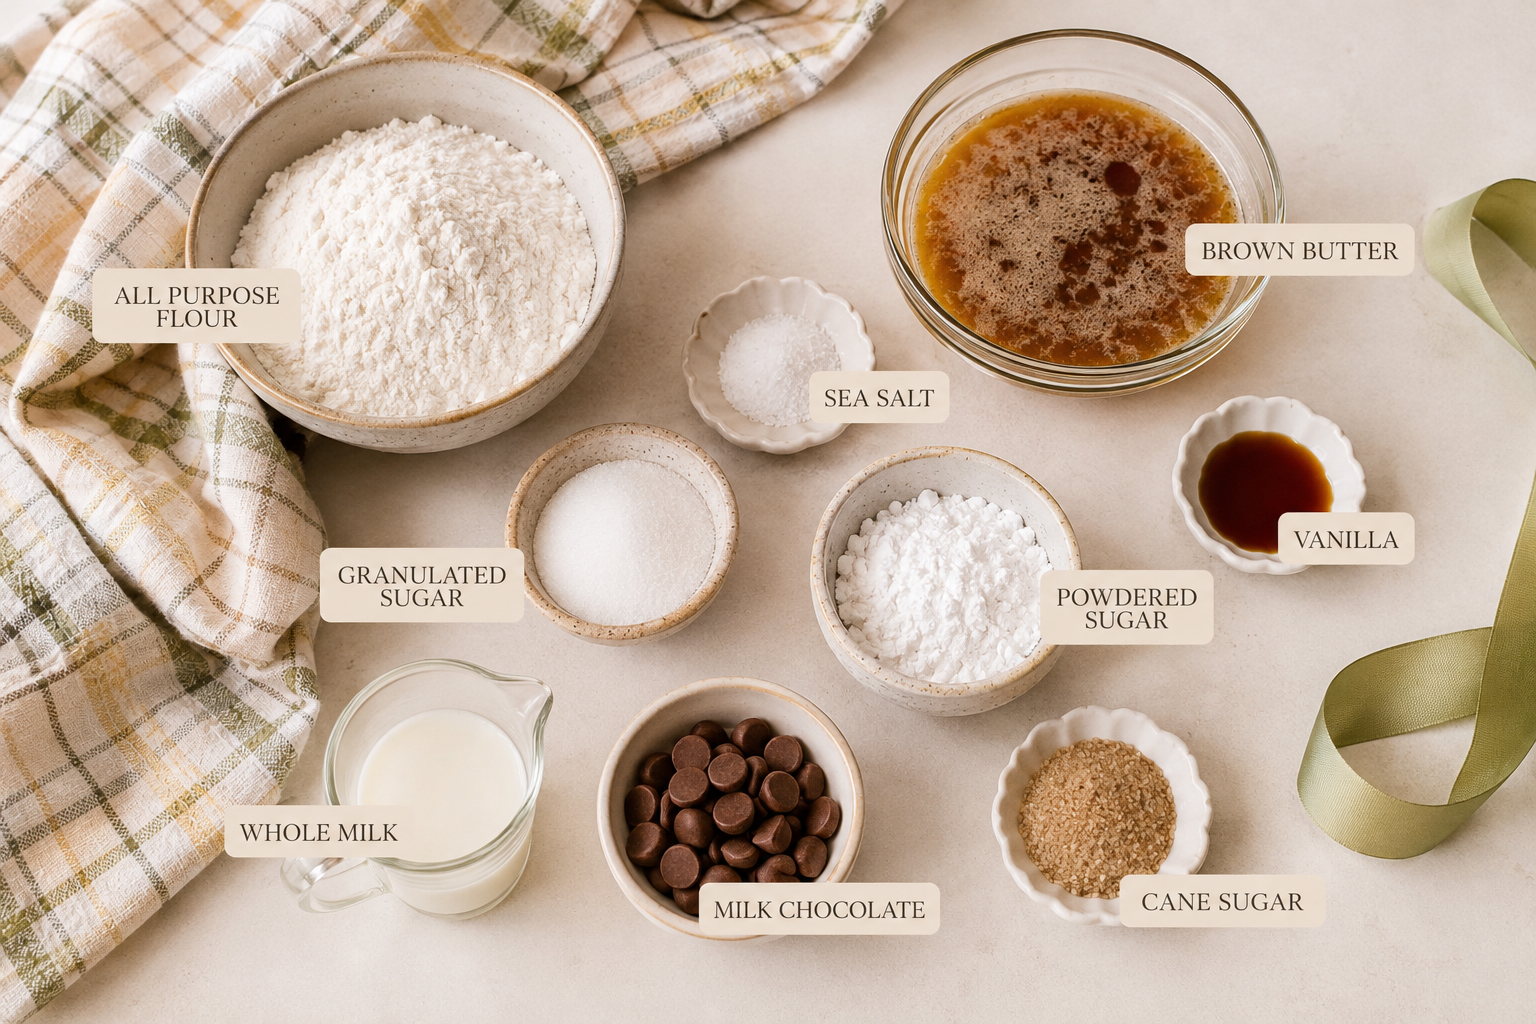
Ingredients for homemade brown butter shortbread cookies including flour, butter, sugar, vanilla, milk, and chocolate.

Brown Butter

This is what makes the recipe special. Brown the butter until the milk solids turn golden and it smells wonderfully nutty, then cool it completely before making your dough.

All-Purpose Flour

Regular all-purpose flour gives the cookies their classic tender, crumbly shortbread texture.

Granulated + Powdered Sugar

I use both sugars here. Granulated sugar provides sweetness and a little structure, while powdered sugar contributes to that delicate, melt-in-your-mouth texture.

Vanilla

Vanilla complements the warm flavor of the brown butter without overpowering it.

Whole Milk

Shortbread dough naturally looks crumbly. Add the milk one tablespoon at a time, stopping as soon as the dough holds together.
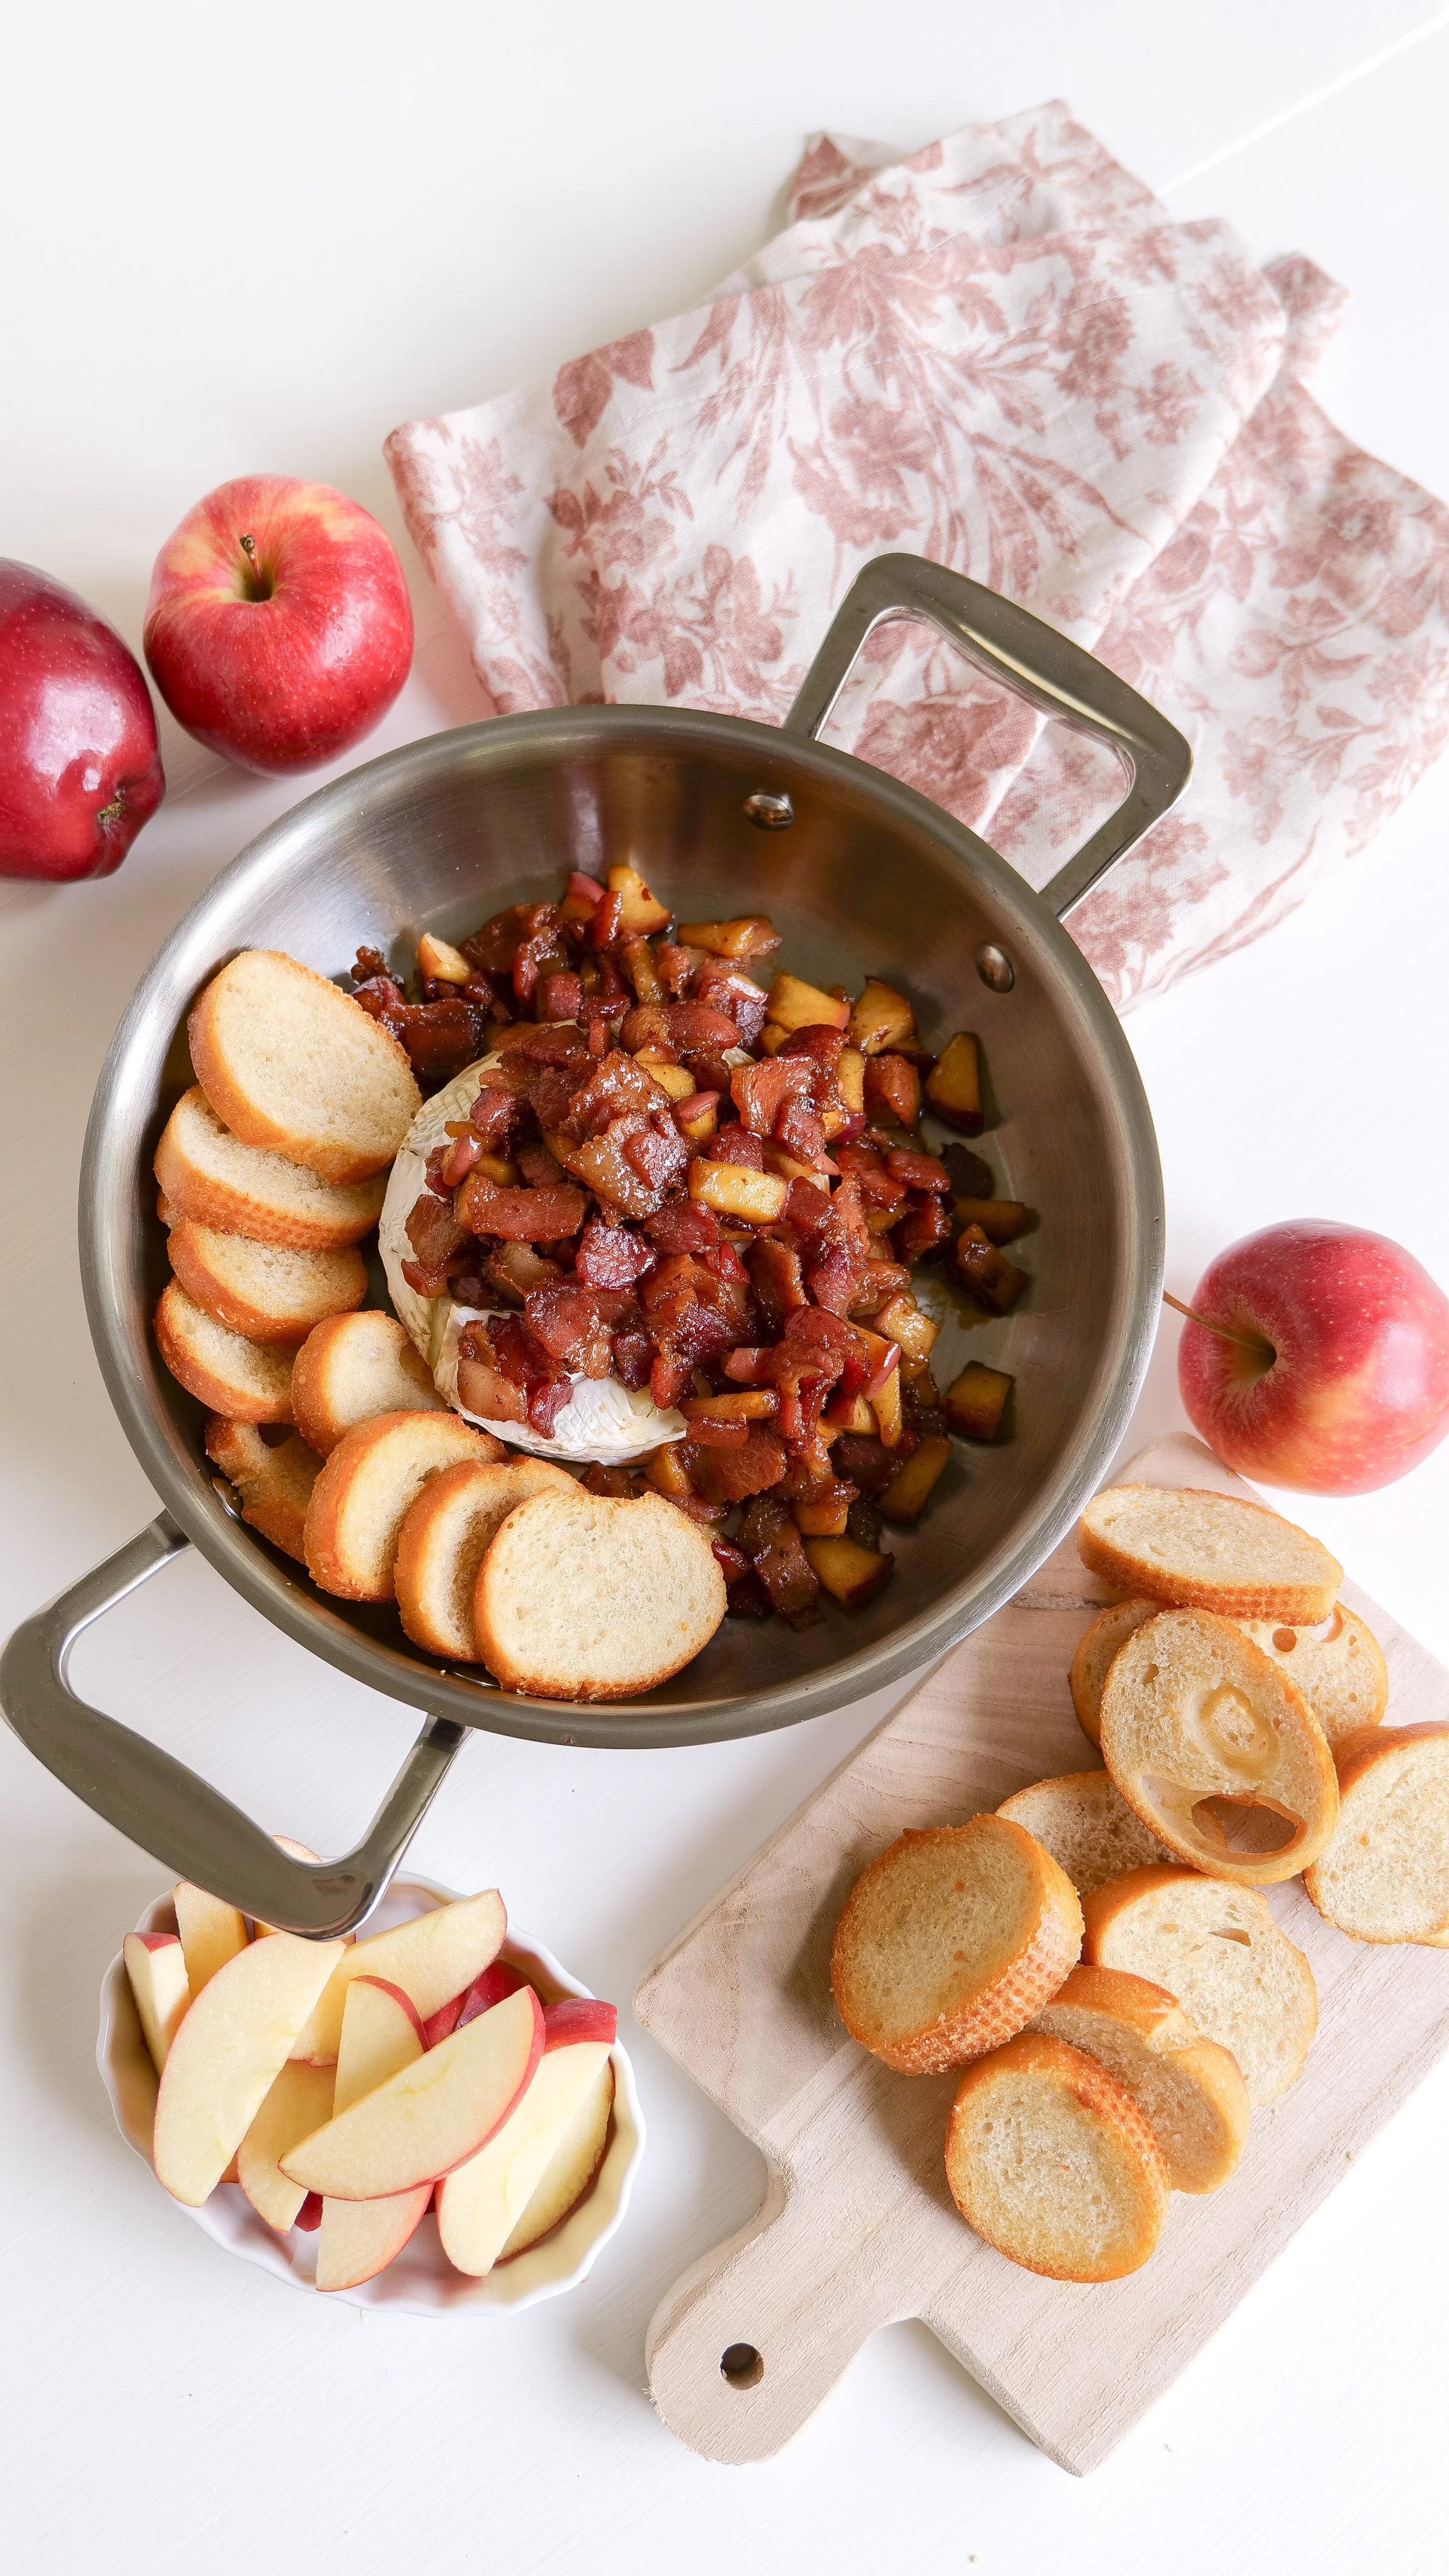
Milk Chocolate

The chocolate drizzle makes these feel extra special for Christmas. Milk chocolate is my favorite with the brown butter, although semi-sweet or dark chocolate would also work.

Cane Sugar

A final sprinkle of coarse cane sugar adds a beautiful sparkle and a subtle crunch.

Kitchen Tools

You don't need anything complicated for this recipe.

  • Small saucepan

  • Stand mixer or electric hand mixer

  • Large mixing bowl

  • Measuring cups and spoons

  • Rolling pin

  • Christmas cookie cutters

  • Baking sheets

  • Parchment paper

  • Cooling rack

  • Microwave-safe bowl or double boiler for chocolate

  • Piping bag or small zip-top bag for drizzling

I've gathered my favorite holiday baking pieces, cookie cutters, serving platters, linens, and Christmas kitchen finds in my Christmas in the Kitchen collection.

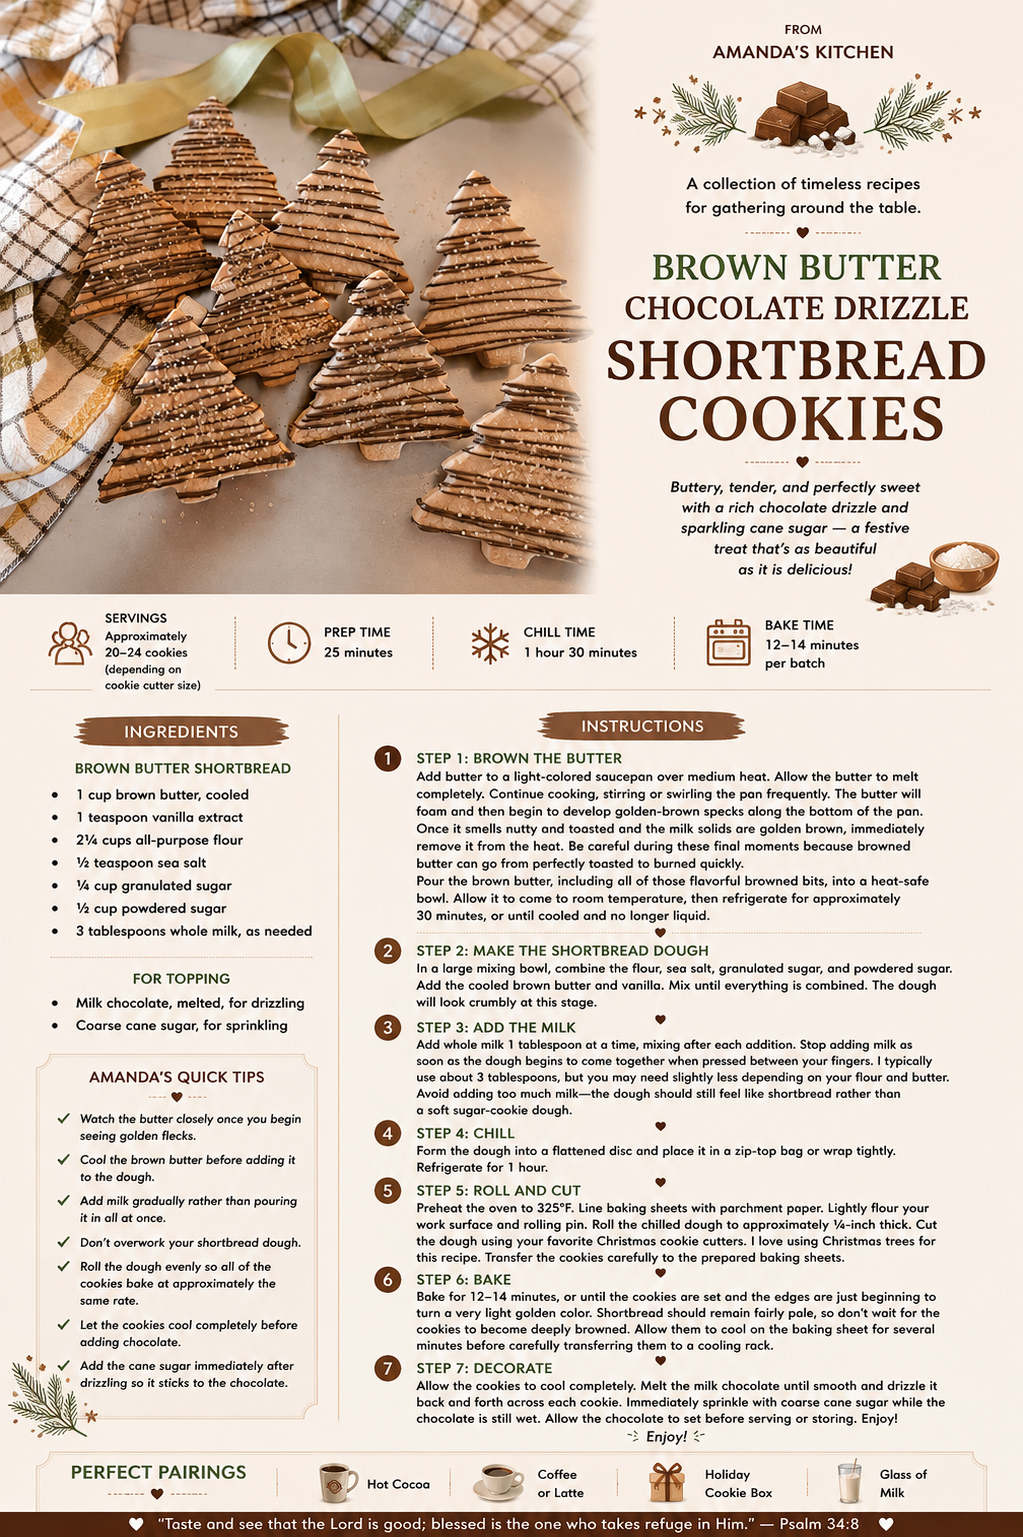
Brown Butter Chocolate Drizzle Shortbread Cookies Recipe

Prep Time: 25 minutes
Chill Time: 1 hour 30 minutes
Bake Time: 12–14 minutes per batch
Servings: Approximately 20–24 cookies, depending on cookie cutter size

Ingredients

Brown Butter Shortbread

  • 1 cup brown butter, cooled

  • 1 teaspoon vanilla extract

  • 2¼ cups all-purpose flour

  • ½ teaspoon sea salt

  • ¼ cup granulated sugar

  • ½ cup powdered sugar

  • 3 tablespoons whole milk, as needed

For Topping

  • Milk chocolate, melted, for drizzling

  • Coarse cane sugar, for sprinkling

Instructions

Step 1: Brown the Butter

Add butter to a light-colored saucepan over medium heat.

Allow the butter to melt completely. Continue cooking, stirring or swirling the pan frequently.
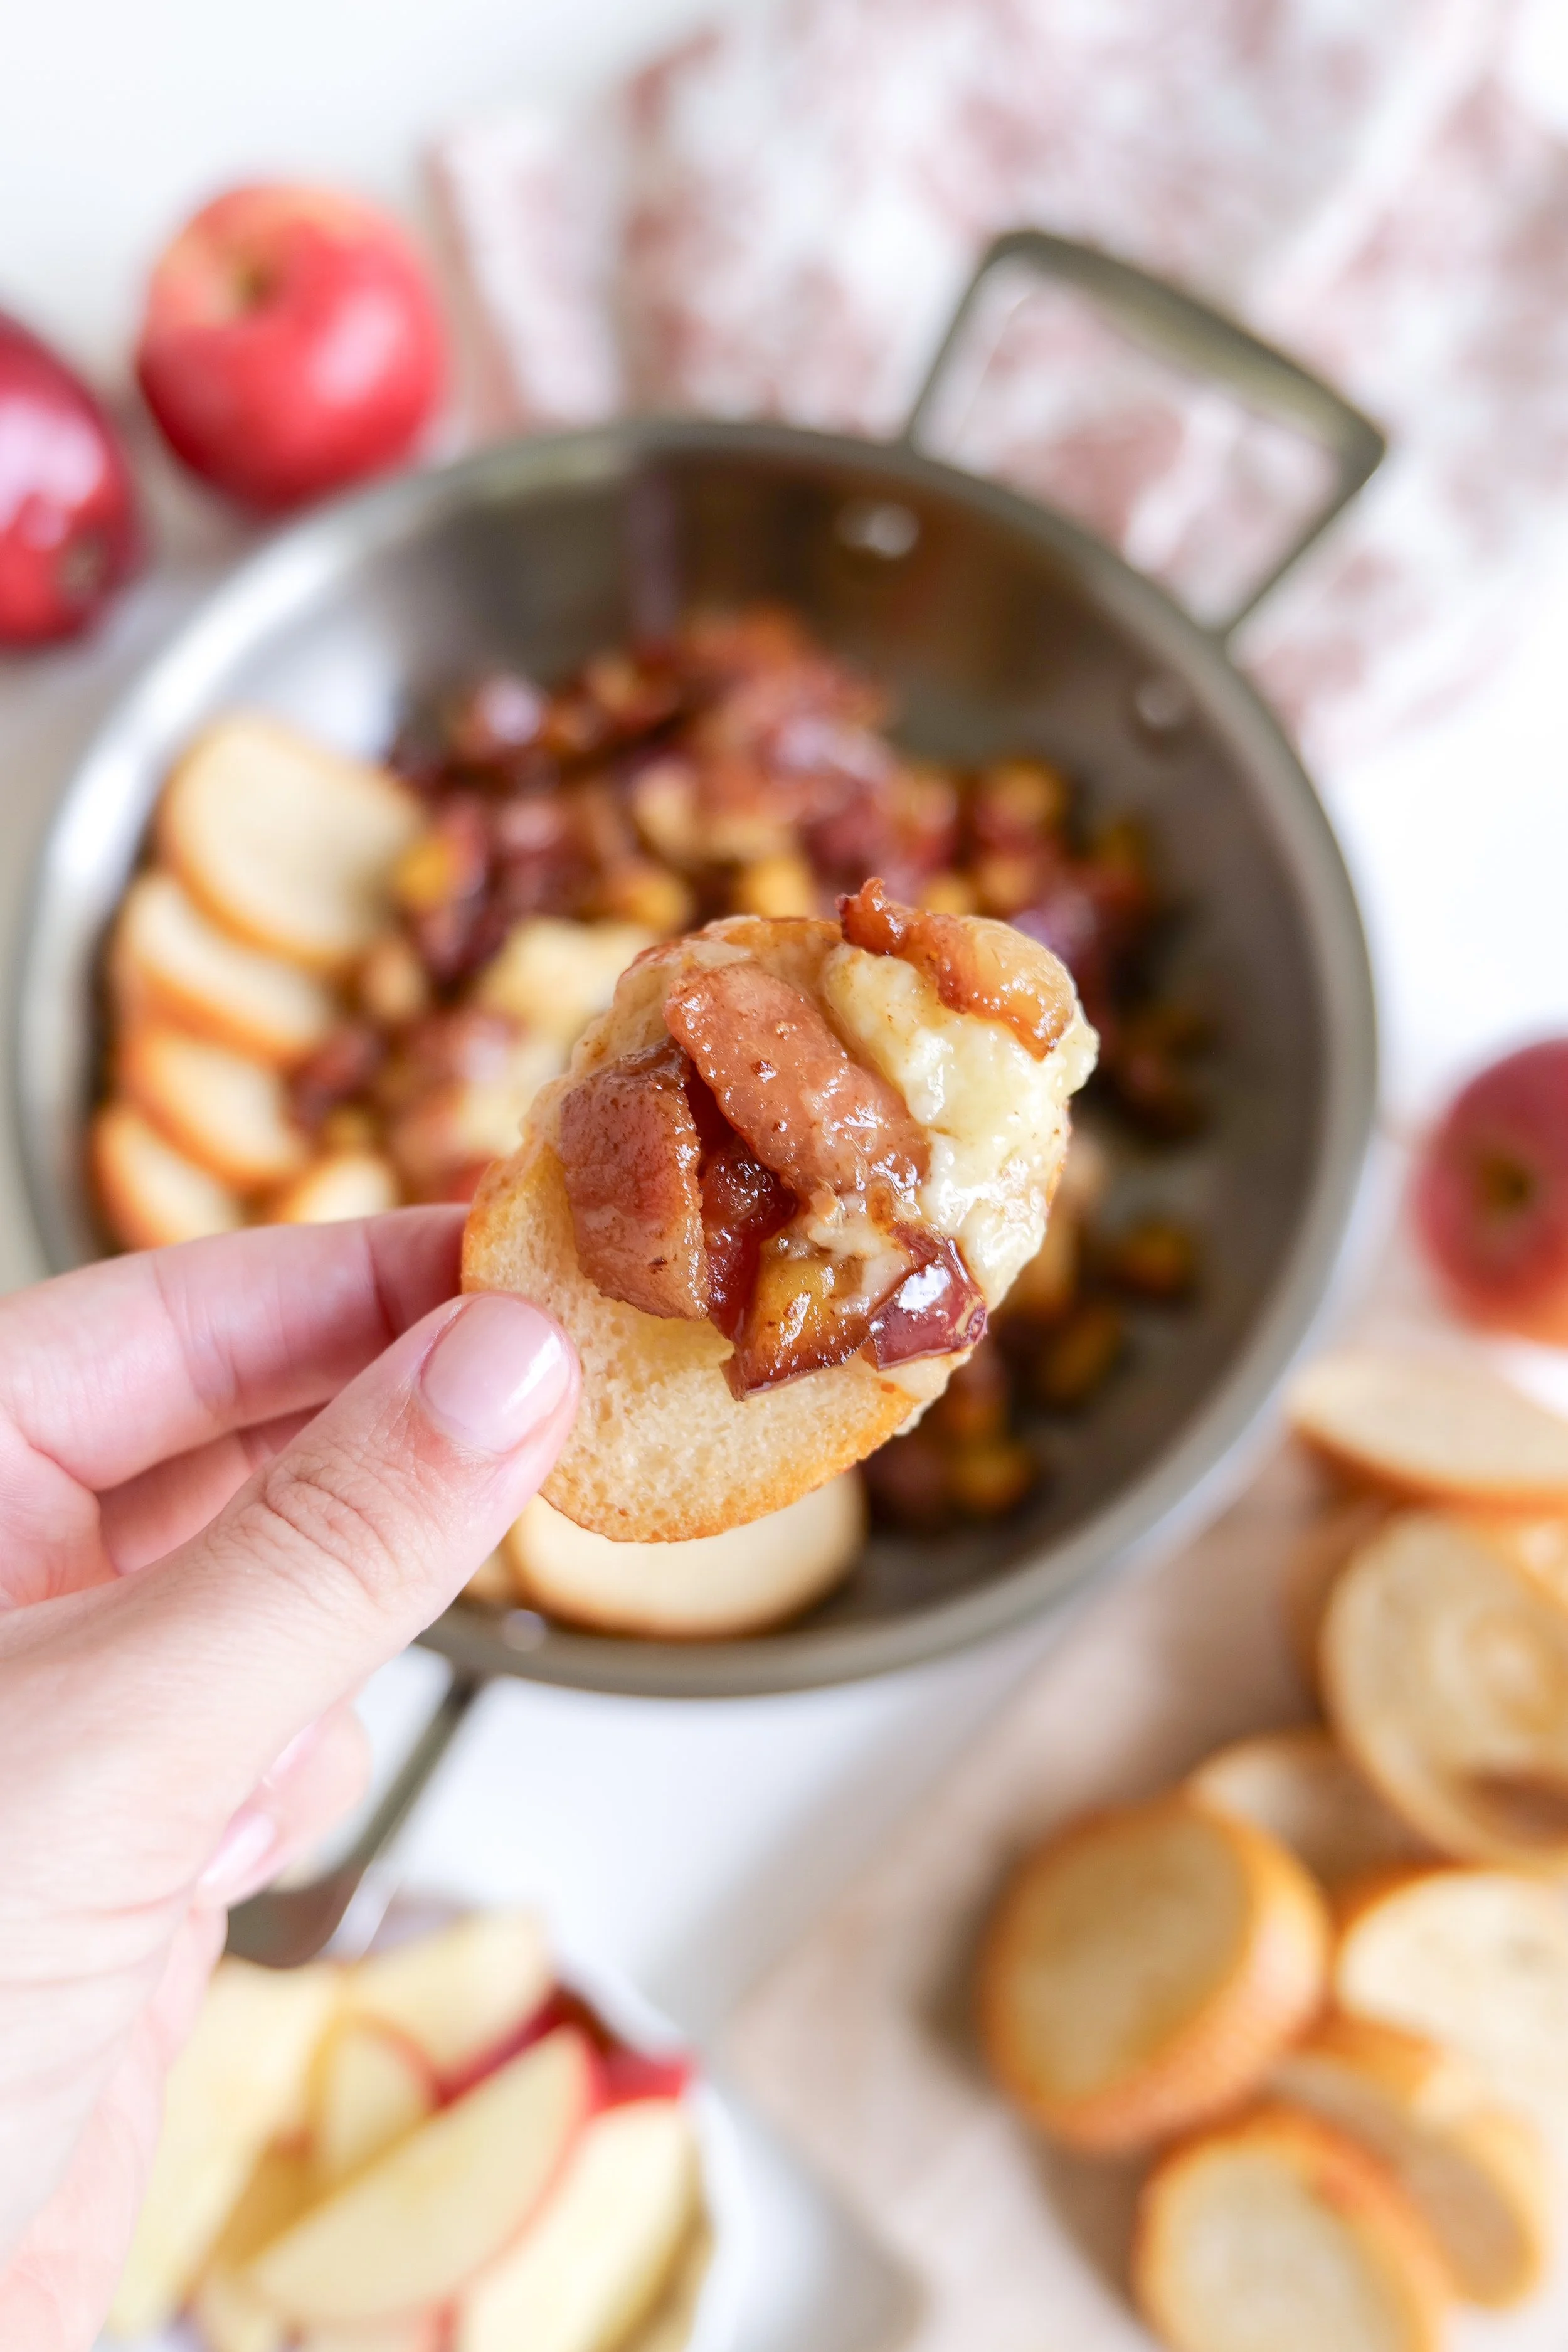
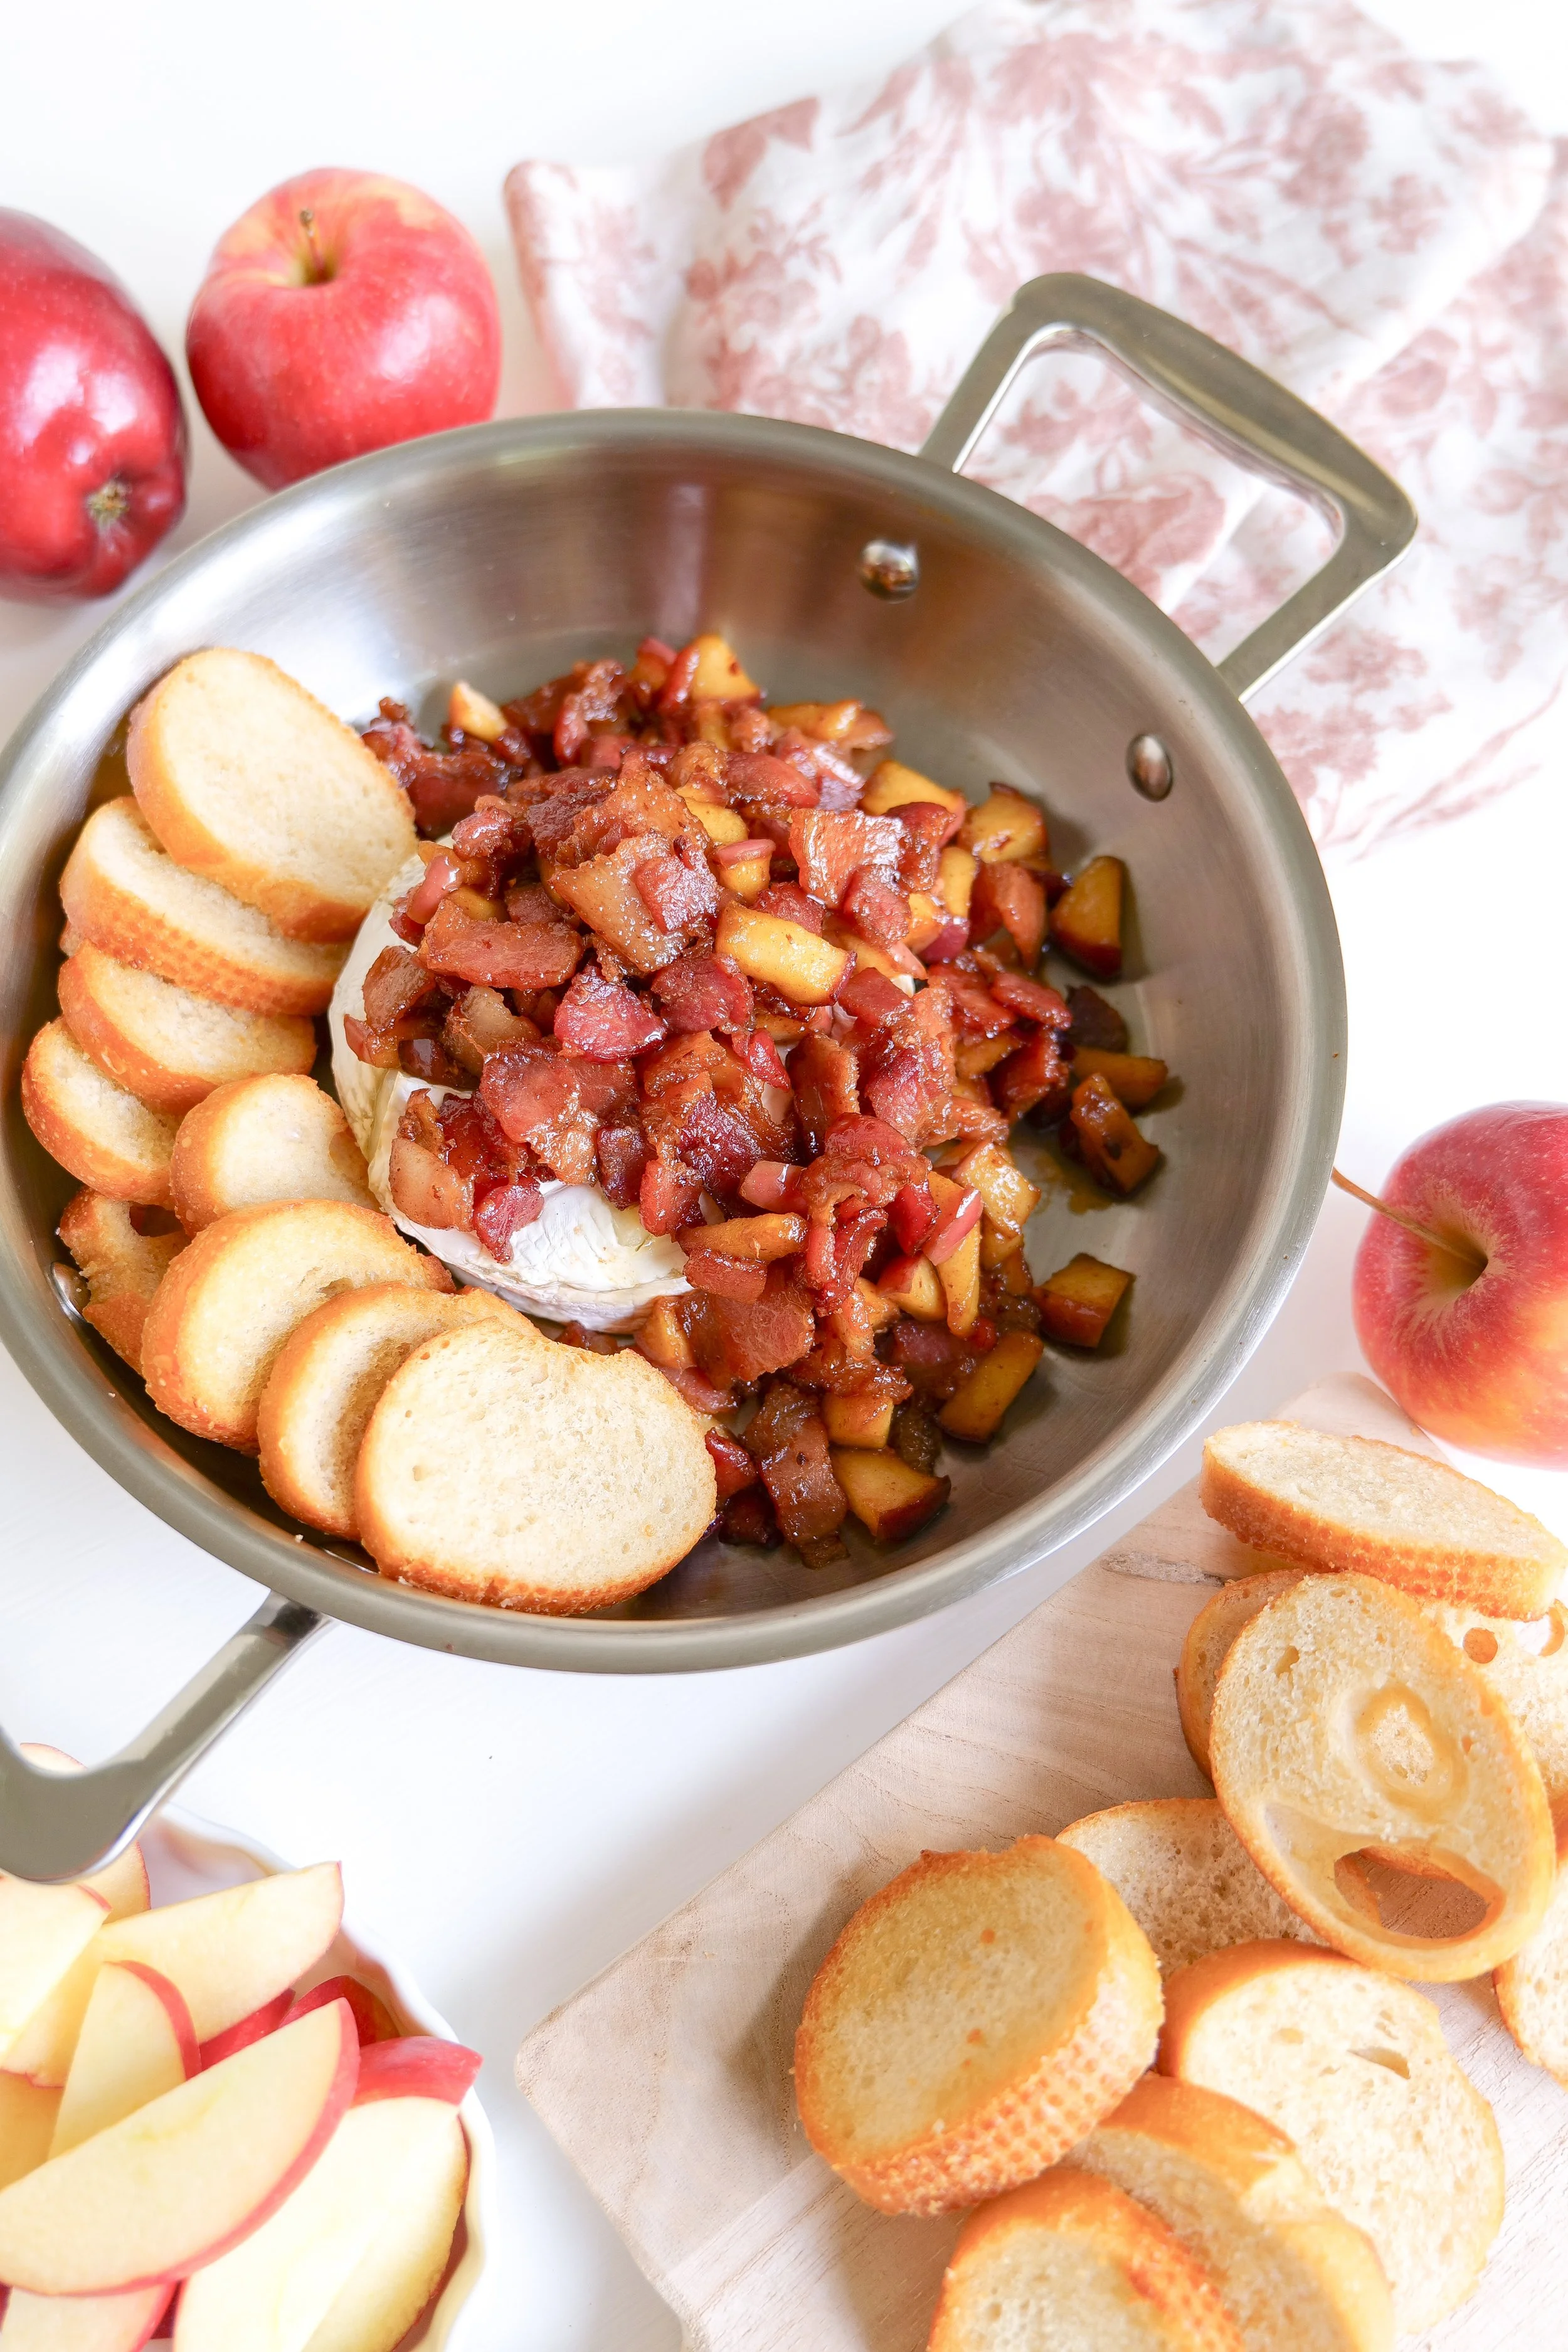
The butter will foam and then begin to develop golden-brown specks along the bottom of the pan. Once it smells nutty and toasted and the milk solids are golden brown, immediately remove it from the heat.

Be careful during these final moments because browned butter can go from perfectly toasted to burned quickly.
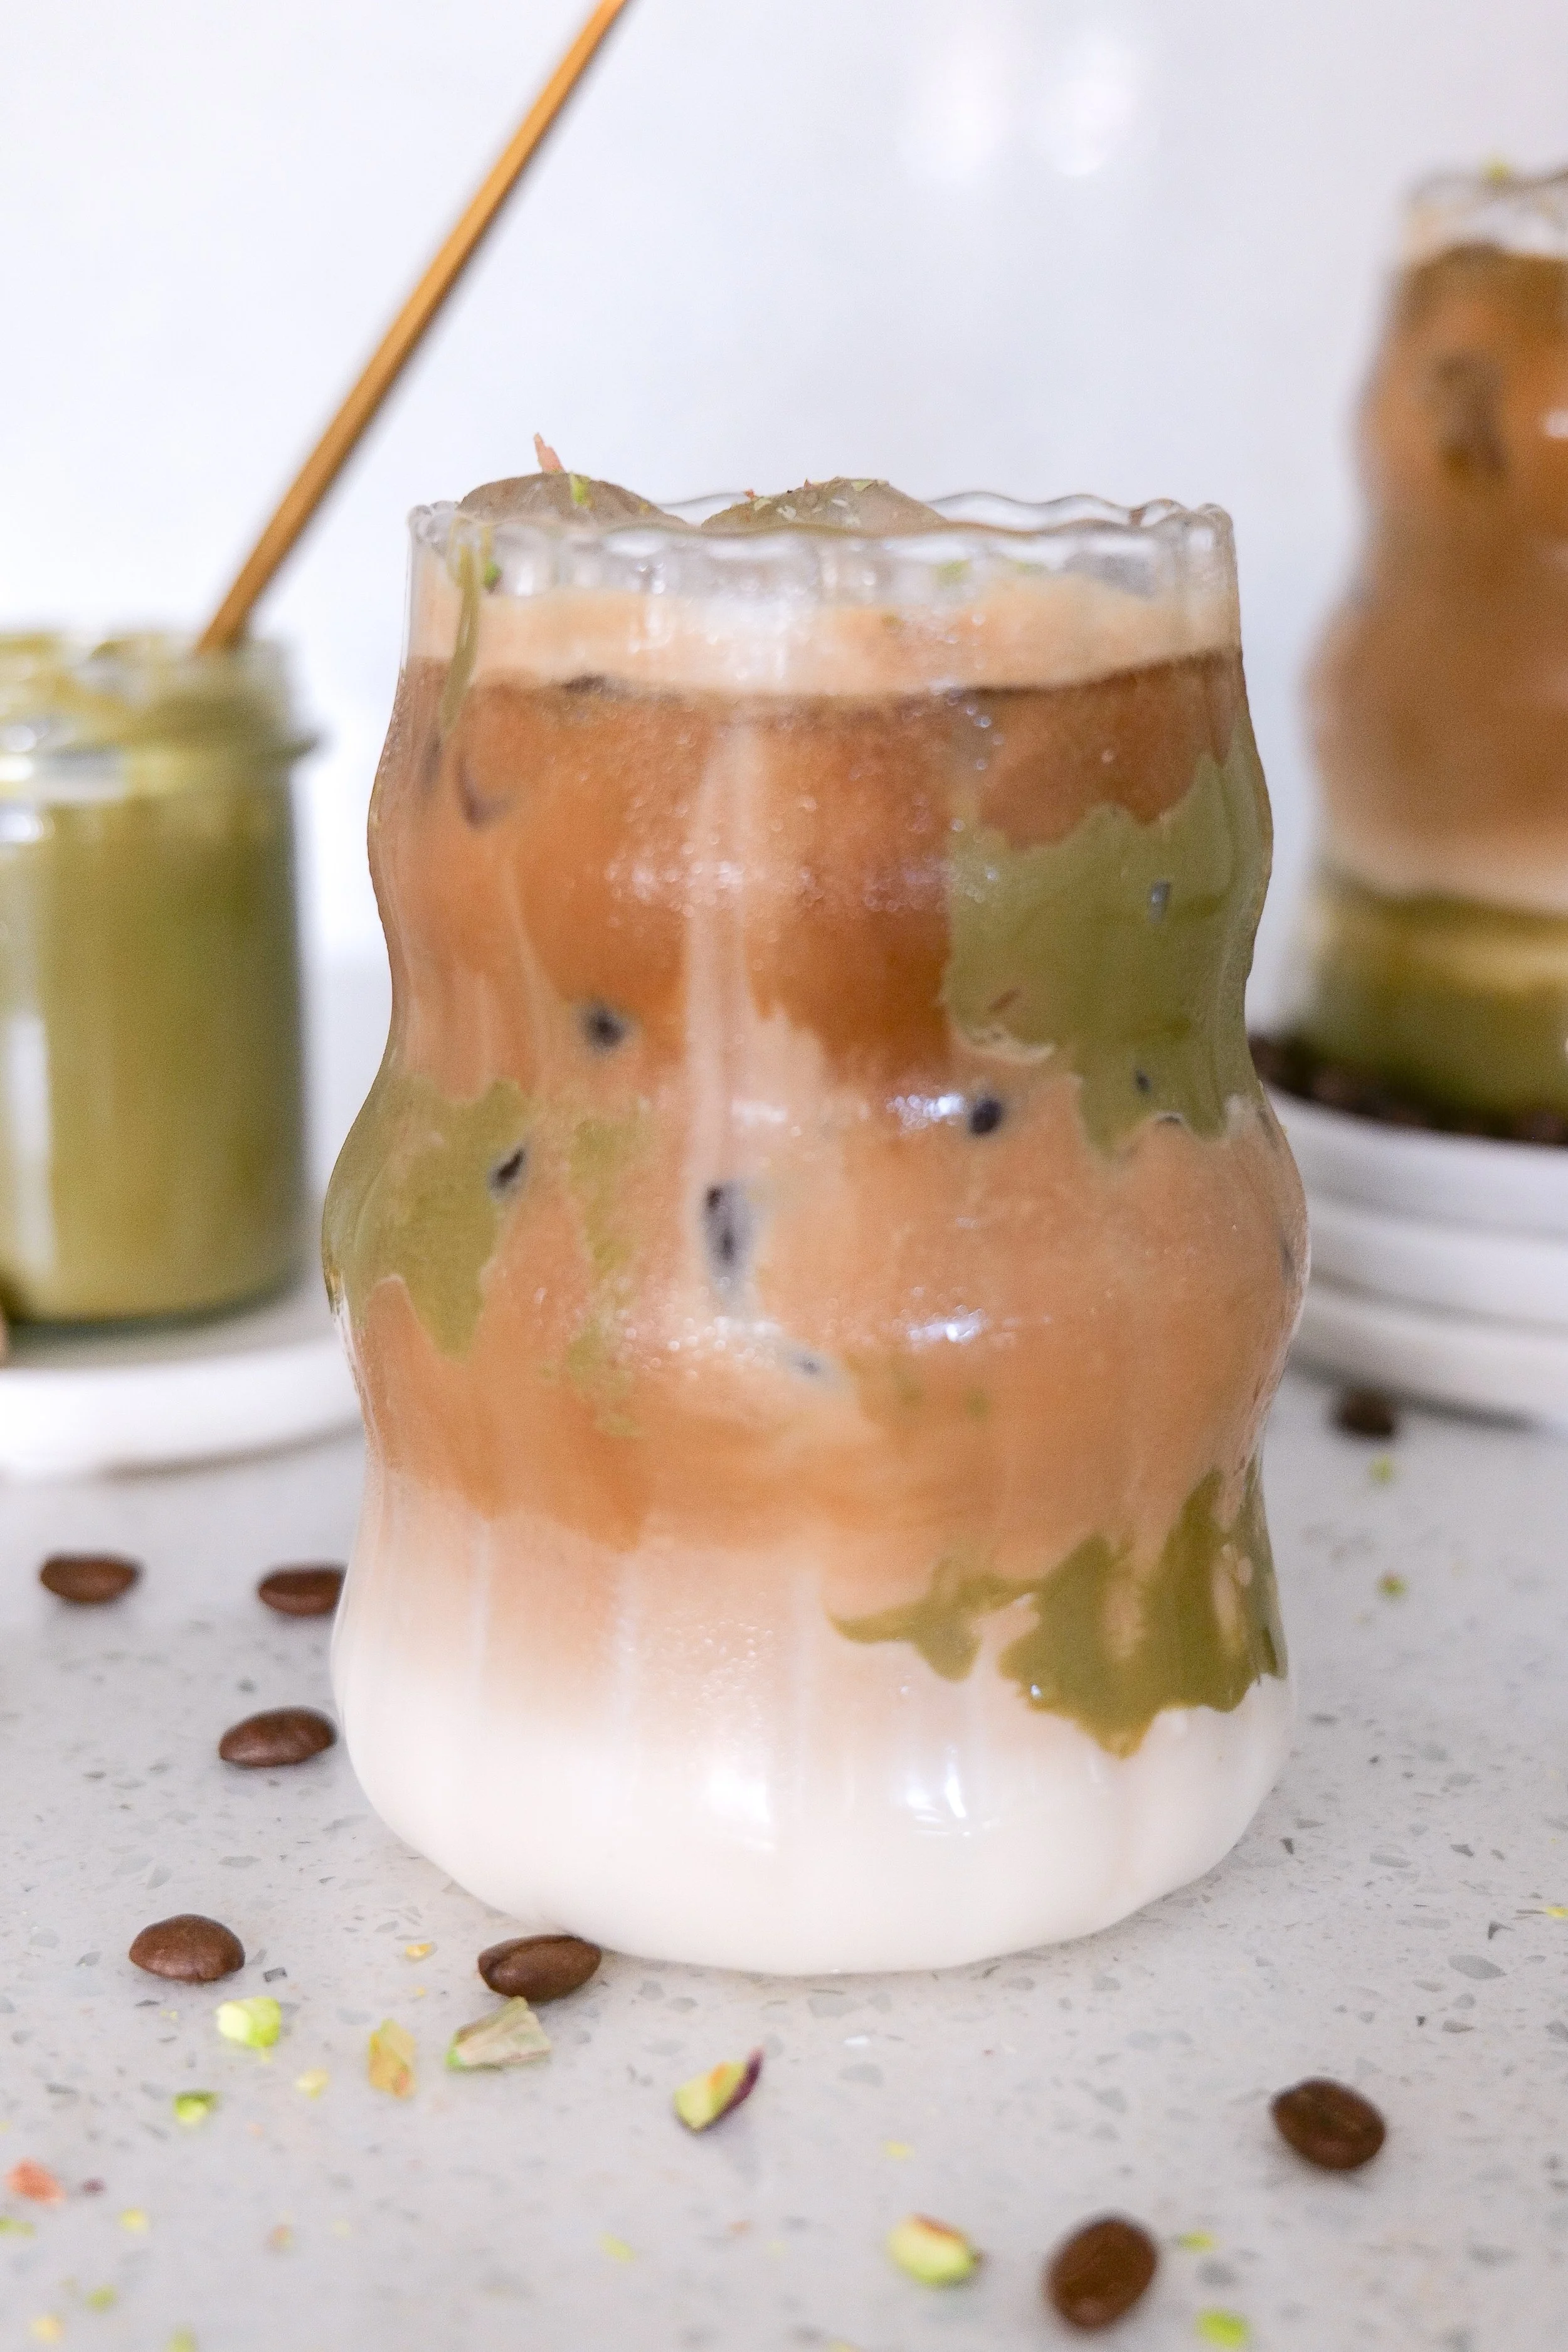
Pour the brown butter, including all of those flavorful browned bits, into a heat-safe bowl.

Allow it to come to room temperature, then refrigerate for approximately 30 minutes, or until cooled and no longer liquid.

Step 2: Make the Shortbread Dough

In a large mixing bowl, combine the flour, sea salt, granulated sugar, and powdered sugar.

Add the cooled brown butter and vanilla.

Mix until everything is combined. The dough will look crumbly at this stage.

Step 3: Add the Milk

Add whole milk 1 tablespoon at a time, mixing after each addition.

Stop adding milk as soon as the dough begins to come together when pressed between your fingers.

I typically use about 3 tablespoons, but you may need slightly less depending on your flour and butter.

Avoid adding too much milk—the dough should still feel like shortbread rather than a soft sugar-cookie dough.

Step 4: Chill

Form the dough into a flattened disc and place it in a zip-top bag or wrap tightly.
Refrigerate for 1 hour.
Step 5: Roll and Cut

Preheat the oven to 325°F.

Line baking sheets with parchment paper.

Lightly flour your work surface and rolling pin.

Roll the chilled dough to approximately ¼-inch thick.

Cut the dough using your favorite Christmas cookie cutters. I love using Christmas trees for this recipe.

Transfer the cookies carefully to the prepared baking sheets.

Step 6: Bake

Bake for 12–14 minutes, or until the cookies are set and the edges are just beginning to turn a very light golden color.

Shortbread should remain fairly pale, so don't wait for the cookies to become deeply browned.

Allow them to cool on the baking sheet for several minutes before carefully transferring them to a cooling rack.

Step 7: Decorate

Allow the cookies to cool completely.

Melt the milk chocolate until smooth and drizzle it back and forth across each cookie.

Immediately sprinkle with coarse cane sugar while the chocolate is still wet.

Allow the chocolate to set before serving or storing.

Enjoy!

Amanda's Quick Tips

  • Watch the butter closely once you begin seeing golden flecks.

  • Cool the brown butter before adding it to the dough.

  • Add milk gradually rather than pouring it in all at once.

  • Don't overwork your shortbread dough.

  • Roll the dough evenly so all of the cookies bake at approximately the same rate.

  • Let the cookies cool completely before adding chocolate.

  • Add the cane sugar immediately after drizzling so it sticks to the chocolate.

Homemade shortbread Christmas cookies finished with thin lines of melted milk chocolate and sparkling sugar.

How to Know When Brown Butter Is Ready

Brown butter sounds fancy, but once you know what you're looking for, it's incredibly simple.

As the butter cooks, you'll notice three stages:

First, it melts.

Then it begins to foam.

Finally, you'll see little golden-brown milk solids forming at the bottom of the pan and notice a distinctly toasted, nutty aroma.

That's your cue to remove it from the heat.

I recommend using a light-colored saucepan when possible because it makes those browned milk solids much easier to see.

Amanda's Tips for Perfect Shortbread

Don't Add Too Much Milk

This is probably the most important tip.

Shortbread dough is naturally more crumbly than traditional cookie dough. Don't keep adding milk simply because it doesn't look like sugar-cookie dough.

When you squeeze a little dough in your hand and it stays together, you're ready.

Keep the Dough Cold

Chilling helps the butter firm back up and keeps your Christmas shapes more defined while baking.

If the dough becomes particularly warm while you're rolling and cutting, place the cut cookies in the refrigerator for 10–15 minutes before baking.

Don't Overbake

You want the cookies set with just the faintest hint of golden color around the edges.

Shortbread that is baked too long can lose its wonderfully tender texture.

Let Them Cool Before Decorating

Warm cookies can cause your chocolate drizzle to melt and spread. Wait until the shortbread is completely cool before decorating.

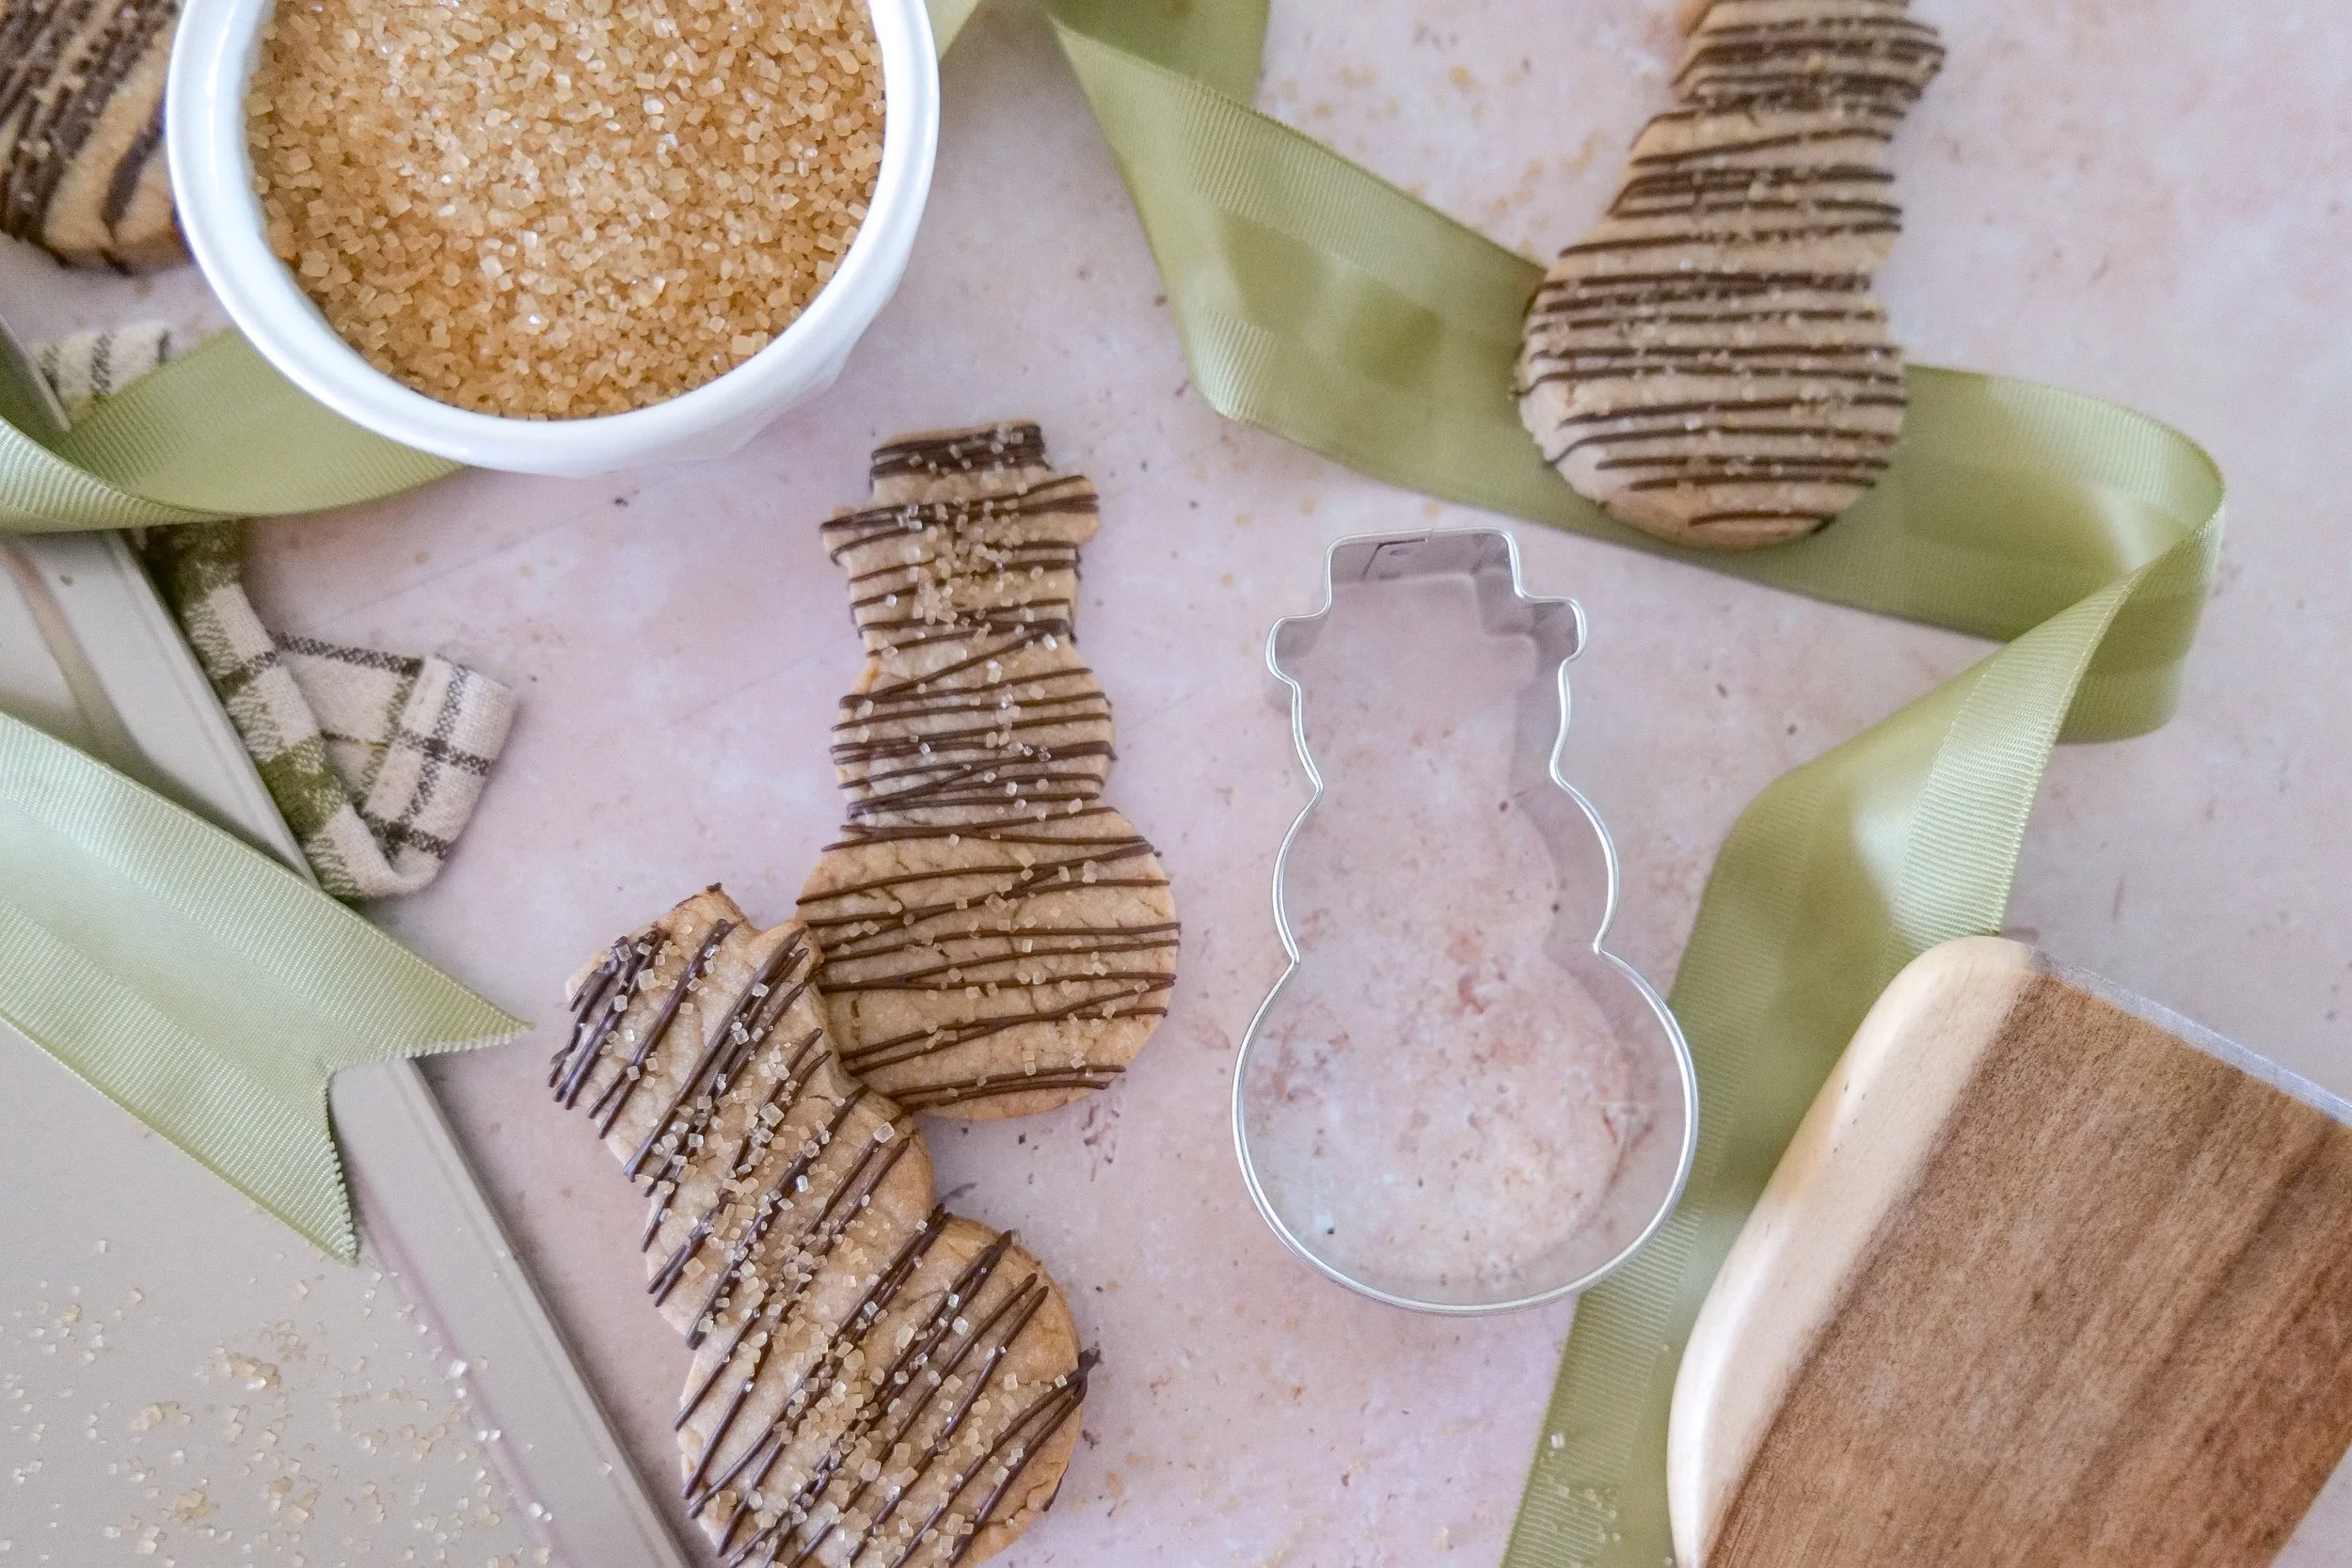
snowman Christmas tree shortbread cookies made with brown butter and decorated with chocolate drizzle for holiday baking.

Brown Butter Shortbread for Christmas Gifting

These cookies make such a beautiful homemade Christmas gift because they're sturdy enough to package while still feeling special.

Once the chocolate has completely set, arrange them in:

  • A Christmas cookie tin

  • A kraft bakery box tied with ribbon

  • A glass cookie jar

  • Cellophane treat bags

  • A small basket with coffee or tea

I especially love the idea of pairing them with a pretty holiday mug for a simple hostess or neighbor gift.

What to Serve with Christmas Shortbread Cookies

These cookies are wonderful on their own, but I especially love them alongside:

  • Hot coffee

  • Cappuccino

  • Hot chocolate

  • Tea

  • Warm apple cider

  • A Christmas dessert board

  • Fresh berries

  • Other Christmas cookies

They would also be beautiful arranged on a dessert table after Christmas dinner.

Christmas in the Kitchen

Christmas is one of my favorite times to make the kitchen feel extra special.

I've gathered the pieces I reach for during holiday baking and entertaining—from Christmas cookie cutters and baking essentials to pretty serving pieces, festive linens, mugs, and little details that make an afternoon of baking feel like part of the celebration.

SHOP CHRISTMAS IN THE KITCHEN

Frequently Asked Questions

Why is my shortbread dough crumbly?

Shortbread dough is supposed to be somewhat crumbly. Add the whole milk one tablespoon at a time until the dough holds together when pressed.

Why do I need to chill the brown butter?

Browning melts the butter completely. Cooling it allows the fat to firm again so the shortbread maintains the proper texture.

Can I use regular butter instead?

Yes, although you'll lose the deep toasted flavor that makes this recipe special.

Can I make the dough ahead?

Yes. Prepare the dough, wrap it tightly, and refrigerate it until you're ready to roll and bake.

How thick should I roll shortbread cookies?

Approximately ¼ inch thick works beautifully for cut-out shortbread.

How do I keep the cookies from spreading?

Keep the dough chilled and avoid placing cookie dough onto warm baking sheets.

Can I use different chocolate?

Absolutely. Milk, semi-sweet, dark, and white chocolate all work.

When are shortbread cookies done?

The cookies should be set and still fairly pale, with perhaps a very light golden color around the edges.

Can I freeze the dough?

Yes. Wrap it tightly before freezing, thaw it overnight in the refrigerator, and then roll, cut, and bake.

Are these good for Christmas cookie boxes?

Yes. Shortbread is an especially good cookie-box choice because it holds its shape and travels well.

More Christmas Recipes You'll Love

Sparkling Cider Punch for Christmas

Gingerbread Whoopie Pies at Home

Gingerbread Cinnamon Rolls Made with Sourdough Starter

Gingerbread Cake with a Brown Butter Caramel Frosting

Everything I use to make Christmas baking a little prettier and easier is gathered in my Christmas in the Kitchen shelf, including my favorite cookie cutters, baking tools, serving pieces, and holiday kitchen finds.

Save This Recipe

Whether you're starting your Christmas baking early, putting together cookie boxes for friends and neighbors, or simply looking for something sweet to enjoy at home, save this Brown Butter Chocolate Drizzle Shortbread Cookie recipe for the holiday season.

I've included my printable From Amanda's Kitchen recipe card below so you can save it, print it, and bring it back out every Christmas.

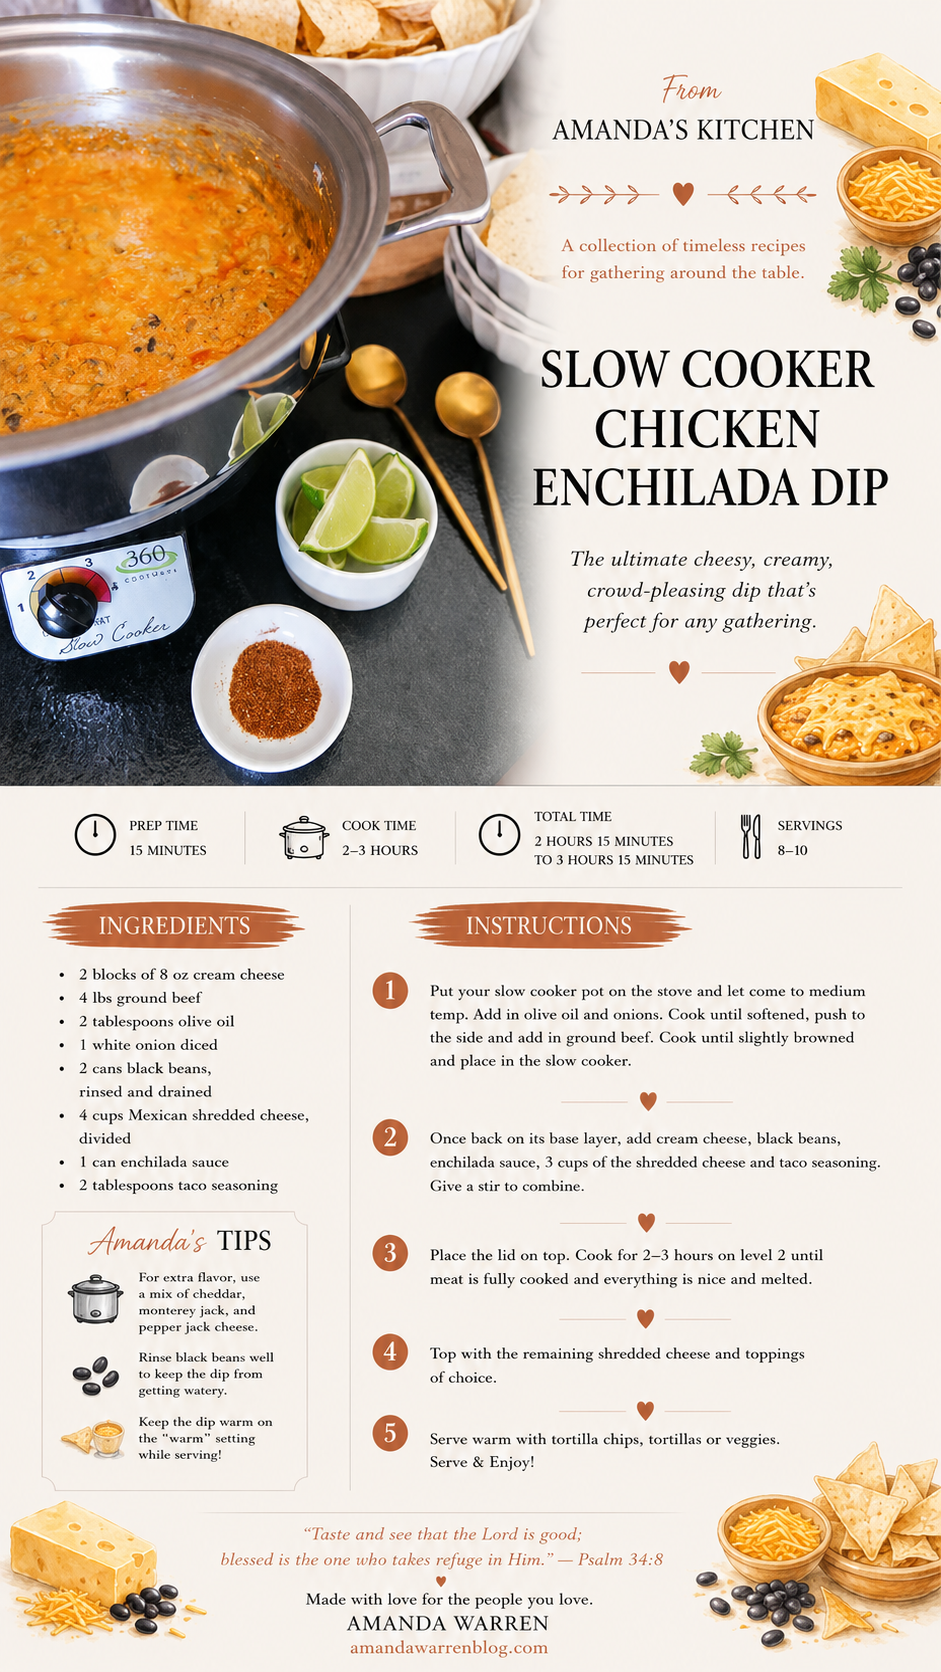
Printable recipe card for brown butter chocolate drizzle shortbread cookies from Amanda's Kitchen.

A Note From Amanda

Some of my favorite Christmas traditions are the simplest ones: turning on Christmas music, pulling out the cookie cutters, covering the kitchen counter in flour, and making something sweet for the people we love.

These shortbread cookies feel like exactly that kind of recipe.

They're simple enough for an afternoon of baking at home, but the brown butter, chocolate drizzle, and sparkling sugar make them feel a little more special for Christmas. I hope they become a recipe you bring back to your kitchen year after year.

"Taste and see that the Lord is good."
Psalm 34:8

Made with love for the people you love.

Easy Bacon Apple Baked Brie (The Ultimate Fall Party Appetizer)

Easy Bacon Apple Baked Brie

The Ultimate Fall Party Appetizer

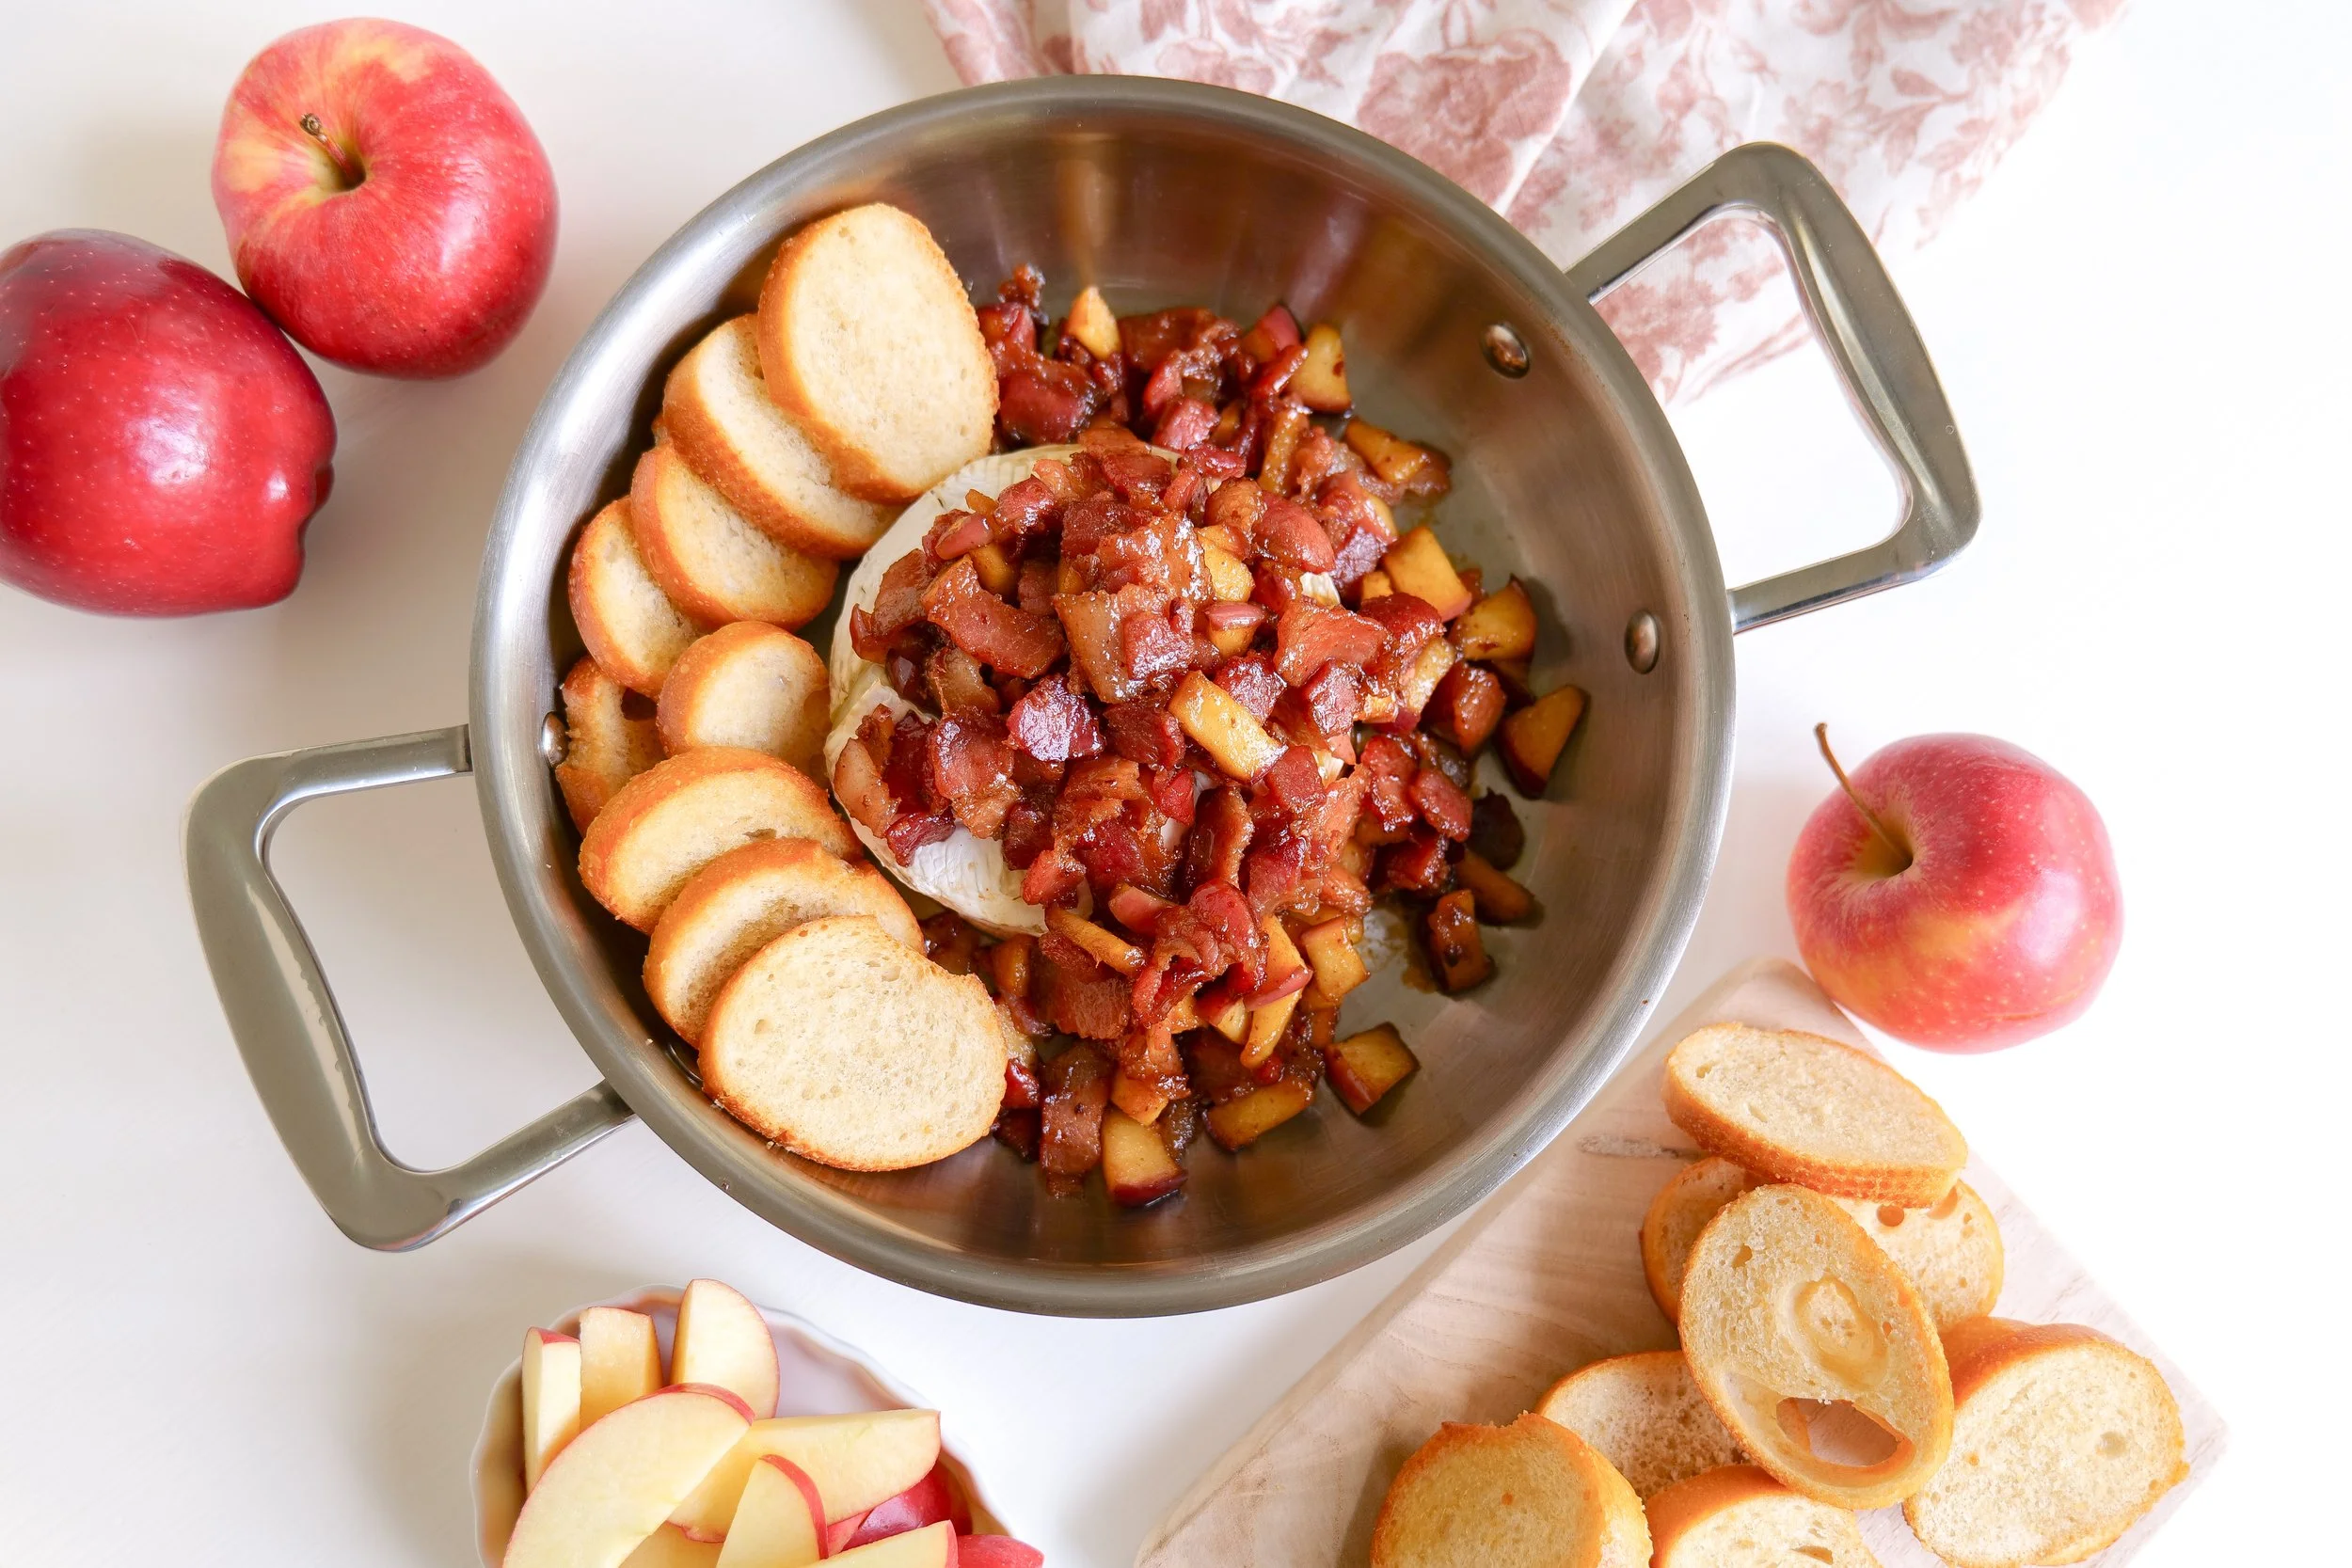
There are a handful of appetizers that disappear almost as quickly as they're set on the table, and this Easy Bacon Apple Baked Brie is always one of them.

Warm, creamy baked brie topped with crispy bacon, tender caramelized apples, and a touch of brown sugar feels like everything we love about fall wrapped into one beautiful appetizer. It's elegant enough for Thanksgiving, Christmas, and holiday parties, yet simple enough to make for a cozy weekend at home or a football gathering with friends.

One of my favorite things about this recipe is that nearly all of the prep can be done ahead of time. When guests begin arriving, simply bake the brie, warm the bacon apple topping, and dinner—or at least everyone's favorite part before dinner—is ready in just a few minutes.

Whether you're building a fall charcuterie board, hosting Friendsgiving, or looking for an appetizer that's guaranteed to impress, this baked brie is always the first thing to disappear.

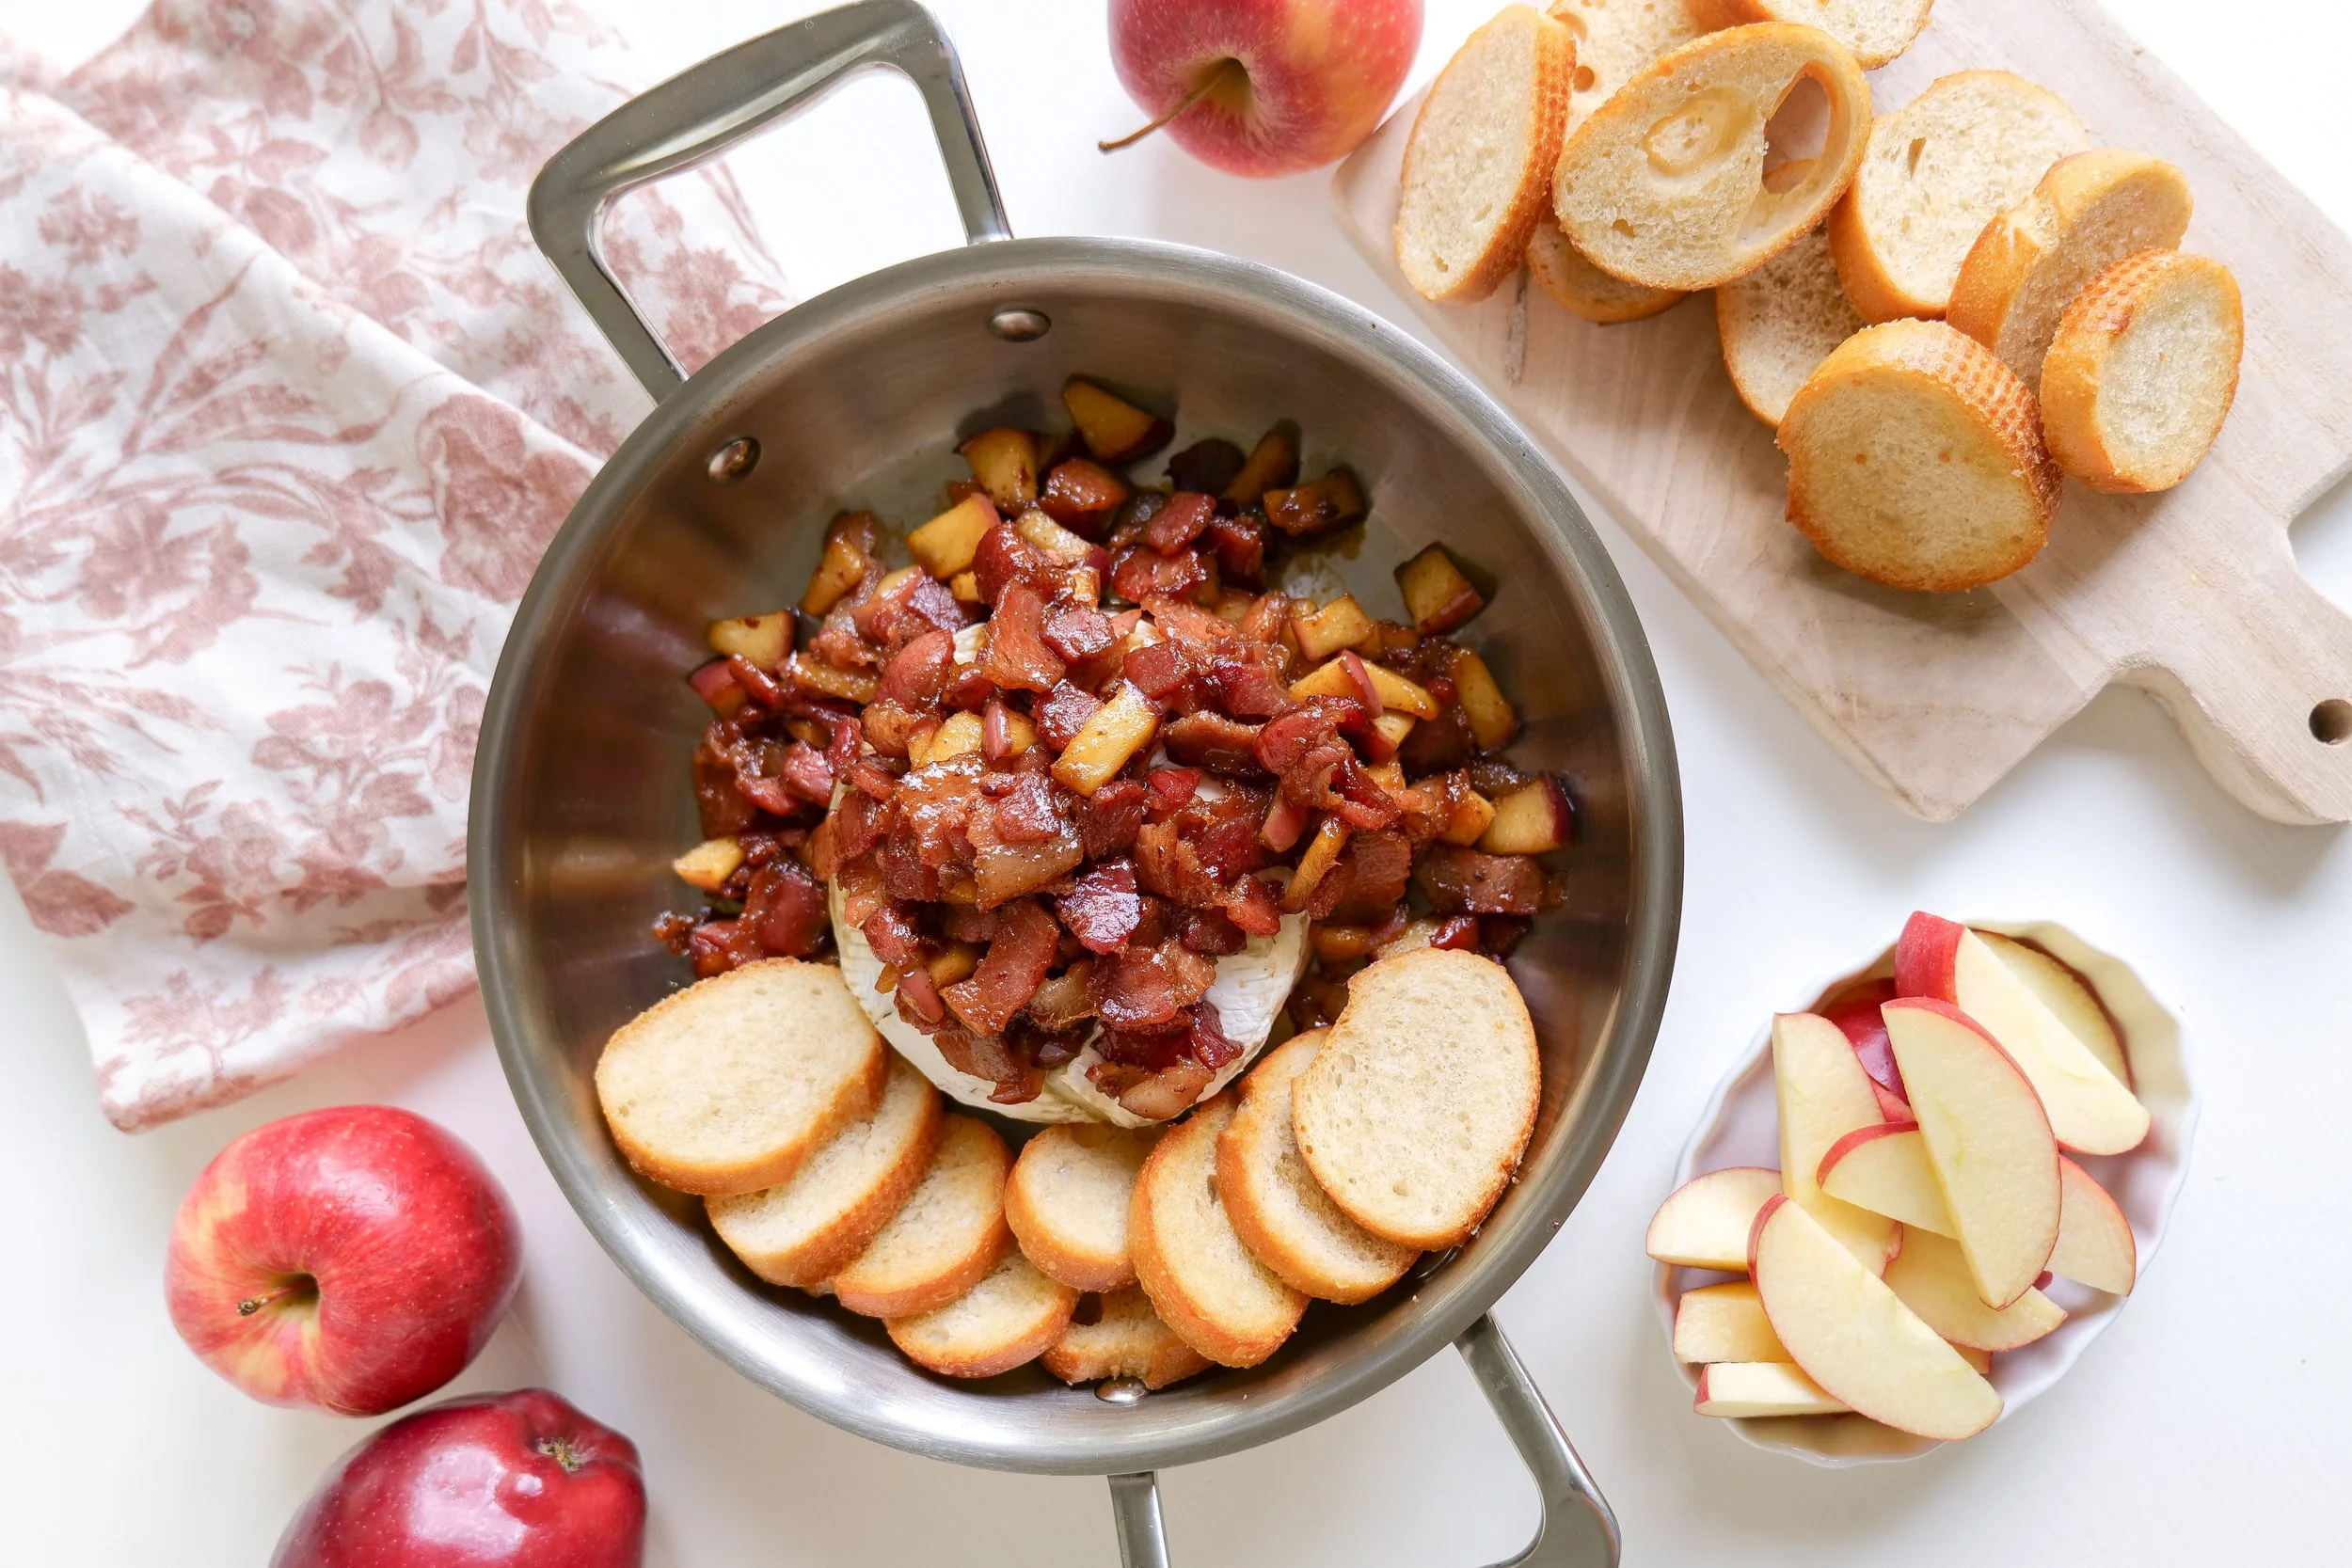
Easy bacon apple baked brie topped with crispy bacon, caramelized apples, and brown sugar served warm with crackers.

Why You'll Love This Recipe

If you're looking for an appetizer that looks impressive without spending hours in the kitchen, this is it.

You'll love this recipe because it's:

• Ready in under 30 minutes

• Perfect for holiday entertaining

• Sweet, savory, creamy, and crunchy

• Easy to prepare ahead

• Beautiful on any charcuterie board

• Made with just a handful of ingredients

• Great for Thanksgiving, Christmas, football parties, and fall gatherings

• Always the first appetizer to disappear

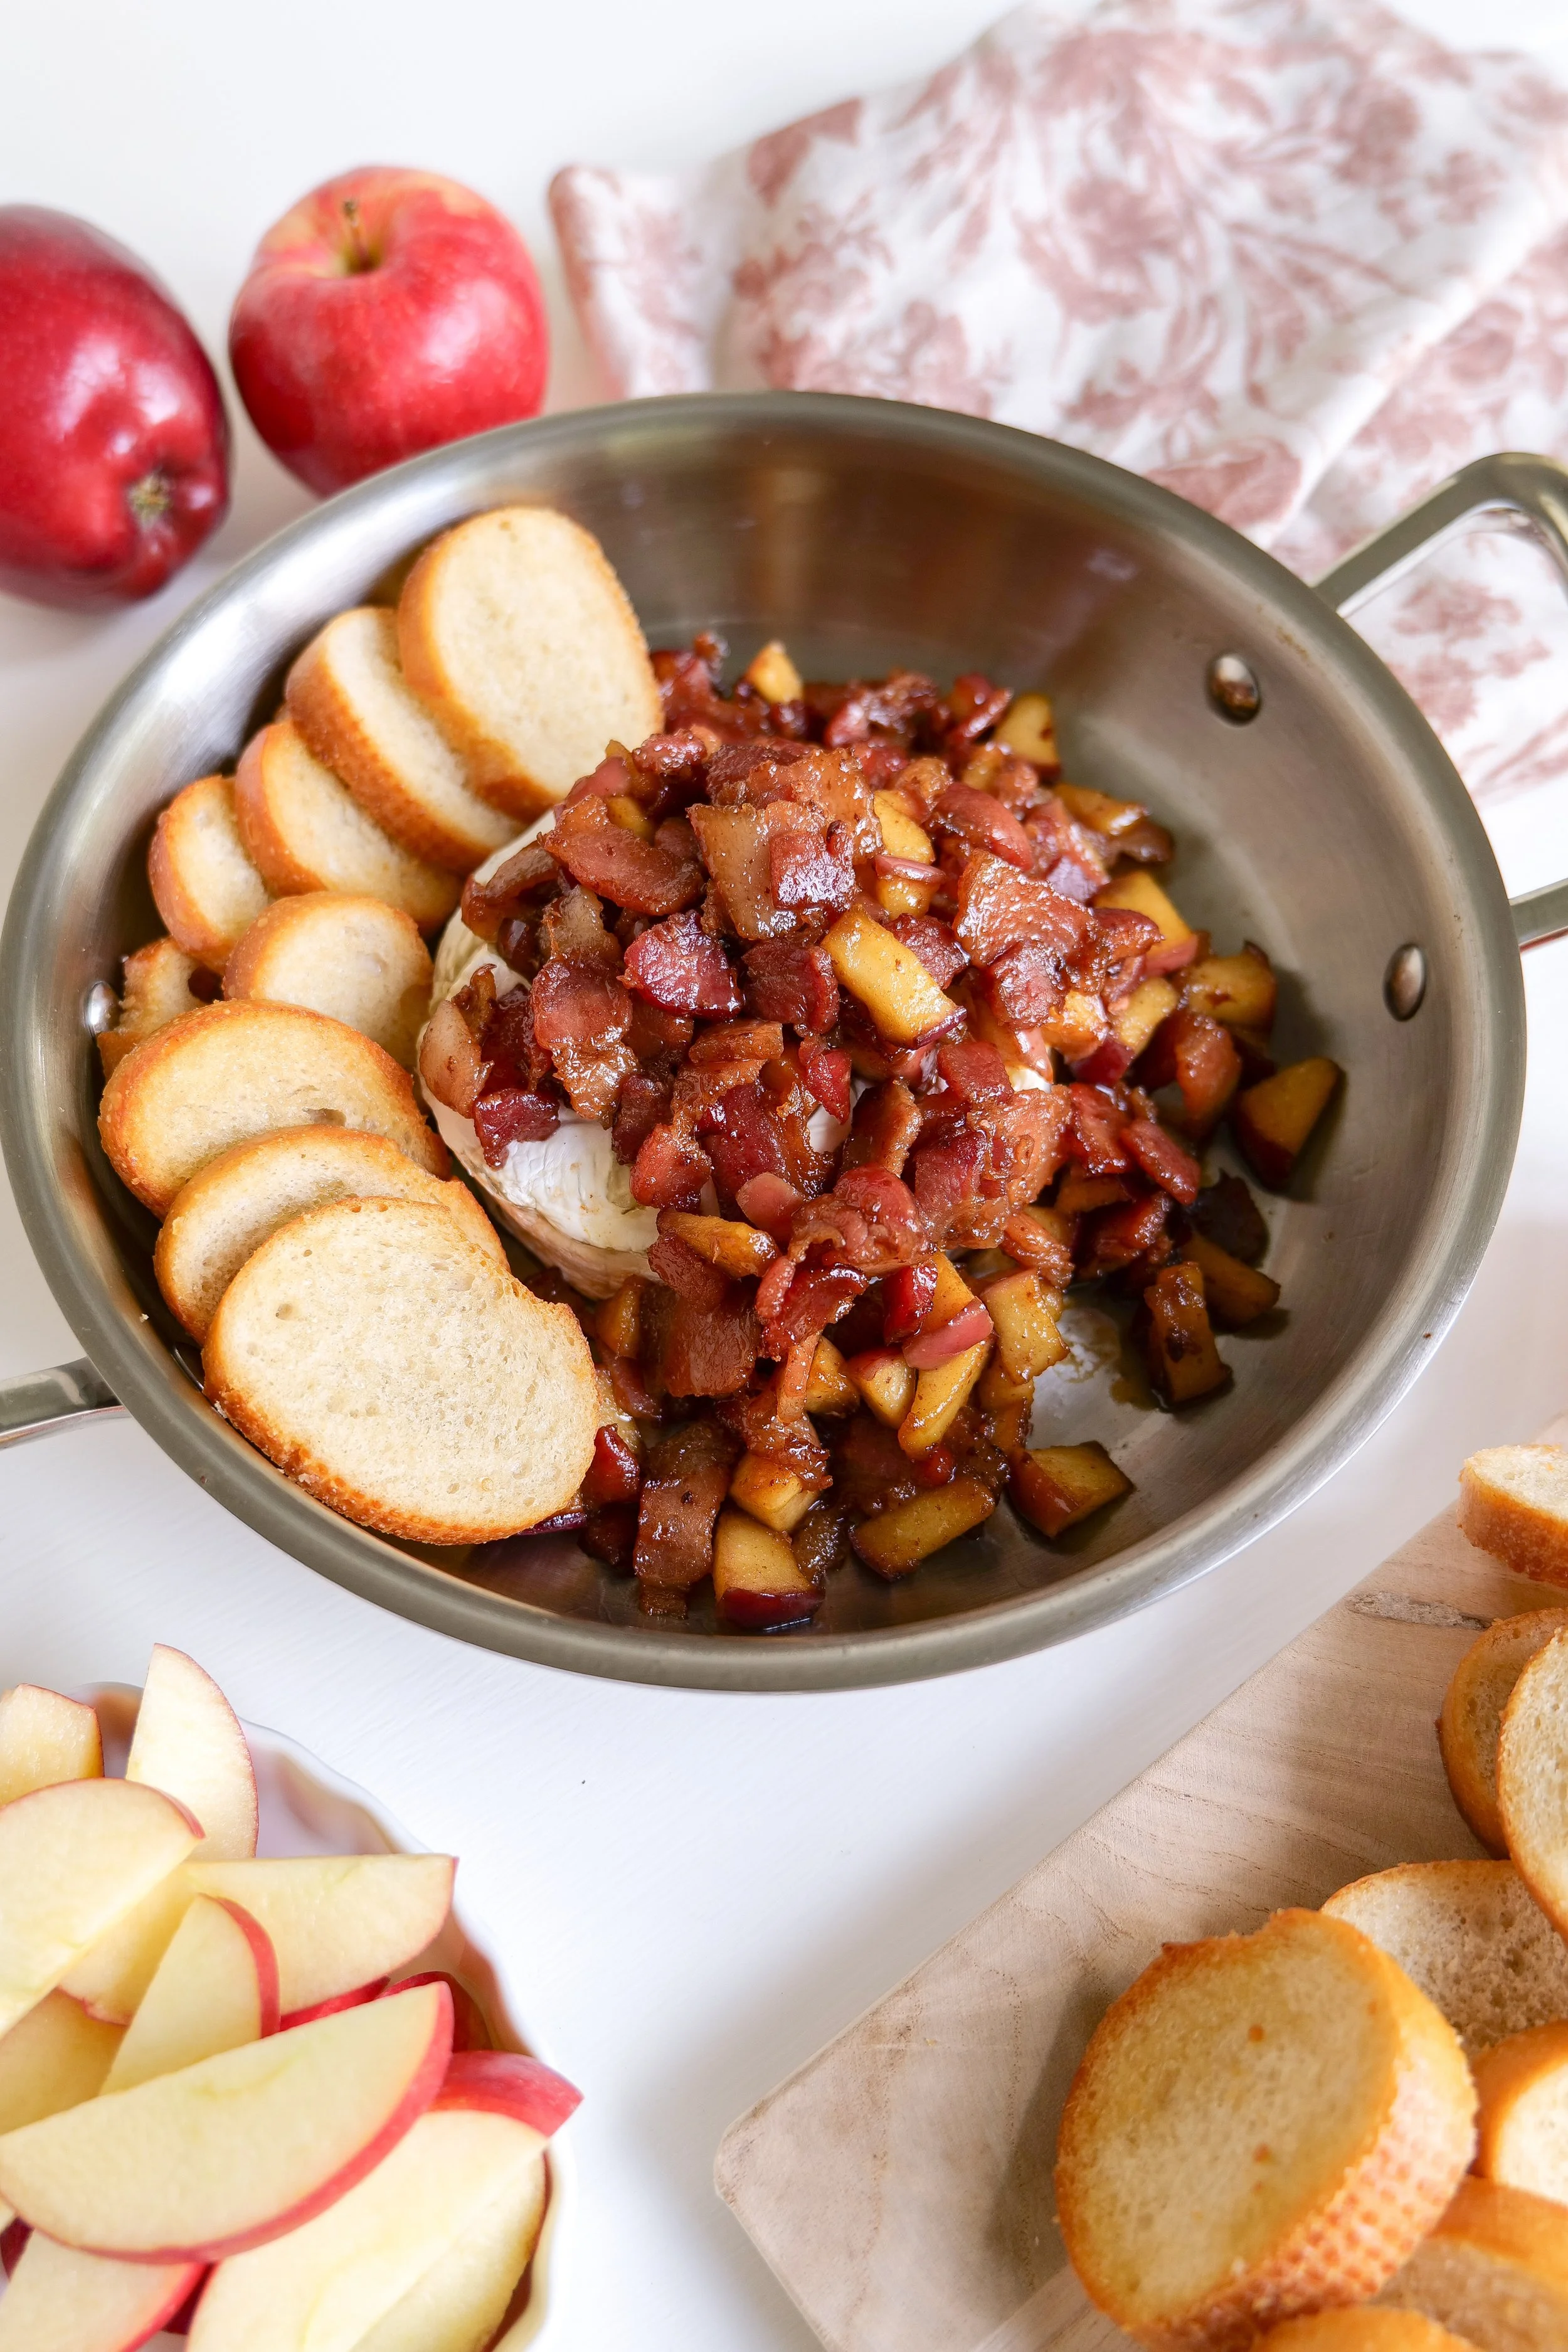
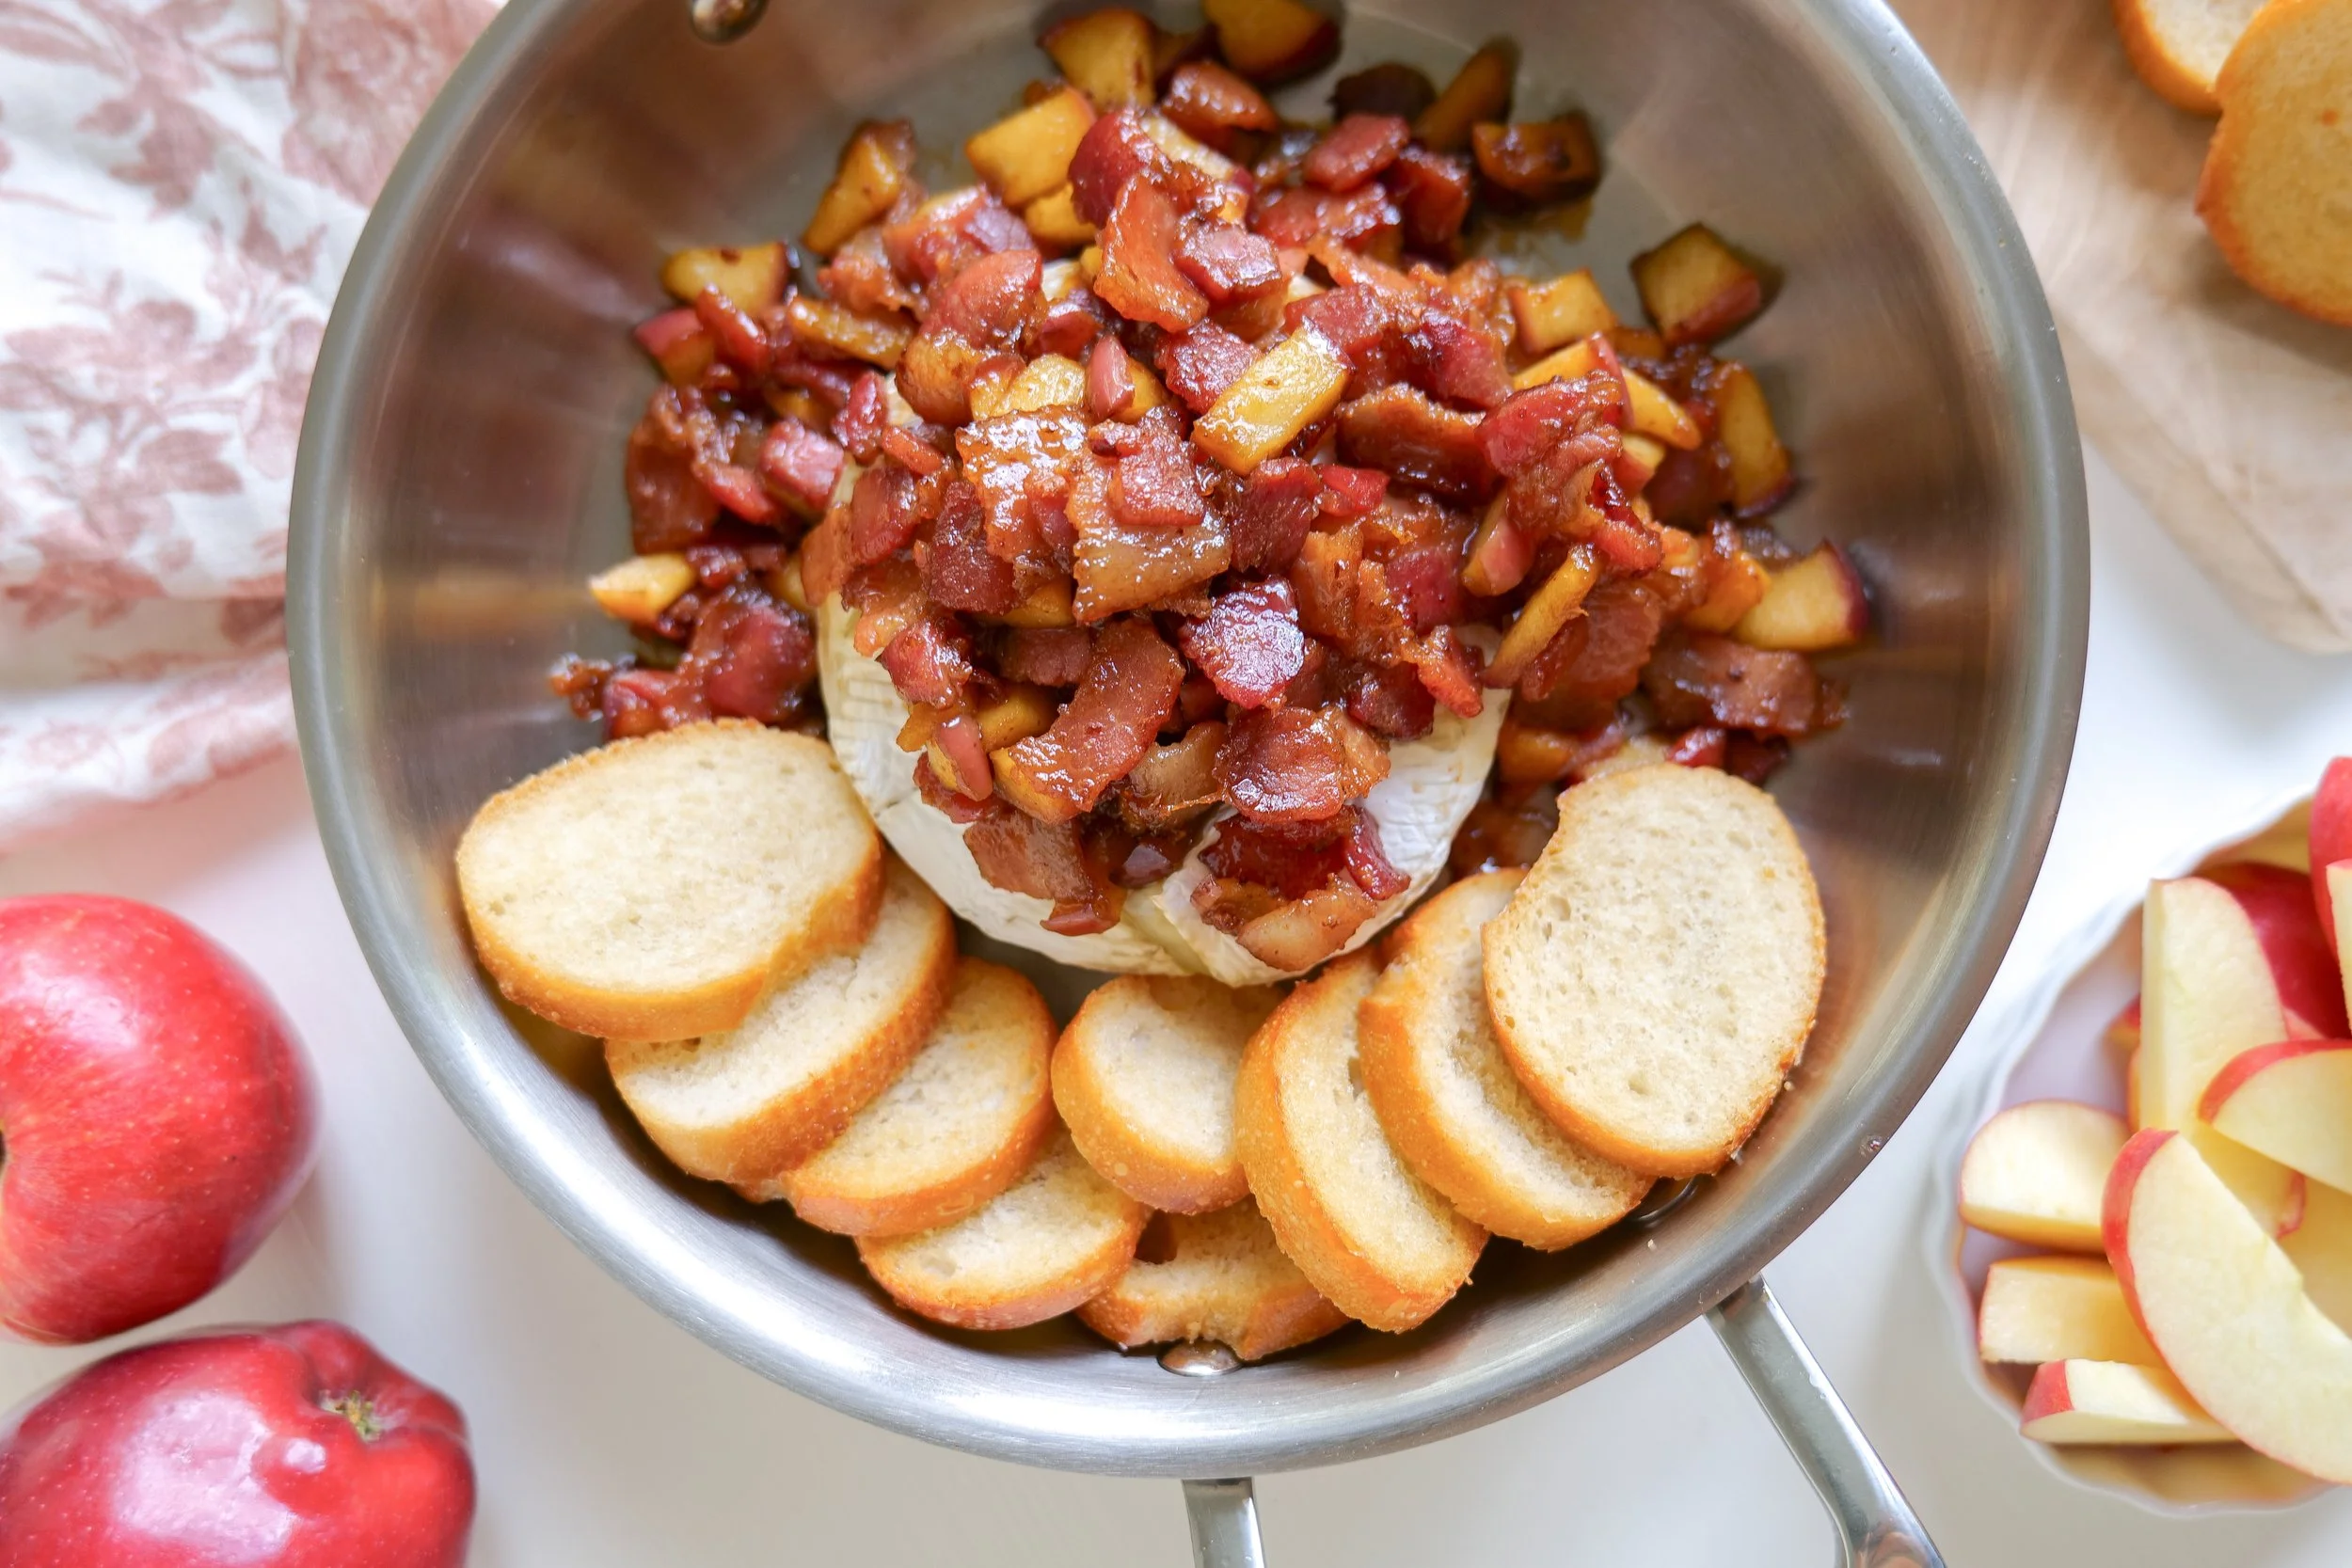
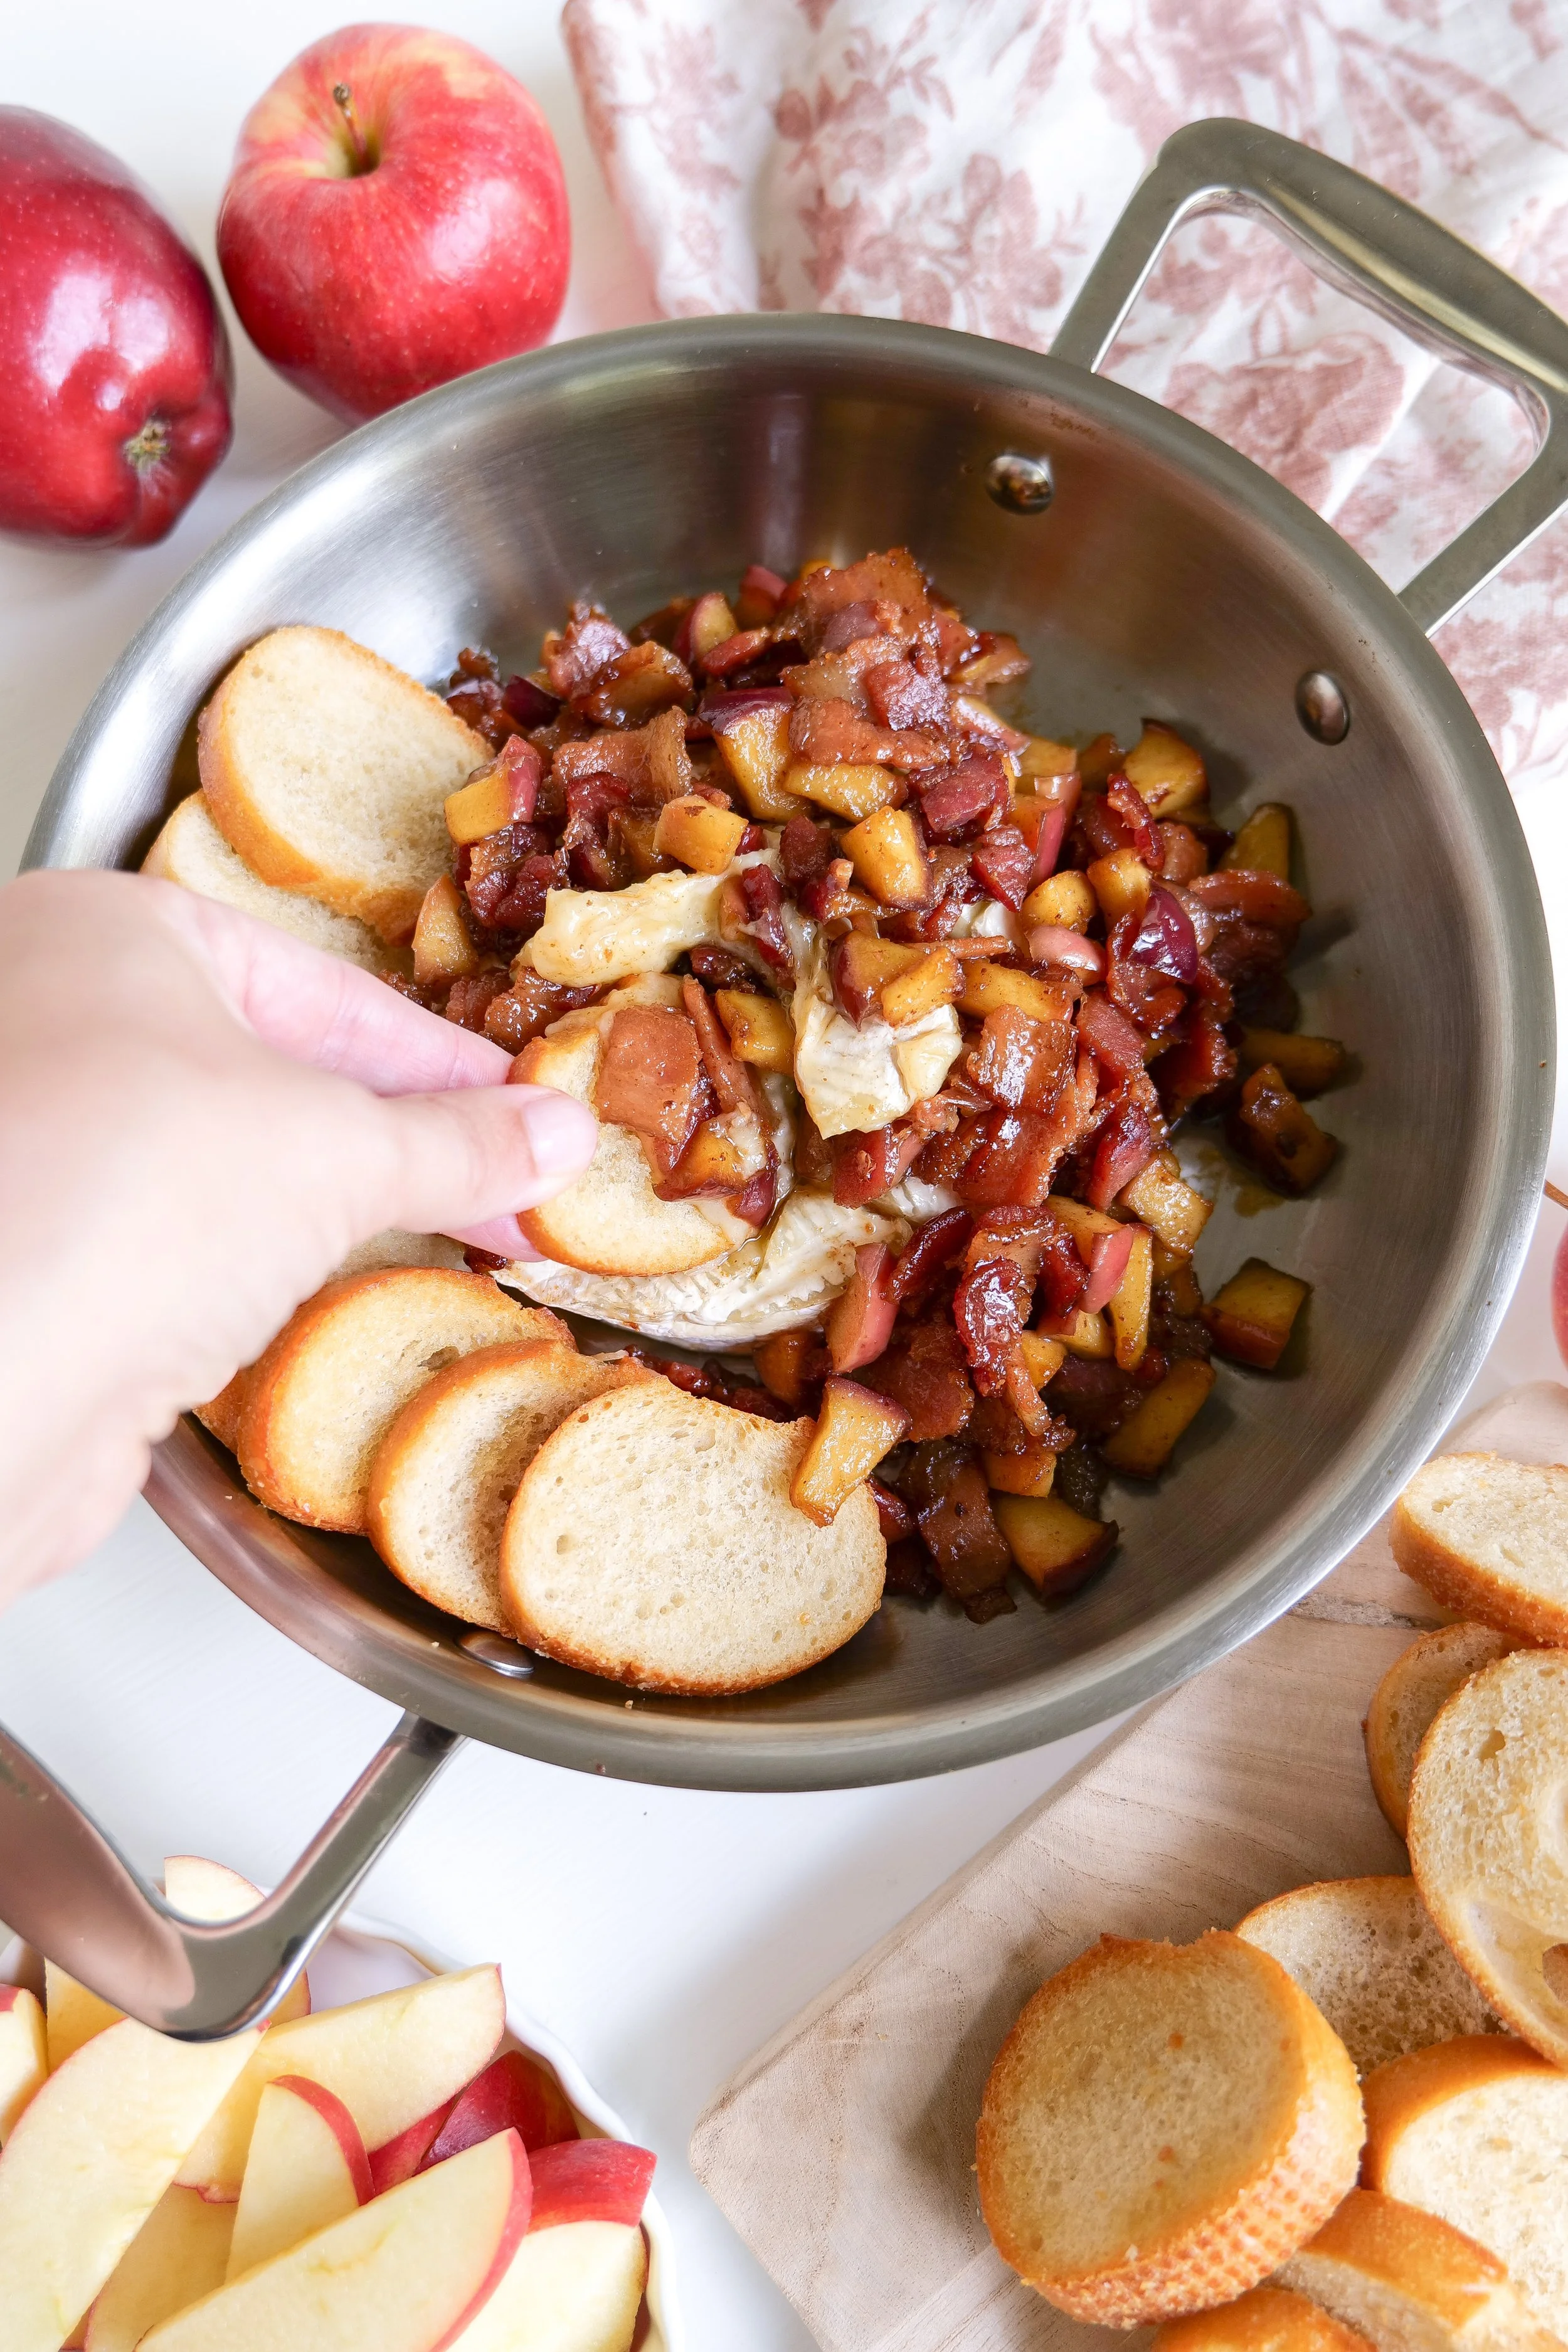
Warm baked brie topped with caramelized apples and crispy bacon on a serving platter.

Ingredient Notes

Simple ingredients make this recipe feel extra special.

Brie

Use one whole wheel of double cream brie. It becomes perfectly soft and creamy while baking without becoming runny.

Apples

Granny Smith apples are my favorite because they balance the richness of the cheese with just the right amount of tartness.

Honeycrisp also works beautifully if you prefer a sweeter bite.

Bacon

Thick-cut bacon gives the topping the best texture and smoky flavor.

Brown Sugar

Dark brown sugar creates a rich caramel-like sweetness as it melts into the apples.

Optional Additions

Although this recipe is wonderful exactly as written, chopped pecans, walnuts, fresh thyme, or a drizzle of hot honey make beautiful additions for holiday entertaining.

Creamy baked brie appetizer with bacon and apples for Thanksgiving and holiday entertaining.

Kitchen Tools

You'll only need a few kitchen staples.

  • Small oven-safe baking dish

  • Medium skillet

  • Cutting board

  • Sharp chef's knife

  • Wooden spoon

  • Serving platter

I've linked all of my favorite entertaining pieces, serving boards, cheese knives, and kitchen essentials in my Kitchen Favorites shelf.

SHOP MY KITCHEN FAVORITES

Ingredients

  • 1 (8-ounce) wheel brie cheese

  • 2 Granny Smith apples, diced

  • 3 slices thick-cut bacon, chopped

  • 2 tablespoons dark brown sugar

Optional

  • Fresh thyme

  • Chopped pecans

  • Honey

  • Crackers

  • Crostini

  • Fresh baguette

How to Make Bacon Apple Baked Brie

Preheat your oven to 350°F.

Place the wheel of brie into a small oven-safe baking dish. Using a sharp knife, lightly score the top of the cheese in a crisscross pattern.

Bake for 10–15 minutes, or until the cheese feels soft and slightly puffed.

While the brie bakes, cook the chopped bacon in a skillet over medium heat until crispy.

Remove most of the bacon grease, leaving just enough to coat the pan.

Add the diced apples and dark brown sugar.

Cook for 3–5 minutes, stirring occasionally, until the apples begin to soften and become lightly caramelized.

Carefully transfer the warm baked brie to a serving platter.

Spoon the bacon apple mixture over the top.

Serve immediately with crackers, crostini, or sliced baguette.

Easy baked brie recipe served with crackers for a simple holiday appetizer.

Amanda's Tips

Bake the Brie Just Until Soft

The brie should feel soft to the touch and slightly puffed but still hold its shape. Overbaking can cause the cheese to lose too much of its creamy center.

Cook the Apples Until They're Just Tender

You want the apples to soften while still keeping a little bite. They continue to soften slightly after they're spooned over the warm brie.

Serve Immediately

Baked brie is at its absolute best fresh from the oven while it's perfectly warm and creamy.

Make It Your Own

A sprinkle of chopped pecans, fresh thyme, or a drizzle of hot honey makes this recipe feel even more special during the holidays.

Build a Beautiful Board

Arrange crackers, sliced baguette, grapes, apple slices, and a handful of nuts around the baked brie for an effortless appetizer everyone will gather around.

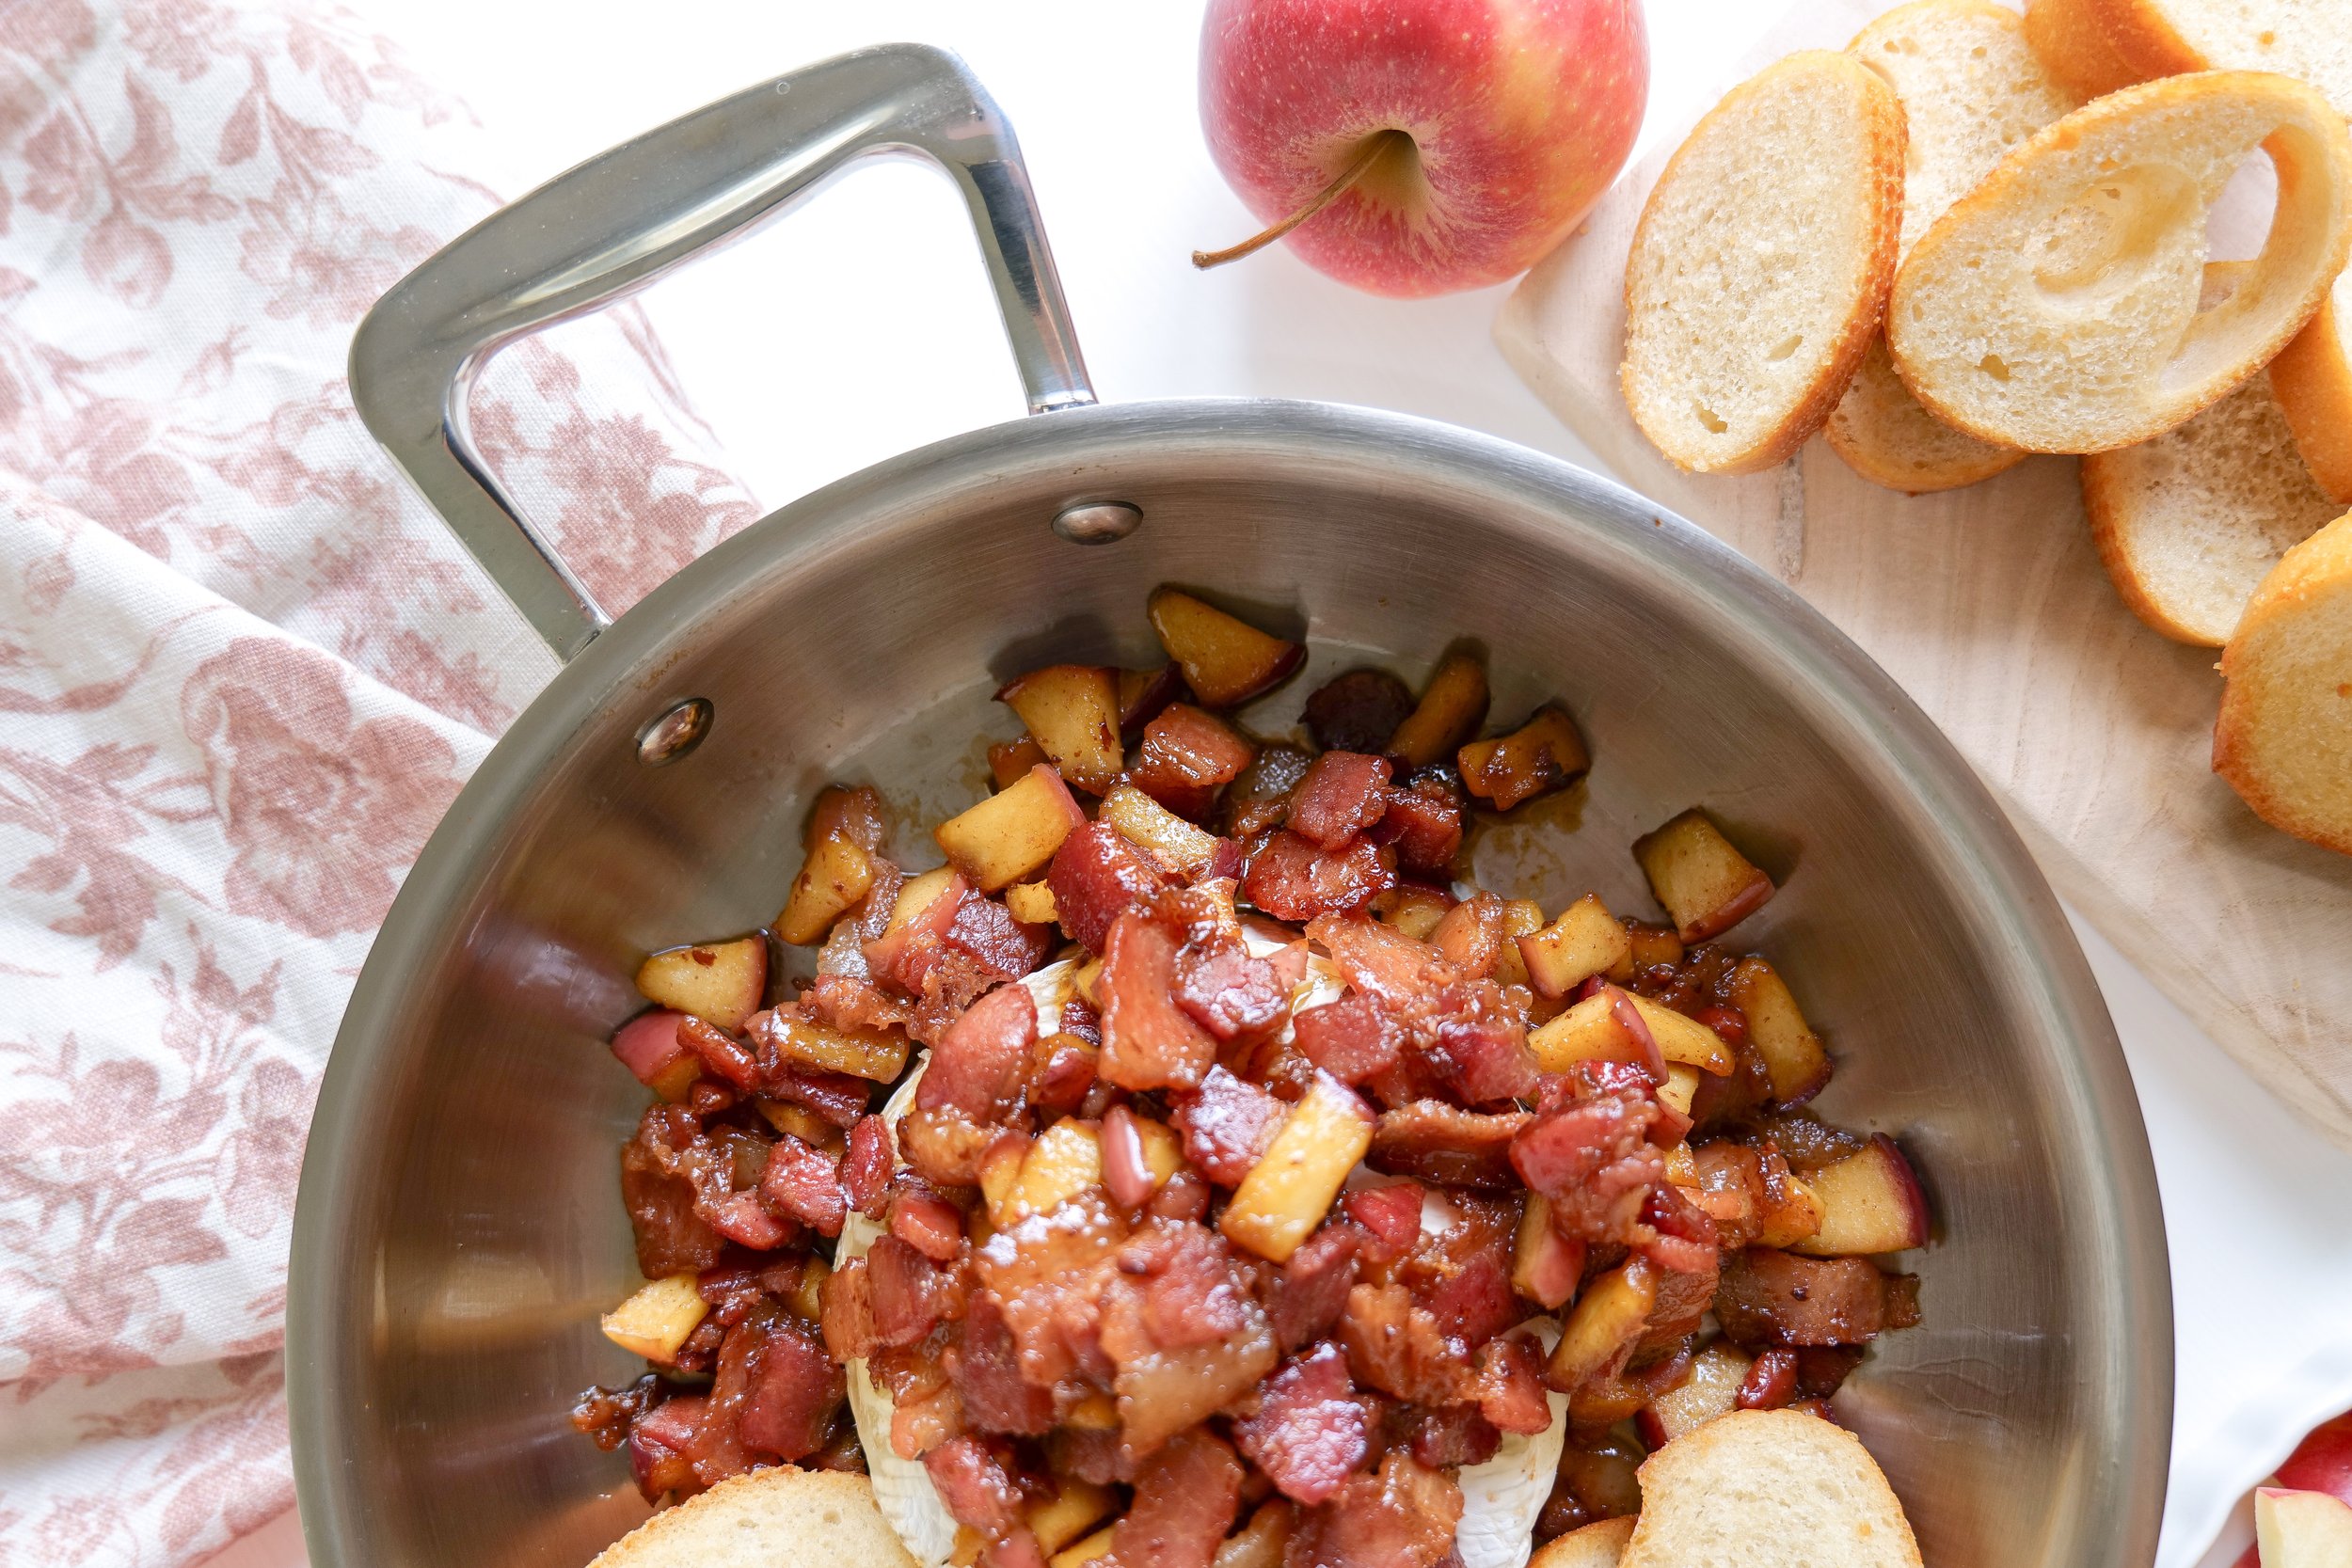
Close-up of creamy baked brie topped with crispy bacon and tender apples.

Easy Variations

One of my favorite things about this recipe is how easy it is to customize depending on the season or the occasion.

Maple Bacon Baked Brie

Replace the brown sugar with pure maple syrup for an even richer fall flavor.

Cranberry Bacon Brie

Swap the apples for homemade cranberry sauce during Thanksgiving and Christmas.

Pear & Brie

Use diced ripe pears instead of apples for a softer, sweeter topping.

Candied Pecan Brie

Top with chopped candied pecans for extra crunch.

Hot Honey Brie

Finish with a drizzle of hot honey for a sweet and spicy twist.

Bacon apple baked brie served as part of a fall cheese board with crackers.

Make Ahead Tips

This appetizer is perfect for entertaining because almost everything can be prepared ahead of time.

Cook the bacon and apple mixture earlier in the day and refrigerate until you're ready to serve.

Just before guests arrive, bake the brie, gently reheat the topping, and spoon it over the warm cheese.

You'll have an appetizer that tastes freshly made without spending the entire party in the kitchen.

Storage & Reheating

If you happen to have leftovers, transfer the baked brie to an airtight container and refrigerate for up to 3 days.

To reheat, place it in a 350°F oven for about 10 minutes, or until warmed through.

I don't recommend microwaving it, as the cheese can separate and become oily.

Warm baked brie with apples and bacon served for a Thanksgiving appetizer.

Frequently Asked Questions

Can I prepare baked brie ahead of time?

Yes! Prepare the bacon apple topping in advance, then bake the brie just before serving.

What apples work best?

Granny Smith is my favorite because the tartness balances the rich cheese beautifully.

Honeycrisp is another wonderful option.

Should I remove the rind?

No.

The rind is completely edible and helps the brie hold its shape while baking.

Can I use a different cheese?

Brie is definitely the best option, but Camembert also works well.

Can I make this without bacon?

Absolutely.

Simply leave it out for a delicious vegetarian baked brie.

Can I add nuts?

Yes!

Pecans and walnuts are both delicious additions.

Can I freeze baked brie?

I don't recommend freezing it because the texture of the cheese changes after thawing.

How long can it sit out?

Plan to enjoy it within about 2 hours of serving.

What crackers are best?

I love serving it with butter crackers, crostini, toasted baguette slices, or hearty artisan crackers.

Can I make this for Thanksgiving?

Absolutely.

This is one of my favorite appetizers for Thanksgiving, Christmas, Friendsgiving, and holiday parties.

Holiday baked brie appetizer topped with apples and bacon for entertaining guests.

What to Serve with Bacon Apple Baked Brie

This appetizer pairs beautifully with:

  • Fresh sliced baguette

  • Crostini

  • Artisan crackers

  • Apple slices

  • Pear slices

  • Grapes

  • Candied pecans

  • Mixed nuts

  • Charcuterie meats

  • Sparkling apple cider

For a complete appetizer spread, I also love serving it alongside:

Easy fall cheese appetizer featuring baked brie with bacon and apples.

More Appetizers You'll Love

If you're planning a party, holiday gathering, or cozy evening at home, here are a few more favorites from Amanda's Kitchen:

Shop My Entertaining Favorites

If you loved this recipe, you can shop my favorite serving boards, cheese knives, baking dishes, entertaining pieces, and kitchen essentials that I use for hosting family and friends.

SHOP MY ENTERTAINING FAVORITES

Printable Recipe Card

Whether you're hosting Thanksgiving dinner, Christmas appetizers, Friendsgiving, or simply enjoying a cozy evening at home, I've included the printable recipe card below so you can easily save, print, and make this recipe again and again.

It's one of those appetizers that always disappears first.

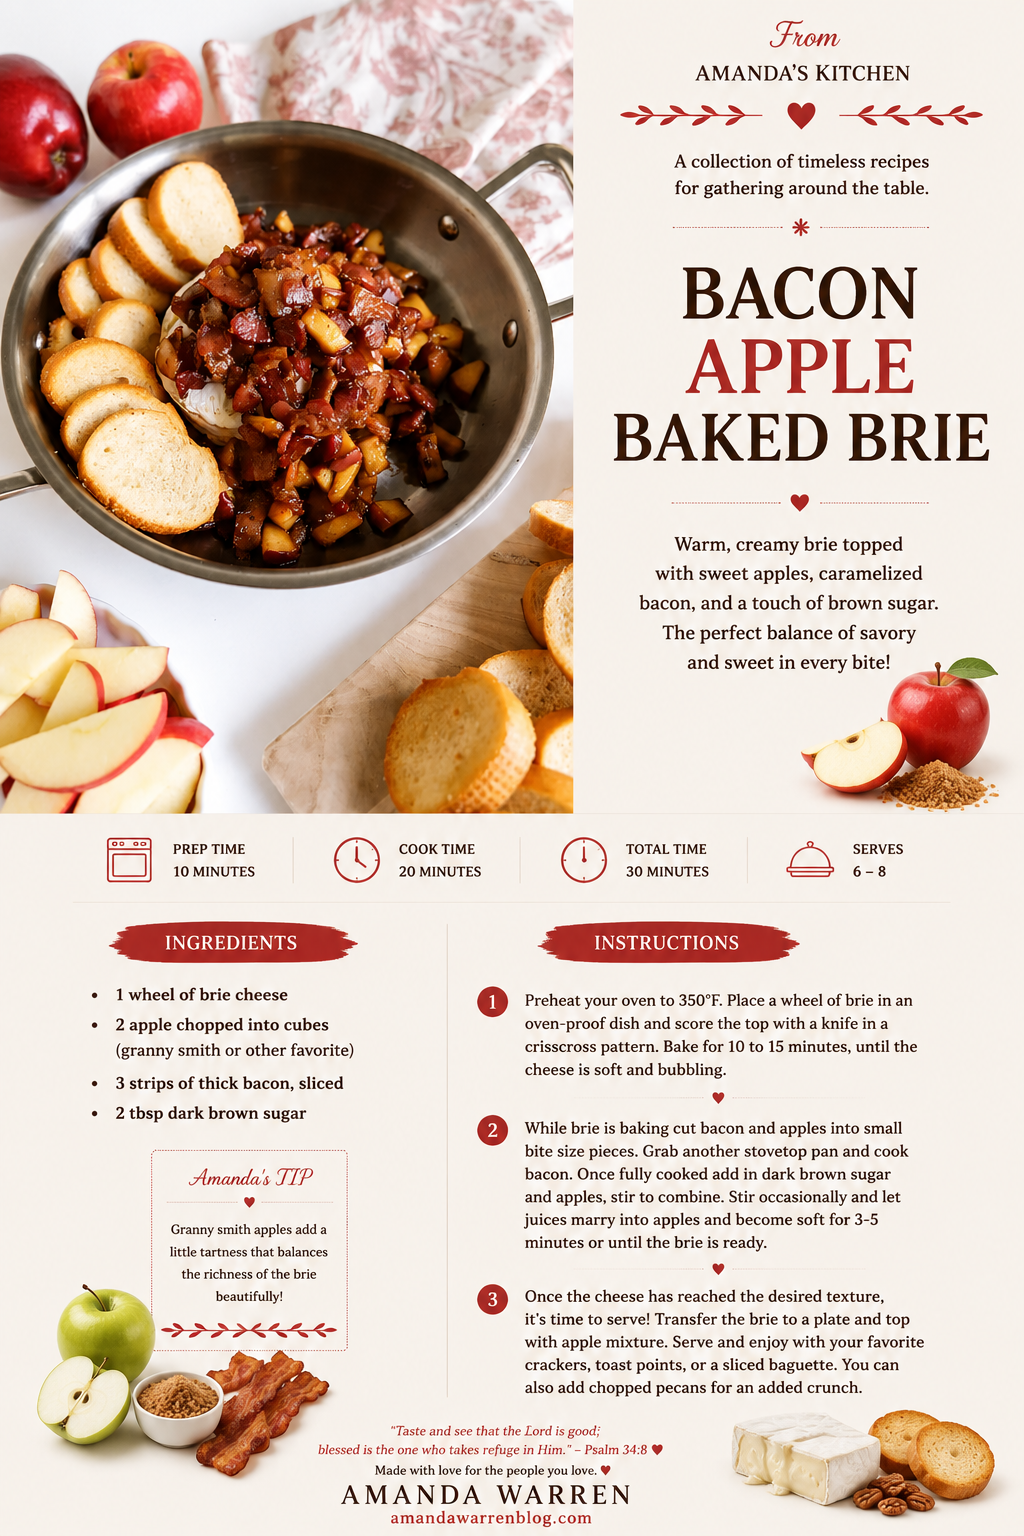
Printable recipe card for easy bacon apple baked brie with step-by-step instructions.

A Note From Amanda

There is something special about gathering people around good food.

Some recipes become traditions because they're complicated, but I think the very best ones are often the simplest. This baked brie has become one of those recipes I know I can count on. It comes together quickly, looks beautiful on the table, and somehow always seems to be the first thing everyone reaches for.

Whether you're hosting a holiday gathering, celebrating with friends, or simply slowing down for a cozy evening at home, I hope this recipe brings a little extra warmth to your table and reminds you that some of life's sweetest moments begin with sharing a meal.

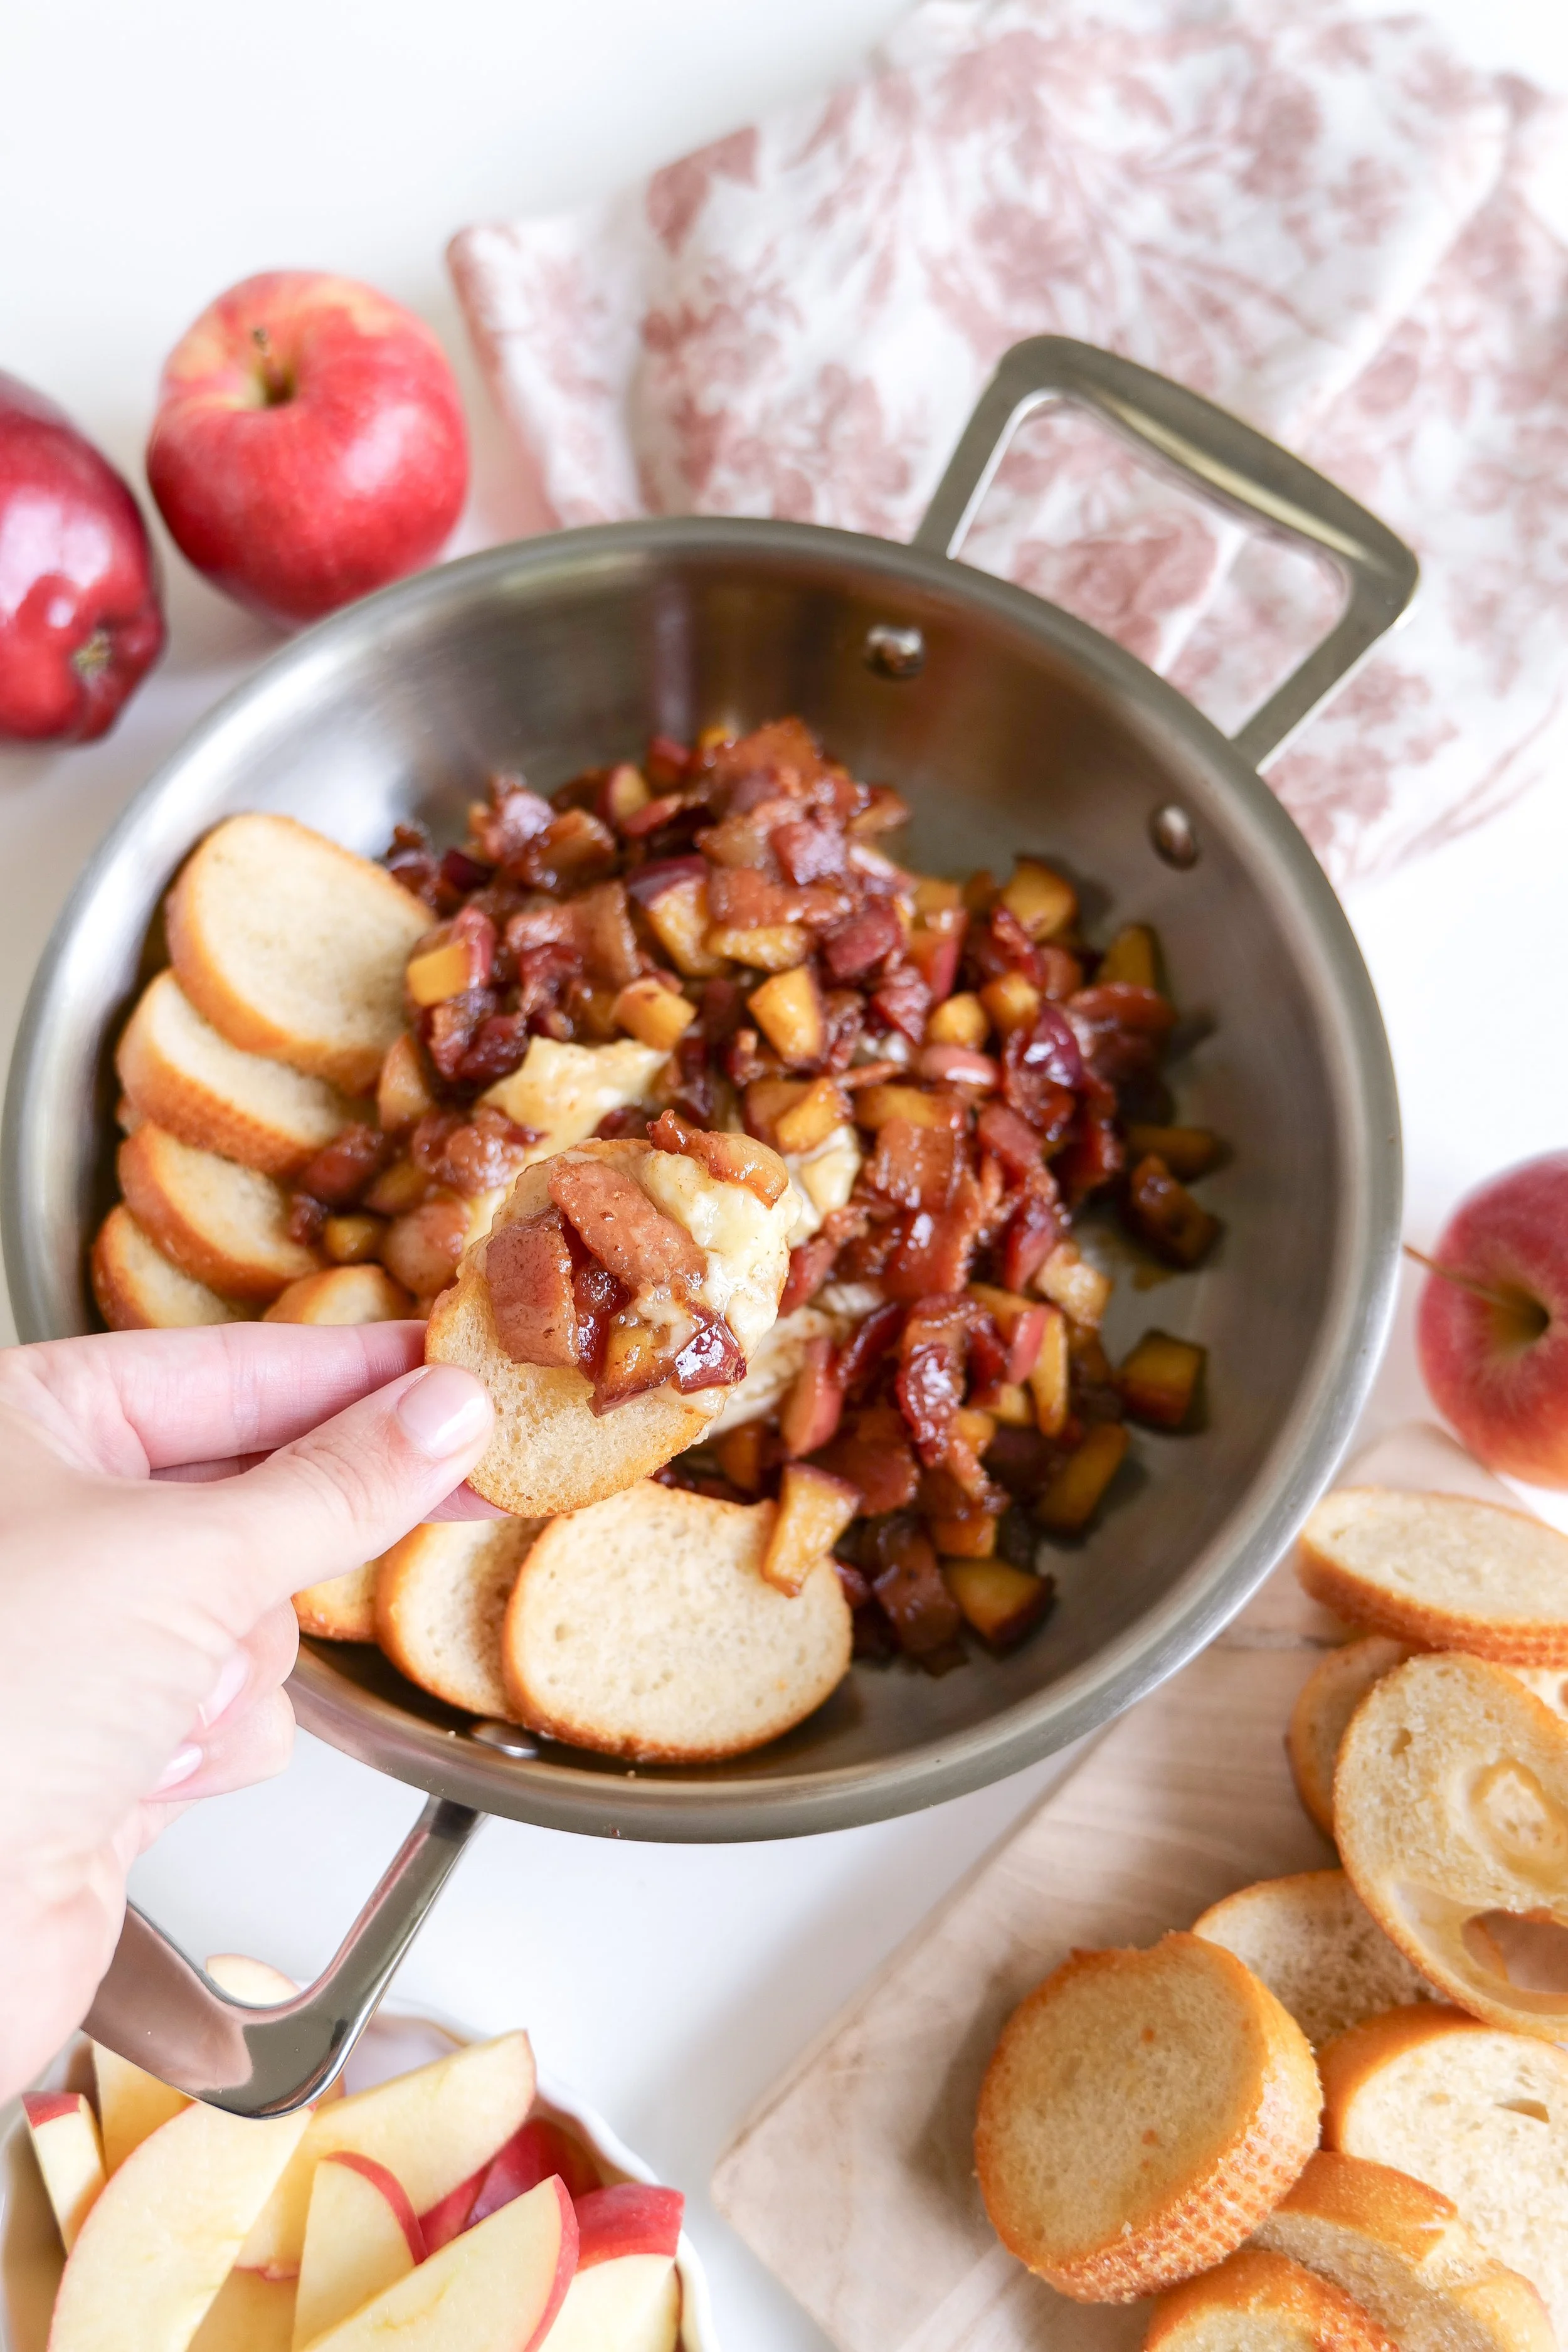
Creamy cheese pull from warm baked brie topped with crispy bacon and caramelized apples.

Easy Skillet Chicken Pot Pie with Biscuits

There's something so comforting about a warm chicken pot pie simmering away at the end of a long day. Creamy, hearty, and filled with tender chicken and vegetables, it's one of those timeless dinners that instantly makes a house feel like home.

This Easy Stovetop Chicken Pot Pie with Biscuit Topping has everything you love about the classic recipe without all the extra work. Instead of making a traditional pie crust, buttery biscuits bake until perfectly golden over a rich, creamy chicken filling. It's a simple one-pan dinner that's cozy enough for Sunday supper but easy enough for busy weeknights.

Whether you're cooking for your family on a chilly evening or looking for a comforting meal to add to your weekly dinner rotation, this recipe is one you'll come back to again and again.

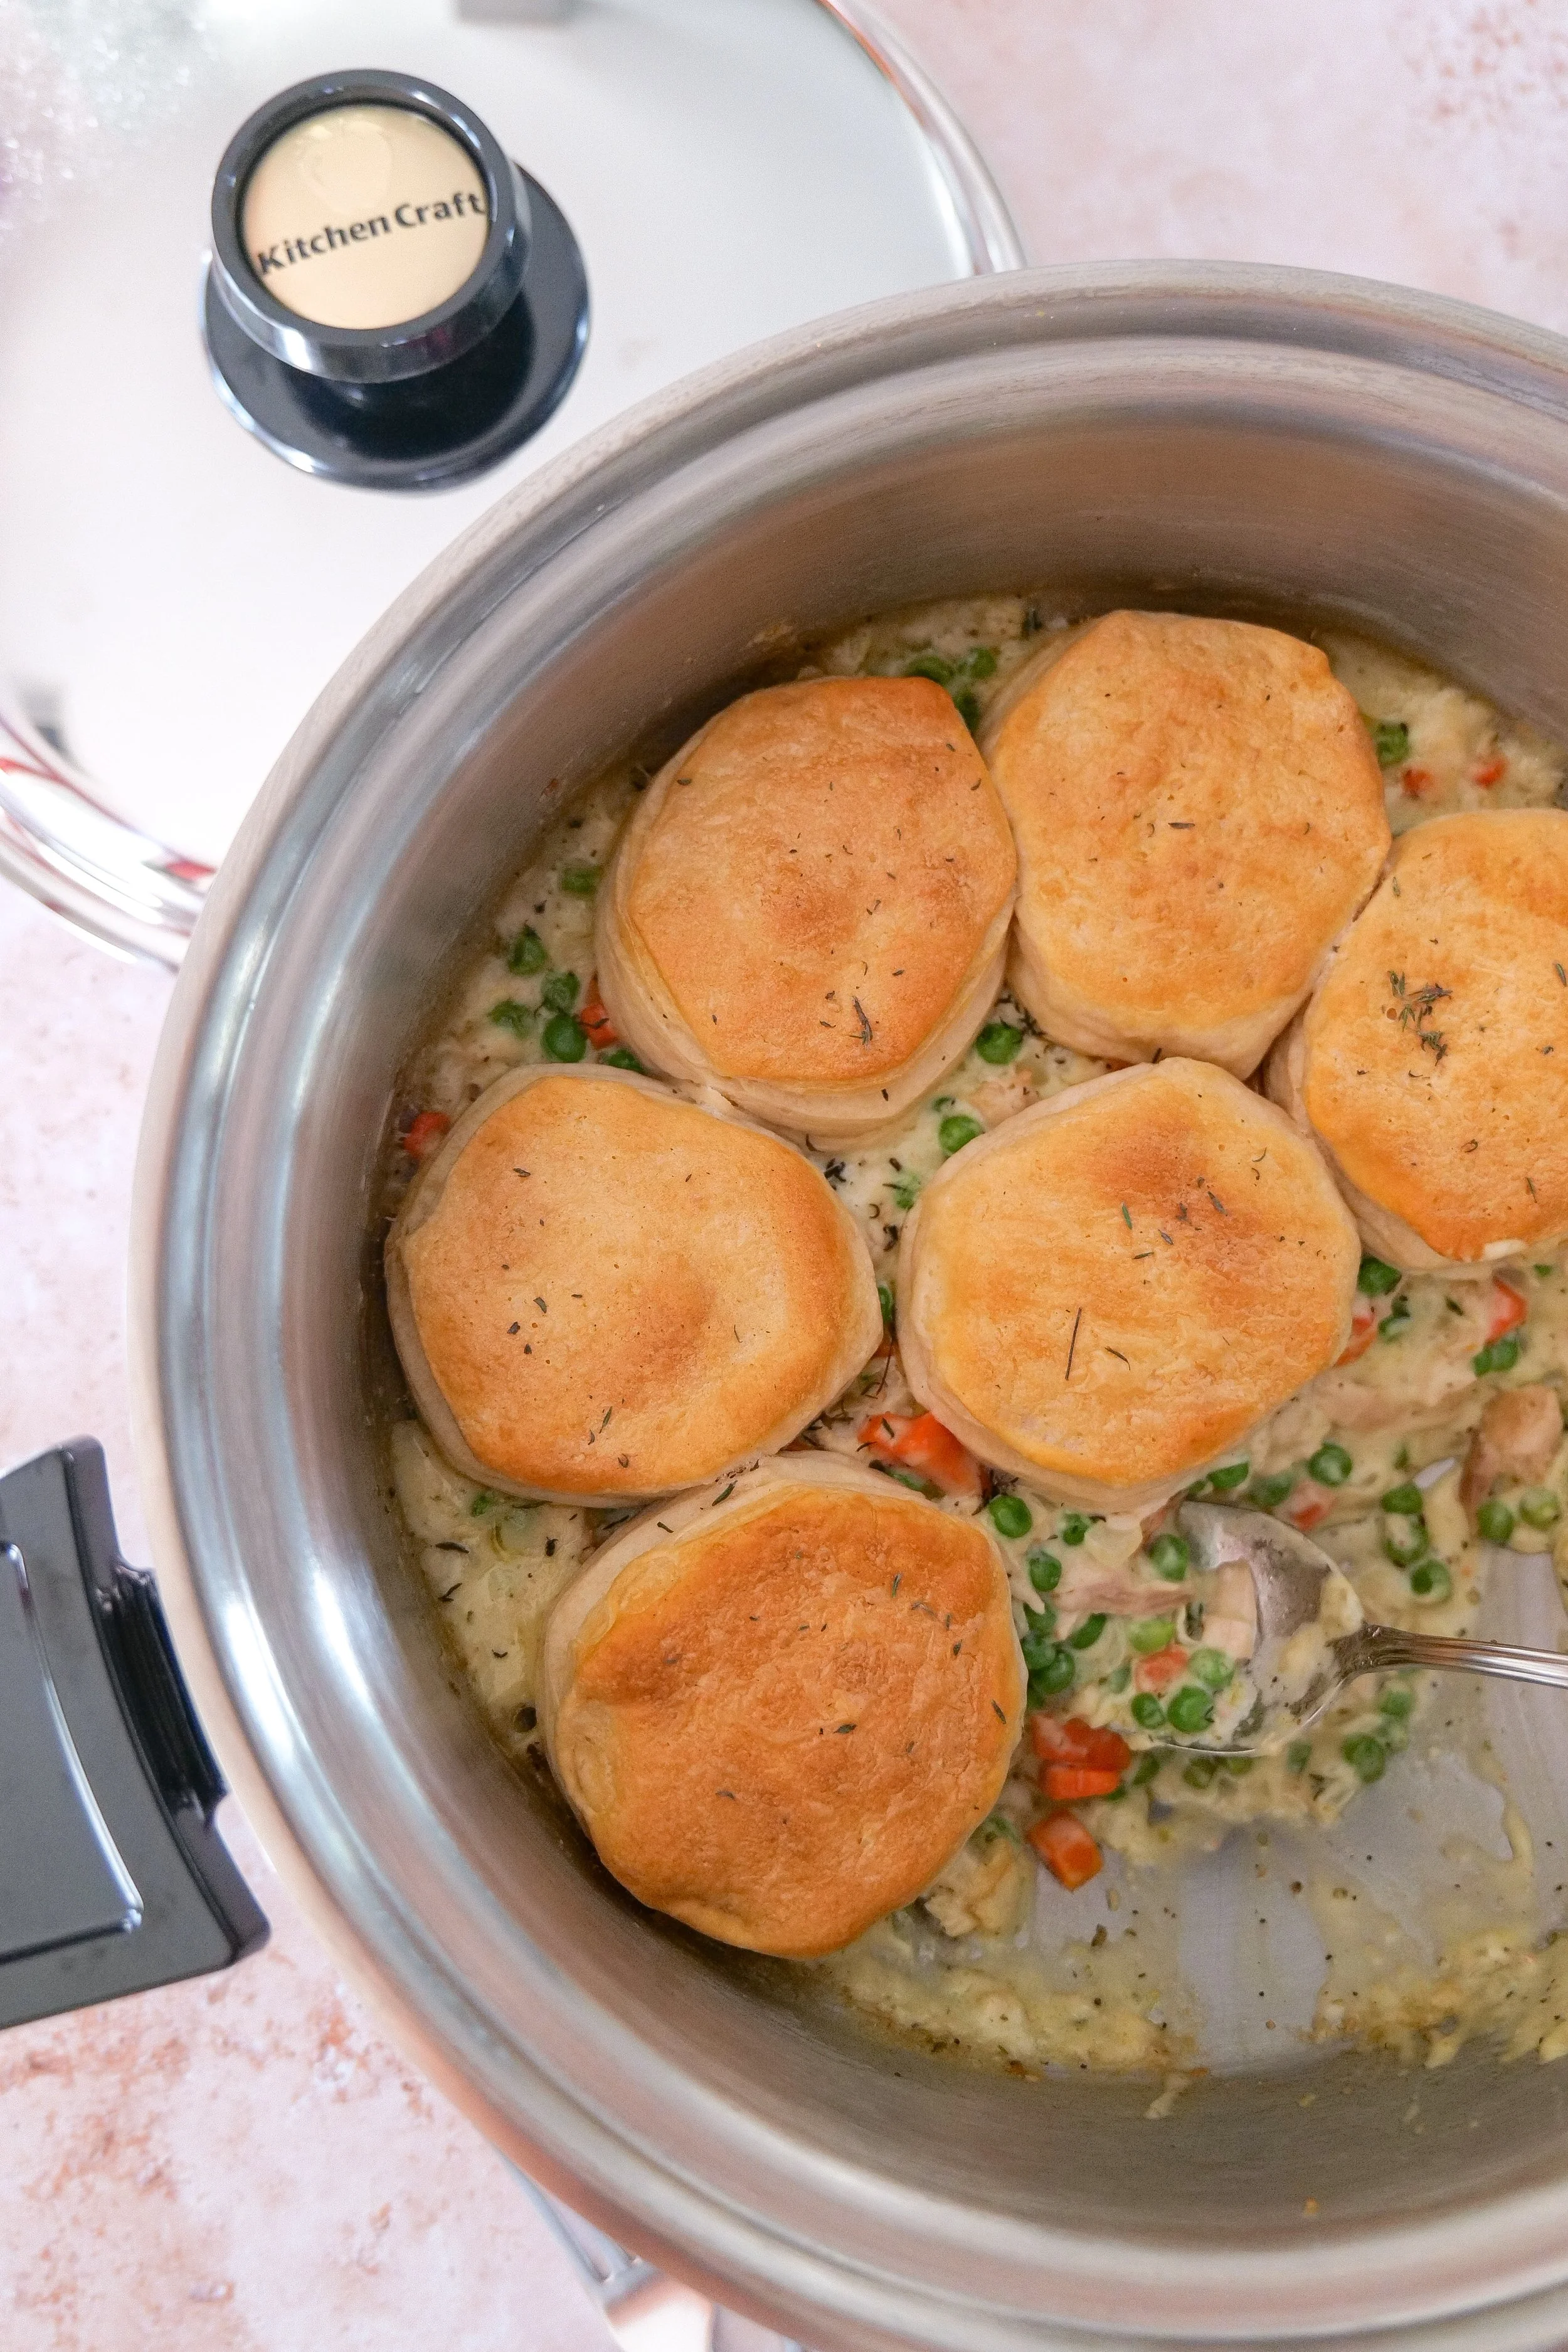
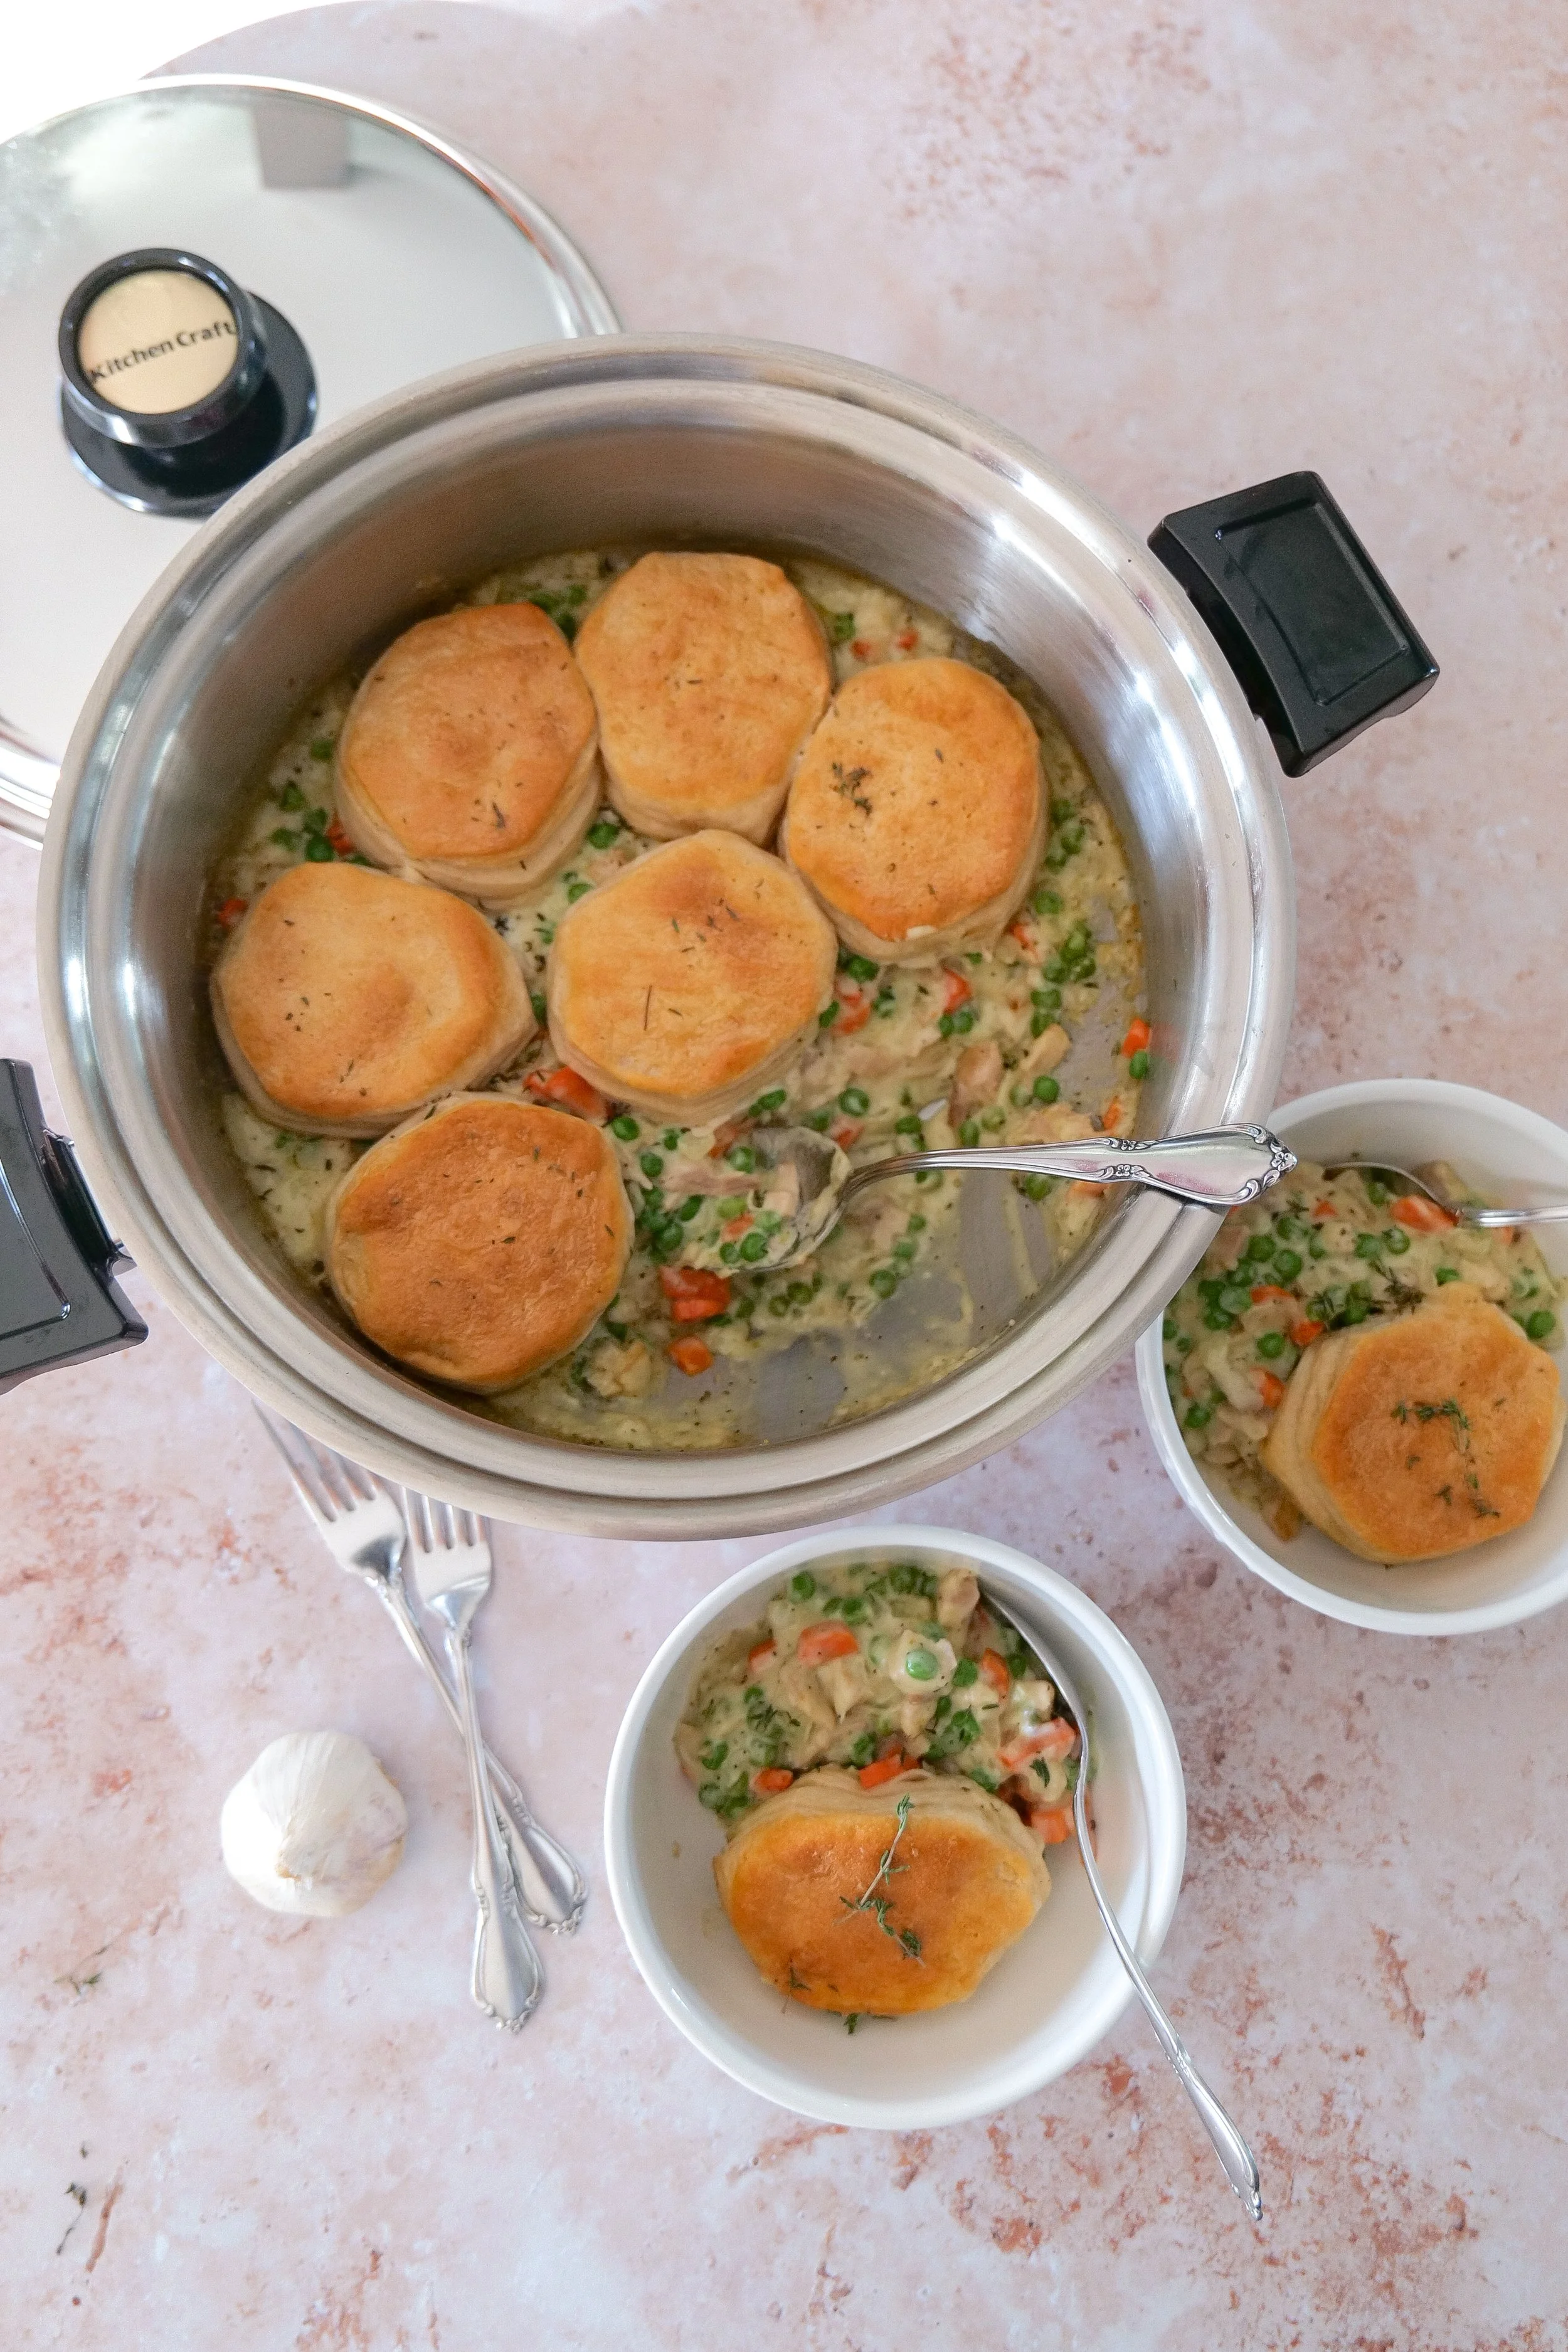
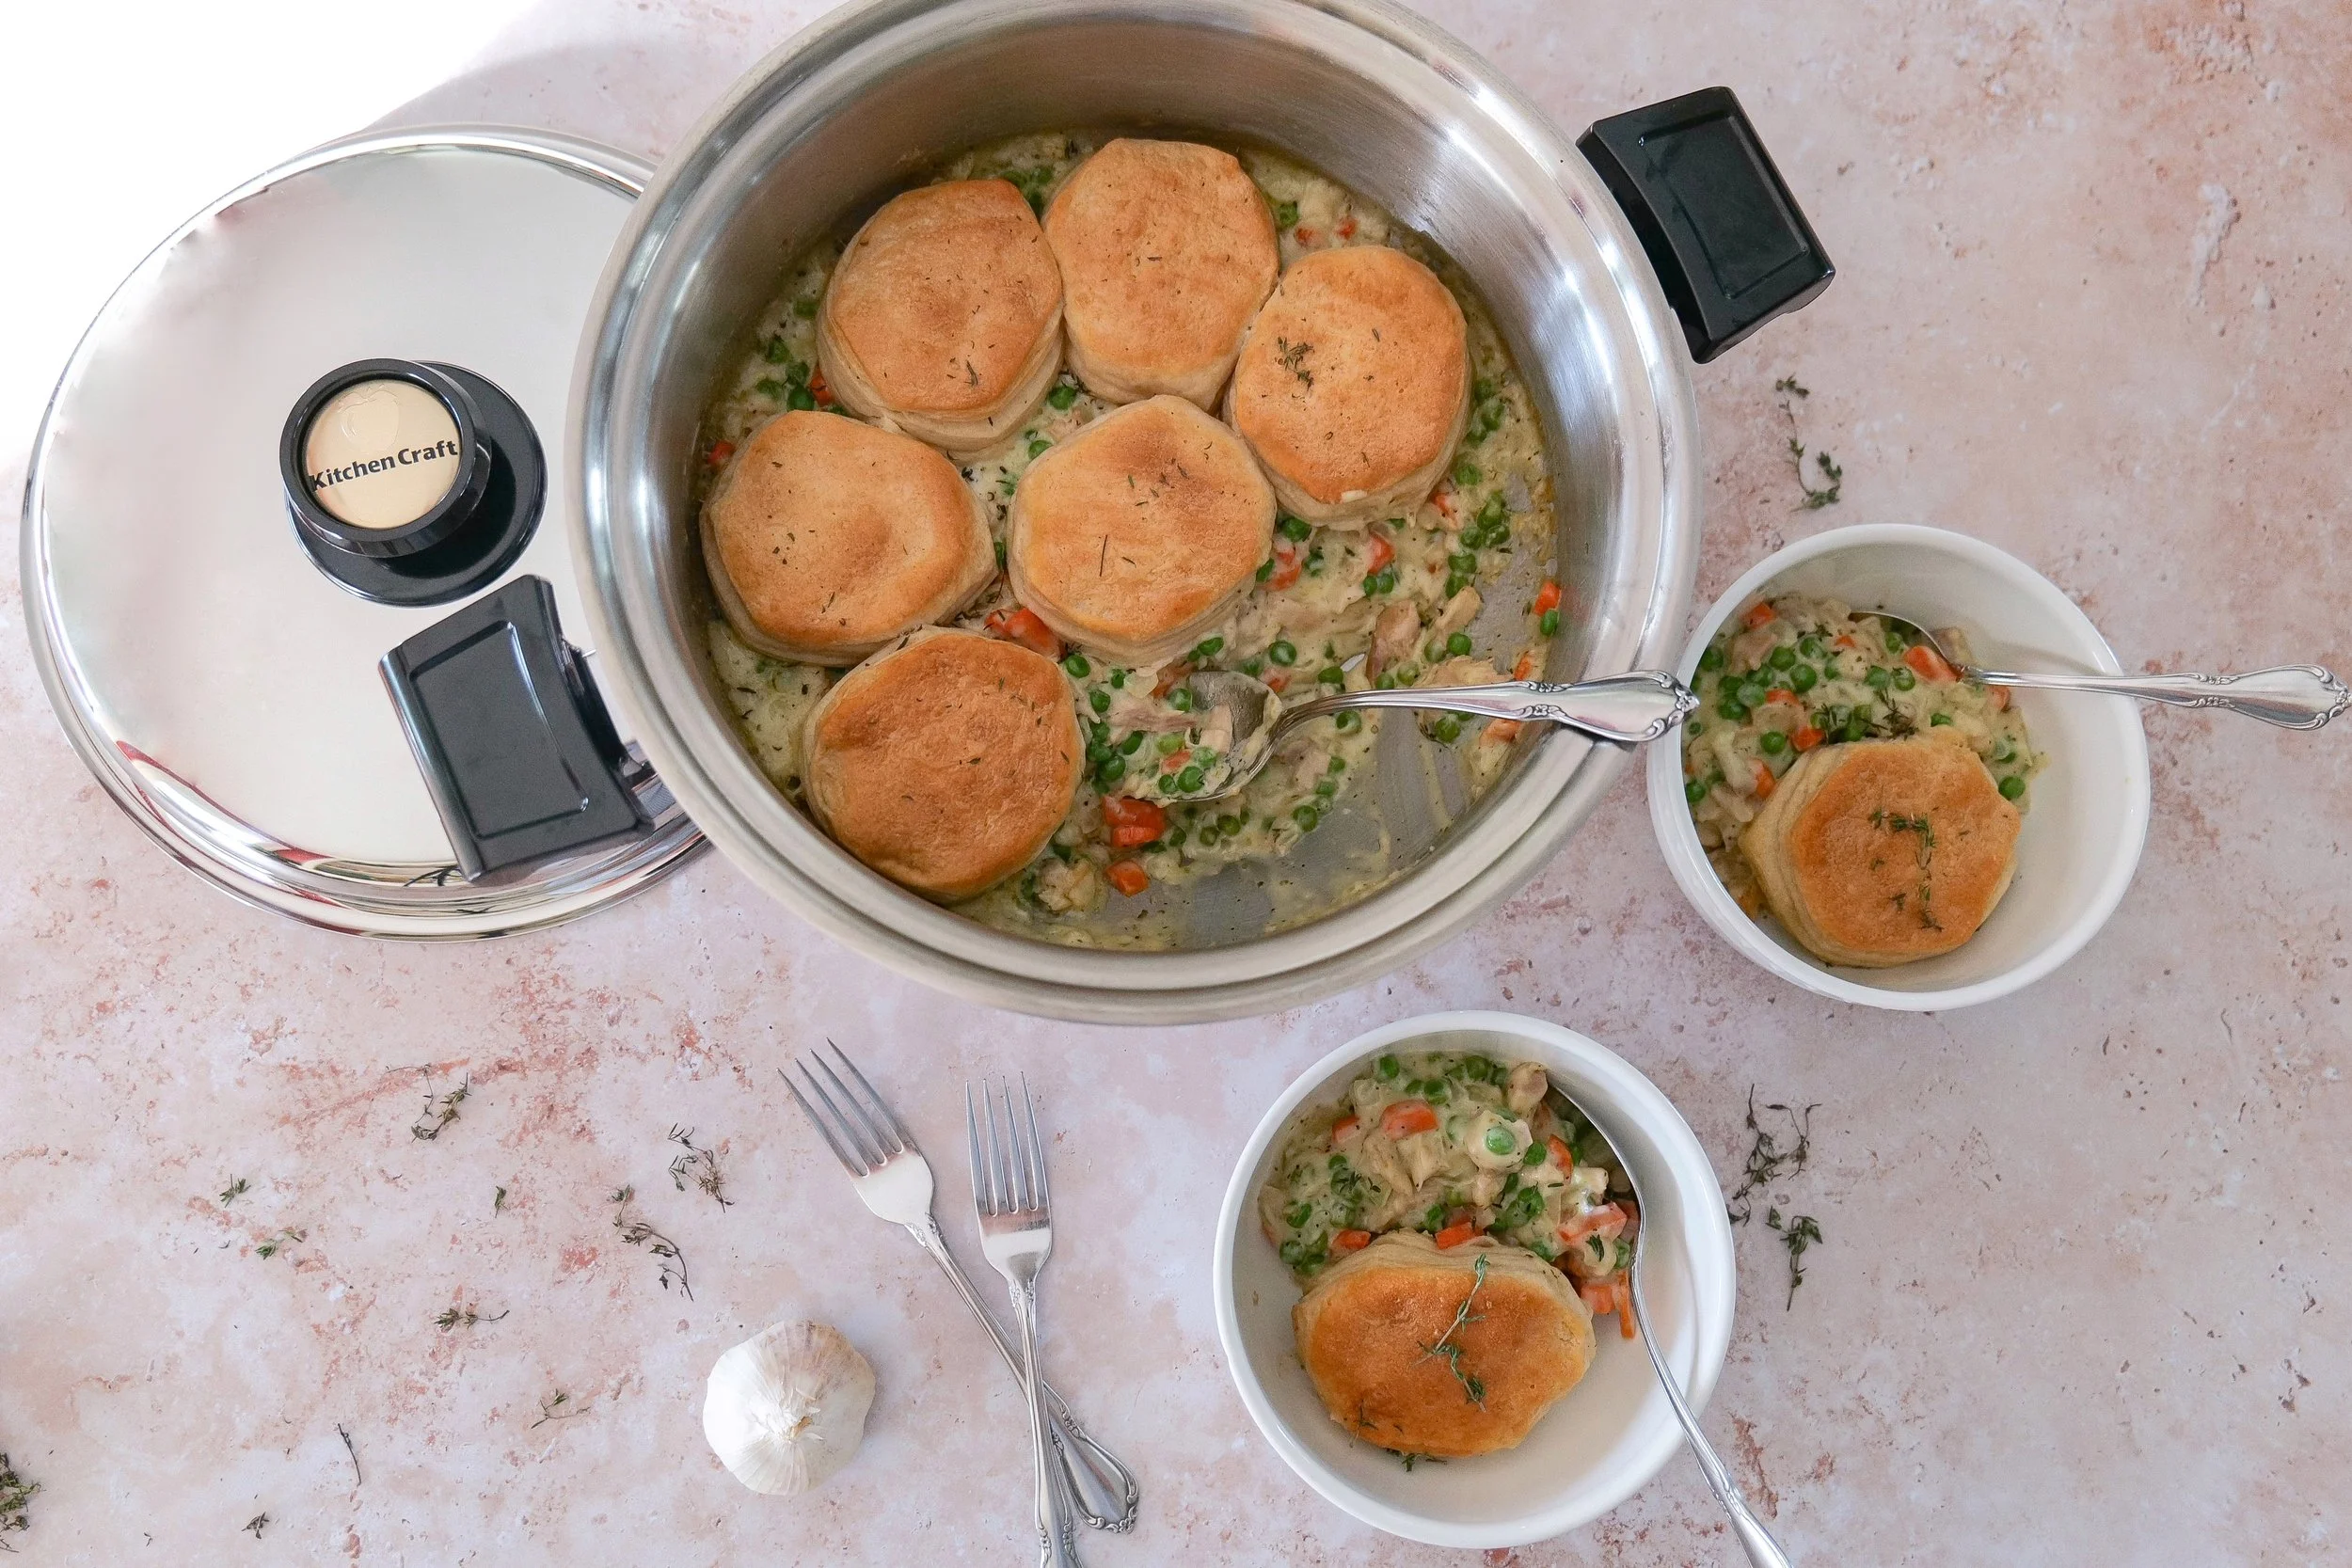
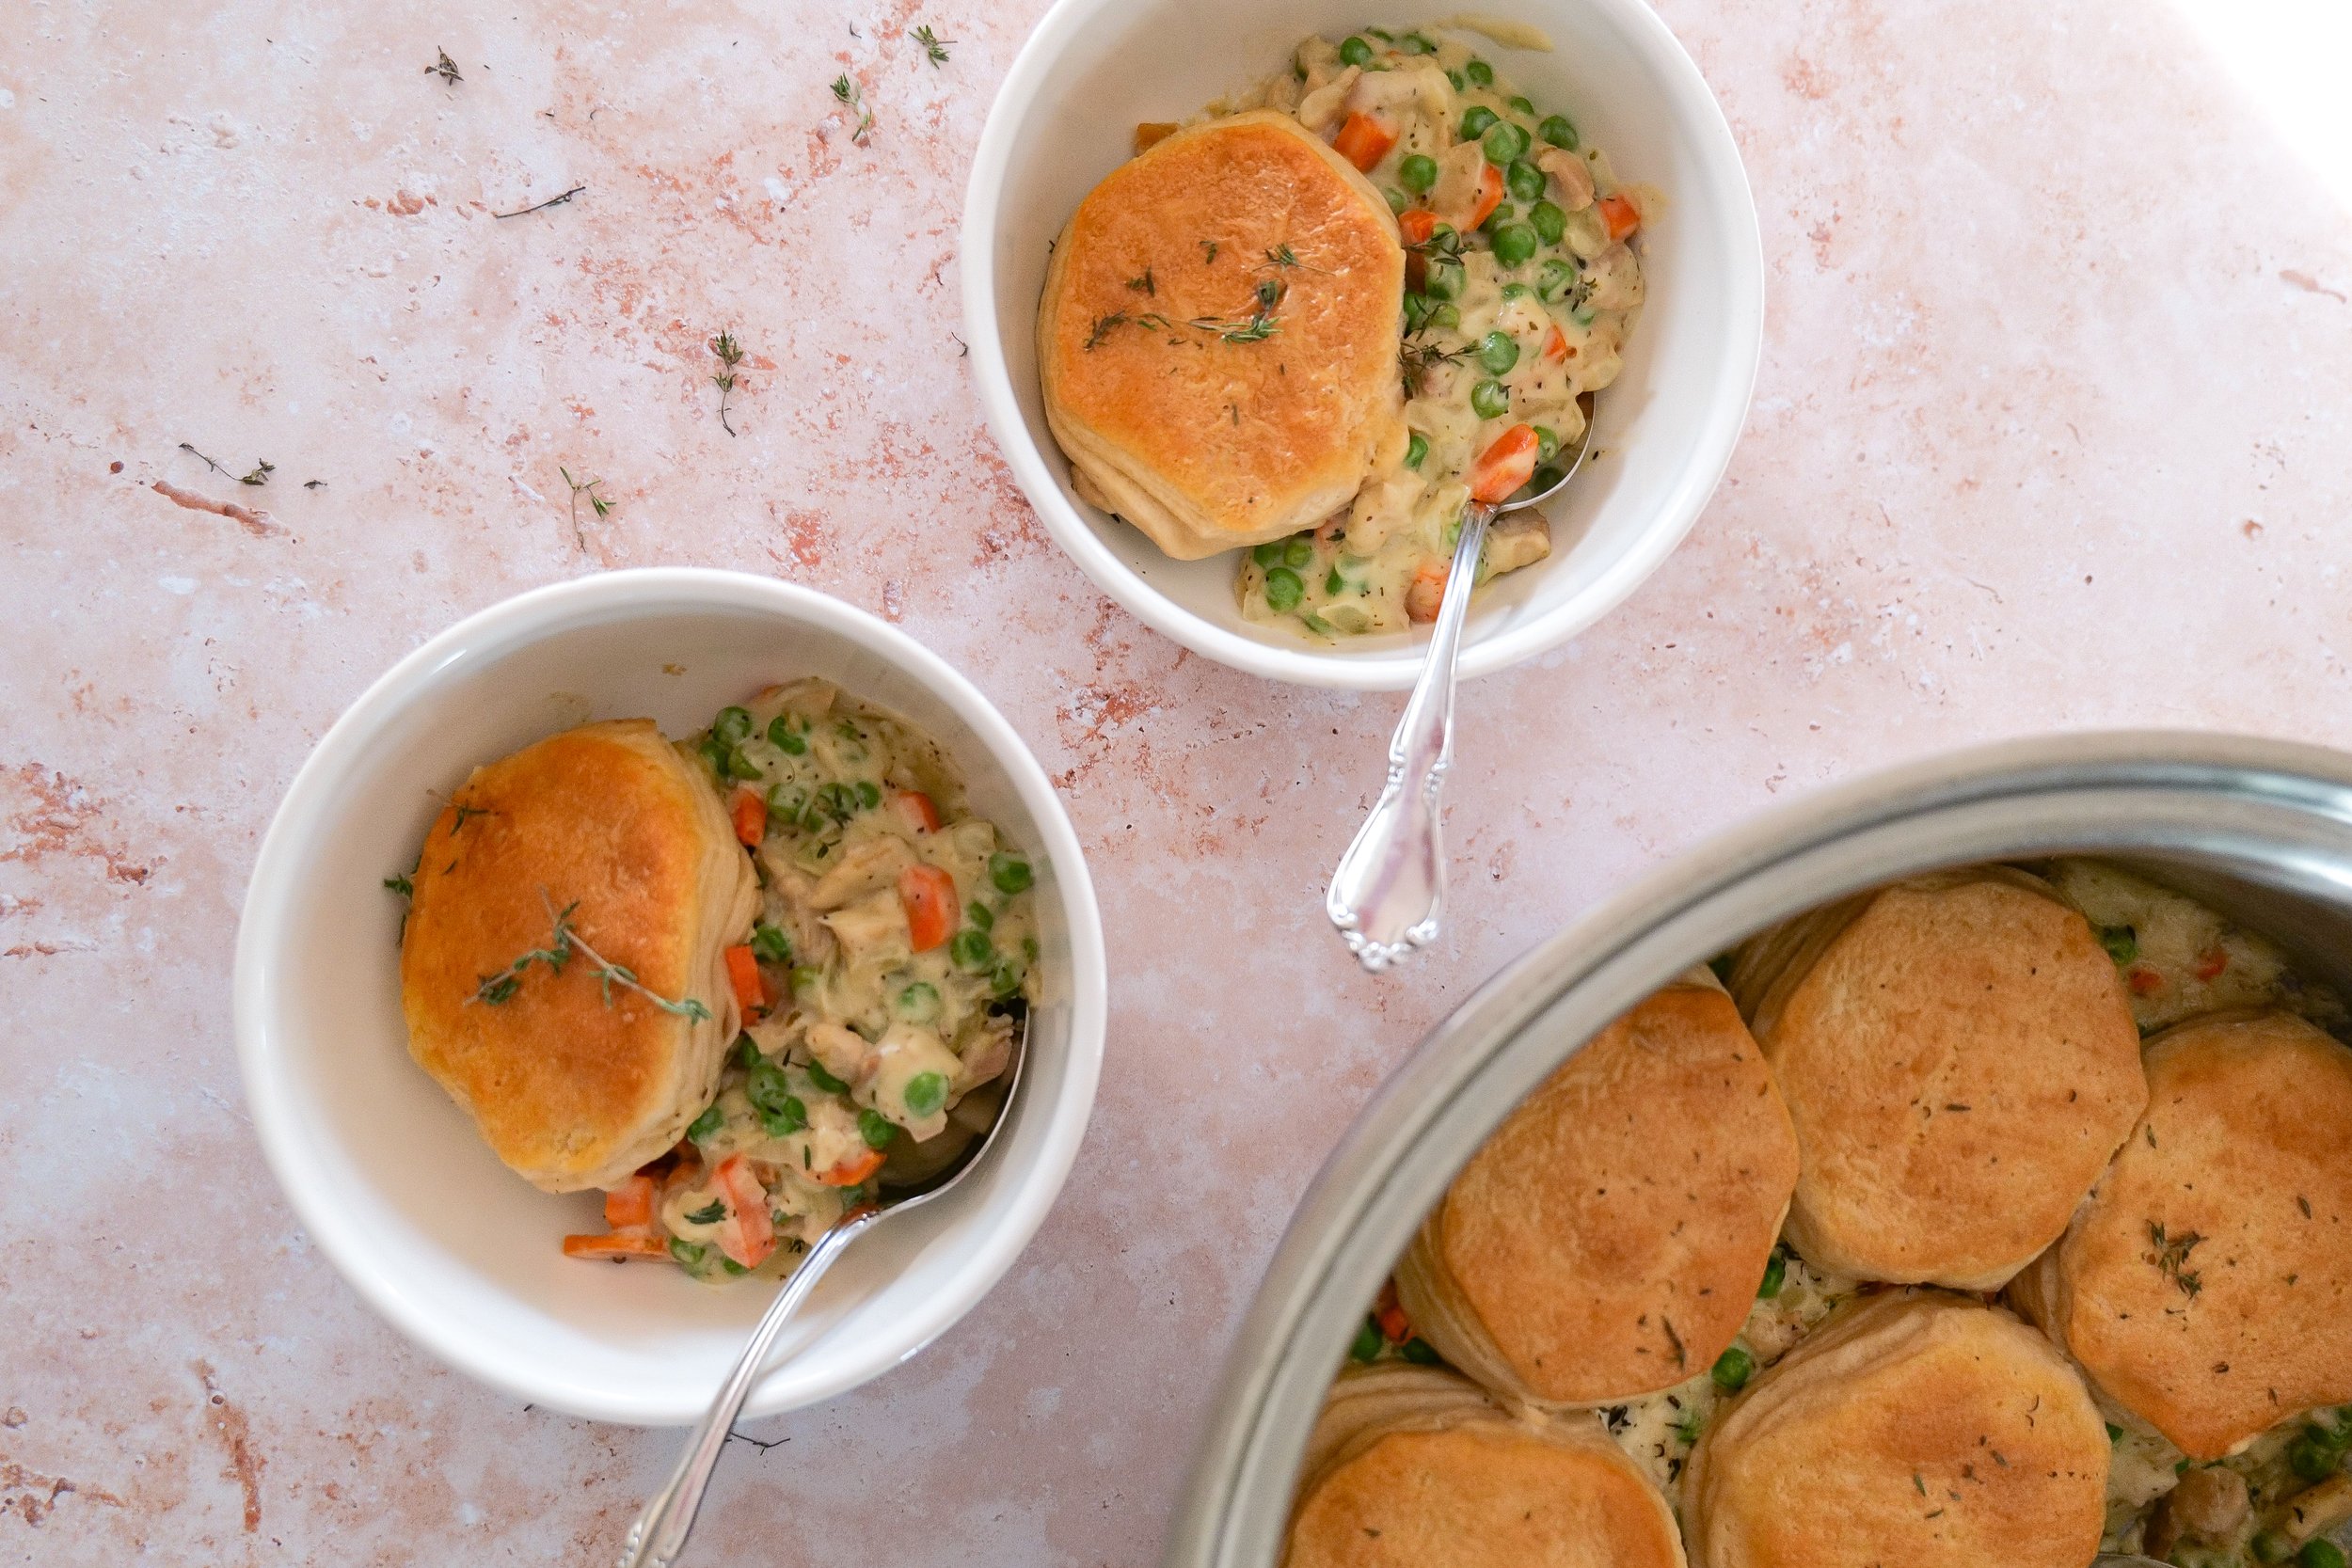
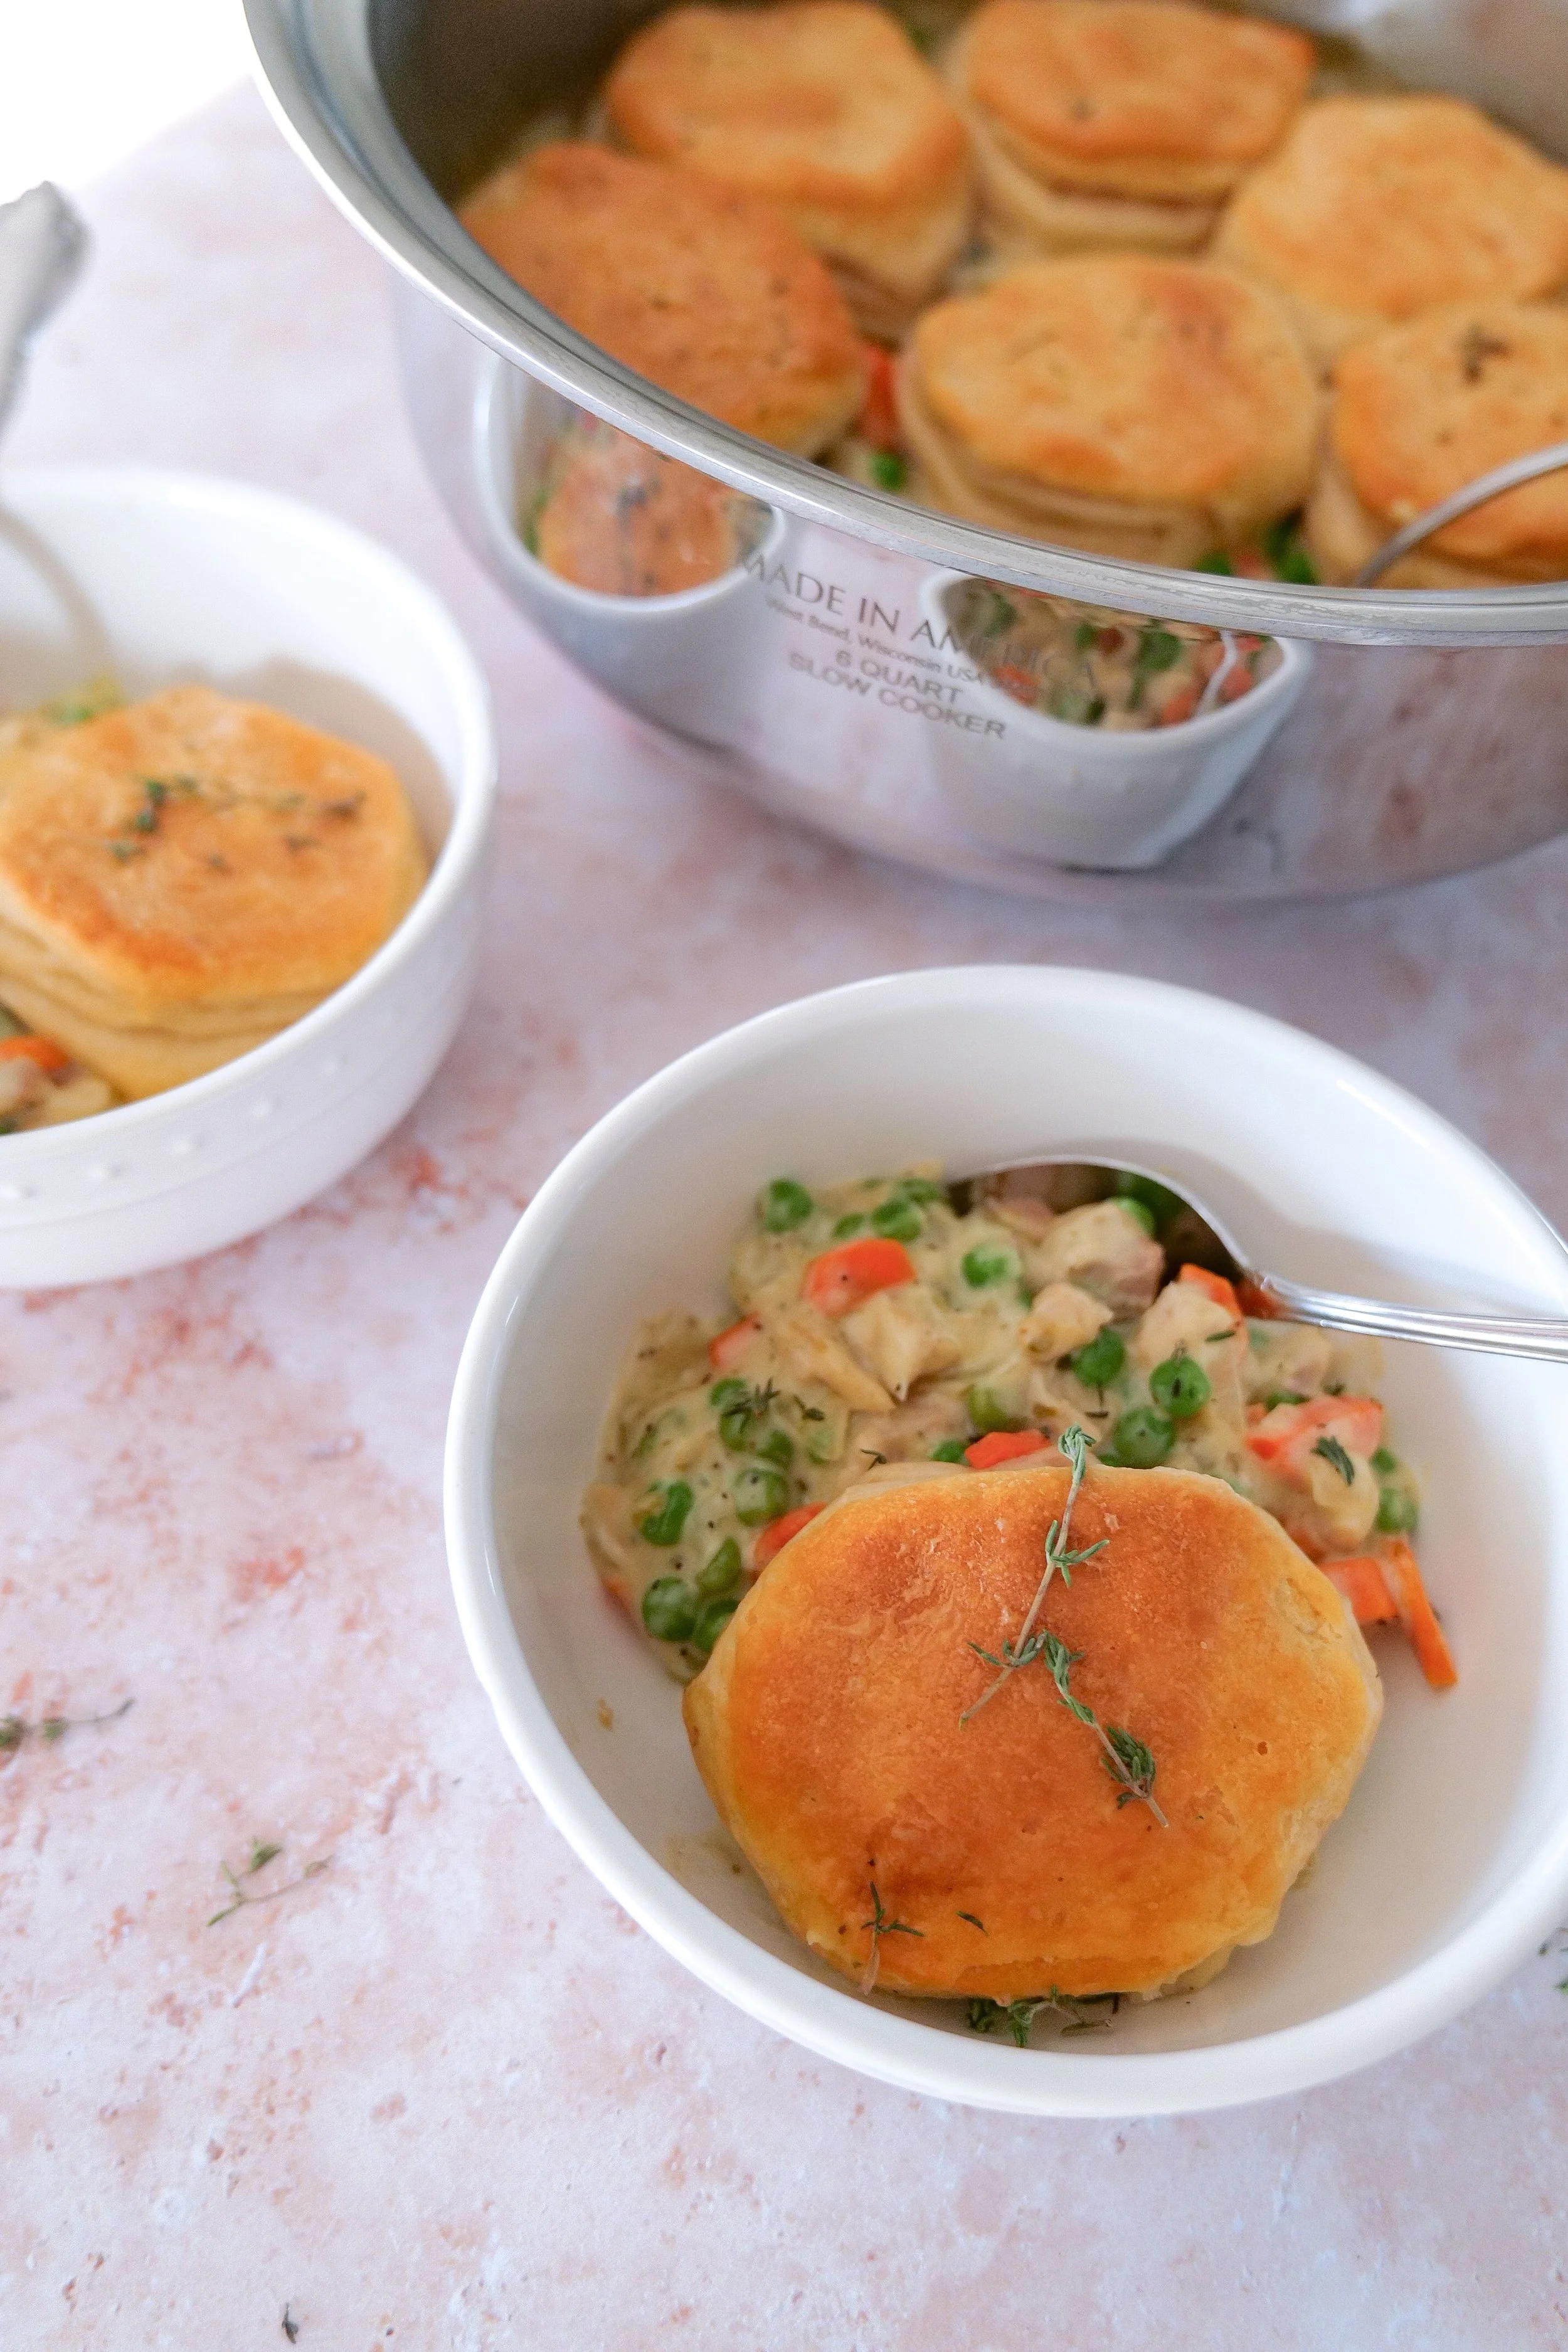
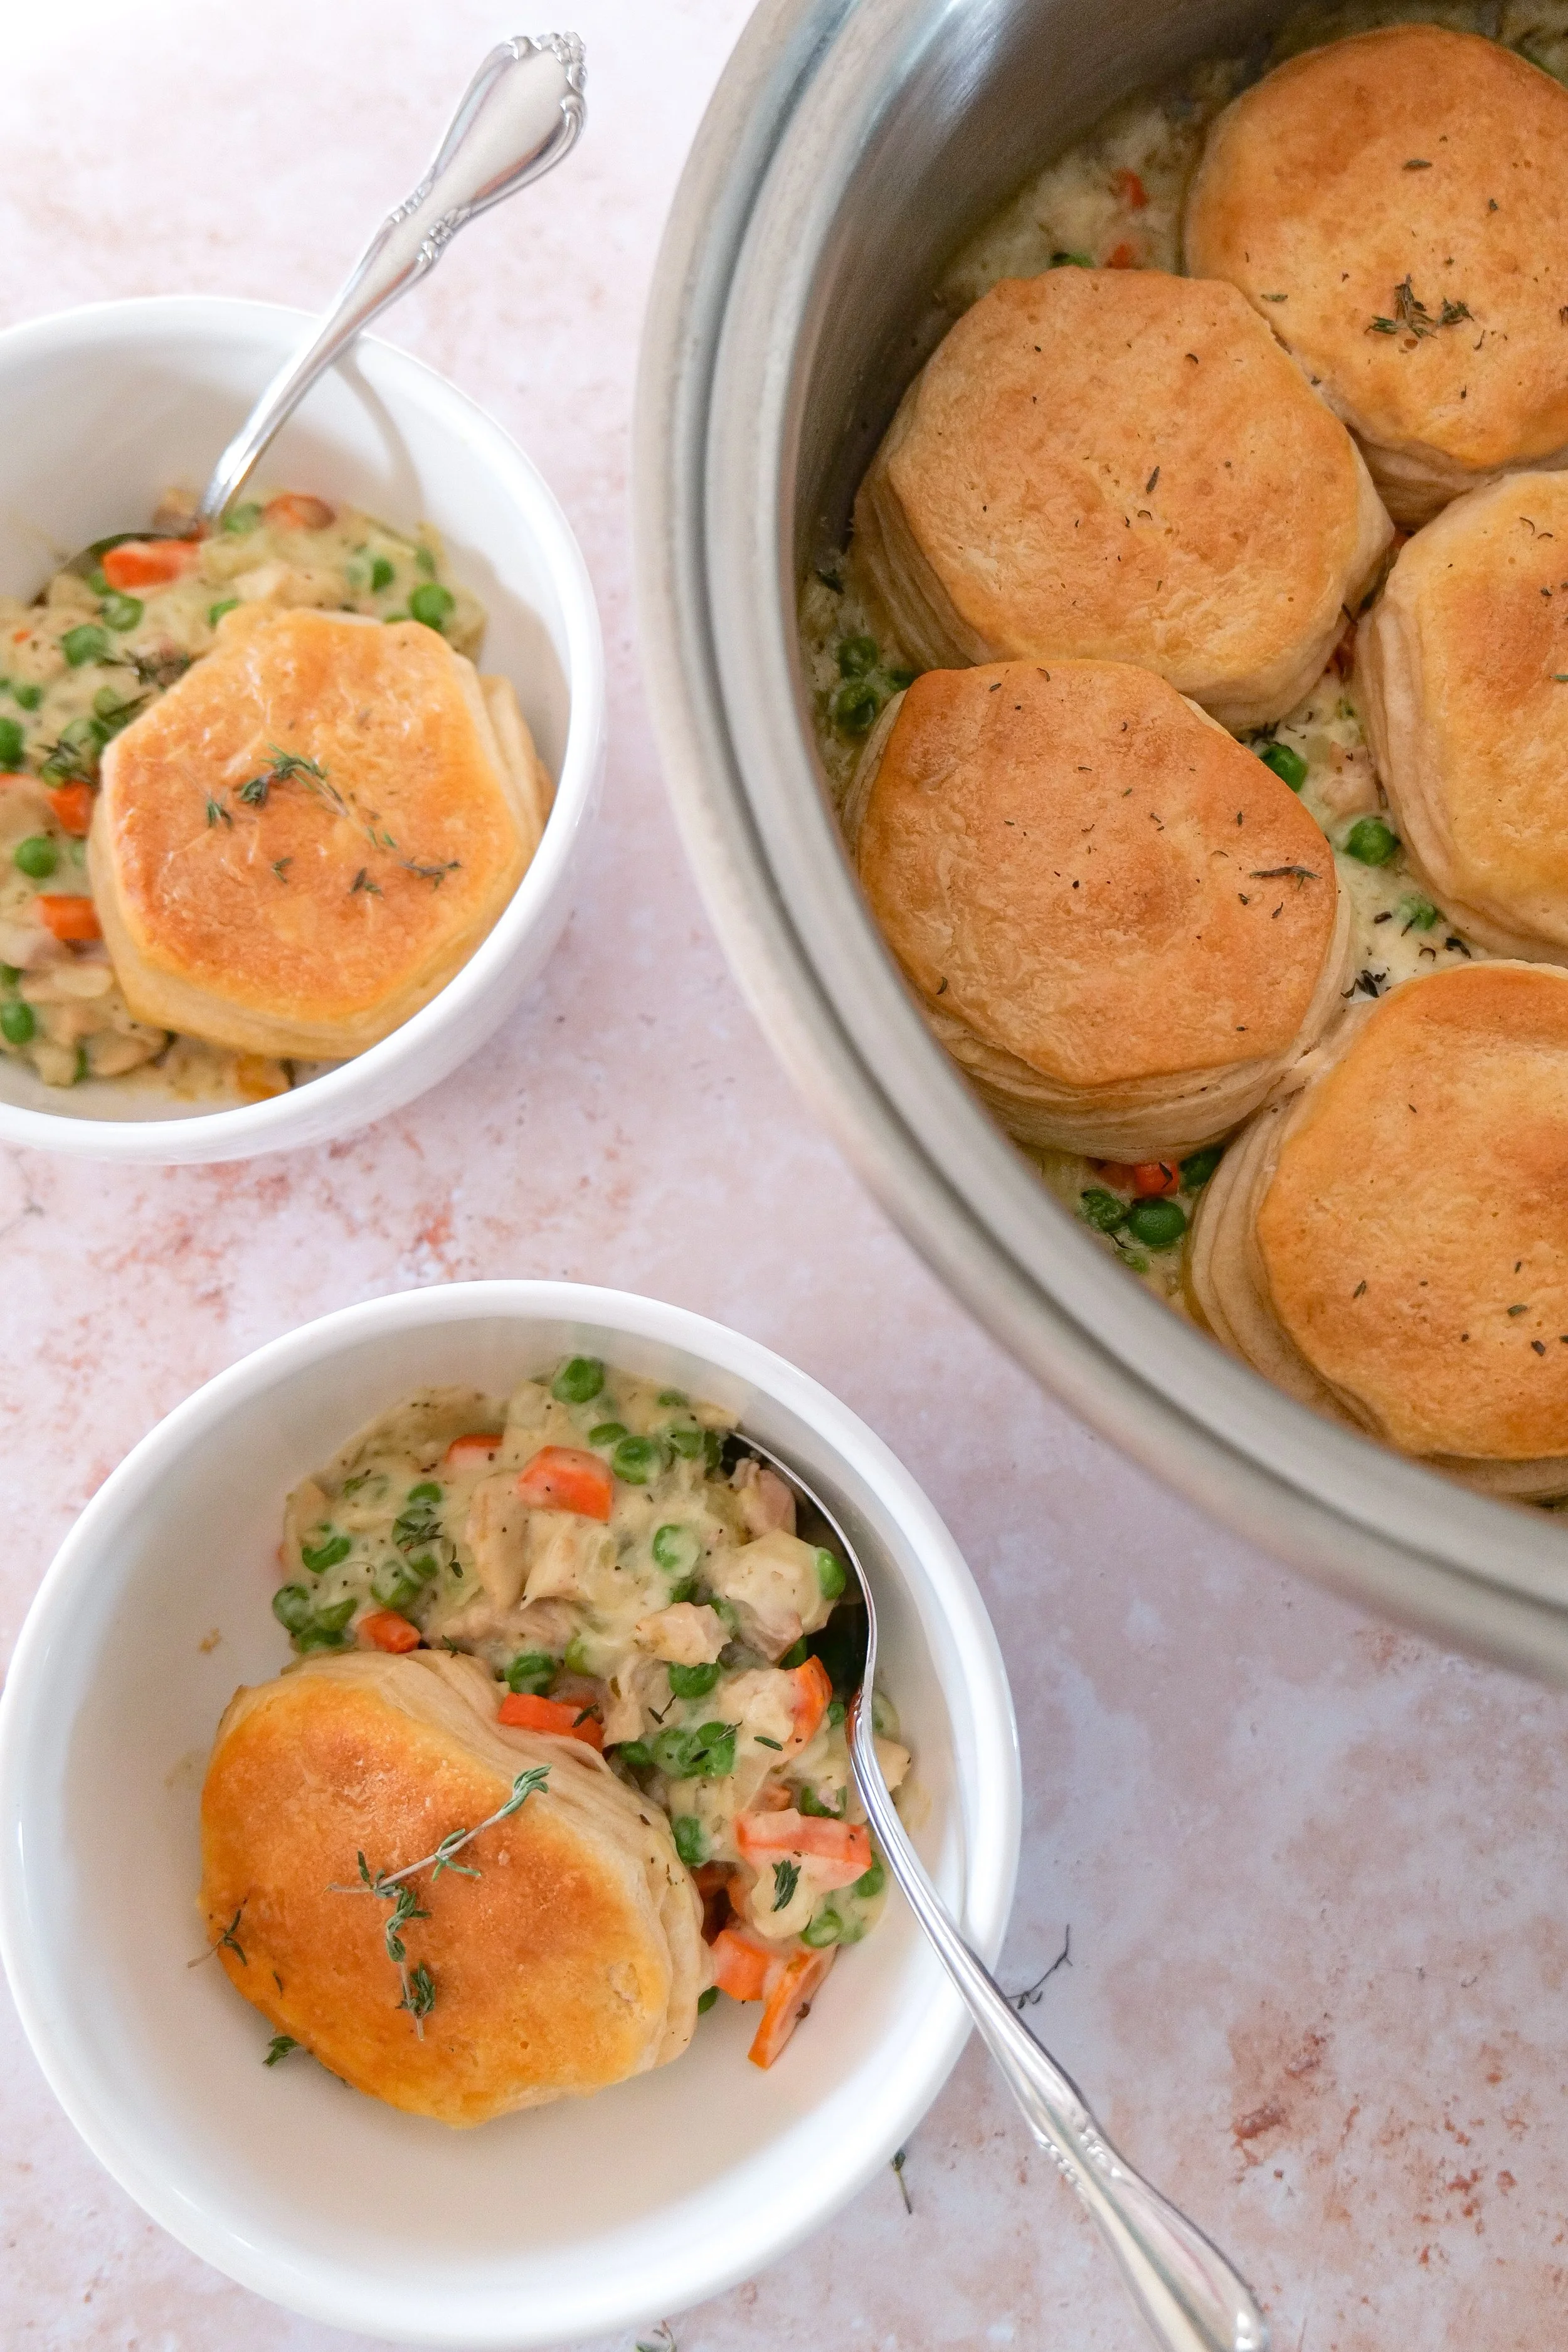
Easy skillet chicken pot pie with flaky golden biscuits baked over a creamy chicken and vegetable filling in a cast iron skillet.
Creamy homemade chicken pot pie filling with tender chicken, carrots, peas, garlic, and herbs simmering in a skillet.
Fresh ingredients for skillet chicken pot pie including chicken, carrots, onion, garlic, peas, broth, cream, herbs, and refrigerated biscuits.

Why You'll Love This Recipe

  • Ready in about 45 minutes

  • Made with simple pantry staples

  • Rich, creamy, and packed with flavor

  • Family-friendly comfort food

  • One-pan dinner for easy cleanup

  • Perfect for cozy fall and winter evenings

  • Easy to customize with your favorite vegetables

  • Great for leftovers

Kitchen Tools You'll Need

  • Large oven-safe skillet or cast iron skillet

  • Wooden spoon

  • Sharp chef's knife

  • Cutting board

  • Measuring cups and spoons

  • Pastry brush (for brushing the biscuits with cream and butter)

Diced chicken browning in butter as the first step for making an easy skillet chicken pot pie.

Ingredient Notes

One of my favorite things about this recipe is how flexible it is.

Chicken: Boneless, skinless chicken breasts work wonderfully, but rotisserie chicken is a fantastic shortcut when you're short on time.

Vegetables: Carrots, onions, peas, and garlic create the classic chicken pot pie flavor. Frozen peas make this recipe even easier.

Cream: Heavy cream creates an extra rich filling, while half & half is a lighter option that still delivers a wonderfully creamy texture.

Broth: Vegetable broth works beautifully, but chicken broth adds even more savory flavor if you have it on hand.

Biscuits: Refrigerated biscuits make this recipe incredibly simple, but homemade buttermilk biscuits are equally delicious if you have a little extra time.

How to Make Stovetop Chicken Pot Pie

Begin by melting the butter in a large oven-safe skillet over medium-high heat. Add the diced chicken and cook until lightly browned on all sides.

Next, stir in the diced onion, carrots, and garlic. Cook for about 5 minutes, or until the onions become translucent and the carrots begin to soften.

Sprinkle the flour evenly over the chicken and vegetables, stirring constantly for one minute to cook out the raw flour flavor.

Slowly whisk in the broth, followed by the heavy cream, thyme, rosemary, sea salt, and black pepper. Allow the filling to simmer for 3–5 minutes until thickened into a rich, creamy sauce.

Stir in the frozen peas before topping the filling with refrigerated biscuits. Brush each biscuit with a little heavy cream before transferring the skillet to a 350°F oven.

Bake for 20–25 minutes, or until the biscuits are beautifully golden brown and cooked through. Brush the warm biscuits with melted butter and finish with a sprinkle of flaky sea salt before serving.

Creamy chicken pot pie filling cooking in a skillet after adding broth, cream, herbs, and vegetables.

The Best Biscuits for Chicken Pot Pie

One of the best parts of this recipe is the buttery biscuit topping.

You can use refrigerated biscuits for a quick weeknight dinner, or make homemade biscuits if you have extra time. Buttermilk biscuits are always a favorite, while flaky layered biscuits create an especially beautiful presentation.

For something a little different, try cheddar biscuits or herb biscuits for extra flavor. Gluten-free biscuits also work well if needed.

Ingredients

  • 2 tablespoons salted butter

  • 2 cups boneless, skinless chicken breasts, diced

  • 1 medium yellow onion, diced

  • 2 cloves garlic, minced

  • 4 medium carrots, peeled and diced

  • 2 cups frozen peas

  • 1 teaspoon dried thyme

  • 1 teaspoon dried rosemary

  • ½ teaspoon fine sea salt

  • ½ teaspoon freshly ground black pepper

  • ¼ cup all-purpose flour

  • 2 cups chicken broth

  • 1 cup heavy cream or half-and-half

  • 1 (16.3-ounce) can refrigerated flaky biscuits

  • Heavy cream, for brushing the biscuits

  • 2 tablespoons melted butter, for brushing

  • Flaky sea salt, for finishing (optional)

Instructions

  1. Heat a large oven-safe skillet over medium-high heat. Melt the butter, then add the diced chicken. Cook until lightly browned on all sides.

  2. Add the diced onion, carrots, and minced garlic. Sauté for about 5 minutes, or until the onions are translucent and the carrots begin to soften.

  3. Sprinkle the flour over the chicken and vegetables. Stir constantly for 1 minute, making sure the flour is fully incorporated.

  4. Slowly pour in the broth, then stir in the heavy cream (or half & half), thyme, rosemary, sea salt, and black pepper. Bring to a gentle simmer and cook for 3–5 minutes, stirring frequently, until the sauce thickens.

  5. Stir in the frozen peas until evenly combined. Arrange the biscuits over the top of the filling and brush each biscuit with a little heavy cream.

  6. Transfer the skillet to a 350°F oven and bake for 20–25 minutes, or until the biscuits are golden brown and cooked through.

  7. Remove from the oven, brush the warm biscuits with melted butter, sprinkle with flaky sea salt, and serve immediately.

I linked all of my favorite skillets, Dutch ovens, measuring cups, and everyday cooking tools in my Kitchen Essentials shelf.

Flaky refrigerated biscuits arranged on top of creamy chicken pot pie filling before baking.

Amanda's Tips

  • Rotisserie chicken is a wonderful shortcut that saves time without sacrificing flavor.

  • Taste the filling before adding the biscuits and adjust the seasoning as needed.

  • If the sauce becomes too thick, stir in a splash of broth.

  • Don't overcrowd the biscuits—leave a little room for them to rise.

  • For extra golden biscuits, brush them with heavy cream before baking.

  • Finish with melted butter and flaky sea salt for bakery-style biscuits.

  • If you love easy comfort food, don't miss my Chorizo One Pan Dinner for another simple weeknight meal.

Easy Variations

This recipe is easy to customize based on what you have on hand.

  • Swap the chicken for leftover turkey after Thanksgiving.

  • Add mushrooms for extra richness.

  • Stir in frozen corn or green beans.

  • Use cheddar biscuits for a cheesy twist.

  • Add fresh parsley before serving.

  • Make it with homemade biscuits for a completely from-scratch dinner.

Storage & Reheating

Store leftovers in an airtight container in the refrigerator for up to 3 days.

To reheat, warm gently on the stovetop over medium-low heat, adding a splash of broth or cream if needed to loosen the sauce.

The filling can also be frozen for up to 3 months. I recommend baking fresh biscuits when serving for the best texture.

Frequently Asked Questions

Can I use rotisserie chicken?

Absolutely! Rotisserie chicken is one of my favorite shortcuts and makes this recipe even quicker.

Can I make this ahead of time?

Yes! Prepare the filling up to one day in advance, refrigerate it, then top with biscuits and bake just before serving.

Can I freeze chicken pot pie?

Yes. Freeze the filling separately and add fresh biscuits when you're ready to bake.

Can I use homemade biscuits?

Definitely. Homemade buttermilk biscuits make this recipe extra special.

Can I substitute chicken broth?

Yes! Chicken broth adds a richer flavor, while vegetable broth keeps the recipe lighter.

What to Serve with Chicken Pot Pie

This cozy dinner pairs beautifully with:

  • A simple green salad

  • Roasted Brussels sprouts

  • Homemade applesauce

  • Fresh sourdough bread

  • Cranberry sauce during the holidays

More Cozy Recipes You'll Love

If your family loves comforting one-pan dinners, here are a few more favorites from Amanda's Kitchen:

Shop My Kitchen Favorites: Looking for the cookware and kitchen tools I use most often? Browse my favorite kitchen essentials that I reach for every day.

Save This Recipe

Whether you're planning ahead for a special occasion or adding a new favorite to your recipe collection, I've included a printable recipe card below so it's easy to save, print, and share with the people you love.

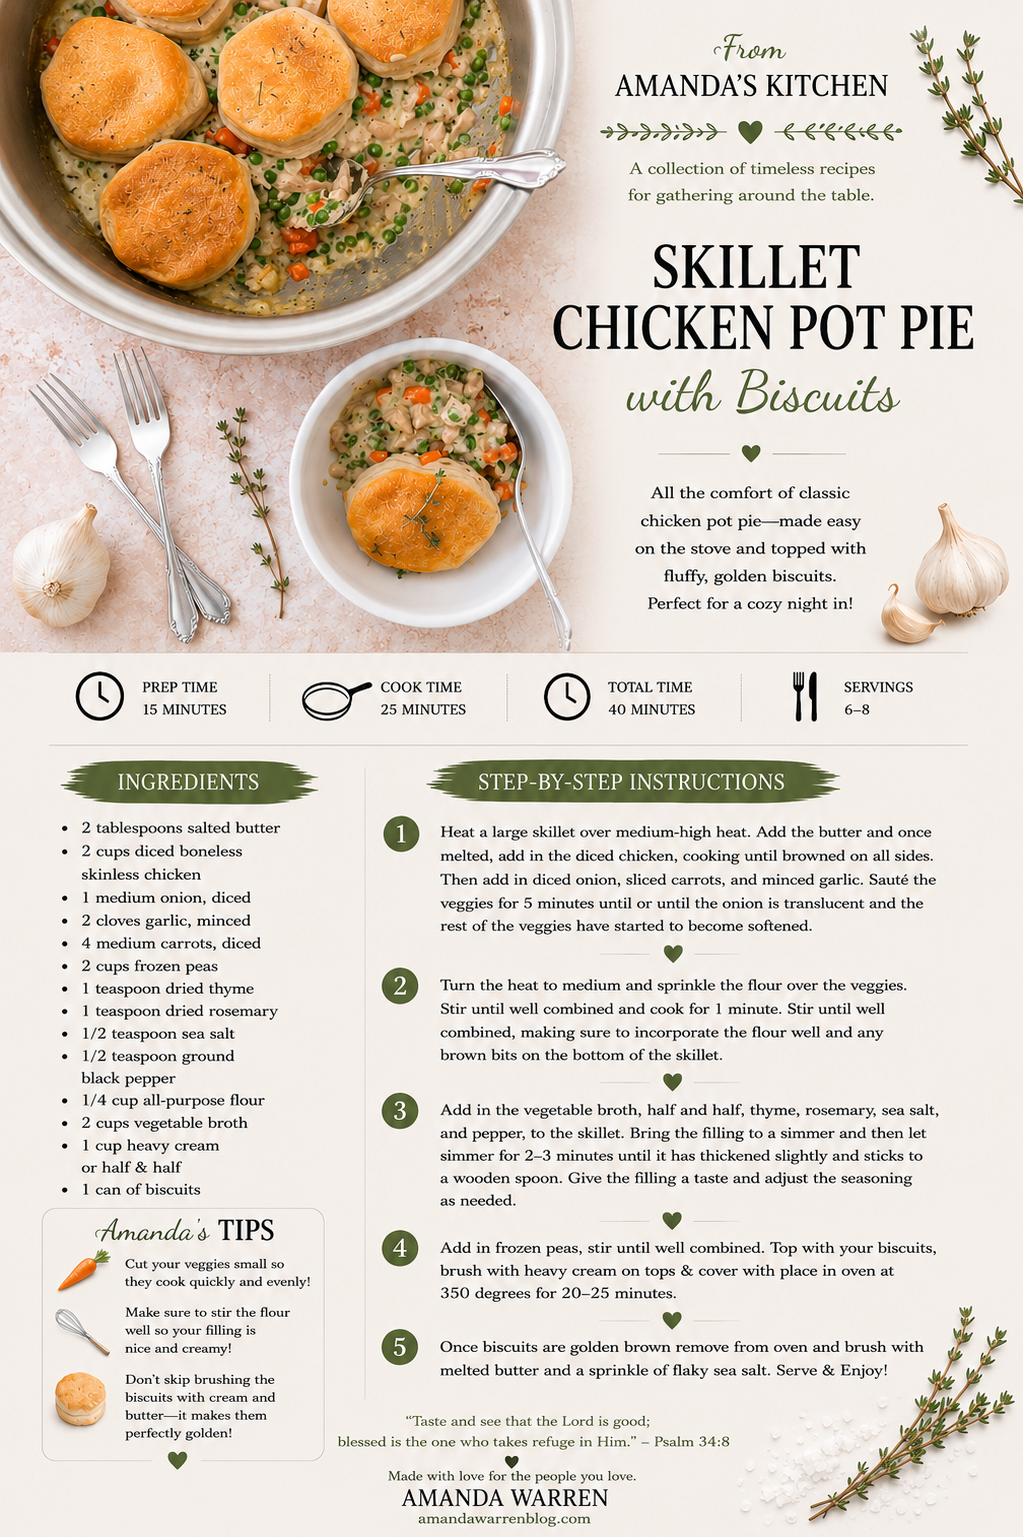
skillet chicken pot pie with biscuits recipe card
Golden brown biscuits baked over homemade chicken pot pie filling in an oven-safe skillet.
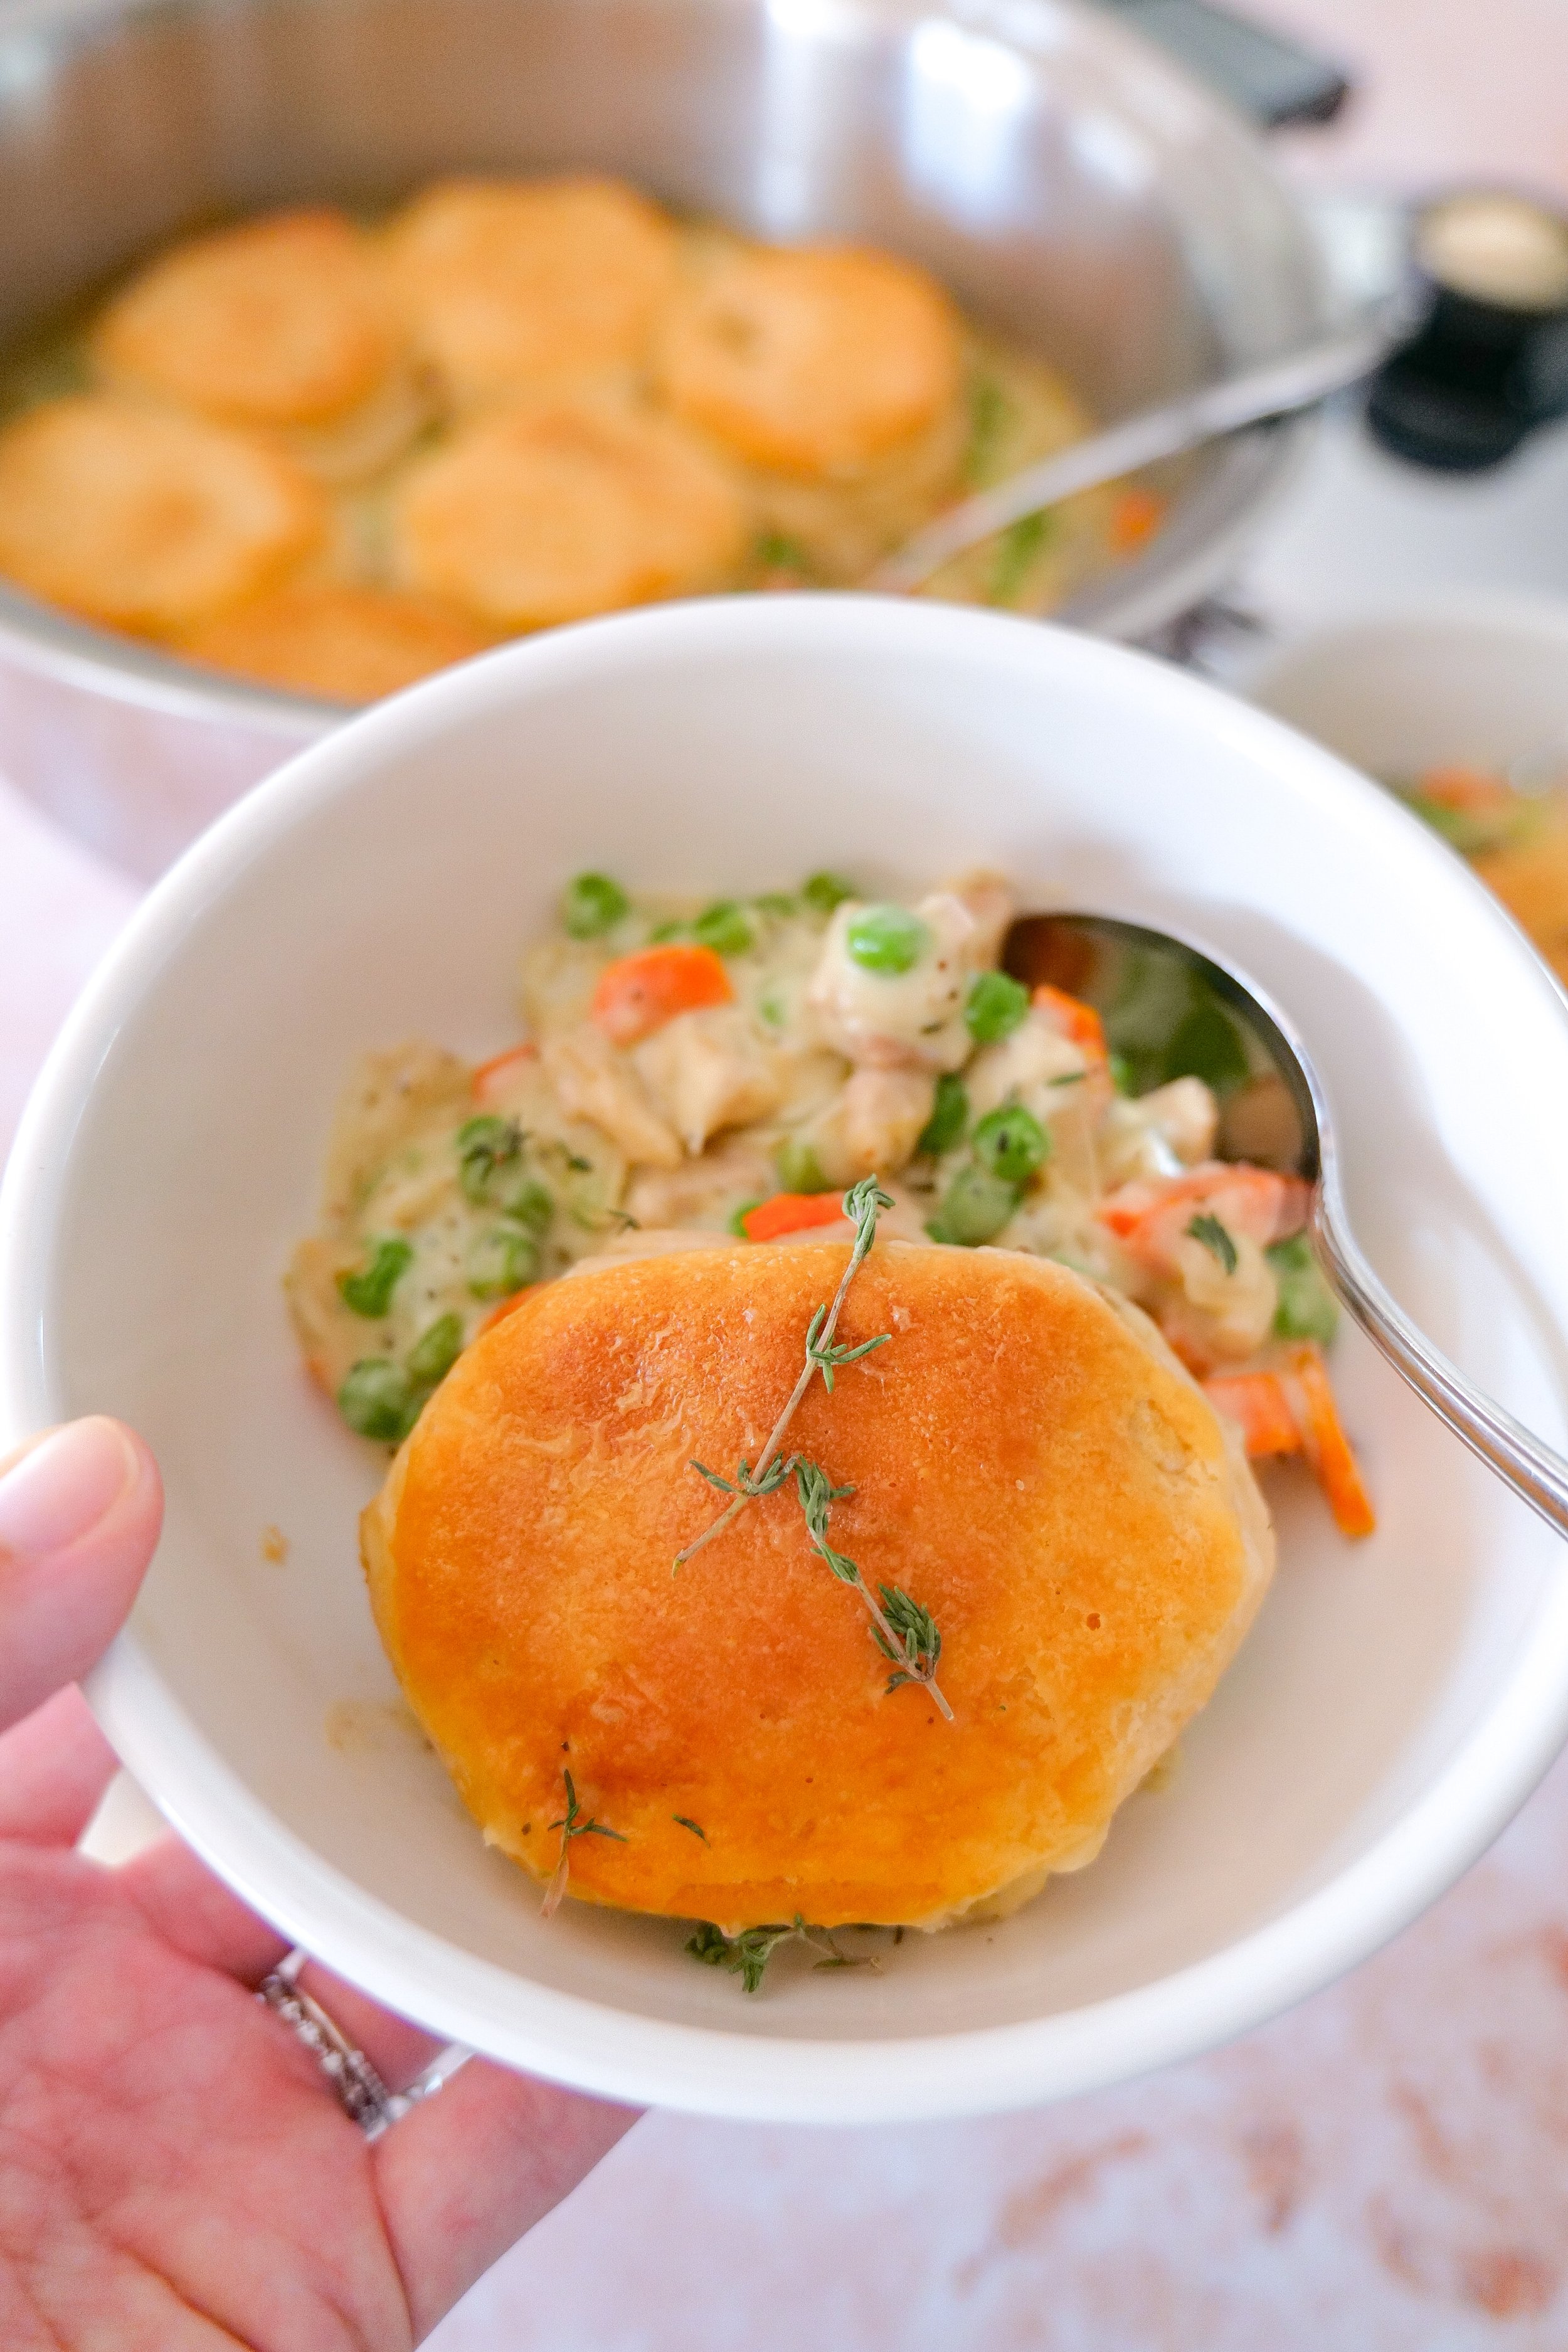
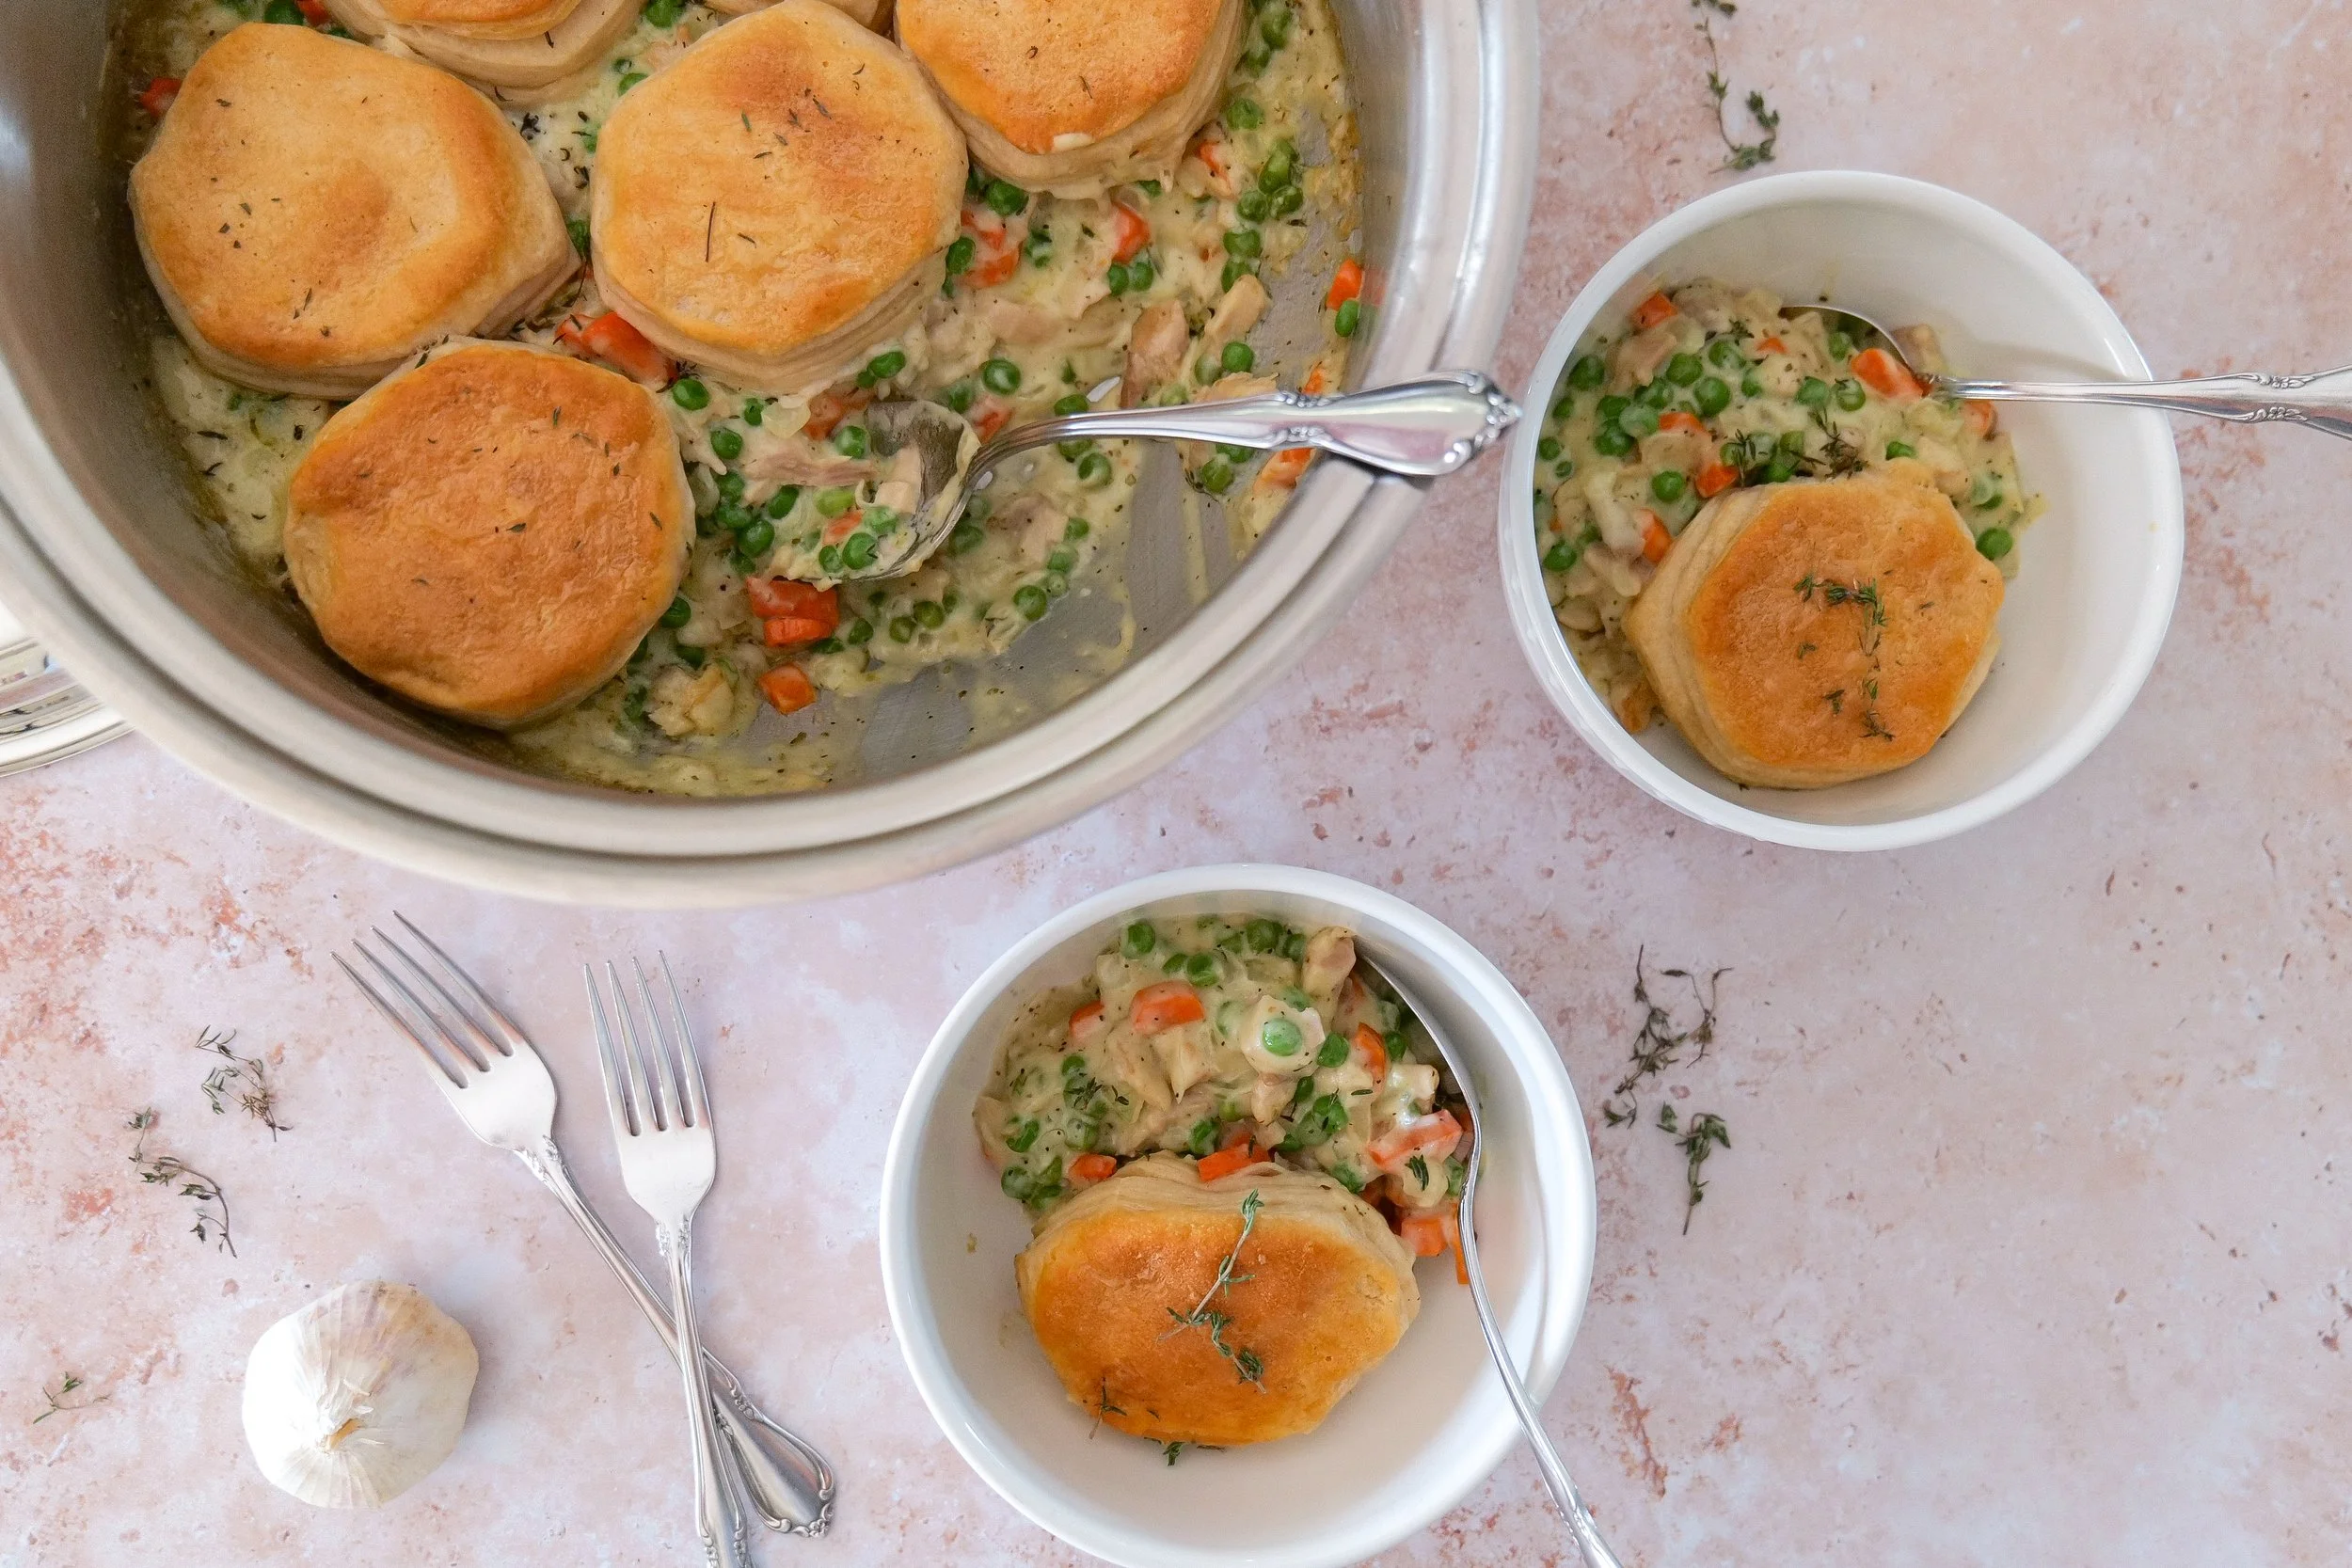
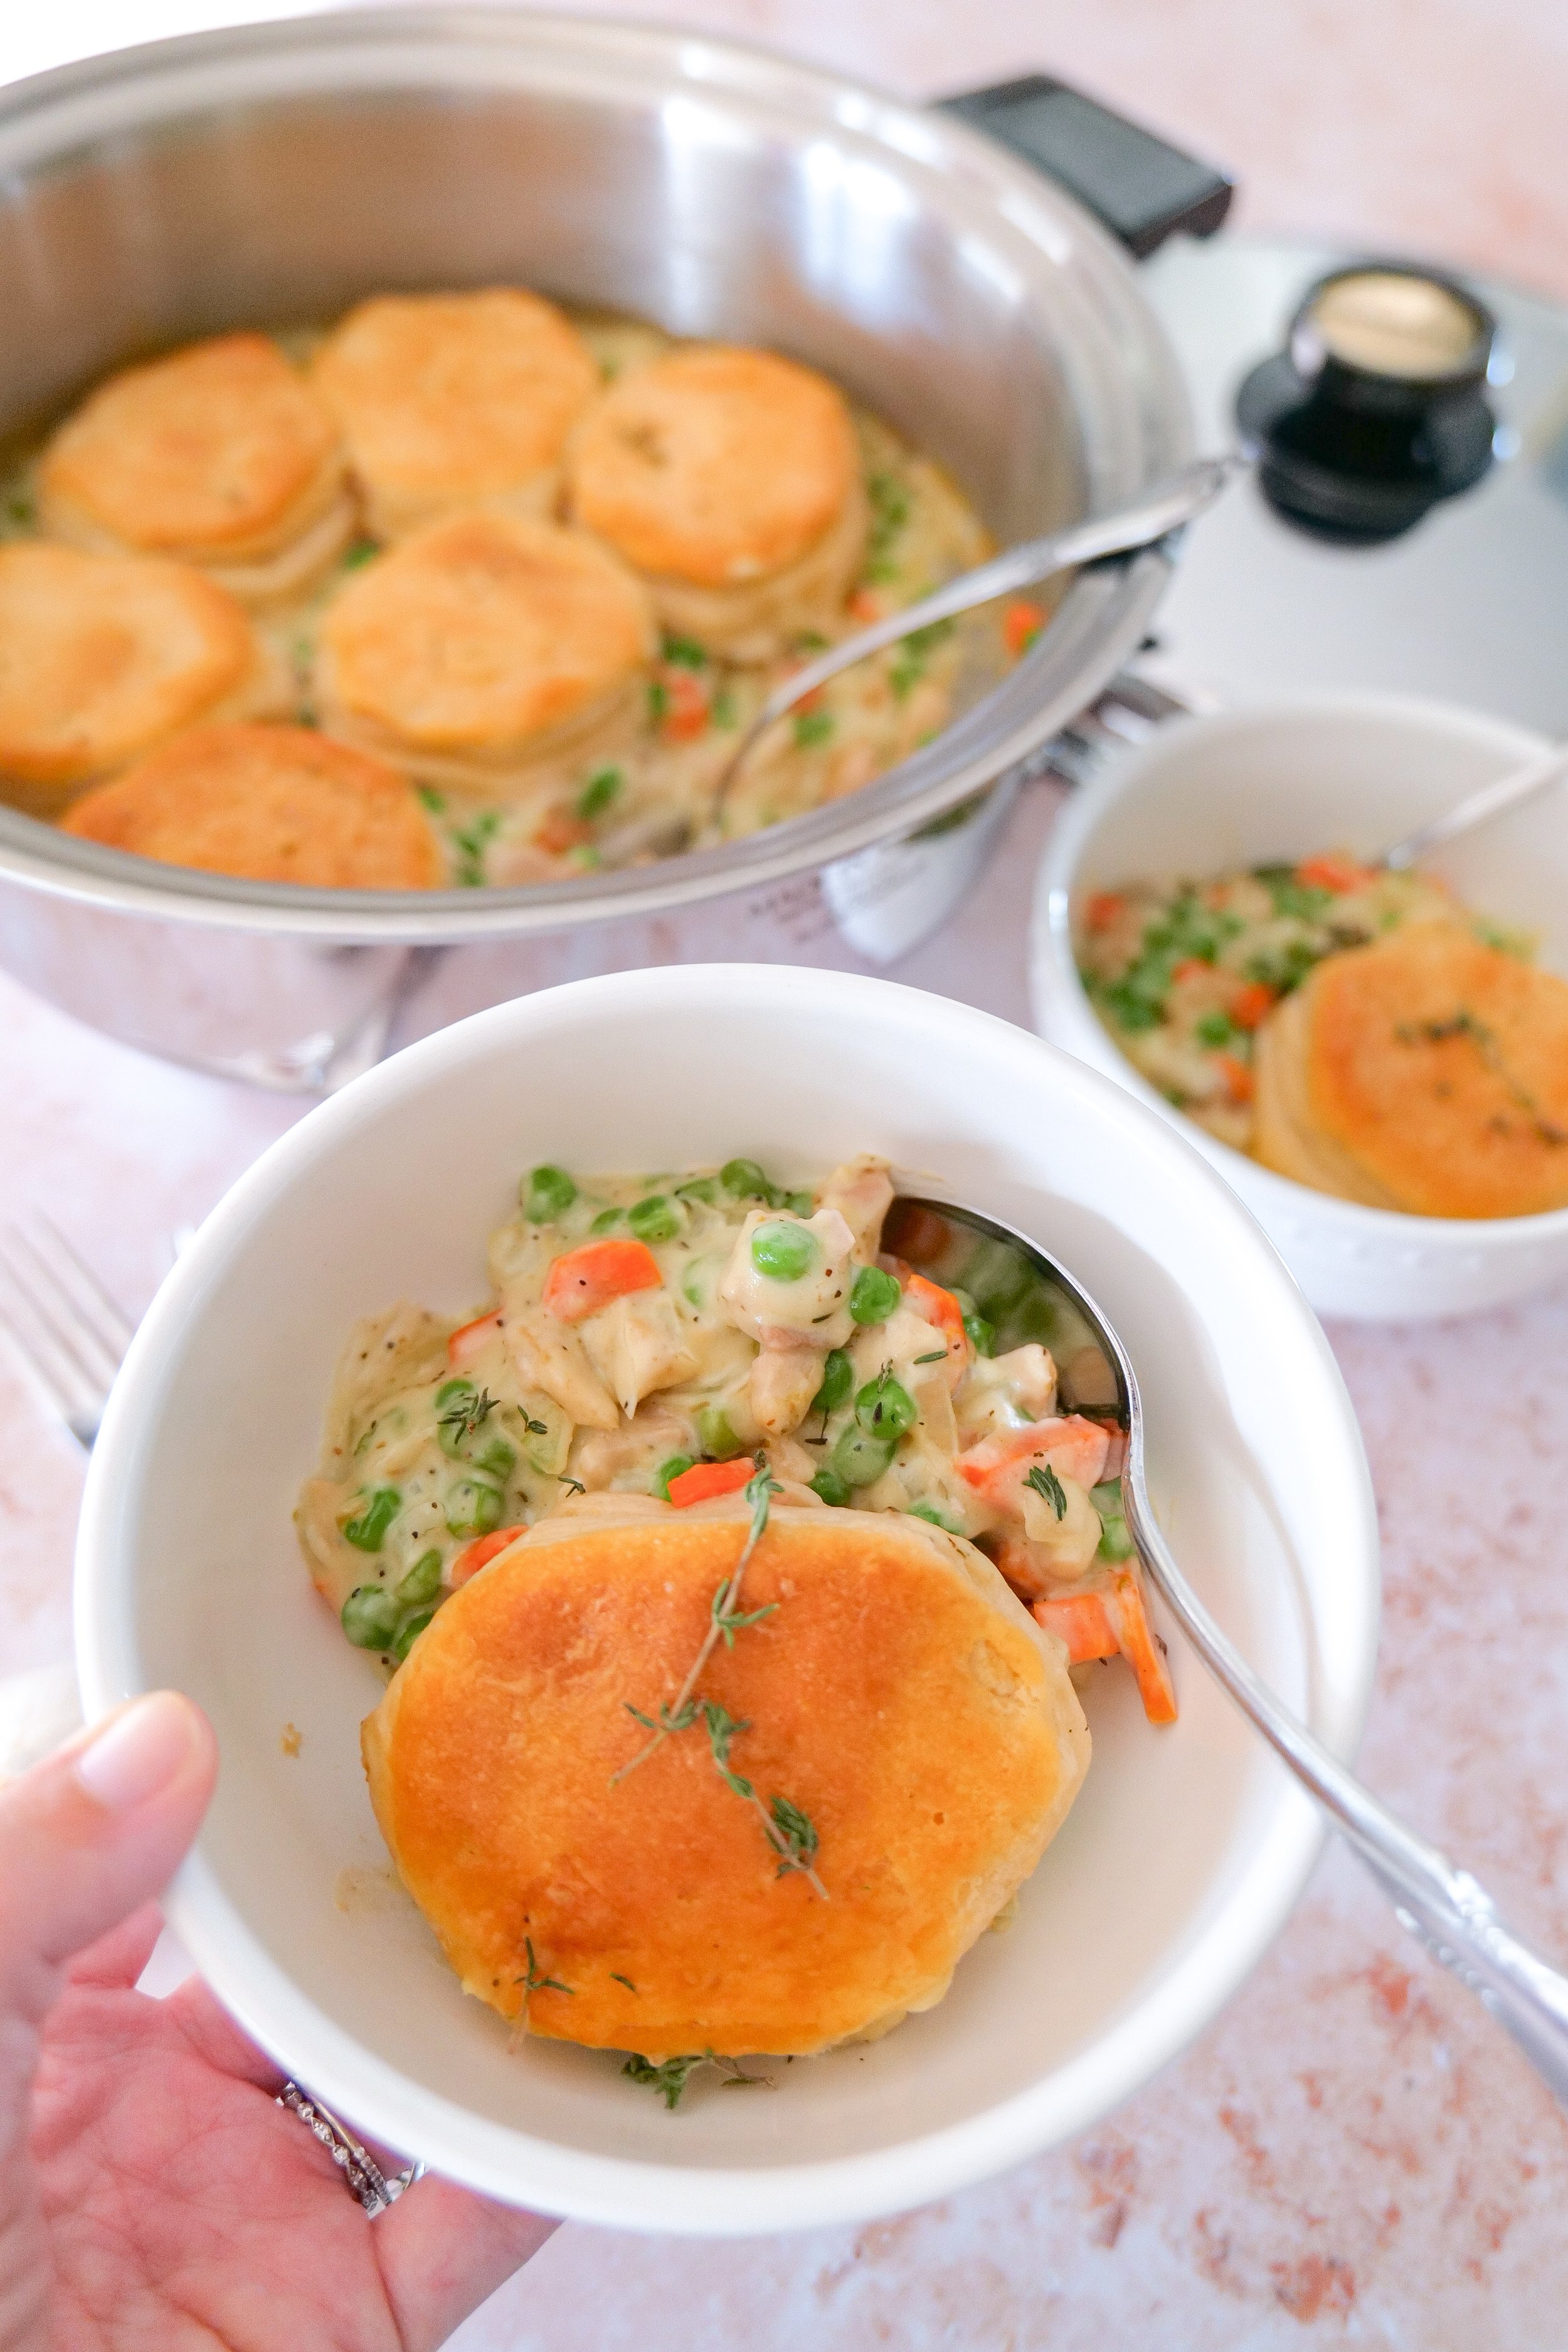
Homemade skillet chicken pot pie topped with buttery biscuits and served warm for a cozy family dinner.
One-pan chicken pot pie recipe with tender chicken, vegetables, creamy sauce, and fluffy biscuit topping.

Vanilla Bean Cherry Layer Cake (The Perfect Summer Celebration Cake)

A soft vanilla bean cake layered with sweet cherry filling and finished with whipped vanilla cherry mascarpone frosting.

↓ Skip to Recipe
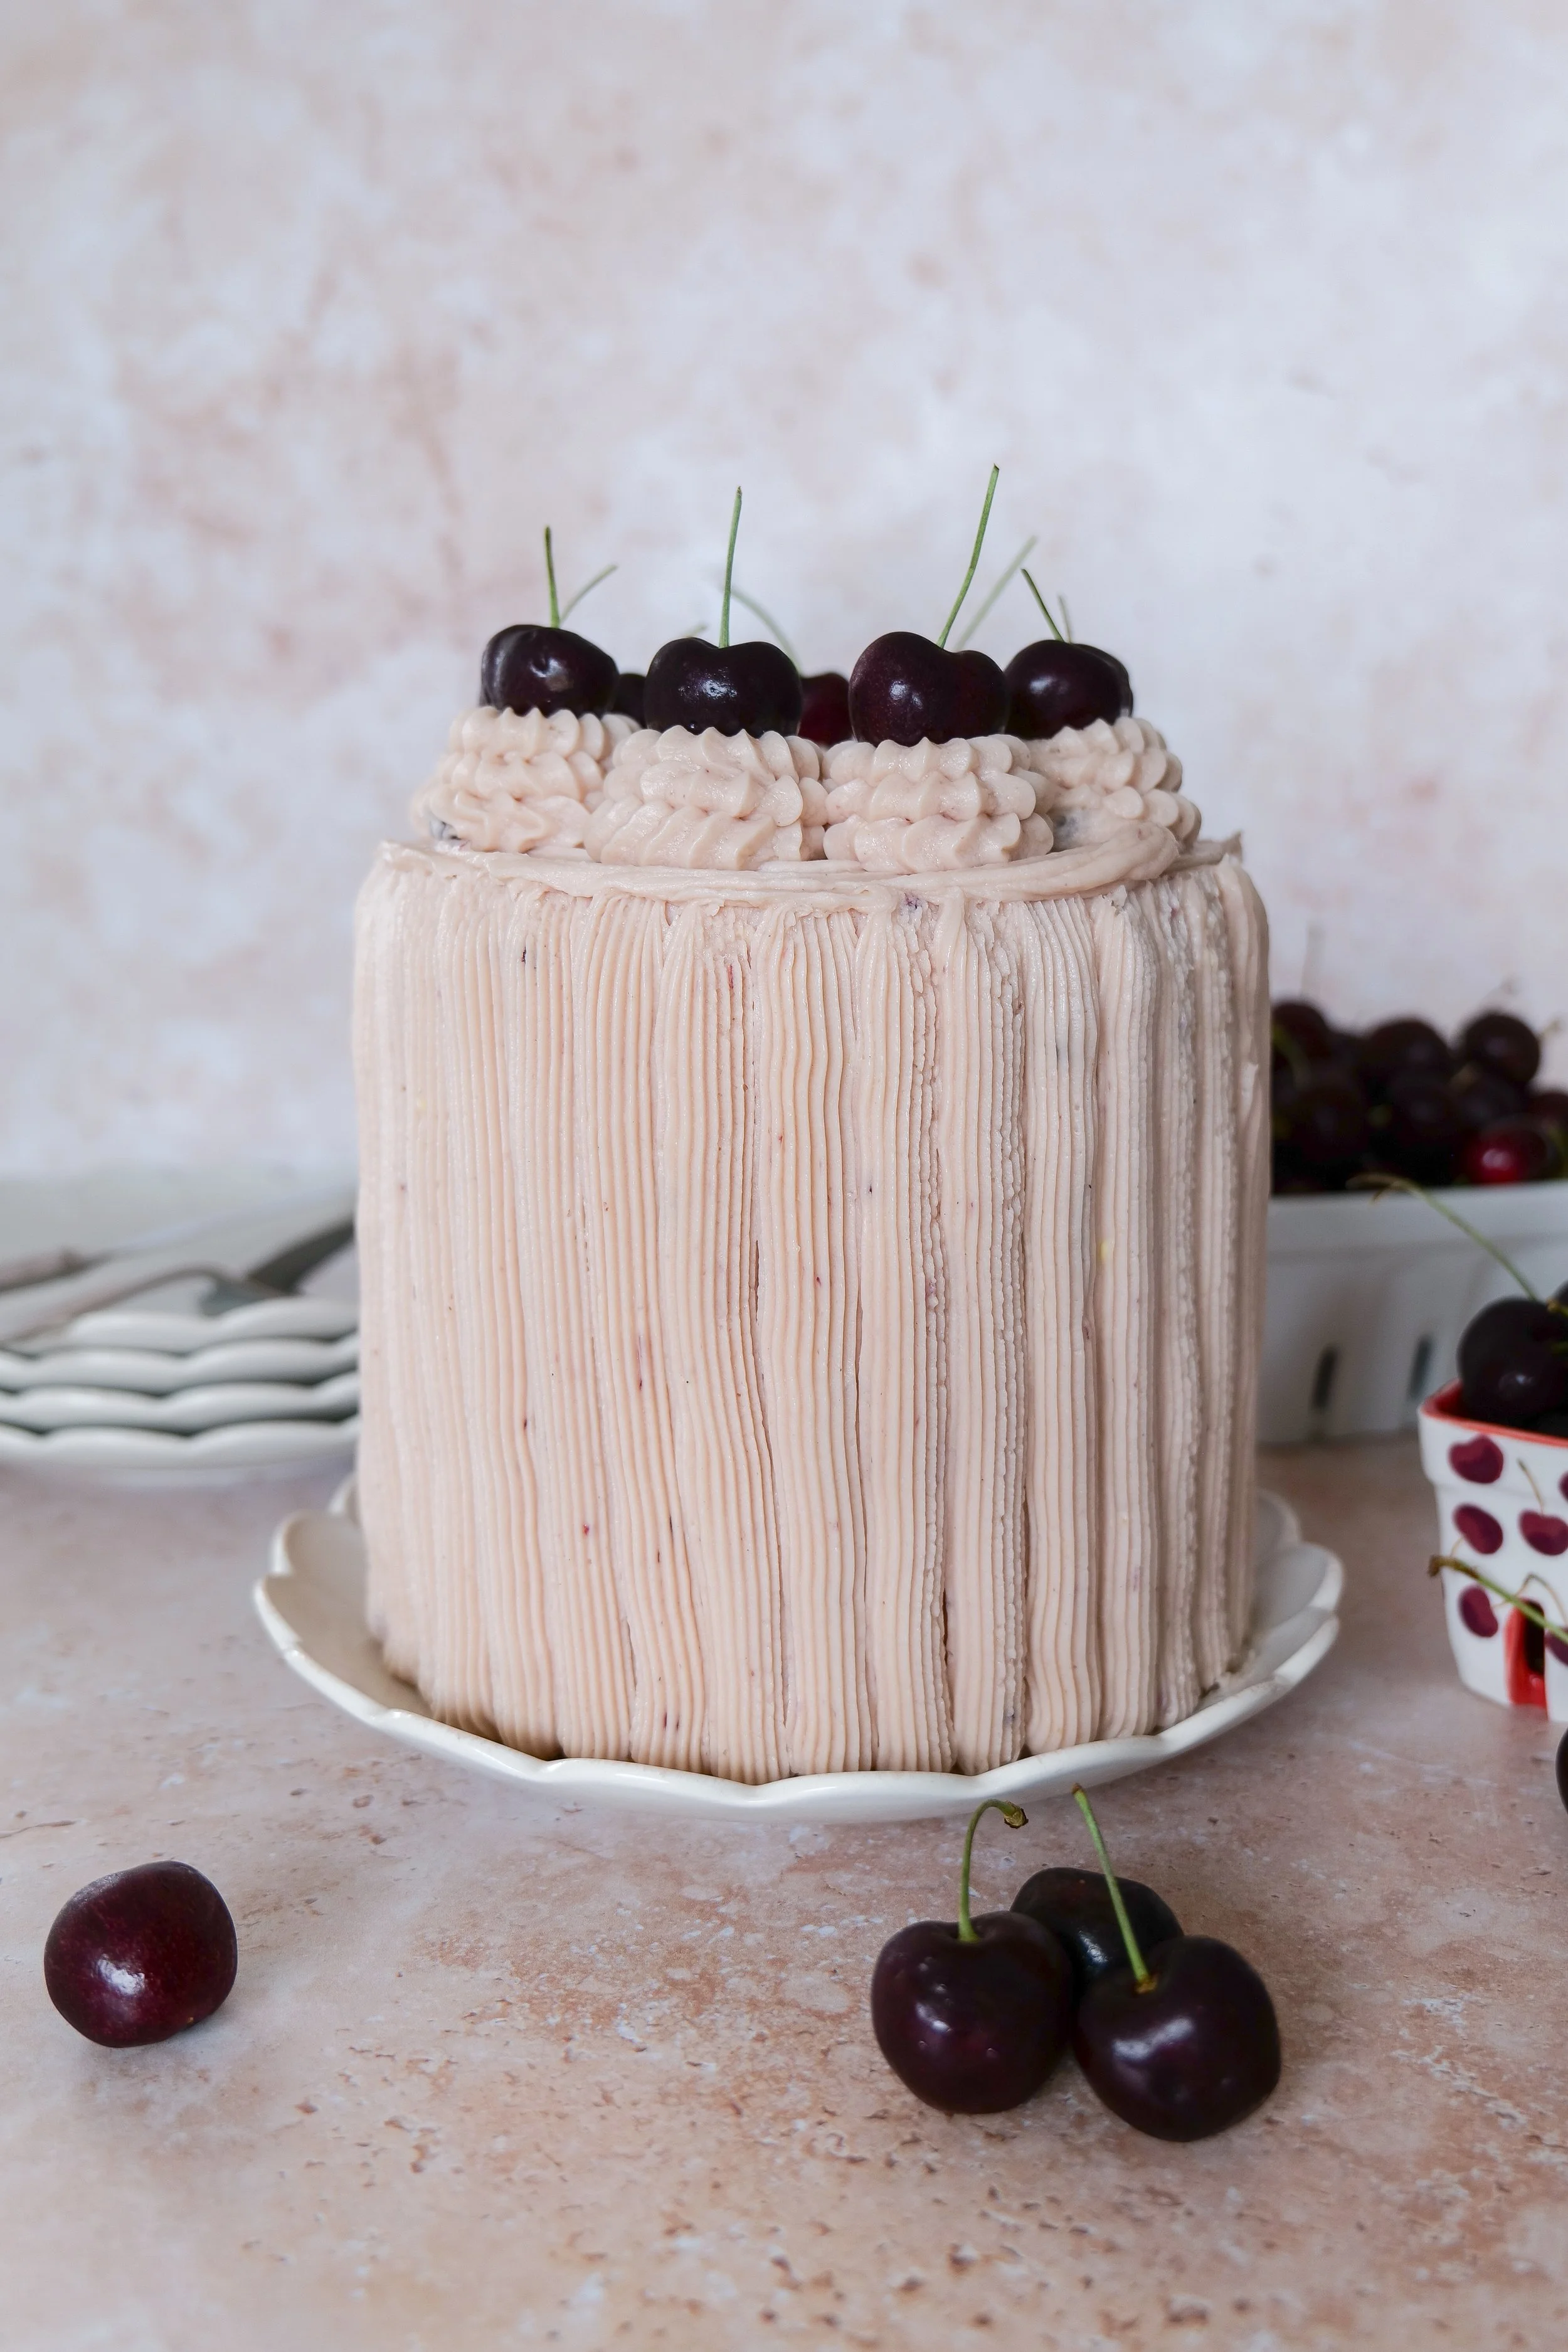
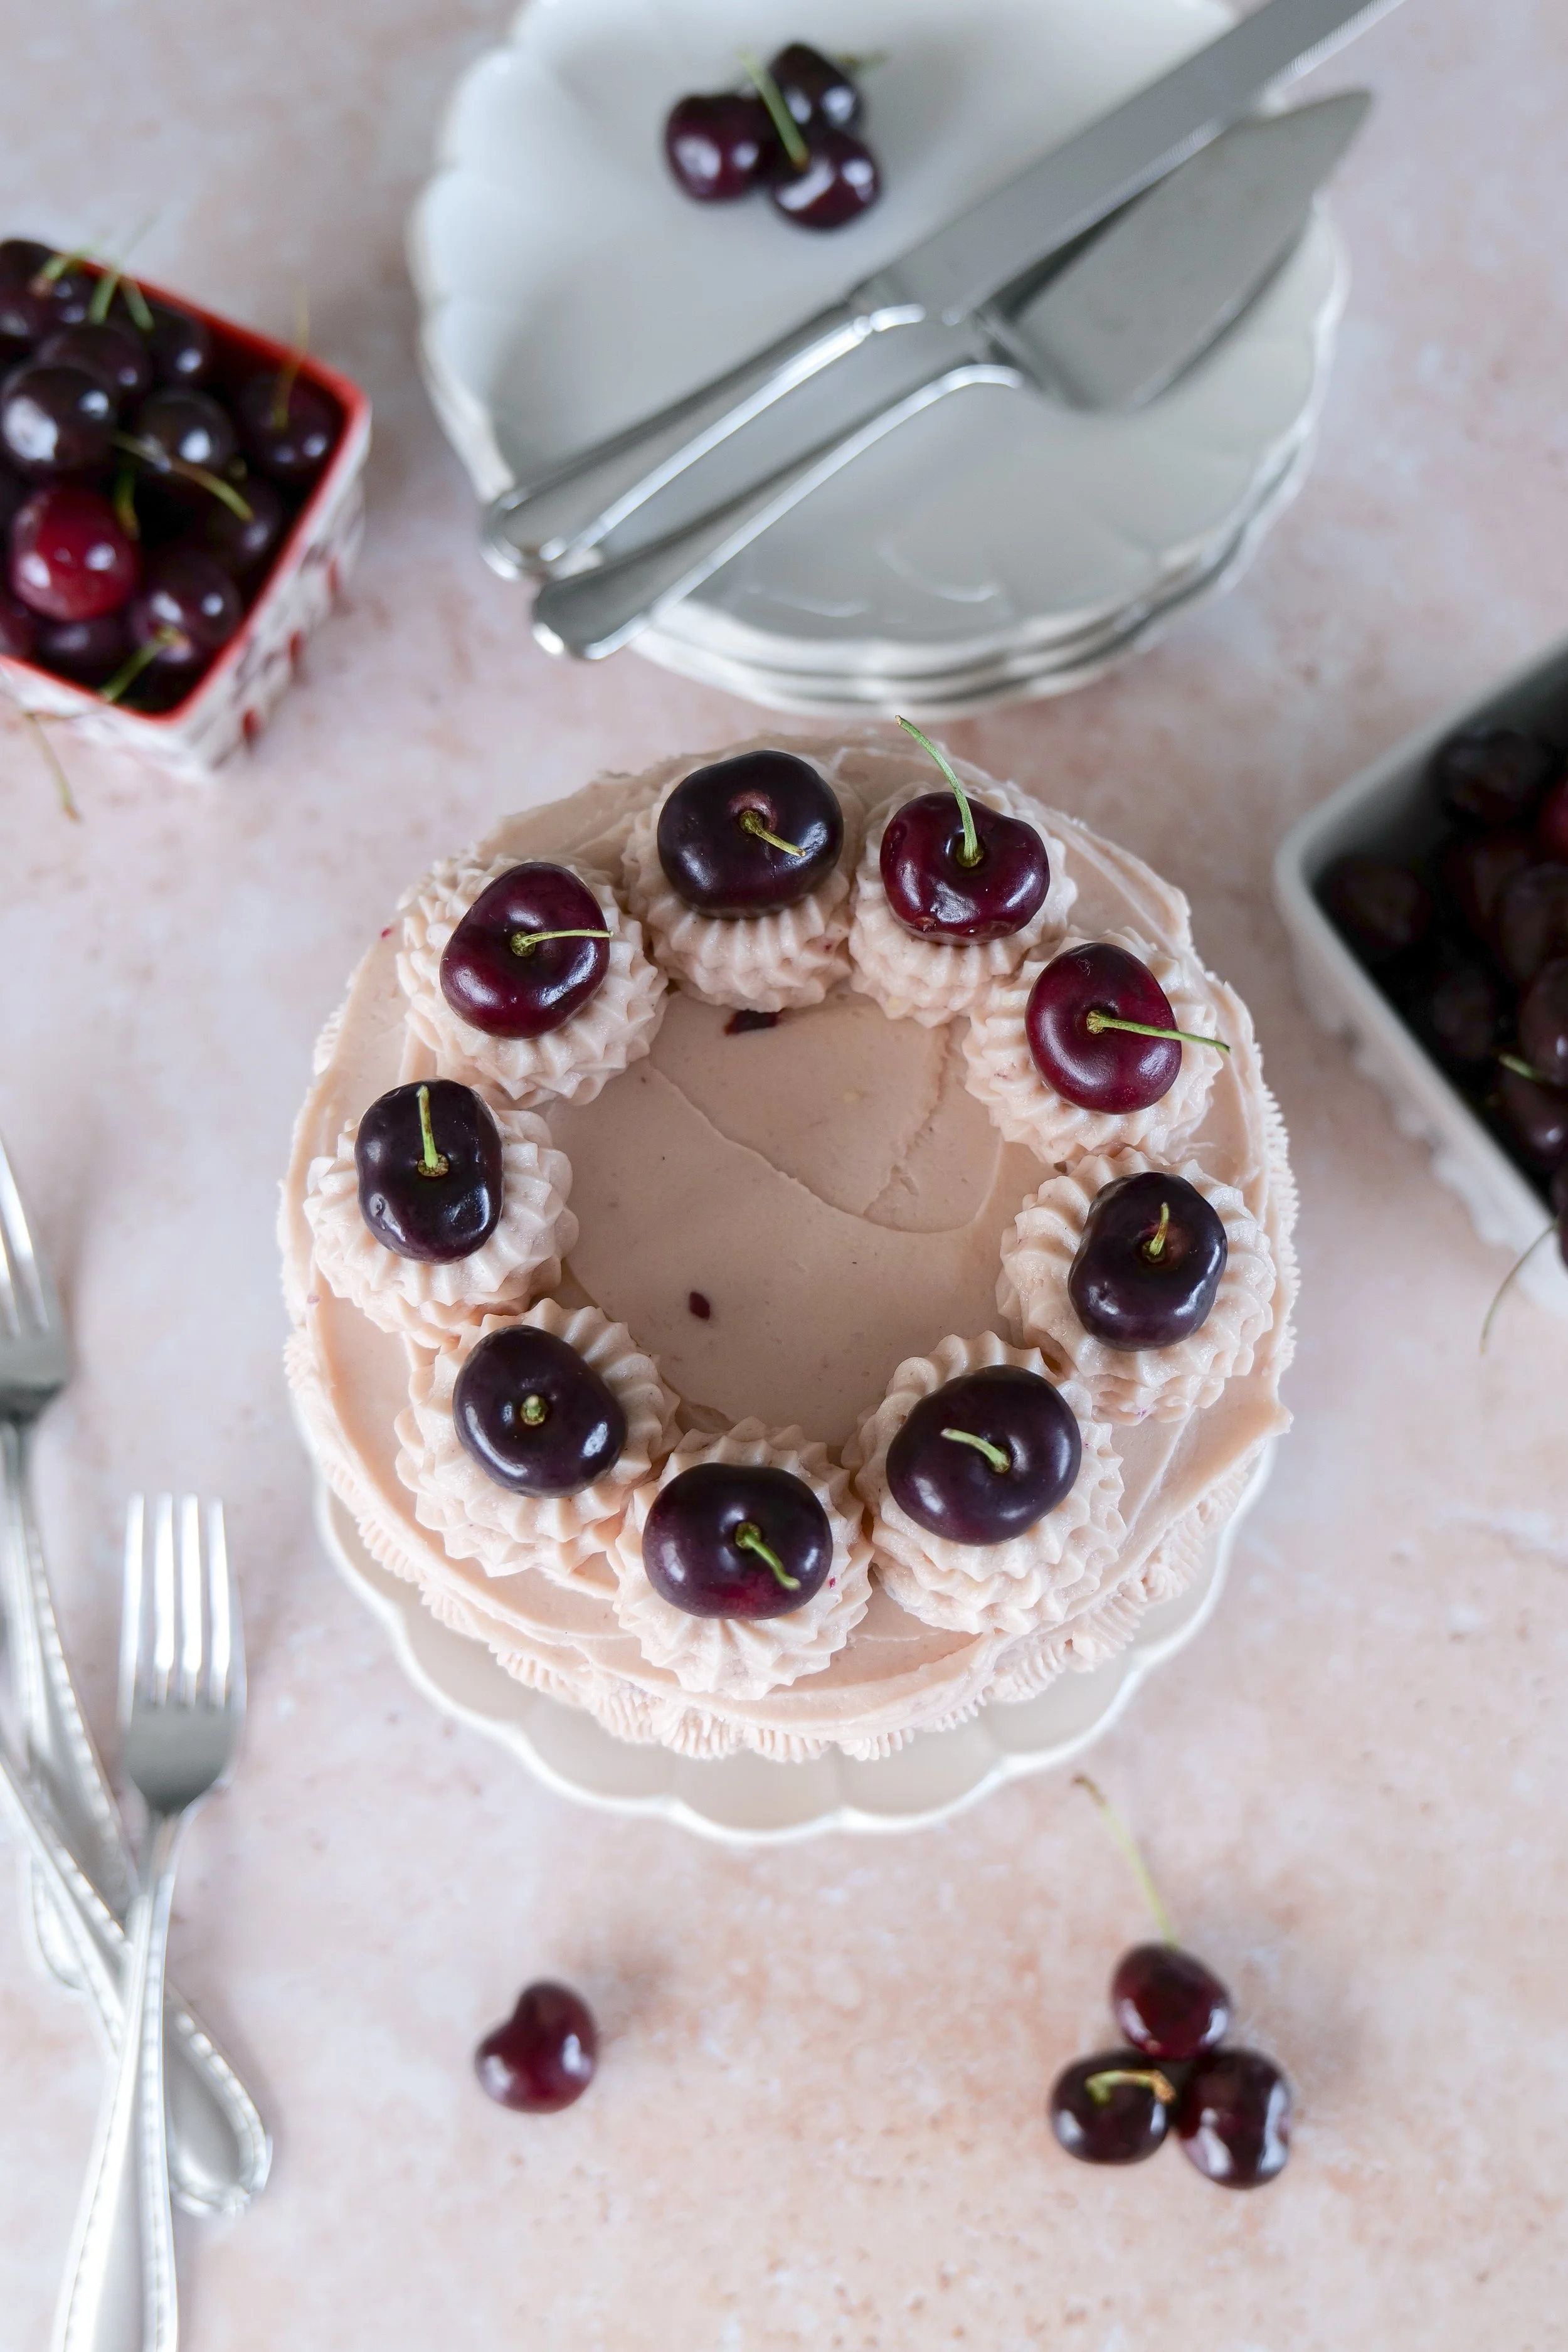
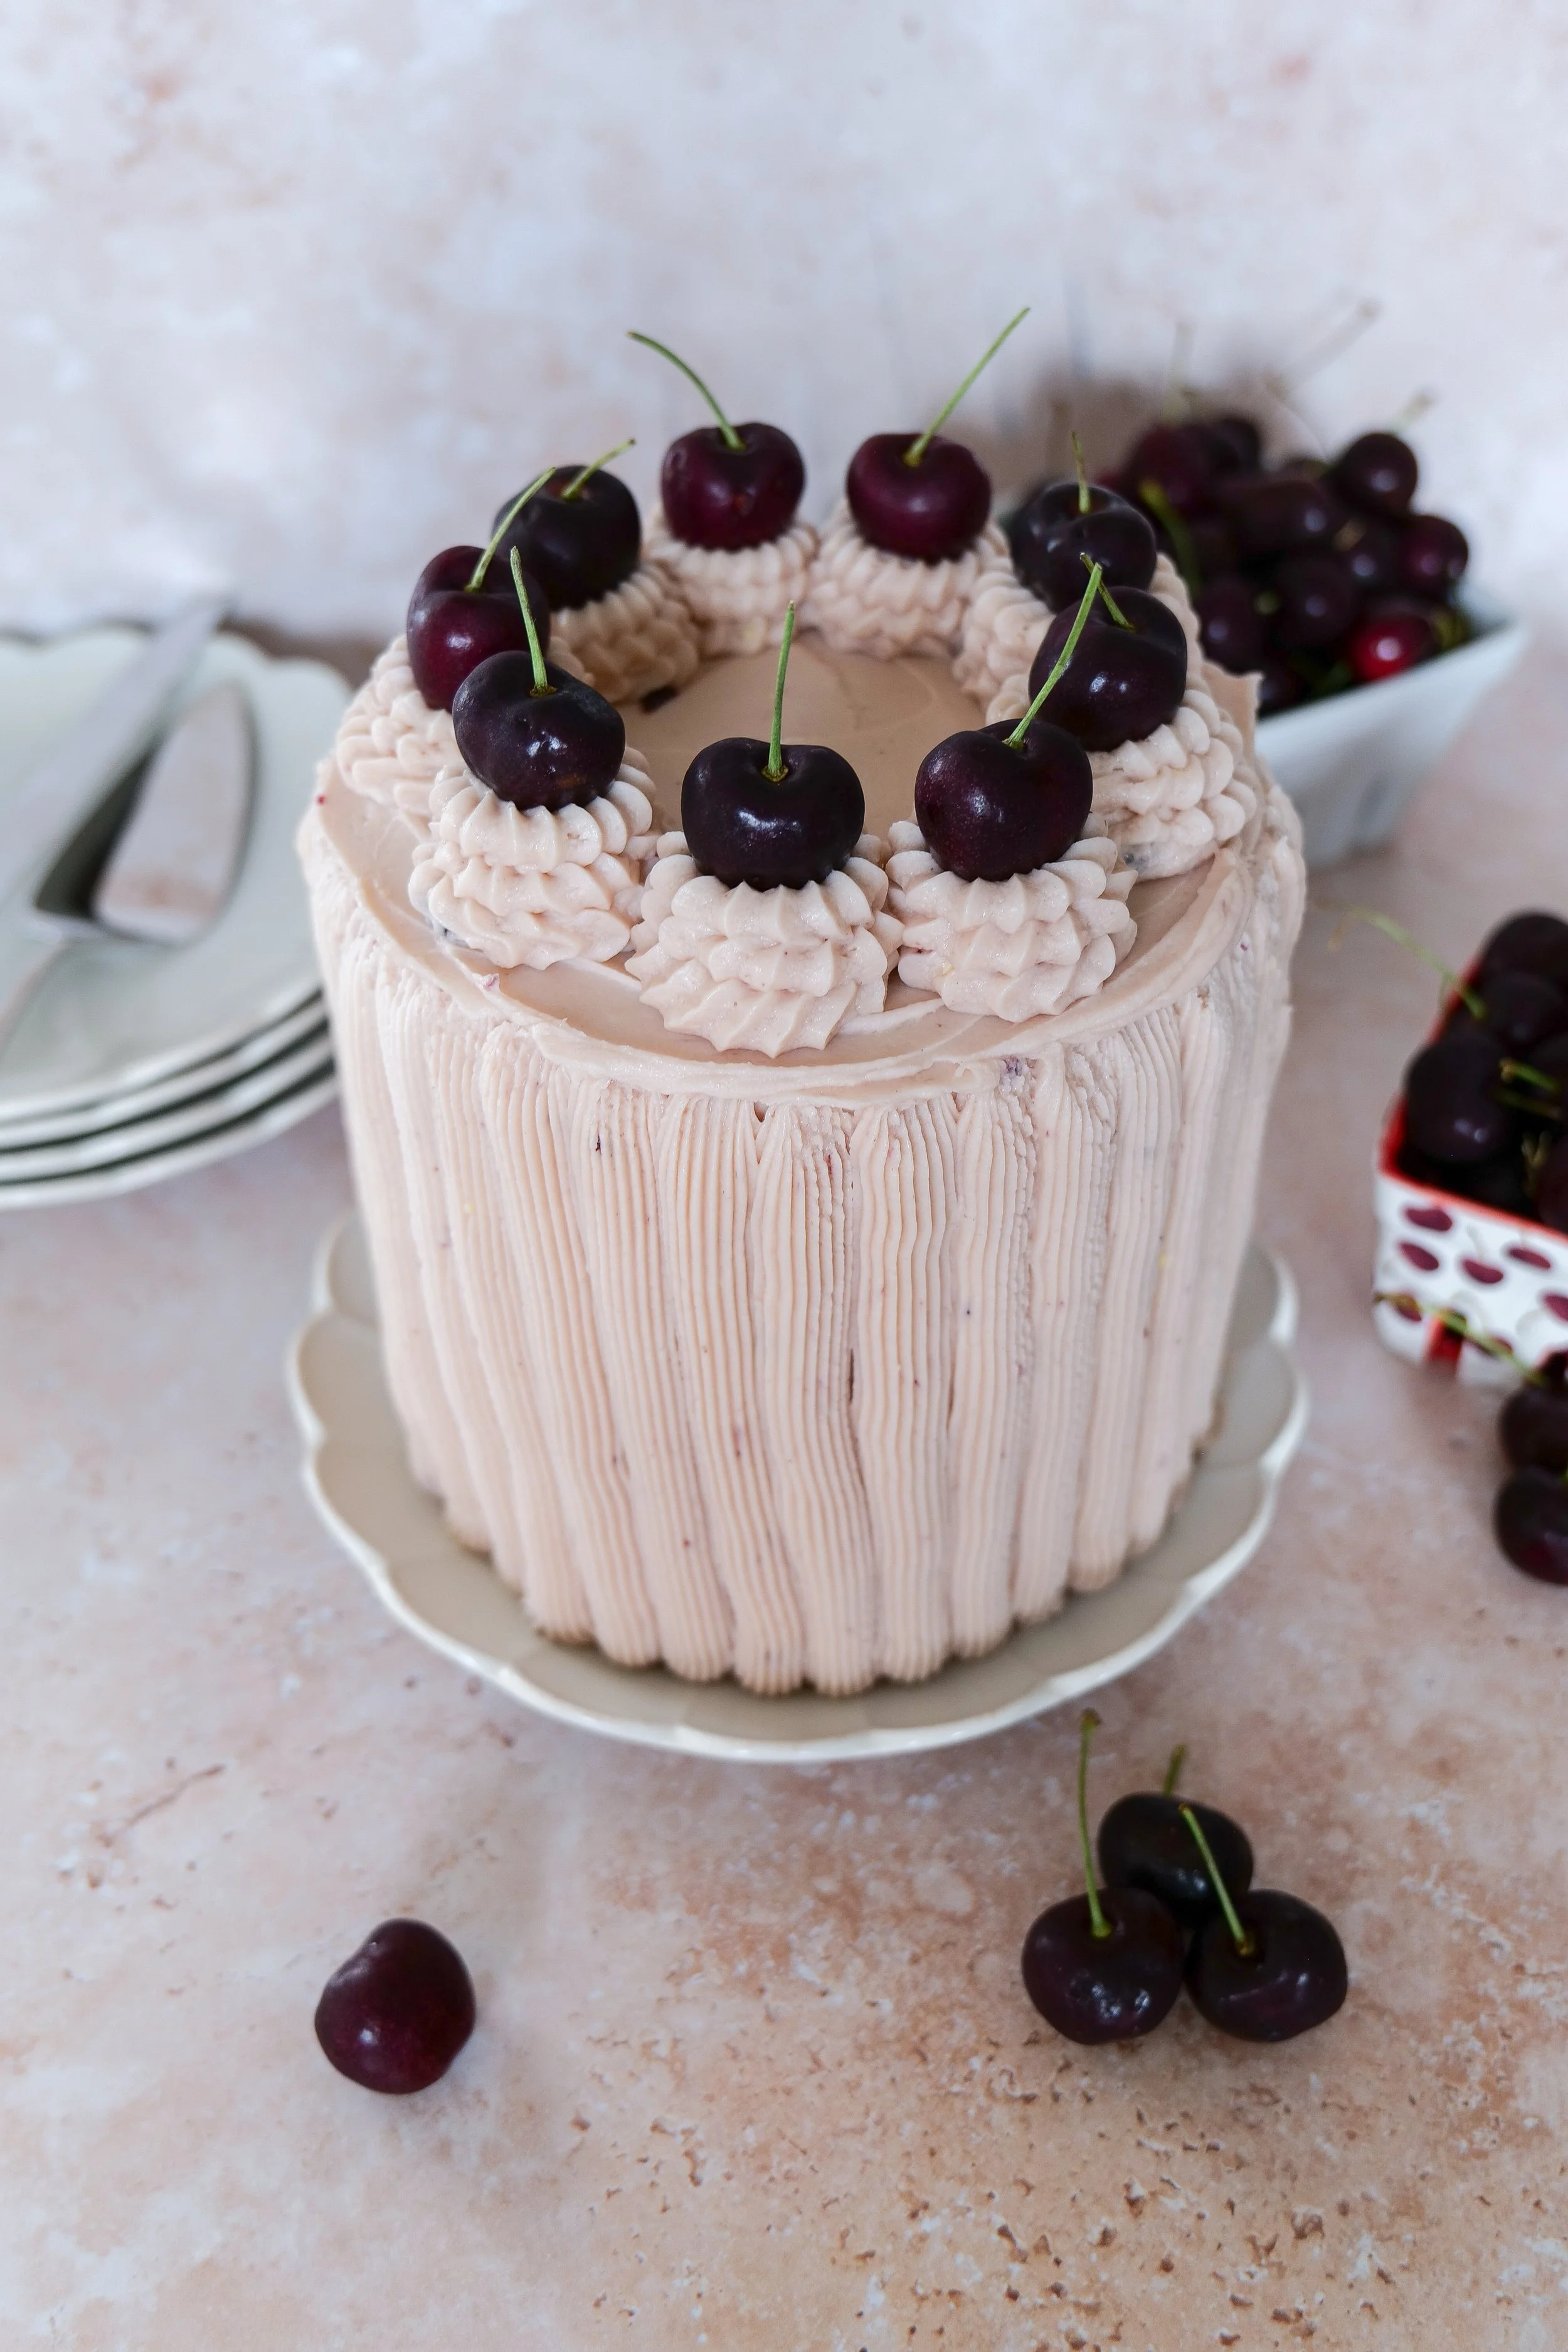
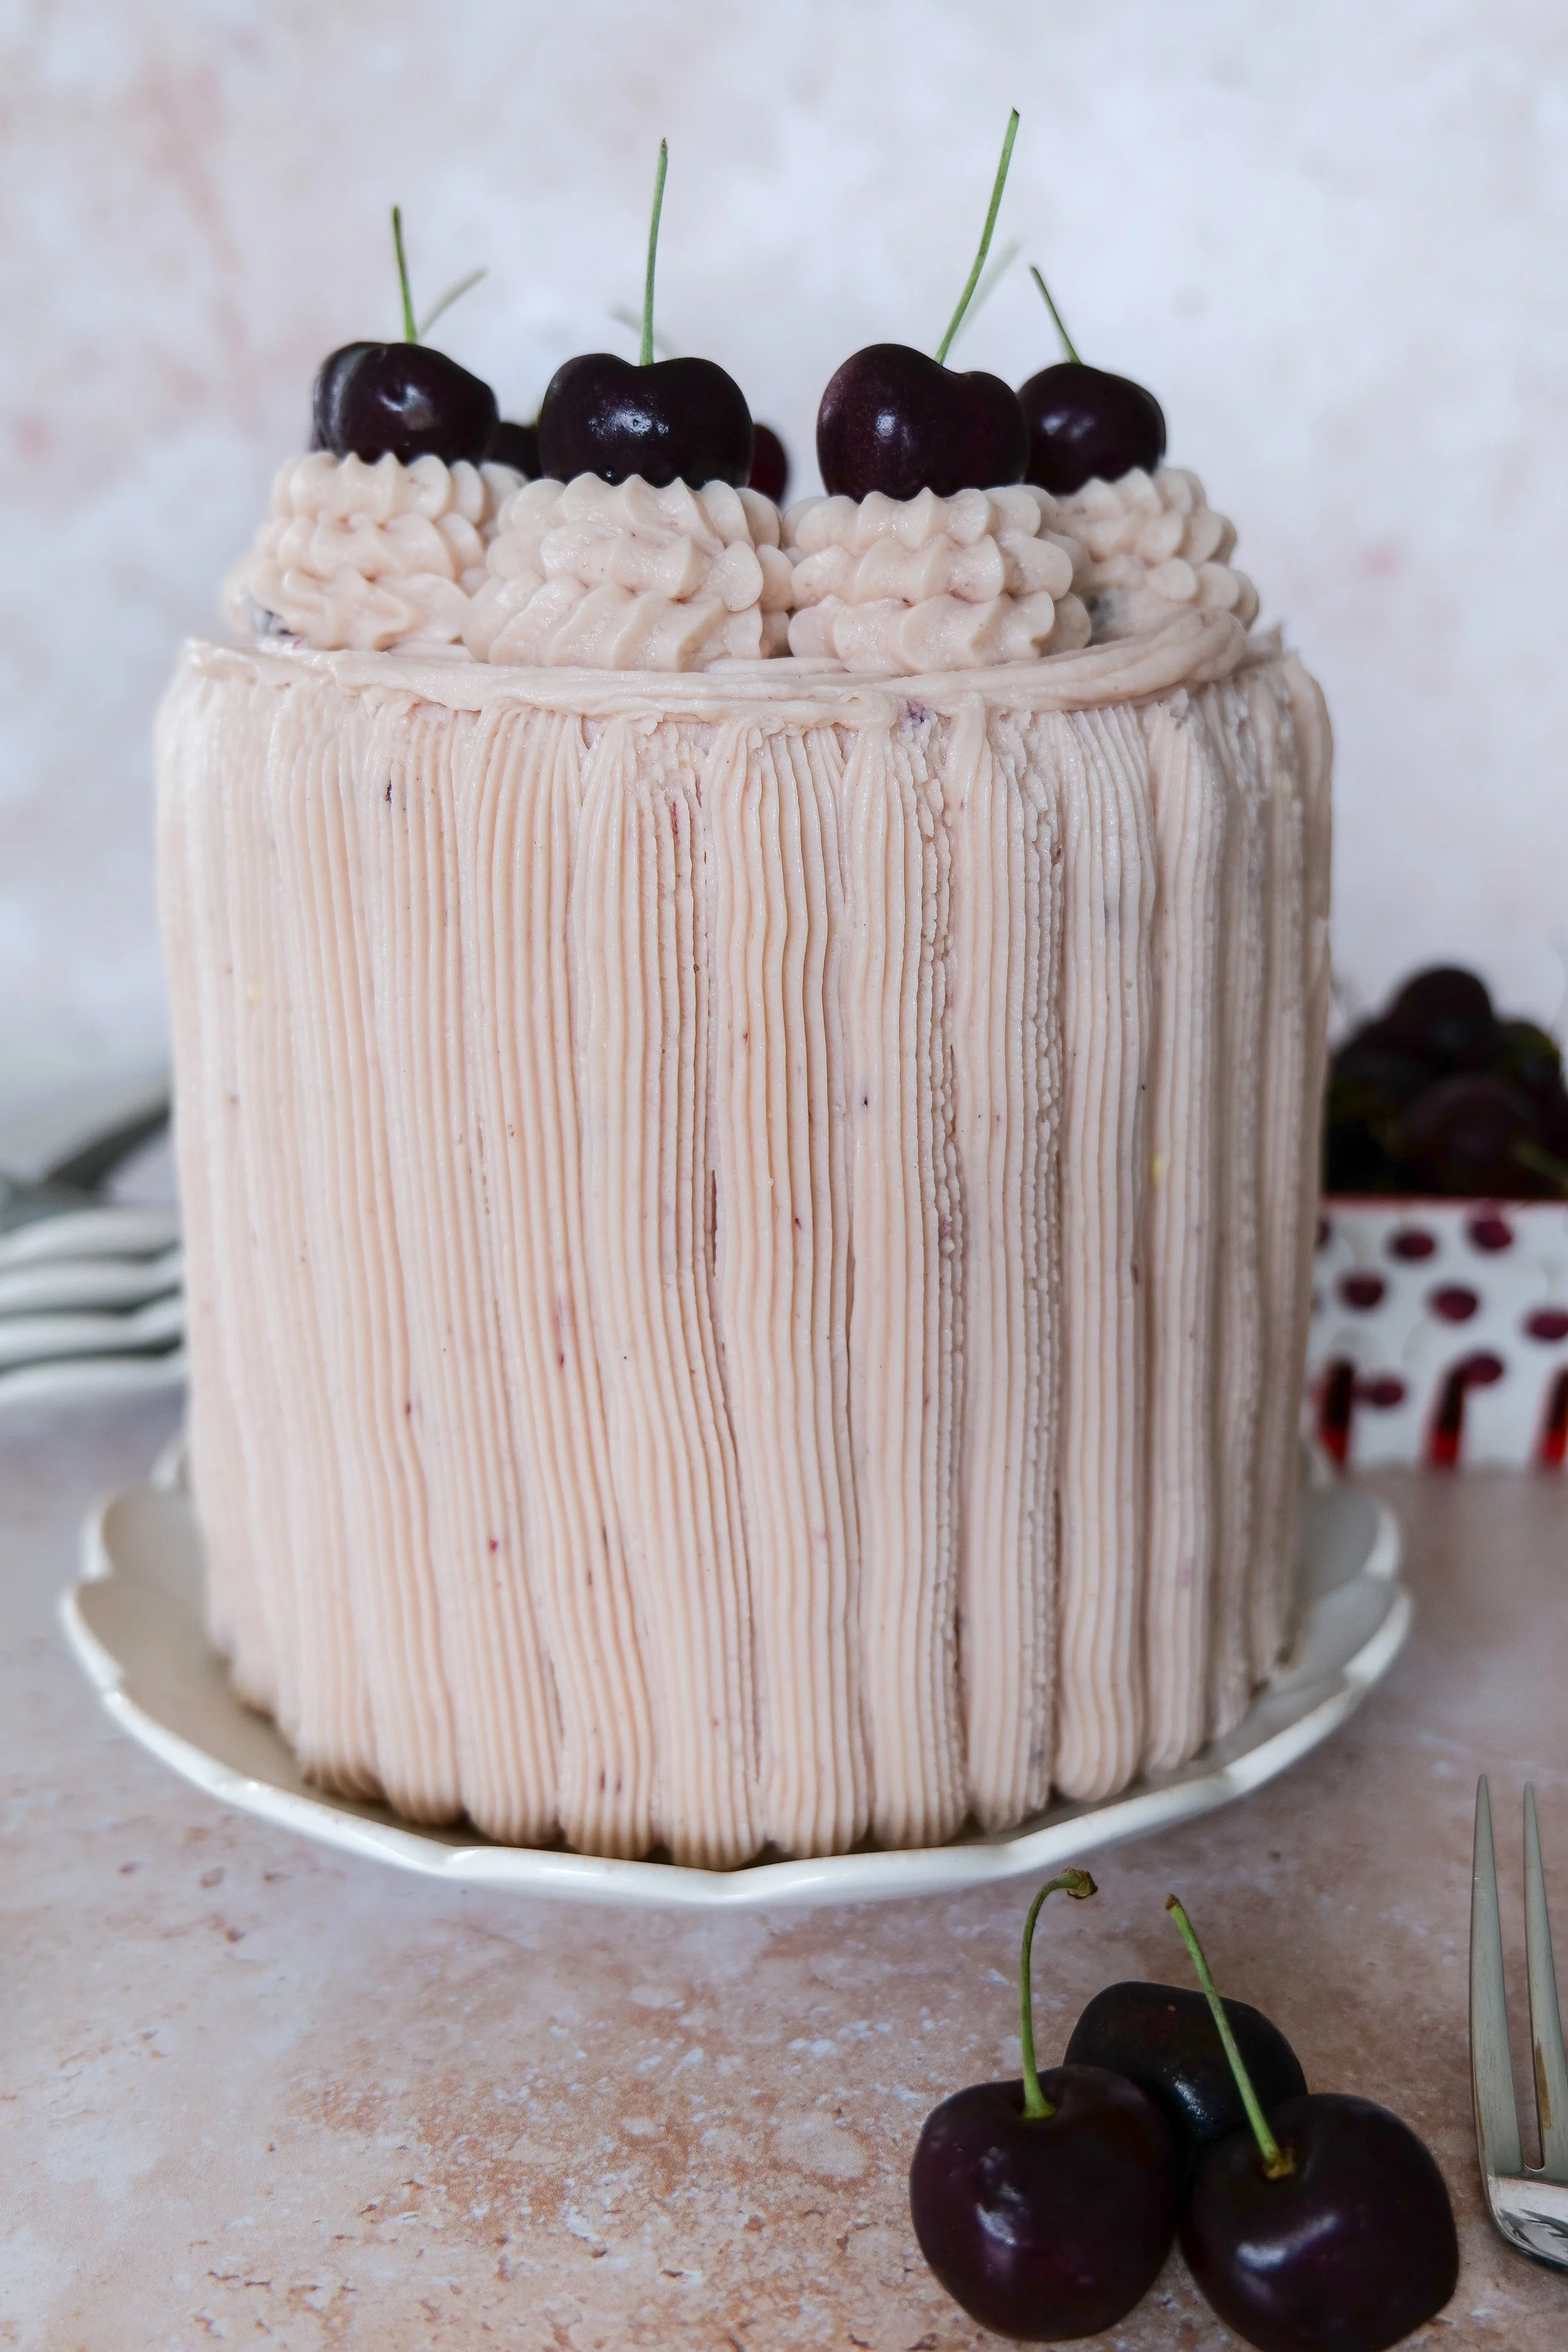
Vanilla bean cherry layer cake with pink cherry buttercream frosting and homemade cherry filling.
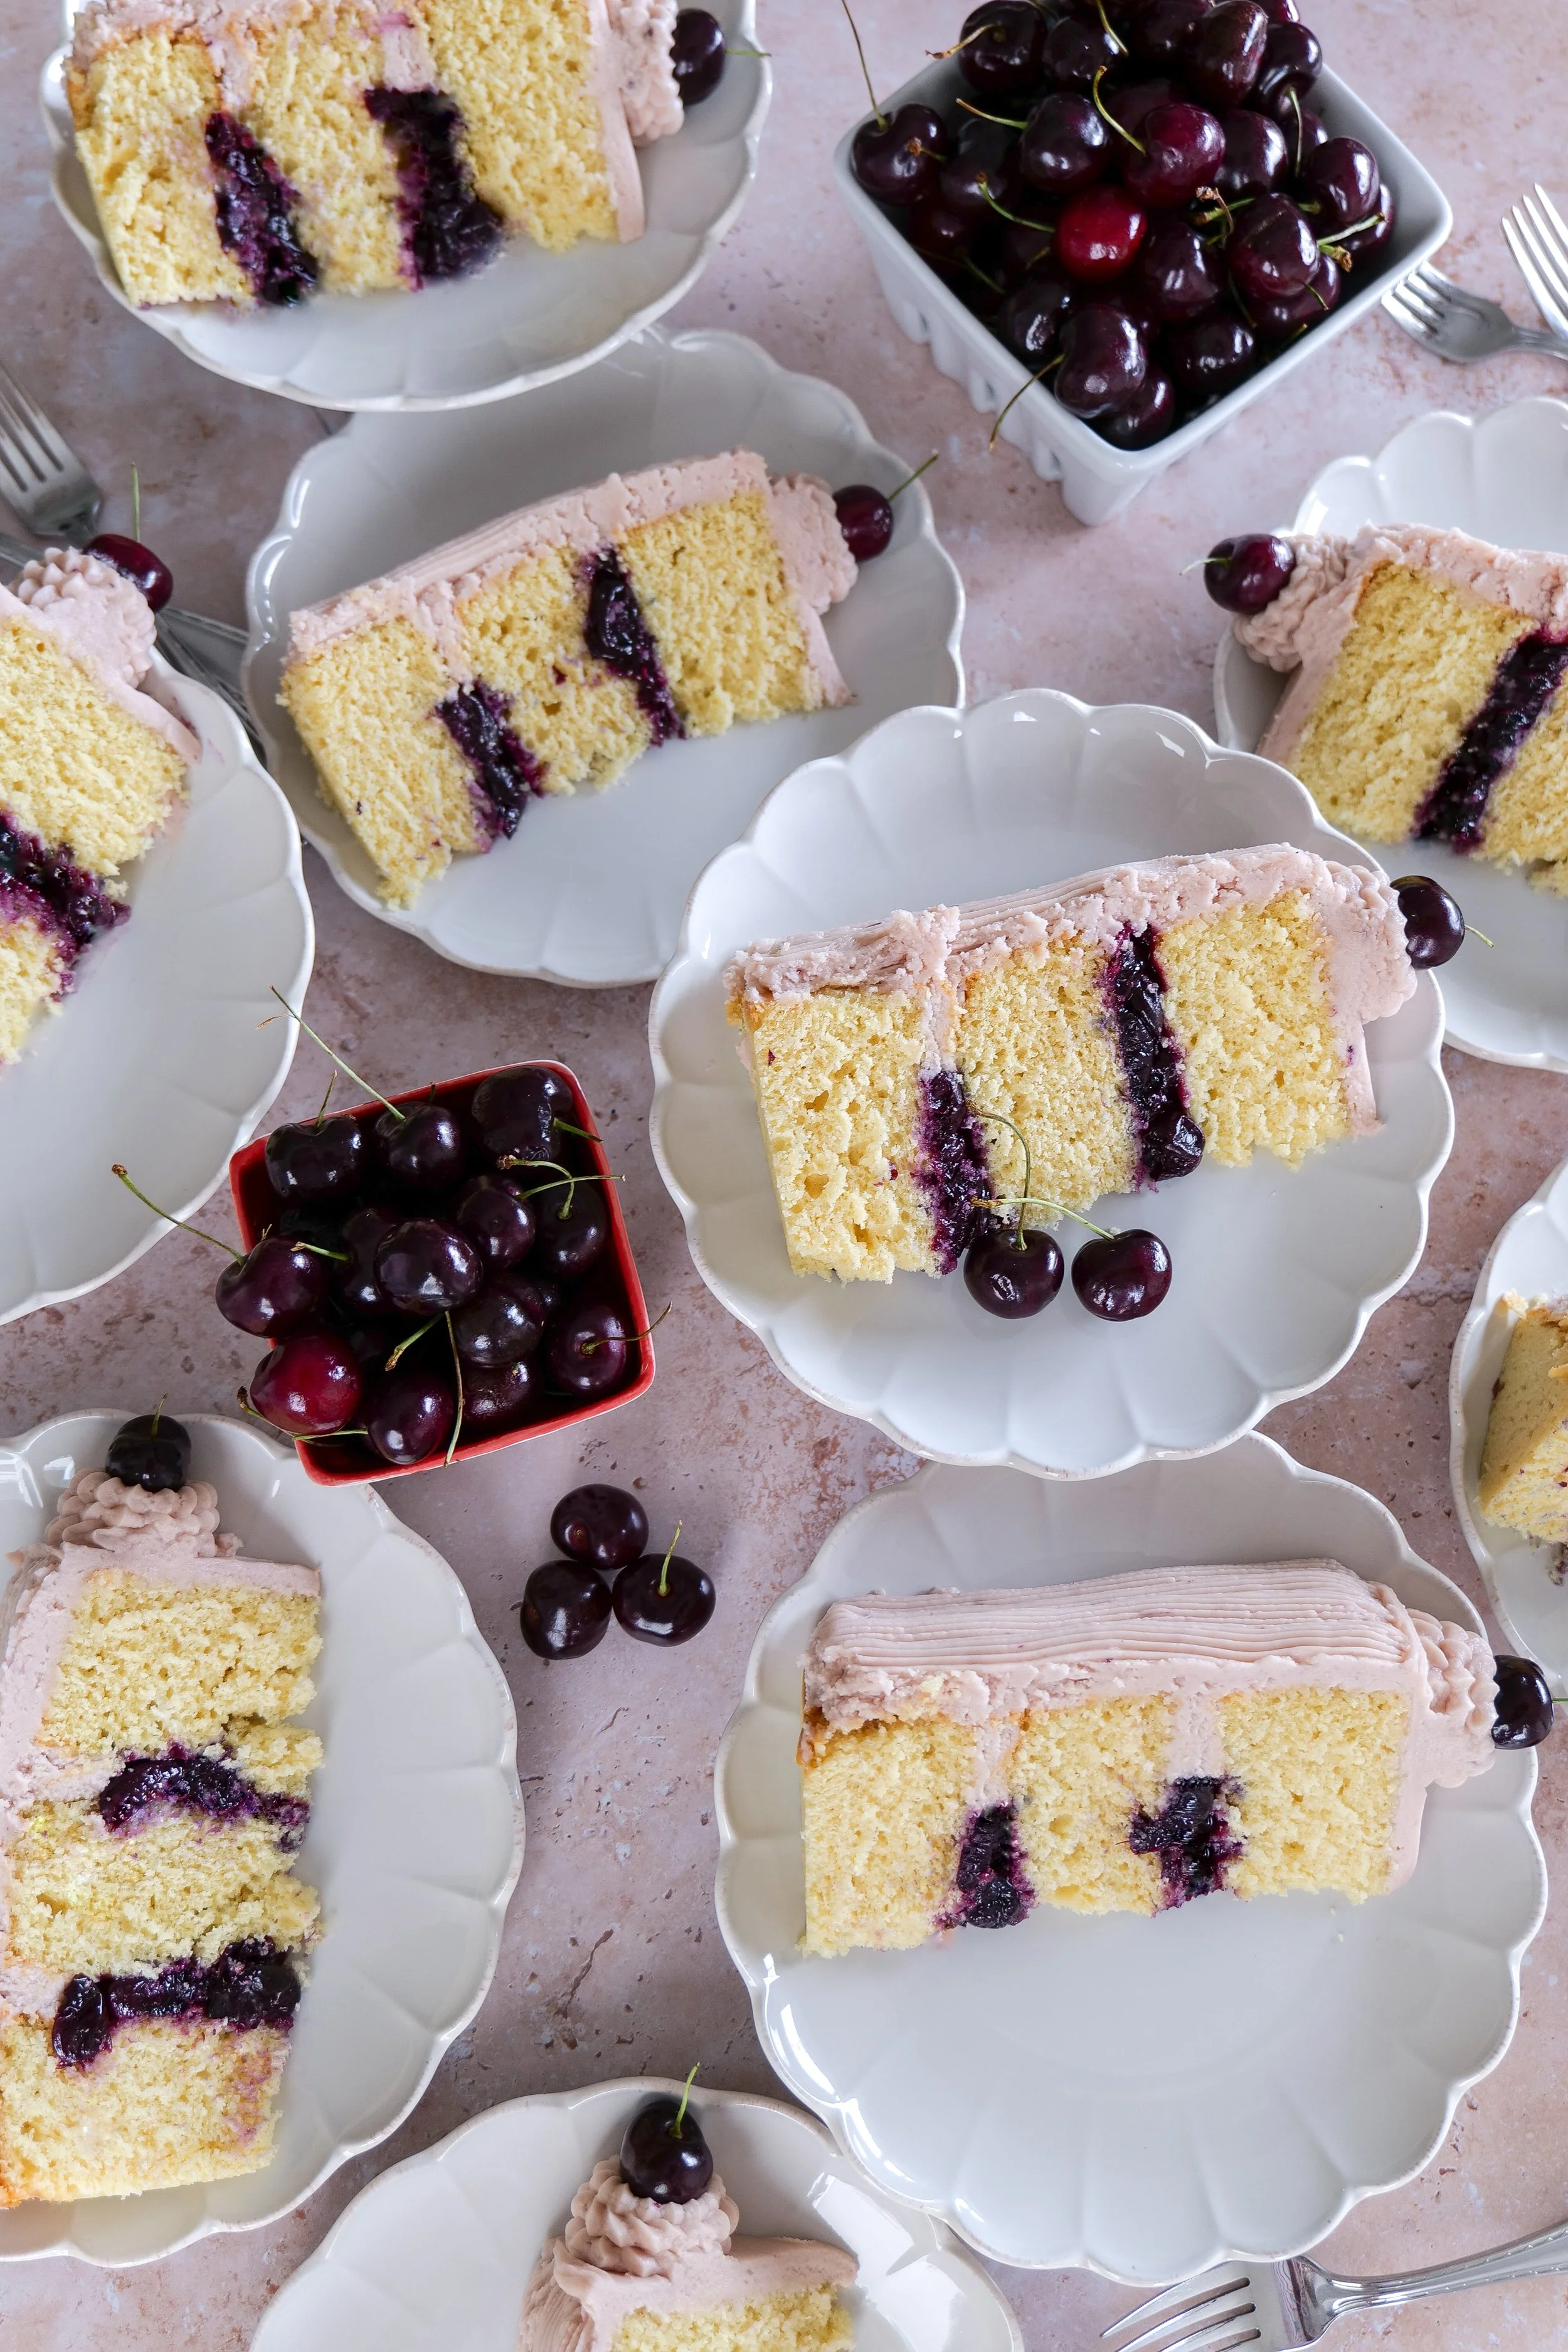
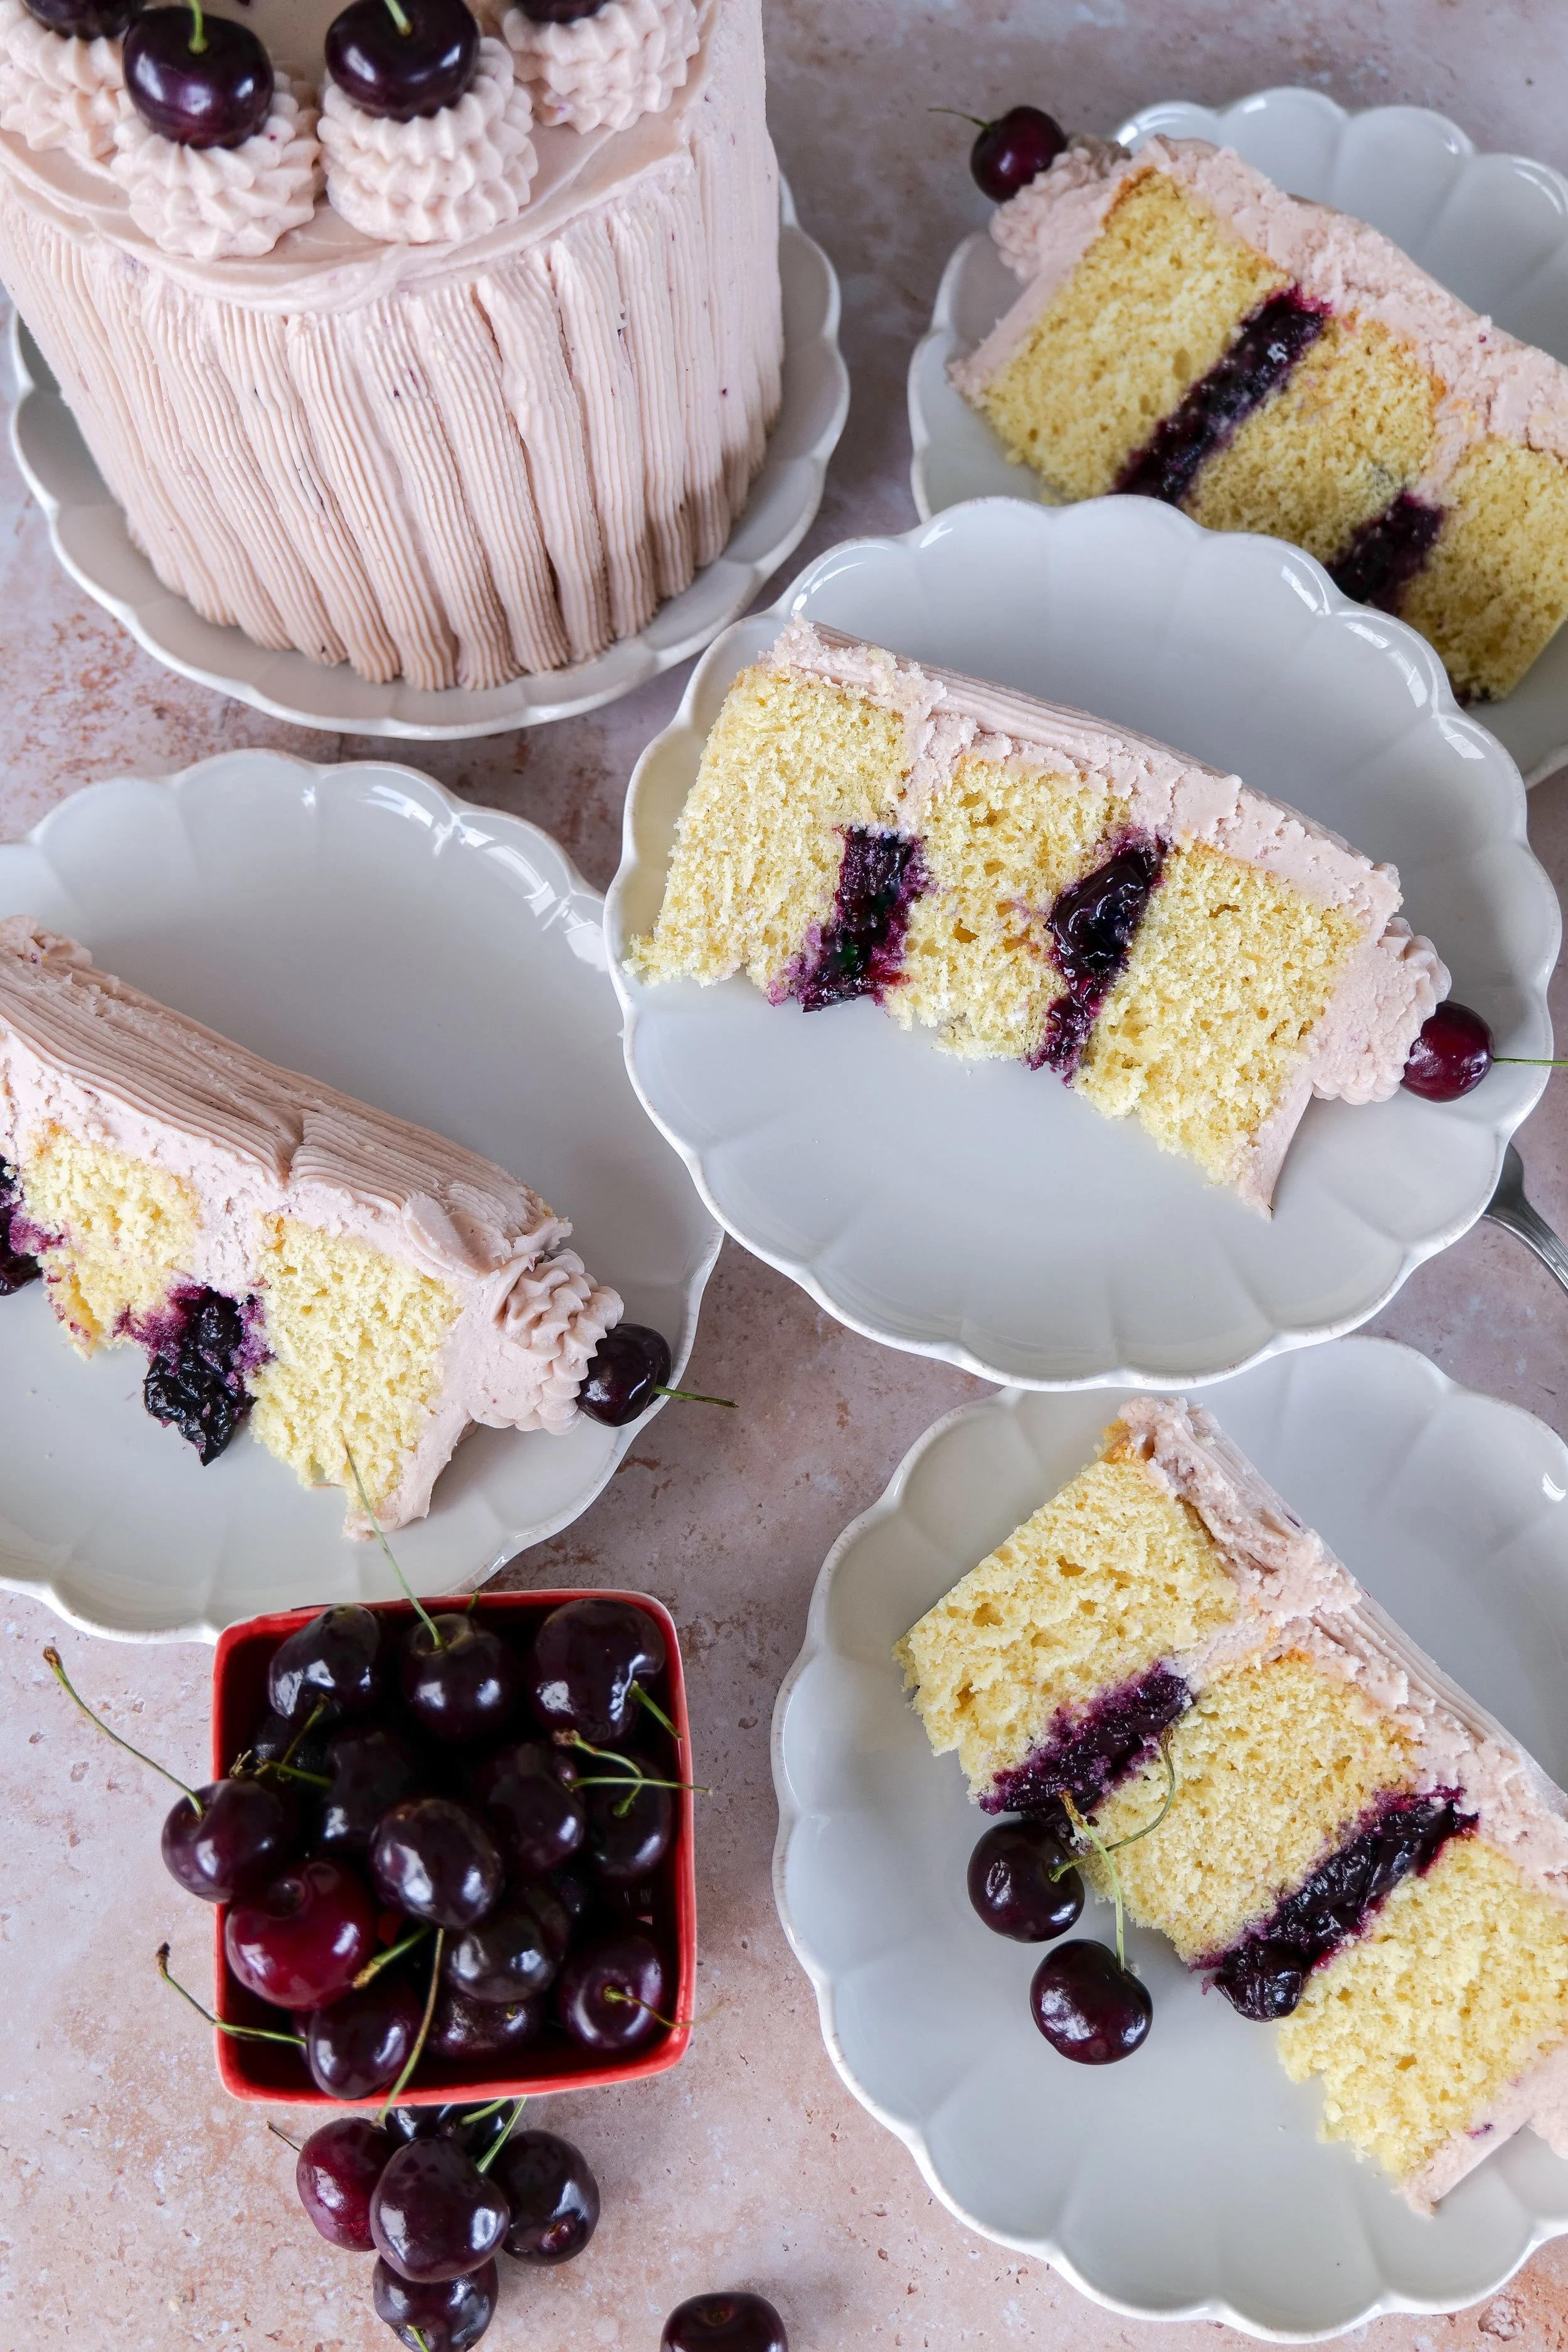
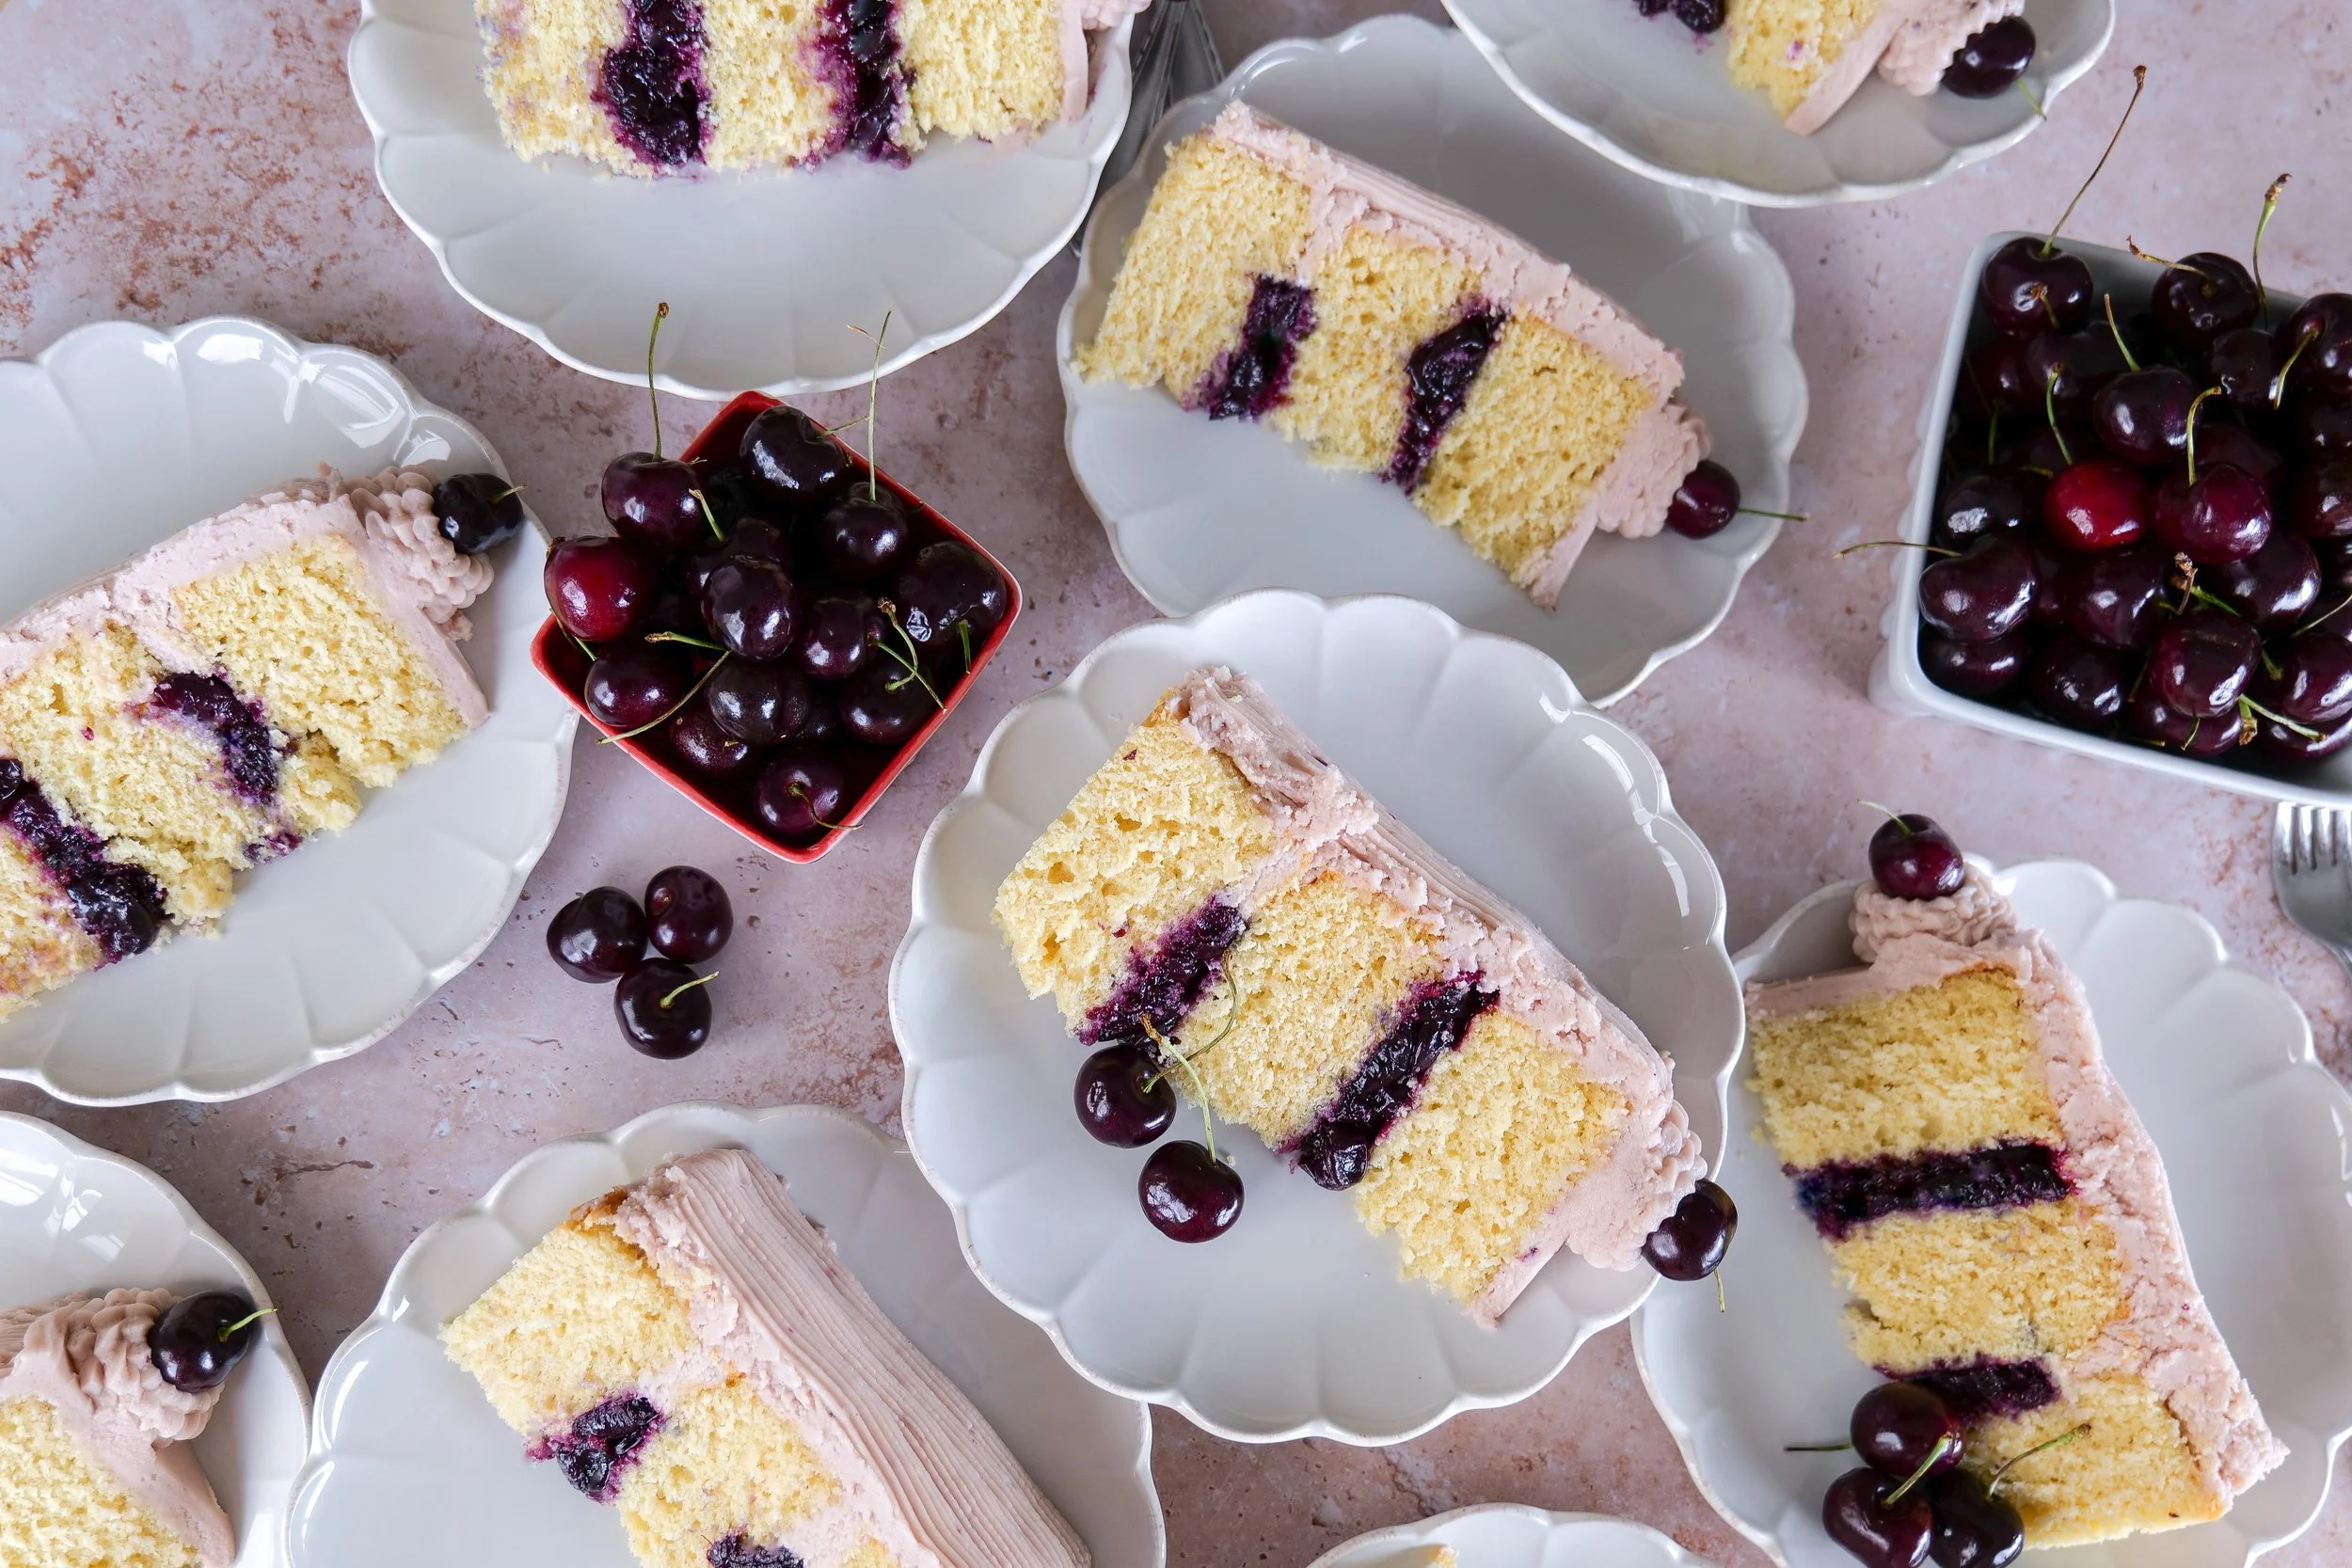
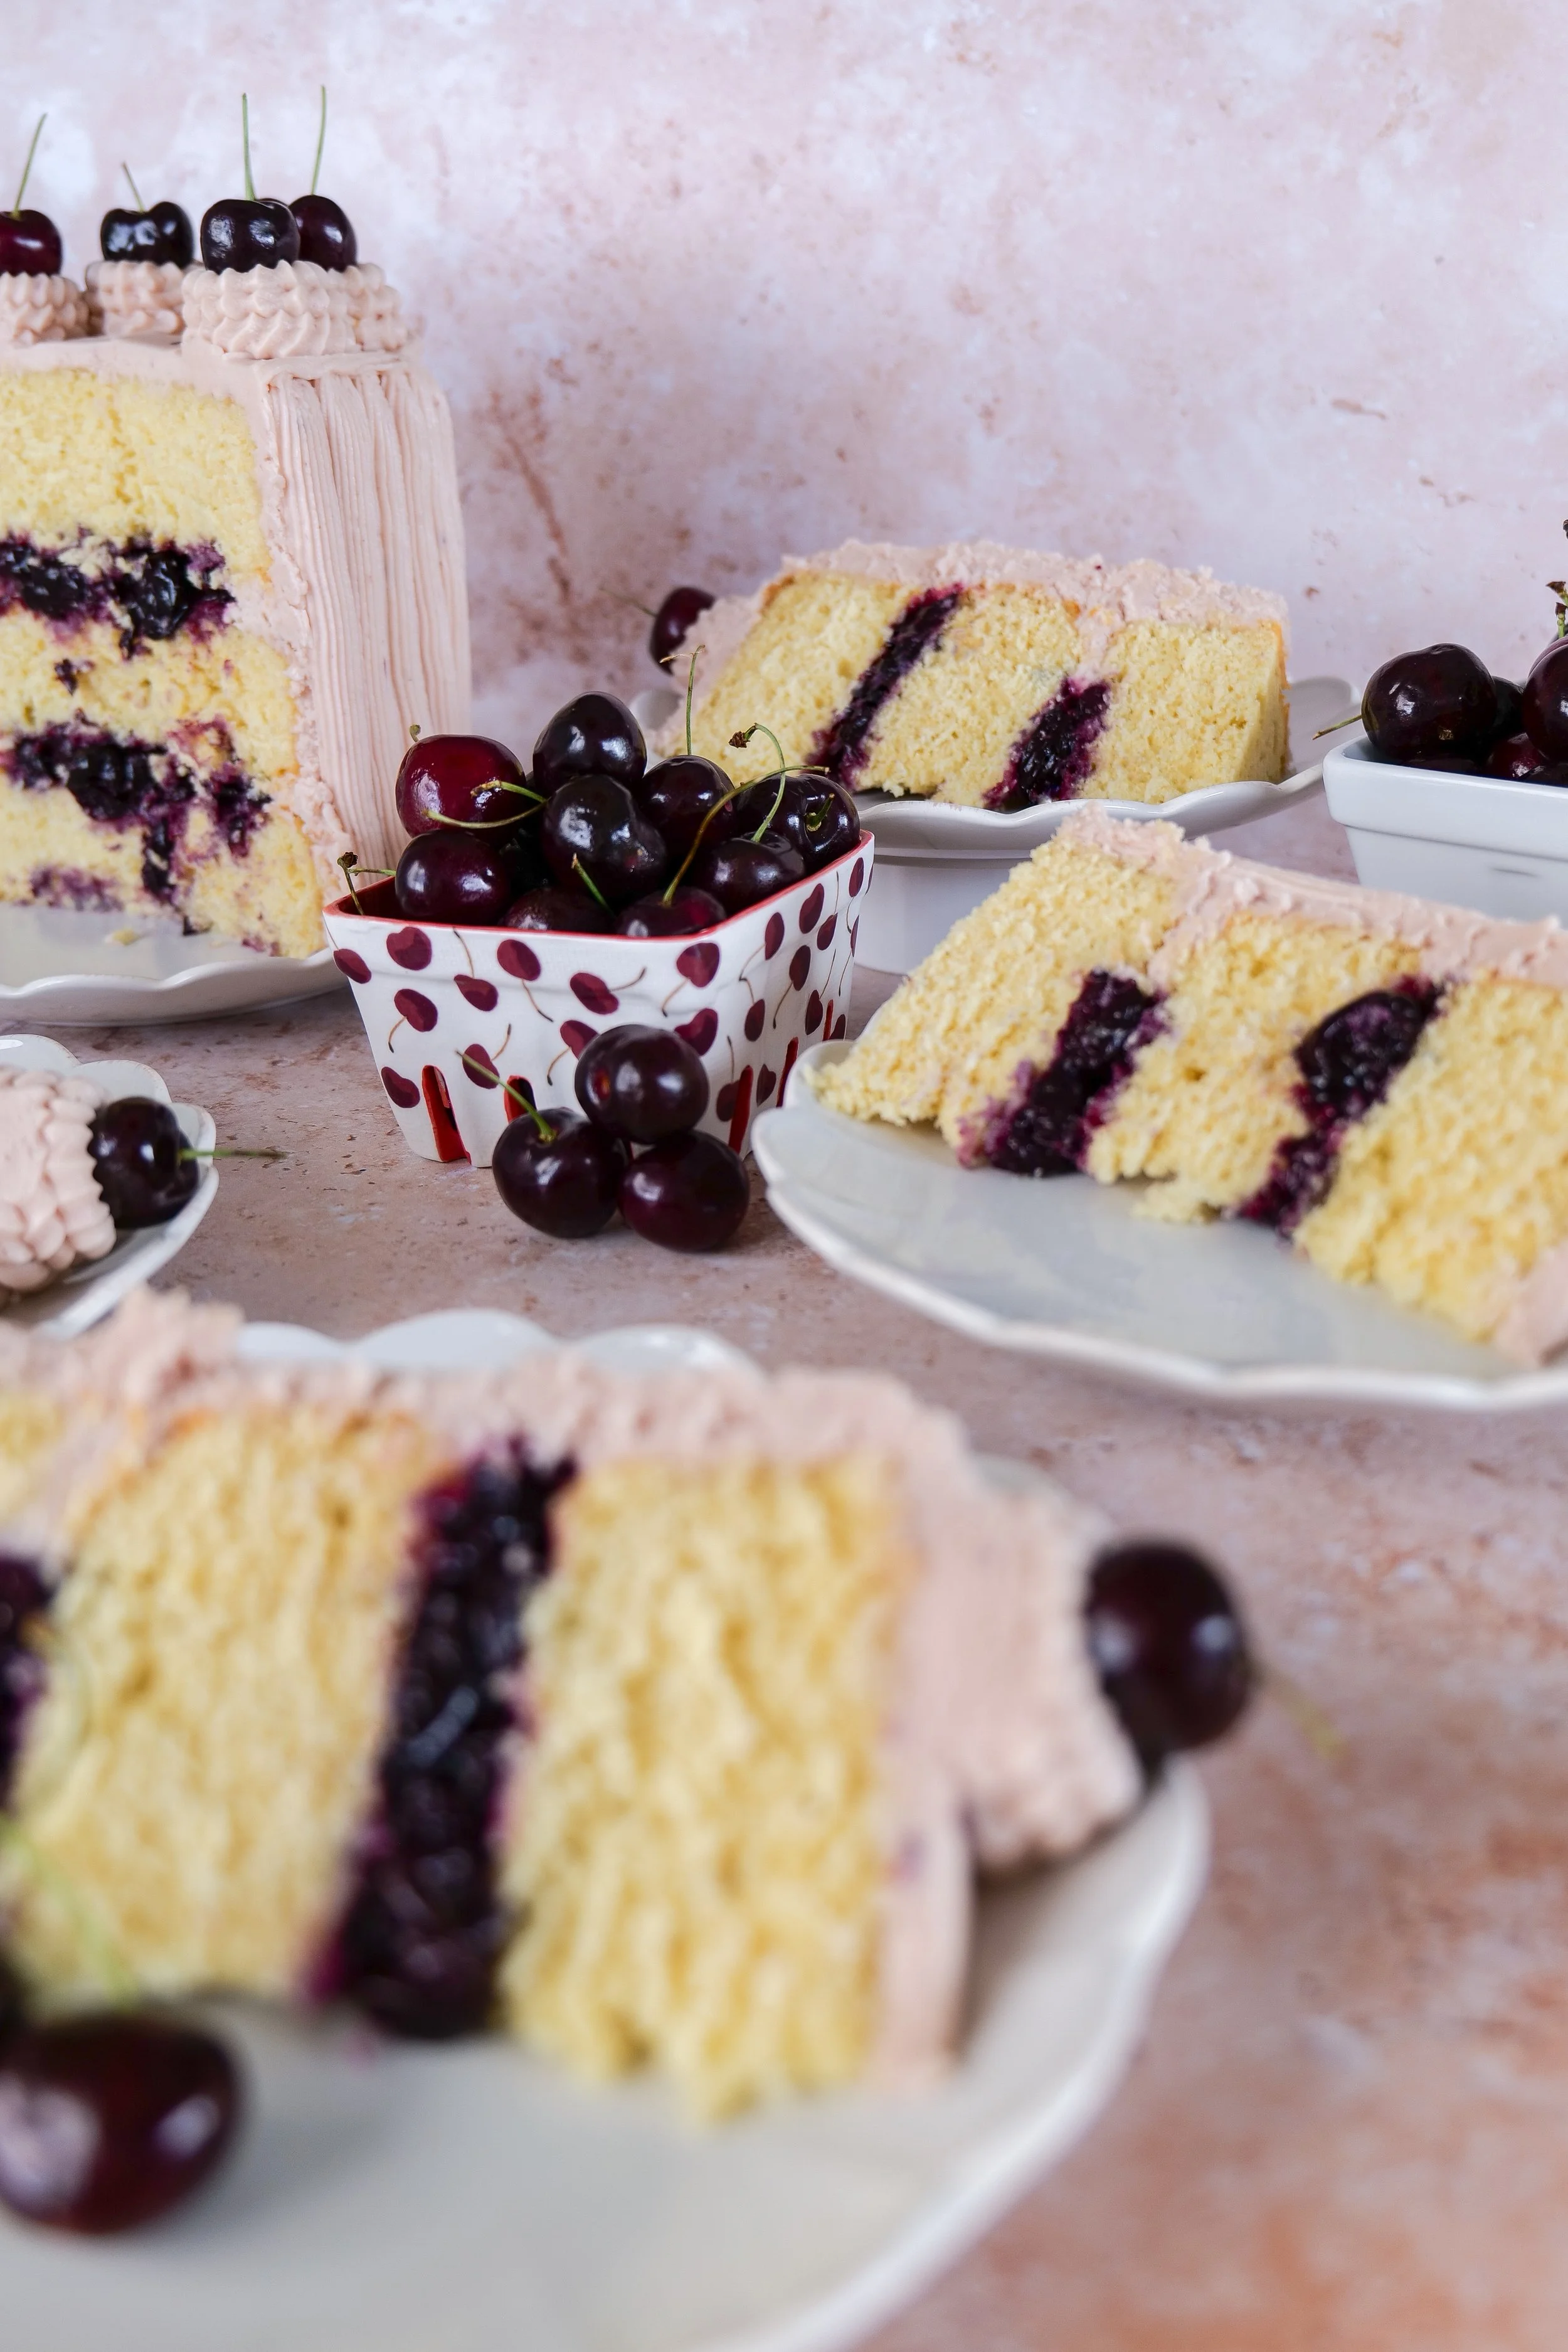
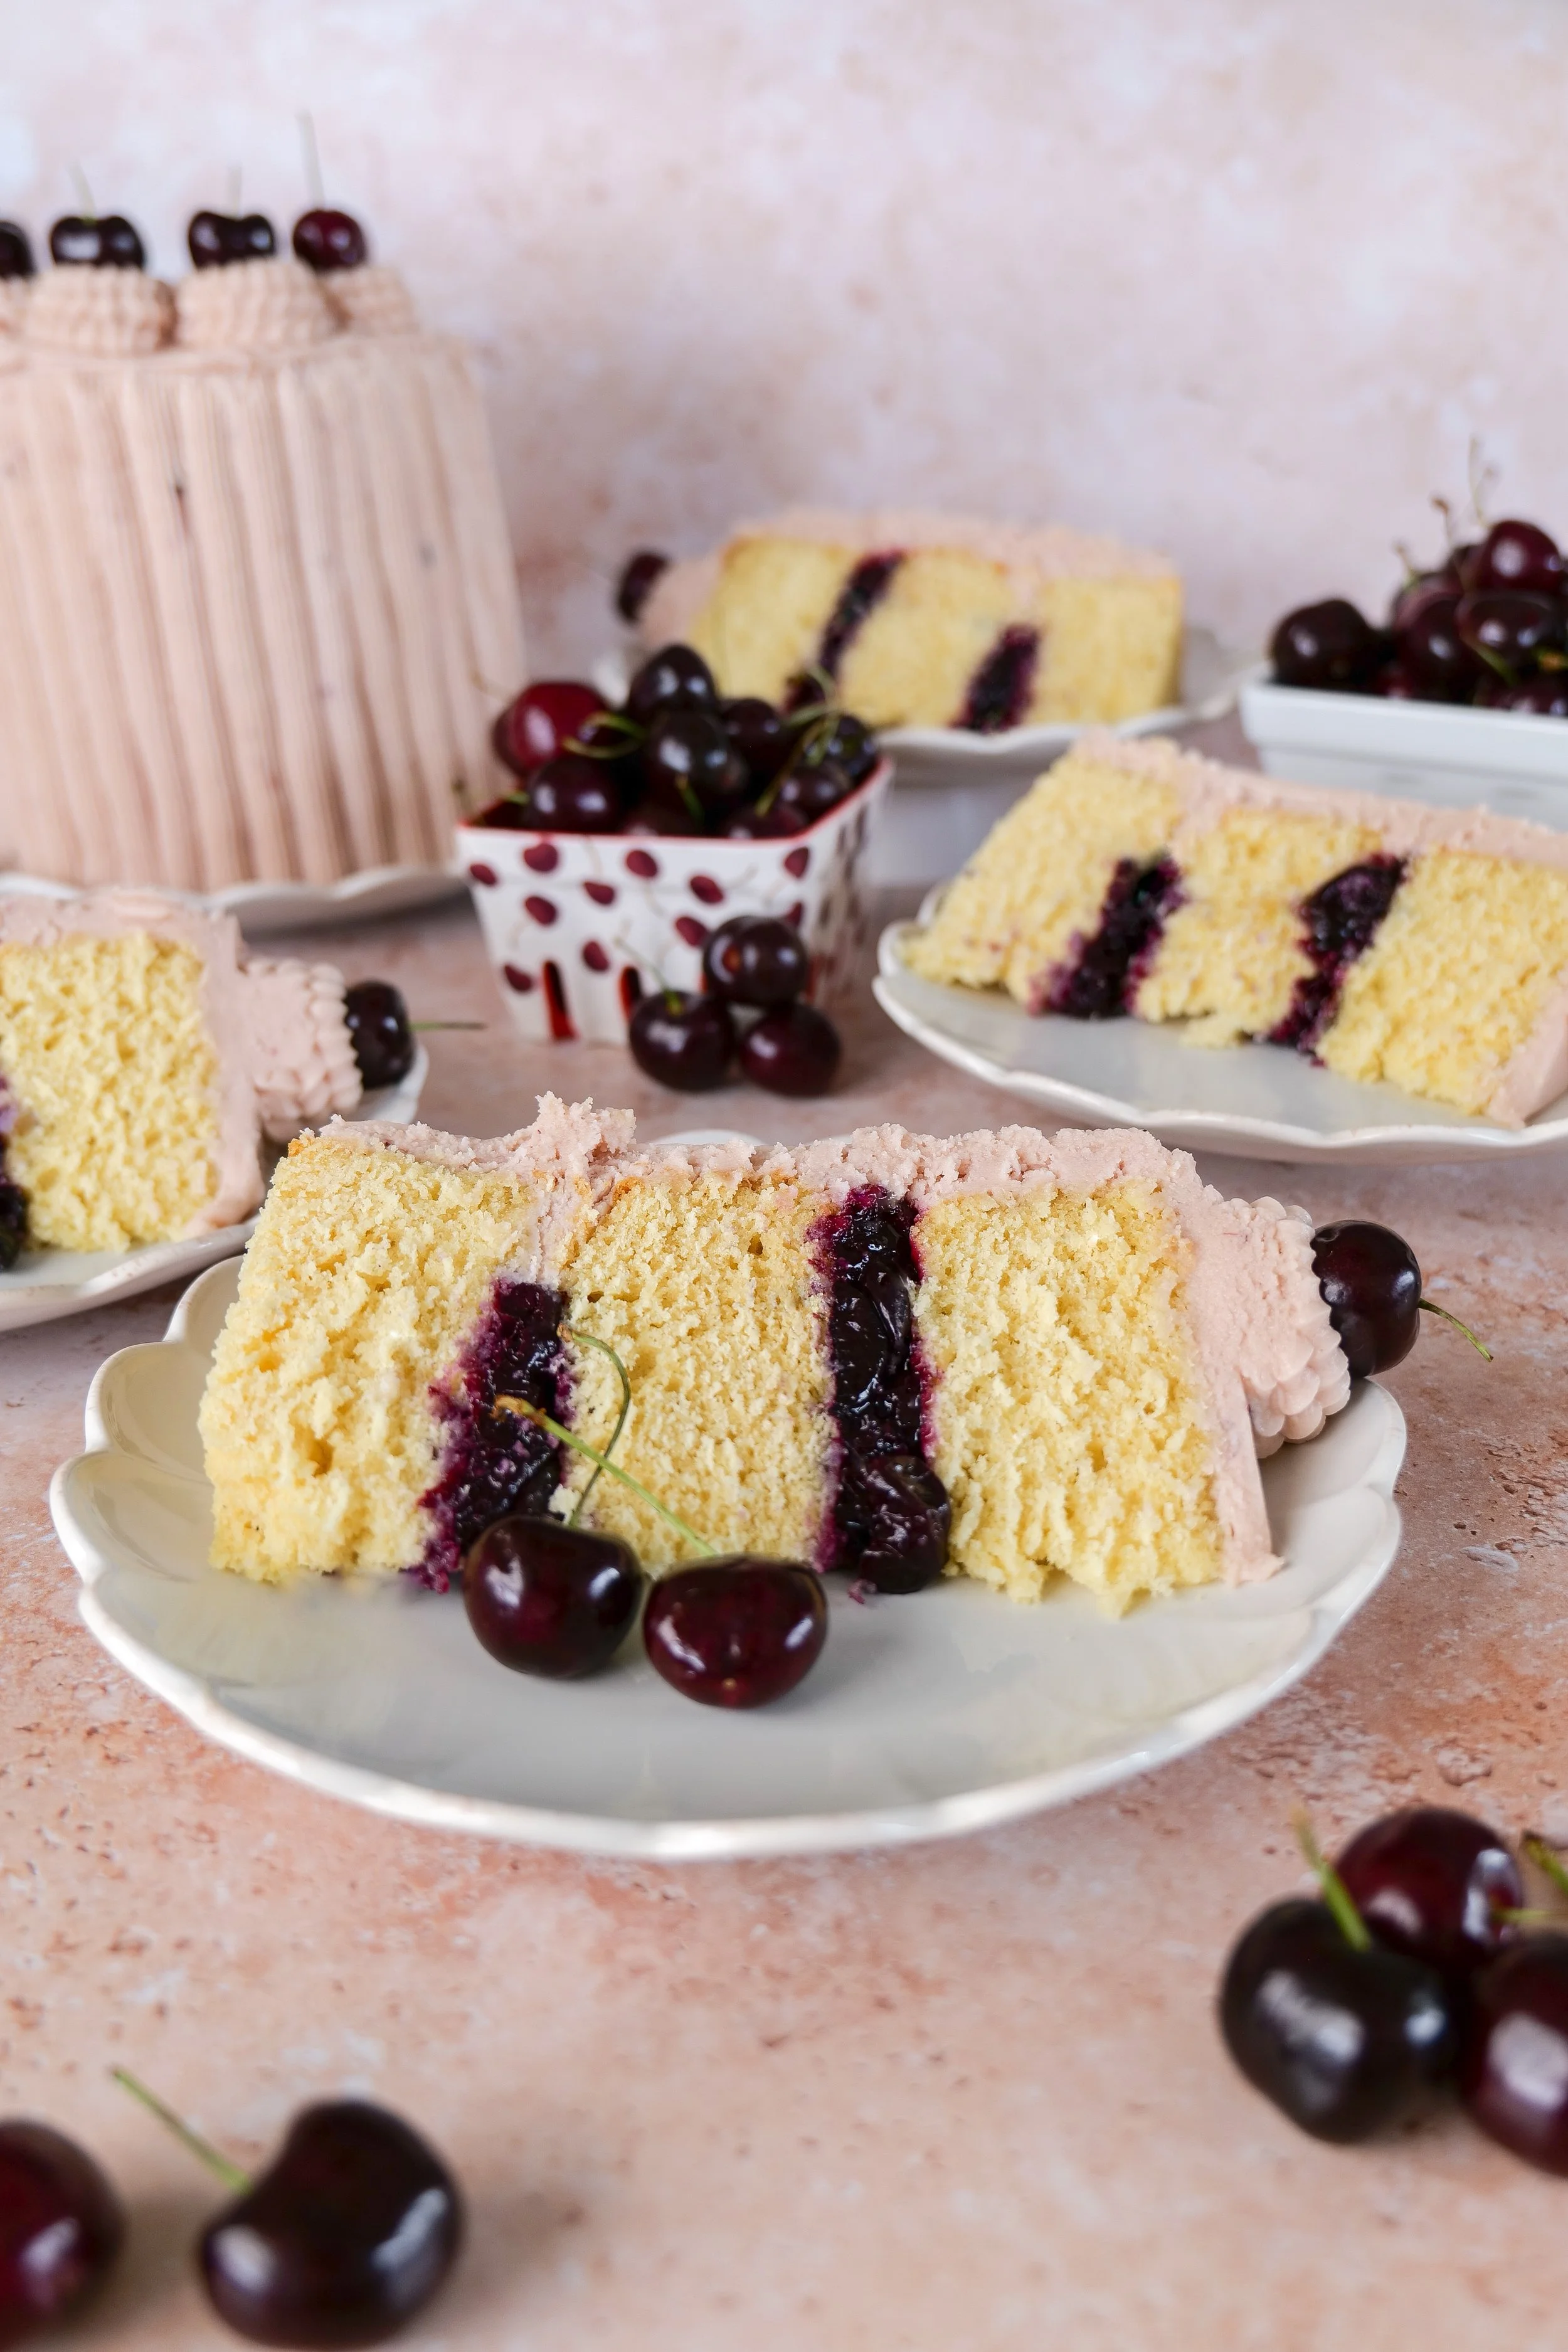
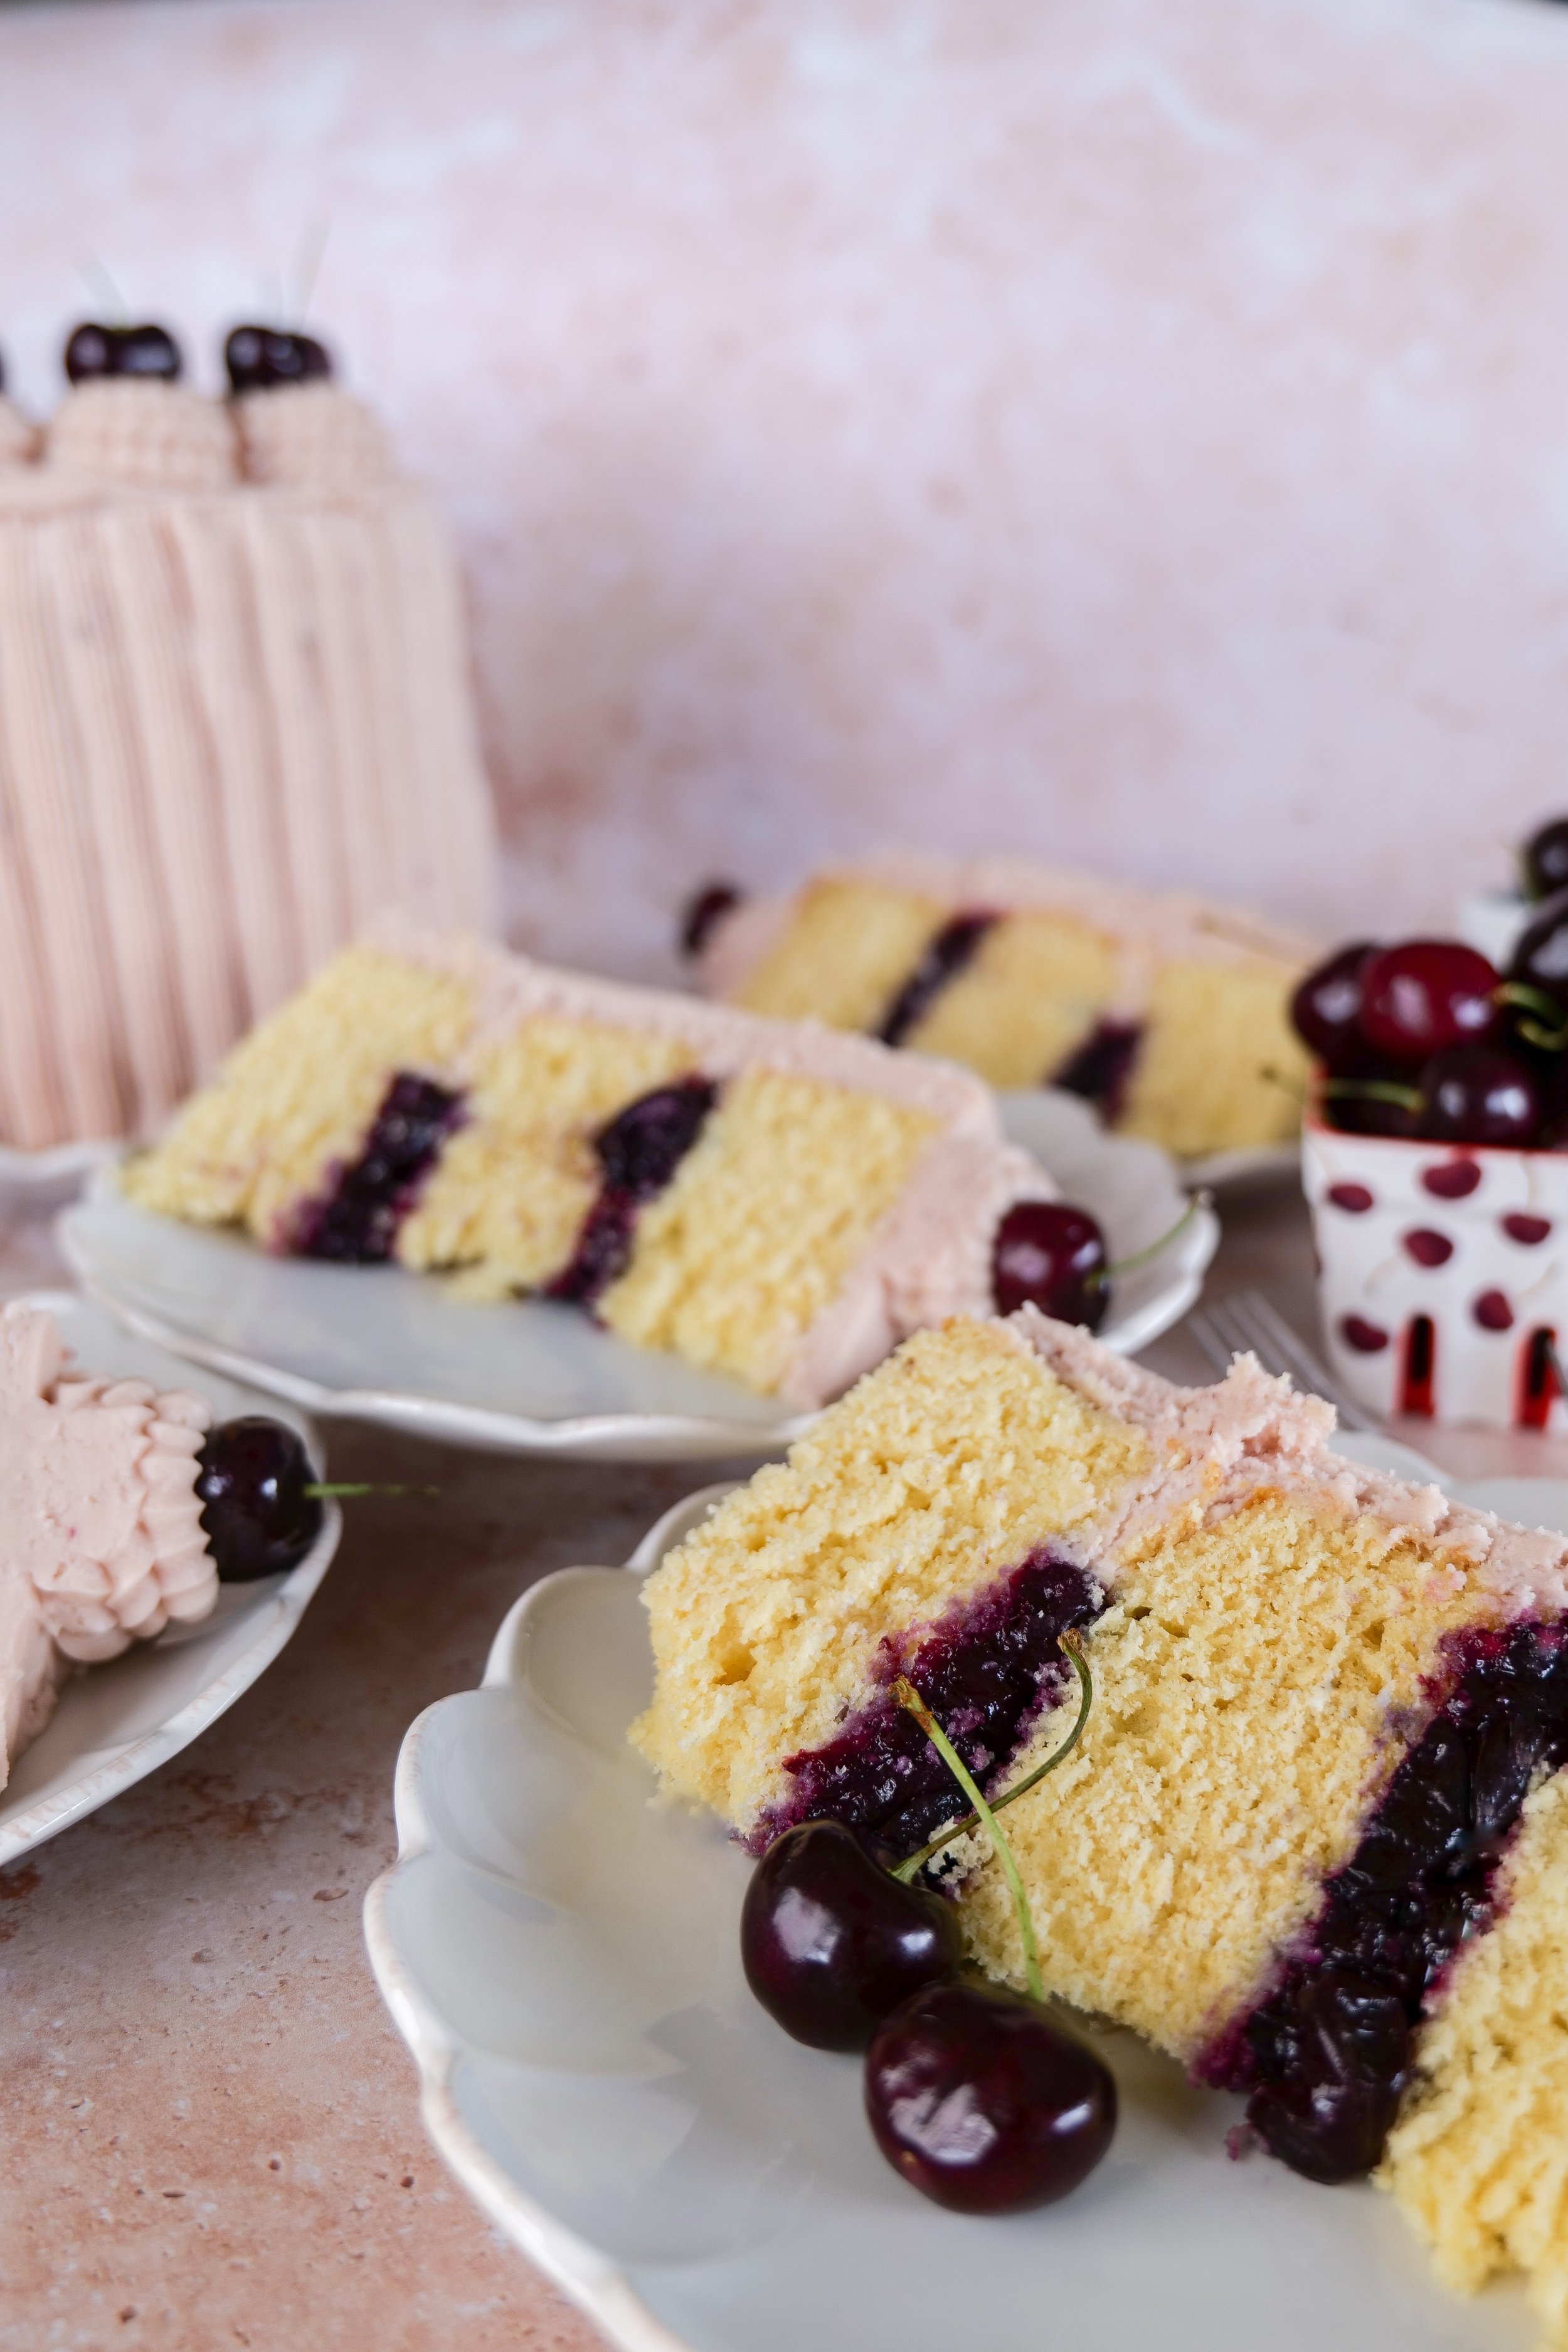
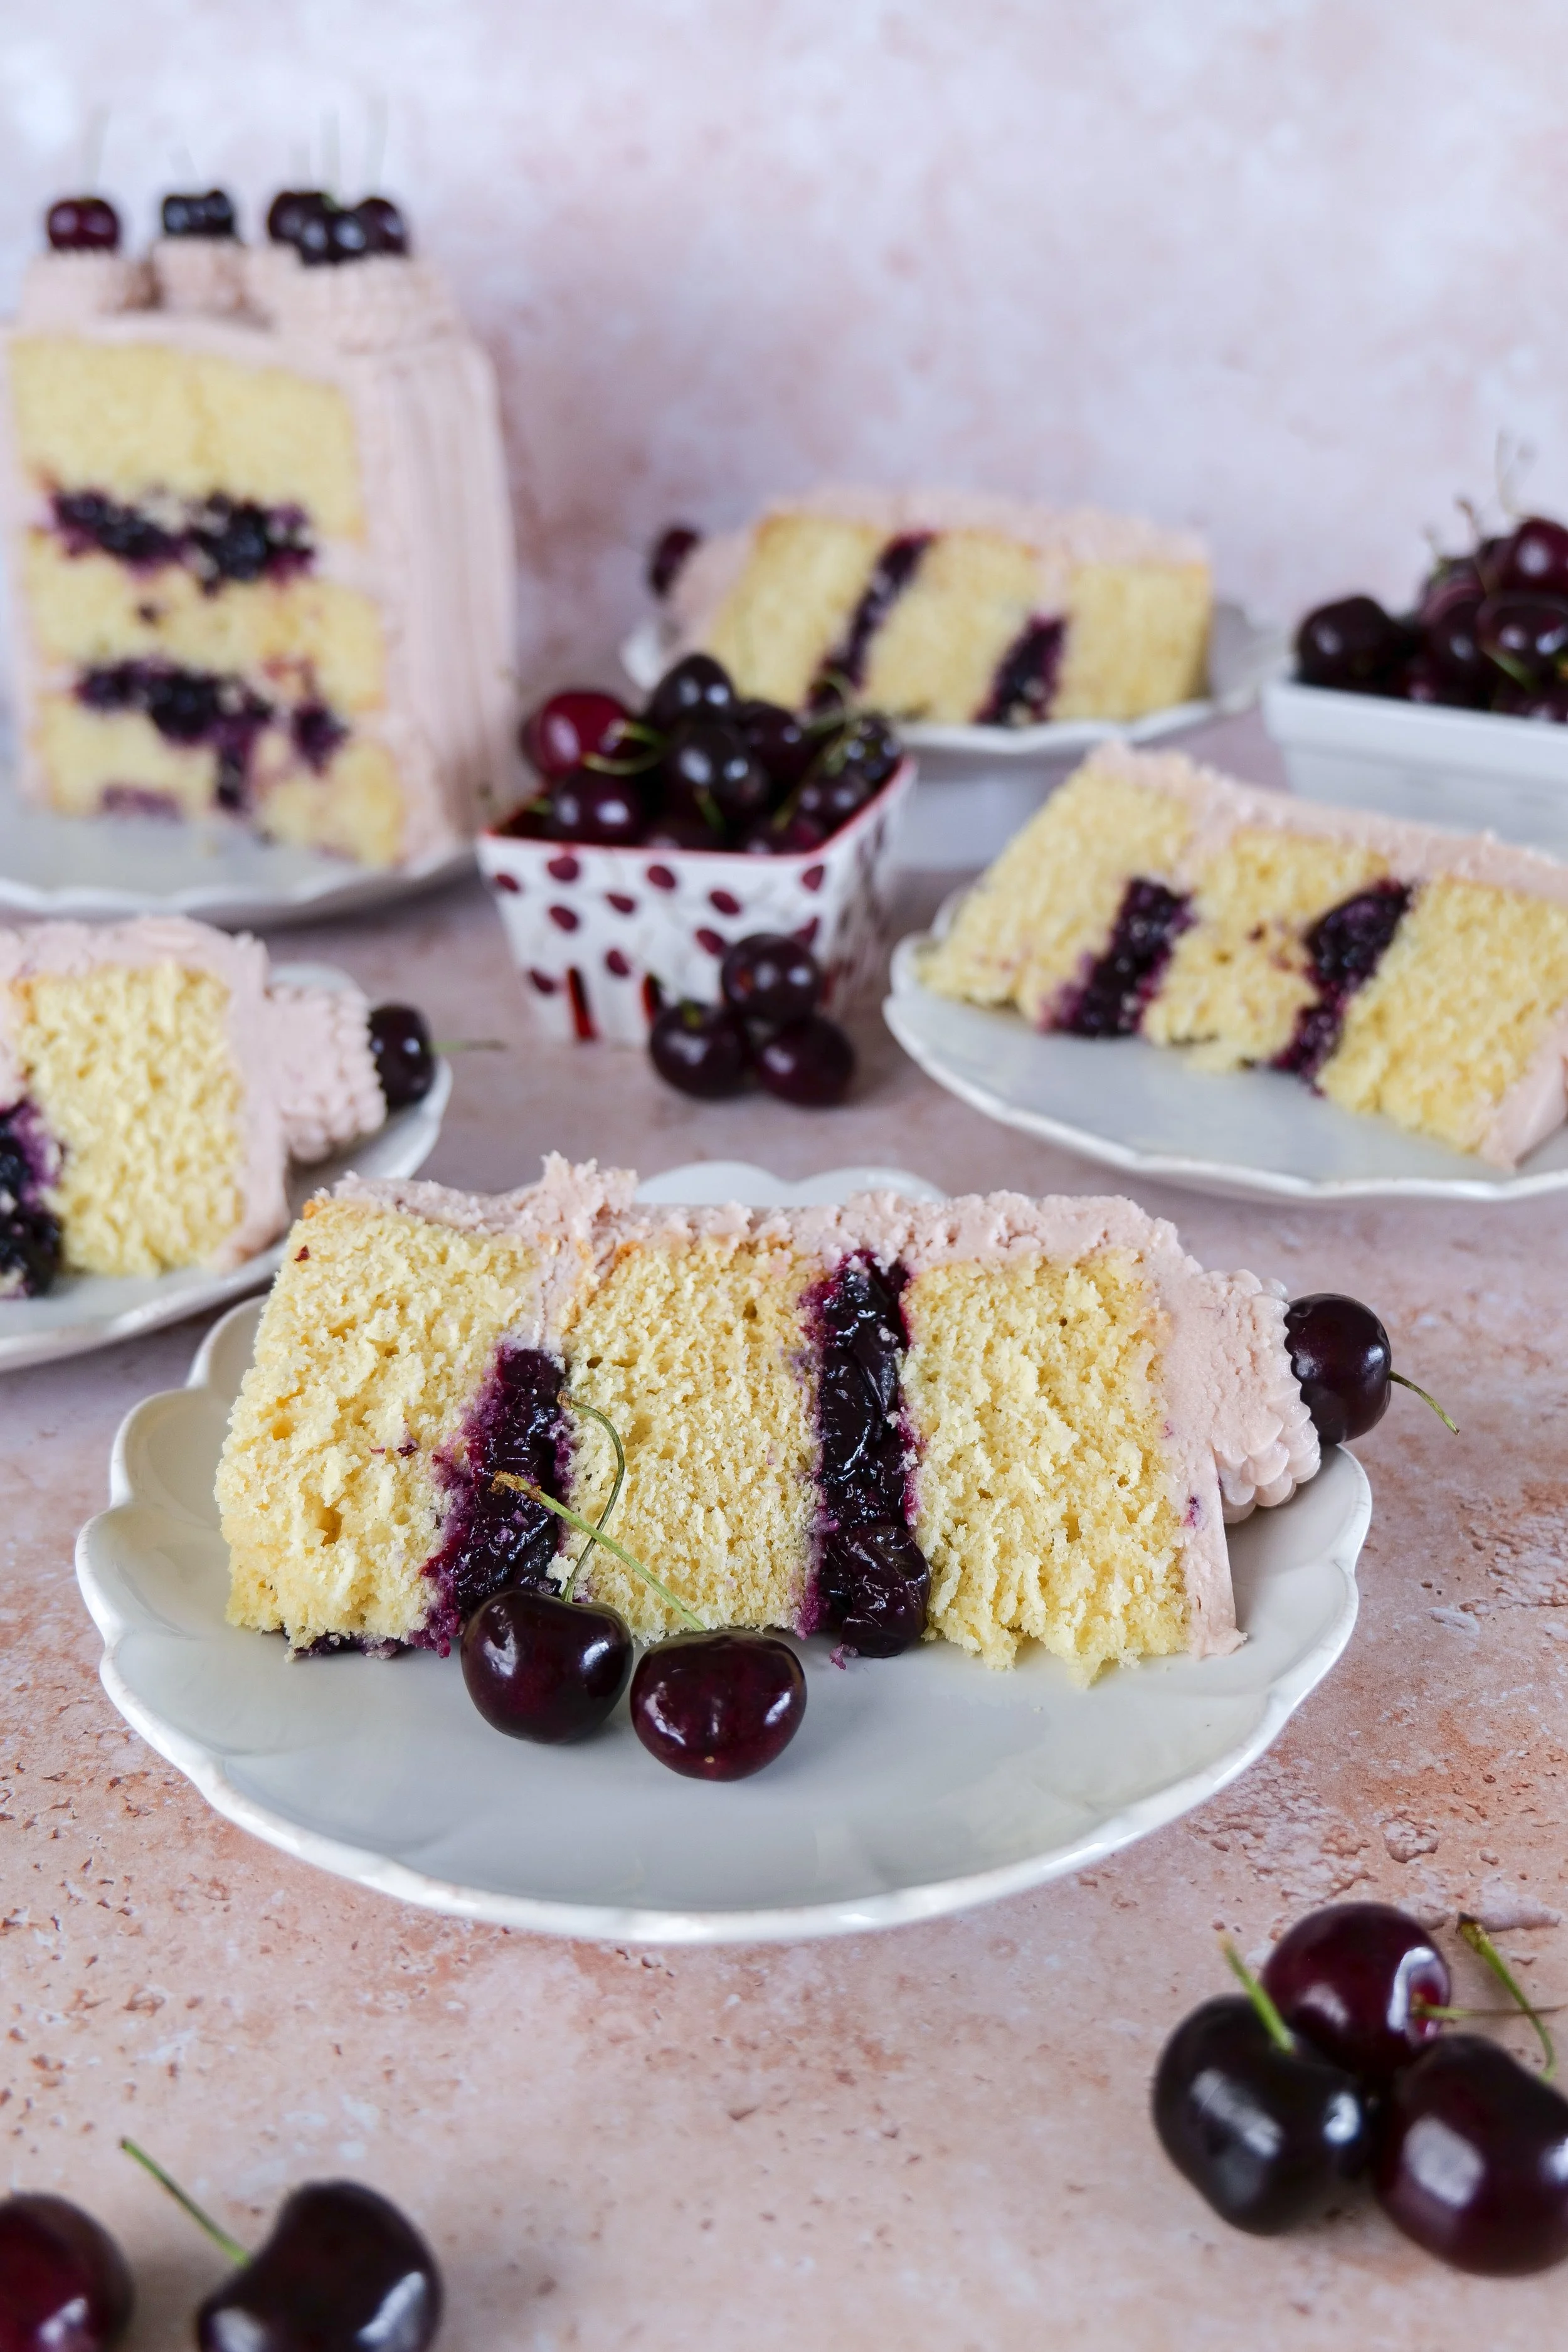
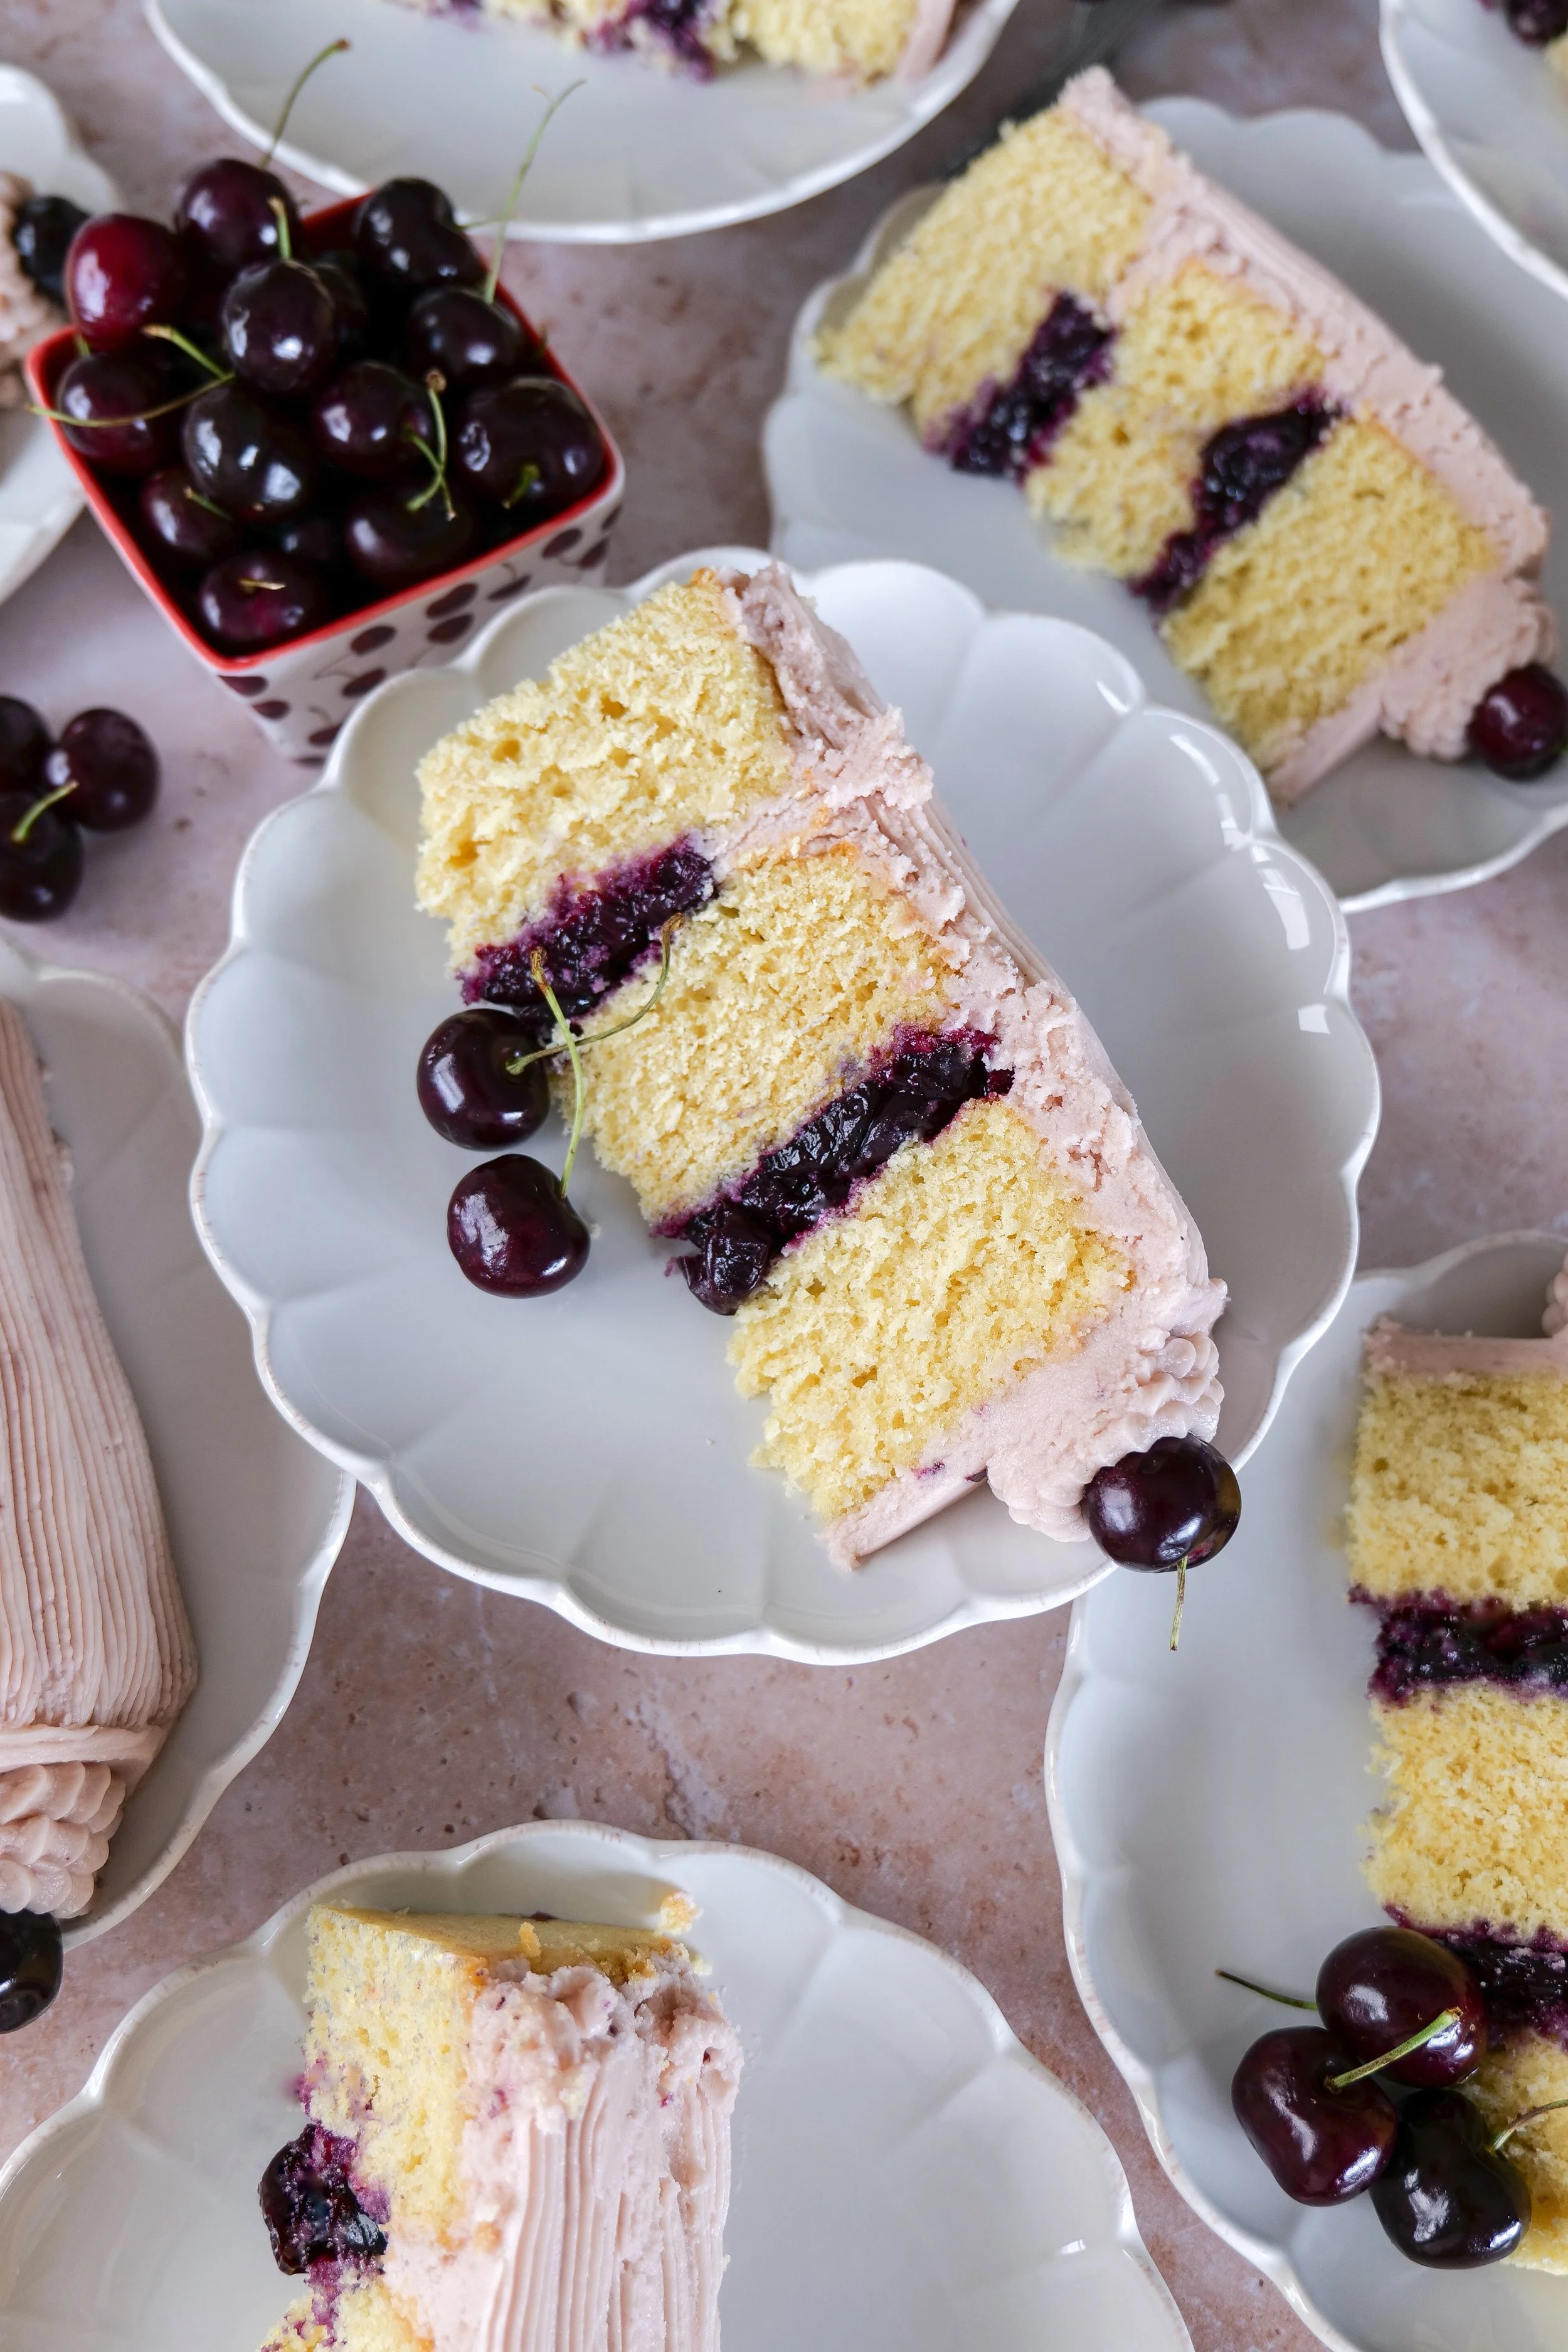
Slice of vanilla bean cherry layer cake showing fluffy vanilla cake layers and fresh cherry filling.
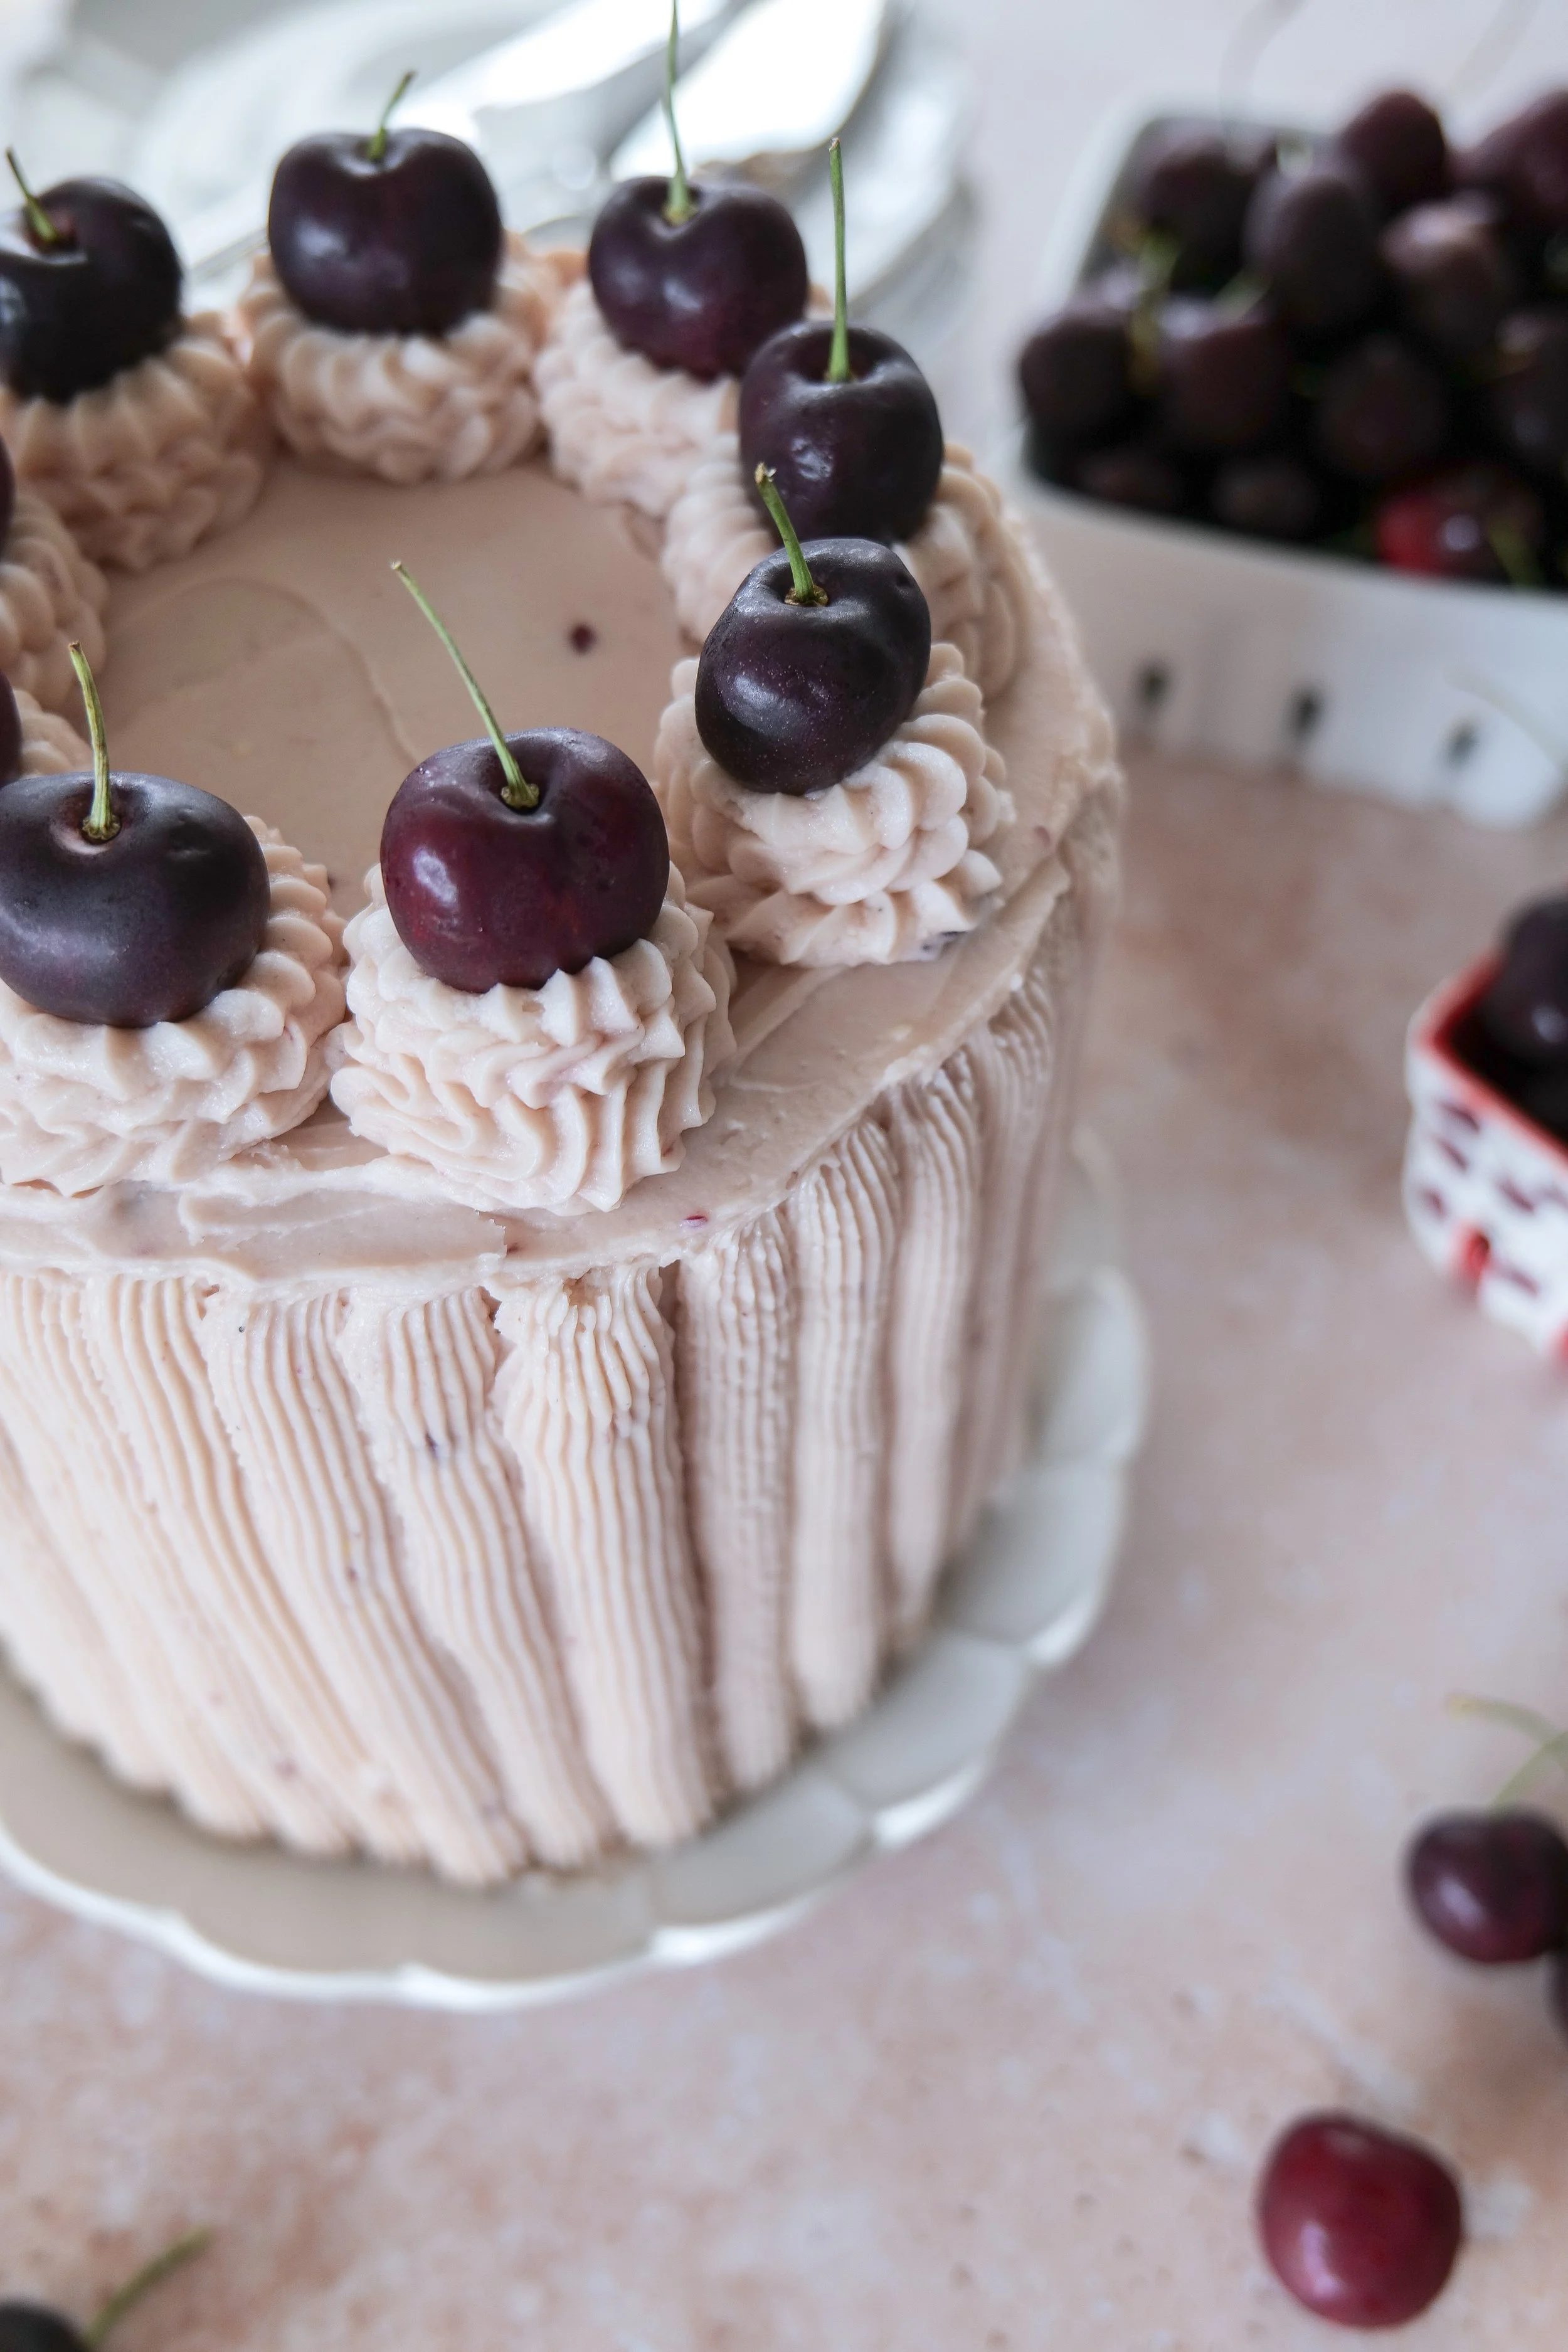
Close-up of vanilla bean cherry cake with homemade cherry filling and soft pink buttercream.

July always feels like the peak of summer.

Fresh cherries are everywhere, the light lasts just a little longer in the evenings, and everything feels slower in the best way. This month’s milestone cake is inspired by exactly that moment—the simplicity of peak cherry season.

Instead of a heavy or overly complex dessert, I wanted something light, beautiful, and centered around one clear flavor: cherry. Paired with soft vanilla bean cake layers and a whipped cherry mascarpone frosting, this cake feels like summer in its most elegant form.

It’s simple, fresh, and designed to let the cherries shine.

Homemade vanilla bean cherry layer cake decorated with fresh cherries and cherry buttercream.
Beautiful summer cherry layer cake perfect for birthdays, holidays, and celebrations.

Why You’ll Love This Cherry Layer Cake

  • Soft vanilla bean cake layers with a tender crumb

  • Homemade cherry filling made with fresh summer cherries

  • Light whipped mascarpone frosting infused with cherry syrup

  • Naturally soft pink frosting for a beautiful finish

  • Elegant but easy enough for home baking

  • Perfect for birthdays, summer gatherings, or milestone celebrations

Shop the Cherry Layer Cake

Before baking, here are the essentials used to create this cake.

Baking + Cake Essentials

Includes:

  • 8-inch cake pans

  • Stand mixer or hand mixer

  • Offset spatula

  • Cake turntable

  • Cooling racks

  • Parchment rounds

  • Piping bags (optional for decoration)

These tools help create a smooth, bakery-style finish at home.

Easy vanilla bean cherry cake recipe made with fresh cherries and creamy buttercream frosting.  7.
Slice of cherry layer cake served on a white scalloped dessert plate.
Vanilla cake frosted with naturally pink cherry buttercream and filled with homemade cherries.

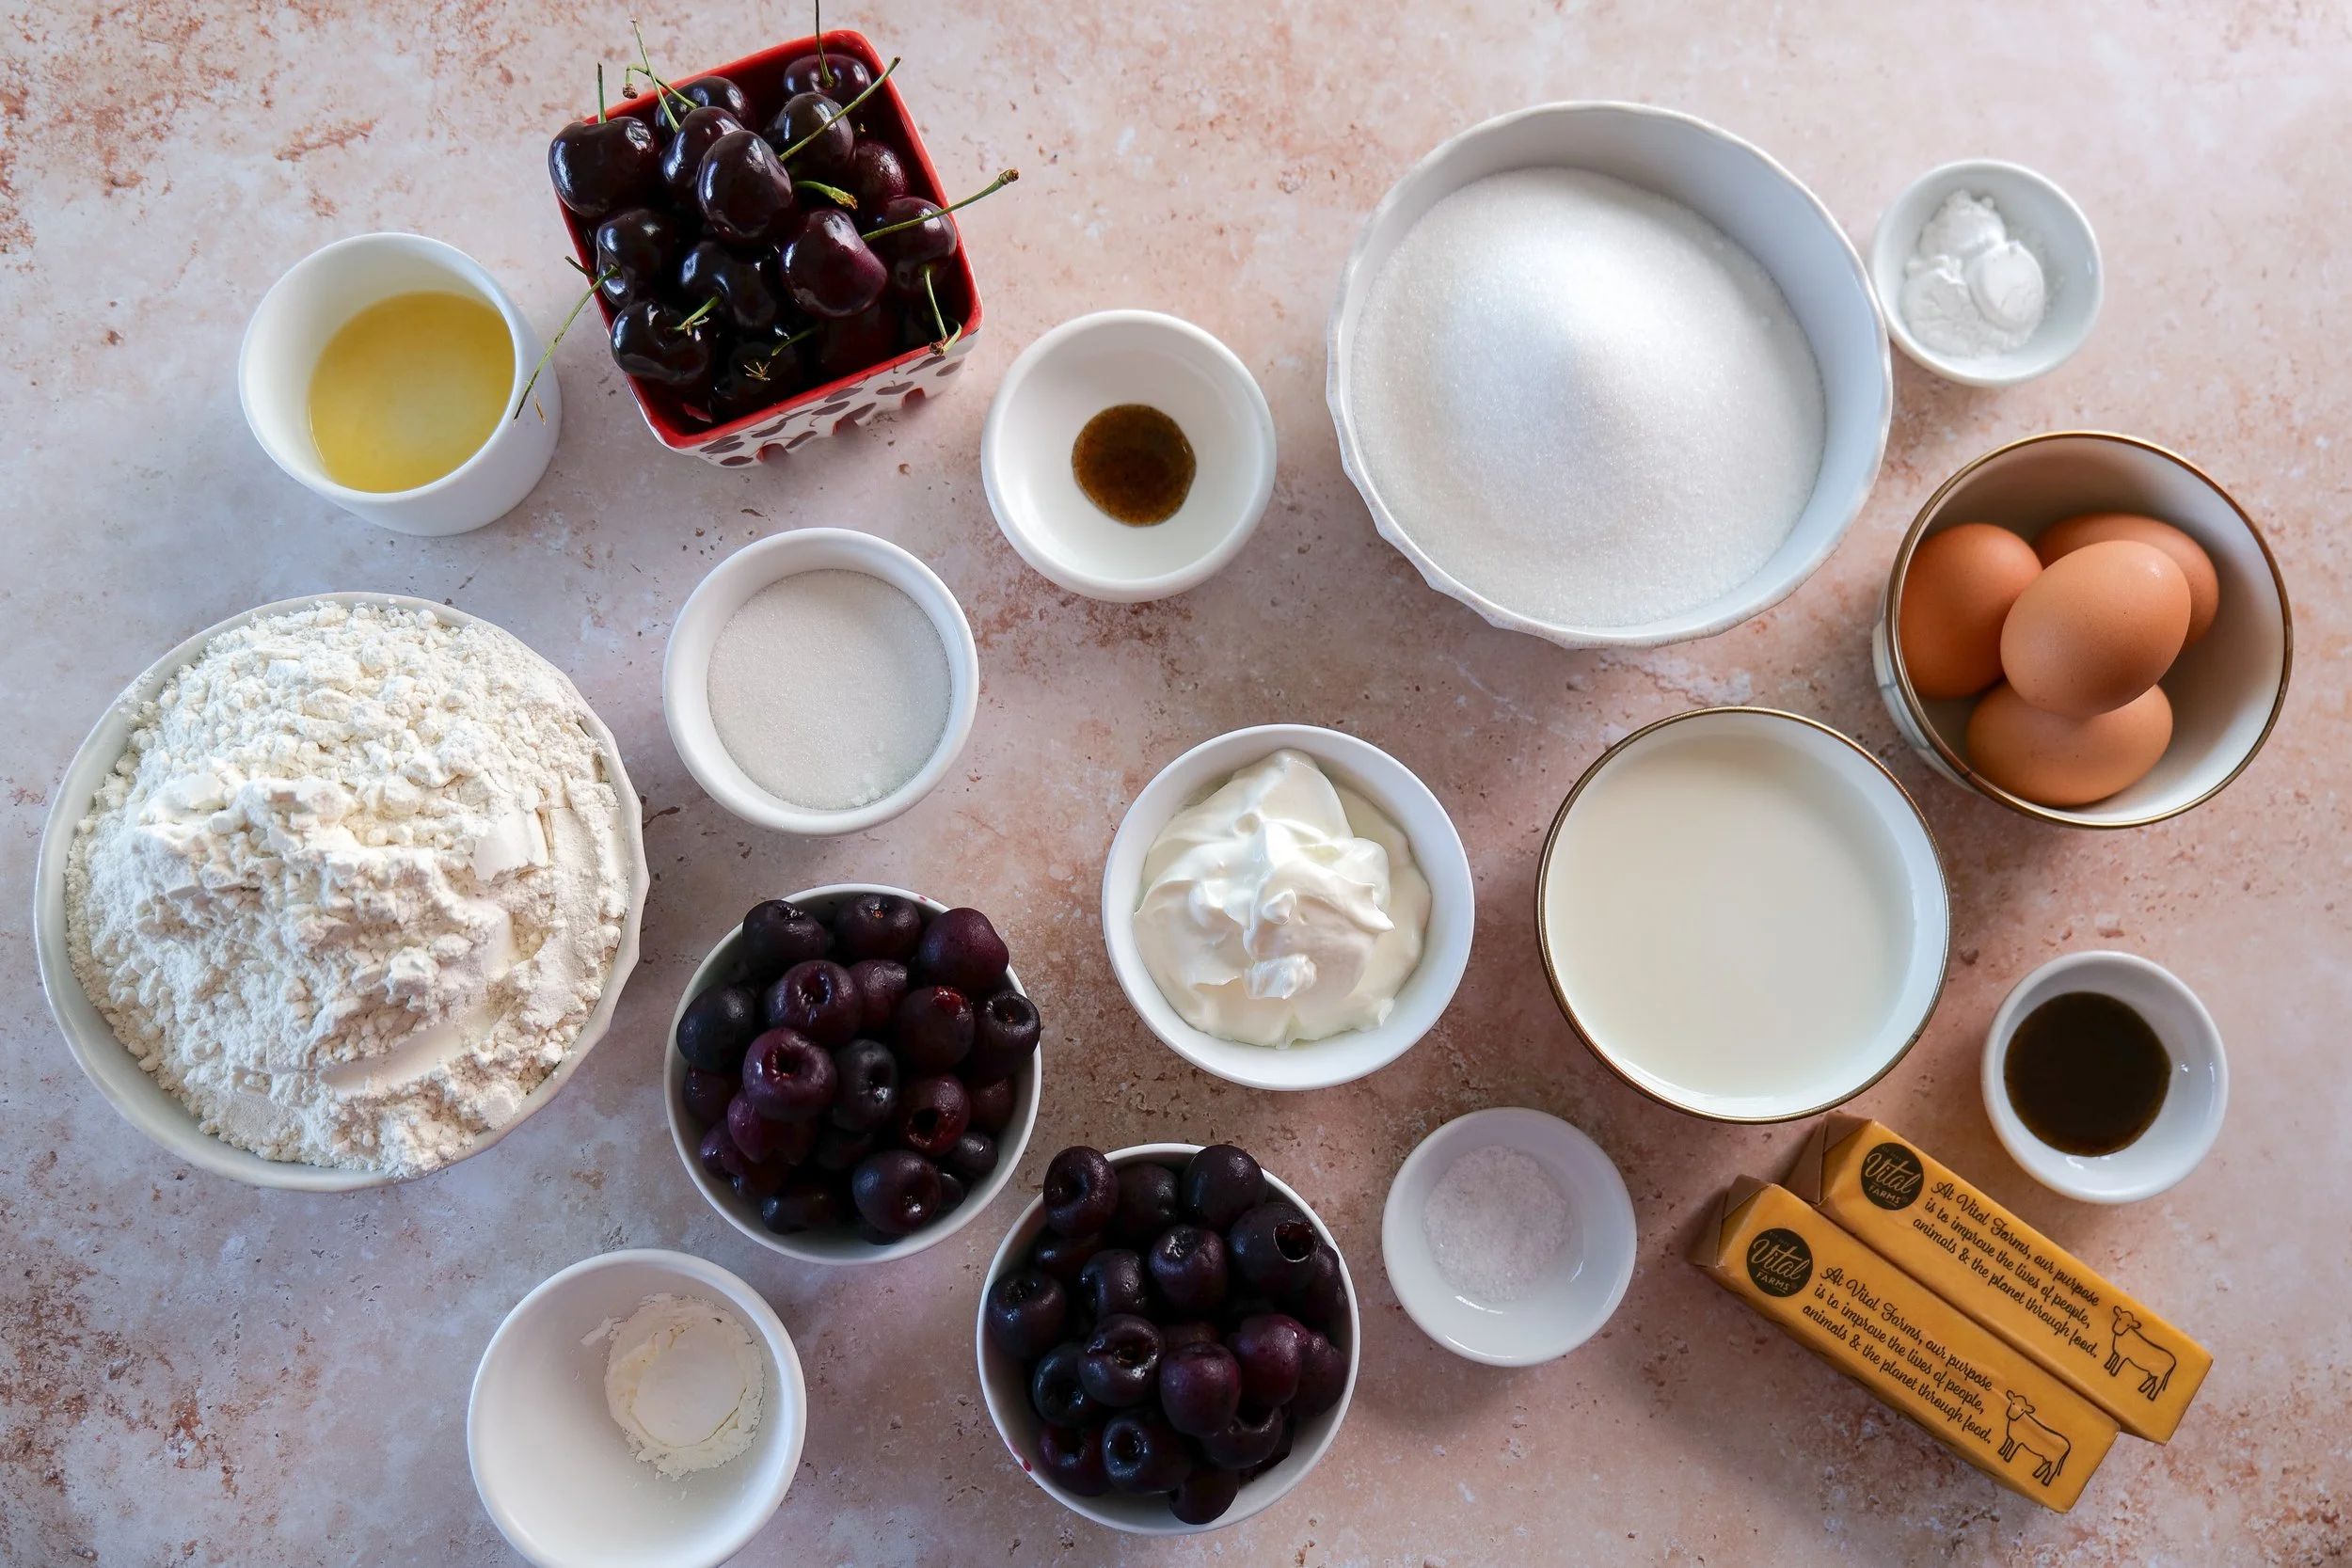
Ingredients

Vanilla Bean Cake Layers

  • 3 cups all-purpose flour

  • 2½ teaspoons baking powder

  • ½ teaspoon baking soda

  • ½ teaspoon salt

  • 1 cup salted butter, softened

  • 1¾ cups granulated sugar

  • 4 large eggs

  • 1 tablespoon vanilla bean paste

  • 1 cup whole milk

  • ½ cup sour cream

Cherry Filling

  • 3 cups fresh cherries, pitted

  • ⅓ cup granulated sugar

  • 1 tablespoon lemon juice

  • 1 tablespoon cornstarch

  • ½ teaspoon vanilla bean paste

Whipped Vanilla Cherry Mascarpone Frosting

This frosting is light, fluffy, and naturally tinted a soft pink from cherry syrup. It adds both flavor and color to the finished cake.

  • 16 oz mascarpone cheese, softened

  • 2 cups salted butter

  • 8 cups powdered sugar

  • 1 tablespoon vanilla bean paste

  • 3–5 tablespoons cherry syrup (or until color and consistency is reached)

How to Make the Cherry Filling

  1. Add cherries, sugar, and lemon juice to a saucepan.

  2. Cook over medium heat for 8–10 minutes until cherries soften and release juices.

  3. Stir in cornstarch and cook until slightly thickened.

  4. Remove from heat and stir in vanilla.

  5. Cool completely before assembling the cake.

How to Make the Vanilla Bean Cake

  1. Preheat oven to 350°F. Grease and line three 8-inch cake pans.

  2. Whisk together flour, baking powder, baking soda, and salt.

  3. Cream butter and sugar until light and fluffy.

  4. Add eggs one at a time, mixing well after each addition.

  5. Mix in vanilla bean paste.

  6. Alternate adding dry ingredients and buttermilk until combined.

  7. Fold in sour cream until smooth.

  8. Divide batter evenly between pans.

  9. Bake 24–28 minutes or until a toothpick comes out clean.

  10. Cool completely before assembling.

How to Make the Whipped Cherry Mascarpone Frosting

  1. Beat mascarpone and butter until smooth and creamy.

  2. Add powdered sugar and vanilla, mixing until fully combined.

  3. Gradually add cherry syrup, 1 tablespoon at a time, while whipping.

  4. Continue mixing until light, fluffy, and softly pink.

  5. Adjust color and flavor with additional syrup if desired, being careful not to overmix.

Tip: Use a thick cherry syrup or reduced cherry juice to avoid thinning the frosting.

Assemble the Cake

  1. Place one cake layer on a stand or plate.

  2. Pipe a border of cherry mascarpone frosting around the edge.

  3. Fill the center with cherry filling.

  4. Repeat with remaining layers.

  5. Frost the outside of the cake with whipped cherry mascarpone frosting.

  6. Smooth or texture as desired for a rustic or bakery-style finish.

  7. Top with fresh cherries if desired.

Fresh cherry cake recipe featuring vanilla bean cake layers and juicy cherry filling.

Decorating Ideas

  • Fresh cherries with stems for a natural finish

  • Soft swirls of pink frosting

  • Light, rustic textured finish for a homemade bakery look

  • Minimal decoration to highlight the natural color of the frosting

Tips for Success

  • Make sure cherry filling is fully cooled before assembling

  • Use thick cherry syrup for frosting color and stability

  • Do not overwhip mascarpone or it may loosen

  • Chill cake slightly before slicing for cleaner layers

More Cake Recipes You'll Love

This creates another internal linking hub, which Google loves for recipe sites. Since this is a cake recipe, readers are often looking for another cake to save for later.

I'd link to something like:

Shop Pairings for Summer Hosting

Shop Shelf: Summer Dessert & Hosting Pairings

Three-layer vanilla bean cake filled with fresh cherries and finished with cherry frosting.
Vanilla bean cake layered with sweet homemade cherry filling and whipped cherry buttercream.

Frequently Asked Questions

Can I use frozen cherries?

Yes. Thaw completely and drain excess liquid before cooking.

Can I make this cake ahead of time?

Yes. Bake layers a day ahead and assemble the next day for best texture.

Can I replace mascarpone frosting?

Yes. A vanilla buttercream works, but the mascarpone version keeps it lighter and less sweet.

How to Serve Vanilla Bean Cherry Cake

This vanilla bean cherry cake is delicious served:

  • with fresh whipped cream

  • alongside vanilla bean ice cream

  • topped with fresh cherries

  • with hot coffee or iced lattes

  • at birthdays, bridal showers, baby showers, and summer celebrations

From Amanda's Kitchen

Some recipes become traditions the moment they're placed on the table, and this Vanilla Bean Cherry Layer Cake is one of those recipes for our family.

The soft vanilla bean cake, homemade cherry filling, and light mascarpone frosting create a cake that's elegant enough for birthdays and celebrations, yet simple enough to make just because cherries are in season. It's the kind of dessert that invites everyone to slow down, pour another cup of coffee, and linger around the table just a little longer.

I hope this recipe finds its way into your family's celebrations for years to come. Print this recipe card, tuck it into your favorite recipe binder, and know it's being shared from my kitchen to yours.

Love, Amanda

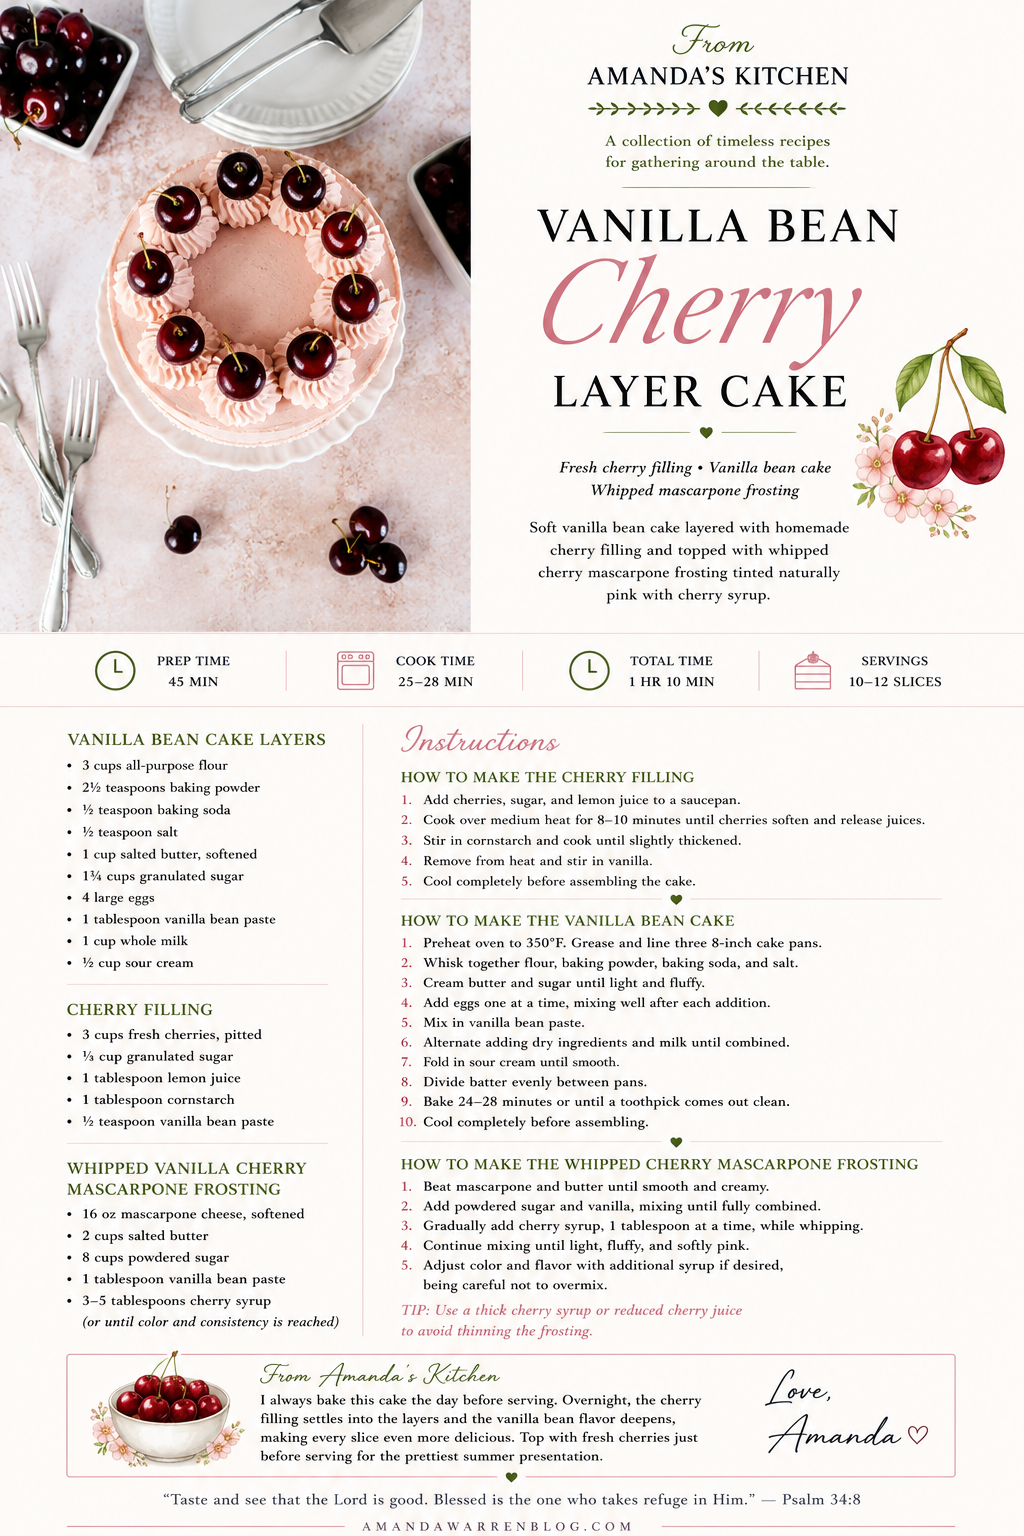
Printable recipe card for Vanilla Bean Cake with Cherry Filling featuring soft vanilla bean cake layers, homemade fresh cherry filling, and whipped vanilla cherry mascarpone frosting. An elegant summer layer cake recipe by Amanda Warren.
Elegant homemade cherry birthday cake with fluffy vanilla layers and fresh fruit filling.
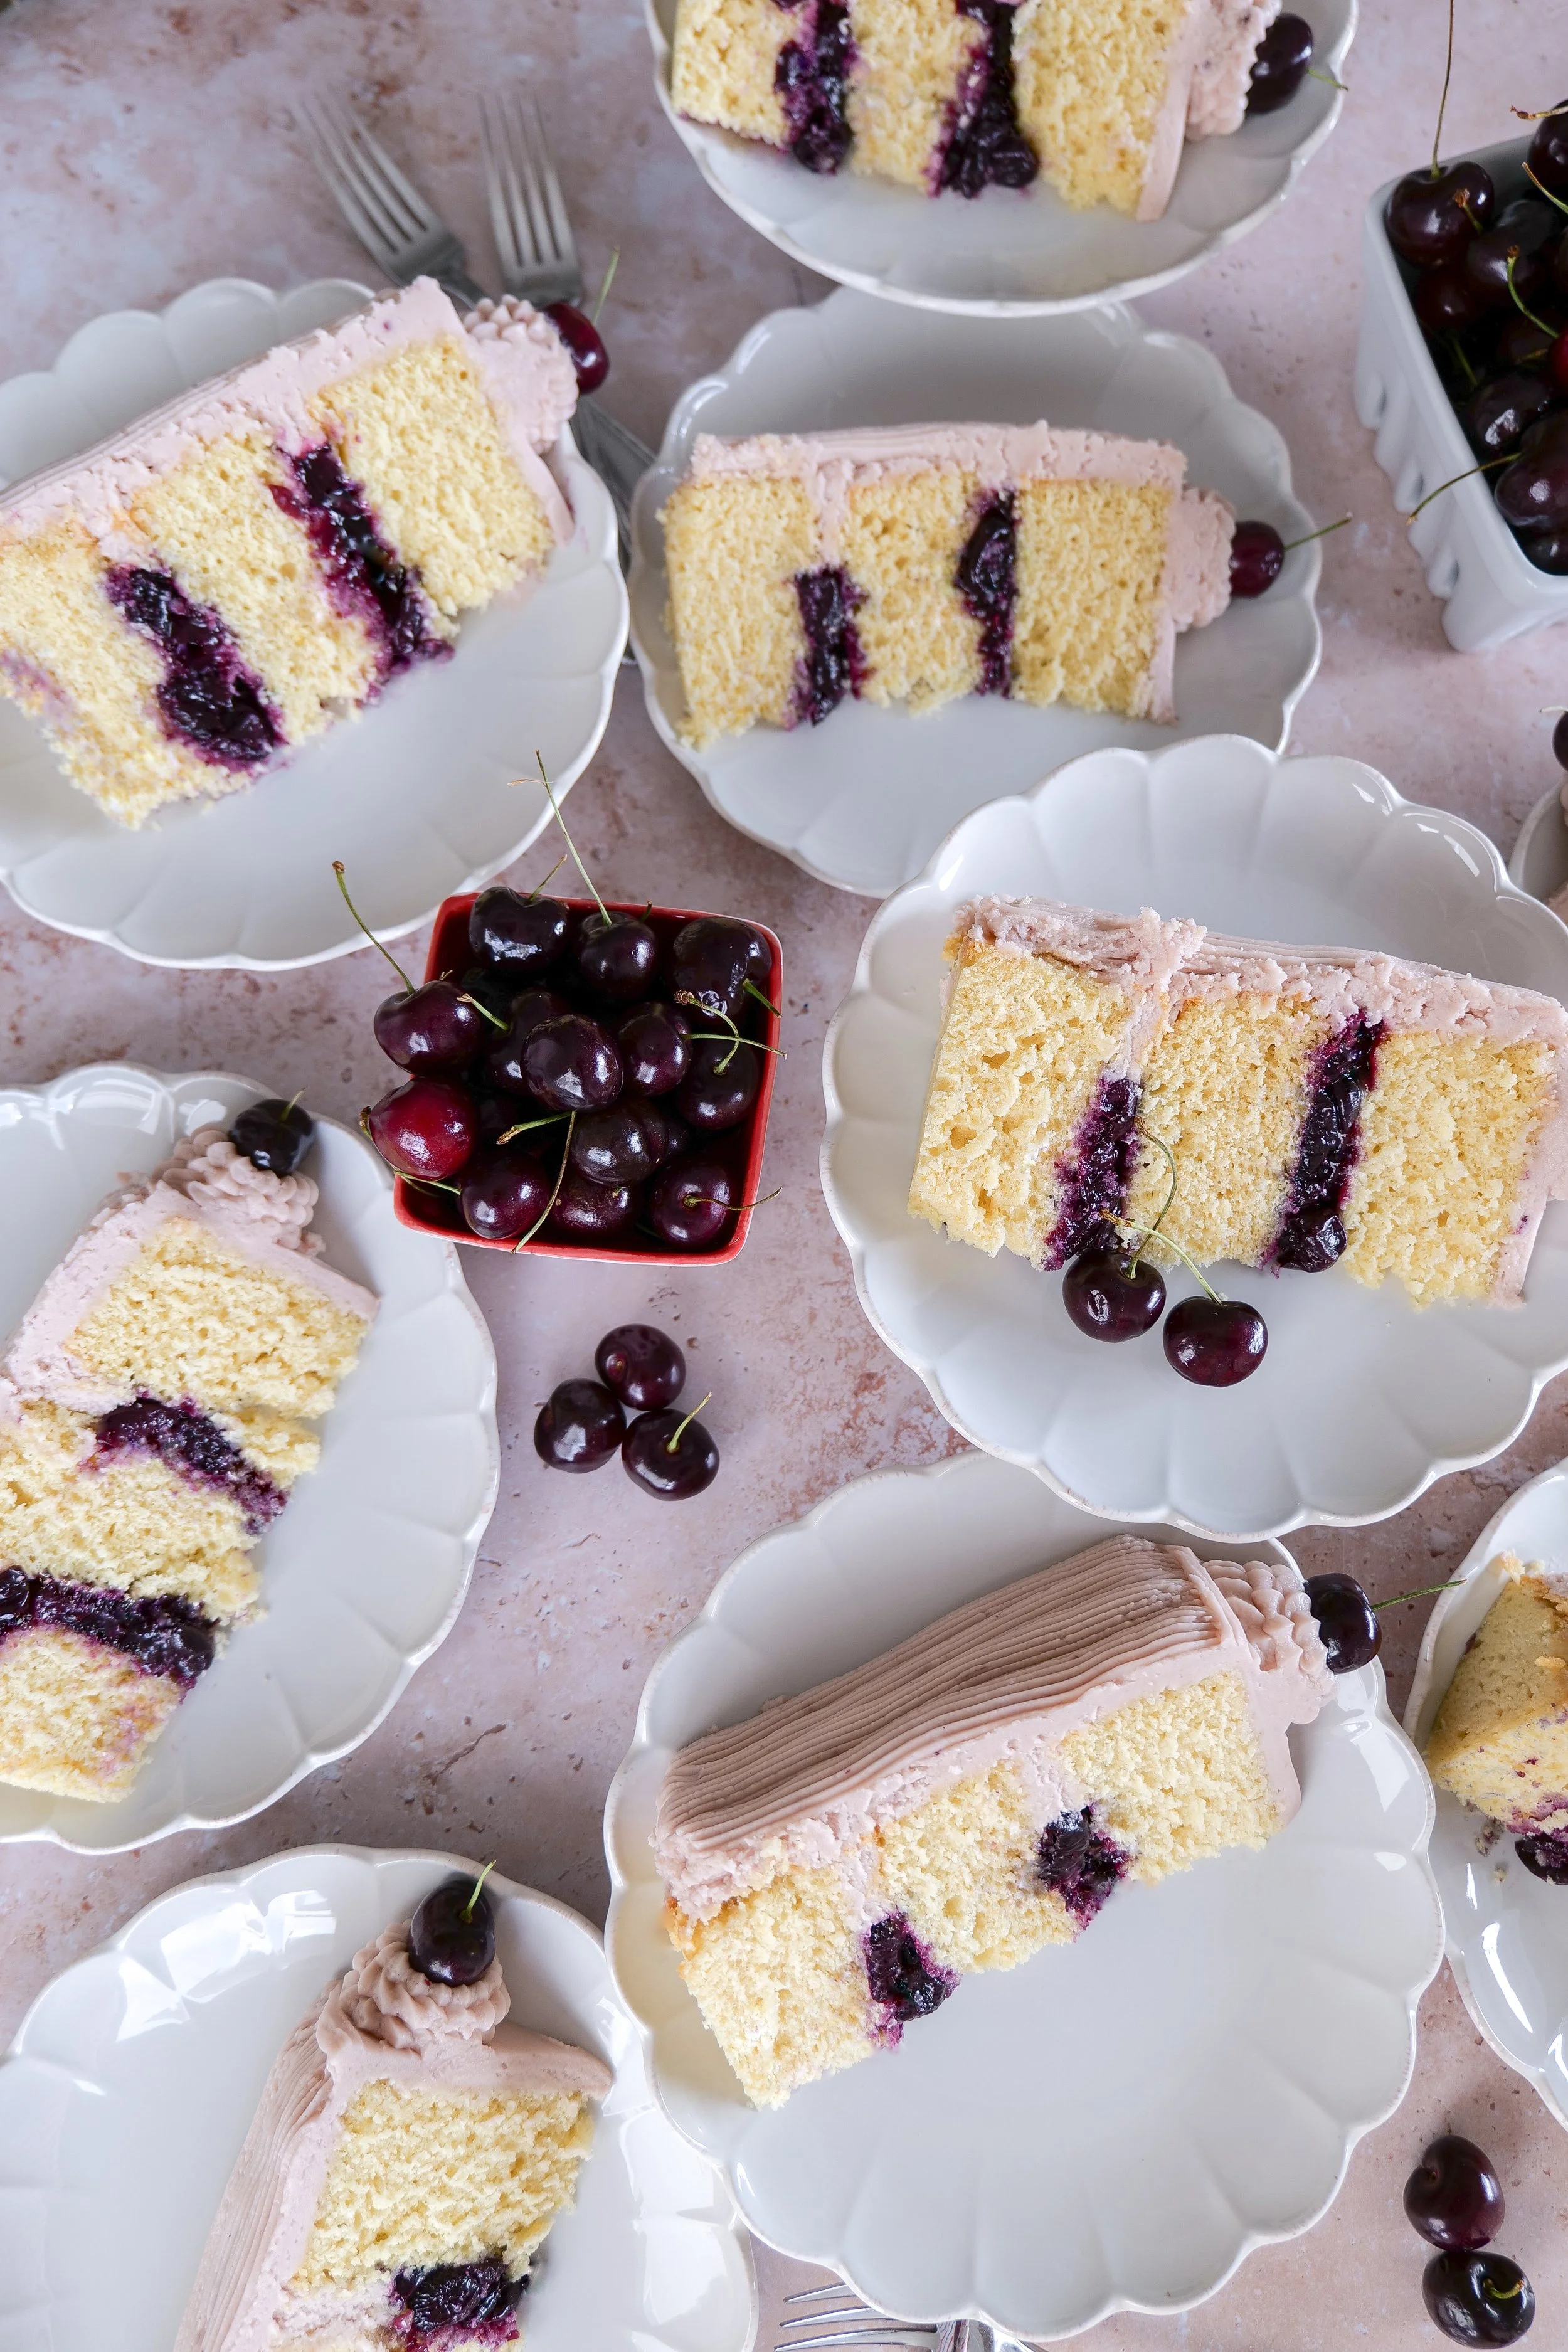
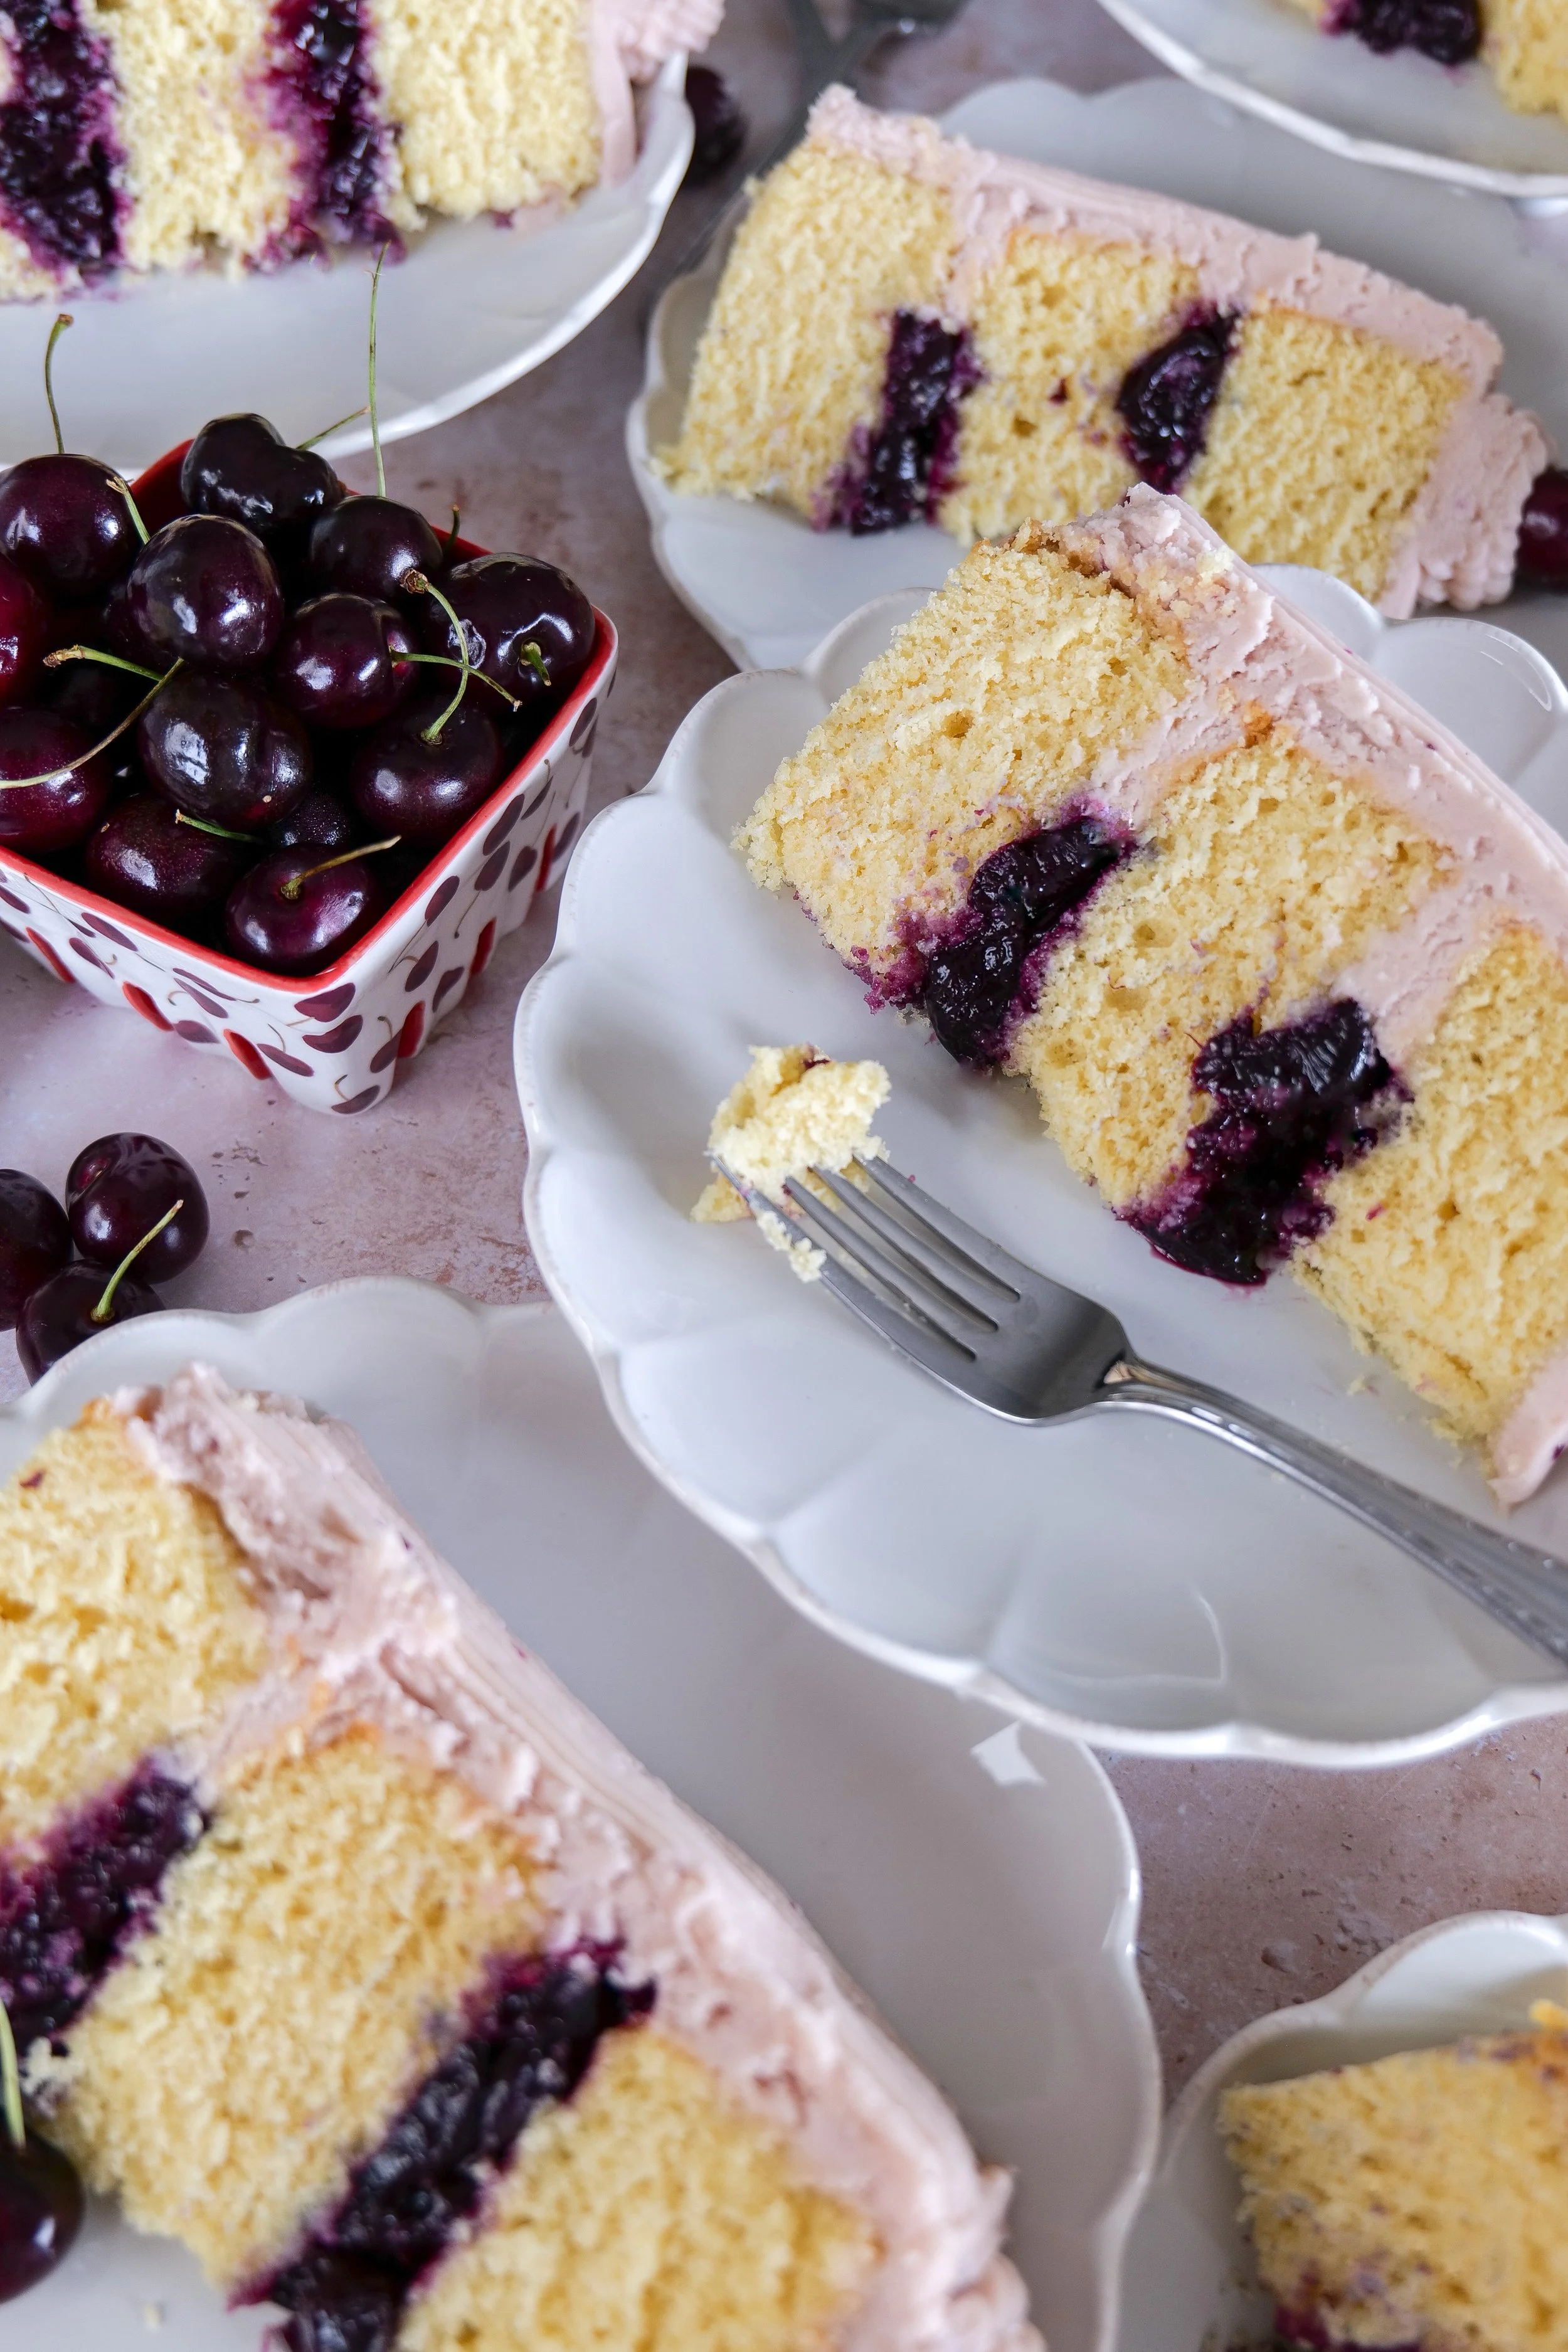
Fresh cherries styled beside slices of homemade vanilla bean cherry cake.
Cross section of vanilla bean cherry layer cake showing thick cherry filling between cake layers.
Several slices of vanilla bean cherry cake styled for summer entertaining and celebrations.
Easy homemade vanilla bean cherry layer cake recipe with fresh cherries and pink buttercream frosting.