Tuxedo Cake with Chocolate Mousse and White Chocolate Mousse
/A Decadent Chocolate Layer Cake with Brown Butter, Espresso & Chocolate Ganache
If you're looking for a cake that feels as special as it looks, this Tuxedo Cake is it.
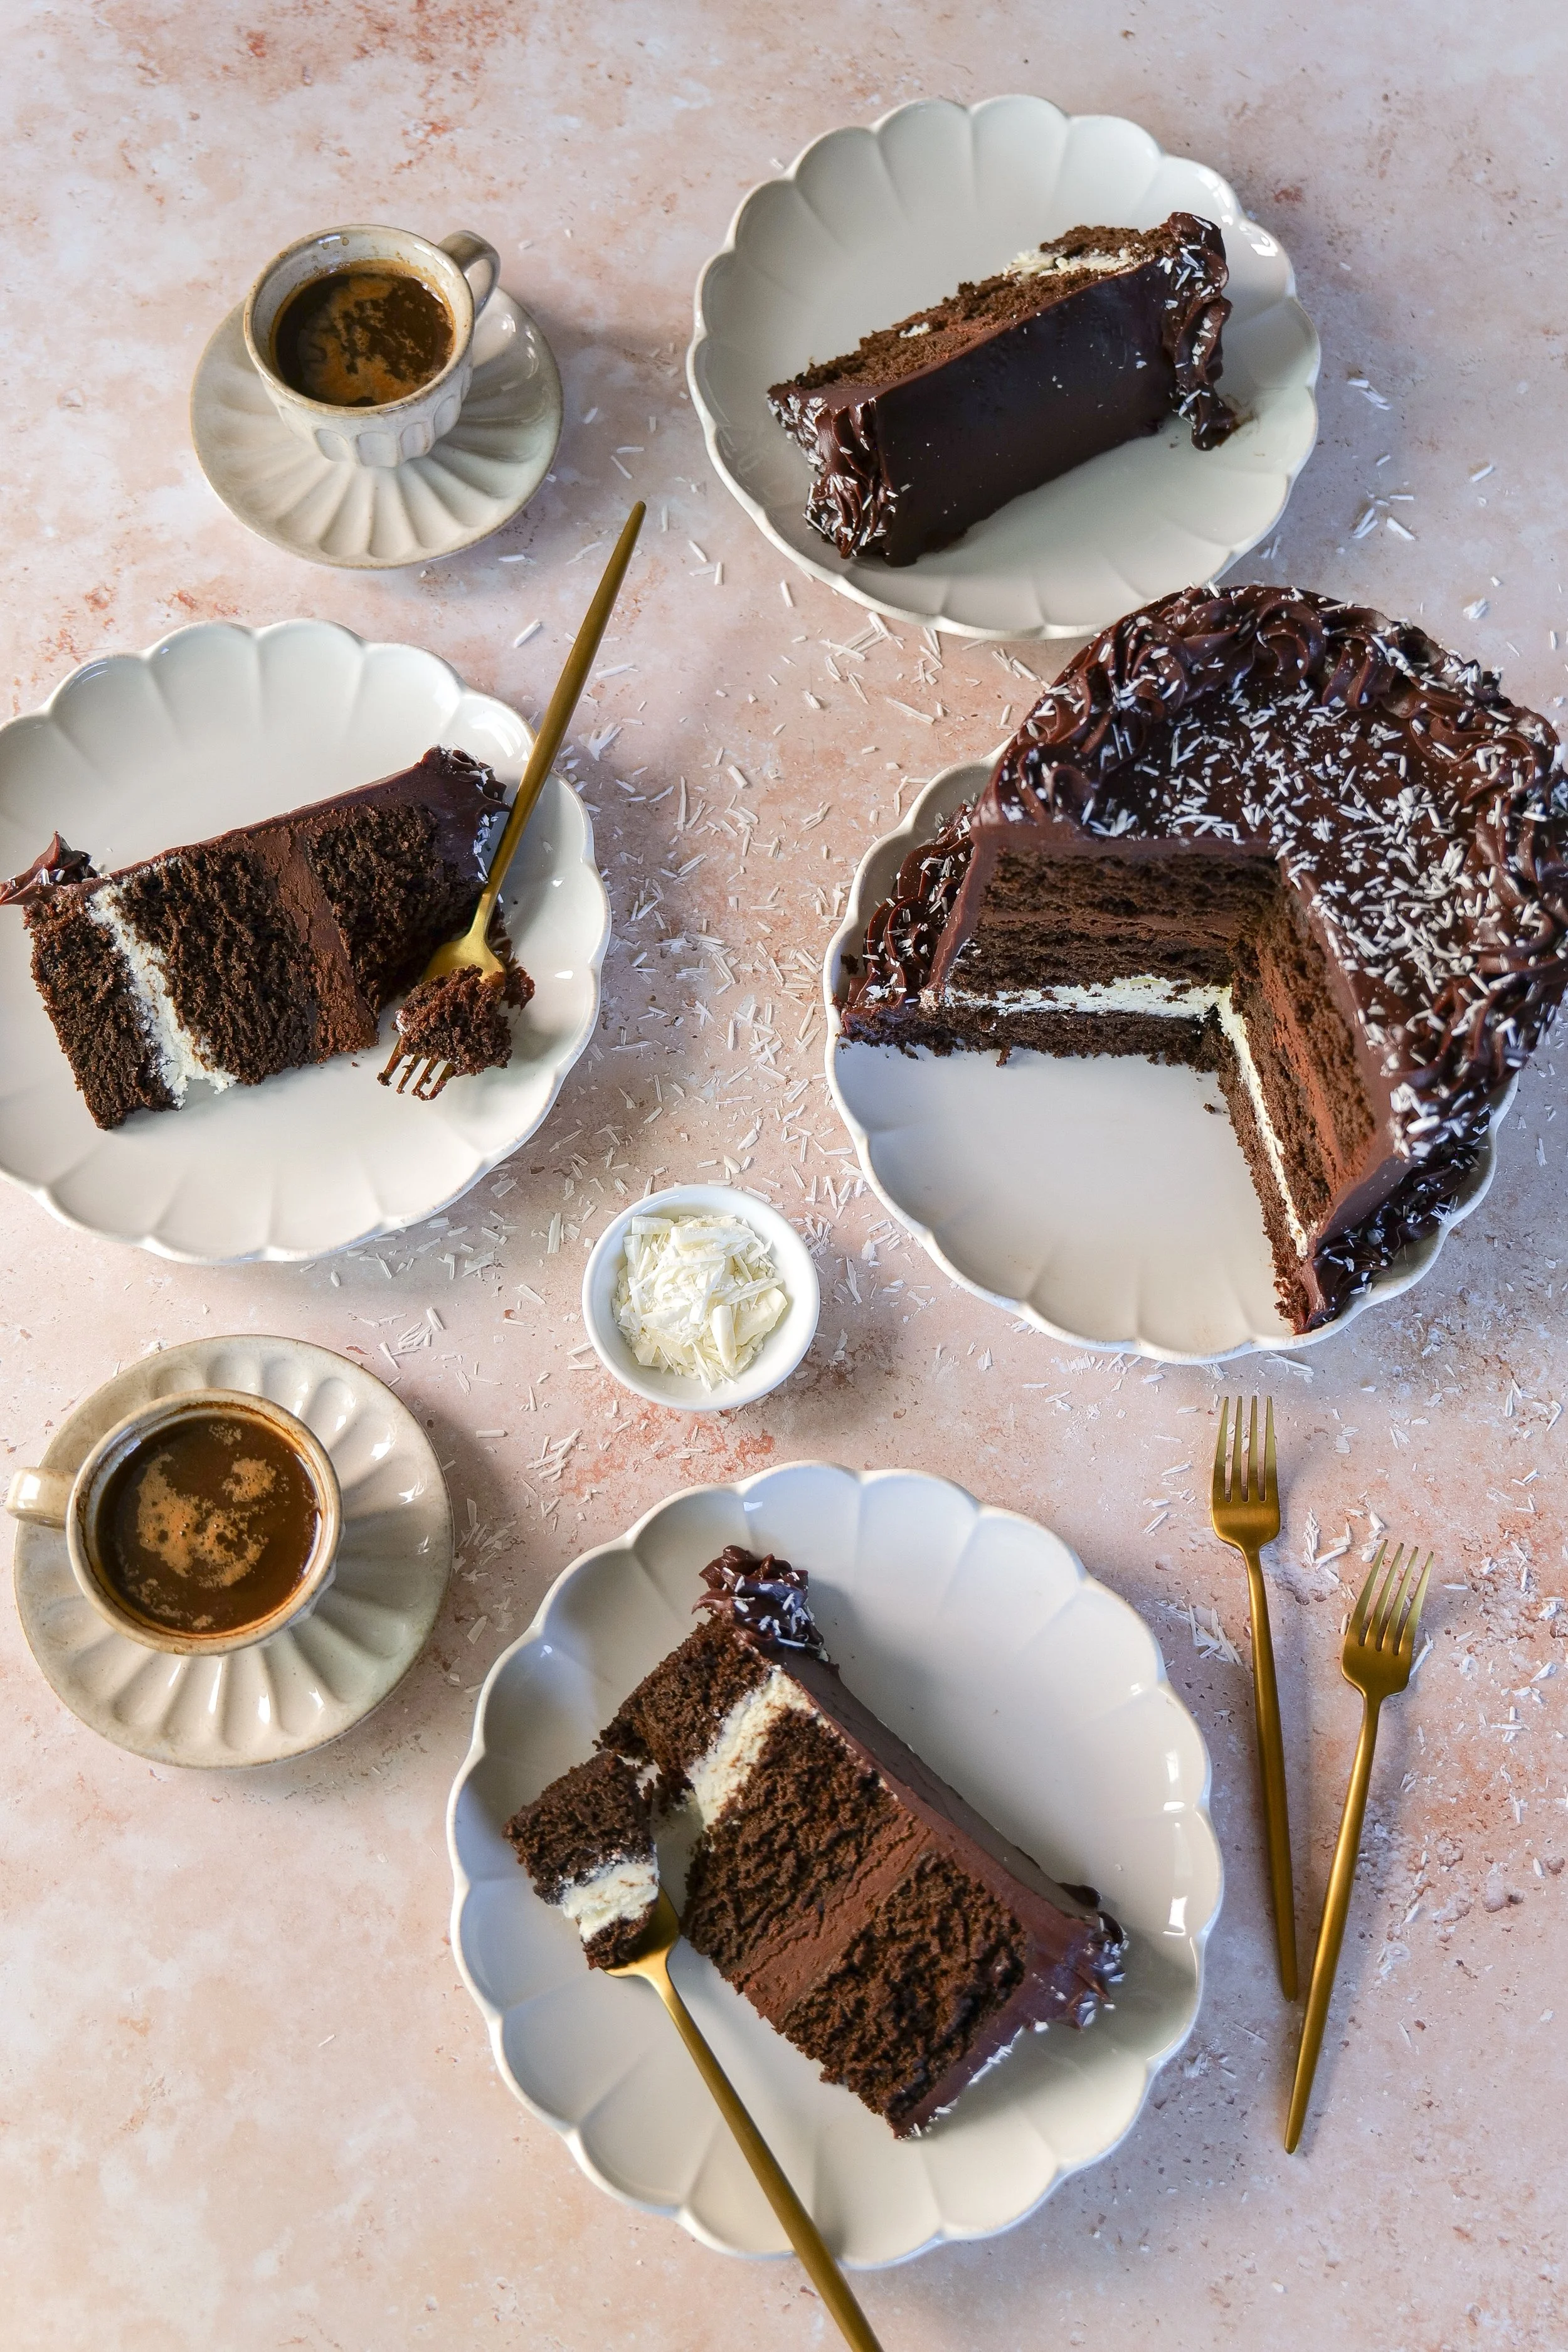
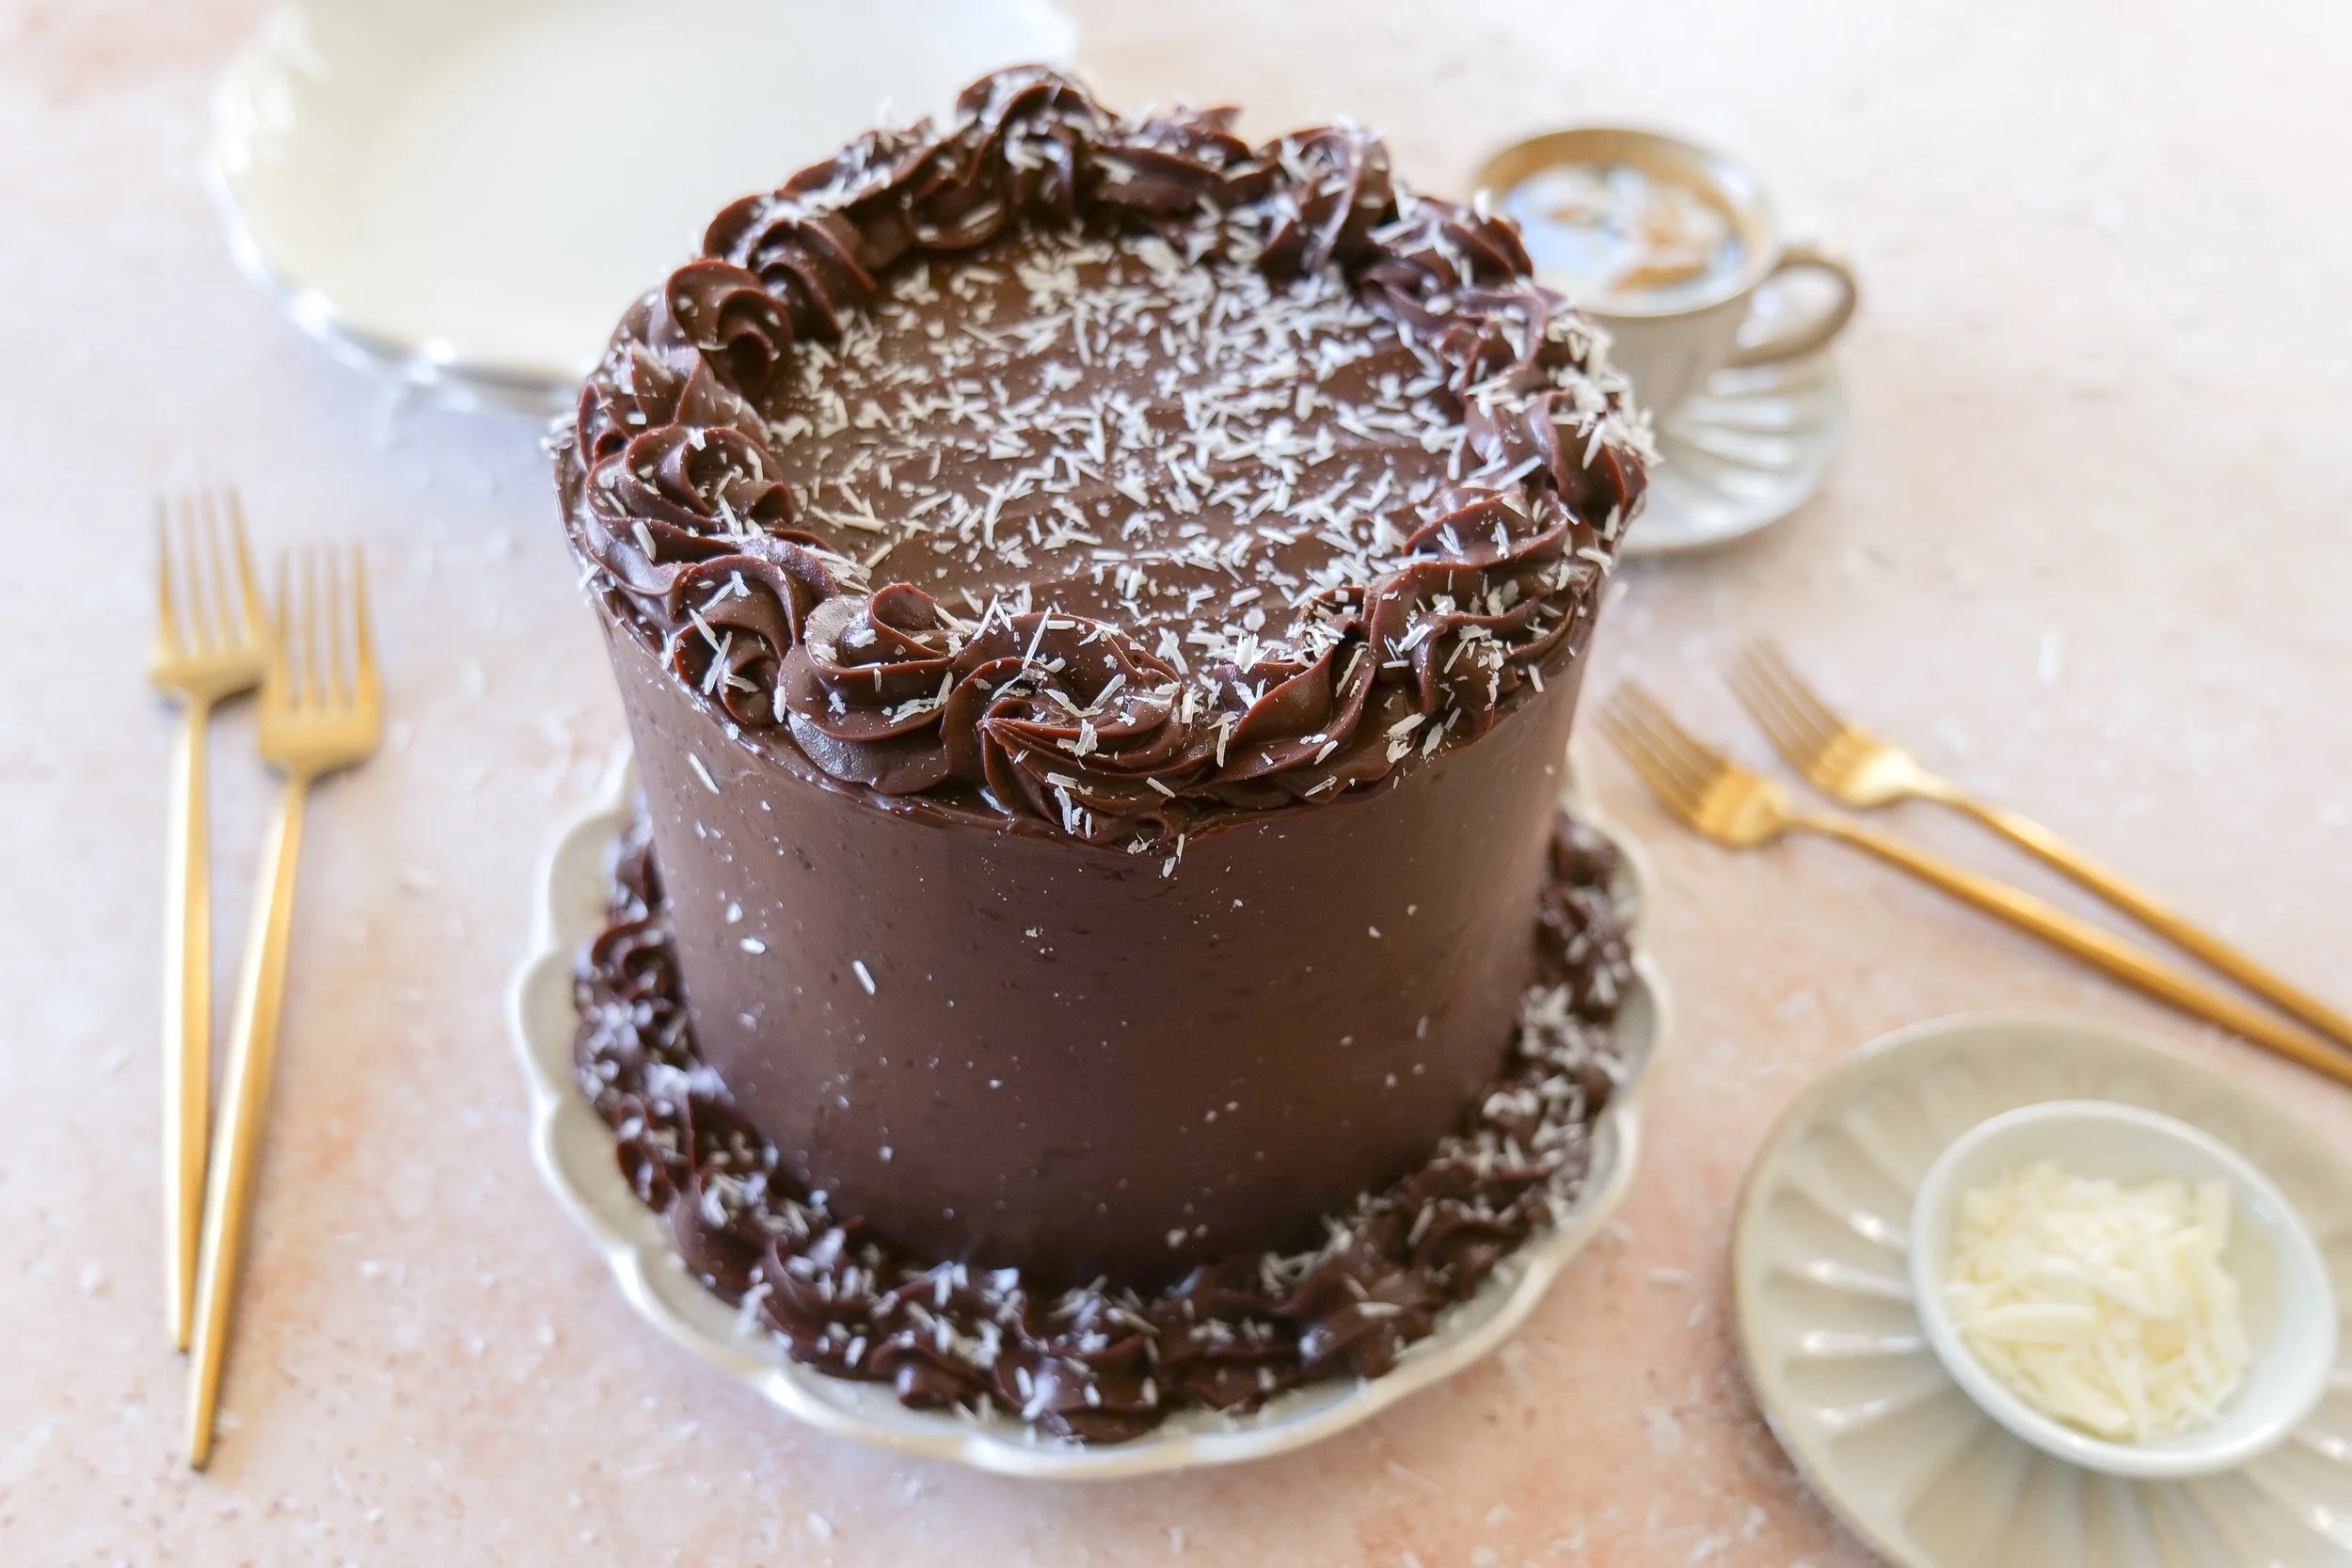
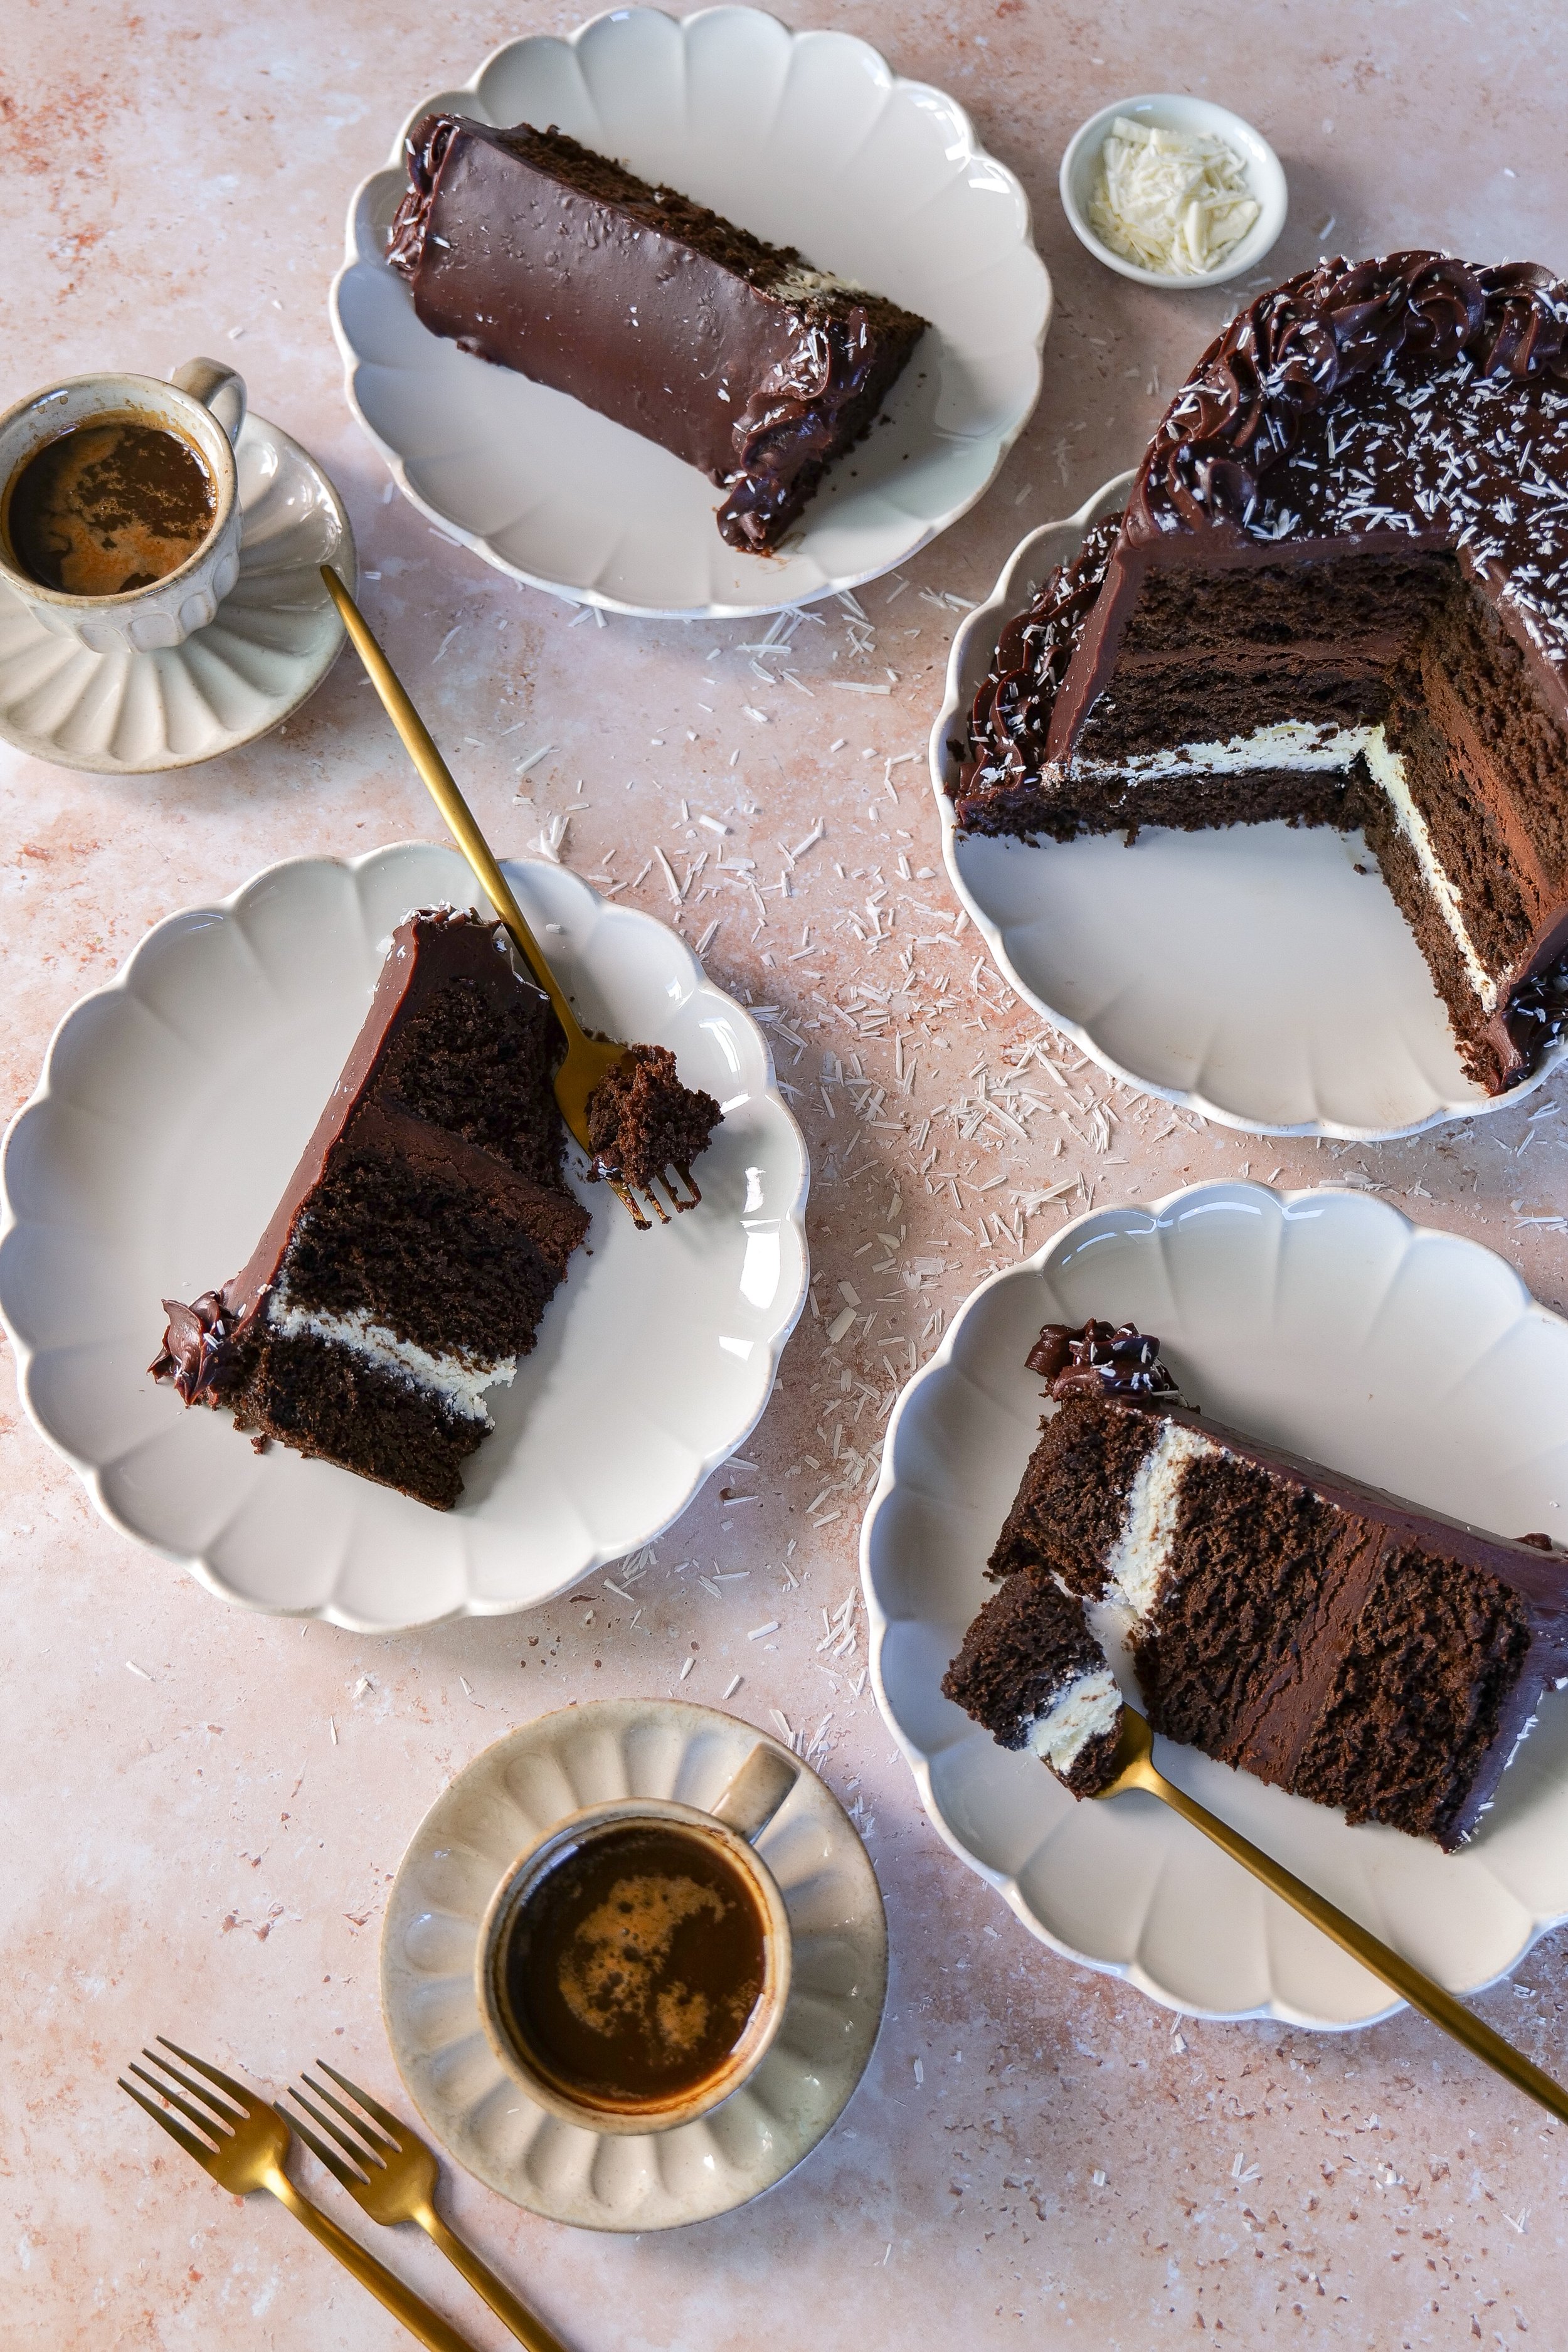
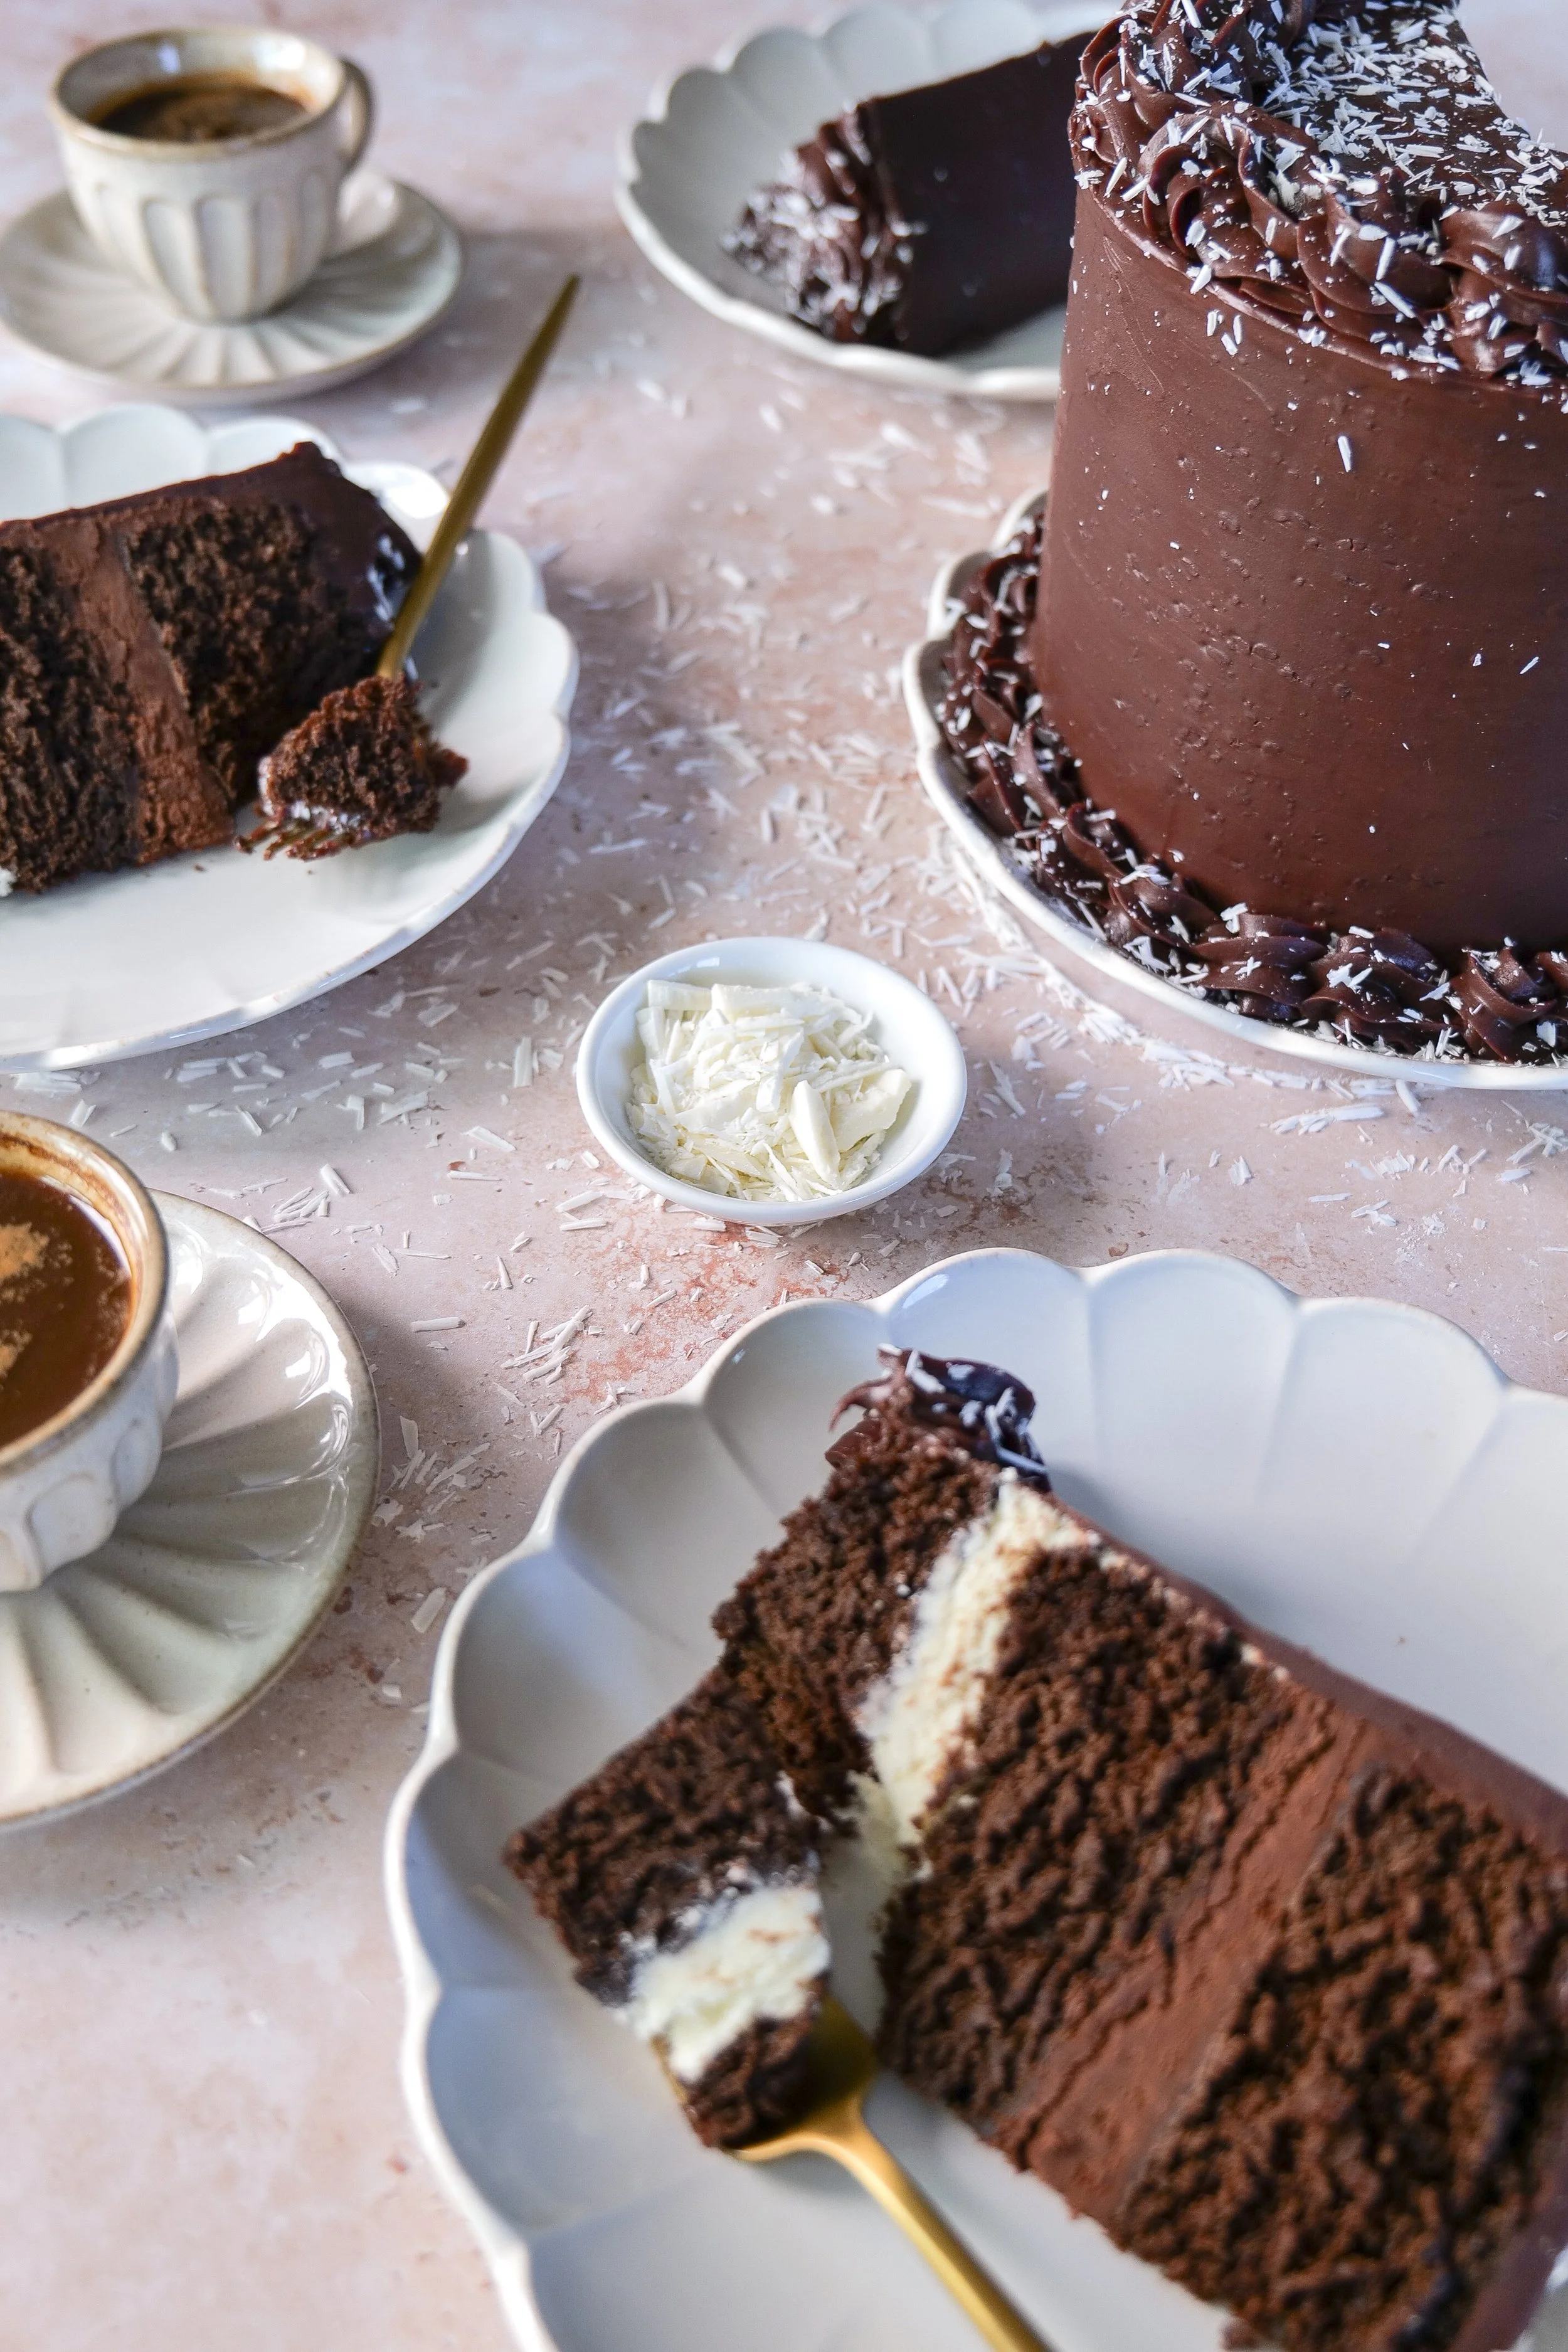
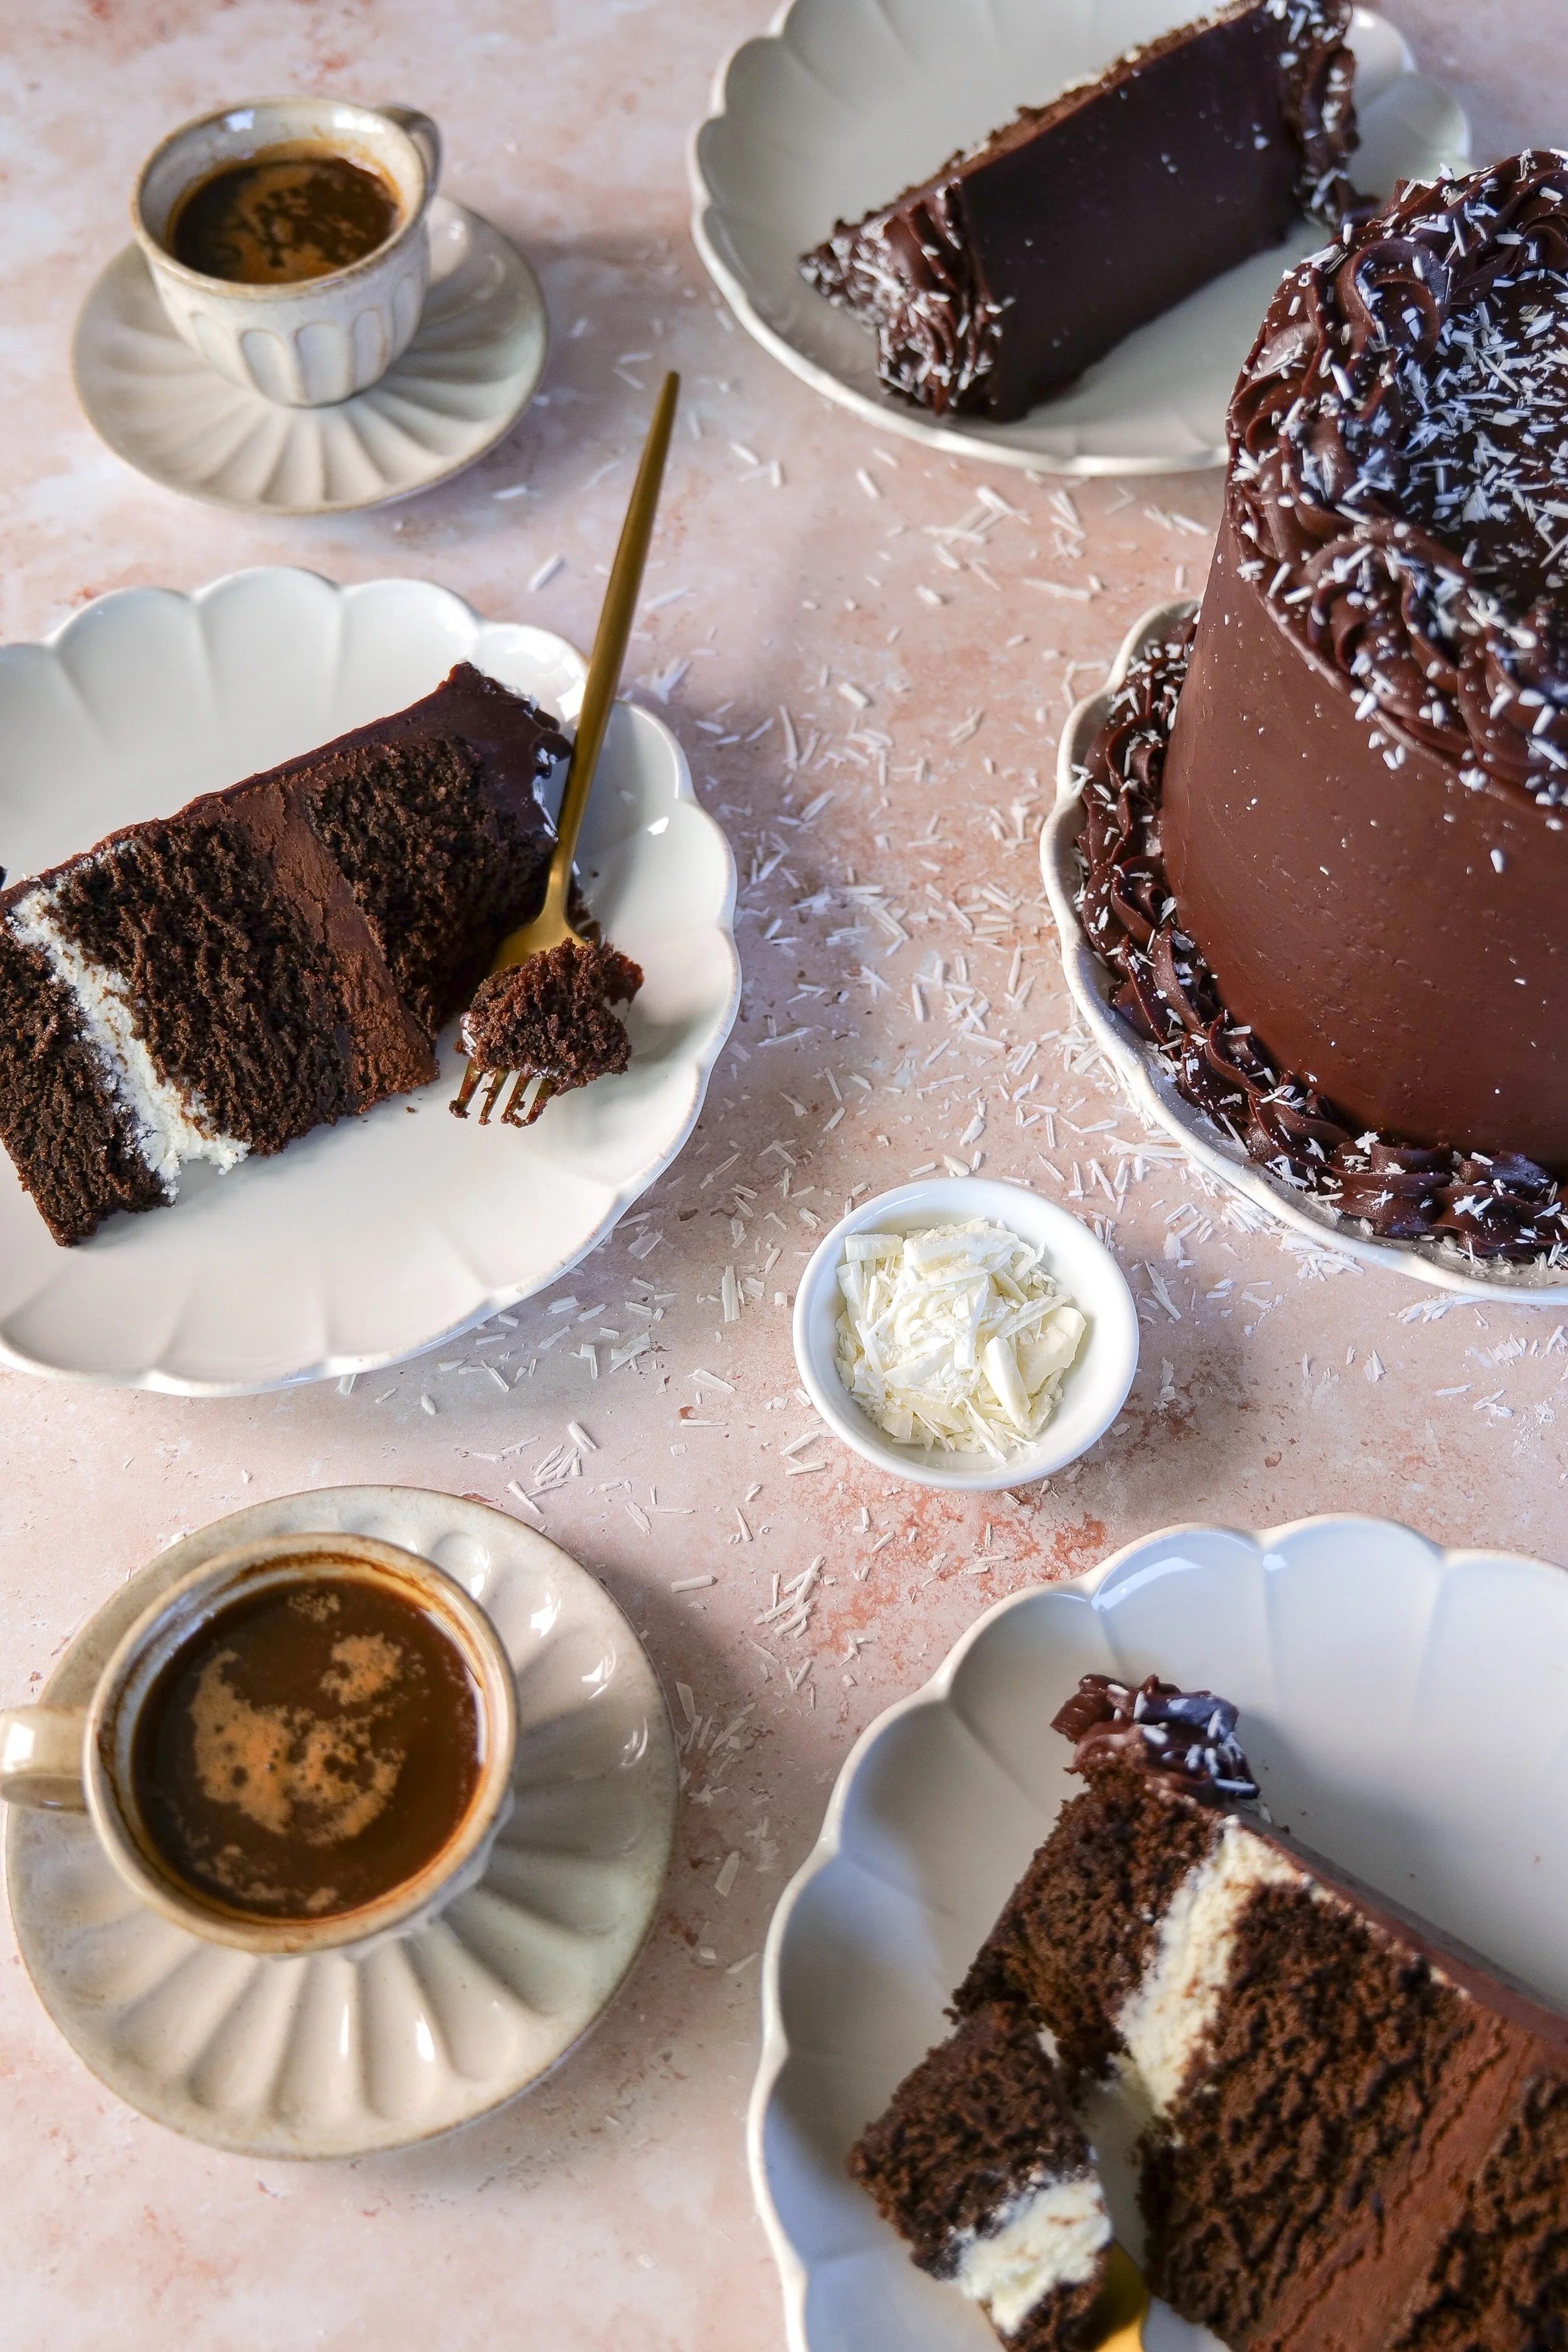
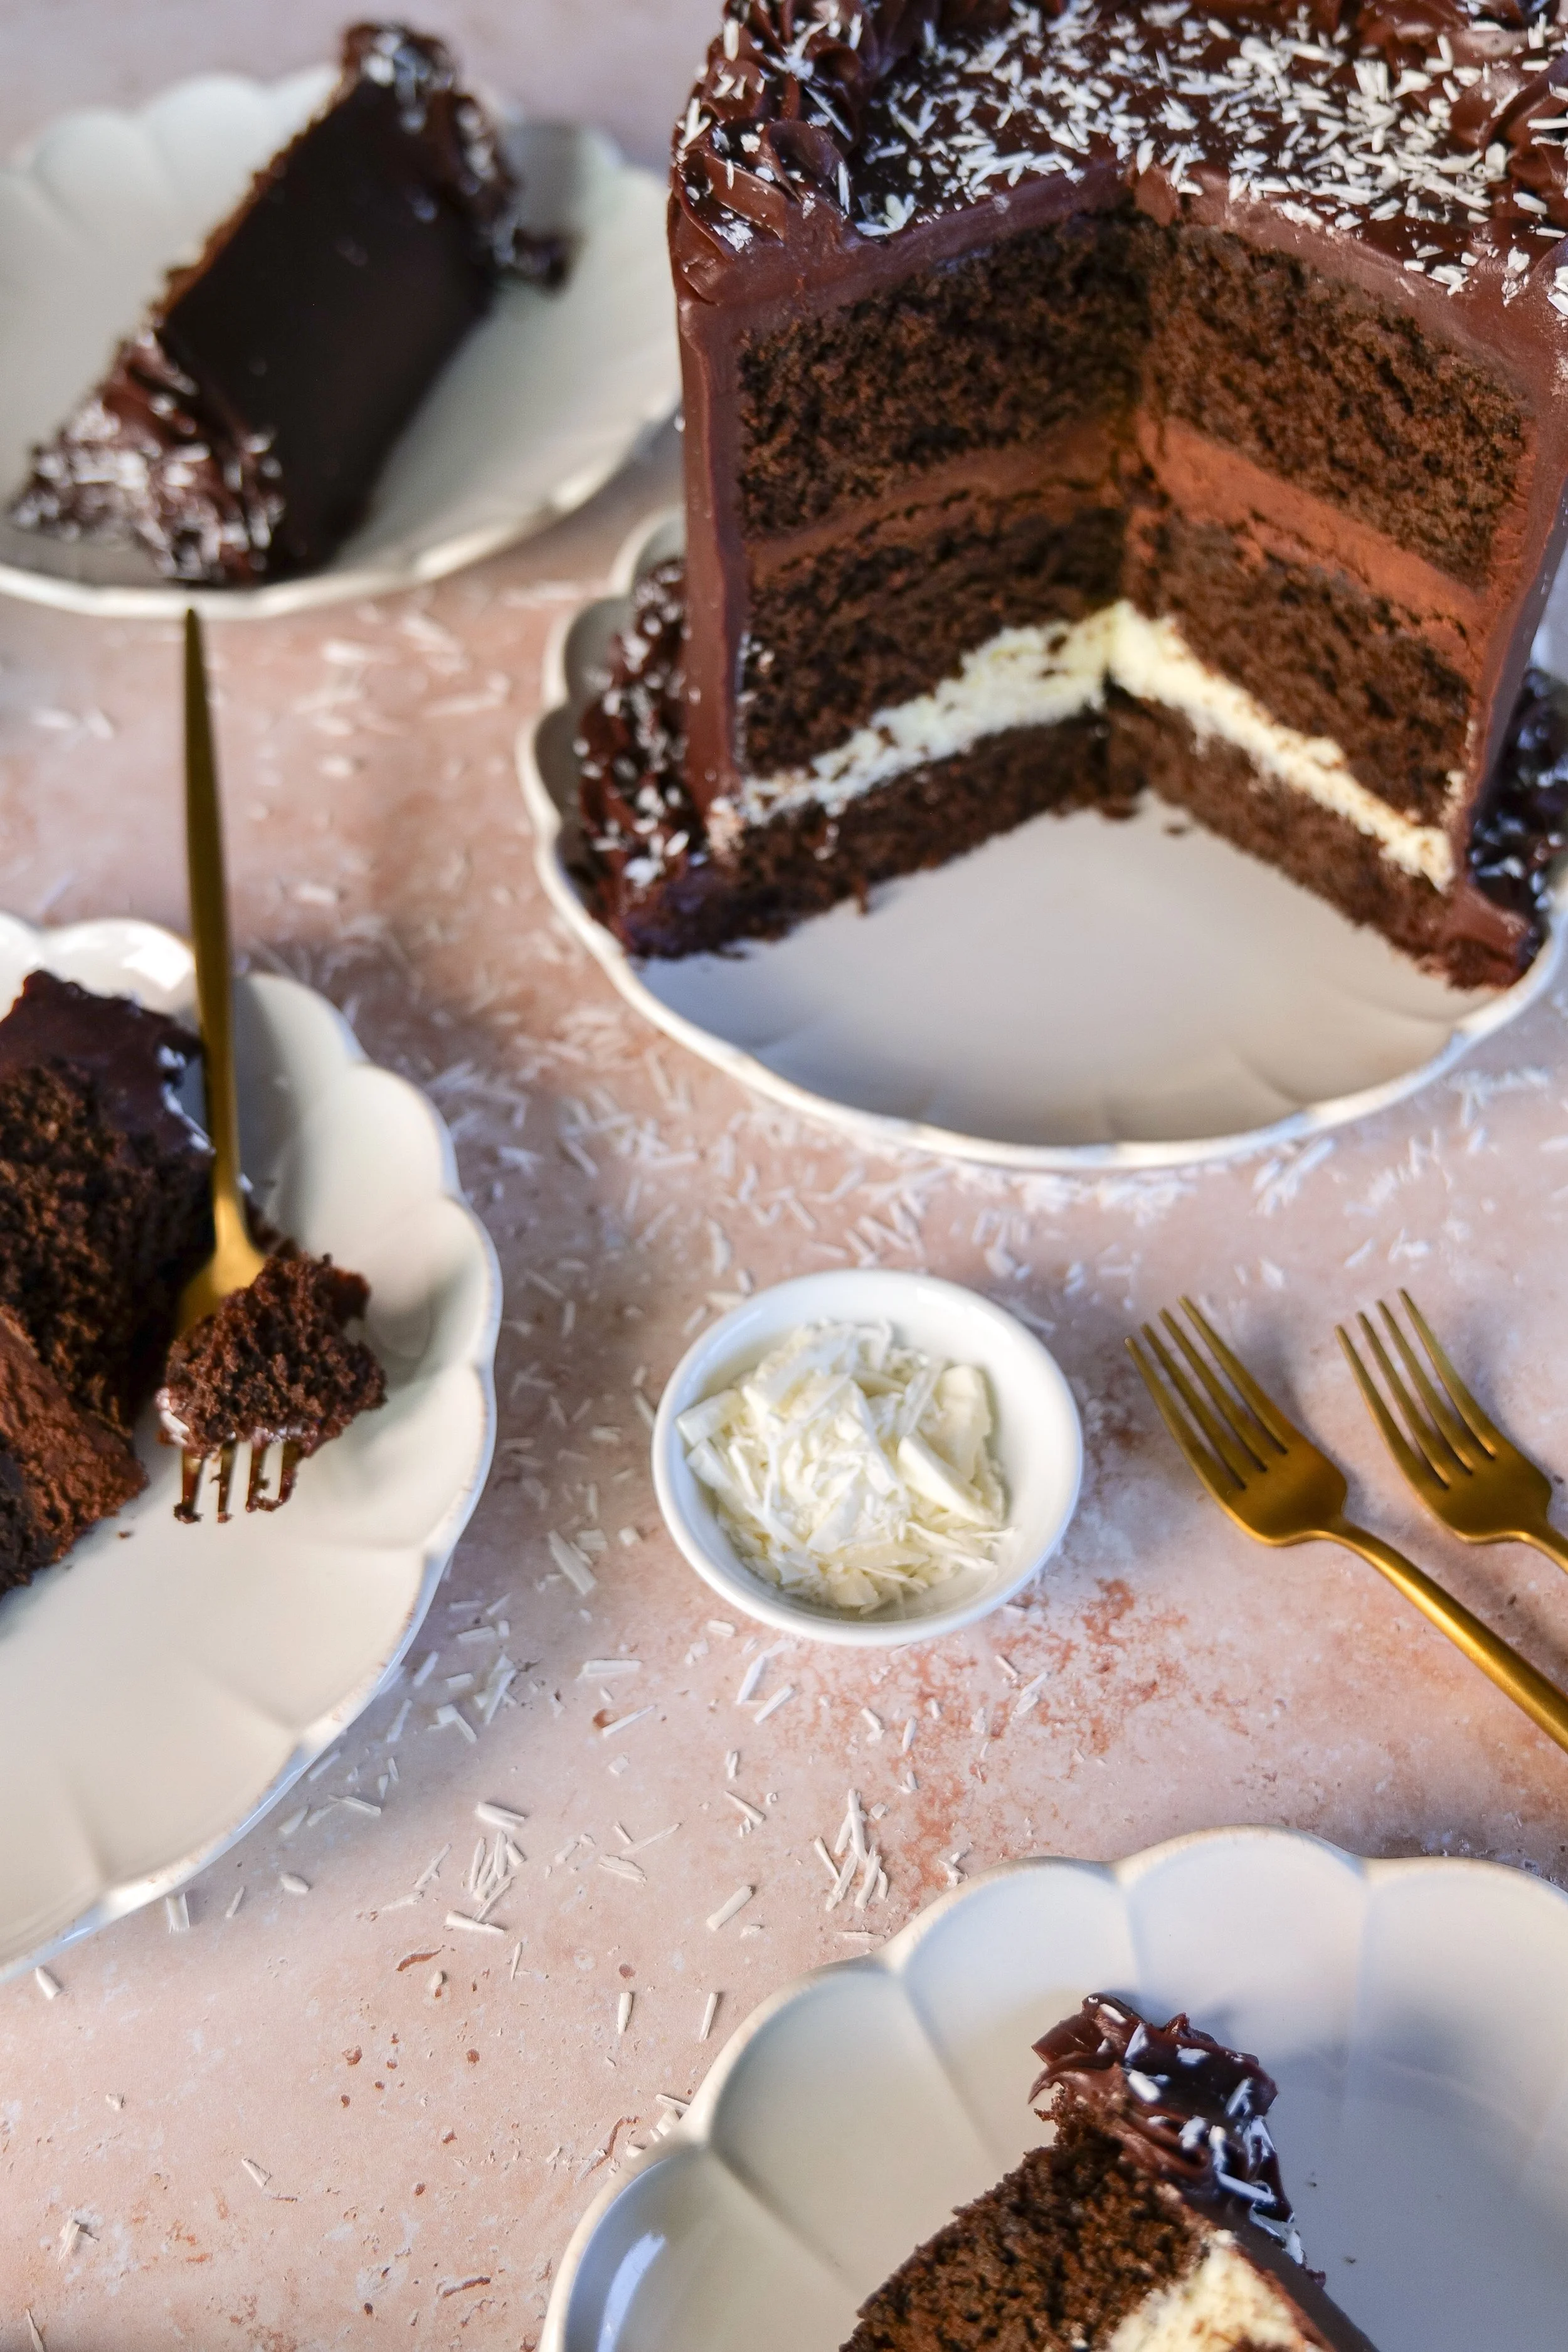
Rich chocolate cake made with brown butter and espresso is layered with both white chocolate mousse and dark chocolate mousse, then finished with a silky milk chocolate ganache. When you cut into it, you get those beautiful contrasting layers that give a tuxedo cake its signature look.
But as beautiful as this cake is, the flavor might be my favorite part.
Brown butter gives the chocolate cake a warm, almost nutty richness, while espresso deepens the chocolate flavor without making the finished cake taste overwhelmingly like coffee. The two mousses add a light, creamy contrast to the rich cake, and that chocolate ganache brings everything together.
It's decadent, dramatic, and exactly the kind of cake I love making when dessert deserves to be part of the celebration.
What Is a Tuxedo Cake?
A tuxedo cake gets its name from its contrasting dark and light layers, reminiscent of the classic black-and-white look of a tuxedo.
There are many versions of tuxedo cake, but chocolate is usually the star.
My version starts with rich chocolate cake and takes that classic contrast even further with white chocolate mousse and dark chocolate mousse between the layers.
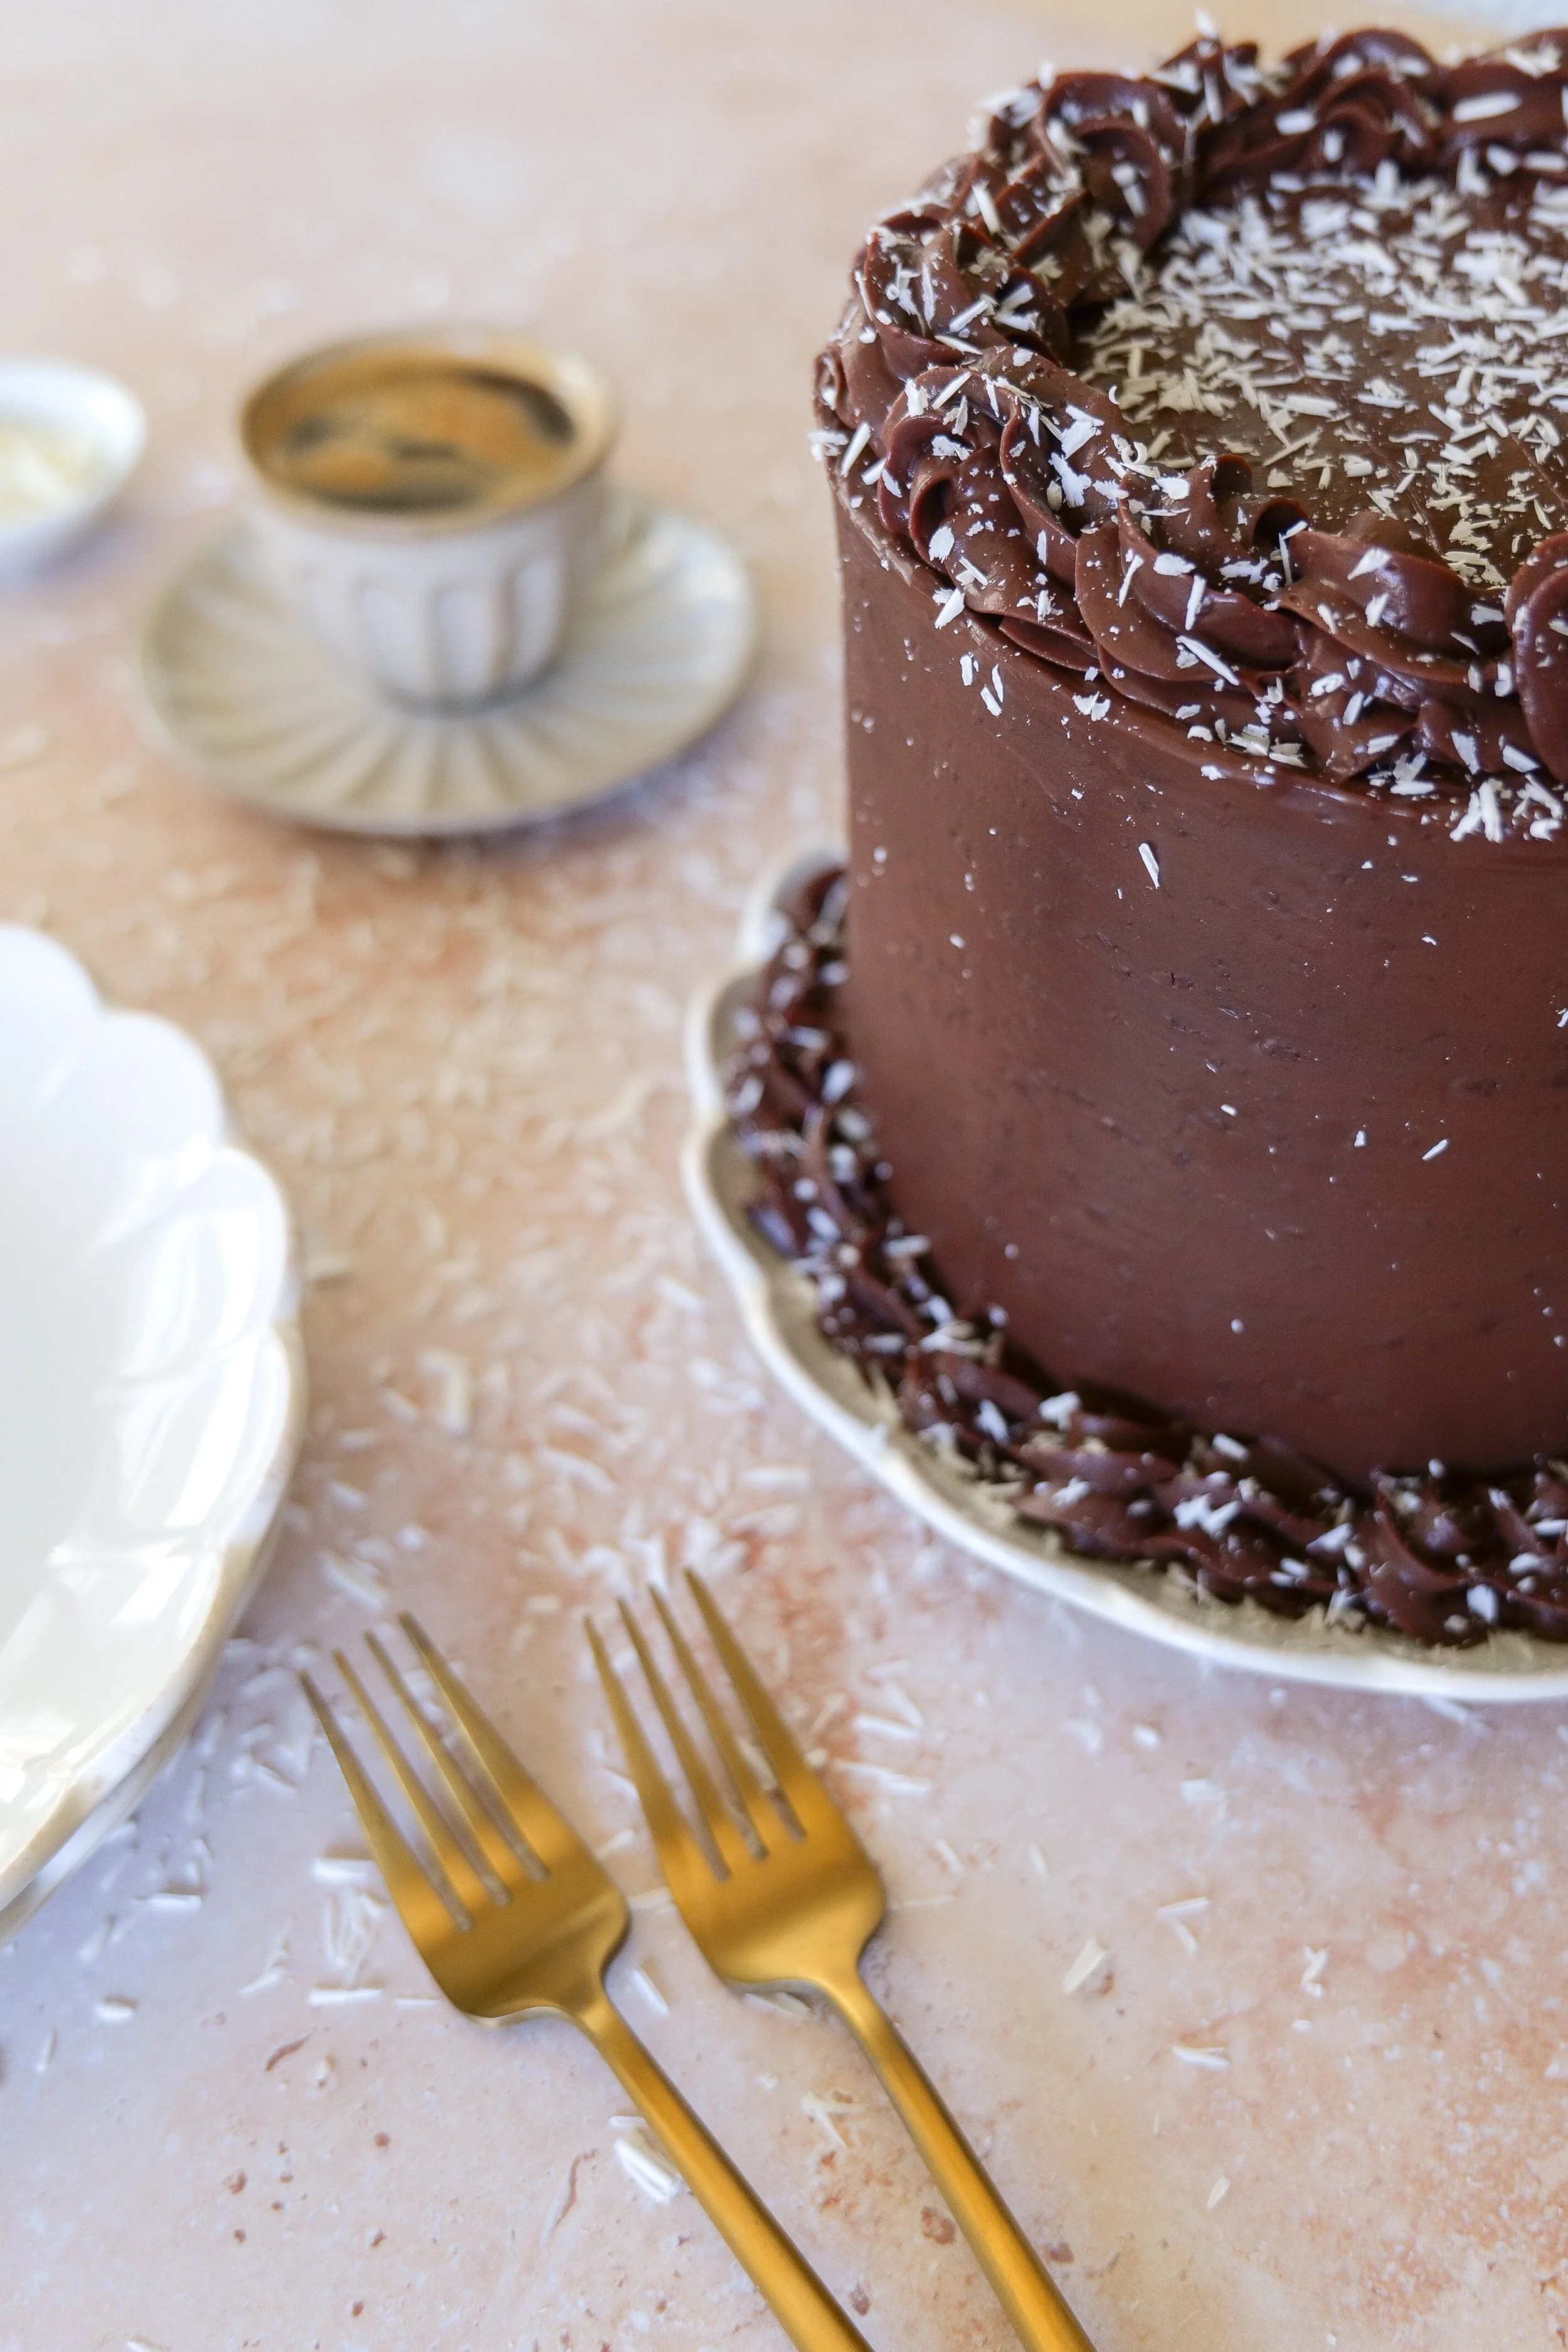
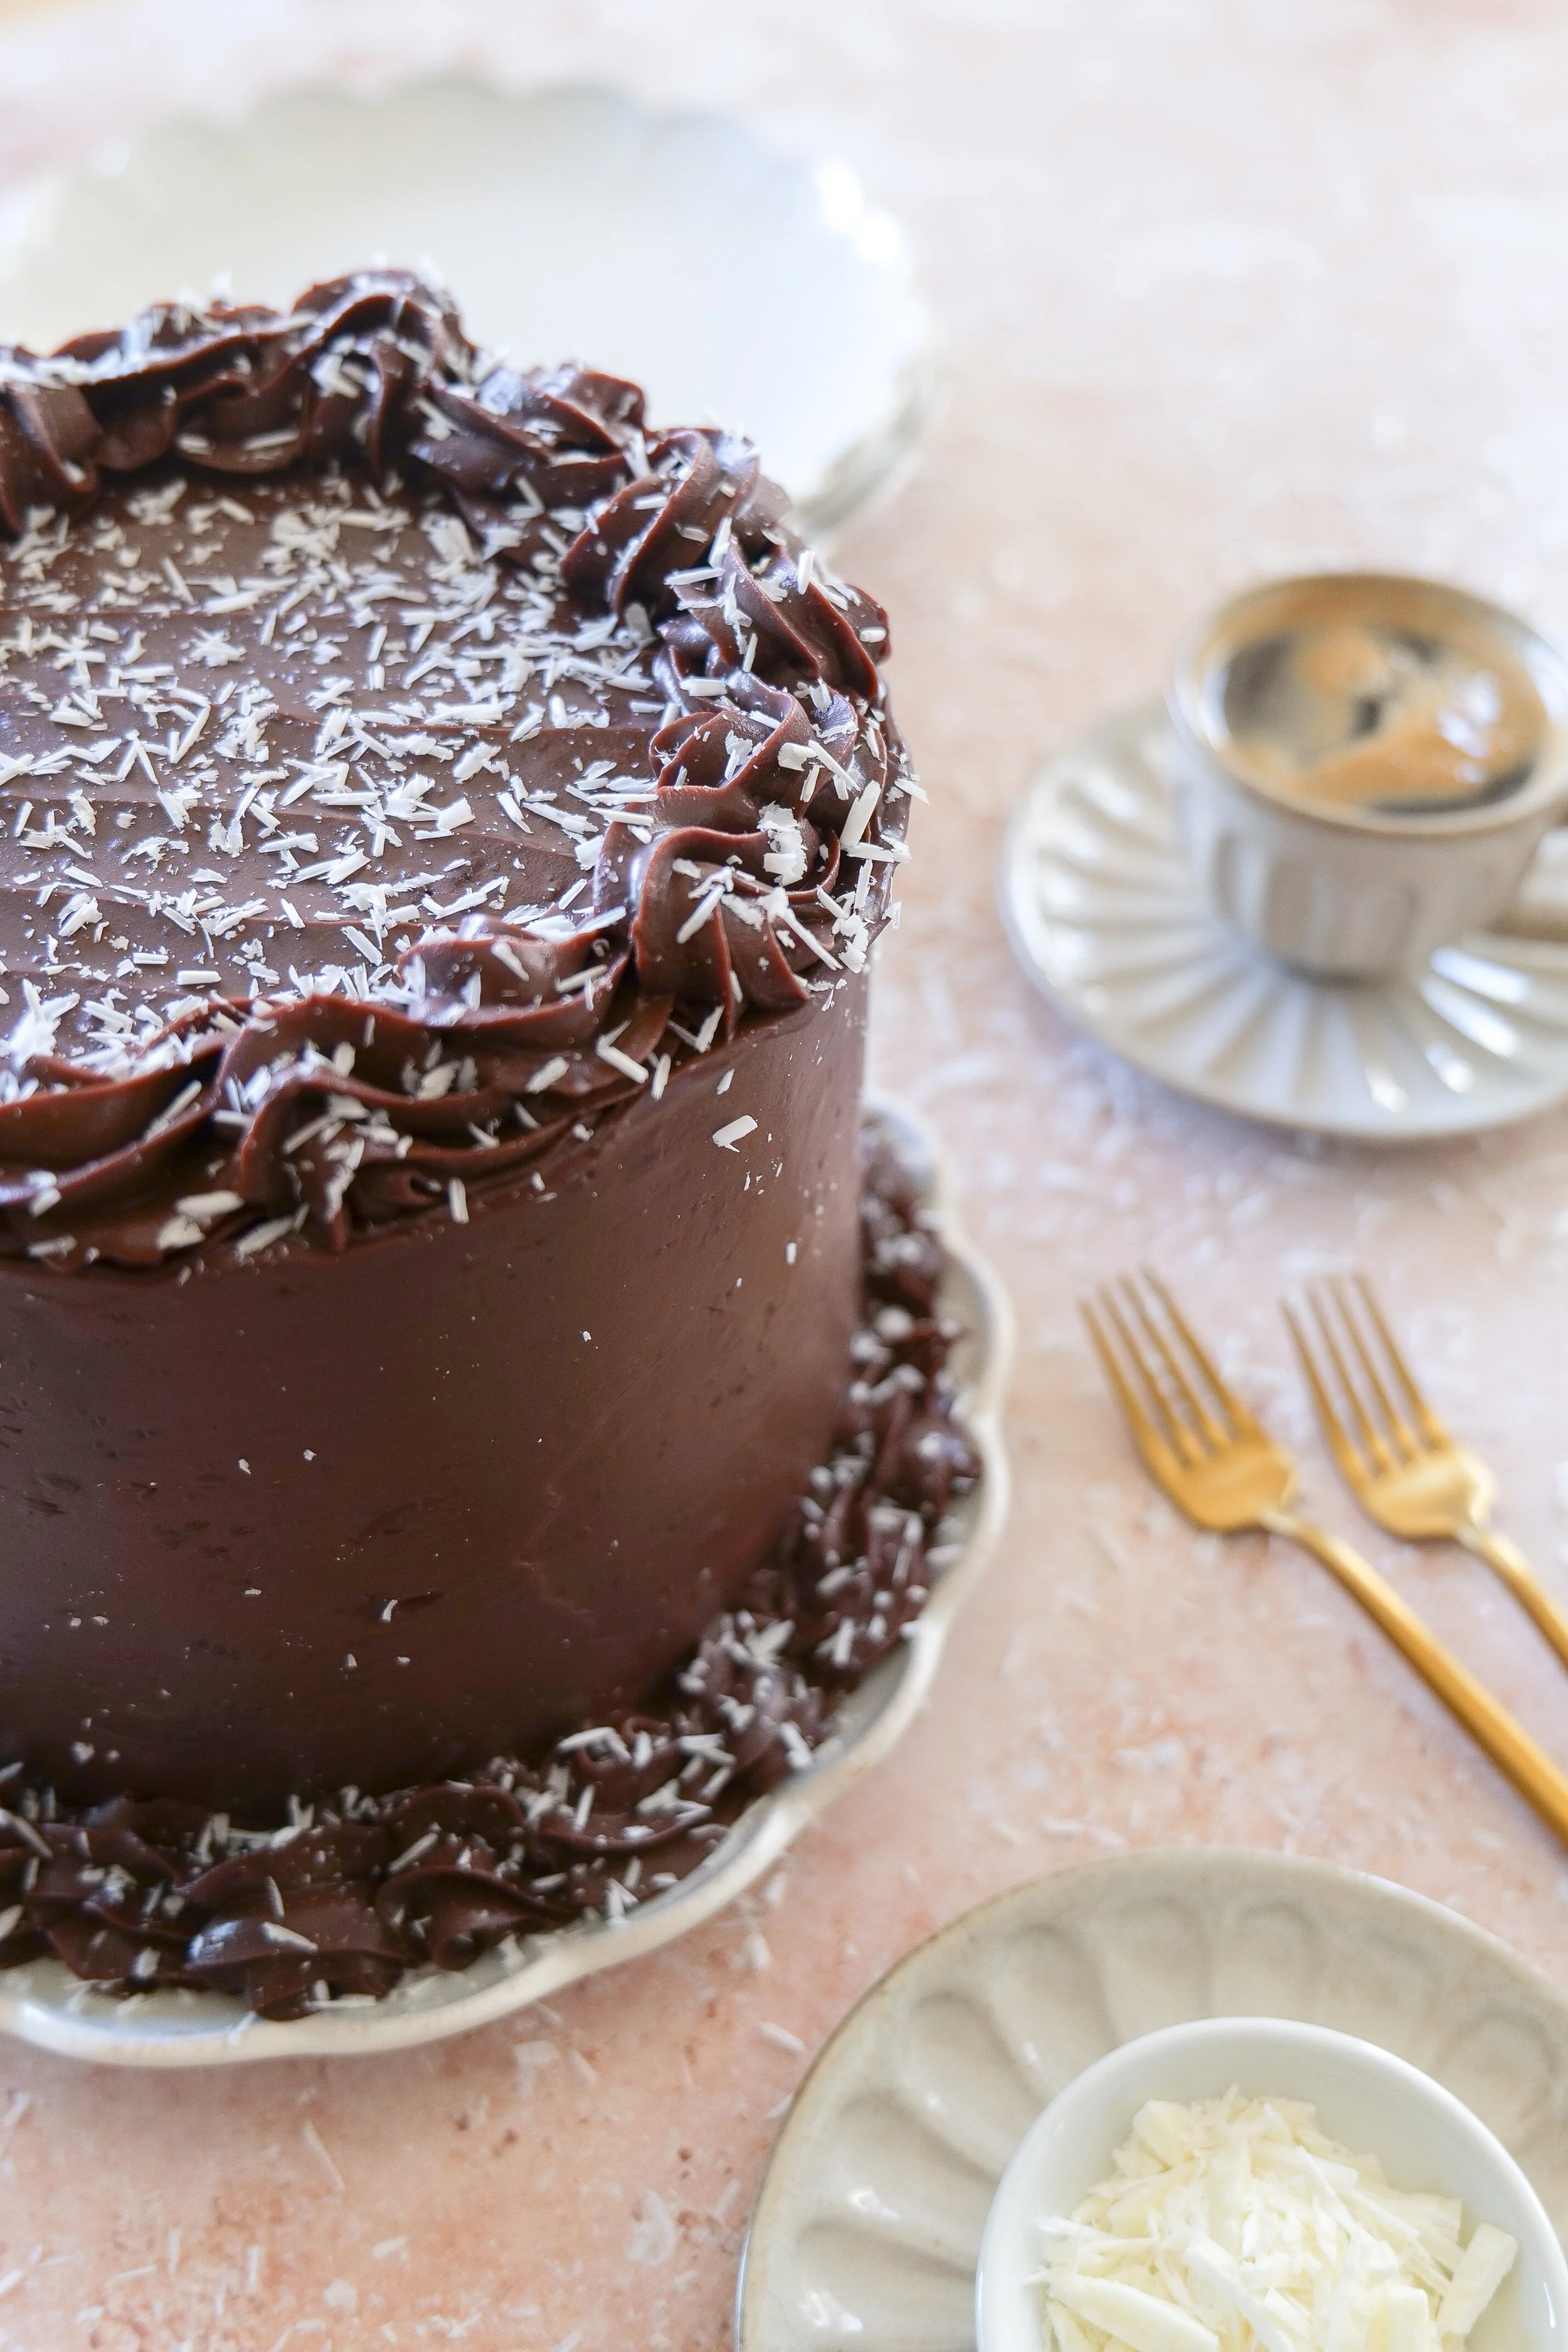
The entire cake is then finished with a smooth milk chocolate ganache.
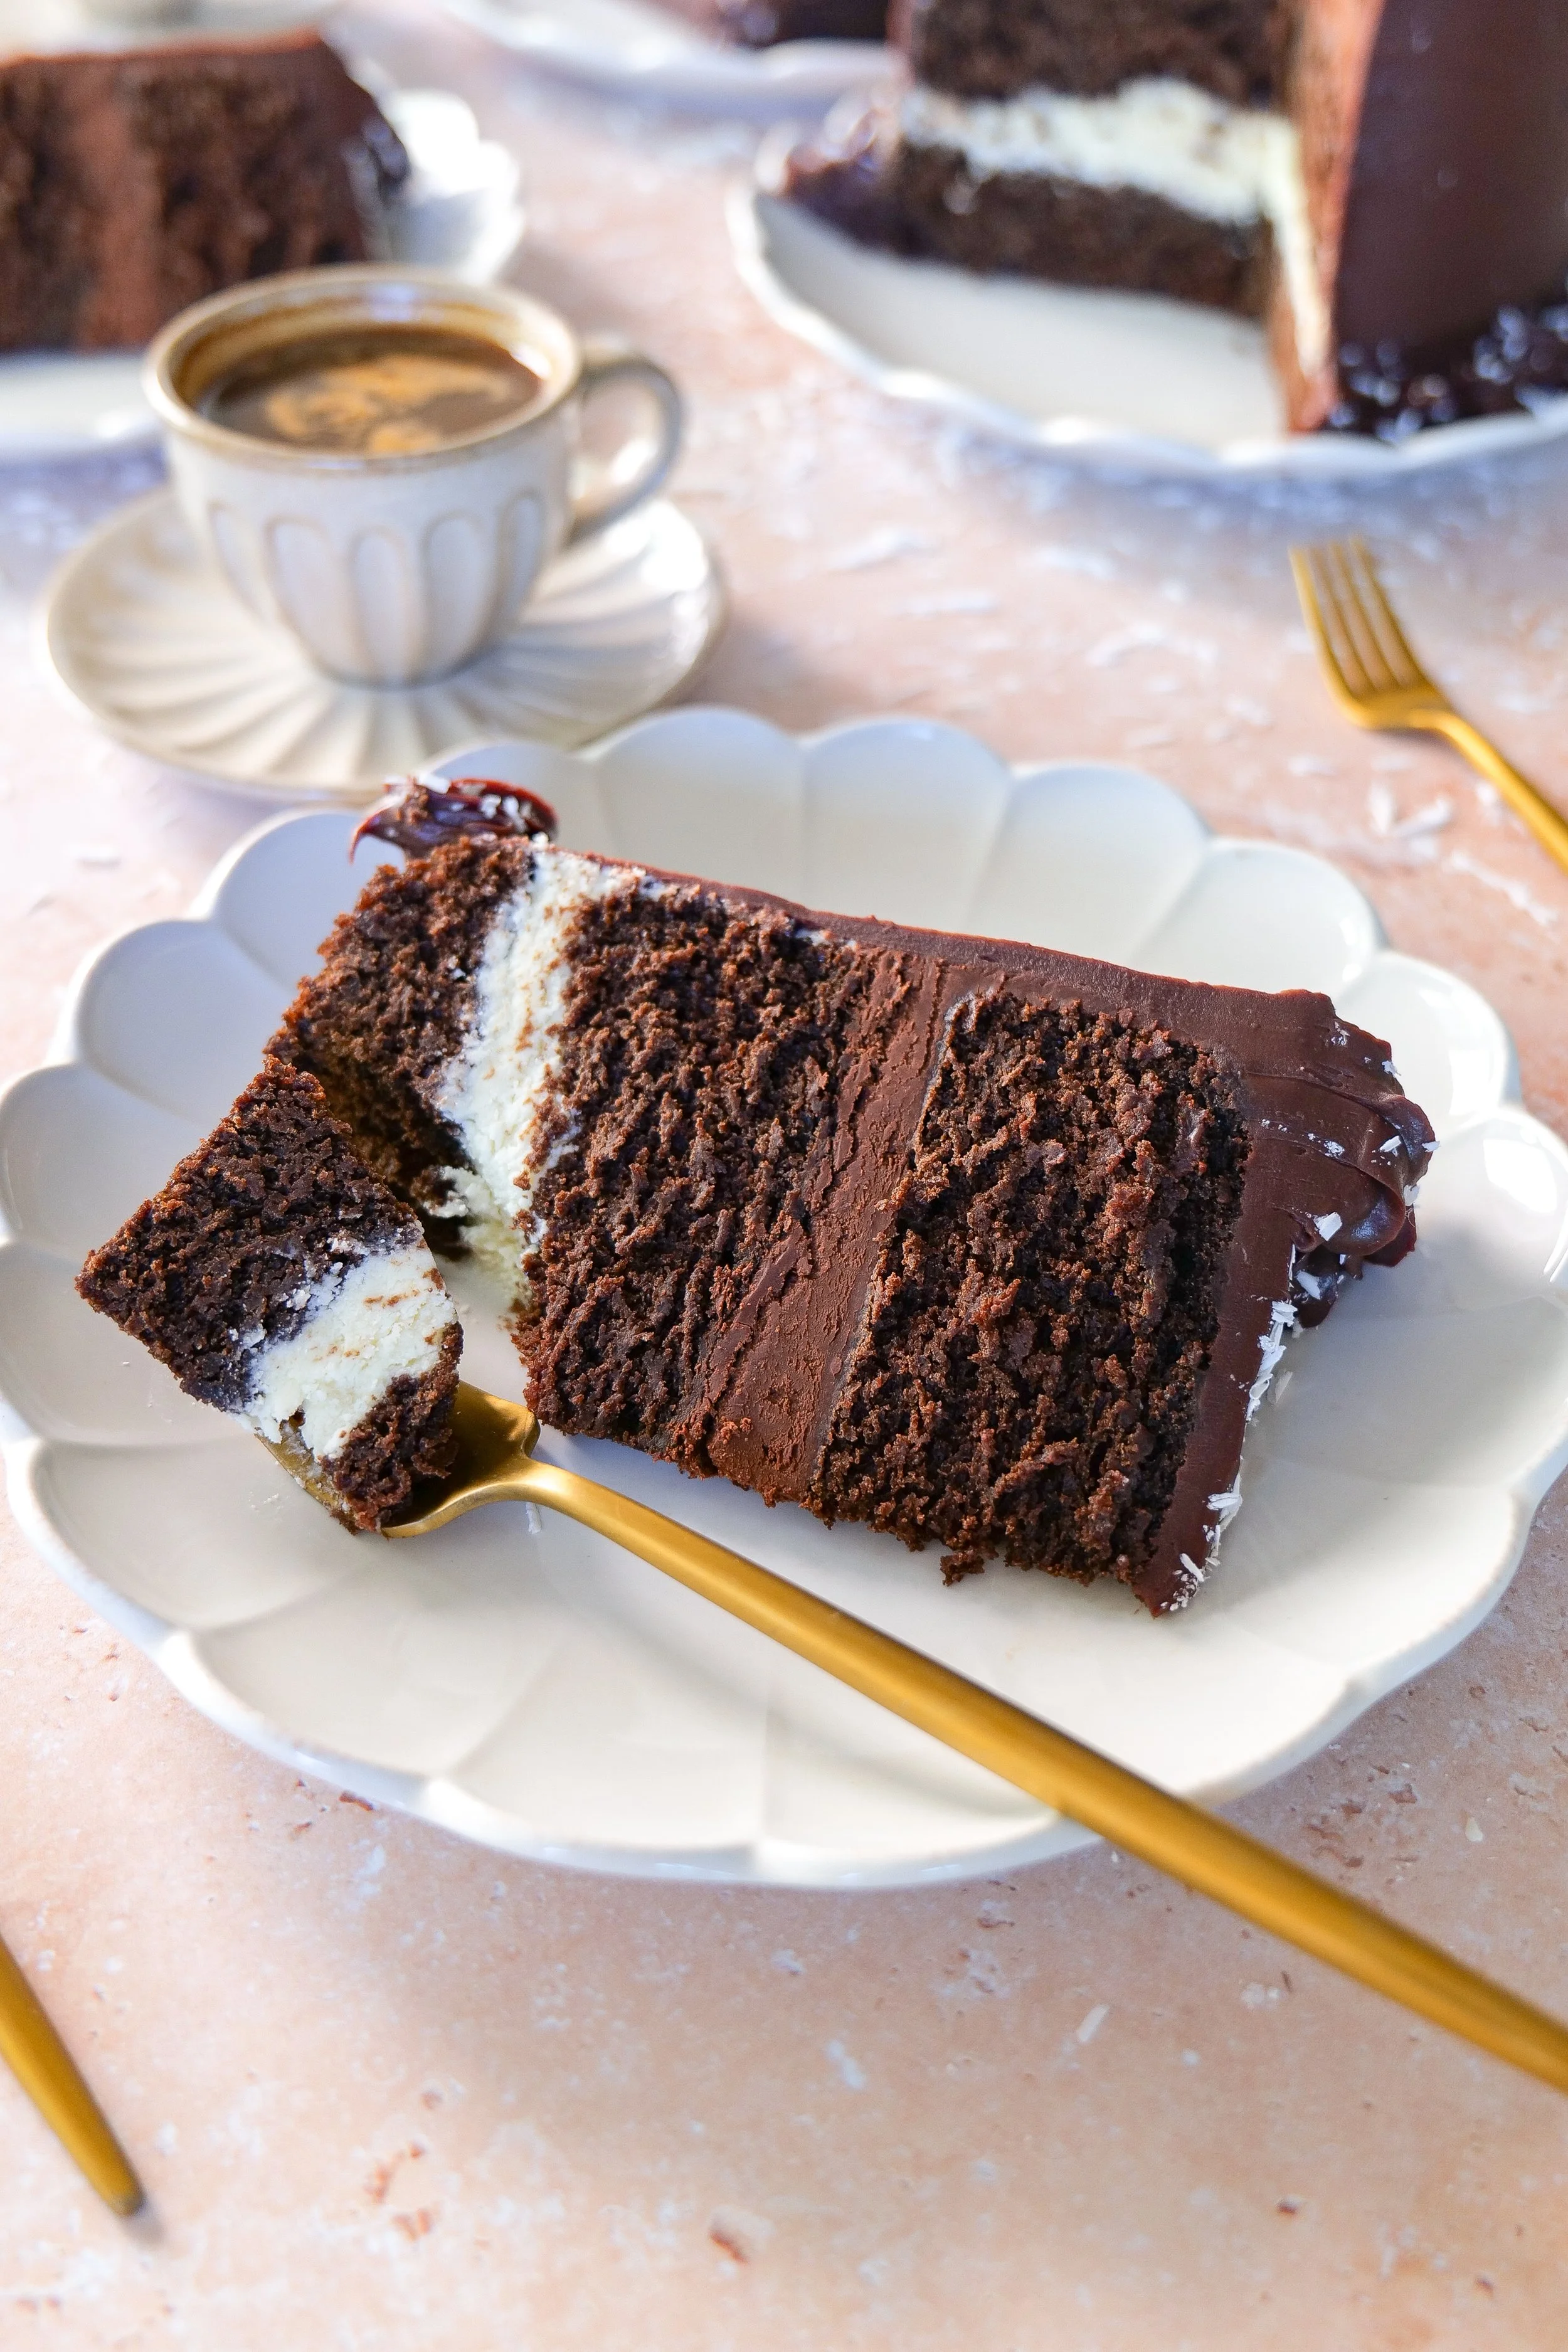
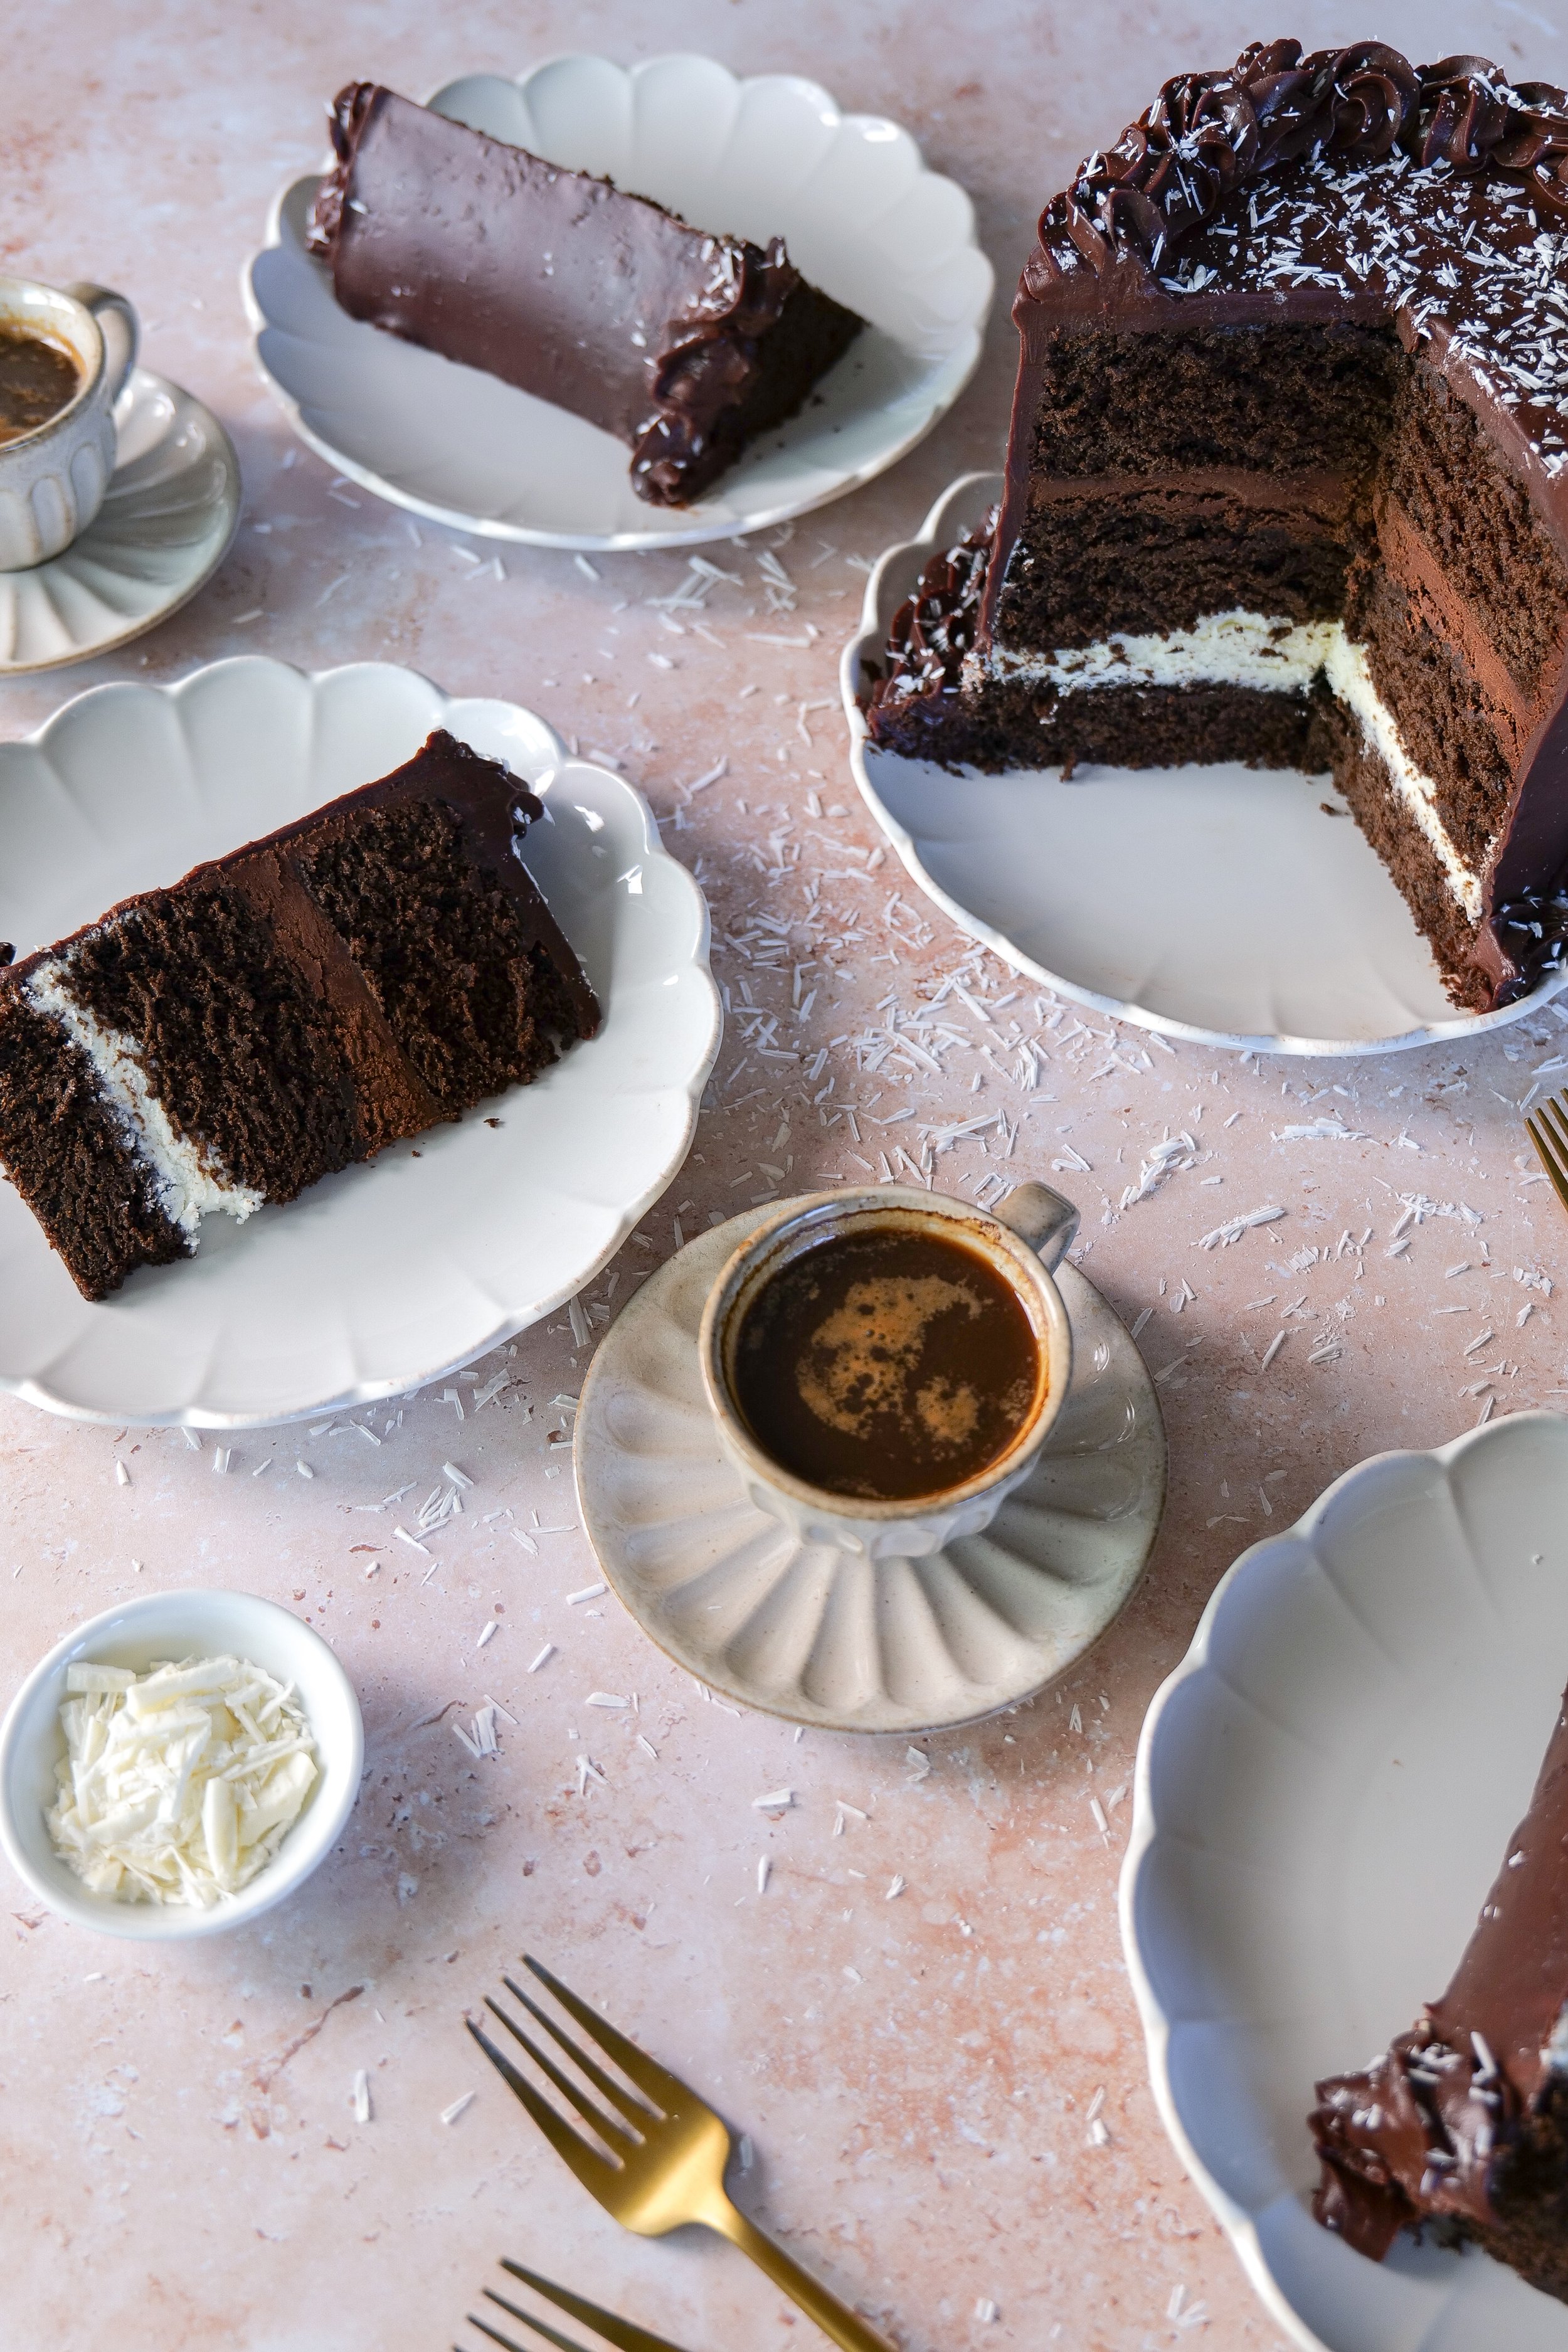
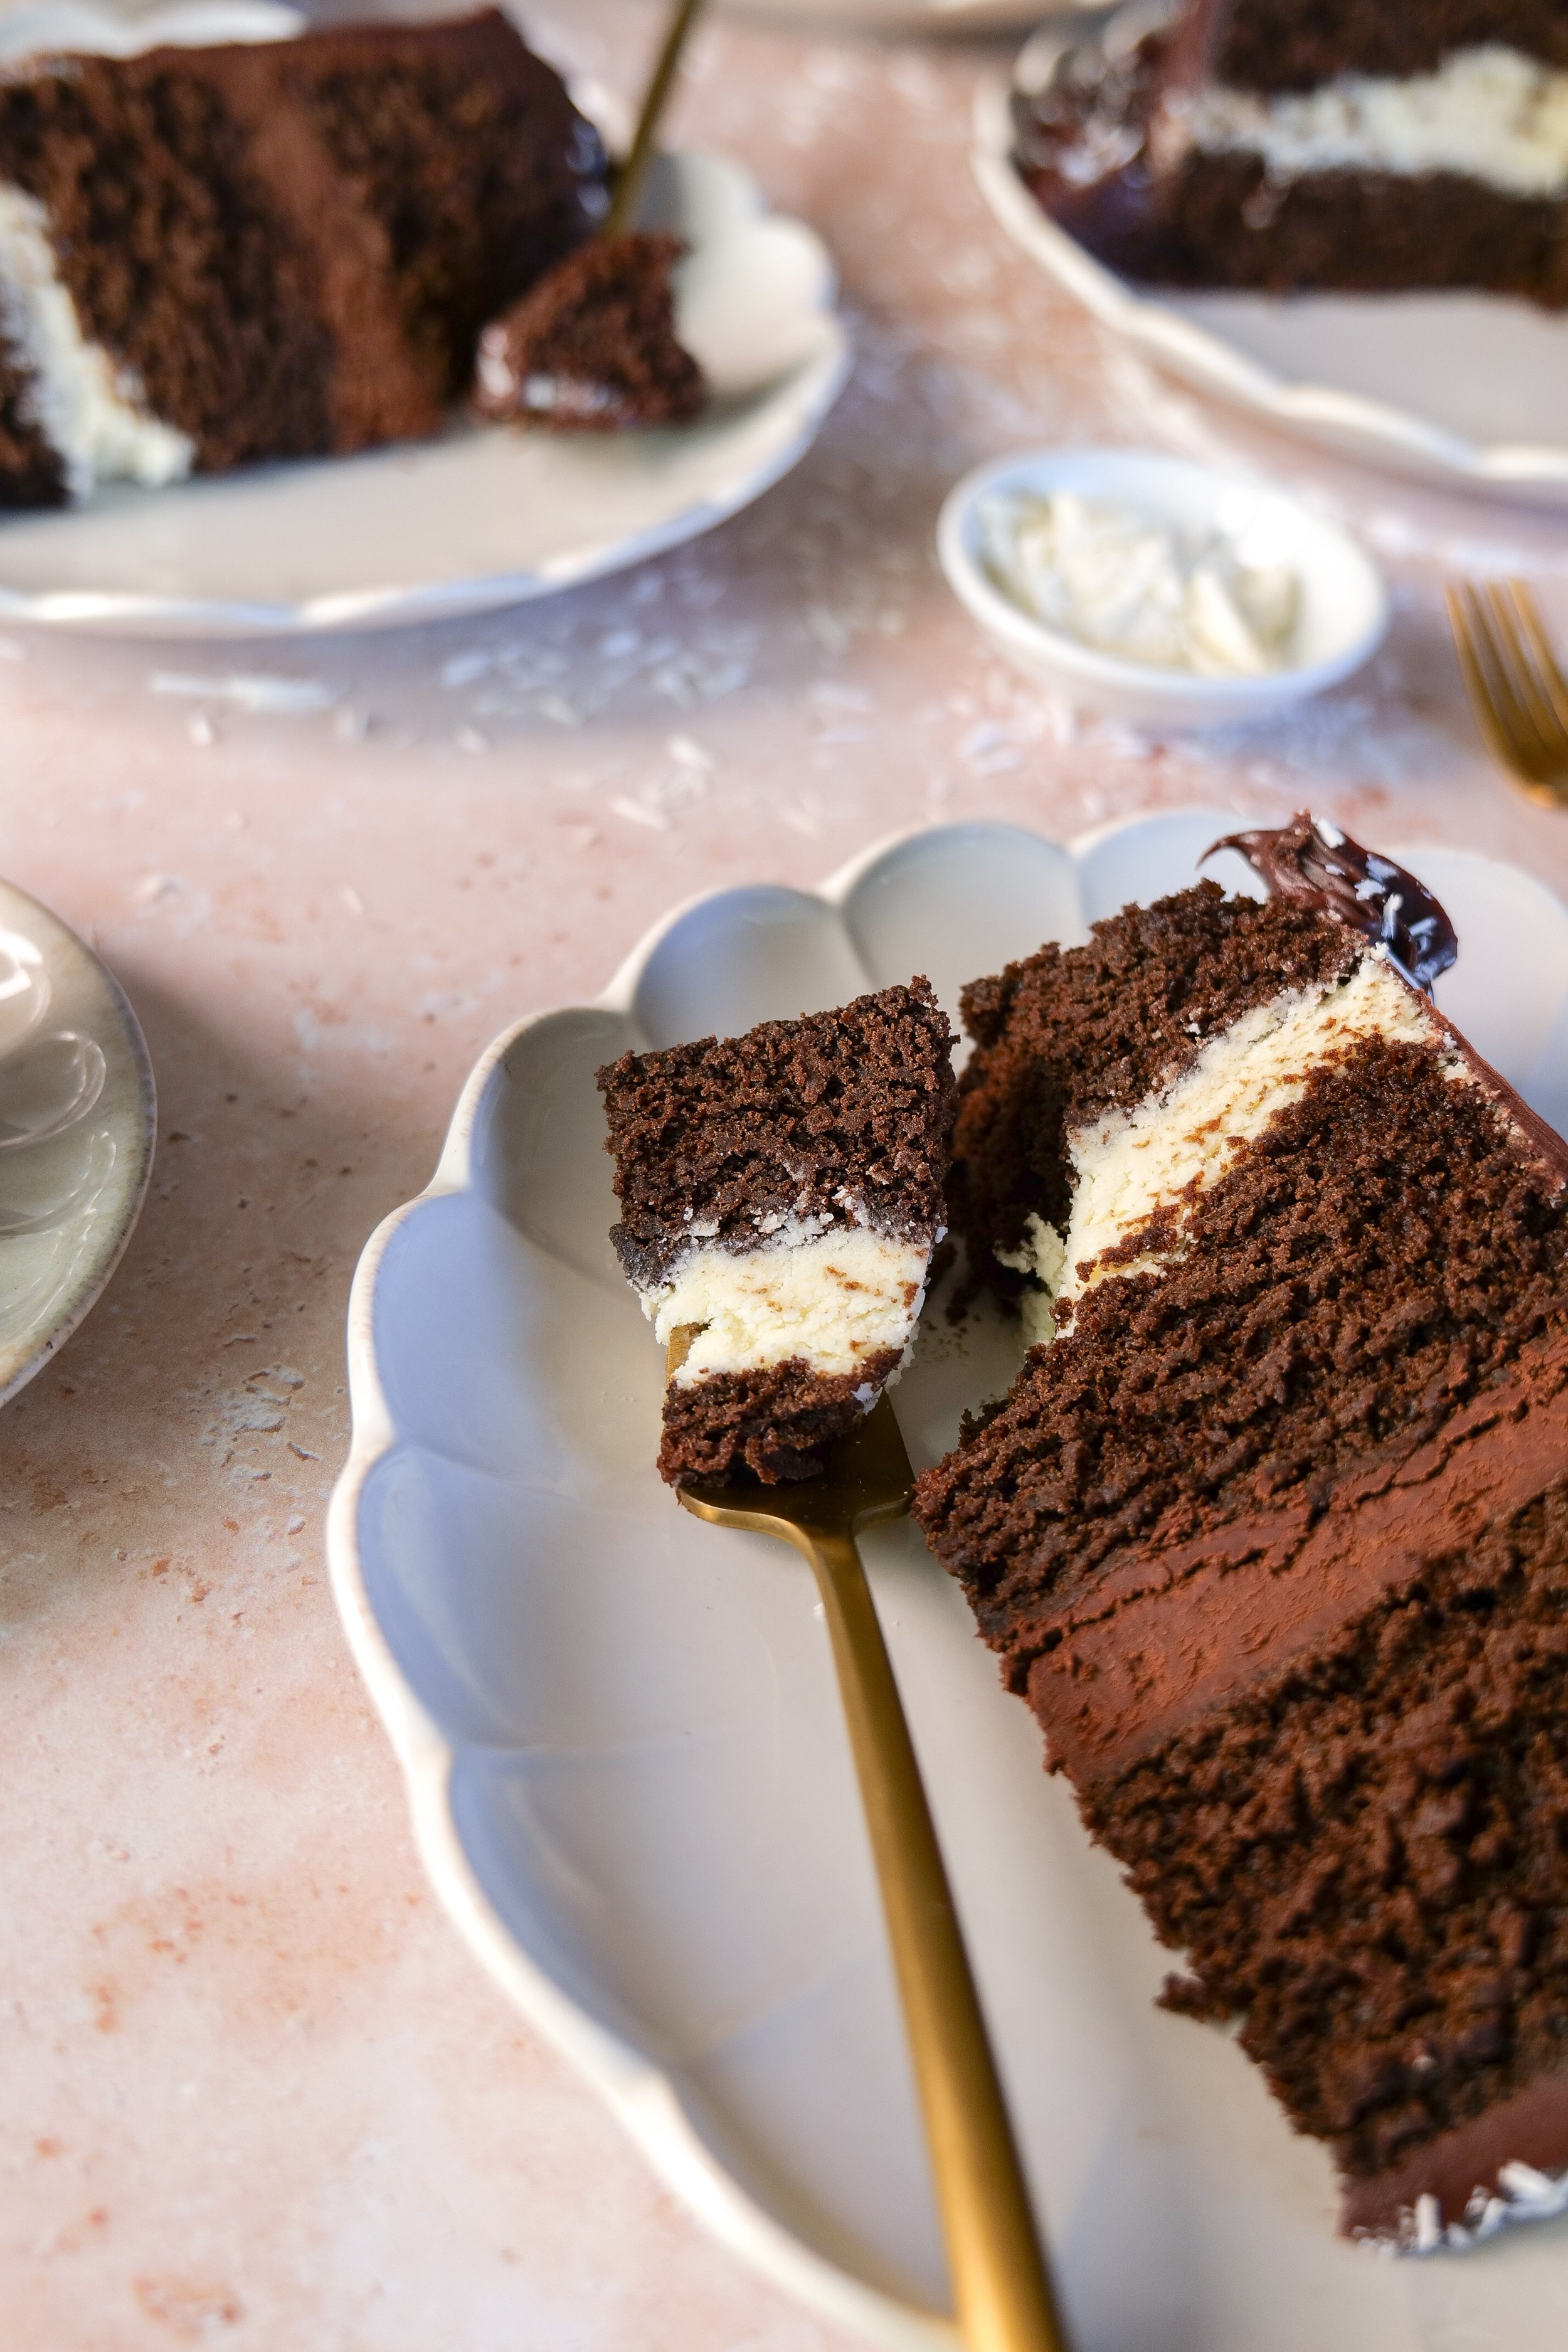
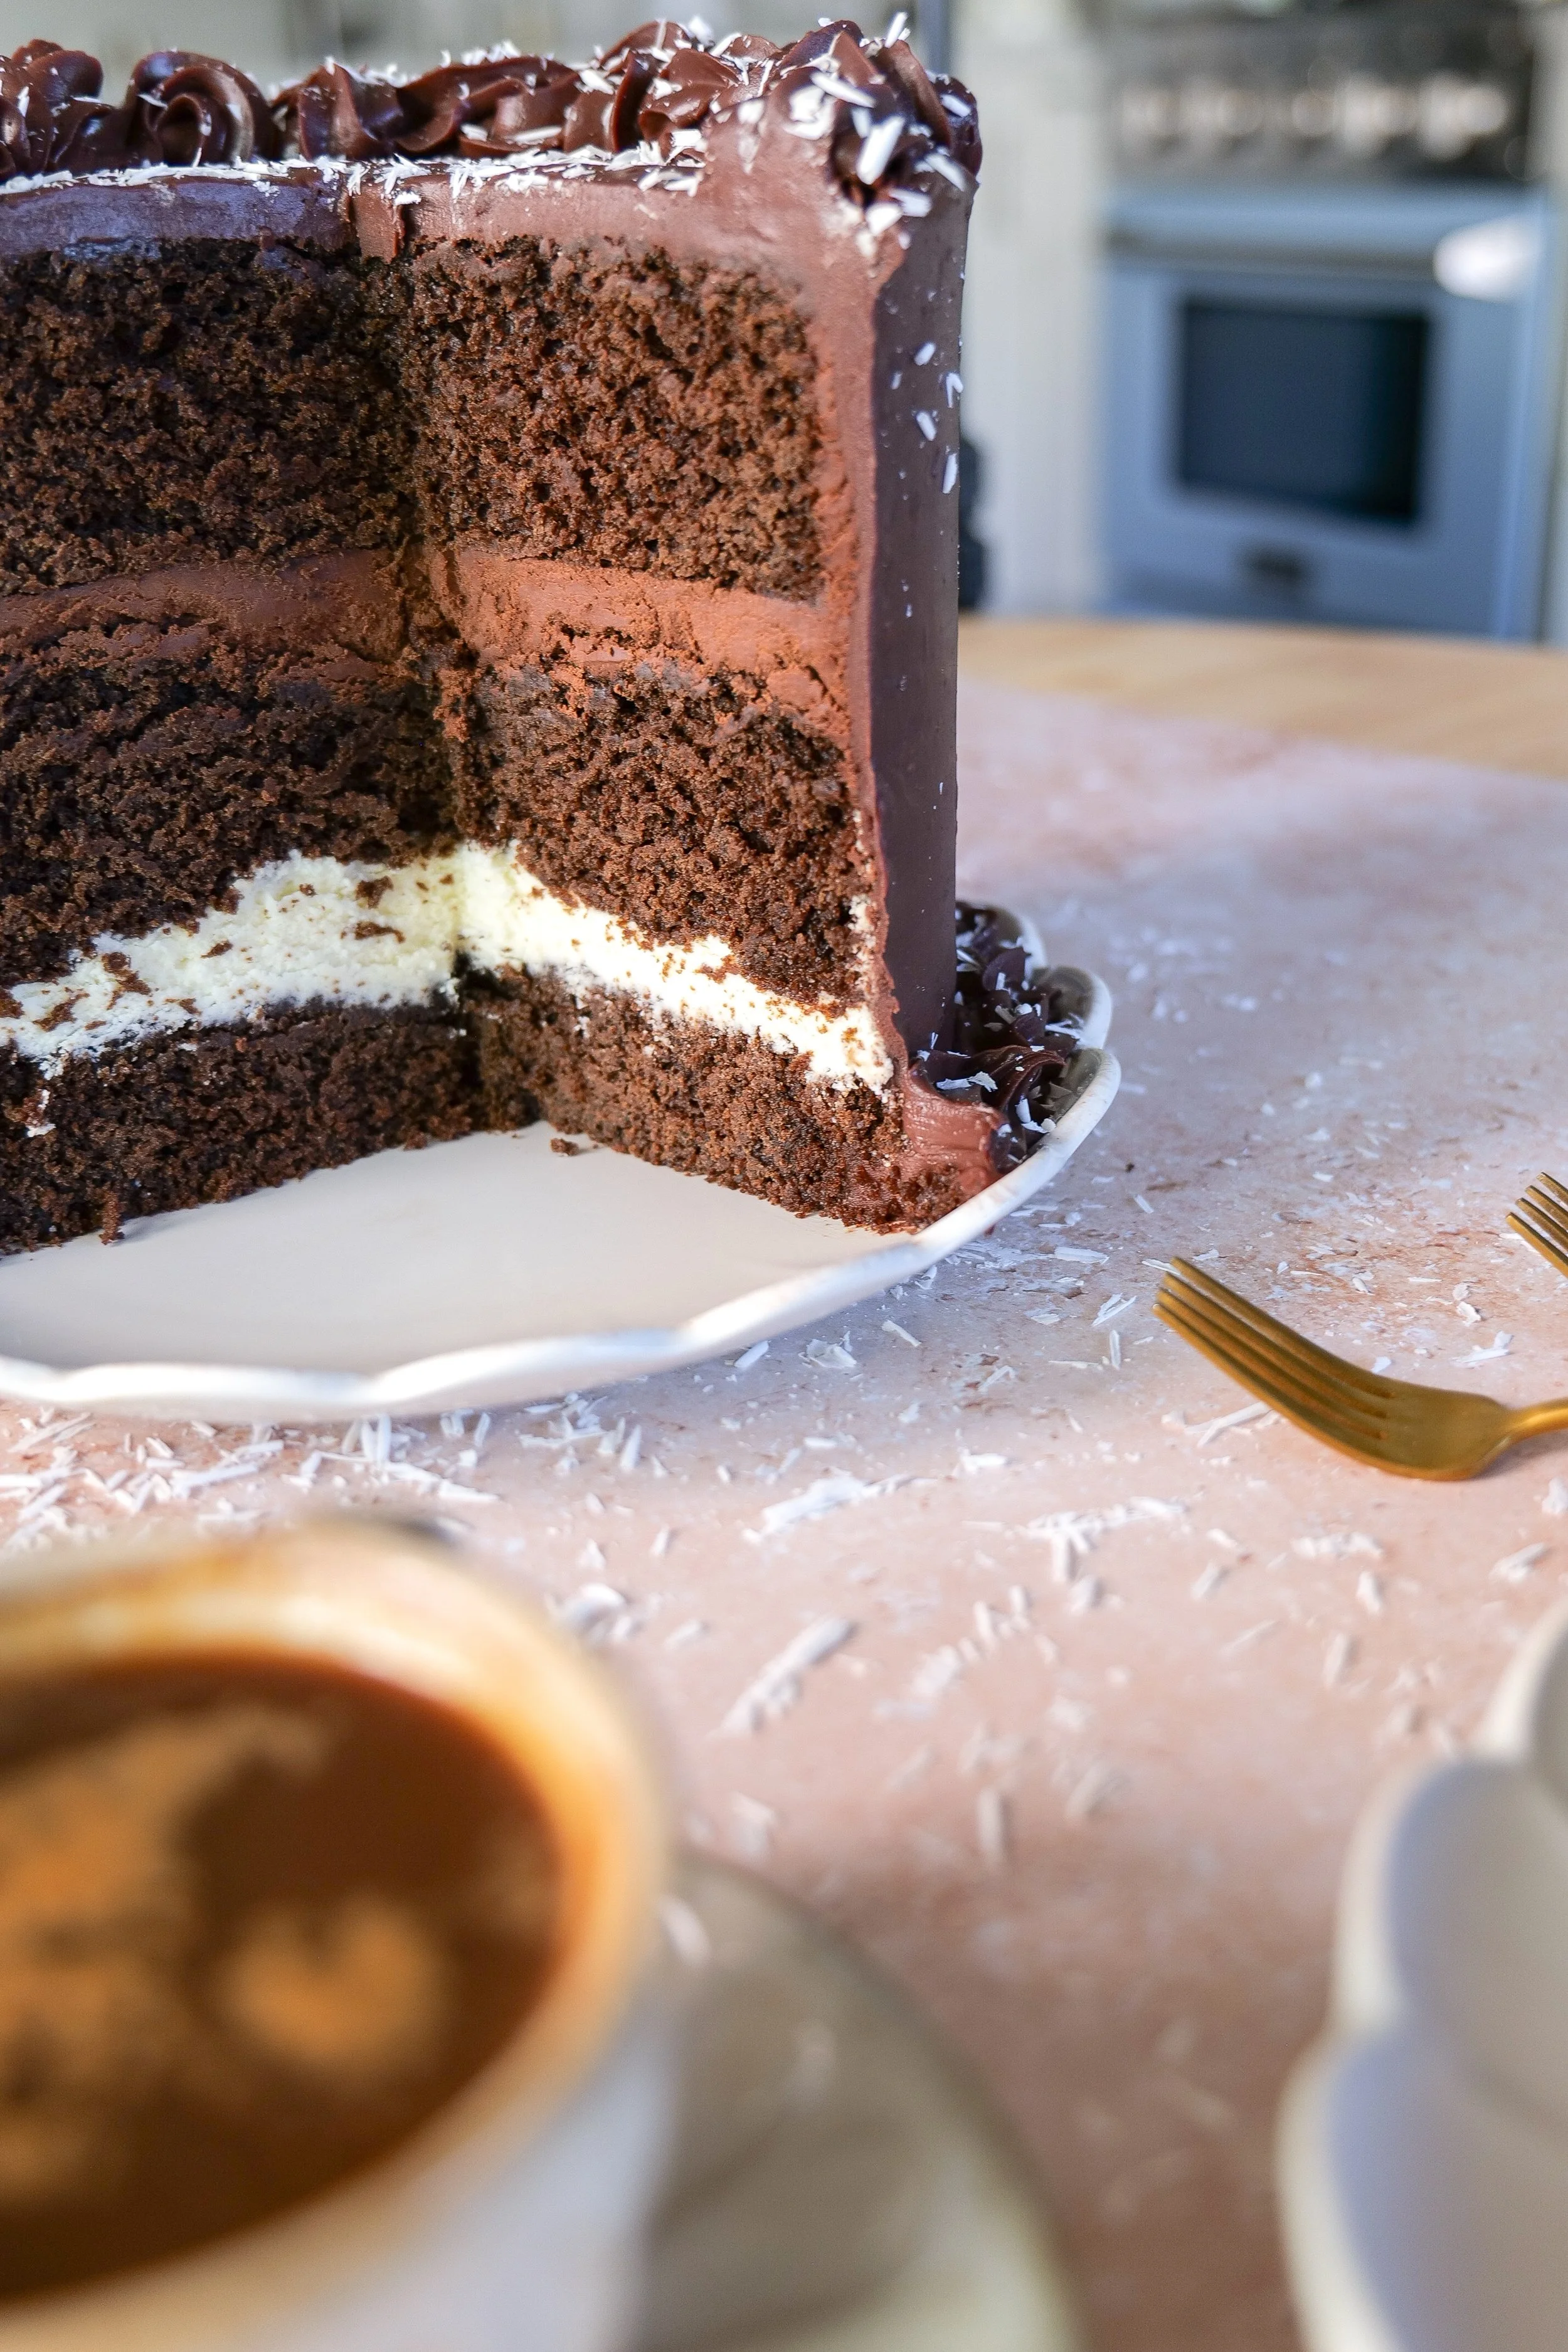
When sliced, you get layers of dark chocolate cake and contrasting mousse, making this one of those desserts that's just as beautiful on the inside as it is on the outside.
Why You'll Love This Tuxedo Cake
There is a lot going on in this cake—in the very best way.
You'll love it because it has:
Rich chocolate cake
Nutty brown butter
Espresso to deepen the chocolate flavor
Creamy white chocolate mousse
Decadent dark chocolate mousse
Silky milk chocolate ganache
Beautiful contrasting layers
An impressive presentation for celebrations
Despite having several components, you can prepare much of this cake ahead, which makes it much easier to manage for a special occasion.
The Chocolate Cake
The chocolate cake is the foundation of this recipe, so I wanted it to have plenty of flavor on its own.
Instead of using regular melted butter, I start by browning the butter.
As butter browns, it develops a warm, nutty aroma and deeper flavor that works beautifully with chocolate.
Semi-sweet chocolate melts directly into the warm brown butter, followed by fresh espresso.
That mixture gets incorporated into the cake batter to create layers that are rich enough to stand up to both mousses and the ganache.
Why Add Espresso to Chocolate Cake?
Espresso is one of my favorite additions to chocolate cake.
It intensifies the chocolate flavor and gives the cake more depth without necessarily making it taste like a coffee cake.
For this recipe, I use three shots of espresso, so it plays a meaningful role in the finished cake.
If you love rich chocolate desserts, it's one of those little additions that makes a noticeable difference.
White Chocolate & Dark Chocolate Mousse
The contrasting mousses are what really give this cake its tuxedo personality.
Both are made with a simple combination of chocolate, heavy cream, powdered sugar, and vanilla.
For the white layer, you'll use white chocolate.
For the darker layer, you'll use dark chocolate.
The trick to a light mousse is allowing the melted chocolate to cool slightly before gently folding it into the whipped cream.
You don't want to aggressively mix the two together because you'll lose the air you've whipped into the cream.
Once prepared, refrigerate both mousses for at least two hours so they have time to set before assembling the cake.
Milk Chocolate Ganache
And then there's the ganache.
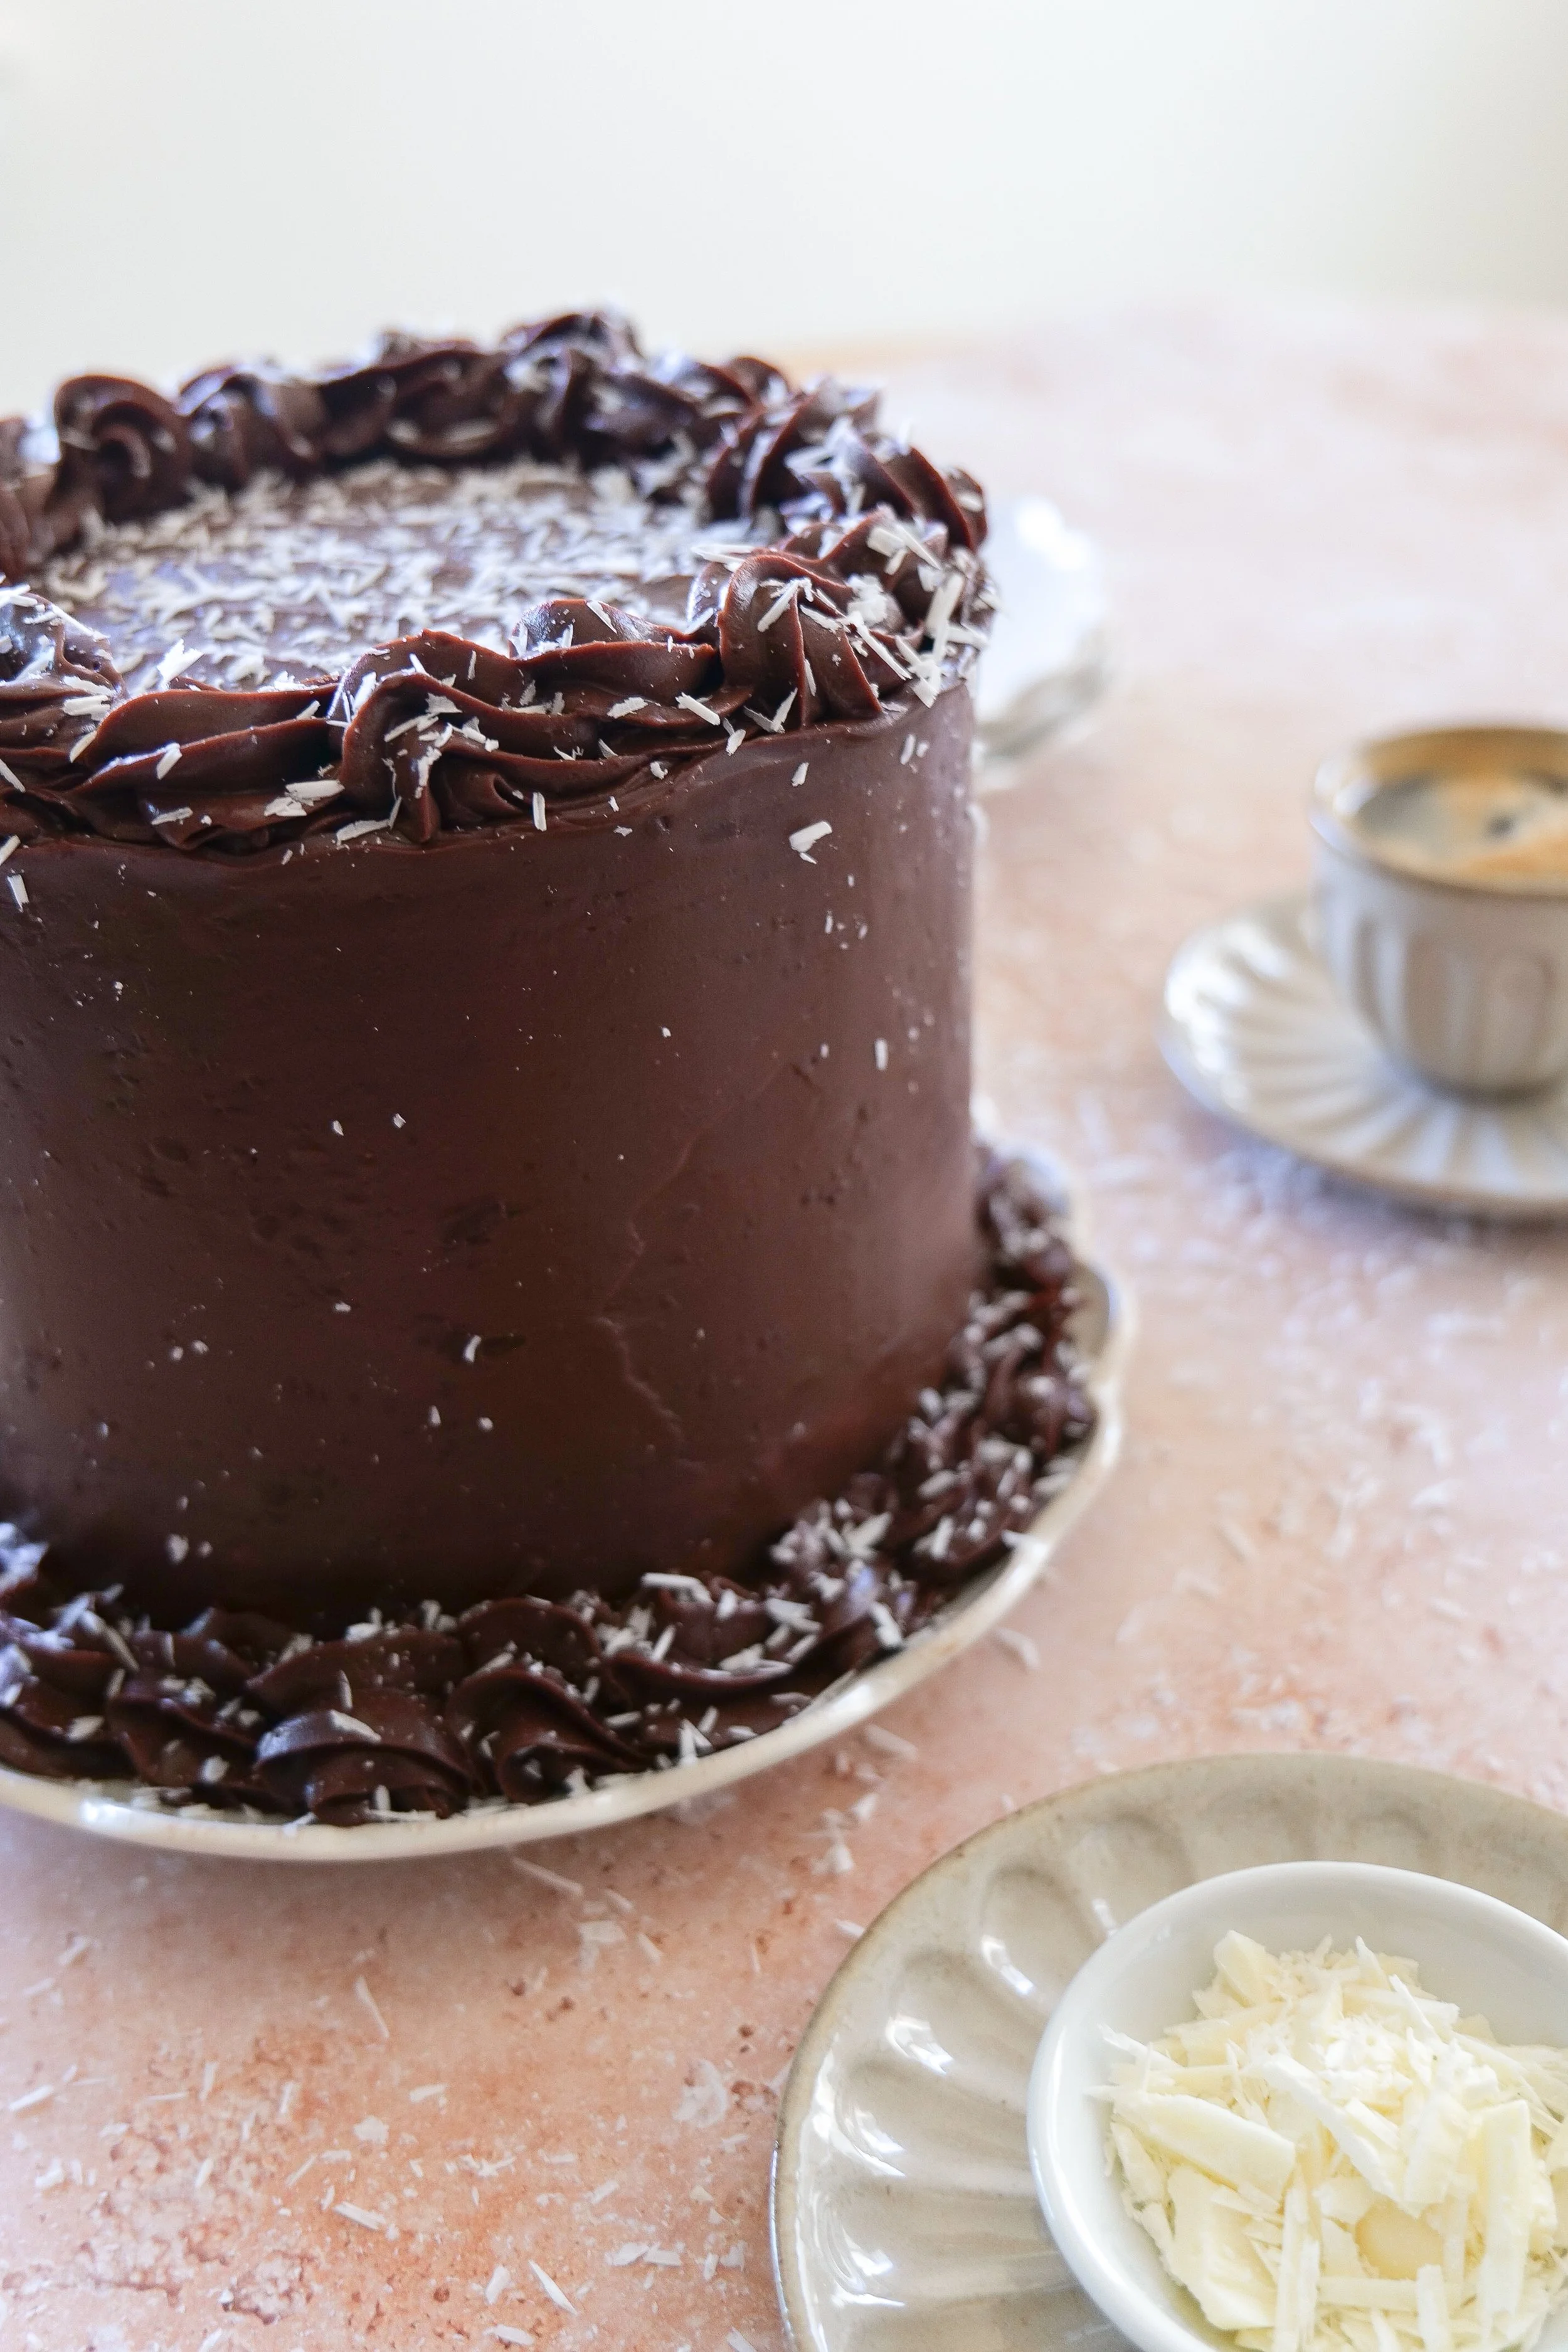
This is what gives the finished cake its rich chocolate exterior and brings all of the flavors together.
Milk chocolate, heavy cream, and a little maple syrup create a smooth, glossy ganache with just enough sweetness.
After mixing the ganache, let it cool until it reaches a spreadable consistency.
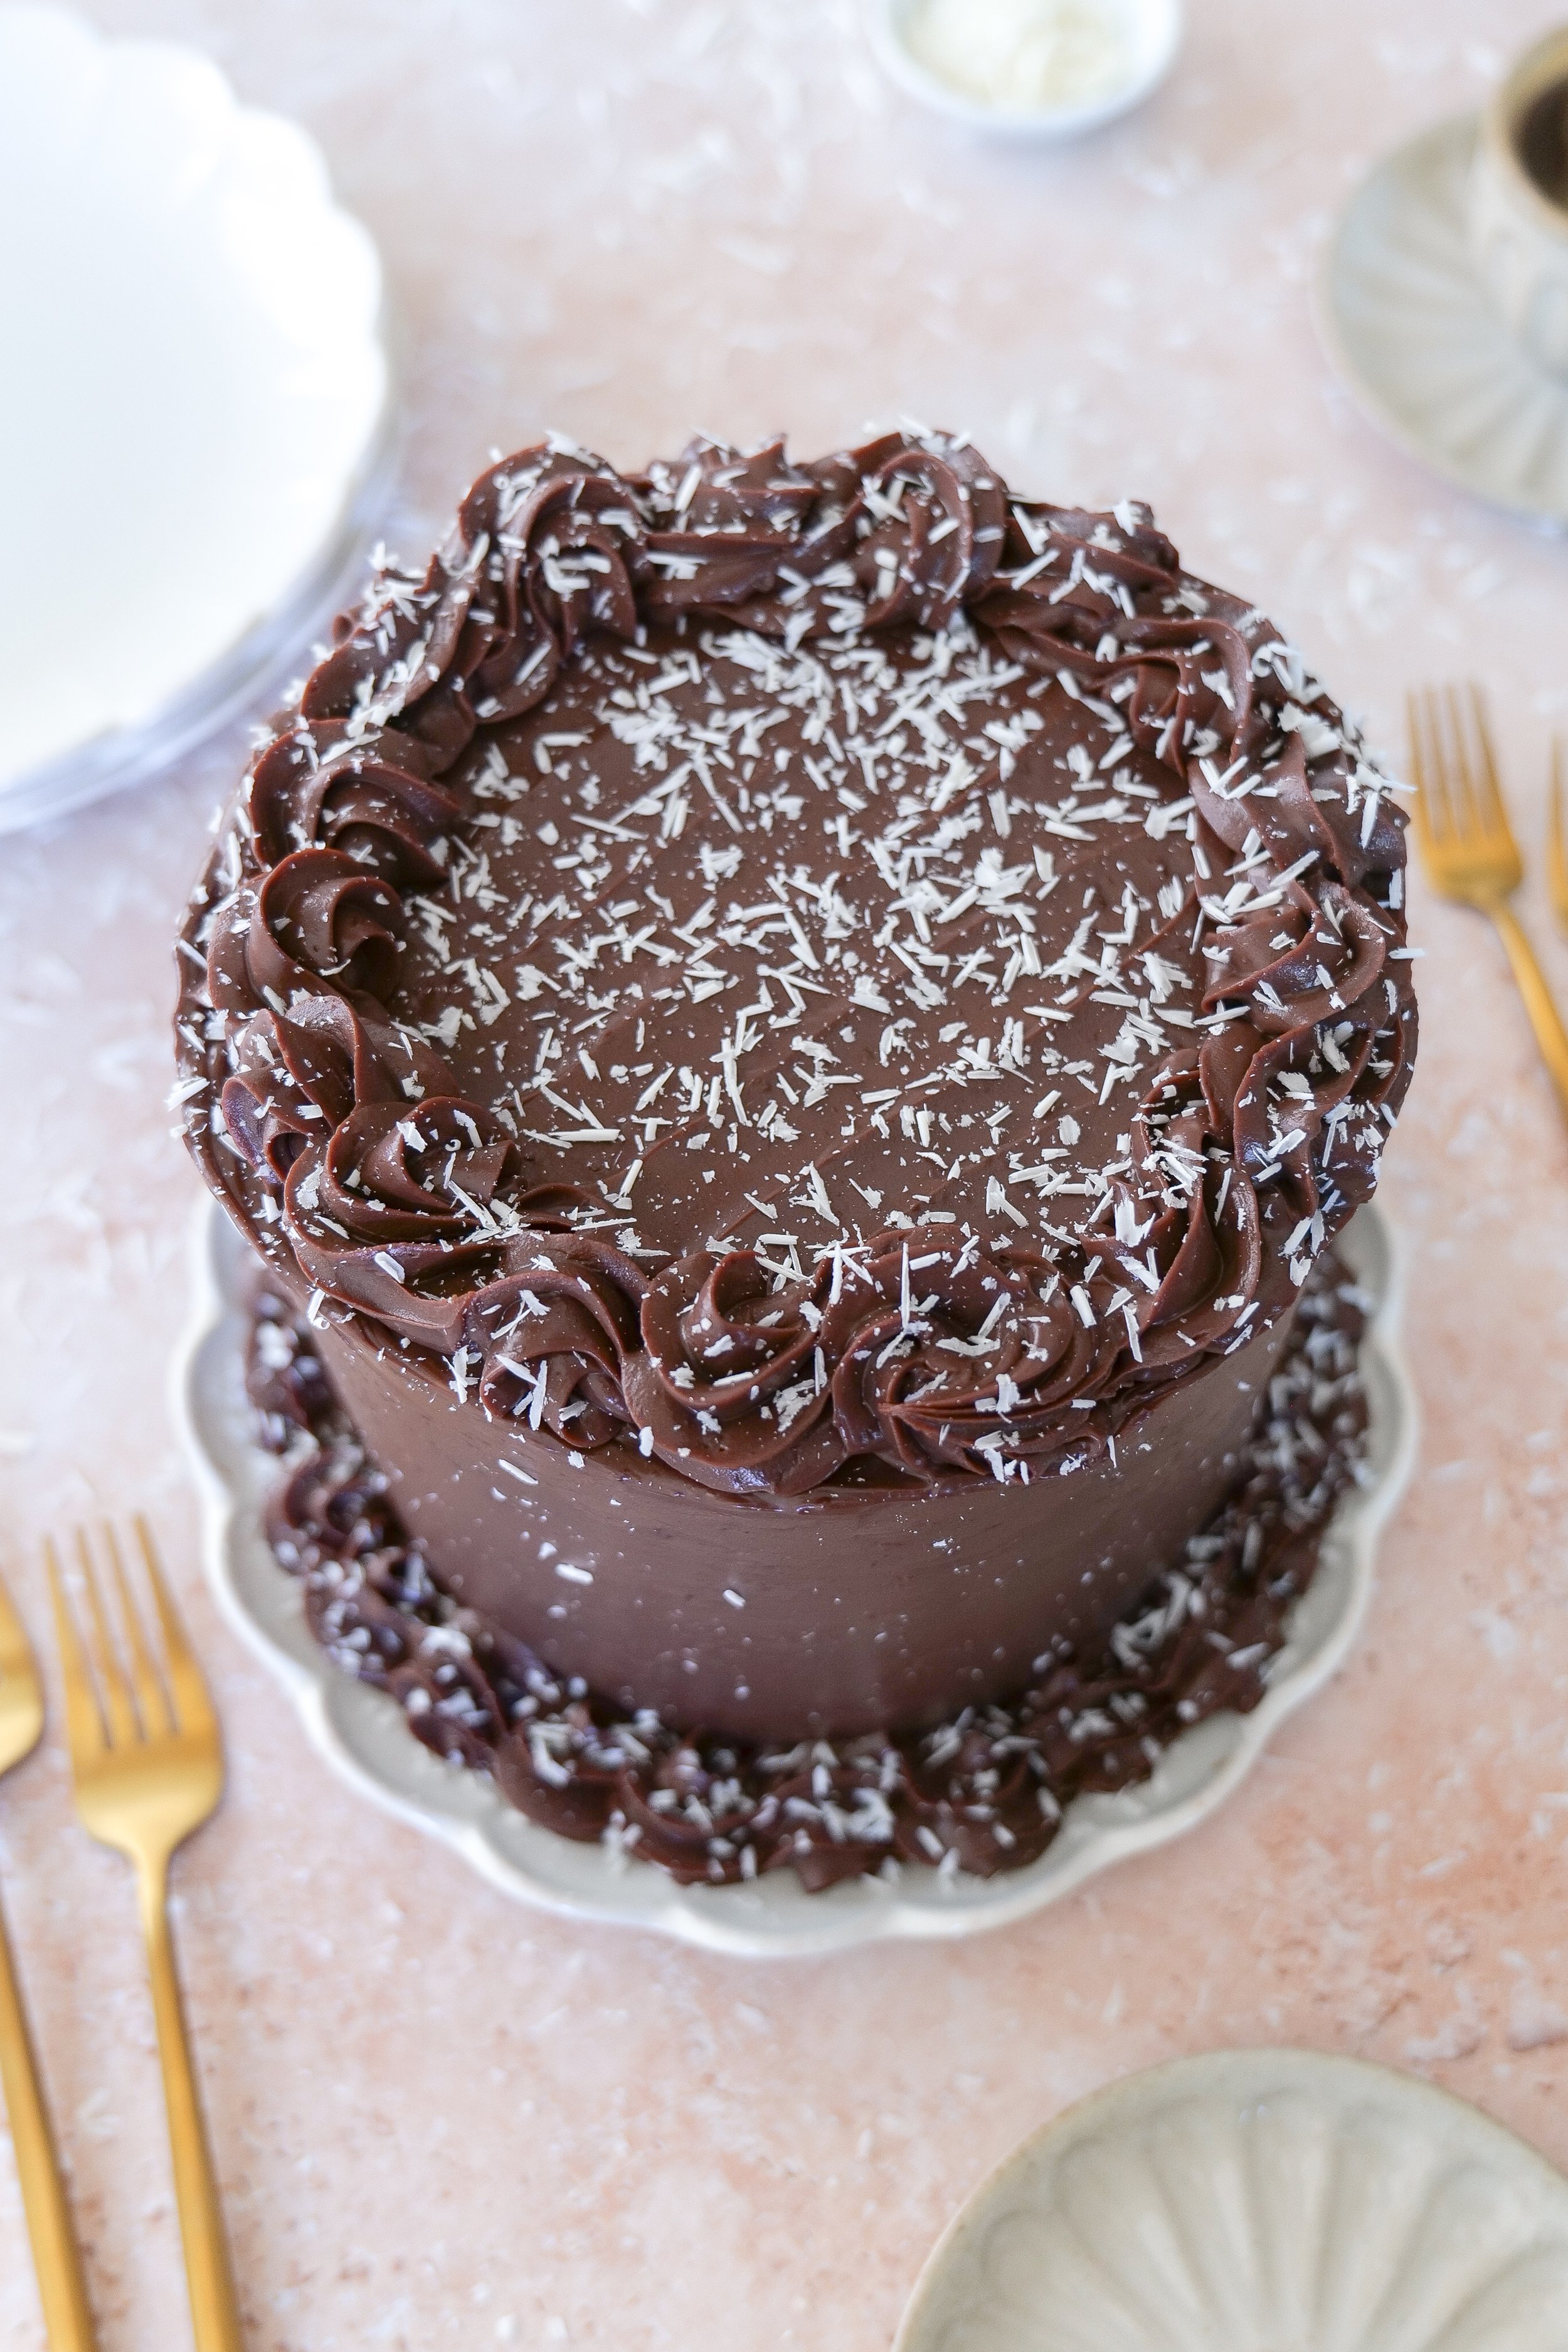
I like applying a thin crumb coat first to trap any loose cake crumbs. Once that layer has set, you can go back with the final layer and decorate the cake however you like.
The result doesn't have to be perfectly smooth. A little texture can be beautiful, too.
Kitchen Tools You'll Need
A few good cake-baking tools make this recipe much easier:
Three 6-inch round cake pans
Medium saucepan
Large mixing bowls
Electric hand mixer or stand mixer
Rubber spatula
Serrated cake knife
Offset spatula
Cooling racks
Cake turntable, optional
You can find more of my favorite cake pans, baking tools, decorating pieces, and everyday kitchen essentials in my Cake Essentials shelf.
Tuxedo Cake Recipe
Prep Time: 45 minutes
Bake Time: 45–55 minutes
Chilling & Assembly: About 3 hours
Servings: Approximately 10–12 slices
Ingredients
Chocolate Cake
1 cup semi-sweet chocolate
1 cup brown butter
2 cups all-purpose flour
1½ cups granulated sugar
¼ cup unsweetened cocoa powder
2 teaspoons baking powder
1 teaspoon baking soda
½ teaspoon salt
3 large eggs
1 cup milk
2 teaspoons pure vanilla extract
3 shots espresso
White Chocolate Mousse
8 ounces white chocolate, chopped
1 cup heavy cream
2 tablespoons powdered sugar
1 teaspoon vanilla extract
Dark Chocolate Mousse
8 ounces dark chocolate, chopped
1 cup heavy cream
2 tablespoons powdered sugar
1 teaspoon vanilla extract
Milk Chocolate Ganache
1 cup heavy cream
2 cups milk chocolate
2 tablespoons maple syrup
Instructions
Step 1: Prepare the Cake Pans
Preheat the oven to 350°F.
Lightly grease three 6-inch round cake pans.
Step 2: Brown the Butter
Add the butter to a saucepan over medium heat.
Cook until the butter begins to turn golden brown and develops a warm, nutty aroma.
Remove from the heat.
Step 3: Add the Chocolate & Espresso
Add the semi-sweet chocolate to the warm brown butter and stir until completely melted and smooth.
Pour in the espresso and stir to combine.
Set aside briefly.
Step 4: Make the Chocolate Cake Batter
In a large mixing bowl, combine the flour, granulated sugar, cocoa powder, baking powder, baking soda, and salt.
Add the eggs, milk, and vanilla and begin mixing.
Pour in the brown butter, chocolate, and espresso mixture.
Mix until everything is fully incorporated and the batter is smooth.
Step 5: Bake the Cake
Divide the batter evenly between the three prepared 6-inch cake pans.
Bake for approximately 45–55 minutes, or until a toothpick inserted into the center comes out clean or with a few moist crumbs.
Allow the cakes to cool in their pans briefly before transferring them to cooling racks.
Cool completely before assembling.
Step 6: Make the White Chocolate Mousse
Melt the white chocolate in the microwave in approximately 15-second intervals, stirring between each interval until smooth.
Allow it to cool slightly.
In a separate bowl, whip the heavy cream until it begins forming soft peaks.
Add the powdered sugar and vanilla and continue whipping until the mixture holds its shape.
Gently fold the cooled white chocolate into the whipped cream, taking care not to deflate the mixture.
Cover and refrigerate for at least 2 hours.
Step 7: Make the Dark Chocolate Mousse
Repeat the same process using the dark chocolate.
Melt the chocolate until smooth and allow it to cool slightly.
Whip the heavy cream until soft peaks begin to form, then add powdered sugar and vanilla.
Gently fold in the cooled dark chocolate.
Cover and refrigerate for at least 2 hours.
Step 8: Make the Milk Chocolate Ganache
Heat the heavy cream until hot and just beginning to bubble.
Place the milk chocolate in a heat-safe bowl and pour the hot cream over it.
Add the maple syrup.
Let everything sit undisturbed for approximately 1 minute, then slowly stir until the chocolate and cream are completely combined and smooth.
If needed, heat in approximately 10-second intervals and stir again until smooth.
Press plastic wrap directly against the surface of the ganache and allow it to cool for approximately 3 hours, or until it reaches a thick, spreadable consistency.
Step 9: Level the Cakes
Once the chocolate cakes have completely cooled, use a serrated knife to carefully level the tops if needed.
Step 10: Assemble the Tuxedo Cake
Place the first chocolate cake layer onto your cake stand.
Spread one of the chocolate mousses evenly over the cake.
Add the second cake layer and spread the contrasting mousse over the top.
Finish with the final chocolate cake layer.
Step 11: Crumb Coat
Spread a thin layer of chocolate ganache over the entire cake.
This crumb coat will catch any loose crumbs and create a smooth base for the final layer.
Chill until the crumb coat has set.
Step 12: Finish the Cake
Cover the cake with the remaining milk chocolate ganache.
Smooth the exterior or create a more textured finish depending on the look you prefer.
Decorate as desired, slice, and enjoy!
Amanda's Quick Tips
Don't rush the brown butter. Wait for that nutty aroma before removing it from the heat.
Melt the chocolate directly into the warm brown butter.
Espresso enhances the chocolate flavor, so I wouldn't skip it unless you need to.
Let melted chocolate cool slightly before folding it into whipped cream.
Fold the mousse gently so you don't lose its light texture.
Chill both mousses for at least two hours.
Make sure the cakes are completely cool before assembling.
Level your cake layers for the cleanest finished slices.
Give the ganache enough time to cool and thicken before frosting.
A crumb coat makes the final ganache layer much easier to apply.
Can I Make Tuxedo Cake Ahead of Time?
Yes—and with a cake like this, I actually recommend breaking the work into stages.
You can bake the chocolate cake layers ahead of time. Once completely cool, wrap each layer well and refrigerate until you're ready to assemble.
The mousse can also be prepared in advance and refrigerated.
You can make the ganache ahead as well, although you may need to let it soften slightly before spreading if it becomes very firm in the refrigerator.
Then assemble and decorate the cake before your celebration.
This makes the recipe much more manageable than trying to bake, cool, make two mousses, prepare ganache, assemble, and decorate everything at once.
How to Get Beautiful Tuxedo Cake Layers
The inside of this cake deserves just as much attention as the outside.
A few things help:
Cool the Cakes Completely
Warm cake and mousse are not friends. Give the cake layers plenty of time to cool.
Level the Layers
Use a serrated knife to remove any domed tops.
Chill the Mousse
The mousse needs enough structure to support another cake layer.
Spread Evenly
Try to keep your mousse layer relatively even from edge to edge.
Chill Before Slicing
A chilled cake will generally give you a much cleaner slice than a warm or freshly assembled cake.
And with a tuxedo cake, that beautiful slice is half the fun.
Tuxedo Cake Variations
Once you've made the original, there are a few ways you could play with the flavors.
Raspberry Tuxedo Cake
Add a thin layer of raspberry preserves between the chocolate cake and mousse.
Orange Chocolate Tuxedo Cake
Add a little fresh orange zest to the chocolate cake or ganache.
Extra Dark Chocolate
Use dark chocolate in the ganache rather than milk chocolate for a less-sweet finish.
Vanilla Espresso
Add vanilla bean paste to the white chocolate mousse for even more vanilla flavor.
Holiday Tuxedo Cake
Decorate the finished cake with sugared cranberries or other seasonal decorations for Christmas.
I would keep the actual cake recipe unchanged and use these simply as inspiration for future versions.
How to Store Tuxedo Cake
Because this cake contains whipped cream-based mousse, it should be stored in the refrigerator.
Keep the cake covered in a cake carrier or airtight container to prevent it from drying out.
For the best texture and flavor, enjoy it within approximately 3–4 days.
You can let individual slices sit at room temperature briefly before serving so the cake and ganache soften slightly.
Can You Freeze Tuxedo Cake?
Yes.
For individual slices, wrap them well in plastic wrap and then place them inside a freezer-safe container.
Freeze for up to approximately 2 months.
Thaw overnight in the refrigerator before serving.
For the best presentation, however, I prefer serving this cake fresh or refrigerated rather than freezing the entire decorated cake.
Frequently Asked Questions
What is a tuxedo cake?
Tuxedo cake is a chocolate dessert known for contrasting dark and light layers. This version combines chocolate cake with white chocolate mousse, dark chocolate mousse, and milk chocolate ganache.
Why is it called tuxedo cake?
The contrasting chocolate and white layers resemble the classic black-and-white color combination associated with a tuxedo.
Does tuxedo cake need to be refrigerated?
Yes. Because this recipe contains white and dark chocolate mousses made with whipped heavy cream, keep it refrigerated.
Does the cake taste like coffee?
The espresso enhances the chocolate flavor, although there will be a subtle coffee note because this recipe uses three espresso shots.
Can I make the cake layers ahead?
Yes. Bake and cool them completely, wrap them well, and refrigerate until you're ready to assemble.
Can I make the mousse ahead?
Yes. In fact, both mousses need at least two hours in the refrigerator before assembling the cake.
What is the filling in this tuxedo cake?
This version uses two fillings: white chocolate mousse and dark chocolate mousse.
What frosting is used on tuxedo cake?
This recipe is finished with a milk chocolate ganache made with heavy cream, milk chocolate, and maple syrup.
How do I get clean slices?
Chill the assembled cake before slicing and use a clean, sharp knife. Wiping the knife between slices helps keep those contrasting layers visible.
Can I use larger cake pans?
You can, but larger pans will produce thinner cake layers and will likely change the baking time.
More Cake Recipes You'll Love
If you're looking for another beautiful homemade cake, try:
Espresso Chocolate Cake with Raspberry Cream Cheese Frosting
Banana Cake with Brown Butter Cream Cheese Frosting
Blueberry Cake with Mascarpone Frosting
Layered Orange Cake with Raspberry Mascarpone Frosting
Gingerbread Cake with Brown Butter Caramel Frosting
Shop My Cake Baking Essentials
I've gathered my favorite cake pans, decorating tools, mixing bowls, spatulas, cake stands, and other pieces I reach for when baking layer cakes in my Cake Essentials shelf.
Save This Recipe
Whether you're planning a birthday, dinner party, holiday, or another special celebration, save this Tuxedo Cake recipe for the next time you want a dessert that makes an impression.
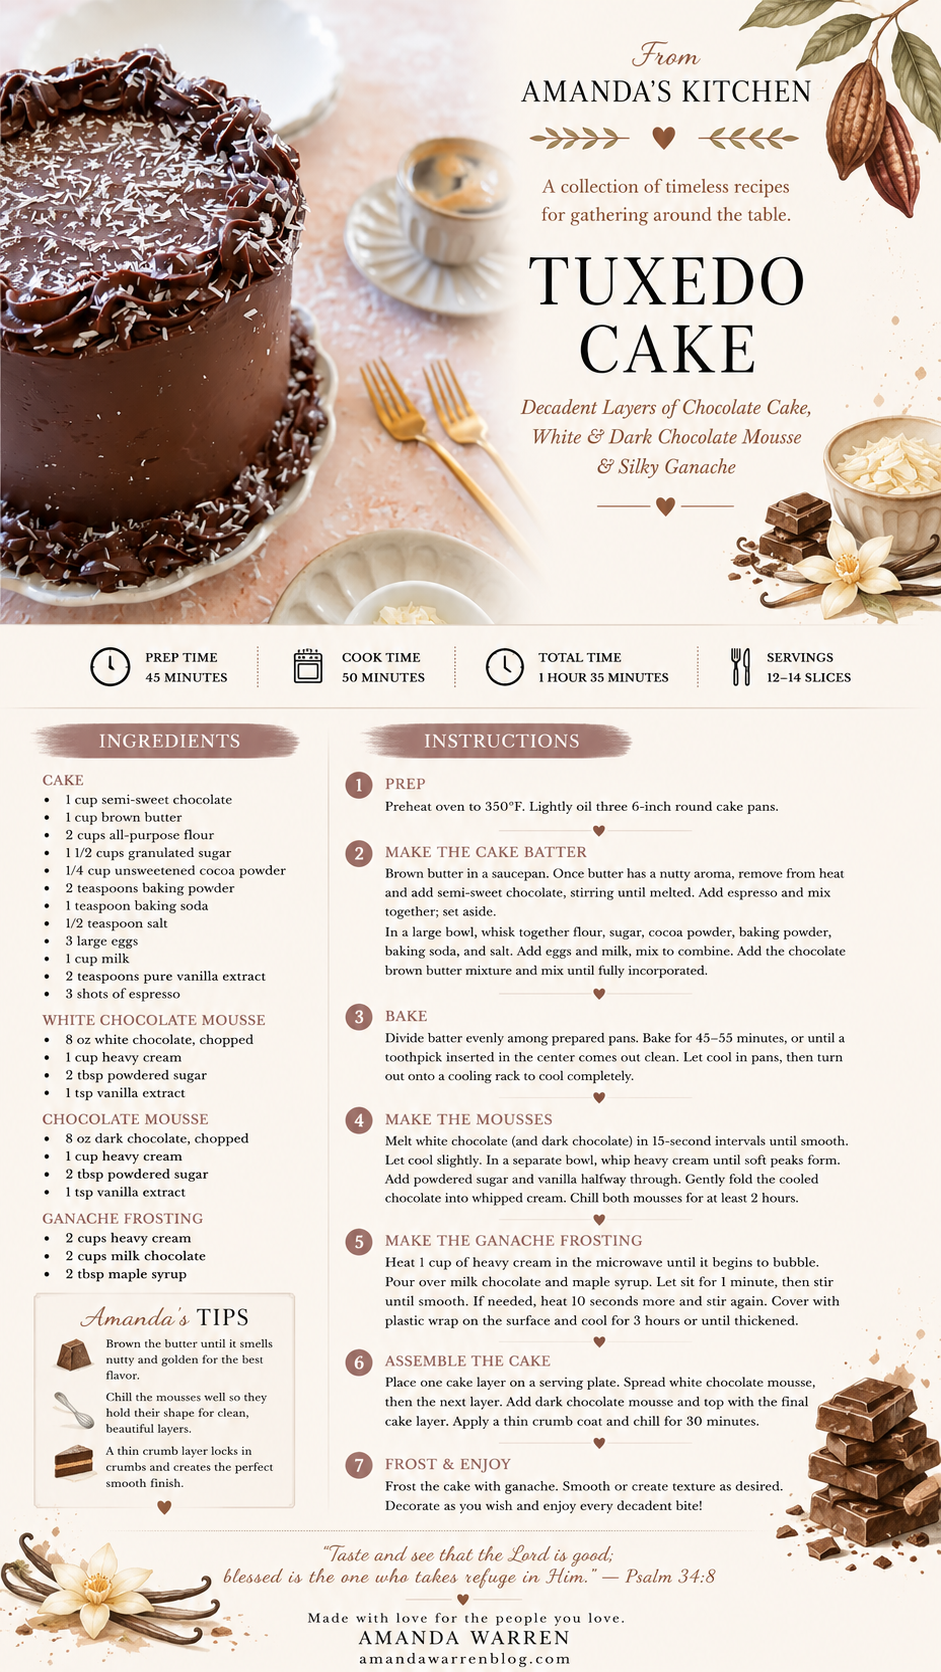
I've included my printable From Amanda's Kitchen recipe card below so it's easy to save, print, and make again.
A Note From Amanda
Some cakes are just as much fun to photograph as they are to bake, and this is definitely one of them.
I love the contrast between the dark chocolate cake and lighter mousse layers, but even more than that, I love how all of the flavors come together. The brown butter, espresso, three different chocolates, and creamy mousse make every layer feel a little special.
It's the kind of cake I love bringing to the table when we're celebrating something—or sometimes simply because making a beautiful cake feels like reason enough to celebrate.
"Taste and see that the Lord is good."
Psalm 34:8
Made with love for the people you love.