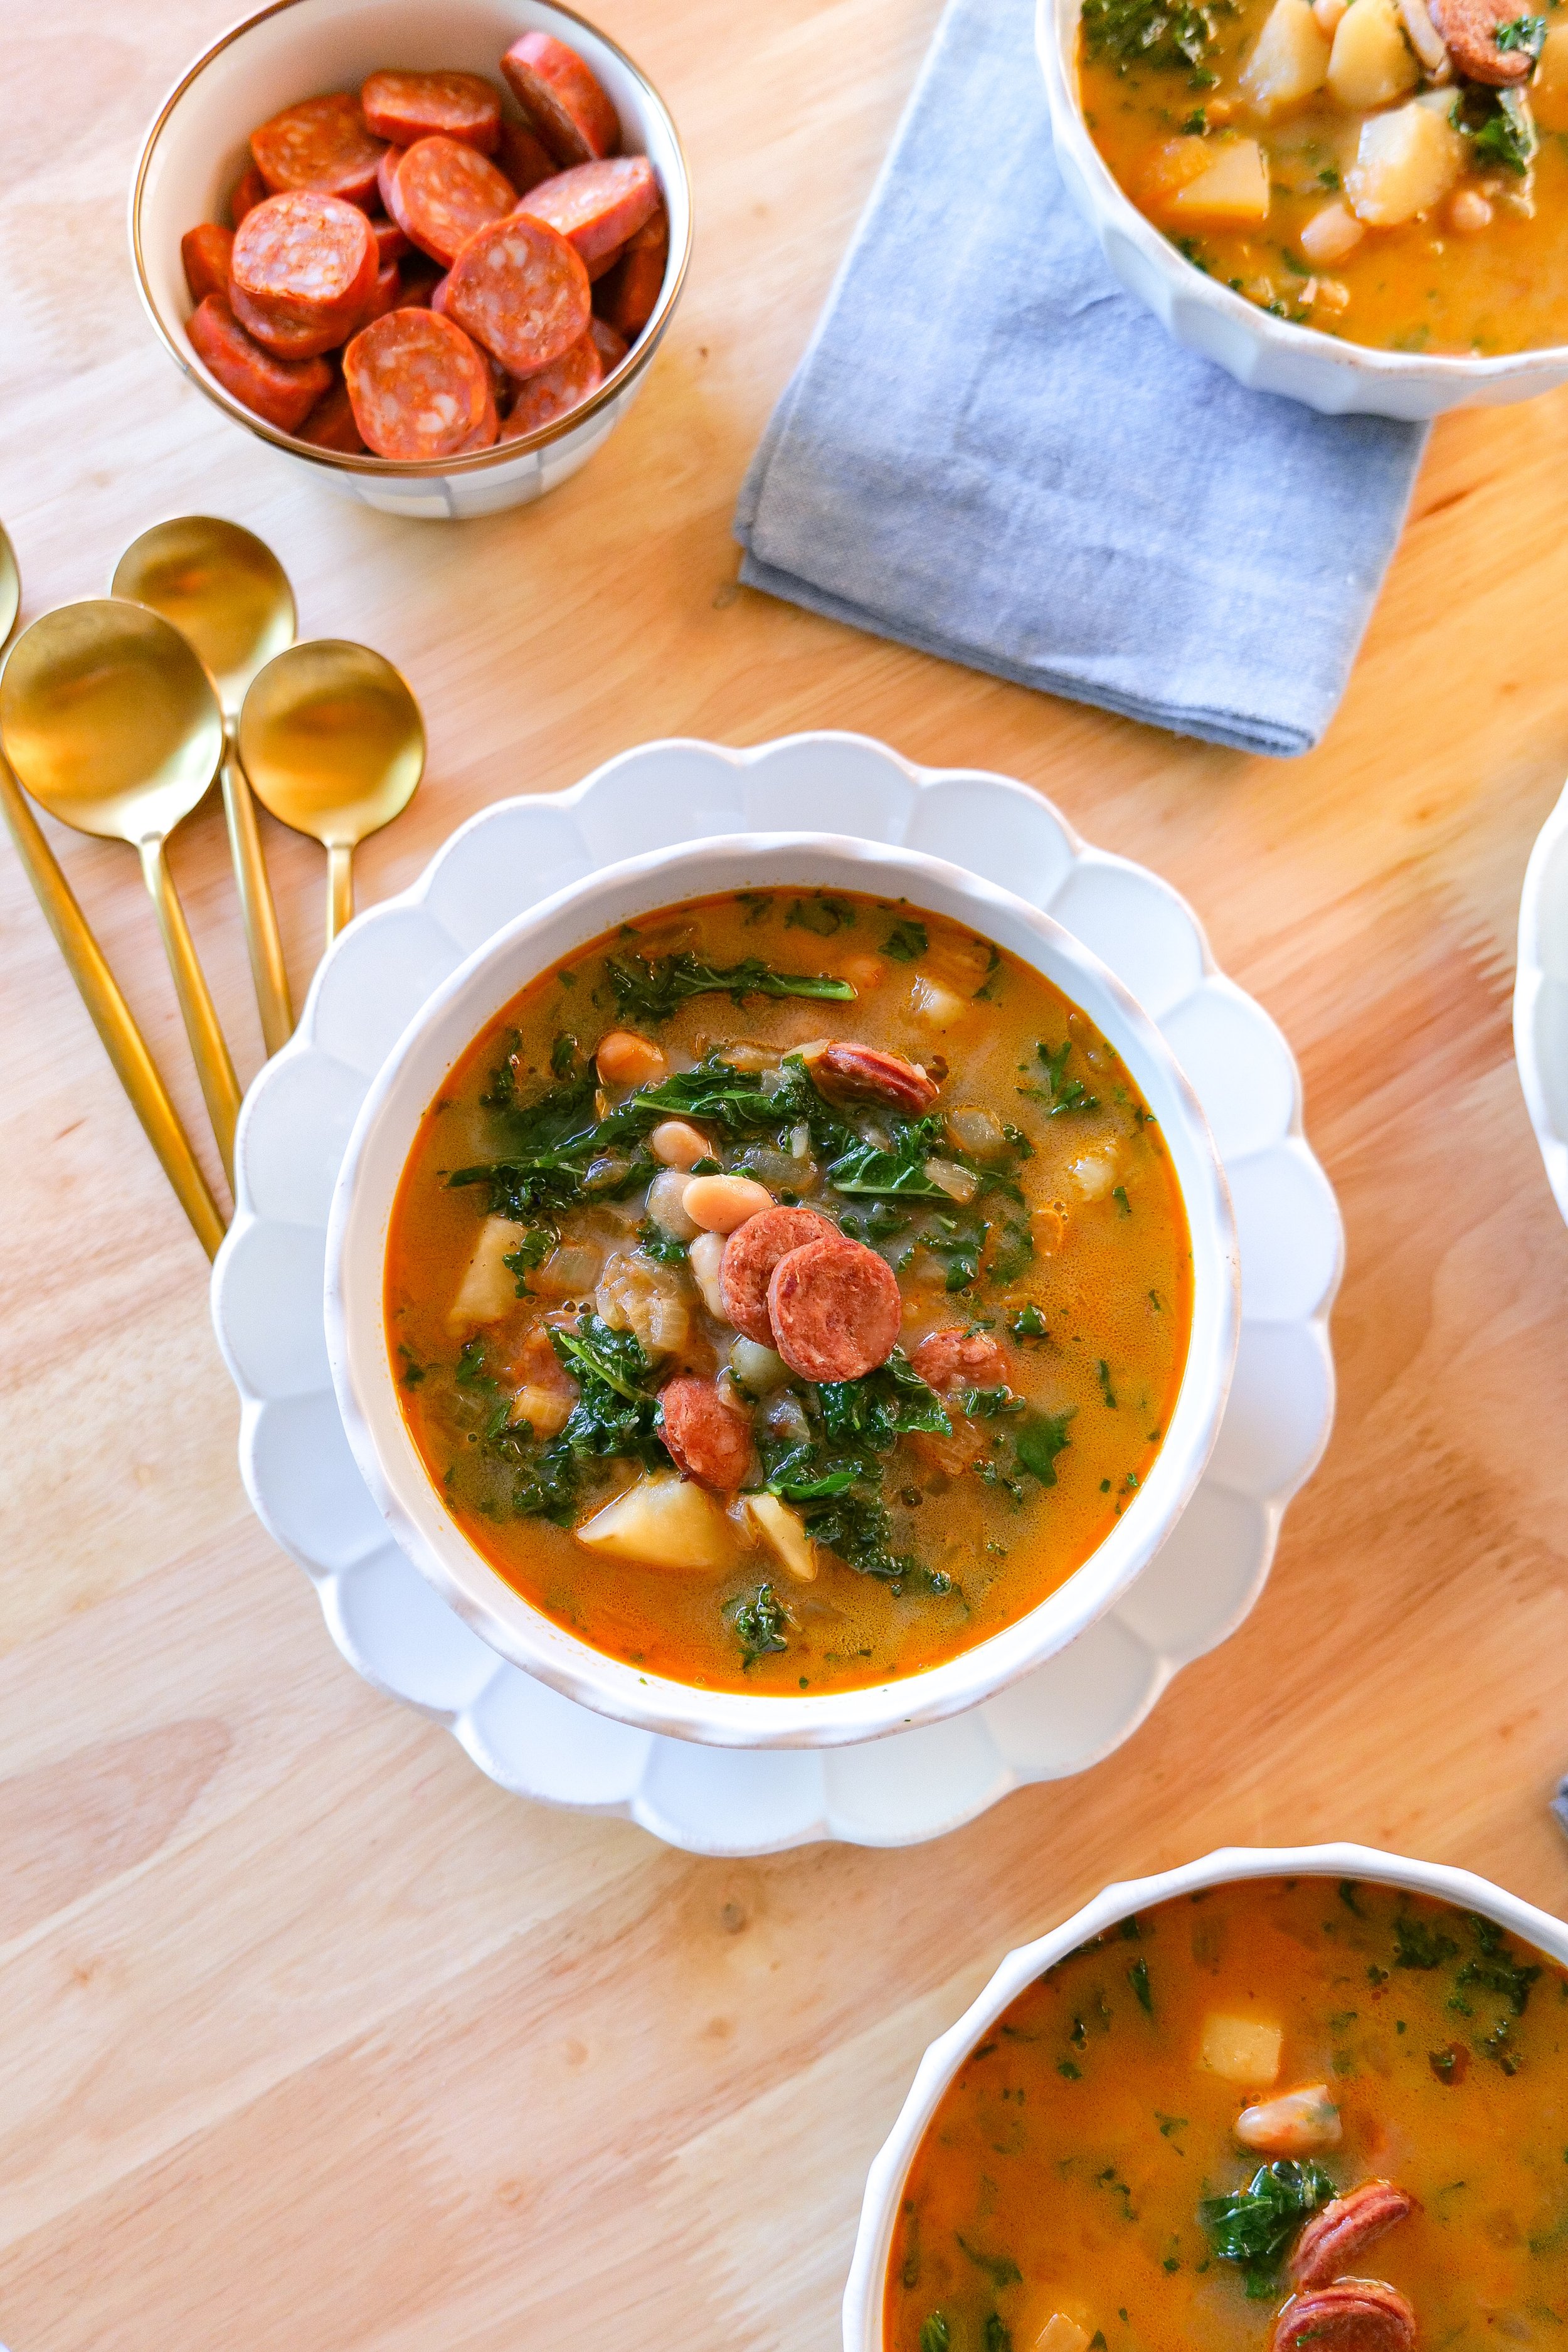
Warm Up Your Evenings with Irresistibly Delicious Slow Cooker Italian Wedding Soup: A Comforting Meal You Can't-Miss!

As the chill settles in, nothing warms you more than a steaming bowl of Italian Wedding Soup made in your Slow Cooker. This timeless classic is a comforting treat, combining juicy meatballs, nourishing greens, and tender pasta all mixed together in a savory broth. Whether you're hosting a casual dinner or craving a comforting meal, this irresistible dish promises to be a delicious highlight for those cold nights. So, enjoy this fun-named soup known for beautiful blend of flavors. You can say it is a true marriage made in the kitchen rather than the altar.

What is Italian Wedding Soup? Do you Serve it at Weddings?

Italian Wedding Soup is a delightful soup renowned for its savory blend of ingredients. It's a traditional Italian-American dish that combines flavorful meatballs, leafy greens, and tiny pasta such as acini di pepe or orzo in a tasty broth. The essence of the soup lies in its named origin, derived from the Italian phrase "minestra maritata," meaning "married soup." This refers to the blend of its ingredients rather than a matrimonial occasion. In reality, despite its name, Italian Wedding Soup does not hold a customary place at wedding celebrations but is rather just a comforting dish meant for all occasions. Ultimately, the slow cooker version of Italian Wedding Soup is an ideal compromise of convenience and taste, making it a beloved choice for family dinners or casual get-togethers when the weather turns cool.

How to Make Italian Wedding Soup from Scratch in the Slow Cooker?

Begin your creation by preparing homemade meatballs. This is a key piece of the dish using a combination of ground meat, typically beef and pork, mixed with breadcrumbs, Parmesan cheese, and Italian seasoning to capture those authentic Italian flavors. Using the 360 slow cooker it allows you to remove the stockpot from the base and easily brown these delightful morsels right in the pot that you will slow cook in. This enhances their taste before they join the slow-cooked symphony of flavors. Combine them with chicken broth, carrots, celery (optional), and onions in the slow cooker pot on top of the base, allowing the ingredients to form together over several hours. Near the end of cooking add in fresh spinach or kale and small pasta, ensuring they remain perfectly al dente and vibrant. This kitchen adventure involves slow cooking on low for a delicious broth that’s rich and flavorful.

What Sides to Serve with Italian Wedding Soup?

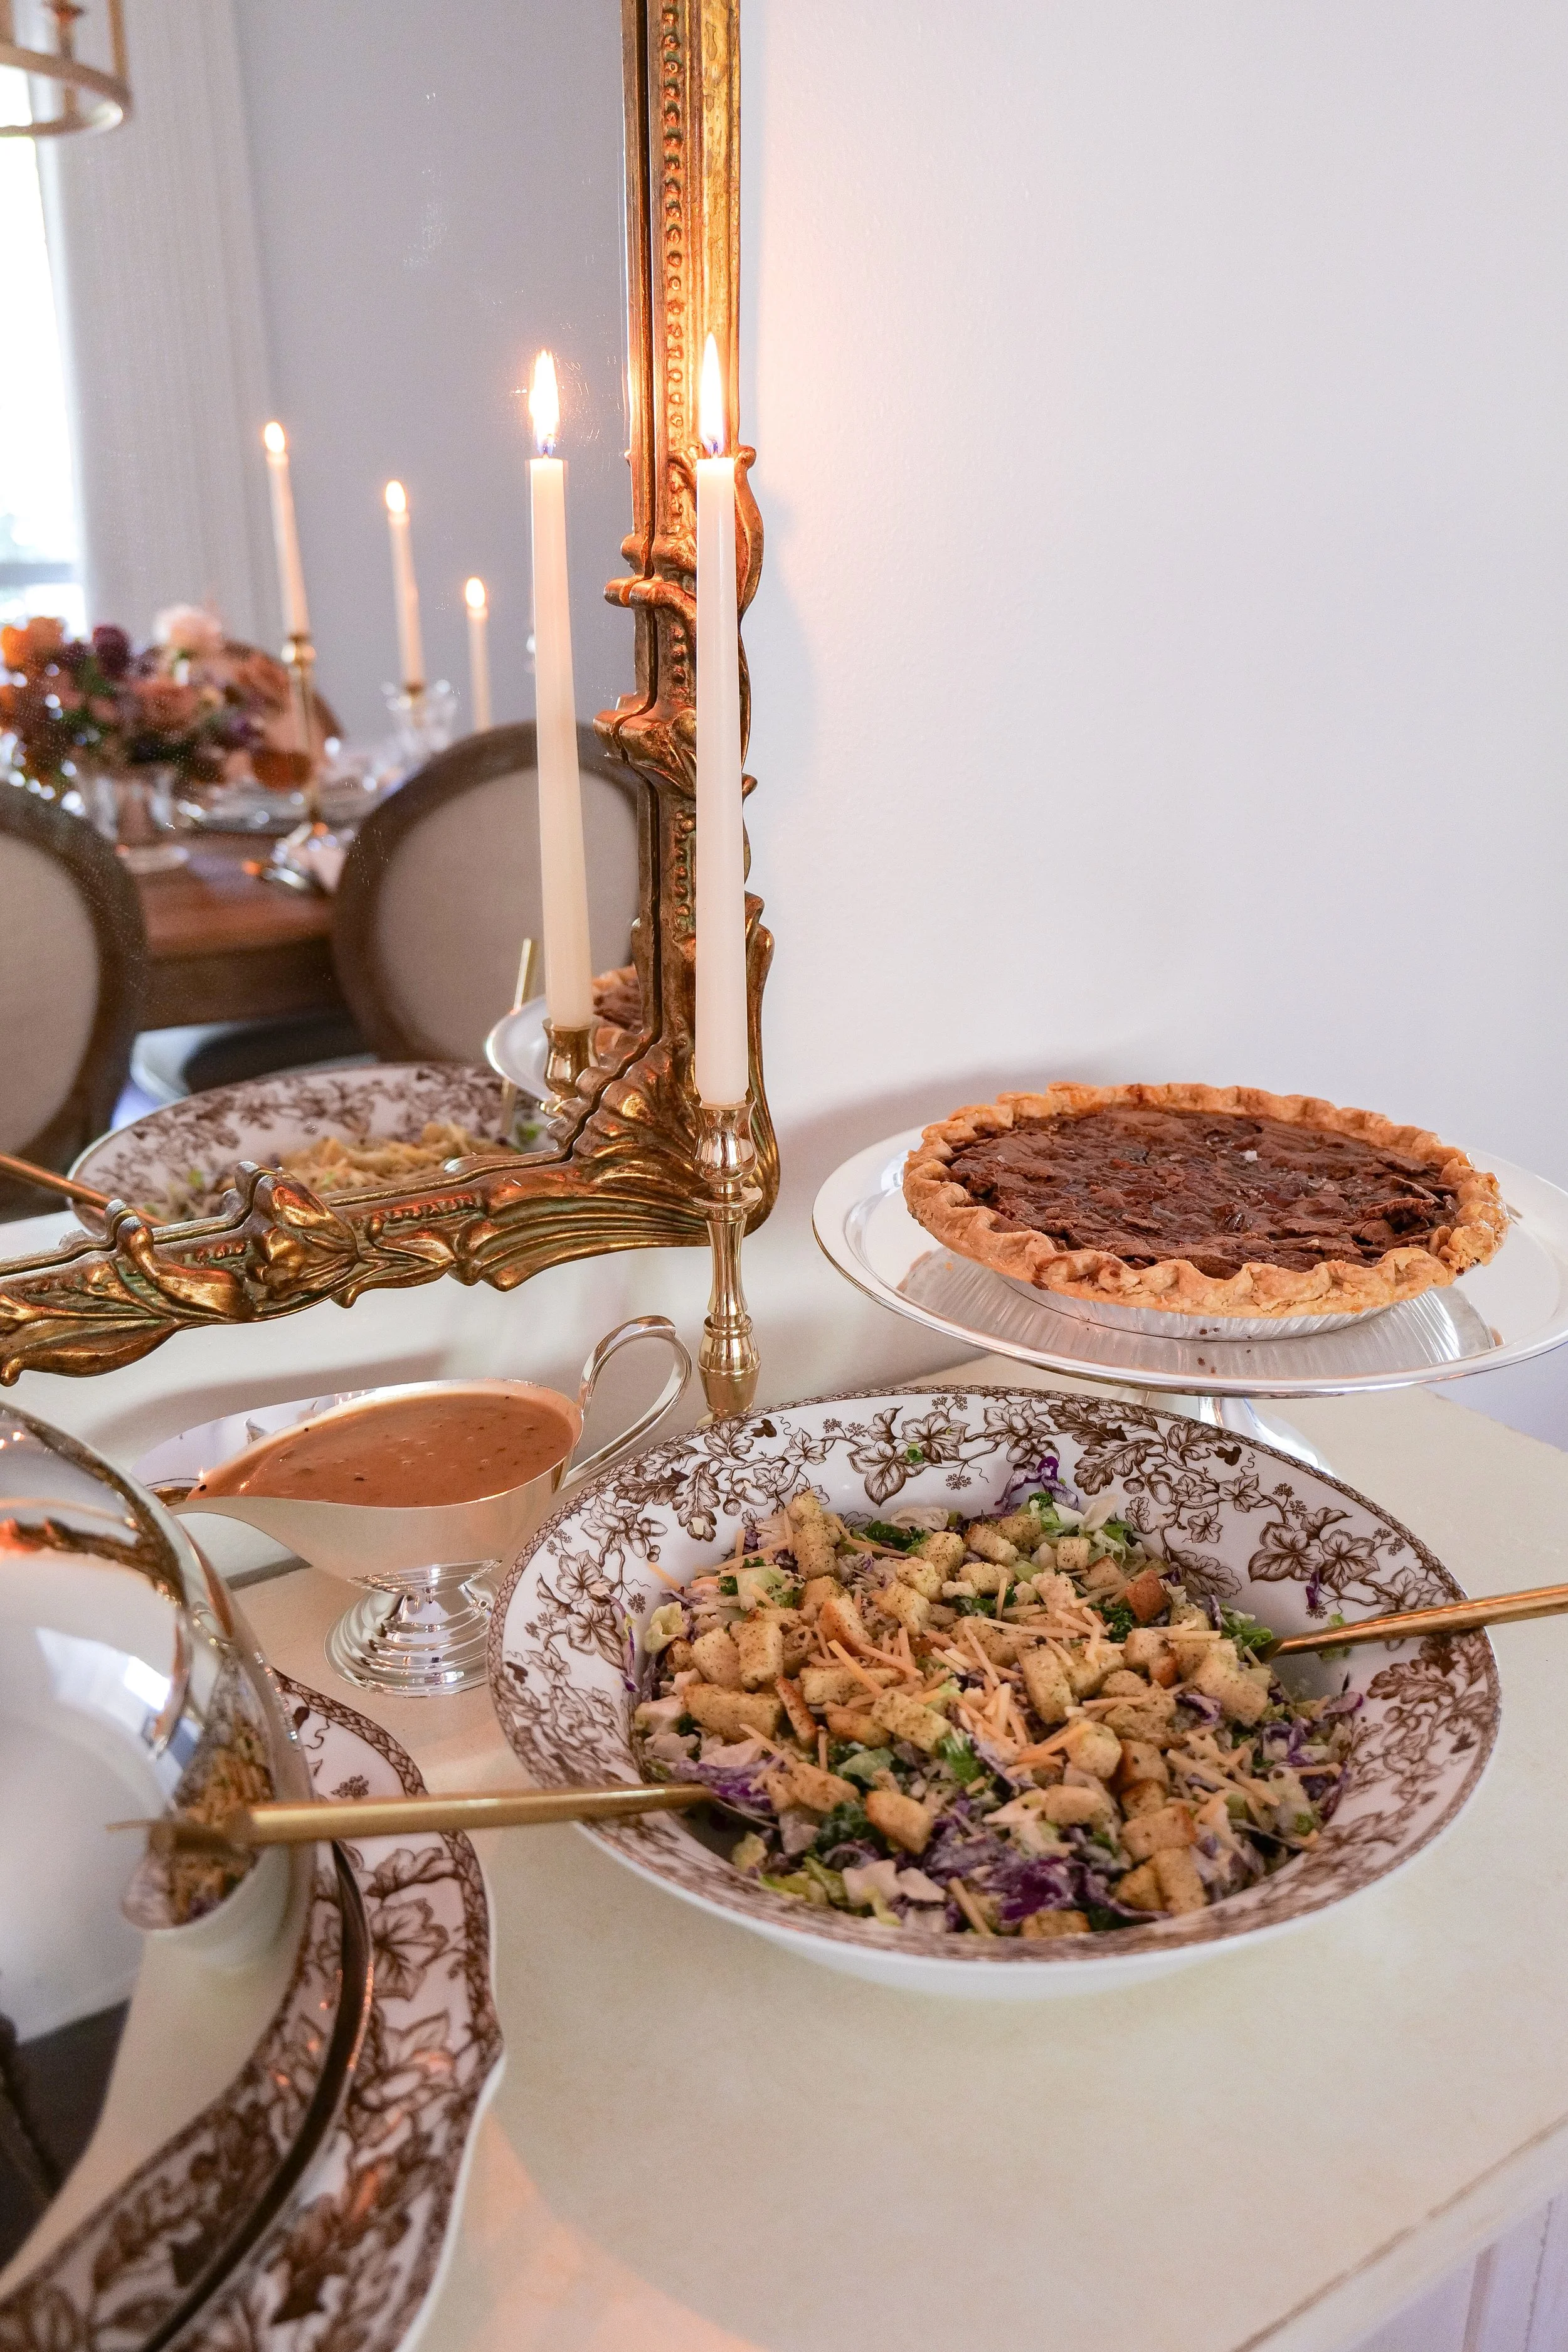
Pairing your Italian Wedding Soup with thoughtful sides can transform your meal into a true dining experience. Consider complementing the savory broth with a serving of fresh, crusty Italian bread. This is perfect for soaking up every delicious drop. Another option is a crisp Caesar salad that provides a refreshing contrast, adding crunch and brightness to your table. For those seeking added textures, a platter of assorted bruschetta, with toppings like diced tomatoes, basil, and mozzarella, can elevate the experience. A creamy polenta or a serving of risotto can create a richer and more filling Italian meal, providing further dimension alongside your soup. Overall, these sides, when thoughtfully paired, enhance the magnificent flavors of Italian Wedding Soup, creating a meal that leaves an unforgettable impression on your taste buds.

Italian Wedding Soup shines with its hearty ingredients and effortless preparation, making it a great choice for any evening meal. By using a slow cooker, you're able to capture all the depth of flavors offered by the ingredients. The aroma of the herbs, savory meatballs, vibrant veggies, and tender pasta, effortlessly form themselves into a delicious, comforting soup. This soup is also nutritionally balanced and satisfying, as it offers proteins, carbs, and essential vitamins, making it as healthy as it is delicious.

Pro Tips for Perfect Italian Wedding Soup

Achieving great flavor and consistency with your Italian Wedding Soup is made easier with a few pro tips. I like to begin by preparing the ingredients the night before, as this not only saves time but also allows flavors to form an even better taste during the slow cooking process. Opt for a mix of ground beef and pork when making the meatballs for a richer, more traditional taste. Brown the meatballs in a skillet first. This step is crucial for a better texture and adds more flavor to your soup. I would only do this ahead of time if you are really in a pinch for time or are using a non 360 cooker crock pot that you would need to use two separate pans for. Using the same pan to make the meatballs as the rest of the soup adds additional flavoring.

- Prep Ahead: Save time by organizing ingredients the night prior.

- Meat Choice: A mix of beef and pork offers traditional richness.

- Skillet Browning: Enhances texture and adds flavor.

- Green Addition: Add spinach towards the end for vibrant color.

- Fresh Herbs: Incorporate parsley and basil before serving to enhance flavor.

With these tips, every sip of your Italian Wedding Soup will give a deeply satisfying taste of home-cooked goodness, and will provide a deliciously comforting experience.

Storage Suggestions for Your Slow Cooker Italian Wedding Soup

Ensuring the longevity of your easy Slow Cooker Italian Wedding Soup involves strategic preparation and storage. When assembling your ingredients, choose ripe, fresh ingredients to guarantee the best results. Utilize your slow cooker to create a savory and rich taste that matures over hours. Once finished, store any leftover soup in airtight container. This preserves the freshness of flavors. Make sure your soup has cooled and come to room temperature before adding to the refrigerator or freezer. When it's time to enjoy your soup again, reheat gently either on the stove or in a microwave. Stir occasionally to maintain a consistent temperature and texture. If you by chance end up with leftovers you can freeze in a container for up to 3 months. I have personally frozen this soup before. I had my son last summer, and I made extra as prep so that I would have some easy and nutritious meals to help me heal after returning home. I was so glad I thought to do this. It was such a welcome treat and something I ate for days after coming home from the hospital. Implementing these storage guidelines ensures that your Italian Wedding Soup remains a quick, comforting option for meals ahead, without compromising on its signature taste.

Variations You Can Try

Exploring variations of Italian Wedding Soup recipe offers an opportunity to personalize this classic dish to suit any palate or dietary requirement. Consider experimenting with different ingredients to develop your signature twist. Swap traditional ground beef and pork with chicken or turkey for a leaner version. Incorporate other vegetables like finely chopped bell peppers, zucchini or peas to enhance texture and nutrients. You can also try other pasta shapes to introduce a new character to your soup like macaroni noodles, orzo or anything your grocery stores carry. Adjust the seasonings and herbs like thyme, rosemary, or oregano to cater to personal preferences. Ultimately, by embracing variations, you can enjoy the timeless comfort of Italian Wedding Soup while making it uniquely your own, ensuring it remains a beloved staple in your meal routine.

This Slow Cooker Italian Wedding Soup stands out as a fun Italian tradition full of flavor and convenience. Its broth-based fusion of savory meatballs, greens, and tender pasta embodies a delicious soothing sipping experience. This yummy soup offers versatility and ease of preparation, fitting nicely into any busy lifestyle. Each ingredient blends together so nicely in a slow cooker, allowing you to serve a dish that warms your evenings and captures the essence of home-cooked comfort. So gather your ingredients and let them "marry" in your slow cooker then enjoy a meal that embodies heartwarming comfort.

Ingredients

For the Meatballs

1/2 pound ground beef

1/2 pound Italian sausage

1/3 cup breadcrumbs

1/4 cup parmesan cheese grated

2 teaspoons Italian seasoning

1/2 teaspoon salt

1/2 teaspoon pepper

1 large egg

For the Soup

1 tablespoon salted butter

1/4 medium white onion diced

1 large carrot, diced

3 cloves of garlic, minced

1/4 teaspoon salt

1/4 teaspoon pepper

9 cups of vegetable broth

3/4 cup acini de pepe pasta

2 cups spinach, chopped

Instructions

1. Mix together in a large bowl all meatball ingredients. Make into 1 to 2 inch meatballs (size of your liking). Heat your slow cooker stockpot on the stove. Add in the butter.

2. Cook all sides of your meat balls and remove to a plate while cooking vegetables.

3. Add in garlic around 1 minute or until becomes fragrant. Stir in and sautΓ© your onion and carrots. Continue to cook until onions are transparent. Add back in your meatballs.

4. Return the slow cooker stockpot to the base of the slow cooker. If you do not have this style of slow cooker you can do this on a separate pot or pan and then add your meatballs into the slow cooker.

3. Once on your slow cooker pour in your broth and salt and pepper to taste. You can also add in additional Italian seasoning if you would like more. Let cook on 3 in the slow cooker or Medium heat for 1 to 2 hours.

4. The last 30 min add in your pasta and chopped spinach and stir together letting these cook.

5. Serve and Enjoy!

Other Delicious Soup Recipe Ideas:

Deliciously Creamy Basil Tomato Soup: An Easy and Delicious Recipe

Easy & Flavorful Fiesta in a Bowl: Ultimate Slow Cooker Chicken Tortilla Soup Recipe!

Bring the Heat with this Deliciously Spicy Tortellini Soup

Delicious One-Pot Italian Lasagna Soup for Busy Weeknights!

An Alluring Combination: French Onion & Shallot Soup Recipe

Mom's Favorite Minestrone Soup Recipe

Deliciously Warm Your Soul: Guide to Creamy Corn Chowder Soup

Italian Sausage, Potato & Kale Soup

The Ultimate Guide to Creamy Cheddar Cauliflower Soup

Indulge in Irresistible Delight: Mouthwatering Chicken & Biscuits Appetizer Paired with Sweet Honey Butter Dipping Sauce!

If you're looking for an appetizer that combines comfort foods with a gourmet flair, look no further than the Chicken & Biscuits Appetizer with Honey Butter Dipping Sauce. This delightful dish captures the perfect blend of savory and sweet, offering a dining experience that is finger licking good. Whether you're hosting a fun super bowl party, or simply indulging in a weekend treat, this appetizer promises to treat your taste buds and give the most deliciously cute appetizer with its irresistible charm.

There is nothing quite like sinking your teeth into tender pieces of chicken wrapped in the fluffy embrace of golden biscuits, all made even better by a delicious honey butter dipping sauce. This delightful appetizer perfectly combines the juicy, seasoned chicken with the buttery, flaky biscuits that are a joy to savor. The contrast between the crispy chicken skin and the soft, warm biscuits creates a perfect blend of textures and flavors that is hard to resist. The real showstopper of this appetizer is the Honey Butter Dipping Sauce, which introduces a sweet and salty balance to the savory dish. Made with rich honey and salty butter, this dipping sauce provides a sweet finish to every bite.

A Different Type of Fried Chicken Sandwich

This Chicken & Biscuits Appetizer offers a fresh take on the beloved classic fried chicken sandwich, bringing a unique twist to a dish. Instead of the usual bread bun, this version features soft, buttery biscuits that perfectly complement the crispy fried chicken. This pairing creates a delicious contrast between the warm, fluffy biscuits and the juicy, seasoned chicken. What truly sets this combination apart is the addition of the honey butter dipping sauce. Its sweetness and rich flavors enrich the savory foundation, adding to the dish. Below are key points that highlight this appetizer's uniqueness:

- Texture Harmony: The contrast of soft biscuits and crisp chicken is a sensory delight.

- Flavor Fusion: The honey butter sauce enriches the burger-like experience with its sweetness.

- Innovative Approach: A refreshing alternative to the typical fried chicken sandwich.

- Enticing for Adventurers: Perfect for those seeking new flavors and culinary excitement.

- Guaranteed Satisfaction: Ensures a fulfilling and memorable meal experience.

When it comes to making a delightful Honey Butter Chicken Biscuit, balance is key. This recipe achieves the perfect harmony of sweet and savory, making it a versatile appetizer option suitable for any occasion. The richness of honey butter paired with the succulent flavors of the chicken creates a match made in heaven. This recipe doesn’t just satisfy your taste buds, it also offers a convenient and quick preparation process. By using flavorful, high-quality ingredients, each piece of this dish shines to create a comforting taste with every bite. This makes it the perfect go to for any Football themed party or for any fun gathering where people can quickly grab this bite sized pair.

By combining simple ingredients, these biscuits achieve a balance of buttery flakiness and a hint of honey sweetness. The key to this recipe is achieving that perfect texture and flavor, making it a great companion for savory chicken and a sweet dipping sauce.

To ensure you're baking the biscuits to golden perfection, consider these important tips:

- Ingredient Quality: Choose top-notch butter and honey for the best flavor.

- Snap the Texture: Mix the dough until just combined for flaky layers.

- Golden Bake Time: Monitor closely to achieve a light, golden brown finish.

- Serving Freshness: Serve warm for melt-in-your-mouth delight.

- Flavor Match: Complements savory chicken and rich dipping sauces beautifully.

for cocktail idea to pair with this -here-

What are the main ingredients in the Chicken & Biscuits Appetizer with Honey Butter Dipping Sauce?

To master this Chicken & Biscuits Appetizer, understanding the symphony of its main ingredients is essential. These components come together nicely to create a dish that is both comforting and always a crowd pleaser. Here’s what you’ll need:

- Chicken: Juicy, seasoned pieces form the heart of this appetizer.

- Biscuits: Fluffy, buttery biscuits provide a tempting, soft texture.

- Butter: Offers a buttery base for the sauce, complementing savory notes.

- Honey: Enhances the sauce with added sweetness and smoothness.

- Spices: A balanced blend of herbs and spices to elevate the flavor profile.

With these ingredients, you're set to recreate a dish that everyone loves and brings joy to any occasion.

How can I make the Maple Honey Dipping Sauce at home?

Making the delicious Honey Butter Dipping Sauce at home is a simple yet rewarding task. This sauce not only enhances the Chicken & Biscuits Appetizer but also is excellent on many other various dishes you may make. Begin with the basics, which are equal parts of raw, high-quality maple syrup and honey.

To bring this sauce to life, follow these easy steps:

- Combine Ingredients: Mix equal parts honey (or maple syrup) and butter in a saucepan.

- Heat Gently: Stir over low to medium heat until smooth and fully blended.

- Season with Spice: Add a pinch of cinnamon and a dash of salt for depth.

- Cool for Consistency: Allow the sauce to slightly thicken as it cools.

- Store Smart: Keep leftovers in an airtight container in the fridge.

With this sauce, you bring a sweet, velvety companion to your savory dish, allowing the flavors to unfold nicely with every dip.

Can the Chicken & Biscuits Appetizer be prepared in advance?

One advantage of making the Chicken & Biscuits Appetizer is its ability to be prepared in advance, making it a convenient choice for hosting stress-free gatherings. With some simple prep work ahead of time, you can ensure that your appetizers are fresh, delicious, and hassle-free when it’s time to serve.

Here are a few tips for advanced preparation:

Bake the Biscuits: Cook a day ahead and store them in an airtight container at room temperature.

Fry the Chicken: Keep it refrigerated, reheating in the oven to maintain crispiness.

Sauce Prep: Create the Maple Honey Dipping Sauce ahead, letting flavors combine beautifully in the fridge.

Reheat Wisely: Timing your reheating just before serving ensures optimal texture and flavor.

Serve with Ease: Gather it all together on the day for a quick service.

With proper prep, you’ll find yourself ready to impress your guests without sacrificing taste or texture if needing to make this dish in advance. The final step to serving this delicious Chicken & Biscuits Appetizer is all about its presentation. Start by assembling each element with care, ensuring that all of its parts are ready for the best culinary experience. The freshly baked biscuits, when paired with perfectly cooked chicken and a generous serving of maple dipping sauce, create a flavor that we all know and love, and could eat every day of the week. With thoughtful preparation and presentation, this chicken and biscuits appetizer stands as a crowd favorite each and every time.

With the perfect balance of savory chicken, buttery biscuits, and sweet maple honey dipping sauce, this Chicken & Biscuits Appetizer redefines comfort food. It's a versatile dish that caters to a range of tastes and occasions, offering a delightful indulgence for all. By following this guide, you can create an appetizer that satisfies and leaves a lasting impression on anyone who enjoys it. Don't forget to have fun with the process of making this delicious treat and, most importantly, savor every bite!

Ingredients

1 package of biscuits

1 lb chicken

3/4 cup Unbleached flour

1 teaspoon sea salt

1 teaspoon garlic powder

1 tsp onion powder

1 egg

2 tbsp heavy cream

Olive oil, for frying

honey

3/4 cup salted butter

1/4 cup honey

Instructions

  1. Cut biscuits in half and prepare according to the instructions on package.

  2. Cut chicken into 1 inch cubes, place in bowl and set aside.

  3. In a shallow bowl mix together flour and seasoning. In another shallow bowl it’s whisk egg and cream.

  4. Taking each piece of chicken dip into flour, then egg picture and then back into the flour. Coating all sides. When done set them all aside on a sheet pan while you get oil in pan hot.

  5. In a large stainless steel pan each olive oil, around 1” high or 2” if you don’t want to flip. Let heat.

  6. Add chicken into the pan not over crowding so they don’t stick. Letting cook fully on one side and flip doing the same on the other. 2-3 minutes per side. You will need to probably do 2-3 batches in pan until all done.

  7. Once finished with chicken add to a towel lined plate.

  8. Melt butter in bowl, add in honey. You can serve this way or you can put in the refrigerator and serve it a little bit harder to be more of a spread. I personally like it where you can dip the chicken and biscuits into it and it’s nice and melted.

  9. Assemble chicken on top of biscuits, you can put in a toothpick and place on a plate with honey butter and serve! Enjoy!

Other Delicious Crowd Pleasing Appetizers:

5 Ingredient Bacon Ranch Football Shaped Cheese Ball

A Crowd-Pleasing Stuffed Mushroom Recipe

Fruit & Goat Cheese Bruschetta

Oven Baked Drumsticks

Delicious Buttery Italian Croissant Sandwich

Comfort in a Bowl: Discover the Wonderful Flavors of Shepherd's Pie Soup

With our recent newborn baby boy that we named Shepherd, I of course had to find a yummy Shepherd's Pie recipe. This Shepherd’s Pie Soup is a delightful twist on the traditional pie, with the same beloved flavors into a soothing and savory soup. This comforting twist on the classic dish captures the taste we all love with Shepherd's Pie, just in a bowl. Each spoonful is really a heartwarming experience. With its rich beef or lamb broth and perfectly seasoned combination of tender vegetables such as carrots, peas, and corn, Shepherd's Pie Soup promises to deliver a cozy dining adventure. By incorporating creamy mashed potatoes within the soup or as a dollop on top, it matches the texture of the pie's signature topping. This ultimate comfort food is perfect for chilly days or whenever you're craving a taste of nostalgia. The simplicity of preparation makes the best Shepherd's Pie Soup an ideal choice for a quick and satisfying meal, inviting you to enjoy a trusted old favorite with minimal effort.

How does it differ from traditional Shepherd’s Pie?

Shepherd's Pie Soup is a hearty and comforting dish that draws inspiration from the traditional Shepherd's Pie, transforming it into a delicious and soothing soup. This soup has all the familiar flavors of Shepherd's Pie, with ground meat, a variety of vegetables, and savory seasonings, all nicely blended into a brothy base. Unlike a classic Shepherd's Pie, which is traditionally baked with a mashed potato topping, this soup incorporates creamy potatoes directly into the mix, offering a nice and creamy texture. By being more liquid-based, the soup provides an inviting and warm comfort, making it a great choice for enjoying on those cold-weather days. Additionally, Shepherd's Pie Soup is remarkably versatile, allowing for easy customization with various ingredients, thus giving it flexibility to suit different taste preferences.

How to Make It

Creating Shepherd's Pie Soup is a straightforward process that produces great results, bringing the warmth of a classic dinner to your table with ease. Begin by browning ground beef or lamb in a large pot, ensuring the meat is fully cooked while pouring off any excess fat. Once the meat is ready, add chopped onions, carrots, and celery, allowing them to cook until softened and fragrant, filling the soup with their yummy smells. Stir in garlic, tomato paste, Worcestershire sauce, and your choice of herbs and spices to deepen the flavor profile, enriching the soup’s inviting taste. Next, pour in beef broth and bring the mixture to a gentle simmer, allowing it to thicken and the flavors to blend together nicely. Finally, stir in the peas and corn before serving hot with a generous dollop of creamy mashed potatoes on top for that classic Shepherd's Pie touch that ties everything together the way it should.

Low Carb Version

For those embracing a low-carb lifestyle, Shepherd's Pie Soup can easily adapt by swapping traditional potatoes with cauliflower or doing without the potatoes in general. This will help maintain the comfort factor while significantly reducing carbohydrates. This healthy change ensures the rich, savory flavors remain intact, providing a cozy and fulfilling meal without compromising dietary goals. To further enhance the soup’s nutritional profile, incorporate low-carb vegetables like zucchini and spinach, adding vibrant colors and textures to the dish. These veggies will lead to a hearty and satisfying meal perfect for individuals following low-carb or keto diets who crave comforting alternatives. Other customizable toppings such as shredded cheese or fresh herbs offer their own personal touch, all while staying true to a low-carb framework that delights both flavor enthusiasts and nutritional purists.

Pro Tips

Elevate your Shepherd's Pie Soup with these expert tips for a truly indulgent experience. For added flavor, ensure to brown the meat thoroughly before incorporating it into the soup, establishing a nice savory base. Fresh herbs such as thyme and rosemary make for perfect companions, filling the soup with traditional flavors and a refreshing smell. Incorporate seasonal vegetables to tailor the soup to your taste, and also to introduce different textures and nutrients to the mix. For a creamier consistency, consider adding a touch of heavy cream or a dollop of sour cream before serving. Finally, top with crispy fried onions or freshly shredded cheese to introduce a delightful crunch and additional layers of flavor that may elevate the dining experience to new heights for your taste buds.

What to Serve with Shepherd’s Pie Soup

Consider pairing this pie with crusty bread or a warm, buttery roll, perfect for dipping into the rich and savory broth. A crisp green salad also serves as an excellent complementary dish, providing a refreshing contrast and some color to the meal. Alternatively, roasted or grilled seasonal vegetables offer an additional layer of warmth that goes nicely with the soup’s comforting essence. To elevate the dining experience, offer a selection of cheeses like sharp cheddar or tangy goat cheese to sprinkle over the soup, enhancing its creamy texture and adding more and more depth to the flavor. Finish off this great meal with a light dessert, such as lemon sorbet or apple crumble, to cleanse the palate and finish off a great meal with a nice, sweet finish.

Can you Freeze Shepherd’s Pie Soup?

Shepherd's Pie Soup is wonderfully convenient as a make-ahead meal option, given its ability to be successfully frozen. To ensure optimal freezing, allow the soup to cool completely before transferring it into airtight containers or freezer-safe bags. Leave some space at the top of the container to allow for the soup's expansion as it freezes. For best results, enjoy the frozen soup within three months to retain its best flavor and texture. When ready to dig in, first defrost the soup in the refrigerator overnight, then gently reheat it on the stove for an easy and warming meal that brings back the cozy flavors of Shepherd’s Pie Soup any time you want.

Proper storage of Shepherd's Pie Soup ensures that every bite is as fresh and delicious as when you first made it. Store leftovers in an airtight container in the refrigerator, where they'll stay flavorful for up to 3-4 days. For extended storage, freeze the soup in a freezer-safe container, remembering to leave some room for expansion, and enjoy it within 2-3 months for optimum taste. To thaw efficiently, transfer the frozen soup to the refrigerator and allow it to defrost overnight before proceeding with reheating. Both the stovetop and microwave offer excellent reheating options. When on the stovetop, use low heat and stir occasionally, and when in the microwave, cover the soup and heat in intervals, stirring between each for balanced warmth. This ensures that each spoonful of Shepherd’s Pie Soup delivers the creamy, savory delight it's known for, no matter when you choose to enjoy it.

Shepherd's Pie Soup brings the comforting feel of the original pie into a bowl. It captures the rich flavors of ground meat, hearty vegetables, and creamy potatoes, all perfectly blended into a savory broth. This dish makes for an easy, comforting meal, that is just perfect for whipping up on chilly days. Additionally, the soup allows for many creative adaptations, allowing you to explore different meats and favorite seasonal vegetables. With every spoonful, savor the familiar taste you love. Embrace that comfort and warmth that this Shepherd’s Pie Soup offers and be sure to follow for my next soup recipe.

Ingredients

1 lb Ground Beef

1 tablespoon Salted Butter

1 Yellow Onion diced

2 ribs Celery diced

2 carrots diced

3 cloves Garlic minced

32 oz Beef Bone Broth

2 tablespoons Tomato Paste

1 cup Frozen Peas

1 tablespoon Coconut Aminos

1 teaspoon Thyme, dried

1 teaspoon Salt

1 teaspoon Pepper

For additional creaminess add 1/2 cup heavy cream or buttermilk (optional)

3 cups mashed potatoes

1/2 cup grated cheddar cheese

Fresh parsley

Instructions

1. In a large stockpot (4 or 6 qt) cook ground beef over medium-high heat. Once fully cooked and broken into bite sized pieces drain and strain excess fat. Let sit aside while preparing rest of soup.

2. Add butter to the same empty pot, letting melt. Add in garlic, onion, carrots and celery letting cook until onion is transparent.

3. Add ground beef back into pot with veggies. Add in coconut aminos, thyme, tomato paste, salt and pepper. Letting come together. Once mixed well add in beef broth and let cook for 20-25 minutes until veggies are tender and soup has had time to come to a low simmer. Add in frozen peas the last 5 minutes.

4. Turn off heat and add in heavy cream if you are wanting it creamier. Ladle into soup bowls and add mashed potatoes on-top. (Make these to your liking or use leftovers you might have) now sprinkle cheese on-top.

5. Optional but I like to now put my soup bowl in the stove at 350 for 10 minute or until top of soup has a little browning and cheese is melted (totally optional). Sprinkle with parsley and serve your Shepherds Pie Soup!

Other Delicious Soup Recipes:

Deliciously Creamy Basil Tomato Soup: An Easy and Delicious Recipe

Easy & Flavorful Fiesta in a Bowl: Ultimate Slow Cooker Chicken Tortilla Soup Recipe!

Bring the Heat with this Deliciously Spicy Tortellini Soup

Delicious One-Pot Italian Lasagna Soup for Busy Weeknights!

An Alluring Combination: French Onion & Shallot Soup Recipe

Mom's Favorite Minestrone Soup Recipe

Deliciously Warm Your Soul: Guide to Creamy Corn Chowder Soup

Italian Sausage, Potato & Kale Soup

The Ultimate Guide to Creamy Cheddar Cauliflower Soup

Deliciously Irresistible Loaded Potato Soup Recipe You Can’t Miss!

As the weather cools, this timeless soup recipe is always a staple in my house. This Loaded Potato Soup Recipe is rich with delicious flavors and creamy textures, and it not only warms your body but also feels so comforting. This dish brings together the heartiness of potatoes, the smoky goodness of bacon, and the joy of good cheese, creating a masterpiece in a bowl. Whether you're seeking a cozy meal for a chilly evening or just craving something indulgent, a loaded potato soup is just the right choice. Follow this guide and master the art of creating this irresistible soup that is sure to become one of your go-to recipe for years to come.

Ideal for cold days, this soup is easy to prepare and can be presented on the table in under an hour. Customizing your toppings means each bowl can become a unique experience that aligns with individual taste preferences. You can even get creative, and feel free to leave some ingredients off and allow your guests to experiment with each topping themselves. Paired with crusty bread or a simple side salad, this loaded potato soup isn't just an average night dish, it's a can't miss family favorite meal that brings everyone to the table.

Tips for Perfect Creamy Potato Soup

Creating the perfect creamy potato soup requires attention to detail and quality ingredients. Yukon Gold or Russet potatoes are ideal for this dish. Their natural creaminess and ability to blend well create the best texture that a genuine potato soup demands. Before introducing the potatoes, you'll first want to sautΓ© onions and garlic in butter to give a flavorful start. This simple step helps to enhance the overall taste, adding to your soup.

Incorporating heavy cream or whole milk will transform the consistency of the soup to a rich, velvety taste and texture. For those who prefer a smooth soup with a bit of chunk, blend a portion of the mixture while leaving some potato pieces intact. This technique ensures every spoonful has a great combination of creamy and chunky flavors. Topping the soup with crispy bacon, shredded cheese, and chopped green onions not only elevates the flavor but also adds a visually pleasing garnish that your taste buds will appreciate.

How to Make Potato Soup

The process of making a delightful potato soup starts with gathering all the necessary ingredients of potatoes, bacon, onion, garlic, chicken broth, heavy cream, cheese, and seasonings. Begin by cooking the bacon until it reaches the perfect crispness, then set it aside, leaving some bacon fat in the pan for added flavor. This bacon grease will also be the base for sautΓ©ing onions and garlic until they become soft and fragrant and perfectly work into every bite of the soup.

Next, add diced potatoes and chicken or vegetable broth, allowing the mixture to simmer until the potatoes are tender. This gentle simmering enhances the creaminess of the soup. Blending or mashing the cooked potatoes enables you to customize the texture, before mixing in the heavy cream and cheese. Customizing the toppings allows you to personalize each serving. Consider including chives, green onions, sour cream or additional cheese for a twist that suits your palate. No matter how you customize this soup, it promises to be hearty and comforting and great for any season.

Everything You’ll Need to Make This Recipe

Setting up for success with this recipe involves gathering all essential ingredients. Begin with the core ingredients of potatoes, bacon, cheddar cheese, and green onions. It's also crucial to have staple pantry items like chicken broth, butter, flour, and cream ready to create the rich base of the soup. Don't forget your seasonings such as salt, pepper, and garlic powder to enhance the overall flavor. Then, break out your large pot, stirring spoon, and cutting board as they are essentials. To add a fresh and zesty touch, green onions can be used as a garnish, giving each serving a special color and flavor. Together, these ingredients come together to create a wonderful soup. To elevate the richness of your soup, consider optional toppings like sour cream, chives, or extra cheese. These small additions can upgrade the taste and texture profile of the dish.

Frequently Asked Questions About This Recipe

Some may wonder if they can substitute ingredients, like using sweet potatoes instead of regular. The simple answer is yes, though the taste will vary, so adjust your seasonings accordingly for this change. As mentioned, choosing the right potatoes is crucial, and varieties like Russets are preferred. For those picky about texture, controlling the soup's thickness can be achieved by adding more cheese or reducing the simmering time. Cooking times may vary, but tenderness guides the process. When it comes to leftovers, storing in airtight containers preserves freshness, and reheating should be done gently to maintain the best flavor. If freezing, you will be able to do so in an airtight container for up to 6 months. Additionally, for dietary modifications, consider dairy-free substitutes or gluten-free ingredients.

Can I Make Loaded Potato Soup in a Slow Cooker?

A slow cooker does offer a convenient alternative for preparing loaded potato soup. By incorporating your essential ingredients of potatoes, broth, onions, garlic, and seasonings, the foundation of the soup base can be started. Cooking on a low setting over several hours helps draw out the flavors while ensuring tender potatoes.

Adding cheese, bacon, and cream towards the end not only enhances the dish's richness but also allows the flavors to come together nicely. The slow cooker method provides the added benefit of hands-off cooking, making it ideal for busy days when comfort food is desired.

How Do I Store and Reheat Leftover Loaded Potato Soup?

Preserving the deliciousness of leftover loaded potato soup is simple when following proper storage techniques. Keep the soup in an airtight container in the refrigerator for up to 3-4 days, ensuring its optimal freshness. For extended storage, utilize a freezer-safe container, leaving room for expansion to prevent bursting.

Thaw frozen soup overnight in the refrigerator before reheating. I would choose stovetop reheating over medium heat, stirring occasionally to maintain an even consistency. You can also use a microwave-safe bowl and interval heating can be used, with regular stirring to ensure thorough warming.

How Can I Thicken My Loaded Potato Soup if It's Too Thin?

If you find your loaded potato soup's consistency slightly lacking, several methods can make it thicker and enhance its richness. A cornstarch or flour slurry, made by mixing equal parts with water, can be gradually stirred into the soup. This method adds body without overpowering the existing flavors.

Also, mashing some of the potatoes within the soup not only thickens the base naturally but intensifies the potato flavor with every mouthful. For an instant effect, stir in some instant potato flakes, which thicken the soup without altering its taste. Consider incorporating heavy cream or more cheese for added richness and let the soup simmer uncovered, reducing the liquid for a thicker consistency.

Loaded potato soup is really a classic example of comfort, warmth, and satisfaction all in a bowl. This dish involves a blend of hearty ingredients that transform into a delicious meal. Whether you make it on the stovetop or take the slow cooker route, the end result is always enjoyable. Enjoy making this loaded potato soup with these detailed insights, and you're sure to have a go-to recipe that your family and friends will love.

Ingredients

8 slices of bacon

1 yellow onion

1 clove of garlic, minced

4 large russet potatoes

4 cups vegetable broth

3/4 cup cheddar cheese, additional for topping

1 cup heavy whipping cream

2 tablespoons all-purpose flour

1/4 cup green onion

1/2 teaspoon salt

1/2 teaspoon black pepper


Instructions

1. In a large pot cook bacon on medium heat to your crispness. Leave grease in pan and remove to a paper towel lined plate.

2. In the large pot with bacon grease add in onion and sautΓ© until transparent. Add in minced garlic and stir until fragrant. Add in diced potatoes and let get a little crispy or slightly browned around the edges, around 5 minutes. Adding in flour salt and pepper and coat the potato and onion mixture to help absorb any oils.

3. Pour in Vegetable broth and cook until potatoes are easily pierced with a fork.

4. Now with an immersion blender blend to your liking, leaving plenty of potatoes for a thick potato bite but blending enough to give your soup a delicious thick consistency.

5. Pour in heavy cream and cheese and stir on medium heat until cheese has melted. Ladell into soup bowls and top with bacon, additional cheese and green onion or chives. You can even add a dollop of sour cream. Serve and Enjoy!


Other Delicious Soup Recipe Ideas:

Deliciously Creamy Basil Tomato Soup: An Easy and Delicious Recipe

Easy & Flavorful Fiesta in a Bowl: Ultimate Slow Cooker Chicken Tortilla Soup Recipe!

Bring the Heat with this Deliciously Spicy Tortellini Soup

Delicious One-Pot Italian Lasagna Soup for Busy Weeknights!

An Alluring Combination: French Onion & Shallot Soup Recipe

Mom's Favorite Minestrone Soup Recipe

Deliciously Warm Your Soul: Guide to Creamy Corn Chowder Soup

Italian Sausage, Potato & Kale Soup

The Ultimate Guide to Creamy Cheddar Cauliflower Soup

Achieve Restaurant-Quality Lobster Bisque at Home: Simple Steps for an Unforgettably Delicious Dinner Experience!

Creating a restaurant-quality lobster bisque at home might seem like a tough task, but with the right approach, it can be a tasty and rewarding experience. Lobster bisque is a classic dish that I love, and one that is known for its rich flavors and smooth, creamy texture. So, whether you're planning a romantic dinner or an elegant gathering with friends, making your own lobster bisque elevates any meal into a memorable occasion. This guide will walk you through the essential steps needed to master this sophisticated soup.

Discovering the secrets of restaurant-quality lobster bisque in your own kitchen can be an exciting adventure. With a few essential ingredients and techniques, you can achieve the rich, creamy texture and deep, savory flavors characteristic of this classic seafood soup. The key lies in following a step-by-step guide that simplifies the cooking process, making it easy enough for any skill level of home chefs. We'll explore tips for selecting the best lobster and options for substitutions or enhancements to tailor the bisque to your taste. By following these tips, you too can transform any meal into a special occasion with an unforgettable dining experience.

What is Lobster Bisque Made Of?

Lobster bisque is a creamy and flavorful soup that begins with a rich, homemade lobster stock. This luxurious dish draws its irresistible taste from a combination of fresh ingredients that are simmered to perfection. Essential components include fresh lobster, paired with aromatic vegetables such as onions, carrots, celery, garlic, and tomatoes. These elements provide the base flavors, which develop further depth with the addition of heavy cream and butter, resulting in a decadent texture. To enhance the bisque's complexity, herbs like thyme and bay leaves are added, as well as white wine, cognac or sherry.

The soup achieves its smooth consistency through careful blending, ensuring all ingredients are merged into a seamless blend. The final touch before serving often includes garnishing with chunks of tender lobster meat, adding an extra layer of sophistication and indulgence. Understanding these foundational ingredients and techniques allows cooks to appreciate the delicate balance of flavors that defines lobster bisque.

How Do You Thicken Lobster Bisque?

To achieve the perfect creamy texture in lobster bisque, understanding how to properly thicken it is very important. The process begins with making a roux, which is a classic technique involving equal parts butter and flour cooked together to form a paste that serves as a creamy base. Incorporating heavy cream or half-and-half towards the end of cooking enhances the richness and thickness of the bisque without compromising its flavor profile. Blending the bisque using an immersion blender or traditional blender ensures that the soup reaches its signature smooth and velvety texture while bringing together all its flavors perfectly.

Additionally, natural thickeners such as pureed vegetables like carrots or potatoes can be added to enrich the bisque further and enhance its nutritional content, if needed. Some cooks will opt to adjust the consistency by introducing a cornstarch or arrowroot slurry as well. Remember to always ensure the mixture is added gradually to achieve the desired thickness. Continuous stirring and care ensure the bisque turns out perfectly creamy.

What Alcohol is in Lobster Bisque?

Incorporating alcohol into lobster bisque is a time-honored tradition that enriches its already robust flavor profile. Often, a splash of dry white wine is used to enhance the bisque's savory flavors, providing an acidic balance to its creaminess. Some traditional recipes may include brandy or sherry, adding complexity with a touch of sweetness and depth. The alcohol content typically evaporates during cooking, leaving behind a nuanced flavor that elevates the dish. So, no need to worry about getting a buzz off of your soup. White wine, known for its citric acidity, plays a crucial role in balancing the bisque's richness. On the other hand, brandy or sherry provides warmth and sophistication, and pairs beautifully with the natural sweetness of the lobster. Opting for high-quality alcohol ensures these flavors complement rather than overpower and helps to achieve a gourmet experience.

Lobster Meat & What Kind To Use

The tender and succulent nature of lobster meat makes it an ideal ingredient for high-quality lobster bisque. Fresh lobster meat is the preferred choice for this dish, though frozen alternatives can be used when accessibility is an issue, ensuring convenience for home cooks. The meat's unique textures and flavors, sourced from lobster tails and claws, contribute significantly to the complexity of the bisque.

Choosing the right type of lobster is very important for making a great bisque. Live Maine lobsters are renowned for their sweet and tender meat, making them the ideal choice for this dish. Opting for fresh and sustainably sourced lobsters not only enhances flavor, but also supports responsible fishing practices.

Smaller lobsters actually tend to have more flavorful meat, which adds depth to soups like bisque. Proper cleaning and preparation of lobsters are essential, ensuring all the rich flavors are extracted effectively for your bisque. While frozen lobsters are available, they often compromise the dish's taste and texture, and I think are best to be avoided.

Proper preparation of lobster meat is crucial to achieving restaurant-quality results. This includes careful cooking methods and incorporating lobster shells in the stock to maximize flavor. The shells give additional depth to the broth, and makes sure the bisque has a rich foundation. Mastering the art of preparing lobster meat allows your bisque to reach new heights of sophistication and taste.

How to Serve Lobster Bisque

Serving lobster bisque involves a few key steps to ensure the dish is presented at its finest. Ensuring the bisque is smoothly blended and seasoned to taste beforehand is essential, and adjusting salt and pepper as needed can refine its flavor profile. The serving bowls you use should be warmed before plating to help maintain the bisque's ideal temperature throughout the dining experience.

Consider garnishing the dish with fresh herbs, such as parsley or chives, for an added pop of color and freshness that enhances the visual appeal. Accompanying the bisque with crusty bread or warm rolls complements its creamy texture nicely. Pairing the dish with a suitable wine, like a Chardonnay or Sauvignon Blanc, rounds out the meal for a complete and elevated dining experience.

How To Store and For How Long

Storing lobster soup correctly ensures it maintains flavor and safety for future enjoyment. Allowing the soup to cool to room temperature before storing helps prevent bacterial growth and maintains quality. Once cooled, transfer the soup into airtight containers, leaving a small amount of space at the top for potential expansion during storage. Use an airtight container to maintain its quality and prevent any contamination from outside odors or substances. It's generally recommended to consume refrigerated bisque within 2-3 days, ensuring it retains its creamy texture and rich taste. For extended storage, place the soup in the freezer, where it can be kept for up to 3 months. When you're ready to enjoy the soup again, thaw it in the refrigerator overnight and gently warm it on the stovetop to preserve its creamy texture.

Reheating the bisque gently on the stove over low heat is crucial, as high temperatures can alter its consistency. While freezing lobster bisque is possible, it is typically discouraged due to potential cream separation. Proper refrigeration practices can help maintain its integrity. Always check for any off odors or changes in texture before consuming leftovers to ensure both safety and quality.

Can I Make Lobster Bisque Without Heavy Cream for a Lighter Version?

Creating a lighter version of lobster bisque is possible by making smart ingredient substitutions. Coconut milk or cashew cream are excellent alternatives to heavy cream, achieving a creamy texture while helping to reduce calories. Thicken the bisque with a roux made from flour and a lighter butter or oil for a more delicate consistency.

Incorporating freshly pureed vegetables like carrots and celery can enhance richness naturally, preserving the dish's flavorful aspect. Using low-sodium chicken or seafood stock as a base allows you to control the salt levels, making the bisque healthier. Finally, a splash of white wine or lemon juice adds complexity and brightness without unnecessary fats or calories.

Ingredients

4 Lobster tails, medium sized

1/4 cup Butter

1 Onion, Chopped

2 Carrots, Chopped

2 Celery stalks, Chopped

2 Garlic Cloves, minced

2 Tablespoons Tomato Paste

1/3 cup dry White Wine

1/3 cup Cooking Sherry

4 cups Lobster Stock

1 teaspoon Fresh Thyme

1 Bay Leaf

1 1/2 Cups Heavy Cream

Salt & Pepper to taste

Fresh Parsley for garnish

Instructions

1. Boil lobster tails until cooked. Reserve 4 cups of water from boiling. Once lobster is fully cooked remove tails from shell. Keep shells and cut tails into bite-sized pieces, set aside.

2. In a large pot start building the base. Heat butter, add in veggies (onions, carrots and celery). Cook until softened and onions are translucent. Add in minced garlic and cook another minute.

3. Add in tomato paste and cook for a few more minutes to intensify the flavor. Once blended pour in white wine and sherry, cleaning around the sides and scrape up and bits from the bottom of the pan.

4. Now add in the lobster shells and stock from earlier. As well as the thyme and bay leaf. Let come to a simmer for 30 minutes.

5. After soup has simmered you'll remove from heat and take out the lobster shells and bay leaf from pan. Using an immersion blender puree the soup until smooth. If you prefer a chunkier soup you can of course skip this step.

6. Add in the heavy cream and bite-sized pieces of lobster meat (leave a little out if you would like to use onto for garnish). Cook for a few more minutes on medium-high heat. Season with salt and pepper to your liking.

7. Ladle the soup to a bowl and garnish with parsley and chunks of lobster. Serve and Enjoy!

Other Delicious Soup Recipes:

Deliciously Creamy Basil Tomato Soup: An Easy and Delicious Recipe

Easy & Flavorful Fiesta in a Bowl: Ultimate Slow Cooker Chicken Tortilla Soup Recipe!

Bring the Heat with this Deliciously Spicy Tortellini Soup

Delicious One-Pot Italian Lasagna Soup for Busy Weeknights!

An Alluring Combination: French Onion & Shallot Soup Recipe

Mom's Favorite Minestrone Soup Recipe

Deliciously Warm Your Soul: Guide to Creamy Corn Chowder Soup

Italian Sausage, Potato & Kale Soup

The Ultimate Guide to Creamy Cheddar Cauliflower Soup

Ring In The New Year with A Spectacular NYE Clock-Themed Charcuterie Board That Everyone Will Rave About!

New Year's Eve is a time for celebration, anticipation, and counting down the moments until a fresh start. What better way to toast to the upcoming year than with a fun centerpiece that combines both taste and theme with this New Year’s Eve clock charcuterie board. This unique take on a classic favorite is designed to wow your guests with your creativity and add an element of fun and sophistication to your festivities. Dive into the magic of designing, assembling, and customizing this delightful spread, and learn how to make it a memorable part of your New Year's Eve party.

Designing a New Year's Eve clock-themed charcuterie board allows you to blend creativity with the perfect grab-and-go food, setting the stage for a festive celebration. Making your board to resemble a clock brings a touch that perfectly rings in the New Year. Start by arranging your round cheeses, each numbered from 1 to 12 into a clock around a circular board. Next, you'll select your assortment of meats, cheeses, fruits, and nuts that you will place around each number. Enhance this whimsical concept with sparkling touches, such as gold-dustings, rock candy, star shaped cookies and sugar covered fruits, all of which can elevate the board's aesthetic allure for the occasion.

Creating a visually stunning board involves careful selection of shapes, colors, and textures. Using a round serving platter can perfectly capture the likeness of a clock face, providing the perfect base for symmetry and balance. Experiment with different textures, such as creamy cheeses next to crunchy nuts. This will help to cater to a wide array of palates and ensure the board is as delicious as it is beautiful.

- Layered brie or hard cheeses to serve as the numbers on the clock.

- Sparkling grapes or figs to match the festive cheer.

- Edible flowers or gold flakes to highlight thematic touches.

- Large round board to set the stage for the design.

- Circular cheese arrangement for clock hour representation.

- Intermittent cured meats for taste and visual appeal.

- Fillers like fruits, pistachios, and olives to complete the board.

- Crackers or breadsticks as clock hands to indicate time.

By thinking outside the box and implementing a thematic approach, your New Year's charcuterie board will not only satisfy appetites but also double as an engaging conversation starter for your guests. The heart of any charcuterie board lies in its delectable mix of ingredients, and your New Year's Eve clock-themed board is no exception. An ideal board incorporates a delicious blend of cheeses, meats, fruits, and nuts, creating an irresistible array of flavors and textures. Choose a selection of cheeses like creamy goat cheese, sharp cheddar, or tangy blue cheese to provide varieties to your taste experience. The success of your board lies in the balance of assembled presentation and taste, capturing the spirit of New Year's Eve while providing a feast for both the eyes and the mouth.

Can I Make The Board Ahead?

One of the advantages of crafting this clock-themed charcuterie board is the ability to prepare it ahead of time, granting you more freedom to enjoy the day without the stress of last-minute assembly. By putting together the board a day in advance, you ensure the nice mix of flavors and a seamless presentation.

Certain ingredients like meats and cheeses can be pre-sliced and stored in airtight containers, allowing you to maintain freshness. However, perishable items such as fruits and crackers should be added shortly before your guests arrive to ensure optimal quality. With planned organization, assembling the board on the day of the event becomes a simple and enjoyable task. Creating the board ahead of time means more time spent celebrating with friends and family instead of worrying about the majority of the board's details.

How Many People Does This Serve?

The size and scope of your clock-themed charcuterie board should reflect the guest list and nature of your New Year's Eve gathering. Designed to serve approximately 8-12 guests, this board offers opportunity for each attendee to explore your variety of flavors. If hosting a larger crowd, consider supplementing your board with additional snacks to accommodate everyone's taste preferences. I like to add in a different variety of pieces for each guest. I usually start with 6 different things - 1 meat, 1 cracker, 1 cheese, 1 fruit, 1 nut and 1 extra (something sweet in this case) and then add on an additional variety for each additional guest. This gives you a good base but remember the length of party as well. The longer the party, the more food you will want to have, and my golden rule is to never run out of food for your guests. Leftovers are always a plus and, to me, it looks better then running out.

Balancing the diversity of meats, cheeses, and accompaniments is important to satisfy a wide range of palates. This approach ensures that dietary preferences and needs are met without compromising the board's visual impact. A beautiful presentation often brings in the guests, inviting them to engage around the spread and enjoy its delicious offerings. A well-prepared, aesthetically pleasing charcuterie board becomes a great focal point of your celebration, naturally inviting everyone to linger around it and enjoy the festivities.

How to Keep My New Year's Eve Charcuterie Board Fresh Throughout the Evening

Keeping your New Year's Eve charcuterie board fresh is crucial for sustained appeal and satisfaction throughout the evening. Placing your board appetizer in a cool area, away from direct heat sources like fireplaces or heaters, helps maintain freshness of your ingredients. Consider using ice packs or a chilled serving tray beneath the board to keep perishable items at an optimal temperature.

Regularly replenish the board with fresh portions of meats, cheeses, and fruits as they get consumed, preventing any items from appearing depleted or unappealing. Cover the board with plastic wrap if it's not in active use to retain its freshness and store it safely in the refrigerator if necessary. Also, use small serving utensils to minimize direct handling and cross-contamination. By taking these steps, you can confidently present an inviting charcuterie board that maintains its freshness and appeal from the first toast of the night, until the final countdown.

Non-Traditional Items to Wow Guests on a New Year's Eve Charcuterie Board

Adding unique elements to your New Year's Eve charcuterie board can elevate the experience for your guests, turning it from a traditional spread to an unforgettable one. Incorporate colorful and exotic fruits such as pomegranate seeds and starfruit slices to be a little different, adding both visual and taste variety. Decorative edible flowers or sprigs of fragrant herbs can lend elegance and fragrance to your presentation. Introduce sweet surprises like dark chocolate truffles or honeycomb pieces, offering a perfect balance to the savory selection.

Ingredients Used Here:

Sugared Green Grapes

Sugared Cranberries

Blackberries

Blueberries

Sliced Pears

Salami

Prosciutto

Crackers

Star Walkers Cookies

Goat Cheese

Round Baby bell cheese

Melted Chocolate (to make numbers on baby bel)

Gold dust edible glitter

Instructions

Have fun and arrange to your liking! There are no rules here just fun being creative!

Other Charcuterie Board Inspiration :

2023: Charcuterie Board Ideas to Help You Ring in the New Year

Delight Your Guests with an Antipasto Christmas Wreath

Celebrating Mother's Day with a Deliciously Decadent Charcuterie Board

Creating the Perfect Light & Fresh Italian Summer Charcuterie Board

Welcome To Summer Charcuterie Board for Your Next Gathering

Creating the Perfect Memorial Day Charcuterie Board

A Guide to Creating a Magical St Patrick's Day Charcuterie Board

Discover the Irresistibly Delicious Slow Cooker Cinnamon Roll Casserole Recipe Today!

Indulging in a warm, gooey cinnamon roll casserole has become even more delightful with the convenience of using a slow cooker. The Slow Cooker Cinnamon Roll Casserole brings together the rich flavors of cinnamon, sugar, and a sweet, decadent icing that makes each bite pure bliss. Whether it's served for breakfast, brunch, or as an anytime treat, this dish lets you enjoy the simplicity of a classic favorite with minimal effort. With its ease of preparation, this casserole is perfect for gatherings or a cozy family morning, offering a rich taste that is bound to become a beloved staple in your home.

How to Make Cinnamon Roll Casseroles in a Slow Cooker

Creating a mouthwatering Cinnamon Roll Casserole is a straightforward process when using a slow cooker. Begin by gathering your essential ingredients: pre-made cinnamon rolls, eggs, milk, vanilla extract, cinnamon, nutmeg, and optional toppings such as nuts or icing. Start by cutting the cinnamon rolls into quarters and placing them in the slow cooker, ensuring they spread evenly. This step lays the foundation for a perfectly layered casserole. Next, whisk together the eggs, milk, vanilla, cinnamon, and nutmeg in a bowl, creating a luscious custard mix that adds richness to the dish. Pour this mixture evenly over the cinnamon roll pieces, immersing them in flavor. By using a slow cooker, you allow the ingredients to meld beautifully, resulting in a dish that is both aromatic and delicious.

Tips on upgrading this delight with optional add-ins like nuts, raisins, or a drizzle of caramel sauce encourages creativity and personalization. By experimenting with different additions, you unveil the versatility of the casserole, ensuring it meets the tastes of any crowd and becomes a cherished option for any table.

What to Serve with Cinnamon Rolls?

Elevate your slow cooker cinnamon roll casserole by pairing it with complementary sides. Begin with fresh fruits like berries or sliced apples, lending a refreshing contrast to the sweetness of the casserole. These naturally sweet accompaniments create a balance of flavors, perfect for a well-rounded breakfast experience. A warm cup of coffee or tea heightens the cozy ambiance, while savory sides such as bacon or sausage provide a pleasing contrast to the sugary delight. Topping the casserole with a dollop of whipped cream or a scoop of vanilla ice cream transforms it into a decadent dessert. The combination of these options ensures that every bite of your cinnamon roll casserole is a culinary delight.

Ensuring Longevity: How Long Does Crock Pot Cinnamon Roll Casserole Last in the Fridge?

After enjoying your delicious crock pot cinnamon roll casserole, you might find yourself with leftovers. Proper storage ensures it remains just as delectable in the coming days. The casserole can be preserved in the refrigerator for up to 3-4 days. To maintain its freshness, keep it in an airtight container, preventing unwanted moisture or smells from impacting its taste. Allow the casserole to cool completely before refrigerating, as this prevents condensation which could lead to sogginess. This way, you can enjoy the delightful flavors of your cinnamon roll casserole over several days or even reserve it for a future craving.

Can I Make These in the Oven?

Yes, this scrumptious cinnamon roll casserole can be made in the oven for those who might not have a slow cooker at hand. Preheat your oven to 350Β°F (175Β°C) to get the best baking results. Assemble the ingredients similarly to how you would for the slow cooker version: cut cinnamon rolls into pieces, mix the custard separately, and layer everything in an oven-safe dish. Bake for about 25-30 minutes or until the top turns golden and the contents are bubbly. This oven method ensures quicker preparation while retaining the delicious flavors we all love. By baking in the oven, you enjoy a quicker version of the same beloved dish without sacrificing any of the sweetness or texture.

Embrace the joy and aroma of this Cinnamon Roll Casserole made effortlessly in a slow cooker or baked in an oven. With its enticing flavors and simple preparation, this dish provides a wonderful start to any day or a delightful addition to brunch gatherings. Whether enjoyed immediately or stored for later indulgence, it offers a comforting reminder of homemade warmth and joy with every bite. Experiment, savor, and discover why this slow cooker cinnamon roll casserole is a recipe you'll return to time and again and will soon become on of your Christmas favorites like at our house.

Ingredients

4 tubes of refrigerated premade cinnamon rolls

1/2 cup salted butter, melted

1 cup heavy whipping cream

1 cup maple syrup

8 eggs, beaten

1 tablespoon cinnamon

1 tablespoon vanilla extract

1/4 cup chopped pecans, optional

Instructions

1. Add melted butter to bottom of slow cooker and evenly coat around the edges. Cut up your cinnamon rolls into 4. Add to bottom of slow cooker.

2. In a separate bowl whisk eggs until well beaten. Add in heavy cream, maple syrup, cinnamon, and vanilla extract. Pour over top of cinnamon rolls. Set slow cooker to medium heat, if using a 360 cookware slow cooker set to 2. let cook for 2 to 2 1/2 hours.

3. Once finished you will see a slightly golden brown top and center will not be giggly. Use icing from the cinnamon roll packaging and pour over top. Serve and Enjoy!

Warm-Up Your Winter with This Irresistibly Delicious Gingerbread Affogato Recipe: A Sweet Treat You Can’t Resist!

As the chilly breeze brings in the winter months, nothing feels more comforting than a dessert that combines that touch of sweetness with a little bit of warmth. This Gingerbread Affogato Recipe is the perfect concoction that combines rich espresso tastes with yummy gingerbread flavors and ice cream. This heavenly blend not only warms your soul but also serves as a festive treat for you and your guests.

The unique Gingerbread Affogato is the perfect winter treat, made from the fusion of intoxicating espresso and gingerbread flavors and ice cream. This affogato gives the soothing comfort of a warm drink and the refreshing chill of ice cream, surrounded by the festive aroma of seasonal spices like cinnamon and nutmeg. This dessert offers a delight to the senses with its blend of temperatures and textures, making it an ideal indulgence during the colder months. Made with simple yet key ingredients like freshly brewed espresso and a hint of seasonal spices, this recipe is both a creative twist on traditional sweets and a crowd-pleaser. Whether you're hosting a festive gathering or enjoying this drink alone, this Gingerbread Affogato captures the spirit of the holidays in each delightful spoonful, making it a must-try for dessert enthusiasts.

Espresso

The espresso component of the Gingerbread Affogato adds a sophisticated boldness that perfectly complements the sweet and spicy delight of gingerbread flavors. Espresso, a concentrated brew obtained by forcing hot water through finely-ground coffee beans, offers a unique taste that enriches any dessert. A traditional affogato features a shot of hot espresso poured over ice cream, and with this gingerbread version, the combination of the warm spices enriches the intense coffee notes even more. This contrast creates a comforting experience and warmth with each spoonful.

Creating the Gingerbread Affogato is an exciting trip into comforting, wintry flavors that come together without fuss. The process involves pairing creamy vanilla ice cream, a tasty spoon full of molasses, all with a piping hot shot of espresso. The blending of the stimulatingly hot with invigoratingly cold is what makes this treat unique. It's simple and only requires a handful of ingredients that result in a dish that leaves an impression. Finished with shot of coffee liquor and a sprinkle of crushed gingerbread cookies or a hint of cinnamon, it has amazing taste and texture and adds festivity to your table.

To craft the Best Gingerbread Affogato will make you a hostess to remember. Its distinctive concoction of bold espresso combined with sweet-spicy gingerbread is what makes it stand out. Begin your culinary adventure by preparing a gingerbread-infused ice cream base and follow with a steamy hot espresso shot. As a finishing touch, decorate each serving with whipped cream, gingerbread crumbs, or a rich caramel drizzle for added decadence. This dessert’s ability to satisfy both the eyes and the palate makes it a wonderful choice for holiday gatherings or intimate occasions.

What Ingredients Do I Need to Make a Gingerbread Affogato?

To craft a Gingerbread Affogato, you'll need a carefully curated list of ingredients, each contributing to the classic affogato experience.

- Espresso: Essential for its rich and robust aroma.

- Ice cream: Delivers the signature creamy essence.

- Coffee Liquor: Giving a delicious night cap.

- Crushed gingerbread cookies: Provides texture and enhances the spice.

- Ground cinnamon or nutmeg (optional): Offers aromatic spice.

By combining these components, you can craft a drink and dessert that not only pleases the palate but delights the senses.

How Do I Prepare the Gingerbread Cookies for the Affogato?

Fresh, homemade gingerbread cookies can elevate your affogato to new heights. Start with gathering the necessary ingredients and preparation tools. Roll out the dough to your preferred thickness on a floured surface, utilizing festive-shaped cutters to create your cookie shapes. Transfer these to a baking sheet, following the baking instructions until golden brown. Allow the cookies to cool completely, ensuring they're ready for that perfect crumble on your affogato. These cookies not only accentuate the flavors but also serve as a delightful representation of your seasonal spirit. For my delicious gingerbread cookie recipe click here.

Can I Use a Different Type of Coffee for the Affogato?

Absolutely, the Gingerbread Affogato permits modifications, including experimenting with different coffees to customize your experience. Although traditional affogato utilizes espresso, opting for a milder coffee like a flavored brew or a cold brew might appeal to different preferences. Specialty coffees can give unique taste dimensions, and it's crucial to consider their strength. Using high-quality coffee ensures that the fusion of gingerbread and espresso remains at its best. Every variation allows for a fresh take, keeping your gingerbread affogato enticing and never dull.

Is it Possible to Make a Non-Dairy Version of the Gingerbread Affogato?

Creating a non-dairy option of Gingerbread Affogato is straightforward, given the abundant variety of dairy-free options available. Substitute traditional ice cream with coconut, almond, or soy-based alternatives that maintain creamy textures. Likewise, craft espresso using plant-based creamers or milk for a full-bodied substitute. Enhance with gingerbread spices or syrups to ensure an authentic feel. Cap your creation with non-dairy whipped toppings for both taste and visual flair. Maintain the authentic appeal while accommodating dietary preferences.

How Should I Serve the Gingerbread Affogato for the Best Presentation?

Presentation elevates the Gingerbread Affogato to new heights, enticing both the eyes and palate. Begin with a clear glass or elegant cup to capture the layered beauty of your creation. Place a scoop of your gingerbread ice cream or gelato into the glass, then proceed to brew a fresh espresso shot, pouring it over the ice cream for the delightful mixture. Garnish with a sprinkle of ground cinnamon or crushed cookies, presenting the dessert with added visuals and aroma. Serve with a small spoon and a side of biscotti for a comprehensive enjoyment. Enhance the indulgence of this lovely treat with a captivating presentation, ensuring your Gingerbread Affogato shines brightly at any occasion.

Ingredients

1 shot of espresso

1 tablespoon molasses

2 spoon full of vanilla ice cream

1 oz shot of coffee liquor

Instructions

1. Mix together espresso, coffee liquor and molasses until well combined. Pour over 2 scoops of vanilla ice cream, serve in coupe glasses and enjoy! A very simple and delicious cocktail that doubles as dessert.

There you have it! The best Gingerbread Affogato recipe that not only delights the tastebuds but also enhances the winter spirit. Whether you're savoring these rich flavors alone or sharing the warmth with guests, this dessert is the perfect comforting symbol of the season. Embrace the chill with a warm affogato in hand and let the scents of espresso and gingerbread elevate your seasonal celebrations.

Indulge in the Irresistible Delight of Gingerbread Cake with a Decadently Rich Brown Butter Caramel Frosting!

There's something inherently magical about the fusion of flavors found in a Gingerbread cake with a Brown Butter Caramel Frosting. As the holidays approach, it becomes the ideal showstopper dessert, rich in tradition yet infused with a modern twist. This delectable cake combines the aromatic spices of gingerbread with a luxurious topping that elevates its appeal, providing a slice of heaven perfect for any celebratory gathering or cozy winter evening.

The beauty of gingerbread lies in its complex flavor profile, offering a symphony of warm and spicy notes. Gingerbread cake boasts the aroma of ginger, the comforting warmth of cinnamon, and the subtle undertone of nutmeg, crafting an inviting taste. This cake's structure is perfected by the addition of Salted Caramel Buttercream, where the richness of caramel is balanced by a hint of salt, making every bite utterly tantalizing. The buttercream, infused with brown butter, adds decadence that elevates the cake to new gourmet heights.

This combination, however, is more than the sum of its parts. The cake's crumb is delightfully moist, working in perfect harmony with the smooth texture of the frosting, creating a melt-in-your-mouth experience. While the complexity of flavors makes it a sophisticated dessert, the familiar spicy notes render it nostalgic, evoking the warmth of home and tradition. Ideal for holiday dinners, this cake causes family and friends to gather around in eager anticipation, making your celebrations all the more memorable.

How to Store Leftover Frosting

The secret to enjoying any dessert over time lies in how well it's stored. When it comes to leftover brown butter caramel frosting, proper storage ensures that both flavor and texture remain perfectly preserved. Transferring the frosting into an airtight container is the first step to maintaining its freshness and preventing it from taking on any unwanted flavors or odors from the fridge. If you plan to use it within a few days, simply refrigerate it, allowing for a quick return to its original, luscious state.

For those seeking to savor leftover frosting over an extended period, freezing is an excellent option. Ensure the frosting is packed in a freezer-safe container with a tight seal, effectively preserving its silken texture and taste for up to three months. As you're ready to enjoy it once more, thaw it in the fridge overnight, and let it reach room temperature before stirring or re-whipping to restore its creamy smoothness. Each step ensures that every dollop of frosting remains as indulgent as the first time you made it.

Can I prepare the gingerbread cake in advance? How should I store it?

Absolutely, the gingerbread cake can be prepared in advance, an advantage for those with busy schedules or those seeking enhanced flavor with time. To ensure it retains its delectable characteristics, allow the cake to cool completely after baking. Then, either wrap it tightly in plastic wrap or encase it in aluminum foil to preserve its moisture and keep it fresh. For short-term storage, place the wrapped cake in an airtight container at room temperature for up to three days. For longer durations, refrigeration is suitable up to a week, while freezing extends this finery's life to three months. Whether you opt to enjoy the cake soon after or relish it later, rest assured it will maintain its delightful crumb and spice, offering a slice of joy whenever it's served.

Tools You Need for Gingerbread Cake with Brown Butter Frosting

Crafting a masterpiece like a gingerbread cake with brown butter frosting requires precision and the right set of tools. Begin by gathering all the mixing essentialsβ€”whether you prefer a trusty stand mixer or a hand mixer, these will facilitate a smooth combination of ingredients, leading to an even and airy cake batter. To achieve the perfect cake layers, using recommended baking pans, such as 9-inch rounds or a 9x13-inch rectangular, is crucial.

Preparing the pans with parchment paper and a good non-stick spray or sumptuous butter ensures the cake slides out effortlessly, maintaining its integrity. Accuracy in baking is key; use precision measuring tools to measure each ingredient carefully, guaranteeing consistent flavor and texture. Finally, for the grand finish, have at hand a spatula and piping bagβ€”these will become your best friends when spreading or artfully decorating the cake with the divine brown butter caramel frosting.

Key Ingredients for Gingerbread and Brown Butter Frosting and Why

Creating a gingerbread cake with brown butter caramel frosting requires a carefully curated selection of ingredients, each contributing to the overall depth and flavor. The Ginger and Spices, including cinnamon, nutmeg, and cloves, form the foundation of the gingerbread, delivering warmth and complexity essential for its signature taste. Molasses infuses the cake with a rich, robust sweetness, elevating the texture to a moist perfection that is the hallmark of authentic gingerbread.

The frosting benefits greatly from the inclusion of Brown Butter, which imparts it with a deeply nutty and intense flavor that harmonizes beautifully with the spices. It also combines beautifully with the Caramel Notes, layering the frosting with an extra dimension, creating a luxurious topping that teasingly offsets the spice-laden cake. Such a combination results in flavors that are simultaneously bold and balanced, satisfying every craving with each decadent slice.

Tips for Making Caramel

Producing the perfect caramel is as much about technique as it is timing. Begin with a heavy-bottomed saucepan, which aids in distributing heat evenly, preventing sugar from burning. As you stir the sugar over medium heat, watch as it transforms into a deep amber, a crucial stage indicative of caramelization. Slowly integrating butter into this mixture is a delicate dance, requiring constant stirring to maintain the smooth consistency vital for a faultless caramel blend.

Once the butter is fully incorporated, gradually add heavy cream while being cautious of the steam and potential splatters. Precision and patience at this stage result in a rich and creamy caramel that will rest effortlessly atop your gingerbread cake. Allow it to cool slightly; this pause helps achieve the desired consistency, ensuring it retains its lusciousness when layered as frosting, promising a flawless finish to your stunning dessert.

In the world of cakes, the Easy Gingerbread Cake with a Brown Butter Caramel Frosting distinguishes itself with its deliciously uncomplicated charm. This recipe delivers on ease without compromising on taste, offering a beautifully spiced gingerbread base paired with an opulent frosting. With a perfect blend of gingerbread's warm and spicy flavors and the frosting's rich nuttiness, this cake becomes a delightful addition to any holiday gathering.

What are the main ingredients needed for a gingerbread cake with brown butter caramel frosting?

Creating this stunning cake begins with a well-stocked pantry of essential ingredients. All-purpose flour serves as the structural base while the cardinal spicesβ€” ground ginger, cinnamon, cloves, and nutmegβ€”compose the signature spice blend unique to gingerbread. Molasses and dark brown sugar bring deep, rich sweetness, ensuring each bite is as flavorful as it is slightly chewy and moist. Within the cake batter, eggs and unsalted butter offer structure and moisture, critical for achieving the perfect crumb.

The frosting's richness is dependent on butter, confectioners' sugar, and heavy cream, essential for the desired luxurious texture. A hint of vanilla extract with a pinch of salt subtly intensifies and balances the flavors, refining both the cake and frosting into a harmonious delight. These ingredients married together create the ideal layers of this festive dessert, harmonizing warmth, sweetness, and indulgence.

Ingredients

Cake

4 cups all-purpose flour

4 teaspoons baking powder

2 teaspoon baking soda

2 teaspoon sea salt

2 tablespoon ground cinnamon

1 teaspoon ground cloves

1 teaspoon ground nutmeg

4 teaspoons ginger

1 - 1/2 cup molasses

2 cup brown butter

2 cup dark brown sugar

2 cup granulated sugar

8 eggs

3 teaspoons vanilla bean paste

1 1/2 cups heavy cream

Brown Butter Cream Cheese Frosting

8 oz cream cheese, softened

1/2 cup brown butter

1/2 cup caramel sauce

2 tsp vanilla extract

5 cups powdered sugar

Instructions

1. Preheat oven to 350 degrees and prep cake pans by oiling and adding parchment paper if you prefer.

2. Prepare the cake by adding all dry ingredients; all-purpose flour, baking powder, salt, cinnamon, cloves, and ginger into a bowl and whisking together, set aside.

3. In a large bowl mix together brown butter and both dark brown sugar and granulated sugar together. Add in eggs, vanilla and molasses.

4. Slowly add in dry ingredient mixture to bowl until well blended. Add in heavy cream slowly.

5. Pour batter into prepared pan and bake in the oven for 20-25 minutes or until a toothpick comes out clean.

6. Once fully baked let cool in a pan for 20 minutes and transfer to a cooling rack for another 30 minutes to fully cool to room temperature while you make the delicious frosting.

7. Make frosting by blending all ingredients together until fully incorporated. Ice cake and a drizzle of extra salted caramel sauce or fun gingerbread men like I did here. If adding decorative gingerbread you will just take a small portion of frosting and dye brown. Place in a piping bag and pipe gingerbread on top of the frosting of the frosted cake. Serve & Enjoy!

This simple and delicious Gingerbread cake with a brown butter caramel frosting will quickly become a go-to dessert. With its wonderfully moist and flavorful cake and rich and creamy brown butter caramel glaze, it’s sure to be a hit with family and friends.

Other Delicious Cake Recipes You Will Love:

Indulge Your Sweet Tooth with This Delicious Brown Butter Spice Cake with Honey & Fig Jam Frosting

Deliciously Sweet: Pumpkin Coffee Cake with Pecan Crumbles

Indulge in Deliciousness: Cherry Chip Cake with Chunks of Dark Chocolate Recipe

My Favorite White Cake Recipe

Savor the Sweetness: A Guide to Making Carrot Sheet Cake with Brown Butter Frosting

Zesty Indulgence: Crafting the Perfect Layered Orange Cake with Raspberry Mascarpone

Taste the Deliciousness of Pistachio Cake: A Treat for Any Occasion

Delight in Every Slice: Delicious Blueberry Cake with Mascarpone Frosting

The Irresistible Appeal of Pumpkin Chocolate Chunk Loaf

Fall season brings with it a symphony of warm spices, knit sweaters, and the undeniable allure of pumpkin-infused treats. One of those pumpkin-infused treats that perfectly marries spice and sweetness is found in this Pumpkin Chocolate Chunk Loaf recipe. This delightful bread combines the comforting taste of pumpkin with the indulgence of chocolate, making it a perfect culinary combination that gets you in the spirit of the season.

Starting with its unique flavor combination, the Pumpkin Chocolate Chunk Loaf dazzles the palate. It takes the traditional seasonal magic of pumpkin flavors and includes an unexpected partner of decadent chocolate chunks. A key to this bread's success lies in getting it to its perfect texture. The loaf boasts a moist crumb that elevates the soft pumpkin base and blends with the warm chocolate chunks which melt just enough to be gooey but still maintain their tempting form. The seasonal joy this bread brings cannot be understated. There's something about the way it draws on the comforting spices of the season that makes it an ideal choice for gatherings or as a companion to your favorite hot beverage during a beautiful Fall afternoon watching football or cheesy movies.

Whether it's the star of your morning breakfast, the sweet finale to your meals, or the pick-me-up during an afternoon slump, this loaf answers the call for comfort food across the board. It is a vibrant balance of sweet and spice that makes every bite exciting. The delicious contrast of moist pumpkin and rich chocolate offers the most divine texture.

How to Make Pumpkin Chocolate Chunk Loaf:

Creating this autumnal treat begins with a preheated oven and a well-greased loaf pan. You're laying the foundation for the Pumpkin Chocolate Chunk magic to happen. The journey starts by whisking together dry ingredients like flour, baking powder, and a medley of spices, all tied together with a pinch of salt. These form the flavorful canvas onto which your loaf masterpiece will emerge. A separate bowl becomes the mixing ground for the wet ingredients. Here, pumpkin puree meets eggs, oil, and sugar in a blend that promises to be smooth and rich. Then the real stars of the show, chocolate chunks, join this wet mix. Once they're folded in, you gradually welcome the dry elements, ensuring no lumps disrupt the batter's consistency. Once your batter graces the pan, the oven does the rest. When a toothpick inserted comes out clean, your Pumpkin Chocolate Chunk Loaf is ready to take its place as the centerpiece of your fall cuisine. As always, feel free to customize this recipe all on your own as well by adding in additional flavors and substituting options of dried cranberries, chopped pecans or anything your heart desires!

Storage and Freezing Instructions

Keeping your Pumpkin Chocolate Chunk Loaf delicious and fresh is simple with the right techniques. Room temperature storage can see that your bread remains perfect for up to three days if placed in an airtight container, left untouched by the elements.

For longer lasting freshness, wrapping the loaf with plastic wrap or aluminum foil will grant it endurance for up to a week in the cool embrace of your refrigerator. But should you wish to preserve its flavors for a full season, freezing is a winter-worthy choice. Freeze with proper wrapping before cutting to savor the loaf over months.

Whether kept chilled or at room temperature, it's always advisable to label your loaf with a date to avoid staleness.

Pro Tips for the Ultimate Loaf

Every recipe has its secrets, and this Pumpkin Chocolate Chip Loaf recipe is no different. Using high-quality chocolate is a non-negotiable, as it lends an unmatched taste that elevates the entire baking experience.

Watching the consistency of your pumpkin puree is crucial. If the puree is too watery, you'll find yourself with a soggy loaf. If you get the puree just right, you'll strike moistness perfection. To further the loaf's allure, your classic blend of autumn spices is essential.

Ease of extraction is also key when dealing with any bread loaf recipe, thus good old parchment paper is your friend. Not just for its ease, but also for those clean cuts that make every slice a visual treat. Finally, patience is a virtue, allowing the loaf to cool unveils the depth of its flavors, making the wait worthwhile.

In the world of baked goods, this Pumpkin Chocolate Chunk Loaf stands out as the perfect seasonal comfort food. Its heartwarming spices and chocolatey goodness deliver a comforting hug with every slice. Such a treat deserves a place at every fall table, and perhaps deserves its own spot within the pages of our cherished family recipes. Celebrate the cooling days ahead with a slice of this loaf and watch as the simple pleasures of baking become the canvas for lasting autumn memories.

Ingredients

1 1/2 cups all-purpose flour

1/2 tsp salt

2 teaspoons baking powder

2 teaspoons pumpkin pie spice

1 teaspoon cinnamon

1 cup canned pumpkin puree

1/3 cup brown sugar

1/3 cup granulated sugar

1/2 cup butter

2 eggs

2 teaspoons vanilla extract

1 cup chocolate chunks or semi-sweet chocolate chips

Step-by-Step Instructions

1. Preheat oven to 350 degrees and lightly spray and oil loaf pan or line with parchment paper.

2. Mix together pumpkin, both sugars, and butter (fully melted) until well blended. Add in eggs and vanilla, mix again.

3. Add in dry ingredients until well incorporated. Fold in chocolate chunks, leaving a handful behind to sprinkle on top. Pour into loaf pan.

6. Cook for 40-45 min or until a toothpick inserted in the center comes out clean. Let cool for 10 minutes, serve and enjoy your pumpkin bread recipe!

Other Pumpkin Recipes You Will Love:

Deliciously Sweet: Mastering the Perfect Pumpkin Molasses Cookie Recipe for the Autumn Season

The Ultimate Thanksgiving Dessert - My Pumpkin Crisp Recipe

Savor the Fall Season with the Perfect Pumpkin Espresso Martini

Yummy Pumpkin Ice Cream Recipe with a Twist: Pumpkin Molasses Cookie Chunks!

Sweet Serenity: Mastering the Art of Pumpkin Cinnamon Rolls with Cream Cheese Icing

Deliciously Sweet: Pumpkin Coffee Cake with Pecan Crumbles

Baked Burrata Pumpkin Ziti with Pork Sausage Recipe

Achieve a Stunning Subtle French Country Living Room Design Effortlessly!

Creating a version of French country in my living room design is my personal favorite design theme. Capturing the charm and elegance of rural French aesthetics, with a modern twist, is where my mind goes for how to decorate my space. This includes weaving subtle blue and pink hues into the space to achieve a serene and captivating atmosphere. This guide will provide you with some practical ideas to design an awe-inspiring French country living room, effortlessly blending rustic elegance with contemporary style, while focusing on a soft color palette that really gives a calming ambiance.

Incorporate a Soft Color Palette with Subtle Shades of Blue and Pink

Incorporating a soft color palette is vital to capturing the essence of a French country living room. Soft blues and pinks are great color choices that give a sense of tranquility and warmth often associated with the French countryside. This color scheme not only helps to visually enlarge the living space but also imparts a serene yet sophisticated ambiance. One way you can do this is by painting your walls in muted tones of blue. This helps to set a gentle backdrop, while then incorporating pink accents in decorative elements adds warmth and charm. The blend of these colors reflects the understated elegance synonymous with French country design.

Other Ways To Incorporate:

- Use light blue accent piece like our ottoman has done here.

- Add pink accents through throw pillows, blankets or decorative vases.

- Select an area rug with subtle blue and pink motifs.

- Opt for floral curtains that incorporate these shades.

- Utilize pastel artwork to enhance the serene ambiance.

Emphasize Rustic Elegance with Vintage Furniture Pieces

Rustic elegance is a hallmark of French country design, best achieved through carefully selected vintage furniture pieces. Distressed wooden tables and aged upholstered chairs capture the timeless appeal of French country aesthetics. This furniture style adds warmth and history to your living room. Combining these pieces with the soft color palette ensures a cohesive design that feels inviting and regal. Consider mixing antique finds with modern touches to create a space that's both classic and fresh. The main vintage piece I added in to our living room was the side table from Round Top Antiques. I looked for a long time before stumbling upon this piece on one of our visits to Round Top, Texas and it's been the most beautiful focal point ever since.

Other Ways You Can Incorporate:

- Select a distressed wooden coffee table for a rustic touch.

- Use vintage upholstered chairs with elegant curves.

- Incorporate a reclaimed wood bookshelf for added warmth.

- Choose an antique-style sofa with simple, elegant lines.

- Accentuate with a vintage-inspired sideboard or cabinet.

Use Floral Patterns and Textures to Add Charm and Sophistication

Floral patterns epitomize French country aesthetics, offering a touch of charm and sophistication. Whether through curtains, cushions, or rugs, floral motifs help accentuate the scenic beauty of the French countryside, providing an instant mood lift and inviting warmth. Opt for delicate patterns that seamlessly blend with the subtle color palette, adding depth and intrigue without overwhelming the space. This design choice encourages a balanced ambiance while ensuring that the intricate details of your living room become talking points. I added in florals with our curtains, matching pillows and a few of my beloved Sid Dickens tiles I have on the wall. These subtle hints didn't make the room overly feminine for us but added a soft touch that blends well.

Other Ways To Incorporate:

- Incorporate floral-patterned throw pillows in muted hues.

- Add a floral rug to ground the space aesthetically.

- Opt for tapestry or fabric wall art featuring floral designs.

- Use floral-patterned upholstery to refresh vintage chairs.

Introduce Statement Pieces like Antique Mirrors or Wrought Iron Chandeliers

Creating focal points in your French country living room is essential for adding interest and elegance. Statement pieces like antique mirrors and wrought iron chandeliers not only match the grandeur of traditional French design but also draw attention to the room's unique features. These elements bring a touch of sophistication while maintaining the room's overall theme of subtlety and warmth. The reflective quality of mirrors can enhance natural lighting, making spaces feel brighter and more open, while chandeliers add to the charm. Our wrought iron chandelier came from Pottery Barn. They have the best lighting options in my opinion, I have been using them for years in all of our homes. This piece came up earlier this year and its exactly what I had been looking for in this space. The iron gave a more masculine feel while the leaves on each light gave a soft touch. I thought it tied in so well with the leather chair and floral curtains to give a very balanced feel in this space.

Other Ways To Incorporate:

- Hang an ornate antique mirror above the fireplace.

- Install a wrought iron chandelier as a central lighting fixture.

- Place a large decorative mirror on one wall for added light.

- Use a statement sculptural piece that captures attention.

- Select intricate candle holders for ambient lighting.

Accessorize with Delicate Decorations to Enhance the French Country Aesthetic

Delicate decorations are the finishing touches that tie the entire French country living room design together. These accessories, including porcelain vases and lace tablecloths, help give the space elegance and artistic flair. By choosing items that reflect your own personal stories and interests, a living room becomes more than mere aesthetics but also becomes the best place of comfort. Ensuring these elements complement the soft blues and pinks will harmonize the room's visual appeal and ultimately enhance its charm. I added in the decorative "head lamp" as we call it in our house from Anthropologie to help achieve my French vibe. I loved the way it added something into the corner of the room under our collection of tiles. The tiles also give a French style piece of artwork with the stone material they are made out of. They also help to give that personal element that I mentioned, because they are all handpicked by my husband and I and given as gifts to each other or as gifts from our moms. Each tile has a story behind it as well which we feel tells the story of our lives.

Other Ways to Incorporate:

- Use porcelain vases with fresh flowers as centerpieces.

- Place lace tablecloths on side tables for a vintage touch.

- Select delicate glassware or figurines for display.

- Hang vintage-inspired frames with family photographs.

- Incorporate a woven basket or antique clock for an authentic finish.

Keep Neutrals Interesting

Integrating subtle blue and pink colors into a neutral color palette can make your living room both engaging and serene without becoming overpowering. Neutrals serve as a versatile canvas for these colors, creating a refined, cohesive look while adding visual intrigue. A good mix of textures further enhances this effect, offering good depth and interest. Consider soft fabrics like linens and rustic wood for a relaxed atmosphere. Balancing these elements with classic French Country decor ensures the room remains calming and approachable. As you can see in our living room I kept our couches neutral, as they have been with us for over 6 years now and are very easy to clean with our 60 pound dog and now a baby they have made it through wine spills, baby spit ups, out of state moves and endless dog hair! They add in a softer color of neutral along with our rug. The leather recliner helps add in a deeper and more masculine neutral. All the while making sure to give ample space for us and our guests to sit.

Creating a comfortable and inclusive living room requires prioritizing seating that accommodates the whole family. Selecting furniture in soft blues and pinks that aligns with French country aesthetics contributes to a cohesive and stylish environment. Incorporating a variety of seating option, such as sofas, armchairs, and ottomans, ensures comfort for different preferences and activities, all while giving a nice space to sit and visit and enjoy company. Thoughtfully planned seating arrangements can enhance the room's warm ambiance, while considering the furniture's scale and proportion maintaining space and an airy feel typical of French country design.

Other Ways To Incorporate:

- Use a neutral sofa with blue and pink accent pillows.

- Place a soft blue throw over a neutral-toned armchair.

- Choose a light wooden coffee table against a neutral rug.

- Add subtle patterns with neutral, textured drapery.

- Incorporate metallic or glass elements for additional depth.

Use French Blue, and Lots of It

French blue is a color synonymous with elegance and sophistication, making it an ideal choice for a French country living room. Utilizing this color as a primary shade can gracefully balance subtle pink accents, creating a room that's cohesive. Incorporating a variety of textiles like curtains, cushions, and upholstery in multiple shades of blue can tailor the room's aesthetic, ensuring each element seamlessly blends with the design. Combining vintage or rustic furniture in muted tones can nicely reflect the soft allure of French blue, accentuated by complementary decorative pieces in pink hues.

Think Rich

The concept of "Think Rich" in the realm of French country design revolves around incorporating luxurious elements with subtlety and elegance. By opting for high-quality materials like soft linens and natural woods, the living room achieves an understated elegance. A soft color palette of blues and pinks ensures the ambiance remains serene and inviting, typical of French country design. Introducing mirrors and vintage accessories creates character and depth, ensuring the room feels personal and unique. Don't be afraid to add in crown molding or added ceiling design like we did here. It's subtle but adds to the room. Maintaining a clutter-free space allows these design elements to shine, striking a pivotal balance between richness and simplicity.

Add Modern Touches to a Traditional Space

Integrating modern touches into a traditional French country space creates a unique fusion of past and present. Pastel blue and pink accents bring a contemporary elegance to classic designs, highlighting the synergy between old-world charm and modern flair. The use of soft fabrics such as linen and cotton maintains a cozy atmosphere, while contemporary artwork with subtle color palettes complements the room's aesthetics. Balancing vintage and modern furniture pieces offers a chic feel, while metallic or glass elements provide sophistication without going away from the overall design plan.

Creating a nice blend of new and old elements helps achieve the timeless appeal of a French country living room. By incorporating vintage furniture and modern decor, an understated elegance that's both classic and contemporary is achieved. Using a soft color palette of blues and pinks offers serenity and invitation across the room. Textures, such as distressed wood, soft linens, and elegant ceramics give depth and interest, ensuring a unique design plan. Also, balancing traditional patterns with contemporary touches ensures a cohesive interior that celebrates both French country history and modernity.

Ways To Do This:

- Select pastel artwork that reflects a modern touch.

- Introduce metallic frames or sculptures for a contemporary edge.

- Mix a mid-century modern chair with vintage furnishings.

- Choose clean-lined coffee tables with delicate metallic accents.

- Layer cotton throws over classical furniture for a hip vibe.

Subtly Mix and Match Patterns

The art of mixing and matching patterns can add layers of understated elegance to your French country living room. By experimenting with complementing blue and pink patterns, the overall aesthetic flows throughout. Opting for delicate florals, gentle stripes, and classic checks can transform the space into a sophisticated place of visual interest. Balancing different pattern scales, such as larger motifs with intricate designs, helps maintain room balance without overwhelming. Introducing these patterns through accessories like throw pillows and rugs ensures a subtle infusion of pattern that elegantly enhances the room. As you can see here I achieved this with our floral curtains & pillows along with the gingham ottoman all from Ballard Designs.

Ways You Can Do This:

- Combine floral and striped pillows in coordinated colors.

- Select a checkered blue rug beside floral drapes and cushions.

- Use a patterned slipcover for armchairs for diversity.

- Blend floral wallpaper with striped pillow cushions.

- Opt for a classic quilted or patchwork throw.

Go Grand With Window Treatments

Getting grand with window treatments can transform your French country living room, serving as an elegant and majestic focal point. Oversized window treatments contribute to an open, airy feel, while fabrics in soft blue and pink shades complement the room's palette. Layering curtains with sheer drapes or lace adds texture and romantic charm, typical of French country design. Delicate patterns or embroidery in the curtains elevate the room's aesthetics, while ensuring the window treatment's length extends from ceiling to floor makes for a luxurious, cohesive look that balances with the entire living room decor.

- Use floor-length drapes for a grand appearance.

- Layer sheer lace curtains with heavier fabric panels.

- Choose embroidered patterns for visual intrigue.

- Install drapery rods with elegant, subtle details.

- Coordinate curtain colors with room's color scheme.

Simplifying French style in your living room centers on a refined balance of color, textures, and decor. By embracing a soft color palette with subtle shades of blue and pink, the room immediately feels calming and welcoming. Mixing in vintage or distressed furniture pieces enhances the rustic yet timeless allure, creating a place that feels lived-in and elegant. Utilize natural materials like wood, linen, and cotton to maintain authenticity and warmth while delicate accents like floral patterns or pastel ceramics add charm. Integrating these elements creates a space exuding both elegance and comfort. Implementing these few steps will insure a charming and elegant living room that is also very inviting and comfortable to you and your guests. I hope this blog post on subtle blue and pink French country living room design gives you inspiration for your own home. Happy Decorating!

Transforming Your Space: Achieve a Stunning Traditional Neutral Primary Bathroom Makeover with These Simple Tips!

When it comes to bathroom makeovers, incorporating a traditional and neutral palette can breathe new life into your space. By utilizing timeless colors and classic fixtures, you can create the perfect elegant and inviting atmosphere while still achieving a classic sophisticated look that doesn't overwhelm the senses. This blog post will help guide you through various methods and ideas to achieve your dream stunning traditional neutral primary bathroom makeover and give you inspiration from ours.

Creating a warm-toned neutral bathroom involves using a range of comforting colors and timeless fixtures to promote a cozy and inviting atmosphere. Warm neutral colors such as beige, taupe, and creamy whites can make your primary bathroom a sanctuary of relaxation. One important key element in achieving this look is to choose fixtures and fittings that align nicely with a traditional bathroom aesthetic. Think of things like classic faucets, vintage-style lighting, and natural stone or wood materials. Incorporating soft, textured textiles like plush towels and rugs also adds a luxurious feel to the space, helping to make it both elegant and comfortable. You can also add these elements to add in your desired pops of color. Doing your pop color with these elements like I did with my favorite color of pink makes it easy to change out for other colors or prints should you change your mind later without having to change paint, wallpaper, flooring, etc.

Subtle Tile Patterned Neutral Bathroom

Introducing subtle tile patterns in a neutral bathroom can add texture and visual interest while maintaining your serene atmosphere. Utilizing a neutral color palette of beiges, and whites creates a cohesive and timeless look. It's important to ensure that fixtures, vanities, and hardware complement the tile patterns to achieve a harmonious aesthetic. Enhanced lighting, including ambient, task, and accent lighting, can highlight the subtle patterns you choose and contribute to a warm and inviting environment. These elements work perfectly together to create the balance you may be looking for in your traditional neutral bathroom.

In our bathroom we went for a simple but warm tile on the shower & bath that added depth with the variations of creamy white and shine, but it didn't add much contrast. The wall tile partnered well with a warmer, slightly darker tile floor. Adding in that darker tile floor in a herringbone pattern gave the bathroom floor a beautiful contrast of patterns and colors to match the shower tile as well, and it added in the depth I was seeking from all the white and creamy colors throughout the rest of the bathroom.

Complement these tiles with classic fixtures and natural elements for a cohesive look that blends seamlessly with the overall design. Highlighting the elegance of handcrafted tiles can significantly elevate the design of a traditional neutral bathroom. Choosing neutral colors helps to create that timeless and serene atmosphere, while mixing textures and finishes adds depth and interest. These elements will ensure your bathroom feels uniquely sophisticated and traditional.

Light and Airy Neutral Bathroom

For a light and airy neutral bathroom, incorporating a soft color palette and maximizing natural light are key strategies. Opt for color hues like beige, ivory, and light grey to create a serene and open atmosphere. Using sheer curtains, adding skylights, or incorporating large mirrors can enhance the natural light, making the precious space were all usually lacking feel more expansive. Classic fixtures like clawfoot tubs, elegant faucets, and polished brass fixtures contribute to an elegant look, while textural elements such as elegant decor and plush towels add interest and depth. These strategies together create a light, airy, and elegant traditional neutral bathroom that feels both open and inviting.

5 Classic Neutral Bathroom Ideas to Inspire

Incorporating timeless colors and classic fixtures can transform your primary bathroom into a calming and sophisticated retreat. Here are five classic neutral bathroom ideas to inspire your makeover:

1. Timeless Colors

Choosing a warm neutral palette can create a cozy and inviting atmosphere in your primary bathroom. Incorporate colors like beige, taupe, and soft grays, and use textured materials such as stone, wood, and natural fibers to add depth and interest. These ideas will help you create a warm and inviting traditional neutral bathroom that feels timelessly elegant.

2. Classic Fixtures

Timeless fixtures such as glamourous lighting, clawfoot tubs, polished brass faucets and elegant hardware enhance the traditional style while maintaining a neutral aesthetic. Adding visual intrigue through patterned tiles, wallpaper, or textiles and balancing the lighting ensures the space is well-lit and comforting.

3. Textured Materials

Materials like marble, herringbone design, and glossy tile are a great way to layer textured tiles and Materials for interest and harmony. Different Textures of matte and glossy finishes like I did with glossy shower tiles and matte floors help give contrast but also serve well for the purpose of cleaning. Natural Materials of stone and wood give character to the space and add beautiful warmth. We used subtle patterns of herringbone to add depth and beautiful without overpowering the space. Lastly be sure they complement each other for a unified look.

4. Understated Accessories

This is where you can really bring in your personality with some fun additions. Bring in warmth and lift a Neutral Scheme with Accessories. With warm textures of wood, wicker, or rattan you can create a perfectly cozy vibe. Soft furnishings of plush towels, fluffy rugs, cushioned mats and stunning floral arrangements also help finish off the space. Accessories in warm hues like soft blush, any shade of subtle blue, or deep greens give great accent colors. Decorative elements of vintage mirrors, elegant vases, classic artwork are fun eye-catching centerpieces that make the space elegant and uniquely yours.

5. Natural Light Enhancement

Adding in Sheer window treatments and well-placed mirrors will help add additional light into the room. They also can help the bathroom appear bigger. Larger mirrors help a small bathroom look bigger by doubling what you see in the space. Sheer window treatments give contributing natural light from outside without allowing anyone to see in. This gives you a beautiful decorative element as well as cherished additional lighting.

Traditional neutral bathrooms often feature a variety of classic materials and finishes:

- Neutral Color Palette: Whites, beiges, and soft tans.

- Classic Tiles: Subway tiles, marble, and ceramic tiles.

- Natural Materials: Stone countertops and wooden or white cabinetry.

- High-Quality Fixtures: Chrome or brushed brass fixtures.

- Refined Finishes: Detailed moldings, crown moldings, and wainscoting.

These materials and finishes combine to create an elegant and timeless traditional neutral bathroom. Makeover ideas will help you achieve a serene and elegant traditional neutral primary bathroom.

Transforming your primary bathroom into your special space that is a haven of calm and elegance is achievable with the right approach. By incorporating warm neutral tones, classic fixtures, subtle patterns, and elegant accents, you can create that special space that feels both timeless and refreshing. Every element, from lighting to textiles, plays an important part in creating a bathroom that is not only functional but also a pleasure to be in every day. I hope you found inspiration in this blog post and that it helps you organize your thoughts and helps remodel be a breeze.

Indulge in Irresistible Breakfast Croissants: Savory Sausage, Crisp Bacon, and a Sweet Maple Dijon Spread Delight!

In the hustle and bustle of everyday life, breakfast shouldn't merely about waking up and quickly throwing something into your body. Just like dinner, breakfast can be an experience, especially with a dish as decadent as these Breakfast Croissants with sausage, bacon, and maple Dijon spread. These croissants combine the buttery crunch of croissants with the comforting flavors of savory sausage, the crispness of bacon, and the intriguing sweetness of a maple Dijon spread. In this blog post, we will dive into the flavor nuances of each component, ensuring your breakfast is as delicious and indulgent. We'll discuss all things from the variations of maple syrups to perfecting the scrambled eggs. So, let's embark on a tasty kitchen journey centered on crafting the ultimate breakfast croissant.

Not All Maple Syrup is Created Equal

Maple syrup, a natural sweetener derived from maple tree sap, is an essential ingredient in creating a perfect balance of flavors in Breakfast Croissants with sausage, bacon, and maple Dijon spread. Even though the grocery store may be filled with many different maple syrup options, just know that not all maple syrups are created equal. Each different grade has unique flavors and colors impacting its use in various recipes. Grade A maple syrups, lighter both in hue and taste, are favored for drizzling over foods like buttery breakfast pancakes and waffles. In contrast, the darker Grade B syrups offer a robust flavor, adding depth to dishes and complex spreads like here with our maple Dijon.

Understanding the differences in maple syrups allows you to enhance the balance of sweet and savory in your recipes. By selecting the right syrup, your maple Dijon spread will elevate the accompanying sausage and bacon, creating a harmony of tastes. By knowing this, you can make a maple Dijon spread that perfectly complements your breakfast creation, turning each bite into the perfect way to start your mornings.

How to Make Perfect Scrambled Eggs

Perfect scrambled eggs add a creamy, fluffy texture that enriches the Breakfast Croissants with sausage, bacon, and maple Dijon spread. Starting with quality eggs and using the right technique, you can the perfect eggs fitting of a gourmet breakfast. Whisking the eggs thoroughly with a splash of milk or cream is the first step, which introduces air for that desired fluffiness.

Utilizing a skillet over medium-low heat is key to preventing sticking and ensuring even cooking. Melt butter or oil in the skillet, evenly coating the pan before pouring in the eggs. Let the eggs sit momentarily, allowing the bottom to set. Then, gently stir the eggs with a rubber spatula, folding them for soft curds without over-scrambling. Remove the eggs from the heat while they remain slightly undercooked, as residual heat will finish the cooking process. Making scrambled eggs with these methods brings a sense of sophistication to your breakfast, creating a perfect pairing with the indulgent flavors of sausage, bacon, and maple.

Bring on the Meat

When it comes to breakfast indulgence, few combinations hit the spot quite like the savory sausage and crispy bacon featured in our Breakfast Croissants. These meats not only add hearty flavors but also provide the perfect counterbalance to the sweet and tangy maple Dijon spread. These famous breakfast meats speak to the masses, as they are pretty much universally loved by all.

The addition of sausage and bacon ensures that the croissants delight with a dynamic mix of savory-sweet tastes. These croissants are ideal for brunch gatherings or as a special breakfast treat at home. These yummy sandwiches easily stand out as a centerpiece. Each flavorful bite of them combines the smoky, salty notes of bacon with the seasoned goodness of sausage, topped off with a unique sweetness of the maple Dijon spread. This blend of meats and spread introduces a perfect balance that both satisfies and excites the palate, and makes these croissants as a go-to morning indulgence.

Ready, Set, Consume!

This unique combination brings together a medley of flavors that is truly irresistible, whether enjoyed at home or on the move. The combination of savory sausage and crisp bacon provides a comforting foundation, while the maple Dijon spread introduces a distinctive twist with its sweet and tangy profile.

These gourmet croissants redefine breakfast indulgence, offering an experience that is satisfying yet remarkably convenient. They are perfect for anyone looking to elevate their morning meals, as each bite promises a luxurious journey of flavors. From busy mornings to leisurely weekend brunches, these croissants effortlessly fit into any schedule. Enjoying the yummy morning creation easily sets the tone for an enjoyable day ahead.

How to Freeze Breakfast Sandwiches

To enjoy breakfast croissants effortlessly, knowing how to freeze them is key. By freezing these delicious sandwiches, you can ensure a quick, delicious breakfast option whenever needed. Begin by assembling the croissants with cooked sausage, bacon, and a generous layer of maple Dijon spread, ensuring all ingredients are fully cooled to preserve flavor and texture.

For perfect results, wrap each croissant tightly in plastic wrap to maintain freshness and prevent freezer burn, then place them in a labeled, airtight freezer bag. This strategy allows you to store the sandwiches in the freezer for up to three months, ready to be consumed at your convenience. To reheat you can place in the oven or microwave for your convenience and best flavor. Through proper preparation and storage, frozen breakfast croissants become an easy, tasty solution to hectic mornings.

Breakfast Croissants with sausage, bacon and maple Dijon spread stand as a testament to what can be achieved with a thoughtful blend of traditional morning flavors. By carefully selecting each ingredient and embracing both preparation and preservation techniques, you create not just a meal, but the perfect indulgent morning experience. Whether made fresh or stored for later, these croissants promise a delightful balance of savory and sweet, inviting you to savor each moment of your morning ritual. So, get ready enjoy these at home, as there is a great chance you will enjoy them more than any local hometown breakfast.

Ingredients

6 croissant rolls

6 slices of cooked bacon, cut in half

16 oz of sausage, cooked into rectangular patties

1 tablespoon maple syrup

2 tablespoons Dijon mustard

olive oil

6 eggs

1/4 cup heavy cream

1 tsp garlic powder

salt & pepper, to taste

4 oz shredded cheddar cheese or colby jack

Instructions

1. Start by preheating the oven to 350 degrees.

2. Next book your bacon on the stove top to your liking. Cut in half and set aside. Add your sausage formed into rectangular shapes to the same pan and cook on both sides. Once done remove from pan and set aside.

3. Whisk eggs in a large bowl with heavy cream, garlic powder and salt and pepper to taste. Pour eggs into same pan (grease will help eggs from not sticking, if you have too many stuck on sausage bits you can use a new pan with olive oil). Using a spatula to scramble soft serve eggs.

4. While eggs are cooking cut croissants in half and place into the oven to cook for 5 min. Whisk together Dijon mustard and maple syrup and spread onto crispy croissants.

6. Assemble the croissants. Layer cooked eggs over croissant and maple syrup mixture. Add shredded cheese on top, then sausages and bacon. Place back in oven and bake until cheese is melted for about 10-12 min. Remove from oven and serve immediately. Enjoy!

Other Delicious Breakfast Recipes:

Whip up a Breakfast Delight: Pumpkin Pie Overnight Oats with A Hard Chocolate Top - A Recipe Worth Waking Up For

Sweet Perfection: Baking the Ultimate Cinnamon Roll Loaf with Espresso Glaze

Sweet Serenity: Mastering the Art of Pumpkin Cinnamon Rolls with Cream Cheese Icing

Soft Cream Cheese Lemon Blueberry Scones

An Irresistible Treat: The Delicious Berry Custard Puff Pastry Tart

Deliciously Sweet and Tangy: Blueberry Orange Glazed Muffins

Unlock the Irresistible Magic of Gingerbread Cinnamon Rolls Made with Sourdough Starter: A Delightful Holiday Recipe!

The holiday season is synonymous with warm flavors and comforting aromas that make the whole house smell so festive. Among the many holiday treats, this blend of two holiday favorites of Gingerbread Cinnamon Rolls made with Sourdough Starter stand out as a deliciously unique twist on the classic cinnamon roll. These rolls capture the delicious taste of gingerbread while incorporating the natural rise of a sourdough starter, creating a delightful treat perfect for holiday gatherings. In this blog post, we'll explore not only how to create these scrumptious rolls but also tips and tricks to ensure they turn out perfect every time. Enjoy the adventure of baking these holiday delights and impress your friends and family with a treat that embodies the spirit of the season.

Creating these Sourdough Gingerbread Cinnamon Rolls is an art that blends traditional flavors with the unique properties of a sourdough starter. Begin by preparing your sourdough starter well in advance, ensuring its bubbly and active to give the dough the best rise. Flour, brown sugar, molasses, and spices like ginger and cinnamon form the filling, giving it those classic gingerbread elements that evoke the holiday spirit and don't overpower the dough flavor.

As you work the dough, your precision matters. Roll out your creation and cover it evenly with your gingerbread filling mixture before rolling it tightly. The dough should then be sliced into individual rolls. Patience is key as you allow the rolls to rise until they double in size, a step that is ensured by the sourdough starter’s slower natural fermentation process. Once ready, bake until golden brown and finish with a cream cheese or vanilla glaze for the traditional festive touch. With patience and precision, you'll produce a treat that delights the taste buds and brings warmth and cheer to your holiday festivities.

Can I Store These Gingerbread Cinnamon Rolls?

Storing Gingerbread Cinnamon Rolls correctly maximizes their freshness and ensures that you can enjoy them over several days. They can be kept in an airtight container at room temperature for up to two days. However, refrigeration is an excellent option if you wish to extend their shelf life to a week.

To savor that just-baked freshness, reheat the rolls gently in the microwave or oven. For longer-term storage, consider freezing the rolls. Ensure you wrap them individually and store them in a freezer-friendly container for up to three months. By properly storing these delicious rolls, you guarantee a yummy treat whenever the mood strikes, all through the holiday season.

Freezing Sourdough Cinnamon Rolls offers flexibility for both before and after baking. To freeze before baking, shape the rolls and store them in an airtight container, preventing freezer burn. For unbaked rolls, thaw them in the refrigerator overnight, allowing them to rise for optimal texture before cooking. After baking, cooling the rolls completely before wrapping them tight in a freezer bag is essential. Reheat frozen baked rolls by letting them thaw at room temperature and warming them in the oven for that fresh-baked taste. The ability to freeze these treats ensures you're always prepared for a deliciously warm gingerbread cinnamon roll whenever cravings hit.

These rolls are a perfect addition to your holiday breakfast spread, especially when topped with a rich cream cheese frosting that adds an extra layer of indulgence. Baking these from scratch automatically get you in the holiday spirit. These rolls not only satisfy your craving for holiday treats but also bring a touch of homemade warmth to your Christmas morning celebrations.

The perfect blend of holiday spices with the use of a sourdough starter makes these gingerbread cinnamon rolls a standout holiday treat. With added spices like ginger, cinnamon, and nutmeg enhancing the traditional flavor, they offer a delicious twist on typical cinnamon rolls. Celebrate the season with a breakfast that warms the heart and satisfies your holiday cravings.

As they bake, these rolls cover your home in a comforting aroma of ginger, cinnamon, and nutmeg, giving it that cozy holiday atmosphere. The sourdough starter adds the tender, fluffy interior with a slightly chewy crust, enhancing your traditional cinnamon roll experience. This versatile recipe also allows for creativity, whether you prefer adding nuts, dried fruits, or a luscious cream cheese glaze. Beyond their universally love flavor, these rolls offer a fun baking project for sourdough enthusiasts and beginners, providing a rewarding exploration of sourdough's versatility. Share the joy of baking during the holidays with this wonderfully flavorful and delicious recipe that’s sure to impress.

Tips for Making Fluffy Sourdough Cinnamon Rolls

Creating fluffy Sourdough Cinnamon Rolls starts with ensuring your sourdough starter is active and bubbly, laying the foundation for the perfect rise and texture. It's beneficial to allow the dough to undergo a slow, overnight fermentation, which results in enhanced flavor and fluffiness. The next morning you will add in your baking soda and baking powder. This step is very important to ensure your rolls rise overnight.

When preparing, be generous with your filling mix, adding gingerbread spices for just that hint of the perfect flavor. As you roll the dough, do so tightly and evenly to maintain uniformity and prevent unraveling. Before baking, allow the shaped rolls to rise once again, guaranteeing the softest, fluffiest results. These tips ensure your gingerbread cinnamon rolls come out to the perfect texture and flavor, leaving everyone asking for more.

What Type of Baking Dish Will Work Best?

Choosing the right baking dish enhances the baking experience and outcome of your gingerbread cinnamon rolls. Make sure to use a dish that conducts heat evenly to ensure uniformly baked rolls. The size is important too, because the dish shouldn’t overcrowd the rolls, but instead should allow for proper space for expansion. A dish with sides at least 2 inches high offers good enough support for rising dough. Ensure you generously grease your dish to prevent sticking and to allow for easy removal post-baking. For a festive touch, selecting a decorative baking dish enhances the holiday presentation of your rolls, such as the Mackenzie Childs dish I am using here. Such attention to detail in your choice of baking dish complements the love and care poured into making these delightful rolls.

Can I Substitute Regular Yeast if I Don't Have a Sourdough Starter for the Gingerbread Cinnamon Rolls?

If a sourdough starter is unavailable, regular yeast can indeed be a substitute in your gingerbread cinnamon rolls. However, it's important to note that the flavor might fluctuate slightly, with sourdough offering a more complex tang than regular yeast.

When substituting, follow a standard cinnamon roll recipe, but incorporate gingerbread spices for that festive flair. Be sure to adjust the rising times, as regular yeast tends to act more rapidly than sourdough. Activating yeast properly through warm water and a pinch of sugar is crucial before integration into the dough. This substitution allows you to still enjoy these delightful rolls, ensuring that nothing holds back your holiday baking.

How Long Does It Take to Prepare and Bake These Gingerbread Cinnamon Rolls from Start to Finish?

From preparation to baking, the gingerbread cinnamon rolls use a time commitment of approximately 10 to 12 hours. This timeframe is in large part because of the use of the sourdough starter, which requires long fermentation and rise periods to enhance the rolls' flavor and texture.

Active preparation, including ingredient mixing and dough rolling, takes about 1 to 2 hours. The dough is left to rise over a span of 7 to 8 hours or overnight, offering flexibility in your baking schedule. Baking the rolls takes an additional 20 to 25 minutes, yielding golden-brown and fully cooked pastries. Planning ahead ensures you’ll enjoy freshly baked gingerbread cinnamon rolls that elevate any holiday gathering.

Can I Make the Dough for the Gingerbread Cinnamon Rolls Ahead of Time and Bake Them Later?

Preparing the dough ahead of time provides a convenient option for managing busy schedules during the holidays. After the first rise, you can refrigerate the dough for up to 24 hours. Before rolling and filling, allow the dough to come to room temperature, enhancing its flavor and workability. This method ensures that when you're ready to bake, you’ll have fresh, warm rolls right out of the oven, delighting everyone with their enticing aroma and flavor. With this proactive approach, you can enjoy the magic of freshly baked goodies on your schedule, keeping holiday stress to a minimum.

Incorporating these Gingerbread Cinnamon Rolls made with a Sourdough Starter into your holiday traditions enriches the spirit in your household with flavorful indulgence and the smell of joy. Not only do these rolls offer a unique flavor profile, but they also provide an engaging and rewarding baking experience. By following the tips outlined, using proper storage techniques, and considering the convenience of freezing, you ensure that this delightful treat remains a highlight of your holiday celebrations. Take joy in the savory blend of sweet, spicy, and tangy with every bite, and share the warmth and aroma of the season with those you love the most.

Ingredients

8 tablespoons cold butter

3 cups all-purpose flour

1/2 cup active sourdough starter

1 cup whole milk

2 tablespoon honey 

1/2 teaspoon fine sea salt

1 teaspoon baking powder (added in the next morning)

Β½ teaspoon baking soda (added in the next morning)

Filling

1/2 cup dark brown sugar

2 teaspoons cinnamon

1 teaspoon ginger

1/4 teaspoon nutmeg

1/2 cup salted butter

3 tablespoons molasses

Frosting

8 oz cream cheese

1/2 cup brown butter

4 cups powdered sugar

1 teaspoon cinnamon

4 tbsp milk

2 tsp vanilla extract

Instructions

1. In a large bowl grate butter & mix together with flour. Make sure butter pieces are mixed in well no larger then a pea size.

2. Add in active sourdough, milk, honey, & sea salt. Mix together until blended well. Cover with a clean dish towel or plastic wrap and set aside overnight or for at least 10 hours.

3. The next morning, or once risen, add in baking soda & powder. Turn oven to 375 degrees. Mix together filling ingredients & set aside. Roll out the dough into a large rectangle. Spread filling mixture all over rolled dough.

4. Roll up from the largest side to the other making a log shape. Cut into 12 cinnamon rolls. Add into a large pan, My bake & roast pan from 360 cookware is the perfect size, linked below.

5. Bake in the oven center rack for 30-35 minutes. While its baking make frosting. Blend together softened cream cheese, softened butter, powdered sugar, milk, & vanilla extract in a bowl.

6. Once cinnamon rolls are done add frosting on top and sprinkle chopped walnuts on top. Serve & Enjoy!!

Elegant Table Setting Ideas for Your Thanksgiving Feast

Thanksgiving is a time for reflection, gratitude, and gathering around the table with loved ones to enjoy what for many is the most memorable feast of the year. Crafting an elegant table setting for Thanksgiving is always key to the celebration. When I envision the holiday accompanied by a beautifully arranged table, every detail plays a part in creating the sophistication that I'm looking for. The art of creating an elegant table setting for Thanksgiving not only enhances the meal's presentation, but also enriches the overall dining experience. To help you transform your own Thanksgiving celebration, I've put together a series of stunning and creative ideas for setting an unforgettable table. From color palettes to personalized touches, these insights ensure your dinner will be both elegant and memorable.

How to Style and Set a Simple Thanksgiving Table

Begin by establishing the perfect base for your Thanksgiving table with a neutral tablecloth, runner or layered chargers. This simple yet effective method lays the groundwork for an elegant table setting, allowing other decorative elements to shine. Neutral tones like beige, cream, or soft gray serve as a nice canvas upon which the colors and textures of autumn can really pop. For an elevated look, like the one I have put together for this Thanksgiving, add in metals of silver and gold to really set the bar high of elegance.

Once the base is set, focus on using simple, classic tableware and glassware that keeps the emphasis on the meal and on the natural decor. By choosing tableware with clean lines and timeless designs, you allow the food and decorative elements of the table to coexist harmoniously. Incorporating cloth napkins, paired with metallic or wooden napkin rings, adds an additional touch of elegance, creating a polished and cohesive look. Finish by personalizing each place setting with handwritten name cards or small gifts. This thoughtful touch not only makes guests feel special but also enhances the personalized feel of the table setting.

Choose a Color Palette

The secret to an elegant Thanksgiving table often lies in the thoughtfully curated color palette. Start by considering the mood and atmosphere you wish to convey during your celebration. Classic autumnal hues such as deep reds, burnt oranges, beautiful mauves and rich yellows bring out warmth and invite guests into an intimate dining experience. Complement these vibrant colors with metallic accents like gold, copper and silver. These colors introduce sophistication and illuminate the setting. To balance bold color tones, incorporate more neutral tones like cream or beige, ensuring the best all-around color scheme works nicely together.

Enhance the table aesthetics further by integrating natural elements that mirror your chosen palette. Seasonal flowers or foliage are perfect additions that tie the theme together, bringing a touch of beauty and the outdoors inside. When selecting a color scheme, remember that a few strategic choices can dramatically influence the table's visual narrative. Ultimately, a well-chosen color scheme enhances the ambiance and ensures a visually appealing and joyful Thanksgiving table. One personal touch I always love to add in are golden leaves to my centerpieces to really bring the beautiful feel of falling leaves from outside right into the home.

Table Linens and Dinnerware

Choose elegant dinnerware with classic designs or subtle patterns to elevate the dining experience. Mixing and matching dinnerware pieces can create a visually appealing arrangement, adding personality to the table. Lastly, incorporate decorative elements such as chargers or napkin rings to offer the final, sophisticated touches. These important decisions made in table linens and dinnerware selection leave a lasting impact on guests and really elevates the festiveness of the table.

I used the same Thanksgiving dinnerware from last year but added a whole new elegant spin on it this year so the table setting feels brand new. Last year I had more greens and earth tones with lots and lots of natural elements. In its own way it was just as beautiful with the dinnerware from Williams Sonoma and is just a different look. However, it really shows how these same dishes can transform from year to year. I did add in some new serving pieces you can see in this video on Instagram making it even more special. I can't wait to get creative and tinker and change the theme every year while continuing to just add to this collection.

The strategic placement of tableware plays a crucial role in setting an elegant Thanksgiving atmosphere. Attention to detail in the placement of plates, utensils, and glasses can significantly enhance both the aesthetic appeal and functionality of the table setting. Mastering the art of tableware placement and balance ensures that each place setting is visually compelling and welcoming. Begin layering your tableware by positioning chargers, followed by dinner plates, and then salad or appetizer plates. This approach not only adds sophistication but also emphasizes a sense of order. Personalized touches, such as name cards or customized napkin rings, further enrich the setting, giving the dining experience more warmth and individuality. Well-placed tableware encourages a seamless dining flow, where elegance and practicality work nicely together.

Napkin folding transforms this simple table element into a key player in your Thanksgiving celebration's elegance. Engaging in creative napkin designs offers an opportunity to elevate the dining atmosphere while providing a delightful conversation starter among guests. Choose materials and colors that complement your overall table theme, which will once again enhance the aesthetic appeal. Simple, elegant designs can be achieved effortlessly with online tutorials and a little bit of practice. Personalizing napkin folds with themed napkin rings or decorative accessories instantly gives your table setting a touch of classy uniqueness . This attention to detail not only elevates the table's sophistication but also shows a level of thoughtfulness that guests will remember.

Candles and Lighting

Candles and lighting are vital components in establishing a warm and inviting ambiance to your Thanksgiving table. Incorporate candles of varying heights to create a dynamic and cozy environment for your gathering. Elegant candle holders in metallic or neutral tones can enhance the table's sophistication, reflecting gentle warmth across the setting. Consider mixing different types metals for a beautiful and elegant contrast. I'm always careful to choose unscented candles to ensure the yummy aroma of your Thanksgiving feast stays front and center. For those who prefer a safer option, LED candles provide a cozy ambiance without the risk of open flames, allowing you and your guests to bask in comfort and safety.

Easy Centerpiece for a Thanksgiving Table

Creating a stunning Thanksgiving centerpiece can be simple and effective when using seasonal elements like pumpkins, gourds, and autumn leaves. These elements not only capture the festive essence of the holiday but also add rustic charm to your table. Incorporate candles of various heights within the centerpiece to provide warmth and an inviting glow, tying together the table's overall decor with a long, decorative runner.

Using natural textures, such as wooden trays, cornucopia or baskets, also enhances the rustic elegance of the centerpiece, creating depth and character. Add personal touches like handwritten place cards or small decorative accents to bring a sense of personalization and cohesion to the table setting. These thoughtful additions transform a simple centerpiece into the perfect focal point that embodies warmth and hospitality. I always use flowers for my tables because they are so special for me. This year I did a soft mix of pinks, mauves and neutrals with a leafy base. There are so many fun ways to add in florals to tie the colors into Thanksgiving.

Making your Thanksgiving table memorable involves a cohesive color scheme that complements your dining area. This harmonious balance creates an appealing table setting that resonates with both beauty and comfort. Layer table linens, such as a classic tablecloth paired with elegant placemats or runners, adding interest and depth to the arrangement.

Select sophisticated dinnerware, glassware, and flatware that not only enhances the table's aesthetic but also ensures functionality. Add personalized touches with thoughtful place settings, like handwritten name cards or small, meaningful tokens for each guest. Integrating natural elements like seasonal flowers, foliage, or decorative gourds infuses the table with warmth and richness, ensuring a memorable dining experience that celebrates togetherness.

Go Bold with Gold & Silver

To instantly elevate your Thanksgiving table setting, incorporate bold gold and shiny silver accents such as cutlery, napkin rings, or chargers. Gold symbolizes luxury and warmth, leaving a lasting impression as part of your festive decor. Silver adds in that beautifully classic shine and is always a good choice. Feel free to use these two tones together create an inviting, plush ambience.

Balance the richness of gold by pairing it with neutral-toned table linens and natural elements like autumn leaves or pumpkins. Opt for gold and silver centerpiece pieces, such as candlesticks or vases, to draw guests' attention and create a stunning focal point. Mixing and matching different shades and finishes of gold allows you to achieve a layered look with a dynamic aesthetic that is both elegant and welcoming. To ensure that you have the right look, select a cohesive color scheme that embraces the autumnal palette. Once again, personal touches, like handmade place cards or family heirlooms, give the occasion deeper meaning and helps to create lasting memories. Each detail you get creative with intertwines with the next to create a dining environment that truly enhances the holiday spirit and celebrates the joy of Thanksgiving.

Indulge in the Irresistible Taste of Nana's Apple Pancakes: A Delicious Family Tradition You Can't Resist!

To me, Nana's Apple Pancakes are more than just any ordinary breakfast dish These pancakes are a cherished family tradition that has journeyed from my Nana's kitchen to mine, and hopefully to yours. These pancakes offer warmth and comfort with every bite, as they are a perfect blend of fluffy batter and tender grated apples, creating an irresistible taste that captures the essence of home-cooked love. Whether you're enjoying these pancakes on a slow weekend morning or sharing them with friends during a special brunch, Nana's Apple Pancakes bring a sense of togetherness and joy to the dining table. Join me as we explore the magic behind this family favorite, diving into the recipe, ingredients, and tips that make Nana's Apple Pancakes a must-have for your breakfast routine.

What Ingredients Do I Need to Make Nana's Apple Pancakes?

To achieve the perfect pancakes, the choice of ingredients plays a crucial role. Fresh apples, such as Granny Smith or Honeycrisp, offer a crisp and tart flavor that complements the sweetness of the pancakes beautifully. All-purpose flour gives the pancakes their necessary structure, while baking powder contributes to their light and fluffy nature. Eggs, milk, and butter enrich the batter with flavor and moisture, ensuring each bite is a delight. My Nana's recipe called for oil, but I use melted butter in mine, and you can do either. Finally, sugar brings additional sweetness to the natural sweetness of the apples.

How Long Does It Take to Prepare and Cook Nana's Apple Pancakes?

Preparing and cooking Nana's Apple Pancakes is an efficient process, making them an excellent choice for family breakfasts. The entire process takes around 30 minutes, with 10 minutes dedicated to preparation and 20 minutes to cooking. This quick timeline ensures you won't be stuck in the kitchen for long, allowing you more time to enjoy the time with loved ones at the breakfast table. The ingredients are easily gathered, and once mixed, the batter is ready to transform into golden pancakes. The quick cooking time means that a warm, delicious meal can be prepared with minimal fuss, perfect for busy mornings or relaxing weekends.

What Type of Apples for Nana's Apple Pancakes?

While Granny Smith and Honeycrisp apples are perfect choices for Nana’s recipe, experimenting with other apple varieties can add a personal twist to the dish. Each type of apple brings its own distinct flavor and texture. Granny Smith apples are celebrated for their tartness, providing a refreshing contrast to the sweetness of pancakes. On the other hand, Honeycrisp apples deliver a juicy and crisp texture, enriching the overall experience. If a sweeter flavor is more to your liking, Fuji or Gala apples can be excellent alternatives. Mixing things up can be a fun way to adapt this timeless recipe to your taste, ensuring it continues to delight. You can't go wrong with any apple you choose here.

How Should I Store Any Leftover Nana’s Apple Pancakes?

Storing leftover pancakes properly is key to preserving their freshness and flavor. Allow the pancakes to cool completely before packing them away to avoid moisture buildup, which can make them soggy. Stack the pancakes with sheets of parchment paper in between to prevent them from sticking together. Store in an airtight container or resealable plastic bag to maintain their quality. If refrigerated, they can be enjoyed for up to three days. For longer storage, freezing is an option. To reheat, simply use the oven or toaster to help give the crisp edging back to the pancakes. Following these steps will ensure a warm and delightful breakfast or snack anytime you crave these delicious pancakes.

Like I mentioned, Nana's Apple Pancakes are more than an ordinary meal to me. These pancakes are a heartfelt tradition that continues to bring my family together with their comforting taste and easy preparation. The perfect blend of fluffy pancakes and cinnamon-spiced apples makes for a breakfast delight that’s hard to resist. Whether you're honoring your Nana, or someone special in your own family, or simply indulging in a delicious breakfast, these pancakes offer a taste of home and tradition in every bite. So, gather your loved ones and share in the timeless joy of nana’s apple pancakes recipe. This is one delectable experience to be cherished and savored this fall season and all year long. I hope you enjoy this recipe, I know my Nana would be so proud to share it with you.

Ingredients

1 1/2 cups sifted flour

1 1/2 teaspoons baking powder

3/4 teaspoon salt

1 tablespoon sugar

1 1/4 cup milk

2 tablespoons butter

1 egg, beaten

3/4 cup peeled and grated apples

Instructions

1. Sift together dry ingredients; flour, baking powder, salt, sugar.

2. Combine in a separate bowl milk, oil and beaten egg. Add gradually to dry ingredients. Stirring until batter is smooth.

3. Fold in apples. Drop by spoonful's onto hot greased griddle. Cook slowly until the surface is covered with bubbles. Turn and cook until the bottom is a delicate brown.

Other Delicious Apple Recipes:

A Taste of Heaven: Deliciously Easy Apple Pie!

Unforgettable Apple Cider and Donuts Themed Party With Recipes for the Ultimate Fall Party Bash!

Transform Your Fall Meals with This Irresistible Spinach Salad Featuring A Warm Shallot Dressing, Apples, and Pistachios!

Shaved Brussel Sprout Salad with Apples, Goat Cheese & Candied Pecans

Apple-Glazed Chicken Thighs : A Fall Dinner Everyone Will Love

Delight in Every Bite: Making the Ultimate Apple Cider Loaf with Brown Butter Glaze

Irresistible Fall Ice Cream Bark Recipes to Delight Your Taste Buds This Autumn!

As the crisp air of autumn begins to hit, what better way to celebrate the season than with a delightful treat like Fall Ice Cream Bark? This unique dessert combines the cozy flavors of fall from the refreshing taste of the Trader Joe's mini pumpkin ice cream cones, offering a true celebration of the season’s best. The Ice Cream Bark is a treat that brings multiple layers of fall flavors to the front. The combination of rich layers of white chocolate, mini pumpkin ice cream cones, and crunchy toppings melds perfectly as either a topping over a delicious bowl of creamy vanilla ice cream or to eat all on its own. This delightful combination promises a seasonal treat with a huge presentation quite like no other.

Versatile Toppings

You can absolutely customize the toppings in Fall Ice Cream Bark based on your taste preferences. The variety of possible toppings allows you to create unique and delightful combinations. Customizing the toppings gives you the freedom to experiment and create a bark that caters to your tastes. Choose from a range of options like chocolate chips, toffee bits, pumpkin seeds, marshmallows, maraschino cherries and strawberry chocolates to mix and match for different flavors and textures. One of the joys of making an Ice Cream Sundae Bark is the sheer versatility of toppings available. You can customize your bark with a variety of fall-inspired toppings, making each batch unique. The versatile toppings choices can really change both the flavor and texture, so have fun with it. Crunchy elements, such as crushed pecans or pumpkin seeds, provide a satisfying counterpoint to the creamy ice cream. Meanwhile, apple crumble bits or dried cranberries introduce bursts of flavor that incorporate nicely to the seasonal tastes. Cinnamon sugar and nutmeg dustings also can bring some cool weather warmth and nostalgia to the dessert.

Kid-Friendly Fun

Ice Cream Bark isn't just a delicious treat, it’s also an excellent way to get the whole family involved in the kitchen. Kids love the opportunity to sprinkle their favorite toppings and express their creativity through food. Involving children in making Ice Cream Sundae Bark transforms baking into a fun, interactive activity. Letting kids choose from various toppings, arrange them on the melted chocolate base, and even participate in layering can really foster a fun environment for cooking. This can also be a great educational experience, teaching them about different flavors, textures, and seasonal ingredients.

Seasonal Aesthetics

The Easy Fall Bark Recipe captures the aesthetic beauty of autumn with its white chocolate base adorned with mini pumpkin ice cream cones from Trader Joe's, pumpkin shaped cookies and sprinkles. This cute and creative design instantly brings to mind the vibrant colors of fall, making it the perfect treat for the season. Creating seasonal aesthetics in your treat adds a layer of delight and festivity. The white chocolate base serves as a blank canvas, which can be decorated with food coloring to resemble autumn leaves. Adding fall-themed sprinkles or candies completes the look, making the bark visually appealing and seasonally appropriate.

Effortless Preparation

The preparation process for this bark couldn't be easier. Melting white chocolate, spreading it evenly on a baking sheet, and artistically decorating it with your favorite fall treats. The entire process ensures a fun and stress-free cooking experience. Effortless preparation means spending less time in the kitchen and more time enjoying your creation. Add sprinkles for extra flair, then let the bark set in the refrigerator before breaking it into pieces.

Perfect Snack

Once prepared, this autumn-themed bark makes for an ideal snack. Whether you're attending fall gatherings, looking for school snacks, or simply want a festive treat at home, this bark works perfectly. The appeal of the Easy Fall Bark Recipe lies in its versatility as a snack. It can be made ahead of time, stored, and brought out whenever you need a touch of seasonal joy. Each piece is a burst of flavor and color, making it a hit at any event or as an everyday treat.

How Long Does Fall Ice Cream Bark Last in the Freezer?

Fall Ice Cream Bark can last up to three months when stored properly in the freezer. Ensuring the bark is tightly wrapped in plastic wrap or kept in an airtight container maintains its freshness. Proper storage is crucial for preserving the flavor and texture of the bark. Ensuring that it's well-wrapped and sealed prevents freezer burn and keeps the ingredients from absorbing unwanted odors.

For the best flavor and texture, try to consume the bark within the first month of freezing. While it can last up to three months, the bark’s taste and texture are optimal during this time. Eating the bark within the first month ensures that you experience it at its freshest and most delicious. Keeping track of the storage date helps you manage your stock and

Ingredients

1 pound white chocolate

1 package of Trader Joe's pumpkin mini ice cream cones

2 tablespoons Chopped Pecans

2 tablespoons butterscotch chips

Handful of pumpkin cookies

Instructions

1. Melt white chocolate and pour onto parchment paper lined traditional cookie sheet. I used one with a side on it to ensure no chocolate dripped off.

2. Cut mini-ice cream cones in half and layer onto the chocolate. Lastly add in your toppings of choice. I did chopped pecans, butterscotch chips and pumpkin cookies but you can really make it your own here and add in any toppings you like.

3. Freeze until ice cream cones and chocolate have hardened again. Break into chunks and serve on it own or on top of a scoop of vanilla or pumpkin flavored ice cream. Enjoy!

Other Fall Desserts:

Yummy Pumpkin Ice Cream Recipe with a Twist: Pumpkin Molasses Cookie Chunks!

A Divine Caramel Cheesecake with a Graham Cracker Pecan Crust

Indulge Your Sweet Tooth with This Delicious Brown Butter Spice Cake with Honey & Fig Jam Frosting

Satisfy Your Sweet Tooth: A Guide to Making Irresistible Salted Pecan Brownies

Deliciously Sweet: Mastering the Perfect Pumpkin Molasses Cookie Recipe for the Autumn Season

Delight in Every Bite: Making the Ultimate Apple Cider Loaf with Brown Butter Glaze

Deliciously Sweet: Pumpkin Coffee Cake with Pecan Crumbles

Discover the Magic in Every Bite: Pumpkin Cream Cheese Muffins with Streusel Topping

Sweet Serenity: Mastering the Art of Pumpkin Cinnamon Rolls with Cream Cheese Icing

Delight in Every Bite: Pumpkin Swirl Brownies

The love of the smell of freshly baked brownies is universal, but when autumn arrives, incorporating the essence of the season into the classic treats leads a delightful recipe. These Pumpkin Swirl Brownies are a perfect blend of deep chocolate tones and the comforting spices of a pumpkin pie. This dessert is a symphony of flavors that echoes the spirit of the fall season. Chocolate and pumpkin might just be the unsung heroes of the autumn flavor palette. Not only do Pumpkin Swirl Brownies satisfy that deep, chocolaty craving, but they also embrace the nostalgia of pumpkin pie spices. Crafting these brownies involves preparing a chocolate brownie batter and a pumpkin spice blend separately. Layering and swirling the two batters together creates a beautiful, marbled design. The result is a creation that not only looks impressive but delivers a complexity of flavors that will have everyone rushing to the kitchen.

In this simple yet exquisite dessert, each ingredient plays an important role. To achieve the perfect Pumpkin Swirl Brownie, you'll need brownie ingredients, pumpkin layer and a good swirl technique. Begin by sourcing fresh, quality ingredients, including real pumpkin puree, not just for its taste but for the moistness it lends. For the brownie this includes classics like melted chocolate or cocoa powder, flour, sugar, and butter that provide the dense and chocolatey foundation. For the pumpkin layer it will be made with real pumpkin puree, cinnamon, nutmeg, and cloves, as this mixture infuses the brownies with the season's signature scents and tastes. Lastly, achieving the swirl technique involves adding dollops of pumpkin mixture atop the brownie batter and artfully swirling with a knife.

The Art of Swirling Success:

- Place spoonsful of pumpkin batter about an inch apart on top of the chocolate layer.

- Using the tip of a knife or toothpick, glide through the batters in a swirling motion to create a marbled effect.

- Tap the pan gently on the countertop to settle the batter and enhance the swirls' visibility.

- For a pronounced pattern, use a consistent swirling motion.

- To enhance the effect, alternate the swirl direction between adjacent rows.

- Remember, less is more, and over-swirling can muddy the distinct flavors.

The swirling not only makes for a stunning presentation but also allows every bite to deliver a great fusion of flavors. Visual appeal is half the treat with these brownies. Achieving it is a simple, yet delicate process so be sure to follow these steps on how to swirl brownies.

Pro Tips for Ultimate Brownie Success

Crafting perfection requires more than a just a recipe, it also at times requires a certain finesse. Some expert tips on how to achieve this for the best pumpkin brownies are as follows. First don't skimp on the good stuff, find high-quality chocolate. The type of chocolate you use matters. Opt for a rich, high-quality chocolate for the best flavor. Same goes for your pumpkin so be sure to find a quality pumpkin puree. For the best flavor and texture, use unadulterated pumpkin puree. Next you need to spice it right. Don’t skimp on the fall spices, they are after all the soul of the pumpkin layer. Like we mentioned above, make sure to use smooth swirls. This is so important that I feel like I have to mention it twice. Use a skewer, knife tip or the handle end of a spoon for more control when swirling. Lastly before putting in the oven be sure to do pan tapping. Gently tap the pan before baking to remove any air bubbles. Just like with any recipe consistent oven temperature is key. An overlooked element in brownie baking is oven temperature. Make sure your oven is properly calibrated for the perfect bake. A few careful steps can elevate your brownie experience from delightful to unforgettable. Enjoy these moist and flavor-packed Pumpkin Swirl Brownies and remember that each bite is a perfect celebration of the season.

These brownies represent a comforting fusion of worlds where the timeless appeal of a gooey chocolate brownie meets the warm, spiced caress of pumpkin. It's a match made in heaven, and especially one for the Fall months. This treat is perfect for enjoying with a hot drink as the leaves turn golden. The Pumpkin Swirl Brownie is not just a seasonal delicacy, as you'll find that it's so loved that people will crave it year-round. Appreciate the moist, tender crumb of these brownies, as it is a result of the perfect balance between chocolate and pumpkin. With every swirl, just the right hint of cinnamon, nutmeg, and clove will hit your taste buds amid the backdrop of the decadent chocolate. Take pleasure in creating and savoring these glorious Pumpkin Swirl Brownies. They are sure to become a treasured part of your fall tradition and will have your entire house filled with the best smells of fall.

Ingredients

Brownie Batter

Β½ cup dark brown sugar packed

1 cup granulated sugar

3 large eggs

2 teaspoons vanilla extract

1/2 cup salted butter

1 cup all-purpose flour 

1/2 cup unsweetened cocoa powder

1/2 tsp baking powder

ΒΌ teaspoon salt

1 cup heavy whipping cream

Pumpkin Batter

1 cup pumpkin puree

1/4 cup granulated sugar

6 oz cream cheese, softened

3/4 teaspoon cinnamon

1/2 teaspoon ground cloves

1/2 teaspoon ground nutmeg

1 large egg

Instructions

  1. Preheat the oven to 350 degrees and oil and line an 9X13 pan with cooking spray and parchment paper (if desired).

  2. In a large mixing bowl, whisk together the melted butter, dark brown sugar, and granulated sugar until light and fluffy. Add in eggs and vanilla and mix again. Set aside.

  3. In another medium bowl, whisk together the all-purpose flour, salt, baking powder and unsweetened cocoa powder. Gradually mix in wet ingredients into dry. Lastly, add in heavy whipping cream.

  4. Pour the batter into the prepared pan and begin mixing pumpkin mixture.

  5. In a medium sized bowl mix together cream cheese and sugar until blended. Add in pumpkin, spices and egg.

  6. Once blended add in large spoonsful of pumpkin batter on top of brownie mix. Using a knife swirl batter and pumpkin mixture, be sure to not over blend the two together but make a swirl. Tap on table to remove air bubbles.

  7. Bake for 45 minutes or until a toothpick inserted comes out clean. Remove from oven and let cool for five minutes. Cut into squares, serve and enjoy!

Other Delicious Pumpkin Recipes You Will Love:

Deliciously Sweet: Mastering the Perfect Pumpkin Molasses Cookie Recipe for the Autumn Season

The Ultimate Thanksgiving Dessert - My Pumpkin Crisp Recipe

Savor the Fall Season with the Perfect Pumpkin Espresso Martini

Yummy Pumpkin Ice Cream Recipe with a Twist: Pumpkin Molasses Cookie Chunks!

Sweet Serenity: Mastering the Art of Pumpkin Cinnamon Rolls with Cream Cheese Icing

Deliciously Sweet: Pumpkin Coffee Cake with Pecan Crumbles

Baked Burrata Pumpkin Ziti with Pork Sausage Recipe

Transform Your Fall Meals with This Irresistible Spinach Salad Featuring A Warm Shallot Dressing, Apples, and Pistachios!

Many years ago, while dining at a restaurant in California I had the most delicious salad with a warm dressing. Although this isn't the most common dressing presentation, it was a wonderful surprise and one I always think about come the fall months. So, this is my take on that delightful salad made at home. The star of the dish is a warm shallot dressing that marries all the flavors together, adding a comforting, savory touch perfect for the cooler seasons. Fresh spinach leaves provide a nutritious base, packed with vitamins and a subtle earthiness that complements the other ingredients perfectly. Thinly sliced apples bring a hint of natural sweetness and a satisfying crunch, balancing out the richness of the dressing. The contrast of textures and flavors creates a delightful experience. Additionally, chopped pistachios add an irresistible crunch to the texture and a burst of nutty flavor. This combination makes the salad not only delectable but also nourishing, adding an elegant yet simple touch to your fall meals.

A great salad is all about the right ingredients, and this Spinach Fall Salad is no exception. These are the key components you will need. The base of the salad, providing vibrant green color and nutritional benefits, such as vitamins A and C with the fresh spinach. Warm shallot dressing adds the rich, savory flavor that elevates the simple ingredients into a gourmet dish. The crisp apples bring a sweet and tangy crunch, adding both texture and an autumnal flair to the salad. Crunchy pistachios offer a nutty taste and additional crunch, enriching the salad’s overall texture and making each bite exciting. The salad is ultimately topped off with creamy goat cheese crumbles for a perfect balance.

Spinach Salad Dressing

The spinach walnut salad dressing can make or break a salad, and this warm shallot dressing is nothing short of amazing. It enhances every bite of fresh spinach, apples, and pistachios, making each forkful a delightful experience. The shallot, when sautΓ©ed and combined with apple cider vinegar, Dijon mustard, and honey, offers a perfect balance of savory and sweet. The star of the show are the finely diced shallots that are sautΓ© until translucent to create a fragrant base. The apple cider vinegar adds a tangy kick to the dressing. My favorite Dijon mustard will provide depth and a slightly zesty flavor. Sweet honey balances the acidity with its sweetness, and you can also switch out the honey for maple syrup to create even more fall flavors. The beauty of this dressing lies in its simplicity and in the way it brings all the ingredients together seamlessly. It is easy to prepare and adds a nice comforting touch to the salad.

Possible Recipe Variations

While the classic combination of spinach, apples, and pistachios is perfect, you can always get creative with this salad. Experimenting with these variations allows you to create a personalized version of the salad that suits your taste and dietary preferences. Here are some versatile options:

- Swap pistachios for walnuts or pecans: Adds a different nutty crunch.

- Incorporate seasonal fruits like pears or pomegranate seeds: For a tailored taste to those fruits.

- Add protein such as grilled chicken, chickpeas, or tofu: To make it a heartier dish.

- Use goat cheese or feta: For a creamy, tangy complement to the salad's flavors.

- Experiment with different greens: Such as arugula or kale for varied textures and tastes.

- Add-ins: As always, a salad can be adaptable by adding in your favorites like dried cranberries or pomegranate arils. Feel free to experiment.

You can substitute pistachios with another type of nut in the Spinach Fall Salad. Walnuts provide a richer, earthier taste, perfect for autumn dishes. Pecans offer a buttery, slightly sweet flavor that pairs well with the warm shallot dressing. Almonds add a subtle, sweet crunch that complements the apples and spinach. Toasting the nuts before adding them to the salad enhances their flavor. Consider any allergy concerns or dietary preferences when choosing a substitute. Ultimately, using your favorite nuts can personalize the salad to suit your taste perfectly.

Choosing the right type of apple can make a big difference in the taste and texture of your salad. Honeycrisp or Fuji varieties are firm and crisp, perfect for a balanced texture and flavor. Granny Smith adds a delightful tart contrast to the sweet ingredients in the salad. Avoid overly soft apples like Red Delicious, as they can become mushy and lose their distinct sweetness. Mixing two types of apples can enhance the complexity and depth of the salad's taste profile. Vibrant red or green apples add visual appeal, making the salad more attractive.

What to Serve with Spinach Salad

To elevate your meal experience even further, pair your spinach salad with other delightful dishes. Options that go well for protein are grilled chicken, salmon, or shrimp. These all add a satisfying protein boost and elevate the meal's heartiness. Serve alongside a slice of warm, crusty bread or a fresh baguette to soak up the delicious warm shallot dressing. Complement the flavors with a variety of cheeses such as goat cheese, feta, or shaved parmesan for a creamy addition. A bowl of butternut squash soup or a hearty lentil soup can accompany the salad, providing comfort and warmth on a cool fall day. Finish your meal with a light, autumn-inspired dessert like an apple crisp or a spiced pear tart to keep the seasonal theme intact. These pairings can create a harmonious and satisfying dining experience, making the Spinach Fall Salad even more memorable.

Is This Salad Suitable for Making Ahead of Time?

The Spinach Fall Salad with warm shallot dressing, apples, and pistachios can be prepared ahead of time, making it convenient for busy schedules. To retain the salad's freshness, store the warm shallot dressing separately and add it just before serving. Toss the apples in a bit of lemon juice or add them just before serving to prevent browning. Keep the pistachios aside until the last minute to ensure they remain crunchy and delicious, and don't get soft. Preparing these components ahead of time and combining them just before serving ensures the salad remains fresh and the spinach leaves crisp. This make-ahead capability makes the salad an excellent choice for gatherings, potlucks, or meal planning.

This Spinach Fall Salad with warm shallot dressing, apples, and pistachios is a delightful and nourishing dish that incorporates ingredients that are the essence of the fall season. Whether enjoyed as a light lunch or as part of a larger meal, the combination of fresh spinach, crisp apples, and nutty pistachios, all tied together with a warm, savory dressing is sure to please your palate. Incorporating various add-ins and pairing options can further personalize your dining experience to your own tailored tastes. Embrace the flavors of the season and transform your meals with this irresistible spinach fall salad with warm shallot dressing, apples and pistachios!

Ingredients

10 -12 cups spinach

2 small apples

4 oz crumbled goat cheese

2 cups pistachios

Dressing:

1 tablespoon butter

2 shallots, diced

2 tablespoons honey

2 tablespoons apple cider vinegar

1 tablespoon Dijon mustard

1/3 cup olive oil

sea salt & fresh ground pepper

Instructions

  1. Make The Dressing. Add butter to pan, a pinch of sea salt and sautΓ© your diced shallot until caramelized. Add in honey, dijon mustard and apple cider vinegar. Let simmer for 30 seconds while ingredients marry together. Turn off oven and add in olive oil, whisky as you do. Add in sea salt and pepper to taste. Pour into a container to serve dressing on the side of the salad. You want the dressing warm not hot where it will wilt the spinach. So let cool slightly while assembling the salad.

  2. Assemble the salad. Add together in a large bowl spinach, sliced apples, goat cheese and pistachios. I like to add half of the apples goat cheese and pistachios, then add the other half after plating. For this salad you will want to add dressing right before serving so you can do so not and then plate or you can serve small dressings to each of your guests depending on how you are serving. After adding dressing add to plate and add additional toppings. Serve and enjoy!

Other Salad Recipes You Will Enjoy:

Delicious, Nutritious Pear & Walnut Salad with Honey Mustard Dressing

How to Make the Perfect Pear and Pomegranate Arugula Salad

Shaved Brussel Sprout Salad with Apples, Goat Cheese & Candied Pecans

The Perfect Summer Meal: Grilled Chicken, Mexican Street Corn & Cucumber Salad

Savory Italian Chopped Salad Jar Recipe: A Symphony of Flavors in Every Bite

Discover the Delightful Twist of Sweet Kale Salad with Poppy Seed Dressing

A Taste of the Southwest: Southwestern Chop Salad Recipe

Transform Your Kids' Halloween Tablescape: Magical Ideas That Will Amaze the Little Trick-or-Treaters!

Creating a memorable Halloween experience for the kids isn't just about the costumes and candy. You can help bring up their festive spirits by sprucing up the house and setting the scene with a magical and whimsical Halloween tablescape. In this blog post, we'll explore some fun and enchanting ideas that involve colorful, kid-friendly decorations, ensuring your little trick-or-treaters are amazed and delighted. Transforming your dinner table into an enchanting Halloween spectacle involves a few thoughtful touches and imaginative themes. A whimsical Halloween theme can set the stage for a night filled with fun and surprises that cater specifically to the adorable little children.

Creating the perfect Halloween tablescape is an artform that helps to capture the essence of the holiday while making it fun and safe for kids. By incorporating vibrant, kid-friendly decorations, you can captivate their young imaginations and create a memorable experience for them.

Start by layering the table with playful Halloween-themed placemats. Think of using bright colors and fun patterns help set a festive tone. Using playful elements like mini pumpkins, ghostly figurines, and colorful Halloween-themed dishware can add charm and excitement, making the dinner much more festive. Personalize the tablescape with customized trick or treat bags for each child. It not only looks adorable, but it also in certain types of gatherings helps to give assigned seating, and also adds to the decor. You can ask the kid's parents to pick a bag from the website like I did here to capture each child's personality, or you can pick different ones yourself to surprise them. Finally, ensure the setup is interactive and engaging, with themed activities and treats that keep the little ones entertained and excited throughout the meal.

Festive tableware featuring Halloween themes like pumpkins, ghosts, and black cats helps to set the tone from the start. Spooky decorations such as miniature pumpkins, fake spider webs, and cute skeletons add to the ambiance and charm. Themed linens, including tablecloths, placemats, and napkins with Halloween designs, provide a cohesive and festive look. Special unique treats like cuties made to look like mini pumpkins, ghost-shaped cut out bananas, and eyeful celery delight kids and keep treats healthy between all the candy.

Soft and safe decorations are crucial. Avoiding sharp or fragile items, and choosing plush toys and decorations made from child-friendly materials like felt or plastic, ensures safety. These melamine plates, cups and kid friendly silverware from Pottery Barn Kids help ensure safety and no accidents while kids are sure to be playful!

Looking for crafting? Here are a few fun ways to get kids involved in crafts during your Halloween party. Mason jar lanterns can be transformed into enchanting decorations by painting them with Halloween themes and adding battery-operated tea lights inside. Crafting mini pumpkin centerpieces by decorating small pumpkins with glitter, paint, and googly eyes results in a kid-friendly aesthetic that's both fun and festive. Spooky napkin rings made using pipe cleaners and beads to form shapes like spiders or bats add playful fright to the table. Finally, designing custom place cards with cardstock, stickers, and markers, and letting kids personalize each card, brings a touch of individuality and creativity to each place setting.

Creating the perfect kids' Halloween tablescape involves combining playful and festively entertaining elements to create a spooky fun atmosphere. By incorporating themed decorations, interactive elements, and personalized touches, you can ensure that your little trick-or-treaters have a magical experience that they'll remember for years to come. Whether it's through creative DIY crafts, or thoughtfully chosen snacks, every detail can add to the wonder and excitement of the Halloween season. Let your imagination run wild and transform your kid's Halloween tablescape into a magical world that captivates and delights children of all ages.