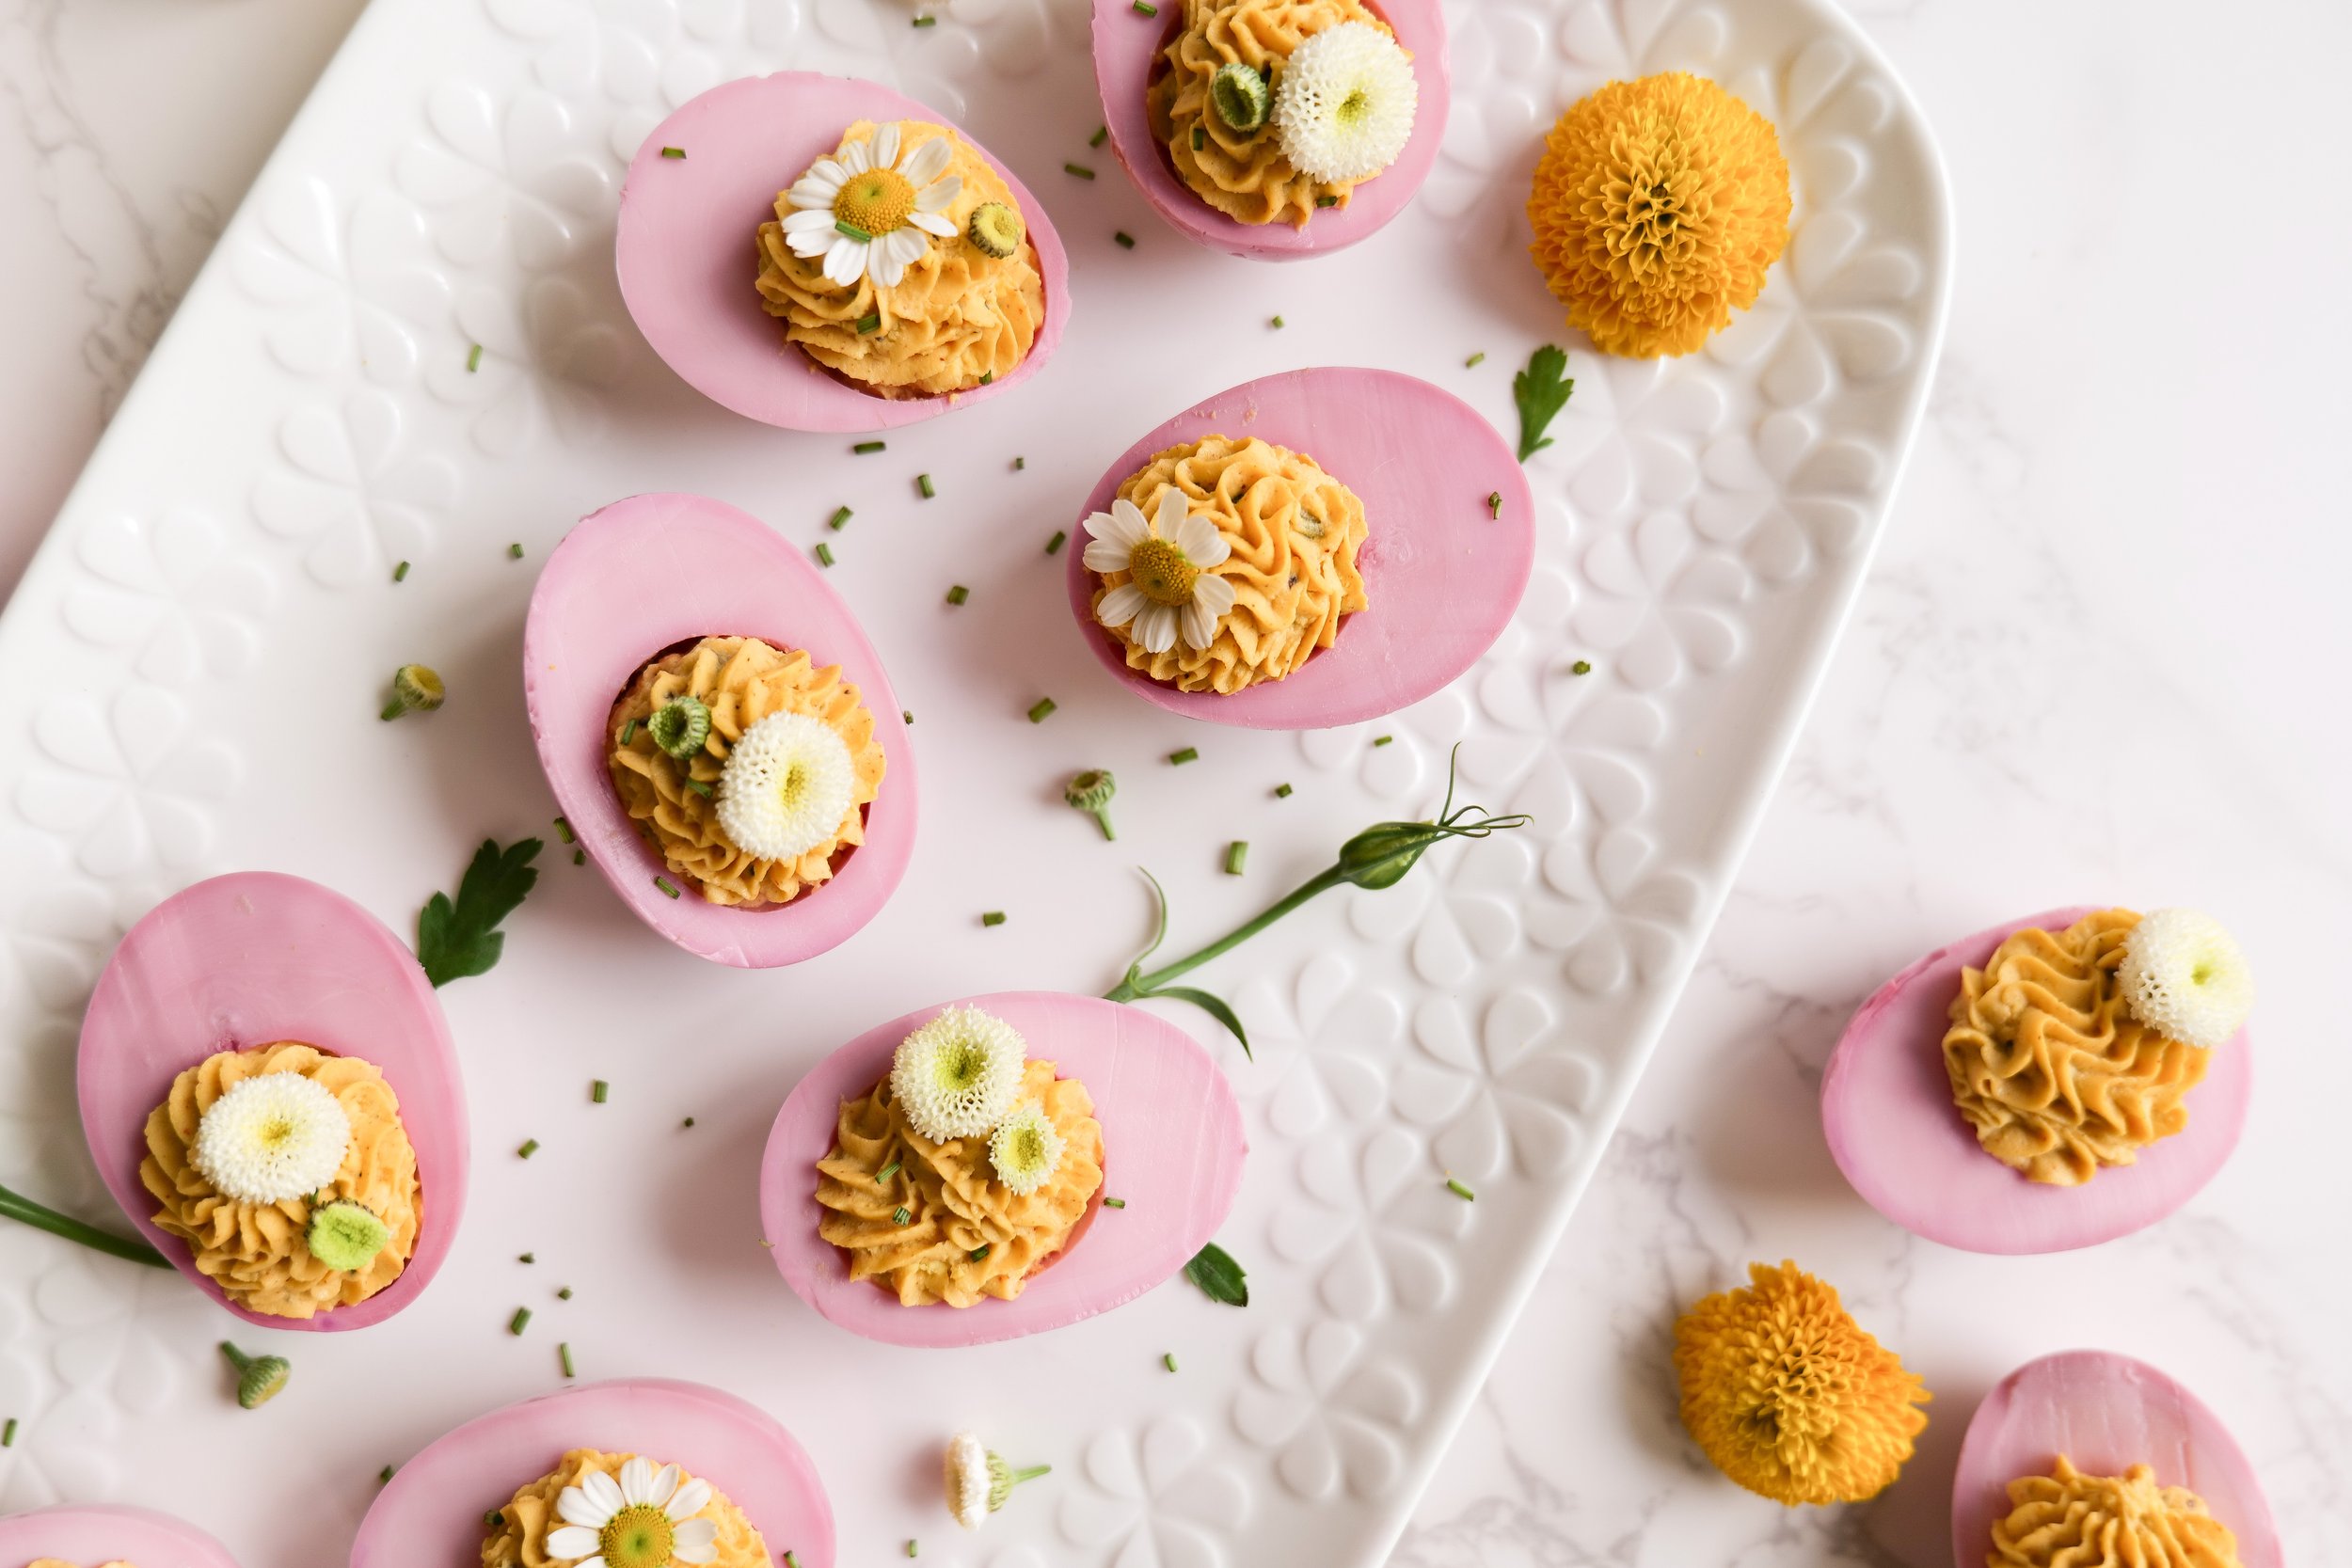
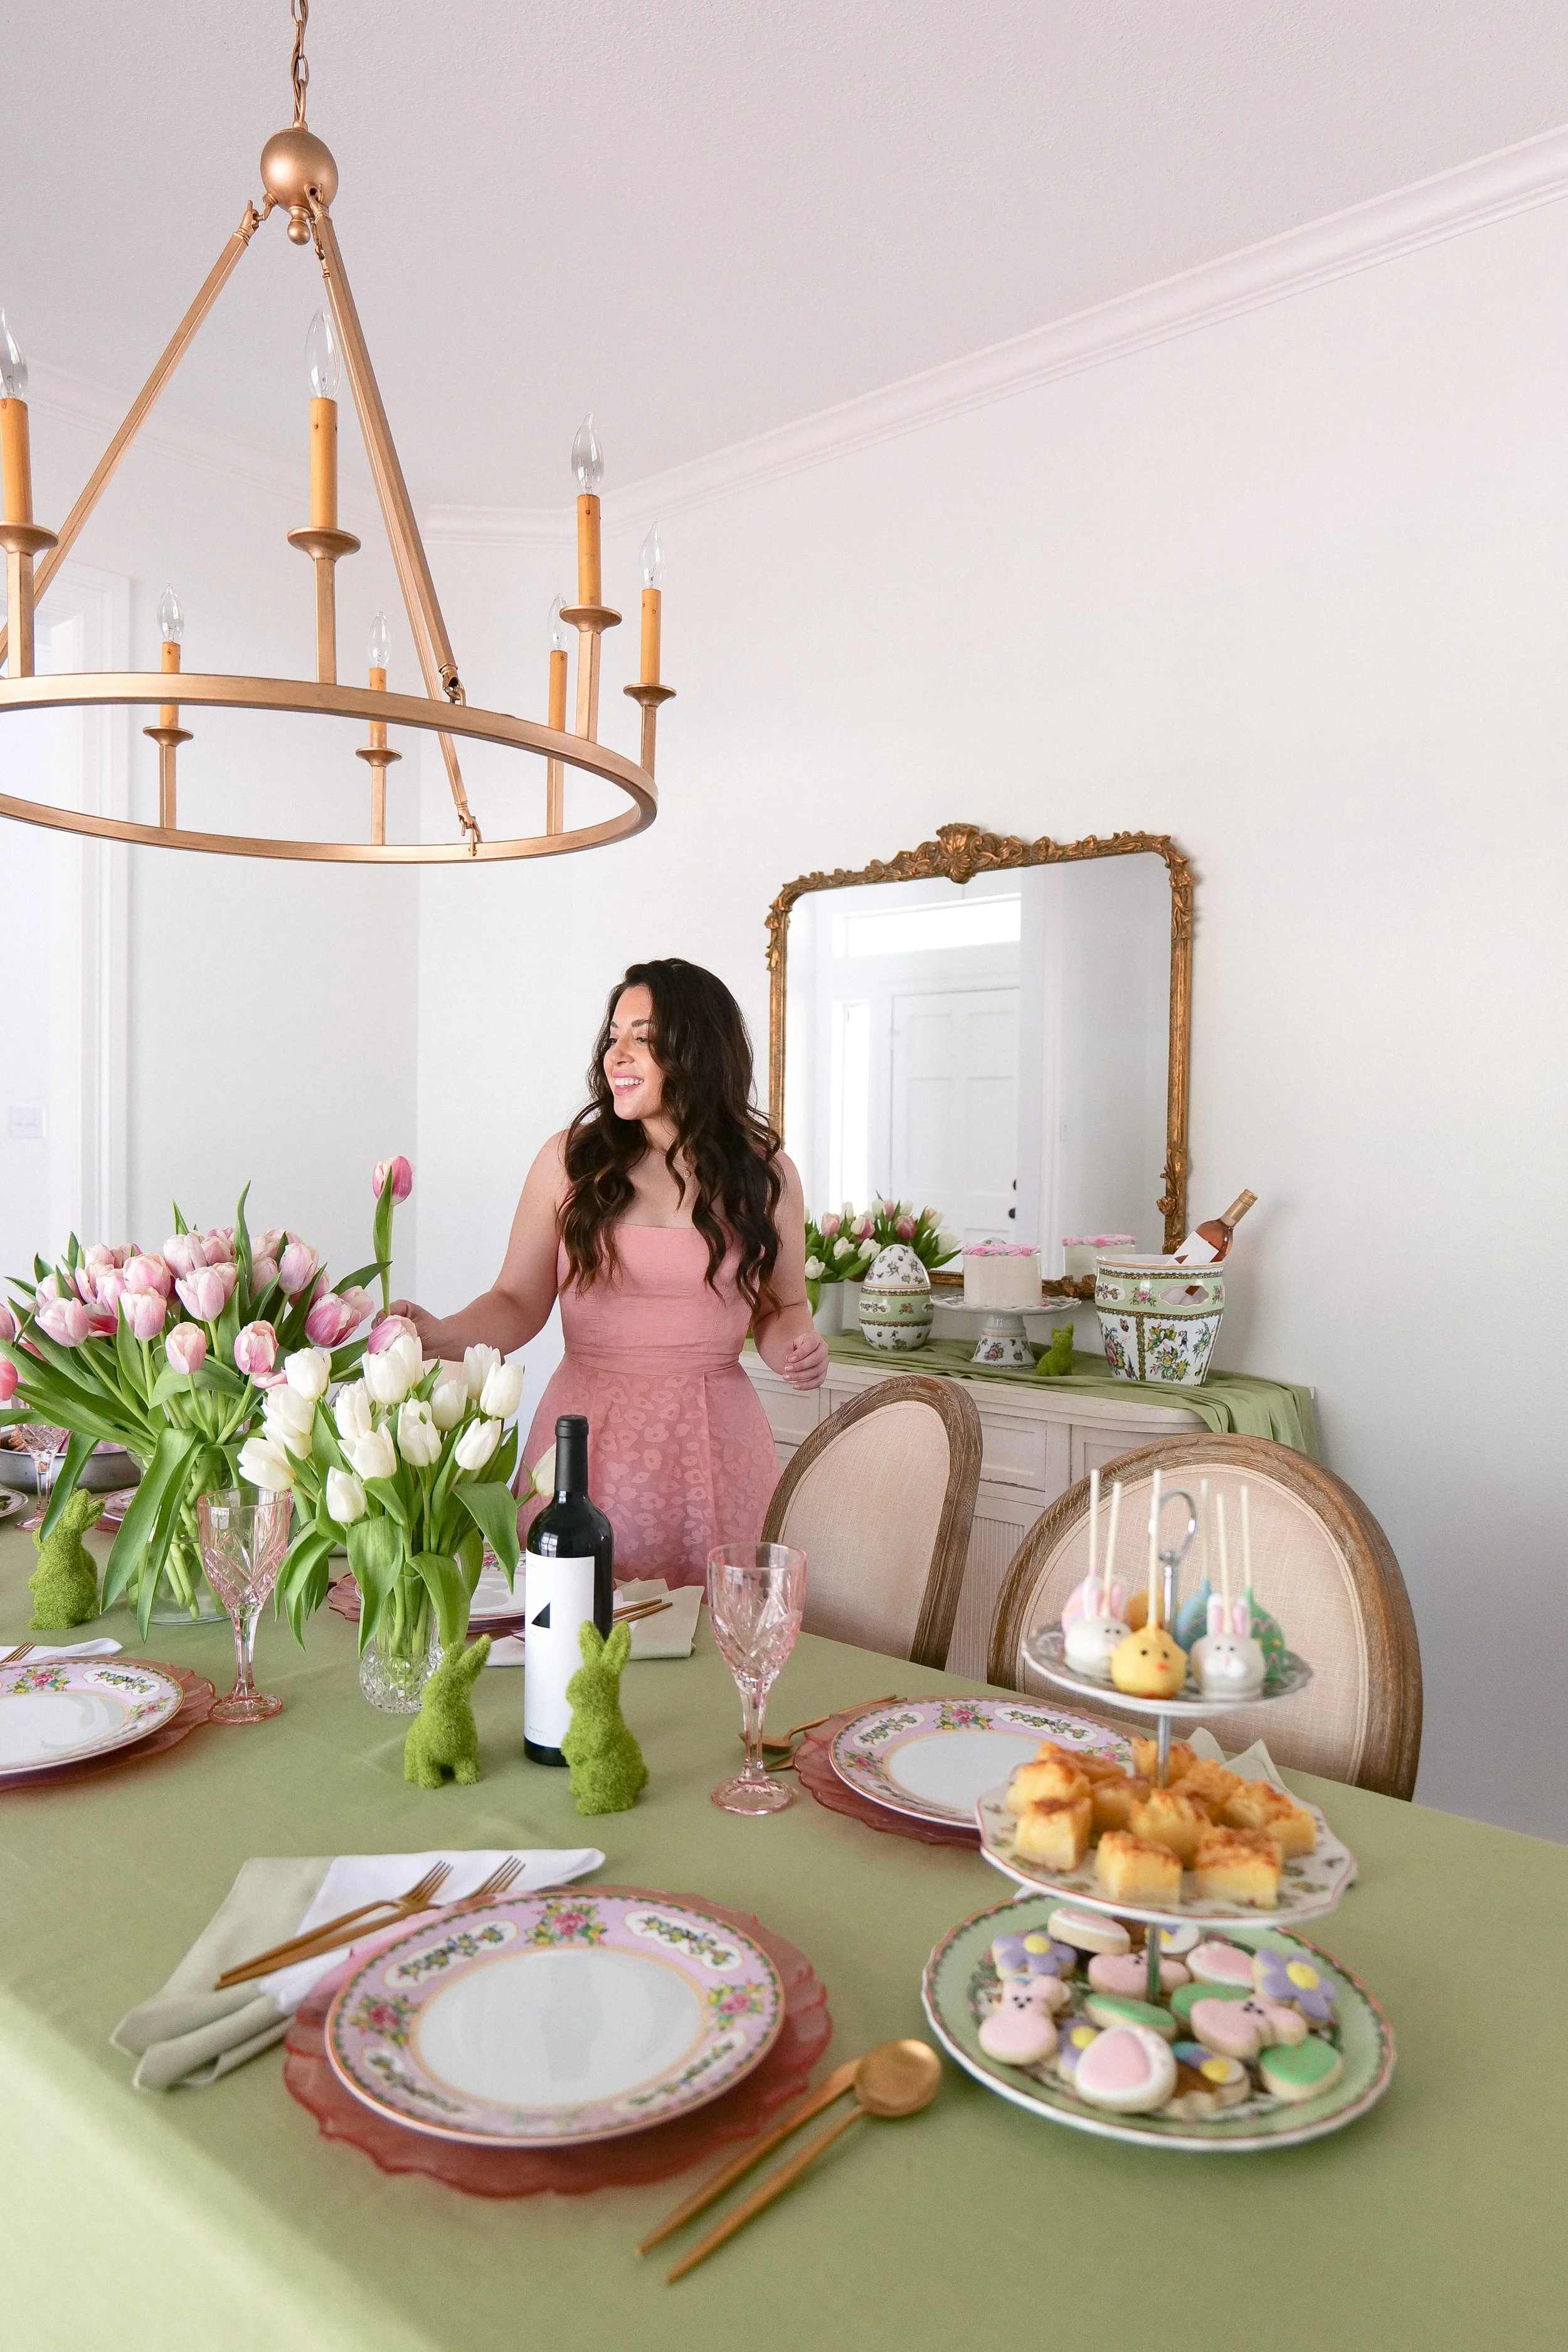
Deliciously Different: Pink Deviled Eggs to Spruce Up Your Easter Brunch
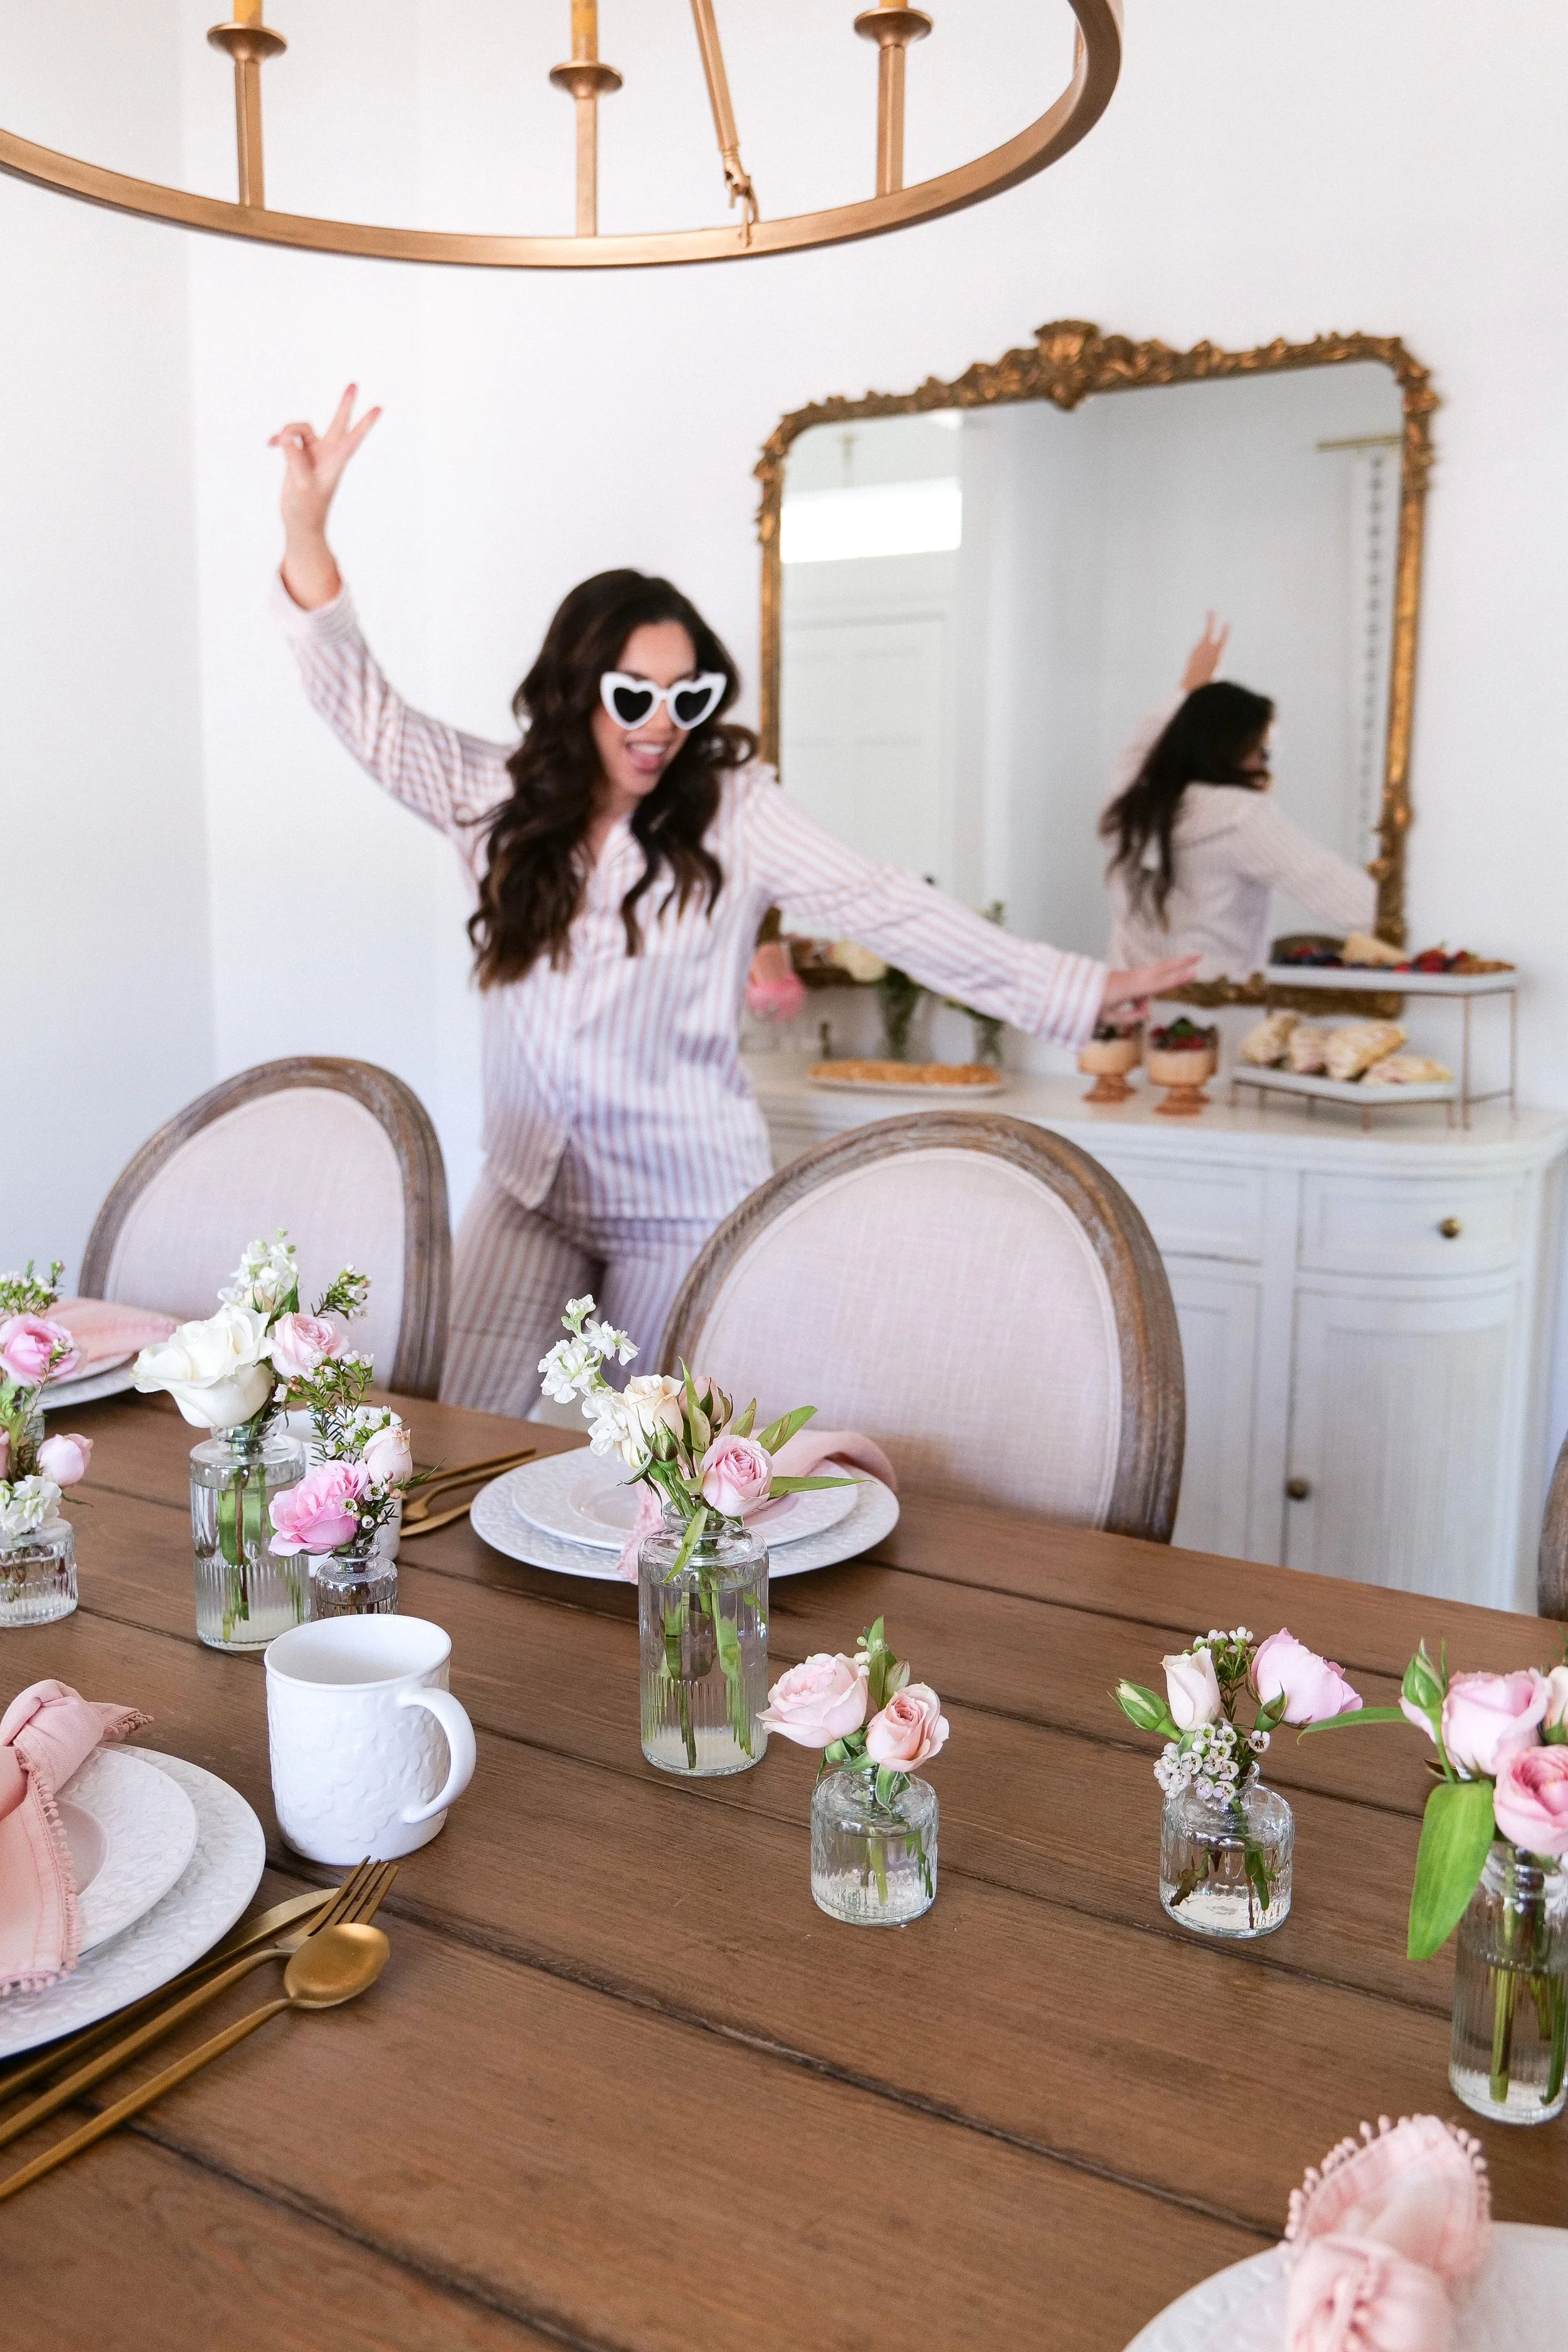
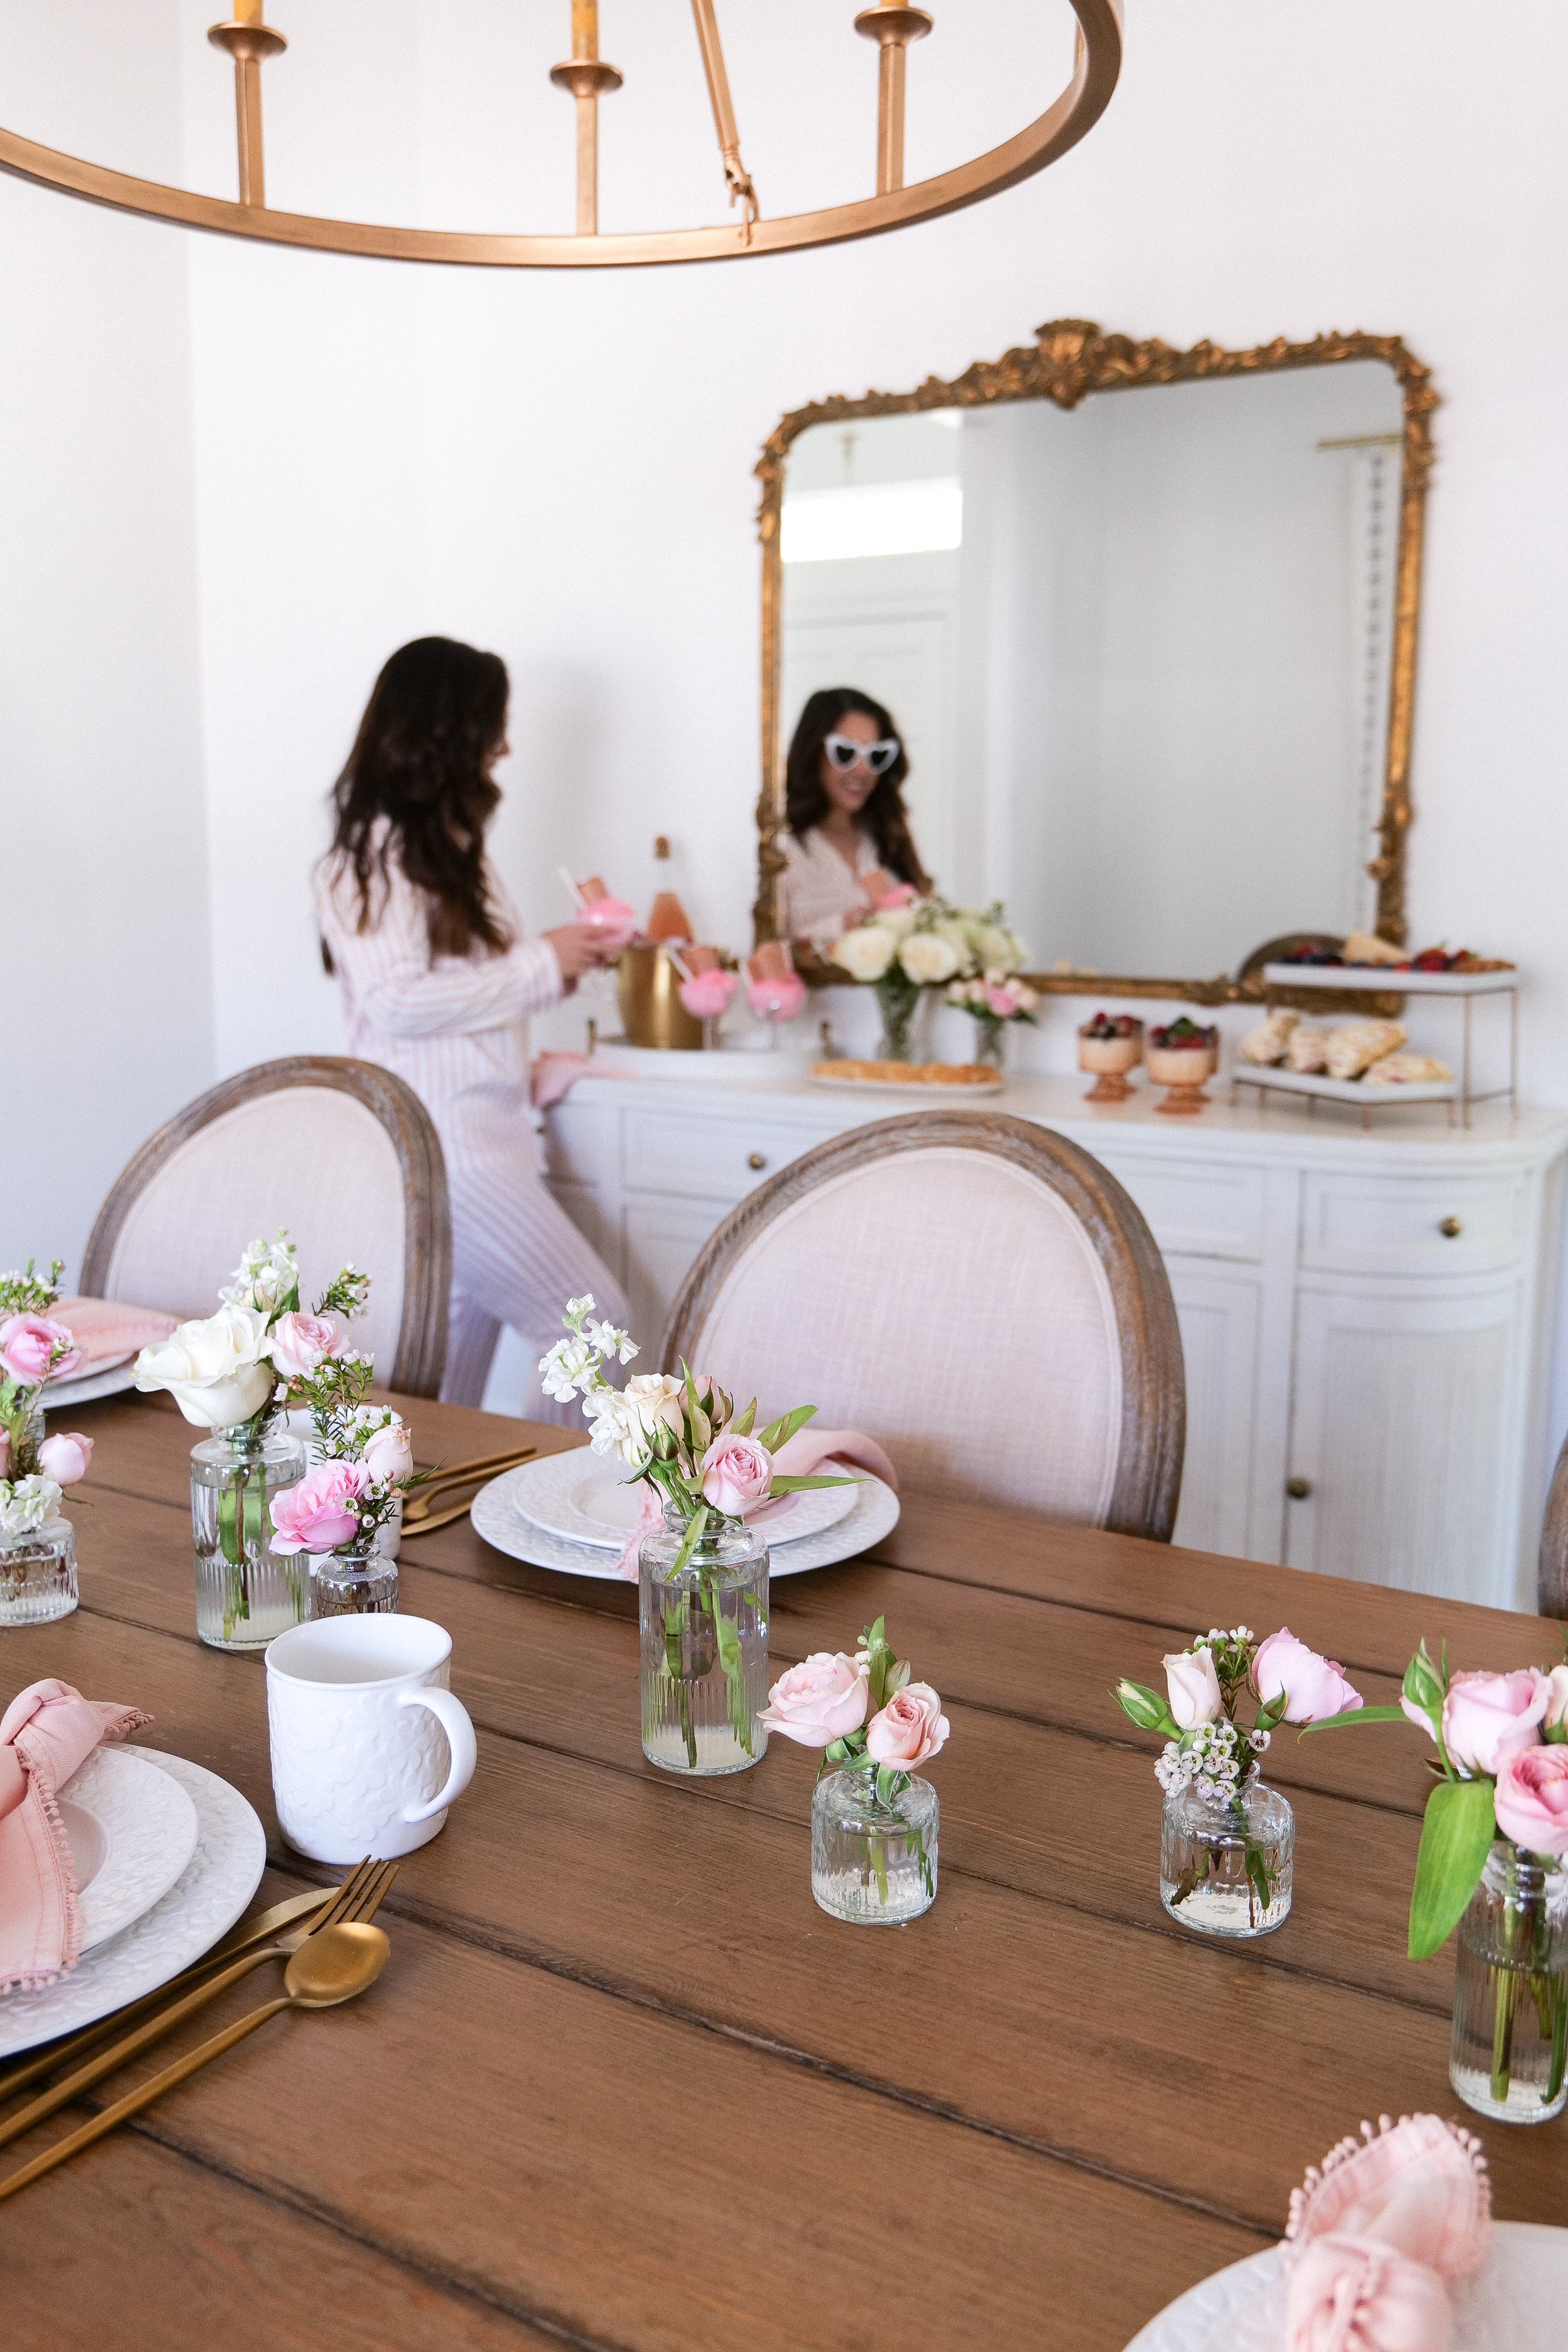
Nothing says springtime like a picnic with friends, and a plate of colorful pink deviled eggs. If you know me you know pink is my favorite color, so these pink eggs make for the perfect addition to any outdoor gathering. Not only are these deviled eggs a visually stunning food to share, but they are also packed with flavor. Whether you’re a fan of the classic deviled egg recipe or you’re looking for something new, this pink version is sure to become a favorite. Read on to learn the easy steps for making this fun twist on a classic picnic favorite.

Pink Easter Deviled Eggs

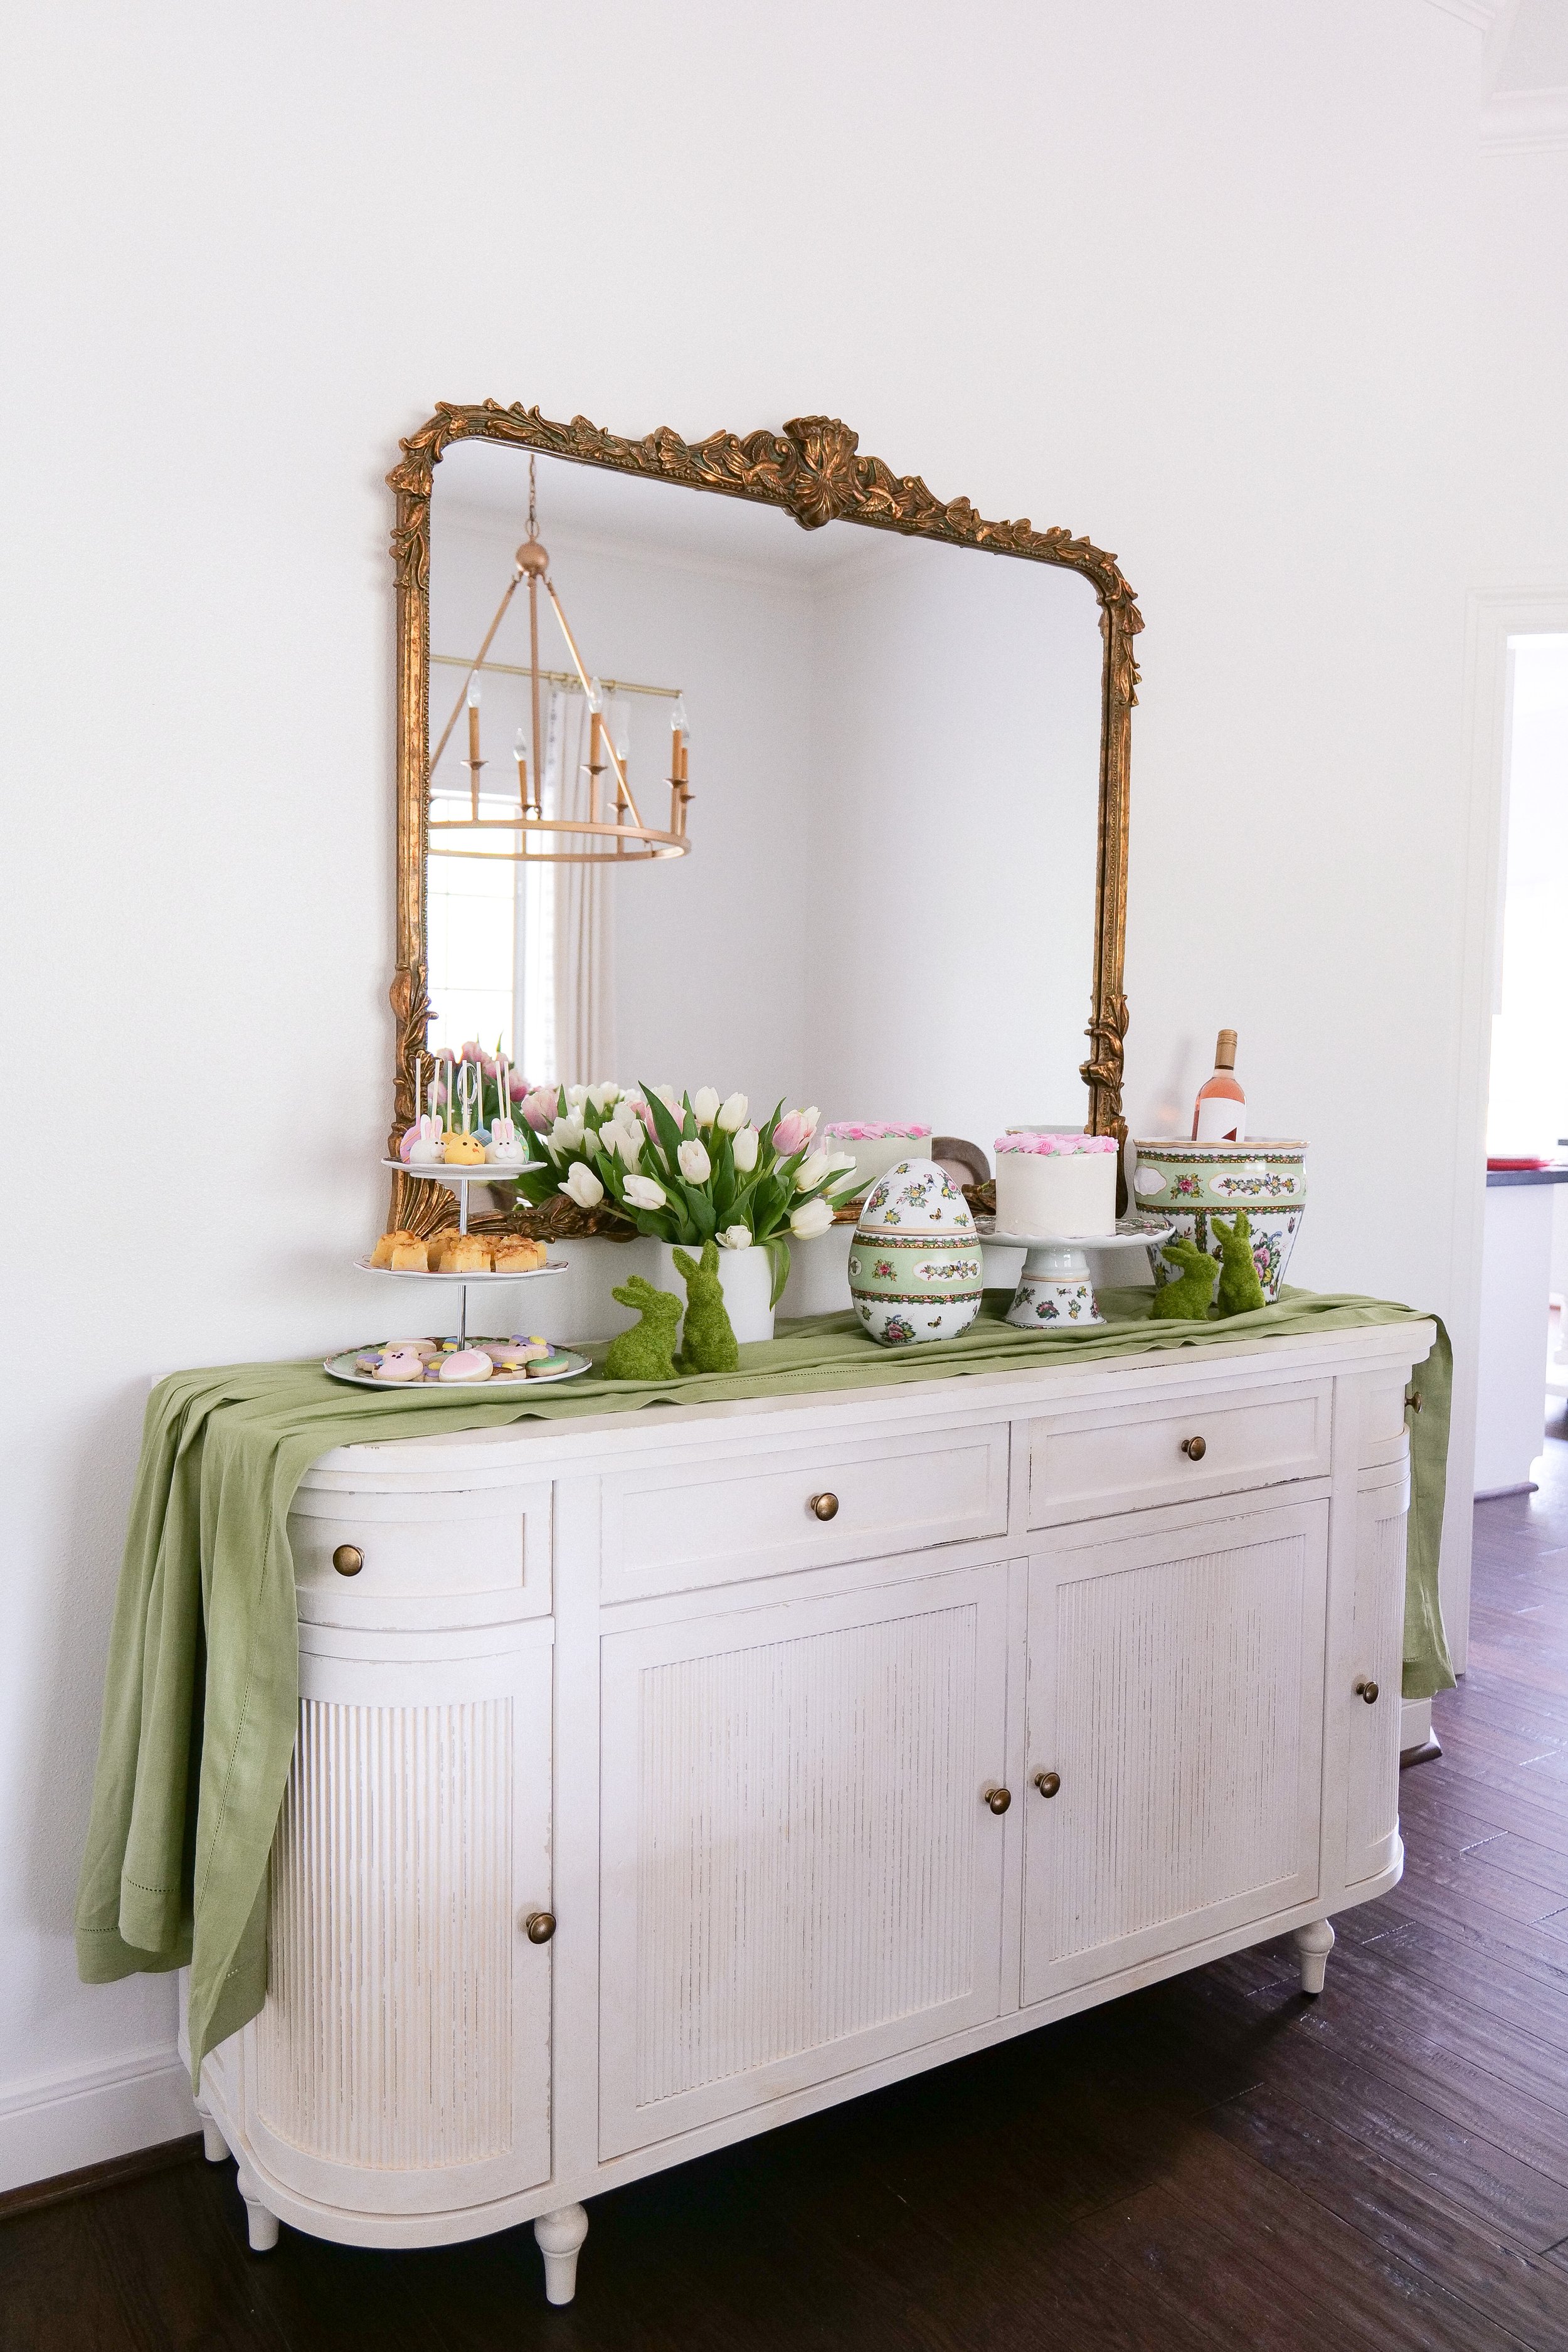
Pink Easter Deviled Eggs are an easy, creative, and delicious way to celebrate the Easter holiday. With a natural vegetable dye, you can create a beautiful pastel hue for your eggs. The creamy, tangy filling is the perfect complement to the eggs and will leave your guests wanting more! They are an easy and inexpensive dish making them the perfect dish for a family gathering or Easter party. The eggs can be served as an appetizer, snack, or even as a main dish. Have fun decorating the eggs and make them as creative as you wish. Whether you're hosting an Easter brunch or a dinner, Pink Easter Deviled Eggs will be sure to impress your guests.

If you're looking for a unique and fun way to celebrate the Easter holiday, Pink Easter Deviled Eggs are the perfect option. With easy preparation and affordable ingredients, you can have a delicious dish that will wow your guests. Add a bit of creativity to the eggs and you have the perfect appetizers or main dish to serve. Take the time to make these beautiful eggs and you'll have a memorable Easter celebration!

How to Make Colorful Deviled Eggs

Pink deviled eggs are a great way to add a personal pop of color to any gathering! Making them is surprisingly easy and does not take too much time.

To get started, you'll need twelve large eggs. Boil them until they are hard-boiled, then peel the shells off. In a medium-sized bowl, mix 1/3 cup mayonnaise, 1 tablespoon chopped pickles, 1 tablespoon pickle juice, 1/2 teaspoon paprika, and a pinch of salt and pepper. Once the ingredients are combined, add the egg yolks and mash them with a fork or potato masher until the mixture is creamy.

Next, you'll need to dye the egg whites. To make pink deviled eggs, use beet juice and water. Place the egg whites in the dye for one minute or longer, depending on how deep of a pink you are trying to achieve. Fill the dyed egg whites with the yolk mixture.

For the final touch, you can add small flowers or more paprika to the tops of the eggs. Serve the pink deviled eggs immediately or store them in the fridge for later. Enjoy!

What are Other Ways to Hard Boiled Eggs?

Using my 360 2 Quart Saucepan to make my hard-boiled eggs without water. First you will wet a paper towel and your eggs. Fold the paper towel to fit into the saucepan, wet it with water, and place it in the pot. Make sure the towel isn't sitting in a pool of water but that all the water is held in the towel. Carefully place the eggs in a single layer on top of the wet towel. Cover the pot and heat it over medium heat until steam just begins to escape from under the lid, about 3 minutes. Spin the lid to engage the vapor seal then immediately reduce the heat to low. The cooking time will vary depending on the desired doneness of the eggs. For soft-cooked eggs, cook 5 to 6 minutes; for medium-cooked eggs, cook 7 to 8 minutes; and for hard-cooked eggs, cook 13 to 15 minutes.

How to Dye the Eggs

To make your own Pink Deviled Eggs, gather the supplies: hard-boiled eggs, food coloring, water, a shallow bowl, and a slotted spoon. Then, fill the bowl with equal parts water and beet juice or food coloring. Submerge the hard-boiled eggs in the colored water and let them sit for about 1 minute or more depending on the depth of color you are looking for. Carefully remove the eggs from the liquid and pat them dry with a paper towel. Now you have festive Pink Deviled Eggs!

These eggs can be served as a colorful appetizer at a party, or you can use them as deviled egg filling. The possibilities are endless! Try adding a bit of color to your classic deviled eggs for a festive twist. Pink Deviled Eggs are sure to be a hit at your next gathering!

INGREDIENTS

(Serving Size 12)

12 large eggs

1/3 cup mayonnaise

1 tbsp chopped pickles

1 tbsp pickle juice

1/2 tsp Salt

1/2 tsp black pepper

1/2 Paprika

INSTRUCTIONS

  1. Hard boil the eggs first. Fold the paper towel to fit into the 2 Quart Saucepan.

  2. Wet the paper towel with water and place it in the pot. (The towel shouldn’t be sitting in a pool of water. All the water should be held in the towel.) Place the eggs in a single layer on top of the wet towel.

  3. Cover the pot and heat over medium heat until steam just begins to escape from under the lid, about 3 minutes.

  4. Spin the lid to engage the vapor seal then immediately reduce the heat to low for 15 minutes.

  5. Remove from heat and put eggs in an ice-cold bath. This makes it easier to peel them.

  6. Once you peel the shell of the egg cut it in half lengthwise and remove egg yolk in a bowl. Put egg whites in another bowl and cover with 1 cup beet juice and 1 cup water until completely submerged. Leave for 1 minute and rinse with water and lay on a paper towel to dry. You can add more beet juice or leave it for longer to achieve a deeper pink.

  7. In the egg yolk bowl mush eggs and add in pickle juice, chopped pickles, salt, pepper and paprika. Once mixed add to a piping bag and fill with egg yolks.

Adjustments you can make for this meal would be adding in dijon mustard in exchange for pickles if you want less of a pickled flavor. If you like a pickled flavor and are out of juice you can additionally use apple cider vinegar. Seasoning can also be changed for your taste buds as well as mayo ratio. I always encourage making all my recipes into your own to fit your diets and taste buds. Deviled eggs are a classic appetizer perfect for any occasion. Pink deviled eggs are a fun twist on a classic dish and are sure to be a hit at any gathering. Whether you’re hosting a dinner party or celebrating a special occasion, pink deviled eggs are an easy and delicious addition to your menu. Here are a few other recipes I think you will love this Easter season:

Easy and Delicious Mushroom & Pea Risotto Recipe

Tantalizingly Delicious Recipe For Lemon Cheesecake With An Amazing Glaze

Indulge in Deliciousness: Cherry Chip Cake with Chunks of Dark Chocolate Recipe

Shaved Brussel Sprout Salad with Apples, Goat Cheese & Candied Pecans

Blackberry Cinnamon Rolls with Mascarpone Frosting

Bringing the Joy of Easter to Your Table: Creative Ideas for Easter Spring Table Decor

Easter is the perfect time to bring some fun, festive, and colorful decorations into your home. Whether you’re hosting an Easter brunch or dinner for family and friends, setting the scene with a beautiful Spring-themed table is the perfect way to welcome in the season. From simple and elegant centerpieces to bright and cheerful table settings, there are so many ways to create a stunning Easter table display that you and your guests will love. Read on for some creative decorative ideas for your Easter Spring table to create the perfect celebration. I'll show you exactly what I used to create my Easter Spring table decor this year.

Bring the beauty of the Spring season to your Easter table with these simple tips for festive decorating. Utilize bright and cheerful colors to create a festive atmosphere. Opt for a beautiful green or a pastel pink. Incorporate fresh flowers to bring the outdoors inside. Consider adding a few colorful blooms or a fragrant bouquet to the center of the table. To complete the look, choose seasonal accents such as Easter eggs, fun and festive decorative plates, or even a bunny-shaped centerpiece. Make sure your table is dressed for the occasion with a brightly-colored tablecloth with an Easter motif or a solid color. Select festive plates and napkins for each place setting. Choose a color scheme and stick to it for an elegant look. With these simple tips, your Easter table will be sure to wow your guests.

Some Inexpensive Easter Spring Table Decor Items

Spring is the perfect time to get your home ready for the upcoming Easter holiday. Sprucing up the dining room table with some festive decorations is a great way to get in the Easter spirit. Whether you’re celebrating small with family or hosting a big Easter brunch, here are some ideas to help you create a beautiful and memorable Easter table.

Start by adding a colorful Easter tablecloth. Choose a fabric that is bright and cheery to bring springtime vibes to your table. Consider adding a few sprigs of fresh flowers and greenery around the table. You can also add some potted plants or tulips for an even more gorgeous seasonal feel. For a fun and creative centerpiece, consider filling a basket with Easter eggs and other goodies. You can get creative and dye the eggs in different colors or use plastic eggs filled with candy. You can also add a few bunny or chick figurines to the basket for a cute touch.

For an extra special touch, create place settings for each guest. You can add a few Easter-themed items such as moss bunnies or carrots. You can also add a few party favors such as chocolate eggs or bunny bark treats. This will make your guests feel special and appreciated. With these easy Easter table decor ideas, you can create a beautiful and festive table that everyone will enjoy. So get creative and have fun–you’ll be sure to have a happy and memorable Easter!

Colors to Use for My Easter Spring Table Decor

Easter is a time of year to celebrate new life and joy, and adding a special touch to your table decor is a great way to show your family and friends how much you care. Pastel colors like yellow, pink, light green and lavender are the perfect way to achieve a classic look for your Easter table decor. For a more vibrant and cheerful look, incorporate bright colors like blue, orange, and purple into your decor. If you want to create a calming atmosphere, use neutral colors like white, grey, and beige. Adding metals like gold, silver, and copper to your decor can give it an elegant touch. For a fun and whimsical touch, use floral patterns, stripes, and polka dots in your decor. With these simple tips, you can create a beautiful Easter table that everyone will love!

Types of Flowers that are Best for Easter Spring Table Decor

Gerbera Daisies are the perfect way to bring some vibrancy and color to any Easter Spring table. These cheerful blooms come in a variety of bright and cheerful colors, from pinks to oranges and yellows, and are sure to bring a smile to all the guests. Tulips are another great way to decorate an Easter Spring table. These classic and elegant flowers are timeless and will look great in any setting and are what I'm using for this table. Daffodils can be used to bring a ray of sunshine to your Easter Spring table. These cheerful and sunny blooms will bring a bit of cheer to any setting. Lilies are also a great way to add a beautiful and delicate touch to any Easter Spring table. These fragrant flowers will bring a wonderful aroma to your table while adding a touch of elegance and beauty.

My Table Decor With William Sonoma

This year I found the most beautiful place setting and decor from William Sonoma that I fell in love with, the Famille Rose. The patterned pieces look amazing with so many colors but I opted to stay with the beautiful pink and green elements. Adding in a neutral green tablecloth and napkins gave a soft touch of color to go with the pink chargers and plates. For the side table, I added a green tablecloth and more gorgeous pieces from the William Sonoma collection that highlights their fun desserts for Easter. The Champagne bucket is also a perfect touch for brunch with champagne or rose for an Easter dinner. I filled ours with Justin rosé and two bottles of Justin red (Right Angle and Cabernet Sauvignon) on the table to give our guests options to pair with their delicious ham dinner from William Sonoma.

The final touches I added were the cutest little moss bunnies on the table and the sideboard. They make the best addition to any Easter and Spring table. I also went with tulips for the ultimate Spring floral addition. I found pink and white tulips at our local Trader Joe's and added them to vases for a simple centerpiece our guests would love!

No matter how you choose to decorate your table, Easter is a special time of the year. It's a time for celebrating with family and friends. With a few simple decorations and thoughtful touches, you can create a beautiful Easter Spring table that will be sure to bring joy, happiness, and wonderful memories to your celebration.

Other Spring-Inspired Tablescapes You Will Love:

My Spring Tablescape

Father's Day Picnic

Mom's 60th Birthday Party

Making the Most of 3 Days in NOLA - A Guide to Exploring New Orleans

If you’re looking for a unique, historic, and lively vacation spot, look no further than New Orleans, Louisiana. Also known as “NOLA”, this charming city offers a unique and vibrant culture, delicious Creole and Cajun cuisine, and plenty of activities to keep you entertained for days. With the number of attractions and activities in the city, three days in NOLA is the perfect amount of time to get a taste of this magical city. In this blog post, I’ll be sharing the best activities and attractions to check out during your three-day adventure in NOLA.

Spending 3 days in NOLA is an absolute must for any traveler looking to explore the city's unique culture and vibrant atmosphere. A great way to start your NOLA adventure is to admire the architecture of the iconic St. Louis Cathedral, in the heart of the French Quarter in the famous Jackson Square. This 18th-century structure is a symbol of the city’s French and Spanish colonial roots and a must-see for anyone visiting the city. This beautiful and historic church is one of the most recognizable landmarks in the city. Built-in the late 18th century, it is the oldest cathedral in the United States and the seat of the Archdiocese of New Orleans. Inside the Cathedral, visitors will find a beautiful sanctuary, ornate chapels, and a museum dedicated to the history of the church. There is a free guided tour offered every day, as well as daily mass services. It's no wonder that the Saint Louis Cathedral and Jackson Square is a major tourist attraction!

Next, head to the Cabildo and Presbytere, two of the most famous buildings in the French Quarter. Both buildings were constructed in the late 1700s and are now home to the Louisiana State Museum and the Historic New Orleans Collection. As you wander around Jackson Square, take some time to enjoy the street performers, jazz artists, and many other artists who gather there. You can also take a horse-drawn carriage ride around the square for a truly unique guided and informative experience.

No trip to the French Quarter is complete without a visit to the bronze statue of Andrew Jackson and the equestrian statue of General P.G.T. Beauregard. Both statues are a reminder of the city’s rich history and a great photo opportunity. Finally, browse the unique souvenirs, gifts, and artwork at the Jackson Square Art Market. Here you’ll find everything from handcrafted jewelry to local artwork, all of which make great souvenirs.

Bourbon Street

No visit to NOLA is complete without a visit to Bourbon Street, the iconic street that is alive with bars, live music, shops, and energy. Enjoy the lively atmosphere, check out the shops, and listen to all the amazing live music. Next, sample some of the region’s classic and unique cuisine. Enjoy some of the classic Cajun dishes like gumbo and jambalaya, and try some of the seafood options like crawfish and oysters. After dinner, visit a jazz club and experience some of the best jazz music in the country. We went to The Jazz Playhouse after dinner on our first night and enjoyed a show and a cocktail. It was so fun and a must-do! Don't forget to visit some of the other iconic streets, such as Canal Street and Royal Street, and take a riverboat cruise to view the skyline from the water.

Ride the St. Charles Streetcar

A trip to New Orleans wouldn't be complete without hopping aboard the historic St. Charles Streetcar line. This century-old streetcar has been operating continuously since 1835 and is the oldest streetcar in the world. As you travel along the streetcar line, you can enjoy the unique atmosphere and view stunning architecture, beautiful homes in all the neighborhoods, and popular sites such as the Audubon Zoo and the French Quarter.

Live jazz musicians often perform at the streetcar stops, adding to the vibrant atmosphere of the ride. Whether you're a local or a tourist, the St. Charles Streetcar is a great way to explore the city and take in the sights. Make sure to take a break and grab a bite to eat or a refreshing drink at one of the many restaurants, cafes, and bars along the route. With three days in New Orleans, you can easily make the most of your time by hopping on the St. Charles Streetcar and experiencing the city in a unique and memorable way.

While on the street car stop off at the Garden District with one-of-a-kind neighborhoods, where you can marvel at the grandiose and historic homes from the 19th century. Take a guided tour to learn about the history of the area and see some of the most beautiful Victorian mansions in the country.

Wander the French Quarter

Exploring the charming streets of the French Quarter in New Orleans is a must-do for any traveler. From the vibrant architecture to the quaint courtyards, there is so much to take in and admire. For an unforgettable experience, take a horse-drawn carriage ride around the neighborhood and take in all of the sights and sounds. Spend some time shopping at the open-air French Market where you can find unique art, trinkets, and souvenirs to take home. My favorite shops were the antique shops with beautiful chandeliers and tons of unique pieces! You can also take a look at the many murals and sculptures that adorn the walls and alleys of the French Quarter.

No trip to New Orleans is complete without trying some authentic Creole cuisine. There are many restaurants in the French Quarter that offer amazing food from po’boys to gumbo. You’re sure to find something delicious for your taste buds.The French Quarter is also where the Pharmacy Museum is located and it is a worthy 10$ to see the rich history of the start of the pharmacy and healthcare in Louisiana; past and present

Magazine Street

One of the best places to spend an afternoon in New Orleans is Magazine Street. This iconic New Orleans neighborhood offers six miles of unique shopping, dining, and entertainment. No matter what you’re looking for, you’re sure to find it on Magazine Street. From vintage boutiques and art galleries to cozy cafes and hip bars, the neighborhood has something for everyone. Enjoy a leisurely stroll down the street, and take in all the sights, sounds, and smells of the Big Easy. Whether you’re looking for souvenirs, great food, or a lively atmosphere, you’re sure to find it in this iconic neighborhood.

Vue Orleans

At Vue Orleans, you can also experience the city from a whole new colorful, high-tech perspective. Enjoy spectacular 360° indoor and outdoor observation decks to get a bird's-eye view of the city. From 34 floors above the most storied city in America, you can get a deep dive into the history, music, and culture of New Orleans. Visit the 360° Outdoor Observation Deck, and get one of the best outdoor views of the city, with panoramic views of the Superdome, French Quarter and the Mississippi River. Vue Orleans is the perfect place to experience New Orleans like never before. With its interactive, extremely high-tech cultural experiences, you'll get a comprehensive view of the city and never forget your three days in NOLA.

Where to Stay In New Orleans

If you’re looking to explore the vibrant city of New Orleans, there are plenty of great places to stay and things to do. The French Quarter is the original neighborhood of the city and is filled with historic buildings, quaint cafes, and some of the best restaurants and nightlife. For a more relaxed experience, the Marigny neighborhood provides a residential area with plenty of activities to keep you busy. The Garden District is known for its stately mansions and lush gardens, making it a great area for an upscale experience. Lastly, the Warehouse District is the city’s arts and entertainment hub and a great place to stay if you want to be close to the action.

We stayed at the Kimpton Hotel Fontenot, which was a chic retreat in NOLA's Central Business District. Just like all Kimpton hotels we have stayed at it was adorable, with the perfect modern decor representative of the city's history. The staff was exceptionally tentative and the restaurants on site had delicious food! Highly recommend this area when in NOLA to stay far enough away from the noise of Bourbon street, but still an easy 15-minute walk to it and the French Quarter. Everything was walkable and you didn't deal with the noise when trying to get a goodnights rest.

Where we ate

No trip to New Orleans is complete without trying some of the most iconic dishes in the city. When we visited NOLA, we made sure to visit Cafe du Monde to try their iconic beignets and a cup of cafe au lait. The atmosphere was great and a perfect way to start the day.

We stayed at The Kimpton Hotel Fontenot and it had a delicious quick-service coffee shop Gospel coffee and boozy treats and sit-down restaurant The PeacockRoom. We ate at both and loved the food, service and convenience of being in our hotel. At The PeacockRoom we ordered the pimento cheese dip and croque madame.

For dinner, we decided to try Meril, which was located on Girod Street. It was highly recommended by my friend for delicious desserts, especially the bread pudding. We were not disappointed! The food was very good, as were the desserts. Portions were a little smaller than most places, so be advised when ordering. We ordered the pinapple upside down cornbread, mexican street corn, korean beef short ribs, and cinnamon toast bread pudding.

After dinner, make a stop at the Carousel Bar for a drink or two. This is a must-experience when down in the French Quarter frequenting Bourbon Street and the French Market. It's a small bar, in an amazing hotel, but just wait for an open seat and sit down for a cocktail before or after dinner! We had the FRENCH 007 and Knob Creek bourbon.

One of our favorite meals was probably at Chemin a la Mer. Located inside the Four Seasons New Orleans. This location gave a beautiful view of the Mississippi river and had the most delicious French-inspired food. They are open all day and next to the Vue Orleans so lunch was a perfect time to visit and then pop over to see the Vue. We ordered the seasonal beet salad, the grackle burger and lamb shoulder roulade.

Have a taste-off between Beignet's at Café Du Monde and Café Beignet

When visiting New Orleans, no trip is complete without experiencing the classic local treat, the beignet (with extra powdered sugar)! Two iconic locations make it easy to satisfy that craving: Café Du Monde and Café Beignet.

At Café Du Monde, visitors can experience the classic beignet with a cup of their world-famous chicory coffee. This café has been around since 1862 and is a local favorite. Plus, the outdoor seating is the ideal spot for people-watching and soaking up the culture of the city. Café Beignet also offers a wide variety of beignets in flavors such as blueberry, strawberry, and more. Plus, visitors can enjoy their beignets with a hot mug of coffee or a cold glass of lemonade. No matter where you go, beignets are the perfect accompaniment to your New Orleans experience. It was fun to try them both and compare them while also experiencing the classic flavor and culture of the city in a bite with beignets in both of these two iconic locations!

Hope this blog post helps you plan the best 3 days in NOLA. We truly enjoyed our trip and I know you will too! Here are a few other Travel Guides I know you will love as well:

Paso Robles City Guide

Morro Bay Travel Tips

Nashville Travel Guide

A weekend in Tampa Bay

Savannah, Georgia City Guide

A weekend in Carmel, CA

Yellowstone Road Trip From California

Explore Bozeman Montana with Our City Guide

Charleston, South Carolina City Guide

Easy and Delicious Mushroom & Pea Risotto Recipe

This Mushroom & Pea Risotto Recipe is a classic Italian dish that is sure to satisfy. Combining creamy Arborio rice, sautéed mushrooms, and sweet peas, this dish is packed with flavor and is surprisingly easy to make. This delicious risotto comes together in just 30 minutes, making it a great choice for any weeknight meal. As a bonus, it is also vegetarian-friendly! If you're looking for a tasty and quick meal, this is the best risotto recipe and is simply a must-try.

Mushroom and Pea Risotto is a delicious, creamy, and hearty dish that is perfect for a cozy night with family or friends. This easy-to-follow recipe takes no more than 30 minutes to make and is budget friendly as it is made with simple and affordable ingredients. Not only is it delicious, but it is also healthy and nutritious, and packed full of flavor. It is also a great option for vegetarians and vegans if you omit parmesan cheese at the end and swap the butter for olive oil. To make this dish, you will need your favorite mushrooms, peas, arborio rice, vegetable stock, garlic, olive oil, and parmesan cheese. You will also need some butter, parsley and salt to season. This creamy mushroom risotto recipe is a delicious and easy-to-make dish that is sure to become a family favorite. Below I will show you exactly how to make this.

INGREDIENTS

(Serving Size 8)

6 tablespoons butter

16 oz baby bella mushrooms

2 cloves minced garlic

3 finely chopped shallots

2 cups arborio rice

1/2 cup white wine

6 cups vegetable broth

1 1/2 cups frozen or fresh peas

2 teaspoons sea salt

1 cup grated parmesan cheese

1 teaspoon thyme

1 teaspoon rosemary

INSTRUCTIONS

1. To begin, heat the butter in a large pan ( I am using 3.5 Quart Sauté Pan with Short Handles

from 360cookware) over medium heat. Once melted, add the mushrooms and cook for about 3 minutes until softened. Then, add the peas and cook for an additional 5 minutes until well mixed and the mushrooms have shrunk in size. Remove the mixture to a clean plate and set aside.

2. Return the pan to the stove and add additional butter and shallots. Sautee until the shallots are transparent. Then, add the rice and cook for 1 minute. After that, reduce heat to medium-low heat and add the white wine and stir to scrape up any browned bits from the bottom of the pan. Slowly add in the stock, one cup at a time, stirring frequently.

3. When the rice is almost cooked through, stir in the peas and mushroom mixture for an additional 2 minutes. Taste and season with salt, thyme, and rosemary.

4. Finally, stir in the butter and Parmesan cheese until fully melted. Serve the risotto with a sprinkle of Parmesan cheese and fresh herbs. Enjoy!

Substitutions You Can Make:

Mushrooms are a key ingredient in this Mushroom & Pea Risotto recipe, as they add a savory and earthy flavor. Any type of wild mushroom or even a mixture of mushrooms can be used, such as porcini, shiitake, and oyster mushrooms. The main ingredient in this risotto recipe are peas, however, they can be swapped out for any other type of green vegetable such as spinach, kale, or asparagus. The type of rice used in this recipe can be swapped out for any type of short-grain white rice or even a mixture of different types, such as basmati or jasmine rice. The type of broth used in the recipe can be swapped out for chicken or beef broth, or white wine can be omitted for additional broth. Parmesan cheese is the main cheese used in this recipe, but it can be swapped out for any other type of hard cheese such as pecorino or cheddar.

This Mushroom & Pea Risotto recipe is a versatile dish that can be customized according to preference. With its delicious combination of mushrooms, peas, and cheese, it is sure to be a crowd-pleaser.

Tantalizingly Delicious Recipe For Lemon Cheesecake With An Amazing Glaze

If you love a dessert that is both tart and sweet, then you must try this tantalizingly delicious lemon cheesecake with an amazing glaze. Not only is this a crowd-pleaser, but it is also fairly easy to make. The sweet lemon cheesecake is perfectly balanced with a tangy tart glaze, making it the perfect end to any meal. This recipe is sure to please everyone at your next gathering. Not only is it incredibly delicious, but it's beautiful presentation will surely impress your guests. This rich and creamy confection offers a perfect balance of sweetness and citrus. The smooth and velvety texture is light and airy, yet dense enough to satisfy. The golden-brown crust is a delicious base for the perfectly balanced flavor of sweet and tart lemon, and to top it all off, a decadent and delectable topping of fresh lemon curd makes this amazing. Read on to learn how to make this delicious lemon cheesecake!

The perfect base of this sweet treat is a graham cracker crust that is incredibly easy to make with butter, graham crackers and pecans. This gives a great base for your cheesecake with a buttery and nutty crunch that is so scrumptious. This buttery crust will be a staple recipe to use on any cheesecake, I promise you that!

With its creamy and sweet lemon cheesecake filling made with fresh lemon juice, it has a rich and velvety smooth texture that melts in your mouth. The sweet light flavor is enhanced with a hint of vanilla and an aromatic citrus aroma that tantalizes your taste buds. This perfectly balanced flavor will make your mouth water and its light and airy texture will leave you craving for more. The amazing glaze adds the perfect finishing touch to this delightful dessert and adds an element of surprise from your traditional cheesecakes.

Making the glaze is also very simple and requires minimal ingredients. Once the glaze is finished, you can serve it on top of the cheesecake, or on the side so guests can add it themselves. The glaze gives the cheesecake an extra bit of texture and flavor that will make it truly irresistible. With a combination of eggs, sugar, butter, fresh lemon zest, and juice, the glaze adds a layer of sweetness to the creamy cheesecake that complements it perfectly. You can top the cheesecake and glaze with fresh berries, additional lemon zest or thinly sliced lemons like I have done here.

INGREDIENTS

Crust:

12 oz graham crackers

1 cup pecans

1 cup melted butter

Filling:

3 - 8 oz cream cheese ( room temperature )

1 stick salted butter

1/2 cup brown sugar

1/2 cup granulated sugar

1/4 teaspoons sea salt

3 eggs

1/2 cup heavy cream

1 tsp vanilla extract

3 tablespoons lemon zest

Glaze -

1 cup granulated sugar

2 eggs

1/4 cup fresh lemon juice

3 tablespoons lemon zest

6 tablespoons butter

INSTRUCTIONS

  1. Preheat oven to 375. Spray cheesecake pan with olive oil spray and wrap around the outside with foil.

  2. Make Crust by adding pecans & graham cracker to blender and processing until fine. Add in melted butter and blend again.

  3. Press crust mixture into bottom of pan until even all the way around. I use a flat bottom cup or a metal spoon to help.

  4. Bake in oven for 13-15 minutes. Once done remove and let cool before adding filling.

  5. Reduce oven temperature to 325 degrees.

  6. Make filling. Mix together softened cream cheese and butter with both sugars and salt until well combined.

  7. Add in eggs. One at a time. Making sure they are fully incorporated each time.

  8. Next add heavy cream, vanilla and lemon zest! Once well mixed add into cooled cheesecake pan.

  9. You will then add this onto a tray with a lip. I use this one -here-. (Code Amanda20 for 20% off any order at 360cookware.com) Place on oven rack and add in warm water until halfway full and push back rack and start timer.

  10. Cook the cheesecake for 1 hour. The center will still be a little jiggly, but side will be set. After baked for 1 hour you will turn oven off the oven and leave the cheesecake in the oven for an additional hour.

  11. Once baked for an hour and let sit for an hour in the oven, you can remove from the oven. Wrap cheesecake and let sit in your refrigerator overnight. Up to 24 hours before serving or adding glaze.

GLAZE INSTRUCTIONS

After Cheesecake has cooled overnight you will want to get the glaze ready for the finishing touch! You can add this onto each piece as you serve as you go just in case someone doesn’t want it, but I always add ahead of time, because it's so good everyone will!!

  1. Take a small saucepan over low/medium heat and whisk eggs, sugar, lemon peel & lemon juice.

  2. Add butter and continue whisking constantly. Mix until thickened. (It will stick the back of a wooden spoon)

  3. Remove from pan into a glass bowl and let cool for 15 min.

  4. Place in refrigerator until completely cooled. Then place on top of cheesecake and serve!

For those of us who are looking for a way to get creative in the kitchen, this recipe is the perfect choice. You can make this recipe your own by adding different flavors and ingredients. Plus, you can even top it off with a unique glaze. For those wanting a sweeter crust try adding in honey. Switch out the lemon zest and juice in the glaze for fresh berries and make a blueberry drizzle that is also amazing on a lemon cheesecake! For those wanting a keto option, change the graham cracker to additional nuts, either more pecans or almonds will do great. No matter what you do to make this your own this tantalizingly delicious: lemon cheesecake with amazing glaze is sure to be a hit!

If you’re looking for more delicious recipes like this one, make sure to follow me on Pinterest. I have lots of incredible delicious desserts that are perfect for any occasion. From cakes and pies to cookies and bars, you’ll find something that’s sure to be tantalizing your taste buds.

Here are a few others I think you will enjoy:

Indulge in Deliciousness: Cherry Chip Cake with Chunks of Dark Chocolate Recipe

Chocolate Peanut Butter Brownies

Brown Butter Caramel Pretzel Cookies

Delicious & Easy Apple Pie

Delicious Buttery Italian Croissant Sandwich

Do you have a craving for a savory and delicious sandwich that you can make at home and feel like you got a famous deli experience? Look no further than this Buttery Italian Croissant Sandwich! This sandwich is the perfect combination of Italian flavors, buttery croissants, and fresh ingredients, making it the perfect lunch time meal. Whether you’re looking for that perfect lunch or a great dish to bring as an appetizer, this sandwich will satisfy your cravings. Keep reading to find out how to make this buttery Italian croissant sandwich and why it’s so delicious!

Buttery Italian Croissant Sandwich is a unique twist on the classic sub sandwich. The buttery croissant roll adds an extra crunch and flavor to the sandwich, making it different from a classic roll taste, and just truly irresistible. Topped with a ranch butter, this yummy croissant it's a surefire hit. Adding in a variety of Italian deli meats, cheeses, and condiments to choose from, you can customize your sandwich to your heart's delight. It's a great choice for any lunch or party. I will be serving them at my Superbowl party, but these are perfect for summer parties or the office potlucks. Trust me, they will be gone before you know it. These sandwiches are so easy to make and are perfect for picnics and outdoor gatherings. Serve them up with a side of chips or fresh fruit for a complete classic meal.

INGREDIENTS

12 croissants (I did mini ones for a perfect grab size for Superbowl)

1/4 cup melted butter

3 teaspoons ranch seasoning

4 oz. Pepperoni

4 oz. Hard Salami

7 oz Ham

7 slices provolone cheese

2 cups cut iceberg lettuce

1/2 red onion

1/4 cup pepperoncini's

1 tablespoon white wine vinegar

1/3 cup mayonnaise

3 teaspoons ranch seasoning

INSTRUCTIONS

1. Preheat oven to 350 degrees. While heating whisk together butter and Italian seasoning and butter tops of croissant rolls. Place in oven for 5 minutes or until golden. This helps the butter to melt into rolls and toast slightly.

2. While rolls cook mix together lettuce mixture of chopped iceberg, sliced red onion, pepperoncini's, white wine vinegar, mayonnaise and ranch seasoning. Stirring to evenly coat.

3. Cut rolls in half and start filling with provolone, pepperoni, hard salami, ham and lettuce mixture.

4. Insert toothpicks in middle to hold together and serve! You can make ahead to refrigerate as well. Enjoy!

If you're a sandwich lover, you simply must try these Buttery Italian Croissant Sandwiches. You won't regret it! The crunchy roll, savory meats, and tasty condiments come together in a delicious combination that will leave your mouth watering. Plus, with the ease of customization, you'll be able to make the perfect sandwich, with the perfect meats, cheeses, and vegetables that you crave each and every time.

As always I love to share some easy substitutions to every recipe I post. Some easy subtle changes to this recipe would be to change the cheese to a mozzarella, or any other favorite of yours. Changing meats to your liking is easy as well. Prosciutto is a great addition to this one as well. If you want to use a bigger sandwich size croissant you can add other additions like bell peppers, avocado, tomatoes, or any other of your favorite tastes. Depending on the crowd size you are serving you could even custom cater each sandwich to the wants of your crowd, with the same basic idea for each.

Side Dishes you can serve with these Sandwiches

How to Make the Perfect Pear and Pomegranate Arugula Salad

Mom's Favorite Minestrone Soup Recipe

Shaved Brussel Sprout Salad with Apples, Goat Cheese & Candied Pecans

Deliciously Creamy Basil Tomato Soup: An Easy and Delicious Recipe

5 Ingredient Bacon Ranch Football Shaped Cheese Ball

Super Bowl is here and that means it's time to break out the snacks! If you're looking for the most festive and delicious appetizer for your football party, then you should try making a Bacon Ranch Football Shaped Cheese Ball. This delightful snack is easy to make and is sure to be a hit with your friends and family. The crowd will definitely gather around the dish, and because of its fun shape it's sure the be the memorable meal of the party. The tasty combination of bacon, ranch flavor, and the football shape make this cheese ball the perfect addition to your tailgating spread. Read on for the recipe for this delicious appetizer!

This delicious appetizer combines the creamy texture of cheese with the crunchy texture of bacon and the savory flavor of ranch. Not only is it tasty, but it can also be made ahead of time and stored in the refrigerator for easy party prep. When it comes time to serve, this football shaped cheese ball is sure to be a touchdown! Enjoy it with pantry staples like crackers, chips or sliced vegetables. With its football-shaped presentation, it's the perfect way to bring together friends and family for a delicious game-day themed snack. It’s the perfect dish for any game day gathering and is sure to be a crowd favorite. So, grab your cheeseball, kick back and enjoy the game!

The Bacon Cheddar Football Cheese Ball is sure to be a hit at any tailgate or game-day gathering. It's a great way to show your team spirit while enjoying a savory and delicious snack. So don't wait until the last minute, get your cheese ball ready now and get ready for a winning season! All you need to do is mix together cream cheese, ranch dressing mix, bacon bits, and sharp cheddar cheese. Then shape the mixture into a football shape and roll it in more bacon bits. Refrigerate until firm and you're ready to serve!

INGREDIENTS

16 oz cream cheese

8 oz shredded sharp cheddar cheese

2 tablespoons ranch seasoning

8 slices of bacon

1/2 cup chopped pecans

Provolone or Mozzarella Cheese


INSTRUCTIONS

1. Bring cream cheese to room temperature before beginning mixing process. Chop pecans and cooked bacon. You will use these both as 2-part ingredients.

2. In a large bowl mix together room temperature cream cheese, sharp cheddar cheese, ranch seasoning, a fourth of the bacon and pecans and mix together. You can mix with a fork or a hand mixer. If cream cheese is soft enough, then the hand mixer is good enough.

3. Once cheese ball is mixed together roll out plastic wrap large enough to shape your football. Pour cheese mixture into plastic wrap and full wrap around cheese. Now that the cheese mixture is fully covered its less messy when forming into a football.

4. Once football shape is formed you can remove plastic wrap from the bottom of the cheeseball and place on plate.

5. Add remainder of pecans and bacon together and press into football shape cheeseball. This is fairly easy just press into cheese and all around edges.

6. Using any type of white sliced cheese to make thin strips to create the look of laces for the football. Add your pairings of vegetables, crackers, chips or pretzels and serve!

The Bacon Cheddar Football Cheese Ball is sure to be a crowd-pleasing appetizer at any tailgate or game-day gathering. It's a great way to show your team spirit while enjoying a savory and delicious snack. So don't wait until the last minute, get your cheese ball ready now and get ready for a winning season!

This recipe is also incredibly customizable. You can switch up the ingredients to make it your own. If you're looking for a bite-sized snack, you can make small cheeseball bites. Simply roll the cheeseball mixture into small balls, then roll each ball in bacon bits and refrigerate until firm. When ready to serve, arrange the mini cheeseballs on a platter and serve with crackers or baguette slices. If you want to take it up a notch, you can even add a chip, buttery crackers or pretzel to the top of each ball for easy grabbing at your next football theme party! No matter how you make it, this Bacon Ranch Football Shaped Cheese Ball is sure to be a hit at your next game day gathering.

Other Game Day Appetizers You Will Love

A Crowd-Pleasing Stuffed Mushroom Recipe

Fruit & Goat Cheese Bruschetta

Oven Baked Drumsticks

Decorating Your Home for a Football Party: Tips for Stylish Football Party Home

If you're hosting a football party, you want to make sure your home is properly decorated for the big game. Whether you're cheering for your favorite team or just looking for some fun ideas to excite the guests, there are plenty of ways to create a festive atmosphere with football party home décor. From creative and colorful decorations to easy DIY projects, this blog post has all the ideas you need to create an awesome football themed party atmosphere in your home. Read on for some great football party home décor ideas that will help you create a fun and festive environment for your guests.

This Super bowl I am setting up a display centered around the most important thing for any football party.. the tv! I used our new sideboard and added cute touches of food and football decor. Having a sideboard table under your tv or in a dining room provides a great way to display your serving trays full of food, drink stations, plates and makes it a great way for guests to grab and go and serve themselves.

The Super Bowl can sometimes bring out quite the stress on the crowd, whether they're fans of the team or have a friendly wager on the game itself. So, I thought it would be fun and cute to fill our glass jars with football shaped stress balls. This adds an adorable decor touch that can double down on cutting the tension during big plays. Another added football themed touch I did were the drinks. I found the perfect football shaped cups with straws. You can fill them with a signature drink or leave empty for guests to decide themselves what to put in. The shape of these cups makes them great for cutting down on spills that often happen at larger parties and they are suitable for kids too!

Speaking of spills don't forget to totally cover your side board with tablecovers or a tablecloth. For this display I added a brown gingham table runner for added color and texture, as well as for coverage. This gave a very neutral tone that went well with my new tv frame and sideboard, but if you want your party more personalized to your team colors, the table runner is a great way to add in those pops of color to show your team spirit. Great personalization always leaves a lasting memory with guests.

Wanting to add more football party homedecor? I added in football themed pillows to my side chairs! They made for a super fun and a great way to tie in the party to the entire home! With all these football party home decor ideas for inspiration, your home is sure to be the most talked-about spot on game day!

Other Football Party Decor Ideas:

Give your home a game-day makeover with these additional football party home decor ideas!

-Hang up a mini football field backdrop to create an instant party atmosphere.

-Use team colors to decorate in style: add plates, cups, napkins and streamers in the team colors.

-Get creative with your decorations: hang up a few football-shaped balloons, use mini footballs as place markers, and even hang up a few football-shaped paper lanterns.

-Use a few game-day signs to liven up the walls: hang up a few "Go Team!" signs and "Welcome to the Big Game" signs.

-Add a few football-shaped centerpieces for each table.

-Hang up a few football-themed decorations, such as a goal post, a football-shaped wreath, or a few football-shaped garlands.

-Set up a few football-themed activities, such as a football toss or a football-themed trivia game. Create a football-themed snack bar: set out some chips, pretzels, and other game-day snacks.

Indulge in Deliciousness: Cherry Chip Cake with Chunks of Dark Chocolate Recipe

If you're looking for an indulgent and delicious dessert that's sure to please, then look no further than this amazing cherry chip cake with chunks of dark chocolate. This moist and flavorful cake is full of sweet and tart cherry flavor, and the addition of dark chocolate adds an extra layer of richness and decadence. Whether you make this for a special occasion or just a regular weeknight treat, this cake is sure to be a hit with everyone.

This cake is loaded with tart cherries and dark chocolate chunks, creating an irresistible flavor combination that’s sure to impress your family and friends. Whether you’re making it for a holiday, birthday, to celebrate valentines this year or just for a fun dessert, this cherry chip cake is perfect for any occasion. To top it off, this cake is finished with a simple cherry buttery cream cheese frosting. The frosting adds a subtle tanginess to the cake and ties together all of the flavors nicely. Read on for the full recipe and instructions for making this delicious dessert.

Ingredients

6 large eggs

6 large egg whites

2 cup heavy cream

4 tablespoons melted butter

1 tablespoon vanilla extract

1 tsp almond extract

1/2 cup maraschino cherry juice

3 cups sugar

4 1/2 cups cake flour (additional for coating cherries)

2 tablespoon baking powder

1 1/2 teaspoon salt

2 cups grated butter

8 oz dark chocolate chunks

1/2 cup chopped cherries (you will need 10-12 with stems for topping)

Frosting:

1 cup butter

8 oz cream cheese

8 cups powdered sugar

1/4 cup heavy cream

1/4 cup cherry juice

Instructions:

1. Prep by oiling 3 circle pans (8 or 9 inch) and preheat oven to 350 degrees.

2. Whisk gently together eggs, heavy cream, melted butter, and vanilla in mixing bowl.

3. In a separate mixing bowl combine dry ingredients.

4. Grate butter on top of dry ingredients. Combined by hand until butter is no larger than pea sizes.

5. Next up add in wet ingredients and blend together with electric mixer until well combined on medium speed. Then add in dark chocolate chunk and coarsely chopped flour coated cherries. Coating the cherries will make sure they don't sink to the bottom of the cake while baking in the oven. Using electric mixer until blended once more, making sure to keep on low and not over mixing.

6. Once combined put into 3 pans that are oiled and put into oven. 22-27 min or until wooden pick inserted comes out clean. Once cake is done baking let cool in pan for 15 min and transfer to cooling rack for another 15.

7. Blend together all frosting ingredients until well combined. (butter and cream cheese should be room temp if not heat in microwave for 30 sec at a time) You can add more heavy cream or powdered sugar depending on desired consistency. I sometimes choose to double the recipe for an even thicker layer on the outside.

8. Ice layers of cake and do a thin later around for a “crumb layer” that will catch all the crumbs and then make a base for the final layer. Place in fridge for 30 min and then do another layer of frosting. I enjoy piping small circles on top with a piping bag and adding cherries to each one. This also helps when cutting so I know how big to make each slice. Cut, Serve and Enjoy!


Notes

Baking a cherry chip cake with chunks of dark chocolate can be a delicious treat for any occasion. Taking notes while baking is an essential part of achieving the desired outcome especially the next time you cook the same recipe. Keeping track of the times for mixing the batter, the temperature of the oven, and the size of the cake pan you use can help you achieve the perfect cake. No two ovens are created equal, so be sure to check on your cake periodically when making it for the first time. Writing down any adjustments you made along the way can help you replicate the recipe or make improvements for when you choose to make the same cake again. Following the above steps and taking notes can help you bake a delicious cherry chip cake with chunks of dark chocolate.

Other Incredible Cakes

My Favorite White Cake Recipe

is a simple but delicious crowd pleaser. Light, airy and easily adaptable with a filling of jam or fresh fruit makes it one of my first go to cakes.

Scotty's Birthday Pistachio Cake

Another fantastic option for a summertime celebration for that pistachio lover in your life. This light and refreshing cake has layers of pistachio cake and is filled and topped with an outstanding mascarpone frosting that you are going to crave! This is my husband's favorite cake, and I make it every year for his birthday. So that's how we got its name.

No matter which cakes you choose, you can be sure that any of these will be a hit at any occasion. Whether you are looking for a classic like Cherry Chip Cake or something a bit more unique like Pistachio Cake, you can rest assured that your guests will be delighted.

An Alluring Combination: French Onion & Shallot Soup Recipe

French Onion & Shallot Soup is a classic French dish that has been delighting people for centuries. This hearty, flavorful soup is perfect for a cold winter day and is sure to warm you up while still delighting your taste buds. This soup is easy to make and is filled with ingredients that are sure to tantalize your taste buds. Whether you're a novice in the kitchen or a professional chef, French Onion & Shallot Soup is a great dish to make for your next dinner. In this blog post, I will walk you through the steps for making this delicious soup.

Best French Onion and Shallot Soup

The combination of the two creates a delicious flavor and texture. The sweetness of the caramelized onions and shallots pairs perfectly with the beef broth and creates a rich, flavorful soup. Caramelizing the onions and shallots is key to getting the most out of this simple dish.

The process of caramelizing the onions and shallots for this soup is straightforward and easy. To start, heat up a large skillet over medium heat and add a few tablespoons of butter. Once the butter melts, add the onions and shallots and cook until they are lightly browned. This will take close to an hour. Once the onions and shallots are caramelized, add the beef broth and bring to a boil. To make the soup even more flavorful, add wine, a pinch of thyme or a bay leaf. Once the soup is boiling, reduce the heat to a simmer and cook for about 15 minutes. After 15 minutes, the soup should be thick and flavorful. To top the soup off, pour into individual bowls and add a crunchy baguette and cheese. This adds a nice contrast and texture to the soup. You will pop in the oven until cheese is melted and browning on top.

French Onion and Shallot Soup is a classic French dish that is easy to make and bursting with flavor. Topping the soup off with crunchy croutons or cheese croutons adds texture and a nice contrast. French Onion and Shallot Soup is a great way to use up leftover onions and shallots and is a comforting meal for any time of year. With its rich and hearty flavor profile, it's no wonder why it's a popular choice whenever you're looking for something comforting and delicious. Beef stock, garlic, and herbs give the soup an added depth of flavor that takes it to the next level.

The best French onion and shallot soup is made with freshly caramelized onions and shallots. This caramelization process takes time but is well worth the effort as it brings out the sweet flavor of the onions and shallots. Adding a dash of brandy or cognac is a great way to enhance the flavor, or you can also add wine or sherry to the soup for a rich, complex flavor. Topping the soup with a generous sprinkling of grated cheese enhances the flavor and gives the soup a cheesy crust. My favorite way to top off this meal is with a glass of Decoy Chardonnay. The Gruyère cheese topping with the french onion & shallot soup pairs very well with Chardonnay, and makes this a delicious combo.

Ingredients

1/2 cup butter

4 yellow onions, thinly sliced

3 shallots, thinly sliced

1 teaspoon salt

2 sprigs of fresh thyme, additional for topping

2 bay leaves

2 cloves minced garlic

1/2 cup white wine

6 cups chicken or beef broth

salt & black pepper to taste

6-12 sourdough baguette slices

8 oz shredded gruyère cheese

Instructions

1. First you will add butter to hot pan. Letting melt before starting to add in Shallots. I like to brown mine a little bit to add additional flavor. Once butter is ready add in shallots and coat with butter. Let sauté in pan for 5 minutes & add onions. Stirring frequently (every 5 minutes) over medium-high heat for an hour until onions and shallots are fully caramelized and cooked down. Make sure as you are stirring you scrape up any brown bits that might start to form each time. If they are too hard to rise off the pan, you can pour in some of the wine that we use later now to help.

2. Add in salt, thyme, bay leaves and garlic. Stir together to incorporate. Slowly pour in white wine and chicken or beef broth. Let come to a boil and reduce heat to medium-low. Let simmer for 15 minutes.

3. While soup is simmering preheat oven to broil and lightly butter baguette let toast while oven is preheating. Grate cheese for next step.

4. Now that soup is ready pour equally into oven safe bowls. Top each bowl with sourdough baguette slices. This could be 1-2 per bowl depending on the size of bowl and baguette. Top that with your gruyere cheese and place of a baking sheet.

5. Put soup bowls on baking sheet in the oven and bake for 5-10 minutes or until cheese is melted and starting to become a deep golden on tops.

6. Remove from oven, top with additional fresh thyme salt and black pepper. Serve and Enjoy!

French onion and shallot soup is best served with a side of crusty French bread or delicious Cesar salad. The combination of the savory soup and the crunchy bread makes for the perfect incredible bite. You'll be sure to enjoy every last spoonful of this classic soup.

Notes

French Onion & Shallot Soup is a classic French comfort food dish that is sure to please anyone who enjoys the sweet and savory flavor of caramelized onions. The soup’s flavor comes primarily from the combination of caramelized onions and shallots, along with a variety of herbs and spices. However, if you’re not a fan of shallots, they can be substituted by removing them and adding two additional onions to the soup. You can also add in mushrooms for an even richer flavor.

For other ways to substitute, I recommend using beef or chicken stock but if you’re looking for a vegetarian option, you can use vegetable stock instead. The soup is usually served topped with a baguette and melted gruyere cheese, but croutons topping instead of a baguette make for an added crunch, which I occasionally prefer. For a healthier version, use low-sodium broth and skip the cheese and croutons. For an added touch of protein, you can top with crispy bacon and additional herbs. French Onion & Shallot Soup is a delicious meal that can be adapted to meet a variety of dietary needs. Whether you’re looking for a comforting meal or a first course, this dish will be sure to please.

Other Soups You’ll Love!

For those looking for a creamier option, there is also the classic Italian Sausage, Potato & Kale Soup. This dish combines sausage, potatoes, kale, blended of herbs and is finished off with a hint of cream for a truly decadent experience. Or, for those looking for something a bit more substantial, there is always Mom's Favorite Minestrone Soup Recipe, a protein-packed dish that is sure to fill you up on even the coldest of days. Needing something with a little kick? Bring the Heat with this Deliciously Spicy Tortellini Soup. Finally, there is the classic Deliciously Creamy Basil Tomato Soup, which combines tomatoes and basil with a hint of cream for an unforgettable flavor. Whether you’re looking for a comforting soup or something a bit more substantial one of these recipes is sure to hit the spot.

I truly hope you enjoy this recipe and all my others. If you are looking for a recipe on amandawarrenblog.com you can search in my search bar for anything you can't find. I am always sharing more videos on my Instagram, Pinterest and Tik Tok as well so you can see the exact process of how each meal is made. Thank you again for stopping by and I hope to see you again soon!

Creating the Perfect Valentines Rosé and Brunch Tablescape

The beautiful season of love is on the way, and what better way to celebrate Valentine's Day than with an elegant rosé brunch tablescape? Whether you’re planning a romantic dinner for two or a fun gathering with friends, the perfect tablescape can make your Valentine's Day celebration even more special. With the right combination of food, drinks, decorations, and a bit of creativity, you can create a memorable Valentine's Day brunch tablescape that your guests will love. There are many different selections of delicious rosé wines and delicate decorations, so here are some tips to help you put together a stunning Valentine's Day brunch tablescape.

Wine and Roses

I started my brunch and rose themed Valentines tablescape off by finding the cutest evite online. That little bit of inspiration helped, and from then on everything just fell into place. Evite's make entertaining and inviting friends and family to an event so easy by being sent straight to their email address, but you can also print and mail them as well. The next thing I added to this theme was a toast to love, using a special bottle of wine. This brand of rose is sentimental to me because years ago it was actually a wine bottle my husband gave to me and had engraved with " I LOVE YOU" to tell me for the first time that he loved me. So, it's obviously holds a special place in my heart and one I like to pull out from time to time. What more perfect of a time than on Valentines day. Next, I set the table with romantic rose colored inspired dinnerware and linens. I placed floral place settings around the rim of each plate and coffee mug and a rose colored napkin. To complete the table, I created a custom menu of delicious breakfast, brunch and lunch items. To add that extra bit of love to your table, decorate it with hearts and love-inspired decorations. I wanted this Valentines rosé and brunch tablescape to be very easy and whimsical so I ordered small bud vases to line the center of the table and picked up beautiful flowers from our local Trader Joe's. Bud vases make for an easy tablescape because a few florals fill the vase and it makes a very beautiful delicate centerpiece arrangement. I made a few larger rose arrangements for the sidebar that I made into a buffet area as well.

Valentine Inspired Dishes

To complete the table, create a custom menu of delicious breakfast, brunch and lunch items. I put all of the breakfast items on my side table for easy access and to add to the display. For some inspiration on your brunch menu, you could start with heart shaped waffles, a fun and easy way to show your love with breakfast. For a lighter option, I love to make parfaits without granola and instead use chopped pecans. This is a great way to still have a delicious treat, but be a little lighter than the waffles and scones. Speaking of raspberry scones, I made this delicious treat that pairs perfectly with the theme with its raspberry coloring. I will link my full recipes at the end of this blog post as well. To have a little something for everyone, fruit and cheese is an easy and delicious grazing dish. Don’t forget to have drinks! Coffee, Rose, Teas, Water and Juices are all great options for your guests. With these delicious treats and drinks, your Valentine’s Day brunch table will be sure to be a hit!

Garden Style Rose Inspiration

This Valentine's Day, create a romantic brunch tablescape your loved ones won't soon forget. An abundance of garden roses in blush and white will give your space a romantic touch. You can incorporate a variety of pink and white roses to give your tablescape a soft and beautiful texture. Also consider adding a few accents of greenery, like eucalyptus, for a fresh, whimsical and natural look. To keep a bottle of rosé chilled, fill a champagne bucket with ice and add left over florals peddles to the ice for a beautiful, over the top creative detail that will tie into the centerpiece. Place your favorite rosé glasses by the bucket, and stuff it with cotton candy for an extra pop of color and sweetness. With these simple tips, you can create a beautiful Valentine's Day brunch tablescape that will wow your guests.

You'll Also Love These Tablescapes & Recipes

A Rosey Pink Galentines Party

Romantic Valentines Table

Watermelon Twist Cocktail

Deliciously Light Raspberry Scones

Deliciously Creamy Basil Tomato Soup: An Easy and Delicious Recipe

If you're looking for a warm and comforting meal, look no further than creamy tomato basil soup. This creamy and delicious soup is packed full of flavor provided by fresh tomatoes, garlic, basil, and a hint of cream. A side of crusty bread or grilled cheese makes this soup a complete meal that is sure to please. A great perk to this recipe is that it is vegetarian-friendly and gluten-free. It can also be made easily vegan by changing out heavy cream for coconut milk and omitting any cheese.

This soup is also a great way to use up any leftover vegetables and herbs from the fridge. It's a great way to make sure that nothing goes to waste. Plus, it's a perfect dish to enjoy on a chilly evening. Rich and creamy tomato basil soup is a great way to warm you up and fill your belly. So, if you're looking for a delicious and comforting meal, give this creamy tomato basil soup a try.

Ingredients

2 tablespoons butter

1 yellow onion, chopped

4 garlic cloves, minced

9 roma tomatoes

1 tablespoons Italian seasoning

1 cup vegetable broth

8 oz tomato paste

1/4 cup basil pesto

3/4 cup heavy cream

sea salt & freshly ground black pepper to taste

basil & parmesan cheese for toppings

Instructions

1. To make this soup, start by melting 2 tablespoons of butter in a dutch oven over medium heat. Once melted, add the chopped yellow onion and minced garlic and sauté for about 5 minutes until the onions are softened and slightly golden brown.

2. Next, add 9 roma tomatoes and bring the mixture to a simmer, cover and let sit simmer for 15 minutes, stirring often. Add 1 tablespoon of Italian seasoning and stir to combine.

3. Once the tomatoes are softened, use an immersion blender to blend the mixture until you get a smooth consistency. If you don't have an immersion blender, you can transfer the mixture to a blender and blend until smooth. Once blended, pour back into pot and add 1 cup of vegetable broth, 8 oz of tomato paste, 1/4 cup of basil pesto and parmesan rind. Let come together but turning heat to medium low and cover. Simmer for 15 minutes, stirring often.

4. Finally, stir in 3/4 cups of heavy cream and simmer the soup for another 5 minutes until warmed through. Serve the Creamy Basil Tomato Soup hot with a sprinkle of fresh basil, parmesan cheese and a slice of warm crusty bread. Enjoy!

What to Serve with Tomato Basil Soup?

Creamy Basil Tomato Soup is a classic comfort meal that is sure to please everyone in the family. It’s perfect for warming up on a cold winter’s day, or for enjoying as a light and nutritious lunch. The creamy texture and flavorful blend of basil, tomatoes, and other ingredients make this soup a favorite in households around the world.

For the perfect accompaniment to your soup, try pairing it with some of your favorite comfort food classics. Grilled cheese sandwiches are a tasty option for dipping into the soup, as are crusty French bread, croutons, and even garlic bread. For a healthier side and bit of freshness, serve a simple green salad on the side. Grilled vegetables such as zucchini, squash, and bell peppers also make an excellent side dish. Or, for a bit of extra flavor, try serving focaccia bread with your creamy basil tomato soup.

No matter which accompaniments you choose, you’ll be sure to enjoy this creamy basil tomato soup. With a few simple ingredients and a few minutes of preparation, this classic comfort food is the perfect meal for any occasion.

Other great soup recipes

Mom's Minestrone Soup and Italian Sausage, Potato & Kale Soup are great options for a cold winter day, but for something a bit lighter and more refreshing, Creamy Basil Tomato Soup is a delicious choice. This creamy soup has a hint of basil that adds a hint of complexity to the flavor. The creamy tomato base is combined with garlic, herbs, and a variety of delicious vegetables to make a hearty soup that is both comforting and surprisingly satisfying. The basil adds a unique flavor to the soup that will have you coming back for more. Whether you are looking for a light lunch or a hearty dinner, Creamy Basil Tomato Soup is a great option for any meal.

Bring the Heat with this Deliciously Spicy Tortellini Soup

Welcome to this blog post about Spicy Tortellini Soup! This delicious soup is a flavorful twist on classic tortellini soup, but adds a spicy kick that is sure to tantalize your taste buds. The combination of the spicy broth and cheesy tortellini is a comforting, filling meal that is perfect for any occasion. It's easy to make and requires only a few simple ingredients. The spicy Italian sausage makes it so tasty and adds that great kick of flavor, while the tomatoes, cheese, and tortellini provide an incredible balance of sweetness and creaminess. Read on to learn how to make this tasty dish and find out why it's the perfect meal for any chilly day.

So this time of year go ahead and warm up with a comforting bowl of this Creamy Sausage Tortellini Soup. Made with simple ingredients, this hearty and flavorful dish is a great way to add variety to your dinner menu. It features a delicious combination of Italian sausage, cheese tortellini, and a creamy tomato-based broth. The addition of spicy Italian sausage gives the soup a kick of heat that is balanced out by the creamy broth. This meal is perfect for a cold night and can easily be prepared in just one pot. Your entire family will love this flavorful and filling soup.

What You Need to Make Creamy Sausage Tortellini Soup

Spicy Tortellini Soup is the perfect dish for a chilly evening. This flavorful and hearty soup is sure to warm you up and leave you wanting seconds. To start, you’ll need one pound of hot Italian sausage, one onion diced, and five cloves of garlic minced. Sauté the sausage and onion until the sausage is fully cooked and the onion is translucent. Then add in mix two tablespoons of flour, one teaspoon of red pepper flakes, one teaspoon of sea salt, and one teaspoon of Italian seasoning and stir. Adding Flour here helps remove any moisture from meat, marry in the seasonings and thicken soup if needed. Next pour in one can of fire-roasted diced tomatoes, one can of tomato sauce, and six cups of vegetable broth. Allow the mixture to come together and add in one package of refrigerated cheese tortellini and cook the soup for 15-20 minutes, or until the tortellini is cooked and floating on top.

Next, add in three cups of chopped spinach, and cook the soup for an additional 5 minutes. Finally, stir in one-and-a-half cups of half-and-half and 3 chopped basil leaves. Let the soup simmer until heated through. Be sure not to let come to a boil, because then the cream will start to curd or get chunky.

To finish off the dish, mix one-quarter cup of ricotta and one-quarter cup of parmesan cheese and spoon on top of each bowl before serving. You can also serve this separately incase anyone doesn't like this additional topping. I like to finish by adding additional chopped basil for color and flavor. Spicy Tortellini Soup is sure to become a family favorite in no time!

Ingredients :

1 lb. of Spicy Italian Sausage

1 Yellow Onion

1 tsp. red pepper flakes

1 tsp sea salt

1 tsp italian seasoning

5 cloves of minced garlic

2 tbsp unbleached flour

6 cups vegetable or chicken broth

1 can fire roasted diced tomatoes

1 - 8 oz can of tomato paste

1 package of cheese tortellini (I use the package from Sam’s club)

3 cups chopped spinach

1-1/2 cups heavy whipping cream

3 basil leaves, chopped (additional for garnish)

1/2 cup Ricotta Cheese

1/4 cup grated Parmesan Cheese


Instructions :

1. First prepare vegetables & open cans of tomatoes. Dice Onion, Chop spinach and basil, and mince garlic. Set aside.

2. Now that everything is prepared, grab your soup pot and turn to medium-high heat. Add spicy italian sausage, garlic and onion cooking until the onion is transparent and sausage is cooked. Adding in Flour, red pepper flakes, sea salt, and italian season.

3. Pour in broth, diced tomatoes and paste. Stir and let come together. Add in tortellini and let simmer for 10-15 min. Stirring Occasionally.

4. Add in chopped spinach and marry together for about 5 minutes. Lastly add in heavy cream and basil leaves. Let simmer an additional 5 minutes until warmed throughout.

5. Mix together ricotta and parmesan cheese for topping. Top each soup with ricotta mixture and additional basil.

6. ENJOY!


If you are looking for a delicious and satisfying soup that is sure to be a hit with your family, you will love this Spicy Tortellini Soup! This soup is bursting with flavor, and it is surprisingly easy to make. The spicy flavor Is aided by the additions of red pepper flakes, fire roasted tomatoes, and spicy Italian sausage. The tortellini adds that hearty texture to the soup, making it a nice complete meal.

You can make the soup ahead of time and enjoy it over multiple days, storing in an airtight container. To take it to the next level, add in grated Parmesan cheese and ricotta mixture. This soup is perfect for a weeknight dinner or a cold winter day. Get creative with the spices and flavors and you will have a flavorful and satisfying soup that you will want to make again and again.

Variations on This Sausage Tortellini Soup

Spicy Tortellini Soup is a delicious and flavorful dish that can easily be adjusted to customize the taste to your own preference with a few of these variations. If you are looking for a more mild flavor, substitute spicy Italian sausage for a traditional variety and add a can of regular diced tomatoes instead of the fire roasted. If you’re looking for less creaminess, top it off with freshly grated Parmesan cheese instead of the ricotta mixture. For those who prefer a spicier kick, simply add an additional pinch of red pepper flakes before serving for an extra kick of fire. For a dairy-free option you can use coconut milk instead of heavy cream and omit ricotta topping. To tweak the flavor a little bit, swap out the tortellini for cheese ravioli. For an extra protein boost, add a can of cannellini beans. Whichever way you choose to serve it, Spicy Tortellini Soup is sure to be a hit with everyone you enjoy it with!

Try These Next

Italian Sausage, Potato & Kale Soup - with a few teaks you can turn this into a sausage, kale tortellini soup also.

Mom's Favorite Minestrone Soup Recipe - Deliciously satisfying and easily adaptable to your nutritional needs.

Mom's Favorite Minestrone Soup Recipe

"Mom's Favorite" Minestrone Soup Recipe: A Delicious and Nutritious Meal for Everyone

If you're looking for a comforting and delicious soup recipe that will bring as big of a smile to your mom's faces as it does to my moms, then look no further! This classic minestrone soup recipe is sure to please. It's easy to make, packed with nourishing ingredients, and simply tastes like good old-fashioned home cooking. An added bonus is it's a great way to use up any leftovers you have in the fridge. With just a few simple ingredients, you can whip up a pot of this soup in no time and make your mom happy and proud. Read on for the recipe!

Tips for Minestrone Soup

Mom's Favorite Minestrone Soup Recipe is a hearty and flavorful soup that is sure to be a hit with not just Mom, but the whole family. It's a great way to use up any vegetables you have on hand. I actually started making this soup because it's the only soup my mom truly enjoys and will order when out at a restaurant. So naturally, I had to try my own hand at it. I am always trying to please the family and make meals they all will love.

To start off this delicious soup, melt some good quality butter in a large pot over medium heat. Once the butter has melted, add in some chopped garlic and onion and sauté until the onion is soft and translucent. Next, add in the vegetables of your choice, such as carrots, celery, or zucchini, and sauté for a few minutes until they start to soften. Once the vegetables have softened, add in some canned tomatoes, 5 oz of chopped pancetta, cannellini beans and season with your favorite Italian seasoning blend. I personally use my own italian seasoning, which I make monthly to just to have on hand. Pour in enough broth or stock to cover the vegetables and bring to a boil. Once boiling, reduce the heat and let simmer for 15-20 minutes.

Next, add in some cooked pasta and beans, such as cannellini beans, and simmer for an additional 10 minutes. Once the pasta is cooked, taste and adjust seasoning as desired. Finish off your soup with freshly grated Parmesan cheese and additional herbs if desired. Serve with a crusty loaf of bread and a side salad for a complete meal.

Mom's Favorite Minestrone Soup Recipe is sure to be a hit with the whole family. It's a hearty and flavorful soup that is packed with vegetables and beans and is sure to become a regular in your dinner rotation, especially on those cold days.

What to Serve with Vegetarian Minestrone Soup

Mom’s favorite minestrone soup recipe is a simple yet satisfying dish that will make anyone’s mouth water. The perfect combination of veggies, broth, and spices make this dish a family favorite. This soup is best served with a variety of accompaniments such as crusty French bread, grilled cheese sandwiches, garlic bread, Caesar salad, grilled vegetables, antipasto platter, focaccia bread, cheese & herb biscuits, caprese salad, roasted garlic bread, toasted ciabatta bread, garlic toast, and bruschetta.

This soup is a great way to make a meal out of whatever ingredients you have on hand. You can customize the soup by adding different veggies and beans, or even switching up the broth and seasonings. If you’re looking for an easy, yet delicious meal, Mom’s favorite minestrone soup recipe is just the thing. Enjoy a bowl of this comforting soup and pair it with any of the accompaniments listed above for a complete meal.

Ingredients

3 tablespoons salted butter

1 large onion

4 cloves minced garlic

5 oz diced pancetta

1 cup chopped carrots

1/4 cup chopped celery

1 zucchini chopped

1 can diced tomatoes (lightly drained)

6 cups vegetable broth

1 tablespoon Italian seasoning

2 bay leaves

black pepper (to taste)

1 can cannellini beans

1 1/2 cup pasta (of your choice)

2 handfuls of spinach, roughly chopped

1/2 cup white wine

2 tablespoons basil pesto

Parmesan for topping

Instructions

1. To make this delicious soup, simply gather all of the ingredients and have them ready. Then, chop the onion, celery, carrots, and garlic. Heat the butter in a large pot over medium-high heat in your favorite stockpot. I love my 8 qt 360 Cookware stockpot for making all soups. Then add the vegetables and cook until they are soft, about 5 minutes.

2. Next, add the canned tomatoes, pancetta, vegetable broth, Italian seasoning and bay leaf and bring to a boil. Then, add the zucchini, beans and pasta and reduce the heat to low and simmer for 25-30 minutes.

3.To finish it off, you will stir in the spinach, white wine (I prefer to use Decoy Chardonnay and enjoy the rest of the bottle to serve with the soup), basil pesto and season with pepper to taste. Let ingredients come together for an additional 10-20 minutes or until the spinach has changed color to a dark leafy green.

Serve the soup hot, with a sprinkle of freshly grated Parmesan cheese and slices of crusty bread. Enjoy! This flavorful and comforting soup will become a staple in your house. Remember, this minestrone soup is easy to make and is sure to please the entire family. Enjoy!

Recipe Variations

Mom's favorite minestrone soup recipe is a classic Italian dish that is perfect for a cozy lunch or dinner. It's a hearty soup made with a variety of vegetables, beans, broth and optional pancetta. This soup is so versatile and can be easily customized depending on your taste preferences. Feel free to make it all your own.

For a creamier texture, add a ½ cup of heavy cream to the broth before adding the vegetables. If you are looking for a heartier soup, you can add ½ cup of cooked quinoa or barley to the soup with the vegetables. For a protein packed version, add a can of drained and rinsed black beans. To give the soup a smoky flavor, add a teaspoon of smoked paprika to the broth. If you want to make a vegan version, add in extra vegetables like butternut squash or green beans, substitute the beef broth with vegetable broth and omit the pancetta. You can also add a teaspoon of crushed red pepper flakes to the broth to give it a spicier flavor. For an extra flavor boost, add a few sprigs of fresh thyme or oregano or an additional tomato paste.

This soup is sure to please everyone at the table! Enjoy Mom's favorite minestrone soup recipe with a crusty loaf of bread and a glass of your favorite white wine.

Other Soups & Bread Recipes to Make

Italian Sausage, Potato & Kale Soup

The Perfect Beginners Sourdough Bread Recipe for Delicious Homemade Bread

Garlic & Herb Focaccia Bread

Guest Bedroom Makeover Reveal

For many of us, having a dedicated guest bedroom is a luxury, but can also be a challenge to make it feel inviting as well as be functional. To help create a warm and welcoming space for our guests, we decided to transform this basic guest bedroom into a beautiful, colorful and inviting sanctuary. This charming pink and green guest bedroom offers the perfect little cozy retreat for visitors. The walls have been wallpapered in a soft pink and light floral print that we have carried throughout the room.

Wallpaper is from wallpaperdirect.com

We started off by giving the room a big bold makeover by updating the neutral wall color the room previously had by installing a beautiful wallpaper. Along with the wallpaper we installed, we also added a few statement pieces to create visual interest in the room and to give it a cozy and inviting feel. We went with fresh white linens and pops of pinks and greens in the pillows to bring color and texture to the space. The bed is dressed by a Pottery Barn duvet cover with small pink detail that matches the Pottery Barn quilt, quilt euro shams, and curtains. These all added pops of pink that matches the wallpaper perfectly. To complete the bedside look, I found an antique style nightstand that was small enough to fit the space and also close enough in style to match the beautiful bed. A pink lamp with white shade was added for a subtle pink touch and the white shade tied into the bedding nicely. Shockingly, I found the Bed for this room on Amazon and am so in love with it. I will link below if you are looking for a great quality bed that is budget-friendly and that can also be functional with so many color schemes.

To complete the look, we accessorized the room with small pieces like the custom wallpaper art I created to add character and art. You can see more on how I did this on my Instagram highlight labeled pink & green room. We also added a few pieces of furniture to create a functional reading space for our guests. The green gingham armchair provides a cozy spot for reading and sipping coffee or just relaxing and looking out the window, all while giving a nice contrasting touch of patterns. We also added a matching dresser to the bed with a mirror over its top with a great find from Round Top, Texas, and this adds a spot for guests to have a mirror as well as store their clothing. Extra blankets were added in this dresser in case the guests get cool at night or while sitting in the armchair. Together, these elements create a warm and inviting space that any guest will find fantastic!

After all of the updates, the room looks inviting and comfortable, and is the perfect place for guests to relax. We’re so happy with how the room turned out and can’t wait to have our first visitors stay in this newly updated pink & green guest bedroom.

Updating a guest bedroom can be an exciting task that can completely transform the look and feel of the space. A room that may have been forgotten before can easily become your new favorite room of the house. With the right sources and details, the process can be easy and effective, and hopefully you can shop deals to make it an inexpensive as possible. When completing an update to your guest bedroom, it is important to consider the furniture and decor that will be used. Think about the color palette, style, and size of the furniture and decor that will be used in the room. It is a good idea to look for items that will complement and enhance the existing decor and furniture in the room. Investing in quality pieces that will last for years to come is essential. With these simple updates, your guest bedroom will be ready to welcome any guest in style.

Last few tips I have for you when redoing a guest room of any room. When selecting bedding and accessories, think about the textures and colors that will help create a cozy atmosphere. The size of the room is important and should be taken into account when deciding how to measure and maximize the space for guests. Remember to measure the room before purchasing furniture and decor items, I make this mistake far too many times. Finally, think about the amount of storage needed for guest items and choose pieces accordingly. With these tips, the guest bedroom update will be a great success.

I hope you enjoyed these bedroom ideas and I cannot wait to share more decorating ideas as we transform our new Farm House in a French Country / Farm House of our dreams.

Everything we used for this room is linked below or similar to those pieces that are sold out of found at antique stores.

The Perfect Beginners Sourdough Bread Recipe for Delicious Homemade Bread

If you are looking for an easy and delicious bread recipe to try out, look no further! This beginner's sourdough bread recipe is perfect for those just starting out the task of making your very own homemade bread. With a few simple steps, you will be able to whip up your own homemade loaf of sourdough bread in no time. Not only is this bread delicious, but it is also extremely healthy, with all of the probiotic benefits of sourdough. So, give it a try and enjoy the amazing flavor and smell of your own homemade bread!

I've tried many different recipes using sourdough starter trying to get it right each time. There really is nothing like the delicious smell and taste of freshly baked sourdough bread, and thankfully, lately, it's our new normal favorite smell in the home. Just imagine the lovely smell when using the sourdough for cinnamon rolls! I make this bread weekly for sandwich bread and sides for dinners and delicious soups.

Full disclosure, I have only been making sourdough bread and working with sourdough starter for about 6 months now. However, making it weekly, I have been able to dabble with this recipe time and time again and this has been the easiest to work with and the best tasting of all! To start you will want to make sure your sourdough starter has been fed one of its "regular feedings" 12 hours before starting. A good rule of thumb is that if your starter has risen to twice its size after a feeding, then you're ready to use. I normally will feed my starter the night before and start the bread process first thing in the morning to have fresh bread by dinner that evening. You cn say this makes this a same day sourdough bread. If I want a breakfast loaf, I would feed it in the early evening and once its risen enough start the process. Then, let it sit overnight and bake in the morning.

Another important note is the surrounding environment for your sourdough starter and your bread dough. If you're house is set at a colder temperature like usual for the Winter, and room temperature is slightly cooler than the norm, then it will take longer for your starter to rise . During this time, I usually keep my starter in the pantry of our house because I notice it's the warmest part of the house. and will keep a towel around the jar. When the sourdough bread is in the proofing bowl, I do the same thing and wrap a towel around the bottom of the bowl as well as keeping the top covered like normal.

Let's get started and make some yummy sourdough bread!

Ingredients:

1/3 cup sourdough starter

1 - 3/4 cup filtered water

1 tsp sea salt

4 cups bread flour

Directions:

1. Once sourdough starter is ready to go you will add 1/3 cup to bowl with water and whisk until blended. Add in sea salt and bread flour and mix together with your hands. Flour bread mixture will be scruffy, that's okay. If all flour hasn't blended in you will need a bit more water, but don't over water just enough so your flour is all incorporated. Place a clean towel over the top and let sit for one hour.

2. After one hour stretch and fold. To stretch and fold you will pick up on one side of the dough pull up and fold into center. Continue around the sides until they have all been picked up and folded into middle. It will normally be around 4-5 times. Cover again and let sit for 30 min. Repeat once more.

3. After all stretch and folds have finished you will scoop out the dough onto a lightly floured countertop. Using a bench scraper fold under to form a large ball of dough. Make sure to have everything floured so that you prevent sticking to your surfaces.

4. Once ball is formed you will pick up with your bench scraper and flip over into floured proofing basket. Pinching sides of dough on bottom pull together so the part of the dough showing is creased together. Cover with towel and let sit for 7 - 10 hours.

5. When you are ready to bake flip your proofing basket with sourdough onto a lightly floured piece of parchment paper. Now you can score your dough and let sit for 30 minutes while you preheat the oven and stockpot.

6. While your bread is sitting grab your best 360 stockpot, I use the 8 Quart Stockpot with Cover, place in oven and turn on to 450 degrees. Once temperature is reached lower your bread into stockpot holding the sides of the parchment paper. Cover and let bake for 20 minutes. After 20 minutes remove cover and bake an additional 25 minutes or until golden brown.

7. Baking is all done. Now remove bread and set on cooling rack or cutting board for at least 30 minutes for a resting period before cutting. Your sourdough bread will continue to cook while sitting so cutting too early will cut the full bake time down.

8. ENJOY!!

I hope you enjoyed this beginners sourdough bread recipe.

Some of my other favorite bread recipes are:

Garlic & Herb Focaccia Bread

Banana Bread Recipe

Lemon Poppy Seed Bread Recipe

Corn Bread Loaf Recipe

CODE AMANDAWARREN20 GIVES YOU 20% OFF ENTIRE SITE

2023: Charcuterie Board Ideas to Help You Ring in the New Year

Are you looking for a creative way to spruce up the food at your New Year's celebration? Well, then look no further than to the perfect charcuterie board! Charcuterie boards are always a crowd favorite. They are not only delicious, they're also a visually stunning way to impress your guests and add that touch of sophistication to your party. With a variety of meats, cheeses, fruits, and nuts, there are endless possibilities for creating a unique charcuterie board. To help get you started, I've put together a list of 2023 charcuterie board fun ideas to help you create the perfect board for your own New Year's celebration! Whether you are planning a party with friends, or staying in for an intimate classic dinner for two, a charcuterie board for an appetizer is always a winning idea.

Just because Christmas is now over doesn't mean you have to go back to a boring diet and stop eating all the delicious Holiday foods! My 2023 charcuterie board ideas will help to spice up both your New Year's party, as well as any occasion you have coming into the New Year!! Feel free to make this any way you want, with your very own favorite varieties of the food. I will share my inspiration below.

Everything I used is listed on the photo below so you can see how I used each delicious item. These are some of my favorite things to add into my boards any time of the year. Remember, the best part is these boards are fairly easy to make, and the possibilities are endless. I find it's best to use whatever you can find locally along with what is in season. This makes your board even more unique to you and to the time of year!

Ingredients I used:

Charcuterie/Meats -

Prosciutto

Spicy Sopresso Salame

Sopressata

Cheese -

Cheddar Cheese

Manchego

Tete De Moine

Fruits -

Figs

Blackberries

Blueberries

Raspberries

Nuts -

Pecans ( almonds, pistachios, walnuts)

Other -

Other things to add on the side or onto your board could be chocolates, crackers, sliced French bread or anything else you can enjoy paired with sparkling wine or apple cider to bring in the New Year!

Transforming our Dining Room for a New Year Celebration!

Transforming our Dining Room for a New Year Celebration!

Are you ready to say goodbye to Christmas and welcome to the New Year? If you’re like most of us and love decorating for the holidays, then you know that the change from Christmas to New Year's can be a bittersweet moment. So why not make the transition from one holiday to the next even more enjoyable by transforming your dining room? With a few simple upgrades and decorations, you can create a festive look that celebrates both the end of one year and the start of the next. In this blog post, I'll share a fun and creative way to transform your dining room from Christmas to New Year's.

I had so much fun transforming our dining room from Christmas to New Years and enjoying our tree a little longer this holiday season. I incorporated lots of silvers and golds to make my version of a Winter wonderland. This allowed me to leave up my tree and garland across the table for the greenery centerpiece. I found the perfect decorative mini Christmas trees for table decor (I will link them all below. Many are on major sale after Christmas!) which made for highs and lows across the centerpiece and tied in the Winter wonderland. I went with a velvet tablecloth and layers of placemats with beading to give elements and layers that are so New Years and a beautiful combination.

For even more pops of New Years that made the dining room even more special, I added a balloon garland from Target across our mirror. This was a 5 dollar find that added an adorable touch to the mirror. I knew I was going to be sad when I took our Christmas wreath off of the mirror -see our Christmas dining room here- but this balloon totally made an adorable element and added to the mirror once again! Adding a champagne station below with rock candy gets everyone ready for a midnight toast while also giving a decorative element! One last thing I added are the Christmas crackers. These are fun to crack at midnight when the ball drops. Another great idea would be to add a New Years horn, noisemakers, or poppers.

I hope this gives you inspiration on how to transform your home space from Christmas straight into New Year's Eve! Most of these decorative ideas you may have already from other tablescapes and from Christmas decorations. I made sure to link everything I used (down to our outfits) many are on major sale for 50% off. The idea of this tablescape was to inspire you to use things you may already have for a simple and elegant New Year's Eve table. Wishing you a Happy New Year and a blessed 2023.

I hope you enjoy this tablescape idea, here are some I others I have done in the past that I hope will be inspiring to you as well.

Other Tablescapes from Amanda Warren

My Spring Tablescape

Father Day Picnic

Chic Halloween Party

Romantic Valentines Table

A Rosy Pink Galentines Party

9th Annual Christmas Cookie Party

Mom's 60th Birthday Party

"A Festive Taste of Tradition: Sparkling Cider Punch for Christmas!"

Welcome to the Holiday season! With Christmas just around the corner, it's time to start thinking about the special treats that are going to keep your guests happy and their tummies content during the festivities. One of my favorite treats of the Christmas season are the delicious, festive, colorful signature drinks. I love to get creative on drinks that can be served to family and friends. If you're looking for something special to serve this season, why not try a Sparkling Cider Punch? This classic Christmas drink is easy to make, uses ingredients you can find at most grocery stores, and is sure to be a hit at any Holiday gathering. Read on to find out how to make a Sparkling Cider Punch that will help you sparkle like the star of your Christmas party!

When moving to Texas this summer, my husband's grandma gifted me her beautiful punch bowl. A bowl she had spent every Christmas making her famous brandy slush in. A bowl I had been admiring every Holiday since he and I got together. She knew I had loved that bowl it and she generously gave it to me to enjoy. This Christmas, we won't be in our hometown to enjoy her brandy slush, but I wasn't going to let her beautiful punch bowl sit this season out. I wanted to put together a new recipe I could share with you as well. So, grab your favorite punch bowl and let's make a tasty sparkling cider punch for Christmas!


Ingredients

2 bottles of sparkling apple cider

1 bottle of ginger beer

1 cup vodka

1/2 cup cinnamon sugar simple syrup

2 to 3 apples thinly sliced ( I like to do 1 green and 1 red)

1/2 cup pomegranate ariels

1/2 cup cranberries

Cinnamon & sugar mixed for rim of glass

Simple syrup mix:

1 cup sugar

2 tablespoons cinnamon

1 cup water


Instructions

1. Make Simple syrup by adding all ingredients into a stove top pot and letting come to a simmering boil and sugar has all dissolved. Add to a jar to let cool. I like to make this the night before and put in fridge, so it doesn't make the punch warm.

2. Rim glasses you plan to serve with. I used coupe glasses I had from Pottery Barn for this. Makes it so easy to ladle in fruit and punch.

3. Once simple syrup is cooled, or if you waited for the following day, Add all ingredients into a punch bowl.. the bottles of sparkling apple cider, ginger beer (you can add 2 if you want more carbonation) vodka, simple syrup and then layer in fruit.

3. Ladle in punch as guests arrive! You can add ice if you want as well to keep cool.

4. ENJOY!

This sparkling cider punch recipe includes alcohol. If you are wanting to have this as a non-alcoholic punch that everyone (even the littles) can enjoy it this Christmas season, then you can substitute the vodka for tonic water. This will enhance the flavors of the other ingredients of the punch without adding any other alternative flavors. It makes it a drink that everyone can enjoy!

As you may have read above, this punch bowl was given to me by Scotty's grandma Dot. However, if you are looking for a beautiful bowl for yourself to make this punch in this Holiday season I have more linked below.

5 Ways To Elevate Your Christmas Style This Holiday Season

Christmas time is the perfect time to show off your festive style. Whether you want to dress up for Holiday events like work parties or seeing the ballet, or simply for your everyday Winter look, there are plenty of ways to add some Christmas flair to your wardrobe. Here are 5 simple ways to elevate your Christmas style and add a little extra holiday cheer to your look.

Add Some Sparkle

I always love to some sparkle any time of the year, but the Holidays are the perfect time to really add some extra! Here I went with a sequins skirt, cozy sweater, a coat, and a little more sparkle on the heels! It makes for a beautiful, elegant, fun, and one of my favorite ways to look even more festive for Christmas and New Year's events. Other ways to add sparkle is a beautiful statement necklace, sequins top, or if you want to go all out, I linked some beautiful dresses and jumpsuits below!

You Can Never Go Wrong With Fur

I always love a fur coat! Whether it's a full fur or a partial fur with just a little around the collar like this coat from Abercrombie. I love this coats versatility as well as it has the collar detachable so you can make this look less dressy without the fur if desired. However, this blog post is all about dressing UP for the holidays! I love how much the fur around the collar dresses this monochromatic look up. Adding element and detail that is so perfect for Christmas and New Years. Also, fur is a wonderful choice for any Winter wedding you may have!

Velvet Screams Christmas

I'll be honest, I love velvet all year round. However, Christmas and New Years is the perfect time of year to really bring it out! Velvet gives a beautiful dress an even more cozy feel and elegant vibe because of the comfy texture. I loved this dress from Red Dress and especially love how the velvet feels on. It comes in so many different colors and is a very flattering fit. The dress goes in under the bust and lays so nicely on top. You will love this one! (Linking everything below and adding others that you will love as well) If you are thinking a full Velvet dress is too much.. Add a top with a velvet bow for a more subtle look that still says Merry Christmas!

Lace Is Great

Lace is one of my all-time favorites looks because it's beautiful and dainty for any style. I added it here for a more dressy/casual look with jeans, an overcoat and booties. You can also do lace for a very fancy look with a dress or a silk skirt and you can't go wrong with that gorgeous choice for the Holiday season and all year long!

Silky!!

I am ALWAYS a fan of a silk dress or skirt paired with a sweater. I wear it often and it's an easy way to reuse a silk dress that you may have worn to a Spring or Fall wedding. My trick for using a dress with a sweater is wearing your bra over the dress and under the sweater. You will tuck the sweater under and into the bra. This way your sweater doesn't hang too low and overwhelm the dress. I did it below with this outfit. Above in the monochromatic/fur look that is a silk skirt so you can tuck into the skirt or do the bra trick if the sweater is too bulky.

I hope these ideas help you or give you some inspiration to put together the best Holiday look that makes you feel extra special and stylish during the Holidays. Christmas & New Years are the best time of year, but we tend to be so busy that we have even less time to shop for ourselves. These are ways you can use pieces you may already have in the closet and create fun and beautiful outfits that will WOW! If you are looking for something new to add into your wardrobe, I have linked everything in my outfits above and some other pieces I think will help your looks as well.

Wishing you a Very Merry Christmas and the Best New Year!

Click below to shop what I am wearing or visit my LTKit -here-