Delight Your Guests with an Antipasto Christmas Wreath

Welcome to the Holiday season! With Christmas just around the corner, what better time to get creative with your holiday recipes? One of the most eye-catching and unique dishes to serve for any Christmas gathering is an antipasto Christmas wreath. This delicious and festive dish is sure to be the talk of the table. I think it is so cute that this dish is designed to look like your traditional Christmas wreath, with a variety of savory antipasto ingredients like salami, olives, cherry tomatoes, and cheese. Not only is this dish festive and colorful, but it's also a great way to feed a crowd without having to spend too much time slaving away in the kitchen. Read on to find out how to make stunning antipasto for Christmas Eve or Christmas Day to wow your guests and give them something fun to change up the same old charcuterie boards we have been making all year.

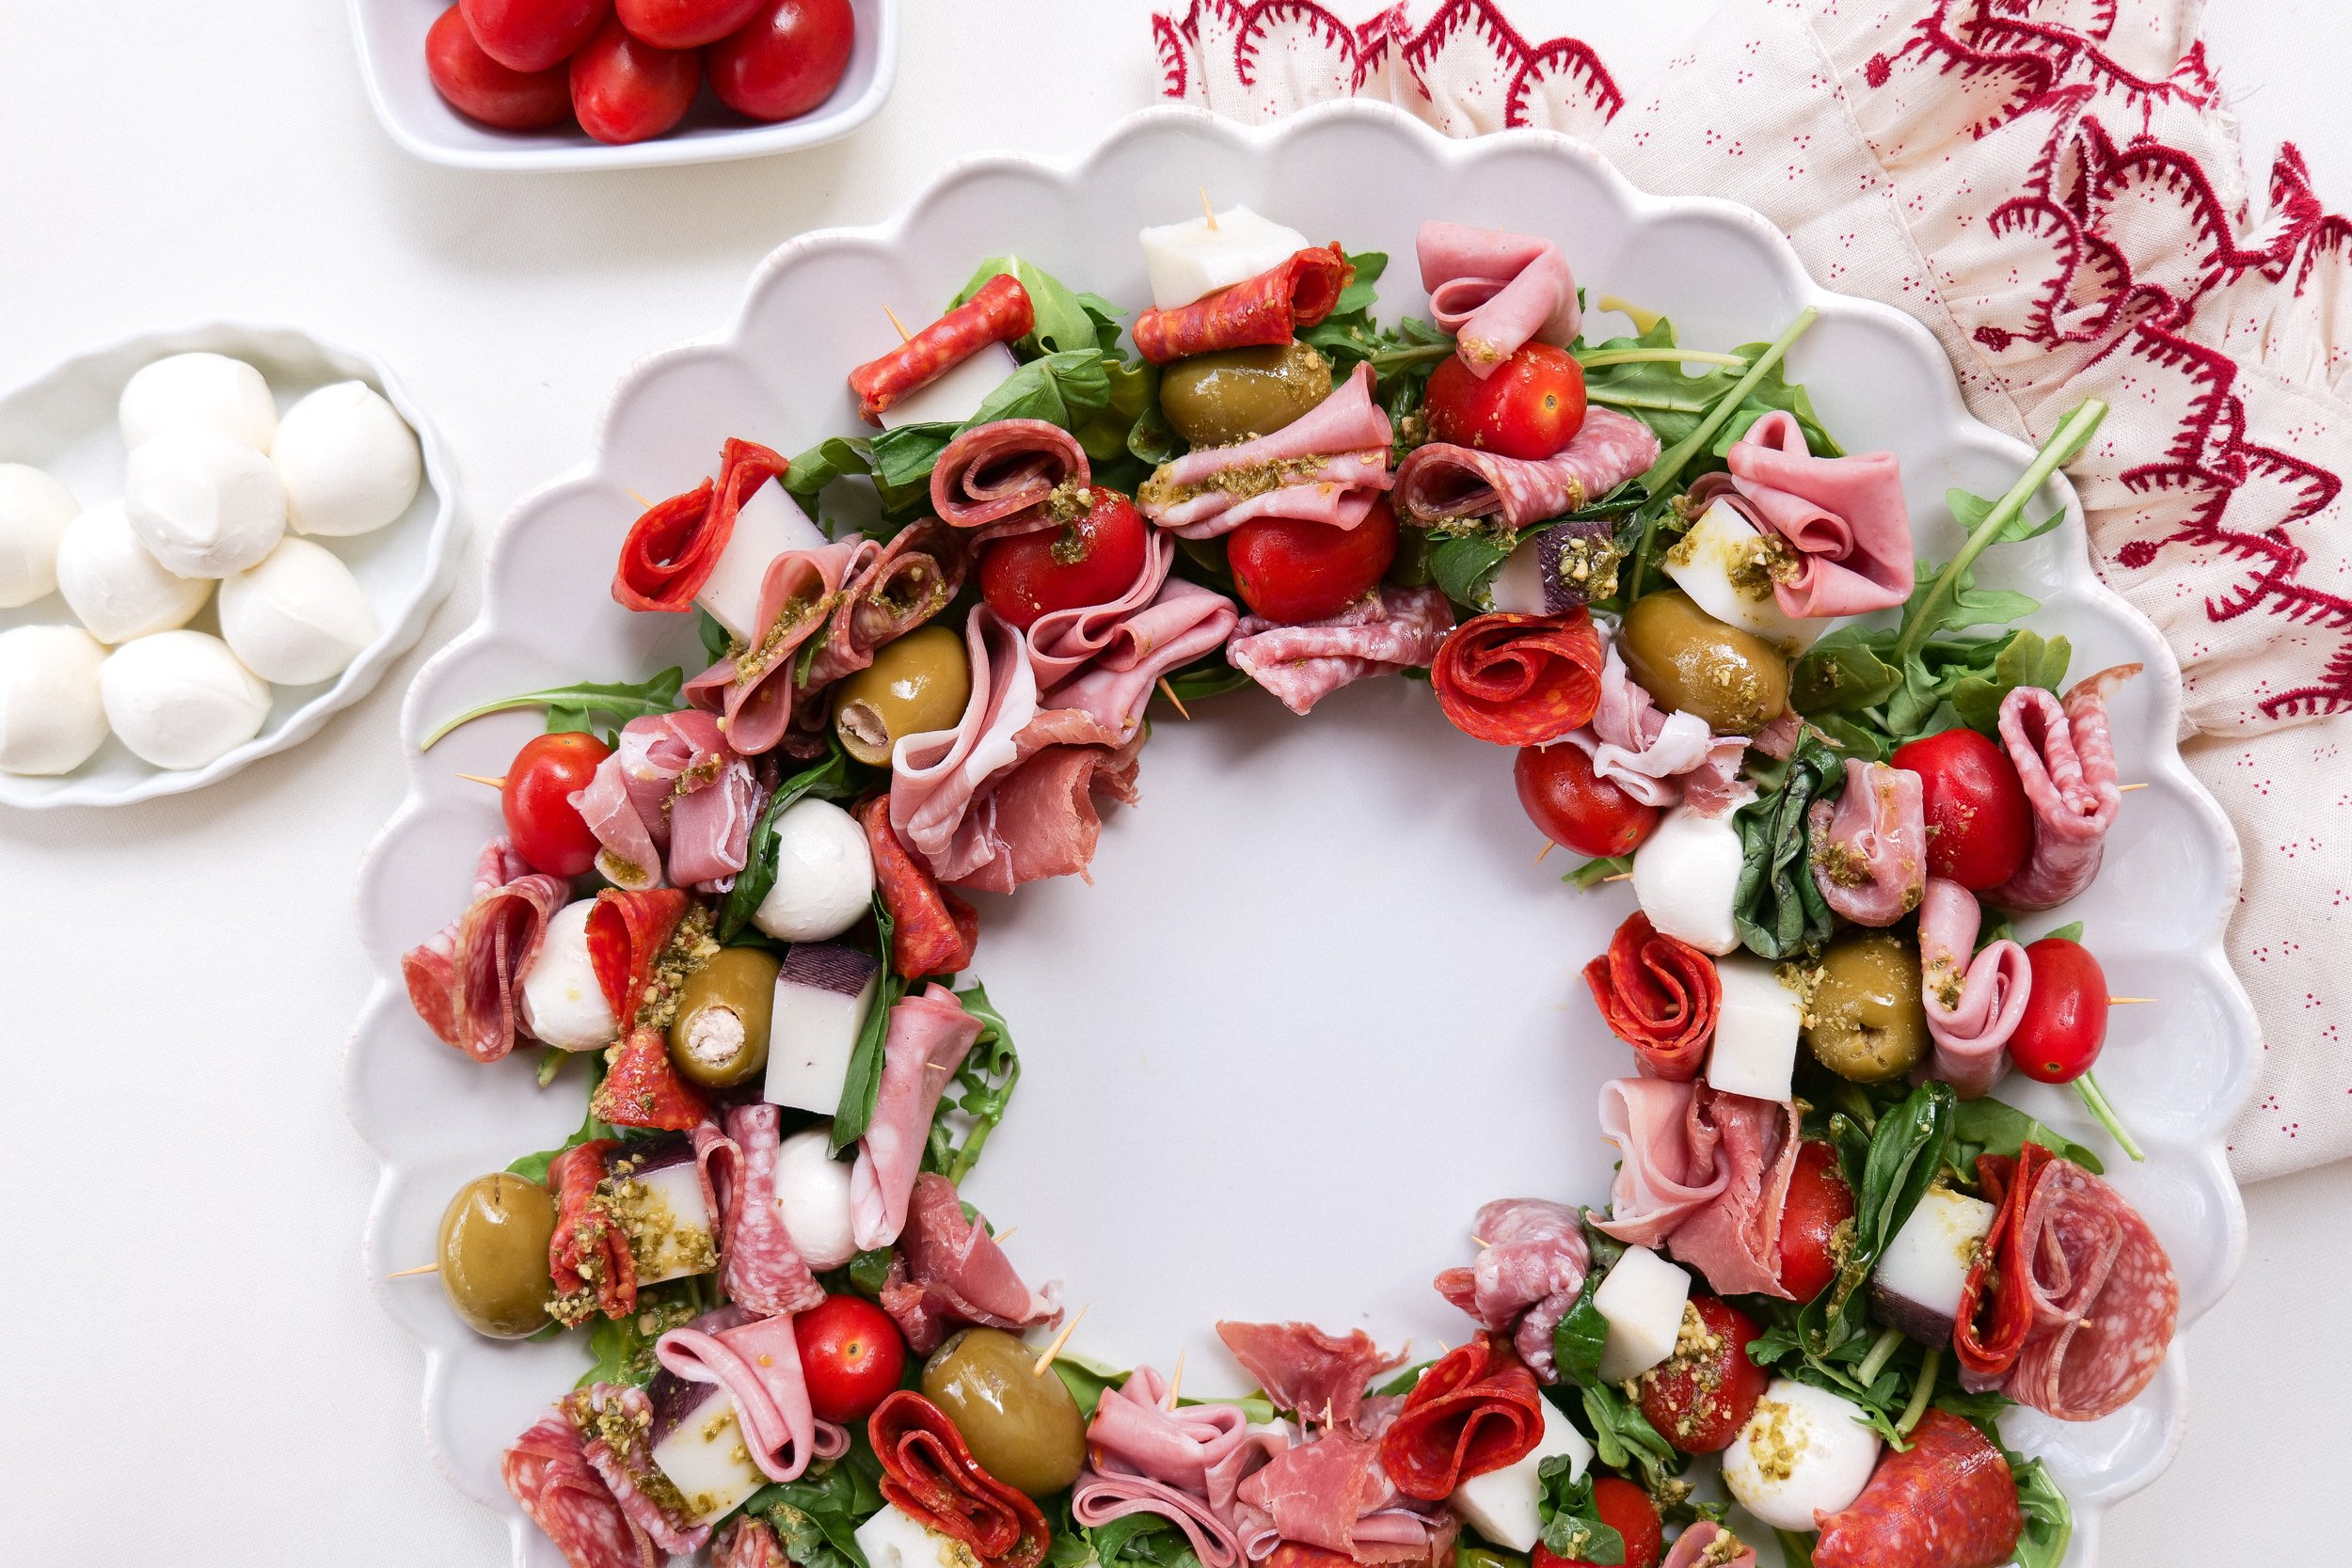
This wreath is the ultimate edible centerpiece that promises to be as visually stunning as it is tantalizing to the taste buds. This culinary creation is both a feast for the eyes and a prelude to the main events of the holiday meal. Prepare to be the host with the most, as we show you how to delight your guests with an Antipasto Christmas Wreath that's guaranteed to be the talk of the table. The fun thing about this antipasto Christmas wreath is you can customize it in so many ways to make it all your own! You can change and swap the cured meats, add marinated artichoke hearts, and drizzle different toppings instead of the olive oil pesto I share below. Other delicious options for drizzle would be balsamic vinegar or garlic butter. YUM! This is one of my favorite recipes that I have found and is such a unique appetizer that is sure to be a hit for your first course of the meal. Another great option is to make this antipasto in the form of a candy cane instead of a wreath. Both are beautiful and perfectly festive for the Christmas season!

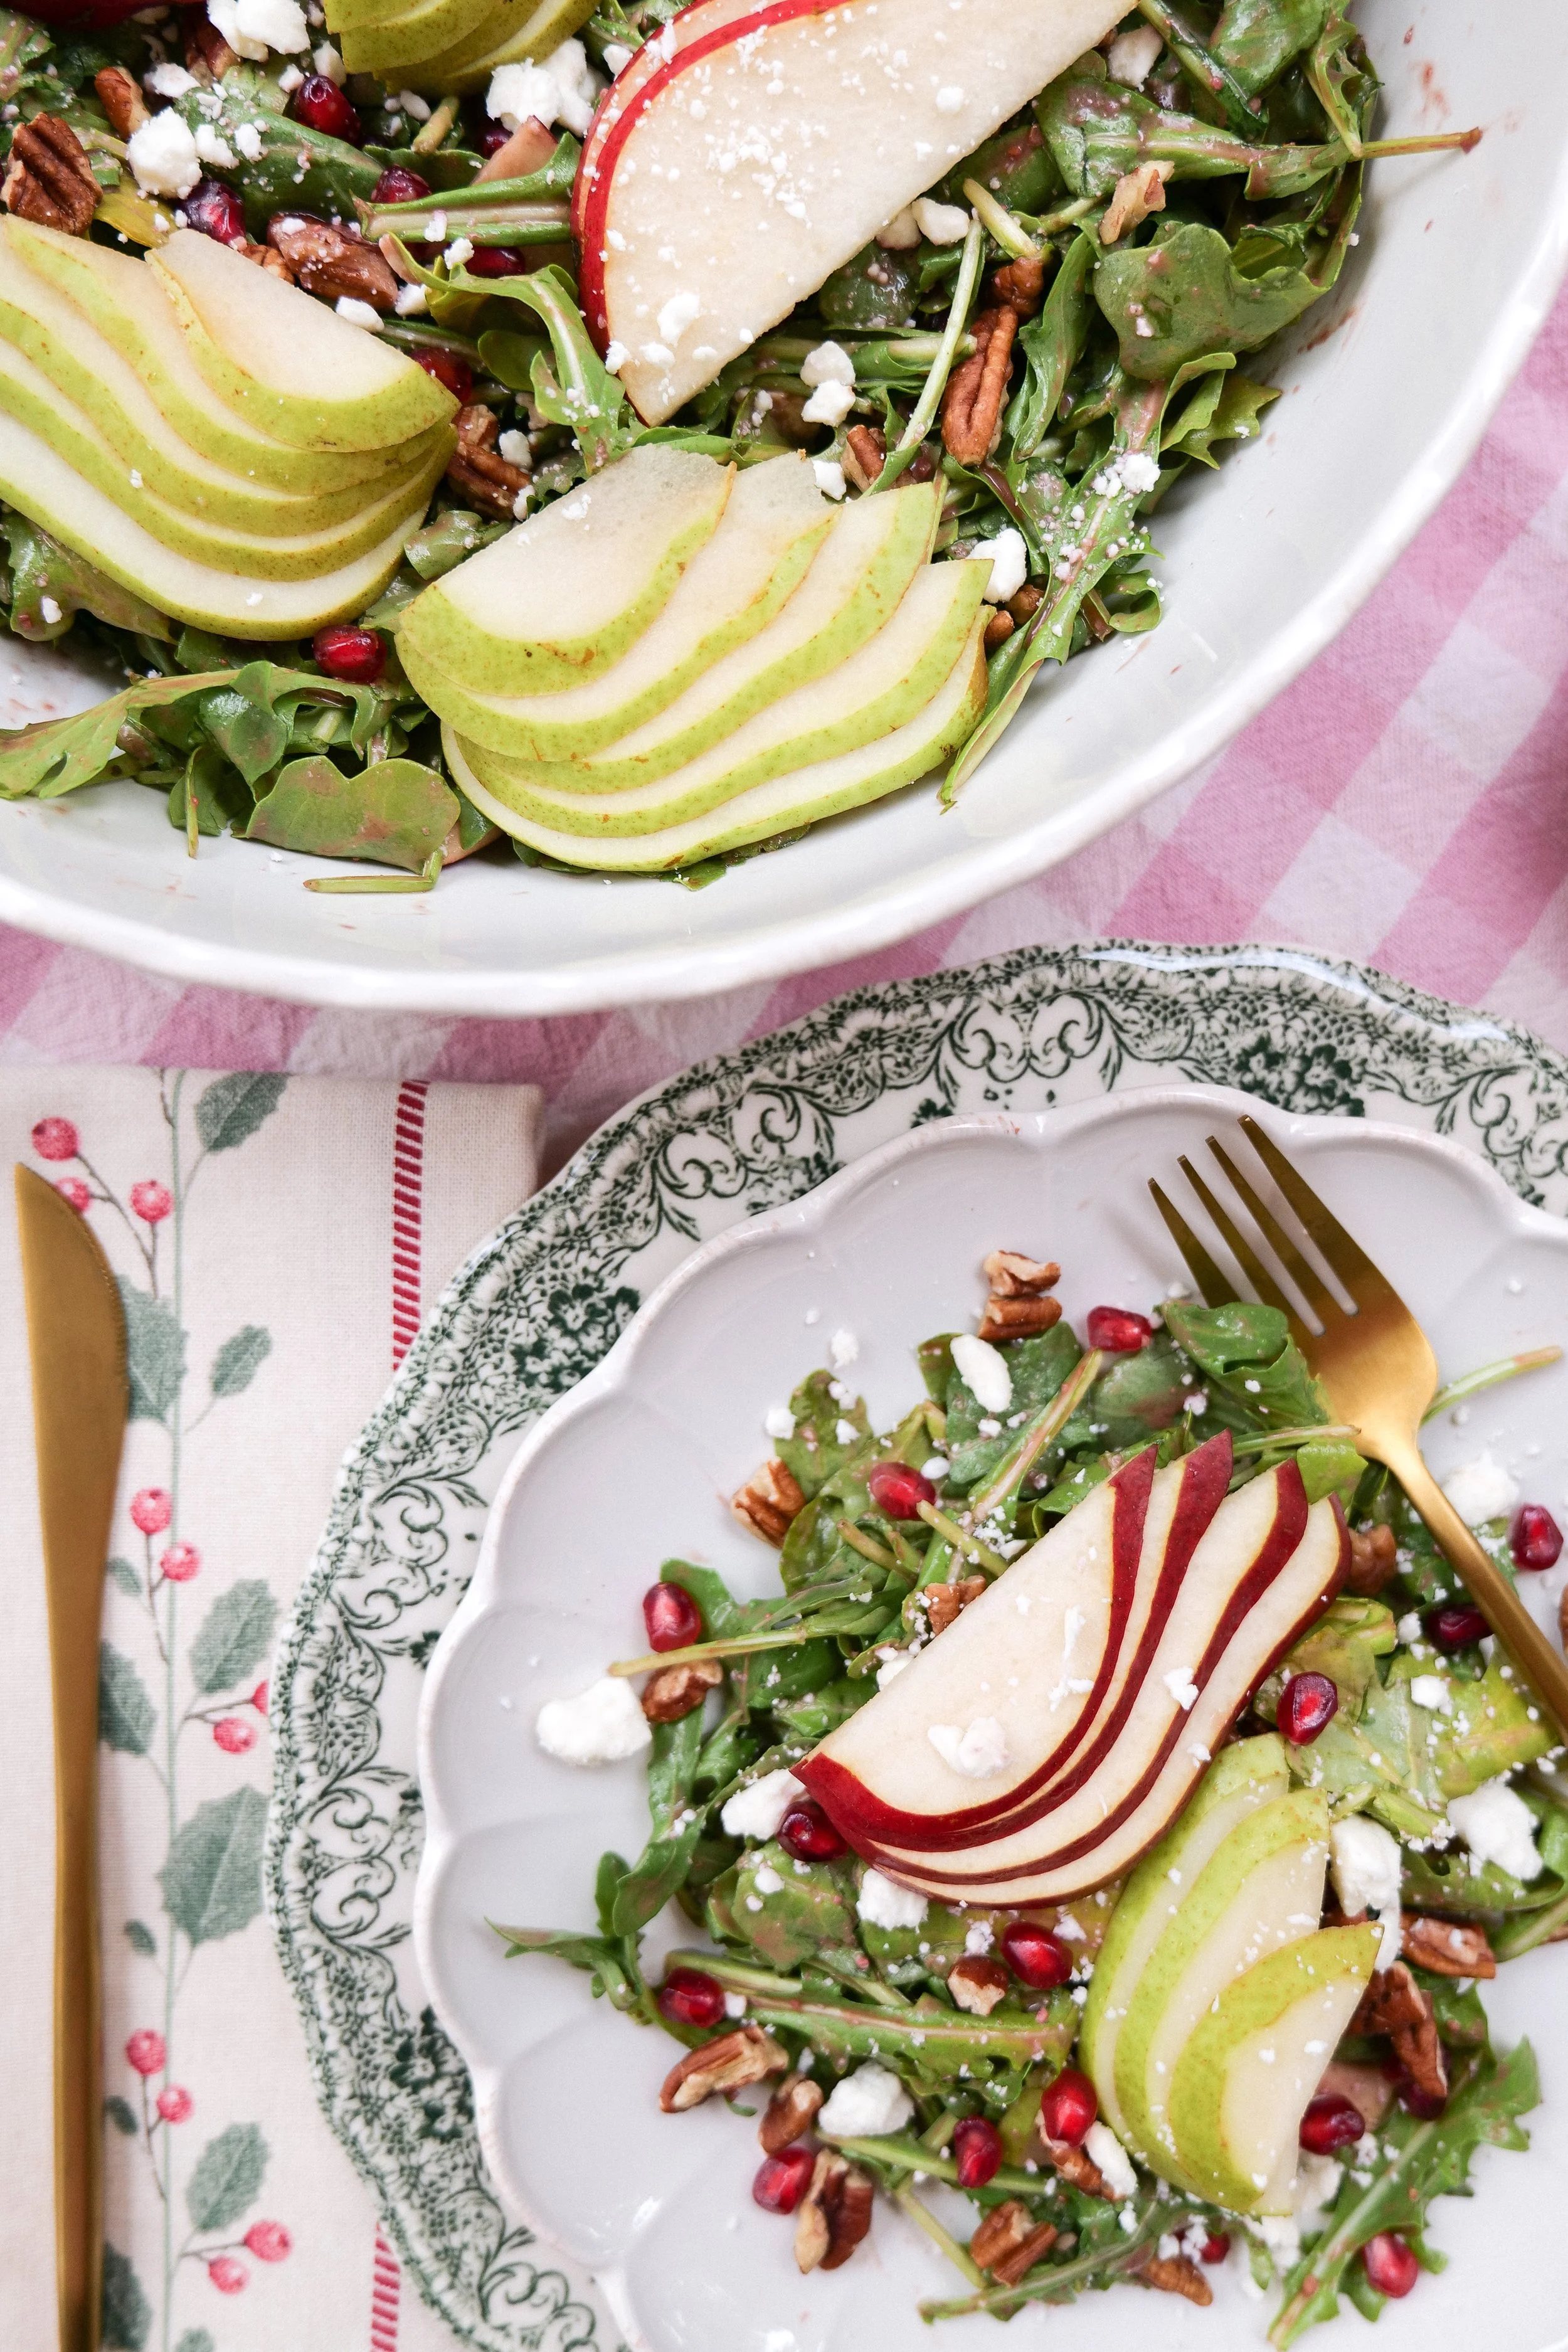
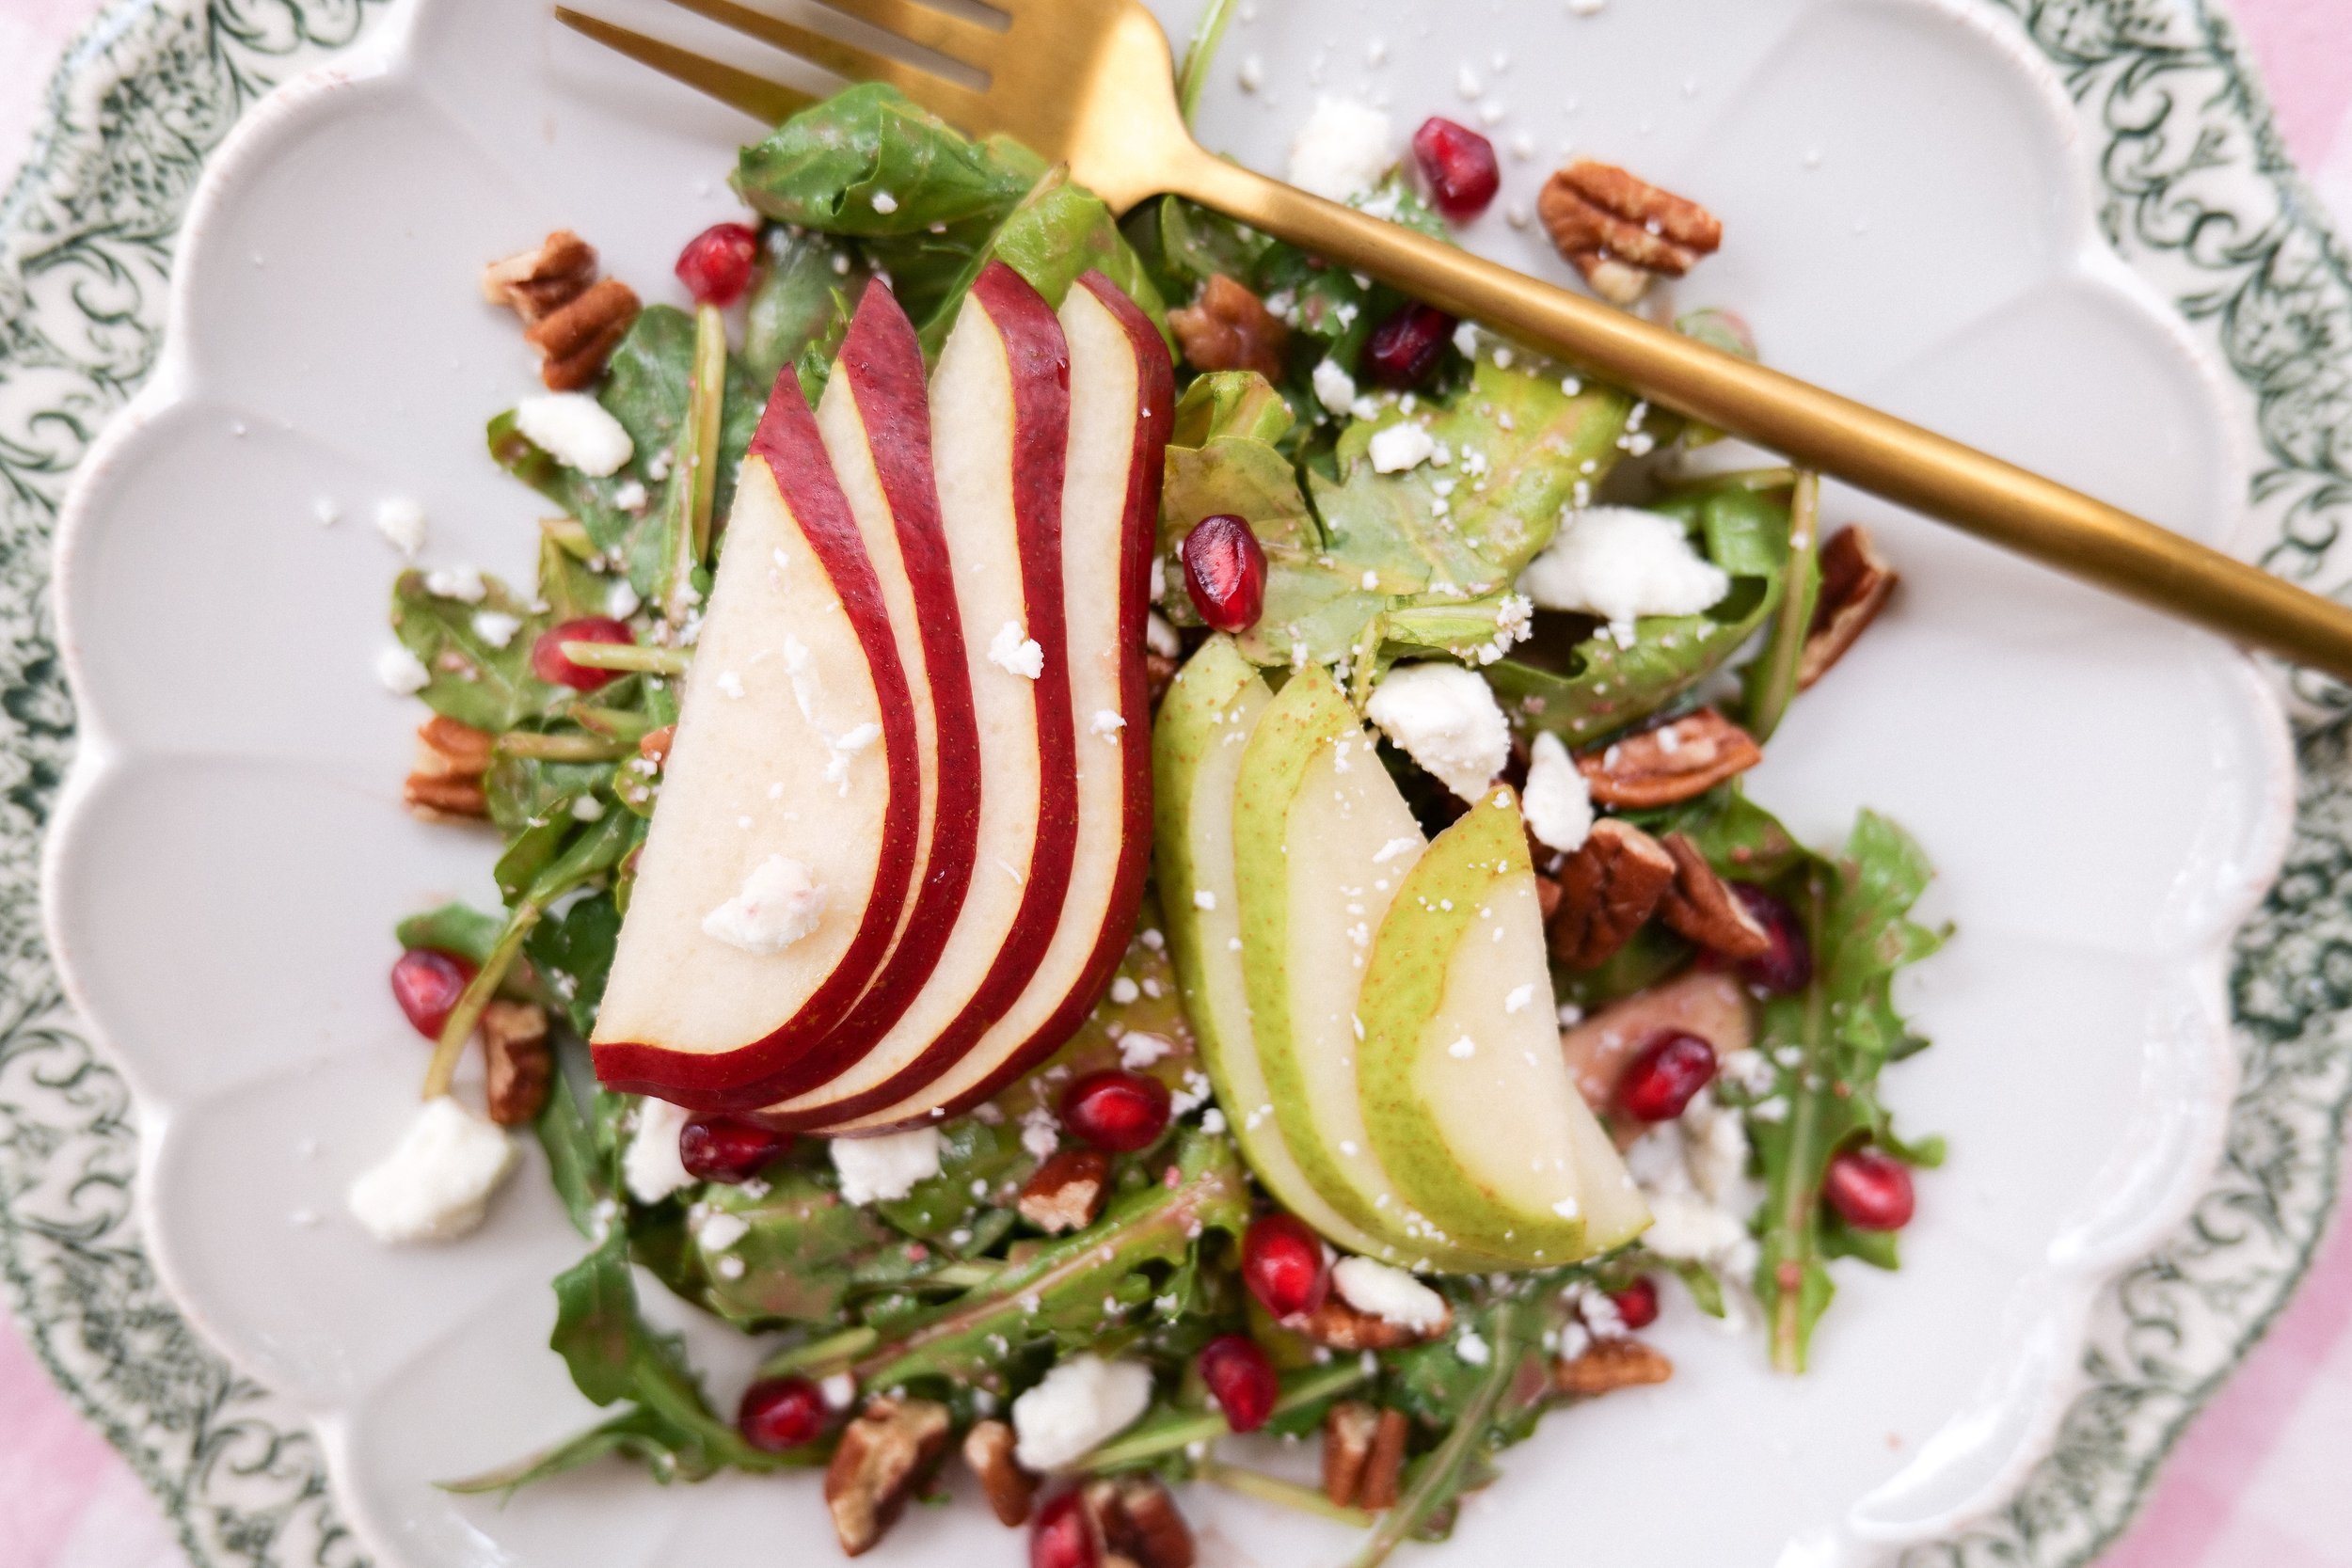
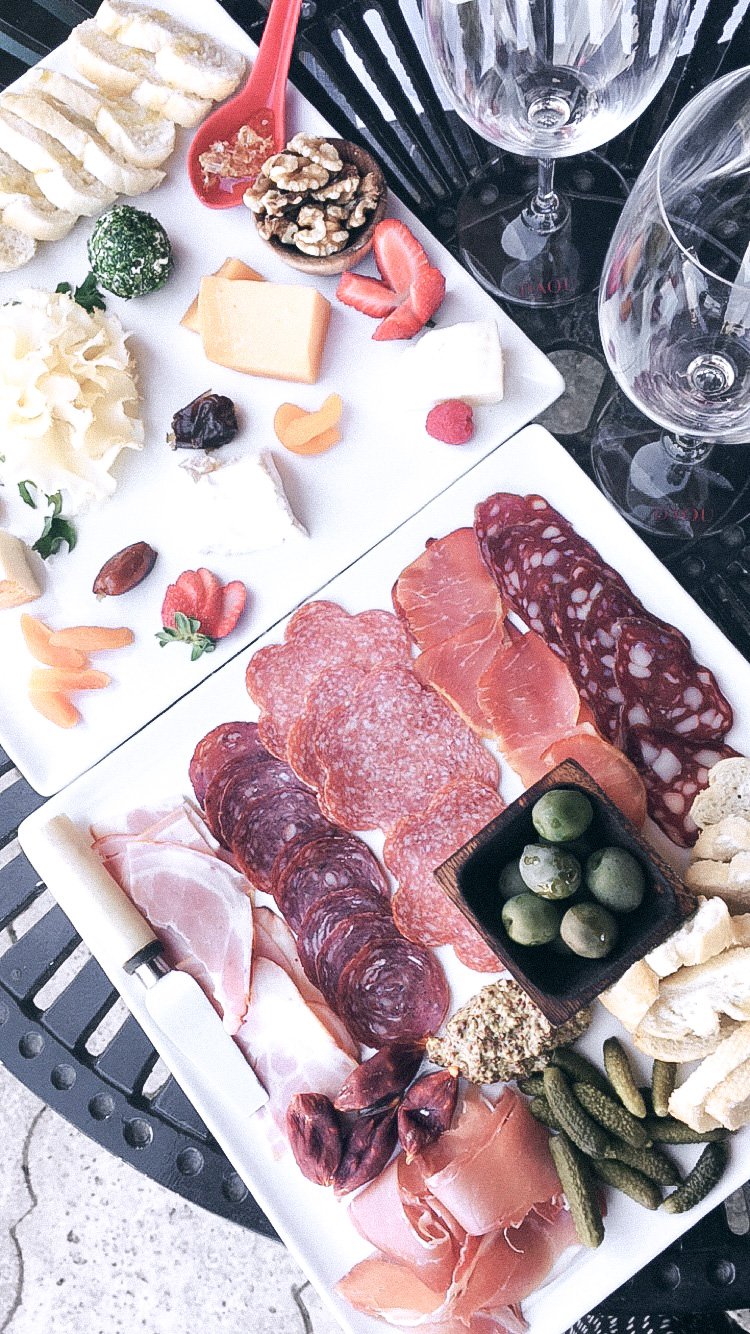
Start with a large round platter lined with arugula or green lettuce. Then layer the cured meats, such as salami, prosciutto, and soppressata, and top off the wreath with a variety of cheeses, olives, sundried tomatoes, artichokes, and roasted red peppers. For a festive look, add fresh herbs and edible flowers. Include a few different types of crackers on the side and a bowl of olive oil and balsamic vinegar for dipping. Enjoy the traditional flavors of Italy without leaving your home with this tasty and convenient dish. No cooking necessary - just assemble the ingredients and you're set! Your guests will be delighted by the unique presentation and delicious flavors of this antipasto Christmas wreath. This is a great way to provide an elegant and tasty centerpiece that will impress your guests this holiday season. To complete the experience, serve the wreath with a festive holiday cocktail. Your guests will love it! With a little bit of effort, you can create a beautiful and delicious antipasto Christmas wreath that will be the highlight of your holiday gathering.

Other Appetizers To Serve On The Side Of The Antipasto Wreath

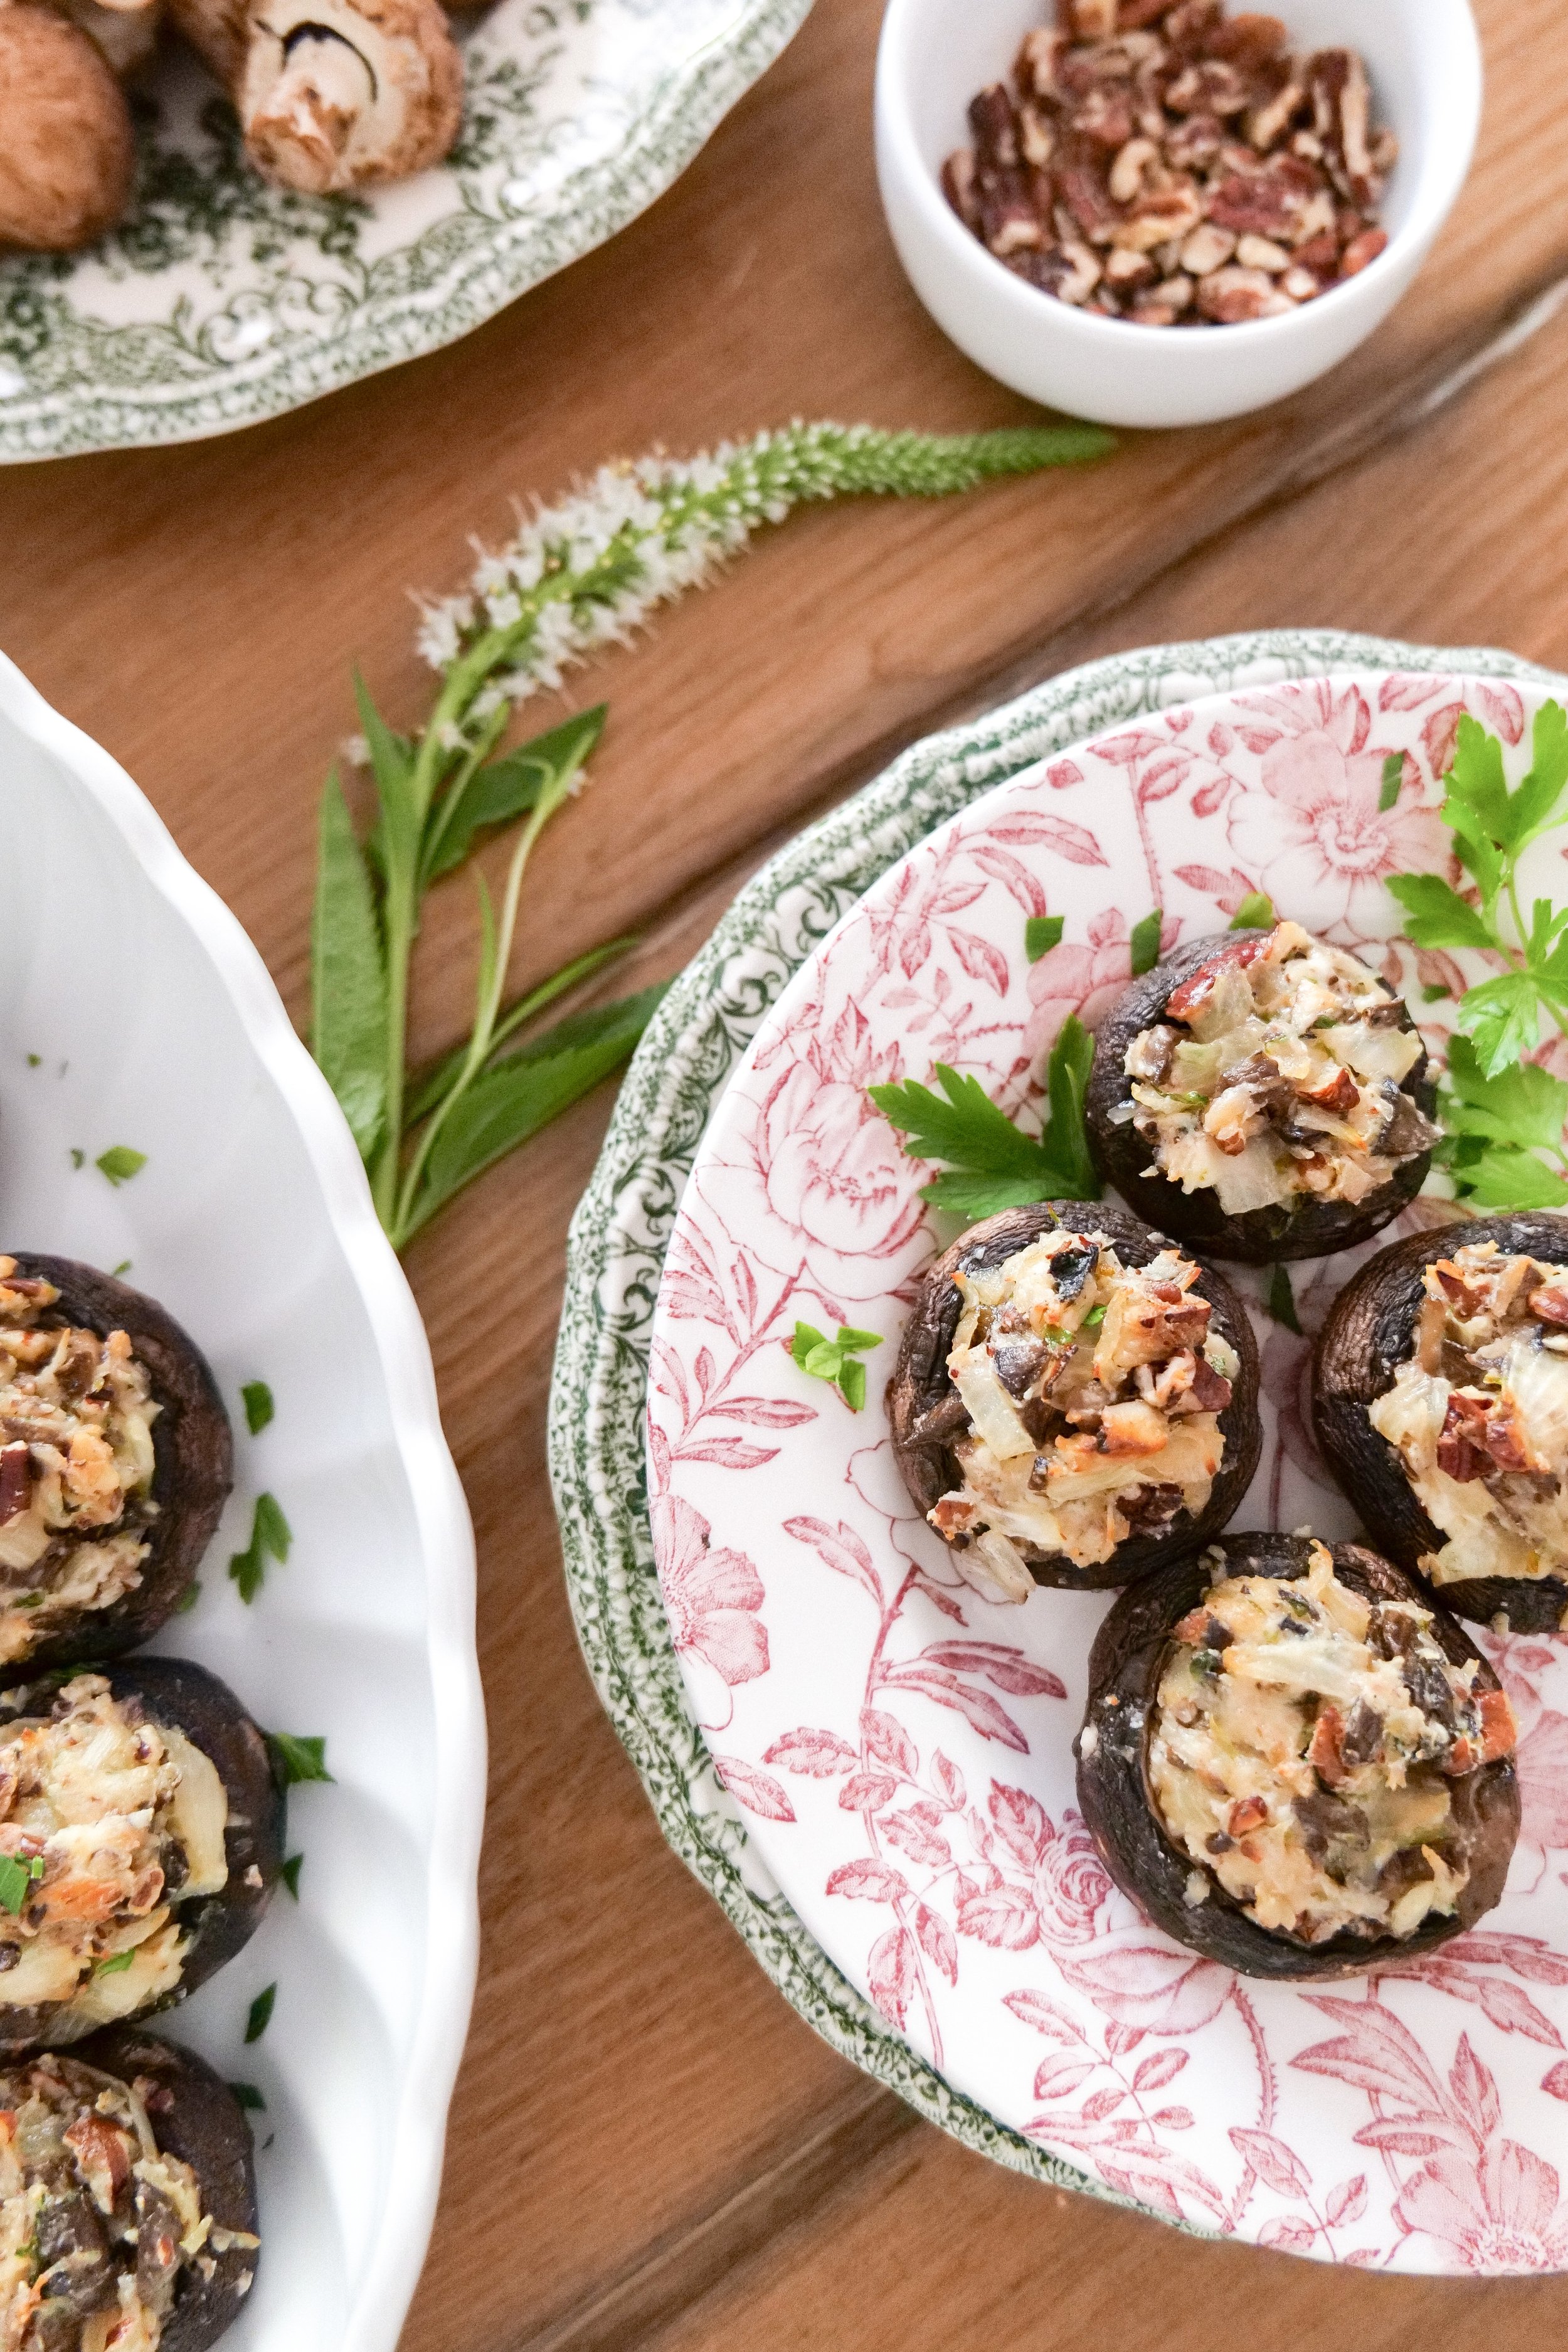
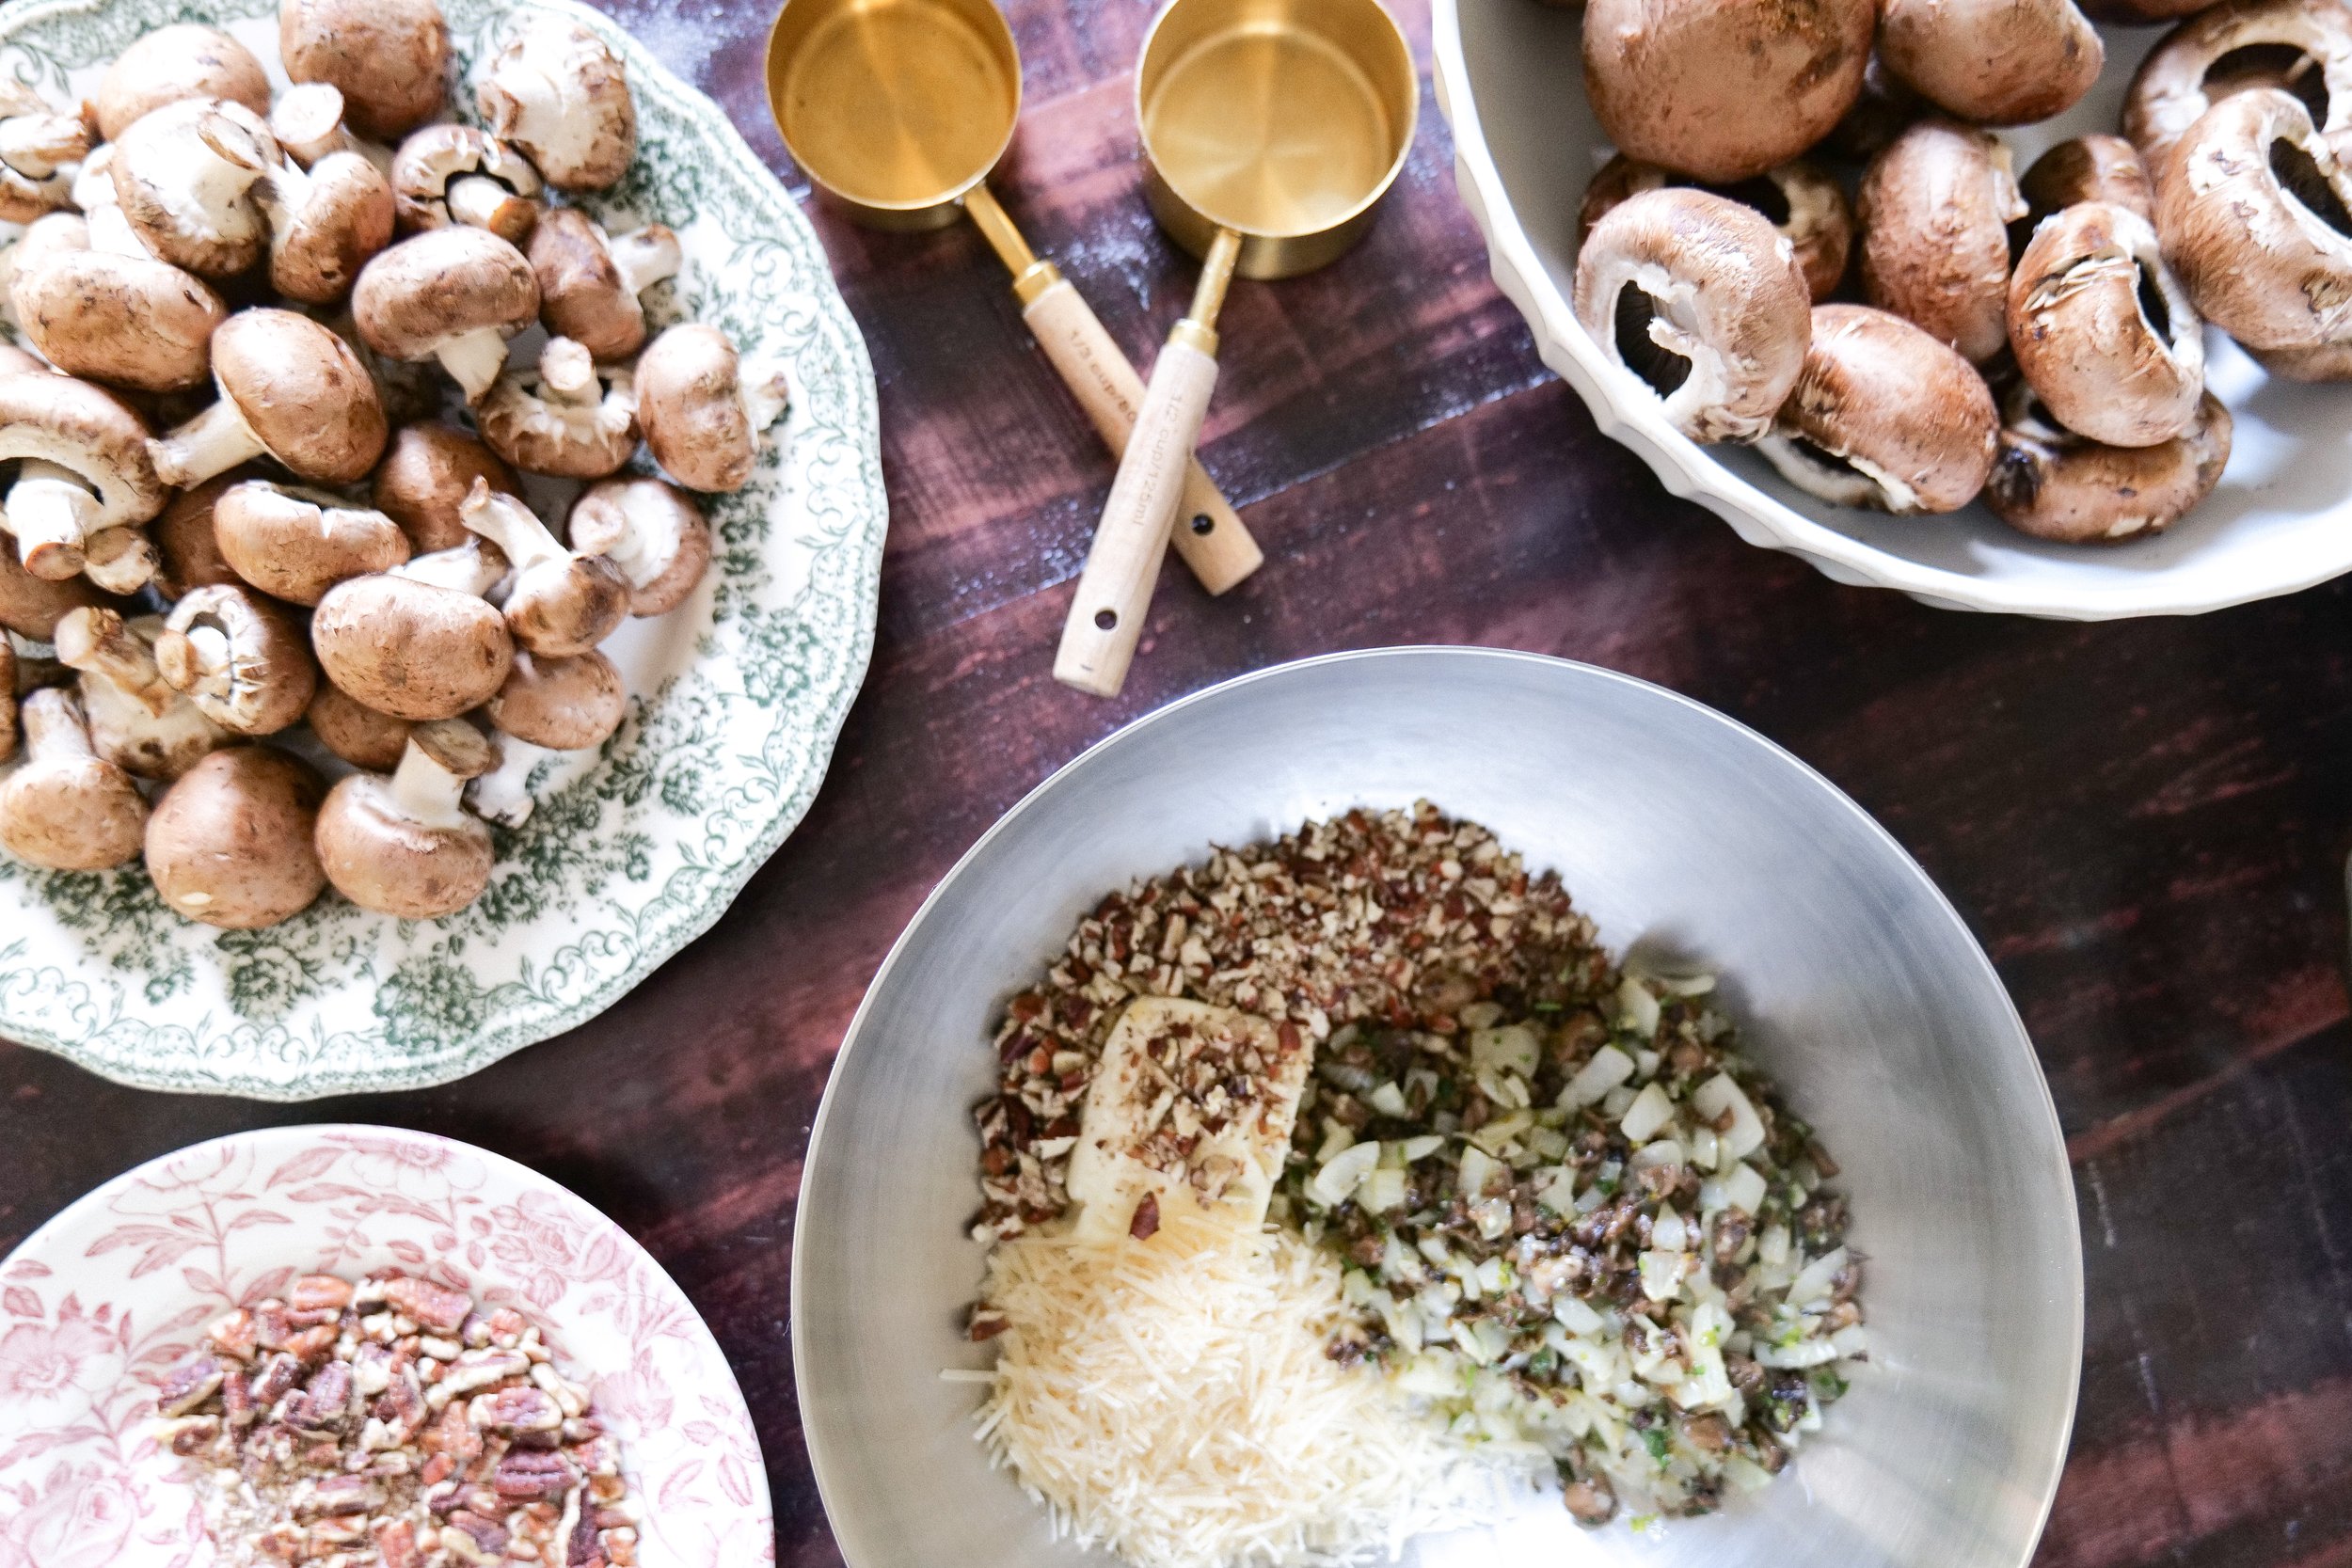
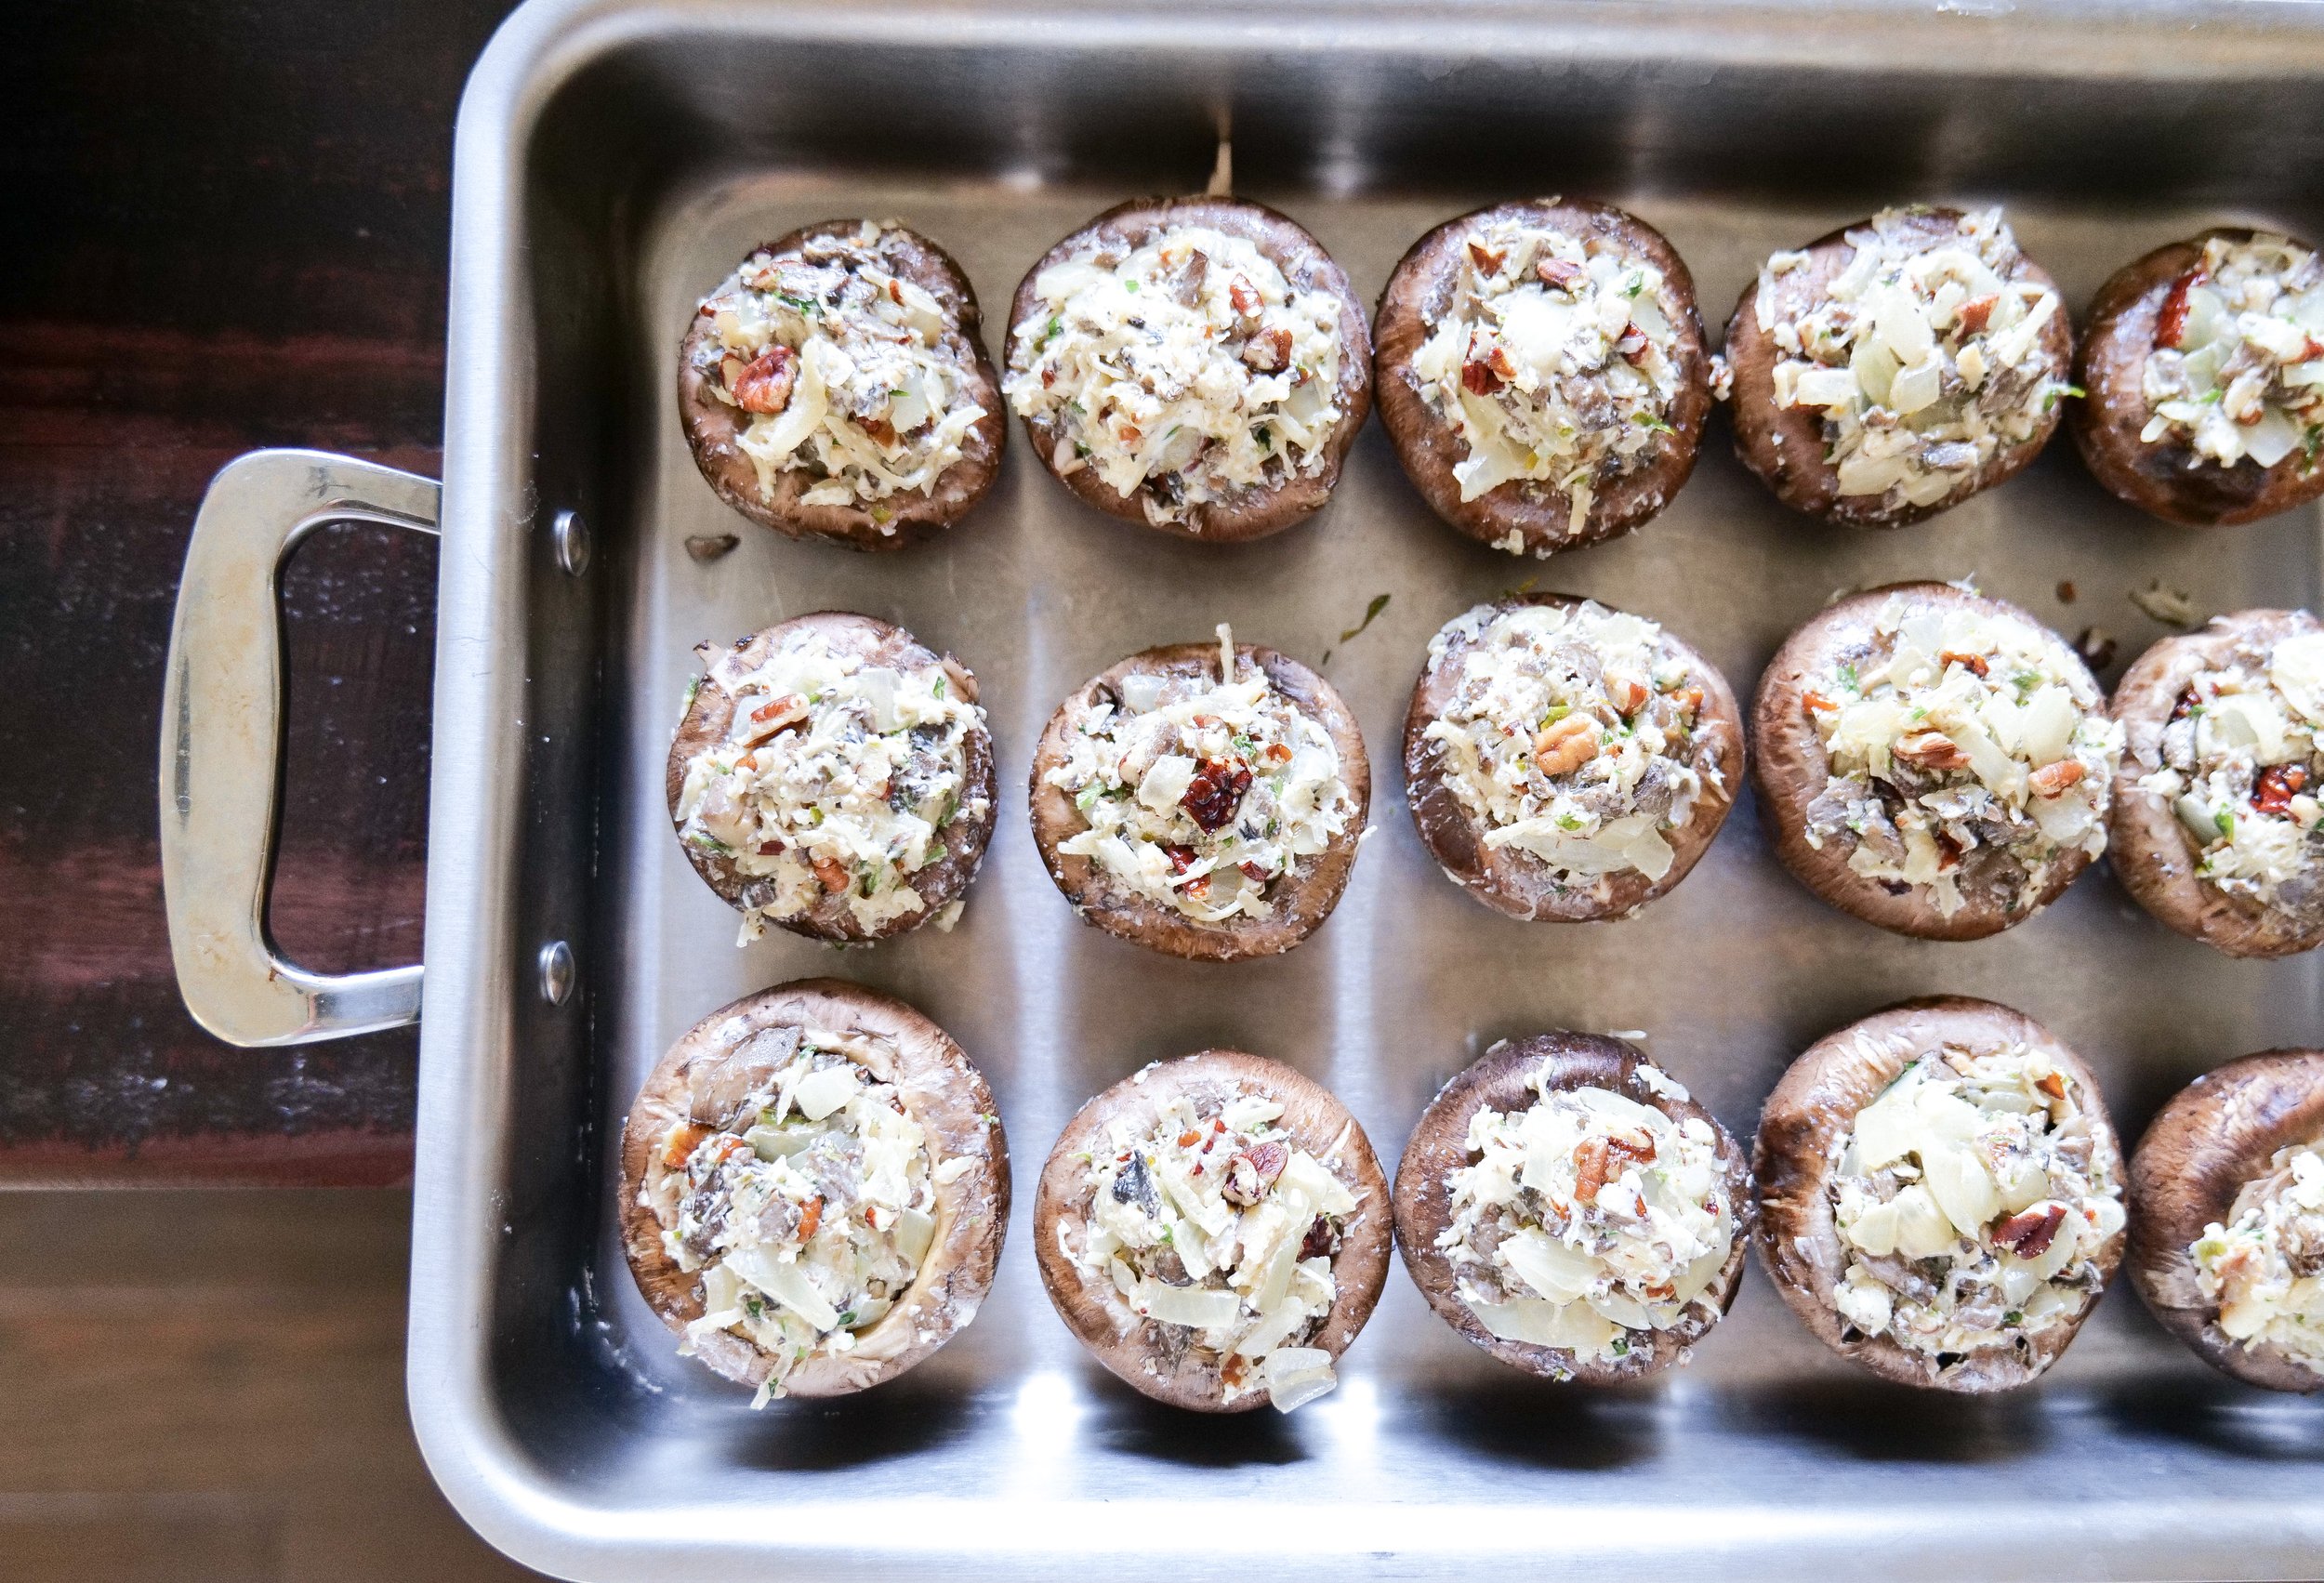
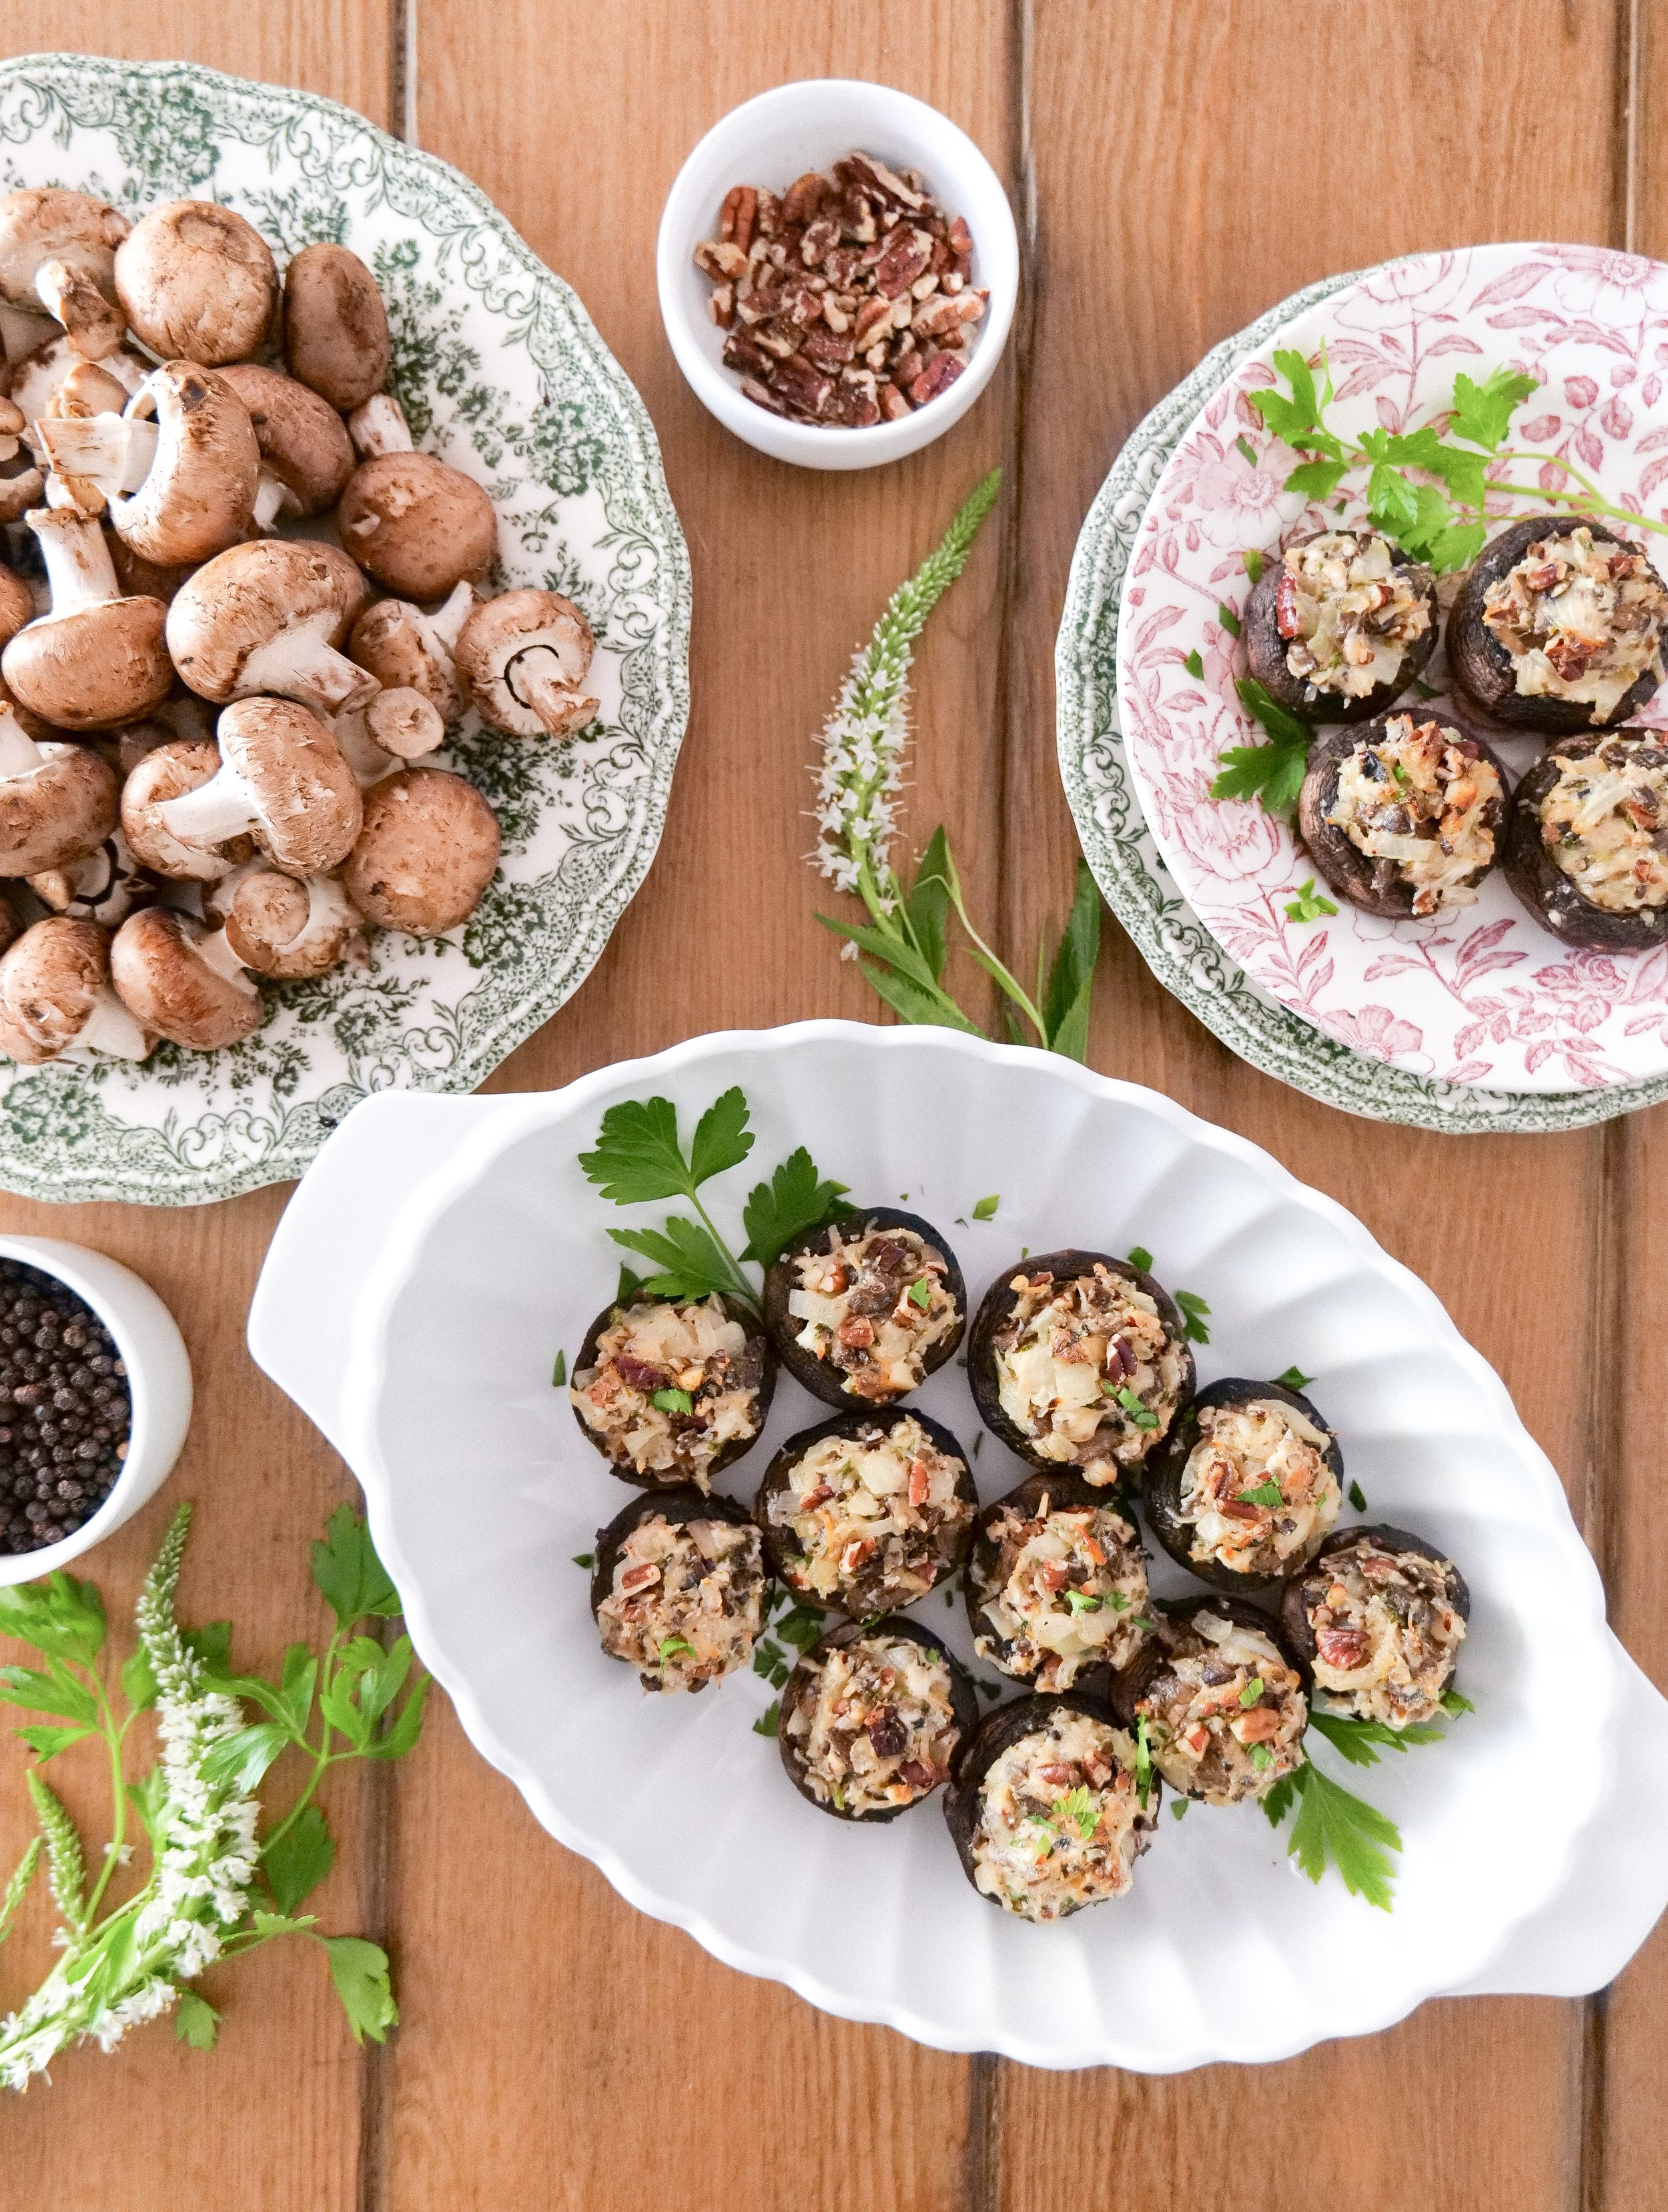
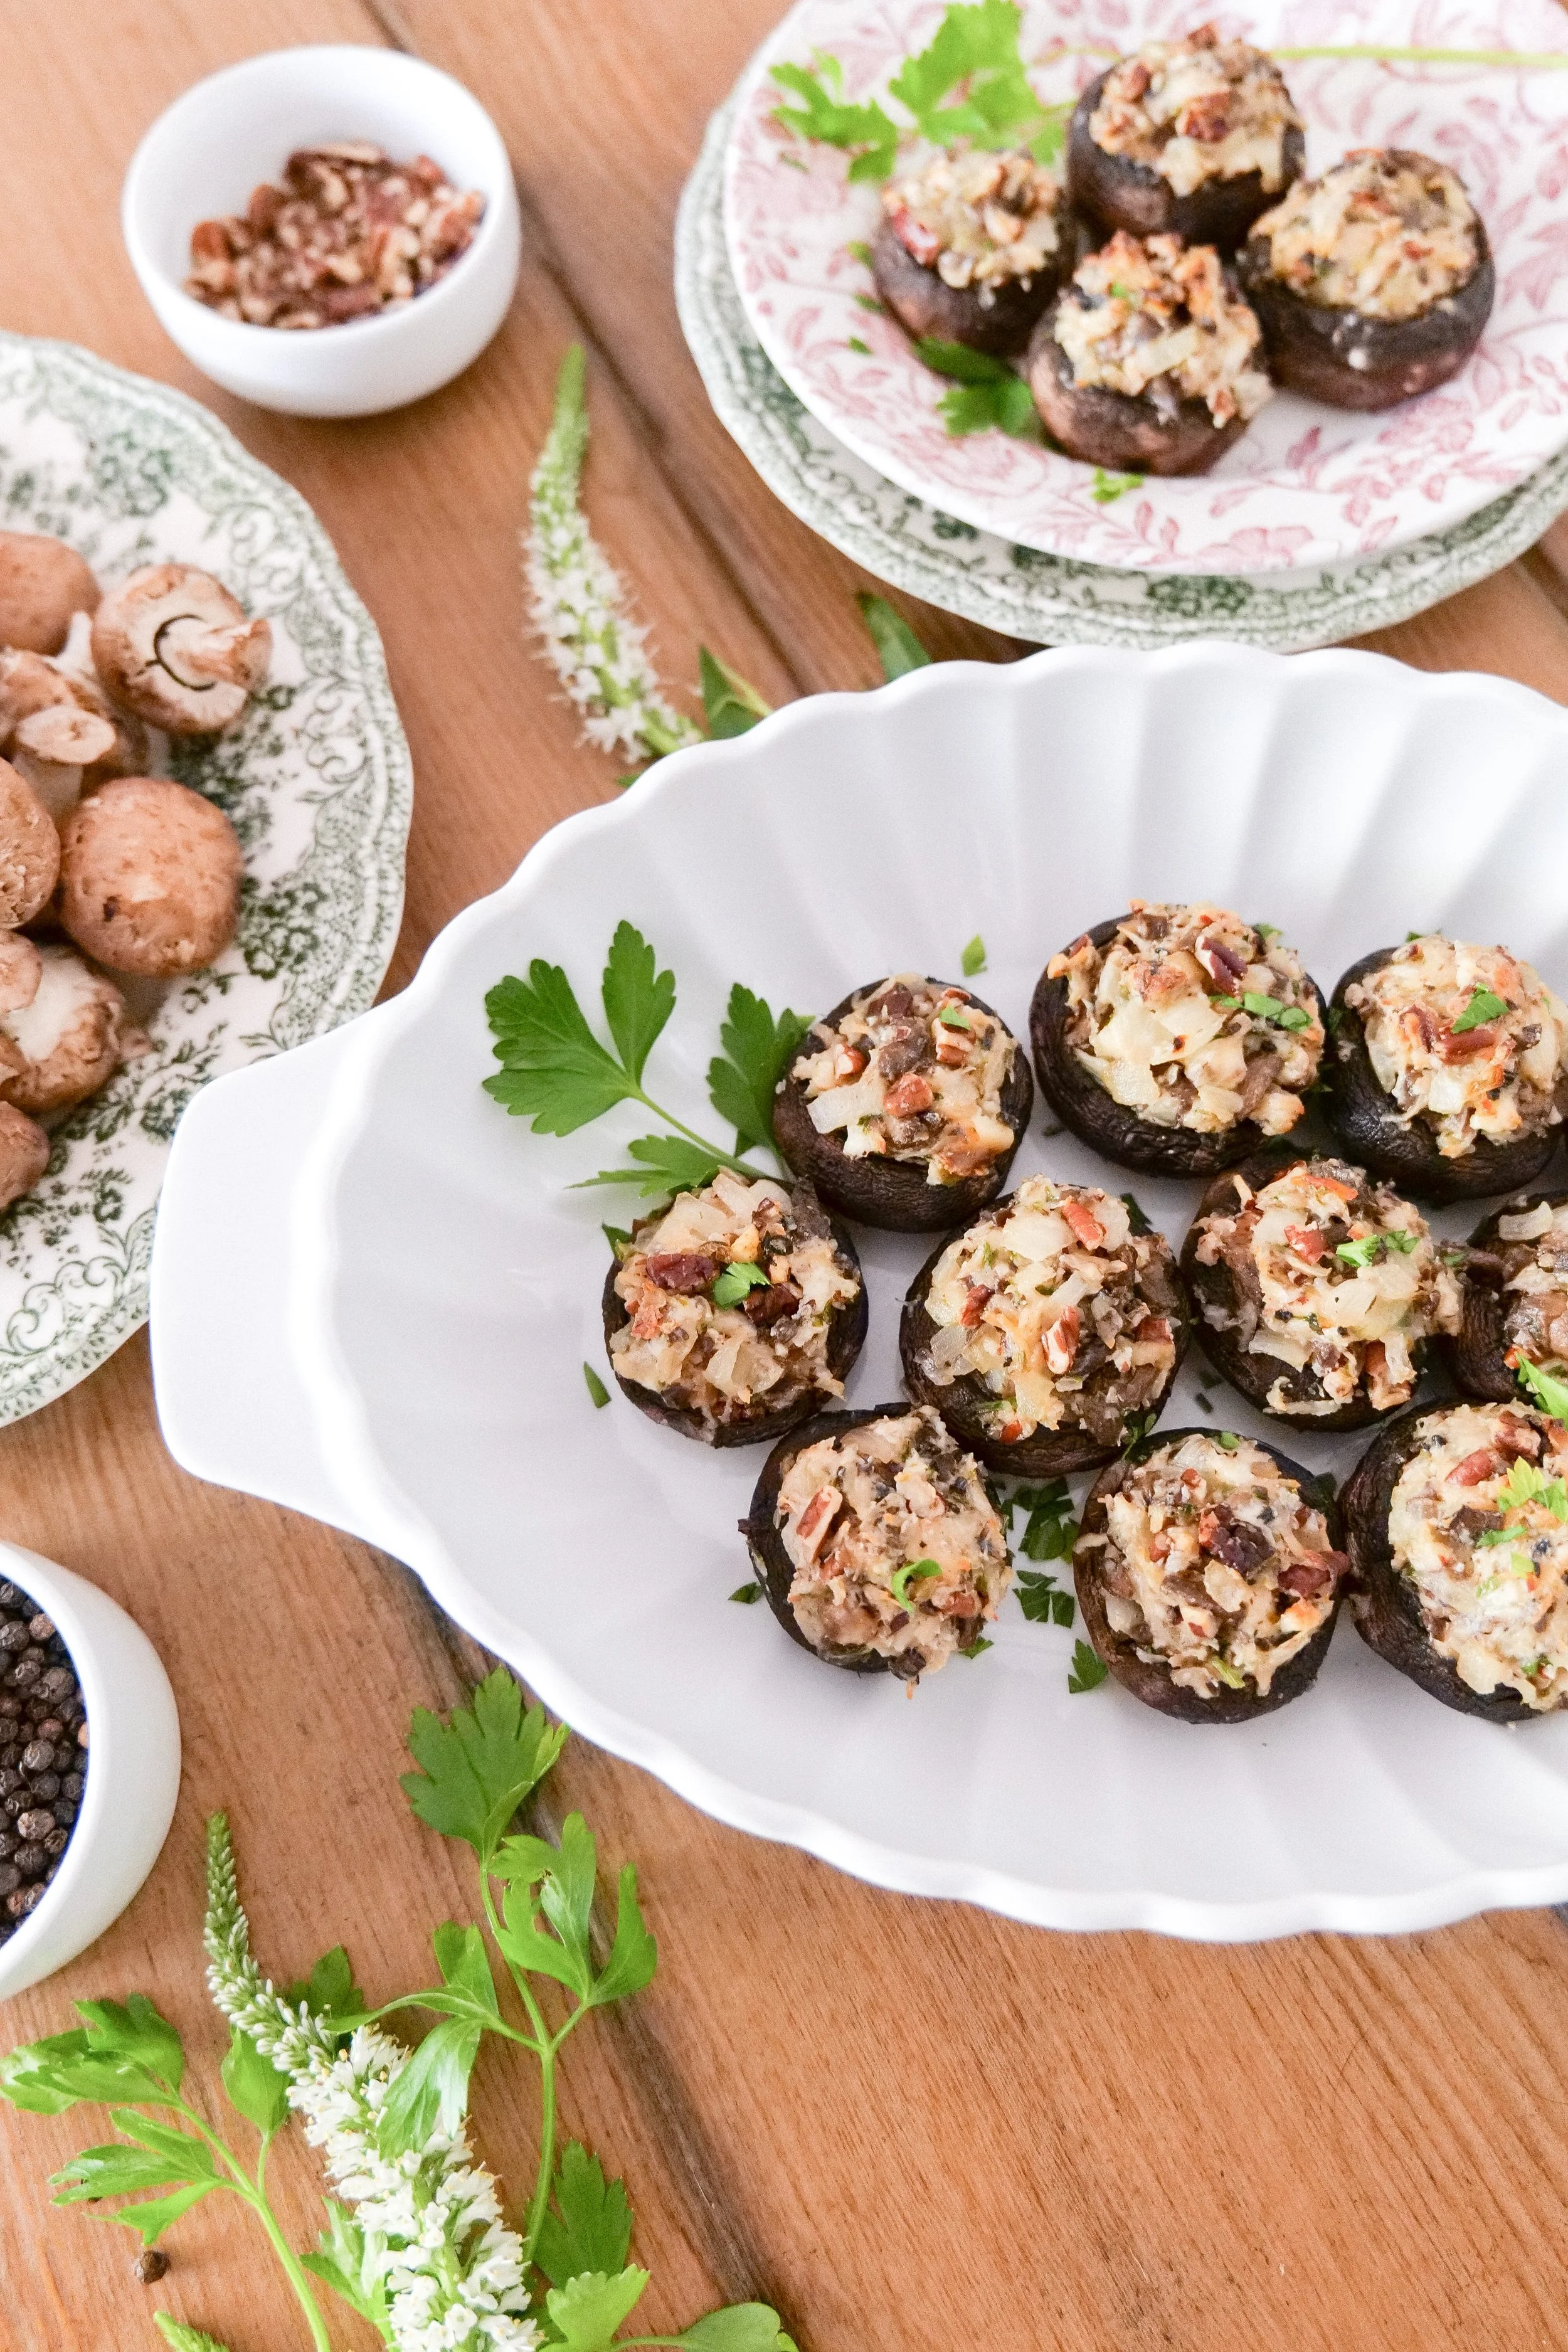
For an appetizer that won't take too much time to prepare, pesto crostini is a great choice. Simply spread pesto on a toasted baguette, top with slices of fresh tomato and you will have a delicious and easy appetizer that is sure to please any crowd. Bruschetta is another classic Italian appetizer that is perfect for a holiday gathering. Fresh tomatoes, basil, and garlic make the perfect topping for a toasted baguette. Stuffed mushrooms are also a great appetizer for your holiday party. Filled with a flavorful mix of herbs, cheese, and breadcrumbs, these mushrooms are sure to be a crowd-pleaser. Finally, antipasto skewers are a colorful and easy way to add some pizzazz to your antipasto Christmas wreath. Olives, artichokes, salami, and other delicious ingredients will make for a great presentation and a tasty treat. Delight your guests with all of these great choices, especially the Antipasto Christmas Wreath this holiday season. With a variety of options to choose from, whatever you prepare is sure to be a hit!

Holiday Antipasto Wreath Ingredients

4 oz salami salami

4 oz pepperoni

4 oz prosciutto

4 oz mortadella

1 pint cherry tomatoes

1 cup blue cheese stuffed olives or similar

8 oz favorite cubed cheese

8 oz Cherry sized mozzarella balls

Mezzetta Basil pesto

Olive oil

Fresh Basil

Arugula or other lettuce to lay down on a plate

Instructions

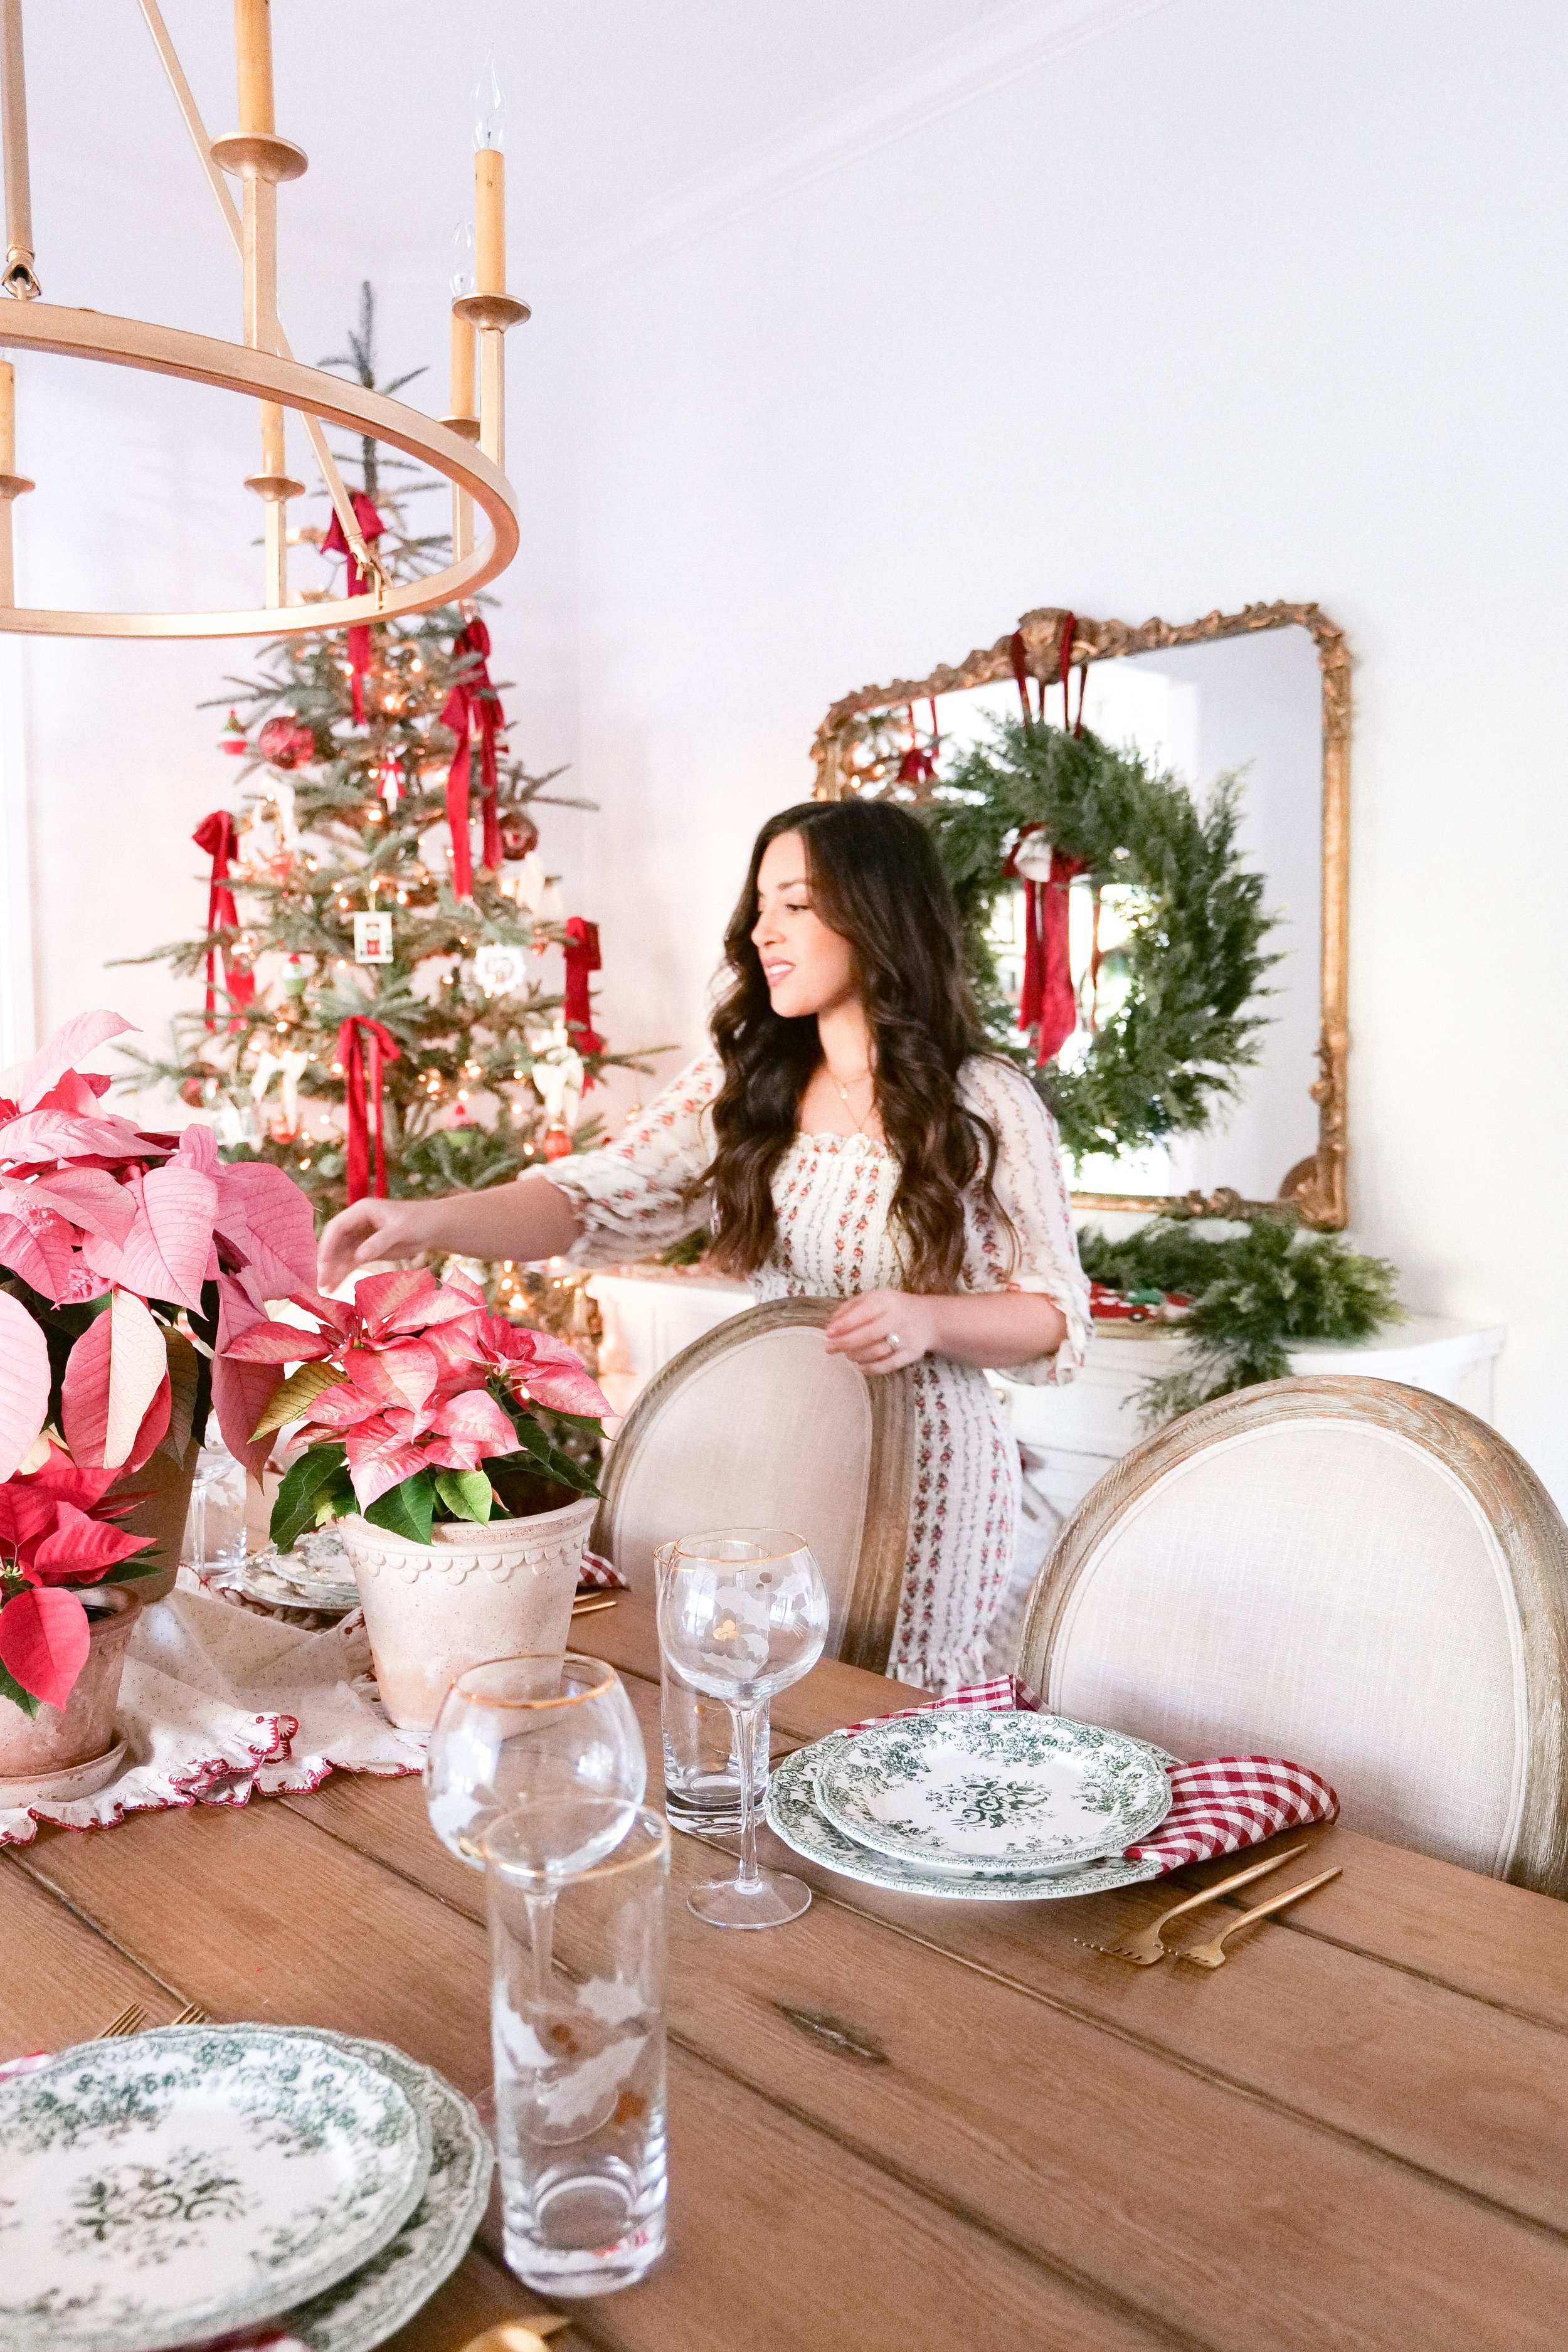
1. Layer arugula or other lettuce on your round plate of choice. I used a white dish to let the colors of the food stand out but feel free to add in holiday color and texture here also.

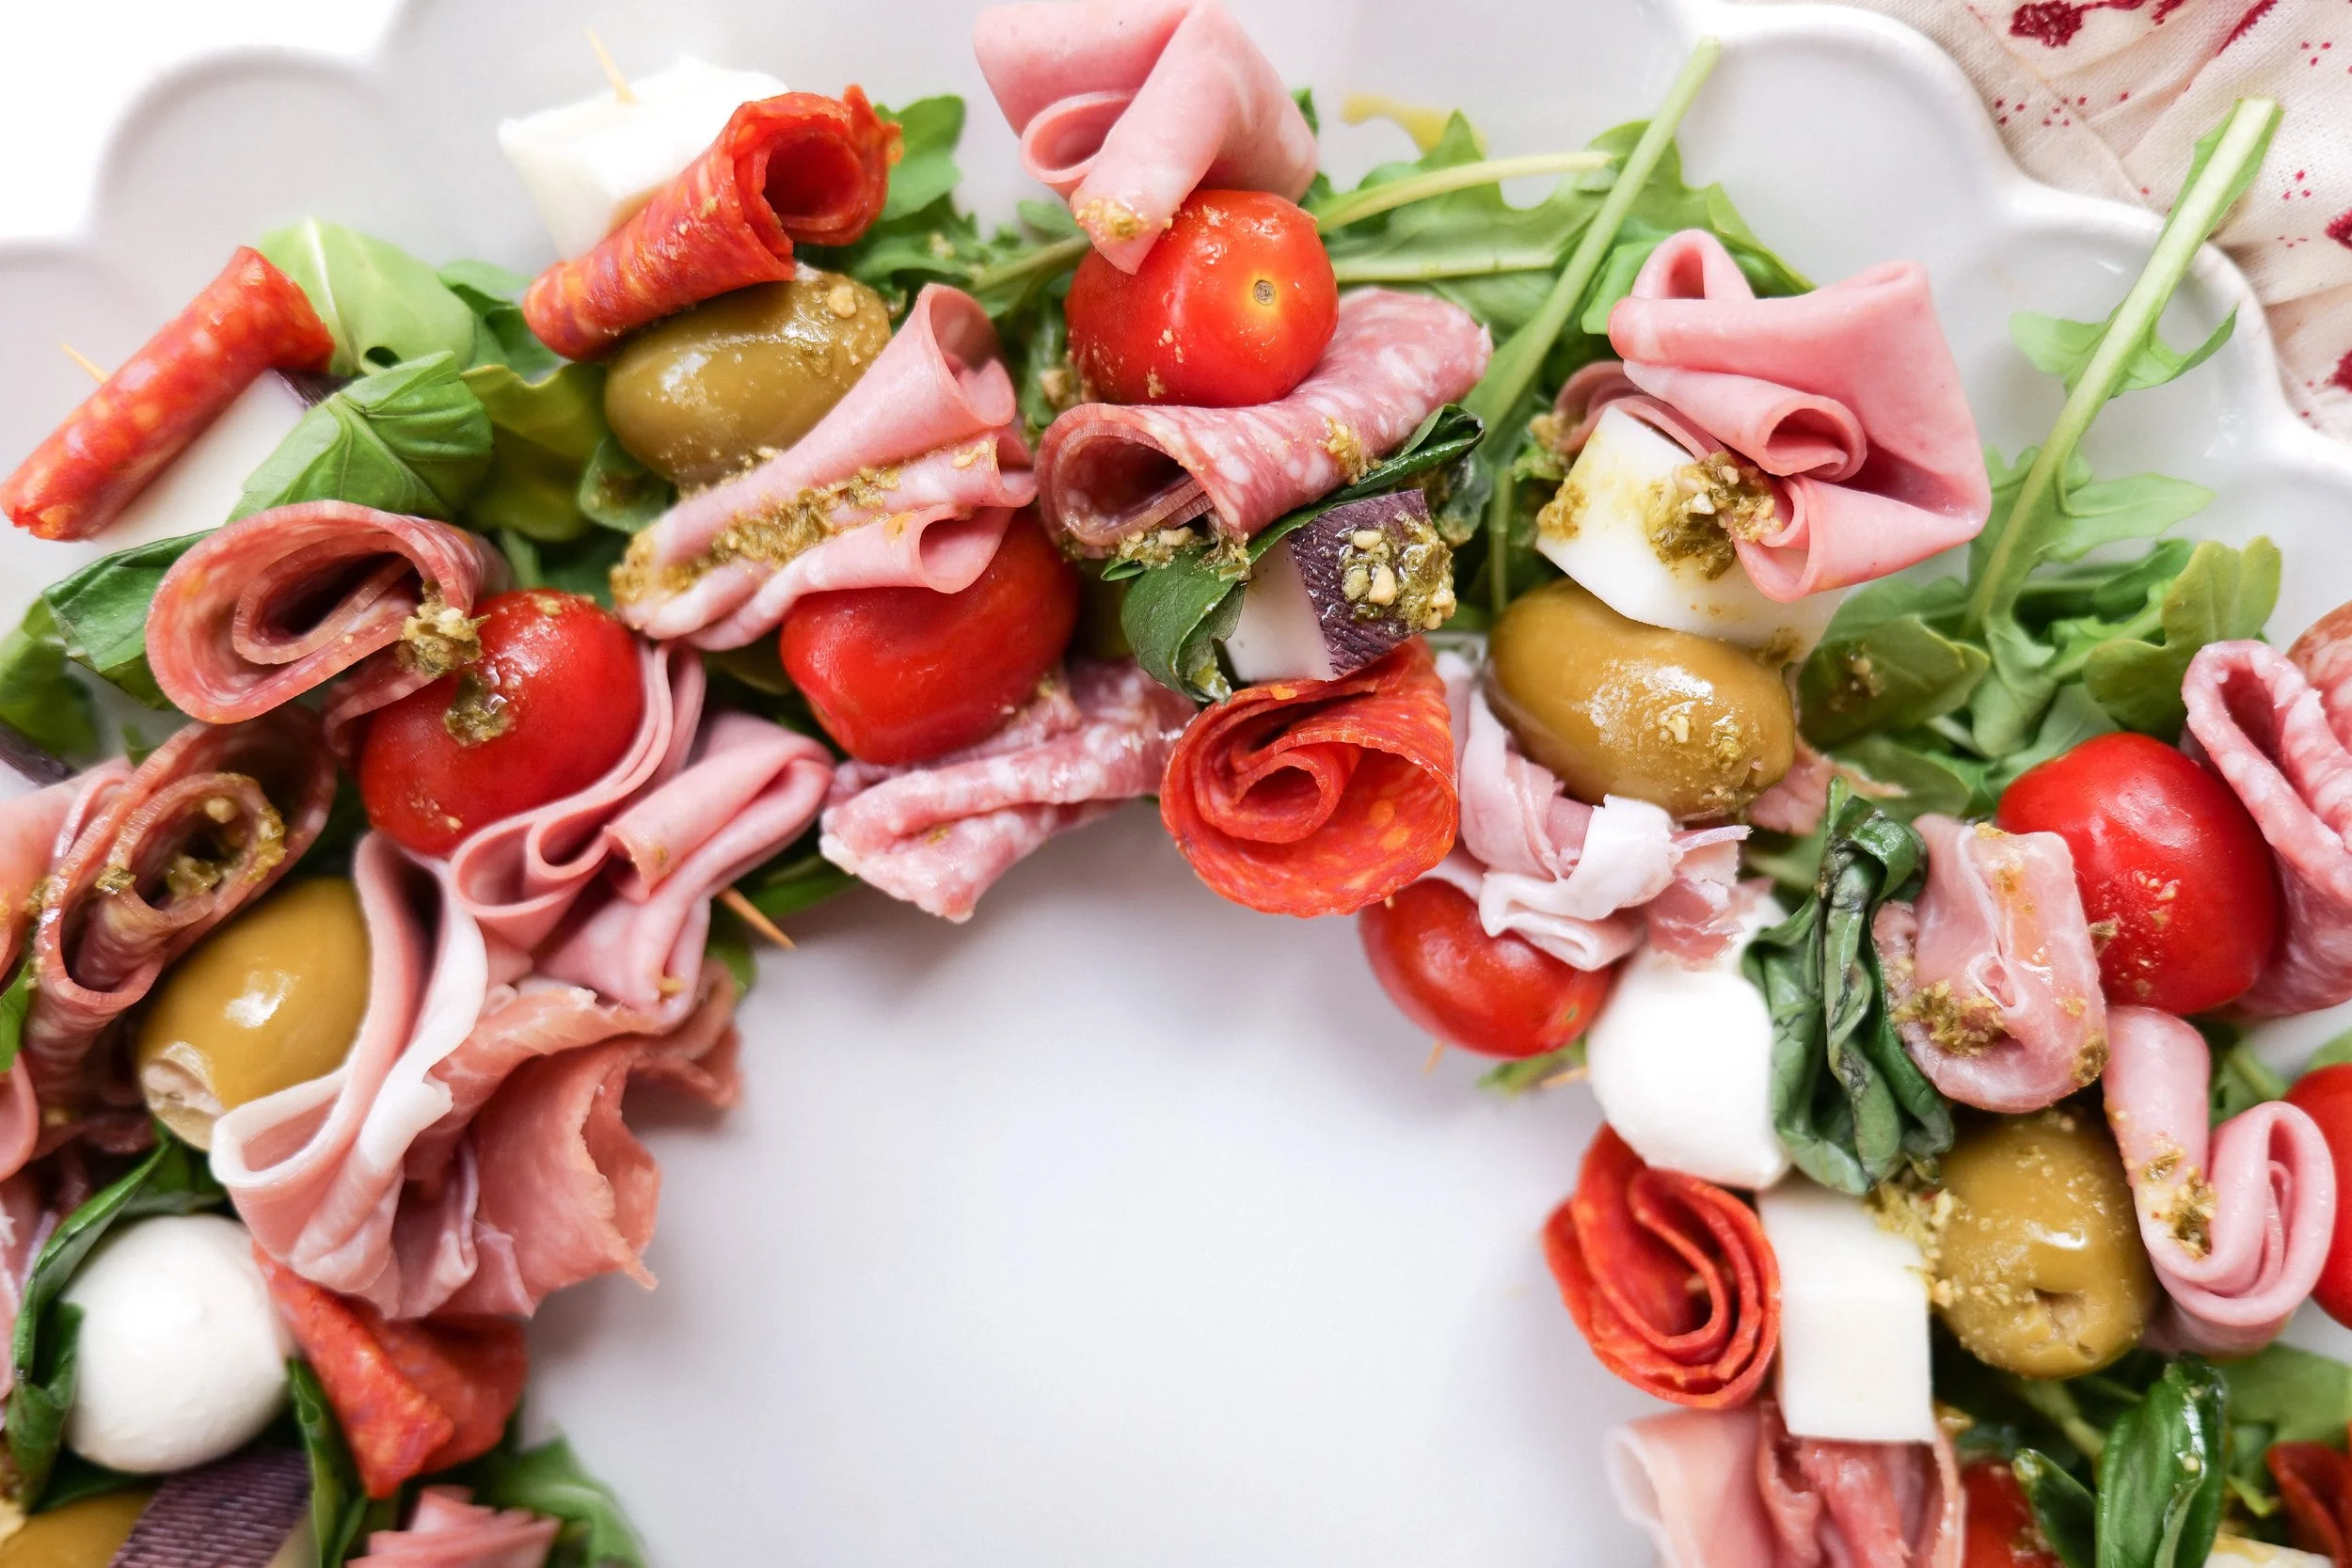
2. Lay out all of the ingredients so you can see everything you're using to assemble the antipasto skewers. Grab your skewer and start layering your meats, cheeses, veggies, and herbs! I change it up for each one so if a guest doesn't like one thing on one they can grab another. However, if you like to have more symmetry and keep it simple, then of course make them all the same. I also try to not put the same colors next to each other. So, meats and cherry tomatoes wouldn't go by each other but instead you can add olives, marinated artichokes, and mozzarella balls to add variety and color.

Now that you assembled the skewers and layered them in a wreath pattern you're ready to layer with a light sauce to make it extra delicious! I personally love the pesto & olive oil sauce I make but they give delicious combination variations to this dish. (another option if you are making for a big party is to add all 3 sauces on the side for the guests to pick whatever one they would like!).

3. Mix together the Mezzetta basil pesto and olive oil to your consistency. I add roughly 3 tablespoons. Stir and sprinkle over the antipasto skewers.

4. You can make this ahead of time and leave in the refrigerator in an airtight container and bring it out right before the guests arrive. I hope you ENJOY this recipe and that it gave you lots of inspiration for your holiday appetizers!

Other great recipes to try this holiday season:

A Crowd-Pleasing Stuffed Mushroom Recipe

How to Make the Perfect Pear and Pomegranate Arugula Salad

Slow Cooker Hot Cocoa Bar Station

Chocolate Peanut Butter Brownies

Perfect Pairings: Savor the Flavor with Our Ultimate Steak and Feta Crostini Recipe!

Festive Flavors Unveiled: Crafting a Herb Christmas Tree Focaccia Bread Masterpiece for the Holidays

Indulge Your Taste Buds with The Ultimate Raspberry Pistachio Cheesecake Recipe

A Crowd-Pleasing Stuffed Mushroom Recipe

If you're looking for an easy, crowd pleasing, finger grab appetizer, then look no further than this delicious stuffed mushroom recipe. This appetizer is the perfect start to any Christmas meal, but also just as fitting any time of the year! They are quick and easy to prepare, and sure to be a hit at your next gathering. This tasty dish is packed with flavor, thanks to a combination of creamy cheese, savory herbs, and my secret ingredient...chopped pecans. These are a great way to add some gourmet flair to your next gathering, and to be food friendly to most all types of guests. They are keto and vegetarian, making an incredibly versatile dish to bring to any holiday event. If you don't have anyone coming to your party that is vegetarian, and you want to add some delicious meat, my favorite to add in is Italian sausage for a great and hearty taste. Read on to discover the recipe and how to make these tasty stuffed mushrooms.


My Crowd pleasing stuffed mushroom recipe

Ingredients

15 large baby bell or portobello mushrooms

3 tablespoons butter

2 garlic cloves

1 small yellow onion

1 teaspoon sea salt or kosher salt

1/2 teaspoon black pepper

4 oz cream cheese

1/2 cup grated Parmesan cheese

1/3 cup chopped pecans

3 tablespoons fresh parsley

Instructions

  1. Preheat oven to 400 degrees.

  2. De-stem mushrooms, set aside tops and chop stems.

  3. Take a sauté pan and heat adding butter and chopped mushroom stems. Sauté for 3-5 minutes. Add in chopped onion, garlic cloves, salt and pepper. Cooking until onion is soft and opaque.

  4. Add stove top mixture to softened cream cheese, Parmesan and chopped pecans. Mix until well combined and fill mushroom tops!

  5. Add into a casserole pan (or my personal favorite from 360 cookware the 9 by 13 bake & roast pan) and bake in oven for 20-25 min.

  6. Sprinkle fresh parsley and serve!

For 20% off all 360 cookware use code AMANDAWARREN20

More Appetizer Recipes

Fruit & Goat Cheese Bruschetta

My Italian Seasoning Recipe

3 Easy Homemade Seasoning Recipes

How to Make the Perfect Pear and Pomegranate Arugula Salad

Looking for a unique and flavorful salad to serve at your next dinner party? Look no further than this Pear and Pomegranate Arugula Salad! The flavors come together so nicely with this salad from the sweetness of the pears and pomegranate seeds, complemented by the peppery arugula, and the bitterness of the feta cheese crumbles. You get a little bit of every delicious taste in your mouth. This salad is sure to impress your guests during this Christmas season and beyond! It's also a beautiful looking dish to bring to any gathering.

You can pair this with chicken for a wonderfully balanced combination, and it typically will serve 5-6 people if used as a main dish. Of course, if served as a side salad in addition to your delicious breakfast, brunch, lunch, or dinner you can serve as many people as you want. It's honestly good enough to enjoy any time of the day.

Ingredients

10 ounces of arugula salad

1/2 cup Pomegranate seeds

1/2 cup feta cheese ( goat cheese is also a delicious addition)

1 thinly sliced red pear

1 thinly sliced green pear

Ingredients For Dressing

1/2 cup pomegranate seeds

1/4 balsamic vinegar

1/2 cup raw honey

1/2 cup extra virgin olive oil

1/4 tsp salt

1/4 tsp pepper

Instructions

1. Rinse and pat dry all fruit and vegetables.

2. Add all dressing ingredients into blender and blend until smooth. I use fresh pomegranate seeds but pom pomegranates arils are great when in a hurry! This dressing can be premade in an airtight container in refrigerator up to 2 days ahead of time.

3. Now it's time to assemble the pear and pomegranate arugula salad. Add half the pomegranates seeds, half feta cheese, and half of both thinly sliced pears. Pour dressing over top and mix up! Then layer remainder of pears on top. Sprinkle feta cheese and pomegranates on top and serve!

I hope you enjoy this delicious salad recipe during Christmas season and all year around! For another favorite salad head to my Shaved Brussel Sprout Salad with Apples, Goat Cheese & Candied Pecans.

To Shop These plates head -here- holly napkins head -here-. For all other items shown here you can shop my LTK -here-

Quick & Easy Enchiladas using Happi Foodi

When life gets busy we all tend to grab quick and easy bites on the go. Usually those quick, easy bites aren’t the healthiest of choices! I love having Happi Foodi bowls and other delicious quick meals on hand that I can warm up when pressed for time. I also love adding a little extra something to their bowls at times to make it a whole new meal, but without the time consuming work! Today I’m going to share how I make the Happi Foodi enchilada bowl into enchiladas by using the bowl for the filling. So easy and delicious!

Ingredients:

1 box of Happi Foodi enchilada bowl

4-6 tortillas

1 can of green enchilada sauce

6-8oz cheese

Directions:

  1. Preheat oven to 375

  2. Layer bottom of pan with enchilada sauce

  3. Fill each tortilla with Happi Foodi enchilada bowl and roll. Lay into prepared dish of enchilada sauce.

  4. Layer the top with enchilada sauce again and cheese!

  5. Bake in oven for 20-25 min.

  6. Enjoy!

My Dining Room Decor For Christmas: How I Made My Dining Room Festive

It's that time of year again! Time to get out the Christmas decor and get your home ready for the holidays. If you're looking for some inspiration for your dining room, look no further. Here are my dining room decor ideas that I put together for my own space. I hope you enjoy it and get inspired to spruce up your own homes this holiday season!

This year, in our new home I decided to add more to my dining room decor for Christmas. I love that I have more room in this house, with a formal dining room, and I even added in our Christmas tree to the room. It makes it feel so cozy when we eat and walk up to the house because that window faces the front yard. The room gives a great evergreen feeling. I decorated the tree with velvet ribbon and antique ornaments, which I feel gave it a French country vibe that I really love to have as a basic theme for our home.

This year instead of my regular floral centerpieces on the table, I decided to do the cutest pots filled with different varieties of poinsettia. I found the flowers at Walmart & Trader Joes and went with 3 different colors. They have them in different shades of pinks, greens, reds and creams. I mixed and matched the sizes and varieties of pots for a wonderful and elevated arrangement.

I used traditional red and green colors, and I added more greens into the fun textured plates, layering two and adding in a red detailed napkin. I found these all on Zara Home and will link them all below.

With the beautiful table top I used my favorite gold napkins and layered two Lenox holiday glasses. I love the simple detail on these glasses, but I feel they still helped the area stay very Christmas and festive.

I hope you love my Christmas dining room this year! It is always such a joy to decorate and come up with a wonderful theme and share with you all. Have fun with all your decorating, and let your guests enjoy and admire as you entertain! For all links and to shop my furniture, collection of dishes and more I will link below. They are also on my Like To Know It app to shop anytime.

LINKS:

Sideboards - From Ballard Designs linked here

Mirror - From Anthropologie linked here

Chairs - From World Market linked here

Table - From Arhaus linked here

Dishes - From Zara Home linked here

Napkins - From Zara Home linked here & here

Glasses - From Lenox linked here

Cutlery - From Amazon linked here

Tree - From King of Christmas linked here

Dress - From Red Dress linked here

Pots - From Terrain linked here and here

Wreath - From Target linked here

Slow Cooker Hot Cocoa Bar Station

Slow Cooker Hot Cocoa Bar Station

If you love a delicious cup of hot cocoa and are serving it for a crowd at a party or event, then you will love this Slow Cooker Hot Cocoa Bar Station idea! This hot cocoa bar is a perfect looking setup for parties and makes for a fun way to make and display the cocoa. There are so many ways to customize different ingredients in your cocoa to make it just the way you like it. With this hot cocoa bar, you can have all the fixings for the hot cocoa ready to go and all you have to do is mix it up and turn on your slow cooker 2 hours before your company arrives.

One of my favorite things to do for company is to be very detailed with the small things, but also be practical and leave yourself time for the other things you have to do and not be rushing to make the cocoa last minute. It's also a fun way for the guests to get creative when making their own cup!

Some of my favorite things to add in the hot cocoa station and on the tray are heavy whipping cream, Chocolate chips, sprinkles, cookies, cinnamon sticks, caramel, and candy canes. Christmas is such a special time of year and adding in little touches to the station like Santa mugs and Holiday decor will help the area feel even more special and festive for all your December celebrations!

HOT COCOA RECIPE

Ingredients

Slow Cooker Hot Cocoa

1- 14 oz can sweetened condensed milk

1/2 cup cocoa powder unsweetened

2 teaspoons vanilla extract

Pinch of salt

4 cups whole milk

4 cups half and half

Marshmallows

Directions:

1. Mix together all ingredients in slow cooker

2. Turn on slow cooker to 1 to 2. Stirring every 30 min for 2 hours.

3. Top with marshmallows and turn slow cooker all the way down.

4. You can leave slow cooker on low to serve and enjoy for 2-3 hours.

5. Stir again before serving and Enjoy! 

You can shop my slow cooker on 360 Cookware -shop here- and use code AMANDWARREN20 for 20% off your entire purchase! I love that this is the only slow cooker that is stainless steel and made in the USA. Amazing quality that will last you a lifetime!

The Ultimate Thanksgiving Dessert - My Pumpkin Crisp Recipe

Looking for a new dessert this Thanksgiving that isn’t the same ol’ pumpkin pie? This is it!! My husband isn’t the biggest pie fan, so I was looking for something as a replacement with that same familiar taste to accommodate the whole crowd, especially those that still love and crave a traditional pumpkin pie! This dessert hit all the marks for our early family Thanksgiving, and it will surely be a hit throughout the Holiday season as well!

We hope this pumpkin crisp recipe satisfies every sweet tooth of every family member you have, just as it did to ours! Here is the best pumpkin crisp recipe ever!

Ingredients

  • 1 (15-oz.) canned pumpkin purée

  • 1 cup sugar

  • 3 large eggs

  • 2 teaspoons pumpkin pie spice

  • 1/2 teaspoon kosher salt

  • 2 teaspoons pure vanilla extract

  • I can evaporated milk

Cinnamon topping

  • 2 cups all-purpose flour*

  • 3/4 cups granulated sugar

  • 3/4 cups brown sugar

  • 2 teaspoons cinnamon

  • 1/2 teaspoon salt

  • 12 tablespoons butter, melted

  • 1/2 cup pecans

Instructions

  1. Preheat oven to 425. Grease 9” round pan and set aside.

(Exact pan I used linked -here-)

  1. Whisk together pumpkin, evaporated milk, vanilla, eggs until combined.

  2. Add in sugar, pumpkin pie spice, and salt.

  3. Pour into pre-greased pan and place in oven uncovered for 20 minutes.

  4. While pumpkin mix if cooking mix together all cinnamon topping ingredients and make a nice crumble for the top.

  5. Once 20 min has passed remove from oven and turn oven to 375.

  6. Add crumble onto top of pumpkin mix and place back into oven for 20-30 minutes or until a knife or toothpick comes out clean. Let cool for 5-10 minutes before serving.

  7. Enjoy with ice cream, caramel or chocolate toppings.

If you by chance don't finish you can store in the refrigerator, cover with plastic wrap, and reheat in oven when ready for leftovers!

For all 360 pans I used shop -here- and use code AMANDAWARREN20 for 20% off your entire purchase.

Designing My Thanksgiving Table 2022: Festive Inspirations for a Memorable Feast!

As the crisp Autumn leaves tumble to the ground and the excitement of the holiday season starts to warm our hearts, I'm excited to share my vision for " My Thanksgiving Table 2022 ". This special time of the year calls for a deep sense of gratitude, a delicious cornucopia of food, and meaningful connections with our most loved ones. As we gear up to set the stage for memorable conversations and laughter, I'm here to inspire you with tablescape ideas and tips to make your Thanksgiving gathering unforgettable. Let's get ready to serve up elegance along with your turkey feast!

Begin by selecting a color palette that is the traditional Thanksgiving colors, and are both inviting and warm. Great choices include golds, oranges, and reds. For a nice statement piece, consider a unique table runner or a decorative tablecloth. After laying out the tableware, such as plates, glasses, and cutlery, in a way that is both aesthetically pleasing and practical, add a centerpiece to the middle of the table. For a more traditional look, opt for a cornucopia or a vase of flowers. For a more modern look, consider an arrangement of pumpkins, gourds, and greenery.

You can also add a few small decorations such as candles or fall-themed place cards to make the table look more festive. Hang a few decorations such as garlands or lights for an extra touch of festivity. Set the mood with a Thanksgiving playlist and some cozy lighting. Don’t forget to pull out the cozy throws and pillows for extra comfort! With these tips and tricks, hopefully, you’ll find inspiration to host the perfect Thanksgiving Table this year!

Fall floral arrangement

Whether you’re hosting a formal dinner or a casual gathering, My Thanksgiving Table has you covered. Incorporate classic Thanksgiving colors such as reds, oranges, and browns into your floral arrangements to create a festive atmosphere. Add texture to your floral arrangements with seasonal leaves, twigs, and berries to make them look even more stunning and festive. Consider using seasonal blooms like chrysanthemums, sunflowers, and dahlias to give your table a truly autumnal feel. For an extra festive touch, add pumpkins, gourds, and other Fall decorations. Fragrant herbs like rosemary, sage, and lavender can also be used for decoration or even as part of the meal. Place a single large flower or a few small ones in the center of the table for a classic look. Alternatively, use small vases or mason jars to display smaller bouquets. For a bolder look, create a focal point by arranging large, tall flowers in the center of the table. Use white or cream as an accent color to make other colors stand out and give your table a finished look.

Creating my arrangement this year was tough. I no longer have my amazing florist nearby who did all my centerpieces before we moved to Texas. I tried my best to make my own and went out to the supermarkets. All I found were old flowers that were falling apart on me. My sweet florist from Cali went the extra mile for me and found and called a local florist nearby in The Woodlands, TX without me knowing and had them piece together a beautiful flower arrangement just the way I would like it based on my inspo pictures. I love the leafy elements of the arrangement against the soft pastel colors of the flowers. It gives it beautiful natural elements!

Place Settings

I used white dishes and serve ware to make the table timeless and classic and added pops of color with seasonal fruits and vegetables such as pumpkins, pine cones, eucalyptus, gourds, and cranberries. Be sure to accentuate the table with a few metallic pieces for a touch of glamour. I wanted to break up the colors plus use my new dishes, so I went with the beautiful Lenox French Perle Scallop place setting. I added in my all-time favorite Amazon finds with my gold silverware. Lastly, I found these adorable napkins on Amazon and tied a velvet ribbon as napkin rings/holders that gave a beautiful texture and visual interest. I love it when I can find multiple uses for things! This gave a soft layer and offset the centerpieces with all the color!

Accents

Accent candles and candlesticks are a great way to add a touch of elegance to your Thanksgiving table. They come in a variety of colors, shapes, and sizes, so it's super easy to find something that will fit your theme and décor. Place the candles on the table to create a cozy atmosphere and add a touch of elegance to the room. Use different colored candles to create a vibrant look, or mix and match to create a unique and personalized touch. They are also great for setting the mood and creating the perfect ambiance for your Thanksgiving dinner. When the candles are lit, the flickering light will create a soft and inviting glow, making your guests feel right at home. Candlesticks are an easy and affordable way to make your Thanksgiving table look beautiful and inviting. I found mine at Sur La Table along with my gingham table runner. Gingham is a timeless pattern that will never go out of style, making it a great choice to use year after year. With the checkered pattern available in a variety of colors, you can choose a runner or tablecloth that best fits your Thanksgiving table. Not only is the gingham pattern beautiful, but the lightweight fabric allows it to drape nicely, giving your table a polished look.

I also added a small charcuterie board as part of the table decor to get people to come to the table before dinner was served and give a beautiful element that tied into the pears & pomegranates. Choose an array of meats, cheeses, nuts, olives, and crackers that will create a delicious and attractive presentation. Layer the board with different textures and colors to make it more interesting, and include a few seasonal items such as cranberries, pumpkin seeds, and spiced nuts. Add a few sweet items such as honey, jams, and candied nuts to give it a festive flair.

Food & Wine

Nothing says Thanksgiving like traditional food and wine. I always love to have elements on the table that make sure my guests know they can sit and enjoy at any time. Having open bottles of wine and simple charcuterie boards allows for this comfortable snacking. This also makes sure your guests don't go hungry or thirsty while you are preparing dinner and tending to other guests. This Thanksgiving we are serving Decoy wines, both with a red and a white, so our guests can choose their favorite. To see all that Decoy has to offer for your Thanksgiving day gatherings and where you can pick up their brand locally head to their website -here-. For the simple charcuterie board, I did cheeses, crackers and grapes. Our local H-E-B has the most delicious varieties of cheese balls, and I grabbed an amazing pecan one! Mixing the cheeseball up with a few other cheeses gave the board variety, yet still keeps it simple. Also, make sure not to do anything too heavy, as you have a big meal coming soon!

With these simple touches, your Thanksgiving table will be transformed into a warm and inviting space for your family and friendships. Your guests will be delighted by the atmosphere of your Thanksgiving table and you will be sure to have a memorable celebration. That is my Thanksgiving table decor for this go around. The last Thanksgiving table I did, linked -here- included more pastels, so this difference was such a fun way to mix things up in our new home. I hope you enjoyed this read and the pictures, and I hope it gave you some inspiration and creativity for your next holiday table decor. For more table decor ideas, recipes and everyday life be sure to stick around and subscribe -here-.

Shop Everything Used On my LTK -here- and below

Baked Burrata Pumpkin Ziti with Pork Sausage Recipe

This dish is an Autumn favorite and is perfect for a nice cold day. It features pumpkin ziti, oven-baked burrata cheese and Italian pork sausage. The burrata cheese texture is soft, mild and delicate, made from both mozzarella and cream. The pork sausage is a seasoned ground pork that is smoked for a richer flavor and pairs so well with the pumpkin sauce taste on the ziti pasta. This dish takes a delicious traditional pasta plate and pairs it with that Fall pumpkin craze for a fun festive way to celebrate the season. If someone coming over for dinner isn't the biggest pumpkin fan, then don't worry because this blend isn't an overpowering flavor of pumpkin. This makes it a satisfying dish with just a hint of unique flavors that everyone is sure to love. Trust me when I tell you this dish is sure to be an Autumn favorite, but also one you will find yourself craving all year long.

Ingredients :

1 lb ziti

4 tablespoons butter

1 shallot

2 tablespoons flour

1 teaspoon red pepper flakes

1 teaspoon basil

1 teaspoon oregano

1 cup 100% pure pumpkin

1 cup heavy cream

1 lb pork sausage

2 cloves garlic

1/2 cup veg broth

1 1/2 cup parmesan

8 oz. Burrata

Instructions :

Prep: Preheat oven to 375 degree temperature. Bring pot of water to a boil. Mince shallot and garlic cloves. Shred Parmesan. Prep time 5 minutes.

1. Add butter garlic and shallots to pot and let cook until fragrant and shallots become caramelized.

2. Add in pork sausage (you can double the amount of meat in this if you want a more hearty meal as well) and cook breaking up meat as it cooks.

3. Once sausage is cooked in pan add seasoning; red pepper flakes, basil and oregano. Blend together and add flour. Now add in 100% Pumpkin pure and vegetable broth stirring to marry together.

4. While cooking sausage and sauce, if water has come to a boil add in the 1 lb of ziti to cook. Once al dente drain. Usually this takes 9-11 minutes

5. When you are almost ready to add in pasta turn off stove and add in heavy cream and 1 cup of the parmesan cheese. Add pasta and incorporate together.

6. Next to make a baked ziti you will be adding this into the oven. If you do not have an oven-safe pan you will need to pour ingredients into a new oven-safe container. I love the 360 pans because they are 100% stainless steel and can go from stove top to oven!.

7. Once ready to go into oven you will sprinkle the remaining 1/2 cup of parmesan on top and break apart the Burrata as well.

8. Place in oven and bake for 12-17 minutes until top is bubbly.

9. ENJOY!!

For more recipes like these head to my Pinterest tab titled Cooking with Amanda. Here you will find even more 100% pure pumpkin recipes and comfort food to enjoy this Christmas and holiday season.

You can shop all 360 cookware I use -here- discount code AmandaWarren20 will give you 20% off the entire site and will make the perfect Christmas gift this season for your favorite chef!

The Most Delicious Homemade Corn Bread Loaf Recipe

Fall is upon us, the weather is cooling down, and that makes the timing perfect to serve a warm plate of cornbread. I love making this tasty treat. Cornbread is so easy to make and can be used to pair with such a variety of dishes. In this article I'm going to show you how to make a cornbread loaf everyone will love! This recipe makes will make 2 full sized loafs, so to only make 1 loaf you will just split all ingredients of the recipe in half. Another fun way to use this recipe is to make mini cornbread loaves. To do this you will make change the cooking time accordingly. Such Fun for the holidays!

In this recipe I used my 360 Cookware loaf pans that are linked -here- and as you can see in the photos their pans have beautiful handles that look great on the table when serving. They also have the tab loaf -here- that has more of a table handle and is also beautiful. Both of these pans are the best way to make this bread. All 360 Cookware products are made in the good ol' USA and stainless steel, giving your food the best quality and making you feel good about your purchase!

Cornbread loaf is the ultimate comfort food. It Goes great with chili, soups and really any Fall meals, especially warm meals. I love adding actual corn into my cornbread to give an extra crunch that isn't always expected.

Ingredients:

2 cups yellow cornmeal

2 cups all-purpose flour

1 cup sugar

3 teaspoons baking powder

1 tablespoon sea salt

2 cups milk (or buttermilk substitute)

1 stick butter + additional 1/2 tbsp butter

1/2 cup honey

4 eggs

1 cups corn

Directions:

  1. Preheat oven to 375 degrees and oil your loaf pans. This recipe makes 2 loaves of corn bread if you are looking for less just cut everything in half. I use my 360 Cookware pans and will link them below.

  2. Add all dry ingredients into a bowl and mix together.

  3. In a new bowl add eggs, and lightly beat with a fork. Add in milk, melted butter, honey and mix with eggs.

  4. Add all dry ingredients into wet mixture and blend well. Lastly, add in 1 cup of corn and softly fold into batter.

  5. Pour batter into loaf pans equally and bake for 30-45 min or until loaf is set in the middle. Tip..place a toothpick in the center of the loaf, then pull out to see if it comes out clean. This means your loaf is cooked well.

  6. Next take the last 2 tbsp of butter and lather the top of the cornbread evenly. This gives a delicious caramelized top to the golden brown bread.

  7. Enjoy! I love my cornbread with butter and a little honey on top! YUM!

To Find more recipes from Amanda Warren head -here- or click on Food & Dink on the website!

The Bloggers Guide to Merlot

If you're a wine lover like me, chances are you've seen the movie "Sideways", which showcases a large part of the beautiful, majestic wine region of the Central California Coast which contains 40 AVA's (American Viticultural Area). We all know the famous Paul Giamatti "not safe for the blog" line about Merlot in the movie, but I need you to forget about that line right now! This movie has actually been heavily mentioned as being a serious catalyst to the cause in the drop of the popularity of Merlot, affecting its sales, and even simultaneously increasing the popularity of other varietals such as Pinot Noir. Sideways couldn't take down Merlot though as it is the second most planted grape variety in the world! Being that it's Merlot month, I want to take you through the back story of this great wine and explain why it's become one of our favorites. Of course, the foodie in me has compelled me to share a few ideas on what you can pair Merlot with at your next dinner party!

Why We Like Merlot

It's quickly become one of our favorite wines in the Warren home, especially as a dinner wine. Merlot pairs so well with many of the things we like to cook. It's often compared to Cabernet but with a softer option and usually lower in tannins. I happen to be slight;y sensitive to tannins and find that I get headaches easier with some red blends that are heavy in them. Sometimes all it takes is one glass, and I can still wake up with a headache. Merlot doesn't have this effect on me however, and even though I also love a good cab, this is one reason why I find myself quicker to grab for Merlot off the shelf. Merlot also has a lower acidity and lighter body which I also feel helped fuel the rise in popularity of Pinot Noir as a replacement for a bit of lost popularity in the past. Depending on the region and climate of where the wine is produced will also have a factor on the taste. Growing in a warmer client will produce juicier, fruit forward notes. Whereas growing in cooler climates can produce a product closer to the taste of a Cab. This is why we love the J. Lohr Estate Los Osos Merlot from Paso Robles, CA. The climate in which its grown is a perfect mix of cooler nights and warmer days. The 2020 vintage is also blended with 14% Malbec which brings juiciness to the palate and 10% Cabernet Franc that adds layers of cocoa and peppery spice. This blend gives a lighter, juicier mouthfeel product with fantastic notes of fresh plum and bright raspberry flavors.

Characteristics of Merlot

Wine drinkers have been known to say that they can taste of the local flavor of the wine grapes. These can be sweet and sometimes dry, sometimes smooth and sometimes bitter at the finish, and often times that they can't taste any difference at all. Have you ever wondered about the different grape varieties themselves and how the wine has these differing tastes and textures? Merlot is a type of grape that has a soft, fruity taste and is grown in many wine-producing regions around the world. The grapes grow in different climates, soils, and with differing techniques will slightly alter the characteristics of it. This makes Merlot one of my favorite wines to enjoy and experience the uniqueness of it at wine tastings.


Merlot Growing Regions

Grown all over the world the four leading producers of Merlot grapes are

1.)Bordeaux, France 2.)Tuscany, Italy 3.) A northern region of Italy called Friuli-Venezia Giulia, and of course close to my heart, and my personal favorite, 4.) California. According to The Wine Institute the majority of California's Merlot vines are planted in Lodi/San Joaquin County, followed by Napa, Sonoma and Monterey counties. While the majority of California Merlot comes from these regions, there are not many other popular wined regions in California that produce world class Merlot, such as Paso Robles. Our favorite, the Los Osos Merlot from J. Lohr Vineyards & Wines, is grown in the moderately cool El Pomar District of Paso Robles, which is acknowledged to be the ideal area for this variety in the Paso Robles AVA.

Food Pairings with Merlot

Merlot, while amazing to sip on its own, is just as wonderful to enjoy with food.

Our featured wine, the J. Lohr Estate Los Osos Merlot is a very versatile wine for food pairings as well. This wine goes absolutely great with a variety of foods ranging from a grilled sausage and vegetable shish kebob all the way to a decadent creamy spinach and tomato tortellini dish. I personally love pairing the Los Osos Merlot with lamb chops topped with a fig cherry glaze and a side of roasted vegetables and garlic mashed potatoes.

No matter the occasion, be it elegant dinner parties, or just a weekend backyard BBQ the 2020 J.Lohr Estates Los Osos Merlot is going to please every guest that sits at your table. This perfect blend of 76% Merlot, 14% Malbec, and 10% Cab Franc gives the wine the bright, fruitful flavor that brings a juiciness to the pallet that you are sure to love. Do yourself a favor and uncork a bottle, then sit back and enjoy the smiles of all your satisfied friends.

For more about the J. Lohr Estate Los Osos Merlot or to visit the beautiful vineyards in Paso Robles, California click -here-.

This is a sponsored post by J. Lohr Vineyards & Wines. All opinions and research is my own.

Chocolate Peanut Butter Brownies

I love both chocolate and peanut butter so much, so naturally when mixed together and its doubly delicious. They both just melt in your mouth, and my sweet tooth just can't get enough. That's why I made these brownies for my friends and family. You won't be able to stop with just one, and I promise you wont be disappointed!

You can serve these up fresh out of the oven, or let come to room temperature and add-on a delicious peanut butter buttercream frosting topping making for a delicious cake brownie!

What Pan is Best for Baking Brownies?

I am using the newest 360 cookware brownie pan and its the absolute best pan for baking brownies to ensure even baking. I always use their stainless steel pans for the best non-toxic baking. All of their pots and pans are also made homegrown here in America which I love, and from my dealings with them they are the nicest company!! This recipe works perfect for this pan size only, but if you are wanting to make it in one of their other pans like the jelly roll -here- or bake and roast pan -here- you will need to double everything in the recipe. I would start the baking time the same and just check in adding 5 min increments until cooked to your liking.

Ingredients :

1/4 cup melted butter

2 oz melted chocolate

2 tablespoons unsweetened cocoa powder

1/2 cup granulated sugar

1/4 brown sugar

2 eggs

2 teaspoons pure vanilla extract

1/4 cup all-purpose flour

1/4 cup melted peanut butter

Instructions & Directions :

1. Add hot melted butter to chocolate and mix until chocolate melts. If it doesn't melt quick enough I put my mixing bowl -here- on top of my 2 quart sauce pot -here- on my stove. Stirring the entire time to prevent from burning.

2. After melted, mix into bowl eggs & vanilla ingredients.

Next add in unsweetened cocoa powder, granulated sugar, brown sugar, and flour ingredients until well blended.

3. Take your brownie pan of choice and pour 1 tbsp olive oil or melted butter and using a paper towel coat the entire pan evenly. Pour in brownie batter

4. In a new bowl melt peanut butter and add tablespoons of peanut butter into brownie mix. Taking a sharp knife swirl around peanut butter. Be sure not to over swirl or the peanut butter brown will start to blend with brownie batter. You want them to have a fun design and the peanut butter to be equally spread throughout, while still being separate from brownie batter.

5. Bake for 25 minutes at 350.

6. Remove from oven and let cool before cutting and ENJOY!

Substitute:

A few substitutions you can make are:

  • Regular brown sugar to dark brown sugar - this will give a more rich taste for this substitute.

  • Adding 1/4 cup chocolate chips into brownie batter - this will give you a richer and gooier brownie! This combination is amazing if you love a rich chocolate dessert!

  • Trading our butter for olive oil - I am always a fan of butter however if you cannot have butter switching to olive oil is the best switch to make in the directions.

I really hope you guys enjoy my Chocolate Peanut Butter Brownies recipe! This is one of my favorite baked goods to enjoy at home or to take to a party! If you are precutting to take to an event I suggest placing on parchment paper in an airtight container for the best presentation and taste!

For more recipes head -here- and come back soon for a delicious lemon cheesecake recipe!

Have a blessed day, Amanda

Pork Banh Mi Bowl : Deliciously Satisfying

Are you looking for an easy and delicious meal that will have everyone in your house coming back for more? Try the Pork Banh Mi Bowl! This flavorful dish is sure to satisfy your cravings with its combination of Vietnamese-inspired flavors and fresh ingredients. Not only is it packed with flavor, but it is also incredibly easy to make, making it the perfect go-to for busy weeknights. Whether you're hosting a dinner party or just looking for a quick and tasty meal, the Pork Banh Mi Bowl is sure to hit the spot!

I first started making this after getting it in a Home Chef box and thinking it was delicious. Then I thought…this was something different than we normally eat, but so yummy that I decided to make it with my own little twist! I took their recipe and tweaked it just a little by adding a little more garlic, and radishes, along with a few other different ingredients I normally have on hand! It came out super tasty and now is always a favorite in our home. I hope you enjoy it just as much as we do!! So here is my version of a pork banh mi bowl recipe.

A way to make this meal all your own.. You can always change this to a beef banh mi bowl with a change of meat or take our the meat and use even more vegetables to make a vegetarian banh mi bowl. If you are looking for a more low carbohydrates meal substitute the jasmine rice for lettuce wraps.


Ingredients:

2 lbs ground pork

4 garlic cloves diced

1/4 cup coconut aminos

1 tablespoons cornstarch

1/3 cup vegetable stock

1 tablespoons rice vinegar

2 tablespoons brown sugar

1 cup jasmine rice

Pickled Veggies:

1/2 cup cucumber

1/2 cup carrots

1/2 cup radish

1 cup warm water

1 cup rice vinegar

1/2 cup sugar

1 cup jasmine rice

Sauce: (my version of a sriracha mayo, you can always substitute if you want)

1/4 cup mayo

2 tablespoons chili garlic sauce

Instructions:

  1. Lets pickle the veggies first! Cut cucumbers, carrots and radish (add jalapenos in also if you want a little more spice) into slices and stir together with warm water, vinegar and sugar. Let sit in refrigerator while building your bowl.

  2. Making the pork. Start cooking pork in a stainless steel pan. As always I use 360 cookware and will link everything used below as well as my discount code!

  3. Heat 1 cup water in pan until boiling. Add 1 cup of jasmine rice and stir. Once comes to a boil reduce heat to low and cover with lid. Cooking until water has evaporated. Around 15 min,

  4. While pork is cooking on medium make sauce to pour onto pork. Combine all ingredients; minced garlic cloves, coconut aminos, corn starch, vegetable stock, rice vinegar and brown sugar in a bowl until well combined.

  5. Once pork is all cooked pour over sauce and stir. Let coat the pork until its combined and not runny. Set aside

  6. Lastly make spicy sauce by combining mayo and chili garlic!

  7. Now, Make your bowl! Layer rice, pork, veggies and sauce! ENJOY!

Items used for recipe from 360 Cookware linked below. When using code AmandaWarren20 you will receive 20% off entire order! Or by clicking -here-.

For more recipes make sure you are following along by signing up for emails and be the first to know when a recipe is posted. Sign up -here-.

Banh Mi Bowls are bursting with bold flavors and a variety of textures. The jasmine rice base is the perfect foundation for the bright, crunchy vegetables, savory marinated pork, and creamy Sriracha mayo dressing. To boost the flavor, top with pickled jalapeños and a sprinkle of sesame seeds. Delicious and healthy, Banh Mi Bowls are a great way to enjoy a satisfying meal. The combination of flavors and textures will delight your taste buds. Plus, it is a quick and easy meal to put together. Simply cook the ground pork and assemble all the ingredients in a bowl. Enjoy a delicious and satisfying meal in no time!

Other Dinners You May Enjoy:

Baked Burrata Pumpkin Ziti with Pork Sausage Recipe

Delicious and Easy Chorizo One Pan Dinner

Easy and Delicious Mushroom & Pea Risotto Recipe

Garlic Mushroom & Shrimp Pasta

Paso Robles City Guide

With over 20,000 visitors yearly its no wonder Paso Robles wine and food scene is becoming so popular. Me and the hubs love to visit often and enjoy the amazing wine, views and award-winning restaurants! We lived less than 2 hours away and would try to stop at a new winery when we pass through on our way to the beach house! Recently moving to Texas the Paso Robles wine country is one of the biggest things I am missing about California travel. Growing more than 40 varieties of wine you can always find the most delicious wine to take home too! Below I’ll share our favorite wineries, restaurants, where to stay and other things to do around the area.

Wineries & Wine Tasting

These are our favorite places to go wine tasting with quick reasons why. We have been going to Paso Robles tasting for over 10 years and our goal was to try them all.. we ended up moving out of California this year so this goal may take a little longer then we had hoped for but out of the MANY we have tried these are ones we continue to order wine from and still love to visit! (This are not in order by favorites, these are all our favorites and each experience is different so read through and see what you are looking for in a winery.)

Austin Hope: Top 5 for all around experiences. Delicious charcuterie boards, beautiful architecture, amazing wine, and allow dogs! We sat outside in a cozy little area, we loved that each tasting spot felt secluded to you own group yet special. Staff was very friendly and knowledgeable as well. More info: https://hopefamilywines.com/

Justin Winery: Some of our favorite wines, gorgeous location, food is AMAZING and they also have a tasting room downtown Paso if you don't want to make the drive to their winery. I highly recommend it though because the experience is beautiful with outdoor seating. Be sure to order some Justification for us with a juicy burger!! Dogs are also welcome outside. More info: https://www.justinwine.com/

Thatcher Winery: We walked into this family-owned winery one afternoon and loved the adorable space, delicious wines and views of wild turkeys running around the vines. For a more in depth tasting and one on one experience you can book a stable tasting as well! More info: https://www.thatcherwine.com/

Parrish Family Vineyard: An absolutely stunning location!! Home concept tasting room helps everyone feel at home while they enjoy their wine. Also serving Sunday brunch, pairing foods and a gorgeous outside seating area that the whole family can enjoy! More info: https://www.parrishfamilyvineyard.com/

Daou: One of the most stunning views in all of Paso! Delicious charcuterie boards make for a great afternoon stop to enjoy the views and really enjoy the rolling hills of Paso Robles. More info: https://daouvineyards.com/

Chronic Cellars: Fun & Chill vibe! They have some delicious wine and a glass comes with your tasting! We actually grabbed this wine last night at our local Whole Foods here in Texas. A great price point for a quick grab or as they say a "weekday wine". More info: https://www.chroniccellars.com/

AmByth Estate: Such a fun winery with animals that are maintaining the land, giving the Biodynamic farming for the most natural way to produce wine. It was truly fascinating to do a tour around the estate-grown farm and see the animals & vineyard and to hear all about how they grow and produce on their farm. More info: https://www.ambythestate.com/

Tablas Creek Vineyard: Known for bringing Rhone wine to California this winery is a perfect place to come for all! Fans of both red & whites will both be happy here! They have tastings options with all white, all red or a mix. This gets a top rating for wine from us! More info: https://tablascreek.com/

Booker: This will definitely win for ambiance.. and its not just because of the adorable winery pup that is always at the tasting room! To truly see why this wins ambiance you have to head to my Instagram highlights under "Paso Wine" and see the attention to detail in this one. The wine was as delicious as the architecture as well! More info: https://www.bookerwines.com/

Bodega de Edgar: Rhone & Spanish style wines right in California! Staff was very friendly, wine was amazing and you have choice of outside or inside tastings. Great relaxed style of wine tasting. More info: https://www.bodegadeedgar.com/

Calcareous Vineyard: If you are looking for a spot with great wine, incredible views and amazing food? This is it! A great place for even those non wine drinkers in your group to really take in Paso while having an incredible lunch. More info: https://www.calcareous.com/

Castoro Cellars: Great location for a stop while wine tasting. Organic & Estate grown wines. They also allow you to bring in your own food. Makes for a great place if you want to bring in a box lunch from Vivant Cheese (I talk more about this below) More info: https://castorocellars.com/

Linne Calodo Cellars: A beautiful boutique style winery that has some truly amazing wine. They aren't a wine you will find on a shelf or on the menu at your local restaurant so be sure to buy online or on your tasting trip. Also make sure you make a reservation at this one as the times they are open can change. Well worth the appointment ahead of time! More info: https://linnecalodo.com/

Where to Enjoy a Meal

Thomas Hill Organics: One of the most deliciously prepared meals with unexpected ingredients you may never think to order. With farm-to-table local ingredients as well as an ever changing menu its one of our top favorites for sure! Make sure to make a reservation its always packed. If you happen to go during colder months request a table by the fire it makes for a wonderful experince!

Vivant Fine Cheese: We found this place a few years ago after getting a wine and cheese pairing at Daou. They told us the store in town where we could get one of the cheeses we loved and we have been coming back ever since! Everything we have gotten from here has been so amazing! I highly recommend getting a picnic box and taking it to one of your wineries if they don't serve food.

Les Petites Canailles: Incredible is the first word that comes to mind! Deliciously amazing food and if you haven't had enough wine yet the selection here is huge! Highly recommend making a reservation here as they are always packed and like a lot of places in Paso its small and intimate inside. Don't skip on the dessert either. My husband usually never wants to get dessert and I always do. We ordered one here and he was in love!

Finca: Looking for somewhere quick or to go? Finca is a perfect little spot right down from the Mercantile that is an adorable Market Walk. Food at Finca is fresh Baja/Mexican style food that is a great go to! We took my in-laws here and the next time they drove through Paso they stopped by again! (I think they liked it!!)

Fish Gaucho: Delicious sit down modern Mexican. Full bar and delicious Guacamole are sure to make this a great stop on your trip!

Lastly.. Negranti Creamery for a quick ice cream dessert on your way back to your hotel!

Where to Stay In Paso Robles

After all that food and wine you might want to know where to rest that sleepy and maybe a bit buzzy head!

Paso Robles Hotels:

Allegretto: A gorgeous hotel with so many wonderful amenities. A wine tasting room, delicious restaurant, cabanas by the pool, large fitness center, complementary bikes and the most comfortable beds!

Hotel Cheval: We haven't stayed at this hotel however it is absolutely adorable and last time we were in town we walked inside to get a feel for it. In a great downtown location perfect to walk to dinner. Is a boutique style so be sure to book this one early as availability is limited.

Stables Inn: We also haven't styed at this location but we did drive by on our last visit as well. I also have it saved on an Instagram tab to stay at on our next time we visit. A 19-room boutique style hotel is in another great location and has a super cute Western chic vibe.

Local Vacation Rentals are also a great way to stay around Paso with many beautiful homes in walking distance to downtown. As well as some wineries having small availability/bed and breakfast style stays. Many of these are only available for wine members so check online at your favorites to see if they have this available as well!

Other things to do that don't involve wine:

Craft Beer & Cider Tasting: With many great local breweries you will find a place for those non wine drinkers in the group. Some of our favorites are in Tin City including; firestone walker, barrel house, and other great little places to stop at.

Distillery Trail: As you journey along the Paso Robles and SLO Distillery Trails, you’ll taste one of a kind spirits and meet the individuals behind the bottle as they work passionately and artfully to create exquisite brandy, whiskey, gin, vodka, liquors and grappa. For more info on distilleries click -here-.

Take a Day Trip: Other great things to do around Paso Robles are the beautiful Central Coast. We of course are partial to Morro Bay, you can see my guide -here-. However many other beautiful coastal towns are just 30ish minutes away and worth the drive to get to your destination.

Antique Shopping Downtown: Downtown is filled with adorable antique shops in between the restaurant. You can make an entire afternoon around this square.

Mid State Fair: If you plan your trip to Paso Robles in line with the Mid State Fair you will be sure to find some of the best concerts in the United States. Full of amazing singers, great eats, lots of rides, and animals!

Paso Robles Mercantile: The cutest indoor shopping center full of little boutique store, cheese shops, wine tasting, ice cream and so much more. Every time we go to this stop with someone new they love it! You will too!

Field of Light at Sensorio: This is a beautiful night light show in a Paso Robles field. Showing incredible views of Paso and the rolling hills in a whole new way. I suggest going before sun sets so you can get the whole effect. Also make sure you have a jacket it gets cool at night.

What to Pack/wear:

Paso Robles is a great town full of all types of styles. I of course am a little partial to wearing dresses, so a nice light weight dress with a sweater or coat is perfect. Even in summer Paso Robles can tend to get cool at nights so I highly recommend taking some type of jacket just incase. In January and February I do tend to wear jeans and layers... however you could tend to get warm days. So my biggest recommendation on what to pack and wear is layers! Here are a few of my favorite looks from wine tasting. You can also shop my LTK -here- and search Paso Robles or Wine Tasting to see some of my past outfits and shop them as well.

There you have our city guide to Paso Robles, CA! Hope you enjoy the beautiful countryside and have a sippin’ good time! Let me know below if you have a favorite place I didn't mention below. I am always looking for new places to try!

Have A Blessed Day, Amanda

Birthday Cutout Sugar Cookies

These may be called “birthday sugar cookies” but I approve them to be eaten on any day all year long! Enjoy them for any celebration, special milestones, or also just because you want a tasty dessert. I love making these for fun and adding a small amount of white chocolate to add décor and to add a little extra sweetness. The cookie itself without the chocolate isn’t overly sweet (but more buttery and delicious), so this makes for the ultimate pairing! Adding in the colorful sprinkles makes for a fun burst of color and you can even add different color themes to go with parties, holidays like Christmas, Valentine Day, and more! Hope you enjoy!

Ingredients:

1 cup melted butter

2 cups white sugar

2 eggs

2 tsp vanilla ext

4 cups all-purpose flour

1/2 tsp salt

1 tsp baking soda

1 tsp baking powder

3/4 cup buttermilk

1/2 cup sprinkles

white chocolate for decorating (can use buttercream if you rather)

Instructions:

  1. Beat butter and sugar together.

  2. 2. Add eggs and vanilla extract, and mix well.

  3. In another bowl, sift flour, salt, baking soda and baking powder together, and add little by little to butter mixture, alternating with buttermilk.

  4. Now that your dough is made you will wrap in plastic wrap and refrigerate for at least 6 hours. I like to let mine stay overnight and up to 24 hours. This makes the cutouts come out better on edges.

  5. After dough has chilled and you are ready to roll out. Heat oven to 375 degrees.

  6. Be sure to flour surface area, rolling pin and dough to make sure no sticking happens. I am using 360 cookie cutters here! So many amazing designs and shapes!! Shop entire collections -here- (use code AMANDAWARREN20 for 20% off entire site)

  7. Bake for 8-10 minutes on stainless steel pan. After baking place onto cooling rack and decorate once cooled. After decorated ENJOY!!

Morro Bay Travel Tips

I have to admit I have emotionally put this blog post off for the last few months because it makes me feel a little bitter sweet about all the memories we had in Morro Bay. Now that we live in Texas we probably wont be visiting this beautiful little beach town much if at all. The memories are fond and our beach house was such a blessing and a beautiful time in our lives that I’m so thankful we had for a few years.

If you are new around here my husband and I had a beach house in Morro Bay, CA for over 2 years. At one point we thought we would move there from our little home town that was 2 hours away. Life changed and so did our plans. We decided to flip the script and moved to Texas instead in May of this year. Even though we sold our home in Morro Bay, we are keeping the memories we built there for a lifetime!

I have received so many questions about things to do, places to eat (especially that are dog friendly) and towns to visit nearby. So I want to offer you this as a “locals” perspective. I grew up visiting Morro Bay many times a year along with the surrounding areas. Then when we had our house I would spend at least 1 week a month if not more at this charming beach town.

Many people ask why we chose this town over the other surrounding nearby beaches. I grew up coming here, my grandparents had a home and we would visit often. Scotty’s grandparents had a place in Pismo Beach, which is just a little south on the coast line but is always bustling and busy. This brings us to the biggest reason we chose Morro Bay, for the small town quiet, peaceful vibe of it most days. The Embarcadero area does get busy during weekends, but go on a week day or on the off season and its just a charming little town full of locals and vacation homeowners. Its a little cooler here and has more moody weather that the surrounding towns, like sometimes a stiff wind when walking the beach. This means the beaches are never usually packed. We aren’t very big lay on the beach all day people anyway, so this made for the perfect place for us to just simply walk with our dog everyday. Lastly, we wanted this area because it was somewhere we could see ourselves living.

Favorite Things To Do:

  1. Walk on the dog beach - Our favorite thing to do and a daily MUST! We would go every single day with our pup and she absolutely loved it. An off leash beach that she can run along in the water and sand and enjoy life to the fullest. Bonus we got to get our exercise in as well.

  2. Strolling along the Embarcadero - the downtown are where all the shopping, eats and fun things to do are! Also the best spot to see sea otters and sea lions.

  3. Kayak - Along the Embarcadero you will see lots of watersports and rental things to do. We went kayaking a few times and loved being in the water and around all the seals. Its a beautiful little area to see from another view on kayak’s. They also have great whale watching, paddleboarding, and many other attractions.

  4. Get on a boat - Another water activity we loved! We rented a pontoon boat from -bay cruisers- when my cousins visited one weekend and it was so much fun! You can take your own drinks and food and ride around the Embarcadero area. It moves slow and is perfect for kids.

  5. Take a Hike - There are countless hiking trails around Morro Bay that allow for great adventures. Some of our favorites with the most magnificent views are: Montana De Oro State Park - Bluff Trail, Marina Peninsula Trail, Cloisters Wetland, and Harmony Headlands State Park.

  6. Golf - Morro Bay has one of the most beautiful golf courses that overlooks the water and makes for one our favorite activities on a weekend in Morro Bay.

  7. Take a Day Trip - Some of our favorite places to go near by are Paso Robles (see my blog post here for more on Paso), Cambria, Cayucos, Avila Beach, Arroyo Grande, and Pismo Beach

Favorite Eats :

  1. Flavor Factory - Delicious burgers, sandwiches, fries and specializes in the most amazing desserts. I might rate this one the best cheesecakes we have ever had! They are all made fresh and so good. Must try!

  2. Sea Shanty - Amore’s favorite BY FAR! If you are looking for somewhere to go with your pup. Head up the road to Cayucos and enjoy a patio seating where Dog’s are treated just as good as people (if not better)! They have blankets for your pup to lay on, dog bowls for water, treats, and an entire dog menu. Amore loves the Hamburger and rice! The food they serve for us humans is just as delicious! If you order dessert, the Swamp Pie is my favorite. One night driving into town I ordered this 2 minutes before they closed so I could pickup before we got to our house. I jumped out of the truck as Scott pulled up and grabbed it as they were cleaning the kitchen. Its that good!!

  3. The Hidden Kitchen - The adorable location isn’t the only thing keeping me coming back to this spot! Healthy, fresh produce, organic and 100% gluten free makes this a great spot for breakfast, brunch and lunch!

  4. High Tide - Looking for a sandwich or acai bowl? This is your spot! Absolutely delicious, quick service and in a great location on Morro Bay Blvd. Its also outside seating if you want somewhere your pup can come with you! Perfect to eat and shop the vintage stores down the strip.

  5. Dorn’s - One of my Mom’s favorite restaurants! On our last week in Morro Bay my Mom had a list of places she wanted to visit, and this was at the top of the list! I grew up going here for brunch every time we came to Morro Bay and still love their breakfast. If you are heading here for dinner get ready for the freshest warm bread! This is by far the best place you can eat around the Embarcadero. It over looks the water and Morro Rock.

  6. Umi Sushi & Sake - If you are looking for sushi, this is your spot! Another one on the Embarcadero and very delicious!! Highly recommend. Spicy Edamame & Angry Lobster Roll were our favorites!

  7. Taco Temple - The best Mexican food in Morro Bay.. and we tried them all! They have the freshest seafood. Last time we went they said they had caught our cod fish for tacos just 2 hours before. You cant get any fresher then that friends! They also have outside seating for those with furry friends.

  8. La Parisienne - Delicious Cookies & Baked goods! The Almond Chocolate Chip was a family favorite!

I cant give an honest review on hotels & places to stay because we never stayed at any. There are tons of campgrounds and great hotels through the town! If you aren't far make it a Morro Bay day trip! We have stayed at hotels in San Luis Obispo and our favorites are Madonna Inn ( also a favorite place to eat!!) and the Kinney SLO.

Hope this article helps on your next trip to Morro Bay and the Central Coast at least in terms of the important stuff…what to do and where to eat haha. Its a favorite place of ours and will always hold a special place in our hearts! Head to my Instagram to see all my stories from the times in Morro Bay. I have more Videos & Photos from everything we have done there.

If you have more questions on anything please leave them in the comments below. Until next time..

Xo, Amanda

Charleston Photoshoot

It’s been just about a year since we went to Charleston, South Carolina and I’m still obsessing over the photos we had done! Which reminds me… I never shared them for inspiration! Maybe one day I’ll get better and get my blog posts up right away once we get them! Until then.. here are the photos we took with links to what we are wearing, or similar looks if they are sold out that I loved as well.

This Charleston couples photoshoot was a super last minute booking, in fact the whole trip was! So, I was so excited that Rebecca was able to get us in the day we landed (before we ate our way around every restaurant in Charleston. LOL!) The best part of having photos done while on vacation is the photographer will bring you to parts of the city you may not have otherwise seen. In my opinion, you have one of the best souvenirs that you will have for a lifetime, to look back on, and in this case it worked for our Christmas cards too!

How did I find Rebecca to shoot our photos? Hashtags! Just lookup wherever you are going and photographers. So in this case I looked up #CharlestonPhotographer and there she was! Look through all the hashtags and see who has your style and fit is and basically just slide in their DM’s to contact them! In this case Rebecca was perfect. Her photos were light, airy, and really highlighted all of the downtown Charleston charm and beautiful homes. She was exactly what I was looking for to create these lifestyle images in this photo session.

Now that I had found our photographer I had to pick outfits. We had booked this trip just 2 weeks before we went, so I didn’t have all the time in the world. I first found an adorable blue floral dress on ShopLovestitch.com that I knew would standout against all the gorgeous colors of Charleston and found Scotty a blue linen shirt that matched perfectly. Of course for another look I needed something pink because its just on brand for me haha.. I had a hard time finding anything that would come on time if ordered online, so I looked in my closet. I found a pink long dress that I had gotten from Revolve and hadn’t actually worn yet. It was perfect! Next, I needed to find something for Scotty. I wanted him to have a little more formal for this but also layers. So I grabbed a pink button down with a print at our local Banana Republic and a blue jacket in his closet. The 2 outfits we wore complimented each other so well. The whole shoot went so nice and it was once again great to use for our yearly Christmas card, but also for any photo collages we may want to frame in our home.

Last tip I have for you… On this shoot Scotty wore the same pants and shoes in both outfits. His two looks were completely different and you wouldn’t really focus on that but it made it so much easier for changing outfits! Let’s be real, husbands and kids don’t love taking these photos, they just do it for us. So its important to make things easier for them when you can being they don't enjoy it. So something like using the same bottom half of outfits really helps! Also mentioning its a gift or in this case my "souvenir" from our trip!

Here are more from our Charleston Photoshoot:

Shop Pink Dress Inspo

Shop Blue Dress Inspo

To book your own appointment with our Charleston Photographer Rebecca click -here-. She is also an amazing wedding and engagement photographer if you are looking!!

Pitcher of Pina Colada’s

Summer may be nearing an end but this pitcher of pina coladas is still tasty all year long! The perfect drink to serve with your next lunch or to have when relaxing and enjoying the pool! I’m a big fan of having fresh pineapple and coconut milk in the mix making it a little healthier version of for your fun cocktail! Cheers to a great drink to enjoy with friends and family!

Ingredients:

2 cups rum

1 cup pineapple juice

1 can coconut milk

1/4 cup lime juice

1/4 cup honey

4 cups frozen pineapple

3 cups ice

Directions:

  1. Add all ingredients into blender and blend!

  2. Pour into pitcher and serve!

  3. Enjoy!!

Fruit & Goat Cheese Bruschetta

In the middle of a hot Summer and the hottest days of all call for the most delicious treats to make it through! I’m a huge fan of bruschetta, so making this twist on it as a fruity version just seemed so delicious and fit for Summer. You can totally change this up in the fruit department to whatever fruit sounds yummy to you along with whatever is best in season! I did strawberries, cherries and raspberries this time, and it was oh so delicious!

Now.. how do you BBQ these little slices of baguette’s? I just found out the way to not burn my 360 cookware griddle on the grill is to put a coat of dish soap on the bottom and MY GOODNESS its genius! The Pan Cleaned so easy! Cannot wait to work on even more recipes for the grill with my favorite 360 pans!

Ingredients:

8 oz cut strawberries

6 oz cut cherries

6 oz raspberries

8 oz whipped cream cheese

8 oz goat cheese

1 lime

1 baguette

honey

salt & pepper

Directions:

  1. Wash & cut all fruits and mix into bowl.

  2. Zest 1 lime making 1 tsp of lime zest and add into small bowl with 1 tbsp of sugar. Pour over fruit mix & juice of 1 lime and mix together.

  3. Mix whipped cream cheese & goat cheese. sprinkle over with sea salt & pepper to taste. Drizzle with honey and set aside until bread is ready.

  4. Slice baguette and spray with olive oil spray.

  5. Take your 360 griddle and apply dish soap on bottom to prevent from burning pan.

  6. Now on your BBQ take the griddle and place bread on top until lightly toasted (or to liking). Flip and do the same to other side.

  7. You can serve with everything separate and allow everyone to make their own. Or prep ahead of time. Baguette, cheese mixture, fruit. You can also top with more honey & more lime zest if desired.

Delicious and Easy Oven Baked Drumsticks Recipe

Oven Baked Drumsticks are a delicious and easy meal to make for a weeknight dinner. Whether you're looking for a quick and easy meal or a tasty and satisfying dish, these oven-baked drumsticks are sure to hit the spot. They're juicy and flavorful, without being too heavy, and they can be cooked in a fraction of the time it takes to prepare a more complicated meal. Plus, you can customize them to your tastes with the addition of spices and sauces. Read on to learn how to make these tasty and simple oven-baked chicken drumsticks recipe!

This is such a simple and delicious recipe that I make very often. It’s great for Summer dinners accompanied with side dishes like; fresh fruit, cauliflower, veggies and broccoli rice or in the Winter with cornbread and baked beans. It’s a fan favorite and the perfect dish for a crowd as well as something you can whip up quickly when you aren’t sure what to make.

Ingredients

6 Drumsticks

1/2 teaspoon salt

1/2 teaspoon black pepper

2 teaspoon garlic powder

1 teaspoon onion powder

1/2 teaspoon smoked paprika

olive oil spray

1/4 cup coconut amino

2 tablespoons. honey

Instructions

  1. Preheat oven to 425 degrees

  2. Spray olive oil on drumsticks and coat.

  3. Put all additional ingredients in a bowl with drumsticks and mix to coat over all drumsticks.

  4. Place bowl in the fridge and marinate for at least 1-2 but can go longer too! Halfway through marinating toss to coat drumsticks again.

  5. Once ready bake for 45 min on 360 cookware jelly roll pan or any pan you have to lay chicken drumsticks on a single layer. (I will link below) I like to place foil or parchment paper under for easy cleanup. Halfway through cooking flip the drumsticks over.

  6. Remove from oven, serve with your favorite side dishes and enjoy!

  7. For storage place in an airtight container for up to 5 days.

You can shop all the pans I used to make this dish at 360cookware and use code AMANDA20 for a total of 20% off your entire order!!

2 qt pot for rice tap -here-

Bake & Roast Pan for Chicken tap -here-

Other Chicken Dinner Recipes you will Love:

Salsa Verde Chicken Enchiladas

Slow Cooker Orange Chicken

Whole 30 Chicken Piccata