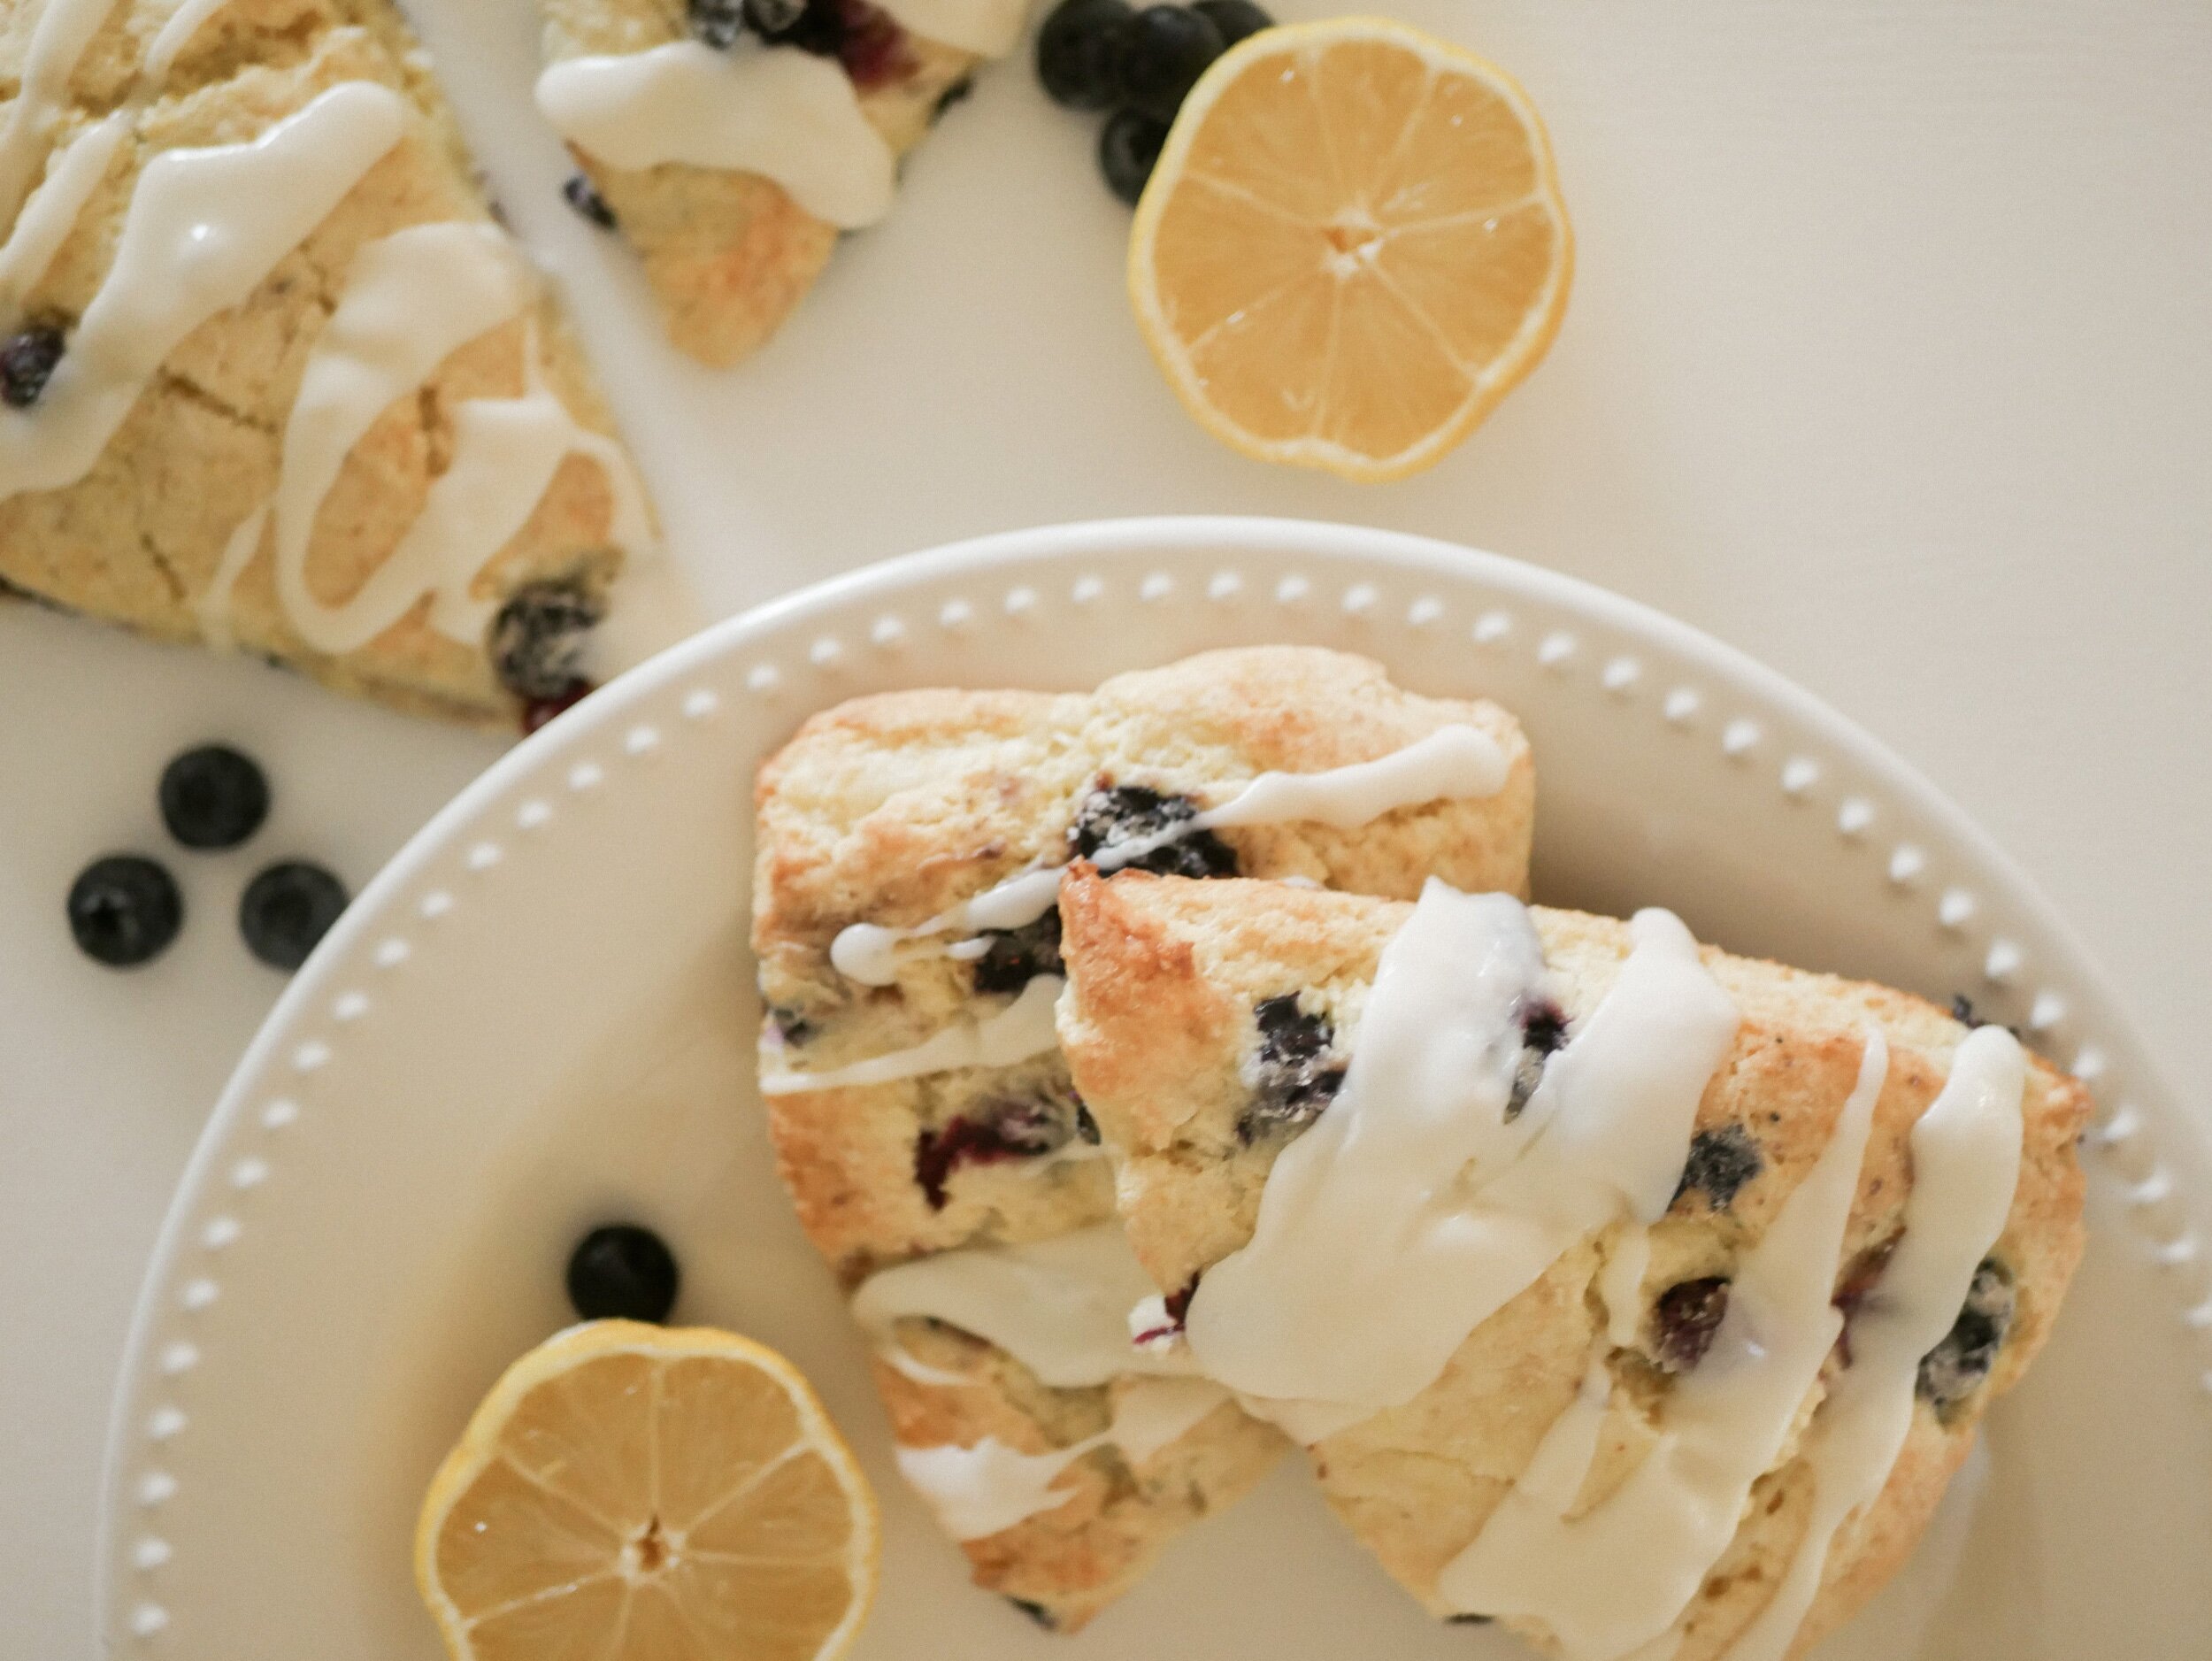
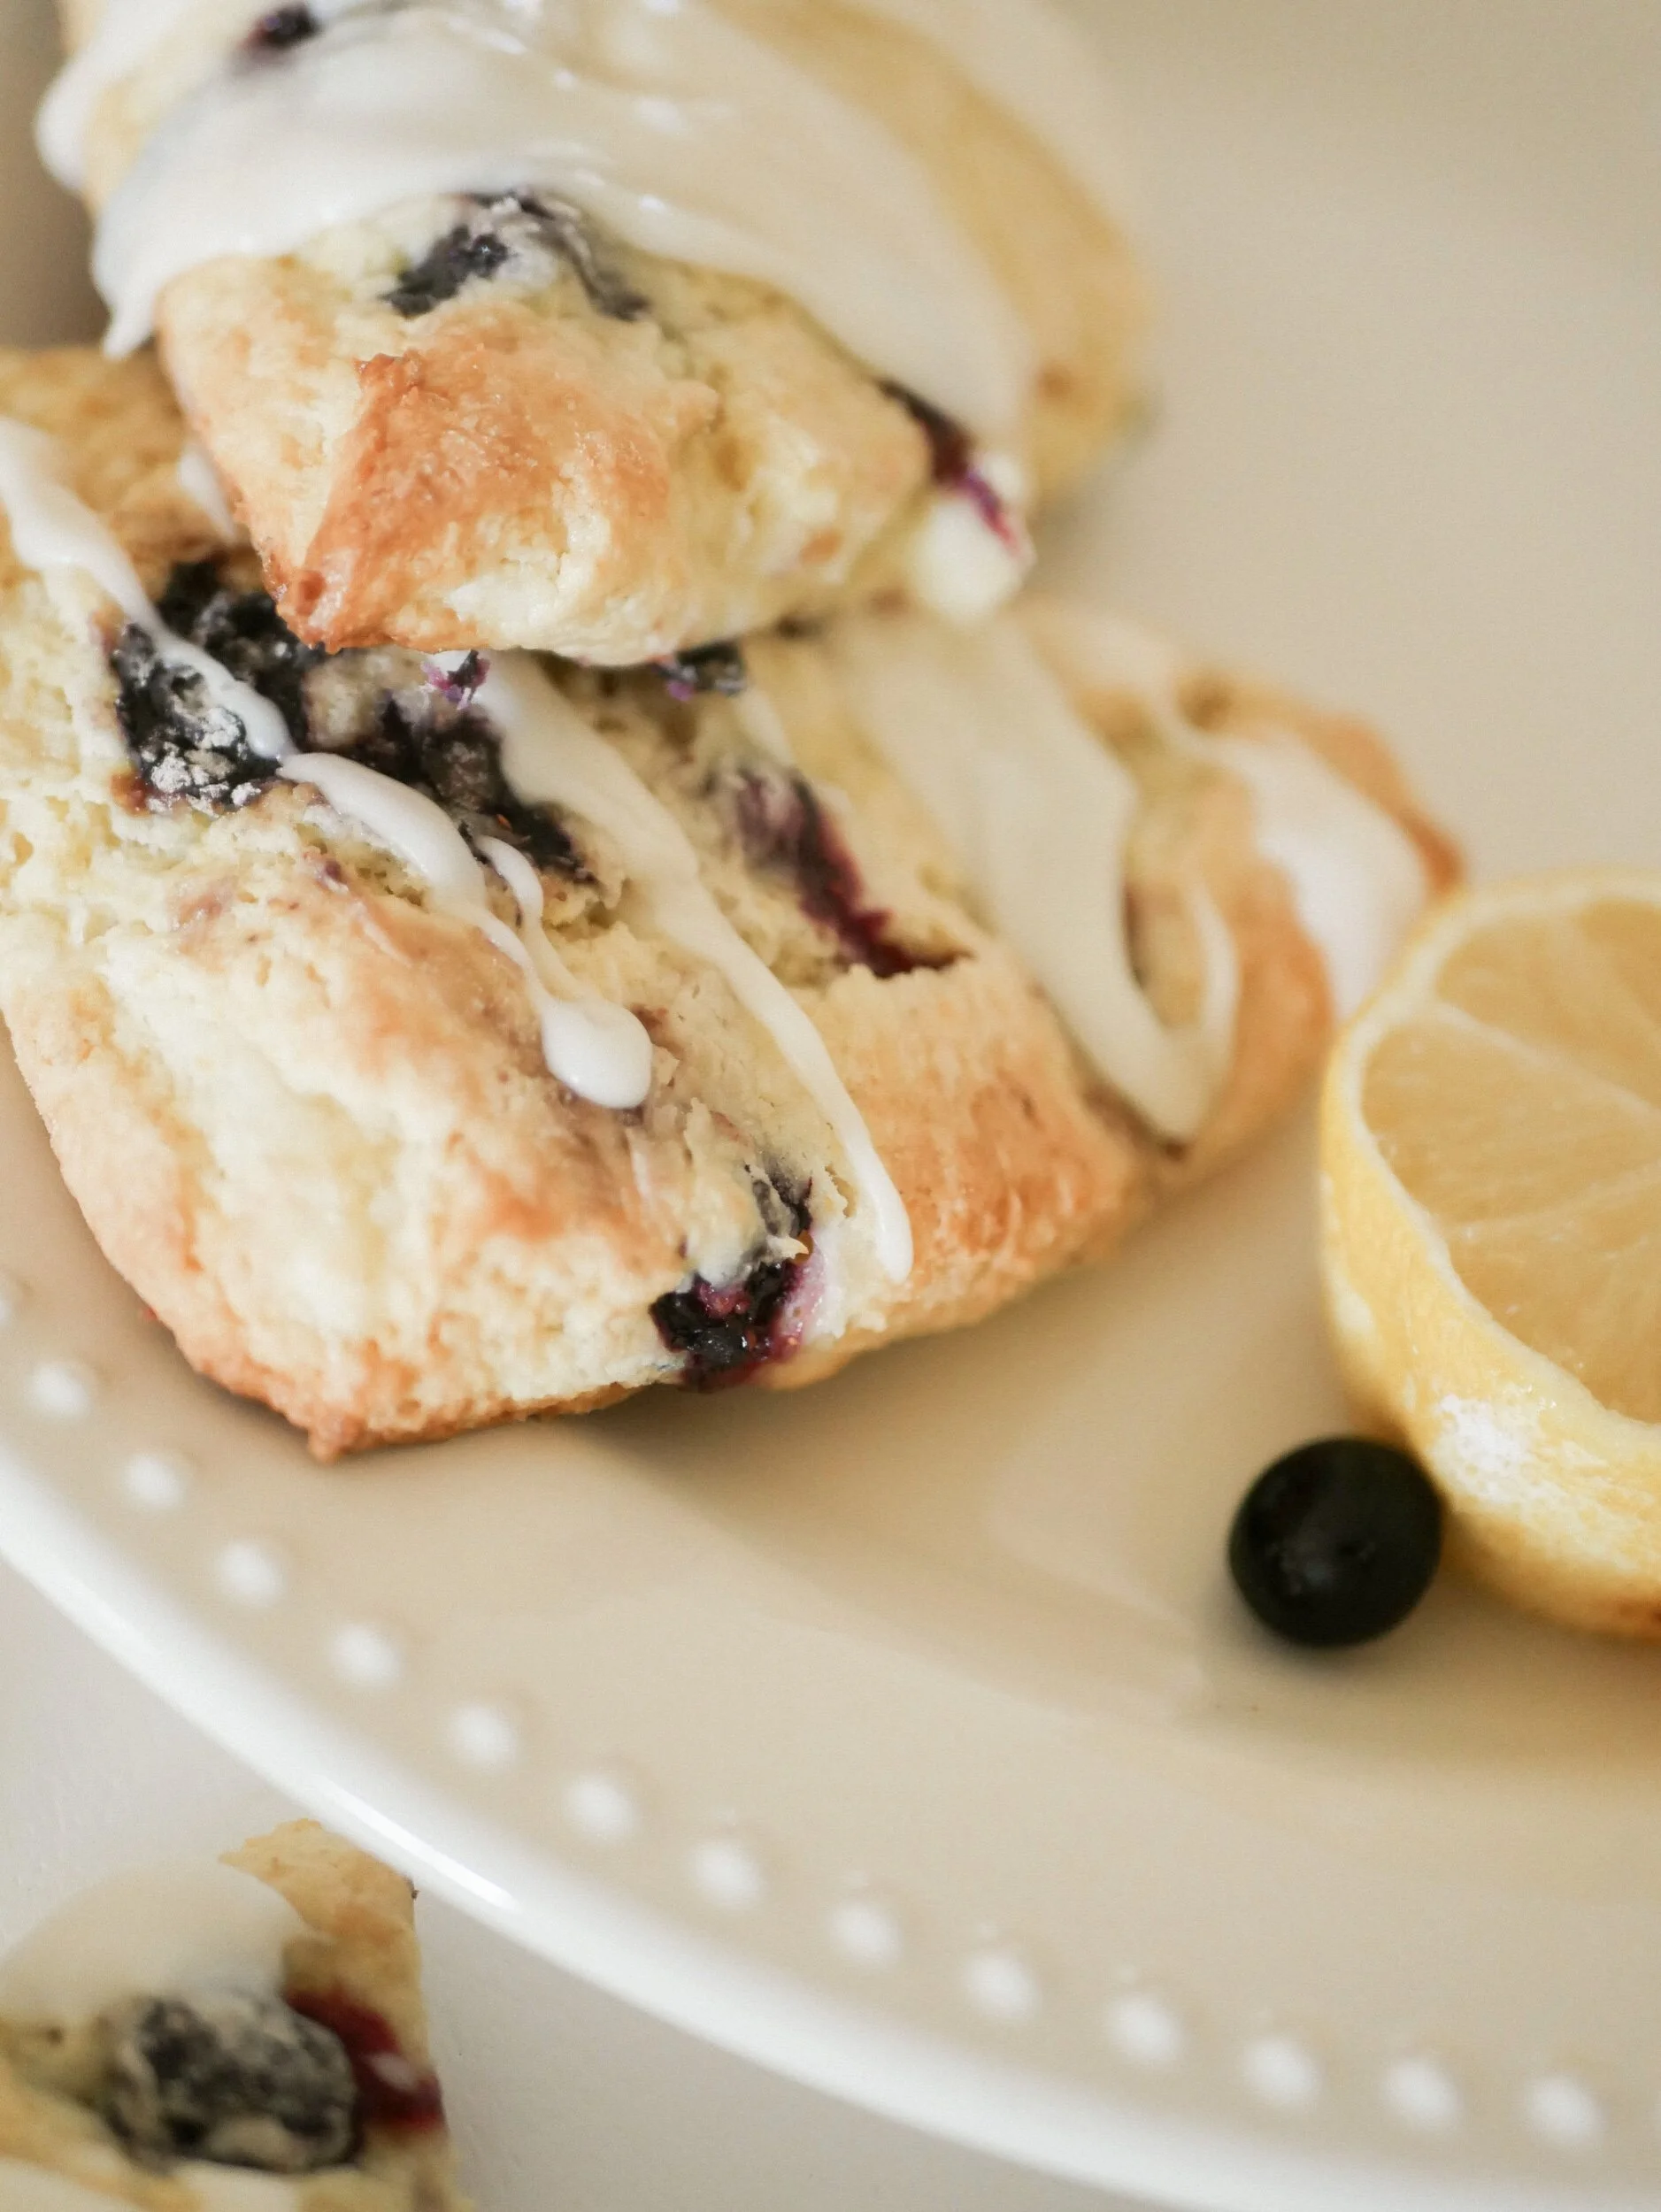
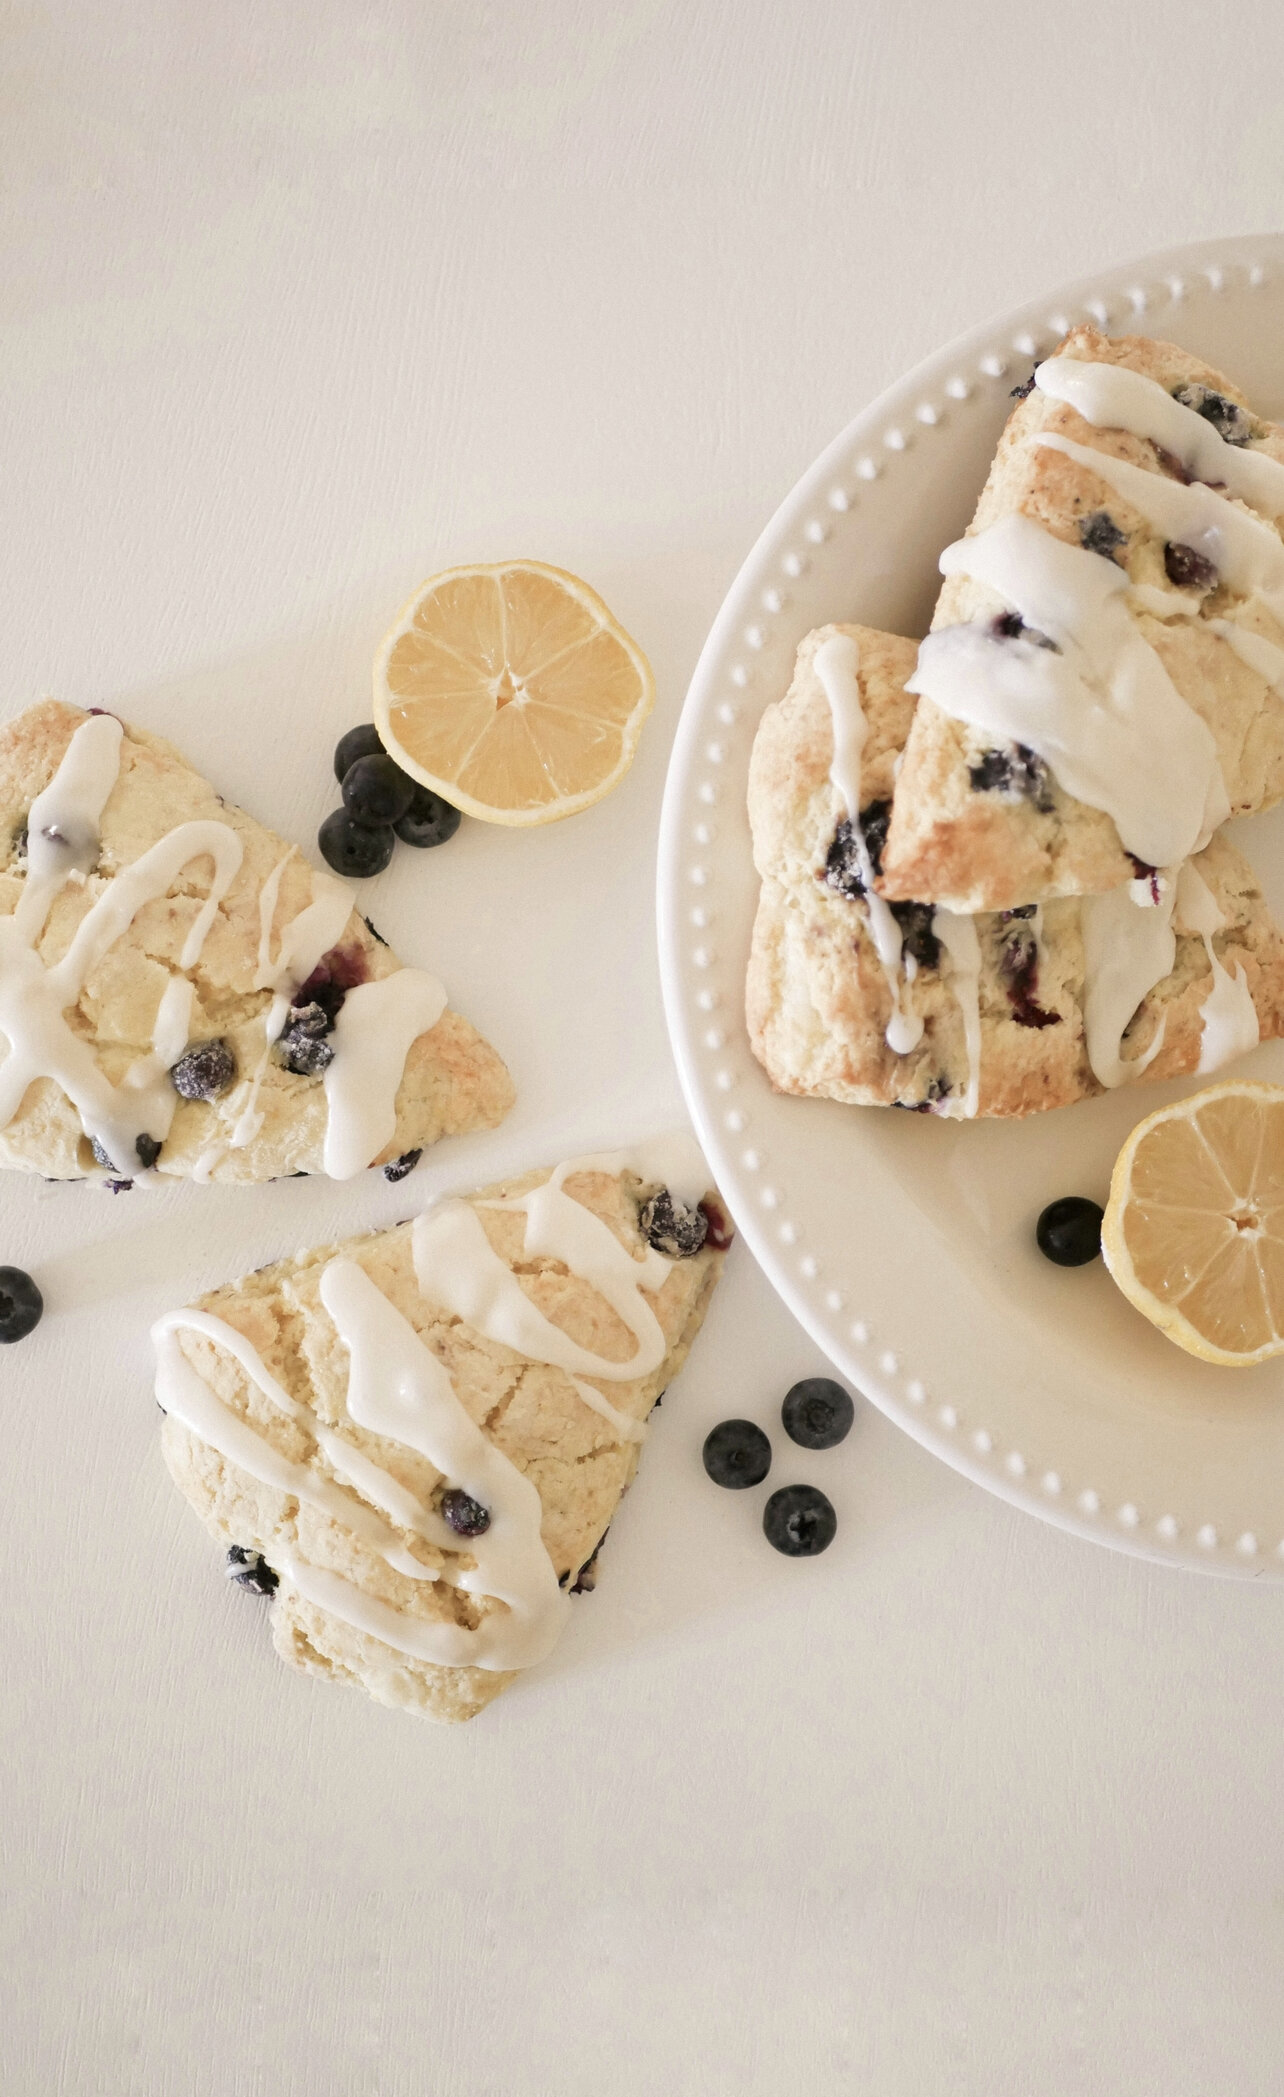
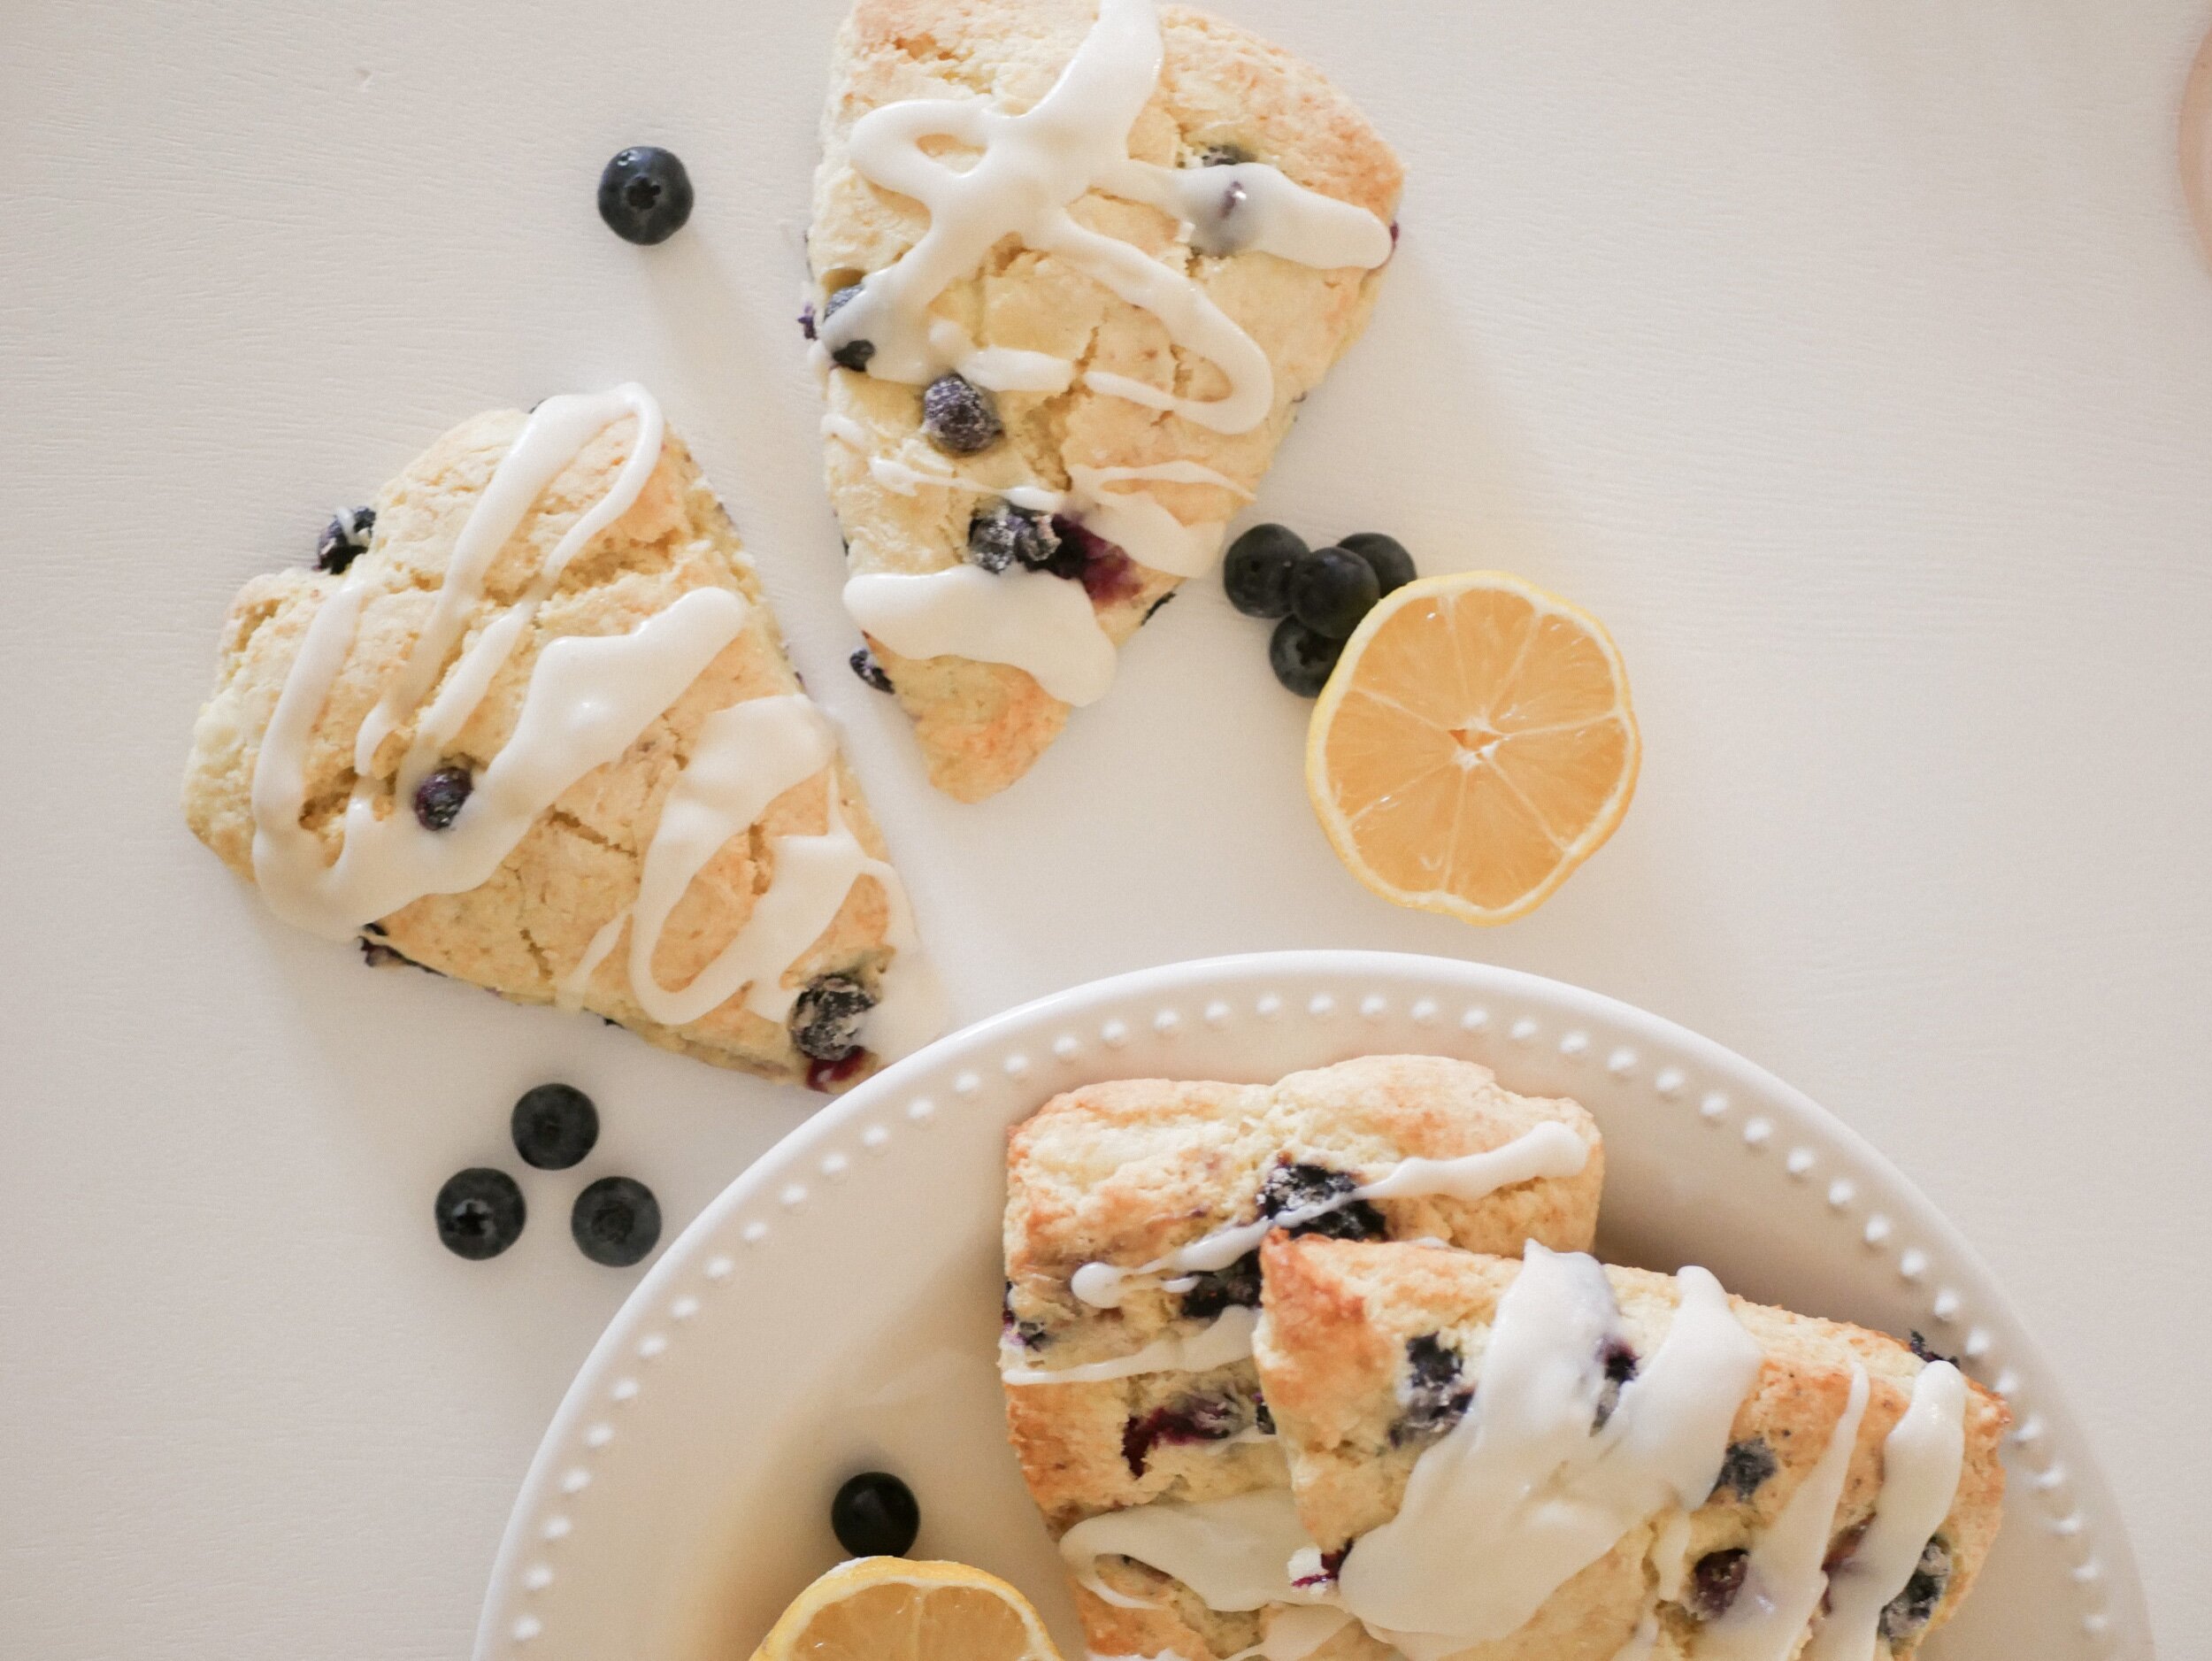
Soft Cream Cheese Lemon Blueberry Scones

The softest, melt in your mouth scones! So good you wont be able to just eat one!! this recipe is for lemon blueberry.. however feel free to mix it up and make it your own. Have strawberries and not blueberries? Swap it out! Want just lemon? Sounds Great!! They will taste amazing with anything you add or take out and you get to make it all your own!! Now lets get started!

Ingredients:

21/2 cups flour

1/2 cup sugar

1/2 tsp salt

1 tbsp baking powder

1/2 cup cold butter

1 egg

1 tsp vanilla extract

2/3 cup heavy cream

8 ounce package of cream cheese

1/2 cup sugar (to cover cream cheese with)

1 pint blueberries

2 tbsp lemon zest

Glaze:

1 tsp vanilla extract

1 cup powdered sugar

2 tbsp melted butter

2 tbsp lemon juice

Directions:

  • Mix together dry ingredients in a large bowl

  • Grate butter into bowl and blend with dry mixture. I use my hands to make sure that the butter doesn’t stick together any larger then a pea size amount.

  • After well mixed make a hole in the center of the mix and put all wet ingredients; egg, vanilla and heavy cream. Mix together. Be sure to not over mix or it will get too tough.

  • Cube cream cheese into dime size chunks. Coat in a small bowl with sugar and add into the dough. Don’t over mix just enough that its well spread out in the dough. Next add in blueberries and lemon zest (or whatever you decide to add in)

  • After all is mixed together, flour your work station and make dough into a pie looking around shape. I keep mine a little thicker so it stays soft. If you like your scones harder and more flaky then you can make it thinner. Mine is usually around an inch to an inch and a half thick. Once in a circle cut like a pizza into slices. I do about 8. Again if you prefer it to be smaller and not as soft you can do more.

  • Place on a cookie sheet and put in the fridge for 45 min to an hour. The last 10 min preheat oven to 400 degrees

  • Bake at 400 degrees for 15 min. Turn the temp down to 350 and bake for 10 min.

  • While baking make glaze! Melt butter completely in a bowl and add in the other ingredients. Mix with a fork until you have your desired consistency. Add more powdered sugar or water to achieve thickness. I like mine a little thicker so it will stick to the top of scones.

  • Transfer scones to cookie sheet and drizzle glaze on top. Let cool and enjoy!!

public.jpeg

Yellowstone Road Trip From California

7 states, 10 days and over 3,000 miles!! One big loop from California on our adventure to Yellowstone and back! It was such a fun filled trip with lots of scenic stops along the way. You may or may not be coming from California, but whatever way you’re coming from these stops were all so fun that I wanted to share them all with you…especially the places we ate and where we stayed along the way!! So let’s go!!

public.jpeg

First Stop: RENO, NEVADA

We had about 24hrs in Reno and didn’t even need to leave out hotel/casino once. Staying at the Peppermill gave us everything we were looking for in a quick fun filled relaxing day. We loved every minute of it. The Peppermill has so many different restaurants, a spa, a gym bigger then most, a fancy pool, and lots and lots of gambling!! As soon as we checked in we headed to eat lunch at their Oceano Seafood restaurant. So delish! I had a salmon salad, Scotty got the Mixed Seafood Ramen and we shared edamame and a delish roll! After lunch we had a spa date in the Hotel for massages that were so relaxing!! Dinner was at their Romanza Italian restaurants where we shared the pasta trio and steak, along with and a delicious bottle of Duckhorn wine. Prepping ourselves for the Longest stretch of driving we’d be doing the next day of driving called for room service breakfast and a quick workout. Breakfast was also amazing and the staff at Peppermill were so friendly and attentive! Highly recommend staying here if you are heading to Reno (fun fact, Scotty’s grandparents always stayed at the peppermill when they use to travel to Reno. So sweet!)

Book your trip -here-

public.jpeg
Whatever it is, the way you tell your story online can make all the difference.
public.jpeg

Second Stop: BOZEMAN, MONTANA

I already talked all about this hip little mountain town on my Bozeman post so I wont bore you again. Head to the blog post -here- to see more info!

Third Stop: YELLOWSTONE

Short hour and a half drive to the North entrance of Yellowstone National Park. We chose to stay in Bozeman for lodging instead of in the Park because it was an off season for their hotels and employees. We pre planned a map of our travel path through the park and tried to research if any roads would be closed along the way. Most of our planned stops we got to see, however, we had to do them in a bit of a different driving order because of some unforeseen closures. When you pull up to the Park the Rangers will tell you where you can and cannot go. If you power through the Park in a day like we did you can still have plenty of time to pull over, take plenty of pics, and do the quick hikes around some of the famous springs, falls, etc. We planned stops in Mammoth Hot Springs, the Grand Canyon of Yellowstone, the Yellowstone Lake, the Grand Purismatic, Morning Glory, and of course the famous Old Faithful Geyser. However, along the drive there are so many perfect turn offs that you could stop for a scenic picture or for a potential animal sighting. We actually stopped with a group to see what their excitement was and got saw a grizzly bear in the wild across the street and up the hillside just about 100 yards away from us. The park is so full of different vibrant colors and peaks and valleys and Rivers and Falls and amazing Springs that we have yet to see in any of our past travels to National Parks. This place is a must visit in your lifetime to unwind and take in the beauty of Mother Nature.

public.jpeg

Stop Four: JACKSON HOLE, WYOMING

This cute little ski town village is a MUST stop when on this trip. Full of charm and beauty nestled right alongside the mountain with lots of cute spots to eat, shop and drink! Biggest tip I can give you on this one is.. a good part of the businesses in town basically close down during their “off season” so if you are wanting this to be a main attraction for your trip don’t come during the months April or November. We of course went during April so a lot was closed but we still got to shop and eat at a couple of the cutest and most popular restaurants. Dinner at Gather in Jackson Hole was delicious. We shared pork buns, red wine marinated bison and pork belly fried rice. Everything was really good but portions were smaller then we expected (just to prepare you) I wont complain tho because that left room for dessert! Their best local ice cream spot is Moo’s Gourmet Ice Cream where the flavors change throughout the year and they have signature local favorites like wild huckleberry, which was delicious!

Day two we went and visited the beautiful Grand Teton’s and explored the roads that were open throughout the village of Moose. Unfortunately, even though we gave it some time pulling over and parking in the moose habitat, we didn’t actually see one. Still though, the drive was so worth it and lead us to some great pics for memories. Before starting our Tetons day we ate at the famous Cafe Genevieve’s. A perfect little place for breakfast or Lunch and a must stop when in Jackson Hole! We both had two different varieties of delicious egg’s benedicts. We made sure to eat breakfast every day and that was actually the third time I chose eggs bennys on the trip and this was by far my favorite!!

public.jpeg

Stop Five: SALT LAKE CITY, UTAH

We spent two nights in Salt Lake and did lots of driving around the city to see so much more the area has to offer. We decided to go to the ski village of Park City for the day and we are so glad we did!! It was one of the best parts of our trip and may be our favorite town we stopped in. Park City is Such a cute town to see with the best strip of downtown including great shopping, dining, and entertainment. It’s surprising close to Salt Lake as well being only 30 mins away. Highly recommend..especially for some Winter fun! Another drive we made was to the Bonneville salt flats. This drive took a while to get to, but it was beyond worth the drive to see. We also of course pulled over on the way for the best views of the Great Salt Lake. Once we made it to the flats that Pure white sandy salty floor goes on for miles and miles and it is so rare and gorgeous. Definite must see for its rarity.

Places we ate at:

Red Iguana- a highly recommended Mexican restaurant all over the online searches. The food was good, the portions were huge, and the staff was so sweet.

Valter’s Osteria - Italian at its finest! The menu is a bit all over the place but you are sure to find something you love! They bring your food and plate it from the pan right in front of you! Personal touch! I couldn’t decide what to order so I went with the pasta sampler. I loved the ravioli the most, so if you go back try that!

Sweet Lake Biscuits & Limeade - Best Limeade I have ever had! Perfectly sweetened with cane sugar and all the different flavors you could imagine!! I went with eggs benedicts again and Scotty got a huge breakfast sandwich. Biscuits were amazing!

HSL Restaurant - Such a hip little place for dinner! We went for the burger but let me tell you… I had a few biscuits on this trip (Scotty reminded me haha!!) and this was by far the best!! Also, I got the cauliflower appetizer and that was surprisingly amazing. Recommend calling with a reservation ahead of time if you want to eat inside at a table. We were outside which was fine because it was a gorgeous night!

Stop Six: ZION NATIONAL PARK

Such a gorgeous park! A beautiful windy drive, with lots of scenic varieties of red rock anddddd super crowded full of hikers! I think we got used to how spacious Yellowstone was that we didn’t expect so many people getting out there enjoying nature and getting in their exercise. However, even though the crowds were bigger, the park offered a completely different but beautiful landscape that we had yet to see on our trip. Highly recommend the drive through and we made a couple stops to get out and snap some very unique photos. I would highly recommend doing this park but maybe on a weekday to avoid crowds. It’s a must add to get out of the hustle and bustle of a Vegas trip and the Vegas strip.

Stop Seven: LAS VEGAS, NEVADA

We regularly visit Vegas as it’s about a 5 hour drive or the quickest flight from our hometown, but it was a much needed last stop. We made a quick 1 night 2 day stop out of it but really enjoyed the luxuries of a nice hotel..Vegas style! We stayed at Aria this time and chose to stay and eat at the hotel (I really don’t like walking the strip as much as some). We had breakfast at the Salt & Ivy and dinner at Bavette’s and both were really delicious and adorable places! Only thing I wanted to do in Vegas was stop in and shop for a new hand bag and Scotty wanted to golf so we hit up Royal Links for golf Monday! Both were a success and made for a happy cap to our trip and a happy ride home!

Other Travel Blogs You Will Love:

Explore Bozeman Montana with Our City Guide

Three Days in The Rainy City: A Seattle Washington City Guide

Unlock the Secrets of Paradise: Your Ultimate Hana, Maui Travel Guide to an Unforgettable Adventure!

Making the Most of 3 Days in NOLA - A Guide to Exploring New Orleans

Discovering the Magic of Carmel, CA: A Weekend Getaway at California's Coastal Paradise

Paso Robles City Guide

Explore Bozeman Montana with Our City Guide

Welcome to Bozeman, Montana! Bozeman is a vibrant, outdoor-oriented city surrounded by majestic mountains and a plethora of outdoor activities. Whether you’re an outdoor enthusiast looking for a great destination for your next nature-filled adventure, or a city slicker looking for a great place to explore and experience the best of Montana, Bozeman is the place for you. This Bozeman Montana City Guide will provide you with all the information you need to get the most out of your visit to this wonderful city. From local attractions to the best restaurants, to outdoor activities and a bit of history, this guide will have you covered during your stay in Bozeman.

We just returned from our 10-day road trip to Yellowstone (blog post on the whole trip coming soon!!) The number 1 question I got was after planning lots and lots of different stops along the way from Cali, which was my absolute favorite place? I would definitely have to say it was Bozeman, MT. I really loved the cute hotel we stayed at called RSVP. This hip mountain towns food was AMAZING and a few of the restaurants were so much better than even expected and advertised. Everywhere we went seemed to be easily accessible with a quick drive and centrally located off the main road. Are you going to start planning a trip here soon? I’ll break down all my favorites for you, so all the hard work is done!!

#1 Where to Stay?

I always do plenty of research before we travel to find the perfect hotel that fits our needs. Although you may not spend tons of time in the room its so nice to try and find the comforts of home! I personally love a boutique style hotel that has character and charm! I found RSVP Motel of Bozeman long before this trip and had it pinned in my “Vacation Ideas” folder. So as soon as I knew we would be going to Yellowstone I booked it! Bozeman is a little over an hour outside of the North entrance of Yellowstone so it was an easy scenic drive to get to the famous park. The town being outside of the park a bit actually ended up being the perfect place for us to stay because parts of the park (especially lodging) happen to be closed in April. Bozeman was wide open and allowed us to see an amazing town we might not have otherwise if we would’ve chosen lodging in the park.

Back to the hotel. RSVP. Such a cute place to stay with a vintage Motel vibe but modernized! Every corner of the room had design and details that gave it so much character and charm. They offered lots of room goodies like beauty samples for example, and you know I’m all about that attention to detail! They have a coffee maker in each room, but if you need more they have the cutest coffee shop and restaurant called The Farmers Daughter. Its just darling inside and happens to be one of the top rated places to eat online. We didn’t get a chance to eat at their restaurant but the coffee was great and gave us that kickstart in the morning and the staff was so sweet and the place was always busy!

#2 Places To Eat

Bozeman, Montana is an amazing city to explore, boasting a vibrant downtown, unique eateries, and plenty of cultural activities. The main street area is home to a variety of restaurants, from upscale dining to casual pubs and coffee shops, so there’s something for everyone. Probably my favorite thing to do on vacation.. is EAT haha! If you’ve followed along on this trip through Instagram stories you sure did see a lot of food places! Let's break down our favorites, why we liked them and my recommendations on what you should order.

Black Bird Kitchen

SO DARN GOOD! Make a reservation because this small but adorable restaurant is a popular one!! It was packed all night long and I totally get why. We shared different antipasti , salad and tried the blackbird bread (which was delish). We split (dare we say) one of the best pizzas we have ever had. Scott read a review online before going and read that people were saying it was the best pizza they had ever had and even better then Italy. We laughed at that thought and told ourselves that they must not order pizza much. However… They may have been right! The pizza lived up to the hype and then some! BlackBirdKitchen.com

Western Cafe Of Bozeman

A classic that has been around seemingly forever in the heart of downtown and a must eat for breakfast. The scenery is so perfectly Western and gives you that cozy feel of being in a real mountain town. Scott got the Chicken Fried Steak and I got the Cinnamon Roll French Toast. Both are the top sellers and we soon learned why! Such big portions and so delicious make this place a must eat when in Bozeman! Western Cafe of Bozeman

Mint Cafe and Bar

A short drive to the next small town outside of Bozeman but you’ll get yourself a delicious steak and enjoy the quaint downtown of Belgrade. We both got steaks and Scotty being a good boy got asparagus while I got my favorite guilty pleasure.. the Fries! I wont ever regret getting them either because as good as the steaks were those fries were THE BEST of the entire trip!! Mint was totally worth the 20 min drive and highly recommend calling before you head from Bozeman to get on the waiting list because even in the middle of this small town in the middle of week the place was poppin! Mint Cafe & Bar

The Coffee Pot Bakery Cafe

This was located just up the street from the Bozeman Hot Springs and the cutest little place to start your day with breakfast or to have a delicious midday sandwiches. They make all their fresh pastries and are known for their cinnamon rolls (sadly we didn’t get one because they had sold out!) However the scone we shared was so delicious!! The Coffee Pot Bakery Cafe

public.jpeg

Fink’s Deli

Right next to Wild Crumb you will find Fink’s. An adorable little place to grab a sandwich, soups, salads and cuts of meat and cheese. We grabbed a sandwich to share in Yellowstone and eat as we waited for Old Faithful to blow! It was SO good. The sauce was perfect and the meat and cheese were so fresh. Highly recommend for a quick sandwich grab when going to Yellowstone, planning a picnic or to enjoy at their location. Fink’s Deli

Roost Fried Chicken

If you are in the mood for fried chicken.. Look no further! They have every type of chicken and sauce you could ever want. We of course we tried a few different options on the menu and loved them all. My favorite was the classic chicken sandwich! Its a quick place to eat also if you are in a rush! Roost Fried Chicken

Wild Crumb

A great place to grab some pastries! I got banana nut bread, a cheese and ham croissant and blueberry scone for the day we drove to Yellowstone. They open early enough that it was perfect little stop to grab and eat on the road. Wild Crumb

Jam!

Trendy little place in downtown Bozeman only open for breakfast and lunch! Top of my list from what we ordered? The pancakes! They have tons of options and were so good! Side note, make a reservation as well. Even mid week breakfast the place was crowded. Jam On Main

#3 Things To do

Bozeman, Montana is a vibrant city full of outdoor activities and cultural attractions. Located in the beautiful Gallatin Valley, the city is surrounded by mountain ranges and is home to Montana State University. Whether you’re visiting for a weekend getaway or an extended stay, Bozeman has something for everyone. Here are some of the things we did during our stay.

Bozeman Hot Springs

Number 1 thing Scotty needs on vacation is a gym after all the good food that we eat. So, me being the planner I am, when I knew our hotel didn’t have one I had to find something to keep him happy! Luckily one of the top things to do was relax in the Hot Springs…but on the property they also had a gym! So, it was a perfect morning to go workout and then jump in the Hot Springs for relaxation all in one place.

Peet’s Hill/ Burkes Park

A beautiful view of the town and a great way to get outside and get some exercise. With beautiful mountains all around it's the ultimate place to take an afternoon walk especially if you brought your dog on this trip.

Drink’s at Montana Ale Works

We didn’t eat here so I can’t comment on the food.. even though it was highly popular on my search before our trip. It was super cute to just stop by and have a beer from their huge list!!

Bridger Creek Golf Course

If you are a golf fan then Bridger Creek is a perfect place to spend an afternoon. Gorgeous location that I enjoyed the nature of while Scotty got to play a round of golf.

Yellowstone

If you are staying in Bozeman to visit Yellowstone or just looking for something to do on a free day I highly recommend visiting the famous park. Scott and I saw everything we wanted in the Yellowstone Park in one day. We didn’t do too many hikes, but we researched and mapped out everything we wanted to see before so that we got the most out of our time and weren’t looking for things as we were driving. For outdoor enthusiasts this is a must do when in the area.

No matter what brings you to Bozeman, you’re sure to find something that fits your interests. Whether it’s exploring the city’s cultural attractions or enjoying the great outdoors, Bozeman has something for everyone.

We both really enjoyed our 4 days in Bozeman and I know you will too! The town offers lots more that you could add (especially for lovers of the outdoors) but these are the things we narrowed our days down to and truly enjoyed! Hope this Montana travel guide helps your planning.

Wishing you wonderful travels, Amanda

(for more on this trip in video form go to my Instagram stories under the YELLOWSTONE highlight and to shop these looks head to my liketoknow.it where everything is linked.)

public.jpeg

Creamy Root Beer Popsicle

The temperature is starting to heat up here in Cali.. which means Summer is almost here! Time to start having some of those yummy cool down treats! I am a huge fan of Zevia and had to come up with a delicious recipe using their new root beer!! Their drink is creamy and delicious on its own, but why not make it into a delish treat the whole family can enjoy all Summer long! They are SOOO quick and easy to make! Just two ingredients and a little time!

Ingredients:

1 can of Zevia Root Beer

Heavy Cream

Popsicle forms

Directions:

  1. Add 1 tbsp of heavy cream into each form

  2. Top off with Root Beer until full

  3. Put in the freezer until hard!

  4. ENJOY!

Mom's 60th Birthday Party

I had so much fun recently planning my Mom’s 60th Birthday. It was not only the joy planning parties brings me, but seeing the reaction on my mom’s face when I would tell her my plans. It was PRICELESS! When starting to plan her party I knew I wanted plenty of pink to be the main color. Pink is her favorite color and both her and I wouldn’t have had any other color! I also wanted to sprinkle in some elements of the Spring season and using lots of citrus fruits seemed like such a fun and creative way to do so! Then I got to work! I found the very best vendors to help me put everything together for this event!! I highly recommend them all!! Everyone was so amazing and genuinely happy to be working on this special day for my mom and that really made us feel special .

List of Vendors:

Flowers: Emerald Grace

Citrus: The Sisters Market

Rentals: Stockroom Picks

Invitations & Menu: Minted

Catering: Jack’s Catering

Fruit Names Calligraphy: willemina_typography

Chairs: Westwood Barns

Chargers & Linen’s: BBJ Linen & La Tavola Fine Linen

Favor Station: Vital Proteins

Coffee Bike: Nitro Bike

Pastries: Wildgrain

Photos: Ellie Koleen

9707.jpg
9702.jpg
9719.jpg
9711.jpg
IMG_5860.jpg

Hope you enjoyed being a part of the event virtually! If you want more videos and upclose images they are all saved in my instagram highlight under “Mom’s Party

Xo, Amanda

My 3 Easy Homemade Seasoning Mixes

We never have a meal at our house without spices! I probably use my ranch seasoning the most, but other spices like Italian and taco seasoning are always important to have in the cabinet! What I love most about making my own seasonings instead of buying them is getting rid of all the extra unhealthy additives they put in store bought pre made spices. They mainly do this so the shelf life is a little longer. I am using spices to make these seasonings that I will also use in my other meals and recipes so when I buy a large glass jar of it at the store I’m sure to use the entire thing instead of it going bad before it can finish. I also can reuse the glass jars (usually Good and Gather) to make new seasonings. I like to change the color of the tops on the jars so they are bright and fun and fit with my house! Here I used a spray paint to make them all match and they came out ohhh so cute! Who doesn’t love that salmon color! Now lets get to the recipes!

image1 (12).jpeg

Ranch Seasoning Mix

1 tsp Garlic Powder

2 tbsp Parsley Flakes

1 tsp Onion Powder

1/2 tsp Basil

1 tsp Dill Weed

1/2 tsp Pepper

1/2 tsp sea salt

Directions:

Mix together and enjoy over EVERYTHING!! I also make my homemade ranch dressing by mixing with equal parts whole milk and mayo (Primal Kitchen is my favorite clean mayo brand)

image3.jpeg

Taco Seasoning Mix

2 tbsp Chipotle Chili Powder

2 tbsp Ground Cumin

1 1/2 tsp Onion Powder

1 1/2 tsp Garlic Powder

1 tsp Paprika

1/2 tsp Cayenne Pepper

1/2 tsp Sea Salt

1/2 tsp Oregano

Directions

Mix together and put in a new spice container! Add more Cayenne Pepper depending on how hot you would like it!!

image4.jpeg

Italian Seasoning Mix

1 tbsp Basil

1 tbsp Oregano

1 tbsp Rosemary

1 tbsp Thyme

1 tbsp Garlic Powder

1 tbsp Marjoram

Directions:

Mix together and enjoy! Add in 1 tbsp red pepper flakes if you want spicy Italian dishes also!

image0 (7).jpeg

Garlic Mushroom & Shrimp Pasta

This is one of my favorite quick and easy pastas to make. It’s deliciously light on sauce but full of great flavorful taste. Every time I make this dish Scotty easily cleans his plate and always tells me how delicious it was. Quotes like “It tastes like it’s from a fancy restaurant”… “Add this to the menu”…and “That was really good babe”.. always leaves me with a smile on my face. It’s such a great feeling when someone loves the food I cook. So I had to share for this months recipe because I want everyone leaving your table with a smile too!

public.jpeg

Ingredients:

For Pasta I always use Wild Grain’s pasta sent in a monthly membership that is fresh and so delicious! One package makes enough for 2-4 people

3 Cloves of Garlic

Olive Oil spray

8 oz Baby Bella Mushrooms

1/3 Pasta water

3 tbsp Butter

3 tbsp soy sauce

1/3 cup white wine

Shrimp (you can really use any amount you want here)

Directions:

1. Start water on medium heat for pasta. Once boiling add in pasta until Al dente.

2. While water is boiling spray skillet with olive oil cooking spray until fully coated and start on medium heat. Mince garlic and add into pan. Stirring until fragrant.

3. Add mushrooms to garlic pan and stir. Cooking for a few minutes then adding in wine. Let it cook while the liquid fully evaporates.

4. Once mushrooms are finished transfer to a plate for later. No need to wipe out pan just use another coating of olive oil spray and cook shrimp. Add a little salt and pepper onto shrimp and cook until done!

5. While mushroom and shrimp are cooking and pasta is done boiling. Drain and keep 1/3 cup pasta water.

6. Put pasta back into original pan and stir together with pasta water, butter and soy sauce.

7. Now that you have everyone ready to go.. plate your dish! pasta first, then add on your mushrooms and shrimp and serve!

8. Enjoy! Maybe even have a glass of that wine you opened!

To get $10 off your first order with Wild Grain and sourdough rolls in every box for life!!

Use code AMANDAWARREN

www.wildgrain.com

public.jpeg
public.jpeg
public.jpeg

A Rosy Pink Galentines Party

Are you looking for a unique and fun way to celebrate Valentine's Day this year? How about throwing a Rosey Pink Galentines Party? This fun and festive celebration is perfect for getting together with your closest friends and celebrating love, friendship, and all things pink and rosey! Whether you're hosting a dinner, brunch, or an afternoon tea, a Rosey Pink Galentines Party will bring a bit of cheer and joy to your special day. From decorations to activities, we'll show you how to plan the perfect Rosey Pink Galentines Party. Read on to find out more!

Galentines.. a fun way to celebrate the season of love with your favorite gals. I am always looking for a way to incorporate my very favorite color of pink into any dinner party I throw, and for this time of the year it fit the theme perfectly. Valentines is a month where my favorite color is EVERYWHERE! I turned our dining room into a rosy pink Valentines oasis filled with the most stunning flowers and pink touches everywhere.

IMG_1386.JPG

For the balloon wall I found a listing on Etsy that lets you pick whatever letters or numbers you want. I measured the wall to see how many X’s and O’s I could fit onto the wall. The exact ones I got on Etsy are linked -here-! The best part is you can deflate these after you use them and save them to reuse the next time!

For the table setting I used two different sets of glasses to add differing heights and dimensions. One set were crystal wine glasses and the other antique pink glasses that were my grandmothers. To make them even more special I dipped their rims in melted white chocolate and then sprinkles. It adds a cute element and tastes delicious! To layer up the place setting I found the cutest pink heart shaped plates at target for only $3 each! Such a steal and so popular they keep selling out! Just add Target to notify you and they will when they come back in stock, but hurry.. they sell out very fast! Next, I folded and placed cheesecloth napkins (They are the same ones I used on my Thanksgiving table linked -here- for another way to style.) on top of the plate and put my silverware on top then wrapped in a bow. Its super simple but oh so cute! All the layers add such great detail as well!

IMG_1254.JPG
IMG_0942.JPG
IMG_1240.JPG
IMG_1232.JPG
IMG_0914.JPG

Onto the superheroes of any good party.. the Vendors! Luckily for parties we have help and resources and don’t have to hold all the weight of it all. I found the best food and floral vendors to help put this fun party together.

I was so excited to work with Emerald Grace who did all the floral arrangements for the gorgeous table! She is such a doll and did AMAZING work!! I have loved all of her beautiful arrangements she’s done for me in the past but this table really took the cake! She also added a very special unique element that any girls party needs…a bouquet bar! She brought different types of greenery and flowers to put on my bar cart with butcher paper and string. This added a cute focal point and something special for each of the ladies to take home and enjoy the rest of the week! For more of Julie’s work from Emerald Grace head to her website -here-.

IMG_1233.JPG
IMG_0948.JPG
IMG_1236.JPG
IMG_0934.JPG

In my opinion party favors are something that every party, big or small, needs. I added an adorable touch next to each place setting with a yummy cookie favor from Just Dough With It! They have a Valentines cookie with The Moira Rose (rose shortbread). They are so delicious and they came individually bagged to perfection! To get cookies for your valentine or for your next event head to their website -here-. On top I placed a valentine card.. because after all it is that time of year. I found the cutest small valentines cards from Minted that went perfectly with everything else!

IMG_1221 (1).JPG
IMG_1218.JPG
IMG_1244.JPG

Food! It’s probably the most memorable good or bad part of any party. If you leave with a full and happy belly you will never forget it! For this event I started with the most delicious charcuterie board that was perfectly made with heart shaped cheeses and strawberries along with salami folded into the shape of roses. Sandra from Fig and Olive totally created a masterpiece of food. I don’t think I can ever make my own board again haha!! For more info on Fig and Olive and to hire her for your next event or for just a box of yummies on your next date night at home head to her website -here-.

IMG_1193.JPG

Dinner was absolute perfection! My friends at Tacos San Marcos made the most delicious spread! They made tacos, Strawberry Limeade, Quesadilla, Quesatacos, rice and beans and delicious churro cheesecake! Each and everything they made was delicious. They even cater so I highly recommend they for your next event! Everything was amazing and they send all the toppings you could possibly want. To see where they will be located this week or to book for your next event head to their website -here-.

IMG_1147.JPG
IMG_1496.JPG
IMG_1176 (1).JPG

Brown Butter Caramel Pretzel Cookies

These cookies are probably my all time favorite homemade ones.. That’s a big statement being that I love to bake so much, but I’m pretty sure they can hold up the pressure of it! They have all the tastes with the salt, the sweet, and the crunch! So good that the hubby even agrees with me! You may think he’s just being nice because he is my husband. He is sweet.. but he would never lie about my cooking to save face! If I ever need to know if a recipe is good enough to share online.. I call on him and my mom. They both without a doubt will give me their honest opinions no matter what!

Now that I hyped these cookies up.. I have to tell you the bad news. They do take a few hours to make!! (Sorry!!) However the hours that it takes are mostly spent with them in the fridge cooling. So in reality its not too bad and it just means you get more done during that time!

Let’s Get Cooking!

IMG_0467.JPG
IMG_0464.JPG

Recipe:

1 cup butter (2 sticks)

3/4 cup sugar

3/4 dark brown sugar

1 tsp vanilla

2 large eggs

2 1/4 cups flour

1 tsp baking powder

1 tsp salt

1 package of chocolate covered caramels

1 cup crushed pretzels + more to add in later

Sea Salt

Directions:

1. Making brown butter! You want to melt the 2 sticks of butter in a pan until they boil, change in color and start to smell a nutty delicious flavor! The entire house will smell like this and its heavenly. Once the butter gets brown in color and is a yummy nutty smell put into a bowl and let sit cool 5 min. Next, put that bowl into the fridge for 1 hour. I suggest to stir at the 30 min mark just to make sure its cooling evenly and as fast as possible. Once the butter is more like butter and not melted you are ready!

2. While the butter is in the fridge this is the perfect time to get the goodies ready for the end. The chocolate covered caramels I typically use are the Dove brand (if you are a fan of another kind any will work). Unwrap and cut each candy into 4 pieces. Fill a plastic bag with 1 cup of pretzels and crush them!

3. Blend in both sugars and vanilla completely

4. Add in eggs, one at a time

5. Slowly add in all dry ingredients a little at a time until well blended.

6. Now the dough is all ready add in the chocolate caramels and pretzels. Don’t over blend of the chocolate and caramel will over mix and not be in whole chunks.

7. Roll into dough balls, sprinkle with sea salt and add extra pieces of pretzel on corners for extra crunch!

8. Bake at 375 for 9-11 min.

9. Let cool and enjoy!

IMG_0453.JPG

My experience with ELEMIS products & what I will buy again!

I’ve used ELEMIS products in the past but only in small sample sizes and never enough to get the full experience and know what to suggest to you! I have gotten many questions about this brand in the past, like how certain products worked, if they were worth the price, and what products to try first. I decided it was time to try them for longer than a week at a time and to share my experience and research. There is nothing I hate more than spending good money on things that don’t live up to the hype! I’m sure you can relate!!

Well I’m here to tell you, the hype is real! Imagine an at home spa experience that you and your skin will both love! I tried a lot of their products and liked them all a LOT! I’ll break down my top 5 favorites and let you know what I loved and why I will be a returning customer!

IMG_0404.jpg
Facetune_24-01-2021-13-11-21.JPG
IMG_0373.JPG

PRO-COLLAGEN EYE REVIVE MASK

This anti wrinkle eye mask is my favorite eye treatment I have ever used! It’s a jelly formula and can used in several ways! I love applying it at night and it can also be used under makeup. It gives the eyes 24 hours of moisturization that leaves them brighter and less fatigued. Feels incredible on and I can see a difference since using it.

PRO-COLLAGEN TRI-ACID PEEL

This is a GOOD one! I highly suggest this as a treatment twice a week! Helps with fine lines and dull skin which I have been noticing more of lately. I could tell the difference just after the first use! It helped remove dead skin cells I could feel on my skin that a facial scrub wasn’t getting rid of. After I do this and add the rest of my nighttime routine I could feel my skin just drinking it all in!

Facetune_24-01-2021-13-04-59.JPG

PRO-COLLAGEN CLEANSING BALM

This also comes in Rose and smells amazing in both! This super cleansing treatment balm feels so good on the skin. I have seen it all over online and now know why! It melts away your makeup, cleanses your skin and all without feeling dry. It leaves you feeling moisturized and ready for the rest of your skincare routine. Best part is you can also use for a nourishing treatment. Leaving on for 10 min to leave skin even more moisturized.

DYNAMIC RESURFACING FACIAL PADS

Love using resurfacing facial pads and these did not disappoint! I like to use these when I am not using the tri acid peel. I typically use this in the evening after washing my face to gently exfoliate my skin. However they can be used morning and/or night. Depending on how your skincare routine is.

IMG_0359.JPG

SUPERFOOD FACIAL OIL

I don’t typically use a facial oil mostly because I do get acne still from time to time. My acne is mostly hormonal but new products and oils can cause breakouts too. I love that this oil is made of super foods and very light so It hasn’t caused me any breakouts. I have only been using it once a week to add a little something on Sundays to my routine. I also apply a drop to a small patch I have on my neck. Its a little red patch that came out of nowhere a few months ago and is super dry. Since adding the facial oil at night to it its less dry and has gotten so much better! You can also add this to your moisturizer in the mornings, your makeup will go on so smooth after!!

Facetune_24-01-2021-13-05-31.JPG

I sure hope this has helped you decide on a few products to try, incase you were on the fence about it! I would highly recommend ELEMIS now that I have tried so many of their products. Out of everything I ordered there wasn’t a single item I didn’t like! Shop my favorites below and for even more beauty tips be sure to follow me on Instagram @amandawarren__

Until Next Time.. Xo

Amanda

For 20% off your entire purchase use code “WARREN20”

Jaci Shampoo & Conditioner - Which one is right for you?

I have been using Jaci since the beginning of the year when it first came out. I first tried it out because all of their formulas are sulphate, paraben, and phthalate free, along with being vegan and cruelty free. Another plus is they are manufactured in an environmentally responsible way. Jaci has done this by partnering with a leading, state of the art factory that has a committed mission to minimize their carbon footprint through solar power and innovative cutting edge technology to reduce climate changing emissions. These things are of course great to have in every brand I try out but I also had to make sure that the results followed! My hair has never felt so amazing and silky smooth and my color has stayed in tact (even though I haven’t been coloring it). I have been going between the volumizing shampoo/conditioner and toning shampoo/conditioner to keep my hair full but also to keep my hair from getting brassy!

6926_.jpg

I know starting a new line of haircare as a customer can be hard if you aren’t sure which one is right for your hair. So I’m going to break it down for you! Starting at the very top..

Volumizing Shampoo/Conditioner:

This shampoo gently removes impurities without stripping hair of its natural oils giving fullness all while using a lightweight cleanser. All made with extracts of green tea leaf, sunflower, and rosemary leaf help strengthen the hair shaft and simultaneously hydrate the scalp. The conditioner is lightweight giving fine, limp hair a much needed lift. Filled with aloe leaf juice that is shown to thicken and separate strands for more lush and voluminous looking locks and who doesn’t want that!! I have noticed my hair is so full when using this especially when followed by a blowout with a big round brush! It also seems to not get oily as fast. Which every day I don’t have to wash my hair is a good day to me!

Hydration Shampoo/Conditioner:

Hair filling frizzy, dry, with plenty of fly aways? This one is for you! Their conditioner moisture-rich formula includes hydrolyzed quinoa protein which penetrates into the hair shaft for powerful moisture benefits and protection against further dryness. Just a few washes and you will have shiny, soft manageable locks! Pair it with hydration shampoo to help get rid of excessive dryness caused by chemical processes or environmental damages. Their shampoo is packed with coconut, quinoa, and sunflower essential oils to hydrate your strands, while the green tea extract gently cleanses while locking in long lasting moisture. They recommend air drying for best results.

Reparative Shampoo/Conditioner:

If hair in need of smoothing frizz and repairing split ends? This reparative duo is for you by simultaneously hydrating the scalp and hair follicle all at once you are sure to have hair feeling softer, stronger and hydrated all at once. Formulated from pure plant derived ingredients, the blend is primarily argon oil based and packed with vitamins, minerals and amino acids that are the answer to damaged hair follicles. The conditioner includes shea butter, sunflower extract and coconut essential oils that leaves damaged hair silky and smooth.

Toning Shampoo/Conditioner:

Feeling brassy?? This shampoo with help minimize and neutralize that by depositing a hint of tint! Natural pigments cool and calm all shades of blonde (even my balayage hair). The violet pigments enhance and extend color while sweet almond and coconut oils nourish and strengthen the hair leaving it with great moisture and promoting shine. All while fighting frizz! This duo will help you hair color last longer between salon visits for the best color 24/7!

Curly Shampoo/Conditioner:

Fighting frizz while improving definition and texture of your wave and curls! This rich shampoo gives the perfect level of nourishment while gently removing impurities. The curl quenching conditioner is the perfect next step to sealing down the hair cuticle to form a barrier that locks in moisture and helps protect against damage from environmental aggressors. The results are soft, supple, defined curls that bounce and spring. Pair these two together for the best curly locks!

For more info visit Jaci.com

For 20% off your order use code AMANDAWARREN

6927_.jpg
6919_.jpg
6924_.jpg

Unveiling the Feast: A Warm Welcome to My Thanksgiving Table

Welcome, lovely readers! As we approach that wondrous time of year when we gather around the table, sharing laughter, stories, and, of course, a bounty of delicious food, I can't help but share my excitement with you all. Thanksgiving is more than just a holiday; it's a sentiment, a feeling of warmth and gratitude. So pull up a chair, pour yourself a cup of hot apple cider, and join me as we prepare to celebrate. Welcome to my Thanksgiving table — a place where food meets tradition, love, and gratitude.

20201114-warren-laurenwestra-182.jpg

Creating the table decor for the Holidays has always been such a special hobby for me. I can remember being a young girl and loving helping my mom set the table for a regular weeknight dinner. It was so important to me to have a dinner for our family at the table. It helped me feel all grown-up and explore my creativity in decorating skills! So now that I officially am a grown-up I put a lot more thought and energy into my table settings, and I still love every single moment of it! This year I had the pleasure of hosting our Friendsgiving, so of course I decided to make a real production of it. I got to work with a few of my favorite companies to showcase all the amazing work they do.

Here is a list of Vendors I was so blessed to work with! Feel free to click on their Instagram handles to see more of their amazing work along with how to get in touch with them for your next event this year!

Rentals by @stockroom_picks

Floral arrangements by @floraflowercart

Leaf Logo Design by @willemina_typography

Pans by @360cookware (use code Amanda20 for 20% off the entire website!)

Meat by @exeter_meats & @westsidelockers

Cheese by @adutchmasterpiececheese & @parranocheese

Wine by @roberthallwinery

Pumpkins from @avilavalleybarn

20201114-warren-laurenwestra-4.jpg
20201114-warren-laurenwestra-16.jpg
20201114-warren-laurenwestra-3.jpg
20201114-warren-laurenwestra-30.jpg
20201114-warren-laurenwestra-33.jpg

The Charcuterie Table

A charcuterie board or table is such a fun element to add to any party! It adds a relaxed vibe to any elegant event and makes for a great meeting point. The foods you can get creative with and can range from anything like traditional cheeses & salamis to veggies and fruit. Anything in season goes so well here! A board also makes for fun textures and color schemes. There should be plenty of options for even the pickiest of eaters! I love using everything that is in season for this because provides the freshest of ingredients and gives a great vibe to your table, board or plate!

The Drinks

No party is complete without a drinking station!! I try to put the drinks in a different area than the food just so people will move around and not stick to one place or corner at a party. It's always best to fully utilize the space you have and spread things out! For most of our events, I have a mix of beer, wine and one signature cocktail. Doing one signature cocktail cuts down on the waste of alcohol along with the cost (as well as the tipsy guests haha!!) I loved using all Robert Hall wine varieties so that everyone had a wine they would enjoy! No two people or wines are alike so the variety made sure everyone had something that they could enjoy!

20201114-warren-laurenwestra-46.jpg
20201114-warren-laurenwestra-44.jpg

The Tablescape

This might be the most memorable thing for your guests if they are visual people! I always love a table that is functional as well as gorgeous! I try to keep room for glasses in the center and my centerpiece below or above eye level so people can see across the table. Since this was a Thanksgiving gathering I wanted to use a Fall color scheme, but I of course wanted to incorporate my all-time favorite color of pink on this table as well. I am always keeping colors on the lighter side because that is the vibe I love and they looked nice against the wood tones in the tables and chairs. I added a mix of different collections of chairs to add a home/family element to the table and give an instant feeling of warmth. They are all from Stockroom Picks, a local vendor, along with the glasses and candlesticks that gave an eclectic style and charm. The beautiful flower centerpiece fits in just perfectly with these elements from Floral Flower Cart! The dishes and place settings are my everyday dishes that added a light touch to the darker table, and I LOVE how they turned out together! I finished off the place settings with a personalized leaf place card that was handwritten. This added a decorative piece to the autumnal place setting and was a perfect special touch.

The linens I used here are cheesecloth that I ordered on Amazon and died myself with Ritdye. I ordered it all on Amazon and shared them on my Instagram stories of how the dyeing process went. To get the light color I suggest using VERY little dye and following the instructions exactly. I ended up dyeing mine twice. The first time the pinkness came out too bright and I washed them with hot water several times to get it a little lighter and used those inside on the charcuterie board and drink station. I wanted them lighter on the table so I did it again and used very little dye! I used a mix of the petal pink color and tan, linking them both below for you. For the napkins, I used the same process and cut the tablecloth into the amount of napkins I needed. Tied them in a knot and they were good to go.

20201114-warren-laurenwestra-83.jpg
20201114-warren-laurenwestra-92.jpg
20201114-warren-laurenwestra-111.jpg
20201114-warren-laurenwestra-113.jpg
20201114-warren-laurenwestra-89.jpg
20201114-warren-laurenwestra-86.jpg
20201114-warren-laurenwestra-123.jpg
20201114-warren-laurenwestra-159.jpg

The Food

After about 7 years of hosting events as a married gal, I’ve learned a few tricks on how to manage my time and not have a meltdown in the kitchen. Two tips of advice are to know what your strengths are and how to simplify. I know that my strengths are as a baker and although I cook meat fairly well, if someone can do it better I’m all for it! So this Thanksgiving I gladly handed off the task to my friends at Exeter Meats. They smoked the turkey for our Friendsgiving (and are making one for our family Thanksgiving) to perfection!! It was so moist and delicious that I don’t think I will ever go back to cooking turkey myself! Another helpful hint when planning for a party is when you can do something the day before, do it! This always helps too in the case of something unexpected coming up. I made most of the dishes the day before and left a little time off of each recipe to finish cooking the day of right before it was time to eat! Last note on the food, having good high-quality pans that cook food well helps to ensure each dish will always be the best. I will link my favorites I used for this Thanksgiving below from my friends at 360 Cookware.

20201114-warren-laurenwestra-208.jpg
20201114-warren-laurenwestra-211.jpg
20201114-warren-laurenwestra-259.jpg
20201114-warren-laurenwestra-205.jpg
20201114-warren-laurenwestra-216.jpg
20201114-warren-laurenwestra-199.jpg
20201114-warren-laurenwestra-261.jpg
20201114-warren-laurenwestra-267.jpg
20201114-warren-laurenwestra-197.jpg

Thank you for having a seat at my table where you are always welcome! I hope this Thanksgiving is one that you enjoy with the people you love most. Let the times we have with our love ones remind us of what we are most thankful for. I am so thankful to share my life with you and hope I am always here to bring joy and helpful tips that will simplify your life and add just a little more beauty to it!

Have A Very Blessed Day, Amanda Warren

Everything I could link for you is below and things I couldn’t I found similar items.

A Taste of Heaven: Deliciously Easy Apple Pie!

If you are looking for a sweet and delicious dessert that is easy to make, look no further than this delicious & easy apple pie recipe! This classic treat tops the list as the #1 favorite for many dessert lovers, and it doesn't have to be difficult to make. In this blog post, we will be going over all the steps to make a delicious and easy apple pie that you and your family can enjoy. We'll also be discussing some of the tips and tricks to make sure your pies come out perfect every time. So, get ready to make the most scrumptious apple pie you've ever tasted!

Everyone loves this classic and timeless treat that can be quickly and easily whipped up with minimal ingredients. All you need is apples, sugar, flour, butter, and cinnamon. To make the pie even more special, you can add different toppings such as nuts, raisins, or of course a scoop of ice cream. As the delicious aroma of baking apples and spices fills your home, your family and anyone coming over will surely be delighted!

Easy Part 1: Store-Bought Crust

Apple pie is a classic dessert that is sure to please any crowd. But it can be time-consuming to make from scratch, especially when it comes to making the pie crust. Luckily, there is an easy and delicious way to make an apple pie with minimal effort - using a store-bought pre-made pie crust. This easy apple pie recipe requires minimal ingredients and is great for those who are short on time or are new to baking. The trick to making this recipe successful is to use a good quality store-bought crust. This makes this recipe easier and even more enjoyable. I love to get the double pack and make fun designs on the top with cookie cutters and crisscrossing them. This also makes your pie unique and special.

I always try my hardest to make the best homemade desserts, but I know when the experts have some things figured out better then me.. Like pie crust. I had a hard time trying to make the perfect pie crust so I finally gave up and focused all my energy on the filling! One delicious filling, a store-bought crust and the best pie pan make for a killer apple pie everyone will rave over!!

I am using the 360 cookware pie pan. The pan is made with 5-Ply construction and has a T-304 surgical stainless steel baking surface. No other bakeware cooks so evenly and perfectly as this pie pan! The Pie Pan is covered by a Lifetime Warranty like all of their products making this a legacy pan you can pass down for years to come. Better yet, they are all 100% American Made! Every pan I have used from them has cooked everything so well. This pie pan was nothing short of amazing and not one piece stuck to the pan! That was always irritating for me in the past, but now those worries are gone!

The Best Apples for Apple Pie

Apple pie is a classic dessert that is loved by many. The key to making a great apple pie is to choose the right type of apple. Granny Smith apples are a tart and firm classic choice for a delicious apple pie. Sweet, juicy, and crisp Honeycrisp apples are the perfect balance of tart and sweet. Braeburn apples are full of flavor and hold their shape when baked, making them an ideal choice. For a sweeter pie, Golden Delicious apples add a hint of tartness and are great for baking pies. Finally, Jonathan apples are sweet and tart, making them a great addition of flavor and texture to your apple pie. I like to mix 2 or 3 different apple types to give each bite a unique and delicious flavor. Two of my favorites are the Granny Smith and Golden Delicious together. With these apples in hand, you’re ready to make a delicious & easy apple pie.

20201114-warren-laurenwestra-175.jpg

Apple Pie Ingredients

2 store-bought roll-out crusts

7 cups thinly sliced apples (I like to do a mix of two different types of apples)

1 1/2 teaspoons cinnamon

1/2 cup melted butter

3 tablespoons all-purpose flour

1/4 cup water

1 cup sugar

1 egg with 1 tablespoons water mixed for egg washing

Instructions

1. Take out pie crust and pre-heat oven to 425

2. Peel and cut apples into evenly thinly sliced pieces. Place in a large bowl with cinnamon and toss.

3. Melt butter in the microwave until completely melted. Whisk in flour, water and lastly sugar blending until it all comes together. After fully mixed pour in the apple mixture and fully blend.

4. Take pie crusts that have been sitting out and roll over a sprinkle of flour. Take store-bought crust and lay it over a pre-oiled pie pan. Fill the pan with the apple mixture. Lastly, for the design of your pie the options are endless! I did a crisscross pie here and used extra dough with leaf cookie cutters to make the top even more fun!

5. Once the top is all designed and ready to go use egg wash mixture (1 egg and 1 tbsp water whisked) and brush onto dough.

6. Bake at 425 for 15 min and then reduce heat to 350 and bake for another 45 min or until apples are a soft consistency.

20201114-warren-laurenwestra-195.jpg

You can enjoy your pie right away with vanilla ice cream, let it come to room temperature, or keep refrigerated for the next day. Anyway that you enjoy it I promise you wont be disappointed! The combination of sweet apples, cinnamon, and sugar make this pie a heavenly treat. Whether you are looking for something to end a meal on a sweet note or just a special treat, this apple pie is the perfect choice.

Other Desserts and Comfort Food you will love:

The Ultimate Thanksgiving Dessert - My Pumpkin Crisp Recipe

Chocolate Peanut Butter Brownies

Scotty's Birthday Pistachio Cake

My Favorite White Cake Recipe

Brown Butter Caramel Pretzel Cookies

The Most Delicious Pumpkin Coffee Cake

I hope you enjoy this apple pie just as much as I do! Click -HERE- for my favorite pie pan for the perfect pie all year long! You can also use code “Amanda20” for 20% off the entire 360 cookware site!

20201114-warren-laurenwestra-171.jpg
20201114-warren-laurenwestra-65.jpg
20201114-warren-laurenwestra-170.jpg
20201114-warren-laurenwestra-67.jpg

Pumpkin Spice Homemade Cinnamon Rolls

My homemade cinnamon rolls are a staple for the Holidays as well as anytime we host company for breakfast! They are so yummy and soft, but the best part is I get to lick the whole bowl of frosting! I love the recipe so much that I have been working on making it into a Fall recipe for all my pumpkin lovers. If you’re not as obsessed with pumpkin as much as I am I made sure to make the recipe a pumpkin spice flavor to have the pumpkin taste be a little more subtle. My hubby (aka food tester) isn’t the biggest pumpkin fan in the world, but he absolutely loved them! I myself am a pumpkin lover..so naturally, I loved them as well. So, its safe to say this is simply a great Fall treat the whole group will love!! Lets get baking!!

image2 (3).jpeg

Ingredients:

Dough

  • 3 cups luke warm water

  • 3 packets of Fact acting dry yeast

  • 2 tbsp sugar

  • 1 cup sugar

  • 1/2 cup butter

  • 1 egg

  • 1 tsp salt

  • 1 tsp pumpkin spice

  • 6 cups flour

Filling

  • 1/2 cup melted butter

  • 1/2 cup pumpkin puree (if you want it more pumpkiny double this part)

  • 1/2 cup sugar

  • 2 tbsp cinnamon

Icing

  • 8 oz cream cheese

  • 1/2 cup butter

  • 4 cups powdered sugar

  • 4 tbsp milk

  • 2 tsp vanilla

  • 1 tsp pumpkin spice

Directions:

  1. Mix luke warm water, yeast and 2 tbsp of sugar, let sit for around 10 minutes to make sure yeast is good. You will notice the yeast growing in size.

  2. Once you see yeast grow add in sugar, butter (softened for 15-20 sec on microwave) egg, salt and pumpkin spice

  3. Slowly add in flour, once you have added in all 6 cups make sure the dough is slightly sticky and looking like dough. Once you see this mix for another few minutes. If you still don’t add in more flour until you do.

  4. Sift flour over a clean counter top and lay dough down in the middle. Make sure to over flour the area outside of where dough is. You will be rolling it out here and you don’t want it to stick later.

  5. Once you have tipped the bowl over and poured out the dough lightly flour the top and cover with a clean kitchen towel.

  6. Let rise for 3 hours.

  7. Once you are about ready to roll dough. Melt butter in a clean bowl and mix with pumpkin puree.

  8. When dough is ready roll out to about 1/4 inch thick rectangular form.

  9. Pour over the butter mix and evenly spread over the dough. Sprinkle sugar, cinnamon and pumpkin spice

  10. Next roll dough up for cinnamon rolls!

  11. Cut about 1 inch apart and place on pan. They will grow in size so pay attention to spacing.

  12. Bake at 350 for 20-25 minutes

  13. Once cooked to your liking pour frosting on rolls and enjoy!

Frosting:

  1. Mix cream cheese and butter until smooth. (if not at room temp warm for 30 seconds in microwave before)

  2. Add powdered sugar, milk, vanilla and pumpkin spice

image1 (11).jpeg
image0.png

Sparkling Ice Mint Mango Mock-tail

This shop has been compensated by Inmar Intelligence and its advertiser. All opinions are mine alone. #MySparklingIce #SparklingIceLife #SparklingIcePartner

Sparkling Ice Mock-tail Summer may be coming to a close but refreshing mock-tails will never end!! I am especially loving the Sparkling Ice Orange Mango sparkling water and enjoying it for a backyard brunch picnic. It can get pretty hot where we live, over 100 most August days and it’s always nice to find a refreshing drink we can enjoy before it’s too hot to be outside. I love enjoying a backyard brunch all year around but especially when the mornings are cooling down! Look below for the perfect mock-tail recipe to finish off your summer and head into fall! It’s great for brunch, lunch and anytime of day! I shopped for all of these ingredients at our local Save Mart. Cheers!

image0 (5).jpeg
image002 (1).jpg

Ingredients for 2 Orange Mango Mock-tails:

1 chilled Sparkling Ice Orange Mango

Sliced Mango

Fresh Mint

1 cup water

1 cup sugar + more for garnish

Ice

Directions:

1. Make simple syrup. Mix together water, sugar, 3 mint leaves in pot over fire. Continuously stir them together until sugar melts into water. Let cool and place in glass jar ready for use!

2. Fill bottom of glass with 3 mango slices and muddle with straw.

3. Add ice, 2 tbsp of simple syrup and fill rest of glass with Sparkling Ice Orange Mango.

4. Garnish with mint and a slice of mango.

5. Enjoy!

image0 (4).jpeg
image004.jpg
image003.jpg

Whole 30 Chicken Piccata

Chicken Piccata has always been a favorite dish around our house and once we started the “Whole 30” diet, I had to find a way to still enjoy it! To our pleasant surprise, now that I have changed the recipe, we like it so much that we will probably never go back to the old one! Finding new ways to enjoy our favorite dishes while still keeping them healthy is the best thing that has come from being on this new diet. Another great perk is how it takes me back to our time Italy when we enjoyed this on the cobblestone streets. Although we couldn’t go this year, we get to enjoy our stay cation with Mezzetta right at home! I hope you enjoy making and eating this dish just as much as we do!

Mezzetta is a California based company right here in the USA and I couldn’t be more excited to support them! Other delicious treats from Mezzetta we have been enjoying on our ‘whole 30’ diet are green olives on salads, jalapeno peppers on EVERYTHING, and peperoncini’s in our lettuce wraps!

IMG_1205.JPG
IMG_1176.jpg

Ingredients:

2 lbs chicken cutlets

2 organic eggs

1 cup almond flour

1/4 cup olive oil + 2 tablespoon

4 minced garlic cloves

1 shallot

1-2 tablespoon arrowroot

1 cup chicken broth

1/4 cup fresh lemon juice

1/4 cup Mezzetta capers (drained)

Salt & pepper to taste

Directions:

1. Rinse and pat dry chicken. Beat eggs in a bowl and put almond flour in a separate bowl. Put 1/4 cup olive oil in large pan on medium heat. Once olive oil is to medium temp (you can test by placing egg and making sure it doesn’t over cook) you can place each piece of chicken into egg mixture and then into almond mixture (making sure to coat well) then place into olive oil. Cook until golden brown on both sides.

2. Once all chicken is cooked place onto paper towel lined plate while making sauce. Clean out pan and return to stove top.

3. Begin making sauce by dicing shallot and mincing garlic. Add remains of olive oil to pan on medium heat. Add in shallot and garlic and cook until fragrant. Now add in arrowroot until well coated.

4. Add in chicken broth and lemon juice and let simmer. Once simmering to add a nice texture add in Mezzetta capers and salt and pepper until you like the taste!

5. You can now add chicken back in or you can plate it and pour sauce over, however you like to serve! I like to put mine over a bed of cauliflower rice and pour sauce on top!

6. ENJOY!!

IMG_1187.jpg
IMG_1166.JPG

This is a paid sponsorship with Mezztta.

5 Tips When Shopping For Dresses For A Pear Shaped Body

We love our curves ladies, but one wrong outfit can take you from looking like JLo to looking like Mrs. Piggy. No shade Mrs. Piggy …I think your fabulous! Down for you below how I break it down how I have completely embraced my curves and been able to cater my shopping for my body type and not just the trends of the moment!

Dress is from LoveStitch you can shop -HERE- Use code “XoAmanda20” for 20% off your order

Hat is linked -HERE-

IMG_0236.jpg

1. Waist

This might be the most important part of making a dress a goal dress for you! Some dresses will already have that built in fit to flare shape for you, but what about the ones that don’t? It doesn’t mean that dress you love has to be off the table!. Simply add in a belt, fabric tie, or anything to can to accentuate your waist and give that hour glass curve we pear shaped girls love!

2. Sleeves

These are so important!! I am not the biggest fan of my arms so I have always been very mindful of how to make them not look less large (winter is my friend)! It cant be winter all year around though, so we want to look at where the sleeve is hitting. Cap sleeves look good on basically no one, frills add bulk and weight, and in this case less is more! Look for sleeves that are simple, sleek and not cutting your arms making them look larger and in return giving you a larger top half.

3. Neckline

I LOVE the decolletage of a woman. (the upper part of a woman’s neck, shoulders and upper chest) I think it can be such a beautiful and sexy part of our bodies. So I tend to love off the shoulder tops (this also helps with my not loving my arms but still showing skin) . Again as a pear shaped girl I try to find sleek, non boxy type necklines. Things that will flatter our gorgeous top half and accentuate it!

4. Silhouette

Fitted, accentuating dresses are OUR friends! Yes, if you order them too tight or in an unflattering material they can make us look worse! When you make the right choice they can make us look like the curvy goddess God intended us to be! Don’t worry about the size of the clothes, worry about the fit of the dress. How it lays on you is what matters and what will give you the confidence to rock that outfit! If needed ALWAYS size up to fit your bottom half and take it into your local seamstress to take in the top and get it to fit perfectly for you!

5. Straight Lines

As a curvy pair shaped lady, like me, you probably have thicker thighs. Not a bad thing (in fact i’d rather have those thick thighs then lose my booty) but this is just something you want to take into consideration when shopping. Straight lines and mini skirts tend to not be our friends. They cut your legs in half and don’t help give the long lines you want! I always love to go a little longer on a dress and half a slit up one leg. This will give you a longer look and not cut your leg in half and also a sexy look (especially for photos if you dominate that pose! If you aren’t going for a sexier look I would go with a little more of a flowy dress, short or midi. This gives a less boxy appearance that can tend to hurt us! We want all the curves, we aren’t trying to hide them just accentuate them!

FullSizeRender (4).jpg

I hope these 5 tips will help you when your shopping for a dress next time. We are all beautiful! Every size, every shape!! The sooner we learn to shop to accentuate our shapes, the sooner we will feel more confident and empowered! I linked the dresses below that I myself have or would buy to help accentuate my shape. I also posted photos of dresses I wouldn’t buy and explained why. I tend to visually learn better so I felt this would help the most! Happy shopping my pear shaped friends!

Xo, Amanda

Dress is from LoveStitch you can shop -HERE- and Use code “XoAmanda20” for 20% off your order

Hat is linked -HERE-

Enjoy the Comfort of Homemade Delicious Banana Bread

Few aromas are as welcoming as the scent of banana bread baking in the oven. That unmistakably sweet, cozy fragrance that fills the home in the morning is only the beginning of the experience of a slice of Simply Delicious Banana Bread. Whether you're looking for a way to use up those browning bananas on your counter or you're after a foolproof treat that's sure to please, this banana bread recipe is the answer. Let's explore what makes this treat so special, from the rich banana flavor to the nutty crunch, to the customizable mix-ins, and how this simple pleasure has become a staple in kitchens around the world.

With its moist crumb and rich banana taste, this classic dessert has stolen the hearts of many. It stands as a testament to the phrase "less is more," proving that deliciousness can also be simple. The sweetness of these bananas eliminates the need for excess sugar, while their soft texture contributes to the bread's irresistible moistness. The key ingredients in this easy-to-make treat are items you likely already have in your kitchen, like flour, sugar, and eggs. Combining these basics with ripe bananas results in a sweet delight that is as fun to make as it is to eat.

This is a great starter recipe for those new to baking and a quick, satisfying project for seasoned bakers. Add in your favorite nuts, chocolate chips, or a pinch of cinnamon or nutmeg to put your own twist on the classic recipe. Whether you're craving a quick breakfast, a midday snack, or a dessert, Simply Delicious Banana Bread fits the bill.

The Ideal Loaf Pan for Perfect Banana Bread

Choosing the right loaf pan is key to banana bread bliss. Here are some tips and essentials I am sure to use every time. A stainless steel loaf pan is your golden ticket to easily removing that golden loaf and achieving an even bake every time. Steer clear of dark or glass pans. These can unevenly distribute heat, potentially leading to an overcooked exterior and undercooked middle. Make sure to mind the depth. A pan that's too deep might leave you with an underbaked center amid dry edges. My favorite loaf pans to use for this recipe and all my bread recipes are the 360 Cookware loaf pans. They have three to choose from and my personal code AmandaWarren20 will give you 20% off your order. Shop Here No matter your choice in bakeware, the key is to ensure that your Simply Delicious Banana Bread turns out perfectly each time.

How to Ripen Bananas for Banana Bread

The ideal banana for this bread is ripe with plenty of brown spots. Think of those brown spots as nature's sweetener. But what if your bananas aren't quite there yet? There are tricks to accelerate ripening. If you're in a hurry to bake and your bananas are still too firm, you don't have to wait for days for them to ripen. A few ways I speed up the process are to place bananas in a warm area to help the ripening or store them with an already ripe banana or an apple in a paper bag to promote ripeness through natural gas release. For another express route to ripeness, pop unpeeled bananas into the oven. Ripening bananas properly ensures Simply Delicious Banana Bread will live up to its name with the perfect sweetness and texture.

Storing and Freezing Your Banana Bread

Once your banana bread has cooled and you've had your fill, storing it properly is important to maintain its taste and texture. Be sure to let it cool completely and use plastic wrap or foil to protect the bread's freshness. For enjoying within a few days, an airtight container will suffice. For longer storage, freeze slices or the entire loaf and thaw as needed.

Looking to freeze for later use? This is always a favorite of mine, so I have bread when unexpected company comes over or I want something tasty for breakfast. Be sure to wrap tightly to keep the air out and prevent freezer burn. You can keep your treat fresh in the freezer for up to 3 months. So be sure to mark the date on the outside. Once you are ready to enjoy again remove from freezer and let sit out to defrost overnight or microwave for that just-baked taste. Proper storage ensures that every slice of Simply Delicious Banana Bread remains as good as the first.

Classic simply delicious banana bread embodies the comfort of home-baked goods. Its wonderfully moist texture and naturally sweet flavor gained from ripe bananas make it an everlasting favorite. This breakfast loaf is as practical as it is satisfying, because you are reducing food waste while also whipping up a tasty delight! It truly is a win-win situation! The simple ingredients make for a hassle-free baking experience and offer a warm, inviting finish to any meal. Banana bread is really suitable for any occasion like breakfast, snack time, or dessert. My favorite part of baking banana bread is how much you can customize with confidence by adding nuts, or chocolate chips to make it uniquely yours. So, the next time you spot those speckled bananas on your counter, know that they are the start of something truly special.

Ingredients:

3 overripe mashed bananas

1/2 cup melted butter

3/4 cup brown sugar

2 eggs

2 cups all-purpose flour

3 teaspoons baking powder

1/4 teaspoon salt

Directions:

  1. Preheat oven to 350 degrees, oil favorite loaf pan and set aside.

  2. In a large bowl mash overripe bananas. Add in eggs, brown sugar, and melted butter. Mix well.

  3. Stir in flour, baking powder and salt. If adding in nuts or chocolate chips you can add now.

  4. Pour batter into prepared loaf pan and top with chopped nuts if desired.

  5. Bake for 60 minutes on middle rack until a skewer inserted comes out clean.

  6. Let come to room temperature and turn over on a wire rack to remove loaf from pan.

  7. Enjoy!

How To Keep Your Hair Healthy and Looking Great Between Salon Visits

Having healthy, beautiful hair is a goal that many of us strive for. However, to achieve this goal, it’s important to learn how to properly take care of your hair in between salon visits. With the right hair-care routine, you can maintain healthy hair and keep your locks looking their very best. In this blog post, we'll discuss some tips on how to take care of your hair between salon visits and protect your hair in the best way possible.

Ideally, you leave the salon looking fabulous, with your color on point, your blowout looking amazing and with the best shine!! But how do you make it all last? Here are my helpful ways to help your beautiful salon visit last until your next visit. I’m going to tell you how you can keep your hair in the best shape! I was a former hairstylist behind the chair and Matrix educator for over 10 years and these are the tips and tricks I always shared with my clients and continue to use for myself to this day.

Washing Your Hair

I was always having this conversation with clients as to how often they wash their hair. Often if they are doing daily shampooing it's hard to get them to change, but when they do they are so much happier! Think of all the time you will save, the money on shampoo and to top it all off, your hair will look even better. Now I know some of you say that your hair is too oily to do this or you hate the smell. To ease yourself into this process, start with regularly washing every other day to get your hair used to not producing as much oil, wear a hat on day two or plan it for when you won't be leaving the house. Once your hair gets used to an every other day schedule you can keep pushing it until your only washing your hair around 2 times a week. This will give the best results! Your hair will continue to produce those oils because you are stripping them away. The less you wash the less oil it will produce.

Washing your hair every day actually can strip the scalp of its natural oils, leading to dry, brittle hair. I suggest aiming to wash your hair every 2-3 days, this seems to be the sweet spot for more people for never getting oily and keeping their hair clean. If you have an oily scalp, try using a dry shampoo in between washes to absorb some of the excess oils. When you do wash your hair, make sure to use a gentle, sulfate-free shampoo and use lukewarm water as hot water can also strip your hair of its natural oils. You also want to make sure you are cleansing correctly. Use two shampoos every time you wash. The first one will clean off any dirt, oils and chemicals from the product, and the second wash will actually clean the hair. This is important for getting your washes to last longer as well. After washing your hair, make sure to condition it to keep it soft and healthy.

Now when you are washing, your water shouldn’t be so hot you're burning your head. For a number of reasons this isn’t good for you! One is it will remove your color faster. Two it’s stripping the oils from your hair again and can cause dryness to your hair. It can also cause your hair to produce even MORE oil. Bottom line, the cooler the water the better for washing your hair.

Heat on Hair

Along with hot water, using hot tools on your hair can also cause damage. Yes, we all want a gorgeous blowout, but save it for special events or use your blow dryer in a cooler setting. Here’s what I do: I wash my hair twice a week. On day one I will usually braid it when it's half dry and sleep on it. This way I have the appearance of full-volume hair in the morning with a beautiful wave but I didn’t use any heat. On day two I will blow it out and give my hair curl (with a lower heat setting and protective products). Usually, day two is for the weekend when I have more places I am going and people to see. If you still need to blow dry and curl your hair just turn down the setting and use a heat protector.

Heat styling can cause extensive damage to your hair, so it is best to keep heat styling to a minimum. Instead, allow your hair to air dry as much as possible and avoid using hot tools such as curling irons, straightening irons, and blow dryers. If you must use heat styling tools, always use a heat protectant product first and set the temperature to the lowest setting. I will link below all of my favorite heat protectants and styling aids to help you maintain gorgeous hair!

When To Use Top Knots & Hats

Yes, we all love those days when you can throw a hat on or pull your hair into a top knot. However, they aren’t ideal for your hair. I myself am a lover of both!! However, if I wear a hat I only use it outside of the house, and as soon as I am home I take it off! Top knots are also my favorite style when it's almost hair-washing day, but I try my best to never sleep with it like that and always leave it loose. The tighter you pull your hair the more it's pulling each strand and causing breakage. I like to use silk scrunchies and tie in a loose pony when I go to bed or leave it loose. The silk scrunchies will help fight the frizz and breakage of hair. You also want to be cautious when combing or brushing your hair. Be sure to use a wide-toothed comb to minimize breakage.

What Products To Use

You just paid good money for your hair to get done, so please don’t run to the store and buy some products off the shelf without some research. The wrong product can strip your color, as well as cause damage to your hair. There is a reason stylists show you the products they use and ask if you need anything as you are checking out. To keep your hair looking its best, it is important to avoid products that contain harsh chemicals such as sulfates, parabens, and mineral oils. These ingredients can strip away natural oils from your hair, leaving it dry and brittle. Instead, opt for natural, organic hair products with ingredients like aloe vera, coconut oil, and shea butter. These ingredients will nourish and moisturize your hair without stripping away essential oils.

Using fewer styling products such as mousses, gels, and sprays can also help keep your hair healthy between salon visits. These products can leave a residue on your hair that can cause it to become dry and brittle. Again, try to limit your use of heat-styling tools such as curling irons and straighteners as well, as they can cause heat damage and strip away natural oils from your hair.

To further nourish your hair between salon visits, deep condition your hair once a week. This will help replenish moisture and nourish the overall health of your hair. If you are only washing your hair once a week then stick to every other week or every other time. You don't want to over-add protein from conditioners and conditioning masks to your hair, this can cause the opposite effect. So stick to once a week if you wash 2 or more times and every other week or once a month if you wash weekly.

Bonus Tips

- One way to extend the life of your color between salon visits is to use a root touch-up powder or spray to conceal your roots. Apply it to the root area only and blend it in with a brush or a comb for a natural look. Be sure to brush this out before washing your hair.

- Appointments to trim your hair every 6-8 weeks to keep your hair looking healthy and avoid any split ends that can cause your hair to actually get shorter from breakage.

- Protect your hair from the sun with a hat or other coverage, and avoid over-washing your hair. Eating a healthy diet rich in protein, vitamins, and minerals is also important for keeping your hair healthy and looking its best.

- Avoid using chemical treatments (such as bleaching or coloring) too often or over-processing. A good hairstylist will advise you against any hairstyle that will overly damage your hair.

By following these tips, you can keep your hair looking great between salon visits and maintain a healthier hair care routine.

The Best Monster Cookie Recipe You'll Ever Try!

Are you looking for a delicious and easy-to-make cookie recipe? Look no further—this Monster Cookie recipe is sure to satisfy anyone's sweet tooth! Packed with sweet and salty flavors, this amazing cookie is already a fan favorite and a classic that has universally loved cookie ingredients. This simple and delicious treat is made with oats, peanut butter, M&Ms, and chocolate chips, creating a classic flavor combination that nobody can turn down. Best of all, this cookie is super easy to make and takes no time at all. So, if you’re looking for a delicious and colorful cookie recipe that everyone will love, give this Monster Cookie recipe a try. You won't be disappointed!

I love making monster cookies so much because of how customizable they are.

Monster cookies are a classic treat that can be customized in countless ways. With the right ingredients, you can create a cookie that is perfect for any occasion. Whether you're looking for a classic monster cookie recipe or something a little unique to the ingredients, you can make a batch of delicious monster cookies that everyone will love. The best part about making monster cookies is that you can add whatever ingredients you like. Traditionally this cookie would start with classic favorites like chocolate chips and all-natural peanut butter, but delicious new twists to the recipe could include adding things like crushed pretzels and candy. Adding in colorful sprinkles or M&M's for the holidays is one of my favorite seasonal customizations as well. You can even get creative and mix and match different flavors to create the perfect monster cookie for you and your event!

What You’ll Need to Make Monster Cookies

For this recipe, you will need butter, sugar, brown sugar, vanilla extract, eggs, all-purpose flour, baking powder, salt, and 3 cups of your favorite goodies. I typically use chocolate chips, old-fashioned oats, chopped pecans or walnuts, M&M's and sprinkles. You can add in other things like peanut butter, butterscotch, or anything you have in your pantry to make this monster cookie recipe all your own.

In addition to these ingredients, you’ll likely need a few basic kitchen tools such as a large bowl, an electric mixer or stand mixer, a baking sheet, and measuring cups and spoons. You’ll also need an oven to bake the cookies. Preheat your oven to 375 degrees Fahrenheit before you begin. Finally, you’ll need a few minutes of free time to step-by-step mix, scoop, bake, and enjoy the delicious monster cookies you’ve created.

How to Store Leftover Cookies

If you don't plan on eating your leftovers right away, it's important to store them properly. When it comes to storing leftover cookies, there are a few key things to keep in mind. First, it's important to store them in an air-tight container, such as a plastic bag or airtight container. This will help to keep them as fresh as possible and keep out any moisture that could cause the cookies to spoil. Additionally, it's important to store the cookies in a cool, dry place. If you plan on storing them for more than a day or two, then it's best to put the container in the refrigerator or freezer. If you plan on keeping them in the freezer, make sure to use freezer-safe bags or containers. This will help to prevent the cookies from becoming soggy or developing freezer burn. Finally, make sure to label the containers with the date you stored them, so you can easily see when they need to be eaten. By following these simple steps, you can easily store your leftover cookies and enjoy them later.

monster 8.JPG

INGREDIENTS

1 cup butter (2 sticks)

3/4 cup sugar

3/4 brown sugar

1 tsp vanilla

2 large eggs

2 1/4 cups flour

3 tsp baking powder

1 tsp salt

3 cups of your favorite goodies

INSTRUCTIONS

1. Preheat oven to 375 degrees.

2. Melt the butter for 30 seconds in the microwave (if the butter is not at room temperature).

3. Add sugar & brown sugar into butter and mix. Scrape sides and mix again immediately after.

4. Mix in Vanilla Extract and eggs. Mix again.

5. Gradually add all-purpose Flour, Baking Soda, and salt. Mix well.

6. Now add in all your favorite treats! For these cookies, I did chunks of a milk chocolate bar, old-fashioned oats, colorful M&M’s, sprinkles, and walnuts (all equal to 3 cups)

7. I use a pre-measured cookie scooper linked -here- works great to have even-sized cookies! Scoop onto a baking sheet or parchment paper. Add 2 scoops right on top of each other to give a fuller cookie with a gooier middle.

8. Bake for 9 minutes and cool on a cookie sheet.

9. Enjoy!

Other Cookie Recipes You Will Love:

Birthday Cutout Sugar Cookies

Brown Sugar Toffee Cookies

Brown Butter Caramel Pretzel Cookies

How to Make Delicious Nutter Butter Cookies At Home