Garlic Mushroom & Shrimp Pasta

This is one of my favorite quick and easy pastas to make. It’s deliciously light on sauce but full of great flavorful taste. Every time I make this dish Scotty easily cleans his plate and always tells me how delicious it was. Quotes like “It tastes like it’s from a fancy restaurant”… “Add this to the menu”…and “That was really good babe”.. always leaves me with a smile on my face. It’s such a great feeling when someone loves the food I cook. So I had to share for this months recipe because I want everyone leaving your table with a smile too!

public.jpeg

Ingredients:

For Pasta I always use Wild Grain’s pasta sent in a monthly membership that is fresh and so delicious! One package makes enough for 2-4 people

3 Cloves of Garlic

Olive Oil spray

8 oz Baby Bella Mushrooms

1/3 Pasta water

3 tbsp Butter

3 tbsp soy sauce

1/3 cup white wine

Shrimp (you can really use any amount you want here)

Directions:

1. Start water on medium heat for pasta. Once boiling add in pasta until Al dente.

2. While water is boiling spray skillet with olive oil cooking spray until fully coated and start on medium heat. Mince garlic and add into pan. Stirring until fragrant.

3. Add mushrooms to garlic pan and stir. Cooking for a few minutes then adding in wine. Let it cook while the liquid fully evaporates.

4. Once mushrooms are finished transfer to a plate for later. No need to wipe out pan just use another coating of olive oil spray and cook shrimp. Add a little salt and pepper onto shrimp and cook until done!

5. While mushroom and shrimp are cooking and pasta is done boiling. Drain and keep 1/3 cup pasta water.

6. Put pasta back into original pan and stir together with pasta water, butter and soy sauce.

7. Now that you have everyone ready to go.. plate your dish! pasta first, then add on your mushrooms and shrimp and serve!

8. Enjoy! Maybe even have a glass of that wine you opened!

To get $10 off your first order with Wild Grain and sourdough rolls in every box for life!!

Use code AMANDAWARREN

www.wildgrain.com

public.jpeg
public.jpeg
public.jpeg

A Rosy Pink Galentines Party

Are you looking for a unique and fun way to celebrate Valentine's Day this year? How about throwing a Rosey Pink Galentines Party? This fun and festive celebration is perfect for getting together with your closest friends and celebrating love, friendship, and all things pink and rosey! Whether you're hosting a dinner, brunch, or an afternoon tea, a Rosey Pink Galentines Party will bring a bit of cheer and joy to your special day. From decorations to activities, we'll show you how to plan the perfect Rosey Pink Galentines Party. Read on to find out more!

Galentines.. a fun way to celebrate the season of love with your favorite gals. I am always looking for a way to incorporate my very favorite color of pink into any dinner party I throw, and for this time of the year it fit the theme perfectly. Valentines is a month where my favorite color is EVERYWHERE! I turned our dining room into a rosy pink Valentines oasis filled with the most stunning flowers and pink touches everywhere.

IMG_1386.JPG

For the balloon wall I found a listing on Etsy that lets you pick whatever letters or numbers you want. I measured the wall to see how many X’s and O’s I could fit onto the wall. The exact ones I got on Etsy are linked -here-! The best part is you can deflate these after you use them and save them to reuse the next time!

For the table setting I used two different sets of glasses to add differing heights and dimensions. One set were crystal wine glasses and the other antique pink glasses that were my grandmothers. To make them even more special I dipped their rims in melted white chocolate and then sprinkles. It adds a cute element and tastes delicious! To layer up the place setting I found the cutest pink heart shaped plates at target for only $3 each! Such a steal and so popular they keep selling out! Just add Target to notify you and they will when they come back in stock, but hurry.. they sell out very fast! Next, I folded and placed cheesecloth napkins (They are the same ones I used on my Thanksgiving table linked -here- for another way to style.) on top of the plate and put my silverware on top then wrapped in a bow. Its super simple but oh so cute! All the layers add such great detail as well!

IMG_1254.JPG
IMG_0942.JPG
IMG_1240.JPG
IMG_1232.JPG
IMG_0914.JPG

Onto the superheroes of any good party.. the Vendors! Luckily for parties we have help and resources and don’t have to hold all the weight of it all. I found the best food and floral vendors to help put this fun party together.

I was so excited to work with Emerald Grace who did all the floral arrangements for the gorgeous table! She is such a doll and did AMAZING work!! I have loved all of her beautiful arrangements she’s done for me in the past but this table really took the cake! She also added a very special unique element that any girls party needs…a bouquet bar! She brought different types of greenery and flowers to put on my bar cart with butcher paper and string. This added a cute focal point and something special for each of the ladies to take home and enjoy the rest of the week! For more of Julie’s work from Emerald Grace head to her website -here-.

IMG_1233.JPG
IMG_0948.JPG
IMG_1236.JPG
IMG_0934.JPG

In my opinion party favors are something that every party, big or small, needs. I added an adorable touch next to each place setting with a yummy cookie favor from Just Dough With It! They have a Valentines cookie with The Moira Rose (rose shortbread). They are so delicious and they came individually bagged to perfection! To get cookies for your valentine or for your next event head to their website -here-. On top I placed a valentine card.. because after all it is that time of year. I found the cutest small valentines cards from Minted that went perfectly with everything else!

IMG_1221 (1).JPG
IMG_1218.JPG
IMG_1244.JPG

Food! It’s probably the most memorable good or bad part of any party. If you leave with a full and happy belly you will never forget it! For this event I started with the most delicious charcuterie board that was perfectly made with heart shaped cheeses and strawberries along with salami folded into the shape of roses. Sandra from Fig and Olive totally created a masterpiece of food. I don’t think I can ever make my own board again haha!! For more info on Fig and Olive and to hire her for your next event or for just a box of yummies on your next date night at home head to her website -here-.

IMG_1193.JPG

Dinner was absolute perfection! My friends at Tacos San Marcos made the most delicious spread! They made tacos, Strawberry Limeade, Quesadilla, Quesatacos, rice and beans and delicious churro cheesecake! Each and everything they made was delicious. They even cater so I highly recommend they for your next event! Everything was amazing and they send all the toppings you could possibly want. To see where they will be located this week or to book for your next event head to their website -here-.

IMG_1147.JPG
IMG_1496.JPG
IMG_1176 (1).JPG

Brown Butter Caramel Pretzel Cookies

These cookies are probably my all time favorite homemade ones.. That’s a big statement being that I love to bake so much, but I’m pretty sure they can hold up the pressure of it! They have all the tastes with the salt, the sweet, and the crunch! So good that the hubby even agrees with me! You may think he’s just being nice because he is my husband. He is sweet.. but he would never lie about my cooking to save face! If I ever need to know if a recipe is good enough to share online.. I call on him and my mom. They both without a doubt will give me their honest opinions no matter what!

Now that I hyped these cookies up.. I have to tell you the bad news. They do take a few hours to make!! (Sorry!!) However the hours that it takes are mostly spent with them in the fridge cooling. So in reality its not too bad and it just means you get more done during that time!

Let’s Get Cooking!

IMG_0467.JPG
IMG_0464.JPG

Recipe:

1 cup butter (2 sticks)

3/4 cup sugar

3/4 dark brown sugar

1 tsp vanilla

2 large eggs

2 1/4 cups flour

1 tsp baking powder

1 tsp salt

1 package of chocolate covered caramels

1 cup crushed pretzels + more to add in later

Sea Salt

Directions:

1. Making brown butter! You want to melt the 2 sticks of butter in a pan until they boil, change in color and start to smell a nutty delicious flavor! The entire house will smell like this and its heavenly. Once the butter gets brown in color and is a yummy nutty smell put into a bowl and let sit cool 5 min. Next, put that bowl into the fridge for 1 hour. I suggest to stir at the 30 min mark just to make sure its cooling evenly and as fast as possible. Once the butter is more like butter and not melted you are ready!

2. While the butter is in the fridge this is the perfect time to get the goodies ready for the end. The chocolate covered caramels I typically use are the Dove brand (if you are a fan of another kind any will work). Unwrap and cut each candy into 4 pieces. Fill a plastic bag with 1 cup of pretzels and crush them!

3. Blend in both sugars and vanilla completely

4. Add in eggs, one at a time

5. Slowly add in all dry ingredients a little at a time until well blended.

6. Now the dough is all ready add in the chocolate caramels and pretzels. Don’t over blend of the chocolate and caramel will over mix and not be in whole chunks.

7. Roll into dough balls, sprinkle with sea salt and add extra pieces of pretzel on corners for extra crunch!

8. Bake at 375 for 9-11 min.

9. Let cool and enjoy!

IMG_0453.JPG

My experience with ELEMIS products & what I will buy again!

I’ve used ELEMIS products in the past but only in small sample sizes and never enough to get the full experience and know what to suggest to you! I have gotten many questions about this brand in the past, like how certain products worked, if they were worth the price, and what products to try first. I decided it was time to try them for longer than a week at a time and to share my experience and research. There is nothing I hate more than spending good money on things that don’t live up to the hype! I’m sure you can relate!!

Well I’m here to tell you, the hype is real! Imagine an at home spa experience that you and your skin will both love! I tried a lot of their products and liked them all a LOT! I’ll break down my top 5 favorites and let you know what I loved and why I will be a returning customer!

IMG_0404.jpg
Facetune_24-01-2021-13-11-21.JPG
IMG_0373.JPG

PRO-COLLAGEN EYE REVIVE MASK

This anti wrinkle eye mask is my favorite eye treatment I have ever used! It’s a jelly formula and can used in several ways! I love applying it at night and it can also be used under makeup. It gives the eyes 24 hours of moisturization that leaves them brighter and less fatigued. Feels incredible on and I can see a difference since using it.

PRO-COLLAGEN TRI-ACID PEEL

This is a GOOD one! I highly suggest this as a treatment twice a week! Helps with fine lines and dull skin which I have been noticing more of lately. I could tell the difference just after the first use! It helped remove dead skin cells I could feel on my skin that a facial scrub wasn’t getting rid of. After I do this and add the rest of my nighttime routine I could feel my skin just drinking it all in!

Facetune_24-01-2021-13-04-59.JPG

PRO-COLLAGEN CLEANSING BALM

This also comes in Rose and smells amazing in both! This super cleansing treatment balm feels so good on the skin. I have seen it all over online and now know why! It melts away your makeup, cleanses your skin and all without feeling dry. It leaves you feeling moisturized and ready for the rest of your skincare routine. Best part is you can also use for a nourishing treatment. Leaving on for 10 min to leave skin even more moisturized.

DYNAMIC RESURFACING FACIAL PADS

Love using resurfacing facial pads and these did not disappoint! I like to use these when I am not using the tri acid peel. I typically use this in the evening after washing my face to gently exfoliate my skin. However they can be used morning and/or night. Depending on how your skincare routine is.

IMG_0359.JPG

SUPERFOOD FACIAL OIL

I don’t typically use a facial oil mostly because I do get acne still from time to time. My acne is mostly hormonal but new products and oils can cause breakouts too. I love that this oil is made of super foods and very light so It hasn’t caused me any breakouts. I have only been using it once a week to add a little something on Sundays to my routine. I also apply a drop to a small patch I have on my neck. Its a little red patch that came out of nowhere a few months ago and is super dry. Since adding the facial oil at night to it its less dry and has gotten so much better! You can also add this to your moisturizer in the mornings, your makeup will go on so smooth after!!

Facetune_24-01-2021-13-05-31.JPG

I sure hope this has helped you decide on a few products to try, incase you were on the fence about it! I would highly recommend ELEMIS now that I have tried so many of their products. Out of everything I ordered there wasn’t a single item I didn’t like! Shop my favorites below and for even more beauty tips be sure to follow me on Instagram @amandawarren__

Until Next Time.. Xo

Amanda

For 20% off your entire purchase use code “WARREN20”

Jaci Shampoo & Conditioner - Which one is right for you?

I have been using Jaci since the beginning of the year when it first came out. I first tried it out because all of their formulas are sulphate, paraben, and phthalate free, along with being vegan and cruelty free. Another plus is they are manufactured in an environmentally responsible way. Jaci has done this by partnering with a leading, state of the art factory that has a committed mission to minimize their carbon footprint through solar power and innovative cutting edge technology to reduce climate changing emissions. These things are of course great to have in every brand I try out but I also had to make sure that the results followed! My hair has never felt so amazing and silky smooth and my color has stayed in tact (even though I haven’t been coloring it). I have been going between the volumizing shampoo/conditioner and toning shampoo/conditioner to keep my hair full but also to keep my hair from getting brassy!

6926_.jpg

I know starting a new line of haircare as a customer can be hard if you aren’t sure which one is right for your hair. So I’m going to break it down for you! Starting at the very top..

Volumizing Shampoo/Conditioner:

This shampoo gently removes impurities without stripping hair of its natural oils giving fullness all while using a lightweight cleanser. All made with extracts of green tea leaf, sunflower, and rosemary leaf help strengthen the hair shaft and simultaneously hydrate the scalp. The conditioner is lightweight giving fine, limp hair a much needed lift. Filled with aloe leaf juice that is shown to thicken and separate strands for more lush and voluminous looking locks and who doesn’t want that!! I have noticed my hair is so full when using this especially when followed by a blowout with a big round brush! It also seems to not get oily as fast. Which every day I don’t have to wash my hair is a good day to me!

Hydration Shampoo/Conditioner:

Hair filling frizzy, dry, with plenty of fly aways? This one is for you! Their conditioner moisture-rich formula includes hydrolyzed quinoa protein which penetrates into the hair shaft for powerful moisture benefits and protection against further dryness. Just a few washes and you will have shiny, soft manageable locks! Pair it with hydration shampoo to help get rid of excessive dryness caused by chemical processes or environmental damages. Their shampoo is packed with coconut, quinoa, and sunflower essential oils to hydrate your strands, while the green tea extract gently cleanses while locking in long lasting moisture. They recommend air drying for best results.

Reparative Shampoo/Conditioner:

If hair in need of smoothing frizz and repairing split ends? This reparative duo is for you by simultaneously hydrating the scalp and hair follicle all at once you are sure to have hair feeling softer, stronger and hydrated all at once. Formulated from pure plant derived ingredients, the blend is primarily argon oil based and packed with vitamins, minerals and amino acids that are the answer to damaged hair follicles. The conditioner includes shea butter, sunflower extract and coconut essential oils that leaves damaged hair silky and smooth.

Toning Shampoo/Conditioner:

Feeling brassy?? This shampoo with help minimize and neutralize that by depositing a hint of tint! Natural pigments cool and calm all shades of blonde (even my balayage hair). The violet pigments enhance and extend color while sweet almond and coconut oils nourish and strengthen the hair leaving it with great moisture and promoting shine. All while fighting frizz! This duo will help you hair color last longer between salon visits for the best color 24/7!

Curly Shampoo/Conditioner:

Fighting frizz while improving definition and texture of your wave and curls! This rich shampoo gives the perfect level of nourishment while gently removing impurities. The curl quenching conditioner is the perfect next step to sealing down the hair cuticle to form a barrier that locks in moisture and helps protect against damage from environmental aggressors. The results are soft, supple, defined curls that bounce and spring. Pair these two together for the best curly locks!

For more info visit Jaci.com

For 20% off your order use code AMANDAWARREN

6927_.jpg
6919_.jpg
6924_.jpg

Unveiling the Feast: A Warm Welcome to My Thanksgiving Table

Welcome, lovely readers! As we approach that wondrous time of year when we gather around the table, sharing laughter, stories, and, of course, a bounty of delicious food, I can't help but share my excitement with you all. Thanksgiving is more than just a holiday; it's a sentiment, a feeling of warmth and gratitude. So pull up a chair, pour yourself a cup of hot apple cider, and join me as we prepare to celebrate. Welcome to my Thanksgiving table — a place where food meets tradition, love, and gratitude.

20201114-warren-laurenwestra-182.jpg

Creating the table decor for the Holidays has always been such a special hobby for me. I can remember being a young girl and loving helping my mom set the table for a regular weeknight dinner. It was so important to me to have a dinner for our family at the table. It helped me feel all grown-up and explore my creativity in decorating skills! So now that I officially am a grown-up I put a lot more thought and energy into my table settings, and I still love every single moment of it! This year I had the pleasure of hosting our Friendsgiving, so of course I decided to make a real production of it. I got to work with a few of my favorite companies to showcase all the amazing work they do.

Here is a list of Vendors I was so blessed to work with! Feel free to click on their Instagram handles to see more of their amazing work along with how to get in touch with them for your next event this year!

Rentals by @stockroom_picks

Floral arrangements by @floraflowercart

Leaf Logo Design by @willemina_typography

Pans by @360cookware (use code Amanda20 for 20% off the entire website!)

Meat by @exeter_meats & @westsidelockers

Cheese by @adutchmasterpiececheese & @parranocheese

Wine by @roberthallwinery

Pumpkins from @avilavalleybarn

20201114-warren-laurenwestra-4.jpg
20201114-warren-laurenwestra-16.jpg
20201114-warren-laurenwestra-3.jpg
20201114-warren-laurenwestra-30.jpg
20201114-warren-laurenwestra-33.jpg

The Charcuterie Table

A charcuterie board or table is such a fun element to add to any party! It adds a relaxed vibe to any elegant event and makes for a great meeting point. The foods you can get creative with and can range from anything like traditional cheeses & salamis to veggies and fruit. Anything in season goes so well here! A board also makes for fun textures and color schemes. There should be plenty of options for even the pickiest of eaters! I love using everything that is in season for this because provides the freshest of ingredients and gives a great vibe to your table, board or plate!

The Drinks

No party is complete without a drinking station!! I try to put the drinks in a different area than the food just so people will move around and not stick to one place or corner at a party. It's always best to fully utilize the space you have and spread things out! For most of our events, I have a mix of beer, wine and one signature cocktail. Doing one signature cocktail cuts down on the waste of alcohol along with the cost (as well as the tipsy guests haha!!) I loved using all Robert Hall wine varieties so that everyone had a wine they would enjoy! No two people or wines are alike so the variety made sure everyone had something that they could enjoy!

20201114-warren-laurenwestra-46.jpg
20201114-warren-laurenwestra-44.jpg

The Tablescape

This might be the most memorable thing for your guests if they are visual people! I always love a table that is functional as well as gorgeous! I try to keep room for glasses in the center and my centerpiece below or above eye level so people can see across the table. Since this was a Thanksgiving gathering I wanted to use a Fall color scheme, but I of course wanted to incorporate my all-time favorite color of pink on this table as well. I am always keeping colors on the lighter side because that is the vibe I love and they looked nice against the wood tones in the tables and chairs. I added a mix of different collections of chairs to add a home/family element to the table and give an instant feeling of warmth. They are all from Stockroom Picks, a local vendor, along with the glasses and candlesticks that gave an eclectic style and charm. The beautiful flower centerpiece fits in just perfectly with these elements from Floral Flower Cart! The dishes and place settings are my everyday dishes that added a light touch to the darker table, and I LOVE how they turned out together! I finished off the place settings with a personalized leaf place card that was handwritten. This added a decorative piece to the autumnal place setting and was a perfect special touch.

The linens I used here are cheesecloth that I ordered on Amazon and died myself with Ritdye. I ordered it all on Amazon and shared them on my Instagram stories of how the dyeing process went. To get the light color I suggest using VERY little dye and following the instructions exactly. I ended up dyeing mine twice. The first time the pinkness came out too bright and I washed them with hot water several times to get it a little lighter and used those inside on the charcuterie board and drink station. I wanted them lighter on the table so I did it again and used very little dye! I used a mix of the petal pink color and tan, linking them both below for you. For the napkins, I used the same process and cut the tablecloth into the amount of napkins I needed. Tied them in a knot and they were good to go.

20201114-warren-laurenwestra-83.jpg
20201114-warren-laurenwestra-92.jpg
20201114-warren-laurenwestra-111.jpg
20201114-warren-laurenwestra-113.jpg
20201114-warren-laurenwestra-89.jpg
20201114-warren-laurenwestra-86.jpg
20201114-warren-laurenwestra-123.jpg
20201114-warren-laurenwestra-159.jpg

The Food

After about 7 years of hosting events as a married gal, I’ve learned a few tricks on how to manage my time and not have a meltdown in the kitchen. Two tips of advice are to know what your strengths are and how to simplify. I know that my strengths are as a baker and although I cook meat fairly well, if someone can do it better I’m all for it! So this Thanksgiving I gladly handed off the task to my friends at Exeter Meats. They smoked the turkey for our Friendsgiving (and are making one for our family Thanksgiving) to perfection!! It was so moist and delicious that I don’t think I will ever go back to cooking turkey myself! Another helpful hint when planning for a party is when you can do something the day before, do it! This always helps too in the case of something unexpected coming up. I made most of the dishes the day before and left a little time off of each recipe to finish cooking the day of right before it was time to eat! Last note on the food, having good high-quality pans that cook food well helps to ensure each dish will always be the best. I will link my favorites I used for this Thanksgiving below from my friends at 360 Cookware.

20201114-warren-laurenwestra-208.jpg
20201114-warren-laurenwestra-211.jpg
20201114-warren-laurenwestra-259.jpg
20201114-warren-laurenwestra-205.jpg
20201114-warren-laurenwestra-216.jpg
20201114-warren-laurenwestra-199.jpg
20201114-warren-laurenwestra-261.jpg
20201114-warren-laurenwestra-267.jpg
20201114-warren-laurenwestra-197.jpg

Thank you for having a seat at my table where you are always welcome! I hope this Thanksgiving is one that you enjoy with the people you love most. Let the times we have with our love ones remind us of what we are most thankful for. I am so thankful to share my life with you and hope I am always here to bring joy and helpful tips that will simplify your life and add just a little more beauty to it!

Have A Very Blessed Day, Amanda Warren

Everything I could link for you is below and things I couldn’t I found similar items.

A Taste of Heaven: Deliciously Easy Apple Pie!

If you are looking for a sweet and delicious dessert that is easy to make, look no further than this delicious & easy apple pie recipe! This classic treat tops the list as the #1 favorite for many dessert lovers, and it doesn't have to be difficult to make. In this blog post, we will be going over all the steps to make a delicious and easy apple pie that you and your family can enjoy. We'll also be discussing some of the tips and tricks to make sure your pies come out perfect every time. So, get ready to make the most scrumptious apple pie you've ever tasted!

Everyone loves this classic and timeless treat that can be quickly and easily whipped up with minimal ingredients. All you need is apples, sugar, flour, butter, and cinnamon. To make the pie even more special, you can add different toppings such as nuts, raisins, or of course a scoop of ice cream. As the delicious aroma of baking apples and spices fills your home, your family and anyone coming over will surely be delighted!

Easy Part 1: Store-Bought Crust

Apple pie is a classic dessert that is sure to please any crowd. But it can be time-consuming to make from scratch, especially when it comes to making the pie crust. Luckily, there is an easy and delicious way to make an apple pie with minimal effort - using a store-bought pre-made pie crust. This easy apple pie recipe requires minimal ingredients and is great for those who are short on time or are new to baking. The trick to making this recipe successful is to use a good quality store-bought crust. This makes this recipe easier and even more enjoyable. I love to get the double pack and make fun designs on the top with cookie cutters and crisscrossing them. This also makes your pie unique and special.

I always try my hardest to make the best homemade desserts, but I know when the experts have some things figured out better then me.. Like pie crust. I had a hard time trying to make the perfect pie crust so I finally gave up and focused all my energy on the filling! One delicious filling, a store-bought crust and the best pie pan make for a killer apple pie everyone will rave over!!

I am using the 360 cookware pie pan. The pan is made with 5-Ply construction and has a T-304 surgical stainless steel baking surface. No other bakeware cooks so evenly and perfectly as this pie pan! The Pie Pan is covered by a Lifetime Warranty like all of their products making this a legacy pan you can pass down for years to come. Better yet, they are all 100% American Made! Every pan I have used from them has cooked everything so well. This pie pan was nothing short of amazing and not one piece stuck to the pan! That was always irritating for me in the past, but now those worries are gone!

The Best Apples for Apple Pie

Apple pie is a classic dessert that is loved by many. The key to making a great apple pie is to choose the right type of apple. Granny Smith apples are a tart and firm classic choice for a delicious apple pie. Sweet, juicy, and crisp Honeycrisp apples are the perfect balance of tart and sweet. Braeburn apples are full of flavor and hold their shape when baked, making them an ideal choice. For a sweeter pie, Golden Delicious apples add a hint of tartness and are great for baking pies. Finally, Jonathan apples are sweet and tart, making them a great addition of flavor and texture to your apple pie. I like to mix 2 or 3 different apple types to give each bite a unique and delicious flavor. Two of my favorites are the Granny Smith and Golden Delicious together. With these apples in hand, you’re ready to make a delicious & easy apple pie.

20201114-warren-laurenwestra-175.jpg

Apple Pie Ingredients

2 store-bought roll-out crusts

7 cups thinly sliced apples (I like to do a mix of two different types of apples)

1 1/2 teaspoons cinnamon

1/2 cup melted butter

3 tablespoons all-purpose flour

1/4 cup water

1 cup sugar

1 egg with 1 tablespoons water mixed for egg washing

Instructions

1. Take out pie crust and pre-heat oven to 425

2. Peel and cut apples into evenly thinly sliced pieces. Place in a large bowl with cinnamon and toss.

3. Melt butter in the microwave until completely melted. Whisk in flour, water and lastly sugar blending until it all comes together. After fully mixed pour in the apple mixture and fully blend.

4. Take pie crusts that have been sitting out and roll over a sprinkle of flour. Take store-bought crust and lay it over a pre-oiled pie pan. Fill the pan with the apple mixture. Lastly, for the design of your pie the options are endless! I did a crisscross pie here and used extra dough with leaf cookie cutters to make the top even more fun!

5. Once the top is all designed and ready to go use egg wash mixture (1 egg and 1 tbsp water whisked) and brush onto dough.

6. Bake at 425 for 15 min and then reduce heat to 350 and bake for another 45 min or until apples are a soft consistency.

20201114-warren-laurenwestra-195.jpg

You can enjoy your pie right away with vanilla ice cream, let it come to room temperature, or keep refrigerated for the next day. Anyway that you enjoy it I promise you wont be disappointed! The combination of sweet apples, cinnamon, and sugar make this pie a heavenly treat. Whether you are looking for something to end a meal on a sweet note or just a special treat, this apple pie is the perfect choice.

Other Desserts and Comfort Food you will love:

The Ultimate Thanksgiving Dessert - My Pumpkin Crisp Recipe

Chocolate Peanut Butter Brownies

Scotty's Birthday Pistachio Cake

My Favorite White Cake Recipe

Brown Butter Caramel Pretzel Cookies

The Most Delicious Pumpkin Coffee Cake

I hope you enjoy this apple pie just as much as I do! Click -HERE- for my favorite pie pan for the perfect pie all year long! You can also use code “Amanda20” for 20% off the entire 360 cookware site!

20201114-warren-laurenwestra-171.jpg
20201114-warren-laurenwestra-65.jpg
20201114-warren-laurenwestra-170.jpg
20201114-warren-laurenwestra-67.jpg

Sparkling Ice Mint Mango Mock-tail

This shop has been compensated by Inmar Intelligence and its advertiser. All opinions are mine alone. #MySparklingIce #SparklingIceLife #SparklingIcePartner

Sparkling Ice Mock-tail Summer may be coming to a close but refreshing mock-tails will never end!! I am especially loving the Sparkling Ice Orange Mango sparkling water and enjoying it for a backyard brunch picnic. It can get pretty hot where we live, over 100 most August days and it’s always nice to find a refreshing drink we can enjoy before it’s too hot to be outside. I love enjoying a backyard brunch all year around but especially when the mornings are cooling down! Look below for the perfect mock-tail recipe to finish off your summer and head into fall! It’s great for brunch, lunch and anytime of day! I shopped for all of these ingredients at our local Save Mart. Cheers!

image0 (5).jpeg
image002 (1).jpg

Ingredients for 2 Orange Mango Mock-tails:

1 chilled Sparkling Ice Orange Mango

Sliced Mango

Fresh Mint

1 cup water

1 cup sugar + more for garnish

Ice

Directions:

1. Make simple syrup. Mix together water, sugar, 3 mint leaves in pot over fire. Continuously stir them together until sugar melts into water. Let cool and place in glass jar ready for use!

2. Fill bottom of glass with 3 mango slices and muddle with straw.

3. Add ice, 2 tbsp of simple syrup and fill rest of glass with Sparkling Ice Orange Mango.

4. Garnish with mint and a slice of mango.

5. Enjoy!

image0 (4).jpeg
image004.jpg
image003.jpg

Whole 30 Chicken Piccata

Chicken Piccata has always been a favorite dish around our house and once we started the “Whole 30” diet, I had to find a way to still enjoy it! To our pleasant surprise, now that I have changed the recipe, we like it so much that we will probably never go back to the old one! Finding new ways to enjoy our favorite dishes while still keeping them healthy is the best thing that has come from being on this new diet. Another great perk is how it takes me back to our time Italy when we enjoyed this on the cobblestone streets. Although we couldn’t go this year, we get to enjoy our stay cation with Mezzetta right at home! I hope you enjoy making and eating this dish just as much as we do!

Mezzetta is a California based company right here in the USA and I couldn’t be more excited to support them! Other delicious treats from Mezzetta we have been enjoying on our ‘whole 30’ diet are green olives on salads, jalapeno peppers on EVERYTHING, and peperoncini’s in our lettuce wraps!

IMG_1205.JPG
IMG_1176.jpg

Ingredients:

2 lbs chicken cutlets

2 organic eggs

1 cup almond flour

1/4 cup olive oil + 2 tablespoon

4 minced garlic cloves

1 shallot

1-2 tablespoon arrowroot

1 cup chicken broth

1/4 cup fresh lemon juice

1/4 cup Mezzetta capers (drained)

Salt & pepper to taste

Directions:

1. Rinse and pat dry chicken. Beat eggs in a bowl and put almond flour in a separate bowl. Put 1/4 cup olive oil in large pan on medium heat. Once olive oil is to medium temp (you can test by placing egg and making sure it doesn’t over cook) you can place each piece of chicken into egg mixture and then into almond mixture (making sure to coat well) then place into olive oil. Cook until golden brown on both sides.

2. Once all chicken is cooked place onto paper towel lined plate while making sauce. Clean out pan and return to stove top.

3. Begin making sauce by dicing shallot and mincing garlic. Add remains of olive oil to pan on medium heat. Add in shallot and garlic and cook until fragrant. Now add in arrowroot until well coated.

4. Add in chicken broth and lemon juice and let simmer. Once simmering to add a nice texture add in Mezzetta capers and salt and pepper until you like the taste!

5. You can now add chicken back in or you can plate it and pour sauce over, however you like to serve! I like to put mine over a bed of cauliflower rice and pour sauce on top!

6. ENJOY!!

IMG_1187.jpg
IMG_1166.JPG

This is a paid sponsorship with Mezztta.

5 Tips When Shopping For Dresses For A Pear Shaped Body

We love our curves ladies, but one wrong outfit can take you from looking like JLo to looking like Mrs. Piggy. No shade Mrs. Piggy …I think your fabulous! Down for you below how I break it down how I have completely embraced my curves and been able to cater my shopping for my body type and not just the trends of the moment!

Dress is from LoveStitch you can shop -HERE- Use code “XoAmanda20” for 20% off your order

Hat is linked -HERE-

IMG_0236.jpg

1. Waist

This might be the most important part of making a dress a goal dress for you! Some dresses will already have that built in fit to flare shape for you, but what about the ones that don’t? It doesn’t mean that dress you love has to be off the table!. Simply add in a belt, fabric tie, or anything to can to accentuate your waist and give that hour glass curve we pear shaped girls love!

2. Sleeves

These are so important!! I am not the biggest fan of my arms so I have always been very mindful of how to make them not look less large (winter is my friend)! It cant be winter all year around though, so we want to look at where the sleeve is hitting. Cap sleeves look good on basically no one, frills add bulk and weight, and in this case less is more! Look for sleeves that are simple, sleek and not cutting your arms making them look larger and in return giving you a larger top half.

3. Neckline

I LOVE the decolletage of a woman. (the upper part of a woman’s neck, shoulders and upper chest) I think it can be such a beautiful and sexy part of our bodies. So I tend to love off the shoulder tops (this also helps with my not loving my arms but still showing skin) . Again as a pear shaped girl I try to find sleek, non boxy type necklines. Things that will flatter our gorgeous top half and accentuate it!

4. Silhouette

Fitted, accentuating dresses are OUR friends! Yes, if you order them too tight or in an unflattering material they can make us look worse! When you make the right choice they can make us look like the curvy goddess God intended us to be! Don’t worry about the size of the clothes, worry about the fit of the dress. How it lays on you is what matters and what will give you the confidence to rock that outfit! If needed ALWAYS size up to fit your bottom half and take it into your local seamstress to take in the top and get it to fit perfectly for you!

5. Straight Lines

As a curvy pair shaped lady, like me, you probably have thicker thighs. Not a bad thing (in fact i’d rather have those thick thighs then lose my booty) but this is just something you want to take into consideration when shopping. Straight lines and mini skirts tend to not be our friends. They cut your legs in half and don’t help give the long lines you want! I always love to go a little longer on a dress and half a slit up one leg. This will give you a longer look and not cut your leg in half and also a sexy look (especially for photos if you dominate that pose! If you aren’t going for a sexier look I would go with a little more of a flowy dress, short or midi. This gives a less boxy appearance that can tend to hurt us! We want all the curves, we aren’t trying to hide them just accentuate them!

FullSizeRender (4).jpg

I hope these 5 tips will help you when your shopping for a dress next time. We are all beautiful! Every size, every shape!! The sooner we learn to shop to accentuate our shapes, the sooner we will feel more confident and empowered! I linked the dresses below that I myself have or would buy to help accentuate my shape. I also posted photos of dresses I wouldn’t buy and explained why. I tend to visually learn better so I felt this would help the most! Happy shopping my pear shaped friends!

Xo, Amanda

Dress is from LoveStitch you can shop -HERE- and Use code “XoAmanda20” for 20% off your order

Hat is linked -HERE-

Enjoy the Comfort of Homemade Delicious Banana Bread

Few aromas are as welcoming as the scent of banana bread baking in the oven. That unmistakably sweet, cozy fragrance that fills the home in the morning is only the beginning of the experience of a slice of Simply Delicious Banana Bread. Whether you're looking for a way to use up those browning bananas on your counter or you're after a foolproof treat that's sure to please, this banana bread recipe is the answer. Let's explore what makes this treat so special, from the rich banana flavor to the nutty crunch, to the customizable mix-ins, and how this simple pleasure has become a staple in kitchens around the world.

With its moist crumb and rich banana taste, this classic dessert has stolen the hearts of many. It stands as a testament to the phrase "less is more," proving that deliciousness can also be simple. The sweetness of these bananas eliminates the need for excess sugar, while their soft texture contributes to the bread's irresistible moistness. The key ingredients in this easy-to-make treat are items you likely already have in your kitchen, like flour, sugar, and eggs. Combining these basics with ripe bananas results in a sweet delight that is as fun to make as it is to eat.

This is a great starter recipe for those new to baking and a quick, satisfying project for seasoned bakers. Add in your favorite nuts, chocolate chips, or a pinch of cinnamon or nutmeg to put your own twist on the classic recipe. Whether you're craving a quick breakfast, a midday snack, or a dessert, Simply Delicious Banana Bread fits the bill.

The Ideal Loaf Pan for Perfect Banana Bread

Choosing the right loaf pan is key to banana bread bliss. Here are some tips and essentials I am sure to use every time. A stainless steel loaf pan is your golden ticket to easily removing that golden loaf and achieving an even bake every time. Steer clear of dark or glass pans. These can unevenly distribute heat, potentially leading to an overcooked exterior and undercooked middle. Make sure to mind the depth. A pan that's too deep might leave you with an underbaked center amid dry edges. My favorite loaf pans to use for this recipe and all my bread recipes are the 360 Cookware loaf pans. They have three to choose from and my personal code AmandaWarren20 will give you 20% off your order. Shop Here No matter your choice in bakeware, the key is to ensure that your Simply Delicious Banana Bread turns out perfectly each time.

How to Ripen Bananas for Banana Bread

The ideal banana for this bread is ripe with plenty of brown spots. Think of those brown spots as nature's sweetener. But what if your bananas aren't quite there yet? There are tricks to accelerate ripening. If you're in a hurry to bake and your bananas are still too firm, you don't have to wait for days for them to ripen. A few ways I speed up the process are to place bananas in a warm area to help the ripening or store them with an already ripe banana or an apple in a paper bag to promote ripeness through natural gas release. For another express route to ripeness, pop unpeeled bananas into the oven. Ripening bananas properly ensures Simply Delicious Banana Bread will live up to its name with the perfect sweetness and texture.

Storing and Freezing Your Banana Bread

Once your banana bread has cooled and you've had your fill, storing it properly is important to maintain its taste and texture. Be sure to let it cool completely and use plastic wrap or foil to protect the bread's freshness. For enjoying within a few days, an airtight container will suffice. For longer storage, freeze slices or the entire loaf and thaw as needed.

Looking to freeze for later use? This is always a favorite of mine, so I have bread when unexpected company comes over or I want something tasty for breakfast. Be sure to wrap tightly to keep the air out and prevent freezer burn. You can keep your treat fresh in the freezer for up to 3 months. So be sure to mark the date on the outside. Once you are ready to enjoy again remove from freezer and let sit out to defrost overnight or microwave for that just-baked taste. Proper storage ensures that every slice of Simply Delicious Banana Bread remains as good as the first.

Classic simply delicious banana bread embodies the comfort of home-baked goods. Its wonderfully moist texture and naturally sweet flavor gained from ripe bananas make it an everlasting favorite. This breakfast loaf is as practical as it is satisfying, because you are reducing food waste while also whipping up a tasty delight! It truly is a win-win situation! The simple ingredients make for a hassle-free baking experience and offer a warm, inviting finish to any meal. Banana bread is really suitable for any occasion like breakfast, snack time, or dessert. My favorite part of baking banana bread is how much you can customize with confidence by adding nuts, or chocolate chips to make it uniquely yours. So, the next time you spot those speckled bananas on your counter, know that they are the start of something truly special.

Ingredients:

3 overripe mashed bananas

1/2 cup melted butter

3/4 cup brown sugar

2 eggs

2 cups all-purpose flour

3 teaspoons baking powder

1/4 teaspoon salt

Directions:

  1. Preheat oven to 350 degrees, oil favorite loaf pan and set aside.

  2. In a large bowl mash overripe bananas. Add in eggs, brown sugar, and melted butter. Mix well.

  3. Stir in flour, baking powder and salt. If adding in nuts or chocolate chips you can add now.

  4. Pour batter into prepared loaf pan and top with chopped nuts if desired.

  5. Bake for 60 minutes on middle rack until a skewer inserted comes out clean.

  6. Let come to room temperature and turn over on a wire rack to remove loaf from pan.

  7. Enjoy!

How To Keep Your Hair Healthy and Looking Great Between Salon Visits

Having healthy, beautiful hair is a goal that many of us strive for. However, to achieve this goal, it’s important to learn how to properly take care of your hair in between salon visits. With the right hair-care routine, you can maintain healthy hair and keep your locks looking their very best. In this blog post, we'll discuss some tips on how to take care of your hair between salon visits and protect your hair in the best way possible.

Ideally, you leave the salon looking fabulous, with your color on point, your blowout looking amazing and with the best shine!! But how do you make it all last? Here are my helpful ways to help your beautiful salon visit last until your next visit. I’m going to tell you how you can keep your hair in the best shape! I was a former hairstylist behind the chair and Matrix educator for over 10 years and these are the tips and tricks I always shared with my clients and continue to use for myself to this day.

Washing Your Hair

I was always having this conversation with clients as to how often they wash their hair. Often if they are doing daily shampooing it's hard to get them to change, but when they do they are so much happier! Think of all the time you will save, the money on shampoo and to top it all off, your hair will look even better. Now I know some of you say that your hair is too oily to do this or you hate the smell. To ease yourself into this process, start with regularly washing every other day to get your hair used to not producing as much oil, wear a hat on day two or plan it for when you won't be leaving the house. Once your hair gets used to an every other day schedule you can keep pushing it until your only washing your hair around 2 times a week. This will give the best results! Your hair will continue to produce those oils because you are stripping them away. The less you wash the less oil it will produce.

Washing your hair every day actually can strip the scalp of its natural oils, leading to dry, brittle hair. I suggest aiming to wash your hair every 2-3 days, this seems to be the sweet spot for more people for never getting oily and keeping their hair clean. If you have an oily scalp, try using a dry shampoo in between washes to absorb some of the excess oils. When you do wash your hair, make sure to use a gentle, sulfate-free shampoo and use lukewarm water as hot water can also strip your hair of its natural oils. You also want to make sure you are cleansing correctly. Use two shampoos every time you wash. The first one will clean off any dirt, oils and chemicals from the product, and the second wash will actually clean the hair. This is important for getting your washes to last longer as well. After washing your hair, make sure to condition it to keep it soft and healthy.

Now when you are washing, your water shouldn’t be so hot you're burning your head. For a number of reasons this isn’t good for you! One is it will remove your color faster. Two it’s stripping the oils from your hair again and can cause dryness to your hair. It can also cause your hair to produce even MORE oil. Bottom line, the cooler the water the better for washing your hair.

Heat on Hair

Along with hot water, using hot tools on your hair can also cause damage. Yes, we all want a gorgeous blowout, but save it for special events or use your blow dryer in a cooler setting. Here’s what I do: I wash my hair twice a week. On day one I will usually braid it when it's half dry and sleep on it. This way I have the appearance of full-volume hair in the morning with a beautiful wave but I didn’t use any heat. On day two I will blow it out and give my hair curl (with a lower heat setting and protective products). Usually, day two is for the weekend when I have more places I am going and people to see. If you still need to blow dry and curl your hair just turn down the setting and use a heat protector.

Heat styling can cause extensive damage to your hair, so it is best to keep heat styling to a minimum. Instead, allow your hair to air dry as much as possible and avoid using hot tools such as curling irons, straightening irons, and blow dryers. If you must use heat styling tools, always use a heat protectant product first and set the temperature to the lowest setting. I will link below all of my favorite heat protectants and styling aids to help you maintain gorgeous hair!

When To Use Top Knots & Hats

Yes, we all love those days when you can throw a hat on or pull your hair into a top knot. However, they aren’t ideal for your hair. I myself am a lover of both!! However, if I wear a hat I only use it outside of the house, and as soon as I am home I take it off! Top knots are also my favorite style when it's almost hair-washing day, but I try my best to never sleep with it like that and always leave it loose. The tighter you pull your hair the more it's pulling each strand and causing breakage. I like to use silk scrunchies and tie in a loose pony when I go to bed or leave it loose. The silk scrunchies will help fight the frizz and breakage of hair. You also want to be cautious when combing or brushing your hair. Be sure to use a wide-toothed comb to minimize breakage.

What Products To Use

You just paid good money for your hair to get done, so please don’t run to the store and buy some products off the shelf without some research. The wrong product can strip your color, as well as cause damage to your hair. There is a reason stylists show you the products they use and ask if you need anything as you are checking out. To keep your hair looking its best, it is important to avoid products that contain harsh chemicals such as sulfates, parabens, and mineral oils. These ingredients can strip away natural oils from your hair, leaving it dry and brittle. Instead, opt for natural, organic hair products with ingredients like aloe vera, coconut oil, and shea butter. These ingredients will nourish and moisturize your hair without stripping away essential oils.

Using fewer styling products such as mousses, gels, and sprays can also help keep your hair healthy between salon visits. These products can leave a residue on your hair that can cause it to become dry and brittle. Again, try to limit your use of heat-styling tools such as curling irons and straighteners as well, as they can cause heat damage and strip away natural oils from your hair.

To further nourish your hair between salon visits, deep condition your hair once a week. This will help replenish moisture and nourish the overall health of your hair. If you are only washing your hair once a week then stick to every other week or every other time. You don't want to over-add protein from conditioners and conditioning masks to your hair, this can cause the opposite effect. So stick to once a week if you wash 2 or more times and every other week or once a month if you wash weekly.

Bonus Tips

- One way to extend the life of your color between salon visits is to use a root touch-up powder or spray to conceal your roots. Apply it to the root area only and blend it in with a brush or a comb for a natural look. Be sure to brush this out before washing your hair.

- Appointments to trim your hair every 6-8 weeks to keep your hair looking healthy and avoid any split ends that can cause your hair to actually get shorter from breakage.

- Protect your hair from the sun with a hat or other coverage, and avoid over-washing your hair. Eating a healthy diet rich in protein, vitamins, and minerals is also important for keeping your hair healthy and looking its best.

- Avoid using chemical treatments (such as bleaching or coloring) too often or over-processing. A good hairstylist will advise you against any hairstyle that will overly damage your hair.

By following these tips, you can keep your hair looking great between salon visits and maintain a healthier hair care routine.

The Best Monster Cookie Recipe You'll Ever Try!

Are you looking for a delicious and easy-to-make cookie recipe? Look no further—this Monster Cookie recipe is sure to satisfy anyone's sweet tooth! Packed with sweet and salty flavors, this amazing cookie is already a fan favorite and a classic that has universally loved cookie ingredients. This simple and delicious treat is made with oats, peanut butter, M&Ms, and chocolate chips, creating a classic flavor combination that nobody can turn down. Best of all, this cookie is super easy to make and takes no time at all. So, if you’re looking for a delicious and colorful cookie recipe that everyone will love, give this Monster Cookie recipe a try. You won't be disappointed!

I love making monster cookies so much because of how customizable they are.

Monster cookies are a classic treat that can be customized in countless ways. With the right ingredients, you can create a cookie that is perfect for any occasion. Whether you're looking for a classic monster cookie recipe or something a little unique to the ingredients, you can make a batch of delicious monster cookies that everyone will love. The best part about making monster cookies is that you can add whatever ingredients you like. Traditionally this cookie would start with classic favorites like chocolate chips and all-natural peanut butter, but delicious new twists to the recipe could include adding things like crushed pretzels and candy. Adding in colorful sprinkles or M&M's for the holidays is one of my favorite seasonal customizations as well. You can even get creative and mix and match different flavors to create the perfect monster cookie for you and your event!

What You’ll Need to Make Monster Cookies

For this recipe, you will need butter, sugar, brown sugar, vanilla extract, eggs, all-purpose flour, baking powder, salt, and 3 cups of your favorite goodies. I typically use chocolate chips, old-fashioned oats, chopped pecans or walnuts, M&M's and sprinkles. You can add in other things like peanut butter, butterscotch, or anything you have in your pantry to make this monster cookie recipe all your own.

In addition to these ingredients, you’ll likely need a few basic kitchen tools such as a large bowl, an electric mixer or stand mixer, a baking sheet, and measuring cups and spoons. You’ll also need an oven to bake the cookies. Preheat your oven to 375 degrees Fahrenheit before you begin. Finally, you’ll need a few minutes of free time to step-by-step mix, scoop, bake, and enjoy the delicious monster cookies you’ve created.

How to Store Leftover Cookies

If you don't plan on eating your leftovers right away, it's important to store them properly. When it comes to storing leftover cookies, there are a few key things to keep in mind. First, it's important to store them in an air-tight container, such as a plastic bag or airtight container. This will help to keep them as fresh as possible and keep out any moisture that could cause the cookies to spoil. Additionally, it's important to store the cookies in a cool, dry place. If you plan on storing them for more than a day or two, then it's best to put the container in the refrigerator or freezer. If you plan on keeping them in the freezer, make sure to use freezer-safe bags or containers. This will help to prevent the cookies from becoming soggy or developing freezer burn. Finally, make sure to label the containers with the date you stored them, so you can easily see when they need to be eaten. By following these simple steps, you can easily store your leftover cookies and enjoy them later.

monster 8.JPG

INGREDIENTS

1 cup butter (2 sticks)

3/4 cup sugar

3/4 brown sugar

1 tsp vanilla

2 large eggs

2 1/4 cups flour

3 tsp baking powder

1 tsp salt

3 cups of your favorite goodies

INSTRUCTIONS

1. Preheat oven to 375 degrees.

2. Melt the butter for 30 seconds in the microwave (if the butter is not at room temperature).

3. Add sugar & brown sugar into butter and mix. Scrape sides and mix again immediately after.

4. Mix in Vanilla Extract and eggs. Mix again.

5. Gradually add all-purpose Flour, Baking Soda, and salt. Mix well.

6. Now add in all your favorite treats! For these cookies, I did chunks of a milk chocolate bar, old-fashioned oats, colorful M&M’s, sprinkles, and walnuts (all equal to 3 cups)

7. I use a pre-measured cookie scooper linked -here- works great to have even-sized cookies! Scoop onto a baking sheet or parchment paper. Add 2 scoops right on top of each other to give a fuller cookie with a gooier middle.

8. Bake for 9 minutes and cool on a cookie sheet.

9. Enjoy!

Other Cookie Recipes You Will Love:

Birthday Cutout Sugar Cookies

Brown Sugar Toffee Cookies

Brown Butter Caramel Pretzel Cookies

How to Make Delicious Nutter Butter Cookies At Home

Uncovering the Unexpected Benefits of Taking a Bath

Taking a warm bath after a long day is one of the most popular ways to relax and unwind. Not only is it a great way to relax, but there are also many surprising health benefits associated with taking regular baths. In this blog post, we will explore the numerous benefits of taking a bath that has been scientifically proven. Some of those amazing benefits include increased energy levels, improved sleep quality, and also taking a bath can simply help improve your overall health and well-being. So if you're looking for a peaceful way to unwind and relax and stay healthy, taking a bath may be the perfect answer.

beautybyearth3.JPG

Warm Evening Baths Help Promote Restful Sleep

One of the most underrated activities before bedtime is taking a warm evening bath. Taking a warm evening bath can help relax the body and mind, allowing you to drift off into a restful sleep. Not only does it help you relax, but it also helps your body to produce melatonin, which is an important hormone for regulating sleep. Melatonin helps to ensure that your body is getting the rest it needs, so taking a warm evening bath before bedtime can help to improve your overall sleep quality.

A warm evening bath can also help to reduce stress, anxiety, and tension, all of which can interfere with sleep. Taking a warm evening bath can help to improve circulation, which helps to relax your body and improve your overall sleep quality. It can also help to soothe sore muscles, helping you to feel more comfortable and relaxed when it comes time to fall asleep. Taking a warm evening bath gives you an opportunity to unwind and clear your mind, allowing you to drift off in peace and get a good night's sleep. Not only does it help to relax your body and mind, but it can also help regulate your sleep hormones and reduce stress, anxiety, and tension that can otherwise interfere with sleep.

Lukewarm Bath Water Hydrates the Skin

Taking a lukewarm bath is a great way to keep your skin soft, supple, and healthy. The optimal temperature for a lukewarm bath helps to open your pores without being too hot or too cold. By improving circulation and reducing inflammation, a lukewarm bath can help you feel refreshed and revitalized. Be sure to use your favorite moisturizers after drying off from your bath. This will help lock in moisture into the skin from your bath as well.

Baths Soothe Joint and Muscle Pain

Taking a warm bath is a great way to reduce joint and muscle pain. The warmth of the water helps to relax tense muscles and improve circulation, which can reduce inflammation in the joints and muscles. One of the great benefits of taking a bath is the feeling of buoyancy that comes with it. Floating in the water can help you relax and release tension from your body and mind. You can also use bath time to practice mindfulness and enjoy the feeling of weightlessness. Allowing the joints and muscles to relax from fitness performance or overly work of your joints and muscles. Furthermore, the minerals in the water can help to reduce inflammation and improve circulation, leading to further pain relief. Taking a warm bath can contribute to reducing stress which can help to reduce tension in the muscles and reduce pain. Soaking in a bath can be a great way to relax and alleviate joint and muscle pain.

beautybyearth5.JPG

Balance Your Hormones by Bathing

Taking a bath is one of the simplest and most effective ways to balance your hormones and improve your overall health. A warm bath helps to relax your body and mind, reducing stress levels and restoring balance to your hormones. The minerals in the water can help to nourish your skin and provide essential nutrients to help keep your hormones in balance. The heat of the water can also help to open up your pores and allow your body to naturally detoxify, removing toxins that can disrupt hormonal balance.

Furthermore, the hydrotherapy of a bath can help to improve circulation, which can help to keep your hormones in check. Finally, aromatherapy can also be used in your bath to help soothe your senses and reduce stress levels, helping to keep your hormones balanced. Taking a bath is an easy and enjoyable way to promote hormonal balance and improve your overall health and well-being.

Relieves Cold Symptoms and Improves Breathing

Taking a hot bath is a great way to get relief when you’re feeling under the weather. Hot baths can help to reduce inflammation, loosen tight muscles, and increase circulation, which can all help to relieve the symptoms of the common cold. The steam from a hot bath can also help to clear your nasal passages, helping you breathe easier. In addition to the physical benefits, hot baths can also help to reduce stress and anxiety, which can help your body to focus on fighting off the cold. So the next time you feel a cold coming on, consider taking a hot bath to help relieve your symptoms.

beautybyearth2.JPG

Might Boost Your Immune System

Taking a hot bath is one of the best ways to improve your overall health and well-being. It has numerous benefits that can improve your physical and mental health, and it can even help to boost your immune system. One of the most important benefits of taking a hot bath is that it can help to increase your white blood cell count, which strengthens your immune system. The warm water helps to relax your muscles and increase your circulation, which can help to flush out toxins from your body. Additionally, the hot water helps to open your pores, which can allow your skin to absorb beneficial minerals and vitamins. The hot water can also help to reduce inflammation throughout your body, which can help to keep your immune system functioning properly. Taking a hot bath can also help to reduce stress, which can help to prevent your immune system from becoming weakened.

The benefits of taking a hot bath are numerous and can help to improve your overall health and well-being. Taking a hot bath can help to increase your white blood cell count, which strengthens your immune system. It can also help to relax your muscles, flush out toxins, open your pores, reduce inflammation, and reduce stress. All of these benefits can help to keep your immune system functioning properly and can even help to prevent it from becoming weakened. So, make sure to take a hot bath regularly to reap the benefits and improve your health and well-being.

Reduces Symptoms of Anxiety and Depression

Taking a warm bath has numerous benefits, both physical and mental. It can help ease physical tension associated with depression and anxiety, relax tense muscles, and promote a sense of well-being. The warmth of the water can help you relax and make it easier to sleep, which can help reduce symptoms of depression and anxiety. Soaking in a hot bath also increases your body temperature, which can help relax your muscles and improve your mood. The physical act of submerging your body in the water can also be therapeutic and calming, while the Epsom salt in a warm bath can help reduce stress hormones and promote relaxation. Additionally, warm baths can help reduce inflammation, which can also reduce symptoms of depression and anxiety. Taking a warm bath is a great way to take care of your physical and mental health.

Quiets the Mind

There are many benefits to taking a hot bath! Taking a warm bath can help to quell the mind of negative thoughts, worries, and anxieties. The heat of the bath can help to relax tense muscles and reduce mental stress, creating a sense of calm. Spending time in a hot bath can also increase the body's production of serotonin, the neurotransmitter associated with mood and well-being. This can help to promote restful sleep, as it allows you to wind down and relax before bed. The warmth of a hot bath can also help to clear the mind and allow one to focus on the present moment. Taking a hot bath can be a great way to unwind and de-stress from a long day.

beautybyearth1.JPG

Burns Calories and Lowers Blood Sugar

Taking a hot bath can provide numerous health benefits, from burning calories to reducing stress. Studies have shown that taking a hot bath can burn up to 126 calories, making it an easy form of light exercise. Additionally, the hot water of a bath can increase your body temperature, which can help lower blood sugar levels. Soaking in a hot bath can also cause your body to sweat, which helps burn calories and can also help relax your muscles, easing any aches and pains while promoting better circulation. As mentioned above, taking a long, hot bath can help reduce stress levels and quiet the mind, both of which can help lower blood sugar levels. The combination of these benefits makes taking a hot bath an excellent way to maintain good health.

Bathing Can Improve Heart Health

Taking a warm bath can be beneficial for your health in many ways. Studies have shown that taking a warm bath can help lower your heart rate and reduce blood pressure, which can help improve your circulation and reduce your risk of heart disease. The heat of the water can also help relax your muscles, which can help reduce stress levels and improve overall heart health. In addition, warm water can stimulate the release of endorphins, which can provide a calming and soothing effect. Bathing can also help reduce inflammation, which can help reduce the risk of heart disease. In addition, bathing can help flush out toxins from the body, which can help improve overall health. This can help improve your skin health, as well as your immune system. Taking a warm bath can be a great way to relax and improve your overall health.

Is Sweating In the Bath Good for You?

Taking a hot bath is a great way to relax and detoxify your body. Sweating in the bath is an effective way to rid your body of toxins and open your pores so that your body can release impurities. This action of sweating can help reduce stress and anxiety, as it can help your body relax and loosen tight muscles. It can also help boost your immune system as it helps flush out bacteria and other pathogens. Sweating can also help you sweat out toxins that can accumulate in your body from everyday living. Not only can it help improve circulation, it can also help your skin stay healthy and glowing. Taking a hot bath has many beneficial effects, so make sure to take one at least once a week to reap the benefits.

Other Articles You Will Enjoy:

Unlock the Beauty & Health Benefits Of Raw Honey Today

My experience with ELEMIS products & what I will buy again!

How To Take Care Of Your Hair Between Salon Visits

Benefits Of Taking A Bath

Blue vs. Purple Shampoo

Unlocking the Secrets of Biolage Oil Renew & The Porosity of Your Hair

Tips for Making Dry Shampoo work for you

Wrapping Up Christmas With Clevermade

If your new around here you may not know how obsessed I am with Clevermade products. I love everything about their products and how they make my life so much easier. When Christmas is sadly over this year and your boxing up those ornaments and gorgeous Christmas decor, you’ll want Clevermade by your side.

clevermade.JPG

With every snap of a box it makes storing just as easy as stacking them away! Whether you are storing them under your bed or in a closet there is a Clevermade package that will work for you. In our house, we love using the crates for perfect storage in our spare bedroom closet or our attic. The storage containers stack on top of each other making them super sturdy and perfect for ornaments and breakable items. Click -here- for crates.

clevermade5.JPG
clevermade7.JPG

The collapsible 44 liter soft storage is perfect to store under my bed as well as to put Winter and holiday sweaters in and store in my closet. The steel frame gives this storage a sturdy frame so that you can stack them but the soft edges makes it perfect for the holiday decor that is oddly shaped. Click -here- for soft storage.

clevermade6.JPG
clevemade4.JPG
clevermade3.JPG
clevermade8.JPG

The last item I can’t do without this holiday season is Clevermade’s new package theft and weather protection. This helps all my Christmas gifts to stay safe after being delivered. Holiday season is the biggest time of year for porch pirates to strike, and they don’t deserve to take away our gifts. This package protection gives me peace of mind when i’m not home but are having packages delivered. Click -here- for Parcel Lockbox.

Make this holiday a little bit easier with Clevermade.

Xo, Amanda Warren

The Gift Everyone Will Love - Purple Mattress

This summer we started the long process of updating our house. Although we didn’t do every room, our bedroom was one we focused on that needed some attention!! Our mattress topped the list for what needed to be updated, STAT! After researching a ton of different mattresses I knew I wanted to try something that delivers, so I went with PURPLE! We first got the mattress and Scott was obsessed with the cushion like feel of it (AKA the Purple hex technology), you can even see below how it looks and feels underneath in the tiny replica of the cushion that they sent below.

purple3.jpg

Once we slept on it a few times we knew we were in love and thought our guest bedroom deserved the same love. We want our company to feel the same pleasure and get a comfy nights sleep as if they are in a nice hotel when they visit! Once we got used to the mattresses we saw that PURPLE came out with a pillow with the same exact purple hex technology and we knew we had to get it. The pillow gives you:

No pressure support (adapting to your head and neck for support)

Stays cool at night (open air channels throughout keep you cool through the night)

Doesn’t lose its shape (keeps its shape over night and over time)

purple4.jpg

Just like PURPLE mattresses this pillow comes with 100 day trial! It also comes with a 1 year warranty, which I think is more than fair because I probably buy 2 pillows a year!! Their mattresses come with a 2 year warranty and also have that same hex technology that will keep you cool and give you support no matter how you lay at night.

purple1.JPG
purple2.JPG

We have been loving our mattress from the minute we laid on them and now we hope our guests will too! If you are looking for the best, look no further! Have questions about this mattress or pillows? Let me know below! I know it can be hard to find what your looking for when it comes to sleeping every night so I’m here to help!

Happy Sleeping Friends.

Xo, Amanda

Click on photos below to shop my pillow and mattress!!

Bed Bath and Beyond Gift Guide

Christmas tends to be the most hectic and stressful time of year. You get pulled in a million directions, with extra work, endless parties, and a 100 different gifts to buy for family, friends and coworkers. The easiest way to calm things down at Christmas is to have one stop where you’ll be able to find something for everyone on your list! Bed Bath and Beyond’s website is the perfect place to go. Their shipping is free, and you can find some of their best hidden discounts and merchandise online!

bbb.JPG
bbb8.JPG

A GIFT FOR EVERYONE:

I got this Nespresso machine as a gift to treat our guests when they visit our house. I think it ended up being more of a gift for myself, but all the holiday visitors are going to enjoy the warm and yummy tastes that i’m currently in love with! The machine makes such a great gift for everyone on our list. Coffee is such a universal necessity and I think every avid drinker will love the one we got! Even if you don’t like Espresso, the Nespresso® by De'Longhi Evoluo Coffee and Espresso Maker makes amazing coffee and gives more than just one option! Another perfect gift if your family member already has a Nespresso or Keurig is the pods to drink their coffee. I love going to Bed Bath and Beyond for those pods all year round! They have the biggest selection and best prices! Nespresso linked -HERE- My favorite pods are linked -HERE-

bbb0.JPG

A GIFT FOR THE BEER DRINKERS:

Our dads are always pretty hard to buy for. I thought this was the perfect gift for them! Fun, practical, and something they can enjoy for years to come! I filled the beer caddy will different types of beers they might not always buy to give them something fun to drink. The caddy can also be used in many other ways as well. One way in particular that comes to mind is as a silverware holder at BBQ’s or parties. You can place mason jars inside to hold forks, knives and spoons. Who doesn’t love a personalized gift? There is always something prideful about seeing your last name engraved on things and the men in our family love that little personalized touch! The beer caddy is linked -HERE-

bbbb.JPG

THE TEA LOVER:

My mother in law is the biggest tea fan! Every time we go out to eat or choose to stay in she has to have a cup of tea and she loves to try different flavors of it. Knowing this I had to try and come up with a creative gift that fit her love of tea. I found her the cutest wood tea chest made by Fulton St. She will love the look of this gift! Another gift option idea would be to add a tea kettle to the chest, and BBB has so many amazing options for this as well! Tea Box linked -HERE-

bbb5.JPG
bbb6.JPG
bbb7.JPG

THE NEW HOME OWNER:

For the new home owner or room renovator. My mom happens to be redecorating, painting and giving my old bedroom a face lift. I thought it was only fitting I found a perfect pink bedspread to help her finish up the final touches! I knew the color she wanted and the theme she was going for so it was pretty easy to pick something out I knew she would love. Bed Bath has so many options and you’ll be able to find the perfect bedding for every style.

bbb00.JPG

THE TRAVELER:

My brother in law is always traveling to visit us and going to fun places with his baseball group so I thought it would be fun and cute to get him a personalized toiletry case. I went with a grey canvas one that was very minimal and clean. This way he can travel in style and think of us when he does! I filled it will some fun beard oils and body washes! Travel case linked -HERE-

bbb9.JPG

THE PERSON YOU NEVER KNOW WHAT TO BUY:

Even though I offered up some great gift ideas, you may still be hung up on the perfect gift for the people that have everything. Maybe you have the white elephant gift exchange at work, the newly engaged couple in the family, or the mother in law that is just too picky! Fear not, the new Bed Bath and Beyond, BEYOND+ is always a great gift option! It gives you 20% off everything all year long and free shipping! That means no more hunting for a coupon or trying to spend more so you wont have to pay to ship! This gift is perfect for everyone, and if you need to spend more then 29$ you can always add on a gift card! DOUBLE win!

bbb4.JPG
bbb3.JPG
bbb2.JPG

THE FAMILY PUP:
Before you finish up shopping don’t forget the lovable family dog. We don’t have kids at our small family Christmas brunch, so our pup Amore provides the most entertaining gift opening excitement. She gets so overjoyed by everything we get her and it puts the biggest smile on everyones faces! This year it was so easy finding toys and bones for her at Bed Bath and Beyond. Ranging in gifts for small to large dogs, hyper to mellow. I may have even given her one bone early (Just for photo purposes!)

Shop All Items Below By Clicking On Them

I hope these ideas help calm down the craziness of the Christmas season and give you the perfect ideas for everyone on your list! Treat yourself, your family, friends, and don;t forget your doggies at Bed Bath and Beyond’s one stop shop! Happy Holidays and Happy Shopping!!

Xo, Amanda

The ultimate gift for every guy on your list

Its always hard to shop for the guys on my Christmas list. They either have it all, are super picky, or I just can’t figure out what they really need. This year I found just what I needed on my weekly Target run! Cremo came out with the cutest gift sets and they worked perfectly for every guy on my list!

cremo.jpg

For my brother in law I found a beard oil set, which will helpto keep his beard in the perfect condition and add moisture during the cold Winter months. For my step dad and father in law igot the body wash kits. They smelled so amazing when Scott first tried Cremo body wash this year so I thought our moms deserved that same gift of a hunky man. Your welcome ladies!! Lastly, the gift for my hubby. I added a shave kit into his stocking this year to help keep that close shave all year long. Cremo is officially his new favorite shave cream and I too love the way it smells, so I make sure to keep him stocked!

cremo3.JPG
cremo4.JPG

Cremo products have the ultimate gifts of manly beauty for every guy in your life. Its a gift that keeps on giving and one that you know they will use almost on a daily basis. I have been obsessing over their products all year long and the amazing smells that come from the bathroom every time Scotty takes a shower. Head to your local Target or Wal-mart and pickup these great gift sets, or click on the links below and make this Christmas shopping the easiest of them all!

Click -HERE- for bodywash gift set, -HERE- for beard giftset, -HERE- for beard oil gift set, and -HERE- for shaving cream gift set!

Happy Shopping!!

Xo, Amanda Warren

This is a partnership with Cremo Company

cremo2.JPG

Exploring Lake Tahoe: An Unforgettable City Guide

Lake Tahoe is a breathtakingly beautiful alpine lake nestled in the Sierra Nevada Mountains. With its crystal-clear waters, Lake Tahoe provides some of the world's most stunning views along with plenty of fun recreational activities. No matter what type of Tahoe experience you're looking for, this place has something to offer everyone. The beauty of Lake Tahoe makes for the perfect vacation destination. It truly is one of the most majestic and beautiful locations in the United States. The lake is 22 miles long and 12 miles wide. It is known for its crystal-clear, blue-green waters and stunning views of the surrounding mountains. With a maximum depth of 1,645 feet and an average depth of 1,000 feet, Lake Tahoe is the second deepest lake in the United States and the tenth deepest lake in the world. The lake's average surface elevation is 6,225 feet above sea level, and it contains an estimated 39 trillion gallons of water. That's enough to cover the entire state of California in 14.5 inches of water.

tahoe2.JPG

Lake Tahoe is home to a variety of fish and wildlife, including rainbow and brown trout, largemouth bass, and mule deer. The lake is also a popular vacation spot, offering a variety of recreational activities such as swimming, boating, sailing, fishing, and hiking. Whether you're looking for a relaxing getaway or an adventure-filled vacation, Lake Tahoe is the perfect destination for all. With its breathtaking views and abundance of outdoor activities, Lake Tahoe is sure to provide a memorable experience with nature for all who visit.

Spend a day exploring the lake's many beaches and coves, or take a boat out for an unforgettable experience during the hot Summer months. For the more adventurous types, take a hike around the lake to take in the breathtaking beauty of the area. In the Winter months, take advantage of the region's famous local ski resorts and snow parks. For a memorable experience, take a scenic drive around the lake or explore the area's many trails. Sample the delicious cuisine offered by the many restaurants in the area. You can also visit the local casinos on the Nevada side of the state lines for a night of bright lights, entertainment, and fun.

tahoe6.JPG
tahoe5.JPG

Where To Stay

North Lake Tahoe is a popular destination for both tourists and locals alike. Here you can find a variety of activities, from sandy beaches to great restaurants and shopping, as well as plenty of outdoor activities. The popular Tahoe City and Kings Beach communities provide plenty of things to do and see, as well as spectacular views of the lake and surrounding mountains.

For those looking to have a little fun, the South Shore has a number of casinos, resorts, and spas that make it a great weekend getaway, along with group gatherings such as bachelor/bachelorette parties. There are also plenty of amazing golf courses, hiking trails, and other outdoor activities in the area, making it an ideal spot for a family vacation.

We stayed at the Cedar Crest Cottages located on West Shore. Each cabin is so cute and full of character and I loved the vibe of the modern little trendy mountainous decor. We loved being able to get up and make breakfast in the full kitchen with dishes and everything we needed. Then, we would take a scenic walk by all the cabins and beach area every morning. It was probably one of my favorite things on our trip. The cottages would be so perfect for families or groups of friends going on trips! The cabin also has a washer and dryer, ironing board and complimentary laundry pods making it helpful for longer stays. You also have beach access across the street from the Cedar Crest Cottages. They even have the perfect little campfire setup for a night full of laughs and fun!

tahoe3.JPG
tahoe9.JPG

Dining

Lake Tahoe is a paradise for foodies, offering a wide variety of restaurants to suit any taste. From romantic restaurants to casual eateries, there is something for everyone in this stunning city. To help you plan your visit, here is a Lake Tahoe City Guide featuring some of the city’s most popular restaurants. Here is a list of our favorites:

Lone Eagle Grill - Located in Incline Village. This should be one of your top stops, and not just for the food alone. This restaurant has the most gorgeous views of the lake and one of the widest sandy beachy areas that we saw around the lake! We walked out to the water and enjoyed the view, stunning!

Driftwood Cafe - You know you're at the right place when it's packed full of locals! As soon as we sat down to breakfast we saw plenty of regulars and locals coming in and out! The breakfast was great and the staff was so friendly!

Edgewood Restaurant - If you are looking for an elegant place for dinner with one amazing view of the lake and a scenic golf course, look no further. The famous luxury Edgewood Resort is also a hotel, spa, and golf course, and has 2 other restaurants. For those golf fans out there, the resort golf course hosts a yearly PGA tournament full of celebrities and famous athletes paired up with a PGA pro. This is a great place to visit and if you are looking to stay in South Lake Tahoe in luxury. This place is packed full of amenities and I would highly recommend staying here.

Base Camp Pizza - Such a great place to enjoy delicious pizza and craft brews and enjoy live entertainment! Located in the Heavenly Village which is surrounded by tons of shopping and next to the gondola that will take you up the mountain to the Heavenly Ski Village!

tahoe8.JPG
tahoe10.JPG

Things to Do

Lake Tahoe is a stunning destination offering a range of activities for all types of travelers. Here is a guide to the best things to do in the area.

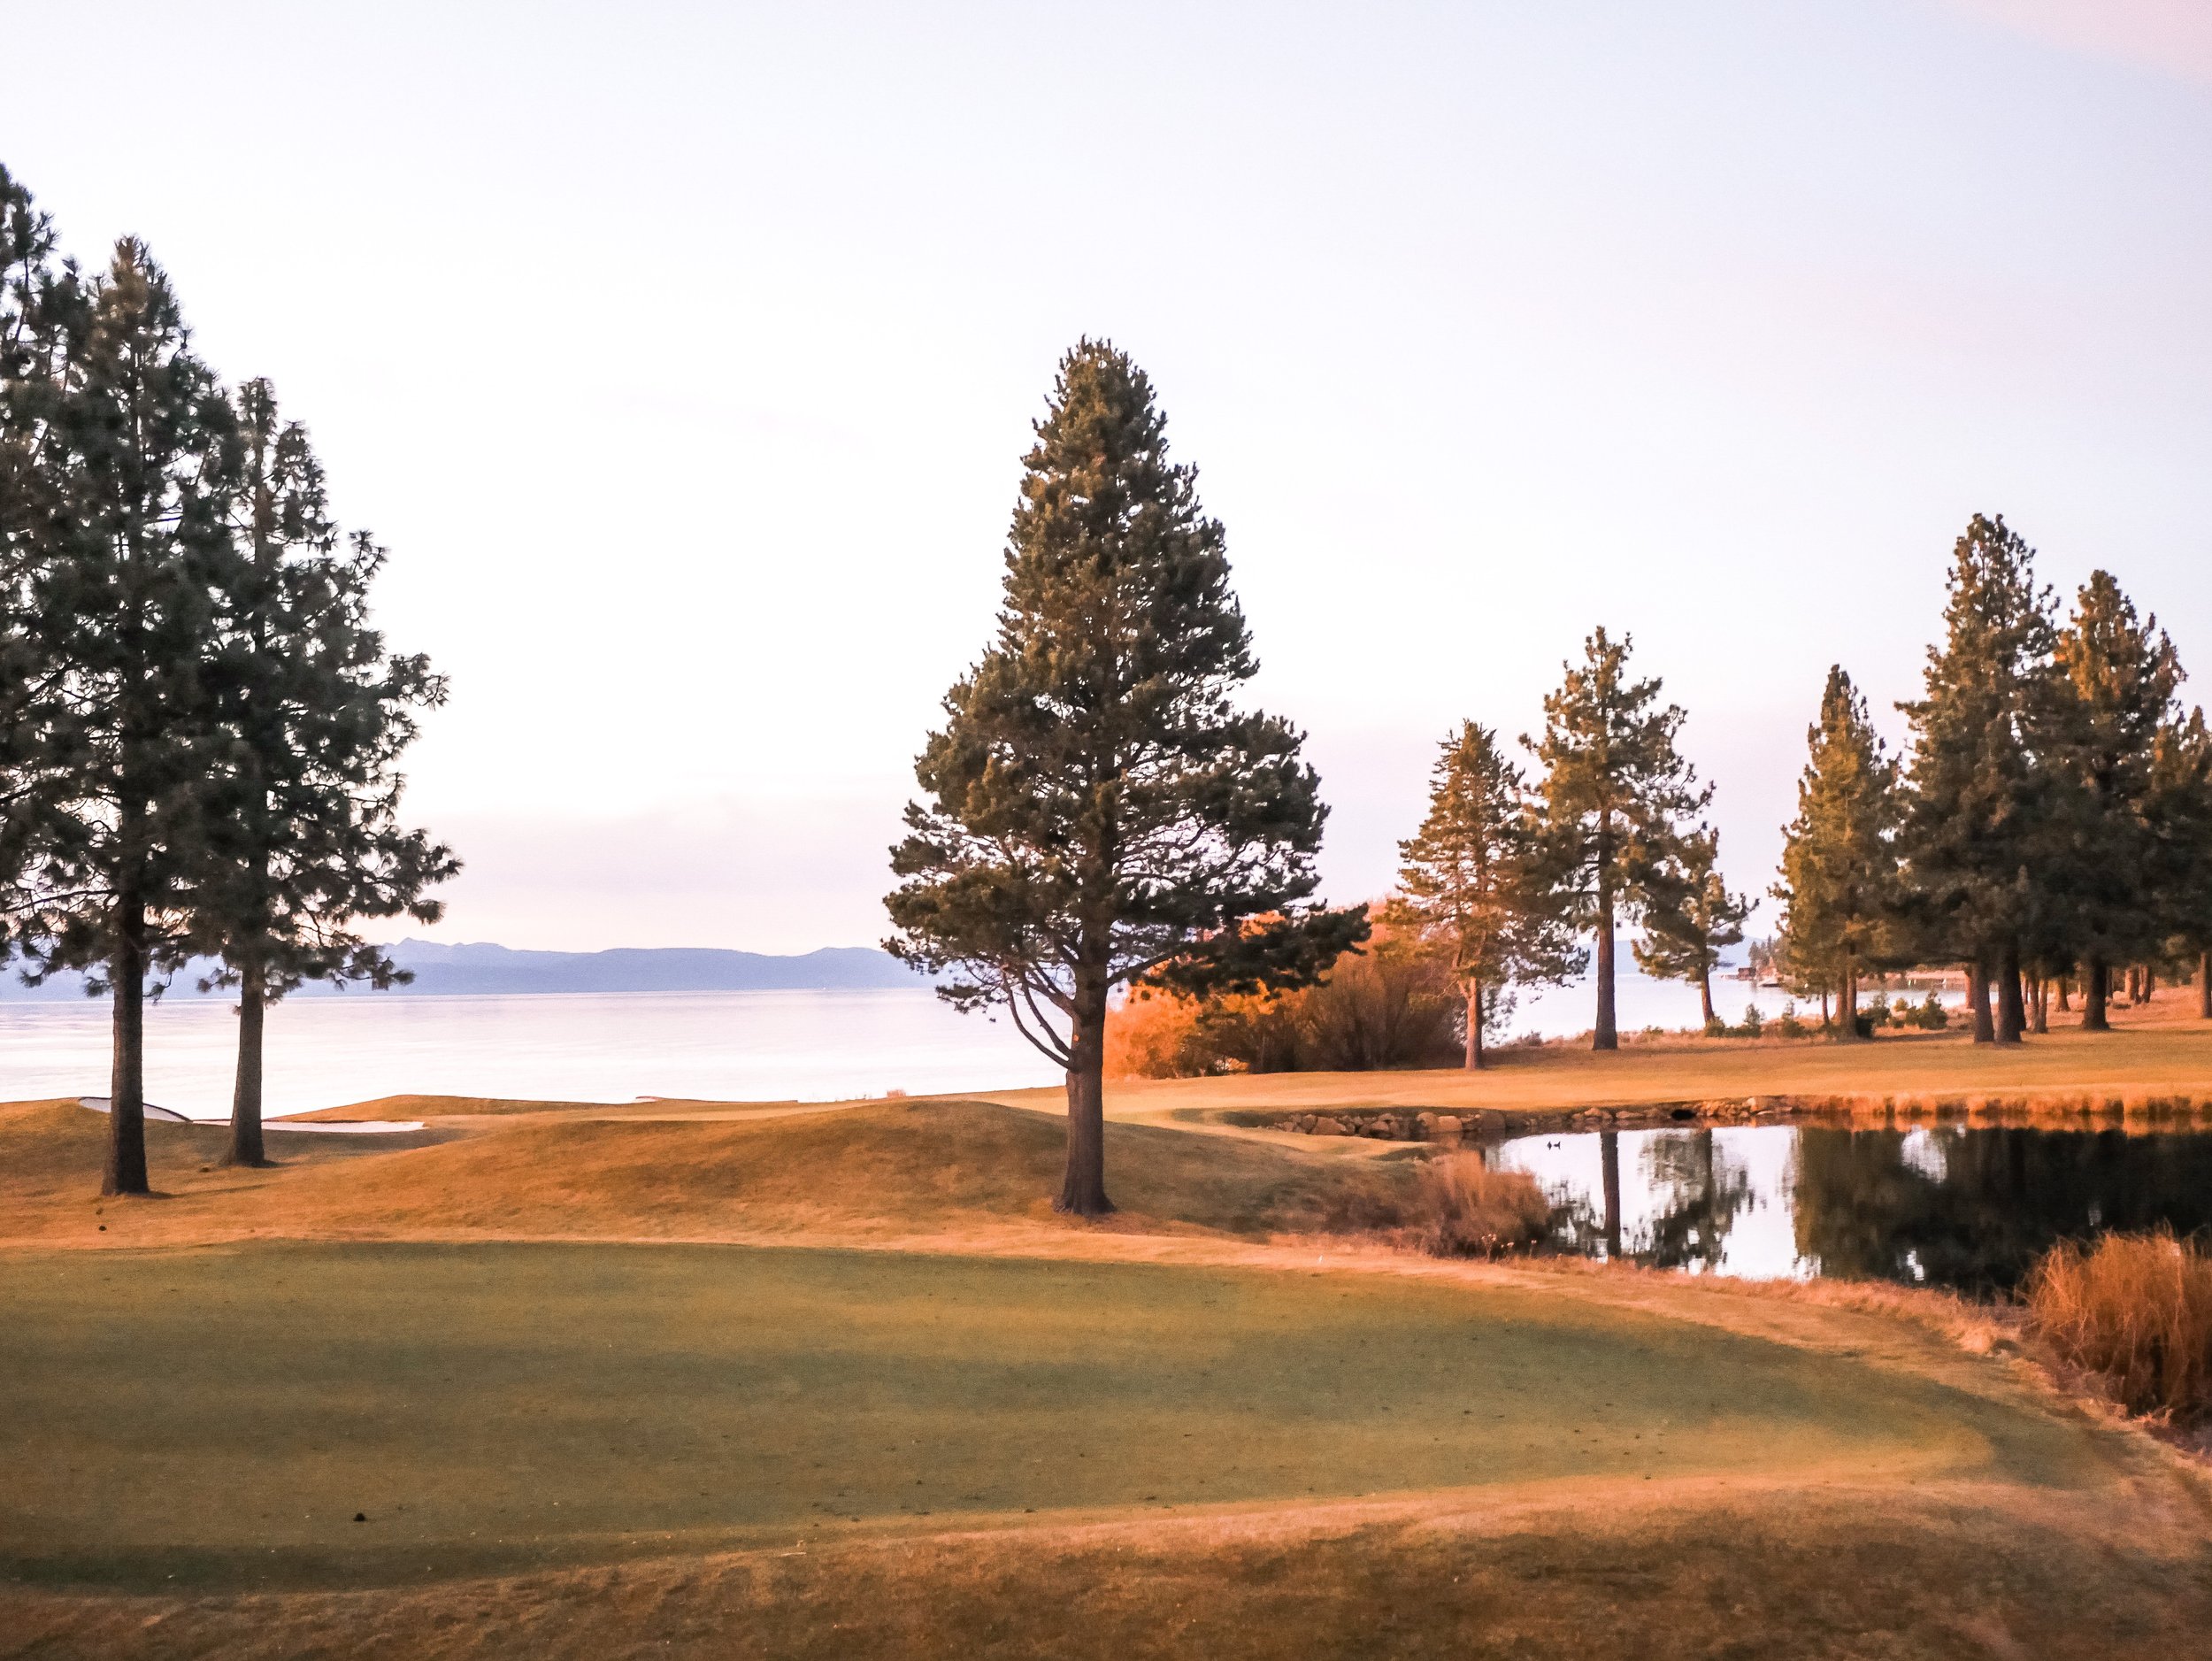
Cruising on the lake: Take a boat tour and explore the emerald waters of Lake Tahoe. Located in the Sierra Nevada mountains, the lake is one of the largest and deepest alpine lakes in the world. Enjoy the beautiful scenery and get a taste of the local culture as you cruise along the lake.

Hiking at Mount Tallac: Enjoy a challenging hike to the top of Mount Tallac and take in the stunning views. From the summit, you’ll get a panoramic view of the entire Lake Tahoe area, making it a must-do activity for all hikers.

A Scenic Tour: We booked a tour with "Get Your Guide" and found the best tour! The one I picked was with a professional photographer who teaches you his art while showing you the landscape. He took us to the most beautiful spots in all of Lake Tahoe! Many of them were secret spots he loves to go to and photograph. He made the day so fun for us and he knew so much about the art of photography and the local land. He was even a photojournalism major and an art professor at the local community college in Lake Tahoe.

Lake Drive: This is one big lake and can take you hours without stopping just to circle the entire thing. However, the drive is beautiful. I highly recommend hopping in the car and taking a slow, enjoyable scenic drive around the lake, making plenty of stops along the way at the many villages to check out their local shops!! Incline Village is on the Northern side of the lake. Incline Village along with South Lake Tahoe are the two areas that will offer the most entertainment on the lake, but all the different villages have their unique charm and this made every last mile of the drive well worth it.

North Tahoe Arts - North Tahoe Arts is a not-for-profit arts organization located in Lake Tahoe that offers a wide variety of art exhibitions, educational programs, and community events. The organization has two galleries located in Tahoe City and Kings Beach, showcasing works by local, regional, and international artists. In addition to exhibiting art, North Tahoe Arts also offer workshops and classes in painting, drawing, photography, and other visual arts.

Tahoe City Winter Sports Park: Visitors can find skiing and snowboarding for all levels of experience here. The park has two ski lifts, two terrain parks, and a tubing hill, as well as special events and activities throughout the Winter season. Ski and snowboard rentals are available on-site, and experienced instructors are available for lessons. The park is conveniently located in the heart of Tahoe City, making it easy to access for visitors. Not only is the park an excellent spot for families to come and enjoy the mountain experience, but there are also a variety of other winter activities available nearby, such as snowshoeing, ice skating, and sledding. If you are looking for thrilling Winter destinations and activities Tahoe City Winter Sports Park is the place to go for all outdoor fun on the mountain.

Tahoe Treetop Adventure Park: The perfect activity for a day of fun. Located in South Lake Tahoe, the park offers an aerial obstacle course that is sure to bring out the inner daredevil in everyone. With courses ranging from easy to expert, there is something for all ages and skill levels. The courses include zip lines, rope bridges, suspended logs, cargo nets, and more. Safety equipment is provided, and the park offers group rates and special events, making it an ideal choice for a family outing, team-building exercise, or birthday parties. The views of Lake Tahoe from the treetops are breathtaking, making the experience even more memorable. Visitors of all ages will love the thrill of Tahoe Treetop Adventure Park and the views of the lake from the treetops.

Other Winter Sports at Lake Tahoe: Spend your days skiing and snowboarding on the slopes of the Sierra Nevada Mountains and get a unique experience with a snowmobile tour. If you're feeling adventurous, strap on a pair of snowshoes and trek through the snow-covered trails or go on a winter hike to experience the stunning scenery surrounding Lake Tahoe. Enjoy a classic Winter experience and ice skate on the pristine lake waters of Lake Tahoe. Get a truly magical experience and take a horse-drawn sleigh ride through the Winter wonderland. Don't forget to witness the breathtaking sunsets from the shore of Lake Tahoe and finish the day off with hot cocoa by the fire after a day of winter fun.

Emerald Bay State Park- Located on the west shore of Lake Tahoe, Emerald Bay State Park is one of the most popular and beautiful parks in the area. With its stunning granite cliffs, turquoise waters, and lush forests, visitors can enjoy a variety of activities such as camping, hiking, swimming, boating, and fishing. The park also has a visitor center that provides educational programs and interpretive displays about the natural history of the area. One of the most iconic sights in Emerald Bay State Park is Eagle Falls, a breathtaking waterfall that is one of the most photographed in the world. The park is also home to the historic Vikingsholm Castle, a 19th-century estate open to the public. Whether you're looking for an afternoon of outdoor activities or a romantic evening, Emerald Bay State Park is the perfect place to explore and experience all that Lake Tahoe has to offer. This stunning area is home to Vikingsholm, a Scandinavian-style castle, and the Emerald Bay State Park. Enjoy the breathtaking views of Emerald Bay from the lake or take a hike to the stunning Eagle Falls.

tahoe11.JPG
tahoe12.JPG
tahoe1.JPG
tahoe7.JPG

Simple and Budget-Friendly Living Room Updates in Just a Few Easy Steps

If you're looking for an easy, low-cost way to update your living room without completely starting from scratch, you've come to the right place. This blog post will provide you with some simple tips and tricks to give you simple living room updates in just a few easy steps. We'll discuss everything from rearranging furniture to adding a few new accessories, and hopefully, you'll find plenty of inspiring ideas to help you create the perfect living room for you and your family.

living9.jpg

Time to Freshen Up the Family Room

Do you want to give your living room a much-needed update but not sure where to start? If you're looking to give your living room a fresh new look, then these simple steps are all you need to get started! First, identify if you need to rearrange your furniture. Rearranging your furniture to create the most inviting atmosphere should be your goal. Moving furniture around helps to reduce visual distractions and creates a more open, inviting space with nice walk-throughs from the main entrances.

Next, add a few colorful accents to brighten up the room. Choose items that are both functional and stylish, like a bright rug, a decorative vase, or a new paint color. To add visual interest, hang a few large framed photos. If you’re feeling extra creative, you can even create a gallery wall for a unique look. For a cozy feel, invest in some new throw pillows and blankets. You can also add a few potted plants to bring a bit of nature and serenity into the room.

Finally, hang a few wall decor pieces to add personality. Consider hanging mirrors, paintings, or wall hangings that you love. Investing in good lighting is also important to make your space look as bright and inviting as possible. Also, try adding a few lamps or changing out the lightbulbs for a brighter look.

living5.JPG

Curate a Gallery Wall

Are you looking for a way to give your living room a fresh look without breaking the bank? A gallery wall is a great way to add a unique touch to a living room. With just a few easy steps, you can create a beautiful gallery wall where you can add pieces you have been collecting over the years.

The first step is to gather artwork or family photos you love. You can find art pieces at flea markets, thrift stores, online, or even create your own. Let finding or creating these gems leave a lasting memory for you. If you are wanting something more personal take a look at the old family photos you took. Maybe you had some professionally taken photos like for Christmas cards, or from vacations, and frame any of those fond memories you have! When selecting pieces, try to choose pieces of similar size and color to create a classic, cohesive look. Once you have your artwork ready, pick a wall in your living room that has plenty of space to work with.

Next, begin to create your wall by mapping out the pieces you have chosen and experimenting with different arrangements. Use hardware to hang the artwork and add your own personal touches such as picture frames, shelves, or vintage items.

Finally, step back and admire your work! You’ve just created a beautiful gallery wall that will be the perfect addition to your living room. With just a few easy steps, you can give your living room a fresh look and create a unique and stylish space.

Reimagine Your Existing Antiques

One way to instantly update your living room is to add an antique piece of furniture as a statement piece. An antique armchair or sofa in the center of your living room will be the focal point of the room and give it an old-fashioned charm and sophistication. You can also incorporate antique accent pieces such as lamps, clocks, or mirrors to give your living room a vintage vibe.

Another way to update your living room is to reupholster existing furniture. If you have an old armchair or sofa, give it a new look by adding new upholstery to it for a fresh new look. This will give your living room a more current feel, while still keeping the vintage elements of the pieces that you love. You can also replace the hardware on your furniture with vintage-style hardware to give it a fresh look.

living6.JPG
living3.JPG
living4.JPG

Paint Your Fireplace

Are you looking for an easy way to give your living room a fresh, new look? Painting your fireplace is a simple and cost-effective way to update your space in no time. With the right materials and a few easy steps, you can have a new and improved fireplace in no time.

To start, begin by prepping the area around the fireplace. Remove any furniture and give the area a thorough cleaning. Once the area is ready, use painter's tape to mask off any areas around the fireplace that you don't want to paint. This will help keep your lines clean and give you a professional-looking finish.

Next, apply a primer to the fireplace before painting. This will help the paint adhere better and last longer. When all the prep work is done, you're ready to paint! Use a brush or roller to apply two coats of paint, letting each coat dry between applications.

However, if you are looking for a whitewash paint on a fireplace like I did on mine you will want to add water to your paint and do one coat at a time with no primer. I didn't do the same amount of coats on the entire thing to keep it alternating between the bricks. I gave the color a more natural vibe, even as a whitewash, but I loved the change fro the original red brick.

Finally, remove the painter's tape and admire your newly updated fireplace. With just a few simple steps, you can easily give your living room a fresh new look.

Cue the Color with Pillows & Throw Blankets

Update your living room in just a few easy steps with colorful pillows or blankets! Pillows are a simple and cost-effective way to add life to a dull living room. Adding a few colorful pillows can give your living room a new look without breaking the bank. Not sure what colors and textures to use? Cue the Color with Pillows can help you pick the perfect pillows to add vibrancy to your living room. You can mix and match different colors and textures to create a unique look that will fit your decor. Besides adding color, pillows can also be used to tie together different colors and patterns in the room, creating a cohesive look. Moreover, they can be used to add texture and character to your living room, making it look more inviting.

Another great place to start is with a brightly colored throw. This can instantly give your living room a pop of color and texture. When selecting your throw, try to stay within the same color palette, but feel free to mix in different textures and patterns. This will create an interesting and inviting look. Also, choose a throw that has a pattern or texture that will stand out from the other elements in the room. This will draw attention to the throw and can help to make the living room look more interesting. Another great thing about throws is that they can be used to cover up a worn or outdated sofa with the right placement. This can instantly give your living room a more modern and updated look. And the best part is that it’s an easy and affordable way to instantly spruce up the room. Plus, it can be easily switched out if you want to change up the look of the room.

When choosing pillows and throws, consider the style of your room and your own personal preferences. Carefully selecting colors and textures can help create a unified look in your living room. Selecting pillows and throws that match a color scheme or overall look of the room can help to pull everything together. Whether you’re looking to add a pop of color or make a statement with bold patterns, pillows and throws are an easy way to update your living room in a few easy steps.

living2.JPG
living.JPG

Rearrange Your Bookshelves

Giving your living room a facelift doesn't have to mean investing in expensive furniture or a complete renovation. One of the simplest and quickest ways to update the look of your living room is by rearranging your bookshelf. This small change can have a big impact without breaking the bank.

The first step is to remove all the books from the shelves and sort them into categories. This way you can easily figure out how to arrange the books in the most visually appealing way. You can group them by color or alphabetically, or even get creative and arrange them in an interesting pattern. Once the books are in place, you can add in other decorative items such as plants, vases, pictures or frames to give the shelves more personality. These items can add texture, color, and pattern to your living room and make the overall look more interesting.

Style a Stack on Your Coffee Table

When it comes to simple living room updates, books can be your best friend. Start by selecting a stack of books in different shapes, sizes, and colors that will fit on your coffee table. Place the stack in the center of the table and add a tray or coaster beneath it to protect the surface. Then layer different types of décor items on top of the stack for a one-of-a-kind look. To keep the living room looking uncluttered, keep the décor pieces relatively small. To add the finishing touches, place a few candles, a vase of flowers, or other decorative accents around the stack. With just a few easy steps, you can instantly update your living room without breaking the bank.

living8.JPG

Budget-Friendly Ways to Update Your Living Room

Revamping your living room can seem like a daunting task, however, it does not have to be! With just a few easy steps, you can update the look of your living room and give it a fresh, modern feel in an inexpensive way.

To start, painting the walls is a great way to instantly transform the look of a room. Choose the latest colors in style to create a warm and inviting atmosphere. Once the walls are painted, replace old furniture with modern pieces. If you are on a budget, consider buying second-hand pieces and give them a fresh coat of paint. Hanging artwork is an easy way to add texture and color to a room. Choose pieces that reflect your style and personality.

Changing out the curtains, window treatments or blinds can add a new layer of sophistication to the room. Consider adding a sheer fabric for a cozy feel or a bright print for a bold look. Adding a few throw pillows can give the room an updated look and create a comfortable place to relax. You can also switch out the light fixtures for a more modern look. Reorganizing the furniture can create a more inviting space. Place a mirror in the room for an illusion of more space. Finally, adding some plants and shelves can give a homey vibe.

Simple living room updates can be achieved without breaking the bank as long as you know where to look. Start by taking advantage of sales at stores like IKEA and Home Goods. These stores are great for finding furniture and décor at discounted prices. Don't forget to look at the big stores like Pottery Barn as well, because they often run huge clearance sales and can have outlet stores where you can find the beautiful pieces of furnishings and decorating items you are looking for at half the price! You can also get creative with DIY projects by searching for tutorials online. Shopping second-hand at Goodwill, facebook marketplace or yardsales is another great way to find unique furniture and accent pieces. Plus, you can repurpose items you already own in your living room to give them a whole new look. Finally, be sure to utilize online coupons and discount codes to save money noticeable amount of money on all your purchases. With these few easy steps, you'll be able to update your living room in no time.

Other Home DIY & Inspiration You Will Love:

Our Neutral (with pops of pink) Bedroom

Guest Bedroom Makeover Reveal

Our Blue Guest Room Remodel & Tips On How To Remodel Your Guest Bedroom

Creating a Stunning Small Modern Bathroom With White and Gold Colors

living11.jpg