Easy Watermelon Fruit Cake for Summer Celebrations

Easy Watermelon Fruit Cake for Summer Celebrations

There is something especially sweet about finding a new way to continue a family tradition.

Each month, I make a milestone cake to celebrate another month with our baby girl. For her eight-month milestone, I wanted to create something a little different. She had the sweetest outfit covered in colorful fruit, so instead of baking a traditional cake, I made a watermelon fruit cake to match.

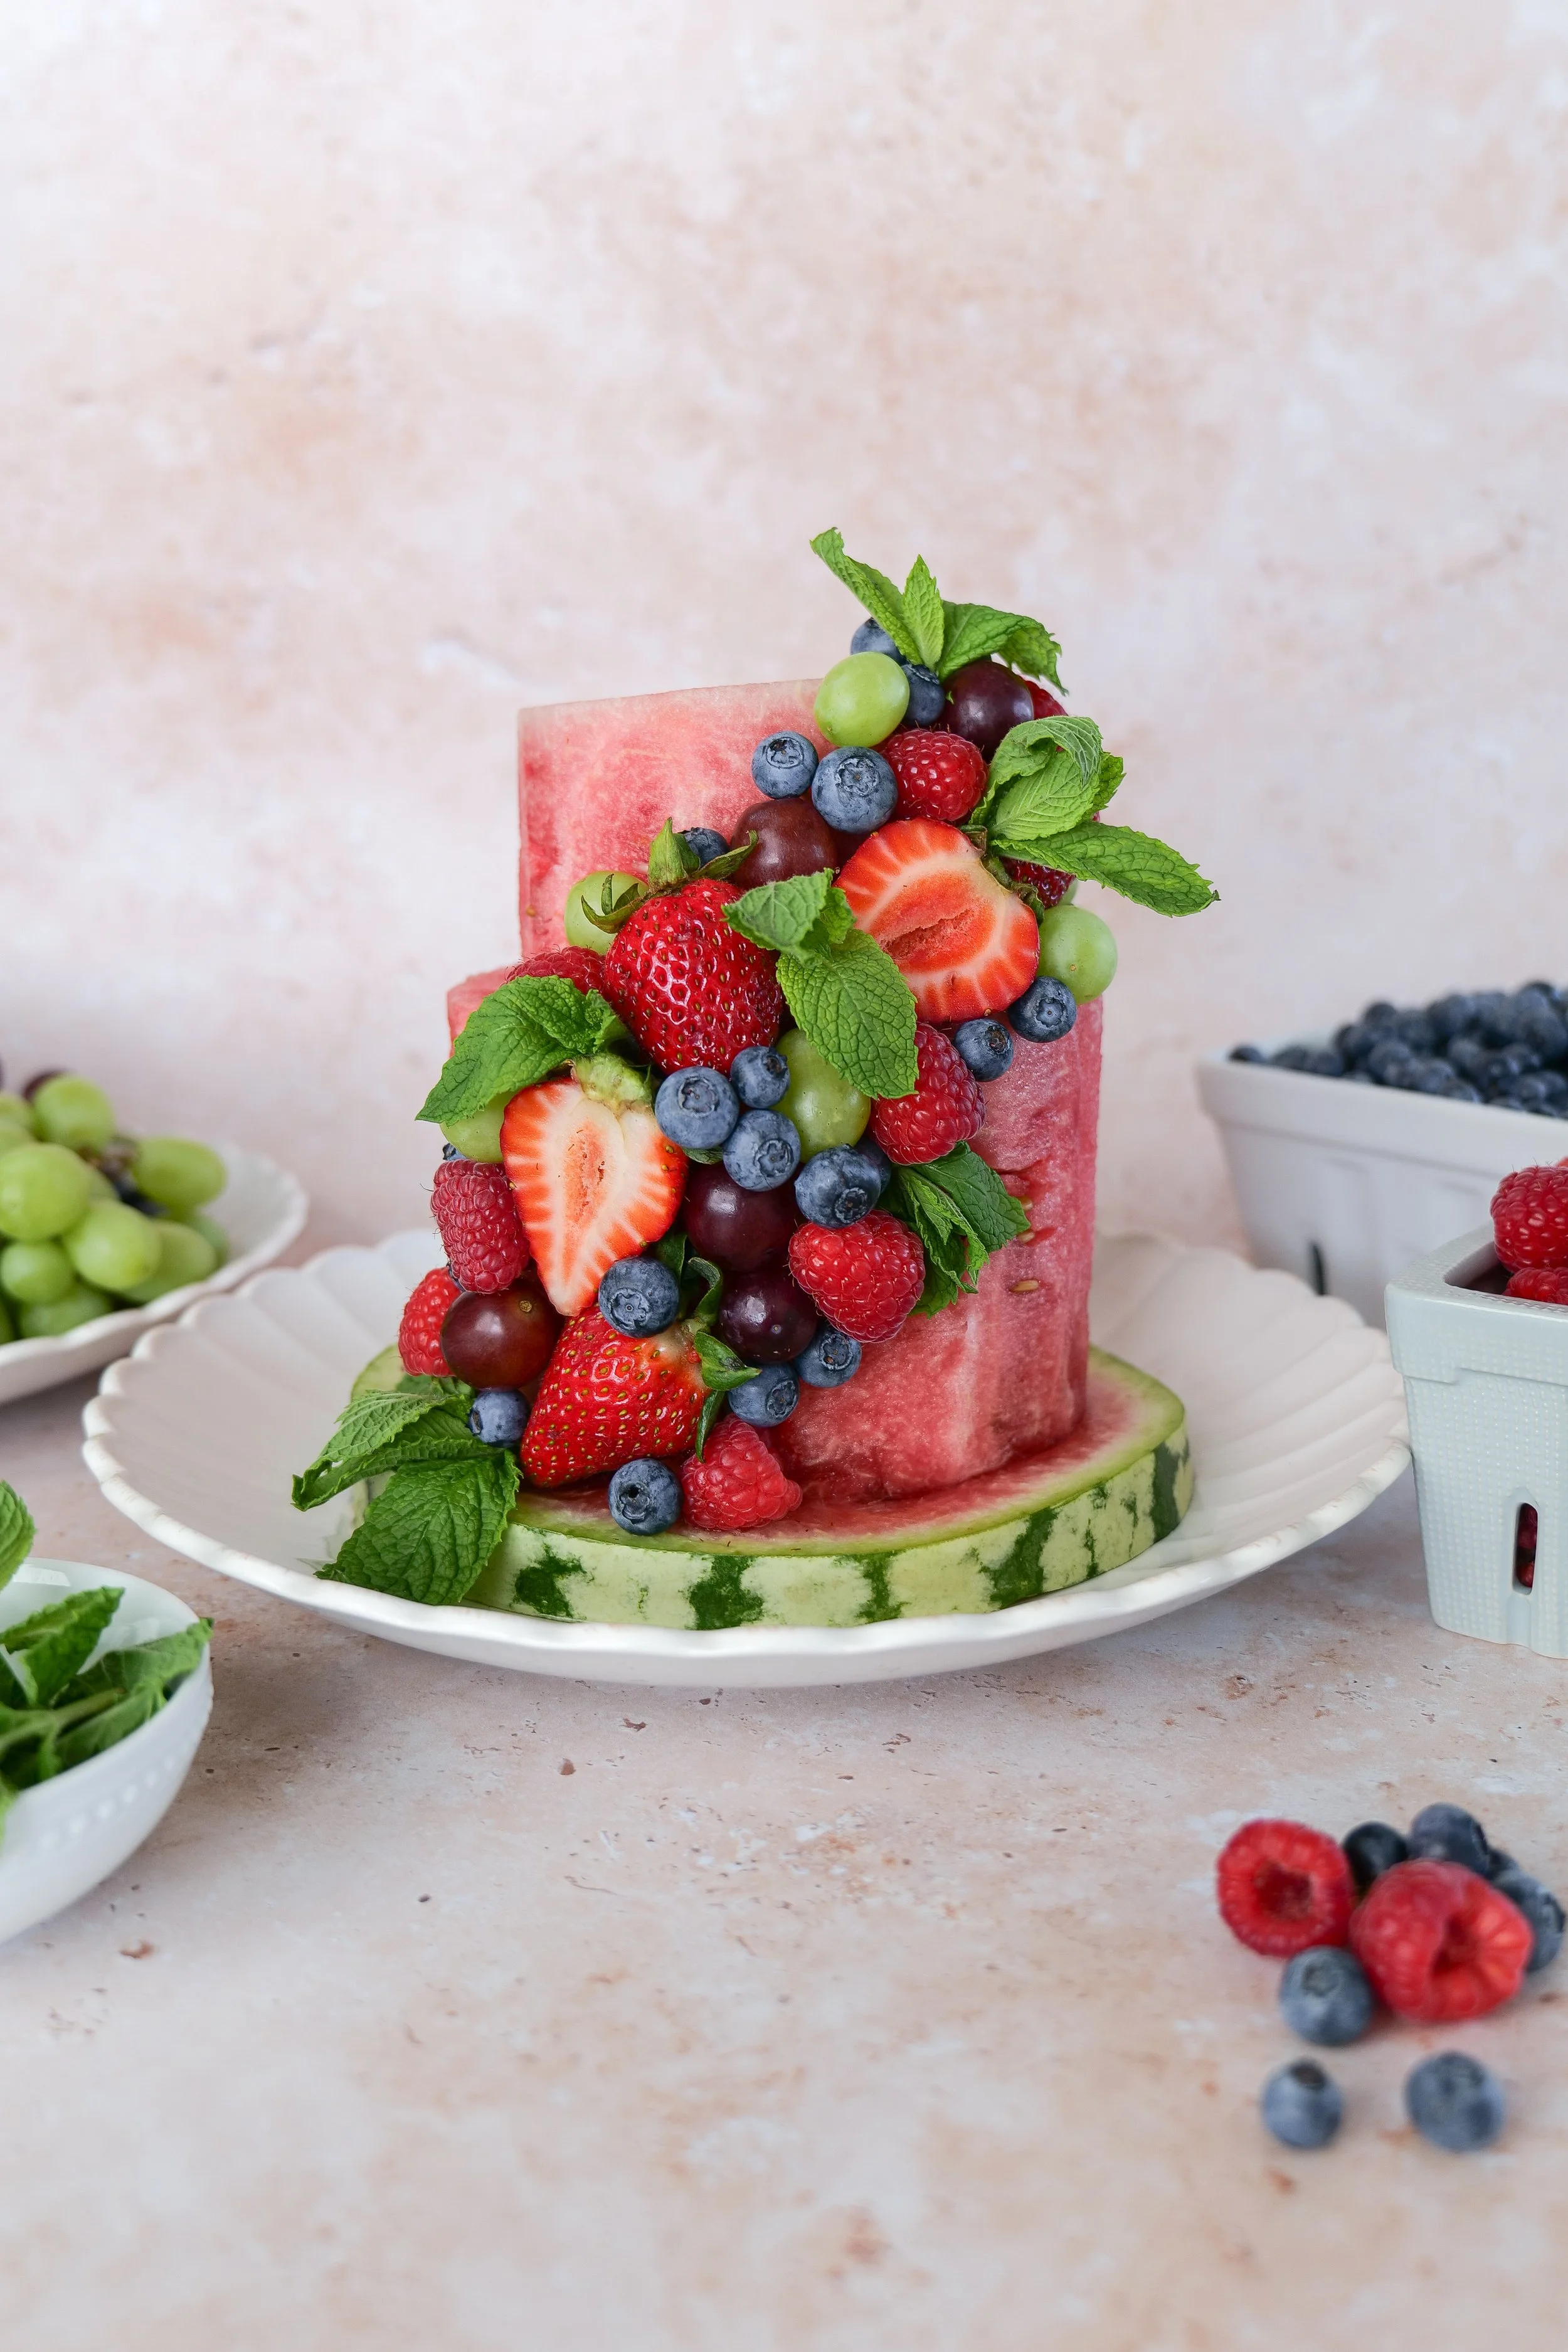
This no-bake watermelon cake is made entirely from fresh fruit. Two watermelons are trimmed into tiers and decorated with raspberries, blueberries, strawberries, colorful grapes, and fresh mint. I served homemade whipped cream on the side for everyone who wanted a little something extra.

It was bright, playful, and perfect for an August celebration. It also turned out to be much easier to assemble than it looks.

Although I made this one for a baby milestone, it would also be beautiful for a summer birthday, brunch, baby shower, pool party, Fourth of July gathering, or backyard dinner. It is a refreshing alternative to a traditional cake and a simple way to make seasonal fruit feel celebration-worthy.

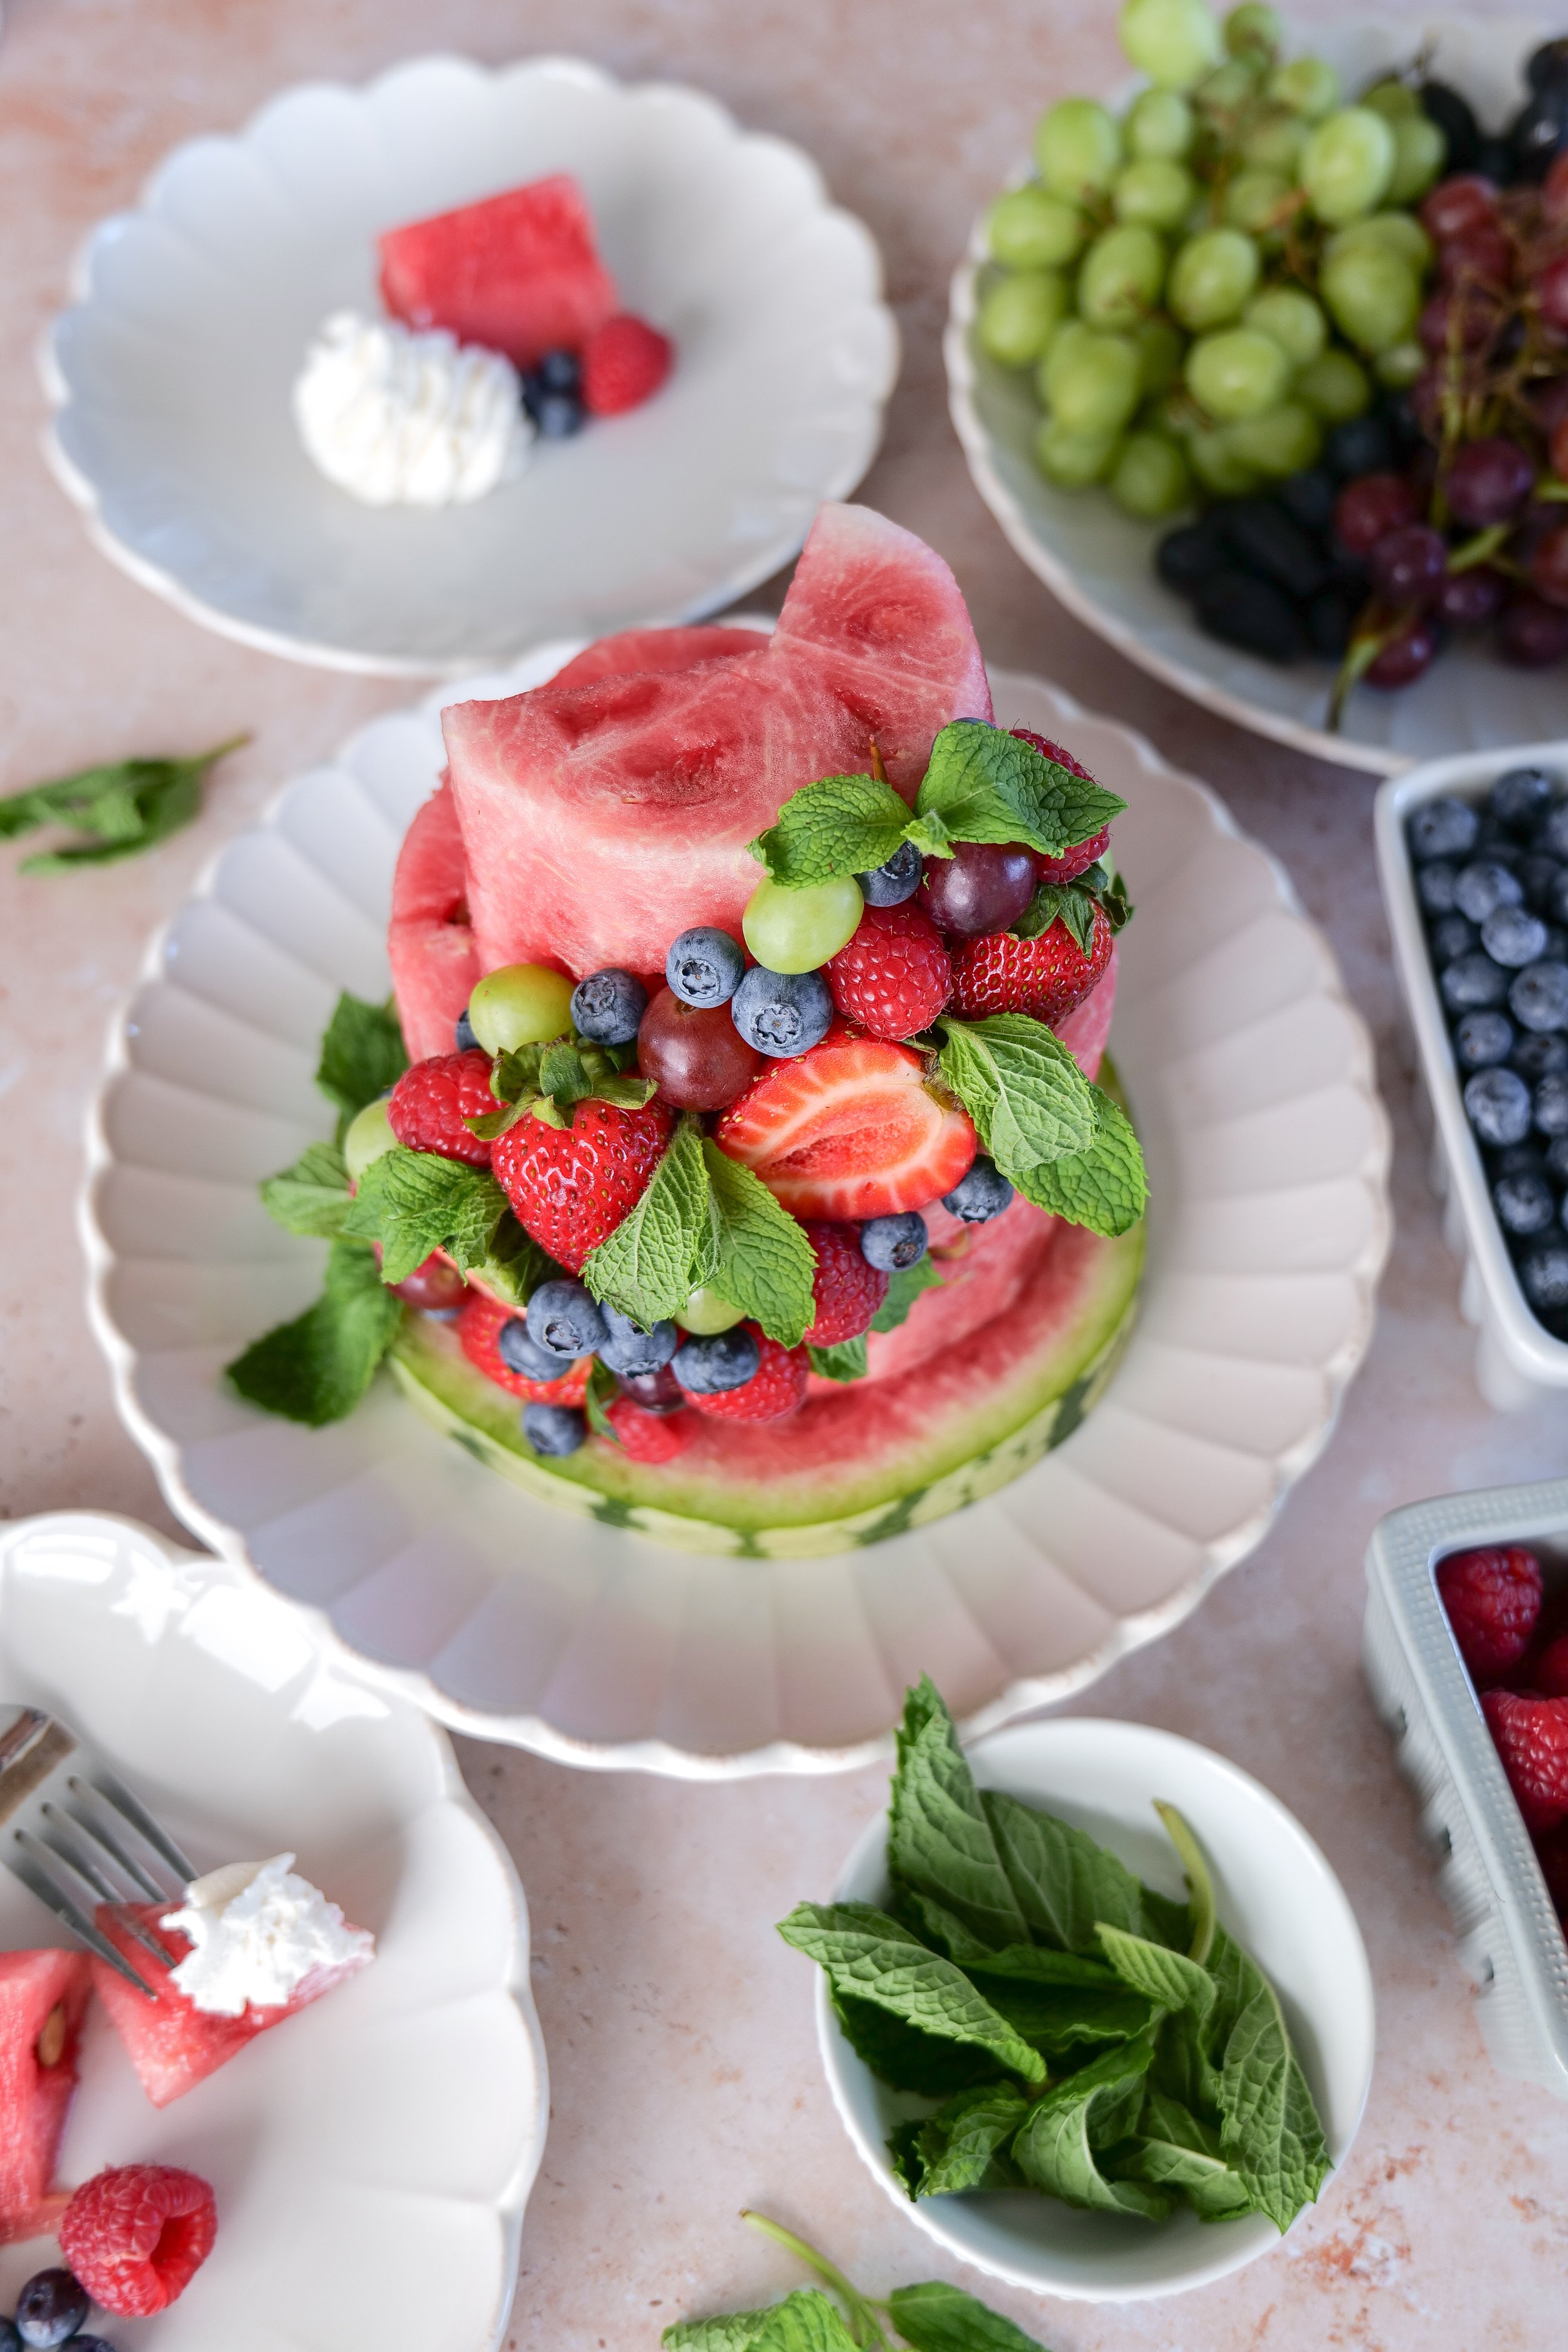
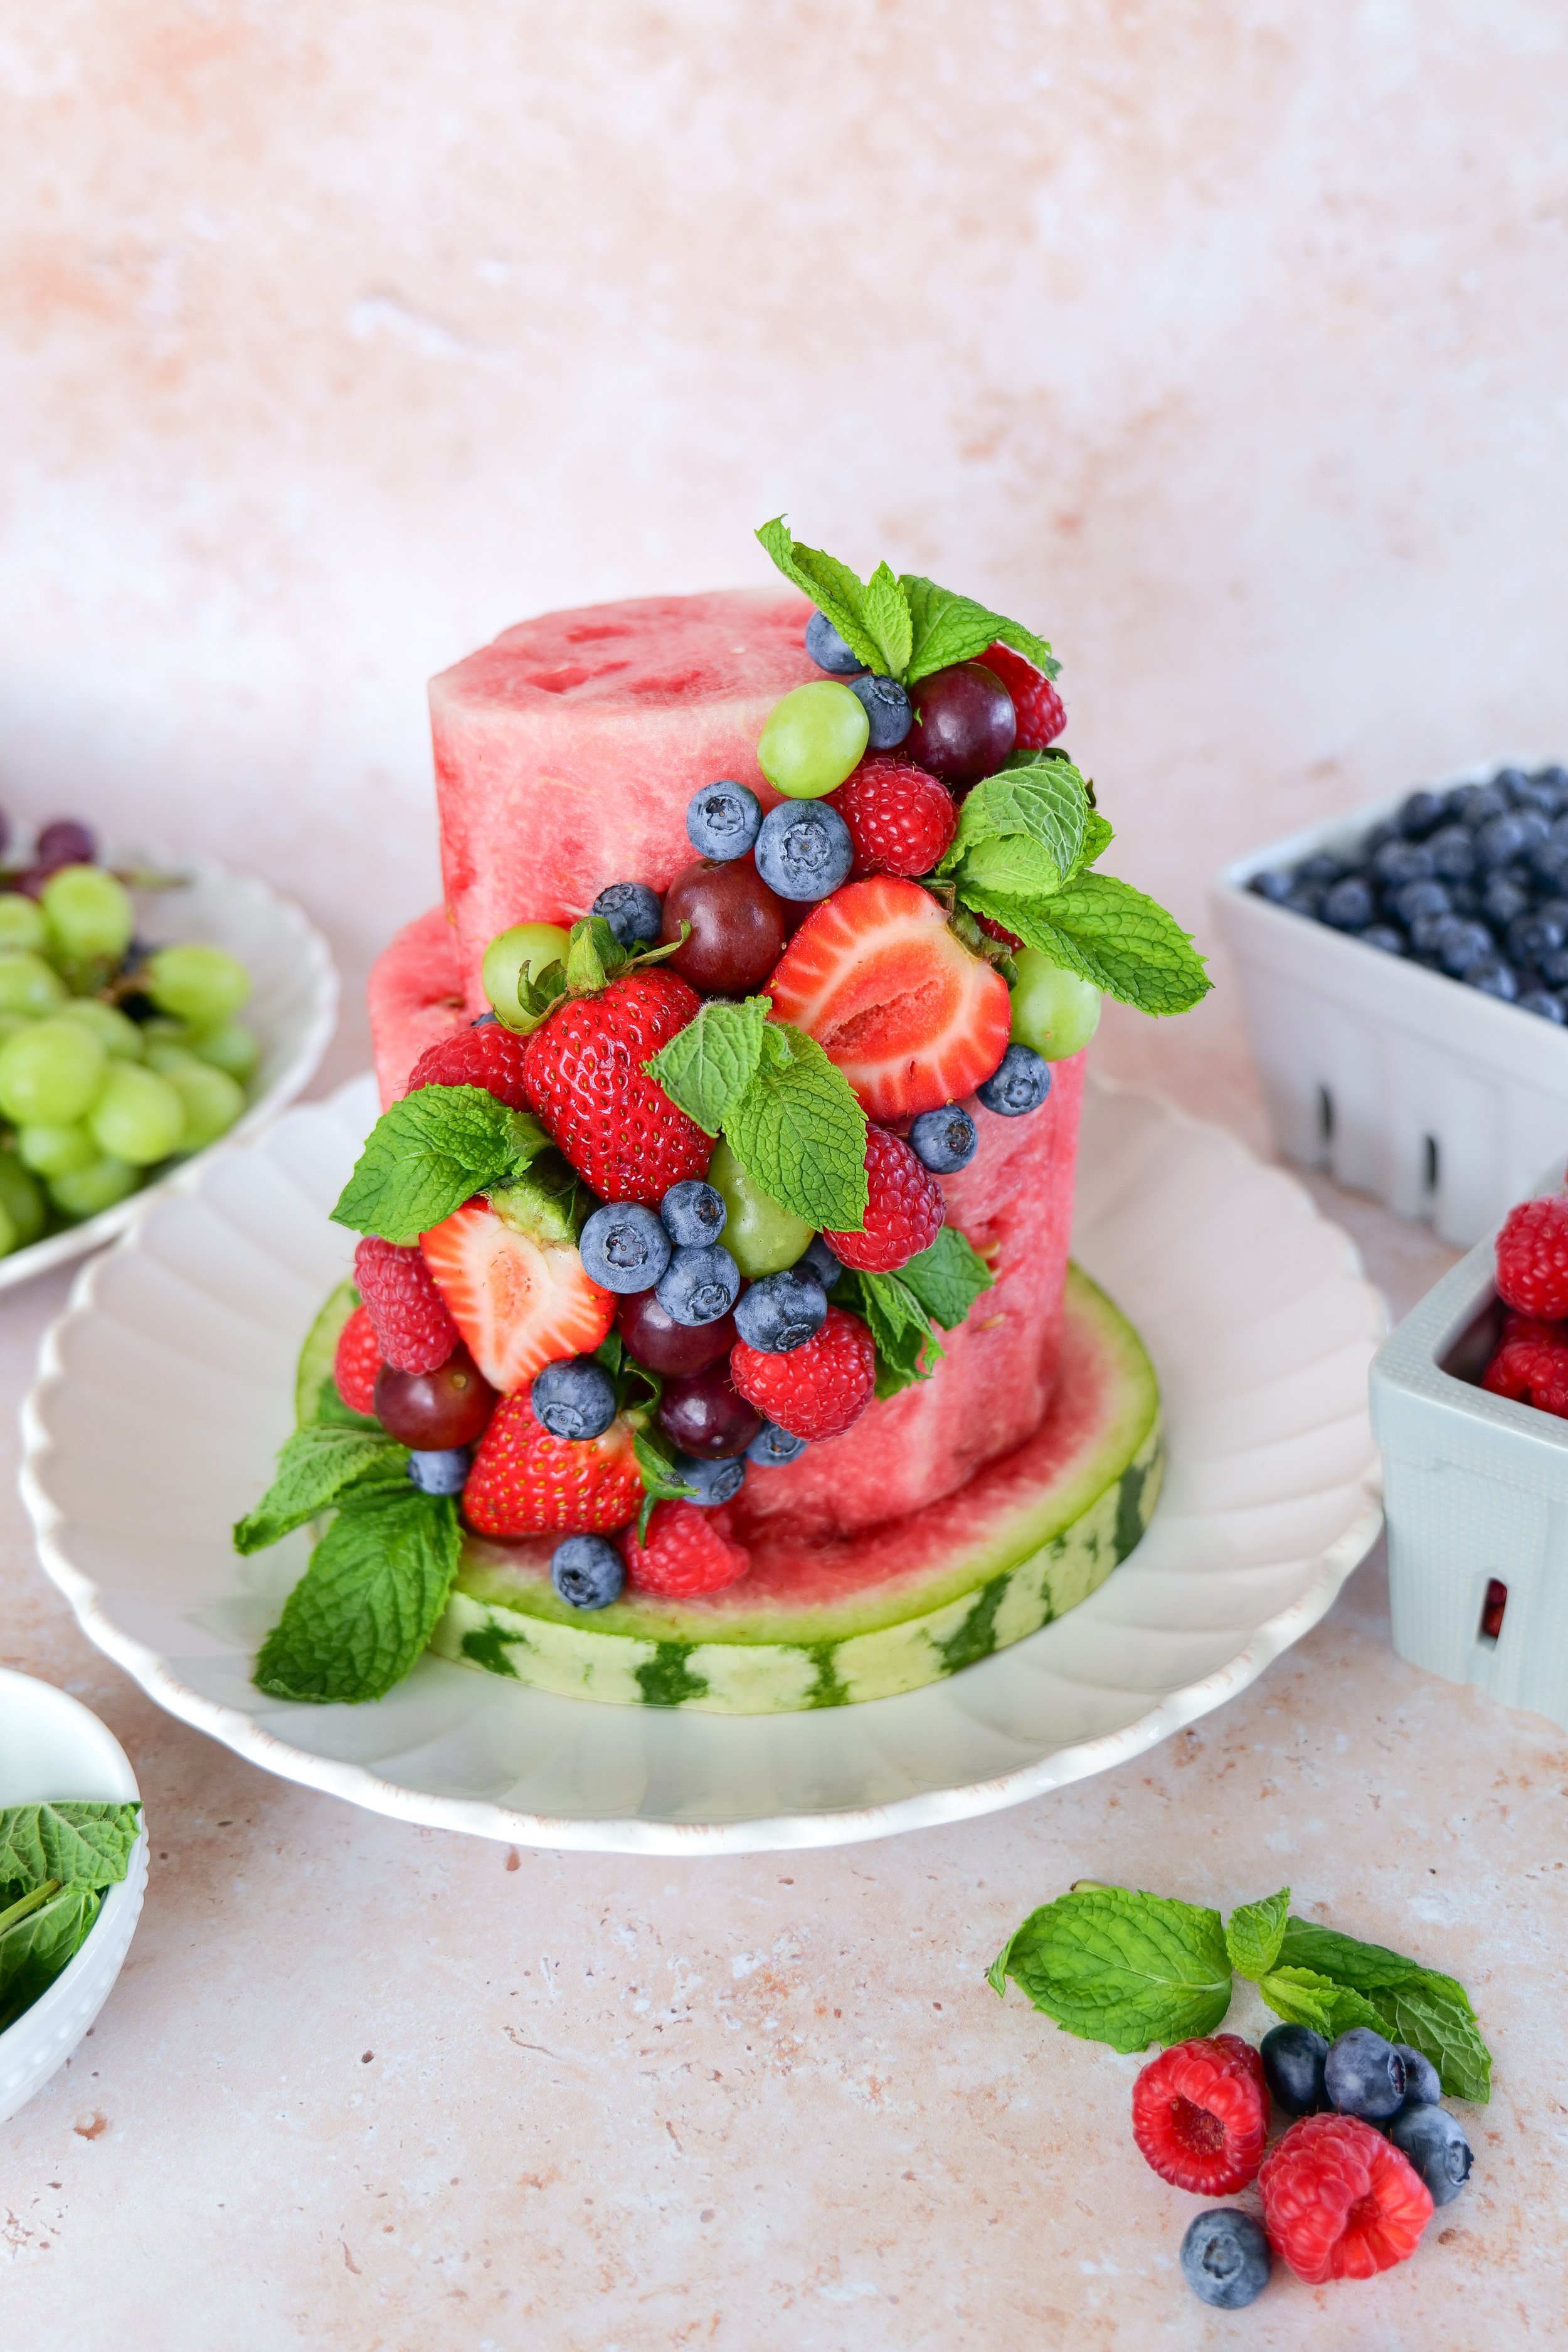
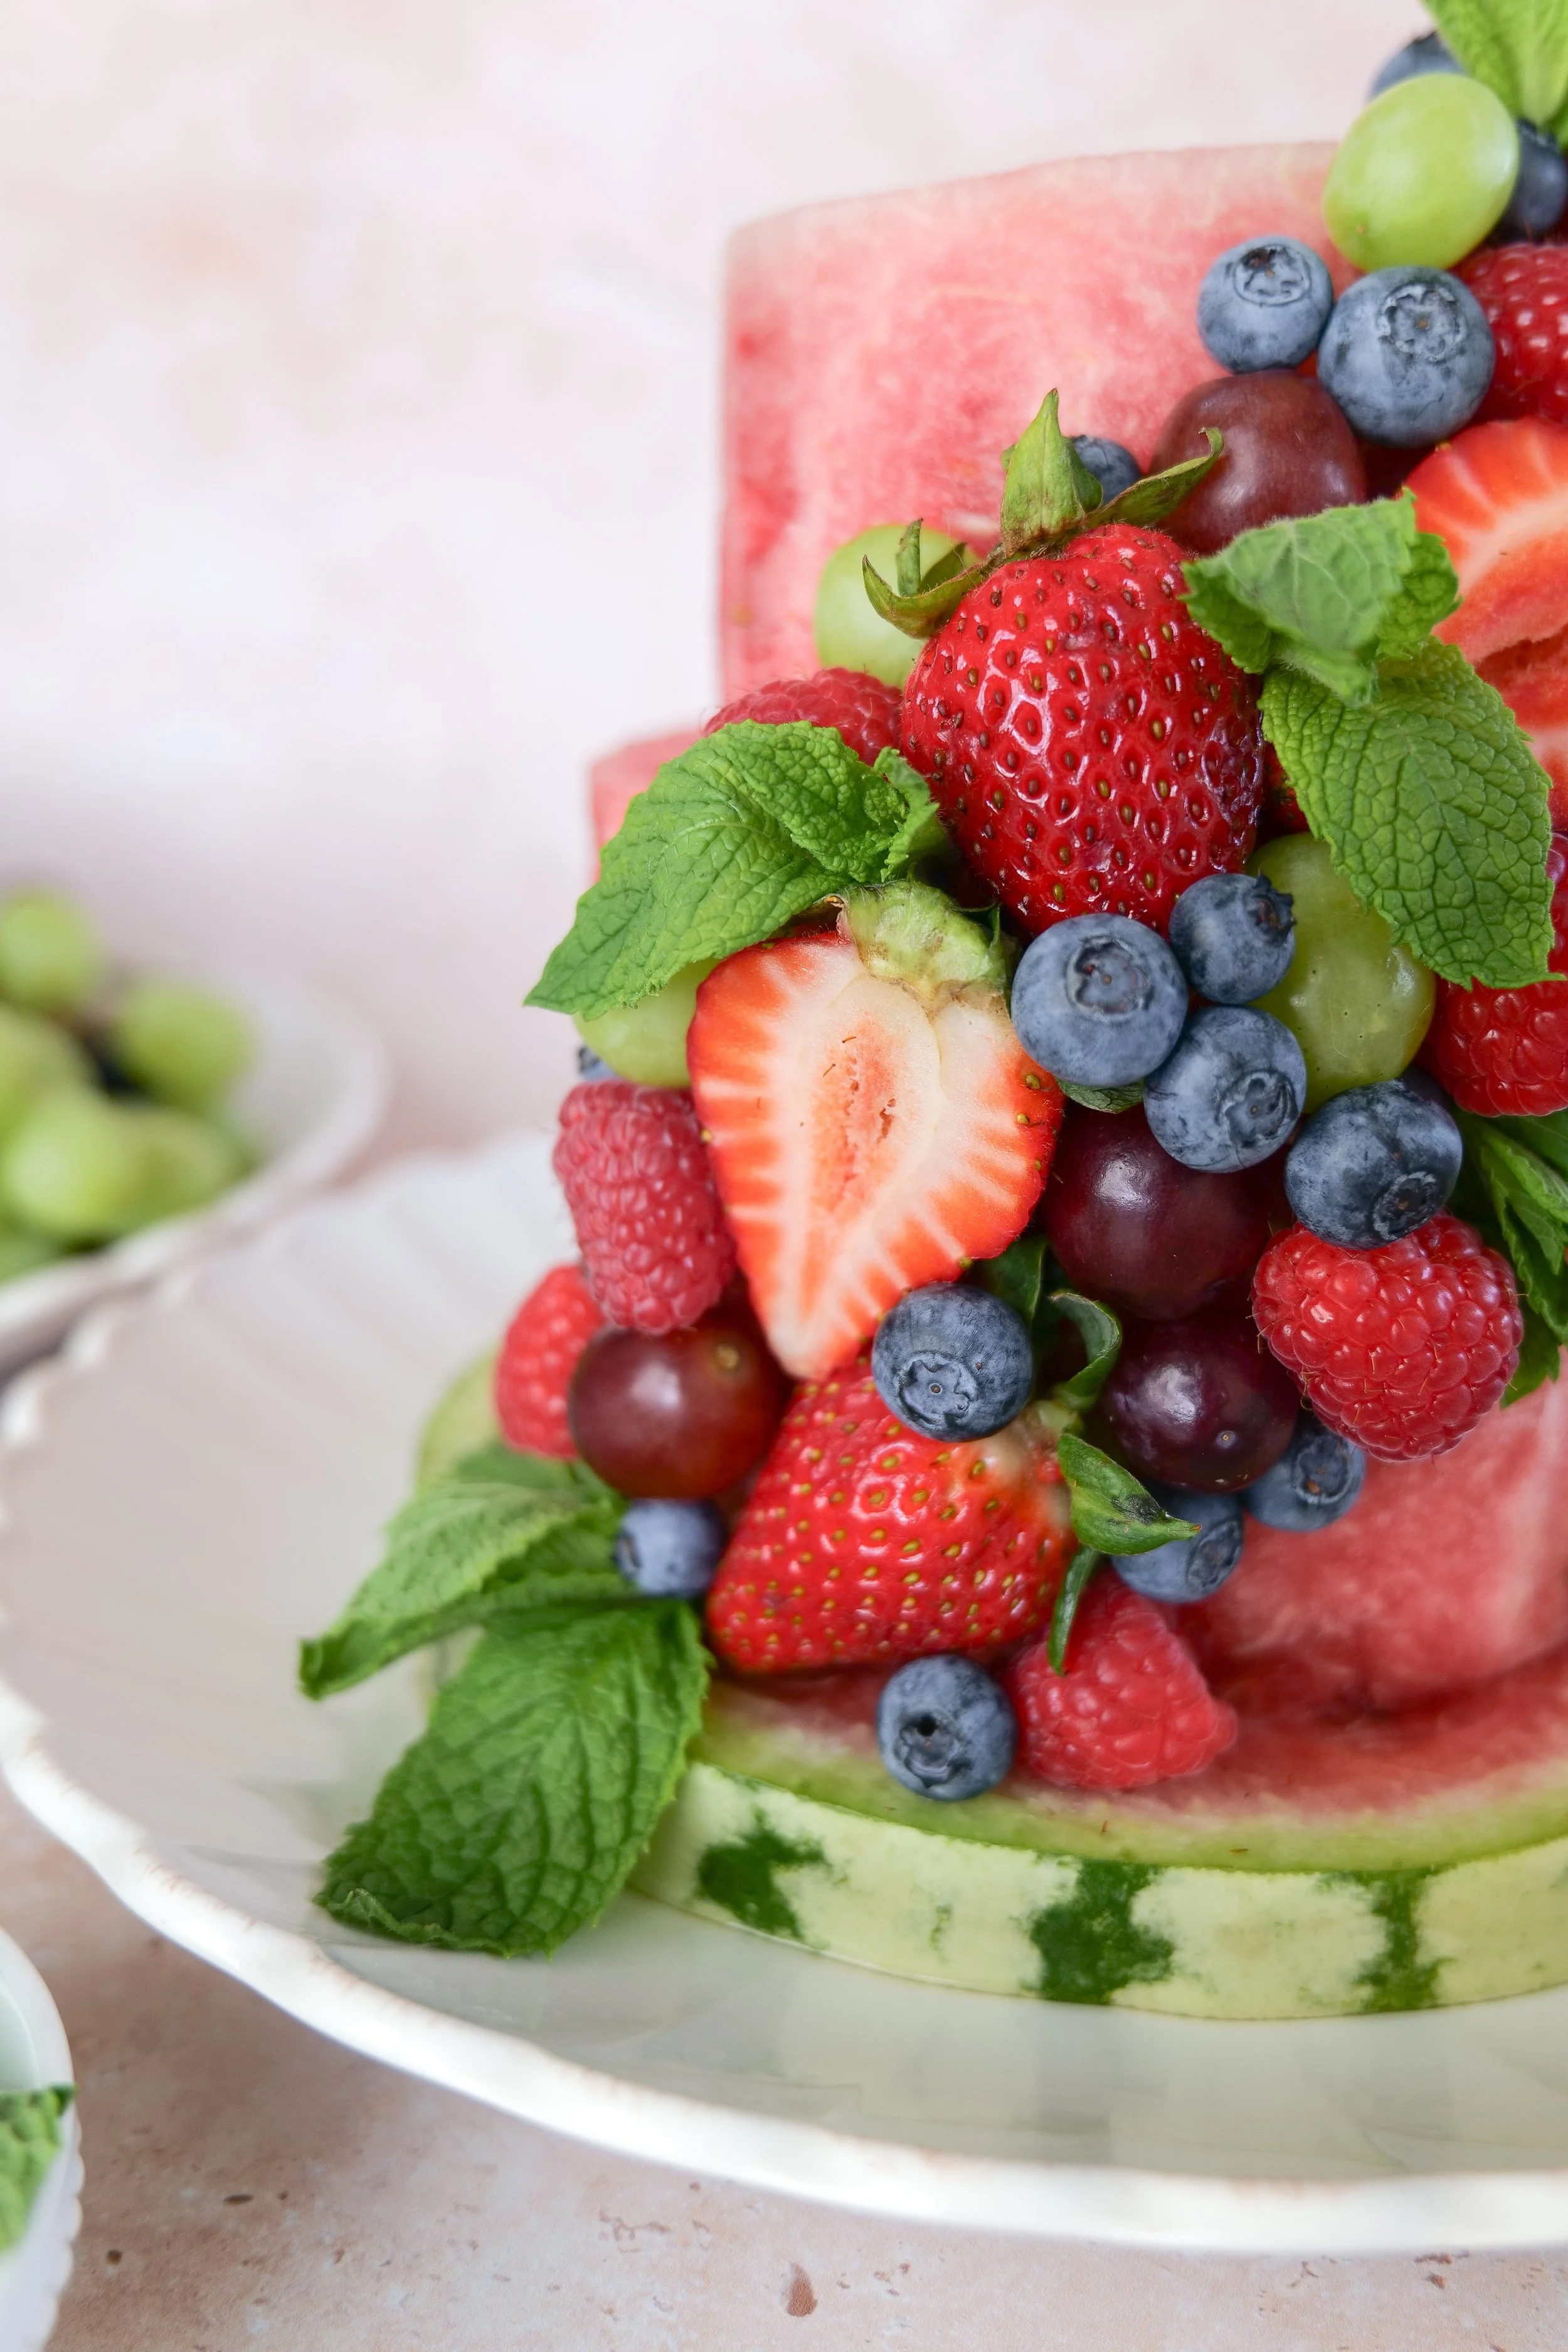
Two-tier watermelon fruit cake decorated with strawberries, raspberries, blueberries, colorful grapes, and fresh mint.

Why You Will Love This Watermelon Fruit Cake

This is one of those ideas that looks impressive on the table without requiring complicated decorating skills.

You will love it because it is:

  • Completely no-bake

  • Made with fresh seasonal fruit

  • Easy to customize for different celebrations

  • Naturally colorful and beautiful

  • Refreshing for warm summer days

  • Simple to prepare ahead

  • A fun alternative to a traditional birthday or milestone cake

  • Easy to serve with whipped cream on the side

It is also a wonderful way to use a variety of summer fruit in one centerpiece instead of preparing a separate fruit tray.

Fresh watermelon cake covered with colorful summer fruit for a birthday, baby milestone, or warm-weather celebration.

Is Watermelon Fruit Cake Actually Cake?

Watermelon fruit cake is not a baked cake. Instead, trimmed rounds of watermelon are stacked to create the shape of a tiered cake and then decorated with fresh fruit.

The watermelon acts as both the structure and the dessert. Toothpicks help secure some of the berries and grapes, while fresh mint adds color and makes the finished cake feel extra special.

Because I wanted the watermelon and fruit to remain the focus, I did not frost the cake. I prepared whipped cream separately and served it alongside each slice.

What You Will Need

For the Watermelon Cake

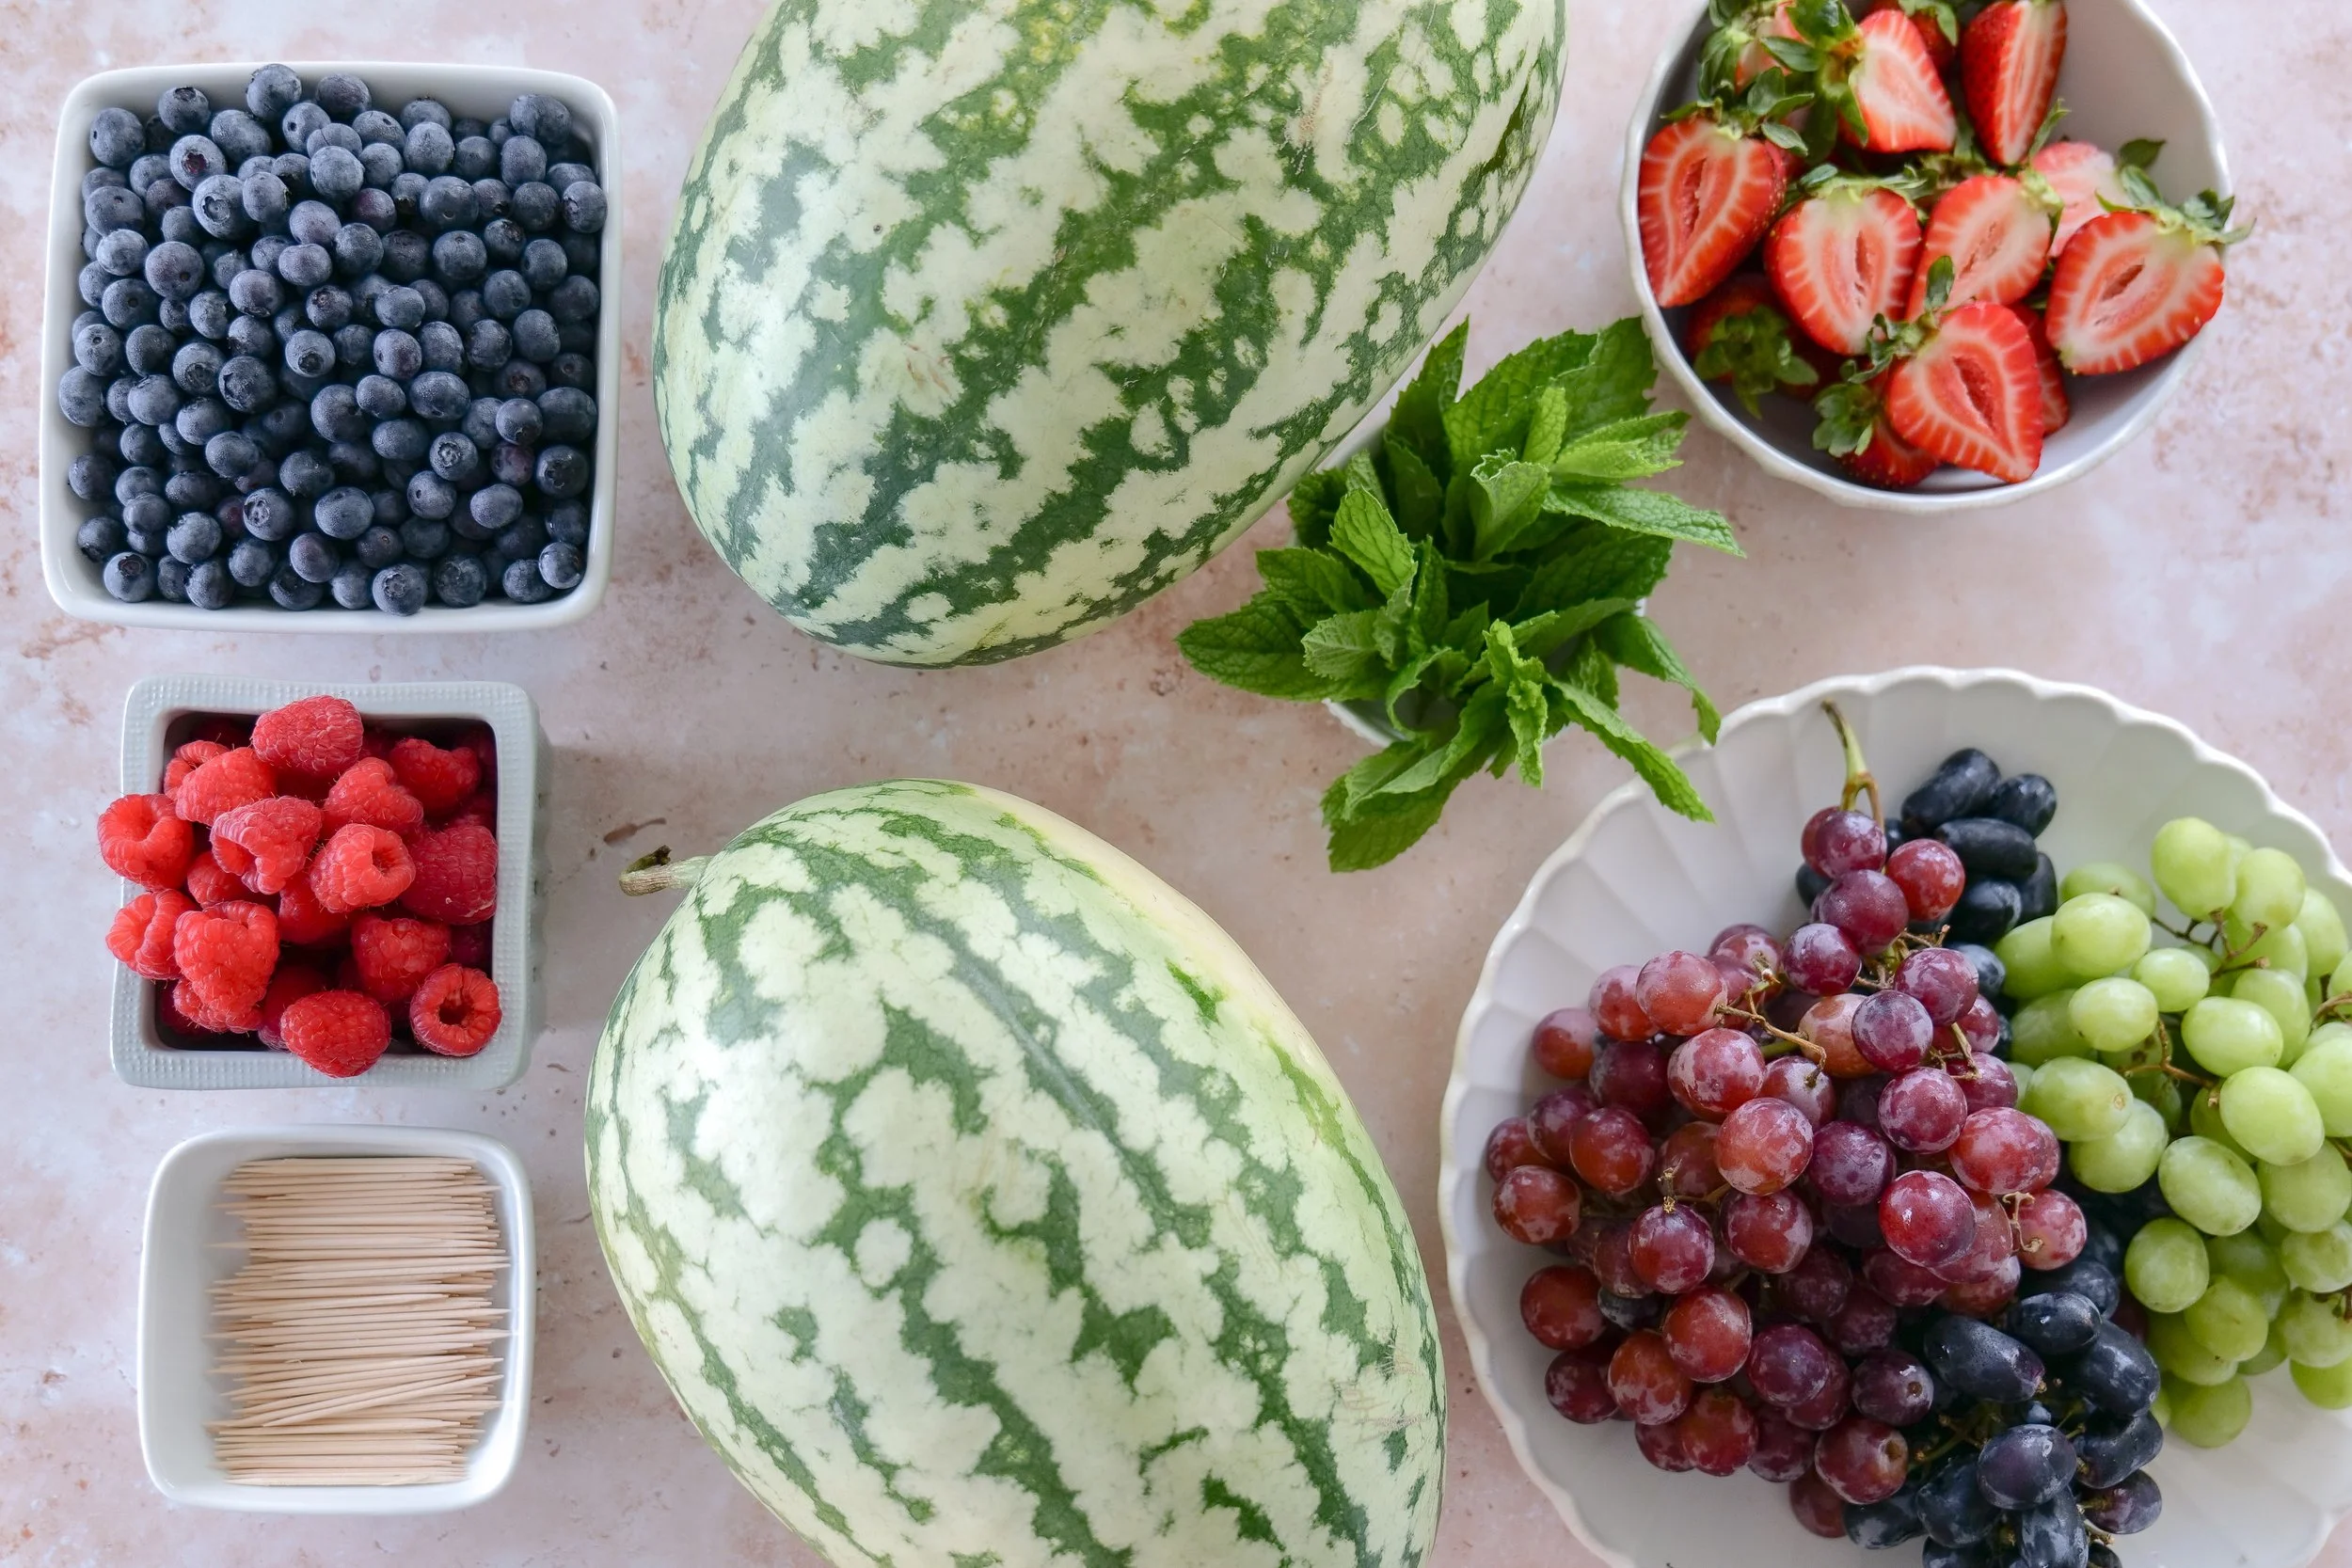
  • 2 seedless watermelons in different sizes

  • 1 cup raspberries

  • 1 cup blueberries

  • 1 cup grapes in various colors

  • 1 cup strawberries

  • Fresh mint, for garnish

  • Toothpicks, as needed to secure the fruit

For Serving

  • Homemade whipped cream, optional

The fruit amounts are flexible. You may use a little more or less depending on the size of your watermelons and how full you would like the cake to look.

Fresh strawberries, raspberries, blueberries, and colorful grapes prepared for decorating a watermelon fruit cake.

Kitchen Tools

  • Large cutting board

  • Sharp chef’s knife

  • Small paring knife

  • Paper towels

  • Cake stand or large serving platter

  • Toothpicks

  • Small bowls for organizing the fruit

I have linked the knives, cutting boards, cake stands, serving pieces, and other kitchen tools I use most often in my Kitchen Essentials and Summer Entertaining shelves.

How to Choose the Best Watermelons

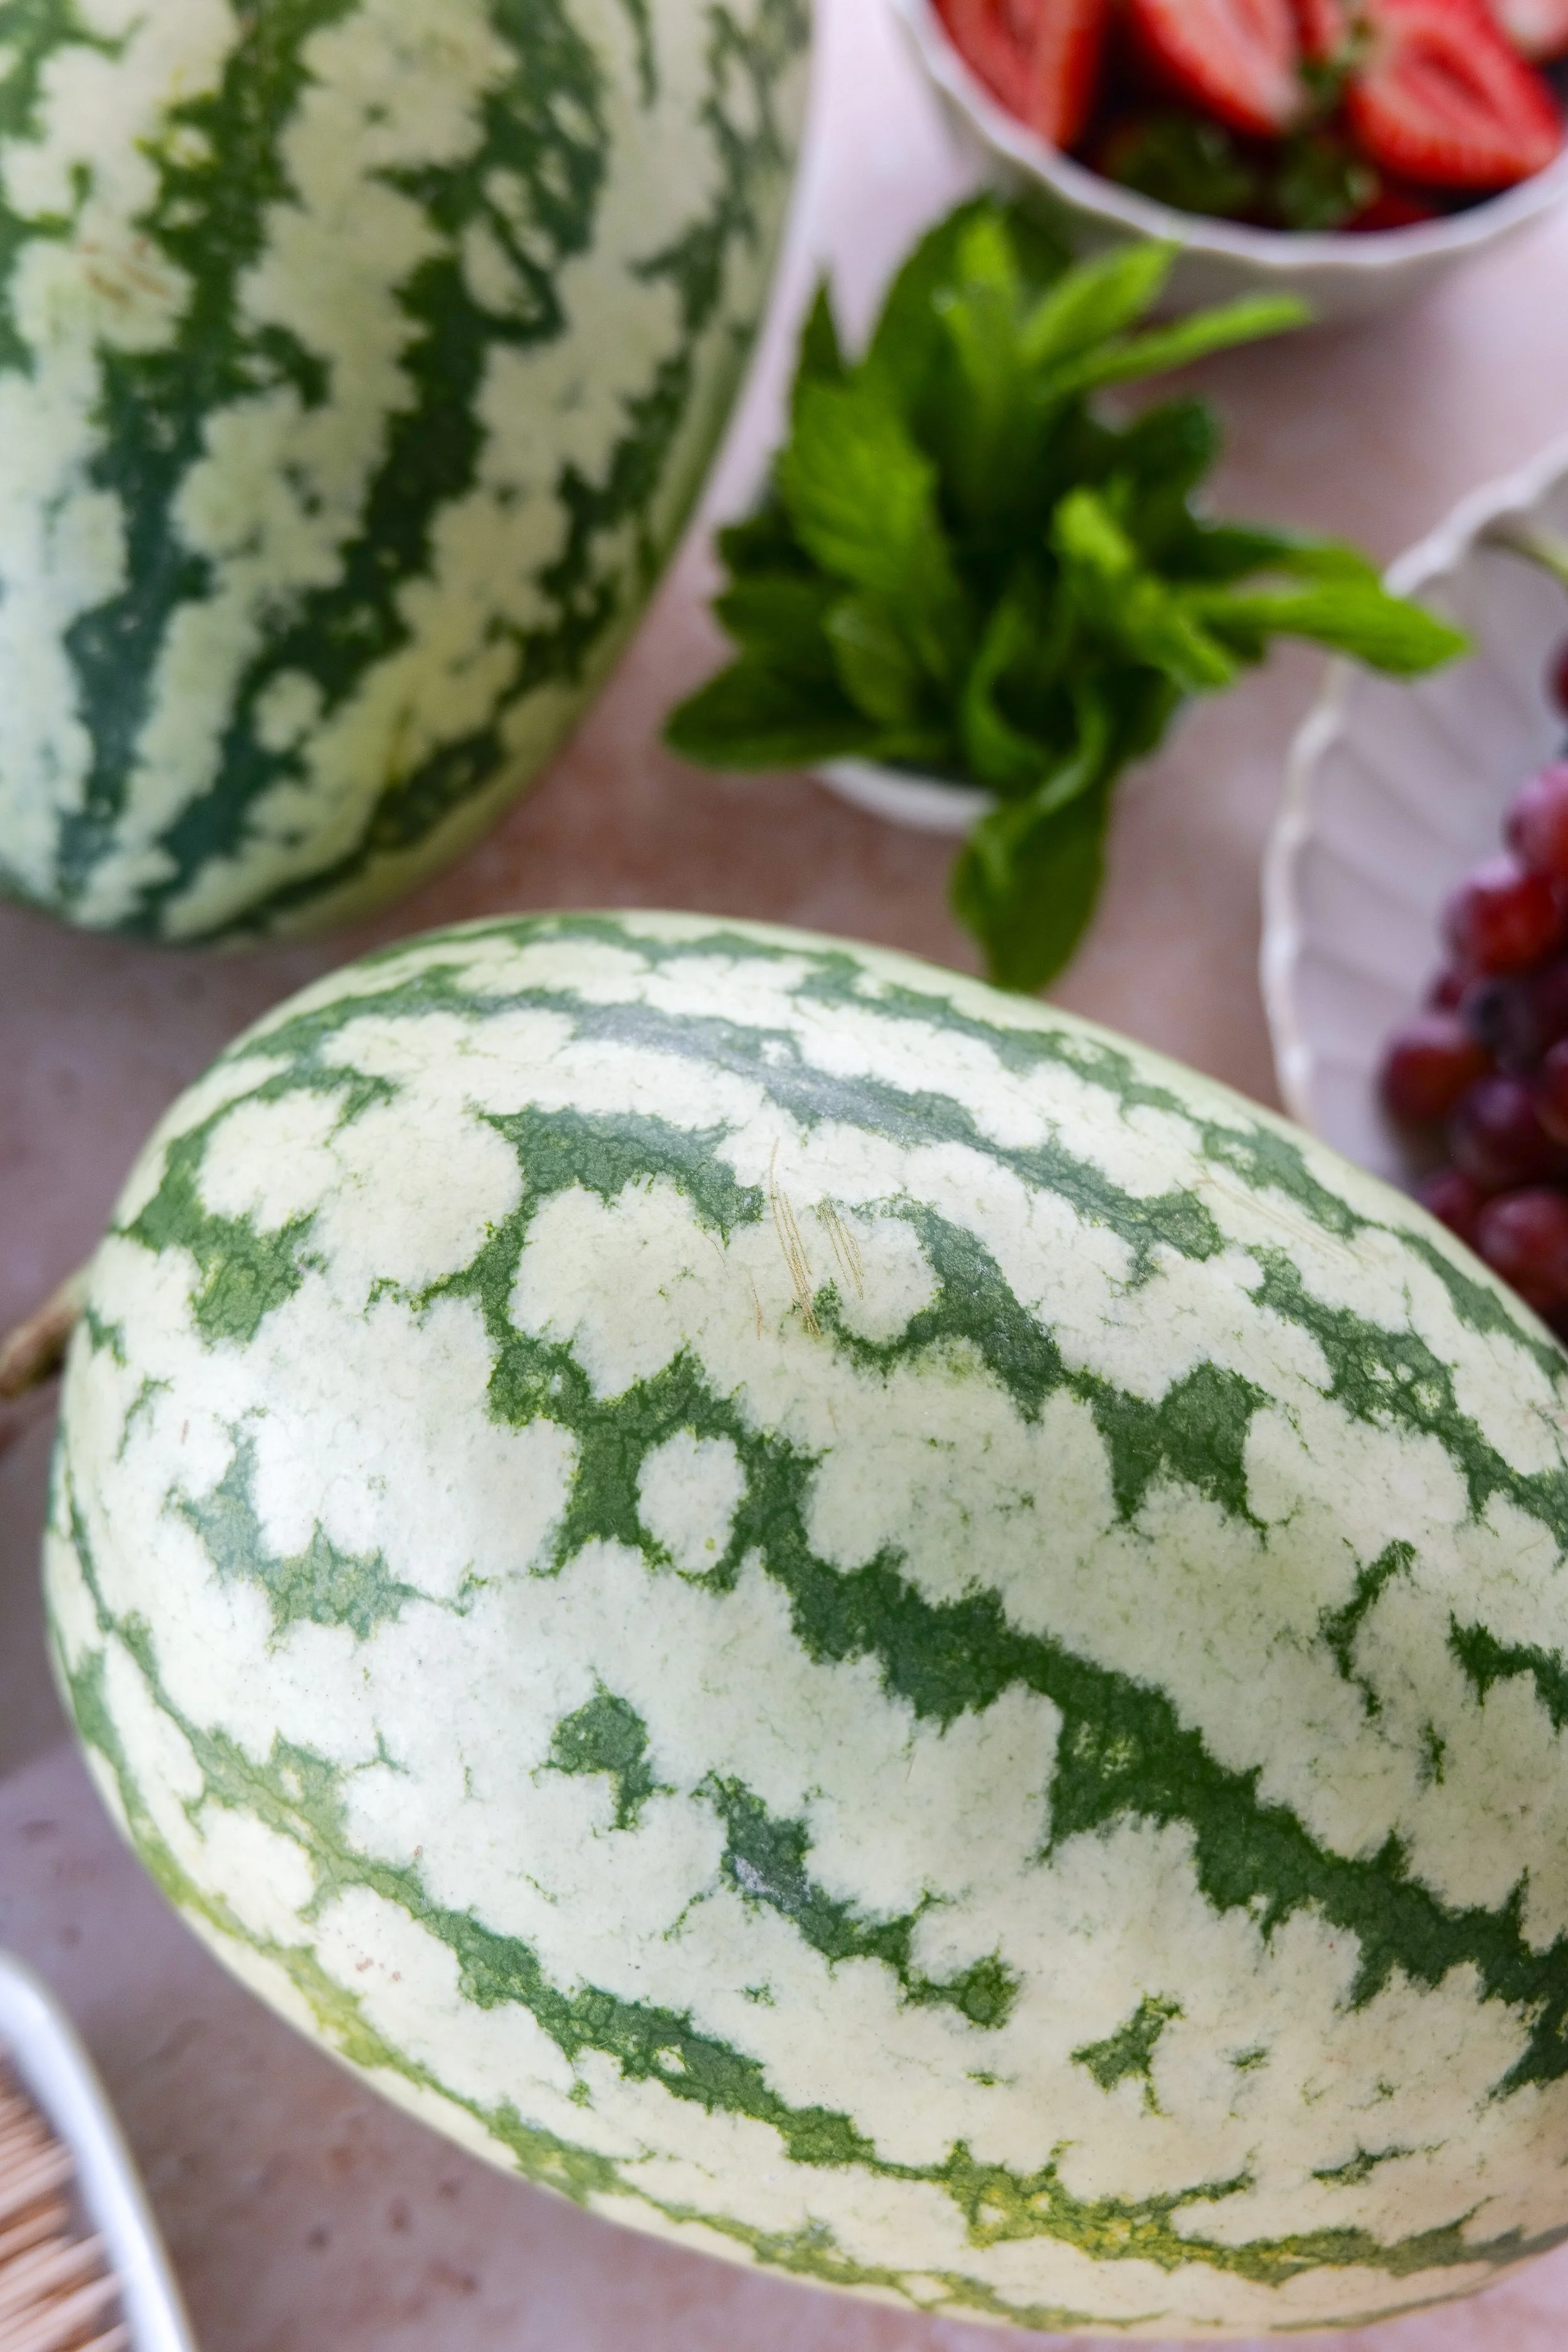
For a two-tier watermelon cake, choose two seedless watermelons in noticeably different sizes. The larger one will become the bottom tier, and the smaller one will sit on top.

Look for watermelons that:

  • Feel heavy for their size

  • Have a creamy yellow field spot

  • Have a firm rind without soft areas

  • Are relatively round and evenly shaped

  • Sound deep and hollow when tapped

A round watermelon is generally easier to trim into a cake shape than a long oval watermelon.

How to Prepare the Fruit

Wash and dry all of the berries, grapes, strawberries, and mint before beginning.

The fruit needs to be completely dry before it is added to the watermelon. Excess water can make the surface slippery and prevent the fruit from staying in place.

Remove the green tops from the strawberries. You may leave smaller strawberries whole and halve or quarter larger ones.

Leave the raspberries and blueberries whole. Grapes can remain whole for decorating, but they should be cut into age-appropriate pieces before serving to babies or young children.

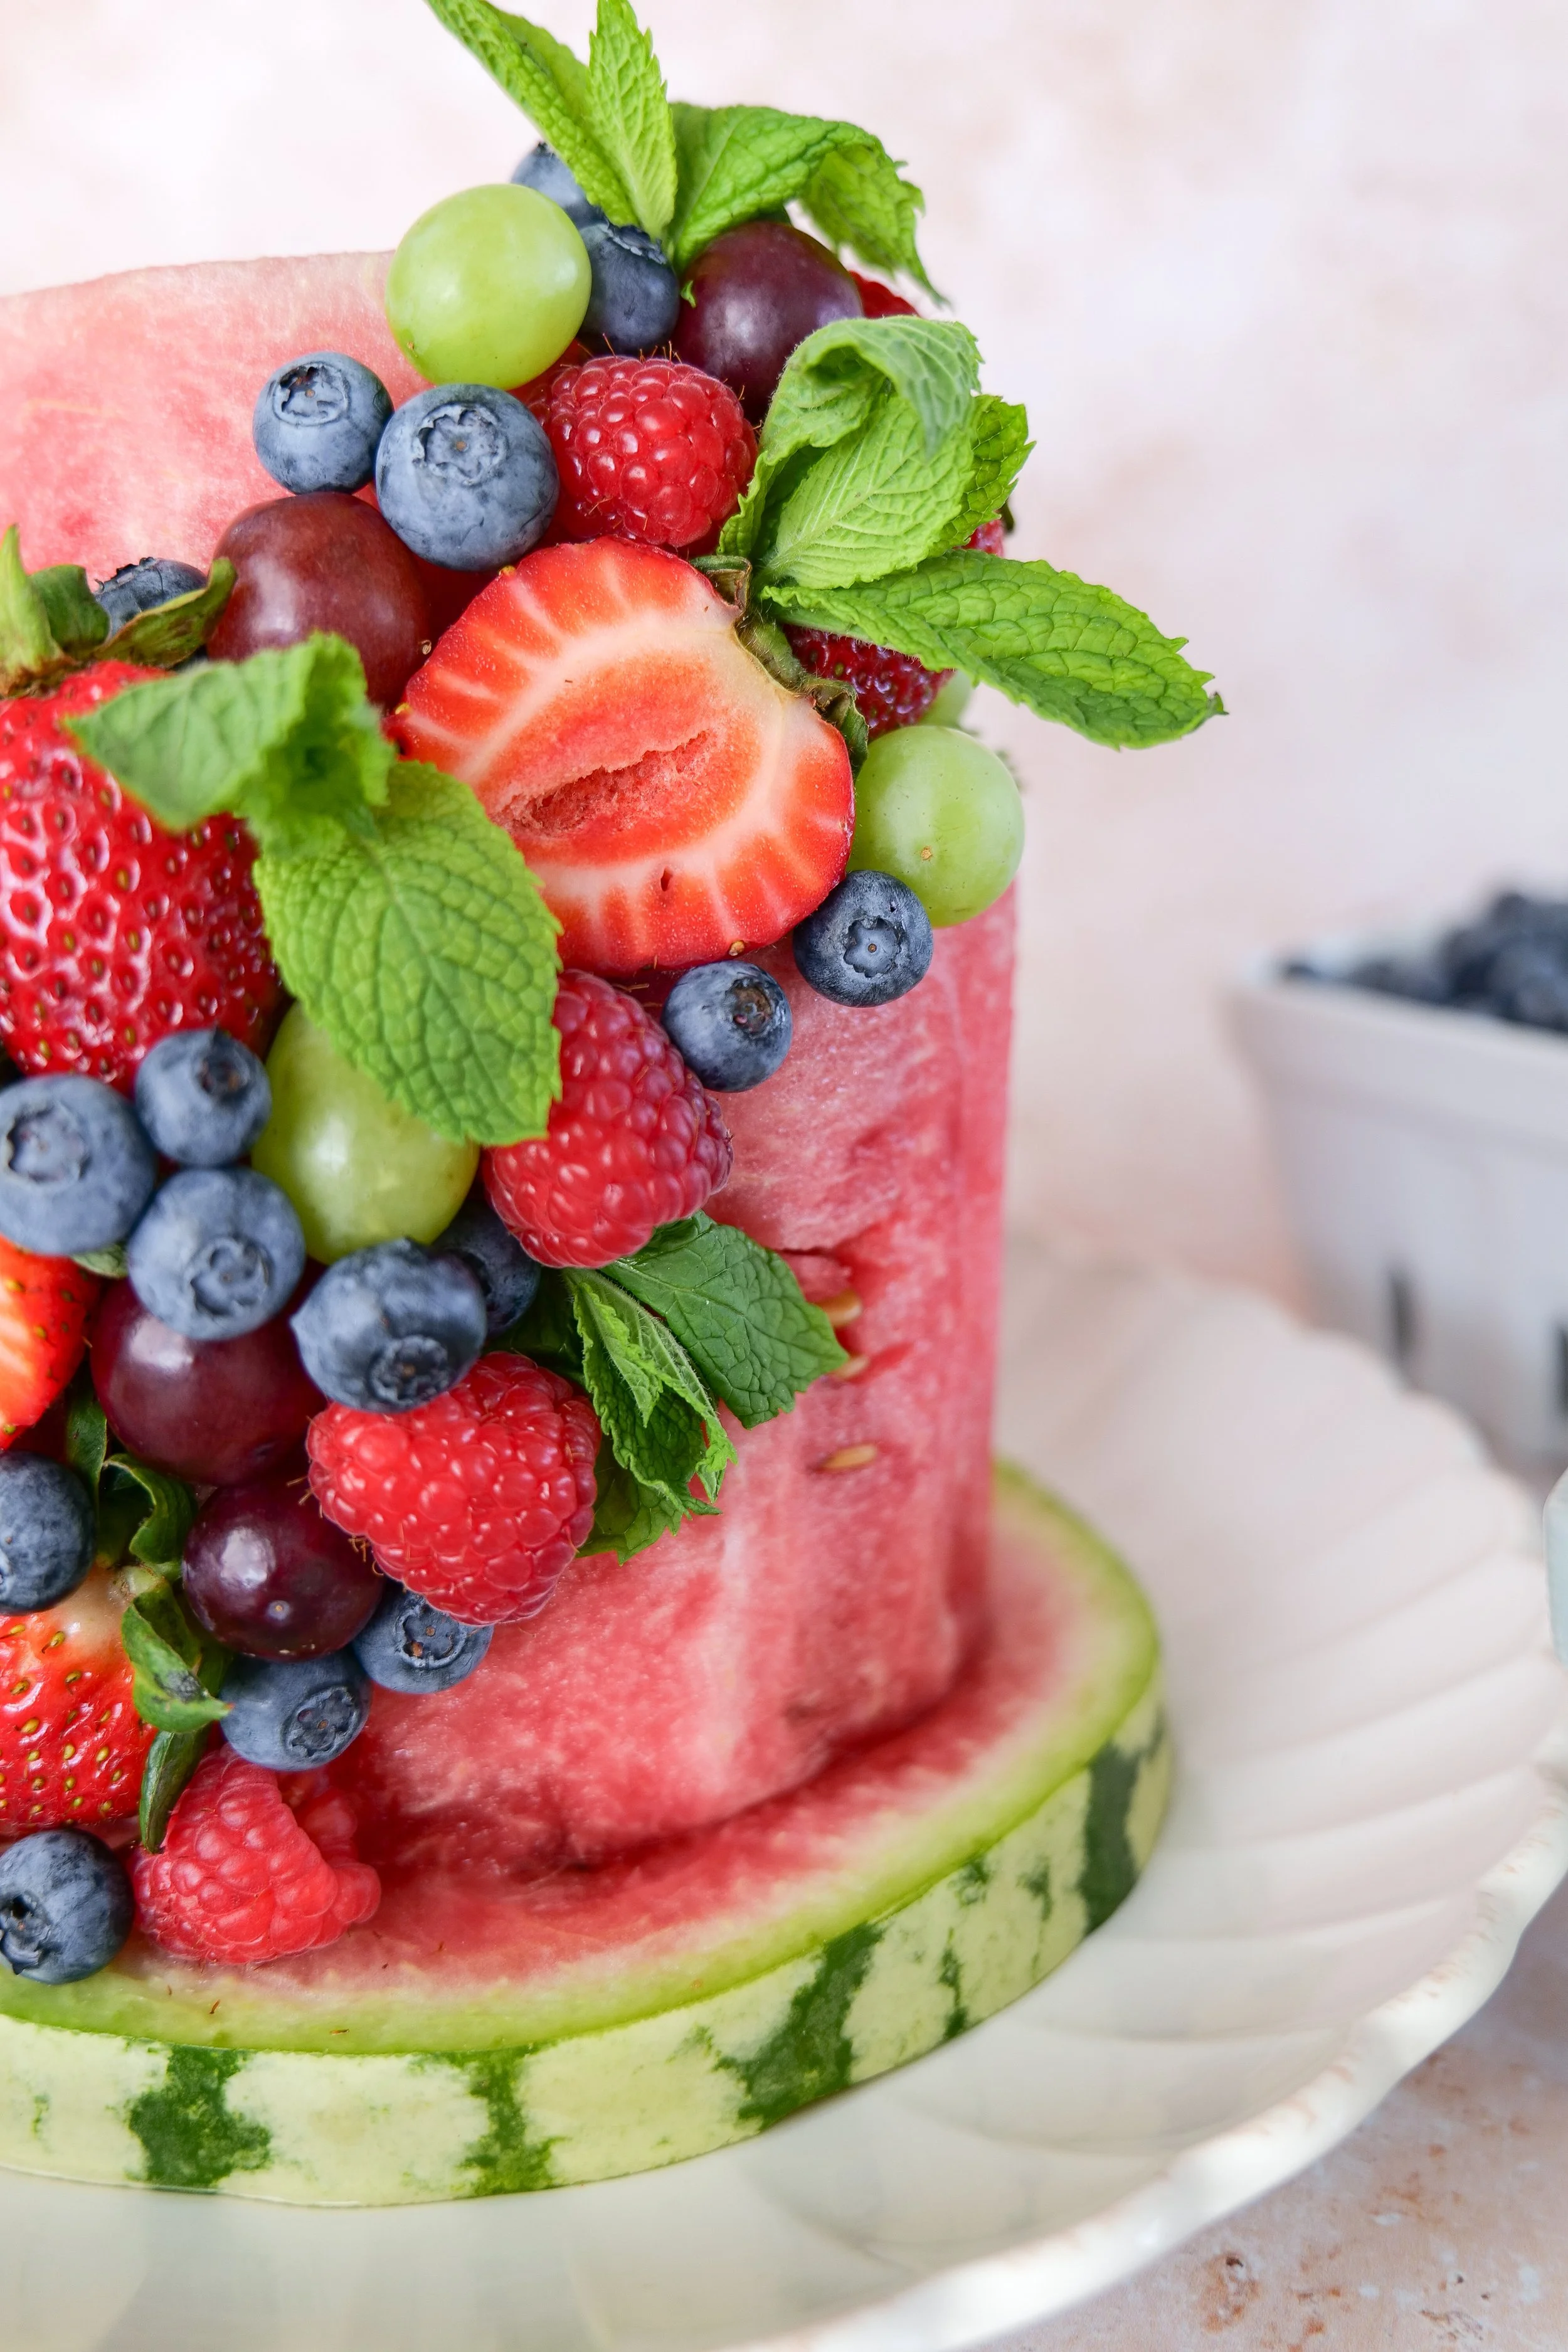
No-bake watermelon cake decorated with fresh raspberries, blueberries, grapes, strawberries, and mint leaves.

How to Make a Watermelon Fruit Cake

Step 1: Trim the Larger Watermelon

Place the larger watermelon on a sturdy cutting board.

Cut a thin slice from the top and bottom to create two flat surfaces. Stand the watermelon upright and carefully cut away the rind and white portion, following the curve of the fruit.

Continue trimming until you have an even cylinder approximately 4 to 5 inches tall.

Pat the entire watermelon tier dry with paper towels.

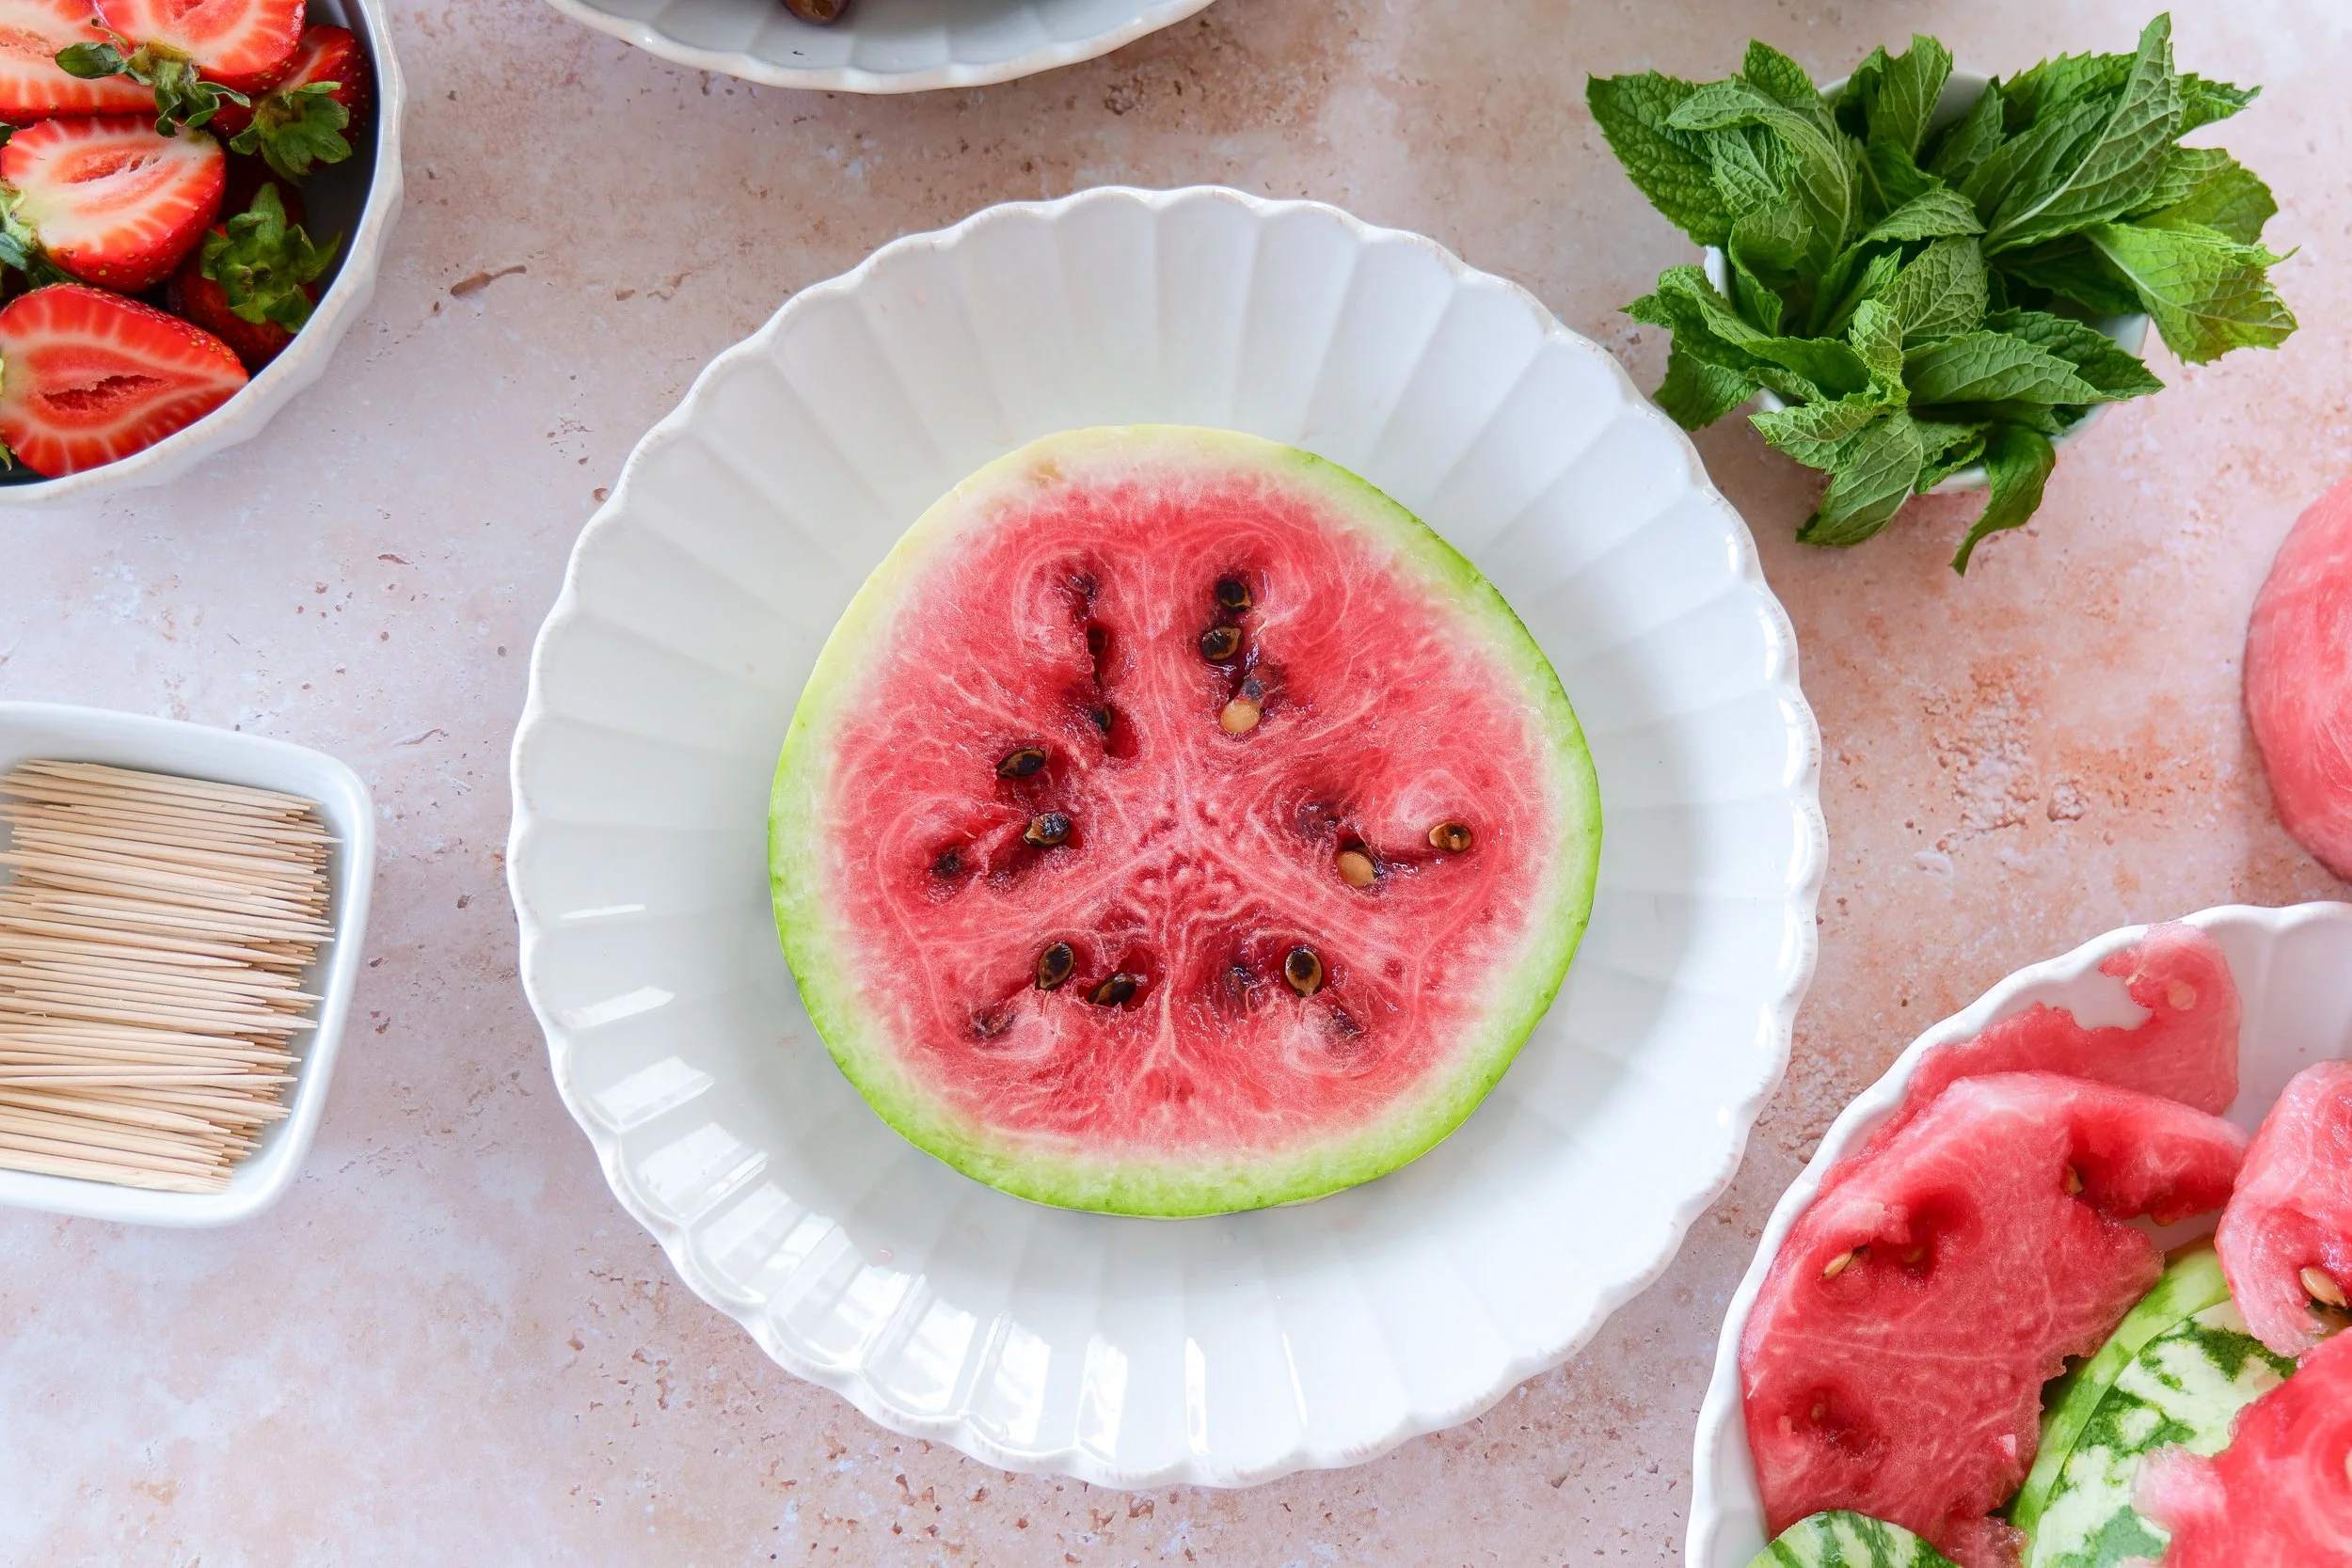
Seedless watermelon being trimmed into a round cake-shaped tier for an easy no-bake fruit cake.

Step 2: Create the Top Tier

Repeat the same process with the smaller watermelon.

Trim the second watermelon into a shorter and narrower cylinder that will sit securely on top of the first tier.

Pat it thoroughly dry with paper towels.

Step 3: Stack the Watermelon Tiers

Transfer the larger watermelon tier to a cake stand or serving platter.

Center the smaller tier on top. The natural weight of the watermelon should keep it in place, but you may insert a few long wooden skewers vertically through both tiers for additional stability.

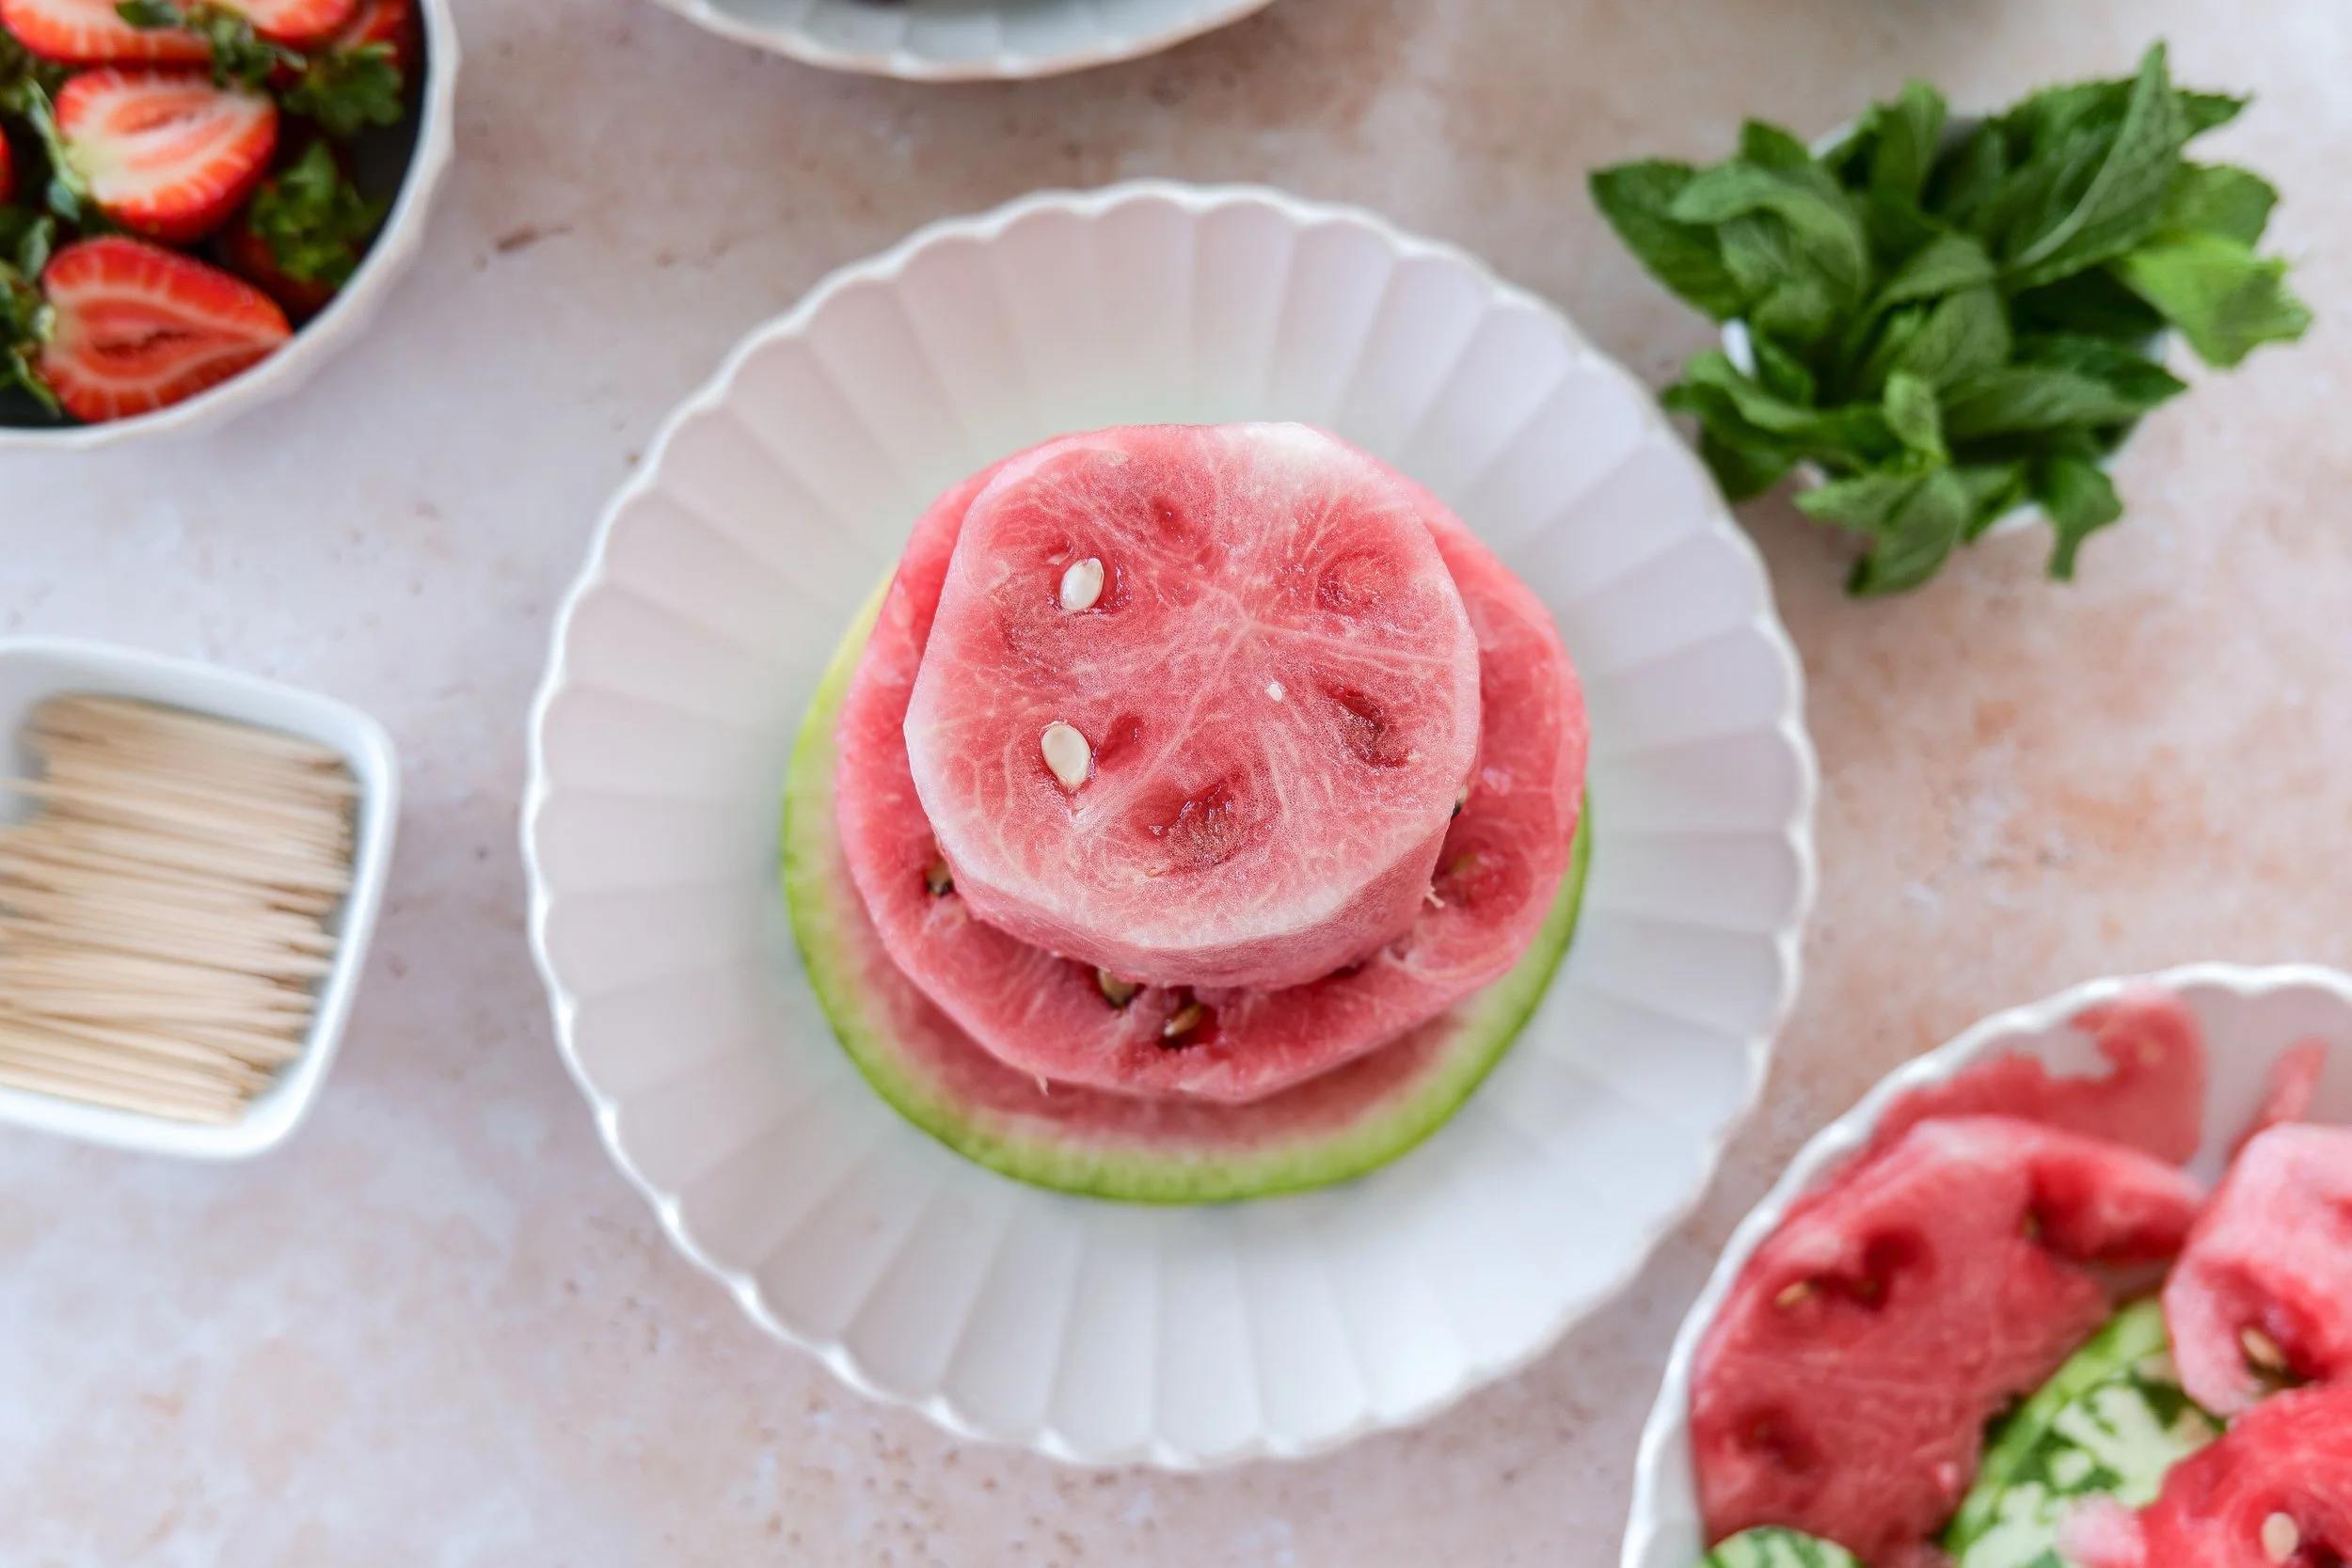
Fresh watermelon trimmed into an even round tier before assembling a two-tier watermelon cake.

Step 4: Decorate with Fresh Fruit

Begin decorating the cake with strawberries, grapes, raspberries, and blueberries.

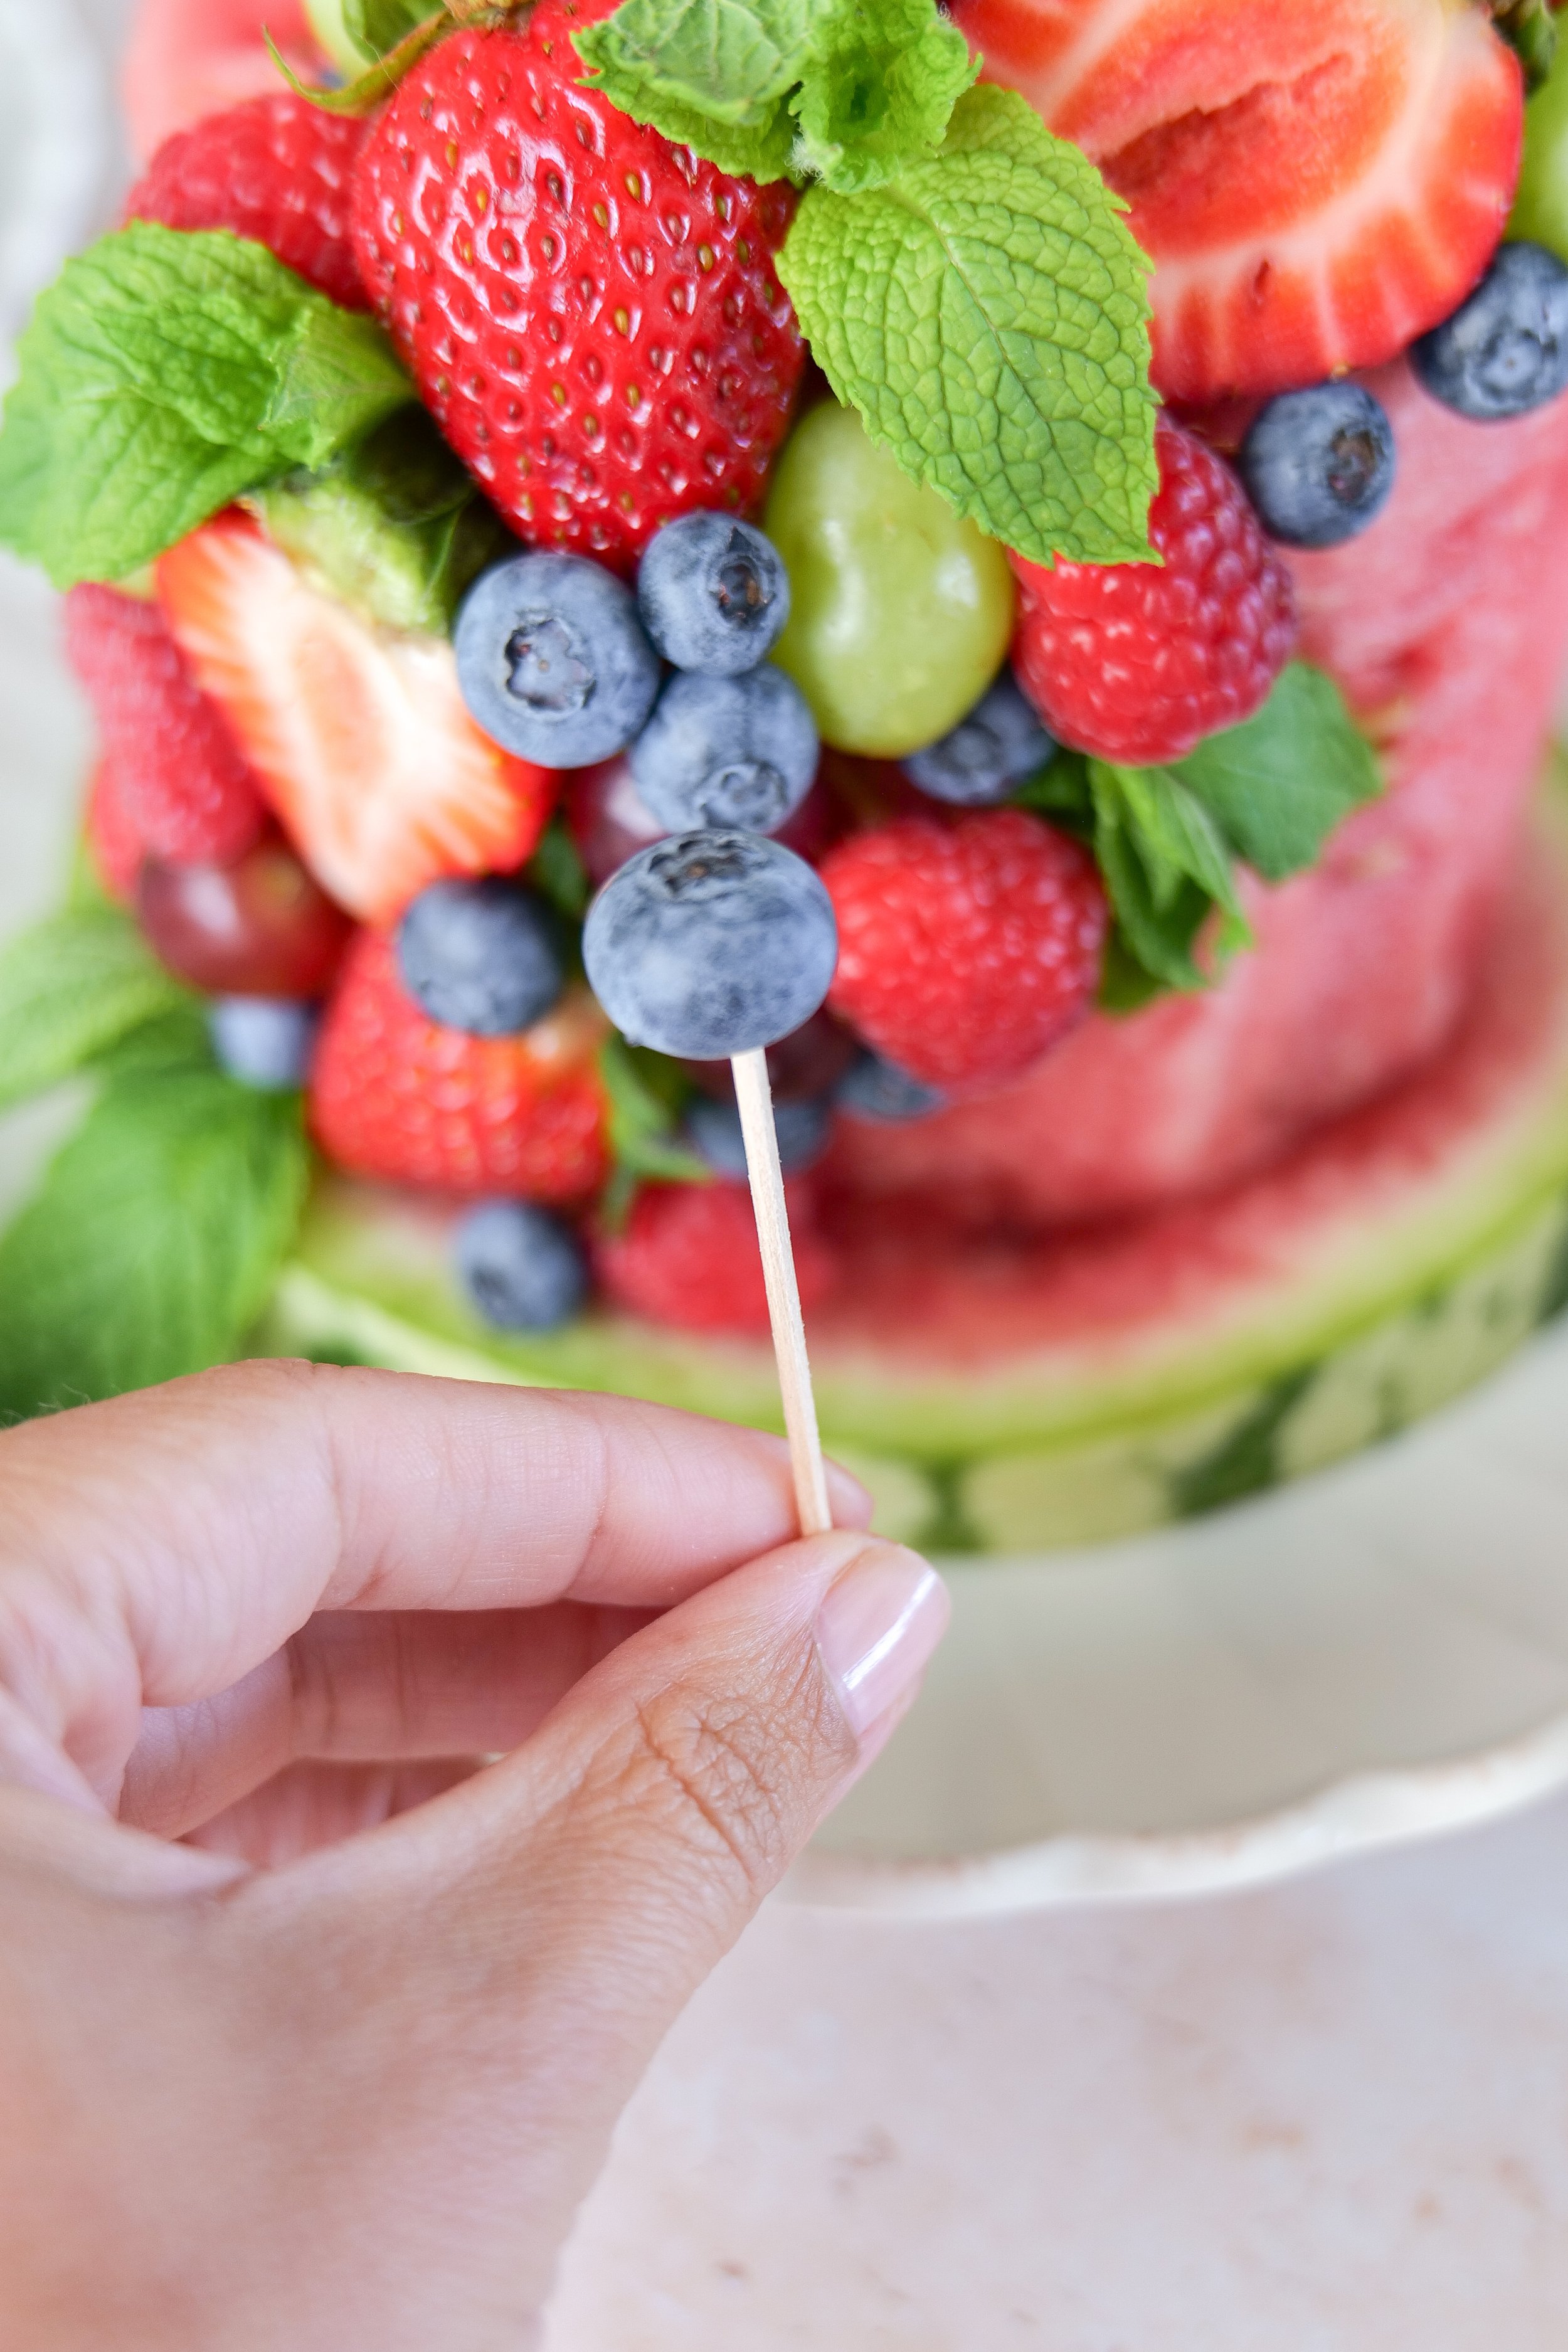
Use toothpicks to secure individual pieces of fruit around the sides of the watermelon. Press each toothpick partly into the fruit first and then carefully insert it into the watermelon.

Arrange additional fruit around the top tier and the base of the cake. Alternate colors, shapes, and sizes to create a full, natural appearance.

Fresh berries and grapes being attached to a watermelon cake with toothpicks for a colorful summer dessert.

Step 5: Add Fresh Mint

Tuck small mint leaves between the fruit and around the base of the cake.

Use mint sparingly so it adds a fresh green accent without overwhelming the fruit.

Step 6: Chill Until Serving

Refrigerate the finished cake until you are ready to serve it.

For the freshest appearance, assemble the cake within a few hours of your celebration.

Serve chilled with homemade whipped cream on the side.

Finished watermelon cake garnished with fresh mint and colorful summer berries and grapes.
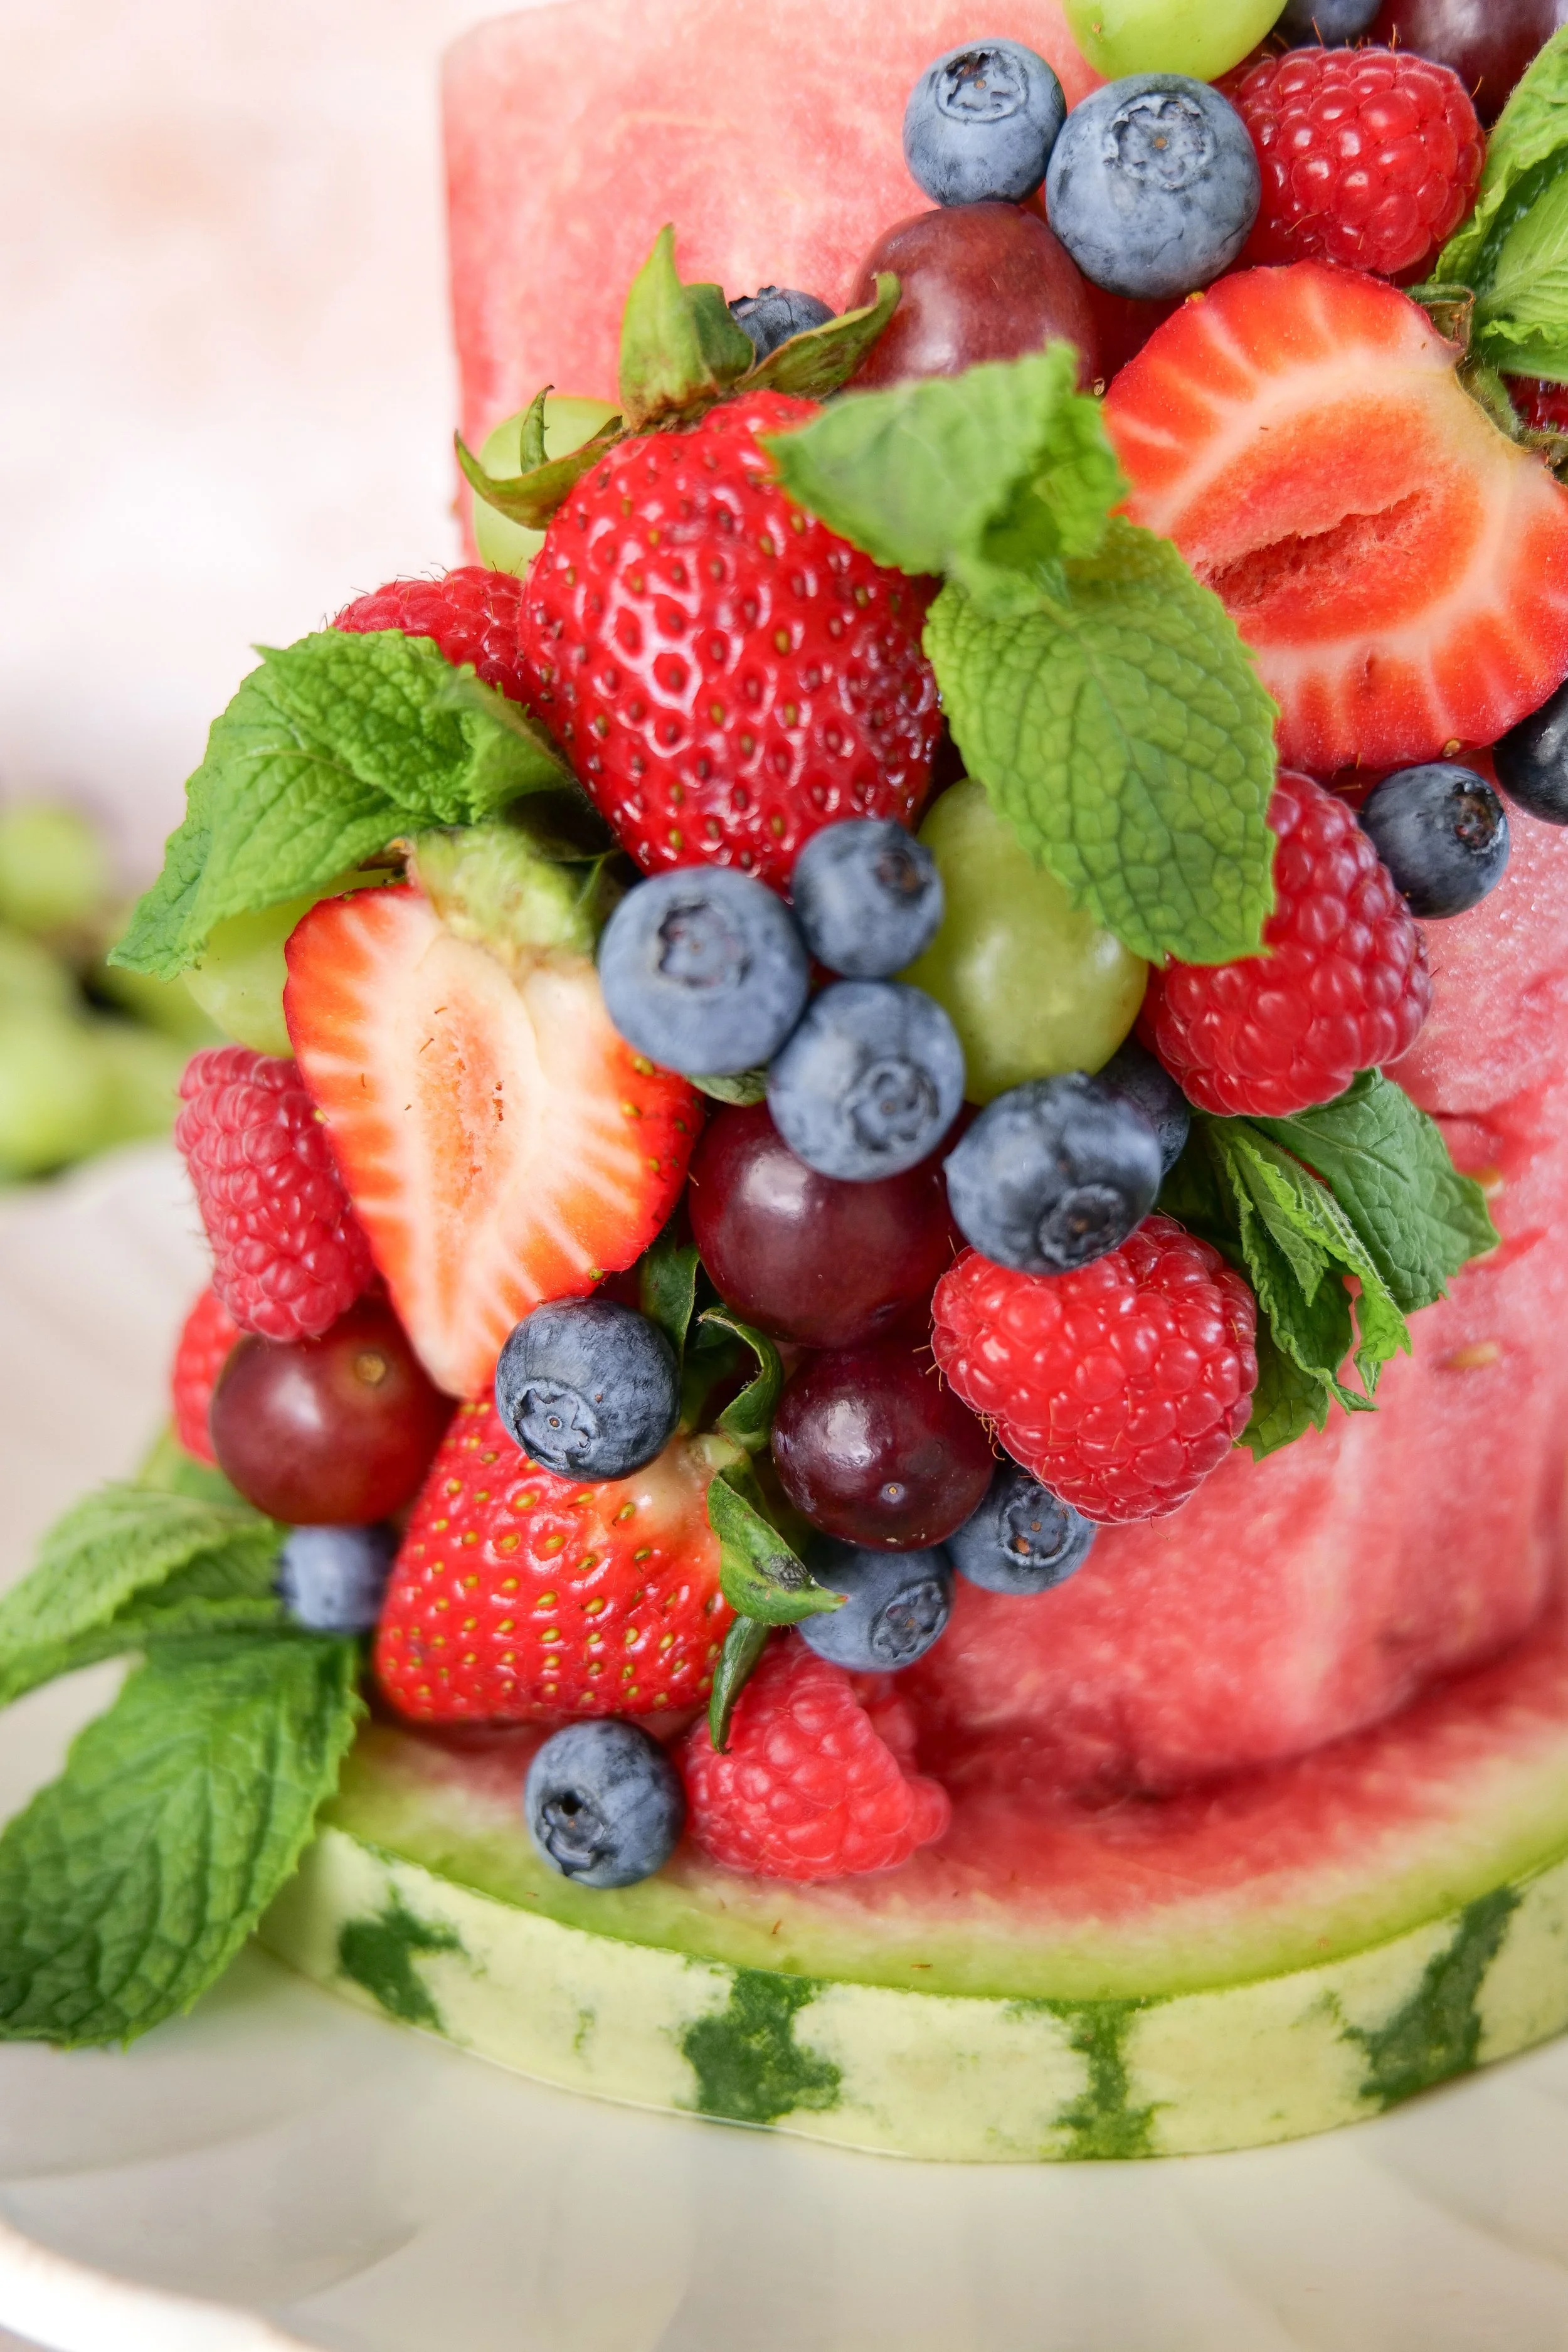
Watermelon fruit cake decorated with raspberries, blueberries, strawberries, and grapes in several colors.
Fresh fruit watermelon cake served as a refreshing no-bake alternative to a traditional summer birthday cake.

Homemade Whipped Cream for Serving

I kept the watermelon cake completely unfrosted and served whipped cream separately. This allowed the fruit to remain bright and fresh while giving everyone the option to add a spoonful of cream to their slice.

To make a simple homemade whipped cream, beat the following ingredients together until soft or medium peaks form:

  • 1 cup cold heavy whipping cream

  • 1/4 cup powdered sugar

  • 1 teaspoon vanilla extract

Keep the whipped cream refrigerated until serving.

Amanda’s Tips

Dry Everything Thoroughly

The watermelon and decorative fruit must be dry. Moisture makes it more difficult for the tiers and decorations to remain secure.

Use Watermelons in Different Sizes

Choosing one large watermelon and one smaller watermelon will make the finished cake look naturally tiered and balanced.

Trim Slowly

It is easier to remove more watermelon than it is to repair a tier that has been trimmed too narrowly. Cut away the rind gradually and rotate the watermelon as you work.

Assemble It on the Serving Stand

Once the watermelon is decorated, it becomes heavy and difficult to move. Stack and decorate the tiers directly on the cake stand or platter you plan to use.

Keep It Chilled

Watermelon tastes best cold and will hold its shape more reliably when chilled.

Remove Every Toothpick Before Serving

Keep track of where the toothpicks are inserted and remove all of them before slicing or serving the fruit.

Prepare Fruit Safely for Children

Whole grapes and some berries can be choking hazards for babies and young children. Remove all toothpicks and skewers, then cut the fruit into developmentally appropriate pieces before serving. Always supervise young children while they eat.

How Far Ahead Can You Make a Watermelon Cake?

The watermelon tiers can be trimmed several hours before decorating.

After trimming, pat them dry, wrap them gently, and refrigerate them separately. Prepare and dry the decorative fruit at the same time.

For the best presentation, stack and decorate the cake two to four hours before serving. Watermelon naturally releases moisture, so I would not fully assemble it the night before.

How to Store Leftovers

Remove all toothpicks and skewers before storing leftovers.

Cut the remaining watermelon into slices or cubes and transfer it to an airtight container. Store it in the refrigerator for up to three days.

Store the whipped cream separately in a covered container in the refrigerator.

The cake will not retain its original tiered appearance after it has been sliced, but the leftover fruit is perfect for snacks, smoothies, fruit salad, or breakfast.

Watermelon Cake Decorating Variations

Red, White, and Blue Watermelon Cake

Decorate with strawberries, raspberries, blueberries, and whipped cream on the side for a Fourth of July celebration.

Pastel Baby Shower Cake

Use pale green grapes, strawberries, raspberries, and small mint leaves for a soft garden-inspired presentation.

Tropical Watermelon Cake

Decorate with mango, kiwi, pineapple, grapes, and toasted coconut.

Farmers Market Watermelon Cake

Use whatever berries, stone fruit, grapes, and herbs look best at your local farmers market that week.

One-Tier Watermelon Cake

For a smaller gathering, use one watermelon and create a single short cake tier. Decorate the top and sides using the same method.

What to Serve with Watermelon Cake

This fresh fruit cake works especially well as part of a summer brunch or outdoor gathering. Serve it alongside:

  • Homemade whipped cream

  • Yogurt parfaits

  • Pastries or muffins

  • Lemonade

  • Iced tea

  • Iced coffee

  • A brunch board

  • Tea sandwiches

  • A summer charcuterie board

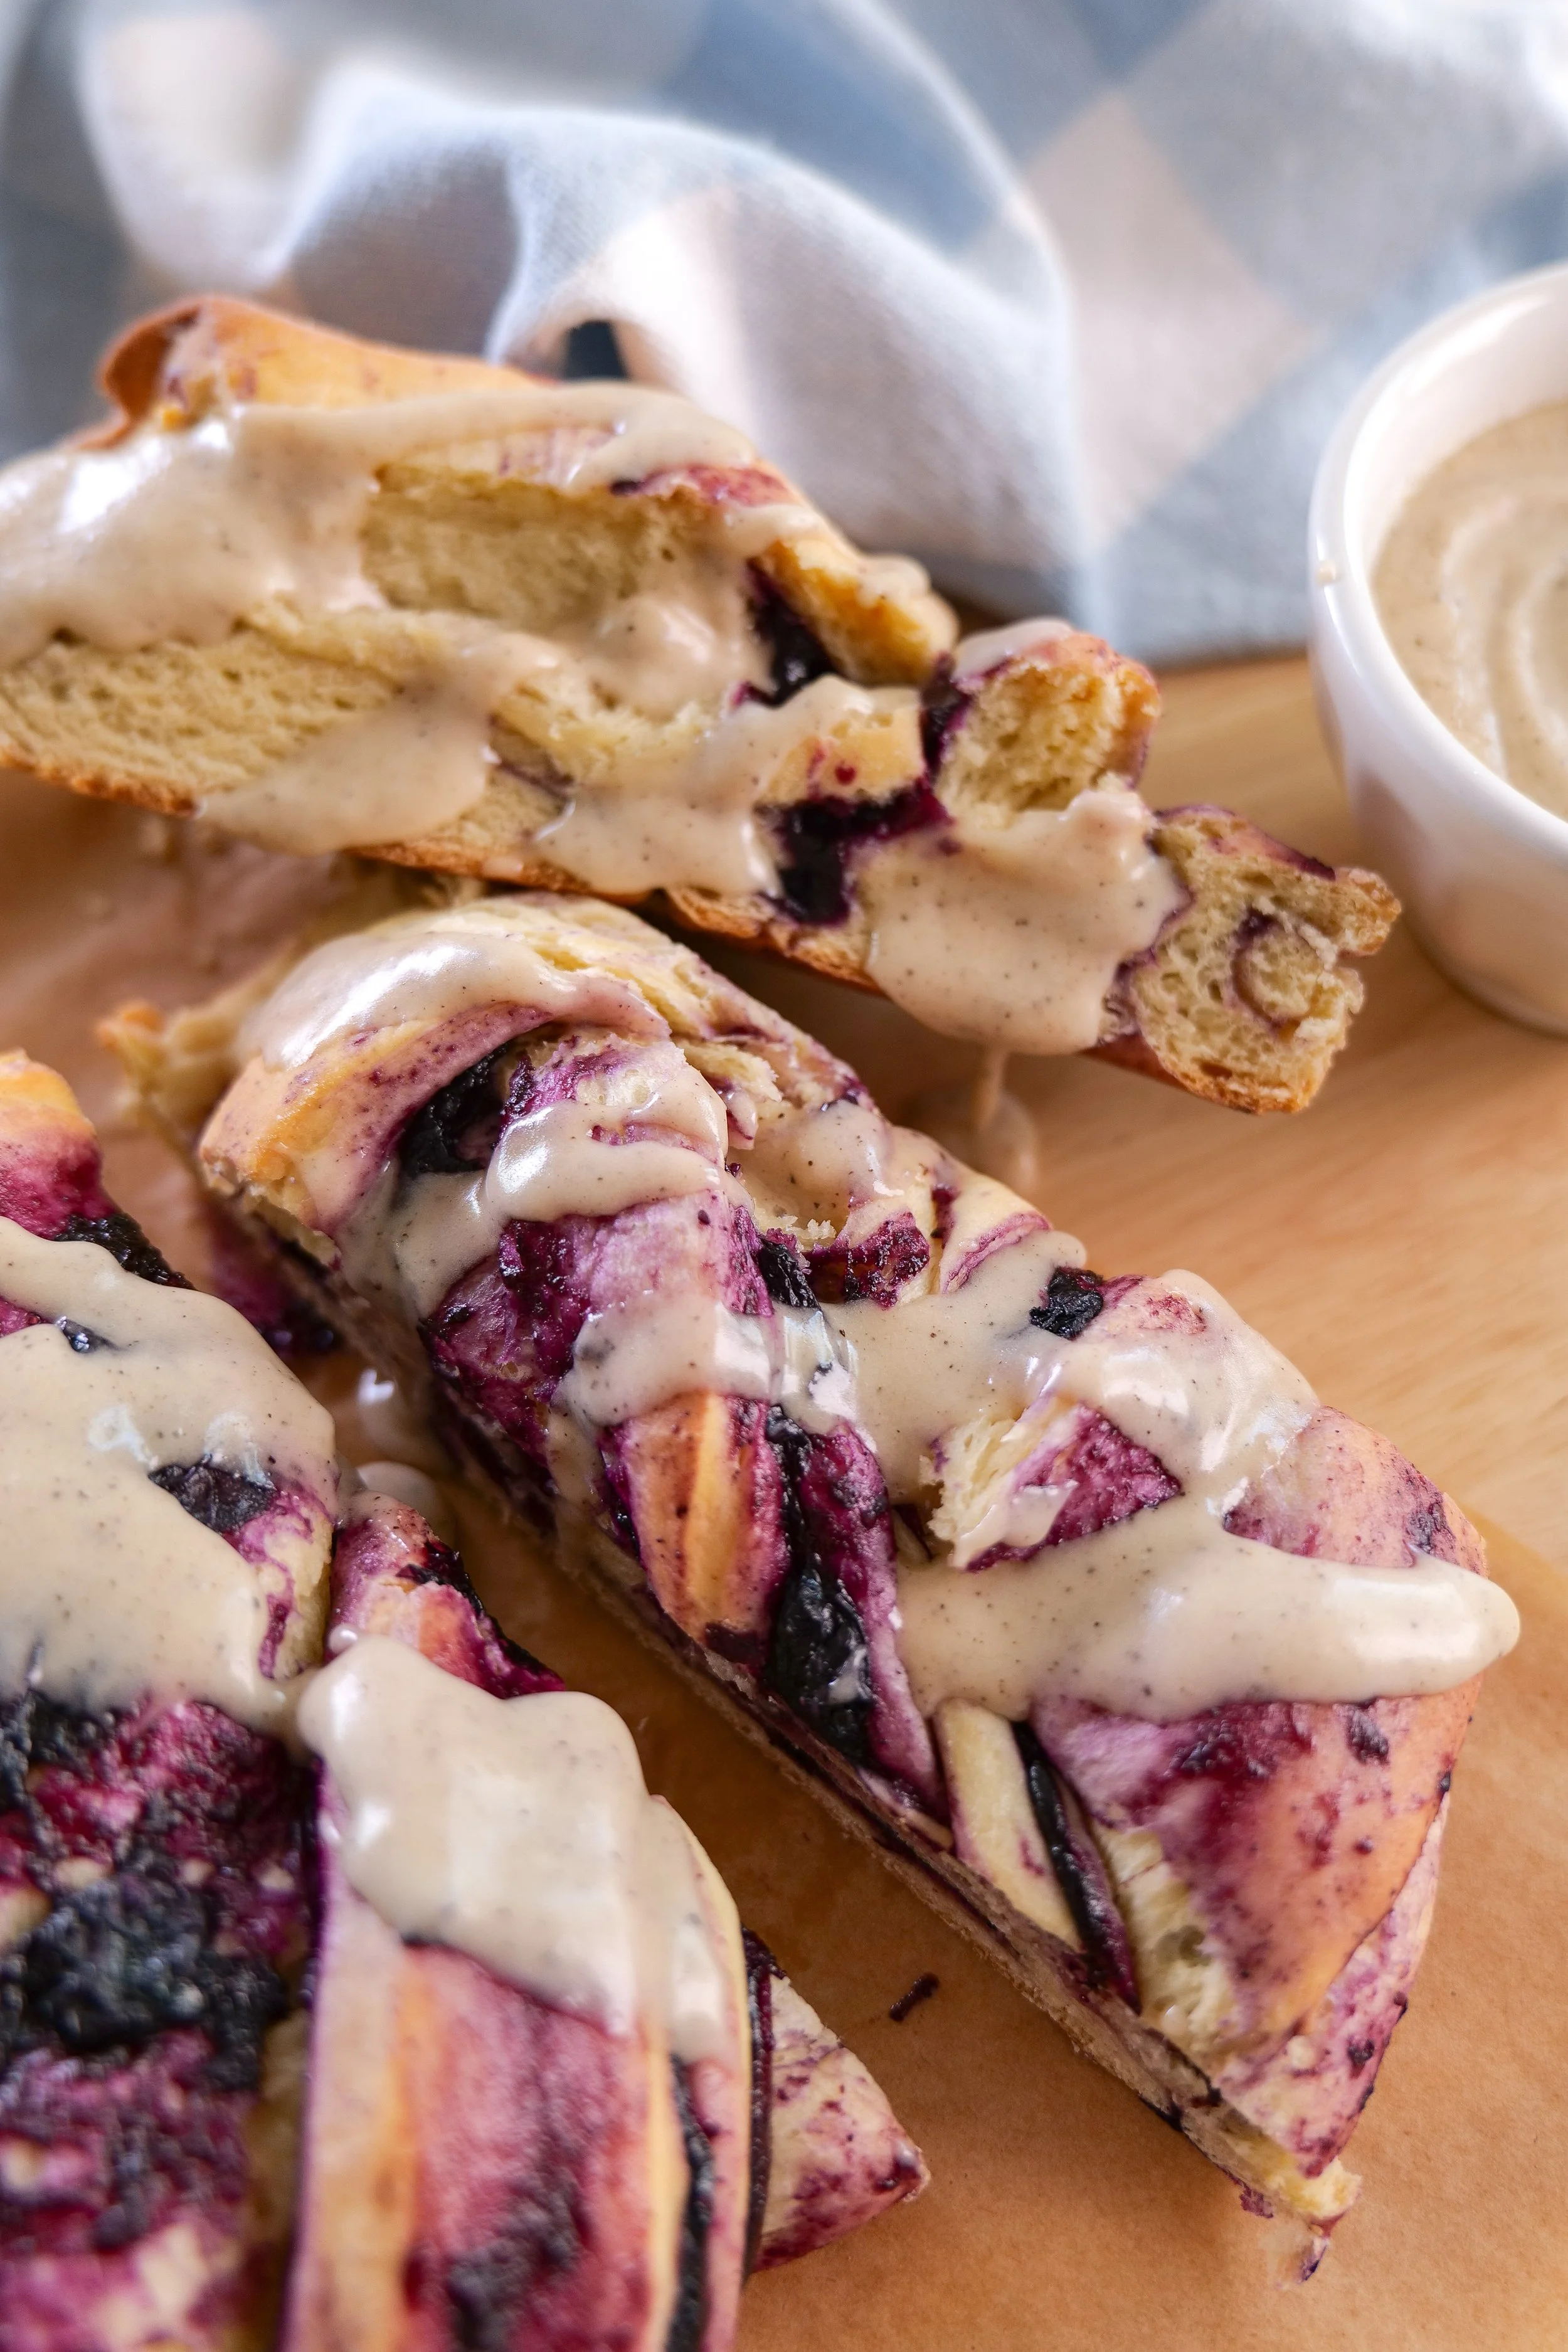
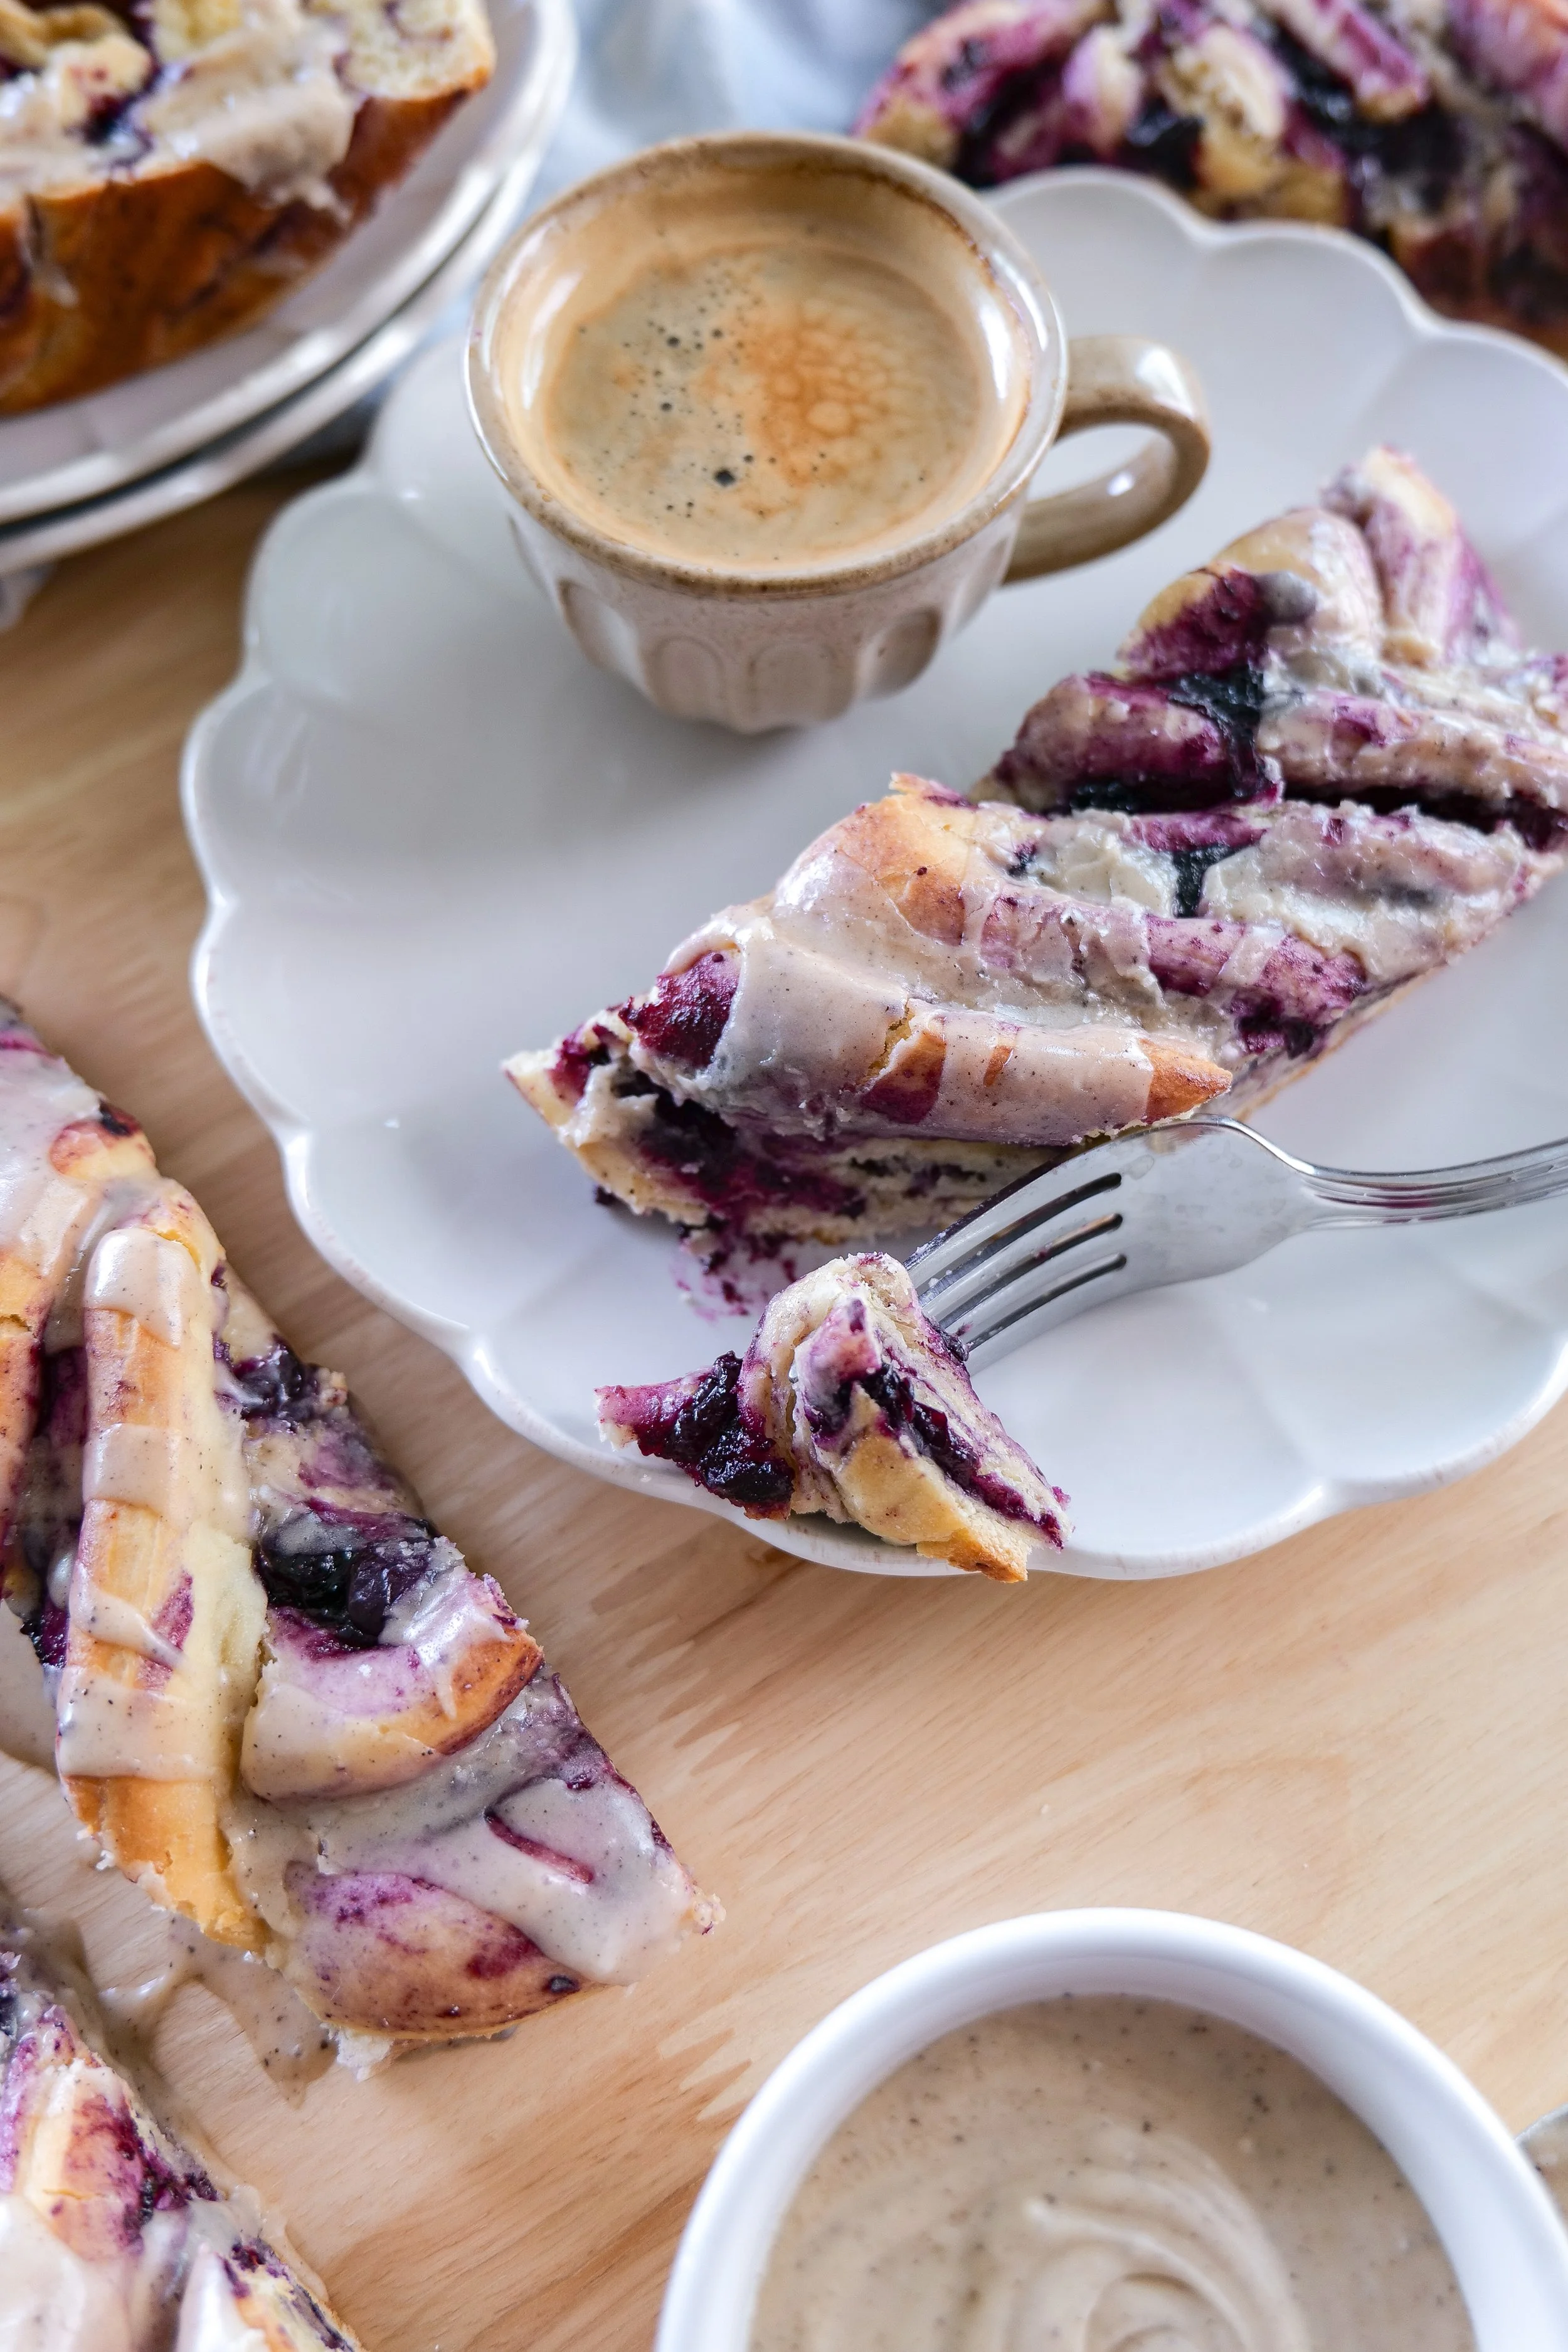
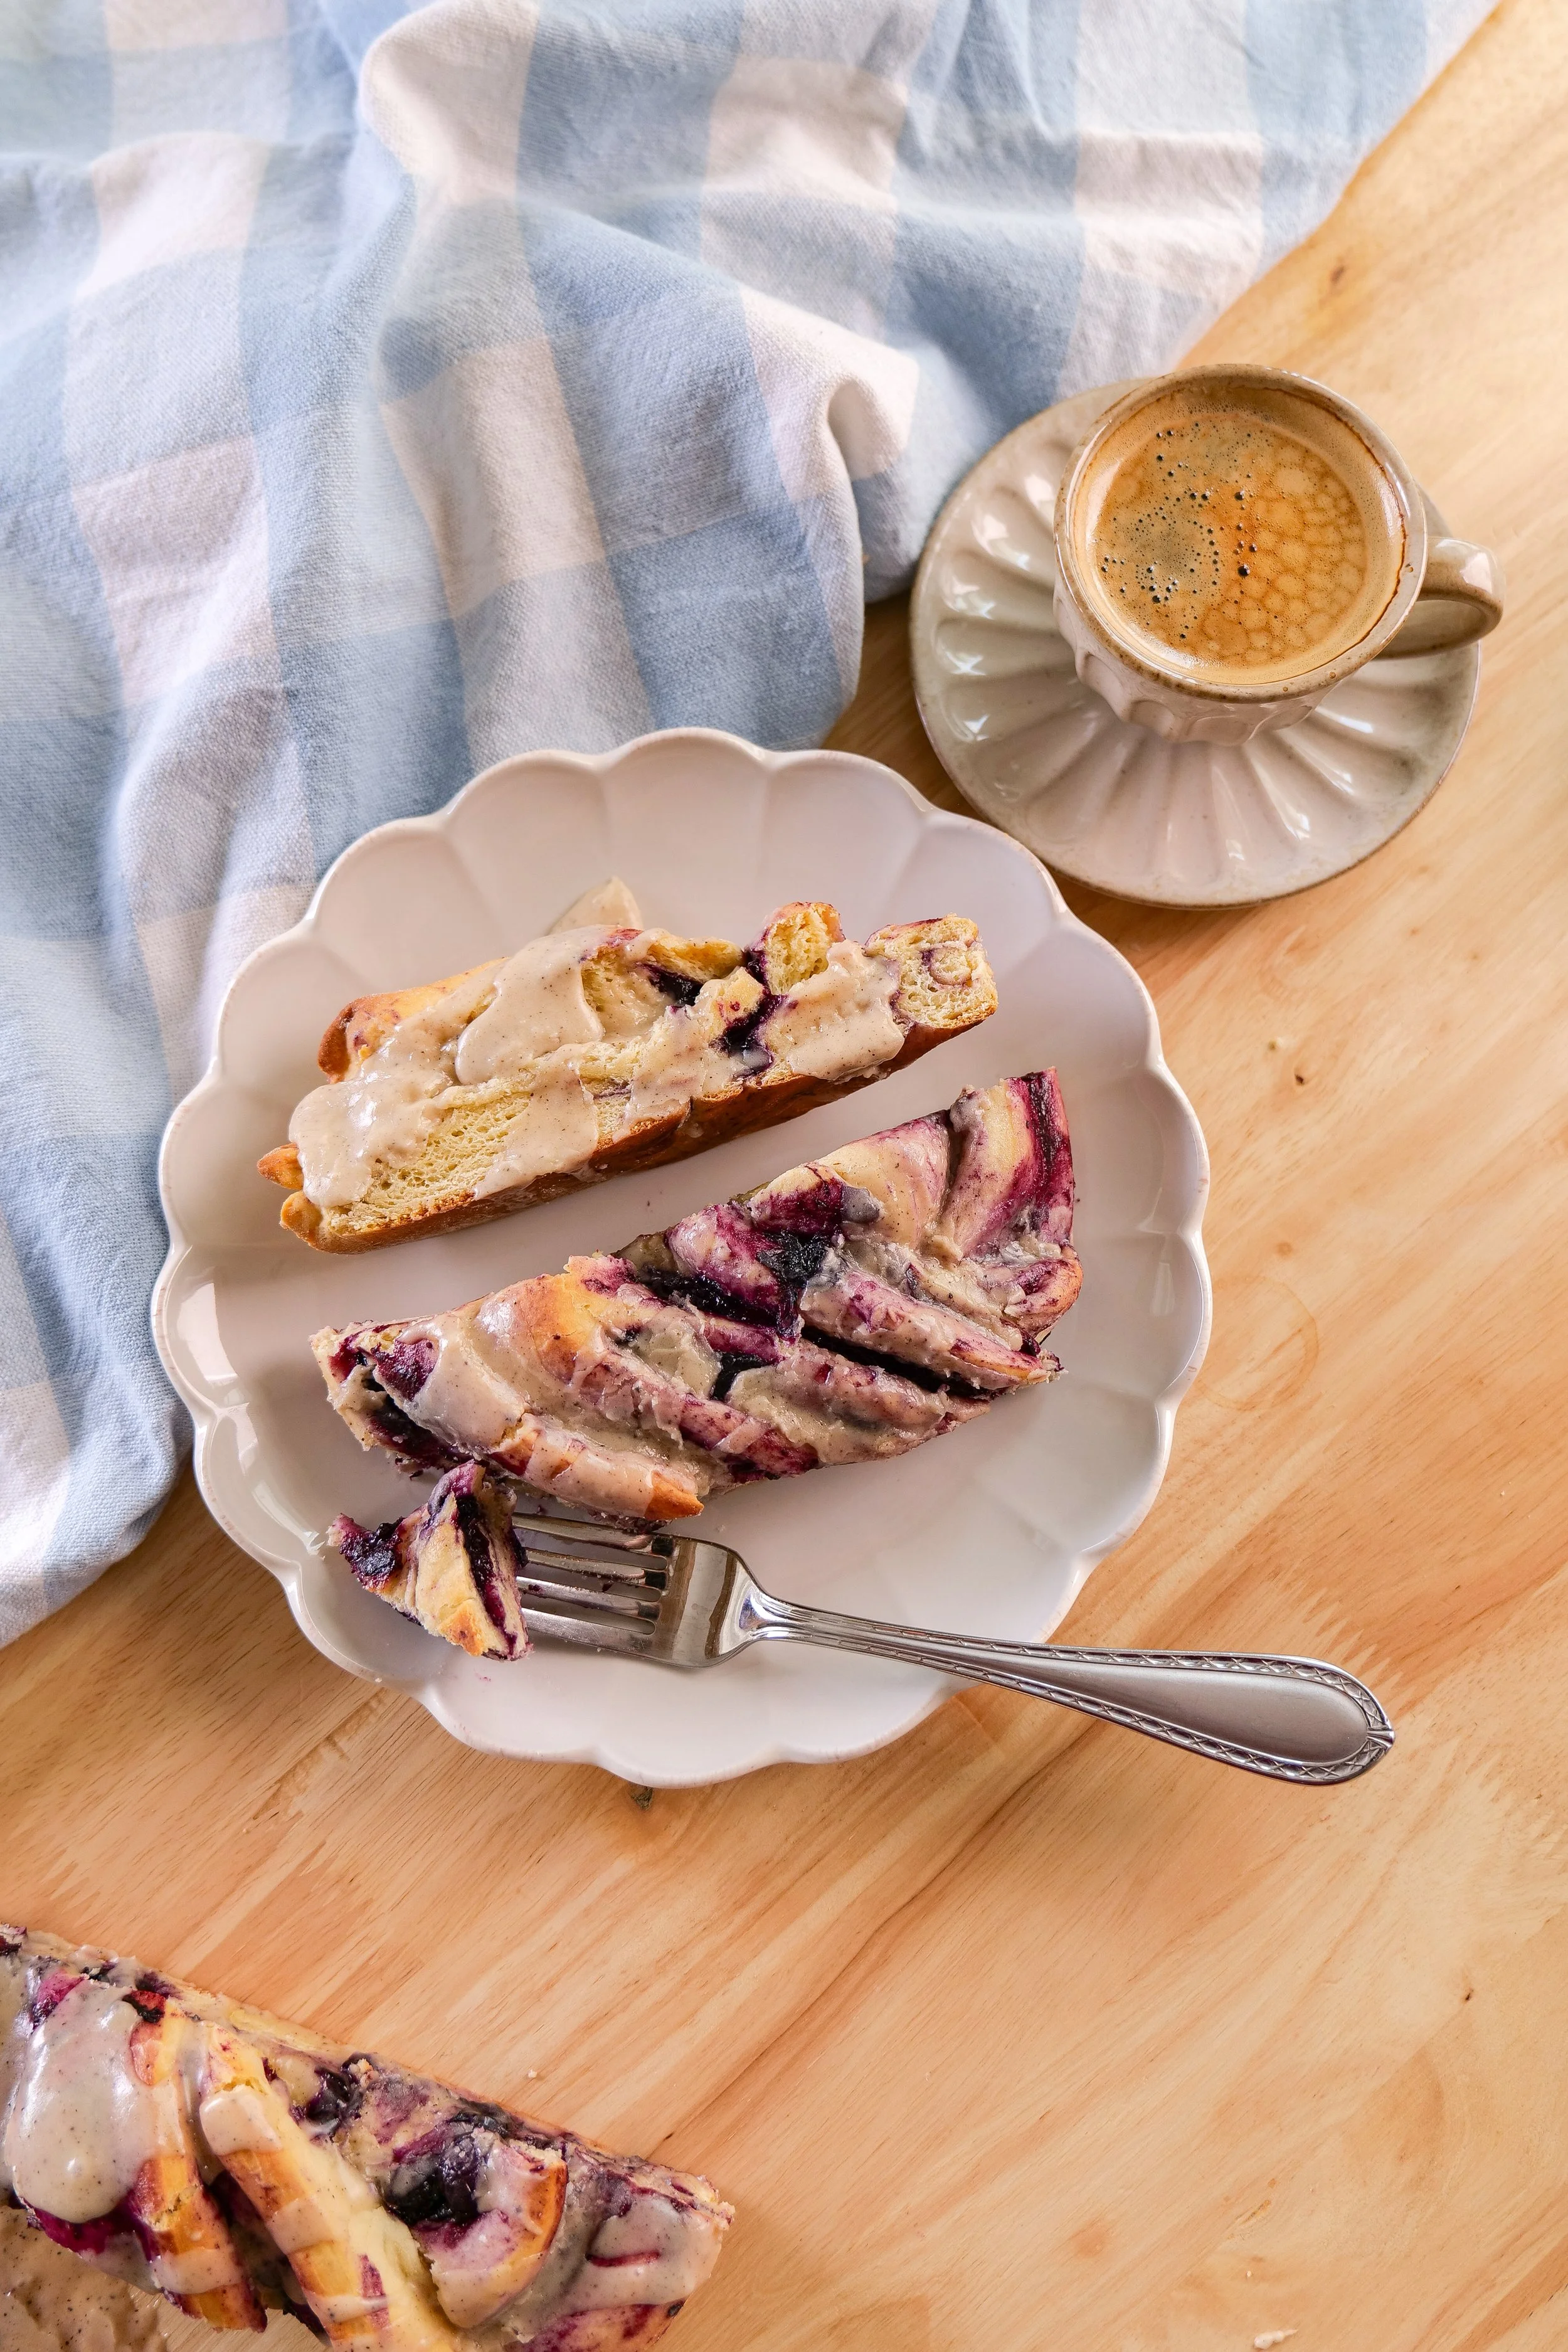
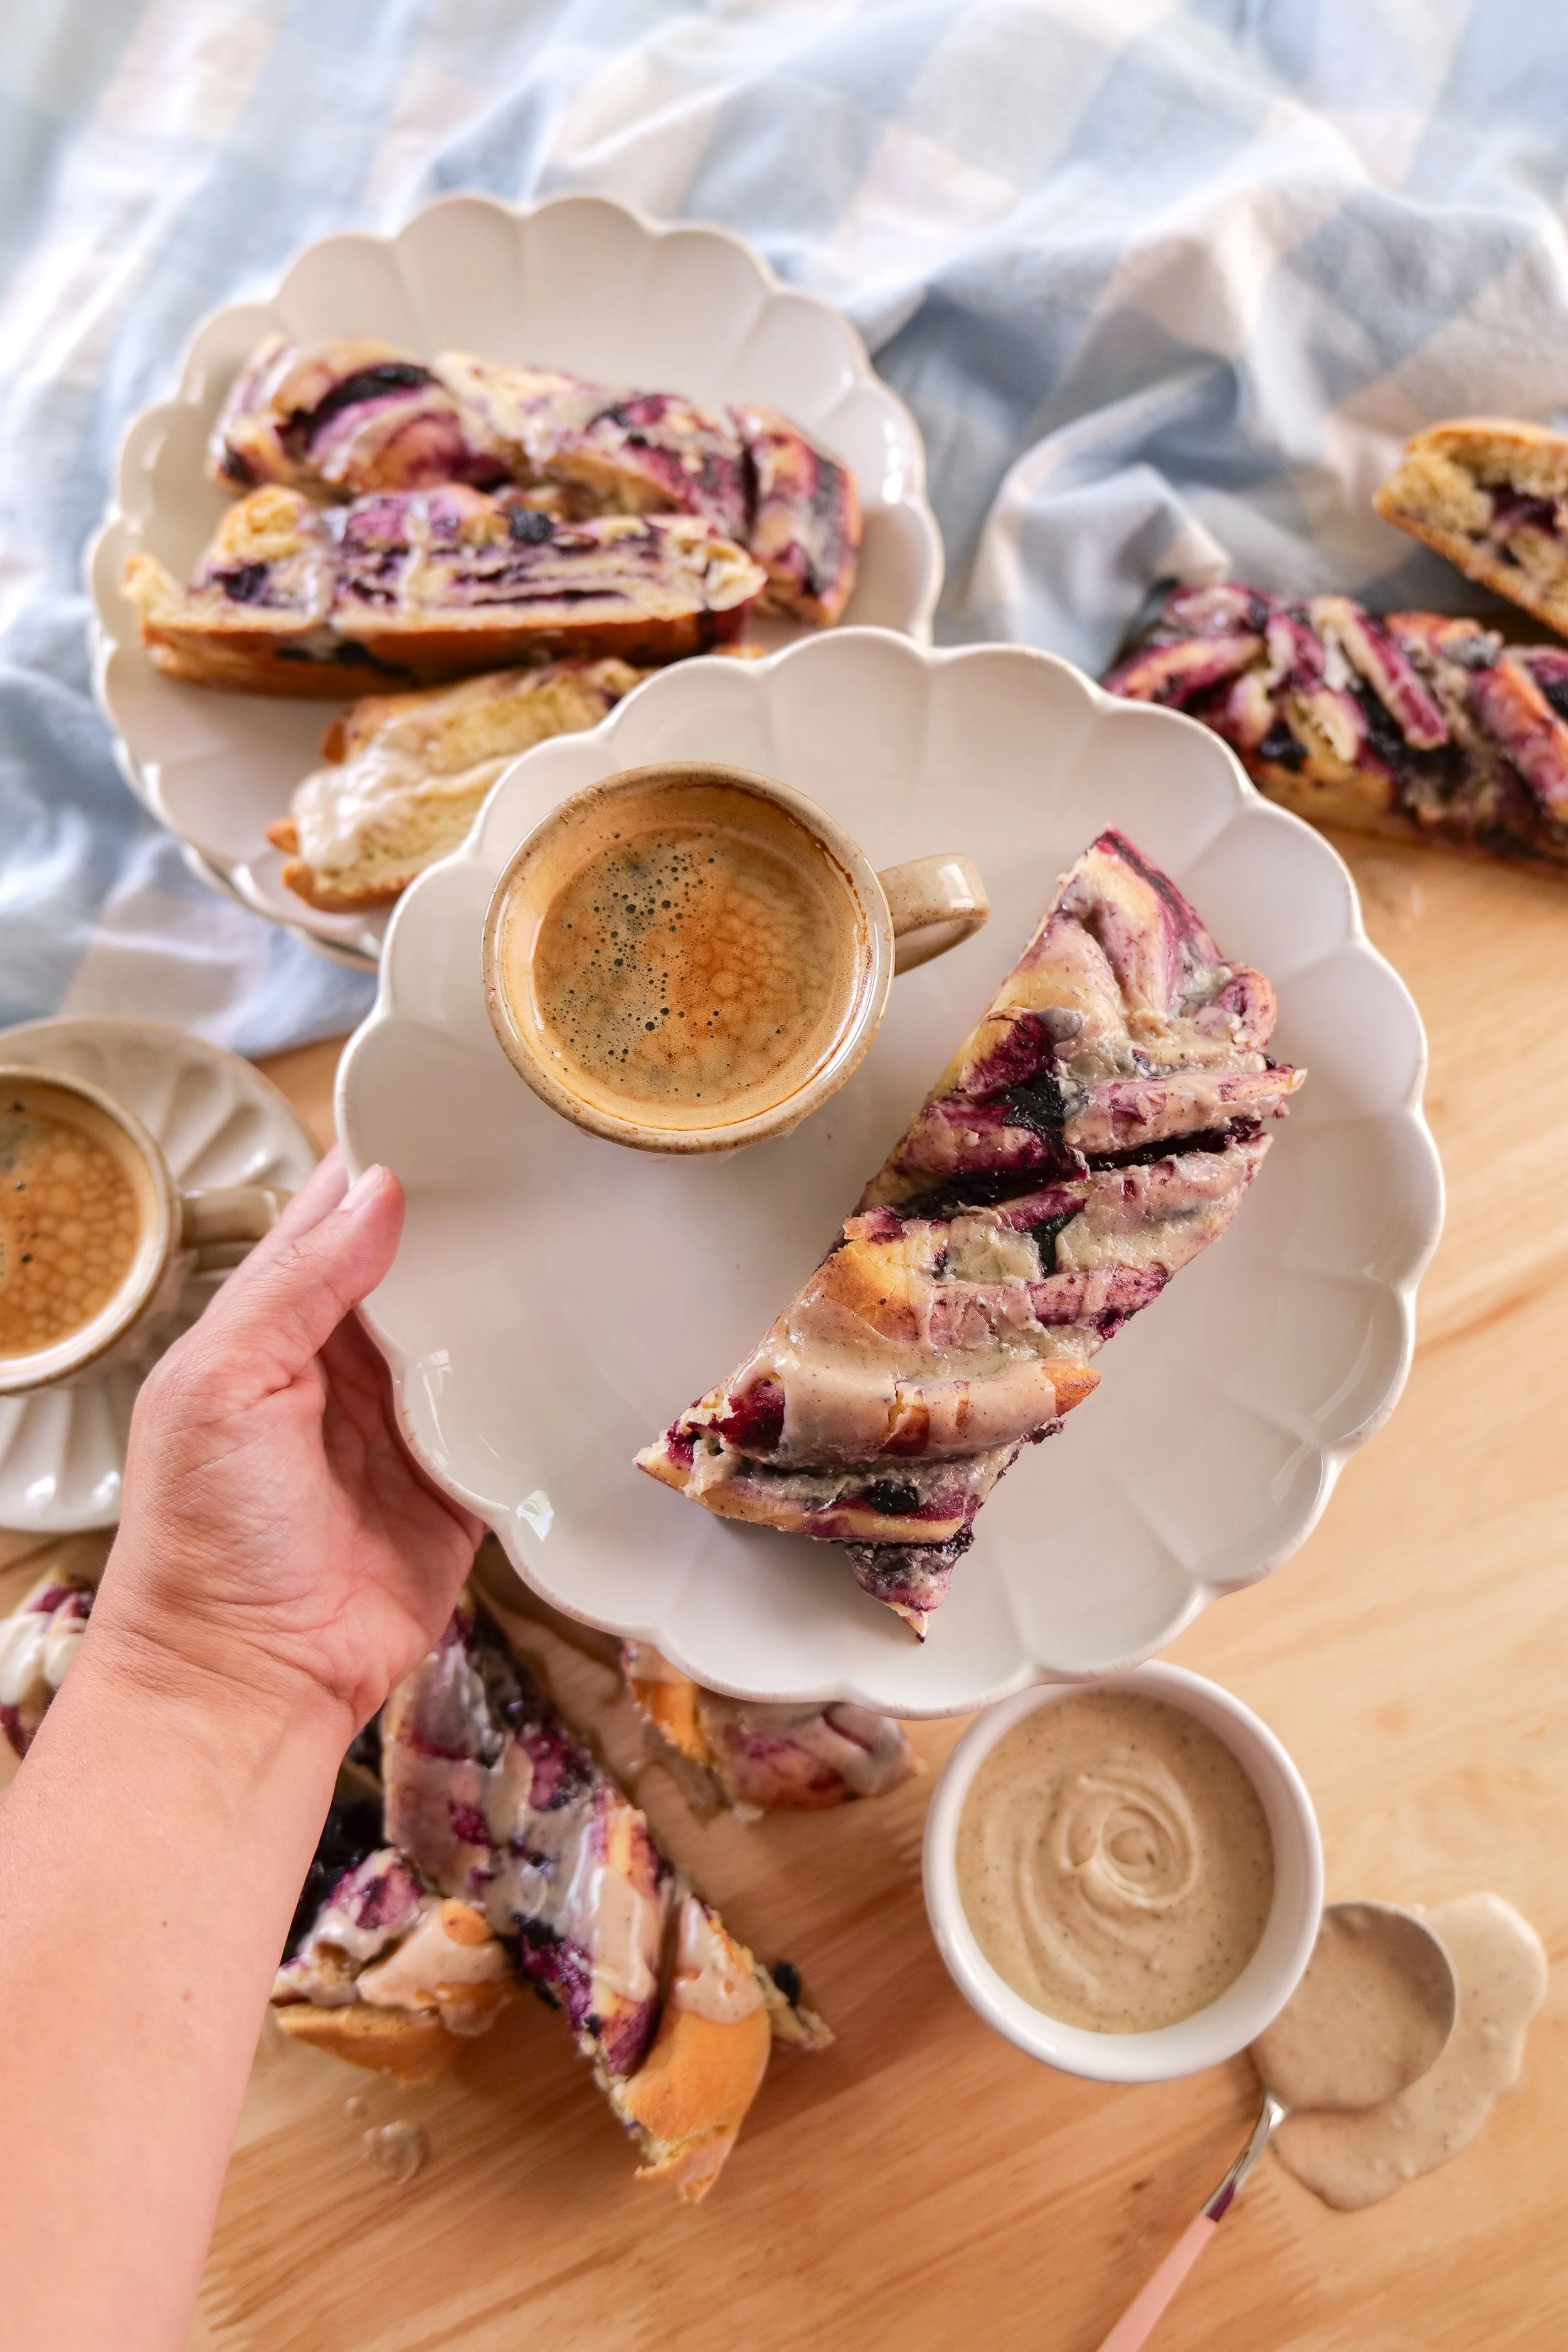
For more seasonal inspiration, you may also enjoy my Blueberry Peach Streusel Bread, Blueberry Pie Overnight Oats, Peach Cobbler Overnight Oats, and Iced Cherry Cobbler Latte.

Frequently Asked Questions

Can I make a watermelon cake the night before?

You can trim the watermelon and prepare the fruit the night before, but I recommend stacking and decorating it on the day you plan to serve it.

How do I keep the watermelon tiers from sliding?

Dry both tiers thoroughly and keep them chilled. Long wooden skewers may be inserted through the center for additional support, but they must be removed before slicing.

Do I need to frost a watermelon cake?

No. This version is intentionally left unfrosted. Whipped cream is served on the side so guests can add it to individual portions.

Can I use other fruit?

Yes. Blackberries, kiwi, peaches, pineapple, mango, and cherries can all be used. Choose fruit that is firm enough to hold its shape.

How long can watermelon cake sit outside?

On a warm day, keep it outdoors only while serving. Return any leftovers to the refrigerator as soon as possible.

Can I make this as a smash cake?

A small watermelon tier can be used as a fresh-fruit celebration cake, but all toothpicks and skewers must be removed first. Fruit should be prepared appropriately for the child’s age and eating abilities.

Can I transport a watermelon cake?

It is safest to transport the trimmed tiers and decorative fruit separately, then assemble the cake at your destination. A completed two-tier watermelon cake is heavy and can shift during transportation.

How do I slice a watermelon cake?

First remove all decorative toothpicks and support skewers. Lift off the top tier and slice each tier separately into wedges or smaller pieces.

A Note From Amanda

I love finding small ways to make ordinary moments feel worth celebrating.

This watermelon cake was created for our daughter’s eight-month milestone and inspired by the colorful fruit outfit she wore for her monthly photos. It was a little different from the cakes I usually make for her, but that is part of what made it so memorable.

The finished cake was simple, seasonal, and filled with everything that feels like August. It reminded me that traditions do not need to look exactly the same each time to remain meaningful.

Sometimes the sweetest memories begin with two watermelons, a table covered in fruit, and another reason to gather the people you love.

Printable Watermelon Fruit Cake Recipe

Whether you are making this for a summer birthday, baby milestone, shower, backyard gathering, or family brunch, I have included the complete printable recipe below.

It includes the exact fruit I used, simple step-by-step instructions, and my best tips for building and decorating a two-tier watermelon cake.

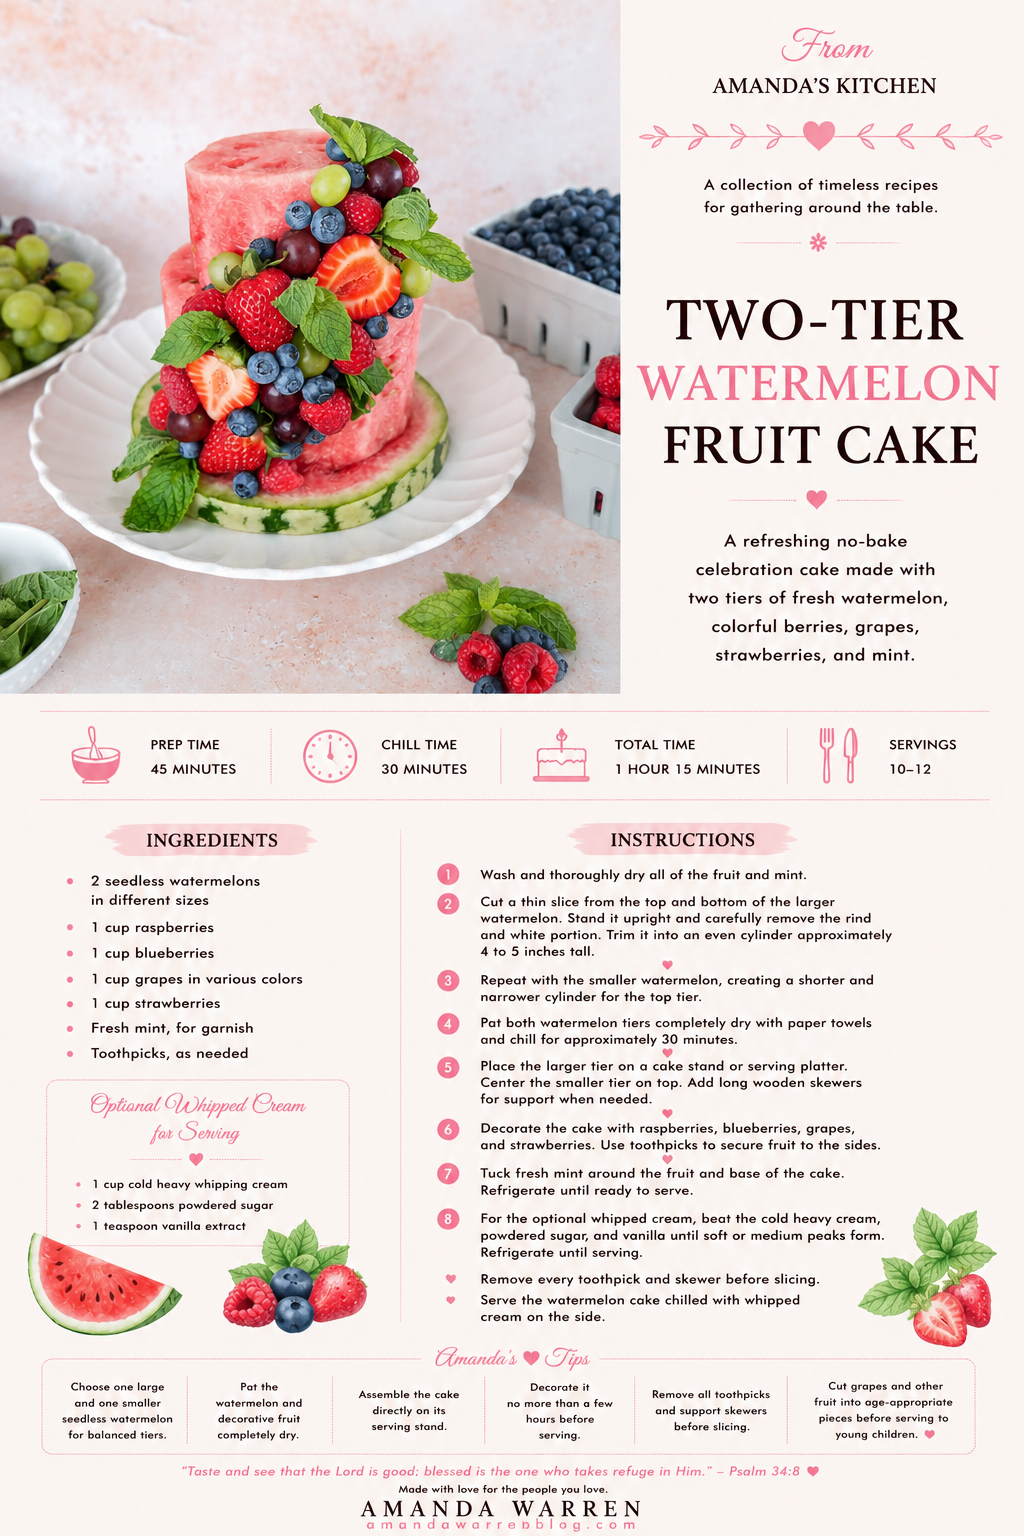
Printable recipe for an easy two-tier watermelon fruit cake made with berries, grapes, strawberries, and fresh mint.

Recipe Card Copy

Two-Tier Watermelon Fruit Cake

A refreshing no-bake celebration cake made with two tiers of fresh watermelon, colorful berries, grapes, strawberries, and mint.

Prep Time: 45 minutes
Chill Time: 30 minutes
Total Time: 1 hour 15 minutes
Servings: 10–12

Ingredients

  • 2 seedless watermelons in different sizes

  • 1 cup raspberries

  • 1 cup blueberries

  • 1 cup grapes in various colors

  • 1 cup strawberries

  • Fresh mint, for garnish

  • Toothpicks, as needed

Optional Whipped Cream for Serving

  • 1 cup cold heavy whipping cream

  • 2 tablespoons powdered sugar

  • 1 teaspoon vanilla extract

Instructions

  1. Wash and thoroughly dry all of the fruit and mint.

  2. Cut a thin slice from the top and bottom of the larger watermelon. Stand it upright and carefully remove the rind and white portion. Trim it into an even cylinder approximately 4 to 5 inches tall.

  3. Repeat with the smaller watermelon, creating a shorter and narrower cylinder for the top tier.

  4. Pat both watermelon tiers completely dry with paper towels and chill for approximately 30 minutes.

  5. Place the larger tier on a cake stand or serving platter. Center the smaller tier on top. Add long wooden skewers for support when needed.

  6. Decorate the cake with raspberries, blueberries, grapes, and strawberries. Use toothpicks to secure fruit to the sides.

  7. Tuck fresh mint around the fruit and base of the cake.

  8. Refrigerate until ready to serve.

  9. For the optional whipped cream, beat the cold heavy cream, powdered sugar, and vanilla until soft or medium peaks form. Refrigerate until serving.

  10. Remove every toothpick and skewer before slicing. Serve the watermelon cake chilled with whipped cream on the side.

Amanda’s Tips

  • Choose one large and one smaller seedless watermelon for balanced tiers.

  • Pat the watermelon and decorative fruit completely dry.

  • Assemble the cake directly on its serving stand.

  • Decorate it no more than a few hours before serving.

  • Remove all toothpicks and support skewers before slicing.

  • Cut grapes and other fruit into age-appropriate pieces before serving to young children.

Made with love for the people you love.

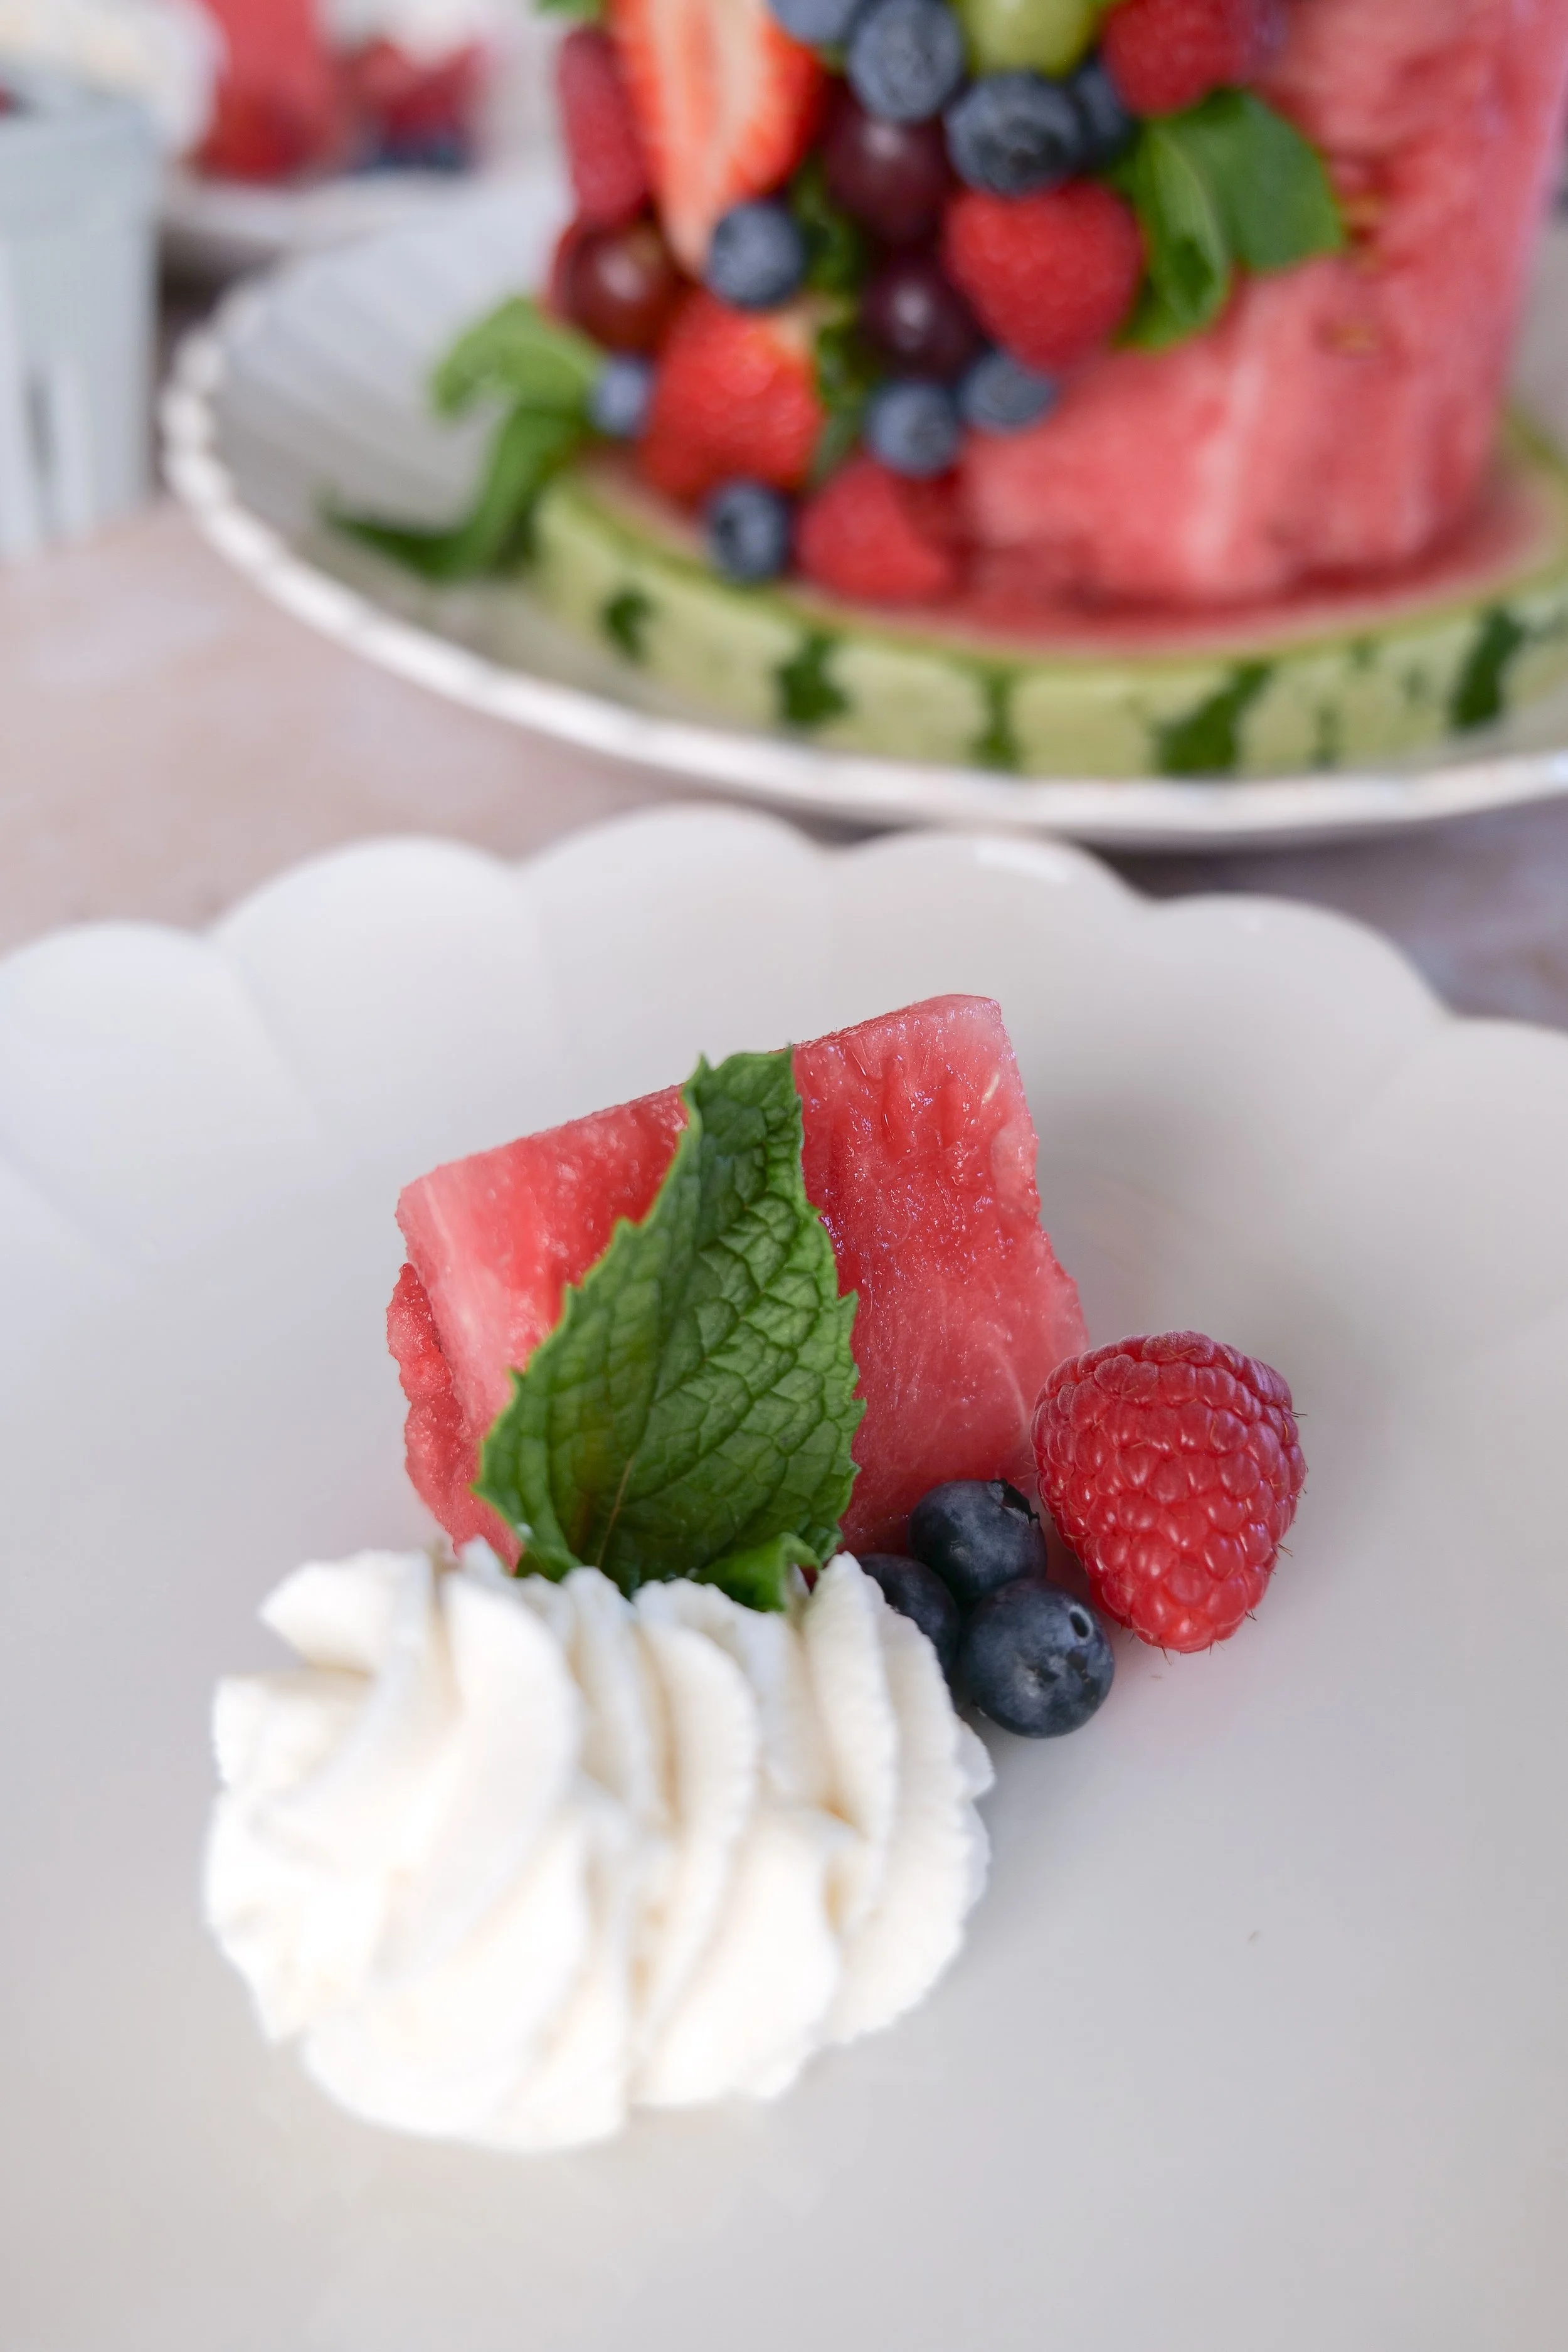
Sliced watermelon fruit cake served chilled with homemade whipped cream on the side.
A slice of two-tier watermelon fruit cake served with homemade whipped cream on the side, fresh berries, grapes, strawberries, and mint for a refreshing summer dessert.

Blueberry Peach Bread with Cinnamon Streusel (Easy Summer Loaf)

The Best Blueberry Peach Streusel Bread

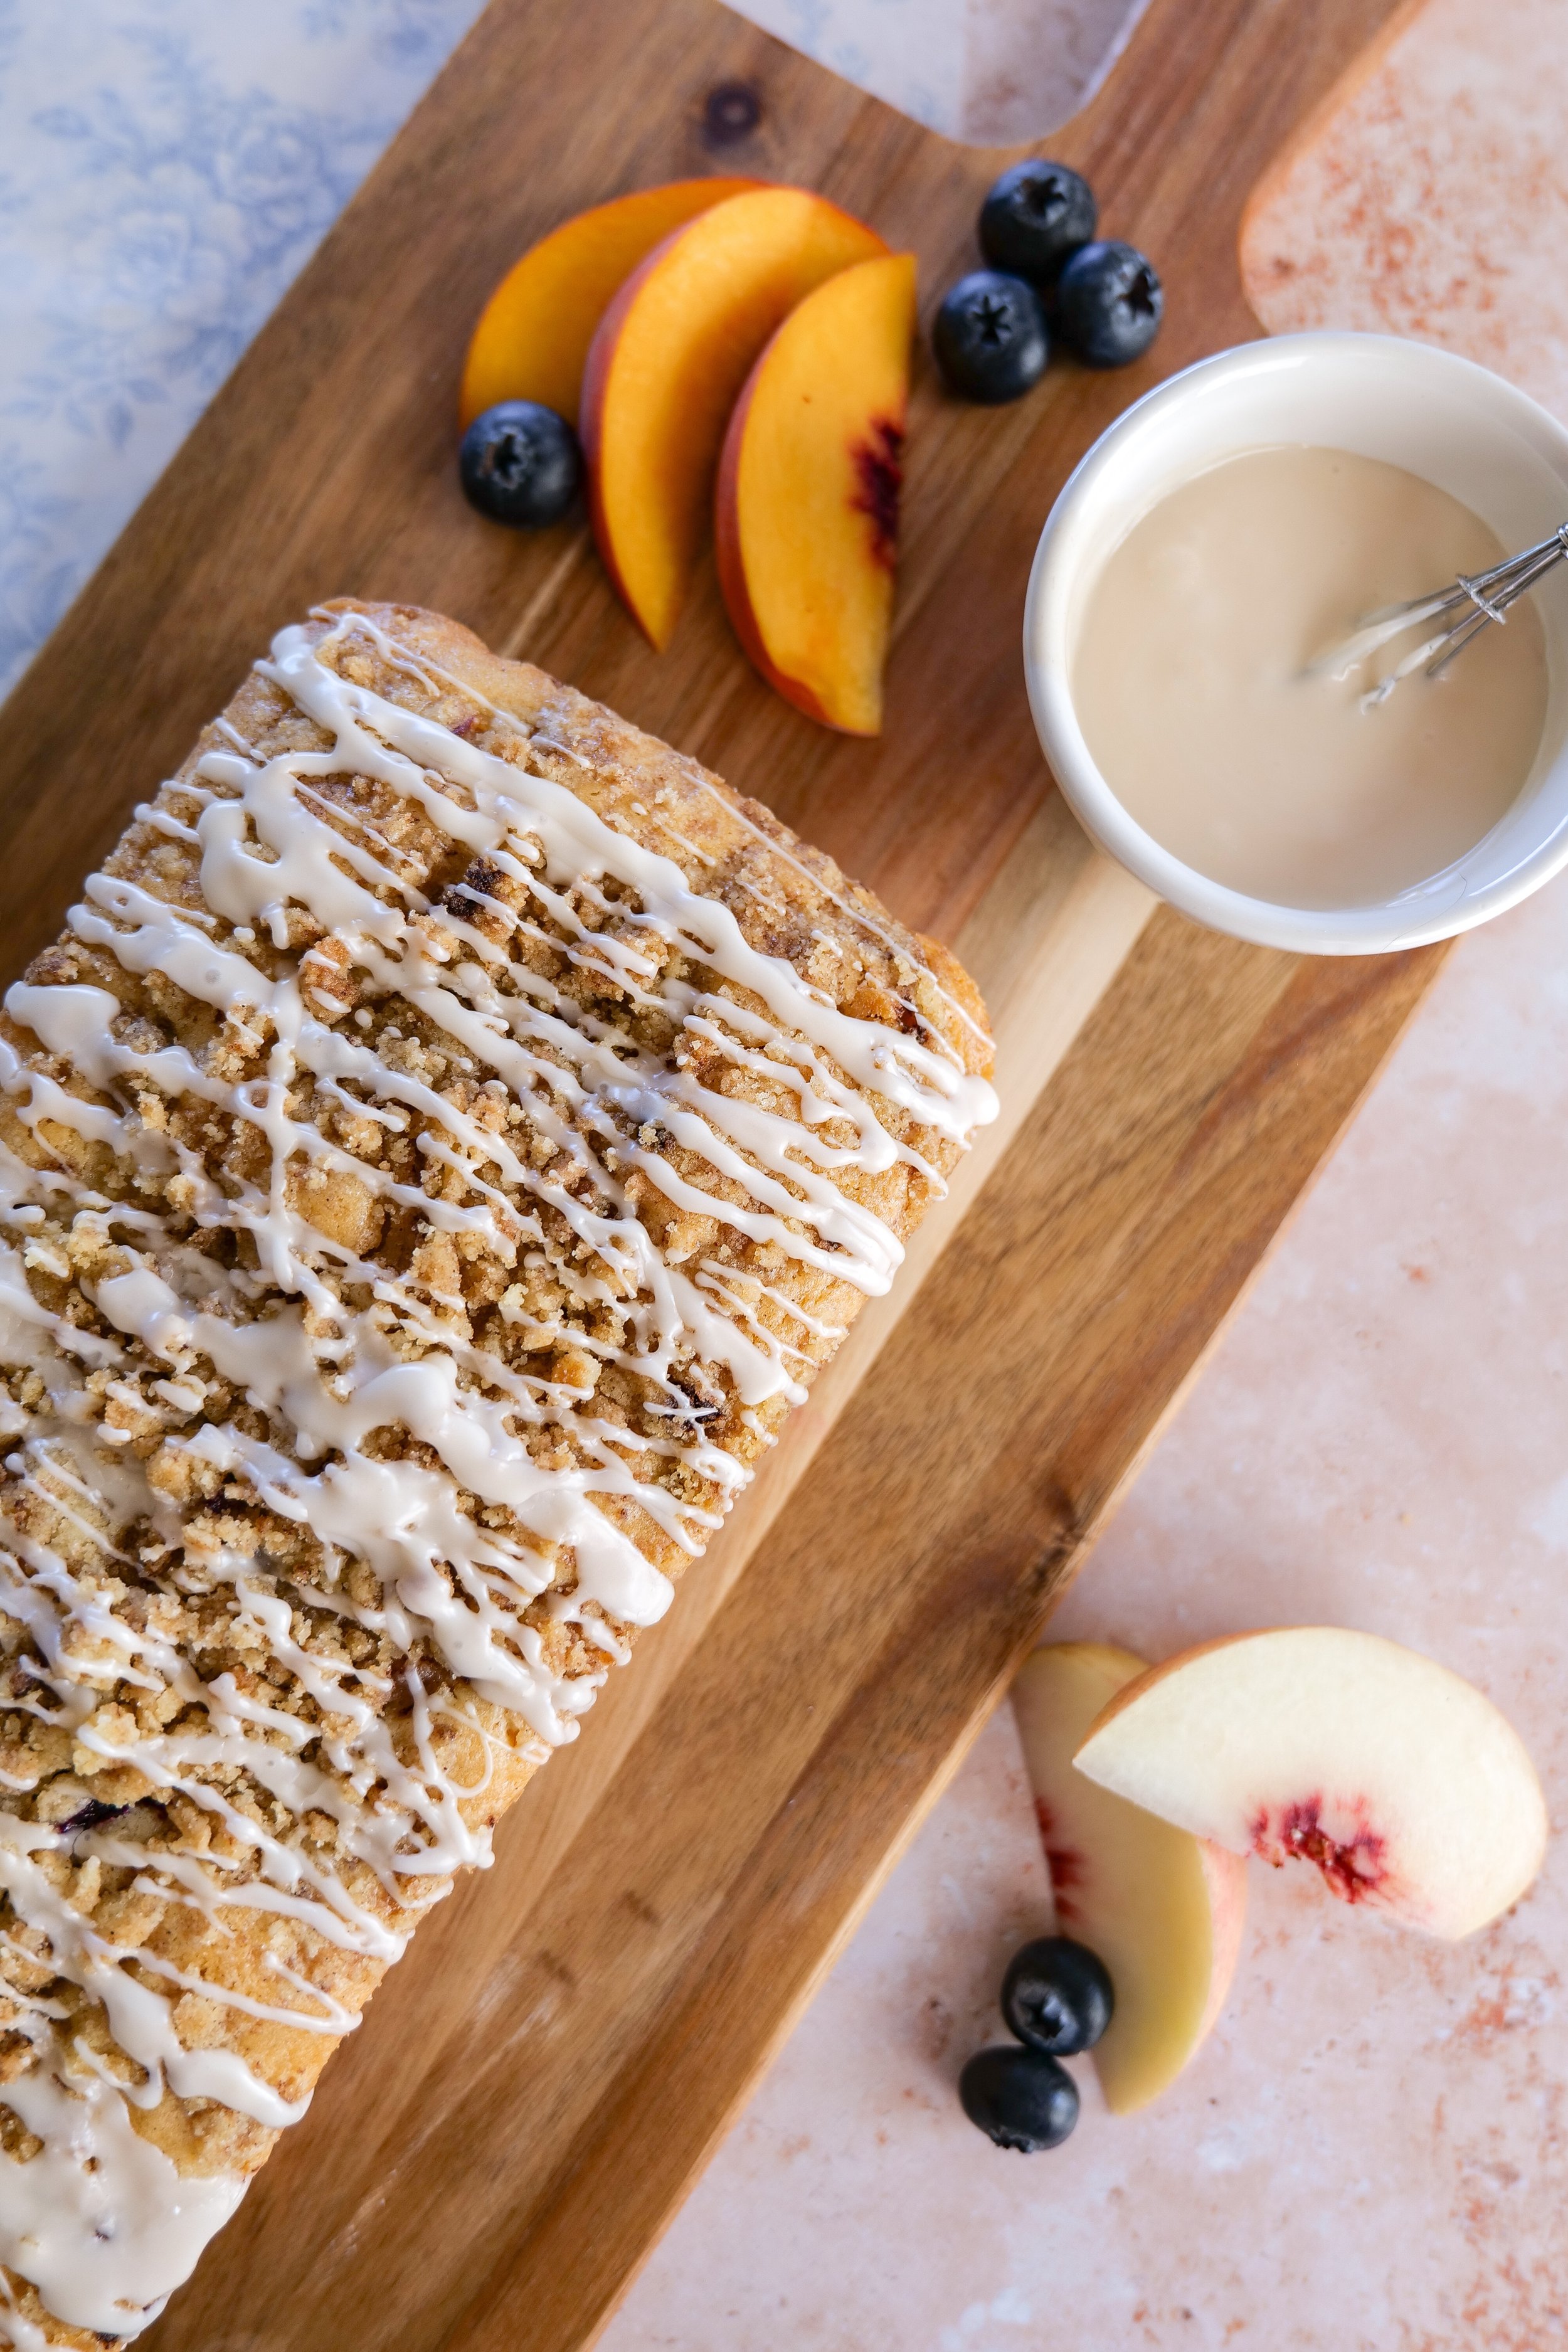
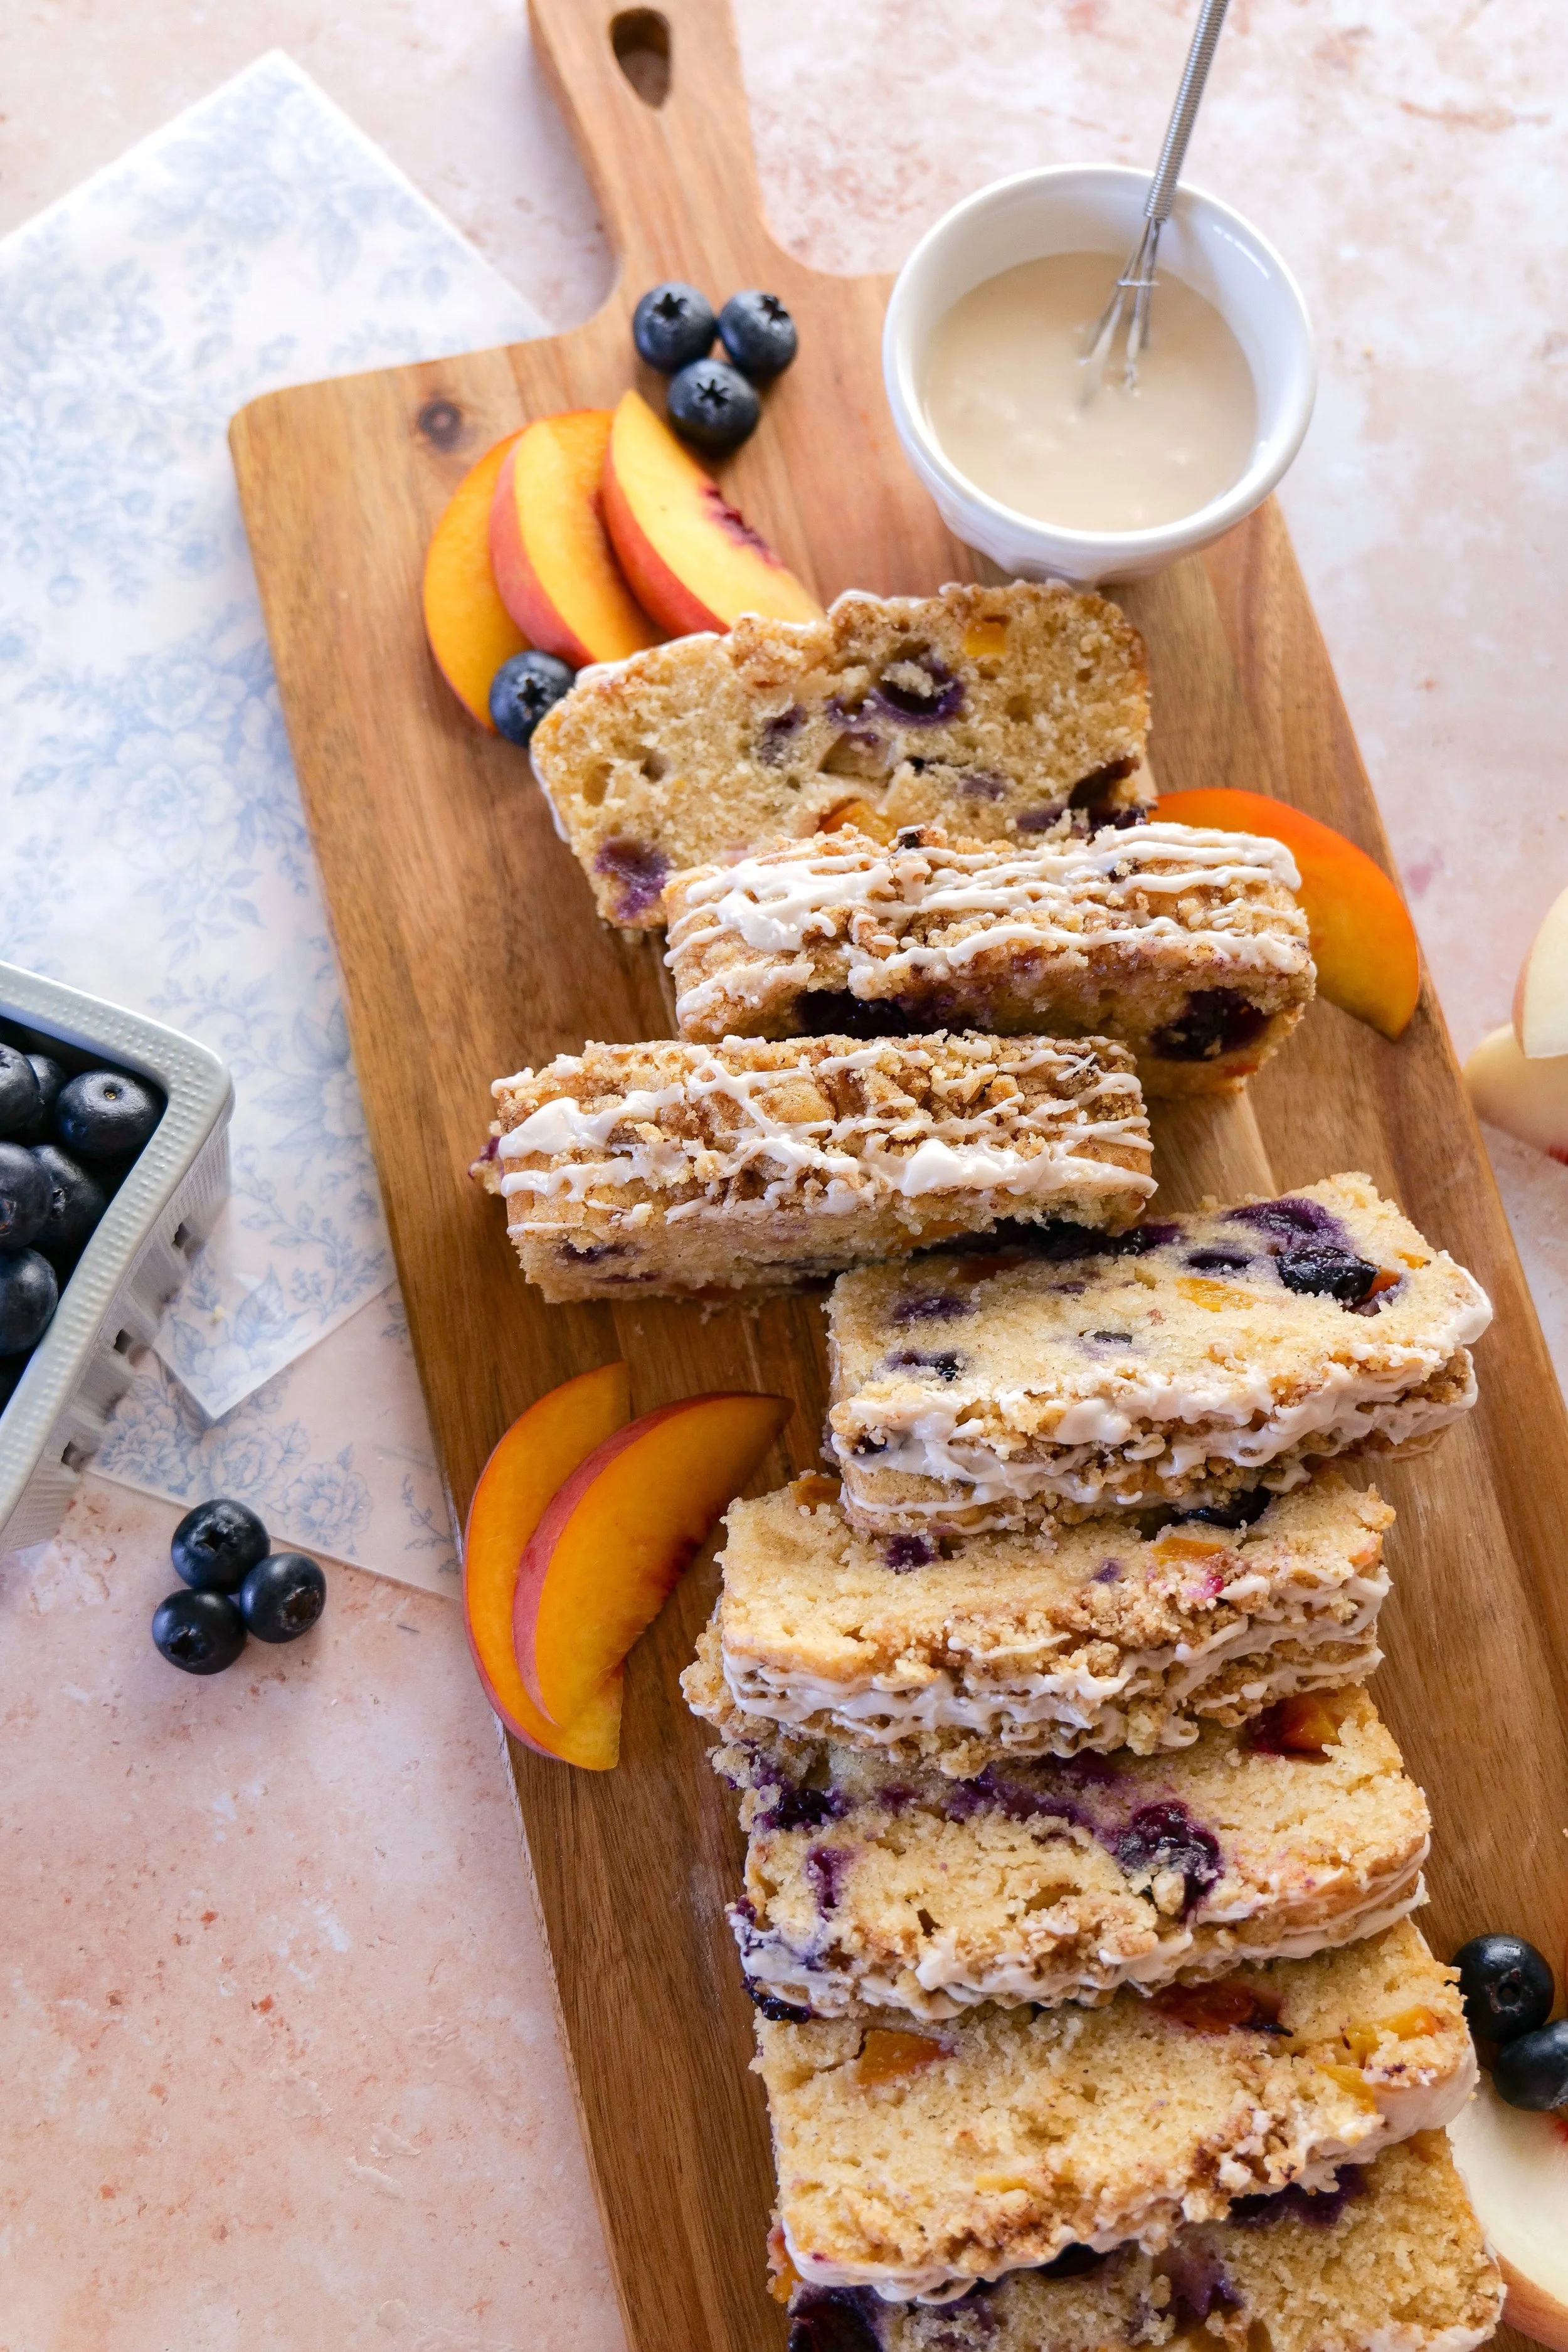
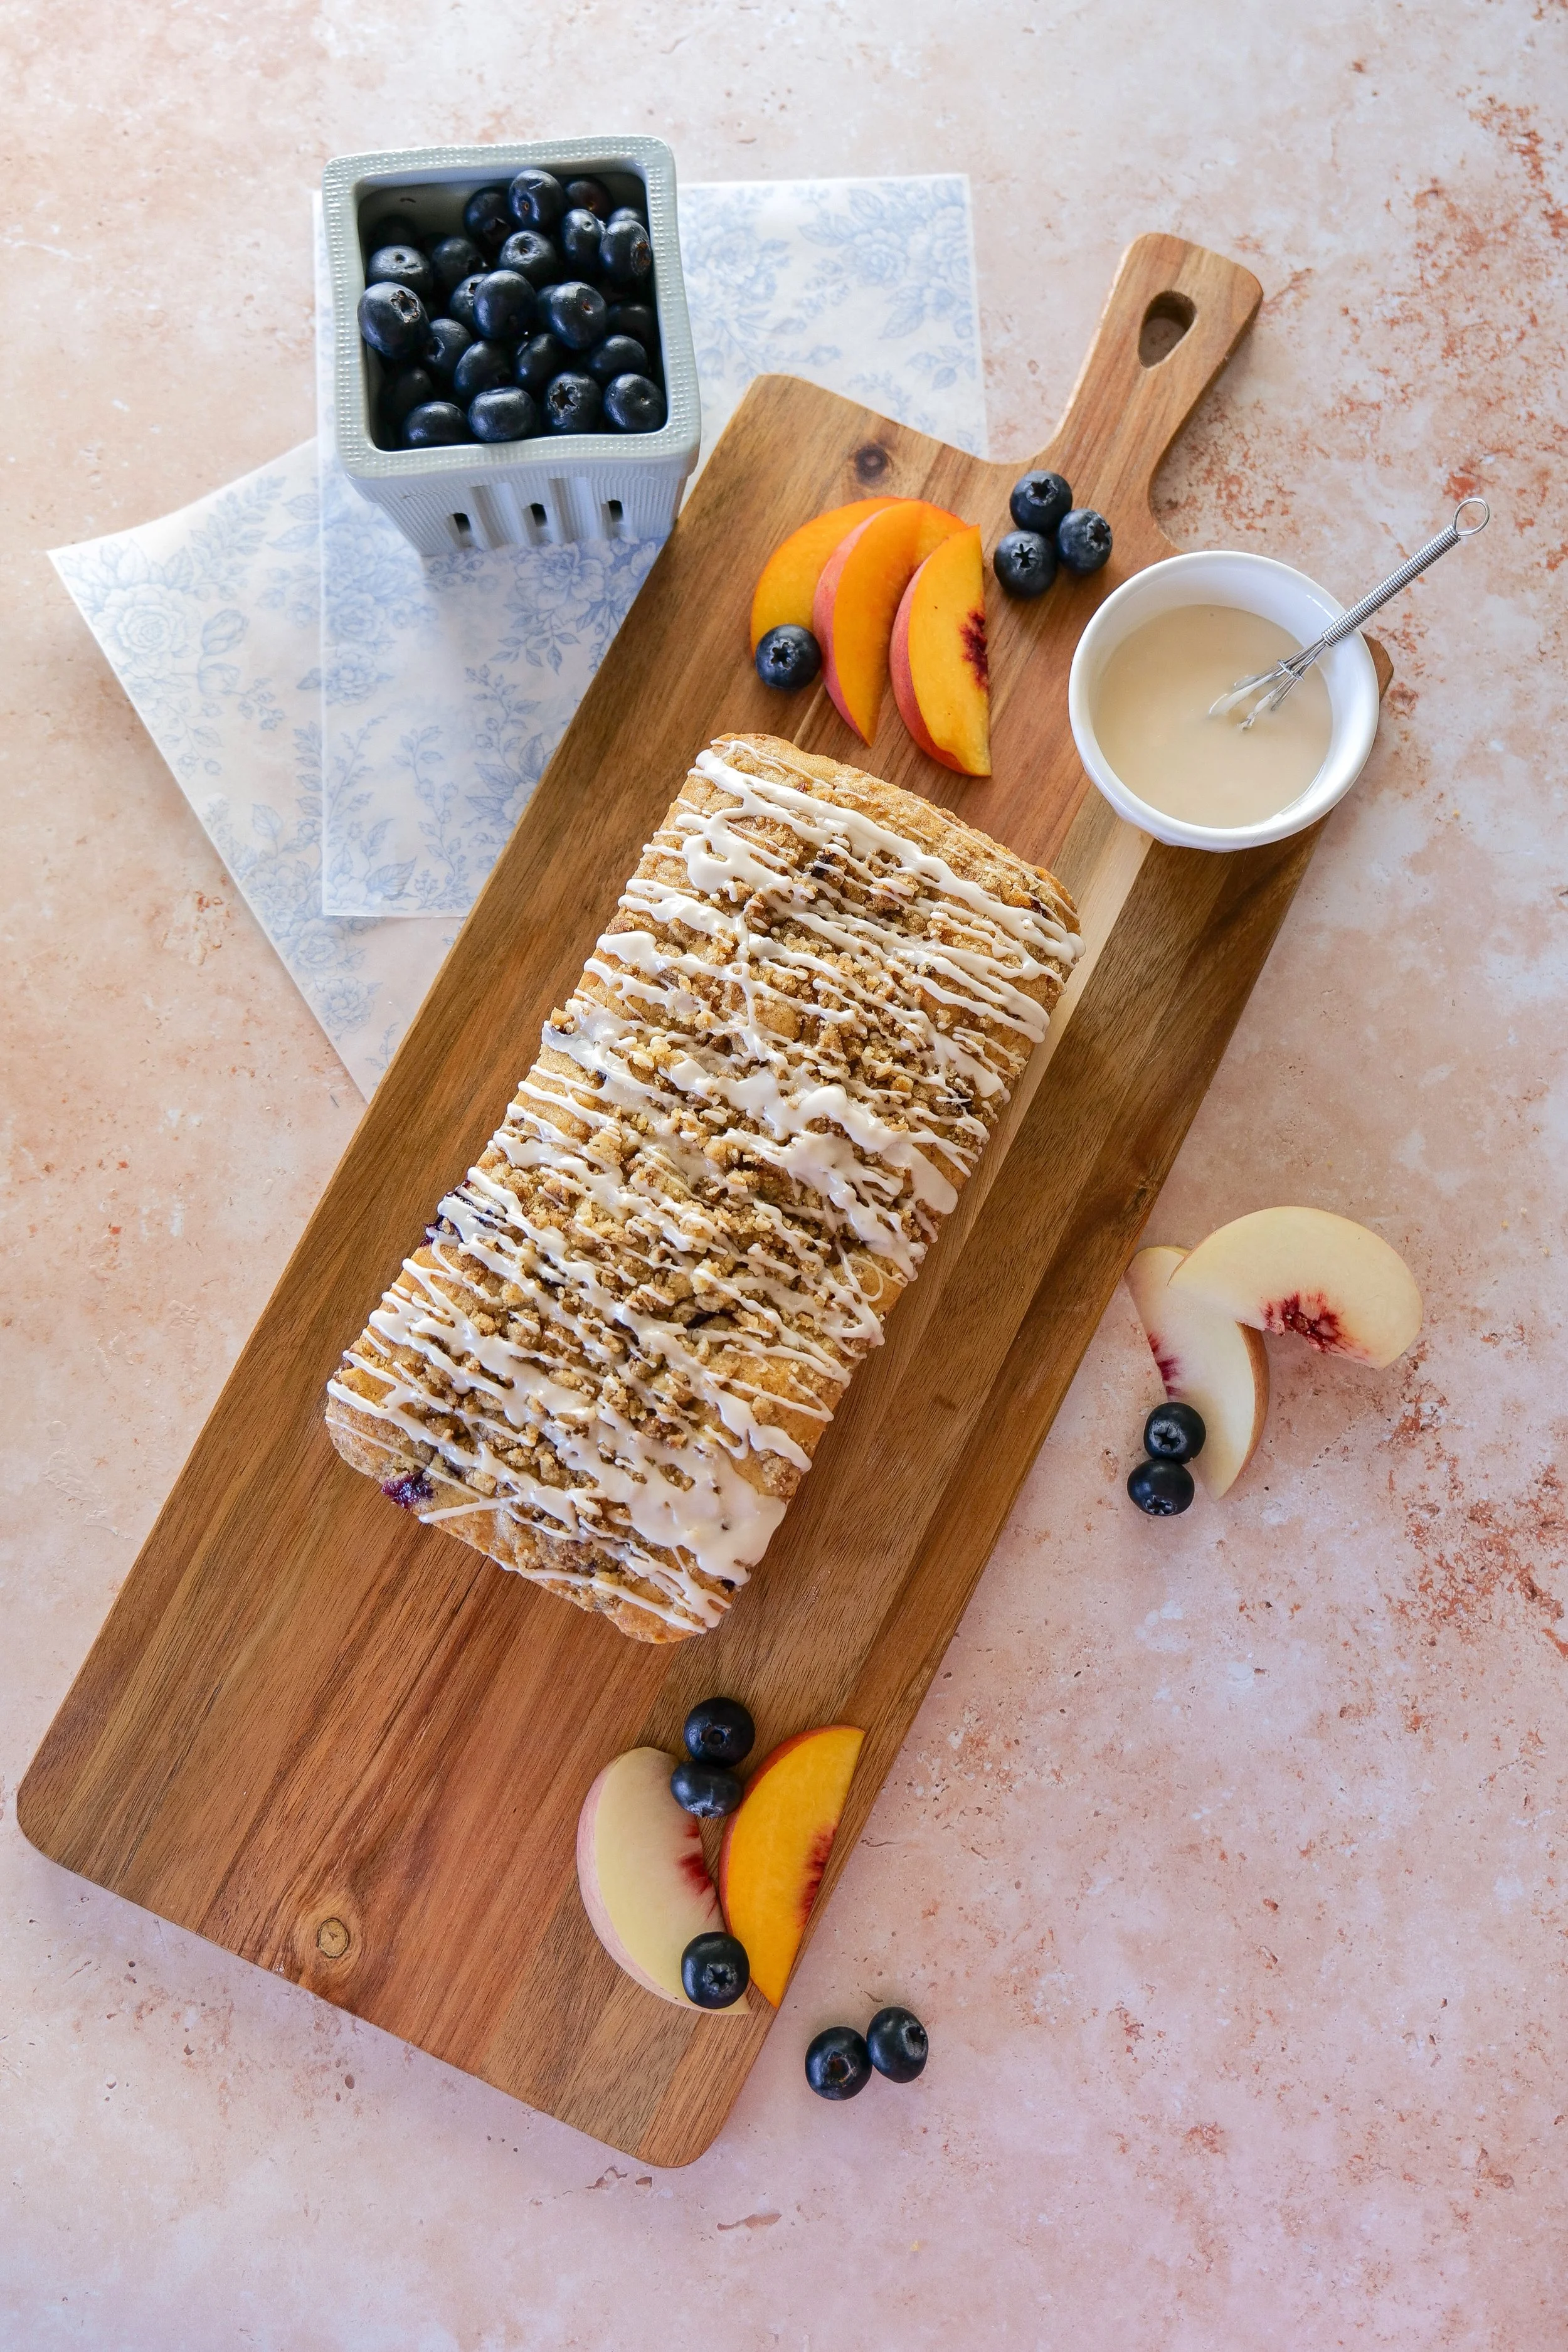
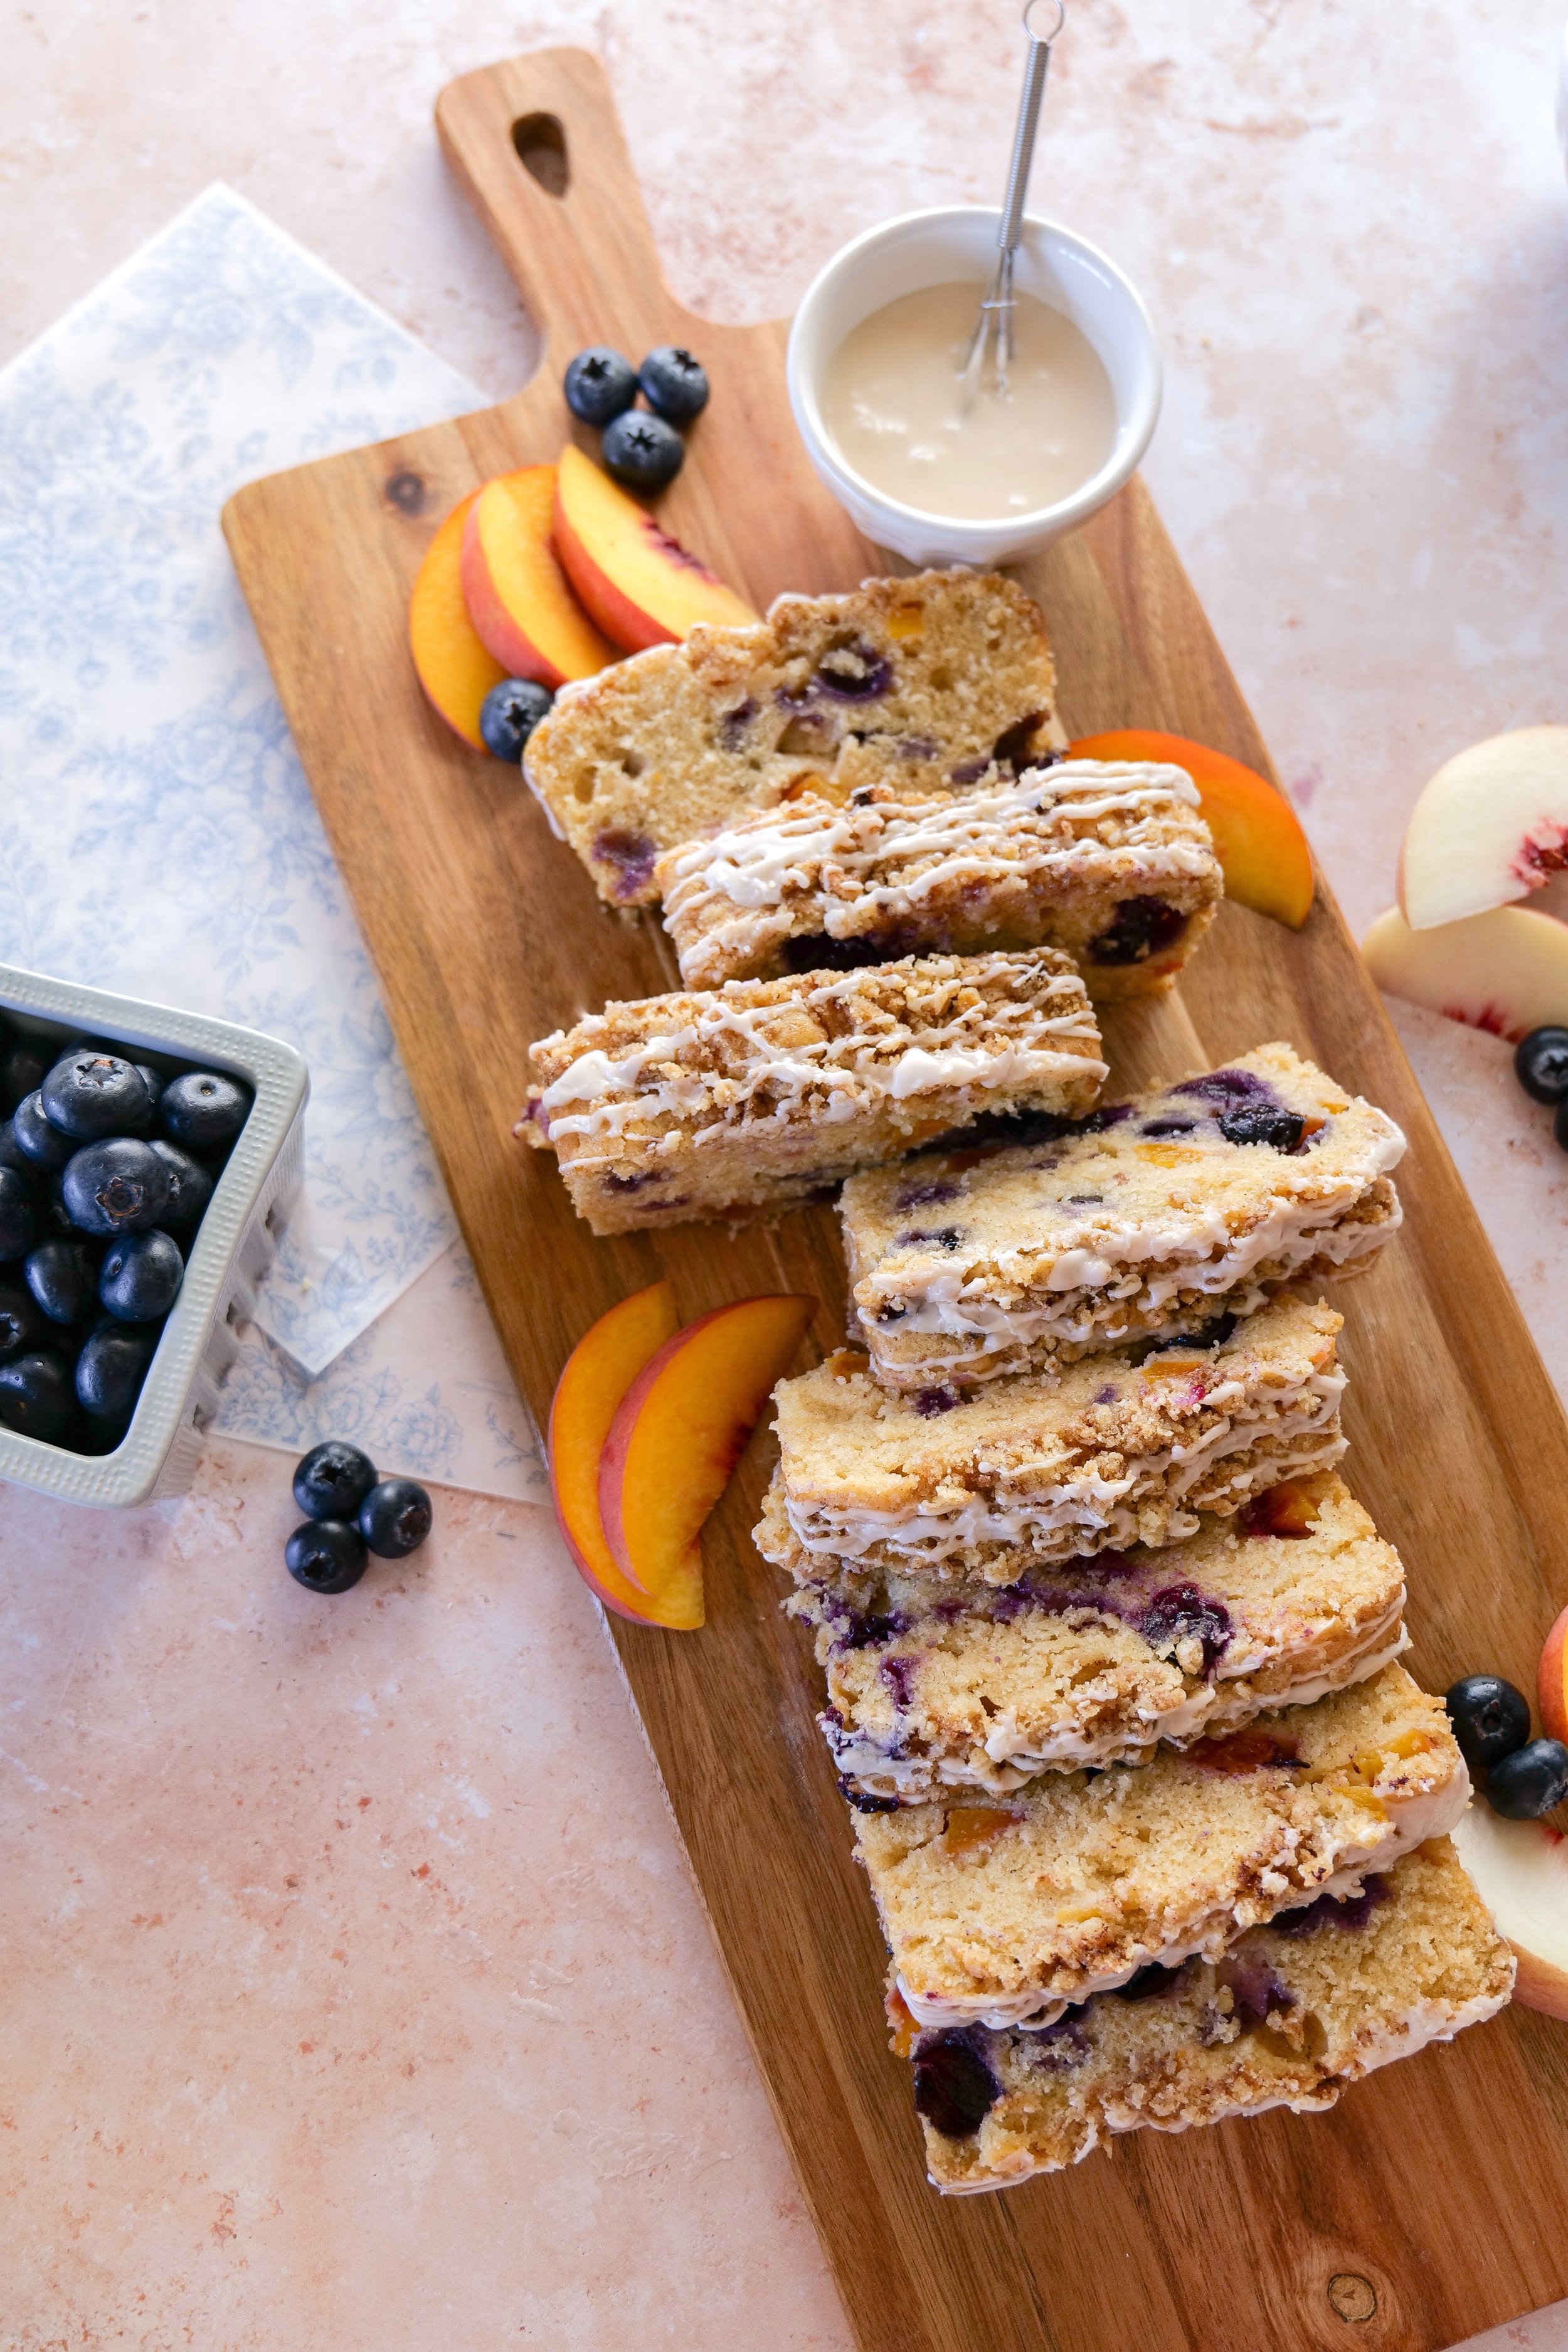
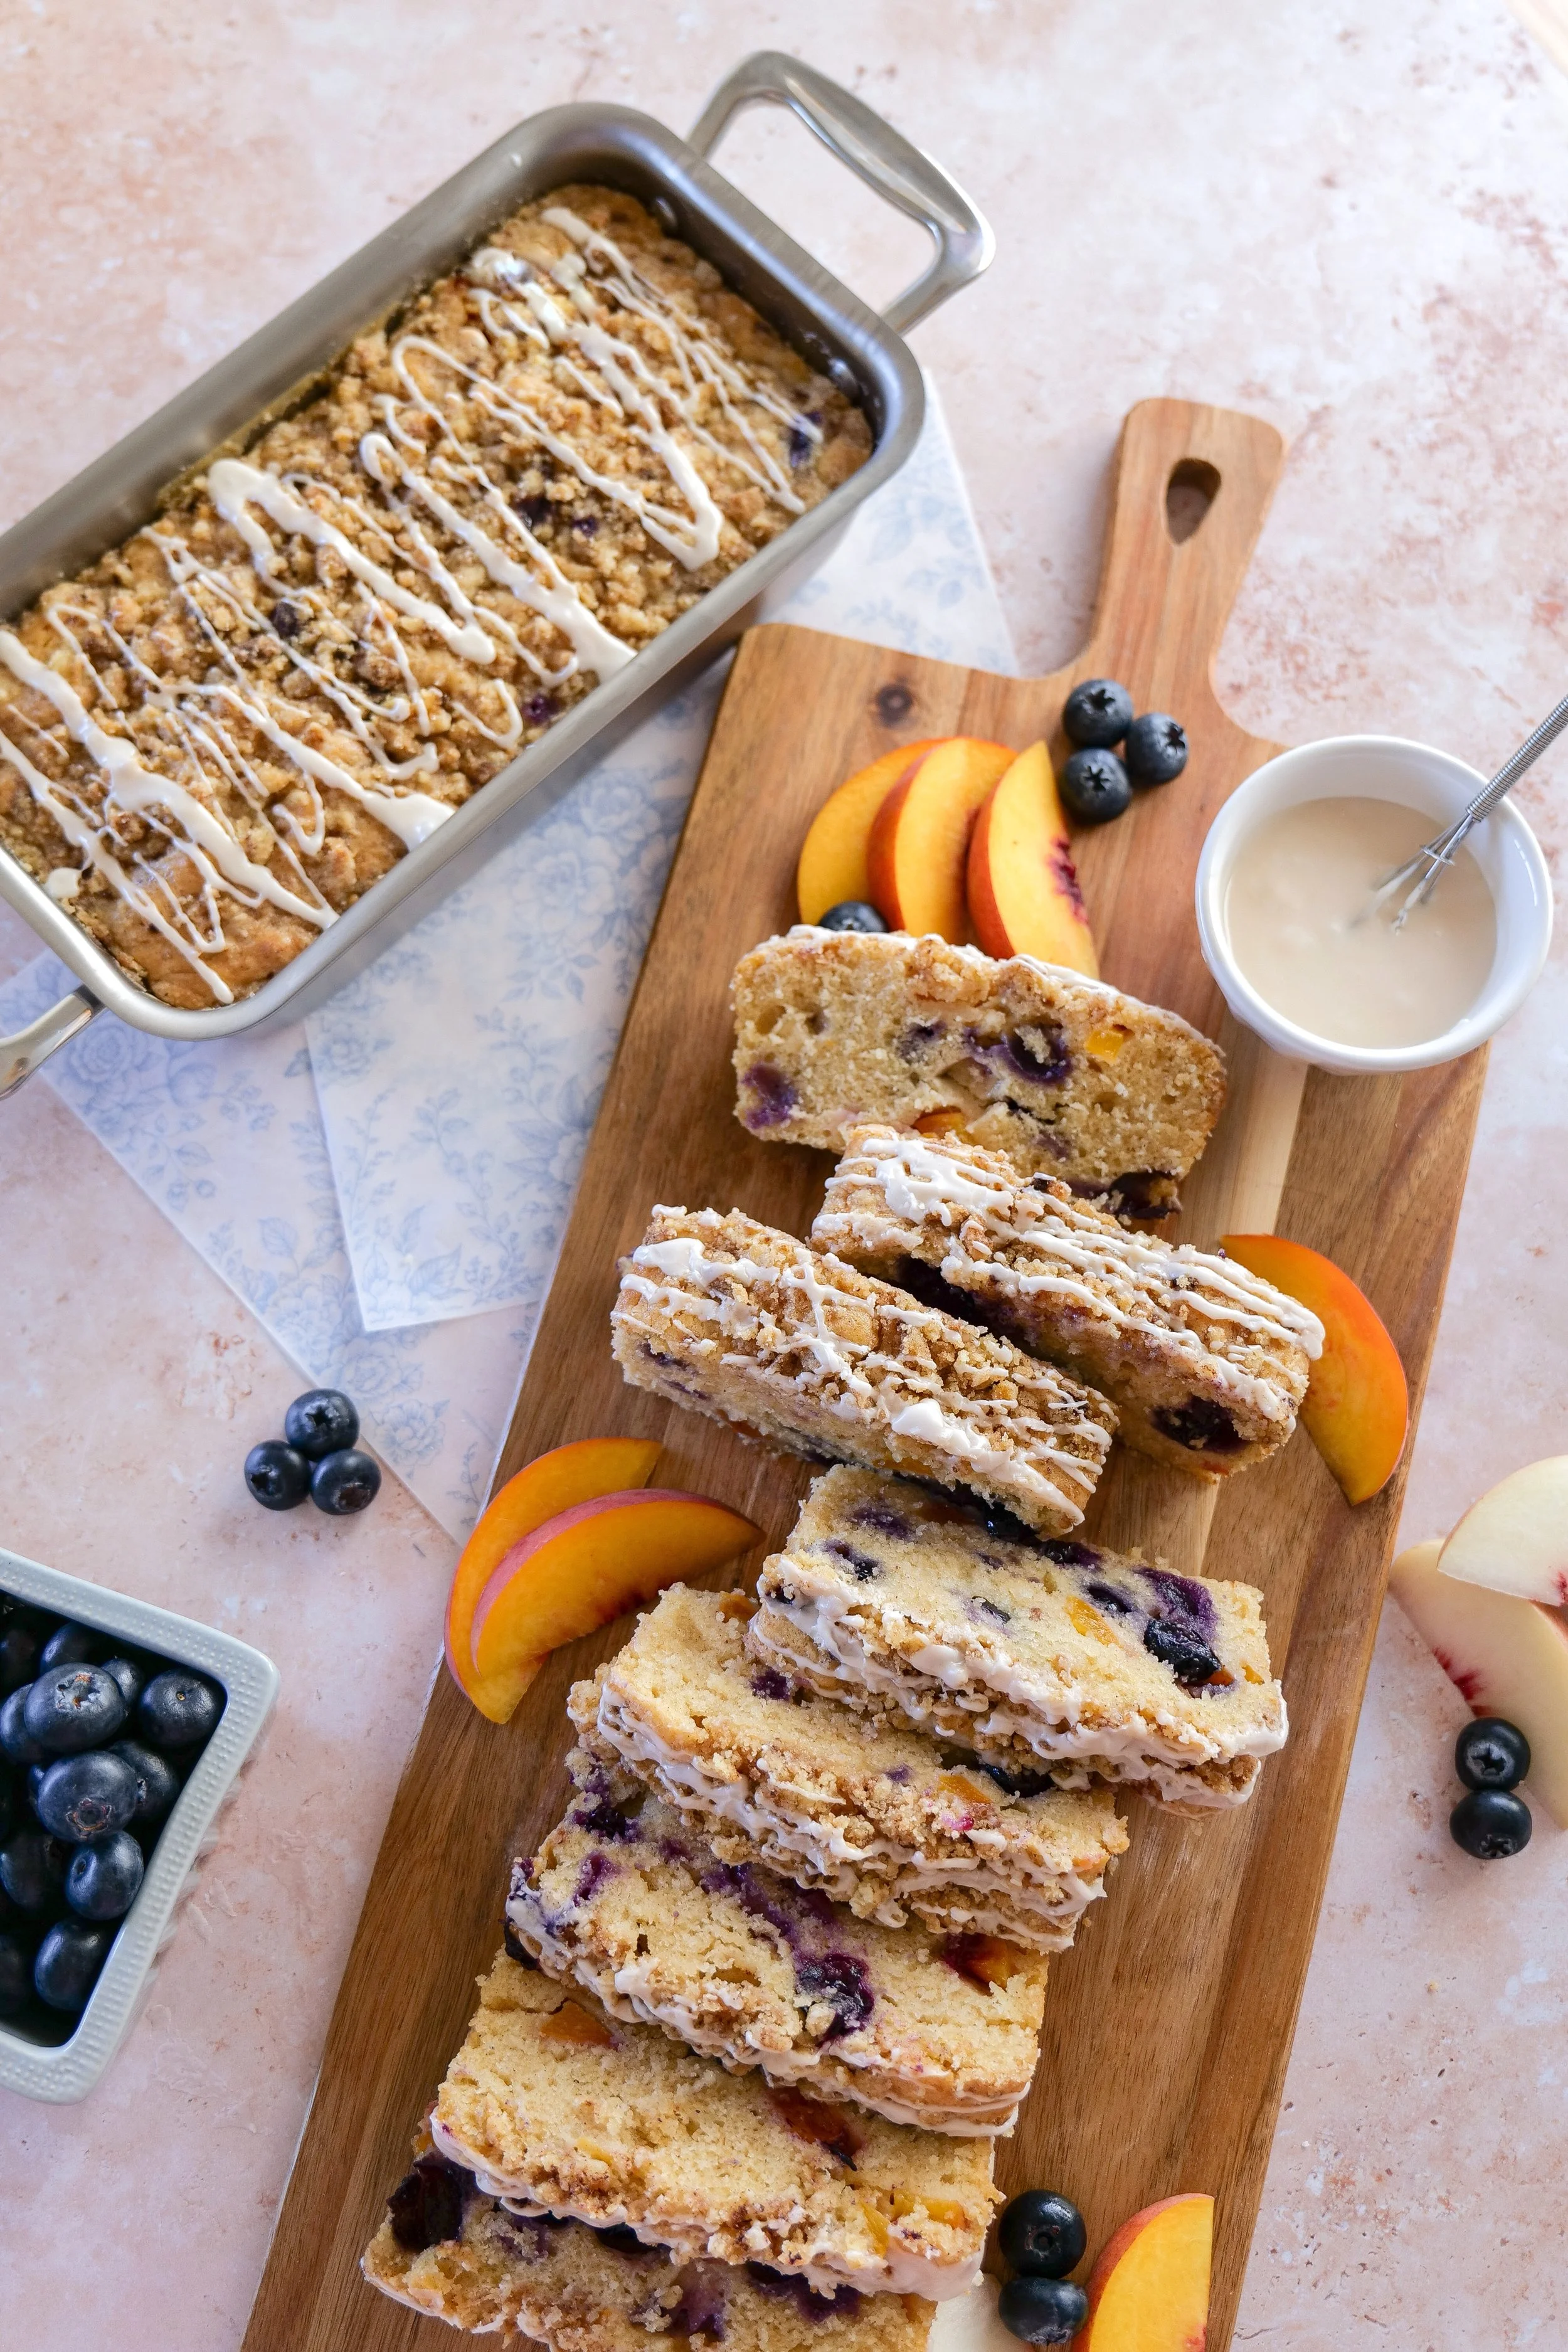
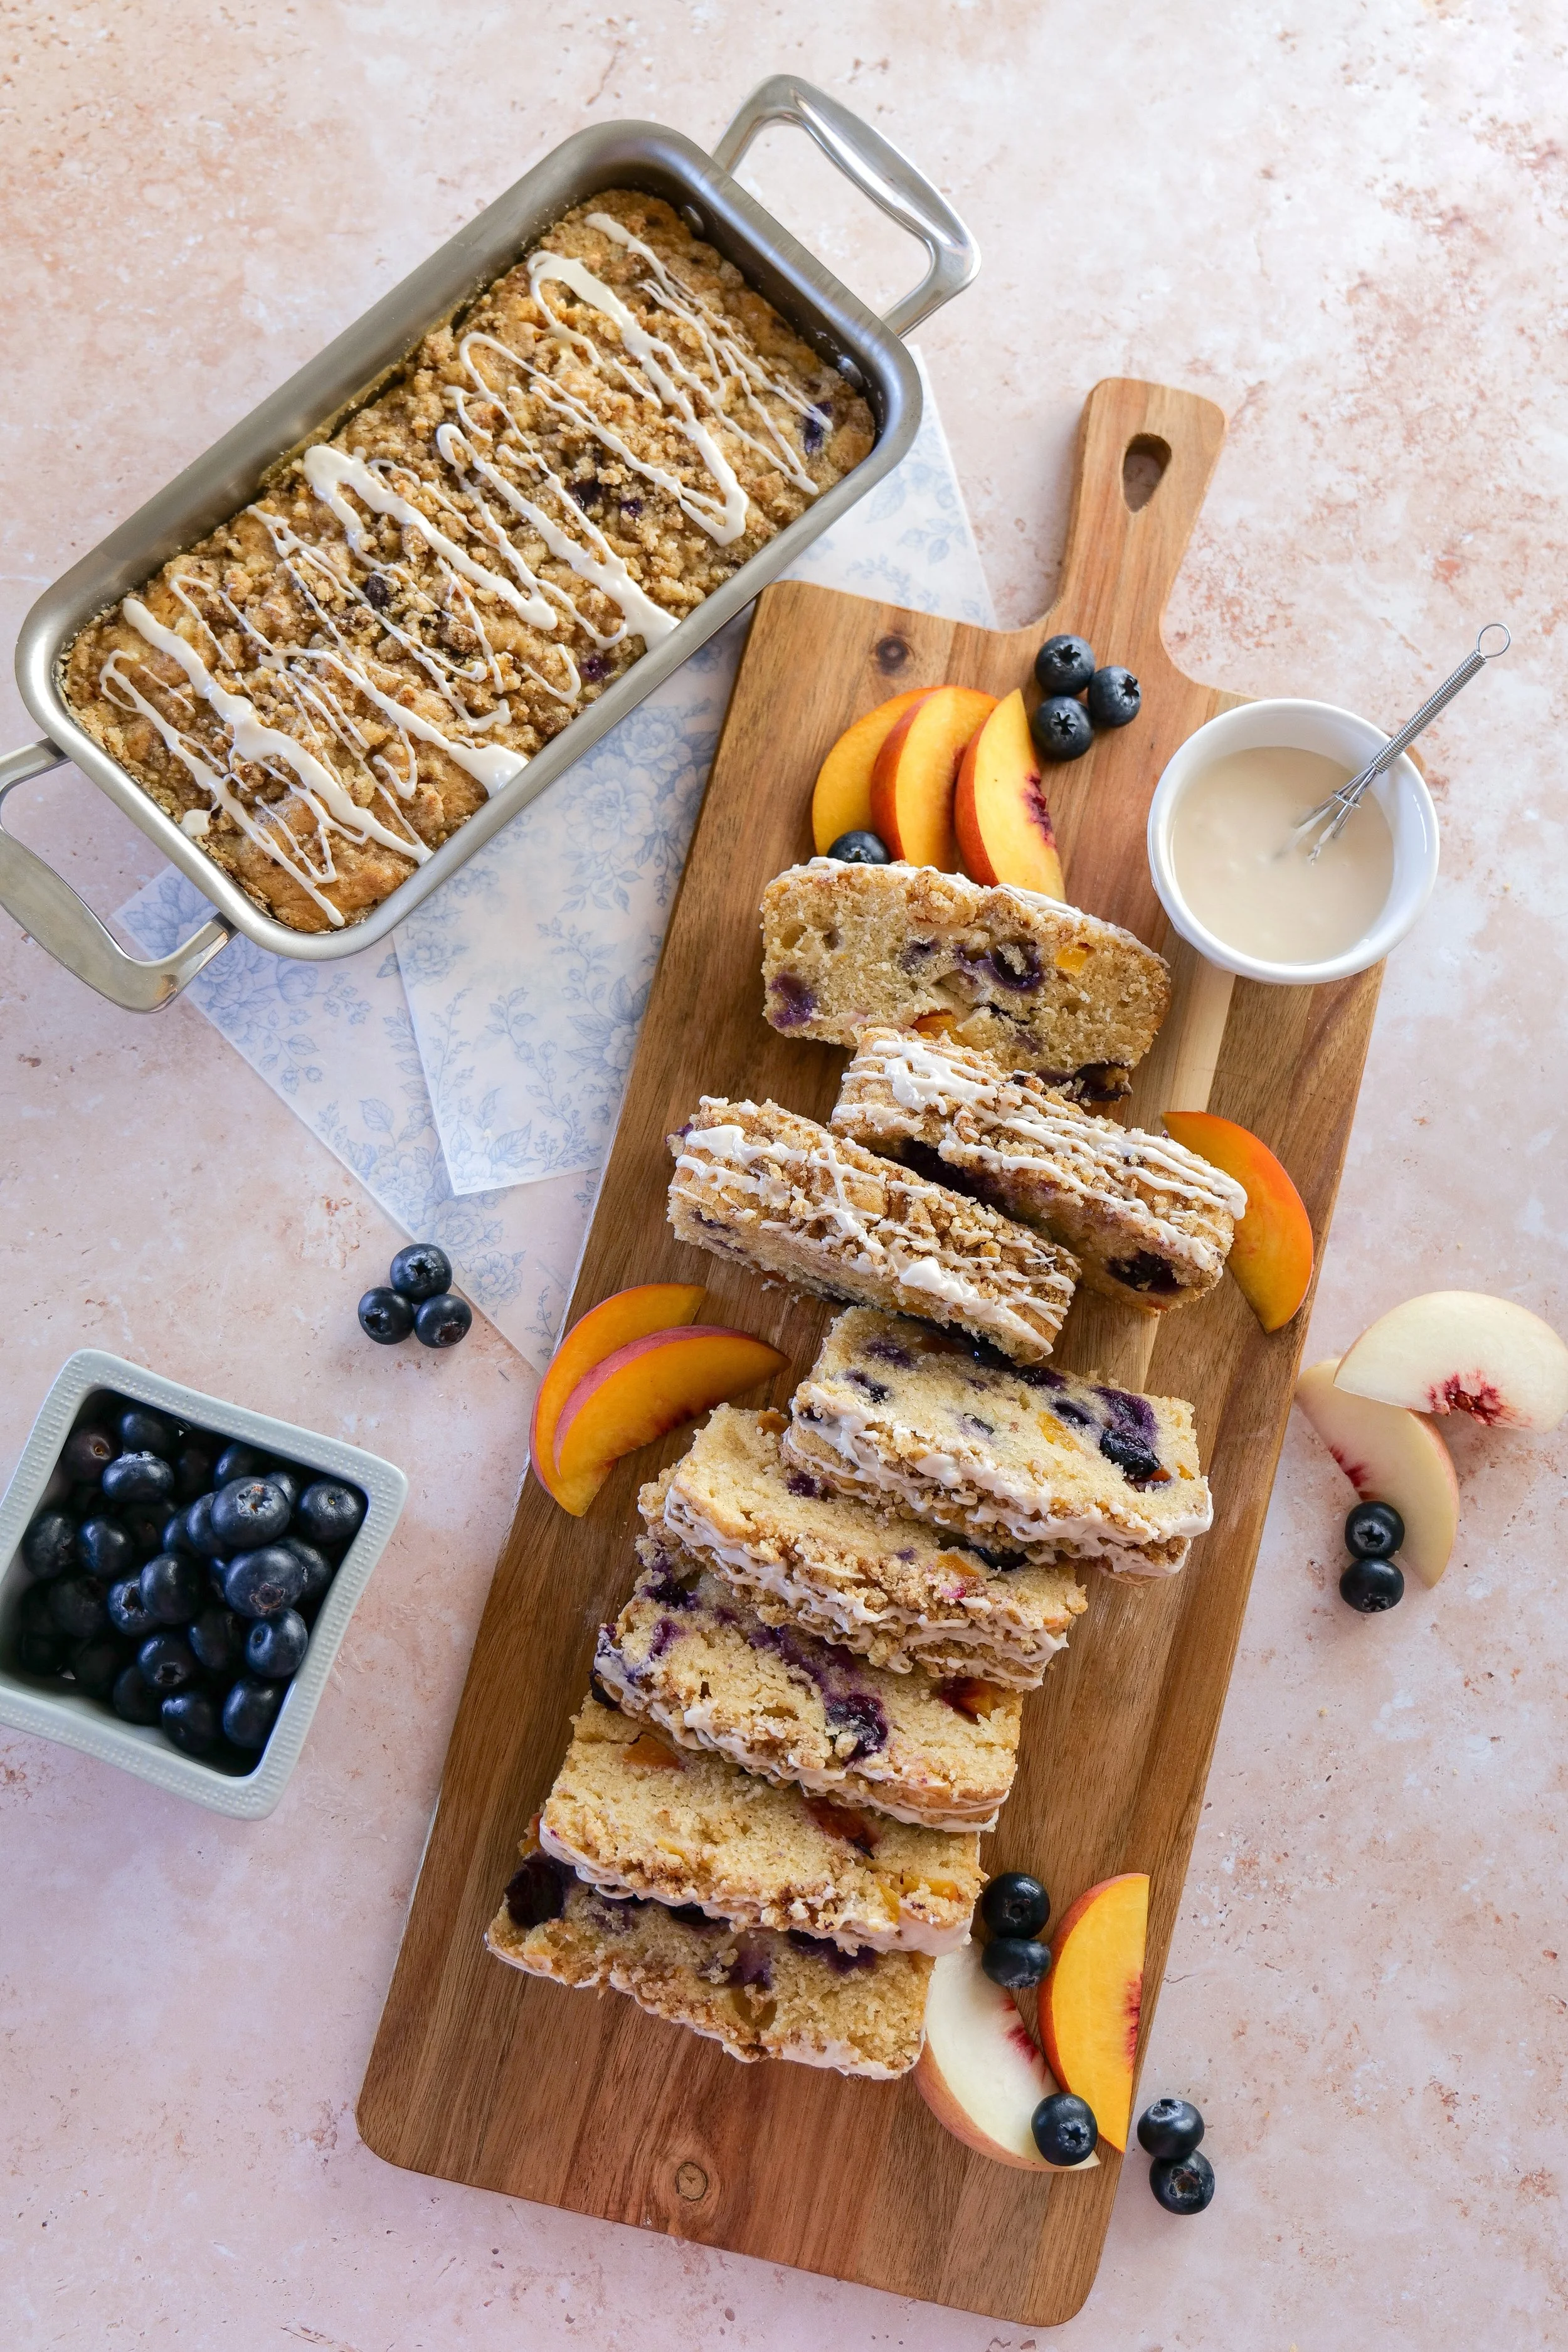
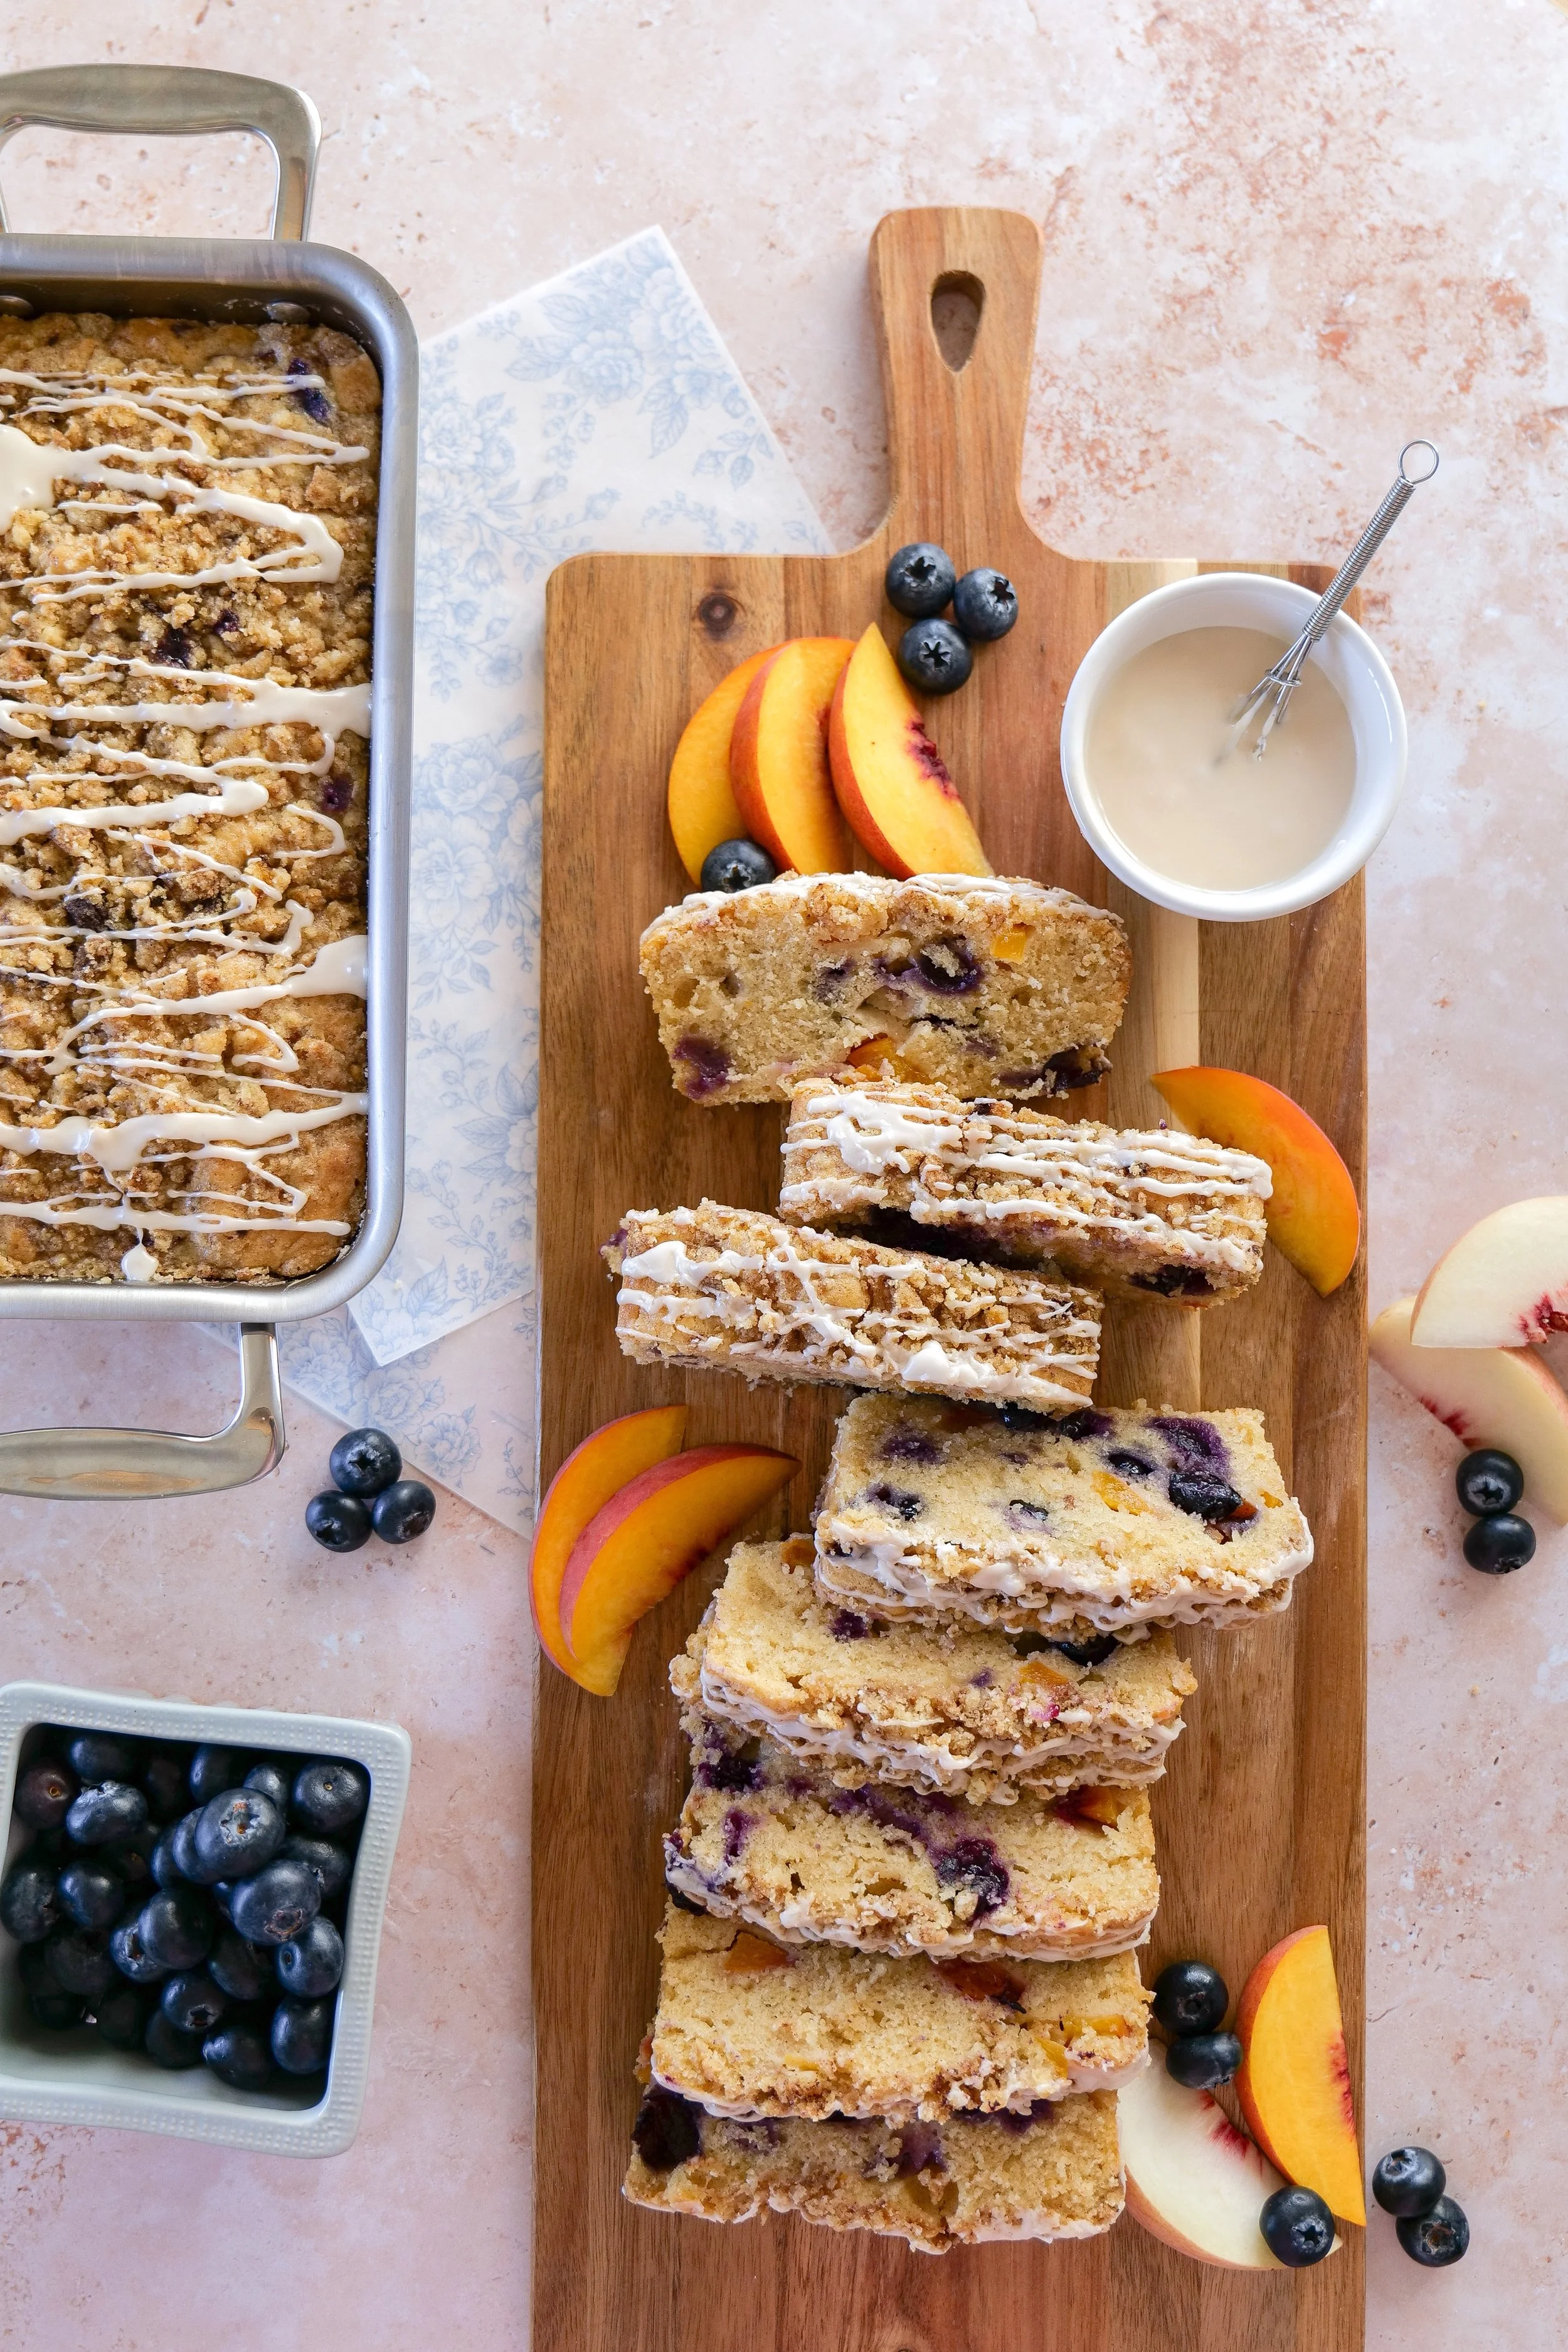
Blueberry Peach Bread with Cinnamon Streusel topped with vanilla glaze, fresh peaches, and blueberries on a cooling rack.
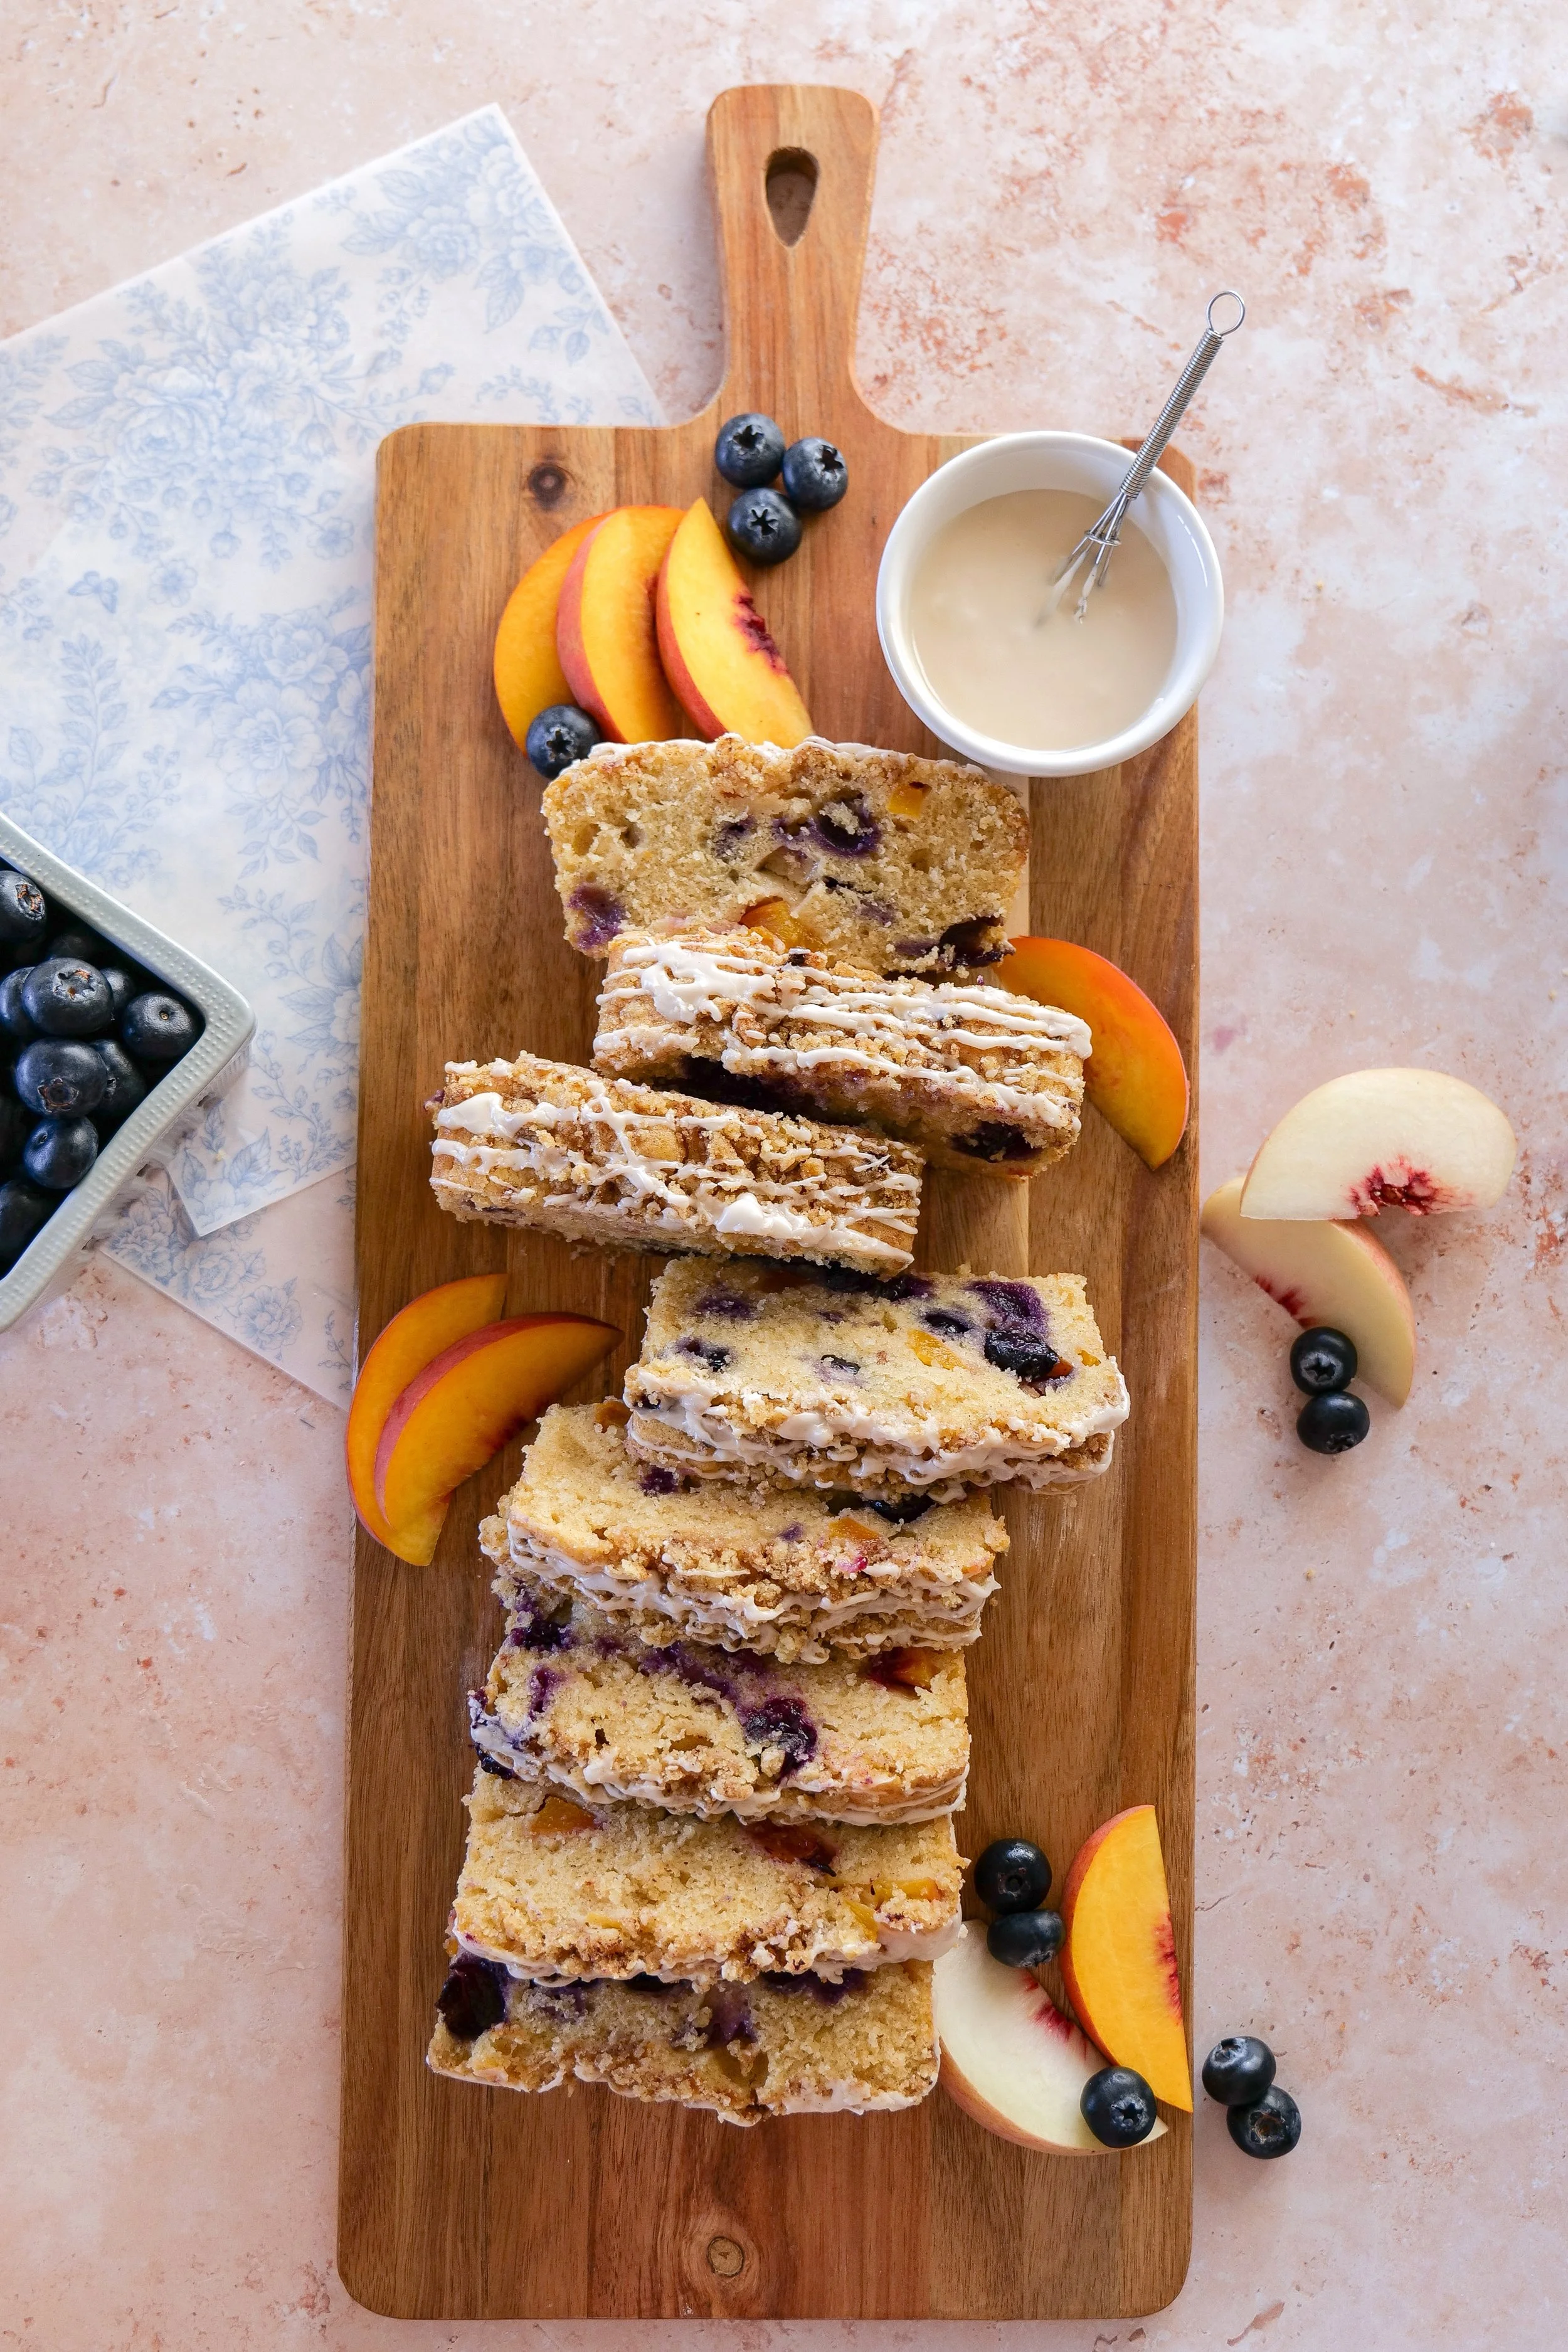
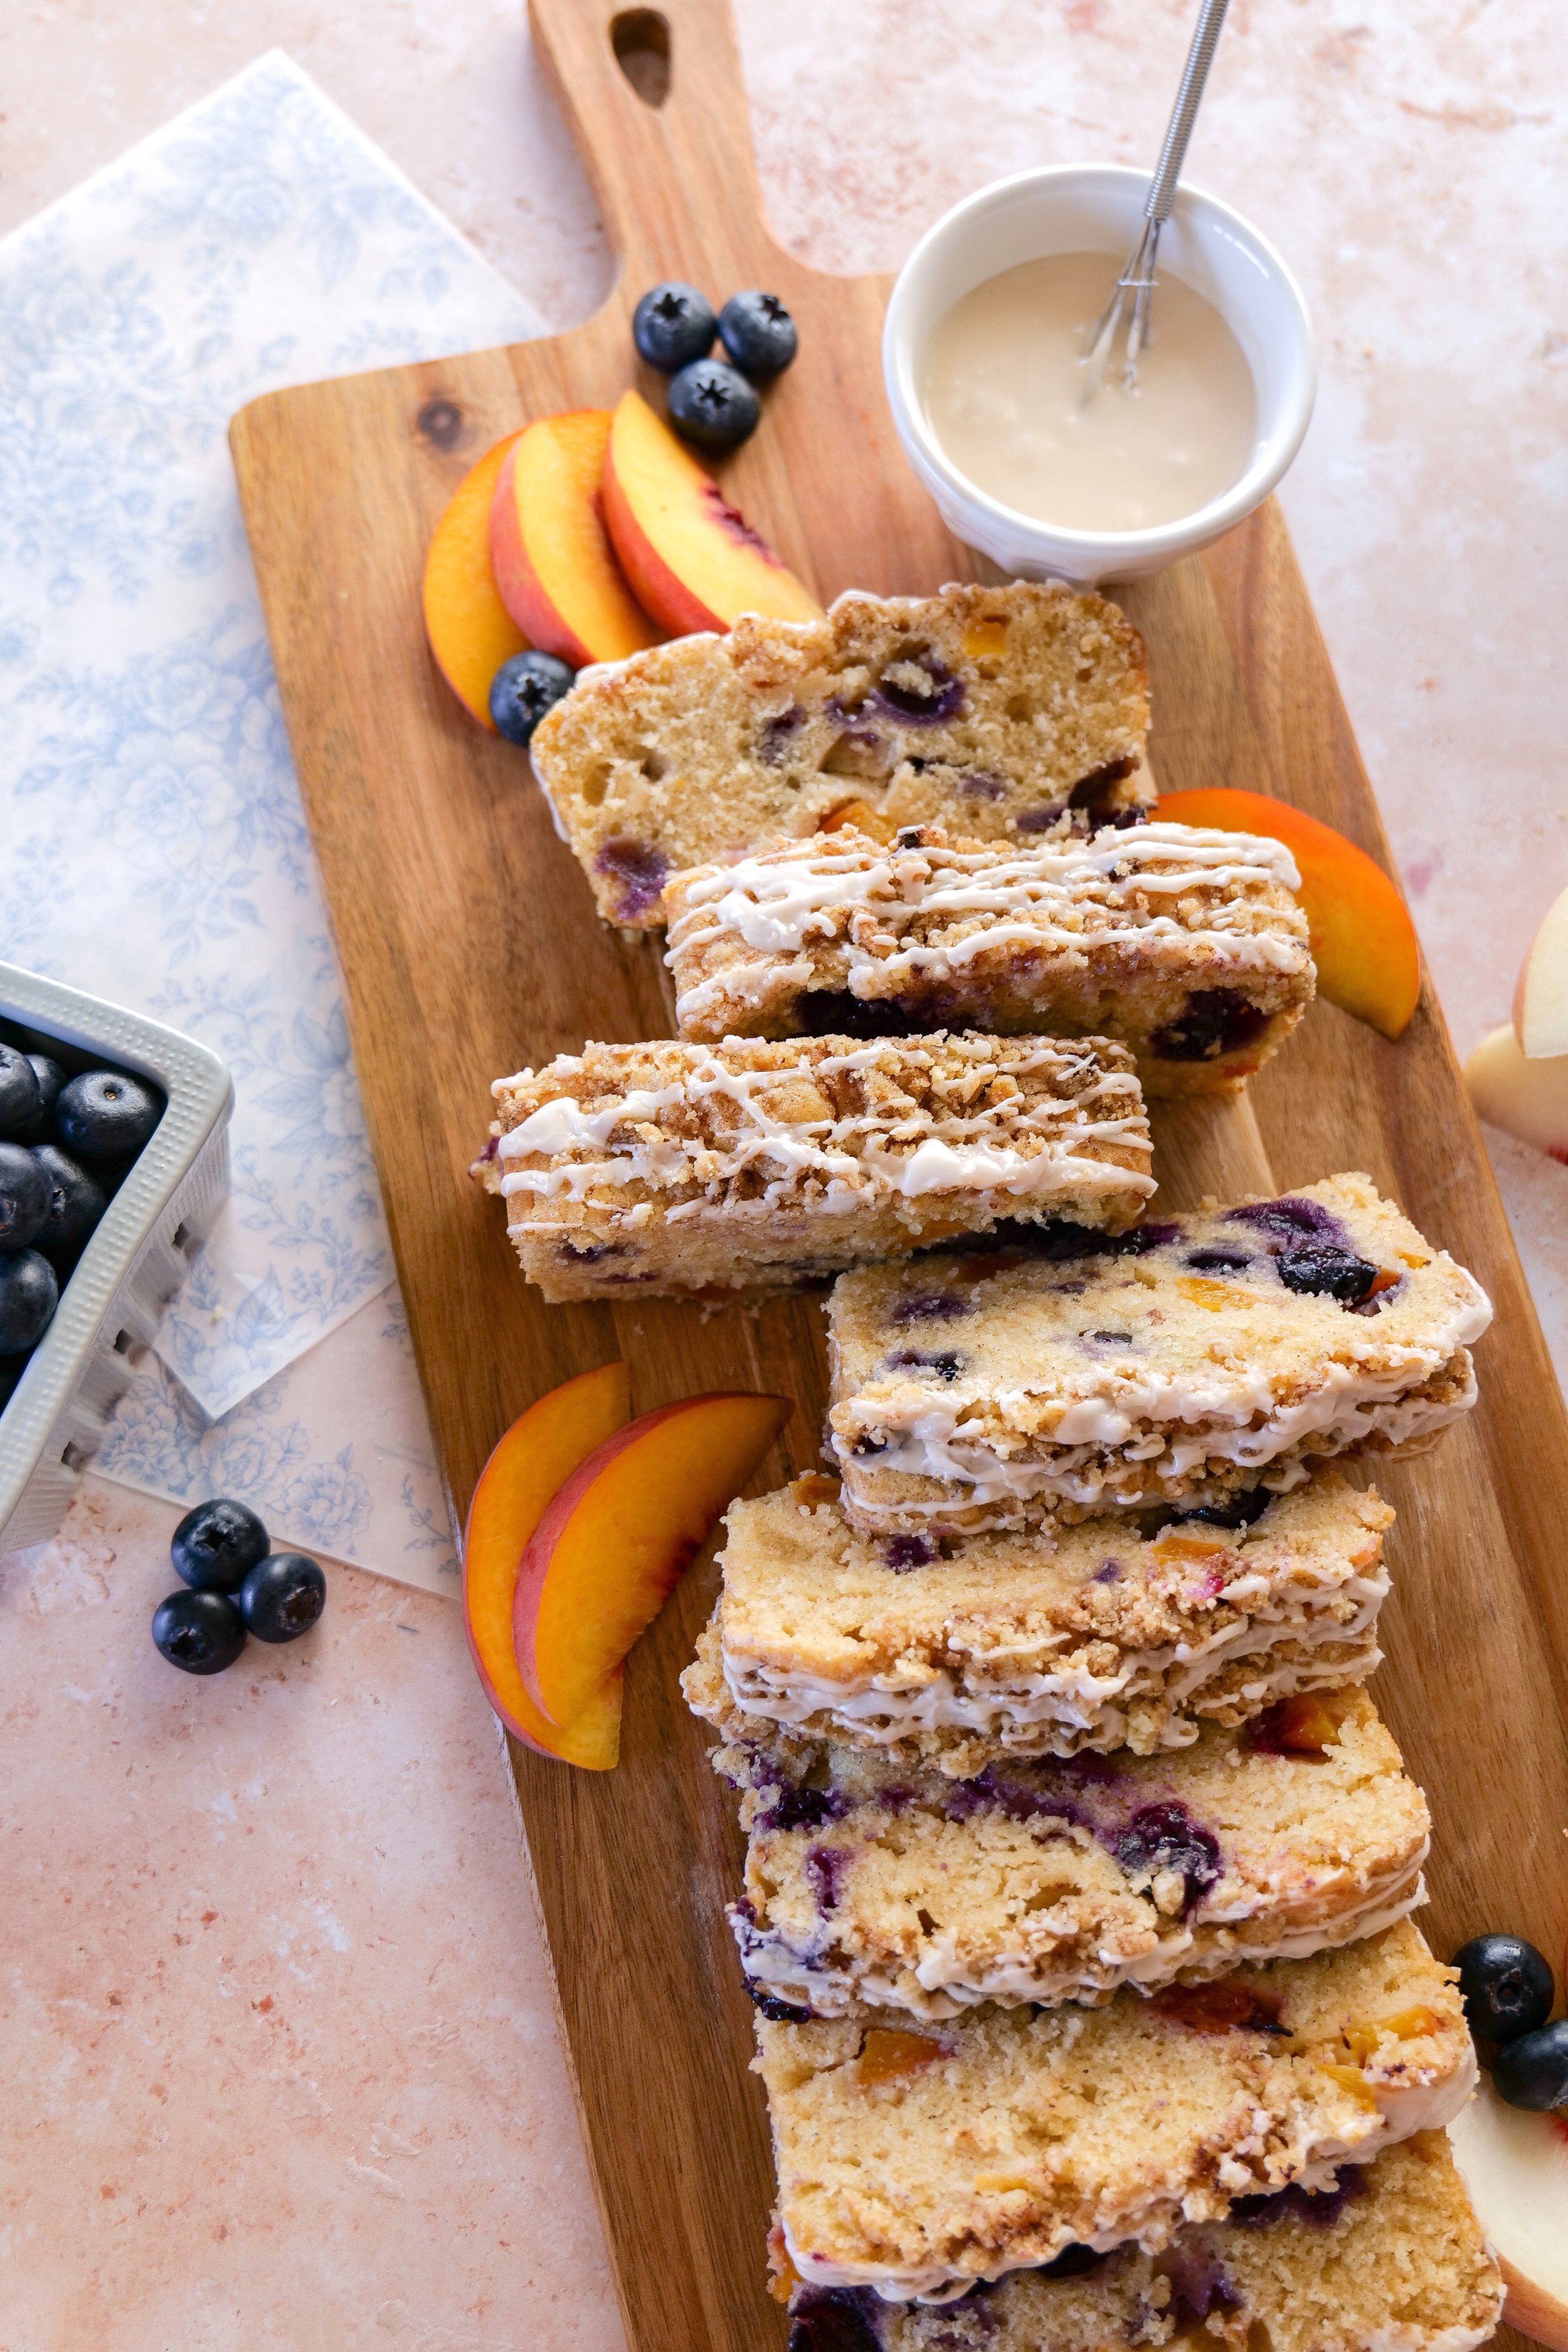
Slices of homemade Blueberry Peach Bread showing fresh peaches, blueberries, and cinnamon streusel inside.
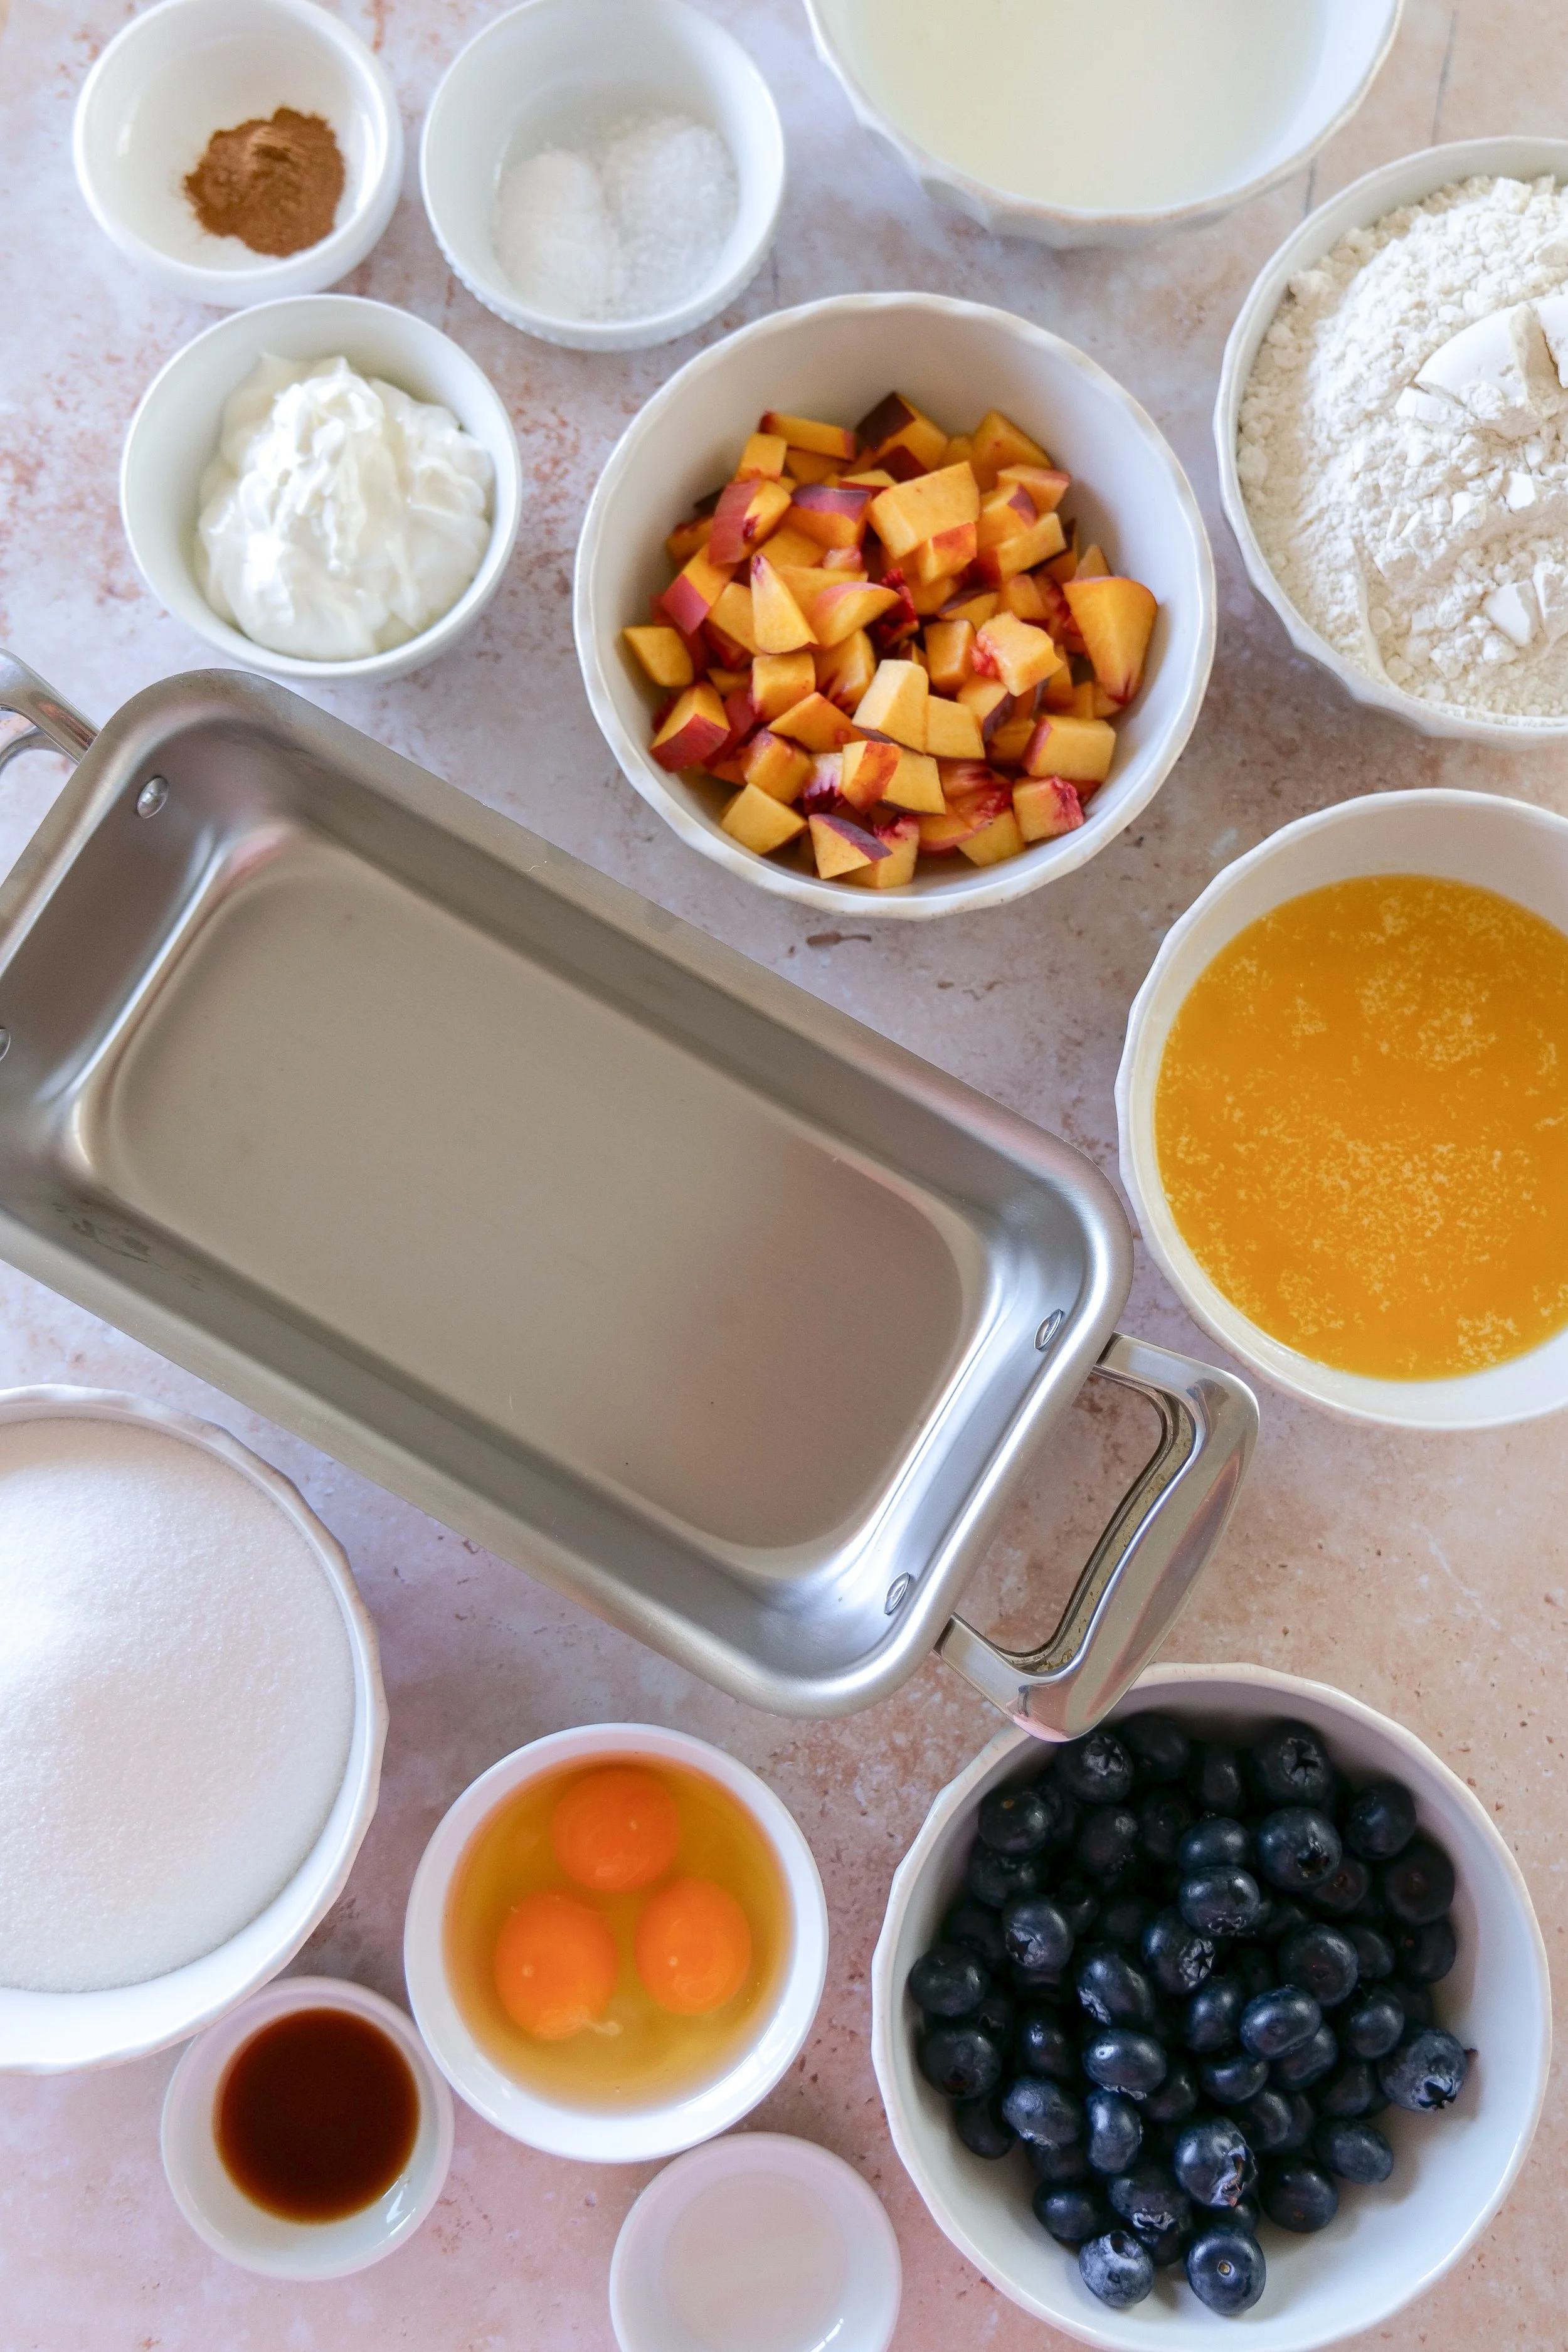
Fresh peaches and blueberries ready for baking Blueberry Peach Bread.

Moist, buttery, and bursting with fresh peaches and blueberries, this Blueberry Peach Streusel Bread is topped with a buttery cinnamon crumble that's perfect for breakfast, brunch, or dessert.

There's Something Special About Baking with Summer Fruit

Every summer, I find myself reaching for the freshest fruit I can find and dreaming up new recipes around whatever is in season. There's just something about juicy peaches and sweet blueberries that feels like summer in every bite.

This Blueberry Peach Streusel Bread has quickly become one of my favorite ways to enjoy both. It has a soft, buttery crumb filled with ripe peaches and fresh blueberries, all topped with a cinnamon streusel that bakes into the most irresistible golden topping.

It's the kind of loaf that disappears quickly around our house. One slice with coffee in the morning somehow turns into another slice after dinner, and before long, there's only a few crumbs left on the cutting board.

One of my favorite things about this recipe is using beautiful seasonal fruit whenever possible. A special thank you to Family Tree Farms for growing some of our family's favorite peaches and blueberries that inspire so many of my summer recipes.

Whether you're baking this for a slow Saturday morning, a baby shower brunch, or simply because you have peaches sitting on your counter that need to be used, I hope it becomes one of those recipes you come back to every summer.

Why You'll Love This Blueberry Peach Streusel Bread

  • Moist, bakery-style crumb

  • Loaded with fresh peaches and blueberries

  • Buttery cinnamon streusel topping

  • Easy one-bowl quick bread

  • Perfect for breakfast, brunch, coffee breaks, or dessert

  • Freezes beautifully

  • Great for gifting neighbors or bringing to gatherings

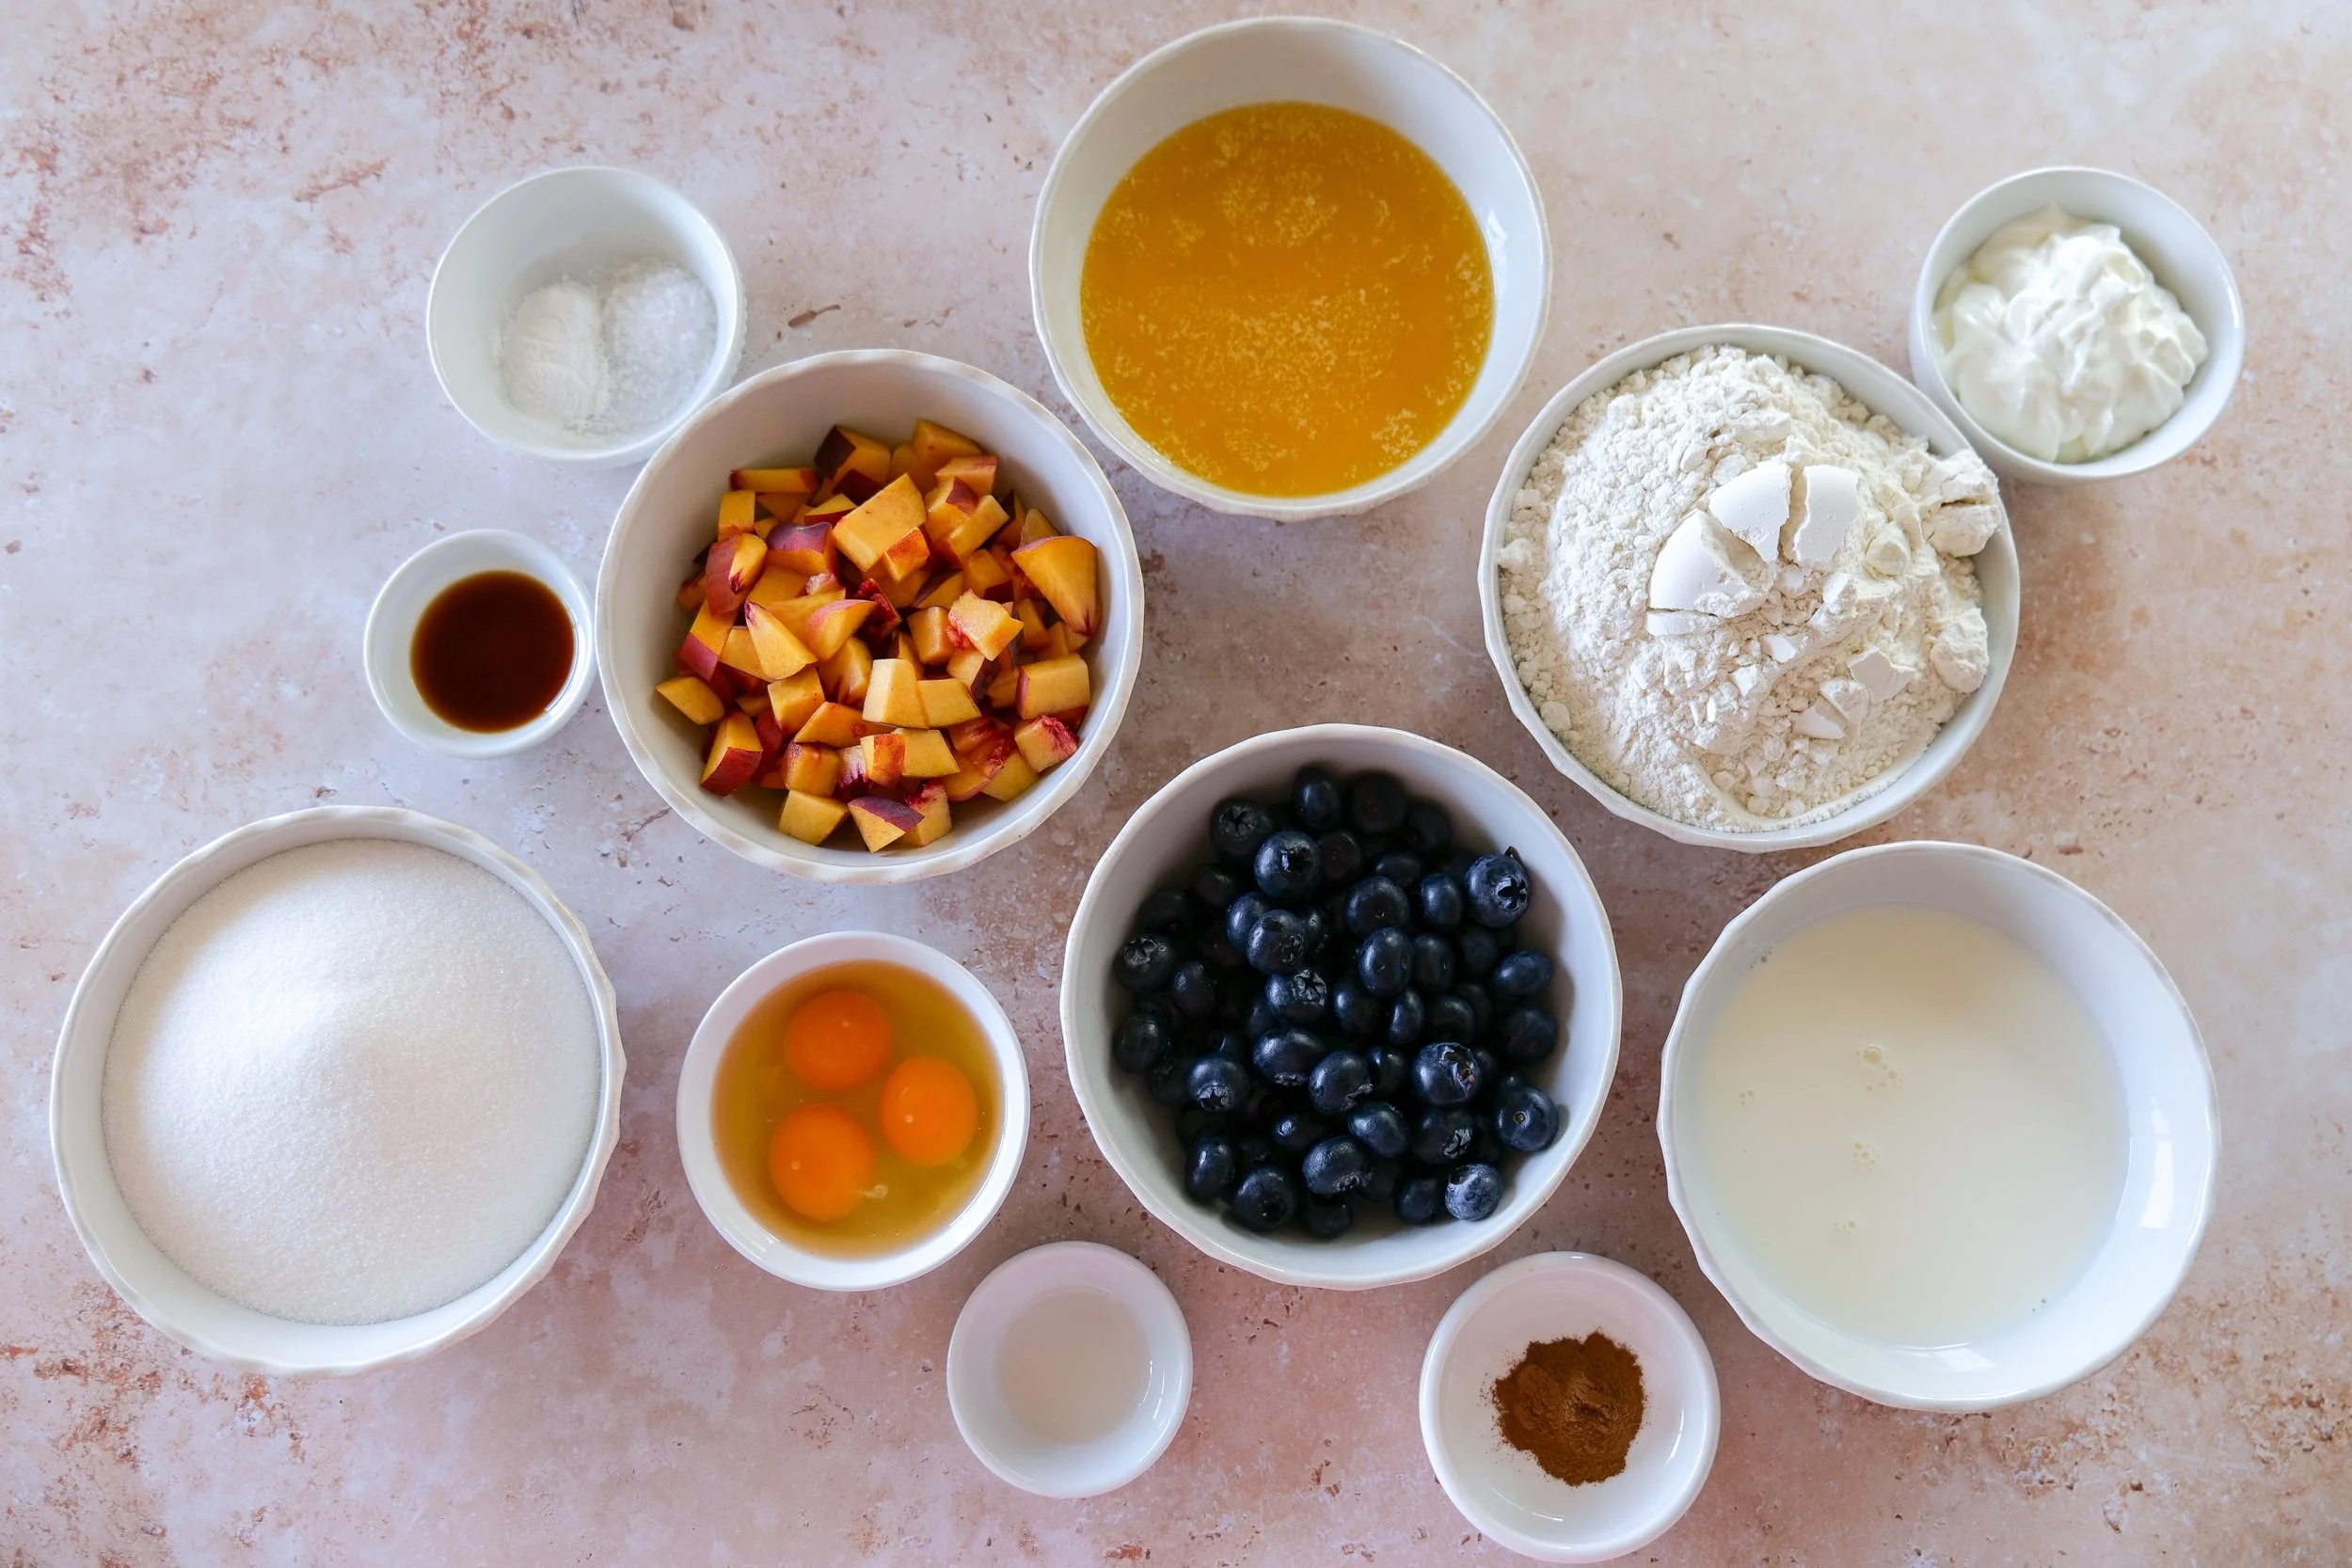
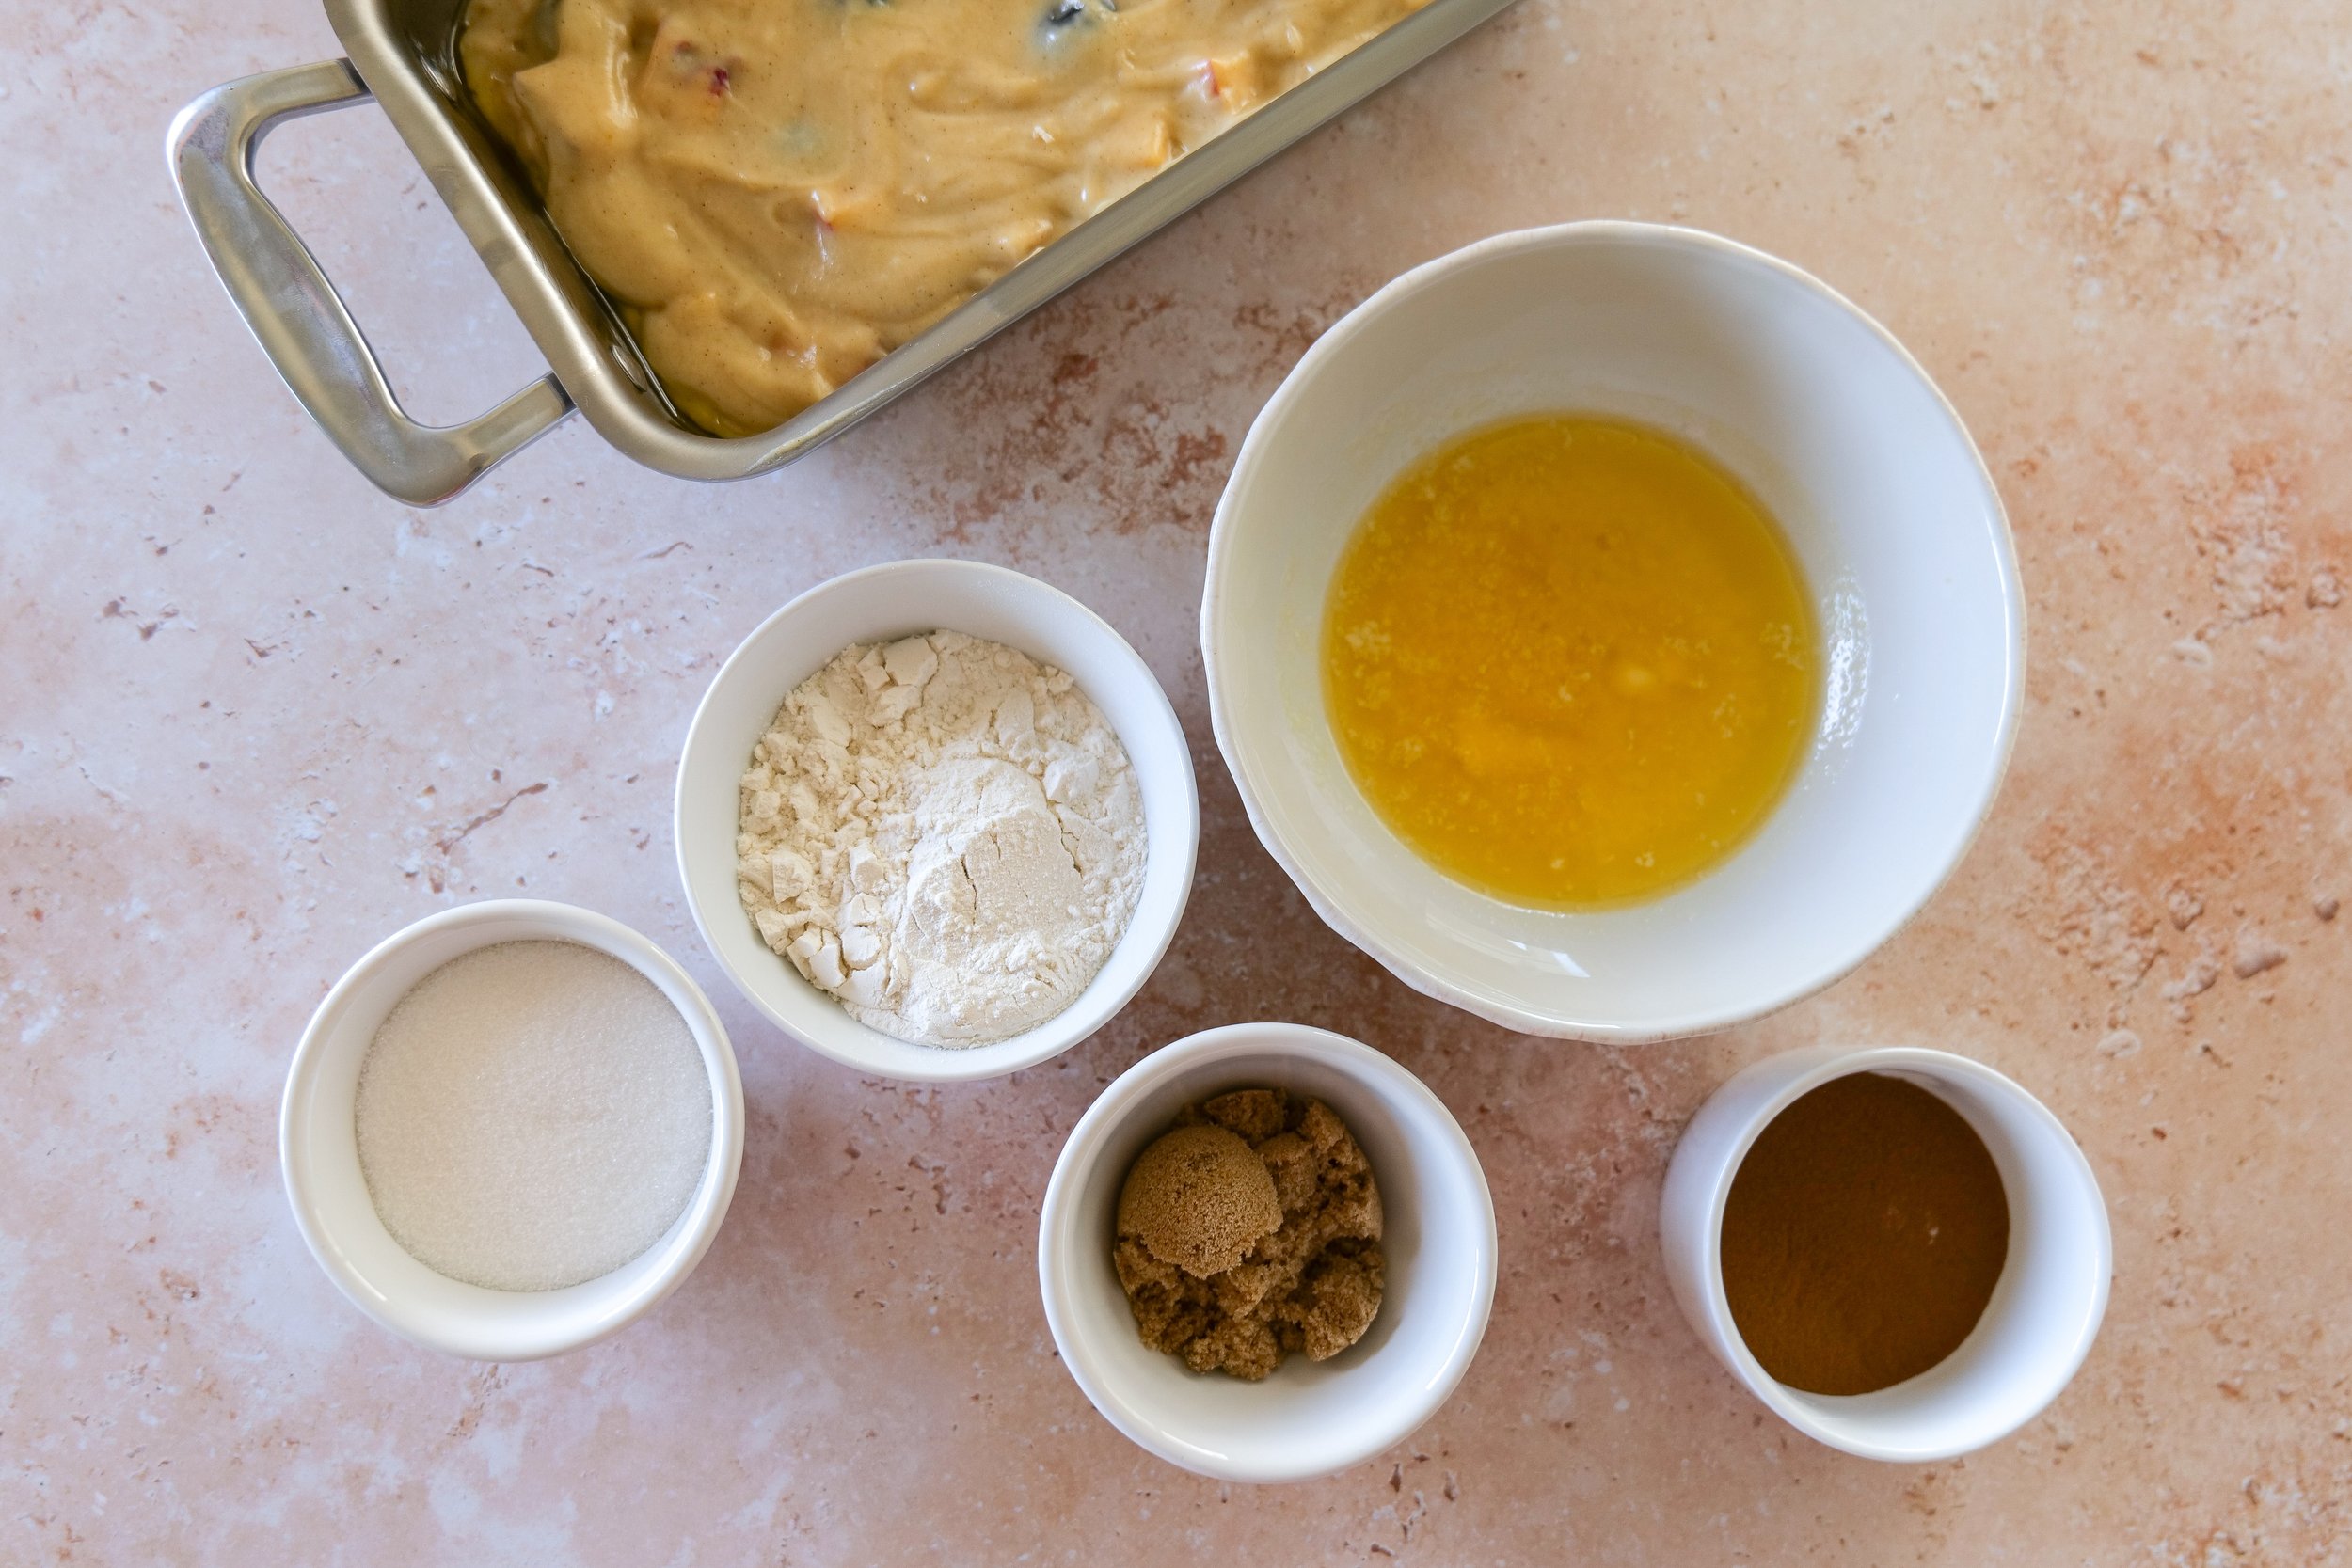
Ingredients for Blueberry Peach Bread including peaches, blueberries, flour, butter, eggs, cinnamon, and sour cream.
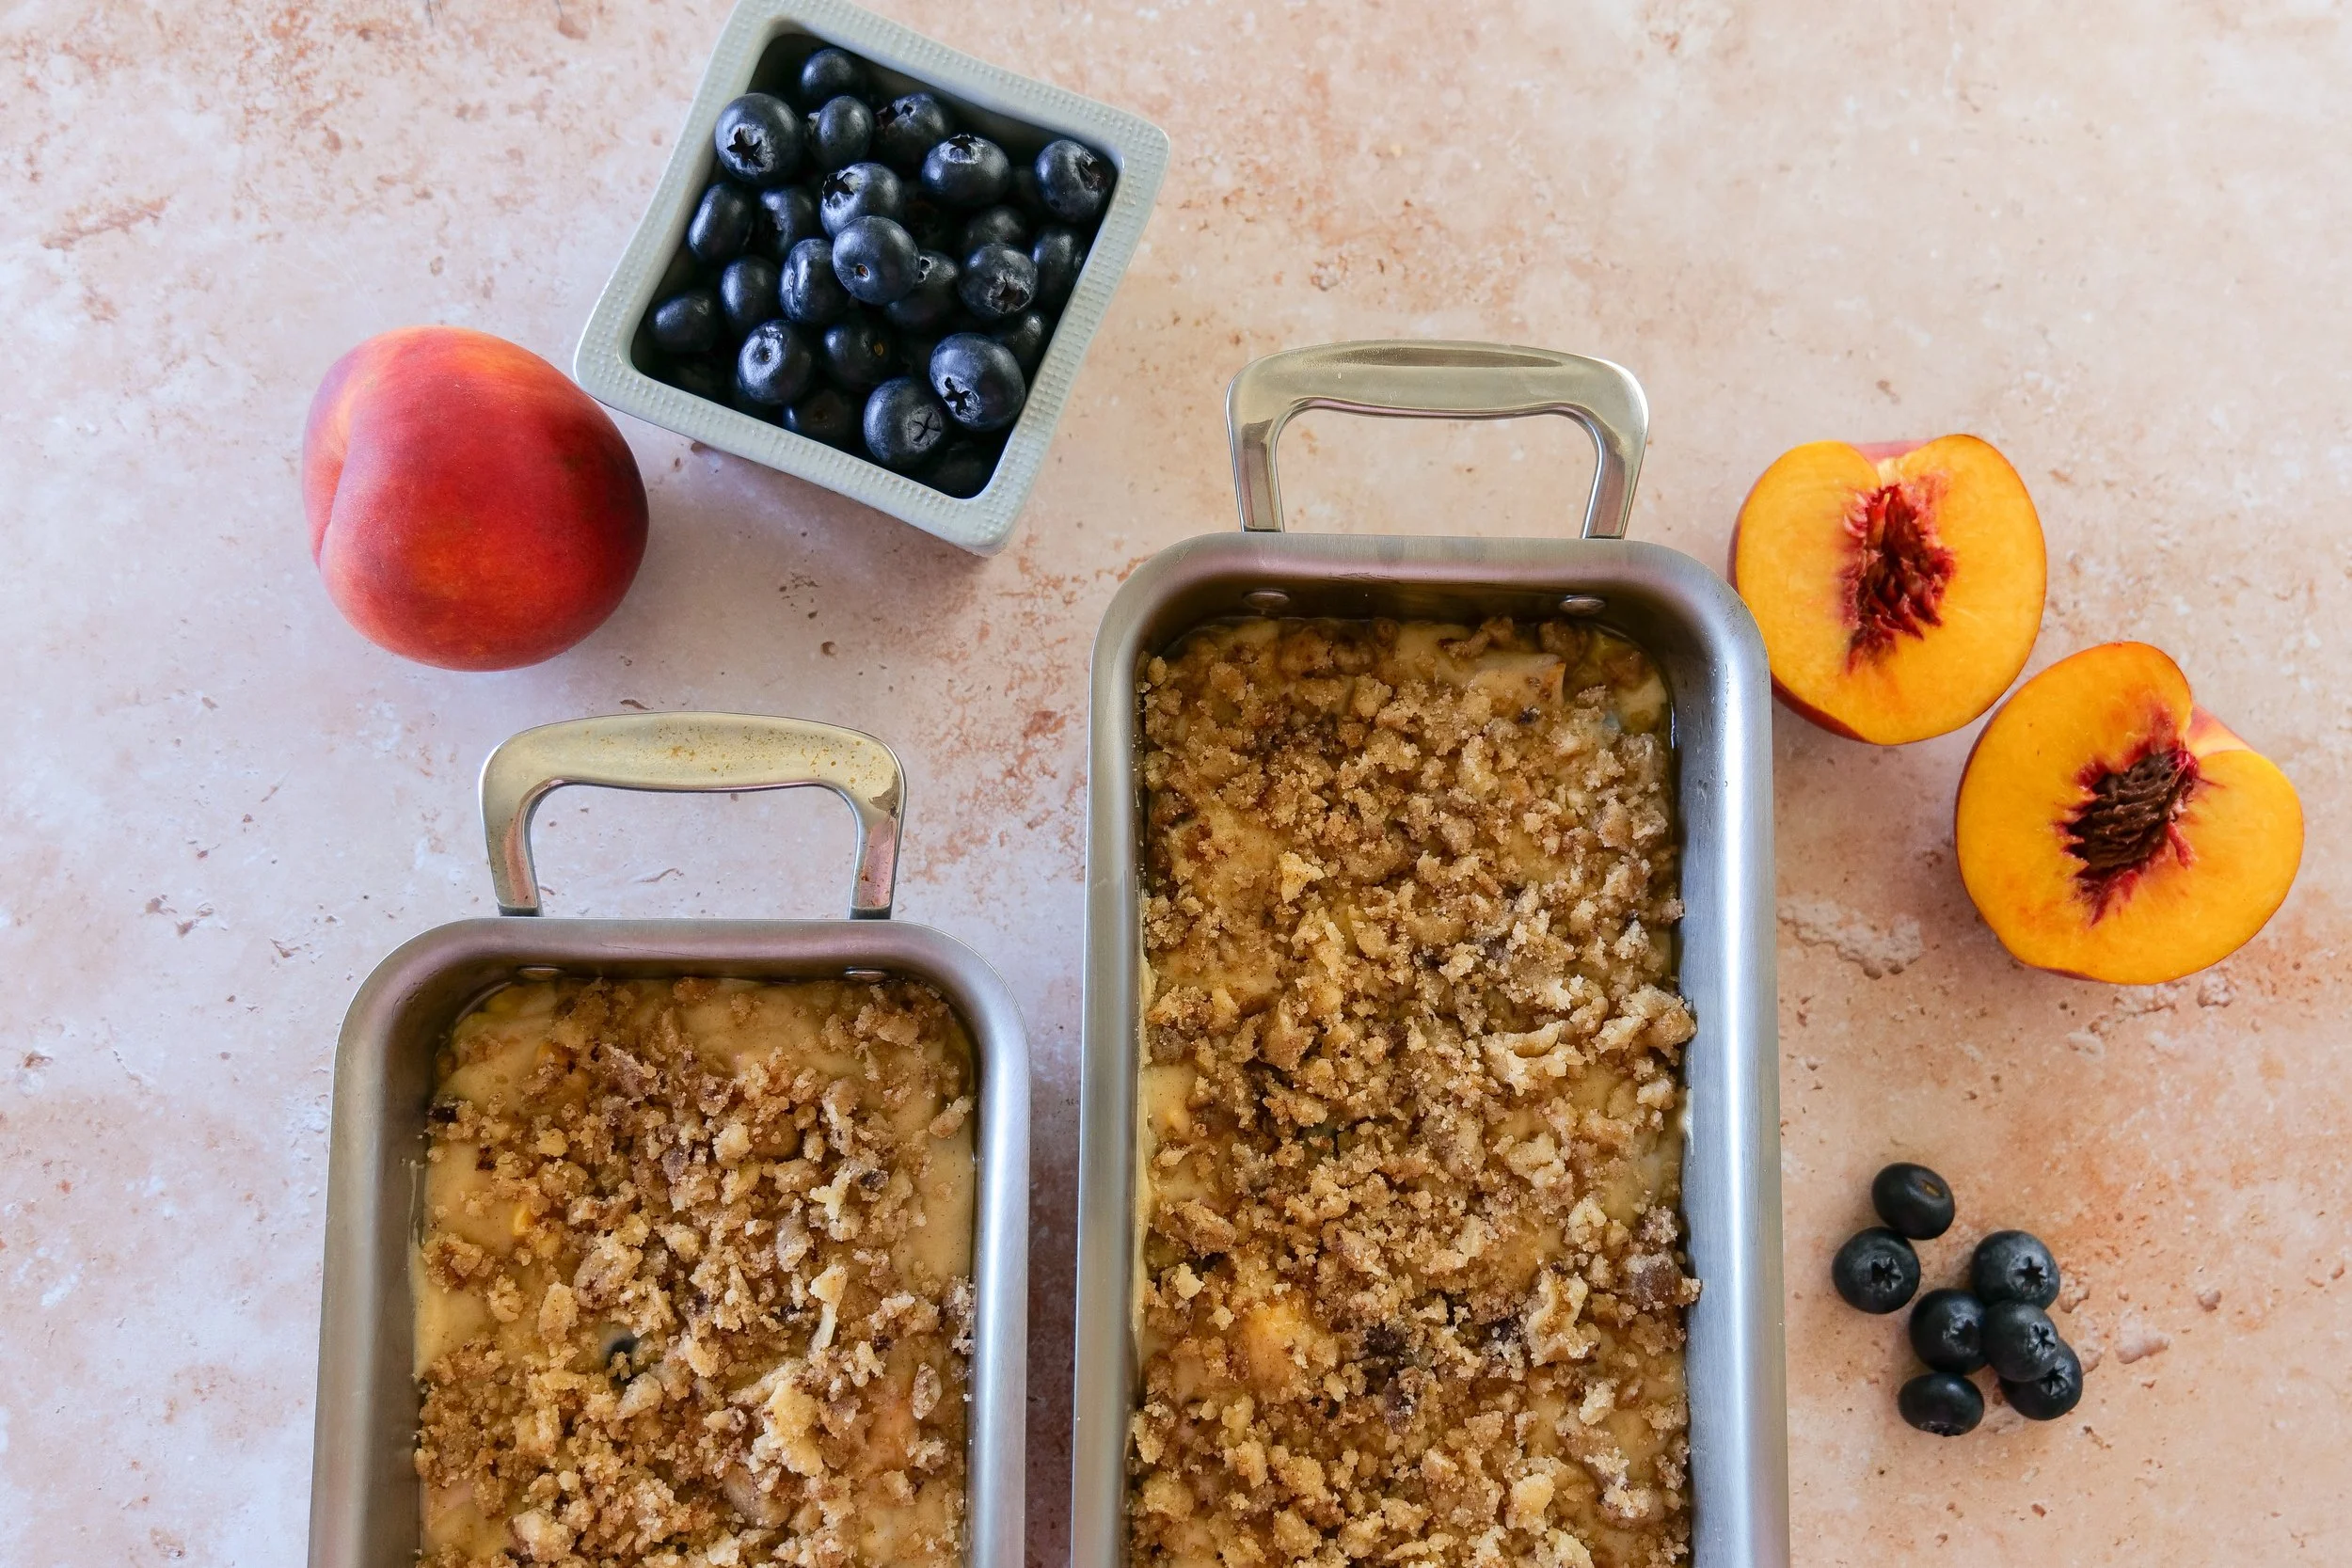
Homemade cinnamon streusel topping before baking Blueberry Peach Bread.
Freshly baked Blueberry Peach Bread cooling after baking with golden cinnamon streusel topping.

Ingredient Notes

One of the things that makes this loaf so special is using fresh, seasonal ingredients.

Fresh Peaches

Choose peaches that are ripe but still slightly firm. They'll soften beautifully while baking without turning mushy.

Blueberries

Fresh blueberries hold their shape best, but frozen blueberries work wonderfully too. If using frozen, don't thaw them first.

Sour Cream

Sour cream keeps the loaf incredibly moist while creating a tender crumb.

Cinnamon

Just enough cinnamon complements the fruit without overpowering it.

Equipment You'll Need

For this recipe I used a few of my favorite baking tools that I reach for over and over again.

Mixing the batter for homemade Blueberry Peach Bread before adding fresh fruit.
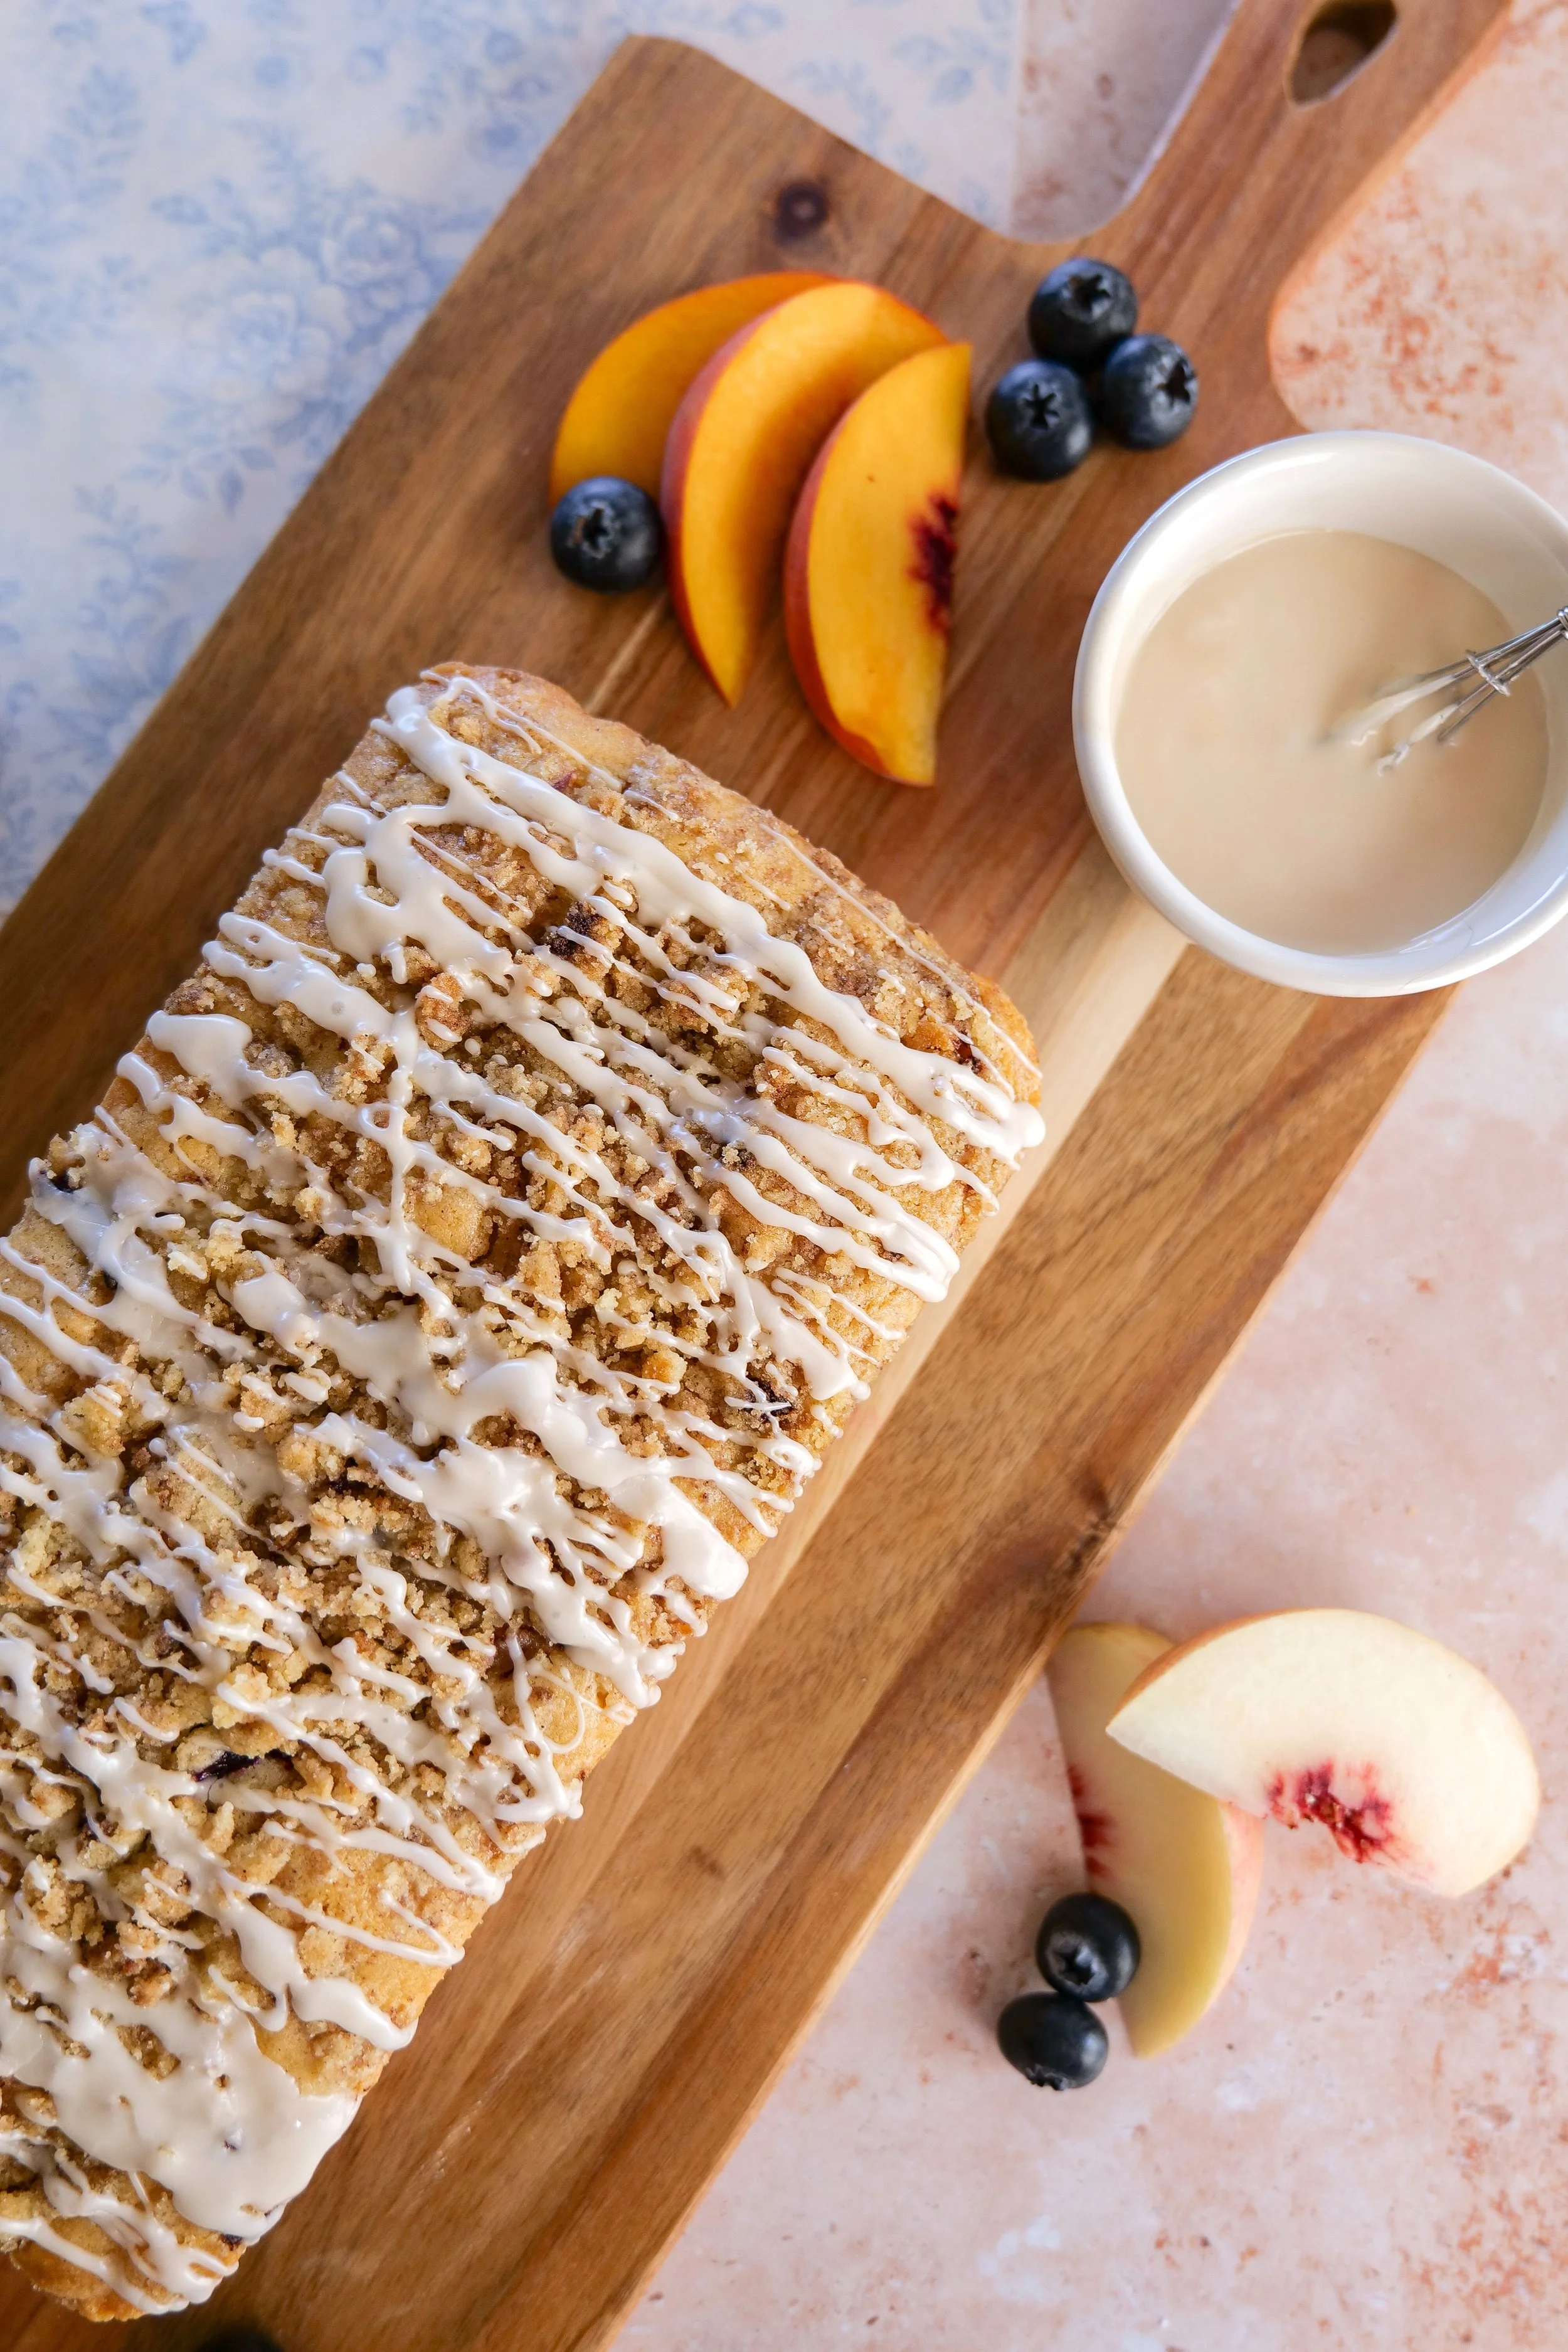
Vanilla glaze being drizzled over homemade Blueberry Peach Bread.
Fresh blueberries folded into homemade Blueberry Peach Bread batter.
Loaf pans filled with Blueberry Peach Bread batter and cinnamon streusel before baking.
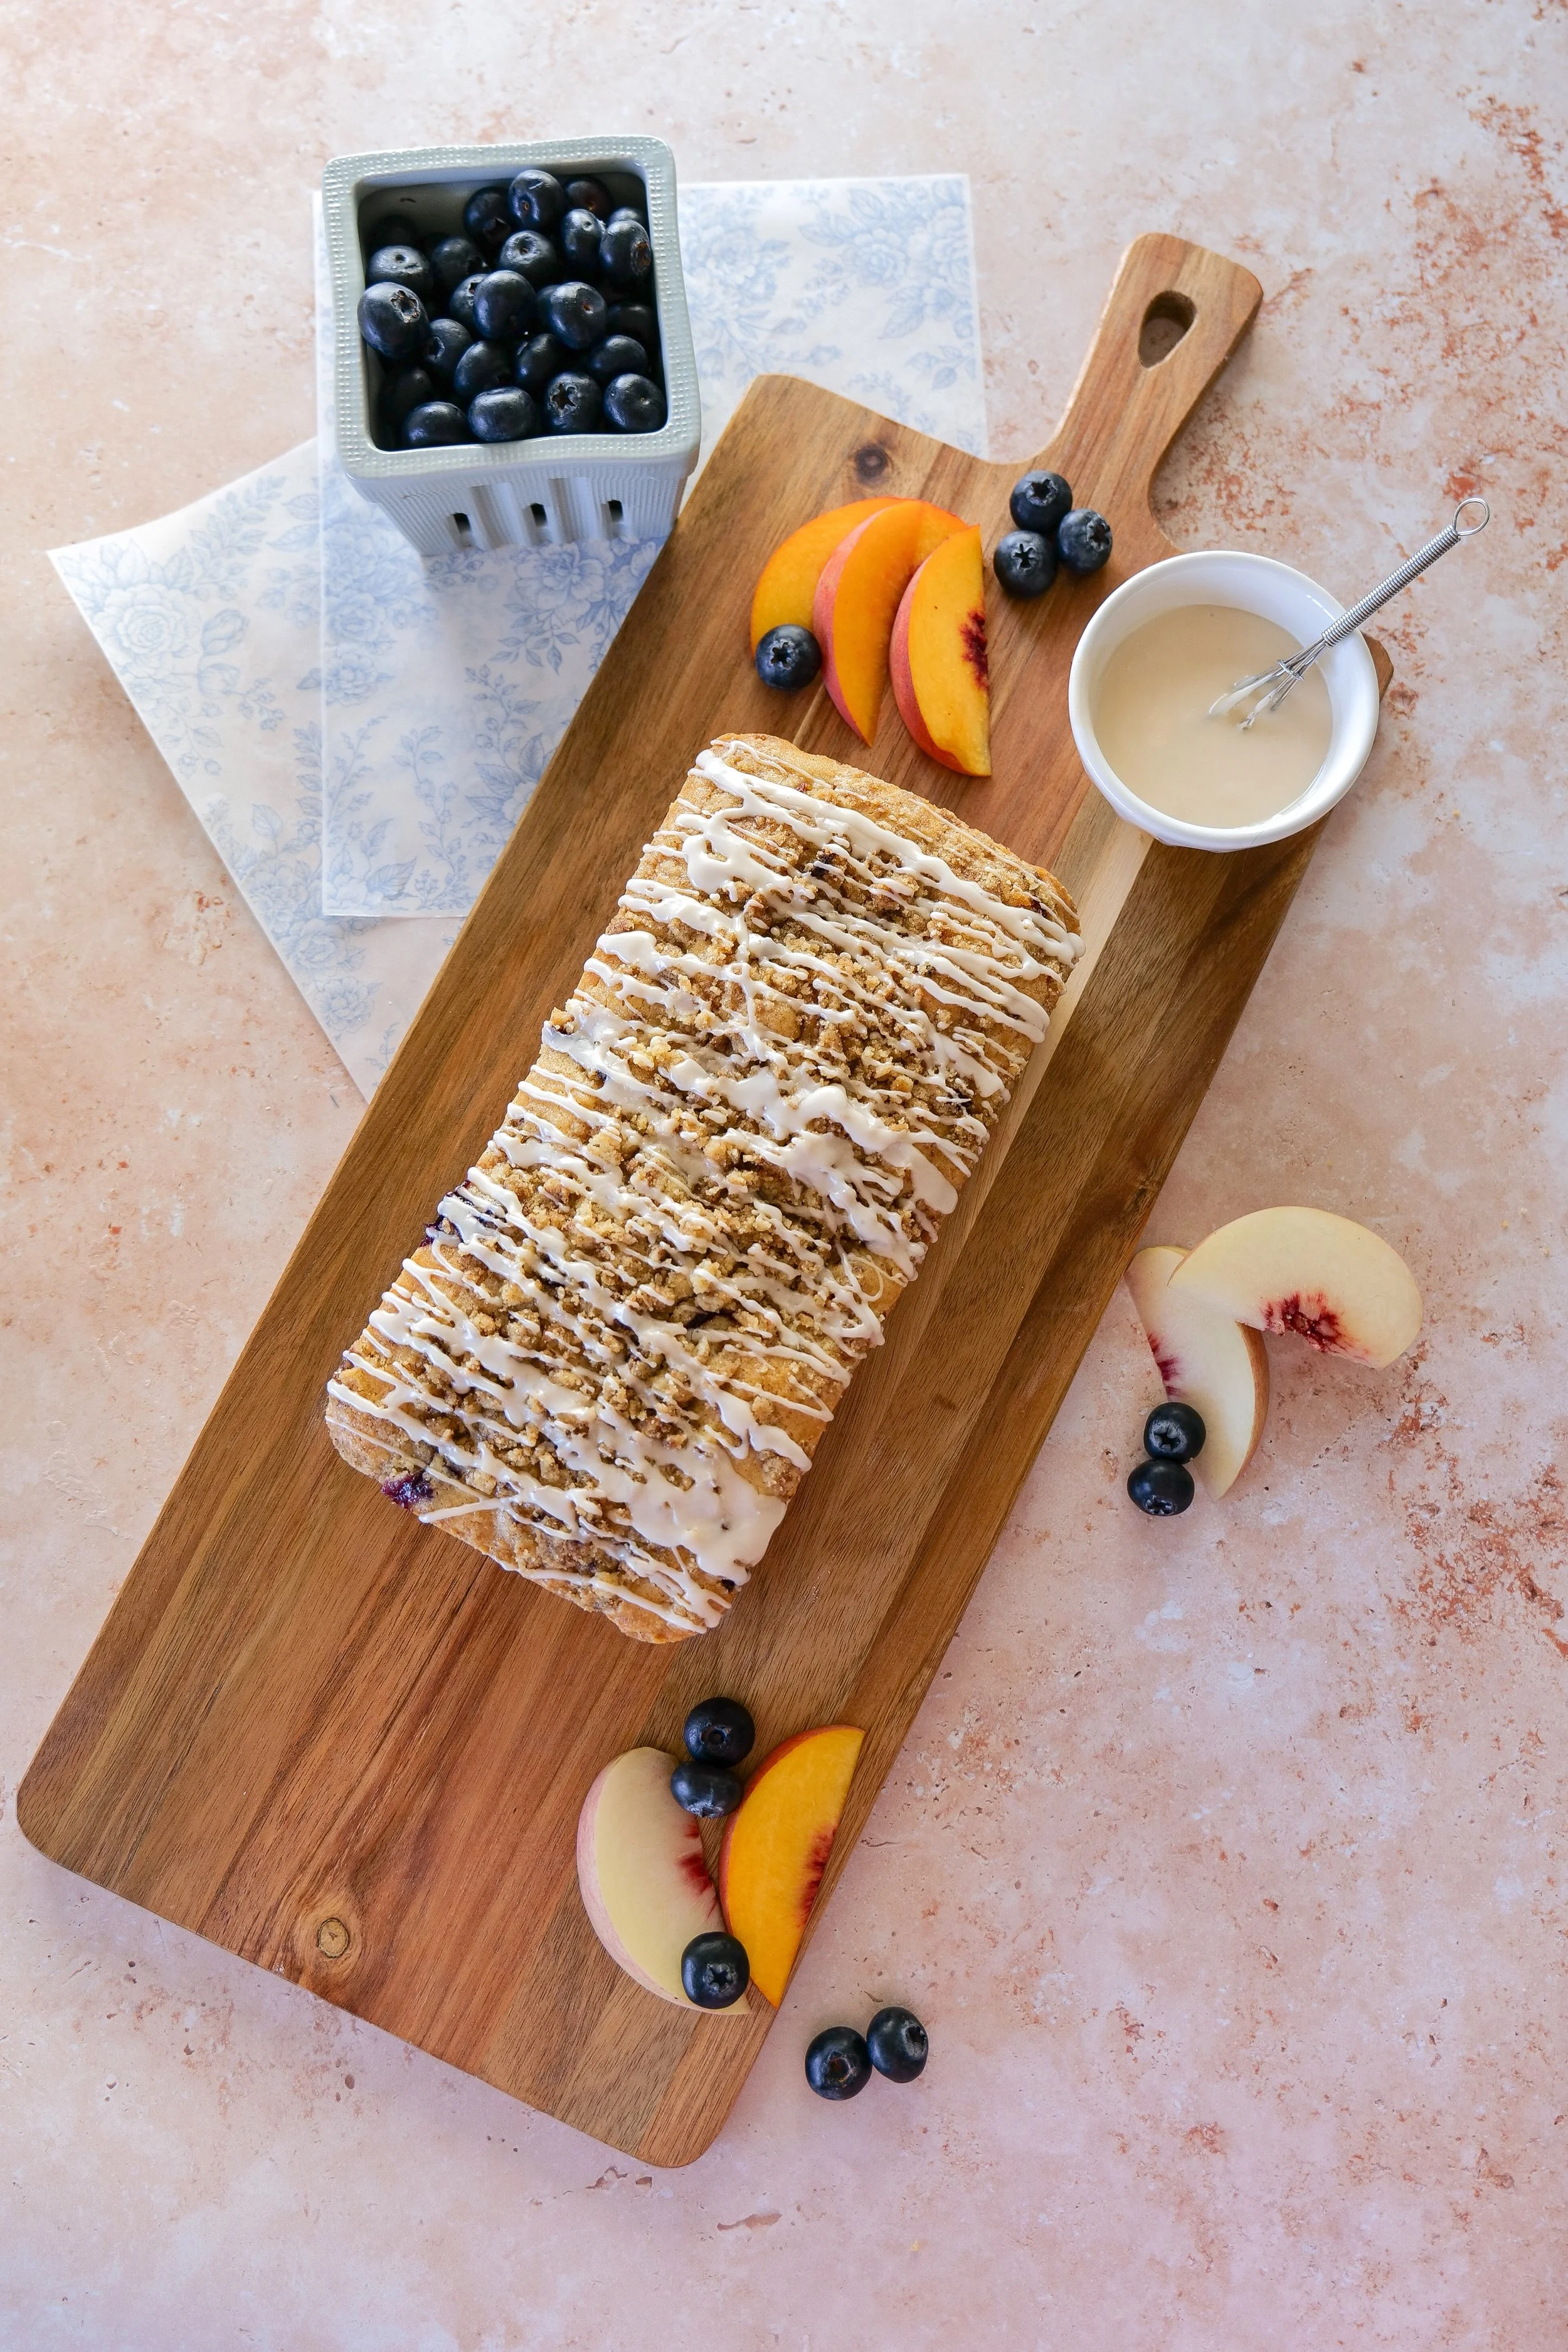
Easy homemade Blueberry Peach Loaf topped with cinnamon streusel and vanilla glaze.
Blueberry Peach Bread batter topped with cinnamon streusel in a loaf pan before baking.

Ingredients

Blueberry Peach Bread

2 cups granulated sugar

  1. 1 cup unsalted butter, melted

  2. 3 large eggs

  3. 1½ teaspoons vanilla extract

  4. ½ teaspoon almond extract (optional but highly recommended)

  5. ½ cup sour cream

  6. 1 cup milk

  7. 3 cups all-purpose flour

  8. 1½ teaspoons baking powder

  9. 1½ teaspoons salt

  10. 1 teaspoon ground cinnamon

  11. 2 cups fresh blueberries

  12. 2 cups diced fresh peaches

Cinnamon Streusel

½ cup all-purpose flour

  1. ⅓ cup granulated sugar

  2. 3 tablespoons light brown sugar

  3. 1 teaspoon cinnamon

  4. ¼ cup melted butter

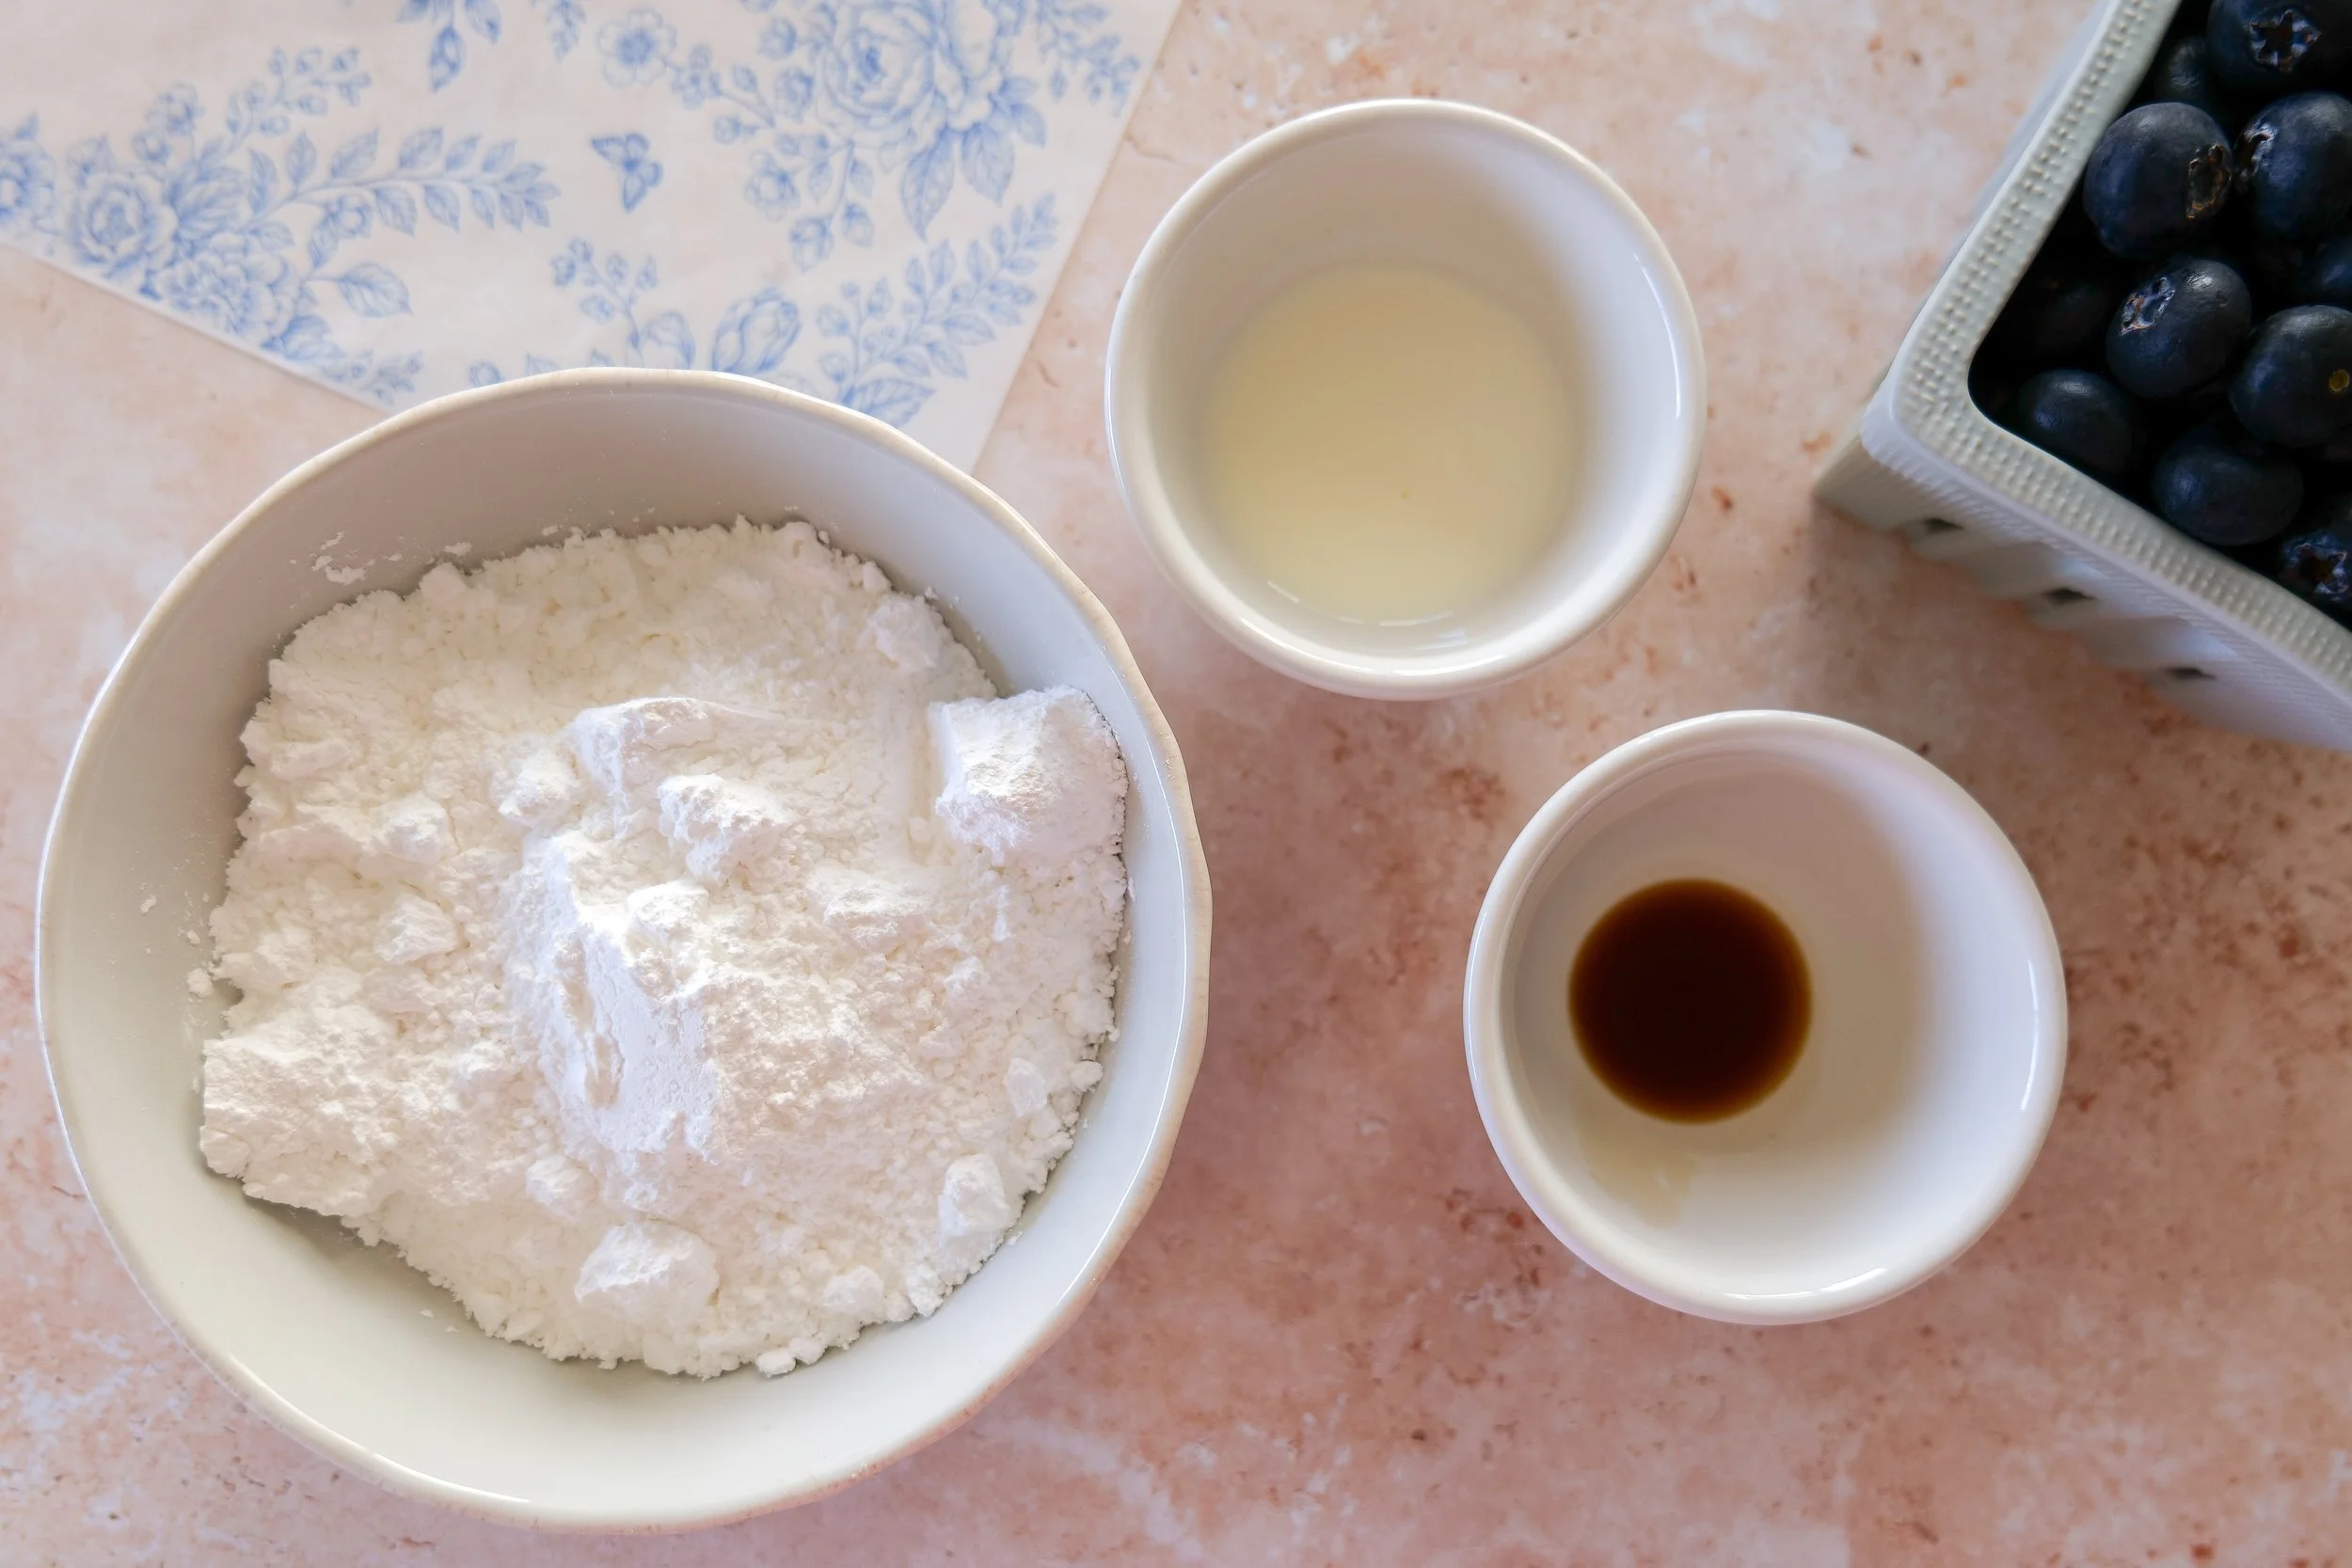
Vanilla Glaze

  • 1¼ cups powdered sugar

  • 1–2 tablespoons milk

  • ½ teaspoon vanilla extract

Instructions

Step 1

Preheat oven to 350°F. Grease or line two 9x5-inch loaf pans with parchment paper.

Step 2

In a large mixing bowl whisk together:

  • sugar

  • melted butter

  • eggs

  • vanilla

  • almond extract

  • sour cream

until smooth.

Step 3

Add:

  • flour

  • baking powder

  • salt

  • cinnamon

Mix until almost combined.

Pour in the milk and stir until just incorporated. Do not overmix.

Step 4

Gently fold in:

  • 2 cups blueberries

  • 2 cups diced peaches

using a rubber spatula.

Step 5

Divide half of the batter between both loaf pans.

Sprinkle a small handful of blueberries and peaches over each layer.

Top with the remaining batter.

This gives fruit throughout every slice.

Step 6

To make the streusel, stir together:

  • flour

  • granulated sugar

  • brown sugar

  • cinnamon

Add melted butter and mix until crumbly.

Sprinkle generously over both loaves.

Step 7

Bake 50–60 minutes, or until a toothpick inserted into the center comes out clean.

If the streusel begins browning too quickly, loosely tent with foil during the last 15 minutes.

Step 8

Allow the loaves to cool for 10–15 minutes before removing from the pans.

Transfer to a wire rack.

Step 9

Whisk together:

  • powdered sugar

  • milk

  • vanilla

until smooth.

Drizzle over completely cooled loaves.

Serve and enjoy!

Slice of Blueberry Peach Bread topped with cinnamon streusel and a drizzle of vanilla glaze.

Amanda's Tips

  • Toss the peaches and blueberries with 1 tablespoon of flour before folding them into the batter to help prevent them from sinking.

  • Use peaches that are ripe but still slightly firm so they hold their shape while baking.

  • Don't overmix the batter—this keeps the loaf tender.

  • The loaf tastes even better the next day as the flavors meld together.

  • Freeze individual slices for an easy grab-and-go breakfast.

Cut Blueberry Peach Bread loaf showing a moist crumb filled with fresh peaches and blueberries.

Variations

Want to change it up?

Try adding:

  • sliced almonds

  • chopped pecans

  • lemon zest

  • vanilla bean

  • raspberries

  • nectarines

You can even divide the batter into muffin tins for Blueberry Peach Streusel Muffins.

Freshly baked Blueberry Peach Bread with golden cinnamon streusel cooling on a wire rack.

Storage

Store covered at room temperature for up to three days.

For longer storage, refrigerate for up to one week.

Can You Freeze Blueberry Peach Bread?

Absolutely!

Wrap the entire loaf or individual slices tightly and freeze for up to three months.

Simply thaw overnight or warm gently before serving.

Frequently Asked Questions

Can I use frozen peaches?

Yes! Thaw and pat them dry before adding them to the batter.

Should I peel the peaches?

That's completely up to you. The peel softens beautifully during baking, but peeled peaches work just as well.

Can I make this into muffins?

Yes! Divide the batter between muffin tins and reduce the baking time to about 20–25 minutes.

Why did my blueberries sink?

Coating the fruit in a little flour before folding it into the batter helps keep it suspended.

Can I make this ahead of time?

Yes! In fact, the flavors are even better the next day.

What type of peaches work best?

Yellow peaches provide the sweetest flavor and hold up beautifully during baking.

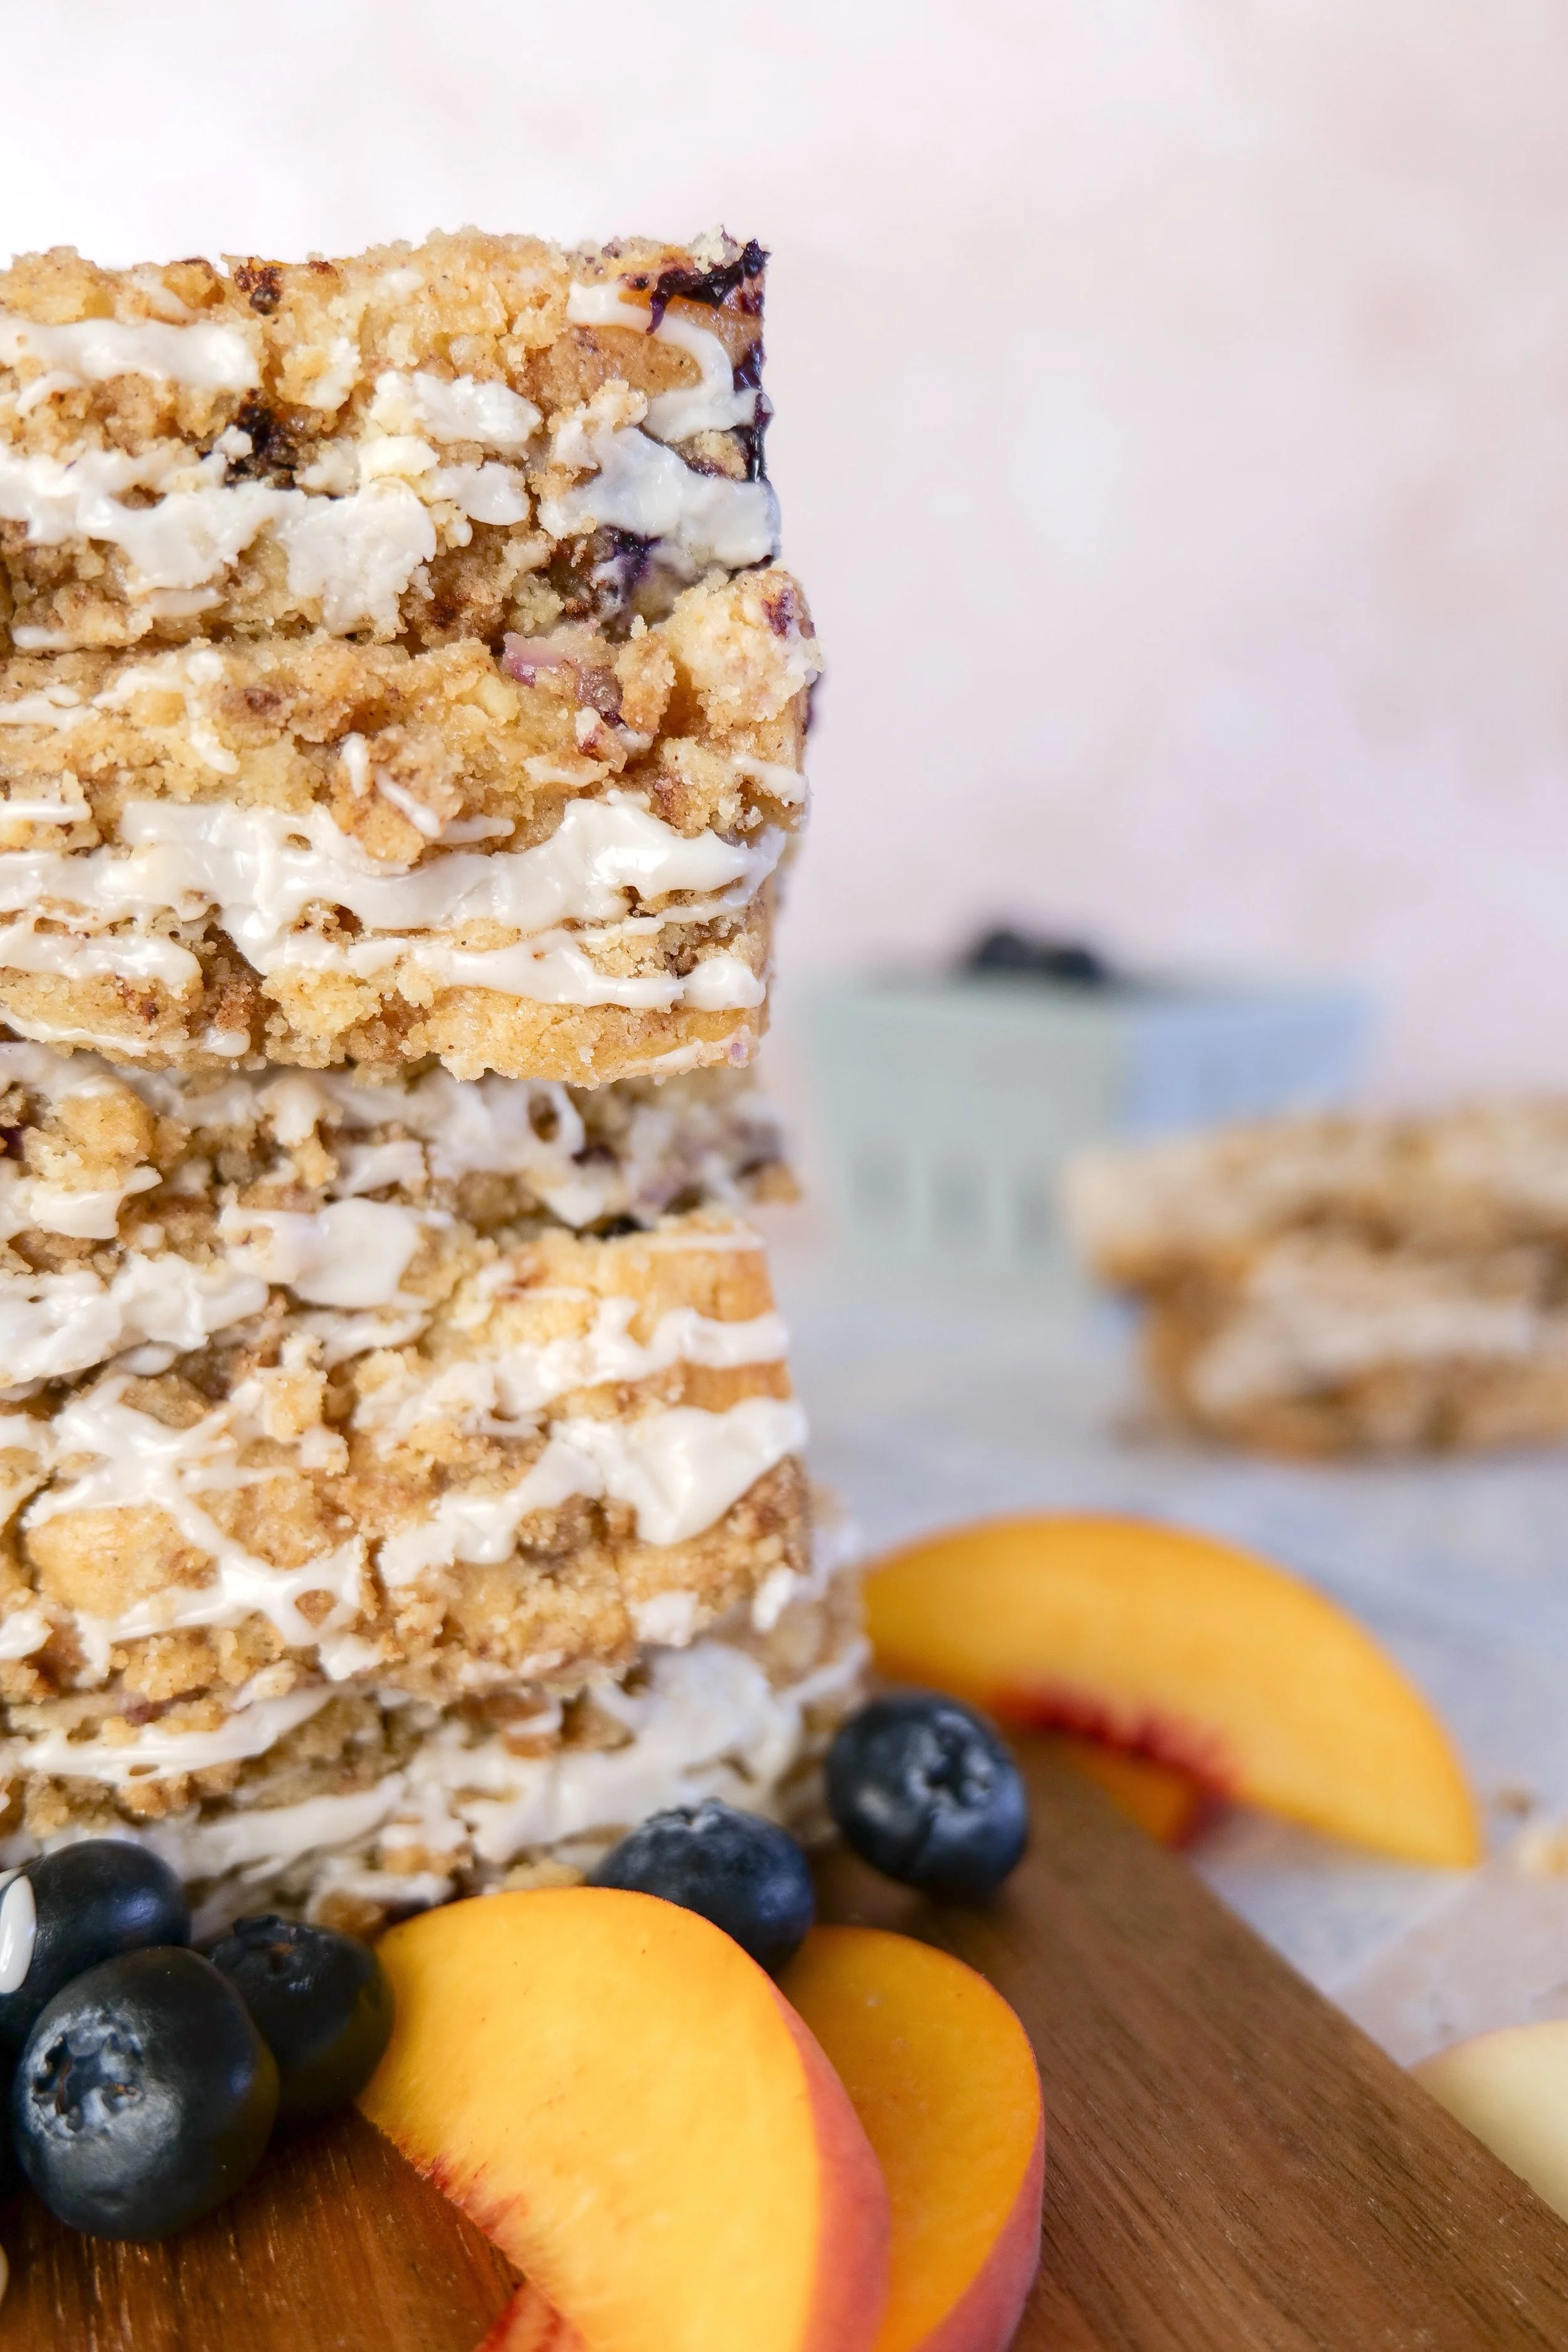
Close-up of a golden Blueberry Peach Streusel Loaf topped with vanilla glaze.

Serving Suggestions

This loaf pairs perfectly with:

More Summer Recipes You'll Love

If you enjoyed this Blueberry Peach Streusel Bread, I think you'll love these recipes too:

Shop My Summer Baking Favorites

Want to recreate this recipe at home?

I've linked all of my favorite baking tools, loaf pans, mixing bowls, measuring cups, cooling racks, parchment paper, and everyday kitchen essentials in one place.

Summer Baking Essentials ShopMy Shelf

You can also browse my Kitchen Essentials ShopMy Shelf for the products I use almost every day in my kitchen.

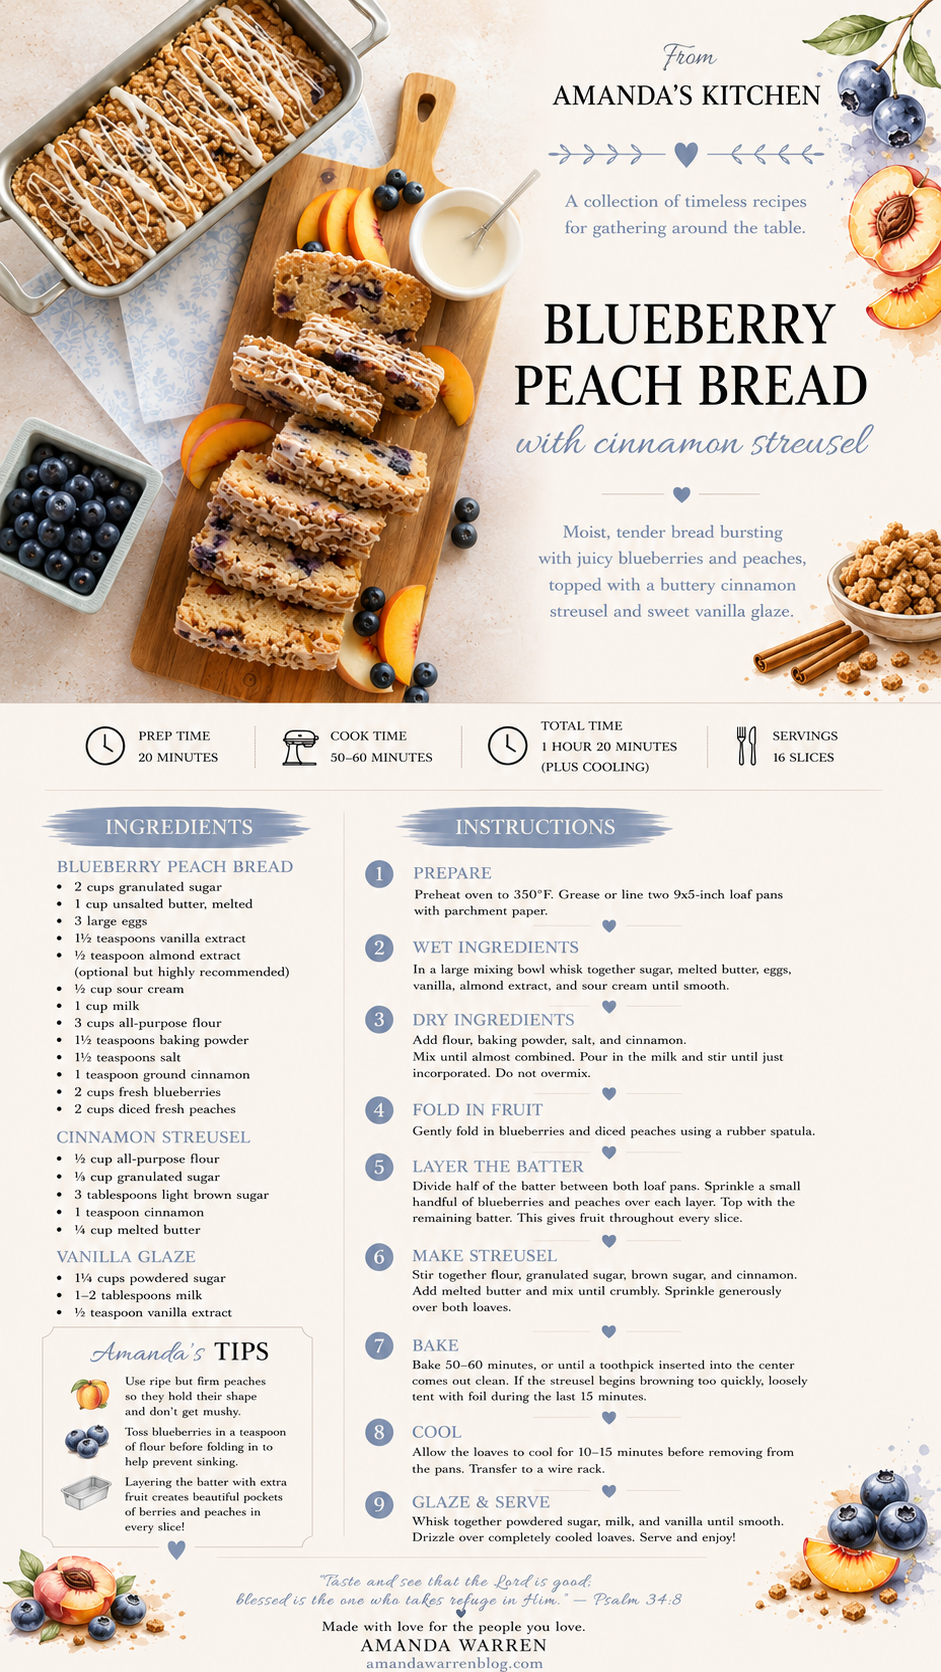
From Amanda's Kitchen Printable

Prefer a printable version?

I've created a beautiful printable recipe card in my From Amanda's Kitchen collection so you can save it to your recipe binder or print it for your kitchen.

blueberry peach streusel loaf recipe card from amanda's kitchen
Homemade Blueberry Peach Bread served with coffee and fresh peaches for a summer breakfast.

A Little Note From Amanda

One of my favorite things about baking is that someone always wanders into the kitchen asking what smells so good. Those little moments—sharing a warm slice over coffee, wrapping up a loaf for a neighbor, or watching little hands reach for another piece—are the memories that stay with us long after the last crumb is gone.

I hope this Blueberry Peach Streusel Bread becomes one of those recipes that finds its way into your family's traditions, bringing people together around the table, one slice at a time.

Easy Summer Veggie Frittata Recipe (Healthy, Quick & Gluten-Free Breakfast)

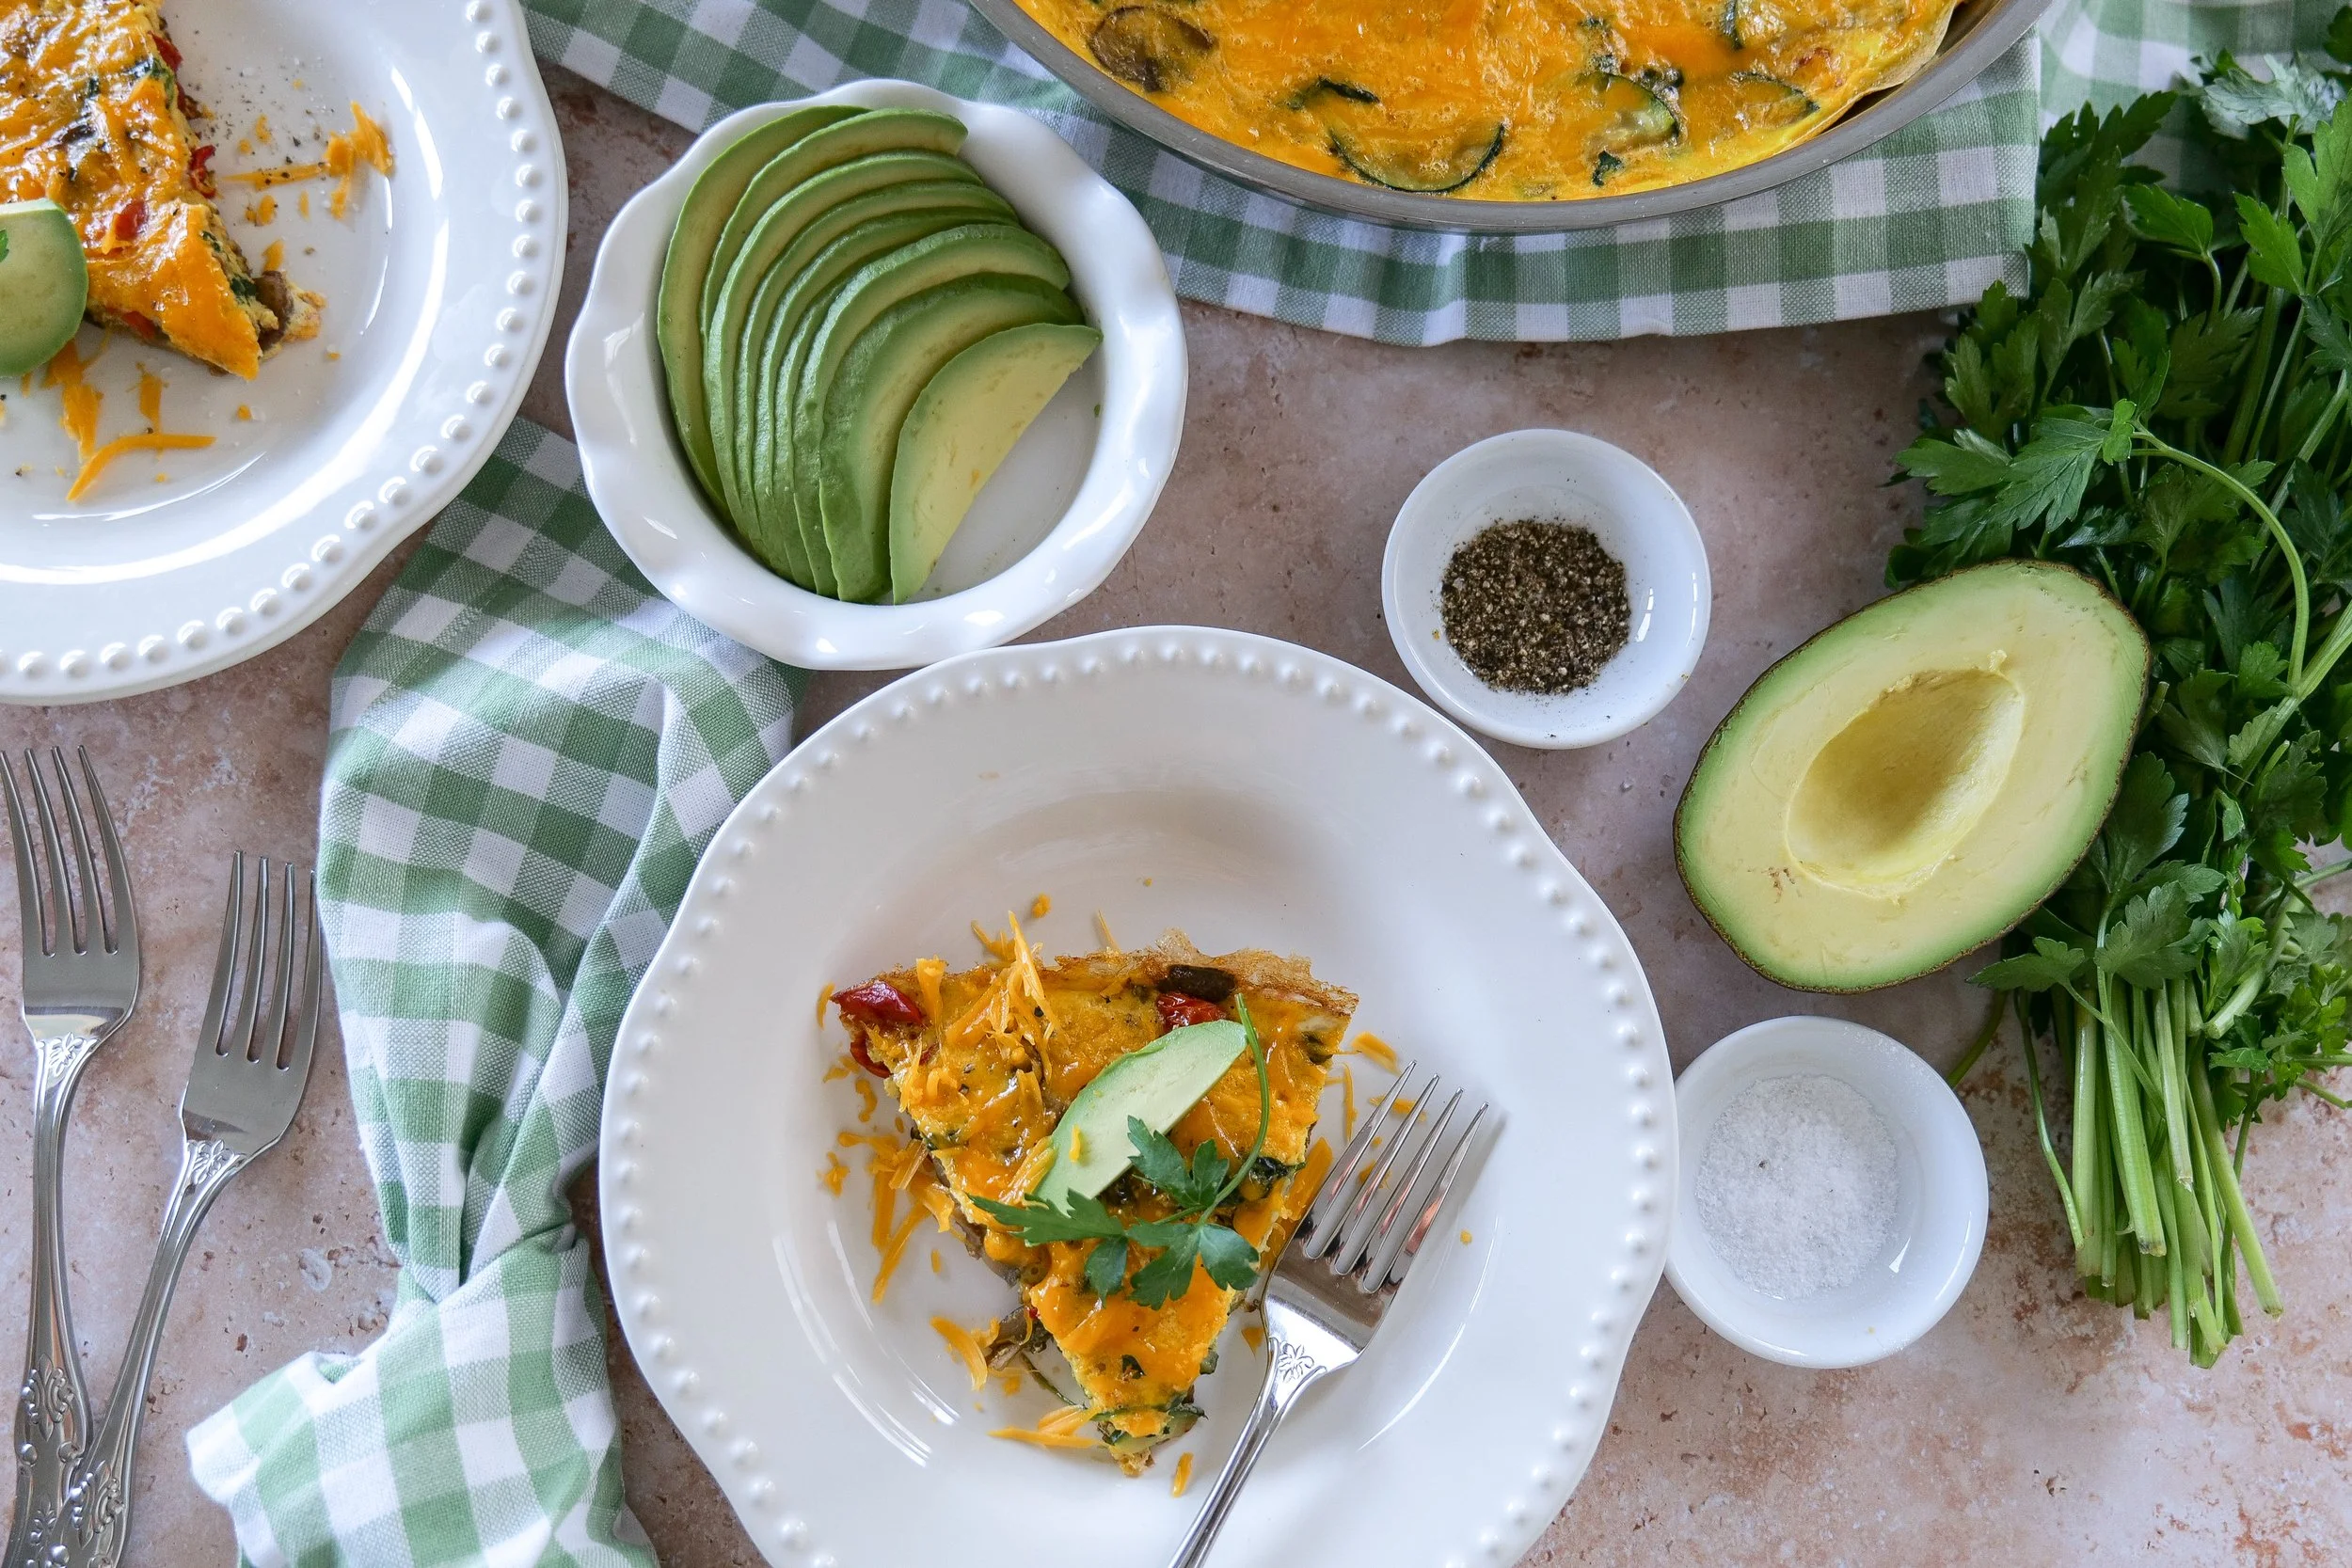
If you’re searching for an easy summer veggie frittata recipe packed with fresh seasonal produce, this healthy breakfast dish is one you’ll make again and again. Made with colorful vegetables like zucchini, tomatoes, and spinach, this gluten-free frittata is light, flavorful, and perfect for breakfast, brunch, or even a quick summer dinner.

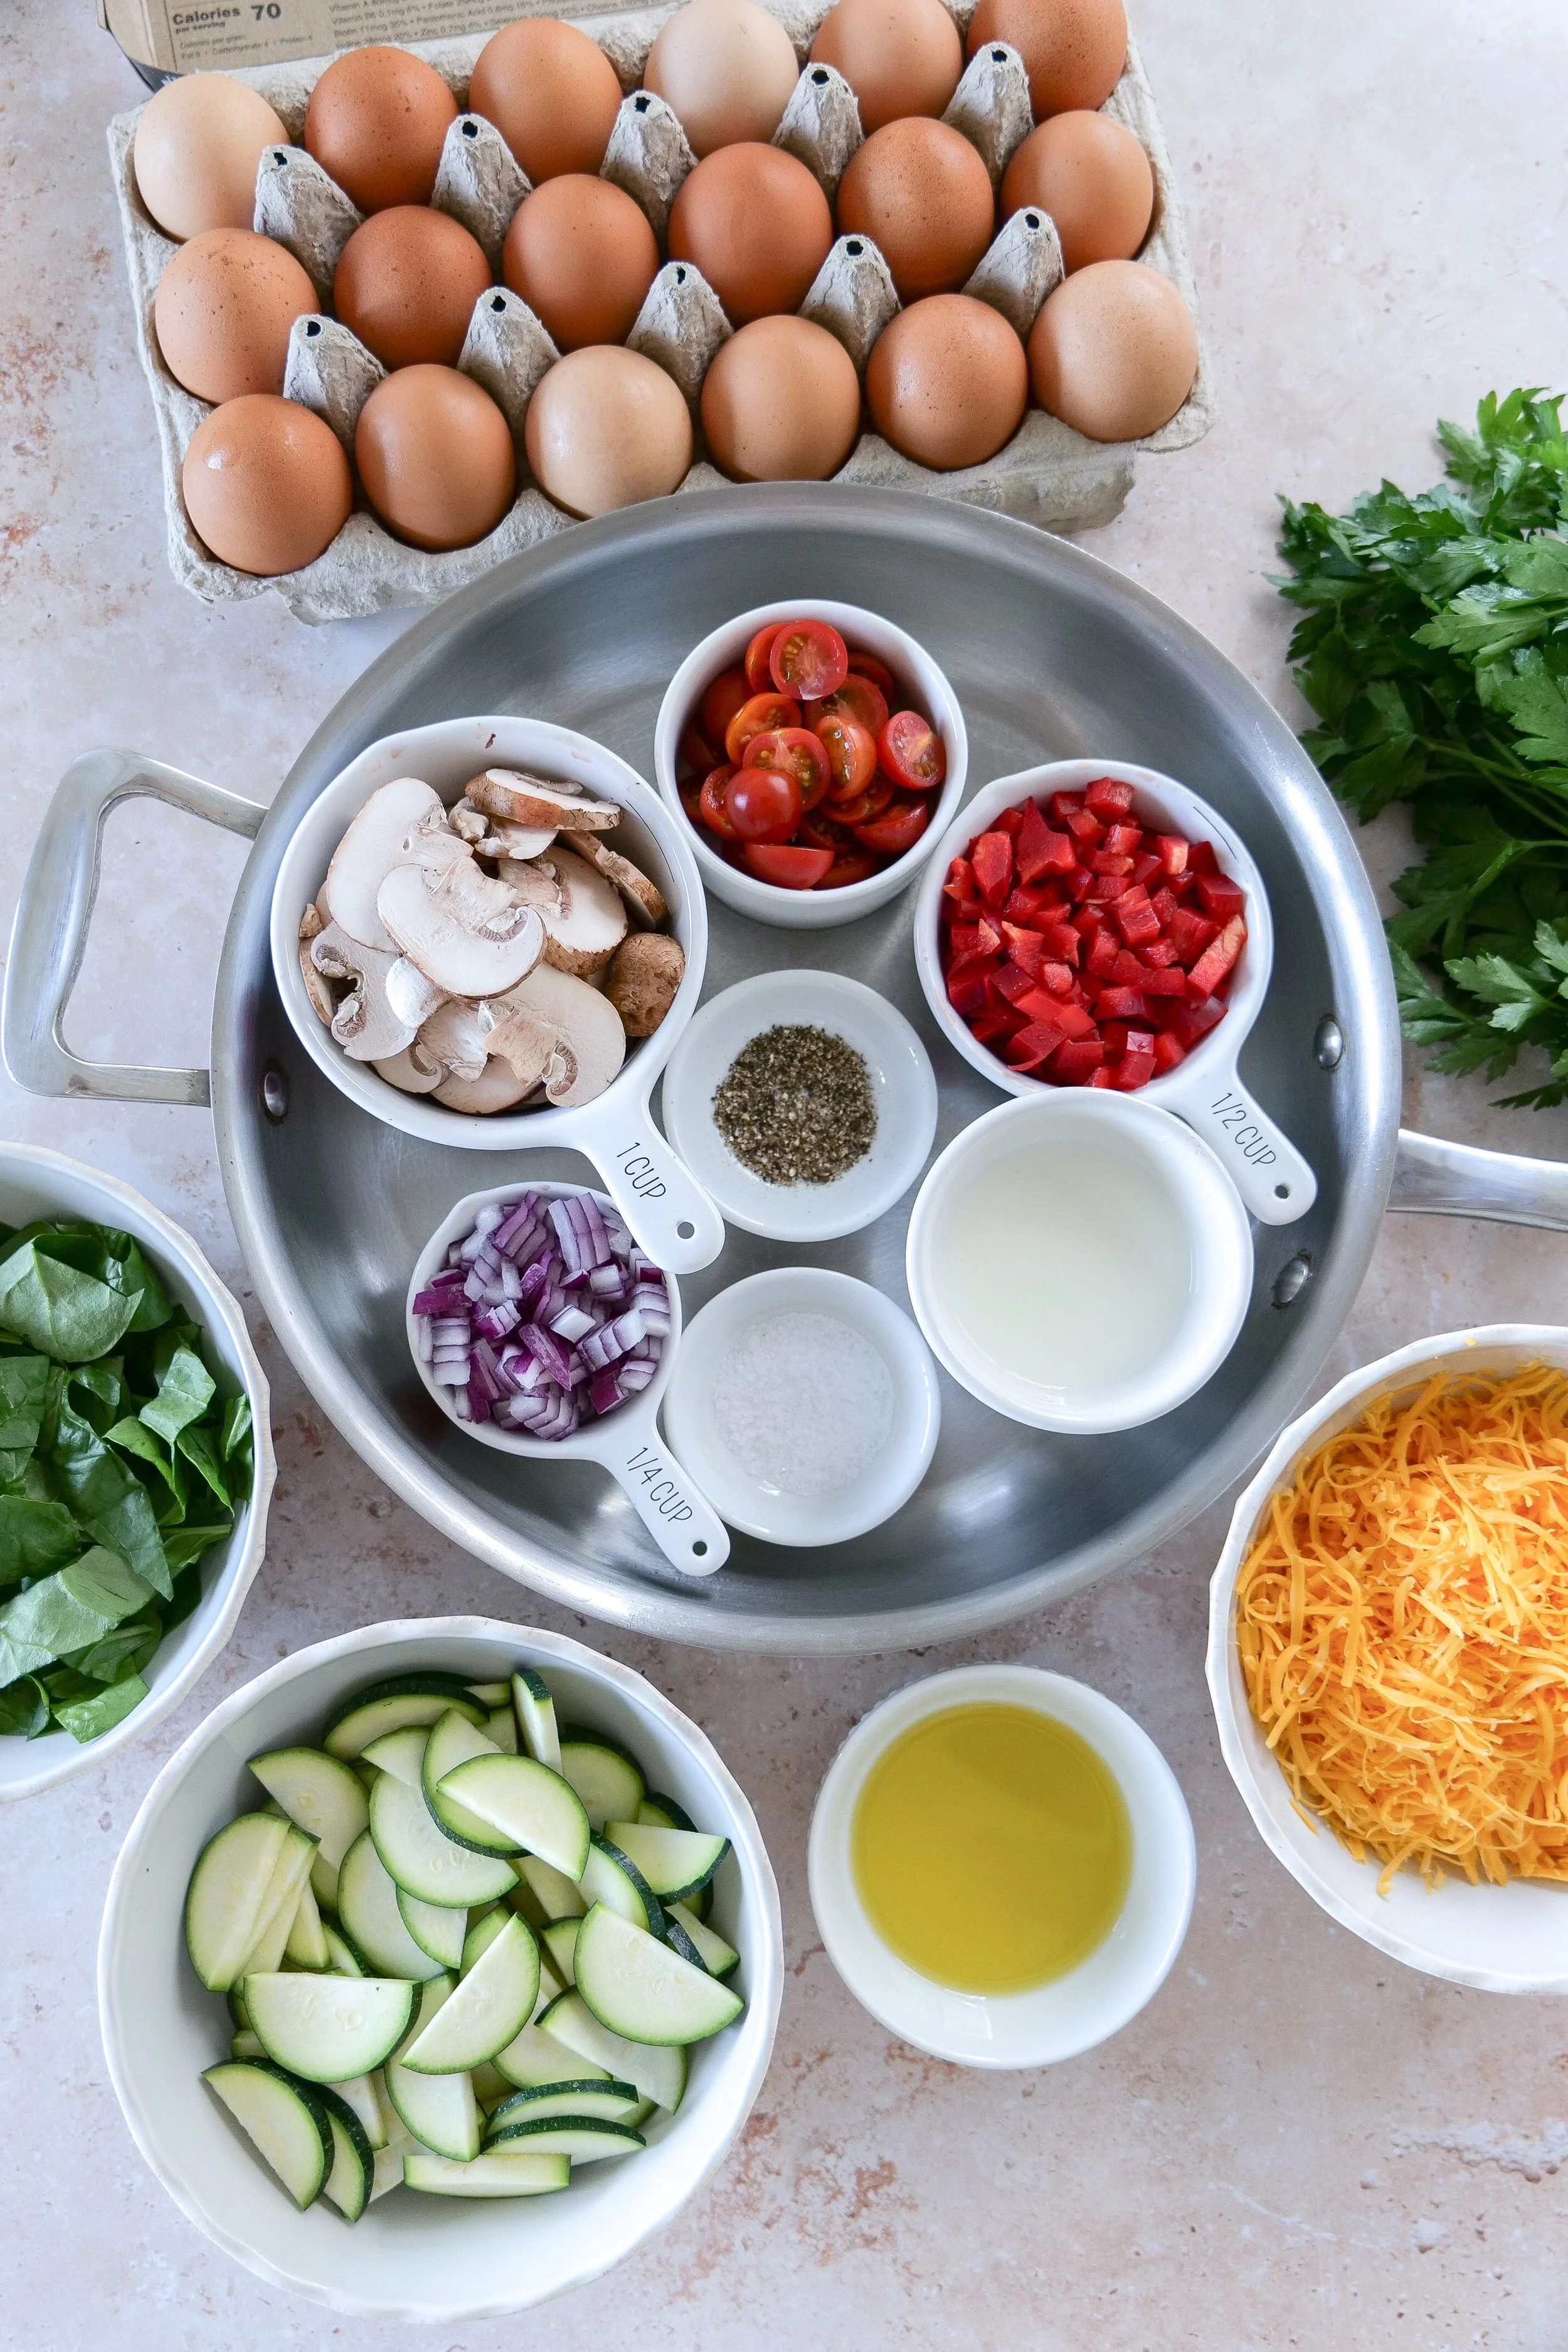
Frittatas are one of the easiest meals you can make, yet they feel elevated enough for a weekend brunch or casual gathering. This easy frittata recipe comes together in just 30 minutes, uses minimal ingredients, and is naturally gluten-free and low in carbs—making it perfect for a variety of diets.

↓ Skip to Recipe
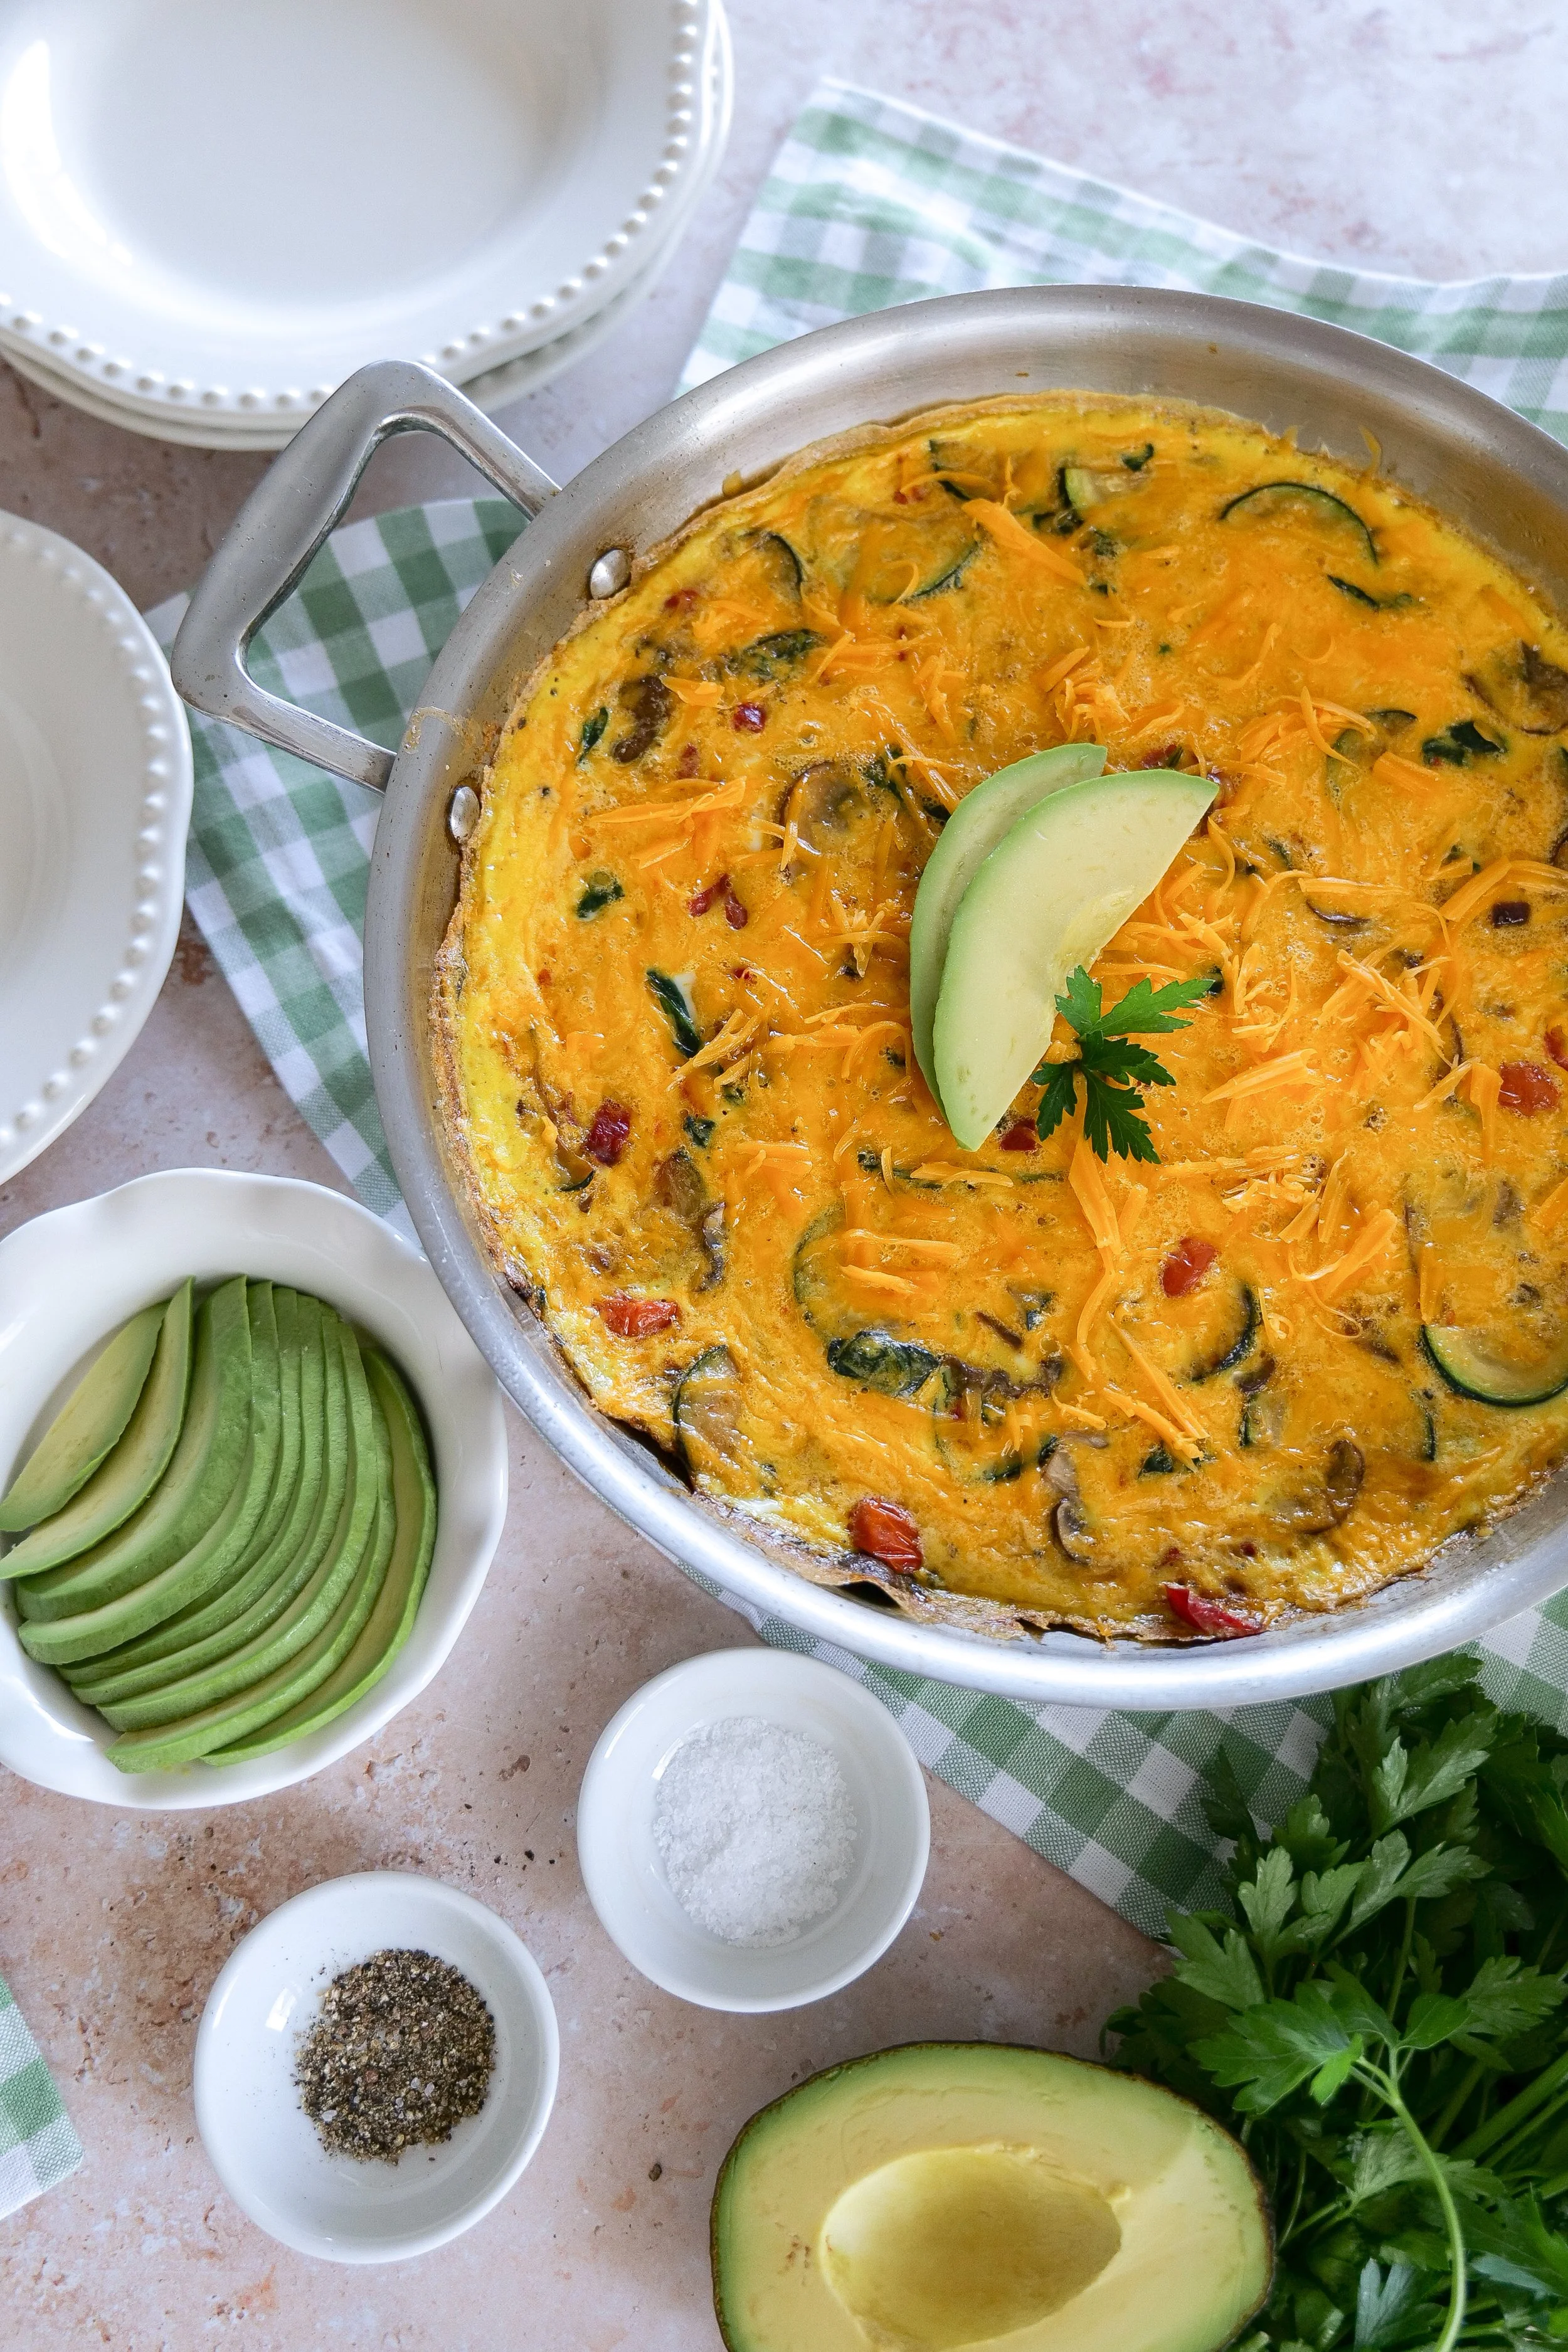
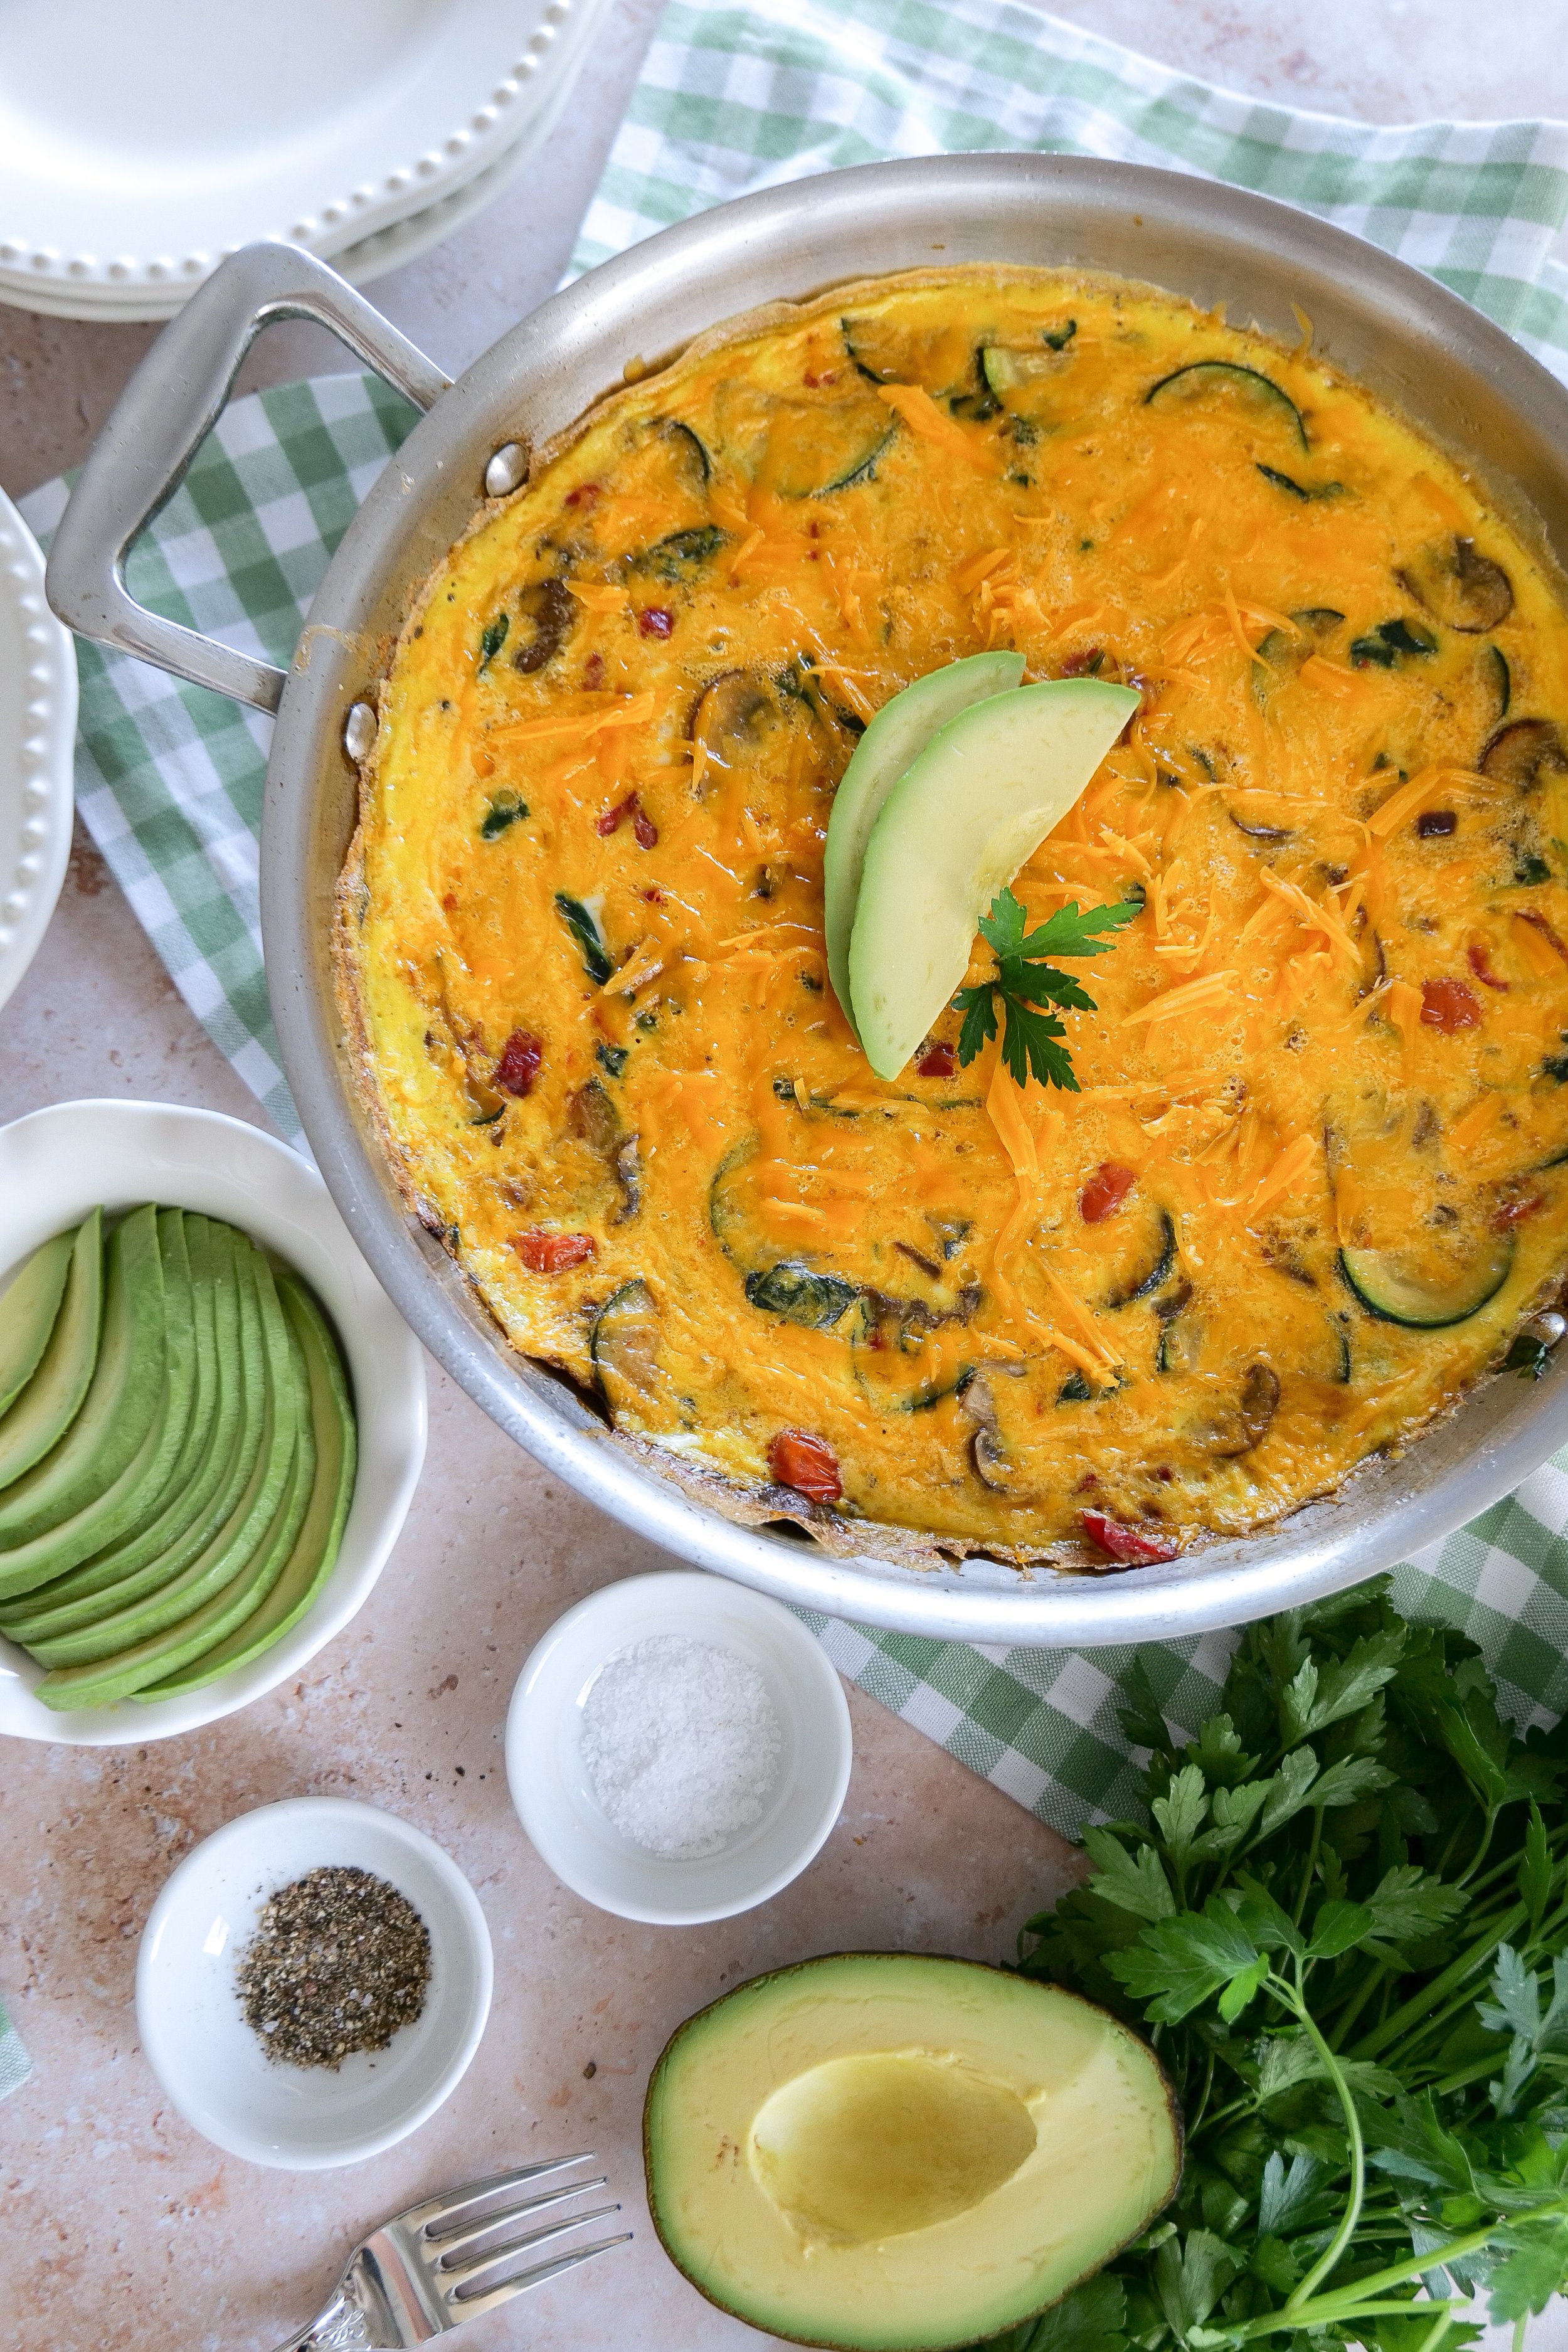
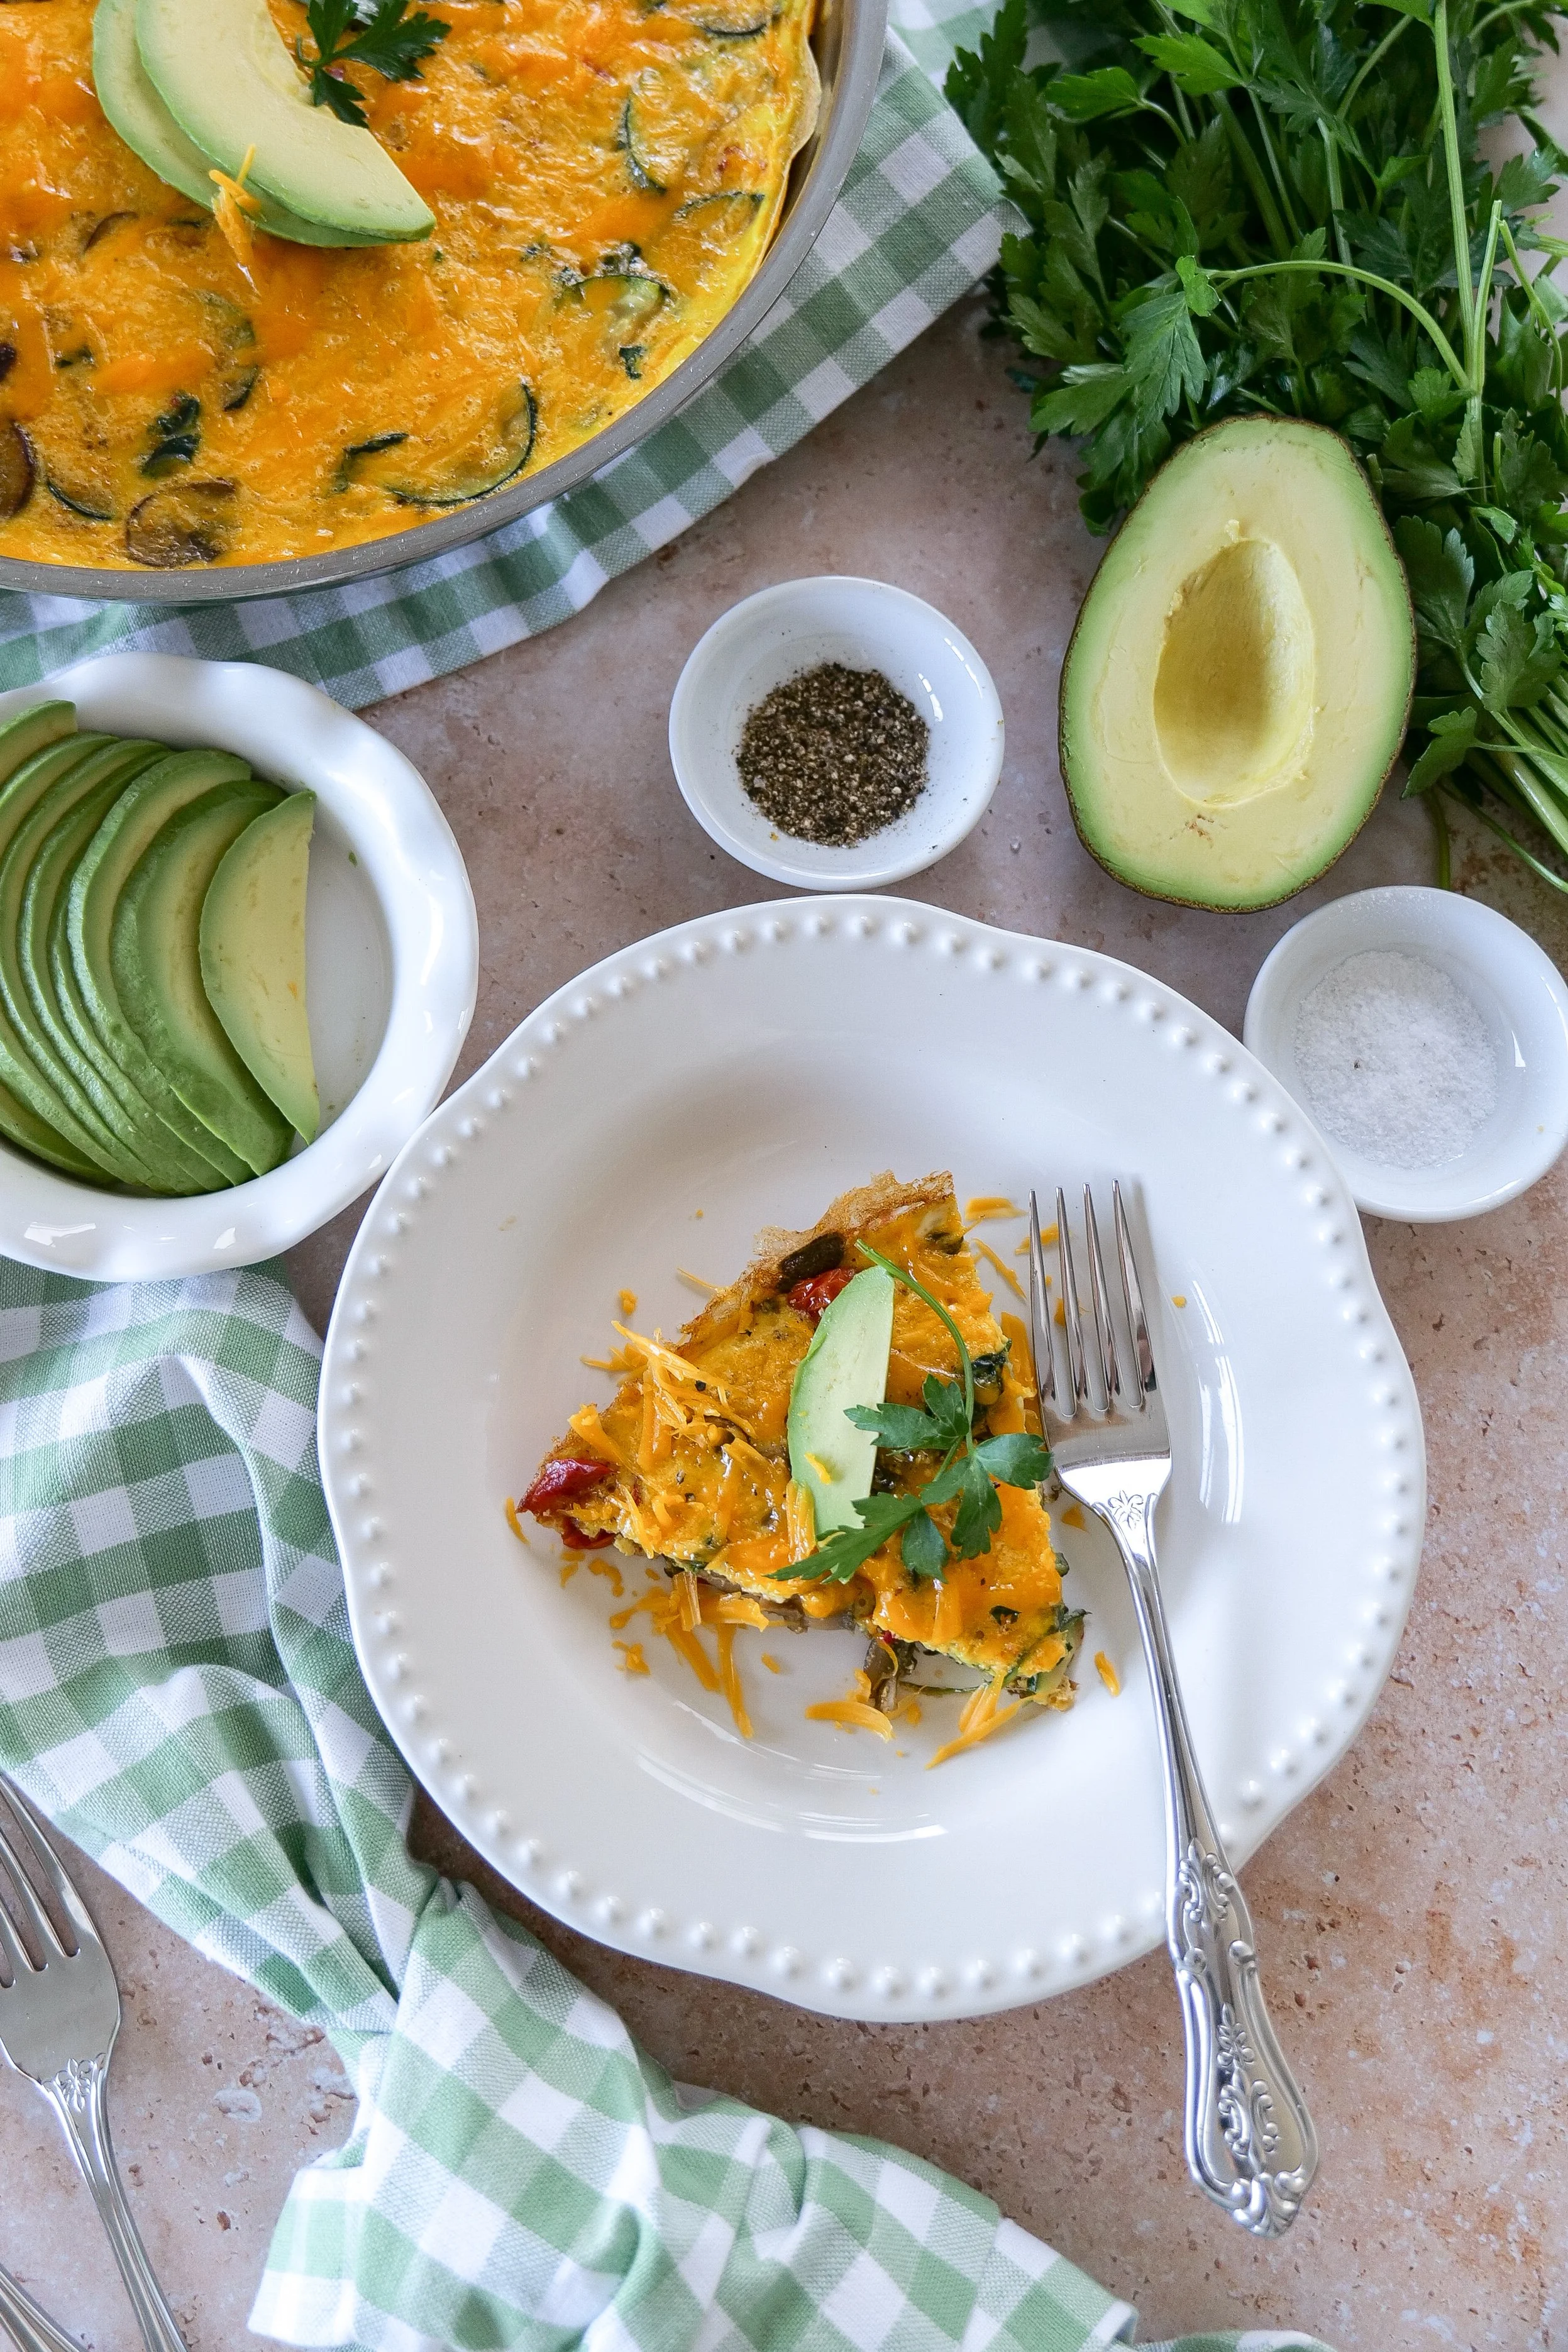
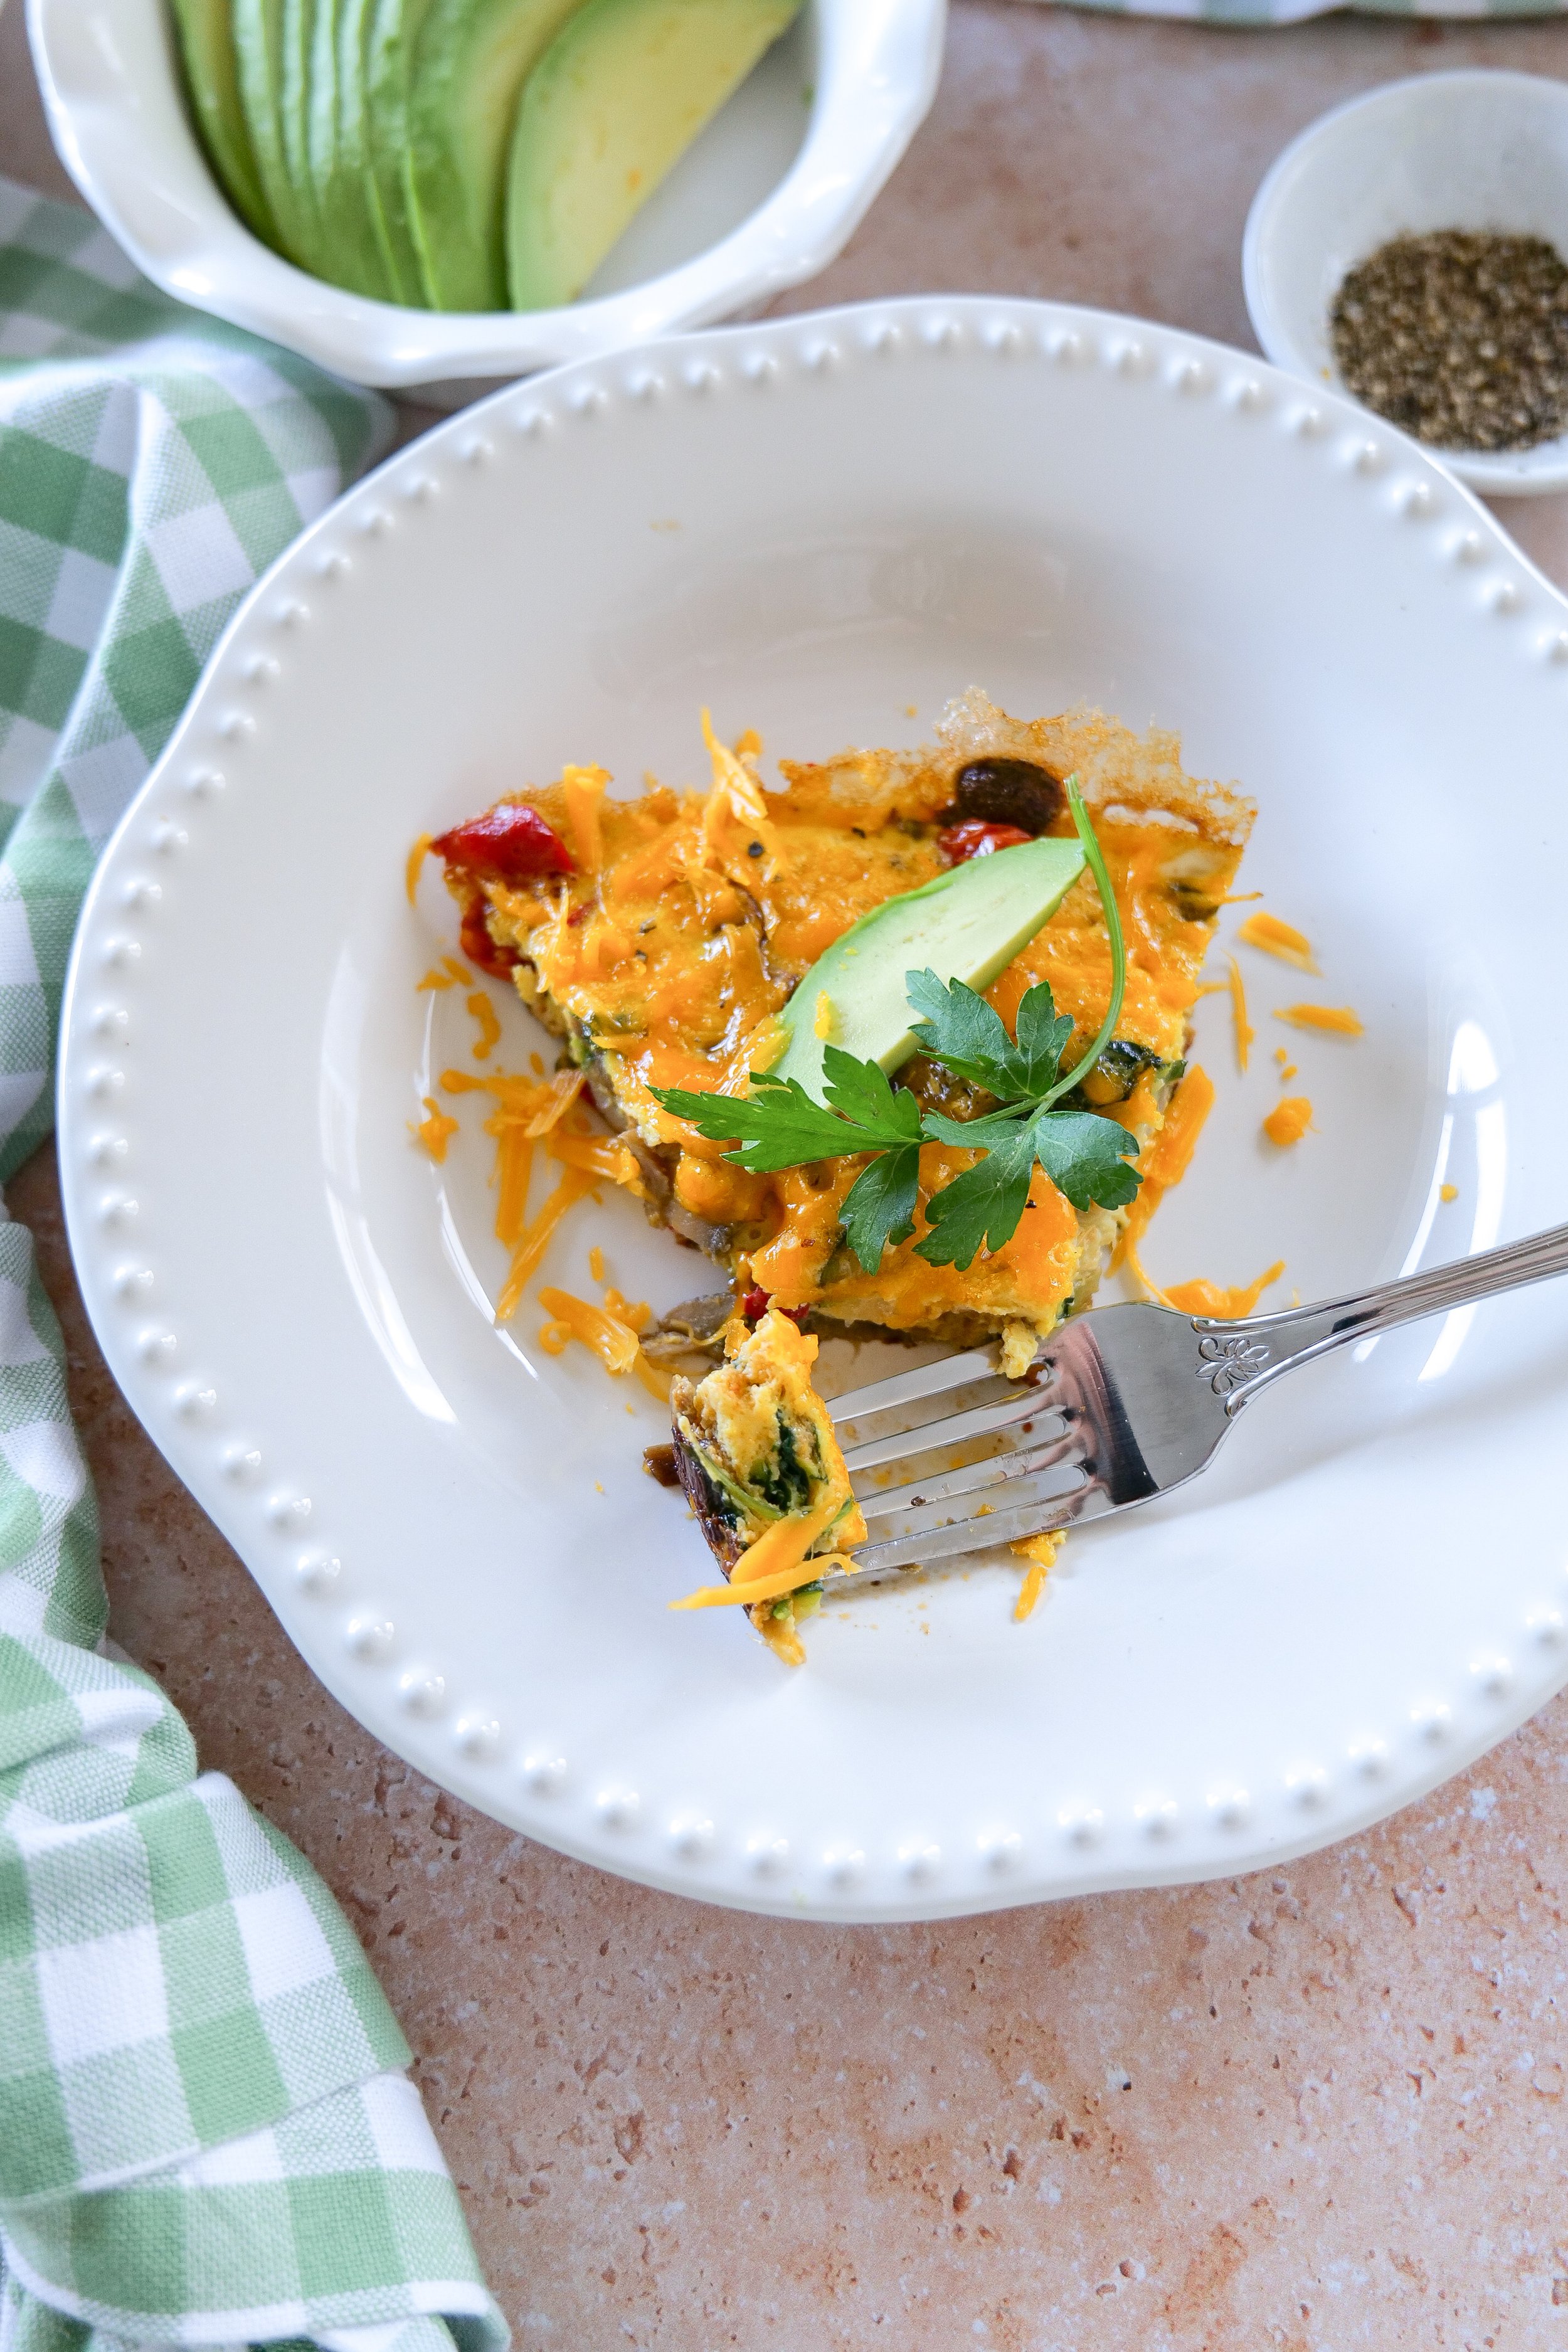
Easy summer veggie frittata recipe with zucchini tomatoes spinach and fresh herbs
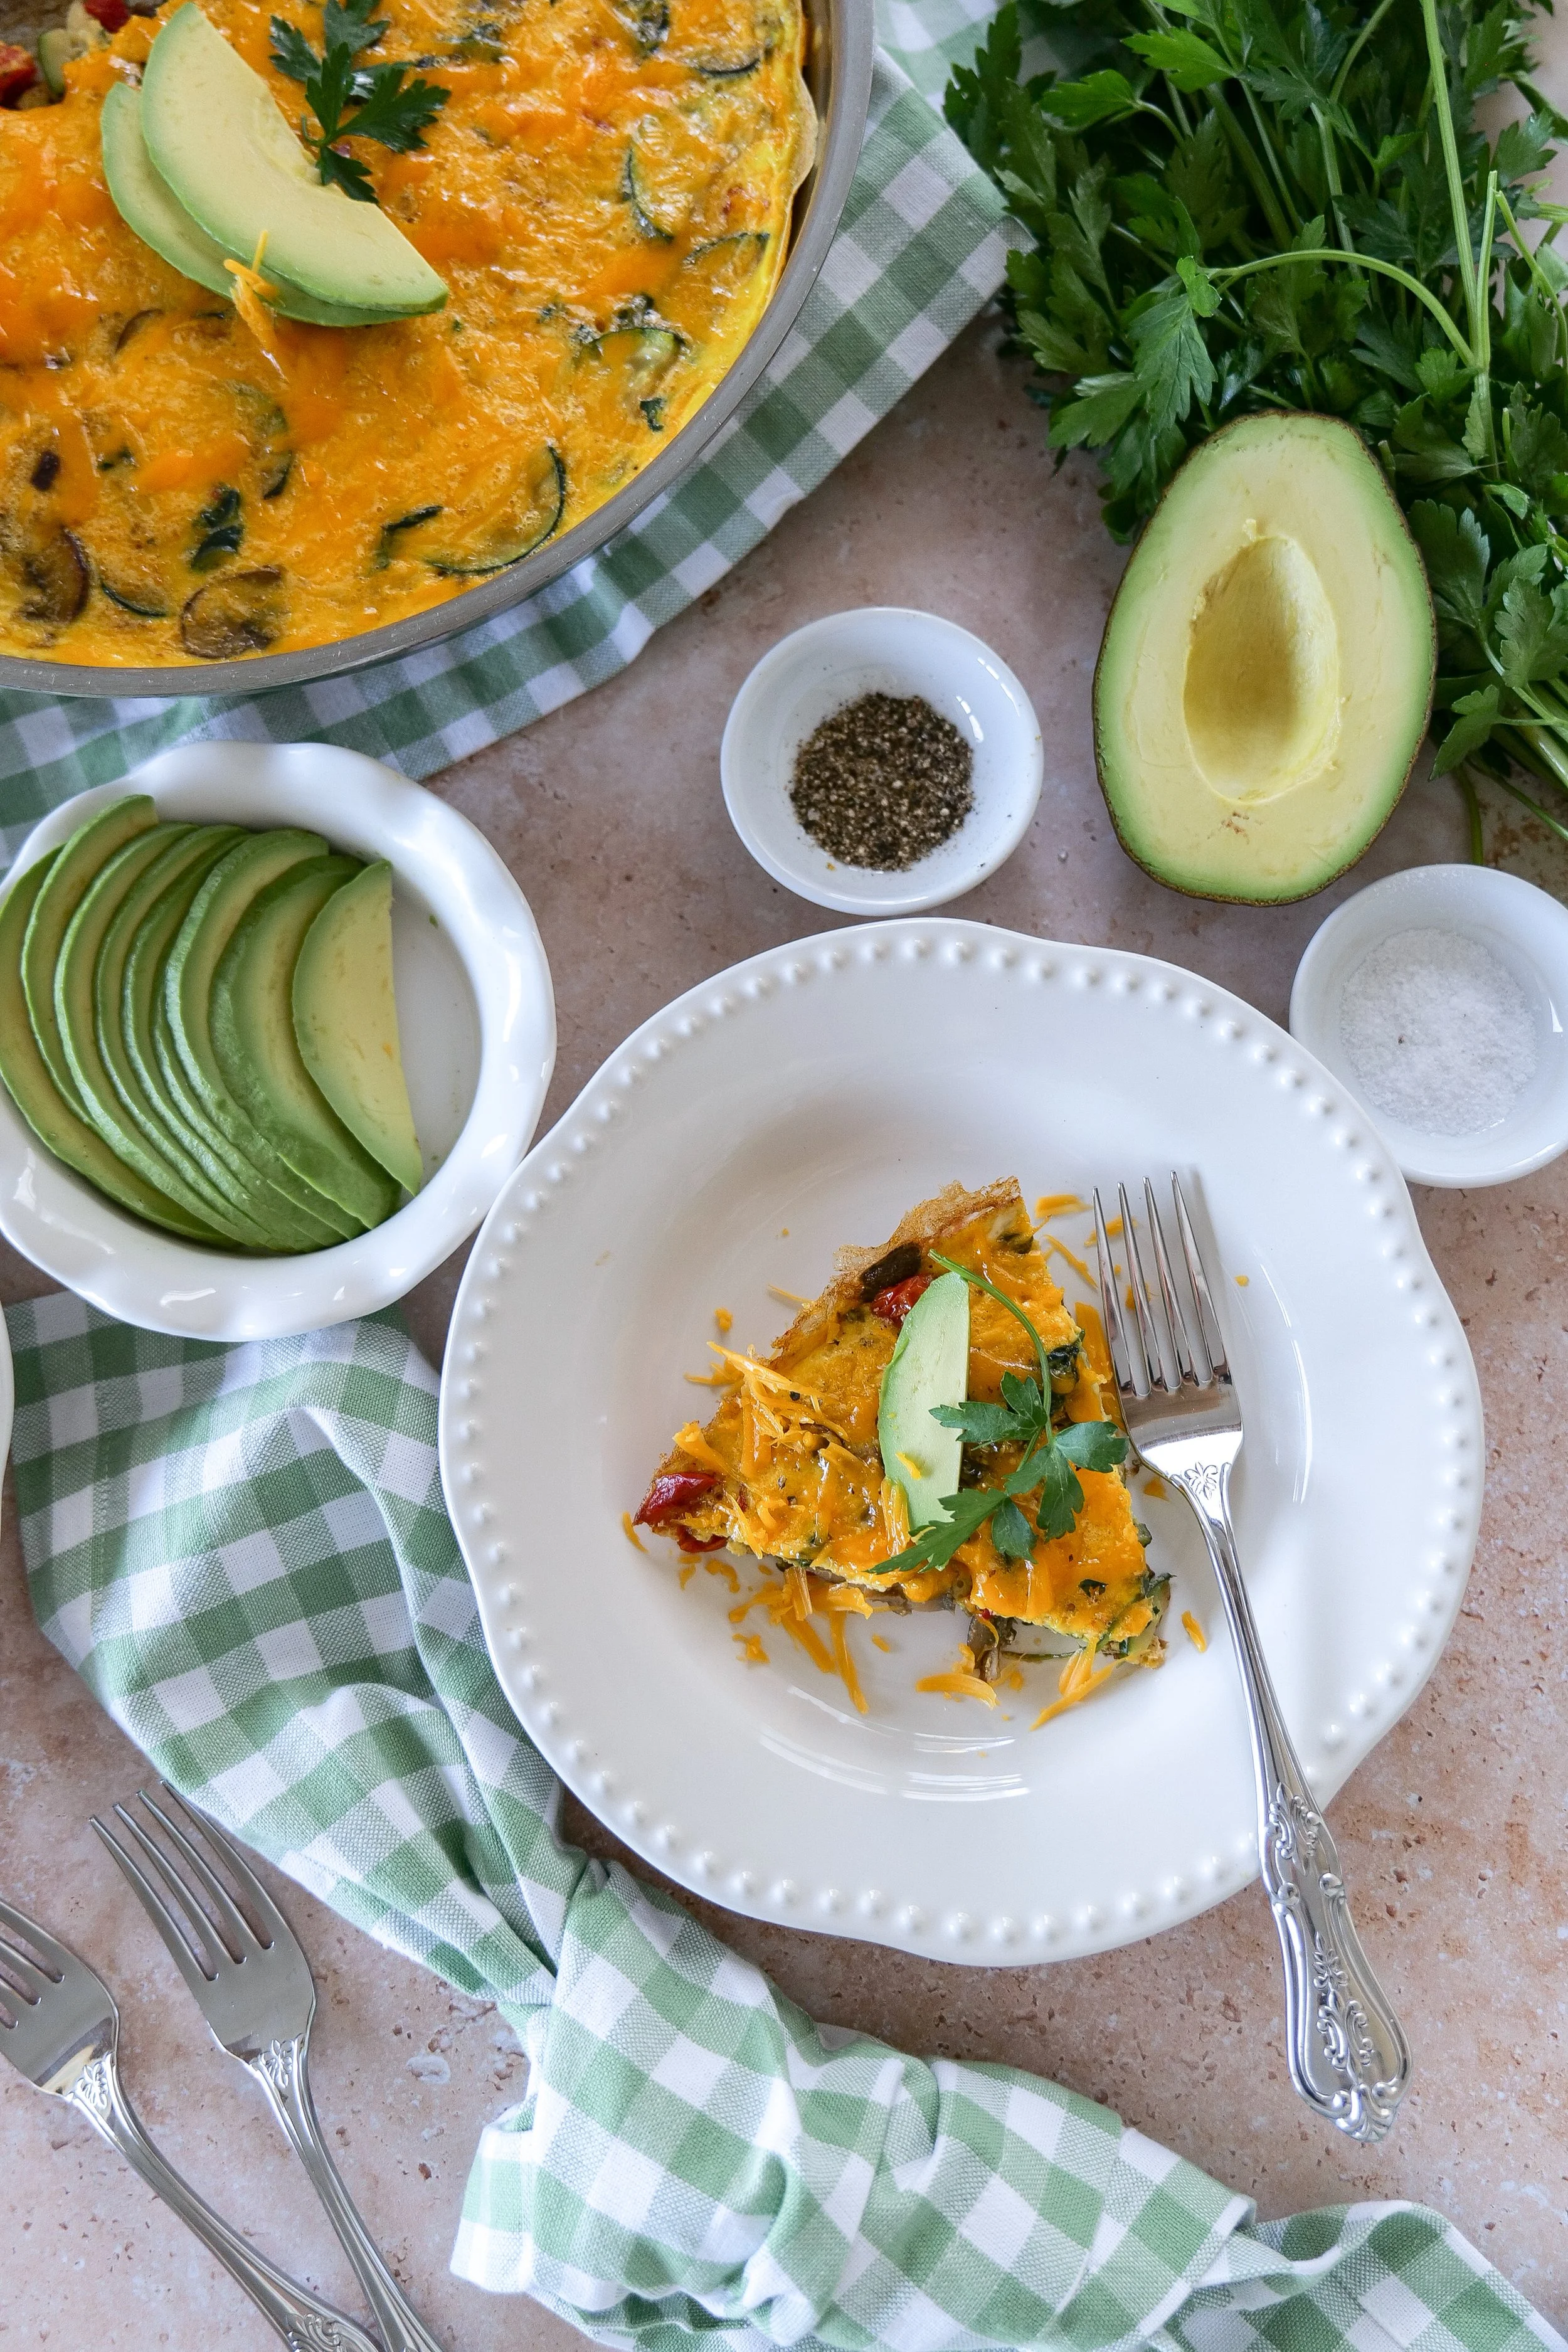
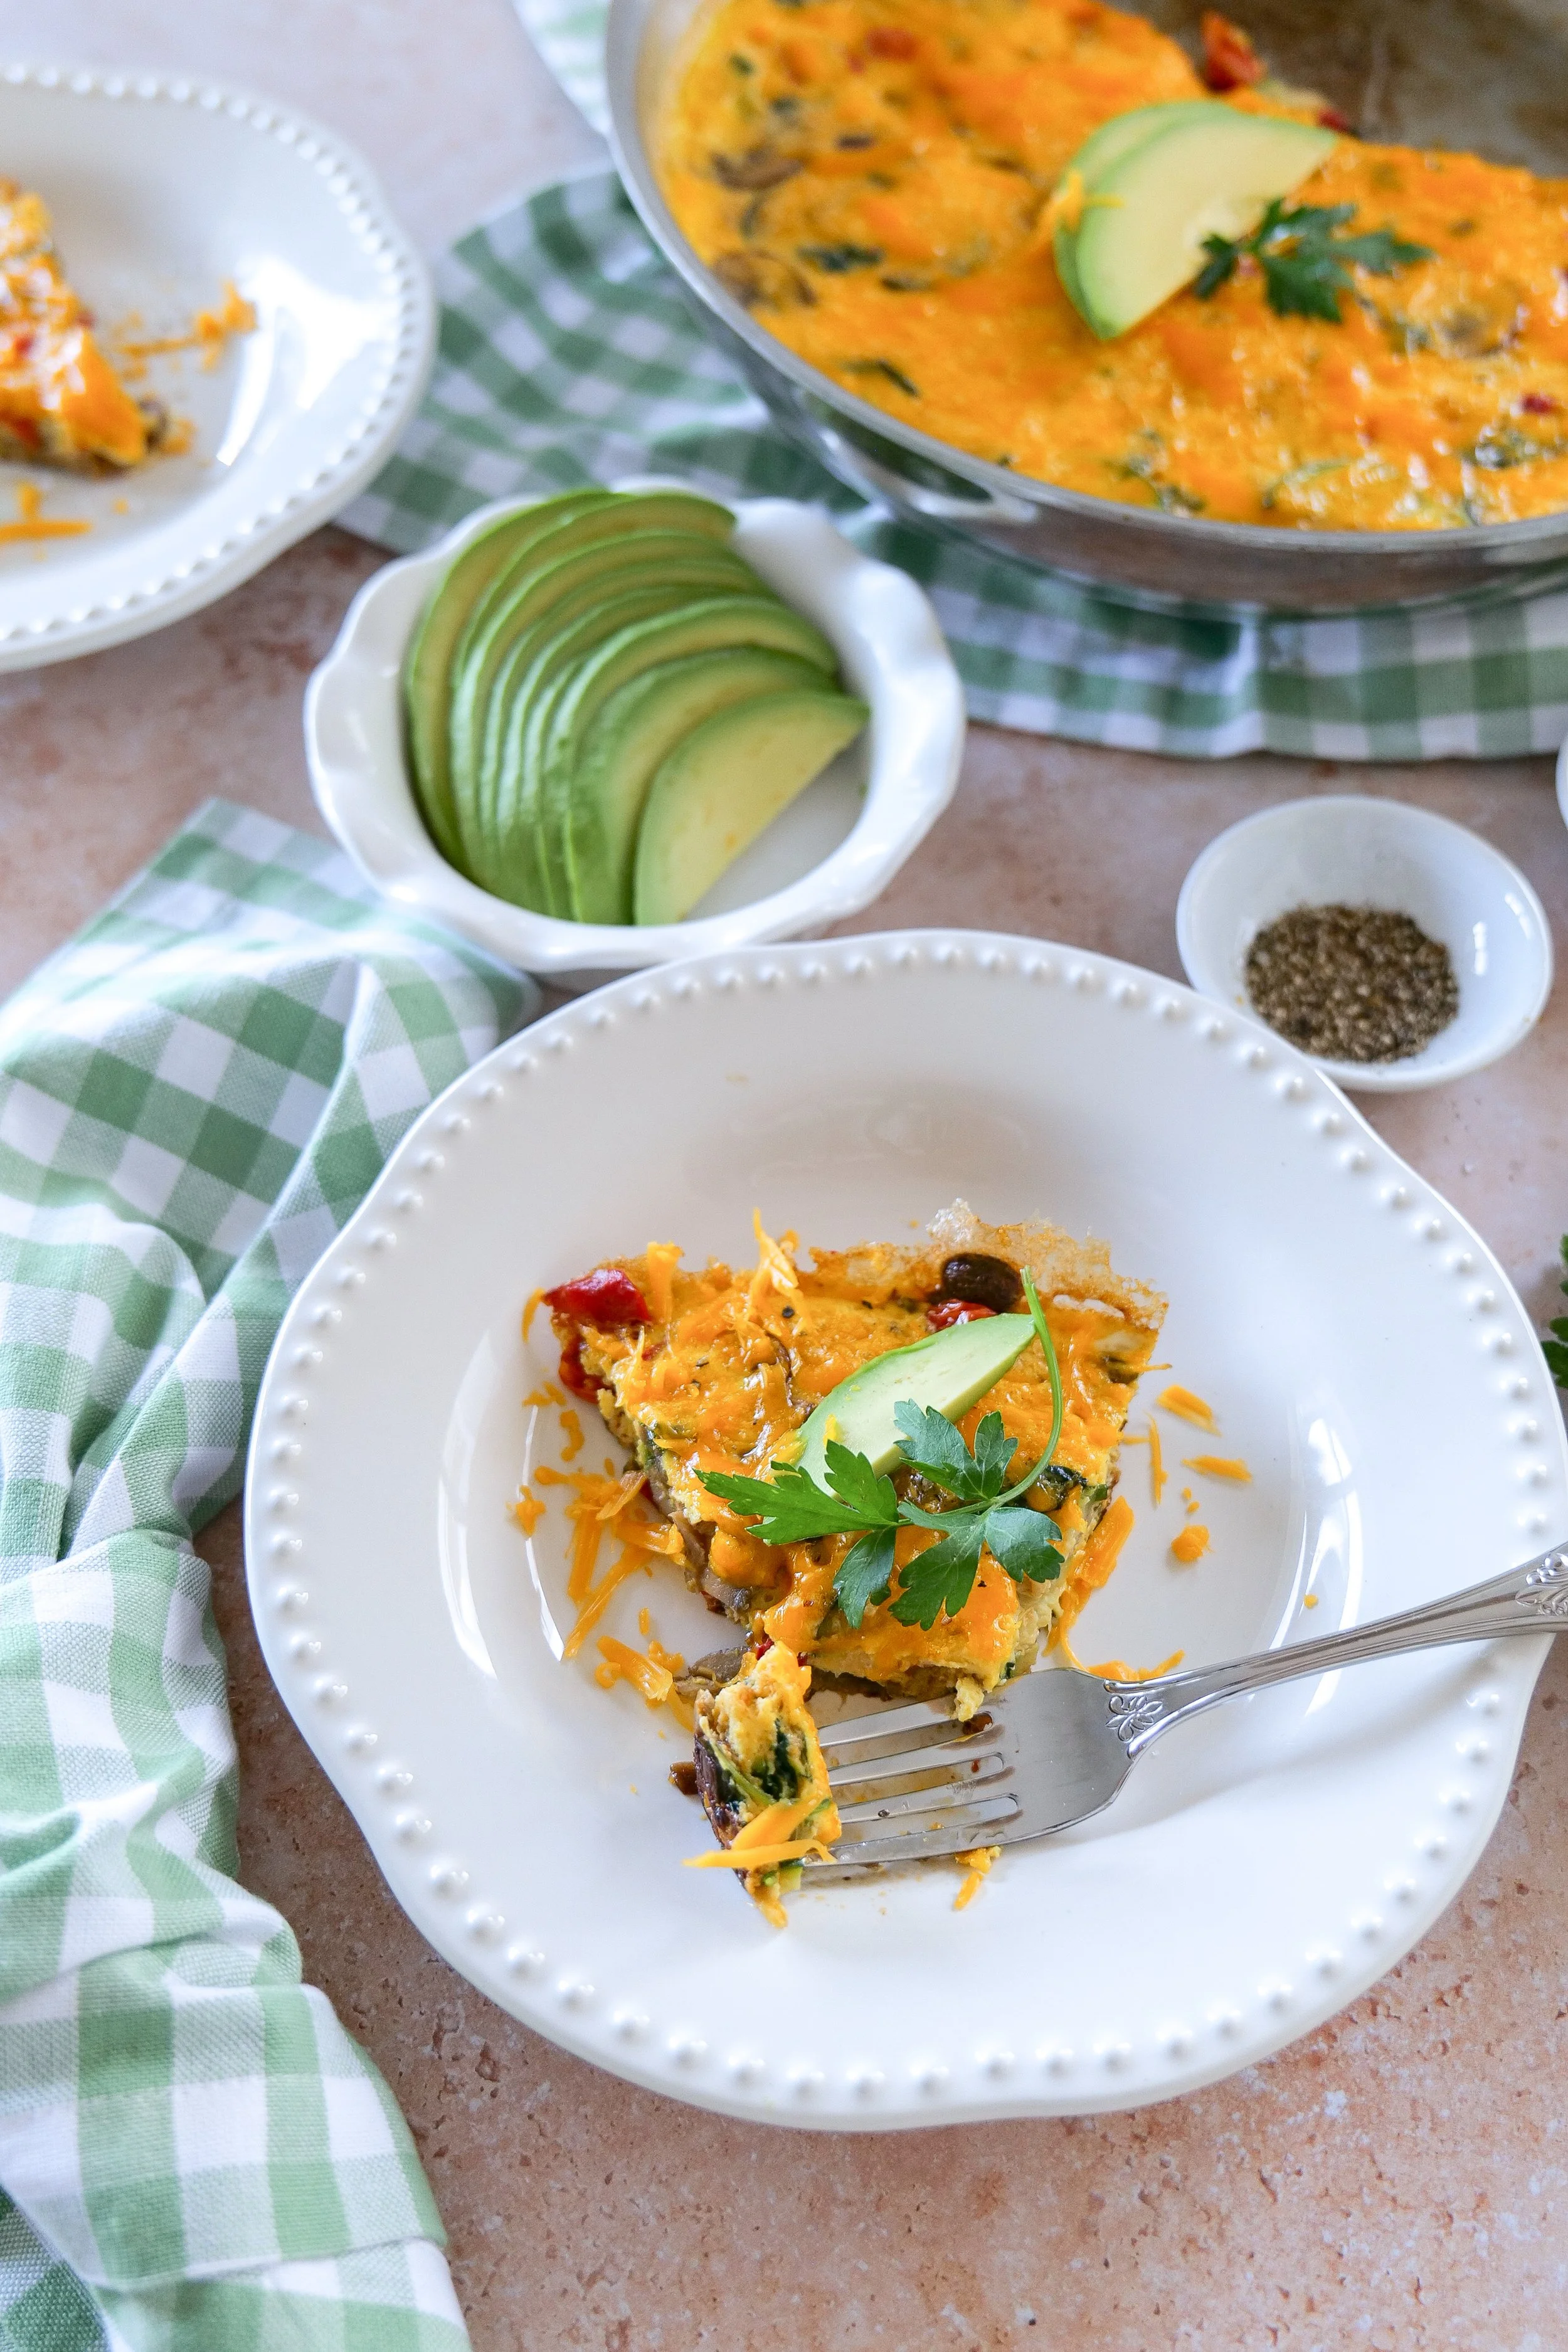
Gluten-free brunch recipe with spinach zucchini tomatoes and eggs

Why You’ll Love This Summer Veggie Frittata Recipe

This easy summer veggie frittata recipe is the perfect way to use fresh seasonal produce while creating a healthy, satisfying meal the whole family will love. Whether you’re planning a relaxed weekend brunch, prepping breakfasts for the week, or looking for a quick summer dinner, this versatile dish comes together with simple ingredients and minimal effort.

Here’s why this healthy frittata recipe is a favorite:

  • Quick and easy to make in just 30 minutes

  • Packed with fresh summer vegetables and flavor

  • Naturally gluten-free and low carb

  • Perfect for breakfast, brunch, lunch, or dinner

  • Great for meal prep and easy leftovers

  • Easily customizable with your favorite vegetables, cheeses, or proteins

  • A beautiful brunch recipe for summer gatherings and entertaining

Light, colorful, and incredibly versatile, this vegetable frittata is one of those recipes you’ll find yourself making all season long.

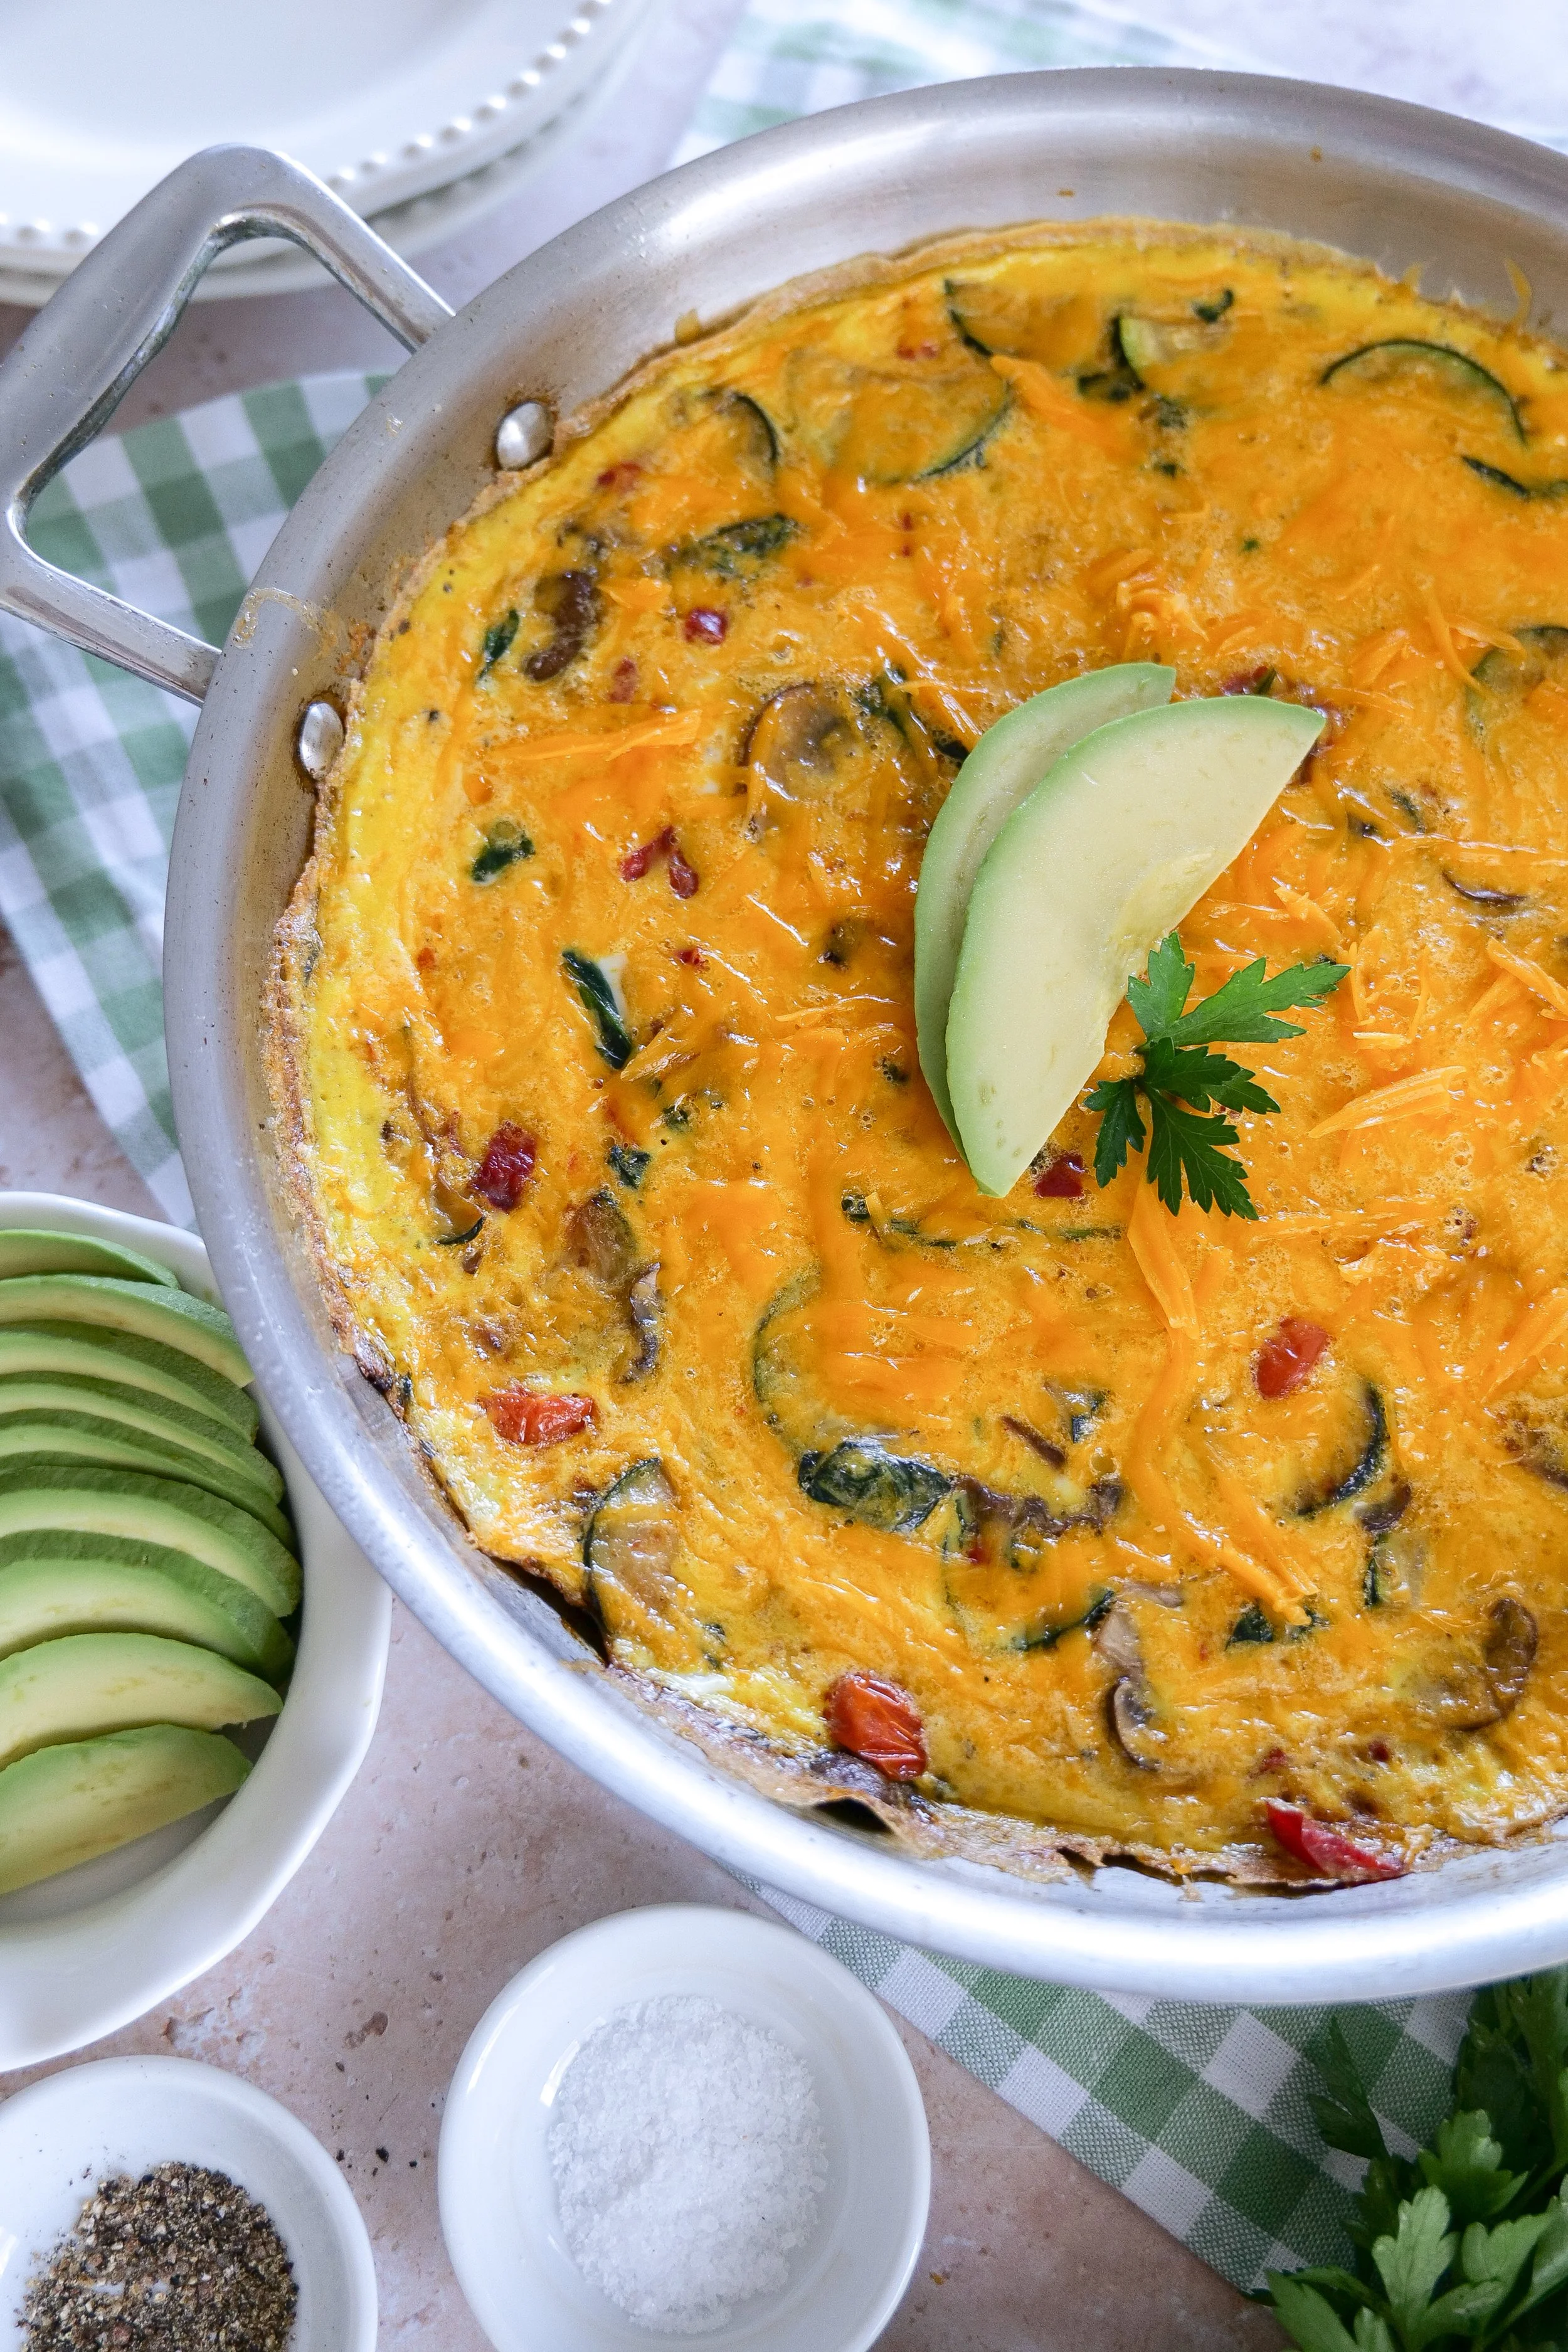
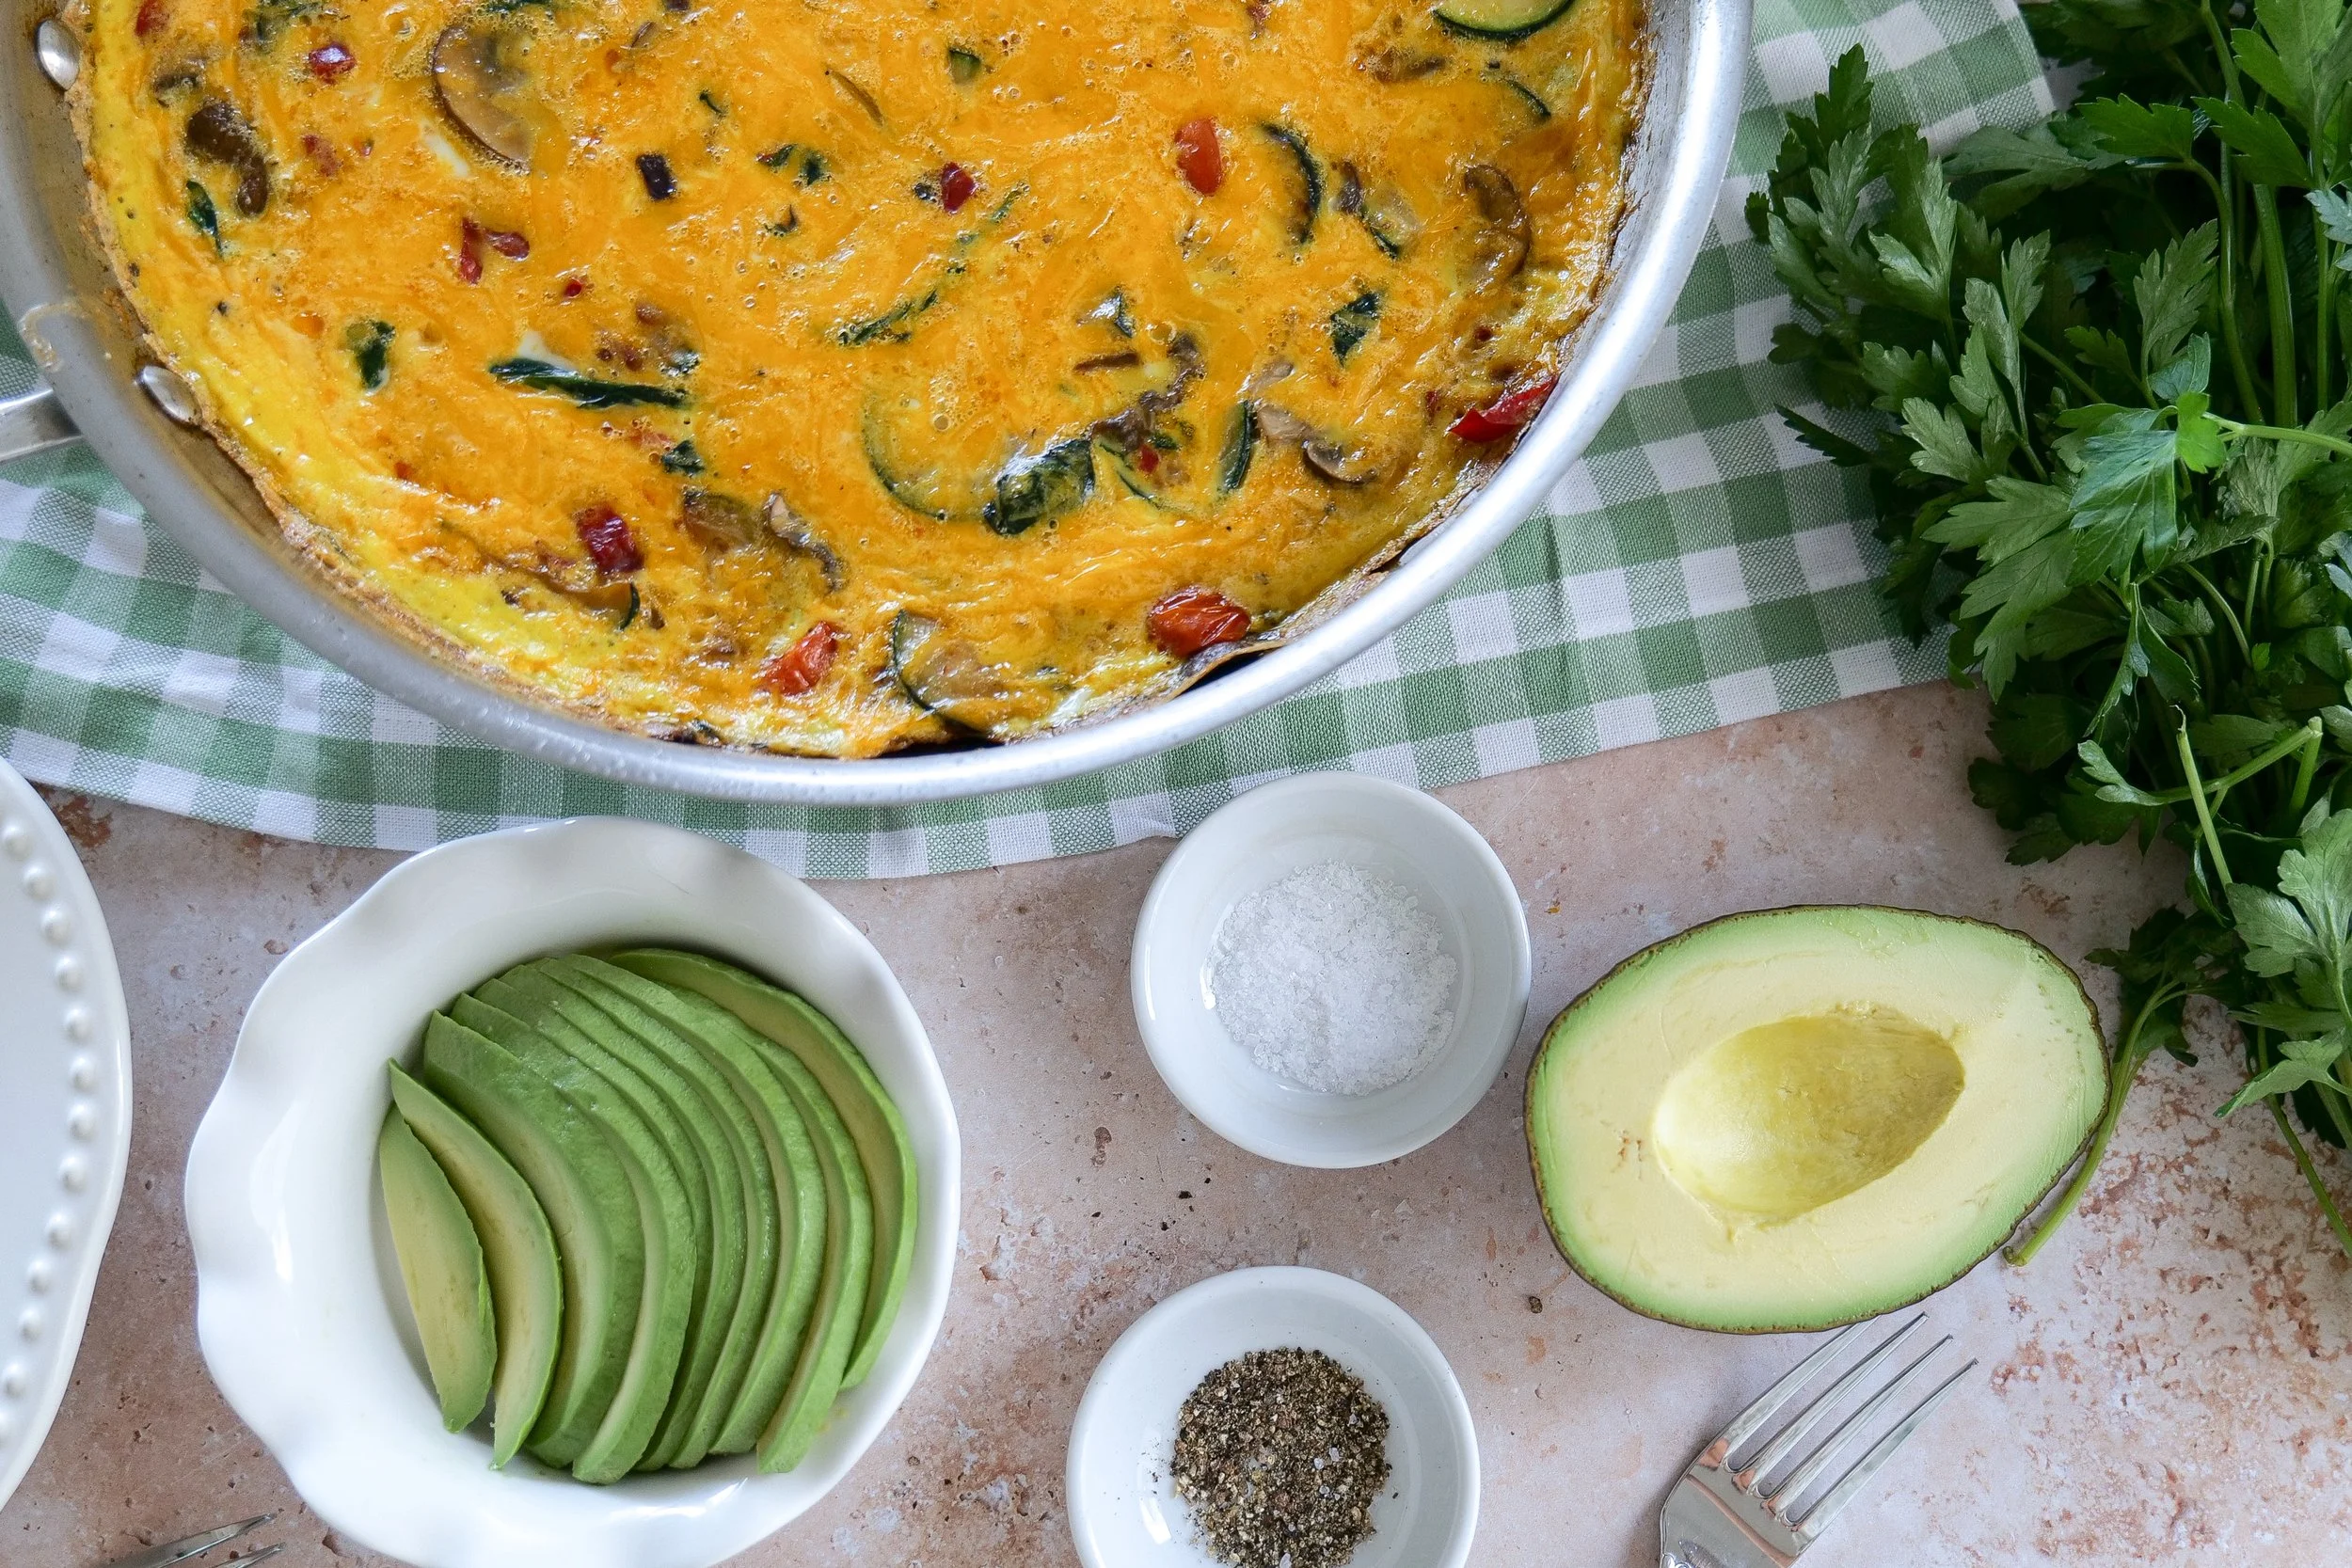
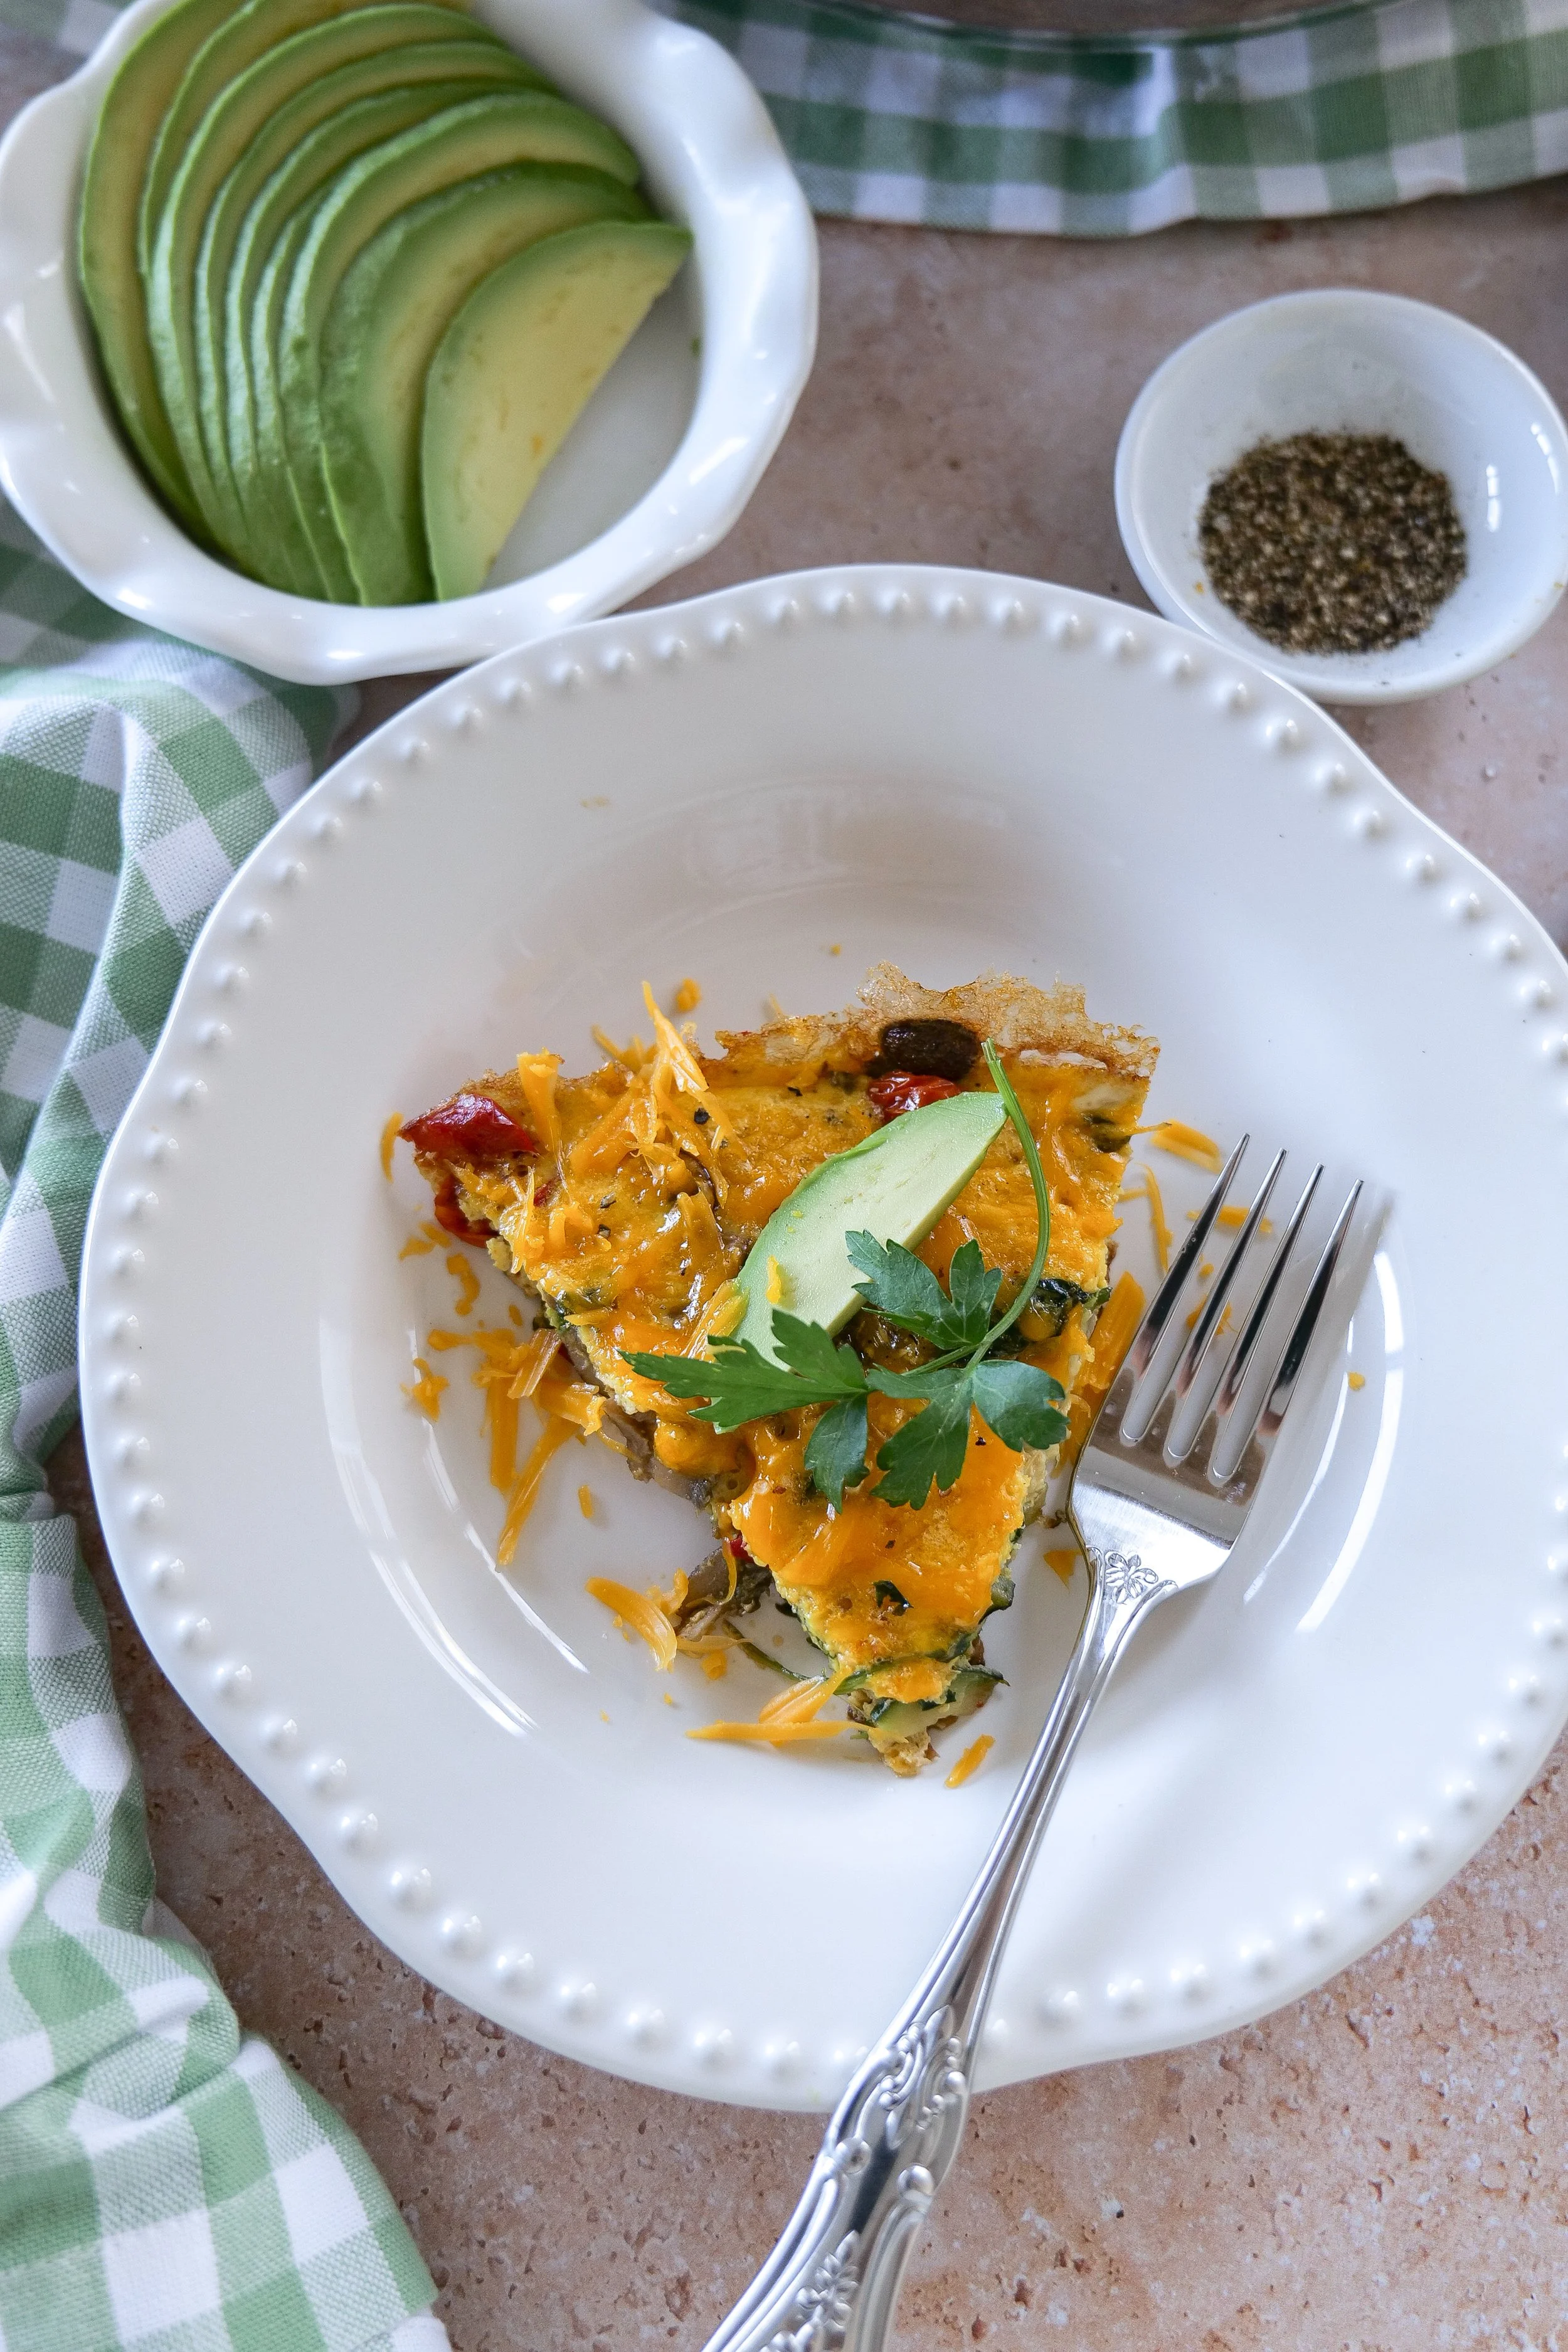
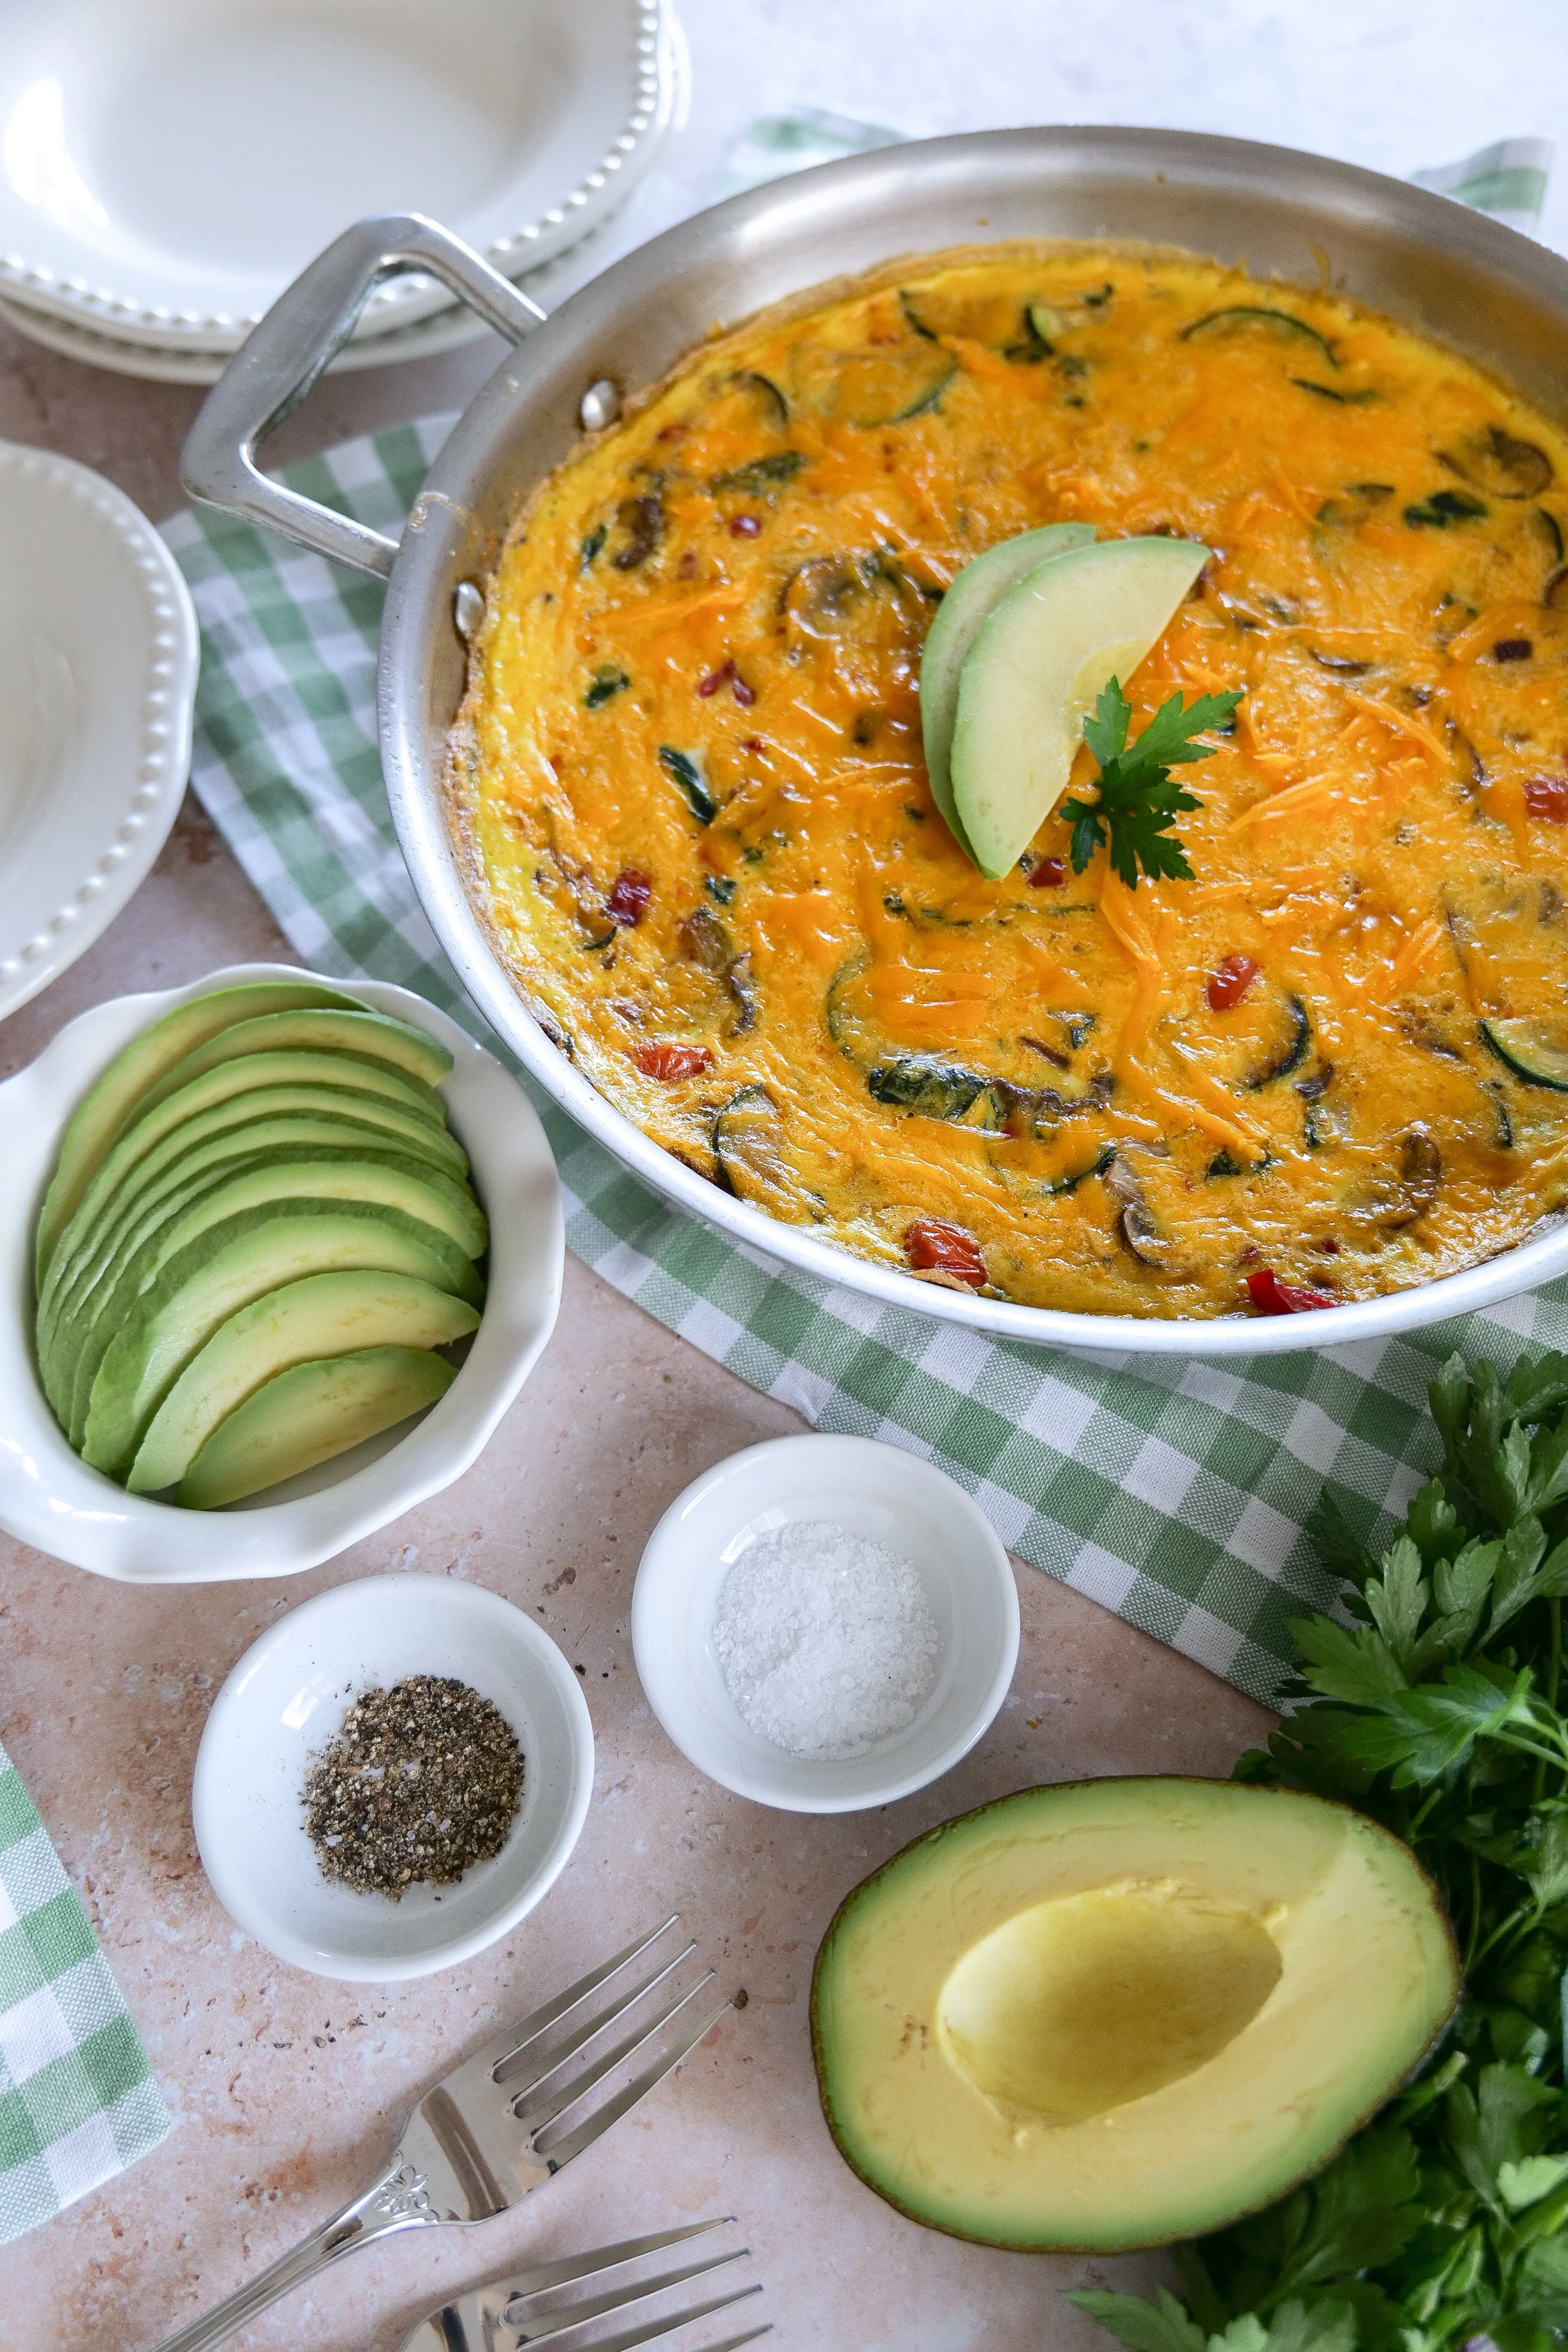
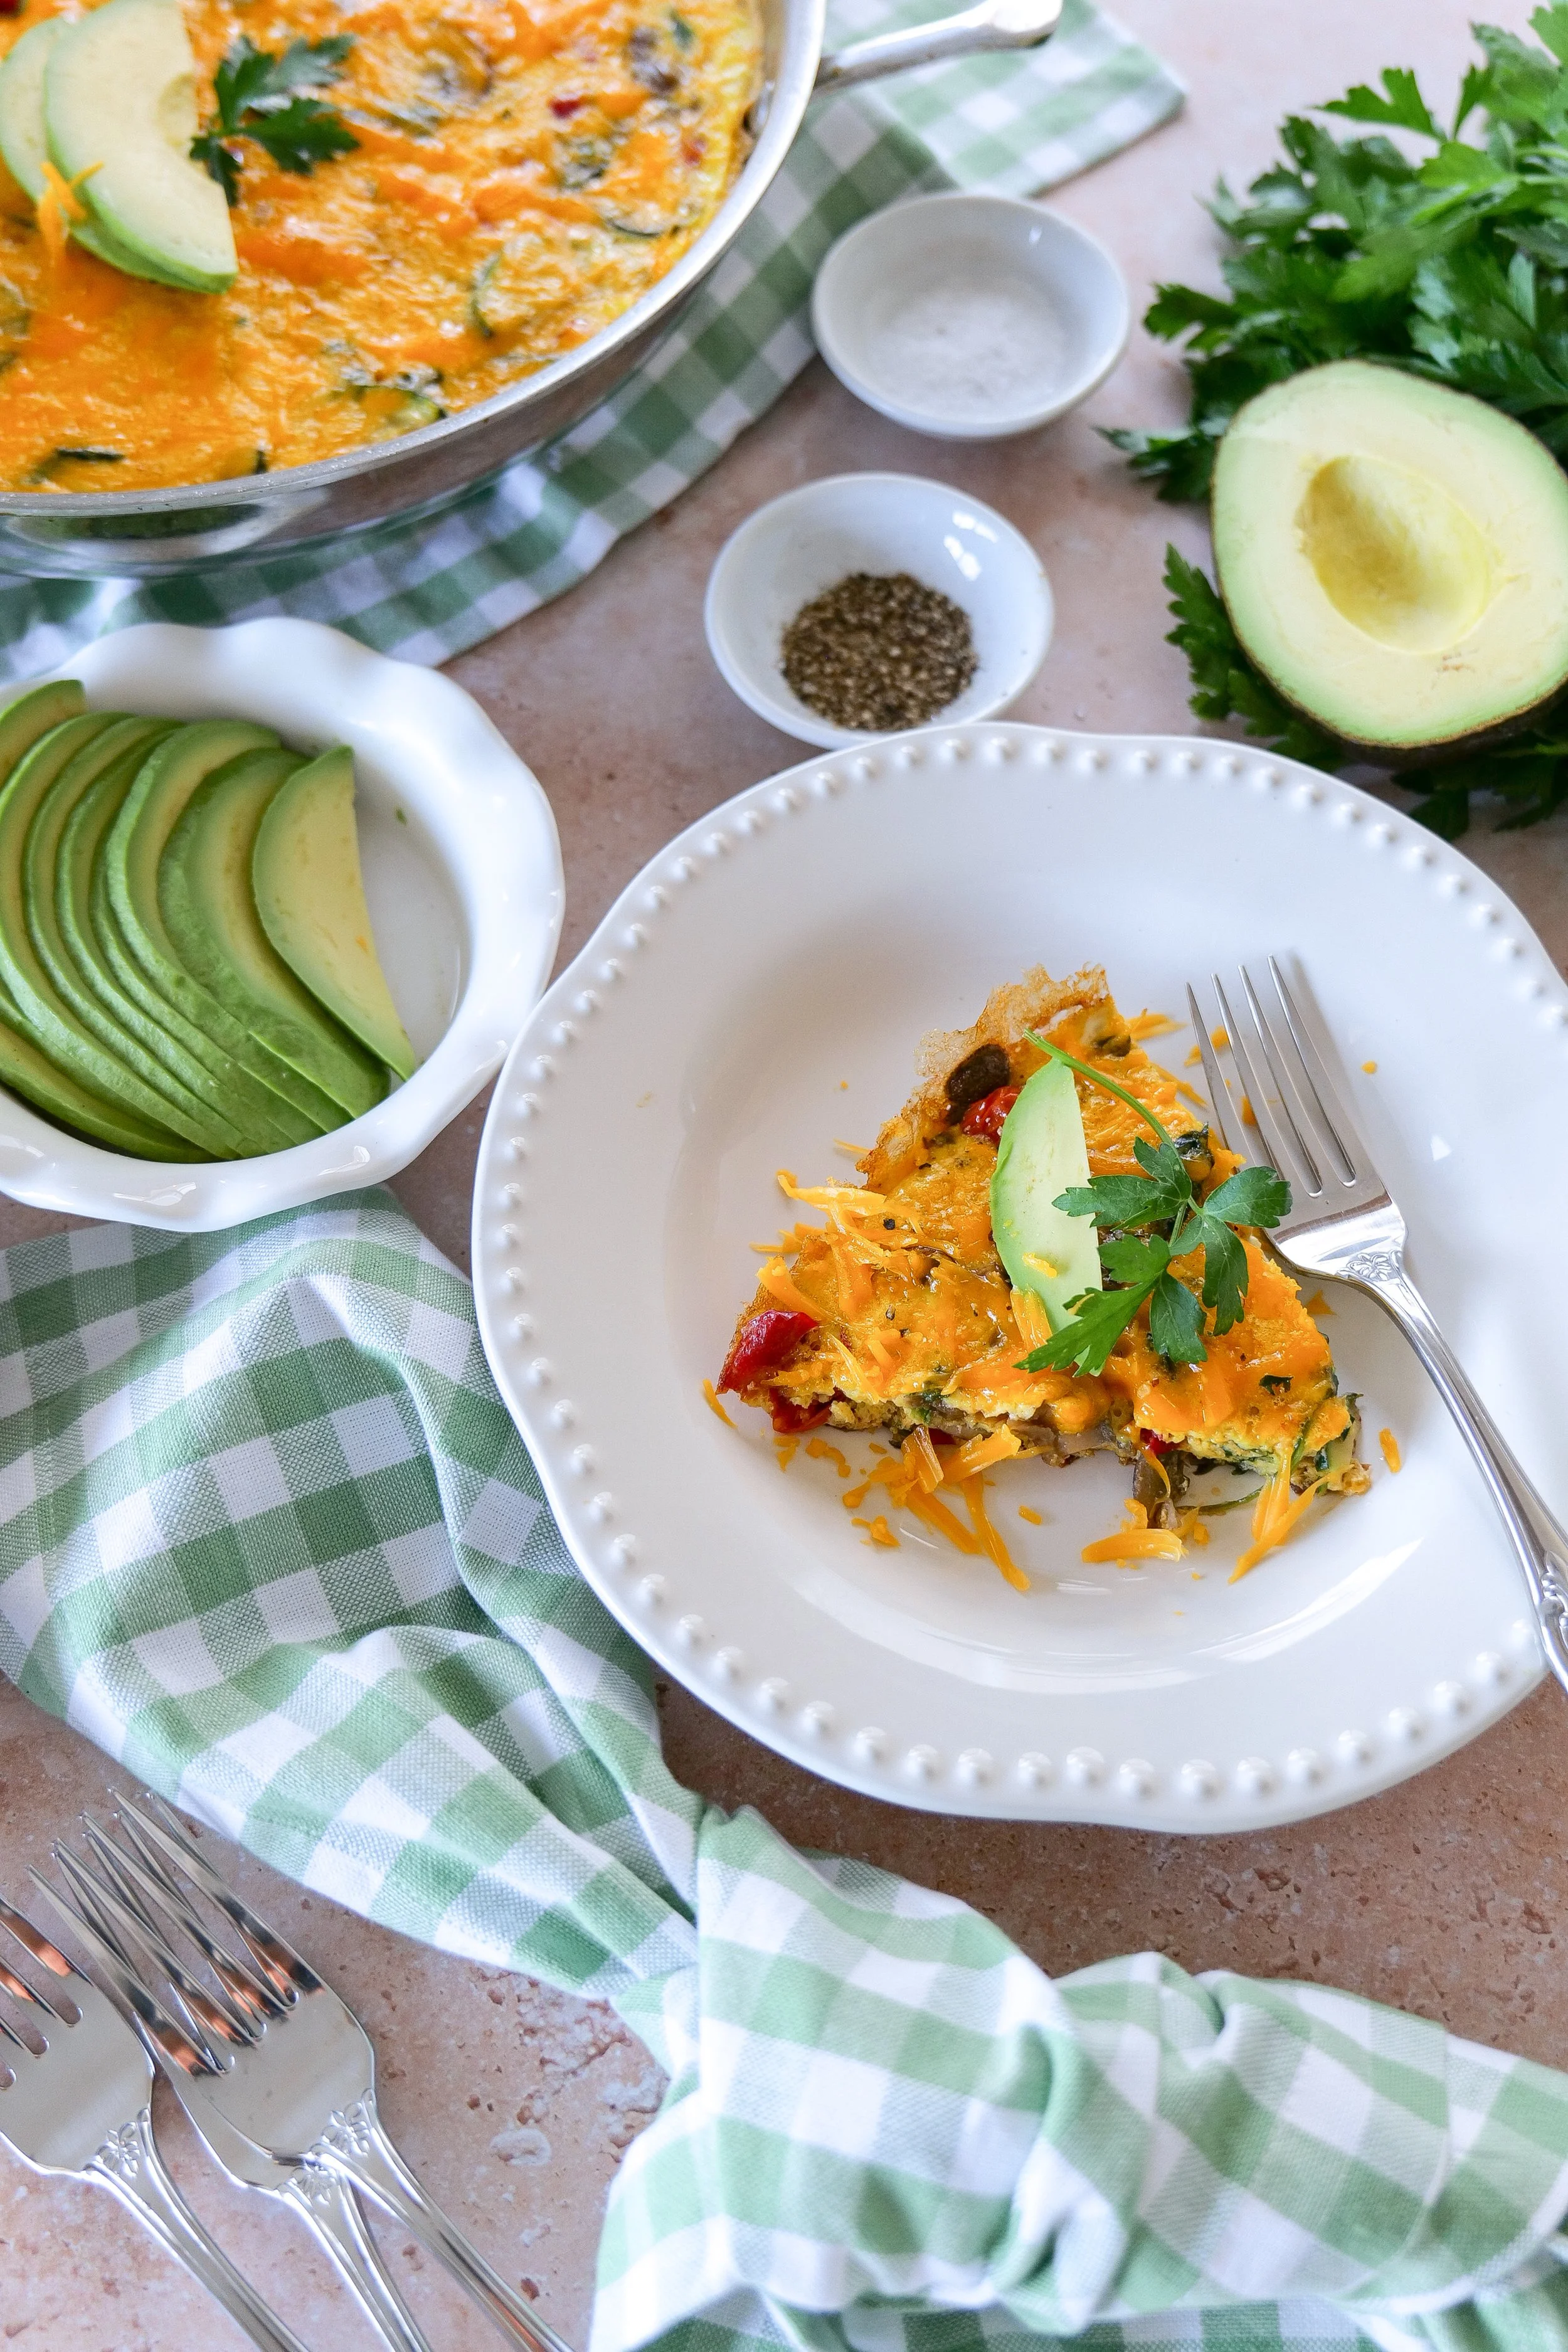
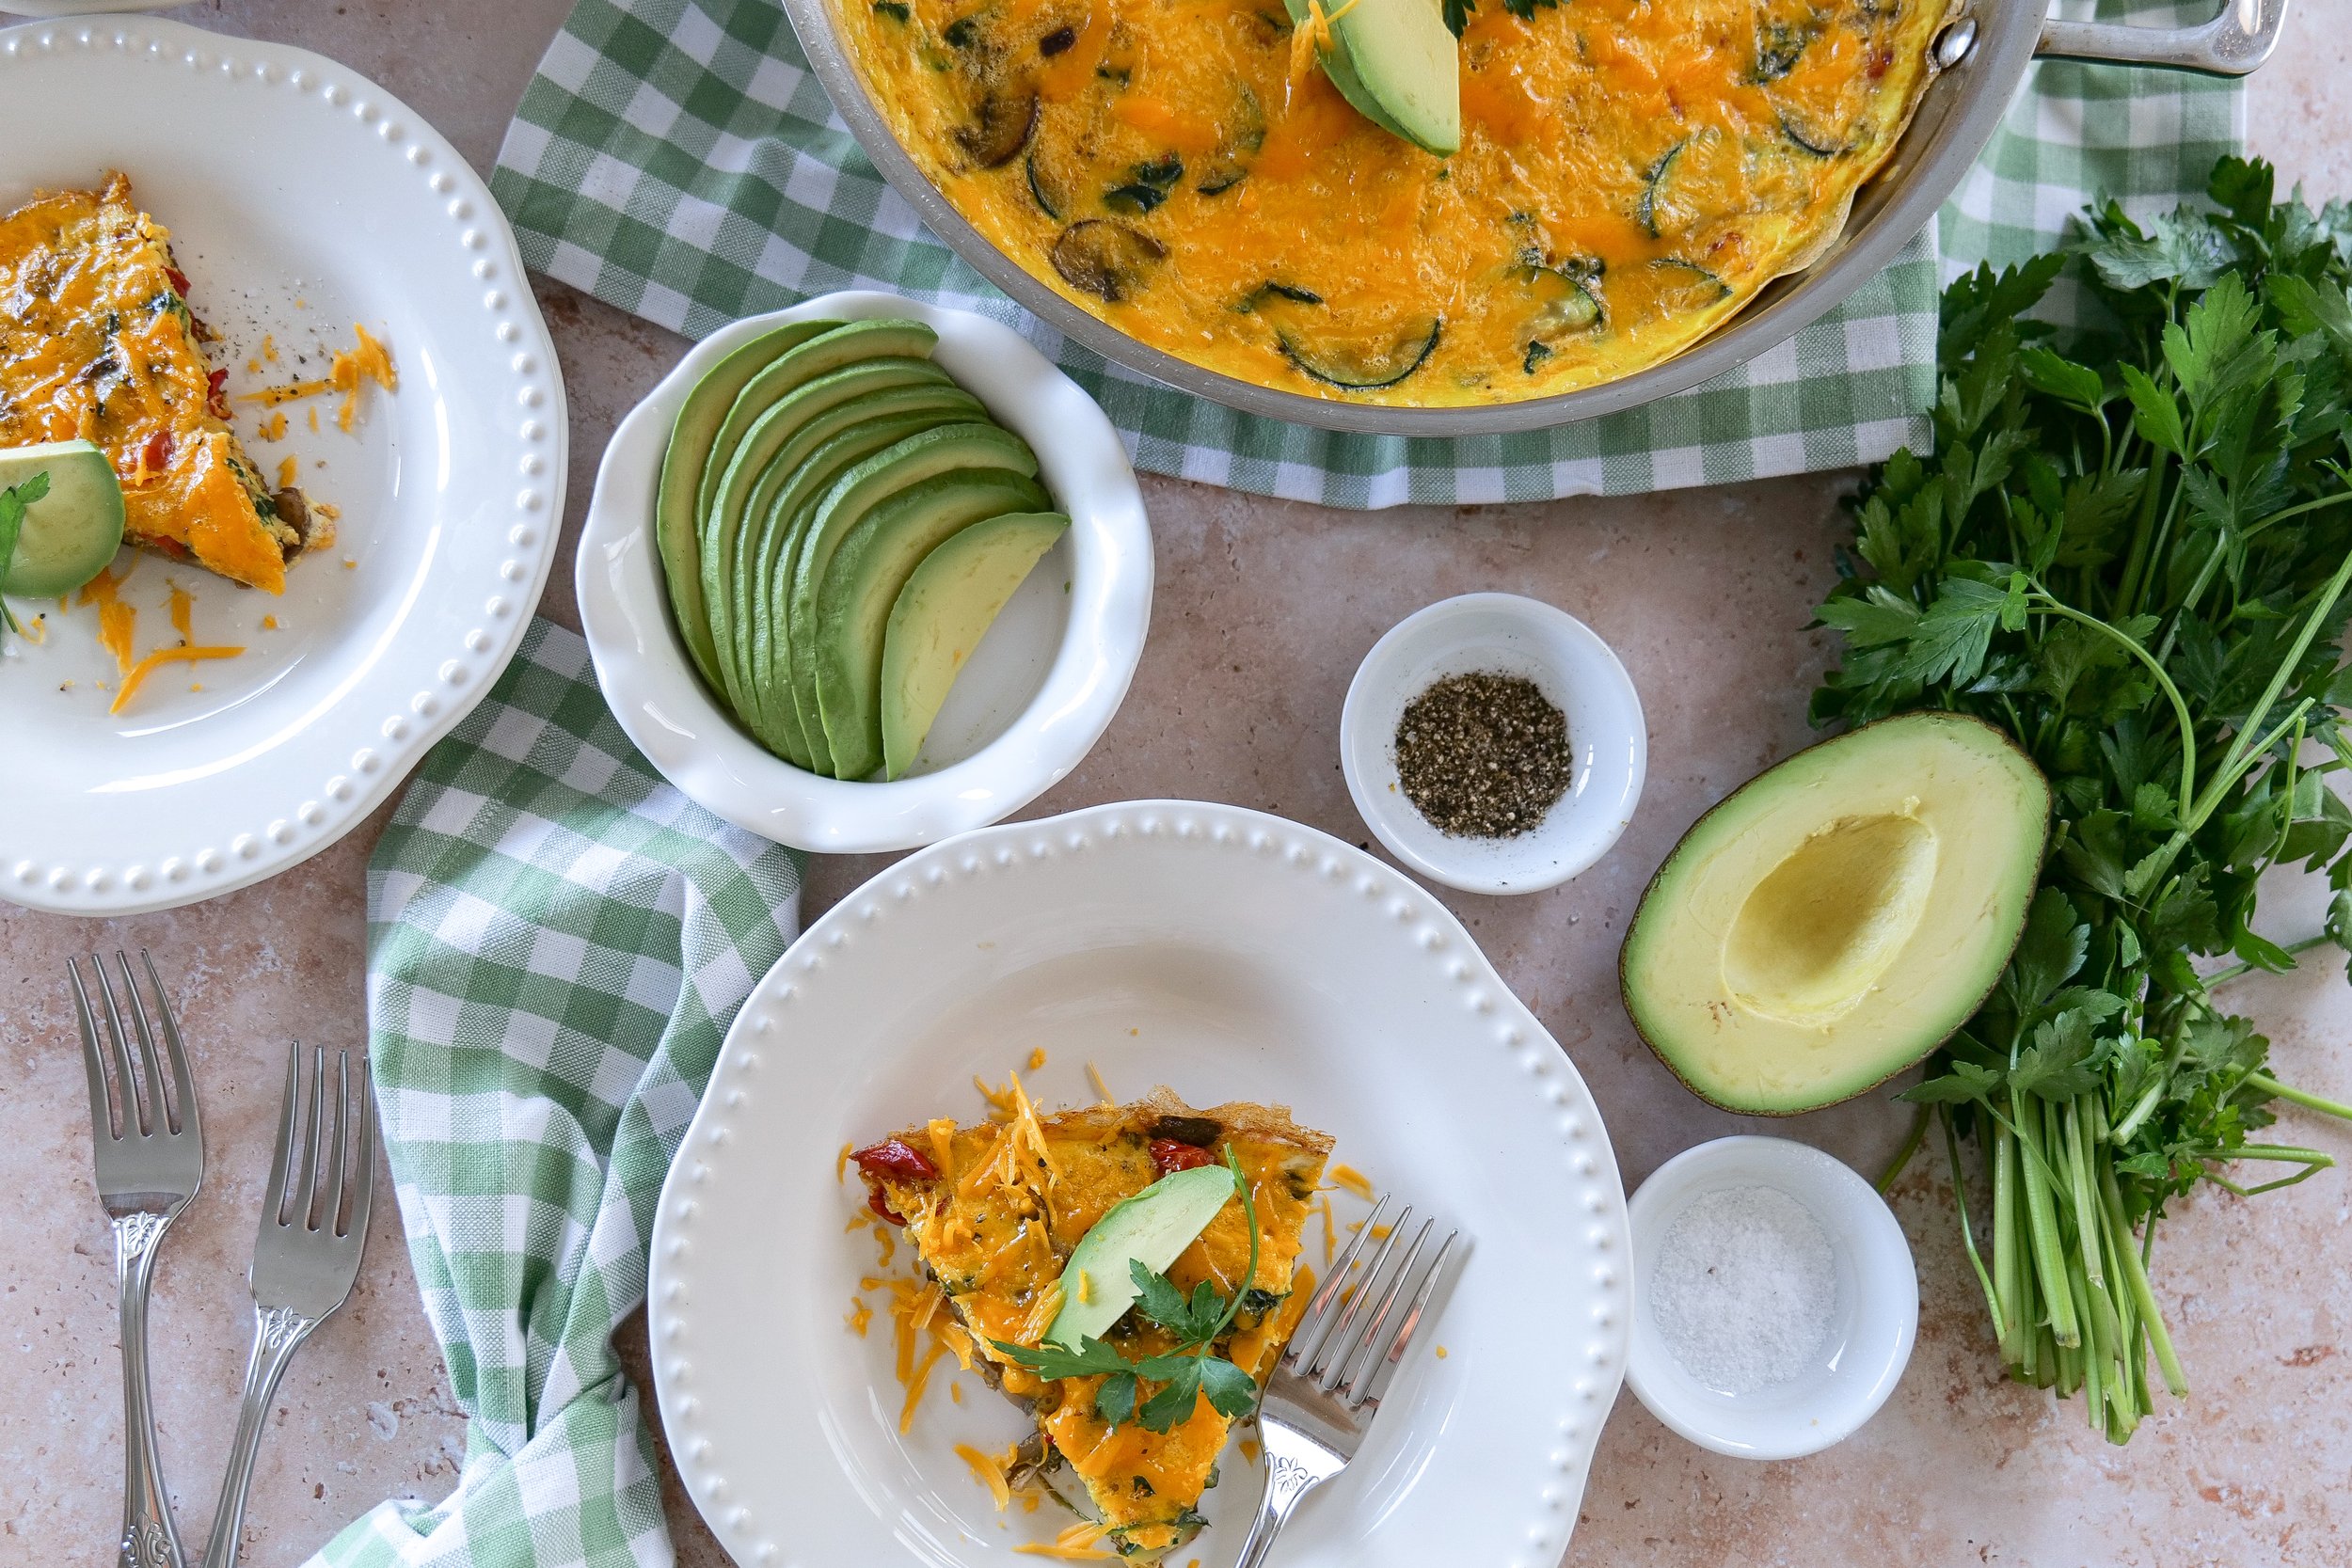
Baked vegetable frittata with fresh summer ingredients and cheese
Seasonal vegetable frittata recipe for breakfast brunch or meal prep
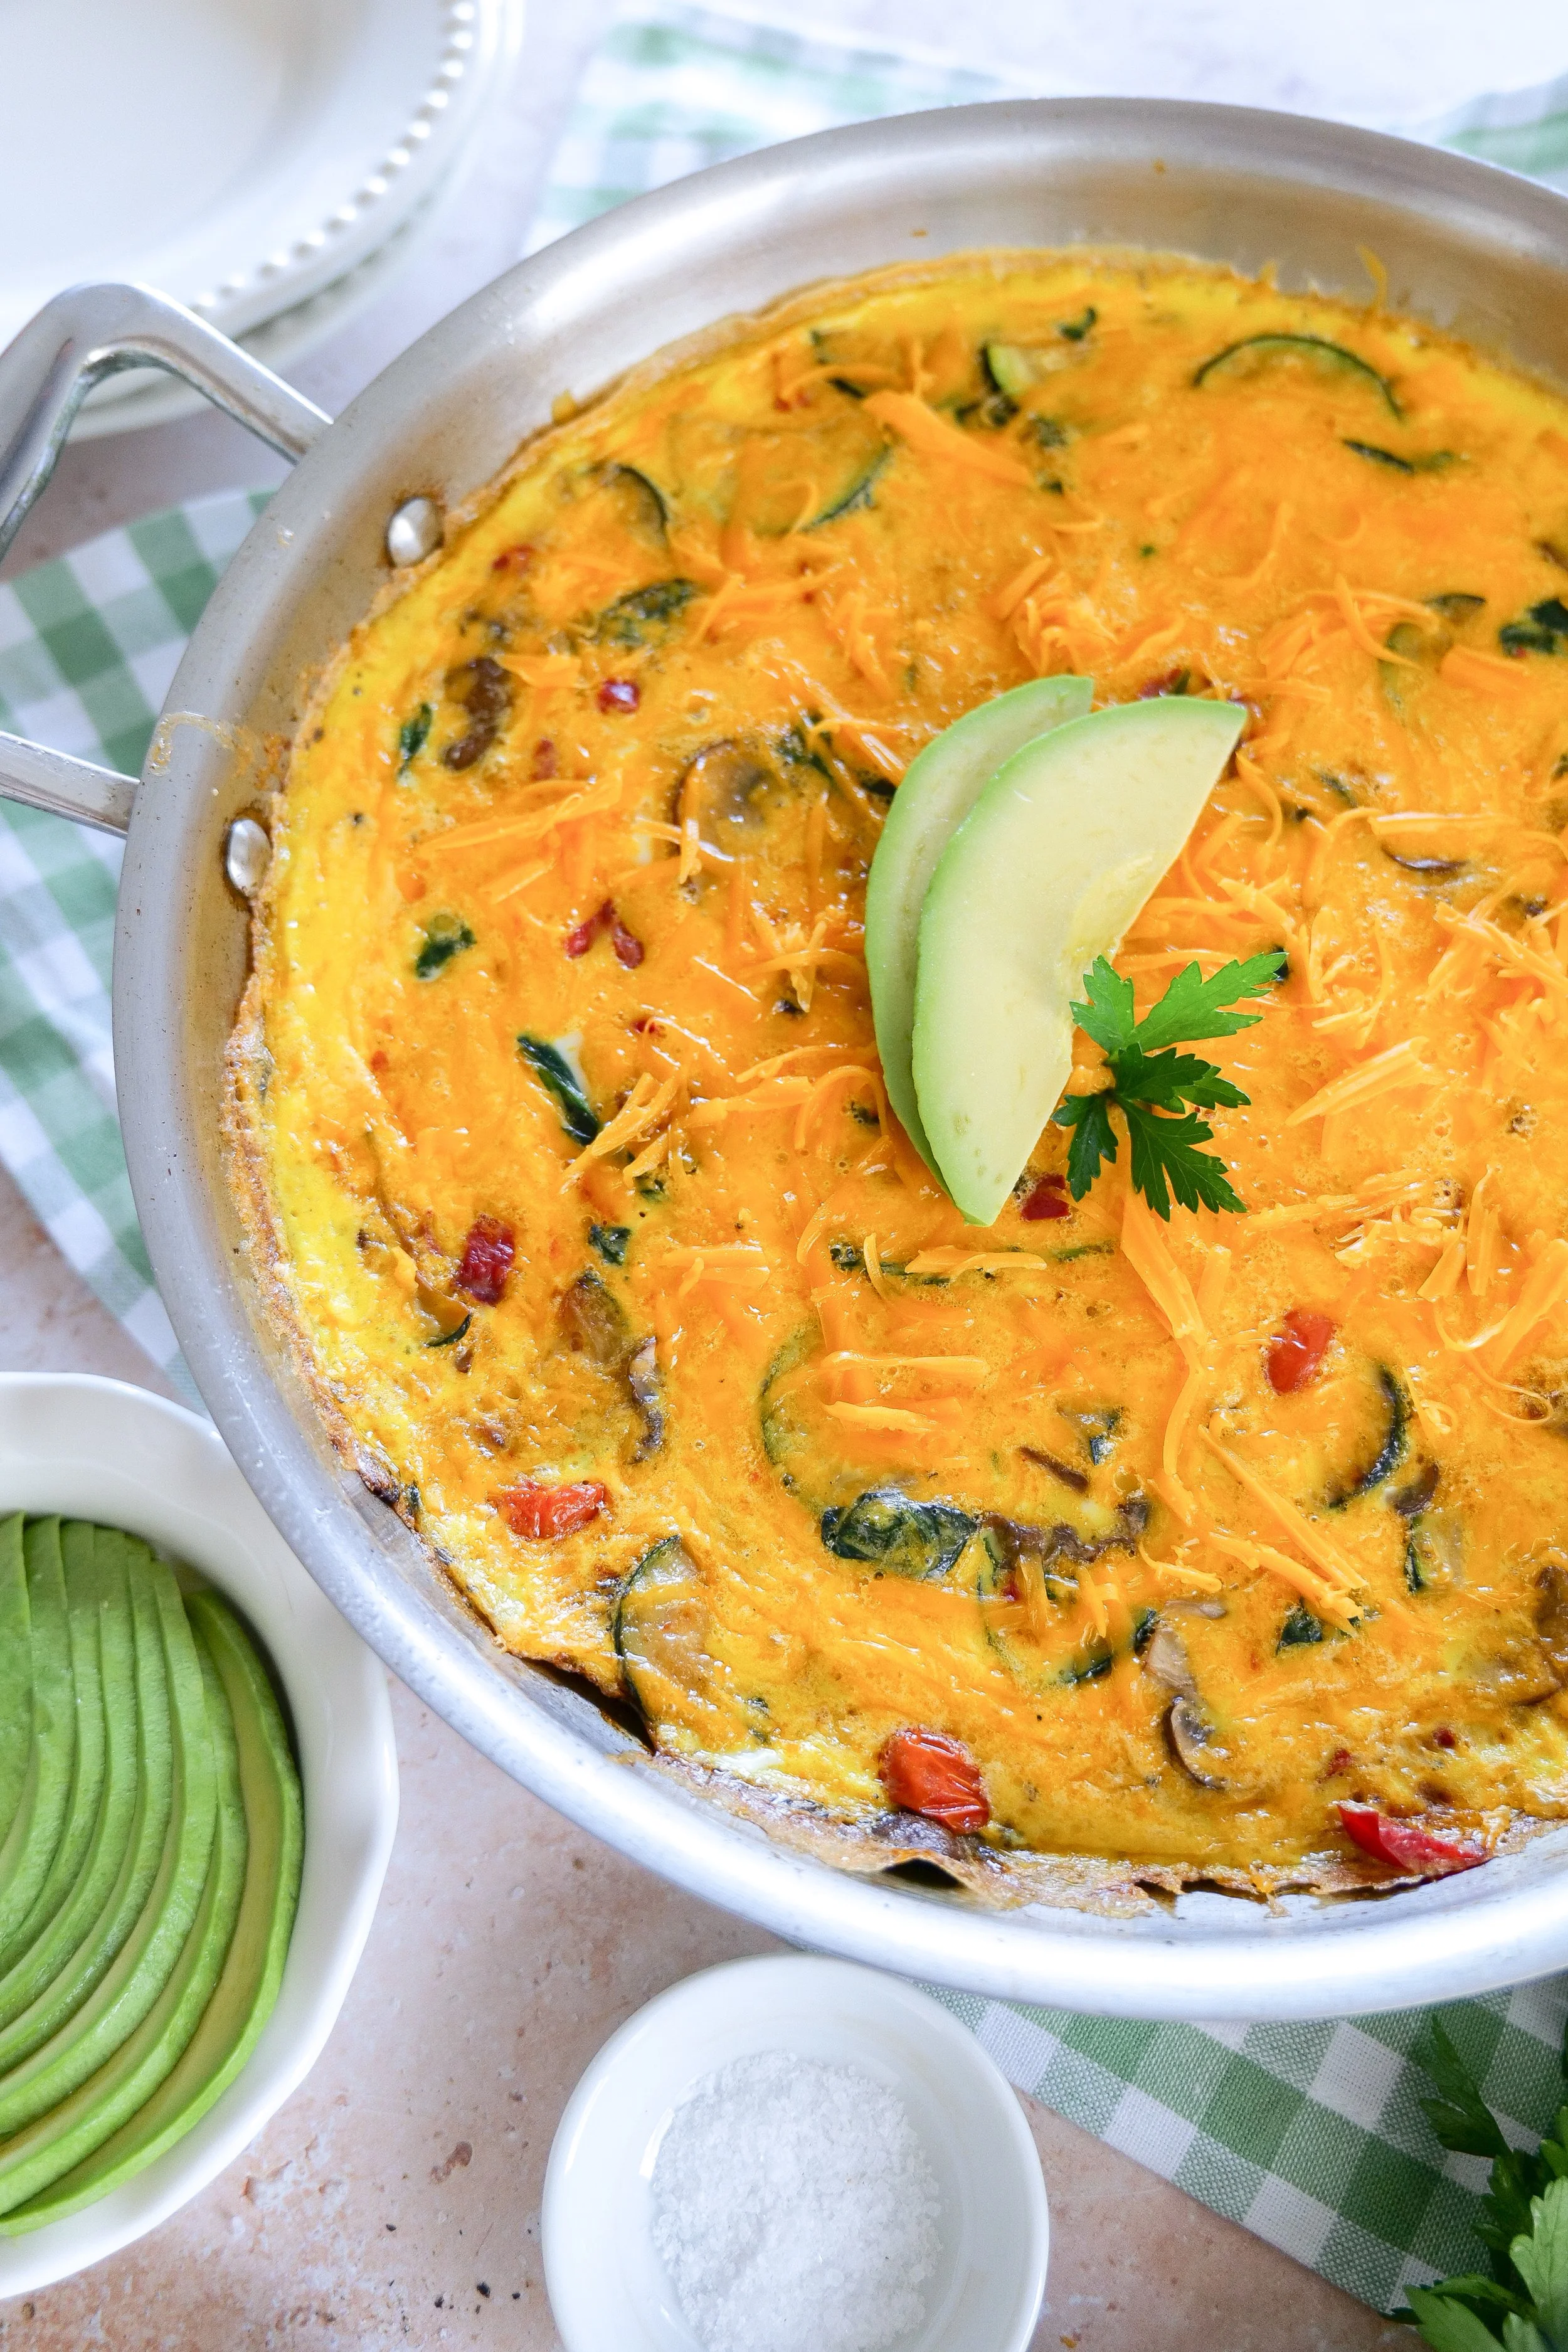
Summer brunch frittata recipe served fresh from the oven in a cast iron skillet

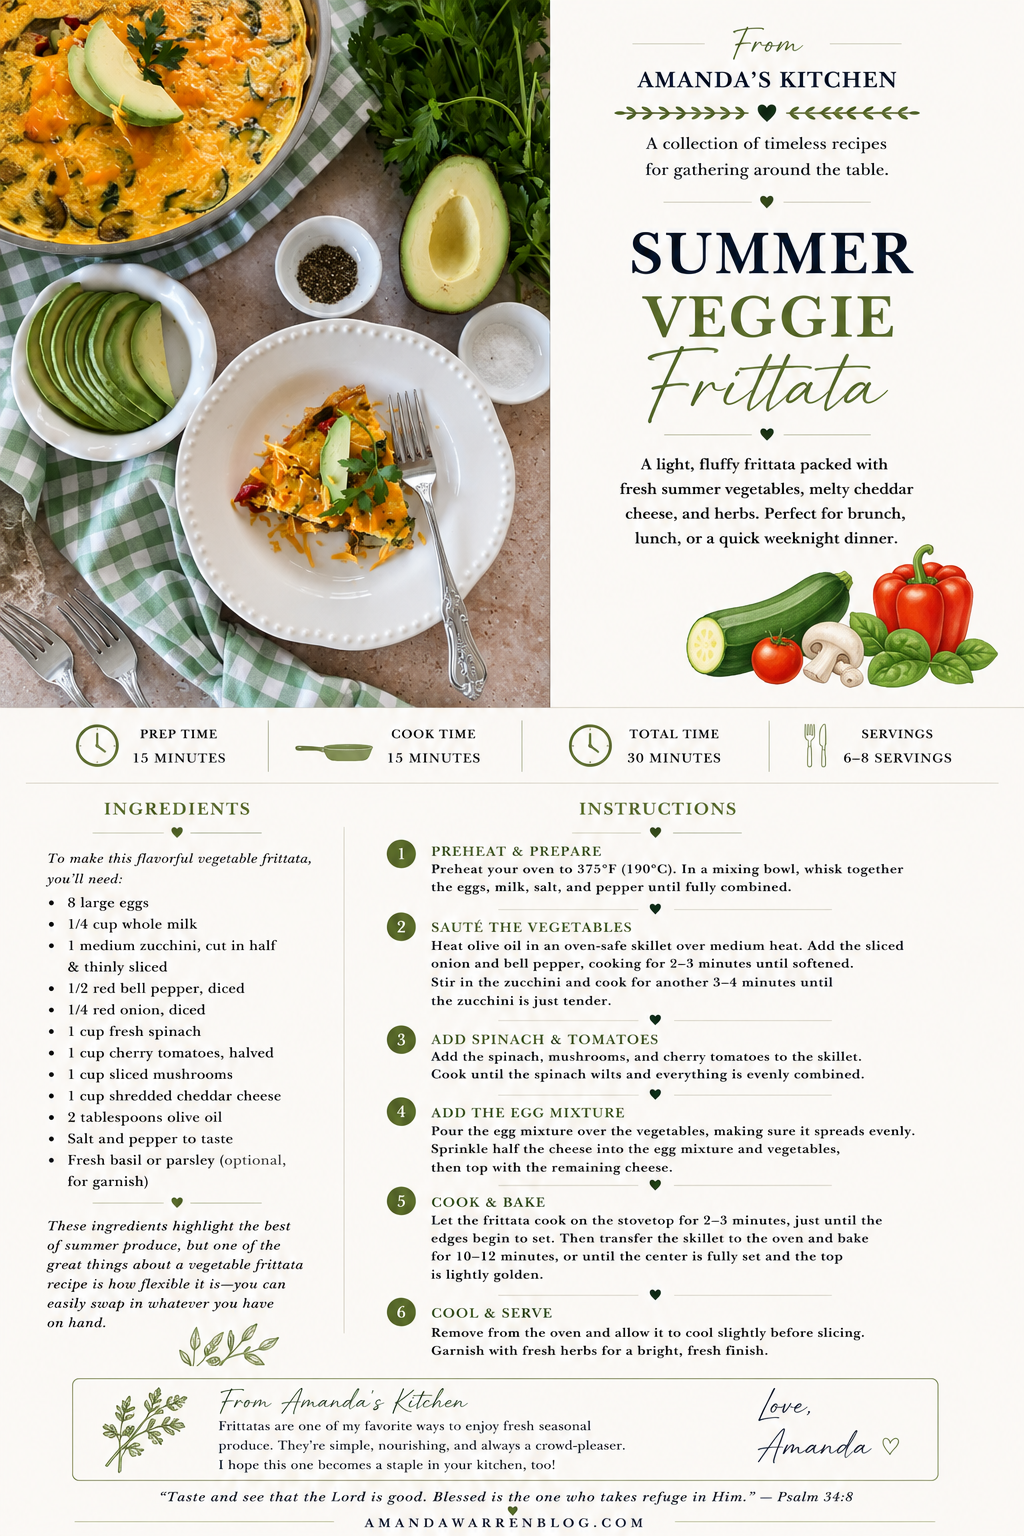
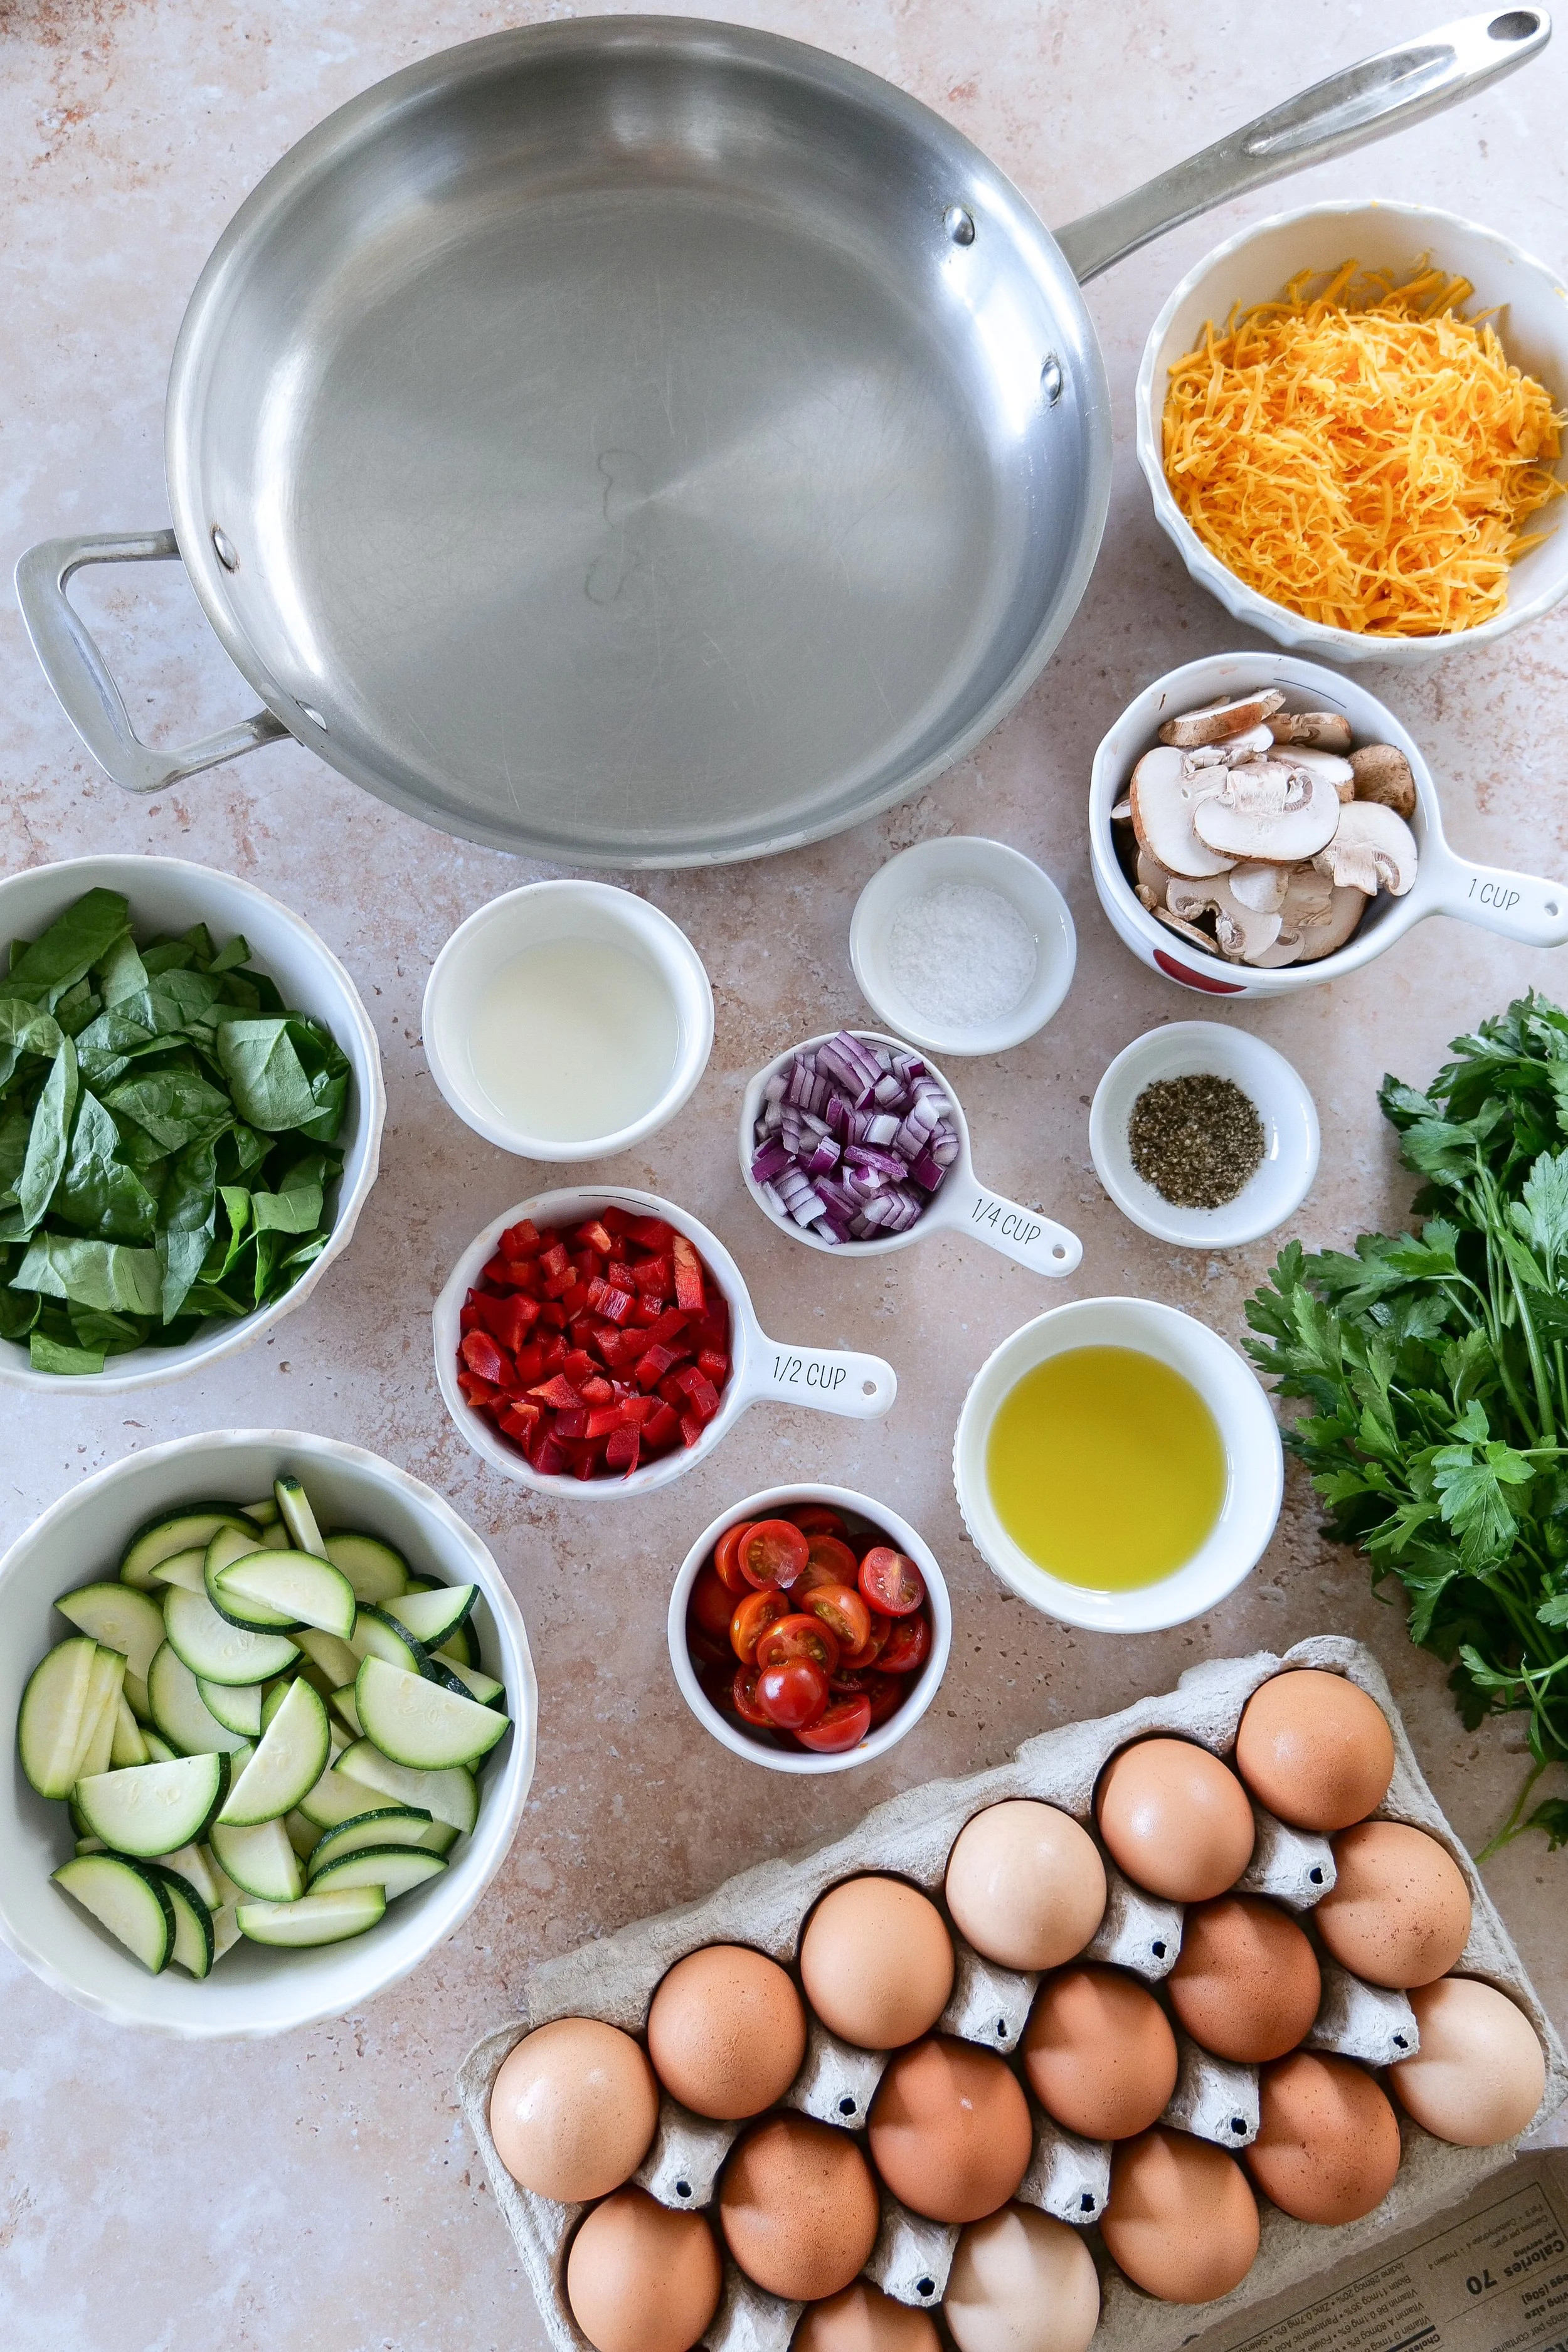
Ingredients

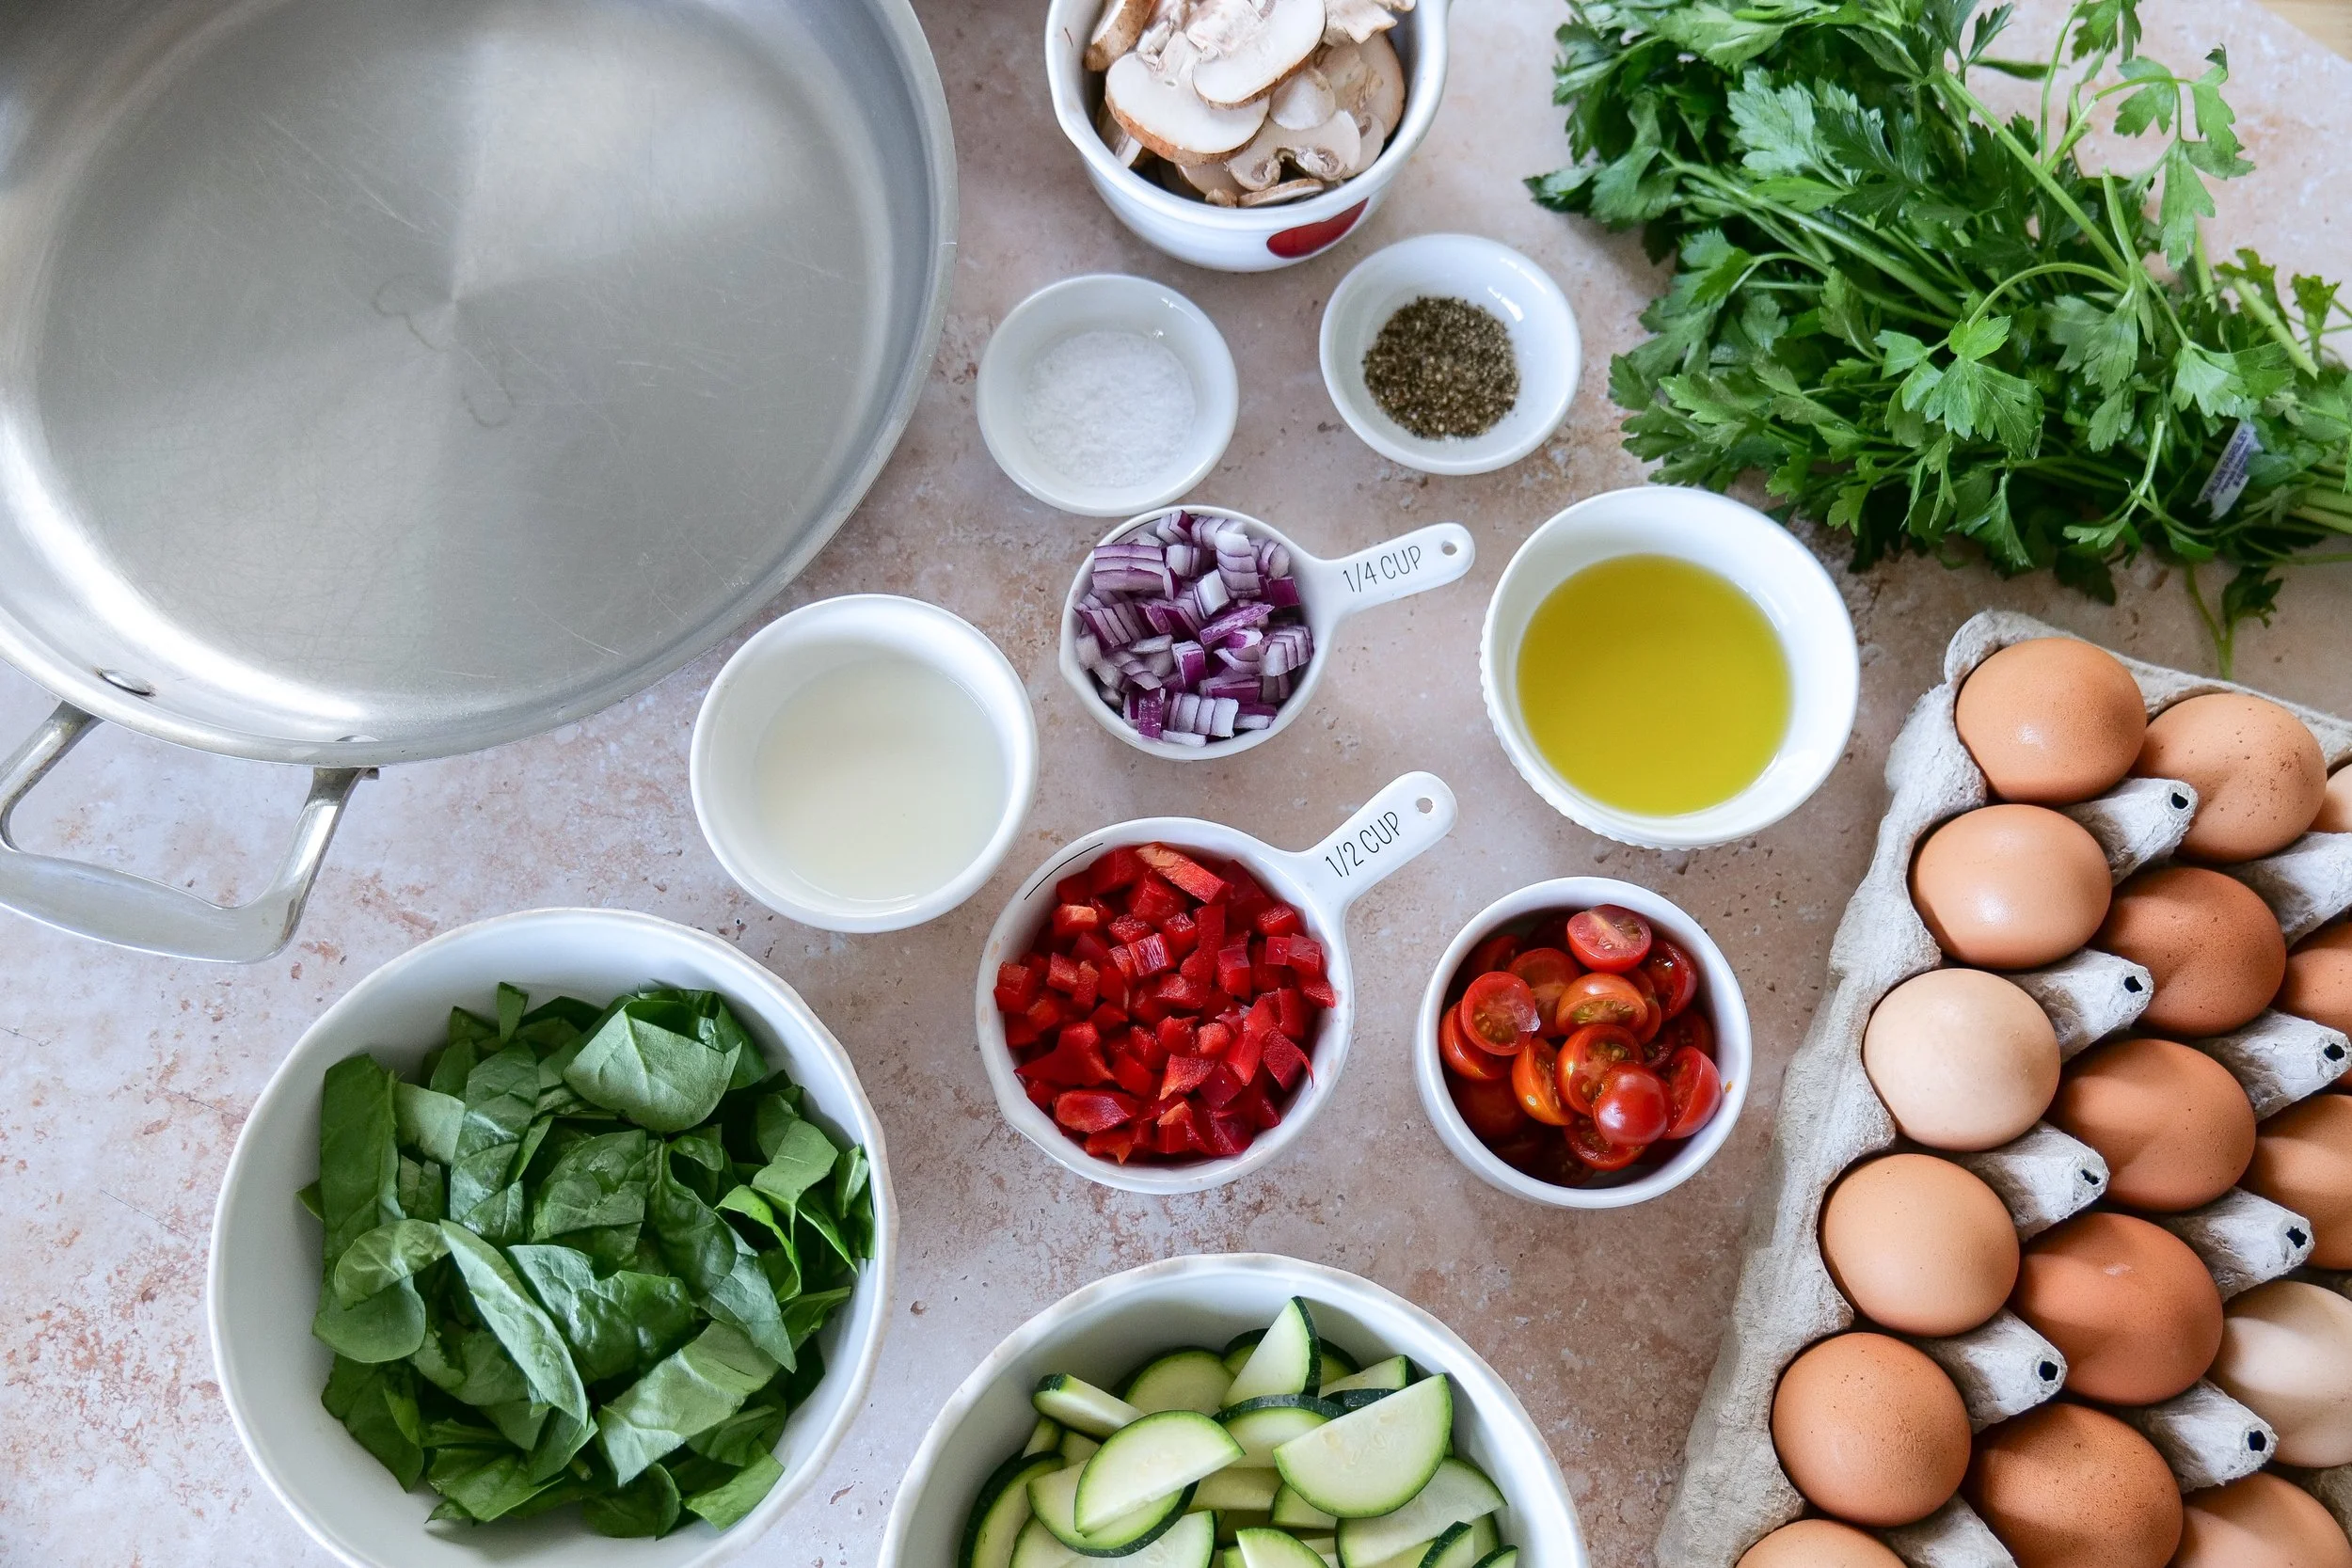
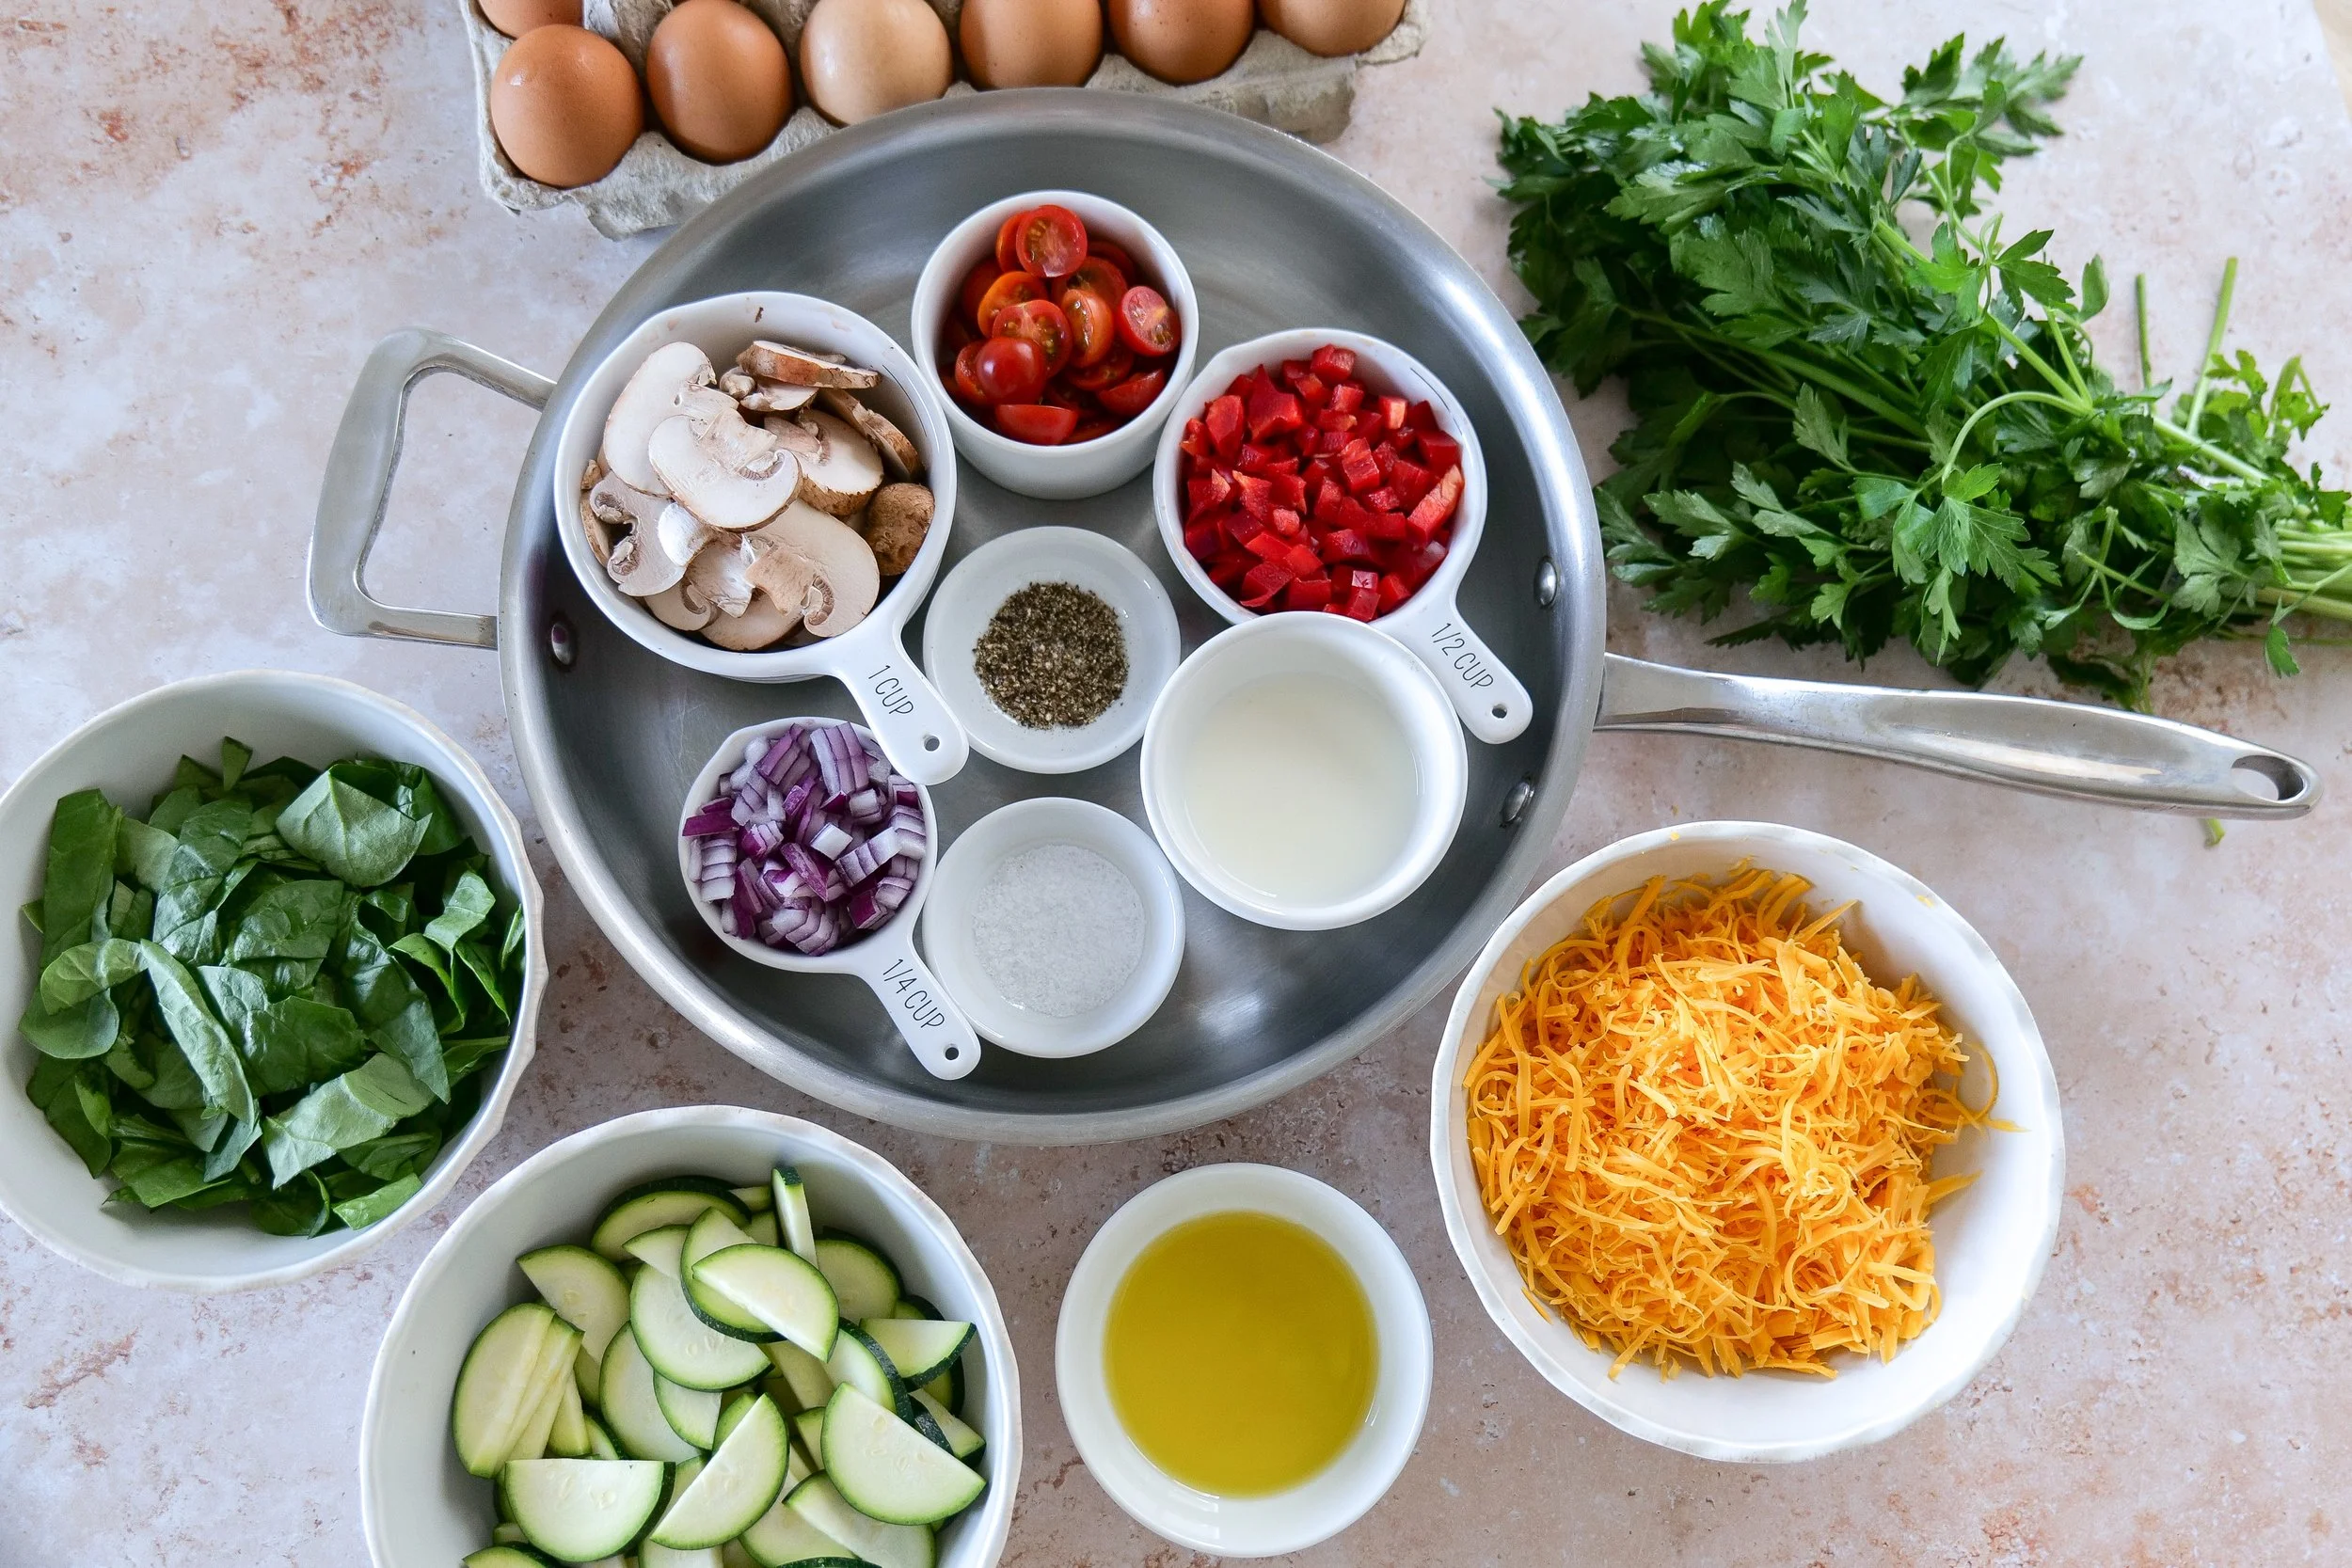
To make this flavorful vegetable frittata, you’ll need:

  • 8 large eggs

  • 1/4 cup whole milk

  • 1 medium zucchini, cut in half & thinly sliced

  • 1/2 red bell pepper, diced

  • 1/4 red onion, diced

  • 1 cup fresh spinach

  • 1 cup of cherry tomatoes, halved

  • 1 cup of sliced mushrooms

  • 1 cup shredded cheddar cheese

  • 2 tablespoons olive oil

  • Salt and pepper to taste

  • Fresh basil or parsley (optional, for garnish)

These ingredients highlight the best of summer produce, but one of the great things about a vegetable frittata recipe is how flexible it is—you can easily swap in whatever you have on hand.

Summer farmers market frittata made with seasonal produce and herbs

Instructions

1. Preheat and Prepare

Start by preheating your oven to 375°F (190°C). In a mixing bowl, whisk together the eggs, milk, salt, and pepper until fully combined.

2. Sauté the Vegetables

Heat olive oil in an oven-safe skillet over medium heat. Add the sliced onion and bell pepper, cooking for 2–3 minutes until softened. Stir in the zucchini and cook for another 3–4 minutes until the zucchini is just tender.

3. Add Spinach and Tomatoes

Add the spinach, mushrooms and cherry tomatoes to the skillet. Cook until the spinach wilts and everything is evenly combined.

4. Add the Egg Mixture

Pour the egg mixture over the vegetables, making sure it spreads evenly. Sprinkle half the cheese into the egg mixture and vegetables, then top with the remaining cheese..

5. Cook and Bake

Let the frittata cook on the stovetop for 2–3 minutes, just until the edges begin to set. Then transfer the skillet to the oven and bake for 10–12 minutes, or until the center is fully set and the top is lightly golden.

6. Cool and Serve

Remove from the oven and allow it to cool slightly before slicing. Garnish with fresh herbs for a bright, fresh finish.


Whether you’re cooking for yourself, your family, or guests, this healthy brunch idea delivers every time.

What to Serve with a Vegetable Frittata

This healthy frittata recipe pairs beautifully with a variety of sides. For a balanced meal, try serving it with:

  • A simple green salad with vinaigrette

  • Fresh fruit or a berry bowl

  • Avocado toast or whole-grain bread

It’s versatile enough to serve for breakfast, brunch, lunch, or even a light dinner.

Tips for the Best Summer Frittata

If you want your frittata to turn out perfectly every time, keep these tips in mind:

  • Use an oven-safe skillet, like cast iron, for seamless stovetop-to-oven cooking

  • Don’t overcook the eggs—they should be just set for the best texture

  • Cut vegetables evenly so they cook at the same rate

  • Add delicate herbs at the end to preserve their flavor

Healthy summer breakfast recipe with fresh vegetables and eggs
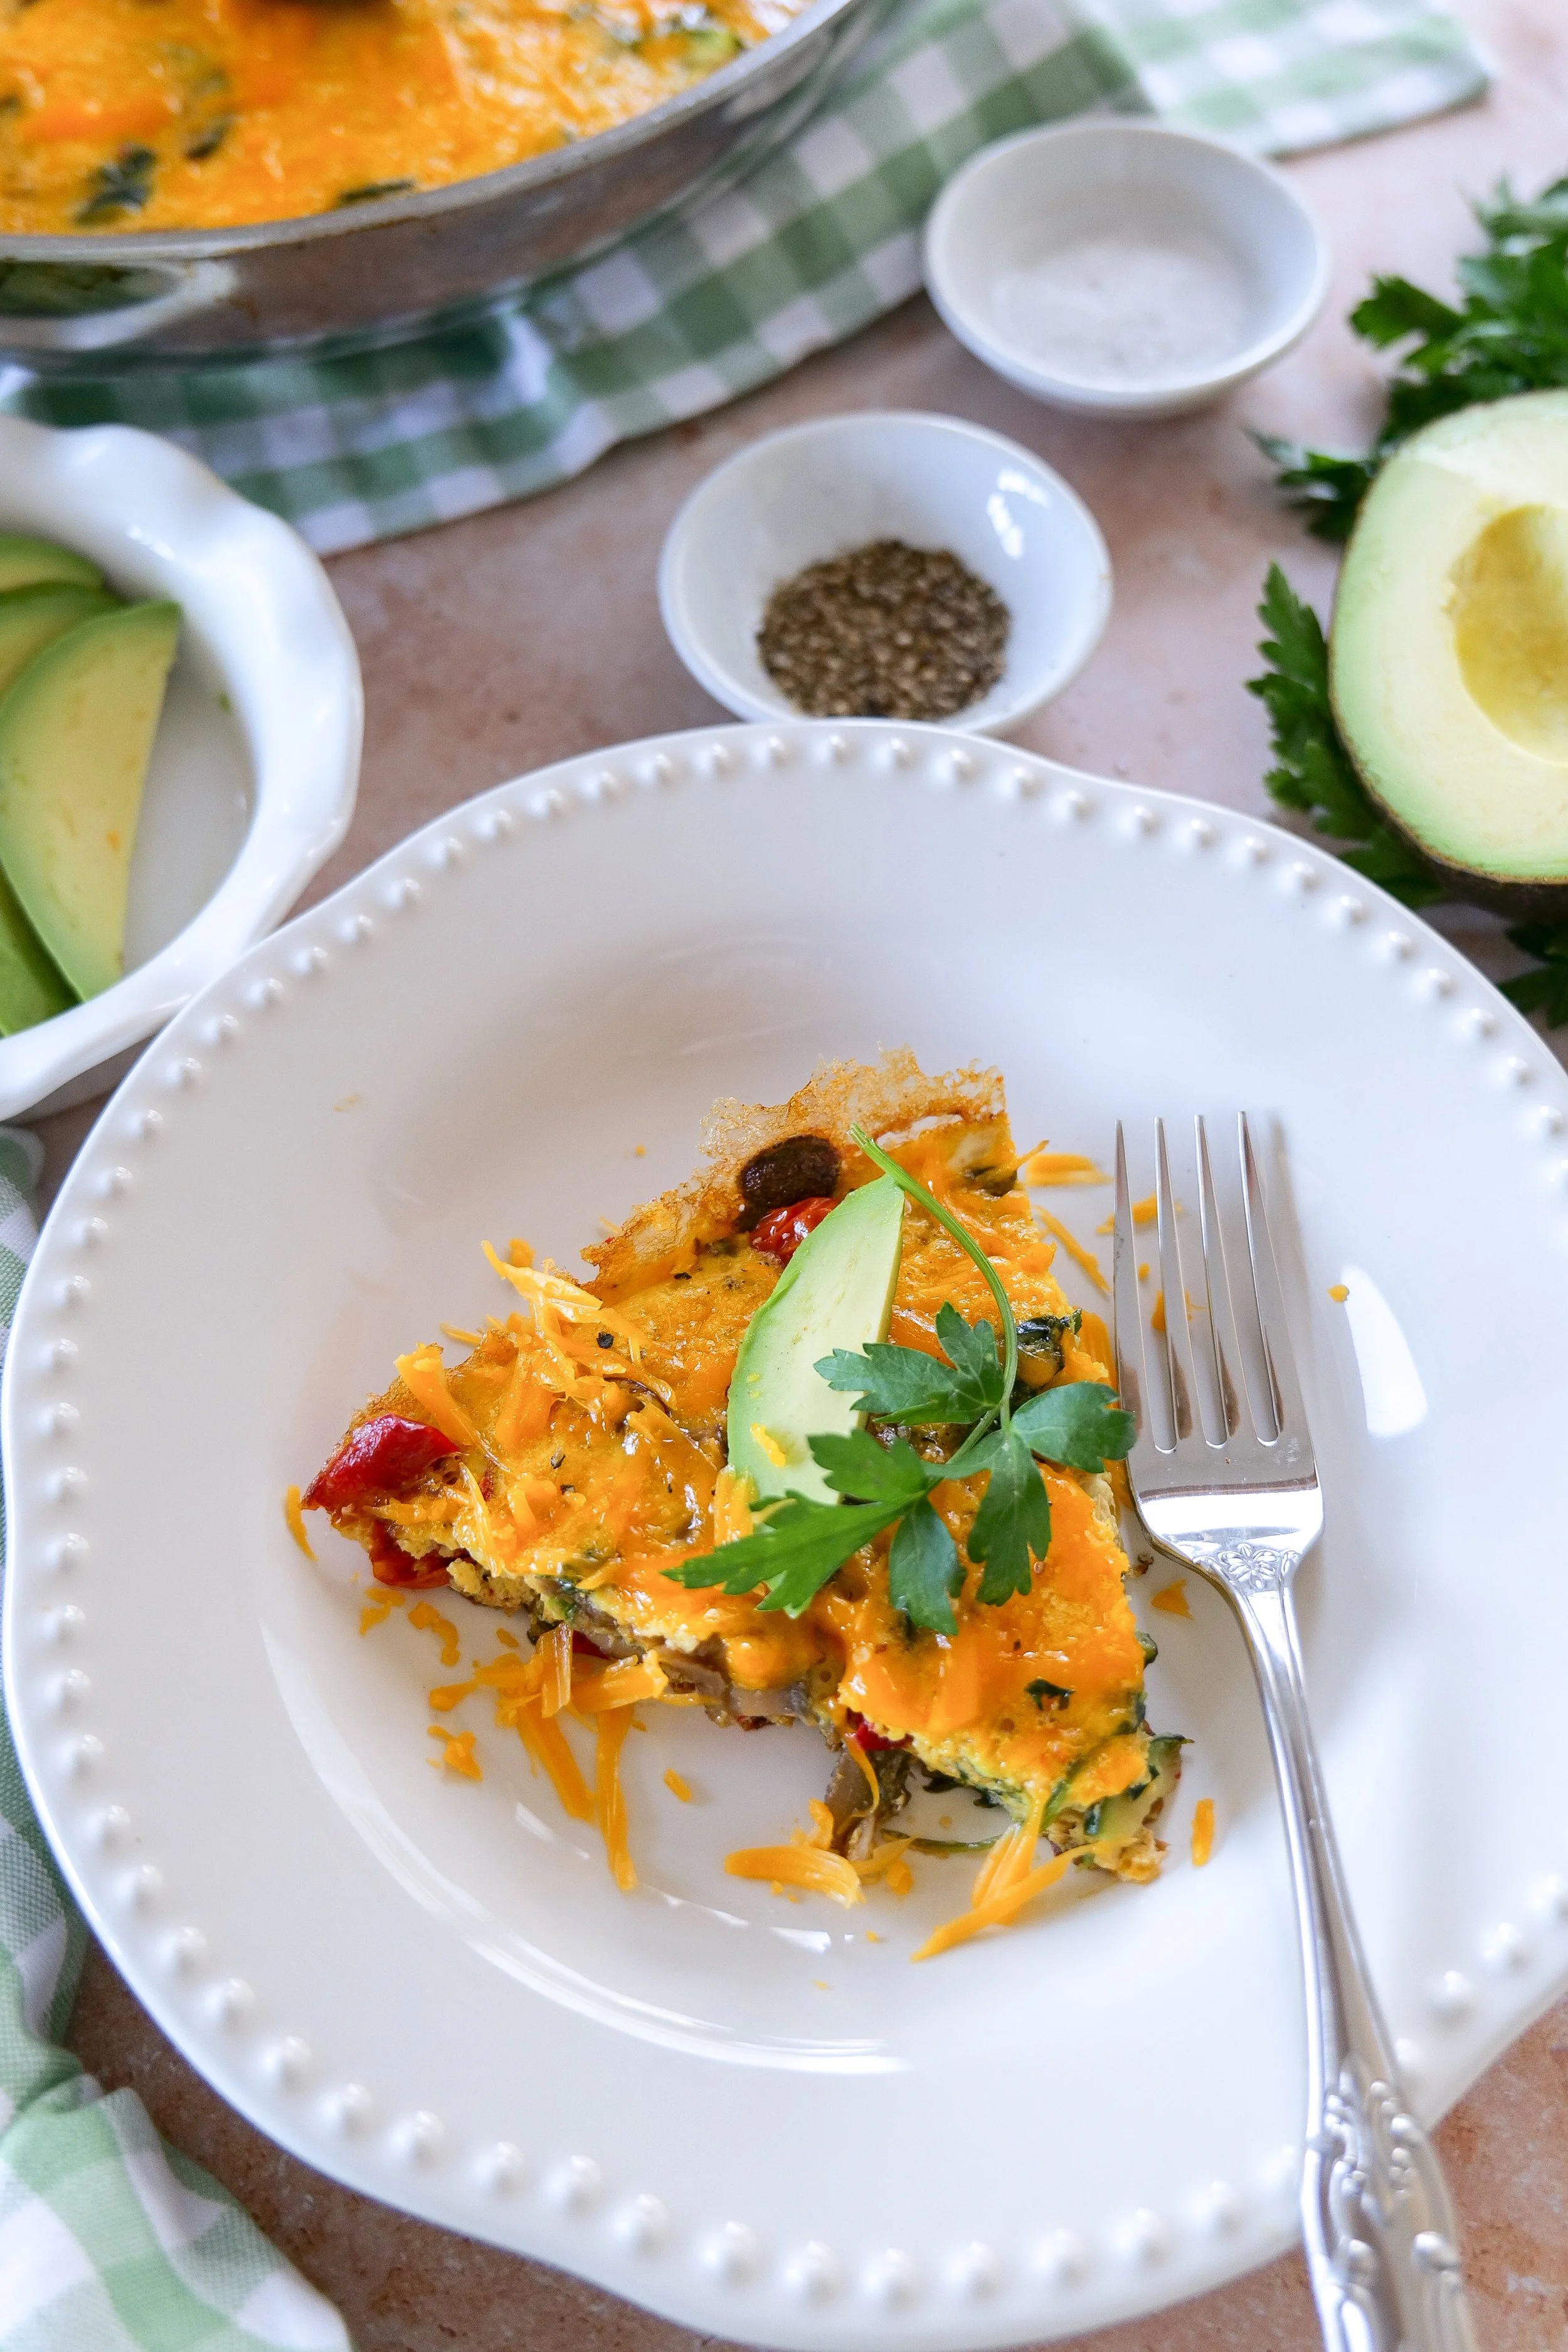
Zucchini veggie frittata with eggs tomatoes and melted cheese
Homemade summer frittata baked in a cast iron skillet

Easy Variations to Try

This easy summer brunch recipe is incredibly customizable depending on what vegetables and proteins you have on hand. One of the best things about this quick breakfast recipe is how customizable it is:

  • Dairy-Free Option: Skip the cheese or use a plant-based version

  • Protein Boost: Add cooked chicken, turkey sausage, or smoked salmon

  • Mediterranean Twist: Include olives, feta cheese, and sun-dried tomatoes

  • Farmers Market Version: Toss in corn, asparagus, or mushrooms

Frequently Asked Questions

Can I make a frittata ahead of time?
Yes! This is a great meal prep option. Store it in an airtight container in the fridge for up to 4 days.

How do I reheat frittata?
Reheat slices in the microwave or in a low-temperature oven until warmed through.

Can I freeze a frittata?
You can freeze it, though the texture may change slightly. Wrap individual slices for easy reheating.

What makes a frittata different from an omelet?
A frittata is cooked slowly and finished in the oven, while an omelet is cooked quickly and folded on the stovetop.

Looking for more ideas? Check out these quick breakfast ideas for busy mornings:

Save This Recipe

Whether you're planning ahead for a special occasion or adding a new favorite to your recipe collection, I've included a printable recipe card below so it's easy to save, print, and share with the people you love.
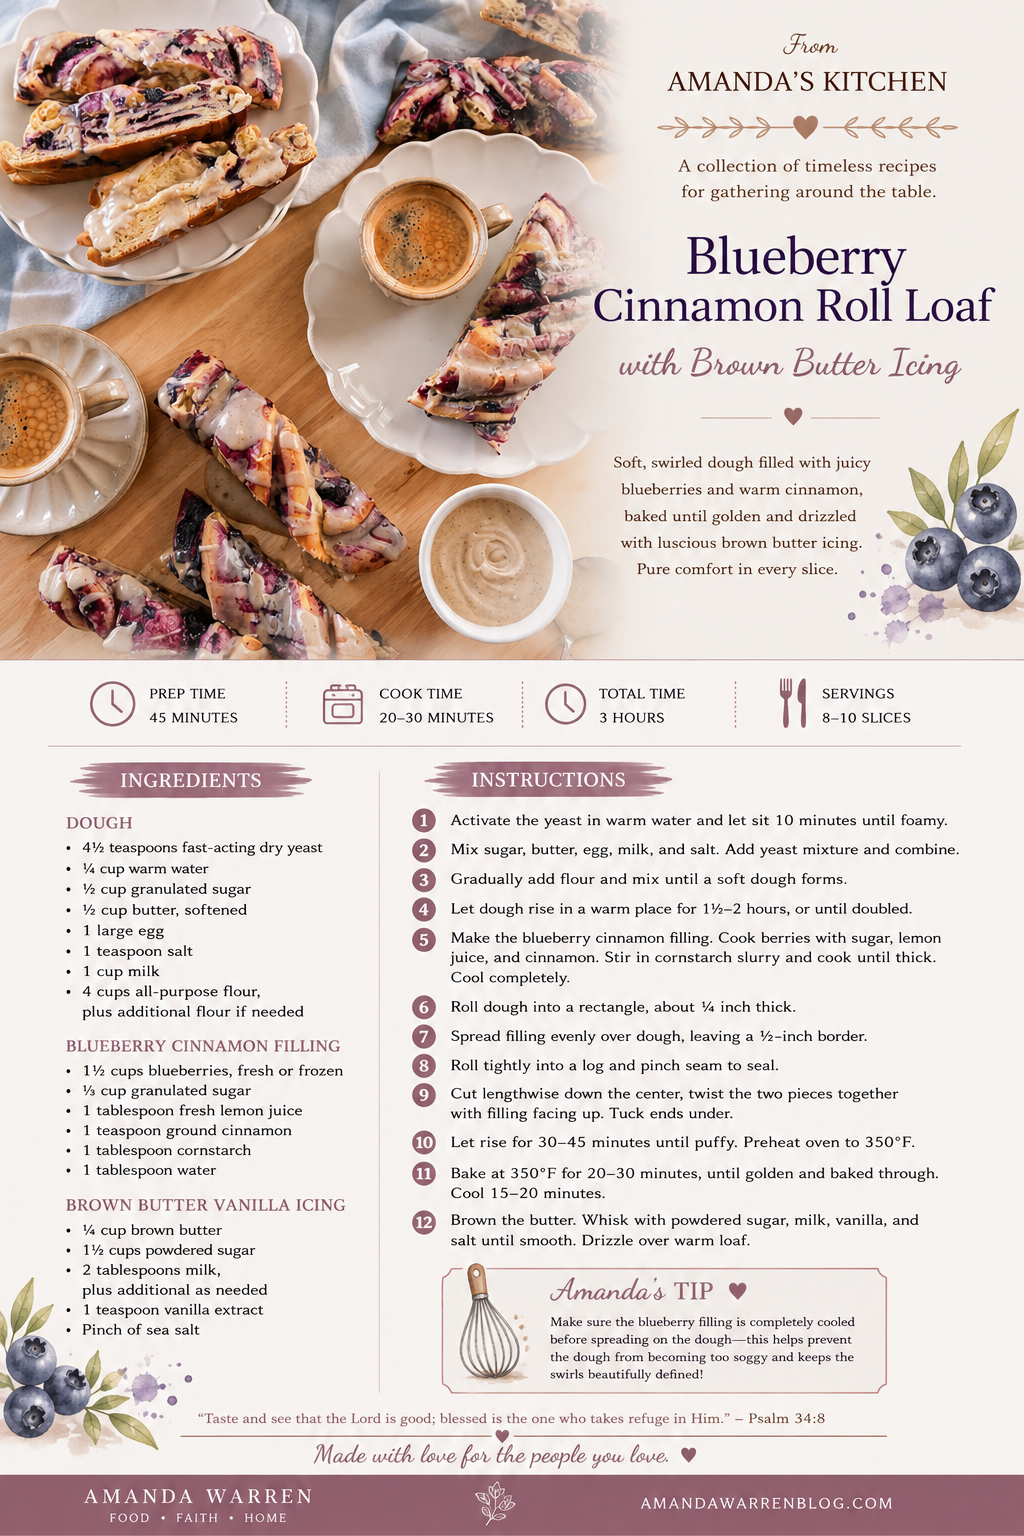
Printable Summer Veggie Frittata recipe card featuring eggs, zucchini, spinach, mushrooms, tomatoes, cheddar cheese, and fresh avocado in an elegant cookbook-inspired layout by Amanda Warren.
Easy summer veggie frittata recipe made with zucchini tomatoes spinach and fresh herbs
Healthy gluten-free vegetable frittata baked with fresh summer vegetables
Fresh veggie frittata topped with herbs and seasonal produce
Savory summer frittata recipe perfect for brunch or light dinners
Easy vegetable frittata breakfast recipe perfect for busy mornings
Spinach and tomato frittata with fluffy eggs and fresh basil
Easy meal prep frittata recipe for healthy weekday breakfasts
Low carb frittata recipe packed with fresh summer vegetables
Healthy brunch idea featuring a colorful summer vegetable frittata
Easy egg frittata recipe with zucchini spinach tomatoes and cheese

Elevate Your Appetizers with This Must-Try Deviled Egg Flight: 6 Irresistible Recipes to Craft at Home!

Looking for a creative appetizer that's guaranteed to impress guests? This Deviled Egg Flight features six unique deviled egg recipes in one beautiful presentation, making it perfect for Easter, brunches, baby showers, holiday gatherings, and spring entertaining.

↓ Skip to Recipe

From classic Bacon & Cheddar Deviled Eggs to Lobster Roll, Caesar Salad, Bloody Mary, Carbonara, and Dill Pickle variations, this viral deviled egg flight offers something for everyone. Easy to customize and surprisingly simple to assemble, it's a fun way to elevate traditional deviled eggs into a memorable appetizer experience.

Why You'll Love This Deviled Egg Flight

✔ Six unique deviled egg flavors in one platter

✔ Perfect for Easter, brunches, and parties

✔ Easy to prepare ahead of time

✔ Great conversation starter for entertaining

✔ Customizable with your favorite flavors

✔ A fun twist on traditional deviled eggs

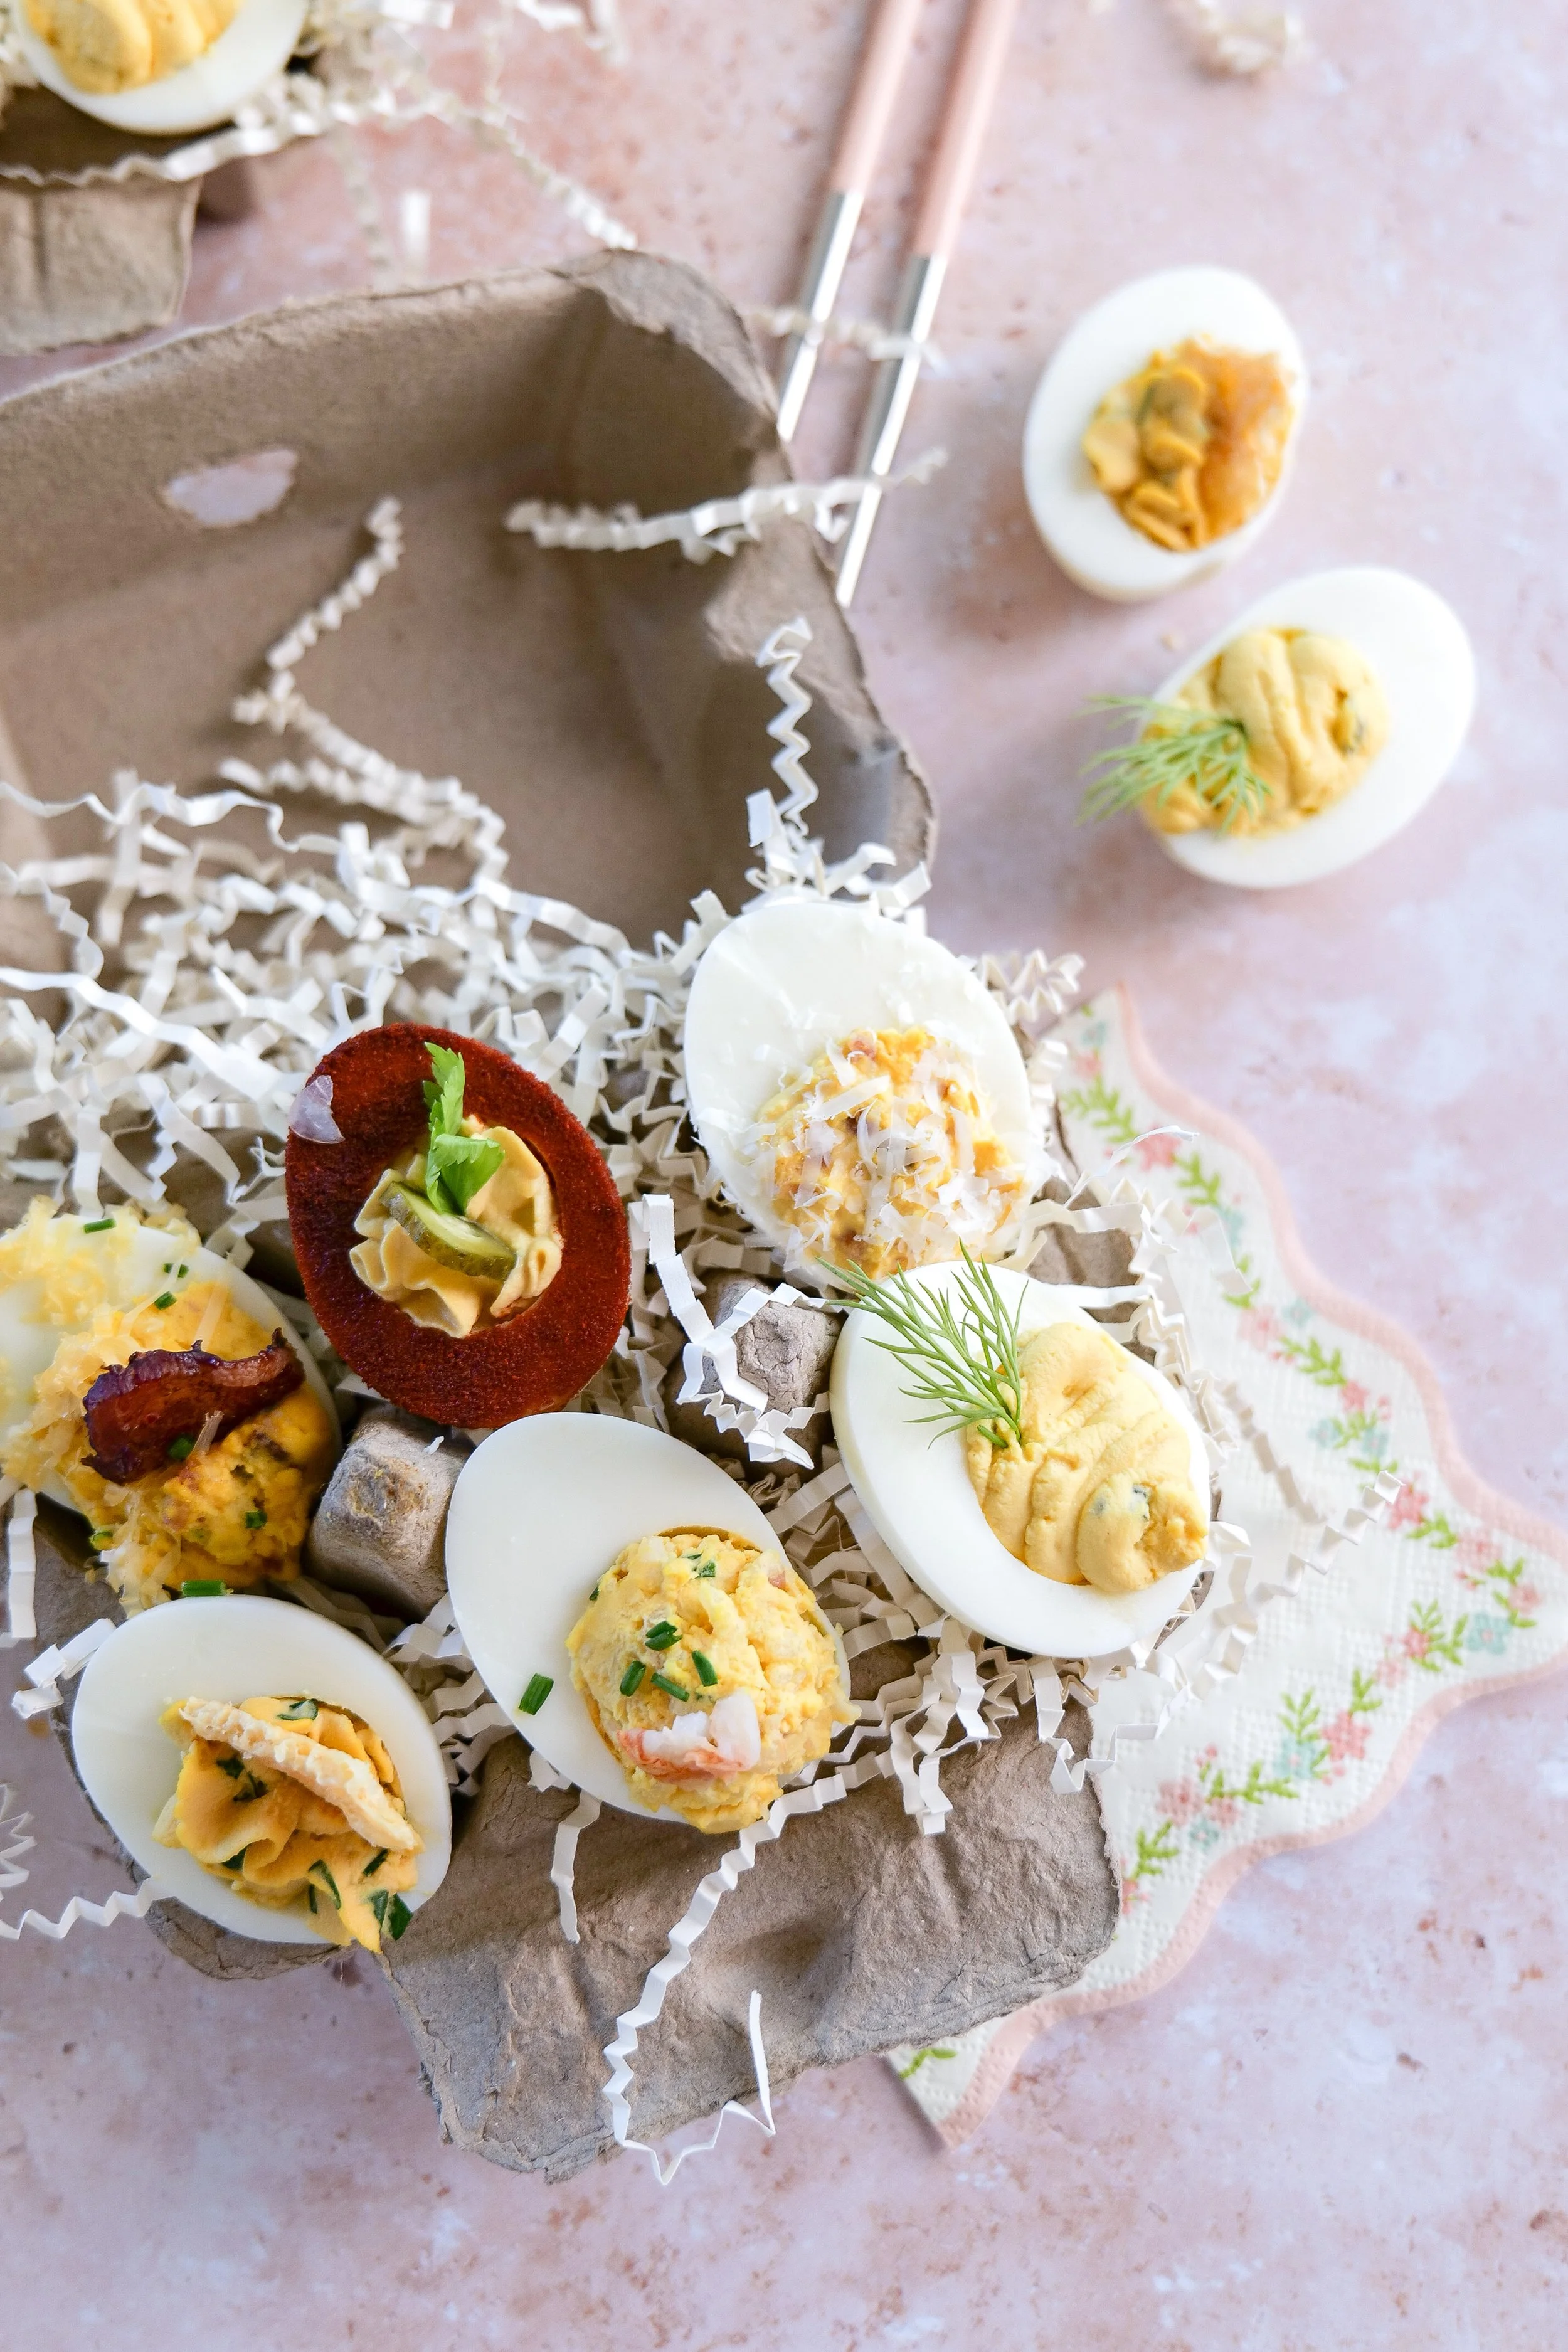
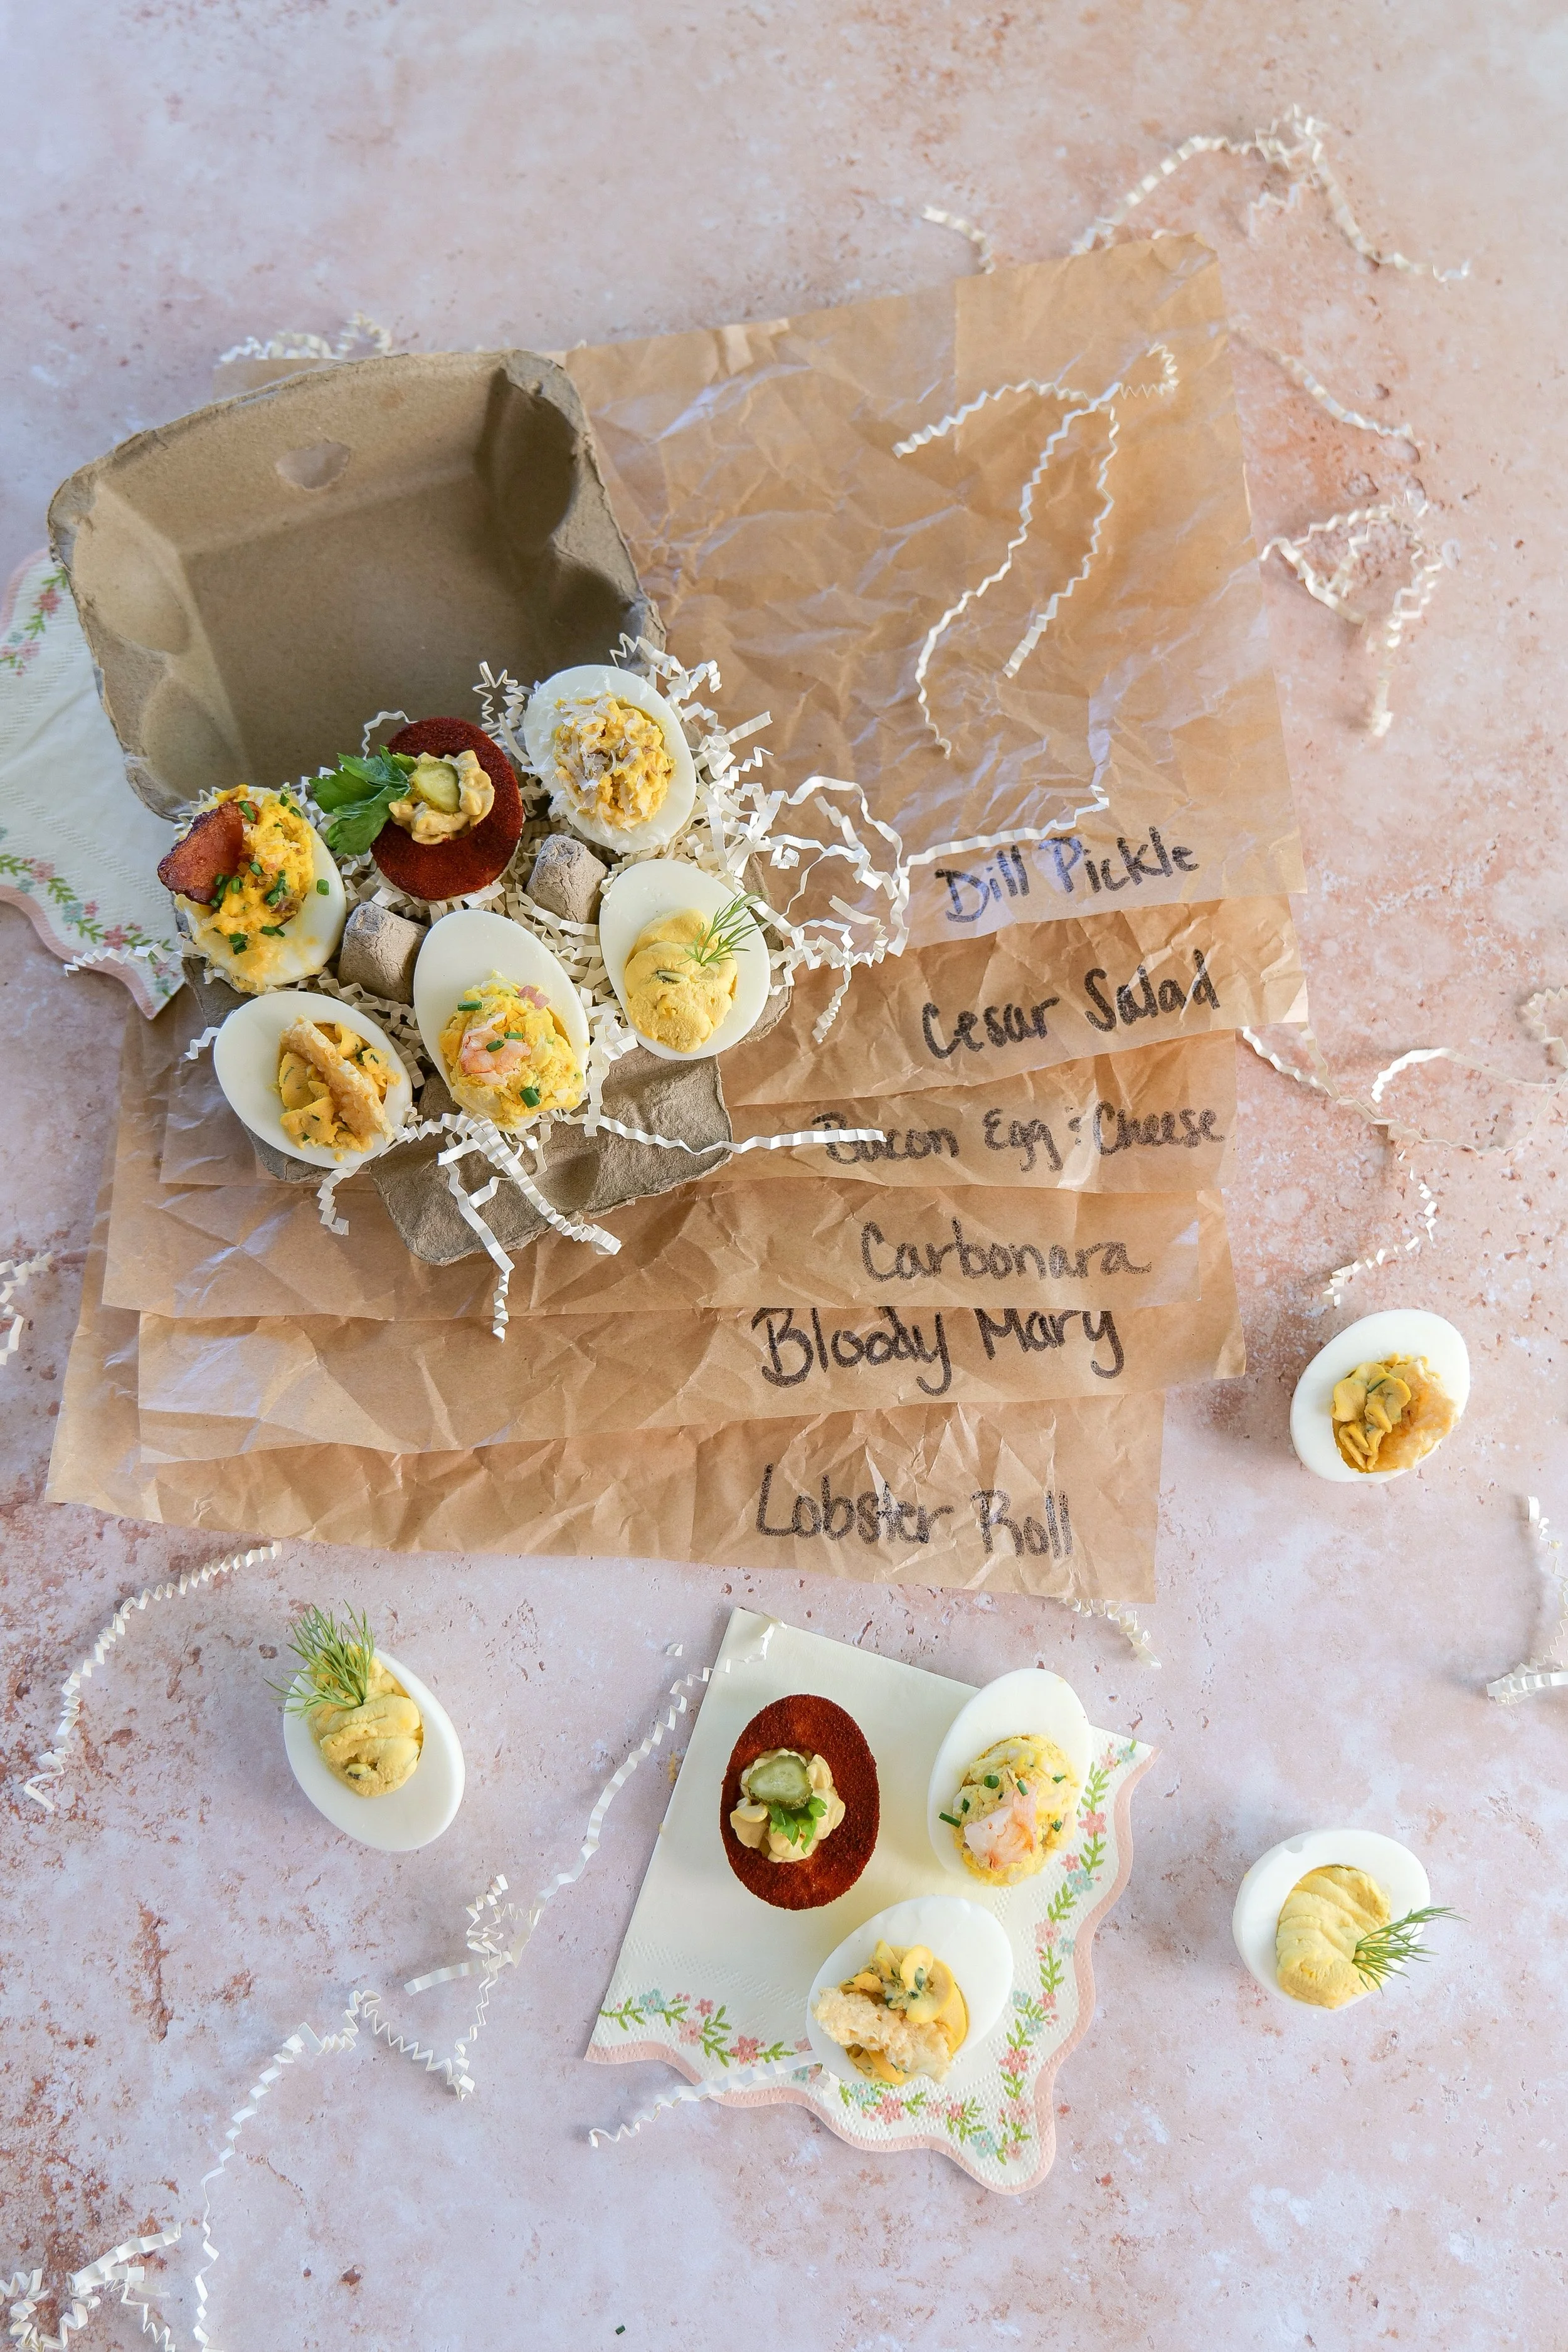
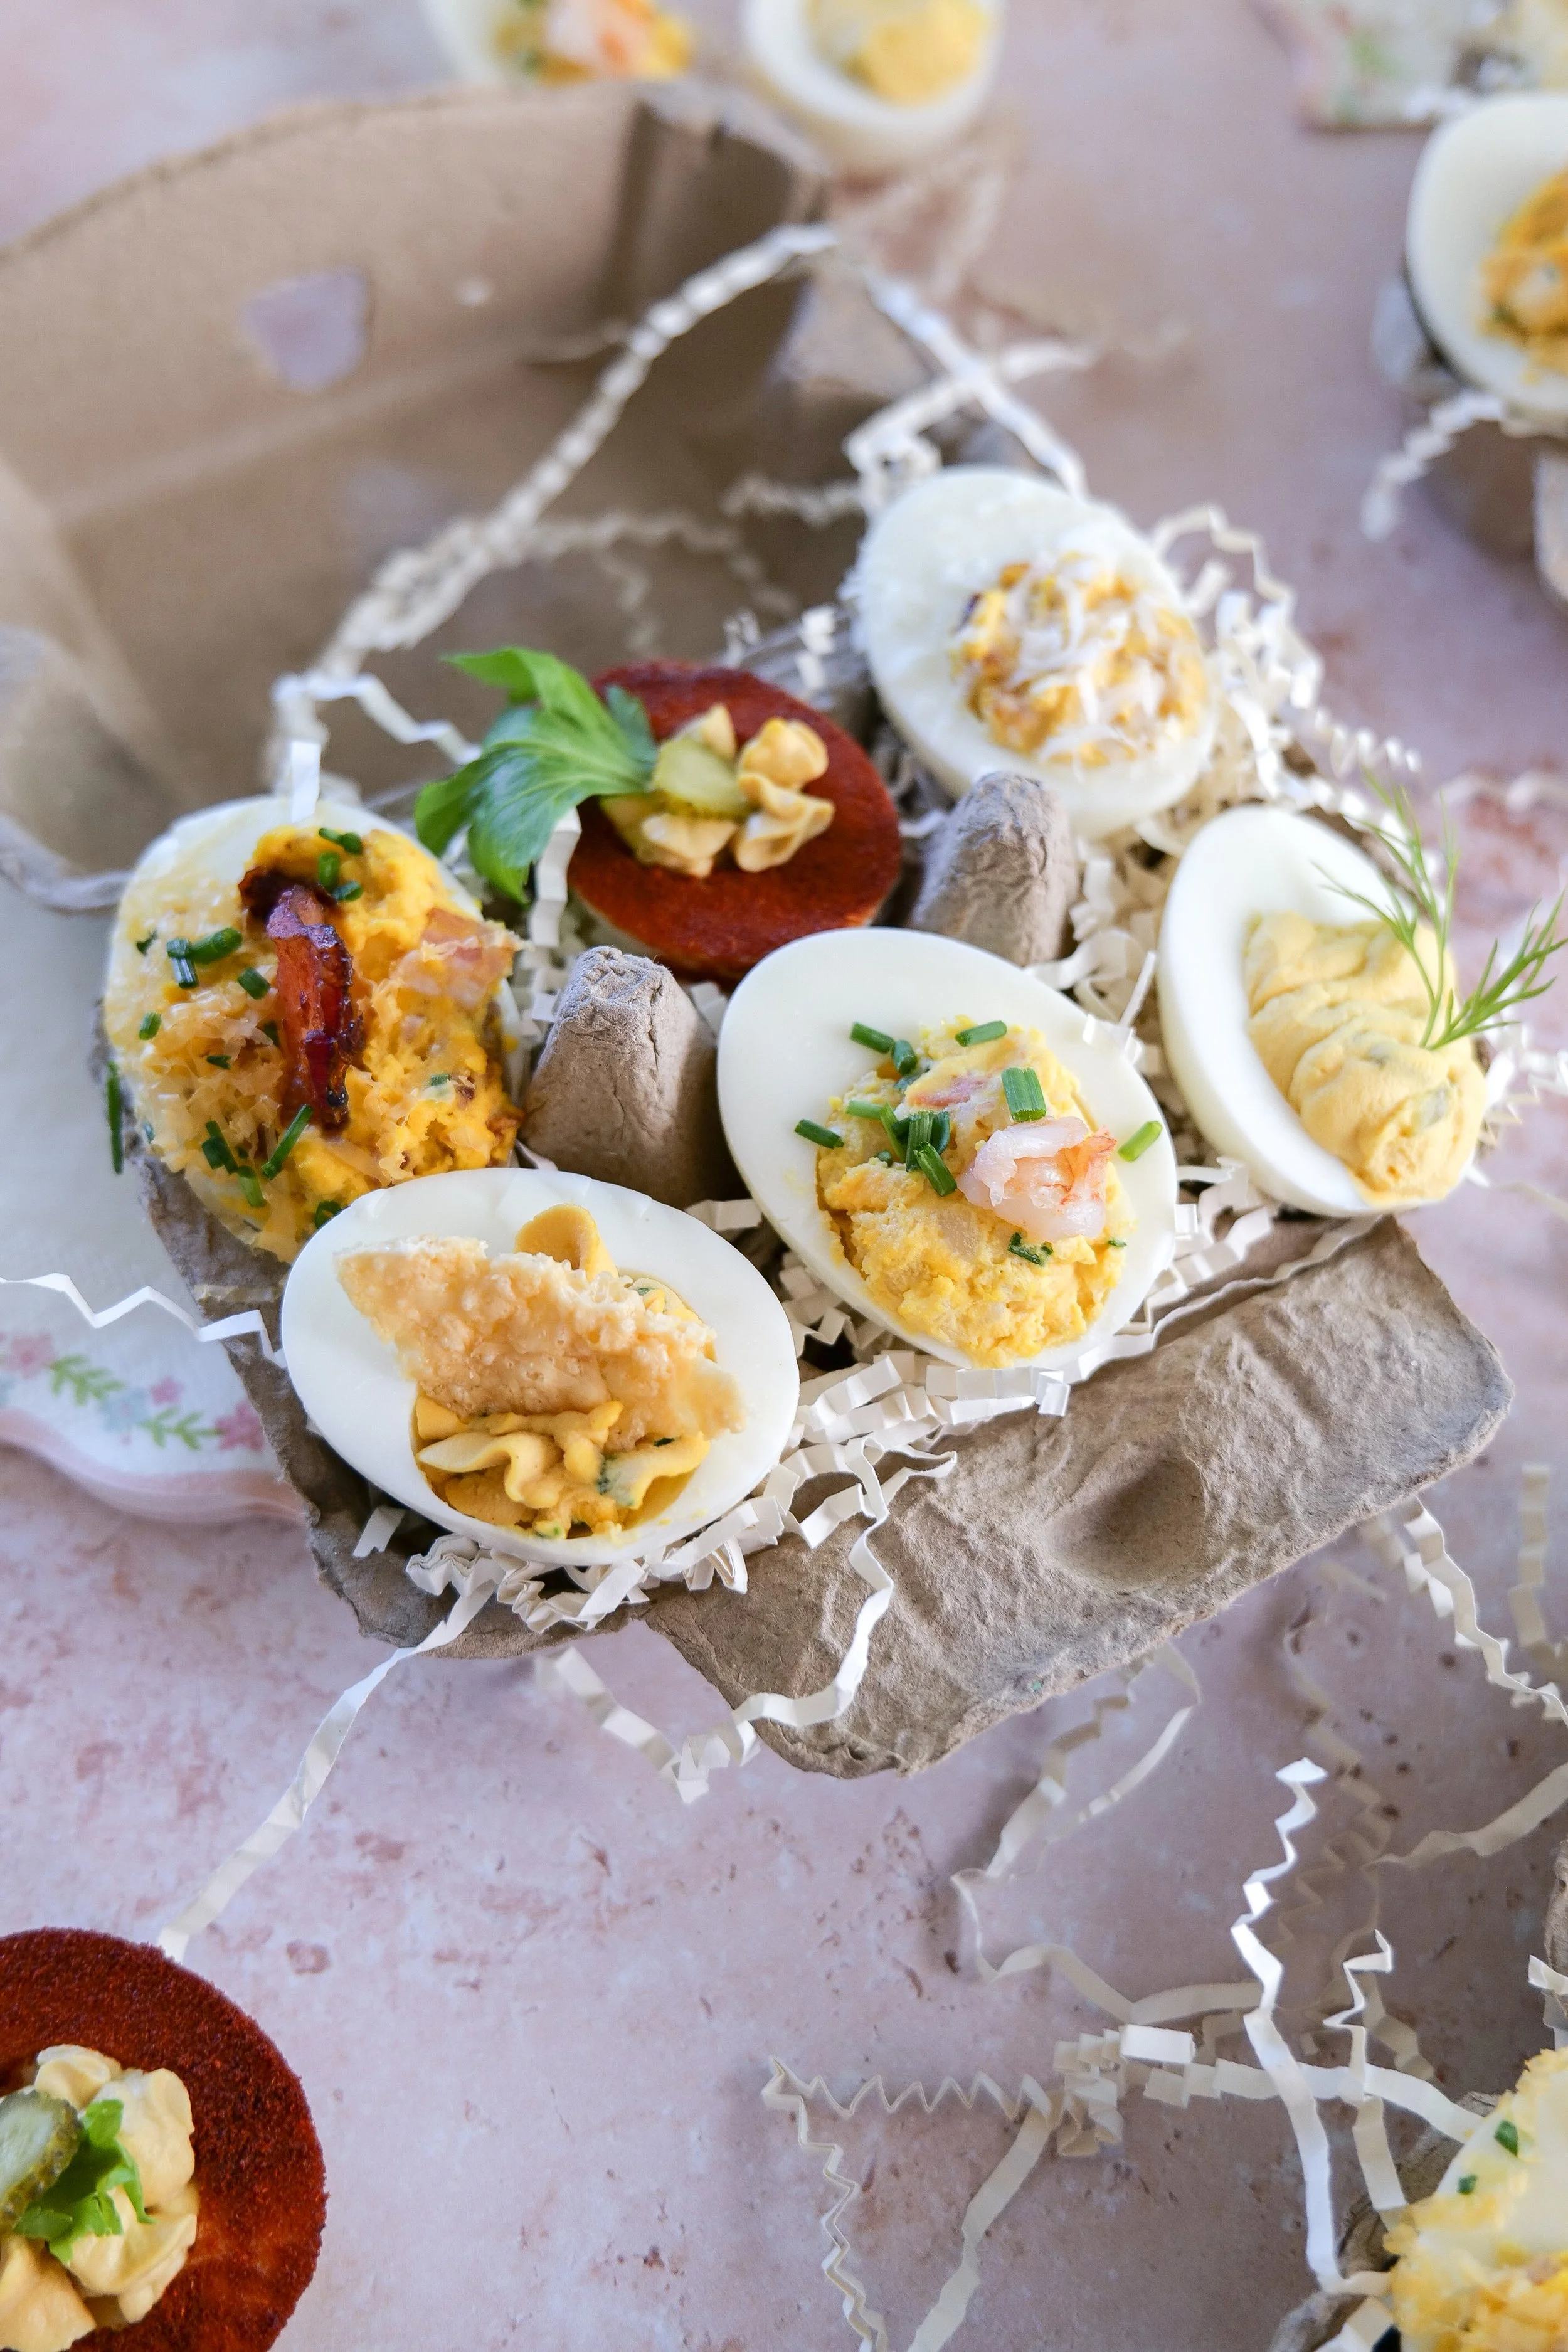
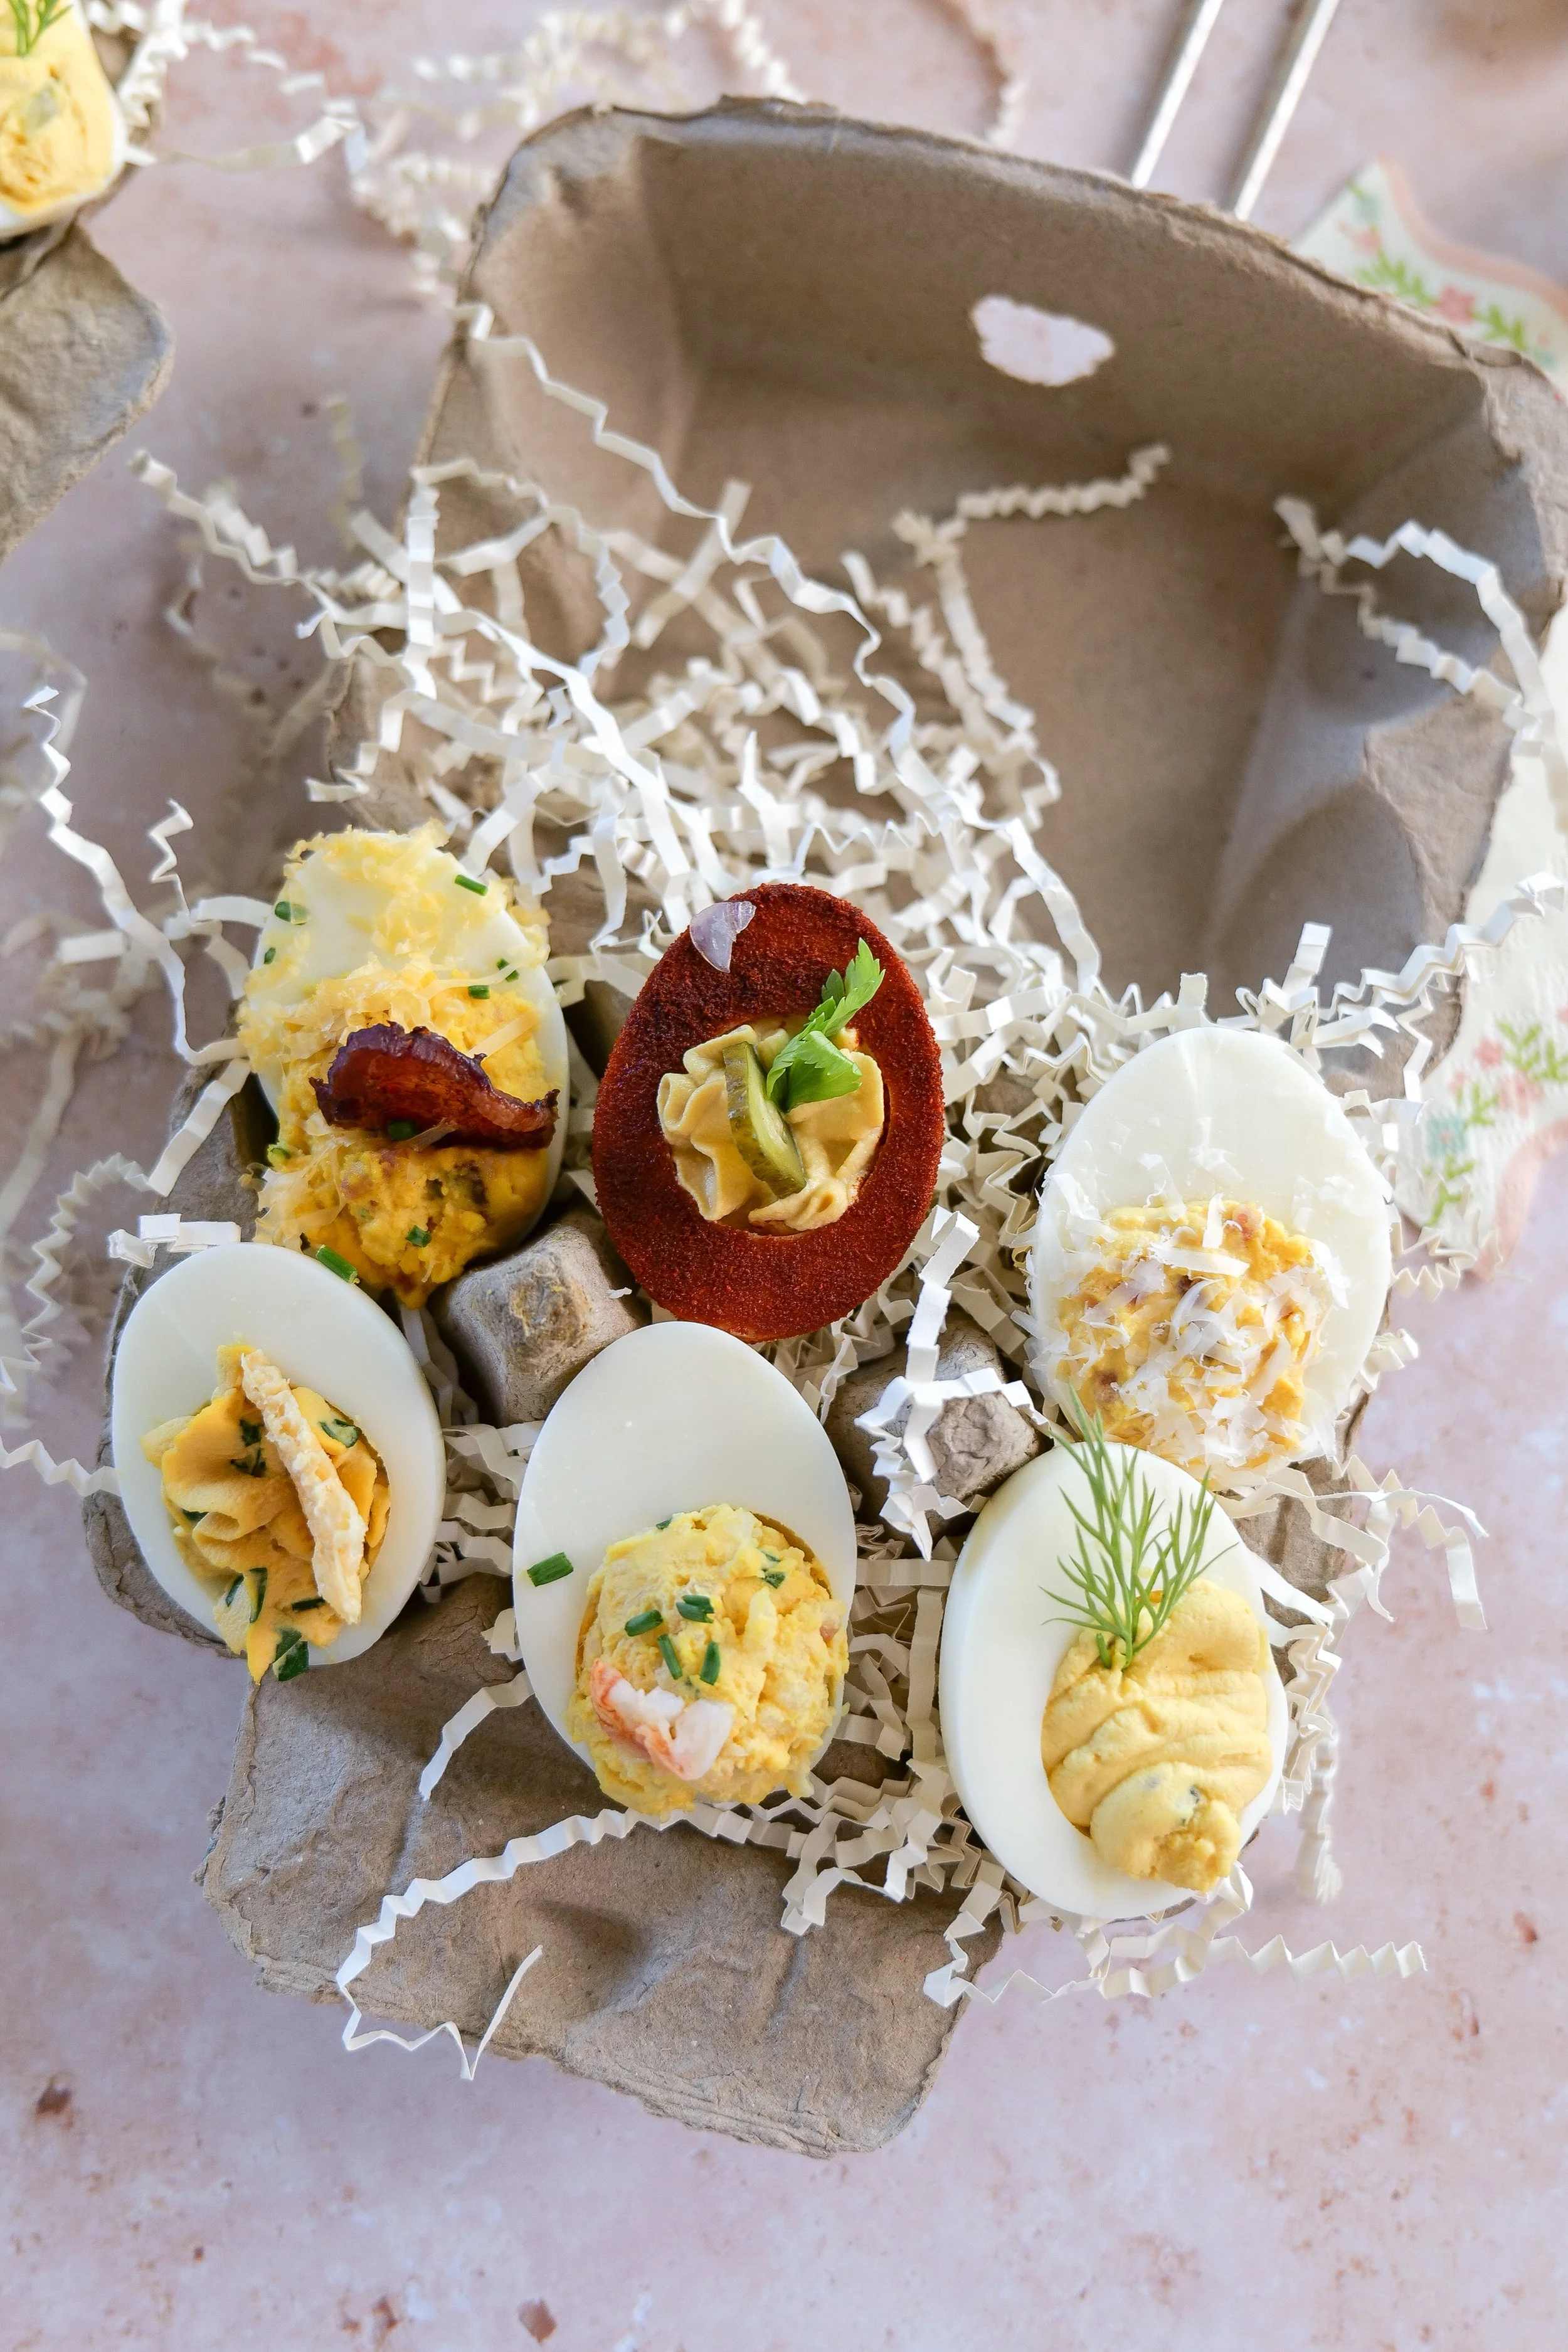
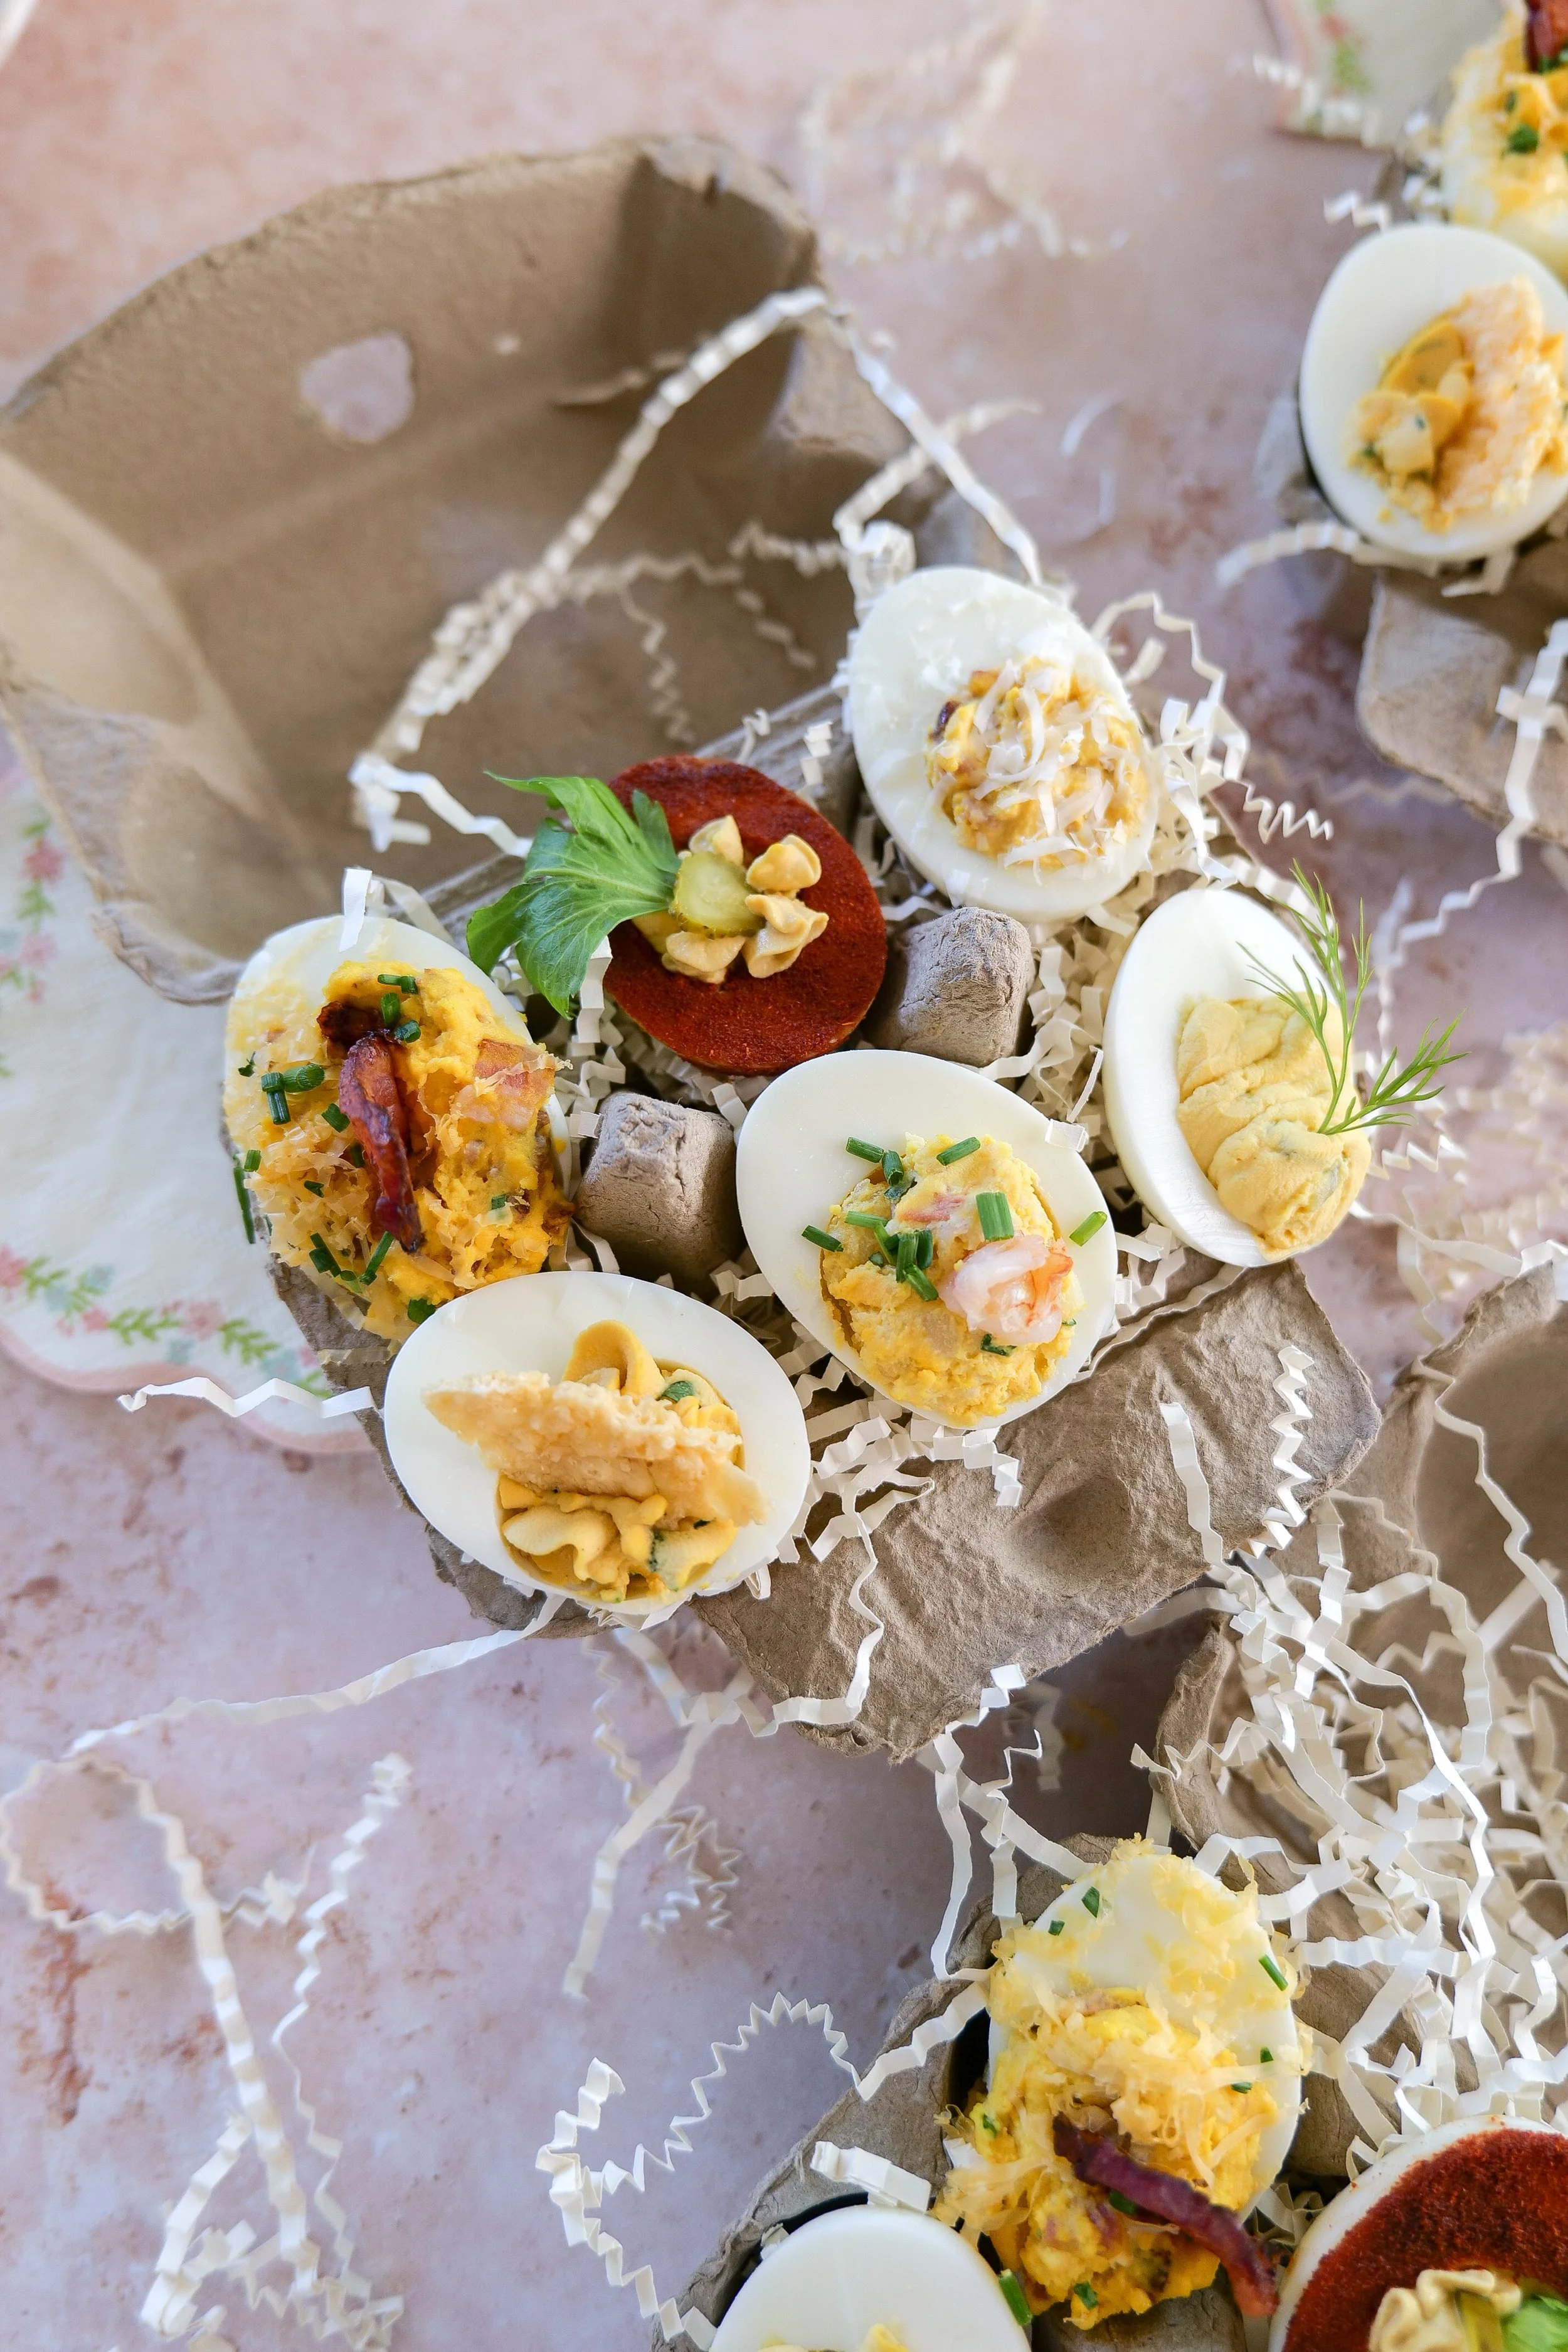
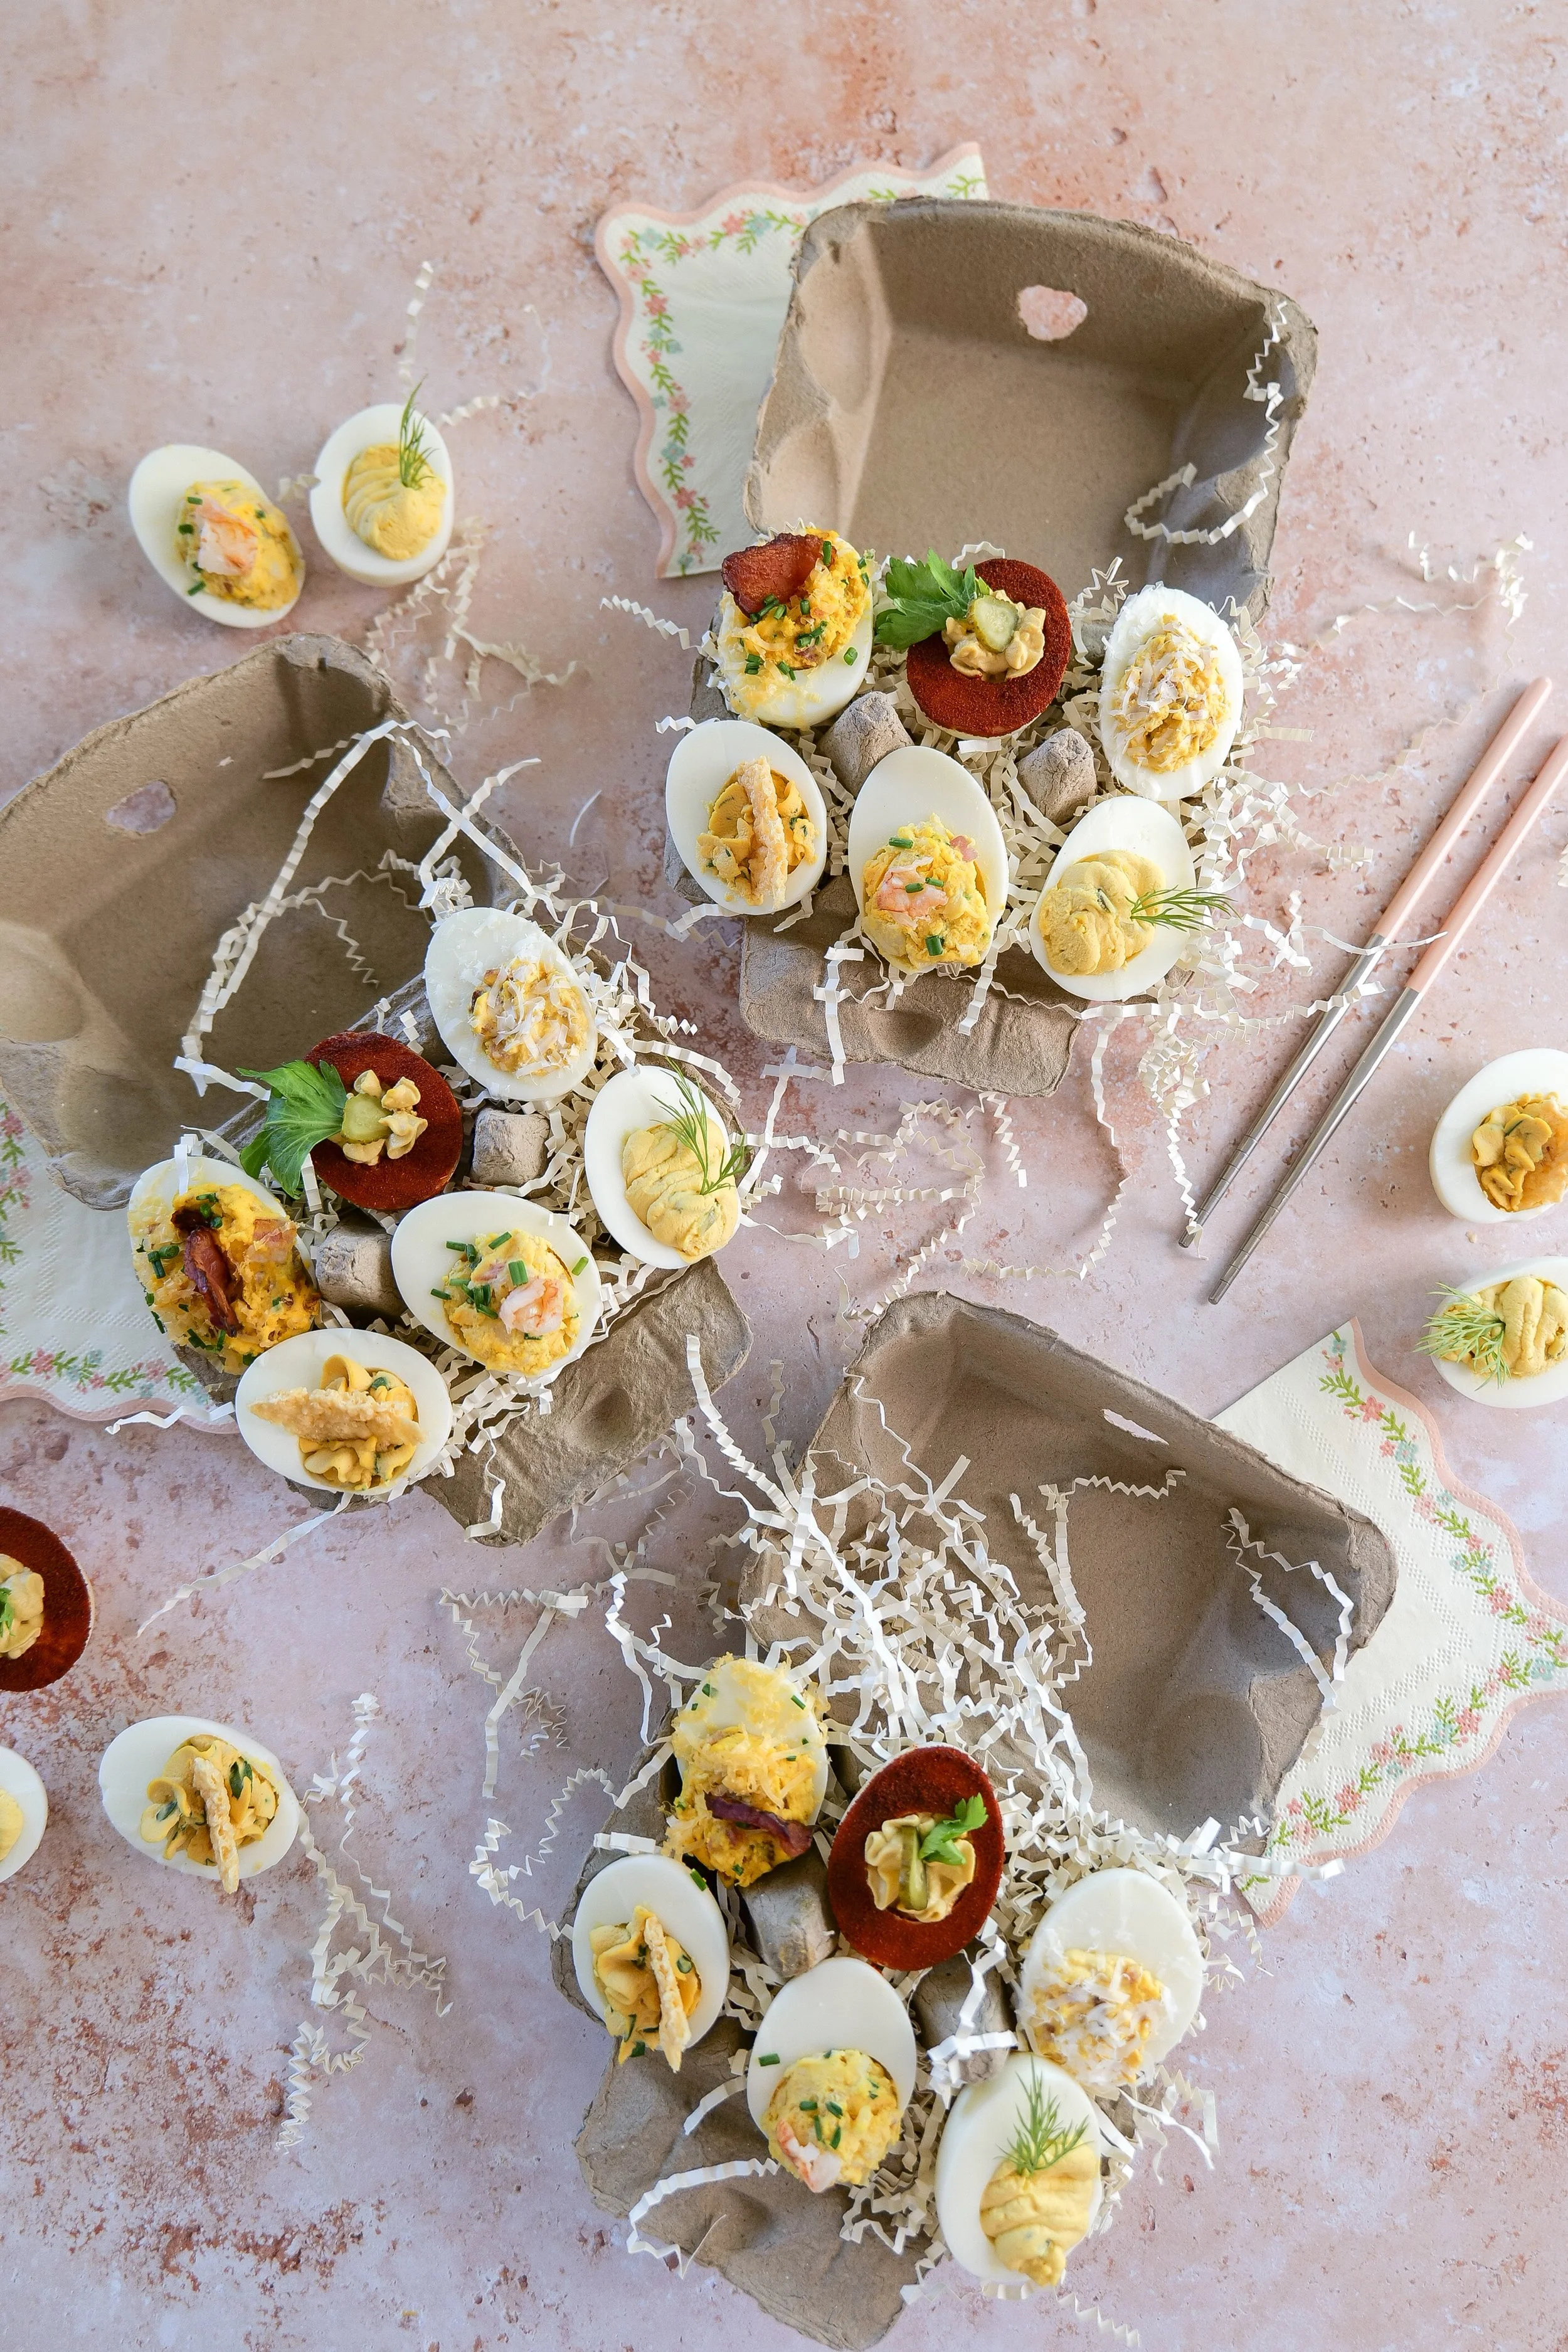
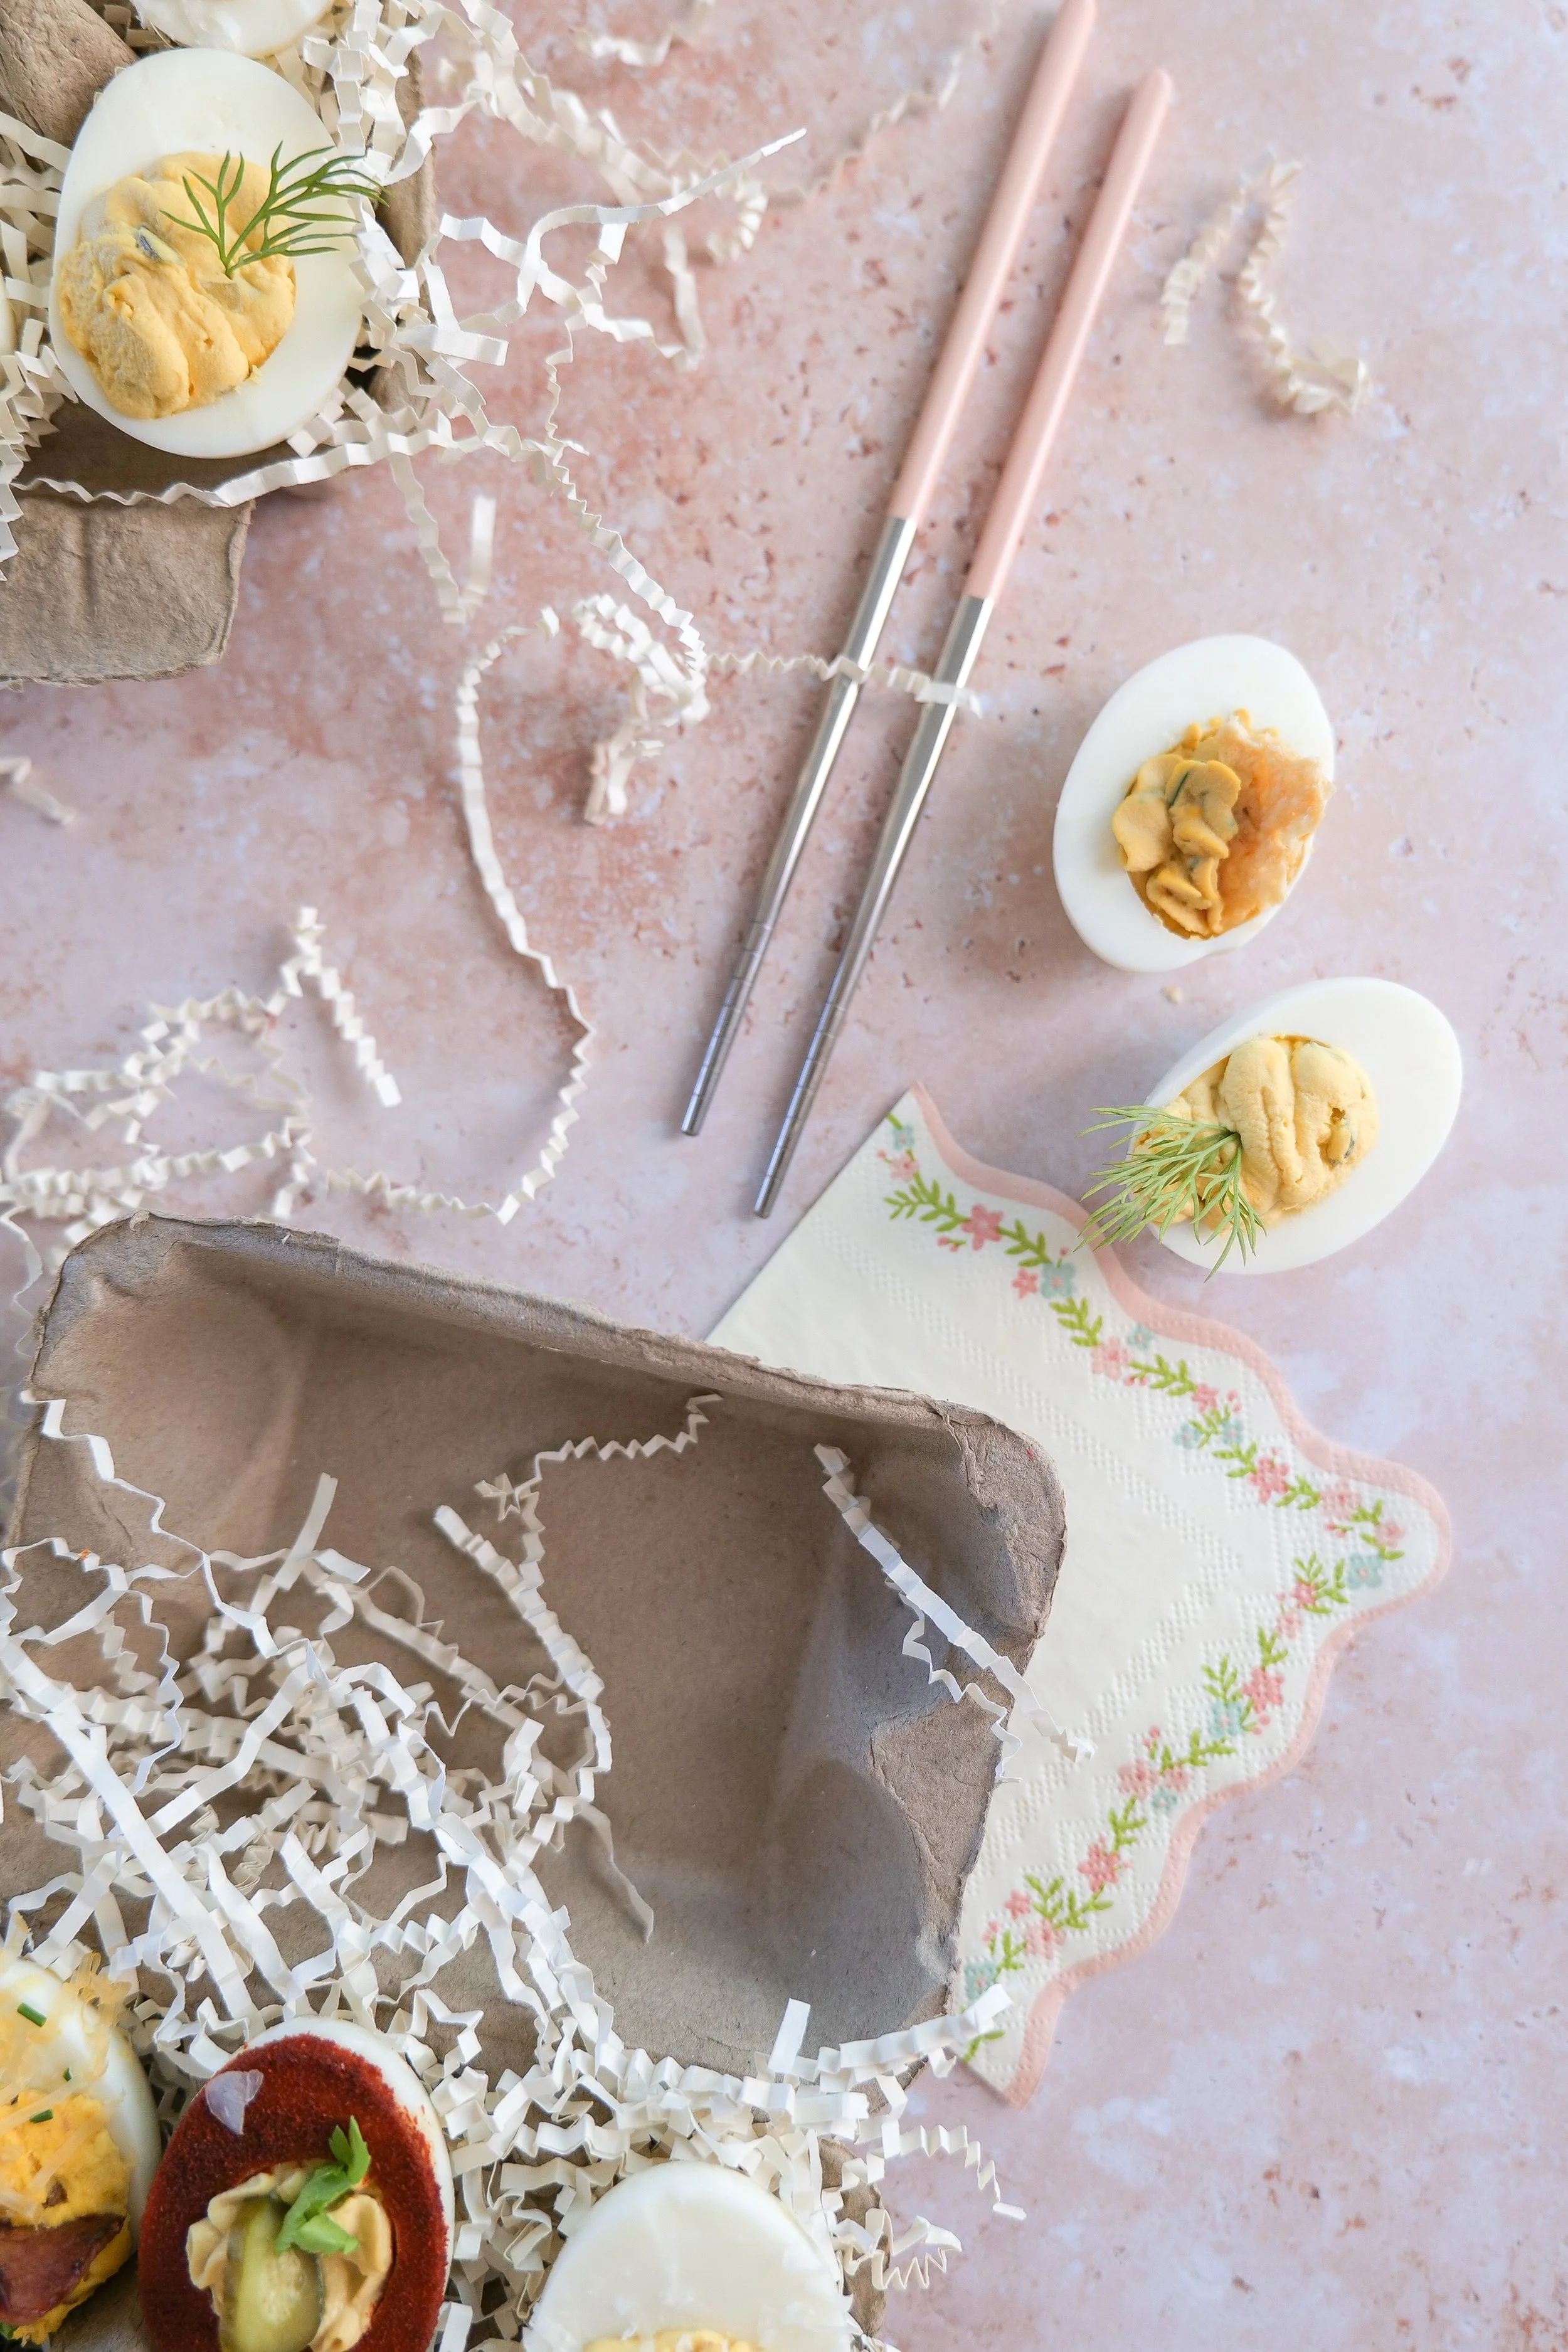
Deviled egg flight featuring six unique deviled egg flavors for Easter and entertaining
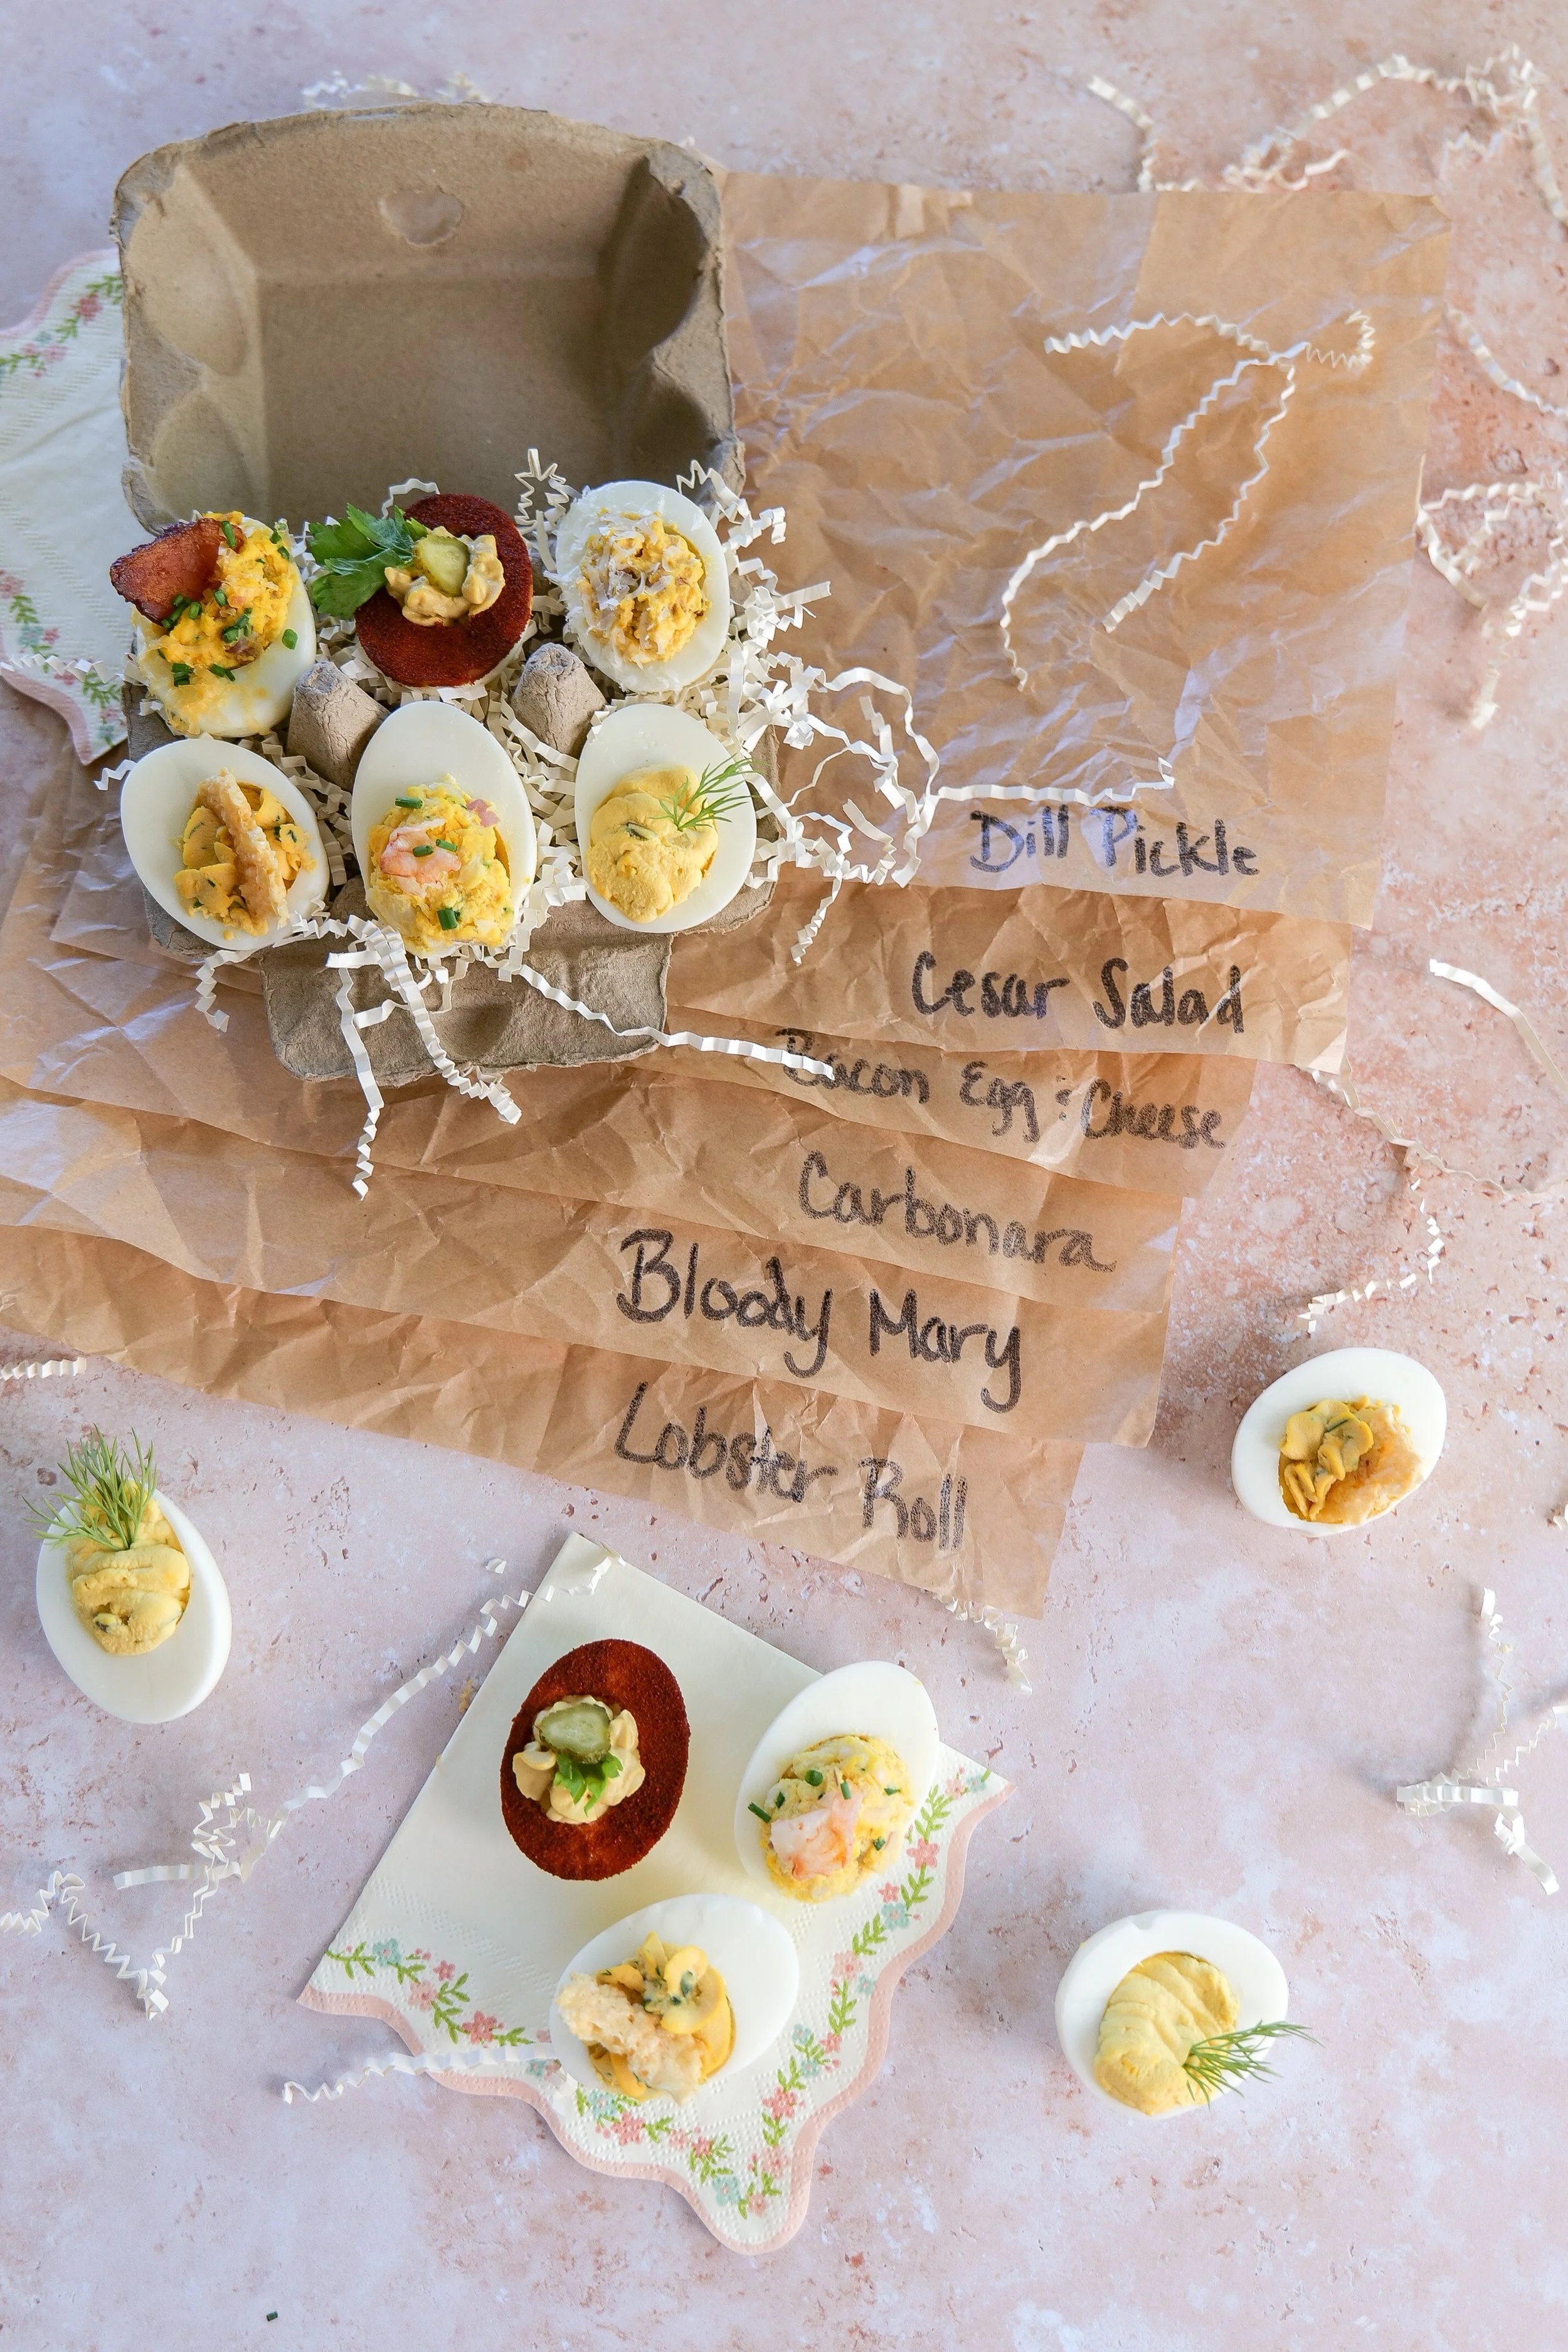
Six different deviled egg recipes arranged on a serving platter
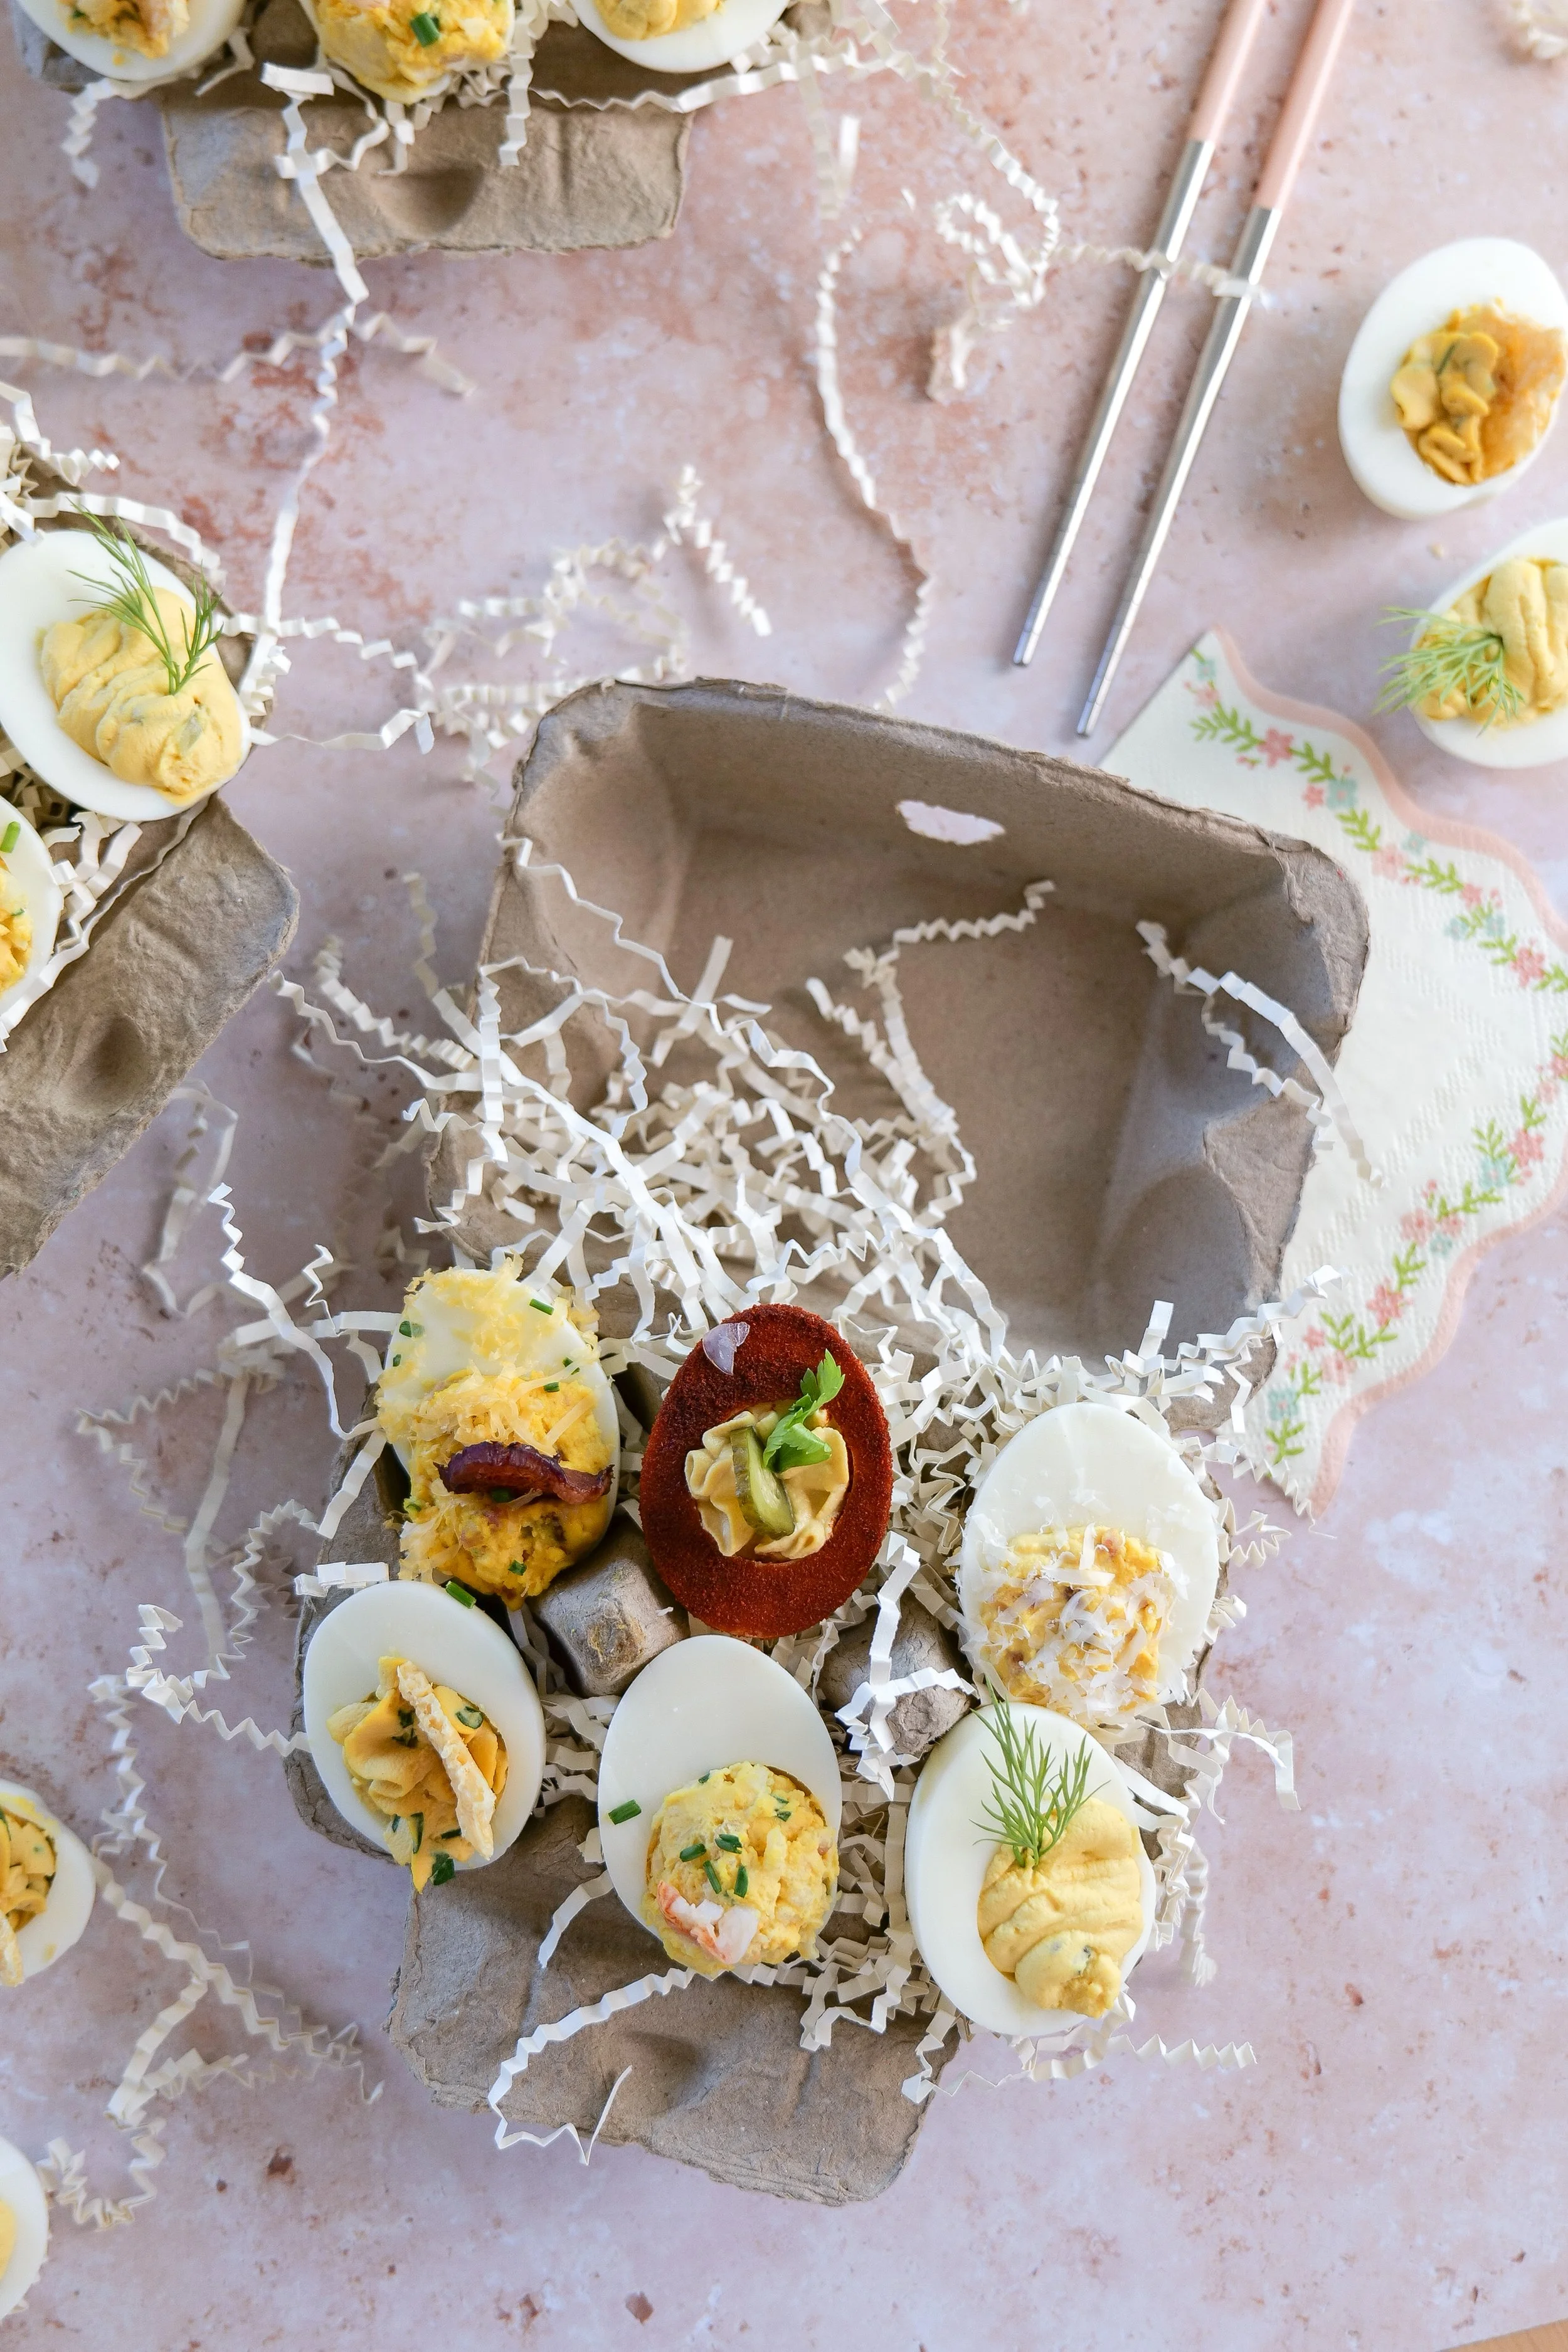
Easter deviled egg flight displayed in a decorative egg carton

The viral egg flight concept puts an unexpectedly exciting twist on deviled eggs, transforming them into a unique appetizer experience. This innovative array showcases the blend of flavors and textures, turning each bite into a delightful surprise. Perfect for entertaining, this deviled egg flight features six distinctive recipes designed to cater to a variety of taste preferences. Each deviled egg recipe is crafted with creative ingredients and seasonings, providing guests with an elevated, bite-sized treat. The blog provides easy-to-follow steps for crafting your own deviled egg flight, ensuring your appetizer platter becomes the star of any gathering.

Featured In My Flight:

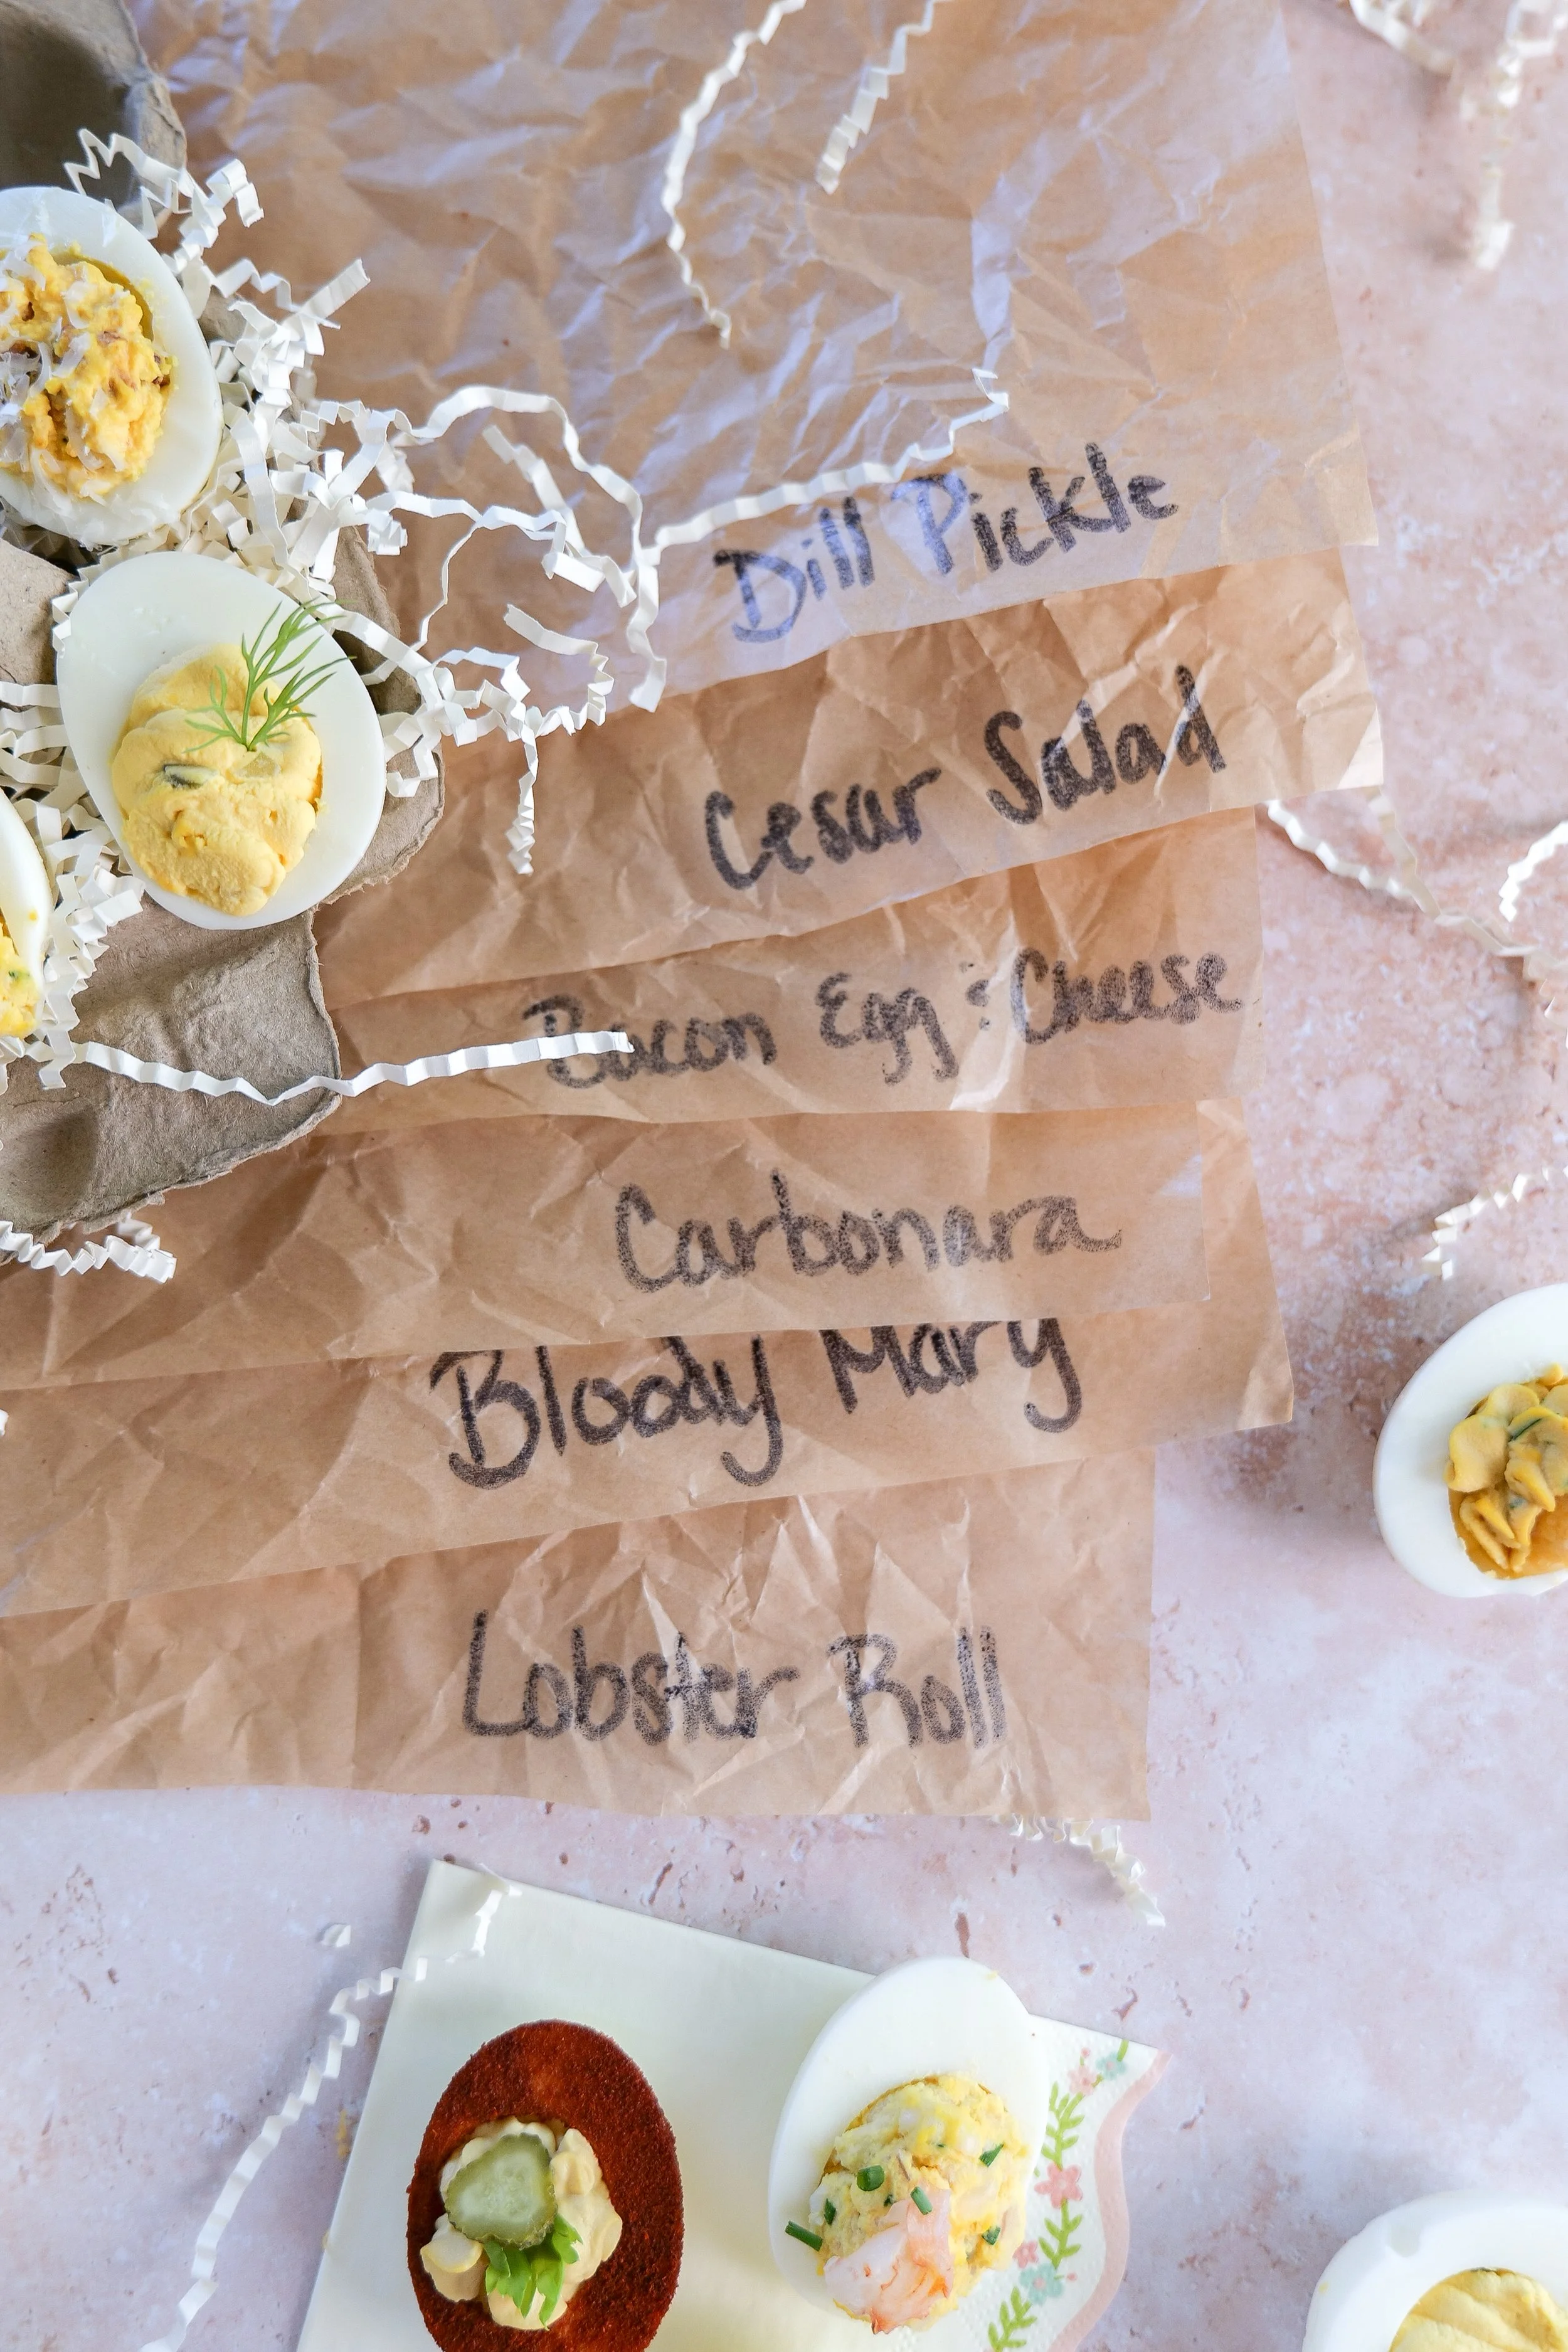
- Bacon & Cheddar: Delightfully savory.

- Dill Pickle: Fresh and zesty for light palates.

- Carbonara: An appetizer twist perfect for chip lovers.

- Bloody Mary: Exotic and packed with extra spice.

- Lobster Roll: Spicy sea flavors for an adventurous bite.

- Cesar Salad: Creamy, crunchy, and tangy.

Let your creativity shine as you bring this viral sensation to your home, ensuring a memorable and engaging culinary adventure. Whether you're hosting a festive holiday party or a casual weekend brunch, these deviled egg flights are a perfect choice. Each step-by-step recipe is easy to follow, making them accessible to even novice home cooks. Elevate your culinary skills with these tips and tricks, perfecting the art of deviled egg preparation and presentation. By balancing contrasting flavors and textures, each bite becomes a harmonious and unforgettable culinary experience. Impress your guests while pushing the boundaries of traditional deviled eggs, ushering creativity and excitement into your next gathering.

Bacon cheddar deviled eggs topped with crispy bacon and fresh chives
Carbonara deviled eggs garnished with parmesan cheese and bacon bits

What is a Deviled Egg Flight and How Does it Differ from Regular Deviled Eggs?

The concept of a deviled egg flight is akin to a sampler platter, offering a variety of deviled eggs with different flavors and toppings. Unlike regular deviled eggs, which traditionally have a uniform style in terms of taste and presentation, deviled egg flights encompass multiple unique recipes. This provides an exploration of flavors catering to a wide range of tastes and preferences. This creative concept not only satisfies diverse palates but also adds an interactive and engaging dimension to your appetizer experience at home. Crafting your own deviled egg flight involves preparing multiple distinct recipes, allowing for experimentation with flavors and creative presentation. Encouraging exploration in both recipe and presentation, this culinary trend takes deviled eggs to exciting new heights.

Creating a successful deviled egg flight at home begins with selecting a variety of recipes with distinct flavors to ensure an exciting and diverse experience. Prepare all fillings in advance, which not only streamlines assembly but also allows for a more polished and efficient presentation process. Utilize a piping bag for neat and attractive filling of the egg whites, adding to the overall aesthetics of the dish. Consider garnishing each type of deviled egg with unique toppings that complement their flavors, adding another layer of sensory enjoyment. Finally, arrange the deviled eggs on a platter to showcase the variety, making it easy for guests to sample each type.

Caesar salad deviled eggs topped with parmesan crisps and parsley
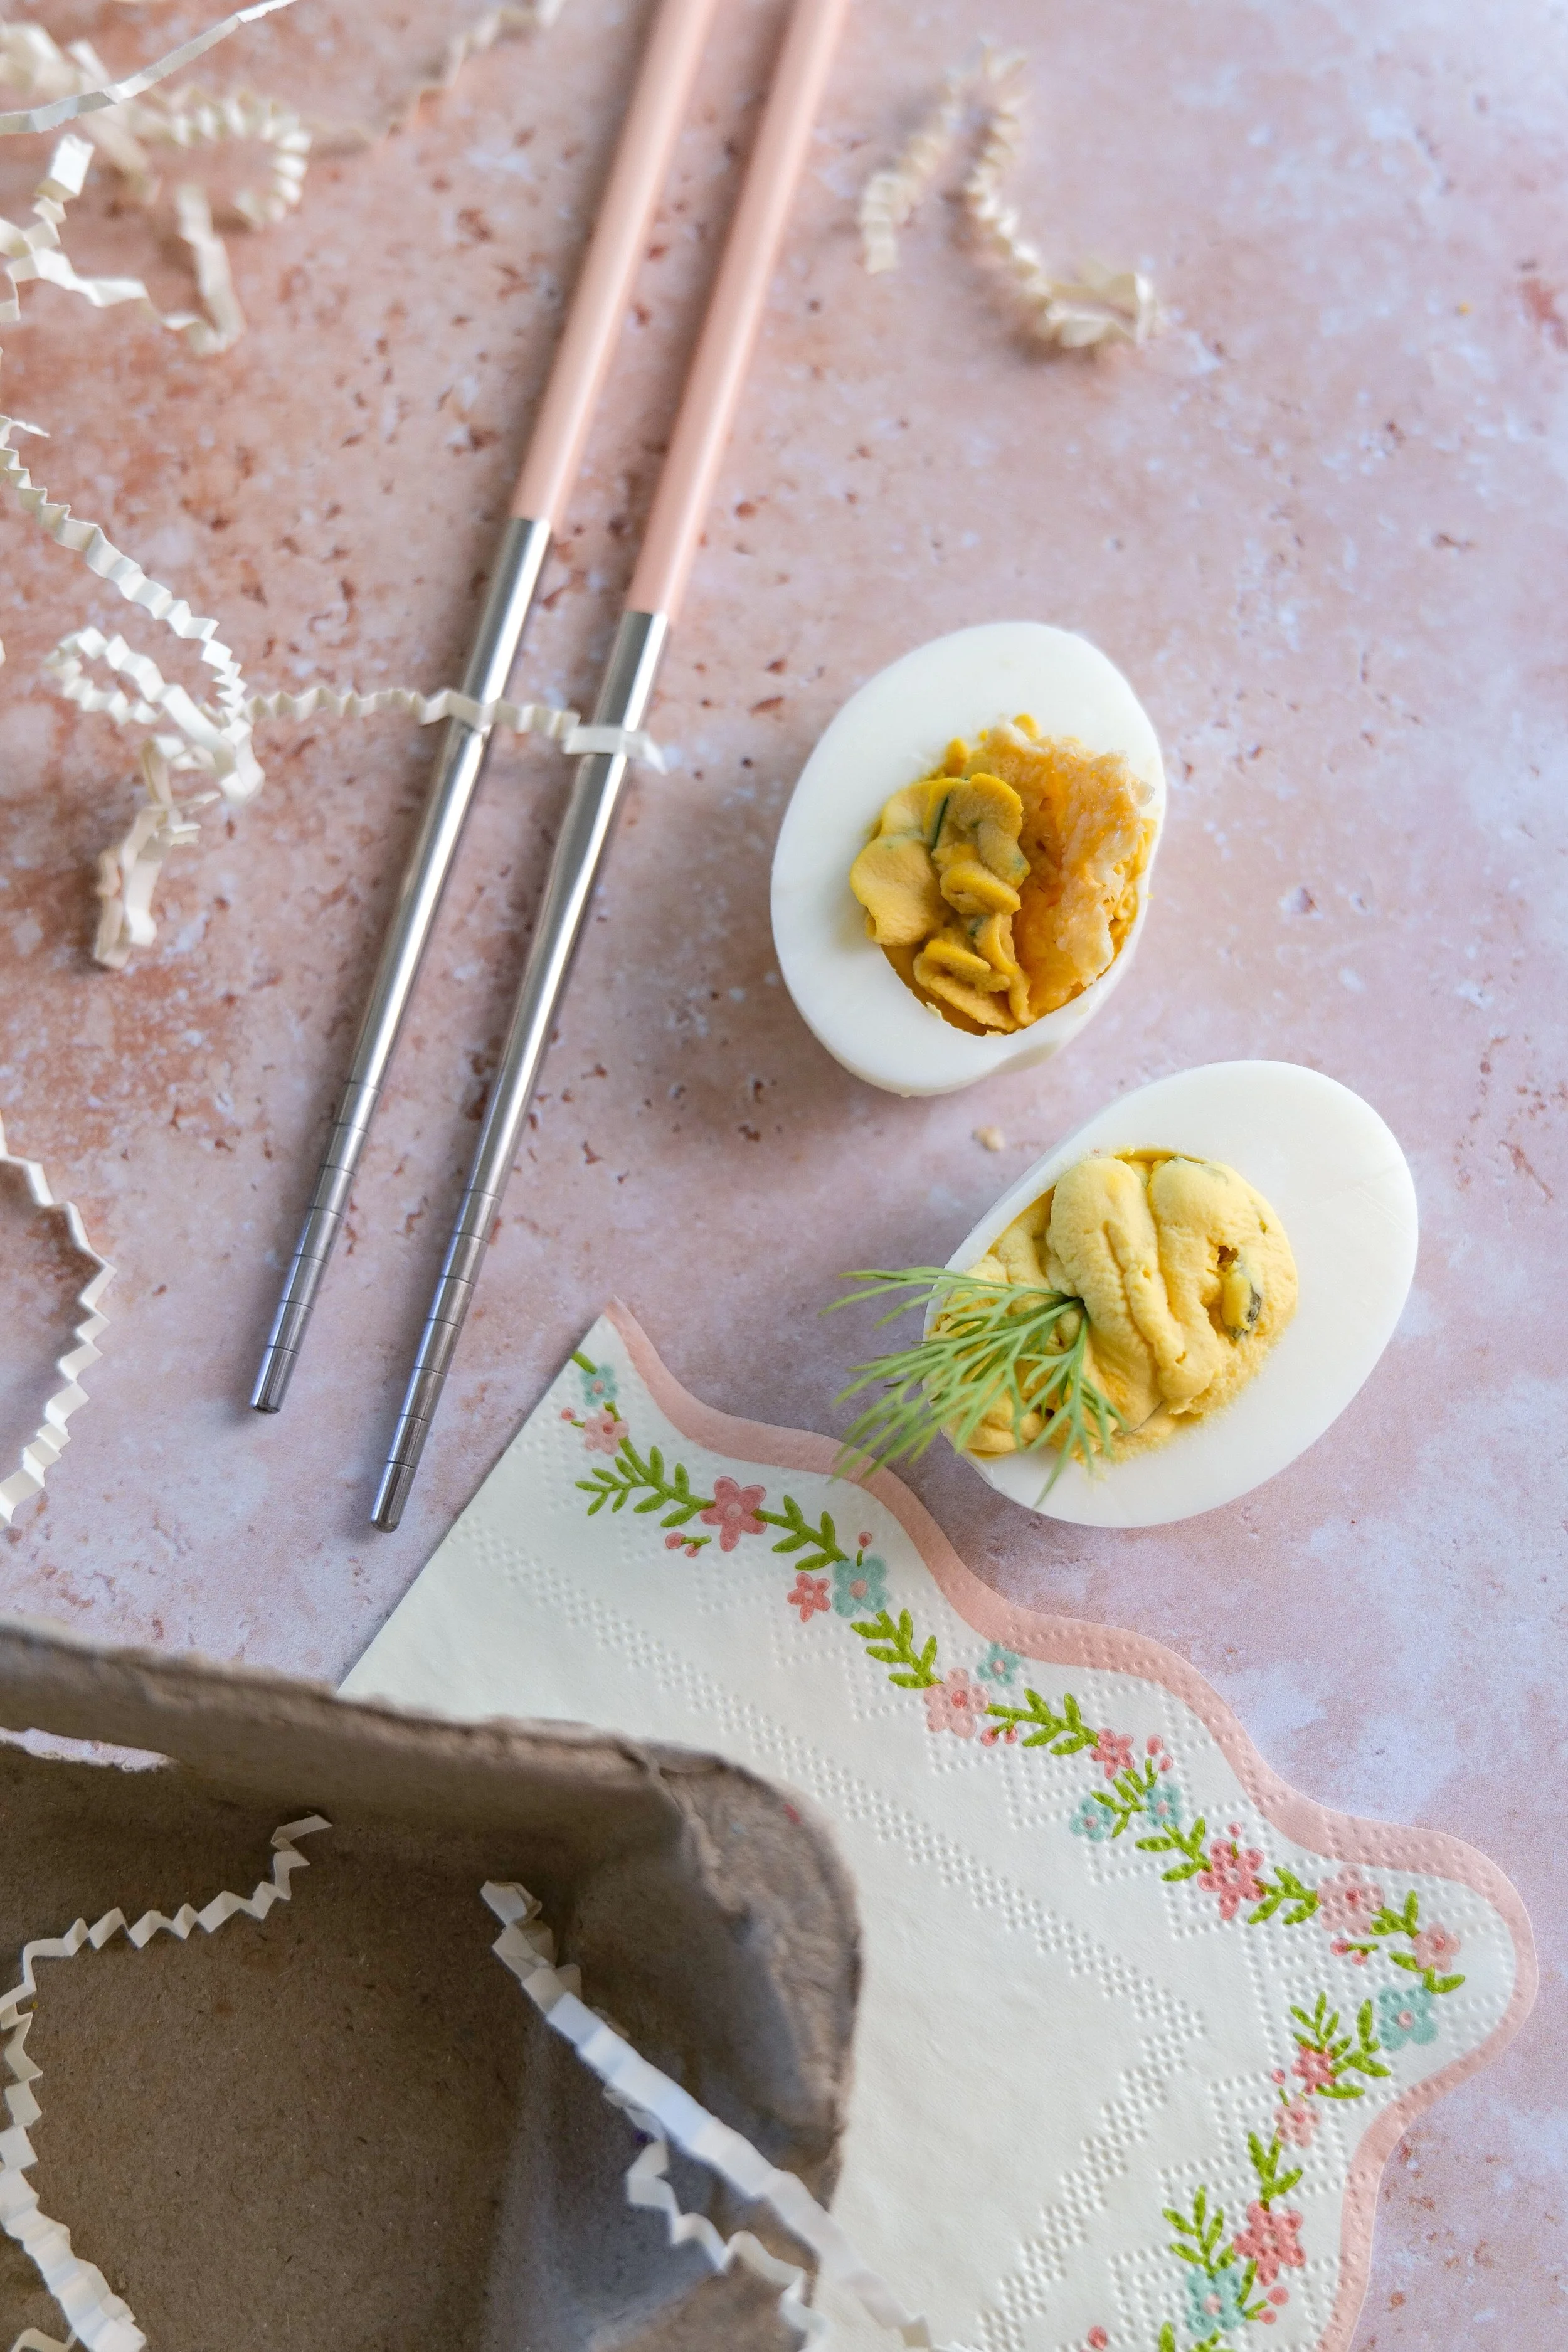
Dill pickle deviled eggs garnished with fresh dill and pickle slices
Lobster roll deviled eggs topped with lobster meat and fresh chives

What Are Some Unique Flavor Combinations to Include in a Deviled Egg Flight?

Exploring unique flavor combinations takes deviled eggs from everyday to extraordinary, offering an elevated culinary adventure at any gathering. Consider smoky and spicy elements such as bacon and jalapeño for a bold, fiery twist. Smoked salmon with dill and capers introduces a sophisticated touch with a nod to global cuisine. For a bold flavor profile, create an Asian-inspired deviled egg with soy sauce, ginger, and sesame seeds. Add a Mediterranean flair by combining sun-dried tomatoes, feta cheese, and Kalamata olives. Lastly, experiment with a sweet and savory combination using maple syrup and crispy prosciutto for a delightful contrast in flavors.

Some Additional Flavor Ideas:

- Bacon and Jalapeño: Smoky spice balance.

- Smoked Salmon with Dill: Seafood elegance.

- Sesame Ginger Fusion: Exotic and earthy.

- Mediterranean Delight: Bright, sun-drenched flavors.

- Maple Crunch: A surprising sweet-savory combo.

How Can I Present My Deviled Egg Flight to Make it Visually Appealing for Guests?

Enhance the visual appeal of your deviled egg flight by creatively arranging them on a large, elegant platter, providing a sense of abundance and sophistication. Use garnishes such as fresh herbs, edible flowers, or microgreens to add pops of color, enhancing their overall visual presentation. Incorporate small labels or cards to identify each egg’s flavor, adding both an informative and decorative touch. Vary the colors and textures of toppings to provide visual contrasts, intriguing guests with complexity upon first glance. Consider using tiered stands or layered platters to add height and dimension, making your arrangement more dynamic. The thoughtful presentation will make your deviled egg flight as appealing to the eyes as it will be to the taste buds. What I did for my set up was a 6-count egg carton to display all 6 flavors and put down some crinkly paper that is used for basket filling to resemble an easter basket. This tied together the theme for Easter and made a great element.

Are There Any Common Ingredients or Tools Needed to Prepare the Six Different Deviled Egg Recipes?

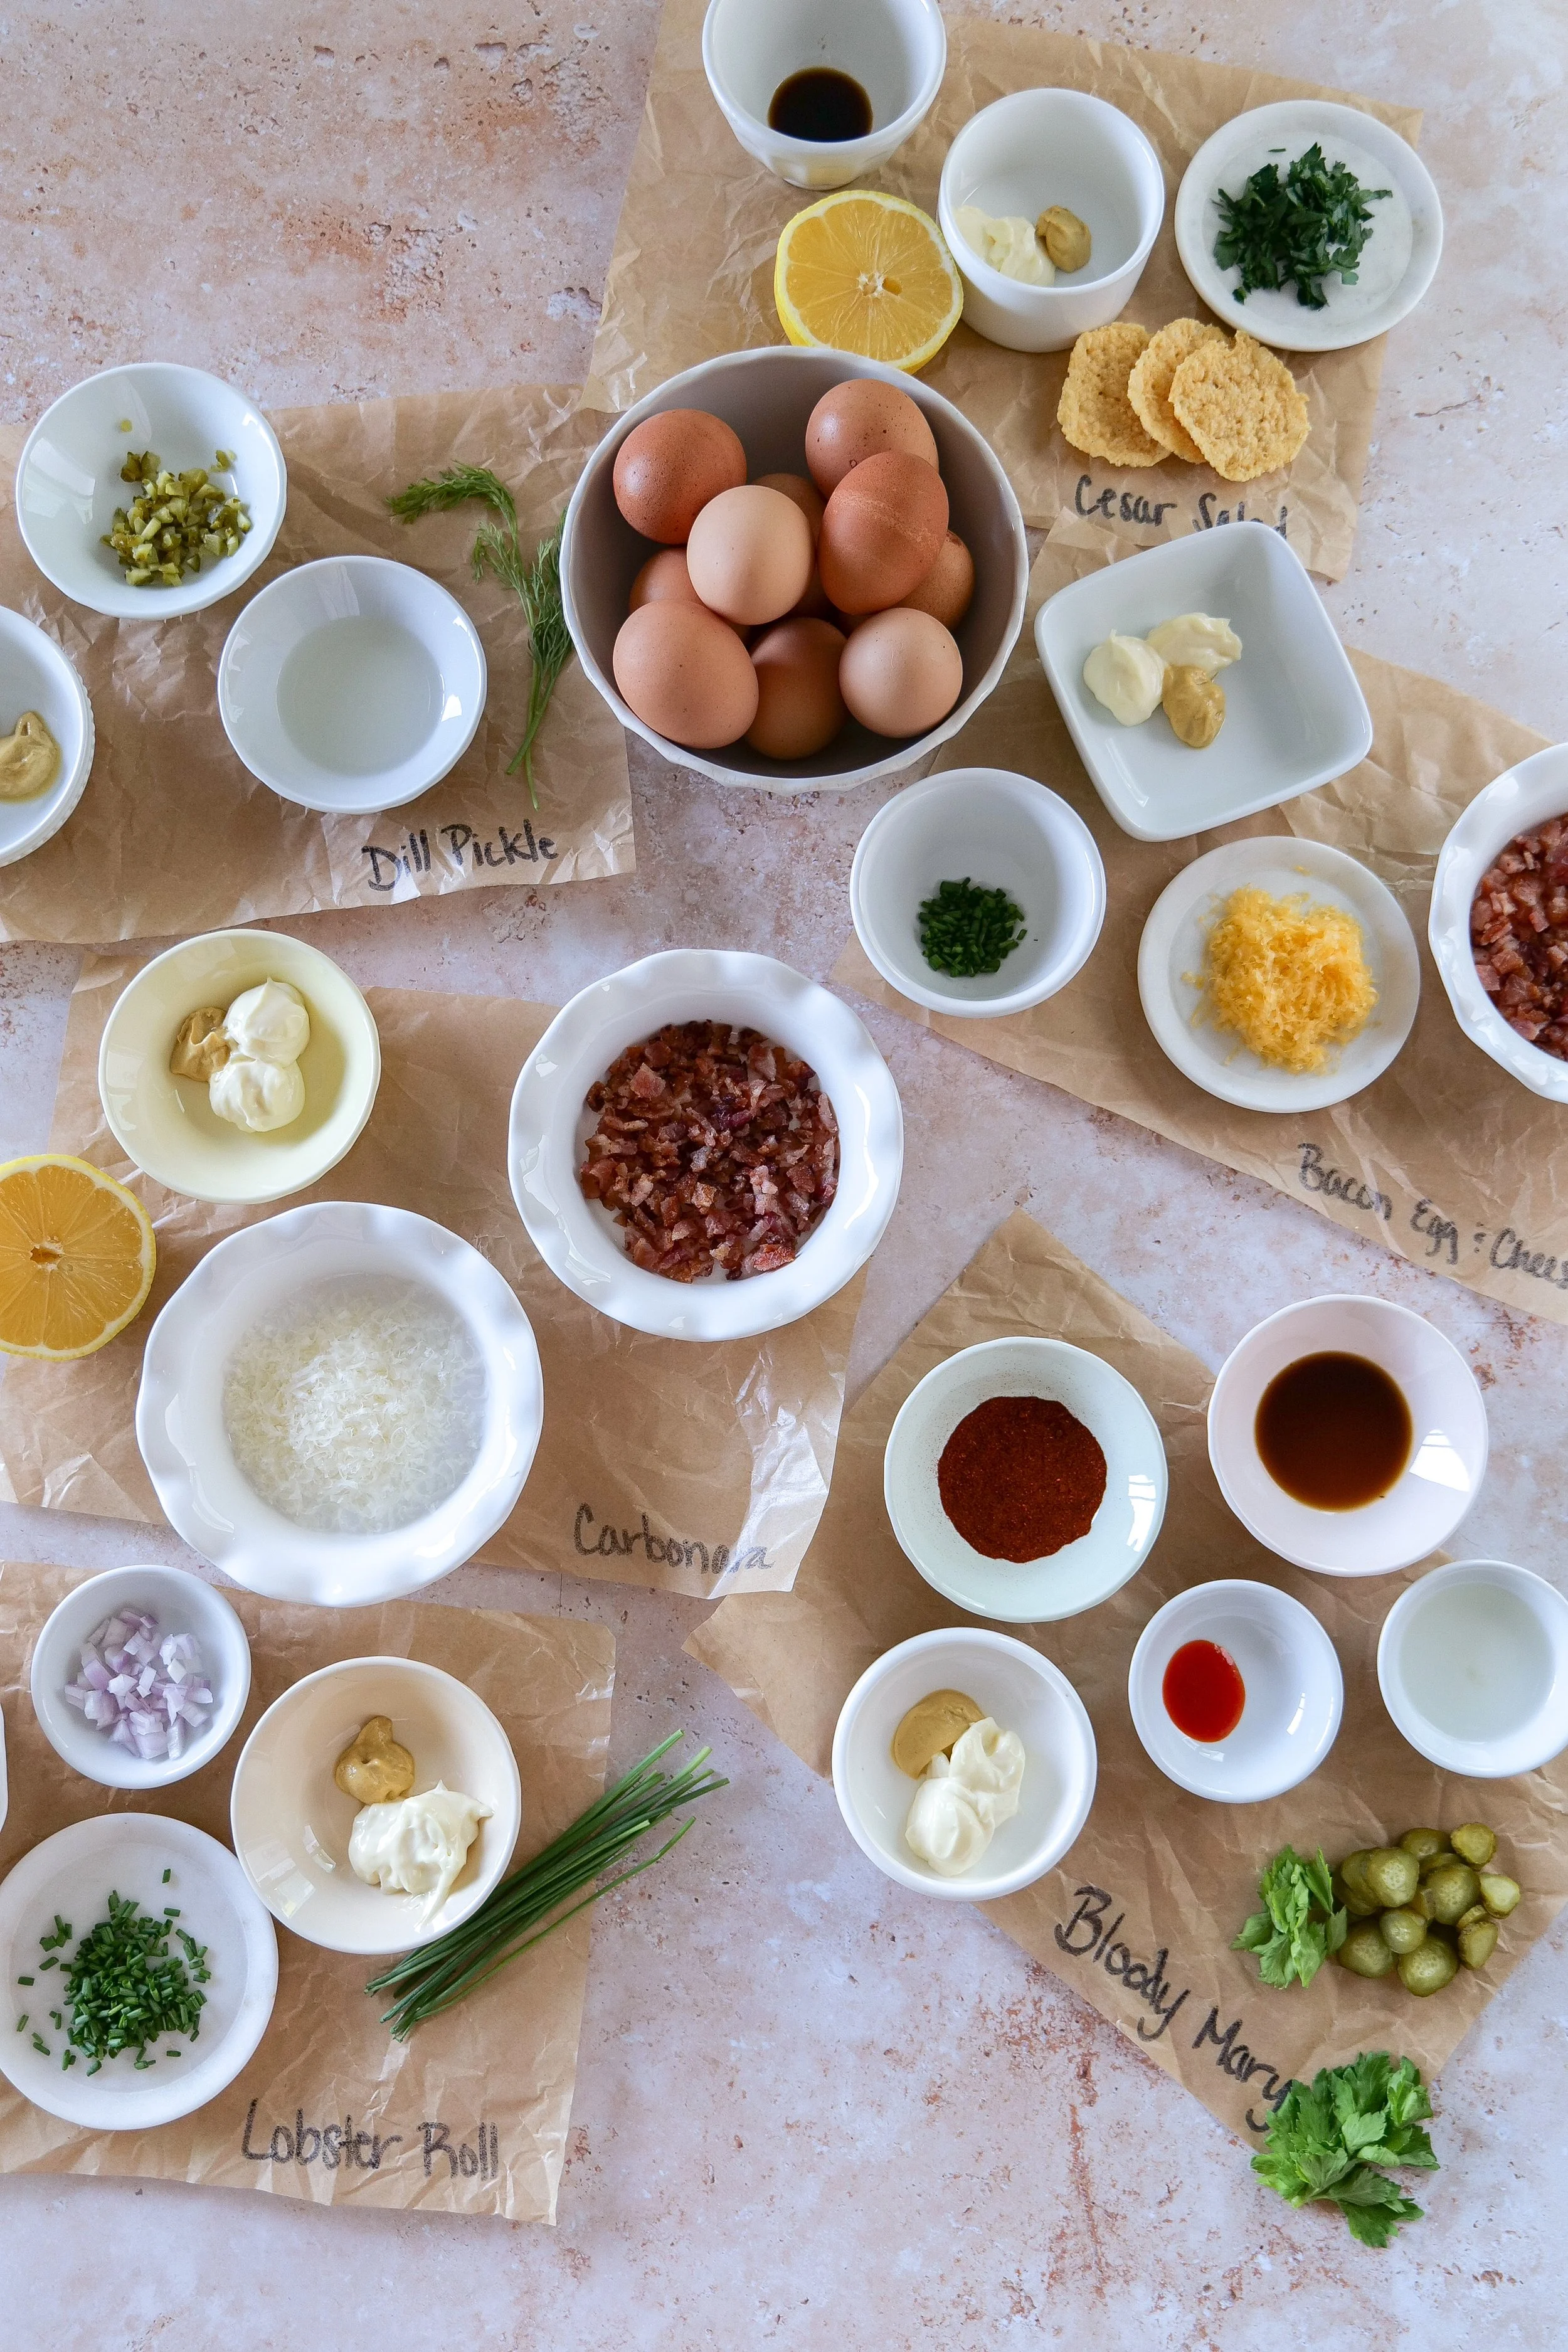
The foundational ingredients for deviled egg flights typically include hard-boiled eggs, mayonnaise, and mustard, forming the base for all recipes. A careful selection of spices such as paprika, salt, and pepper provides essential seasoning. Vinegar or lemon juice is frequently used to introduce tang to the yolk mixture, enhancing its flavor. Small kitchen tools, including piping bags, aid in presenting a clean and attractive filling of egg whites. Optional garnishes like fresh herbs or pickles can be used for added flavor and decoration, elevating the visual and taste appeal of your deviled egg creations. With these ingredients and tools on hand, creating a successful deviled egg flight becomes a simple, enjoyable process.

How to Build a Deviled Egg Flight

Creating a deviled egg flight is easier than it looks.

  1. Hard boil 18 eggs and cool completely.

  2. Prepare each filling flavor separately.

  3. Pipe fillings into egg white halves.

  4. Garnish each flavor with its signature topping.

  5. Arrange on a serving tray or egg carton display.

  6. Label flavors if serving at a party.

For Easter gatherings, I love displaying mine in a six-count egg carton filled with decorative basket filler for a festive presentation.

Hosting a brunch or holiday gathering? I've rounded up my favorite serving pieces, deviled egg platters, entertaining essentials, and Easter hosting finds that help make a simple appetizer feel extra special.

Bacon Egg & Cheese Deviled Egg

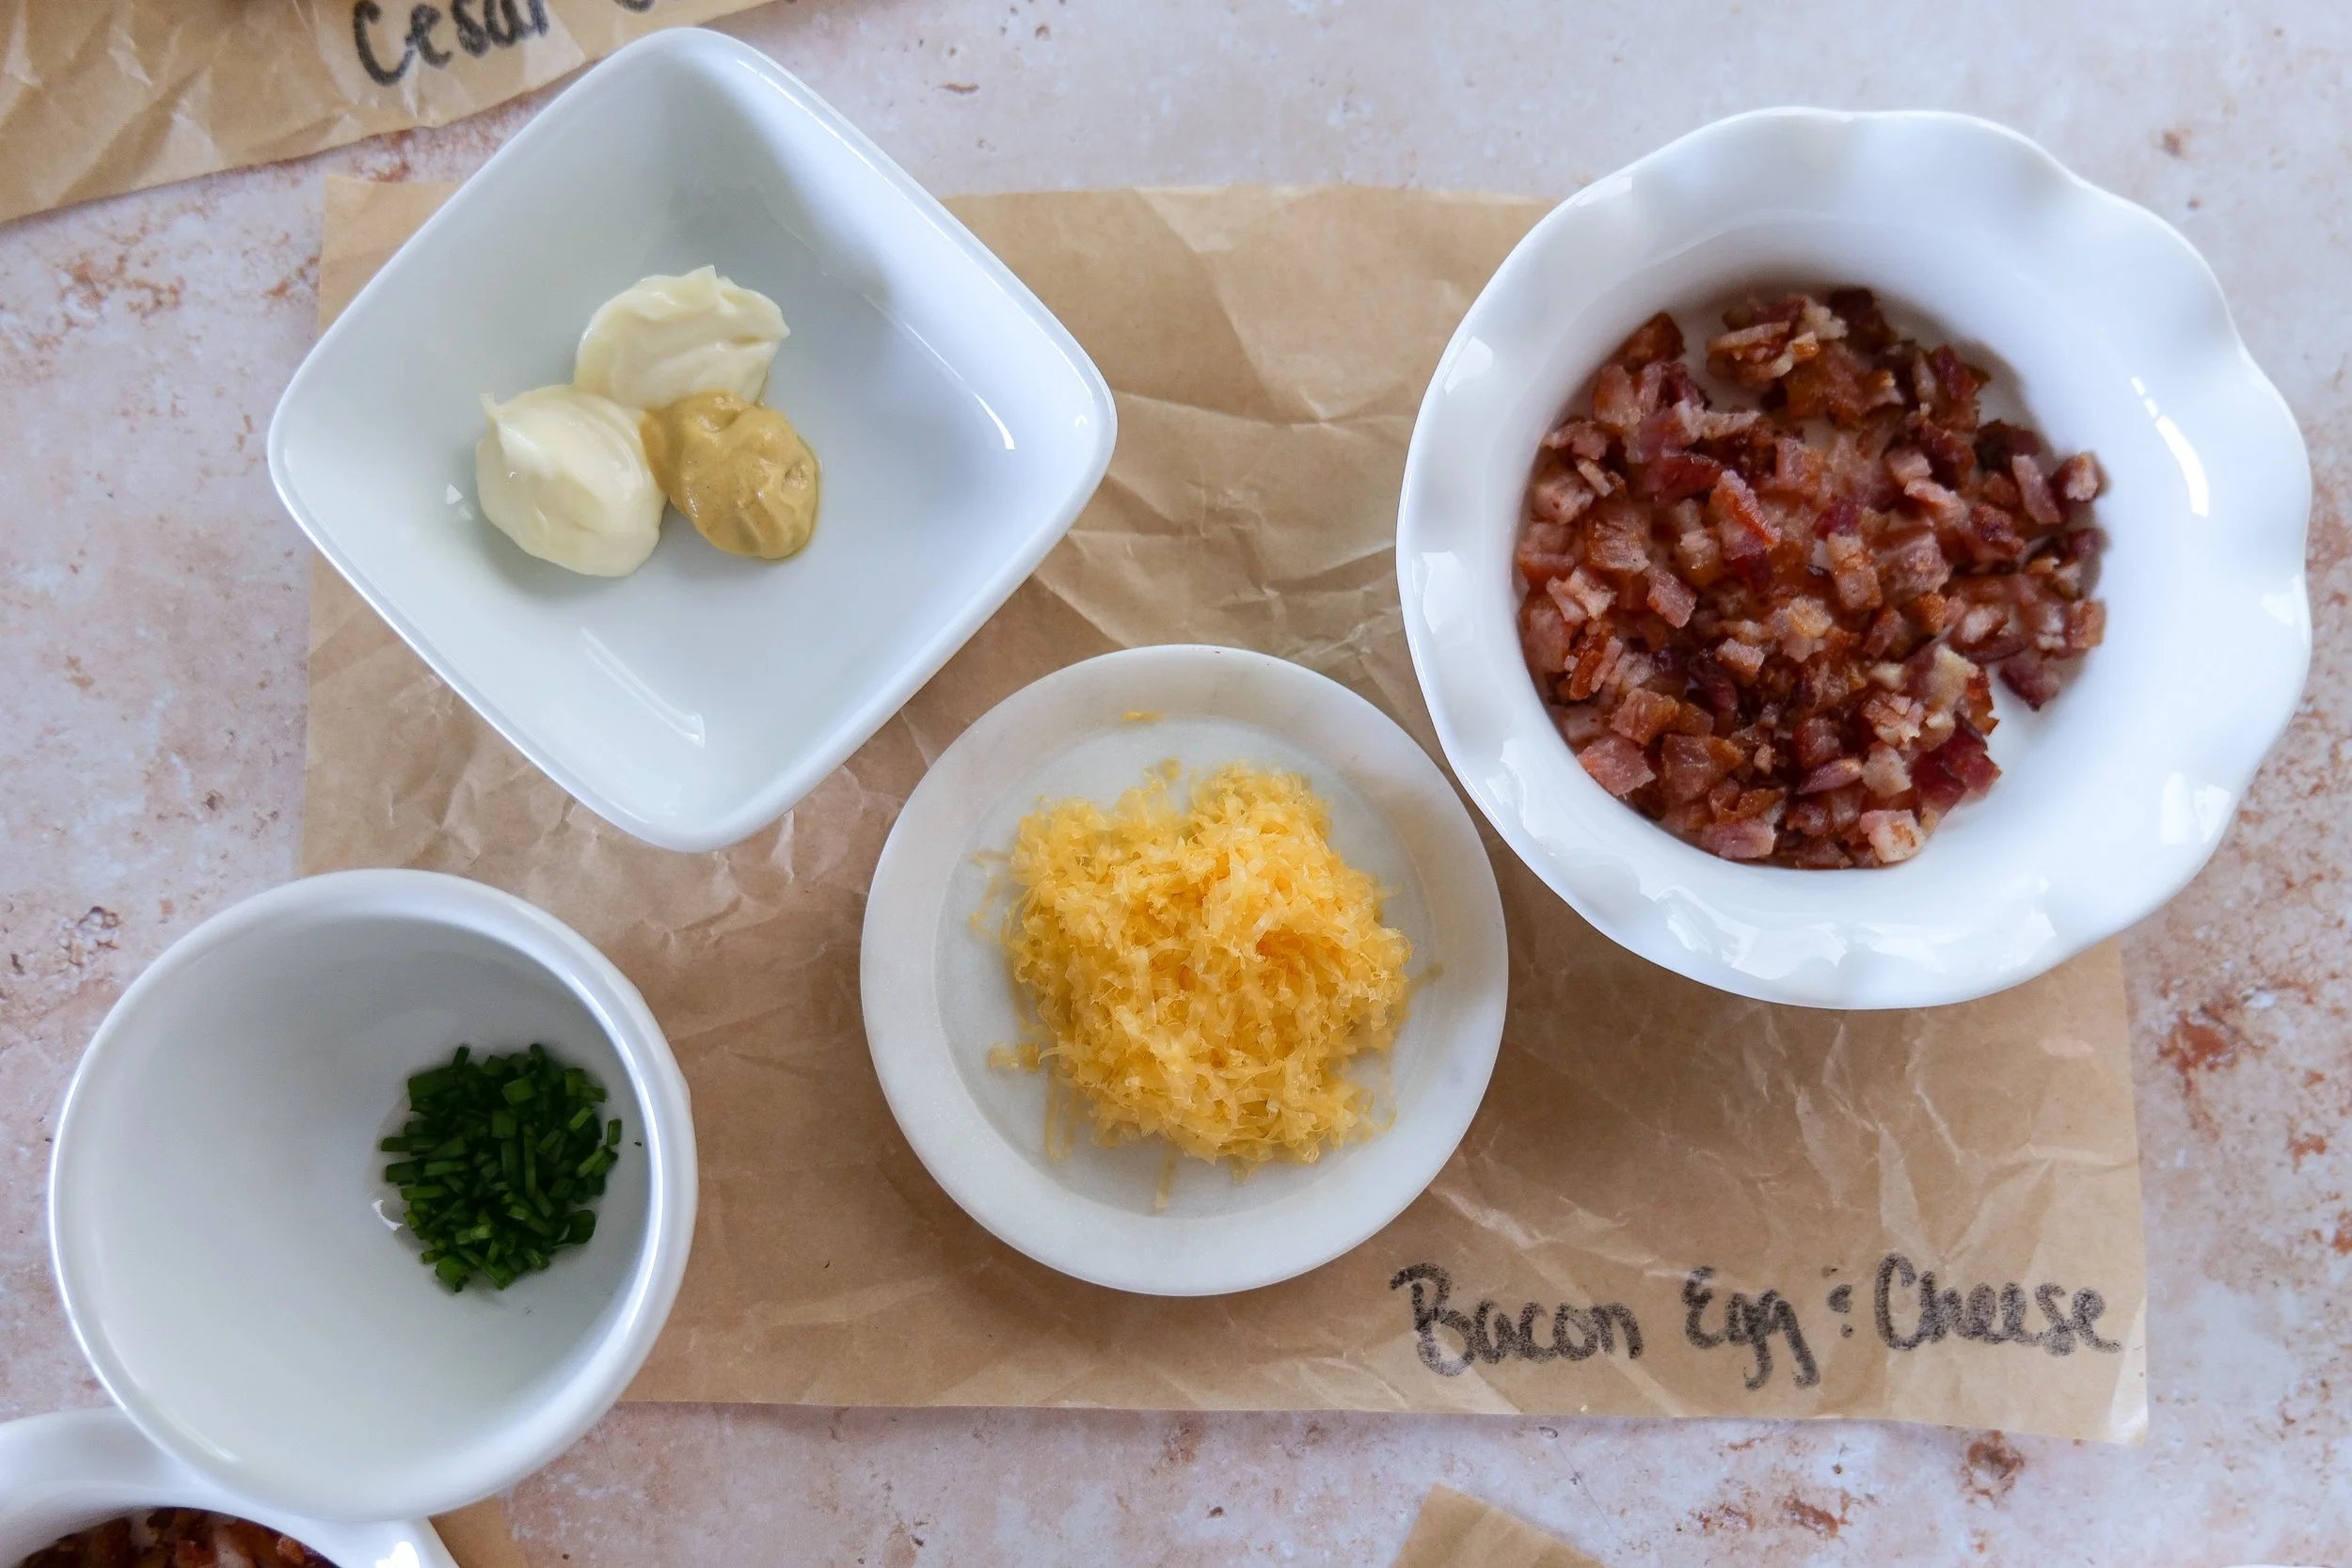
Bacon egg & cheese variety, a creative twist that every appetizer enthusiast must try. This version ingeniously combines crispy bacon, creamy yolk filling, and savory cheese for a burst of rich, flavorful delight in every bite. Perfectly seasoned and elegantly presented, this deviled egg variety elevates any deviled egg flight with its unique taste and

Assorted gourmet deviled eggs perfect for entertaining guests

Ingredients:

3 large eggs

2 tablespoons mayonnaise

1/2 teaspoon Dijon mustard

fine sea salt & freshly ground black pepper, to taste

2 slices thick-cut bacon, cooked until crisp and crumbled

1/8 cup finely shredded sharp cheddar cheese

2 teaspoons fresh chives, finely chopped

Instructions:

  1. Remove yolk from egg whites of hard boiled eggs.

  2. Add to a bowl with mayonnaise, mustard, bacon, cheddar cheese, chives and salt & pepper. Mix together well and pipe into egg whites.

  3. Garnish with a thick piece of bacon and chives

Carbonara Deviled Eggs

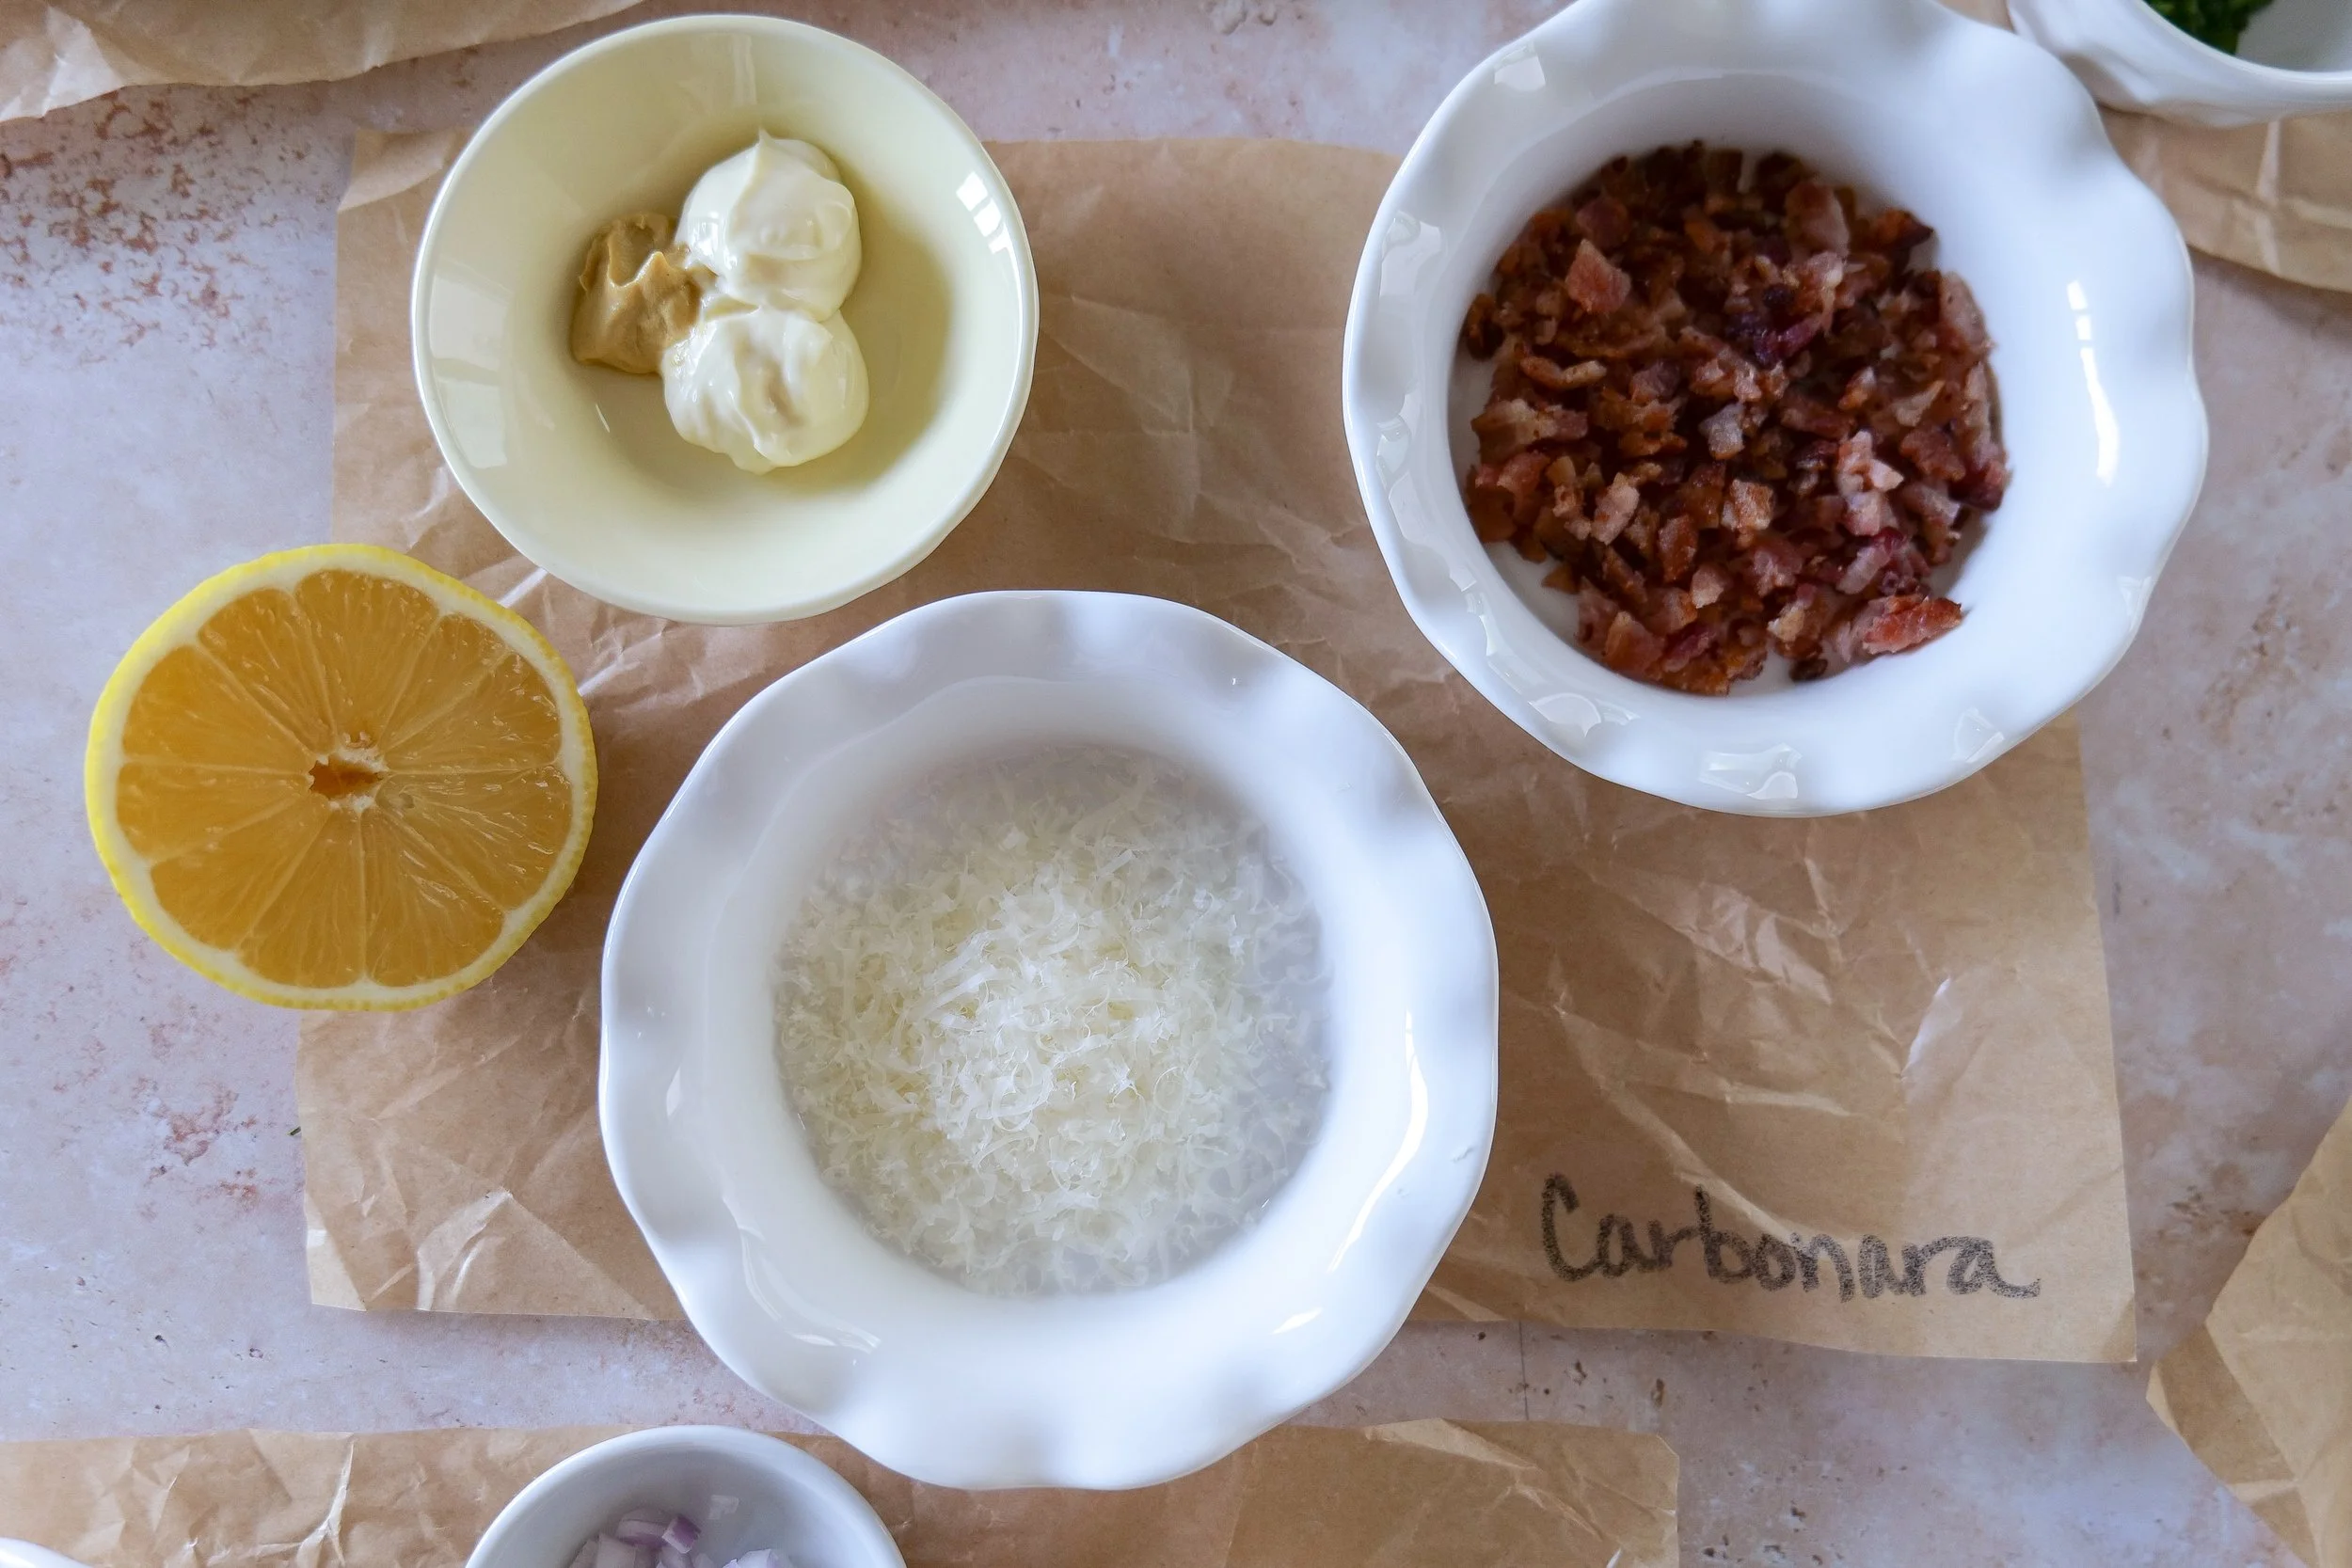
Carbonara deviled eggs are a rich, irresistible twist on the classic appetizer, inspired by the creamy, savory flavors of traditional Italian pasta carbonara. This easy deviled eggs recipe blends hard-boiled egg yolks with mayonnaise, grated Parmesan cheese, crispy bacon, and a touch of garlic and black pepper to recreate that signature carbonara taste in a bite-sized form. Some variations even incorporate a hint of cream or pecorino for extra depth, making these eggs ultra-smooth and indulgent. Topped with crunchy bacon bits, freshly grated cheese, and a sprinkle of parsley, carbonara deviled eggs are perfect for parties, holiday appetizers, keto snacks, or low-carb entertaining. If you're searching for a unique deviled eggs recipe or a crowd-pleasing appetizer idea, these carbonara deviled eggs deliver bold flavor, creamy texture, and guaranteed foodie appeal.

Unique deviled egg flavor variations served as an appetizer flight

Ingredients:

3 large eggs

2 slices bacon

2 tbsp mayonnaise

1 tablespoon grated Parmesan cheese

1/4 teaspoon Dijon mustard

1/4 teaspoon lemon juice

Freshly ground black pepper, to taste

Pinch of garlic powder

Chopped fresh chives, for garnish

Extra Parmesan cheese, for garnish

Extra crispy bacon bits, for garnish

Instructions:

  1. Remove yolk from egg whites of hard boiled eggs.

  2. Add to a bowl with mayonnaise, mustard, Parmesan cheese, bacon (crumbled),lemon juice, garlic powder and salt & pepper. Mix together well and pipe into egg whites.

  3. Garnish with fresh chives, bacon bits and Parmesan cheese.

Cesar Salad Deviled Eggs

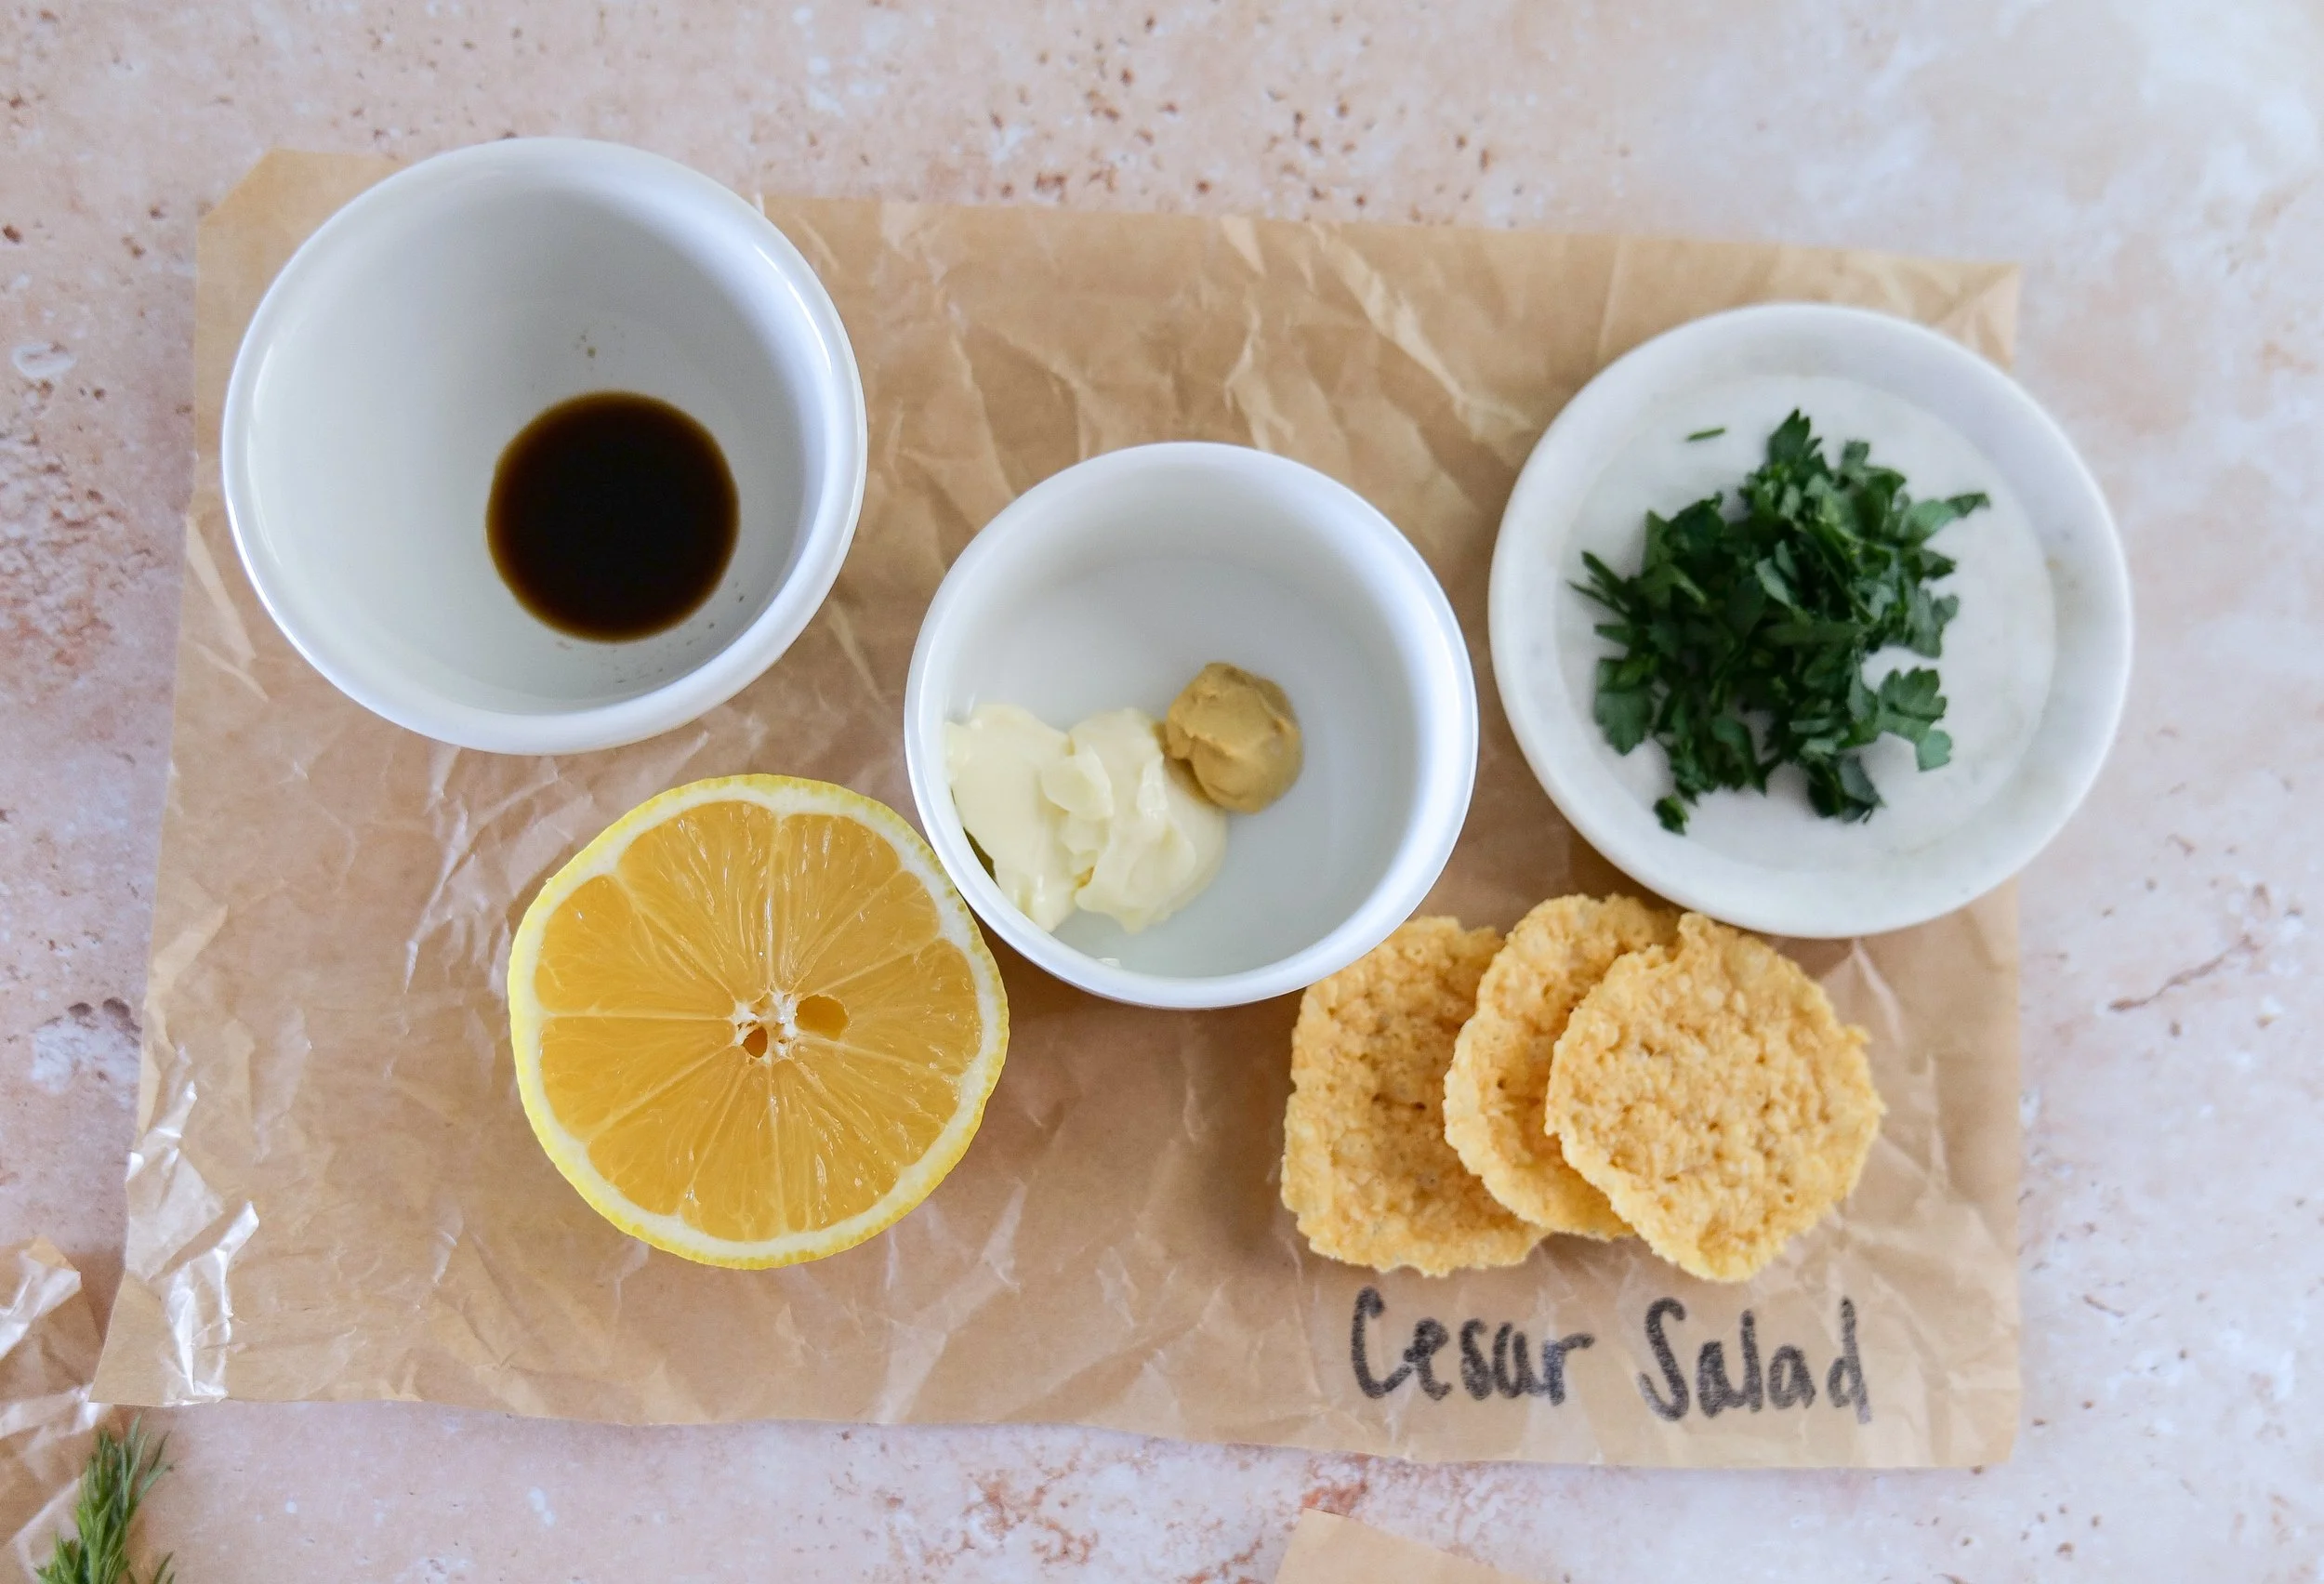
Caesar salad deviled eggs are a fresh, flavorful twist on a classic appetizer, combining everything you love about Caesar salad with the creamy richness of deviled eggs. This easy deviled eggs recipe features hard-boiled egg yolks blended with mayonnaise, Dijon mustard, garlic, lemon juice, and anchovy paste to capture that signature Caesar dressing flavor. Finely grated Parmesan cheese adds a salty, umami boost, while crisp romaine lettuce or crunchy crouton crumbs bring texture and contrast. Topped with extra Parmesan, cracked black pepper, and a hint of zest, these Caesar salad deviled eggs are perfect for brunch, party appetizers, holiday spreads, or low-carb snacks. If you’re looking for a unique deviled eggs recipe or a creative Caesar salad-inspired appetizer, this crowd-pleasing dish is packed with bold flavor and appeal for food lovers searching for something new.

Gourmet deviled egg flight with creative flavor combinations

Ingredients:

3 large hard boiled Eggs

2 tablespoons Mayonnaise

1/2 teaspoon Dijon Mustard

1 tsp Worcestershire Sauce

1 1/2 tsp Lemon Juice

1 tbsp Fresh Parsley Chopped for filling and garnish.

Sea Salt & Black Pepper

Parmesan Crisps, for garnish

Instructions:

  1. Remove yolk from egg whites of hard boiled eggs.

  2. Add to a bowl with mayonnaise, mustard, Worcestershire sauce, lemon juice, salt & pepper and fresh parsley. Mix together well and pipe into egg whites.

  3. Garnish with Parmesan crisp

Dill Pickle Deviled Eggs

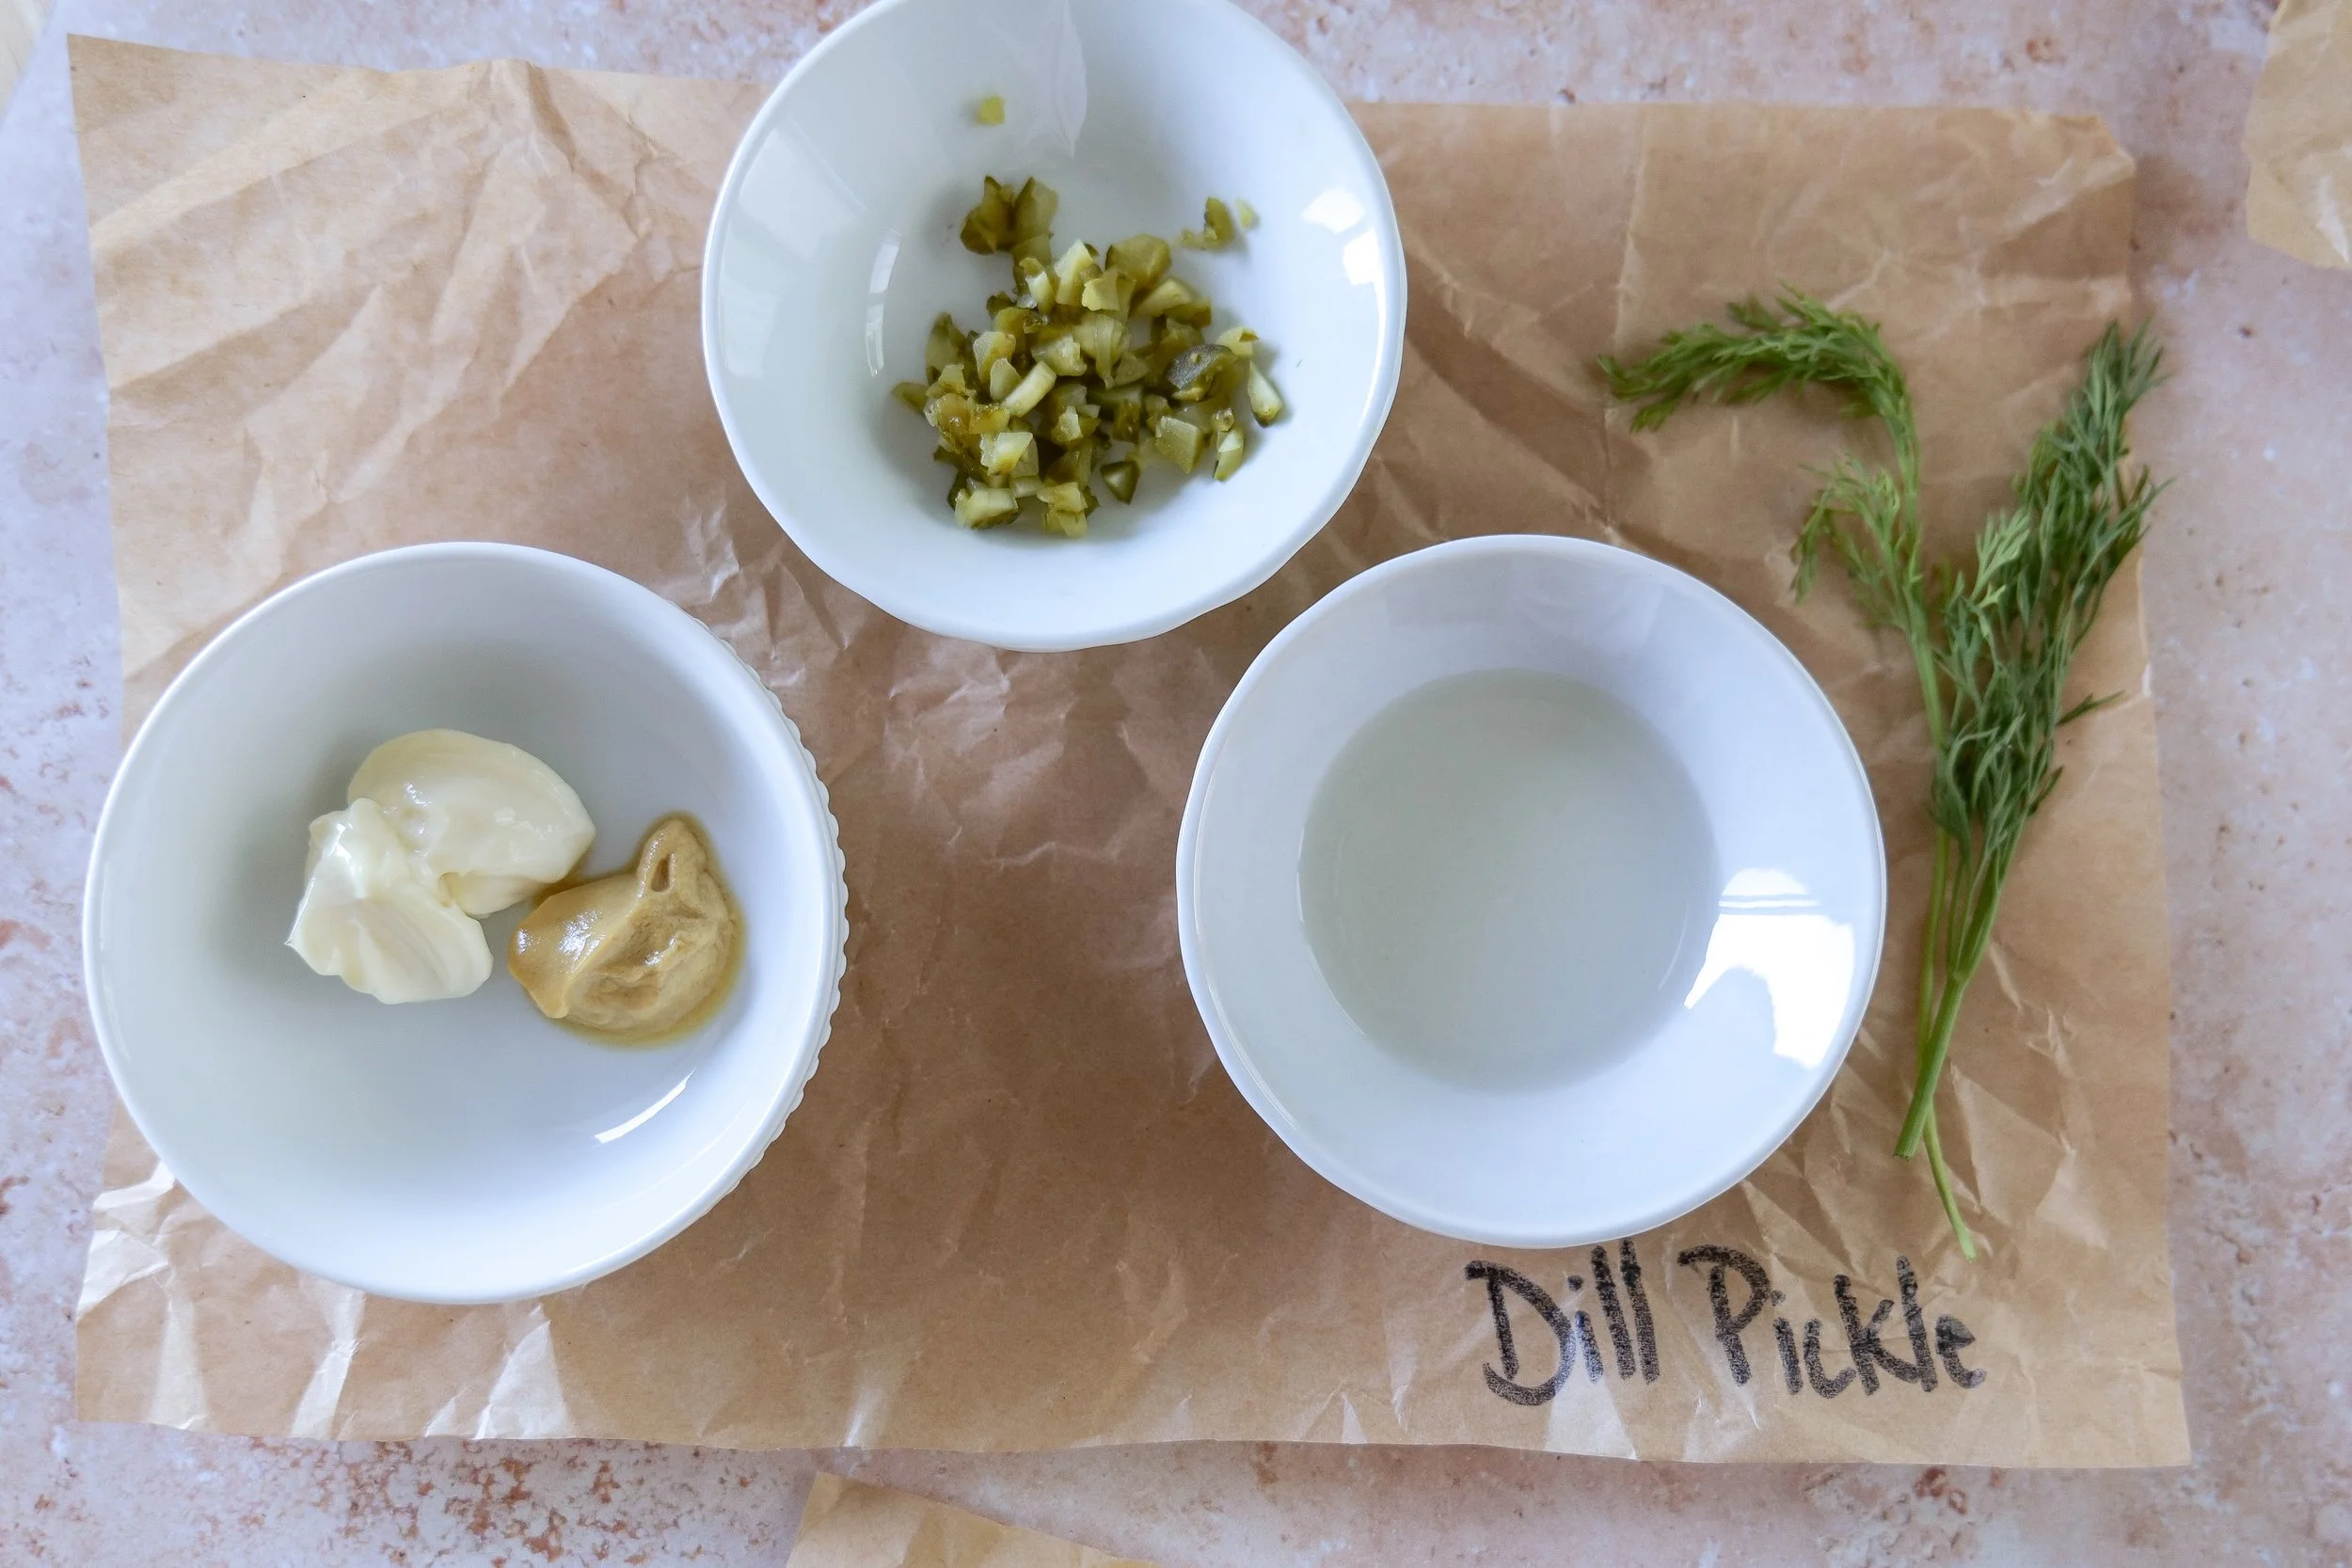
Dill pickle deviled eggs are a tangy, crowd-pleasing twist on the classic appetizer, perfect for anyone who loves bold, briny flavor. This easy deviled eggs recipe combines creamy egg yolks with mayonnaise, finely chopped dill pickles, and a splash of pickle juice for that signature zesty kick. A touch of Dijon mustard, garlic powder, and fresh dill enhances the flavor, while a sprinkle of paprika adds a classic finishing touch. These dill pickle deviled eggs are ideal for parties, BBQs, holiday gatherings, potlucks, or as a low-carb snack, making them a versatile favorite for any occasion.

Elegant Easter appetizer featuring assorted deviled eggs

Ingredients:

3 hard boiled eggs

2 tablespoons mayonnaise

2 teaspoons dill pickles, finely minced

2 teaspoons dill pickle juice

1/2 teaspoon mustard

A pinch of garlic powder

Fresh dill for garnish

Instructions:

  1. Remove yolk from egg whites of hard boiled eggs.

  2. Add to a bowl with mayonnaise, mustard, dill pickles, pickle juice and garlic powder. Mix together well and pipe into egg whites.

  3. Garnish with slice of pickle and fresh dill

Lobster Roll Deviled Eggs

Lobster deviled eggs are an elegant, gourmet twist on the classic appetizer, perfect for special occasions, holiday parties, or upscale brunch spreads. This easy yet luxurious deviled eggs recipe combines creamy egg yolks with mayonnaise, Dijon mustard, fresh lemon juice, and tender chunks of succulent lobster meat for a rich, buttery flavor. A touch of Old Bay seasoning or paprika adds depth, while finely chopped chives or parsley bring a fresh, vibrant finish. These lobster deviled eggs are ideal for entertaining, seafood lovers, or anyone searching for a high-end appetizer recipe that feels both indulgent and approachable. If you’re looking for a unique deviled eggs recipe that’s packed with flavor and visual appeal, these lobster deviled eggs are a show-stopping dish.

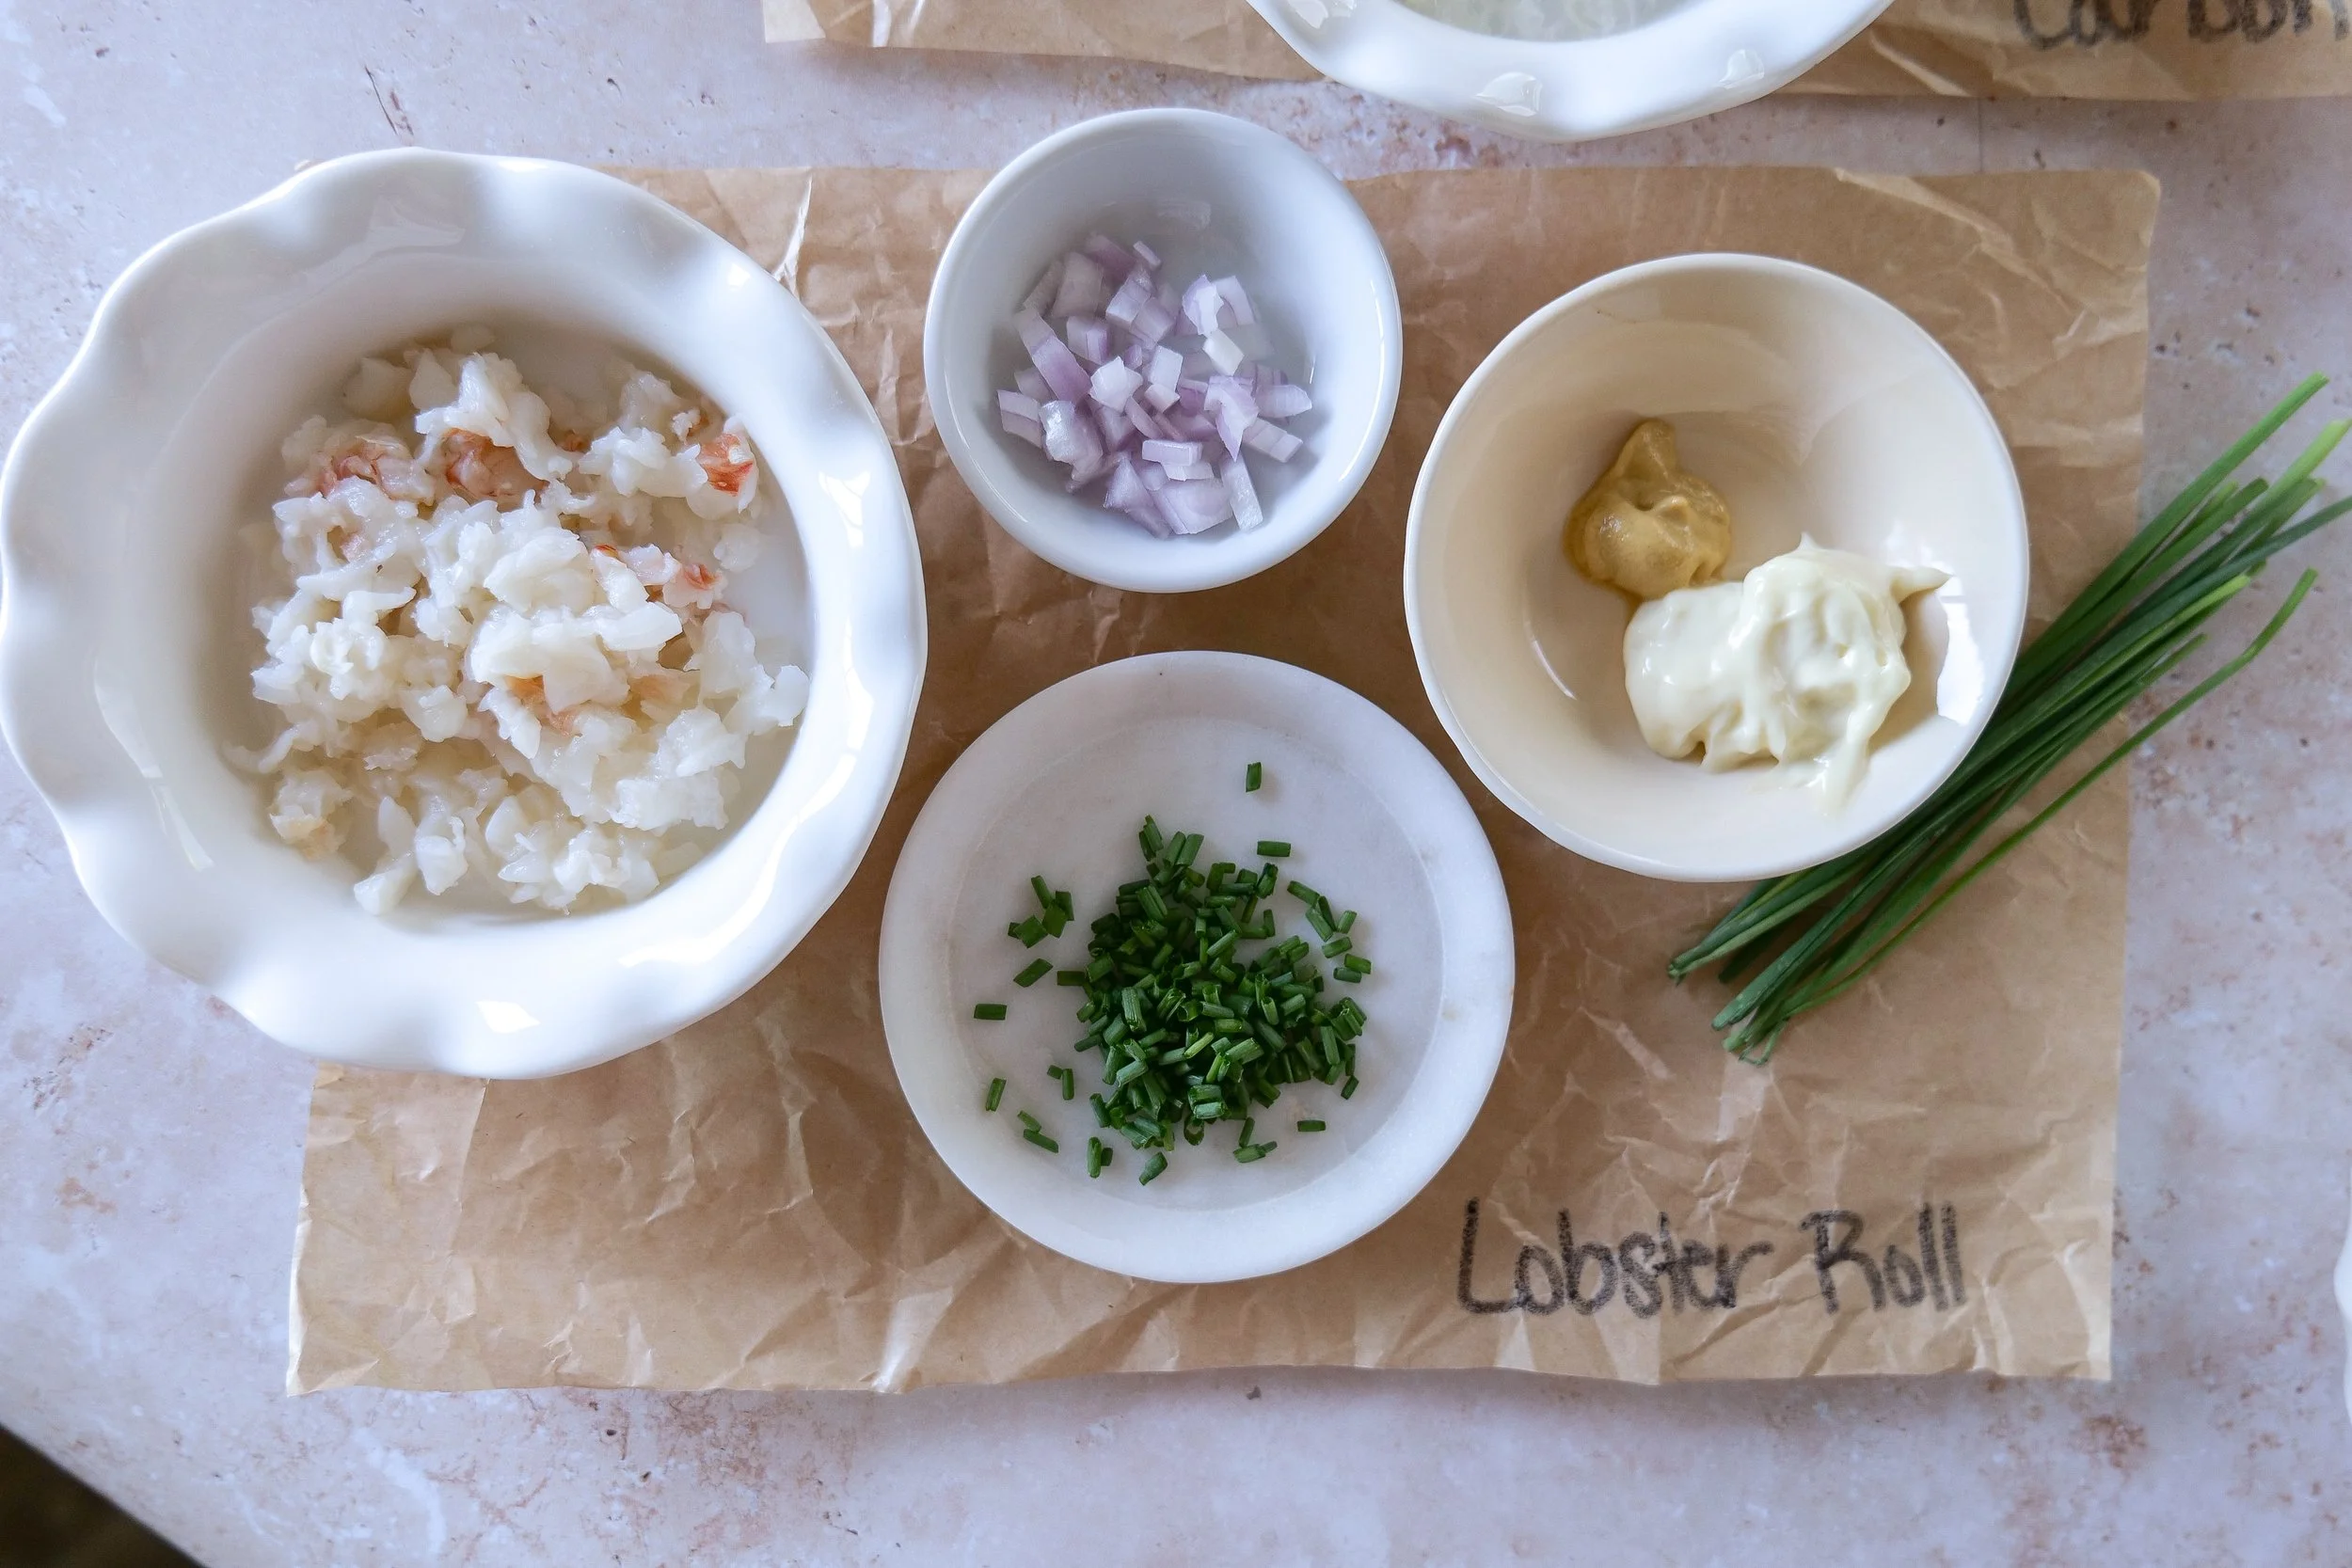
Creative deviled egg flight presentation in an egg carton display

Ingredients:

3 hard-boiled eggs

2 ounces chopped cooked lobster meat, reserve 6 pieces for garnish

1/2 teaspoon dijon mustard

1/2 tablespoon chopped shallot

2 tablespoons mayonnaise

1 1/2 teaspoons chopped chives

Spoon into the egg whites; top with reserved lobster bite & more chives

Instructions:

  1. Remove yolk from egg whites of hard boiled eggs.

  2. Add to a bowl with mayonnaise, mustard, lobster, shallot, and chives. Mix together well and pipe into egg whites.

  3. Garnish with additional lobster and chives

Bloody Mary

Bloody Mary deviled eggs are a flavorful, crowd-pleasing appetizer that combines the classic appeal of deviled eggs with the bold, zesty taste of a Bloody Mary cocktail. Made with creamy egg yolks, mayonnaise, tomato juice or paste, horseradish, and a splash of Worcestershire sauce, these deviled eggs deliver the perfect balance of tangy, spicy, and savory flavors. A dash of hot sauce, celery salt, black pepper, and fresh lemon juice enhances the signature Bloody Mary taste, while optional vodka adds an authentic cocktail twist. Garnished with toppings like chopped celery, olives, pickles, or even shrimp, Bloody Mary deviled eggs are ideal for brunch, holiday gatherings, game day snacks, or party appetizers. If you're looking for a unique deviled egg recipe with a spicy kick, this Bloody Mary deviled eggs recipe is guaranteed to stand out and impress guests.

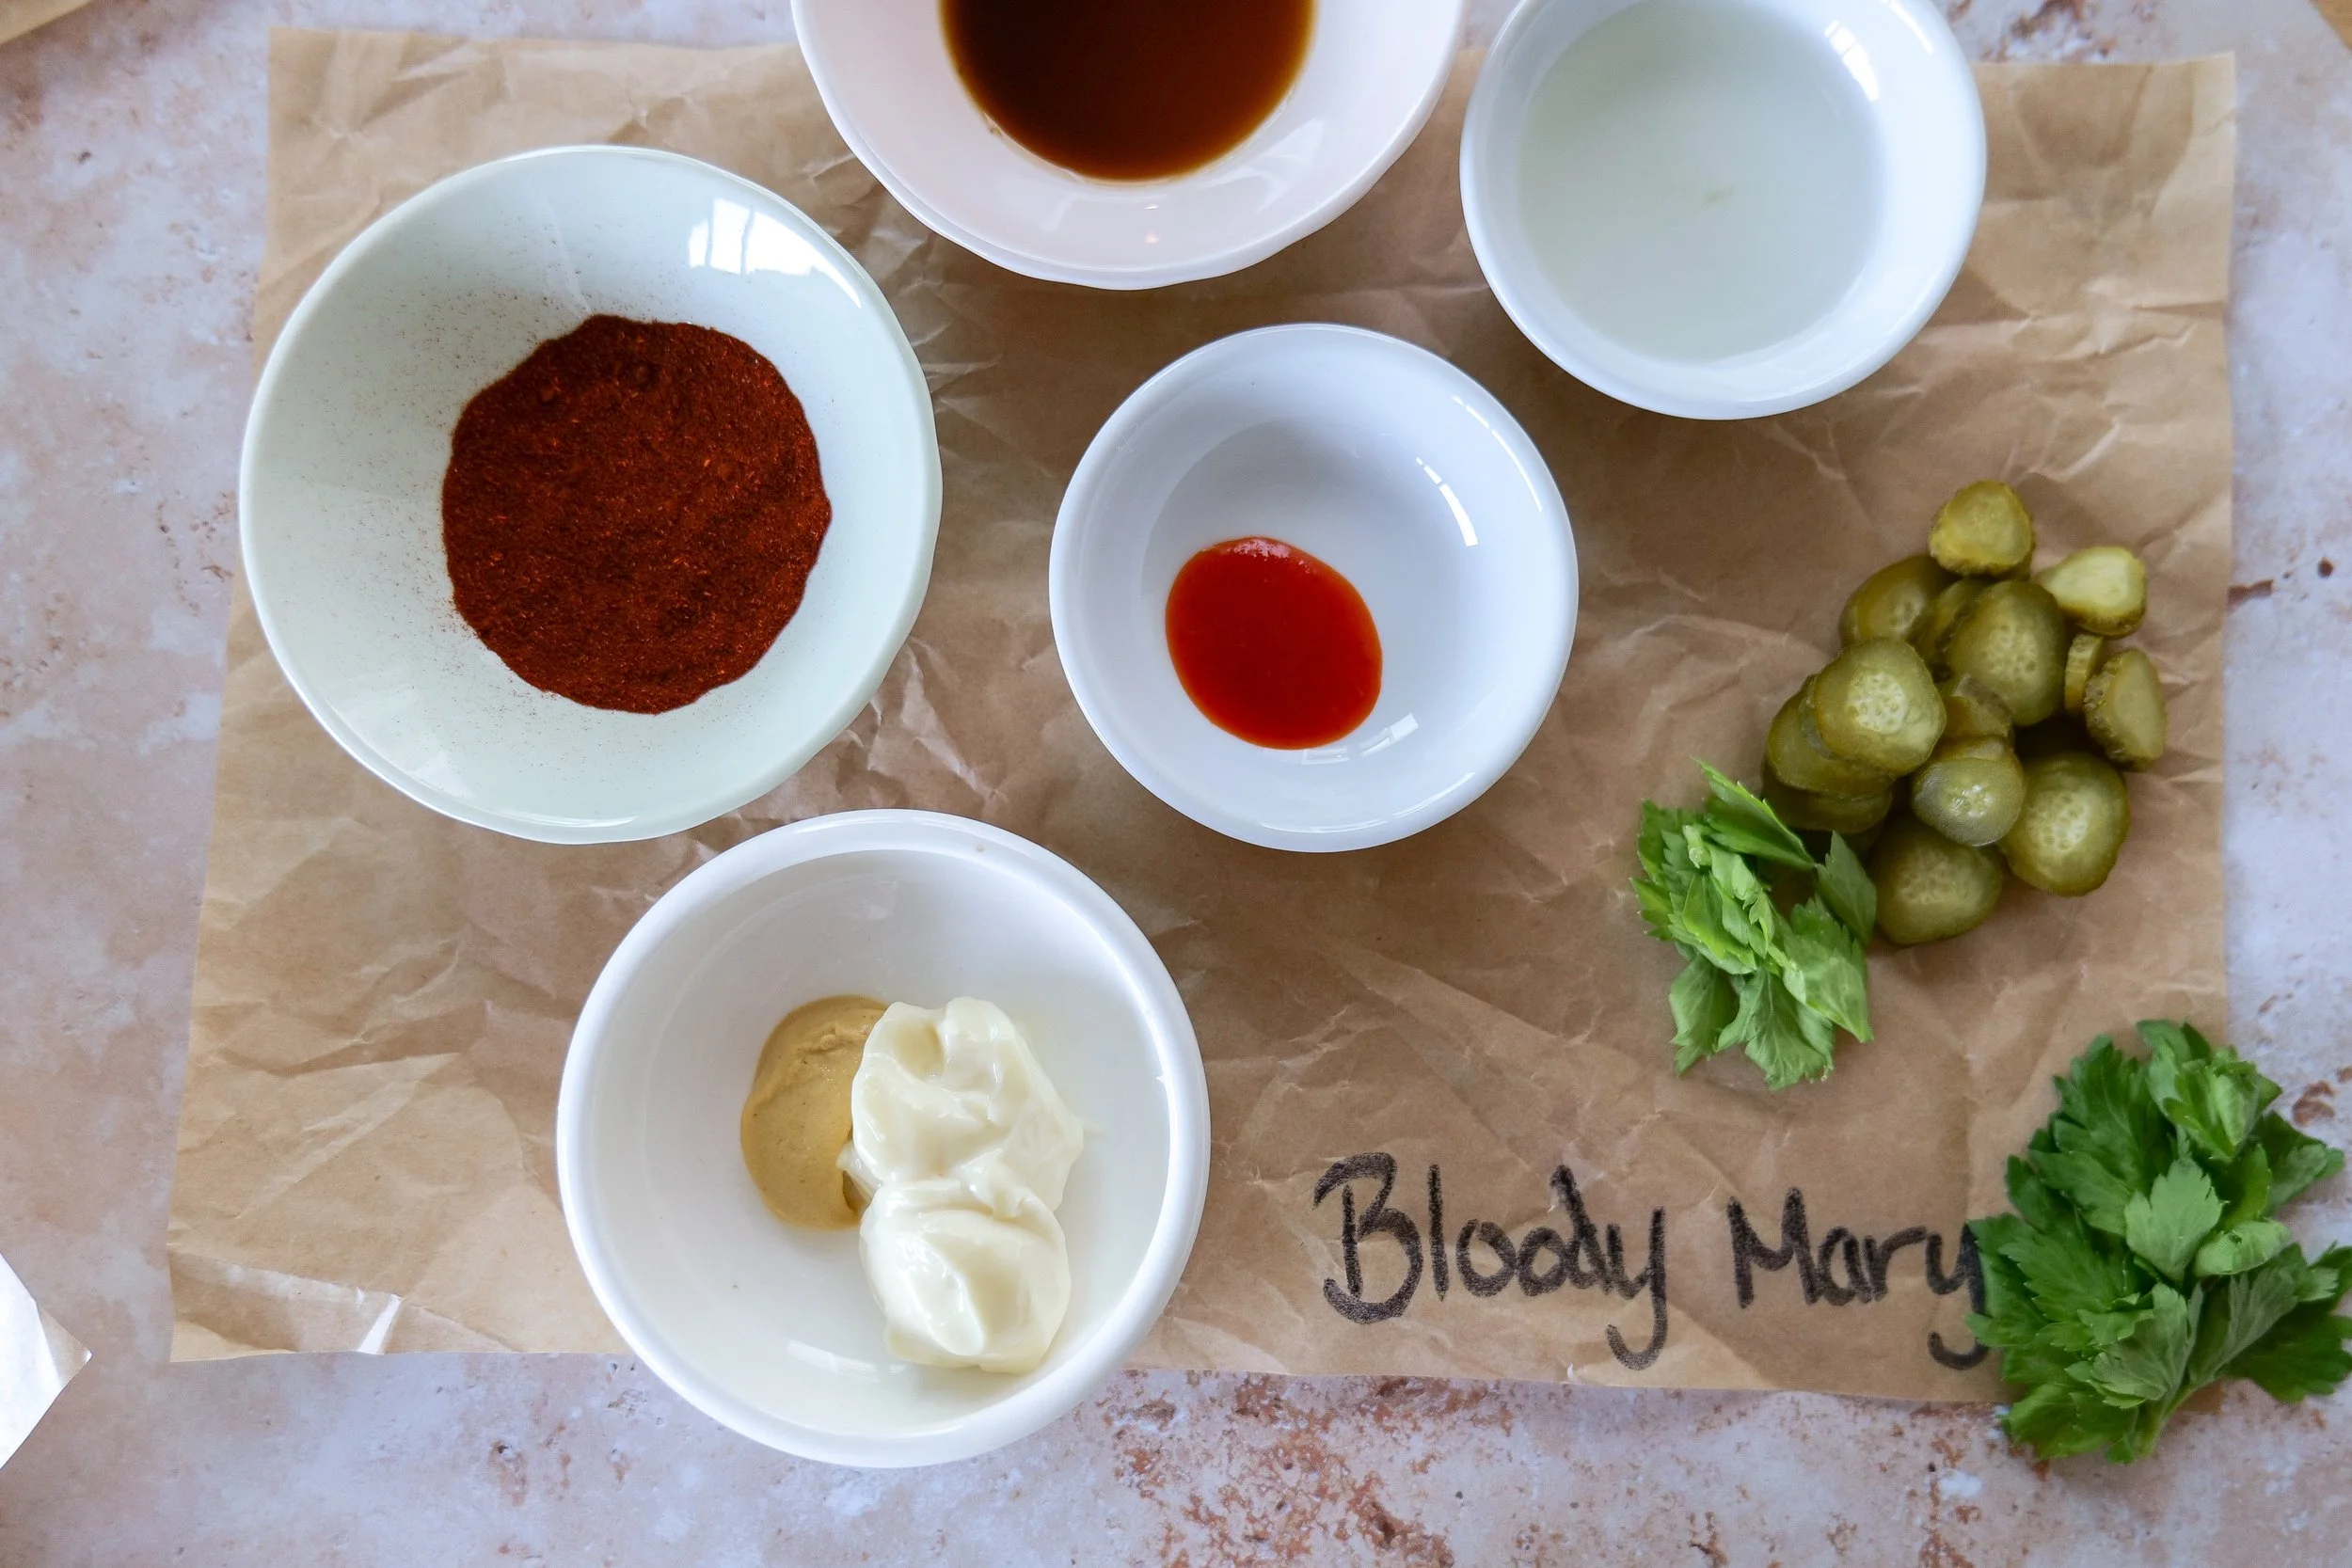
Bloody Mary deviled eggs garnished with celery pickle and paprika

Ingredients:

3 large hard-boiled eggs

2 tablespoons mayonnaise

1/2 teaspoon mustard

1 teaspoons Worcestershire sauce

1/2 teaspoons hot sauce

2 tsp pickle juice

Salt and pepper to taste

Chopped celery, pickle, & paprika for garnish

Instructions:

  1. Remove yolk from egg whites of hard boiled eggs.

  2. Add to a bowl with mayonnaise, mustard, Worcestershire sauce, hot sauce, pickle juice and salt & pepper. Mix together well and pipe into egg whites.

  3. Garnish with celery, pickle and paprika if desired

What to Serve With a Deviled Egg Flight

A deviled egg flight makes a beautiful centerpiece for Easter brunches, spring gatherings, baby showers, and holiday entertaining. To create a complete spread, pair it with:

Easy Hash Brown Breakfast Casserole

Summer Veggie Frittata

Slow Cooker Baked Beans

Chicago-Style Hot Dogs

4th of July Flag Fruit Pizza

Mixing savory dishes with a sweet dessert creates a balanced menu that guests will love and gives everyone a variety of flavors to enjoy.

Creating a full brunch spread? Here are some of my favorite hosting pieces, serving trays, and entertaining essentials I reach for when styling holiday tables and appetizer spreads.

More Egg Recipes You'll Love

Frequently Asked Questions

What is a deviled egg flight?

A deviled egg flight is a collection of multiple deviled egg flavors served together on one platter. Similar to a tasting flight, it allows guests to sample a variety of unique flavor combinations in a fun and interactive way.

Can I make a deviled egg flight ahead of time?

Yes! You can hard boil the eggs and prepare the fillings up to one day in advance. Store everything separately in the refrigerator and assemble just before serving for the freshest presentation.

How long do deviled eggs last in the refrigerator?

Deviled eggs are best enjoyed within 1–2 days. Store them in an airtight container in the refrigerator and keep them chilled until ready to serve.

What are the best toppings for deviled eggs?

Some of my favorite toppings include crispy bacon, fresh herbs, pickles, lobster meat, parmesan cheese, paprika, and chives. The garnish helps highlight the flavor of each deviled egg variation.

How many deviled eggs should I make per person?

For appetizers, plan on 2–4 deviled egg halves per person. If you're serving a deviled egg flight as part of a larger brunch or holiday spread, guests will usually sample several different flavors.

What occasions are perfect for a deviled egg flight?

A deviled egg flight is perfect for Easter brunch, Mother's Day, baby showers, bridal showers, spring gatherings, holiday parties, potlucks, and summer entertaining.

Can I customize the flavors?

Absolutely! One of the best things about a deviled egg flight is that you can mix and match flavors based on your guests' preferences. Try buffalo chicken, smoked salmon, ranch bacon, avocado, or even spicy jalapeño versions.

What should I serve with a deviled egg flight?

Deviled egg flights pair beautifully with breakfast casseroles, fresh fruit, brunch boards, vegetable trays, salads, baked beans, and other party appetizers. They make a great addition to any entertaining menu.

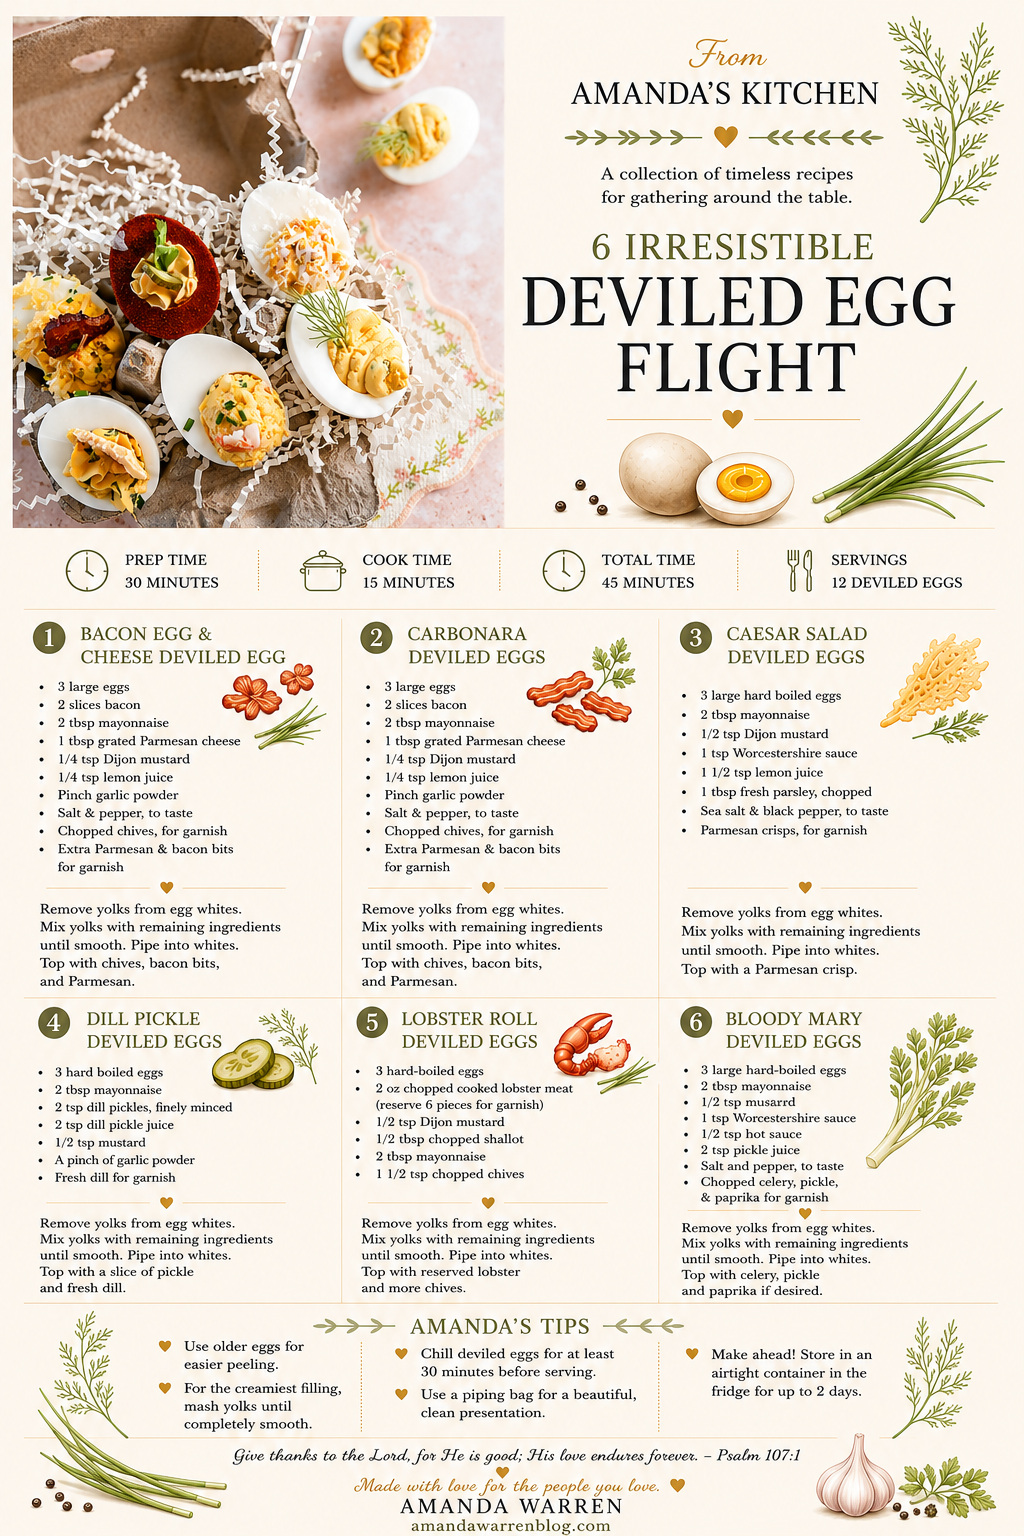
Save This Recipe

Whether you're planning ahead for a special occasion or adding a new favorite to your recipe collection, I've included a printable recipe card below so it's easy to save, print, and share with the people you love.
A deviled egg flight featuring six gourmet deviled egg recipes including bacon egg and cheese, carbonara, Caesar salad, dill pickle, lobster roll, and Bloody Mary deviled eggs arranged on a serving tray.
Party-ready deviled egg recipes with a variety of toppings and garnishes
Deviled egg platter perfect for Easter brunch and spring gatherings
Homemade deviled egg flight featuring six easy appetizer recipes
Colorful assortment of deviled eggs for Easter brunch entertaining
Viral deviled egg flight trend featuring six creative deviled egg recipes