Master Stress-Free Postpartum: Delicious and Nutritious Meals to Prep and Freeze for Your Recovery Journey!
/Bringing a newborn into your life is such a beautiful journey filled with many rewards and challenges. As you prepare for this postpartum adventure, one of the best gifts you can give yourself is the peace of mind that comes from having your meals ready and waiting in your freezer when you arrive back home. Prepping nutritious and delicious postpartum meals in advance can help you and your family get through the early days of parenthood with ease. This blog post is your guide to stress-free postpartum recovery with freezable meals that are easy to prepare and packed with all the nutrients you need to regain your strength. Let’s explore how you can create meals that will make those first few weeks with your newborn a little less overwhelming and a lot more enjoyable.

Preparing postpartum freezer meals ahead of time can greatly ease the stress of meal planning and cooking during recovery. The key is to focus on simple, wholesome, and nourishing recipes that support your body’s healing process while providing the energy needed to care for both yourself and your newborn. It’s important to include a variety of meals in your freezer stockpile to cater to different tastes and dietary needs, ensuring that every mealtime is still appealing and fulfilling. Freezer-safe options are critical as they ensure meals retain their flavor and texture when reheated, reducing food waste and saving money while still giving delicious results.
Freezer meals mean more time for rest and bonding with your newborn. As a new parent, your schedule may be unpredictable, and having these ready-made meals at your disposal can provide the flexibility you need. Imagine spending less time in the kitchen and more time to cuddle and enjoy the precious early moments with your child, knowing that your nutrition is taken care of. With the right planning, you're on your way to a smoother postpartum experience.
A few Ideas:
- Casseroles: Creamy chicken and vegetable casseroles are comforting, easy to prepare in large quantities, and freeze perfectly.
- Soups and Stews: Nutritious options like lentil soup and hearty beef stew are excellent choices for freezing, as they maintain their consistency and flavor well.
- Breakfast Burritos: Perfect for a quick start to the day, they can be stuffed with proteins and veggies for a balanced meal.
- Smoothies: Pre-portion fruit and veggie smoothies in freezer bags—simply blend with your choice of milk or Greek yogurt when needed.
The benefits of preparing freezer meals for postpartum go beyond mere convenience. By having ready-to-eat meals at your disposal, you save invaluable time and energy that can be better spent on new parent duties. They also make it easy for your family and even visitors to heat them up for you when your busy nursing, changing diapers or sleeping. Meal prepping assists in maintaining a balanced diet because you can plan in nutritious ingredients that support healing, promoting a speedy recovery and enhancing overall wellness postpartum. Including the right nutrition to help your body heal as well as to produce milk for your new precious baby is so important. Freezer meals offer convenience for your family, ensuring that everyone stays nourished and satisfied. The demands of caring for a newborn can take a toll on the entire household, so providing easy-to-prepare meals that can be enjoyed by all is a huge plus. This way, everyone benefits from nutritious, homemade meals without the hassle and time commitment of daily cooking. Also, cutting down food waste and saving money through efficient bulk-cooking and proper portioning makes meal prepping an even wiser choice for your pocketbooks
- Focus on nutrient-rich ingredients like leafy greens, lean proteins, and whole grains.
- Portion meals to reduce waste and control nutrition intake.
- Label portions with reheating instructions for ease.
- Mix it up to prevent repetitive meals and satisfy cravings.
- Plan meals that can cater to dietary restrictions if necessary (e.g. gluten-free, plant-based, dairy-free).


Tips for Prepping Postpartum Freezer Meals
Planning plays an essential role in successful postpartum meal prep. Focus on meals that are both nutritious and easy to reheat, ensuring a balanced mix of all food groups necessary for a healthy recovery. To make reheating and serving more convenient, prepare individual portions that can accommodate both solo meals and family-size servings. This strategy helps save trips to the grocery store and will help reduces food waste. Also, labeling meals with cooking instructions and the date of preparation simplifies the process of choosing and reheating meals, ensuring freshness for each dining occasion. Incorporating a variety of recipes prevents meal fatigue and provides a range of flavors and nutrients, crucial for speedy postpartum recovery. The aim is to deliver satisfying meals that fit easily into your new routine without sacrificing quality or nutrition.
How I Prepped and Stored My Postpartum Freezer Meals
When I was preparing my postpartum freezer meals, I carefully planned a variety of nutritious options to ensure a balanced diet. The focus was on creating easy-to-prepare and family-friendly recipes that catered to all tastes and dietary needs, making sure everyone in the house was happy. Pre-cooking meals and then freezing them in portioned containers made for convenient reheating and significantly reduced the stress surrounding meal preparation during that busy time.
Labels became my best friend, as each container was marked with the meal name, preparation date, and any specific reheating instructions needed for quick and easy organization. I included a mix of breakfast, lunch, and dinner options to cover all meal times, ensuring good food wasn’t compromised no matter how chaotic the day was. I prepped and prepped until my freezer was full and it set us up for over a month of meals with those sprinkled in from friends, take out and just a few I cooked when I was feeling better.
Best Postpartum Freezer Meals I Made My First and Second Pregnancy
Breakfasts
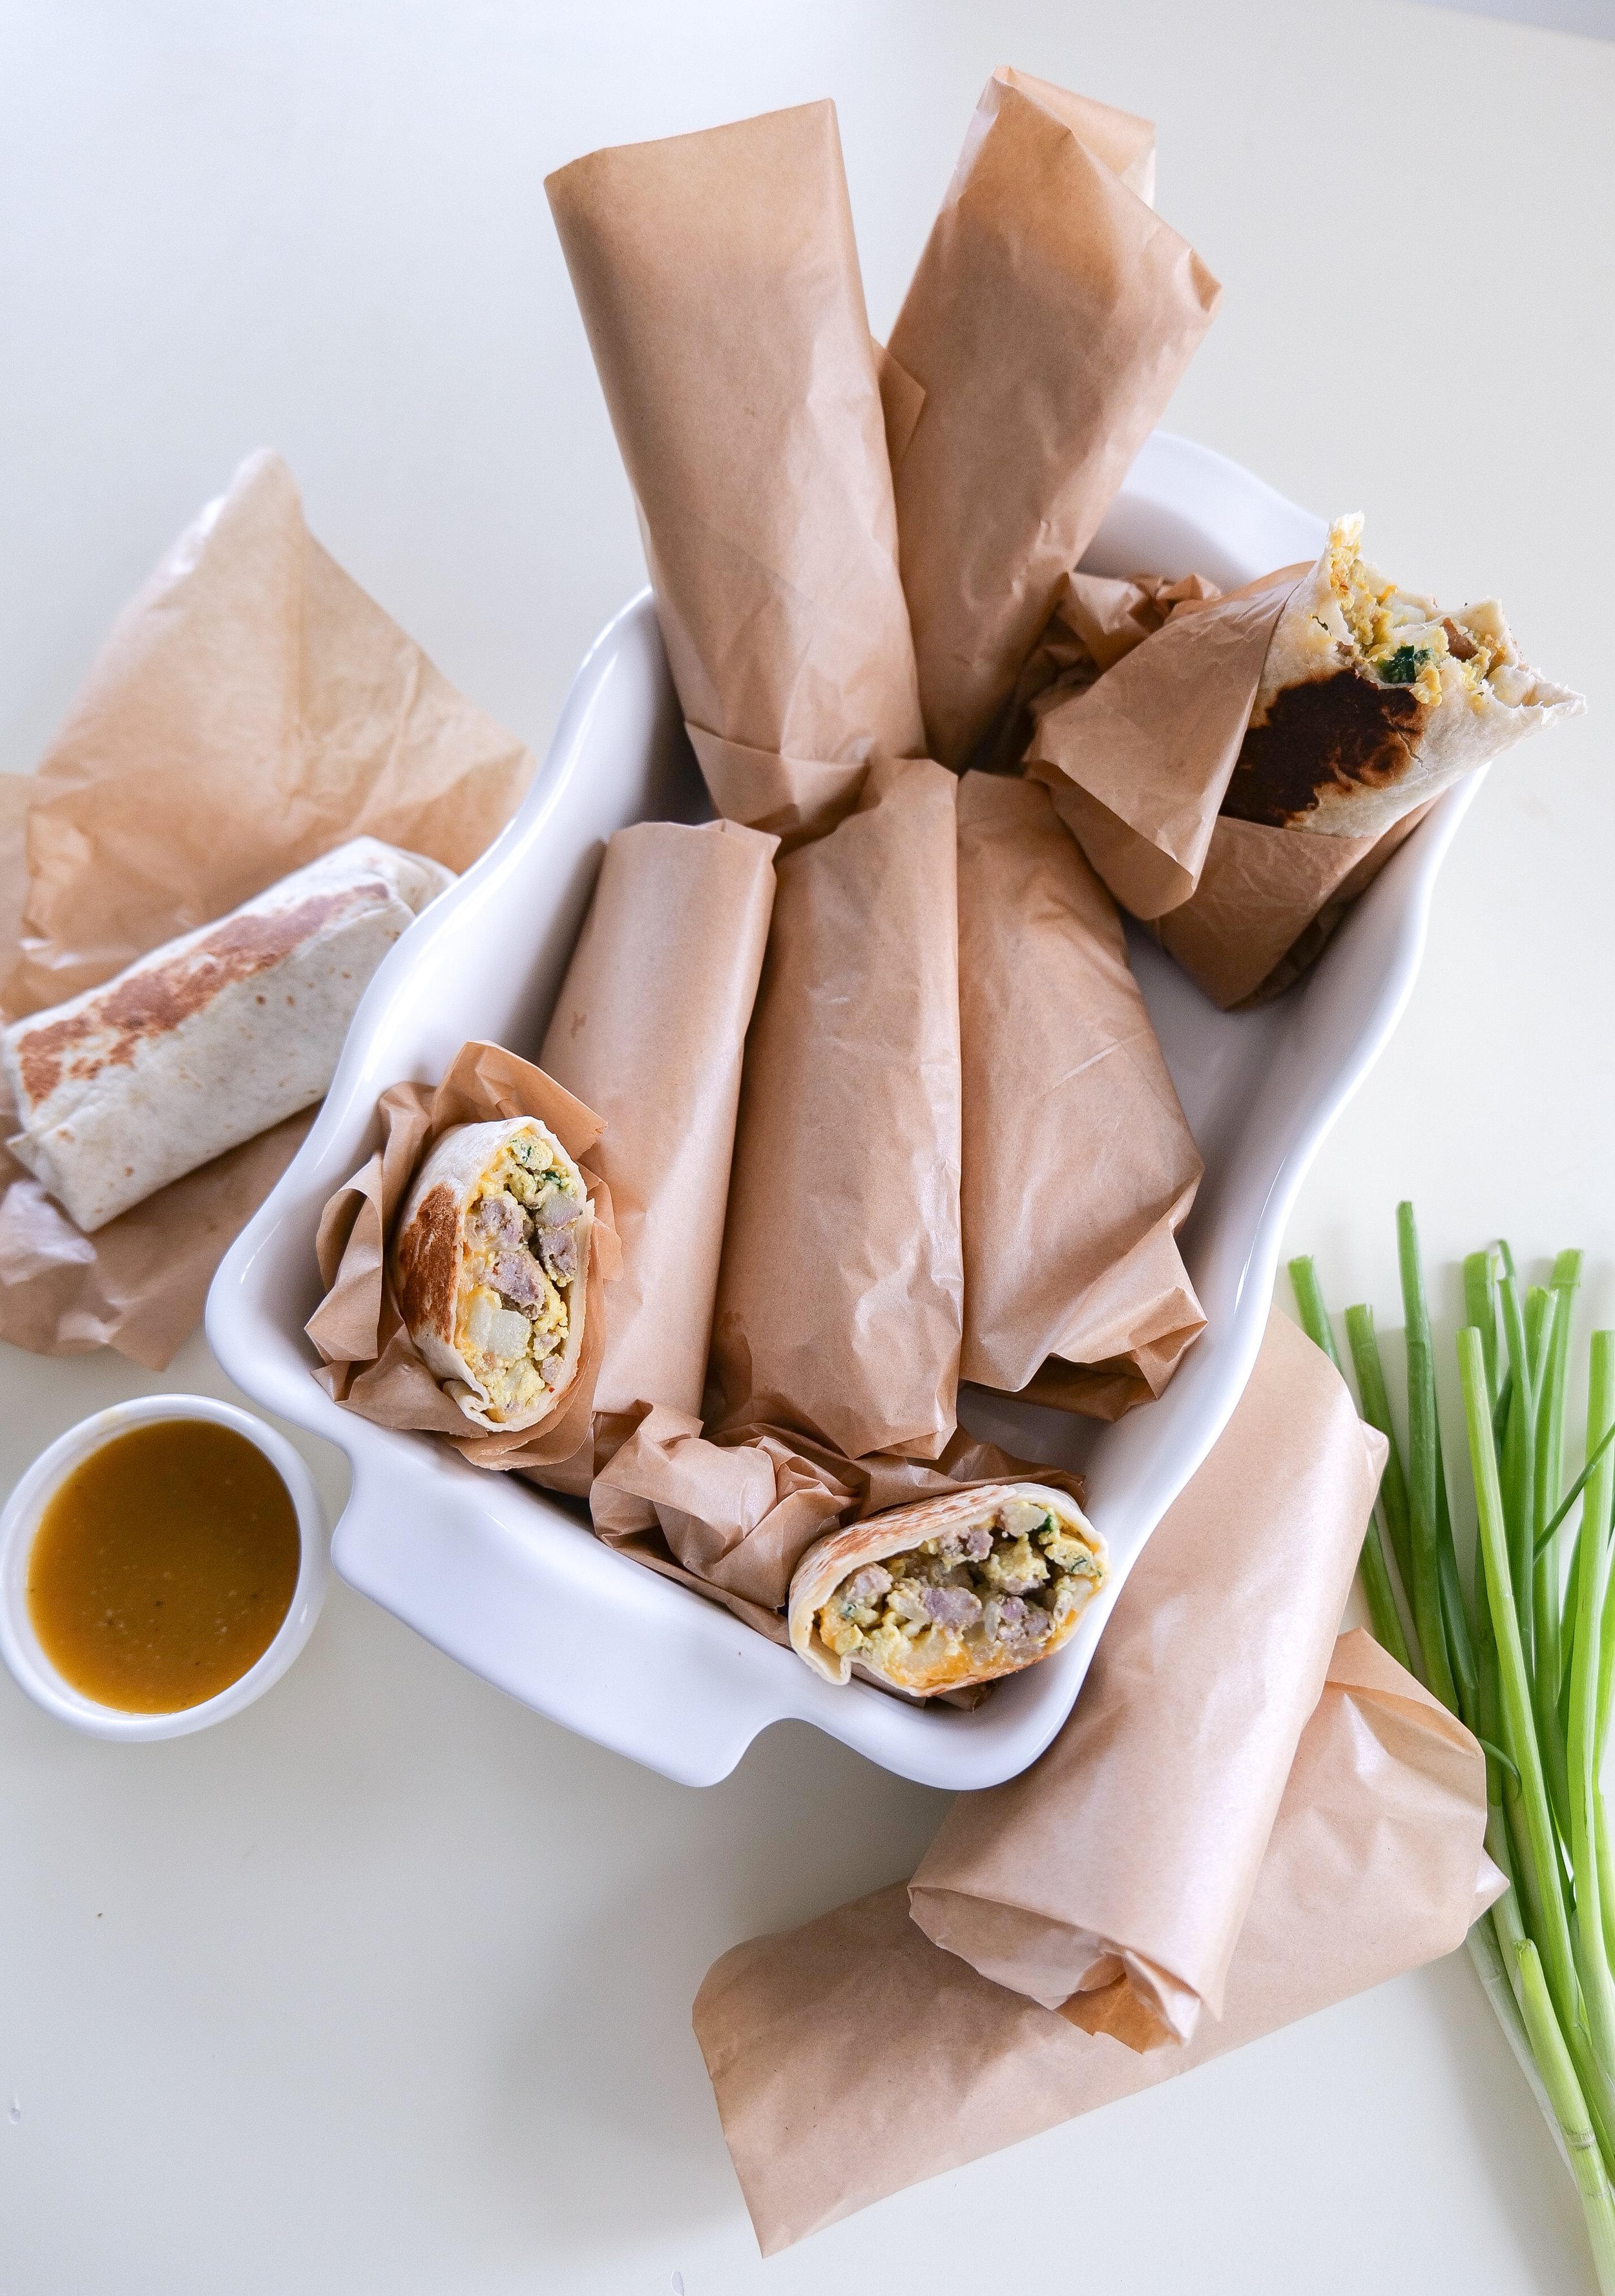
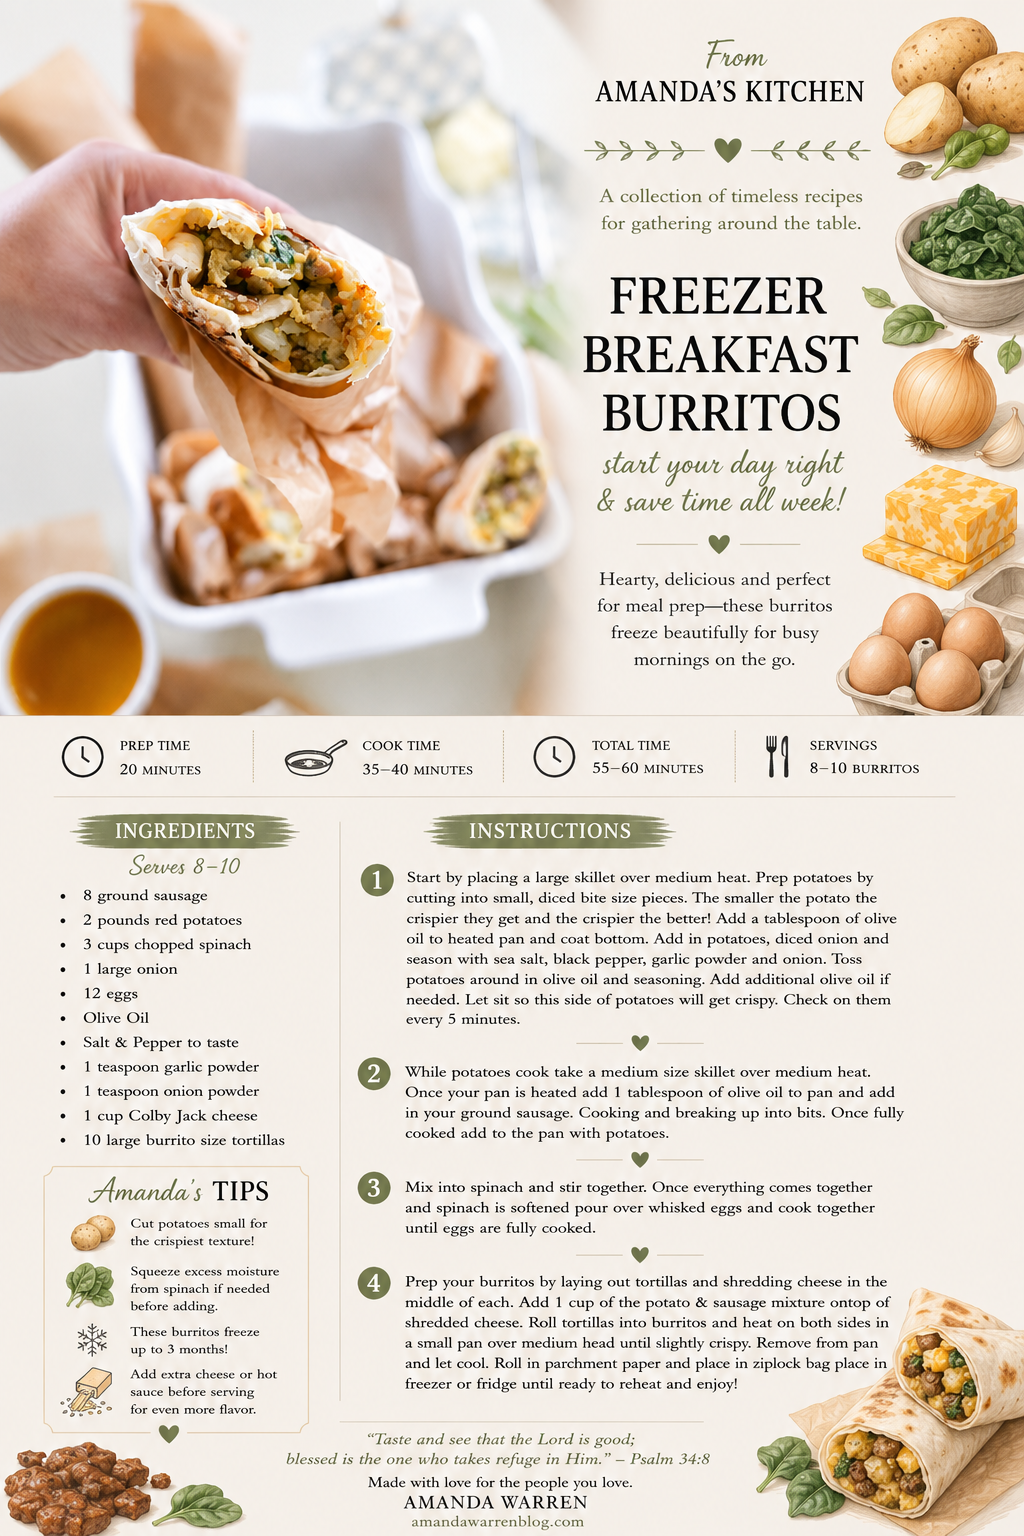
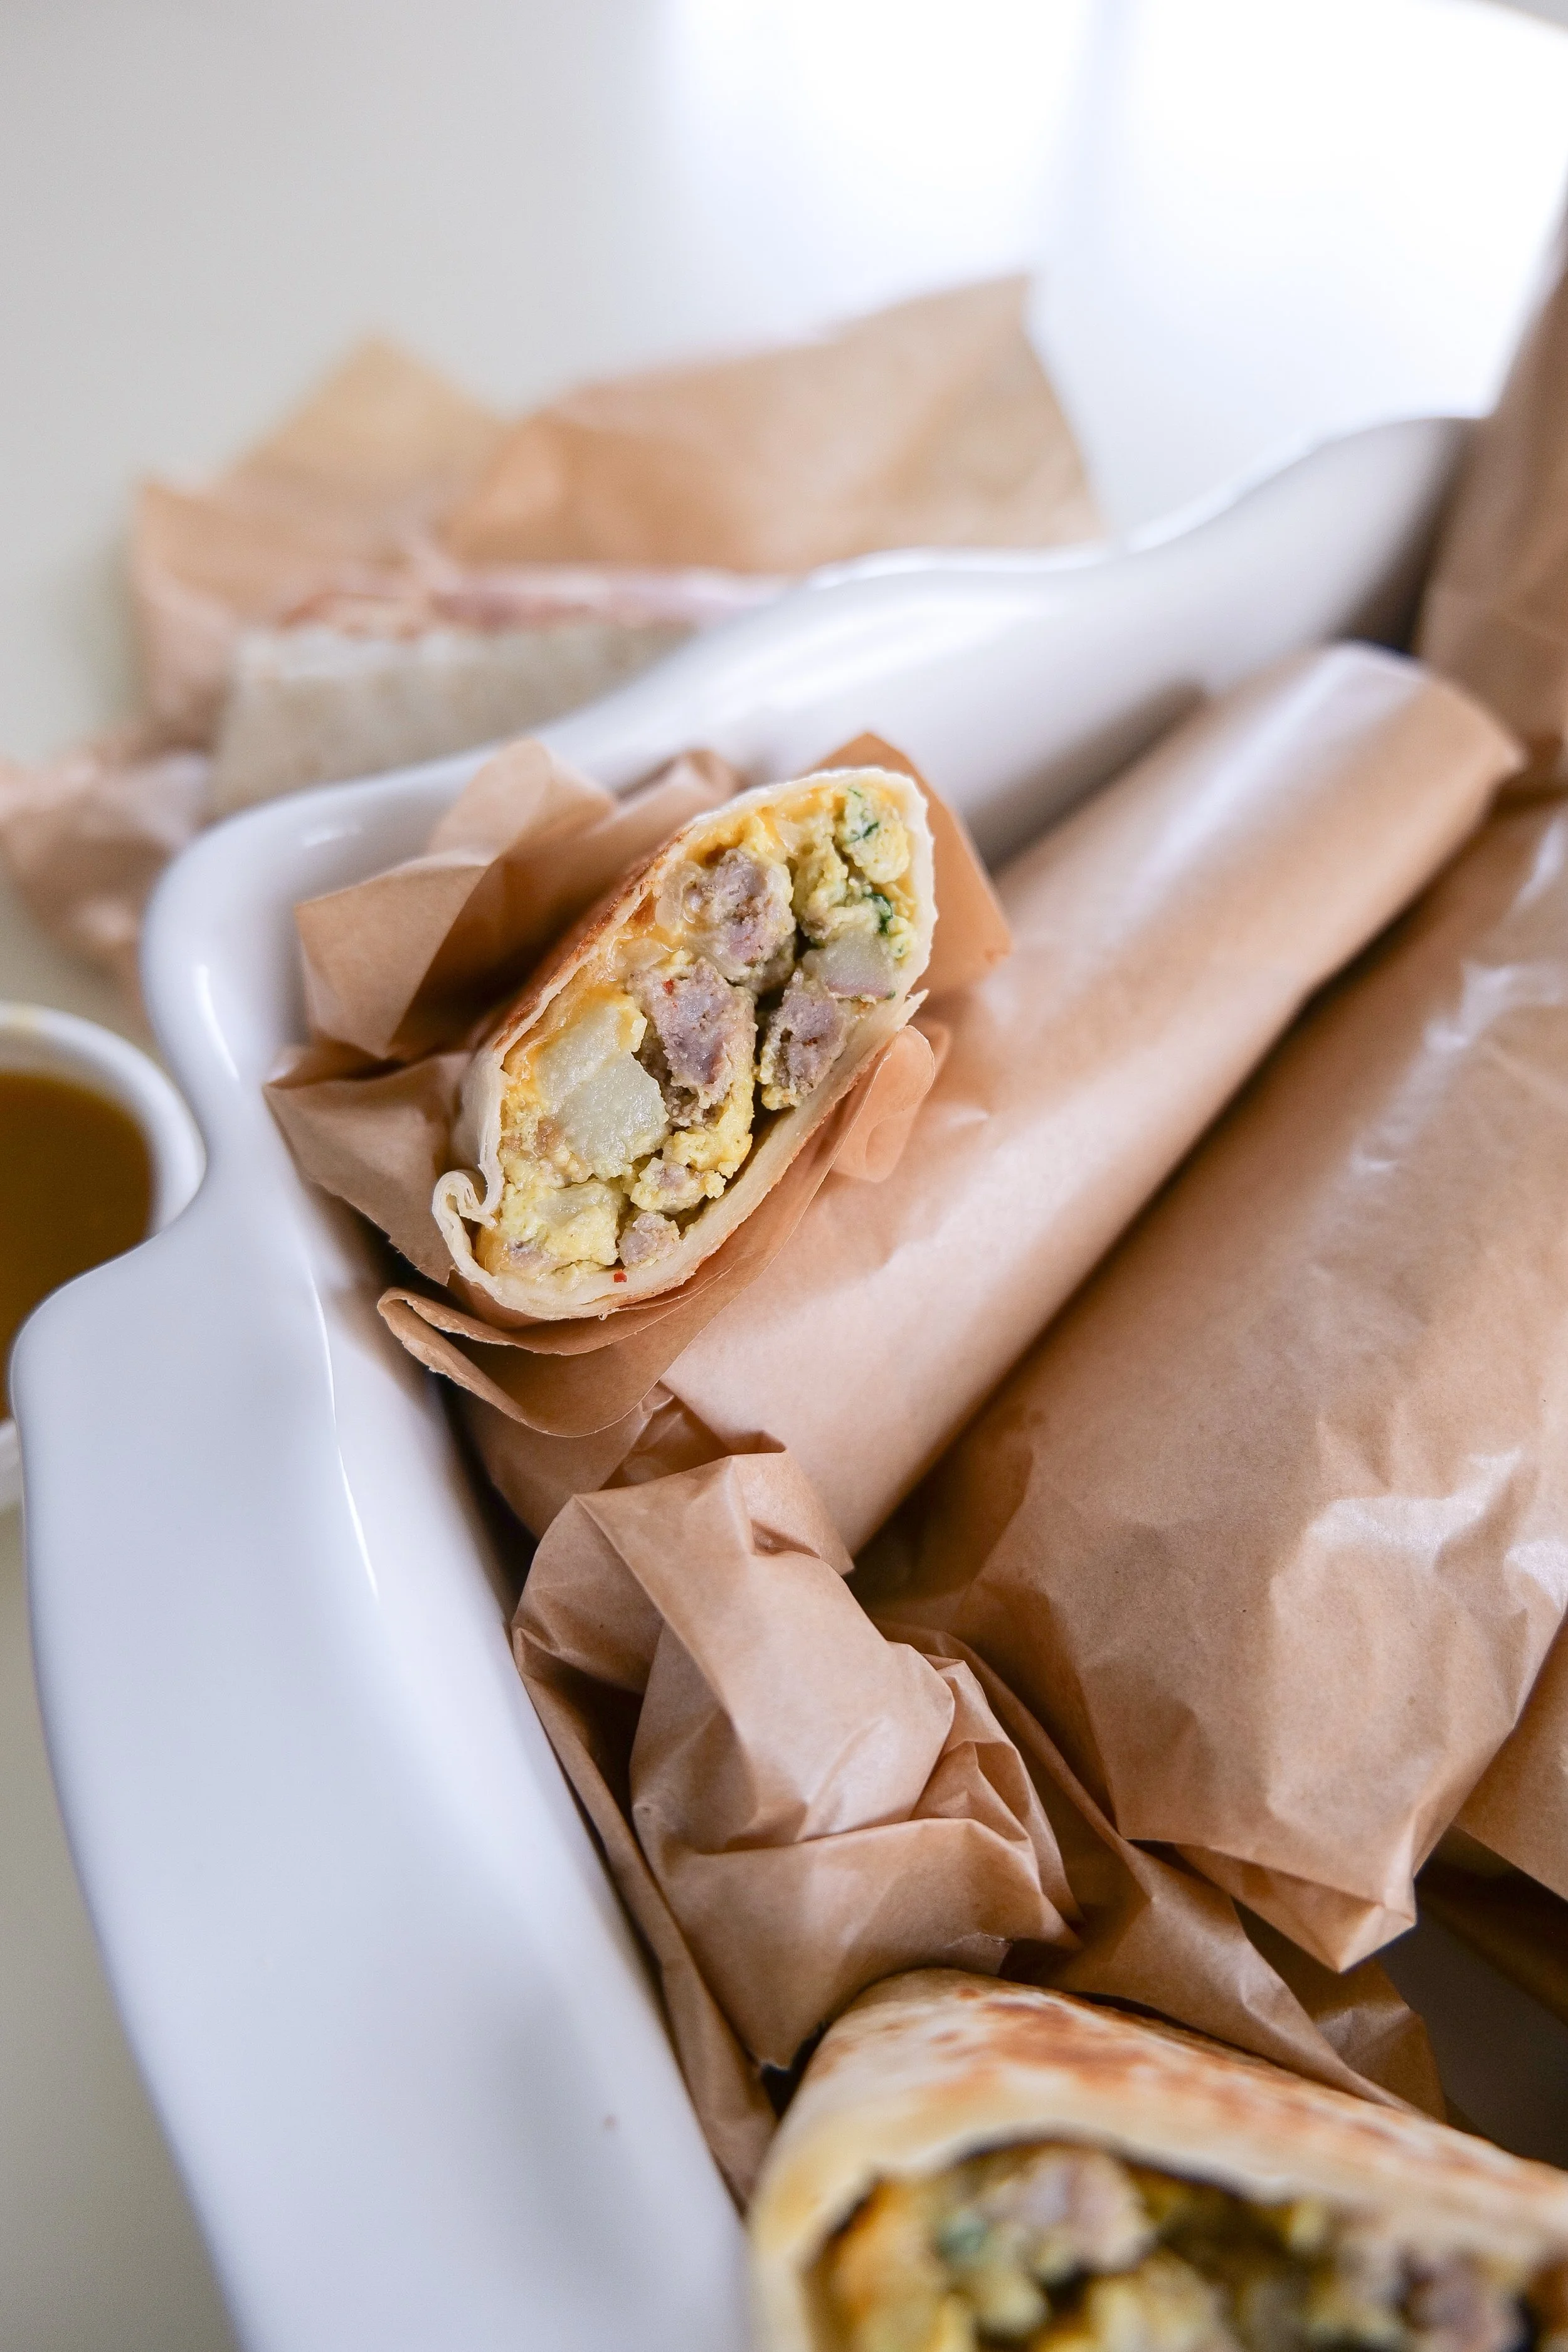
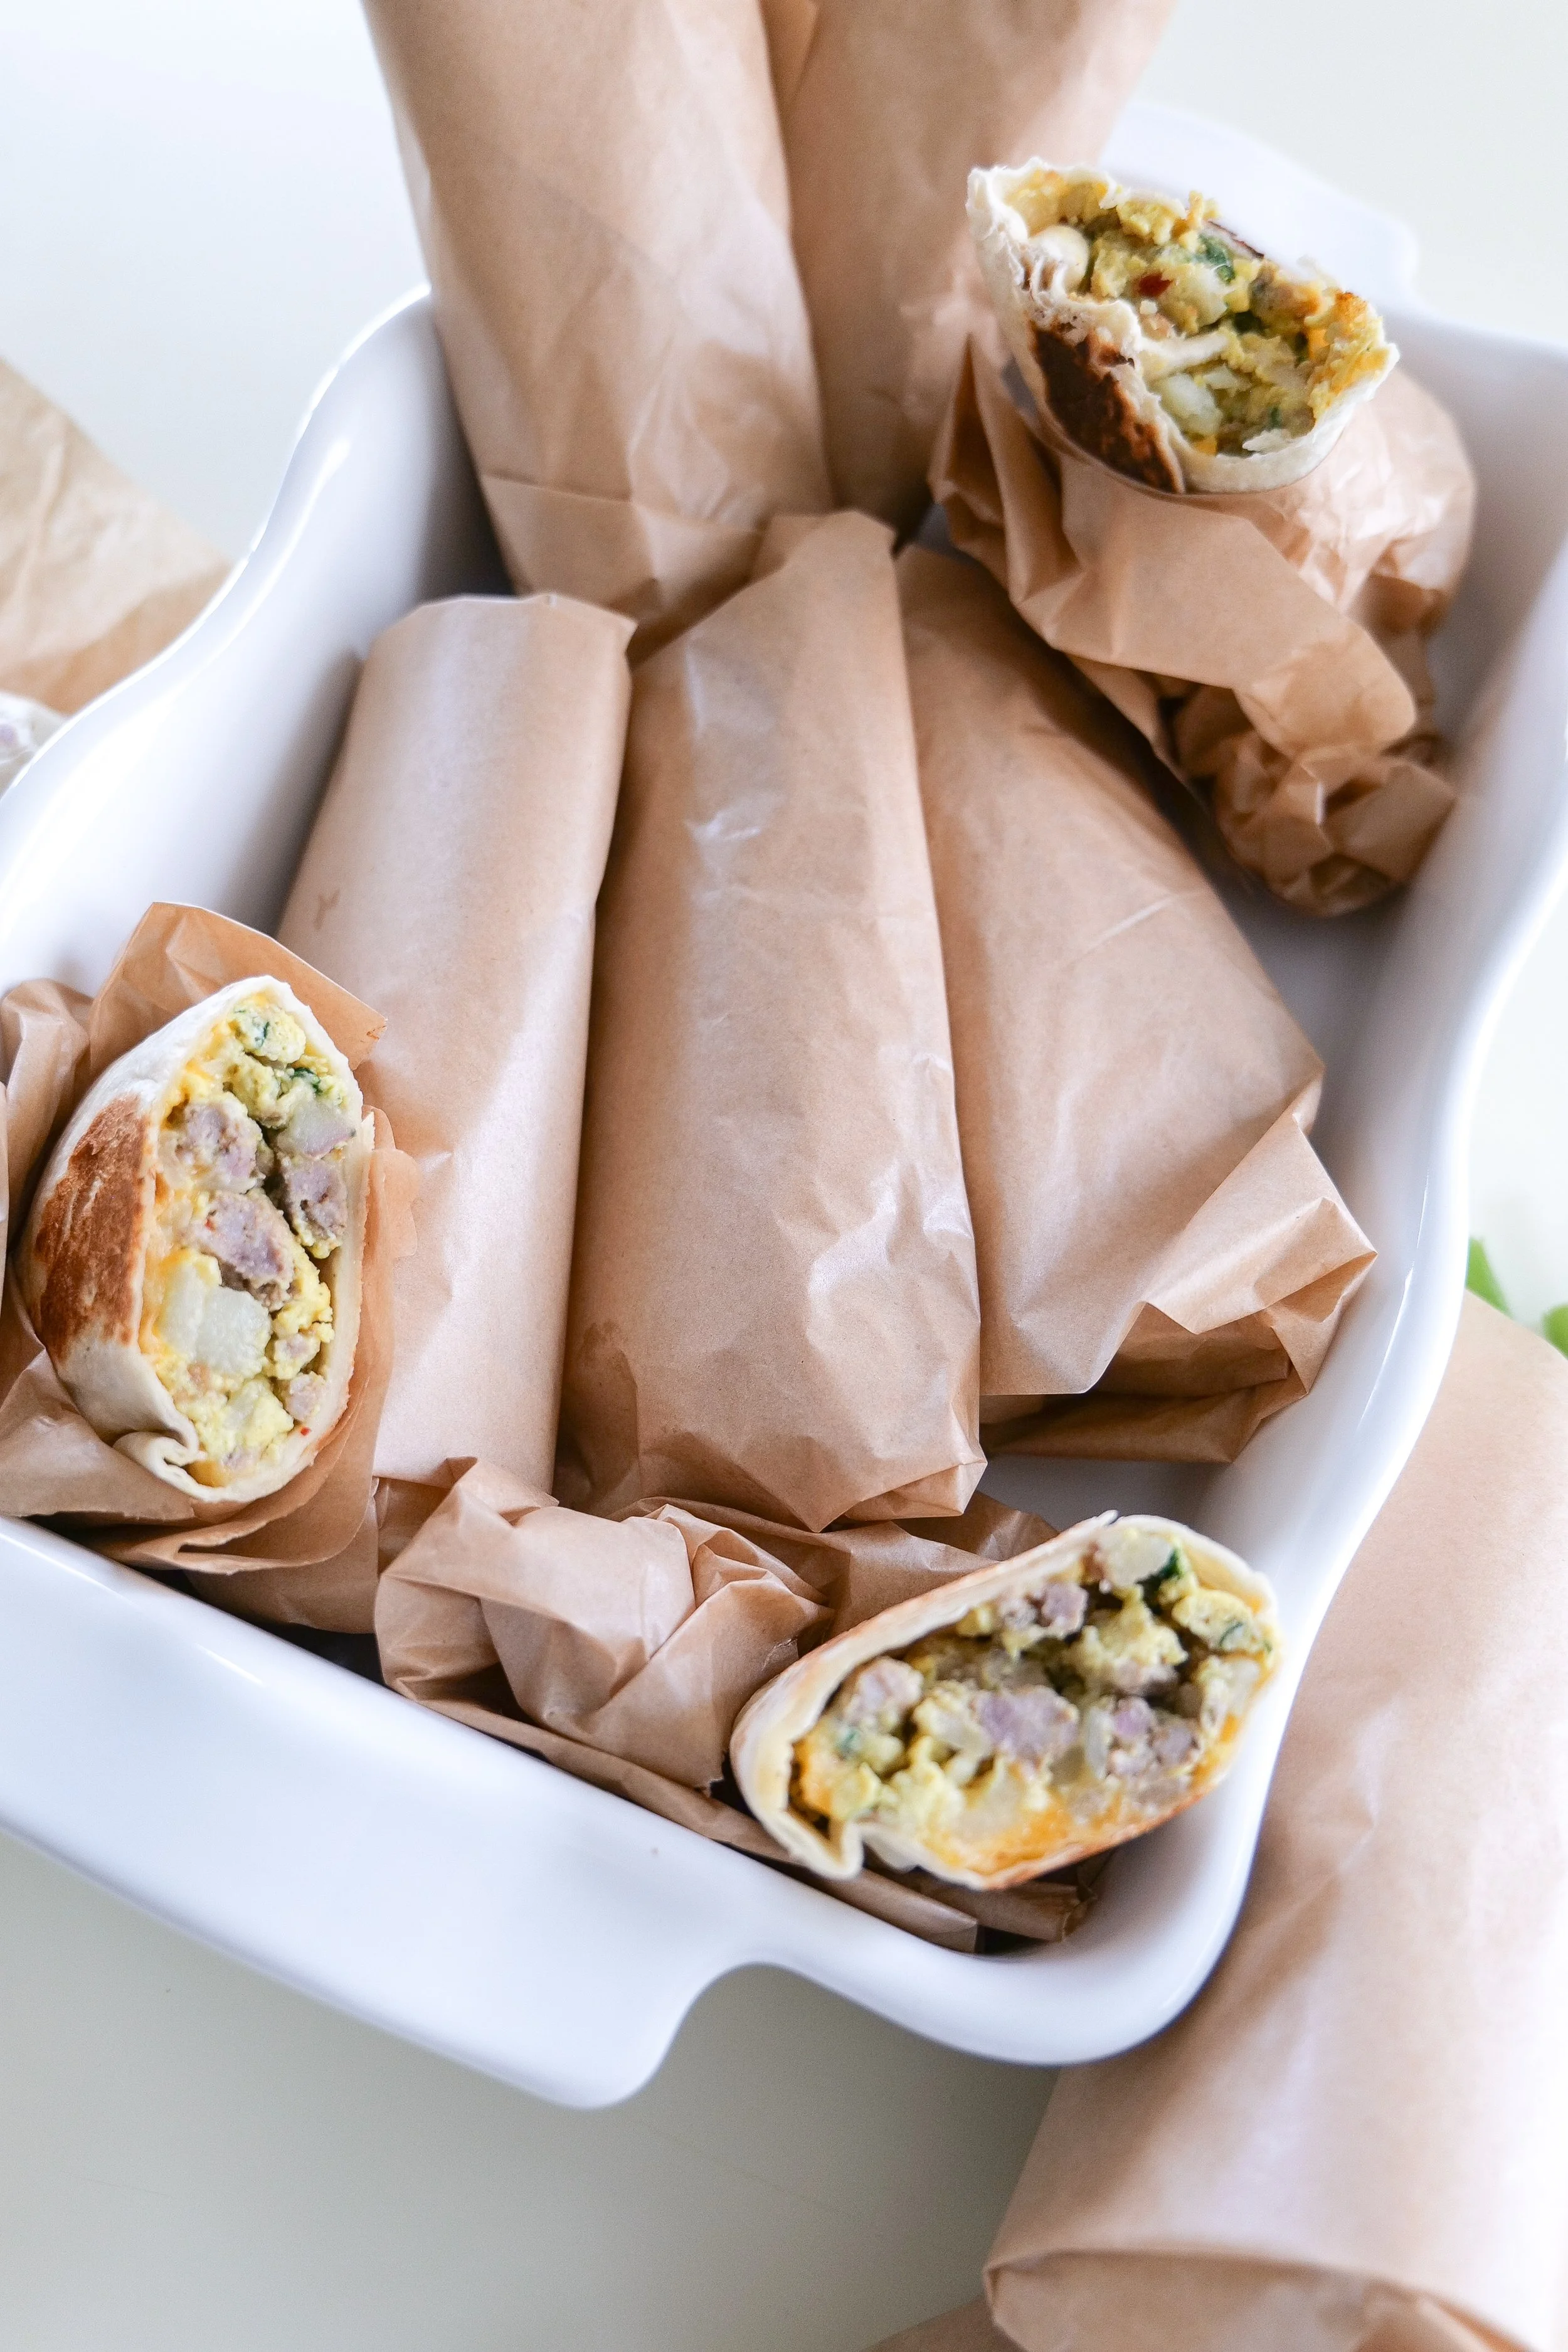
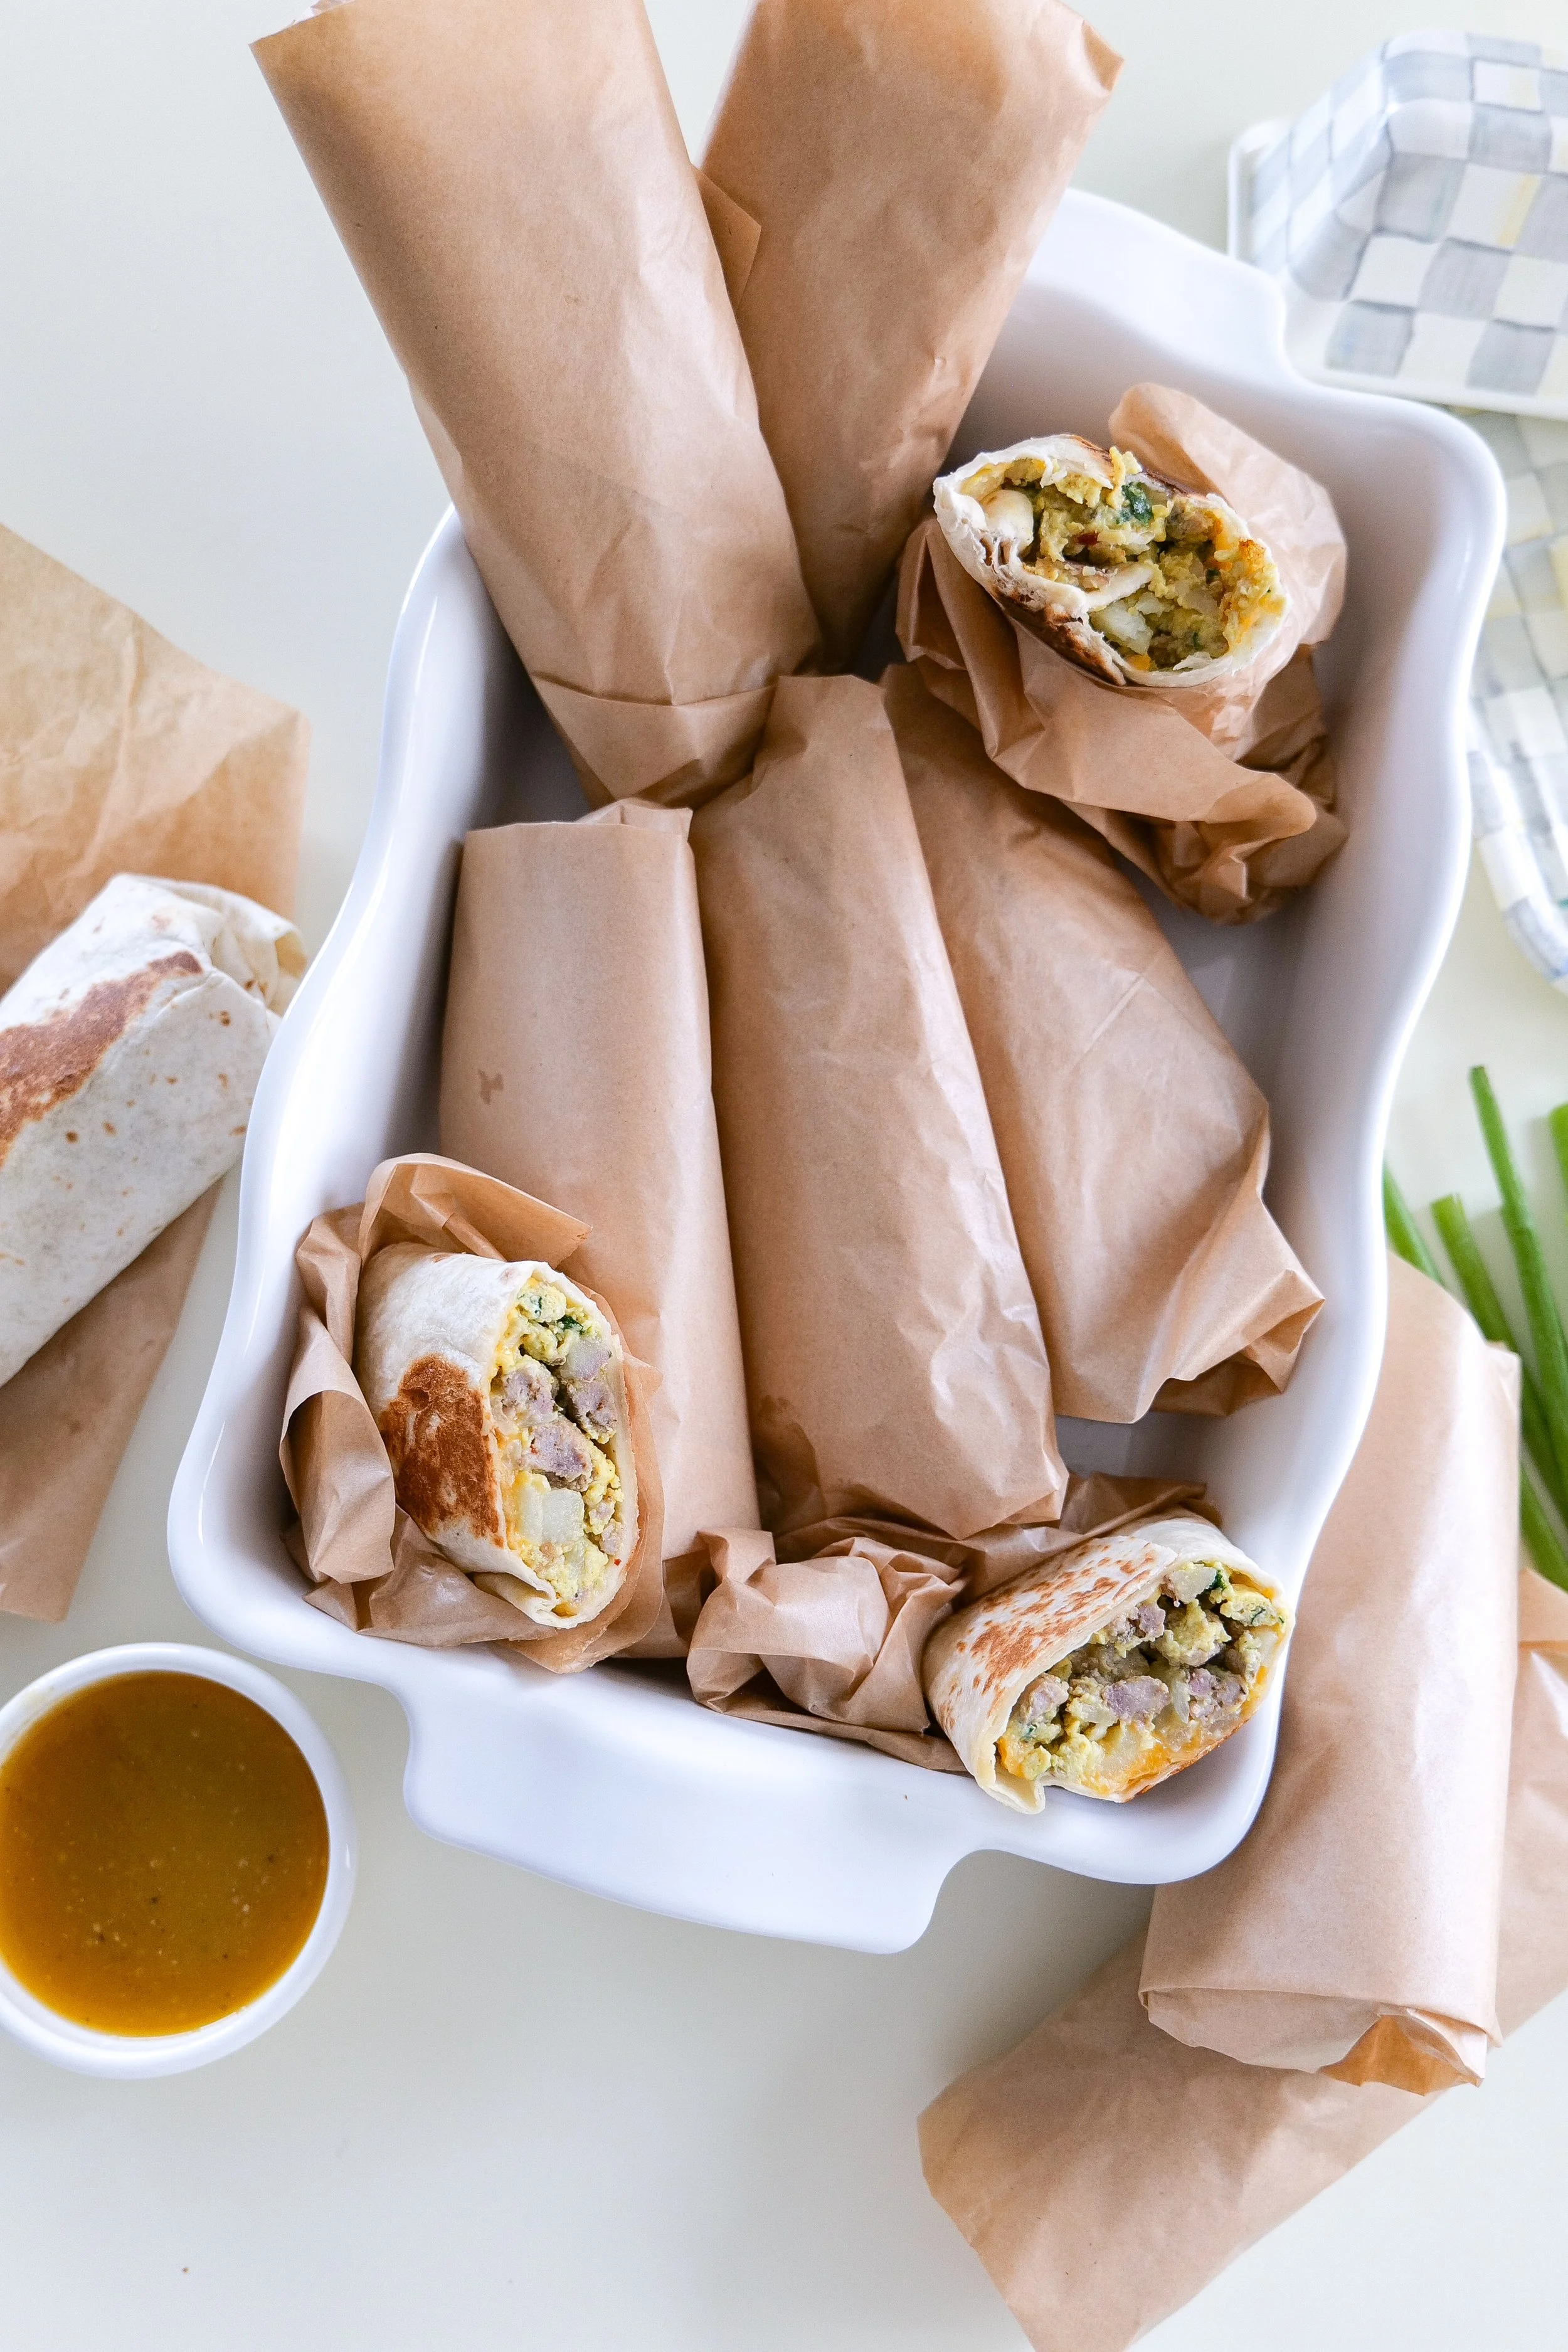
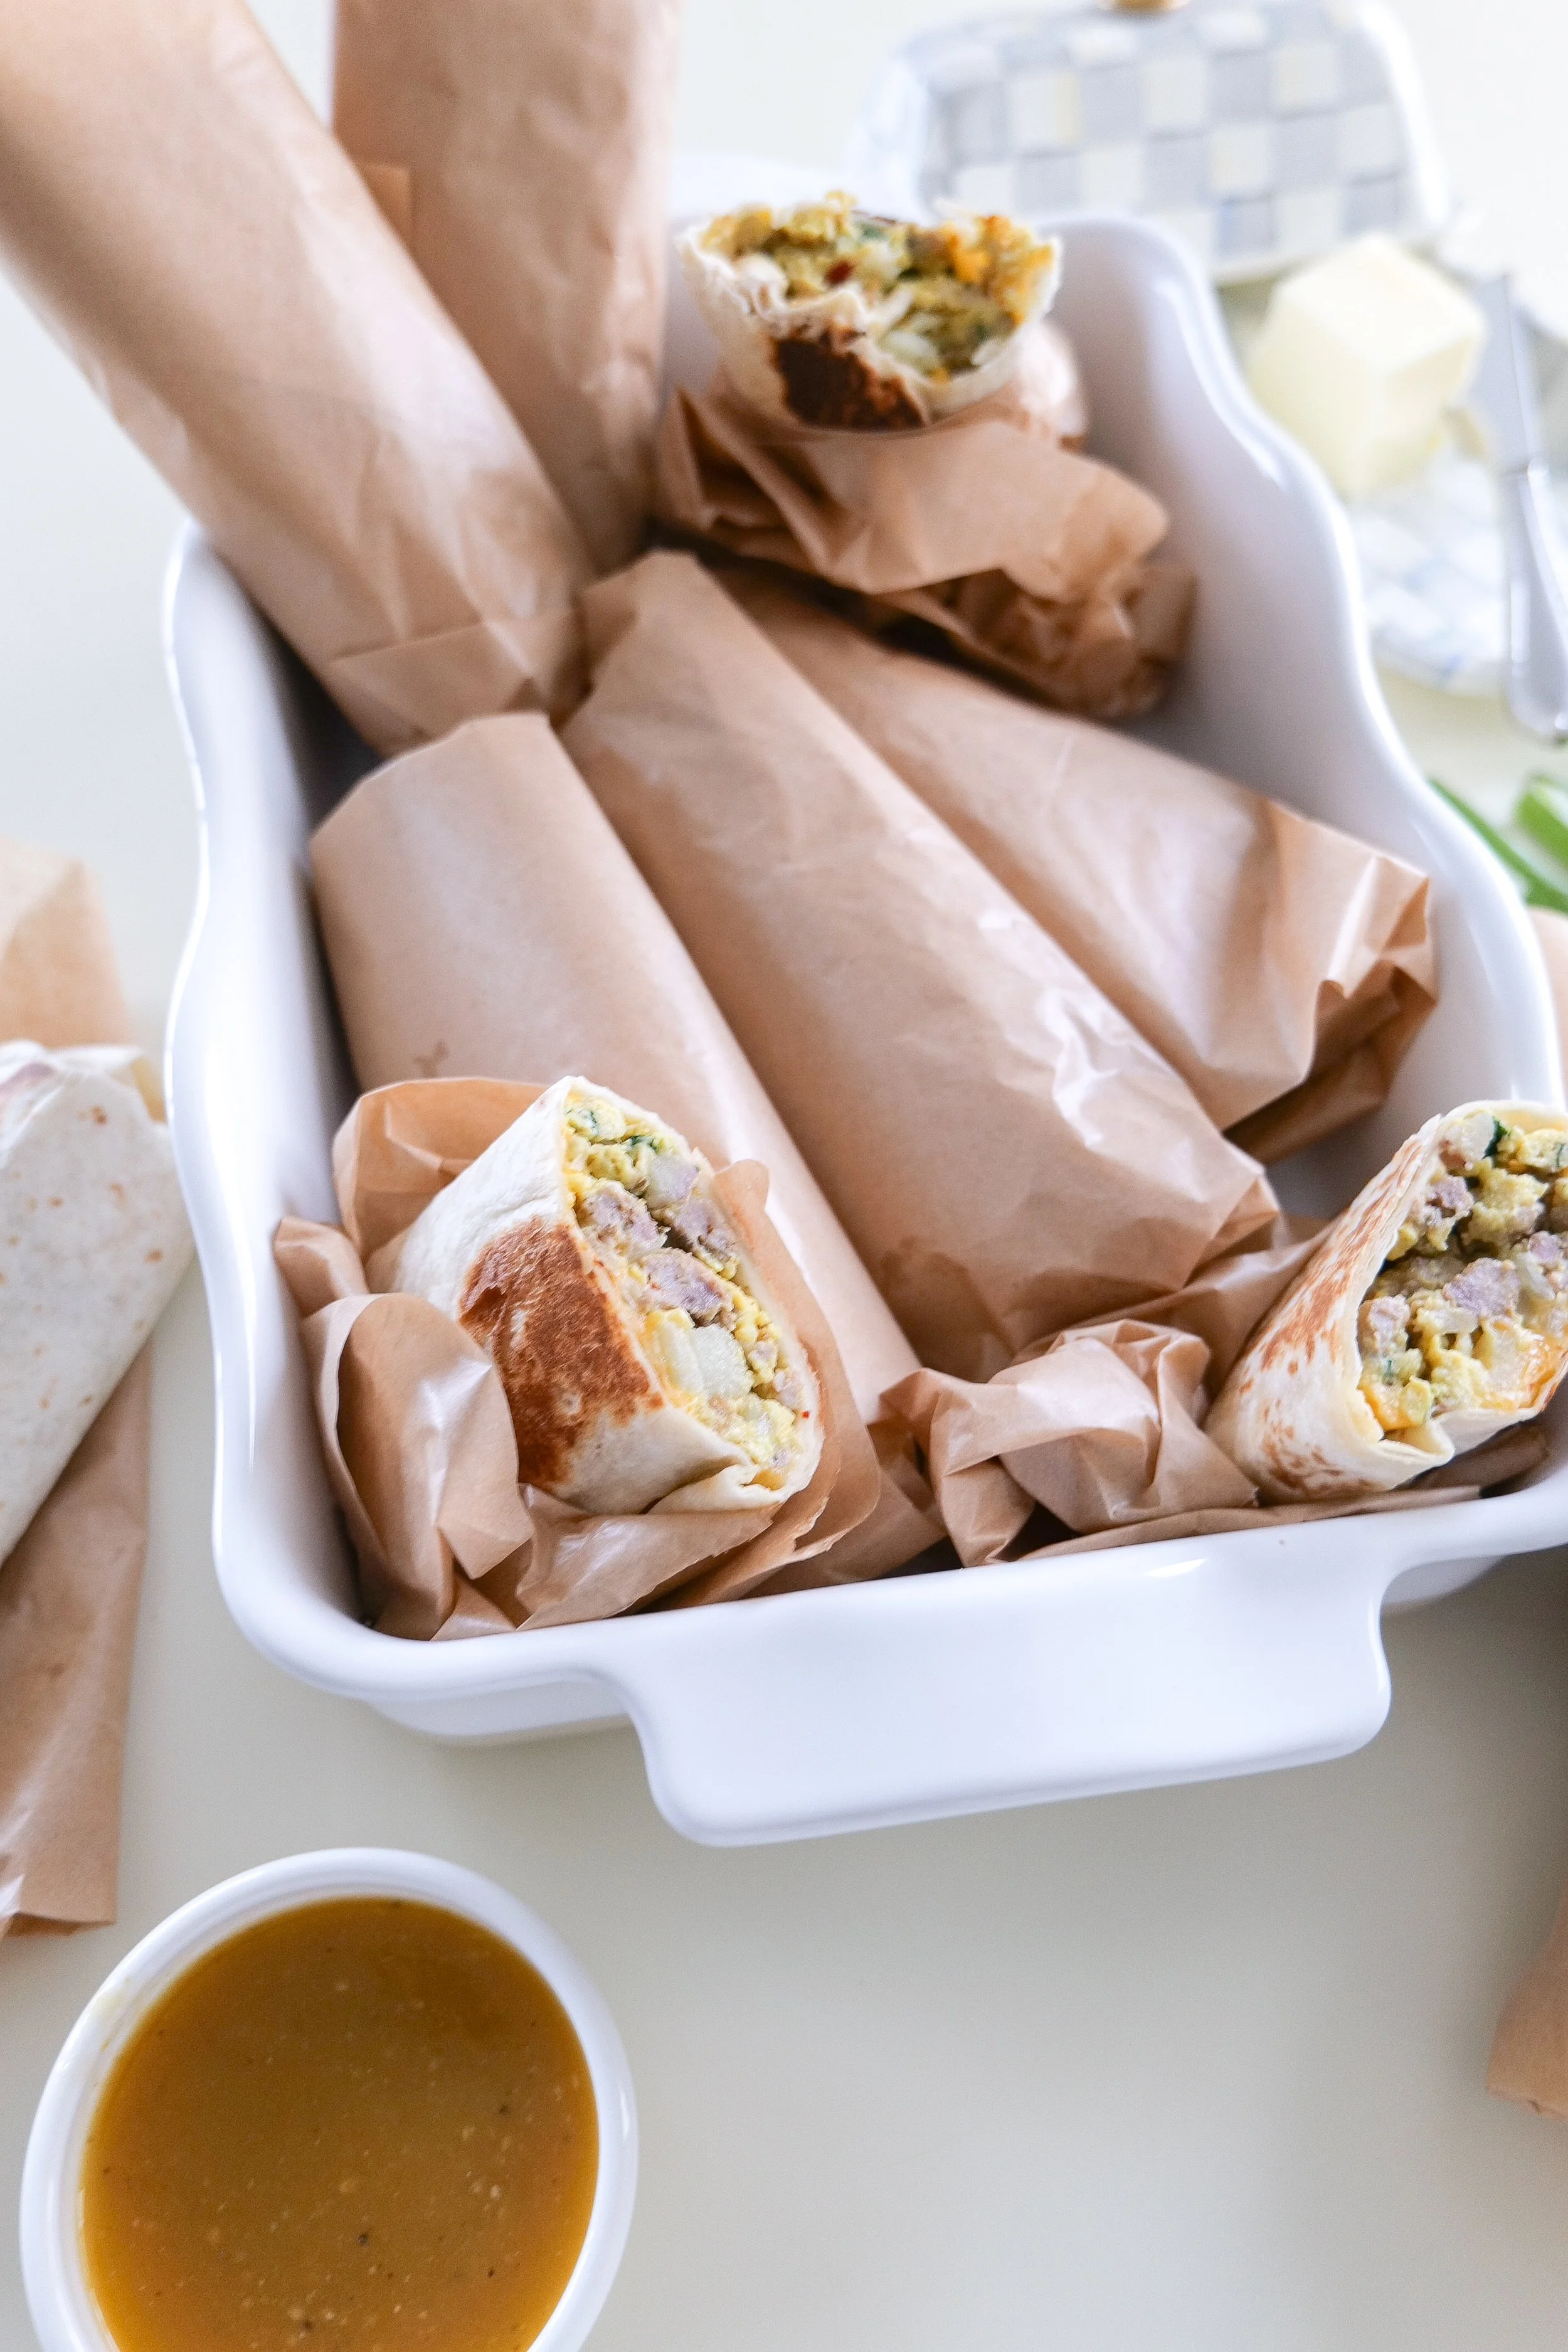
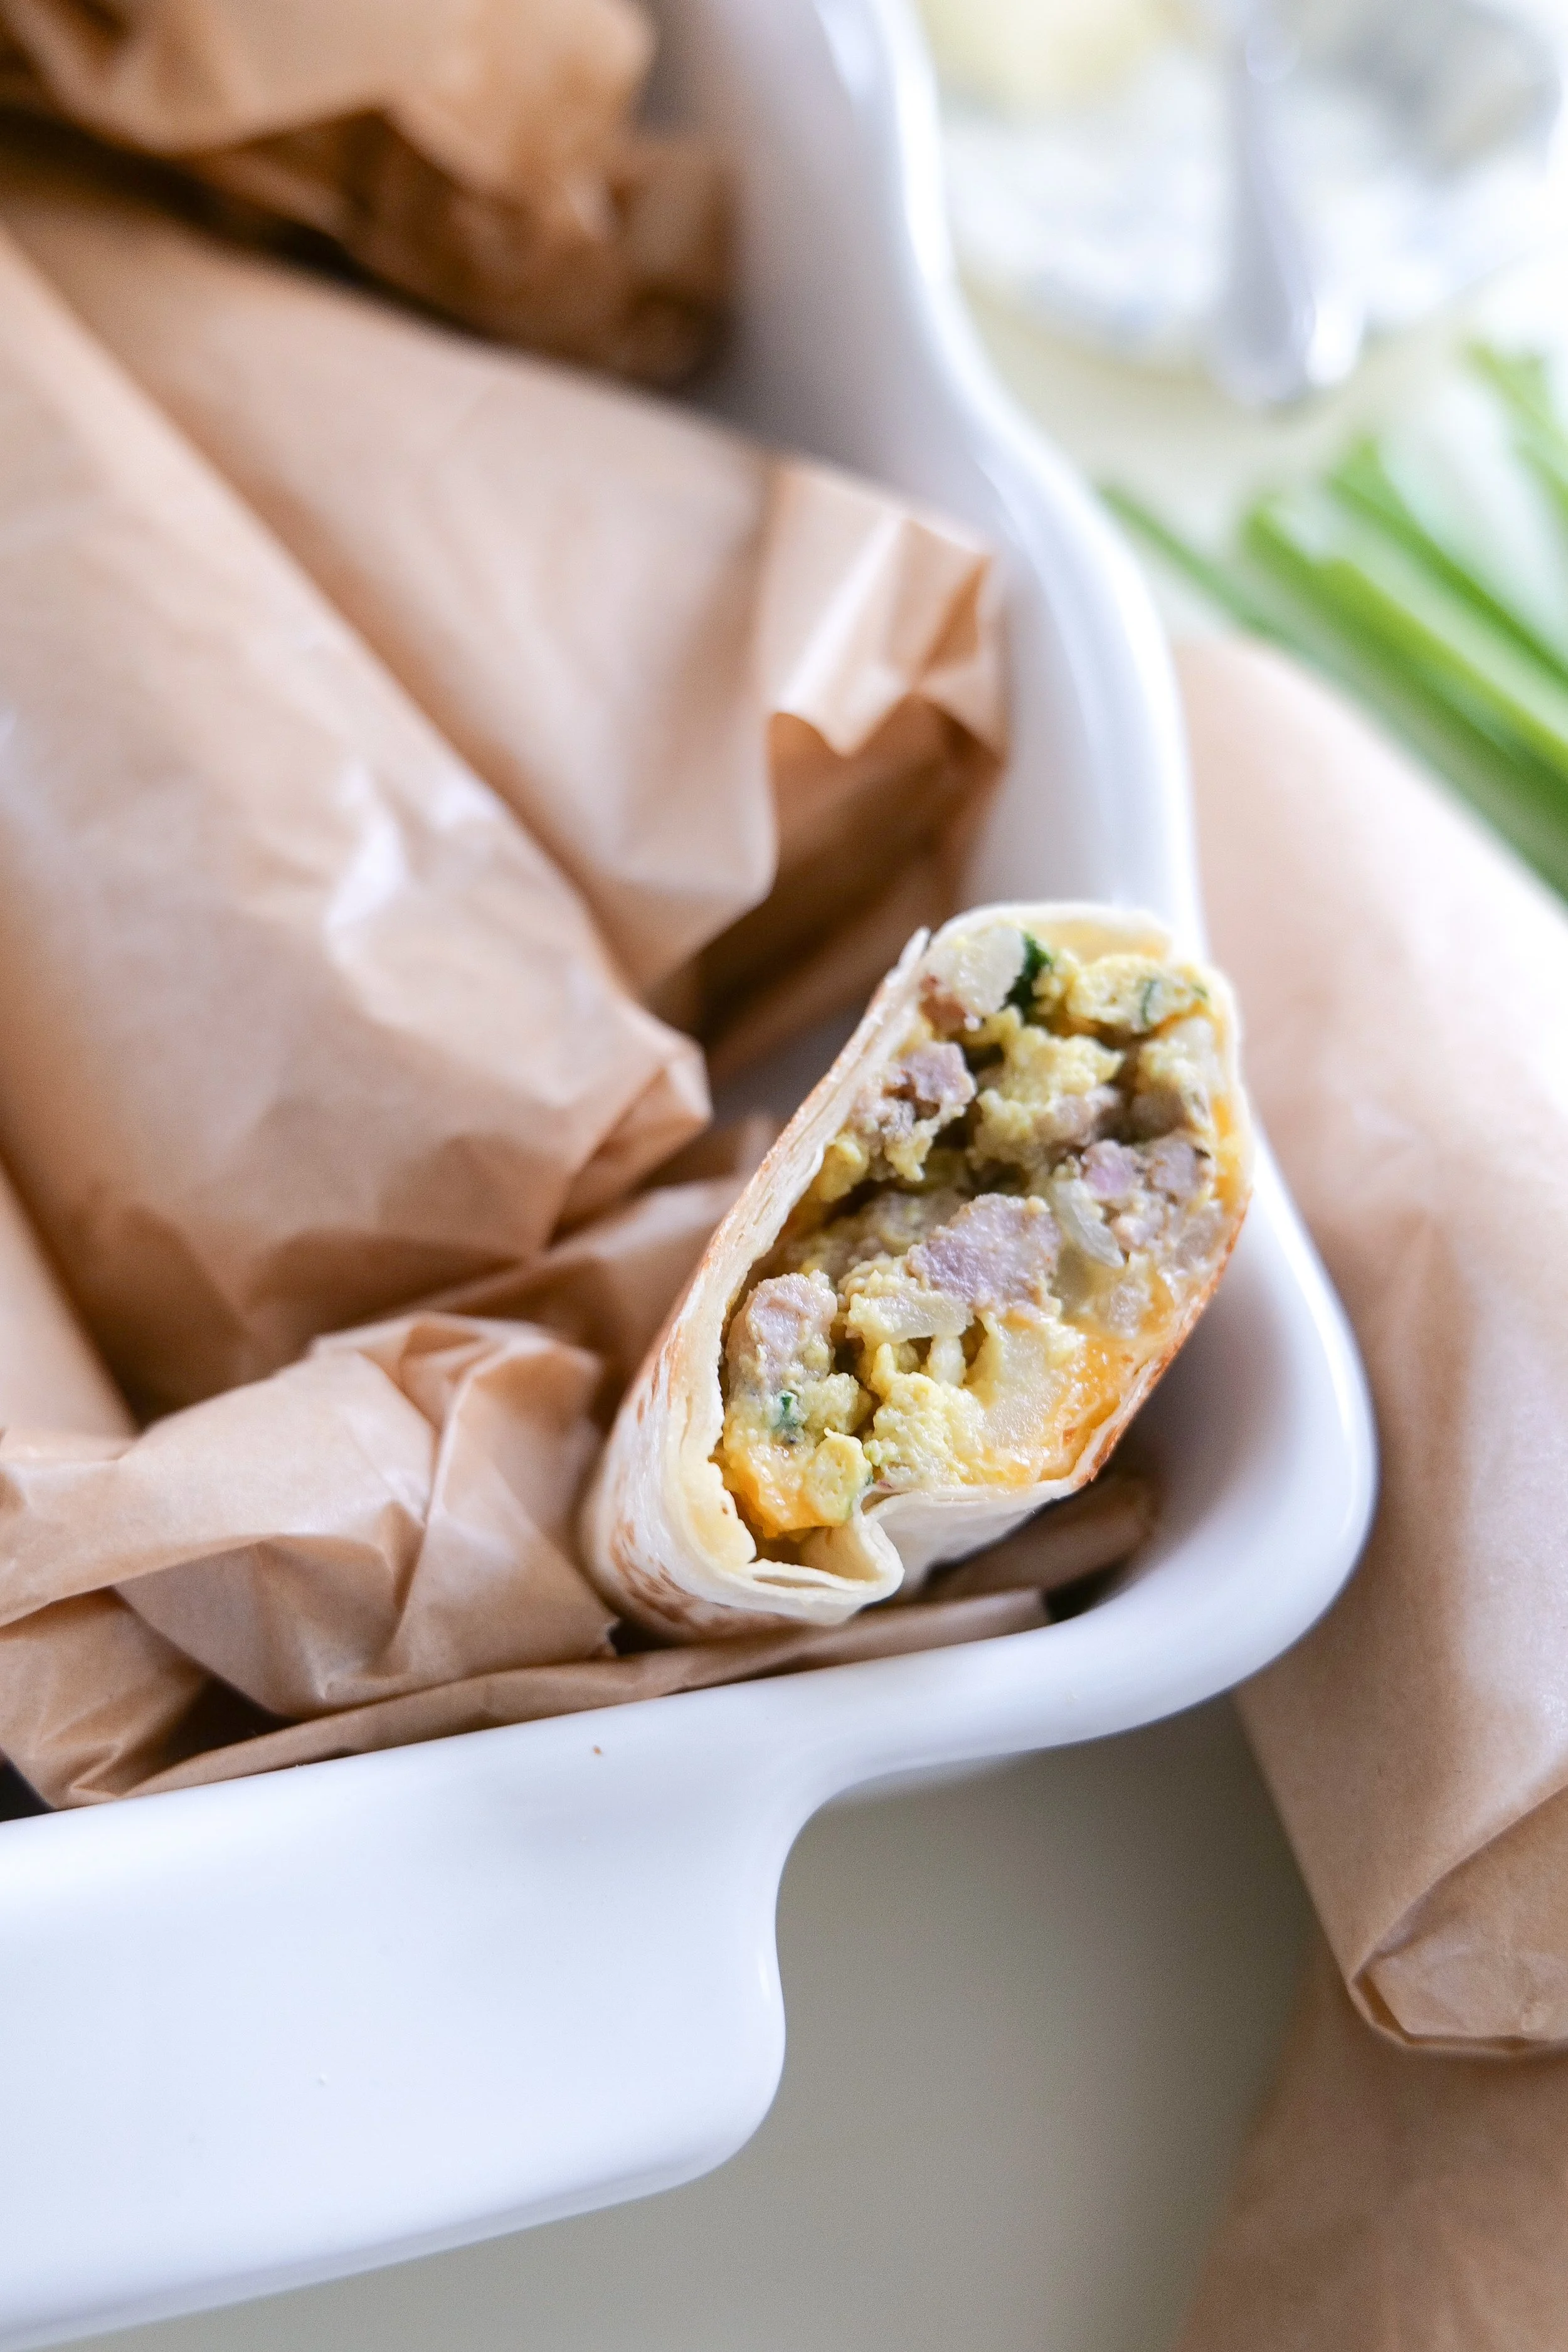
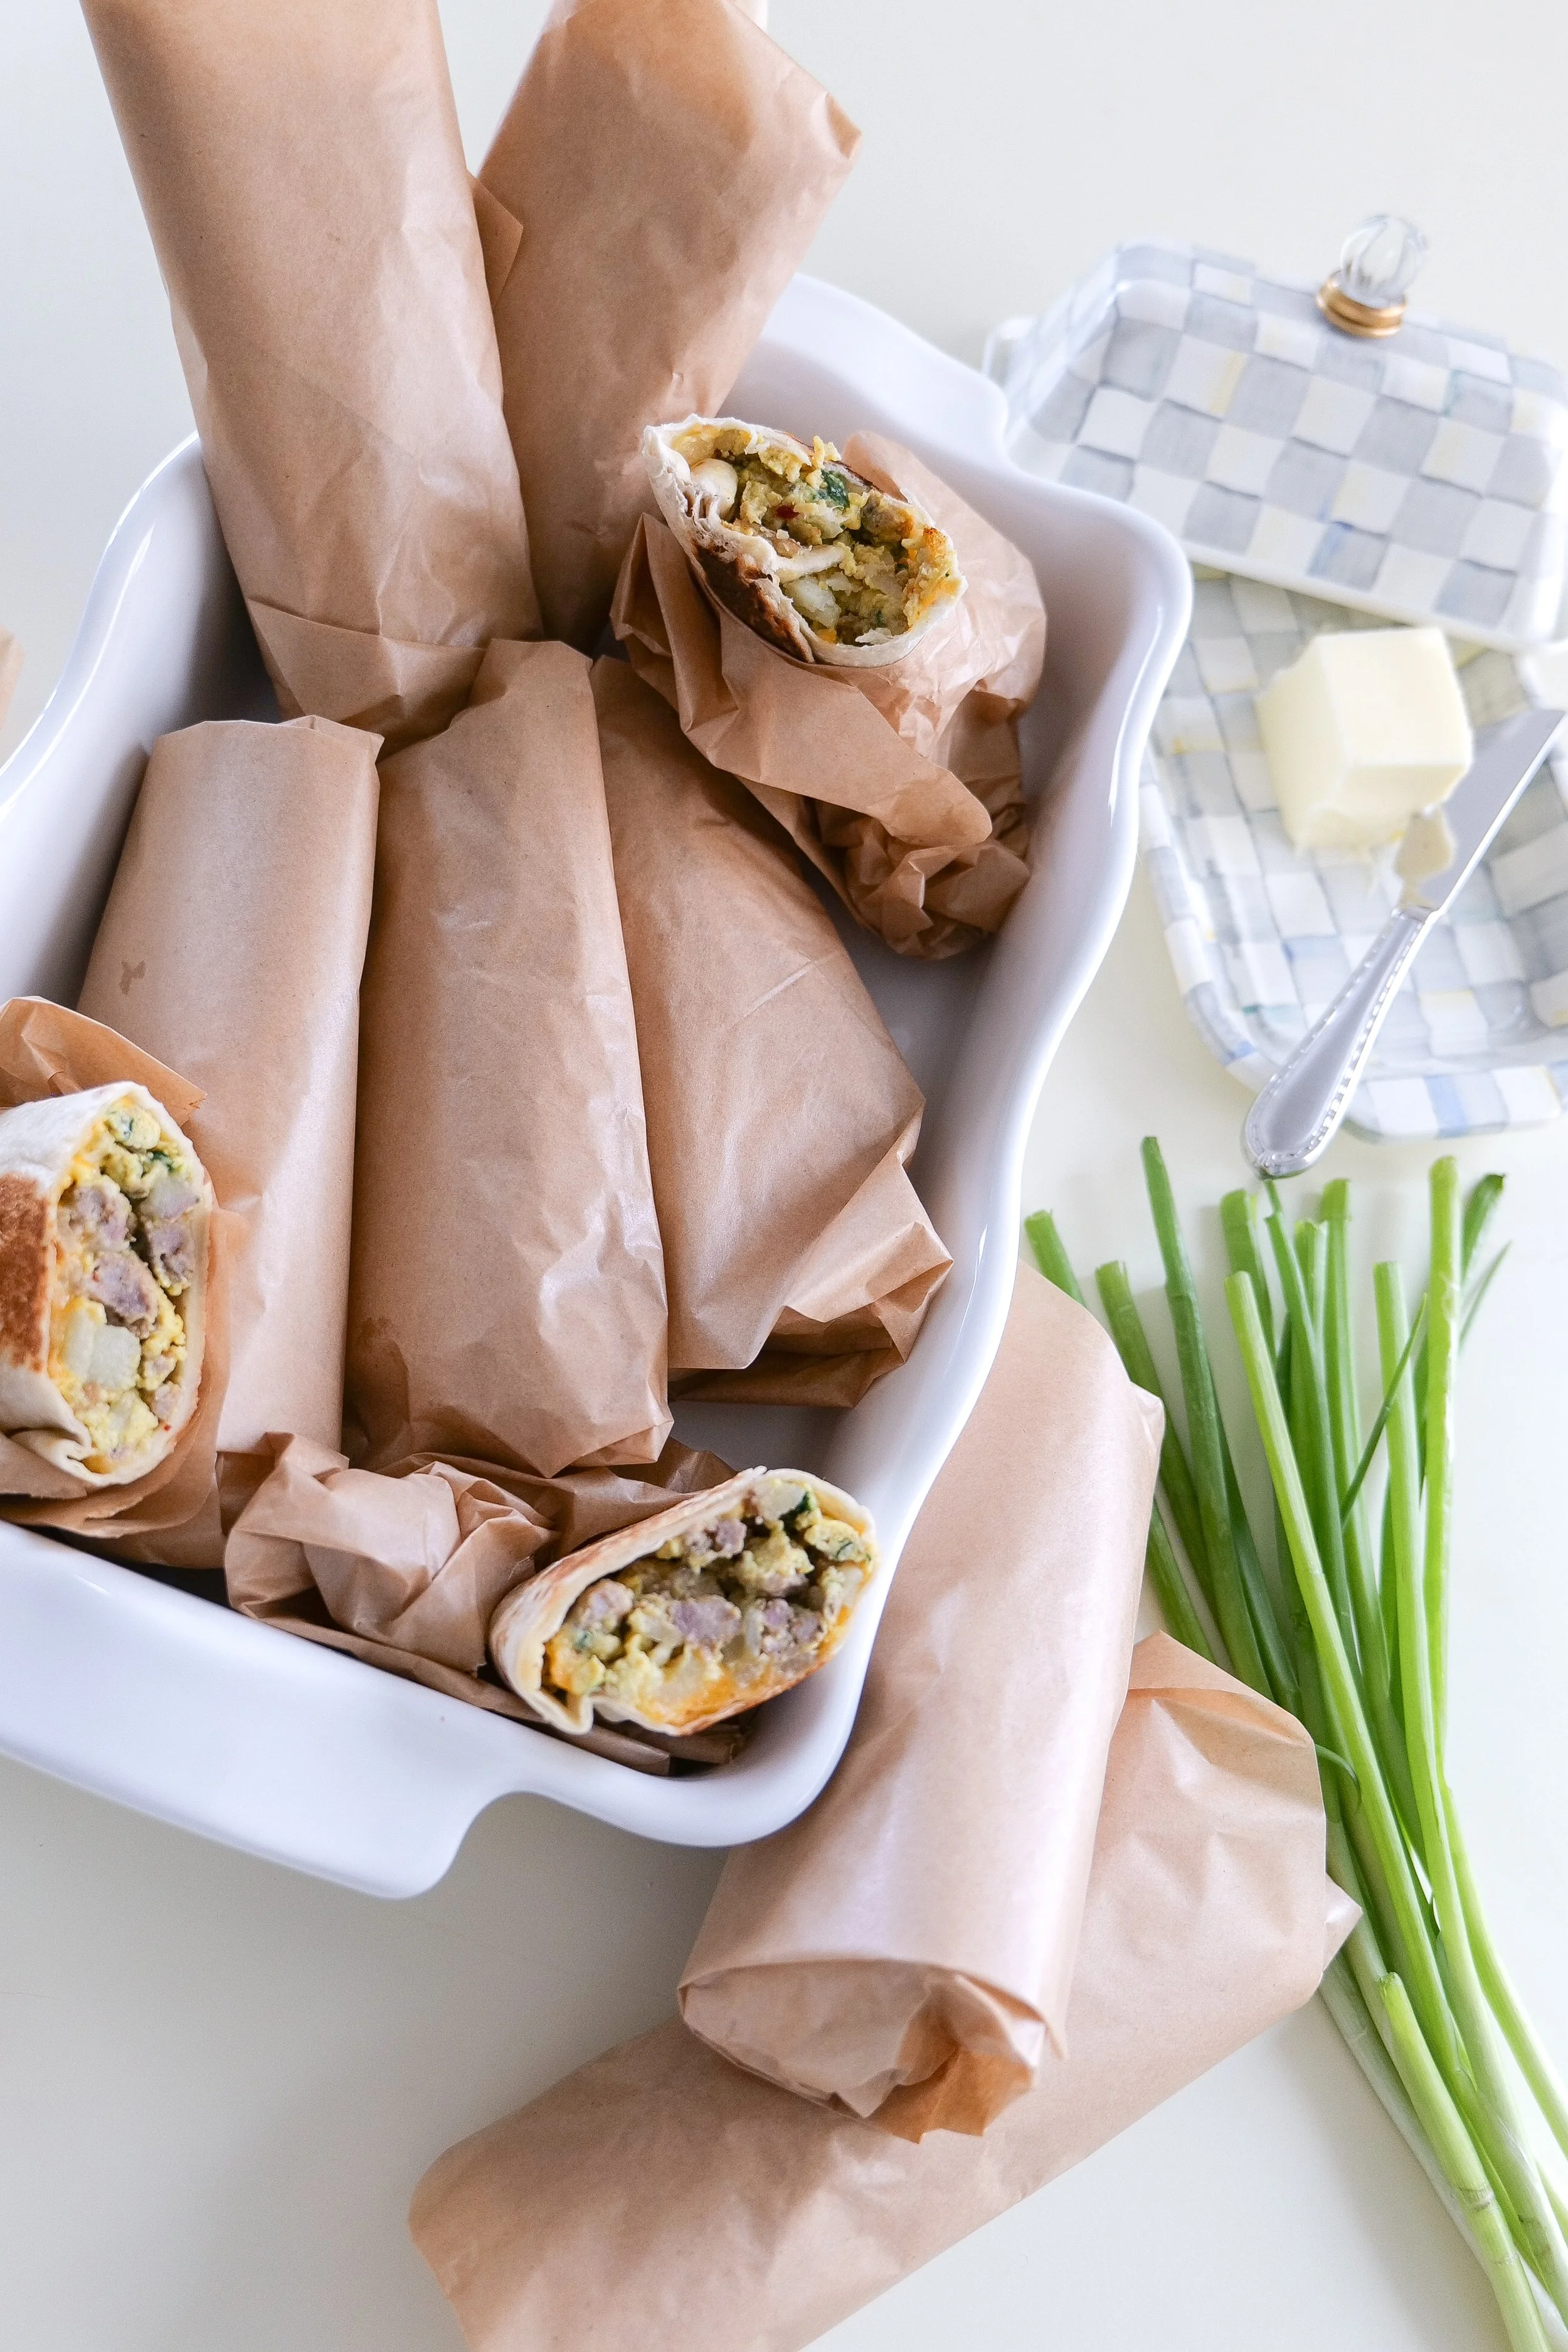
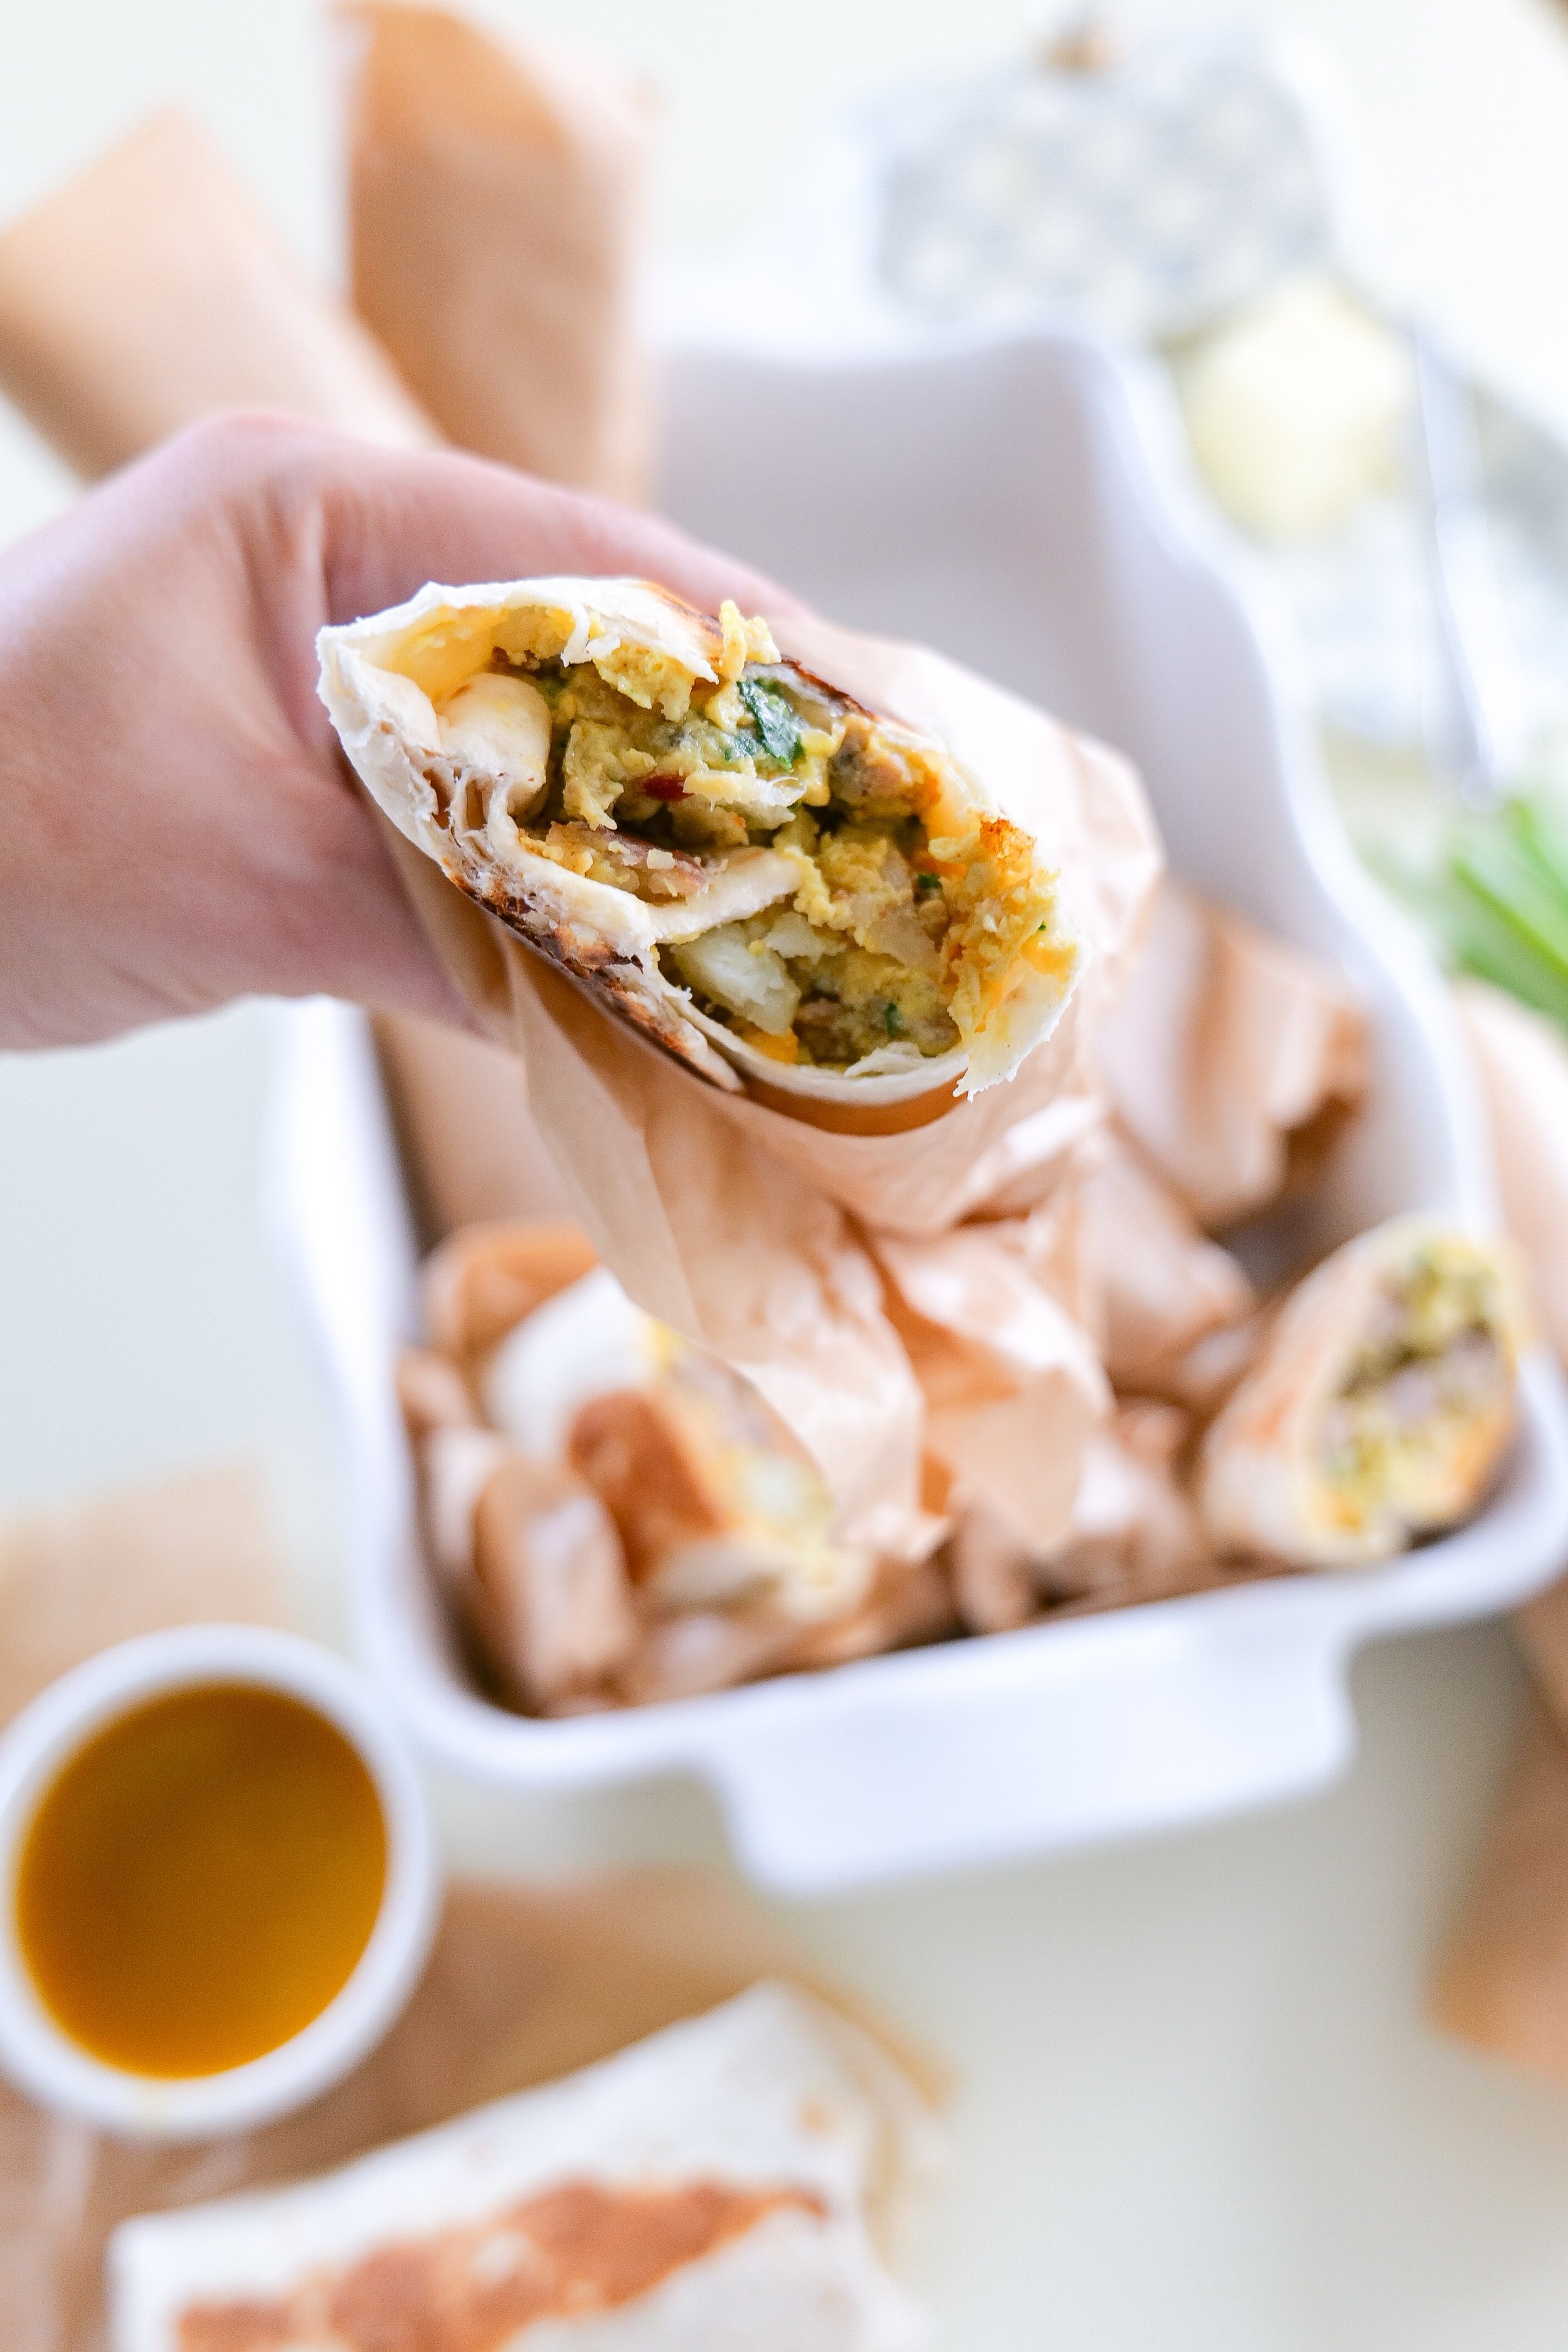
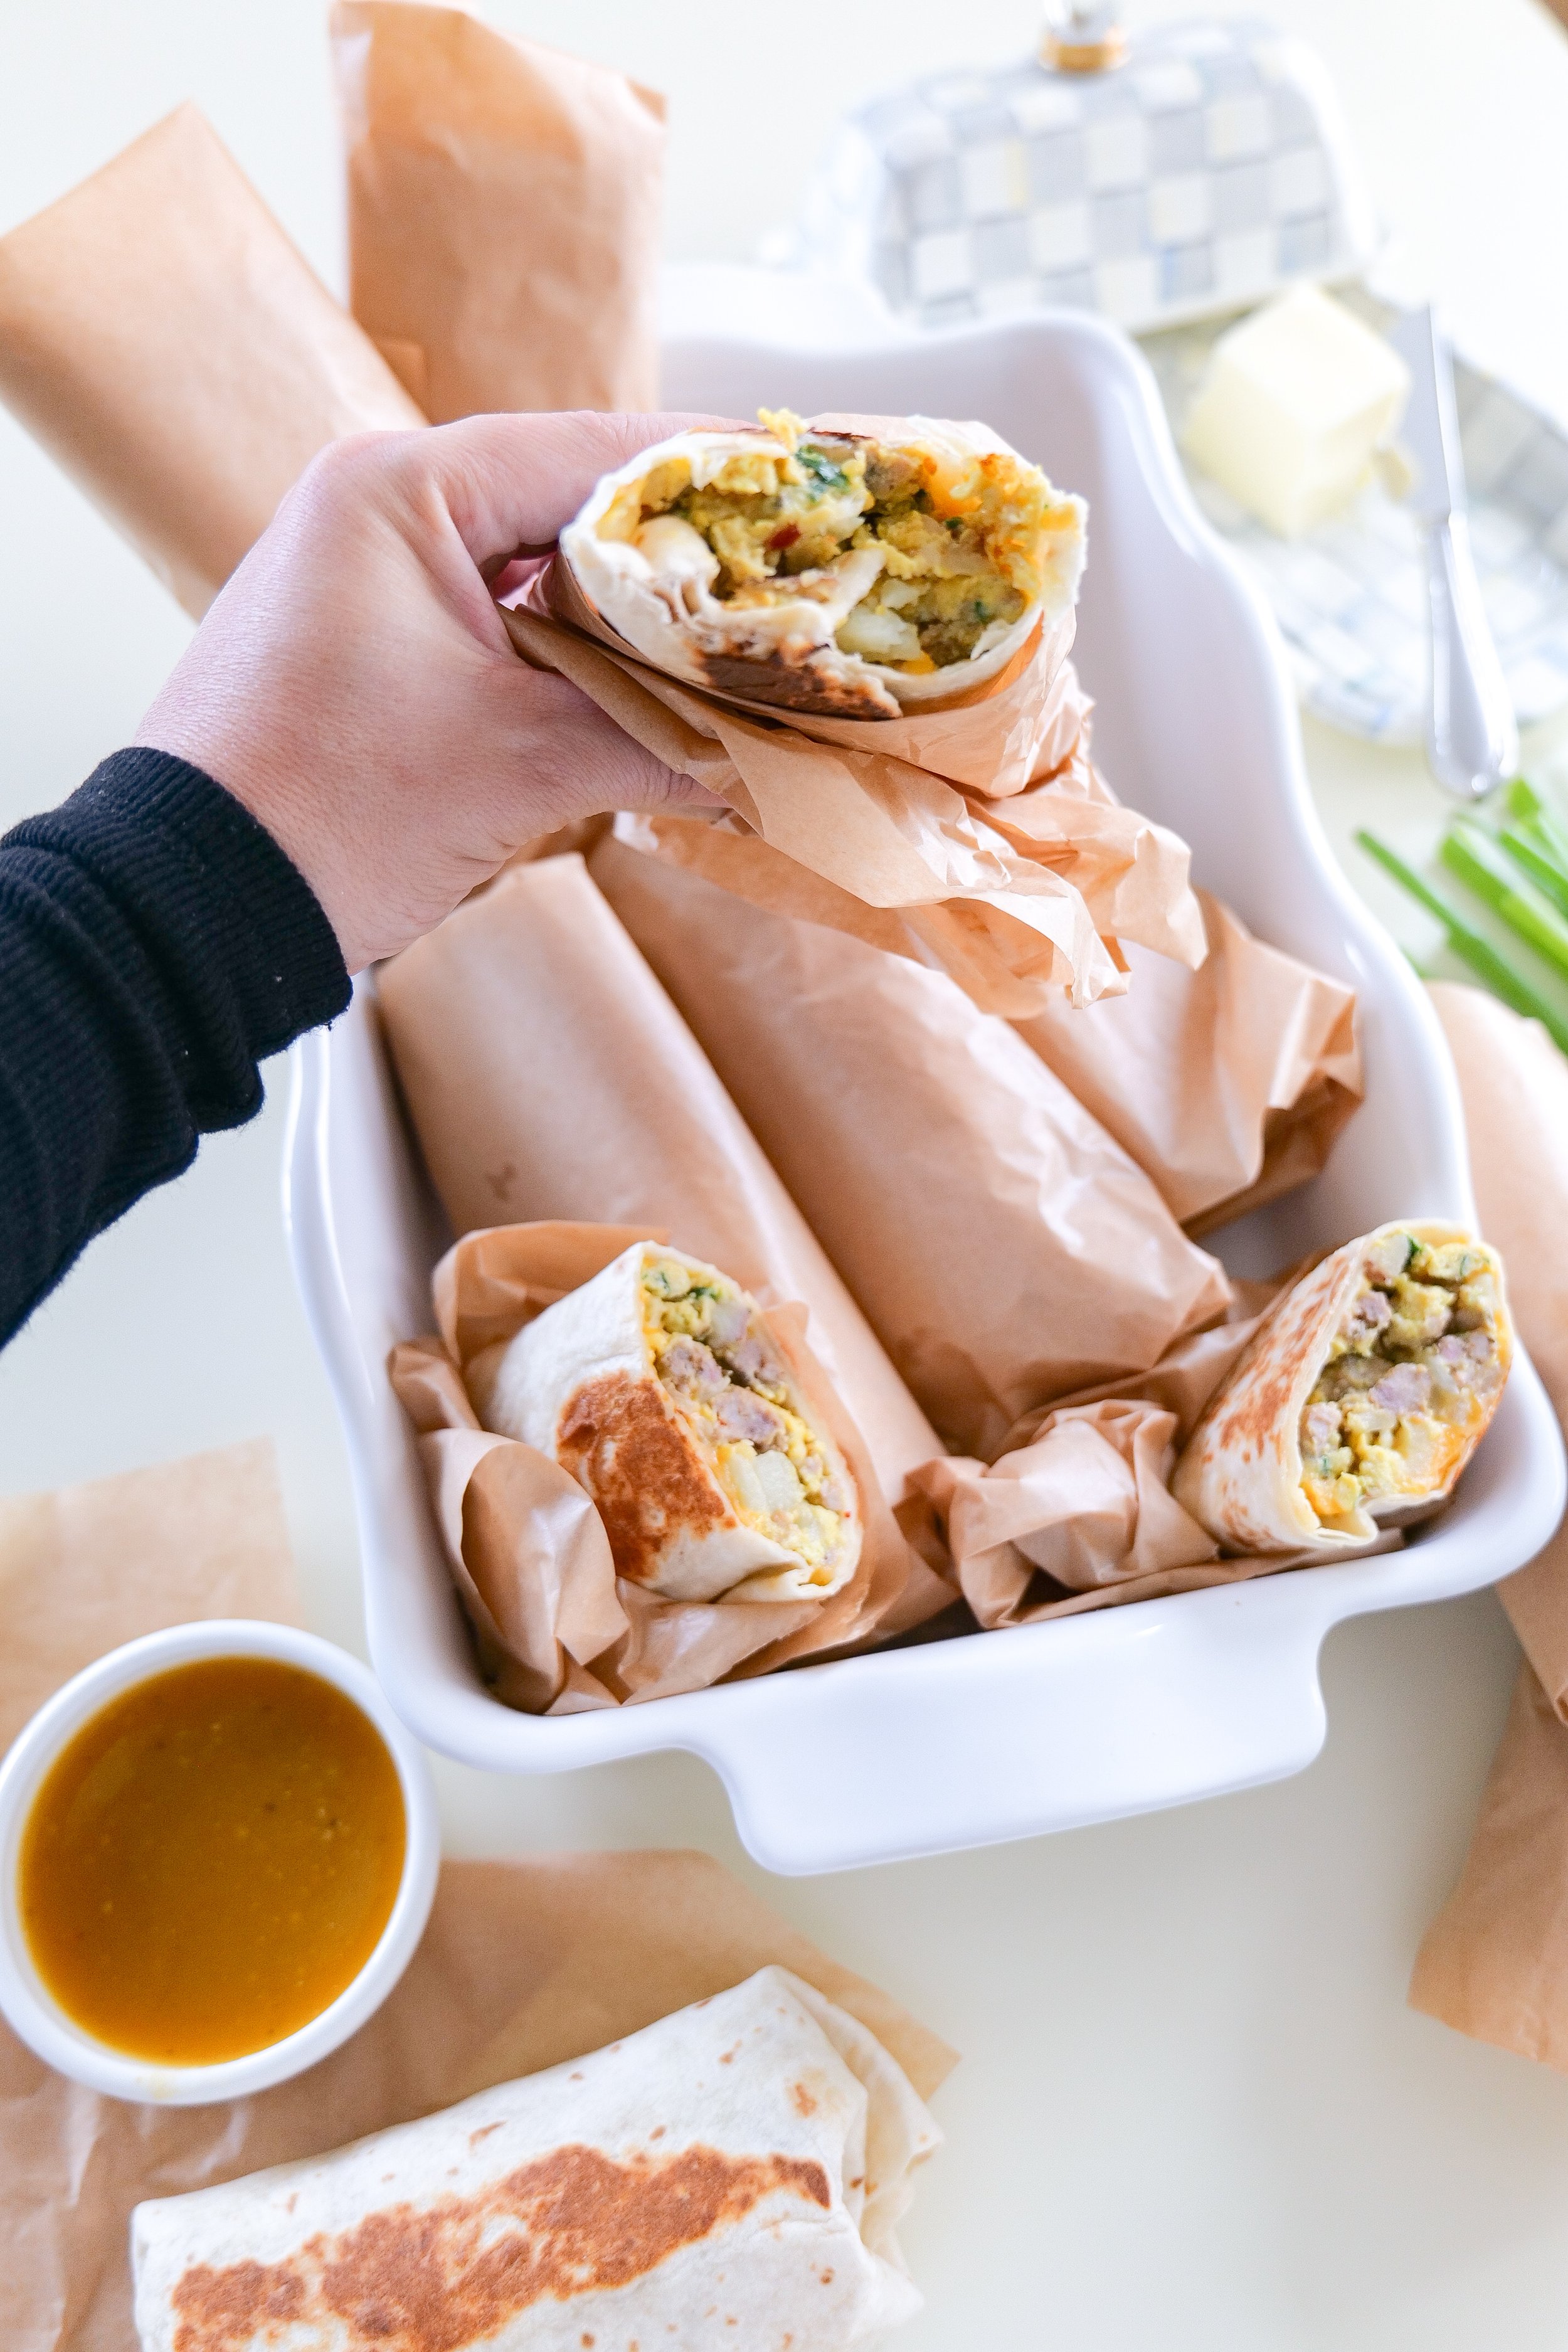
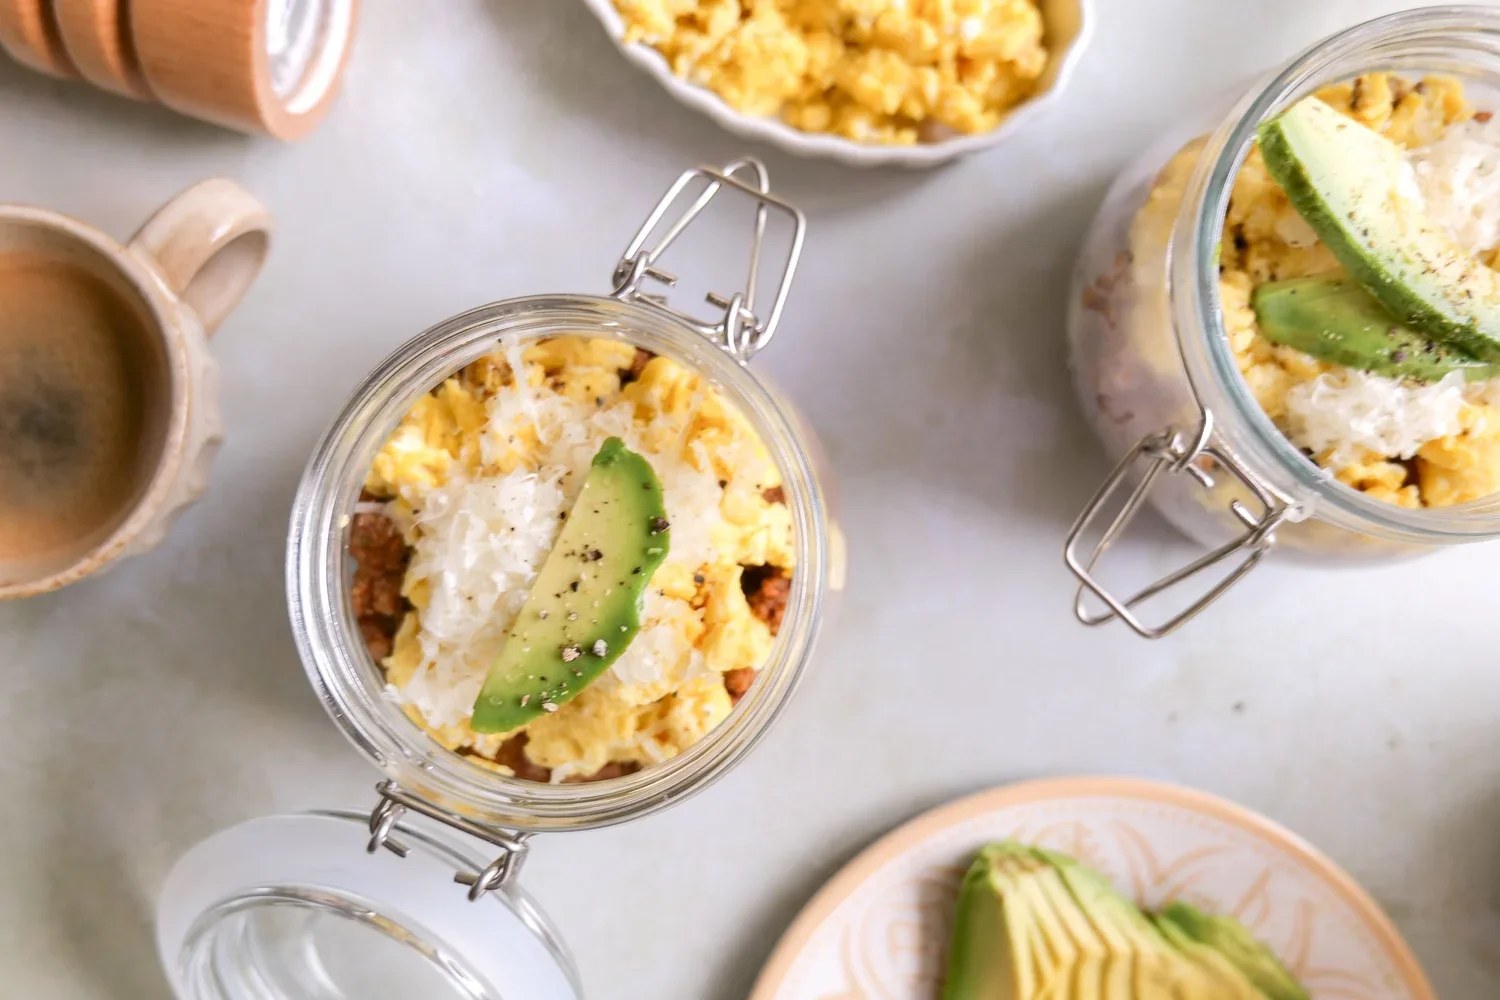
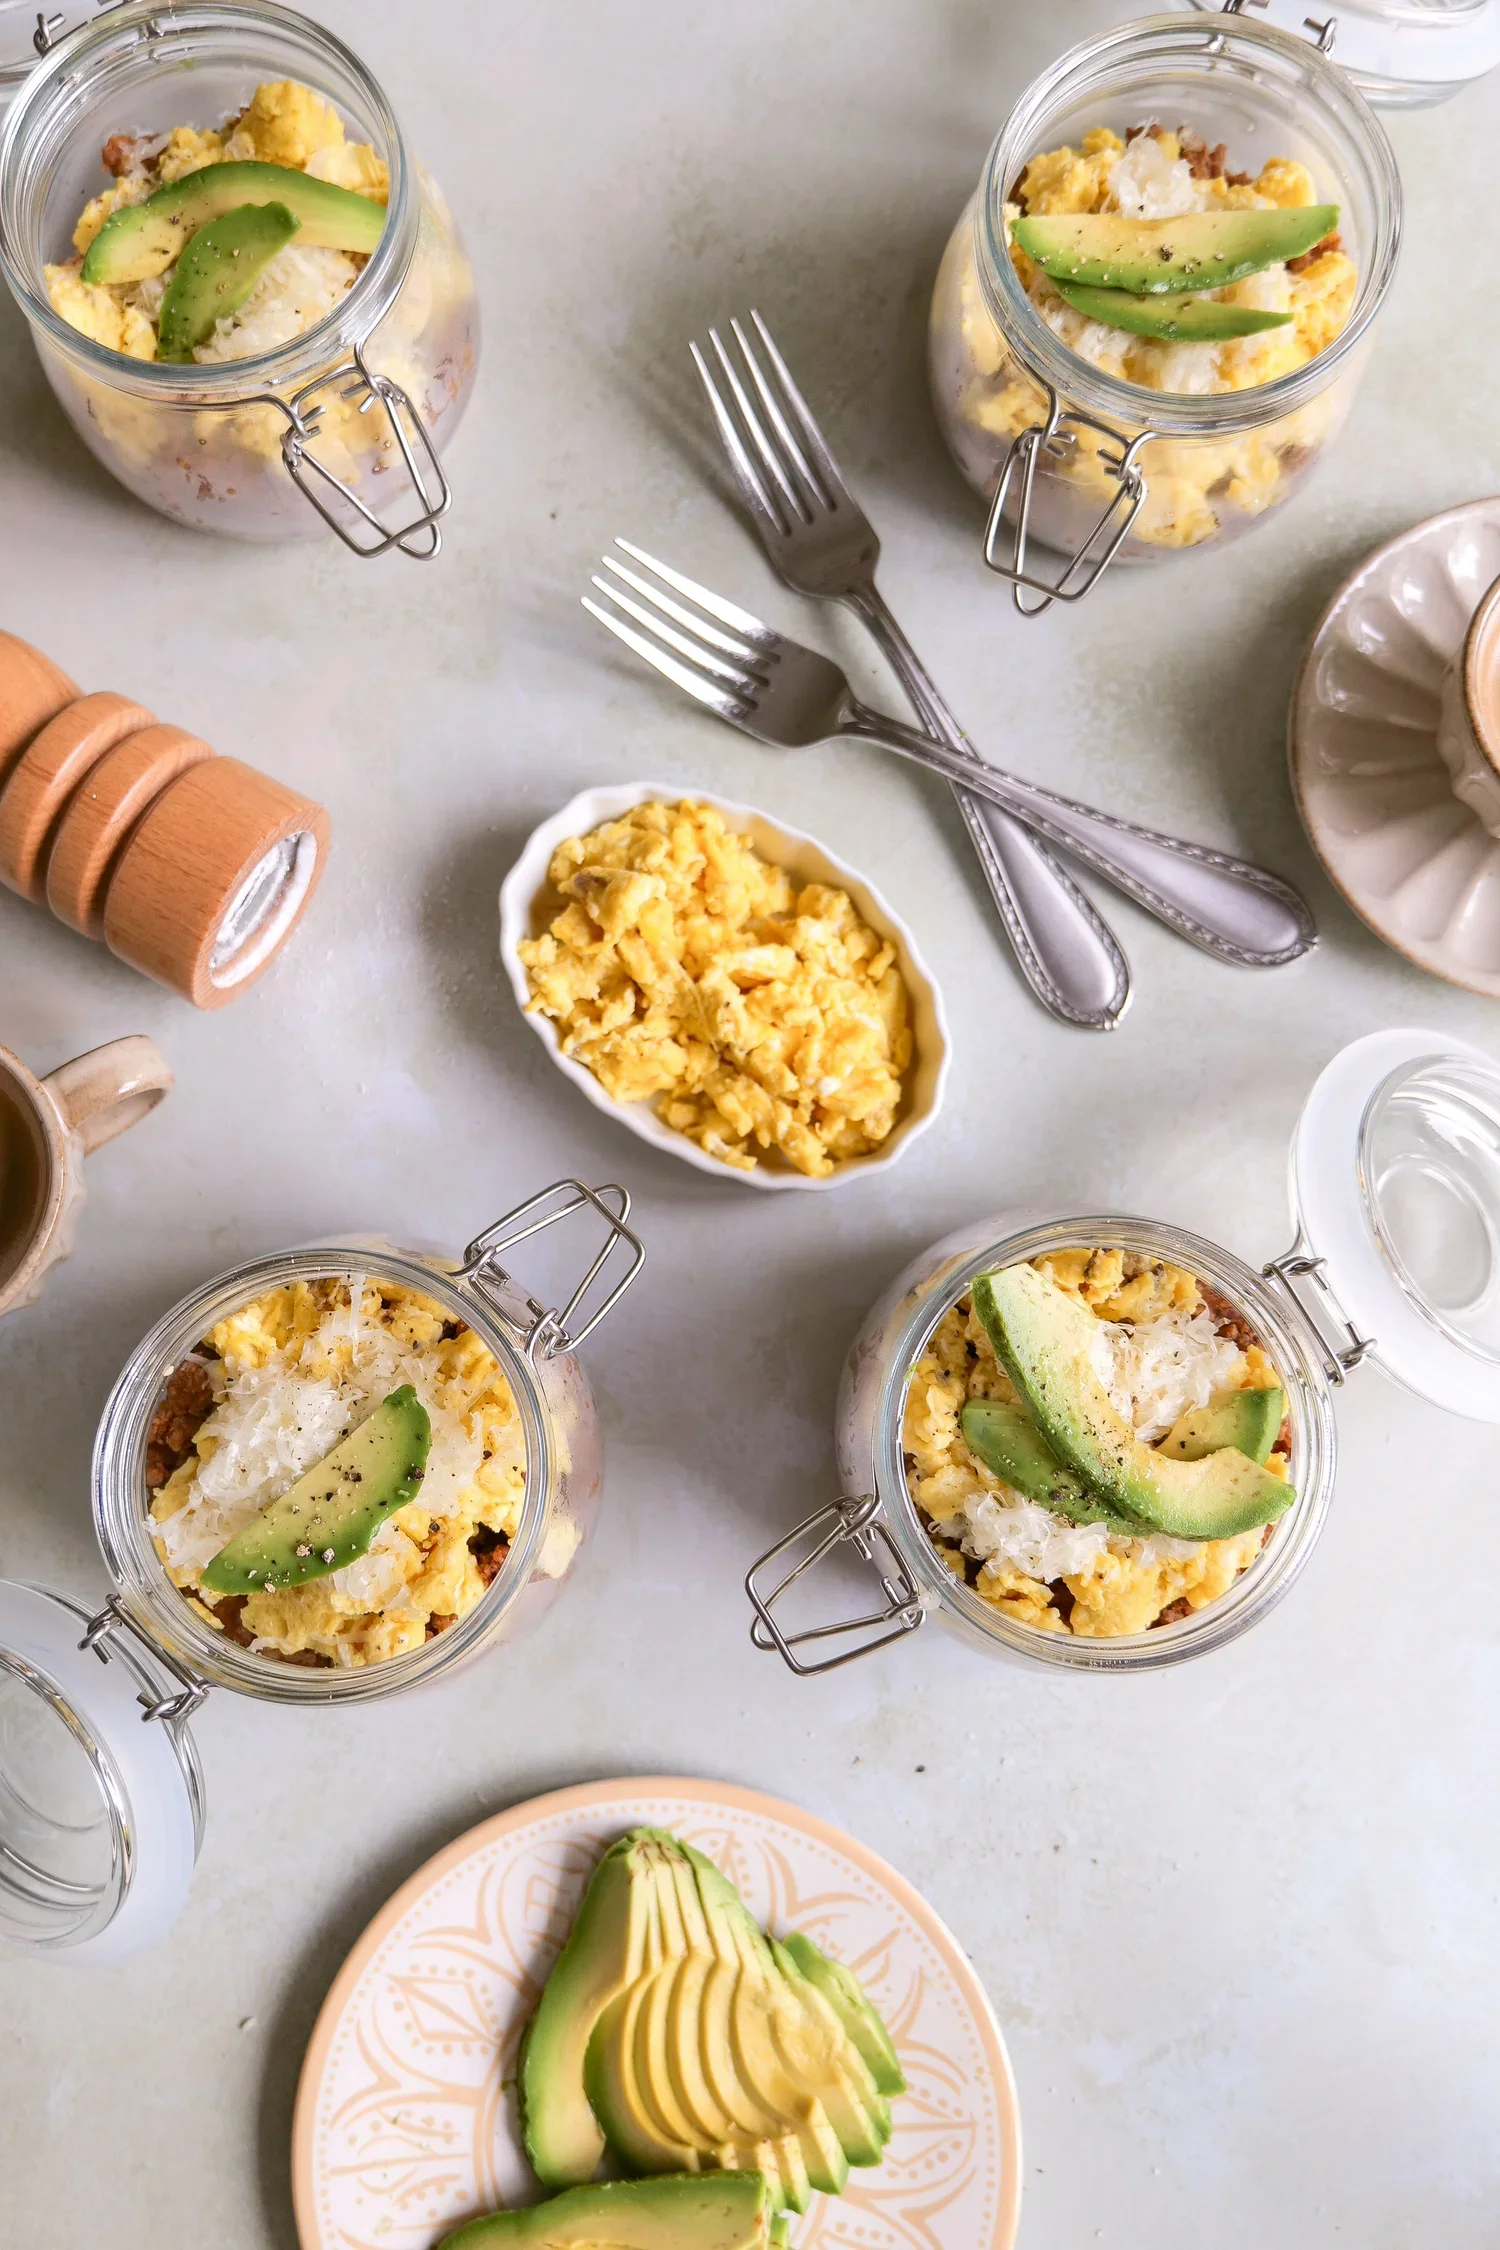
Sausage Spinach Potatoes & Egg Burritos
During my first and second pregnancies, preparing meals ahead of time was a lifesaver, and one of the staples that became a family favorite was the sausage, spinach, potatoes, and egg burritos. These burritos are not only delicious but also pack a punch with protein and nutrients, which are essential during the postpartum period. To make them, I sautéed some hearty breakfast sausage with fresh spinach until wilted, then added in diced potatoes and scrambled eggs to complete the filling. Once cooled, I wrapped them in tortillas, ensuring a balanced mix of carbs, fiber, and protein in each bite. I individually wrapped each burrito in parchment paper and stored them in Ziplock bags in the freezer, making it easy to grab and reheat on those busy early days when cooking from scratch wasn't an option. These burritos became an easy go-to breakfast, lunch, or snack. These freezer-friendly burritos will surely be a hit and a huge time-saver.
The Full Recipe: Start Your Day Right: Delicious and Time-Saving Freezer Meal Prep Breakfast Burritos for Busy Mornings!


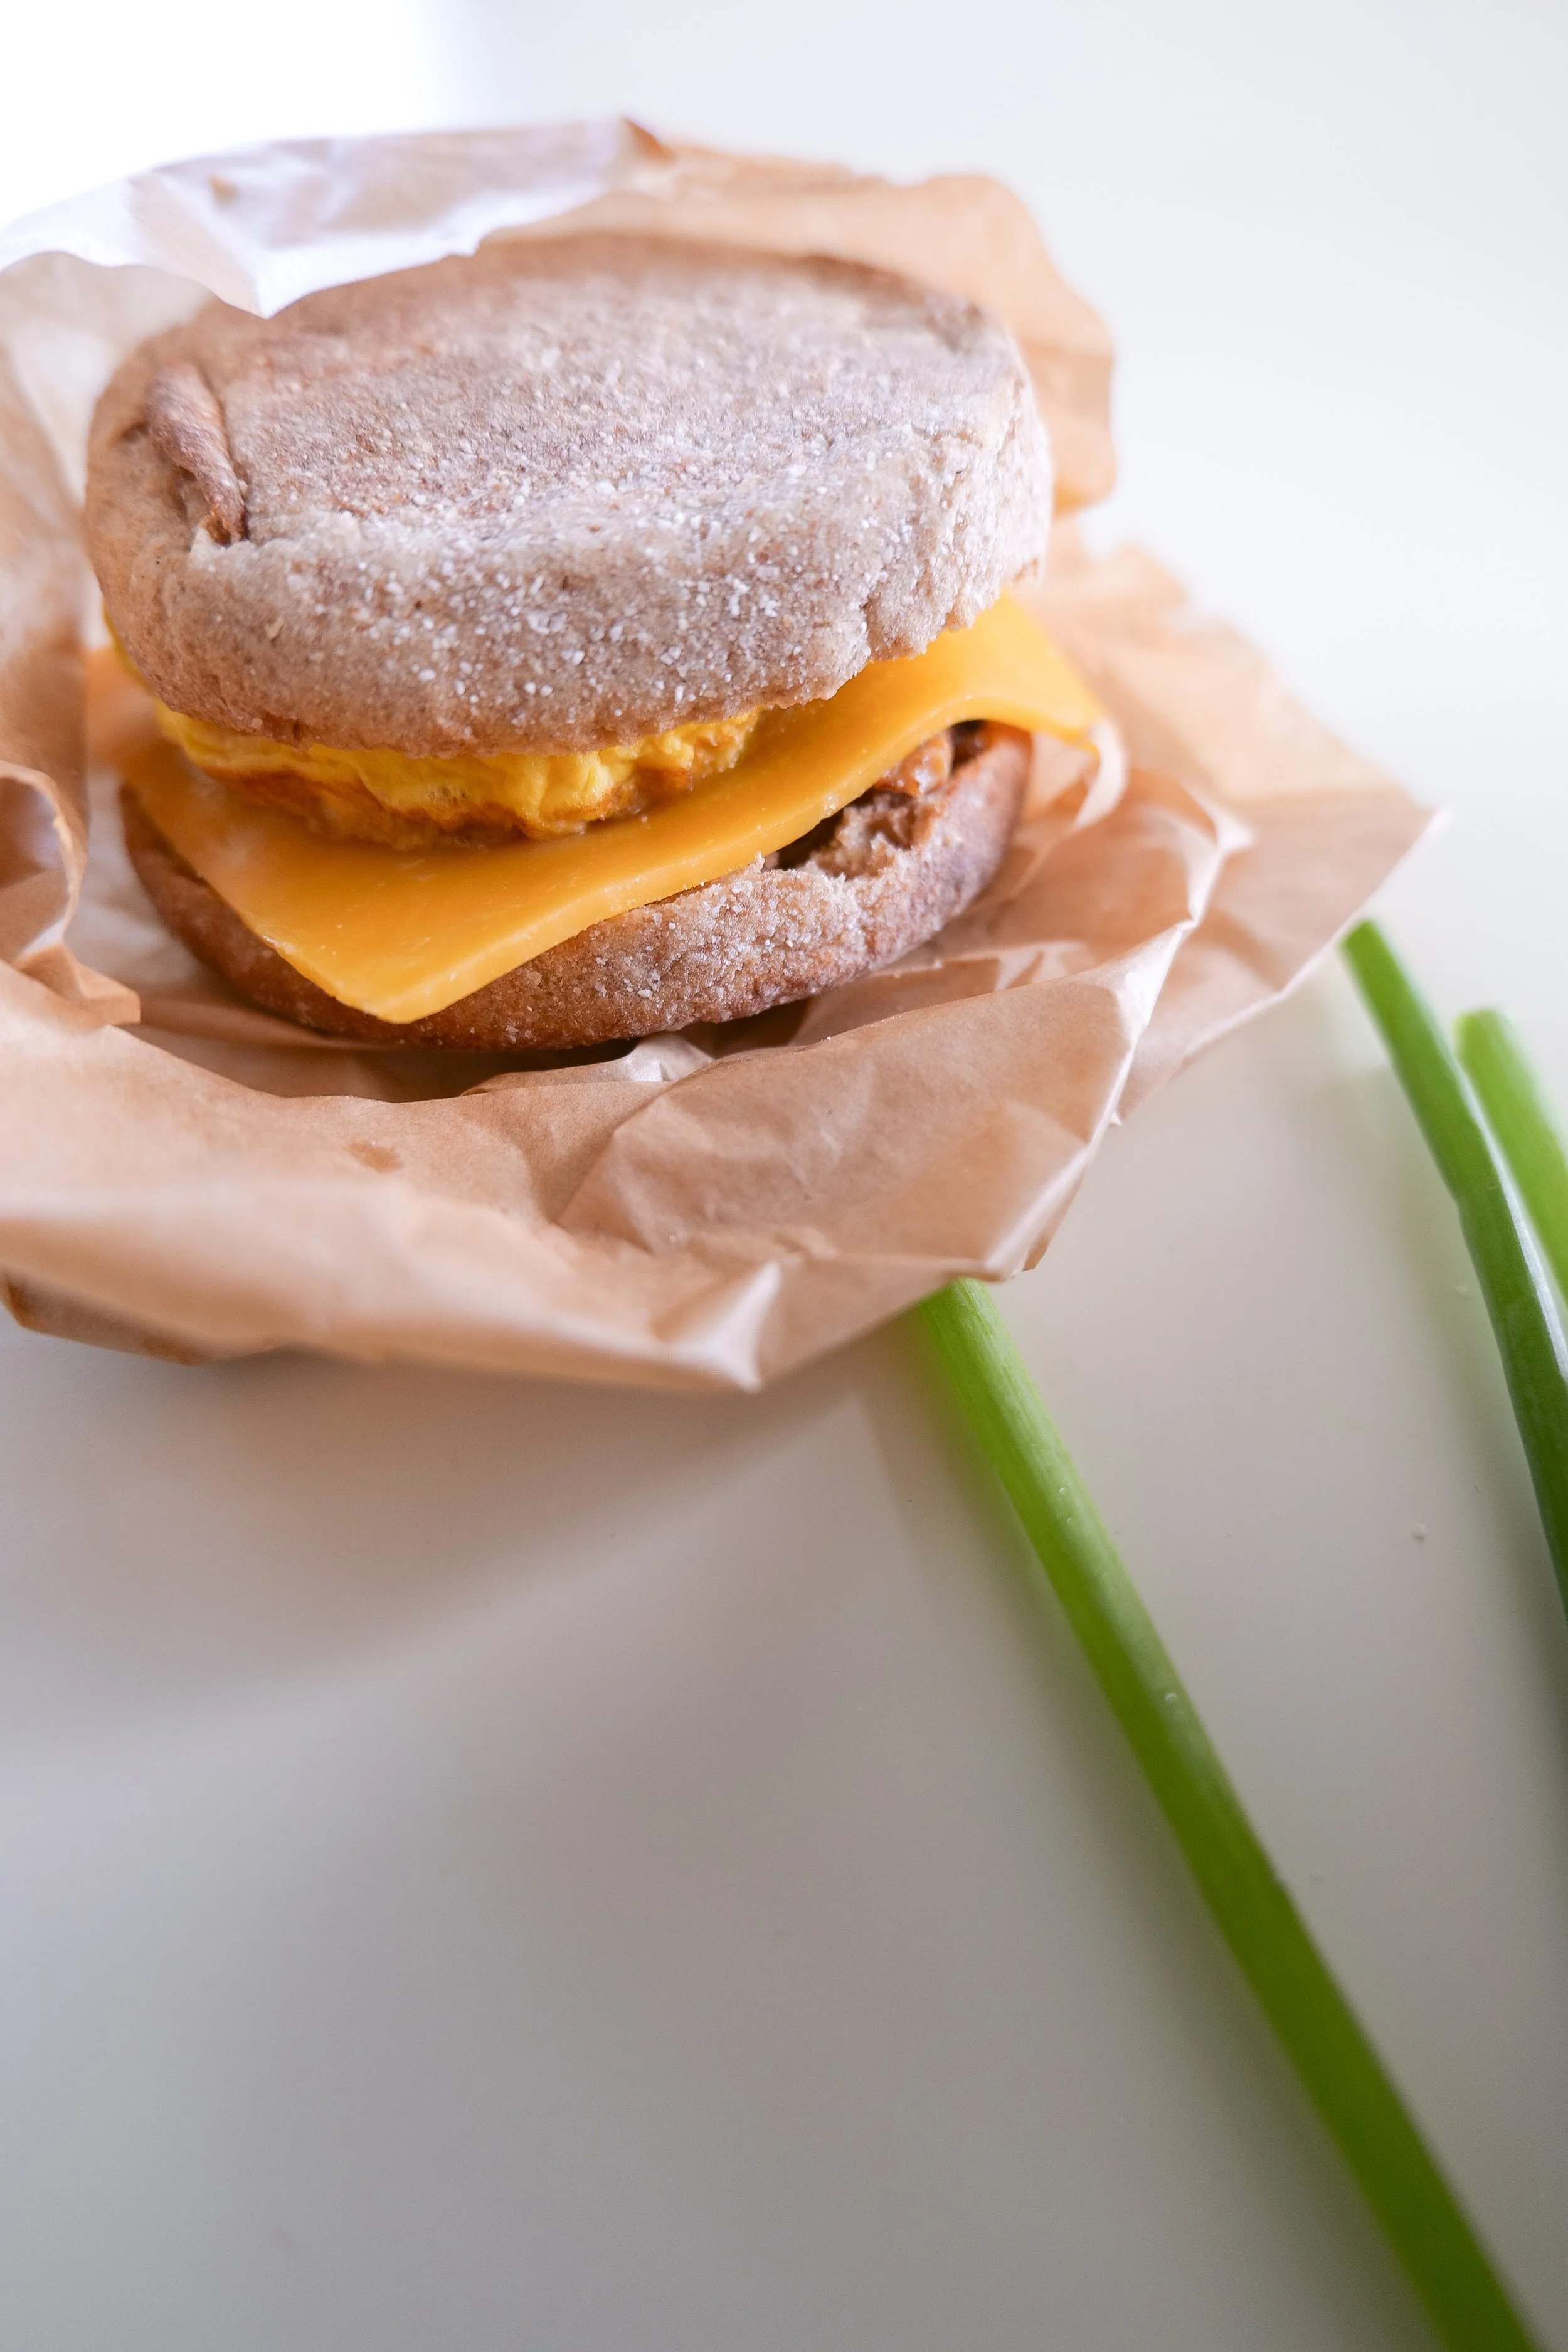
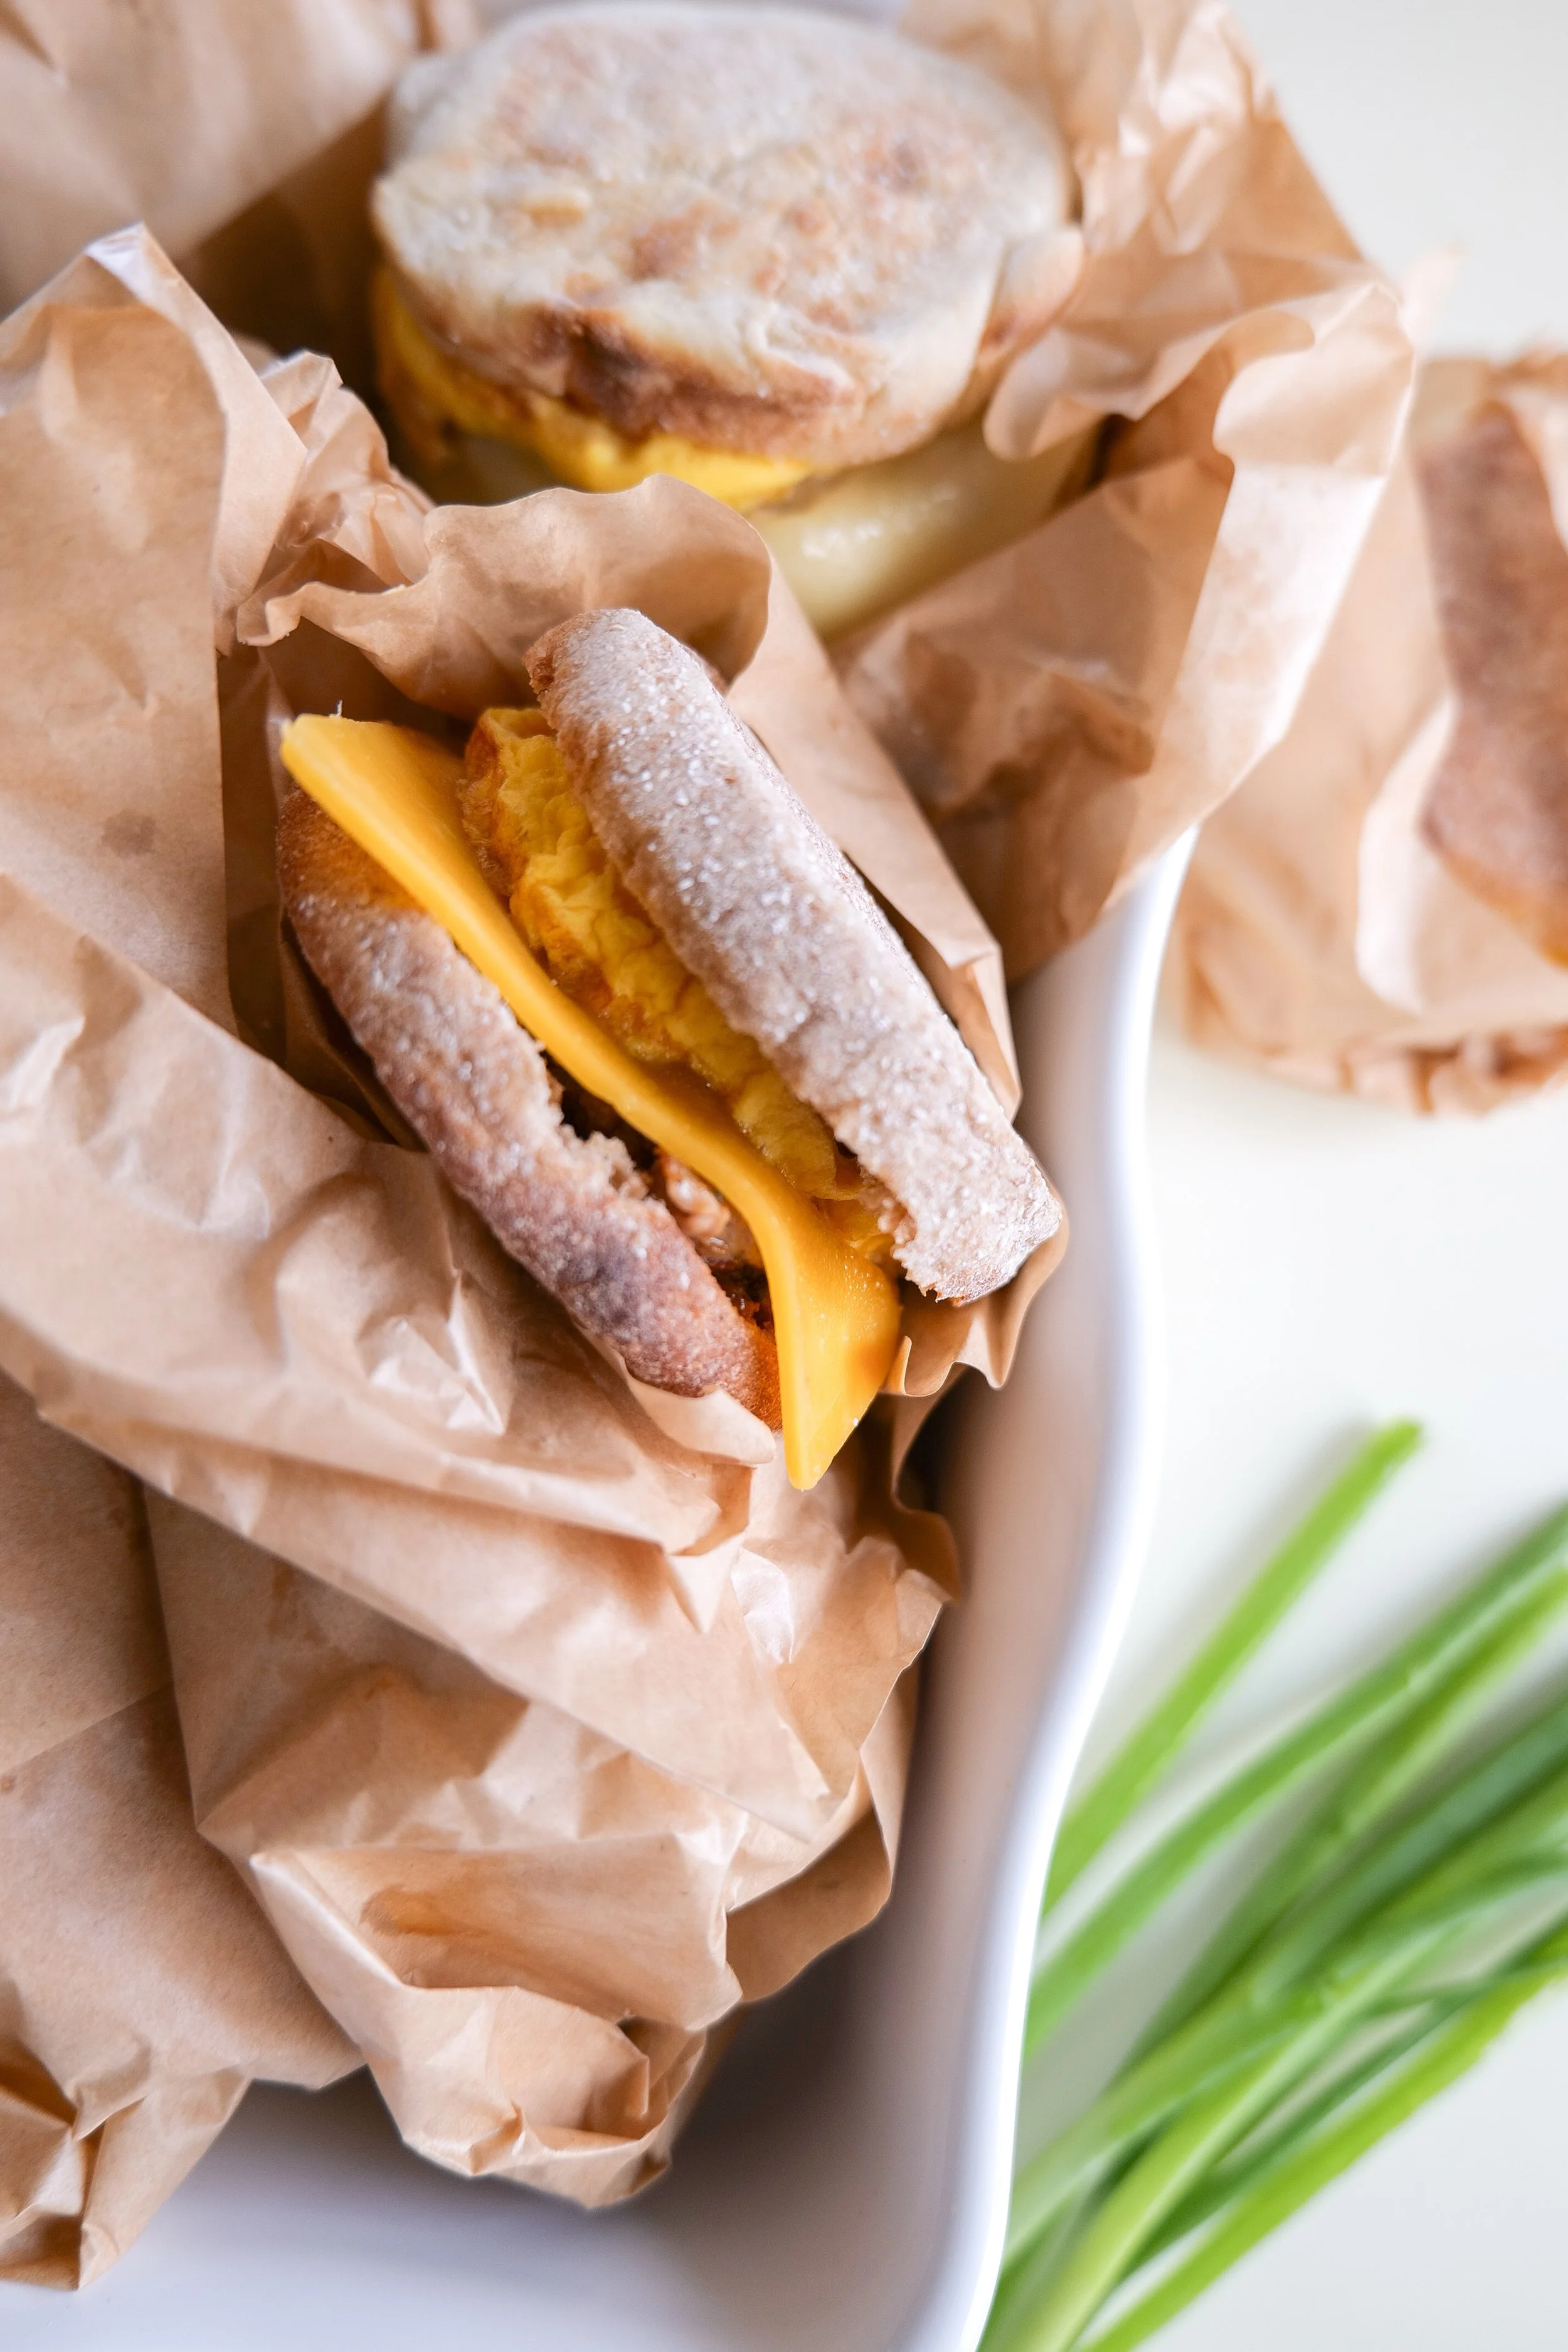
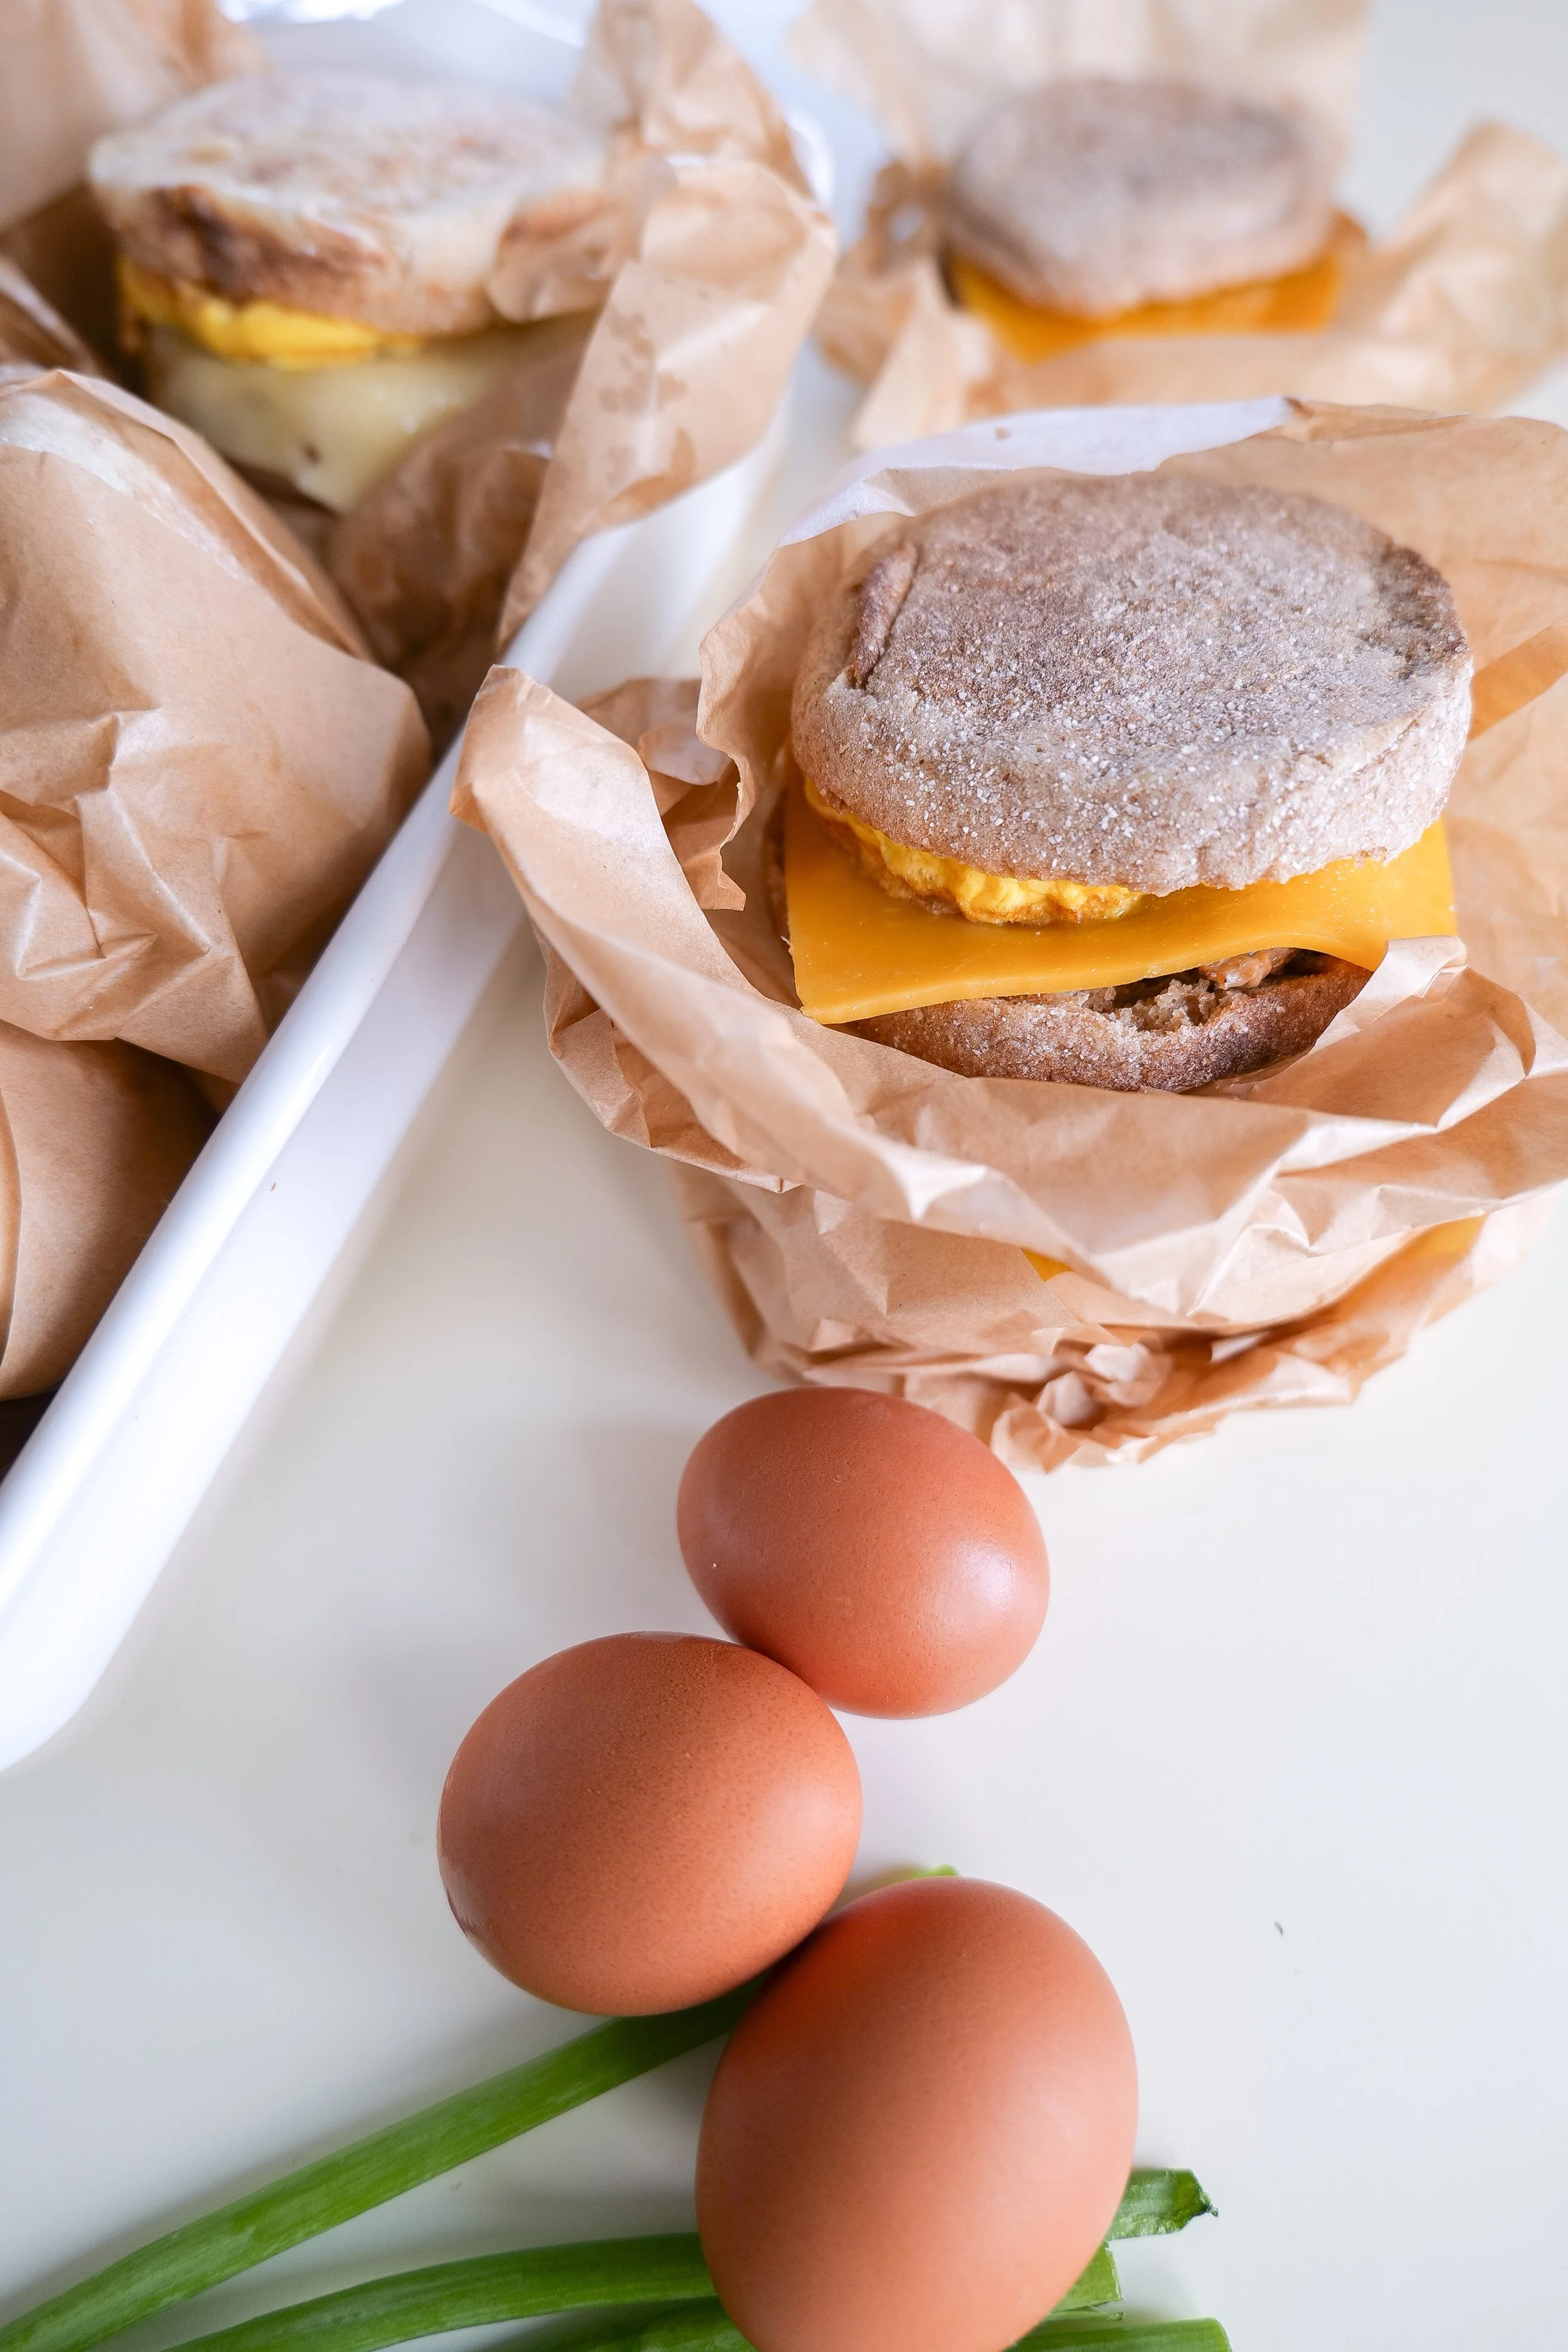
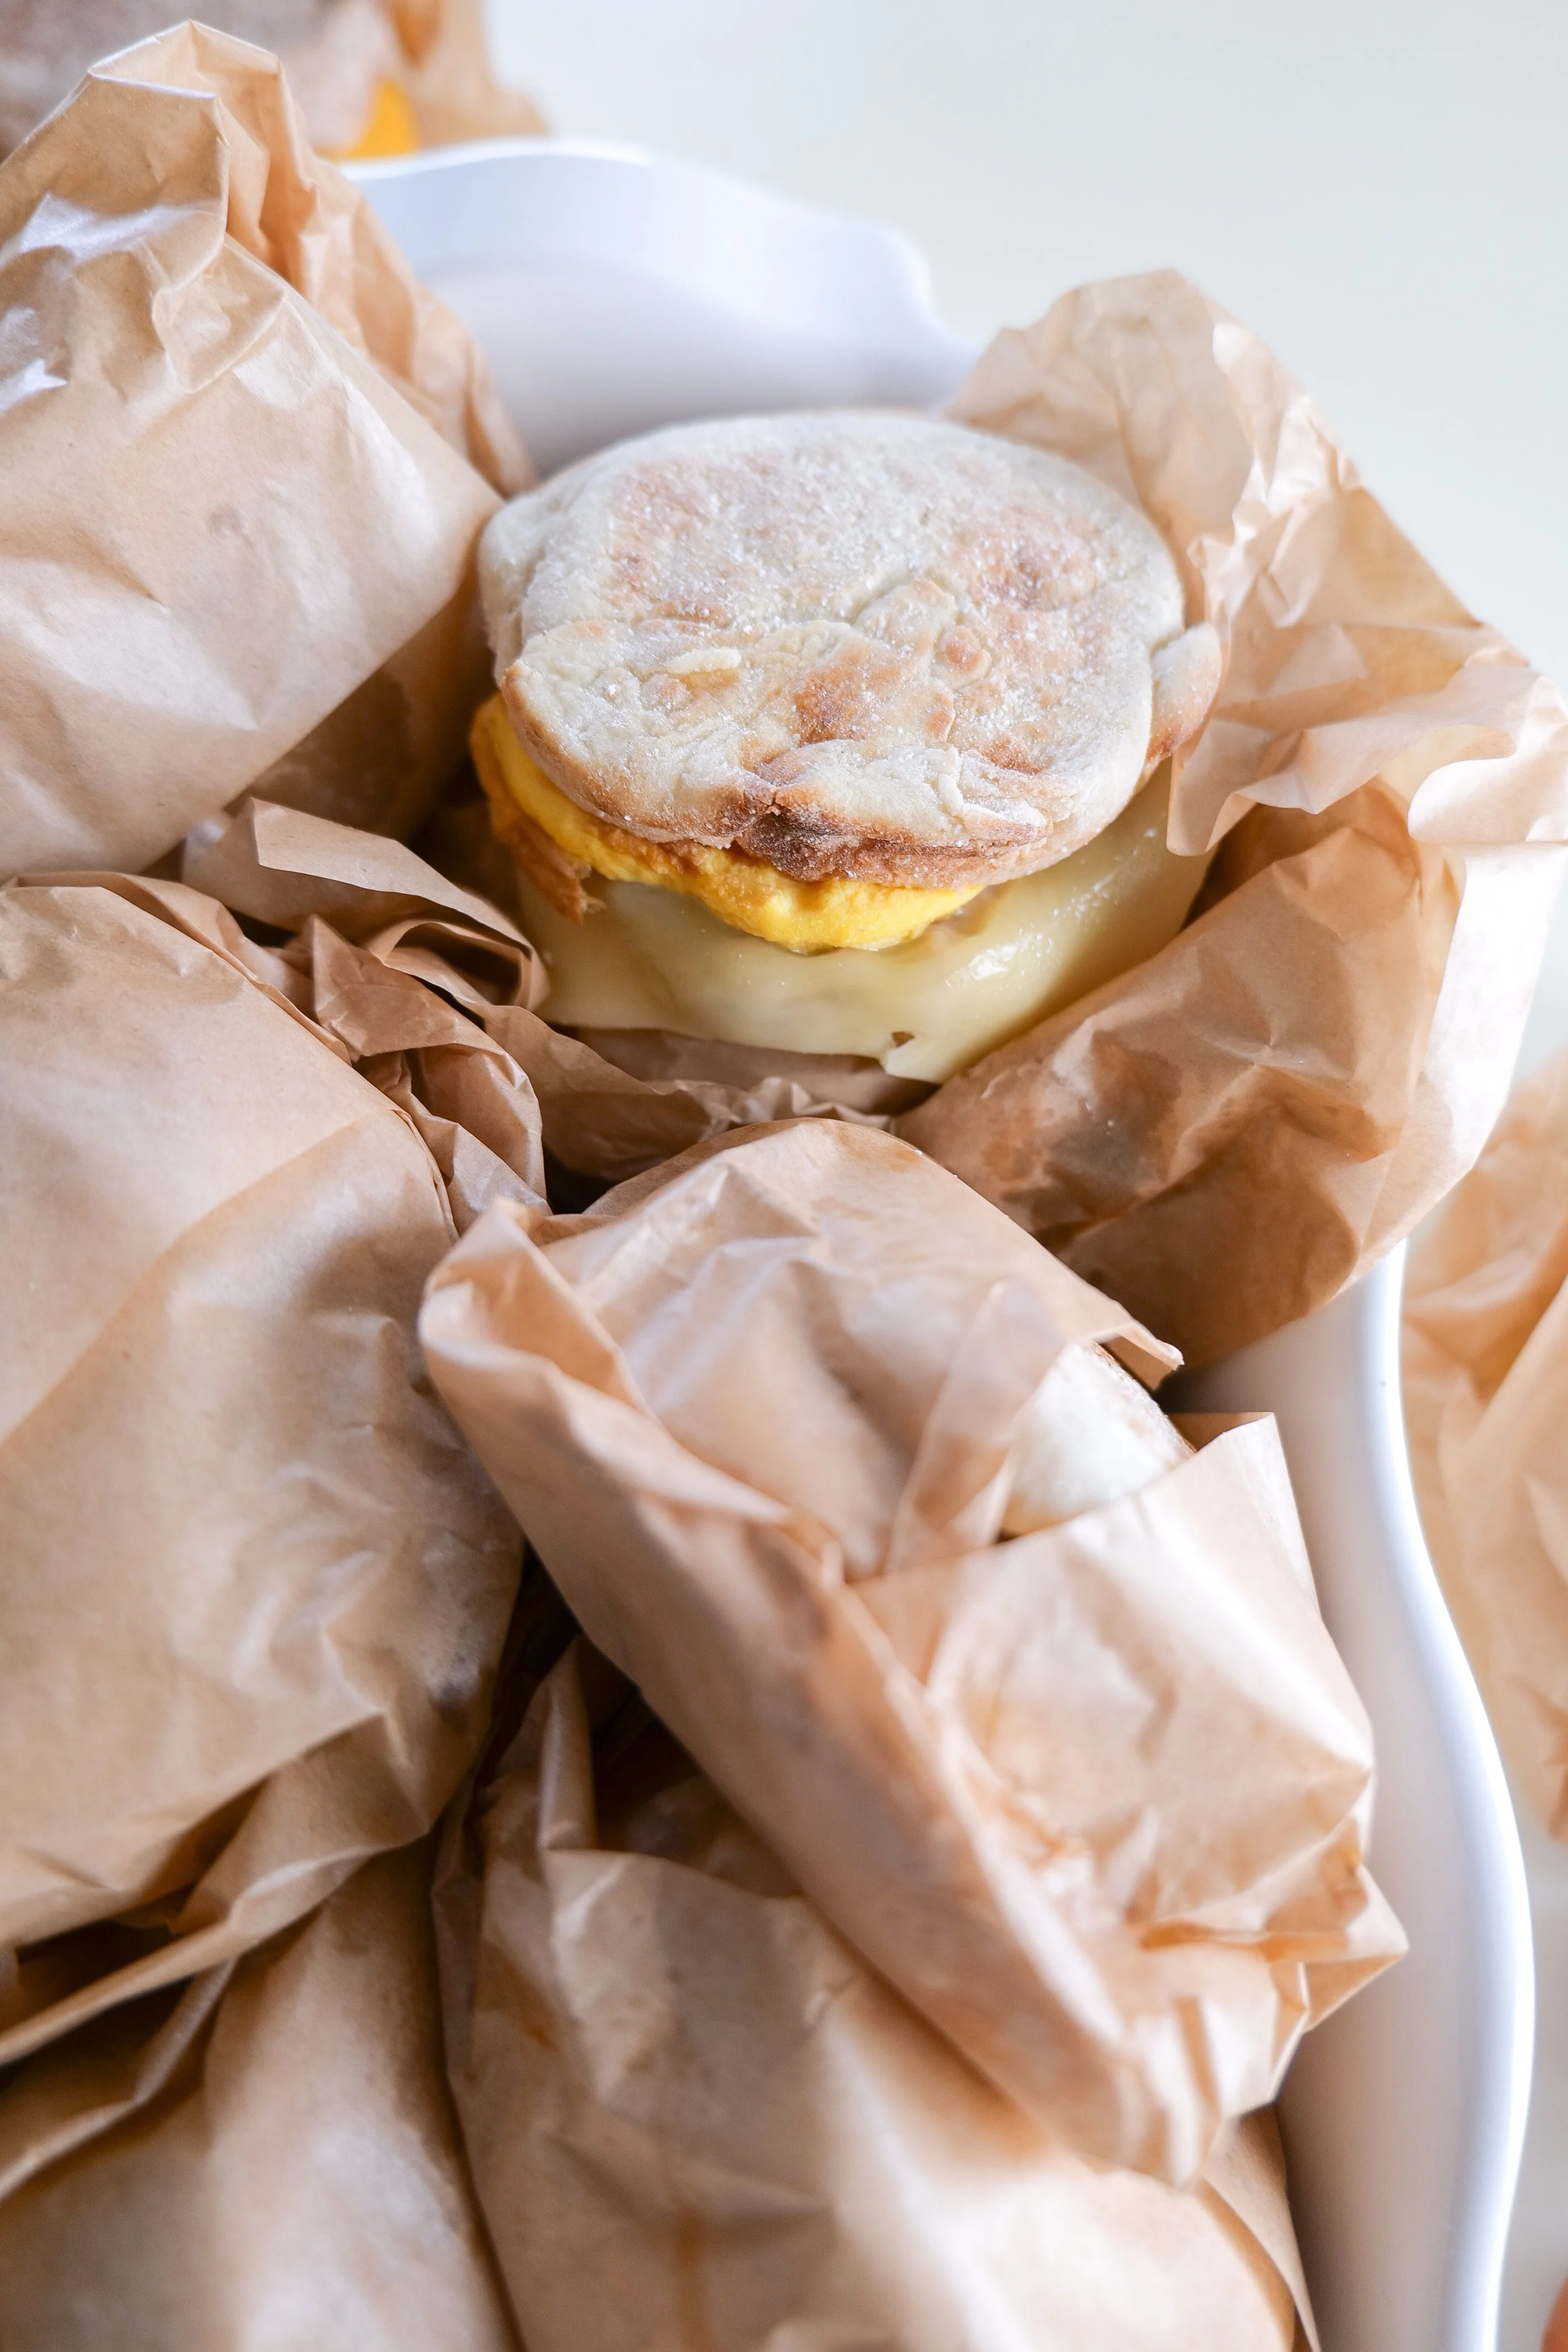
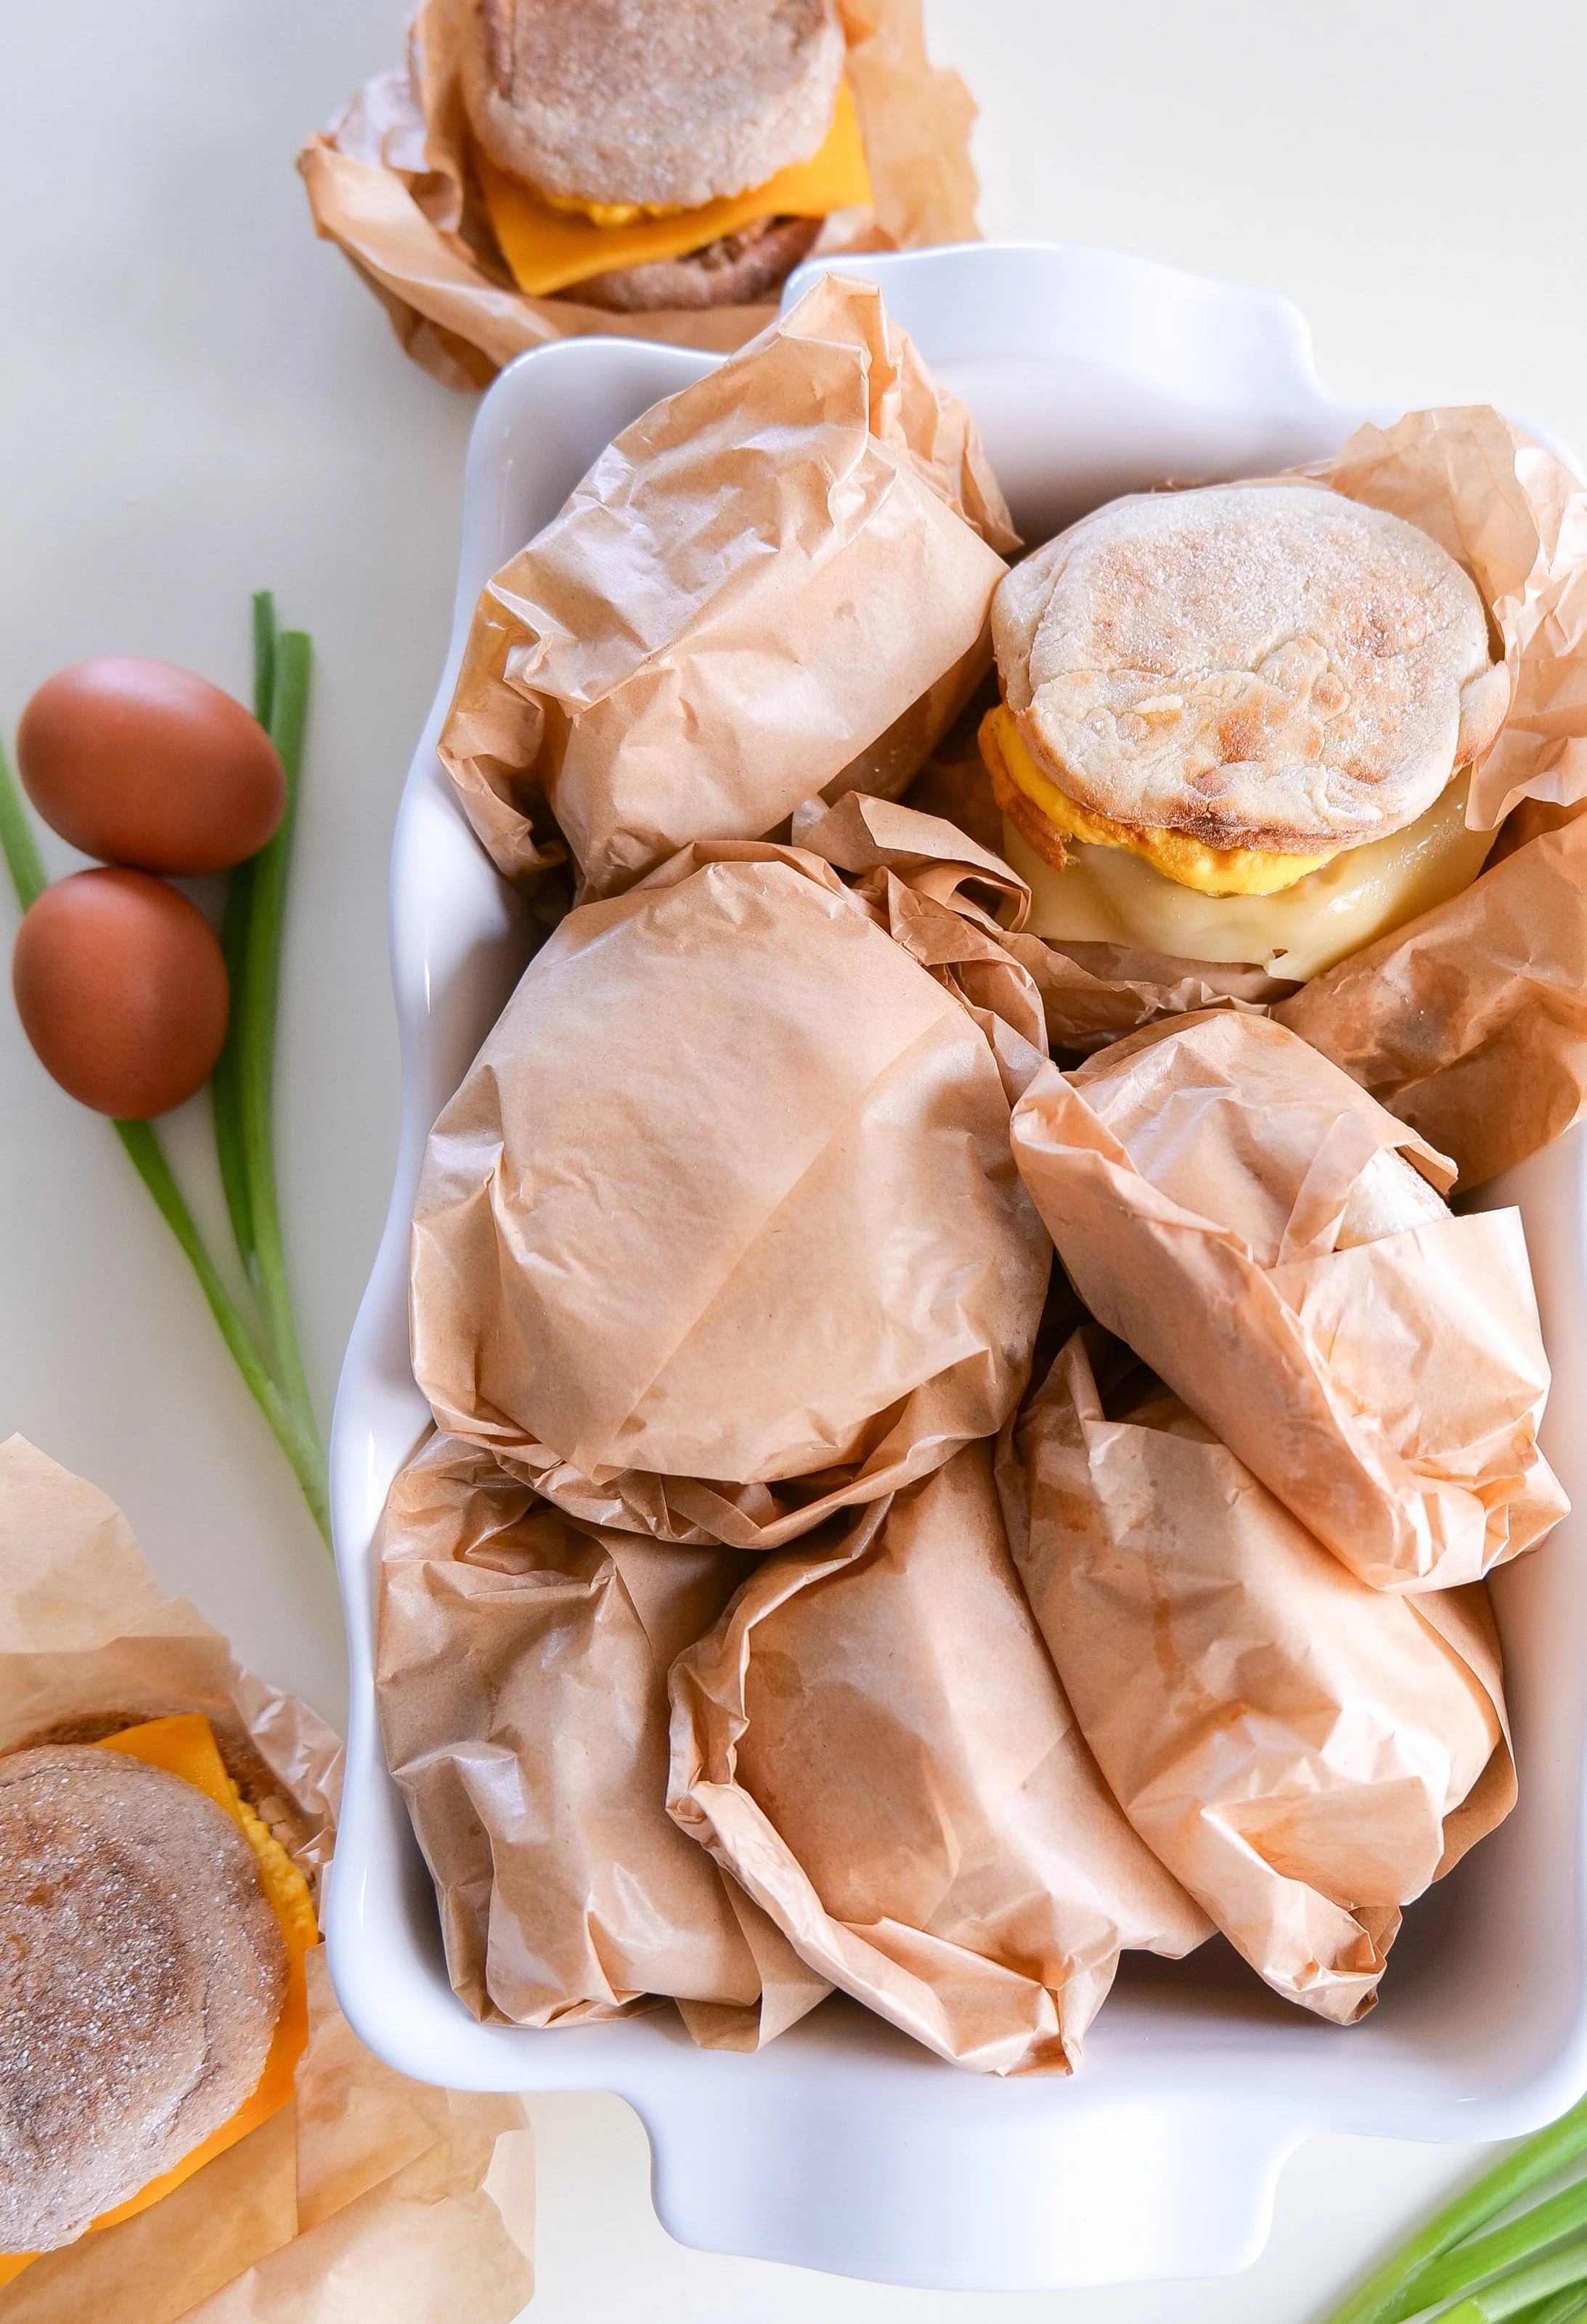
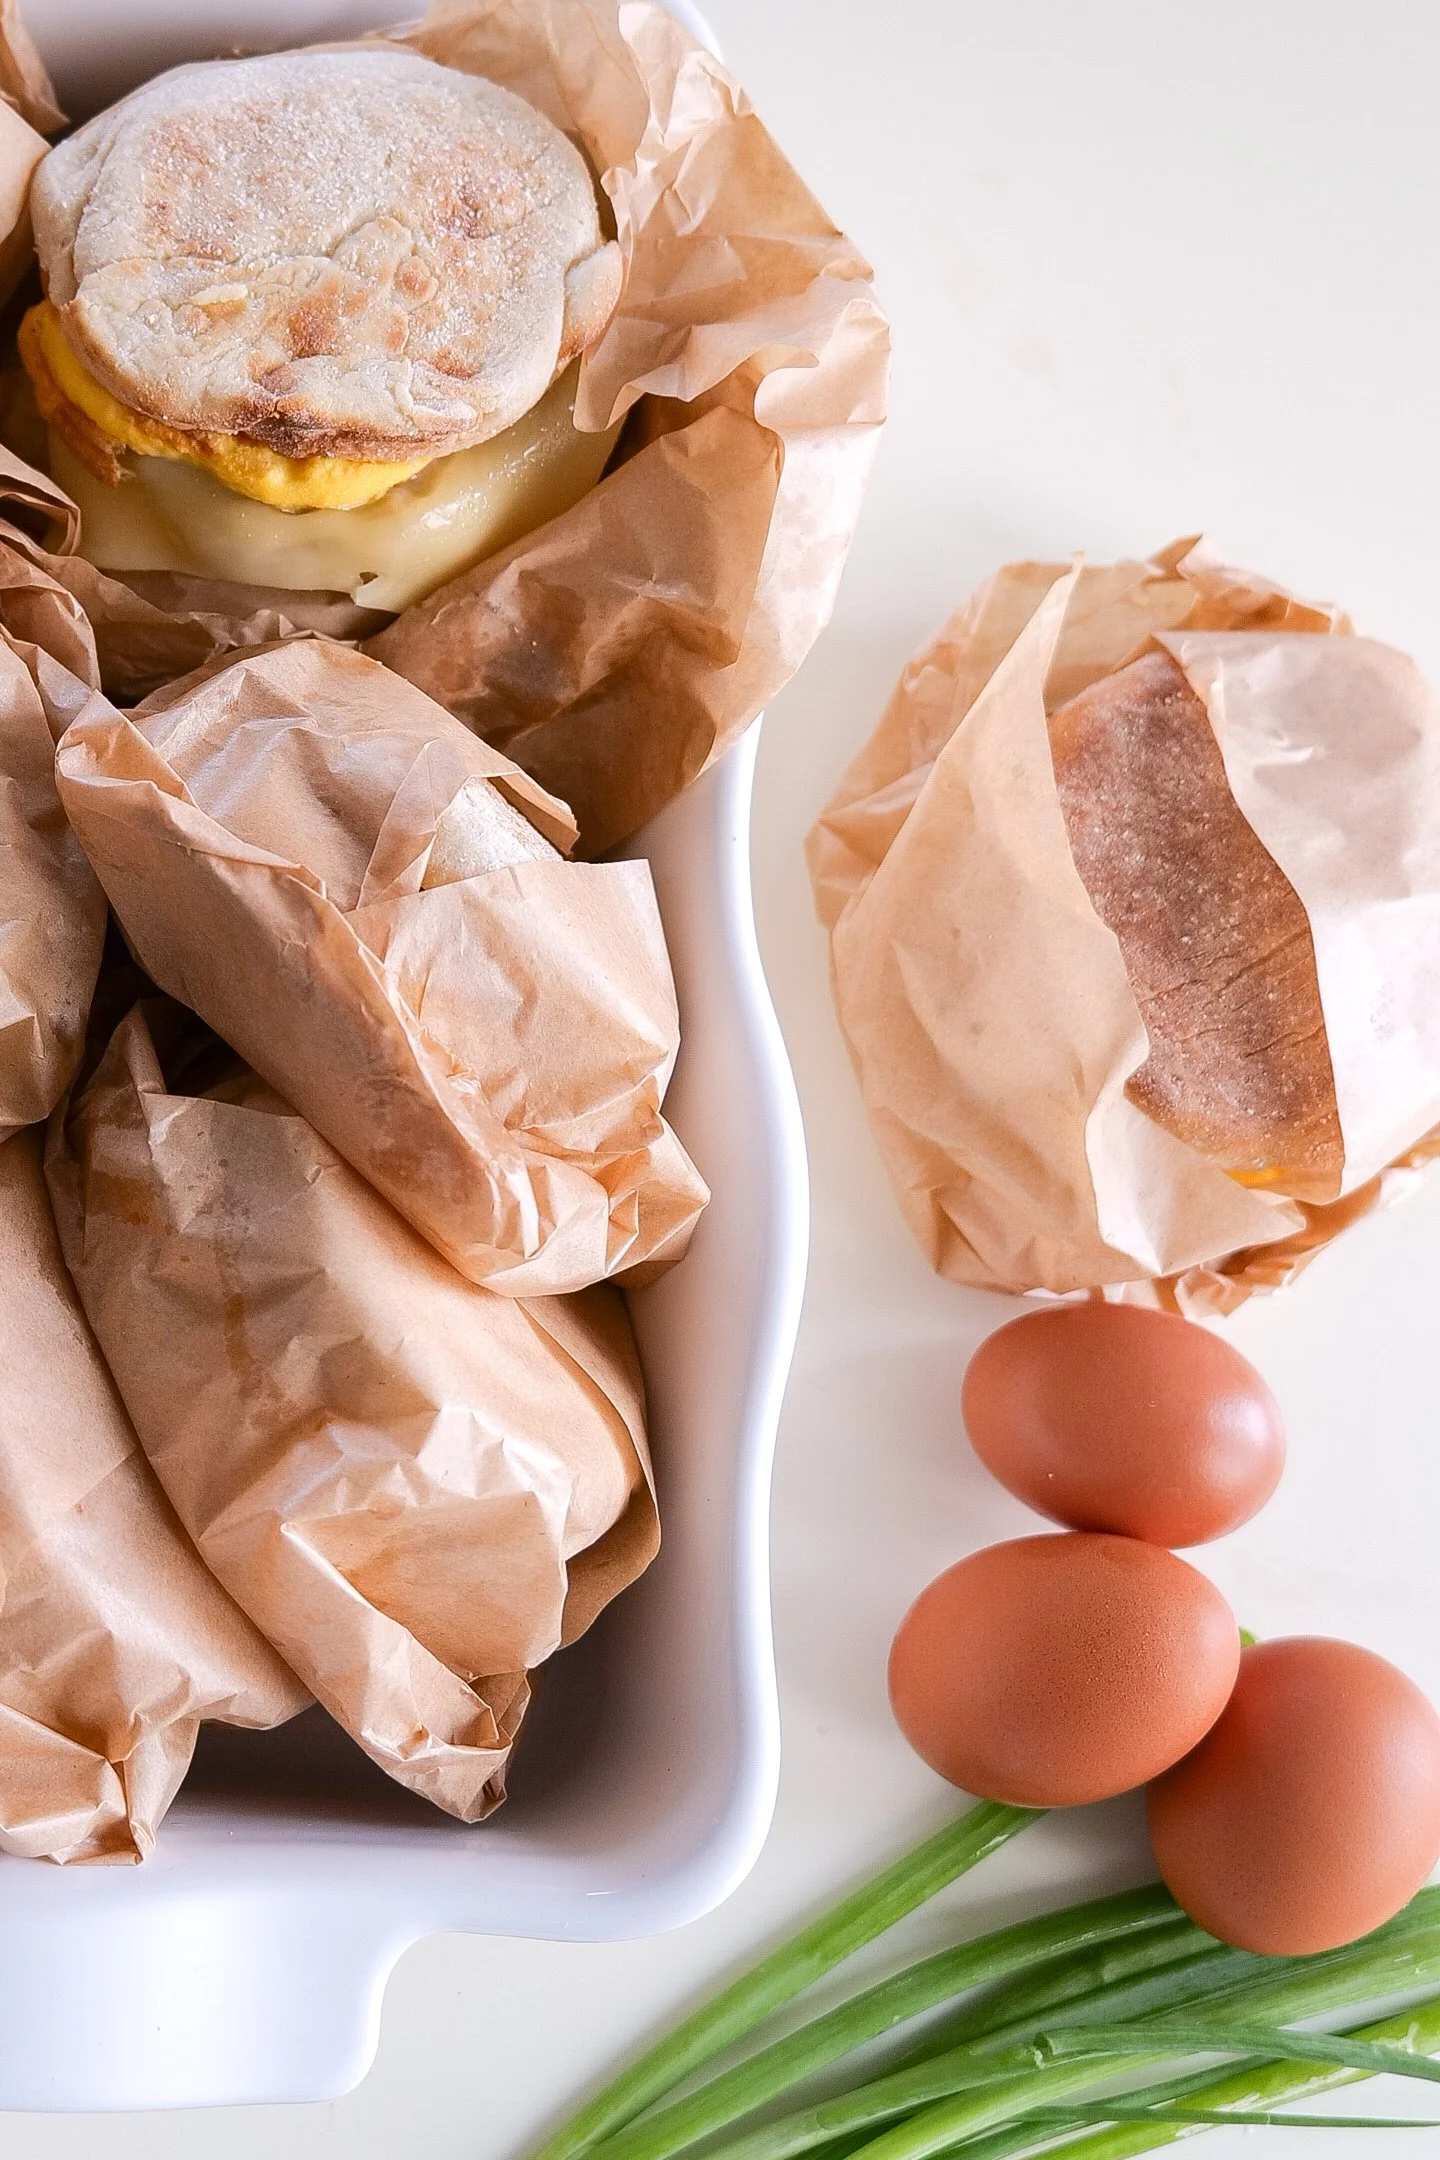
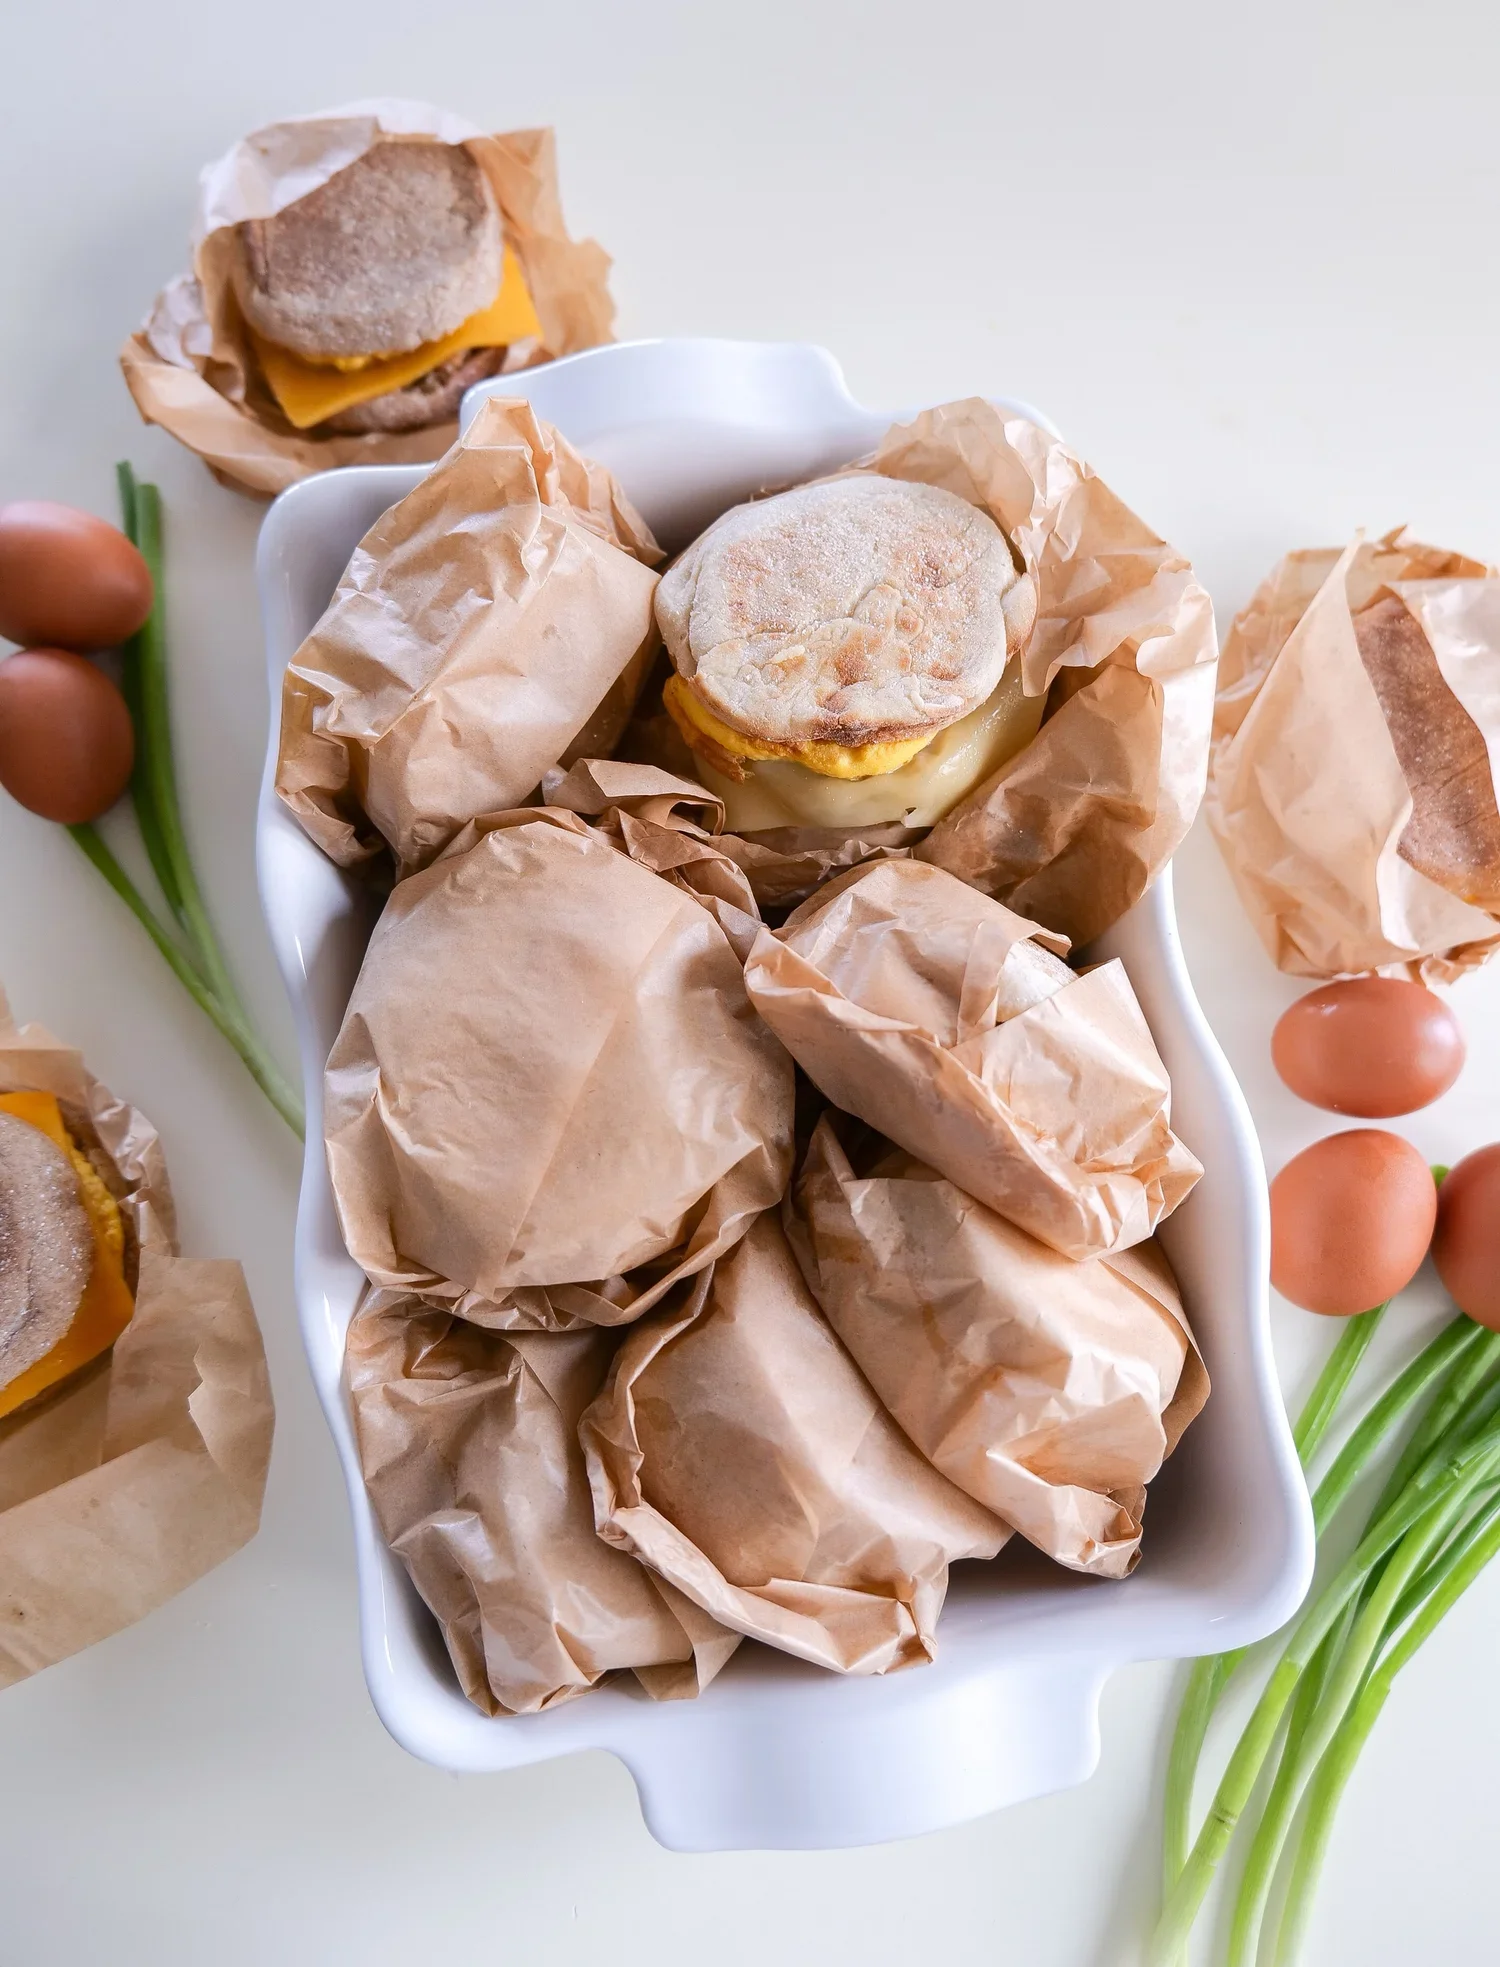
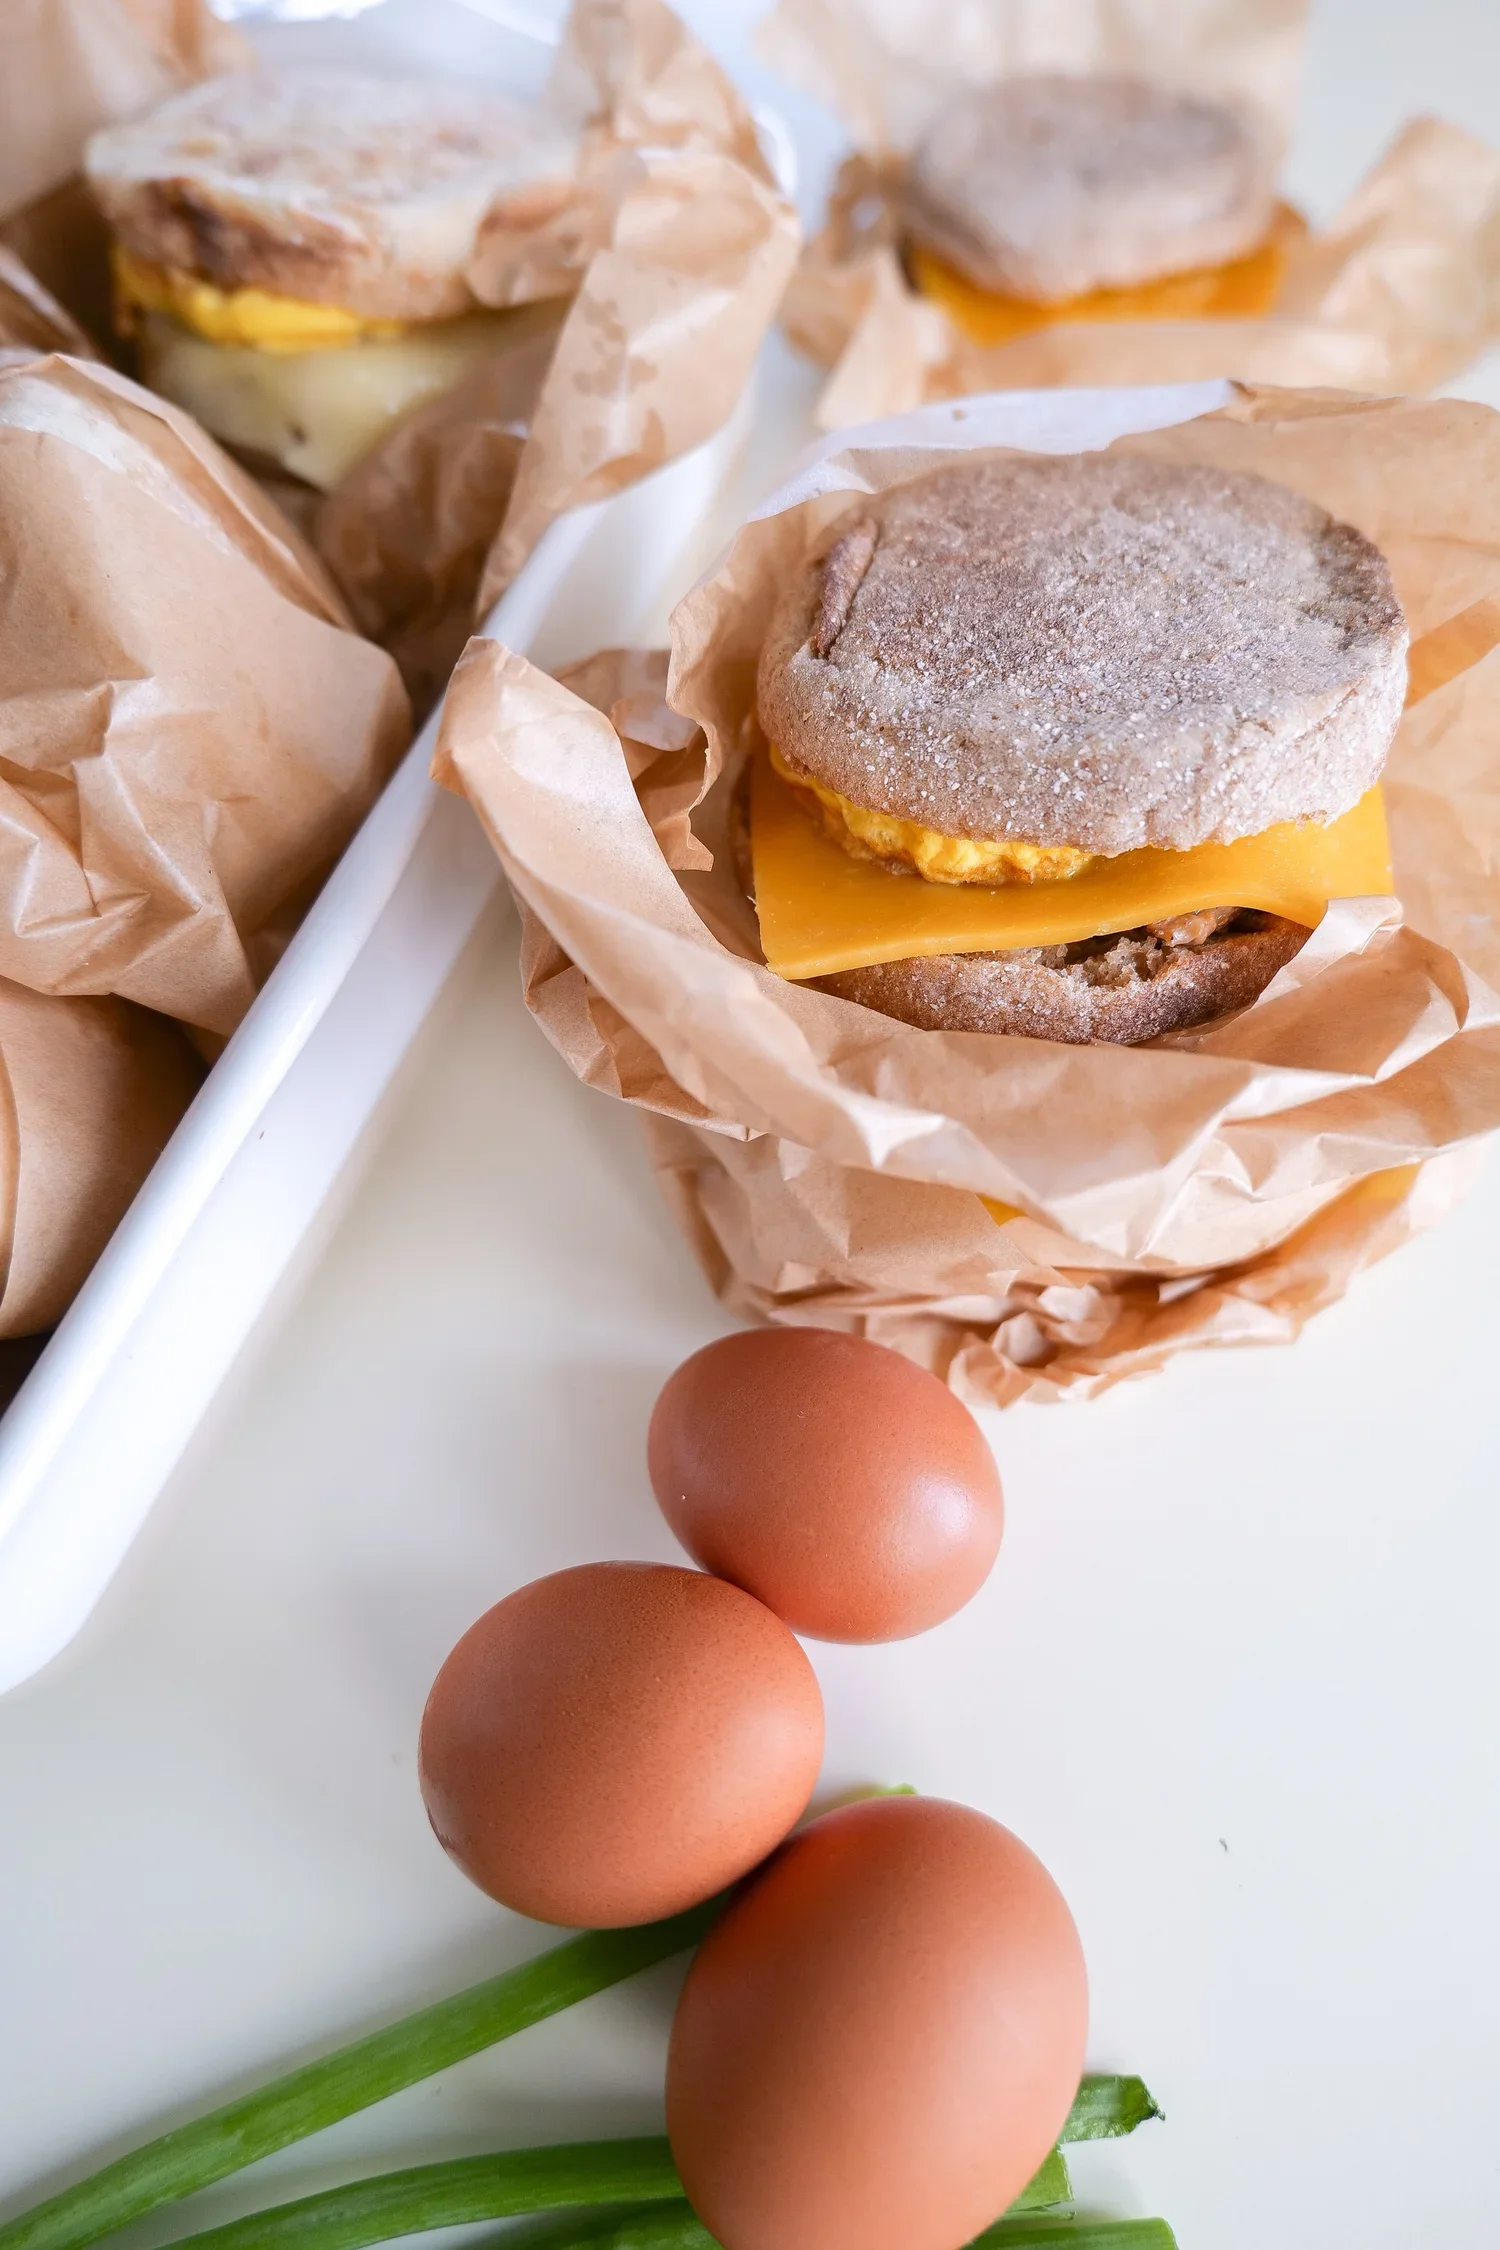
Sausage English Muffin Breakfast Sandwiches
These meal prep sausage English muffin sandwiches offer a convenient, tasty, and time-saving breakfast option perfect for busy lifestyles. Not only do these sandwiches simplify your mornings, but they also pack a flavorful punch that keeps you satisfied. So, whether you're trying to help your weekday breakfast routine or ensure you have something delicious to grab on your way out, these sandwiches are your ideal solution.
The Full Recipe: Effortlessly Prep Your Week with These Delicious and Time-Saving Sausage English Muffin Sandwiches!
Chorizo, Egg, and Potato Breakfast Bowls
Nothing beats a hearty breakfast to kickstart your day, and these chorizo, egg, and potato breakfast bowls are the ultimate choice for a delicious and satisfying meal. With their comforting flavors and textures, these breakfast bowls combine the spiciness of chorizo, the fluffiness of eggs, and the crunch of potatoes. Whether you are big breakfast people like us, or someone looking for a quick and nutritious start to the day, these breakfast bowls are bound to brighten your morning. When freezing these I like to put each bowl in its own container, preferably glass so that I can pop it into the oven to quickly reheat and also give it a crispness that the microwave wont.
The Full Recipe: Irresistible Chorizo, Egg, and Potato Breakfast Bowls for The Perfect Start to Your Day
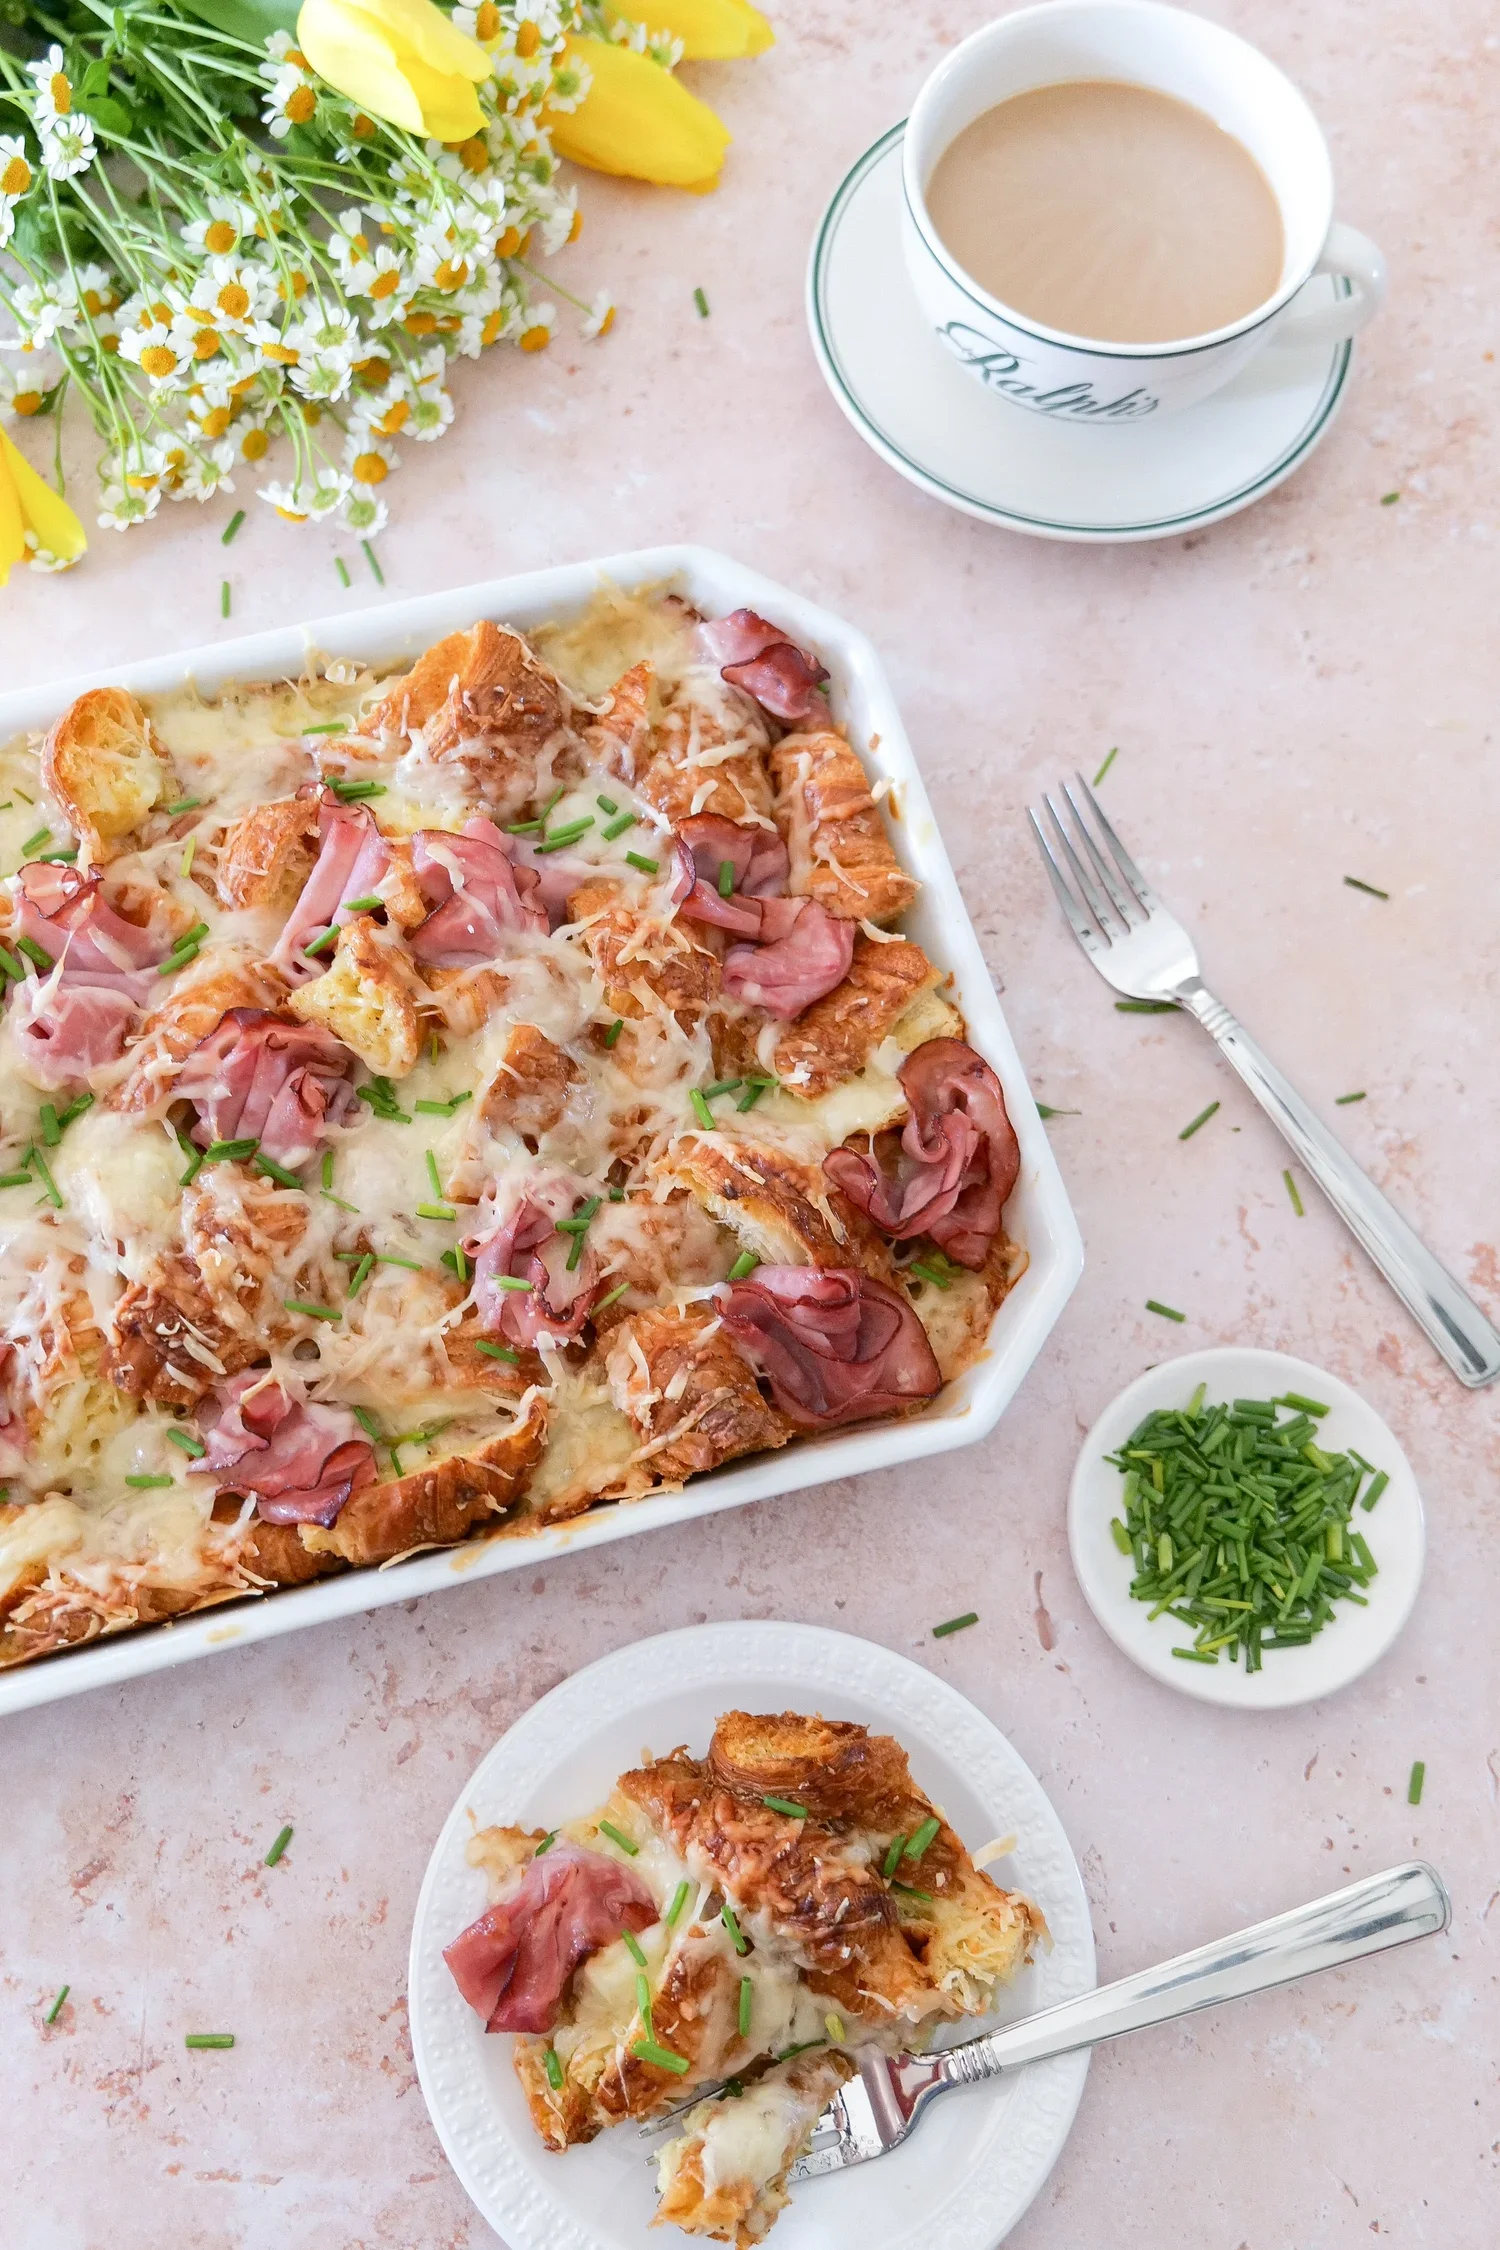
Easy Breakfast Casserole Recipe
After enjoying this easy breakfast casserole, you'll appreciate how simple and effective it is to prepare nourishing meals in advance for those tender postpartum days. One key aspect of successful postpartum meal prep is focusing on meals that are not only nutritious and filling but also easy to reheat and enjoy with minimal effort. By stocking your freezer with a variety of homemade recipes like hearty casseroles, protein-rich soups, and fiber-packed grain bowls, you ensure that you and your family have access to balanced meals without the added stress of cooking from scratch. These prepared dishes can be a lifesaver, providing comfort and sustenance as you navigate the early days of motherhood. Not only do they save you time, but they also offer peace of mind knowing you’re giving your body the wholesome ingredients it needs to recover and thrive.
The Full Recipe: Breakfast Casserole Recipe: The Ultimate Morning Delight
Lunch & Dinners
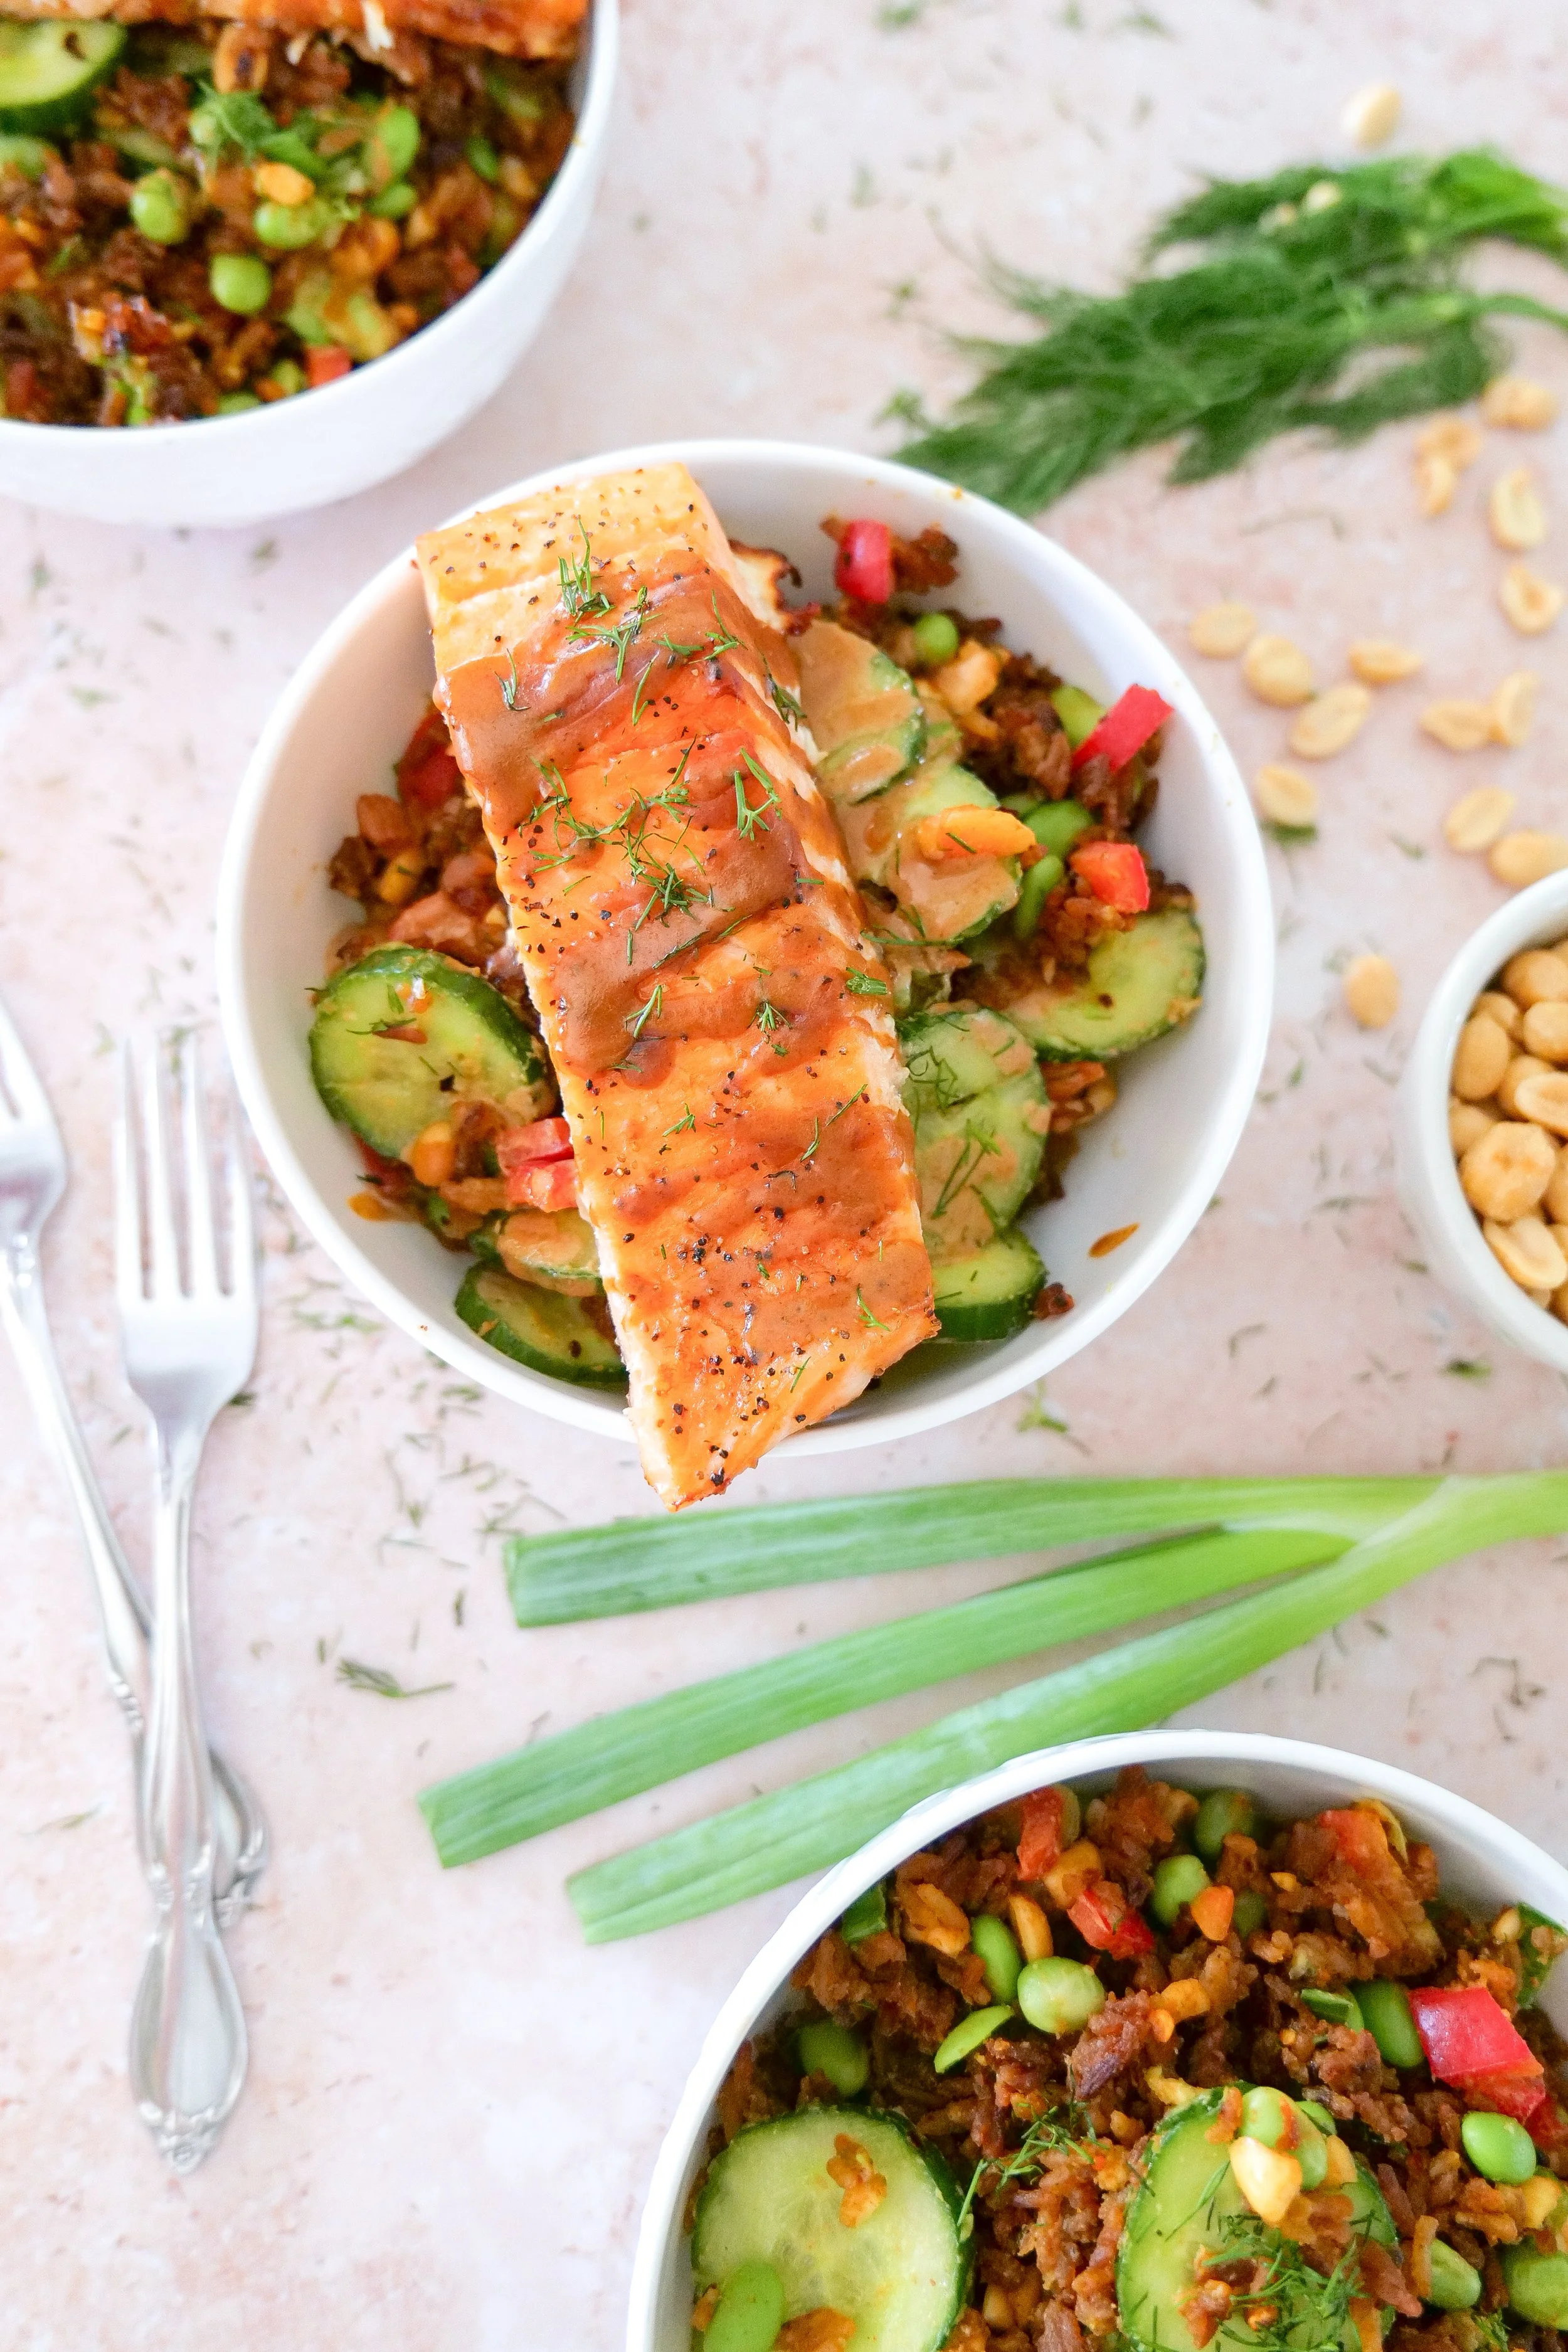
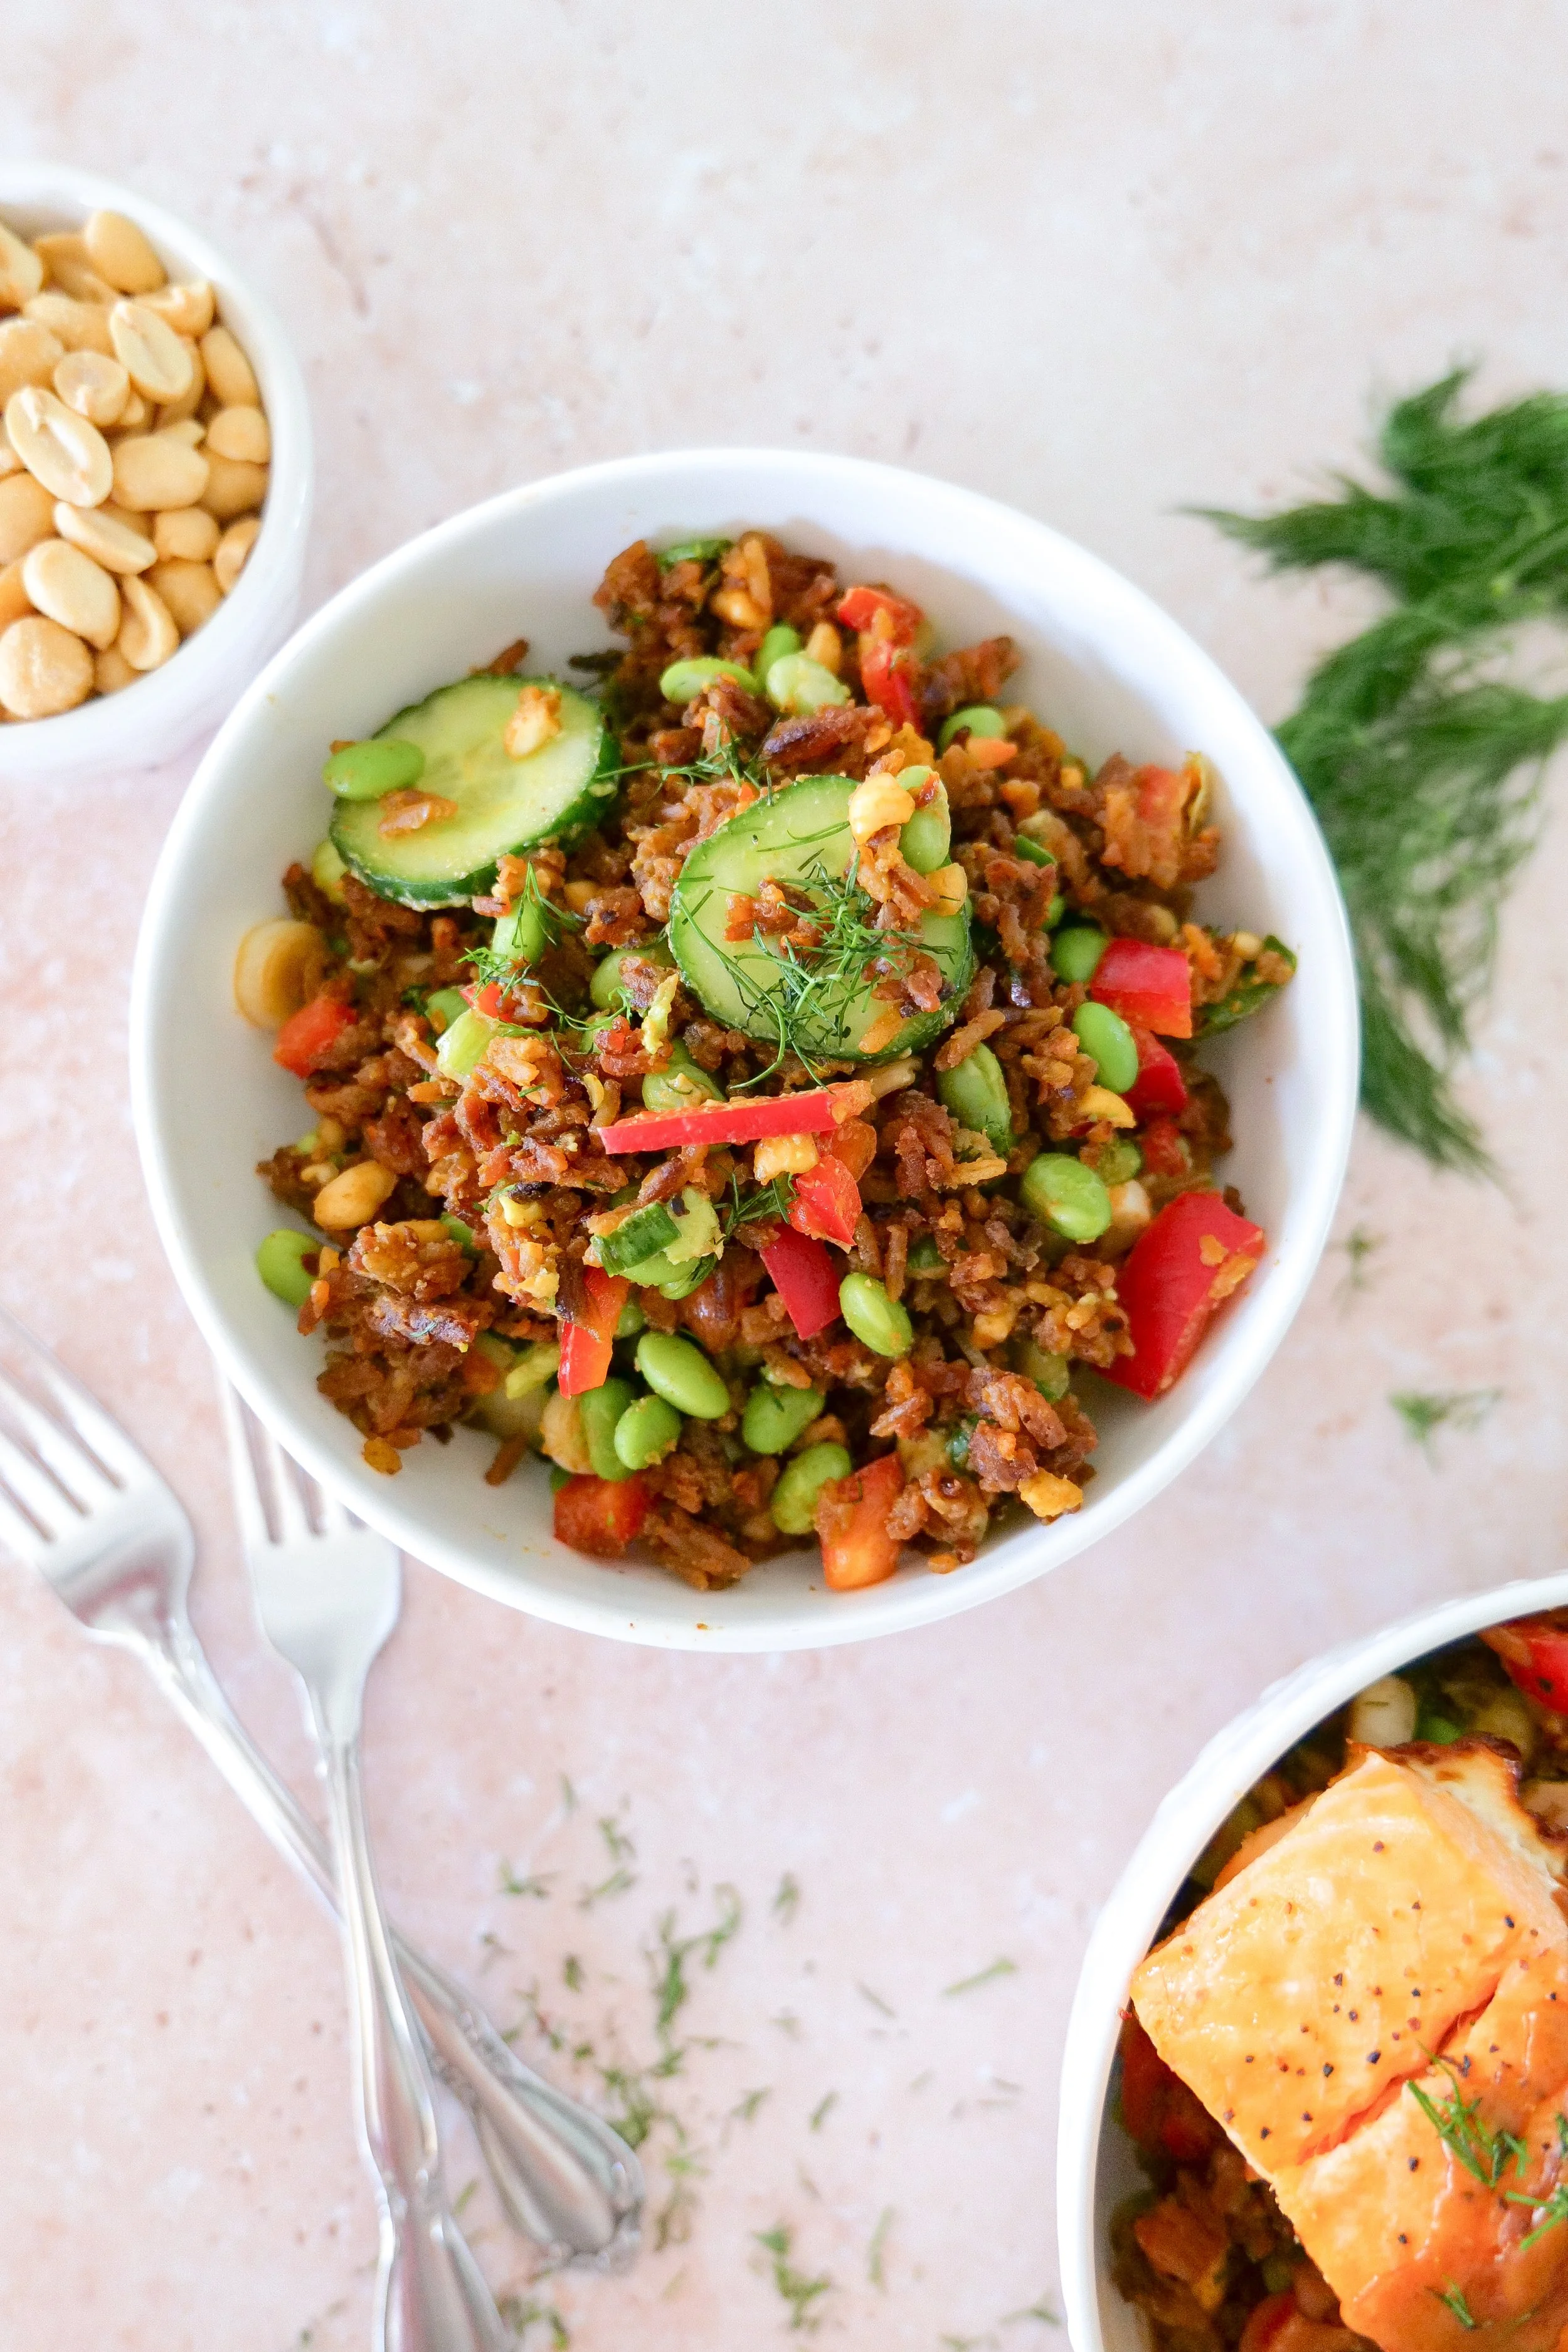
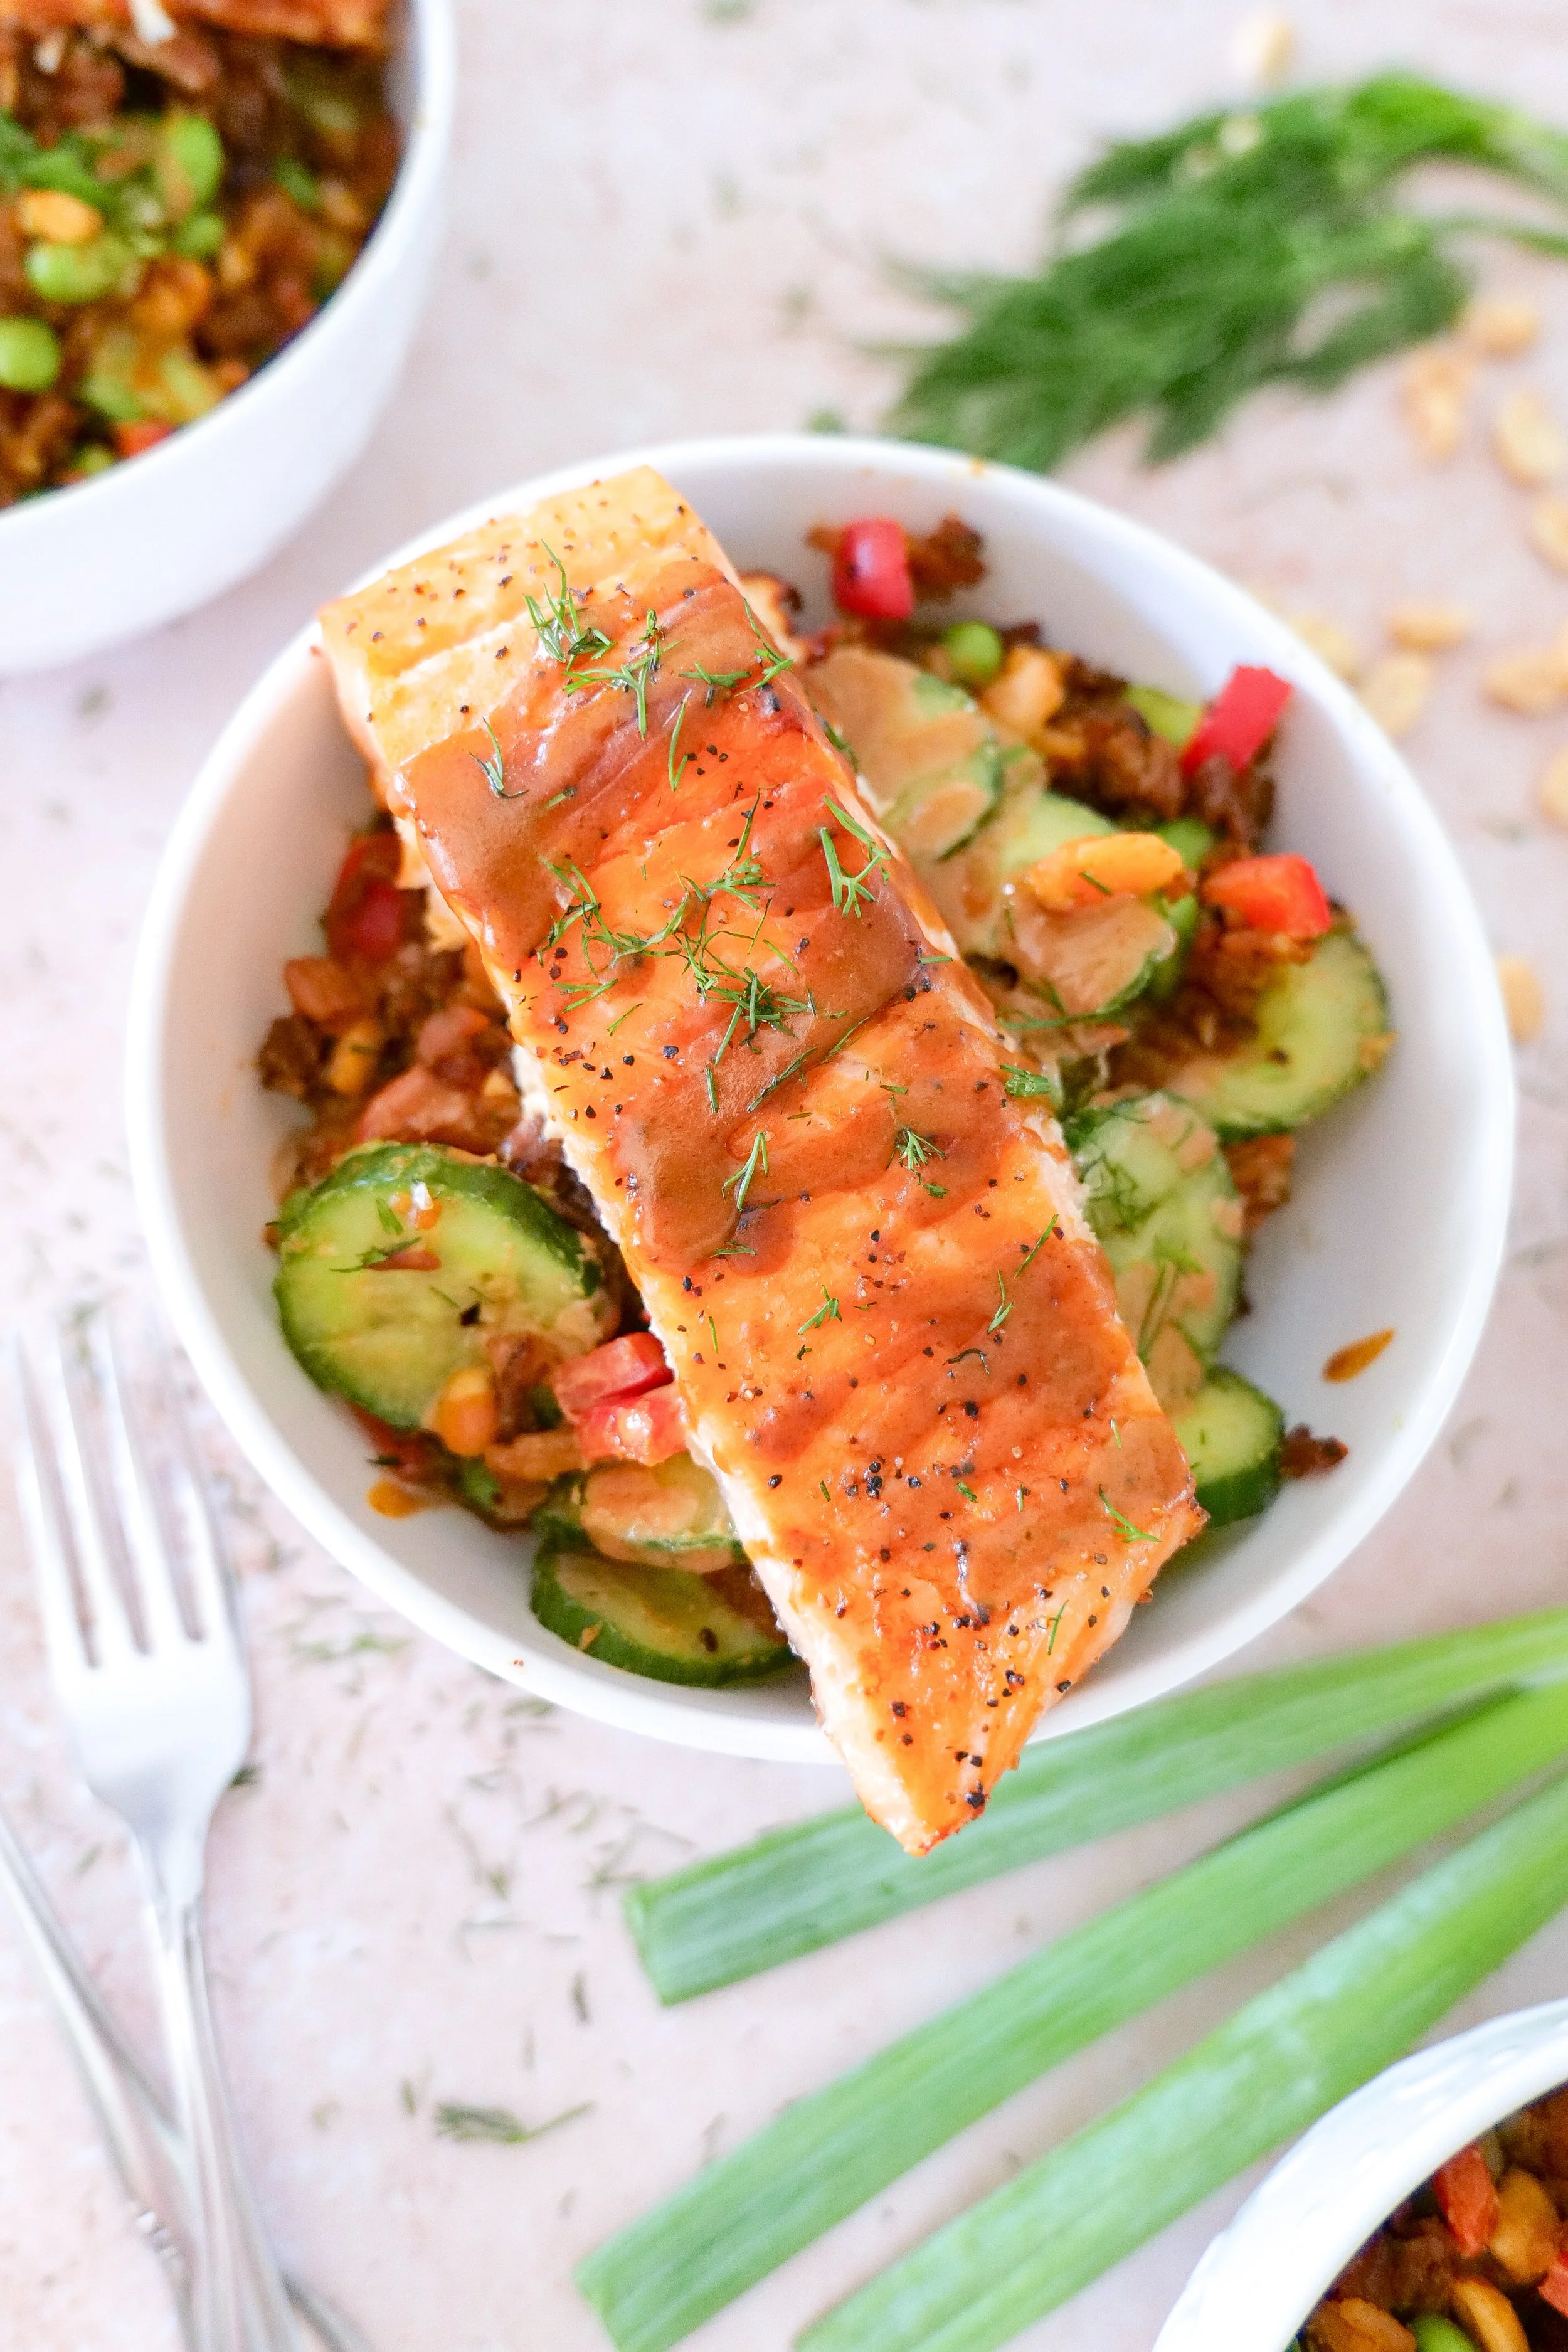
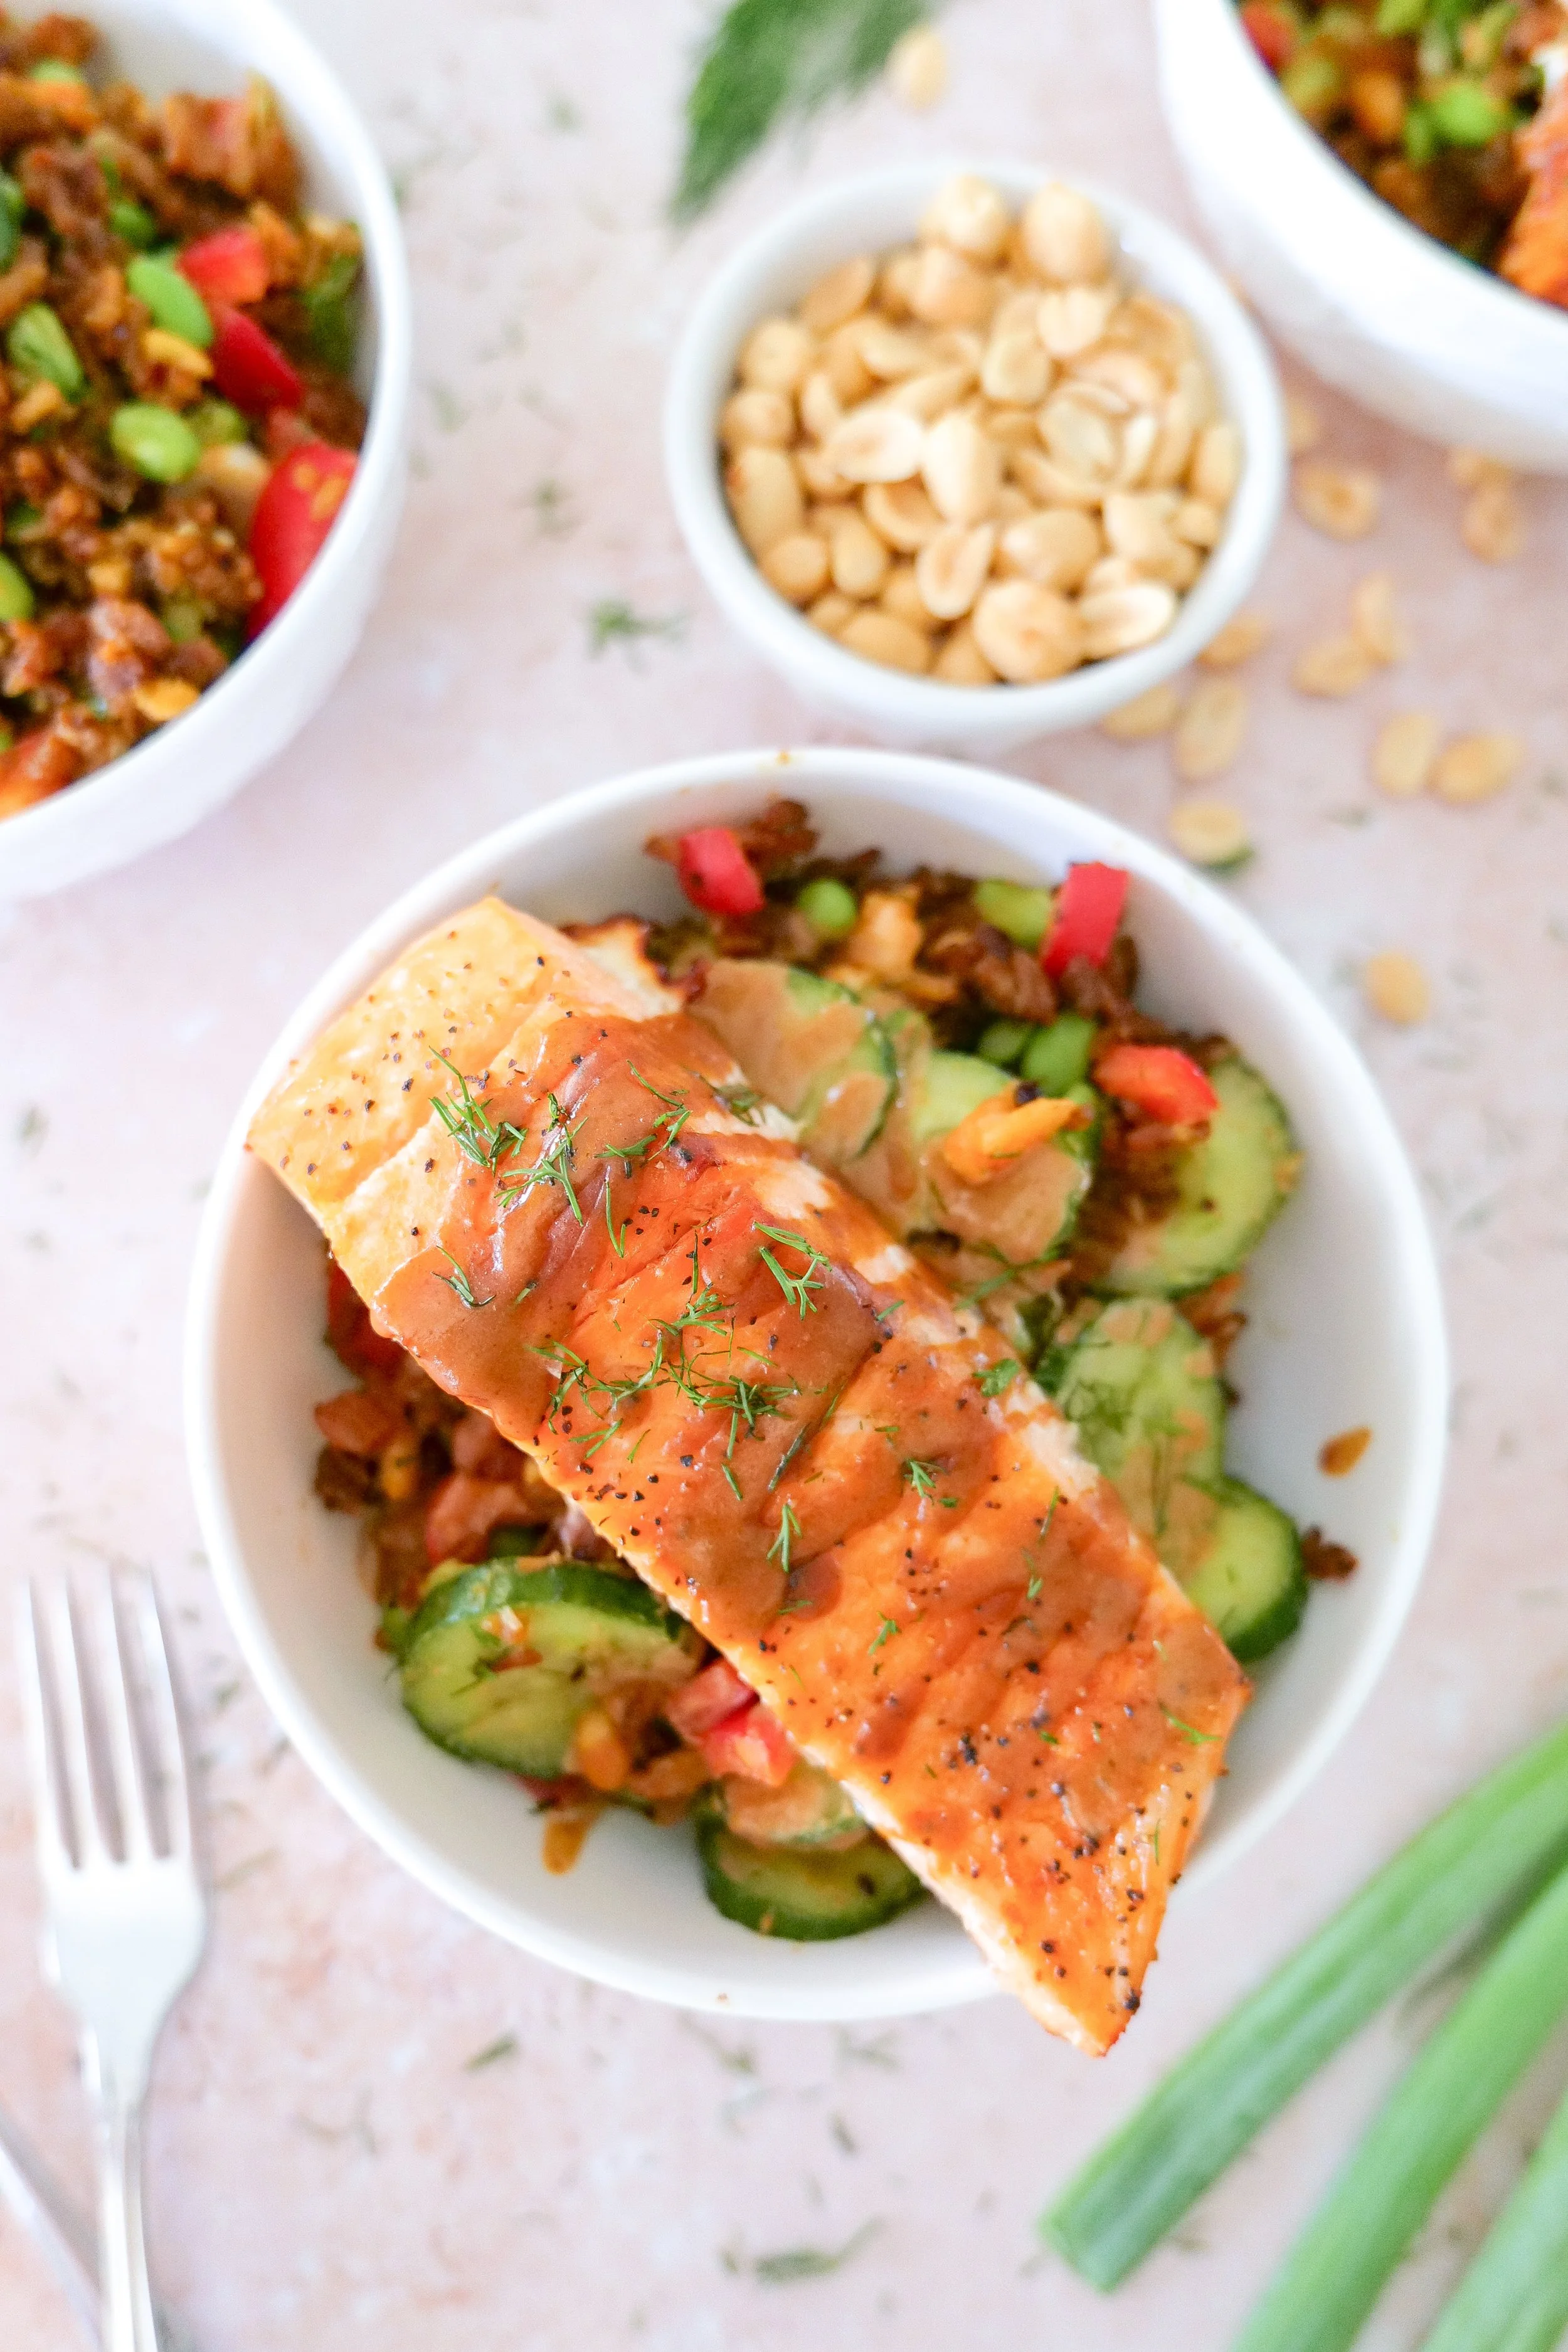
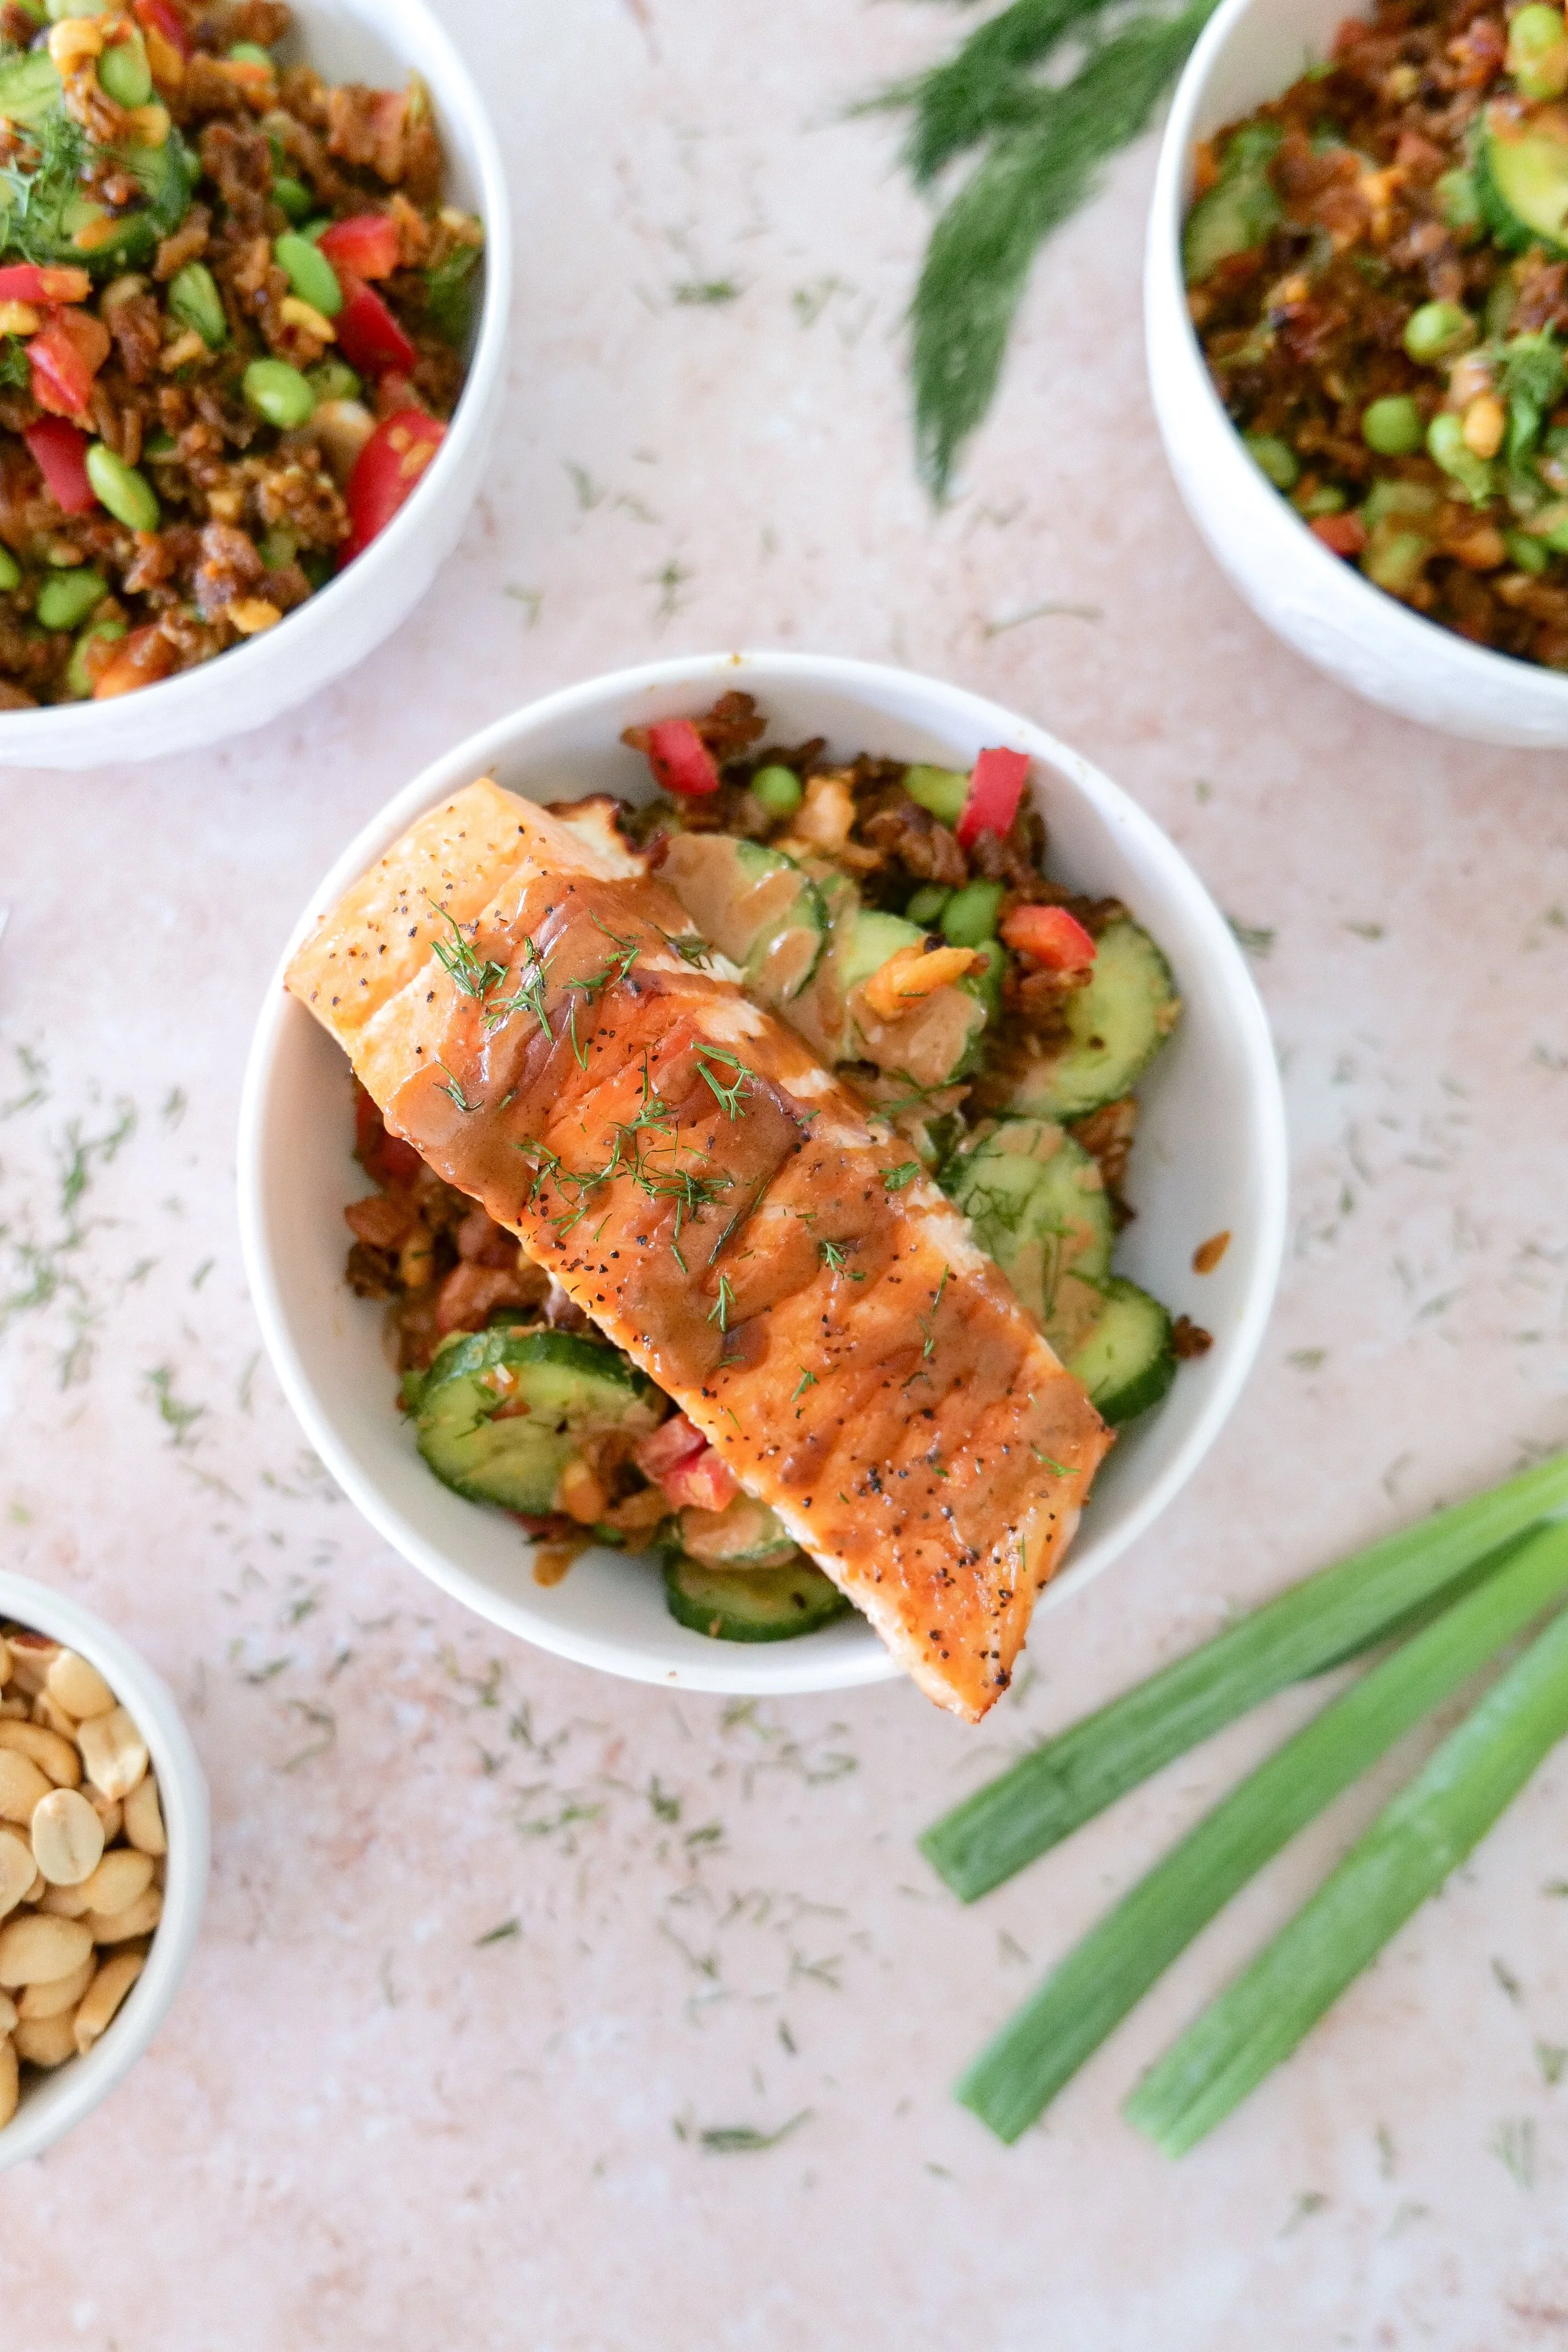
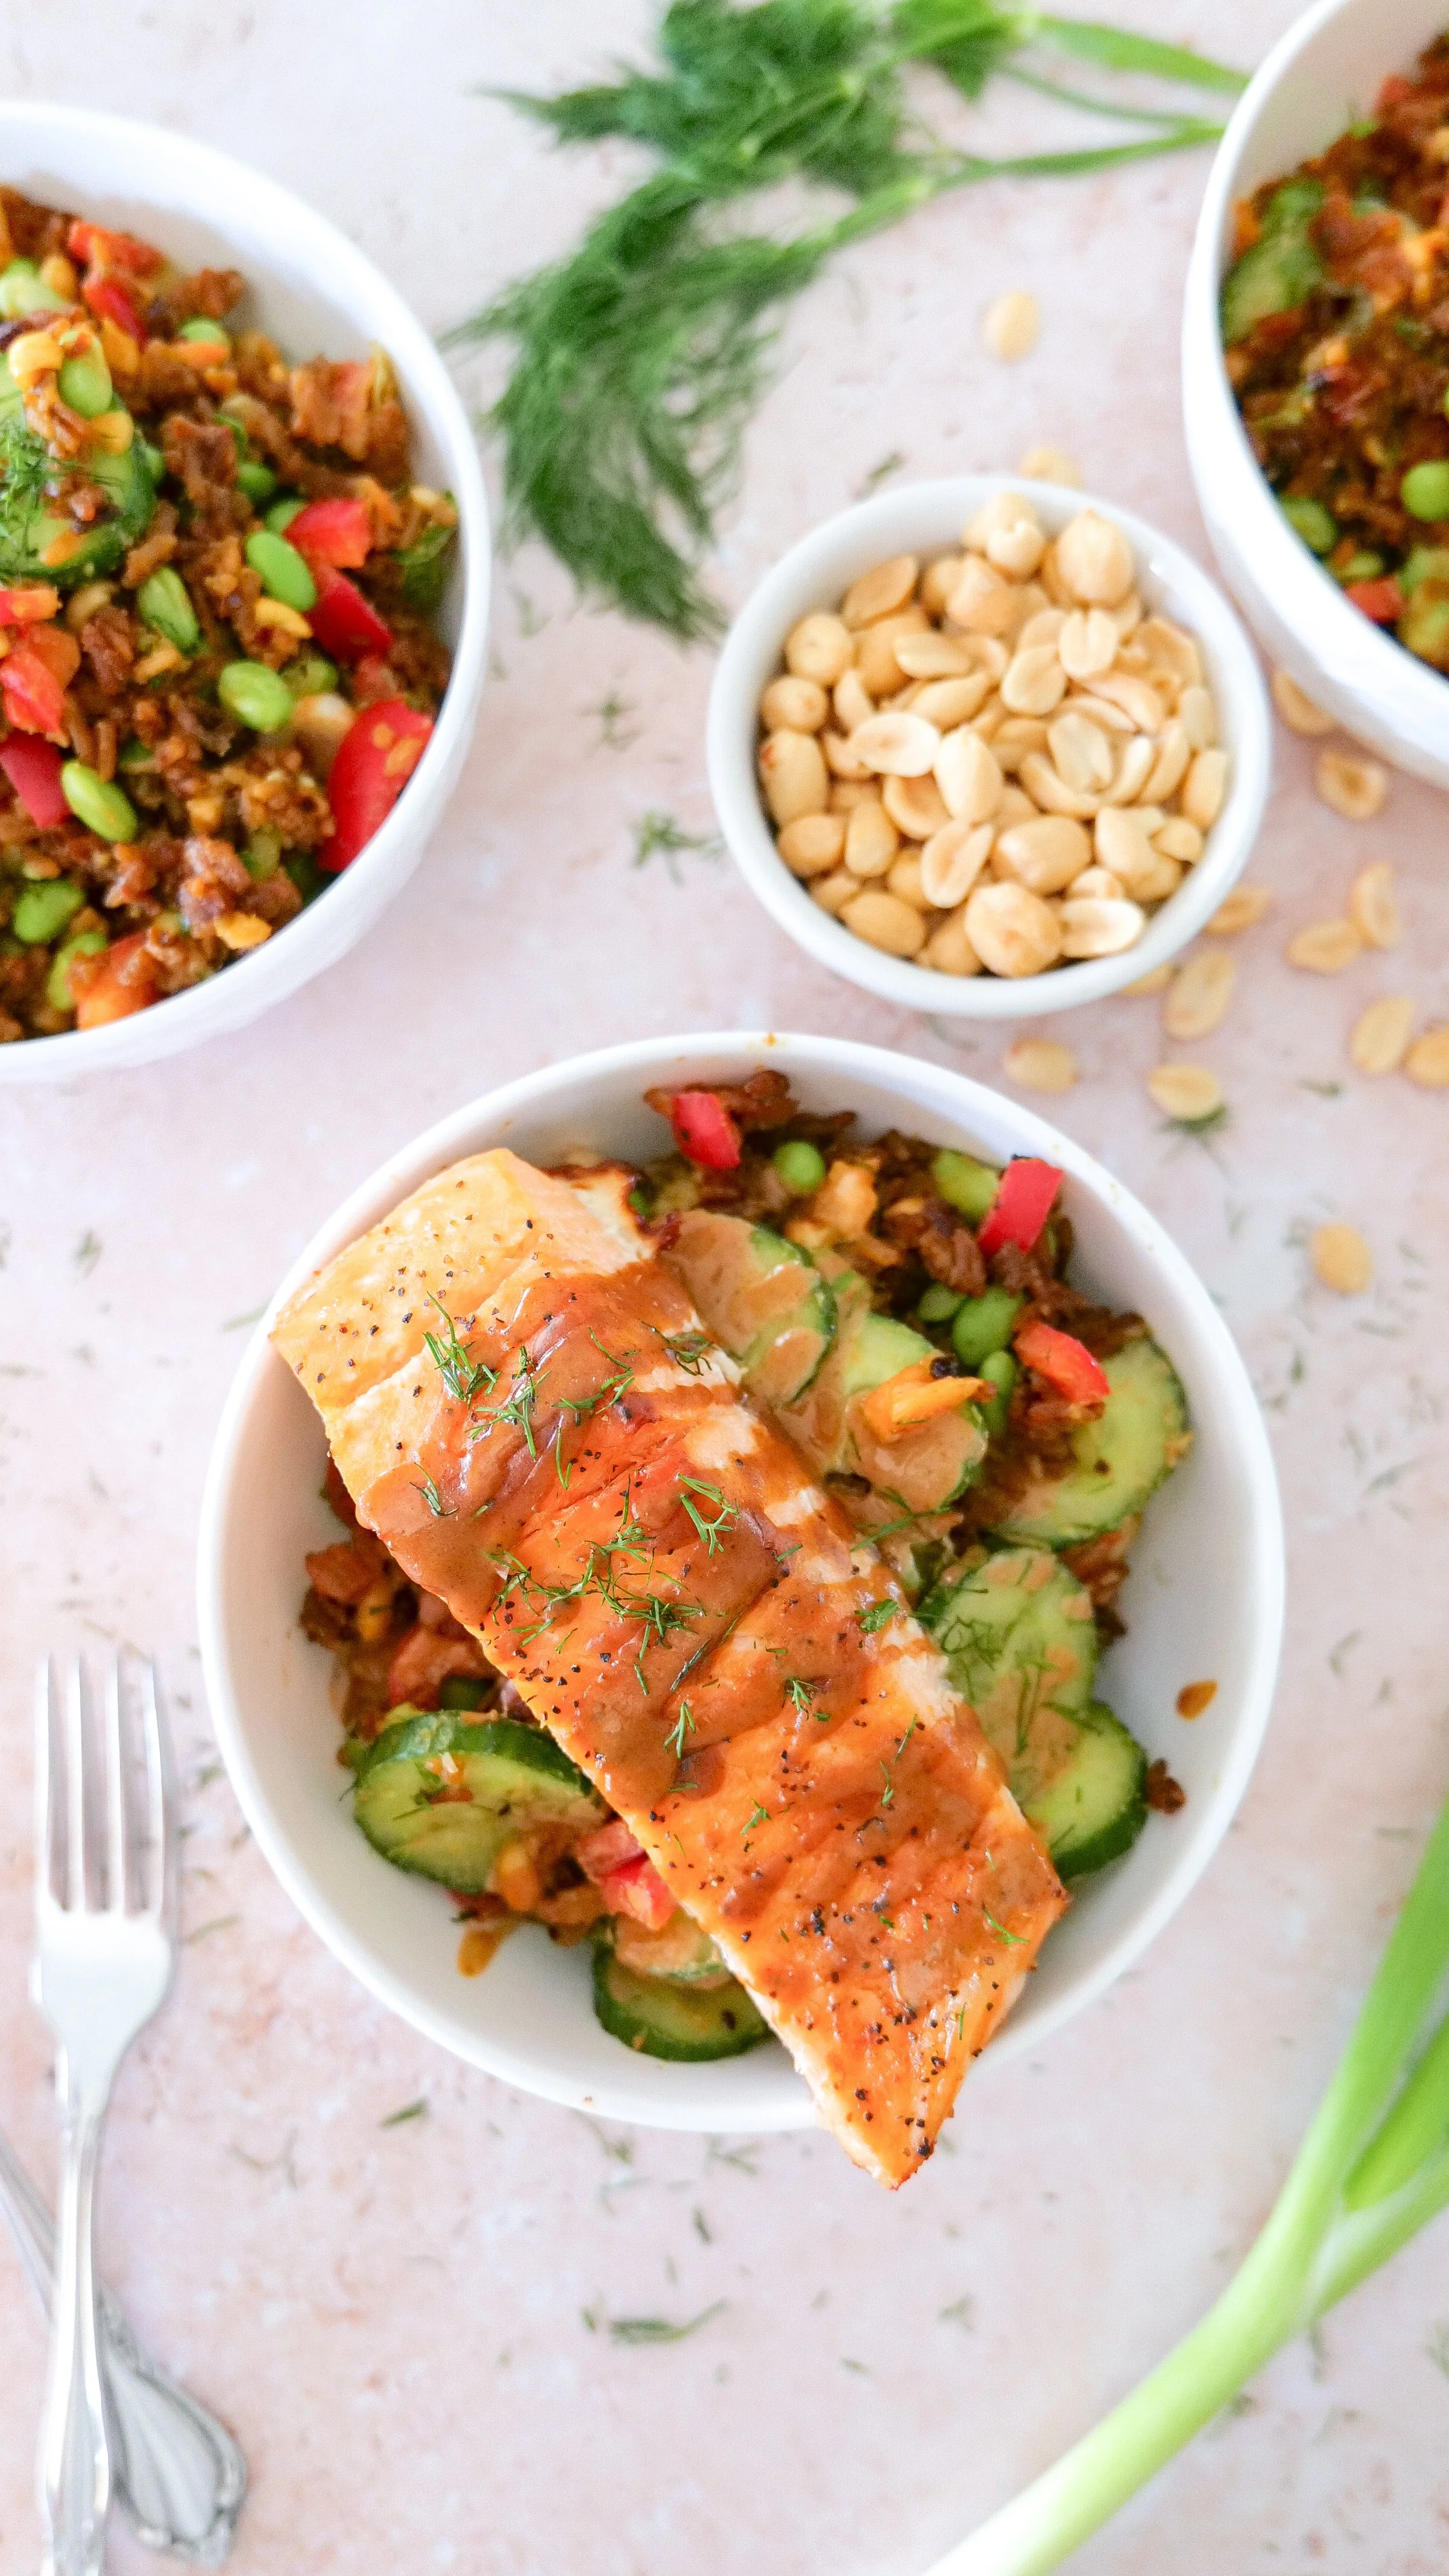
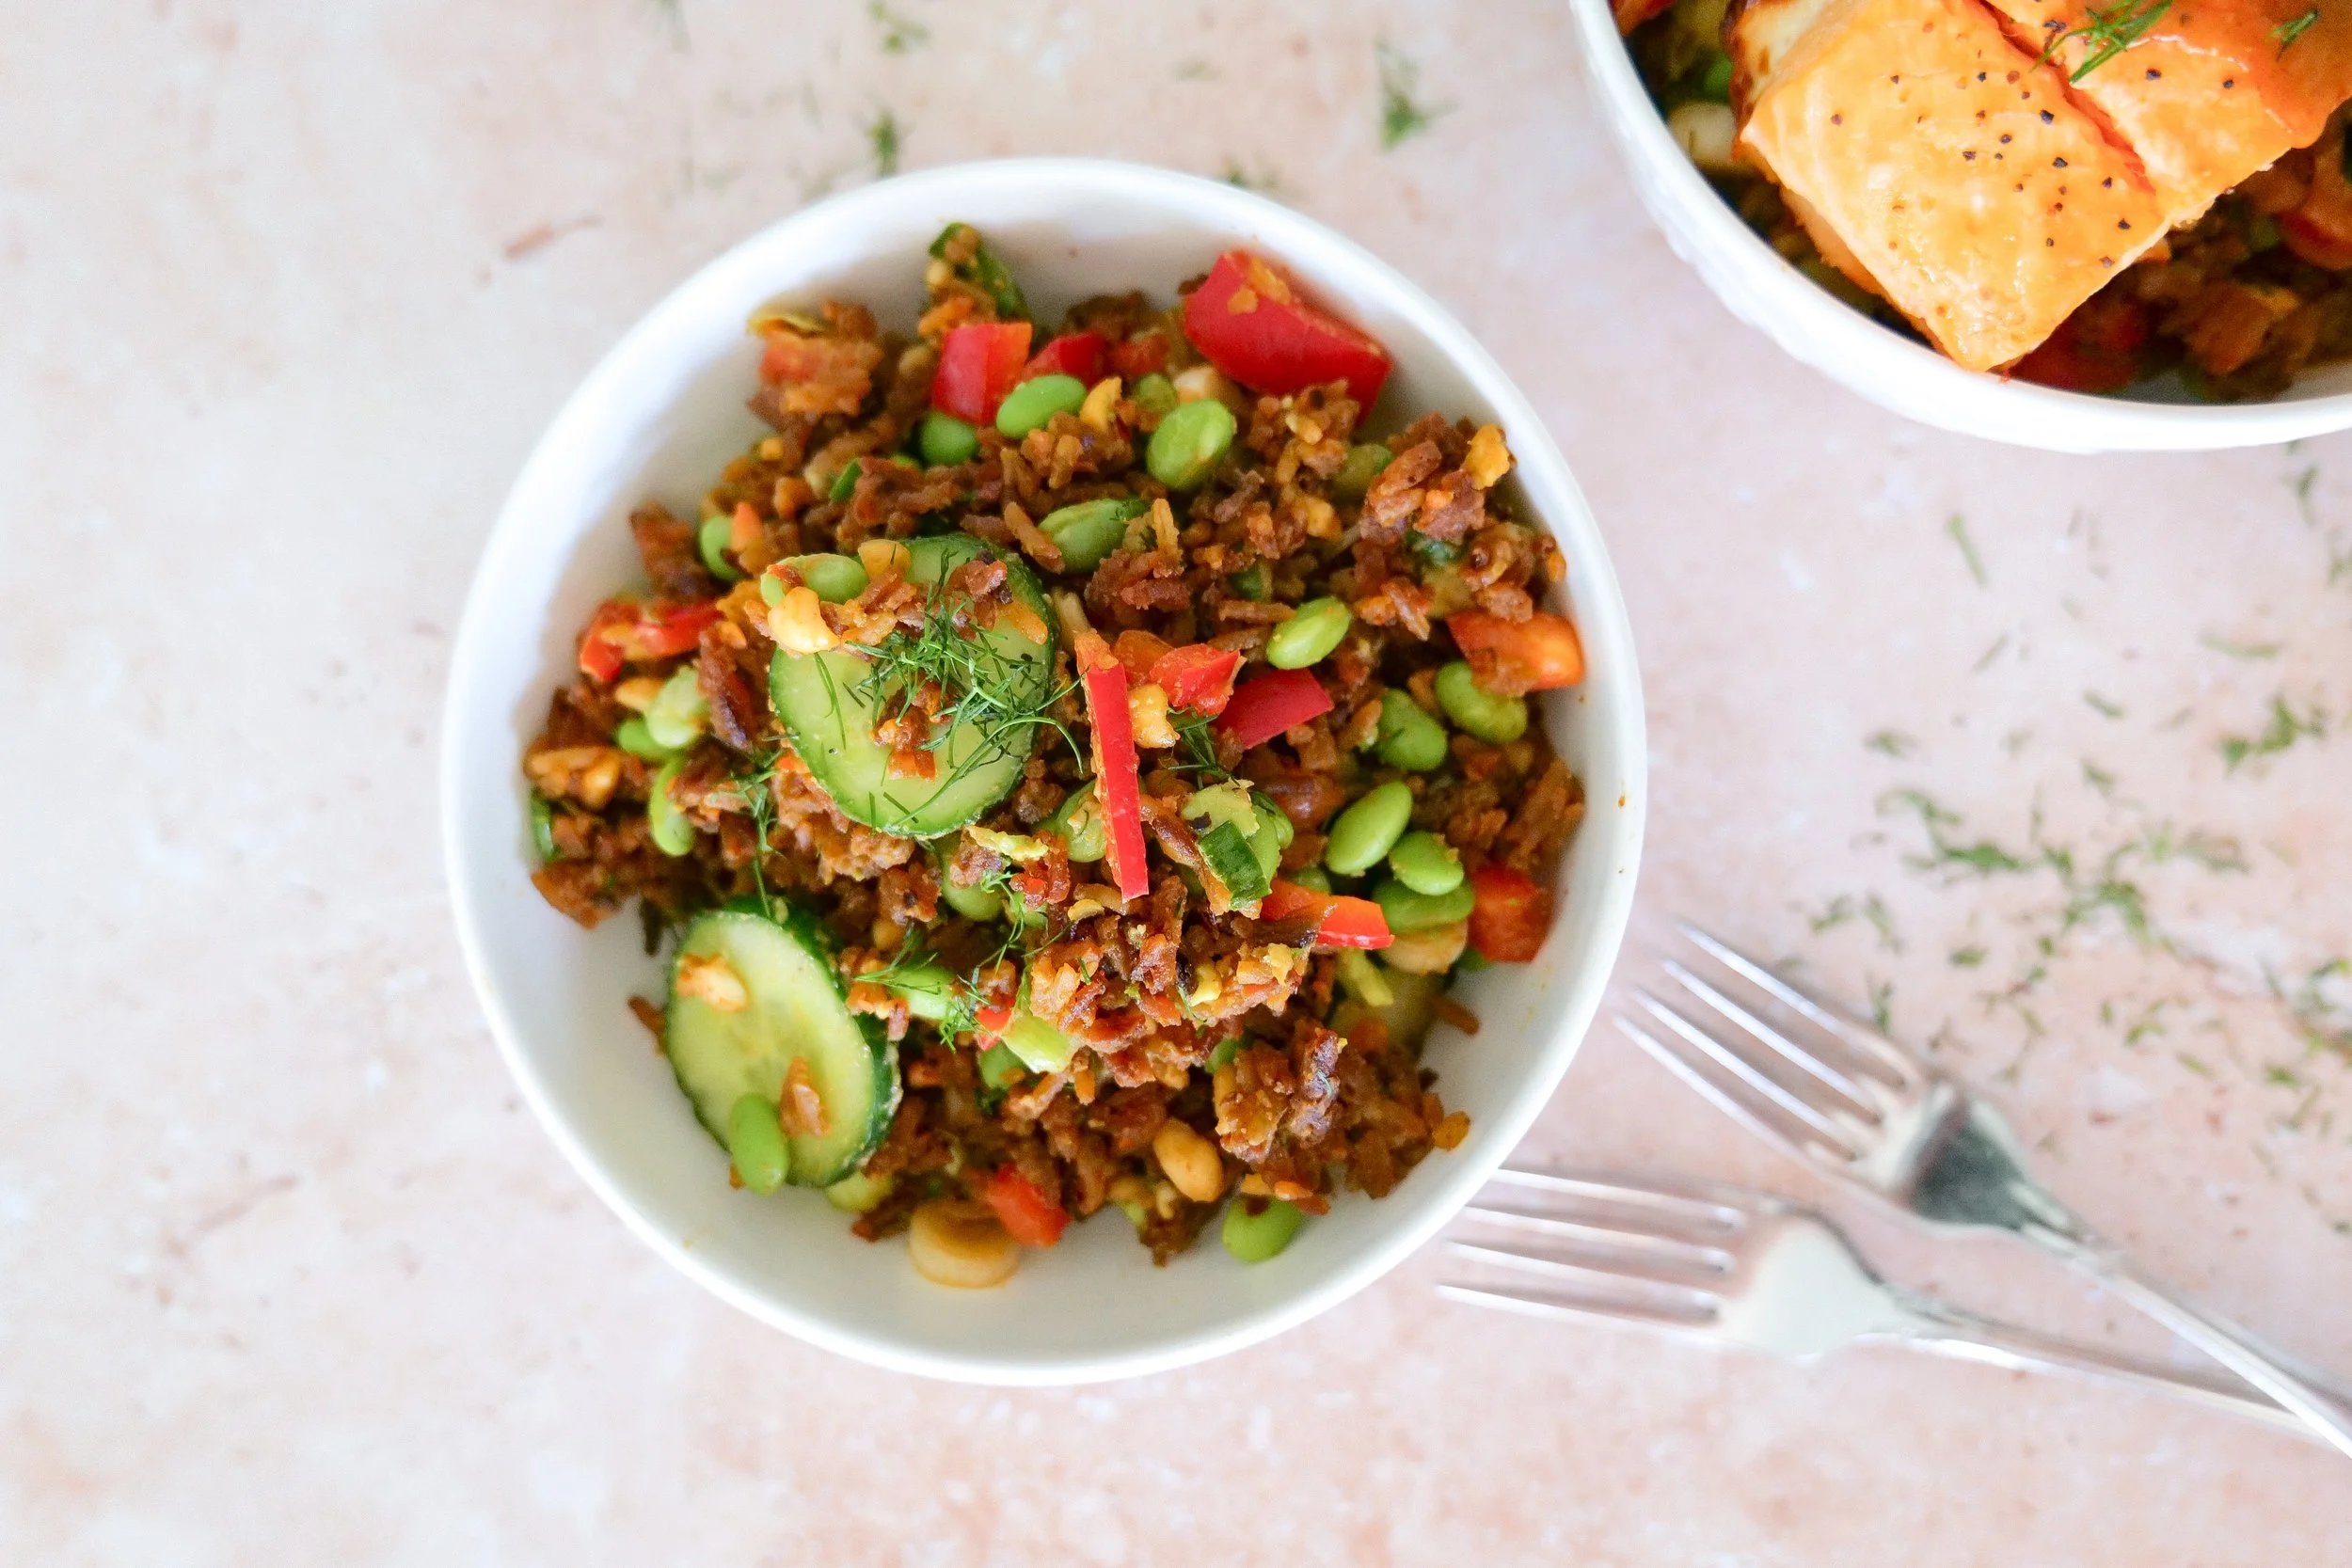
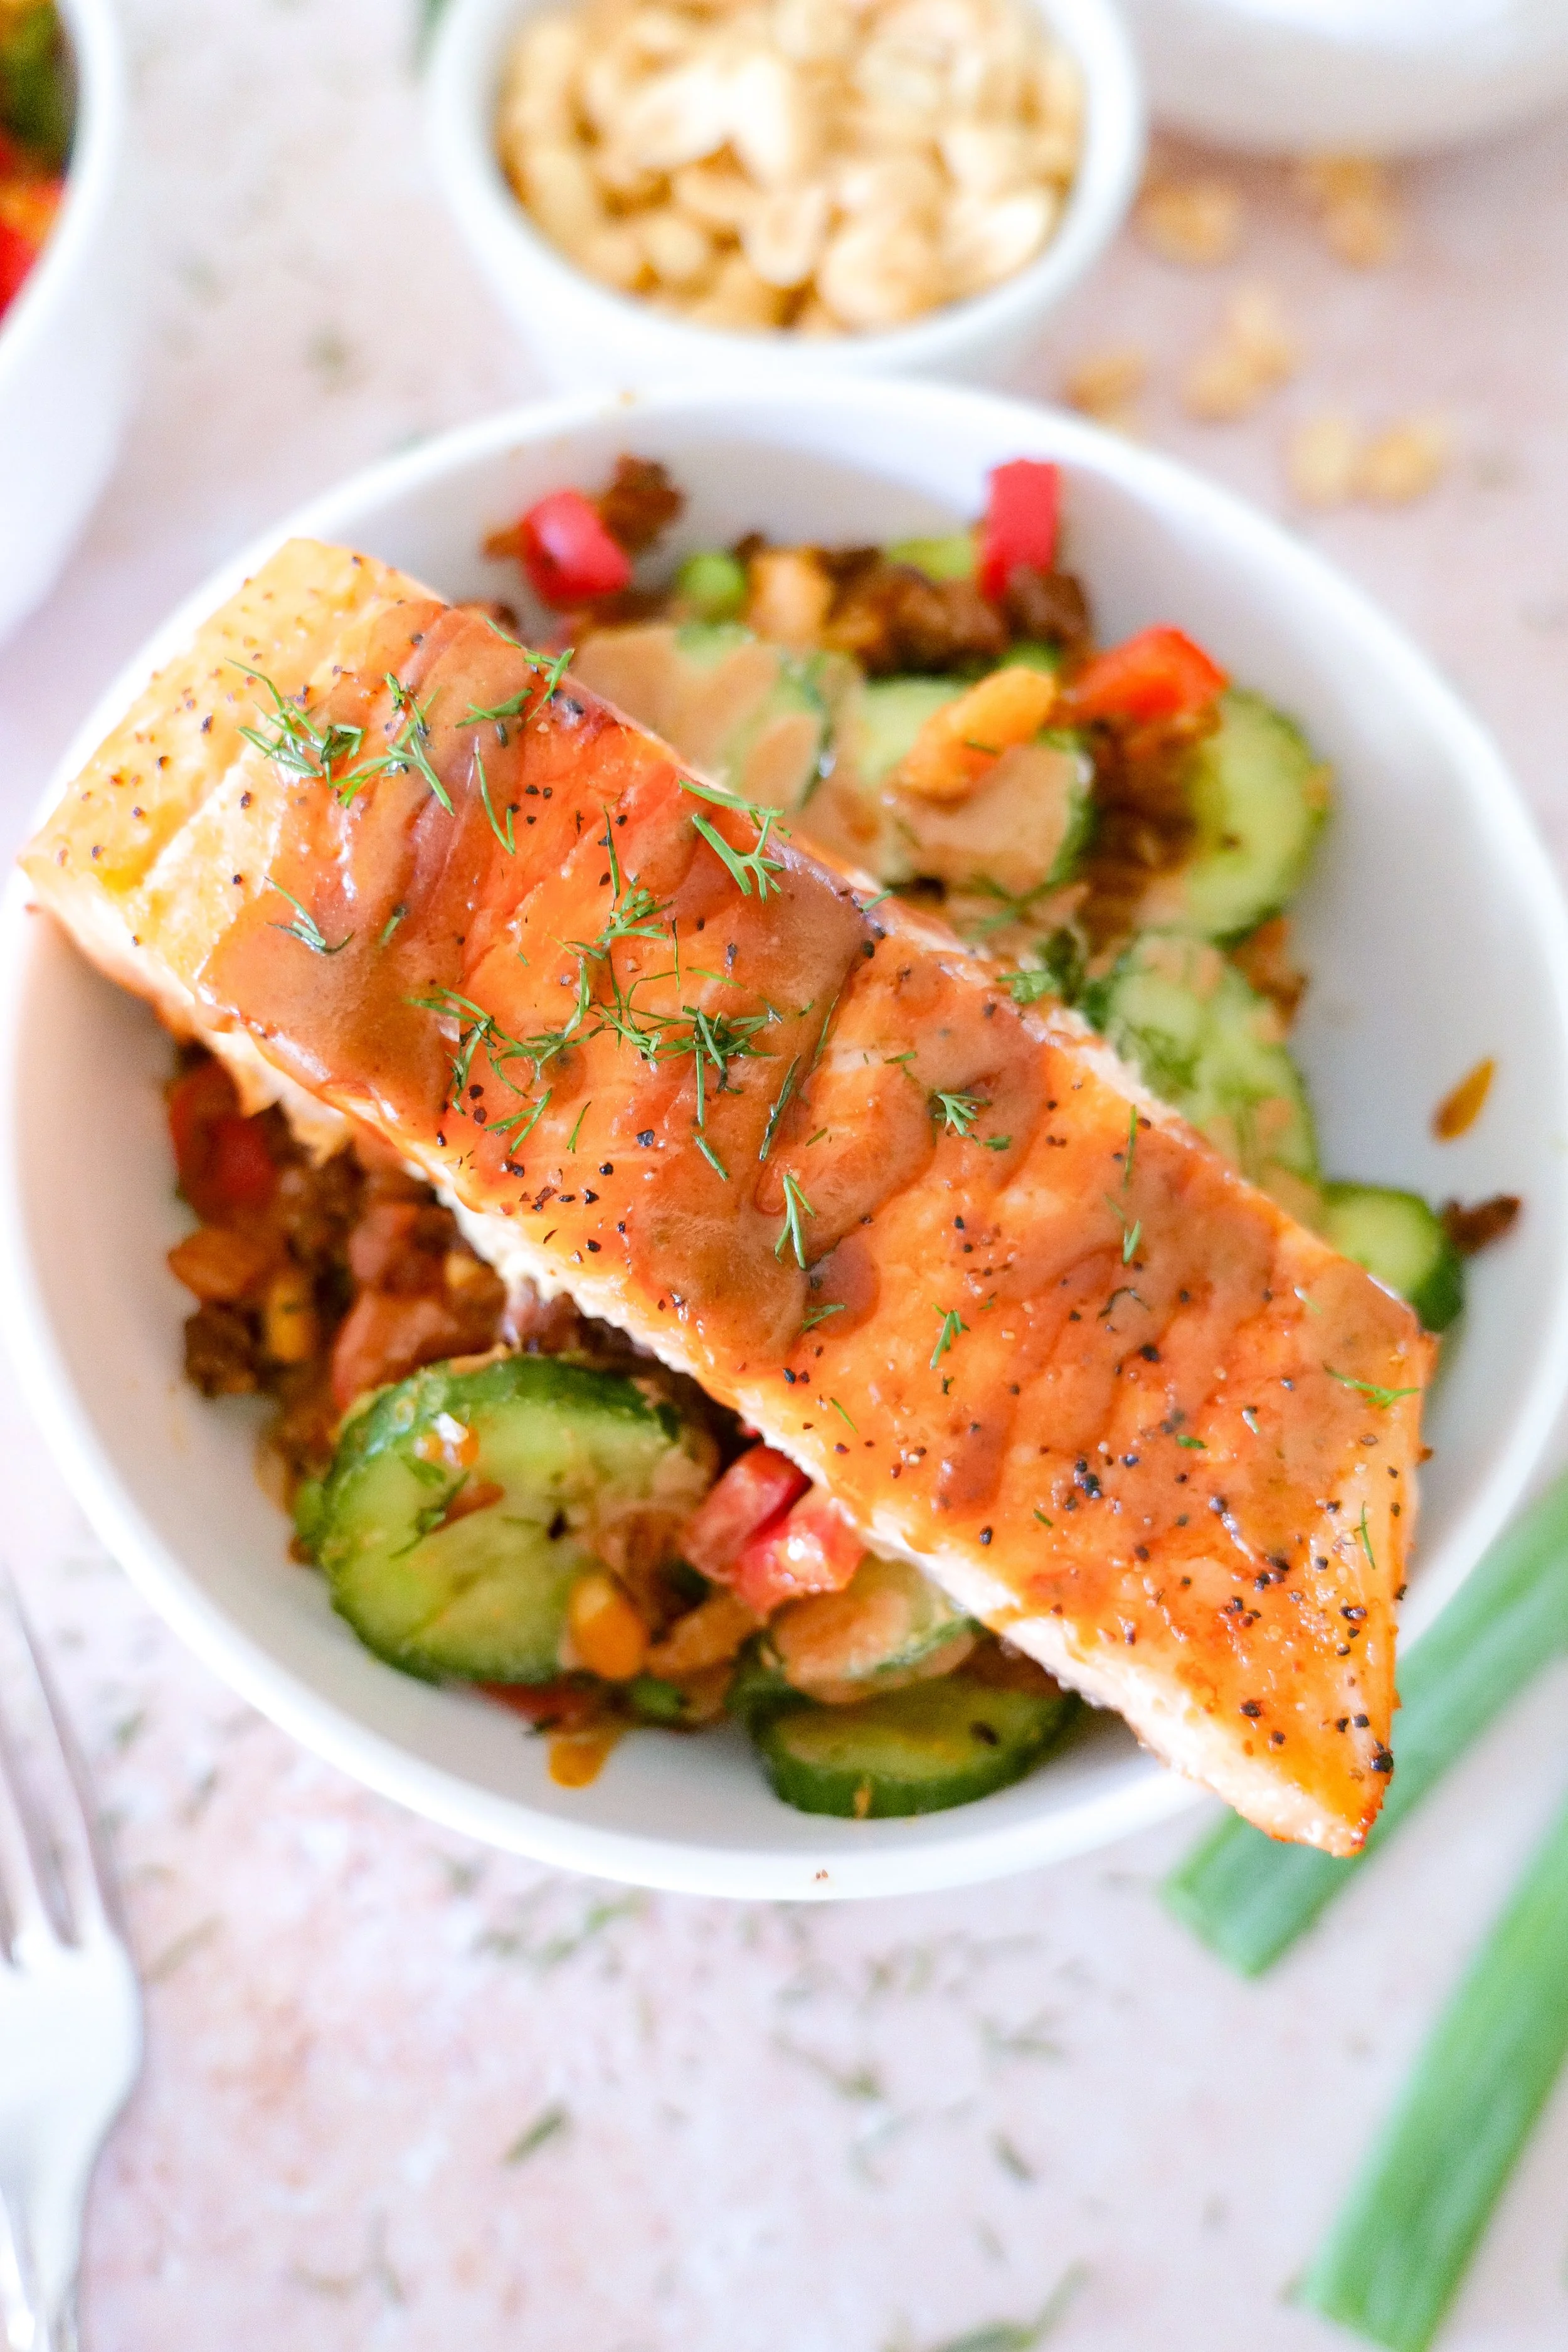
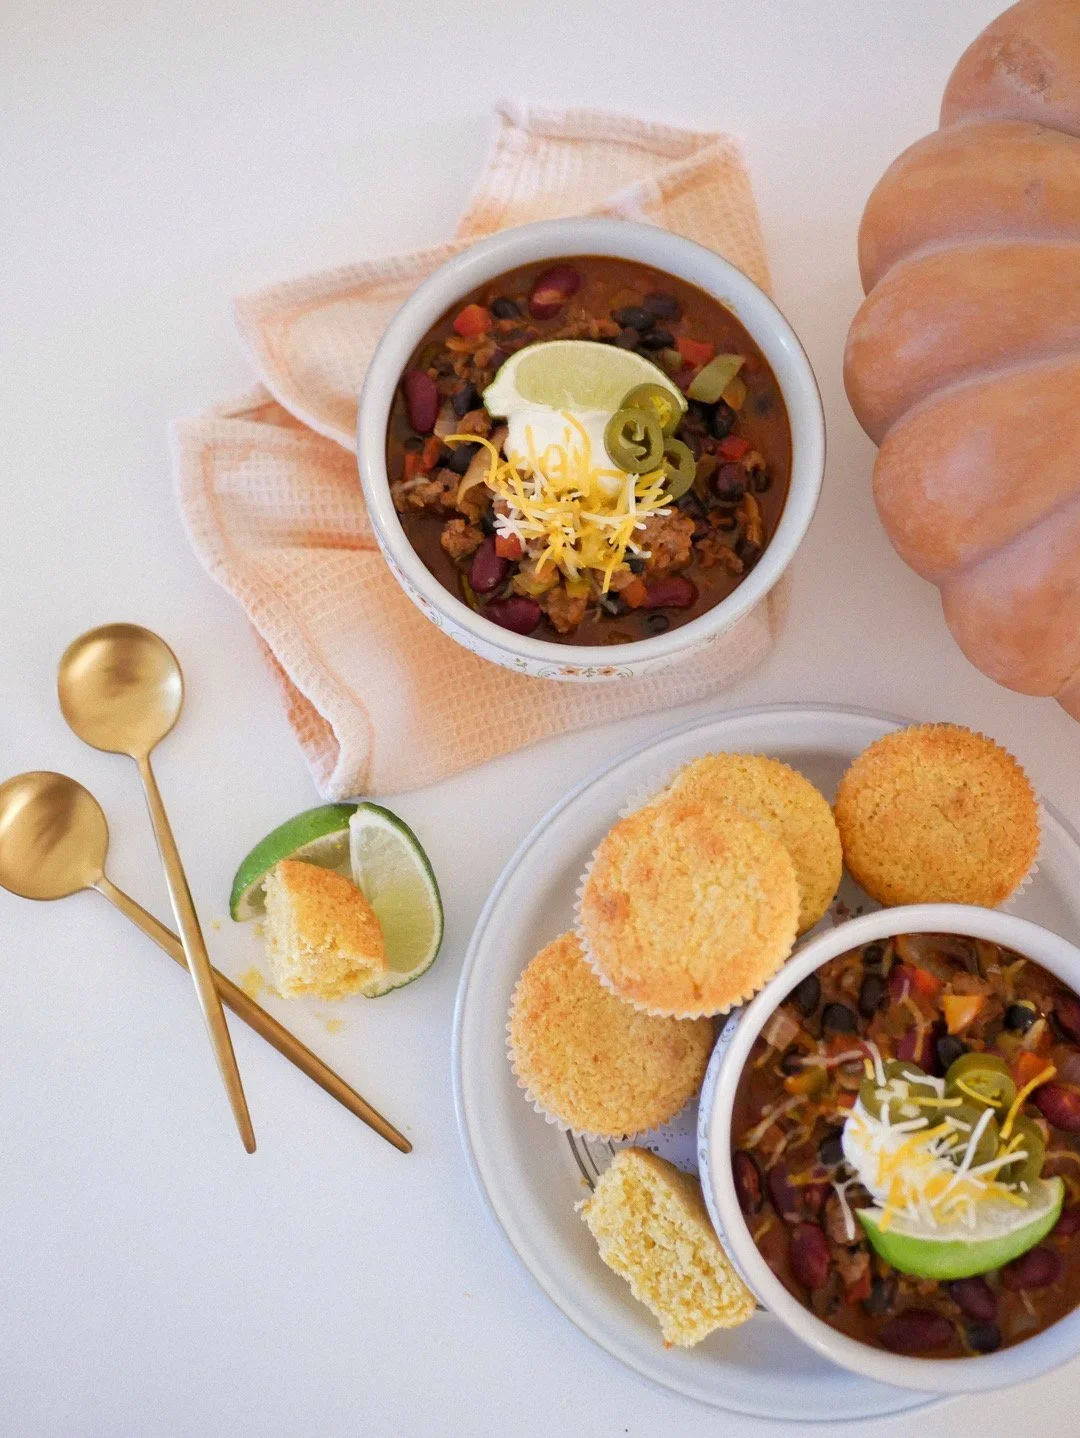
Hearty Ground Beef Chili
One of the most nourishing and convenient meals to have ready in your freezer postpartum is a classic hearty ground beef chili. It's a perfect blend of proteins and flavors that will refuel your body while delighting your taste buds. As a new mom, having easy access to nutritious meals is crucial, and this chili is packed with essential nutrients. It features a balance of ground beef for protein, black bean for fiber, and a mix of tomatoes and spices for a flavor punch. Not only is it satisfying, but it's also incredibly easy to reheat and serve, making it an ideal option for those busy days when cooking from scratch is the last thing on your mind. Simply defrost a portion in the morning, and by dinner time, you'll have a warming, delicious meal ready to enjoy. Plus, you can easily customize this recipe to suit your family's preferences by adding extra vegetables or adjusting the spice level. By preparing dishes like this ahead of time, you can ensure that your postpartum recovery is supported by wholesome, homemade meals, giving you more time to focus on bonding with your new baby.
The Full Recipe: Hearty Ground Beef Chili
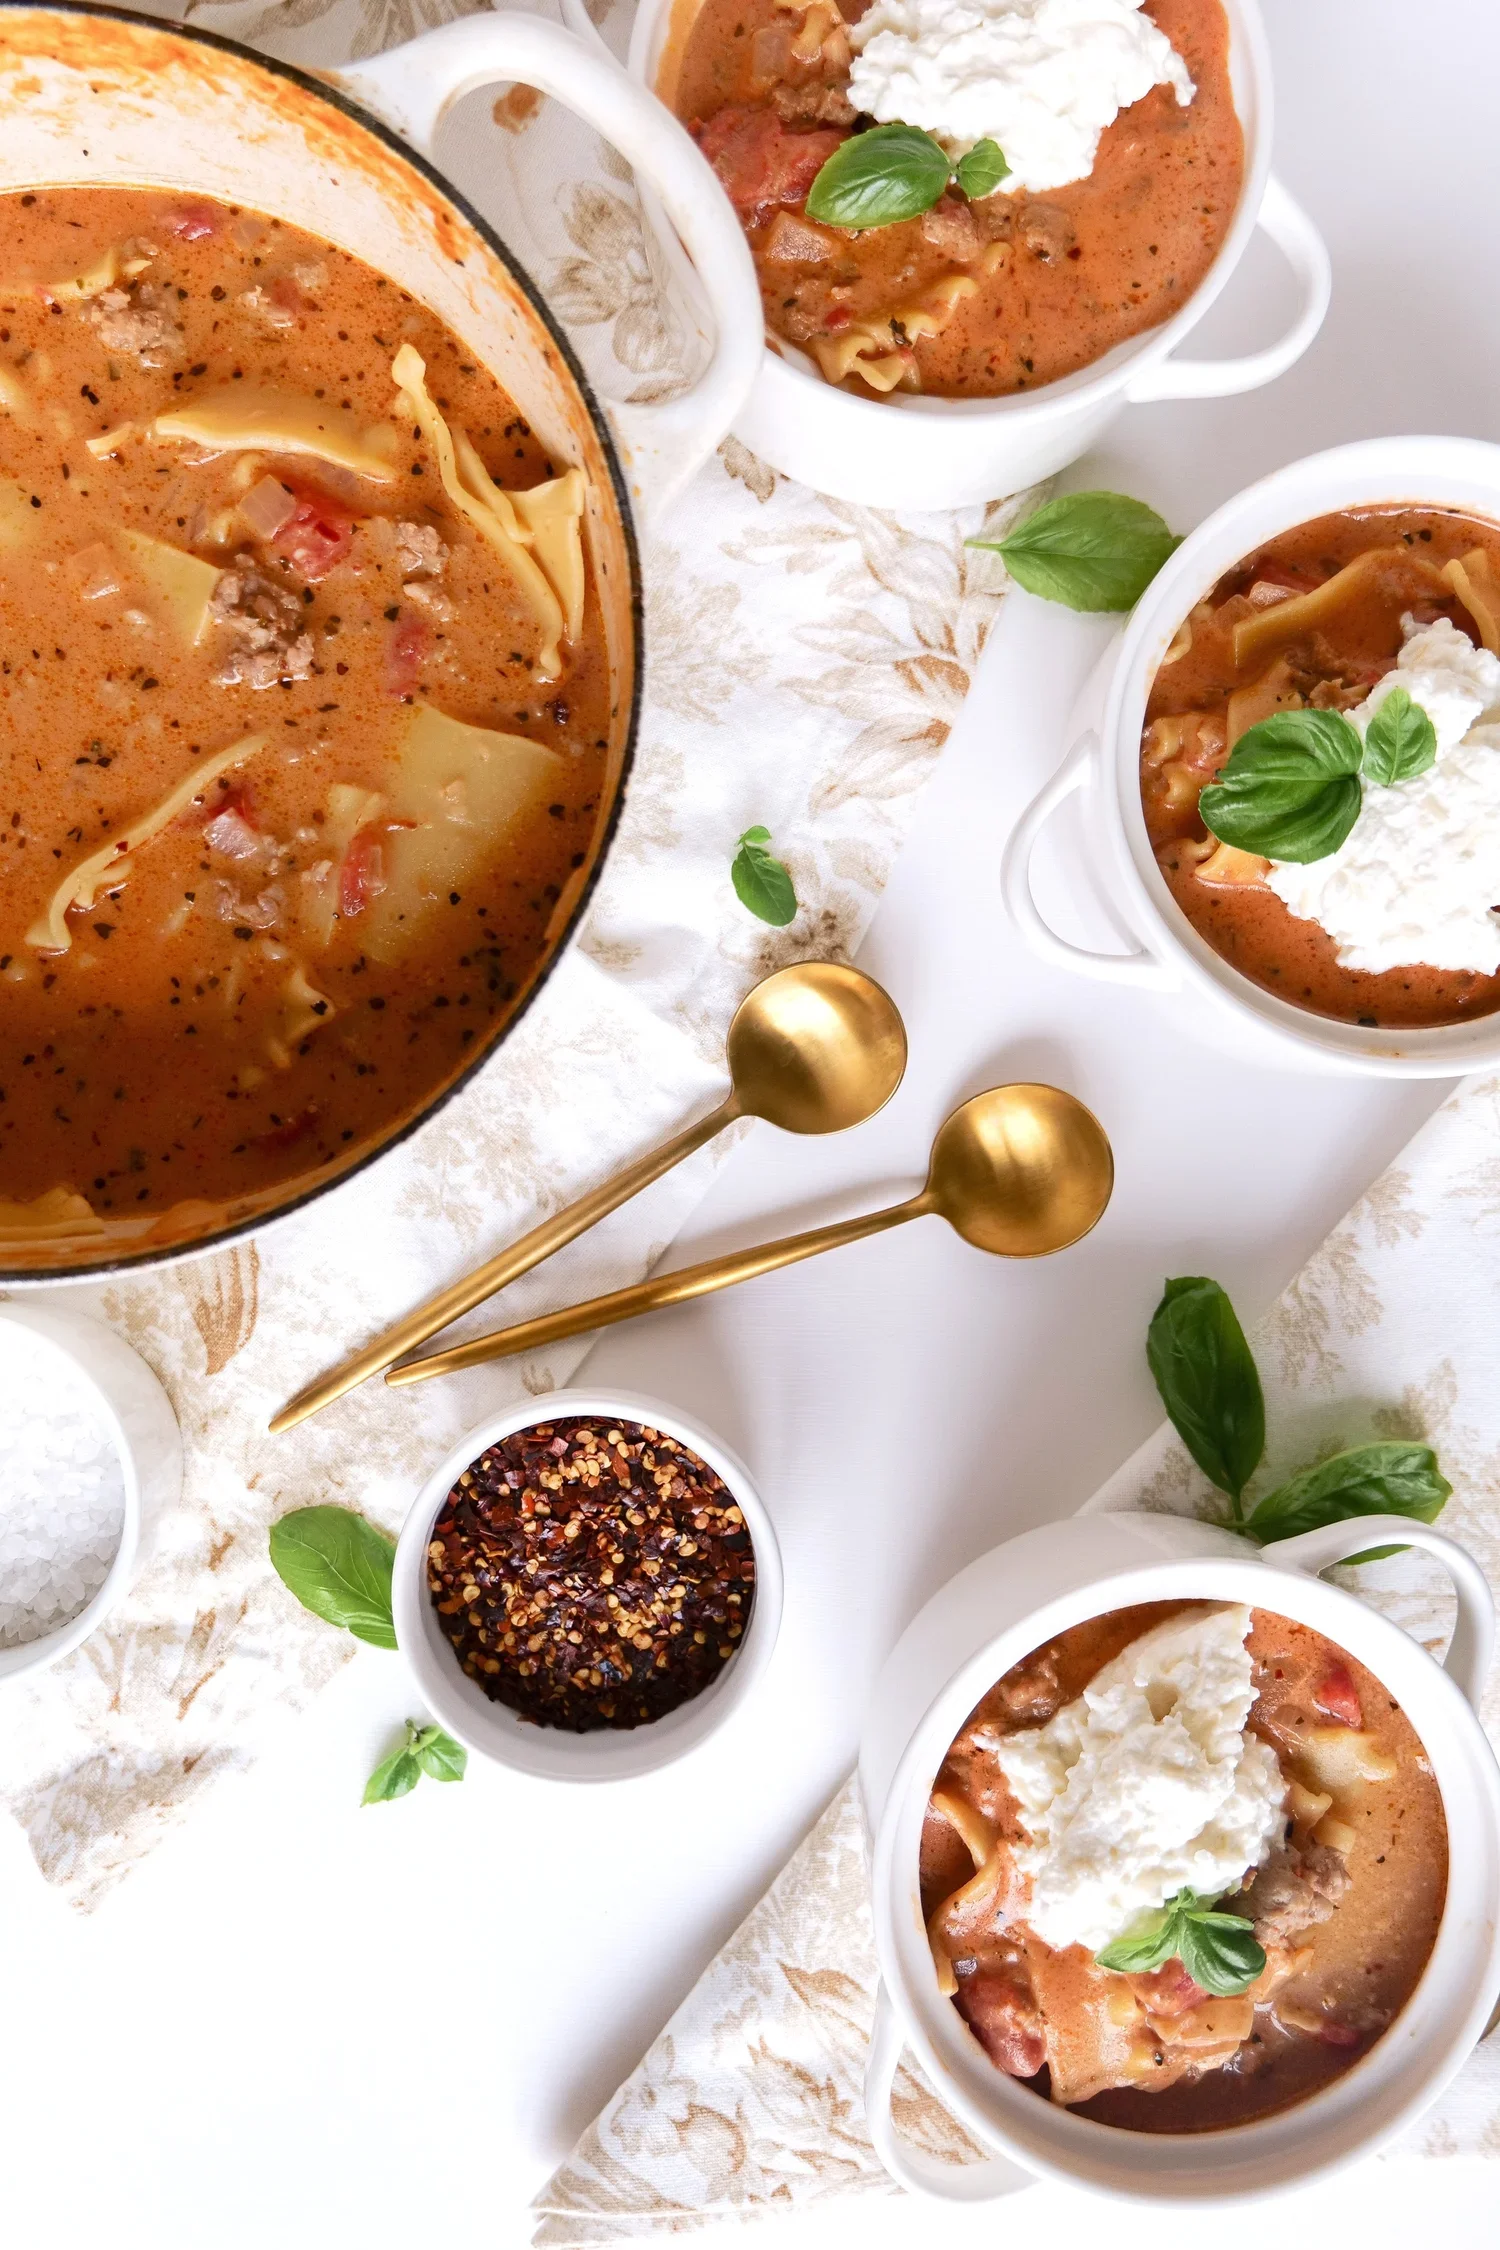
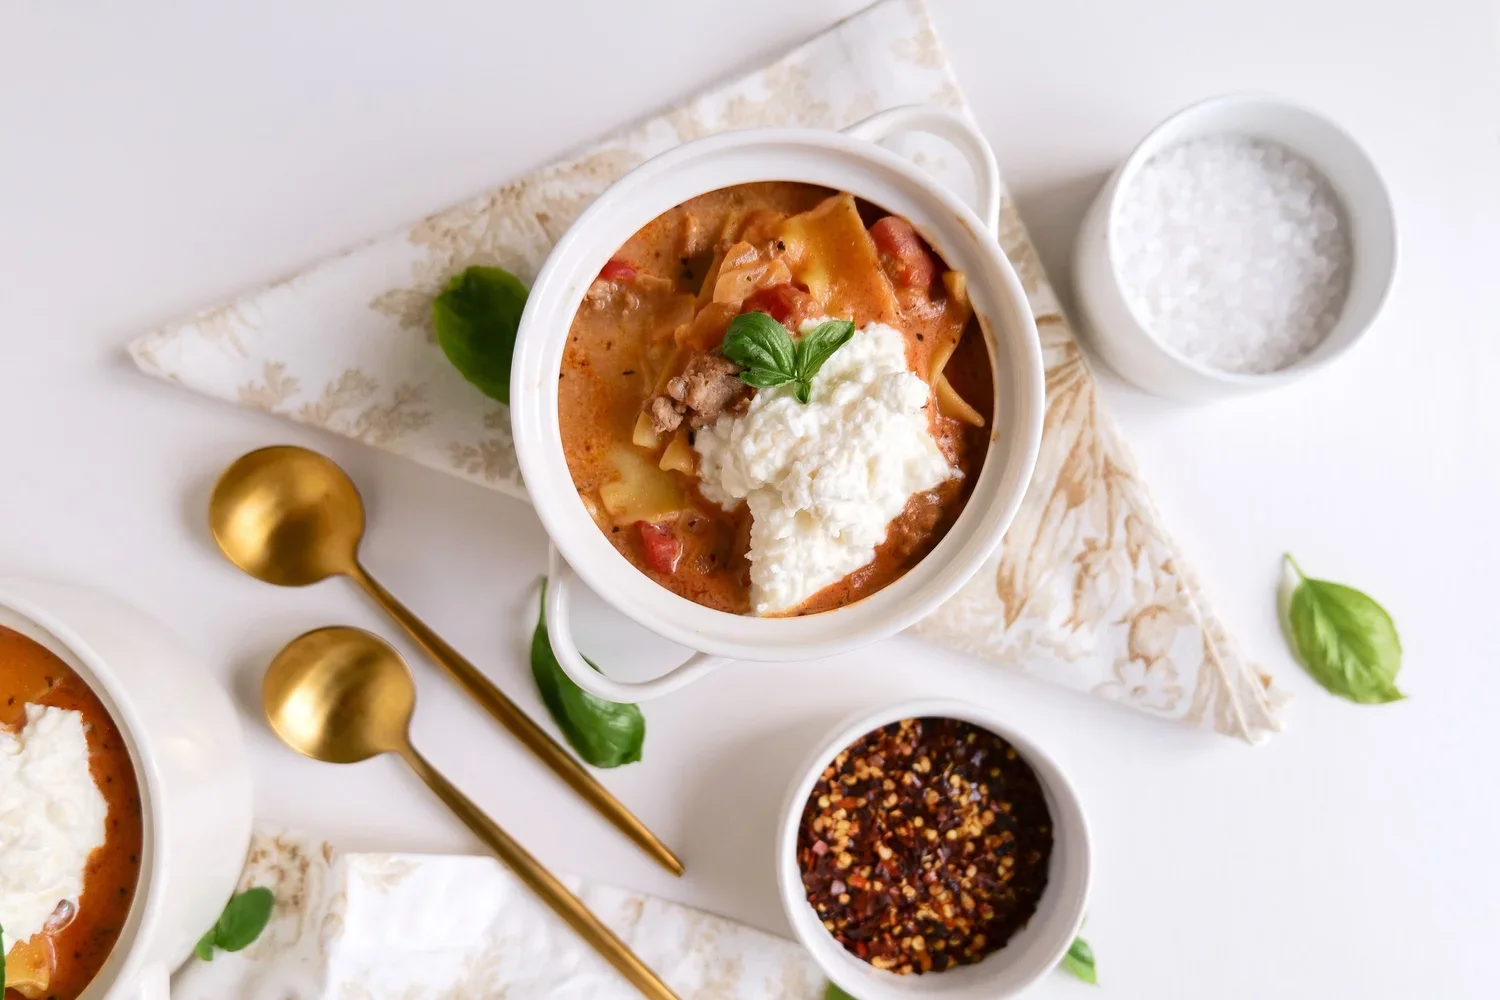
Lasagna Soup
This delicious and comforting soup is quick and easy to make and can all be done in 30 minutes or less. The convenient part of preparing this meal is that you can find all the ingredients you need in most pantries. It is also extremely versatile and can be easily adapted to your taste. It is full of all the flavors of lasagna which makes it the perfect way to use up any leftovers you have in the fridge. To prepare for the freezer after making I put into individual containers that would feed 2-3 people each. This made for easy reheating and gave enough for 4 meals. I also recommend adding in extra broth and even using bone broth for added protein during postpartum.
The Full Recipe: Delicious One-Pot Italian Lasagna Soup for Busy Weeknights!
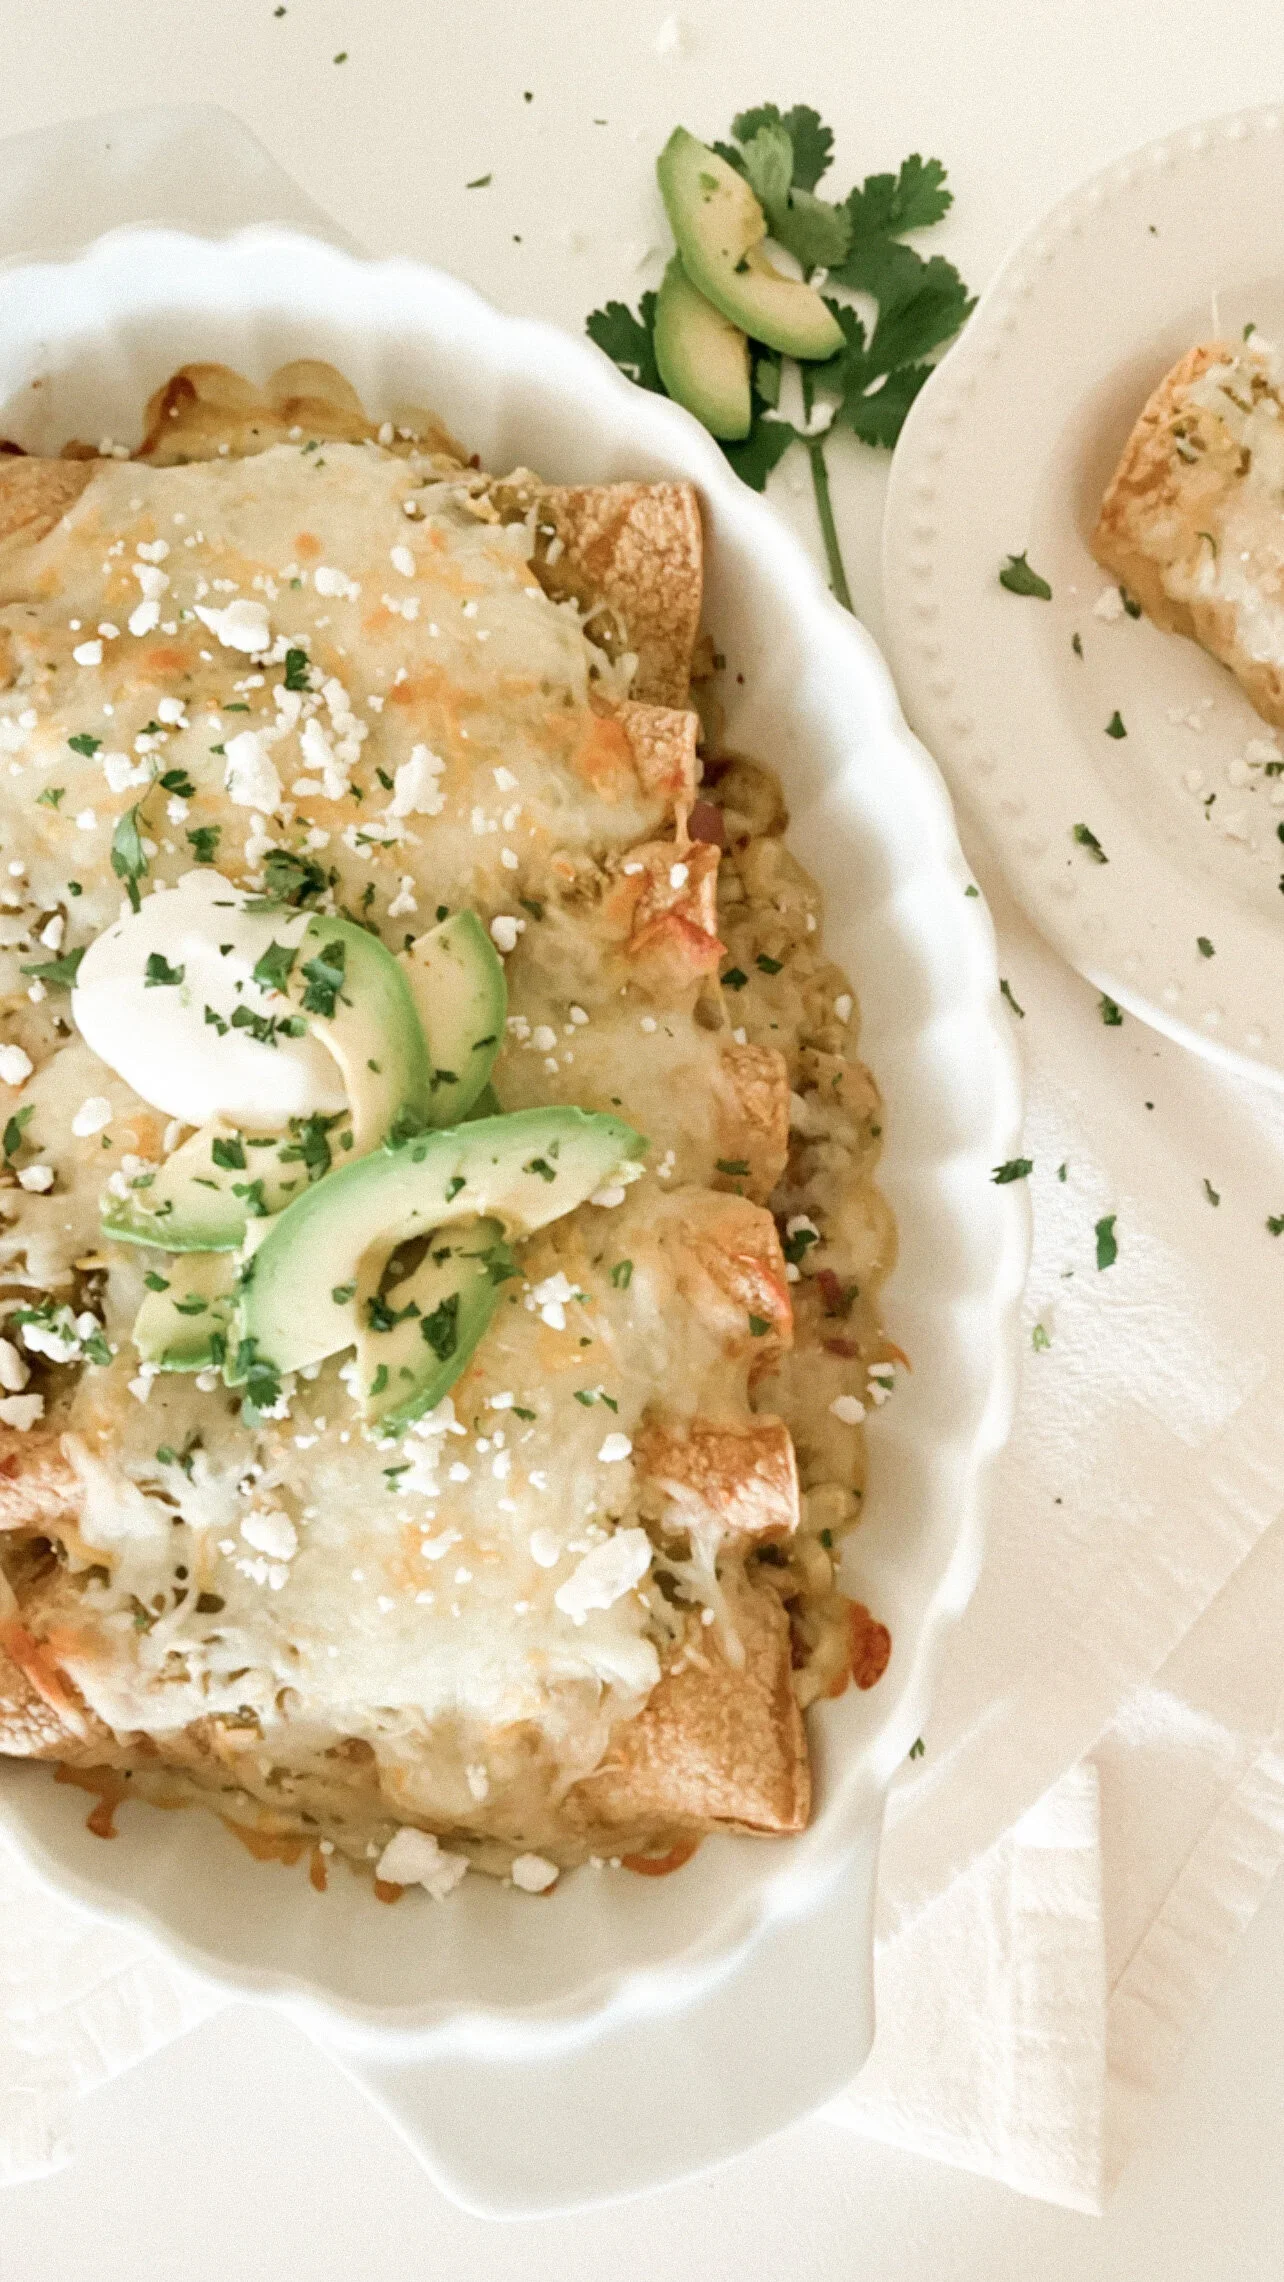
Salsa Verde Chicken Enchiladas
This dish is not only incredibly delicious but also highly practical for postpartum meal prep. As a new parent, time and energy are often in short supply, making it essential to have nutritious and satisfying meals readily available. By preparing Salsa Verde Chicken Enchiladas in advance and freezing it, you ensure that a comforting, home-cooked meal is always just a few minutes away. The combination of tangy salsa Verde and tender chicken provides a balanced and flavorful option that the whole family will enjoy. Plus, freezing it in individual portions allows for easy reheating, catering to varied schedules and appetites. With this dish in your freezer, you can focus more on your new baby and less on meal preparation, making your postpartum period a little more manageable.
The Full Recipe: Salsa Verde Chicken Enchiladas
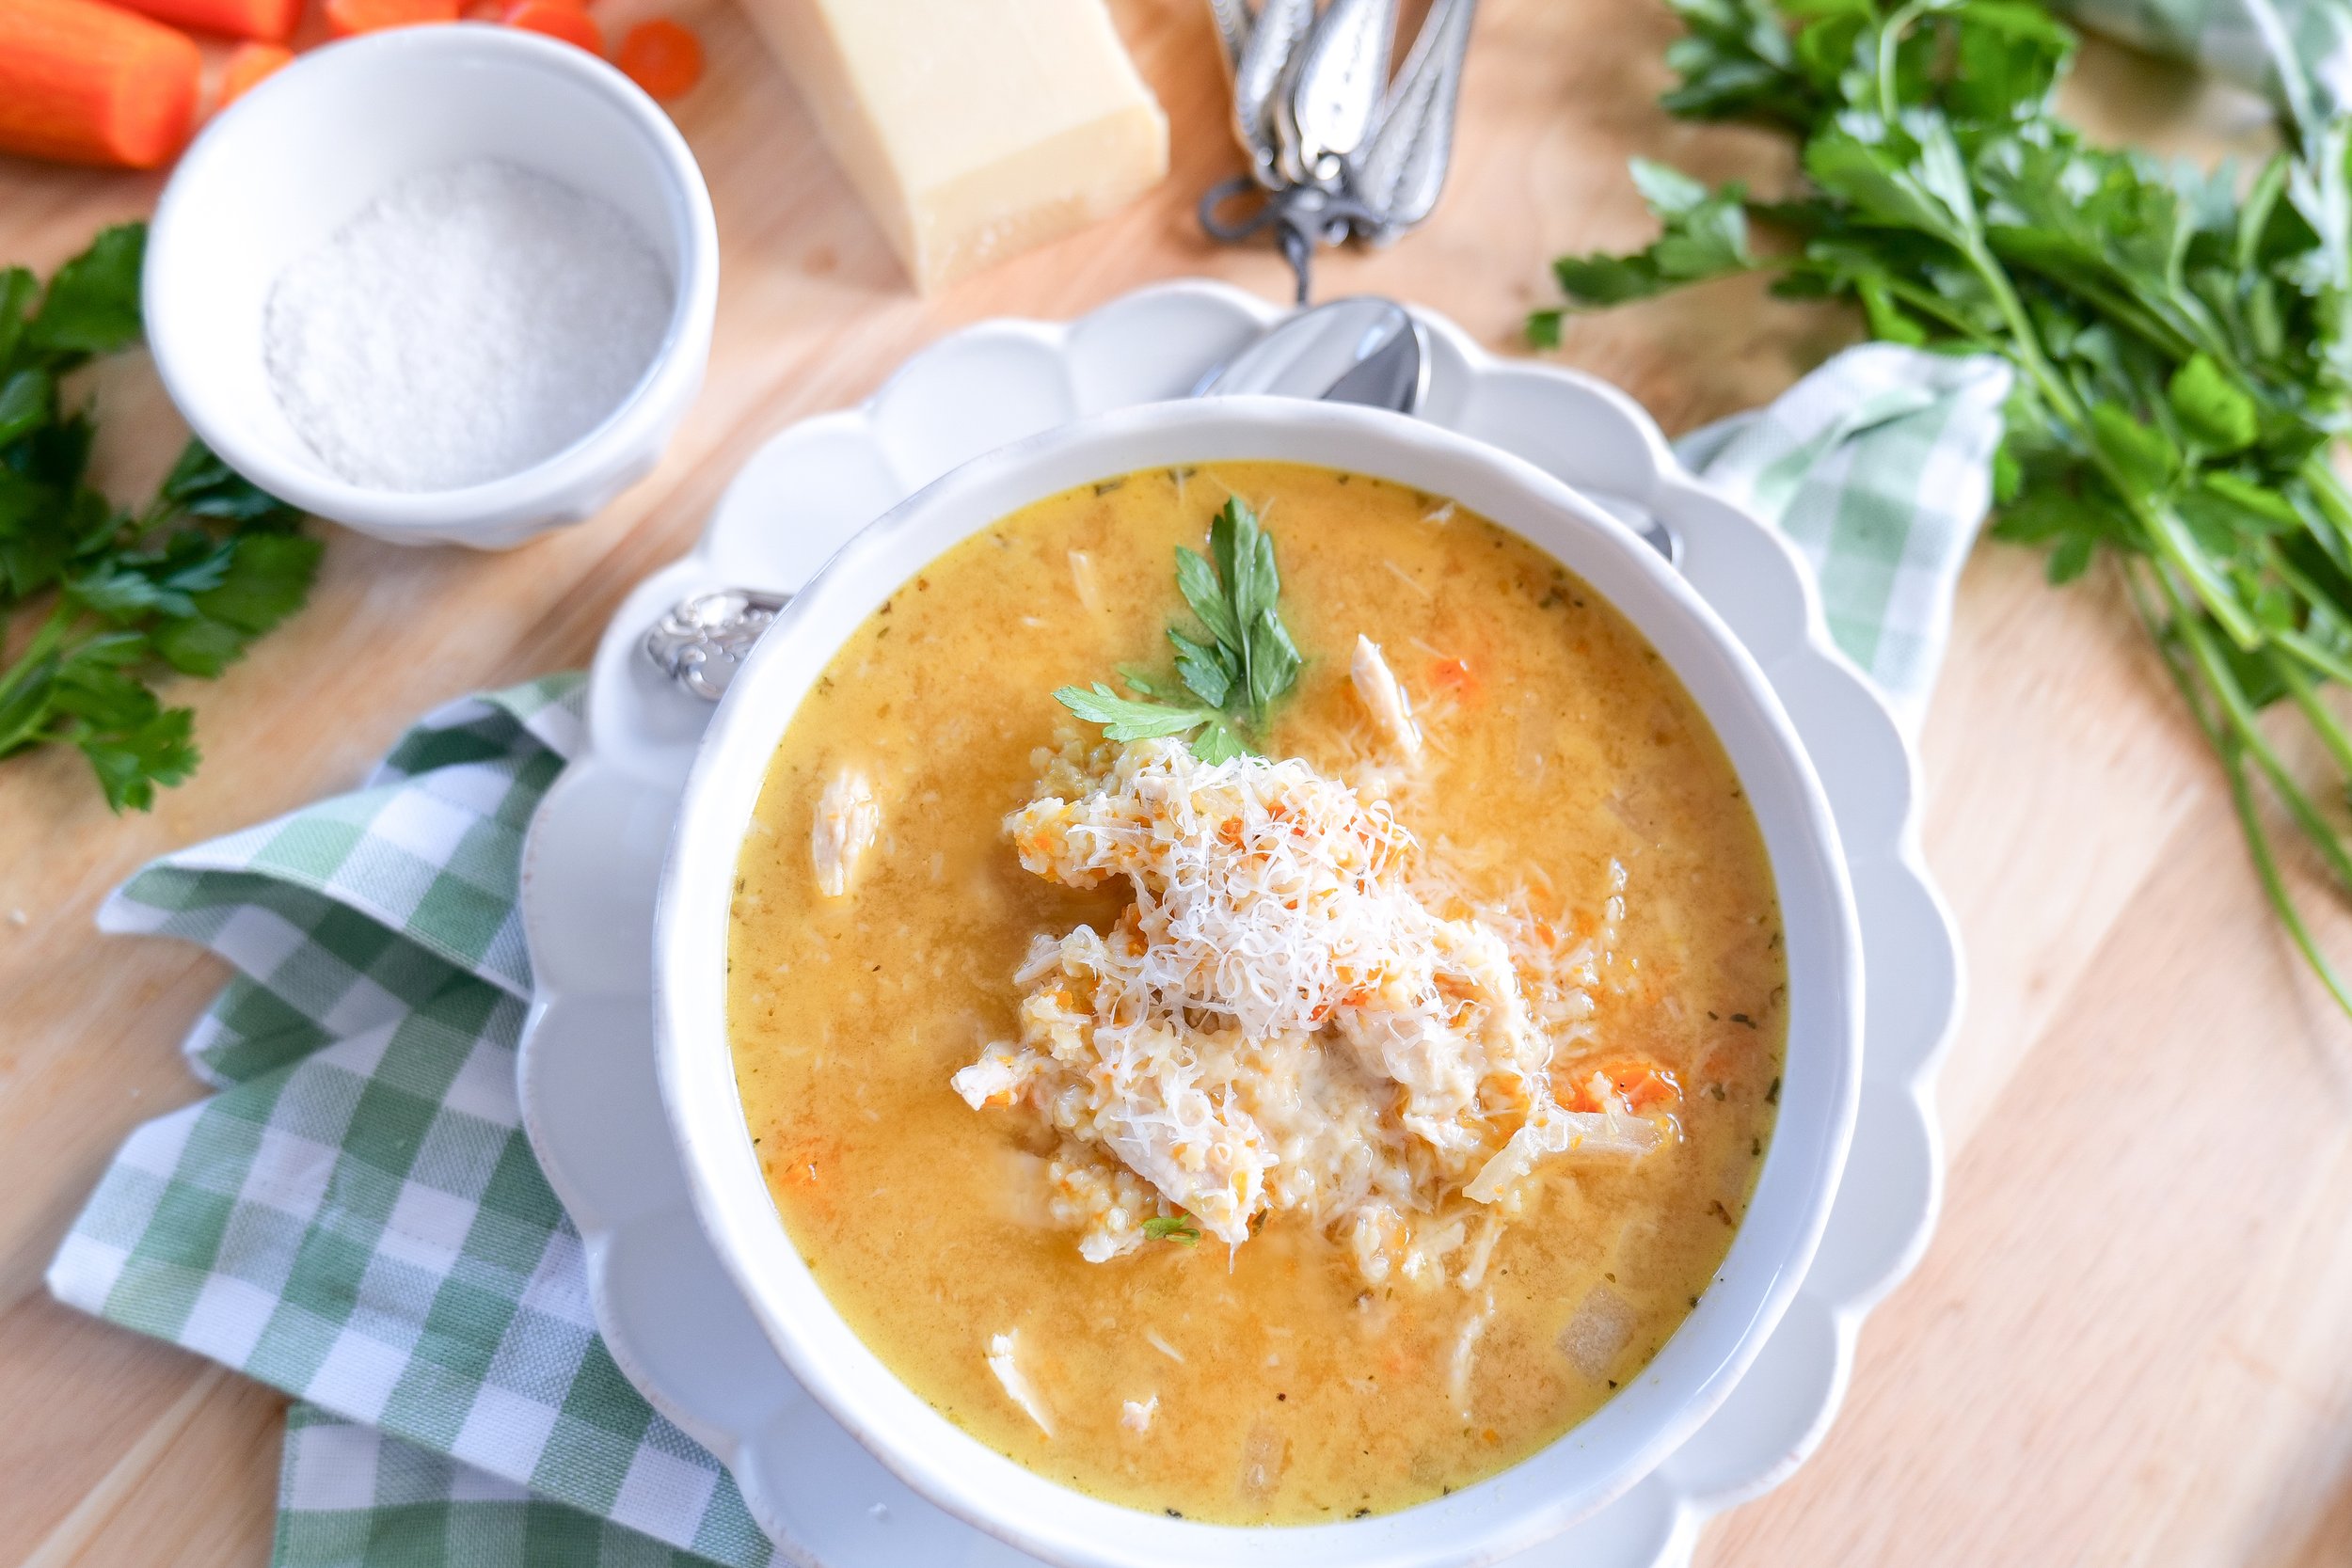
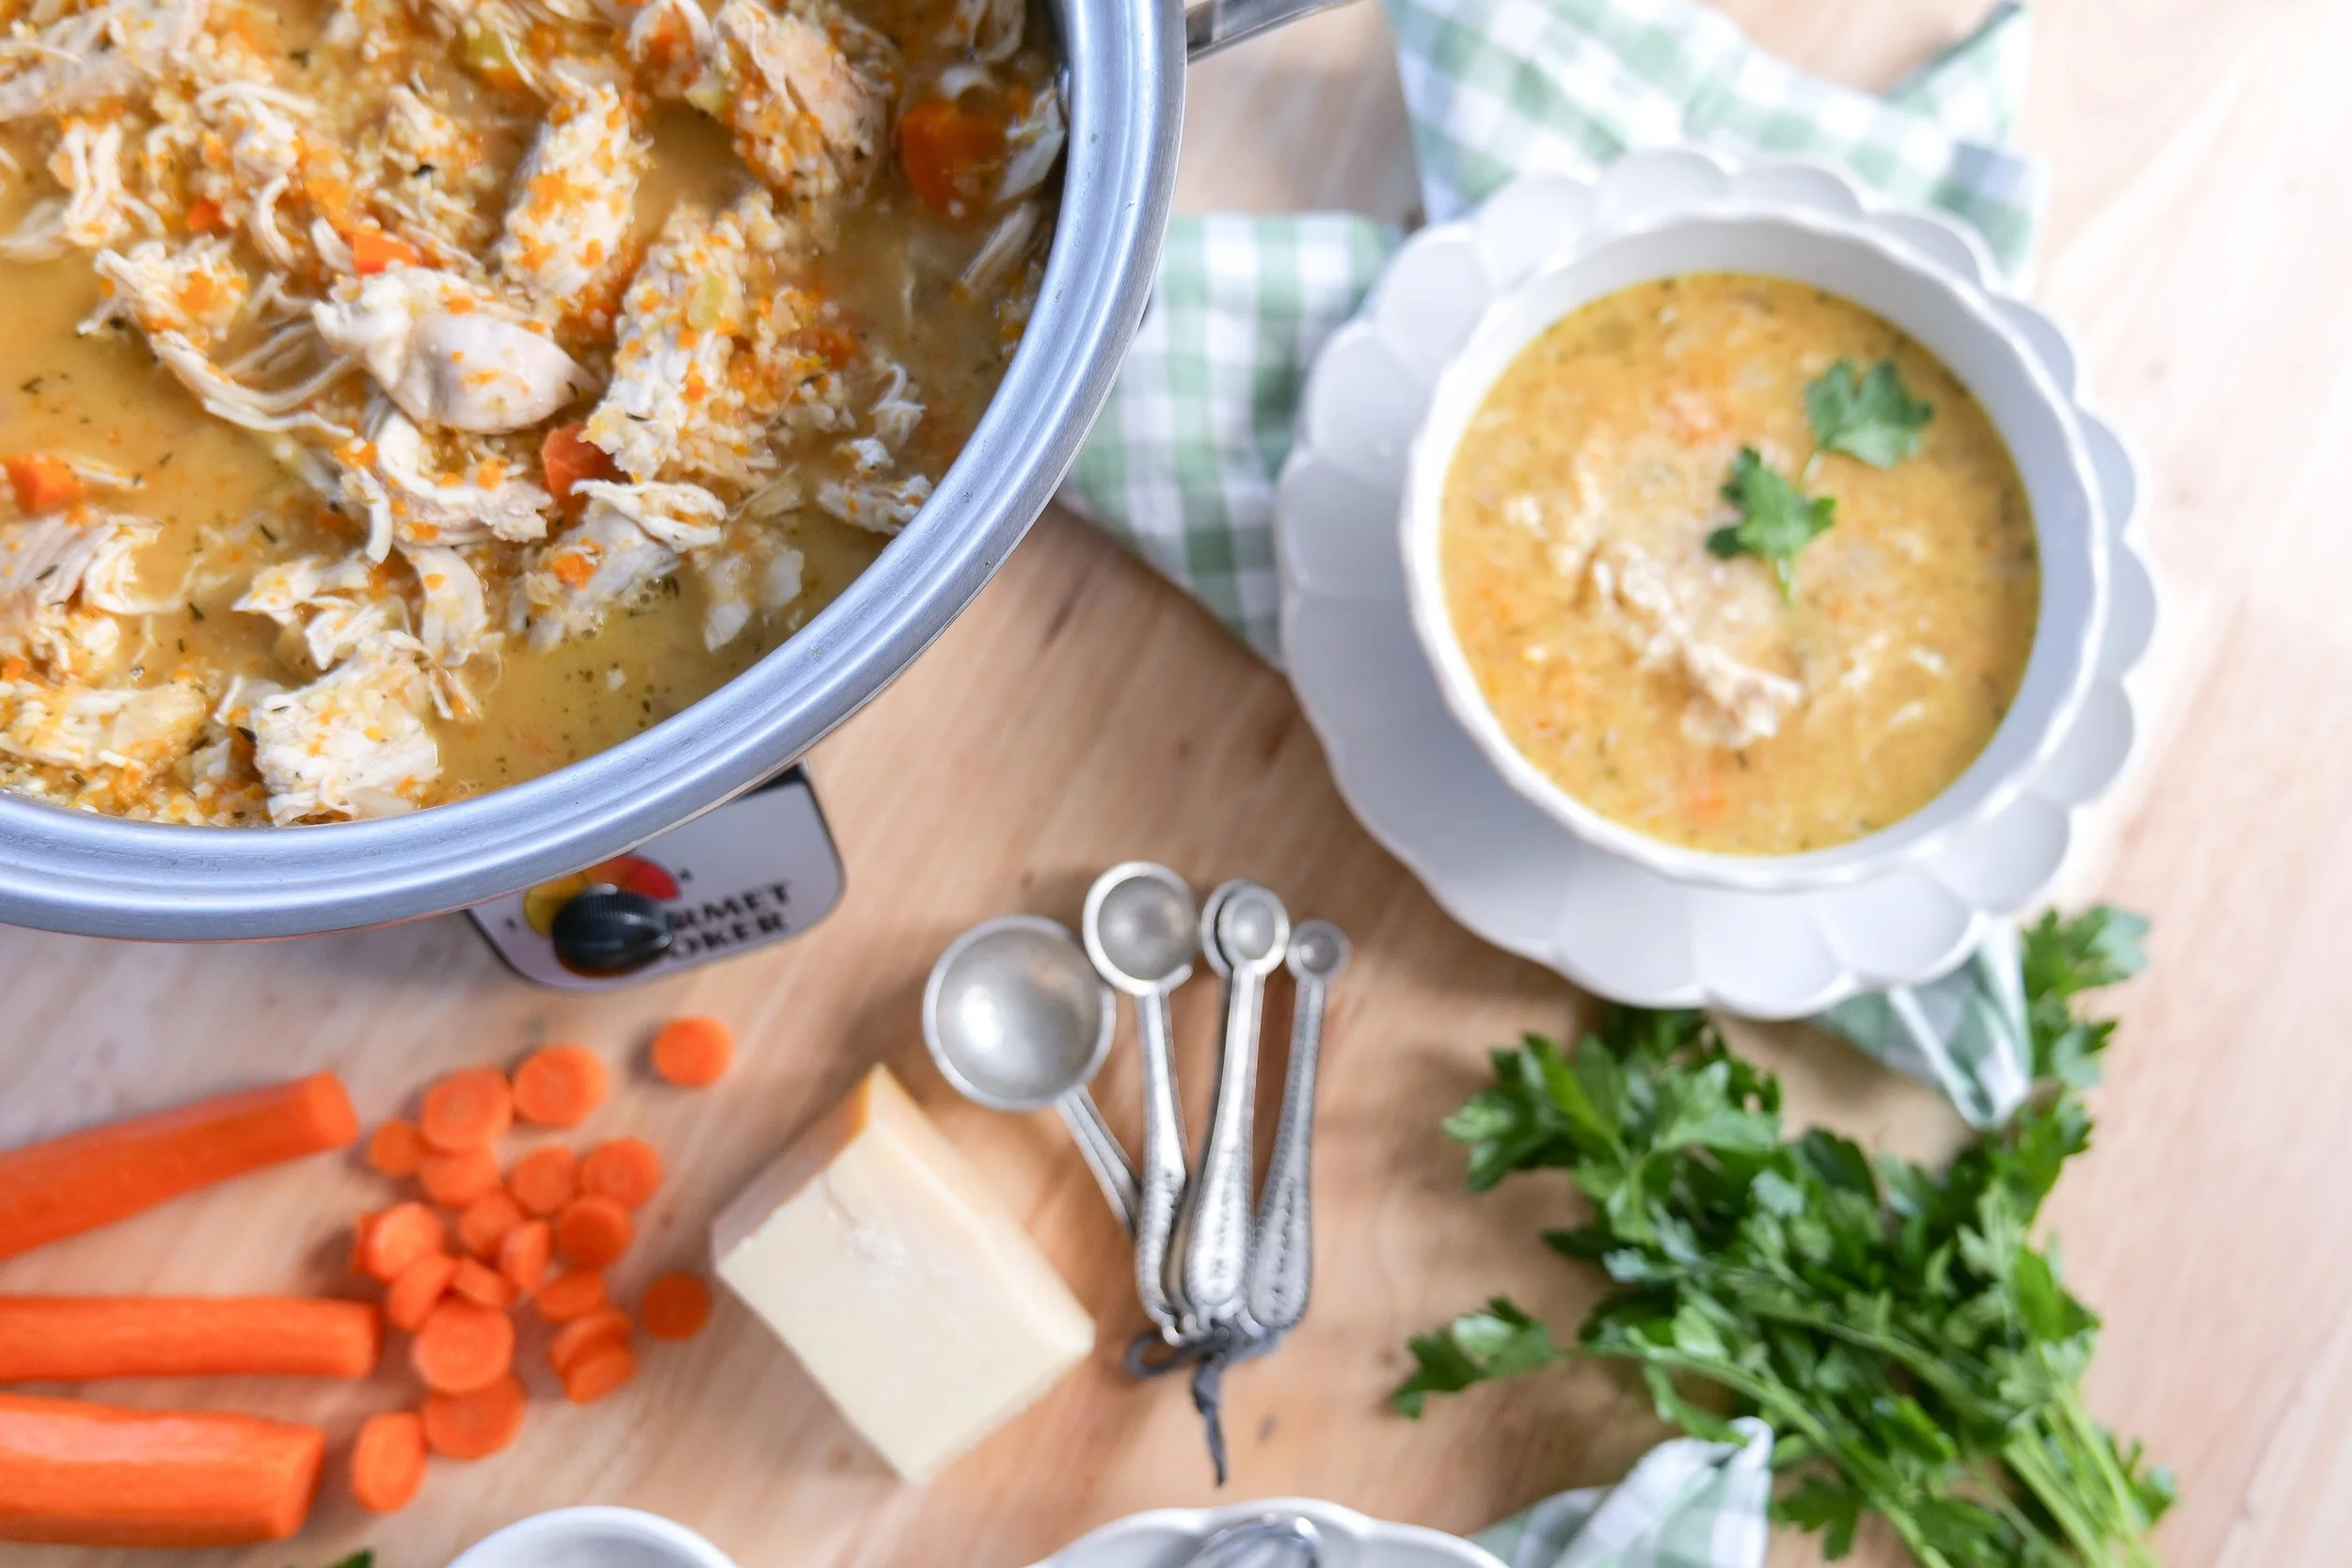
Italian Penicillin Soup
Known for its soothing effects, this soup is a flavorful blend that nicely blends tender chicken pieces, pastina pasta, and a bunch of nourishing vegetables into a warm pot of delight. With the essence of Italian home cooking, this dish serves as a heartwarming gesture of love and care crafted through generations of culinary wisdom that is perfect for make-ahead meals. The key to its magic lies in the rich, savory broth infused with classic Italian herbs and spices, which not only amplify the flavor but also contribute to its healthy and supportive benefits. Making it a great soup to have ready after having a baby.
The Full Recipe: Italian Penicillin Soup: A Flavorful Remedy to Boost Your Health and Warm Your Soul
Easy Breads for Snacks or Breakfast with Eggs
Delicious Banana Bread
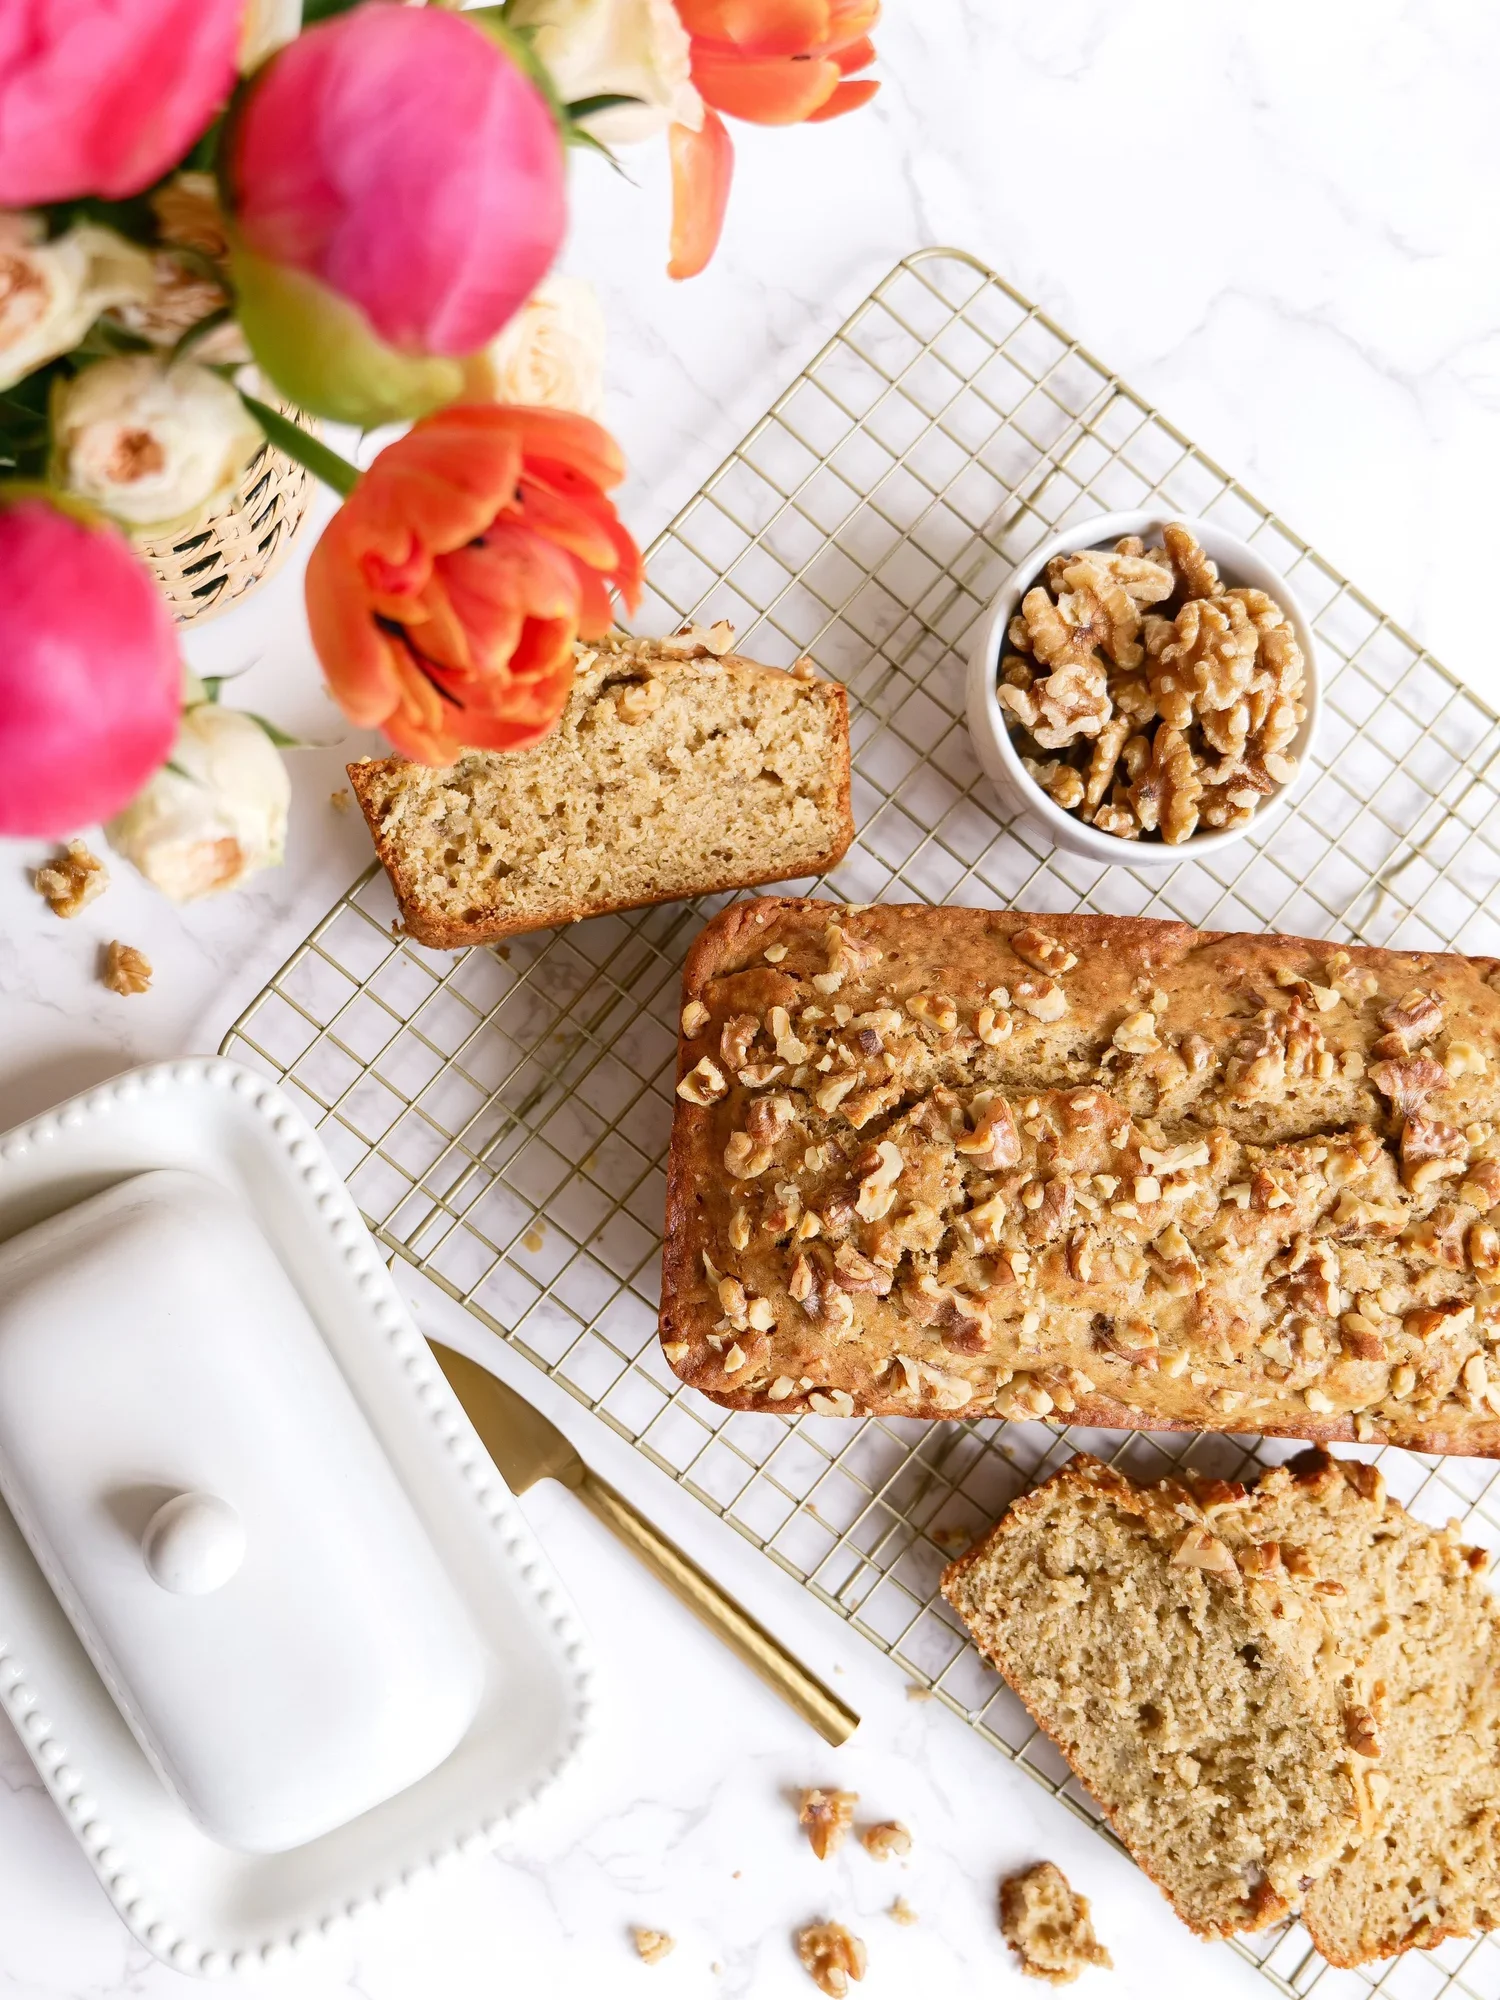
Few aromas are as welcoming as the scent of banana bread baking in the oven. That unmistakably sweet, cozy fragrance that fills the home in the morning is only the beginning of the experience of a slice of Simply Delicious Banana Bread. Once your banana bread has cooled and you've had your fill, storing it properly is important to maintain its taste and texture. Be sure to wrap tightly to keep the air out and prevent freezer burn. You can keep your treat fresh in the freezer for up to 3 months. So be sure to mark the date on the outside. Once you are ready to enjoy again remove from freezer and let sit out to defrost overnight or microwave for that just-baked taste. Proper storage ensures that every slice of Simply Delicious Banana Bread remains as good as the first. I like to double the recipe to make sure I have plenty on hand.
The Full Recipe: Enjoy the Comfort of Homemade Delicious Banana Bread
Blueberry Crumble Streusel Loaf
The true beauty of this loaf lies in its crumbly topping and of course its blueberry fruits, offering a great mix of textures and flavors. As part of my meal prep strategy, I made sure to include several hearty and nutritious options like this blueberry bread in my freezer stash. Perfect for postpartum recovery, this bread is not only a quick and satisfying breakfast but also a great snack that can be enjoyed at any time of the day. Packed with the superfruit of blueberries, it provides much-needed energy and nutrients for new moms. Freezing individual slices is a practical tip for quick and easy servings, helping you manage those hectic postpartum days without compromising on taste or nutrition. With the added benefit of a crumbly topping, this bread stands out as a sweet, yet wholesome addition to any postpartum meal plan. You can also add in oatmeal to give a little boost to your breastfeeding journey.
The Full Recipe: Delight in Every Slice: Blueberry Crumble Streusel Loaf Recipe


Other Delicious Recipes You Can Make Ahead & Freeze So Easily:
A Sweet and Delicious Recipe for Lemon Poppyseed Bread
Delicious Slow Cooker Italian Wedding Soup: A Comforting Meal You Can't-Miss!
Deliciously Creamy Basil Tomato Soup: An Easy and Delicious Recipe
Easy & Flavorful Fiesta in a Bowl: Ultimate Slow Cooker Chicken Tortilla Soup Recipe!
An Alluring Combination: French Onion & Shallot Soup Recipe
Mom's Favorite Minestrone Soup Recipe
Delicious Chicken & Rice Enchilada Casserole
Breakfast Croissants: Savory Sausage, Crisp Bacon, and a Sweet Maple Dijon Spread Delight!